

Page 1
1-2mm
1mm
Fig.1
ROVAL ALLOY RIM WHEELSET OWNER’S GUIDE
THIS BRIEF INSTALLATION GUIDE CONTAINS IMPORTANT INFORMATION.
PLEASE READ CAREFULLY AND STORE IN A SAFE PLACE.
Congratulations! The Roval wheelset you have chosen is among the
finest products available in cycling. This short form installation guide
contains instructions and warnings, plus maintenance information.
Please read the following Warnings. Because the failure to follow any
Warning may result in a catastrophic failure of the wheels, resulting in
serious personal injury or death, this phrase may not be repeated in
connection with each Warning.
Warning! Bicycle assembly is a complicated task requiring
training and experience, which should only be carried out by
a trained and experienced bicycle mechanic. Do not attempt
installation of any component if you do not have experience
and training as a bicycle mechanic.
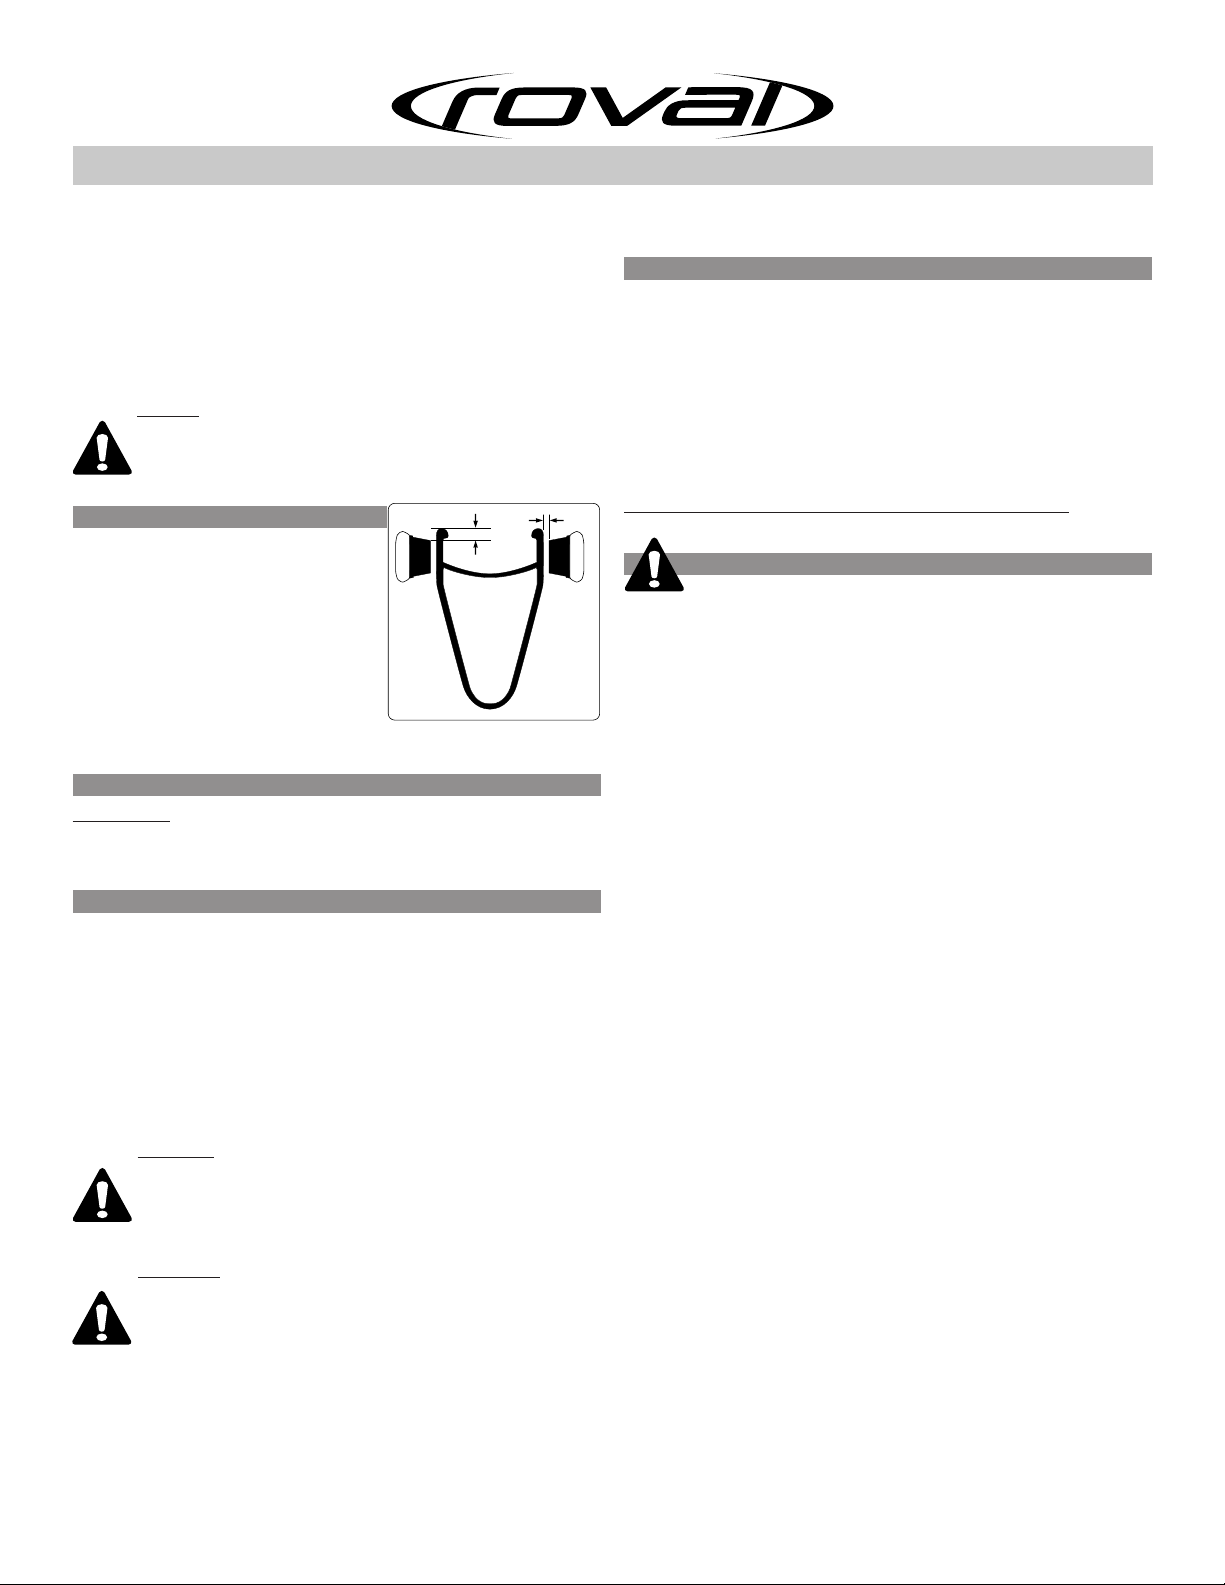
BRAKE PAD INSTALLATION
• Refer to the installation procedures
recommended by the component
manufacturer.
• Ensure that the pads are properly
positioned and aligned.
• Ensure that the pads do not touch
the rims when the wheel is rotating.
When correctly positioned, the brake
pads should be 1mm away from the
braking surface of the rim. The pads
should be positioned 1 to 2mm below the
outer edge of the rim to prevent contact with the tire (fig.1).
BRAKE PAD REPLACEMENT
IMPORTANT! Most brake pads have grooves or wear indicators to
show you how much life your pads have left. It’s very important to
replace the brake shoes when they are worn to the bottom of the
indicators.
BEFORE EVERY RIDE:
• Ensure that the quick-releases are securely fastened, and that
the axles are centered within the dropouts.
• Inspect the rims and tires for any signs of excessive wear.
• Inspect the tires to ensure correct tire pressure and that the
beads are properly seated within the rim.
• Ensure that the wheels spin true and smooth with no side-to-
side play, and spoke tension is even on all spokes. There should
be no contact between the rim and the brake pad.
• Inspect the spokes for any signs of damage.
• Inspect the brakes for any signs of cable damage, excessive
brake pad wear or misalignment.
WARNING!
• Do not exceed tire’s maximum pressure rating.
• Do not under inflate tires. Under inflation may allow
contact between the rim and the road surface.
• Do not use tires narrower than 21mm. Tires narrower than
21mm may not protect the rim adequately from impacts.
WARNING! Use proper braking techniques. The front brake
possesses most of the stopping power and should be used accordingly. Excessive or exclusive use of the rear brake to control speed on long descents is not recommended. Prolonged,
continuous use of brakes can build up excessive heat, which
may result in failure of rim, tire and/or tube.
MAINTENANCE
• For all repair requirements, the wheels must be sent to the Roval Service
center, through your authorized Roval dealer.
• Roval wheels should be regularly inspected by a qualified bicycle
technician at an authorized Roval dealer, or by the Roval Service Center.
Regular maintenance is essential for maximum service life of the wheel.
• Always use a wheel bag for storage or transportation to prevent damage.
Prolonged exposure to sunlight can cause the carbon to yellow over time.
• Use only mild soap and water to clean the wheels. Do not use solvents or
harsh chemicals.
• Avoid direct contact with pressurized water on the hub to prevent
bearing or freehub damage.
Refer to following pages for hub maintenance steps.
ADDITIONAL WARNINGS!
• Ensure that the rim’s braking surface is kept clean. Grease, oil
and other contaminants can affect braking performance.
• Do not make any modifications to the wheels. To do so will void the
warranty and may cause failure.
• Do not ride on components that have been damaged in an accident
or have worn beyond their usable limit. ALWAYS HAVE DAMAGED
OR WORN PARTS REPLACED BEFORE YOUR NEXT RIDE.
• Many different factors can affect the life span of Roval Wheels.
Adverse environmental conditions, impacts, falls, and road hazards
may compromise the structural integrity of the wheels and
significantly reduce their lifespan. Wheels and related components
are subject to wear over time. It is important to have your wheels
regularly inspected by a qualified mechanic for damage, fatigue, or
signs of wear. If the inspection finds any signs of damage (cracks,
stress marks, deformations), fatigue or wear immediately replace
the wheel or affected part.
• Before each ride, and after any crash, you should carefully inspect
your wheels for any dents, gouging, bending, or any other signs of
damage. Do not ride if your wheels show any of these signs. After
any crash, and before you ride any further, take your bicycle to an
authorized Roval retailer for a complete inspection.
WARRANTY
For the complete warranty provisions, please refer to the
Specialized Owner’s Manual or www.specialized.com.
Periodically review the tech support section at www.specialized.
com for updates and additional technical information regarding this
product.
SPECIALIZED BICYCLE COMPONENTS
15130 Concord Circle, Morgan Hill, CA 95037 (408) 779-6229
Please note all instructions are subject to change for improvement without notice.
Rev.3, September 2006
1
Page 2
1
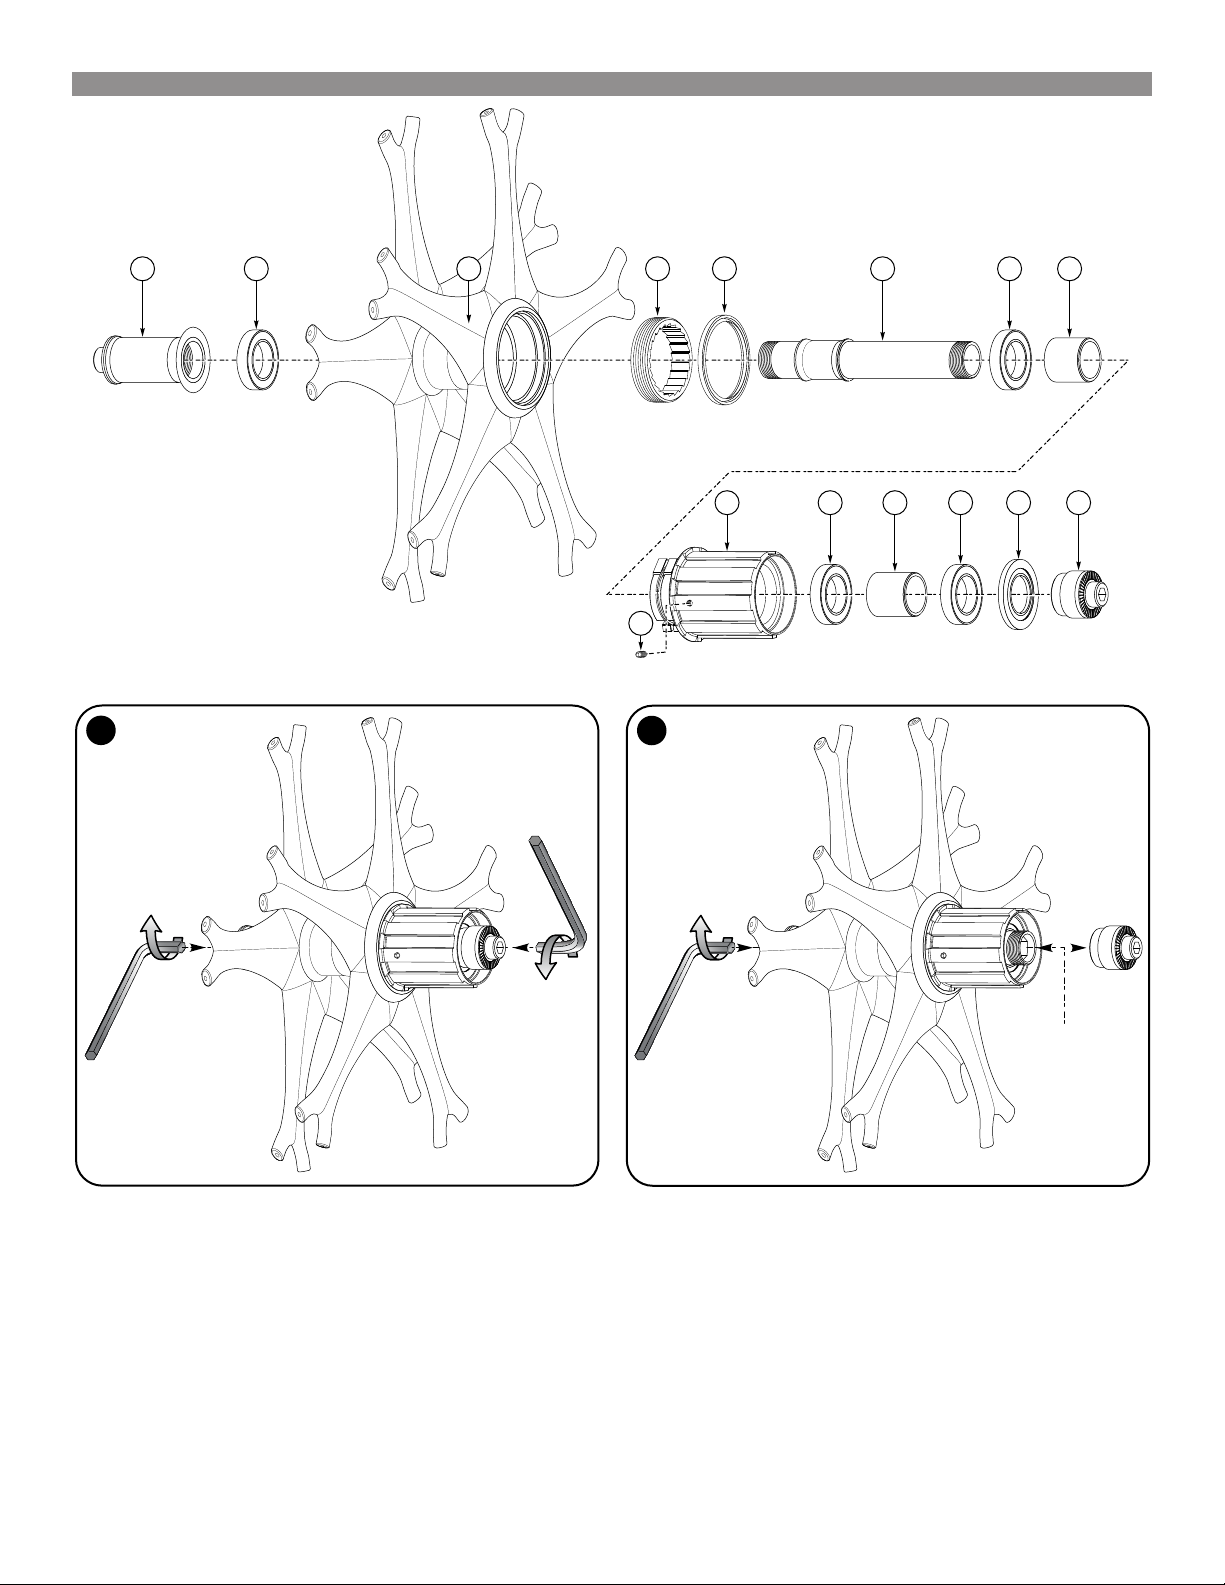
HIGH FLANGE HUB MAINTENANCE - ASSEMBLY / DISASSEMBLY
1 2 2
8
3
2 2 109 11
12
6 74 5
1
2
3
4
5
6
7
8
9
10
11
12
Non-Drive Side Axle Cap
Sealed Bearing
Hub Shell
Ratchet
Cassette Body Seal
Axle
Alloy Axle Spacer
Cassette Body
Alloy Cassette Body Spacer
Cassette Body Seal
Drive side Axle Nut
Cassette Body Locking Screw
2
5mm
Allen key
5mm
Allen key
NOTE: For front and rear hub axle end cap removal, when using both 5mm Allen keys (fig.1), only one side will come off. To remove the
second axle end cap (fig.2), place an 8mm Allen key (front hub) or an 11mm Allen key (rear hub) inside the axle and place a 5mm
Allen key in the remaining axle end cap.
2
11mm
Allen key
Page 3

3
GREASE
GREASE
GREASE
GREASE
GREASE
GREASE
HIGH FLANGE HUB MAINTENANCE - ASSEMBLY / DISASSEMBLY
4
Recommended Torque:
80 in-lbf (9.0 N-m)
Maximum Torque:
90 in-lbf (10.2 N-m)
Axle Cap
Threads
Bearing
surfaces
Bearing
surfaces
Seal and pawl
mechanism
NOTE: Use a low viscocity grease
5mm
Allen key
5mm
Allen key
ADDITIONAL MAINTENANCE INFO:
FRONT HUB: The steps are the same as the rear hub, without the parts specific to the cassette body (1 axle, 2 bearings, 2 axle caps).
AXLES: Front and rear Star Hub axle extraction requires removal of the hub bearings, due to the axle flanges between the hub bearings.
This service should be performed by an authorized Roval service center.
For additional information on Roval wheel service for spoke repair/replacement, bearing, cassette body or rim replacement, please contact your local Specialized dealer, or the Specialized Customer Service department, e-mail at customerservice@specialized.com or call
(877) 808-8154.
3
Page 4

1 2
7 8
3 3
3 3 109 11 12
654
1
2
3
4
5
6
Non-Drive Side Axle Cap
Alloy Axle
Sealed Bearing
Hub Shell
Ratchet
Cassette Body Seal
Alloy Axle Spacer
Cassette Body
Alloy Axle Spacer
Cassette Body Seal
Drive side Axle Nut
Locking screw
7
8
9
10
11
12
17mm
1
2
3
LOW FLANGE HUB MAINTENANCE - DISASSEMBLY
5mm Allen Key
Clockwise
1/4 turn
10mm Allen key
Pull to remove axle cap
• Pull cassette body off by hand
• Remove spacer
• Push axle out with thumb
• Rotate the bearings with a finger to feel for roughness or play. If the bearings show signs of roughness or play, replace the bearings.
• Clean bearing surfaces.
4
Page 5

LOW FLANGE HUB MAINTENANCE - ASSEMBLY
5
GREASE
GREASE
17mm
Recommended Torque:
80 in-lbf (9.0 N-m)
Maximum Torque:
90 in-lbf (10.2 N-m)
6
GREASE
GREASE
GREASE
GREASE
GREASE
4
GREASE
NOTE: Use a low viscocity grease
10mm Allen key
Bearing
surface
Bearing
surface
Seal and pawl
mechanism
5mm Allen key
• Finger tighten drive side axle nut, use 10mm Allen in axle.
• Check for bearing play, wiggle back and forth.
• Rear wheel: Do not install cassette immediately.
• Install the wheels in the front and rear dropouts, check for any bearing play at the rim. If any play is felt, remove wheel and repeat
adjustment steps.
• Install cassette on rear hub.
LOW FLANGE FRONT HUB:
Follow the same assembly/disassembly steps as the rear hub.
One side Alloy axle cap: non-adjustable.
Other side Steel axle cap: adjustable, same as rear hub.
• Unlock and unthread adjustable axle cap.
• Push axle out with thumb.
• Service bearings same as rear hub.
5
Page 6

1 2 3 4 4
4 4
5
6 7 8 9 10
11 12 13 14
1
2
3
4
5
6
7
8
Left Axle Nut
Alloy Nut Spacer
Left Bearing Cap
Sealed Bearing
Hub Shell
Alloy Hub Shell Sleeve
Ratchet
Cassette Body Seal
Hollow Axle
Alloy Axle Spacer
Cassette Body
Alloy Cassette Body Sleeve
Cassette Body Seal
Right Axle Nut
9
10
11
12
13
14
17mm
17mm
1
1
2
3
2
GREASE
Seal
3
GREASE
GREASE
17mm
17mm
4
HIGH FLANGE HUB MAINTENANCE - DISASSEMBLY / ASSEMBLY
Alloy spacer
• Place 5mm Allen key inside non-drive side of axle.
• Place 17mm wrench on drive side axle nut, loosen.
• Place 17mm wrench on non-drive side axle nut, loosen.
• Grease cassette body & hub body bearing surfaces.
• Reverse parts order for assembly, re-install cassette
body and tighten nuts.
6
 Loading...