

Page 1

Ambulatory Blood Pressure Report
Management System
92506
Operations Manual
070-0932-00 Rev. C
Page 2

©2005 Spacelabs Medical, Inc.
y
All rights reserved. Contents of this publication may not be reproduced in any form without the written permission of
Spacelabs Medical. Products of Spacelabs Medical are covered by U.S. and foreign patents and/or pending patents.
Printed in U.S.A. Specifications and price change privileges are reserved.
Spacelabs Medical considers itself responsible for the effects on safety, reliability and performance of the equipment
only if:
• assembly operations, re-adjustments, modifications or repairs are carried out by persons authorized by
Spacelabs Medical, and
• the electrical installation of the relevant room complies with the requirements of the standard in force, and
• the equipment is used in accordance with the operations manual.
Spacelabs Medical will make available, on request, such circuit diagrams, component part lists, descriptions,
calibration instructions or other information which will assist appropriately qualified technical personnel to repair those
parts of the equipment which are classified by Spacelabs Medical as field repairable.
Spacelabs Medical is committed to providing comprehensive customer support beginning with your initial inquiry
through purchase, training, and service for the life of your Spacelabs Medical equipment.
CORPORATE OFFICES
U.S.A.
Spacelabs Medical, Inc.
5150 220th Ave SE
Issaquah, WA 98029
Telephone: 425-657-7200
Telephone: 800-522-7025
Fax: 425-657-7212
Authorized EC Representative UNITED KINGDOM
Blease
Beech House, Chiltern Court
Asheridge Road, Chesham
Buckinghamshire HP5 2PX
Telephone: 44 (0) 1494 784422
Fax: 44 (0) 1494 794414
BirthNet, Clinical Browser, Data Shuttle, Flexport, Intesys, Mermaid, MOM, Multiview, PCIS, PCMS, PrintMaster,
Quicknet, Sensorwatch, TRU-CAP, TRU-CUFF , TruLink, Ultralite, Ultraview, Ultraview Care Network, Ultraview Clinical
Messenger, Ultraview Digital Telemetry, Ultraview SL, Uni-Pouch, UCW, Varitrend and WinDNA are trademarks of
Spacelabs Medical, Inc.
Other brands and product names are trademarks of their respective owners.
Caution:
US Federal law restricts the devices documented herein to sale by, or on the order of, a
Rx
Onl
physician.
Before use, carefully read the instructions, including all warnings and cautions.
!
Page 3

Table of Contents
Contents Page
Introduction
Overview. . . . . . . . . . . . . . . . . . . . . . . . . . . . . . . . . . . . . . . . . . . . . . . . . . . . . . . . . . . . . . . . . . . . . . . . . . . . . . . . . 1-1
Warnings, Cautions, and Notes . . . . . . . . . . . . . . . . . . . . . . . . . . . . . . . . . . . . . . . . . . . . . . . . . . . . . . . . . . . . . . .1-1
Starting the Program . . . . . . . . . . . . . . . . . . . . . . . . . . . . . . . . . . . . . . . . . . . . . . . . . . . . . . . . . . . . . . . . . . . . . . .1-2
Setting up a New User . . . . . . . . . . . . . . . . . . . . . . . . . . . . . . . . . . . . . . . . . . . . . . . . . . . . . . . . . . . . . . . . . . . . . .1-3
ABP Main Menu . . . . . . . . . . . . . . . . . . . . . . . . . . . . . . . . . . . . . . . . . . . . . . . . . . . . . . . . . . . . . . . . . . . . . . . . . . .1-5
Logging Off the System . . . . . . . . . . . . . . . . . . . . . . . . . . . . . . . . . . . . . . . . . . . . . . . . . . . . . . . . . . . . . . . . . . . . .1-6
User Permissions . . . . . . . . . . . . . . . . . . . . . . . . . . . . . . . . . . . . . . . . . . . . . . . . . . . . . . . . . . . . . . . . . . . . . . . . . .1-6
Electronic Signature . . . . . . . . . . . . . . . . . . . . . . . . . . . . . . . . . . . . . . . . . . . . . . . . . . . . . . . . . . . . . . . . . . . . . . . .1-7
System Navigation . . . . . . . . . . . . . . . . . . . . . . . . . . . . . . . . . . . . . . . . . . . . . . . . . . . . . . . . . . . . . . . . . . . . . . . . .1-8
Report Manager
Overview. . . . . . . . . . . . . . . . . . . . . . . . . . . . . . . . . . . . . . . . . . . . . . . . . . . . . . . . . . . . . . . . . . . . . . . . . . . . . . . . . 2-1
Displaying Reports . . . . . . . . . . . . . . . . . . . . . . . . . . . . . . . . . . . . . . . . . . . . . . . . . . . . . . . . . . . . . . . . . . . . . . . . .2-2
Tracking Open Windows. . . . . . . . . . . . . . . . . . . . . . . . . . . . . . . . . . . . . . . . . . . . . . . . . . . . . . . . . . . . . . . . . . . . .2-7
Opening a Patient Report (Importing). . . . . . . . . . . . . . . . . . . . . . . . . . . . . . . . . . . . . . . . . . . . . . . . . . . . . . . . . . .2-7
Saving a Report . . . . . . . . . . . . . . . . . . . . . . . . . . . . . . . . . . . . . . . . . . . . . . . . . . . . . . . . . . . . . . . . . . . . . . . . . . .2-9
Initializing the Monitor
Overview. . . . . . . . . . . . . . . . . . . . . . . . . . . . . . . . . . . . . . . . . . . . . . . . . . . . . . . . . . . . . . . . . . . . . . . . . . . . . . . . . 3-1
Entering Patient Information. . . . . . . . . . . . . . . . . . . . . . . . . . . . . . . . . . . . . . . . . . . . . . . . . . . . . . . . . . . . . . . . . .3-1
Monitor Initialization . . . . . . . . . . . . . . . . . . . . . . . . . . . . . . . . . . . . . . . . . . . . . . . . . . . . . . . . . . . . . . . . . . . . . . . .3-3
Summary . . . . . . . . . . . . . . . . . . . . . . . . . . . . . . . . . . . . . . . . . . . . . . . . . . . . . . . . . . . . . . . . . . . . . . . . . . . . . . . .3-6
Acquiring Patient Data
Overview. . . . . . . . . . . . . . . . . . . . . . . . . . . . . . . . . . . . . . . . . . . . . . . . . . . . . . . . . . . . . . . . . . . . . . . . . . . . . . . . . 4-1
Performing Data Transfer. . . . . . . . . . . . . . . . . . . . . . . . . . . . . . . . . . . . . . . . . . . . . . . . . . . . . . . . . . . . . . . . . . . .4-1
Entering Patient Demographic Information. . . . . . . . . . . . . . . . . . . . . . . . . . . . . . . . . . . . . . . . . . . . . . . . . . . . . . .4-2
Entering Test-Related Information . . . . . . . . . . . . . . . . . . . . . . . . . . . . . . . . . . . . . . . . . . . . . . . . . . . . . . . . . . . . .4-4
Entering Patient Information. . . . . . . . . . . . . . . . . . . . . . . . . . . . . . . . . . . . . . . . . . . . . . . . . . . . . . . . . . . . . . . . . .4-5
Reviewing the Report
Overview. . . . . . . . . . . . . . . . . . . . . . . . . . . . . . . . . . . . . . . . . . . . . . . . . . . . . . . . . . . . . . . . . . . . . . . . . . . . . . . . . 5-1
Cover Page — Patient Information. . . . . . . . . . . . . . . . . . . . . . . . . . . . . . . . . . . . . . . . . . . . . . . . . . . . . . . . . . . . .5-2
ABP Report Summary . . . . . . . . . . . . . . . . . . . . . . . . . . . . . . . . . . . . . . . . . . . . . . . . . . . . . . . . . . . . . . . . . . . . . .5-3
Interpretation . . . . . . . . . . . . . . . . . . . . . . . . . . . . . . . . . . . . . . . . . . . . . . . . . . . . . . . . . . . . . . . . . . . . . . . . . . . . .5-4
Raw Data Graph. . . . . . . . . . . . . . . . . . . . . . . . . . . . . . . . . . . . . . . . . . . . . . . . . . . . . . . . . . . . . . . . . . . . . . . . . . .5-5
Discrete Raw Data Graph. . . . . . . . . . . . . . . . . . . . . . . . . . . . . . . . . . . . . . . . . . . . . . . . . . . . . . . . . . . . . . . . . . . .5-6
ABP Raw Data Tabular . . . . . . . . . . . . . . . . . . . . . . . . . . . . . . . . . . . . . . . . . . . . . . . . . . . . . . . . . . . . . . . . . . . . .5-7
Hourly Average Graph . . . . . . . . . . . . . . . . . . . . . . . . . . . . . . . . . . . . . . . . . . . . . . . . . . . . . . . . . . . . . . . . . . . . . .5-8
Discrete Hourly Average Graph . . . . . . . . . . . . . . . . . . . . . . . . . . . . . . . . . . . . . . . . . . . . . . . . . . . . . . . . . . . . . . .5-9
ABP Hourly Data Tabular . . . . . . . . . . . . . . . . . . . . . . . . . . . . . . . . . . . . . . . . . . . . . . . . . . . . . . . . . . . . . . . . . . .5-10
Caliper Summary View. . . . . . . . . . . . . . . . . . . . . . . . . . . . . . . . . . . . . . . . . . . . . . . . . . . . . . . . . . . . . . . . . . . . .5-11
Edit Summary. . . . . . . . . . . . . . . . . . . . . . . . . . . . . . . . . . . . . . . . . . . . . . . . . . . . . . . . . . . . . . . . . . . . . . . . . . . .5-12
System Setup
Overview. . . . . . . . . . . . . . . . . . . . . . . . . . . . . . . . . . . . . . . . . . . . . . . . . . . . . . . . . . . . . . . . . . . . . . . . . . . . . . . . . 6-1
Configuring Windows Settings . . . . . . . . . . . . . . . . . . . . . . . . . . . . . . . . . . . . . . . . . . . . . . . . . . . . . . . . . . . . . . . .6-1
Configuring System Settings . . . . . . . . . . . . . . . . . . . . . . . . . . . . . . . . . . . . . . . . . . . . . . . . . . . . . . . . . . . . . . . . .6-2
Report Format Tab. . . . . . . . . . . . . . . . . . . . . . . . . . . . . . . . . . . . . . . . . . . . . . . . . . . . . . . . . . . . . . . . . . . . . . . . .6-3
Statistics Tab . . . . . . . . . . . . . . . . . . . . . . . . . . . . . . . . . . . . . . . . . . . . . . . . . . . . . . . . . . . . . . . . . . . . . . . . . . . . .6-6
Monitor Tab . . . . . . . . . . . . . . . . . . . . . . . . . . . . . . . . . . . . . . . . . . . . . . . . . . . . . . . . . . . . . . . . . . . . . . . . . . . . . . 6-8
System Tab . . . . . . . . . . . . . . . . . . . . . . . . . . . . . . . . . . . . . . . . . . . . . . . . . . . . . . . . . . . . . . . . . . . . . . . . . . . . .6-10
i
Page 4

ABP Report Management System Operations Manual
Printing and Sending Files
Printing the Report . . . . . . . . . . . . . . . . . . . . . . . . . . . . . . . . . . . . . . . . . . . . . . . . . . . . . . . . . . . . . . . . . . . . . . . . .7-1
Printing Pictures of the Display. . . . . . . . . . . . . . . . . . . . . . . . . . . . . . . . . . . . . . . . . . . . . . . . . . . . . . . . . . . . . . . .7-2
Faxing Reports . . . . . . . . . . . . . . . . . . . . . . . . . . . . . . . . . . . . . . . . . . . . . . . . . . . . . . . . . . . . . . . . . . . . . . . . . . . .7-3
Sending Reports Via E-mail (Portable Document Format). . . . . . . . . . . . . . . . . . . . . . . . . . . . . . . . . . . . . . . . . . .7-4
Maintenance and Troubleshooting
Overview. . . . . . . . . . . . . . . . . . . . . . . . . . . . . . . . . . . . . . . . . . . . . . . . . . . . . . . . . . . . . . . . . . . . . . . . . . . . . . . . . 8-1
Troubleshooting . . . . . . . . . . . . . . . . . . . . . . . . . . . . . . . . . . . . . . . . . . . . . . . . . . . . . . . . . . . . . . . . . . . . . . . . . . .8-1
Diagnosis Tool . . . . . . . . . . . . . . . . . . . . . . . . . . . . . . . . . . . . . . . . . . . . . . . . . . . . . . . . . . . . . . . . . . . . . . . . . . . .8-8
Appendix A — Symbols
ii
Page 5

Contents
Overview
The Ambulatory Blood Pressure (ABP) Report Management System assesses a patient’s cardiac
health via blood pressure readings taken during daily activity for 24 to 48 hours, or more.
Introduction
Overview . . . . . . . . . . . . . . . . . . . . . . . . . . . . . . . . . . . . . . . . . . . . . . . . . . . . . . . . . . . 1
Warnings, Cautions, and Notes. . . . . . . . . . . . . . . . . . . . . . . . . . . . . . . . . . . . . . . . . . 1
Starting the Program . . . . . . . . . . . . . . . . . . . . . . . . . . . . . . . . . . . . . . . . . . . . . . . . . . 2
Setting up a New User. . . . . . . . . . . . . . . . . . . . . . . . . . . . . . . . . . . . . . . . . . . . . . . . . 3
ABP Main Menu. . . . . . . . . . . . . . . . . . . . . . . . . . . . . . . . . . . . . . . . . . . . . . . . . . . . . . 5
Logging Off the System. . . . . . . . . . . . . . . . . . . . . . . . . . . . . . . . . . . . . . . . . . . . . . . . 6
User Permissions . . . . . . . . . . . . . . . . . . . . . . . . . . . . . . . . . . . . . . . . . . . . . . . . . . . . 6
Electronic Signature . . . . . . . . . . . . . . . . . . . . . . . . . . . . . . . . . . . . . . . . . . . . . . . . . . 7
System Navigation. . . . . . . . . . . . . . . . . . . . . . . . . . . . . . . . . . . . . . . . . . . . . . . . . . . . 8
The ABP system consists of a standard ABP monitor, a personal computer (PC), host software
application, and an electronic interface between the monitor(s) and the PC system(s). The
monitors used with the ABP system include the 90207 monitor and 90217 Ultralite
Warnings, Cautions, and Notes
Warning:
• The ABP Report Management System and any non-medical equipment that is
connected to the ABP Report Management System should not be a llowed within the
patient’s vicinity (patient vicinity extends 6 feet or 1.83 m beyond the perimeter of
the bed, table or chair, and 7 1/2 feet or 2.29 m above the floor).
• Remove the arm cuff from the patient before defibrillation. There is a risk of
defibrillation failure, burns and equipment damage if defibrillator paddles contact
the arm cuff or ABP monitor. In the special case where the patient has a defibrilla tor
at home, family members and in-home caregivers who could be responsible for
attempting defibrillation must be advised of this hazard.
• Explosion hazard. Do NOT use in the presence of flammable anesthetics.
Caution:
• Do NOT use acetone, ether, freon, petroleum derivatives, or other solvents to clean
the ABP monitor.
• Spacelabs Medical’s ABP monitors are designed to meet IEC 60601-1-2 EMC
immunity requirements. The presence of strong EMI fields generated by electronic,
surgical, or diathermy instruments in close proximity to the unit may cause trace
noise or input overload conditions. Refer to the Electromagetic Compatibility
appendix in the 90207 service manual (P/N 070-0 189-xx) or the 90217 service manual
(P/N 070-0502-xx).
• To avoid operator injury, refer to your PC owner’s ma nual fo r prope r ergometric use.
™
monitor.
1-1
Page 6

ABP Report Management System Operations Manual
• Microsoft Windows requires a minimum of 250 MB fr ee hard drive space ava ilable at
all times for virtual memory, print spooling, and caching. Failure to comply with
these requirements will degrade system performance or cause th e system to crash.
• U.S. Federal law restricts this device to use by or on the order of a physician.
Note:
• This device is intended to be used as an ABP monitor analysis system for the purpose of
screening for blood pressure disturbances.
• A 24-hour patient record with 240 readings requires a maximum of 50 KB of hard drive
space. A 48-hour patient record with 240 readings requires a maximum of 50 KB of hard
drive space.
• A qualified physician should review the results of the ABP reading befor e treatment or nontreatment of any patient.
• Installing the application on an operating system not specified on the 92506 Ambulatory
Blood Pressure Report Management System data sheet (P/N 061-1283-00) is not
supported.
• The regional/language settings for the operating system must be identical to that of the
application.
Starting the Program
When the ABP Report Management System software is loaded on your computer a Client
application icon is placed on the desktop.
To initiate the Client application:
Note:
If this is the first time starting the Client application since installation, refer to Setting up a New
User on page 1-3
1 Power ON your computer.
2 Double-click the Client application icon to start the program.
Note:
The User Profile is automatically set to Administrator and Physician during initial startup. Your
screen may be different, depending on your software version.
.
1-8
Page 7
ABP Report Management System Operations Manual
3 Type in your User ID and your Password at the User Login window and then click Login
(Figure 1-1).
Figure 1-1: User Login window
Introduction
Note:
If this is the first time you have logged on, a message displays, and you will be required to
change your password. Click OK to close the confirmation box. Enter the old and new
password information and then click OK.
The Client application starts and the Main Menu displays.
Setting up a New User
The first time you log on to the system the software will prompt you to establish a User ID.
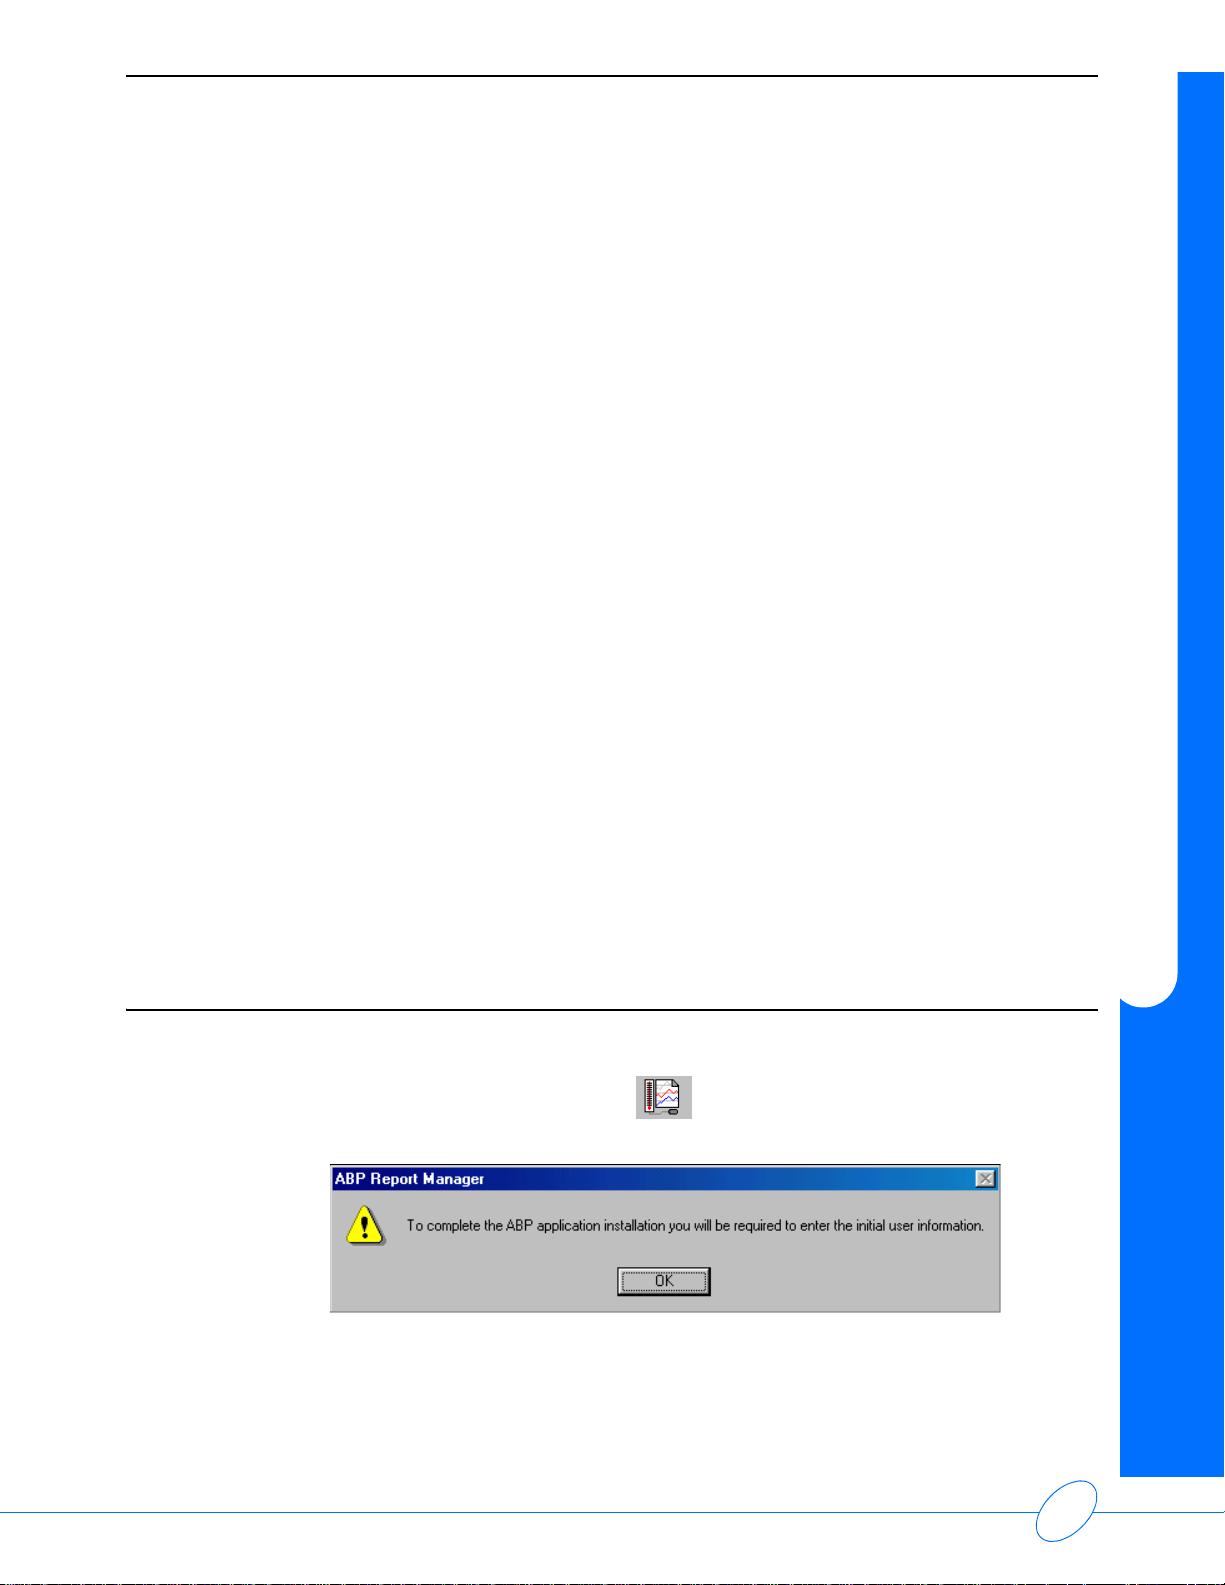
1 Double-click the Client application icon to start the program. A confirmation box
appears (Figure 1-2).
2 Click OK to open the New User dialog box.
Figure 1-2: Initial startup message
1-5
Page 8
ABP Report Management System Operations Manual
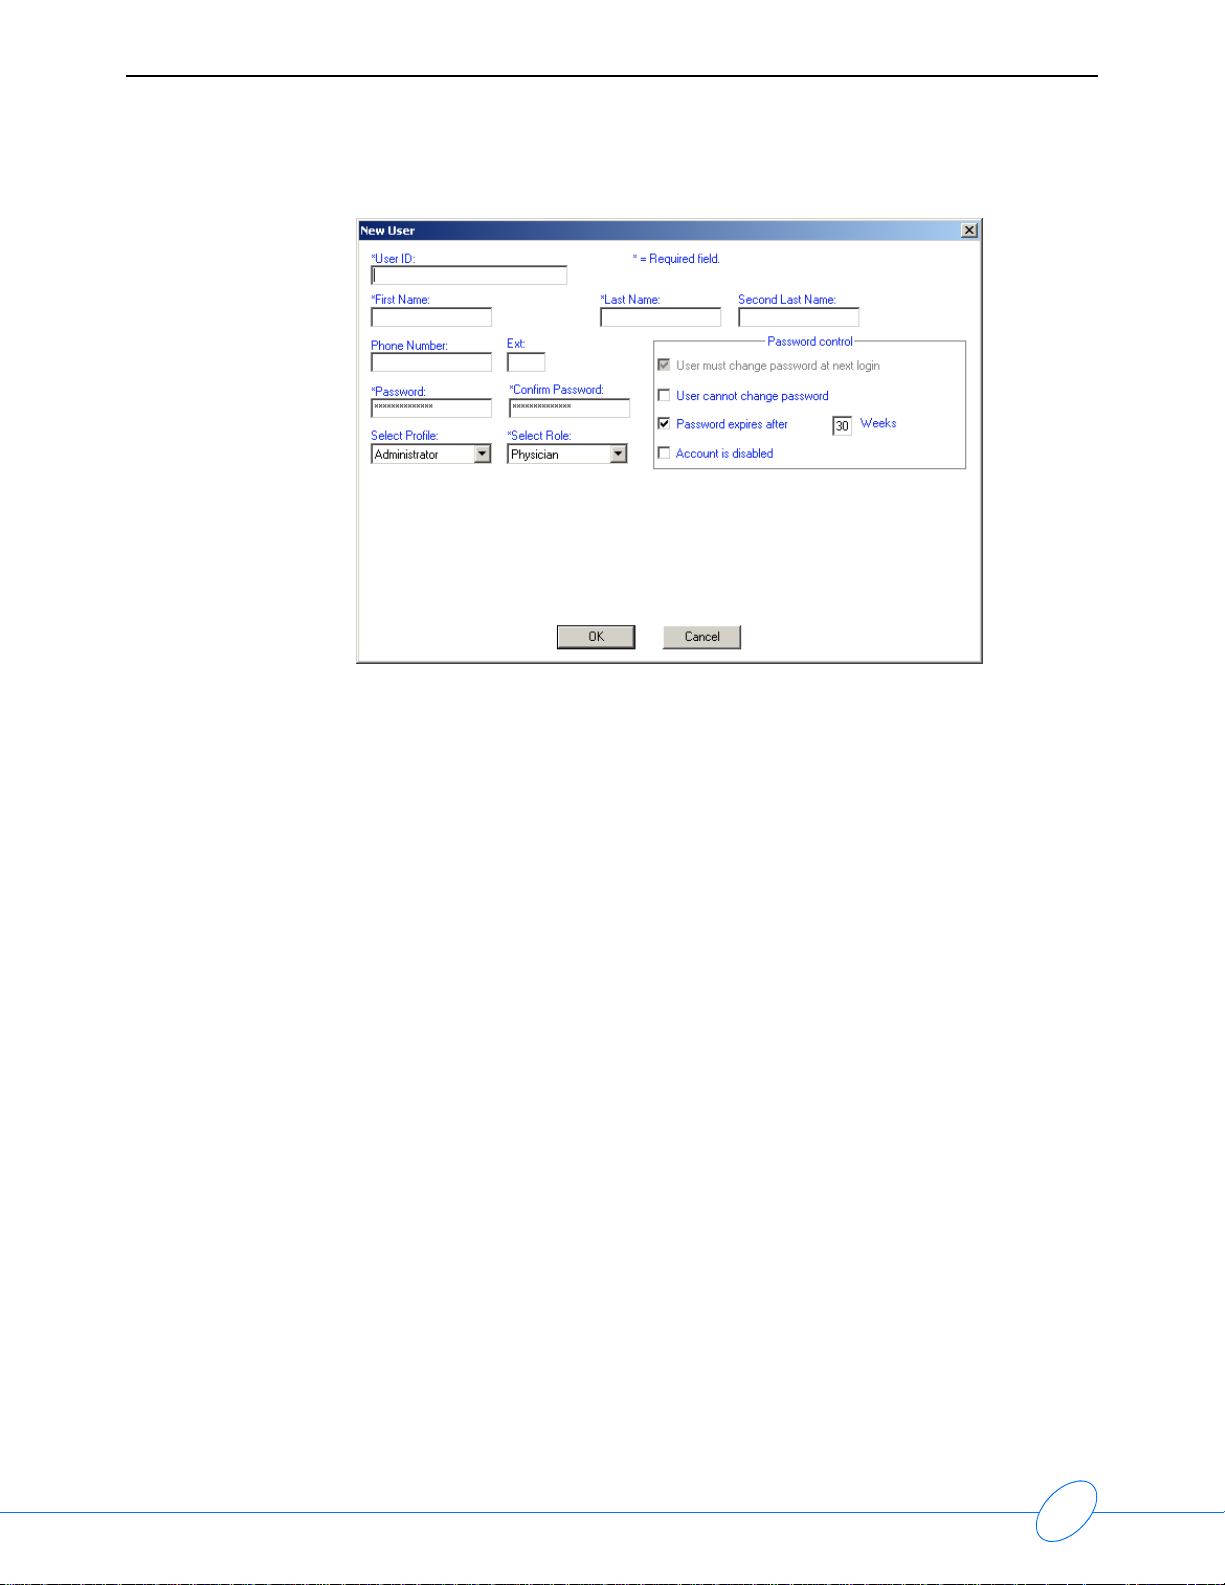
Figure 1-3: New User dialog box
3 Fill in the required fields: User ID, First Name, Last Name, Password, Confirm Password,
and Select Role.
4 Click OK.
Note:
• For additional information on configuring this dialog box, refer to Adding User Profiles on
page 6-13.
• The User Profile is automatically set to Administrator and Physician during initial startup.
Your screen may be different, depending on your software version.
• The Password you enter in this dialog box is temporary. You will be required to chang e it
immediately after the Client application adds you as a user.
5 Click OK when the confirmation box appears.
6 Enter your User ID and Password and then press ENTER at the User Login window.
7 Click OK at the message stating that the initial password has expired.
8 Enter the old and new password information and then click OK.
The Client application starts and the Main Menu displays.
Inactivity Logon
If the application remains inactive for more than 15 minutes, you must log on again before
continuing.
If you click OK and log on again, unsaved information will still be available to save, and all
previously opened reports and other windows will remain open.
If you click Cancel, all unsaved information will be lost, and open reports and windows will be
initialized the next time you log on to the application.
1-8
Page 9

ABP Report Management System Operations Manual
ABP Main Menu
The Main Menu appears immediately after you log on.
Introduction
Figure 1-4: Main Menu
The following options are available from the Main Menu:
• Initialize Monitor (refer to Initializing the Monitor on page 3-1)
• Upload Monitor (refer to Acquiring Patient Data on page 4-1)
• Review/Edit Patient Test (refer to Reviewing th e Re po rt on page 5-1)
• View/Change System Settings (refer to System Setup on page 6-1)
• Log Off/Exit (refer to Logging Off the System on page 1-6)
Click the appropriate button to continue.
Note:
The Select group list box only appears if multiple groups are set up on the
ABP Report Management System.
1-5
Page 10

ABP Report Management System Operations Manual
Logging Off the System
When you are finished working with the Client application, be sure to log off:
1 Click Close or Cancel to return to the Main Menu from any other location.
2 Click Log Off/Exit from the Main Menu.
User Permissions
This manual covers all of the normal operating procedures of the Client application. However, the
ABP Report Management System assigns access permission based on user type: administrator,
user, physician, technician, or nurse. Depending on your user type, you may have access to some,
most, or all of the actions that are covered in this manual.
The following table shows which user types have access permission to various tasks.
Table 1: User Permission
Serial
No.
1
2
3
4
5
6
Task
Create a new patient record
by entering the demographics
in the Initialization wizard
while importing from a file.
Modify an existing patient’s
demographics.
Delete a patient record and
demographics.
Confirm a patient’s
demographics.
Create a new ABP report/test
by uploading from the monitor
or by importing from a file.
Modify data in an existing ABP
report/test (monitor start time,
indications, medications, etc.).
User Permission (Yes/No)
System
Administrator
Yes Yes Yes Yes Yes Yes Yes
Yes Yes Yes Yes Yes Yes Yes
Yes Yes No Yes No Yes Yes
Yes Yes Yes Yes No No No
Yes Yes Yes Yes Yes Yes Yes
Yes Yes Yes Yes No Yes No
Physician Nurse T e chnician
Admin User Admin User Admin User
7 Delete an ABP report/test. Yes Yes No Yes No Yes Yes
8 Confirm an ABP report/test. Yes Yes Yes No No No No
Print a report or send a report
9
through e-mail.
Yes Yes Yes Yes No No No
1-8
Page 11

ABP Report Management System Operations Manual
Serial
No.
10
11
12
13
Table 1: User Permission (continued)
Task
Create a custom report format
for printing or sending through
e-mail. (The Report Format
tab on the System Settings
dialog box will not be
displayed.)
Delete an individual reading
from the set of readings in the
ABP report/test.
Modify monitor settings
(change the minimum and
maximum values of the blood
pressure readings, etc.).
Modify statistical settings
(change the sleep and wake
periods and the number of
readings/hour, etc.).
User Permission (Yes/No)
System
Administrator
Yes Yes No Yes Yes Yes Yes
Yes Yes Yes Yes Yes No No
Yes Yes Yes Yes No No No
Yes Yes Yes Yes No No No
Physician Nurse T e chnician
Admin User Admin User Admin User
Introduction
Modify a patient ID in the
14
report.
Electronic Signature
The Client application may be configured to stamp a confirmed test with the electronic signature of
the confirming physician. Any time a physician who is logged on to the Client application confirms
a test, the Client application stamps the test with the physician’s electronic signature, as well as
the date and time the test was confirmed. The confirmation information appears on the hard copy
printout as well as in the electronic display of the report.
Yes Yes No Yes No Yes No
1-5
Page 12

ABP Report Management System Operations Manual
System Navigation
The Client application is capable of displaying multiple, independent windows, enabling you to
have several different reports open at once. Each report opens in a sep arate window which can be
moved, resized, opened, closed, and printed.
To activate a window:
1 Click the window,
-OR-
2 Press CTRL+TAB to cycle through the open windows.
You can also open the Window menu on the menu bar and select from the list of open windows
Note:
• When an object appears lighter than the rest, or dimmed, this means that the object is not
available. An object may be unavailable if:
- You do not have permission to access this object (refer to User Permissions on page 1-
6 for more information).
- Your version of the Client application does not support the object’s function.
- Patient demographics or report information has been confirmed.
Menu Bars
Click an item on the menu bar to open a list of menu commands corresponding to that item.
Figure 1-5: Example of a menu bar
You can use either the mouse or the keyboard to select a item in a menu.
Using the Keyboard
To access menu items using the keyboard:
• Hold down the ALT key and press the appropriate hot key (the underlined letter) to activate a
menu. For example, hold down the ALT key and press R to open the Procedure menu.
• Press the appropriate underlined hot key to select an item from the menu that appears. (The
ALT key is not needed once the menu is active.) The up ar row and d own arrow keys ma y also
be used to highlight an item in a menu.
• Press ENTER to select the highlighted item.
• Press ALT to close menus, or use the left and right arrow keys to move to other menus.
1-8
Page 13

ABP Report Management System Operations Manual
Toolbars
Toolbars consist of a row (or rows) of icon buttons located just below the menu bar. Toolbar
buttons provide shortcuts to the most commonly used functions. All of the buttons have a
corresponding menu command that will perform the same function.
Figure 1-6: Example of a toolbar
The icons presented in the toolbar change according to what is shown in the active window.
You may also choose which toolbars are displayed an d wh et he r or not the te xt lab els are ON or
OFF.
To change these options:
• Right-click anywhere in the toolbar area. A shortcut menu appears.
• Options are active when a check mark is next to the name. If you make any changes to these
options, your selections will become active after the program is restarted.
Introduction
1-5
Page 14

Page 15

Contents
Overview
The Report Manager is the starting point for accessing and organizing patient records. Click
Review/Edit Patient Test on the Main Menu to access the Report Manager.
Report Manager
Overview . . . . . . . . . . . . . . . . . . . . . . . . . . . . . . . . . . . . . . . . . . . . . . . . . . . . . . . . . . . 1
Displaying Reports . . . . . . . . . . . . . . . . . . . . . . . . . . . . . . . . . . . . . . . . . . . . . . . . . . . 2
Tracking Open Windows . . . . . . . . . . . . . . . . . . . . . . . . . . . . . . . . . . . . . . . . . . . . . . . 7
Opening a Patient Report (Importing) . . . . . . . . . . . . . . . . . . . . . . . . . . . . . . . . . . . . . 7
Saving a Report. . . . . . . . . . . . . . . . . . . . . . . . . . . . . . . . . . . . . . . . . . . . . . . . . . . . . . 9
Figure 2-1: Report Manager
Note:
To return to the Main Menu, click the Close icon on the toolbar at the top of the Report
Manager window. (This will also close all open reports.)
2-1
Page 16

ABP Report Management System Operations Manual
Displaying Reports
Default/Advanced Search
When the Report Manager opens, the default patient search options display. When searching for
a particular patient’s record, you can provide one or more details of the record for which you are
searching. The more details you provide, the more accurate the search results will be. (All fields
except Monitor Time are empty by default. The default value for Monitor Time is 01/01/1900.)
The default search fields include First Name, Last Name, Patient ID, Physician, Monitor Time,
and Status.
Figure 2-2: Default search options
Advanced search enables you to search on multiple conditions at the same time.
Click Advanced on the toolbar to display the advanced search options.
Figure 2-3: Advanced search options
To display the default search options again, click Default on the toolbar.
Performing a Search
To perform a default search:
1 Specify as many factors as you can for the search.
2 Click Search.
2-10
Page 17
ABP Report Management System Operations Manual
To perform an advanced search:
1 Click Advanced.
2 Click the Field arrow and select an option from the list. The options available include:
Medications, Indications, Interpretations, Confirming Physician, Nurse, Physician,
Status, Monitor start date, Monitor end date, First Name, Last Name, Second Last Name,
Patient ID, Date of Birth, Gender, Race, Height, and Weight.
3 Specify search conditions using a combination of the Field, Operator, and Criteria boxes.
4 Click Add to Search to add a search condition to the box below the Field, Operator, and
Criteria boxes.
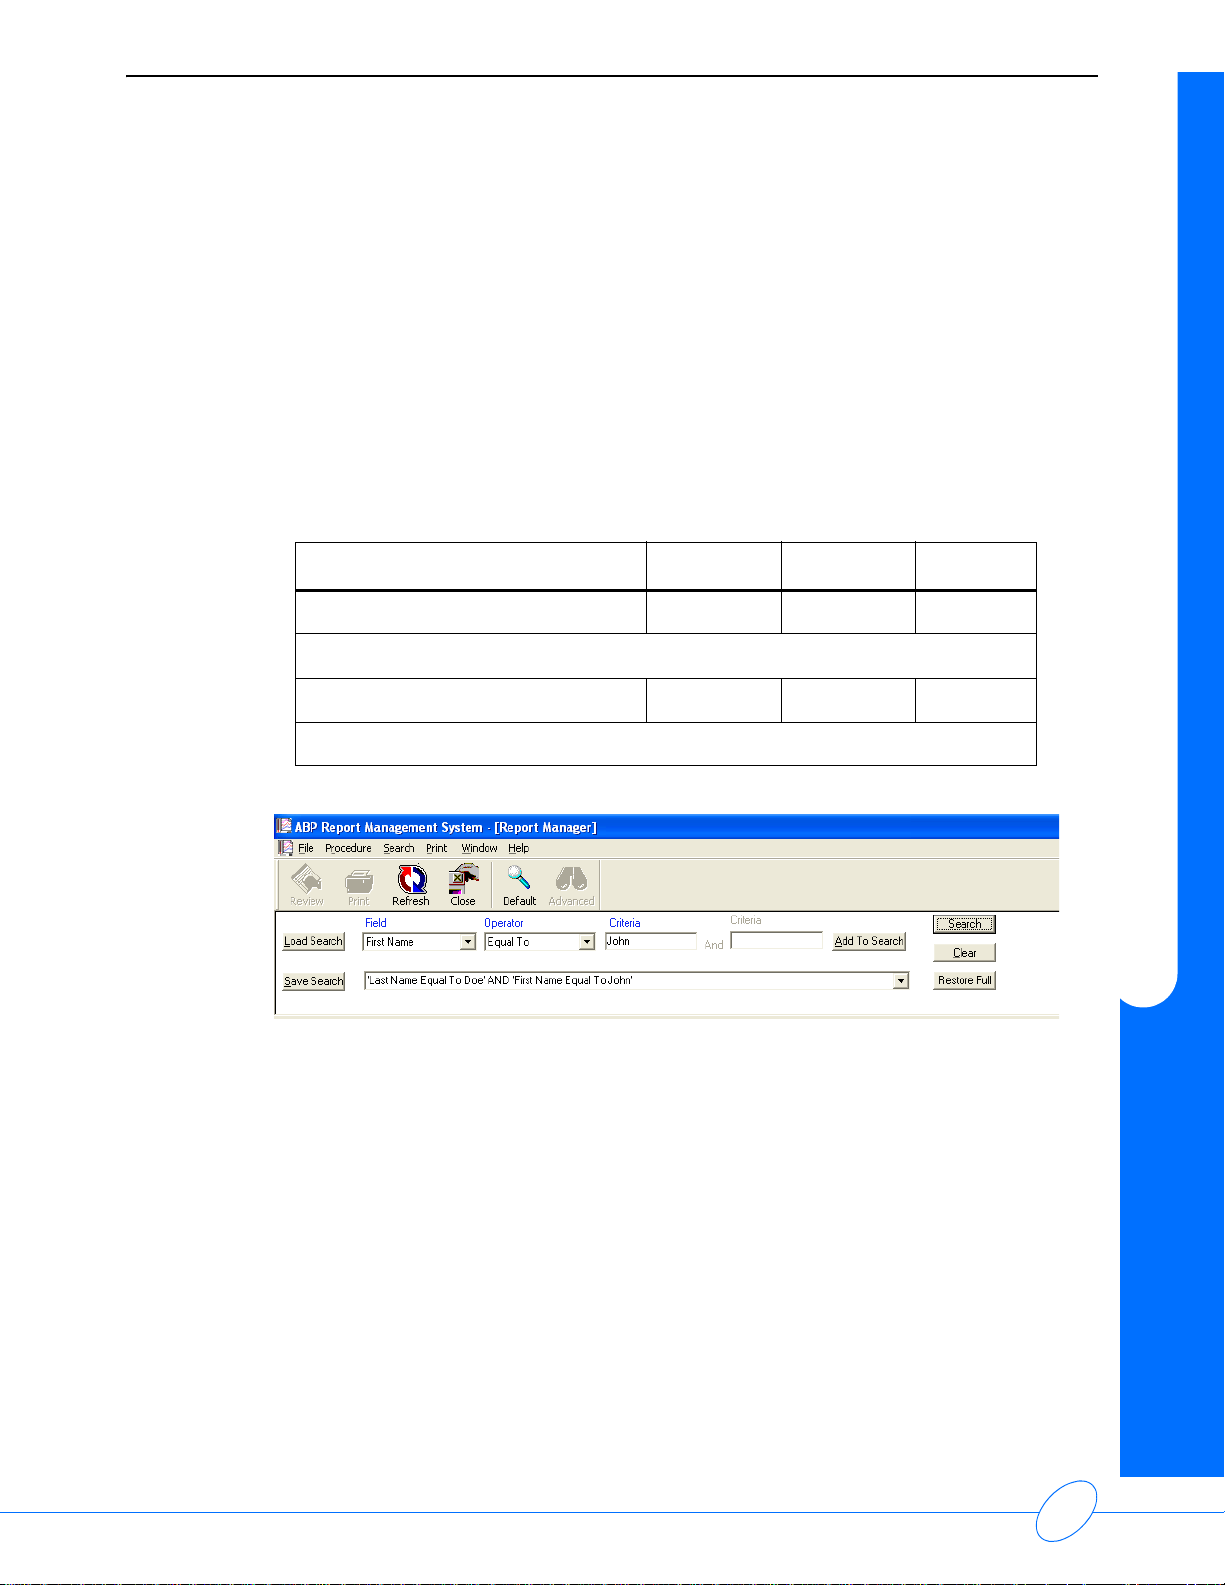
In Figure 2-4, the final search condition was achieved as follows:
Field Operator Criteria
First search criteria entered Last Name Equal To Doe
Click Add to Search
Second search criteria entered First Name Equal To John
Click Search
Report Manager
Figure 2-4: Example of search combinations
To clear all search conditions specified and refresh the list of records with the default search
conditions, click Restore Full.
To clear all values across all fields, click Clear.
2-11
Page 18

ABP Report Management System Operations Manual
Saving Search Factors
After specifying a set of factors for a search, you can save these factors for later use in case you
need to search on these factors or a similar set of factors again.
To save search factors:
1 Click Save Search.
2 Specify in the Save As dialog box the folder where you want to save the file, and then specify
a file name for the set of factors (Figure 2-5).
3 Click Save.
Figure 2-5: Save As dialog box
2-10
Page 19

ABP Report Management System Operations Manual
Loading Search Factors
If you previously used the Save Search button to save a set of search factors, you can recall and
use this search file.
To load a previously saved search file:
1 Click Load Search.
2 Browse from the Open dialog box to the folder containing the saved set of search factors and
then specify the file name (Figure 2-6).
3 Click Open.
Report Manager
Figure 2-6: Open dialog box
2-11
Page 20

ABP Report Management System Operations Manual
Sorting Patient Reports
The patient records listed in the Report Manager are displayed in table format with each row
organized into columns of information for a single patient record . Click a column he ading to sort all
the displayed records according to the information in that column in either descending or
ascending order.
Figure 2-7: Click a column heading to sort
Quick Find Feature
The row directly below the column headings can be used to quickly locate a specific report in the
list. Each column contains the text, Enter text here. Click in the desired column box and type the
appropriate data for the patient record you wish to locate.
Figure 2-8: Type text into a Quick Find edit box
For example, to locate the record for a patient with a last name of Smith, click in the Enter text
here box in the Patient Name column and type Smith. The Report Manager window displays
only those records that match the information you typed. If you enter only the first letter of the
patient’s last name, the list displays all the records that begin with that letter.
To return to the normal display of the patient record s, delete the text you entered in the Enter text
here box, or click Refresh.
2-10
Page 21
ABP Report Management System Operations Manual
Tracking Open Windows
Open the Window menu on the Report Manager menu bar to display the viewing options of
Cascade or Tile.
•Select Cascade to display all open windows overlapping each other.
•Select Tile to display all windows so that no window is obscured by any other.
Each open window is listed at the bottom of the list. The window that is currently active is indicated
by a check mark.
Opening a Patient Report (Importing)
To open a patient report from the Report Manager, double-click the record you want to review or
edit (refer to Reviewing the Report on page 5-1).
Report files generated with previous versions of ABP that used the extension .rpt can be imported
into the present system by selecting Open from the File menu. (Current version .abp files not
listed in the Report Manager can also be imported in this manner.)
Report Manager
To open (import) a patient report:
1 Select Review/Edit Patient Test from the Main Menu.
2 Select Open from the File menu.
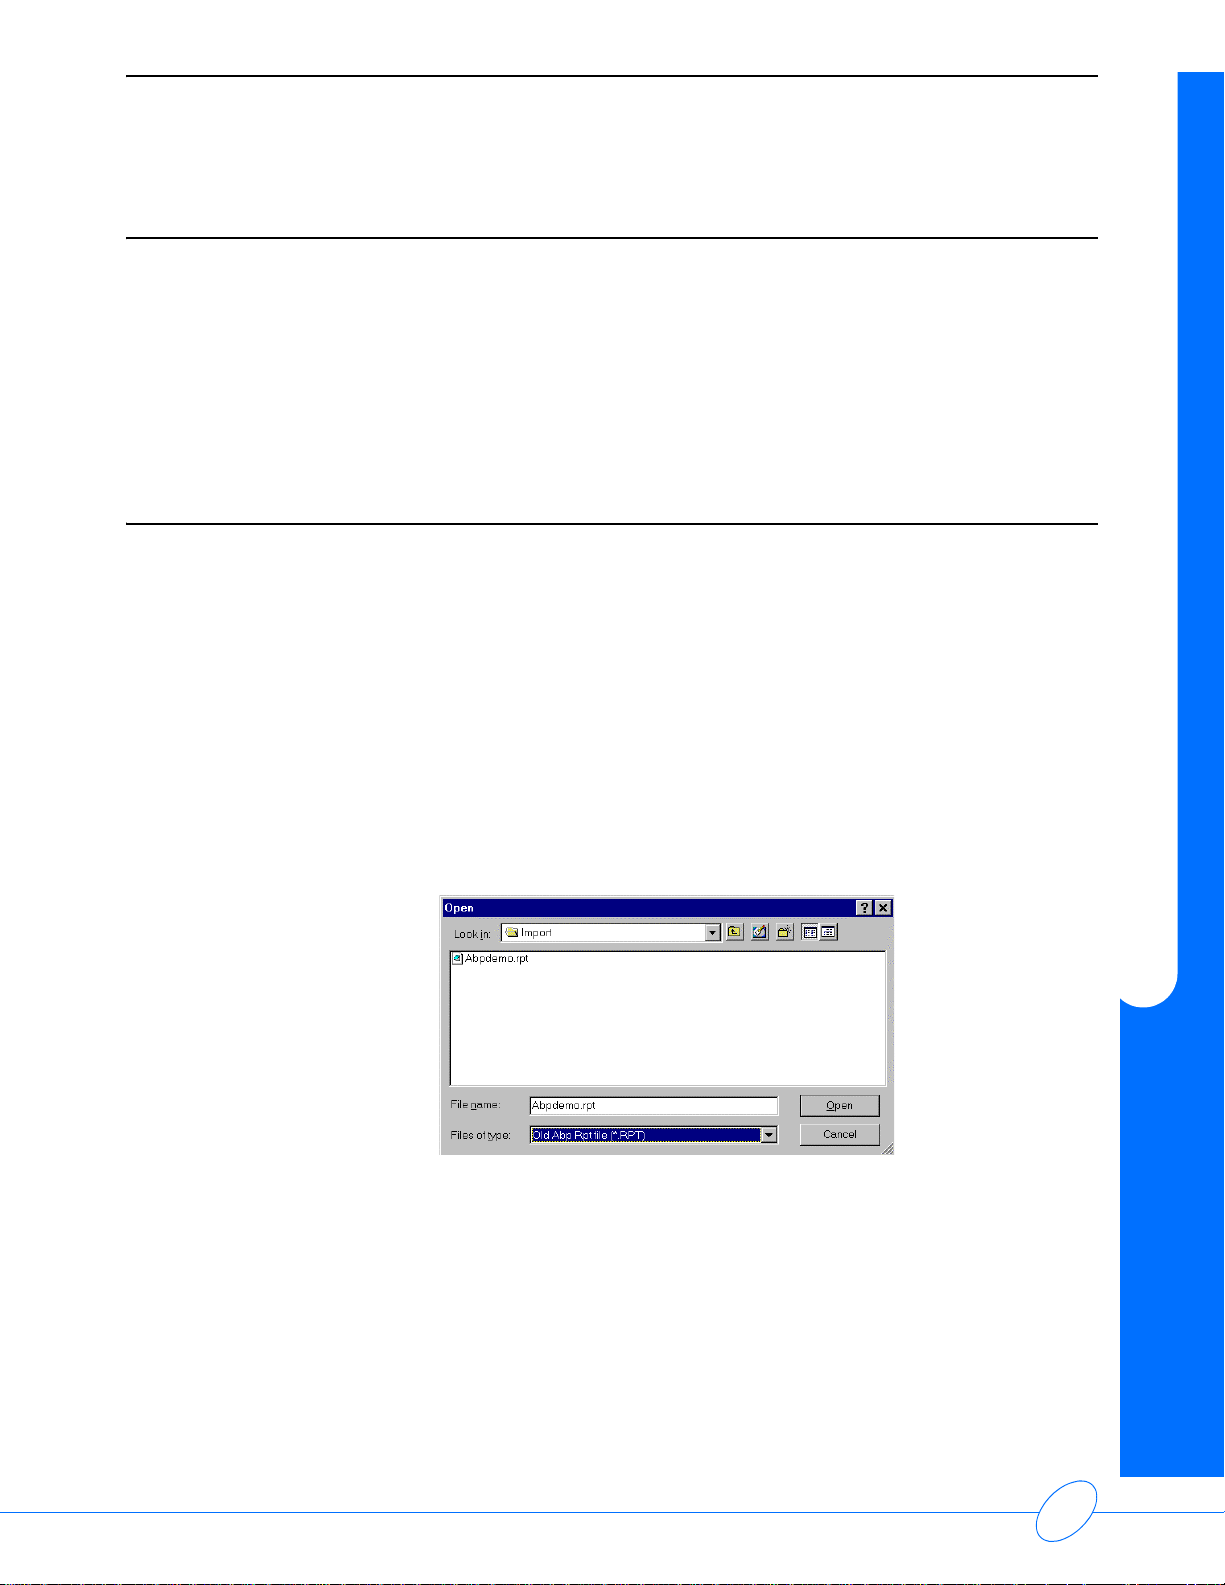
3 Click the Look In drop-down arrow and browse to the folder where the file is located (. abp, .rpt,
.g, or .mon file). Refer to Figure 2-9.
Figure 2-9: Open dialog box
4 Select the file to import and click Open. The Acquisition Wizard guides you through the steps
necessary to open the file.
5 Click Finish in the Acquisition Wizard to open the patient’s record in the ABP system and
make it available for editing.
6 Click Close on the toolbar to return to the Report Manager.
2-11
Page 22

ABP Report Management System Operations Manual
Opening Multiple Reports
The Open Multiple feature enables you to import multiple reports (.abp, .rpt, .g, and .mon files)
simultaneously and assign them to a physician.
To open (import) multiple reports:
1 Select Review/Edit Patient Test from the Main Menu. The Report Manager opens.
2 Select Open Multiple from the File menu. The Open dialog box opens (Figure 2-10).
Figure 2-10: Open dialog box
3 Click the Look in arrow and browse to the folder where the report files are stored.
4 Select one or more report files from the list and click Open.
Note:
You may open files of multiple types by selecting
The Multiple Open Report File dialog box opens (Figure 2-11).
in the Files of type text box.
* . *
Figure 2-11: Multiple Open Report File dialog box
The files you selected are listed under Unassigned Report Field(s) on the left side.
2-10
Page 23

ABP Report Management System Operations Manual
5 Select a file from the list.
Note:
To select more than one file, press and hold the CTRL key and click the additional file names.
6 Select a physician from the Assign to Physician list.
7 Click Assign to move the selected file(s) to the Assigned Re po rt Fi el d( s ) list.
Note:
To unassign an already assigned file, select the file name under Assigned Report Field(s)
and click Unassign
8 Click Open to import the assigned files.
9 Click OK when the successful import message appears (Figure 2-12).
.
Figure 2-12: Import successful message
Report Manager
The files are now available in the Report Manager.
Saving a Report
Saving in .abp Format
To save a report in .abp format:
1 Select a patient record in the Report Manager.
2 Select Save from the File menu.
3 Browse to the folder where you want to save the files, and click OK.
Note:
The default folder is: C:\Spacelabs\Export.
4 Click OK at the confirmation message.
Performing the steps above creates a file in the designated folder with the patient’s name, patient
ID, and the date of the report as the file name. The file name extension is .abp.
2-11
Page 24

ABP Report Management System Operations Manual
Saving in Other Formats
Entire patient reports or partial information may also be saved (or exported) in a variety of other
formats. You can also convert the entire report into an Adobe Acrobat .pdf file.
Note:
The Adobe Acrobat software must be purchased and installed on your workstation before
attempting to convert the patient reports to .pdf files. The application may be rendered
inoperable if an attempt is made to convert the report to .pdf and Adob e Acroba t is n ot loaded
on the workstation.
Several file extensions are available to differentiate between the different sections of the report.
These files may be opened in a standard text editor, such as Windows Notepad. All of these file
types are in a comma- separated value (CSV) format, enabling your to export them into a
spreadsheet program (for example, Excel).
The following table lists the various options and their corresponding file extensions.
Table 1: File Extensions for Report Sections
Report Page to Save/Export File Extension
Cover Page .txc
Raw Data Table .txr
Hourly Data Table .txa
Caliper Summary .txs
Complete Patient Data .pdf
To save the report sections in a different format other than .abp:
1 Select a patient record in the Report Manager.
2 Select Save As from the File menu to open the Export Wizard (Figure 2-13).
2-10
Page 25
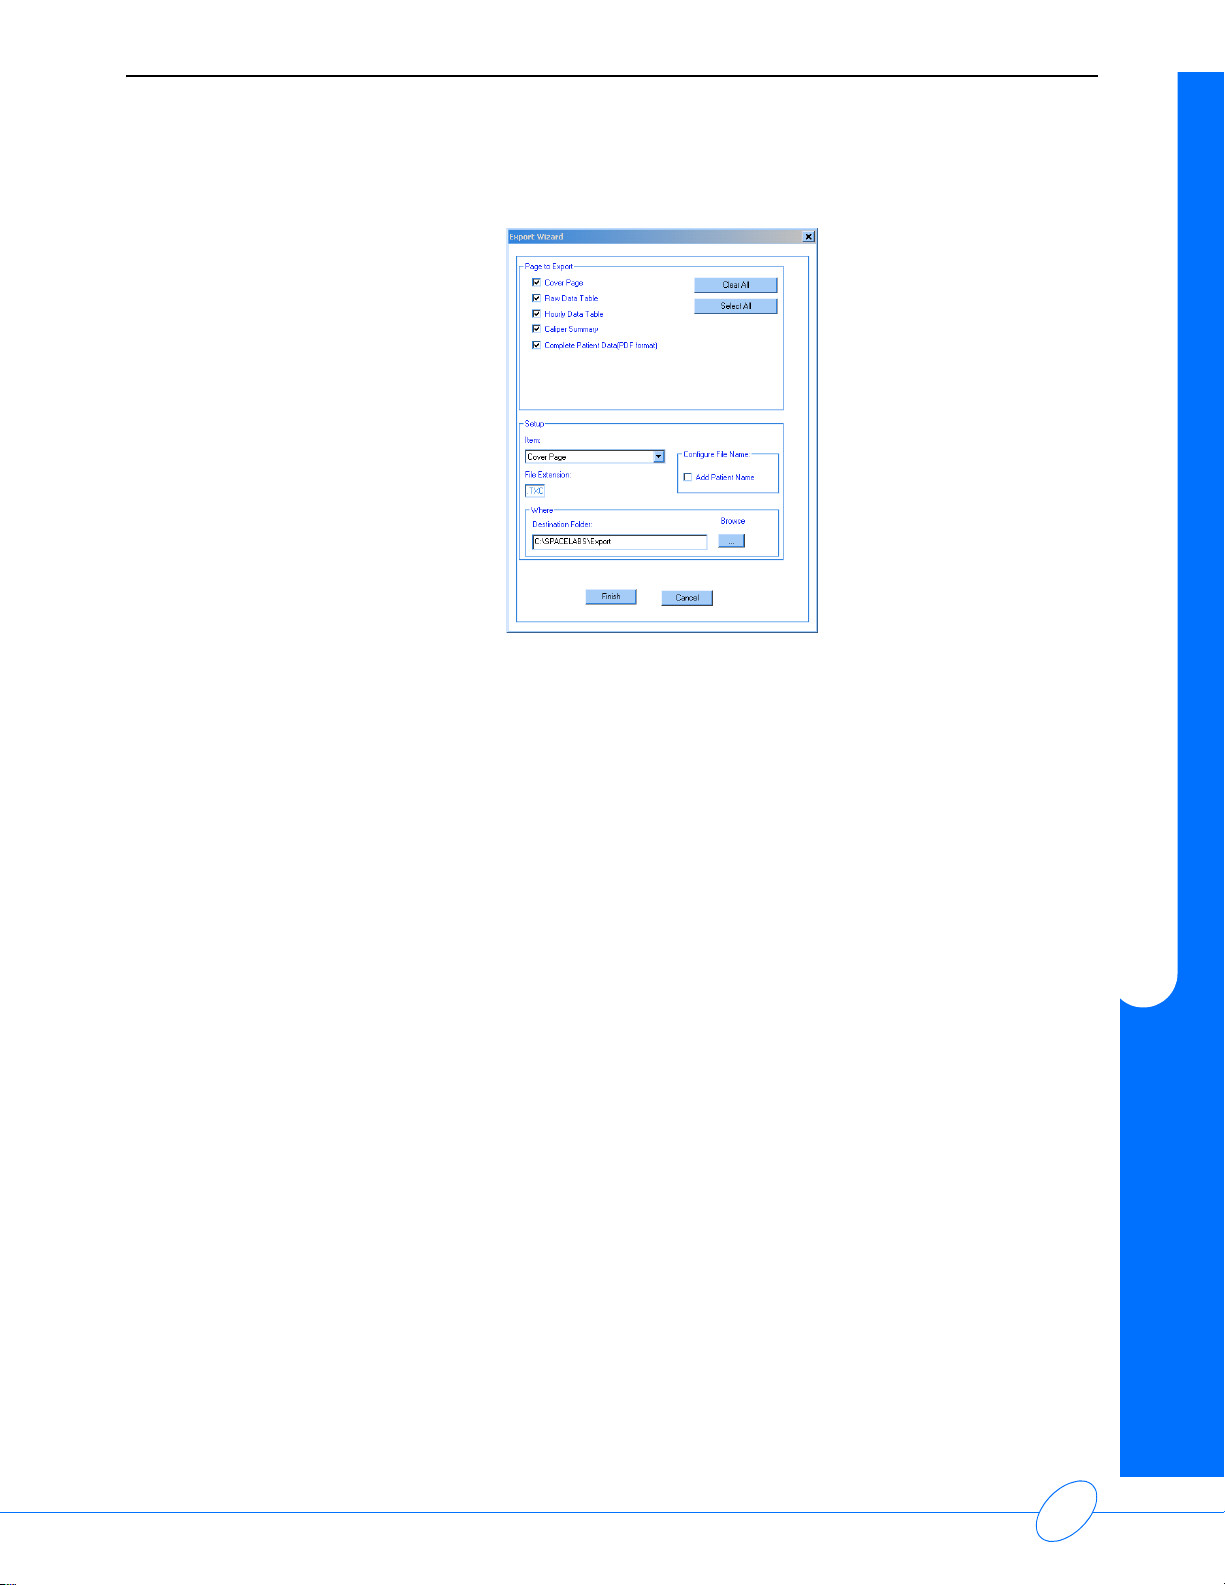
ABP Report Management System Operations Manual
Figure 2-13: Export Wizard
Report Manager
3 Select the appropriate pages to save or export from the Page to Export area of the
Export Wizard dialog box.
4 Select the Add Patient Name check box from the Configure File Name area of the
Export Wizard dialog box, if you want the patient’s name to appear in the file name.
Note:
The default file name consists of the patient ID and the date and time when the report was
generated. The patient name is optional.
5 Specify the Destination Folder where you want to save the file(s).
Note:
The default folder is C:\Spacelabs\Export.
6 Click Finish.
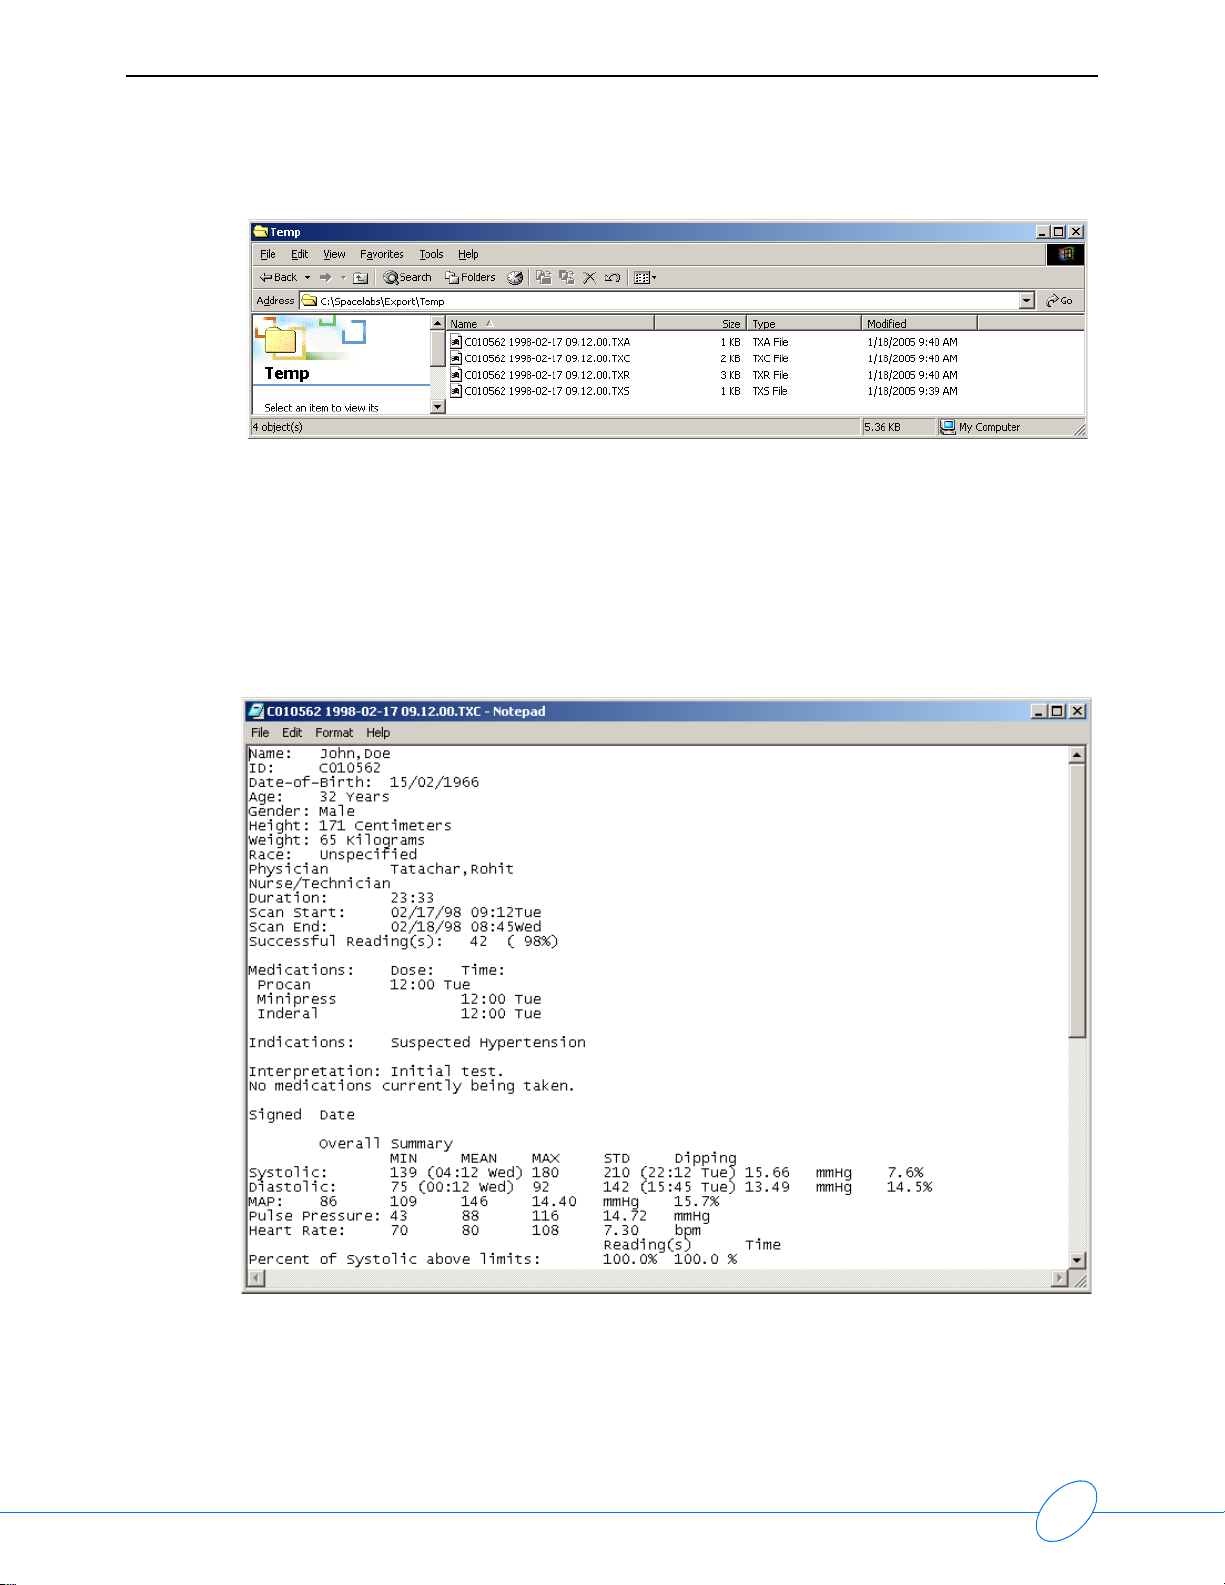
Figure 2-14 displays examples of four files created using the procedure specified above. The .pdf
file is not shown.
Note:
The Add Patient Name box was not checked when the files were generated – only the
Patient ID is noted in the file names.
2-11
Page 26
ABP Report Management System Operations Manual
Figure 2-14: Example file entries
Note:
Files generated by the Save As command (file extensions .t** and .pdf) cannot be imported
back into the ABP report management system.
You can open the files listed in Figure 2-14 using any standard text editor (for example, Windows
Notepad). You can export the files that are in CSV format to a spreadsheet program using the
standard Windows copy and paste procedures.
Figure 2-15: Sample .txc file
2-10
Page 27

Contents
Overview
To prepare for a patient recording, you must pre pa re the ABP moni to r an d at ta ch th e cu ff to th e
patient. Refer to the operating instructions that came with your monitor for additional information.
To record data from a patient, first initialize the monitor.
1 Connect the ABP monitor to the ABP Report Management System using the monitor interface
2 Start the Client application to display the Main Menu.
Initializing the Monitor
Overview . . . . . . . . . . . . . . . . . . . . . . . . . . . . . . . . . . . . . . . . . . . . . . . . . . . . . . . . . . . 1
Entering Patient Information . . . . . . . . . . . . . . . . . . . . . . . . . . . . . . . . . . . . . . . . . . . . 1
Monitor Initialization. . . . . . . . . . . . . . . . . . . . . . . . . . . . . . . . . . . . . . . . . . . . . . . . . . . 3
Summary . . . . . . . . . . . . . . . . . . . . . . . . . . . . . . . . . . . . . . . . . . . . . . . . . . . . . . . . . . . 6
cable.
3 Click Initialize Monitor to start the Monitor Initialization Wizard.
Entering Patient Information
The Monitor Initialization Wizard opens when you click Initialize Monitor on the Main Menu
(Figure 3-1).
Figure 3-1: Monitor Initialization Wizard
3-1
Page 28

ABP Report Management System Operations Manual
Existing Patients
If the patient has been tested before, the demographic information already exists in the
ABP Report Management System.
To search for the patient’s name:
1 Click the Search Patient button in the Patient Demographic Information area of the
Monitor Installation Wizard to display the Patients List dialog box (Figure 3-2).
Figure 3-2: Patients List dialog box
2 Select the patient’s name from the list and click Close.
The patient information displays in the Patient Demographic Information area of the
Monitor Installation Wizard.
Note:
To quickly locate a patient in the list, begin typing the appropriate information in any of the
Enter text here boxes below each column title. The closest match will display at the top of the
list. For more information, refer to Quick Find Feature on page 2-6
3 Select the name of the physician from the Physician list box.
Continue with Optional Information on page 3-3.
.
New Patients
For new patients, enter the appropriat e in fo rmation in each text box under Patient Demogra phi c
Information. (Press TAB to move from field to field.)
Select the name of the physician from the Physician list box.
Note:
•The Second Last Name, Date of Birth, Race, and Gender fields are optional.
• You may enter a maximum of 64 characters in each name box. However, the Client
application displays only the first 52 characters of the combined name text boxes in the
Report Manager window. The name and patient ID may be truncate d for printing
purposes.
3-2
Page 29

ABP Report Management System Operations Manual
Optional Information
The following steps are optional. Skip to Monitor Initialization on page 3-3 if you do not wish to
include any of this information in the patient’s report.
To select optional information:
1 Select an item from the Indications list in the Reason for Test area.
Note:
The indications list may be edited. Click New/Edit to add, delete, or edit the available
selections. Any changes are saved automatically
2 Select the ABP Data Recorder Serial Number from the available list.
Note:
This list can be edited. Click New/Edit to add, delete, or edit the available selections. Any
changes you make will be saved automatically
Monitor Initialization
After completing the patient demographic information in the Monitor Initialization Wizard, click
Next to select various settings for the ABP monitor (Figure 3-3).
Initializing the Monitor
.
.
Figure 3-3: Monitor Initialization Wizard — Monitor Intialization
Initialization Name list box — Select from a list of preconfigured initialization settings.
Monitor display settings — Select ABP monitor settings.
Period settings and pie chart — Make adjustments to wake and sleep p eriods as desire d. The
pie chart reflects the total wake time and total sleep time settings.
3-3
Page 30

ABP Report Management System Operations Manual
Existing Configurations
To select from existing monitor initialization configurations:
1 Select an option from the Initialization Name list. The appropriate settings for your selection
display automatically.
2 Click Next to display the Monitor Initialization Wizard dialog box (Figure 3-4).
Figure 3-4: Monitor Initialization Wizard — Initialize Monitor
Note:
In the time box (
from the system time.
3 Click Initialize Monitor to complete the initialization process.
4 Click Finish to return to the Main Menu when the system has finished initializing the monitor
(indicated by a fully shaded progress bar).
Note:
Monitor initialization configurations may also be uploaded by modem connection.
), type or select the upload time if you want the upload time to be different
3-2
Page 31

ABP Report Management System Operations Manual
Adding a Configuration
To add a new monitor initialization configuration:
1 Click New/Edit at the top of the Monitor Initializ at io n Wiz ard dialog box (Figure 3-3). The
Monitor Initialization List dialog box opens.
2 Type a name for the new configuration in the Item text box, and then click Add.
3 Click Close.
4 Select the desired monitor display settings (refer to
• Select the Show results of reading check box to display the reading results on the ABP
monitor after each blood pressure reading.
• Select the Clinical verification setup check box to detect blood pressure levels as low as
40 mmHg (the cuff will always bleed to 40 mmHg).
• Select the Display Cuff Pressure check box to display the cuff pressure on the ABP
monitor while the cuff is pumping and bleeding.
•The Monitor clock display time in options determine how the time appears on the ABP
monitor: either in a 12-hour or 24-hour (military) format.
5 Configure the Wake periods and Sleep periods as necessary. The physician may require that
the blood pressure readings occur more often during certain times of the day, and less often
during other times of the day.
• Make changes to Start Hour and Readings/Hour as desired.
• If the Tone check box is selected, an audible tone will precede each blood pressure
reading. (In most situations, ensure that Tone is not selected for sleep periods.)
• Once a period is defined, the pie chart on the right automatically updates to reflect the
changes. Refer to Figure 3-3.
• The pie chart reflects the sleep and wake period settings with numbers (representing the
readings per hour), asterisks ( * ; indicating that the tone is enabled), and colors (each
period is color-coded to correspond with the clock display).
in Figure 3-3).
Initializing the Monitor
6 Click Next after completing the initialization settings.
Note:
The ABP Report Management System automatically saves your changes and updates global
monitor initialization values to reflect the changes.
7 Click the Initialize Monitor button to complete the initialization process (Figure 3-4).
Note:
• If the monitor is not properly connected to the system, two error messages will appear.
Click OK to close the messages, and properly connect the monitor to the system.
• If the ABP Report Management System does not detect the monitor, it may be necessary
to select the serial communications port for the monitor. Click the Select Com Port
check box to activate the list. Select an item from the list, and click Initialize Monitor.
• To initialize the monitor over the modem, select Modem under Select Communication
Mode
.
8 Click Finish to return to the Main Menu when the system has finished initializing the monitor
(indicated by a fully shaded progress bar).
3-3
Page 32

Editing a Configuration
To edit an existing monitor initialization configuration:
1 Select the configuration from the Initialization Name list.
2 Click New/Edit at the top of the Monitor Initializ at io n Wiz ard dialog box (Figure 3-3).
3 Make changes to the monitor settings as necessary (refer to Adding a Configuration on page
4 Click Next.
5 Click the Initialize Monitor button to complete the initialization process (Figure 3-4).
6 Click Finish to return to the Main Menu when the system has finished initializing the monitor
Summary
The ABP monitor is now ready to record patient information. Refer to the ABP monitor’s operating
instructions for further instructions on attaching the cuff to the patient.
ABP Report Management System Operations Manual
3-5).
(indicated by a fully shaded progress bar).
3-2
Page 33

Contents
Overview
After you have recorded data from a patient, you must copy that data to your workstation for
analysis.
To acquire and analyze data:
1 Connect the ABP monitor to the ABP Report Management System using the monitor interface
Acquiring Patient Data
Overview . . . . . . . . . . . . . . . . . . . . . . . . . . . . . . . . . . . . . . . . . . . . . . . . . . . . . . . . . . . 1
Performing Data Transfer . . . . . . . . . . . . . . . . . . . . . . . . . . . . . . . . . . . . . . . . . . . . . . 1
Entering Patient Demographic Information . . . . . . . . . . . . . . . . . . . . . . . . . . . . . . . . . 2
Entering Test-Related Information. . . . . . . . . . . . . . . . . . . . . . . . . . . . . . . . . . . . . . . . 4
Entering Patient Information . . . . . . . . . . . . . . . . . . . . . . . . . . . . . . . . . . . . . . . . . . . . 5
cable.
2 Start the Client application.
3 Click Upload Monitor on the Main Menu.
The Acquisition Wizard opens and guides you through the steps necessary to acquir e the patient
record from the recording media.
Performing Data Transfer
The Acquisition Wizard starts with the Data Transfer process (Figure 4-1).
Figure 4-1: Acquisition Wizard — Data Transfer
4-1
Page 34

ABP Report Management System Operations Manual
Click Acquire Monitor Data to upload the patient data to the ABP Report Management System.
The ABP Report Management System provides status messages area beneath the
Acquire Monitor Data button.
If the ABP Report Management System does not detect the monitor, it may be necessary to select
the serial communications port for the monitor. Select the Select Com Port check box to activate
the list box. Select an item from the list box and then click Acquire Monitor Data.
Note:
• If the monitor is not properly connected to the system, two error messages will appear.
Click OK to close the messages, and properly connect the monitor to the system.
• To initialize the monitor over the modem, select Modem under Select Communication
Mode.
Once the data transfer is complete (indicated by a fully shaded progress bar), click Next. The
Enter Patient Demographic Information dialog box appears.
Entering Patient Demographic Information
Figure 4-2: Acquisition Wizard — Patient Demographics
If you entered patient information during monitor initialization, this information will appear
automatically in the Enter Patient Demographic Information dialog box.
If the edit boxes in this dialog box are empty but the patient has been tested before, the
information for the patient may already exist in the ABP Report Management System. Refer to
Existing Patients on page 4-3 to continue.
If the patient is new, you must manually enter text into the text boxes. Continue with the
instructions in New Patients on page 4-4.
4-2
Page 35

ABP Report Management System Operations Manual
Existing Patients
If the patient has been tested before, the information for this dialog box already exists in the
ABP Report Management System.
To search locate an existing patient:
1 Click Search Patient to search for a patient’s name. The Patients List dialog box displays
(Figure 4-3).
Acquiring Patient Data
Figure 4-3: Patients List
2 Select the patient’s name from the list and click Close.
The patient’s demographic information displays in the Acquisition Wizard dialog box
(Figure 4-2).
Note:
To quickly locate a patient in the Patients List dialog box, type the appropriate data into any
of the Enter text here boxes below each column title. For more information, refer to Quick
Find Feature on page 2-6
3 Edit the information, if necessary, and then click Next. The Optional Test Related Information
dialog box opens (refer to Entering Test-Related Information on page 4-4).
.
4-3
Page 36

ABP Report Management System Operations Manual
New Patients
Note:
Although a total of 64 characters in each name box ma y be enter ed , th e Clien t ap plic ation
displays only the first 52 characters of the combined name edit boxes in the Report Manager
window. The name and patient ID can be truncated for printing purposes.
To add a new patient:
1 Enter the Patient ID number assigned to the patient (20 characters maximum).
2 Press TAB and enter the patient’s Last Name (64 characters maximum).
3 Press TAB and enter the patient’s First Name (64 characters maximum).
4 Select a physician from the Physician list.
5 Enter the patient’s middle name in the Second Last Name box if desired (64 characters
maximum).
6 Enter the patient’s date of birth, race, and gender, if desired.
7 Click Next. The Optional Test Related Information dialog box opens (Figure 4-4).
Entering Test-Related Information
Figure 4-4: Acquisition Wizard — Optional Test Related Information
Note:
The fields on this screen are optional. Click Next if you do not wish to include any of this
information on the patient’s report.
4-4
Page 37

ABP Report Management System Operations Manual
To enter test related information:
1 Make any necessary changes to the Monitor Date and Time boxes. These boxes are
automatically filled in with the date and time of the first good reading.
2 Select one of the options from the Select Statistic Setting list to apply preset analysis limits to
the patient data. These limits determine which parts of the patient’s data are considered normal
and which parts are considered abnormal when the program analyzes the data. Refer to
Statistics Tab on page 6-6 for additional information on the Statistical settings.
3 Select a name from the Nurse/Technician list.
4 Click Next to display the Enter Patient Information dialog box.
Entering Patient Information
Acquiring Patient Data
Figure 4-5: Acquisition Wizard — Enter Patient Information
Note:
• The fields in this dialog box are optional. Click Finish if you do not wish to include any of
this information in the patient’s report.
• Some of the information in this dialog box may be filled in automatically if information was
entered during monitor initialization or if the patient has been tested before
To enter optional patient information:
1 Enter the patient’s Weight and select the appropriate units from the list.
2 Enter the patient’s Height and select the appropriate units from the list.
3 Click Diary/Events to add comments to the patient event list or insert patient diary time and
comments. For more information refer to Diary Event Entry on page 4-6.
.
4-5
Page 38

ABP Report Management System Operations Manual
4 Enter the patient’s indications.
• Select a medication from the Indications list. To select more than one indication, repeat
this step.
-AND/OR-
• Type information directly into the text box.
Note:
Click New/Edit to add, delete, or edit the available selections. Any changes you make in this
window are saved automatically.
5 Select any medications that the patient is taking from the Medications list. Each medication
you select will appear in the window under the Medications list box.
Note:
Click New/Edit to edit the medication information and disp lay the Medications dialog box. For
more information on working in the Medications dialog box, refer to Medications on page 4-7
6 Click Finish.
The Client application automatically analyzes the data as the last step in the acquisition process.
In addition, the application automatically adds the test to the database, and opens the report for
further review and editing.
.
Diary Event Entry
To add comments to the patient event list or to insert patient diary times and comments:
1 Click Diary Events in the Enter Patient Information dialog box (Figure 4-5). The
Diary/Patient Event List dialog box opens.
Figure 4-6: Diary/Patient Event List
2 Select the Annotate Diary in Report check box to if you want the diary entries annotated in
the final report.
4-6
Page 39

ABP Report Management System Operations Manual
3 Enter the Date and Time to enter a diary event. Select a diary comment from the Diary
Comment list box.
4 Click Add to add the entry to the Event List. Repeat these steps as necessary to enter all of
the diary events.
• To update an entry, select the entry in the Event List. Make changes as necessary in the
Date and Time and Diary Comment boxes. Click Update.
• To remove an entry, select the entry in the Event List and click Remove.
Note:
Click New/Edit to add or delete the available selections. Any changes you make in this
window are saved automatically.
5 Click Close, when you have completed editing, to return to the Enter Patient Information
dialog box (Figure 4-5).
Medications
To display the Medications dialog box (Figure 4-7) and edit patient medication information, click
New/Edit next to Medications in the Enter Patient Information dialog box (Figure 4-5).
Note:
Click New/Edit to add, delete, or edit the available selections. Any changes you make in this
window are saved automatically.
Acquiring Patient Data
Figure 4-7: Medications dialog box
4-7
Page 40

ABP Report Management System Operations Manual
Adding a Medication
To add a medication to the patient’s list:
1 Select the medication from the Medications list.
2 Enter the dose amount, date, and time.
3 Select the Annotation check box if medication annotation is to be included in the final report.
4 Click Add.
5 Repeat step 1 through step 4 to edit another medication.
6 Click OK.
4-8
Page 41

Contents
Overview
Reviewing the Report
Overview . . . . . . . . . . . . . . . . . . . . . . . . . . . . . . . . . . . . . . . . . . . . . . . . . . . . . . . . . . . 1
Cover Page — Patient Information . . . . . . . . . . . . . . . . . . . . . . . . . . . . . . . . . . . . . . . 2
ABP Report Summary . . . . . . . . . . . . . . . . . . . . . . . . . . . . . . . . . . . . . . . . . . . . . . . . . 3
Interpretation . . . . . . . . . . . . . . . . . . . . . . . . . . . . . . . . . . . . . . . . . . . . . . . . . . . . . . . . 4
Raw Data Graph . . . . . . . . . . . . . . . . . . . . . . . . . . . . . . . . . . . . . . . . . . . . . . . . . . . . . 5
Discrete Raw Data Graph . . . . . . . . . . . . . . . . . . . . . . . . . . . . . . . . . . . . . . . . . . . . . . 6
ABP Raw Data Tabular . . . . . . . . . . . . . . . . . . . . . . . . . . . . . . . . . . . . . . . . . . . . . . . . 7
Hourly Average Graph. . . . . . . . . . . . . . . . . . . . . . . . . . . . . . . . . . . . . . . . . . . . . . . . . 8
Discrete Hourly Average Graph. . . . . . . . . . . . . . . . . . . . . . . . . . . . . . . . . . . . . . . . . . 9
ABP Hourly Data Tabular . . . . . . . . . . . . . . . . . . . . . . . . . . . . . . . . . . . . . . . . . . . . . 10
Caliper Summary View . . . . . . . . . . . . . . . . . . . . . . . . . . . . . . . . . . . . . . . . . . . . . . . 11
Edit Summary . . . . . . . . . . . . . . . . . . . . . . . . . . . . . . . . . . . . . . . . . . . . . . . . . . . . . . 12
The ABP Report Management System provides a comprehensive and detailed report of a patient's
ambulatory blood pressure.
Note:
A qualified physician should review the results of the ABP reading before treatment or
non-treatment of any patient.
To review a report:
1 Start the Client application.
2 Click Review/Edit Patient Test from the Main Menu to open the Report Manager window.
3 Double-click the record you wish to review or edit (or highlight the record and click Review).
The Patient Information page opens. Refer to Figure 5-1 on page 5-2.
Note:
To select multiple records to review, hold down the CTRL key, click each report, and click
Review.
4 Advance through the pages of the final report by either:
• Pressing the PgUp and PgDn keys on the keyboard.
-OR-
• Clicking the Prev or Next icons ( / ) on the toolbar to move forward or back through the
pages.
Note:
Some of the information that will appear in the report windows is determined by system
settings (refer to Configuring System Settings on page 6-2). Some of the fields discussed in
this chapter may not appear on your system.
5-1
Page 42

ABP Report Management System Operations Manual
Cover Page — Patient Information
The Patient Information page includes patient demographics, medications, indications, and
monitor information. In addition, this page may contain a number of fields customized by the
system administrator.
Figure 5-1: Patient Information page
Edit or enter the appropriate information as necessary.
To confirm the patient demographics:
1 Right-click an open area on the Patient Information page.
2 Select Confirm Patient Demographics from the menu.
3 Enter your User ID and Password and click OK. Once you confirm patient demographics, you
will not be able to edit most demographic fields.
Note:
To unconfirm previously confirmed patient demographics, right-click any open area on the
Patient Information page, select Unconfirm Patient Demographics, and enter your User ID
and Password. Click OK.
4 Click Next to go to the next page in the report.
5-2
Page 43

ABP Report Management System Operations Manual
ABP Report Summary
Reviewing the Report
Figure 5-2: ABP Report Summary
The ABP Report Summary displays a summary for the entire scan and for each of the statistical
periods. The information provided is for the patient’s systolic, diastolic, MAP, pulse pressure, and
heart rate. The low, high, and mean rates for the prescribed periods are also recorded.
This page also indicates the percentage of time that the readings in each of the periods were
higher than the statistical boundaries.
Dipping is an indication of the change in blood pressure between day (or wake) and night (or
sleep). It is the percentage change for the mean systolic and diastolic readings for the day and
night. If there is no day or no night period, the dipping values cannot be calculated and, therefore,
will not be available and will be indicated with a hyphen (-).
Click Next to continue to the next page.
5-3
Page 44

Interpretation
ABP Report Management System Operations Manual
Figure 5-3: Interpretation page
The Interpretation text box provides a place for the reviewing physician to type in the
interpretation. Blank lines are omitted to save space on the printouts. When the final report is
printed, there is a place for the reviewing physicia n to sig n and da te the inte rp re ta tio n.
To enter the patient’s interpretations:
• Select the desired interpretation from the Interpretations list and select the desired
interpretation. Repeat this step to select more than one interpretation.
-AND/ORType interpretation information directly into the Interpretation edit box.
Note:
Click New/Edit to add, delete, or edit the available selections. Any changes you make in this
window are saved automatically
To confirm the test:
1 Select your name from the Confirmed by drop-down list box.
2 Enter your User ID and Password and click OK. (Once you have confirmed the report no
further editing is possible.)
Note:
You can also unconfirm a test after it has been confirmed, click Unconfirm Report in the
Interpretation window. Enter your User ID and Password and click OK.
.
3 Click Next to continue to the next page in the report.
5-4
Page 45

ABP Report Management System Operations Manual
Raw Data Graph
Reviewing the Report
Figure 5-4: Raw Data Graph
The Raw Data Graph displays raw data from ABP readings in a graphical format.
• The BP (top) graph displays the systole (the upper value), MAP (the middle value), and
diastole (the lower value).
• The PP (middle) graph displays pulse pressure.
• The HR (bottom) graph displays heart rate.
• The statistical sleep period is the horizontal gray bar at the bottom of the BP graph.
• The statistical settings thresholds are the black ho rizontal line(s) in the BP graph.
Each type of measurement (BP, MAP, systole, etc.) is represented by a unique color in the graphic
summary. Refer to Table 1 to locate and identify information in the graph.
Table 1: Graph Color Identification
Measurement Line Color
Systolic Red
Diastolic Blue
MAP Purple
Pulse Pressure Magenta
Heart Rate Green
Clicking in the graph area results in a vertical line imposed on the closest reading.
5-5
Page 46

ABP Report Management System Operations Manual
Discrete Raw Data Graph
To display the Discrete Raw Data Graph (Figure 5-5), right-click the Raw Data Graph page and
clear the Point-to-Point check box.
Figure 5-5: Discrete Raw Data Graph
The Discrete Raw Data Graph is similar to the Raw Data Graph (refer to Raw Data Graph on
page 5-5).
Note:
The Discrete Raw Data Graph does not use colors to represent the systolic, diastolic, and
MAP measurements. For each reading, the upper end point represents the systolic
measurement, the lower end point represents the diastolic measurement, and th e re d do t
represents the MAP measurement.
Inserting Calipers into Graphical Data
To insert a caliper:
1 Click the desired first reading and drag the mouse over to the desired last reading and then
release the mouse button. The selected readings appear highlighted in black.
2 Right-click and select Insert Caliper from the menu. A dialog box opens displaying summary
information for the selected readings.
3 Edit the summary information and enter comments, if desired.
Note:
If you edit the start time and end time values, click Calculate before proceeding.
4 Click Save to return to the Raw Data Graphic Summary page.
5 Select Caliper Summary from the View menu to view the caliper summary.
6 Click Next to continue to the next page.
5-6
Page 47

ABP Report Management System Operations Manual
ABP Raw Data Tabular
Reviewing the Report
Figure 5-6: Raw Data Tabular summary
The ABP Raw Data Tabular page displays raw data from ABP readings in a tabular format. Each
reading is a row in the table. The reading numbers appear at the left side of the table. The various
components of the reading appear at the top of the columns. Use the vertical scroll bars to scroll
through the readings.
The ABP Report Management System records the edit status of each reading and displays this
information in the Edit Status column.
• EE signifies an event edit, which comes from the ABP monitor.
• AE signifies an automatic edit, which has configurable limits set on the Statistics tab of the
System Settings dialog box.
• ME signifies a manual edit, which the operator initiates. Angle brackets (< and >) signify an
estimated reading (for example, <114>).
You can edit a cell in the Edit Status column if the cell does not already contain an EE or an AE
status.
To edit the cell:
1 Click the desired cell in the Edit Status column. The ME edit status is displayed.
2 Click the cell again to reverse the edit status. The ME edit status is cleared.
You can also edit cells in the Diary Activity column.
To add or change a diary activity:
1 Click the desired cell and select a diary activity item from the list.
-ORType the diary activity into the selected cell.
2 Click Next to continue to the next page.
5-7
Page 48

ABP Report Management System Operations Manual
Hourly Average Graph
Figure 5-7: Hourly Average Graph
The Hourly Average Graph displays hourly average values of the ABP readings in a graphical
format.
•The BP (top) graph displays the hourly averages of systole (the upper value), MAP (the middle
value), and diastole (the lower value).
•The PP (middle) graph displays the hourly averages of pu ls e pressure.
•The HR (bottom) graph displays the hourly averag es of hea r t rat e.
• The statistical sleep period is the horizontal gray bar at the bottom of the BP graph.
• The statistical settings thresholds are the black horizontal line(s) in the BP graph.
Each type of measurement (BP, MAP, systole, etc.) is represented by a unique color graph. Refer
to Table 2 to locate and identify information in the graph.
Table 2: Graph Color Identification
Measurement Line Color
Systolic Red
Diastolic Blue
MAP Purple
Pulse Pressure Magenta
Heart Rate Green
Clicking in the graph area results in a vertical line imposed on the closest reading.
5-8
Page 49

ABP Report Management System Operations Manual
Discrete Hourly Average Graph
To display the Discrete Hourly Average Graph, right-click the Hourly Average Graph page and
clear the Point-to-Point check box.
Reviewing the Report
Figure 5-8: Discrete Hourly Average Graph
The Discrete Hourly Average Graph is similar to the Hourly Average Graph (refer to Hourly
Average Graph on page 5-8).
Note:
The Discrete Hourly Average Graph does not use colors to represent the systolic, diastolic,
and MAP measurements. For each reading, the upper end point represents the hourly
average systolic value, the lower end point represents the hourly average diastolic value, and
the red dot represents the hourly aver ag e M AP value
.
5-9
Page 50

ABP Report Management System Operations Manual
ABP Hourly Data Tabular
Figure 5-9: Hourly Data Tabular summary
The ABP Hourly Data Tabular page provides an hourly summary of the results.
• Use the vertical scroll bar to move through the rows.
• This page may be viewed only; you cannot edit any values.
• Mean Averages are the averages of the hourly averages.
The time format in the ABP Hourly Data Tabular window is a user-configur able setting. Fo r more
information on the time formats available, or to change the time format, refer to Tabular Time
Format on page 6-4.
Click Next to continue to the next page.
5-10
Page 51

ABP Report Management System Operations Manual
Caliper Summary View
Reviewing the Report
Figure 5-10: Caliper Summary View
The Caliper Summary View page displays the calipers in the order in which they were saved.
Each caliper summary displays the time period; the number of readings for that period; the
minimum, maximum, mean, and standard deviation for systolic, diastolic, MAP, pulse pressure,
and heart rate values; and any comments. This page also displays the time of each occurrence of
minimum and maximum systolic and diastolic values.
You may insert, edit, and delete calipers on this page.
Inserting Calipers
Note:
To insert calipers into graphical data, refer to Inserting Calipers into Graphical Data on page 56
.
To insert calipers:
1 Click Insert. A dialog box opens.
2 Enter the start time and end time, as well as any comments.
3 Click Calculate.
4 Click Save.
5-11
Page 52

ABP Report Management System Operations Manual
Editing Calipers
To edit calipers:
1 Click the appropriate caliper summary from the list.
2 Click Edit. A dialog box opens displaying summary information for the selected readings.
3 Edit the summary information and enter comments, if desired.
Note:
If you edit the start time and end time values, click Calculate before proceeding.
4 Click Save.
Deleting Calipers
To delete calipers:
1 Click the appropriate caliper summary from the list.
2 Click Delete.
Edit Summary
The Edit Summary page is a summary of all raw data readings that are out of range of the Auto
Edit limits and is available only as a part of the hard copy printout. For information on se tting Auto
Edit limits, refer to Statistics Tab on page 6-6.
The Edit Summary is very similar to the Raw Data Summary. The Edit Summary lists the
information as a table. The Raw Data Summary contains all of the readings that fall within the
range of the Auto Edit limits, while the Edit Summary contains all of the readings that are out of
range of the limits.
5-12
Page 53

Contents
Overview
Before using your Client application, you may wish to spend a few minutes configuring the
application to suit your individual needs.
There are two types of information that you may wish to personalize:
• Windows settings
• System settings
System Setup
Overview . . . . . . . . . . . . . . . . . . . . . . . . . . . . . . . . . . . . . . . . . . . . . . . . . . . . . . . . . . . 1
Configuring Windows Settings. . . . . . . . . . . . . . . . . . . . . . . . . . . . . . . . . . . . . . . . . . . 1
Configuring System Settings . . . . . . . . . . . . . . . . . . . . . . . . . . . . . . . . . . . . . . . . . . . . 2
Report Format Tab . . . . . . . . . . . . . . . . . . . . . . . . . . . . . . . . . . . . . . . . . . . . . . . . . . . 3
Statistics Tab. . . . . . . . . . . . . . . . . . . . . . . . . . . . . . . . . . . . . . . . . . . . . . . . . . . . . . . . 6
Monitor Tab . . . . . . . . . . . . . . . . . . . . . . . . . . . . . . . . . . . . . . . . . . . . . . . . . . . . . . . . . 8
System Tab . . . . . . . . . . . . . . . . . . . . . . . . . . . . . . . . . . . . . . . . . . . . . . . . . . . . . . . . 10
Configuring Windows Settings
Your workstation should arrive with the Windows settings preconfigured as appropriate for your
region.
Use the Windows Control Panel to set the formats for:
•Time
•Date
• Height units
• Weight units
Refer to the 92506 Ambulatory Blood Pressure Management System data sheet,
(P/N 061-1283-00) for supported languages.
For more information, refer to the instructions provided with your workstation.
6-1
Page 54

ABP Report Management System Operations Manual
Configuring System Settings
System Settings enables you to set various parameters of the system setup and report
configurations. (Refer to User Permissions on page 1-6 for information regarding user access.)
To access System Settings:
1 Start the Client application.
2 Click View/Change System Settings on the Main Menu.
The System Settings dialog box opens (Figure 6-1).
Figure 6-1: System Settings dialog box
There are four tabs in the System Settings dialog box:
• Report Format
• Statistics
•Monitor
• System
Note:
The Report Format tab is available only to certain users (refer to User Permissions on page
1-6). Only three tabs will display for all other users.
6-2
Page 55

ABP Report Management System Operations Manual
Report Format Tab
The Report Format tab contains user-configurable settings for printed reports.
The settings you configure on this tab are used as the default settings for each patient report that
you print. Patient report settings can be configured individually. For more information, refer to
Printing Specific Pages on page 7-1.
When the Report Format tab first displays, the Use Standard Report check box is selected.
• If you prefer to use the standard settings as the default setting for all reports, no changes are
necessary. Click the Statistics tab or click OK to close the System Settings dialog box.
• To view and edit the options on the Report Format tab, select the Use Custom Report check
box.
System Setup
Figure 6-2: Report Format tab — Use Custom Report selected
To create custom report format settings:
1 Select the pages you want to include in reports. Use Clear All, Select All, and Standard to the
right of the check boxes to assist you:
• Click Clear All to clear all check boxes.
• Click Select All to select all check boxes.
• Click Standard to display the standard (factory-configured) report settings.
Note:
Refer to Reviewing the Report on page 5-1 for a description of the pages that can be inclu ded
in the reports.
6-3
Page 56

ABP Report Management System Operations Manual
2 Click the text box under Facility Identification to include your hospital, clinic, or office name;
address; and other identifying information. Type in th e information you wish to appear at the top
of each report. A maximum of five lines are possible.
• The first line of the text will appear on the cover page and on each additional page of the
report.
• Additional lines of text will appear on the cover page only.
3 Select a Tabular Time Format. For more information, refer to Tabular Time Format on page
6-4.
4 Select the Enable Icon Selection check box, as shown in Figure 6-3, to include a logo on each
report. A Browse button and list box appears below the check box.
Figure 6-3: Icon selection options enabled
• Click Browse to navigate to the logo, and select the file. Supported format types include
bitmaps (.bmp) and icons (.ico).
• Once you have selected the icon, it will appear in the text box.
5 Click Advanced to access custom labels and make a selection, if your system administrator
has configured custom labels. For more information, refer to User Advanced Dialog Box on
page 6-5.
6 Click OK to close the dialog box when you are finished customizing the report format settings,
or select the Statistics tab to continue (refer to Statistics Tab on page 6-6).
Tabular Time Format
There are three time formats that you can select for Tabular Time Format. The time format you
select affects how the data is displayed in the ABP Hourly Data Tabular summary (for more
information, refer to ABP Hourly Data Tabular on page 5-10).
• Even Hours — Reading values are calculated at an even-hour boundary (the minute is zero).
If the scan does not start on an even hour, calculations will include only those readings that
occurred in the partial hour. The last hour may be a partial hour.
• Incremental Hours — Reading values are calculated starting with the first good reading and
all other good readings for the next 59 minutes and 59 seconds. For example, if the first
reading is at 9:42, all readings from 9:42:00 to 10:41:59 are grouped in Hour 1. This process
continues for each hour, for the entire procedure.
• Relative Hours — Reading values are calculated starting with the hour of the first good
reading (the minute time is :31). For example, if the first goo d re a ding is 9 :42, the star t time of
the first hourly tabular reading will be 9:31, and the end time (not shown) is 10:30. The second
hourly time will be 10:31, and the end time is 11:30. This continues for each hour, for the entire
procedure.
6-4
Page 57

ABP Report Management System Operations Manual
User Advanced Dialog Box
Click Advanced on the Report Format tab. The User Advanced dialog box opens (Figure 6-4).
Figure 6-4: User Advanced dialog box
The User Advanced dialog box contains check boxes for enabling custom labels to include on
reports. Custom labels are user-configurable and may include information such as secondary
patient ID number (refer to Custom Label Settings on page 6-10). Select one or more check boxes
to enable the option of entering custom labels in the repor t, or clear the ch eck boxes to disable the
option.
System Setup
6-5
Page 58

Statistics Tab
The Statistics tab in the System Settings dialog box contains user-configurab le settings fo r data
analysis limits.
When the Statistics tab is first opened, the Factory Default setting is selected.
If you prefer to use the factory default settings as given for da ta analysis, no chang es are neede d.
Click the Monitor tab, or click OK to close the System Settings dialog box.
ABP Report Management System Operations Manual
Figure 6-5: Statistics tab
To edit the settings on the Statistics tab:
1 Click the arrow next to Statistics Name text box and select an option from the list if there are
existing statistical setting configurations. The settings for your selection will display on the
Statistics tab.
-ORClick New/Edit if this is the first time you have configured statistical settings. The Statistical
Settings dialog box opens. Type a na me for your configuration into the Item text box and click
Add. Click Close.
2 Define the edit limits for data analysis. These limits are used when the ABP Report
Management System analyzes the data. Out-of-boun dary readings are unavailable on the Raw
Data Tabular Summary, and are not displayed on the Raw Data Graphic Summary, the
Discrete Raw Data Graph, the Hourly Average Graphic Summary, the discrete Hourly
Average Graphic Summary, or the Hourly Data Tabular summary.
6-6
Page 59

ABP Report Management System Operations Manual
Table 1: Edit Limits
System Setup
Systolic Max
Systolic Min
Diastolic Max
Diastolic Min
MAP Max
MAP Min Lowest acceptable value for a MAP reading. The value entered must be ≥1.
PP Max
PP Min Lowest acceptable value for a PP reading. The value entered must be ≥1.
Heart Rate Max
Heart Rate Min Lowest acceptable value for a heart rate reading. The value entered must be ≥1.
3 Define the statistical period boundaries.
• Enter the start time and end time for each period, as well as the expected average systolic
and diastolic blood pressure. Select Sleep if the period is during sleep.
• The pie chart in the dialog box reflects the period settings. If the period is a sleep period,
an “S” will appear in the corresponding section of the pie chart.
Highest acceptable value for a systolic reading. The value entered cannot exceed
250 and must be greater than the Diastolic Max value.
Lowest acceptable value for a systolic reading. The value entered must be ≥2,
and must be greater than the Diastolic Min value.
Highest acceptable value for a diastolic reading. The va lue entered cannot
exceed 200 and must be less than Systolic Max value.
Lowest acceptable value for a diastolic reading. The value entered must be ≥1,
and must be less than the Systolic Min value.
Highest acceptable value for a mean arterial pressure (MAP) reading. The value
entered cannot exceed 250.
Highest acceptable value for a pulse pressure (PP) reading. The value entered
cannot exceed 250.
Highest acceptable value for a heart rate reading. The value entered cannot
exceed 200.
4 Click OK to close the dialog box when you finish customizing the statistics settings, or select
the Monitor tab to continue.
6-7
Page 60

Monitor Tab
The Monitor tab contains user-configurable settings for initializing the ABP monitor.
When the Monitor tab first opens, the Standard setting is selected. If you prefer to use the
standard settings as given for data analysis, no changes are needed. Click the System tab or click
OK to close the System Settings dialog box.
To create a new configuration or edit an existing configuration, follow the instructions below.
ABP Report Management System Operations Manual
Figure 6-6: Monitor Initialization Options
Creating a New Configuration
To create a new monitor initialization configuration or to select an existing configuration:
1 Click New/Edit if this is the first time you have configured the Monitor Initialization settings.
The Monitor Initialization List dialog box opens.
2 Type a name for your configuration into the Item text box.
3 Click Add.
4 Click Close.
To select from existing monitor initialization configurations, select an option from the Initialization
Name list. The settings for your selection display on the Monitor tab.
6-8
Page 61

ABP Report Management System Operations Manual
Editing the Existing Configuration
To make changes to the settings, select the appropria te check box:
• If you select the Show results of reading check box, the reading results will appear on the
ABP monitor display after each blood pressure reading.
• If you select the Clinical verificatio n setu p check box, the monitor will detect blood pressure
levels as low as 40 mmHg (the monitor will always bleed to 40 mmHg).
• If you select the Display Cuff Pressure check box, the cuff pressure will appear on the ABP
monitor display while the cuff is pumping and bleeding.
•The Monitor clock display time selection determines how the time appears on the ABP
monitor, either in 12-hour or 24-hour (military) format.
Wake and Sleep Configuration
The physician may require that the blood pressure readings occur more often during cert ain times
of the day, and less often during other times. Configure the Wake periods and Sleep periods as
necessary to meet the physician’s requirements.
• Make any necessary changes to the Start Hour and Readings/Hour options.
• If you select the Tone check box, an audible tone will precede each blood pressure reading.
(In most situations, ensure that Tone is not selected for sleep periods.)
• Once a period is defined, the pie chart on the right side of the dialog box automatically u pdates
to reflect changes.
• The pie chart will reflect the sleep and wake period settings with numbers (representing the
readings per hour), asterisks ( * ; representing that the tone is enabled), and colors (each
period is color coded to correspond with the pie chart).
System Setup
When you finish customizing the monitor settings, either click OK to close the dialog box, or select
the System tab to continue.
6-9
Page 62

System Tab
The System tab contains language, password, and time display settings.
ABP Report Management System Operations Manual
Figure 6-7: System tab
Language Settings
To select the system language:
• Choose the language from the list of options under Select Language.
Custom Label Settings
Custom labels (identification fields) can be added by the system administrator to include specific
information on the cover page of each report, in addition to standard report information (for
example, a secondary patient identification number or an important message that a physician
wants to appear in each report).
In the electronic report, the custom label consists of a label name and a text entry box. On the
printed report, the custom label information appears on each page, below the facility information.
6-10
Page 63

ABP Report Management System Operations Manual
To create a custom label:
1 Click Edit Custom Labels to display the Group Advanced dialog box (Figure 6-8).
Figure 6-8: Group Advanced dialog box
2 Type the appropriate text into one of the Custom Label text boxes.
Note:
In order for the custom label to appear in the report, the box must be enabled. For more
information, refer to User Advanced Dialog Box on page 6-5.
3 Click OK.
The next time the report is acquired in a ABP Report Management System, the cover page of the
electronic report will contain a text entry box for that custom identification field.
System Setup
Figure 6-9: Example of custom label
Editing a Custom Label
If you change a custom label, all future generated reports will contain the new custom label.
Existing reports containing the old custom label will not change.
Existing reports that do not have values entered for the old custom label, or are not confirmed, will
show the new custom label.
6-11
Page 64

ABP Report Management System Operations Manual
Changing a Password
If it is necessary to change your password, click Change Password on the System tab of the
System Settings dialog box to open the User Password dialog box (Figure 6-10).
Figure 6-10: User Password dialog box
To change your password:
1 Type in your current password and press TAB.
2 Type in a new password and press TAB.
3 Type in the new password again.
4 Type in a password reminder in the Optional Password Helper text box, if desired.
5 Click OK.
Adding, Editing, and Deleting User Profiles
Click New User on the System tab to access the User List dialog box.
Figure 6-11: User List dialog box
From the User List dialog box you can add, edit, and delete users.
6-12
Page 65

ABP Report Management System Operations Manual
Adding User Profiles
To provide an individual with access to the Client application, you must define the person as a
certain type of user. When you define a user, you must provide a logon name and password for
them, as well as classify their role. (Refer to User Permissions on page 1-6 for information
regarding user access.)
Note:
Only certain users have privileges to add a new user (refer to Table 1 on page 1-6 for more
information).
To add a new user:
1 Click Add to open the New User dialog box (Figure 6-12).
Note:
Required fields are indicated with an asterisk (*). All other fields are optional. You can skip
optional fields by pressing TAB.
System Setup
Figure 6-12: New User dialog box
2 Type in a User ID and press TAB.
3 Type in the first name, last name and second last name, pressing the TAB key after each.
Note:
You can use the Second Last Name field, which is optional, to enter a middle name.
4 Type in the phone number, as well as an extension, if desired.
5 Create a new password and type it in the Password text box and the Confirm Password text
box.
Note:
All new users are required to change their passwords the first time they log on.
6 Select Password control options by selecting each desired check box.
7 Select a profile from the Select Profile list. Select User, unless the individual should have
administrative permissions (for exam p le, ac ce ss to all fu nctions in the Client application).
8 Select a role from the Select Role list.
Note:
To see the privileges available for various roles, refer to Table 1 on page 1-6.
9 Click OK.
6-13
Page 66

ABP Report Management System Operations Manual
Editing User Profiles
To change the information for a user profile (for example, to reset a password or change a
phone number):
Note:
Only users with administrative profiles ma y ed it the use r profiles.
1 Select the user profile you wish to edit in the User List dialog box.
2 Click Edit. The Edit User dialog box opens.
3 Edit the information in the Edit User dialog box as necessary.
Note:
The Edit User dialog box is similar to the New User dialog box. For information on editing and
configuring the Edit User dialog box, refer to Adding User Profiles on page 6-13.
4 Click OK when you finish editing.
Deleting User Profiles
Note:
Only users with administrative profiles may dele te th e Use r Pro file s.
When a person leaves a position, and in other similar situations, it is appropriate to delete a user
profile from the Client application.
Note:
You can deny access to a user, without removing the user from the user list by selecting the
Account is Disabled check box in the Edit Users dialog box. The user’s access will be
denied as long as this check box is selected.
To delete a user profile:
1 Select the user profile you wish to edit in the User List dialog box.
2 Click Remove. A confirmation box appears.
Figure 6-13: Confirmation dialog box
3 Click Yes to delete the user profile.
-OR-
Click No to cancel the action.
6-14
Page 67

ABP Report Management System Operations Manual
Time Display Options
This setting affects all references to time in reports, the Report Manager dialog box, and printed
hard copy reports. Options may be changed by selecting one of the options available in the
Time display option area.
Auditing Information
Every activity in the Client application is logged. You may wish to generate a report that shows
specific activities. In addition, you may also delete logs from the system.
Use the audit feature to view reports on a variety of activities. The audit feature is divided between
patient record activities (updates to patient demographics, etc.), and system activities, which
include all other activities in the Client applicat ion (instances a user profile was deleted, etc.).
When auditing activity in patient records, you may select the patient type (Patient Demographics,
Test, and All), and the action that you want to audit (Read, Insert, Update, Delete, and All).
Examples of patient records activity audits are an audit of every instance a test was read or an
audit of every activity related to the patient demographics for tests.
When auditing system activities, you may select an option (User, Role, Permissions, ABP Test,
Others, or All), and what activity you wish to audit (Read, Insert, Update, Delete, or All).
Examples of system activity audits are an audit of every update to a user or an audit of every
instance a permission was inserted.
System Setup
System Audit
To view a System Audit:
1 Click System Audit. The System Audit dialog box opens.
Figure 6-14: The System Audit dialog box
2 Select a system classification: Group, User, Role, Permissions, ABP Test, Others, or All.
3 Select the action that you wish to audit: Read, Insert, Update, Delete, and All.
4 Do one of the following:
• Click View to view the data on the screen. You also will have the option to print the data
from the Audit Trail dialog box.
-ORClick Print to print the data. You may view the data after printing by clicking View.
The Client application generates a report. Refer to Audit Report on page 6-17 for further
information on the report.
6-15
Page 68

ABP Report Management System Operations Manual
Patient Audit
To view an audit of patient record activity:
1 Click Patient Audit The Patient Audit dialog box opens.
Figure 6-15: Patient Audit dialog box
2 Select an application from the Application list.
3 Select a patient type from the Patient Type list.
•The Patient Demographics category limits the audit trail to items related to patient
demographics. One example is a change to a patient’s name.
•The Test category limits the audit trail to items related to the actual tests or reports.
Adding a test, changing a statistical setting, and inser tin g a diary entry are examples.
•The All category covers both Patient Demographics activity and Test activity.
4 Select the action that you wish to audit from the Action Type list: Read, Insert, Update,
Delete, and All.
5 Do one of the following:
• from the Audit Trail dialog box.
-ORClick Print to print the data. You may view the data after printing by clicking View.
The Client application will generate a report. Refer to Audit Report on page 6-17 for further
information on the report.
6-16
Page 69

ABP Report Management System Operations Manual
Audit Report
Note:
• The information on the printed report is identical to the information displayed in the
Audit Trail dialog box.
•The System Audit Trail window is shown in Figure 6-16. The Patient Audit Trail
window and report are similar to the System Audit Trail window and report.
Refer to Table 2 on page 6-17 for descriptions of each column heading.
System Setup
Figure 6-16: System Audit Trail window
Table 2: User Permission
Column Heading Description
Action Describes the action that was taken.
Patient Describes which patient record was affected (Patient Audit only).
Test Indicates the date of the patient test (Patient Audit only).
Who Indicates the user who made the change.
When Indicates when the user made the change.
Classification Indicates what was changed.
Group Involved Indicates which group was involved or affected (System Audit only).
Item Involved Indicates specifically what was changed.
Value Affected Indicates what value was changed.
New Value Indicates the new value.
Previous Value Indicates the old value.
Application Involved Indicates which ABP Report Management System was involved.
6-17
Page 70

ABP Report Management System Operations Manual
1 Use the scroll bar on the right of the Audit Tra il dialog box to vie w all of the contents in the list
(the scroll bar will only appear if the list does not fit in the dialog box).
2 Use the scroll bar at the bottom of the Audit Trail dialog box to view all of the columns in the
dialog box.
3 Double-click (or click and drag) the bars between the column titles to expand the columns, as
necessary.
4 Click Print to print the report.
5 Click Close.
6-18
Page 71

Contents
Printing the Report. . . . . . . . . . . . . . . . . . . . . . . . . . . . . . . . . . . . . . . . . . . . . . . . . . . . 1
Printing Pictures of the Display . . . . . . . . . . . . . . . . . . . . . . . . . . . . . . . . . . . . . . . . . . 2
Faxing Reports . . . . . . . . . . . . . . . . . . . . . . . . . . . . . . . . . . . . . . . . . . . . . . . . . . . . . . 3
Sending Reports Via E-mail (Portable Document Format) . . . . . . . . . . . . . . . . . . . . . 4
Printing the Report
Click Review/Edit Patient Test from the Main Menu to access the directory of patient tests. The
Report Manager window opens.
In the Print menu, there are two options for printing patient data:
• Print Report
• Print Specific Pages
To print patient data:
Printing and Sending Files
1 Select the desired record in the Report Manager window.
2 Select the desired print option from the Print menu.
Printing Reports
Select Print Report from the Print menu to print the entire report as defined in the
System Settings dialog box (refer to Report Format Tab on page 6-3).
Printing Specific Pages
Select Print Specific Pages from the Print menu to print only those final report pages that you
select. A dialog box similar to the System Settings dialog box (refer to Report Format Tab on
page 6-3 for a description of this dialog box) opens enabling you to make selections that affect
only the current printout.
7-1
Page 72

ABP Report Management System Operations Manual
Printing Pictures of the Display
Note:
You must install the Print Now software to perform the following functions.
With the ABP Report Management System, you can obtain pictures of the image shown on the
display. This option is useful if, for example, you are experiencing difficulties with your system.
Having a picture of the display is useful when consulting with Spacelabs Medical Technical
Support personnel.
There are several options available with the Print Screen feature:
• Obtain a picture of the entire screen display.
• Obtain a picture of the active window only.
• Obtain a printout from the printer.
• Obtain a picture that can be pasted into a document (such as WordPad) or a graph ic program
document.
Obtaining a Picture of the Entire Screen Display
To obtain a picture of the entire display:
1 Press PRINT SCREEN to open the Print dialog box (Figure 7-1).
2 Click OK to print the picture.
-ORClick Cancel to paste the picture into a document (refer to Obtaining a Picture to Paste on
page 7-3).
Obtaining a Picture of the Active Window
To obtain a picture of the active window:
1 Click within the appropriate window to make the window active.
2 Press ALT+PRINT SCREEN to display the Print dialog box (Figure 7-1).
3 Click OK to print the picture.
-ORClick Cancel to paste the picture into a document (refer to Obtaining a Picture to Paste on
page 7-3).
7-2
Page 73

ABP Report Management System Operations Manual
Obtaining a Printout from the Printer
To obatina a printout from the printer:
1 Press PRINT SCREEN or ALT+PRINT SCREEN to open the Print dialog box.
Figure 7-1: Print dialog box
2 Select the desired printer.
3 Click OK. The printer will print the picture of the entire screen or the active window.
Printing and Sending Files
Obtaining a Picture to Paste
To obtain a picture to paste:
1 Press PRINT SCREEN or ALT+PRINT SCREEN to open the Print dialog box.
2 Click Cancel.
3 Open the document into which you want to paste the picture.
4 Paste the picture into the document.
Faxing Reports
Note:
To use the Fax option, you must have a modem and fax software installed
1 Print as you normally would (refer to Printing the Report on page 7-1 and Printing Pictures of
the Display on page 7-2).
2 Select Microsoft Fax (Windows 98) or Fax (Windows 2000) as the name of the printer in the
Print dialog box.
3 Click OK.
.
7-3
Page 74

ABP Report Management System Operations Manual
Sending Reports Via E-mail (Portable Document Format)
You can e-mail reports to recipients using either Outlook Express or Microsoft Exchange. When
you send a report, the Client application creates and attaches a portable document format (PDF)
version of the report to the e-mail. The PDF file can be easily viewed with Adobe Acrobat, which
can be downloaded free of charge from the Adobe internet web site (http://www.adobe.com).
Note:
The full version of Adobe Acrobat must be purchased and installed on your computer in order
to create a .pdf file and send patient reports via e-mail.
To e-mail an ABP report:
1 Create a PDF file from the report using Adobe Acrobat Distiller.
2 Highlight the PDF file in the Report Manager window.
Note:
To select more than one file, hold down the CTRL key.
3 Select Send and then select Mail Recipient from the Procedure menu.
4 Enter the e-mail recipient(s) and subject on the e-mail form.
abptest@example.com
ABP Report Management System
Figure 7-2: E-mail Form in Outlook Express
5 Click the Send button to send the report.
7-4
Page 75

Maintenance and T roubleshooting
Contents
Overview
No calibration is needed for the ABP Report Management System. For maintenance and cleaning
procedures, consult the documenta tio n tha t ca me w ith yo ur work sta tio n.
Contact an authorized field service engineer immediately if:
• The equipment is dropped or subjected to some other mechanical stress.
• Liquid is spilled on the equipment.
• The equipment is not functioning as described in this manual.
• Parts of the enclosure are cracked or missing.
• Any connector shows signs of deterioration such as cracking.
Overview . . . . . . . . . . . . . . . . . . . . . . . . . . . . . . . . . . . . . . . . . . . . . . . . . . . . . . . . . . . 1
Troubleshooting. . . . . . . . . . . . . . . . . . . . . . . . . . . . . . . . . . . . . . . . . . . . . . . . . . . . . . 1
Diagnosis Tool. . . . . . . . . . . . . . . . . . . . . . . . . . . . . . . . . . . . . . . . . . . . . . . . . . . . . . . 8
All functions of the ABP Report Management System are designed to be user-friendly and easy to
understand. If questions arise or you would like additional information, contact your local
representative.
Note:
Please consult the operating instructions that accompanied your monitor for event codes and
additional information.
Troubleshooting
Occasionally you may encounter problems with the ABP Report Management System or related
equipment.
Refer to the following table for solutions to common problems. For any questions concerning the
operation or servicing of your product, contact your local representative.
8-1
Page 76

ABP Report Management System Operations Manual
Problem Probable Cause Solution
1 Access the SQL Service Manager by
clicking Start and selecting Programs >
Microsoft SQL Server 7.0 > Service
The application
displays an
“Exception error.”
The SQL server on the
PC may not be running.
Manager.
2 Ensure that the Start/Continue option is
selected. If the option is not selected,
your SQL Server is not running.
3 Click the Start/Continue option to start
the SQL server.
Application Features
Refer to the following tables if problems are encountered with any of the features.
Main Menu
Problem Probable Cause Solution
The on-line manuals
do not open when
the F1 key is
pressed.
The manuals are not
installed on the PC.
1 Navigate to the installed\manuals folder.
2 Check if .pdf files exist (manual files).
3 If the files are not present, the manuals
are not installed on the PC.
4 Close the current session of the Client
application and re-install from the
CD-ROM.
8-2
Page 77

ABP Report Management System Operations Manual
Monitor Communications
Problem Probable Cause Remedy
Not able to initialize
or upload the
monitor.
An error message
indicates, Monitor
unavailable while
initializing or
uploading the
monitor.
The monitor does
not show any
readings or time in
its display.
The ABP monitor may not
be connected to the PC.
The ABP monitor may not
be connected to the PC.
The batteries in the ABP
monitor may need to be
replaced.
Maintenance and Tr oubleshooting
• Make sure the monitor is powered
ON.
• Make sure the connecting cable is
connected to the COM port and to
the monitor.
• Make sure you are choosing the
correct COM port in the
initialization/upload wizard.
• Make sure the monitor is powered
ON.
• Make sure the connecting cable is
connected to the COM port and to
the monitor.
• Make sure you are choosing the
correct COM port in the
initialization/upload wizard.
Replace the batteries in the monitor and
check if the monitor displays correct
readings. If the problem persists, contact
Spacelabs Medical support.
Report Manager
Problem Probable Cause Remedy
The Print feature is
not working.
Cannot send the
report via e-mail.
The printer may not be
installed.
The report is modified to a
.pdf file and sent to the
recipient by e-mail using
Microsoft Outlook Express.
This operation uses the
Adobe Acrobat Writer
software.
1 Click Start > Settings > Printers.
2 Click Add Printer and add the
appropriate printer.
Note: Most printing problems result in a
message being displayed on the screen.
Consult the operating instructions for
your printer to troubleshoot these
problems.
Install the Adobe Acrobat Writer
software and try again.
8-3
Page 78

ABP Report Management System Operations Manual
Individual Report
When a report is opened in the Report Manager (by double-clicking or pressing ENTER on a
selected report), the report can be viewed in detail in different forms. The following table refers to
possible problems with these forms.
Problem Probable Cause Remedy
Cannot view the
raw data in tabular
view.
Cannot change the
patient’s details in
the report.
There may have been a
problem when the Client
application was installed.
The patient
demographics may have
been confirmed.
Re-install the application. If the problem
persists, contact Spacelabs Medical support.
1 Double-click the report in the Report
Manager to access the patient’s
information.
2 Right-click and select Unconfirmed
Patient Demographics.
3 Enter your login name and password.
You can now modify the patient’s details.
System Settings
You can access the System Settings dialog box may be accessed by clicking View/Change
System Settings on the Main Menu. The following table refers to problems encountered in
modifying the system settings.
Problem Probable Cause Solution
ABP Monitor Time
1 Click View/Change System Settings on
the Main Menu.
The time is
displayed in a 12hour format only.
Can I change it to
a 24-hour format?
You can set 12-hour or 24hour settings for both the
ABP monitor display and
the report time display in
the Report Manager.
2 Select the Monitor tab.
3 Select 12-hour or 24-hour display.
Report Time
1 Click View/change Syst em Settings on
the Main Menu.
2 Select the System tab.
3 Select 12-hour or 24-hour display (or by
accessing the Windows setting).
8-4
Page 79

ABP Report Management System Operations Manual
Frequently Asked Questions
The following tables provide answers to frequently asked questions regarding the Client
application. Refer to the appropriate chapters in this manual for more detailed procedures.
Initializing/Uploading Monitor
Question Answer
The ABP monitor must be initialized with details such as:
• At what intervals should the blood pressure be checked?
What does Initialize
Monitor mean?
Report Manager
Question Answer
How can I associate a
“new” test with an
“existing” user?
• What are the allowable limits of blood pressure?
• Patient details (if needed).
Click Initialize Monitor on the Main Me nu to initialize the monito r with
these details.
1 Click Upload Monitor on the Main Menu.
2 Click Acquire Monitor Data and transfer the data from the ABP
monitor into the Report Management System.
3 Click Next.
4 Click Search Patient and associate the test with the patient in the
database.
Maintenance and Tr oubleshooting
What is the difference
between a report
status that is
confirmed versus a
report status that is
non-confirmed?
How can I confirm the
patient’s details?
The status of the report is confirmed when a physician (or any user)
validates and confirms the report’s details.
The status of the report is non-confirmed when a physician has not
yet validated the report. As soon as the report is transferred into the
system from the ABP monitor (using the Upload Monitor feature or by
importing a report), the status is set to non-confirmed.
1 Double-click the patient’s report in the Report Manager to view the
patient’s information.
2 Right-click and select Confirm Patient Demographics.
3 Enter your login name and password.
The patient’s details are now confirmed and cannot be modified.
8-5
Page 80

ABP Report Management System Operations Manual
Question Answer
A physician (or any user) validates and confirms the report’s
details as follows:
1 Double-click a report in the Report Manager to view the patient’s
How can I confirm a
patient’s report?
What are diary events
and how do I set
them?
information.
2 Click Next twice to reach the interpretations part of the report.
3 Select your name from the Confirmed by list.
4 Enter your login name and password.
The patient’s details are confirmed and cannot be modified.
The patient’s activities can be entered at various points in time. These
activities are maintained as diary activities.
1 Open the patient’s report.
2 Click the Diary icon on the toolbar.
3 Select the time and the activity and then click Add.
What are annotations
and how do I set
them?
How can I create
another user profile?
What are custom
labels and how do I
use them?
The medications and the diary activities of a patient may be annotated
to display on the raw data graph.
Select the Annotation check box while adding medication or while
adding a diary activity.
1 Click View/Change System Settings on the Main Menu.
2 Select the System tab.
3 Click New User.
4 Click Add on the User List dialog box and add the new user and
details.
If you needs more fields than the existing patient and report detail
fields, custom labels can be created.
1 Click View/Change System Settings on the Main Menu.
2 Select the System tab.
3 Click Edit custom labels.
4 Enter the desired names for the custom labels (employee number,
address. etc.).
5 Select the Report Format tab.
6 Click Advanced.
7 Enable the custom labels.
8 Open a report. You should now be able to see the labels you
created on the cover page.
8-6
Page 81

ABP Report Management System Operations Manual
Question Answer
You can set 24/12-hour setting for both the ABP monitor display and
also for the report time display in the Report Manager.
ABP Monitor Time
How can I change the
way the time is
displayed? (24-hour
clock or 12-hour
clock)
1 Click View/Change System Settings on the Main Menu.
2 Go to the Monitor tab.
3 Select 12-hour or 24-hour display.
Report Time
1 Click View/Change System Settings on the Main Menu.
2 Go to the System tab.
3 Select 12-hour or 24-hour display (or Windows setting).
There are two types of audits: a System Audit and a Patient Audit. A
System Audit reflects various system actions (insertion, deletion,
reading) such as lists of users and available tests. A Patient Audit
reflects various patient actions (insertion, deletion, reading) for patient
details.
1 Click View/Change System Settings on the Main Menu.
2 Go to the System tab.
Maintenance and Tr oubleshooting
What is audit
information?
System Audit
1 Click the System Audit button.
2 Select the classification and action and click OK.
All the audit information pertaining to the selected classification and
action will display.
Patient Audit
1 Click the Patient Audit button.
2 Select the application, patient type, and action, and then click OK.
All audit information pertaining to the selected application, pa tient type
and action will display.
8-7
Page 82

ABP Report Management System Operations Manual
Diagnosis Tool
The ABP Diagnosis tool checks the Client application installed on your computer and corrects
and/or reports problems. If you encounter a problem with the Client application, use the
ABP Diagnosis tool to locate the problem and, if possible, correct the error.
Figure 8-1: ABP Diagnosis tool
To start the Diagnosis application:
1 Insert the Setup CD into the CD-ROM drive.
2 Click Start and select Programs > Spacelabs > ABPDiagnosis.
3 Click Diagnose on the AbpDiagnosis dialog box.
The application performs the following checks in the order listed:
• Gathers hardware-related information about the system
• Confirms the operating system version
• Confirms the Internet Explorer version
• Checks configuration information
• Checks the application executable
• Checks the MSDE (Microsoft Desktop Engine) installation
• Checks the MDAC (Microsoft Data Access Components) installation
• Checks the database configuration
Errors encountered are classified as fixable (non-critical) or non-fixable (critical). You can
correct a fixable error by clicking the Fix button.
8-8
Page 83

ABP Report Management System Operations Manual
Note:
The fix may involve reinstalling some parts of the Client application. Make sure the CD is in the
CD-ROM drive during the diagnosis and repair process.
If the ABP Diagnosis tool encounters a non-fixable error, a message appears indicating that
the error cannot be fixed.
4 Click Create Log when the diagnosis is complete to create a log file and save it on your
workstation as a text file.
Maintenance and Tr oubleshooting
Figure 8-2: Diagnosis complete
5 If you encounter non-fixable errors, e-m ail the lo g file to the support team by clicking the Mail
Log button. Refer to Figure 8-3 on page 8-10.
Note:
• An e-mail program (for example, Microsoft Outlook) must be installed on your computer for
the Mail Log option to function.
• Your personal information or patient data from your installation of the Client application is
NOT transmitted with this e-mail. Only details about the error encountered and relevant
data about the application are sent
6 Click Send when the Mail dialog box opens to mail the log file to Spacelabs Medical Global
Product Support.
.
8-9
Page 84

ABP Report Management System Operations Manual
Figure 8-3: Send Diagnostics log file to Spacelabs Medical
Note:
If the following dialog box appears when you click Send, click Yes to proceed with sending th e
file to tech support. This is a security feature built into some e- mail client software applications.
Figure 8-4: Send e-mail confirmation
8-10
Page 85

Appendix A — Symbols
The following list of international and safety symbols describes all symbols used on Spacelabs Medical
products. No one product contains every symbol.
Symbol Description Symbol Description
HELP Key Keyboard Connection
SPECIAL FUNCTIONS Key Mouse Connection
RECORD Key START/STOP Key
NORMAL SCREEN Key START/STOP
MONITOR SETUP Key STOP or CANCEL Key
ALARMS Key CONTINUE Key
PREVIOUS MENU Key ENTER Key
ON — Power Connection to Mains
ON Position for Push Button Power
Switch
On Direction ON/OFF
Television; Video Display Video Output
OFF — Power Disconnection from
Mains
OFF Position for Push Button Power
Switch
ON — Part of the Instrument Only OFF — Part of the Instrument Only
A-1
Page 86

ABP Report Management System Operations Manual
Symbol Description Symbol Description
Standby STANDBY Key
PAUSE or INTERRUPT Slow Run
Reset Power Indicator LED
?
Alarm
Temporary Shut Off of Alarm Tone
or Screen Indicators
Indicator — Remote Control Indicator — Local Control
PRINT REPORT Key Indicator — Out of Paper
Partial ON/OFF Recorder Paper
1
2
1
3
Normal Screen Return to Prior Menu
2
3
Clock/Time Setting Key TREND/TIMER Key
HELP (Explain Prior Screen) Key Keypad
Activate Recorder for Graphics Indoor Use Only
START (NIBP) Key Auto Mode (NIBP)
Output No Output (Terminated)
A-2
Page 87

ABP Report Management System Operations Manual
Symbol Description Symbol Description
Data Input/Output Input/Output
Input Reset
Menu Keys Waveform/Parameter Keys
Appendix A — Symbols
1
2
3
1
2
3
Monitor Setup
Select Program Options
B
Access Special Function Menu Return Unit to Monitor Mode
1
Serial Port 1 Serial Port 2
External marker push button
connection
Arterial Pulse
1
2
3
1
2
3
A
Set Initial Conditions Menu
2
SDLC
SDLC Port
Electrocardiograph or
Defibrillator Synchronization
Gas Exhaust Foot Switch
Enlarge, Zoom Delete
x
12,200 m
PCMCIA Card Event
Keep Dry Fragile; Handle with Care
Environmental Shipping/Storage
Altitude Limitations
Environmental Shipping/Storage
Temperature Limitations
This Way Up
Environmental Shipping/Storage
Humidity Limitations
A-3
Page 88

ABP Report Management System Operations Manual
Symbol Description Symbol Description
Open Padlock Closed Padlock
Down Arrow Up Arrow
Hard Drive Power Indicator LED
Antenna Mermaid Connector
Microphone Omnidirectional Microphone
Audio Output, Speaker Activate Telemetry Recorder
Network Connection Universal Serial Bus
Gas Sampling Port Gas Return Port
Remote Alarm; Nurse Alert Nurse Call
Battery Status Low Battery
Battery
Replace only with the appropriate
battery.
All batteries should be disposed of
properly to protect the environment.
Lithium batteries should be fully
discharged before disposal.
Batteries such as lead-acid (Pb) and
nickel-cadmium (Ni-Cd) must be
recycled. Please follow your internal
procedures and or local (provincial)
laws regarding disposal or recycling.
Replace only with the appropriate
battery.
(+ / - signs may be reversed)
This symbol indicates that the waste
of electrical and electronic
equipment must not be disposed as
unsorted municipal waste and must
be collected separately. Please
contact an authorized representa tive
of the manufacturer for information
concerning the decommissioning of
your equipment.
A-4
Page 89

ABP Report Management System Operations Manual
Symbol Description Symbol Description
Caution - hazardous voltages. To
reduce risk of electric shock, do not
remove the cover or back. Refer
servicing to a qualified field service
engineer (U.S.A.).
DANGER - High Voltage
(International)
Protective Earth Ground Fuse
Replace Fuse Only as Marked Equipotentiality Terminal
Functional Earth Ground
Appendix A — Symbols
Power supply jack polarity.
(+ / - signs may be reversed)
Alternating Current AC/DC Input
Both Direct and Alternating Current Hertz
AW
V
Amperes Watts
Volts
IEC 60601-1 Type B equipment.
The unit displaying this symbol
contains an adequate degree of
protection against electric shock.
Hz
Direct Current
IEC 60601-1 Class II equipment,
double-isolated. The unit displaying
this symbol does not require a
grounded outlet.
IEC 60601-1 Type BF equipment.
The unit displaying this symbol
contains an F-type isolated (floating)
patient-applied part providing an
adequate degree of protection
against electric shock.
IEC 60601-1 Type BF equipment
which is defibrillator-proof. The unit
displaying this symbol contains an
F-type isolated (floating) patientapplied part which contains an
adequate degree of protection
against electric shock, and is
defibrillator-proof.
IEC 60601-1 Type CF equipment.
The unit displaying this symbol
contains an F-type isolated (floating)
patient-applied part providing a high
degree of protection against electric
shock.
A-5
Page 90

ABP Report Management System Operations Manual
S
Symbol Description Symbol Description
IEC 60601-1 Type CF equipment.
The unit displaying this symbol
contains an F-type isolated (floating)
patient-applied part providing a high
degree of protection against electric
shock, and is defibrillator-proof.
Adult NIBP
Loop Filter
ETL Laboratory Approved
Risk of Explosion if Used in the
Presence of Flammable Anesthetics
Note Note Caution
Warning
Warning About Potential Danger to
Human Beings
Noninvasive Blood Pressure (NIBP),
Neonate
Fetal Monitor Connection
RS-232 (Digital)
!
®
Canadian Standards Association
Approved
U
Operates on Non-Harmonized
Radio Frequencies in Europe
Attention - Consult Operations or
!
Service Manual for Description
Caution About Potential Danger to a
Device
Fetal Monitor Connection (Analog)
Physiological Monitor Connection
RS-232 (Digital)
Sad Face
Happy Face Compression
Magnifying Glass List of Rooms
File Cabinet Printer
Arrows Service Message
Recycle Do Not Reuse; Single Use Only
2
A-6
Page 91

ABP Report Management System Operations Manual
Symbol Description Symbol Description
Appendix A — Symbols
LATEX
LOT
Latex-free Reusable
Radio transmitting device; elevated
levels of non-ionizing radiation
Batch Code Nellcor Oxisensor II Compatible
Date of Manufacture Novametrix Compatible
UL recognized component in
Canada and United States
REF
NE
2
NV
X
Catalog Number
R
Spacelabs TruLink Compatible
Nellcor OxiMax Compatible Nellcor OxiMax Compatible
Masimo SET Compatible
Abbreviations used as symbols are shown below.
Symbol Description Symbol Description
1 - 32
ANT 1
ANT 2
CH
ch
C.O.
CO
co
ECG
ecg
Access Codes
1 Through 32
Diversity Antenna System 1
Diversity Antenna System 2
EEG, EMG, or ECG Channel
EEG Channels - CH1, CH2, CH3, CH4
EMG Channel - CH5
Cardiac Output
Electrocardiogram
AIR Air
Arr1
ArrNet2
cmH
O Centimeters of Water
2
DIA
dia
EEG
eeg
Arrhythmia Net 1
Arrhythmia Net 2
Diastolic
Electroencephalogram
A-7
Page 92

ABP Report Management System Operations Manual
Symbol Description Symbol Description
EMG
emg
Electromyogram ESIS
Electrosurgical Interference
Suppression
EXT External FECG Fetal Electrocardiogram
FHR1
FHR2
HLO
hlo
NIBP
nibp
Fetal Heart Rate, Channel 1
Fetal Heart Rate, Channel 2
GND
gnd
Ground
High-Level Output Multiview Multi-Lead Electrocardiogram
Noninvasive Blood Pressure N
O Nitrous Oxide
2
PRESS
O
2
Oxygen
press
Pressure
PRS
RESP
resp
Respiration SDLC Synchronous Data Link Control
SPO2
SpO2
SpO
SaO
SYS
sys
TEMP
temp
Arterial Oxygen Saturation
2
2
as Measured by Pulse Oximetry
Systolic
Temperature UA Uterine Activity or Umbilical Artery
SVO2
SvO2
Sv
O
T1
T2
T3
T4
Mixed Venous Oxygen Saturation
2
Temperature 1
Temperature 2
Temperature 3
Temperature 4
VAC Vacuum Connection UV Umbilical Venous
A-8
 Loading...