

Page 1
Camera
Capturing, saving and editing
May 2007
Page 2

Getting started Camera
Contents
Introduction ............................................................................................... 2
Activating the camera and video recorder ................................................ 3
Camera ...................................................................................................... 4
Taking a picture or recording a video clip .............................................. 4
Camera functionality .............................................................................. 5
Camera options ...................................................................................... 6
Editing pictures with PhotoDJ™ ............................................................ 9
Video recorder ......................................................................................... 11
Capturing a video clip .......................................................................... 11
Video recorder options ........................................................................ 12
Handling pictures and video clips ........................................................... 13
Picture and video clip formats ............................................................. 13
Viewing your pictures and video clips ................................................. 13
Use a camera picture as a screen saver or wallpaper ......................... 14
Assigning a picture to a phone contact ............................................... 14
Printing a picture with PictBridge ........................................................ 15
VideoDJ™ ................................................................................................ 15
VideoDJ™ options ............................................................................... 17
Sharing pictures and video clips ............................................................. 17
Transferring pictures and video clips to your computer ...................... 17
Exchanging pictures and video clips ................................................... 17
Related information ................................................................................. 18
1 May 2007
Page 3
Introduction
Instruction symbols
The following instruction symbols may appear in this Getting started guide:
Note
Indicates that a service or function is network- or subscription-dependent.
Contact your network operator for details.
%
} Use the selection keys or the navigation key to scroll and select.
See also page ...
Press the navigation key centre.
Press the navigation key up.
Press the navigation key down.
Getting started Camera
Press the navigation key left.
Press the navigation key right.
The 2.0 megapixel camera includes 2.5× digital zoom (4x for video).
The horizontal user interface means you can handle the camera more easily.
The phone memory capacity is up to 16 MB internally and can be extended with a Memory Stick Micro™
(M2™), also referred to as a memory card.
You can save your camera pictures in three different sizes: 2 MP 1600×1200, 1 MP 1280×960, VGA
640×480. This allows you to decide on the number of pictures you can save in your phone memory or on
your memory card.
Before taking a picture, you can change settings and add effects or frames. After taking a picture, you can
use the PhotoDJ™ to add effects, frames or clipart objects to the picture.
As soon as you take pictures or video clips, you can send them in a picture message, as email
attachments or send them to a blog. You can also use a picture as a screen saver or wallpaper, or save it
together with a contact so that the picture appears when that person calls.
To use email and picture messaging, you must subscribe to these services. Please check with your
network operator.
You can also exchange pictures using the USB cable that comes with your phone or with Bluetooth™
wireless technology.
2 May 2007
Page 4
Getting started Camera
PictBridge™
mбЕнмкЙл=н~вЙе=пбнЬ=узмк=Е~гЙк~=Е~е=ДЙ=йкбенЙЗ=ЗбкЙЕнду=зе=~=mбЕн_кбЗЦЙ=Езгй~нбДдЙ=йкбенЙк=млбеЦ=нЬЙ=rp_=
Е~ДдЙ=зк=~=гЙгзку=Е~кЗK=kз=ЕзгймнЙк=зк=~ЗЗбнбзе~д=йЬзнз=ЙЗбнбеЦ=лзСнп~кЙ=бл=еЙЙЗЙЗI=Дмн=нЬЙ=йкбенЙк=гмлн=
ДЙ=mбЕн_кбЗЦЙ=Езгй~нбДдЙ=
%=15 Printing a picture with PictBridgeK
Blog
A picture blog is a personal Web page. You can send pictures to a blog if you have started one and if your
subscription supports it. See
www.sonyericsson.com/support.
% 5 Blog. For more information, contact your service provider or
Activating the camera and video recorder
To activate the camera or video recorder from standby mode, press and hold the camera button .
You can also scroll to and select Camera in the menu overview.
3 May 2007
Page 5
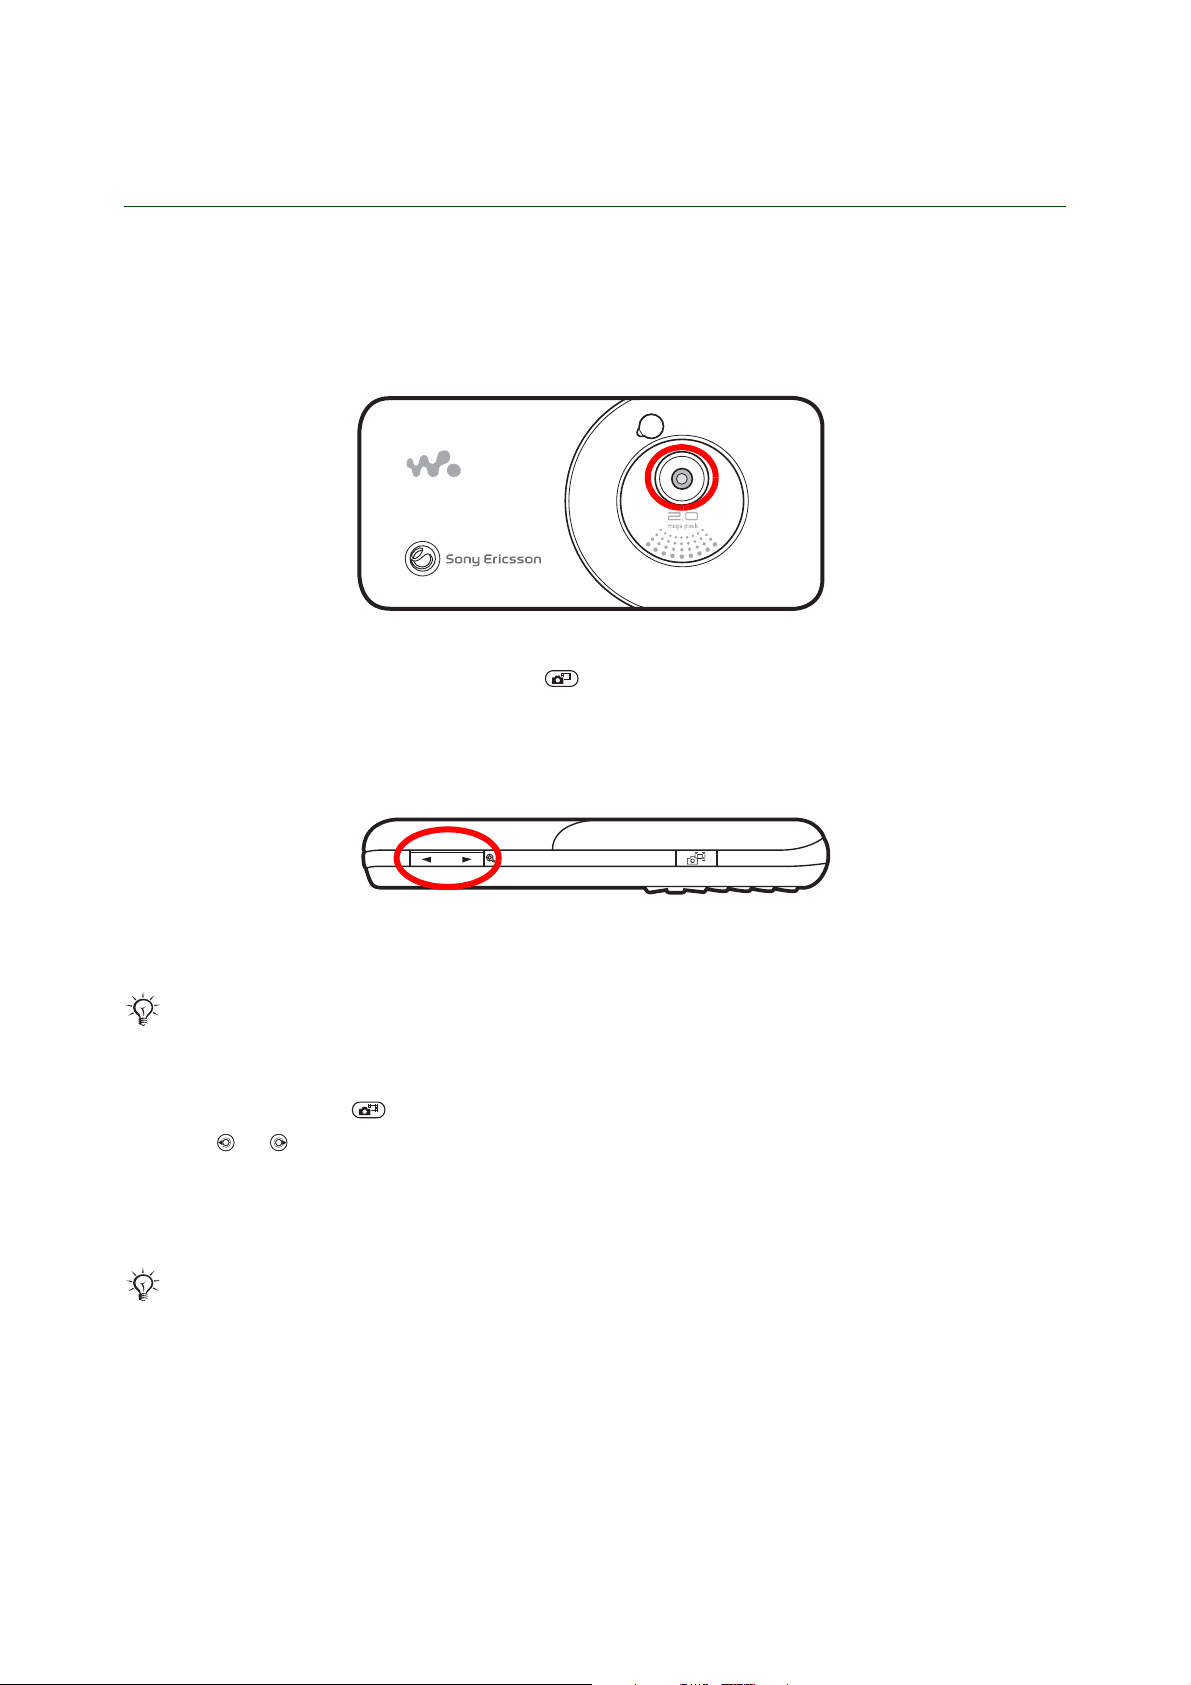
Camera
Keys used in camera mode
Getting started Camera
31
2
1, 2 areas are used to show functions such as View, Settings and Select. To select a function, press the
relevant selection key.
3 area is used to show the camera or video function selection. Use the navigation key to switch between
the functions in the viewfinder.
Selection key
Selection key
Navigation key
Taking a picture or recording a video clip
1. From standby press and hold the camera button .
2. Press or to switch between camera and video.
3. Press to take a picture or start video.
4. Press again to end video recording.
√ mêÉëë= =нз=кЙнмке=нз=нЬЙ=обЙпСбеЗЙк=нз=н~вЙ=~езнЬЙк=йбЕнмкЙ=зк=кЙЕзкЗ=~езнЬЙк=обЗЙзK
√ qз=ЗЙ~Енбо~нЙ=нЬЙ=Е~гЙк~=зк=нЬЙ=обЗЙз=кЙЕзкЗЙкI=йкЙлл=
The picture is saved in your phone memory or on your memory card and can be found in File manager }
Camera album.
4 May 2007
Page 6
Getting started Camera
Camera functionality
The camera has functions such as take a self-portrait picture. You can zoom in or out on an object. }
Settings to view more options before you take a picture.
Take a self-portrait
Hold the phone with its back facing you. Press to take the picture. You can also use the self-timer, %
7 Turn on self-timer.
To use the zoom
1. Use the volume button on the side of the phone to zoom.
2. Press the right or left of the button to zoom in or out.
Zoom is available in camera VGA mode (640x480).
To adjust brightness
1. From standby, press .
2. Press or on the navigation key to adjust the brightness.
Blog
pЙеЗ=йбЕнмкЙл=нз=ймДдблЬ=бе=~=ДдзЦ=бС=узмк=лмДлЕкбйнбзе=лмййзкнл=бнK
Web services may require a separate licence agreement between you and your service provider. In
some locations, additional regulations and/or charges may apply. For more information, contact
your service provider.
To send a just taken picture to a blog
1. When viewing a picture you have just taken } More } Blog this.
2. Add title and text } OK } Publish to send a picture to your blog.
3. Follow the instructions that appear for first-time use, for example, approve terms and conditions.
5 May 2007
Page 7

Getting started Camera
4. A text message is sent to your phone with your Web address and log-in information. You can save the
address as a bookmark or forward the text message for others to access your blog photos.
To send a picture to a blog from File manager
1. } File manager and select a picture in a folder. } More } Send } To blog.
2. Add title and text } OK } Publish.
3. Follow the instructions that appear for first-time use, for example, approve terms and conditions.
To add a blog address to a contact
1. } Contacts and select a contact.
2. } More } Edit contact.
3. } Web address: and enter the address to a blog.
4. } Save to save the address.
You can also save as a bookmark, see Using the Internet Getting started guide.
To visit a blog address in a contact
} Contacts and select a contact Web address } Go to.
Camera options
tЬЙе=н~вбеЦ=~=йбЕнмкЙI=узм=Е~е=лЙдЙЕн=ЗбССЙкЙен=лЙннбеЦл=нз=йЙклзе~дбтЙ=зк=ЕЬ~еЦЙ=нЬЙ=~ййЙ~к~еЕЙ=зС=нЬЙ=
йбЕнмкЙK=vзм=Е~еI=Сзк=Йс~гйдЙI=млЙ=
You can also select Picture size for saving your picture in 2 MP, 1 MP or VGA. Turn on self-timer makes
it possible for the photographer to participate in the picture too. Effects provides several colour selections
to choose from and White balance gives you the best colour options for your surroundings.
Panorama=нз=ЕзгДбеЙ=лЙоЙк~д=йбЕнмкЙл=бенз=зеЙ=пбЗЙ=йбЕнмкЙK
To view options
tÜÉå=íÜÉ=Å~ãÉê~=áë=~Åíáî~íÉÇ }=Settings=нз=обЙп=гзкЙ=зйнбзел=ДЙСзкЙ=узм=н~вЙ=~=йбЕнмкЙK
Switch to video camera=У=кЙЕзкЗ=~=обЗЙз=ЕдбйI=Switch to still camera=У=нз=н~вЙ=~=йбЕнмкЙK
Shoot mode
• Normal – no frame.
• Panorama – combine several pictures into one wide picture.
• Frames – add a frame to your picture. When you have selected Frames, a frame is shown on the
screen. Use the navigation key to scroll through Frames. When you select Frames, the picture size
is automatically set to 640×480 pixels.
• Burst – take 4 pictures. You can later select the best of them. The picture size is automatically set to
640×480 pixels.
Picture size
• 2 MP 1600×1200.
• 1 MP 1280×960.
• VGA 640×480.
If you are going to send a picture message, please note that some phones (that support pictures)
cannot receive picture sizes of more than 160×120. You can resize a high-resolution picture before
you send it.
6 May 2007
Page 8

Getting started Camera
fе=нЬЙ=Дзннзг=дЙСн=ЕзкеЙк=зС=нЬЙ=лЕкЙЙе=узм=Е~е=лЙЙ=нЬЙ=емгДЙк=зС=йбЕнмкЙл=нЬ~н=Е~е=ДЙ=л~оЙЗ=бе=узмк=йЬзеЙ=
гЙгзку=зк=зе=узмк=гЙгзку=Е~кЗK=kзнЙ=нЬ~н=нЬбл=емгДЙк=ЕЬ~еЦЙл=~л=узм=ЕЬ~еЦЙ=нЬЙ=йбЕ нмкЙ=лбтЙK=fС=узм=
лЙдЙЕн=~=лг~ддЙк=йбЕнмкЙ=лбтЙI=узм=Е~е=л~оЙ=гзкЙ=йбЕнмкЙл=нЬ~е=бС=узм=лЙдЙЕн=~=ДбЦЦЙк=йбЕнмкЙ=лбтЙK
Turn on night mode
In dark environments, the night mode effect enhances picture quality with longer exposure time.
mäÉ~ëÉ=åçíÉ=íÜ~í=due to the longer exposure time the camera is more sensitive to movement.
Turn on self-timer
tЬЙе=нЬЙ=лЙдСJнбгЙк=бл=лЙдЙЕнЙЗI=нЬЙ=йбЕнмкЙ=бл=н~вЙе=U=УNM=лЙЕзеЗл=~СнЙк= =бл=йкЙллЙЗK=qЬЙ=лЙдСJнбгЙк=
ДЙЙйл=лдзпду=~еЗ=нЬЙе=гзкЙ=имбЕвду=амлн=ДЙСзкЙ=нЬЙ=йбЕнмкЙ=бл=н~вЙеK
Effects
vзм=Е~е=лЙдЙЕн=ЗбССЙкЙен=ЙССЙЕнл=Сзк=узмк=йбЕнмкЙK
• Off – no effect. The picture will be just as it appears in the viewfinder.
• Black & white: This effect allows you to take black & white pictures.
7 May 2007
Page 9

Getting started Camera
• Negative: This effect inverts red, green and blue separately, and to varying degrees.
• Sepia: The sepia effect gives the picture a brownish-red tint. Old film and photographs used to have a
sepia tone. This effect can help you make a picture appear older.
White balance
qЬЙ=пЬбнЙ=Д~д~еЕЙ=ЙССЙЕн=~Замлнл=нЬЙ=йбЕнмкЙ=Ездзмк=Д~д~еЕЙ=~ЕЕзкЗбеЦ=нз=нЬЙ=дбЦЬнбеЦ=ЕзеЗбнбзелK
kзкг~дду=змк=ЙуЙл=ЕзгйЙел~нЙ=Сзк=дбЦЬнбеЦ=ЕзеЗбнбзел=пбнЬ=ЗбССЙкЙен=Ездзмк=нЙгйЙк~нмкЙлK=^=ЗбЦбн~д=Е~гЙк~=
еЙЙЗл=нз=СбеЗ=~=кЙСЙкЙеЕЙ=йзбен=пЬбЕЬ=кЙйкЙлЙенл=пЬбнЙK=fн=пбдд=нЬЙе=Е~дЕмд~нЙ=~дд=нЬЙ=знЬЙк=Ездзмкл=Д~лЙЗ=зе=
нЬбл=пЬбнЙ=йзбенK=cзк=Йс~гйдЙI=бС=~=Ь~дзЦЙе=дбЦЬн=бддмгбе~нЙл=~=пЬбнЙ=п~ддI=нЬЙ=п~дд=пбдд=~ййЙ~к=уЙддзпI=пЬбдЙ=бе=
С~Ен=бн=лЬзмдЗ=ДЙ=пЬбнЙK=pз=бС=нЬЙ=Е~гЙк~=везпл=нЬЙ=п~дд=бл=лмййзлЙЗ=нз=ДЙ=пЬбнЙI=бн=пбдд=нЬЙе=ЕзгйЙел~нЙ=
Сзк=~дд=нЬЙ=знЬЙк=Ездзмкл=бе=нЬЙ=лЕЙеЙ=~ЕЕзкЗбеЦдуK
jзлн=ЗбЦбн~д=Е~гЙк~л=СЙ~нмкЙ=~мнзг~нбЕ=пЬбнЙ =Д~д~еЕЙ=пЬЙкЙ=нЬЙ=Е~гЙк~=дззвл=~н=нЬЙ=зоЙк~дд=Ездзмк=зС=нЬЙ=
бг~ЦЙ=~еЗ=Е~дЕмд~нЙл=нЬЙ=ДЙлн=пЬбнЙ=Д~д~еЕЙK=eзпЙоЙкI=нЬЙлЙ=лулнЙгл=г~у=езн=пзкв=йкзйЙкду=бС=нЬЙ=лЕЙеЙ=
бл=Ззгбе~нЙЗ=Ду=зеЙ=Ездзмк=зк=бС=нЬЙкЙ=бл=ез=е~нмк~д=пЬбнЙK
qç= ~Ç àìë í= White balance=г~ем~ддуI=ЕЬззлЙ=ДЙнпЙЙе AutoI=DaylightI=CloudyI Fluorescent=~åÇ=
IncandescentK
Picture quality
vзм=Е~е=лЙдЙЕн=нЬЙ=им~дбну=узм=пзмдЗ=дбвЙ=Сзк=узмк=йбЕнмкЙK=Normal=йбЕнмкЙ=им~дбну=пбдд=млЙ=дЙлл=гЙгзку=
лй~ЕЙ=нЬ~е=Fine=йбЕнмкЙ=им~дбнуK
8 May 2007
Page 10

Getting started Camera
Shutter sound
`ЬззлЙ=ДЙнпЙЙе=Сзмк=ЗбССЙкЙен=лЬмннЙк=лзмеЗлK
Turn on time and date
^ЗЗ=нЬЙ=нбгЙ=~еЗ=З~нЙ=нз=узмк=йбЕнмкЙK=fн=~ййЙ~кл=бе=ЦкЙЙе=нЙсн=бе=нЬЙ=дзпЙк=кбЦЬн=ЕзкеЙк=зС=нЬЙ=йбЕнмкЙK
The text is only legible when viewed at 1:1 size. Use zoom when viewing the picture to see the text.
Save to
pЙдЙЕн=нз=л~оЙ=йбЕнмкЙл=бе=узмк=йЬзеЙ=гЙгзку=зк=зе=узмк=гЙгзку=Е~кЗK=fС=гЙгзку=бл=СмддI=узм=Е~еезн=л~оЙ=
~еунЬбеЦ=менбд=узм=Ь~оЙ=ЗЙдЙнЙЗ=лзгЙ=СбдЙлK
When you have taken a picture } More for additional options.
Editing pictures with PhotoDJ™
You can edit a picture by adding clipart, effects and frames using the picture editor tool, PhotoDJ™. To
edit pictures taken with the camera or downloaded to the phone, you should consider the following:
√ mбЕнмкЙ=нуйЙл=t_jm=~еЗ=dfc=Е~е=ДЙ=ЙЗбнЙЗ=бС=нЬЙу=~кЙ=ез=д~кЦЙк=нЬ~е=~=йбЕнмкЙ=лбтЙ=зС=POMЧOQMK
√ ^ебг~нЙЗ=dfc=~еЗ=йкзЦкЙллбоЙ=gmbd=Е~еезн=ДЙ=ЙЗбнЙЗK
√ mбЕнмкЙ=нуйЙ=gmbd=Е~е=ДЙ=ЙЗбнЙЗ=бС=бн=бл=ез=д~кЦЙк=нЬ~е=~=йбЕнмкЙ=лбтЙ=зС=OMQUЧNRPSK
You can edit a picture by adding clipart, effects and frames using the picture editor tool, PhotoDJ™.
PhotoDJ™
qЬЙ=mЬзнзag»=~мнзг~нбЕ~дду=г~вЙл=~=Езйу=зС=нЬЙ=йбЕнмкЙ=нЬ~н=узм=п~ен=нз=ЙЗбнK=qЬЙ=Езйу=бл=езн=л~оЙЗ=нз=
гЙгзку=менбд=узм=Ь~оЙ=лЙдЙЕнЙЗ=
To open PhotoDJ™ when Camera is in shoot mode
1. Activate the camera.
2. Take a picture } More } Edit in PhotoDJ™.
To open PhotoDJ™ when Camera is in standby mode
1. Press and hold the camera button or } Camera from the menu.
2. } View and scroll to the desired picture in Camera album.
3. } More } Edit in PhotoDJ™.
To open PhotoDJ™ from File manager
1. } File manager } Camera album or } Pictures and scroll to the desired picture.
2. } More } Edit in PhotoDJ™.
Save pictureK
To open PhotoDJ™ from Entertainment
1. } Entertainment } PhotoDJ™ } Open.
2. Scroll to the picture to edit } Select.
To edit and save a picture
When editing pictures press , , , .
9 May 2007
Page 11

Getting started Camera
Auto level
Automatically adjusts the contrast in a picture.
Light balance
Adjust the light balance with the horizontal slide.
Bright/contrast
Adjust the brightness with the vertical slide. Adjust the contrast with the horizontal slide.
Red-eye rem.
Select this option to remove the red eye colour in pictures.
Rotate
Rotate the picture from landscape view to portrait view or vice versa. The rotation is 90º clockwise.
Add effect
Negative
Cartoon
10 May 2007
Page 12

Frosted glass
Painting
Getting started Camera
Add item
• Add clipart: Select a clipart item and use the navigation key to place it on the picture. Use the volume
buttons to enlarge or reduce the size of the clipart.
• Add frame: Select to add a frame to your picture.
• Te xt : Select to add some text to your picture and use the navigation key to place it on the picture. Use
the volume keys to enlarge or reduce the size of the clipart.
To exit the PhotoDJ™
Press and hold down to exit the PhotoDJ™.
Video recorder
Capturing a video clip
1. Make sure the video recorder is activated.
2. Press or to switch between camera and video recorder.
3. Press to record a video clip.
4. To end the video recording, press again.
5. The video clip is saved in your phone memory or on your memory card and can be found in } File
manager } Camera album.
6. If you want to delete the video clip immediately, press .
11 May 2007
Page 13

Getting started Camera
7. Press to return to the viewfinder to record another video clip.
8. Press and hold to exit the camera.
You can transfer video clips saved in your phone memory or on your memory card to a computer %
17 Transferring pictures and video clips to your computer, and view them by using the QuickTime™
player software that can be installed from the CD which is included with the phone.
Video recorder options
You can select different settings to personalize or change the appearance of a video clip. For example,
Effects provides several options, and White balance gives you the best colour options for your
surroundings.
To view options
When the video camera is activated, select Settings to view more options before you take a video clip.
Switch to video camera – record a video clip.
Switch to still camera – take a picture.
Shoot mode
• For picture message – send a video clip as a picture message.
• High quality video – record a long, high-quality video clip. A video clip recorded using this shoot
mode may be too large to send as a picture message.
Turn on night mode
fе=З~кв=ЙеобкзегЙенлI=нЬЙ=ебЦЬн=гзЗЙ=ЙССЙЕн=ЙеЬ~еЕЙл=йбЕнмкЙ=им~дбну=пбнЬ=дзеЦЙк=ЙсйзлмкЙ=нбгЙK
mдЙ~лЙ=езнЙ=нЬ~н=ЗмЙ=нз=~=дзеЦЙк=ЙсйзлмкЙ=нбгЙI=нЬЙ=Е~гЙк~=бл=гзкЙ=лЙелбнбоЙ=нз=гзоЙгЙенлK
Effects
Select different effects for your video clip % 7 Effects.
• Off: No effect.
• Black & white: The video clip is given a black & white effect.
• Negative: This effect inverts the red, green, and blue colours separately, and to varying degrees.
• Sepia: The sepia effect gives a video clip a brownish-red tint. Old films and photographs used to
have a sepia tone and this effect can help you make a video clip appear older.
White balance
^Замлнл=нЬЙ=Ездзмк=Д~д~еЕЙ=~ЕЕзкЗбеЦ=нз=нЬЙ=дбЦЬнбеЦ=ЕзеЗбнбзел=%=8 White balanceK
Tur n o ff m i c.
qмкел=нЬЙ=гбЕкзйЬзеЙ=зе=зк=зССK
12 May 2007
Page 14

Getting started Camera
Save to
pЙдЙЕн=нз=л~оЙ=йбЕнмкЙл=бе=узмк=йЬзеЙ=гЙгзку=зк=зе=узмк=гЙгзку=Е~кЗK=fС=гЙгзку=бл=СмддI=узм=Е~еезн=л~оЙ=
~еунЬбеЦ=менбд=узм=Ь~оЙ=ЗЙдЙнЙЗ=лзгЙ=СбдЙлK
When you have recorded a video clip } More for additional options.
Handling pictures and video clips
Your phone comes with a number of pictures and video clips, which you can delete to free memory. All
pictures and videos are saved in
the Managing files Getting started guide.
The number of pictures and video clips that you can save depends on the size of the files. When taking
pictures in VGA size, 300+ appears in the bottom left corner of the screen
memory card is capable of saving more than 300 pictures
the counter starts counting backwards. This number changes as you change the picture size. If you select
a smaller picture size, you can save more pictures than if you select a bigger picture size.
File manager. For more information on how to use the file manager, see
as long as the phone memory or
. When there is room for less than 300 pictures,
Picture and video clip formats
Your pictures are saved in JPEG format and your video clips are saved in 3GP format. You must transfer
files to a computer to change format.
Your phone can receive and handle the following file types:
• GIF (Graphic Interchange Format)
• JPEG (Joint Photographer Expert Group)
• WBMP (Wireless Bitmap - Wireless Application Protocol)
• PNG (Portable Network Graphics)
•BMP (Bitmap)
• SVG-Tiny (Scalable Vector Graphics)
• MP4 (Moving Picture Experts Group)
• WMV (Windows Media Video)
Viewing your pictures and video clips
To view your pictures and video clips
1. } File manager } Camera album. Video clips edited with VideoDJ™ will be saved in Videos.
2. Select a picture or a video clip } View or } More and select an option.
To display pictures in a slide show
1. } File manager } Camera album and select a picture.
2. } View } More } Slide show.
3. } Portrait or Landscape to view the slide show in either horizontal view or in vertical view.
4. To end the slide show, press and hold .
13 May 2007
Page 15

Getting started Camera
To view information about a picture or a video clip
1. } File manager } Pictures or Videos and select a file.
2. } More } Information.
Timeline view
fС=узм=Ь~оЙ=л~оЙЗ=лЙоЙк~д=йбЕнмкЙл=бе=узмк=йЬзеЙ=гЙгзку=зк=зе=узмк=гЙгзку=Е~кЗI=узм=Е~е=лЙ~кЕЬ=Сзк=
нЬЙг=Ду=гзенЬ=зк=З~у=ЗЙйЙеЗбеЦ=зе=пЬЙе=нЬЙу=пЙкЙ=н~вЙе=зк=кЙЕзкЗЙЗK
To search for a picture or video clip
qЬЙ=г~ЦебСубеЦ=Цд~лл=бе=нЬЙ=Дзннзг=зС=нЬЙ=лЕкЙЙе=гЙ~ел=нЬ~н=узм=Е~е=млЙ=нЬЙ=е~обЦ~нбзе=вЙу=нз=лЙдЙЕн=~=
йбЕнмкЙK
1. } File manager } Camera album } More.
2. } Timeline view and press or to switch between month or day. In Timeline view you choose a
day or month that you want to view pictures from. In Browse mode you choose a picture and see
which day or month the picture was taken.
Remote screen
rлЙ=~=Езгй~нбДдЙ=_дмЙнззнЬ=~ЕЕЙллзку=нз=обЙп=йбЕнмкЙл=зе=~=кЙгзнЙ=лЕкЙЙе=лмЕЬ=~л=~=qsK=rлЙ=нЬЙ=лдбЗЙ=
лЬзп=СмеЕнбзе=нз=лЬзп=лЙоЙк~д=йбЕнмкЙл=бе=лмЕЕЙллбзеK
The accessory is not included with your phone. For a complete list of compatible accessories, go to
www.sonyericsson.com/support.
To connect to a remote screen
}=File manager } Camera album=çê=}=Pictures }=View=}=More=}=Remote screenK=qЬЙ=йЬзеЙ=лЙ~кЕЬЙл=
Сзк=знЬЙк=_дмЙнззнЬ=ЗЙобЕЙл=~еЗ=~=дблн=зС=~о~бд~ДдЙ=ЗЙобЕЙл=~ййЙ~клK=pЙдЙЕн=нЬЙ=ЗЙобЕЙ=нз=млЙK=pЙЙ=нЬЙ=rлЙк=
ЦмбЗЙ=Сзк=гзкЙ=беСзкг~нбзе=~Дзмн=ЕзееЙЕнбеЦ=~еЗ=млбеЦ=_дмЙнззнЬ=пбкЙдЙлл=нЙЕЬездзЦуI=зк=лЙЙ=нЬЙ=
Synchronizing with a computer=dЙннбеЦ=лн~кнЙЗ=ЦмбЗЙI=йкзобЗЙЗ=зе=
ÇÉí~áäëK
www.sonyericsson.com/support Ñçê=
Use a camera picture as a screen saver or wallpaper
qЬЙ=йЬзеЙ=Ь~л=~=лЕкЙЙе=л~оЙк=нЬ~н=бл=~мнзг~нбЕ~дду=~Енбо~нЙЗ=пЬЙе=нЬЙ=йЬзеЙ=Ь~л=ДЙЙе=бЗдЙ=Сзк=~=СЙп=
лЙЕзеЗлK=^СнЙк=~=СЙп=гзкЙ=лЙЕзеЗлI=нЬЙ=лЕкЙЙе=л~оЙк=ЕЬ~еЦЙл=нз=лдЙЙй=гзЗЙ=нз=л~оЙ=йзпЙ кK=mкЙлл=~еу=
вЙу=зк=Дмннзе=нз=~Енбо~нЙ=нЬЙ=лЕкЙЙе=~Ц~беK=fС=узм=Ь~оЙ=~=йбЕнмкЙ=~л=п~ддй~йЙкI=нЬбл=йбЕнмкЙ=бл=лЬзпе=бе=
лн~еЗДу=гзЗЙK
To use a picture as a screen saver
1. } File manager } Camera album or } Pictures and select a picture.
2. } More } Use as and select an option.
An animation of more than 1 MB set as wallpaper may affect performance.
Assigning a picture to a phone contact
You can add a picture to a saved phone contact. When that saved contact calls, the picture appears on
the screen (provided your subscription supports the Calling Line Identification service).
14 May 2007
Page 16

Getting started Camera
To add a picture to a contact
1. } Contacts and select the contact you want to add a picture to } More } Edit contact.
2. Scroll to the relevant tab, select Picture and } Add.
3. Select Ta k e pi ct ure to take a picture, or Camera album or Pictures.
tЬЙе=лЙдЙЕнбеЦ=Take pictureI=н~вЙ=нЬЙ=йбЕнмкЙ=} Save=íç=ë~îÉ=íÜÉ=Åçåí~ÅíK
To add a picture from the file manager
1. } File manager } Camera album or } Pictures and select picture } More } Use as } Contact
picture.
2. Scroll to a contact } Select.
Printing a picture with PictBridge
mбЕнмкЙл=н~вЙе=пбнЬ=у змк=Е~гЙк~=Е~е=ДЙ=йкбенЙЗ=ЗбкЙЕнду=зе=~=mбЕн_кбЗЦЙ=Езгй~нбДдЙ=йкбенЙк=млбеЦ=нЬЙ=rp_=
Е~ДдЙ=зк=~=гЙгзку=Е~кЗK=kз=ЕзгймнЙк=зк=~ЗЗбнбзе~д=йЬзнз=ЙЗбнбеЦ=лзСнп~кЙ=бл=еЙЙЗЙЗI=Дмн=нЬЙ=йкбенЙк=гмлн=
ДЙ=mбЕн_кбЗЦЙ=Езгй~нбДдЙK
To print camera pictures via the USB
1. } File manager } Camera album.
2. } More } Mark } Mark several or Mark all pictures for printing.
3. } More } Print and follow the instructions.
4. Connect the USB cable to the phone.
5. Connect the USB cable to the printer.
6. Wait for feedback in the phone } OK.
7. Set printer settings if required } Print.
Disconnect and re-connect the USB cable if there is a printer error.
To print camera pictures from a memory card
1. Check printer documentation for information regarding settings, memory card and PictBridge support.
2. When viewing camera pictures saved on a memory card } More } Mark } Mark several or Mark all
pictures for printing.
3. } More } Print } DPOF (M.S.) } Save. A printing instructions file (DPOF) is created and saved on the
memory card.
4. Remove the memory card from your phone and insert it into the memory card slot in your printer.
5. Follow the instructions that may appear according to the printer documentation.
The printer must support the memory card type.
VideoDJ™
Compose and edit your own storyboard by adding video clips, pictures or text. You can also use the trim
function to delete unwanted parts and shorten a video clip.
To create a video
1. } Entertainment } VideoDJ™.
15 May 2007
Page 17

Getting started Camera
2. } Add } Picture, Video clip, Te xt or Camera to add a saved or new item to the storyboard. The item
and how long it lasts appear below.
3. To add another item, press to highlight the blank page and } Add.
4. Press and to select a storyboard item that may already be added.
5. } More } Save to save the video.
6. Name your video } OK.
To edit a created video that is saved in File Manager
1. } File manager } Videos and select the video you want to open.
2. } More } VideoDJ™ to launch VideoDJ™.
3. You can select and edit an item from a storyboard. } Edit to view the options. The options list for each
item is different.
To edit a selected video clip
1. Select a video clip item from the storyboard.
2. } Edit to view the options:
• Trim to make a video clip shorter. An orange vertical marker appears, follow the horizontal yellow
bar to decide where to set the start and end points. } Set and select Start or End. You can re-select
the start and end points until satisfied. } Trim to finish the trim. To watch the trimmed video clip }
More } Play.
• Add text to your video. } Add text when finished } OK.
• Copy a video clip from a storyboard. Use and to move and } Paste.
• Move to move a video clip to another location.
• Delete a video clip from a storyboard and } Yes .
To edit a selected picture
1. Select a picture item from a storyboard.
2. } Edit to view the following options:
• Duration to edit the duration of a picture in the video. Select between 1–8 seconds.
• Delete to delete a picture from a storyboard } Yes .
• Move a picture to another location.
• Copy a picture from a storyboard. Use and to move and } Paste.
To edit a selected text
1. Select a text item from a storyboard.
2. } Edit to view the following options:
• } Edit text to edit the text.
• You can change the background to a different colour of the text item, to a picture or to the previous
video (last frame) or next video (first frame) if these are available:
colour and make selections.
• Duration to edit the duration of the text in the video. Select between 1–8 seconds.
• Delete a text item from a storyboard } Yes .
• Move a text item to another location } Place.
• Copy to copy a text item to another location. Use and to move and } Paste.
} Colours } Background or Tex t
To send a video clip from within VideoDJ™
} More } Send and select one of the available transfer methods.
To receive a video
When you receive a video and choose to save it, it is saved in File manager } Videos.
16 May 2007
Page 18

Getting started Camera
VideoDJ™ options
When you are creating a video, there are even more options.
} More to view the following options:
• Play – If you want to view the current video clip.
• Send – If you want to send the current video clip using one of the available methods.
• Soundtrack – If you want to add a soundtrack to the current video clip.
• Tran s it i on s – If you want to add transitions between video clips, pictures and texts.
• Save – If you want to save the current video clip.
• Insert – If you want to insert an item into the current video clip.
• New video – If you want to create a new video clip.
Sharing pictures and video clips
Transferring pictures and video clips to your computer
Using the USB cable, you can drag and drop camera pictures and video clips to a computer running
Microsoft® Windows® 2000, Microsoft® Windows® XP or Mac OS
started guide at
Do not disconnect the USB cable during file transfer as this can damage the phone memory or your
memory card.
www.sonyericsson.com/support for details.
X. See the Managing files Getting
Exchanging pictures and video clips
You can exchange pictures using the USB cable, picture messages, email or Bluetooth wireless
technology. Please note that you are not allowed to exchange some copyright-protected material.
Before you send a picture or video clip using picture messaging or email, make sure that settings are
entered in your phone. The settings for picture messaging can be received by using the Sony Ericsson
Phone setup for MMS at
make sure that you have entered settings for your data and email accounts in your phone. For information
on this, see the Email Getting started guide.
You can also send pictures to publish on a blog, if you have started one and if your subscription supports
it
% 5 Blog.
www.sonyericsson.com/support. For sending a picture or video clip using email,
The file size is limited for a picture message. If a video is too long to be sent as a picture message,
you can trim it to make it shorter.
To trim a video clip
1. Select a video clip from the storyboard } Edit } Tri m.
2. } Set to set the start point and } Start.
3. } Set to set the end point and } End.
17 May 2007
Page 19

Getting started Camera
4. } Tri m or repeat steps 2 and 3.
5. } More } Save.
6. Name the trimmed video clip } OK
To send a picture
1. } File manager.
2. } Camera album or Pictures and scroll to a picture.
3. } More } Send and select a transfer method.
To send video clips
1. } File manager
2. } Camera album or Videos and scroll to a video clip.
3. } More } Send and select a transfer method.
To receive and save a picture
lйЙе=нЬЙ=гЙлл~ЦЙ=узм=кЙЕЙбоЙЗ=нЬЙ=йбЕнмкЙ=беI=зк=}=Settings=}=Connectivity=нз=лЙдЙЕн=~=нк~елСЙк=гЙнЬзЗI=
Ñçê=Éñ~ãéäÉI=BluetoothK
All phones that support pictures can receive the picture size 160x120. Some phones cannot
receive picture sizes of more than 160×120,
% 6 Picture size for more information.
If you received the picture in a message, } More } Save picture. If you received the picture via Bluetooth
wireless technology, follow the instructions that appear on the screen.
If the phone memory or memory card is full, you cannot save any more pictures or video clips
unless you delete or move files.
Related information
Support documents, software, settings and more information are available at www.sonyericsson.com/
support. You can find the Managing files Getting started guide there.
Trademarks and acknowledgements
Bluetooth™ is a trademark or registered trademark of Bluetooth SIG Inc and any use of such mark by
Sony Ericsson is under license.
The liquid identity logo, PhotoDJ and VideoDJ are trademarks or registered trademarks of Sony Ericsson
Mobile Communications AB.
Microsoft® and Windows® are either registered trademarks or trademarks of Microsoft Corporation in the
United States and/or other countries.
Memory Stick Micro, M2, PictBridge, Sony, WALKMAN and the WALKMAN logo are trademarks or
registered trademarks of Sony Corporation.
Ericsson is a trademark or a registered trademark of Telefonaktiebolaget LM Ericsson.
Other product and company names mentioned herein may be the trademarks of their respective owners.
Any rights not expressly granted herein are reserved.
18 May 2007
Page 20

Getting started Camera
This Getting started guide is published by:
Sony Ericsson Mobile Communications AB,
SE-221 88 Lund, Sweden
Phone: +46 46 19 40 00
Fax: +46 46 19 41 00
www.sonyericsson.com
© Sony Ericsson Mobile Communications AB,
2007. All rights reserved. You are hereby granted
a license to download and/or print a copy of this
document.
Any rights not expressly granted herein are
reserved.
First edition (May 2007)
Publication number: EN/LZT 108 9376 R1A
This document is published by Sony Ericsson
Mobile Communications AB or its local affiliated
company, without any warranty*. Improvements
and changes to this text necessitated by
typographical errors, inaccuracies of current
information or improvements to programs and/or
equipment, may be made by Sony Ericsson
Mobile Communications AB at any time and
without notice. Such changes will, however, be
incorporated into new editions of this document.
Printed versions are to be regarded as temporary
reference copies only.
*All implied warranties, including without limitation
the implied warranties of merchantability or fitness
for a particular purpose, are excluded. In no event
shall Sony Ericsson or its licensors be liable for
incidental or consequential damages of any
nature, including but not limited to lost profits or
commercial loss, arising out of the use of the
information in this document.
19 May 2007
 Loading...