

Sony WX-C55 Users guide [en, es]

Changer Control
Audio Master
Operating Instructions
Manual de instrucciones
¤ˇ¥˛»¡'œfi
For installation and connections, see the supplied installation/connections
manual.
Con respecto a la instalación y las conexiones, consulte el manual de Instalación/
conexiones suministrado.
ˆ ' ¥» “”ƒw‚¸⁄˛‰u‚ ‡s– ¡A‰— ¤£·£¤ “”¡uƒw‚¸¡ ‰u‚ ‡s– ¡v»¡'œfi ¡C
GB
ES
CT
WX-C55
1999 by Sony Corporation

Welcome !
Thank you for purchasing the Sony Changer
Control Audio Master. This unit lets you enjoy
a variety of features as well as an optional
rotary commander.
In addition to the CD playback, tape playback
and radio operations, you can expand your
system by connecting an optional MD/CD
unit*.
* You can connect a CD changer, an MD changer, a
CD player and an MD player.
2

Table of Contents
This Unit Only
Location of controls ................................................. 4
Getting Started
Resetting the unit ................................................ 6
Using the dummy cover .................................... 6
Setting the clock .................................................. 6
CD Player
Listening to a CD ................................................ 7
Playing a CD in various modes ........................ 8
Cassette Player
Listening to a tape ............................................... 8
Playing a tape in various modes ....................... 9
Radio
Memorising stations automatically
— Best Tuning Memory (BTM) ................. 10
Memorising only the desired stations............ 10
Receiving the memorised stations .................. 10
Other Functions
The rotary commander labels ......................... 11
Using the rotary commander .......................... 12
Adjusting the sound characteristics ............... 13
Changing the sound and beep tone ............... 14
Selecting the spectrum analyzer ..................... 14
With Optional Equipment
CD/MD unit
Playing a CD or MD ......................................... 15
Playing tracks repeatedly
— Repeat Play .............................................. 15
Playing tracks in random order
— Shuffle Play .............................................. 16
Additional Information
Precautions......................................................... 16
Maintenance....................................................... 18
Specifications ..................................................... 19
Troubleshooting guide ..................................... 20
3

Location of controls
1
REPEAT
2
SHUF/
3
METAL
4
ATA
5
BL SKIP
6
SENS
BTM
SOURCE
SA
MODE
DSPL
SOUND
TAPE
D-BASS
SEEK/AMS
CD
OFF
PRESET/
DISC
4

Refer to the pages for details.
1 SENS/BTM (sensitivity adjust/best
tuning memory) button 10, 11
2 During tuner reception:
Preset number buttons 10
During tape/CD/MD playback:
(2) REPEAT button 8, 9, 15
(3) SHUF/; (Shuffle/Dolby) button
8, 9, 16
(4) METAL button 9
(5) ATA (Automatic Tuner Activation)
button 9
(6) BL SKIP (Blank Skip) button 9
3 SA (Spectrum Analyzer) button 14
4 Display window
5 D-BASS button 14
6 OFF button 7, 8
7 CD Z (eject) button 7
8 PRESET/DISC button
During radio reception:
Preset station search 11
During CD/MD playback:
Disc select 15
9 Frequency Select switch (located on the
left side of the unit)
See “Frequency Select Switch” in the
Installation/Connections manual.
0 POWER SELECT switch (located on the
left side of the unit)
See “POWER SELECT Switch” in the
Installation/Connections manual.
qa SOURCE (source select) button 7, 8, 10,
15
qs MODE/o (band/unit select/tape
transport direction change) button
8, 10, 15
qd DSPL (display mode change) button
6, 7, 9, 11, 15
qf Jog roller (volume/bass/treble/balance/
fader) 6, 13
Jog roller usually functions as a volume
control except in some adjusting modes.
qg SOUND button 6, 13
qh TAPE Z (eject) button 8
qj SEEK/AMS (seek/Automatic Music
Sensor/manual search) button 8, 9, 10,
11, 15
qk Reset button 6
When the positions of switch 9 and 0 have
been changed, be sure to press the reset button
after connecting power.
5

Getting Started
Resetting the unit
Before operating the unit for the first time or
after replacing the car battery, you must reset
the unit.
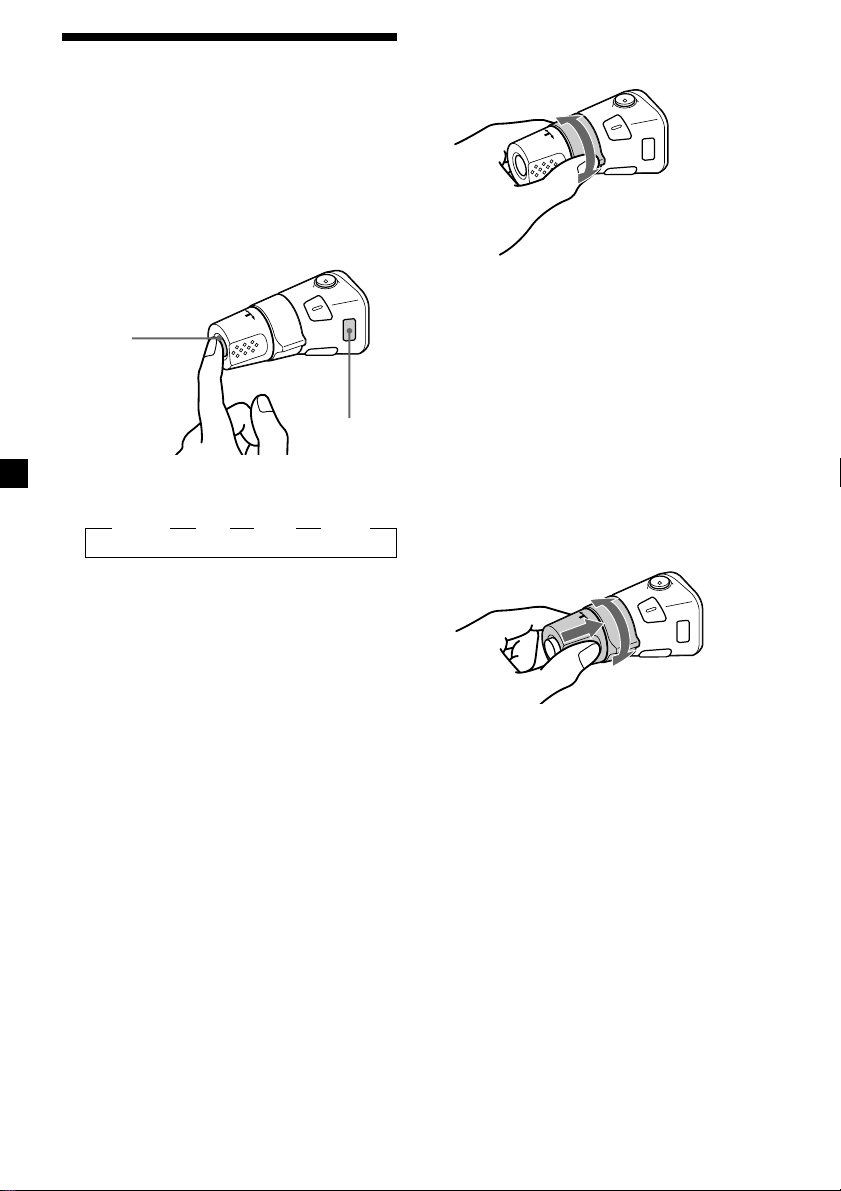
Press the reset button with a pointed object,
such as a ballpoint pen.
SEEK/AMS
CD
OFFD-BASS
PRESET/
DISC
SHUF/
BL SKIP
REPEAT
METAL
SENS
BTM
1
2
3
4
ATA
5
6
SOURCE
SA
TAPE
DSPL
MODE
SOUND
Setting the clock
The clock uses a 12-hour digital indication.
Example: Set the clock to 10:08
1 Press (DSPL) for two seconds.
The hour digit flashes.
1 Set the hour.
To go forward
To go backward
Notes
Reset button
• Pressing the reset button will erase the clock and
some memorised functions.
• When you connect the power supply cord to the
unit or reset the unit, wait for about 10 seconds
before you insert a disc. If you insert a disc
within these 10 seconds, the unit will not be
reset, and you will have to press the reset button
again.
Using the dummy cover
To deter theft of this unit, use the dummy
ashtray cover when not using your car.
Note
If the unit does not extend 6 mm from the
dashboard, you may not be able to use the dummy
cover.
2 Press (SOUND).
The minutes digits flash.
3 Set the minute.
To go forward
To go backward
6

2 Press (DSPL).
CD Player
The clock starts.
Note
If the POWER SELECT switch on the left side of the
unit is set to the B position, turn the power on
first by pressing (SOURCE), then set the clock.
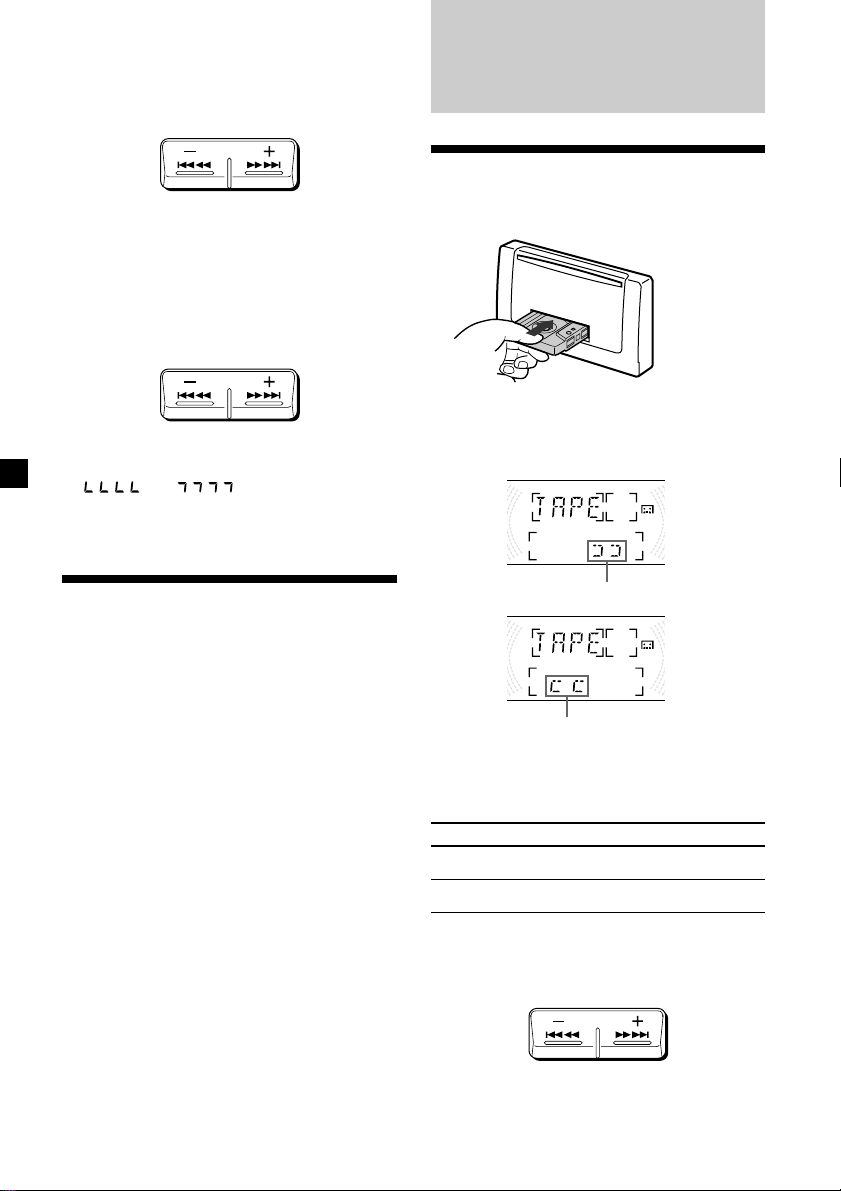
Listening to a CD
Simply insert the CD.
Playback starts automatically.
Labelled side up
If a CD is already inserted, press (SOURCE)
repeatedly until “CD” appears.
Track number
To Press
Stop playback (OFF)
Eject the CD CD Z
Elapsed playing
time
Note
If you leave the disc in the insertion slot for more
than 15 seconds after pressing CD Z, the disc will
reinsert automatically to protect the disc.
Changing the display item
Each time you press (DSPL), the item changes
as follows:
Track number/Elapsed playing time
Y
Clock
7
Locating a specific track
— Automatic Music Sensor (AMS)
During playback, press either side of
(SEEK/AMS) momentarily.
SEEK/AMS
To locate preceding
tracks
To locate succeeding
tracks
Locating a specific point in a track
— Manual Search
During playback, press and hold either
side of (SEEK/AMS). Release the button
when you have found the desired point.
SEEK/AMS
To search forwardTo search backward
Note
If “
that means you have reached the beginning or the
end of the disc and you cannot go any further.
” or “ ” appears in the display,
Cassette Player
Listening to a tape
Insert a cassette.
Playback starts automatically.
If a cassette is already inserted, press
(SOURCE) until “TAPE” appears.
Playing a CD in various
modes
You can play CDs in various modes:
•REPEAT (Repeat Play) repeats the current
track.
•SHUF (Shuffle Play) plays all the tracks in
random order.
Playing tracks repeatedly
— Repeat Play
Press (2) (REPEAT) during playback.
“REP 1” appears on the display and repeat
play starts.
To return to the normal playback mode, press
(2) (REPEAT) again.
Playing tracks in random order
— Shuffle Play
Press (3) (SHUF/;) during playback.
“SHUF 1” appears on the display and
shuffle play starts.
To return to the normal playback mode, press
(3) (SHUF/;) again.
8
The side facing up is played.
The side facing down is played.
Tip
To change the tape transport direction, press
(MODE) (o) during tape playback.
To Press
Stop playback (OFF)
Eject the cassette TAPE Z
Fast-winding the tape
During playback, press and hold either
side of (SEEK/AMS) for two seconds.
SEEK/AMS
Fast-forwardRewind
To start playback during fast-forwarding or
rewinding, press (MODE) (o).

Locating the beginning of a track
— Automatic Music Sensor (AMS)
During playback, press either side of
(SEEK/AMS) momentarily.
SEEK/AMS
To locate preceding
tracks
Note
The AMS function may not work when :
— the blanks between tracks are shorter than four
seconds.
— there is noise between tracks.
— there are long sections of low volume or quiet
sections.
To locate succeeding
tracks
Changing the displayed items
Each time you press (DSPL) during tape
playback, the display changes as follows:
B Tape playbac B Clock B Frequency*
* While the ATA function is activated.
Playing a tape in various
modes
You can play the tape in various modes:
•REPEAT (Repeat Play) repeats the current
track.
•; (Dolby NR) lets you select the Dolby* NR
B system.
•METAL plays CrO2 or metal tape.
•ATA (Automatic Tuner Activation) turns on
the tuner automatically while fast-winding
the tape.
•BL SKIP (Blank Skip) skips blanks longer
than eight seconds.
* Dolby noise reduction manufactured under
license from Dolby Laboratories Licensing
Corporation. “DOLBY” and the double-D symbol
; are trademarks of Dolby Laboratories
Licensing Corporation.
Playing a track repeatedly
— Repeat play
Press (2) (REPEAT) during playback.
“REP” appears on the display and repeat
play starts.
To return to the normal playback mode, press
(2) (REPEAT) again.
Playing a tape recorded in the
Dolby B NR system
Press (3) (SHUF/;) during playback.
“;” appears on the display.
To return to the normal playback mode, press
(3) (SHUF/;) again.
Playing a CrO2 or metal tape
Press (4) (METAL) during playback.
“MTL” appears on the display.
To return to the normal playback mode, press
(4) (METAL) again.
Switching to the radio while fastwinding a tape
— Automatic Tuner Activation (ATA)
Press (5) (ATA) during playback.
“ATA” appears on the display.
To return to the normal playback mode, press
(5) (ATA) again.
Skipping blanks during tape
playback — Blank skip
Press (6) (BL SKIP) during playback.
“BL SKIP” appears on the display.
To return to the normal playback mode, press
(6) (BL SKIP) again.
9
Radio
Memorising stations
automatically
— Best Tuning Memory (BTM)
The unit selects the stations with the strongest
signals and memorises them in the order of
their frequencies. You can store up to 6 stations
on each band (FM1, FM2, AM1, and AM2).
Caution
When tuning in stations while driving, use
Best Tuning Memory to prevent accidents.
1 Press (SOURCE) repeatedly to select the
tuner.
Each time you press (SOURCE), the source
changes as follows:
B CD B TAPE B TUNER
2 Press (MODE) repeatedly to select the
band.
Each time you press (MODE), the band
changes as follows:
B FM1 B FM2 B AM1 B AM2
Memorising only the
desired stations
You can store up to 6 stations on each band in
the order of your choice.
1 Press (SOURCE) repeatedly to select the
tuner.
2 Press (MODE) repeatedly to select the
band (FM1, FM2, AM1, or AM2).
3 Press either side of (SEEK/AMS) to tune
in the station you want to store on the
number button.
4 Press and hold the desired number
button ((1) to (6)) until “PRESET”
appears.
The number button indication appears in
the display.
Note
If you try to store another station on the same
number button, the previously stored station will
be erased.
Receiving the memorised
stations
3 Press (SENS/BTM) for two seconds.
The unit stores stations in the order of their
frequencies on the number buttons.
A beep sounds when the setting is stored.
Notes
• The unit does not store stations with weak
signals. If only a few stations are received, some
number buttons will retain their former setting.
• When a number is indicated in the display, the
unit starts storing stations from the one currently
displayed.
10
1 Press (SOURCE) repeatedly to select the
tuner.
2 Press (MODE) repeatedly to select the
band (FM1, FM2, AM1, or AM2).
3 Press the number button ((1) to (6))
momentarily where the desired station is
stored.
If you cannot tune in a preset
station
Press either side of (SEEK/AMS)
momentarily to search for the station
(automatic tuning).
Scanning stops when the unit receives a
station. Press either side of (SEEK/AMS)
repeatedly until the desired station is
received.

Note
If the automatic tuning stops too frequently, press
(SENS/BTM) to light up “LCL” on the display (local
seek mode). Only the stations with relatively
strong signals will be tuned in.
Tips
• If you know the frequency of the station you
want to listen to, press and hold either side of
(SEEK/AMS) until the desired frequency appears
(manual tuning).
• You can also select the preset stations by
pressing PRESET/DISC
or .
If FM stereo reception is poor
— Monaural Mode
Press (SENS/BTM) repeatedly until
“MONO” appears.
The sound improves, but becomes
monaural (“ST” disappears).
To return to the normal mode, press
(SENS/BTM) again until “MONO” disappears.
Other Functions
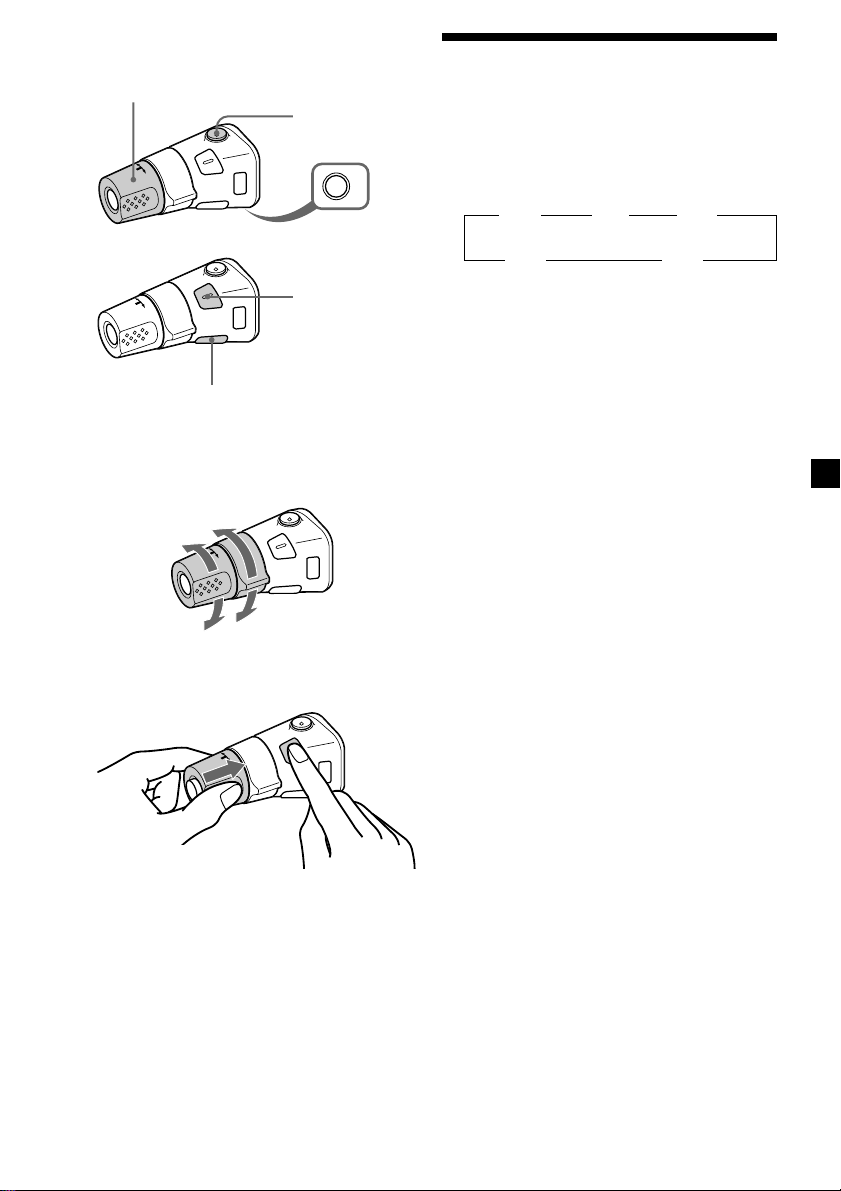
The rotary commander
labels
You can control this unit with the optional
rotary commander (RM-X4S).
Some labels are supplied with the rotary
commander. Attach labels to match the
functions of the master unit according to the
position of the rotary commander.
When you mount the rotary commander,
attach the label as in the illustration below.
Changing the display item
Each time you press (DSPL), the items changes
as follows:
Frequency y Clock
MODE
SOUND
DSPL
D
N
U
O
S
E
D
O
M
PL
S
D
11
Using the rotary
commander
The rotary commander works by pressing
buttons and/or rotating controls.
You can control an optional CD/MD unit by
the rotary commander.
By pressing buttons (the SOURCE
and the MODE buttons)
(SOURCE)
(MODE)
Every time you press (SOURCE), the
source changes as follows:
B TUNER B CD B MD B TAPE
Pressing (MODE) changes the operation
in the following ways:
• Tuner: FM1 t FM2 t AM1 t AM2
• CD unit: CD1 t CD2 t ...
• MD unit: MD1 t MD2 t ...
• Tape: tape transport direction
Tip
You can turn on this unit by pressing (SOURCE) on
the rotary commander.
By rotating the control (the SEEK/
AMS control)
Rotate the control momentarily and
release it to:
•Locate the beginnings of tracks on the
tape. Rotate and hold the control, then
release it to fast-wind the tape.
•Locate a specific track on a disc. Rotate
and hold the control until you locate the
specific point in a track, then release it to
start playback.
•Tune in stations automatically. Rotate
and hold the control to tune in a specific
station.
By pushing in and rotating the
control (the PRESET/DISC control)
Push in and rotate the control to:
•Receive the stations memorised on the
preset buttons.
•Change the disc.
12
Other operations
Rotate the VOL control
to adjust the volume.
Press (ATT) to
attenuate the
sound.
OFF
Press (OFF) to
turn off the unit.
Press (SOUND)
to select the
volume and
adjust the sound
characteristics.
Press (DSPL) to change
the display items.
Changing the operative direction
The operative direction of controls is factoryset as in the illustration below.
To increase
Adjusting the sound
characteristics
1 Select the item you want to adjust by
pressing (SOUND) repeatedly.
Each time you press (SOUND), the item
changes as follows:
B VOL B BAS B TRE
(volume) (bass) (treble)
FAD b BAL b
(front-rear) (left-right)
2 Adjust the selected item by rotating the
jog roller.
Adjust within three seconds after selecting.
(After three seconds the jog roller will again
serve as the volume control.)
To decrease
If you need to mount the rotary commander on
the right side of the steering column, you can
reverse the control’s operative direction.
Press (SOUND) for two seconds while
pushing in the VOL control.
13
 Loading...