

Page 1
Data Projector
4-090-336-41(1)
Operating Instructions for Memory Stick
Mode d’emploi du Memory Stick
Manual de instrucciones de Memory Stick
VPL-CX5
GB
FR
ES
2002 Sony Corporation
Page 2

GB
2
Page 3

Table of Contents
Overview
Features...............................................4
Precautions .........................................4
About This Manual............................. 4
About a Memory Stick ................. 5
Setting Up
Using the Memory Stick ............... 7
Operating the MS Home.....................8
Viewing the Slide
Sliding Material for a Presentation
— Presentation Viewer ...................9
Switching the File Display Mode11
Executing the Slide Show
Promptly ..........................11
Sliding a Picture File
— Picture Viewer..........................12
Executing the Slide Show
Promptly ..........................16
Playing back a Movie File ..........16
Executing the Slide Show
Promptly ..........................18
Deleting a Picture File ................22
Showing/Hiding the Picture File
Information ......................22
Sorting the Picture Files..............23
Displaying Still Picture Files or
Movie Files Only .............23
Useful Settings
Displaying the Picture Files Recorded
by a Digital Camera Only .............24
Starting a Presentation Automatically
— Autorun ....................................25
Projecting a Selected File When the
Power is Turned on — Startup.....26
Operating Memory Stick
Displaying the Memory Stick
Information....................................27
Formatting a Memory Stick .........28
Other
Troubleshooting................................29
GB
Setting/Displaying the
Picture File
Operating the Picture File.................19
Protecting an Important File .......22
Rotating a Picture File ................22
Registering a File as the Startup
Picture.............................. 22
GB
3
Page 4

B
Overview
Features
When you memorize presentation material
converted by the Projector Station for
Presentation (supplied software) or the
picture file recorded by a digital camera in
the Memory Stick, you can easily make
effective presentations without a computer.
Presentation Viewer
After you have converted Microsoft
PowerPoint files by the Projector Station
for Presentation to the file which offers the
most advantages for projection on the
projector, you can make a slide show.
Picture Viewer
You can make the slide show or display on
the screen by using a JPEG still picture file
1)
-compatible) recorded by a digital
(DCF
camera and a MPEG1 movie file recorded
by the Sony MPEG MOVIE etc. You can
set the effect of the slide when it is
displayed, and the way (automatic or
manual) the slide is exchanged.
Usable MPEG1 files: MPEG MOVIE,
MPEG MOVIE AD, MPEG MOVIE EX,
MPEG MOVIE HQ, MPEG MOVIE CV,
MPEG1 of VAIO Giga pocket (equivalent
to a Video CD)
1)DCF: Design rules for Camera File
systems
Digital Camera Mode
The unit can choose and display the JPEG
and MPEG1 picture files recorded by a
digital camera (DCF-compatible) only from
among picture files stored in a Memory
Stick.
Autorun
When the Memory Stick with the picture
file for which the Autorun function is set by
the Projector Station for Presentation is
inserted in the Memory Stick Slot, the
input is automatically switched to MS and
GB
4
Features/Precautions/About This Manual
the slide show starts.
Startup
When the power is turned on, the selected
picture file is projected for about 1 minute.
You can adjust the focus and zoom without
a signal from other equipment.
You can also select the original picture or
the registered picture file in the Memory
Stick.
Precautions
• To prevent data loss, make backups of
data frequently. In no event will Sony be
liable for any loss of data.
• Unauthorized recording may be contrary
to the provisions of copyright law.
• The Memory Stick application software
may be modified or changed by Sony
without prior notice.
About This Manual
This manual explains the operations to
view the picture files stored in the
Memory Stick.
For details on making the presentation
material, see the Operating Instructions of
the Projector Station for Presentation (CDROM, supplied).
For operations other than by the
Stick
, see the supplied Operating
Instructions.
......................................................................
• Microsoft and PowerPoint are registered
trademarks and trademarks of the Microsoft
Corporation in the United States and/or
other countries.
• Adobe and Photoshop are either registered
trademarks or trademarks of Adobe Systems
Incorporated in the United States and /or
other countries.
Memory
Page 5
About a Memory
Stick
On Memory Sticks
Memory Stick is a new compact, portable
and versatile IC recording medium with a
data capacity that exceeds a floppy disk.
Memory Stick is specially designed for
exchanging and sharing digital data among
Memory Stick compatible products.
Because it is removable, Memory Stick
can also be used for external data storage.
Types of Memory Sticks
There are two types of Memory Sticks:
the MagicGate Memory Stick that is
equipped with the MagicGate copyright
protection technology, and the general
Memory Stick. You can use both types of
Memory Stick with your projector.
However, because your projector does not
support the MagicGate standards, data
recorded with your projector is not subject
to MagicGate copyright protection.
On MagicGate
MagicGate is copyright protection
technology that uses encryption technology.
Format to save a file
Material for a presentation converted by the
Projector Station for Presentation is saved
in the following file formats in the
Memory Stick.
• Image files (DCF-compatible)
compressed in the JPEG (Joint
Photographic Experts Group) format
(extension .jpg).
• The Sony Projector Presentation file (SPP
file), which is an original file format of
Sony. This file integrates information
such as the destination and the setting
information of the image file, etc.
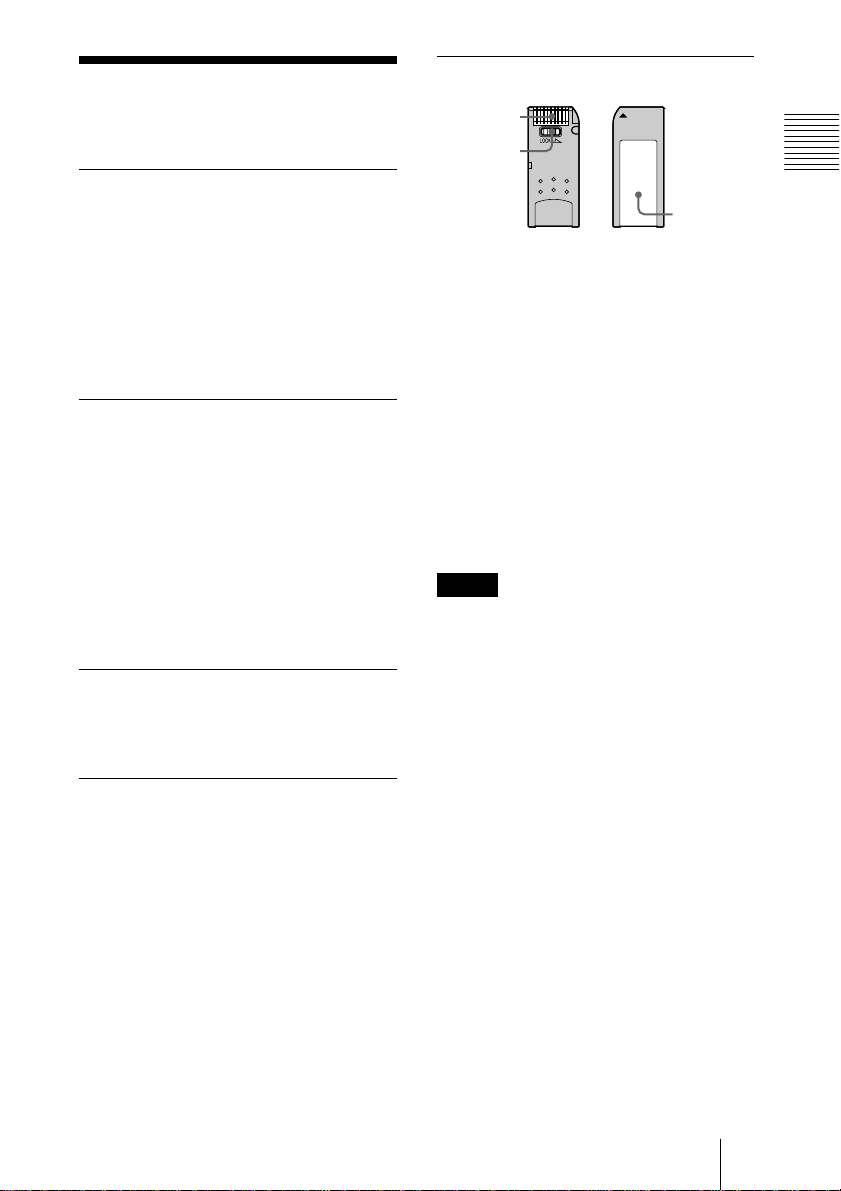
Before using a Memory Stick
Terminal
Writeprotect
tab
Labeling
position
• You cannot record or erase still images
when the write-protect tab on the
Memory Stick is set to LOCK.
• We recommend backing up important
data.
• Image data may be damaged in the
following cases:
– If you remove the Memory Stick,
turn the power off, or detach the
battery for replacement when the
access lamp is flashing.
– If you use a Memory Stick near
static electricity or magnetic fields.
– If you disconnect the USB cable
while reading or writing data.
Notes
• Prevent metallic objects or your finger
from coming into contact with the metal
parts of the connecting section.
• Do not attach any material other than the
supplied label onto the label space.
• Attach the label to the prescribed labeling
position. Make sure the label is attached
to the labeling position properly.
• Do not bend, drop or apply strong shock
to a Memory Stick.
• Do not disassemble or modify a Memory
Stick.
• Do not let the Memory Stick get wet.
• Do not use or keep a Memory Stick in
locations that are:
– Extremely hot, such as in a car
parked in the sun or outdoors under
the scorching sun.
– Under direct sunlight.
– Very humid or subject to corrosive
gases.
• When you carry or store a Memory
Stick, put it in its case.
Overview
About a Memory Stick
GB
5
Page 6

About formatting Memory Sticks
When Memory Sticks are shipped from
the factory, they are already formatted to a
special standard. When you format
Memory Sticks, we recommend
formatting them on this unit.
Caution when formatting Memory
Sticks on a personal computer
Pay attention to the following points when
formatting Memory Sticks on a personal
computer.
Operation of Memory Sticks formatted
on a personal computer is not guaranteed
on this unit. To use a Memory Stick that
has been formatted on a personal computer,
the Memory Stick must be reformatted on
this unit. If it is not reformatted, all data
stored on the Memory Stick will be lost.
Notes on image data compatibility
Image data files saved to a Memory Stick
by using the software conform to the
Design Rules for Camera File Systems
universal standard established by JEITA
(Japan Electronics and Information
Technology Industries Association).
JPEG files converted by Adobe Photoshop,
etc. must be converted to JPEG format
(DCF-compatible) again by the Projector
Station for Presentation.
......................................................................
• Memory Stick and are trademarks
of Sony Corporation.
• MagicGate Memory Stick and
trademarks of Sony Corporation.
are
Access Lamp
If the access lamp is turned on or is
flashing, data is being read from or written
to the Memory Stick. At this time, do not
shake the computer or projector or subject
them to shock. Do not turn off the power of
the computer and projector, disconnect the
USB cable or remove the Memory Stick.
This may damage the data.
About the supplied Memory Stick
Sample data for a presentation is
memorized.
GB
6
About a Memory Stick
Page 7
B
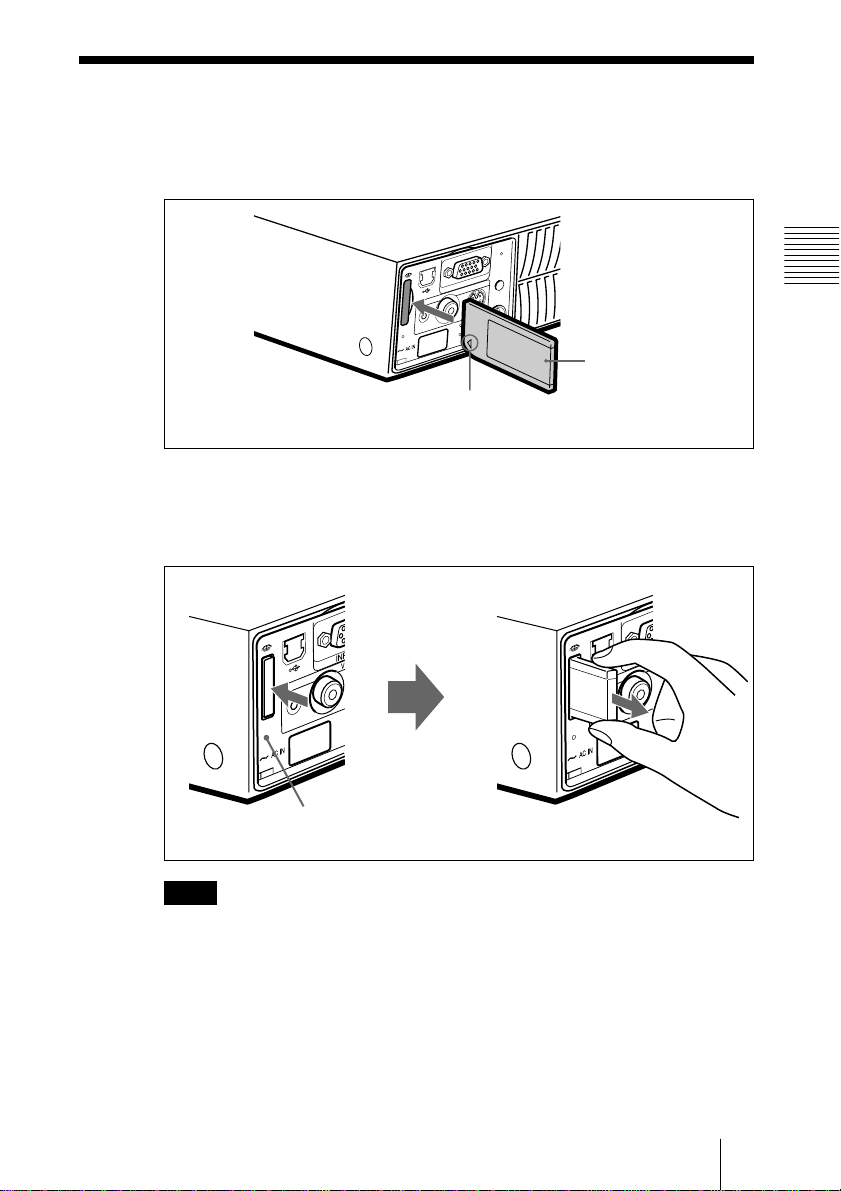
Setting Up
Using the Memory Stick
Insert the Memory Stick into the Memory Stick slot on the side of the
projector.
T A
PU
IN
O
E
ID
V
IO
D
U
A
P
M
E
T
S
S
E
C
C
A
Insert the Memory Stick in the direction of
the arrow until it clicks.
To remove the Memory Stick
When the access lamp is turned off, press the Memory Stick and remove
your hand. As the lock is released, remove the Memory Stick.
P
M
A
L
R
E
W
O
P
G
IN
V
A
S
U
N
E
M
O
E
ID
V
S
H
S
U
P
R
E
T
N
E
N
A
/F
R
E
V
O
/C
Setting Up
Memory Stick
IO
D
U
A
S
S
E
C
C
A
IO
D
U
A
S
S
E
C
C
A
Access lamp
Note
Insert the Memory Stick with the arrow mark pointing toward the
Memory Stick slot.
Using the Memory Stick
GB
7
Page 8
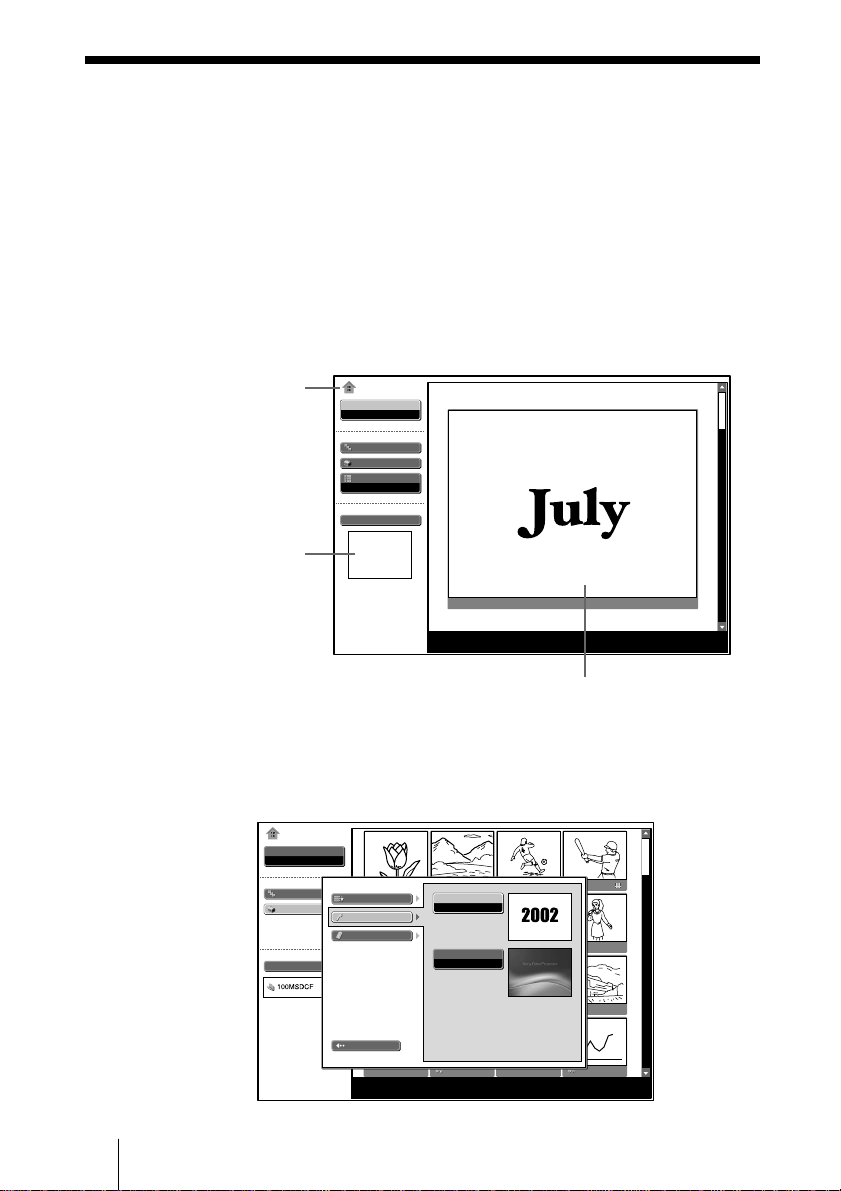
Operating the MS Home
The initial display for MS input is the MS Home. The MS Home is used for
setting and executing an event (e.g., selecting the viewer), setting the
Autorun and Startup and formatting the Memory Stick. The guide for the
key operation is displayed at the bottom of the MS Home display. Use the
Remote Commander or the control panel for setting. The selected item is
displayed in yellow.
For details on each operation, see the relevant page.
1 Press the INPUT key to select MS.
The MS Home appears.
MS Home mark
Title or folder
MS Home
Select
Presentation Viewer
Slide Show
Option
Index Display
Normal
Select Contents
Presentation1
name for the
selected contents
No.: 1/1234
Size: 1024x768
First picture file of the selected content
2 Use the M or m key to select the desired item, then press the ENTER key.
3 Use the M or m key to make the setting for an item, then press the
ENTER key.
MS Home
Select
Picture Viewer
Slide Show
Option
Select Contents
File
MS Home
Setting
Memory Stick
MS Home
Autorun
On
Startup
Original
GB
8
Operating the MS Home
Close
No.: 1/1234
Size: 1024x768
File: SPJP0001.JPG
Date: 7/15/2002 12:34
Page 9
B
Viewing the Slide
Sliding Material for a Presentation
— Presentation Viewer
After you have converted Microsoft PowerPoint files by the Projector Station
for Presentation to the file which offers the most advantages for projection
on the projector, you can make a slide show.
For details on making the presentation material, see the Operating Instructions of the
Projector Station for Presentation (CD-ROM, supplied).
1 Press the INPUT key to select MS.
The MS Home appears.
MS Home
Select
Presentation Viewer
Slide Show
Option
Index Display
Normal
Select Contents
Presentation1
Viewing the Slide
No.: 1/1234
Size: 1024x768
2 Select “Select”, then press the ENTER key.
A drop-down list appears.
MS Home
Select
Presentation Viewer
Presentation Viewer
Picture Viewer
Slide Show
Option
Index Display
Normal
Select Contents
Presentation1
No.: 1/1234
Size: 1024x768
Sliding Material for a Presentation — Presentation Viewer
(Continued)
9
GB
Page 10
3 Select “Presentation Viewer”, then press the ENTER key.
4 Select “Select Contents”, then press the ENTER key.
The Select Contents menu appears.
MS Home
Select
Presentation Viewer
Slide Show
Option
Index Display
Normal
Select Contents
Presentation1
The Presentation Viewer can select the “contents” in units of a folder in
which multiple JPEG files are contained. In the above illustration, there are
three lots of contents of presentation material: Presentation 1, Presentation 2
and Presentation 3.
To select the contents which are not displayed, press the , key to select the
slider in the Select Contents menu and press the m or M key. The next three
lots of contents appear.
Presentation1
Presentation2
Presentation3
No.: 1/1234
Size: 1024x768
GB
5 Select the contents for the presentation, then press the ENTER key.
The title name of the selected presentation material and the first picture file is
displayed.
MS Home
Select
Presentation Viewer
Slide Show
Option
Index Display
Normal
Select Contents
Presentation2
No.: 1/1234
Size: 1024x768
6 Select “Slide Show”, then press the ENTER key.
7 Select “Execute”, then press the ENTER key.
Sliding Material for a Presentation — Presentation Viewer
10
Page 11

Switching the File Display Mode
You can display one picture file only (Normal mode) or thumbnails of
picture files (Thumbnail mode).
1 Select “Index Display” in the MS Home, then press the ENTER key.
2 Select the setting, then press the ENTER key.
Normal: to display a picture file
Thumbnail: to display thumbnails of the picture files contained in the
selected contents.
To execute the slide show
When the slide show setting is set to “Auto” by the Projector Station for
Presentation, the slide show is executed according to the settings made by the
Projector Station for Presentation. When you want to end the slide show,
press the MS SLIDE or ENTER key. When the slide show setting is set to
“Manual”, press the following keys for the slide show.
,: to display the next slide
<: to display the previous slide
MS SLIDE: to end the slide show
To return to the MS Home before executing the slide show
Select “Close”.
Executing the Slide Show Promptly
Viewing the Slide
As the settings are memorized even if you change the input after the setting
of steps 1 to 5, press the MS SLIDE key on the Remote Commander just as
you start the presentation. The input is changed to MS and the slide show
starts promptly. To end the slide show, press the MS SLIDE or ENTER key
when the slide show setting is “Auto”, or press the MS SLIDE key when the
slide show setting is “Manual”.
Sliding Material for a Presentation — Presentation Viewer
11
GB
Page 12
Sliding a Picture File— Picture Viewer
You can make the slide show by using still picture files (DCF-compatible) in
the JPEG format recorded by a digital camera or movie picture files in the
MPEG1 format recorded by the Sony MPEG MOVIE etc.
For details on the operations regarding the picture files, see “Operating the Picture
File” on page 19.
1 Press the INPUT key to select MS.
The MS Home appears.
MS Home
Select
Presentation Viewer
Slide Show
Option
Index Display
Normal
Select Contents
Presentation1
No.: 1/1234
Size: 1024x768
2 Select “Select”, then press the ENTER key.
A drop-down list appears.
GB
MS Home
Select
Presentation Viewer
Presentation Viewer
Picture Viewer
Slide Show
Option
Index Display
Normal
Select Contents
Presentation1
12
Sliding a Picture File — Picture Viewer
No.: 1/1234
Size: 1024x768
Page 13
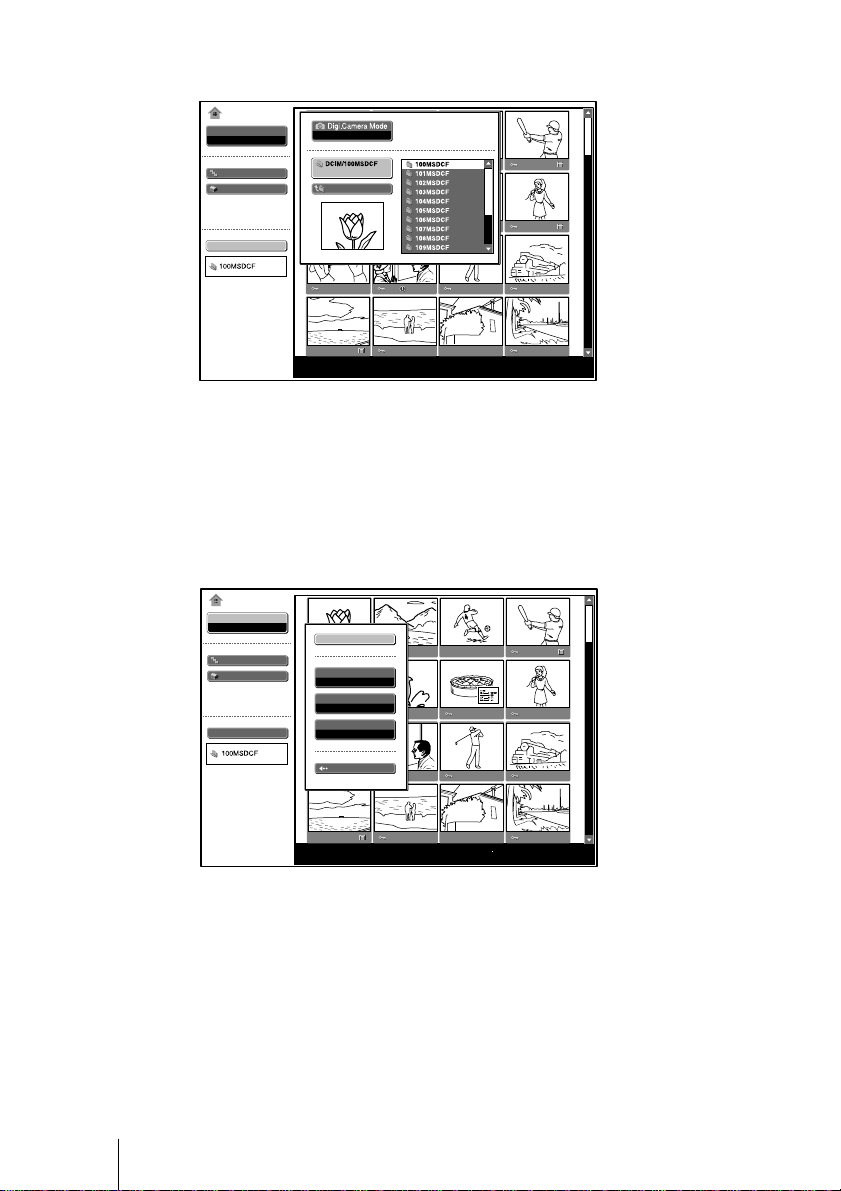
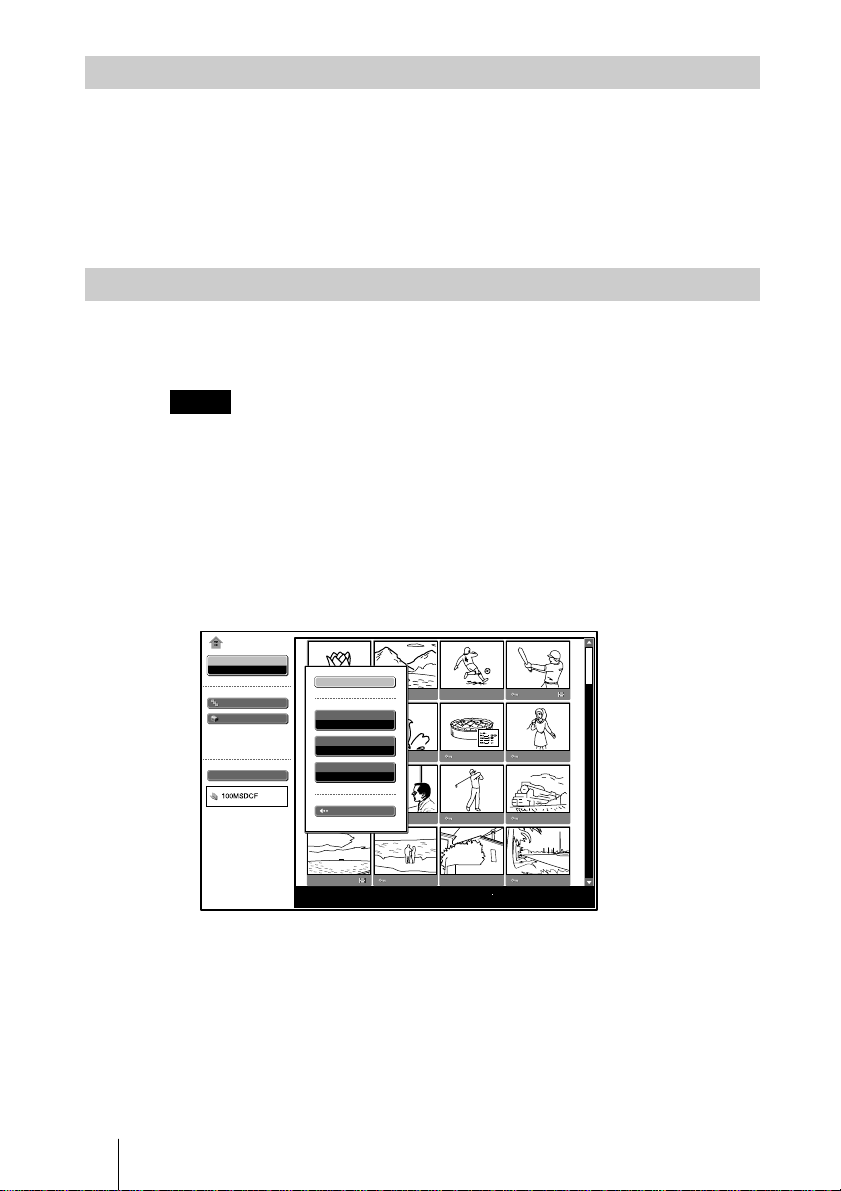
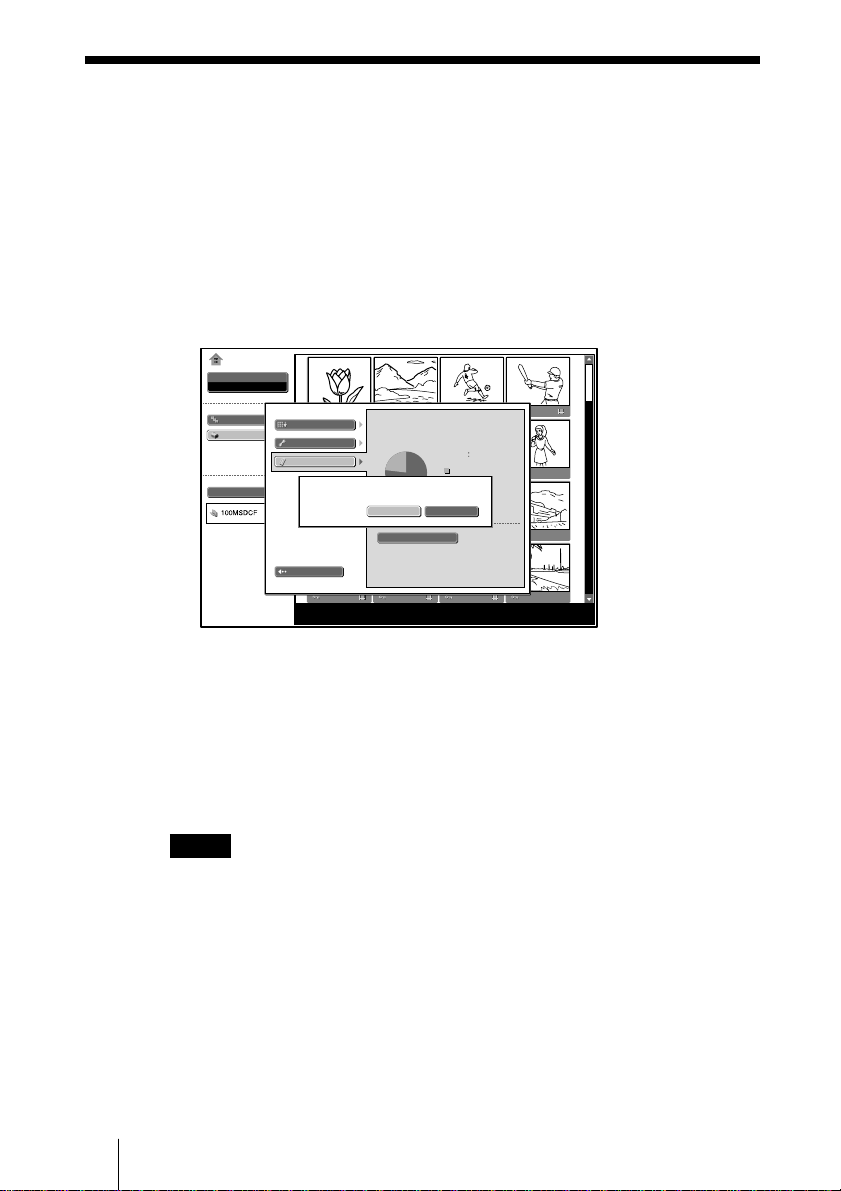
3 Select “Picture Viewer”, then press the ENTER key.
Thumbnails of the picture files contained in the selected folder appear.
MS Home
Select
Picture Viewer
Picture viewer
Slide Show
Option
Index display
Normal
Select Contents
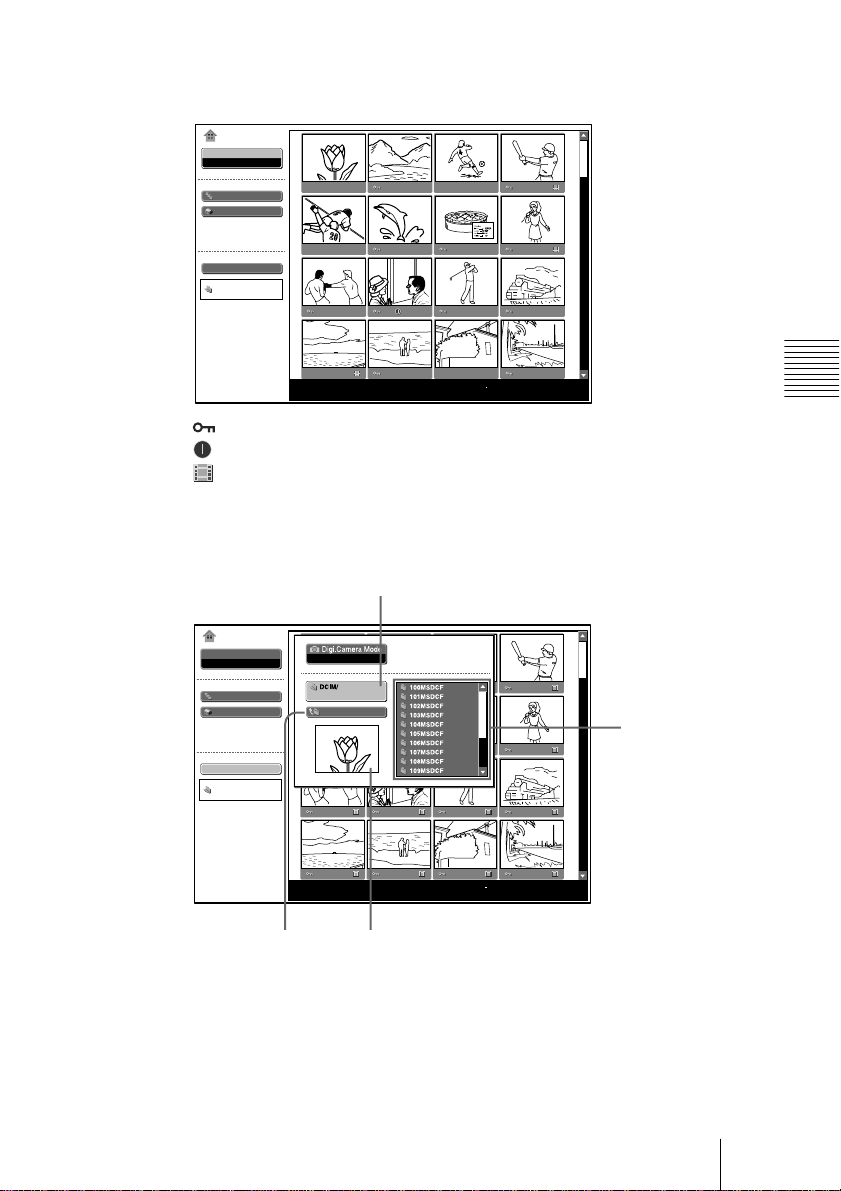
100MSDCF
No.: 1/1234
Size: 1024x768
File: SPJP0001.JPG
Date: 7/15/2002 12:34
: Appears when a file is protected.
: Appears when a startup file is set.
: Movie icon
4 Select “Select Contents”, then press the ENTER key.
The Select Contents menu appears.
Current folder
MS Home
Select
Picture Viewer
Slide Show
Option
Select Contents
DCIM
To upper stage
Off
No.: 1/1234
Size: 1024x768
File: SPJP0001.JPG
Date: 7/15/2002 12:34
First picture file in the current folder
Viewing the Slide
Folders included in
the current folder
(Continued)
Sliding a Picture File — Picture Viewer
13
GB
Page 14
5 Press the , key to select the Select Folders menu.
MS Home
Select
Picture Viewer
Slide Show
Option
Select Contents
Off
No.: 1/1234
Size: 1024x768
File: SPJP0001.JPG
Date: 7/15/2002 12:34
6 Select the folder for your presentation, then press the ENTER key.
The title name and the first picture file of the selected folder are displayed.
To select the folders which are not displayed, press the , key to select the
slider in the Select Folders menu and press the m or M key. The next 10
folders appear.
7 Select “Slide Show”, then press the ENTER key.
MS Home
Select
Picture Viewer
Slide Show
Option
Select Contents
Effect: set the effect when the slide is displayed
Advan. Slds.: set the automatic or manual slide
Interval: set the period for which one slide is displayed. The time is
approximate. When “Advan. Slds.” is set to “Manual”, it does not work.
Execute
Effect
Off
Advan. Slds.
Auto
Interval
5sec
Close
No.: 1/1234
Size: 1024x768
File: SPJP0001.JPG
Date: 7/15/2002 12:34
GB
8 Select each item, then press the ENTER key.
9 Set each item, then press the ENTER key.
10Select “Execute”, then press the ENTER key.
Sliding a Picture File — Picture Viewer
14
Page 15
To execute the slide show
When “Advan. Slds.” in the slide show setting is set to “Auto”, the slides
change automatically. When a movie file is selected, the movie plays back
automatically, and after playback the next slide is displayed automatically.
When you want to end the slide show, press the MS SLIDE or ENTER key.
When it is set to “Manual”, press the following keys for the slide show.
,: to display the next slide
<: to display the previous slide
MS SLIDE: to end the slide show
When “Advan. Slds.” is set to “Manual”, the movie is not played back and the
first picture is displayed for a movie file. By pressing the , key the next slide is
displayed. To play back the movie, see “Playing Back a Movie File” on page 16.
To return to the MS Home before executing the slide show
Select “Close”.
To display a picture file on the full screen
1 Select a picture file in the thumbnail display, then press the ENTER key.
2 Select “Full Screen”, then press the ENTER key.
The selected picture file is enlarged on the full screen.
Viewing the Slide
No.: 1/1234
Size: 1024x768
File: SPJP0001.JPG
Date: 7/15/2002 12:34
To execute the slide show with the picture on the full screen, press the
following keys.
,: to display slides forward. (The slide show ends at the last picture file.)
<: to display slides backward. (The slide show ends at the first picture
file.)
MS SLIDE: to return to the MS Home
Sliding a Picture File — Picture Viewer
15
GB
Page 16
Executing the Slide Show Promptly
As the settings are memorized even if you change the input after the setting
of steps 1 to 9, press the MS SLIDE key on the Remote Commander just as
you start the presentation. The input is changed to MS and the slide show
starts promptly. To end the slide show, press the MS SLIDE or ENTER key
when “Advan. Slds.” is set to “Auto”, or press the MS SLIDE key when
“Advan. Slds.” is set to “Manual”.
Playing Back a Movie File
You can play back a movie using the Movie Player displayed on the screen
when “Advan. Slds.” is set to “Manual”. You can also start movie playback
by selecting a movie file in the thumbnail display mode.
Notes
• The Movie Player cannot be displayed when “Advan. Slds.” is set to
“Auto”.
• The unit can play back a MPEG1 movie file recorded by the Sony MPEG
MOVIE, etc. (Movies may occasionally skip when you watch them.)
Usable MPEG1 files: MPEG MOVIE AD/EX/HQ/CV, MPEG1 of VAIO
Giga pocket (equivalent to a video CD).
1 Follow steps 1 to 7 of “Sliding a Picture File — Picture Viewer”.
2 Set “Advan. Slds.” to “Manual” in the Slide Show setting menu.
MS Home
Select
Picture Viewer
Slide Show
Option
Select Contents
Execute
Effect
Off
Advan. Slds.
Manual
Interval
5sec
Close
3 Press the ENTER key.
4 Select “Execute”, then press the ENTER key.
To execute the slide show
Press the following keys.
,: to display the next slide
<: to display the previous slide
MS SLIDE: to end the slide show
GB
Sliding a Picture File — Picture Viewer
16
No.: 1/1234
Size: 1024x768
File: SPJP0001.JPG
Date: 7/15/2002 12:34
Page 17

When a movie file is selected by pressing the < or , key, the Movie
Player appears on the screen. Operate the Movie Player as follows:
[Movie Player]
Prev.
Full Screen
Menu
MS Home
Next
No.: 1/1234
Size: 320x240
N (play/pause): to play back. During playback, the button display is
changed to the X (pause) button.
x (stop): to stop playback
Full Screen: to play back on the full screen
Menu: to display the index screen
[Guide display]
< Prev.: to display the previous slide in the movie pause mode. During
playback, the guide display is changed to < Rew (rewind).
,Next: to display the next slide in the movie pause mode. During
playback, the guide display is changed to , FF (fast forward).
To play back a movie
Press N.
Playback starts. When the playback is finished, playback stops with the first
picture of the movie file displayed.
To stop the playback momentarily, press the m key to select x.
File: BASEBALL.MPG
Date: 7/15/2002 12:34
Viewing the Slide
To play back on the full screen
Select “Full Screen”, then press the ENTER key.
The picture is enlarged on the full screen and playback starts.
When you press the M, m, <, , or ENTER key during playback, the
Movie Player reappears on the screen.
Note
When the picture size is small, it is not enlarged on the full screen if you
select “Full Screen”.
To return to the MS Home without executing the movie play
Select “MS Home”.
Sliding a Picture File — Picture Viewer
17
GB
Page 18

Executing the Slide Show Promptly
As the settings are memorized even if you change the input after the setting
of steps 1 to 3, press the MS SLIDE key on the Remote Commander just as
you start the presentation. The input is changed to MS and the slide show
starts promptly. To end the slide show, press the MS SLIDE key.
To start full-screen playback when the thumbnails are displayed
1 Select a movie file, then press the ENTER key.
The index screen appears (see page 20.)
2 Select “Movie Player”, then press the ENTER key.
The Movie Player appears.
3 Select “Full Screen”, then press the ENTER key.
Playback starts automatically.
Operating the movie file
Select “Menu”, then press the ENTER key.
The index screen is displayed. Using the index screen, you can show or
hide the movie file information, protect important movie files, or delete
unnecessary movie files.
For details on the operations of the index screen, see “Operating the Picture
File” on page 19.
GB
Sliding a Picture File — Picture Viewer
18
Page 19

B
Setting/Displaying the Picture File
Operating the Picture File
To operate the picture file, display the index screen (see pages 20 and 21. )
When the Presentation Viewer is displayed
To display the index screen, select the contents in the normal or thumbnail
display mode, then press the ENTER key.
You can enlarge a picture file on the full screen using the menu on the index
screen. If you press the ENTER key when a full-screen picture is displayed,
you can show or hide the picture file information.
When the Picture Viewer is displayed
The possible operations depend on the type of the picture file to be selected
(still picture/movie).
When “Thumbnail” is selected for “Index Display”
To display the index screen, select a thumbnail, then press the ENTER key.
You can perform the following operations using the menu on the index
screen: displaying a picture file on the full screen, protecting an important
picture file, rotating a picture file (still picture only), registering the startup
picture file (still picture only) and deleting a picture file.
When a full-screen still picture file is selected
To display the index screen, press the ENTER key when the picture is
displayed on the full screen.
You can perform the following operations using the menu on the index
screen: showing/hiding the picture file information, protecting an important
picture file, rotating a picture file, registering the startup picture file and
deleting a picture file.
Setting/Displaying the Picture File
When a movie file (Movie Player) is selected
To display the index screen, select “Menu” on the Movie Player.
You can perform the following operations using the menu on the index
screen: showing/hiding the movie file information, protecting an important
movie file and deleting a movie file.
For details on the use of the index screen, see the relevant page.
Operating the Picture File
19
GB
Page 20

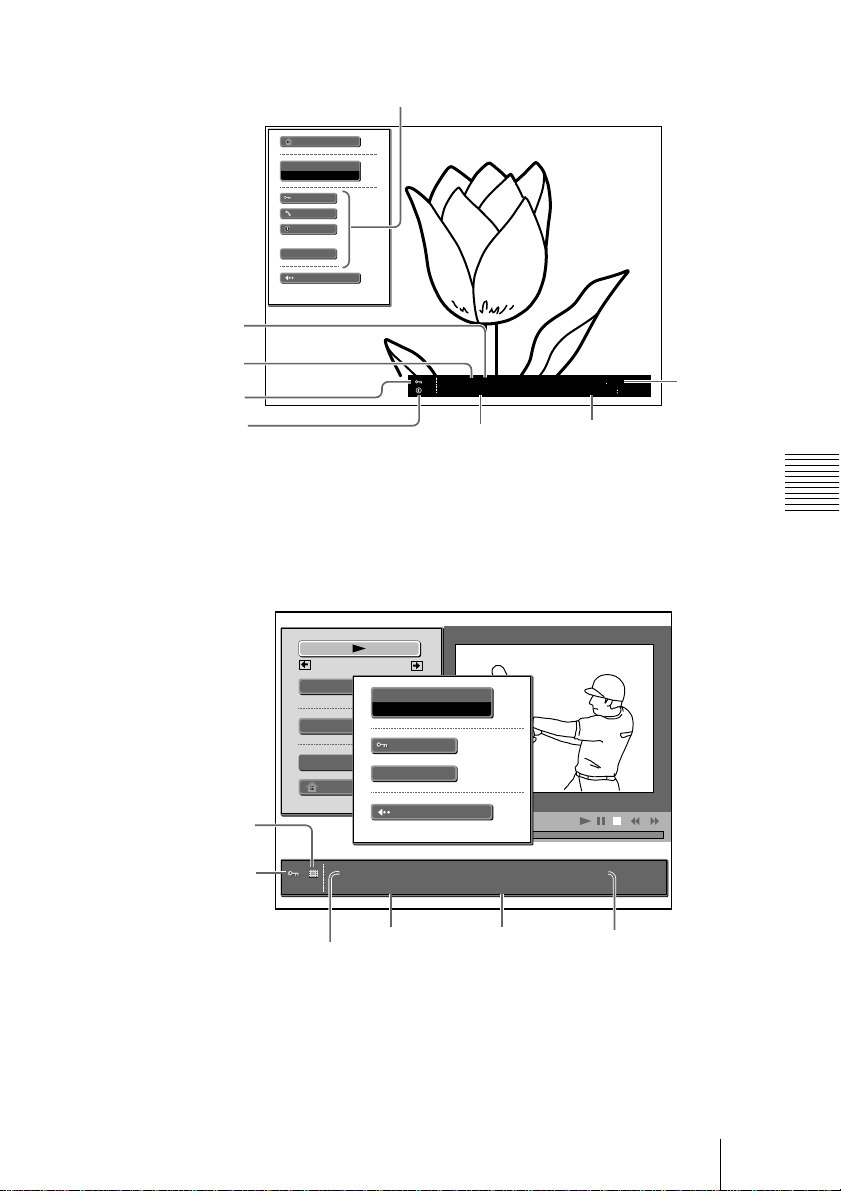
Index screen of a still picture file
MS Home
Select
Picture Viewer
Slide Show
Appears when a
Option
file is protected
Appears when a
Select Contents
startup file is set
Total number of
picture files in the
current content
Order in the
current content
No.: 1/1234
Size: 1024x768
To select a picture file in the thumbnail display mode, press the M/m/</,
key.
If you want to display other picture files when more than 16 picture files are
contained in the current content, select a picture file displayed in the bottom
row and press the m key, or select a picture file displayed on the right-most
column, press the , key to select the slider, then press the m key.
To start the slide show, press the MS SLIDE key in the index screen. The
slide show begins from the selected picture file.
Index screen of a movie file
Full Screen
Protect
Rotate
Startup
Delete
Close
File: SPJP0001.JPG
Date: 7/15/2002 12:34
DateResolution
Index screen
Appears when
the Picture
Viewer is
displayed
File name and
file format
Appears when a
file is protected
Appears for a
movie picture
Total number of picture
files in the current
content
Order in the current
content
GB
Operating the Picture File
20
MS Home
Select
Picture Viewer
Slide Show
Option
Select Contents
No.: 1/1234
Size: 1024x768
Movie Player
Protect
Rotate
Startup
Delete
Close
File: SPJP0001.JPG
Date: 7/15/2002 12:34
DateResolution
Index screen
File name and
file format
Page 21
Index screen of a full-screen still picture file
Appears when the Picture Viewer is displayed
MS Home
Information
On
Protect
Protect
Rotate
Startup
Delete
Close
Total number of picture
files in the current content
Order in the current
content
Appears when a file
is protected
Appears when a startup
file is set
If you want to display another picture file when multiple picture files are
contained in the current content, press the , key.
To return to the MS Home, press the MS SLIDE key in the index full screen.
Movie Player
No.: 1/1234
Size: 1024x768
Resolution
File: SPJP0001.JPG
Date: 7/15/2002 12:34
Date
File name and
file format
Setting/Displaying the Picture File
Movie icon
Appears when a
file is protected
Order in the current content/
Total number of picture files in
the current content
Prev.
Full Screen
Menu
MS Home
Next
Information
On
@@
Protect
Delete
Close
No.: 1/1234
Size: 320x240
Resolution Date
File: BASEBALL.MPG
Date: 7/15/2002 12:34
File name and
file format
Operating the Picture File
21
GB
Page 22

Protecting an Important File
After selecting the file you want to protect, set “Protect” to “On” or “All
On”. When a file is protected, the protect mark is displayed.
Rotating a Picture File
After selecting the file you want to rotate, set “Rotate”. The picture rotates
90° on every pressing of the ENTER key.
Note
A protected file cannot be rotated.
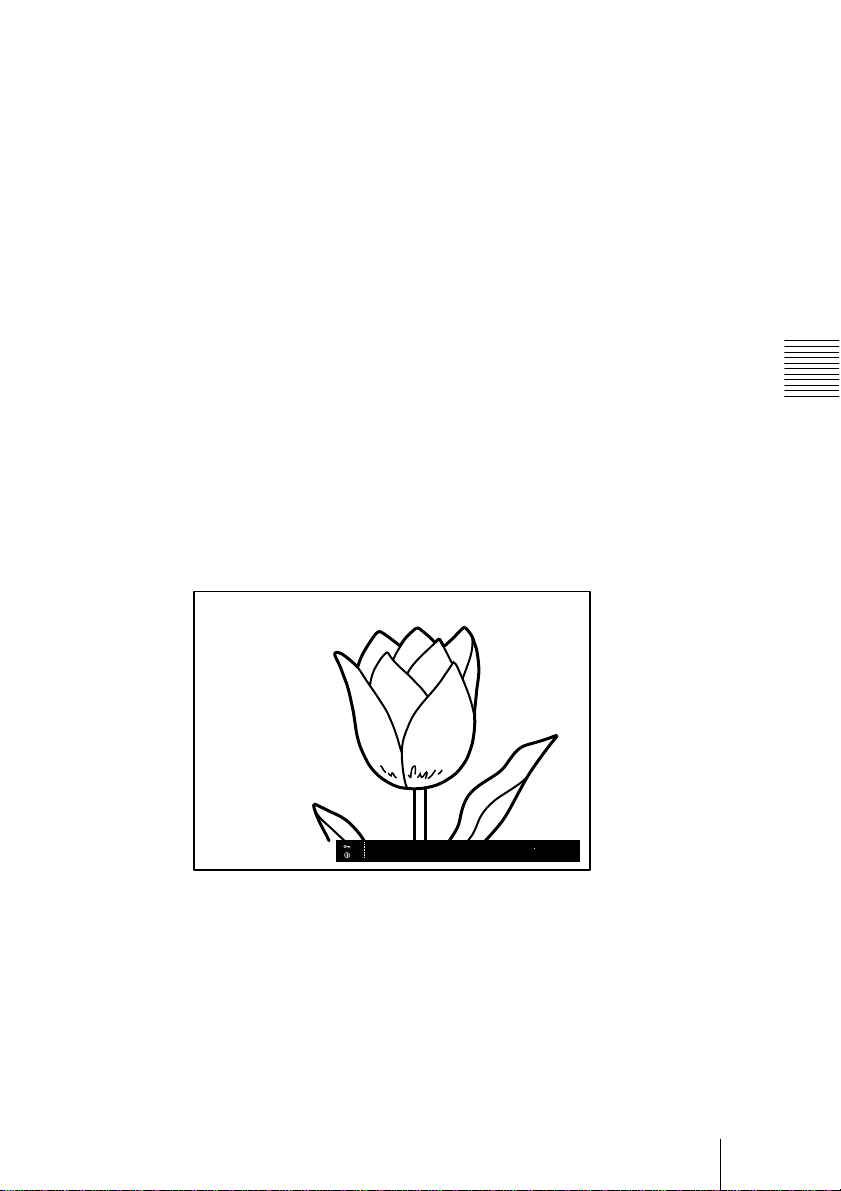
Registering a File as the Startup Picture
You can register a picture file in the Memory Stick as the startup picture
file which is displayed when the power is turned on.
Set “Startup” to “Entry”. When the file is registered, the startup mark is
displayed.
When you want to use the registered picture file as the startup file, set
“Startup” of the Setting screen to “Custom” (see page 26.)
Note
As the setting of “Custom” is memorized in the Memory Stick, when you
want to use the registered picture file as the startup file, insert the Memory
Stick in the projector before turning on the projector.
Deleting a Picture File
You can delete the selected picture file or all picture files of the selected
contents.
1 Select “Delete”, then press the ENTER key.
2 Select an item. When “Selected file deleted” or “All files deleted” is
displayed, select “Yes”, then press the ENTER key.
All Img.: delete all picture files of the selected contents
Sel. Img.: delete the selected picture file
Close: when you do not want to delete the file
Note
A protected file cannot be deleted.
Showing/Hiding the Picture File Information
Select a picture file, select “Information” in the index screen, then press the
ENTER key. When you want to display the picture file information, select
“On”. The information is displayed at the bottom of the screen. If you do
not want to display the information, select “Off”.
GB
Operating the Picture File
22
Page 23

When the Presentation Viewer is displayed, the number and size (resolution)
of the picture file are displayed. When the Picture Viewer is displayed, the
number, size (resolution), file format and recorded date of the picture file are
displayed.
Note
For a picture file processed on a computer, the renewal date may be
displayed instead of the recorded date.
Sorting the Picture Files
You can sort the picture files in a folder by name or by the renewal date in
ascending/descending order.
1 Select “Option” in the MS Home, then press the ENTER key.
2 Select “File”, then press the , or ENTER key.
3 Select “Sort”, then press the ENTER key.
4 Select the item you want to set, then press the ENTER key.
Note
For a picture file processed on a computer, the displayed data may be
different from the renewal date.
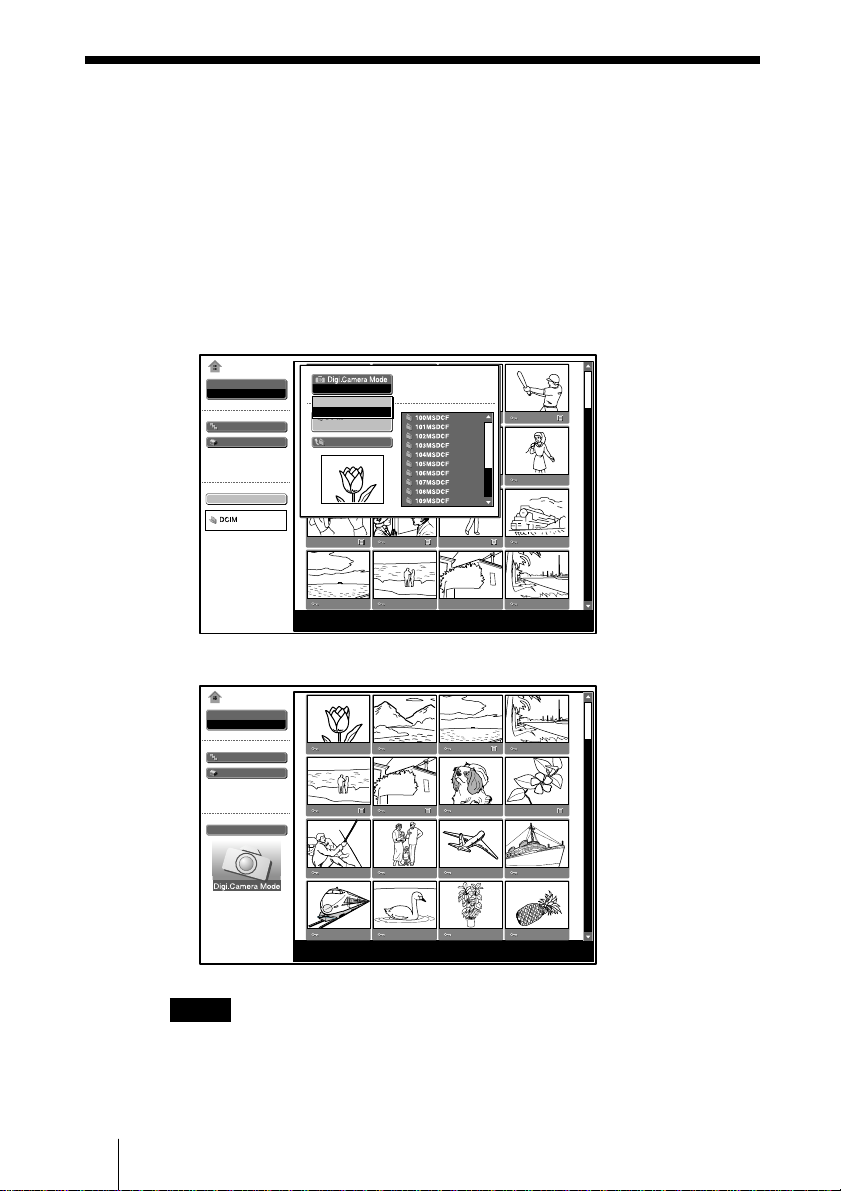
Displaying Still Picture Files or Movie Files Only
You can filter all picture files contained in a folder to display the still picture
files or the movie files only.
1 Select “Option” in the MS Home, then press the ENTER key.
2 Select “File”, then press the , or ENTER key.
3 Select “Filter”, then press the ENTER key.
4 Select the item you want to set, then press the ENTER key.
Still: to display still pictures only
Movie: to display movie files only
Off: to display all files without filtering
Note
When the filter is set, the current filter name (Still or Movie) is displayed at
the right bottom of the MS Home.
Setting/Displaying the Picture File
Operating the Picture File
23
GB
Page 24
B
Useful Settings
Displaying the Picture Files Recorded
by a Digital Camera Only
The unit can choose and display the JPEG and MPEG1 picture files recorded
by a digital camera (DCF-compatible) only from among picture files stored
in a Memory Stick.
1 Select “Select Contents” in the MS Home, then press the ENTER key.
2 Select “Digi. Camera Mode”, then press the ENTER key.
MS Home
Select
Picture Viewer
Slide Show
Option
Select Contents
Off
On
Off
GB
No.: 1/1234
Size: 1024x768
File: SPJP0001.JPG
Date: 7/15/2002 12:34
3 Select “On”, then press the ENTER key.
MS Home
Select
Picture Viewer
Slide Show
Option
Select Contents
No.: 1/1234
Size: 1024x768
Notes
• This function does not work if more than 2000 picture files recorded by a
digital camera are stored in a Memory Stick.
• For a picture file recorded with theVoice Memo function of the Sony
digital camera, the still picture file is displayed only.
Displaying the Picture Files Recorded by a Digital Camera Only
24
File: SPJP0001.JPG
Date: 7/15/2002 12:34
Page 25
Starting a Presentation Automatically
— Autorun
When the Memory Stick with the picture file for which the Autorun
function is set by the Projector Station for Presentation is inserted in the
Memory Stick slot, the input is automatically switched to MS and the slide
show starts.
Setting the Autorun function
1 Select “Option” in the MS Home, then press the ENTER key.
2 Select “Setting”, then press the ENTER key.
3 Select “Autorun”, then press the ENTER key.
MS Home
Select
Presentation Viewer
Slide Show
Option
Index Display
Thumbnail
Select Contents
File
Setting
Memory Stick
Autorun
On
On
Off
Startup
Original
Useful Settings
Close
No.: 1/1234
Size: 1024x768
4 Select “On”, then press the ENTER key.
When you do not want to use the autorun function
Set “Autorun” to “Off”.
Notes
• When the autorun is not set to “On” by the Projector Station for
Presentation, you can not use the autorun function to start the slide show
even if you set “Autorun” to “On” in the MS Home.
• When you want to use the autorun function for a picture file in the JPEG
format, make the presentation material by the Projector Station for
Presentation and set the autorun function to “On”.
Starting a Presentation Automatically — Autorun
25
GB
Page 26
Projecting a Selected File When the
Power is Turned on — Startup
When the power is turned on, the selected picture file is projected for about
one minute.
When you want to use the registered picture file as the startup file, you must register a
picture file as the startup file in the index screen (see page 22.)
1 Select “Option” in the MS Home, then press the ENTER key.
2 Select “Setting”, then press the , or ENTER key.
3 Select “Startup”, then press the ENTER key.
MS Home
Select
Picture Viewer
Slide Show
Option
Select Contents
File
Setting
Memory Stick
Close
Autorun
On
Startup
Original
Original
Custom
Off
GB
No.: 1/1234
Size: 1024x768
File: SPJP0001.JPG
Date: 7/15/2002 12:34
4 Select the item, then press the ENTER key.
Original: select the original picture memorized in the projector
Custom: select the picture file registered in the index screen which is saved
Off: when you do not want to set the startup
Notes
• When you want to clear the startup screen while displaying it, press the M/
m/</, or ENTER key.
• When you want to use the registered file with the custom setting, insert the
Memory Stick where the registered file is saved in the projector, then
turn on the power.
• You can register one startup file per one Memory Stick.
26
Projecting a Selected File When the Power is Turned on — Startup
The original picture cannot be changed.
in the Memory Stick
Page 27
B
Operating Memory Stick
Displaying the Memory Stick
Information
You can display the type and the used and remaining capacity of the
Memory Stick in use. The remaining capacity of the Memory Stick is
also displayed at the right bottom of the MS Home.
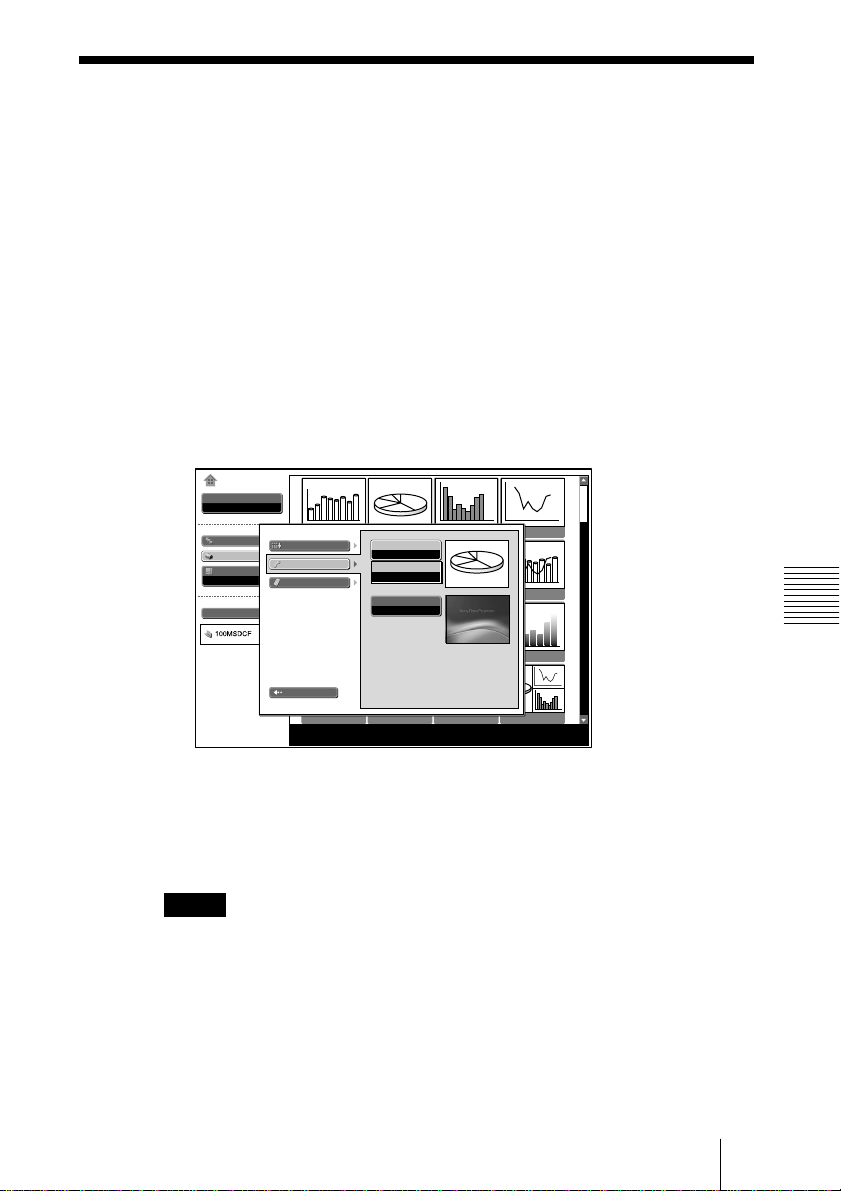
1 Select “Option” in the MS Home, then press the ENTER key.
2 Select “Memory Stick”.
The information of the Memory Stick in use is displayed.
MS Home
Select
Picture Viewer
Slide Show
Option
Select Contents
File
Setting
Memory Stick
Close
No.: 1/1234
Size: 1024x768
Type: MEMORYSTICK 128M
Format
Capacity: 123.3MB
Used: 30.8MB
Remaining: 92.5MB
File: SPJP0001.JPG
Date: 7/15/2002 12:34
Useful Settings
To return to the MS Home
Select “Close”.
Displaying the Memory Stick Information
Operating Memory Stick
GB
27
Page 28
Formatting a Memory Stick
When a Memory Stick cannot be used, format it by the projector.
When a Memory Stick is formatted, its data is cleared.
1 Select “Option” in the MS Home, then press the ENTER key.
2 Select “Memory Stick”, then press the , or ENTER key.
3 Press the ENTER key again.
MS Home
Select
Picture Viewer
Slide Show
Option
Select Contents
File
Setting
Memory Stick
All files deleted
Close
Type: MEMORYSTICK 128M
No
Yes
Format
Capacity: 123.3MB
Used: 30.8MB
Remaining: 92.5MB
GB
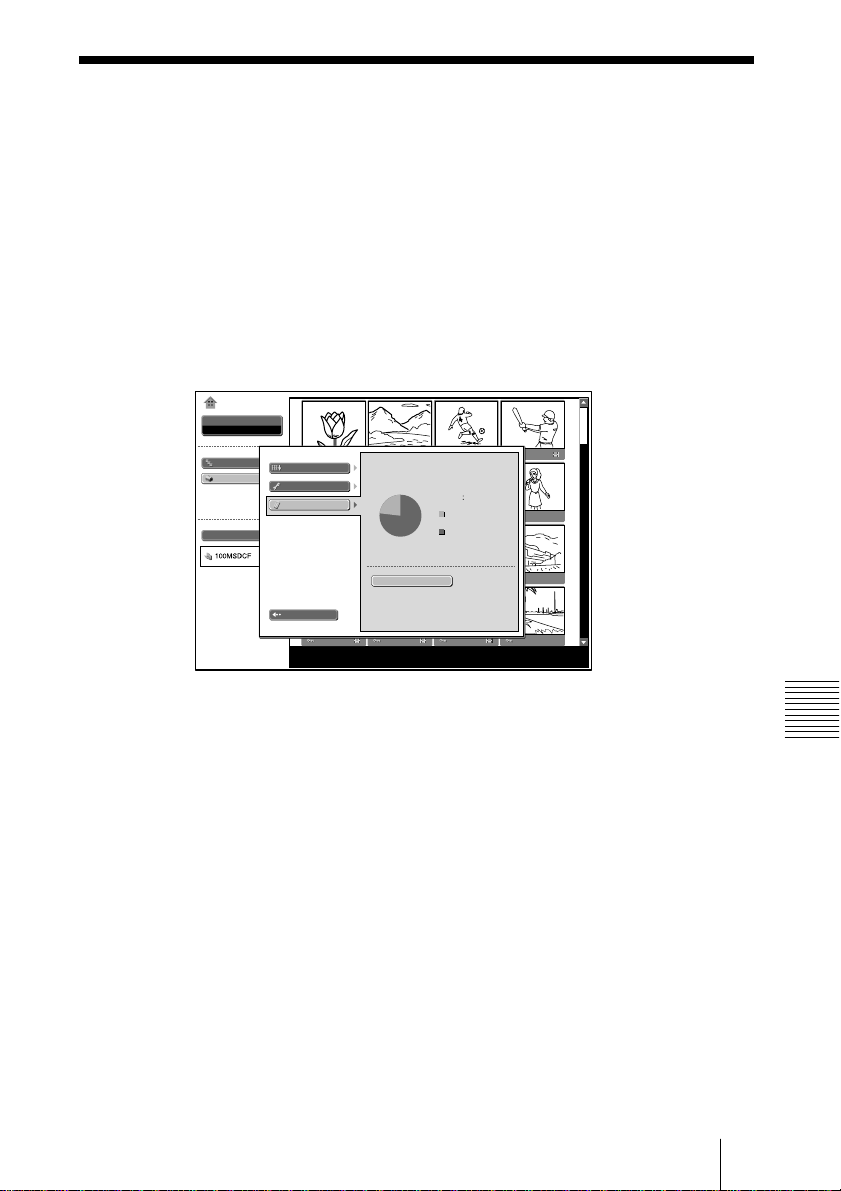
4 When “All files deleted” is displayed, select “Yes”, then press the
ENTER key.
Formatting starts.
When you want to return to the MS Home before formatting the
Memory Stick
Select “Close”.
Notes
• When the Memory Stick is formatted, the protected picture file is also
cleared.
• When the Memory Stick with the write-protect tab set to LOCK is to be
formatted, the “ Memory Stick locked” is displayed.
• While formatting the Memory Stick, the operations for the Memory
Stick of the Projector Station for Presentation and the key operation in the
MS Home cannot be performed.
28
Formatting a Memory Stick
No.: 1/1234
Size: 1024x768
File: SPJP0001.JPG
Date: 7/15 2002 12:34
Page 29

B
Other
Troubleshooting
If you have a problem with the MS Home, check the following. If the problem persists,
contact your nearest Sony dealer.
Problem
Cannot insert the Memory
Stick into the drive.
Cannot save a file.
Cannot delete a file.
Cannot delete all materials.
Cannnot format the Memory
Stick.
The still picture files in the
JPEG format stored in a
Memory Stick cannot be
displayed.
The movie picture files in the
MPEG1 format stored in a
Memory Stick cannot be
displayed.
The picture is not projected
and the
Movies may skip or stutter
during playback.
Black bands appear on the
upper and lower screen during
playback of the movie on the
full screen.
or appears.
Cause and solution
• The Memory Stick is not facing in the correct direction.
c Insert the Memory Stick with the arrow mark pointing
toward the Memory Stick slot of the projector.
• The Memory Stick is full.
c Delete unwanted files in the Memory Stick.
• The write-protect tab on the Memory Stick has been set to
LOCK.
c Cancel the lock.
• The write-protect tab on the Memory Stick has been set to
LOCK.
c Cancel the lock.
• The file is protected.
c Release the protect in the Index screen.
• The write-protect tab on the Memory Stick has been set to
LOCK.
c Cancel the lock.
• The file is protected.
c Release the protect in the Index screen.
• The write-protect tab on the Memory Stick has been set to
LOCK.
c Cancel the lock.
• The Memory Stick is broken.
c Use another Memory Stick.
• A “Filter” is set in the “Option” menu.
c Set “Filter” to “Still” or “Off.”
• A “Filter” is set in the “Option” menu.
c Set “Filter” to “Movie” or “Off.”
• The file is not DCF-compatible.
c Make the presentation material by using the Projector
Station for Presentation.
• This is not a unit malfunction.
c On usable movie file format, see page 16.
• The setting of “Wide Mode” in the INPUT SETTING menu
of the projector may be set to “On”.
c On setting of “Wide Mode”, see Operating Instructiions of
the projector.
Useful Settings
Other
Troubleshooting
29
GB
Page 30

On Display
When the following displays appear in the screen, make the material for a presentation
again by using the Projector Station for Presentation.
The picture file is in the JPEG format or MPEG format
unacceptable.
There is a thumbnail that it is not DCF-compatible.
There is no selected picture file.
There is a picture file but the thumbnail is broken.
The picture file is broken.
GB
30
Troubleshooting
Page 31

31
GB
Useful Settings
Page 32

FR
2
Page 33

Table des matières
Présentation
Caractéristiques ..................................4
Précautions .........................................4
A propos de ce manuel .......................4
Utilisation d’un Memory Stick ...... 5
Configuration
Utilisation du Memory Stick ......... 7
Utilisation de la fonction
Origine MS......................................8
Affichage de la diapositive
Diapositives de présentation
— Visualiseur de présentation ........9
Passer au mode d’affichage des
fichiers ............................. 11
Lancement rapide
du diaporama ...................11
Défilement d’un fichier image
— Visualiseur d’images............... 12
Lancement rapide
du diaporama ...................16
Lecture d’un fichier vidéo...........16
Lancement rapide
du diaporama ...................18
Suppression d’un fichier image ..22
Affichage/Masquage des
informations relatives au
fichier image ....................22
Tri des fichiers image pour une
présentation......................23
Affichage de fichiers d’images
fixes ou de fichiers vidéo
uniquement ......................23
Réglages utiles
Affichage des fichiers image
enregistrés par une caméra
numérique uniquement..................24
Lancement automatique d’une
présentation — Exé. Auto .............25
Projection d’un fichier sélectionné
lorsque le projecteur est sous tension
— Lancement ................................26
Utilisation du Memory Stick
Affichage des informations relatives
au Memory Stick .....................27
Formatage d’un Memory Stick .....28
Autres informations
FR
Réglages/Affichage des
fichiers image
Ouverture du fichier image...............19
Protection d’un
fichier important .............. 22
Rotation d’un fichier image ........ 22
Enregistrement d’un fichier en tant
qu’image de lancement.... 22
Dépannage ........................................29
3
FR
Page 34

B
Présentation
Caractéristiques
Si vous mémorisez un support de
présentation converti par le Projector
Station for Presentation (logiciel fourni) ou
le fichier image enregistré par une caméra
numérique dans le Memory Stick, vous
pouvez facilement réaliser sans ordinateur
des présentations efficaces.
Visualiseur de présentation
Après avoir converti des fichiers Microsoft
PowerPoint avec le Projector Station for
Presentation en fichiers offrant les
principales qualités requises pour la
projection sur le projecteur, vous pouvez
réaliser un diaporama.
Visualiseur d’images
Vous pouvez réaliser le diaporama ou
l’afficher sur l’écran en utilisant un fichier
image JPEG (compatible DCF
avec une caméra numérique et un fichier
vidéo MPEG1 enregistré par un MPEG
MOVIE etc. Vous pouvez régler l’effet
lorsque la diapositive est affichée et la
méthode de changement de diapositive
(automatique ou manuelle).
Fichiers MPEG1 compatibles: MPEG
MOVIE, MPEG MOVIE AD, MPEG
MOVIE EX, MPEG MOVIE HQ, MPEG
MOVIE CV, MPEG1 du VAIO Giga
pocket (équivalent à un CD vidéo)
1) DCF : règles de conception pour les
systèmes de fichiers des appareils
photographiques
Mode photo numérique
L’appareil peut sélectionner et afficher les
fichiers image JPEG et MPEG1 enregistrés
par une caméra numérique (compatible
DCF) uniquement parmi les fichiers image
enregistrés sur un Memory Stick.
Exécution automatique
Lorsque le Memory Stick contenant le
fichier image pour lequel la fonction Exé.
Auto est activée par le Projector Station for
Presentation, est inséré dans l’emplacement
Memory Stick, l’entrée est
automatiquement commutée sur MS et le
diaporama commence.
FR
4
Caractéristiques/Précautions/A propos de ce manuel
1)
) enregistré
Lancement
A la mise sous tension, le fichier image
sélectionné est projeté pendant environ 1
minute. Vous pouvez régler la mise au
point et le zoom sans signal provenant d’un
autre appareil.
Vous pouvez également sélectionner
l’image originale ou le fichier image
enregistré dans le Memory Stick.
Précautions
• Pour éviter toute perte de données,
effectuez fréquemment des copies de
sauvegarde. Sony ne sera en aucun cas
responsable d’éventuelles pertes de
données.
• Les enregistrements non autorisés
peuvent s’avérer contraires aux
dispositions de la législation sur les droits
d’auteur.
• Le logiciel Memory Stick peut être
modifié par Sony sans aucun préavis.
A propos de ce
manuel
Ce manuel explique les opérations en cas
d’utilisation du Memory Stick.
Pour obtenir davantage de détails sur le
support de présentation, consultez le mode
d’emploi du Projector Station for
Presentation (CD-ROM fourni).
Concernant les opérations non effectuées
Memory Stick
par le
d’emploi fourni.
......................................................................
• Microsoft et PowerPoint sont des marques
commerciales et des marques déposées de
Microsoft Corporation aux Etats-Unis et/ou
dans d’autres pays.
• Adobe et Photoshop sont des marques ou
des marques déposées d’Adobe Systems
Incorporated aux Etats-Unis et/ou dans
d’autres pays.
, consultez le mode
Page 35

Utilisation d’un
Memory Stick
Informations relatives aux cartes
Memory Stick
Le Memory Stick est un nouveau support
d’enregistrement IC extrêmement compact,
facile à transporter et ergonomique, avec
une capacité de stockage de données
supérieure à celle d’une disquette. Ce
support est conçu pour l’échange et le
partage de données numériques avec des
produits compatibles Memory Stick. De
plus, étant amovible, il peut également être
utilisé pour le stockage de données externes.
Types de Memory Stick disponibles
Il existe deux types de Memory Stick : les
cartes Memory Stick MagicGate,
disposant de la technologie de protection des
droits d’auteur MagicGate et les cartes
Memory Stick génériques. Ce logiciel
accepte les deux types de Memory Stick.
Cependant, étant donné que ce logiciel ne
gère pas les normes MagicGate, les
informations enregistrées à l’aide de votre
logiciel ne sont pas soumises à la protection
des droits d’auteur MagicGate.
Informations relatives au
MagicGate
La technologie de protection des droits
d’auteur MagicGate utilise la technique de
cryptage des données.
Format de sauvegarde d’un fichier
Un support de présentation converti par le
Projector Station for Presentation est
enregistré dans les formats de fichiers
suivants dans le Memory Stick.
• Fichiers image (compatibles DCF),
compressés au format JPEG (Joint
Photographic Experts Group) avec
l’extension .jpg.
• Fichiers de présentation Projector Sony
(également appelés dans ce manuel,
fichiers SPP). Ce format Sony intègre des
informations, telles que la destination de
stockage, certains des paramètres du
fichier image, etc.
Avant d’utiliser un Memory Stick
Connecteur
Onglet de
protection
en écriture
Emplacement
de l’étiquette
• Vous ne pouvez pas enregistrer ni effacer
des images fixes lorsque l’onglet de
protection en écriture est réglé sur LOCK.
• Nous vous conseillons de faire une copie
de sauvegarde des données importantes.
• Les données image peuvent être
endommagées dans les cas suivants :
- si vous retirez le Memory Stick,
mettez le projecteur hors tension ou
retirez la pile pour la remplacer
lorsque le témoin d’accès clignote;
- si vous utilisez un Memory Stick à
proximité de champs électriques ou
magnétiques;
- si vous débranchez le câble USB lors
de la lecture ou de l’écriture de
données.
Remarques
• Evitez de toucher les parties métalliques
de la pièce de raccordement ou de les
laisser en contact avec d’autres objets
métalliques.
• Ne fixez sur l’espace réservé à l’étiquette
aucun autre élément que l’étiquette
fournie.
• Fixez l’étiquette sur l’emplacement prévu
à cet effet. Assurez-vous qu’elle est
parfaitement positionnée.
• Evitez de déformer, de laisser tomber ou
de soumettre à des chocs le Memory
Stick.
• Ne démontez pas et ne modifiez pas le
Memory Stick.
• Evitez tout contact du Memory Stick
avec des liquides.
• N’utilisez pas ou ne conservez pas le
Memory Stick dans des endroits :
- extrêmement chauds tels qu’une
voiture garée en plein soleil ;
- soumis à la lumière directe du soleil ;
- très humides ou soumis à des gaz
corrosifs.
• Transportez ou conservez le Memory
Stick dans son boîtier.
Utilisation d’un Memory Stick
5
Présentation
FR
Page 36

A propos du formatage des
Memory Stick
Les Memory Stick sont formatés dans un
format standard spécifique à leur sortie
d’usine. Nous vous recommandons de
formater les Memory Stick sur cet
appareil.
Avertissement concernant le
formatage des Memory Stick sur un
ordinateur
Prenez bien en compte les points suivants
lors du formatage de Memory Stick sur
un ordinateur, par exemple sur celui que
vous utilisez.
Le fonctionnement des Memory Stick
formatés sur un ordinateur n’est pas garanti
sur cet appareil. Pour utiliser un Memory
Stick formaté sur un ordinateur, le
Memory Stick doit être reformaté sur cet
appareil. Notez que, dans ce cas, toutes les
données mémorisées sur le Memory Stick
sont perdues.
Remarques sur la compatibilité
des données image
Les fichiers de données image enregistrés
dans un Memory Stick à l’aide de ce
logiciel sont conformes à la norme
universelle sur les règles de conception
pour les systèmes de fichiers des appareils
photographiques, établie par la JEITA
(Japan Electronics and Information
Technology Industries Association).
Le fichier JPEG (compatibles DCF)
converti via Adobe Photoshop, etc. doit de
nouveau être converti au format JPEG via
le Projector Station for Presentation.
Témoin d’accès
Si le témoin d’accès est allumé ou clignote,
des données sont en cours de lecture ou
d’écriture sur le Memory Stick. Ne
secouez pas l’ordinateur ou le projecteur et
ne les soumettez pas à des chocs. Ne mettez
pas l’ordinateur ou le projecteur hors
tension, ne débranchez pas le câble USB et
ne retirez pas le Memory Stick. Vous
risqueriez d’altérer les données.
A propos du Memory Stick fourni
Les données échantillon d’une présentation
sont enregistrées.
......................................................................
• Memory Stick et sont des marques
déposées de Sony Corporation.
• MagicGate Memory Stick et
des marques déposées de Sony
Corporation.
sont
FR
6
Utilisation d’un Memory Stick
Page 37

B
Configuration
Utilisation du Memory Stick
Insérez le Memory Stick dans l’emplacement prévu à cet effet sur le côté
du projecteur.
POWER
SAVING
MENU
T A
U
P
IN
S VIDEO
PUSH
TEMP/FAN
LAMP/COVER
ENTER
AUDIO VIDEO
ACCESS
Insérez le Memory Stick dans le sens indiqué par la
flèche et poussez jusqu’au déclic.
Pour retirer le Memory Stick
Si le témoin d’accès est éteint, appuyez sur le Memory Stick et retirez votre
main. Lorsque le verrou se débloque, retirez le Memory Stick.
Configuration
Memory Stick
AUDIO
ACCESS
AUDIO
ACCESS
Témoin d’accès
Remarque
Insérez le Memory Stick avec la flèche en direction de l’emplacement
Memory Stick.
Utilisation du Memory Stick
FR
7
Page 38

Utilisation de la fonction Origine MS
L’affichage initial du MS est Origine MS. La fonction Origine MS est
utilisée pour la configuration et l’exécution de l’événement (par exemple,
sélection du visualiseur), la configuration de l’exécution automatique et du
démarrage ainsi que l’initialisation du Memory Stick. Le guide des
opérations de base est affiché en bas de l’affichage Origine MS. Utilisez la
télécommande ou le panneau de configuration pour effectuer les réglages.
Le paramètre sélectionné est affiché en jaune.
Pour obtenir des détails sur chaque opération, consultez les pages concernées.
1 Appuyez sur la touche INPUT pour sélectionner MS.
La fonction Origine MS apparaît.
Symbole Origine MS
Titre ou nom du
Origine MS
Sélection
Visual. présent.
Diaporama
Option
Affichage index
Normal
Sél. contenu
Presentation1
dossier correspondant
au contenu sélectionné
n°: 1/1234
Ampl: 1024x768
Premier fichier image du contenu sélectionné
2 Utilisez la touche M ou m pour sélectionner le paramètre, puis appuyez
sur la touche ENTER.
3 Utilisez la touche M ou m pour régler le paramètre, puis appuyez sur la
touche ENTER.
Origine MS
Sélection
Visualiseur d'images
Diaporama
Option
Sél. contenu
Fichier
MS Home
Réglage
Memory Stick
MS Home
Exé. Auto
Activé
Lancement
Original
FR
8
Utilisation de la fonction Origine MS
Fermer
n°: 1/1234
Ampl: 1024x768
Fichier: SPJP0001.JPG
Date: 15/7/2002 12:34
Page 39

B
Affichage de la diapositive
Diapositives de présentation
— Visualiseur de présentation
Après avoir converti des fichiers Microsoft PowerPoint avec le Projector
Station for Presentation en fichiers offrant les principales qualités requises
pour la projection sur le projecteur, vous pouvez réaliser un diaporama.
Pour obtenir davantage de détails sur le support de présentation, consultez le mode
d’emploi du Projector Station for Presentation (CD-ROM fourni).
1 Appuyez sur la touche INPUT pour sélectionner MS.
La fonction Origine MS apparaît.
Origine MS
Sélection
Visual. présent.
Diaporama
Option
Affichage index
Normal
Sél. contenu
Presentation1
Affichage de la diapositive
n°: 1/1234
Ampl: 1024x768
2 Sélectionnez “Sélection”, puis appuyez sur la touche ENTER.
Une liste déroulante apparaît.
Origine MS
Sélection
Visual. présent.
Visual. présent.
Visualiseur d'images
Diaporama
Option
Affichage index
Normal
Sél. contenu
Presentation1
n°: 1/1234
Ampl: 1024x768
Diapositives de présentation — Visualiseur de présentation
(Suite)
9
FR
Page 40

3 Sélectionnez “Visual. présent.”, puis appuyez sur la touche ENTER.
4 Sélectionnez “Sél. contenu”, puis appuyez sur la touche ENTER.
Le menu Sél. contenu apparaît.
Origine MS
Sélection
Visual. présent.
Diaporama
Option
Affichage index
Normal
Sél. contenu
Presentation1
Le visualiseur de présentation peut sélectionner le “contenu” sous forme
d’unités d’un dossier dans lequel se trouvent de nombreux fichiers JPEG.
Dans l’illustration ci-dessus, il y a trois contenus de support de présentation :
Présentation 1, Présentation 2 et Présentation 3.
Pour choisir les contenus qui ne sont pas affichés, appuyez sur la touche ,
pour sélectionner la case de défilement dans le menu Sél. contenu, puis
appuyez sur la touche M ou m. Les trois contenus suivants apparaissent.
Presentation1
Presentation 2
Presentation 3
n°: 1/1234
Ampl: 1024x768
FR
5 Sélectionnez le contenu de la présentation, puis appuyez sur la touche
ENTER. Le titre du support de présentation sélectionné et du premier
fichier image apparaît.
Origine MS
Sélection
Visual. présent.
Diaporama
Option
Affichage index
Normal
Sél. contenu
Presentation2
n°: 1/1234
Ampl: 1024x768
Diapositives de présentation — Visualiseur de présentation
10
Page 41

6 Sélectionnez “Diaporama”, puis appuyez sur la touche ENTER.
7 Sélectionnez “Exécuter”, puis appuyez sur la touche ENTER.
Passer au mode d’affichage des fichiers
Vous pouvez afficher un seul fichier image (mode Normal) ou des miniatures
des fichiers image (mode Miniatures).
1 Sélectionnez “Affichage index” dans l’écran Origine MS, puis appuyez sur la
touche ENTER.
2 Sélectionnez le réglage, puis appuyez sur la touche ENTER.
Normal : pour afficher un fichier image
Miniatures : pour afficher des miniatures des fichiers image du contenu
sélectionné.
Pour lancer le diaporama
Si la fonction diaporama est réglée sur “Auto” par le Projector Station for
Presentation, le diaporama est exécuté en fonction des réglages effectués
dans Projector Station for Presentation. Si vous souhaitez terminer le
diaporama, appuyez sur la touche MS SLIDE ou sur la touche ENTER. Si la
fonction est réglée sur “Manuel”, appuyez sur les touches suivantes pour
lancer le diaporama.
, : pour afficher la diapositive suivante
< : pour afficher la diapositive précédente
MS SLIDE : pour terminer le diaporama
Pour restaurer la fonction Origine MS avant de lancer le diaporama
Sélectionnez “Fermer”.
Lancement rapide du diaporama
Puisque les réglages sont mémorisés même si vous modifiez l’entrée après le
réglage des étapes 1 à 5, il vous suffit d’appuyer sur la touche MS SLIDE de
la télécommande au début de la présentation. L’entrée est paramétrée sur
MS et le diaporama commence rapidement. Pour terminer le diaporama,
appuyez sur la touche MS SLIDE ou ENTER lorsque le réglage du
diaporama est “Auto” ou appuyez sur la touche MS SLIDE lorsque le
réglage du diaporama est “Manuel”.
Affichage de la diapositive
Diapositives de présentation — Visualiseur de présentation
11
FR
Page 42

Défilement d’un fichier image —
Visualiseur d’images
Vous pouvez réaliser le diaporama en mélangeant des fichiers d’images fixes
(compatible DCF) au format JPEG enregistrés par une caméra numérique ou
des fichiers d’images vidéos au format MPEG1 enregistrés par le MPEG
MOVIE de Sony etc.
Pour obtenir plus de détails sur les fonctions des fichiers image, reportez-vous à la
section “Ouverture du fichier image” page 19.
1 Appuyez sur la touche INPUT pour sélectionner MS.
La fonction Origine MS apparaît.
Origine MS
Sélection
Visual. présent.
Diaporama
Option
Affichage index
Normal
Sél. contenu
Presentation1
n°: 1/1234
Ampl: 1024x768
FR
2 Sélectionnez “Sélection”, puis appuyez sur la touche ENTER.
Une liste déroulante apparaît.
Origine MS
Sélection
Visual. présent.
Visual. présent.
Visualiseur d'images
Diaporama
Option
Affichage index
Normal
Sél. contenu
Presentation1
n°: 1/1234
Ampl: 1024x768
12
Défilement d’un fichier image — Visualiseur d’images
Page 43

3 Sélectionnez “Visualiseur d’image”, puis appuyez sur la touche ENTER.
Les miniatures des fichiers image contenus dans le dossier sélectionné
apparaissent.
Origine MS
Sélection
Visualiseur d'images
Picture viewer
Diaporama
Option
Index display
Normal
Sél. contenu
100MSDCF
n°: 1/1234
Ampl: 1024x768
Fichier: SPJP0001.JPG
Date: 15/7/2002 12:34
: apparaît lorsqu’un fichier est protégé
: apparaît lorsqu’un fichier de lancement est défini
: Icône Image vidéo
4 Sélectionnez “Sél. contenu”, puis appuyez sur la touche ENTER.
Le menu Sél. contenu apparaît.
Dossier en cours
Origine MS
Sélection
Visualiseur d'images
Diaporama
Option
Sél. contenu
Vers le haut
Mode photo num.
Désactivé
n°: 1/1234
Ampl: 1024x768
Fichier:
Date:
15/7/2002 12:34
SPJP0001.JPG
Premier fichier image du dossier en cours
Dossiers contenus
dans le dossier en
cours
Affichage de la diapositive
Défilement d’un fichier image — Visualiseur d’images
(Suite)
13
FR
Page 44

5 Appuyez sur la touche , pour sélectionner le menu Sélectionner
dossiers.
Origine MS
Sélection
Visualiseur d'images
Diaporama
Option
Sél. contenu
Mode photo num.
Désactivé
n°: 1/1234
Ampl: 1024x768
Fichier: SPJP0001.JPG
Date: 15/7/2002 12:34
6 Sélectionnez le dossier pour votre présentation, puis appuyez sur la
touche ENTER. Le titre et le premier fichier image du dossier sélectionné
apparaissent. Pour choisir les dossiers qui ne sont pas affichés, appuyez
sur la touche , pour sélectionner la case de défilement dans le menu
Sélectionner dossiers, puis appuyez sur la touche m ou M. Les 10
dossiers suivants apparaissent.
7 Sélectionnez “Diaporama”, puis appuyez sur la touche ENTER.
Origine MS
Sélection
Visualiseur d'images
Diaporama
Option
Sél. contenu
Exécuter
Effet
Désactivé
Diapo avan.
Auto
Intervalle
5sec
Fermer
n°: 1/1234
Ampl: 1024x768
Fichier: SPJP0001.JPG
Date: 15/7/2002 12:34
Effet : réglage de l’effet lorsque la diapositive est affichée.
Diapo avan. : réglage du défilement automatique ou manuel
Intervalle : réglage du temps d’affichage d’une diapositive. Si “Diapo
avan.” est réglé sur “Manuel”, ce réglage ne fonctionne pas. L’indication
de la durée est approximative.
8 Sélectionnez chaque paramètre, puis appuyez sur la touche ENTER.
9 Sélectionnez le paramètre, puis appuyez sur la touche ENTER.
10Sélectionnez “Exécuter”, puis appuyez sur la touche ENTER.
FR
14
Défilement d’un fichier image — Visualiseur d’images
Page 45

Pour lancer le diaporama
Lorsque l’option “Diapo avan.” du réglage du diaporama est réglée sur
“Auto”, les diapositives changent automatiquement. Lorsqu’un fichier vidéo
est sélectionné, la vidéo est lue automatiquement, puis, après la lecture, la
diapositive suivante est automatiquement affichée. Si vous souhaitez
terminer le diaporama, appuyez sur la touche MS SLIDE ou sur la touche
ENTER. Si la fonction est réglée sur “Manuel”, appuyez sur les touches
suivantes pour lancer le diaporama.
, : pour afficher la diapositive suivante
< : pour afficher la diapositive précédente
MS SLIDE/ENTER : pour terminer le diaporama
Lorsque l’option “Diapo avan.” est réglée sur “Manuel”, la vidéo n’est pas lue et la
première image du fichier vidéo est affichée. Appuyez sur la touche , pour afficher
la diapositive suivante. Pour lire la vidéo, reportez-vous à la section “Lecture du
fichier vidéo” page 16.
Pour restaurer la fonction Origine MS avant de lancer le diaporama
Sélectionnez “Fermer”.
Pour afficher un fichier image en écran complet
1 Sélectionnez un fichier image dans l’écran des miniatures, appuyez
ensuite sur la touche ENTER.
2 Sélectionnez “Écran complet”, puis appuyez sur la touche ENTER.
Le fichier image sélectionné est agrandi pour apparaître sur l’ensemble
de l’écran.
n°: 1/1234
Ampl: 1024x768
Pour exécuter le diaporama avec l’image sur l’écran complet, appuyez
sur les touches suivantes.
Fichier: SPJP0001.JPG
Date: 15/7/2002 12:34
Affichage de la diapositive
, : pour afficher les diapositives suivantes. (Le diaporama se termine
par le dernier fichier image.)
< : pour afficher les diapositives précédentes.
(Le diaporama se termine par le premier fichier image.)
MS SLIDE : pour revenir à l’écran Origine MS
Défilement d’un fichier image — Visualiseur d’images
15
FR
Page 46

Lancement rapide du diaporama
Puisque les réglages sont mémorisés même si vous modifiez l’entrée après le
réglage des étapes 1 à 9, il vous suffit d’appuyer sur la touche MS SLIDE de
la télécommande au début de la présentation. L’entrée est paramétrée sur
MS et le diaporama commence rapidement. Pour terminer le diaporama,
appuyez sur la touche MS SLIDE ou ENTER lorsque “Diapo avan.” est réglé
sur “Auto” ou appuyez sur la touche MS SLIDE lorsque “Diapo avan.” est
réglé sur “Manuel”.
Lecture d’un fichier vidéo
Vous pouvez lire une image vidéo à l’aide du Lecteur vidéo affiché sur
l’écran lorsque “Diapo avan.” est réglé sur “Manuel”. Vous pouvez
également lancer la lecture vidéo en sélectionnant un fichier vidéo en mode
d’affichage des miniatures.
Remarques
• Le lecteur vidéo ne peut pas être affiché lorsque “Diapo avan.” est réglé sur
“Auto”.
• L’appareil peut lire un fichier vidéo MPEG1 enregistré par le MPEG
MOVIE de Sony, etc. (il est possible que les vidéos sautent parfois pendant
la lecture.)
Fichiers MPEG1 compatibles : MPEG MOVIE AD/EX/HQ/CV, MPEG1
du VAIO Giga pocket (équivalent à un CD vidéo)
1 Suivez les étapes 1 à 7 de “Défilement d’un fichier image — Visualiseur
d’images”.
FR
2 Réglez “Diapo avan.” sur “Manuel” dans le menu de réglage du
diaporama.
Origine MS
Sélection
Visualiseur d'images
Diaporama
Option
Sél. contenu
Exécuter
Effet
Désactivé
Diapo avan.
Manuel
Intervalle
5sec
Fermer
n°: 1/1234
Ampl: 1024x768
3 Appuyez sur la touche ENTER.
4 Sélectionnez “Exécuter”, puis appuyez sur la touche ENTER.
16
Défilement d’un fichier image — Visualiseur d’images
Fichier: SPJP0001.JPG
Date: 15/7/2002 12:34
Page 47

Pour lancer le diaporama
Appuyez sur les touches suivantes.
, : pour afficher la diapositive suivante
< : pour afficher la diapositive précédente
MS SLIDE : pour mettre fin au diaporama
Lorsqu’un fichier vidéo est sélectionné à l’aide de la touche < ou ,, le
Lecteur vidéo apparaît sur l’écran. Activez le Lecteur vidéo de la façon
suivante :
[Lecteur vidéo]
Préc.
Écran complet
Menu
Origine MS
n°: 1/1234
Ampl: 320x240
N (lecture/pause) : pour procéder à la lecture. En cours de lecture le
bouton devient le bouton X (pause).
x(arrêt) : pour arrêter la lecture
Écran complet : pour effectuer la lecture en écran complet
Menu : pour afficher l’écran d’index
[Affichage du guide]
< Préc. : pour afficher la diapositive précédente en mode de pause vidéo.
En cours de lecture, l’affichage du guide devient < Rembob
(Rembobiner).
, Suiv. : pour afficher la diapositive suivante en mode de pause vidéo. En
cours de lecture, l’affichage du guide devient , Av rap (avance rapide).
Lecture d’une vidéo
Appuyez sur N.
La lecture commence. Une fois la lecture terminée, elle s’arrête sur la
première image du fichier vidéo affiché.
Pour interrompre momentanément la lecture, appuyez sur la touche m pour
sélectionner x.
Suiv.
Fichier: BASEBALL.MPG
Date: 15/7/2002 12:34
Affichage de la diapositive
Défilement d’un fichier image — Visualiseur d’images
17
FR
Page 48

Pour effectuer une lecture en écran complet
Sélectionnez “Écran Complet”, puis appuyez sur la touche ENTER.
L’image est agrandie sur l’ensemble de l’écran et la lecture commence.
Lorsque vous appuyez sur les touches M, m, <, , ou ENTER en cours de
lecture, le Lecteur vidéo réapparaît sur l’écran.
Remarque
Lorsque l’image est petite, elle n’est pas agrandie sur l’écran complet si vous
sélectionnez “Écran complet”.
Pour revenir à l’écran Origine MS sans exécuter de lecture vidéo
Sélectionnez “Origine MS”.
Lancement rapide du diaporama
Puisque que les réglages sont mémorisés même si modifiez l’entrée après le
réglage des étapes 1 à 3, appuyez sur la touche MS SLIDE de la
télécommande au début de la présentation. L’entrée est paramétrée sur MS et
le diaporama commence rapidement. Pour mettre fin au diaporama, appuyez
sur la touche MS SLIDE.
Pour lancer une lecture en écran complet alors que les miniatures sont
affichées
1 Sélectionner un fichier vidéo, puis appuyez sur la touche ENTER.
L’écran d’index apparaît. (Voir page 20.)
2 Sélectionnez “Lecteur vidéo”, puis appuyez sur la touche ENTER.
Le Lecteur vidéo apparaît.
3 Sélectionnez “Écran complet”, puis appuyez sur la touche ENTER.
La lecture commence automatiquement.
Ouverture du fichier vidéo
Sélectionnez “Menu”, puis appuyez sur la touche ENTER.
L’écran d’index apparaît. A l’aide de l’écran d’index, vous pouvez afficher
ou masquer les informations relatives au fichier vidéo, protéger des fichiers
vidéo importants ou supprimer des fichiers vidéo inutiles.
Pour obtenir des détails sur les fonctions de l’écran d’index, reportez vous à la
section “Ouverture du fichier image” page 19.
FR
18
Défilement d’un fichier image — Visualiseur d’images
Page 49

B
Réglages/Affichage des fichiers image
Ouverture du fichier image
Pour ouvrir le fichier image, affichez l’écran d’index. (Voir pages 20 et 21.)
Si le visualiseur de présentation est affiché
Pour afficher l’écran d’index, sélectionnez le contenu en mode d’affichage
Normal ou Miniatures, appuyez ensuite sur la touche ENTER.
Vous pouvez agrandir un fichier image sur l’écran complet en utilisant le
menu de l’écran d’index. Si vous appuyez sur la touche ENTER, lorsqu’une
image en écran complet est affichée, vous pouvez afficher ou masquer les
informations concernant le fichier image.
Lorsque le visualiseur d’images est affiché
Les fonctions possibles dépendent du type de fichier image à sélectionner
(image fixe/vidéo).
Lorsque “Miniatures” est sélectionné pour “Affichage index”
Pour afficher l’écran d’index, sélectionnez une miniature, puis appuyez sur la
touche ENTER. Vous pouvez effectuer les opérations suivantes à l’aide du
menu affiché sur l’écran d’index : afficher un fichier image en écran
complet, protéger un fichier image important, faire pivoter un fichier image
(image fixe uniquement), enregistrer le fichier image de lancement (image
fixe uniquement) et supprimer un fichier image.
Lorsqu’un fichier d’image fixe en écran complet est sélectionné
Pour afficher l’écran d’index, appuyez sur la touche ENTER lorsque l’image
apparaît en écran complet.
Vous pouvez effectuer les opérations suivantes à l’aide du menu affiché sur
l’écran d’index : afficher/masquer les informations relatives au fichier image,
protéger un fichier image important, faire pivoter un fichier image,
enregistrer le fichier image de lancement et supprimer un fichier image.
Réglages/Affichage des fichiers image
Lorsqu’un fichier vidéo (Lecteur vidéo) est sélectionné
Pour afficher l’écran d’index, sélectionnez “Menu” sur le Lecteur vidéo
Vous pouvez effectuer les opérations suivantes à l’aide du menu affiché sur
l’écran d’index : afficher/masquer les informations relatives au fichier vidéo,
protéger un fichier vidéo important et supprimer un fichier vidéo.
Pour obtenir plus de détails sur l’utilisation de l’écran d’index, reportez vous à la
page s’y rapportant.
Ouverture du fichier image
19
FR
Page 50

Ecran d’index d’un fichier d’image fixe
Origine MS
Sélection
Apparaît lorsqu’un
fichier est protégé
Apparaît lorsqu’un fichier
de lancement est défini
Visualiseur d'images
Diaporama
Option
Sél. contenu
Nombre total de fichiers
image du contenu en
cours de lecture
Ordre du contenu en
cours de lecture
n°: 1/1234
Ampl: 1024x768
Pour sélectionner un fichier image en mode d’affichage des miniatures,
appuyez sur la touche M/m/</,.
Si vous souhaitez afficher d’autres fichiers image lorsque le contenu en cours
de lecture contient plus de 16 fichiers image, sélectionnez un fichier image
affiché dans la ligne du bas, puis appuyez sur la touche v ou sélectionnez un
fichier image affiché dans la colonne la plus à droite, appuyez sur la touche
, pour sélectionner la case de défilement, puis appuyez sur la touche m.
Pour lancer le diaporama, appuyez sur la touche MS SLIDE dans l’écran
d’index. Le diaporama commence à partir du fichier image sélectionné.
Écran complet
Protect.
Rotation
Lancmnt
Suppr.
Fermer
Fichier: SPJP0001.JPG
Date: 15/7/2002 12:34
Résolution Date
Ecran
d’index
Apparaît
lorsque le
visualiseur
d’images
est
affiché
Nom et
format du
fichier
Ecran d’index d’un fichier vidéo
Origine MS
Sélection
Apparaît lorsqu’un fichier
est protégé
Apparaît lorsqu’un fichier
vidéo est sélectionné
Nombre total de fichiers
image du contenu en
cours de lecture
Ordre du contenu
en cours de lecture
FR
20
Ouverture du fichier image
Visualiseur d'images
Diaporama
Option
Sél. contenu
n°: 1/1234
Ampl: 1024x768
Résolution Date
Lecteur vidéo
Protect.
Rotation
Lancmnt
Suppr.
Fermer
Fichier: SPJP0001.JPG
Date: 15/7/2002 12:34
Ecran
d’index
Nom et
format
du fichier
Page 51

Ecran d’index d’un fichier d’image fixe en écran complet
Apparaît lorsque le visualiseur
d’images est affiché
Origine MS
Informations
Act
Protect.
Protect
Rotation
Nombre total de fichiers
image du contenu en
cours de lecture
Ordre du contenu en
cours de lecture
Apparaît lorsqu’un fichier
est protégé
Apparaît lorsqu’un fichier
de lancement est défini e
Résolution
Suppr.
Lancmnt
Fermer
n°: 1/1234
Ampl: 1024x768
Fichier: SPJP0001.JPG
Date: 15/7/2002 12:34
Résolution Date
Nom de
fichier et
format de
fichier
Si vous souhaitez afficher un autre fichier image alors de nombreux fichiers
image se trouvent dans le contenu en cours de lecture, appuyez sur la touche
,.
Pour revenir à l’écran Origine MS, appuyez sur la touche MS SLIDE dans
l’écran complet de l’index.
Lecteur vidéo
Icône d’image vidéo
Apparaît lorsqu’un
fichier est protégé
Ordre/nombre total de
fichiers image du contenu
en cours de lecture
Préc
Écran complet
Menu
Origine MS
Suiv.
Information
Act
Protect.
Suppr.
Fermer
n°: 1/1234
Ampl: 320x240
Résolution Date
Fichier: BASEBALL.MPG
Date: 15/7/2002 12:34
Nom et format de fichier
Réglages/Affichage des fichiers image
Ouverture du fichier image
21
FR
Page 52

Protection d’un fichier important
Après avoir sélectionné le fichier à protéger, réglez “Protect.” sur “Act” ou
“Tt act”. Lorsqu’un fichier est protégé, le symbole de protection est affiché.
Rotation d’un fichier image
Après avoir sélectionné le fichier que vous souhaitez faire pivoter,
sélectionnez “Rotation”. L’image pivote de 90° à chaque fois que vous
appuyez sur la touche Enter.
Remarque
Il est impossible de faire pivoter un fichier protégé.
Enregistrement d’un fichier en tant qu’image de lancement
Vous pouvez enregistrer un fichier image dans le Memory Stick en tant que
fichier image de lancement qui s’affiche lors de la mise sous tension.
Réglez “Lancmnt” sur “Entrée”. Lorsqu’un fichier est enregistré, le symbole
de lancement est affiché.
Si vous souhaitez utiliser le fichier image enregistré en tant que fichier de
lancement, réglez l’option “Lancement” de l’écran de réglage sur
“Personnalisé” (voir page 26.)
Remarque
Puisque le réglage de “Personnalisé” est mémorisé dans le Memory Stick,
si vous souhaitez utiliser le fichier image enregistré en tant que fichier de
démarrage, insérez le Memory Stick dans le projecteur avant de mettre
celui-ci sous tension.
Suppression d’un fichier image
Vous pouvez supprimer le fichier image sélectionné ou tous les fichiers
image des contenus sélectionnés.
1 Sélectionnez “Suppr.”, puis appuyez sur la touche ENTER.
2 Sélectionnez un paramètre. Lorsque le message “Fichier sélectionné
supprimé” ou “Ts fichiers supprimés” apparaît, sélectionnez “Oui”, puis
appuyez sur la touche ENTER.
Tts imgs : suppression de tous les fichiers images des contenus sélectionnés
Img sél : suppression du fichier image sélectionné
Fermer : si vous ne supprimez pas le fichier
Remarque
Il est impossible de supprimer un fichier protégé.
Affichage/Masquage des informations relatives au fichier image
Sélectionnez un fichier image, sélectionnez “Informations” dans l’écran
d’index, puis appuyez sur la touche ENTER. Si vous souhaitez afficher les
informations relatives au fichier image, sélectionnez “Act”. Les informations
apparaissent en bas de l’écran. Si vous ne souhaitez pas afficher les
FR
22
Ouverture du fichier image
Page 53

informations, sélectionnez “Dés”.
Lorsque le visualiseur de présentation est affiché, le nombre et la taille
(résolution) du fichier image apparaissent. Lorsque le visualiseur d’images
est affiché, le nombre, la taille (résolution), le format du fichier et la date
enregistrée du fichier image apparaissent.
Remarque
Pour un fichier image traité par ordinateur, la date de renouvellement peut
apparaître au lieu de la date enregistrée.
Tri des fichiers image pour une présentation
Vous pouvez trier les fichiers image d’un dossier par nom ou par date de
renouvellement en ordre croissant/décroissant.
1 Sélectionnez “Option” dans Origine MS, puis appuyez sur la touche
ENTER.
2 Select “Fichier”, puis appuyez sur la touche , ou ENTER.
3 Sélectionnez “Trier”, puis appuyez sur la touche ENTER.
4 Sélectionnez le paramètre de votre choix, puis appuyez sur la touche
ENTER.
Remarque
Pour un fichier image traité par ordinateur, la date affichée peut être
différente de la date de renouvellement.
Affichage de fichiers d’images fixes ou de fichiers vidéo uniquement
Vous pouvez filtrer tous les fichiers image d’un dossier pour afficher les
fichiers d’images fixes ou les fichiers vidéo uniquement.
1 Sélectionnez “Option” dans Origine MS, puis appuyez sur la touche
ENTER.
2 Select “Fichier”, puis appuyez sur la touche , ou ENTER.
3 Sélectionnez “Filtre”, appuyez ensuite sur la touche ENTER.
4 Sélectionnez le paramètre de votre choix, puis appuyez sur la touche
ENTER.
Image fixe : pour afficher des images fixes uniquement
Image vidéo: pour afficher des fichiers vidéo uniquement
Désactivé : pour afficher tous les fichiers sans les filtrer
Remarque
Lorsque le filtre est activé, le nom du filtre en cours d’utilisation (Image fixe
ou Image vidéo) apparaît en bas à droite dans l’écran Origine MS.
Réglages/Affichage des fichiers image
Ouverture du fichier image
23
FR
Page 54

B
Réglages utiles
Affichage des fichiers image
enregistrés par une caméra numérique
uniquement
L’appareil peut choisir et afficher les fichiers image JPEG et MPEG1
enregistrés par une caméra numérique (compatible DCF) uniquement parmi
les fichiers image enregistrés sur un Memory Stick.
1 Sélectionnez “Sél. Contenu” dans Origine MS, puis appuyez sur la
touche ENTER.
2 Sélectionnez “Mode photo num.”, puis appuyez sur la touche ENTER.
Origine MS
Sélection
Visualiseur d'images
Diaporama
Option
Sél. contenu
Mode photo num.
Désactivé
Activé
Désactivé
FR
n°: 1/1234
Ampl: 1024x768
Fichier: SPJP0001.JPG
Date: 15/7/2002 12:34
3 Sélectionnez “Activé”, appuyez ensuite sur la touche ENTER.
Origine MS
Sélection
Visualiseur d'images
Diaporama
Option
Sél. contenu
Mode photo num.
n°: 1/1234
Ampl: 1024x768
Remarques
• Cette fonction est inopérante si plus de 2 000 fichiers image enregistrés par
une caméra numérique sont mémorisés sur un Memory Stick.
• Pour un fichier image enregistré avec la fonction Voice Memo de l’appareil
photo numérique Sony, seul le fichier d’image fixe est affiché.
24
Affichage des fichiers image enregistrés par une caméra numérique uniquement
Fichier: SPJP0001.JPG
Date: 15/7/2002 12:34
Page 55

Lancement automatique d’une
présentation — Exé. Auto
Lorsque le Memory Stick contenant le fichier image pour lequel la fonction
Exé. Auto est activée par le Projector Station for Presentation, est inséré dans
l’emplacement Memory Stick, l’entrée est automatiquement commutée sur
MS et le diaporama commence.
Paramètrage de la fonction Exécution auto
1 Sélectionnez “Option” dans Origine MS, puis appuyez sur la touche
ENTER.
2 Sélectionnez “Réglage”, puis appuyez sur la touche ENTER.
3 Sélectionnez “Exé. Auto”, puis appuyez sur la touche ENTER.
Origine MS
Sélection
Visual. présent.
Diaporama
Option
Affichage index
Miniatures
Sél. contenu
Fichier
Réglage
Memory Stick
Exé. Auto
Activé
Activé
Désactivé
Lancement
Original
Réglages utiles
Fermer
n°: 1/1234
Ampl: 1024x768
4 Sélectionnez “Activé”, puis appuyez sur la touche ENTER.
Si vous ne souhaitez pas utiliser la fonction d’exécution
automatique
Réglez “Exé. Auto” sur “Désactivé”.
Remarques
• Si l’exécution automatique n’est pas réglée sur “Activé” par le Projector
Station for Presentation, vous ne pouvez pas utiliser la fonction
d’exécution automatique pour lancer le diaporama même si vous réglez
“Exé. Auto” sur “Activé” dans Origine MS.
• Si vous souhaitez utiliser la fonction d’exécution automatique sur un
fichier image au format JPEG, réalisez le support de présentation à l’aide
du Projector Station for Presentation et réglez la fonction d’exécution
automatique sur “Activé”.
Lancement automatique d’une présentation — Exé. Auto
25
FR
Page 56

Projection d’un fichier sélectionné
lorsque le projecteur est sous tension
— Lancement
A la mise sous tension, le fichier image sélectionné est projeté pendant
environ 1 minute.
Si vous souhaitez utiliser le fichier image enregistré en tant que fichier de lancement,
vous devez enregistrer un fichier image en tant que fichier de lancement dans l’écran
d’index (voir page 22).
1 Sélectionnez “Option” dans le Origine MS, puis appuyez sur la touche
ENTER.
2 Select “Réglage”, puis appuyez sur la touche , ou ENTER.
3 Sélectionnez “Lancement”, puis appuyez sur la touche ENTER.
Origine MS
Sélection
Visualiseur d'images
Diaporama
Option
Sél. contenu
Fichier
Réglage
Memory Stick
Exé. Auto
Activé
Lancement
Original
Original
Personnalisé
Désactivé
FR
Fermer
n°: 1/1234
Ampl: 1024x768
Fichier: SPJP0001.JPG
Date: 15/7/2002 12:34
4 Sélectionnez le paramètre, puis appuyez sur la touche ENTER.
Original : sélection de l’image originale mémorisée dans le projecteur
Personnalisé : sélection du fichier image enregistré dans l’écran d’index
Désactivé : aucun lancement réglé
Remarques
• Si vous souhaitez effacer l’écran de lancement alors qu’il est affiché,
appuyez sur M/m/</, ou la touche ENTER.
• Si vous souhaitez utiliser le fichier enregistré, insérez le Memory Stick là
où le fichier enregistré est sauvegardé dans le projecteur, puis mettez
l’appareil sous tension.
• Vous pouvez enregistrer un seul fichier de lancement par Memory Stick.
26
Projection d’un fichier sélectionné lorsque le projecteur est sous tension —Lancement
L’image originale ne peut pas être modifiée.
enregistré dans le Memory Stick
Page 57

B
Utilisation du Memory Stick
Affichage des informations relatives au
Memory Stick
Vous pouvez afficher le type, ainsi que la capacité utilisée et la capacité
restante du Memory Stick en cours d’utilisation. La capacité restante du
Memory Stick est également affichée en bas à droite de l’écran Origine
MS.
1 Sélectionnez “Option” dans Origine MS, puis appuyez sur la touche
ENTER.
2 Sélectionnez “Memory Stick”.
Les informations concernant le Memory Stick utilisé sont affichées.
Origine MS
Select
Visualiseur d'images
Diaporama
Option
Sél. contenu
Fichier
Réglage
Memory Stick
Type: MEMORYSTICK 128M
Format
Capacité: 123.3MB
Utilisée: 30.8MB
Restante: 92.5MB
Fermer
n°: 1/1234
Ampl: 1024x768
Pour revenir à l’écran Origine MS
Sélectionnez “Fermer”.
Affichage des informations relatives au Memory Stick
Fichier: SPJP0001.JPG
Date: 15/7/2002 12:34
27
FR
Utilisation du Memory Stick
Page 58

Formatage d’un Memory Stick
Si un Memory Stick ne peut pas être utilisé, réinitialisez-le à l’aide du
projecteur.
Lors de l’initialisation du Memory Stick, les données sont effacées.
1 Sélectionnez “Option” dans Origine MS, puis appuyez sur la touche
ENTER.
2 Sélectionnez “Memory Stick”, puis appuyez sur la touche , ou
ENTER.
3 Appuyez de nouveau sur la touche ENTER.
Origine MS
Sélection
Visualiseur d'images
Diaporama
Option
Sél. contenu
Fichier
Réglage
Memory Stick
Ts fichiers supprimés
Fermer
Type: MEMORYSTICK 128M
Non
Oui
Format
Capacité: 123.3MB
Utilisée: 30.8MB
Restante: 92.5MB
4 Lorsque le message “Ts fichiers supprimés” apparaît, sélectionnez “Oui”,
puis appuyez sur la touche ENTER.
Le formatage commence.
Si vous souhaitez restaurer les réglages de la fonction Origine
MS avant l’initialisation du Memory Stick
Sélectionnez “Fermer”.
Remarques
• Lorsque le Memory Stick est réinitialisé, le fichier image protégé est
également supprimé.
• Lorsqu’un Memory Stick dont l’onglet de protection en écriture est réglé
sur LOCK, est réinitialisé, l’indication “Memory Stick verrouillé”
s’affiche.
• Lors de l’initialisation du Memory Stick, le fonctionnement du Memory
Stick du Projector Station for Presentation et des commandes de la
fonction Origine MS sont impossibles.
FR
28 Formatages d’un Memory Stick
n°: 1/1234
Ampl: 1024x768
Fichier: SPJP0001.JPG
Date: 15/7/2002 12:34
Page 59

B
Autres informations
Dépannage
Si vous rencontrez des problèmes dans Origine MS, vérifiez ce qui suit. Si le problème
persiste, contactez votre revendeur Sony le plus proche.
Problème Cause et solution
Impossible d’insérer le
Memory Stick dans le
lecteur.
Impossible d’enregistrer
un fichier.
Impossible de supprimer
un fichier.
Impossible de supprimer
tous les documents.
Impossible de formater le
Memory Stick.
Impossible d’afficher les
fichiers d’images fixes au
format JPEG enregistrés
sur un Memory Stick.
Impossible d’afficher les
fichiers d’images vidéo
au format MPEG1
enregistrés sur un
Memory Stick.
L’image n’est pas
projetée et les icônes
ou apparaissent.
Il est possible que les
vidéos sautent pendant la
lecture.
Des bandes noires
apparaissent sur les
parties supérieures et
inférieures de l’écran en
cours de lecture de la
vidéo en écran complet.
• Le Memory Stick n’a pas été inséré dans le bon sens.
c Insérez le Memory Stick avec la flèche pointant vers
l’emplacement prévu à cet effet dans le projecteur.
• Le “Memory Stick” est saturé.
c Supprimez les fichiers inutiles du Memory Stick.
• L’onglet de protection en écriture du Memory Stick a été réglé
sur LOCK.
c Déverrouillez le Memory Stick.
• L’onglet de protection en écriture du Memory Stick a été réglée
sur LOCK.
c Déverrouillez le Memory Stick.
• Le fichier est protégé.
c Désactivez la protection sur l’écran d’index.
• L’onglet de protection en écriture du Memory Stick a été réglée
sur LOCK.
c Déverrouillez le fichier.
• Le fichier est protégé.
c Désactivez la protection sur l’écran d’index.
• L’onglet de protection en écriture du Memory Stick a été réglée
sur LOCK.
c Déverrouillez le Memory Stick.
• Le Memory Stick est cassé.
c Utilisez un autre Memory Stick.
• Un “Filtre” est défini dans le menu “Option”.
c Réglez “Filtre” sur “Image fixe” ou “Désactivé”.
• Un “Filtre” est défini dans le menu “Option”.
c Réglez “Filtre” sur “Image vidéo” ou “Désactivé”.
• Le fichier n’est pas compatible DCF.
c Réalisez le support de présentation à l’aide du Projector Station
for Presentation.
• Ceci est normal.
c En ce qui concerne le format de fichier vidéo compatible,
reportez-vous à la page 16.
• Le paramètre “Wide Mode” du menu INPUT SETTING du
projecteur peut être réglé sur “Activé”.
c En ce qui concerne le réglage de “Wide Mode”, reportez-vous
au mode d’emploi du projecteur.
Dépannage
Autres informations
FR
29
Page 60

Affichage
Si les indications suivantes s’affichent à l’écran, réalisez de nouveau le support de
présentation à l’aide du Projector Station for Presentation.
Le fichier image est au format JPEG ou MPEG et ne peut pas être
utilisé.
La vignette est affichée mais elle n’est pas compatible DCF.
Aucun fichier image n’est sélectionné.
La vignette est cassée. Le fichier image est affiché mais la vignette
est cassée.
Le fichier image est cassé.
FR
30 Dépannage
Page 61

Autres informations
FR
31
Page 62

ES
2
Page 63

Índice
Descripción general
Características.....................................4
Precauciones .......................................4
Acerca de este manual ........................4
Acerca de los Memory Stick ......... 5
Instalación
Uso del Memory Stick.................. 7
Funcionamiento de la
página Inicio MS .............................8
Visualización de la
diapositiva
Material de diapositivas para una
presentación — Visor de
presentación ....................................9
Cambio del modo de visualización
de archivos....................... 11
Ejecución inmediata de la
presentación de
diapositivas ......................11
Presentación con un archivo
de imagen — Visor de imágenes ..12
Ejecución inmediata de la
presentación de
diapositivas ......................16
Reproducción de un archivo de
película ............................16
Ejecución inmediata de la
presentación de
diapositivas ......................18
Protección de un archivo
importante........................ 22
Giro de un archivo de imagen..... 22
Registro de un archivo como
imagen de inicio ..............22
Eliminación de un archivo de
imagen .............................22
Visualización/ocultación de la
información de un archivo
de imagen.........................22
Organización de archivos de
imagen para una
presentación .....................23
Visualización sólo de los archivos
de imagen fija o sólo de los
archivos de película .........23
Ajustes útiles
Visualización sólo de los archivos de
imagen grabados con una cámara
digital ............................................24
Inicio automático de una presentación
— Ejecución automática ...............25
Proyección de un archivo seleccionado
con la alimentación activada —
Inicio ............................................. 26
Funcionamiento del
Memory Stick
Visualización de la información del
Memory Stick..........................27
Formateo de un Memory Stick ..... 28
ES
Ajuste/Visualización de un
archivo de imagen
Funcionamiento de un archivo de
imagen ...........................................19
Otros
Solución de problemas .....................29
3
ES
Page 64

B
Descripción general
Características
Si memoriza en el Memory Stick material
de presentación convertido mediante
Projector Station for Presentation (software
suministrado) o el archivo de imagen
grabado mediante una cámara digital, podrá
realizar fácilmente las presentaciones sin
utilizar un ordenador.
Visor de presentaciones
Después de convertir archivos de Microsoft
PowerPoint mediante Projector Station for
Presentation en el archivo que ofrece el
mayor número de ventajas para proyectarlo
en el proyector, podrá realizar la
presentación de diapositivas.
Visor de imágenes
Para realizar una presentación de
diapositivas en la pantalla, puede utilizar un
archivo de imagen JPEG (compatible con
1)
) grabado con una cámara digital y
DCF
un archivo de película MPEG1 grabado con
MPEG MOVIE, etc. También puede ajustar
el efecto al visualizar la diapositiva y la
manera (automática o manual) en la que
ésta se intercambia.
establecido la función de ejecución
automática mediante Projector Station for
Presentation, la entrada cambia
automáticamente a MS y se inicia la
presentación de diapositivas.
Inicio
Al activar la alimentación, el archivo de
imagen seleccionado se proyecta durante 1
minuto aproximadamente. Puede ajustar el
enfoque y el zoom sin señal de otro equipo.
También puede seleccionar la imagen
original o el archivo de imagen registrado
en un Memory Stick.
Precauciones
• Para evitar pérdidas de datos, realice
copias de seguridad de los datos con
frecuencia. En ningún caso Sony será
responsable de pérdidas de datos.
• La grabación no autorizada puede ir en
contra de lo establecido por las leyes de
copyright.
• Sony puede modificar o cambiar el
software de aplicación de los Memory
Stick sin previo aviso.
Archivos MPEG1 que se pueden utilizar:
MPEG MOVIE, MPEG MOVIE AD,
MPEG MOVIE EX, MPEG MOVIE HQ,
MPEG MOVIE CV, MPEG1 de VAIO
Giga Pocket (equivale a un CD de vídeo)
1) DCF: Normas de diseño de sistemas de
archivos de cámara
Modo de cámara digital
La unidad puede utilizarse para seleccionar
y visualizar archivos de imagen JPEG y
MPEG1 grabados con una cámara digital
(compatible con DCF) pero únicamente de
entre los archivos de imagen almacenados
en un Memory Stick.
Ejecución automática
Cuando se inserta en la ranura para
Memory Stick el Memory Stick con el
archivo de imagen para el que se ha
ES
4
Características/Precauciones/Acerca de este manual
Acerca de este
manual
En este manual se describen las
operaciones realizadas cuando se utiliza el
Memory Stick.
Para obtener información detallada sobre
la creación del material de presentación,
consulte el manual de instrucciones de
Projector Station for Presentation (CDROM, suministrado).
Con respecto a operaciones que no realice
el Memory Stick, consulte las
instrucciones de funcionamiento
suministradas.
......................................................................
• Microsoft y PowerPoint son marcas
comerciales registradas y marcas
comerciales de Microsoft Corporation en
Estados Unidos y/u otros países.
• Adobe y Photoshop son marcas comerciales
registradas de Adobe Systems Incorporated
en Estados Unidos y/u otros países.
Page 65

Acerca de los
Memory Stick
Memory Stick
El Memory Stick es un nuevo medio de
grabación IC compacto, portátil y versátil
con una capacidad de datos superior a la de
un disquete. El Memory Stick está
especialmente diseñado para intercambiar y
compartir datos digitales entre productos
compatibles con Memory Stick. Puesto
que es extraíble, el Memory Stick
también puede utilizarse para el
almacenamiento externo de datos.
Tipos de Memory Stick
Existen dos tipos de Memory Stick:
MagicGate Memory Stick equipados
con la tecnología de protección de
copyright MagicGate y Memory Stick
generales. Es posible utilizar ambos tipos
de Memory Stick con el proyector. Sin
embargo, puesto que el proyector no es
compatible con las normas MagicGate, los
datos grabados con dicho proyector no
están sujetos a la protección de copyright
MagicGate.
MagicGate
MagicGate es una tecnología de protección
de copyright que utiliza tecnología de
cifrado.
Formato de almacenamiento de
archivos
El material de las presentaciones convertido
mediante Projector Station for Presentation
se guarda en los siguientes formatos de
archivo en el Memory Stick.
• Archivos de imagen (compatibles con
DCF) comprimidos en el formato JPEG
(Joint Photographic Experts Group)
(extensión .jpg).
• Archivo de presentación de proyector
Sony (archivo SPP), que es un formato de
archivo original de Sony. Este archivo
integra información, como el destino y la
información de configuración del archivo
de imagen, etc.
Antes de utilizar un Memory Stick
Terminal
Lengüeta
de
protección
contra
escritura
• No será posible grabar ni borrar imágenes
fijas si la lengüeta de protección contra
escritura del Memory Stick está
ajustada en LOCK.
• Se recomienda hacer copias de seguridad
de los datos importantes.
• Los datos de imagen pueden dañarse en
los siguientes casos:
– Si extrae el Memory Stick,
desactiva la alimentación o retira la
batería para su sustitución mientras
el indicador de acceso parpadea.
– Si utiliza un Memory Stick cerca
de electricidad estática o campos
magnéticos.
– Si desconecta el cable USB
mientras se leen o se graban datos.
Notas
• Evite que objetos metálicos o sus dedos
entren en contacto con los componentes
metálicos de la sección de conexión.
• En el espacio para la etiqueta, no adhiera
ningún material que no sea la etiqueta
suministrada.
• Adhiera la etiqueta en la posición de
etiquetado indicada. Compruebe que
adhiere adecuadamente la etiqueta en la
posición de etiquetado.
• No doble, deje caer ni dé golpes fuertes a
los Memory Stick.
• No desmonte ni modifique los Memory
Stick.
• No permita que el Memory Stick se
moje.
• No utilice ni guarde los Memory Stick
en lugares:
– Extremadamente calientes, como en
un automóvil aparcado al sol o bajo
un sol abrasador.
– Expuestos a la luz solar directa.
– Muy húmedos o expuestos a gases
corrosivos.
• Cuando vaya a transportar o guardar el
Memory Stick, introdúzcalo en su caja.
Acerca de los Memory Stick
Posición de
etiquetado
5
Descripción general
ES
Page 66

Acerca del formateo de los
Memory Stick
Cuando los Memory Stick salen de
fábrica, se encuentran formateados en un
formato estándar especial. Cuando
formatee un Memory Stick, se
recomienda que lo realice en esta unidad.
Precauciones que debe tener en
cuenta cuando formatee Memory
Stick en un ordenador personal
Preste atención a los siguientes puntos
cuando formatee un Memory Stick en un
ordenador personal.
No se garantiza que los Memory Stick
formateados en un ordenador personal
funcionen en esta unidad. Para utilizar
Memory Stick formateados en un
ordenador personal, los Memory Stick
deben reformatearse en esta unidad. Tenga
en cuenta que, en este caso, todos los datos
almacenados en los Memory Stick se
perderán.
Notas sobre compatibilidad de
datos de imagen
Los archivos de datos de imagen guardados
en un Memory Stick mediante el uso de
este software cumplen con las Normas de
diseño de sistemas de archivos de cámara,
norma universal establecida por JEITA
(Japan Electronics and Information
Technology Industries Association).
El archivo JPEG convertido mediante
Adobe Photoshop, etc. debe convertirse de
nuevo en formato JPEG (compatible con
DCF) mediante Projector Station for
Presentation.
Acerca del Memory Stick
suministrado
Dispone de datos de muestra memorizados
para una presentación.
......................................................................
• Memory Stick y son marcas
comerciales de Sony Corporation.
• MagicGate Memory Stick y son
marcas comerciales de Sony Corporation.
Indicador de acceso
Si el indicador de acceso está iluminado o
parpadeando, se están leyendo o
escribiendo datos en el Memory Stick. No
mueva el ordenador ni el proyector ni los
someta a sacudidas. No desactive la
alimentación del ordenador ni del
proyector, ni tampoco el cable USB ni
extraiga el Memory Stick. Esto podría
dañar los datos.
ES
6
Acerca de los Memory Stick
Page 67

B
Instalación
Uso del Memory Stick
Inserte el Memory Stick en la ranura para Memory Stick del lateral del
proyector.
AUDIO VIDEO
ACCESS
Inserte el Memory Stick en la dirección de la
flecha hasta que oiga un “clic”.
Para extraer el Memory Stick
Cuando el indicador de acceso esté apagado, presione el Memory Stick y
retire la mano. Extraiga el Memory Stick cuando se haya liberado el
bloqueo.
U
P
IN
TEMP/FAN
LAMP/COVER
T A
S VIDEO
POWER
SAVING
MENU
PUSH
ENTER
Instalación
Memory Stick
AUDIO
ACCESS
AUDIO
ACCESS
Lámpara de acceso
Nota
Inserte el Memory Stick con la marca de flecha apuntando a la ranura del
Memory Stick.
Uso del Memory Stick
ES
7
Page 68

Funcionamiento de la página Inicio MS
La pantalla inicial de entrada de MS es la página Inicio MS. La pantalla
Inicio MS se emplea para configurar y ejecutar el evento (por ejemplo,
seleccionar el visor), definir las funciones de ejecución automática y
arranque e inicializar el Memory Stick. La guía de funcionamiento de las
teclas se muestra en la parte inferior de la pantalla de la página Inicio MS.
Utilice el mando a distancia o el panel de control para realizar ajustes. El
elemento seleccionado se muestra en amarillo.
Para obtener información detallada sobre cada operación, consulte la página
correspondiente.
1 Pulse la tecla INPUT para seleccionar MS.
Aparece la página Inicio MS.
Marca de la página
Inicio MS
Inicio MS
Selec.
Visor pres.
Diapos.
Opción
Present. Índice
Normal
Sel. cont.
Título o nombre de
carpeta del
contenido
seleccionado
2 Utilice la tecla M o m para seleccionar el elemento y, a continuación,
pulse la tecla ENTER.
3 Utilice la tecla M o m para configurar un elemento y, a continuación,
pulse la tecla ENTER.
ES
8
Funcionamiento de la página Inicio MS
Inicio MS
Selec.
Visor de imágenes
Diapos.
Opción
Sel. cont.
Presentation1
Archivo
MS Home
Ajuste
Memory Stick
Cerrar
MS Home
Num.: 1/1234
Tamaño: 1024x768
Num.: 1/1234
Tama ño: 1024x768
Eje. Auto
Sí
Iniciar
Original
Archivo: SPJP0001.JPG
Fecha: 15/7/2002 12:34
Primer archivo de imagen del
contenido seleccionado
Page 69

B
Visualización de la diapositiva
Material de diapositivas para una
presentación — Visor de
presentaciones
Después de convertir archivos de Microsoft PowerPoint mediante Projector
Station for Presentation en el archivo que ofrece el mayor número de
ventajas para proyectarlo en el proyector, podrá realizar la presentación de
diapositivas.
Para obtener información detallada sobre la creación del material de presentación,
consulte el manual de instrucciones de Projector Station for Presentation (CD-ROM,
suministrado).
1 Pulse la tecla INPUT para seleccionar MS.
Aparece la página Inicio MS.
Inicio MS
Selec.
Visor pres.
Diapos.
Opción
Present. Índice
Normal
Sel. cont.
Presentation1
Num.: 1/1234
Tamaño: 1024x768
2 Seleccione “Selec.” y pulse la tecla ENTER.
Aparecerá una lista desplegable.
Inicio MS
Selec.
Visor pres.
Visor pres.
Visor de imágenes
Diapos.
Opción
Present. Índice
Normal
Sel. cont.
Presentation1
Visualización de la diapositiva
Num.: 1/1234
Tamaño: 1024x768
(Continúa)
Material de diapositivas para una presentación — Visor de presentaciones
ES
9
Page 70

3 Seleccione “Visor pres.” y pulse la tecla ENTER.
4 Seleccione “Sel. cont.” y pulse la tecla ENTER.
Aparecerá el menú Sel. cont.
Inicio MS
Selec.
Visor pres.
Diapos.
Opción
Present. Índice
Normal
Sel. cont.
Presentation1
El Visor de presentaciones puede seleccionar el “contenido” en unidades de
una carpeta con varios archivos JPEG. En la ilustración anterior, hay tres
contenidos de material de presentación: Presentación 1, Presentación 2 y
Presentación 3.
Si desea seleccionar los contenidos que no se muestran, pulse la tecla ,
para seleccionar la barra de desplazamiento del menú Sel. cont. y pulse la
tecla m o M. Aparecerán los tres contenidos subsiguientes.
Presentation1
Presentation2
Presentation3
Num.: 1/1234
Tamaño: 1024x768
ES
5 Seleccione el contenido para la presentación y pulse la tecla ENTER.
Aparecerán el título del material de presentación seleccionado y el primer
archivo de imagen.
Inicio MS
Selec.
Visor pres.
Diapos.
Opción
Present. Índice
Normal
Sel. cont.
Presentation2
Num.: 1/1234
Tamaño: 1024x768
6 Seleccione “Diapos.” y pulse la tecla ENTER.
7 Seleccione “Ejecutar” y pulse la tecla ENTER.
Material de diapositivas para una presentación — Visor de presentaciones
10
Page 71

Cambio del modo de visualización de archivos
Puede visualizar un solo archivo de imagen (modo Normal) o miniaturas de
los archivos de imagen (modo Miniatura).
1 Seleccione la opción “Present. Índice” en Inicio MS y, a continuación,
pulse la tecla ENTER.
2 Seleccione el ajuste y pulse la tecla ENTER.
Normal: para visualizar un archivo de imagen
Miniatura: para visualizar miniaturas de los archivos de imagen en los
contenidos seleccionados.
Para ejecutar la presentación de diapositivas
Cuando el ajuste de presentación de diapositivas está ajustado en “Auto”
mediante Projector Station for Presentation, la presentación de diapositivas
se ejecuta en función de los ajustes en Projector Station for Presentation.
Cuando desee finalizar la presentación de diapositivas, pulse la tecla MS
SLIDE o ENTER. Si está ajustada en “Manual”, pulse las siguientes teclas
para realizar la presentación de diapositivas.
,: para mostrar la siguiente diapositiva
<: para mostrar la diapositiva anterior
MS SLIDE: para finalizar la presentación de diapositivas
Para volver a la página Inicio MS antes de ejecutar la presentación de
diapositivas
Seleccione “Cerrar”.
Visualización de la diapositiva
Ejecución inmediata de la presentación de diapositivas
Puesto que los ajustes se memorizan aunque cambie la entrada después del
ajuste de los pasos 1 a 5, pulse la tecla MS SLIDE del mando a distancia al
iniciar la presentación. La entrada cambia a MS y la presentación se inicia
de forma inmediata. Para finalizar la presentación de diapositivas cuando el
ajuste de la presentación de diapositivas está en “Auto”, pulse la tecla MS
SLIDE o ENTER; si dicho ajuste está en “Manual”, pulse la tecla MS
SLIDE.
Material de diapositivas para una presentación — Visor de presentaciones
11
ES
Page 72

Presentación con un archivo de
imagen — Visor de imágenes
Puede crear una presentación de diapositivas al mezclar archivos de imagen
fija (compatibles con DCF) en el formato JPEG grabado con una cámara
digital o archivos de imagen de película en el formato MPEG1 grabados con
Sony MPEG MOVIE, etc.
Para obtener detalles sobre las operaciones relacionadas con archivos de imagen,
consulte “Funcionamiento del archivo de imagen” en la página 19.
1 Pulse la tecla INPUT para seleccionar MS.
Aparece la página Inicio MS.
Inicio MS
Selec.
Visor pres.
Diapos.
Opción
Present. Índice
Normal
Sel. cont.
Presentation1
Num.: 1/1234
Tamaño: 1024x768
ES
2 Seleccione “Selec.” y pulse la tecla ENTER.
Aparecerá una lista desplegable.
Inicio MS
Selec.
Visor pres.
Visor pres.
Visor de imágenes
Diapos.
Opción
Present. Índice
Normal
Sel. cont.
Presentation1
Num.: 1/1234
Tamaño: 1024x768
12
Presentación con un archivo de imagen — Visor de imágenes
Page 73

3 Seleccione “Visor de imágenes” y pulse la tecla ENTER.
Aparecerán miniaturas de los archivos de imagen de la carpeta seleccionada.
Inicio MS
Selec.
Visor de imágenes
Picture viewer
Diapos.
Opción
Index display
Normal
Sel. cont.
100MSDCF
Num.: 1/1234
Tamaño: 1024x768
Archivo: SPJP0001.JPG
Fecha: 15/7/2002 12:34
: Aparecerá cuando un archivo esté protegido
: Aparecerá cuando un archivo se haya ajustado como archivo de
inicio
: Icono Película
4 Seleccione “Sel. cont.” y pulse la tecla ENTER.
Aparecerá el menú Sel. cont.
Carpeta actual
Inicio MS
Selec.
Visor de imágenes
Diapos.
Opción
Sel. cont.
Al nivel
superior
Modo cámara digi.
No
SPJP0001.JPG
Num.: 1/1234
Tamaño: 1024x768
Archivo:
Fecha:
15/7/2002 12:34
El primer archivo de imagen de la carpeta actual
Visualización de la diapositiva
Carpetas
incluidas en
la carpeta
actual
(Continúa)
Presentación con un archivo de imagen — Visor de imágenes
13
ES
Page 74

5 Pulse la tecla , para seleccionar el menú Seleccionar carpetas.
Inicio MS
Selec.
Visor de imágenes
Diapos.
Opción
Sel. cont.
Modo cámara digi.
No
Num.: 1/1234
Tamaño: 1024x768
Archivo: SPJP0001.JPG
Fecha: 15/7/2002 12:34
6 Seleccione la carpeta para la presentación y pulse la tecla ENTER.
Aparecerán el título y el primer archivo de imagen de la carpeta seleccionada.
Si desea seleccionar las carpetas que no se muestran, pulse la tecla , para
seleccionar la barra de desplazamiento del menú Seleccionar carpetas y pulse
la tecla m o M. Aparecerán las diez carpetas subsiguientes.
7 Seleccione “Diapos.” y pulse la tecla ENTER.
Inicio MS
Selec.
Visor de imágenes
Diapos.
Opción
Sel. cont.
Ejecutar
Efecto
No
Av. diap.
Auto
Interval
5seg
Cerrar
ES
Num.: 1/1234
Tamaño: 1024x768
Archivo: SPJP0001.JPG
Fecha: 15/7/2002 12:34
Efecto: para ajustar el efecto cuando se muestra la diapositiva
Av. diap.: para ajustar la visualización automática o manual de diapositivas
Interval: para ajustar el período durante el cual se mostrará cada diapositiva
(la duración de este período es aproximada). Sin embargo, no funcionará
si “Av. diap” está ajustado en “Manual”.
8 Seleccione cada elemento y pulse la tecla ENTER.
9 Ajuste el elemento y pulse la tecla ENTER.
10Seleccione “Ejecutar” y pulse la tecla ENTER.
14
Presentación con un archivo de imagen — Visor de imágenes
Page 75

Para ejecutar la presentación de diapositivas
Si la opción “Av. diap.” del ajuste de presentación de diapositivas se ajusta
en “Auto”, las diapositivas cambian automáticamente. Si se selecciona un
archivo de película, la película se reproduce automáticamente. Después de la
reproducción, aparecerá automáticamente la diapositiva subsiguiente.
Cuando desee finalizar la presentación de diapositivas, pulse la tecla MS
SLIDE o ENTER. Si está ajustada en “Manual”, pulse las siguientes teclas
para proseguir con la presentación de diapositivas.
,: para mostrar la siguiente diapositiva
<: para mostrar la diapositiva anterior
MS SLIDE: para finalizar la presentación de diapositivas
Si la opción “Av. diap.” se ajusta en “Manual”, la película no se reproduce y
aparecerá la primera imagen de un archivo de película. Al pulsar la tecla ,,
aparecerá la diapositiva subsiguiente. Para reproducir la película, consulte
“Reproducción del archivo de película” en la página 16.
Para volver a la página Inicio MS antes de ejecutar la presentación de
diapositivas
Seleccione “Cerrar”.
Para ver un archivo de imagen en modo de pantalla completa
1 Seleccione un archivo de imagen de la pantalla de miniaturas y pulse la
tecla ENTER.
2 Seleccione la opción “Pant. Completa” y pulse la tecla ENTER.
El archivo de imagen seleccionado se agranda para llenar toda la pantalla.
Num.: 1/1234
Tama ño: 1024x768
Archivo: SPJP0001.JPG
Fecha: 15/7/2002 12:34
Pulse las teclas siguientes para ejecutar la presentación de diapositivas con la
imagen en la pantalla completa.
,: para ver las diapositivas hacia adelante. (La presentación de diapositivas
se finaliza con el último archivo de imagen.)
<: para ver las diapositivas hacia atrás. (La presentación de diapositivas se
finaliza con el primer archivo de imagen.)
MS SLIDE: para volver a Inicio MS
Visualización de la diapositiva
Presentación con un archivo de imagen — Visor de imágenes
15
ES
Page 76

Ejecución inmediata de la presentación de diapositivas
Puesto que los ajustes se memorizan aunque cambie la entrada después del
ajuste de los pasos 1 a 9, pulse la tecla MS SLIDE del mando a distancia al
iniciar la presentación. La entrada cambia a MS y la presentación se inicia
de forma inmediata. Para finalizar la presentación de diapositivas, si el
ajuste “Av. diap.” está en “Auto”, pulse la tecla MS SLIDE o ENTER. Si
dicho ajuste está en “Manual”, pulse la tecla MS SLIDE.
Reproducción de un archivo de película
Si el ajuste “Av. diap.” está en “Manual”, puede utilizar el Reproductor de
películas que aparece en la pantalla para reproducir una película. También
puede iniciar la reproducción de una película al seleccionar un archivo de
película en el modo de visualización de miniaturas.
Notas
• Si el ajuste “Av. diap.” está en “Auto”, el Reproductor de películas no se
puede visualizar.
• La unidad puede reproducir un archivo de película MPEG1 grabado
mediante Sony MPEG MOVIE, etc. (Es posible que ocasionalmente se
produzcan saltos en las películas durante su reproducción.)
Archivos MPEG1 que se pueden utilizar: MPEG MOVIE AD/EX/HQ/CV,
MPEG1 de VAIO Giga pocket (equivalente a un CD de vídeo)
1 Realice los pasos 1 a 7 que se describen en “Presentación con un archivo
de imagen — Visor de imágenes”.
2 Ajuste la opción “Av. diap.” del menú de ajustes Diapos.
Inicio MS
Selec.
Visor de imágenes
Diapos.
Opción
Sel. cont.
Ejecutar
Efecto
No
Av. diap.
Manual
Interval
5seg
Cerrar
Num.: 1/1234
Tamaño: 1024x768
Archivo: SPJP0001.JPG
Fecha: 15/7/2002 12:34
3 Pulse la tecla ENTER.
4 Seleccione “Ejecutar” y pulse la tecla ENTER.
Para ejecutar la presentación de diapositivas
Pulse las teclas siguientes.
,: para visualizar la diapositiva subsiguiente
<: para visualizar la diapositiva anterior
MS SLIDE: para finalizar la presentación de diapositivas
ES
16
Presentación con un archivo de imagen — Visor de imágenes
Page 77

Si se selecciona un archivo de película mediante la tecla < o ,, aparecerá
el Reproductor de películas en la pantalla. Utilice el Reproductor de películas
de la siguiente manera:
[Reproductor de películas]
Ant.
Pant. Completa
Menú
Inicio MS
Sig.
Num.: 1/1234
Tamaño: 320x240
Archivo: BASEBALL.MPG
Fecha: 15/7/2002 12:34
N(reproducir/pausa): para reproducir. Durante la reproducción, el botón
cambia al botón X (pausa).
x(detener): para detener la reproducción
Pant. Completa: para reproducir en el modo de pantalla completa
Menú: para ver la pantalla de índice
[Visualización guiada]
< Ant.: para ver la diapositiva anterior en el modo de pausa de película.
Durante la reproducción, la visualización guiada cambia a < Reb
(rebobinar).
, Sig: para ver la diapositiva subsiguiente en el modo de pausa de película.
Durante la reproducción, la visualización guiada cambia a , Avance
(avance rápido).
Para reproducir una película
Pulse N.
Se iniciará la reproducción. Cuando ésta finalice, se detendrá en la primera
imagen del archivo de película que se visualiza.
Si desea detener la reproducción temporalmente, pulse la tecla m para
seleccionar x.
Para reproducir en el modo de pantalla completa
Seleccione “Pant. Completa” y pulse la tecla ENTER.
La imagen se agrandará para llenar toda la pantalla y se iniciará la
reproducción.
Si pulsa la tecla M , m , <, , o ENTER durante la reproducción, el
Reproductor de películas volverá a aparecer en la pantalla.
Nota
Si el tamaño de la imagen es pequeño, éste no aumentará a pantalla completa
aunque seleccione “Pant. Completa”.
Para volver a Inicio MS sin ejecutar la reproducción de la
película
Seleccione “Inicio MS”.
Presentación con un archivo de imagen — Visor de imágenes
Visualización de la diapositiva
ES
17
Page 78

Ejecución inmediata de la presentación de diapositivas
Puesto que los ajustes se memorizan incluso si se cambia la entrada después
del ajuste de los pasos 1 a 3, pulse la tecla MS SLIDE del mando a distancia
en el momento en el que se inicia la presentación. La entrada se cambia a MS
y la presentación de diapositivas se inicia inmediatamente. Para finalizar la
presentación, pulse la tecla MS SLIDE.
Para iniciar la reproducción en modo de pantalla completa cuando se
visualizan miniaturas
1 Seleccione un archivo de película y pulse la tecla ENTER.
Aparecerá la pantalla de índice. (Consulte la página 20.)
2 Seleccione “Repr. de películas” y pulse la tecla ENTER.
Aparecerá el Reproductor de películas.
3 Seleccione “Pant. Completa” y pulse la tecla ENTER.
La reproducción se inicia automáticamente.
Funcionamiento de un archivo de película
Seleccione “Menú” y pulse la tecla ENTER.
Aparecerá la pantalla de índice. Utilice esta pantalla para mostrar u ocultar
información sobre el archivo de película, proteger archivos de película
importantes o eliminar los que no se necesiten.
Para obtener detalles sobre las operaciones de la pantalla de índice, consulte
“Funcionamiento del archivo de imagen” en la página 19.
ES
18
Presentación con un archivo de imagen — Visor de imágenes
Page 79

B
Ajuste/Visualización de un archivo de imagen
Funcionamiento de un archivo de
imagen
Para utilizar un archivo de imagen, visualice la pantalla de índice. (Consulte
las páginas 20 y 21.)
Si se visualiza el Visor de presentaciones
Para visualizar la pantalla de índice, seleccione el contenido en el modo de
visualización Normal o Miniatura y pulse la tecla ENTER.
Puede utilizar el menú de la pantalla de índice para agrandar un archivo de
imagen en modo de pantalla completa. Si pulsa la tecla ENTER al visualizar
una imagen en este modo, puede mostrar u ocultar la información del archivo
de imagen.
Si se visualiza el Visor de imágenes
Las operaciones disponibles dependen del tipo de archivo de imagen que se
seleccionará (imagen fija/película).
Si la opción “Miniatura” se selecciona para “Present. Índice”
Para mostrar la pantalla de índice, seleccione una miniatura y pulse la tecla
ENTER. Podrá realizar las siguientes operaciones mediante el menú que
aparece en la pantalla de índice: visualizar un archivo de imagen en modo de
pantalla completa, proteger un archivo de imagen importante, girar un
archivo de imagen (únicamente una imagen fija), registrar el archivo de
imagen de inicio (únicamente una imagen fija) y eliminar un archivo de
imagen.
Cuando se selecciona un archivo de imagen en modo de pantalla
completa
Para mostrar la pantalla de índice, pulse la tecla ENTER cuando la imagen
aparezca en el modo de pantalla completa.
Podrá realizar las siguientes operaciones mediante el menú de la pantalla de
índice: visualizar/ocultar información de un archivo de imagen, proteger un
archivo de imagen importante, girar un archivo de imagen, registrar el
archivo de imagen de inicio y eliminar un archivo de imagen.
Cuando se selecciona un archivo de película (Reproductor de
películas)
Para visualizar la pantalla de índice, seleccione la opción “Menú” del
Reproductor de películas.
Podrá realizar las siguientes operaciones mediante el menú de la pantalla de
índice: visualizar/ocultar la información de un archivo de película, proteger
un archivo de película importante y eliminar un archivo de película.
Para obtener detalles sobre el uso de la pantalla de índice, consulte la página
correspondiente.
Ajuste/Visualizaci
ón de un archivo de imagen
Funcionamiento de un archivo de imagen
19
ES
Page 80

Pantalla de índice de un archivo de imagen fija
Inicio MS
Selec.
Visor de imágenes
Aparece cuando un
archivo está protegido
Diapos.
Opción
Aparece cuando un
archivo se ha ajustado
Sel. cont.
como archivo de inicio
Número total de archivos
de imagen en el contenido
actual
Orden en el contenido
actual
Num.: 1/1234
Tamaño: 1024x768
Resolución Fecha
Para seleccionar un archivo de imagen en el modo de pantalla de miniaturas,
pulse la tecla M/m/</,.
Si desea visualizar otros archivos de imagen cuando el contenido actual tiene
más de 16 archivos de imagen, seleccione uno de los archivos de imagen que
se muestran en la fila inferior y pulse la tecla m, o bien seleccione uno de los
archivos de imagen que se muestran en la columna derecha, pulse la tecla ,
para seleccionar la barra de desplazamiento y, a continuación, pulse la tecla
m.
Para iniciar la presentación de diapositivas, pulse la tecla MS SLIDE en la
pantalla de índice. La presentación se inicia a partir del archivo de imagen
seleccionado.
Pant. Complet
Protec.
Rotar
Iniciar
Borrar
Cerrar
Archivo: SPJP0001.JPG
Fecha: 15/7/2002 12:34
Pantalla de
índice
Aparece
cuando se
visualiza el
Visor de
imágenes
Nombre y
formato del
archivo
Pantalla de índice de un archivo de película
Inicio MS
Selec.
Visor de imágenes
Aparece cuando un
archivo está protegido
Aparece cuando
se selecciona un
archivo de película
Número total de
archivos de imagen
en el contenido actual
Orden en el contenido
actual
ES
20
Funcionamiento de un archivo de imagen
Diapos.
Opción
Sel. cont.
Num.: 1/1234
Tamaño: 1024x768
Repr. de películas
Protec.
Rotar
Iniciar
Borrar
Cerrar
Archivo: SPJP0001.JPG
Fecha: 15/7/2002 12:34
Resolución Fecha
Pantalla de
índice
Nombre y
formato del
archivo
Page 81

Pantalla de índice de un archivo de imagen fija en modo de pantalla
completa
Aparece cuando se visualiza el
Visor de imágenes
Inicio MS
Information
Sí
Protec.
Protect
Rotar
Iniciar
Borrar
Número total de
archivos de imagen
en el contenido actual
Orden en el
contenido actual
Aparece cuando un
archivo está protegido
Aparece cuando un archivo se ha
ajustado como archivo de inicio
Cerrar
Num.: 1/1234
Tamaño: 1024x768
Resolución
Archivo: SPJP0001.JPG
Fecha: 15/7/2002 12:34
Fecha
Nombre y
formato
del
archivo
Si desea visualizar otro archivo de imagen cuando el contenido actual tiene
varios archivos de imagen, pulse la tecla ,.
Para volver a Inicio MS, pulse la tecla MS SLIDE en la pantalla completa de
índice.
Icono Película
Aparece cuando un
archivo está protegido
Orden/número total de
archivos de imagen en el
contenido actual
Reproductor de películas
Ant.
Pant. Complet
Menú
Inicio MS
Sig.
Información
Sí
Protec.
Borrar
Cerrar
Num.: 1/1234
Tamaño: 320x240
Resolución Fecha
Archivo: BASEBALL.MPG
Ajuste/Visualizaci
ón de un archivo de imagen
Fecha: 15/7/2002 12:34
Nombre y formato del
archivo
Funcionamiento de un archivo de imagen
21
ES
Page 82

Protección de un archivo importante
Tras seleccionar el archivo que desee proteger, ajuste “Protec.” en “Sí” o
“Todo sí”. Cuando un archivo está protegido, se muestra la marca de
protección.
Giro de un archivo de imagen
Tras seleccionar el archivo que desee girar, ajuste “Rotar”. La imagen gira
90° cada vez que se pulsa la tecla ENTER.
Nota
Un archivo protegido no se puede girar.
Registro de un archivo como imagen de inicio
Puede registrar un archivo de imagen del Memory Stick como archivo de
imagen de inicio que se muestra al activar la alimentación.
Ajuste “Iniciar” en “Intro”. Cuando el archivo está registrado, se muestra la
marca de inicio.
Cuando desee utilizar el archivo de imagen registrado como archivo de
inicio, ajuste el elemento “Iniciar” de la pantalla Ajuste en “Personal”
(consulte la página 26).
Nota
Puesto que el ajuste de “Personal” se memoriza en el Memory Stick,
cuando desee utilizar el archivo de imagen registrado como archivo de inicio,
inserte el Memory Stick en el proyector antes de encenderlo.
Eliminación de un archivo de imagen
Puede eliminar el archivo de imagen seleccionado o todos los archivos de
imagen del contenido seleccionado.
1 Seleccione “Borrar” y pulse la tecla ENTER.
2 Seleccione un elemento. Cuando aparezca el mensaje “Eliminado archivo
seleccionado” o “Eliminados todos los archivos”, seleccione “Sí” y, a
continuación, pulse la tecla ENTER.
Todo Im.: elimina todos los archivos de imagen del contenido seleccionado
Sel. Img.: elimina el archivo de imagen seleccionado
Cerrar: cuando no desee eliminar el archivo
Nota
Un archivo protegido no se puede eliminar.
Visualización/ocultación de la información de archivo de imagen
Seleccione un archivo de imagen, seleccione “Información” en la pantalla de
índice y, a continuación, pulse la tecla ENTER. Si desea visualizar la
ES
22
Funcionamiento de un archivo de imagen
Page 83

información del archivo de imagen, seleccione “Sí”. La información
aparecerá en la parte inferior de la pantalla. Si no desea visualizarla,
seleccione “No”.
Si se visualiza el Visor de presentaciones, aparecerán el número y el tamaño
(resolución) del archivo de imagen. Si se muestra el Visor de imágenes,
aparecerán el número, el tamaño (resolución), el formato y la fecha de
grabación del archivo de imagen.
Nota
Para un archivo de imagen procesado en un ordenador, es posible que
aparezca la fecha de actualización en lugar de la fecha de grabación.
Organización de archivos de imagen para una presentación
Puede ordenar los archivos de imagen en una carpeta por su nombre o por su
fecha de actualización, en orden ascendente o descendente.
1 Seleccione “Opción” en Inicio MS y, a continuación, pulse la tecla
ENTER.
2 Seleccione “Archivo” y pulse la tecla , o ENTER.
3 Seleccione “Ordenar” y pulse la tecla ENTER.
4 Seleccione el elemento que desee ajustar y pulse la tecla ENTER.
Nota
Para un archivo de imagen procesado en un ordenador, es posible que la
fecha que se visualiza sea diferente a la fecha de actualización.
Ajuste/Visualizaci
ón de un archivo de imagen
Visualización sólo de los archivos de imagen fija o sólo de los
archivos de película
Es posible filtrar todos los archivos de imagen de una carpeta con el fin de
visualizar sólo los archivos de imagen fija o sólo los archivos de película.
1 Seleccione “Opción” en Inicio MS y, a continuación, pulse la tecla
ENTER.
2 Seleccione “Archivo” y pulse la tecla , o ENTER.
3 Seleccione “Filtrar” y pulse la tecla ENTER.
4 Seleccione el elemento que desee ajustar y pulse la tecla ENTER.
Imagen estática: para visualizar sólo imágenes fijas
Película: para visualizar sólo archivos de película
No: para visualizar todos los archivos sin filtrado
Nota
Si se ajusta el filtro, aparecerá el nombre del filtro actual (Imagen estática o
Película) en la parte inferior derecha de Inicio MS.
Funcionamiento de un archivo de imagen
23
ES
Page 84

B
Ajustes útiles
Visualización sólo de los archivos de
imagen grabados con una cámara
digital
La unidad puede seleccionar y visualizar sólo los archivos de imagen JPEG y
MPEG1 grabados con una cámara digital (compatible con DCF) de entre los
archivos de imagen que se almacenan en un Memory Stick.
1 Seleccione “Sel. cont” en Inicio MS y, a continuación, pulse la tecla
ENTER.
2 Seleccione “Modo cámara digi.” y pulse la tecla ENTER.
Inicio MS
Selec.
Visor de imágenes
Diapos.
Opción
Sel. cont.
Modo cámara digi.
No
Sí
No
ES
Num.: 1/1234
Tamaño: 1024x768
Archivo: SPJP0001.JPG
Fecha: 15/7/2002 12:34
3 Seleccione “Sí” y pulse la tecla ENTER.
Inicio MS
Selec.
Visor de imágenes
Diapos.
Opción
Sel. cont.
Modo cámara digi.
Num.: 1/1234
Tamaño: 1024x768
Notas
• Esta opción no funciona si se almacenan en un Memory Stick más de
2.000 archivos de imagen grabados con una cámara digital.
• Para un archivo de imagen grabado con la función Voice Memo de una
cámara digital Sony, sólo aparecerá el archivo de imagen fija.
Visualización sólo de los archivos de imagen grabados con una cámara digital
24
Archivo: SPJP0001.JPG
Fecha: 15/7/2002 12:34
Page 85

Inicio automático de una presentación
— Ejecución automática
Cuando se inserta en la ranura para Memory Sticks el Memory Stick con
el archivo de imagen para el que se ha establecido la función de ejecución
automática mediante Projector Station for Presentation, la entrada cambia
automáticamente a MS y se inicia la presentación de diapositivas.
Configuración de la función de ejecución automática
1 Seleccione “Opción” en la página Inicio MS y pulse la tecla ENTER.
2 Seleccione “Ajuste” y pulse la tecla ENTER.
3 Seleccione “Eje. Auto” y pulse la tecla ENTER.
Inicio MS
Selec.
Visor pres.
Diapos
Opción
Present. Índice
Miniatura
Sel. cont.
Archivo
Ajuste
Memory Stick
Cerrar
Eje. Auto
Sí
Sí
No
Iniciar
Original
Ajustes útiles
Num.: 1/1234
Tamaño: 1024x768
4 Seleccione “Sí” y pulse la tecla ENTER.
Cuando no desee utilizar la función de ejecución automática
Ajuste “Eje. Auto” en “No”.
Notas
• Cuando la ejecución automática no está ajustada en “Sí” mediante
Projector Station for Presentation, la función de ejecución automática no
puede utilizarse para iniciar la presentación de diapositivas aunque ajuste
“Eje. Auto” en “Sí” en la página Inicio MS.
• Cuando desee utilizar la función de ejecución automática para un archivo
de imagen de formato JPEG, cree el material de presentación mediante
Projector Station for Presentation y ajuste la función de ejecución
automática en “Sí”.
Inicio automático de una presentación — Ejecución automática
25
ES
Page 86

Proyección de un archivo seleccionado
con la alimentación activada — Inicio
Al activar la alimentación, el archivo de imagen seleccionado se proyecta
durante un minuto aproximadamente.
Cuando desee utilizar el archivo de imagen registrado como archivo de inicio, es
preciso registrar un archivo de imagen como archivo de inicio en la pantalla de
índice (consulte la página 22).
1 Seleccione “Opción” en la página Inicio MS y pulse la tecla ENTER.
2 Seleccione “Ajuste” y pulse la tecla , o ENTER.
3 Seleccione “Iniciar” y pulse la tecla ENTER.
Inicio MS
Selec.
Visor de imágenes
Diapos.
Opción
Sel. cont.
Archivo
Ajuste
Memory Stick
Cerrar
Eje. Auto
Sí
Iniciar
Original
Original
Personal
No
ES
Num.: 1/1234
Tamaño: 1024x768
Archivo: SPJP0001.JPG
Fecha: 15/7/2002 12:34
4 Seleccione el elemento y pulse la tecla ENTER.
Original: selecciona la imagen original memorizada en el proyector
Personal: selecciona el archivo de imagen registrado en la pantalla de índice
No: cuando no desee eliminar el inicio
Notas
• Cuando desee borrar la pantalla de inicio mientras la visualiza, pulse la
tecla M/m/</, o ENTER.
• Cuando desee utilizar el archivo registrado, inserte el Memory Stick
donde está guardado dicho archivo y active la alimentación.
• Puede registrar un archivo de inicio por cada Memory Stick.
26
Proyección de un archivo seleccionado con la alimentación activada — Inicio
No es posible cambiar la imagen original
que se almacenó en el Memory Stick
Page 87

B
Funcionamiento del Memory Stick
Visualización de la información del
Memory Stick
Es posible visualizar el tipo y la capacidad utilizada y restante del Memory
Stick que se está utilizando. La capacidad restante del Memory Stick
también se muestra en la parte inferior derecha de Inicio MS.
1 Seleccione “Opción” en Inicio MS y, a continuación, pulse la tecla
ENTER.
2 Seleccione “Memory Stick”.
Aparecerá la información del Memory Stick que se está utilizando.
Inicio MS
Selec.
Visor de imágenes
Diapos.
Opción
Sel. cont.
Archivo
Ajuste
Memory Stick
Tipo: MEMORYSTICK 128M
Formato
Capacidad: 123.3MB
Usada: 30.8MB
Restante: 92.5MB
Cerrar
Para volver a Inicio MS
Seleccione “Cerrar”.
Num.: 1/1234
Tamaño: 1024x768
Archivo: SPJP0001.JPG
Fecha: 15/7/2002 12:34
Visualización de la información del Memory Stick
27
ES
Funcionamiento del Memory Stick
Page 88

Formateo de un Memory Stick
Cuando no pueda utilizar un Memory Stick, formatéelo mediante el
proyector.
Los datos se borran al formatear el Memory Stick.
1 Seleccione “Opción” en la página Inicio MS y pulse la tecla ENTER.
2 Seleccione “Memory Stick” y pulse la tecla , o ENTER.
3 Pulse la tecla ENTER de nuevo.
Inicio MS
Selec.
Visor de imágenes
Diapos.
Opción
Sel. cont.
Archivo
Ajuste
Memory Stick
Eliminados todos los archivos
Cerrar
Tipo: MEMORYSTICK 128M
No
Sí
Formato
Capacidad: 123.3MB
Usada: 30.8MB
Restante: 92.5MB
ES
4 Cuando aparezca el mensaje “Eliminados todos los archivos”, seleccione
“Sí” y, a continuación, pulse la tecla ENTER.
Se inicia el formateo.
Cuando desee volver a la página Inicio MS antes de formatear el
Memory Stick
Seleccione “Cerrar”.
Notas
• Al formatear el Memory Stick, el archivo de imagen protegido también
se borra.
• Cuando se formatea el Memory Stick con la lengüeta de protección
contra escritura ajustada en LOCK, aparece el mensaje “Memory Stick
bloqueado”.
• Durante el formateo del Memory Stick, no es posible realizar las
operaciones del Memory Stick de Projector Station for Presentation ni
utilizar las teclas de la página Inicio MS.
28
Formateo de un Memory Stick
Num.: 1/1234
Tamaño: 1024x768
Archivo: SPJP0001.JPG
Fecha: 15/7/2002 12:34
Page 89

B
Otros
Solución de problemas
Si tiene cualquier problema con la página Inicio MS, realice las siguientes
comprobaciones. Si el problema persiste, consulte con el proveedor Sony más próximo.
Problema Causa y solución
No es posible insertar el
Memory Stick en la
unidad.
No es posible guardar un
archivo.
No es posible eliminar un
archivo.
No es posible eliminar
todos los materiales.
No es posible formatear el
Memory Stick.
Los archivos de imagen
fija en formato JPEG que
se almacenan en un
Memory Stick no se
pueden visualizar.
Los archivos de película
en formato MPEG1 que se
almacenan en un Memory
Stick no se pueden
visualizar.
La imagen no se proyecta
y aparece
Es posible que se produzcan
saltos o perturbaciones en las
películas durante su
reproducción.
Aparecerán bandas negras en
la parte superior e inferior de
la pantalla durante la
reproducción de la película
en pantalla completa.
o .
• El Memory Stick no está orientado en el sentido correcto.
c Inserte el Memory Stick con la marca de flecha orientada
hacia la ranura para Memory Stick del proyector.
• El Memory Stick está lleno.
c Elimine los archivos no deseados del Memory Stick.
• La lengüeta de protección contra escritura del Memory Stick se
ha ajustado en LOCK.
c Cancele el bloqueo.
• La lengüeta de protección contra escritura del Memory Stick se
ha ajustado en LOCK.
c Cancele el bloqueo.
• El archivo está protegido.
c Cancele la protección en la pantalla de índice.
• La lengüeta de protección contra escritura del Memory Stick se
ha ajustado en LOCK.
c Cancele el bloqueo.
• El archivo está protegido.
c Cancele la protección en la pantalla de índice.
• La lengüeta de protección contra escritura del Memory Stick se
ha ajustado en LOCK.
c Cancele el bloqueo.
• El Memory Stick no funciona.
c Utilice otro Memory Stick.
• Se ha ajustado la opción “Filtrar” en el menú “Opción”.
c Ajuste la opción “Filtrar” en “Imagen estática” o “No”.
• Se ha ajustado la opción “Filtrar” en el menú “Opción”.
c Ajuste la opción “Filtrar” en “Película” o “No”.
• El archivo no es compatible con DCF.
c Cree el material de presentación mediante Projector Station for
Presentation.
• No se trata de un fallo de funcionamiento de la unidad.
c Para conocer los formatos de archivo de película que se pueden
utilizar, consulte la página 16.
• Es posible que el ajuste de “Wide Mode” (Modo panorámico) del
menú INPUT SETTING del proyector esté ajustado en “Sí”.
c Para obtener más información acerca del ajuste de “Wide
Mode”, consulte las instrucciones de funcionamiento del
proyector.
Solución de problemas
29
Otros
ES
Page 90

Indicaciones en pantalla
Si las siguientes indicaciones aparecen en pantalla, cree el material de presentación de
nuevo mediante Projector Station for Presentation.
El archivo de imagen está en un formato JPEG o MPEG no
compatible.
Hay una que no es compatible con DCF.
No hay ningún archivo de imagen seleccionado.
Hay un archivo de imagen, pero la miniatura está dañada.
El archivo de imagen está dañado.
ES
30
Solución de problemas
Page 91

31
Otros
ES
Page 92

Printed in Spain
 Loading...