

Page 1
1
2
3
4
5
6
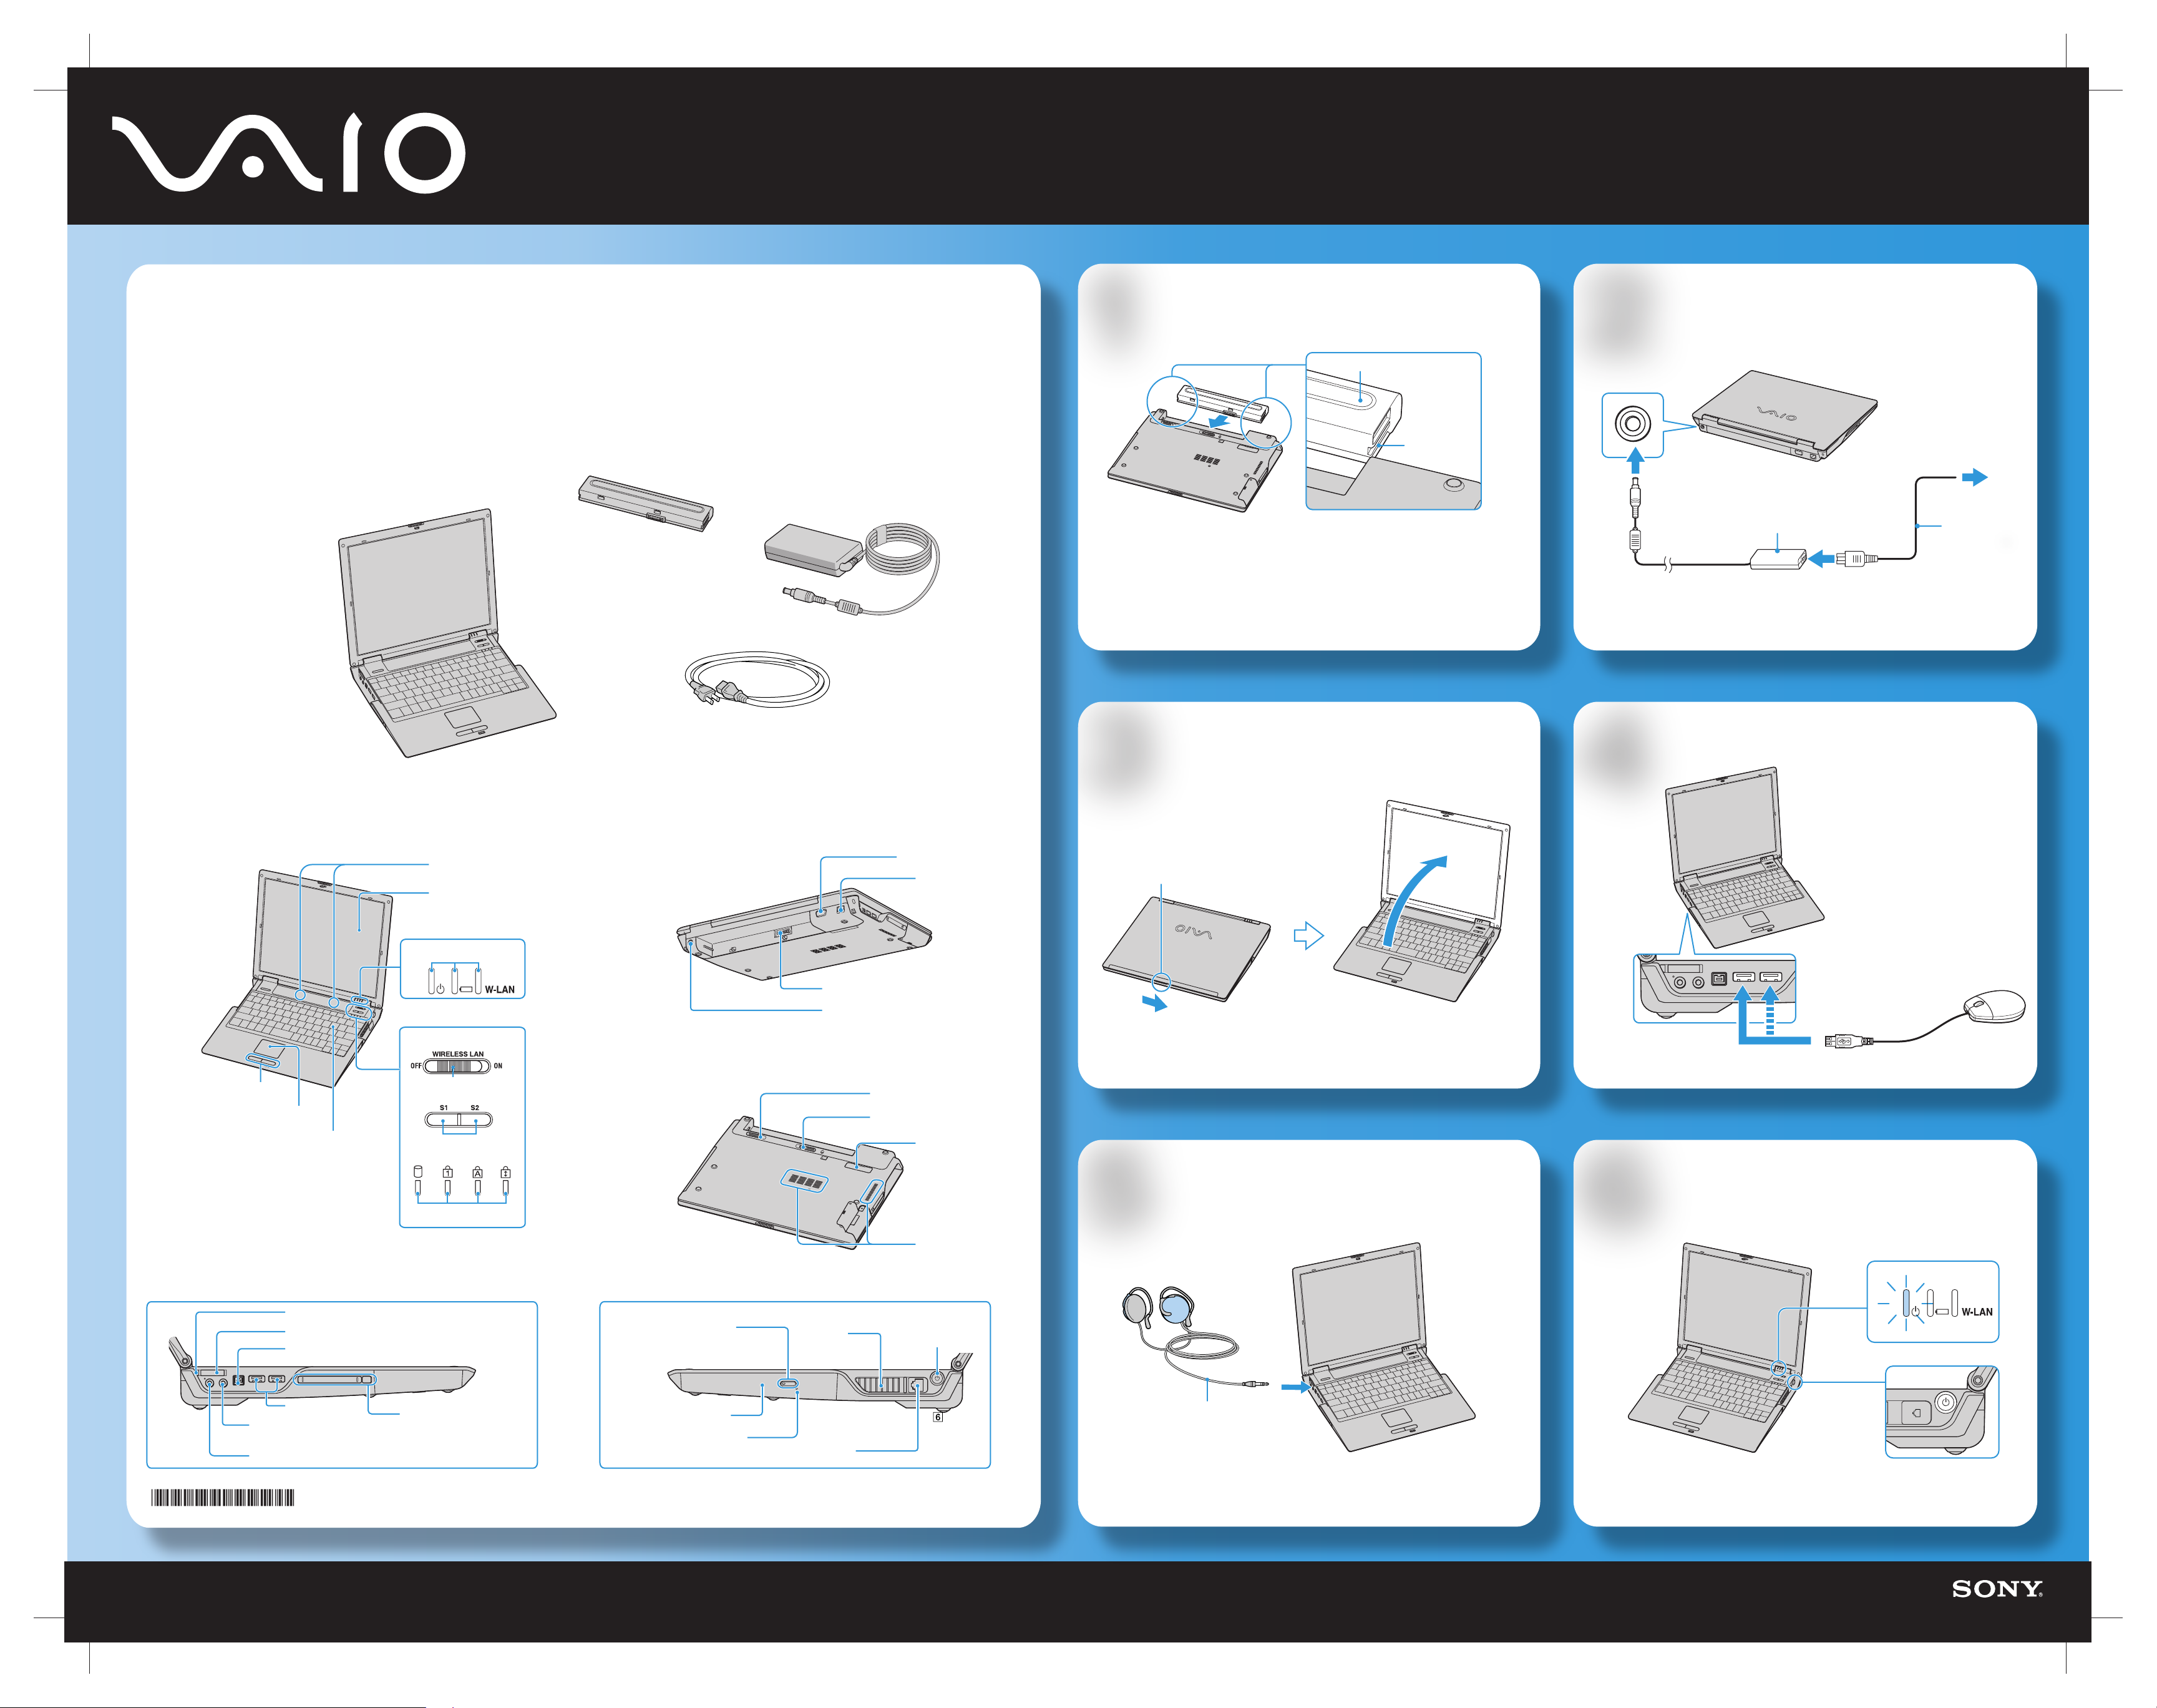
Meet your new
Insert Battery
Connect AC
VGN-B100 Series
Thank you for purchasing a Sony VAIO® computer!
Your new computer is a superb blend of high
technology and easy-to-use functionality. The
information provided here is designed to help
you to become familiar with your computer.
A Main unit
B Battery
C AC Adapter
D Power Cord
A
B
D
C
Battery
1 Unlock the UNLOCK/LOCK switch.
2 Insert the battery.
3 Lock the UNLOCK/LOCK switch.
Grooves
AC adapter
Power cord
FRONT
Left and right buttons
Touch pad
Speakers
Computer screen (LCD)
Indicators
Wireless LAN switch
REAR
BOTTOM
Monitor (VGA) port
Battery connector
DC IN port
UNLOCK/LOCK switch
RELEASE switch
Network (Ethernet)
port
Open Lid
RELEASE switch
Connect Mouse
* Mouse available separately.
LEFT
Keyboard
Memory Stick® media indicator
Memory Stick® media slot
i.LINK® (IEEE 1394) S400 port
USB 2.0 ports
Headphones jack
Microphone jack
2-541-670-01 © 2004 Sony Electronics Inc. All rights reserved. Printed in Japan.
S1 and S2 buttons
Indicators
PC Card slot and
eject button
RIGHT
Optical drive eject
button and indicator
Optical drive
Optical drive
manual eject hole
Air vent
Modem jack
Port replicator
connector
Air vents
Power button
Connect Headphones
Audio cable
(not supplied)
* Headphones and speakers available separately.
Power On
Page 2

Connect the
Port Replicator
Locate the
User Guide
1 Turn off the computer and disconnect all
attached devices.
2 On the bottom of the computer, slide the port
replicator cover down until the port replicator
connector is completely visible.
3 Align the sides of the computer with the
sidewalls of the port replicator, and gently place
the computer on top of the port replicator until it
clicks into place.
4 Plug the AC adapter into the DC IN port
on the port replicator, and plug
the power cord into the
AC adapter and an AC outlet.
* Port replicator available separately.
AC adapter
The online VAIO® Computer User Guide offers you more valuable information about your new computer.
Once your computer is up and running, you can find the guide by following these instructions.
Power indicator
1 Click Start > VAIO Help and Support.
2 Under Pick A Help topic, click VAIO User Guide.
To AC outlet
Power cord
Use the
A wireless local area network (LAN) is a network in which you can
connect through a wireless (radio) connection. You can opt to
purchase a Sony Wireless LAN Access Point to set up a LAN.
Wireless
1 Make sure an access point is set up. (See the instructions
that accompanied the access point.)
2 Move the Wireless switch to ON.
3 Select the Enable Wireless LAN option in the Wireless
Device Switch window, and click OK.
4 Click Start > All Programs > VAIO Wireless Utility.
5 Follow the steps provided by the VAIO Wireless Utility.
What do I do if my computer stops responding?
Although unsaved files may be lost, it is best to turn off your computer by following these steps:
Click Start > Turn Off Computer > Turn Off.
Alternatively, you may follow one or more of these suggestions to turn off the computer:
Press the Ctrl+Alt+Delete keys simultaneously. Select the Shut Down menu, and click Turn Off.
This option is particularly useful if your computer stops responding while you are playing a CD or DVD.
Press and hold the power button until the computer turns off.
Disconnect the AC adapter and remove the battery.
What do I do if my computer won’t start?
The power indicator on the computer is off when the computer is not securely attached to a source of power. Make sure the computer is plugged into the AC
adapter and the adapter is plugged into an outlet. If you are using battery power, make sure the battery is inserted properly and charged. You may check the
power source by disconnecting the AC adapter and removing the battery. Wait one minute before reattaching the AC adapter and reinserting the battery.
Additional suggestions include:
If the computer is plugged into a power strip or uninterruptible power supply (UPS), make sure the power strip or UPS is turned on
and working.
If your computer is connected to an external display, such as a multimedia monitor, make sure the display is plugged into a power source
and turned on. The brightness and contrast controls may need to be adjusted. See the guide that came with your display for more
details.
If the computer is starting from a floppy disk, eject the disk from the floppy disk drive (if applicable).
If you notice condensation on the computer, do not use the computer for at least one hour. Condensation may cause the
computer to malfunction.
Use the
Internet
Rubber tab
Telephone cable
Modem jack
1 Locate the Modem jack on your computer.
2 Plug one end of the telephone cable into the
Modem jack. Make sure it clicks into place.
3 Plug the other end into the wall jack.
To wall jack
To set up an Internet connection
1 Click Start > All Programs > Accessories > Communications >
New Connection Wizard.
2 Click Next.
3 If it is not already selected, click Connect to the Internet.
4 Click Next.
5 Follow the on-screen instructions.
To register your computer
You are prompted to register your computer the first time you turn on the unit.
Follow the on-screen instructions to complete the registration process. If you
are not able to register your computer during the first session, you are
provided with additional registration opportunities later. You can also register
your computer online at http://www.sony.com/vaioregistration.
Take advantage of Sony’s commitment to quality customer support and
receive these benefits by registering your computer:
Sony Customer Support — Talk to a support representative to troubleshoot
problems you may have with your computer.
Product Information Notification — By giving Sony your contact information,
you will enable Sony to reach you regarding performance updates and
upgrades.
Refer to the following Web sites for additional information about your
computer.
http://www.vaio.net
http://www.sonystyle.com
http://www.sony.com/pcsupport
 Loading...