

Sony UP-CX2 Operating Instructions Manual

4-198-698-11 (1)
Digital Photo Printer
Operating Instructions
Before operating the unit, please read this manual thoroughly
and retain it for future reference.
UP-CX2
© 2010 Sony Corporation

Owner’s Record
The model and serial numbers are located at the rear.
Record these number in the space provided below.
Refer to these numbers whenever you call upon your Sony
dealer regarding this product.
Model No. ____________________
Serial No. ____________________
WARNING
To reduce the risk of fire or electric shock, do not
expose this apparatus to rain or moisture.
To avoid electrical shock, do not open the
cabinet. Refer servicing to qualified personnel
only.
If you have any questions about this product, you may call;
Sony Customer Information Service Center 1-800-2227669 or http://www.sony.com/
Declaration of Conformity
Trade Name : SONY
Model : UP-CX2
Responsible Party :Sony Electronics Inc.
Address : 16530 Via Esprillo, San Diego,
CA 92127 U.S.A.
Telephone Number: 858-942-2230
This device complies with part 15 of the FCC Rules.
Operation is subject to the following two conditions:
(1) this device may not cause harmful interference,
and (2) this device must accept any interference
received, including interference that may cause
undesired operation.
THIS APPARATUS MUST BE EARTHED.
To disconnect the main power, unplug the AC IN
connector.
For the customers in the U.S.A.
This equipment has been tested and found to comply with
the limits for a Class B digital device, pursuant to Part 15
of the FCC Rules. These limits are designed to provide
reasonable protection against harmful interference in a
residential installation. This equipment generates, uses,
and can radiate radio frequency energy and, if not installed
and used in accordance with the instructions, may cause
harmful interference to radio communications. However,
there is no guarantee that interference will not occur in a
particular installation. If this equipment does cause
harmful interference to radio or television reception,
which can be determined by turning the equipment off and
on, the user is encouraged to try to correct the interference
by one or more of the following measures:
• Reorient or relocate the receiving antenna.
• Increase the separation between the equipment and
receiver.
• Connect the equipment into an outlet on a circuit
different from that to which the receiver is connected.
• Consult the dealer or an experienced radio/TV
technician for help.
For the customers in Canada
This Class B digital apparatus complies with Canadian
ICES-003.
Warning on power connection
Use a proper power cord for your local power supply.
1. Use the approved Power Cord (3-core mains lead) /
Appliance Connector / Plug with earthing-contacts that
conforms to the safety regulations of each country if
applicable.
2. Use the Power Cord (3-core mains lead) / Appliance
Connector / Plug conforming to the proper ratings
(Voltage, Ampere).
If you have questions on the use of the above Power Cord
/ Appliance Connector / Plug, please consult a qualified
service personnel.
For the customers in Europe
The manufacturer of this product is Sony Corporation, 17-1 Konan, Minato-ku, Tokyo, Japan.
The Authorized Representative for EMC and product
safety is Sony Deutschland GmbH, Hedelfinger Strasse
61, 70327 Stuttgart, Germany. For any service or
guarantee matters please refer to the addresses given in
separate service or guarantee documents.
You are cautioned that any changes or modifications not
expressly approved in this manual could void your
authority to operate this equipment.
All interface cables used to connect peripherals must be
shielded in order to comply with the limits for a digital
device pursuant to Subpart B of Part 15 of FCC Rules.
2
For kundene i Norge
Dette utstyret kan kobles til et IT-strømfordelingssystem.

Table of Contents
Introduction
Features .......................................................4
Basic Application Example .......................... 4
Controls and Functions ..............................4
Front.............................................................. 4
Rear............................................................... 5
Preparation
Supplied Accessories.................................6
Connection to a Computer .........................7
Installing the Printer Driver.......................... 7
Connections .................................................. 7
Specifications............................................22
Printing Trouble ........................................24
Troubleshooting........................................24
Operation
Loading Paper Roll and Ink Ribbon...........8
Handling the paper roll and ink ribbon......... 8
Before Loading the Paper Roll and Ink
Ribbon ................................................. 9
Loading the Paper Roll and Ink Ribbon ....... 9
Attaching the Paper Tray ............................ 13
Replacing the Paper Roll and Ink
Ribbon .................................................14
Removing the Paper Roll and Ink
Ribbon ............................................... 14
Loading the Paper Roll and Ink Ribbon ..... 15
If the Ink Ribbon Breaks during Use.......... 15
Removing Scraps from the Paper
Holder................................................ 16
Printing from the Computer .....................17
Miscellaneous
Precautions................................................19
Cleaning...................................................... 20
Ink Ribbon and Paper ...............................22
Table of Contents
3
Introduction
q
q
09
q
Introduction
Controls and Functions
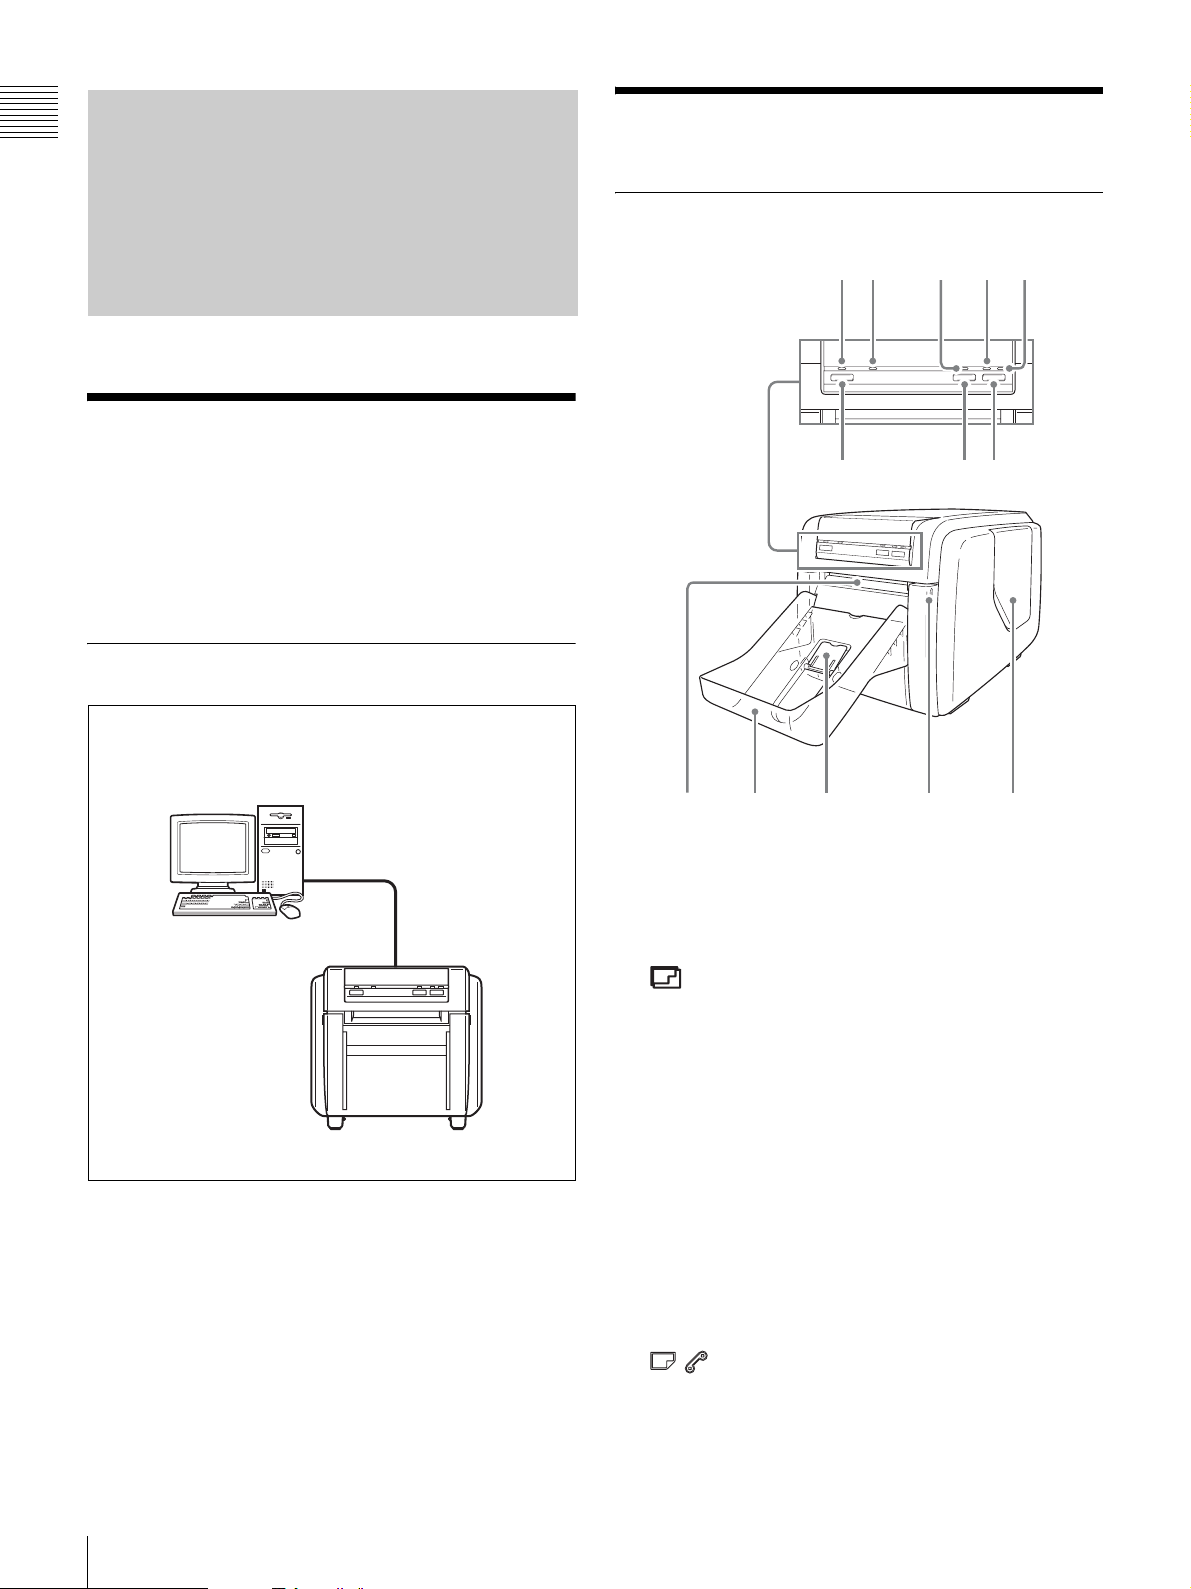
Front
Features
The UP-CX2 Digital Photo Printer is a dye sublimation
thermal transfer printer providing high quality, high
resolution (300 dpi), and high speed printing of computer
image data on four sizes of paper in full color (256
gradations process and 16.7 million colors).
Basic Application Example
Computer: sends image data
for printing and printer control
signals
21
34
67
a
s
5
8
d
UP-CX2 Digital Photo Printer
a MATTE indicator
Lit: Printing will be performed with matte finish.
Off: Printing will be performed with the finish configured
in the printer driver.
b (PRINT) indicator
Lit: The printer is turned on.
Flashing (0.5-sec. interval): Receiving print data.
Flashing (1-sec. interval): Printing is in progress.
c CLEANING indicator
Lit: Cleaning is in progress.
Flashing: Cleaning cartridge is inserted, and the printer is
awaiting operation.
d ALARM indicator (page 24)
Lit (red): The printer is malfunctioning. Consult a Sony
service representative.
Lit (orange): A paper jam has occurred, or the ribbon
cartridge has severed.
e indicator (page 24)
Lit: Lights in the following cases.
• The paper roll or ink ribbon has run out.
• The paper roll or ink ribbon is not inserted.
• The paper roll and ink ribbon sizes do not match.
4
Features / Controls and Functions
Flashing: When the paper roll or ink ribbon run out while
AB
printing is in progress, the indicator begins flashing
after you replace them. Press the RESET button after
replacement, and the indicator turns off.
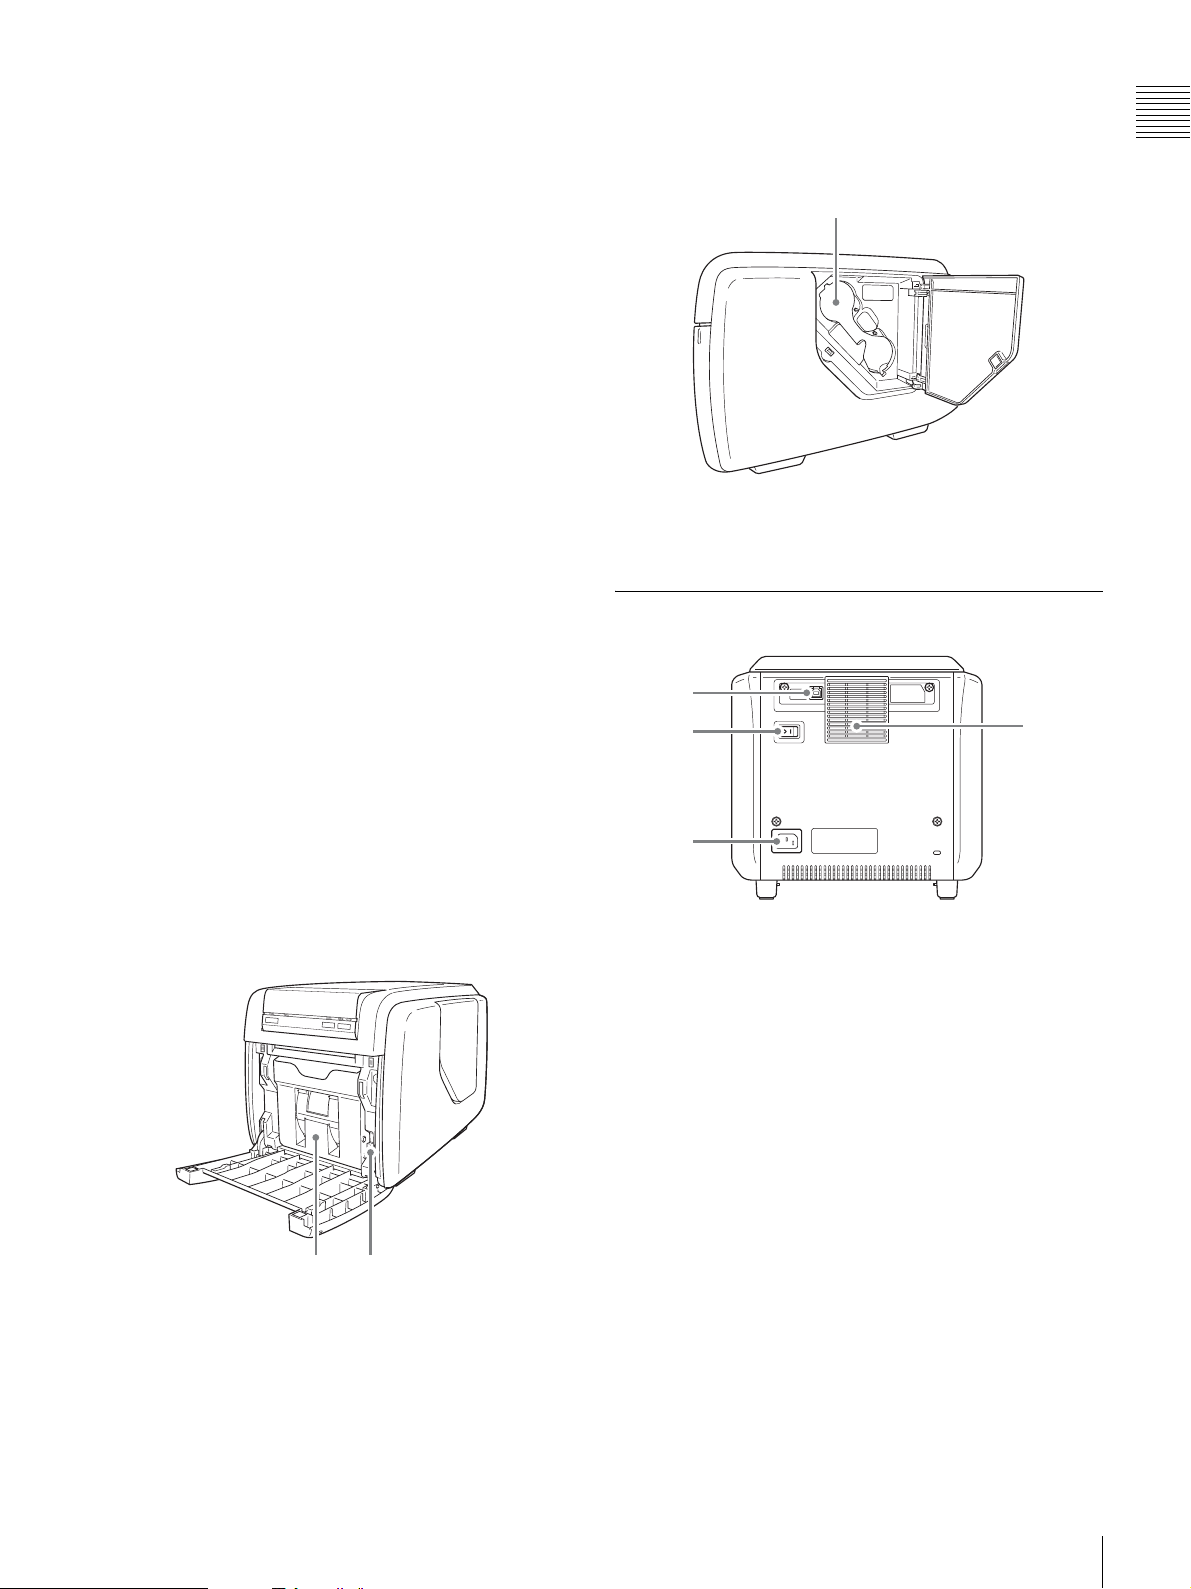
m Side door (page 12)
Open this door for replacing the ink ribbon.
Introduction
Side door open
f MATTE button
Press this for about one second to select whether to print
with matte finish.
When you press and hold this button, the MATTE
indicator lights and matte finish is selected. If you press
and hold the button again, the MATTE indicator turns off
and printing is performed with the finish configured in the
printer driver.
For details on using the MATTE button, see “Printing
from the Computer” on page 17.
g CLEANING button (page 20)
Press this button to perform cleaning.
h RESET button
When the paper roll or ink ribbon run out while printing is
in progress or an error occurs, press this button to resume
printing after the problem has been resolved.
i Eject slot
The printed photo emerges from this slot.
j Paper tray (page 13)
Printed photos are collected in this tray.
A
A Ink ribbon access opening (page 12)
Mount the ink ribbon here.
Rear
1
2
4
k Paper eject stopper (page 13)
Raise this stopper when printout size is small.
l Front door (page 9)
Open this door to change the paper roll.
Front door open
A Paper holder (page 9)
The paper roll is inserted here.
The white areas between printouts are cut off and
collected in the top portion of the paper holder.
3
a USB port (device) (page 7)
Use the supplied USB cable to connect the unit to a
computer.
Operation is not guaranteed when connected by a USB
hub.
b POWER switch
Turns the printer on and off.
c ~ AC IN (Power Source) Connector (page 7)
Connect the power cord here.
d Air vent
Features a built-in filter for the thermal head cooling fan.
B Paper holder release button (page 9)
Press this button to remove the paper holder.
Controls and Functions
5

Preparation
Preparation
Supplied Accessories
Paper Tray (1)
Ink Ribbon Holder (1)
Make certain you have received the following accessories:
Paper Holder
The paper holder is stored in the printer. Be sure to remove
the paper holder from the inside of the printer before turning
the power on.
These accessories are stored in the paper holder.
Paper Core (1)
Cleaning Cartridge (1)
USB Cable (1)
CD-ROM (1)
Software License Agreement (1)
Before Using This Printer (1)
Warranty Card (1)
Notes
• When taking the unit out of the carton box, be careful not
to hurt your back.
• The packaging materials are needed when transporting
the unit, so we suggest you keep them.
• Before transporting the unit, remove the ink ribbon and
paper roll from the unit.
• Before transporting the unit, also remove any paper
remnants from the paper holder. The paper remnants
may slip into the inner parts of the unit and result in
damage if not removed.
6
Supplied Accessories
Adaptor (left,1) Adaptor (right,1)
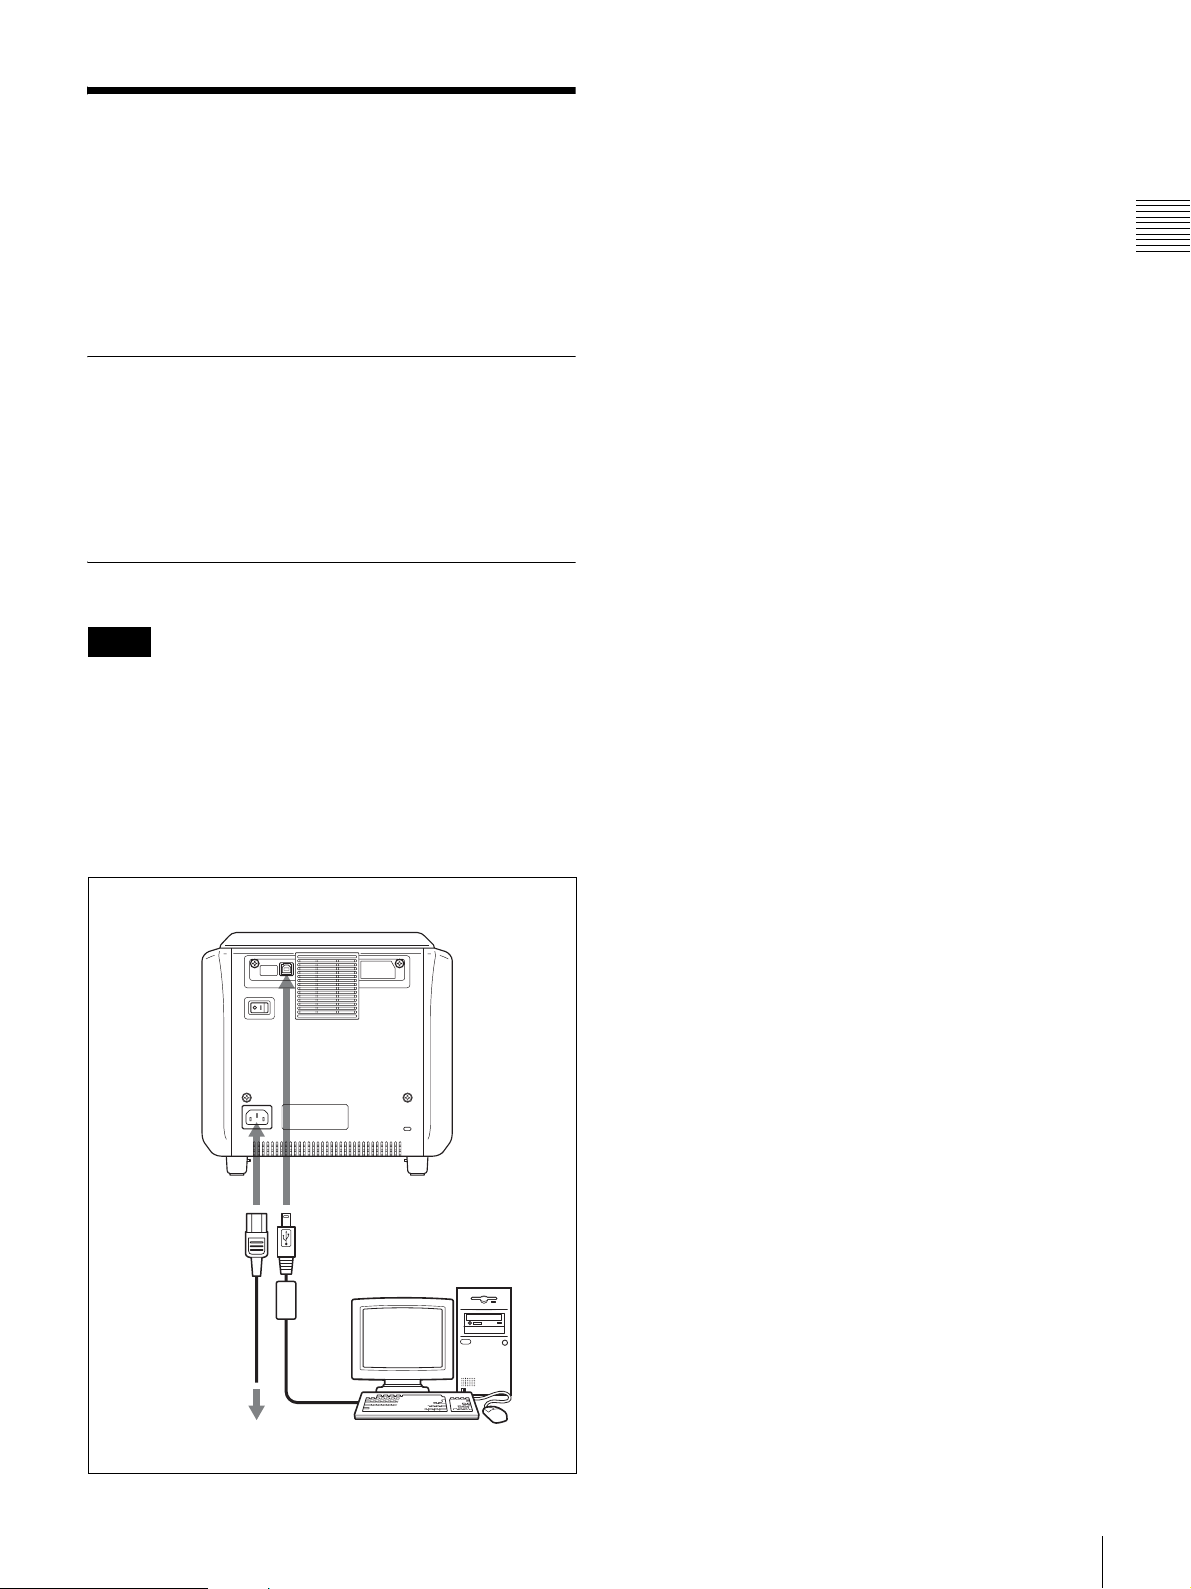
Connection to a Computer
After connecting the supplied USB cable to the printer and
the computer, connect the power cord. For details about
the printer connection, refer to the manuals for the
computer or other peripheral devices.
Installing the Printer Driver
Before connecting the printer to the computer, install the
printer driver provided with the printer. For detailed
instructions on how to install the printer driver, refer to the
Readme file and the install manual contained on the CDROM disc supplied.
Connections
Notes
• Follow the connection procedures described in the
computer manual.
• Make sure that the interface cable is connected securely
at both ends.
• The printer driver software provided with the printer is
not suitable for using the printer connected to a network.
• Operation of the printer is not guaranteed for connection
to a USB hub.
Preparation
to - AC IN
connector
AC power cord
(not supplied)
to wall outlet
UP-CX2
to USB port
USB cable (supplied)
Computer
Connection to a Computer
7
Operation
Operation
• Do not replace the ink ribbon and paper roll before they
are used up. Otherwise the above number of sheets may
not be achieved.
• Place the paper roll vertically. If you place the paper roll
horizontally, the paper roll may roll around and fall. This
may cause an injury.
Loading Paper Roll and Ink Ribbon
Handling the paper roll and ink ribbon
Notes
• The print pack contains two ink ribbons and two paper
rolls. Be sure to use the ink ribbon and paper roll in the
same carton as a set. (See “Ink Ribbon and Paper” on
page 22.)
• The ink ribbon and paper roll are not meant to be used up
completely. Even if there is some ink ribbon and paper
remaining, be sure to load a new ink ribbon and paper
roll as a set. Using leftover paper may result in
malfunction.
• Make sure to use a matching paper roll and ink ribbon
set. Using an unmatched combination will not only
prevent you from obtaining normal print results but may
cause a paper jam or a malfunction.
• Do not touch the printing surface of the paper roll or the
ink on the ink ribbon. Fingerprints and other pollutants
can lead to reduced print quality.
• The number of sheets that can be printed depends on the
print pack type. The table below lists the image count for
one ink ribbon and paper roll set.
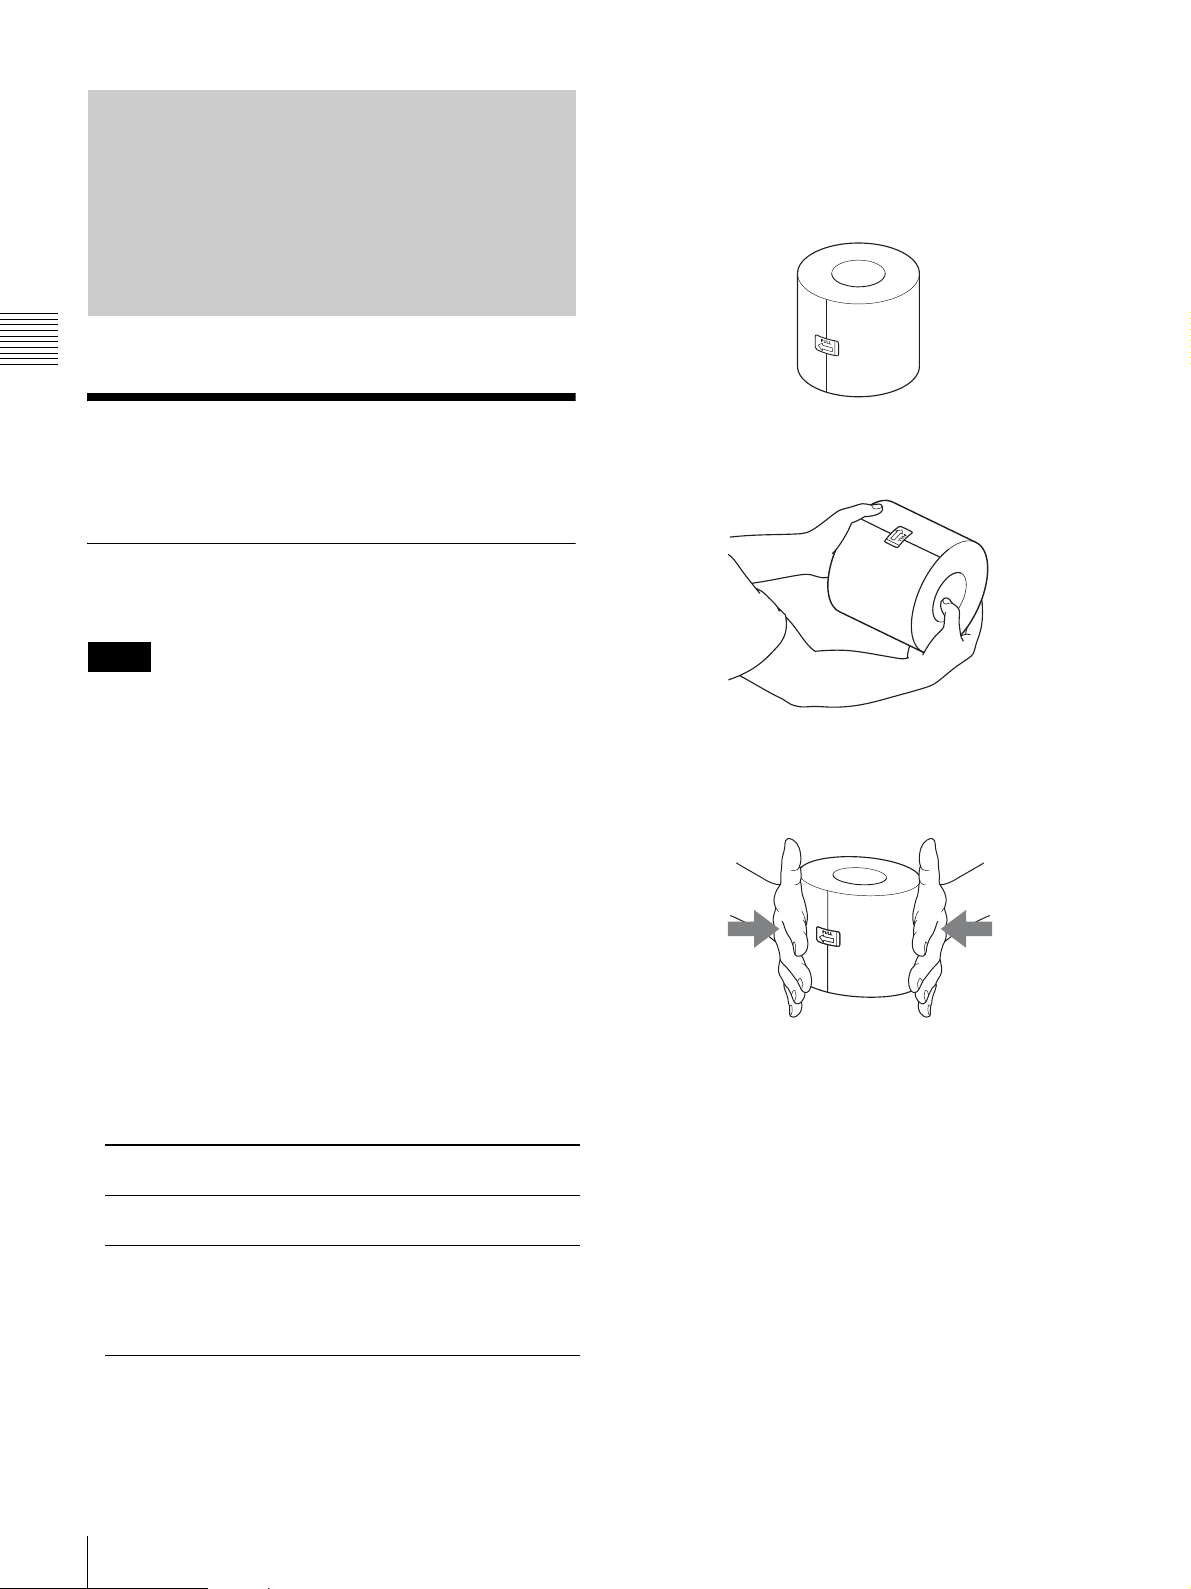
• Hold the paper roll with both hands so that you do not
drop it, because it is heavy. Dropping may result in an
injury.
Hold the paper roll with both hands.
• If inserting the paper core into the paper roll is difficult
when loading the paper roll, squeeze the roll from both
sides to restore its shape.
Squeeze from both sides.
• Do not detach the black and white spools of the ink
ribbon until you start loading the ink ribbon.
Print
pack
Number
of sheets
Print size
8
Loading Paper Roll and Ink Ribbon
2UPC-C53
series
360 215 180 160
89 ×
127 mm
±2 mm
(3.5 × 5 in.
±3/32 in.)
2UPC-C54
series
102
×152 mm
±2 mm
(4 × 6 in.
±3/32 in.)
2UPC-C55
series
127 ×
178 mm
±2 mm
(5 × 7 in.
±3/32 in.)
2UPC-C58
series
102 ×
203 mm
±2 mm
(4 × 8 in.
±3/32 in.)
 Loading...