


Sony UP-CR10L Basic Operation Guide
Printing
*
This may not be necessary in some cases.
Make sure not to forget your prints or memory card.
2-666-587-11
(1)
C
2005 Sony Corporation
Caution
Be for e us ing a me mory car d, be sur e to cre a te a backup cop y of
it s co nte nts. S o ny ass umes no lia b ili ty f or lost or dam aged dat a.
Print it!
Print it!
Services
After editing, go to
7
Touch
to display the edit menu.
Edit it!
Edit it!
For details on how to edit, see
Editing Images
Editing Images
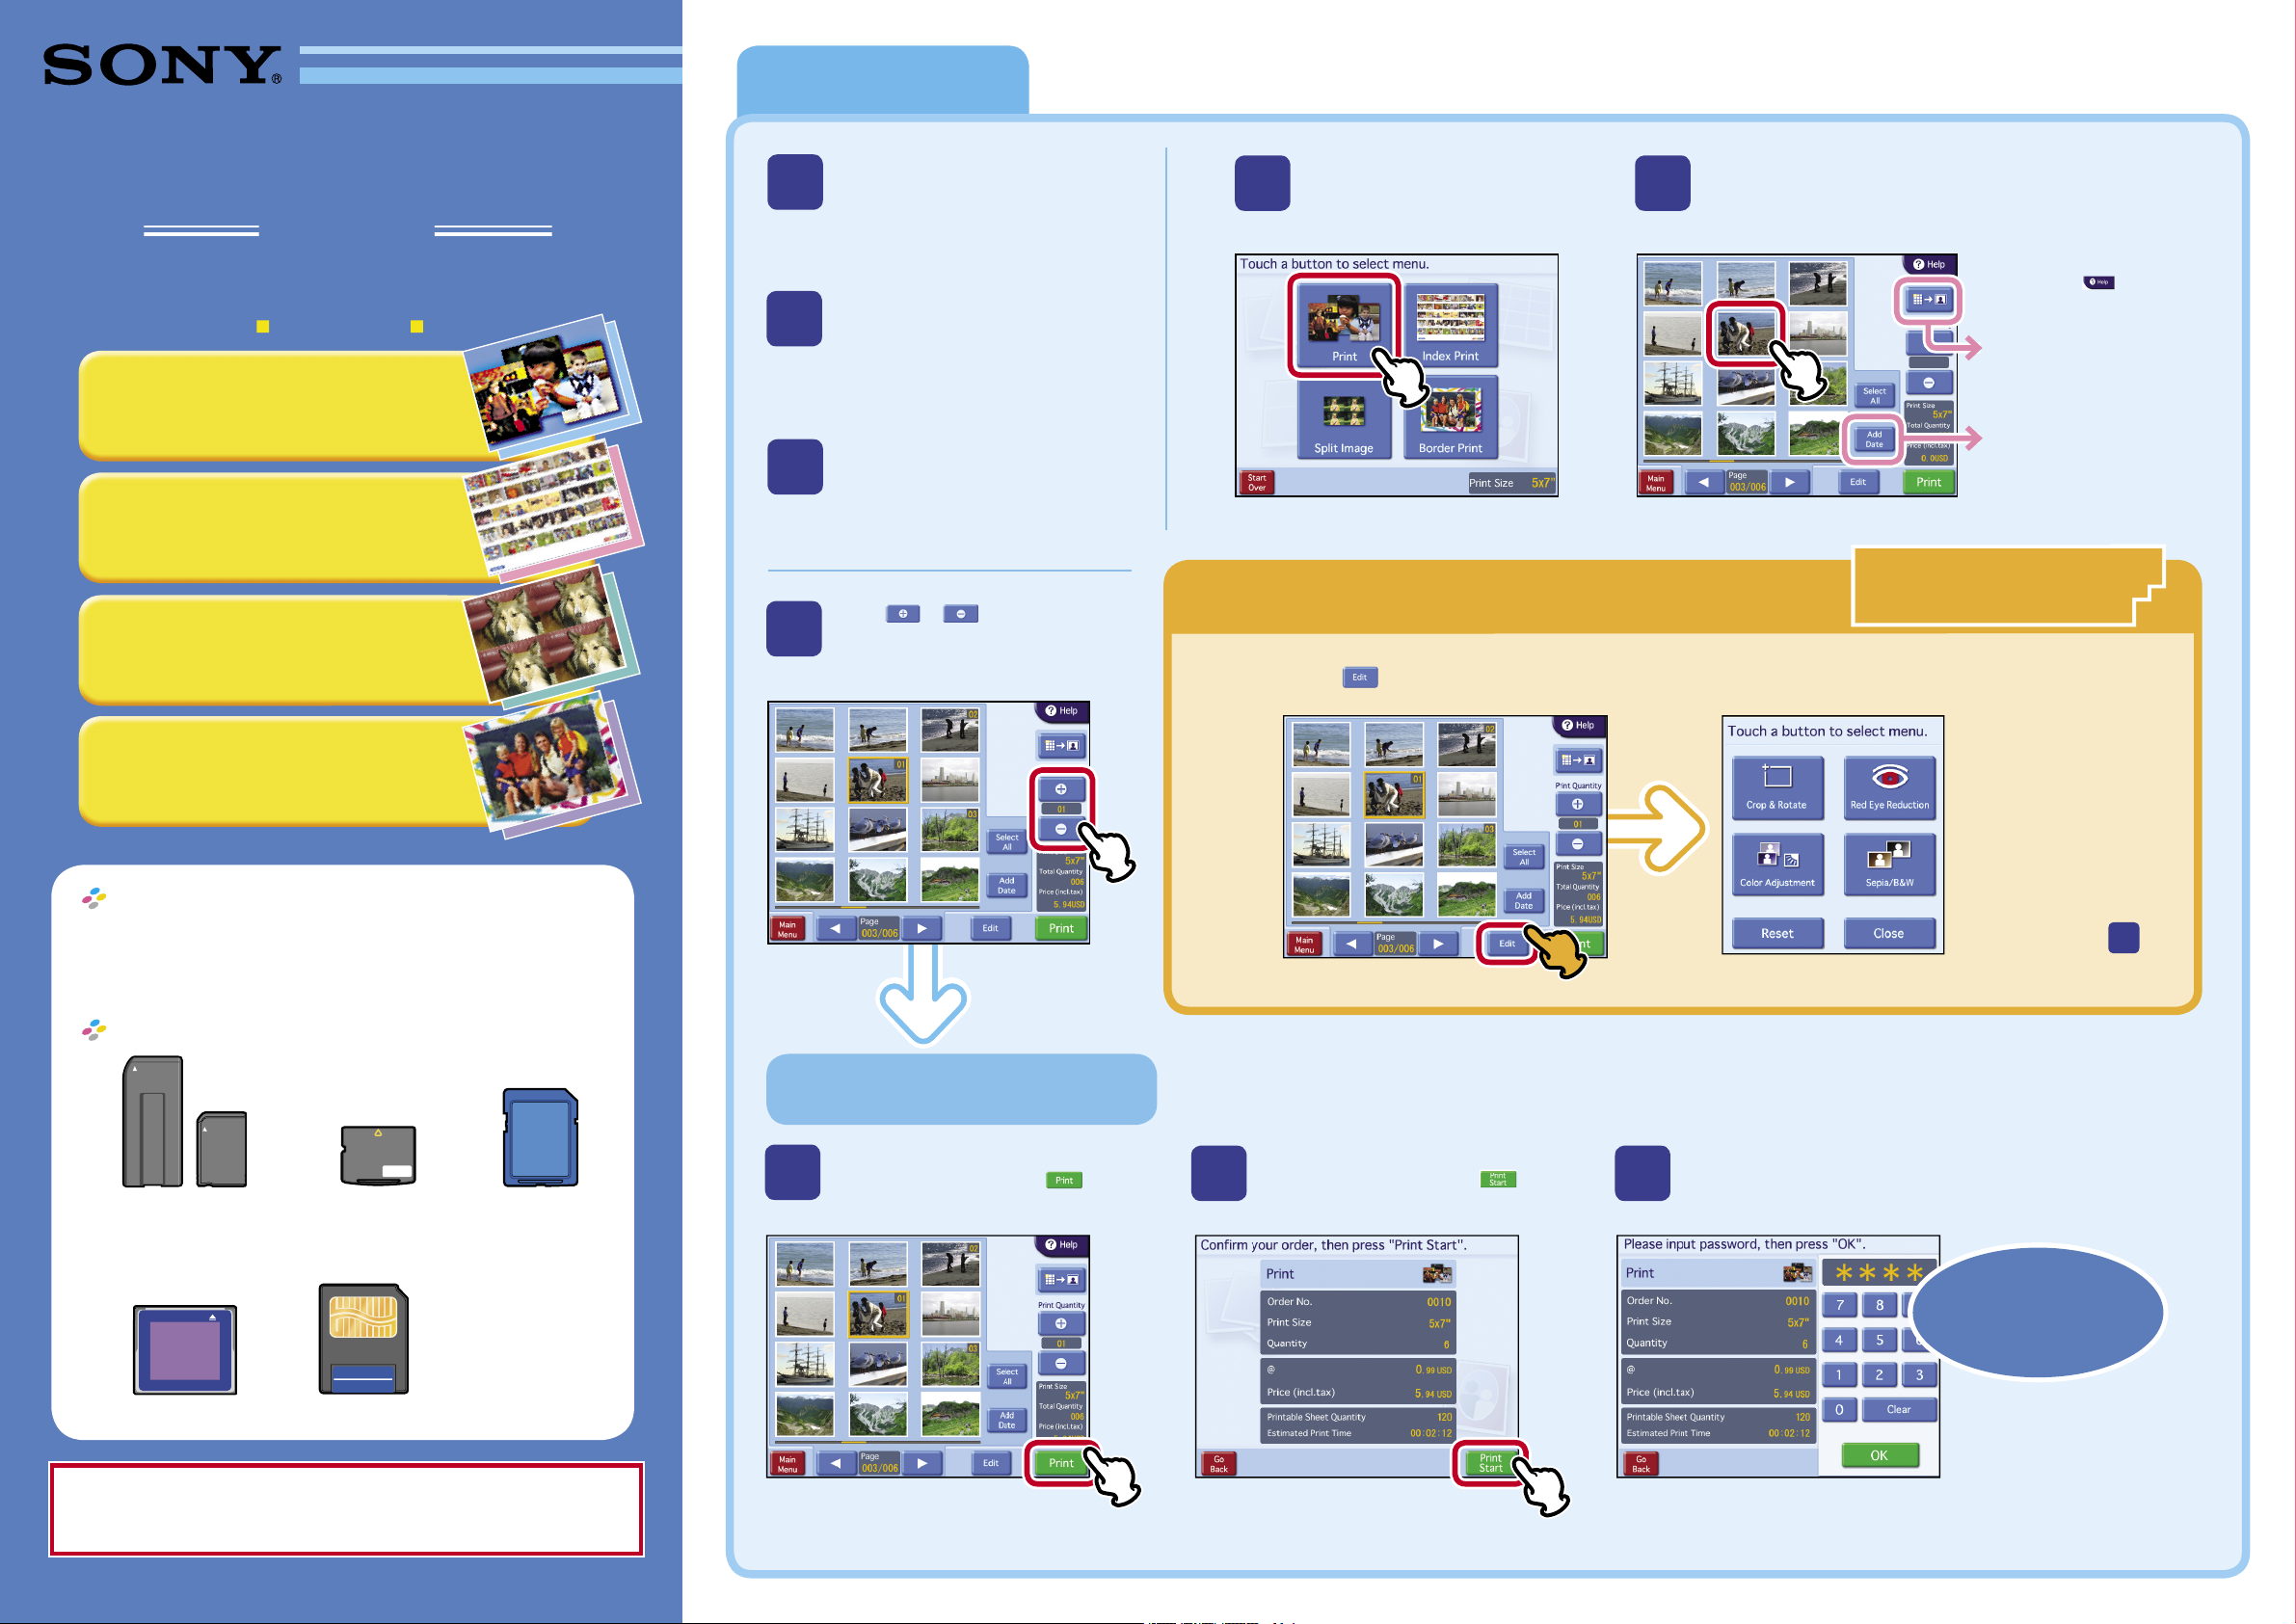
Print
Lets you select and print a desired image.
Index Print
Prints an index of all the images on a memory
card at reduced size.
Split Image
Prints multiple photos on a single sheet.
Also handles ID photo size prints.
Border Print
Lets you select and add a border to your photo
before printing.
Basic Operation Guide
Full Mode
Select your language.*
2
Touch the screen.
1
4
Select “Print.”
5
When you finish setting and
editing the image, touch
.
7
8
After verifying the number of
prints and the price, touch
.
9
Ask the store clerk to enter
the password.*
Touch
or
to set the
number of prints.
6
Insert your memory card into the
slot on the front of the printer.
3
Touch the image you want to print.
Displays an enlarged view
of the image.
z For an explanation of this
screen, touch
.
Adds a date stamp to all
images.
Do not remove your memory card
until a message appears asking
you to do so.
Printing begins!
Supported Data Formats
JPEG (Exif 2.2.1 Baseline)
TIFF (RGB uncompressed)
BMP (24-bit Windows)
Image size: 6,400 x 4,800 pixels max.
Supported Memory Cards
“Memory Stick” Standard /
“Memory Stick PRO”/
“Memory Stick Duo”
compatible
xD
-
Picture Card
SD Card/
MultiMediaCard
CompactFlash card
Microdrive
SmartMedia card
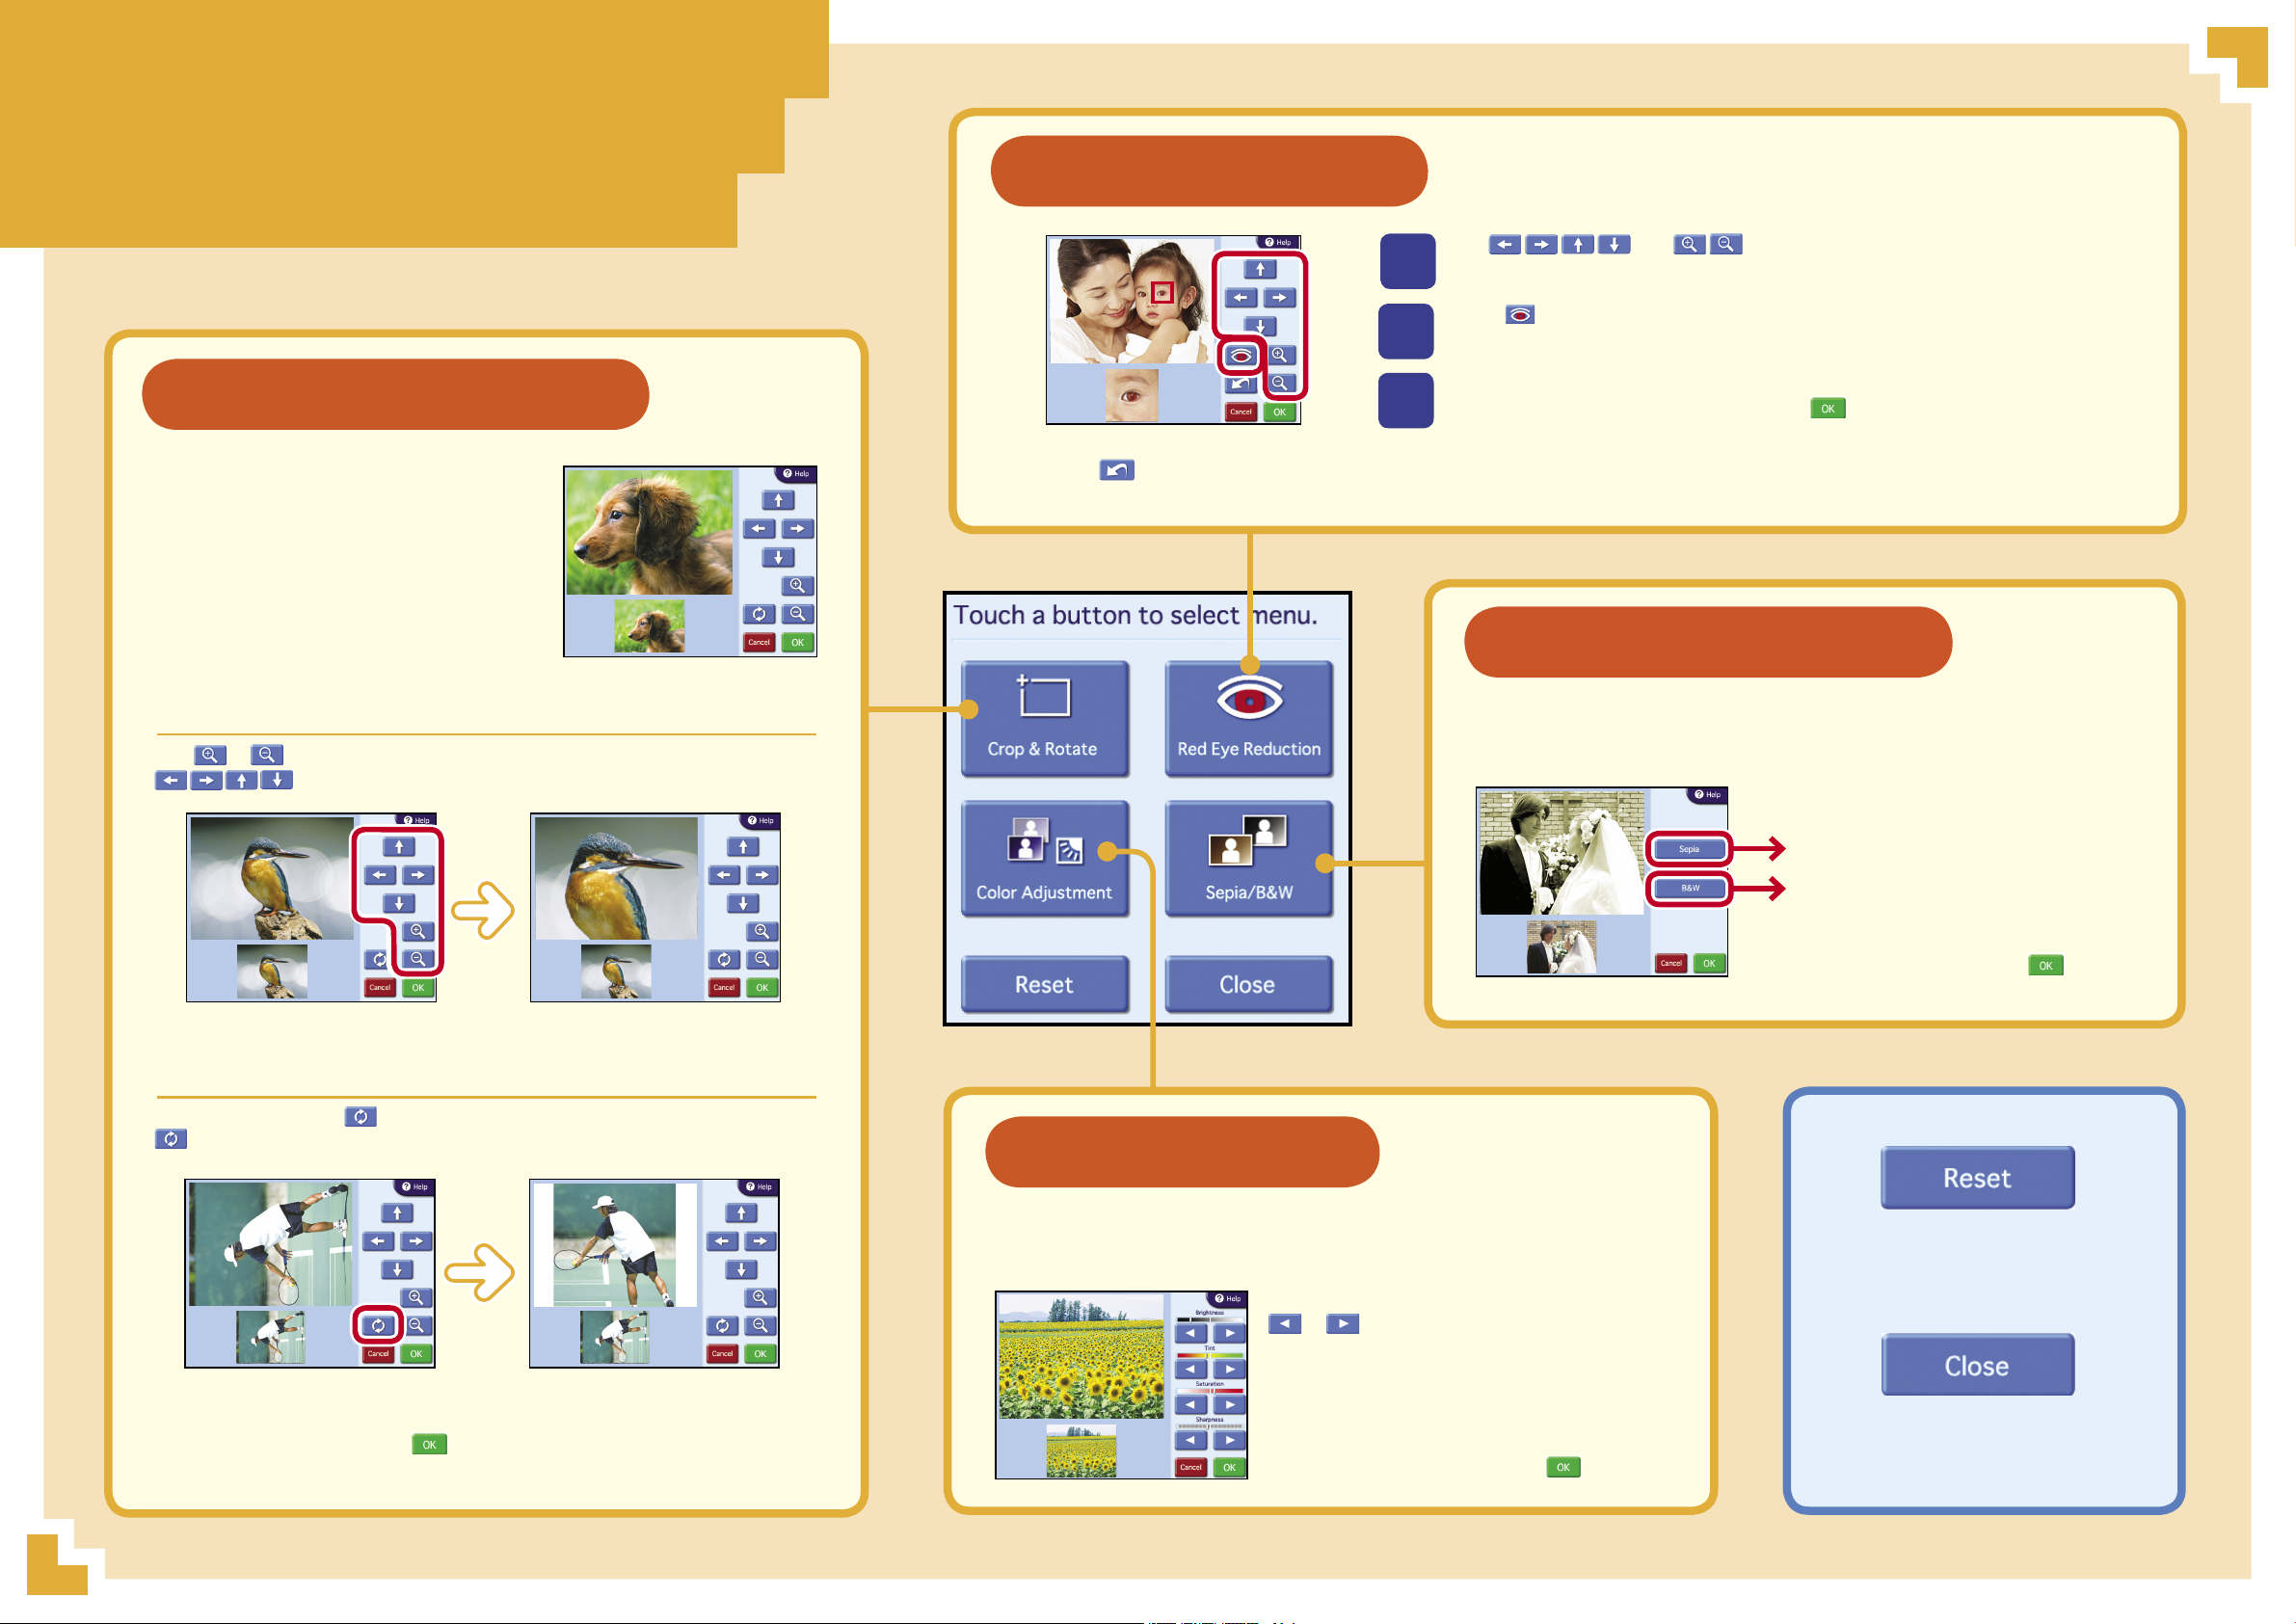
You can edit images taken with a camera for even lovelier
prints. Touch the button of any menu you wish.
Editing Images
If cropping or rotation is performed after red eye reduction, the
corrections for red eye are canceled.
Make sure to perform red eye reduction after cropping or rotation.
The ability to crop images down to
an essential portion and to rotate
them gives you the freedom to
decide an image's composition.
Crop & Rotate
Cropping an Image
Use or to zoom in or out. Then, move the cropping are a with
.
Rotating an Image
Each time you touch , the image rotates 90 degrees clockwise. Touch
until the image is oriented as you wish.
When finished editing, touch .
You can reduce the “red eye” effect resulting from flash
photography.
Red Eye Reduction
Use and to po sition the frame
displayed in the preview screen around the red eye.
1
2
Touch
.
Perform red eye reduction on one eye at a time.
To undo a correction,
touch
.
3
Verify the results of the correction on the preview screen.
When finished making corrections, touch .
You can process your prints in sepia or black and white to
give them the look of old photographs.
Changes to sepia image.
Sepia / Black&White
After selecting an option, touch .
Changes to black and white image.
You can change an image's color settings, adjusting the
brightness, tint, saturation, and sharpness as you wish.
Select the item you want to adjust, and touch
or to change the color value.
To ensure the desired color adjustment, verify
results in the preview screen while making
adjustments.
When finished adjusting, touch .
Color Adjustment
Closes the edit menu and returns to the
original screen.
Undoes your edits and resets to the
original image.
Editing Images