

Page 1
4-429-114-31(2)
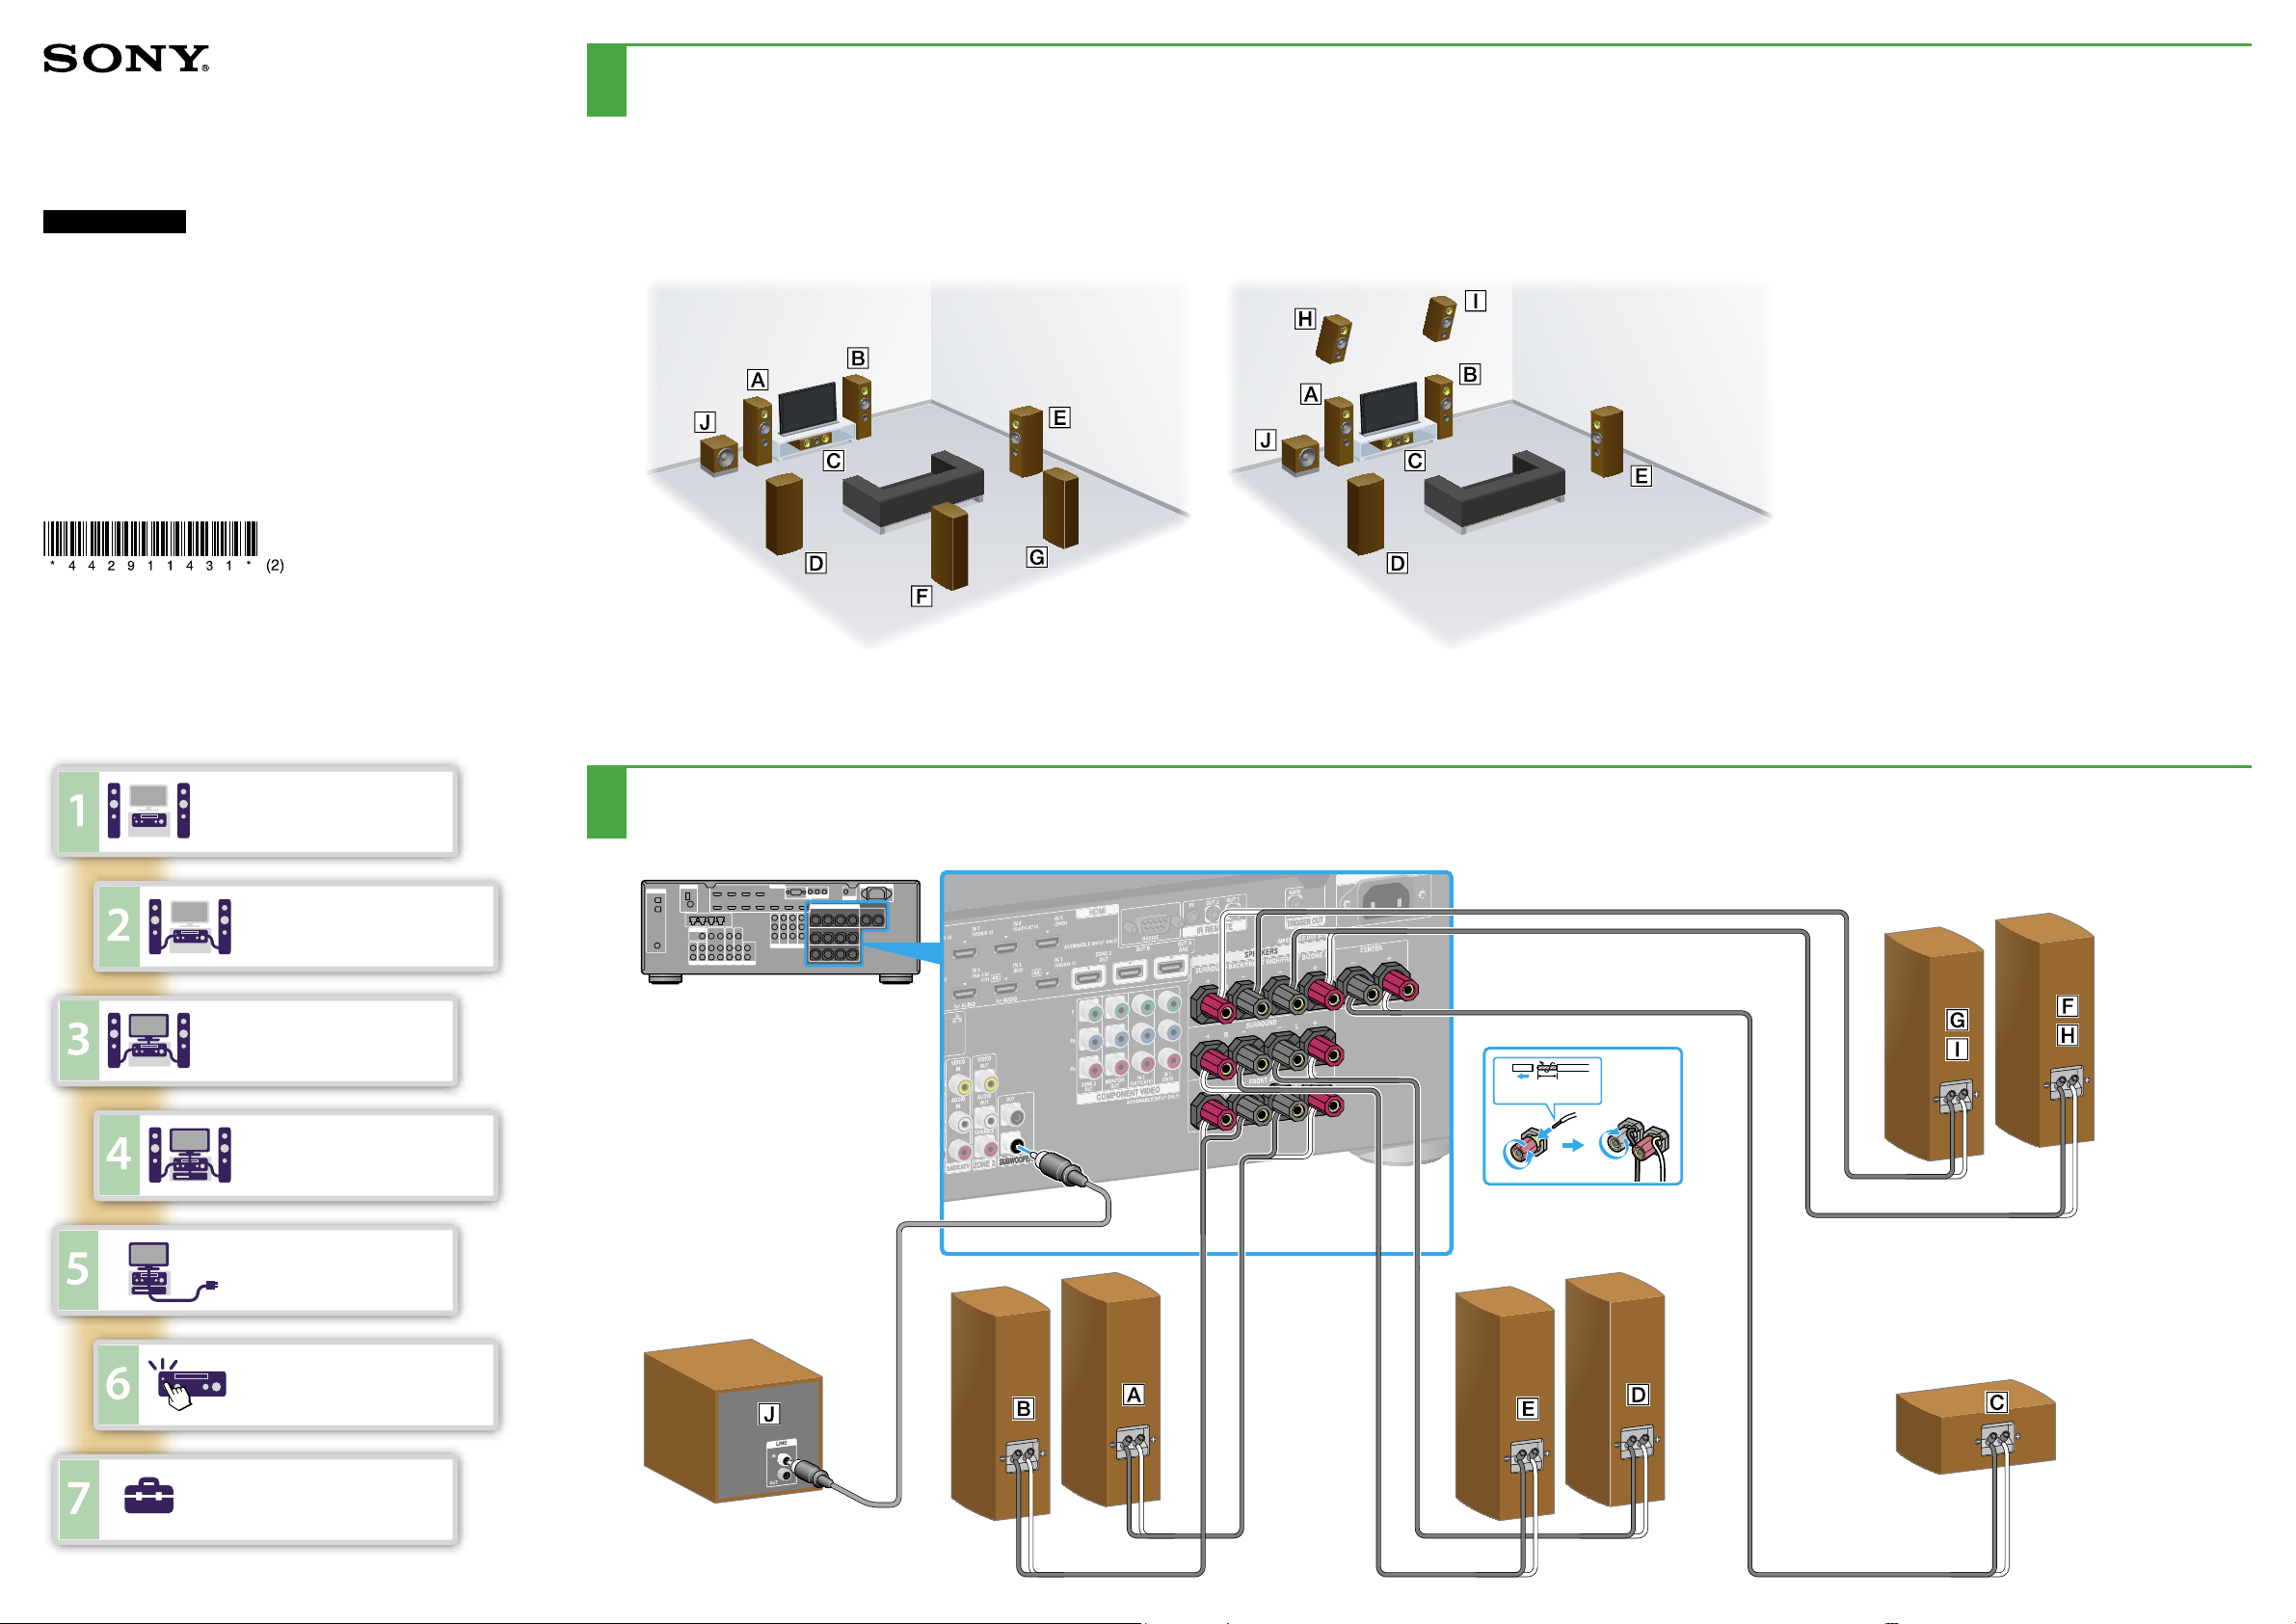
Installing speakers
1
STR-DA2800ES
Quick Setup Guide
This Quick Setup Guide describes how to connect speakers, a
subwoofer, a monitor, and a Blu-ray Disc Player so that you can enjoy
multi-channel surround sound. Refer to the operating instructions
supplied with the receiver for details.
The following illustrations show examples of a 7.1 channel speaker system using 7 speakers (front speakers, a center speaker, surround
speakers, surround back speakers, or front high speakers) and one subwoofer.
Front left speaker
Front right speaker
Center speaker
Surround left speaker
Surround right speaker
Surround back left speaker
Surround back right speaker
Left high speaker
Right high speaker
Subwoofer
Installing speakers
Connecting the speakers
Connecting the monitor
Connecting a Blu-ray Disc Player
Connect all power cords last
Connecting the speakers
2
10 mm
© 2013 Sony Corporation
Turning on the receiver
Setting up the receiver
Page 2
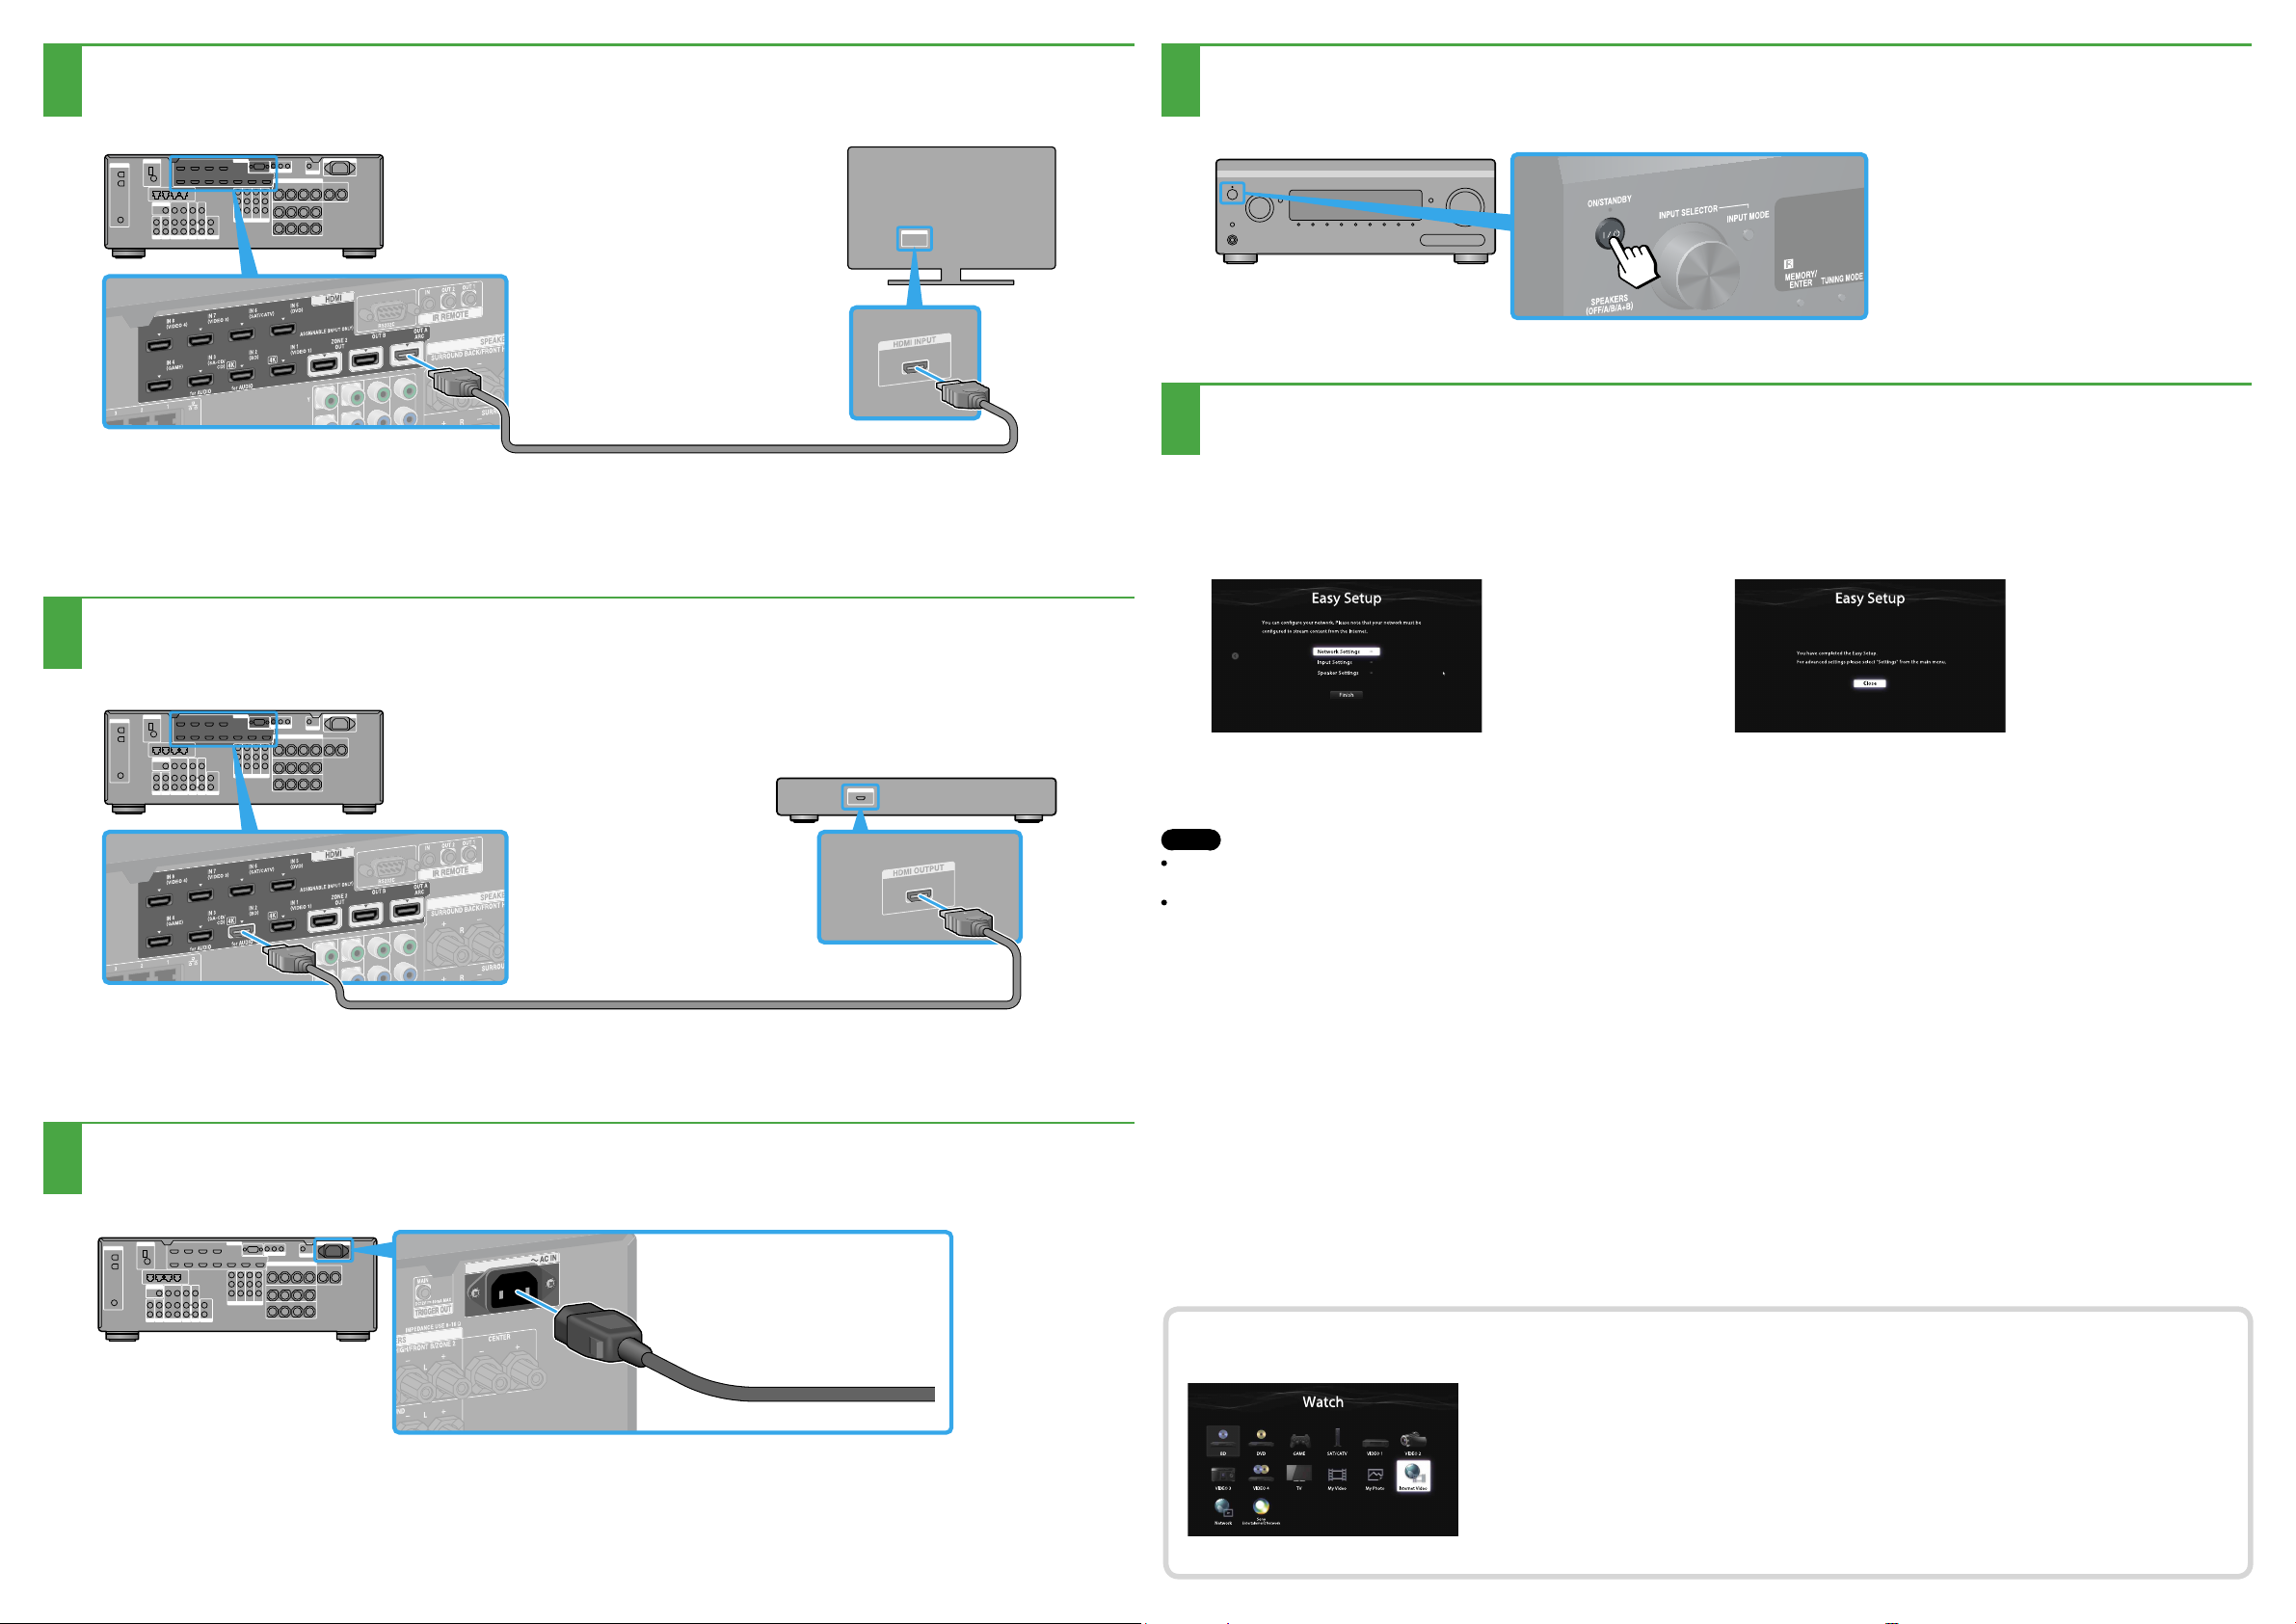
Connecting the monitor
3
Connecting a Blu-ray Disc Player
4
Turning on the receiver
6
Setting up the receiver
7
Switch the input of the TV to the input to which the receiver is connected.
When you turn on the receiver for the first time, the EULA screen appears on the TV screen. Agree to EULA to proceed to the
Easy Setup screen, then set up the receiver in accordance with the instructions on the Easy Setup screen.
Connect all power cords last
5
After performing steps 1 to 7, start playback on the Blu-ray Disc Player.
Notes
When you start operating the receiver, make sure to press AMP on the remote control first.
Otherwise, operations that follow may not be aimed at the receiver.
Set up the Blu-ray Disc Player so that it is able to output multi-channel audio signals. For a Sony Blu-ray Disc Player, check that “Audio (HDMI),” “DSD Output
Mode,” “Dolby Digital/DTS,” “Dolby Digital,” and “DTS” are set to “Auto,” “On,” “Bitstream,” “Dolby Digital,” and “DTS,” respectively (as of August 1, 2012).
You can enjoy Internet video content easily using the receiver.
To the wall outlet
After making the connections and the settings shown above, if you connect the
receiver to a router via a LAN cable, you can enjoy Internet video by simply selecting
the content you want.
For details on the connection of the LAN cable, refer to “5: Connecting to the network”
in the operating instructions supplied with the receiver. For details on the operation,
refer to “Internet video” in the operating instructions supplied with the receiver.
 Loading...