How it Works
Log In / Sign Up
Buy Points
How it Works
FAQ
Contact Us
Questions and Suggestions
Users
Sony
Loading...
S
SNC-DS60
3
SNC-DS60-B-R
2
SNC-EB520
6
SNC-EB520-R
3
SNC-EB600
7
SNC-EB600B
7
SNC-EB602R
4
SNC-EB630
7
SNC-EB630B
6
SNC-EB630-R
3
SNC-EB632R
5
SNC-EB640
3
SNC-EB642R
3
SNC-EM520
8
SNC-EM520-R
3
SNC-EM521
8
SNC-EM521-R
3
SNC-EM600
6
SNC-EM601
6
SNC-EM601-R
3
SNC-EM602R
4
SNC-EM602RC
5
SNC-EM630
6
SNC-EM631
6
SNC-EM632R
6
SNC-EM632RC
4
SNC-EM632R-R
2
SNC-EM641
3
SNC-EM642R
3
SNC-EMX30
3
SNC-EMX30R
3
SNC-EMX32R
3
SNC-EMX50
2
SNC-EMX50R
2
SNC-EMX52R
3
SNC-EP104
SNC-EP520
6
SNC-EP520-R
2
SNC-EP521
5
SNC-EP550
7
SNC-EP550-R
SNC-EP580
6
SNC-ER520
6
SNC-ER521
4
SNC-ER550
7
SNC-ER550-R
SNC-ER580
7
SNC-ER580-R
SNC-ER585
4
SNC-ER585H
SNC-HM662
5
SNC-HMX70
4
SNC-HMX72
SNC-M1
2
SNC-M3
2
SNC-P1
2
SNC-P1-R
2
SNC-P5
3
SNC-RH124
9
SNC-RH124-R
4
SNC-RH164
6
SNC-RH164-R
3
SNC-RS44
SNC-RS44N
6
SNC-RS44N-R
3
SNC-RS44P
2
SNC-RS46
SNC-RS46N
8
SNC-RS46N-R
3
SNC-RS46P
2
SNC-RS84N
7
SNC-RS84N-R
2
SNC-RS84P
2
SNC-RS86N
7
SNC-RS86P
3
SNC-RX
2
SNC-RX530
SNC-RX530N
3
SNC-RX530N-W-R
SNC-RX530P
2
SNC-RX550
SNC-RX550N
5
SNC-RX550N-B
SNC-RX550N-B-R
SNC-RX550P
5
SNC-RX570
SNC-RX570N
4
SNC-RX570N-B-R
SNC-RX570P
2
SNC-RZ25
SNC-RZ25N
4
SNC-RZ25P
7
SNC-RZ30
2
SNC-RZ30N
6
SNC-RZ30N/2
2
SNC-RZ30N (NTSC)
SNC-RZ30P
8
SNC-RZ30P-2
2
SNC-RZ50
3
SNC-RZ50N
6
Loading...
Loading...
Nothing found
SNC-HM662
Brochure
9 pgs
178.95 Kb
0
Quick User Guide
43 pgs
3.11 Mb
0
Specsheet
2 pgs
353.76 Kb
0
User Manual
2 pgs
1.19 Mb
0
User Manual
14 pgs
252.84 Kb
0
Table of contents
Loading...
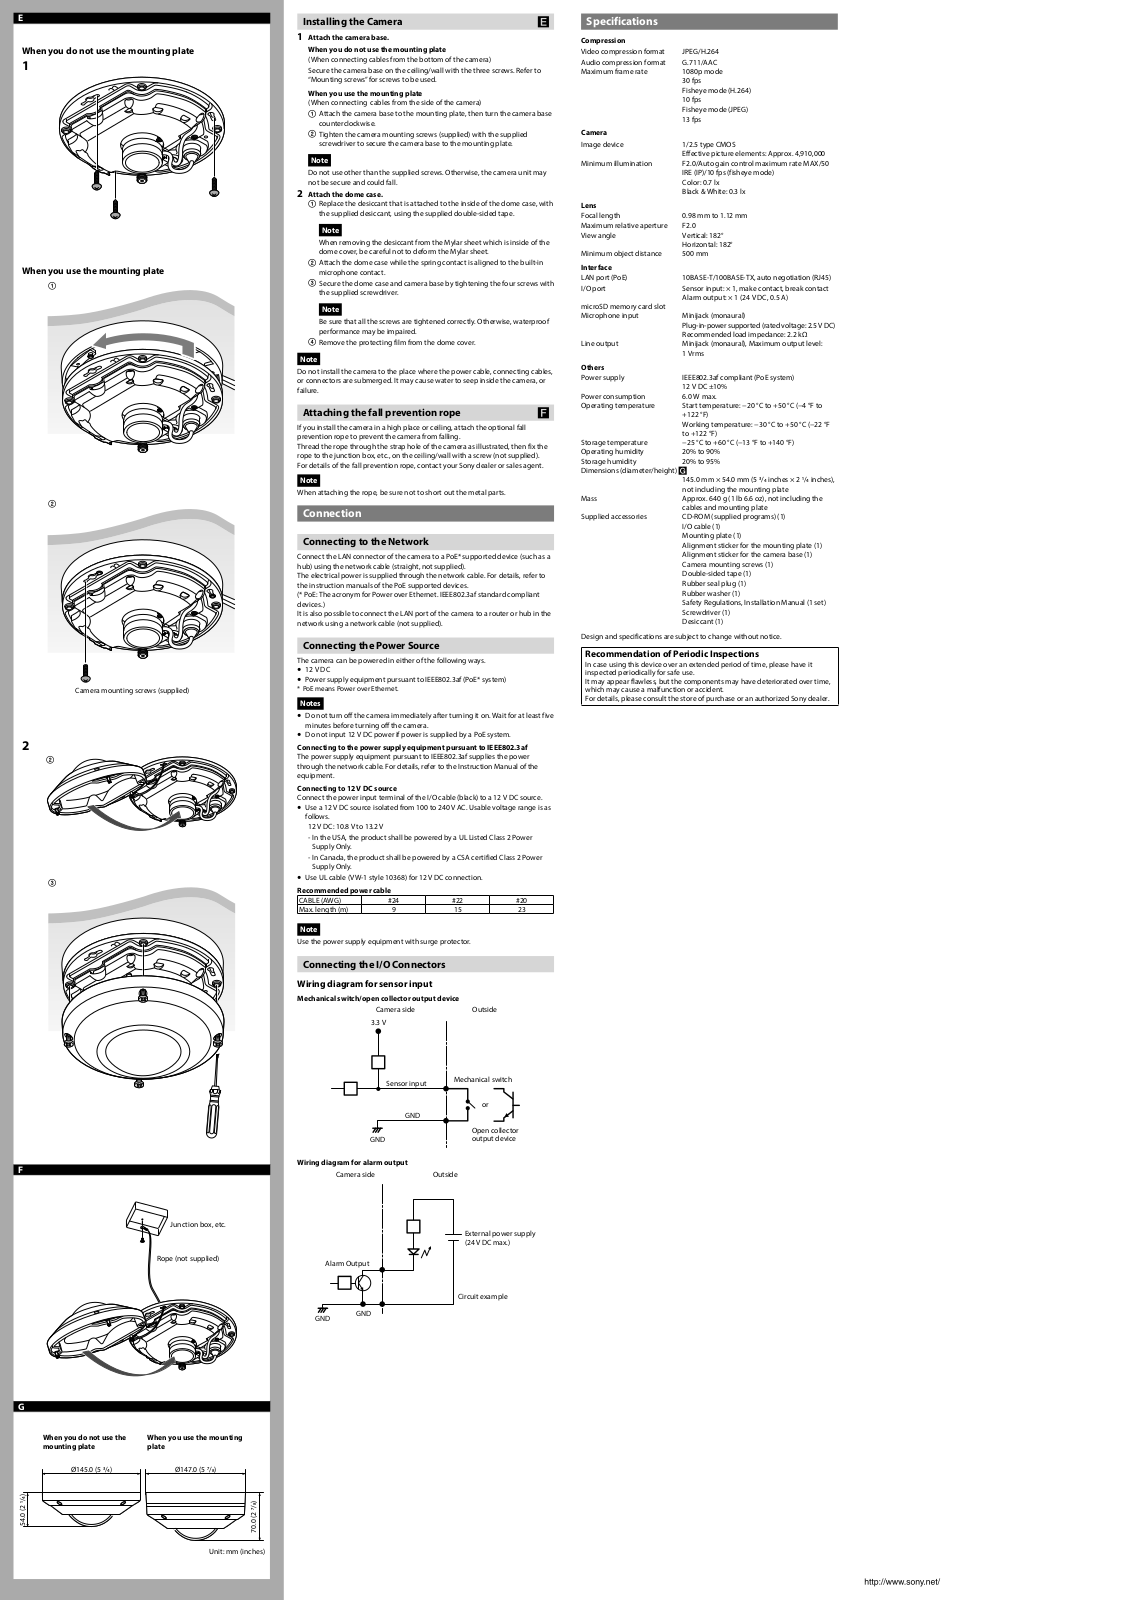
Sony SNC-HM662 User Manual
...
Sony User Manual
Download
Specifications and Main Features
Frequently Asked Questions
User Manual
Download
Loading...
+
hidden pages
Unhide
You need points to download manuals.
1 point = 1 manual.
You can buy points or you can get point for every manual you upload.
Buy points
Upload your manuals
 Loading...