

Page 1
2-187-189-11(2)
DVD Recorder
Operating Instructions
RDR-HX900
© 2004 Sony Corporation
Page 2
WARNING
To prevent fire or shock hazard,
do not expose the unit to rain or
moisture.
To avoid electrical shock, do not
open the cabinet. Refer servicing
to qualified personnel only.
The AC power cord must be
changed only at a qualified
service shop only.
CAUTION
The use of optical instruments with this
product will increase eye hazard. As
the laser beam used in this DVD
recorder is harmful to eyes, do not
attempt to disassemble the cabinet.
Refer servicing to qualified personnel
only.
This symbol is intended
to alert the user to the
presence of uninsulated
“dangerous voltage”
enclosure that may be of sufficient
magnitude to constitute a risk of
electric shock to persons.
instructions in the literature
accompanying the appliance.
For customers in the U.S.A
Owner’s Record
The model and serial numbers are located at
the rear of the unit.
Record the serial number in the space
provided below. Refer to them
whenever you call upon your Sony dealer
regarding this product.
Model No. RDR-HX900
Serial No.______________
CAUTION
You are cautioned that any change or
modifications not expressly approved
in this manual could void your
authority to operate this equipment.
within the product’s
This symbol is intended
to alert the user to the
presence of important
operating and
maintenance (servicing)
Note
This equipment has been tested and
found to comply with the limits for a
Class B digital device, pursuant to Part
15 of the FCC Rules. These limits are
designed to provide reasonable
protection against harmful interference
in a residential installation. This
equipment generates, uses, and can
radiate radio frequency energy and, if
not installed and used in accordance
with the instructions, may cause
harmful interference to radio
communications. However, there is no
guarantee that interference will not
occur in a particular installation. If this
equipment does cause harmful
interference to radio or television
reception, which can be determined by
turning the equipment off and on, the
user is encouraged to try to correct the
interference by one or more of the
following measures:
– Reorient or relocate the receiving
antenna.
– Increase the separation between the
equipment and receiver.
– Connect the equipment into an outlet
on a circuit different from that to
which the receiver is connected.
– Consult the dealer or an experienced
radio/TV technician for help.
VCR Plus+ and PlusCode are
registered trademarks of Gemstar
Development Corporation. The VCR
Plus+ system is manufactured under
license from Gemstar Development
Corporation.
In the United States, TV GUIDE and
other related marks are registered
marks of Gemstar- T V Guide
International, Inc. and/or one of its
affiliates. In Canad a, TV GUI DE i s a
registered mark of Transcontinental
Inc., and is used under license by
Gemstar-TV Guide International, Inc.
The TV Guide On Screen system is
manufactured under license from
Gemstar-TV Guide International, Inc.
and/or one of its affiliates.
The TV Guide On Screen system is
protected by one or more of the
following issued United States patents
6,498,895, 6,418,556, 6,331,877;
6,239,794; 6,154,203; 5,940,073;
4,908,713; 4,751,578; 4,706,121.
Precautions
This equipment has been tested and
found to comply with the limits set
out in the EMC Directive using a
connection cable shorter th an 3
meters.
On safety
Should any solid object or liquid fall
into the cabinet, unplug the recorder
and have it checked by qualified
personnel before operating it any
further.
About the hard disk drive
The hard disk has a high storage
density, which enab le s long
recording durations and quick
access to the written data. However,
it can easily be damaged by shock,
vibration or dust, and should be kept
away from magnets. To avoid losing
important data, observe the
following precautions.
• Do not use the recorder in a place
subject to extreme changes in
temperature (temperat ure gradient
less than 10 °C/hour).
• Do not apply a strong shock to the
recorder.
• Do not place the recorder in a
location subject to mechanical
vibrations or in an unstabl e
location.
• Do not place the recorder on top of
a heat source, such as a VCR or
AV amplifier (receiver).
• Do not move the r ec o r der with its
AC power cord connected.
• Do not move the r ec order for one
minute after you have unplugged
the AC power cord. After one
minute, move the recorder without
shock or vibration.
• Do not disconnect the AC power
cord while the power is on.
• Do not attempt to change the hard
disk. This may result in a
malfunction.
Should the hard disk be damaged,
you cannot recover lost data. The
hard disk is only a temporary
storage space.
On placement
• Place the recorder in a locati o n
with adequate ventilation to
2
Page 3

prevent heat build-up in the
recorder.
• Do not place the r ecorder on a soft
surface su ch as a rug that mi g ht
block the ventilation holes.
• Do not place the recorder in a
confined space such as a bookshelf
or similar unit.
• Do not place the recorder in a
location near heat sources, or in a
place subject to direct sunlight,
excessive dust, or mechanical
shock.
• Do not place the recorder in an
inclined position. It is designed to
be operated in a horizontal
position only.
• Keep the recorder and discs away
from equipment with strong
magnets, such as microwave
ovens, or large loudspeakers.
• Do not place heavy objects on the
recorder.
• To prevent fire or shock hazar d, do
not place objects filled with
liquids, such as vases, on the
apparatus.
On power sources
• The recorder is not disconnected
from the AC power source as long
as it is connected t o the wall outl et,
even if the recorder itsel f has been
turned off.
• If you are not going to use the
recorder for a long time, be sure to
disconnect the recorder from the
wall outlet. To disconnect the AC
power cord, grasp the plug itself;
never pull the cord.
• Before disconnecting the AC
power cord, check that the
recorder’s hard disk is not
operating (recording or dubbing )
on the front panel display.
On recording
Make trial recordings before making
the actual recording.
On compensation for lost
recordings
Sony is not liable and will not
compensate for any lost recordings
or relevant losses, including when
recordings are not made due to
reasons including recorder failure,
or when the contents of a recording
are lost or damaged as a result of
recorder failure or repair undertaken
to the recorder. Sony will not
restore, recover, or replicate the
recorded contents under any
circumstances.
Copyrights
• Television programs, films, video
tapes, discs, and other materials
may be copyrighted. Unauthorized
recording of such material may be
contrary to the provisions of th e
copyright laws. Also, use of this
recorder with cable televisio n
transmission may require
authorization from the cable
television transmitter and/or
program owner.
• This product incorporates
copyright protection technology
that is protected by U. S . patents
and other intellectual property
rights. Use of this copyright
protection technology mu st be
authorized by Macr ovi sion , a nd is
intended for home and other
limited viewing uses only unless
otherwise authorized by
Macrovision. Reverse engineering
or disassembly is prohibited.
Copy guard function
Since the recorder has a copy guard
function, programs received through
an external tuner (not supplied) may
contain copy protection signals
(copy guard function) and as such
may not be recordable, depending
on the type of signal.
IMPORTANT NOTICE
Caution: This recorder is capable
of holding a still video image or
on-screen display image on your
television screen indefinitely. If
you leave the still video image or
on-screen display image d ispl ayed
on your TV fo r an ex tend ed pe ri od
of time you risk permanent damage
to your television screen. Pl as ma
display panels and projection
televisions are especially
susceptible to this.
If you have any questions or
problems concerning your recorder,
please consult your nearest Sony
dealer.
IMPORTANT SAFETY
INSTRUCTIONS
1 Read these instructions .
2 Keep these instructio ns.
3 Heed all warnings.
4 Follow all instruc ti o ns.
5 Do not use this apparatus near
water.
6 Clean only with dry cloth.
7 Do not block any ventilation
openings. Install in acco rd ance
with the manufactu r er’s
instructions.
8 Do not install near any heat
sources such as radiators, heat
registers, stoves, or other
apparatus (including amplifiers)
that produce heat.
9 Do not defeat the safety purpose
of the polarized or groundingtype plug. A polarized plug has
two blades with one wider than
the other. A grounding type plug
has two blades and a third
grounding prong. The wide
blade or the third prong are
provided for your safety. If the
provided plug does not fit into
your outlet, consult an
electrician for replacement of
the obsolete outlet.
10 Protect the power cord from
being walked on or pinched
particularly at plugs,
convenience receptacles, and the
point where they exit from the
apparatus.
11 Only use attachments/
accessories sp ecified by the
manufacturer.
12 Use only with the cart, stand,
tripod, bracket, or table speci fied
by the manufacturer, or sold
with the apparatus. When a cart
is used, use caution when
moving the cart/apparatus
combination to avoid injur y
from tip-over.
13 Unpl ug this apparatus during
lightning storms or when unused
for long periods of time.
14 Ref e r all servicing to qualified
service personnel. Servicing is
required when the appar atus has
been damaged in any way, such
as power-supply cord or plug is
damaged, liquid has been spilled
or objects have fallen into the
apparatus, the apparatus has
been exposed to rain or
moisture, does not operate
normally, or has been dropped.
3
Page 4

Table of Contents
WARNING . . . . . . . . . . . . . . . . . . . . . . . . . . . . . . . . . . . . . . . . . . . . . . . . . . . . . . . . . . .2
Precautions . . . . . . . . . . . . . . . . . . . . . . . . . . . . . . . . . . . . . . . . . . . . . . . . . . . . . . . . . .2
Ways to Use Your DVD Recorder . . . . . . . . . . . . . . . . . . . . . . . . . . . . . . . . . . . . . . . . .6
Quick Guide to Disc Types . . . . . . . . . . . . . . . . . . . . . . . . . . . . . . . . . . . . . . . . . . . . . . 8
Hookups an d Settings . . . . . . . . . . . . . . . . . . . . . . . . . . . . . . . . . . . . . 12
Hooking Up the Recorder . . . . . . . . . . . . . . . . . . . . . . . . . . . . . . . . . . . . . . . . . . . . . .12
Step 1: Unpacking . . . . . . . . . . . . . . . . . . . . . . . . . . . . . . . . . . . . . . . . . . . . . . . . . . . .12
Step 2: Connecting the Antenna Cable and Set Top Box Controller . . . . . . . . . . . . .12
Step 3: Connecting the Video Cords . . . . . . . . . . . . . . . . . . . . . . . . . . . . . . . . . . . . . . 16
Step 4: Connecting the Audio Cords . . . . . . . . . . . . . . . . . . . . . . . . . . . . . . . . . . . . . . 19
Step 5: Connecting the Power Cord . . . . . . . . . . . . . . . . . . . . . . . . . . . . . . . . . . . . . .21
Step 6: Preparing the Remote . . . . . . . . . . . . . . . . . . . . . . . . . . . . . . . . . . . . . . . . . .21
Step 7: Easy Setup . . . . . . . . . . . . . . . . . . . . . . . . . . . . . . . . . . . . . . . . . . . . . . . . . . .24
Connecting a VCR or Similar Device . . . . . . . . . . . . . . . . . . . . . . . . . . . . . . . . . . . . .29
Guide to Displays . . . . . . . . . . . . . . . . . . . . . . . . . . . . . . . . . . . . . . . . 32
Using the On-Screen Menus . . . . . . . . . . . . . . . . . . . . . . . . . . . . . . . . . . . . . . . . . . . .32
Using the TV Guide On Screen System . . . . . . . . . . . . . . . . . . . . . . . . . . . . . . . . . . .33
Using the Title List . . . . . . . . . . . . . . . . . . . . . . . . . . . . . . . . . . . . . . . . . . . . . . . . . . .37
Using the “Disc Info” Screen (disc settings) . . . . . . . . . . . . . . . . . . . . . . . . . . . . . . . .39
Checking the Play Information and Playing Time . . . . . . . . . . . . . . . . . . . . . . . . . . . .41
How to Enter Characters . . . . . . . . . . . . . . . . . . . . . . . . . . . . . . . . . . . . . . . . . . . . . . .43
Recording . . . . . . . . . . . . . . . . . . . . . . . . . . . . . . . . . . . . . . . . . . . . . 45
Before Recording . . . . . . . . . . . . . . . . . . . . . . . . . . . . . . . . . . . . . . . . . . . . . . . . . . . .45
Timer Recording (TV GUIDE/Manual/VCR Plus+) . . . . . . . . . . . . . . . . . . . . . . . . . . .46
Checking/Changing/Canceling Timer Settings . . . . . . . . . . . . . . . . . . . . . . . . . . . . . .49
Recording Without the Timer . . . . . . . . . . . . . . . . . . . . . . . . . . . . . . . . . . . . . . . . . . .50
Recording From a VCR or Similar Device . . . . . . . . . . . . . . . . . . . . . . . . . . . . . . . . .53
Playback . . . . . . . . . . . . . . . . . . . . . . . . . . . . . . . . . . . . . . . . . . . . . . 5 4
Playing . . . . . . . . . . . . . . . . . . . . . . . . . . . . . . . . . . . . . . . . . . . . . . . . . . . . . . . . . . . .54
Chasing Playback/Simultaneous Rec and Play . . . . . . . . . . . . . . . . . . . . . . . . . . . . .60
Searching for a Title/Chapter/Track, etc. . . . . . . . . . . . . . . . . . . . . . . . . . . . . . . . . . .61
Playing MP3 Audio Tracks . . . . . . . . . . . . . . . . . . . . . . . . . . . . . . . . . . . . . . . . . . . . .62
Editing . . . . . . . . . . . . . . . . . . . . . . . . . . . . . . . . . . . . . . . . . . . . . . . 64
Before Editing . . . . . . . . . . . . . . . . . . . . . . . . . . . . . . . . . . . . . . . . . . . . . . . . . . . . . . .64
Editing a Title . . . . . . . . . . . . . . . . . . . . . . . . . . . . . . . . . . . . . . . . . . . . . . . . . . . . . . .65
Creating and Editing a Playlist . . . . . . . . . . . . . . . . . . . . . . . . . . . . . . . . . . . . . . . . . .68
Dubbing (HDD y DVD) . . . . . . . . . . . . . . . . . . . . . . . . . . . . . . . . . . . 72
Before Dubbing . . . . . . . . . . . . . . . . . . . . . . . . . . . . . . . . . . . . . . . . . . . . . . . . . . . . . .72
Dubbing a Single Title (Title Dub) . . . . . . . . . . . . . . . . . . . . . . . . . . . . . . . . . . . . . . . .74
Dubbing Multiple Titles (Dub Selected Titles) . . . . . . . . . . . . . . . . . . . . . . . . . . . . . . .75
4
Page 5

DV/Digital8 Dubbing (DV t HDD/DVD) . . . . . . . . . . . . . . . . . . . . . . . . . 77
Before DV/Digital8 Dubbing . . . . . . . . . . . . . . . . . . . . . . . . . . . . . . . . . . . . . . . . . . . . 77
Recording an Entire DV/D i git al 8 For m at Tape (One Touch Dubbing) . . . . . . . . . . . . 79
Program Edit . . . . . . . . . . . . . . . . . . . . . . . . . . . . . . . . . . . . . . . . . . . . . . . . . . . . . . . . 80
Settings an d Adjustments . . . . . . . . . . . . . . . . . . . . . . . . . . . . . . . . . . . 83
Using the Setup Displays . . . . . . . . . . . . . . . . . . . . . . . . . . . . . . . . . . . . . . . . . . . . . .83
Antenna Reception and Language Settings (Settings) . . . . . . . . . . . . . . . . . . . . . . . . 84
Video Settings (Video) . . . . . . . . . . . . . . . . . . . . . . . . . . . . . . . . . . . . . . . . . . . . . . . . 87
Audio Settings (Audio) . . . . . . . . . . . . . . . . . . . . . . . . . . . . . . . . . . . . . . . . . . . . . . . . 89
Recording and Parental Control Settings (Features) . . . . . . . . . . . . . . . . . . . . . . . . .91
Disc and Remote Control Settings/Factory Settings (Options) . . . . . . . . . . . . . . . . . . 94
Easy Setup (Resetting the Recorder) . . . . . . . . . . . . . . . . . . . . . . . . . . . . . . . . . . . . . 95
Additional Information . . . . . . . . . . . . . . . . . . . . . . . . . . . . . . . . . . . . . 96
Troubleshooting . . . . . . . . . . . . . . . . . . . . . . . . . . . . . . . . . . . . . . . . . . . . . . . . . . . . . 96
Self-diagnosis Function (When letters/numbers appear in the display) . . . . . . . . . .101
Notes About This Recorder . . . . . . . . . . . . . . . . . . . . . . . . . . . . . . . . . . . . . . . . . . .101
Specifications . . . . . . . . . . . . . . . . . . . . . . . . . . . . . . . . . . . . . . . . . . . . . . . . . . . . . . 102
About i.LINK . . . . . . . . . . . . . . . . . . . . . . . . . . . . . . . . . . . . . . . . . . . . . . . . . . . . . . . 103
Guide to Parts and Controls . . . . . . . . . . . . . . . . . . . . . . . . . . . . . . . . . . . . . . . . . . . 105
Glossary . . . . . . . . . . . . . . . . . . . . . . . . . . . . . . . . . . . . . . . . . . . . . . . . . . . . . . . . . .109
Language Code List . . . . . . . . . . . . . . . . . . . . . . . . . . . . . . . . . . . . . . . . . . . . . . . . . 111
Cable Box/Satellite Receiver Brand Code . . . . . . . . . . . . . . . . . . . . . . . . . . . . . . . . 112
Index . . . . . . . . . . . . . . . . . . . . . . . . . . . . . . . . . . . . . . . . . . . . . . . . . . . . . . . . . . . . . 117
About this manual
• In this manual, the internal hard disk drive is written as “HDD,” and “disc” is used as a general reference for the
HDD, DVDs, or CDs unless otherwise specified by the text or illustrations.
• Instructions in this manual describe the controls on the remote. You can also use the controls on the recorder if they
have the same or similar names as thos e on the remote.
• The on-screen display illustrat ions used in this manual may not match the gr aph ic s displayed on your TV screen.
• The explanations regarding discs in this manual refer to discs created on this recorder. The explanations do not apply
to discs that are created on other recorders and played back on this recorder.
5
Page 6
Ways to Use You r DVD Recorder
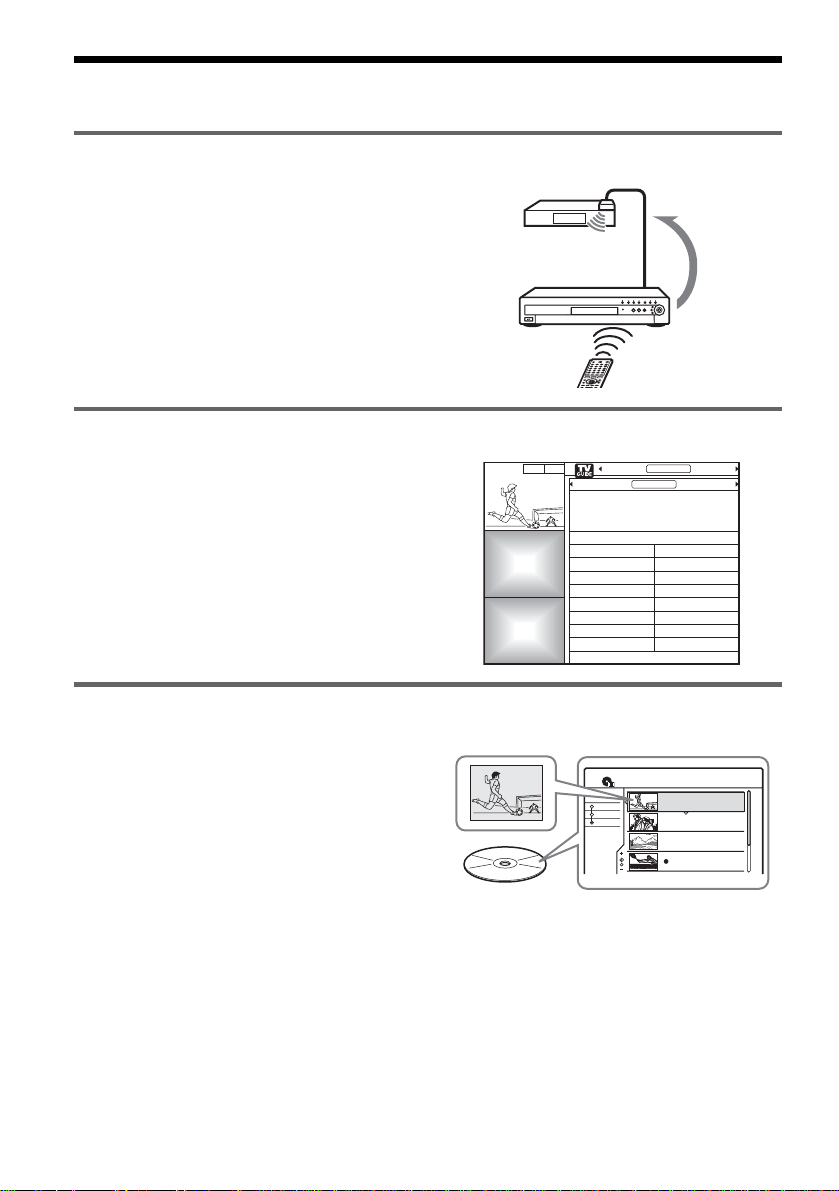
Control your cable box or satellite receiver – Set top box control
, Connect the supplied set top box contr oller
to have the recorder change th e channel of
your cable box or satel lite receiver during a
103
timer recording (page 14).
Easily search for programs with the TV Guide On Screen system – TV Guide
, The TV Guide On Screen system displays a
free television program listing. Search for
your favorite program alphabetic ally or by
category, such as movies or sports, and then
set the timer to record that program with
just the push of a button (pa ge46).
Promotional
Panel
Promotional
Panel
8:05
LISTINGS
ALPHABETICAL SPORTSMOVIES
Move down to select a subcategory for Movies.
Move right for Sports, left for ALPHABETICAL.
All Fantasy
Action Horror
Adventure Musical
Animated Mystery
Biography Romance
Comedy Sci-Fi
Documentary Western
Drama War
CH 103!
PROMOTIONSSORT
Quickly access recorded titles – Title List
, Display the Title List to see all of the titles
on the disc, including recording date,
channel, recording mode and thumbnail
image (page 37). The recorder will
automatically take program la bel
information from the TV Guid e On S creen
data* and display it as the title name
(page 37).
* not available in s o me areas.
6
Title List
Sort
Date
Title
Number
TITLE LIST
My Movies
ORIGINAL
1 2ch 1:00PM - 2:00PM
Wed 9/15 1:00PM( 1H00M)SP
2 5ch 8:00PM - 9:00PM
Fri 9/17 8:00PM( 1H00M)SLP
3 12ch 9:00AM - 9:30AM
Sat 9/25 9:00AM( 0H30M)EP
4 3ch 8:00PM - 8:30PM
Sat 9/25 8:00PM( 0H30M)SLP
1.5/4.7GB
2ch
5ch
12ch
3ch
Page 7
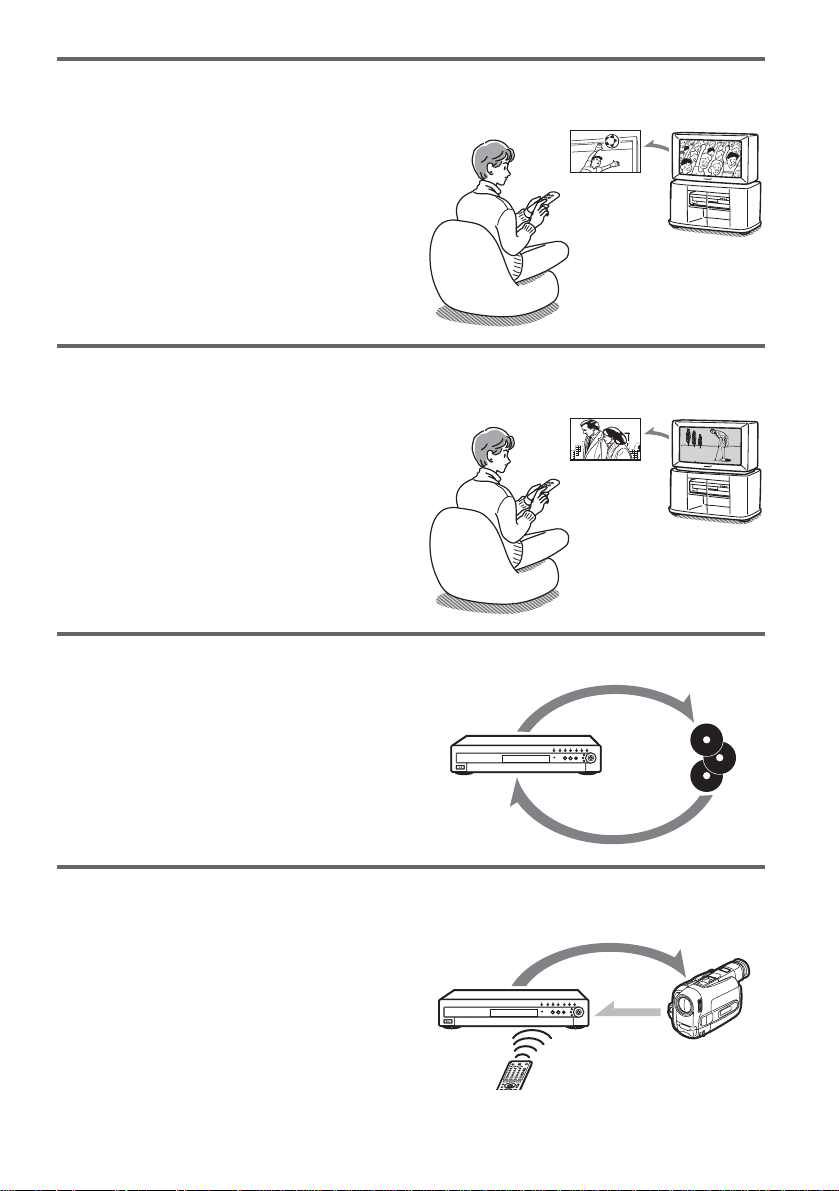
Play the beginning of a title while it is being recorded – Chasing Playback
, If you are using a DVD-RW (VR mode) or
the HDD, you can watch a program from
the beginning while it is being recorded
(page 60).
Recording
The game isn’t over
yet, but I’ll start
watching it from the
beginning now.
Watch one title while recording another – Simultaneous Rec and Play
, If you are using a DVD-RW (VR mode) or
the HDD, you can watch a pr eviously
recorded program while recording another
program on the same disc (page 60).
Recording
I think I’ll watch
yesterday’s golf game
now, even though I
am recording a movie.
Copy a recorded title to and from the HDD – Dubbing (HDD y DVD)
, Create copies of your favorite titles for
safekeeping by dubbin g them to a DVD, or
make a copy of your friend’s recordings by
dubbing them to the HDD (page 72).
Dubbing
Automatically dub DV/Digital8 tapes – DV/Digital8 Dubbing (DV t HDD/DVD)
, Connect your digital video camera to the
DV IN jack and automatically dub the
entire contents or just selected scenes to a
DVD disc (page 77).
A list of recordable and playable discs is on page 8.
Control
Dubbing
7
Page 8
Quick Guide to Disc Types
Recordable and playable discs
Icon
Type
Disc
Logo
used in
this
manual
Formatting
(new discs)
Compatibility with other DVD
players (finalizing)
Hard disk
drive
(internal)
DVD+RW
VR
mode
HDD
+
-
RWVR
RW
(Formatting
unnecessary)
Automatically
formatted
Format in VR mode
(page 40)
DVDRW
DVD+R
DVD-R
Video
mode
-
RW
Format in Video mode
Video
(page 40)
Automatically
+
R
formatted
Automatically
-
R
formatted
Usable disc versions (as of May 2004)
• 4x-speed or slower DVD+RWs
• 2x-speed or slower DVD-RWs (Ver.1.1, Ver.1.1
with CPRM*
1
)
• 8x-speed or slower DVD+Rs
• 8x-speed or slower DVD-Rs (Ver.2.0)
–
Playable on DVD+RW
compatible players
(automatically fina li ze d)
Playable only on VR mode
compatible players
(finalization unnecessary)
Playable on most DVD players
(finalizat ion necessary)
(page 40)
Playable on most DVD+R
compatible players (finalization
necessary) (page 40)
Playable on most DVD players
(finalizat ion necessary)
(page 40)
“DVD+RW,” “DVD-RW,” “DVD+R,” and “DVD-R,”
are trademarks.
*1
CPRM (Content Protection for Recordable Media) is
a coding technology that protects co pyr ights for
images.
*2
Only if the recording mode is SP, HSP, or HQ, and
“DVD Rec. Picture Size” is set to “16:9.”
*3
Erasing titles does not free up disc space.
8
Page 9

Recording Features Editing Features
Rewrite
(page 45)
Auto
Chapter
(page 91)
Manual
Chapter
(page 68)
Record
16:9 sizes
(page 51)
Change
title name
(page 65)
Delete
title
(page 66)
A-B Erase
(page 66)
Yes Yes Yes Yes Yes Yes Yes No
Yes Yes No No Yes Yes Yes No
Yes Yes Yes Yes Yes Yes Yes Yes
Yes Yes No Yes *
No Yes No No Yes Yes *
No Yes No Yes *
2
Yes Yes No No
3
2
Yes Yes *
3
No No
No No
Discs that cannot be re corded on
• 4 x- speed compatible D V D-RWs (Ver. 1.2/4x)
• DVD-RWs (Ve r. 1.0)
• DVD+RWs that are not 2.4x-speed compatible
• Dual layer discs
• 8 cm discs
Playlist
(page 68)
,continued
9
Page 10
Playable discs
Type
DVD VIDEO Discs such as movies that can be purc ha sed or rented
VIDEO CD
CD
DATA CD
Disc
Logo
Discs that cannot be played
• All CD-ROMs (including PHOTO CDs)
• CD -Rs/CD-RW s, ot her than those recorded in
Icon
used in
this
manual
DVD
VCD
CD
DATA CD
Characteristics
VIDEO CDs or CD-Rs/CD-RWs in VIDEO CD/Super
VIDEO CD format
Music CDs or CD- Rs/CD-RWs i n music CD f ormat that c an
be purchased
CD-ROMs/CD-Rs/CD-RWs created on a PC or similar
device in music format containing MP3 audio tracks
z Hint
This DVD recorder can play 8 cm CDs and 8 cm DVDs
as well.
music CD format, MP3 format, or Video CD
format
• Data part of CD-Extras
• DVD-ROMs
• DVD Audio discs
• DVD-RAMs
• HD layer on Super Audio CDs
• DVD VIDEOs with a different region code
(page 11)
• A di sc recorded in a c o l or system other than
NTSC, such as PAL or SE CA M
10
Page 11
Note on playback operations of DVD VIDEOs/
VIDEO CDs
Some playback operations of DVD VIDEOs/
VIDEO CDs may be intentionally set by software
producers. Since this recorder plays DVD
VIDEOs/VIDEO CDs according to the disc
contents the sof tware producers designed, some
playback features may not be available. Also, see
the instructions supplied with the DVD VIDEOs/
VIDEO CDs.
Region code (DVD VIDEO only )
Your recorder has a region code printed on the rear
of the unit and will only play DVD VIDEOs
(playback only) labeled with identical region
codes. This system is us ed to protect copyrig ht s.
DVD VIDEOs labeled will also play on this
ALL
recorder.
If you try to play any other DVD VIDEO, the
message “Playback prohibited by region code.”
will appear on the TV scr een. Depending on the
DVD VIDEO, no region code indication may be
labeled even though playing the DVD VIDEO is
prohibited by area r es tr i ct io ns .
X
RDR–XXXX
00V 00Hz
NO.
00W
Region code
0-000-000-00
Notes
• You cannot mix VR mode and Video mode on the same
DVD-RW. To change the disc’s format, reformat the
disc (page 40). Note that the disc’s contents will be
erased after reformatting.
• You cannot shorten the time required for recording
even with high-speed discs. Also, you cannot record on
the disc if the disc is not 1x speed compa tible.
• It is recommended that you use discs with “For Video”
printed on their packaging.
• You cannot add new recordings to DVD-Rs or DVDRWs (Video mode) that contain recordings made on
other DVD equipment.
• In some cases, you may not be able to add new
recordings to DVD+RWs that contain recordings made
on other DVD equipment. If you do add a new
recording, note that this recorder will rewrite t he DVD
menu.
• If the disc contains PC data unrecogn izable by this
recorder, the data may be erased.
• Some DVD+RWs/DVD+Rs, DVD-RWs/DVD-Rs, or
CD-RWs/CD-Rs cannot be played on this recorder due
to the recording quality or physical c ondi tion of the
disc, or the characteristics of the recording device and
authoring software. The disc will not pla y if it ha s not
been correctly final ized. For m ore in formati on, s ee t he
operating instructions for the recording device.
Music discs encoded with copyright protection
technologies
This product is designed to playback discs th at
conform to the Compact Disc (CD) standard.
Recently, various music discs encoded with
copyright prote ct i on t echnologies are bei ng
marketed by so me record companies. Please be
aware that among those discs, there are some that
do not confor m to the CD sta ndard and may n ot be
playable by this pro duct.
11
Page 12

Hookups and Settings
Hooking Up the Recorder
Follow steps 1 to 7 to hoo k up and adjust the
settings of the r ecorder.
Notes
• Plug cords securely to prevent unwanted noise.
• Refer to the instructions supplied with the components
to be connected.
• You cannot connect this recorder to a TV that does not
have a video input jack.
• Be sure to disconnect the power cord of each
component before connecting.
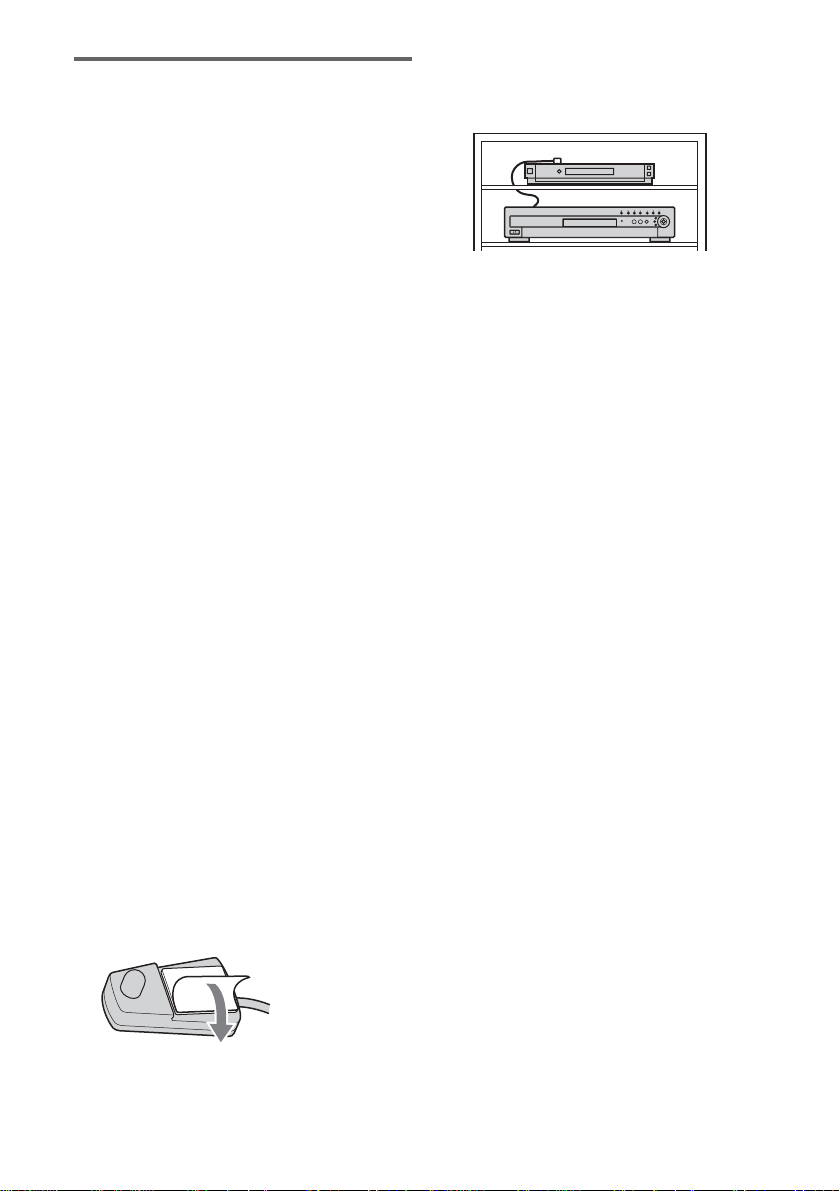
Step 1: Unpacking
Using the cable box/satellite
receiver control function
The cable box/satellite receiver contro l fu nction
can be used with hookup A or B. It allows the
recorder to control a cable box or satellite receiver
via the supplied set top box controller. The
recorder controls channels on the cable box or
satellite receiver for time r recording. You can also
use the recorder’s remote co ntrol to change
channels on the cable box/satellite receiver
whenever the cable box/satellit e receiver is t urned
on, even if the recorder is turned off.
To use the cable box/satellite receiver control
function, you need t o connect the set top bo x
controller an d set the code number an d output
channel (page 24) . After setting up the cable box/
satellite receiver control, check that the recorder
can correctly control the cable box or satellite
receiver (page 28).
Check that you have the following items:
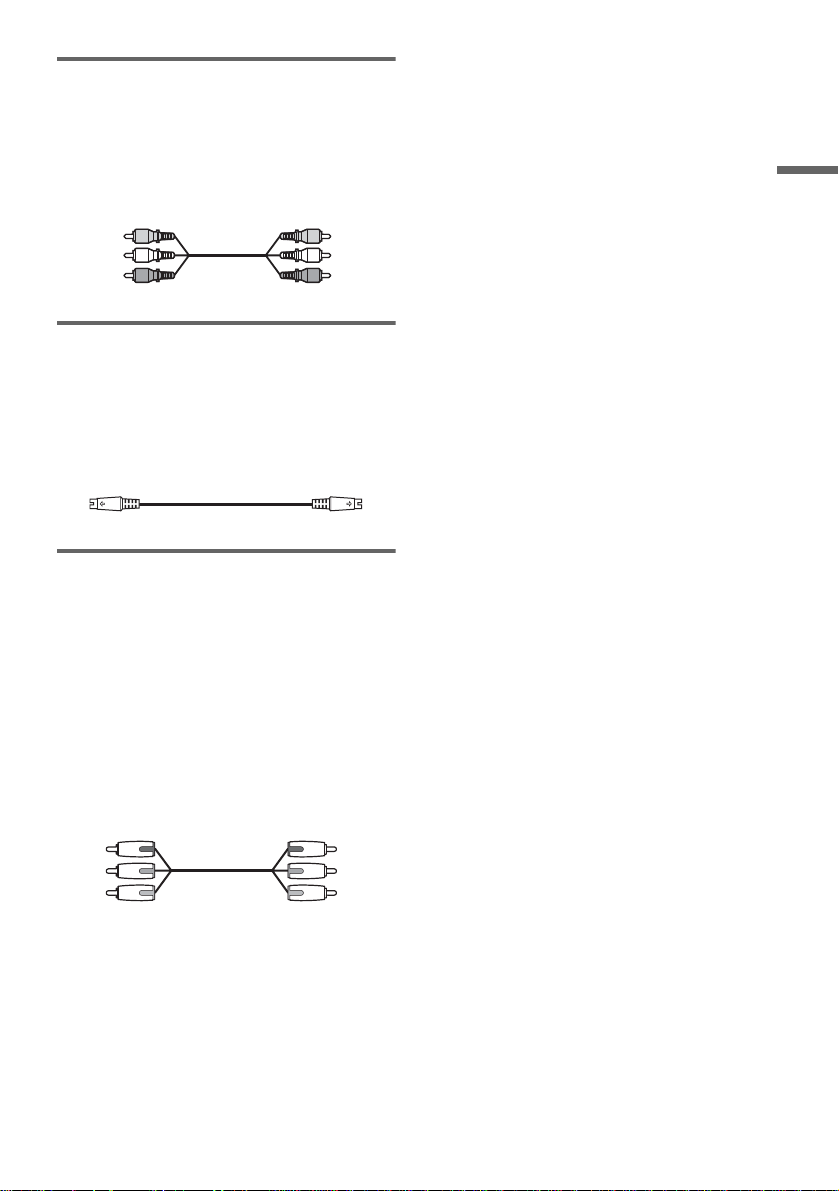
• Audio/video cord (pinplug × 3 y pinplug × 3)
(1)
• Power cord (1)
• Antenna cable (1)
• Remote commander (remote) (1)
• Set top box controller (1)
• Size AA (R6) batteries (2)
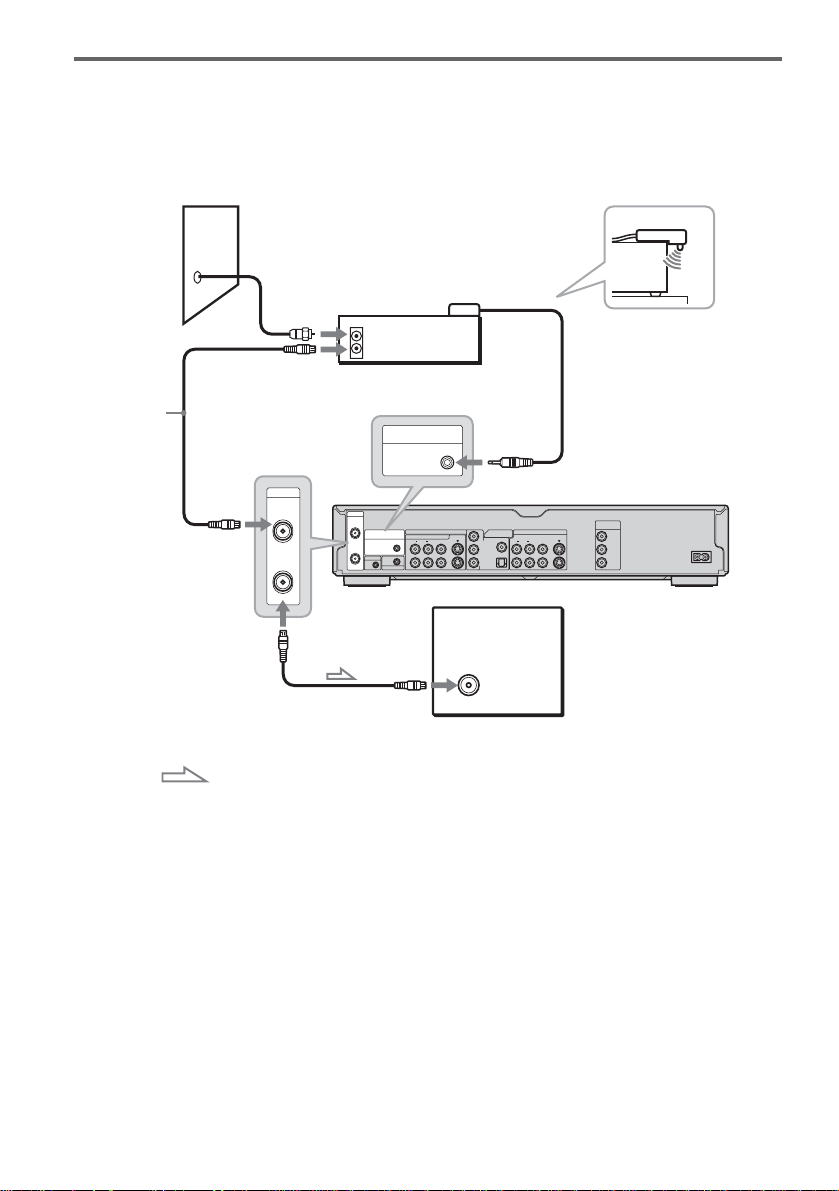
Step 2: Connecting the Antenna Cable and Set Top Box Controller
Select one of the following antenna hookups. Do
not connect the power cord until you reach “Step
5: Connectin g t h e Power Cord” (page 21).
If you have Hookup
Cable box or satellite receiver with a
video/audio output
Cable box with an antenna output
only
Cable without cable box, or antenna
only (no cable TV)
A (page 13)
B (page 14)
C (page 15)
Note to CATV system installer (in USA)
This reminder is provided to call the CATV
system installer’s attention to Article 820- 40 of
the NEC that provides guidelines for proper
grounding and, in par t ic ul ar, specifies that the
cable ground shall be connected to the grounding
system of the buildi ng, as close to the point of
cable entry as practical.
Notes
• If your antenna is a flat cable (30 0- ohm twin lead
cable), use an external ante nna co n ne c t or (no t
supplied) to connect the antenna to the recorder.
• If you have separate cables for VHF and UHF
antennas, use a UHF/VHF band mixer (not supplied) to
connect the antenna to the recorder.
• If you have made hookup A or B and want to use the
TV Guide On Screen system, the cable box must be
turned on, the set top box controller must be connected,
and “Set Top B ox Control” in Settings Setup mus t be
set to “On” (page 86) to download the TV Guide On
Screen data.
• If you are using the TV Guide On Screen syste m and
the recorder is receiving T V Guide On Screen data, y ou
may not be able to use the remote control to change
channels on the cable box when the recorder is off.
Wait until the recorder has finished receiving TV
Guide On Screen da ta .
12
Page 13
A: Cable box or satellite receiver with a video/audio output
With this hookup, you can record any channel on the cable box or sat ellite receiver. Be sur e t hat the
satellite receiver or cable box is turned on.
To watch cable or satellite programs, you need to match the channel on the recorder (L1 or L3) to the
input jack connected to the cable box or satellite receiver (LINE IN 1 or 3). Note that satellite receiver
programs do not ap pear in the TV Guide O n Screen system.
Place the set top box controller
near the remote sensor on the
cable box/satellite receiver.
Set top box
controller
(page 12)
AUDIO
OUT
RL
VIDEO
OUT
S VIDEO
Cable box/
satellite receiver
COMPONENT
VIDEO OUT
ANT IN
TO TV
Antenna cable
(supplied)
to antenna input
Wall
TV
Hookups and Settings
Audio/video
cord (supplied)
Component video cord
(not supplied)
S-video cord (not
supplied)
to LINE IN
1 or 3
Note
SET TOP BOX
CONTROL
to SET TOP BOX
CONTROL
COMPONENT VIDEO IN
LINE IN
VIDEO
AUDIORL
1
3
VHF/UHF
IN
OUT
G-LINK
SET TOP BOX
CONTROL
CONTROL S IN
1
3
COMPONENT VIDEO IN
LINE IN
AUDIORL
DIGITAL OUT
PCM/DTS/DOLBY DIGITAL
Y
S VIDEO
VIDEO
COAXIAL
1
P
B
2
P
R
OPTICAL
S VIDEO
LINE OUT
AUDIORL
Y
P
B
P
R
to
COMPONENT
VIDEO IN
COMPONENT
VIDEO OUT
Y
S VIDEO
VIDEO
P
B
P
R
DVD recorder
: Signal flow
z Hints
• If your cable box or satellite receiver has an S-video jack or component output jacks, you can use an S-video cord (not
supplied) or component video cord (not supplied) instead of the a udi o/video cord. When you connect using a
component video cord, connect the aud io cor ds to the LI NE IN jac ks.
• If you connect an S-video cord to the LINE IN 1 jack or a component video cord, set “Line1 Input” in Video Setup to
“S Video” or “Component” (page 89). If you connect an S-video cord to the LINE IN 3 jack, set “Line3 Input” in
Video Setup to “S Video” (page 89).
Do not connect a hidefinition tuner using the
component video cords. This
recorder only accepts
standard definition inter la c e
signals.
~ AC IN
,continued
13
Page 14
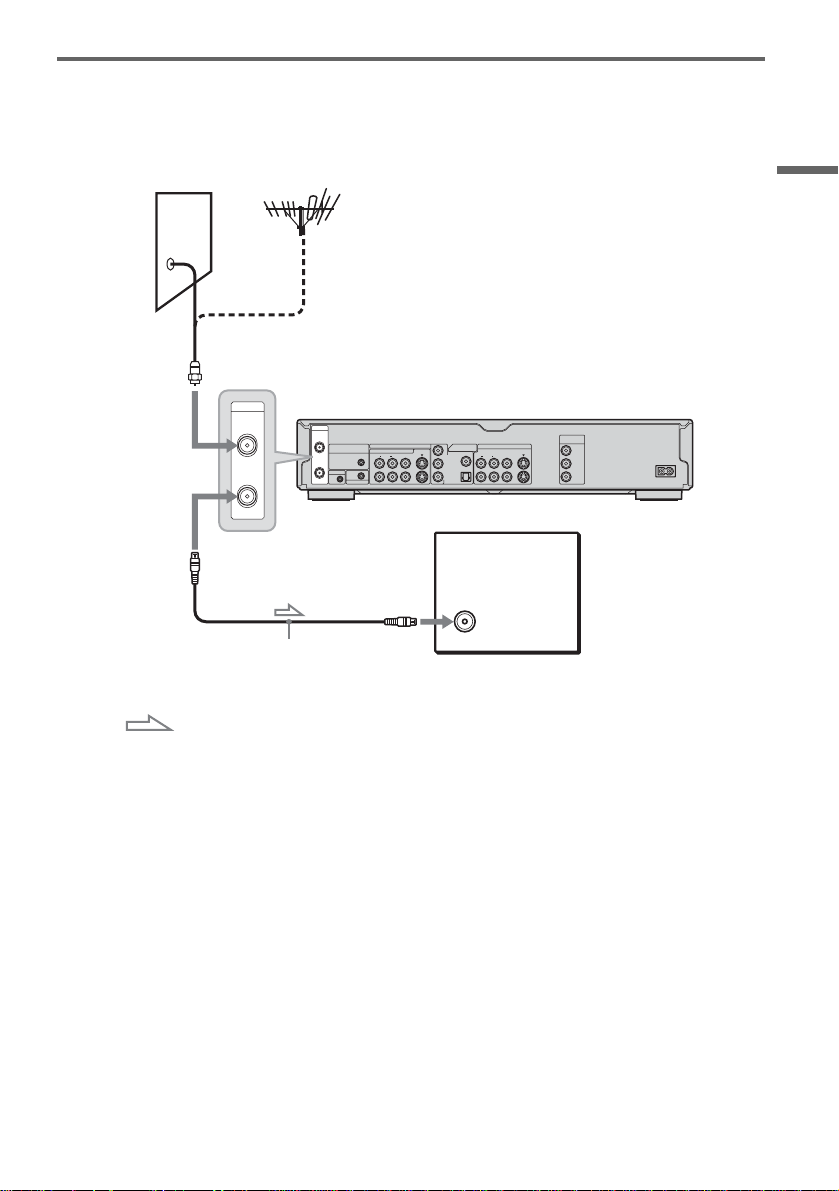
B: Cable box with an antenna output only
With this hookup, y ou can record any chann el on the satellite recei ver or cable box. Be sure t hat the
satellite receiver or cable box is turned on.
To watch cable programs, you need to match the channel on the recorder (2ch, 3ch, or 4ch) to the antenna
output channel on the cable box (2ch, 3ch, or 4ch) .
Wall
Set top box
controller
Cable box
ANT IN
TO TV
(supplied)
Place the set top box controller
near the remote sensor on the
cable box/satellite receiver.
Antenna cable
(supplied)
to VHF/UHF IN
to VHF/UHF OUT
: Signal flow
VHF/UHF
IN
OUT
VHF/UHF
IN
SET TOP BOX
CONTROL
OUT
G-LINK
CONTROL S IN
to antenna
input
SET TOP BOX
CONTROL
AUDIORL
1
3
COMPONENT VIDEO IN
LINE IN
VIDEO
TV
to SET TOP
BOX
CONTROL
Y
S VIDEO
P
B
P
R
DIGITAL OUT
PCM/DTS/DOLBY DIGITAL
COAXIAL
OPTICAL
AUDIORL
1
2
LINE OUT
DVD recorder
COMPONENT
VIDEO OUT
Y
S VIDEO
VIDEO
P
B
P
R
~ AC IN
14
Page 15
C: Cable without cable box, or antenna only (no cable TV)
Use this hookup if yo u w atch cable channels w ithout a cable box. Also use this hookup if you ar e using
a VHF/UHF antenna or separate VH F and UHF antennas.
With this hookup , you can record any channel by selecting th e channel on the reco rder.
Wall
to VHF/UHF IN
COMPONENT
VIDEO OUT
Y
P
B
P
R
DVD recorder
~ AC IN
VHF/UHF
IN
OUT
VHF/UHF
IN
OUT
G-LINK
SET TOP BOX
CONTROL
CONTROL S IN
1
3
COMPONENT VIDEO IN
LINE IN
AUDIORL
S VIDEO
VIDEO
COAXIAL
P
B
P
R
OPTICAL
AUDIORL
1
2
S VIDEO
VIDEO
LINE OUT
DIGITAL OUT
PCM/DTS/DOLBY DIGITAL
Y
Hookups and Settings
to VHF/UHF OUT
Antenna cable (supplied)
: Signal flow
TV
to antenna input
15
Page 16

Step 3: Connecting the Video Cords
Select one of the following patterns A th rough C, according to the input jack on your TV monitor,
projector, or AV amplifier (receiver). This will enable you to view pictures. Audio connections are
explained in “Step 4: Connecting the Audio Cords” (page 19).
A
INPUT
VIDEO
L
AUDIO
R
TV, projector, or AV
amplifier (receiver)
to LINE OUT (VIDEO) 1 or 2
VHF/UHF
IN
SET TOP BOX
CONTROL
AUDIORL
1
OUT
G-LINK
3
CONTROL S IN
to CONTROL S IN
TV or other equipment with a
CONTROL S jack
Audio/video
cord (supplied)
COMPONENT VIDEO IN
LINE IN
S VIDEO
VIDEO
CONTROL S
(yellow)
DIGITAL OUT
PCM/DTS/DOLBY DIGITAL
Y
AUDIORL
COAXIAL
1
P
B
2
P
R
OPTICAL
(red) (blue)
S-video cord
(not supplied)
to LINE OUT (S VIDEO) 1 or 2
COMPONENT
LINE OUT
VIDEO
VIDEO OUT
Y
S VIDEO
P
B
P
R
(green)
Component video
cord (not supplied)
S VIDEO
TV, projector, or AV
amplifier (receiver)
DVD recorder
~ AC IN
to COMPONE N T
VIDEO OUT
COMPONENT
VIDEO IN
TV, projector, or AV
amplifier (receiver)
INPUT
Y
P
B
P
R
B
C
(green)
(blue)
(red)
: Signal flow
Note
Do not connect more than one type of video c or d bet wee n the recorder and your TV at the same time .
16
Page 17
A Connecting to a video input jack
Connect the yellow pl ug of the audio/video cor d
(supplied) to the yellow (video) jack. You will
enjoy standard quality images.
Note that you cannot use the PROGRESSIVE
button with this connection.
Yellow
White (L)
Red (R)
Yellow
White (L)
Red (R)
B Connecting to an S VIDEO input
jack
Connect an S-video cord (not supplied). You will
enjoy high quality im ages.
Note that you cannot use the PROGRESSIVE
button with this connection.
C Connecting to component video
input jacks (Y, P
Connect the COMPONENT VIDEO OUT jacks
using a component vi deo cord (not supplie d) or
three video cords (not supplied ) of the same kind
and length. You will enjoy accurate color
reproduction and hi gh quality images.
If your TV accepts pr ogressive 480p for mat
signals, you must use this connection and then
press PROGRESSIVE on the remote to send
progressive video signals. For details, see “Using
the PROGRESSIV E button” (page 18 ).
B, PR)
If your TV has a CONTROL S jack
You can control th e recorder by pointi ng the
remote at your TV . Th is feature is convenie nt
when you place the recorder and th e TV away
from each other.
After connecti ng t he recorder to other eq uipment
in pattern A, B, or C above, conn e ct the
CONTROL S IN jack to your TV’s CONTROL S
(OUT) jack using a control S cord (not supplied).
See the instructions supplied with the TV to be
connected. Note that your TV’s input will not
automatically switch to this recorder when you
play a disc.
Hookups and Settings
Green
Blue
Red
Green
Blue
Red
When playing “wide screen” images
Some recorded images may not fit your TV
screen. To change the aspect ratio, see page87.
If you are connecting to a VCR
Connect your VCR to the LINE IN (VIDEO) jack
on the recorder (page 29).
,continued
17
Page 18

Using the PROGRESSIVE button
By using the PROGRESSIVE button on the
remote, you can select the signal format in which
the recorder outp ut s vi deo signals: Interl ace or
Progressive.
Connect the recorder using the CO M PONENT
VIDEO OUT jacks (pattern C above), an d press
PROGRESSIVE repeatedly. “PROGRESSIVE”
appears in the front panel display when the
recorder out puts progress ive signals.
◆Progressive
Select this when:
–your TV accepts pr ogressive signals , an d,
–the TV is connected to the COMPONENT
VIDEO OUT jacks.
Note that the pictures will not be clear or no
picture will appear if you se lect progre ssive sig nal
output when either of the above conditions is not
met.
◆Interlace
Set to this position when:
–your TV does not accept progressive signals, or,
–your TV is connected to jacks other than th e
COMPONENT VIDEO OUT jacks (LINE OUT
(VIDEO) or S VIDEO).
z Hint
When you sel e c t pr og re ss iv e s ign a l ou t put , y ou can fi ne tune the signal according to the type of software you are
watching (page 88).
Notes
• Consumers should note tha t not a ll hi gh de fi nition
television sets are f u lly compatible with this pr oduct
and may cause artifacts to be displayed in the picture.
In the case of 480 progressive scan picture problems, it
is recommended th at the user switch the connection to
the ‘standard definition’ output. If there are questions
regarding our TV set co mpatibility with this m odel
480p DVD recorder, please contact our customer
service center.
• TV Guide On Screen does not appear if you connect
your TV using the video or S-video jacks and press the
PROGRESSIVE button on the remote, even if your TV
accepts progressive signals.
18
Page 19
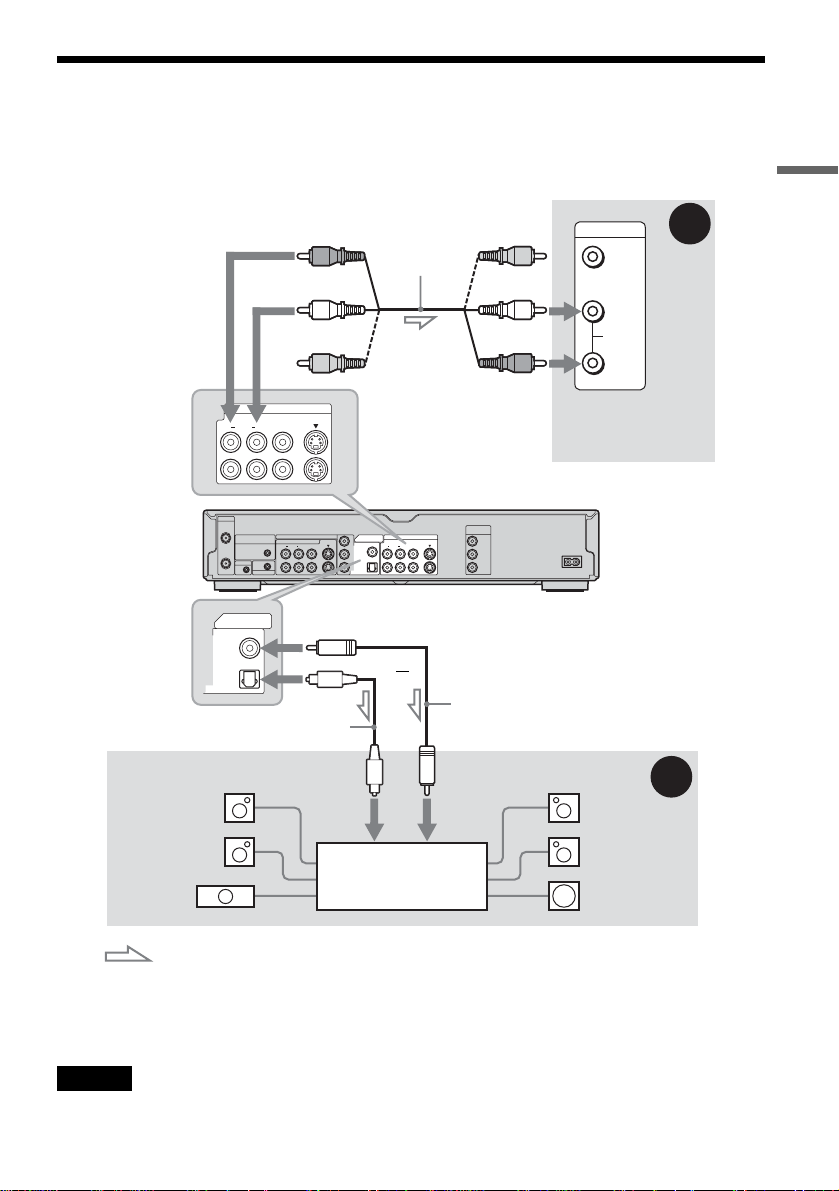
Step 4: Connecting the Audio Cords
Select one of the following patterns A or B, according to the input jack on your TV monitor, projecto r,
or AV amplifier (receiver).
This will enable you to listen to sound.
Hookups and Settings
(red)
(white)
(yellow)*
LINE OUT
S VIDEO
VIDEO
AUDIORL
1
2
VHF/UHF
IN
OUT
G-LINK
DIGITAL OUT
PCM/DTS/DOLBY DIGITAL
COAXIAL
OPTICAL
COMPONENT VIDEO IN
SET TOP BOX
LINE IN
CONTROL
CONTROL S IN
1
3
VIDEO
AUDIORL
S VIDEO
to DIGITAL OUT (COAXIAL or
OPTICAL)
Optical digital cord (not supplied)
[Speakers]
to optical
digital input
Rear (L)
Audio/video
(yellow)
cord (supplied)
(white)
(red)
to LINE OUT (R-AUDIO-L) 1 or 2
COMPONENT
PCM/DTS/DOLBY DIGITAL
Y
COAXIAL
B
P
P
R
OPTICAL
DIGITAL OUT
AUDIORL
1
2
LINE OUT
VIDEO
VIDEO OUT
Y
S VIDEO
B
P
P
R
or
Coaxial digital cord
(not supplied)
to coaxial
digital input
TV, projector, or AV
amplifier (receiver)
~ AC IN
DVD recorder
[Speakers]
INPUT
VIDEO
L
AUDIO
R
A
B
Rear (R)
Front (L)
Front (R)
AV amplifier (receiver)
Center
with a decoder
Subwoofer
: Signal flow
* The yellow plug is use d f or vide o signals (page 17).
z Hint
For correct speaker location, see the operating instructions supplied with the connected components.
Note
Do not connect your TV’s audio output jacks to the LINE IN (AUDIO L/R) jacks at the same time. This will cause
unwanted noise to come from your TV’s spea ke rs.
,continued
19
Page 20
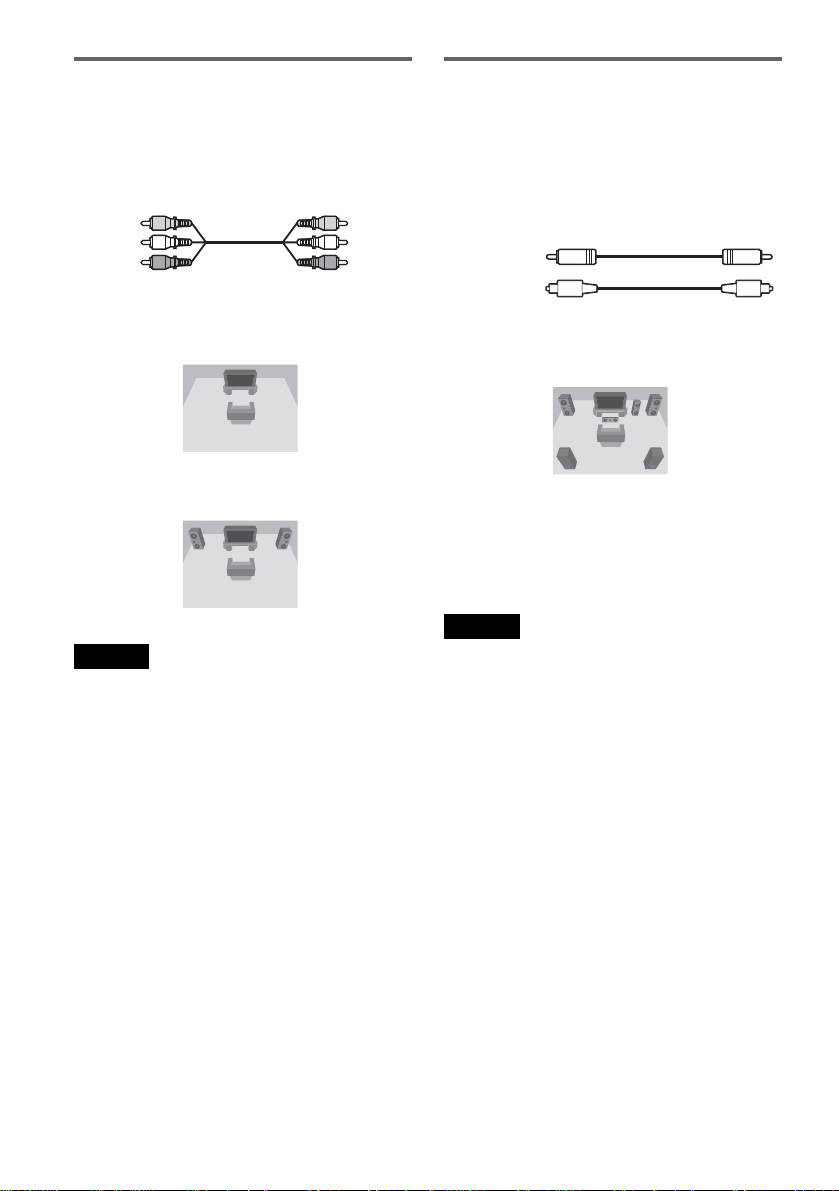
A Connecting to audio L/R input
jacks
This connection wil l use your TV’s or stereo
amplifier’s (rec eiver’s) two speakers for so un d.
Connect using the audi o/ video cord (suppli ed) .
Yellow
White (L)
Red (R)
• Surround effect (page 56)
TV: Dynamic, Wide, Night
Yellow
White (L)
Red (R)
B Connecting to a digital audio
input jack
If your AV ampli f ie r (receiver) has a Do lby*1
Digital or DTS*
use this connection.
Connect using a coaxial or optical digital cord (not
supplied).
Coaxial cord
Optical cord
• Surround effect
Dolby Digital (5.1ch), DTS (5.1ch)
2
decoder and a digital input jack,
Stereo amplifie r (r eceiver): Standar d, Night
Note
Do not connect your TV’s audio output jacks to the LINE
IN (AUDIO L/R) jacks at the same time. This will cause
unwanted noise to come from your TV’s spea kers .
*1
Manufactured under license from Dolby Laboratories.
“Dolby,” “Pro Logic,” and the double-D symbol are
trademarks of Dolby Laboratories.
*2
“DTS” and “DTS Digital Out” are trademarks of
Digital Theater Systems, Inc.
Notes
• After you have completed the connection, make the
appropriate settings under “Audio Connection” in Easy
Setup (page 24). Otherwise, no sound or a loud noise
will come from your speake r s.
• The surround sound effects of this reco rde r cannot be
used with this connection.
20
Page 21
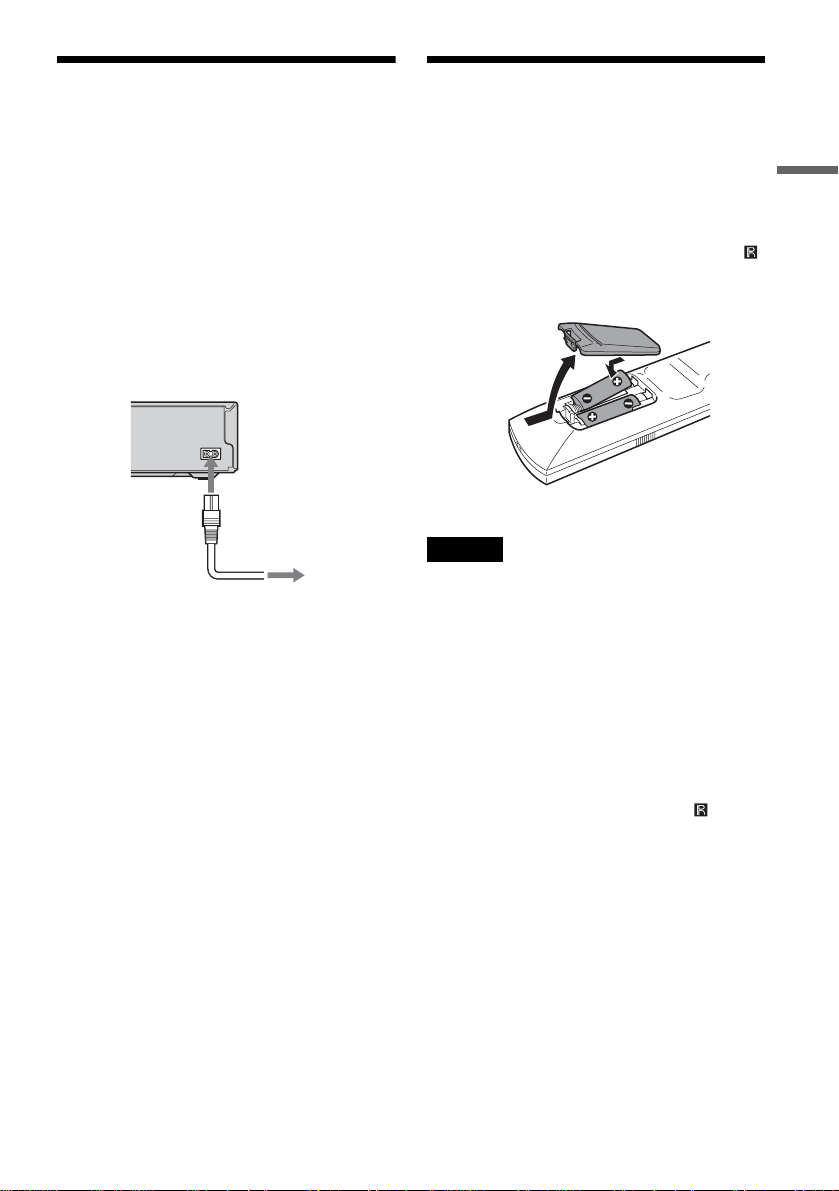
Step 5: Connecting the
Step 6: Preparing the
Power Cord
Connect the supplie d power cord to the AC IN
terminal of the re corder. Then plug t he recorder
and TV power co rd s int o an A C ou tl et. Aft er yo u
connect the pow er cord, you must wait for a
short while before operating the recorder. You
can operate the recorder only after the front panel
display lights up and the recorder en ters standby
mode.
If you connect addi tional equipment to this
recorder (page 29), be sure to connect th e power
cord only after all connections are complete.
~ AC IN
1
to AC IN
2
to AC outlet
Remote
You can control th e recorder using the supplied
remote. Insert two size AA (R6) batteries by
matching the 3 and # ends on the batteries to the
marking s inside the battery compartment. Whe n
using the remote, point it at the remote sensor
on the recorder.
Notes
• If the supplied remote interferes your other Sony DVD
recorder or player, ch ange the command mo de number
for this recorder (page 23).
• Use the batteries correctly to avoid possible leakage
and corrosion. Do not touch the liquid with bare hands
should leakage occur. Observe the following:
– Do not use a new battery wit h an old batte ry, or
batteries of different manufacturers.
– Do not attem pt to recharge the batteries.
– If you do not intend to use the remote for an extended
period of time, remove the batter ie s.
– If battery le a ka g e occur s, wipe out any liquid inside
the battery compar tment, and insert new bat teries.
• Do not expose the remote sensor (marke d on the
front panel) to strong light, such as direct sunlight or
lighting apparatus. The recorder may not respond to the
remote.
Hookups and Settings
,continued
21
Page 22
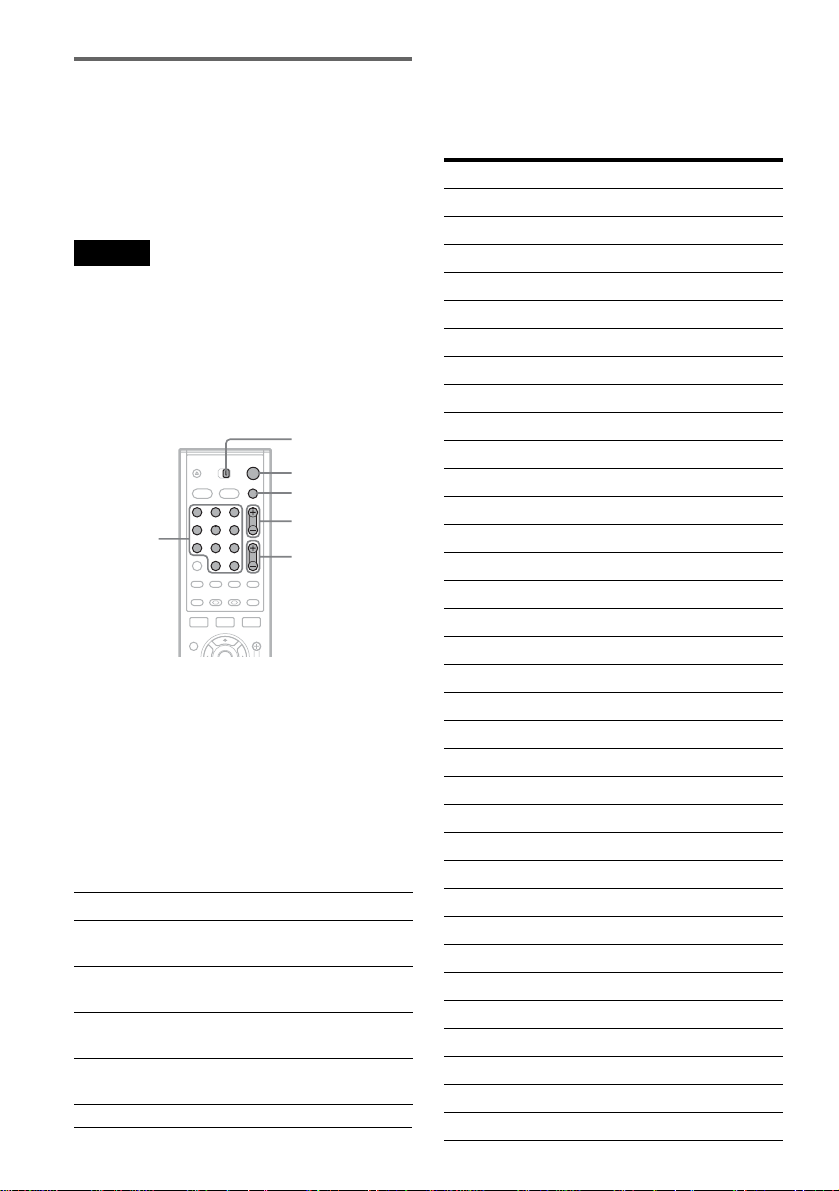
Controlling TVs with the remote
You can adjust the remote control’s signal to
control your TV.
If you connected the recorder to an A V amplifier
(receiver), you can also use the supplied remote to
control the AV amplifier’s (receiver’s) volume
(page 23).
Notes
• Depending on the connected unit, you may not be able
to control your TV or AV amplifier (receive r) with
some or all of the buttons below.
• If you enter a new code number, the code number
previously entered will be erased.
• When you replace the batteries of the remote, the code
number may be reset to the default setting. Set the
appropriate code number again.
TV/DVD
switch
"/1
TV/VIDEO
CH +/–
VOL +/–
Number
buttons, SET
1 2 3
4 5 6
7 8 9
0
1 Slide the TV/DVD switch to TV .
2 Hold down [/1.
3 Enter your TV’s manufacturer code (see
“Code numbers of controllable TVs”
below) using the number buttons.
4 Release [/1.
When the TV/DVD switch is set to TV, the
remote performs the following:
[/1 Turns your TV on or off
VOL +/– Adjusts the volume of your
CH +/– Selects the channel on your
TV/VIDEO Switches your TV’s input
Number buttons and
SET
TV
TV
source
Selects the channel on your
TV
Code numbers of controllable TVs
If more than one code number is listed, try
entering them one at a time until you fin d t he one
that works with your TV.
Manufacturer Code number
Sony 01 (default)
Akai 04
AOC 04
Centurion 12
Coronado 03
Curtis-Mathes 12, 14
Daewoo 04, 22
Daytron 03, 12
Fisher 11
General Electric 04, 06, 10
Gold Star/LG 03, 04, 17
Hitachi 02, 03, 04
J.C.Penney 04, 10, 12
JVC 09
KMC 03
Magnavox 03, 04, 08, 12, 21
Marantz 04, 13
MGA/Mitsubishi 04, 12, 13, 17
NEC 04, 12
Panasonic 06, 19
Philco 02, 03, 04, 08
Philips 08, 21
Pioneer 06, 16
Portland 03
Proscan 10
Quasar 06, 18
Radio Shack 05, 10, 14
RCA 04, 10
Sampo 12
Samsung 03, 04, 12, 20
Sanyo 11, 14
Scott 12
Sears 07, 10, 11
Sharp 03, 05, 18
22
Page 23
Manufacturer Code number
Sylvania 08, 12
Teknika 03, 08 , 14
Toshiba 07, 18
Wards 03, 04, 12
Yorx 1 2
Zenith 14, 15
Controlling the volume of your AV
amplifier (receiver) with the remote
TV/DVD
switch
"/1
Code numbers of controllable AV amplifiers
(receivers)
If more than one c ode number is listed, tr y
entering them one at a time until you fin d th e one
that works with your AV amplifier (receiver).
Manufacturer Code number
Sony 78, 79, 80, 91
Denon 84, 85, 86
Kenwood 92, 93
Onkyo 81, 82, 83
Pioneer 99
Sansui 87
Technics 97, 98
Yamaha 94, 95, 96
Hookups and Settings
Number
buttons, SET
1 2 3
4 5 6
7 8 9
0
VOL +/–
1 Slide the TV/DVD switch to DVD.
2 Hold down [/1, and enter the
manufacturer code (see the table below)
for your AV ampli fi er (receiver) usi ng the
number buttons.
3 Release [/1.
The VOL +/– buttons control the AV
amplifier’s volu m e.
If you want to control the TV’s volume, slide
the TV/DVD switch to TV.
z Hint
If you want to control the TV’s volume even when the
TV/DVD switch is set to DVD, repeat the steps above
and enter the code number 90 (default).
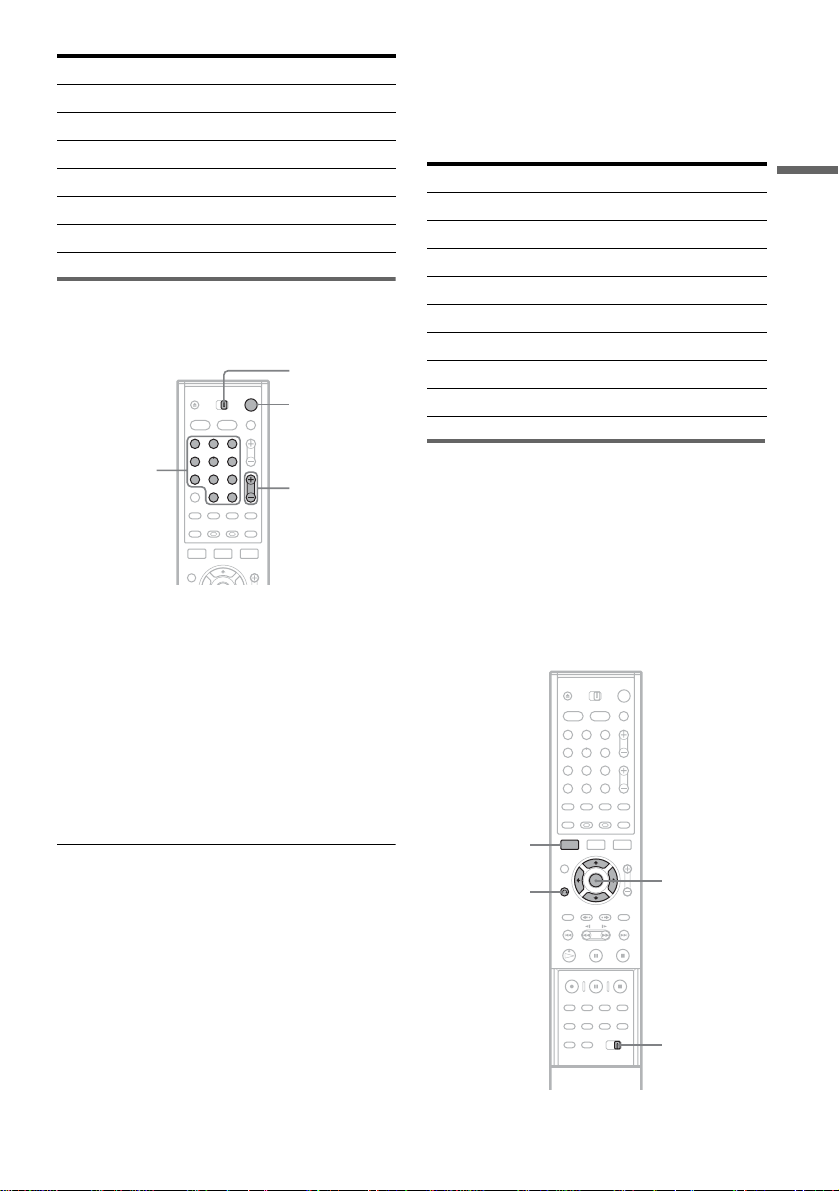
If you have a Sony DVD player or
more than one Sony DVD recorder
If the supplied remote interferes with your other
Sony DVD recorder or player, set the command
mode number for this recorder and the supplied
remote to one that differs from the ot her Sony
DVD recorde r o r pl ayer.
The default command mode setting for this
recorder and the supplied remote is DVD3.
1 2 3
4 5 6
7 8 9
0
SYSTEM
MENU
O RETURN
M/m,
ENTER
COMMAND
MODE switch
,continued
23
Page 24
1 Press SYSTEM MENU.
The System Menu a ppears.
2 Select “SETUP,” and press ENTER.
SETUP
Settings
Tuner Preset
Video
Area Setup
Audio
Clock
Features
Set Top Box Control
Options
Language
Easy Setup
3 Select “Optio ns,” and press ENT ER.
SETUP
Settings
Video
Audio
Features
Options
Easy Setup
Format DVD :
Dimmer :
Auto Display :
Command Mode :
Factory Setup
VR
Normal
On
DVD3
4 Select “Command Mode,” and press
ENTER.
SETUP
Settings
Video
Audio
Features
Options
Easy Setup
Format DVD :
Dimmer :
Auto Display :
Command Mode :
Factory Setup
VR
Normal
On
DVD3
DVD1
DVD2
DVD3
Step 7: Easy Setup
Follow the steps below to make the minimum
number of basic adjustments for using the
recorder. If you do n ot complete Easy Setup, it
will appear each t ime you turn on your recorder.
Settings are made in the following order.
Note that television program listing s do not appear
in the TV Guide On Screen system as soon as you
comple te Easy Setup.
Area Setup
m
OSD Language Setup
m
Clock Setup
m
Cable Box/Sat. Control Setup
m
Tuner and Channel Setup
m
TV Type Setup
m
Audio Connection Setup
m
Finished!
5 Select the Com m and mode (DVD1, DVD2,
or DVD3), and press ENT ER.
6 Slide the COMMAND MODE switch on the
remote so it matches the mode you
selected above.
To return to the previous step
Press O RETURN.
24
You must leave the recorder turned off for at
least 24 hours to receive the TV Guide On
Screen data. If your recorder is connected to a
cable box, be sure to lea ve the cabl e box turn ed
on.
Page 25
Number
buttons
1 2 3
4 5 6
7 8 9
0
"/1
CH +/–
6 Enter your zip code number.
Use M/m to select the number or letter (for
Canada) and </, to move the cursor.
EASY SETUP
Enter your zip code.
Area Setup 1/7
- - - - -
Hookups and Settings
O RETURN
</M/m/,,
ENTER
1 Turn on the TV.
2 Press [/1.
The recorder tu rns on.
3 Switch the input selecto r on your TV so that
the signal from the recorder appears on
your TV screen.
“Initial settings necessary to operate the DVD
recorder will be ma de. You can change them
later using Setup. Before you start, check that
you have made all n ecessary connections.”
appears.
• If this message does not appear, select “Easy
Setup” from “SETUP” in the System Menu
to run Easy Setup. For details, see “Settin gs
and Adjustment s” on page 83.
4 Press ENTER.
The Setup Display f or ent ering your area of
residence appears. This will enable you to use
the TV Guide On Screen system (page 33).
Enter your area of residence even if you do not
want to use the TV Guide On Screen system.
USA
Canada
Area Setup 1/7
EASY SETUP
Select your country.
5 Select a country, and press ENTER.
The display for ente ri ng your zip code
appears.
7 Press ENTER.
The Setup Display for selecting the language
used in the on-screen display appears.
English
Français
Language 2/7
EASY SETUP
Select the screen Language.
8 Select a language, and press EN TER.
The display fo r setting the clock appears.
If the clock data has already been received, go
to step 10.
EASY SETUP
Set the time and date manually.
112:Thu 00 AM1
Clock
2004//
3/7
9 Enter the curre nt date and time.
Press M/m to set the month and press ,. Set
the day, year, hour, and minutes in the same
way. The day of the clock is set automatically.
10Press ENTER.
The Setup Display for cable box/satellite
receiver contro l appears.
Yes
No
Set Top Box Control 4/7
EASY SETUP
Do you want to control your set top box
with this recorder?
(Changes to the current setting will erase all timer settings.)
,continued
25
Page 26
11Set the cable box/satellite receiver
control, and press ENTER.
If you want to use the cable box/satellite
receiver control (page 14), selec t “Yes.”
If you do not have a cabl e b ox, select “No,”
then go to step 15.
12Enter the brand code of your cable bo x/
satellite receiver.
See “Cable Box/Sa t el lit e R eceiver Brand
Code” (page 112).
Use M/m to select the number and </, to
move the cursor.
EASY SETUP
Enter the brand code of your set top box.
Set Top Box Control 4/7
- - - -
15Select whether or not you have a cable
connection.
Antenna
Cable
Tuner Preset 5/7
EASY SETUP
Select the way in which you will receive channels.
If you use an antenn a only (no cable TV),
select “Antenna.”
If you use a cable connection without a cable
box, select “Cable.”
16Press ENTER.
The Tuner Preset function automatically starts
searching for all of the receivable channels
and presets the m .
13Press ENTER.
Line1
Line2
Line3
Ch2
Ch3
Ch4
Set Top Box Control 4/7
EASY SETUP
Select input line or Set Top Box's output channel.
14Select the cable box output channel.
If you connect your cable box or satellite
receiver to the re corder’s audio/ vi deo input
(page 13), select “Line1,” “Line2, ” or
“Line3,” then go to step 17.
If you connect the satellite receiver or cable
box to the recorder’s antenna input (page 14),
select “Ch2,” ‘Ch3,” or “Ch4” and press
ENTER, then go to step 17. See the
instructions supplied with your cable box to
confirm the cable box’s antenna output
channel.
EASY SETUP
Searching for receivable channels.
Please wait.
Tuner Preset 5/7
Ch45
To set the chann el s m anually, see page 85.
After the Tuner Pr es et is fi ni shed, the Setup
Display for selecting the aspect ratio of the
connected TV appears.
17Select the setting that matches your TV
type.
EASY SETUP
Select your TV screen type.
“4:3 Letter Box”: For standard TVs.
Displays “wide screen” pictures with bands
on the upper and lower sections of the screen.
“4:3 Pan Scan”: For standard TVs.
Automatically displays “wide screen ”
pictures on the en t ire screen and cuts off th e
sections that do not fit.
16 : 9
4 : 3 Letter Box
4 : 3 Pan Scan
TV Type 6/7
26
Page 27
“16:9”: For wide-screen TVs or standard TVs
with a wide screen mode.
For details, see “TV Type” on page 87.
18Press ENTER.
The Setup Display f or sel ec ting the type of
jack used to connect to your amplifier
(receiver) appears.
21Press ENTER.
The Setup Display for the DTS signal appears.
On
Off
Audio Connection 7/7
EASY SETUP
DTS
Hookups and Settings
EASY SETUP
Is this recorder connected to an amplifier (receiver)?
Select the type of jack you are using.
Yes :
Yes :
No
Audio Connection 7/7
LINE OUT(R-AUDIO-L)
DIGITAL OUT
19Select the type of jack (if any) you are
using to connect to an amplifi er (receiver),
and press ENTER.
If you did not connect an A V am plifier
(receiver), se lect “No,” then go to step 23.
If you connected an AV amplifier (receiver)
using just an audio cord, select “Yes: LINE
OUT (R-AUDIO-L),” then go to step 23.
If you connected an AV amplifier (receiver)
using either a digital optical or coaxial cord,
select “Yes: DIGITAL OUT.”
20Select the type of Dolby Digital signal you
wish to send to your amplifier (receiver).
EASY SETUP
Dolby Digital
D-PCM
Dolby Digital
Audio Connection 7/7
22Select whether or not you wish to send a
DTS signal to your amplifier (receiver),
and press ENTER .
If your AV amplifier (receiver) has a DTS
decoder, select “On.” Otherwise, select “Off.”
23Press ENTER when “Finish” appears.
Easy Setup is finished. All connections and
setup operations are complete.
If you use the cable box/satellite receiver
control, check that the control works correctly
(see below).
EASY SETUP
Easy Setup is finished.
Finish
You must leave the recorder turned off for
at least 24 hours to receive the TV Guide
On Screen data. If your recorder is
connected to a cable box, be sure to l eave
the cable box turned on.
If your AV amplifi er (receiver) ha s a D olby
Digital decoder, select “Dolby Digital.”
Otherwise, select “D-PCM.”
To return to the previous step
Press O RETURN.
z Hint
If you want to run Easy Setup again, select “Easy Setup”
in the Setup Display (page 95).
Notes
• To record TV programs using the timer, you must se t
the clock accurately.
• If you use an S-video cord to connect your cable box or
satellite receiver, set “Line1 Input” or “Line3 Input” in
Video Setup to “S Video” (page 89).
,continued
27
Page 28
Checking the cable box/satellite
receiver control setting
1 Point the DVD recorder’s remote at the
recorder (not at the cable box/satellite
receiver).
2 Press CH +/– and ch eck that the channel
changes on the cable bo x/satellite receiver
window.
3 Press the number buttons and check th at
the channel changes on the cable box/
satellite receiver window.
Tune your cable box to channel 02. Then
using your DVD recorder’s remote, enter 09
to tune your cable box to channel 09. Did the
cable box change to c hannel 09? If the cable
box did not tune to channel 09, follow the
instructions below for g etting your recor der to
control your cable box.
If you cannot get the recorder to contr ol your
cable box/satellite receiver
Check the settings at “Set Top Box Control” in
Settings Setup (page 86). If more than one code
number is listed for your cable box/satellite
receiver, try entering t hem one at a time in step 1 2
of Easy Setup until you fi nd the one that works
with your cable box/satellite receiver.
Check the conn ection and posit i on of the set top
box controller (page 13).
If your cable box or satellite receiver st ill does not
operate with this recorder, contac t your cable or
satellite company to see if they can provide you
with a compatible cable box or satellite receiver.
2 Attach it so that the set top box controller is
directly above the remote control sensor on
your cable box/satellite receiver.
To fix the set top box controller to your cable
box/satellite receiver
Once you have confir m ed t hat the set top box
controller controls your cable box or sat el lite
receiver, fix it in place.
1 Remove the backing on the double-sided tape.
28
Page 29
Connecting a VCR or Similar Device
After disconnecting the recorder’s power cord from an AC outlet, connect a VCR or similar recording
device to the LINE IN jacks of this recorder.
Use the DV IN jack on the front panel if the equipment has a DV/D igital8 output jack ( i.L I N K j ack)
(page 77).
See also the instruction manual supplied with the connected equipment.
To record on this recorder, see “Recording From a VCR or Similar Device” (page 53).
Connecting to the LINE IN 1 or 3 jacks
If the equipment ha s an S-video jack or com ponent output jacks , you can use an S-video cord or
component video cord instead of an audio/video cord.
VCR, etc.
LINE OUTPUT COMPONENT VIDEO OUT
AUDIO
RL
VIDEO
S Video
Y
P
B
P
R
Hookups and Settings
Audio/video cord
(not supplied)
to LINE IN 1 or 3
: Signal flow
1
3
VHF/UHF
IN
OUT
COMPONENT VIDEO IN
LINE IN
AUDIORL
SET TOP BOX
CONTROL
G-LINK
CONTROL S IN
1
3
VIDEO
COMPONENT VIDEO IN
LINE IN
AUDIORL
S-video cord
(not supplied)
Component video
cord (not supplied)
to COMPONE NT
VIDEO IN
Y
S VIDEO
P
B
P
R
DVD recorder
COMPONENT
VIDEO
VIDEO
AUDIORL
COAXIAL
1
B
P
2
P
R
OPTICAL
LINE OUT
DIGITAL OUT
PCM/DTS/DOLBY DIGITAL
Y
S VIDEO
VIDEO OUT
Y
S VIDEO
B
P
P
R
~ AC IN
,continued
29
Page 30
Notes
• When you connect using a component video cord, co nne ct the aud io cord s to the LI NE IN jac ks.
• Do not connect a hi-definition tuner or similar device using the component video cords. This recorder only accepts
standard definition inte rlace signals.
Connecting to the LINE 2 IN jacks on the front panel
Connect a VCR or similar recording device to the LINE 2 IN jacks of thi s recorder . If the eq uipment has
an S-video jack, yo u can use an S-video cord i nstead of an audio/vi deo cord.
VCR, etc.
OUTPUT
S VIDEO
VIDEO
AUDIO
LR
Audio/video cord
(not supplied)
DVD recorder
to LINE 2 IN
: Signal flow
S-video
cord (not
supplied)
z Hint
When the connected equipment o utputs only monaural sound, use audio cable s tha t distribute monaural sounds to left/
right channels (not supplied).
Notes
• Do not connect the yellow LINE IN (VIDEO) jack when using an S-video cord.
• Do not connect the output jack of this recorder to another equipment’s input jack with the other equipment’s output
jack connected to the input jack of this recorder. Noise (feedback) may result.
• Pictures containing copy protecti on signals that prohibit any copying ca nnot be recor de d .
30
Page 31

• If you pass the recorder signals via the VCR, you may not receive a clear image on your TV screen.
VCRDVD recorder TV
Be sure to connect your VCR to the DVD recorder and your TV in the order shown below. To watch videotapes, watch
the tapes through a second Line input on your TV.
LINE IN 1
VCR DVD recorder TV
LINE IN 2
• Do not connect more than one type of video cord between the recorder and your TV at the same time.
Hookups and Settings
31
Page 32

Guide to Displays
Using the On-Screen Menus
+
-
HDD
DVD
RW
VCD
RWVR-RW
CD
DATA CD
This section introduces the System Menu, TOOLS
menu, and sub-menu. By using these displays, you
can perform most of the recorder’s op er at ions.
1 2 3
4 5 6
7 8 9
0
Video
+
-
R
R
C SCHEDULE (page 49):
Turns on the list menu, which allows yo u to
check, change, or cancel timer settings.
D DV/D8 EDIT (page 77):
Activates the DV Edit function, which allows
you to record and edit the contents of a D V /
Digital8 format tape.
E DUBBING (page 72):
Dubs titles from the HDD to a DVD and vic e
versa. Select the dubbing direction before
dubbing.
F SETUP (page 83):
Turns on the Setup Display, which allows you
to set up the recorder to suit your preferences.
Note
The TV GUIDE option will not contain any listings until
the recorder receive s th e TV Guide On Sc reen data.
SYSTEM
TOOLS
MENU
O RETURN
</M/m/,,
ENTER
System Menu
The System Menu ap pears when you press
SYSTEM MENU, an d pr ovides entries to all of
the recorder’s main functions, such as timer
recording and s etup.
Select an option by pr essing M/m and ENTER.
SYSTEM MENU
TITLE LIST
TV GUIDE
SCHEDULE
DV/D8 EDIT
DUBBING
SETUP
A TITLE LIST (page 37):
Turns on the Title List m enu, which shows
recorded titles on the disc.
B TV GUIDE (page 46):
Allows you to set a new timer recording
setting using the TV Guide On Scre en system.
Sub-menu
The sub-menu appears when you sel ec t an item
from a list menu (e.g. a title from the Title List
menu), and press ENTER. The sub-menu displays
options applicable only to the selected item. The
displayed options differ depending on the
situation and disc type.
Select an option by pressing M/m and ENTER.
Example: The Title List menu
My Movies
TITLE LIST
Sort
Date
Title
Number
ORIGINAL
1 2ch 1:00PM - 2:00PM
2 5ch 8:00PM - 9:00PM
3 12ch 9:00AM - 9:30AM
4 3ch 8:00PM - 8:30PM
5 25ch 8:00PM - 8:30PM
6 L2 9:00PM - 9:30PM
7 8ch 9:00PM - 9:30PM
8 125ch 10:00AM - 10:30AM
Options for the selected item
1.5/4.7GB
Close
Wed
Play
Fri
Play Beginning
9/25
Sat
Erase
Dubbing
9/25
Sat
Protect Title
10/15
Fri
Title Name
10/19
Tue
Set Thumbnail
10/26
Tue
A-B Erase
10/28
Thu
9/15
9/17
TOOLS
The TOOLS menu a ppears when you press
TOOLS, and displays options applicable to the
entire disc (e.g. disc protection), recorder (e.g.
audio settings during record ing), or multiple items
on a list menu (e.g. erasing multiple titles). The
displayed options differ depending on the
situation and disc type.
Select the option by pressing M/m a nd ENTER.
32
Page 33

Example 1: When you press TOOLS while the
Title List menu is turned on.
Using the TV Guide On
My Movies
Close
Sort
Date
Disc Info.
Title
Erase Titles
Number
Dub Selected Titles
Playlist
TOOLS
TITLE LIST
ORIGINAL
1 2ch 1:00PM - 2:00PM
2 5ch 8:00PM - 9:00PM
3 12ch 9:00AM - 9:30AM
4 3ch 8:00PM - 8:30PM
5 25ch 8:00PM - 8:30PM
6 L2 9:00PM - 9:30PM
7 8ch 9:00PM - 9:30PM
8 125ch 10:00AM - 10:30AM
Wed
Fri
Sat
Sat
Fri
Tue
Tue
Thu
1.5/4.7GB
9/15
9/17
9/25
9/25
10/15
10/19
10/26
10/28
Options for the disc or menu
Example 2: When you press TOOLS while a
DVD-RW (VR mode) is playing.
Close
Stop
Disc Info.
Erase Title
Protect Title
TOOLS
Options for the disc or picture
To return to the previous display
Press O RETURN.
Screen System
The TV Guide On Screen system automatically
displays a free television program list. This list
displays the program name, promotions and
related inform ation for progra m s being broadcast
up to eight day s in advance, and for a ma ximum of
120 channels. TV Guide On Screen data for the
television program listing is carried by local
broadcast stations and is received through your
antenna or cab le box.
8:05
Promotional
Panel
Promotional
Panel
These are just a few of the ways to use the TV
Guide On Screen system .
–Search for a program by listing them ac cording
to category, such as Movies or Sports, or in
alphabetical order .
–Once you have found t he p ro gr am you are
looking for, use the TV Guide On Screen system
to set the timer for recording (page46).
–If you find a program that you want to watch in
the future, set it as a Fav orite. You can later tune
in to that program dir ect l y by pressing the blue
button on the remote when the program begins
broadcasting.
For more information, see “Na vi gating the TV
Guide On Scr een system” (pag e 3 4).
LISTINGS
ALPHABETICAL SPORTSMOVIES
Move down to select a subcategory for Movies.
Move right for Sports, left for ALPHABETICAL.
All Fantasy
Action Horror
Adventure Musical
Animated Mystery
Biography Romance
Comedy Sci-Fi
Documentary Western
Drama War
PROMOTIONSSORT
Guide to Displays
,continued
33
Page 34
Troubleshooting guide
If you are having trouble displaying the television
program list, pl ease check the follow ing.
–This recorder downloads the TV Guide On
Screen data several times a day when the
recorder is turned off. Turn off the recorder
when you are not using it (for example, at night).
It may take up to 24 hou rs for your recorder to
start receivin g pr ogram listings.
–When the recorde r i s co nnected to a cable box,
the cable box must be turned on, the set top box
controller must be connected, and “Set Top Box
Control” in the Settings setup must be set to
“On” (page 86) to download the TV Guid e On
Screen data.
–Your area of residence and zip code mu st be set
correctly (page 85).
–The time must be set correctly. If the ti me is not
set, set it manually (page 86).
–The television pro gr am list is blank when TV
Guide On Screen data is being download ed o r a
satellite or terrestrial digital tuner is in use.
You may be asked to select a channel lineup the
first time you press
available channel lineups. If the channel number
in the program listing does not match the
broadcast st ation, see “To match the channel
number with the broadcast station” (page 36).
Notes
• Only English is displayed in the TV Guide On Screen
system.
• The TV Guide O n Screen system is not compatible
with satellite and terrestrial digital broadcasts.
• Your cable box’s channel may suddenly change even if
the recorder is turne d of f . Th is is because the set to p
box control has changed the channel to receive the TV
Guide On Screen data.
[TV GUIDE]. Select one of the
Navigating the TV Guide On Screen
system
Number
buttons
Blue
button
[TV GUIDE]
EXIT
1 2 3
1 2 3
4 5 6
4 5 6
7 8 9
7 8 9
0
0
Green
button
(Info)
</M/m/,,
ENTER
PAGE +/–
1 Press [TV GUIDE].
TV Guide On Screen appears.
2 Press </M/m/, to move the cursor
around the entire TV Guide On Screen
system, and pres s ENT ER to make a
selection.
Example: LISTINGS
SCHEDULE
Promotional
Panel
Promotional
Panel
8:05
8:00PM
TODAY
Doctors and Lawyers
Local News Sports
Today's News
The Urban Garden
Music Show Local News
Chemicals and Chemistry
World Soccer
Teams from across the globe face off in a
yearly tournament to determine the best
soccer country in the world.
8:00 10:00 FAVORITES
High Places
The Law and You
A Picture in Guide: This shows the last
program you were watching. See “To lock
the Picture in Guide” (pag e 36) to prevent
the picture from changing when you move
the cursor.
B Main Menu Bar: Use </, to select one
of the following featu res and press ENTER.
“LISTINGS”: Shows the current programs
for the selected time slot.
“SORT”: Allows you to sort titles
alphabetically or by cat eg o ry (m o vie s ,
sports, children’s, educational, news,
variety, series).
SORTLISTINGS
8:30PM
RECORD INFO.
34
Page 35

“PROMOTIONS”: Sh ows just promotio ns.
Select a promotion and press
.
button
the (info)
“SETUP”: Allows you to change the TV
Guide On Screen system settings an d
channel lineup.
“MESSAGES”: Displays messages and
information such as the TV Guide ID
Number. To delet e unwanted messages,
press the green button.
“SCHEDULE”: Displays either the
RECORD list or the FAVORITES list.
Press ENTER and use </, to switch
between the lists.
C Time Slot: Indicates the curren tly selected
time slot. Use </, to select a different
time slot.
D Program Title: Gives the pro gram title. The
program’s category is also indicated by
color: green (sports), purple (movies), blue
(children’s), teal (others).
E Info. Box: Shows information about the
selected program and displays the
following icons.
“ ”indi cate s that the progr am is set to be
recorded.
“ ”indi cates that the progr am is set as a
Favorite.
“ ”indicates that the pr ogram is in stereo.
“ ”indicates that the program is closed
captioned.
Press the (info) button repeatedly to
show extended information about the
program.
F Action Bar: Shows buttons that can be used
on the remote with the current selection.
For example, when a program is selected,
press blue to add the pr ogram to the
FAVORITES list, or green to add the
program to the RECORD list.
G Channel Logo: Shows th e broadcast station
logo.
To select a program (Direct Tuning)
1 Select “LISTINGS” in the Main Menu Bar
and press ENTER.
2 Press M/m to select a program and press
ENTER.
The TV Guide On Scre en system disapp ears
and the channel changes to the selected
program.
You can also use the number buttons (Direct
Dialing) to select a program. When
“LISTINGS” i s se l ected, enter the chan nel
number of the progr am you want to watch
using the number buttons on the r emote, th en
press ENTER.
To find a program alphabetically or by
category
1 Select “SORT” in the Main Menu Bar and
press ENTER.
2 Press </, to select the main category.
To sort alphabetically, sele ct
“ALPHABETICAL.”
3 Press</M/m/, to select the sub-category
(or a letter if you are sor ting alphabeticall y),
and press ENTER.
4 Press M/m to select a program and press
ENTER.
To set a program as a “Favorite”
If you find a program that you want to watch in the
future, set it as a Favorite by pressing the blue
button. “ ” appears next to the program.
To customize the “Favorite” se tti n g, press the
green button. The settings change as follows:
: Registers the program as a “Favorite.”
: Registers a regula rl y s cheduled program as a
“Favorite.”
: Registers the program as a weekly “Favorite.”
: Temporarily turns off the “Favorite” setting.
To view the programs you have set a “Favorite,”
select “SCHEDULE” in the Main Menu Bar and
press ENTER. Then press </, to select
“FAVORITES.”
To watch a “Favorite” program
When you are w atc hin g TV, pr es s t he bl ue b ut ton
on the remote when the broadc asting time f or that
program arrives. If more than one program is
registered as a “Favorite” in the same time slot,
press the blue button repeated ly to switch between
the programs.
To set a program for timer recording
See “Recording us in g th e TV G uide On Screen
system (TV G U IDE)” (page 46).
Guide to Displays
,continued
35
Page 36

To lock the Picture in Guide
You can lock the Pi ct ure in Guide so that it d oes
not change w hen you mo ve the cur sor acros s other
titles.
Select the logo of the channel that you want t o
lock from LISTINGS and press the blue butt on.
Press the blue button again to unlock the channel.
To customize the channel line-up
1 Select “SETUP” in the Main Menu Bar a nd
press ENTER.
2 Press M/m to select “Change channel display”
and press ENTER.
3 Press M/m to select a chan nel and perf orm one
of the following.
◆To hide the chann el
Press the green button.
◆To change the channel number
Enter the new channel number using the number
buttons.
◆To change the orde r of the channels
Select channel you want to move and press < to
highlight the channel logo. Press th e blue button to
move the channel up, or pr ess the green button to
move the channel down.
To match the chann el number with the
broadcast station
If the channel number in the prog ram listing does
not match the broadcast station, there may be more
than one channel li neup for your area. T o change
the channel lineu p, select “Change ch annel
lineup” from “SETUP” and press ENTER. Then
select a different channel lineup, if avai l able.
You cannot unlock the Picture in Guide during
recording.
• If you are watching programs through a set top box, the
Picture in Guide may not change as fast as you move
the cursor. In this case, lock the Picture in Guide
(page 36).
• When you turn on the recorder, the same channel that
you were watching last will automatically appear, even
if you should change the channel on your se t top box
while the recorder’s power is off.
• The screen saver will not appear wi th the TV Guide On
Screen system. The TV Guide On Screen system will
simply turn off if no buttons are pressed for more than
five minutes.
To turn off the TV Guide On Screen system
Press [TV GUIDE] or EXIT on the remote.
z Hints
• Press the PAGE +/– buttons to change the program list
by page.
• Each time you turn on the power, the TV Guide On
Screen system automati cally appears on your TV
screen. To turn off this func tion, sel ect “SETUP” from
the Main Menu Bar, and then select “Review options.”
Then select “Off” and press ENTER.
Notes
• Programs that contain copy protection signals do not
appear in the Picture in Guide.
• The Picture in Guide is locked during recording and the
lock indicator appears in the Picture in Guide window.
36
Page 37

Using the Title List
Standard Title List (Example: DVD-RW in VR
mode)
HDD
+
RW
-
RWVR-RW
Video
-
+
R
The titles of pro grams recorded on a di sc are
displayed in the Title List.
Z OPEN/
CLOSE
HDD
1 2 3
4 5 6
7 8 9
0
TITLE LIST
CURSOR
MODE
DVD
TOOLS
</M/m/,,
ENTER
ZOOM +/–
1 Press HDD or DVD.
If you select DVD, press Z OPEN/CLOSE
and place a DVD on the disc tray. Press Z
again to close t he disc tray.
With the recording side facing down
Wait until “LOAD” disappears fro m the front
panel display.
2 Press TITLE LIST.
To show the list in greater d etail (zoom), press
ZOOM+.
R
My Movies
TITLE LIST
Sort
Date
Title
Number
ORIGINAL
1 2ch 1:00PM - 2:00PM
2 5ch 8:00PM - 9:00PM
3 12ch 9:00AM - 9:30AM
4 3ch 8:00PM - 8:30PM
5 25ch 8:00PM - 8:30PM
6 L2 9:00PM - 9:30PM
7 8ch 9:00PM - 9:30PM
8 125ch 10:00AM - 10:30AM
Wed
Fri
Sat
Sat
Fri
Tue
Tue
Thu
1.5/4.7GB
9/15
9/17
9/25
9/25
10/15
10/19
10/26
10/28
Guide to Displays
m
“Zoomed” Title List
My Movies
TITLE LIST
ORIGINAL
Sort
Date
Title
Number
1 2ch 1:00PM - 2:00PM
Wed 9/15 1:00PM( 1H00M)SP
2 5ch 8:00PM - 9:00PM
Fri 9/17 8:00PM( 1H00M)SLP
3 12ch 9:00AM - 9:30AM
Sat 9/25 9:00AM( 0H30M)EP
4 3ch 8:00PM - 8:30PM
Sat 9/25 8:00PM( 0H30M)SLP
A Disc type:
Displays a media type, HDD or DVD.
Also displays the title type (Original or
Playlist) for DVD-RWs (VR mode).
B Sort buttons:
Sorts the title order (see below).
C Zooming indicator:
Shows the current zoom status.
D Disc name (D VD only) (pag e40)
E Disc space (remainder/total)
F Title information:
Displays the title number, title name, and
recording date.
z (red): Indicates that the title is currently
being recorded.
: Indicates that the title is currently being
dubbed.
: Indicates the protected title.
“NEW”: Indicates that the title is newly
recorded (not played back) (HDD only).
1.5/4.7GB
2ch
5ch
12ch
3ch
,continued
37
Page 38

G Scroll bar:
Appears when all of the titles do not fit on the
list. To view the hidd en titles, press M/m.
H Title’s thumbnail pictur e
To scroll the list display by page (Page mode)
Press CURSOR MODE while the list display is
turned on. The displa y enters Page mode. Each
time you pres s M/m, the entire Title List changes
to the next/previous page of titles.
To return to the Cursor mode, press CURSOR
MODE again.
About the Title List for DVD-RWs (VR mode)
You can switch the Title List to show Original or
Playlist.
While the Title List menu is turned on, press
TOOLS and select either “Original” or “Playlist,”
and press ENTER. “P LA Y L I ST” appears on the
front panel display when “Playlist” is selected.
For details, see “Edit options for DVD-RWs (VR
mode)” (page 64).
To change the title order (Sort)
Press < while the Title List menu is turned on to
move the cursor to the Sort column. Press M/m to
select the item, and press ENTER.
Order Sorted
New
(HDD only)
Date in order of when the titles were
Title in alphabetical order.
Number in order of recorded title number .
in order of when the titles were
recorded. The ti tle that is recorde d
most recently and not playe d ba ck is
listed at the top.
recorded. The ti tle that is recorde d
most recen tly is listed at th e top.
4 While watching the playback p ic tu re , press
H PLAY, X PAUSE, or m/M to select
the scene you want to set for a thumbnail
picture, and press ENTER.
The scene is set for the title’s thumbnail
picture.
To turn off the Title List
Press TITLE LIST.
z Hint
After recording, the firs t scene of the record ing (the title)
is automatically set as the thumbnail picture.
Notes
• The Title List may not appear for D VDs cre a ted on
other DVD recorders.
• Letters that cannot be displayed are replaced with “*.”
• Title thumbnail pic t ur es are di spla ye d only on this
recorder.
• It may take a few seconds for the thumbnail pictures to
be displayed.
• After editing, the title thumbnail picture may change to
the first scene of the recording (title).
• After dubbing, the title thumbnail picture set on the
source recording is canceled.
To change a title thumbnail picture
(Thumbnail) (HDD/DVD-RW (VR mode) only)
You can select a favorite scen e for the thumbnai l
picture shown in the Title List menu.
1 Press TITLE LIST while a disc is in the
recorder, and press ZOOM+.
2 Select a title whose thumbnail picture you
want to change, and pre ss EN TER.
3 Select “Set Thumbnail” from the sub -m enu,
and press ENTER.
The selected title starts to play in the
background.
38
Page 39

Using the “Disc Info” Screen (disc settings)
+
-
HDD
RW
RWVR-RW
Video
With the Disc Information display, you can check
the disc t yp e and remaining disc s pace. Also, you
can perform operations such as formatting and
finalizing (page 40).
-
+
R
R
Example: DVD-RW (VR mode)
Disc Information
DiscName Movie
Media DVD-RW Format VR
Title no. Original 3 / Playlist 2
Protected Not Protected
Date 9/15/2003 ~ 10/28/2003
HQ : 0H30M
HSP : 0H45M
Remainder
LP : 1H30M
EP : 2H00M
SP : 1H00M
SLP : 3H00M
2. 3 / 4. 7GB
Close
Disc Name
Protect Disc
Finalize
Erase All
Format
Guide to Displays
Z OPEN/
CLOSE
HDD
1 2 3
4 5 6
7 8 9
0
DVD
TOOLS
</M/m/,,
</M/m/,,
ENTER
ENTER
1 Press HDD or DVD.
If you select a DVD, press Z OPEN/CLOSE
and place a DVD on the disc tray. Press Z
again to close t he disc tray.
With the recording side facing down
Wait until “LOAD” disappears fro m the front
panel display.
2 Press TOOLS.
The TOOLS menu ap pears.
3 Select “Disc Info.,” and press ENTER.
Items in the display differ depending on the
disc type or recording format.
A “Disc Name” (DVD only)
B “Media”: Disc type
C “Format”: Recording format type (HDD/
DVD-RW only)
D “Title no.”: Total number of titles
E “Protected”: Indicates whether protection is
set (DVD-RW in VR mode only)
F “Date”: Dates of when the oldest and the
most recent titles were recorded (DVD
only)
G “Continuous Rem. Time”/ “Remainder”
(approximate)
• The lo ngest continuous re cor di ng time in
each of the recording modes
• Disc space bar
• Remaining disc spa ce/ total disc space
H Disc setting buttons (page 40)
• “Disc Name”
•“Protect Disc”
• “Finalize”/“Unfinalize”
• “Eras e A l l ”
•“Format”
Available sett i ngs differ depending on the
disc type.
z Hint
For DVD+RWs and DVD-RWs (Video mode), you can
check free space and title location on the disc using the
Disc Map display (page 67).
Note
On this model, 1 GB ( read “g ig abyte” ) is eq uiva lent to 1
billion bytes. The la r g e r th e number, the larger the dis c
space.
,continued
39
Page 40

Labeling, protecting, or formatting
a disc
HDD
+
RW
-
RWVR-RW
Video
+
R
R
-
You can execute opt i ons effective for the entire
disc using the Disc Informatio n di splay.
1 Press TOOLS while the disc is in the
recorder.
The TOOLS menu ap pears.
2 Select “Disc Info.,” and press ENTER.
Example: When the inserted disc is a DVDRW (VR mode).
Disc Information
DiscName
Media DVD-RW Format VR
Title no. Original 3 / Playlist 2
Protected Not Protected
Date 9/15/2003 ~ 10/28/2003
HQ : 0H30M
HSP : 0H45M
LP : 1H30M
Remainder
EP : 2H00M
SLP : 3H00M
SP : 1H00M
2. 3 / 4. 7GB
Close
Disc Name
Protect Disc
Finalize
Erase All
Format
3 Select an option, and press ENTER .
“Disc Name” (DVD only): Labels a DVD.
Enter the disc name in the “Input Disc Name”
display (page 43).
“Protect Disc” (DVD-RW in VR mode only):
Protects all titles on the disc. To cancel the
protection, sele ct “D on’t Protect.”
“Erase All” (HDD/DVD+RW/DVD-RW
only): Erases all titles on the disc (except the
protected titles).
“Format” (HDD/DVD+RW/DVD-RW only):
Erases all contents. For DVD-RWs, select a
recording format (VR or Video) according to
your needs.
z Hints
• You can set protection for individual titles (page 65).
• By reformatting, you can change the recording format
on DVD-RWs, or record again on DVD-RWs (Video
mode) that have been finali zed .
Note
You can enter up to 64 characters for a DVD disc name.
The disc name may not appear when the disc is played on
other DVD equipment.
Finalizing a disc (preparing a disc
for playback on other equipment)
+
-
RWVR-RW
RW
Video
+
R
R
-
Finalizin g i s necessary whe n you play discs
recorded with this recorder on other DVD
equipment.
When you finalize a DVD+RW, DVD-RW
(Video mode), DVD+R, or DVD-R, a DVD menu
will be automatically created, which can be
displayed on other DVD equipment.
Before finalizing, check the diff erences betwee n
the disc types in the table below.
Differences between the disc types
+
-
-
RW
Discs are automatical ly fi na lized when
RW
removed from the recorder. However,
you may need to finalize the di sc for
certain DVD equipment, or if the
recording time is short. You can edit or
record on the disc even afte r finalizing.
Finalizing is unnecessary when playing
RWVR
a disc on VR format com patible
equipment.
Even if your other DVD equipment is
VR format compatible, you may need to
finalize the disc, especially if the
recording time is short. You can edit or
record on the disc even afte r finalizing.
Finalizing is necessary when playing on
Video
any equipment other than this recorder.
After finalizing, you cannot edit or
record on the disc. If you want to record
on it again, reformat the disc (page 40).
However, all recorded contents will be
erased.
Finalizing is necessary when playing on
+
R
any equipment other than this recorder.
-
R
After finalizing, you cannot edit or
record on the disc.
1 Press TOOLS while the disc is in the
recorder.
The TOOLS menu appears.
2 Select “Disc Info.,” and press EN TER.
The Disc Information displ a y appears.
40
Page 41

3 Select “Finalize,” and pr e s s ENT E R.
The display shows the approximate time
required for finalizing and asks for
confirmation.
Finalize
About xx min is needed for finalizing this disc.
Cannot cancel finalizing during transaction.
Do you want to finalize?
OK Cancel
4 Select “OK,” and pre s s ENT E R .
The recorder starts finalizing the disc.
To unfinalize a DVD-RW (VR mode)
If you cannot record or edit on a DVD-RW (VR
mode) that has been finalized with other DVD
equipment (a message appears), unfinalize the
disc by selecting “Unfinalize” in step 3 a bove.
z Hint
You can check whether the disc has been finalized or not.
If you cannot select “Finalize” in step 3 above, the disc
has already been finalized.
Notes
• Depending on the condition of the disc, rec or ding, or
the DVD equipment, discs may not play even if the
discs are finalized.
• The recorder may not be able to finalize the disc if it
was recorded on another recorder.
Checking the Play Information and Playing Time
+
-
HDD
DVD
RW
VCD
RWVR-RW
CD
DATA CD
You can check the playing time and remaining
time of the current title, chapter, or track. Also,
you can check the disc name recorded on the
DVD/CD.
DISPLAY
Press DISPLAY repeatedly.
Each time you pre ss the button, the disp la y
changes as follow s:
Video
+
R
TIME/TEXT
-
R
Guide to Displays
Title/track info rmation (Display 1)
m
Play mode/time information (Display 2)
m
(Display off)
The displays differ depending on the di sc type or
playing status.
◆D i splay 1
Example: When playing a DVD VIDEO
Title 1
1 : English DolbyDigital 2/0Angle3(5)
,continued
41
Page 42

A Title number/name
(Track number for CDs/VIDEO CDs without
PBC, scene number for VIDEO CDs with
PBC, track number / name for DATA C D s)
B Available functions for DVD VIDEOs
( angle/ audio/ subtitle, etc.)
C The current selected function or audio
setting (appears only temporarily)
D The current selected angle
Example: Dolby Digital 5.1 ch
Rear (L/R)
1 : English DolbyDigital 3/2.1
Front (L/R) + Center
LFE (Low Frequency
Effect)
◆Display 2
Example: When playing a DVD-RW (VR mode)
Original
DVD-RW
VR
Movies
0:00:45
T1SP
z Hints
• If “DTS” is set to “Off” in Audio Setup, the DTS track
selection option will not appear on th e screen even if
the disc contains DTS tracks (page 90).
• When “Auto Disp lay” is set to “On” (default) in
Options Setup (page 94), playback information
automatically appears when the recorder is turned on,
etc.
Notes
• The recorder can only disp la y the firs t le ve l o f a CD’ s
text, such as the disc name.
• The letters or symbols that c an not be displayed are
replaced with “*.”
Checking the playing/remaining
time
You can view the playing or remaining time
information displayed on the TV screen and the
front panel displ ay.
Press TIME/TEXT repeatedly.
The displays diffe r depending on the disc type or
playing status.
◆Front panel displ ay
Example: When playing a DVD
Playing time and number of the current title
A Disc type*2/format (page 8)
B Title type (Original or Playlist) (page 64)
C Play mode
D Recording mode (page 45)
E Playing status bar*
3
F Title number ( c ha p t er number*1) (page 61)
(Track number for CDs/VIDEO CDs without
PBC, scene number for VIDEO CDs with
PBC, track number (album number*
DATA CDs)
G CD text (album name) appears when text is
recorded on a C D .
1
H Playing time (remaining time*
*1Displayed when you press TIME/TEXT repea ted ly.
2
Displays Super VCDs as “SVCD”, DATA CDs as
*
“CD”.
3
Does not appear with VIDEO CDs, or DATA CDs.
*
)
42
1
) for
Remaining time of the current title
Playing time and number of the current chapter
Remaining time of the current chapter
Example: When dubbing a DVD
Remaining time of dubbing in progress
CH
Page 43

Example: When playing a CD
Track playin g ti me an d the c urr ent track /in dex
number
m
Remaining time of the current track
m
Playing time of the disc
m
Remaining time of the disc
m
CD text (when available)
Notes
• The recorder can on ly display the first level of a CD’s
text, such as the disc name.
• The letters or symbols that cannot be displayed are
replaced with “*.”
• Playing time of MP3 audio tracks may not be displayed
correctly.
How to Enter Characters
You can label a title, disc, or program by entering
characters. You can enter up to 64 characters for a
title or disc name, but the actual number of
characters displayed in the menus s uch as the Title
List will vary. When the display for entering
characters appears, follow the steps below.
Number
buttons, SET
1 2 3
4 5 6
7 8 9
0
</M/m/,,
ENTER
1 Press </M/m/, to move the cursor to
the right of the screen and select “A”
(upper-case), “a” (lower-case), or
“Symbol,” and press ENTER.
The characters of the selected type are
displayed.
2 Press </M/m/, to select the character
you want to enter, and press ENTER.
The selected character appears at the top of
the display.
Guide to Displays
Example: Input Title Name
Input Title Name
K
,. - 1
1
BA C 2
2
ED F 3
3
HG I 4
4
KJ L5
5
Back
Clear All
Space
6
QP R S
7
8
9
0
NM O 6
UT V 8
XW Y Z79
0
"A"
"a"
Symbol
Cancel
Finish
The type of characters will change according
to the language you select in Easy Setup.
Some languages allow you to enter an accent
mark.
,continued
43
Page 44

To enter a letter with an accent mark, se lect an
accent followed by the letter.
Example: Select “ ` ” and then “a” to enter “à.”
To insert a space, se l ect “Space.”
3 Repeat steps 1 and 2 to enter the
remaining characters.
Input row
Input Title Name
Kids
,. - 1
1
BA C 2
2
ED F 3
3
4
HG I 4
KJ L5
5
Back
Clear All
Space
6
7
8
9
0
NM O 6
QP R S
UT V 8
XW Y Z79
0
"A"
"a"
Symbol
Cancel
Finish
To erase a charac te r, m ove the cursor to th e
right of the character at the input row. Select
“Back” and press EN TER.
To insert a characte r, m ove the cursor to the
right of the point where you want to insert the
character. Sele ct the character and p ress
ENTER.
To erase all of the char acters, select “Clear
All” and press ENTE R.
4 Select “Finish,” and press ENTER.
To cancel the setting, select “Cancel.”
To use the number buttons
You can also use the number buttons t o enter
characters.
1 In step 2 above, press the number buttons
repeatedly to select a character.
Example:
Press the number 3 button once to enter “D.”
Press the number 3 butto n three ti mes to enter
“F.”
2 Press SET and select the next charac te r.
3 Select “Finish” and press ENTER.
44
Page 45

Recording
Before Recording
Before you start recording…
• This recorder can record on various discs. Select
the disc type according to your needs (page 8).
• Check that the disc has enough availab le space
for the recording (page39). For HDD,
DVD+RWs, and DVD-RWs, you can free up
disc space by eras in g t it l es (page 67).
• Adjust the recording picture quality and picture
size if necessary (page 51).
z Hint
Timer recordings will be made regardless whether or not
the recorder is turned on. You can turn off the recorder
without affecting the recording even afte r reco rd ing
starts.
Recording mode
Like the SP or LP recording m ode of VCRs, this
recorder has six different recording modes.
Select a recording mode according to the time and
picture quality yo u need. For exampl e, if picture
quality is your top priorit y, select the High Quality
mode (HQ). If recording time is your priority,
Super Long Play mode (SLP) can be a pos si ble
choice. Note that recording times in the fol lowing
table are approximate and the actual times may
differ. Note also that the maximum continuous
recording time for a single title is eight hours
(HDD), or six hours (DVD). Contents beyond this
time will not be recorded.
Press REC MOD E repeatedly to swi t ch the
recording modes.
I want to record with the
best possible picture
quality, so I’ll select HQ.
Recording mode Recording time ( hour )
HDD DVD
HQ (High quality) 33 1
HSP R 51 1.5
SP (Standard mode) 67 2
LP r 103 3
EP r 137 4
SLP (Long duration) 204 6
Recording
“HQ+” recording mode
“HQ+” records pict ures in h igher qua lity than HQ
on the HDD. Set “HQ Setting” in Features Setup
to “HQ+” (page 93). Maximum recording time is
21 hours. “HQ” appears in the displa y.
Note
Situations below may cause slight inaccuracies with the
recording time .
– Recording a program with poor reception, or a program
or video source of low picture quality
– Recording on a disc that has already been edited
– Record ing only a still picture or just sound
Recording a stereo/SAP program
The recorder can receive and rec ord stereo/SAP
programs.
Stereo programs
When a stereo program is received, the
“STEREO” indica to r l ig hts up on the front pane l
display. If there is noise in the stereo progra m, set
“Auto Stereo” in Audio Setup to “Off” (page 89).
The sound will be recorded in monaural but with
less noise.
SAP (Second Audio Program)
When a SAP (Second Audio Program) is received,
the “SAP” indicator lights up on the front panel
display. To record only SAP sound, set “Tuner
Audio” in Audio S et up to “SAP” (page 89) .
,continued
45
Page 46

Unrecordable pictures
Pictures with cop y protection cannot be recorded
on this recorder.
When the recorder receives a copy guard signal,
the recorder cont inues to record but onl y a bl ank,
gray colored screen will be recorded.
Copy contr ol
signals
Copy-Free
Copy-Once
Copy-Never None (a blank screen is
* The recorde d disc can be played only on CPRM
compatible equipm en t.
Note
Copy-Once programs can not be dubbed (page 73).
Recordable discs
+
-
HDD
-
RW
HDD
-
RW
+
Video
R
(Ver.1.1 with CPRM*)
RWVR
recorded)
RWVR
-
R
Timer Recording (TV GU ID E/ Manual/VCR Plus +)
There are three methods to set the timer – setting
the timer using the TV Guide On Screen system,
using VCR Plus+ and setting the timer manually.
Notes
• When the recorder is connected to a cable box and you
want to record using the TV Guide On Screen system,
do the following: Turn on the cable box, connect the set
top box controller, and set “Set Top Box Control” in the
Settings setup to “On.”
• Do not operate your cable box or satellite receiver just
before or during a timer recording. This may prevent
the accurate recording of a program.
Recording using the TV Guide On
Screen system (TV GUIDE)
You can use the TV Guide On Screen system to set
the timer to record a program up to eight days in
advance.
Z OPEN/
CLOSE
HDD
1 2 3
4 5 6
7 8 9
0
DVD
46
[TV GUIDE]
Blue button
Green
button
</M/m/,,
ENTER
x REC STOP
1 Press HDD or DVD.
If you select DVD , press Z OPEN/CLOSE
and place a DVD on the disc tray. Press Z
again to close the disc tray.
With the recording side facing down
Page 47

Wait until “LOAD” disappears fro m the front
panel display.
Unused DVDs ar e formatted automatically.
2 Press [TV GUIDE].
SCHEDULE
Promotional
Panel
Promotional
Panel
8:05
TODAY
8:00 10:00 FAVORITES
8:00PM
Doctors and Lawyers
Local News Sports
Today's News
The Urban Garden
Music Show Local News
Chemicals and Chemistry
World Soccer
High Places
The Law and You
SORTLISTINGS
8:30PM
RECORD INFO.
3 Press </M/m/, to select a program.
To search for a progra m alphabetically or by
category, select “SORT” in the Main Menu
Bar. See “Using the TV Guide On Screen
system” for more informa tion about
navigating the TV Guide On Screen sy stem
(page 33).
4 Press the green bu tton.
appears nex t to the pr ogram. Each t ime you
press the blue button, the timer recording
changes as foll ows.
: the program is recorded once.
: the program is record ed on a regula r basis.
: the program is recorded weekly.
: the timer recording is te mporari ly put o n
hold without canc el in g t he setting.
5 Press [TV GUIDE].
The TIMER REC indicator lights up on the
front panel display and the r ecorder is ready to
start recording. When recordi n g from a cable
box, be sure to turn it on .
Unlike a VCR, th er e i s no ne ed t o t ur n of f t he
recorder be fore the time r recording starts.
To adjust the recording quality
See step 3 of “Checking/Changing/Canceling
Timer Settings”(page 49).
Rec Mode Adjust
If there is not enoug h available disc space for the
recording, the recorder automatic all y adju sts the
recording mode to enable th e entire pro gram to be
recorded. Set “Rec Mode Adjust” i n Features
Setup to “On” (page 93).
Auto Title Erase (HDD only)
If there is not enou gh space for a timer re co rd in g ,
the recorder automatically erases old titles
recorded on the HDD.
Set “Auto Title Eras e” in Features Setup to “O n”
(page 93). The oldest, played title is erased. The
protected titles are not erased.
If the timer settings overlap
If one or more timer settings overlap, appears
next to the program and the recording is
suspended. The timer recording resumes its
original status w hen the overlap cond ition no
longer exists. To change the timer settings, see
“Checking/Changing/ Canceling Timer Setti ngs”
(page 49).
Notes
• Check to see that there is enough available space for the
recording (DVD+RW/DVD-RW only) (page 67). Note
that recordings made with the TV Guide On Screen
system require one ex tr a minute of recording time.
• The Rec Mode Adjust function only works with a timer
recording. It does not function with Quick Tim e r
(page 51).
• You cannot adjust the recording qua lity or recording
destination once the rec or ding starts.
Recording
To confirm, change, or cancel a timer
recording
See “Checking/C hanging/Cancelin g Timer
Settings” (page 49).
To stop recording during timer recording
Open the remote’s co ver and pr ess x REC ST OP.
Note that it may take a few seconds for the
recorder to stop recording.
,continued
47
Page 48

Setting the timer manually or using
the VCR Plus+ system (Manual/VCR
Plus+)
You can set the timer for a total of 30 programs.
Number
buttons, SET
[TV GUIDE]
Blue button
M/m, ENTER
1 2 3
4 5 6
7 8 9
0
[TIMER]
Green
button
“PlusCode”: Press the number buttons. To
correct the number, press M/m and enter t he
number again.
3 Press ENTER .
To make another timer setting, select
“RECORD” and repeat from step 3.
4 Press [TV GUIDE].
The TIMER REC indicator lights up on the
front panel display and the recorder is ready to
start recording. When recording fr o m a cable
box or satellite tuner, be sure to turn it on.
Unlike a VCR, there is no need to tu rn off the
recorder before the timer recording starts.
To confirm, change, or cancel a timer
recording
See “Checking / C hanging/Can celing Timer
Settings” (page 49).
1 Press [TIMER].
Promotional
Panel
Promotional
Panel
8:05
FAVORITES
SCHEDULE
MESSAGES LISTINGS
CANCEL
RECORD
7 / 7 / 04
Date:
0 : 00 pm
Start Time:
0 : 00 pm
End Time:
30
Channel:
EP
Quality:
HDD
Destination:
=========
PlusCode:
2 Press M/m to select an item.
“Date”: Press the nu m ber buttons to ente r
month, day, and year.
“Start Time”/”End Time”: Press the number
buttons to enter the time. To change am/pm,
select “am” or “p m ,” and press the blue
button.
“Channel”: If you are using the set top box
control, press the n umber buttons to enter the
channel. If not, select LINE 1, 2, or 3 using the
blue button, whichever your box is connected
to, and select the channel you want to record
on the set top box.
“Quality”: Press the blu e button to c hange the
recording mode.
“Destinat ion” : Pres s the blue butt on to swit ch
between HDD and DVD.
To stop recording during timer recording
Open the remote’s cover and press x REC STOP.
Note that it may tak e a few secon ds for the
recorder to stop recording.
Rec Mode Adjust
If there is not enough available disc space for the
recording, the recorder automatically adjusts the
recording mode to enable the entire program to be
recorded. Set “Rec Mode Adjust” i n Features
Setup to “On” (page 93).
Auto Title Erase (HDD only)
If there is not enough space for a t i mer recording ,
the recorder automatically erases old titles
recorded on the HDD.
Set “Auto Title Eras e” in Features Setup to “On”
(page 93). The olde st , pl ayed title is erased. The
protected titles are not erased.
If the timer settings overlap
If one or more timer settings overlap, appears
next to the program and the record i ng i s
suspended. The timer recording resumes its
original status when the overlap condition no
longer exists. To change the timer settings, see
“Checking/Changing/Canceling Timer Settings”
(page 49).
48
Page 49

Notes
• Check to see that there is enough av ailable space f or the
recording (DVD+RW/DVD-RW only) (page 67).
• To record a cable or satellite pro g r am without using
cable box/satellite box control, turn on the cable box or
satellite receiver and select the program you want to
record. Leave the cable box or satellite receiver turned
on until the recorder finishes record in g .
• The Rec Mode Adjust function only works with a timer
recording. It does not function with Quick Timer
(page 50).
• You cannot adjust the recording quality or recording
destination once the recording starts.
Checking/Changing/ Canceling Timer Settings
You can check, change or cancel timer settings
using the SCHEDULE list, even while a recording
is in progress.
Number
buttons
[TV GUIDE]
Blue
button
EXIT
1 2 3
4 5 6
7 8 9
0
SCHEDULE
Green button
</M/m/,,
ENTER
1 With the TV Guide On Screen system
turned off, press SCHEDULE.
The SCHEDULE list appears.
2 Press M/m to select the program you want
to change, then press ENTER.
Promotional
Panel
Promotional
Panel
8:05
Enter the number of minutes that the show
should begin early and end late. Press the OK
key when all the information is correct. Press
the Green key to cancel.
FAVORITES
Start early by:
SCHEDULE
MESSAGES LISTINGS
CANCEL
RECORD
00 minutes
End late by:
00 minutes
Quality:
EP
Destination:
HDD
Recording
3 Press M/m to select the item you want to
adjust.
“Start early by”: Pre ss the number buttons to
start the recording by up to 99 minutes in
advance.
“End late by”: Press the number buttons to
extend the recording by up to 99 minutes.
“Quality”: Pr ess the bl ue butt on to chan ge the
recording mode.
“Destination”: Press the blue butto n to switch
between HDD and DVD.
4 Press [TV GUIDE].
,continued
49
Page 50

To change the re cording frequency
Press SCHEDUL E and select the program you
want to change. Then pre ss th e green button
repeatedly to change the recording frequency.
Programs set to be recorded “Daily” will only be
recorded from Monday through Friday.
To cancel the timer setting
Press SCHEDUL E and select the program you
want to cancel. Then press the blue button.
To turn off the SCHEDULE list
Press EXIT.
If two or more timer settings overlap
The timer recording set last has priority over the
other settings and is recorded. All other
overlapped sett ings are suspended, even if the
setting only partially overlaps the setting with
priority. appears next to progr am s that are
suspended.
Example: You se t the tim er in order o f A, and then
B.
7:00
A
9:00
will be suspended
11:00
B
will be recorded
Note that if you modify setting A (for instance, if
you extend the recording time), then setting A
becomes the last timer recording you set and will
have priority over setting B.
If the end and start time of two timer settings
are the same
The end of program A or the beginning of program
B will be cut.
Recording Without the Timer
HDD
REC MODE
+
RW
HDD
z REC
-
RWVR-RW
1 2 3
4 5 6
7 8 9
0
Video
+
R
DVD
TV/VIDEO
CH +/–
X REC
PAUSE
x REC
x REC
STOP
STOP
-
R
1 Press HDD or DVD to select a media.
When you selected DVD, insert a recordable
DVD.
2 Press CH +/– to select the c hannel or i nput
source you want to record.
3 Press REC MODE repeatedly to select the
recording mode.
Each time you pr ess the button, t he display
changes on the TV screen as follows:
HQ SP LP EPHSP SLP
50
7:00
9:00 10:00
A
B
For more details about the recording mode,
see page 45.
4 Press z REC.
Recording starts.
Recording conti nues until you stop th e
recording or the disc is full.
Page 51

To stop recording
Press x REC STOP located beneath the remote
control cover. Note that it may ta ke a few seconds
for recording to stop .
To pause recording
Press X REC PAUSE located beneath the remote
control cover. To restart recording, press the
button again.
To watch another TV program while recording
Set your TV to the TV input using the TV/VIDEO
button.
Adjusting the recording picture
quality and size
You can adjust the recording picture quality and
picture size.
1 2 3
4 5 6
7 8 9
0
Recording
z Hint
If you do not want to watch TV while recording, you can
turn off the TV. When using a cable box, make sure to
leave it on.
Notes
• After pressing z REC, it may take a short while to start
recording.
• You cannot change the recording mode while
recording or during recording paus e.
• If there is a power failure, the pr o gr am you are
recording may be erased.
• You cannot watch a TV program while recording
another TV program.
Using the Quick Timer function
You can set the recorder to record in 30 minute
increments.
Press z REC repeatedly to set the duration.
Each press advances the time in 30 minute
increments. The maximum duration is six hours.
0:30 1:00 5:30 6:00
The time counter decreases minute by minute to
0:00, then the recorder stops recording (power
does not turn off). Even if you turn off the recorder
during recording, the recorder continues to record
until the time counter runs out.
To cancel the Quick Timer
Press z REC repeatedly until the counter appears
in the front panel display. The recorder returns to
normal recording mode.
(normal
recording)
TOOLS
</M/m/,,
ENTER
DISPLAY
1 Before recording starts, press TOOLS and
select “Rec Settings.” Then press ENTER.
Rec. Settings
Select the item you want to change.
Rec Mode :
HDD Rec. Picture Size :
DVD Rec. Picture Size :
Rec NR :
Rec Video Equalizer
SP
4 : 3
4 : 3
Off
2 Select the item you want to adjust, and
press ENTER.
The adjustment display appears.
Example: Rec NR
Rec NR
Off 1 2 3
“Rec Mode”: Selects the recor di ng mode for
the desired recording time and picture quality.
For more information, see “Recording mode”
(page 45).
,continued
51
Page 52

“HDD Rec. Picture Size”/“DVD Rec. Picture
Size”: Sets the pictur e size of the program to
be recorded.
• 4:3 (default): Sets the picture size to 4:3.
• 1 6: 9: Set s the picture size to 16:9 (wide
mode).
• Auto (HDD only): Automatically selects the
actual picture size.
“DVD Rec. Picture Size” works with DVDRs and DVD-RWs (Video mode) when the
recording mode is set to HQ, HSP, or SP. For
all other recording modes, the screen size is
fixed at “4:3.”
For DVD-RWs (VR mode), the actual picture
size is recorded regardless of the setting. For
example, if a 16:9 size picture is received, the
disc records t he picture as 16:9 even if “Rec
Screen Size” is set to “4:3.”
For DVD+RWs/DVD+Rs, the screen size is
fixed at “4:3.”
“Rec NR” (noise reduction): Re duces noise
contained in the video signal.
“Rec Video Equalizer”: Adjusts the picture in
greater detail.
Press M/m to select the item you want to
adjust, then press ENTER.
• Contrast: Changes the contrast.
• Br i ghtness: Changes the overall brightness.
• Color: Makes the co lors deeper or light er.
• Hue: changes the co lor balance.
3 Adjust the setting using </M/m/,, and
press ENTER.
The default setting is underlined.
“Rec NR”: (weak) Off 1 ~ 3 (strong)
“Rec Video Equalizer”:
• Contrast: (weak) –3 ~ 0
• Br i ghtness: (dark) –3 ~ 0 ~ 3 (bright)
• Co l or : ( light) –3 ~ 0
• Hue: (red) –3 ~ 0
Repeat steps 2 and 3 to adjust any other items.
~ 3 (strong)
~ 3 (deep)
~ 3 (green)
• You cannot use these settings f or video signals from
the DV IN jack and COMPONENT VIDEO IN jacks.
Checking the disc status while
recording
You can check the r ecording informati on such as
recording time or disc type.
Press DISPLAY twice during r ecording.
The recording informa tio n appears.
DVD-RW
VIDEO
1:23:45SP
A Disc type/format
B Recording status
C Recording mode
D Recording time
Press DISPLAY to turn off the display.
Creating chapters in a title
The recorder will automatic ally divide a reco rding
(a title) into chapter s by inserting chapter marks a t
6 or 15 minute intervals during recording. Select
the interval, “6Min” (default) or “15Min” in
“Auto Chapter” of Features Setu p (page 91).
z Hint
You can create chapters manually when playing DVDRWs (VR mode). For detail s, see page 68.
Notes
• If one program contains two picture sizes, the selected
size is recorded. However, if the 16:9 signal cannot be
recorded as 16:9, it is recorded as 4:3.
• When playing a 16:9 size picture recorde d as 4:3, the
image is fixed to 4:3 letter box regardless of the setting
in “TV Type” of Video Setup (page 87).
• Remnants of images may appear on your sc reen when
using “Rec NR.”
52
Page 53

Recording From a VCR or Similar Device
+
-
RWVR-RW
HDD
You can record from a connected VCR or similar
device. To connect a VCR or similar device, see
“Connecting a VCR or Similar Device” (page 29).
Use the DV IN jack on the front panel if th e
equipment has a DV output jack (i.LINK jack).
RW
HDD
Video
1 2 3
4 5 6
7 8 9
0
+
R
DVD
TOOLS
-
R
4 Press TOOLS and select “Line Audio
Input.” Then press ENTER.
“Main/Sub”: Records two different sound
tracks when recording to the HDD or to a
DVD-RW (VR mode).
“Stereo” (def ault): Reco rds stereo sou nd only.
Select this when recording to discs other than
the HDD or DVD-RWs (VR mode).
5 Press X REC PAUSE to set thi s recorder t o
record pause.
6 Insert the source tape into the connected
equipment and set to playback pause.
7 At the same time, press X REC PAUSE on
this recorder and the pause or play button
on the connected equipment.
Recordin g s t arts.
To stop recording, press x REC STOP on this
recorder.
Recording
M/m, ENTER
X REC
PAUSE
x REC
REC MODE
INPUT
SELECT
STOP
1 Press HDD or DVD.
If you select DVD, insert a recordable DVD.
2 Press INPUT SELECT to select an input
source accordin g to the connection you
made.
The front panel display changes as follows:
*
Channel
number
* Does not appear when “Set Top Box Control” is
set to “On.”
L2L1 L3 DV
3 Press REC MODE repeatedly to select the
recording mode.
The recording mode changes as fo ll ows:
HQ SP LP EPHSP SLP
If you connect a digital video camera with a DV
IN jack
See “DV/Digital8 Dubbing (DV t HDD/DVD)”
(page 77) for an explanation of how to record from
the DV IN jack.
z Hint
You can adjust the settings for the recording pi ct ur e
before recording. See “Adjusting the recording picture
quality and size” (page 51).
Notes
• When recording a video game imag e, the scre e n ma y
not be clear.
• Any program that contains a Copy-Never copy guard
signal cannot be recorded. The recorde r continues to
record, but a blank screen will be recorded.
53
Page 54

Playback
Playing
HDD
DVD
Z OPEN/
CLOSE
Number
buttons
TITLE LIST
O RETURN
TOP MENU
H PLAY
+
RW
VCD
HDD
-
RWVR-RW
CD
DATA CD
1 2 3
4 5 6
7 8 9
0
Video
+
R
"/1
DVD
TOOLS
</M/m/,,
ENTER
MENU
x STOP
X PAUSE
1 Press HDD or DVD.
• If you select DVD, press Z OPEN/CLOSE
and place a DVD or CD on the disc tray.
Then press the button again to close the disc
tray.
• If you insert a DVD VIDEO, VIDEO CD,
CD, or DATA CD, press H. Playback
starts.
2 Press TITLE LI ST.
For details about the Title List, see “Using the
Title List” (page 37).
Example: DVD-RW (VR mode)
My Movies
TITLE LIST
ORIGINAL
1 2ch 1:00PM - 2:00PM
-
R
Sort
Date
Title
Number
2 5ch 8:00PM - 9:00PM
3 12ch 9:00AM - 9:30AM
4 3ch 8:00PM - 8:30PM
5 25ch 8:00PM - 8:30PM
6 L2 9:00PM - 9:30PM
7 8ch 9:00PM - 9:30PM
8 125ch 10:00AM - 10:30AM
Wed
Fri
Sat
Sat
Fri
Tue
Tue
Thu
1.5/4.7GB
9/15
9/17
9/25
9/25
10/15
10/19
10/26
10/28
3 Select the title, and pres s ENTER.
The sub-menu appears.
4 Select “Play,” and pre s s ENT ER.
Playback starts from the selected title on the
disc.
To use the DVD’s Menu
When you play a DVD VIDEO, or a finalized
DVD+RW, DVD-RW (Video mode), DVD+R, or
DVD-R, you can display the disc’s menu by
pressing TOP MENU or MENU.
To play VIDEO CDs with PBC functions
PBC (Playback Con t rol) allows you to play
VIDEO CDs interactively using the menu on your
TV screen.
When you start play ing a V IDEO CD with PBC
functions, the menu appears.
Select an i tem us ing t he n umber butt ons and pr ess
ENTER. Then follow the instructions in the menu
(press
H PLAY when “Press SELECT” appears).
The PBC function of Super VCDs does not w ork
with this recorder. Super VCDs are played in
continuous play m ode only.
54
With the playback side facing down
To stop playback
Press x STOP.
To resume playback from the point where you
stopped the disc (Resume Play)
When you press H PLAY again after you stop
the disc, the recorder resumes playback from the
point where you pressed
x STOP.
To start from the beginning, press TOOLS, select
“Play Beginning” and press ENTER. Playback
starts from the beginning of the title/track/scene.
Page 55

The point where you st opped playing is cle ar ed
when:
–you open the disc tray (except for HDD).
–you play anothe r t itle (except for HD D ).
–you switch the Title List menu to Original or
Playlist (DVD-RW in VR mode only).
–you edit the title after stopping playback.
–you change the settings on the recorder.
–y ou turn off the recorder (VIDEO CD/CD/
DATA CD only).
–you make a recording (except for HDD/DVD-
RWs in VR mode).
To play restricted DVDs (Parental Control)
If you play a restricted DVD, the message “Do
you want temporar i ly change parental control to
*?” appears on you r TV screen.
1 Select “OK” and press ENTER.
The display for entering your password
appears.
2 Enter your four digit password using the
number buttons.
3 Press ENTER to select “OK.”
The recorder starts playback.
To register or change the password, see “Parental
Control (DVD VIDEO only)” (page 92).
Playback
To lock the disc tray (Child Lock)
You can lock the disc tray to prevent children from
ejecting the disc.
When the recorder is in standby mode, press
O RETURN, ENTER, and then {/1 on the
remote.
“LOCKED” ap pears in the front panel display.
The Z OPEN/CLOSE button does not work while
the Child Lock is set.
To unlock the disc tray, press O RETURN,
ENTER, and then {/1 on the remote again when
the recorder is in standby mode.
z Hints
• You can also use the H PLAY button in step 3
(page 54) to start playback.
• Even if a timer recording starts dur ing playback,
neither the recording nor playback will stop. See
page 60.
• Even if you select “Factory Setup” in Opti ons S e tup
(page 94), the Child Lock remains set.
,continued
55
Page 56

Playback options
INSTANT REPLAY/
INSTANT ADVANCE
./> PREV/NEXT
Z OPEN/CLOSE
AUDIO
SUBTITLE
H PLAY
1 2 3
4 5 6
7 8 9
0
m / M
X PAUSE
ANGLE
PROGRESSIVE
SUR
Buttons Operations Discs
Z OPEN/CLOSE Stops play and opens the disc tray. All discs
AUDIO Selects one of the audio tracks recorded on the disc
when pressed repeatedly.
Selects the language.
DVD
-
RWVR
HDD
Selects the main or sub sound.
CDVCD
DATA CD
Selects stereo or monaural
HDD
VCD
audio trac ks.
SUBTITLE Se le cts a subtitle language when pressed repe atedly.
DVD
ANGLE Selects an angle when pressed repeatedly.
If various angles (multi-angles) for a scene are
recorded on the disc, “ ” appears in the front panel
DVD
display.
-
RWVR
CD
DVD
DATA CD
56
Page 57

Buttons Operations Discs
SUR (surround) Selects one of the TVS effects when pressed
repeatedly.
TVS* (TV Virtual Surro und) lets you enjoy virtual
surround sound effects created from the front left and
right speakers. The selected setting is displayed in the
front panel display for a few seconds.
“TVS OFF”: No surround effect
“TVS DYNAMIC”: Creates one set of virtual rear
speakers.
“TVS WIDE”: Creates five sets of virtual rear
speakers.
“TVS NIGHT”: Creates five sets of virtual rear
speakers. Effect iv e at low volume.
“TVS STANDARD”: Creates three sets of virtual rear
speakers. Effective when you use two separate front
speakers.
PROGRESSIVE Switches the type of video output signal to interlace or
progressive format (page 18).
INSTANT
Replays the scene/briefly fast forwards the scene.
REPLAY/
INSTANT
ADVANCE
. PREV/
> NEXT
(fast reverse/fast
forward)
Goes to the beginning of the p revious/next title/
chapter/scene/track.
Fast reverses/fast forwards the disc when pre ssed
during playback.
Search speed changes as follows:
fast reverse fast forward
FR1 T t FF1
FR2 T T t t FF2
FR3* T T T t t t FF3*
DVD
* T VS was de ve lope d
by Sony to produce
home surround sound
with just a stereo TV.
This only works with
multichannel Dolby
Digital soundtracks.
-
+
RWVR
Video
Video
RW
+
R
VCD
+
RW
+
R
-
RWVR
HDD
-
RW
DVD
HDD
-
RW
DVD
All discs
All discs
* FR3 and FF3 are only
available for the HDD
and DVDs.
Playback
-
R
-
R
When you press and hold the button, fast forward/fast
reverse continues at the selected speed until you
release the butto n.
(slow, freeze frame)
Plays in slow motion when pressed fo r mo r e than one
second in pause mode.
Plays one frame at a time when pressed briefl y in
pause mode.
HDD
-
RW
DVD
* P la yback direction
only
X PAUSE Pauses playback. All discs
To resume normal pla yba ck, press H PLAY.
Video
+
RW
+
R
VCD
,continued
-
RWVR
*
-
R
57
Page 58

Notes
• To enjoy the TVS function, set “Digital Out” to “On”
and “Dolby Digital” to “D-PCM” in Au dio S etup.
• When the playback signal does not contain a signal for
the rear speakers, the surround effects will be difficult
to hear.
• When you select one of the surround modes , tu rn off
the surround settings of the connected TV or amplifier
(receiver).
• Make sure that your listening posi tion is between and
at an equal distance from your spea ke rs, and that the
speakers are located in similar sur r oundings.
• The TVS function cannot be used with discs recorded
on this recorder. Angles and subtitles also cannot be
changed.
Notes on playing DTS sound tracks on a CD
• When playing DTS-encoded CDs, excessive noise will
be heard from the analog stereo jack s. To avoi d
possible damage to the audio system, the consumer
should take proper precautions when the analog stereo
jacks of the recorder are connect ed to an amp lificat ion
system. To enjoy DTS Digital Surround™ playback, an
external 5.1-channel decoder system must be
connected to the digital jack of the recorder.
• Set the sound to “Stereo” using the
when you play DTS sound tracks on a CD (page 56).
AUDIO button
Notes on playing DVDs with a DTS sound tr ac k
DTS audio signals are output only through the DIGITAL
OUT (COAXIAL or OPTICAL) jack.
When you play a DVD with DTS sound tracks, set
“DTS” to “On” in Audio Setup (page 90).
Adjusting the picture quality
HDD
DVD
+
RW
VCD
-
RWVR
-
RW
Video
+
R
1 Press TOOLS during playback.
The TOOLS menu appears.
2 Select “Video Settings,” and press
ENTER.
Video Settings
Select the item you want to change.
Y NR :
C NR :
BNR :
DVE :
PB Video Equalizer
2
2
2
Off
3 Select an item, and press ENTER.
The adjustment di splay appears.
“Y NR” (luminance noise reduction):
Reduces noise contained in the luminance
element of the video signal.
“C NR” (chroma noise reduction): Reduces
noise containe d in the color element of the
video signal.
“BNR” (block noise reduction): Reduces
“block noise” or mosaic like patterns in the
picture.
“DVE” (digit al video e nhancer ): Sharpe ns the
outlines of the images.
“PB Video Equalize r” (Playback video
equalizer): Adjusts the picture in greater
detail.
Select an item and press ENTER.
• Contrast: changes the contrast.
• Bri ghtness: change s the overall bright ness.
• Col or : makes the colors deeper or lighter.
• Hue: changes the col or balance.
-
R
58
Page 59

4 Press </, to adjust the setting, and
press ENTER.
The default settin gs are underlined.
“Y NR”: (weak) Off 1 2 3 (strong)
“C NR”: (weak) Off 1 2 3 (strong)
“BNR”: (weak) Off 1 2 3 (strong)
“DVE”*: (weak) Off 1 2 3 (strong)
“PB Video Equalizer ”:
• Contrast: (weak) –3 ~ 0 ~ 3 (strong)
• Brightness: (d ark) –3 ~ 0
• C olor: (light) –3 ~ 0 ~ 3 (deep)
• Hue: (red) –3 ~ 0
Repeat steps 3 and 4 to adjust any other items.
* “1” softens the outlines of the images. “2”
enhances the outlines and “3” enhances them more
than “2.”
Notes
• If the outlines of the images on your scr een be c ome
blurred, set “BNR” to “Off.”
• Depending on the disc or the scene being play ed , the
above BNR, Y NR, or C NR effects may be hard to
discern. An d, the se f unct i ons ma y n ot w ork w i th s o me
screen sizes.
• When playing a disc recorded in SLP recording mode,
the BNR setting may have little effect.
• When using the DVE function, noise found in the disc
may become more apparent. In this case, it is
recommended that you use the BNR function with the
DVE function. If the condition still does not improve,
set the DVE level to “1” or “Off.”
~ 3 (bright)
~ 3 (green)
Adjusting the sound quality
HDD
DVD
+
RW
VCD
-
RWVR
CD
-
RW
Video
-
+
R
R
1 Press TOOLS during playback.
The TOOLS menu appears.
2 Select “Audio Settings,” and press
ENTER.
3 Select an item, and pre s s ENT ER.
“Surround (TVS)” (DVD VIDEO only):
Selects one of the surround mode s. For more
information, see “Playback option s”
(page 56).
“Audio Filter” (all discs): Selects the digital
filter to reduce noise above 22.05 kHz (Fs* is
44.1 kHz), 24 kHz (Fs is 48 kHz), or 48 kHz
(Fs is above 96 kHz).
• Sh arp (default): Prov id es a wide frequency
range and spati al feeling.
• Slow : Provides smooth an d w arm sound.
* Sampling f reque nc y of au dio source. This
function only adjusts the output signals from the
LINE OUT (AUDIO L/R) 1/2 jacks.
4 Press </M/m/, to select the option,
and press ENTER .
Note
There may be little effect by cha ngi ng the Audio Filter
depending on the disc or playback e nvir onment.
Playback
59
Page 60

Chasing Playba ck/ Simultaneous Rec and Play
You can view the beginning of a program while it
is being recorded. You can also play a title or
previously recorded program w hile recording.
HDD
1 2 3
4 5 6
7 8 9
0
Playing from the beginning of the
program you are recording
(Chasing Playback)
-
RWVR
HDD
DVD
TITLE LIST
TOOLS
M/m,
ENTER
• The DVD’s picture on your TV screen freezes for a few
seconds when you fast forward/fast reve r se or ins tant
replay/advance the recordi ng.
Playing a previous recording while
making another (Simultaneous Rec
and Play)
+
-
HDD
DVD
RWVR-RW
RW
VCD CD
DATA CD
“Simultaneous Rec and Play” allows you to vi ew
a previously recorded program while recording
programs. Playback continues even if a timer
recording starts. Use this function as follo ws:
• While recording to the HDD:
Play another title on the HDD.
Play a previously recorded program on a DVD
by pressing DVD.
• While recording to a DVD:
Play a previously recorded pr ogram on the HDD
by pressing HDD.
• While recording to a DVD-RW (VR mode)*
Play another title on the same DVD-RW (VR
mode) disc.*
*1Simultaneous Rec and Play func tion does not work
when you record:
– on a 1x-speed DVD-RW.
– i n the HQ or HSP recording mode.
2
Picture noise may appear depending upo n the
*
condition of the recording, or when play ing a titl e
recorded in the HQ or HSP recording mode.
2
Video
+
-
R
R
1
:
“Chasing Playback” allows you to vi ew th e
recorded part of a program whil e the recording is
being made. You do not need to wait until the
recording f inishes.
1 Press TOOLS while recording.
The TOOLS menu ap pears.
2 Select “Chasing Playback,” and press
ENTER.
Playback sta rts from the begi nning of the
program you are recording.
When you fast forward to the point that you
are recording, Ch asing Playback retur ns to
normal playback.
Notes
• For DVD-RWs (VR mode), this functio n doe s not
work when recording:
– on a 1x-speed DVD-RW.
– in the HQ or HSP recording mode.
60
You can also play a DVD VIDEO, VIDEO CD,
Super VCD, CD, or DATA CD while recording on
the HDD.
Example: Play another title on the HDD while
recording to the HDD.
1 While recording, pres s TITLE LIST to
display the HDD Title List.
2 Select the title you want to play, and press
ENTER.
3 Select “Play” from the sub-menu, and press
ENTER.
Playback starts from the selected title.
Example: Play a DVD while recording to the
HDD.
1 While recording, press DVD and insert the
DVD into the recorder.
2 Press TITLE LIST to display the DVD Title
List.
Page 61

3 Select the title you want to play, and press
ENTER.
4 Select “Play” fr om the sub-menu, an d pr ess
ENTER.
Playback starts from the selected title.
Note
The DVD’s playback picture on your TV screen freezes
for a few seconds when you fast forward/fast reverse or
instant replay/adv ance during Simulta neous Rec and
Play.
Searching for a Title/ Chapter/Track, etc.
+
-
HDD
DVD
RW
VCD
RWVR-RW
CD
Video
DATA CD
You can search a di sc by title, chapter, scene or
track. As titles and tracks are assigned indivi du al
numbers on the disc, select the title or track by
entering its number. You can also search for a
scene using the time code.
-
+
R
R
Playback
Number
buttons, SET
CLEAR
1 2 3
4 5 6
7 8 9
0
TOOLS
M/m,
ENTER
1 Press TOOLS during playback.
The TOOLS menu appears.
2 Select a search method, an d pres s ENTER.
“Title Search ” (for DVDs)
“Chapter Search” (for HDD/DVDs)
“Track Search ” (for CDs/DATA C D s)
“Search” (for VIDEO CDs)
“Album Search” (for DATA CDs)
“Time Search” (for HDD/DVDs): Searches
for a starting point by entering the time code.
The display fo r entering the num ber appears.
Example: Title Search
Title : -- (21)
The number in parentheses indicates the total
number of titles, tracks, etc.
,continued
61
Page 62

3 Press the number buttons to select the
number of the title, chapter, track, time
code, etc., you want.
For example: Tim e Search
To find a scene at 2 hours, 10 minutes, and 20
seconds, enter “21020.”
If you make a mistake, press CLEAR to
cancel the numbe r, th en select another
number.
4 Press SET.
The recorder starts playback from the selected
number.
Note
“Title Search” is not applicable to the HDD.
Playing MP3 Audio Tracks
DATA CD
You can play MP3 a udi o t ra cks on DATA CDs
(CD-ROMs/CD-Rs/CD-RWs).
1 2 3
4 5 6
7 8 9
0
H PLAY
1 Insert a DATA CD on the disc tray.
2 Press H PLAY.
Playback sta rts from the fi rst MP3 audi o track
on the disc. Note that the playback order may
be different from the edited order. See
“Playback order of MP3 audio tracks.”
62
About MP3 audio tracks
MP3 is audio compression technolog y t hat
satisfies certain ISO/MPEG regulations.
You can play back DATA CDs (CD-ROMs/CDRs/CD-RWs) recorded in MP3 (MPEG1 Audio
Layer 3) format. However, the discs must be
recorded according to ISO9660 Level 1, Le vel 2
or Joliet format for the recorder to recognize the
tracks. You can also play discs reco rded in Multi
Session.
See the instructions supplied with the CD-R/CDRW drives and the recording software (not
supplied) for details on the recording format.
Note on Multi Session discs
If MP3 audio tracks are recorded i n t he first
session, the recorder will also play MP3 audio
tracks in other s essions. If audio tr acks in Music
CD format are recorded in the first session, only
the first session will be played back.
Page 63

Playback order of MP3 audio track s
Albums containing MP3 audio tracks play in the
following order.
A t B t C t D t F t G. Albums that
do not contain tracks (such as album E) are
skipped.
Tree 1 Tree 2 Tree 3 Tree 4 Tree 5
ROOT
Notes
• Depending on the software you use to create the DATA
CD, the playback order may differ from th e ab o ve
illustration.
• Proceeding to the nex t or another album may take some
time.
• The recorder may not be able to play some DATA CDs
created in the Packet Write format.
• The recorder will play any data with the extension
“.MP3,” even if they are not in MP3 format. Playing
this data may generate a loud noise which could
damage your speaker system.
• The recorder does not conform to audio tra c ks in
MP3PRO format.
• The playback order above may not be applicable if
there are more than a total of 999 albums and tracks in
the DATA CD.
• The recorder can recognize up to 499 albums (the
recorder will count just albums, includi ng al bum s that
do not contain MP3 audio tracks). The recorder will not
play any albums beyond the first 499 albu ms . Of the
first 499 albums, the recorder will play no more than a
combined total of 999 albums and tr a ck s.
• The recorder can play M P3 audio tracks recorded in the
following sampling frequencie s: 32 kHz, 44.1 kHz,
48 kHz.
• ID3 tags cannot be displayed.
• Only alphabet and numbers can be used for album or
track names. Anything else is display ed as an ast eri sk.
Playback
Album
MP3 audio track
When you insert a DATA CD and press
H PLAY, the numbered tracks ar e pl ayed
sequentially, from 1 through 7. Any sub-
albums/tracks contained within a currently
selected album take priority ove r the next album in
the same tree. (Example: C contains D so 4 is
played before 5.)
z Hints
• You can view the disc information while playing MP3
audio tracks (page 42).
• If you add numbers (01, 02, 03, etc.) to the front of the
track names when you store the tracks in a disc, the
tracks will be playe d in th at order.
• Since a disc with many trees take s longe r to sta r t
playback, it is recommended tha t you create albums
with no more than two trees.
63
Page 64

Editing
Before Editing
This recorder offers various edit options for
various disc types. Before you edit, check the disc
type in the front pane l display, and select the
option available for your disc (pag e 8).
Note
You may lose the edited contents if you remove the disc
or a timer recording starts while editing.
Edit options for the HDD and
DVD+RWs/DVD-RWs (Video mode)/
DVD+Rs/DVD-Rs
+
-
RW
HDD
RW
Video
You can perform simple edits. Since Video mode
titles are actual recordings on the disc, you cannot
undo any edits you make. The edit functions
available for Video mode titles are:
–Setting protection against erasure (page 65).
–Labeling a title (page 65).
–Erasing a title (page 65).
–Erasing multiple titles (page 66).
–Erasing a section of a title (A-B Erase) (HDD
and DVD+RWs only) (page 66).
–Erasing titles to open up disc space (Di sc Map)
(DVD-RWs in Video mode and DVD+RWs
only) (page 67).
Notes
• Once the DVD is finalized, you cannot edit or record on
the disc (except for DVD+RWs and DVD-RWs (VR
mode)).
• You cannot create a Playlist (see below).
• If a message appears and indicates tha t the disc ’ s
control informat ion is full, erase unnece ssary titles.
-
+
R
R
Edit options for DVD-RWs (VR mode)
-
RWVR
You can enjoy adva nced edit functions. Fir st you
have two options for a DVD-RW (VR mode):
editing either the original recording (called the
“original”), or the playback inform at ion created
from the original (called a “Playlist”). Since each
is different in nature and offers different merits,
read the following and select the one that better
suits your needs.
To edit original titles
Edits made to the original titles are final. If you
plan to retain an unaltered original recording,
create and edit a Playlist (se e below). The edit
functions avai la bl e for original titles are:
–Labeling a title (page65).
– Setting protect ion against erasure (page 65).
–Erasing a title (page 65).
–Erasing multiple titles (page 66).
–Erasing a sect ion of a tit le (A-B Eras e) (page 66).
To create and edit Playlist titles
A Playlist is a group of Pla ylist titles create d fr om
the original title for editing purposes. When you
create a Playlist, only the control information
necessary for playback, such as the playback
order, is stored on the d isc. Since the original ti tles
are left unaltered, Playlist titles can be re-edited.
Example: You have recorded t he final few
matches of a soccer tournament on a DVD-RW
(VR mode). You want to create a digest with the
goal scenes and othe r highl ights, b ut you a lso want
to keep the origi n al recording.
64
In this case, you can compile highlight scenes as a
Playlist title. Yo u can even rearrange the scene
order within the Playlist title (“Creating and
Editing a Playlist ” on page 68).
Page 65

The advanced edit functions available for Playlist
titles are:
–Labeling a title (page 65).
–Erasing a title (page 65).
–Erasing multiple titles (page 66).
–Erasing a section of a title (A-B Erase) (page66).
–Rearranging the title order (page 70).
–Dividing a title into multiple titles (page 70).
–Combining multiple titles into one title
(page 71).
Editing a Title
+
-
HDD
RW
RWVR-RW
Video
This secti on explains the basic edit functions . Note
that editing is irreversible. To edit a DVD-RW
(VR mode) without changing the orig in al
recordings, create a Playlist title (page 6 8).
-
+
R
R
z Hint
You can display the disc’ s Playlist titles in the Tit le List
(Playlist), or the original titles in the Title List (Original).
To switch the two Title Lists, press TOOLS while a Title
List is displayed, and select “Or iginal” or “Playlist.”
Notes
• The Playlist title calls up data from the original titles for
playback. When an or iginal title is used for a Playlist
title, the original title cannot be erased.
• You cannot protect Playlist titles.
• If a message appears and indicates that the disc’s
control information is full, erase unnecessary titles.
Note
When editing a DVD+R, DVD-R, or DVD-RW (Video
mode), finish all editing before finalizing the disc. You
cannot edit a finalized disc.
1 2 3
4 5 6
7 8 9
0
TITLE LIST
TOOLS
</M/m/,,
m/M
.
CHAPTER
MARK
ENTER
>
CHAPTER
ERASE
1 Press TITLE LIST.
When editing a DVD-RW in VR mode, press
TOOLS and select “Original” or “Playlist”
from the TOOLS menu to switch the Title
Lists, if necessary.
2 Select a title, and pres s ENT ER.
The sub-menu ap pears.
3 Select an option, and press ENTER.
You can make the following edits to the title.
“Erase”: Era ses th e sele cted t itle. Select “OK”
when asked for confirmation. When the ti tle is
protected, the disp lay asks for confi rmation.
To erase, select “C hange,” and when the
Protection display appears, select “O ff.”
Editing
,continued
65
Page 66

“Protect Tit le” : Pr ote c ts th e ti tl e. Se le ct “On”
when the Protection display appears. “ ”
appears next to the protected title. To cancel
the protection, select “Off.”
“Title Name”: Allows you to ent er or re -ent er
a title name (page 43).
“Set Thumbnail”: Changes the title’s
thumbnail picture that appears in the Title List
(page 38).
“A-B Erase”: Erases a section of the title (see
below).
2 Select point A by pressing m/M, and
press ENTER.
The display fo r setting point B appe ar s.
A-B Erase (Set point B)
A
2 5ch 8:00PM - 9:00PM
A 0:12:34
B 0:23:45
z Hints
• You can erase multiple tit le s at one ti me (p ag e66), or
erase all of the title s on the disc at once (page 40).
• You can label or re-label DVDs (page 40).
Note
You cannot protect Playlist ti tle s.
Erasing a section of a title
(A-B Erase)
+
-
HDD
RW
RWVR
You can select a section (scene) in a title and erase
it. Note that erasing scenes in a title cannot be
undone.
1 After step 2 of “Editing a Title,” sele ct
“A-B Erase” and press ENTER.
The display for setti ng point A appears.
A-B Erase (Set point A)
Playback point
• When the title is protected, the display asks
for confirmation. To continue, select
“Change,” and when the protection dis pl ay
appears, select “Off.”
2 5ch 8:00PM - 9:00PM
A 0:12:34
– – – – –
B : :
3 Select point B by pressing m/M, and
press ENTER.
The display asks for confirmation. To reset
either point A or B, s el ect “Change A” or
“Change B,” and go to st ep 2 or 3.
4 Select “OK, ” and press ENTER.
The scene is erased, and the display asks
whether to erase another scene. To continue,
select “Yes,” and repeat from step 2. To finish,
select “No.”
z Hint
A chapter mark is inserted aft er the scene was erased. The
chapter mark divides the title into separate chapter s on
either side of the mark.
Notes
• Images or sound may be momentarily interrupted at the
point where you erase a section of a title.
• Sections shorter than five se co nds ma y not be erased.
• For DVD+RWs, the erased section may be slightly
different from the points you selected.
Erasing multiple titles (Erase Titles)
+
-
HDD
RW
RWVR-RW
Video
You can select and erase two or mor e t itle s at one
time using the TOOLS menu.
-
+
R
R
1 Press TITLE LIST to turn on the Title List
menu, and press TOOLS.
The TOOLS menu appears.
2 Select “Erase Titles,” and press ENTER.
The display for selecting titles to be erased
appears.
66
Page 67

3 Select a title, and press ENTER.
A check mark appe ars in th e check box next to
the selected title. To clear the check mark,
press ENTER again. To clear all of check
marks, select “Reset All.”
Erase Titles
Select the titles to erase.
1 2ch 1:00PM - 2:00PM
2 5ch 8:00PM - 9:00PM
3 12ch 9:00AM - 9:30AM
4 3ch 8:00PM - 8:30PM
5 25ch 8:00PM - 8:30PM
10/15
OK
9/15
Cancel
9/17
9/25
9/25
Reset All
• When the title is protected, the display asks
for confirmation. To continue, select
“Change,” and when the protection dis pl ay
appears, select “Off.” To cancel, select
“Close.”
4 Repeat step 3 to sele c t all of the titles you
want to erase.
5 When you finish selecting titles, select
“OK,” and press ENTER.
The list of the titles to be erased appears for
confirmation. To change the selection, select
“Change,” and repeat from step 3.
6 Select “OK,” and pre s s ENT E R .
The titles are erased.
2 Press TOOLS and select “Disc Map,” and
press ENTER.
The Disc Map appears . T o che ck the open
space, select the space by pressing </,.
Disc Map
Empty Title
HQ: 0H30M
HSP: 0H45M
SP: 1H00M
LP : 1H30M
EP: 2H00M
Erase
• When
b or B appears on either side of the
Cancel
Selected open space
SLP: 3H00M
2.3GB
screen, you can s cr ol l s ideways by pressin g
</,.
3 Select a title by pressing </,, and
press ENTER.
The display for selecting titles to be erased
appears. To cance l the selection, press
ENTER again.
Disc Map
2 5ch 8:00PM - 9:00PM
Fri 9/17 8:00PM( 1H00M) SP 0.6GB
Editing
Erasing titles to open up disc space
(Disc Map)
+
-
RW
RW
Video
When recording on a DVD+RW or DVD-RW
(Video mode), the recorder searches for the largest
open space and records there. Before you start,
check the disc stat us by usi ng Disc Ma p, and e rase
titles to create a space large enough for the
recording.
1 Insert a disc and press TITLE LIST.
Erase Cancel
Selected title
• W hen the title is protected, th e di splay asks
for confirmation. To continue, select
“Change,” and w hen the protection display
appears, select “O f f. ” To cancel, select
“Close.”
4 Repeat step 3 when erasing more titles.
5 Select “Erase,” an d press ENTER.
The display asks for confirmation. To change
the selection, select “Change.”
6 Select “OK,” and pr ess ENTER.
The selected titles ar e er ased, freeing up disc
space.
,continued
67
Page 68

Creating chapters manually
-
RWVR
HDD
You can manually insert a chapter mark at any
point you like duri ng playback or recording.
Creating and Edit ing a Playlist
-
RWVR
Press CHAPTER MARK at the point where you
want to divide the title into chapters.
Each time you press the button, “Marking...”
appears on the screen and the scenes to the left and
right of the mark become separate chapters.
Marking...
To erase chapter marks
You can combine tw o chapters by erasin g the
chapter mark during playback.
Press
./> to search for a chapter number, and
while displaying the chapter containing the
chapter mark you want to erase, press CHAPTER
ERASE.
The current chap te r combines with t he previous
chapter.
Notes
• If a message appe ars and indicat es that n o more chapter
marks can be added, you may not be able to record or
edit.
• When dubbing, any chapter marks you ent er will be
erased.
Playlist edit allows you to edit or re-edit without
changing the actual recordings. A Play list title can
contain up to 50 scenes.
For details, see “Edit options for DVD-RWs (VR
mode)” (page 64).
Note
Once you create a Playlist title from original titles, you
will be unable to erase or edi t the original titles.
1 2 3
4 5 6
7 8 9
0
TITLE LIST
TOOLS
</M/m/,,
ENTER
m/M
H PLAY
1 Press TITLE LIST to turn on the Title List
menu, and press TOOLS.
The TOOLS menu appears.
2 Select “Create Play list,” and pres s ENTER.
The display for selecting titles appears.
68
Page 69

3 Select the title you want to include in the
Playlist title, and press ENTER.
A check mark appe ars in th e check box next to
the selected title. To clear the check mark,
press ENTER again. To select all of t he title s,
select “Select All.”
Create Playlist
Select the titles you want to capture.
Original
1 2ch 1:00PM - 2:00PM
2 5ch 8:00PM - 9:00PM
3 12ch 9:00AM - 9:30AM
4 3ch 8:00PM - 8:30PM
5 25ch 8:00PM - 8:30PM
6 L2 9:00PM - 9:30PM
10/15
10/19
OK
Cancel
9/15
9/17
Select All
9/25
Reset All
9/25
4 Repeat step 3 to add more titles.
To go to the next page of titles, press m. To
clear all of the check marks, select “Reset
All.”
5 Select “OK,” and pre s s ENT E R .
The list of selected titles appears. To add
another title, select “Add Title.”
Create Playlist - Selected Titles
Select a title to start capturing.
1 2ch 1:00PM - 2:00PM
2 5ch 8:00PM - 9:00PM
Scene List
9/15
9/17
Cancel
Add Title
6 Select one of the titles, an d pre ss ENT ER .
The sub-menu ap pears.
“Capture”: Adds a section of the title to the
Playlist title as one scene.
“Capture All”: Adds the entire title to the
Playlist ti t le as one scen e. After capturing the
title, select “Scene List” and go to step 12.
“Check Scenes”: A llows you to check th e
captured scene.
7 Select “Capture,” and press ENTER.
The display for setting the start point (IN)
appears. The title starts to play in the
background.
Capture (Set IN point) 2 5ch 8:00PM - 9:00PM
IN
0:10:26
OUT - : - - : - -
8 Select the IN poin t by pressing m/M,
and press ENTER.
The display for setting the end point (O U T )
appears, and t he title cont inues to play in the
background.
Capture (Set OUT point)IN2 5ch 8:00PM - 9:00PM
IN
0:10:26
OUT 0:23:45
9 Select the OUT point by pressing m/M,
and press ENTER.
The display asks for confirmatio n. To reset the
IN or OUT point, s el ect “Change IN” or
“Change OUT” and repeat step 8 or 9. To view
the selected scene, select “Prev ie w .”
10Select “OK,” and ENTER.
The selected sectio n is captured as a scene,
and the display ask s wh ether you want to
continue. To continue, select “More,” and
repeat the steps above. To capture a scene
from another titl e, select “New Title.”
11When you finish capturing scenes, select
“No more” and pre ss ENTER.
The Scene List menu appears with all of the
selected scenes.
Total duration of
the selected scene
Scene List Total 0:33:28 Scenes 2
1
2
5ch 8:00PM - 9:00PM
0:10:26 - 0:23:45
5ch 8:00PM - 9:00PM
0:25:00 - 0:45:08
Total number of scenes
OK
Quit
Add
Preview
12Select the scene you want to edit, and
press ENTER.
The sub-menu ap pears.
“Move”: Changes the scene order.
“Erase”: Erases the scene. The selection is
canceled.
“Preview”: Displays thumbnail pictures o f the
scenes.
“Change IN”: Allows you to change the IN
point, and repeat fr om st ep 8.
Editing
,continued
69
Page 70

“Change OUT”: Al lows you to change the
OUT point, and repeat from step 9.
To add more scen es, select “Add ” and go to
step 6. To previ ew all of the cap tured scenes i n
the listed order, select “Preview.”
13When you finish editing the Scene List,
select “OK,” and press ENTER.
The display for entering the title name
appears. To enter a new name, select “Enter”
(see page 43).
14Select “OK” to use the default name, and
press ENTER.
To play the Playlist title
Press TOOLS while the Title List menu is turned
on. Then, select “Playlist” and press ENTER.
When the Title List (Playlist) menu appear s, select
a title and press
z Hint
When a Playlist title is created, the IN and OUT points
will become chapter marks, and each scene will become
a chapter.
Note
The picture may pause when the edited scene is played.
Moving a Playlist title (Move Title)
H PLAY.
4 Select “Move Title,” and press ENTER.
Move
1 2ch 1:00PM - 2:00PM
Where do you want to move this title?
2 5ch 8:00AM - 9:00AM
9/15
Wed
Fri
Cancel
9/17
5 Select a new location for the title by
pressing M/m and press ENTER.
The title moves to the new location.
Dividing a Playlist title (Divide Title)
-
RWVR
1 Press TITLE LIST to turn on the Title List
(Playlist) menu.
If the Title List (Original) menu appears, press
TOOLS and select “P l aylist.”
2 Select a title, and press ENTER.
The sub-menu appears.
3 Select “Divide Title,” and press ENTER.
The display fo r setting the dividing point
appears. The title starts to play in the
background.
Divide
1 2ch 1:00PM - 2:00PM
-
RWVR
You can change the Playlist title order within the
Title List (Playlist).
1 Press TITLE LI ST to turn on the Title List
(Playlist) menu.
If the Title List (Original) menu appears, press
TOOLS and select “Playlist.”
2 Select “Number” in the “Sort” column,
and press ENTER.
The titles are sorted in order of title number.
3 Select a title, and press ENTER.
The sub-menu ap pears.
70
0:12:34
4 Select th e dividing point by pressing
m/M, and press ENTER.
The display asks for confi rma tion. To change
the dividing poin t, se lect “Change.”
5 Select “OK, ” and press ENTER.
The display for entering the title name
appears. To use the same t itle name as befor e,
select “No.”
6 Select “Yes, ” and press ENTER to enter a
new name.
Follow the explanations on page 43. After you
enter a new name, th e tit le is di vi ded in two.
Page 71

Combining multiple Playlist titles
(Combine Titles)
-
RWVR
1 Press TITLE LIST to turn on the Title List
(Playlist) menu.
If the Title List (Ori ginal) menu appears, press
TOOLS and select “Playlist.”
2 Press TOOLS to select “Combine Titles,”
and press ENTER.
The display for selecting titles appears.
3 Select a title, and press ENTER.
A number indicating the order in which you
selected the title appears. To cancel the
selection, press ENTER again.
Combine
Select the titles to combine.
1 2ch 1:00PM - 2:00PM
1
2 5ch 8:00PM - 9:00PM
3 2ch 1:00PM - 2:00PM
4 2ch 1:00PM - 2:00PM
10/ 5
OK
9/15
Cancel
9/17
9/28
Reset All
4 Repeat step 3 to sele c t all of the titles you
want to combine.
To cancel all of the selections , select “Reset
All.”
5 Select “OK,” and pre s s ENT E R .
The list of titles to be combined appears. To
change the select ion, select “Chang e” and go
to step 3.
Combine
Combine the titles in the following order.
1
1 2ch 1:00PM - 2:00PM
2
2 2ch 1:00PM - 2:00PM
3
3 2ch 1:00PM - 2:00PM
9/15
9/28
10/ 5
Editing
OK Change Cancel
6 Select “OK,” and pre s s ENT E R .
The display for selecting a title name from
among the selected titles appears. To enter a
new name, select “Enter Text,” and follow the
explanations on page 43.
7 Select a name, an d press ENTER.
The titles are combined.
71
Page 72

Dubbing (HDD y DVD)
Before Dubbing
+
-
HDD
RW
RWVR-RW
In this section, “dubbing” refers to “copying a
recorded title on the internal hard disk drive
(HDD) to anothe r di sc, or vice versa.” You can
select to dub one title at a time (Title Dubbing –
see “Dubbing a Single Title (Title Dub)” on
page 74), or multipl e ti t le s a ll at once (Multiple
Title Dubbing – see “Dubbing Multiple Titles
(Dub Selected Titles)” on page 75).
Before you start, read the following precautions,
which are common to both dubbing methods.
z Hint
This section deals with dubbing to and from the int erna l
HDD. If you want to record from a digital video camera
connected to the DV IN jack, see “DV/Digital8 Dubbing
(DV t HDD/DVD)” on page 77. To record from
equipment connected to the LINE IN jacks, see
“Recording From a VCR or Similar Device” (page 53).
Before you start…
• Se l ect the disc type accor ding to your needs
(page 8). Thi s recorder can record on various
discs.
• Ti m er recordings do not start during dubbing.
Before you star t, check the SCHEDULE list
(page 49) to see if there is a timer recordi ng du e
to start during dubb ing.
• Chapter marks in the original recording do not
remain in the dubbed title. Chapter marks are
entered according to the “Auto Chapter” setting
in Features Setup (page 91).
• For a title whose aspect ratio (16:9 or 4:3) is
mixed:
–When dubbed from the HDD to DVD-RW
(Video mode) or DVD-R, the picture size is
determined by the setting in “DVD Rec.
Picture Size” (p age 51).
–When dubbed from HDD to DVD+RW or
DVD+R, the pict ur e size is always 4:3.
–When dubbed from HDD to DVD-RW (VR
mode), the originally recorded picture size is
retained.
Video
+
-
R
R
z Hints
• You can dub a Playlist title on a DVD-RW (VR mode)
as an original title on the HDD.
• When dubbed from a DVD to the HDD, the picture size
and the sound types originally recor de d a re r et ai ne d.
Notes
• The recorder may not function as described depending
on the disc status. Follow the instructions that appear on
the screen.
• When a message app ears and indicates t h at the control
information is full, erase unnecessar y titles (page 65).
• You cannot dub from DVD VIDEOs or a DVD
recorded on other DVD equipment to the HDD.
• Thumbnails that you have set fo r the originally
recorded title (pa g e 38) will no t be re ta ine d in the
dubbed title.
About “Dub Mode”
With this recorder, the recording mode for
dubbing is displayed as “Dub Mode.” Two
dubbing methods are available: High-speed
Dubbing and Rec Mode Conversion Dubbin g.
Read the follo w in g and select according to the
required time, disc space, and picture quality.
Dubbing at high-speed (High-speed Dubbing)
+
RW
-
R
-
RWVR-RW
, ////
HDD
Allows you to dub w hat you have stored in the
HDD to a high-speed DVD (4x-speed
DVD+RWs/2x-speed DVD-RWs/8x-speed
DVD+Rs/8x-speed DVD-Rs, or slower versions
of each disc type), without changing the recording
mode. Dubbin g speed is increased w hen the
recording mode of the original title is of a longer
recording mode (such as SLP).
Select “Fast” when selecting the “Dub Mode” in
“Dubbing a Single Title (Title Dub)” (page 74) or
“Dubbing Multiple Titles (Dub Selected Titles)”
(page 75). The minimum required time is as
follows (approximate).
Example: When a 120 minute-title is dubbed to a
high-speed DVD-R in LP mode, dubbing becomes
12 times faster, and takes a minimum of 10
minutes. (120 minutes ÷ 12 = 10 min utes).
Video
+
R
72
Page 73

Note that speeds shown in the table are an
approximate of th e m aximum dubbing speed.
Speed*1x2.4-speed x2-speed x4-speed
Rec
mode
Highspeed
DVD+RW
Highspeed
DVD-RW
Highspeed
DVD+R/
DVD-R
HQ x2.4 x2 x4
HSP x3.6 x3 x6
SP x4.8 x4 x8
LP x7.2 x6 x12
EP x9.6 x8 x16
SLP x1 x12 x24
*1
Maximum recording speed of this recorder.
*2
When dubbing to DVD+Rs, the dubbing speed is
x1-speed.
*2
Notes
• High-speed Dubbing is not available for the f oll owing
titles:
– Titles recorded in HQ+.
– Titles that contain both stereo or mona ur al aud io
tracks (except DVD-RWs (VR mode)).
– Titles recorded in mixed picture size (4:3 and 16:9
etc.) (except DVD-RWs (VR mode)).
– Titles recorded in SLP (DVD+RW/DVD+R only).
• When dubbed to a DVD-RW (Video mode)/
DVD+RW/DVD+R/DVD-R, erased pictures may
remain on the disc.
Rec Mode Conversion Dubbing
+
RW
-
R
-
RWVR-RW
n ////
HDD
Video
+
R
Allows you to dub from t he HDD to a DVD or vice
versa, in a dubbin g mode that differs fro m the
original recordings . F or example, when you dub
an HQ title (data size is large) in SP mode, you can
reduce the data size, saving more titles using less
space.
Select a mode different from the original recording
in “Dub Mode” in the st eps of “Dubbing a Single
Title (Title Dub)” (page 74) or “Dubbing Multiple
Titles (Dub Selected Titles)” (page 75).
When an HQ or HQ+ title is converted to another
mode, the recorder automatically assigns an
appropriate bit rate, thus retaining the original
picture quality as much as possible (“Dynamic
VBR Dubbing”).
◆About “VBR”
VBR (Variable Bit Rate) is an effec tive method of
allocating a suit able bit amount per second. Fine
detail pictures or dynamically moving pictures are
assigned a larg er amoun t, w hi le st at ic p ic tur es are
assigned less, for optimum picture quality.
• Variable bit rate (adopted
for this recorder)
Average dis tribution rate
z Hint
When you dub an edited title u si n g t he Re c Mode
Conversion Dubbing method, pauses between scenes are
smoothed out.
• Fixed bit rate
Average distribution rate
Wasted bit s
More bits
are require d
Note
The picture quality will not improve even if a title is
converted to a recording mode of better picture quality.
Dubbing restriction
Some DVD VIDEOs or TV programs contain
copy protection signals such as “Copy-Never” or
“Copy-Once.” You cannot record such contents on
this recorder ( only a gray, blank scr een will be
recorded). Be espe ciall y c arefu l when dubb ing o n
a non-rewritable DVD such as a DVD-R.
Copy
protection
signals
Copy-Free
Copy-Once
Copy-Never
* Version 1.1 CPRM-compatible DVD-RW (VR mode)
only (page 8).
Original
recording
HDD
-
+
RW
-
RW
Video
-
R
HDD
-
RWVR
Dubbing
,
+
RW
-
RW
Video
-
R
RWVR
+
R
recorded in gray.
*
recorded in gray.
HDD
-
RWVR
+
R
Dubbing (HDD y DVD)
73
Page 74
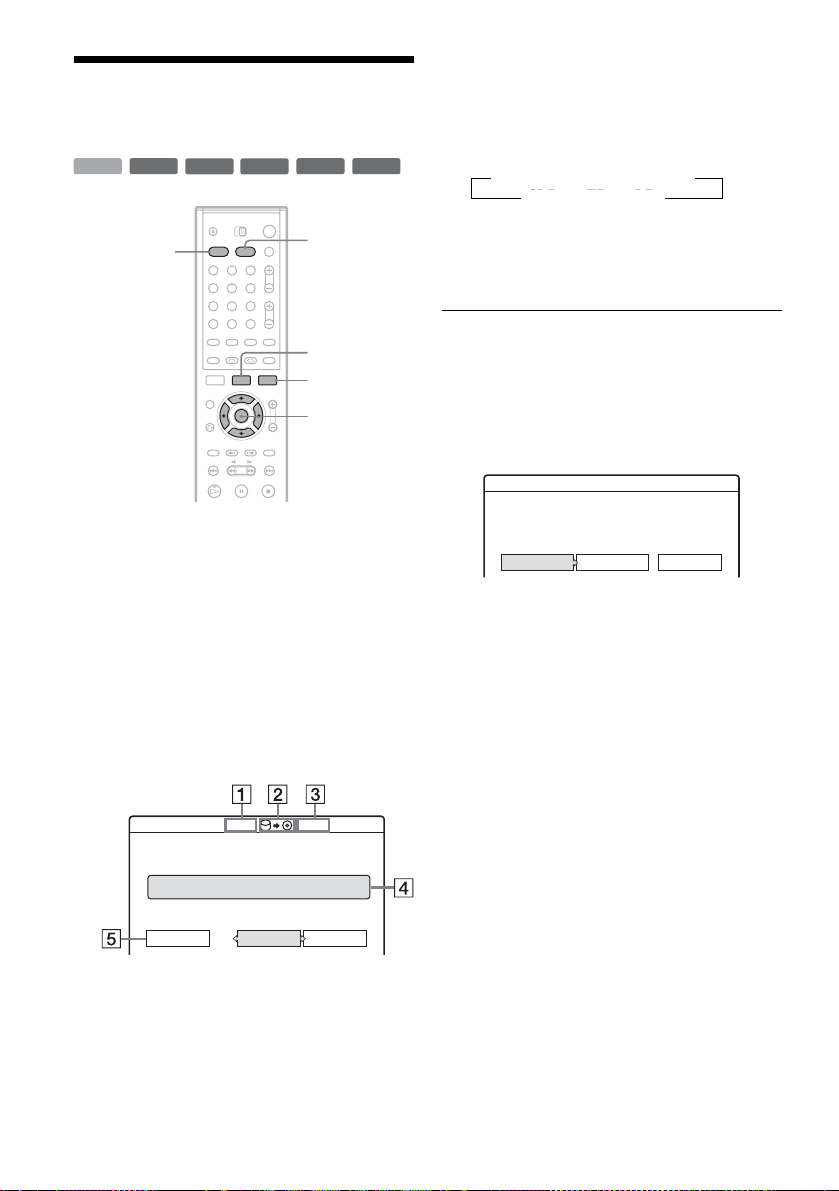
Dubbing a Single Title (Title Dub)
HDD
+
RW
-
RWVR
-
RW
Video
+
-
R
R
E Dubbing mode and the space t hat
remains after dubbing (approximate).
6 Select “Dub Mode.”
7 Select a dubbing mode by pre ssing M/m.
t
Fast* t HQ t HSP t SP
Fast* t HQ t HSP t SP
SLP T EP T LP
SLP T EP T LP
T
HDD
1 2 3
4 5 6
7 8 9
0
DVD
TITLE LIST
TOOLS
M/m, ENTER
1 Insert the DVD that yo u are go ing to dub to
or from.
2 Select the sour ce by pres sing HD D or DVD .
3 Press TITLE LI ST to turn on the Title List
menu.
4 Select a title and press ENTER.
The sub-menu ap pears.
5 Select “Dubbing” and press ENTER.
The display for sele ct in g t he dubbing mode
appears.
* Appears when High-spe e d Dubbi ng is a va ila ble
for the title (page 72).
8 Select “St art,” and press ENTER.
To automatically adjust the dubbing mode
(Auto Dub Mode)
The recorder adjust s the dubbin g mode in orde r to
fit a title on the dis c . I f there is insufficien t disc
space in the selected dubbing mode, the following
display appears after step 8.
Title Dub
There is not enough memory for the dubbing,
Select "Auto Dub Mode" or adjust the mode.
Reset
Select “Auto Dub M ode” and press ENTER to
start dubbing. To manually select another dubbing
mode, select “Res et,” and go to step 7.
To stop dubbing
Press TOOLS to turn on the TOOLS menu. Or,
while the Title List menu is displayed, press
ENTER to display the sub-menu. Select “Stop
Dubbing,” and p re ss ENTER. When aske d for
confirmation, select “Yes,” and press ENTER.
CancelAuto Dub Mode
74
Title Dub
This title will be dubbed. Set the dub mode.
1 World Cup Final
Dub Mode
2.0GB 2.6GB
Rec Mode : SP
Start
CancelSP 2.0GB
A Size of the title (approximate).
B Direction of dubbing.
C Available space on the disc to be
dubbed (approximate).
D Information about the title to be
dubbed.
z Hints
• If disc space is still insufficient for the selected dubbing
mode, erase unnecessary parts of the title, or free up
disc space by erasing titles on the di sc (pag e 65).
• You can turn off the recorder withou t aff e cting the
dubbing. Press "/1 during dubbing.
• You can start Title Dubbing by selecting “DUBBING”
from the System Menu.
Page 75

Dubbing Multiple Titl es (Dub Selected Ti tles)
HDD
+
RW
-
RWVR
-
RW
Video
+
R
7 Repeat step 6 to se lect a ll o f th e ti tle s you
want to dub.
To make adjustments for each of the titles,
select “Settings” (see “Adjusting the settings
for each title” be lo w ). To cancel all of the
-
R
selections, select “Reset,” and go to st ep 6.
8 Select “Start,” and press ENTER.
HDD
1 2 3
4 5 6
7 8 9
0
DVD
TITLE LIST
TOOLS
M/m, ENTER
1 Insert the DVD that you are go ing to dub to
or from.
2 Select the source by pressing HDD or DVD.
3 Press TITLE LIST to turn on the Title List
menu.
4 Press TOOLS.
The TOOLS menu ap pears.
5 Select “Dub Selected Titles,” and press
ENTER.
The display for selecting titles appears.
Select title(s) in the order you want to dub them.
1
World Tour – Asia 1
2
World Tour – Asia 2
3
World Cup Final
4
World Tour – Asia 3
0.0GB 4.6GBDub Selected Titles
Start
6/11
Cancel
6/18
6/20
Settings
6/25
Reset
6 Select titles in the order you want to dub,
and press ENTER.
The titles are numbered in the selected order.
To cancel the selection, press ENTER again.
Adjusting the settings for each title
You can make detailed settings for each of the
selected titles during Multiple Title Dubbing.
1 In step 7 of “Dubbing Multiple Title s (Dub
Selected Titles)” (page75), select
“Settings” and press ENTER.
The following display for making the
adjustments appears. To re-se lect titl es, sele ct
“Change,” and go to step 6 of “Dubbing
Multiple Titles (Dub Selected Titles)” above.
To have the recorder adjust the dubbing mode
so all of the selected titles fit in, select “Auto
mode.”
Dub Selected Titles
Adjust the settings for the dubbing here.
1
World Tour – Asia 1
Rec Mode: SP Dub Mode: Fast 0.3GB
2
World Tour – Asia 2
Rec Mode: SP Dub Mode: Fast 0.3GB
3
World Tour – Asia 3
Rec Mode: SP Dub Mode: Fast 0.3GB
4
World Cup Final
Rec Mode: SP Dub Mode: Fast 1.2GB
A Total size of the selected titles.
B Direction of dubbin g.
C Available space on the disc to be
dubbed (approxi mate).
D Information about the title to be du bbed
(title name, original recording mode,
dubbing mode, and dat a size after
dubbing).
E Order of dubbing.
2.1GB 4.6GB
6/11
6/18
6/25
6/20
Start
Cancel
Auto mode
Change
Dubbing (HDD y DVD)
,continued
75
Page 76

2 Select the title which you want to adjust,
and press ENTER.
The sub-menu ap pears.
“Dub Mode”: Selects the dubbing mode for
each title (see page 72).
“Change Order”: Moves the ti tle to change the
dubbing order. Pr ess M/m to select a new
location, and press ENTER.
“Cancel”: Cancels the title sel ection. Th e title
is excluded from dubbing.
3 Select an option, and press ENTER .
4 When you finish making adjustmen ts,
select “Start,” and press E NTER.
To automatically adjust the dubbing mode
(Auto Dub Mode)
The recorder adj usts the dubbing mode so all of
the titles fit in. The same dubbing mode is set for
all of the titles. If di sc space is insufficient for the
selected dubbing mode, the following display
appears after step 8 of “Dubbing Mul t ip l e Ti tl e s
(Dub Selected Titles)” (page 75).
Dub Selected Titles
There is not enough memory. Select
"Auto Dub Mode" or change the selection.
Change
Select “Auto Dub Mode” and press ENTER . If
you have selected on l y one title, select “OK.”
CancelAuto Dub Mode
To stop dubbing
Press TOOLS to turn on t he TOOLS me nu. S elect
“Stop Dubbing” and pr es s ENTER. When asked
for confirmation, select “Yes,” and press ENTER.
z Hints
• You can turn off the recorder without affecting the
dubbing. Press "/1 during dubbing.
• You can start Multiple Title Dubb ing by se le c ti ng
“DUBBING” from the System Menu.
76
Page 77

DV/Digital8 Dubbing (DV t HDD/DVD)
– the images on the tape contain copy protection
signals, which limit rec o r ding.
• If you want to play the disc on other DVD equipment,
finalize the disc (page 40).
Before DV/Digit al8 Dubbing
This section explains dubbing with a digital video
camera via the D V IN jack on the front pa nel. If
you want to dub by way of the LINE IN jacks, see
“Recording From a VCR or Similar Devi ce” on
page 53.
To record from the DV IN jack
The DV IN jack on this recorder conforms to the
i.LINK standard. You can connect any other
equipment that ha s an i.LINK (DV) jack , a nd
record digital si gnals.
Follow the instructions in “Preparing for
recording using the DV IN jack,” and then move
on to the section on dubbing. For more
information about i.LINK, see “About i.LINK ”
(page 103).
z Hint
If you plan to do additional editing on a disc aft er the
initial dub, use the DV IN jack and record on a DVD-RW
(VR mode) or HDD.
Preparing for recording using the DV
IN jack
You can connec t a digi ta l vide o came ra to th e DV
IN jack on the reco rder to record or ed it from a
DV/Digital8 format tape. Operation is
straightforwar d because the record er will fast
forward and rewind the tape for you – you do not
need to operate your digital video camera. Do the
following to start using the “DV Edit” functions o f
this recorder.
See the instruction manual supplied with the
digital video camer a as well before connecting.
Hookups
Z OPEN/
CLOSE
To DV IN
Digital video camera
: Signal flow
HDD
i.LINK cable
(not supplied)
1 2 3
4 5 6
7 8 9
0
DVD recorder
DV output
DV/Digital8 Dubbin g (DV t HDD/DVD)
DVD
TOOLS
Notes
• The DV IN jack is for input only. It will not outp ut
signals.
• You cannot use the DV IN jack when:
– y our digital video camera does not work with this
recorder. Connect the camera to the L INE IN jack
and follow the instructions of “Recordi ng From a
VCR or Similar Device” (page 53).
– t he input signal is not in DVC - SD for mat. Do not
connect a MICRO MV format digital video camera
even if it has an i.LINK jack.
REC MODE
INPUT
SELECT
M/m, ENTER
,continued
77
Page 78

1 Press HDD or DVD.
If you select DVD, press Z OPEN/CLOSE
and place a DVD on t he disc tray. Press Z
again to close the disc tray.
With the recording side facing down
Wait until “LOAD” disappears fr om the front
panel display.
If you use an unused DVD, formatting starts
automatically.
2 Insert the source DV/Digital8 format tape
into your digital video camera .
For the reco rder to reco rd or e dit , you r digi t al
video camera mu st be set to video playback
mode.
3 Press INPUT SELECT on the rem o te
repeatedly to select “DV.”
The front panel display changes as follows:
Channel*
number
L2L1 L3 DV
z Hints
• You can turn off the recorder during dubbing. T he
recorder completes dubbing even after being turned
off.
• You can adjust the settings f or the rec or ding picture
before recording. See “Adjusting the recording picture
quality and size” (page 5 1 ) .
Notes
• You cannot connect more than one piece of digit al
video equipment to the recorder.
• You cannot control the reco rd er usi ng an othe r dev ic e
or another recorder of the same model.
• You cannot record date , ti me , or the contents of the
cassette memory onto the disc .
• If you record from a DV/Digital8 format tape with a
sound track that is recorded in multiple sampling
frequencies (48 kHz, 44.1 kHz, or 32 kHz), no sound or
an unnatural sound will be output when pla ying back
the sampling frequency switc h point on the disc.
• In order to use this recorder’s Auto Scene Ch ap t ering
function (pages 79, 80), be sure to correctly set the
clock on your digital video came r a bef ore shooting.
• The recorded picture may be momentarily affected if
the picture size of t he sourc e image ch anges, or if there
is nothing recorded on the tape.
* Does not appear when “Set Top Box Contr ol” is
set to “On.”
4 Press REC MODE on the remote repeatedly
to select the recording mode.
The recording m ode changes as fo ll ows:
HQ SP LP EPHSP SLP
For details about th e recording mode, s ee
page 45.
5 Press TOOLS on the remote to select “DV/
D8 Audio Input,” and press ENTER. Then,
select the setting for the audio input.
“Stereo1” (default): Records ori g i nal sound
only. Normally select this when dubb ing a DV
format tape.
“Mix”: Record s both stereo 1 and 2.
“Stereo2”: Re cords additional audio only.
Select “Mix” or “St er eo2” only if you have
added a second au dio chann el when reco rding
with your digital vi deo camera.
You are ready to st ar t dubbing. Select one of
the dubbing meth ods on the following pages.
78
RDR-HX900
2-187-189-11(2)
Page 79

Recording an Entire DV/
Digital8 Format Tape (One
To stop during recording
Open the remote’s cover and press x REC STOP.
Note that it may take a few seconds for the
recorder to stop recording.
Touch Dubbing)
+
-
HDD
RW
RWVR-RW
Video
You can record the entire contents of a D V /
Digital8 format tape onto a disc with a single press
of the ONE TOUCH DUBBING button. The
recorder cont rols the digital video camera for the
whole process, and completes the re cording.
◆How chapters are crea te d
The dubbed contents on the disc become one title,
and the title is divided into chapte rs. For th e HDD
and a DVD-RW (VR mode), every shooting on the
tape becomes a chapt er on the disc (Auto Scen e
Chaptering function). For other discs, the recorder
divides the title in either 6 or 15-minute intervals,
according to the se tting in “Auto Chapter” in
Features Setup.
ONE TOUCH
DUBBING
+
R
REC STOP
x
-
R
z Hints
• If you set “Finalize Disc” to “Auto” in Features Set up
(page 93), the recorded disc (except DVD-RW(VR
mode)) will automatically be finalized after recording
is finished.
• You can play ba ck a previous ly recorded title on the
HDD while One Touch Dubbing is in progress.
Notes
• When a blank space bet ween the reco rdings on the t ape
continues for more than five minutes, One To uc h
Dubbing ends automatically.
• The recorder recor ds a blank for five minutes b efore it
stops dubbing. To stop the blank recording, press
REC STOP.
x
DV/Digital8 Dubbin g (DV t HDD/DVD)
Follow steps 1 to 5 of “Preparing for recording
using the DV IN jack” (page 77), and press
ONE TOUCH DUBBING on the remote.
The recorder rewinds the tape and then starts
recording the ta pe contents.
When the recording is finished, the recorder
rewinds the tape in the digital video camera.
79
Page 80

Program Edit
HDD
+
RW
-
RWVR-RW
Video
-
+
R
R
You can sel ect scenes from a DV/Dig i t al8 format
tape, and then automatically record selected
scenes to a disc of your choice.
To use this function, you will do the following:
Connect your digital vi deo camera and
prepare for recording
m
Select and edit the scenes you want to dub
Using the recorder’s remote control, fast forward
or rewind the tap e to select the scen es . At this
point, the selected scenes are not copied to the
disc. The recorder only remembers the IN and
OUT points of the s cenes that you selected for
dubbing. You can als o r eset, erase, or change the
order of the scenes .
m
Dub the selec t ed scenes to a dis c
After you have selected the scenes, th e recorder
will fast forward and rew ind the tape
automatically a nd record the scenes to a di sc of
your choice.
◆How chapters ar e created
The dubbed contents on the disc become one title,
and the title is divided into chapters. For a DVDRW (VR mode) and t h e HDD, every shootin g on
the tape and each sel ected scene becom es a
chapter on the disc (Auto Scene C haptering
function). For other discs, the recorder divides the
title in either 6 or 15-minute intervals, according
to the setting in “Auto Chapter” in Featu res Setup.
1 2 3
4 5 6
7 8 9
0
SYSTEM
MENU
</M/m/,,
ENTER
m/M
x REC
STOP
1 Follow steps 1 to 5 of “Preparing for
recording using the DV IN jack” (page77),
and press SYSTEM ME NU.
2 Select “DV/D8 E DI T,” and press ENTER.
The display asks if you want to sta rt se lecti ng
scenes.
Scenes Selection
Do you want to select a scene?
Start Cancel
• If you have previously saved a program, the
display asks if you w ant to edit an existing
program or to create a new program. To
resume editing the existing program, select
“Saved Data,” and go to step 6.
3 Select “Sta rt,” and press ENTER.
The display for setting the IN point (start of
the scene) appears.
The scene start s t o play in the background.
Select scene (Set IN point)
RDR-HX900
2-187-189-11(2)
80
Controlling...
IN 0:00:30
OUT - : - - : - -
Page 81

4 Select the IN point by pressing m/M,
and press ENTER.
The display for setting the OUT point (end of
the scene) appears. The scene starts to play in
the background fro m t he I N poi nt .
Select scene (Set OUT point)
Controlling...
IN 0:00:30
OUT 0:00:52
5 Select the OUT point b y pressing m/M,
and press ENTER.
The display asks if you w an t to a dd t he
selected scene to the Scene List menu. To
preview the scene, select “Preview. ” T o reset
either the IN or OUT point, select “Change
IN” or “Change OUT,” and repeat fr o m st ep
4.
Scenes Selection
Do you want to capture the scene
between IN 0:00:30 and OUT 0:00:52?
OK Cancel
Preview Change IN Change OUT
6 Select “OK,” and pre s s ENT E R .
A new Scene List menu appears with the
selected scene.
7 When you finish adding scenes, select the
scene you want to edit, and press ENTER.
The sub-menu appears.
“Move”: Changes the scene order. Follow the
explanation s on the scre en to chan ge the order
by pressing M/m and ENTER.
“Erase”: Erases th e scene. When asked for
confirmation, select “OK.”
“Preview”: Plays the selected scene.
“Change IN”: Ch anges the start of t he scene.
Repeat from st ep 4.
“Change OUT”: Changes the end of the scene.
Repeat from st ep 5.
8 When you finish e diting the Scene Li st,
select “OK,” and pre s s ENT ER.
The display for entering the title name
appears. To ente r a new na me, sel ect “Enter ,”
and follow the explanations on page 43.
Title Name
Enter the title name.
DV10/11/02 1:30PM - 11/12/02 4:46PM
OK Enter
9 Select “OK,” and press ENTER.
The default title name is fixed, and the d isplay
asks if you want to star t re cordin g. To c hange
the disc media, select “Media” and press M/m.
To change the dubbing mode, select “Dub
Mode” and press M/m.
DV/Digital8 Dubbin g (DV t HDD/DVD)
Total 0:00:22 Scenes 1
OK
Quit
Add
1
SCENE LIST
0:00:30-0:00:52
Duration 0:00:22
A Thumbnail picture
B Time information
C Total duration of the program
D Total number of scenes
DV / D8 Dubbing
Change the dubbing mode if necessary.
Select "Start" to start dubbing.
Media Dub Mode
DVD
Data capacity required for the dubbing.
SP 0.8GB
2.6GB
Start
Cancel
,continued
81
Page 82

10Select “Start,” and pre s s ENT ER .
The recorder sta rts recording the t ape contents
as programmed.
• If the recording does not fit due to the
dubbing mode you selected, the display asks
if you want to continu e. To change the
dubbing mode, se lect “Reset” and re peat
from step 9. To have the recorder ad j u st the
dubbing mode, se l ect “A uto Dub Mode.”
• If there is not enough disc space even after
changing the dubbi ng mode, the displ ay
asks if you want to record hal fway. To
continue, select “OK.”
To stop during recording
Open the remote’s cover and press x REC STOP.
Note that it may take a few seconds for the
recorder to stop recording.
Notes
• The disc may not be recorded as programm e d if the
tape’s time code is not sequential or there are blanks
between the recordings on the tape. In this case, see
“Recording From a VCR or Similar Device ” (page 53).
• The start and end points of a program may be different
from what you have set if the sourc e DV / D igital8
format tape is in any of the follow ing c ondi tions:
– Record ing m ode was cha nge d dur ing the recording.
– There is a blan k spa ce in the recorded portion of the
tape.
• If you set the beginning of the tape as the IN point and
the end point as the OUT point, the IN and OUT points
may change slightly during dubbing.
• You cannot set a scene to be shorter than one se con d.
82
RDR-HX900
2-187-189-11(2)
Page 83

Settings and Adjustments
Using the Setup Displays
By using the Setup Displays, you can make
various adjustments to items such as picture and
sound, as well as se le ct a l anguage for the
subtitles.
The Setup Disp lays are used in the fo ll owing way.
Note
Playback settings stored in the disc take priority over the
Setup Display settings, and no t a ll of the fun ct ions
described may work.
1 2 3
4 5 6
7 8 9
0
SYSTEM
MENU
</M/m/,,
ENTER
2 Select “SETUP,” and press ENTER.
The Setup Displ ay appears.
SETUP
Settings
Tuner Preset
Video
Area Setup
Audio
Clock
Features
Set Top Box Control
Options
Language
Easy Setup
3 Select “Settings,” “Video,” “Audio,”
“Features,” “Options,” or “Easy Setup,”
and press ENTER .
The selected Setup Display appears.
Example: “Video” setup
SETUP
Settings
Video
Audio
Features
Options
Easy Setup
TV Type :
Pause Mode :
Y/Pb/Pr Out Black Level
Y/Pb/Pr In Black Level
Progressive Mode :
Screen Saver :
Line1 Input :
Line3 Input :
:
:
4 : 3 Letter Box
Auto
Off
Off
Auto
On
Video
Video
4 Select the item you want to set up, and
press ENTER.
Available options for the item appear.
Example: “TV Type”
Settings and Adjustments
1 Press SYSTEM MENU whi le the r ecorder is
in stop mode.
The System Menu a ppears.
SYSTEM MENU
TITLE LIST
TV GUIDE
SCHEDULE
DV/D8 EDIT
DUBBING
SETUP
Settings
Video
Audio
Features
Options
Easy Setup
SETUP
TV Type :
Pause Mode :
Y/Pb/Pr Out Black Level
Y/Pb/Pr In Black Level
Progressive Mode :
Screen Saver :
Line1 Input :
Line3 Input :
4 : 3 Letter Box
16 : 9
Auto
4 : 3 Letter Box
Off
:
4 : 3 Pan Scan
Off
:
Auto
On
Video
Video
,continued
83
Page 84

Some items display a dialog box that provides
further detailed setting s.
Example: The follow i ng dialog box appears
when “Parental C ont rol” in Features Setup is
selected.
Features - Parental Control
Enter your password.
OK
Cancel
Antenna Reception and Language Settings (Settings)
The Settings Setup helps you to make tuner, clock,
and language settings for the recorder.
Select “Settings” in the Setup Display. To use the
display, see “Using the Setup Displays” (page 83).
In this case, see “Parental Control” in
“Recording and Parental Control Settings
(Features)” (page92).
5 Select an option, and press ENTER .
The currently sel ec ted option is displayed
next to the setup ite m .
Example: when “16:9” is set.
SETUP
Settings
TV Type :
Video
Pause Mode :
Y/Pb/Pr Out Black Level
Audio
Features
Y/Pb/Pr In Black Level
Options
Progressive Mode :
Screen Saver :
Easy Setup
Line1 Input :
Line3 Input :
To turn off the display
Press SYSTEM MENU repeatedly.
16 : 9
Auto
:
Off
Off
:
Auto
On
Video
Video
SETUP
Settings
Tuner Preset
Video
Area Setup
Audio
Clock
Features
Set Top Box Control
Options
Language
Easy Setup
Tuner Preset
Notes
• You cannot presets channels f or the connec te d c abl e
box or satellite receiver.
• You cannot select “Tuner P rese t” whe n you se t “ Se t
Top Box Control” to “On.”
Auto Preset
Automatically presets the receivable channels.
The recorder ca n receive VHF channels 2 to 13,
UHF channels 14 to 69, and unscrambled CATV
channels 1 to 125. Fir s t, w e recommend that you
preset the receivable channels in your area using
automatic presetting methods.
1 Follow steps 1 to 3 of “Using the Setup
Displays” (page 83) to select “Settings” in the
Setup Display.
2 Select “Tuner Pres et ,” and press ENTER .
84
Settings - Tuner Preset
Antenna / Cable :
Auto Preset
Manual Set :
AFT :
Cable
Add
On
Ch1
Page 85

3 Select “Antenna/Cable,” and press ENTER.
Settings - Tuner Preset
Antenna / Cable :
Auto Preset
Manual Set :
AFT :
Cable
Antenna
Cable
Add
On
Ch1
4 Select the cha nnel you want to preset using
the number button s and the SET button.
To disable a channel, select the channel using
CH +/–.
Channel to be preset/disabled
“Cable”: Presets cable TV channels.
“Antenna”: Presets VHF and UHF channels.
4 Select an option , an d press ENTER.
5 Select “Auto Preset,” and press ENTER.
All receivable c hannels are preset in
numerical sequence.
Settings - Tuner Preset - Auto Preset
Searching for receivable channels.
Please Wait.
Ch 23
Manual Set
Presets or disable s ch annels manually.
If some channels could not be set using the Auto
Preset or Easy Setup function, you can set them
manually.
1 Follow steps 1 to 3 of “Using the Setup
Displays” (page 83) to select “Settings” in the
Setup Display.
2 Select “Tuner Preset,” and press ENTER.
Settings - Tuner Preset
Antenna / Cable :
Auto Preset
Manual Set :
AFT :
Cable
Add
On
Ch1
3 Select “Antenna/Cable,” and press ENTER.
Settings - Tuner Preset
Antenna / Cable :
Auto Preset
Manual Set :
AFT :
Cable
Antenna
Cable
Add
On
“Cable”: Presets cable TV channels.
“Antenna”: Presets VHF and UHF channels.
Ch1
Settings - Tuner Preset
Antenna / Cable :
Auto Preset
Manual Set :
AFT :
Cable
Add
Add
On
Erase
Ch34
5 Select “Manual Set,” and press ENT E R.
“Add”: Presets the channel.
“Erase”: Disa bl es the channel.
6 Select “Add” to preset the channel, and press
ENTER.
7 Select “AFT” and press ENTER.
Settings - Tuner Preset
Antenna / Cable :
Auto Preset
Manual Set :
AFT :
Cable
Add
On
On
Off
“On”: Turns on the Auto Fine Tuning
function. Normally, select this.
“Off”: Allows you to adjust the picture
manually.
Ch34
8 Select “On” to turn on AFT, and press
ENTER.
To preset or disable another chan nel, repeat
from step 3.
• If the A ut o Fine Tuning function does not
work effectively, select “Off” in step 7 and
press ENTER. Wh en the fine tuning bar
appears, press </, to obtain a clearer
picture, and press ENTER.
Fine Tuning
Ch34
9 To preset or di sable another channel, repeat
steps 4 to 8.
Area Setup
Sets up your area and zip code number. You need
to set this correctly to use the TV Guide On Screen
system.
Settings and Adjustments
,continued
85
Page 86

Follow steps 1 to 3 of “U s ing the Setup
1
Displays” (page 83) to select “Settings” in the
Setup Display.
2 Select “Area Setup,” and press ENTER.
Settings - Area Setup
USA / Canada :
Zip Code
USA
-----
Note
If the clock data is received automatically, “Clock”
cannot be selected from “Settings” in the Setup Display.
Set Top Box Control
You can control yo ur cable box/satel lit e receiver
using the supplied set top box controller. See
“Step 7: Easy Setup” for details.
3 Select “USA/ C anada,” and press EN TER .
4 Select your count ry , a nd press ENTER.
5 Select “Zip Code,” and press ENTE R.
Area Setup - Zip code
Enter your zip code.
- - - - -
OK
Cancel
6 Enter your zip code number using the </M/
m/, buttons, and press ENTER.
7 Select “OK,” and pr ess ENTER.
Clock
Manual Clock Set
Sets the clock manua l ly .
1 Follow step s 1 t o 3 of “U sing the Setup
Displays” (page 83) to select “Settings” in the
Setup Display.
2 Select “Clock,” and press ENTER.
Settings - Clock - Present Time
Set the time and date manually.
2004//
112:Thu 00 AM1
3 Press M/m t o set the month, and press ,.
Set the day, year, hour, and minutes in
sequence. Press </, to select the item to be
set, then press M/m to set the numbe rs. The
day of the week is set automatically.
4 Press ENTER to st art the clock.
z Hint
To change the numbers in step 3, press < to return to the
item to be changed, and select the number s by pres sing
M/m.
Set Top Box Control
On Turns on the cable box/s atellite
Off
receiver control funct ion. See
“Using the cable box/s atellite
receiver control function”
(page 12).
Turns off the cable box/sate ll it e
receiver control funct ion. Select
this if you do not want to use the
supplied set top box controll er.
When “Set Top Box C ont rol” is set to “On,” you
can make the following settings. Note that when
you change “Set Top Bo x Control” to “On” or
“Off,” all of the timer recording settings will be
canceled.
◆Brand Code
See “Cable Box /S at ellite Receiver Brand Code”
(page 112) for the brand code for your cable box
or satellite receiver, and enter the code using the
number buttons and ENTER.
◆Connection
Selects the connection you used for your cable box
or satellite receiver. When the cable box or
satellite receiver is connected to the recorder’s
LINE IN jacks, select the connection from
“Line1,” “Line2,” or “Line3.” When the cable box
or satellite receiver is connected to the recorder’s
VHF/UHF IN ja ck, select the output channel,
“Ch2,” “Ch3,” or “Ch4.”
◆Ch. digit lock
Allows you to select whether to fix the digits for
your cable box or satellite receiver.
Off
Select this when your cable box or
satellite receiver only accepts a
three or more digit channel
number. Normally select this.
86
Page 87

Lock to
two digits
Select this only when your cabl e
box or satellite receiver only
accepts a two digit channel
number.
◆Mode for SET button
Select “Mode 1” or “Mode 2” if your cable box or
satellite receiver requires pressing an ENTER
button or a SET button etc., after entering the
channel number. If “Mode 1” does not work, try
“Mode 2.” If your cable box or satellite receiver
does not respon d to ei th er setting, contact th e
manufacturer of the cable box or satell ite recei ver.
Off
No code is sent when SET is
pressed. Normally select this.
Mode 1 Sends the channel number you
entered.
Mode 2 Sends the channel number you
entered.
Language
OSD (On-Screen Display)
Switches the display language on the scr een.
Video Settings (V ideo)
Video settings will adjust items related to the
image, such as s iz e and color.
Choose the set ti ngs according to th e type of TV,
tuner, or decoder connected to the DVD recorder.
1 Press SYSTEM MENU while the recorde r is
in stop mode.
2 Select “SETUP,” and press ENTER.
3 Select “Video ,” and press ENTER.
The Video Setup appears with the following
options. The default settings are underlined.
SETUP
Settings
Video
Audio
Features
Options
Easy Setup
TV Type :
Pause Mode :
Y/Pb/Pr Out Black Level
Y/Pb/Pr In Black Level
Progressive Mode :
Screen Saver :
Line1 Input :
Line3 Input :
:
:
4 : 3 Letter Box
Auto
Off
Off
Auto
On
Video
Video
Settings and Adjustments
DVD Menu (DVD VIDEO only)
Switches the language for the DVD menu.
Audio (DVD VIDEO only)
Switches the language of the sound track .
When you select “O r i gi nal,” the language gi ven
priority in the disc is selected.
Subtitle (DVD VIDEO only)
Switches the langua ge of the subtitl es reco rded on
the disc.
When you select “Audio Follow,” the subtitle
language chan ges according to the language you
selected for the sound track.
z Hint
If you select “Others” in “DVD Menu,” “Subtitle,” or
“Audio,” select and enter a languag e code from
“Language Code List” (page 111) using the number
buttons.
Note
If you select a language in “DVD Menu,” “Subtitle,” or
“Audio” that is not recorded on the DVD VIDEO, one of
the recorded languages will be automatically selected.
TV Type
Selects the aspect ratio of the connecte d TV ( 4:3
standard or wide) .
16:9 Select this when co nnecting to a
wide-screen TV or TV w it h a
wide mode function.
4:3 Letter
Box
Select this w h en connectin g to a
4:3 screen TV. Displays a w ide
picture with bands on the uppe r
and lower p o rtions of the s c reen.
4:3 Pan
Scan
Select this w h en connectin g to a
4:3 screen TV. Autom atically
displays a wide picture on the
entire screen and cuts off the
portions that do not fit.
,continued
87
Page 88

16:9
4:3 Letter Box
Y/Pb/Pr In Black Level
Selects the black level (setup level) for th e NTSC
video signals input from the COMPONENT
VIDEO IN jacks (page 13). This setting is
available when “Line1 Input” is set to
“Component” (page 89).
4:3 Pan Scan
Note
Depending on the disc, “4:3 Letter Box” may be selected
automatically instead of “4:3 Pan Scan” or vice versa.
Pause Mode (DVDs only)
Selects the picture quality in pause mode.
Auto The pict ure , including subjects
Frame The picture, inc luding subjects
that move dynamically, is output
with no jitter. Nor mally select this
position.
that do not move dynamically, is
output in high resolution.
Y/Pb/Pr Out Black Level
Selects the black level (setup level) for the video
signals output from the COMPONENT VIDEO
OUT jacks (page 17).
This setting is not effective when the
PROGRESSIVE indicator lights up on the front
panel and the recorder outputs progressive signals.
On Raises the standard black level.
Off
Select this when the picture
appears too dark.
Sets the black level of the output
signal to the standard level.
Normally, select this.
On Raises the standard black level.
Off
Select this when the pict ure
appears too bright.
Sets the black level of the inpu t
signals to the standard level.
Normally, select this.
Progressive Mode
DVD software can be divided into two types: f ilm
based softwar e and video based soft w are. Video
based softwar e is derived from TV , su ch as
dramas and sit-coms, and displays i m ages at 30
frames/60 fields per second. Film based software
is derived from film and displays images at 24
frames per second. Some DVD software contain s
both Video and Film.
In order for these images to appear natural on your
screen when output in PROGRESSIVE mode, the
progressive video signal ne eds to be converted to
match the type of DVD software that you are
watching.
You can fine-tune the progressive 480p vid eo
signals that are ou tput when you press
PROGRESSIVE (“PROGRESSIVE” lights up).
Note that you must connect to a progressive
format TV using the COMPONENT VIDEO OUT
jacks (page 17) .
Auto
Video Fi xes the convers io n mode to the
Automatically detects th e
software type (Film-based or
Video-based) and selects the
appropriate conversi on m ode.
Normally select this position.
mode for Video-based software .
88
Page 89

Screen Saver
The screen save r im age appears when yo u do not
use the recorder for more than 10 minutes while an
on-screen displ ay, such as the System Menu, is
displayed on your T V scr een. The screen sav er
image helps prev ent your display devi ce from
becoming damaged (ghosting).
Audio Settings (A udio)
The Audio Setup a llow s you to adjust the sound
according to the playback and connection
conditions.
On Turns on the screen saver
function.
Off Turns off the function.
Line1 Input
Selects a method of inputting video signals for the
LINE IN 1 jack on the rear panel of the recorder.
Video
Inputs video signals.
S Video Inputs S video signal s.
Component Inputs compone nt-video signals.
Line3 Input
Selects the metho d of inputting video signals for
the LINE IN 3 jack on the rear panel of the
recorder. The pictures will not be clear if this
setting does not match the type of video input
signal.
Video
Inputs video signals.
S Video Inputs S-video signals.
1 Press SYSTEM MENU while the recorde r is
in stop mode.
2 Select “SETUP,” and press ENTER.
3 Select “Audio,” and press ENT ER.
The Audio Setup appears with the fol lo w i ng
options. The default settings are underlined.
SETUP
Settings
Auto Stereo :
Video
Tuner Audio :
Audio
Audio ATT :
Features
Audio DRC :
Options
Downmix :
Digital Out :
Easy Setup
Dolby Digital :
DTS :
Auto Stereo
This function is effective only when “Tuner
Audio” is set to “M ain.”
On Receives ste reo programs.
Normally select this.
Off Select this to red u ce noise.
The sound changes to
monaural.
On
Main
Off
Standard
Dolby Surround
On
D-PCM
Off
Settings and Adjustments
Tuner Audio
Selects the sound t o be recorded.
Main
Records only the mai n
sound.
SAP Records only the SAP
(Second Audio Program)
sound.
Note
If no SAP sound is received, t h e main sound is recorded
regardless of the setting.
,continued
89
Page 90

Audio ATT (attenuation)
If the playback sound is distorted, set this item to
“On.” The record er redu ces the au dio outp ut level .
This function affec ts the output of the follo w in g
jacks:
–LINE OUT (AUDIO L/R) 1/2 jacks
On Select this when the
playback sound from the
speakers is distorted.
Off
Normally select this
position.
Audio DRC (Dynamic Range Con tr o l) (D VDs
only)
Makes the sound clear when the volume is turned
down when playing a DVD that conforms to
“Audio DRC.” This affects the output from the
following jacks:
–LINE OUT (AUDIO L/R) 1/2 jacks
–DIGITAL OUT (OPTICAL or COAXIAL) jack
only when “Dolby Digital” is set to “D-PCM.”
Standard
Normally select this
position.
TV Mode Makes low sounds clear
even if you turn the volume
down.
Wide
Range
Gives you the feeling of
being at a live perf ormance.
Downmix (DVDs only)
Switches the method for mixing down to two
channels when you play a DVD which has rear
sound elements (channels) or is recorded in Dolby
Digital format. For details on the rear signal
components, see “Checking the Play Information
and Playing Time” (page 41). This funct io n
affects the output of the following jacks:
–LINE OUT (AUDIO L/R) 1/2 jacks
–DIGITAL OUT (OPTICAL or COAXIAL) jack
when “Dolby Digital” is set to “D-PCM.”
Dolby
Surround
Normally select this
position.
Multi-channel audio signals
are output to two channe ls
for enjoying surround
sounds.
Normal Multi-channel audio signals
are downmixed to two
channels for use with your
stereo.
Digital Out
Selects if audio signals are output via the
DIGITAL OUT (OPTICAL or COAXIAL) jacks.
On
Normally select this
position. When you select
“On,” see “To set the digital
output signal” for further
settings.
Off The influence of the digital
circuit upon the anal og
circuit is minimal.
◆To set the digital output signal
The following setup items switch the method of
outputting audio si gnals when you connect a
component su ch as an amplifier (r eceiver) with a
digital input jack.
For connection details, see “Connecting the Audio
Cords” (page 19).
Select “Dolby Digital” and “DTS” after setting
“Digital Out” to “On.”
SETUP
Settings
Video
Audio
Features
Options
Easy Setup
Auto Stereo :
Tuner Audio :
Audio ATT :
Audio DRC :
Downmix :
Digital Out :
Dolby Digital :
DTS :
On
Main
Off
Standard
Dolby Surround
On
D-PCM
Off
90
Page 91

If you connect a com ponent that does not a ccept
the selected audio signal, a loud noise (or no
sound) will come out from the speakers, and may
affect your ears o r ca use speaker damage.
Recording and Parental Control Settings (Feature s)
• Dolby Digital (HDD/DVDs only)
Selects th e type of D olby Digital signal.
D-PCM Select this when the reco rder
is connected to a n audio
component lacking a built-in
Dolby Digital decoder. You
can select whether the
signals conform to Dolby
Surround (Pro Logic) or not
by making adjustments to
the “Downmix” item in
Audio Setup (page 90).
Dolby
Digital
Select this when the record er
is connected to a n audio
component with a buil t-i n
Dolby Digital decoder.
• DTS (DVD VIDEO o nly)
Selects whether o r not to output DTS signa ls .
On Select this when the recorder
is connected to a n audio
component with a buil t-i n
DTS decoder.
Off
Select this when the recorder
is connected to a n audio
component without a built-in
DTS decoder.
The Features S etup al lows yo u to adj ust reco rding
and parental control settings.
1 Press SYSTEM MENU while the recorde r is
in stop mode.
2 Select “SETUP,” and press ENTER.
3 Select “Features,” and press EN TER.
The Features Setup appears with the
following options. The default settings are
underlined.
SETUP
Settings
Auto Chapter :
Video
Parental Control
Audio
One Touch Dubbing
HQ Setting :
Features
Auto Title Erase :
Options
Rec Mode Adjust :
Easy Setup
Auto Chapter
Automatically divides a recording (a title) into
chapters by inserting chapter markings at a
specified interval. The markings are inserted while
the recordin g is being made.
6 Min
HQ
Off
Off
Settings and Adjustments
Off No chapter mar k is in s erted.
6Min
Inserts chapter marks at
approximately 6-minute
intervals.
15Min Inserts chapter marks at
approximately 15-mi nute
intervals.
Notes
• Depending upon the size of the recording being made,
the actual interval may vary from the interval selected
in “Auto Chapter.” The selected in terval should only be
used as an approximation to create chapters.
• This function is not available when dubbing DV/
Digital8 format tapes to HDD and DVD-RWs (VR
mode). Chapter marks are automaticall y entered where
the recordings start on the tape (page s 79, 80) .
,continued
91
Page 92

Parental Co ntrol (DVD VID EO only)
Playback of some DVD VIDEOs can be limited
according to a predetermined level, such as the age
of the users. Scenes m ay be blocked or rep la ce d
with different scenes.
1 After step 3 above, select “Parental Control,”
and press ENTER.
• I f you have not entered a password, the
display for registering a new password
appears.
Features - Parental Control
Enter a new password.
OK
Cancel
• W hen you have already registered a
password, the display for entering the
password appears.
Features - Parental Control
Enter your password.
OK
Cancel
2 Enter your four-digit passw or d us ing the
number buttons , t hen select “OK” and press
ENTER.
Features - Parental Control
Level :
Standard :
Password
Off
USA
3 Select “Standard,” and press , or ENTER.
The selection items for “Standard” are
displayed.
4 Select a geographic area as the playback
limitation level, and press ENTER.
The area is selected.
• When you select “Other s,” press t he number
buttons to select and enter an area code in
the table (see below). Then select “OK” and
press ENTER.
5 Select “L evel,” and press ENT E R .
The selection items for “Level” are displayed.
Features - Parental Control
Level :
Standard :
Password
Off
Off
Others
8
7
6
5
4
The lower the value, the str icter the limitatio n.
Discs rated higher than the selected level will
be restricted.
6 Select the level, and press ENTER.
The Parental Control setting is complete.
To cancel the Parental Control setting for the
disc, set “Lev el ” t o “Off” in step 6.
To change the password, select “Password” in
step 3, and press EN TER. When the display
for registering a password appears, enter a
new four-digit password using the number
buttons, then selec t “OK” and press ENTER.
Notes
• If you forget your password, you will have to reset it by
selecting “Parental Contr ol” under “Factory Setup” in
Options Setup (page 94).
• When you play discs which do not have the Parental
Control function, playback cannot be limited on this
recorder.
• Depending on the disc, you may be asked to change the
Parental Control level while playing the disc. In this
case, enter your password, then change the level.
92
Features - Parental Control
Level :
Standard :
Password
Off
Others
USA
Others
Page 93

◆Area code
Standard Code number
Argentina 2044
Australia 2047
Austria 2046
Belgium 2057
Brazil 2070
Canada 2079
Chile 2090
China 2092
Denmark 2115
Finland 2165
France 2174
Germany 2109
India 2248
Indonesia 2238
Italy 2254
Japan 2276
Korea 2304
Malaysia 2363
Mexico 2362
Netherlands 2376
New Zealand 2390
Norway 2379
Pakistan 2427
Philippines 2424
Portugal 2436
Russia 2489
Singapore 2501
Spain 2149
Sweden 2499
Switzerland 2086
Thailand 2528
United Kingdom 2184
One Touch Dubbing
Displays the following opti ons fo r t he One Touch
Dub function.
◆Finalize Disc (for all recordable discs except
DVD-RW in VR mode)
Selects whether or not to finalize the disc
automatically following One Touch Dubbing
(page 79).
Auto Automatical ly f inalizes the
Manual
disc following One To uch
Dubbing.
Allows you to finalize the
disc manually.
HQ Setting (HDD only)
Selects the H Q mode used fo r recording on the
HDD (page 45).
HQ+ Records in higher quality
HQ Records in the standard HQ
(approximate 15 Mbps).
mode.
Auto Title Erase (HDD only)
On Automatically erases old
Off Turns off the function.
titles recorded on the HDD
(page 47).
Rec Mode Adjust
On Automatical ly adjusts the
Off Turns off the function.
recording mode to enable the
entire program to be
recorded (page 47).
Settings and Adjustments
93
Page 94

Disc and Remot e Control Settings/Factory Settings (Options)
Auto Display
On Automatically displays
information on the screen
when the recorder is turned
on, etc.
The Options Setup allows you to set up other
operational settings.
1 Press SYSTEM MENU whil e the rec order is
in stop mode.
2 Select “SETUP,” and press ENTER.
3 Select “Optio ns,” and press ENT ER.
The Options Setup appears with the following
options. The defaul t settings are underlined.
SETUP
Settings
Format DVD :
Video
Dimmer :
Audio
Auto Display :
Features
Command Mode :
Options
Factory Setup
Easy Setup
Format DVD (DVD-RW only)
The recorder automatically starts formatting in
VR mode or Video mode, whichever is selected
below, when a new, unformatted DVD-RW is
inserted.
VR Automati ca lly formats the
Video Automatically formats the
disc in VR mode.
disc in Video mode.
Dimmer
Adjusts the lighting of the front panel display.
Normal
Power
Save
Bright lighting.
Low lighting. Turns off the
lighting when the power is
off.
VR
Normal
On
DVD3
Off Displays information only
when DISPLAY is pressed.
Command Mode
Changes the Co m mand Mode of the r ecorder if
other DVD equipment is assigned the same
Command Mode. Be sure to match the Command
Mode switch on the remote to the setting made
here. For details, see “If you have a Sony DVD
player or more than one Sony DVD recorder” on
page 23.
DVD1 Select this if the default
DVD2 Select this if the default
DVD3
Command Mode conflicts
with other DVD equipment.
Command Mode conflicts
with other DVD equipment.
The default Command Mode
of the recorder.
Factory Setup
Allows you to select the setup settings by group,
and return them to their default setti ngs. Note that
all of your previous settings will be lost .
1 After st ep 3 above, selec t “F actory Setup,”
and press , or ENTER.
The display for selecting a group of settings
appears.
2 Select the group of settings you want to return
to default fr om “Sett ings, ” “Video ,” “Audi o,”
“Features,” “Options,” “Parental Control,”
and “All,” and press , or ENTER.
3 Select “Start,” and press ENTER.
The selected settings return to their default
settings.
4 Press ENTER when “Finish” appears.
94
Page 95
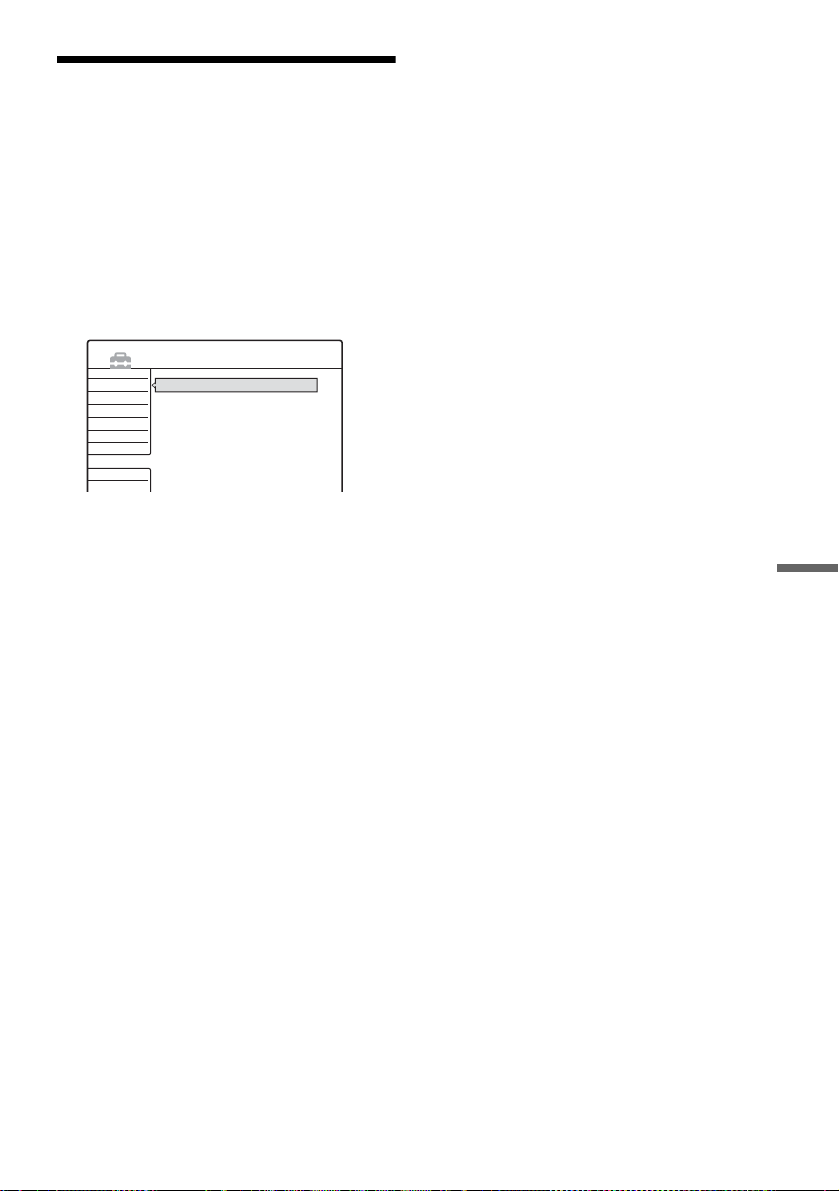
Easy Setup (Resetting the Recorder)
Select this to run the Easy Setup program.
1 Press SYSTEM MENU whi le the r ecorder is
in stop mode.
2 Select “SETUP, ” and press ENTER.
3 Select “Easy Set up,” and press ENTER .
SETUP
Settings
Easy Setup
Video
Audio
Features
Options
Easy Setup
4 Press ENTER.
5 Select “Start,” and press ENTER .
6 Follow the instructions for Easy Setup
(page 24) fr om step 5.
Settings and Adjustments
95
Page 96

Additional Information
Troubleshooting
If you experience any of the following difficulties
while using the recorder, use this troubleshooting
guide to help remedy th e problem before
requesting repairs. Should any p ro b l em persist,
consult your neares t Sony dealer.
Power
The power does not turn on.
, Check that the AC power cord is connected
securely.
TV program reception does not fill the screen.
, Set the channel manually in “Tuner Preset” in
Settings Setup (page 84).
, Select the correct source using the INPUT
SELECT button, or select a channel of any TV
program using the CH + /– butt ons.
TV program pictures are distorted.
, Reorient the TV antenna.
, Adjust the picture (see the TV’s instruction
manual).
, Place the recorder and TV fa r ther apart.
, Place the TV and any bunched antenna cables
farther apart.
, The RF cable is connected to the VHF/UHF
OUT jack on the recorder. Connect the cable to
the VHF/UHF IN jack.
Picture
There is no picture.
, Re-connect all co nn ecting cords secur ely.
, The connecting cor ds ar e damaged.
, Check the connection t o y our TV (page 12).
, Switch the input selector on your TV (such as to
“VCR”) so that the signal from the recorder
appears on the TV screen.
Picture noise appears.
, If the picture output signal from your recorder
passes through your VCR to get to your TV, or if
you are connected to a combination TV/VIDEO
player, the copy-protection signal applied t o
some DVD programs could affect picture
quality. If you stil l experie nce this problem even
when you connect your recorder directly to your
TV, try connecting you r recorder to your TV’s
S VIDEO input.
, You have set the recorder to progressive format
(the PROGRESSIVE indicator lights up) even
though your TV cannot acce pt t he progressive
signal. In this case, press PROGRESSIVE until
the progressive indicator turn s off.
, Even if your TV is compatible with progressive
format (480p) signals, the image may be affected
when you set the recorder to progressive format.
In this case, press PROGRESSIVE so that the
PROGRESSIVE indicator turns off and the
recorder is set to normal (interlace) format.
, Noise may sometimes appear in pictur es
recorded on the HDD, which is due to the
characteristics of HDD, and i s not a malfun ction.
The channel on the cable box/sate llite receiver
has been changed.
, The set top box controller is connected and “Set
Top Box Control” is s et to “On .” C heck the “Se t
Top Box Control” settings in Settings Setup
(page 86).
TV channels cannot be changed.
, The chann el is disabled (page 85 ).
, A timer recording started, which changed the
channels.
The picture from equip m en t co nn ec te d to t he
recorder’s input jack does not appear on the
screen.
, If the equipment is connected to the LINE IN 1
jack, select “L1” in the front panel display by
pressing CH +/– or INP U T S ELECT.
If the equipment is connecte d to the LINE 2 IN
jacks, select “L2” in the front panel disp lay by
pressing CH +/– or INP U T S ELECT.
If the equipment is connecte d to the LINE IN3
jack, select “L3” in the front panel display by
pressing CH +/– or INP U T S ELECT.
If the equipment is connected to the DV IN jack,
(this is usually for a digital video camera
connection), select “DV ” i n the front pane l
display by pressing CH +/– or INPUT SE LE CT .
, When the equipment is connected to the
COMPONENT VIDEO IN jacks using a
component video cord, set “Line1 Input” in
Video Setup to “Compone nt” (page 89).
96
Page 97

, When an S video cable is connected to the
recorder’s LINE IN 1 or LINE IN 3 jack, set
“Line1 Input” or “Line3 Input” in Video Setup to
“S Video” (page 89).
The playback picture or TV program from the
equipment connected throug h the recorder is
distorted.
, If the playback picture output from a DVD
player, VCR, or tuner goes through your recorder
before reaching your T V , th e c opy-protection
signal applied to some programs could affect
picture quality. Disconnect the playback
equipment in question and conne c t it dir ectl y to
your TV.
The picture does not fill the screen.
, Set “TV Type” in V ideo Setup in accordance
with the aspect ratio of your TV (page 87).
, The “Time Lock” function on your cable box is
activated. Set this function to off.
The channel number in th e pr og ram listing
does not match t he broadcast stati on.
, There may be more than on e channel lineup for
your area. To change the channel lineup, select
“Change channel li neup” from “SETUP” in the
Main Menu Bar of TV Guide On Sc ree n
(page 36).
Program listings for some channels is
missing.
, It may take several days for the recorded to
receive all of th e TV Guide On Screen data.
, Channels, such as satellite channels, are not
displayed by the TV Guide O n Sc ree n system.
, All of the TV Guide On Screen data could not be
received because the reception is poor.
The picture does not fill the scree n, even
though the aspect ratio is set in “TV Type” in
Video Setup.
, The aspect ratio of the title is fixed.
TV Guide On Screen
TV Guide On Screen does not appear.
, 1Even if you complete Easy Setup, TV program
listings do n ot appear until the recorder receives
the TV Guide On Screen data. 2Turn off the
recorder, but do not unplug it. 3Wait for 24
hours. It may take several days for the recorder to
receive the TV Guide On Screen data for all
channels.
, The area and/or zip code is inc o rrect. Correctly
set your area of residence and zip cod e in “A rea
Setup” of the Settings Setup (page 85).
, When the recorder is connected to a cable box,
the cable box must be turned on and “Set Top
Box Control” in Settings Setup must be set to
“On” (page 86) to download the TV Guide On
Screen data.
, The cable box/satellite receiver brand code is
incorrect (page 112).
, The TV Guide On Screen data may not be
available in some areas.
, TV Guide On Scre en does not appear if y ou
connect your TV using the video or S-video jacks
and press the PROGRESSIVE button on the
remote, even if your TV acce pt s progressive
signals.
The program listing is not up to date.
, The recorder was in use during the time that the
TV Guide On Screen data was scheduled to be
downloaded.
, All of the TV Guide On Screen data could not be
received because the reception is poor.
Sound
There is no sound.
, Re-connect all co nnections securely.
, The connecting cord is damaged.
, The input source setting on the amplifier or the
connection to the amplifier is incorrect.
, The recorder is in reverse pl ay, fast-forward,
slow motion, or pause mode.
, If the audio signal does no t co me through the
DIGITAL OUT (OPTICAL or COAXIAL)
jacks, check the Au dio Setup settings (page 89).
Sound distortion occurs.
, Set “Audio ATT” in Audio Setup to “On”
(page 90).
Sound is noisy.
, When playing a CD with D TS soun d tra c ks,
noise will come from the LINE OUT (AUDIO
L/R) 1/2 jacks (page 58).
The sound volume is low .
, The sound volume is low on some DVDs.
Additional Infor ma tion
,continued
97
Page 98

The sound volume may improve if you set
“Audio DRC” in Audio Setup to “TV Mode”
(page 90).
, Set “Audio ATT” in Audio S etup to “Off”
(page 90).
An alternate audio track cannot be recorded or
played.
, Second Audio Program (SAP) is not available
for all programs. The program you are recording
does not have a second audio program.
, You have set “Tuner Audio” in Audio Settings to
“Main” (page 89). Select “SAP” to r ecord
alternate audio programs.
, When recording from connected equipment, set
“Line Audio Input” in TOOLS menu t o “Ma in /
Sub” (page 53).
, If you have connected an AV amplifier to the
DIGITAL OUT (OPTICAL or COAXIAL) jack
and want to change the audio track for a DVDRW (VR mode) during playback, set “Dolby
Digital” in Audio Setup to “D-PCM ” (page 90).
Playback
The recorder does not play any type of disc
(except HDD).
, The disc is upside down. Insert the disc with the
labeled side facing up.
, The disc is not corr ectly inserted.
, Moisture has condensed inside the rec order.
Remove the disc and leave the recorder turned on
for about ha lf an hour until the moistur e
evaporates.
, If the disc was recorded on another recorder, the
recorder cannot play the disc if it was not
finalized (page 40).
The disc does not start playback from the
beginning.
, Resume play was activated (page 54).
, You have inserted a DVD whose Title menu or
DVD menu automatically appears on the TV
screen when it is first inserted. Use the menu to
start playback .
The recorder starts playing the disc
automatically.
, The DVD VIDEO features an auto playback
function.
Playback stops automatically.
, If the DVD has an auto pause signal, the r ecorder
stops playback at the auto pause s ignal.
Some functions such as Stop, Search, or Slowmotion Play cann ot be performed.
, Depending on the DVD, you may not be able to
do some of the op erations above. See the
instruction manual supplied wit h the disc.
The language for the sound track cannot be
changed.
, Multilingual tracks are not recorded on the DVD
being played.
, The DVD VIDEO prohibits the changing of the
language for the sound track.
, Try changing the language using the DVD
VIDEO’s menu.
The subtitle language cannot be changed or
turned off.
, Multilingual subti tles a re not recorded on the
DVD VIDEO.
, The DVD VIDEO prohibits changing of the
subtitles.
, Try changing the subtitle using the DVD
VIDEO’s menu.
, The subtitles cannot be changed for the titles
recorded on this recorder .
The angles cannot be changed.
, Multi-angles are not recorded on the DVD
VIDEO being played.
, You are trying to change the angles when “ ”
does not appear on the TV screen (page 56).
, The DVD VIDEO prohibits changing angles.
, Try changing the angle using the DVD VIDEO’s
menu.
, The angles cannot be changed for the titles
recorded on this recorder .
The MP3 audio track does not play.
, The MP3 audio track is not recorded in a format
that the recorde r can play (page 62).
Recording/Timer recording/Editing
The channel cannot be changed from the
channel you are recording.
, Set the TV’s input source to “TV.”
98
Page 99

Recording does not start immediately after you
press z REC.
, Operate the reco rd er only after “LOAD”,
“FORMAT,” or “INFO WRITE” disappears
from the front panel display.
Nothing was recorde d even thou gh y ou se t the
timer setting correctly.
, There was a power failure duri ng re cording.
, The recorder’s internal clock stopped due to a
power failure that lasted for more than one hour.
Reset the clock (page 86).
, The channel was hi dden after th e timer rec ording
was set. (See “To customize the channel line-up”
on page 36.)
, Disconnect the AC pow er cord from the AC
outlet, and connec t it again.
, The program contai ns copy protection signal s
that restrict copying.
, The timer setting overlapped another setting that
was set later.
, There is no DVD inside the recorder.
, There is not enough HDD or DVD disc spac e for
the recording.
, The set top box was turned off.
, The set top box controller was incorrectly
connected (page 13).
, The settings in “Set Top Box Control” in Settings
Setup have been chang ed (p age 86).
, A separate recording was in the process of being
made without the use of the timer (p ag e50).
, The recorder was in the process of dubbing
(HDDyDVD).
, The recorder was in the process of DV/Dig ital8
Dubbing.
Recording does not stop immediately after you
press x REC STOP.
, It will take a few seconds for the recorder to input
disc data before recording can stop.
Recording does not stop after you press x
STOP.
, Open the remote’s cover and press x REC
STOP.
Timer recording is not compl ete or did not start
from the beginning.
, There was a power failure duri ng re cording.
Should the power failu re cont inue for more th an
one hour, reset the clock (page 86).
, There is not enough HDD or DVD disc space for
the recording.
Contents previously recorded were erased.
, Data that has been recorded on a DVD with a PC
will be erased from the disc when the disc is
inserted.
, “Auto Title Erase” in Features Setup is set to
“On” (page93).
Display
The clock has stopped.
, Set the clock again (page 86).
, The clock stopped due to a pow e r f ai lu re that
lasted for more than one hour. Rese t the clock
(page 86).
The clock is wrong.
, Set the clock again (page 86). If you cannot
select “Clock” from “Settings” in the Setup
Display, wait until the clock data is received and
the clock is automatical ly adjusted.
The TIMER REC indicator is flashing.
, The disc does not have enough space.
, Insert a recordable disc in side the recorder.
The recording mode ind i ca tio n is inco r re ct.
, When the recording or dubbing is less than three
minutes, the recording mode indication may be
displayed incorrectly. The actual recording itself
is correctly made i n the sele cted recordi ng mode .
The clock does not appear in the front panel
display.
, “Dimmer” in Options Setup is set to “Power
Save” (page 94).
Remote control
The remote does not function.
, Batteries a re w eak.
, The remote is too far from the recorder.
, The remote’s manufac t urer code returned to the
default setting when you repl ac e d the bat teries.
Reset the code (page21).
, Turn on the recorder.
, The remote is not pointed at the remote sensor on
the recorder.
, Different command modes ar e s et f or th e
recorder and remote. Set the same command
mode (page 23).
,continued
Additional Infor ma tion
99
Page 100

, Set the TV/DVD switch to DVD (page 22 ).
Other Sony equi pment re spond s to the re mote.
, The same command mode is set for both the
equipment and recorde r . Set a di ffe rent
command mode for the recorder (page 23).
Others
The recorder doe s not operate prope rly.
, Restart the recor der. Press down "/1 on the
recorder for more than ten secon ds unt il
“WELCOME” appears in the front panel display.
, When static electricity, etc., causes the recorder
to operate abnormally, turn off the re corder and
wait until th e clock appears i n t he front panel
display. Then, unplug the recorder and after
leaving it of f f or a while, plu g it in again.
Dubbing or DV/Digital8 Dubbing does not start .
, A timer recording is in progress.
Five numbers or letters are displayed on the
front panel display.
, The self-diagnosis function was activated (see
the table on page 101).
The disc tray does not op en after you press Z
OPEN/CLOSE.
, It may take a few seconds for the disc tray to
open after you have recorded or edited a DVD.
This is because the recorder is addi ng disc data to
the disc.
The disc tray does not open and “TRAY
LOCKED” appear s on the front panel display.
, Contact your Sony dealer or local authorized
Sony servic e f acility.
“RECOVERY” appears in the front panel
display.
, The recorder’s recovery fun ct ion w as ac tivated
when the recorder was turned on because the
power was turned off or failed during recording.
Leave the recorde r on un til “RECOVERY”
disappears from the front panel display.
“HDD ERROR” appears in the front panel
display.
, The hard disk error occurred. Press down @/1 on
the recorder for ten second s to restart the
recorder. If this does not resolve the problem,
format the recorder’s HDD by pressing down the
HDD button on the recorder for more than ten
seconds until “WELCOME” appears in the front
panel display. Note that a ll the contents r ecorded
on the HDD will be erased.
“FAN ERROR” appears in the front panel
display.
, Check that the vent on the r ear of the r e corder is
not blocked. Then, turn off the recorder, wait
until the clock appears in the front panel display,
and disconnect the AC power cord. Leave the
recorder off for a while, then re-connect the
power cord, and press "/1 on the recorder.
Mechanical so un d is hea r d when the recorder
is off.
, While th e recorder is adjusting the clock or
downloading the TV Guide On Screen data,
operational noises (such as the internal fan) may
be heard, even wh en t he p ow er i s o ff . Thi s i s n ot
a malfunction.
The disc tray does not open and you cannot
remove the disc after you press Z OPEN/
CLOSE.
, Turn off the recor der, Once the clock appears in
the front panel display, disconnect the AC power
cord. Connect i t again whil e pressing down A on
the recorder, and releas e the butt on when the di sc
tray opens. Then, keep [/
pressed for about ten seconds until
“WELCOME” appears in the f ront pa nel dis play.
1 on the recorder
“LOCKED” app ears in the front panel display.
, The disc tray is locked. Cancel the Child Lock
(page 55).
100
 Loading...