

4-242-051-11(1)
Compact Disc
Recorder
Operating Instructions
Owner’s Record
The model and serial numbers are located on the rear panel. Record the serial number
in the space provided below. Refer to them whenever you call upon your Sony dealer
regarding this product.
Model No. Serial No.
RCD-W50C/W10
©2002 Sony Corporation
WARNING
To prevent fire or shock hazard, do not
expose the unit to rain or moisture.
To prevent fire, do not cover the ventilation of the
apparatus with newspapers, table-cloths, curtains, etc.
And don't place lighted candles on the apparatus.
To prevent fire or shock hazard, do not place objects
filled with liquids, such as vases, on the apparatus.
Don't throw away the battery with
general house waste, dispose of it
correctly as chemical waste.
This appliance is classified as a CLASS 1 LASER
product.
This label is located on the rear exterior.
The following caution label is located inside the
apparatus.
CAUTION
You are cautioned that any changes or modifications
not expressly approved in this manual could void
your authority to operate this equipment.
WARNING
This equipment has been tested and found to comply
with the limits for a Class B digital device, pursuant
to Part 15 of the FCC Rules. These limits are
designed to provide reasonable protection against
harmful interference in a residential installation. This
equipment generates, uses, and can radiate radio
frequency energy and, if not installed and used in
accordance with the instructions, may cause harmful
interference to radio communications. However, there
is no guarantee that interference will not occur in a
particular installation. If this equipment does cause
harmful interference to radio or television reception,
which can be determined by turning the equipment
off and on, the user is encouraged to try to correct the
interference by one or more of the following
measures:
– Reorient or relocate the receiving antenna.
– Increase the separation between the equipment and
receiver.
– Connect the equipment into an outlet on a circuit
different from that to which the receiver is
connected.
– Consult the dealer or an experienced radio/TV
technician for help.
As the laser beam used in this unit is harmful to eyes,
do not attempt to disassemble the cabinet. Refer
servicing to qualified personnel only.
The following caution label is located inside the
apparatus.
For the customers in the U.S.A.
This symbol is intended to alert the user
to the presence of uninsulated
“dangerous voltage” within the
product’s enclosure that may be of
sufficient magnitude to constitute a risk
of electric shock to persons.
This symbol is intended to alert the user
to the presence of important operating
and maintenance (servicing) instructions
in the literature accompanying the
2
appliance.
FOR THE CUSTOMERS IN CANADA
This Class B digital apparatus complies with
Canadian ICES-003.
CAUTION
TO PREVENT ELECTRIC SHOCK, DO NOT USE
THIS POLARIZED AC PLUG WITH AN
EXTENSION CORD, RECEPTACLE OR OTHER
OUTLET UNLESS THE BLADES CAN BE FULLY
INSERTED TO PREVENT BLADE EXPOSURE.

Contents
Getting Started
Unpacking ............................................. 6
Hooking Up the System ........................ 6
This Unit Can Use the Following Discs 7
Basic Operations
Playing a CD ......................................... 8
Using the Display .................................. 9
Locating a Specific Track.................... 11
Locating a Particular Point in a Track....
Playing Tracks/Discs Repeatedly
(Repeat Play) ................................. 13
Playing in Random Order
(Shuffle Play) ................................ 14
Creating Your Own Program
(Program Play) ..............................15
12
Recording/Editing
Notes on Recording ............................. 16
Useful Tips for Recording ................... 16
Synchro-Recording a CD to CD-R or
CD-RW ......................................... 18
Recording on a CD-R or CD-RW
Manually ....................................... 20
Adjusting the Recording Level............ 21
Marking Track Numbers While
Recording ...................................... 22
Recording the Original Sound of the
Program Source
(Direct Recording Function) ......... 23
Fading In and Out (Fader) ................... 23
Finalizing a CD-R or CD-RW ............. 24
Unfinalizing a CD-RW........................ 25
Erasing Tracks of a CD-RW ............... 25
Labeling Tracks/Discs ......................... 26
Additional Information
Using the Setup Menu ......................... 28
Messages ............................................. 29
Self-diagnosis Function ....................... 30
System Limitations.............................. 30
Troubleshooting................................... 31
Specifications ........................Back cover
3
Welcome
Thank you for purchasing this Sony Compact
Disc Unit. Before operating the unit, please
read this manual thoroughly and retain it for
future reference.
About This Manual
The instructions in this manual are for 2
models: RCD-W50C and RCD-W10.
RCD-W50C is the model used for illustration
purposes.
Conventions
• Instructions in this manual describe the controls on
the unit. You can also use the controls on the
remote if they have the same or similar names as
those on the unit.
• The following icons are used in this manual:
Indicates that you can do the task using
Z
the remote.
Precautions
On safety
• Should any solid object or liquid fall into the
cabinet, unplug the unit and have it checked by
qualified personnel before operating it any further.
• The use of optical instruments with this product will
increase eye hazard.
On power sources
• Before operating the unit, check that the operating
voltage of the deck is identical with your local
power supply. The operating voltage is indicated
on the nameplate at the rear of the unit.
• The unit is not disconnected from the AC power
source (mains) as long as it is connected to the wall
outlet, even if the unit itself has been turned off.
• If you are not going to use the unit for a long time,
be sure to disconnect the unit from the wall outlet.
To disconnect the AC power cord, grasp the plug
itself; never pull the cord.
• AC power cord must be changed only at the
qualified service shop.
On condensation in the unit
If the unit is brought directly from a cold to a warm
location, or is placed in a very damp room, moisture
may condense on the lenses inside the unit. Should
this occur, the unit may not operate properly. In this
case, remove the CD, CD-R, or CD-RW and leave the
unit turned on for about an hour until the moisture
evaporates.
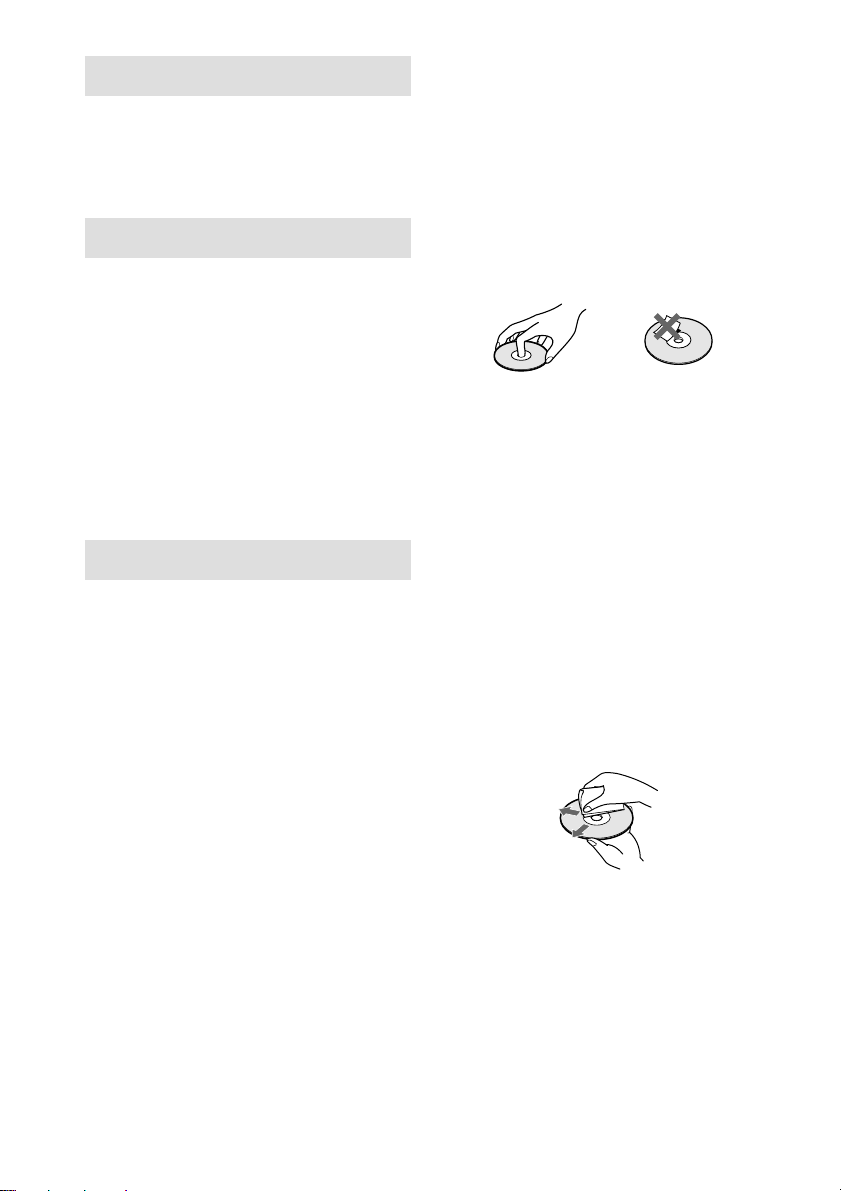
On handling discs
• To keep the disc clean, handle it by its edge. Do
not touch the surface.
• Do not stick adhesive papers or tapes onto the disc.
• Only regular circular discs can be used in this unit.
Irregularly shaped discs, such as star or heartshaped discs may damage the unit.
• If there is glue or a similar substance on the disc,
remove it completely before using the disc.
On storage
• Do not expose the disc to direct sunlight or heat
sources such as hot air ducts, nor leave it in a car
parked in direct sunlight as there can be a
considerable rise in temperature inside the car.
• Store discs in their cases. Do not store discs either
stacked horizontally or standing vertically without
their cases.
On cleaning
• Fingerprints or dust on the disc may cause poor
sound reproduction or sound dropout.
• Before playing a disc, clean it with a cleaning cloth.
Wipe the disc from the center out.
• If the disc is still dirty after being wiped with a
cleaning cloth, wipe it again with a slightly
moistened cloth. Then wipe off the residual
moisture with a dry cloth.
• Do not use solvents such as benzene, thinner,
commercially available cleaners, or antistatic spray
intended for vinyl LPs.
4

Note on High-Speed
Synchro-Recording
Certain CD conditions may cause sound
dropout or noise in the recording results, or
even create unwanted tracks on the CD-R or
CD-RW. If this happens, clean the CD as
instructed in “On cleaning” above, and
record material to the CD-R or CD-RW
using normal speed Synchro-Recording only.
Note on CD-R or CD-RW
playback
When you playback a CD-R or CD-RW
recorded by a CD-R or CD-RW recorder,
you may not be able to playback depending
on the recording conditions (e.g., dirty disc,
etc.). Also, you should note that you need to
finalize a CD-R or CD-RW before playing
back on another system other than the one
used to make the recording. (Finalizing is a
process to complete the recording.)
After finalizing a CD-R, you can play it in
any conventional CD player. However,
depending on the state of the recording, there
may be sound skips during playback.
After finalizing a CD-RW, you can play it in
a CD-RW compatible player only.
5
Getting Started
Unpacking
Check that the following items are included:
• Audio connecting cords
Phono jack × 2 (red/white) y Phono jack ×
2 (red/white) (2)
• Remote commander (remote) (1)
• Size AA (R6) batteries (2)
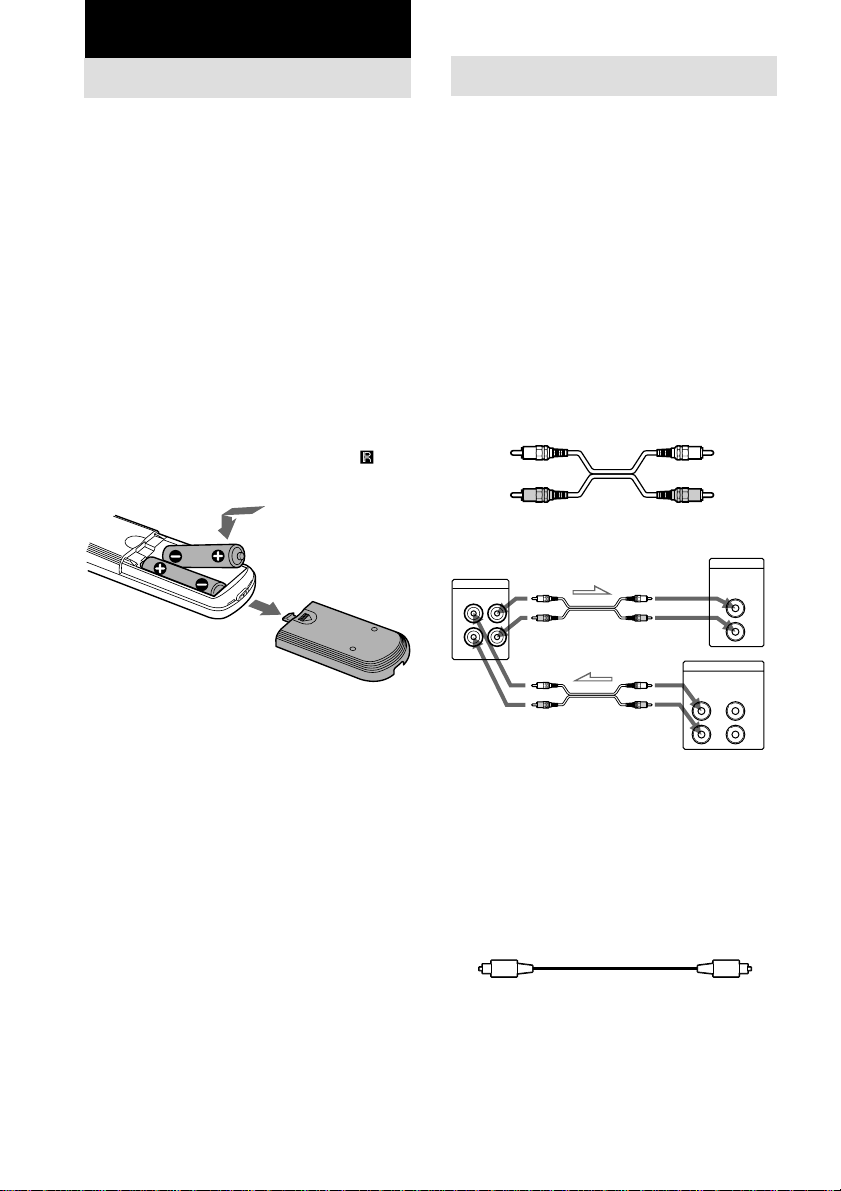
Inserting batteries into the
remote
You can control the unit using the supplied
remote.
Insert two size AA (R6) batteries by matching
the 3 and # ends on the batteries to the
markings inside the compartment. When using
the remote, point it at the remote sensor
the unit.
Tip
With normal use, the batteries should last for about
six months. When the remote no longer operates the
unit, replace both batteries with new ones.
Notes
• Do not leave the remote near an extremely hot or
humid place.
• Do not drop any foreign object into the remote
casing, particularly when replacing the batteries.
• Do not expose the remote sensor to direct light from
the sun or lighting apparatus. Doing so may cause a
malfunction.
• If you don’t use the remote for an extended period
of time, remove the batteries to avoid possible
damage from battery leakage and corrosion.
on
Hooking Up the System
This section describes how to hook up the unit
to an amplifier. Be sure to turn off the power of
each component before making the
connections.
Connecting the unit to an
amplifier
Connect the amplifier to the ANALOG IN/
OUT jacks using the audio connecting cords
(supplied), making sure to match the colorcoded cords to the appropriate jacks on the
components: red (R) to red and white (L) to
white. Be sure to make connections firmly to
prevent hum and noise.
Audio connecting cords (supplied) (2)
White (L) White (L)
Red (R) Red (R)
RCD-W50C/W10
ANALOG
IN
OUT
L
R
ll
l: Signal flow
ll
Connecting the unit to a
digital component
Connect a component such as digital amplifier,
CD player, DAT deck, or MD deck through the
DIGITAL OPTICAL IN/OUT connectors with
the optical digital cord (not supplied). Plug in
the cord.
Optical digital cord (not supplied)
Amplifier
CD
IN
L
R
TAPE/MD
INOUT
L
R
6
Setting the voltage selector
(voltage selector equipped
models only)
Check that the voltage selector on the rear
panel of the unit is set to the local power line
voltage. If not, set the selector to the correct
position using a screwdriver before connecting
the AC power cord to a wall outlet.
VOLTAGE SELECTOR
110-120V 220-240V
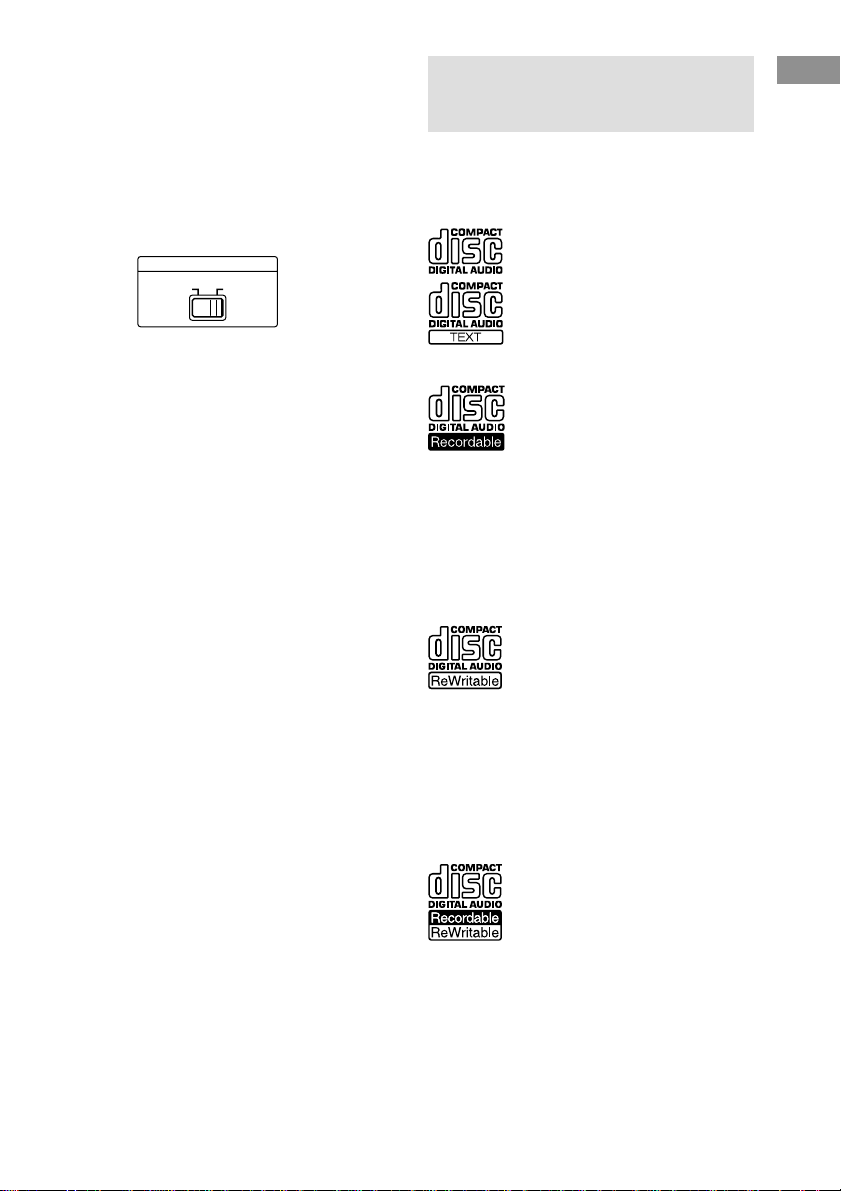
This Unit Can Use the
Following Discs
The unit can use three types of discs as
follows:
Audio CD
Discs with these logos can be played by
both DECK A (the CD player section)
and DECK B (the CD-R or CD-RW
recording section) of the unit.
Getting Started
Connecting the AC power
cord
Connect the AC power cord to a wall outlet.
Audio CD-R
Discs with this logo are recordable
only one time. When you finalize the
disc (page 24), you can play it in either
DECK A (the CD player section) or
DECK B (the CD-R or CD-RW
recording section), or any conventional CD player
(you may not be able to play it in some CD players),
including home, car, and portable models. (An
unfinalized disc can be played only in DECK B.)
When you buy a CD-R, please note that you must buy
an audio CD-R. A CD-R designed for computer use
will not work in this unit.
Audio CD-RW
Discs with this logo are recordable,
and also re-writable. When you
finalize the disc (page 24), you can
play it in either DECK A (the CD
player section) or DECK B (the CD-R
or CD-RW recording section), and CD-RW
compatible players. They will not play back in most
current CD players unless the player is CD-RW
compatible. (An unfinalized disc can be played only
in DECK B.)
When you buy a CD-RW, please note that you must
buy an audio CD-RW. A CD-RW designed for
computer use will not work in this unit.
This logo means that a unit is
compatible with Audio CD-R and
Audio CD-RW (both Audio CD-R and
Audio CD-RW can be used).
7
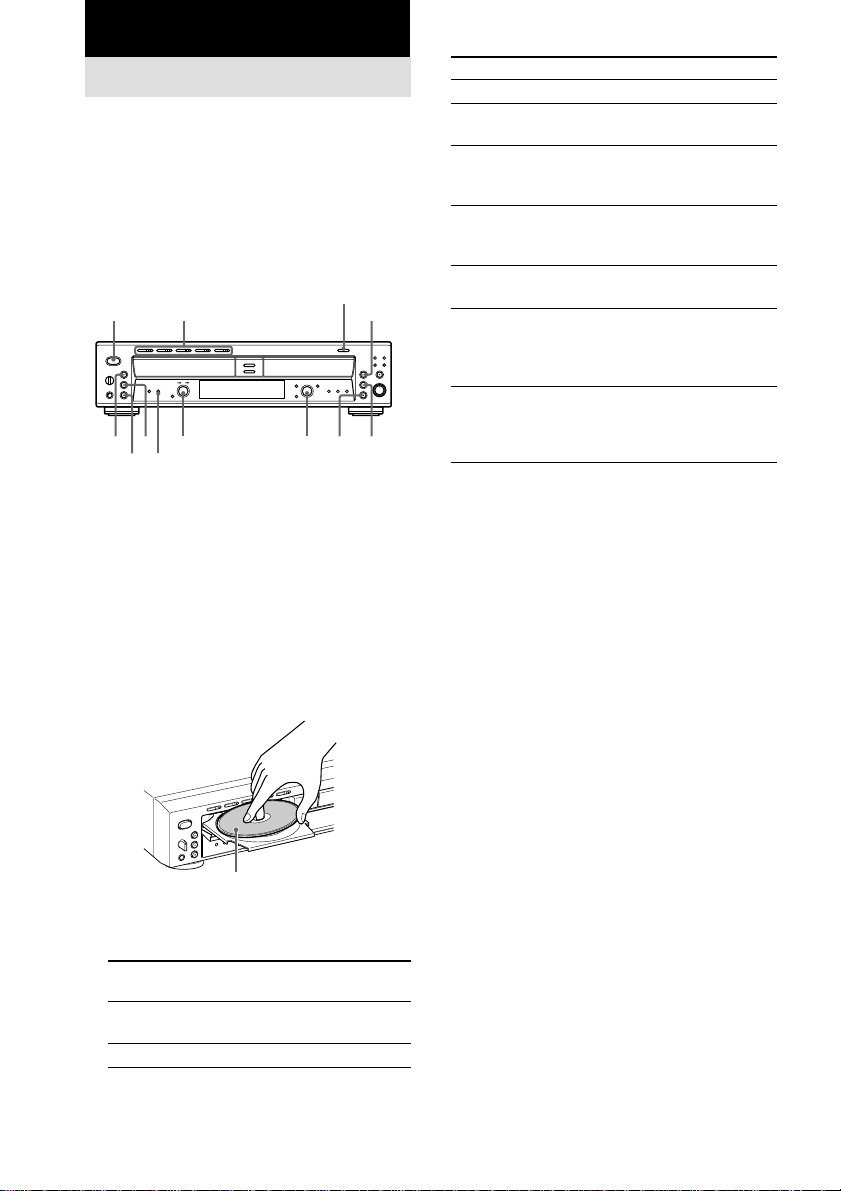
Basic Operations
Playing a CD
This unit has two decks.
In this manual, the CD player section is just
called DECK A, and the CD-R and CD-RW
recording section is called DECK B.
When using the remote, set SELECT to CD for
operations on DECK A (the CD player
section), or to CDR for operations on DECK B
(the CD-R or CD-RW recording section).
DISC 1-5 A
POWER
(OPEN/CLOSE for RCD-W10)
X
x
PLAY MODE
AMS
H
1 Turn on the amplifier and adjust the
volume to the minimum.
2 Set the function of the connected
amplifier with its input selector.
3 Press POWER.
4 Press OPEN/CLOSE (or one of the DISC
1-5 A buttons for DECK A of RCDW50C) and place a disc on the inner
circle of DECK A (or B). Press OPEN/
CLOSE (or A) again to close the disc
tray.
With the label side up
5 For DECK A of RCD-W50C, press PLAY
MODE repeatedly to select the
Continuous play mode.
When you
select
ALL DISCS
1 DISC
The unit plays
All discs in the unit consecutively
in the order of the disc number.
Only one disc you have selected.
6 Press H.
The unit starts playing. Adjust the volume on
8
the amplifier.
OPEN/CLOSE
AMS
To
Stop playback
Pause playing
Select the disc
(for DECK A of
RCD-W50C)
Go to the next disc
(for DECK A of
RCD-W50C) Z
Go to the next
H
x
X
track
Go to the beginning
of the current track
or the preceding
track
Remove the disc
* When the disc is in the unit, the indicator lights up
in orange, then it turns green when the disc is selected.
**AMS: Automatic Music Sensor
Tips
• You can start playing with the track selected in Step 6.
1 Turn AMS (or press ./> or the number
buttons on the remote) to select the track you
want to play using the display*.
2 Press H.
*See “Using the Display” on page 9.
• You can remove or load discs while playing the
other deck. Press OPEN/CLOSE (or A) of the deck
that is not currently playing to open that tray, and
remove or load a disc.
• The DISC 1-5 button indicator lights up when the
disc is in the tray. The indicator turns to green when
the disc is selected.
• You can connect a headphone to the PHONE jack
on the front panel. Turn the PHONE LEVEL
control to adjust the volume.
• You can replace any discs in the other disc trays
while playing a disc in DECK A of RCD-W50C.
Press OPEN/CLOSE (or A) of the deck that is not
currently playing to open that tray, and remove or
load a disc.
Notes
• You can play unfinalized CD-Rs or CD-RWs only
in DECK B. For the detailed explanation about
finalizing, see “Finalizing a CD-R or CD-RW” on
page 24.
• Do not leave the disc tray open when the unit is not
in use to prevent dust and dirt from entering and
prevent damage to the disc tray.
• When you turn on the unit, you will hear some
mechanical noise from the unit. This is not a
malfunction.
Do the following:
Press x.
Press X. Press the button again or
press H to resume playing.
Press one of the DISC 1-5
buttons.*
Press D. SKIP on the remote.
Turn AMS**clockwise (or press
> on the remote ).
Turn AMS counterclockwise (or
press . on the remote).
Press
OPEN/CLOSE (or A),
whichever contains the disc you
want to remove after stopping
play.
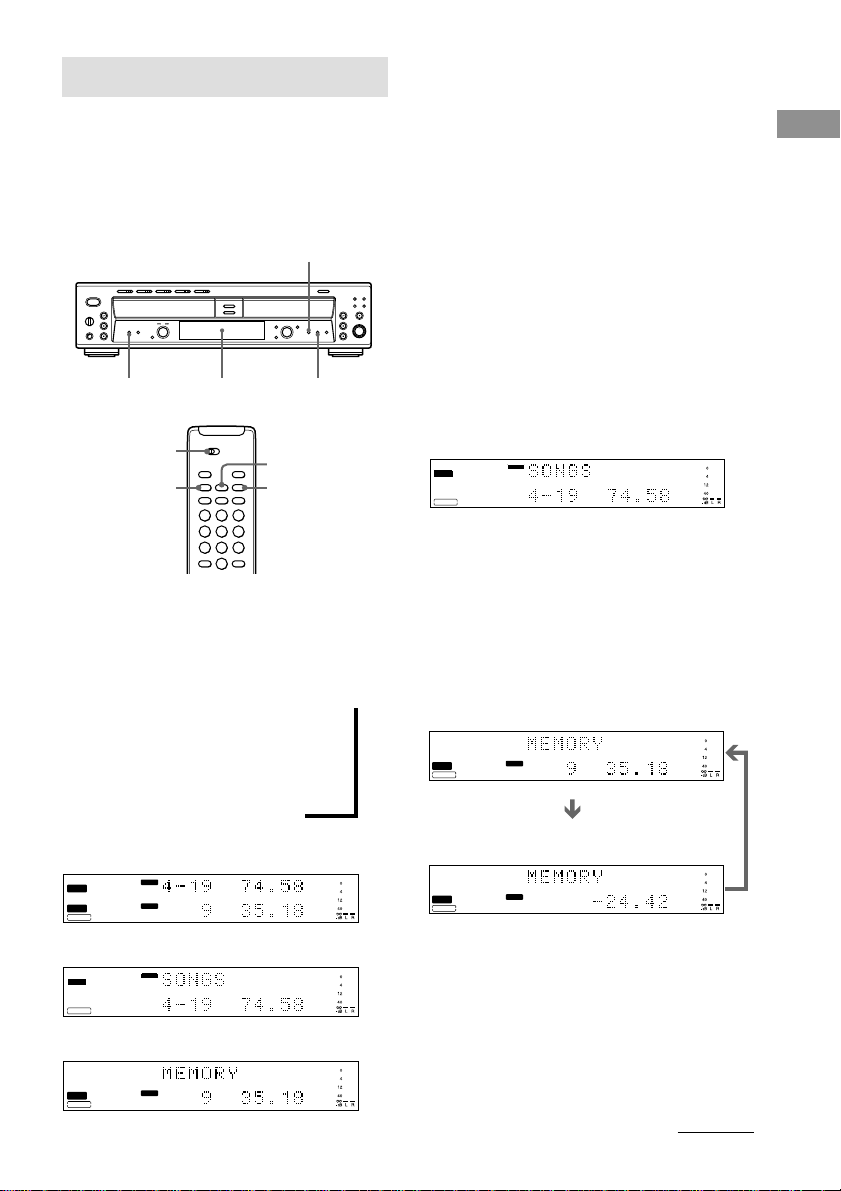
Using the Display
You can check information about the disc using
the front panel display.
When using the remote, set SELECT to CD for
operations on DECK A, or to CDR for
operations on DECK B.
DISPLAY
TIME
Front Panel Display
SELECT
DISPLAY
TIME
SCROLL
TIME
Tips
• The disc titles and track titles are displayed as
follows:
When either of the detailed displays are selected,
the disc title appears whenever the unit is stopped.
The title of the current track appears when a track is
playing.
To label a disc and its tracks, see “Labeling Tracks/
Discs” on page 26.
• You can scroll disc or track titles that do not fit
entirely into the display. Z
Press SCROLL on the remote to see the rest of the
title. Press SCROLL again to pause scrolling, and
again to continue scrolling.
Display while the unit is
stopped
The information appears as follows:
DECK A
The total track number and total playing time
CD
TEXT
DECK A
TOC
CDTEXT
Tip
When you put a CD containing a CD text in the disc
tray, “CD TEXT” lights up in the display.
DISC
CD - RW
Basic Operations
Changing the display
Press DISPLAY while the unit is stopped or
playing. Each time you press the button, you
can change the display as follows:
DECK A/DECK B divided display <
m
Detailed display for DECK A
m
Detailed display for DECK B
DECK A/DECK B divided display
CD
TEXT
DECK A
TOC
DECK B
CDTEXT
Detailed display for DECK A
CD
TEXT
DECK A
TOC
CDTEXT
Detailed display for DECK B
CD
TEXT
TOC
DECK B
CDTEXT
CD - RW
CD - RW
CD - RW
DISC
DISC
DISC
DISC
DECK B
When you placed an unfinalized CD-R or CDRW in DECK B, you can also check the
remaining recordable time by pressing TIME.
The information appears as follows:
The total track number and total playing time
CD
TEXT
TOC
DECK B
CDTEXT
CD - RW
DISC
The remaining recordable time of the disc (only
the unfinalized CD-R or CD-RW)
CD
TEXT
TOC
DECK B
CDTEXT
CD - RW
DISC
Tip
When you put a CD containing a CD text in the disc
tray, “CD TEXT” lights up in the display.
continued
9
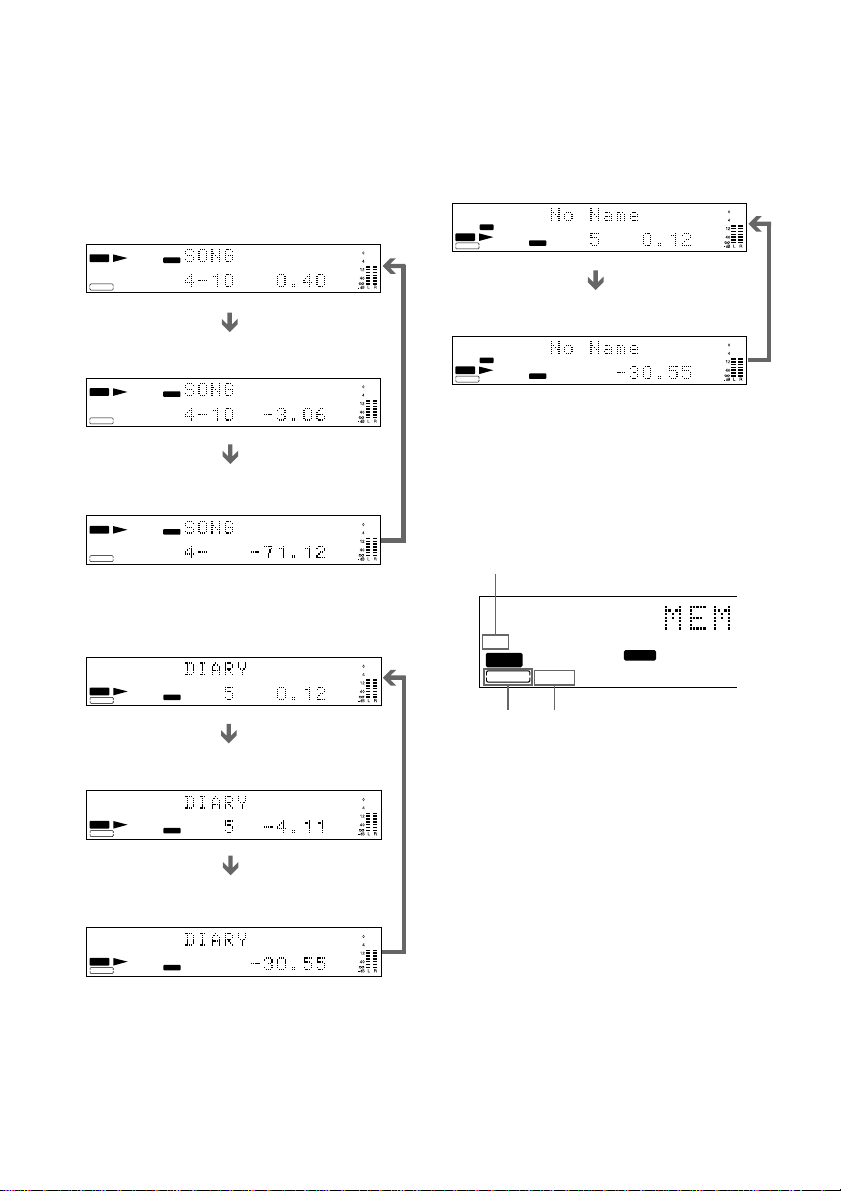
Display while playing
Press TIME repeatedly while the unit is
playing. Each time you press the button, the
display for any deck that has a disc inside
changes as follows:
DECK A
The track number and playing time
CD
TEXT
DECK A
TOC
CDTEXT
The track number and remaining time of the
track currently being played
CD
TEXT
DECK A
TOC
CDTEXT
The total remaining time of the disc (in Continuous
play mode)
CD
TEXT
DECK A
TOC
CDTEXT
DECK B
The track number and playing time
CD
TEXT
TOC
DECK B
CDTEXT
The track number and remaining time of the
track currently being played
CD
TEXT
TOC
DECK B
CDTEXT
The total remaining time of the disc (in Continuous
play mode)
CD
TEXT
TOC
DECK B
CDTEXT
CD - RW
CD - RW
CD - RW
CD - RW
CD - RW
CD - RW
TRACK
TRACK
TRACK
TRACK
TRACK
TRACK
Display while recording
Press TIME repeatedly while recording. Each
time you press the button, the display for
DECK B changes as follows:
The track number and recording time of the
track currently being recorded
CD
TEXT
REC
TOC
DECK B
CDTEXT
The total remaining time of the CD-R or CD-RW
CD
TEXT
TOC
DECK B
CDTEXT
CD - RW
REC
CD - RW
TRACK
TRACK
Display for disc information
of DECK B
The indicators show which type of recordable
disc is in the disc tray, and whether the
recordable disc has been already finalized.
TOC indicator
TOC
DECK B
CDTEXT
CD - RW
CD TEXT
indicator
CD-R/RW
indicator
The CD-R/RW indicator
When you put an unfinalized CD-R in the disc
tray, “CD-R” lights up.
When you put a CD-RW disc in the disc tray,
“CD-RW” lights up.
The TOC indicator
When you put an unfinalized CD-R or CD-RW
in the disc tray, “TOC” lights up.
For details on finalizing, refer to page 24, and
page 25 for unfinalizing.
DISC
10

The CD TEXT indicator
When you put a CD containing a CD text in the
disc tray, “CD TEXT” lights up.
When “CD TEXT” is framed in red in the
display of DECK B, CD TEXT information is
not recorded. In this case, finalize the disc to
record the information.
If you remove the disc or turn off the power
before finalizing, CD TEXT information is
erased.
Note
When you put a CD or finalized CD-R in the disc
tray, “CD” lights up.
Locating a Specific Track
You can quickly locate any track while playing
a disc by using the AMS (Automatic Music
Sensor) dial on the deck, . and >
buttons on the remote, or number buttons on
the remote.
When using the remote, set SELECT to CD for
operations on DECK A, or to CDR for
operations on DECK B.
Basic Operations
H
./>
AMS
SELECT
AMS
Number buttons/
>10
H
H
continued
11

To locate
The next or
succeeding
tracks
The beginning
of the current or
preceding tracks
A specific track
number or track
name directly
Tip
To pause playing at the beginning of a track, turn
AMS (or press ./> on the remote) after
pausing playback.
Do the following:
During playback, turn AMS
clockwise (or press > on the
remote repeatedly) until you find the
track.
During playback, turn AMS
counterclockwise (or press . on
the remote repeatedly) until you find
the track.
In stop mode, turn AMS (or press
./> on the remote repeatedly)
until you find the track number or
track name, and press H.
Playing directly using the
number buttons Z
You can playback a track directly by using the
number buttons. Press the track number you
want to play. When you select a track number
over 10, press >10 first, then the corresponding
number buttons.
Example:
To enter number 15, press >10, then 1 and 5.
Locating a Particular
Point in a Track Z
You can locate a particular point in a track
during playback or playback pause.
Before using the remote, set SELECT to CD
for operations on DECK A, or to CDR for
operations on DECK B.
SELECT
m/M
To locate a
point
While
monitoring the
sound
While
observing the
display
Do the following
During playback, press and hold
m or M on the remote until you
find the point.
During pause, press and hold m or
M on the remote until you find the
point. You will not hear the sound
during operation.
12
Tip
“-Over-” appears if the disc reaches the end. Turn the
AMS dial counterclockwise (or press . or m on
the remote).
Note
Tracks that are only a few seconds long may be too
short to scan using the search function. For such
tracks, it is better to play the disc at normal speed.

Playing Tracks/Discs
Repeatedly (Repeat Play) Z
You can play tracks repeatedly in any play
mode.
Before using the remote, set SELECT to CD
for operations on DECK A, or to CDR for
operations on DECK B.
SELECT
REPEAT
Notes
• When the unit has repeated tracks in the same play
mode five times, playback stops.
• When “ALL DISCS SHUFFLE” (page 14) is
selected, you cannot repeatedly play all tracks on
the disc (for DECK A of RCD-W50C).
Repeating only the current
track
While the track you want to repeat is being
played, press REPEAT repeatedly until
“REPEAT 1” lights up.
To cancel Repeat 1
Press REPEAT repeatedly until “REPEAT 1”
goes off.
Basic Operations
H
x
Repeating all tracks on the
disc
Press REPEAT repeatedly until “REPEAT”
lights up in the display, and then press H.
The unit repeats the discs/tracks as follows:
When the disc
is played in
ALL DISCS
Continuous play
(page 8)
1 DISC
Continuous play
(page 8)
Shuffle Play
(page 14)
Program Play
(page 15)
To stop Repeat Play
Press x.
To cancel Repeat Play
Press REPEAT repeatedly until “REPEAT”
goes off.
The deck repeats
All tracks on all discs.
All tracks on the current disc.
All tracks on the current disc in
random order.
All the same program.
13

Playing in Random Order
(Shuffle Play)
2 Press H.
“;” appears in the display while the unit is
“shuffling” the tracks, and the track is
played.
You can have the unit “shuffle” tracks and play
them in random order.
When using the remote, set SELECT to CD for
operations on DECK A, or to CDR for
operations on DECK B.
H
xx
PLAY MODE
SELECT
PLAY MODE
PLAY MODE
H
To stop Shuffle Play
Press x.
To cancel Shuffle Play
While the unit is stopped, press PLAY MODE
until “SHUFFLE” goes off.
Tip
To play from the beginning of the current track again,
turn AMS counterclockwise (or press .on the
remote). You cannot go back to tracks that have
already been played.
Notes
• If “ALL DISCS SHUFFLE” is selected in the
“REPEAT” setting, “REPEAT” is cancelled (for
DECK A of RCD-W50C).
• You cannot change the PLAY MODE during
playback.
H
1 While the unit is stopped, press PLAY
MODE repeatedly to select the Shuffle
Play mode as follows:
When you
select
ALL DISCS
SHUFFLE (for
DECK A of
RCD-W50C)
1 DISC
SHUFFLE (for
DECK A of
RCD-W50C)
SHUFFLE (for
DECK B of
RCD-W50C
and DECK A/B
of RCD-W10)
14
The unit plays
All tracks on all discs in random
order.
All tracks on the current disc in
random order.
All tracks on the disc in random
order.
x

Creating Your Own
Program (Program Play)
You can specify the playback order of the
tracks on a disc to create your own programs
containing up to 25 tracks.
When using the remote, set SELECT to CD for
operations on DECK A, or to CDR for
operations on DECK B.
DISC 1-5
CLEAR CLEAR
PLAY MODE
H
SELECT
PLAY MODE
AMS
AMS
H
xx
PLAY MODE
To program all tracks on the
selected disc
After displaying the first track number in Step
3 above, turn AMS counterclockwise (or press
. on the remote) to select “AL” instead of a
track number.
To stop Program Play
Press x.
To cancel Program Play
Press PLAY MODE repeatedly until
“PROGRAM” goes off.
To erase the last programmed track
Press CLEAR. Each time you press the button,
the last programmed track is erased.
Tips
• You can also select the track number using the
number buttons on the remote in Step 3 above. See
page 11.
• The program remains even after Program Play ends.
When you press H, you can play the same
program again.
• To check the total number of the programmed
tracks, press TIME while the unit is stopped.
Basic Operations
CLEAR
H
D.SKIP
x
./>
1 While the unit is stopped, press PLAY
MODE repeatedly until “PROGRAM”
lights up in the display.
2 For DECK A of RCD-W50C, press one
of the DISC 1-5 buttons (or D. SKIP on
the remote) to select the desired disc
number.
3 Turn AMS to select the desired track
number, then press AMS (or press ./
> to select the desired track number,
then press PLAY MODE on the remote).
4 To program additional tracks, repeat
Step 3 (Steps 2 and 3 for DECK A of
RCD-W50C).
5 Press H to start Program Play.
The unit starts playing tracks in the
programmed order.
Notes
• You cannot create a program containing tracks from
both DECK A and DECK B.
•“Step Full!” appears in the display when you
program over 25 tracks. Erase the unnecessary
tracks to enter other tracks.
• The program is erased when you turn the unit off.
• If the total time of the program exceeds 99 minutes
59 seconds, “--.--” appears in the display.
• You cannot change the PLAY MODE during
playback.
15

Recording/Editing
Notes on Recording
• You cannot record over existing material. The unit
automatically starts recording from the end of any
existing material.
• Make sure that the remaining recordable time on the
CD-R or CD-RW is longer than the playing time of
a source CD, especially if you want to record all the
tracks on the CD.
• If a message appears in the display, refer to
“Messages” on page 29.
• With the following kinds of CDs, you may
experience a reading failure or noise when recorded
to a CD-R or CD-RW.
– CD with adhesive labels attached to them
– Irregularly shaped CDs (for example, heart or star
shaped)
– CDs with printed text concentrated on one side
only
– Old CDs
– Scratched CDs
– Dirty CDs
– Warped CDs
• If the following occurs during CD playback or
recording, a reading error may occur or noise may
be produced in the recorded results:
– The disc tray or other part of the system is
bumped.
– The system is placed on an uneven or soft
surface.
– The system is located near a speaker, door, or
other source of vibration.
• Recording automatically stops if recording is
paused for more than about 3 minutes.
Note on a copy protection
Some commercial CD may contain a copy
protection code that will prevent the disc from
being recorded. In this case, “Cannot Copy”
and either “C12” or “C41” will appear
alternately in the display.
Do not move the unit or disconnect
the unit from power source in the
following situation. Recording may
not complete successfully.
• When “Finalize,” “Unfinalize,” “Erase,” or “OPC”
appears in the display:
The unit is currently updating the table of contents
(TOC).
• When “PMA Writing” appears in the display:
The unit is currently updating the track information.
Useful Tips for Recording
When using the remote, set SELECT to CDR.
SBM
TIME
SELECT
TIME
Checking the remaining
recordable time on the CD-R
or CD-RW
Press TIME repeatedly.
• Each time you press the button while the unit
is stopped, the display alternates between
total disc playing time and remaining
recordable time on the CD-R or CD-RW
(page 9).
• Each time you press the button while
recording, the display alternates between the
recording time of the current track and the
remaining recordable time on the CD-R or
CD-RW (page 10).
16

If “Auto Cut” appears in the
display (Auto Cut Function)
There has been no sound input for about 30
seconds during recording. The 30 seconds of
silence are replaced by a blank of about 3
seconds and the unit changes to recording
pause.
If the unit continues pausing for about 3
minutes after the Auto Cut Function activated,
recording stops automatically.
Note that this function does not activate if the
unit has started recording from a blank portion
or is synchro-recording from a CD on DECK
A.
Tip
You can turn off the Auto Cut Function. For details,
see “To turn off the Smart Space Function and Auto
Cut Function” below. Note that when you turn off the
Auto Cut Function, the Smart Space Function is also
turned off automatically.
If “Smart Space” appears in
the display (Smart Space
Function)
There has been an extended silence of 4 to 30
seconds in length during recording. When the
signal is input again, the silence is replaced
with a blank of about 3 seconds and the deck
continues recording.
Note that new track numbers may not be
marked for portions recorded while this
function is activated. Also, this function does
not activate even if there has been an extended
silence of 4 to 30 seconds in length when the
deck started recording from the blank portion.
To turn off the Smart Space Function
and Auto Cut Function
Set “Smart Space” in Setup Menu to “Off.” For
details, see “Using the Setup Menu” (page 28).
Note
When you turn off the Smart Space Function, the
Auto Cut Function is also turned off automatically.
Insert the silence into the
end of the song (The function
of adding Post Gap)
You can insert the silence of 2 seconds between
the songs, when recording more than two tracks
at once. The silence is inserted according to the
following situations.
• When recording is stopped.
• When the disc of DECK A changes to the
next disc during Synchro-Recording. (RCDW50C only)
To use the function of adding Post
Gap
Set “Post Gap” of the setup menu to “On” during
stop. For details, see “Using the Setup Menu” on page
28.
Using the SBM (Super Bit
Mapping) function
When you record through the ANALOG input,
the SBM function enables you to record a 24bit high quality sound source by converting it
to a 16-bit source without reduction in sound
quality. This is made possible by incorporating
a noise-shaping filter in the 24-bit A/D
converter of this unit, which has a frequency
range designed to cover the range of human
hearing.
During recording pause, press SBM. The
indicator lights up.
When you press the button again, the function
is canceled and the indicator turns off.
Notes
• You cannot change the setting while recording.
• When you record through the DIGITAL OPTICAL
IN input, or when you make Synchro-Recording,
the SBM function is automatically canceled.
Recording/Editing
17

Synchro-Recording a CD
to CD-R or CD-RW
You can easily make digital recordings from a
CD to a CD-R or CD-RW. Before recording,
see “Notes on Recording” on page 16. To
record a CD at high speed, see page 19.
There are 2 types of recording. Each recording
type can be selected both in normal speed
Synchro-Recording and High-Speed SynchroRecording (page 19).
Normal Synchro-Recording (NORM
SYNC)
• After recording, you must finalize the disc.
Until the disc is properly finalized, it cannot
be played on any other machine. See
“Finalizing a CD-R or CD-RW” on page 24.
• A CD text contained in the disc is not
automatically recorded on the disc. To label
tracks/discs, see “Labeling Tracks/Discs”
(page 26).
Tip
You can perform Synchro-Recording in the
programmed order (page 15).
Make-Disc Synchro-Recording (MAKE
DISC)
Records a CD in the original order of its track
number regardless of the selected play mode,
and finalizes the disc. Be sure to use the disc
that has not been recorded. (“Blank Disc”
appears in the display when you put the disc in
DECK B.)
• A CD text (if contained in the disc) is
automatically recorded. (Note that “Text
Save” in Setup Menu is set to “On.” ) You
can enter the disc name or track name (up to
70 characters each, and 40 tracks per disc).
Tip
When you do not want to record the CD text
automatically, set “Text Save” in Setup Menu to
“Off.” For details, see “Using the Setup Menu” (page
28). Depending on the CDs, the CD text is
automatically recorded even if “Text Save” in Setup
Menu is set to “Off.”
Notes
• You cannot pause recording in Synchro-Recording.
• If Repeat Play has been set, it is automatically
canceled.
• If you start the recording when Shuffle play is set,
Shuffle play is automatically canceled.
• Smart Space, Auto Cut, and SBM functions do not
work during Synchro-Recording.
• The recording level is set to 0.0 dB regardless of the
Setup Menu setting.
• When copying a disc digitally recorded under
control of the Serial Copy Management System
(SCMS), the unit automatically select the analog
recording. High speed recording changes to normal
speed recording. For detailed explanation on
SCMS, refer to the “Notes” on page 20.
• When copying a commercial music CD contains
copy protection code, the unit automatically select
the analog recording. High speed recording changes
to normal speed recording.
• You cannot stop recording during finalizing in
Make-Disc Synchro-Recording.
Normal speed SynchroRecording
The disc is recorded at the same speed as the
playing CD. You can hear the sound during
recording.
When using the remote, set SELECT to CDR.
POWER
DISC 1-5 A
(OPEN/CLOSE for RCD-W10)
CD SYNCHRO NORMAL
SELECT
CD SYNCHRO
H
NORMAL
x
OPEN/CLOSE
H
x
18

1 Press POWER.
2 Press OPEN/CLOSE of DECK B and
place a recordable CD-R or CD-RW on
the disc tray. Press OPEN/CLOSE of
DECK B again to close the disc tray.
With the label side up
“TOC Reading” appears. The unit starts to
read the TOC (Table of Contents) data and
shows the type of the disc on the deck in the
display.
3 Press OPEN/CLOSE of DECK A (one of
the DISC 1-5 A buttons for RCD-W50C)
and place a CD on the disc tray. Press
OPEN/CLOSE (or A) of DECK A again
to close the disc tray.
When you perform Normal SynchroRecording (NORM SYNC), you can choose
the disc which you want to record, and the
play mode.
When you perform Make-Disc SynchroRecording (MAKE DISC), the disc in
DECK A is used to record.
4 Press CD SYNCHRO NORMAL
repeatedly to select the recording type,
“NORM SYNC” or “MAKE DISC.”
DECK B stands by for recording, and
DECK A stands by for playing.*
When you place a CD-R or CD-RW in the
deck, the unit optimizes itself for the best
possible recording and “OPC” appears on
the display shortly.
When “Not Blank” appears, make sure that
the blank disc is placed correctly.
*The unit stands by for recording
immediately by pressing YES. While
“OPC” appears, you cannot press YES.
5 After “New Track” appears in the
display, press H (or X) of DECK B to
start recording.
Synchro-Recording starts. DECK A and
DECK B will automatically stop after
recording.
To stop recording
Press x.
High-Speed SynchroRecording
You can easily make digital recordings from a
CD to a CD-R or CD-RW, faster than normal
speed Synchro-Recording.
You cannot monitor the recorded signal while
recording.
When using the remote, set SELECT to CDR.
H
CD SYNCHRO HIGH
SELECT
H
CD SYNCHRO
HIGH
x
x
1 Do Steps 1 to 3 of “Normal speed
Synchro-Recording” on page 18.
2 Press CD SYNCHRO HIGH repeatedly
to select the recording type, “NORM
SYNC” or “MAKE DISC.”
DECK B stands by for recording, and
DECK A stands by for playing. *
*The unit stands by for recording
immediately by pressing YES.
3 After “New Track” appears in the
.display, press H (or X) of DECK B to
start recording.
High-Speed Synchro-Recording starts.
DECK A and DECK B will automatically
stop after recording.
To stop recording
Press x.
Playing from the beginning of
the disc after recording
1 Press x again while the unit is
stopped.
2 Press H.
The unit starts playing from the first track.
Recording/Editing
19

Recording on a CD-R or
CD-RW Manually
You can start recording from the end of the
existing material. Before recording, see “Notes
on Recording” on page 16.
When using the remote, set SELECT to CDR.
• After recording, you must finalize the disc.
Until the disc is properly finalized, it cannot
be played on any other machine. See
“Finalizing a CD-R or CD-RW” on page 24.
OPEN/CLOSE
SELECT
INPUT
H
X
REC z
1 Turn on the amplifier and the sound
source, and then select the sound
source on the amplifier.
2 Press OPEN/CLOSE of DECK B and
place a recordable CD-R or CD-RW on
DECK B.
Press OPEN/CLOSE again to close the
disc tray.
INPUT
H
X
x
REC z
x
3 Press INPUT repeatedly to select the
input connector.
To record through
DIGITAL OPTICAL IN
ANALOG IN
To record the disc in DECK A, turn off
“OPTICAL” or “ANALOG.”
Turn on the indicator
OPTICAL
ANALOG
4 Press REC z.
DECK B stands by for recording.
5 Adjust the recording level, if necessary.
For details, see “Adjusting the Recording
Level” on page 21.
6 Press H.
7 Start playing the sound source you
want to record.
To pause recording
Press X. To resume recording, press the button
again or press H.
Note
Whenever you pause recording, a new track number
is added. For example, if you paused recording while
recording on track 4, the track number increases by
one and recording continues on the new track when
recording is resumed.
To stop recording
Press x.
“PMA Writing” appears while updating the
information of the disc before stopping the
recording.
Notes
• If you press REC z during recording, you can add
a track (page 22). The track must be longer than 4
seconds.
• This unit uses the Serial Copy Management System,
which allows only first-generation digital copies to
be made of premastered software via the unit’s
digital input. Therefore you may not be able to
record a CD-R or CD-RW digitally through
OPTICAL IN, depending on the content being
recorded.
20
With the label side up

Adjusting the Recording
Level
Adjusting the recording level
for digital recording
You can adjust the recording level using the
Setup Menu. (For details of “Using the Setup
Menu,” see page 28.)
When using the remote, set SELECT to CDR.
MENU/NO
6 While monitoring the sound, turn AMS
(or press ./> on the remote) to
adjust the recording level, then press
AMS (or YES).
Adjust the recording level within a range of
– ∞ to +18 dB, so that the OVER indication
of the peak level meters does not light up in
red.
OVER indication
OVER
TOC
DECK B
CDTEXT
CD - RW
Recording/Editing
AMS
REC LEVEL
SELECT
MENU/NO
./>
YES
1 Do Steps 1 to 4 of “Recording on a CD-
R or CD-RW Manually” on page 20.
2 Play the portion of the sound source
with the strongest signal level.
3 Press MENU/NO.
4 Turn AMS (or press ./> on the
remote) to select the program source.
To select
DECK A
a component connected to
the DIGITAL OPTICAL
IN connector
Display
DECK A Lvl
Optical Lvl
7 Press MENU/NO.
8 Stop playing the sound source.
9 To start recording, do Steps 6 and 7 of
“Recording on a CD-R or CD-RW
Manually” on page 20.
Note
You cannot change the setting of the DIGITAL
OPTICAL output level even if you adjust the
recording level for digital recording.
Adjusting the recording level
for analog recording
Turn the REC LEVEL control on the front
panel. Adjust the recording level so that the
OVER indication on the peak level meters does
not light up.
Note
You can adjust the recording level while recording,
not while playing a disc in DECK B.
5 Press AMS (or YES).
21

Marking Track Numbers
While Recording
You can mark track numbers either manually
or automatically. By marking track numbers at
specific points, you can quickly locate the
points later using the AMS Function or Editing
Functions.
When using the remote, set SELECT to CDR.
REC z
SELECT
REC z
Marking track numbers
manually
You can mark track numbers at any time while
recording.
Press REC z at the point you want to add a
track mark while recording.
Marking track numbers
automatically (Track Marking
Function)
The unit adds track marks differently in the
following cases:
• When you make a Synchro-Recording
(page 18)
The unit marks track numbers automatically under
the control of DECK A.
• When recording from a CD or MD
connected through the DIGITAL
OPTICAL IN connector (with “OPTICAL”
selected by the INPUT button)
The unit marks track numbers automatically
according to the information contained in the source
being recorded. However, the unit may not
automatically mark track numbers when recording
from some CD players and multi disc players.
• In all other cases
When “Track Mark LSync” is set in Setup Menu,
the unit marks a new track number whenever the
signal drops to the specified level* or below for
about 1.5 seconds or longer, then rises to a specified
level.
* The initial setting is –50 dB.
To turn off the Track Mark Function
While the unit is stopped, set “Track Mark” in
Setup Menu to “Off.” For details, see “Using
the Setup Menu” (page 28).
To change the trigger level for Track
Marking Function
While the unit is stopped, select “LSync Lvl”
in Setup Menu and set the level between
–72 dB and –20 dB. For details, see “Using the
Setup Menu” (page 28).
22

Recording the Original Sound
Fading In and Out (Fader)
of the Program Source
(Direct Recording Function)
Digital signals with a sampling frequency of
44.1 kHz can be recorded without using
internal circuits of the unit. You can set this
function using the Setup Menu. (For details on
“Using the Setup Menu,” see page 28.)
When using the remote, set SELECT to CDR.
MENU/NO
SELECT
MENU/NO
./>
YES
AMS
YES
Z
You can gradually increase the recording level
at the beginning of a recording (fade-in
recording) or decrease the recording level at the
end of a recording (fade-out recording).
This function is convenient when you do not
want the track to start or end abruptly.
Before using the remote, set SELECT to CDR.
SELECT
REC FADER
Notes
• Fading lasts for 5 seconds.
• You cannot change the setting of the DIGITAL
OPTICAL output level even if you make fade-in/
fade-out recording.
Recording/Editing
1 While the unit is stopped, press MENU/
NO.
2 Turn AMS (or press ./> on the
remote) to select “Direct Off,” and
press AMS (or YES).
3 Turn AMS (or press ./> on the
remote) to select “Direct On,” and
press AMS (or YES).
4 Press MENU/NO.
Note
Digital signals with other sampling frequencies than
44.1 kHz are automatically recorded through the
sampling rate converter of the unit, even when
“Direct On” is selected in Setup Menu.
Fade-in recording
During recording pause, press REC FADER at
the point where you want to start fade-in
recording.
“Fade In” flashes in the display, and recording
starts.
Fade-out recording
During recording, press REC FADER at the
point where you want to start fade-out
recording.
“ Fade Out” flashes in the display, and the unit
fades out and changes to recording pause.
23

Finalizing a CD-R or CDRW
Finalizing completes the recording of a disc. It
enables you to play the disc on other players.
(The player must be CD-RW compatible. )
When a recording is finished, a CD-R or CDRW must be finalized. Once that is done, a CDR may not be added or erased to. CD-RWs are
locked once they are finalized, and must be
unfinalized to permit additional recording or
erasure.
When using the remote, set SELECT to CDR.
FINALIZE
H
SELECT
Notes
• Once the finalizing process starts, you cannot stop
in the middle of the process.
• Do not turn off the unit or disconnect the unit from
the power source in the middle of the finalizing
process. Recording will not been complete
successfully, and you will not be able to play back
the recorded tracks.
• An unfinalized disc can be played back only in
DECK B.
FINALIZE
1 Place a CD-R or CD-RW that has not
been finalized in DECK B.
Make sure that “TOC” appears in the
display. If a finalized CD is loaded, “TOC”
does not appear.
2 Press FINALIZE while the unit is
stopped.
Finalizing enters standby mode.
3 Press H (or YES).
Finalizing starts. During finalizing,
“Finalize” appears in the display and the
remaining time for finalizing (may not be
accurate) appears. When the finalizing
process is finished, the total track number
and total playing time appears in the display
24
and the TOC (red) indicator goes off.
H

Unfinalizing a CD-RW
Erasing Tracks of a CD-
A finalized CD-RW is neither recordable nor
rewritable. If you want to add new tracks or
erase tracks, you must first unfinalize the disc.
When using the remote, set SELECT to CDR.
ERASE
H
SELECT
ERASE
H
1 Place a finalized CD-RW in DECK B.
Make sure that “TOC” does not appear in
the display. If an unfinalized CD is loaded,
“TOC” appears.
2 Press ERASE while the unit is stopped.
Unfinalizing enters standby mode.
3 Press H (or YES).
Unfinalizing starts. During unfinalizing,
“Unfinalize” appears in the display and the
remaining time for unfinalizing (may not be
accurate) appears. When the unfinalizing
process is finished, the total track number
and the total playing time appears in the
display and the TOC (red) indicator lights
up.
Notes
• Once the unfinalizing process was started, you
cannot stop in the middle of the process.
• Do not turn off the unit or disconnect the unit from
the power source in the middle of the unfinalizing
process.
RW
You can erase tracks recorded on a CD-RW.
This process starts with the last track on the
disc.
Before erasing the track, note that the disc is
not finalized. If the disc is finalized, follow the
instructions for “Unfinalizing a CD-RW” (page
25).
When using the remote, set SELECT to CDR.
YES
ERASE
AMS
H
SELECT
YES
ERASE
H
./>
1 Place an unfinalized CD-RW disc in
DECK B.
Make sure that “TOC” appears in the
display. If a finalized CD is loaded, “TOC”
does not appear.
2 Press ERASE while the unit is stopped.
“Tr Erase?” appears in the display.
3 Press YES.
The last track is selected.
To erase only the last track, go to step 5.
Recording/Editing
continued
25

4 Turn AMS (or press ./> on the
remote) to select the first of the tracks
you want to erase.
5 Press H (or YES).
Erasing of the last track starts. During
erasing, “Tr Erase” appears in the display
and the remaining time for erasing the last
track (may not be accurate) appears. When
this process is finished, the total track
number and the total playing time appears
in the display.
To erase all tracks
1 Place an unfinalized CD-RW disc in
DECK B.
2 Press ERASE repeatedly until “Disc
Erase?” appears in the display while
the unit is stopped.
3 Press H (or YES).
Erasing starts. During erasing, “Disc Erase”
appears in the display and the remaining
time of erasing (may not be accurate)
appears. When the entire disc is erased,
“Blank Disc” appears.
Labeling Tracks/Discs Z
You can create titles for tracks/discs for a
recorded CD-R or CD-RW with capital and
small letters, numbers, and symbols. You can
enter a disc name of up to 70 characters, and a
track name of up to 70 characters per track, for
40 tracks per disc.
Label the track/disc before finalizing it. You
cannot label the track/disc on a finalized disc.
After labeling, you must finalize the disc before
you remove the disc or turn off the unit.
Otherwise, the titles will be cleared.
When using the remote, set SELECT to CDR.
SELECT
MENU/NO
./>
NAME EDIT/
SELECT
YES
Letter/number/
symbol buttons
CLEAR
x
Notes
• Once the erasing process has started, you cannot
stop in the middle of the process.
• You can erase only from the last track.
• Do not turn off the unit or disconnect the unit from
the power source in the middle of the erasing
process.
26
m/M
1 Place a CD-R or CD-RW disc that has
not been finalized in DECK B.
2 Press NAME EDIT/SELECT while the
unit is stopped.
“Name In?” appears in the display.
3 Press YES.
4 Press ./> to select the disc or
track you want to label.
When you label the disc name, select
“Disc,” and when you label the track name,
select the track number.
5 Press YES.
A flashing cursor appears.
TOC
DECK B
CDTEXT
CD - RW

6 Press NAME EDIT/SELECT repeatedly
to select the character type as follows:
TOC
DECK B
CDTEXT
CD - RW
To select
Capital letters and symbols*
Small letters and symbols*
Numbers
* You can use the following symbols in titles:
’ – / , . ( ) : ! ? & + < > _ = ” ; # $ % @ `
To enter a space, press 10/0.
Display
Selected AB
Selected ab
Selected 12
7 Press a letter/number/symbol button to
enter a character.
TOC
DECK B
CDTEXT
CD - RW
To enter a number, press the number button
you want.
To enter a letter or symbol,
1 Press the corresponding letter button
repeatedly until the letter or symbol you
want flashes. You can also enter a letter
or symbol by pressing ./>
repeatedly. To select the symbol, press
> repeatedly after flashing “’.”
2 Press M.
8 Repeat Steps 6 and 7 until you have
entered the entire title.
If you enter an incorrect character, press
m or M until the incorrect character
starts flashing.
Press CLEAR to erase the incorrect
character, then enter the correct one.
9 Press YES.
“Complete !” appears in the display for a
few seconds and the track or disc is labeled.
Finalize the disc before you remove the disc
or turn off the unit. Otherwise, the titles will
be cleared.
Changing an existing title
1 Do Steps 1 to 5 in “Labeling Tracks/
Discs” (page 26) to select the title you
want to change.
2 Press and hold CLEAR until the current
title is erased.
3 Do Steps 6 to 8 of “Labeling Tracks/
Discs” (page 26) to enter the new title.
4 Press YES.
“Complete !” appears in the display for a
few seconds and the track or disc is labeled.
Recording/Editing
To cancel labeling
Press MENU/NO or x.
27

Additional Information
Using the Setup Menu
You can make various settings on this unit by
using the Setup Menu.
When using the remote, set SELECT to CDR.
1 Press MENU/NO.
2 Turn AMS (or press ./> on the
remote) to select the setup item, and
press AMS (or YES).
3 Turn AMS (or press ./> on the
remote) to set the item, and press AMS
(or YES).
4 Press MENU/NO.
To initialize an item’s parameter
Press CLEAR after Step 2.
Notes
• The menus you can use while the unit is stopped,
playing, or recording differ.
• The setting is stored in memory even if you turn off
the unit or disconnect the power.
Menu items
Setup item
Track Mark
LSync Lvl
Smart Space
Direct
Text Save
Post Gap
DECK A Lvl
Optical Lvl
Function (reference page)
Sets the Track Marking Function (page 22).
Changes the trigger level for Track Marking Function (page
22).
Sets the Smart Space and Auto Cut Functions (page 17).
Sets the Direct Recording Function (page 23).
Records the CD text automatically at Make-Disc Synchro-
Recording (page 18).
Sets the function to add Post Gap. (page 17).
Adjusts the input level from the CD player section (DECK A)
(page 21).
Adjusts the input level from the DIGITAL OPTICAL IN
connector (page 21).
SELECT
MENU/NO
./>
MENU/NO
CLEAR
Parameters (Initial setting)
LSync/Off (LSync)
–72 dB to –20 dB in 2 dB
increments (–50 dB)
On/Off (On)
On/Off (Off)
On/Off (On)
On/Off (Off)
– ∞ dB to 18.0 dB (0.0 dB)
– ∞ dB to 18.0 dB (0.0 dB)
YES
AMS
YES
CLEAR
28

Messages
The following table explains the messages that
appear in the display.
Message
Auto Cut
Blank Disc
Check Disc
Complete!
Data Disc
Disc Full!
Erase
Ex-Change
(RCD-W50C
only)
Fade In
Fade Out
Finalize
Incomplete!
Initialize
Name Full!
-NO DISCNo Name
Explanation
The Auto Cut function is operating.
A blank CD-R/CD-RW you have
just bought or a CD-RW you have
entirely erased is in the unit.
You are trying to record or edit a
finalized disc or CD. Or you are
trying to edit a CD-R.
Editing has been completed
successfully.
You are trying to record or edit a
non audio CD-R/CD-RW.
• Insert an audio CD-R/CD-RW.
There is not enough time left on the
CD-R/CD-RW or there are no
recordable tracks available to
complete a planned recording.
The ERASE function is operating.
During CD playback, you remove
and insert another CD.
The FADE IN REC function is
operating.
The FADE OUT REC function is
operating.
The FINALIZE function is
operating.
Editing has not completed
successfully due to vibration of the
unit or a dirty or scratched disc.
The unit does not memorize the
Setup Menu settings or the
previous playback state.
The number of characters used for
the track or disc names is beyond
the maximum.
There is no disc in the unit.
There is no title.
Message
Not Blank
OPC
OPC Over
-Over-
PMA Writing
Push STOP!
-Retry-
Smart Space
Step Full!
TEXT Edited
Unfinalize
Explanation
You have tried the MAKE DISC
Synchro-Recording, with a disc
that is not blank.
• Use a blank disc for the MAKE
DISC Synchro-Recording.
OPC: Optimum Power Control
The unit is optimizing itself for
best possible sound.
The number of times OPC
recording has been performed 90
times.
• Stop the recording and finalize
the disc.
The playback of the last track is
over.
• Turn the AMS dial
counterclockwise (or press .
or m on the remote).
PMA: Program Memory Area
A disc’s information is being
updated.
You operate the unit not in the
STOP mode.
• Stop the unit, and then operate the
unit again.
Recording or editing has been tried
again.
The Smart Space function is
operating.
The number of programmed tracks
has reached the limit, and you
cannot program any more tracks.
• Before you program a new track,
erase the current program and
restart a new program procedure.
A disc whose text has been edited
but has not been finalized is
inserted, and OPEN/CLOSE (or A)
has been pressed.
• Finalize the disc, and then press
OPEN/CLOSE (or A) to remove
the disc. If you want to remove
the disc before finalizing it, press
OPEN/CLOSE (or A) again
while “TEXT Edited” is
displayed.
The UNFINALIZE function is
operating.
Additional Information
29

Self-diagnosis Function
System Limitations
When the self-diagnosis function is activated to
prevent the player from malfunctioning, three
character service numbers in a combination
with a message appears in the display. In this
case, check the following table.
Message
C12/
Cannot Copy
C13/
Rec Error
C14/
TOC Error
C41/
Cannot Copy
C71/
Din Unlock
Explanation
You are trying to record a disc that
cannot be played back in DECK-A
or with an external device, such as
CD-ROM or VIDEO CD.
• Remove the disc, and then insert a
music CD for playback.
Recording has not been completed
successfully because of vibration.
• Relocate the unit in a place free of
vibration and restart the recording
again.
The disc you try to record is
excessively dirty (such as oilstained or finger marked) or
scratched. Or the disc is not
normal.
• Replace the disc with another one
and restart the recording again.
The unit did not read the TOC
information.
• Insert other discs.
The sound source you are trying to
record is a copy of a commercial
music software. Or you are trying
to record on a CD-R/CD-RW
digitally.
• Because of the restriction of the
Serial Copy Management System,
you cannot record a copy of a
commercial music software.
Neither can you record a CD-R/
CD-RW digitally.
If this message is displayed
momentarily, this is not an error. It
is caused by the digital signal
during recording.
During recording of a digital sound
source, the connecting cable has
been disconnected or the player of
the sound source has turned off.
• Connect the cable or turn on the
digital player.
“TOC Reading” appears in the
display for a long time
Regardless of the disc, “TOC Reading” appears in the
display of DECK B longer than in that of DECK A.
This is because, DECK B is a CD-R/RW writer and
reads various version information while setting
optimum recording condition.
Limitations when recording over an
existing track
• The correct remaining recording time may not be
displayed.
• The remaining recording time may be inaccurately
displayed relative to the total recorded time.
• You can record up to 99 tracks.
Note
When you turn on the unit, you will hear some
mechanical noise from the unit. This is not a
malfunction.
30

Troubleshooting
If you experience any of the following
difficulties while using the unit, use this
troubleshooting guide to help you remedy the
problem.
DECK A (the CD player
section)
The player does not start playing.
• Insert a disc.
• Place the disc properly.
• Clean the disc (page 4).
• Place the disc with the label side up.
• Moisture condensation has formed inside the
unit. Take the disc out and leave the unit turned
on for about an hour until the moisture
evaporates (page 4).
• Press POWER to turn the unit on.
DECK B (the CD-R and CD-RW
recording section)
The unit does not operate or operates poorly.
• The CD-R or CD-RW may be damaged. Replace
the disc.
The unit does not play back.
• Place the CD-R or CD-RW with the label side
up.
• Moisture has formed inside the unit. Take the
disc out and leave the unit in a warm place for
several hours until the moisture evaporates (page
4).
• Press POWER to turn the unit on.
• Replace the CD-R or CD-RW with one that has
been recorded.
The unit does not record.
• The CD-R or CD-RW is finalized. Unfinalize
(for CD-RW only) the disc (page 25) and try
again.
• Make connections properly to the sound source
(page 6).
• The sound source is not connected to the selected
input connector. Select the correct input using
the INPUT button (page 20).
• The recording level is set too low. Adjust the
recording level properly (page 21).
• There has been a power failure or the AC power
cord has been disconnected during recording.
Data recorded to that point may be lost.
The sound has a lot of static.
Strong magnetism from a television or a similar
device is interfering with operations. Move the unit
away from any sources of strong magnetism.
Other
No sound is output.
• Make the connections properly (page 6).
• Operate the amplifier properly.
• When using the headphones, turn PHONE
LEVEL to turn up the output level.
The remote does not operate the unit.
• Make sure that there are no obstacles between the
unit and the remote.
• Point the remote at the remote sensor on the unit.
• Replace the batteries in the remote.
When you turn on the unit, you will hear some
mechanical noise from the unit. This is not a
malfunction.
After you have attempted the
prescribed corrective actions
If the unit still does not operate properly, or if
other problems not described above occur, turn
off the unit, then reinsert the plug into the
power outlet.
Should any problem persist even after
reinserting the power plug, consult your nearest
Sony dealer.
Additional Information
31

Specifications
DECK A (the CD player section)
System Compact disc digital audio
Laser Semiconductor laser (λ =
Frequency response 20 Hz – 20,000 Hz (±0.5
DECK B (the CD-R and CD-RW
recording section)
System Compact disc digital audio
Laser Semiconductor laser (λ =
Playable discs CD, CD-R, CD-RW
Recordable discs CD-R, CD-RW (for music
Frequency response 20 Hz - 20,000 Hz (±0.5
Inputs
ANALOG IN
(Phono jacks) Impedance: 47 kilohms
DIGITAL OPTICAL IN
(Square optical connector jack)
system
780 nm)
Emission duration:
continuous
dB)
system
780 nm)
Emission duration:
continuous
use)
dB)
Rated input: 500 mVrms
Minimum input
250 mVrms
Optical wavelength:
660 nm
General
Power requirements
North American model: 120 V AC, 60 Hz
Mexican model: 120 V AC, 60 Hz
Other models: 110-120/220-240V AC,
Power consumption 25 W
Dimensions (approx.) (w/h/d) incl. projecting parts
and control 430 × 108 × 399 mm
Mass (approx.) RCD-W50C: 6.8 kg
Supplied accessories See page 6.
Design and specifications are subject to change
without notice.
50/60 Hz
( 17 × 4 3/8 × 15 3/4 inch)
(15 lbs)
RCD-W10: 6.0 kg
(13 lbs 4 oz)
Outputs
ANALOG OUT
(Phono jacks) Impedance: 47 kilohms
DIGITAL OPTICAL OUT
(Square optical connector jack)
PHONES
(Phono jack) Load impedance: 32 ohms
Rated output: 2 Vrms
Load impedance: over
10 kilohms
Wavelength: 660 nm
Output level: –18 dBm
Output level: 12mW
Sony Corporation Printed in Malaysia
32
 Loading...