

Page 1
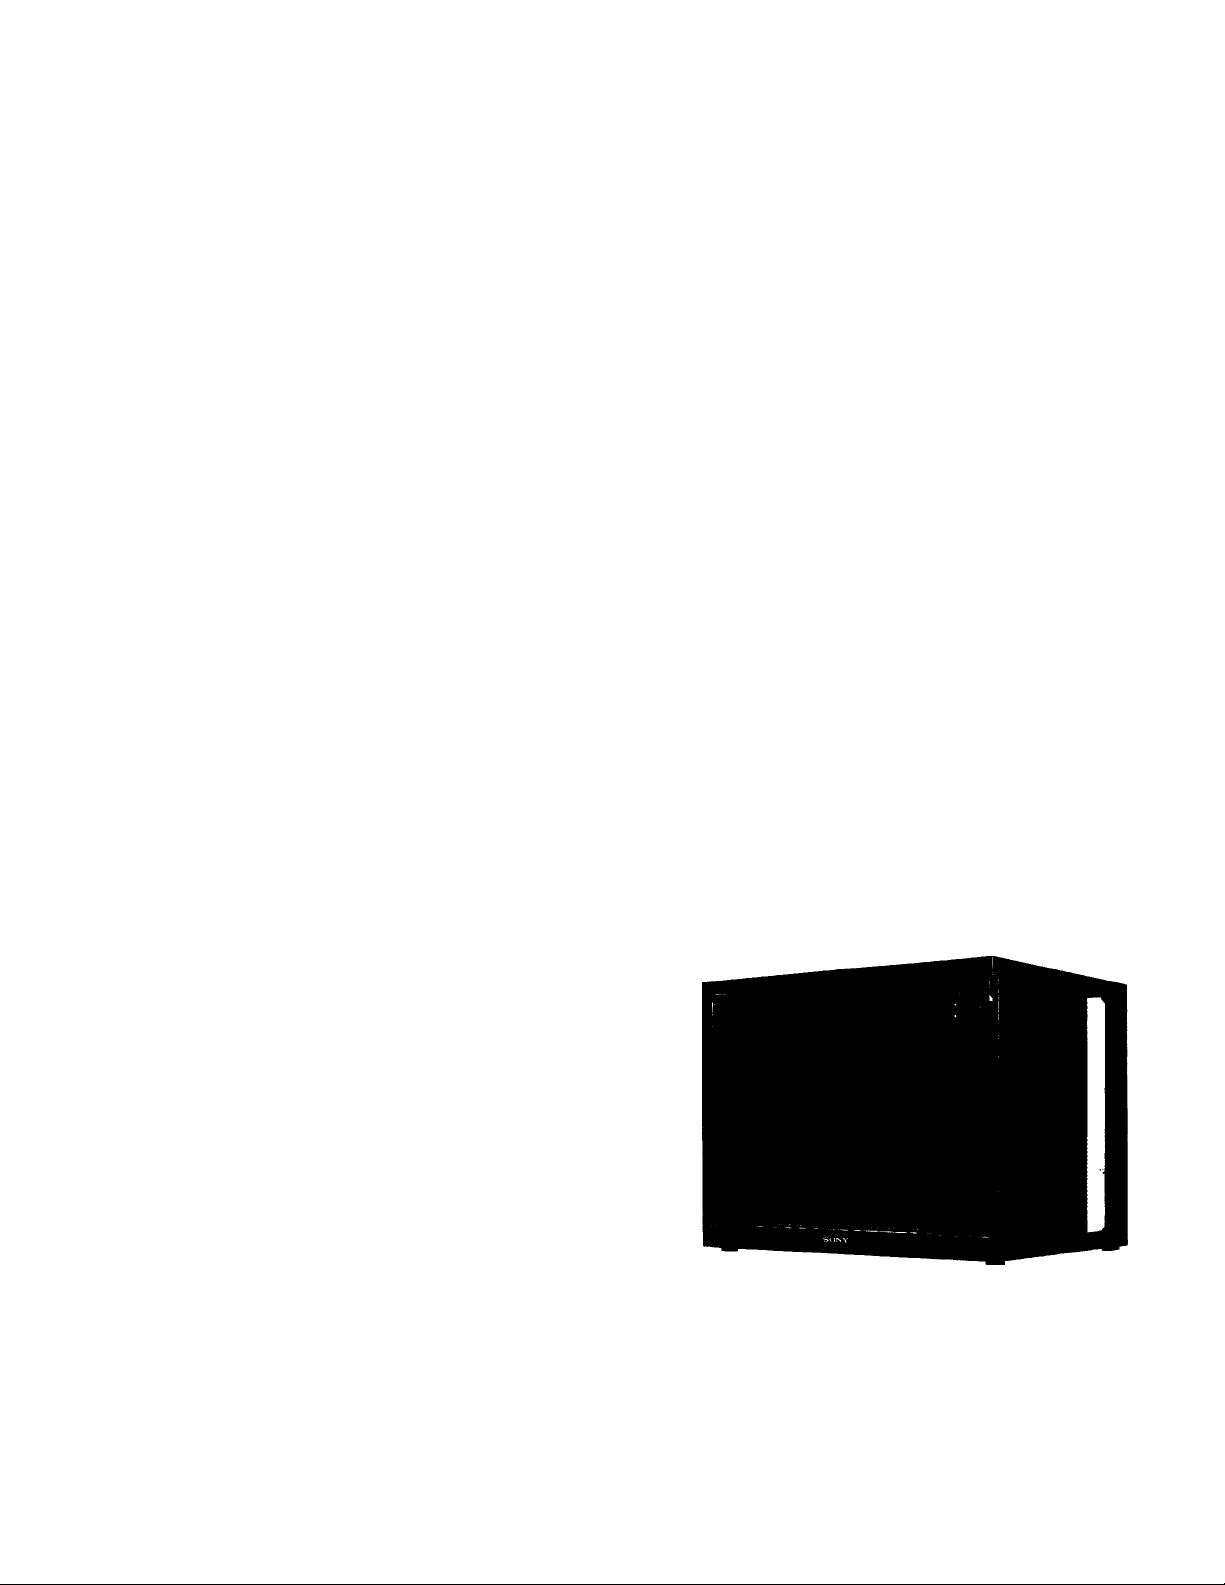
Trinitron® Color Video Monitor
PVM-2950Q
PVM-2950QM
Operating Instructions
Before operating the unit, please read this manual thoroughly and retain it for
future reference.
Mode d'emploi
Avant la mise en service de cet appareil, prière de lire attentivement ce mode
d'emploi et de le conserver pour tout référence ultérieure.
3-759-190-21 (1)
m
3
(Q
fit
3
■S.
I/I
o
A
C
3"
VI
T3
A
Bedienungsanleitung
Vor der Inbetriebnahme lesen Sie diese Anleitung sorgfältig durch und
bewahren Sie sie zum späteren Nachschlagen auf.
Manual de instrucciones
Antes de utilizar la unidad, lea este manual detenidamente y consérvelo para
futuras referencias.
Istruzioni per l'uso
Prima di usare l'apparecchio, leggere con attenzione questo manuale e
conservarlo per riferimenti futuri.
5‘
3
o
©1994 by Sony Corporation
Owner's Record
The model and serial numbers are IcKated on the rear.
Record the model and serial numbers in the spaces provided
below. Refer to these numbers whenever you call upon your
Sony dealer regarding this product.
Model No..
Serial No..
Page 2

English
WARNING Precautions
I
To prevent fire or shock hazard, do not expose the unit to rain or moisture.
For the customers in the U.S.A _
This equipment has been tested and found to comply with
the limits for a Class A digital device, pursuant to Part 15 of
the FCC Rules. These limits are designed to provide
reasonable protection against harmful interference when the
equipment is operated in a commercial environment. This
equipment generates, uses, and can radiate radio frequency
energy and, if not installed and used in accordance with the
instruction manual, may cause harmful interference to radio
communications. Operation of this equipment in a
residential area is likely to cause harmful interference in
which case the user wilt be required to correct the
interference at his own expense.
You are cautioned that any changes or modifications not
expressly approved in this manual could void your
authority to operate this equipment.
For the customers in Canada
This apparatus complies with the Class A limits for radio
noise emissions set out in Radio Interference Regulations.
For PVM-2950QM users
THIS APPARATUS MUST BE EARTHED
IMPORTANT
The wires in this mains lead are coloured in accordance
with the following code:
Green-and-yellow : Earth
Blue : Neutral
Brown : Live
As the colours of the wires in the mains lead of this
apparatus may not correspond with the coloured markings
identifying the terminals in your plug proceed as follows:
The wire which is coloured green-and-yellow must be
connected to the terminal in the plug which is marked with
the letter E or by the safety earth s)unbol + or coloured
green or green-and-yellow.
The wire which is colour^ blue must be connected to the
terminal which is marked with the letter N or coloured
black.
The wire which is coloured brown must be connected to the
terminal which is marked with the letter L or coloured red.
On safety
> Op>erate the unit on 100 -120 V AC (PVM-2950Q) or
220 - 240 V (PVM-2950QM).
> The nameplate indicating operating voltage, power
consumption, etc. is located on the rear.
> Should any solid object or liquid fall into the cabinet,
unplug the unit and have it checked by qualified
personnel before operating it any further.
* Unplug the unit from the wall outlet if it is not to be used
for several days or more.
» To disconnect the AC power cord, pull it out by grasping
the plug. Never pull the cord itself.
On installation
» Allow adequate air circulation to prevent internal heat
build-up.
Do not place the unit on surfaces (rugs, blankets, etc.) or
near materials (curtains, draperies) that may block the
ventilation holes.
• Do not install the unit in a locahon near heat sources such
as radiators or air ducts, or in a place subject to direct
sunlight, excessive dust, mechanical vibration or shock.
On cieaning '^
To keep the unit looking brand-new, periodically clean it
with a mild detergent solution. Never use strong solvents
such as thinner or benzine, or abrasive cleansers since these
will damage the cabinet. As a safety precaution, unplug the
unit before cleaning it.
On repacly|ig,,.|
Do not throw away the carton and packing materials. They
make an ideal container in which to transport the unit.
When shipping the unit to another location, repack it as
illustrated on the carton.
If you have any questions about this unit, contact your
authorized Sony dealer.
The socket-outlet should be installed near the equipment
and be easily accessible.
Page 3

Table of contents ■ Features
Precautions.........................................................................2
Features..............................................................................3
Location and function of parts and controls
Front panel....................................................................4
Rear panel.....................................................................5
Remote commander......................................................6
Power sources
Using on-screen menus......................................................8
Operating through menus
Menu guide...................................................................8
Operating a specific monitor with the remote
commander.......................................................................10
Specifications...................................................................11
....................................................................
.............................................
......................
Trinitron picture tube
The Trinitron picture tube provides a flat and high
4
7
8
resolution picture. Horizontal resolution is more than 600
TV lines at the center of the picture.
Four color systems available
The monitor can display NTSC, PAL*, SEC AM, NTSC4.43**
signals. The appropriate color system is selected
automatically.
* If you set PAL to ON in the menu, the monitor can also
display the PAL60 signal.
**The NTSC4 43 signal is used for playing back NTSC
recorded video cassettes with a video tape recorder /
player especially designed for use with this system.
3
10
Index number
You can operate a specific monitor among several monitors
by using the index number features.
On-screen menus
You can adjust the settings by using the on-screen menus.
Control S
The CONTROL S signal allows remote control of several
monitors and a VCR through a single monitor.
Blue only mode
In this mode, only a blue signal is displayed on the screen
turning off the red and green signals. This facilitates color
saturation and phase adjustments.
RGB/component input connectors
RGB or component (Y,R-Y,B-Y) signals from video
equipment can be input through these connectors.
Y/C input connector
The video signal, split into the chrominance signal (C) and
the luminance signal (Y), can be input through this
connector, eliminating the interference between the two
signals, which tends to occur in a composite video signal,
assuring video quality.
This manual covers PVM-2950Q and PVM-2950QM. The
model number is located on the rear.
The operating procedures of all models are the same.
Page 4
Location and function of parts and controls
Front nanol wiiimq «ounnn f
[U POWER switch
«61^ ftOFF
Press to turn the monitor on. Press again to turn it off.
[2] STANDBY indicator
Lights up when the monitor is turned off with the
remote commander.
SJ-
[5]
m—[
m-
----
m
VOLUME
□
1^'"" ’I
I LINE 3 I
[3] Remote sensor
Receives the beam from the remote commander.
[4] CONTROL key
To operate the keys on the front panel, first press this
key. Then the keys light up or flash that shows they can
be operated. Press again to deactivate them.
[5] VOLUME +/- keys
Press to obtain the desired volume.
[6] LINE 1, LINE 2. LINE 3 keys*
Press to select the line inputs.
H] Y/C key*
Press to select the Y/C input of LINE 1 or LINE 2.
H] RGB key*
Press to select the RGB input of LINE 3.
I
[H MENU key
Press to make the menu appear or to go to the following
menu.
Sa SELECT +/- key
Press to move the cursor (►) to an item or to adjust
value in a menu.
[9}—i
BS—I
m
El
SELECT
□
O ENTER key
Press to select the desired item in a menu.
* Each key acts as follows.
CONTROL
Selected key
Not selected key
If the picture disappears suddenly and the STAND BY
indicator flashes, there may be a failure in the monitor.
Unplug the unit and call your authorized Sony dealer.
On
Flash
Light up Light off ■
Light up
Off ■
Page 5

Rear panel
m
i
3-
Q] AC IN socket
Connect the supplied AC power cord to this socket and
to a wall outlet.
[2] LINE 1, LINE 2 connectors
VIDEO IN (BNC)
Connect to the video output of video equipment, such as
a VCR or a color video camera. For a loop-through
connection, connect to the video output of another
monitor.
VIDEO OUT (BNC)
Loop-through output of the VIDEO IN connector.
Connect to the video input of a VCR or another monitor.
Y/C IN (4-pin mini DIN)
Connect to the Y/C separate output of a video camera,
VCR or other video equipment.
Y/C OUT (4-pin mini DIN)
Loopnthrough output of the Y/C IN connector. Connect
to the Y/C separate input of a VCR or another monitor.
AUDIO IN (phono)
Connect to the audio output of a VCR or to a
microphone via a suitable microphone amplifier. For a
loop-through connection, connect to the audio output of
another monitor.
AUDIO OUT (phono)
Loop-through output of the AUDIO IN jack. Connect to
the audio input of a VCR or another monitor.
LINE 3 connectors
R/R-Y IN, G/Y IN, B/B-Y IN (BNC)
When the RGB input is selected (RGB key on the front
panel is lit), connect to the RGB signal outputs of a video
camera. When the R-Y, G/Y, B-Y input is selected (RGB
key is not lit), connect to the R-Y/Y/B-Y component
signal outputs of a Sony Betacam video camera.
HD/COMP (BNC)
Connect to the H sync signal or composite sync signal
output.
VD (BNC)
Connect to the V sync signal output.
External sync signal is selected automatically. See the
priority chart below.
Input connector
HD/COMP
VD
G Sync on G Sync on G
Sync signals
to be selected
AUDIO IN (phono)
Connect to the audio output of a VCR.
[4] SPEAKER L/R terminals
Connect to speakers with 8 to 16 ohms impedance.
Do not connect the speaker's cord to the monitor and to
an amplifier simultaneously, or an excessive electric
current miglit flow from the amplifier and damage the
monitor.
CONTROL S IN/OUT connectors
Connect to the CONTROL S connectors of a VCR or
several monitors. Then you can control the system with
a single remote commander.
If you connect CONTROL S IN to the other equipmenf s
CONTROL S OUT connector, you cannot operate the
monitor with the supplied remote commander.
inpüt'syhc'signals
H Sync Comp Sync
V Sync
HSync
V Sync
— —
Comp Sync
—
Sync on G
Sync on G
Page 6

Location and function of parts and controls (continued)
Remote conimlinder
jí'í-
■ . SW:;
Q] DISPLAY button
Press to display the color system and the selected line
input.
[U MUTING button
Press to mute the sound.
[3] LINE 1/LINE 2/LINE 3 buttons
Press to choose the line input.
[3 Number buttons
■ Press to select the index number. Cannot use the © to ®
buttons with the monitor.
[5] MENU button
Press to make the menu appear or to go to the following
menu.
[6] SELECT +/- buttons
Press to move the cursor (►) to an item or to adjust value
in a menu.
[7] ENTER button
Press to select the desired item in a menu.
installing battery
Insert a size AA (R6) battery in correct polarity.
Notes
In normal operation, a battery will last up to half a year. If
the remote commander does not operate properly, the
battery might be exhausted. Replace it with new one.
To avoid damage from possible battery leakage, remove
the'battery if you do not plan to use the remote • :
commander for a fairly long time.
d] BRIGHTNESS +!- buttons
Press the + button to make the picture brighter or the button to make it darker.
[9] CONTRAST +/- buttons
Press the + button to increase the contrast or the - button
to decrease it.
QS ID MODE buttons
Press ON to make an index number appear on the
screen. Then press the index number of the monitor you
want to operate and press SET. After you finish the
operation, press OFF to return to the normal mode.
M POWER ON/OFF button
Press to turn on the monitor. Press again to turn it off.
M Y/C button
Press to select the Y/C input of LINE 1 or LINE 2.
01 RGB button
Press to select the RGB input of LINE 3. If you do not
press this button (RGB key is not lit), the component
input is selected on LINE 3.
01 POWER ON button
Press to turn on the moiutor. Use this button instead of
the POWER ON/OFF button when you do not want to
let another monitor be affected.
POWER OFF button
Press to turn off the monitor. Use this button instead of
the POWER ON/OFF button when you do not want to
let another monitor be affected.
Page 7

Power sources
DEGAUSS button
Press to demagnetize the screen. Wait for 10 minutes or
more before activating this feature again. The same
interval is needed after turning on the monitor.
CH +/- buttons
(Cannot use these buttons with the monitor.)
VOL +/- buttons
Press to obtain the desired volume.
APERTURE *1- buttons
Press the + button for more sharpness or the - button for
less sharpness. (This adjustment has no effect on the
pictures of RGB signals.)
PHASE +/- buttons
Press the + button to make the skin tones greenish or the
- button to make them purplish. (NTSC signal only)
I
CHROMA +/- buttons
Press the + button to increase the color intensity and the
- button to decrease it. (This adjustment has no effect on
the pictures of RGB signals.)
Connect the AC power cord (supplied) to the AC IN socket
and to a wall outlet.
To (connect an AC power cord securely with an AC plug holder
1 Plug the power cord into the AC IN socket. Then, attach
the AC plug holder (supplied) to the AC power cord.
AC IN socket AC plug holder
lO
m
3
2 Slide the AC plug holder over the cord until it connects
to the attached holder.
To remove the AC power cord
Squeeze the left and right sides and pull out the AC plugholder.
Page 8

Using on-screen menus
Ojpiirâtihg thrôülh^élil^^^
There are four buttons (keys) on the monitor and the remote
commander for menu operations.
To display a menu, first press MENU. Press + or - to move
the cursor (►) and press ENTER to select an item.
To return to the normal screen, press the selected line input
button (key).
M '»■r 4- »V#
Menu operating buttons
Remote commander
SELECT
(menu^
Each time you press MENU, the screen changes as shown
below. For details see the following guide.
Monitor
□
SELECT
□
' Menu^uide^ . •
You can adjust the picture for each line input. Select the line
input by pressing the line input button (key) before making
adjustments.
The items on Menu 4 are common for all line inputs.
Menu 1
[T] CONTRAST
Press + to increase the contrast and press - to decrease it.
\2} PHASE
Press + to make the skin tones greenish and press - to
make them purplish. (NTSC signal only)
(Set MATRIX to OFF when adjusting this item.)
[3] CHROMA
Press + to increase the color intensity and press - to
decrease it.
(Set MATRIX to OFF when adjusting this item.)
[H BRIGHTNESS
Press + to make the picture brighter and press - to make
it darker.
[D BLUE ONLY
Select ON to turn off the red and green signals. Only a
blue signal is displayed on the screen. This facilitates
"chroma" and "phase"(NTSC signal only) control
adjustments.
[6] MATRIX
Select ON to activate the matrix circuit that may correct
skin tones. (NTSC signal only)
S RESET1
Select to restore the factory settings in MENU 1.
8
Page 9

Menu 2
ENU2 LINE1
H CENT
V CENT
H SIZE
V SIZE
•RESET2
3EGAUSS
RETURN
00
00
00
00
16:9
Select ON for a 16:9 picture signal.
PAL
Select ON when the monitor does not recognize the PAL
signal. (You must select ON when the PAL60 signal is
input.)
COL TEMP
Select the color temperature from among 9300K, 6500K
and 3200K.
IC
3
VI
3
[8] H CENT
Adjusts the horizontal centering. Press + to move the
picture to the right and press - to move it to the left.
[9] V CENT
Adjusts the vertical centering. Press + to move the
picture up and press - to move it down.
QS H SIZE
Adjusts the horizontal picture size. Press + to enlarge the
horizontal size and press - to diminish it.
M V SIZE
Adjusts the vertical picture size. Press + to enlarge the
vertical size and press - to diminish it.
in RESET2
Select to restore the factory settings in MENU 2.
M DEGAUSS
Select to demagnetize the screen. Wait for 10 minutes or
more before activating this feature again. The same
interval is needed after turning on the monitor.
IE RETURN
Select to return to the MENU 1 screen.
Menu 3
RESETS
Select to restore the factory settings in MENU 3.
RETURN
Select to return to the MENU 2 screen.
TILT CORRECT
Adjusts the picture tilt due to the influence of the earth's
magnetism. Press + to rotate the picture clockwise and
press - to rotate it counterclockwise.
INDEX NO.
Sets the index number of the monitor. You cannot set the
number with the remote commander. Use the keys on
the monitor. For more information about the index
number, see "Operating a specific monitor with the
remote commander."
ENU3 LINEI
I
APERTURE
APERTURE : 32
VM
16:9
PAL :OFF
COL TEMP
: ON
:OFF
: 6500
Adjusts the picture sharpness. Press -i- for more
sharpness or press - for less sharpness. (This adjustment
has no effect on the pictures of RGB signals.)
I VM
Select ON to emphasize sharpness and to reproduce a
clear picture. (This adjustment has no effect on the
pictures of RGB signals.)
RETURN
Select-to return to the MENU 3 screen.
9
Page 10

Op era tin g a sp eci fic mo nit or wit h t he rem ote co mma nde r
By following procedure, you can operate a specific
monitor with the remote commander without affecting
other monitors that are installed together.
1 Press ID MODE ON on the remote commander.
Monitor index numbers appear in white characters
on all the monitors. (Every monitor has its own
index number from 1 to 255 as factory preset.)
rID MODEn
ON
s
□
SET
□
2 Input the index number of the monitor you
want to operate using 0-9 buttons of the
remote commander.
The input number appears right next to each
monitor's own index number.
INDEX NO. : 117 ...
o © ©
© © ©
4 After necessary adjustment, press ID MODE OFF.
The monitor returns to the normal mode.
Tq change the index number
You can change the index number if necessary.
You cannot change the number with the remote
commander. Use the keys on the monitor.
1 Display MENU 4 screen with pressing the MENU
button.
2 Select INDEX NO. and press ENTER.
3 Select the index number with the SELECT + /- buttons
and press ENTER.
© © ® ^
3 Press ID MODE SET.
The character on the selected monitor changes to
cyan while others change to red.
ID MODE
ON
□
OFF
□
%
Now you can operate only a specified monitor. (All
operations available in ID mode except POWER
ON/OFF.)
10
Page 11

Specifications
Video signal
Picture tube
Color system
Resolution
Frequency response
Picture performance
Color temperature
Line pull range
Overscan
Zooming
inputs and Outputs
VIDEO IN
Y/C IN
AUDIO IN (L,R)
R/R-Y,G/Y,B/B-YIN
Sync input
Speaker output
29" Super Trinitron tube
Visible picture size: 675 mm
(27" measured diagonally)
AG pitch: 0.70 - 0.85 mm
Anti-glare & Anti-static
NTSC, PAL, SECAM, NTSCj 43,
PAL60
600 TV lines at the center
VIDEO: 7 MHz (-3 dB)
S VIDEO: 8 MHz (-3 dB)
RGB: 10 MHz (-3 dB)
9300K/6500K (standard)/3200K
switchable
Horizontal: ± 500 Hz
Vertical: -8 Hz
7% preset (± 3% variable)
Within 5%
BNC connector
1 Vp-p, sync negative
75-ohm (auto), loop through
4-pin mini DIN connector
Y: 1 Vp-p,syr\c negative
C: 0.286 Vp-p (burst signal) (NTSC)
0.3 Vp-p (PAL)
75-ohm (auto), loop through
Phono jack
-5 dBs high impedance,
loop through
BNC connector
R, G, B channels: 0.714 Vp-p,/non-
composite, 75-ohm terminated
(525 lines)
0.7 Vp-p/non composite, 75-ohm
terminated (625 lines)
1 Vp-p/composite, 75-ohm
terminated
Y channel: 1.0 Vp-p/composite,
75-ohm terminated
0.7 Vp-p/non composite, 75-ohm
terminated
R-Y, B-Y channels: 0.7 Vp-p,
75-ohm terminated
BNC connector
H (or composite) SYNC, V SYNC,
0.5 - 5 Vp-p, 75-ohm terminated
8-16 ohm, 7 W + 7 W
General
Power requirements PVM-2950Q
100-120 VAC, 50/60 Hz,
MAX. 3.7 A .
PVM-2950QM
220 - 240 V AC, 50 - 60 Hz,
MAX. 1.2 A
Operating temperature range-
0-35°C (32-95°F)
Dimensions
Mass
Supplied accessories
Optional accessories
Speaker system
TV tuner
687 X 538 X 529 mm (w/h/d)
(27 1/-8 X 21 1/4 X 20 7/8 inches)
52 kg (114 lb 10 oz)
AC power cord (1)
AC plug holder (1)
Remote commander RM-854 with a
battery (1)
SS-X6A
ST-92TV (USA only)
n
l£
11
 Loading...