

Page 1
Personal
Component
System
3-860-142-16(1)
Operating Instructions page 2
Bedienungsanleitung Seite 2
PMC-D305L
EN
D
EN
D
PMC-D307L
1997 by Sony Corporation
Page 2
Warning
To prevent fire or shock hazard, do
not expose the player to rain or
moisture.
To avoid electrical shock, do not open
the cabinet. Refer servicing to
qualified personnel only.
Information
This Compact Disc player is classified as a
CLASS 1 LASER product.
The CLASS 1 LASER PRODUCT label is
located at the rear.
Warning
Do not install the appliance in a confined
space, such as a bookcase or built-in cabinet.
Notice for customers in the United
Kingdom
A moulded plug complying with BS 1363 is
fitted to this equipment for your safety and
convenience.
CAUTION
You can use this player on AC power
source only. You cannot use it on
batteries.
When you use this player for the first
time, or when you have not used it
for a long time, leave it connected to
AC power source for about one hour
to charge the built-in backup battery
for the clock, timer, preset radio
stations, etc. You can use the player
during charging. The player will
charge the battery automatically as
long as it is connected to a power
source.
When you disconnect the AC power
cord after charging, be sure to turn
the power off first. Once fully
charged, the backup battery will last
for about 30 minutes without being
connected to any power sources.
If the stored data are erased, reenter
them when you use the player again.
About this manual
The instructions in this manual are for the
PMC-D305L and PMC-D307L. Before you
start reading, check your model number. The
PMC-D305L is the model used for illustration
purpose.
Should the fuse in the plug supplied need to
be replaced, same rating fuse approved by
ASTA or BSI to BS 1362, (i.e. marked with
or mark) must be used.
If the plug supplied with this equipment has
a detachable fuse cover, be sure to attach the
fuse cover after you change the fuse. Never
use the plug without the fuse cover. If you
should lose the fuse cover, please contact
your nearest Sony service station.
EN
Introduction2
Page 3

Table of contents
Basic Operations
4 Playing a CD
6 Listening to the radio
8 Playing a tape
10 Recording on a tape
The CD Player
12 Using the display
13 Locating a specific track
14 Playing tracks repeatedly
(Repeat Play)
15 Creating your own program
(Program Play)
The Radio
17 Presetting radio stations
18 Playing preset radio stations
The Tape Player
19 Finding the beginning of a track
The Timer
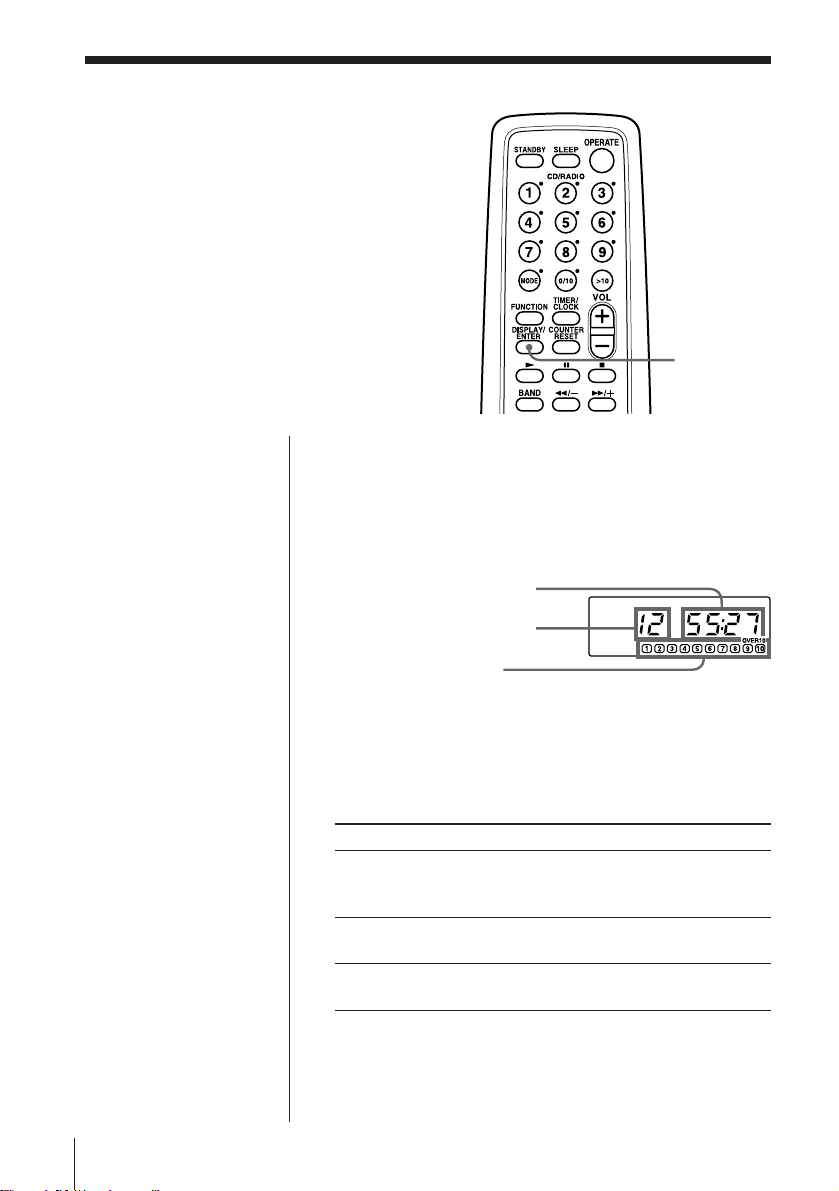
20 Setting the clock
21 Waking up to music
23 Falling asleep to music
24 Timer-recording radio programs
Setting Up
26 Hooking up the system
30 Connecting optional components
32 Selecting the audio emphasis
(Sound Mode/MEGA BASS)
Additional Information
33 Precautions
35 Troubleshooting
38 Maintenance
39 Specifications
40 Index
Basic Operations
EN
Introduction
EN
3
Page 4

Basic Operations
Playing a CD
3
For hookup instructions, see pages 26 - 29.
1,2
1 Press 6 OPEN/CLOSE down to
open the CD compartment and
place the CD on the CD
compartment.
With the label side up
2 Close the lid of the CD
compartment.
3 Press ( on the CD section
(direct power-on).
The player plays all the tracks
once.
EN
Basic Operations4
Display
Page 5
Use these buttons for additional operations
Tip
Next time you want to
listen to a CD, just press
(. The player turns on
automatically and starts
playing the CD.
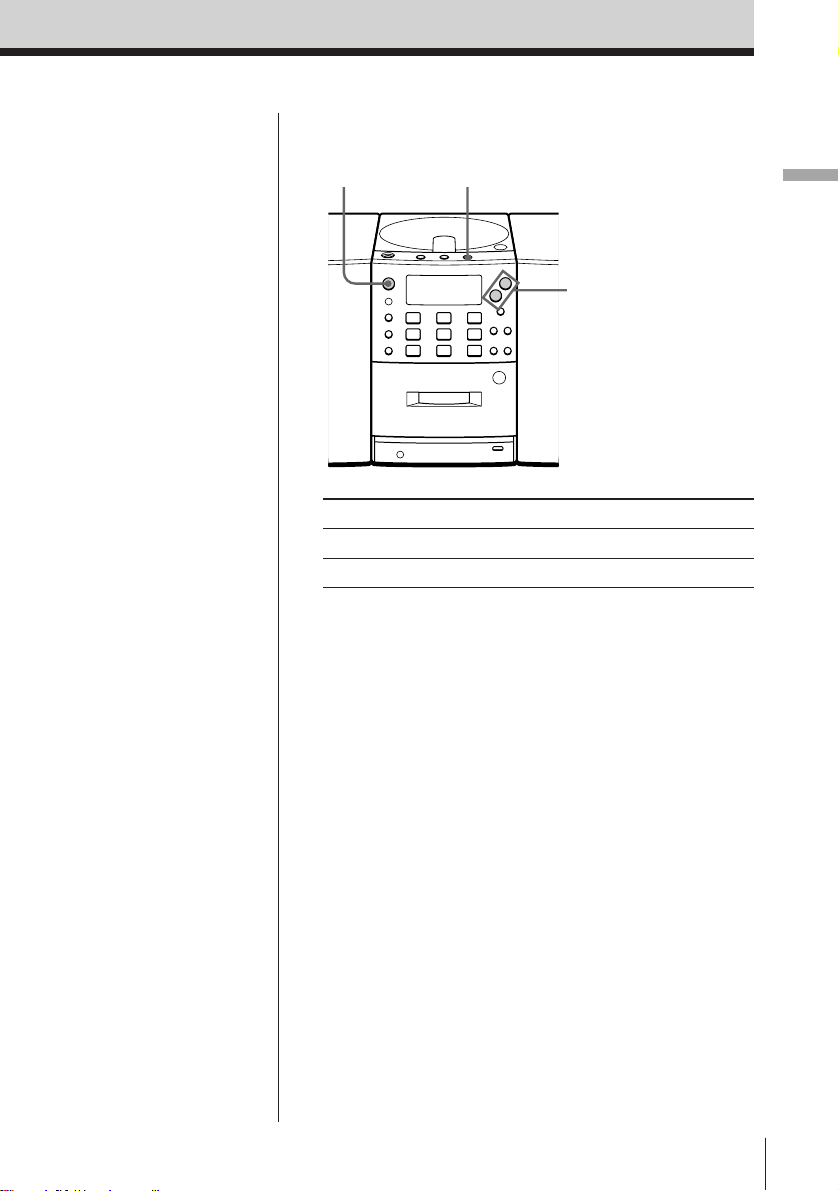
OPERATE
To Press
Adjust the volume VOLUME +/–
Stop playback p
Pause playback P
Go to the next track +
Go back to the previous track =
Remove the CD 6 OPEN/CLOSE
Turn on/off the player OPERATE
p
P
6 OPEN/CLOSE
VOLUME +/–
=/+
Press again to resume play
after pause.
Basic Operations
Basic Operations
EN
5
Page 6
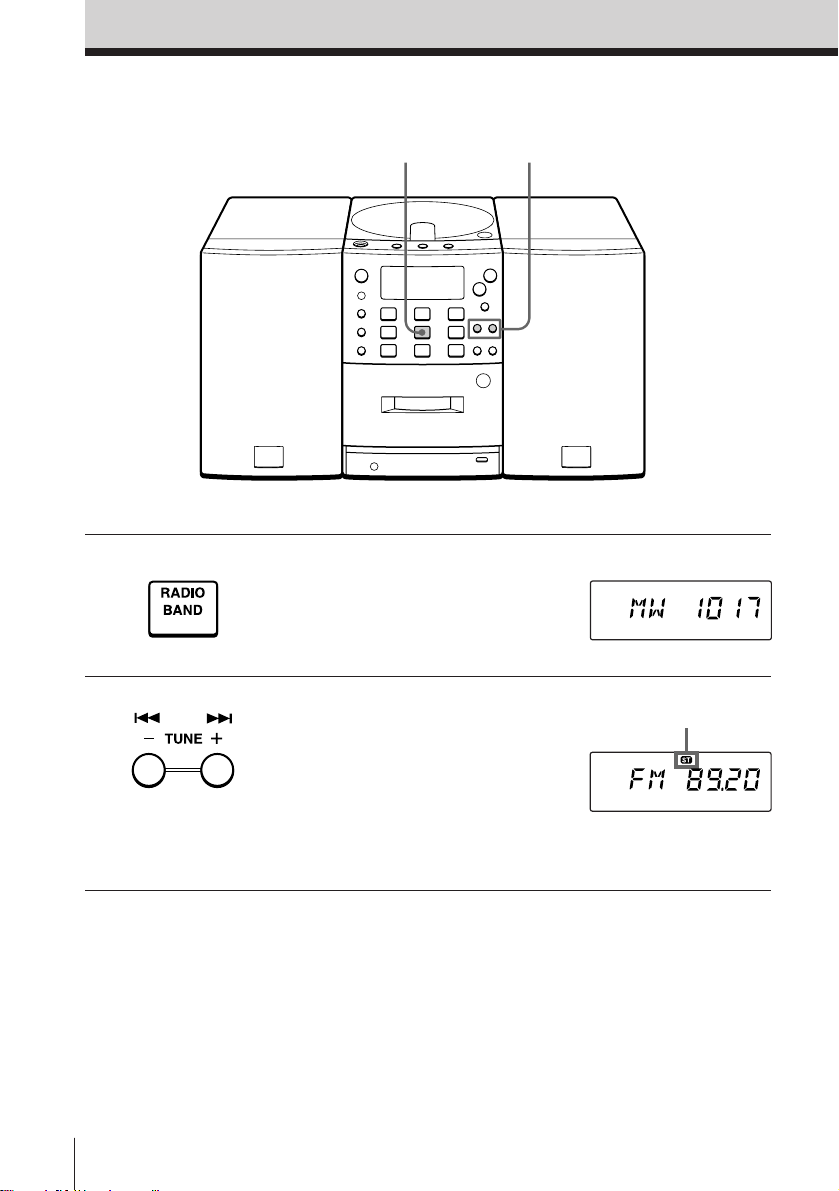
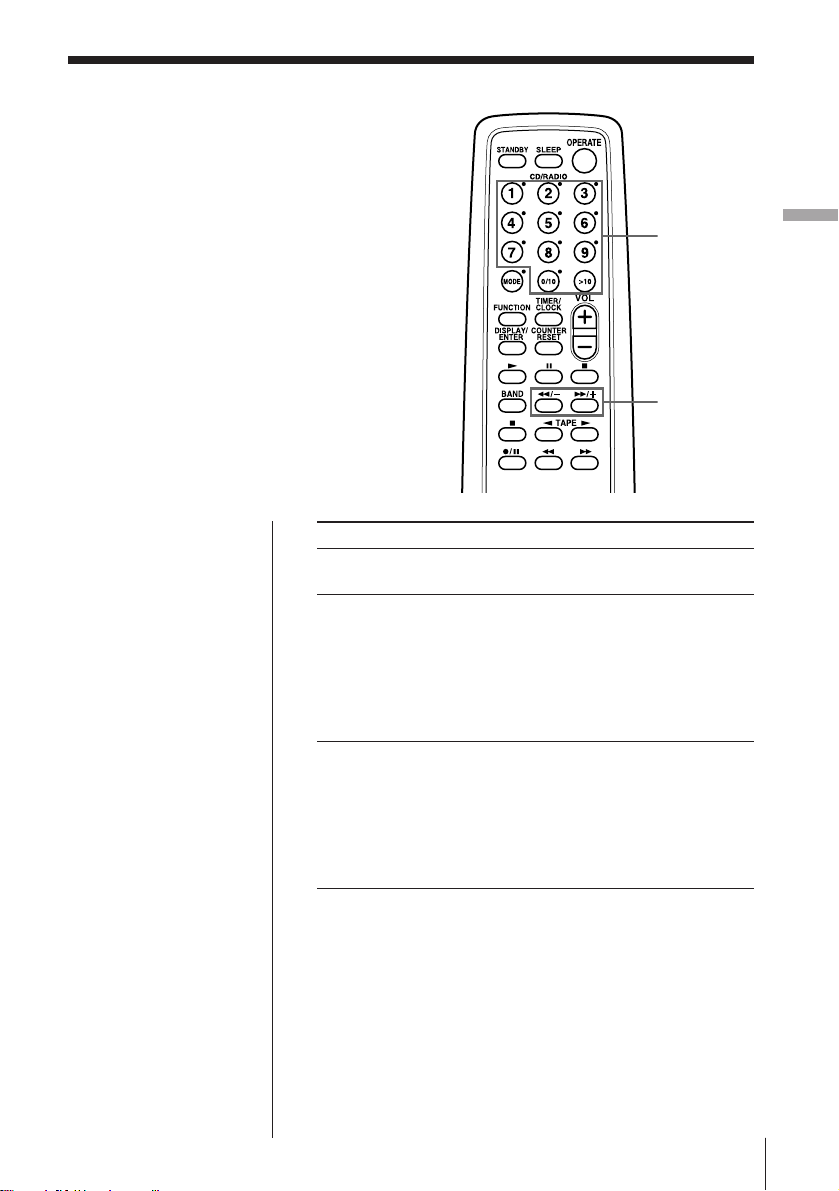
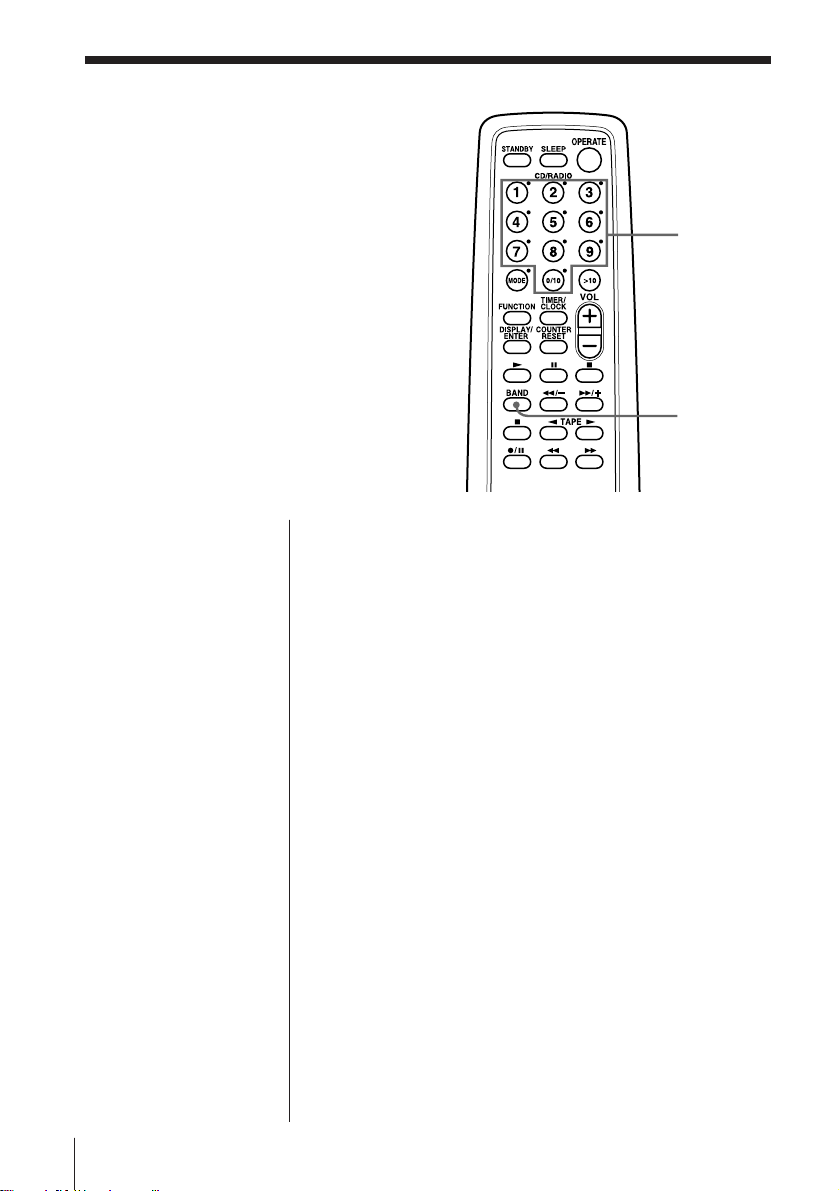
Listening to the radio
1
For hookup instructions, see pages 26 - 29.
2
1 Press BAND until the band you
want appears in the display
(direct power-on).
2 Hold down TUNE +/– until the
frequency digits begin to change
in the display.
The player automatically scans
the radio frequencies and stops
when it finds a clear station.
If you can't tune in a station,
press the button once at a time.
Display
Indicates an FM
stereo broadcast.
EN
Basic Operations6
Page 7
Use these buttons for additional operations
PLAY MODE
OPERATE
MONO/ST/ISS
VOLUME +/–
Basic Operations
Tips
• If the FM broadcast is
noisy, press PLAY
MODE/MONO/ST/ISS
on the player until
“Mono” appears in the
display and the radio
will play in monaural.
• Next time you want to
listen to the radio, just
press BAND. The player
turns on automatically
and starts playing the
previous station.
To Press
Adjust the volume VOLUME +/–
Turn on/off the radio OPERATE
To improve broadcast reception
FM
Connect the supplied FM lead aerial. If the FM
broadcast is still noisy, disconnect the FM lead aerial
and connect the FM outdoor aerial (not supplied) (see
pages 28 and 29.)
MW/LW
Reorient the MW/LW loop aerial (supplied) (see page
28.)
Basic Operations
EN
7
Page 8
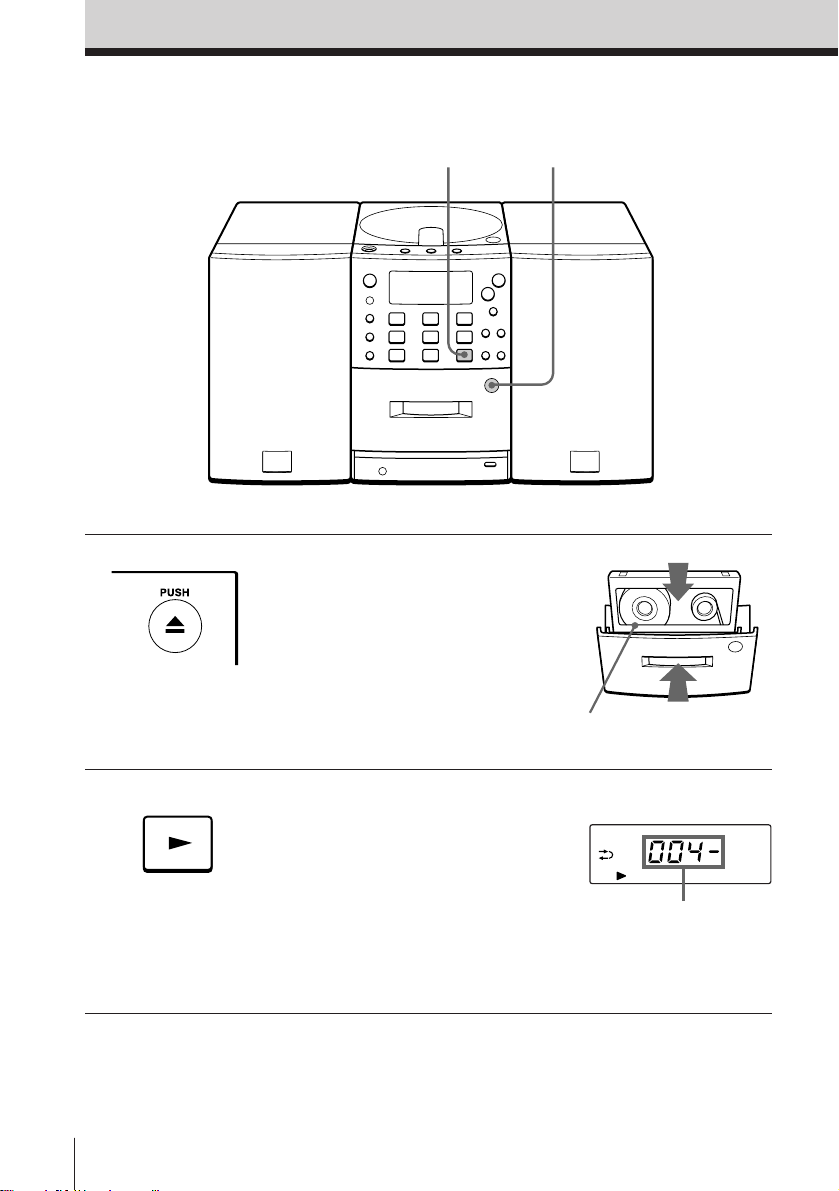
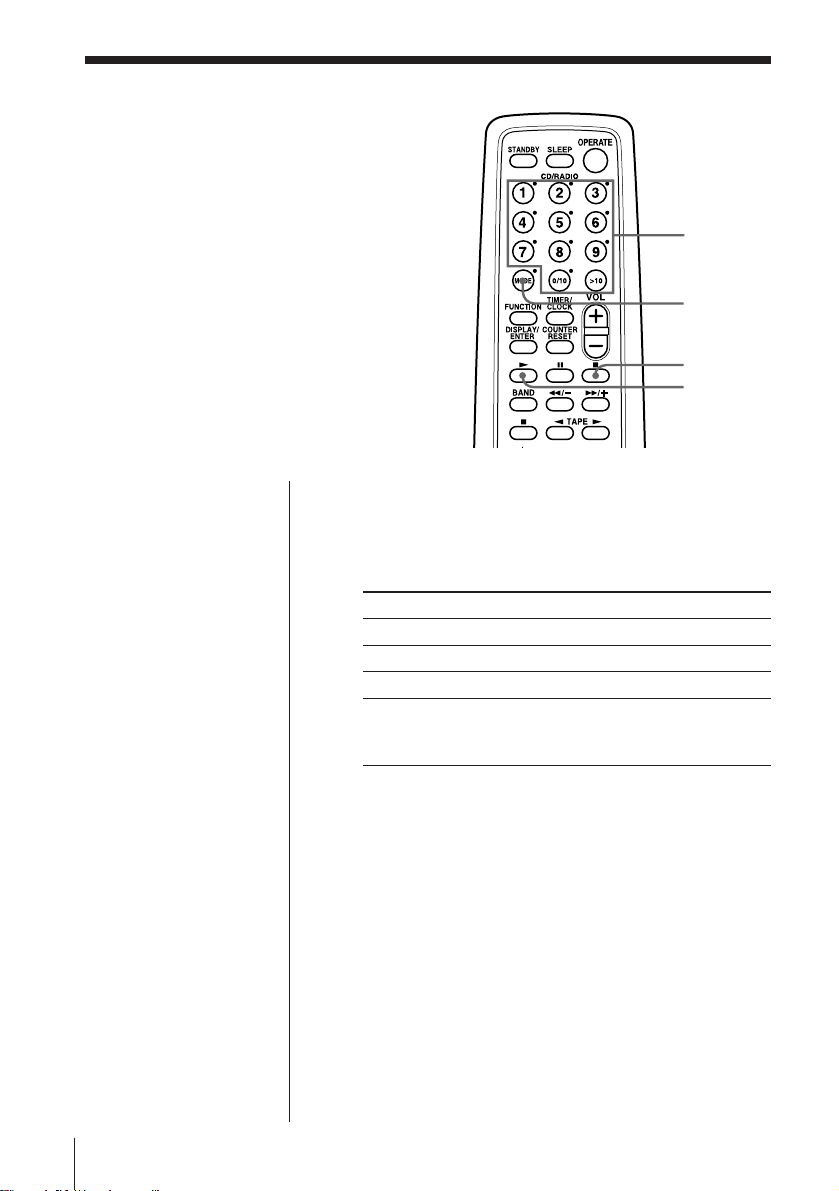
Playing a tape
2
For hookup instructions, see pages 26 - 29.
1 Press 6 PUSH to open the tape
compartment and insert a
recorded tape. Use TYPE I
(normal) tape only. Close the
compartment.
With the side you want
to play facing forward
1
2 Press ( on the TAPE section.
The player turns on (direct
power-on) and starts playing.
EN
Basic Operations8
Display
Tape counter
Page 9

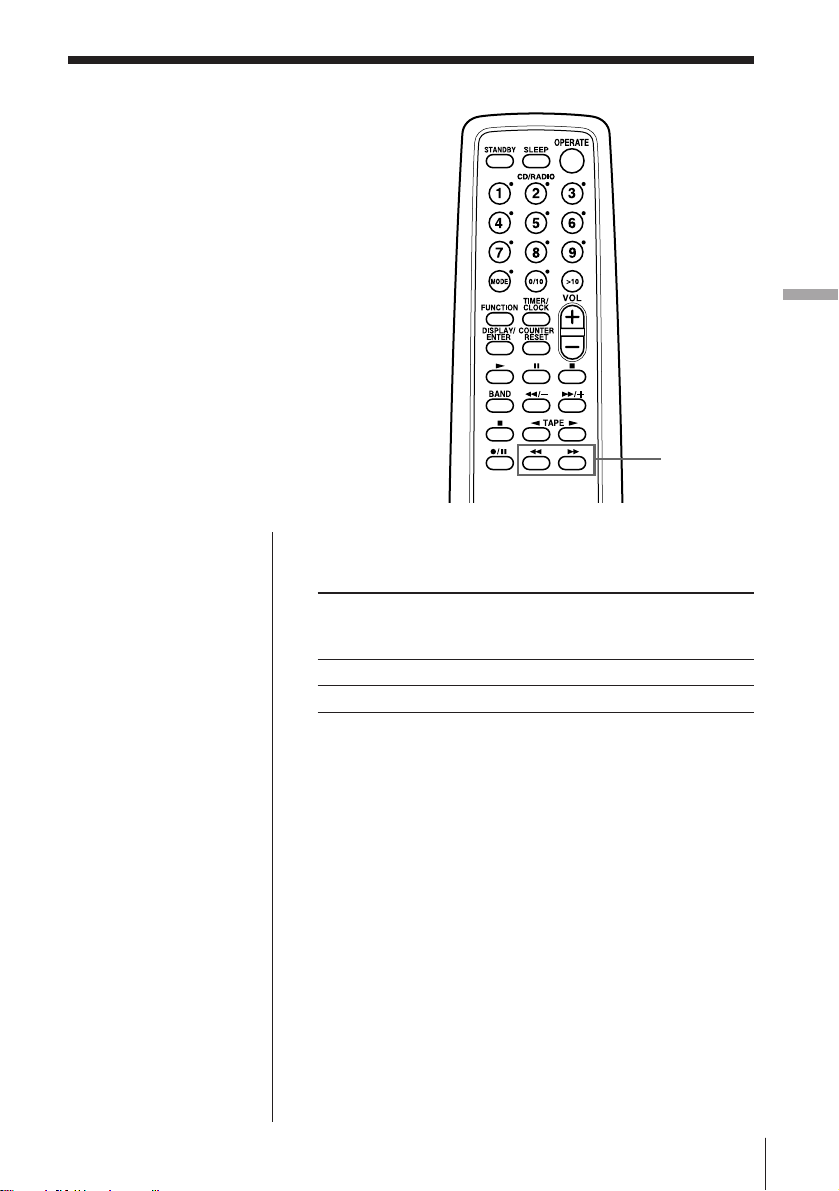
Use these buttons for additional operations
Tips
• Press COUNTER RESET
on the remote to reset
the counter to “000.” (on
the remote only)
• Next time you want to
listen to a tape, just
press ( or 9 . The
player turns on
automatically and starts
playing the tape.
OPERATE
To Press
Adjust the volume VOLUME +/–
Stop playback p
Play the reverse side 9
Fast-forward or rewind the tape ) or 0
Eject the cassette 6 PUSH
Turn on/off the player OPERATE
9p
VOLUME +/–
0/)
6 PUSH
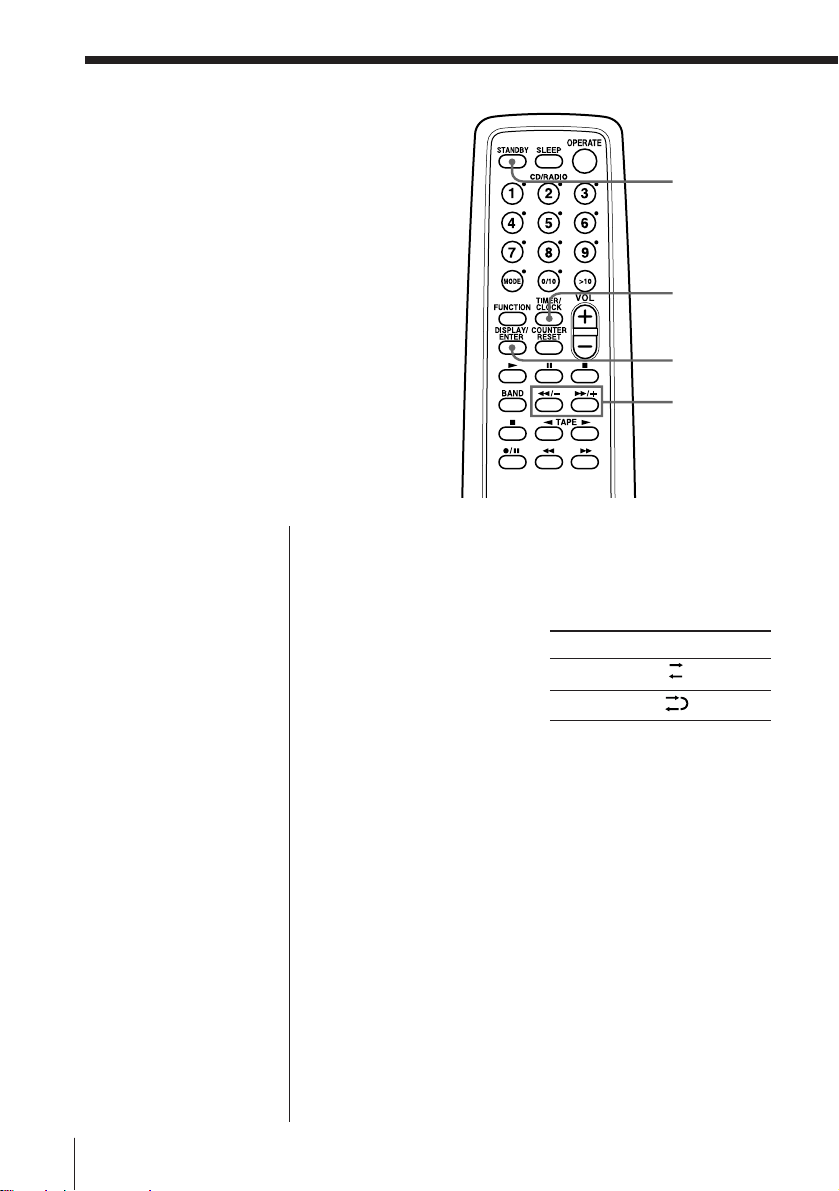
DIR MODE
To select the direction of the tape
Press DIR MODE repeatedly.
Basic Operations
To play Display shows
One side of the tape
Both sides of the tape
from the front side to reverse
side only
Both sides of the tape repeatedly
Basic Operations
EN
9
Page 10
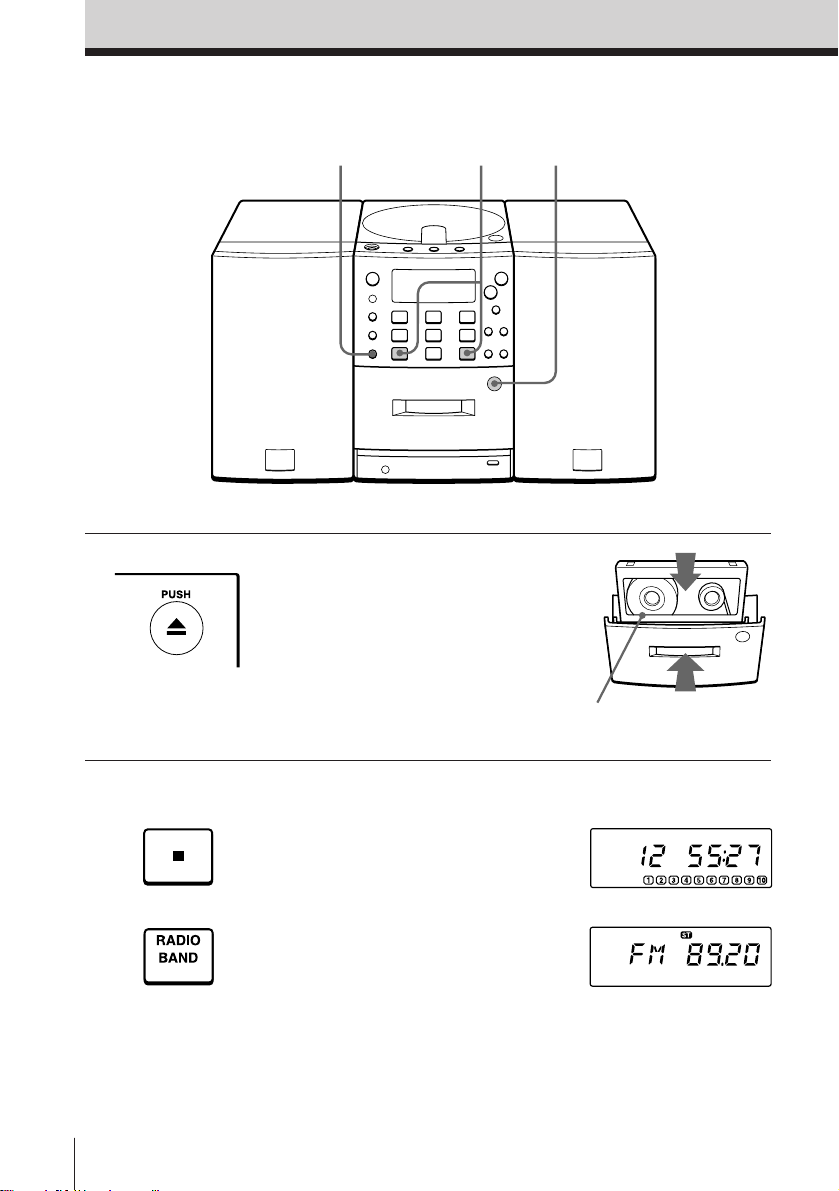
Recording on a tape
3
For hookup instructions, see pages 26 - 29.
3
1 Press 6 PUSH to open the tape
compartment and insert a blank
tape. Use TYPE I (normal) tape
only.
With the side you want to
record on facing forward
1
2 Select the program source you
want to record.
To record from the CD player,
insert a CD (see page 4) and press
p on the CD section.
To record from the radio, press
BAND and tune in the station
you want (see page 6.)
EN
Basic Operations10
Display
Page 11
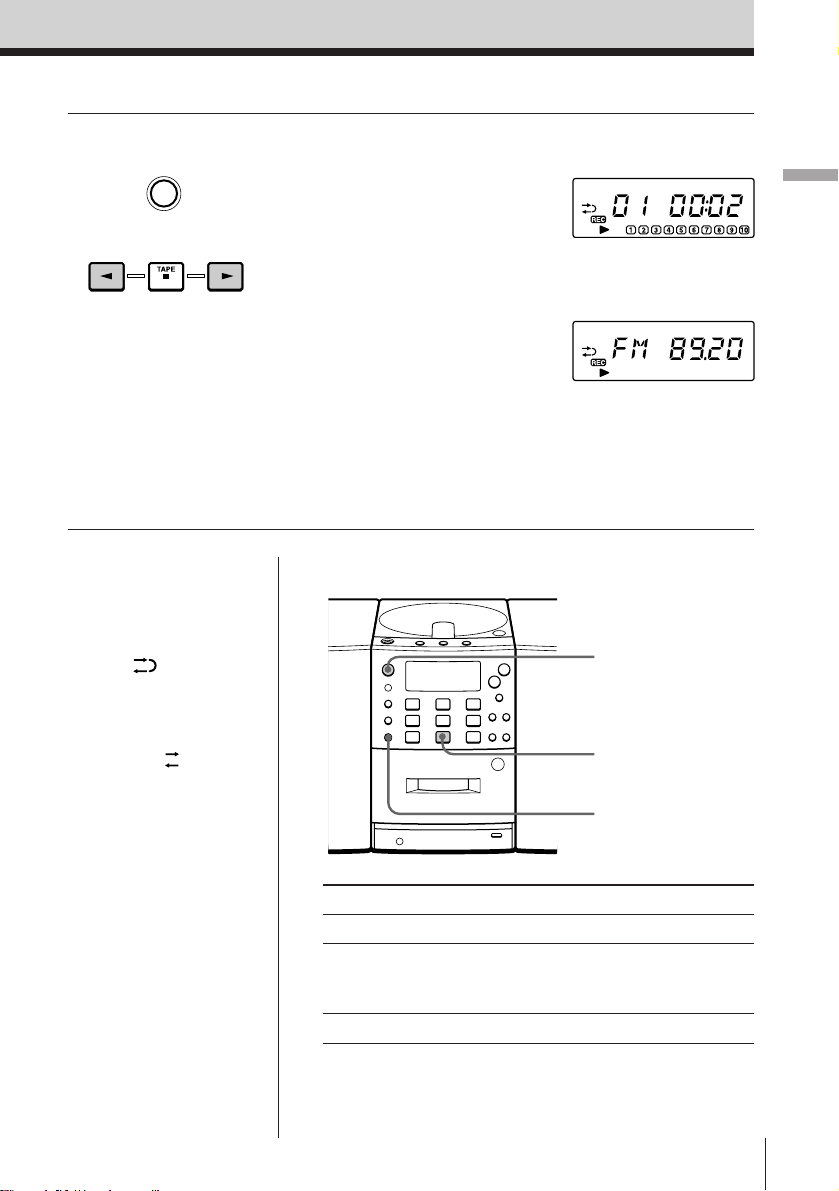
3 Start recording.
r/P
1 Press r/P.
The 9/( indication in the
display flashes.
2 Press ( (for the front side) or
9 (for the reverse side) on the
TAPE section to select the
recording side of the tape.
Recording will start
automatically.
(On the remote, while keeping
r/P pressed, press ( or 9
on the TAPE section.)
Note
If recording does not start, press
r/P and then ( or 9 again.
Recording from the CD
player
Basic Operations
Recording from the
radio
Tips
• Adjusting the volume or
the audio emphasis (see
page 32) will not affect
the recording level.
• When is displayed,
recording will be made
on both sides of the
tape. To record on one
side, press DIR MODE
to display .
• If the MW/LW radio
makes a whistling
sound after you’ve
pressed r/P in step 3,
press PLAY MODE/
MONO/ST/ISS to select
the position that most
decreases the noise.
•
To erase a recording,
proceed as follows:
1 Insert a tape you want
to erase its recording
and press p on the
tape section.
2 On the player: press
r/P and then ( or
9. On the remote:
While keeping r/P
pressed, press ( or
9.
Use these buttons for additional operations
OPERATE
p
r/P
To Press
Stop recording p on the TAPE section
Pause recording r/P
Press the button again to
resume recording.
Turn on/off the player OPERATE
Basic Operations
11
EN
Page 12
The CD Player
Using the display
You can check information about the CD
using the display.
Checking the total track number and playing
time
Press DISPLAY/ENTER in stop mode.
If the CD has more than 10 tracks, “OVER 10” appears
in the display.
Total playing time
DISPLAY/
ENTER
Total track number
Music calendar
Checking the remaining time
Press DISPLAY/ENTER while playing a CD.
The track numbers in the music calendar disappear
after they are played.
To display Press DISPLAY/ENTER
The current track number Once
and the remaining time
on the current track*
The remaining time on the CD Twice
and the number of tracks left
The current track number Three times
and playing time
* For a track whose number is more than 20 the remaining
time appears as “– –:– –”.
EN
The CD Player12
Page 13
Locating a specific
track
You can quickly locate any track using
the number buttons. You can also find a
specific point in a track while playing a
CD.
Number
buttons
0/–,
)/+
The CD Player
Note
You cannot locate a
specific track if “PGM”
or “SHUF REP” is lit in
the display. Turn off
the indication by
pressing p on the CD
section.
Tip
When you locate a
track numbered over
10, press > 10 first, then
the corresponding
number buttons.
Example:
To play track number
23, press >10 first, then
2 and 3.
To locate Press
a specific track directly number button of the
track.
a point while listening to )/+ (forward) or 0/–
the sound (backward) while playing
and hold down until you
find the point.
When you use the buttons
on the player, use =/
+.
a point while observing )/+ (forward) or 0/–
the display (backward) in pause and
hold down until you find
the point.
When you use the buttons
on the player, use =/
+.
The CD Player 13
EN
Page 14
Playing tracks
repeatedly
(Repeat Play)
You can play tracks repeatedly in
normal, shuffle or program play modes
(see pages 15 and 16.)
Note
When you repeat a
single track or all the
tracks, make sure
neither “PGM” nor
“SHUF REP” is lit in
the display. If either is
lit, turn it off by
pressing p on the CD
section.
1 Press p on the CD section.
“Cd” appears in the display.
2 Press MODE until the repeat mode you want
appears in the display.
To repeat Select
a single track REP 1
all the tracks REP ALL
tracks in random order SHUF REP
programed tracks PGM REP and then program
3 Do either of the following to start repeat play:
• When you’ve selected REP1, select the track by
pressing the number button.
• When you’ve selected REP ALL, SHUF REP or
PGM REP, press ( .
Number
buttons
MODE
p
(
tracks (see steps 3 on
page 15).
To cancel Repeat Play
Press MODE until “REP” disappears from the display.
EN
The CD Player14
Page 15
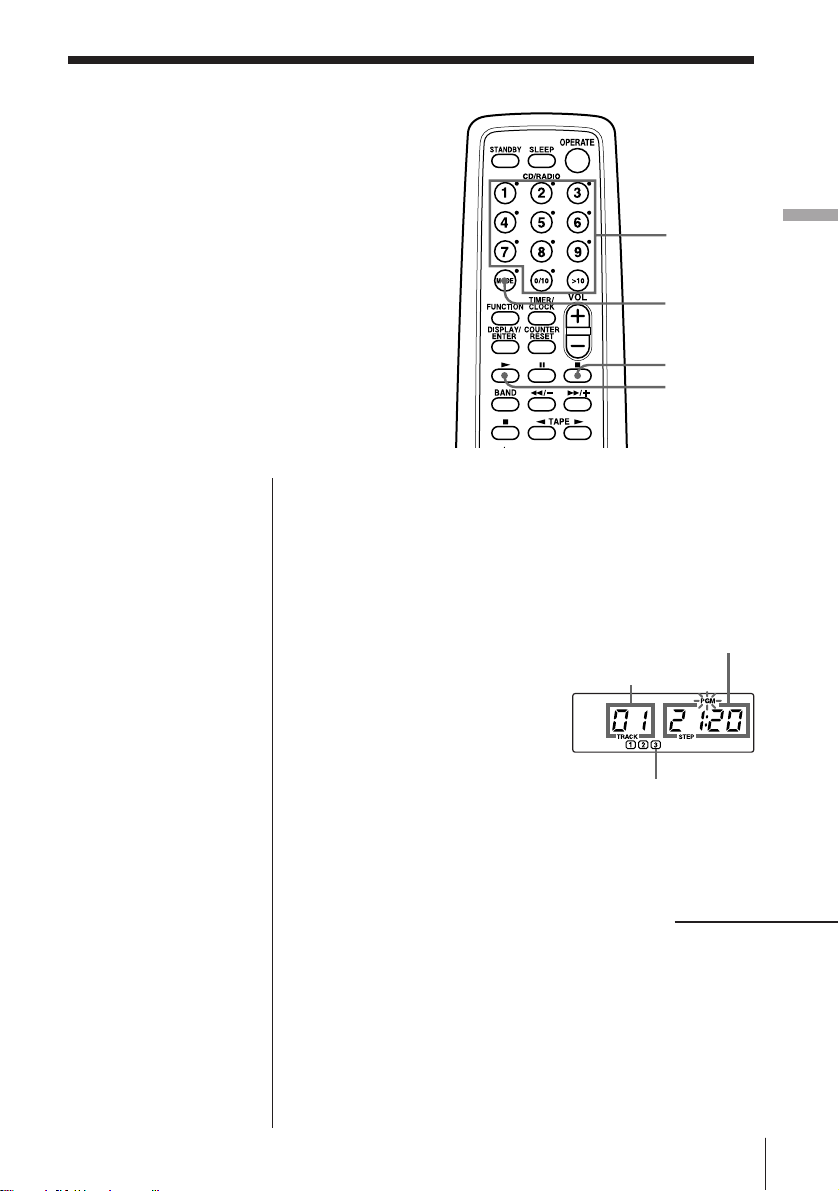
Creating your
own program
(Program Play)
You can make a program of up to 20
tracks in the order you want them to be
played.
Tips
• To create your own
program on the player
by selecting the track
you want while
listening to the CD,
proceed as follows:
1 Press ( on the CD
section to start play.
2 Press PGM SET/
AUTO PRESET .
“PGM” flashes in the
display.
3 Press =/+ to
select the track you
want to program, and
press DISPLAY/
ENTER/MEM.
Repeat this step.
4 Press p.
5 Press ( to start
program play.
Note
When you program a
track from the CD
having more than 21
tracks:
If you program a track
whose track number is
more than 21, “- -:- -” is
displayed instead of the
total programmed time.
1 Press p on the CD section.
“Cd” appears in the display.
2 Press MODE until “PGM” appears in the display.
3 Press the number buttons for the tracks you want
to program in the order you want.
4 Press ( to start program play.
Number
buttons
MODE
p
(
Total programmed time
Track number
Playing order
continued
The CD Player
The CD Player 15
EN
Page 16

Creating your own program (Program Play) (continued)
Notes
• You can play the same
program again, since
the program is saved
until you open the CD
compartment.
• You can record your
own program. After
you’ve created the
program, insert a blank
tape into the tape
compartment and press
r/P and ( (or 9)
to start recording.
To cancel Program Play
Press MODE until “PGM” disappears in the display.
To check the order of tracks before play
Press + on the player.
Every time you press the button, the track number
appears in the programmed order.
To change the current program
Press p once if the CD is stopped and twice if the CD
is playing. The current program will be erased. Then
create a new program following the programming
procedure.
EN
The CD Player16
Page 17

The Radio
Presetting radio
stations
You can store radio stations into the
player's memory. You can preset up to
30 radio stations, 10 for each band in any
order.
1 Press BAND until the band you want appears in
the display.
2 Press PGM SET/AUTO PRESET until “AUTO ”
appears.
The stations are stored in memory from the lower
frequencies unless a station has a weak signal.
BANDPGM SET/AUTO PRESET
The Radio
If a station cannot be preset automatically
You need to preset a station with a weak signal
manually. Also, when you want to replace a preset
station with a new one, do the following:
1 Press BAND until the band you want appears in the
display.
2 Tune in a station you want.
3 On the remote, hold down the number buttons that
you want to preset the new station for about 2
seconds.
On the player:
Press DISPLAY/ENTER/MEM for about 2 seconds
until “PRESET” flashes. Select the preset number
that you want to preset the new station by pressing
PRESET +/–, and press DISPLAY/ENTER/MEM.
The new station replaces the old one.
The Radio
17
EN
Page 18
Playing preset
radio stations
Once you've preset the stations, use the
number buttons to tune in your favorite
stations.
Number
buttons
BAND
Tip
You can tune in a
preset station with the
player. Use PRESET
+/– instead of the
number buttons.
1 Press BAND to select the band.
2 Press the number buttons to tune in a stored
station.
EN
The Radio18
Page 19
The Tape Player
Finding
the beginning of
a track
The player senses where a track begins
by detecting the pauses between the
tracks.
The Tape Player
0/)
Notes
• If a soft sound like
pianissimo continues
for some seconds in a
track, the player may
start to play as the next
track.
• If you press the ) or
0 when there is no
sound in the track, this
function does not
operate correctly.
• To find the beginning
of a track correctly,
a pause of approx. 4
seconds is necessary.
While playing a tape, press ) or 0.
Playing side The beginning The beginning
of the next track of the current
track
Front side (() )0
Reverse side (9) 0)
The tape is wound or rewound to the beginning of the
next or current track, and play will start automatically.
The Tape Plyaer
19
EN
Page 20
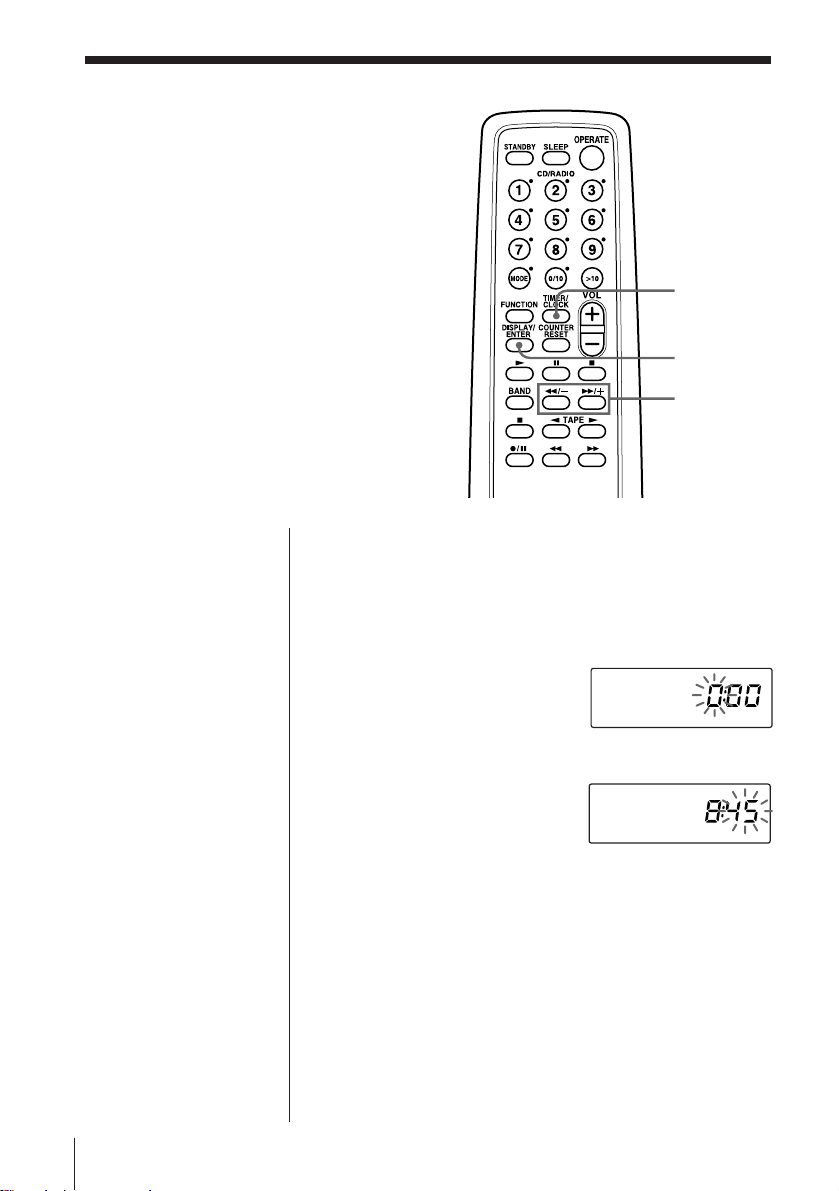
The Timer
Setting the clock
“0:00” indication appears in the display
until you set the clock.
As long as the clock goes, “:” flashes.
TIMER/
CLOCK
DISPLAY/
ENTER
0/–,
)/+
Tip
The time display
system:
24-hour system
Before you begin, hook up the systems (see page 26.)
1 Press and hold TIMER/CLOCK for about 2
seconds until the hour digit flash.
2 Set the clock.
1 Press 0/– or )/+
to set the hour and
press DISPLAY/
ENTER.
.
2 Press 0/– or )/+
to set the minutes.
3 Press DISPLAY/ENTER.
“:” flashes and the clock starts from 00 seconds.
EN
The Timer20
Page 21
Waking up to
music
You can wake up to music or a radio
program at a preset time. Make sure you
have set the clock (“Setting the clock” on
page 20).
STANDBY
TIMER/
CLOCK
Note
You cannot preset
wake-up timer and
recording timer (page
24) at the same time.
DISPLAY/
ENTER
0/–,
)/+
Before you begin, make sure the t (clock) indication is
not lit in the display. If it is lit, press STANDBY.
1 Prepare the music source you want to play.
Source Do this
CD Insert a CD.
TAPE Insert a tape.
RADIO Tune in a station.
LINE Turn on the equipment connected to
LINE IN.
2 Press TIMER/CLOCK to display the t indication.
Do the following operations by checking the
display window.
3 Press 0/– or )/+ until “PLAY” appears in the
display and press DISPLAY/ENTER.
4
Press 0/–, )/+ until the music source (“Cd,”
“TAPE,” “RAdiO” or “LINE”) you want to play
appears in the display and press DISPLAY/ENTER.
The Timer
continued
The Timer 21
EN
Page 22

Waking up to music (continued)
Tips
• The display window
does not light while the
waking up timer is
operating even if the
power is on.
• You can have the
player go on the next
day at the same time.
Just press STANDBY
until the t indication
appears in the display.
The preset settings
remain until you reset
them.
5 Set the timer to the hour and the minutes you want
the music to go on.
1 Press 0/– or )/+
to set the hour and
press DISPLAY/
ENTER.
2 Press 0/– or )/+
to set the minutes and
press DISPLAY/
ENTER.
6 Set the timer to the hour and the minutes you want
the music to go off (Do as step 5.)
7 Press 0/– or )/+ to set the volume you want,
and press DISPLAY/ENTER.
8 Press STANDBY.
The t indication lights up and the power goes off.
At the preset time, the power will go on and music
will fade in. Then, music will fade out and the
power will go off at the preset time, and the player
will enter the standby mode.
To check/change when the playback will start
Press TIMER/CLOCK, then DISPLAY/ENTER. Each
time you press DISPLAY/ENTER, a stored setting
lights up. Change the setting if you need to when the
setting lights up. When you finish checking, press
TIMER/CLOCK.
To use the player before a timer playback starts
If you turn on the player, you can use it as usual ( in
case of the radio, if you listen to the station which is
different from the one you tuned in in step 1 on page
21, you will hear that station at the preset time.) Turn
off the player before the preset time.
To stop play
Turn off the power.
EN
The Timer22
Page 23
Falling asleep to
music
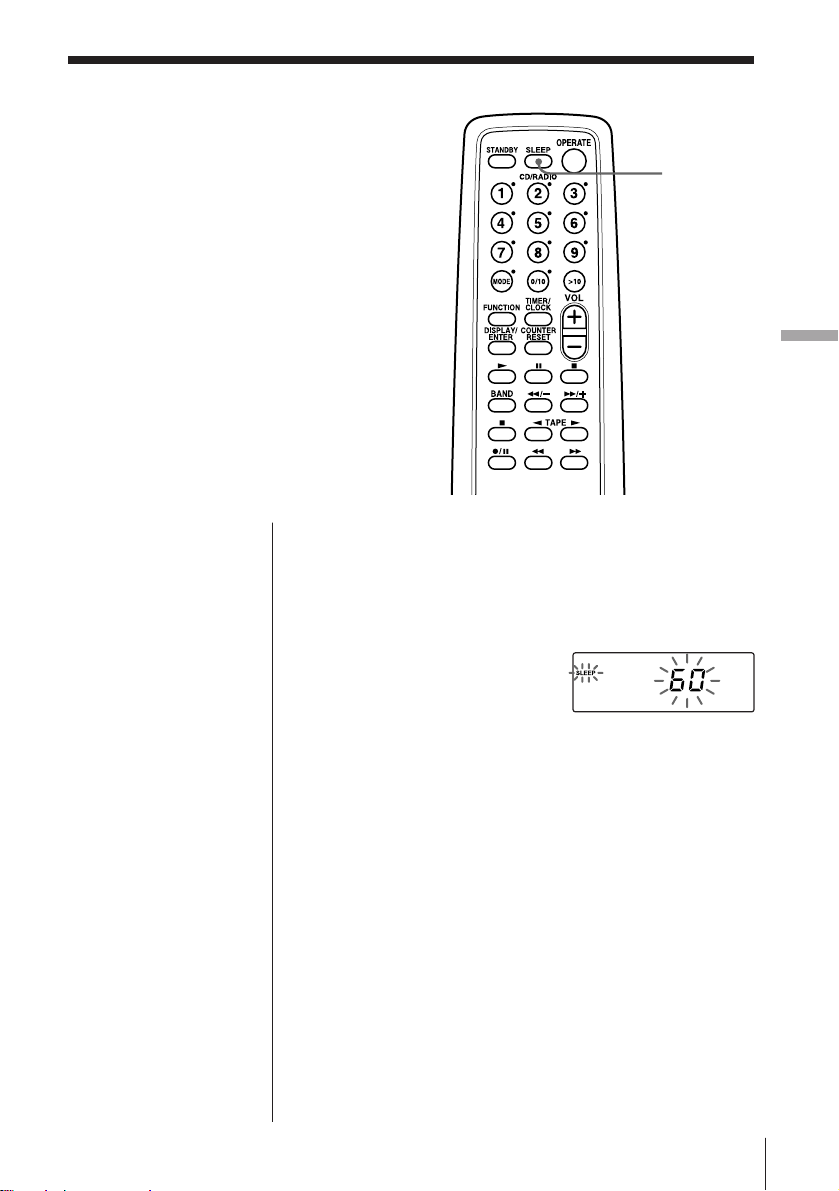
You can set the player to turn off
automatically after 10, 20, 30, 60, 90 and
120 minutes, allowing you to fall asleep
while listening to music.
SLEEP
The Timer
Tips
• The display window
does not light while the
sleep timer is on.
• You can combine the
waking up timer with
the sleeping timer. Set
the waking up timer
first (see page 21), turn
on the power, and then
set the sleep timer.
• You can prepare the
different music for the
waking up timer and
the sleeping timer.
However, you cannot,
store different radio
stations.
• You can set different
volume for the waking
up timer and the
sleeping timer. For
instance, you can sleep
at lower volume and
wake up at higher
volume.
1 Play the music source you want.
2 Press SLEEP to display “SLEEP.”
3 Press SLEEP to select the minutes until the player
goes off automatically.
Each time you press
the button, the
indication changes as
follows: “10” n “20”
n“30” n “60”
n“90” n “120” n
“no indication”.
If 4 seconds have passed after you pressed SLEEP,
the minutes in the display are stored in memory.
The preset time has passed, then music fades out
and the player goes off automatically.
To cancel the sleep function
Press SLEEP to make “SLEEP” disappear.
To change the preset time
Do the steps 2 and 3 again.
The Timer 23
EN
Page 24
Timer-recording
radio programs
You can set timer to record the radio at a
certain time. You can also record the
sound of the component connected to
the LINE IN jack, using the timer. Make
sure you have set the clock (see “Setting
the clock” on page 20.)
Note
You cannot preset
recording timer and
wake-up timer (page
21) at the same time.
Tip
When you receive the
MW/LW program in
step 1, press r/P to
check if the noise is
heard. If so, press
PLAY MODE/MONO/
ST/ISS on the player to
select the position that
most decreases the
noise.
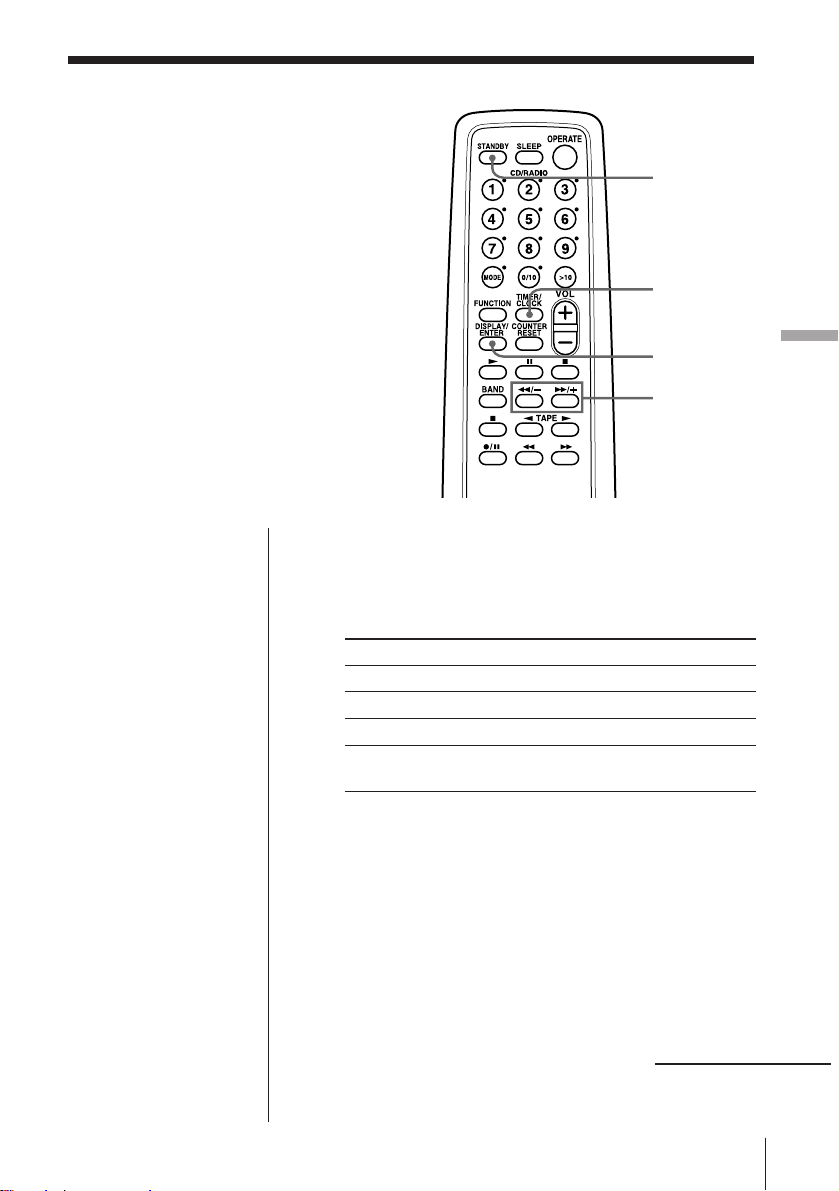
Before you begin, make sure the t (clock) indication
is not lit in the display. If it is lit, press STANDBY.
1 Tune in the radio station and insert a cassette for
recording.
2 Press DIR MODE on
the player to select
direction of the tape.
3 Press TIMER/CLOCK to display the t indication.
Do the following operations by checking the
display window.
4 Press 0/– or )/+ until “REC” appears in the
display, and press DISPLAY/ENTER.
5 Press 0/– or )/+ until “RADIO” appears in
the display, and press DISPLAY/ENTER.
When recording the sound of the component
connected to the LINE IN jack, press 0/– or
)/+ to display “LINE,” and press DISPLAY/
ENTER.
STANDBY
TIMER/
CLOCK
DISPLAY/
ENTER
0/–,
)/+
Display
One side
Both sides
EN
The Timer24
Page 25

Note
To change the
recording side of the
tape from the reverse
side (9) to the front
side ((), press
STANDBY to make the
t indication disappear,
and press STANDBY
again.
Tips
• The preset settings
remain until you reset
them.
• When you select both
sides recording, the
recording will stop
after the both sides
recording finishes so
that accidental
recording will not be
made.
• The display window
does not light while the
recording timer is on.
6 Set the timer to the hour and the minutes you want
to start recording.
1 Press 0/– or )/+
to set the hour and
press DISPLAY/
ENTER.
2 Press 0/– or )/+
to set the minutes and
press DISPLAY/
ENTER.
7 Set the timer to the hour and the minutes you want
to stop recording. (Do as step 6.)
8 Press 0/– or )/+ to set the volume you want,
and press DISPLAY/ENTER.
9 Press STANDBY.
The power goes off. The t indication and the
recording side of the tape (front side (()) appear
in the display.
At the preset time, the power will go on and the
recording will start. Then the power will go off at
the preset time, and the player will enter the
standby mode.
To check/change when the recording will start
Press TIMER/CLOCK, then DISPLAY/ENTER. Each
time you press DISPLAY/ENTER, a stored setting
lights up. Change the setting if you need to when the
setting lights up. When you finish checking, press
TIMER/CLOCK.
To listen to the radio, etc. before a timer-recording
starts
If you turn on the player, you can use it as usual.
Before the preset time, tune in the station you want to
record and turn off the power.
The Timer
To stop timer-recording
Turn off the power.
The Timer 25
EN
Page 26

Setting Up
Hooking up the
system
2 MW/LW loop aeral 2 FM aerial
Make sure you turn off the
power before making any
connections.
Note
Connect the right
speaker for this unit
only to the speaker
terminals of the left
speaker. If you connect
any other speaker or
equipment,
malfunction may
occur.
1 Audio connecting cord
Right speaker
Left speaker
1 Speaker cord
1 Power cord
3 AC power cord
To a wall outlet
1 Hooking up the speakers
1 Connect the power cord of the left speaker to the
POWER IN jack of the player.
Tip
PMC-D307L only:
This unit comes
supplied with 8 round
(10 mm diameter) slip
stoppers. Attach one
under each of the
speaker’s four corners
to prevent the speaker
from moving when
subject to slight
vibrations, etc.
EN
Setting Up26
Page 27

2 Connect the audio connecting cord (supplied) to
the SIGNAL OUTPUT jacks of the player and the
SIGNAL INPUT jacks of the left speaker.
Connect the white plugs to the L (left) jacks and
the red plugs to the R (right) jacks.
3 Connect the speaker cord of the right speaker to
the SPEAKER OUT terminals of the left speaker.
Connect the red wire to the (+) plus terminal, and
the black wire to the (–) minus terminal.
Setting Up
continued
Setting Up 27
EN
Page 28

Hooking up the system (continued)
Note
Keep the aerials away
as far as possible from
the speaker cords and
other connecting cords.
If you do not, noise
may be heard.
2 Hooking up the aerials
MW/LW loop aerial*
(supplied)
FM aerial** (supplied)
*Reorient the aerial to improve broadcast reception.
**Keep the aerial as horizontal as possible.
Setting up the MW/LW loop aerial
Tip
The sound quality may
be changed depending
on the polarity of the
plug. Change the
direction of inserting
the plug and check the
sound quality.
EN
Setting Up28
3 Connecting the AC power cord
Connect the AC power cord to the wall outlet.
Page 29

4 Inserting batteries into the remote
Insert two R6 (size AA) batteries (not supplied)
Replacing batteries
With normal use, the batteries should last for about six
months. When the remote no longer operates the
player, replace all the batteries with new ones.
To improve the FM reception
Disconnect the supplied FM aerial and connect the FM
outdoor aerial (not supplied). If you use a distributor,
you can also use the TV aerial.
Setting Up
FM outdoor
aerial (not
supplied) IEC standard socket
connector (not supplied)
Setting Up 29
EN
Page 30

Connecting
optional
components
You can enjoy the sound from
a VCR or MiniDisc player/
recorder through the speakers
of this player.
Be sure to turn off the power
of each component before
making connections.
For details, refer to the
instruction manual of the
component to be connected.
FUNCTION
Note
Connect the cables
firmly to avoid any
malfunction.
Tip
You can record the
sound of the connected
component. Insert a
cassette, and while
keeping r/P pressed,
press ( of the tape
player.
Tip
You can also record the
sound of this player on
another cassette
recorder by connecting
a cassette recorder to
the LINE OUT jack of
this player.
Listening to TV, VCR and MiniDisc player/
recorder
TV, VCR, MiniDisc
player/recorder,
cassette player/
recorder, etc.
To line out jack
When connections are finished, turn on the player and
press FUNCTION to make “LINE” appear in the
display.
Audio connecting
cable (not supplied)
Front panel of this
player
Listening through the speakers of other audio
equipment
Amplifier
To line in jack
Audio connecting
cable (not supplied)
Front panel of this
player
EN
Setting Up30
Page 31

Notes
• As long as “Cd”
appears in the display,
the optical digital
output jack is in
operation and the jack
lights even if the CD is
in stop mode.
• If you play a CD-ROM
that is not for audio
use, noise may be
heard.
Recording a CD on a MiniDisc recorder and
DAT recorder
Front panel of
MiniDisc
recorder, DAT
recorder, etc.
To digital input
Digital Connecting
cable* POC-5AB (not
supplied)
this player
When connections are finished, turn the power on and
start recording.
* Select a connecting cable depending on the type of the
digital input jack of the recorder to be connected. For details,
refer to the instruction manual of the component to be
connected. The OPTICAL DIGITAL OUT (CD) jack of this
unit is square-shaped jack.
The type of the jack Model number of
of the component the connecting cable
to be connected
Optical miniplug POC-5AB
(MiniDisc Walkman, etc.)
L-type 7-pin connector POC-DA12P
(DAT Walkman, etc.)
Square-shaped optical POC-10A
connector (MiniDisc
recorder, DAT recorder, etc.)
Setting Up
Setting Up 31
EN
Page 32

Selecting the
audio emphasis
(Sound Mode/MEGA BASS)
You can adjust the audio emphasis of the
sound you are listening to.
Selecting the sound characteristic
Press SOUND to select the audio emphasis you want.
Choose To get
SOUND
powerful, clean sounds,
emphasizing low and high range
audio
“MEGA BASS” appears in the
display.
light, bright sounds emphasizing
high and middle range audio
the presence of vocals, stressing
middle range audio
percussive sounds, emphasizing
bass audio
“MEGA BASS” appears in the
display.
the whole dynamic range for
music such as classical music
EN
Setting Up32
Page 33

Additional Information
Precautions
On safety
• As the laser beam used in the CD
player section is harmful to the eyes,
do not attempt to disassemble the
casing. Refer servicing to qualified
personnel only.
• Should any solid object or liquid fall
into the player, unplug the player, and
have it checked by qualified personnel
before operating it any further.
On power sources
• For AC operation, use the supplied
AC power cord; do not use any other
type.
• The player is not disconnected from
the AC power source (mains) as long
as it is connected to the wall outlet,
even if the player itself has been
turned off.
• When the batteries are not to be used,
remove them to avoid damage that
can be caused by battery leakage or
corrosion.
• The nameplate indicating operating
voltage, power consumption, etc. is
located at the rear of the left speaker.
On placement
• Do not leave the player in a location
near heat sources, or in a place subject
to direct sunlight, excessive dust or
mechanical shock.
• Do not place the player on an inclined
or unstable place.
• Do not place anything within 10 mm
of the side of the cabinet. The
ventilation holes must be
unobstructed for the player to operate
properly and prolong the life of its
components.
• If the player is left in a car parked in
the sun, be sure to choose a location in
the car where the player will not be
subjected to the direct rays of the sun.
• Since a strong magnet is used for the
speakers, keep personal credit cards
using magnetic coding or springwound watches away from the player
to prevent possible damage from the
magnet.
• When carrying the player, do not hold
the lid of the CD compartment. If you
do so, the lid may open so that you
may drop the player.
On operation
• If the player is brought directly from a
cold to a warm location, or is placed in
a very damp room, moisture may
condense on the lenses inside the CD
player section. Should this occur, the
player will not operate properly. In
this case, remove the CD and wait
about an hour for the moisture to
evaporate.
• If the player has not been used for a
long time, set it in the playback mode
to warm it up for a few minutes before
inserting a cassette.
If you have any questions or problems
concerning your player, please consult
your nearest Sony dealer.
continued
Additional Information 33
EN
Page 34

Precautions (continued)
Notes on CDs
• Before playing, clean the CD with a
cleaning cloth. Wipe the CD from the
center out.
• Do not use solvents such as benzine,
thinner, commercially available
cleaners or anti-static spray intended
for vinyl LPs.
• Do not expose the CD to direct
sunlight or heat sources such as hot
air ducts, nor leave it in a car parked
in direct sunlight as there can be a
considerable rise in temperature
inside the car.
• Do not stick paper or sticker on the
CD, nor scratch the surface of the CD.
• After playing, store the CD in its case.
If there is a scratch, dirt or fingerprints
on the CD, it may cause tracking error.
Notes on cassettes
• Break off the cassette tab from side A
or B to prevent accidental recording. If
you want to reuse the tape for
recording, cover the broken tab with
adhesive tape.
Side A
Tab for side B Tab for side A
• To record on a tape with its tab broken
off, cover the respective tab hole for
side A or B with adhesive tape.
• The use of a cassette with more than
90 minutes of play time is not
recommended except for long,
continuous recording or playback.
EN
Additional Information34
Page 35

Troubleshooting
Symptom
There is no audio.
General
“no disc“ lights in the display even
when a CD is in place.
The CD does not play.
CD PlayerRadio
The sound drops out.
The audio is weak or has poor
quality.
The audio is not stereo.
The picture of your TV becomes
unstable.
Remedy
• Press OPERATE to turn on the player.
• Connect the AC power cord to a wall outlet
securely.
• Connect the power cord to the POWER IN of
the player (page 26).
• Connect the audio connecting cord correctly
(page 27.)
• Adjust the volume.
• Unplug the headphones when listening through
speakers.
• Insert the CD with the label surface up.
• Make sure that the CD compartment is closed.
• Place the CD with the label surface up.
• Clean the CD.
• Take out the CD and leave the CD compartment
open for about an hour to dry moisture
condensation.
• Press p on the CD section to switch the function
of the player to “Cd”.
• Reduce the volume.
• Clean the CD, or replace it if the CD is badly
damaged
• Place the player in a location free from
vibration.
• Move the player away from the TV.
• If you are using the remote while listening to
MW/LW radio, noise may be heard. This is
unavoidable.
• Press PLAY MODE/MONO/ST/ISS on the
player until “STEREO” appears.
• If you are listening to an FM program near the
TV with an indoor antenna, move the player
away from the TV.
continued
Additional Information 35
EN
Page 36

Troubleshooting (continued)
Symptom
The tape does not move when you
press an operation button.
The r/P button does not
function/The tape does not play.
The tape does not erase completely.
The tape does not record.
The audio is weak/The audio
Tape Player
quality is poor.
The tape player cannot be paused
during playback.
The sound is distorted.
The timer does not operate.
Timer
Remedy
• Close the cassette compartment securely.
• Make sure the safety tab on the cassette is in
place.
• Press p on the TAPE section to switch the
function of the player to “TAPE”.
• Clean the erasing heads (see page 38.)
• Make sure the tape is inserted properly.
• Make sure the safety tab of the cassette is in
place.
• Clean the heads, pinch rollers and capstans
(See page 38).
• Demagnetize the heads using a demagnetizer
(see page 38).
• The tape player can be paused during recording
only.
• The TYPE II (high position) or TYPE IV (metal)
tape is being used. Use TYPE I (normal) tape
only.
• Make sure the time on the clock is correct.
• Check to see if the AC power had been cut off.
• Make sure the tape has not wound to the end.
• Make sure the t (clock) indication is displayed.
EN
Additional Information36
Page 37

Symptom
The remote does not function.
Remedy
• Replace all the batteries in the remote with new
ones if they are weak.
• Make sure that you are pointing the remote at
the remote sensor on the player.
• Remove any obstacles in the path of the remote
and the player.
Remote
• Make sure the remote sensor is not exposed to
strong light such as direct sunlight or
fluorescent lamp light.
• Move closer to the player when using the
remote.
After trying the above remedies, if you still have problems, unplug the AC power cord. After all
the indications in the display disappear, plug the AC power cord again. If the problem persists,
please consult your nearest Sony dealer.
Additional Information 37
EN
Page 38

Maintenance
Cleaning the lens
If the lens becomes dirty, it may cause a
skipping of sound during CD operation.
Clean with a commercially available
blower.
Cleaning the tape heads and tape
path
Wipe the heads, the pinch rollers and
the capstans with a cleaning swab
slightly moistened with cleaning fluid or
alcohol after every 10 hours of operation
for optimum playback and recording
quality. To make the best possible
recording, however, we recommend that
you clean all surfaces over which tape
travels before each recording.
Pinch roller
Capstan
Erase head
Record/Playback head
Demagnetizing the tape heads
After 20 to 30 hours of use, enough
residual magnetism will have built up
on the tape heads to begin to cause loss
of high frequency sound and hiss. At
this time, you should demagnetize the
heads and all metal parts in the tape
path with a commercially available tape
head demagnetizer.
Cleaning the cabinet
Clean the cabinet, panel and controls
with a soft cloth slightly moistened with
a mild detergent solution. Do not use
any type of abrasive pad, scouring
powder, or solvent, such as alcohol or
benzine.
After cleaning, insert a tape when the
areas cleaned are completely dry.
EN
Additional Information38
Lens
Page 39

Specifications
CD player section
System
Compact disc digital audio system
Laser diode properties
Material: GaAlAs
Wave length:780 nm
Emission duration: Continuous
Laser output: Less than 44.6 µW (This output is the
value measured at a distance of about 200 mm from
the objective lens surface on the optical pick-up
block with 7 mm aperture.)
Spindle speed
200 r/min (rpm) to 500 r/min (rpm) (CLV)
Number of channels
2
Frequency response
20 - 20,000 Hz +1/–2.5 dB
Wow and flutter
Below measurable limit
Radio section
Frequency range
FM Italy 87.5 - 108 MHz
Central and eastern
Europe 65 - 74 MHz
Other countries 87.6 - 107 MHz
87.5 - 108 MHz
MW 531 - 1,602 kHz
LW 153 - 279 kHz
IF
FM: 10.7 MHz
MW/LW: 450 kHz
Aerials
FM: External aerial terminal
MW/LW: External aerial terminal
Cassette-corder section
Recording system
4-track 2 channel stereo
Fast winding time
Approx. 130s (sec.) with Sony cassette C-60
Frequency response
TYPE I (normal): 40 - 15,000 Hz
General
Speaker
Full range: 8 cm (3
cone type x 2
Input
LINE IN jack (stereo minijack)
Minimum input level 250 mV
Outputs
Headphones jack (stereo minijack)
For 16 - 68 ohms impedance headphones
LINE OUT jack (stereo minijack)
Rated output level 440 mV at load impedance 47
kilohms
Optical digital output (optical output connector)
Wave length: 630 - 690 nm
Maximum power output
10 W + 10 W
Power requirements
For personal component system:
230 V AC, 50 Hz
For remote commander:
3 V DC, 2 R6 (size AA) batteries
Power consumption
AC 35 W
Dimensions
Mass
Supplied accessories
Design and specifications are subject to change without
notice.
(incl. projecting parts)
PMC-D305L
Player: approx. 130 × 211 × 200 mm (w/h/d)
(5
Left speaker: approx. 125 × 210 × 234 mm
(w/h/d) (5
Right speaker: approx. 125 × 210 × 200 mm
(w/h/d) (5
PMC-D307L
Player: approx. 130 × 211 × 200 mm (w/h/d)
(5
Left speaker: approx. 130 × 210 × 235 mm
(w/h/d) (5
Right speaker: approx. 130 × 210 × 200 mm
(w/h/d) (5
PMC-D305L
Player: approx. 1.7 kg (3 lb. 12 oz)
Left speaker: approx. 2.8 kg (6 lb. 3 oz)
Right speaker: approx. 1.1 kg (2 lb. 7 oz)
PMC-D307L
Player: approx. 1.7 kg (3 lb. 12 oz)
Left speaker: approx. 3.2 kg (7 lb. 1 oz)
Right speaker: approx. 1.6 kg (3 lb. 9 oz)
Remote commander (1)
FM lead aerial (1)
MW/LW loop aerial (1)
Audio connecting cord (1)
Slip stoppers (8) (PMC-D307L only)
1
⁄4 in.) dia., 6.0 ohms,
1
⁄8 × 8 3⁄8 × 7 7⁄8 inches)
×
8 3⁄8 × 9 1⁄4 inches)
×
8 3⁄8 × 7 7⁄8 inches)
1
⁄8 × 8 3⁄8 × 7 7⁄8 inches)
1
⁄8 × 8 3⁄8 × 9 3⁄8 inches)
1
⁄8 × 8 3⁄8 × 7 7⁄8 inches)
Optional accessories
Sony MDR headphone series
Additional Information 39
EN
Page 40

Index
A
Audio emphasis 32
AUTO PRESET 17
B
Batteries for remote 29
C
CD player 12
Cleaning
cabinet 38
tape heads and tape
path 38
Connecting
AC power cord 29
optional components
30
the system. See
Hooking up the system
Creating your own
program 15
D, E, F, G
Demagnetizing the tape
heads 38
Display 12
H
Hooking up
aerials 28
speakers 26
system 26
I, J, K
Improving broadcast
reception 7
L
Listening to the radio 6
Locating a specific track
13
M, N, O
MEGA BASS 32
P, Q
Playing
a CD 4
a tape 8
preset radio stations 18
tracks repeatedly 14
Presetting radio stations
17
Program Play 15
R
Radio stations
playing 18
presetting 17
Recording
on a tape 10
Repeat Play 14
S
Selecting
audio emphasis 32
direction of the tape 9
tracks 5, 13
Setting the clock 20
Setting up 26
Sound mode 32
T
Tape player 19
Timer
Falling asleep to music
23
Timer-recording radio
programs 24
Waking up to music 21
Troubleshooting 35
U, V, W, X, Y, Z
Using the display 12
EN
Additional Information40
Page 41

Additional Information 41
EN
Page 42

Achtung
Um Feuergefahr und die Gefahr eines
elektrischen Schlags zu vermeiden,
setzen Sie das Gerät weder Regen
noch sonstiger Feuchtigkeit aus.
Um einen elektrischen Schlag zu
vermeiden, öffnen Sie das Gehäuse
nicht. Überlassen Sie
Wartungsarbeiten stets nur
qualifiziertem Fachpersonal.
Hinweis
Dieses Gerät wurde als Laser-Gerät der
Klasse 1 (CLASS 1 LASER) klassifiziert.
Das entsprechende Etikett (CLASS 1 LASER
PRODUCT) befindet sich an der
Geräterückseite.
Achtung
Stellen Sie das Gerät nicht an einem Ort auf,
an dem ausreichende Luftzufuhr nicht
gegeben ist, zum Beispiel in einem engen
Regalfach oder in einem Einbauschrank.
VORSICHT
Sie können dieses Gerät nur mit
Netzstrom betreiben. Sie können es
nicht mit Batterien betreiben.
Wenn Sie diesen Player zum ersten
Mal benutzen oder schon lange nicht
mehr benutzt haben, schließen Sie ihn
etwa eine Stunde lang an eine
Wechselstromquelle an, damit die
eingebaute Speicherbatterie zum
Speichern von Uhrzeit, TimerProgrammierungen, Radiosendern
usw. geladen wird. Sie können den
Player beim Laden benutzen. Der
Player lädt die Batterie automatisch,
solange er an eine Stromquelle
angeschlossen ist.
Wenn Sie nach dem Laden das
Netzkabel lösen, müssen Sie zuerst
das Gerät ausschalten. Wenn die
Speicherbatterie vollständig
aufgeladen ist, hält sie etwa 30
Minuten lang, ohne daß das Gerät an
eine Stromquelle angeschlossen ist.
Wenn die gespeicherten Daten
gelöscht wurden, geben Sie sie erneut
ein, wenn Sie den Player wieder
benutzen.
Zudieser Bedienungsanleitung
Die Anweisungen in dieser
Bedienungsanleitung beziehen sich auf die
Modelle PMC-D305L und PMC-D307L. Bevor
Sie beginnen, die Bedienungsanleitung zu
lesen, sehen Sie erst nach der Nummer Ihres
Modells. Die Abbildungen zeigen das Modell
PMC-D305L.
D
Einführung2
Page 43

Inhalt
Grundfunktionen
4 Wiedergeben einer CD
6 Radiobetrieb
8 Wiedergeben einer Kassette
10 Aufnehmen auf eine Kassette
Der CD-Player
12 Das Display
13 Ansteuern eines bestimmten
Titels
14 Wiederholtes Wiedergeben von
Titeln
(Repeat Play)
15 Zusammenstellen eines eigenen
Programms
(Program Play)
Das Radio
17 Speichern von Radiosendern
18 Wiedergeben gespeicherter
Radiosender
Der Kassettenrecorder
19 Ansteuern des Anfangs eines
Titels
Der Timer
20 Einstellen der Uhr
21 Aufwachen mit Musik
23 Einschlafen mit Musik
24 Aufnehmen von
Radiosendungen mit dem Timer
Vorbereitungen
26 Anschließen des Systems
30 Anschließen zusätzlicher
Komponenten
32 Auswählen der Klangbetonung
(Klangmodus/MEGA BASS)
Weitere Informationen
33 Sicherheitsmaßnahmen
35 Störungsbehebung
38 Wartung
39 Technische Daten
Rückwärtige Umschlagseite
Index
Grundfunktionen
D
Einführung
D
3
Page 44

Grundfunktionen
Wiedergeben einer CD
3 1,2
Informationen zum Anschließen des Systems finden Sie auf
Seite 26 - 29.
1 Öffnen Sie mit 6 OPEN/CLOSE
das CD-Fach, und legen Sie die
CD in das CD-Fach ein.
Mit der beschrifteten Seite nach oben
2 Schließen Sie den Deckel des CD-
Fachs.
3 Drücken Sie ( im CD-Feld
(Direkteinschaltfunktion).
Der CD-Player gibt alle Titel
einmal wieder.
D
Grundfunktionen4
Display
Page 45

Folgende Tasten stehen für weitere Funktionen
zur Verfügung:
Tip
Wenn Sie das nächste
Mal eine CD hören
wollen, drücken Sie
einfach (. Das Gerät
schaltet sich
automatisch ein und
beginnt die Wiedergabe
der CD.
OPERATE Pp
6 OPEN/CLOSE
VOLUME +/–
=/+
Zum Drücken Sie
Einstellen der Lautstärke VOLUME +/–
Beenden der Wiedergabe p
Unterbrechen der Wiedergabe P
Drücken Sie die Taste
erneut, um die
Wiedergabe nach einer
Pause fortzusetzen.
Weiterschalten zum nächsten Titel +
Zurückschalten zum =
vorhergehenden Titel
Herausnehmen der CD 6 OPEN/CLOSE
Ein-/Ausschalten des Geräts OPERATE
Grundfunktionen
Grundfunktionen
D
5
Page 46

Radiobetrieb
Informationen zum Anschließen des Systems finden Sie auf
Seite 26 - 29.
12
1 Drücken Sie BAND, bis der
gewünschte Frequenzbereich im
Display angezeigt wird
(Direkteinschaltfunktion).
2 Halten Sie TUNE +/– gedrückt,
bis die Ziffern der
Frequenzangabe im Display
durchzulaufen beginnen.
Das Gerät durchsucht automatisch
die Radiofrequenzen und stoppt,
wenn es einen Sender findet, der
in ausreichender Qualität
empfangen werden kann.
Wird kein Sender gefunden,
drücken Sie die Taste so oft, bis
der gewünschte Sender
eingestellt ist.
D
Grundfunktionen6
Display
Zeigt an, daß es sich um
einen UKW-
Stereosender handelt.
Page 47

Folgende Tasten stehen für weitere Funktionen
zur Verfügung:
Tips
• Wenn beim UKWEmpfang Störgeräusche
auftreten, drücken Sie
PLAY MODE/MONO/
ST/ISS am Gerät, bis
“Mono” im Display
erscheint. Der
Radioempfang ist in
diesem Fall monaural.
• Wenn Sie das nächste
Mal Radio hören
wollen, drücken Sie
einfach BAND. Das
Gerät schaltet sich
automatisch ein, und
der zuvor eingestellte
Sender ist zu hören.
PLAY MODE
OPERATE
Zum Drücken Sie
Einstellen der Lautstärke VOLUME +/–
Ein-/Ausschalten des Radios OPERATE
MONO/ST/ISS
VOLUME +/–
So verbessern Sie den Radioempfang
UKW
Schließen Sie die mitgelieferte UKW-Wurfantenne an.
Ist der UKW-Empfang immer noch verrauscht, lösen
Sie die UKW-Wurfantenne und schließen eine UKWAußenantenne an (nicht mitgeliefert) (siehe Seite 28
und 29).
MW/LW
Richten Sie die MW/LW-Ringantenne (mitgeliefert)
neu aus (siehe Seite 28).
Grundfunktionen
Grundfunktionen
D
7
Page 48

Wiedergeben einer Kassette
2
Informationen zum Anschließen des Systems finden Sie auf
Seite 26 - 29.
1 Öffnen Sie mit 6 PUSH das
Kassettenfach, und legen Sie eine
bespielte Kassette ein. Verwenden
Sie nur Kassetten des Typs TYPE I
(normal). Schließen Sie das
Kassettenfach.
1
2 Drücken Sie ( im Bedienfeld für
den Kassettenrecorder (TAPE).
Das Gerät schaltet sich ein
(Direkteinschaltfunktion) und
startet die Wiedergabe.
D
Grundfunktionen8
Mit der wiederzugebenden
Seite nach vorne
Display
Bandzähler
Page 49

Folgende Tasten stehen für weitere Funktionen
zur Verfügung:
Tips
• Drücken Sie COUNTER
RESET auf der
Fernbedienung, um den
Zähler auf “000” zu
setzen. Diese Funktion
steht nur über die
Fernbedienung zur
Verfügung.
• Wenn Sie das nächste
Mal eine Kassette
abspielen wollen,
drücken Sie einfach (
oder 9. Das Gerät
schaltet sich
automatisch ein und
startet die Wiedergabe
der Kassette.
OPERATE 9p
VOLUME +/–
0/)
6 PUSH
DIR MODE
Zum Drücken Sie
Einstellen der Lautstärke VOLUME +/–
Beenden der Wiedergabe p
Abspielen der Rückseite 9
Vorwärts- oder Zurückspulen ) oder 0
des Bandes
Auswerfen der Kassette 6 PUSH
Ein-/Ausschalten des Geräts OPERATE
So wählen Sie die Bandtransportrichtung
Drücken Sie mehrmals DIR MODE.
Bei der Wiedergabe Erscheint im Display
Einer Bandseite
Grundfunktionen
Beider Bandseiten, und
zwar nur zuerst die Vorder-,
dann die Rückseite
Beider Bandseiten mehrmals
Grundfunktionen
D
9
Page 50

Aufnehmen auf eine Kassette
3
Informationen zum Anschließen des Systems finden Sie auf
Seite 26 - 29.
31
1 Öffnen Sie mit 6 PUSH das
Kassettenfach, und legen Sie eine
leere Kassette ein. Verwenden Sie
nur Kassetten des Typs TYPE I
(normal).
2 Wählen Sie die aufzunehmende
Tonquelle.
Um vom CD-Player
aufzunehmen, legen Sie eine CD
ein (siehe Seite 4) und drücken p
am CD-Player.
Um vom Radio aufzunehmen,
drücken Sie BAND und stellen
den gewünschten Sender ein
(siehe Seite 6).
D
Grundfunktionen10
Mit der Seite, auf die aufgenommen
werden soll, nach vorne
Display
Page 51

3 Starten Sie die Aufnahme.
r/P
1 Drücken Sie r/P.
Die Anzeige 9/( blinkt im
Display.
2 Mit ( (Vorderseite) bzw. 9
(Rückseite) im Bedienfeld für
den Kassettenrecorder (TAPE)
wählen Sie die Aufnahmeseite
der Kassette.
Die Aufnahme startet automatisch.
Auf der Fernbedienung halten Sie dazu r/P gedrückt
und drücken ( bzw. 9 im Bedienfeld für den
Kassettenrecorder.
Hinweis
Wenn die Aufnahme nicht startet, drücken Sie r/P und dann
nochmals ( bzw. 9.
Aufnehmen vom
CD-Player
Grundfunktionen
Aufnehmen vom Radio
Tips
• Das Einstellen der
Lautstärke oder der
Klangbetonung (siehe
Seite 32) beeinflußt den
Aufnahmepegel nicht.
• Wenn angezeigt
wird, erfolgt die
Aufnahme auf beiden
Seiten der Kassette.
Wenn Sie nur auf eine
Seite aufnehmen wollen,
drücken Sie DIR MODE,
bis erscheint.
• Wenn beim MW/LWEmpfang ein
Pfeifgeräusch zu hören
ist, nachdem Sie r/P in
Schritt 3 gedrückt
haben, drücken Sie
PLAY MODE/MONO/
ST/ISS und wählen
damit die Position, in
der am wenigsten
Geräusche zu hören
sind.
Folgende Tasten stehen für weitere Funktionen
zur Verfügung:
OPERATE
p
r/P
Zum Drücken Sie
Beenden der Aufnahme p im TAPE-Feld
Unterbrechen der r/P
Aufnahme Drücken Sie diese Taste erneut,
um die Aufnahme fortzusetzen.
Ein-/Ausschalten OPERATE
des Geräts
Gehen Sie zum Löschen einer Aufnahme
folgendermaßen vor:
1 Legen Sie die Kassette ein, die Sie löschen wollen, und
drücken Sie p im Bedienfeld für den Kassettenrecorder.
2 Am Gerät: Drücken Sie r/P und dann ( oder 9.
Auf der Fernbedienung: Halten Sie r/P gedrückt, und
drücken Sie dann ( oder 9.
Grundfunktionen
11
D
Page 52

Der CD-Player
Das Display
Im Display können Sie Informationen
zur CD anzeigen lassen.
Anzeigen der Gesamtzahl der Titel und der
Gesamtspieldauer
Drücken Sie im Stopmodus DISPLAY/ENTER.
Sind auf der CD mehr als 10 Titel vorhanden,
erscheint “OVER 10” im Display.
DISPLAY/
ENTER
Gesamtspieldauer
Gesamtzahl der Titel
Musikkalender
Anzeigen der Restspieldauer
Drücken Sie DISPLAY/ENTER während der
Wiedergabe einer CD.
Die Titelnummern im Musikkalender werden
ausgeblendet, sobald die entsprechenden Titel
wiedergegeben wurden.
Zum Anzeigen Drücken Sie DISPLAY/ENTER
der aktuellen Titelnummer einmal
und der Restspieldauer
des aktuellen Titels*
der Restspieldauer der CD zweimal
und der restlichen Anzahl
der Titel
der aktuellen Titelnummer dreimal
und der Spieldauer
* Bei einem Titel mit einer Nummer über 20 wird statt der
Restspieldauer “– –:– –” angezeigt.
D
Der CD-Player12
Page 53

Ansteuern eines
bestimmten Titels
Mit Hilfe der Zahlentasten können Sie
mühelos jeden beliebigen Titel direkt
ansteuern. Darüber hinaus können Sie
während der Wiedergabe einer CD eine
bestimmte Passage innerhalb eines Titels
suchen.
Zahlentasten
0/–,
)/+
Der CD-Player
Hinweis
Sie können einen
bestimmten Titel nicht
ansteuern, wenn
“PGM” oder “SHUF
REP” im Display
leuchtet. Schalten Sie
die Anzeige aus, indem
Sie p im CD-Feld
drücken.
Tip
Zum Ansteuern eines
Titels mit einer
Nummer über 10
drücken Sie zunächst
> 10 und dann die
entsprechenden
Zahlentasten.
Beispiel:
Zum Wiedergeben des
Titels mit der Nummer
23 drücken Sie zuerst
>10 und dann 2 und 3.
Zum Ansteuern Drücken Sie
eines bestimmten Titels direkt die entsprechende
Zahlentaste des Titels.
einer Passage während während der Wiedergabe
der Tonwiedergabe )/+ (vorwärts) oder
0/– (rückwärts), und
halten Sie die Taste
gedrückt, bis Sie die Passage
gefunden haben.
Wenn Sie die Tasten am
Gerät verwenden, drücken
Sie =/+.
einer Passage mit Hilfe im Pausemodus )/+
des Displays (vorwärts) oder 0/–
(rückwärts), und halten Sie
die Taste gedrückt, bis
Sie die Passage gefunden
haben.
Wenn Sie die Tasten am
Gerät verwenden, drücken
Sie =/+.
Der CD-Player 13
D
Page 54

Wiederholtes
Wiedergeben von
Titeln
(Repeat Play)
Sie können die Titel auf einer CD
mehrmals wiedergeben lassen, und zwar
wahlweise in der normalen Reihenfolge
(Normal Play), in willkürlicher
Reihenfolge (Shuffle Play) oder in einer
vorher festgelegten Reihenfolge
(Program Play) (siehe auf Seite 15 - 16).
Zahlentasten
MODE
p
(
Hinweis
Wenn Sie einen
einzelnen Titel oder alle
Titel wiederholt
wiedergeben möchten,
achten Sie darauf, daß
weder “PGM” noch
“SHUF REP” im
Display leuchtet. Wenn
eine dieser Anzeigen
leuchtet, schalten Sie
sie mit p im CD-Feld
aus.
1 Drücken Sie p im CD-Feld.
“Cd” erscheint im Display.
2 Drücken Sie MODE so oft, bis der gewünschte
Repeat Play-Modus im Display erscheint.
Zur wiederholten Wählen Sie
Wiedergabe
eines einzelnen Titels REP 1
aller Titel REP ALL
der Titel in willkürlicher SHUF REP
Reihenfolge
programmierter Titel PGM REP. Danach
programmieren Sie die Titel
(siehe Schritt 3 auf Seite 15).
3 Starten Sie Repeat Play:
• Wenn Sie REP1 gewählt haben, wählen Sie den
Titel durch Drüken der Zahlentaste.
• Wenn Sie REP ALL, SHUF REP oder PGM REP
gewählt haben, drücken Sie (.
So brechen Sie Repeat Play ab
Drücken Sie MODE, bis “REP” nicht mehr im Display
angezeigt wird.
D
Der CD-Player14
Page 55

Zusammenstellen
eines eigenen
Programms
(Program Play)
Sie können bis zu 20 Titel in beliebiger
Reihenfolge zu einem individuellen
Programm zusammenstellen und
wiedergeben lassen.
Zahlentasten
MODE
p
(
Der CD-Player
Tips
• Wenn Sie ein eigenes
Programm
zusammenstellen wollen,
indem Sie während der
CD-Wiedergabe die Titel
auswählen, gehen Sie
folgendermaßen vor:
1 Starten Sie mit ( im
CD-Feld die
Wiedergabe.
2 Drücken Sie PGM SET/
AUTO PRESET.
“PGM” blinkt im
Display.
3 Wählen Sie mit =/
+ den zu
programmierenden Titel
aus, und drücken Sie
DISPLAY/ENTER/
MEM. Programmieren
Sie auf diese Weise
weitere Titel.
4 Drücken Sie p.
5 Starten Sie mit ( den
Modus Program Play.
Hinweis
Wenn Sie einen Titel von
einer CD mit mehr als 21
Titeln programmieren:
Wenn Sie einen Titel mit
einer Nummer über 21
programmieren, erscheint
“- -:- -” statt der
Gesamtspieldauer des
Programms im Display.
1 Drücken Sie p im CD-Feld.
“Cd” erscheint im Display.
2 Drücken Sie MODE, bis “PGM” im Display
erscheint.
3 Drücken Sie die Zahlentasten der zu
programmierenden Titel in der gewünschten
Reihenfolge.
Gesamtspieldauer
Titelnummer
Wiedergabereihenfolge
des Programms
4 Starten Sie mit ( die Wiedergabe in
programmierter Reihenfolge.
Der CD-Player 15
Fortsetzung
D
Page 56

Zusammenstellen eines eigenen Programms (Program Play)
(Fortsetzung)
Tips
• Sie können dasselbe
Programm nochmals
abspielen, da das
Programm gespeichert
bleibt, bis Sie das CDFach öffnen.
• Sie können Ihr eigenes
Programm aufnehmen.
Legen Sie nach dem
Zusammenstellen des
Programms eine leere
Kassette in das
Kassettenfach ein, und
starten Sie die
Aufnahme mit r/P
und ( (bzw. 9).
So brechen Sie Program Play ab
Drücken Sie MODE, bis “PGM” nicht mehr im
Display angezeigt wird.
So lassen Sie die Reihenfolge der Titel vor der
Wiedergabe anzeigen
Drücken Sie + am Gerät.
Mit jedem Tastendruck werden die Titelnummern in
der programmierten Reihenfolge angezeigt.
So ändern Sie das aktuelle Programm
Drücken Sie p im Stopmodus einmal und während
der CD-Wiedergabe zweimal. Das aktuelle Programm
wird gelöscht. Stellen Sie nun wie weiter oben
beschrieben ein neues Programm zusammen.
D
Der CD-Player16
Page 57

Das Radio
Speichern von
Radiosendern
Sie können bis zu 30 Radiosender, 10 pro
Frequenzbereich, in beliebiger
Reihenfolge voreinstellen und im
Speicher des Geräts abspeichern.
1 Drücken Sie BAND, bis der gewünschte
Frequenzbereich im Display erscheint.
2 Drücken Sie PGM SET/AUTO PRESET, bis
“AUTO” erscheint.
Die Sender werden in numerischer Reihenfolge,
beginnend mit der niedrigsten Frequenz,
gespeichert, sofern sie in ausreichender
Signalstärke empfangen werden.
BANDPGM SET/AUTO PRESET
Das Radio
Wenn ein Sender nicht automatisch gespeichert
werden kann
Einen Sender mit schwachem Signal müssen Sie von
Hand einstellen und speichern. Gehen Sie dazu und
zum Ersetzen eines gespeicherten Senders durch einen
neuen folgendermaßen vor:
1 Drücken Sie BAND, bis der gewünschte
Frequenzbereich im Display erscheint.
2 Stellen Sie den gewünschten Sender ein.
3 Auf der Fernbedienung halten Sie die Zahlentasten,
unter denen Sie den neuen Sender speichern
möchten, ca. 2 Sekunden lang gedrückt.
Am Gerät:
Drücken Sie DISPLAY/ENTER/MEM etwa 2
Sekunden lang, bis “PRESET” blinkt. Wählen Sie die
Speichernummer, unter der Sie den neuen Sender
speichern wollen, mit PRESET +/– aus, und drücken
Sie DISPLAY/ENTER/MEM.
Ein zuvor unter dieser Nummer gespeicherter
Sender wird durch den neuen Sender ersetzt.
Das Radio
17
D
Page 58

Wiedergeben
gespeicherter
Radiosender
Wenn Sie die Radiosender gespeichert
haben, können Sie sie mit Hilfe der
Zahlentasten mühelos abrufen.
Tip
Sie können einen
gespeicherten Sender
auch mit den Tasten
am Gerät einstellen.
Verwenden Sie dazu
PRESET +/– anstelle
der Zahlentasten.
1 Wählen Sie mit BAND den Frequenzbereich.
2 Stellen Sie mit den Zahlentasten einen
gespeicherten Sender ein.
Zahlentasten
BAND
D
Das Radio18
Page 59

Der Kassettenrecorder
Ansteuern des
Anfangs eines
Titels
Das Gerät kann den Anfang eines Titels
anhand der Pause zwischen den Titeln
erkennen.
Der Kassettenrecorder
0/)
Hinweise
• Wenn ein Titel eine
sehr leise Passage von
einigen Sekunden
Länge enthält, startet
das Gerät
möglicherweise die
Wiedergabe an dieser
Stelle.
• Wenn Sie an einer
Stelle, an der kein Ton
aufgezeichnet ist, )
oder 0 drücken,
arbeitet diese Funktion
nicht korrekt.
• Damit das Gerät den
Anfang eines Titels
finden kann, ist eine
Pause von ungefähr 4
Sekunden zwischen
den Titeln erforderlich.
Drücken Sie während der Wiedergabe einer Kassette
) oder 0.
Wiedergabeseite Ansteuern des Ansteuern des
Anfangs des Anfangs des
nächsten Titels aktuellen Titels
Vorderseite (() )0
Rückseite (9) 0)
Das Band wird an den Anfang des nächsten bzw.
aktuellen Titels gespult, und die Wiedergabe beginnt
automatisch.
Der Kassettenrecorder
19
D
Page 60

Der Timer
Einstellen der Uhr
Die Anzeige “0:00” erscheint im Display,
bis Sie die Uhr einstellen.
Wenn die Uhr läuft, blinkt “:” im
Display.
TIMER/
CLOCK
DISPLAY/
ENTER
0/–,
)/+
Tip
Die Uhrzeit wird im
folgenden Format
angezeigt:
24-Stunden-Format
Schließen Sie zunächst alle Geräte an (siehe Seite 26).
1 Halten Sie TIMER/CLOCK etwa 2 Sekunden lang
gedrückt, bis die Stundenangabe blinkt.
2 Stellen Sie die Uhrzeit ein.
1 Stellen Sie mit 0/–
oder )/+ die
Stunden ein, und
drücken Sie dann
DISPLAY/ENTER.
2 Stellen Sie mit 0/–
oder )/+ die
Minuten ein.
.
3 Drücken Sie DISPLAY/
ENTER.
“:” blinkt, und die Uhr beginnt bei 00 Sekunden zu
laufen.
D
Der Timer20
Page 61

Aufwachen mit
Musik
Sie können sich zu einer bestimmten Zeit
mit Musik wecken lassen. Dazu muß die
Uhr eingestellt sein (siehe “Einstellen der
Uhr” auf Seite 20).
Hinweis
Sie können für den
Weck-Timer und den
Aufnahme-Timer (Seite
24) nicht dieselbe Zeit
voreinstellen.
Sorgen Sie zunächst dafür, daß die Anzeige t
(Uhrzeit) nicht im Display leuchtet. Andernfalls
drücken Sie STANDBY.
1
Bereiten Sie die wiederzugebende Musikquelle vor.
Musikquelle Gehen Sie folgendermaßen vor:
CD Legen Sie eine CD ein.
TAPE Legen Sie eine Kassette ein.
RADIO Stellen Sie einen Sender ein.
LINE Schalten Sie das an LINE IN
STANDBY
TIMER/
CLOCK
Der Timer
DISPLAY/
ENTER
0/–,
)/+
angeschlossene Gerät ein.
2 Drücken Sie TIMER/CLOCK, so daß die Anzeige
t erscheint.
Beachten Sie im folgenden die Anzeigen im
Display.
3 Drücken Sie 0/– oder )/+, bis “PLAY” im
Display erscheint, und drücken Sie DISPLAY/
ENTER.
4 Drücken Sie 0/–, )/+, bis die Tonquelle, die
wiedergegeben werden soll (“Cd”, “TAPE”,
“RAdiO” oder “LINE”), im Display angezeigt
wird, und drücken Sie DISPLAY/ENTER.
Fortsetzung
Der Timer 21
D
Page 62

Aufwachen mit Musik (Fortsetzung)
Tips
• Das Display leuchtet
nicht, solange der
Weck-Timer in Betrieb
ist, auch wenn das
Gerät eingeschaltet ist.
• Sie können das Gerät
so einstellen, daß es
sich am nächsten Tag
zur selben Zeit
einschaltet. Drücken
Sie einfach STANDBY,
bis die Anzeige t im
Display erscheint.
Die Einstellungen
bleiben im Gerät
gespeichert, bis Sie sie
ändern.
5 Stellen Sie die Stunden und Minuten für die
Uhrzeit ein, zu der sich die Musik einschalten soll.
1 Stellen Sie mit 0/–
oder )/+ die
Stunden ein, und
drücken Sie dann
DISPLAY/ENTER.
2 Stellen Sie mit 0/– oder )/+ die Minuten
ein, und drücken Sie DISPLAY/ENTER.
6 Stellen Sie die Stunden und Minuten für die
Uhrzeit ein, zu der sich die Musik ausschalten soll.
Gehen Sie dazu wie in Schritt 5 erläutert vor.
7 Stellen Sie mit 0/– oder )/+ die gewünschte
Lautstärke ein, und drücken Sie DISPLAY/
ENTER.
8 Drücken Sie STANDBY.
Die Anzeige t leuchtet auf, und das Gerät schaltet
sich aus.
Zur voreingestellten Zeit schaltet sich das Gerät
ein, und die Musik wird eingeblendet. Zur
voreingestellten Endezeit wird die Musik wieder
ausgeblendet, und das Gerät schaltet sich aus und
wechselt in den Bereitschaftsmodus.
So können Sie die Startzeit überprüfen/ändern
Drücken Sie TIMER/CLOCK und dann DISPLAY/
ENTER. Mit jedem Tastendruck auf DISPLAY/
ENTER leuchtet eine gespeicherte Einstellung auf.
Ändern Sie gegebenenfalls eine Einstellung, wenn sie
aufleuchtet. Drücken Sie danach wieder TIMER/
CLOCK.
So benutzen Sie das Gerät vor der mit dem Timer
programmierten Zeit
Wenn Sie das Gerät einschalten, können Sie es wie
gewohnt benutzen. Wenn Sie beim Radio einen
anderen als den in Schritt 1 auf Seite 21 eingestellten
Sender einstellen, hören Sie zur voreingestellten Zeit
den zuletzt eingestellten Sender. Schalten Sie das
Gerät vor der programmierten Zeit wieder aus.
So beenden Sie die Wiedergabe
D
Der Timer22
Schalten Sie das Gerät aus.
Page 63

Einschlafen mit
Musik
Sie können das Gerät so einstellen, daß
es sich automatisch nach 10, 20, 30, 60, 90
oder 120 Minuten ausschaltet. Auf diese
Weise können Sie beim Einschlafen
Musik hören.
SLEEP
Der Timer
Tips
• Die Anzeige im Display
ist abgeschwächt,
während der SleepTimer aktiviert ist.
• Sie können den WeckTimer mit dem SleepTimer kombinieren.
Stellen Sie dazu zuerst
den Weck-Timer ein
(siehe Seite 21), schalten
Sie dann das Gerät ein,
und stellen Sie den
Sleep-Timer ein.
•
Sie können für den WeckTimer und den SleepTimer unterschiedliche
Musikquellen
vorbereiten. Sie können
allerdings keine
unterschiedlichen
Radiosender einstellen.
•
Sie können für den WeckTimer und den SleepTimer unterschiedliche
Lautstärken einstellen. So
können Sie z. B. zum
Einschlafen eine
geringere, zum
Aufwachen eine höhere
Lautstärke wählen.
1 Stellen Sie die gewünschte Musikquelle ein.
2 Schalten Sie mit SLEEP die Anzeige “SLEEP” ein.
3 Mit der Taste SLEEP können Sie nun einstellen,
wie lange das Gerät noch laufen soll, bevor es sich
automatisch ausschaltet.
Mit jedem Tastendruck
wechselt die Anzeige
folgendermaßen: “10”
n “20” n “30” n
“60”n “90” n “120”
n “keine Anzeige”.
4 Sekunden nach dem letzten Drücken von SLEEP
werden die im Display angezeigten Minuten
gespeichert.
Wenn die eingestellte Zeit verstrichen ist, wird die
Musik ausgeblendet, und das Gerät schaltet sich
automatisch aus.
So deaktivieren Sie die Sleep-Funktion
Blenden Sie mit der Taste SLEEP die Anzeige “SLEEP”
aus.
So ändern Sie die voreingestellte Zeit
Gehen Sie wie in Schritt 2 und 3 erläutert vor.
Der Timer 23
D
Page 64

Aufnehmen von
Radiosendungen
mit dem Timer
Sie können mit dem Timer die
Aufnahme einer Radiosendung für eine
bestimmte Zeit vorprogrammieren. Über
den Timer können Sie auch Aufnahmen
von einer Tonquelle anfertigen, die an
die Buchse LINE IN angeschlossen ist.
Dazu muß die Uhrzeit korrekt
eingestellt sein (siehe “Einstellen der
Uhr” auf Seite 20).
Hinweis
Sie können für den
Aufnahme-Timer und
den Weck-Timer (Seite
21) nicht dieselbe Zeit
voreinstellen.
Tip
Wenn Sie in Schritt 1
einen MW/LW-Sender
einstellen, drücken Sie
r/P, und überprüfen
Sie, ob Störgeräusche
zu hören sind. Drücken
Sie in diesem Fall
PLAY MODE/MONO/
ST/ISS am Gerät, und
wählen Sie damit die
Position, in der am
wenigsten Geräusche
zu hören sind.
D
Der Timer24
Sorgen Sie zunächst dafür, daß die Anzeige t
(Uhrzeit) nicht im Display leuchtet. Andernfalls
drücken Sie STANDBY.
1 Stellen Sie den Radiosender ein, und legen Sie eine
2 Wählen Sie mit DIR
3 Drücken Sie TIMER/CLOCK, so daß die Anzeige
4 Drücken Sie 0/– oder )/+, bis “REC” im
5 Drücken Sie 0/– oder )/+, bis “RADIO” im
STANDBY
TIMER/
CLOCK
DISPLAY/
ENTER
0/–,
)/+
Kassette für die Aufnahme ein.
MODE am Gerät die
Bandrichtung.
t erscheint.
Beachten Sie im folgenden die Anzeigen im
Display.
Display erscheint, und drücken Sie DISPLAY/
ENTER.
Display erscheint, und drücken Sie DISPLAY/
ENTER.
Wollen Sie Aufnahmen von einer Tonquelle
anfertigen, die an die Buchse LINE IN
angeschlossen ist, drücken Sie 0/– oder )/+,
so daß “LINE” angezeigt wird, und drücken Sie
DISPLAY/ENTER.
Eine Seite
Beide Seiten
Display
Page 65

Hinweis
Wenn Sie als
Bandaufnahmeseite
statt der Rückseite (9)
die Vorderseite (()
einstellen wollen,
blenden Sie mit
STANDBY die Anzeige
t aus und drücken
STANDBY nochmals.
Tips
• Die voreingestellten
Einstellungen bleiben
erhalten, bis Sie sie
wieder ändern.
• Wenn Sie die
Einstellung so gewählt
haben, daß auf beide
Seiten aufgenommen
wird, stoppt die
Aufnahme, nachdem
auf beiden Seiten
aufgenommen wurde,
so daß es zu keinem
versehentlichen
Überspielen kommt.
• Die Anzeige im Display
ist abgeschwächt, wenn
eine Timer-Aufnahme
programmiert ist.
6 Stellen Sie die Stunden und Minuten für die
Uhrzeit ein, zu der die Aufnahme starten soll.
1 Stellen Sie mit 0/–
oder )/+ die
Stunden ein, und
drücken Sie dann
DISPLAY/ENTER.
2 Stellen Sie mit 0/–
oder )/+ die
Minuten ein, und
drücken Sie
DISPLAY/ENTER.
7 Stellen Sie die Stunden und Minuten für die
Uhrzeit ein, zu der die Aufnahme stoppen soll.
Gehen Sie dazu wie in Schritt 6 erläutert vor.
8 Stellen Sie mit 0/– oder )/+ die gewünschte
Lautstärke ein, und drücken Sie DISPLAY/
ENTER.
9 Drücken Sie STANDBY.
Das Gerät schaltet sich aus. Die Anzeige t und die
Anzeige für die Bandaufnahmeseite (Vorderseite
(()) erscheinen im Display.
Zur voreingestellten Zeit schaltet sich das Gerät
ein, und die Aufnahme startet. Danach schaltet das
Gerät zur voreingestellten Zeit in den
Bereitschaftsmodus.
So können Sie den Aufnahmestart überprüfen/
ändern
Drücken Sie TIMER/CLOCK und dann DISPLAY/
ENTER. Mit jedem Tastendruck auf DISPLAY/
ENTER leuchtet eine gespeicherte Einstellung auf.
Ändern Sie gegebenenfalls eine Einstellung, wenn sie
aufleuchtet. Drücken Sie danach wieder TIMER/
CLOCK.
So hören Sie Radio usw. vor dem Start einer TimerAufnahme
Wenn Sie das Gerät einschalten, können Sie es wie
gewohnt benutzen. Stellen Sie vor der voreingestellten
Zeit den aufzunehmenden Sender ein, und schalten
Sie das Gerät aus.
So beenden Sie die Timer-Aufnahme
Schalten Sie das Gerät aus.
Der Timer 25
Der Timer
D
Page 66

Vorbereitungen
Anschließen
des Systems
Achten Sie darauf, daß das
Gerät ausgeschaltet ist, bevor
Sie irgendwelche Anschlüsse
vornehmen.
Rechter Lautsprecher
Hinweise
Schließen Sie
ausschließlich den
rechten Lautsprecher
für dieses Gerät an die
Lautsprecheranschlüsse
des linken
Lautsprechers an.
Wenn Sie einen
anderen Lautsprecher
oder ein Gerät daran
anschließen, kann es zu
Fehlfunktionen
kommen.
2
MW/LW-Ringantenne
1
Lautsprecherkabel
1
1
Audioverbindungskabel
Netzkabel
3
2
UKW-Antenne
Linker Lautsprecher
Netzkabel
1 Anschließen der Lautsprecher
1 Schließen Sie das Netzkabel des linken
Lautsprechers an die Buchse POWER IN des
Geräts an.
an eine
Netzsteckdose
Tip
Nur PMC-D307L:
Mit diesem Gerät
werden 8 runde GleitStopper (10 mm
Durchmesser) geliefert.
Bringen Sie an jeder
der vier
Lautsprecherecken
einen an, damit sich
der Lautsprecher nicht
verschiebt, wenn er
leichten Vibrationen
usw. ausgesetzt wird.
D
Vorbereitungen26
Page 67

2 Schließen Sie das Audioverbindungskabel
(mitgeliefert) an die Buchsen SIGNAL OUTPUT
des Geräts und an die Buchsen SIGNAL INPUT
des linken Lautsprechers an.
Schließen Sie die weißen Stecker an die Buchsen L
(links) und die roten Stecker an die Buchsen R
(rechts) an.
3 Schließen Sie das Lautsprecherkabel des rechten
Lautsprechers an die Anschlüsse SPEAKER OUT
des linken Lautsprechers an.
Schließen Sie das rote Kabel an den Plus-Pol (+)
und das schwarze Kabel an den Minus-Pol (–) an.
Vorbereitungen
Fortsetzung
Vorbereitungen 27
D
Page 68

Anschließen des Systems (Fortsetzung)
Hinweis
Halten Sie die
Antennen so weit wie
möglich von den
Lautsprecher- und
sonstigen
Verbindungskabeln
fern. Andernfalls
können Störgeräusche
zu hören sein.
2 Anschließen der Antennen
MW/LW-Ringantenne*
(mitgeliefert)
UKW-Antenne**
(mitgeliefert)
* Richten Sie die Antenne neu aus, wenn Sie den Empfang
verbessern wollen.
** Die Antenne sollte so horizontal wie möglich ausgerichtet
sein.
Aufstellen der MW/LW-Ringantenne
D
Vorbereitungen28
Page 69

Tip
Je nach Polarität des
Steckers kann die
Klangqualität
unterschiedlich sein.
Ändern Sie die
Richtung, in der Sie
den Stecker einstecken,
und überprüfen Sie die
Klangqualität.
3 Anschließen des Netzkabels
Schließen Sie das Netzkabel an eine Netzsteckdose an.
4
Einlegen der Batterien in die Fernbedienung
Legen Sie zwei R6-Batterien (Größe AA) (nicht
mitgeliefert) ein.
Austauschen der Batterien
Bei normalem Gebrauch beträgt die Lebensdauer der
Batterien etwa sechs Monate. Wenn sich das Gerät
nicht mehr mit der Fernbedienung steuern läßt,
tauschen Sie alle Batterien gegen neue aus.
So verbessern Sie den UKW-Empfang
Lösen Sie die mitgelieferte UKW-Antenne vom Gerät,
und schließen Sie die UKW-Außenantenne (nicht
mitgeliefert) an. Wenn Sie einen Verteiler haben,
können Sie auch die Fernsehantenne verwenden.
UKW-Außenantenne
(nicht mitgeliefert)
IEC-Standardanschluß
(nicht mitgeliefert)
Vorbereitungen
Vorbereitungen 29
D
Page 70

Anschließen
zusätzlicher
Komponenten
Über die Lautsprecher dieses Geräts
können Sie beispielsweise den Ton von
einem Videorecorder oder einem MDPlayer/Recorder wiedergeben lassen.
Achten Sie darauf, alle Komponenten
vor dem Anschließen auszuschalten.
Einzelheiten dazu finden Sie in der
Bedienungsanleitung zu den
anzuschließenden Geräten.
FUNCTION
Hinweis
Schließen Sie die Kabel
fest an. Andernfalls
kann es zu
Fehlfunktionen
kommen.
Tip
Sie können den Ton des
angeschlossenen Geräts
mit diesem Gerät
aufnehmen. Legen Sie
eine Kassette ein,
halten Sie r/P
gedrückt, und drücken
Sie ( am
Kassettenrecorder.
Tip
Sie können von diesem
Gerät Aufnahmen auf
einem
Kassettenrecorder
machen, wenn Sie
einen
Kassettenrecorder an
die Buchse LINE OUT
dieses Geräts
anschließen.
Anschließen von Fernsehgerät, Videorecorder
und MD-Player/Recorder zur Tonwiedergabe
Fernsehgerät,
Videorecorder,
MD-Player/
Recorder
Kassettenspieler/
-recorder usw.
an
Leitungsausgangsbuchse
Audioverbindungskabel
(nicht mitgeliefert)
Wenn Sie die Anschlüsse vorgenommen haben,
schalten Sie das Gerät ein, und drücken Sie
FUNCTION, so daß “LINE” im Display erscheint.
Vorderseite dieses
Geräts
Tonwiedergabe über die Lautsprecher eines
anderen Audiogeräts
Vorderseite
dieses Geräts
Verstärker
an
Leitungseingangsbuchse
Audioverbindungskabel
(nicht mitgeliefert)
D
Vorbereitungen30
Page 71

Hinweise
• Solange “Cd” im
Display erscheint, wird
die optische digitale
Ausgangsbuchse
benutzt, und die
Anzeige der Buchse
leuchtet, auch wenn
sich der CD-Player im
Stopmodus befindet.
• Wenn Sie eine andere
als eine Audio-CDROM wiedergeben,
sind möglicherweise
Störgeräusche zu
hören.
Aufnehmen einer CD auf einem MD- oder
DAT-Recorder
Vorderseite dieses
MD-Recorder,
DAT-Recorder
usw.
an digitalen
Eingang
Digitales Verbindungskabel*
POC-5AB (nicht mitgeliefert)
Wenn Sie die Anschlüsse vorgenommen haben,
schalten Sie das Gerät ein, und starten Sie die
Aufnahme.
* Wählen Sie das Verbindungskabel je nach Typ der
digitalen Eingangsbuchse des anzuschließenden Recorders
aus. Einzelheiten dazu finden Sie in der
Bedienungsanleitung zu dem anzuschließenden Gerät. Die
Buchse OPTICAL DIGITAL OUT (CD) an diesem Gerät ist
eine quadratische Buchse.
Typ der Buchse an der Modellnummer des
anzuschließenden Komponente Verbindungskabels
Optischer Ministecker POC-5AB
(MD-Walkman usw.)
L-förmiger, 7poliger Anschluß POC-DA12P
(DAT-Walkman usw.)
Quadratischer optischer POC-10A
Anschluß (MD-Recorder,
DAT-Recorder usw.)
Geräts
Vorbereitungen
Vorbereitungen 31
D
Page 72

Auswählen der
Klangbetonung
(Klangmodus/MEGA BASS)
Sie können die Klangbetonung der
Musik, die Sie wiedergeben lassen,
einstellen.
Auswählen der Klangeigenschaft
Wählen Sie mit SOUND die gewünschte
Klangbetonung.
Option Ergebnis
SOUND
kraftvolle, klare Klänge mit
Betonung des unteren und oberen
Klangspektrums
“MEGA BASS” erscheint im
Display.
leichte, helle Klänge mit Betonung
des oberen und mittleren
Klangspektrums
hervorgehobene Gesangsstimmen
mit Betonung des mittleren
Klangspektrums
perkussive Klänge mit Betonung
der Bässe
“MEGA BASS” erscheint im
Display.
Wiedergabe des gesamten
Dynamikbereichs für Musik wie z.
B. klassische Musik
D
Vorbereitungen32
Page 73

Weitere Informationen
Sicherheitsmaßnahmen
Sicherheit
•
Der Laser-Strahl, den dieser CD-Player
generiert, schädigt die Augen. Versuchen
Sie daher nicht, das Gerät zu zerlegen.
Überlassen Sie Wartungsarbeiten stets nur
qualifiziertem Fachpersonal.
• Sollten Fremdkörper oder
Flüssigkeiten in das Gerät gelangen,
trennen Sie es von der Netzsteckdose,
und lassen Sie es von qualifiziertem
Fachpersonal überprüfen, bevor Sie es
wieder benutzen.
Stromquellen
• Überprüfen Sie bei Netzbetrieb, ob die
Betriebsspannung des Geräts der
örtlichen Stromversorgung
entsprechend eingestellt ist.
Verwenden Sie ausschließlich das
mitgelieferte Netzkabel.
• Das Gerät bleibt auch in
ausgeschaltetem Zustand mit dem
Stromnetz verbunden, solange das
Netzkabel mit der Netzsteckdose
verbunden ist.
•
Wenn die Batterien nicht benutzt werden
sollen, nehmen Sie sie heraus. So
vermeiden Sie Schäden durch auslaufende
oder korrodierende Batterien.
• Das Typenschild mit Angaben zu
Betriebsspannung,
Leistungsaufnahme usw. befindet sich
an der Geräterückseite des linken
Lautsprechers.
Aufstellung
•
Stellen Sie das Gerät nicht in der Nähe
von Wärmequellen oder an Orten auf,
an denen es direktem Sonnenlicht,
übermäßig viel Staub oder
mechanischen Erschütterungen
ausgesetzt ist.
• Stellen Sie das Gerät nicht auf eine
geneigte oder instabile Oberfläche.
• Achten Sie auf einen Abstand von 10
mm zwischen den Geräteseiten und
angrenzenden Gegenständen. Um
eine ordnungsgemäße Funktion des
Geräts und eine optimale Lebensdauer
seiner Komponenten zu erreichen,
dürfen die Lüftungsöffnungen nicht
blockiert werden.
• Wenn Sie das Gerät in einem in der
Sonne geparkten Auto lassen, achten
Sie darauf, daß es dem Sonnenlicht
nicht direkt ausgesetzt ist.
•
Da starke Magneten in den Lautsprechern
verwendet werden, halten Sie
Kreditkarten mit Magnetcodierung oder
Zugfederuhren von dem Gerät fern.
Andernfalls können durch die Magneten
Schäden auftreten.
• Halten Sie den Player beim Tragen
nicht am Deckel des CD-Fachs.
Andernfalls könnte sich der Deckel
öffnen, und Sie lassen den Player
möglicherweise fallen.
Betrieb
• Wird das Gerät direkt von einem
kalten in einen warmen Raum
gebracht oder wird es in einem Raum
mit hoher Luftfeuchtigkeit aufgestellt,
kann sich auf den Linsen im CDPlayer Feuchtigkeit niederschlagen. In
diesem Fall funktioniert der CDPlayer nicht ordnungsgemäß.
Entnehmen Sie dann bitte die CD, und
warten Sie etwa eine Stunde lang, bis
die Feuchtigkeit verdunstet ist.
Fortsetzung
Weitere Informationen 33
D
Page 74

Sicherheitsmaßnahmen (Fortsetzung)
• Wurde das Gerät lange Zeit nicht
benutzt, schalten Sie es in den
Wiedergabemodus, und warten Sie
ein paar Minuten lang ab
(Aufwärmzeit), bevor Sie eine
Kassette einlegen.
Sollten an Ihrem Gerät Probleme
auftreten oder sollten Sie Fragen haben,
wenden Sie sich bitte an Ihren SonyHändler.
Hinweise zu CDs
• Reinigen Sie die CD vor dem
Abspielen mit einem Reinigungstuch.
Wischen Sie dabei immer von der
Mitte nach außen.
• Verwenden Sie keine Lösungsmittel
wie Benzin oder Verdünner und keine
handelsüblichen Reinigungsmittel
oder Antistatik-Sprays für
Schallplatten.
• Setzen Sie die CD weder direktem
Sonnenlicht noch Wärmequellen wie
zum Beispiel Warmluftauslässen aus.
Lassen Sie sie nicht in einem in der
Sonne geparkten Auto liegen, denn
die Temperaturen im Wageninneren
können sehr stark ansteigen.
• Kleben Sie weder Papier noch
Klebeband auf die CD, und achten Sie
darauf, daß die Oberfläche der CD
nicht zerkratzt wird.
• Bewahren Sie CDs in der
dazugehörigen Kunststoffhülle auf.
Kratzer, Schmutz oder Fingerabdrücke
auf der CD können zu
Spurführungsfehlern führen.
Hinweise zu Kassetten
• Brechen Sie die Überspielschutzlasche
von Seite A oder B heraus, um ein
versehentliches Überspielen der
Kassette zu vermeiden. Wenn Sie
dieselbe Kassette später wieder
überspielen wollen, überkleben Sie die
Aussparung mit Klebeband.
Seite A
Überspielschutzlasche
für Seite B
Überspielschutzlasche für
Seite A
• Wenn Sie auf eine Kassette mit
herausgebrochener
Überspielschutzlasche aufnehmen
wollen, überkleben Sie die
entsprechende Aussparung für Seite A
oder B mit Klebeband.
• Sie sollten Kassetten mit über 90
Minuten Spieldauer - wenn
überhaupt- nur für langes,
ununterbrochenes Aufnehmen oder
Wiedergeben verwenden.
D
Weitere Informationen34
Page 75

Störungsbehebung
Symptom
Es ist kein Ton zu hören.
Allgemeines
Im Display leuchetet “no disc” auf,
auch wenn eine CD eingelegt ist.
Die CD wird nicht
wiedergegeben.
Es kommt zu Tonausfällen.
Der Ton ist sehr leise oder von
schlechter Qualität.
Der Ton wird nicht stereo
Radio CD-Player
wiedergegeben.
An Ihrem Fernsehgerät ist das
Bild nicht mehr stabil.
Abhilfemaßnahme
•
Schalten Sie das Gerät mit der Taste OPERATE
ein.
• Schließen Sie das Netzkabel korrekt an eine
Netzsteckdose an.
• Schließen Sie das Netzkabel an die Buchse
POWER IN des Geräts an (Seite 26).
• Schließen Sie das Audioverbindungskabel
korrekt an (Seite 27).
• Stellen Sie die Lautstärke ein.
• Ziehen Sie das Kopfhörerkabel aus der Buchse,
wenn Sie den Ton über die Lautsprecher hören
wollen.
• Legen Sie die CD mit der beschrifteten Seite
nach oben ein.
• Schließen Sie das CD-Fach korrekt.
• Legen Sie die CD mit der beschrifteten Seite
nach oben ein.
• Reinigen Sie die CD.
• Im Gerät könnte sich Feuchtigkeit
niedergeschlagen haben. Nehmen Sie die CD
heraus, und lassen Sie das Gerät mit geöffnetem
CD-Fach etwa eine Stunde lang stehen.
• Drücken Sie p im CD-Feld, um am Gerät die
Funktion “Cd” einzuschalten.
• Drehen Sie die Lautstärke herunter.
• Reinigen Sie die CD, oder tauschen Sie sie aus,
wenn sie stark beschädigt ist.
• Stellen Sie das Gerät an einem vibrationsfreien
Ort auf.
• Stellen Sie das Gerät weiter entfernt vom
Fernsehgerät auf.
• Wenn Sie die Fernbedienung benutzen und
dabei einen MW/LW-Sender empfangen,
können Störgeräusche zu hören sein. Dies läßt
sich nicht vermeiden.
• Drücken Sie PLAY MODE/MONO/ST/ISS am
Gerät, bis “STEREO” erscheint.
• Wenn Sie einen UKW-Sender empfangen und
das Gerät neben einem Fernsehgerät mit
Zimmerantenne steht, stellen Sie das Gerät
weiter vom Fernsehgerät entfernt auf.
Fortsetzung
Weitere Informationen 35
D
Page 76

Störungsbehebung (Fortsetzung)
Symptom
Das Band läuft nicht, wenn Sie eine
Bandtransporttaste drücken.
Die Taste r/P funktioniert nicht/
Das Band wird nicht abgespielt.
Das Band wird nicht vollständig
gelöscht.
Das Band wird nicht bespielt.
Der Ton ist sehr leise bzw. von
schlechter Qualität.
Kassettenrecorder
Der Kassettenrecorder läßt sich bei
der Wiedergabe nicht in den
Pausemodus schalten.
Der Ton ist verzerrt.
Der Timer funktioniert nicht.
Timer
Abhilfemaßnahme
• Das Kassettenfach muß korrekt geschlossen
sein.
• Die Überspielschutzlasche an der Kassette muß
intakt sein.
• Drücken Sie p im TAPE-Feld, um am Gerät die
Funktion “TAPE” einzuschalten.
• Reinigen Sie die Löschköpfe (siehe Seite 38).
• Die Kassette muß korrekt eingelegt sein.
• Die Überspielschutzlasche an der Kassette muß
intakt sein.
• Reinigen Sie Tonköpfe, Andruckwalzen und
Kapstan (siehe Seite 38).
• Entmagnetisieren Sie die Tonköpfe mit einer
Entmagnetisierungskassette (siehe Seite 38).
• Der Kassettenrecorder kann nur während der
Aufnahme in den Pausemodus geschaltet
werden.
• Sie verwenden eine Kassette des Typs TYPE II
(High Position) oder TYPE IV (Metall).
Verwenden Sie nur Kassetten des Typs TYPE I
(normal).
• Die Uhrzeit muß korrekt eingestellt sein.
• Überprüfen Sie, ob die Stromversorgung
unterbrochen war.
• Sehen Sie nach, ob das Bandende erreicht ist.
• Die Anzeige t (Uhrzeit) muß angezeigt
werden.
D
Weitere Informationen36
Page 77

Symptom
Die Fernbedienung funktioniert
nicht.
Abhilfemaßnahme
•
Tauschen Sie alle Batterien in der Fernbedienung
gegen neue aus, wenn sie schwach sind.
• Achten Sie darauf, die Fernbedienung auf den
Fernbedienungssensor am Gerät zu richten.
• Entfernen Sie Hindernisse zwischen
Fernbedienung und Gerät.
• Achten Sie darauf, daß der
Fernbedienungssensor keiner starken
Lichteinstrahlung, zum Beispiel direktem
Fernbedienung
Sonnenlicht oder dem Licht einer
Leuchtstoffröhre, ausgesetzt ist.
• Benutzen Sie die Fernbedienung in geringerer
Entfernung zum Gerät.
Wenn das Problem nach den oben genannten Abhilfemaßnahmen bestehen bleibt, ziehen Sie
den Netzstecker aus der Steckdose. Wenn alle Anzeigen im Display erloschen sind, stecken Sie
das Netzkabel wieder ein. Sollte die Störung bestehen bleiben, wenden Sie sich an Ihren SonyHändler.
Weitere Informationen 37
D
Page 78

Wartung
Reinigen der Linse
Wenn die Linse verschmutzt ist, kann es
bei der CD-Wiedergabe zu Tonsprüngen
kommen. Reinigen Sie die Linse mit
einem handelsüblichen Staubbläser.
Reinigen der Tonköpfe und des
Bandtransportwegs
Um eine gute Wiedergabe- und
Aufnahmequalität sicherzustellen,
wischen Sie Tonköpfe, Andruckwalzen
und Kapstan nach jeweils 10
Betriebsstunden mit einem
Wattestäbchen ab, das Sie leicht mit
einer Reinigungsflüssigkeit oder
Alkohol angefeuchtet haben. Um eine
optimale Aufnahmequalität zu erzielen,
empfiehlt es sich, alle Oberflächen, über
die das Band transportiert wird, vor
jeder Aufnahme zu reinigen.
Andruckwalze
Kapstan
Legen Sie nach dem Reinigen eine
Kassette erst ein, wenn alle Bereiche
vollständig trocken sind.
Entmagnetisieren der Tonköpfe
Nach etwa 20 bis 30 Betriebsstunden
haben sich auf den Köpfen so viele
magnetische Ablagerungen gebildet,
daß hohe Frequenzen nicht mehr zu
hören sind oder es zu Störgeräuschen
kommt. In diesem Fall müssen die
Köpfe und alle anderen
Metallkomponenten im
Bandtransportweg mit einer
handelsüblichen
Entmagnetisierungskassette
entmagnetisiert werden.
Reinigen des Gehäuses
Reinigen Sie Gehäuse, Bedienfeld und
Bedienelemente mit einem weichen
Tuch, das Sie leicht mit einem milden
Reinigungsmittel angefeuchtet haben.
Verwenden Sie keine Scheuermittel,
Scheuerschwämme oder Lösungsmittel
wie Alkohol oder Benzin.
Löschkopf
Aufnahme-/Wiedergabetonkopf
Linse
D
Weitere Informationen38
Page 79

Technische Daten
CD-Player
System
Digitales CD-Audio-System
Eigenschaften der Laserdiode
Material: GaAlAs
Wellenlänge:780 nm
Emissionsdauer: Kontinuierlich
Laseremission: weniger als 44,6 µW (gemessen im
Abstand von 200 mm von der Linsenoberfläche am
optischen Sensorblock mit einer Apertur von 7
mm)
Spindelgeschwindigkeit
200 U/min bis 500 U/min (CLV)
Anzahl der Kanäle
2
Frequenzgang
20 - 20.000 Hz +1/-2,5 dB
Gleichlaufschwankungen
Unterhalb der Meßgrenze
Radio
Frequenzbereich
UKW Italien 87,5 - 108 MHz
Mittel- und Osteuropa
Andere Länder 87,6 - 107 MHz
MW 531 - 1.602 kHz
LW 153 - 279 kHz
IF
UKW: 10,7 MHz
MW/LW: 450 kHz
Antennen
UKW: Anschluß für Außenantenne
MW/LW: Externe Antennenanschlüssse
65 - 74 MHz
87,5 - 108 MHz
Kassettenrecorder
Aufnahmesystem
4 Spuren, 2 Kanäle, stereo
Spuldauer
ca. 130 Sek. mit Kassette C-60 von Sony
Frequenzgang
TYPE I (normal): 40 - 15.000 Hz
Allgemeines
Lautsprecher
Voller Bereich: Durchmesser 8 cm, 6,0 Ohm, Konus
x 2
Eingang
Buchse LINE IN (Stereominibuchse)
Mindesteingangsleistung 250 mV
Ausgänge
Kopfhörerbuchse (Stereominibuchse)
Für Kopfhörer mit 16 - 68 Ohm Impedanz
Buchse LINE OUT (Stereominibuchse)
Nennleistung 440 mV bei Lastimpedanz von
47 kOhm
Optischer digitaler Ausgang (optische
Ausgangsbuchse)
Wellenlänge: 630 - 690 nm
Maximale Leistungsabgabe
10 W + 10 W
Betriebsspannung
Personal Component System:
230 V Wechselstrom, 50 Hz
Fernbedienung:
3 V Gleichstrom, 2 R6-Batterien (Größe AA)
Leistungsaufnahme
35 W bei Wechselstrom
Abmessungen (einschließlich vorstehender Teile und
Bedienelemente)
PMC-D305L
Player: ca. 130 × 211 × 200 mm (B/H/T)
Linker Lautsprecher: ca. 125 × 210 × 234 mm
(B/H/T)
Rechter Lautsprecher: ca. 125 × 210 × 200 mm
(B/H/T)
PMC-D307L
Player: ca. 130 × 211 × 200 mm (B/H/T)
Linker Lautsprecher: ca. 130 × 210 × 235 mm
(B/H/T)
Rechter Lautsprecher: ca. 130 × 210 × 200 mm
(B/H/T)
Gewicht
PMC-D305L
Player: ca. 1,7 kg
Linker Lautsprecher: ca. 2,8 kg
Rechter Lautsprecher: ca. 1,1 kg
PMC-D307L
Player: ca. 1,7 kg
Linker Lautsprecher: ca. 3,2 kg
Rechter Lautsprecher: ca. 1,6 kg
Mitgeliefertes Zubehör
Fernbedienung (1)
UKW-Wurfantenne (1)
MW/LW-Ringantenne (1)
Audioverbindungskabel (1)
Gleit-Stopper (8) (nur PMC-D307L)
Änderungen, die dem technischen Fortschritt dienen,
bleiben vorbehalten.
Sonderzubehör
MDR-Kopfhörerserie von Sony
Weitere Informationen 39
D
Page 80

Index
A
Anschließen
Antennen 28
des Netzkabels 29
Lautsprecher 26
System 26
Zusätzliche
Komponenten
30
Ansteuern eines
bestimmten Titels 13
Aufnehmen
auf eine Kassette 10
Auswählen
Bandtransportrichtung
9
Klangbetonung 32
Titel 5, 13
AUTO PRESET 17
B
Batterien für
Fernbedienung 29
C
CD-Player 12
K
Kassettenrecorder 19
Klangbetonung 32
Klangmodus 32
M
MEGA BASS 32
P
Program Play 15
R
Radioempfang 6
Radiosender
einstellen 18
speichern 17
Reinigen
Gehäuse 38
Tonköpfe und
Bandtransportweg 38
Repeat Play 14
S
Speichern von
Radiosendern 17
Störungsbehebung 35
T
Timer
Aufnehmen von
Radiosendungen mit
dem Timer 24
Aufwachen mit Musik
21
Einschlafen mit Musik
23
V
Verbessern des
Radioempfangs 7
Vorbereitungen 26
W
Wiedergeben
einer CD 4
einer Kassette 8
gespeicherter
Radiosender 18
von Titeln wiederholen
14
Z
Zusammenstellen eines
eigenen Programms 15
D
Display 12
E
Einstellen der Uhr 20
Entmagnetisieren der
Tonköpfe 38
Sony Corporation
D
Weitere Informationen40
 Loading...