

Sony MEX-R1 User Manual 2

Multi Disc Player
2-581-681-14 (1)
Multi Disc Player
Operating Instructions
Bedienungsanleitung
Mode d’emploi
Istruzioni per l’uso
Gebruiksaanwijzing
Wichtig!
Bitte nehmen Sie sich etwas Zeit, um den Geräte-Pass vollständig
auszufüllen. Dieser befindet sich auf der hinteren Umschlagseite dieser
Bedienungsanleitung.
Si dichiara che l’apparecchio è stato fabbricato in conformità all’art. 2, Comma l del D.M. 28.08.
1995 n. 548.
GB
DE
FR
IT
NL
For installation and connections, see the supplied installation/connections manual.
Zur Installation und zum Anschluss siehe die mitgelieferte Installations-/Anschlussanleitung.
En ce qui concerne l’installation et les connexions, consulter le manuel d’installation/
raccordement fourni.
Per l’installazione e i collegamenti, fare riferimento al manuale di istruzioni per
l’installazione e i collegamenti in dotazione.
Zie voor het monteren en aansluiten van het apparaat de bijgeleverde handleiding "Installatie
en aansluitingen".
MEX-R1
MEX-R5
© 2005 Sony Corporation

Warning
To prevent fire or shock hazard, do not
expose the unit to rain or moisture.
To avoid electrical shock, d o not open the
cabinet. Refer servicing to qualified
personnel only.
CAUTION
The use of optical instruments with this product
will increase eye hazard. As the laser beam used
in this CD/DVD player is harmful to eyes, do not
attempt to disassemble the cabinet.
Refer servicing to qualified personnel only.
This label is located on the bottom of the
chassis.
CAUTION
RADIATION WHEN OPEN AND INTERLOCKS DEFEATED.
DO NOT VIEW DIRECTLY WITH OPTICAL INSTRUMENTS.
This label is located on the drive unit’s internal
chassis.
:
CLASS 1M VISIBLE/INVISIBLE LASER
Disposal of Old
Electrical & Electronic
Equipment (Applicable
in the European Union
and other European
countries with separate
collection systems)
This symbol on the product or
on its packaging indicates that
this product shall not be
treated as household waste.
Instead it shall be handed
over to the applicable
collection point for the
recycling of electrical and electronic equipment. By
ensuring this product is disposed of correctly, you will
help prevent potential negative consequences for the
environment and human health, which could otherwise be
caused by inappropriate waste handling of this product.
The recycling of materials will help to conserve natural
resources. For more detailed information about recycling
of this product, please contact your local city office, your
household waste disposal service or the shop where you
purchased the product.
Applicable accessory: Remote commander
Warning if your car’s ignition has no
ACC position
After turning the ignition off, be sure to press
and hold (OFF) on the unit until the display
disappears.
Otherwise, the display does not turn off and
this causes battery drain.
Hereby, Sony, declares that this RF-T001 (MEXR5) is in compliance with the essential
requirements and other relevant provisions of
Directive 1999/5/EC.
For details, please access the following URL :
http://www.compliance.sony.de/
2
Important notice
RF signals may affect improperly installed or
inadequately shielded electronic systems in
motor vehicles, such as electronic fuel injection
systems, electronic antiskid (antilock) braking
systems, electronic speed control systems or air
bag systems. For installation or service of this
device, please consult with the manufacturer or
its representative of your vehicle. Faulty
installation or service may be dangerous and may
invalidate any warranty that may apply to this
device. Check regularly that all wireless device
equipment in your vehicle is mounted and
operating properly.

Table of Contents
Welcome! . . . . . . . . . . . . . . . . . . . . . . . . . . . 4
Precautions . . . . . . . . . . . . . . . . . . . . . . . . . . 5
Playable discs . . . . . . . . . . . . . . . . . . . . . . . . 5
Getting Started
Resetting the unit. . . . . . . . . . . . . . . . . . . . . . 8
Setting the clock . . . . . . . . . . . . . . . . . . . . . . 8
DEMO mode . . . . . . . . . . . . . . . . . . . . . . . . . 8
Detaching the front panel . . . . . . . . . . . . . . . 8
Inserting the disc in the unit . . . . . . . . . . . . . 9
Location of controls and
basic operations. . . . . . . . . . . . . . . . . . . . 10
Menu displays . . . . . . . . . . . . . . . . . . . . . . . 13
Player
Playing discs . . . . . . . . . . . . . . . . . . . . . . . . 15
Resuming playback
— Resume play. . . . . . . . . . . . . . . . . . . . 17
Viewing the disc information
— Time/text information . . . . . . . . . . . . 17
Searching a specif i c point on a disc
— Scan . . . . . . . . . . . . . . . . . . . . . . . . . . 18
Using the menus on DVDs . . . . . . . . . . . . . 19
Using PBC functions
— PBC (Playback control). . . . . . . . . . . 19
Playing in variou s m odes
— Repeat play/Shuffle play/
Search play . . . . . . . . . . . . . . . . . . . . . . . 20
Various DVD operations
Changing the audio channels. . . . . . . . . . . . 22
Changing the angles . . . . . . . . . . . . . . . . . . 23
Displaying the subtitles. . . . . . . . . . . . . . . . 24
Magnifying pictures. . . . . . . . . . . . . . . . . . . 24
Changing the picture quality
— Picture EQ . . . . . . . . . . . . . . . . . . . . . 25
Locking dis cs
— Parental control . . . . . . . . . . . . . . . . . 26
Settings and Adjustments
Using the Setup menu . . . . . . . . . . . . . . . . . 28
Setting the display la nguage or sound track
— Language setup . . . . . . . . . . . . . . . . . 29
Setting the screen
— Screen setup. . . . . . . . . . . . . . . . . . . . 30
Custom settings
— Custom setup . . . . . . . . . . . . . . . . . . . 31
Audio settin gs
— Audio setup . . . . . . . . . . . . . . . . . . . . 32
Radio
Storing automatically
— BTM . . . . . . . . . . . . . . . . . . . . . . . . . 33
Storing manually. . . . . . . . . . . . . . . . . . . . . 33
Receiving the stored stations . . . . . . . . . . . 33
Tuning automatically . . . . . . . . . . . . . . . . . 3 3
Receiving a station t hr ough a list
— list-up. . . . . . . . . . . . . . . . . . . . . . . . . 33
RDS
Overview. . . . . . . . . . . . . . . . . . . . . . . . . . . 34
Setting AF and TA/TP . . . . . . . . . . . . . . . . 35
Selecting PTY. . . . . . . . . . . . . . . . . . . . . . . 36
Setting CT. . . . . . . . . . . . . . . . . . . . . . . . . . 36
Other functions
Adjusting the sound characteristics . . . . . . 36
Adjusting the equalizer curve
— EQ7 Tune . . . . . . . . . . . . . . . . . . . . . 37
Adjusting unit menu items
— SYSTEM MENU . . . . . . . . . . . . . . . 37
Using optional equipment. . . . . . . . . . . . . . 39
Switching the front/ rear output
— Zone × Zone . . . . . . . . . . . . . . . . . . . 41
Additional Information
Maintenance . . . . . . . . . . . . . . . . . . . . . . . . 42
Removing the unit. . . . . . . . . . . . . . . . . . . . 43
Notes on discs. . . . . . . . . . . . . . . . . . . . . . . 43
About MP3 files . . . . . . . . . . . . . . . . . . . . . 44
Note on wireless transmission
(MEX-R5 only) . . . . . . . . . . . . . . . . . . . 4 4
Specifications . . . . . . . . . . . . . . . . . . . . . . . 45
Troubleshooting . . . . . . . . . . . . . . . . . . . . . 46
Error displays/Messages. . . . . . . . . . . . . . . 50
Glossary . . . . . . . . . . . . . . . . . . . . . . . . . . . 51
Language code list . . . . . . . . . . . . . . . . . . . 53
Index . . . . . . . . . . . . . . . . . . . . . . . . . . . . . . 5 4
3
Welcome!
Thank you for purchasing this Sony Multi Disc
Player. Before operating this unit, read this
manual thoroughly and retain it for future
reference.
FEATURING:
• DVD, CD, VCD playback compatibility
–Compatible with variou s disc fo rmats, su ch as
DVD-R/-RW, DVD+R/DVD+RW, etc.
DVD-RW: compatible with Video mode and
VR mode (various editing available)
DVD+RW: compatible with +VR mode
(various editing available)
–Plays back up to 1,000 tracks*
DVD-R/-RW, DVD+R/+RW or CD-R/-RW in
MP3 file format
• 2 video outputs (front and rear)*
Zone × Zone audio output*
digital output provided
• Wireless transmission*
complicated connections, audio/video signals
can be transmitted to the optional monitor
XVM-F65WL.
• Zone × Zone: You can lis te n to the radio, or
music from a CD/MD changer (if connected) in
the front, and simulta neously output DVD to
the rear.
• Picture EQ: You can select de sired picture
tone from preset settings accord ing to the car
interior/ambient light.
• DVD level adjustment: balances the output
level differences between PCM, Dolby Digital
and DTS, and the volume level differences
between disc and source.
• EQ7: You can select an equ al i zer curve for 7
music types.
• DSO (Dynamic Soundstage Organizer):
creates a more ambient sound field, using
virtual speaker sy nt hesis, to enhance th e sound
of speakers, ev en if the y ar e insta lled lo w in the
door.
• Optional CD/MD units (both changers a nd
players)*
5
.
• Optional controller accessory
Rotary commander RM-X4S
*1 Depends on track length
*2 1 front video output for MEX-R5
*3 MEX-R1 only
*4 MEX-R5 only
*5 This unit works with Sony products only.
1
recorded on
3
, and 1
4
: without
2
, 1
About this manual
• Instructions in this manual describe the
controls on the card remote commander. You
can also use the controls on the unit if they have
the same or similar names to those on the card
remote commander.
• I n this manual, “DVD” is used as the general
term for DVD-R/-RW and DVD+R/+RW.
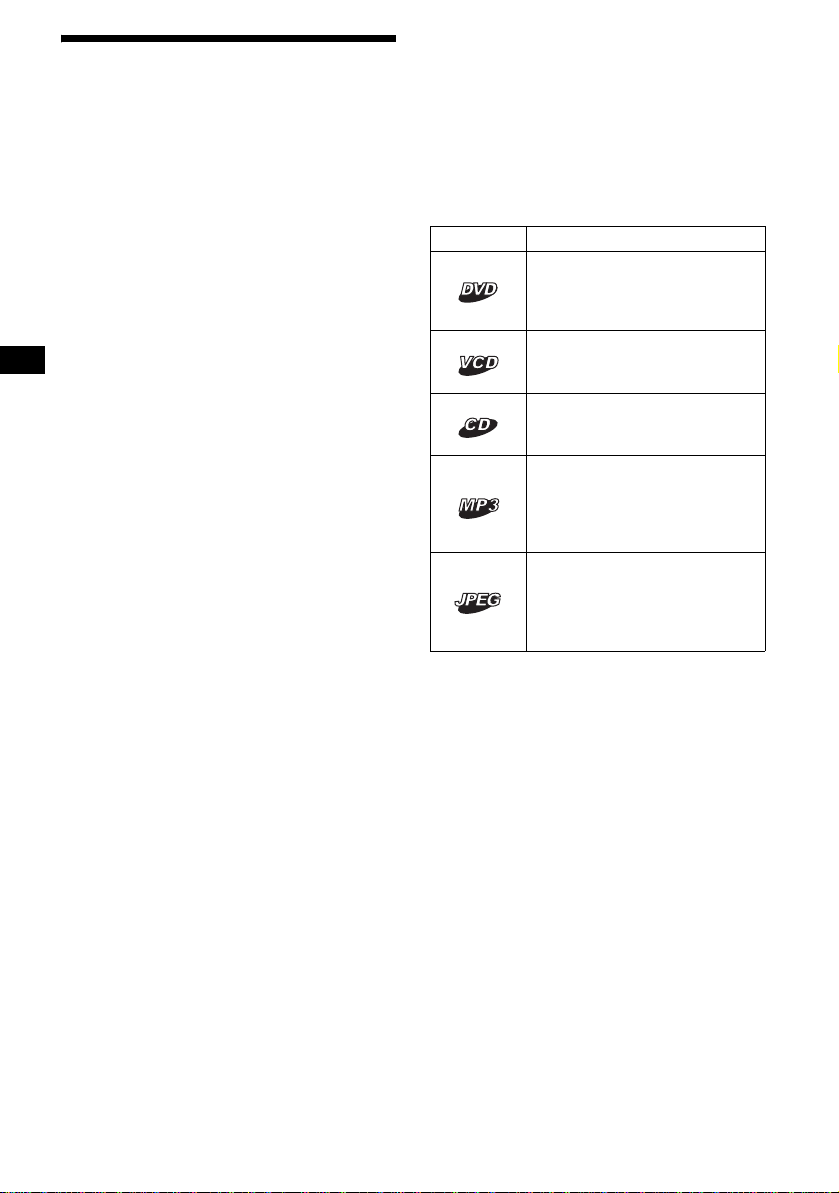
• The meaning of the icons used in this manual is
described bel ow:
Icon Meaning
Functions available for DVD
VIDEOs, DVD-Rs/DVD-RWs,
or DVD+Rs/D VD+RWs in
Vi deo mode
Functions available for Video
CDs or CD-Rs/CD-RWs in video
CD format
Functions available for music
CDs or CD-Rs/CD-RWs in
music CD fo rmat
Functions available for files in
MP3 format stored on CD ROMs/CD-Rs/CD-RWs/DVDRs/DVD-RWs/DVD+Rs/
DVD+RWs
Functions available for files in
JPEG format stored on CDROMs/CD-Rs/CD-RWs/DVDRs/DVD-RWs/DVD+Rs/
DVD+RWs
4
Precautions
Playable discs
• Do not use the custom functions whil e dr iving ,
or perform any othe r function which could
divert your attention from the road.
• If your car has been parked in direct su nl ight,
allow the unit to cool off before operating it.
• Power aerial will extend automatically while
the unit is operating.
On safety
• Comply with the Traffic Laws in your countr y.
• For your safety, the monitor co nnected to the
FRONT VIDEO OUT turns off automatically
when the parking brake is not applied.
Preventing an accident
The pictures appea r only after you park the car
and set the parking brake.
When the car starts moving, the pictures
coming from the FRONT VIDEO OUT
automatically disappear a fter displaying the
following caution.
The monitor connect ed to the REAR VIDEO
OUT is available while the car is in motion.
The pictures on the screen are turned off, but
CD/MP3 sound can be heard.
For your safety,
the video is blocked.
Do not operate the unit or watch the monitor
while driving.
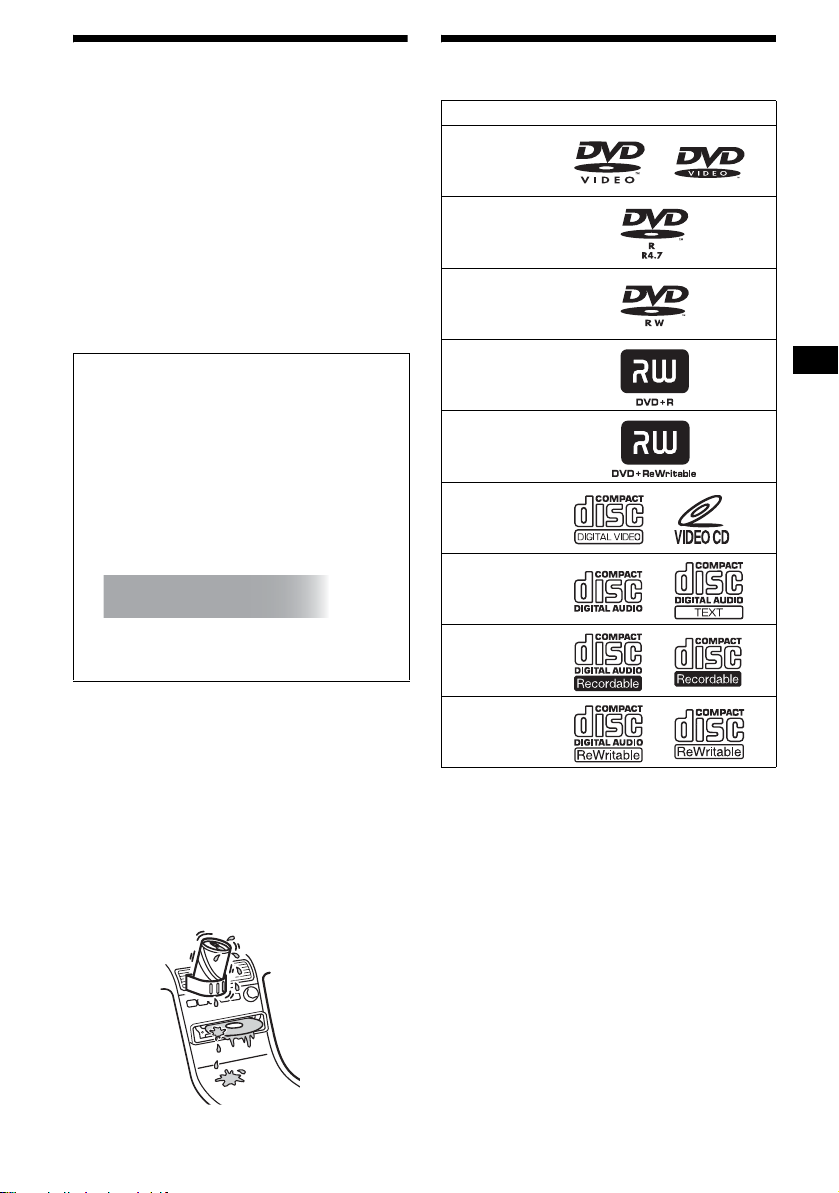
Format of discs
DVD VIDEO
DVD-R*
(MP3/JPEG)
DVD-RW*
Video mode/VR mode
(MP3/JPEG)
DVD+R*
(MP3/JPEG)
DVD+RW*
(MP3/JPEG)
Video CD
Audio CD
CD-R*
(MP3/JPEG)
Moisture condensation
On a rainy day or in a very damp area, moisture
condensation may occur inside the lenses and
display of the unit. Should this occur, the unit
will not operate p roperly. In such a case, remove
the disc and wait for about an hour until t he
moisture has evaporated.
To maintain high sound quality
Be careful not to splash juice or other soft drinks
onto the unit or discs.
CD-RW*
(MP3/JPEG)
* Discs that are not finalized cannot be played.
“DVD VIDEO,” “DVD-R,” “DVD-RW,”
“DVD+R,” and “DVD+RW” are trademarks.
DVD
A DVD contains both audio and visual data. A 12
cm disc can hold 7 times the amount of data
contained in a CD-ROM, which equals to 4
consecutive hours of pl ayi ng time (8 hours for
double-sided dis cs ). DVDs are divided int o 4
types: single sided single layer , single sided
double layer, double side d si ngle layer, and
double sided double layer.
continue to next page t
5

Video CD (VCD)
A Video CD can contain both audio and visual
data on a disc the same si ze as a regular Audio
CD. The playing time is 74 minutes for a
standard 12 cm CD .
Audio CD
An Audio CD cont ainin g audio da ta. Th e playin g
time is 74 minutes for a standard 12 cm CD.
CD-Recordable (CD-R)
With a CD-R, you can edit audi o data. You can
write information on a CD - R onl y once.
CD-Rewritable (CD-RW)
With a CD-RW, you c an edi t au di o data . You can
write information on a CD-RW again and again.
CD-Extra
A CD-Extra has two sections (sessions) for audio
and data respectively. You can only play the
section of audio on this unit.
Notes
• This unit conforms to the PAL colour system. A disc
recorded in a colour system other than P AL, such as
NTSC or SECAM, cannot be played.
• You can play DVD-Rs/DVD-RWs, DVD+Rs/
DVD+RWs and CD-Rs/CD-RWs designed for audio
with this unit. However, depending on the recorded
conditions, you cannot play some discs.
• You cannot play CD-Rs/CD-RWs, DVD-Rs/DVDRWs or DVD+Rs/DVD+RWs that are not finalized.
• Discs created in Packet Write format cannot be
played.
• Recordable discs may not play back correctly if the
ambient temperature is high.
• The discs listed below cannot be played on this unit:
– 8 cm discs
– CD-ROM (the data other than the MP3 or JPEG
files)
– CD-G
–Photo-CD
– VSD (Video single disc)
– DVD-ROM (the data other than the MP3 or JPEG
files)
– DVD-RAM
–DVD-Audio
– DVD+R DL (Dual Layer)
– Active-Audio (Data)
– CD-Extra (Data)
– Mixed CD
– SVCD (Super Video CD)
–CDV
– SACD (Super Audio CD)
Music discs encoded with
copyright protection
This unit is designed t o pl ay back discs that
conform to the Compact Disc (CD) standard.
Recently, various music discs encoded with
copyright protection are marketed by some
record companies. Please be aware that among
those discs, there are some that do not conform to
the CD standard and m ay not be playable and
recordable by this product.
Note on transparent discs
12 cm discs containing of only an inner 8 cm
data portion (the rest is transpare n t) ca nnot be
played o n this unit.
6

Region code
This system is used to protect software
copyrights.
The region code is locate d on the bottom of the
unit, and only DVDs labelled with an identical
region code can be played on this unit.
Region code
DVDs labelled can be also played on this
unit.
If you try to play any other DVD, the message
“Cannot play this disc.” will appear on the
monitor screen. Depending on the DVD, no
region code may be labelled even though playing
the DVD is prohibited by area restrictions.
ALL
Note on playback operations of
DVDs and VCDs
Some playback operations of DVDs and VCDs
may be intentionally set by software producers.
Since this unit plays DVDs and VCDs according
to the disc conten ts the software produ cers
designed, some playback features may not be
available. Also, refer to the instructions supplied
with the DVDs or VCDs.
Copyrights
This product inc orporates copyright protection
technology that is pro te ct ed by U.S. patents and
other intellectual property rights. Use of this
copyright protection technology must be
authorized by Macrovision, and is intended for
home and other limited vie wing u se s o nly u nless
otherwise authorized by Macrovision. Reverse
engineering or disassembly is prohibited.
Manufactured und er li cense from Dolby
Laboratories.
“Dolby” and the doub l e-D symbol are
trademarks of D ol by Laboratories.
“DTS” and “DTS 2. 0 + D ig i ta l Out” are
trademarks of D igital Theater Systems, Inc.
7

Getting Started
Tip
You can set the clock automatically with the RDS
feature (page 36).
Resetting the unit
Before operating the unit for the first time, or
after replacing the car battery or chan ging the
connections, you must reset the unit.
Detach the front panel and press the RESET
button with a pointed o bject, such as a ballpoint
pen.
RESET
button
Note
Pressing the RESET button will er ase the clock setting
and some stored contents.
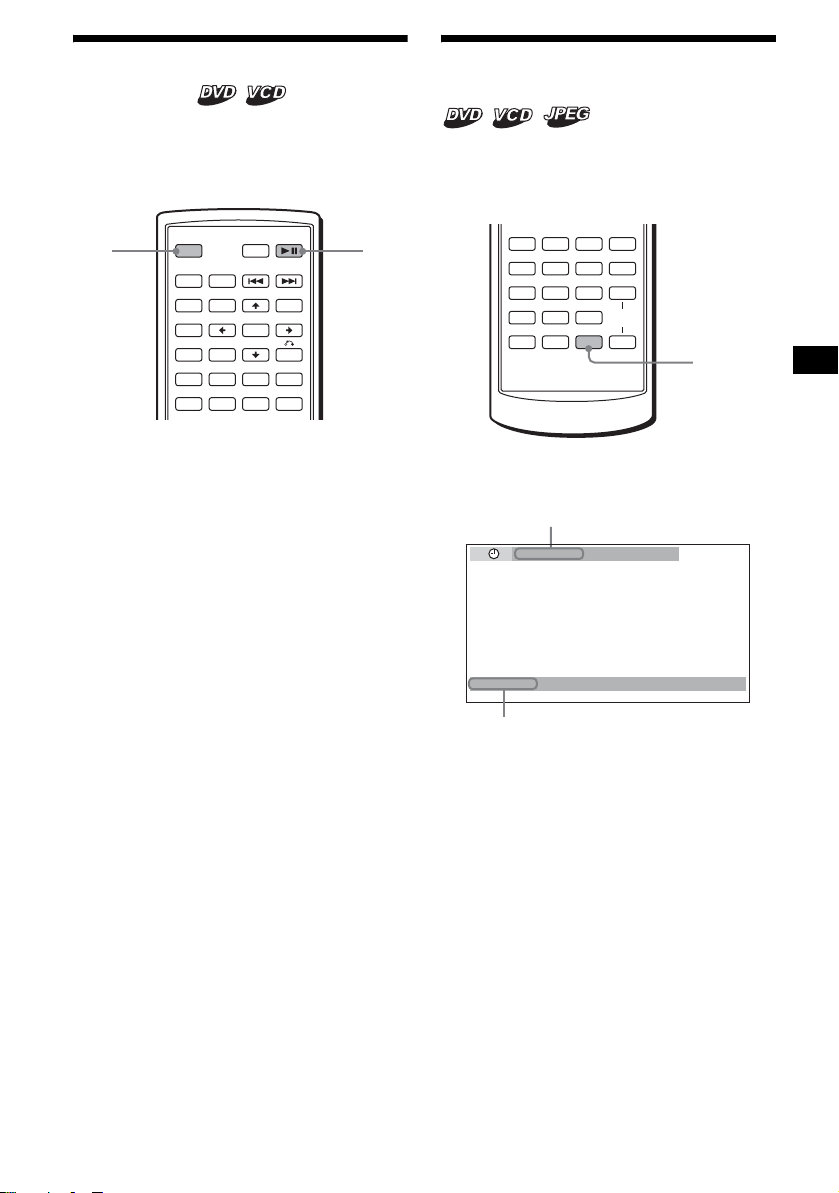
Setting the clock
The clock uses a 24-hour digital indication .
ATT DVD
MODE
TOP MENU
LIST
PICTURE
EQZ
Z DSOAFEQ7
SUBTITLE
+
ENTER
–
ANGLE
MENU
M/m
</,
ENTER
SYSTEM
MENU
OFF
SRC
SOUND
SETUP
SYSTEM
MENU
×
AUDIO
DEMO mode
When the unit is turned off, the clock is
displayed first, then demonstration (DEMO)
mode starts the demonstration display.
To cancel the DEMO mode, set “DEMO -OFF”
in setup (page 38) while the unit is turned off.
Detaching the front panel
You can detach the front panel of this unit to
prevent theft.
Caution alarm
If you turn the ignition switch to the OFF
position without detaching the front panel, the
caution alarm will sound for a few seconds.
The alarm will only sound if the built-in
amplifier is used.
1 Press (OFF).
The unit is turned off.
2 Press , then pull it off towards you .
(OFF)
1 Press (SYSTEM MENU).
The setup display appears.
2 Press M/m repeatedly until “CLOCK-
ADJ” appears.
3 Press (ENTER).
The hour indication flashes.
4 Press M/m to set the hour and m inute.
To move the digital in dication, press </,.
5 Press (ENTER).
The clock starts.
To display the clock during playback/ r eception,
set “CLOCK-ON” (page 38).
8
Notes
• Do not drop or put excessive pressure on the front
panel and display window.
• Do not subject the front panel to heat/high
temperature or moisture. Avoid leaving it in a parked
car or on a dashboard/rear tray.
Tip
When carrying the front panel, use the supplied front
panel case.
Attaching the front panel
Engage part A of the front panel with part B of
the unit, as illustrated, and push the left side into
position until it clicks.
A
B
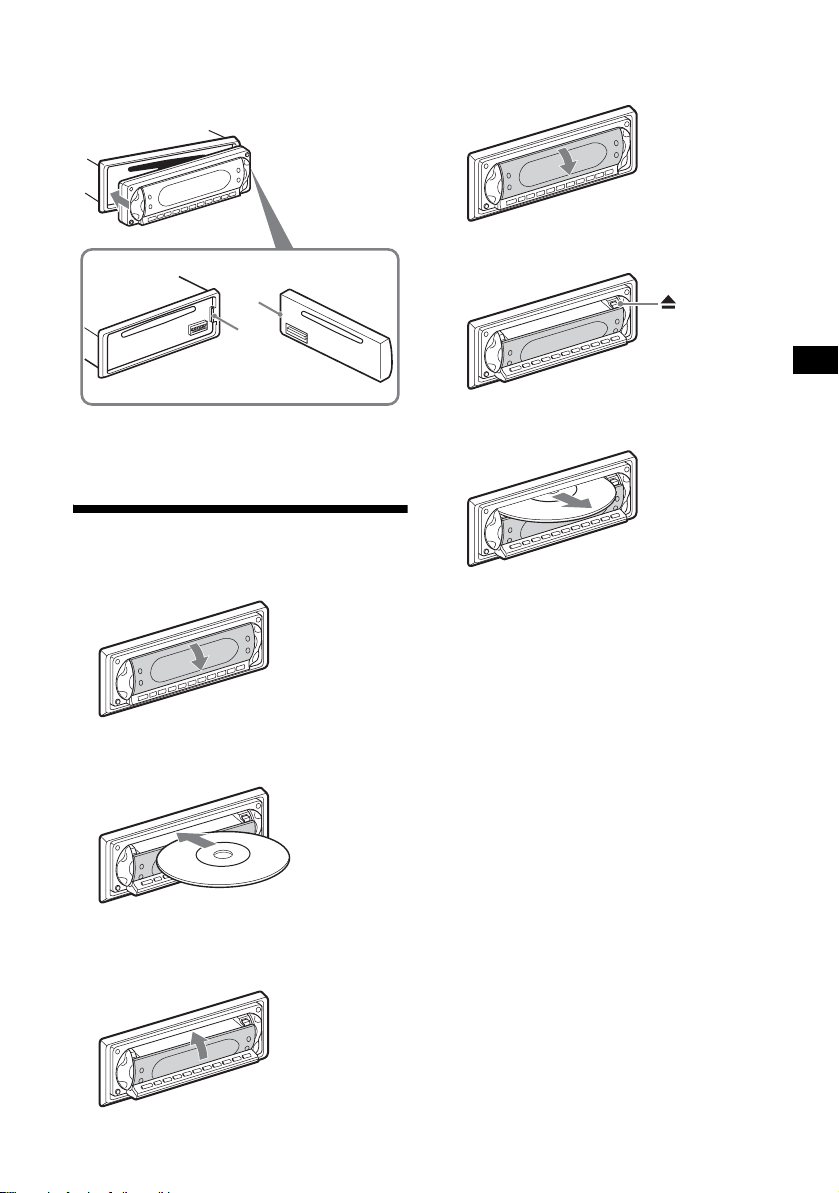
Ejecting the disc
1 Open the shutter.
2 Press Z.
Note
Do not put anything on the inner surface of the front
panel.
Inserting the disc in the unit
1 Open the shutter.
2 Insert the disc with the playback side
down.
Playback st arts . (D ependi ng o n the dis c, pr ess
DVD u to start playback.)
3 Close the shutter.
x
The disc is ejected.
Note
While inserting or ejecting the disc, do not close the
shutter. The disc may be caught and damaged.
Tip
The disc can be played with the shutter open or
closed.
9
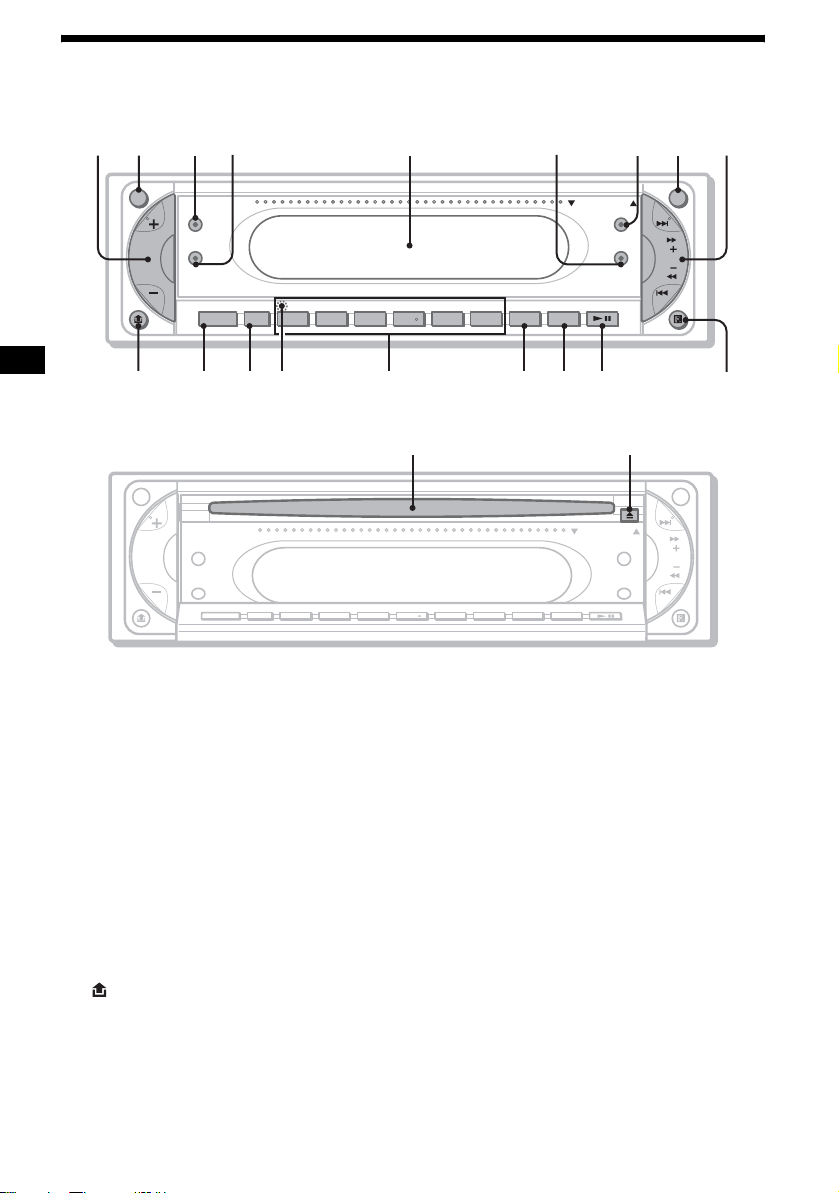
Location of controls and basic operations
Main unit
12 34 6 78 9
ATT OFF
Z
×
Z
SOUND
SOURCE MODE
SHUFREP ALBM +
5
OPEN/CLOSE
DSO
EQ7
-
654321
AF/TA
PICTURE DVD
EQ
SEEK
MEX-R1
MEX-R5
qjqhqgqfqdqsqa0
OPEN/CLOSE shutter opened
ql w;
ATT OFF
OPEN/CLOSE
Z
×
Z
SOUND
SOURCE MODE
Refer to the pages listed for details.
a Volume +/– button 36
b ATT (attenuate) button
c Z×Z (Zone × Zone) button
d SOUND button
e Display window
f EQ7 (equalizer) button
g DSO button
h OFF button 8
i SEEK +/– button
Radio:
T o tune in stat ions automatica lly (press); f ind
a station manual l y (press and hold).
DVD/CD:
To skip chapters/tracks (press); fast-forward/
reverse a chapter/tr ack (press and hold).
j (front panel release) button 8
k SOURCE button 41
l MODE button
m RESET button (located behind the front
panel) 8
DSO
EQ7
AF/TA
654321
DVDPICTURESHUFREP ALBM +
EQ
n Number buttons
Radio:
To receive stored stations (press ); sto re
stations (press and hold ).
CD/MD*
1
:
(1): REP 20, 39
(2): SHUF 20, 39
(3)/(4): ALBM –/+*
To skip albums (press); skip albums
continuousl y (press and hold ).
o AF (Alternative Frequencies)/TA
(Traffic Announcement) button
p PICTURE EQ button
q DVD u (play/pause) button
r Receptor for the card remote
commander
s Disc slot 9
t Z (eject) button 9
*1 When an MD changer is connected.
*2 When an MP3/JPEG is played and a changer is not
connected. If the changer is connected, the
operation is different, see page 39.
SEEK
2
qk
10

Card remote commander RM-X703
1
2
3
4
5
6
7
8
9
MODE
TOP MENU
LIST
PICTURE
EQZ
SUBTITLE
ATT DVD
+
ENTER
–
ANGLE
OFF
SRC
SOUND
SETUP
SYSTEM
MENU
×
Z DSOAFEQ7
AUDIO
123
456
MENU
TA
+
0
qa
qs
qd
qf
qg
qh
qj
qk
ql
w;
wa
ws
LIST
PICTURE
EQZ
SUBTITLE
0
–
ANGLE
PTY
DSPL
SYSTEM
MENU
×
Z DSO EQ7
AUDIO
123
456
789
CLEAR
AF
TA
VOL
wd
wf
wg
wh
+
wj
wk
–
wl
a OFF button 15, 17, 19
To power off/stop the source.
b MODE button 33, 39
To select the radio band (FM/MW / LW)/
select the unit*
1
.
c SRC (SOURCE) button
To po wer on/change the source (Radio/DVD/
CD/MD*
2
/AUX*3).
d TOP MENU button 19
To display the top menu on a DVD.
e SOUND button 36
To select sound items.
f ENTER button
To complete a setting.
g SETUP button
To display the Setup menu and Play mode
menu.
h SYSTEM MENU button
To enter the unit menu.
i LIST button 33, 40
To list up.
j ATT (attenuate) button
To attenuate the sound. To cancel, press
again.
k DVD u (play/pause) button 9, 15, 16 ,
17
To start/pause playback.
l ./> (previous/next; revers e/fast-
forward; station tuning) buttons
m MENU button 19
To display the menu on a disc.
n </, (cursor) buttons
To move the cursor, or turn the pages.
o O (RETUR N) button 19, 28, 29
To return to the previous display, or previous
operation.
p M/m (cursor) buttons
To move the cursor.
q PICTURE EQ button 25
To select the picture quality.
r Z×Z (Zone × Zone) button 41
To switch the front/rear output.
s AUDIO button 22
To change the audio output.
t SUBTITLE button 24
To change the subtitle language.
u Number buttons
continue to next page t
11

v CLEAR button 21
To cancel entered numbers.
w DSO button 4
To select the DSO mode (1, 2, 3 or OFF).
The larger the number, the more enhanced
the effect.
x EQ7 (equalizer) button
T o select an equalizer type (XPLOD,
VOCAL, CLUB, JAZZ, NEW A GE, R OCK,
CUSTOM or OFF).
y AF (Alternative Frequen ci es) button
35
To set AF in RDS.
z TA (Traffic Announcement) button 35
To set TA/TP in RDS.
wj ANGLE button 23
To change the viewing angle.
wk VOL (volume) +/– button 35
To adjust the volume.
wl PTY DSPL button 15, 17, 18, 36, 39
T o select PTY in RDS; change display items.
*1 When a CD/MD changer is connected.
*2 When an MD changer is connected.
*3 When an optional Sony por ta ble device is
connected.
Note
If the unit is turned off and the display disappears, it
cannot be operated with the card remote commander
unless (SOURCE) on the main unit is pressed, or a
disc is inserted to activate the unit first.
Tip
For details on how to replace the battery, see
“Replacing the lithium battery of the card remote
commander” on page 42.
12
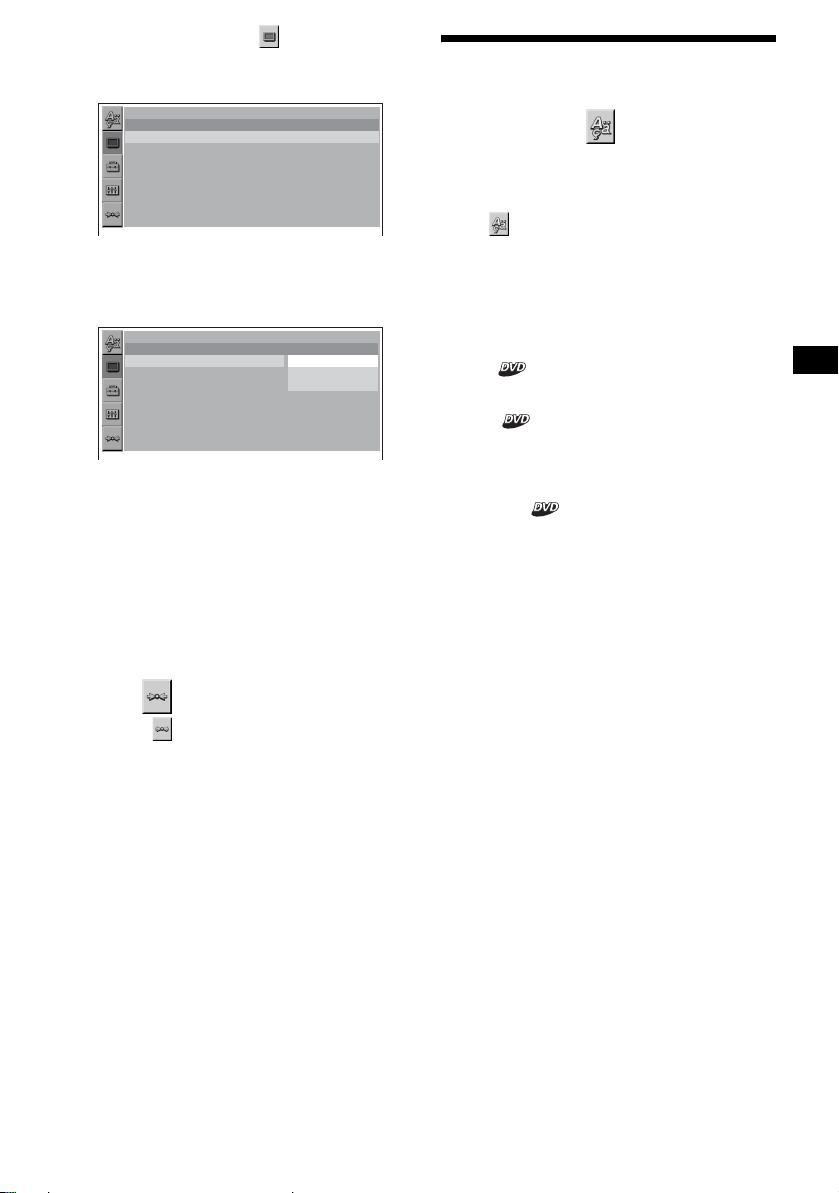
Menu displays
AC DE
ACDEF
Use the menus of this unit to adjust the various
functions and set tings for playback.
The displaying menu differs depending on the
status of the unit.
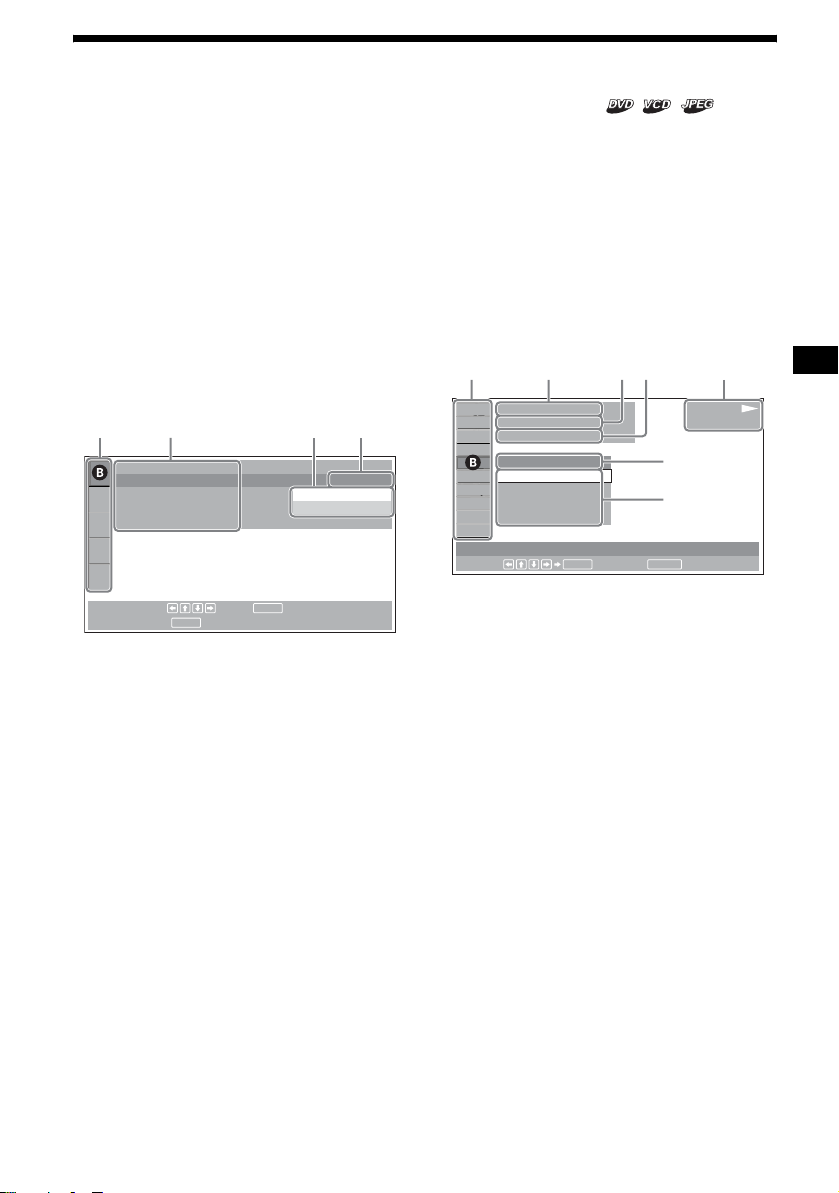
Setup menu
Appears when pr essing (SETUP) while
playback is st opped.
To select the item
Press </M/m/,, then press (ENTER).
To turn off the Setup menu
Press (SETUP).
Example: When “LANGUAGE SETUP” is
selected.
LANGUAGE SETUP
OSD :
MENU :
AUDIO :
SUBTITLE :
To set, press , then .
To quit, press .
SETUP
A Setup items
B Selected item
C Setting items
D Options
E Current setting
ENTER
ENGLISH
JAPANESE
ENGLISH
ENGLISH
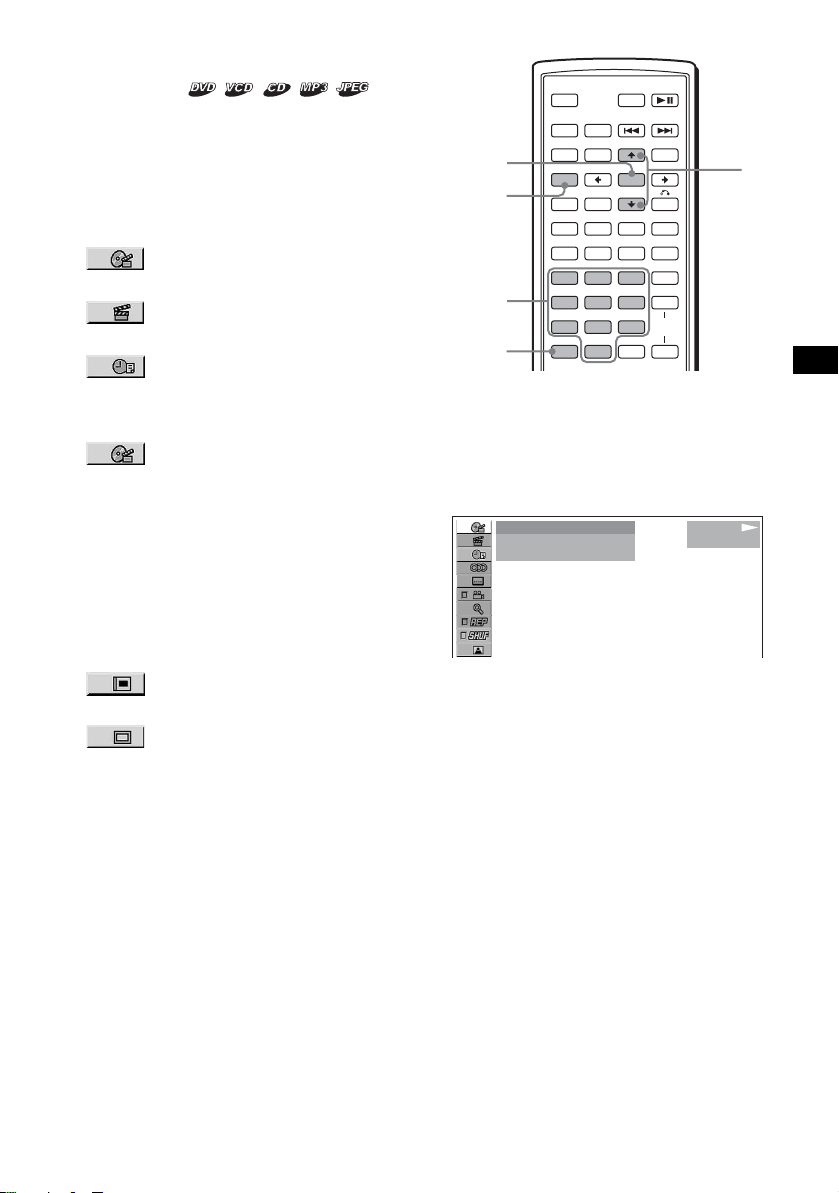
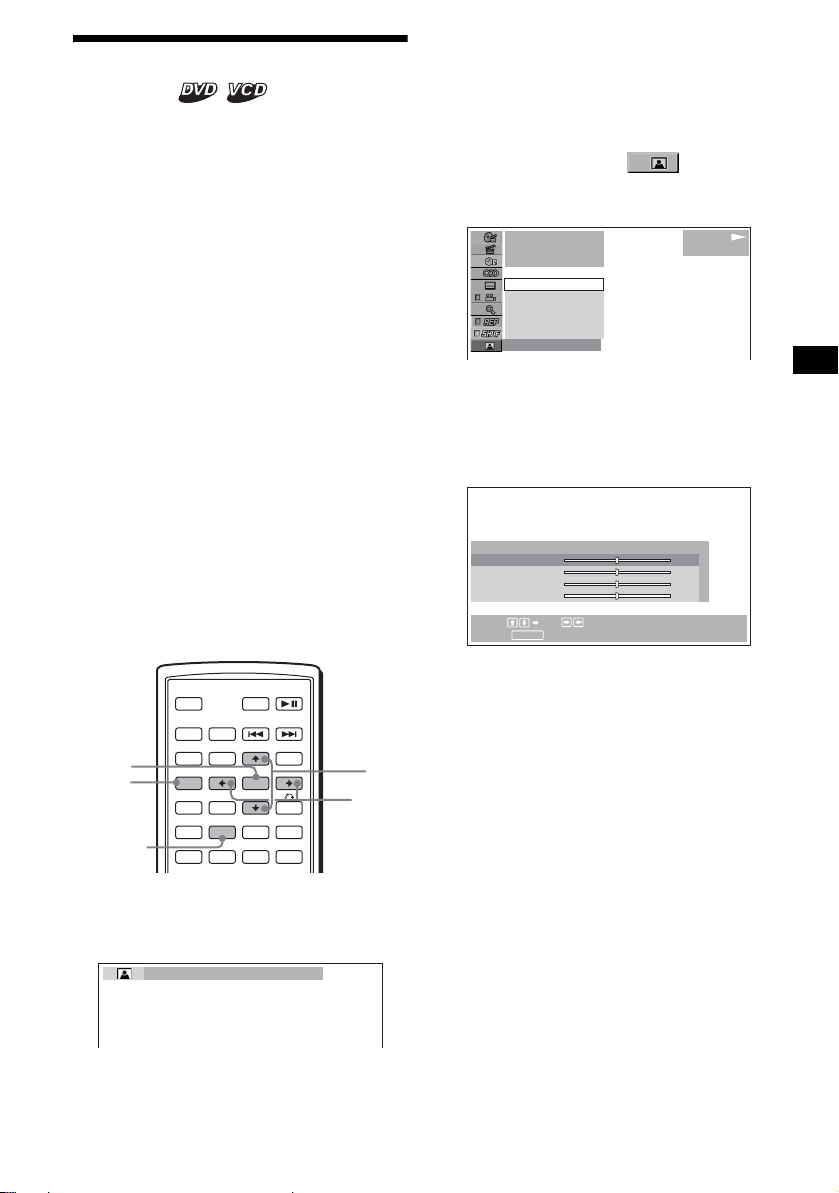
Play mode menu
Appears when pressing (SETUP) during
playback.
To select the item
Press </M/m/,, then press (ENTER).
To tur n off th e Play mode menu
Press (SETUP).
Note
The items on the menu, and the operation procedures
differ depending on the disc.
Example: When playing a DVD
)
12(67
)
018(034
T 1:35:55
1;ENGLISH
OFF
1:ENGLISH
2:FRENCH
3:SPANISH
SUBTITLE
Select :
ENTER RETURN
Cancel
A Play mode items
B Selected item
C Title number*
1
/Total title number*
D Chapter number*2/Total chapter number*
E Elapsed playback time
F Playback status (NPLAY, XPAUSE, etc.)/
Disc format
G Current setting
H Options
*1 Displays the track number for VCDs, album number
for JPEG files. When playing VCD with the PBC
function on, no indication is displayed.
*2 Displays the image number for JPEG files.
Notes
• While playing back CD/MP3, the Play mode menu
cannot be displayed.
• While playing back JPEG files, (SETUP) is active
only when the image is fully displayed.
G
H
PLAY
DVDVIDEO
1
2
continue to next page t
13
Operation message
Menu operations differ depending on the item
selected, and the buttons to be used appear on the
bottom of the menu display to assist your
operations.
ENTER
To set, press , then .
To quit, press .
Selected item name and/or
operation massages appear.
Tip
“Operation not possible” appears when the function is
not available.
SETUP
SETUP
ENTER
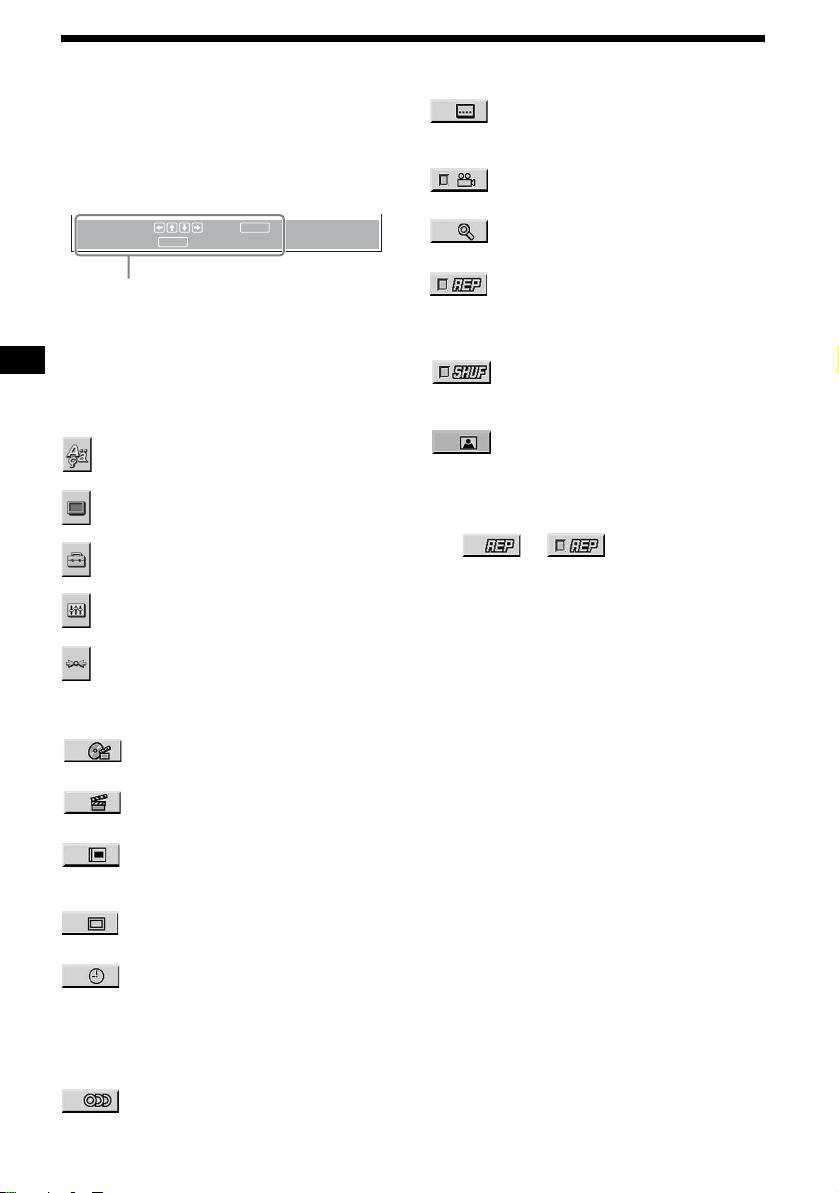
Setup items
LANGUAGE SETUP (page 29)
Switches the languages.
SCREEN SETUP (page 30)
Selects the screen modes.
CUSTOM SETUP (page 31)
Sets the playback operations.
AUDIO SETUP (page 32)
Adjusts the output sound.
RESET (page 29)
Resets all setup items.
SUBTITLE (page 24)
Displays the subtitles.
Changes the subtitle language.
ANGLE (page 23)
Changes the angl e.
CENTER ZOOM (page 24)
Magnifies the picture .
REPEAT (page 20)
Plays the entire disc (all titles/all trac ks /
all albums) repeatedly, or one chapter/
track/album repeatedly.
SHUFFLE (page 20)
Plays titles/chapters/tracks in random
order.
PICTURE EQ (page 25)
Selects the picture quality.
Tip
When “REPEAT” or “SHUFFLE” is activated, or
“ANGLE” is available, its check-box lights up in green
(e.g. ). However, you may not
be able to change the angle depending on the scene,
even if the check-box is lit in green.
t
Play mode items
TITLE, TRACK (page 21)
Selects the title, or track to be played.
CHAPTER (page 21)
Selects the chapter to be played.
ALBUM (JPEG) (page 21)
Selects the image album to be
displayed.
IMAGE (page 21)
Selects the image to be displayed.
TIME/TEXT (page 17, 21)
Checks the elap sed time and the
remaining playback time.
Inputs the time code for picture
searching.
Displays DVD tex t.
AUDIO (page 22)
Changes the audio setting.
14
Player
A
C
B
D
Playing discs
Depending on the disc, some operations may be
different or restricted.
Refer to the operating instru ctions supplied with
your disc.
When “MP3/JPEG” on “CUSTOM SETUP” is
set to “JPEG, ” a slid e sho w starts automatic ally if
JPEG files are on the di sc (page 31).
Each time you pr ess </,, the image rotates
every 90º.
Notes
• If a large-size image is rotated, it may take longer to
display.
• A JPEG file is designed to be optimally displayed at
640 x 480 pixels. A file in another size may not be
displayed correctly , or picture shift (to the left or
right) may occur.
• Progressive JPEG files cannot be displayed.
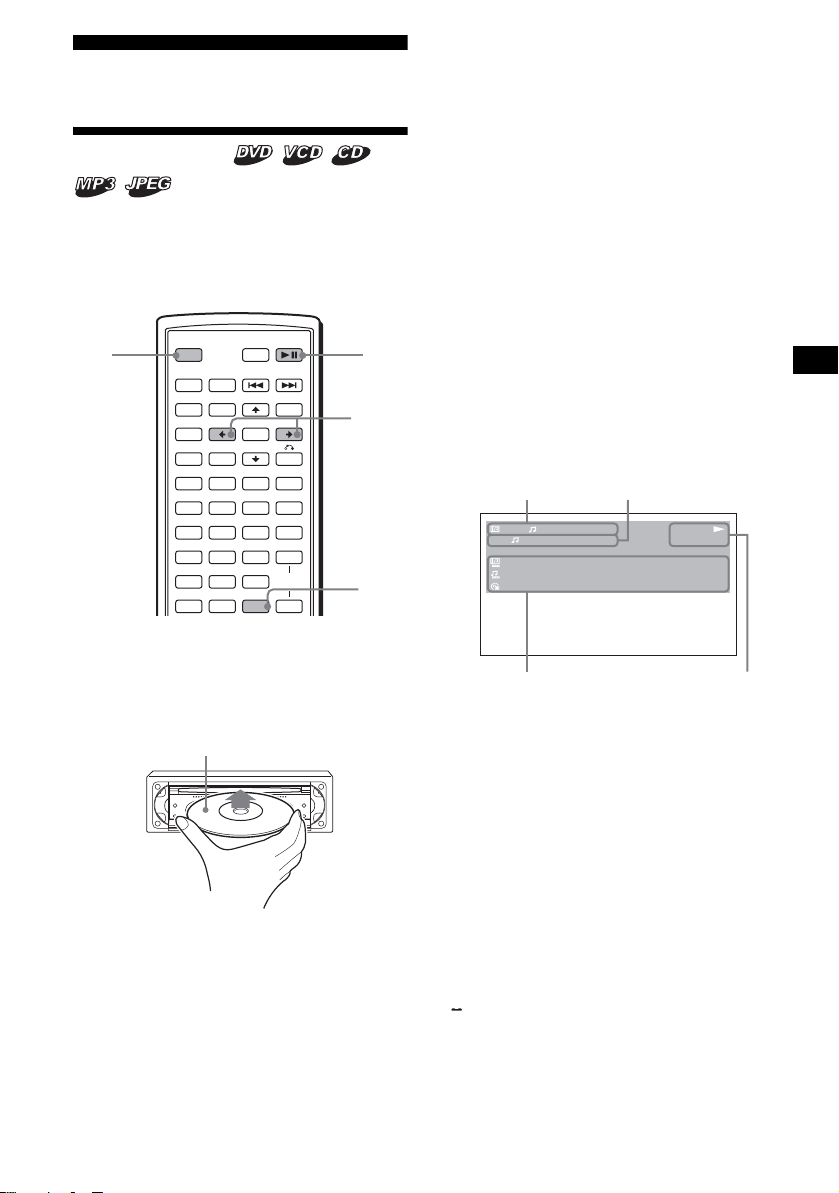
When the disc is inserted
Press DVD u to start playback.
OFF DVD
OFF
SRC
SOUND
SETUP
SYSTEM
MENU
×
AUDIO
123
456
789
CLEAR
ATT DVD
MODE
TOP MENU
LIST
PICTURE
EQZ
Z DSOAFEQ7
SUBTITLE
0
+
ENTER
–
ANGLE
PTY
DSPL
MENU
VOL
TA
+
–
1 Turn on your monitor, then select the
input source on your monitor
corresponding to this unit.
2 Insert a disc.
Playback side down
Playback starts automatically. (Depending on
the disc, press DVD u to start playback.)
A menu may appe ar on t h e screen when a
DVD or VCD is inserted.
For details on these menus, see page19 for
DVDs, and page 19 for VCDs.
u
</,
DSPL
To stop playback/to turn off the unit
Press (OFF).
Tip
You cannot insert a disc while the unit is turned off.
Display items on the CD/MP3
playback
1
1
0:42
REP
:
ALBUM NAME 001
:
TRACK NAME 001
:
ID3 INFORMATION
160k
A Album number*1/Track number/
Elapsed playback time
B Playback mode/Bit rate*
C Disc name*3/Album na m e *1/Track name/
ID3 tag information*
1
D Playback status (NPLAY, XPAUSE, etc.)/
Disc format
*1 Appears only when MP3 files are played.
*2 No indication when VBR (Variable bit rate) is
applied.
*3 “NO DISC NAME” or “NO TRACK NAME” appears
when the disc or track has no name.
To scroll the text information
Press (DSPL).
Note
“ ” appears in place of the letters other than the
alphabet and numbers.
1*2
PLAY
MP3
continue to next page t
15
Notes on DVDs with a DTS sound track
DTS audio signal is output at all times; a loud noise
may come out from the speakers if you connect the
unit to the audio equipment without a DTS decoder.
This may cause damage to the speakers, or affect
your hearing.
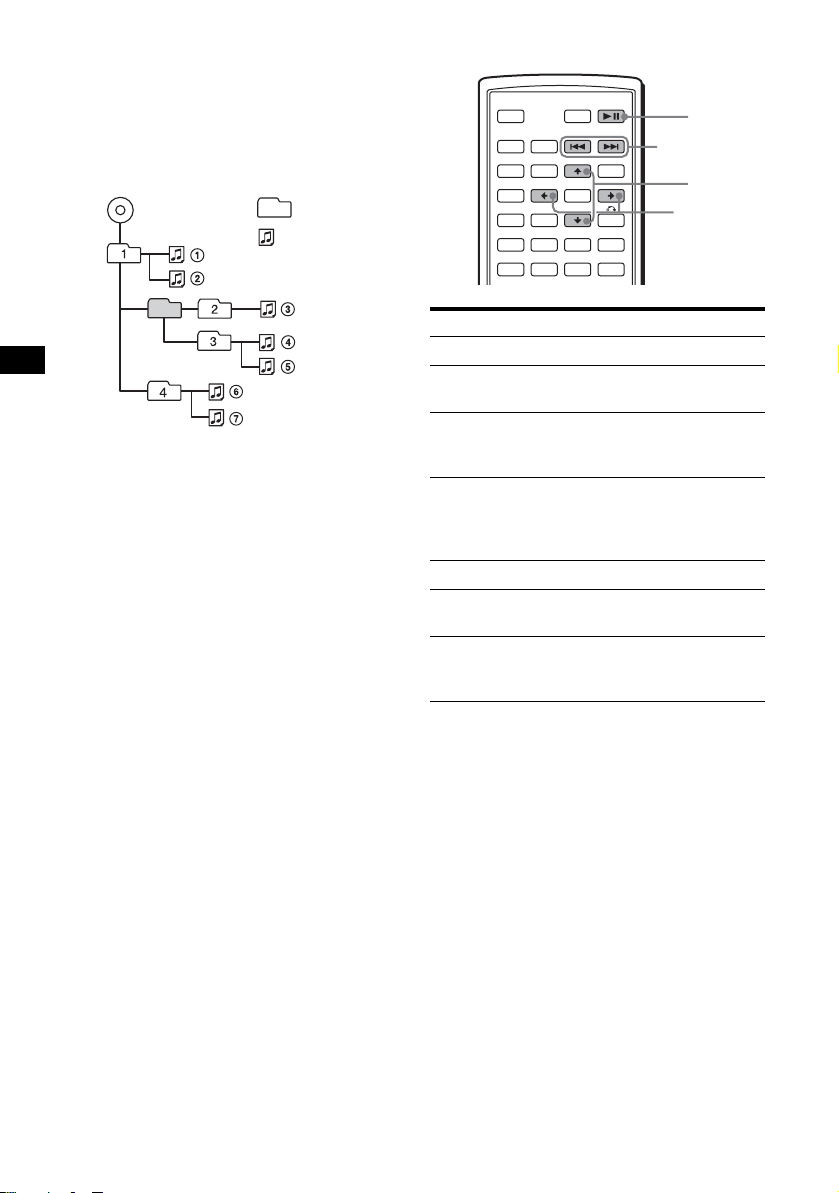
Playback order of MP3 files
MP3
Notes
• The playback order may differ depending on the
writing software.
• The unit can play up to 1,000 tracks and 256
albums. Tracks beyond the first 1,000 and albums
beyond the first 256 cannot be recognized.
Tips
• If you add numbers (01, 02, 03, etc.) to the front of
the track names, the tracks in each folder will be
played in numerical order.
• Since a disc with many trees takes longer to start
playback, it is recommended that you create albums
of no more than two tree levels.
• For details on MP3 files, see “About MP3 files” on
page 44.
Folder
(album)
MP3 file
(track)
Additional operations
OFF
SRC
SOUND
SETUP
SYSTEM
MENU
×
AUDIO
To Operation
Pause Press DVD u
Resume play after
pause
Go to the next chapter,
track, or scene in
continuous play mo de
Go back to the
previous chapter,
track, or scene in
continuous play mo de
Go to the next album Press M*
Go to the previous
album
Stop play and remove
the disc
ATT DVD
MODE
TOP MENU
LIST
PICTURE
EQZ
Z DSOAFEQ7
SUBTITLE
+
ENTER
–
ANGLE
MENU
Press DVD u
Press > (,)
Press . (<)
Press m*
Press Z after opening
the shutter of the unit
(page 9)
./>
</,
DVD
u
M/m
16
* Available only when MP3 or JPEG files are played.
Resuming playback
— Resume play
The unit stores the po int where you stoppe d
playback for up to 20 discs, and starts resuming
playback even after the unit is tur ned off, or the
disc being played is eje ct ed.
OFF
OFF
SRC
SOUND
SETUP
SYSTEM
MENU
×
AUDIO
ATT DVD
MODE
TOP MENU
LIST
PICTURE
EQZ
Z DSOAFEQ7
SUBTITLE
+
ENTER
–
ANGLE
MENU
DVD
u
Viewing the disc information
— Time/text information
You can check the playing tim e an d remaining
time of the current title, chapter, or track. You
can also check text information, such as name of
title, chapter, file, etc.
AUDIO
SUBTITLE
ANGLE
AF
PTY
DSPL
TA
+
VOL
–
DSPL
123
456
789
CLEAR
0
1 During playback, press (OFF) to stop.
2 Press DVD u to r esume playb ack.
Playback start s from the point stopped in
step 1.
To play from the beginning
After settin g “MULTI-DISC RESUME” in
“CUSTOM SETUP” to “O FF” (page 31 ), press
Z to eject the disc, then insert the disc again.
Select the desired c hapter on the DVD menu or
the Top menu depending on the disc.
Notes
• MP3 playback will start from the beginning of the last
track that was played.
• To use resume playback, make sure that “MULTI-
DISC RESUME” in “CUSTOM SETUP” is set to
“ON” (page 31).
• When storing a resume point for the 21st disc, the
stored resume point for the 1st disc is cleared
automatically.
• Resume playback is cancelled when the setting for
the parental controls is changed.
• Depending on the disc or scene, you cannot use the
resume playback.
• If parental contro l is applied, the resume playback
will not work. In this case, playback starts from the
beginning of the disc when it is inserted.
Tip
When CD, MP3 files, or JPEG files are played, the unit
temporarily stores the resume point for the disc being
played. Once the unit is turned off or the disc is
ejected, the stored resume point for the disc is
cleared.
1 During playback, press (DSPL).
The current playba ck information appears.
Time information
T 1:01:57
NO TEXT
Text information*
* “NO TEXT” appears when there is no text
information.
continue to next page t
17
2
Press (DSPL) repeatedly to switch the
time information.
Time information differs depe ndi ng on the
disc as follows:
DVD:
“T
**:**:**
the current title
“T-
**:**:**
current title
“C
**:**:**
the current chap t er
“C-
**:**:**
current chapter
” - Elapsed playin g t ime of
” - Remaining time of the
” - Elapsed playin g t im e of
” - Remaining time of the
VCD (wit hout PBC functions):
“T
**:**
current track
“T-
**:**
track
“D
**:**
current disc
“D-
**:**
disc
” - Elapsed playing time of the
” - Remaining time of the current
” - Elapsed play i ng time of the
” - Remaining time of the current
JPEG:
Album number
Image number
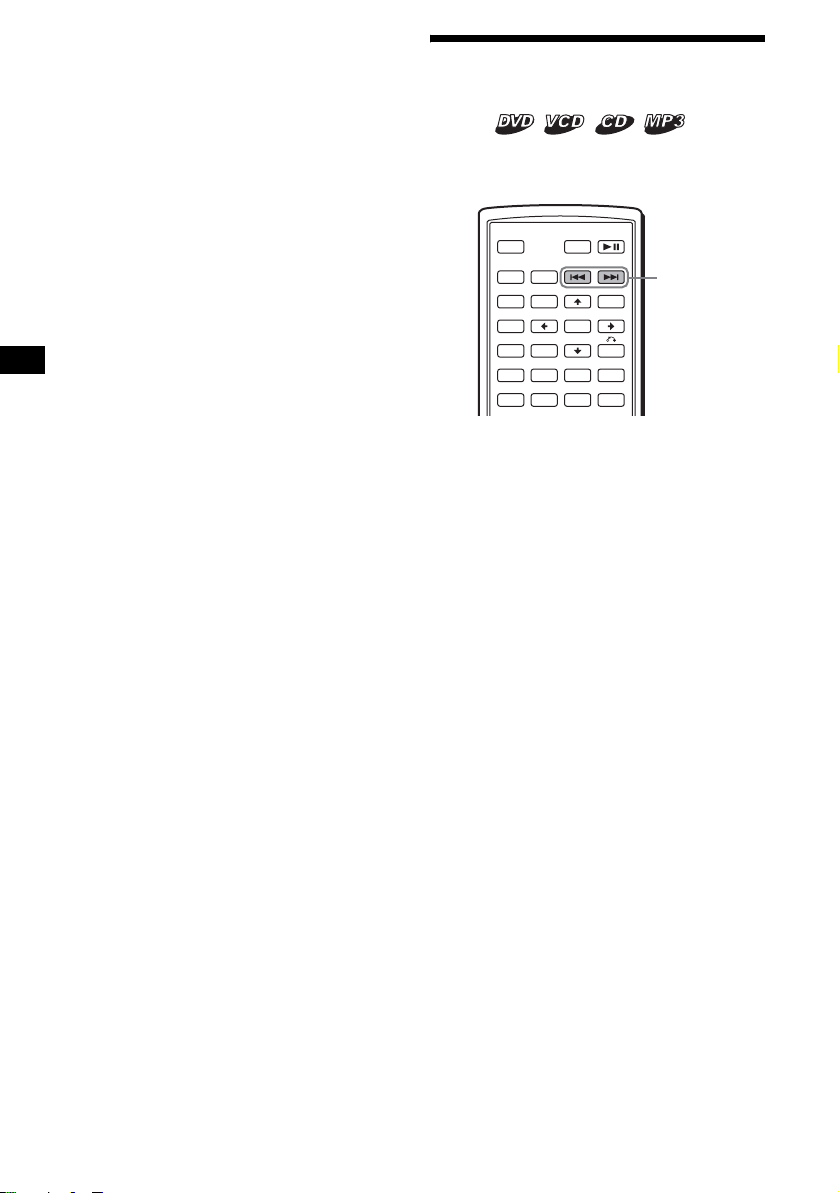
Searching a specific point on
a disc
— Scan
You can quickly locate a specific point on a disc
by monitoring the picture.
OFF
SRC
SOUND
SETUP
SYSTEM
MENU
×
AUDIO
During playback, press and hold ./
>, and release at the desir ed point.
If you press and hold the button, searching speed
increases.
Note
While searching, audio is not output, and subtitles are
not displayed.
ATT DVD
MODE
TOP MENU
LIST
PICTURE
EQZ
Z DSOAFEQ7
SUBTITLE
+
ENTER
–
ANGLE
MENU
./>
18
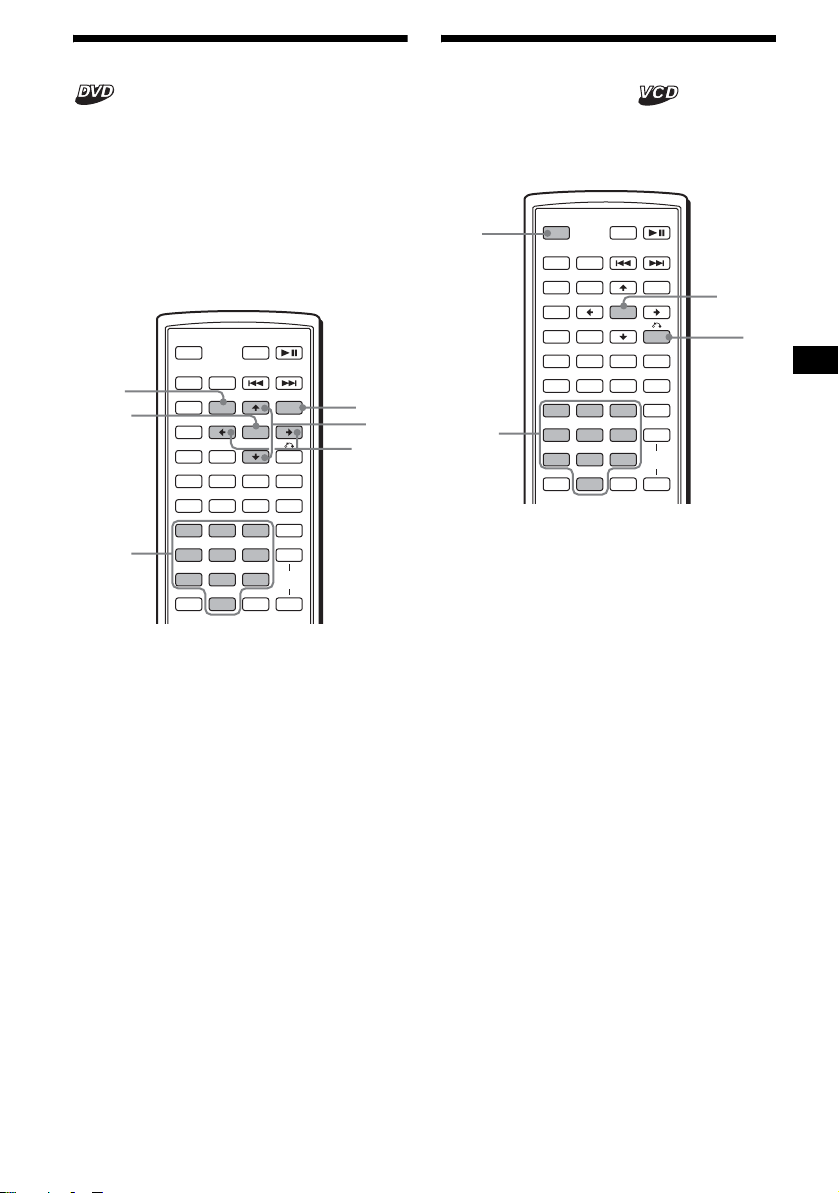
Using the menus on DVDs
With some DVDs, you can use their original
menu(s), such as the Top menu or DVD menu.
If the DVD contains several titles of tracks and
scenes, you can u se the Top menu to select the
desired title, and start playing.
If the DVD contains mo re comprehensive menu
items, such as th e audio and subtit le languages,
titles, chapters, etc., you can use the DVD menu
to select the desired item, and start playing.
ATT DVD
MODE
TOP MENU
LIST
PICTURE
EQZ
Z DSOAFEQ7
SUBTITLE
+
ENTER
–
ANGLE
MENU
MENU
M/m
</,
TOP
MENU
ENTER
OFF
SRC
SOUND
SETUP
SYSTEM
MENU
×
AUDIO
Using PBC functions
— PBC (Playback control)
The PBC menu assists your oper at i o n
interactively while a PBC compatible VCD is
played.
OFF
Number
buttons
OFF
SRC
SOUND
SETUP
SYSTEM
MENU
×
AUDIO
123
456
789
CLEAR
ATT DVD
MODE
TOP MENU
LIST
PICTURE
EQZ
Z DSOAFEQ7
SUBTITLE
MENU
+
ENTER
–
ANGLE
VOL
PTY
DSPL
0
ENTER
TA
+
–
O
PTY
DSPL
TA
+
VOL
–
Number
buttons
123
456
789
CLEAR
0
1 During DVD playback, press
(TOP MENU) or (MENU).
The DVD menu or Top menu appears.
The contents of the menu differ depending on
the disc.
2 Press </M/m/,, or the number
buttons to select the desired item,
then press (ENTER).
Note
The items on the menu, and the operation procedures
differ depending on the disc.
1 Start playing a PBC compat ible VCD.
The PBC menu appear s.
2 Press the number buttons to select the
desired item, then press (ENTER).
3 Follow the instructions in the menu for
interactive opera tions.
To return to the previous display
Press O.
Playing without the PBC function
1 During playback, press (OFF).
2 Press the number buttons to select the
desired item, then press (ENTER).
“Play without PBC” appears and playback
starts.
The PBC menu does not a ppe ar during
playback.
Notes
• The items on the menu, and the operation
procedures differ depending on the disc.
• During PBC playback, the track number, playback
time, etc., are not displayed in the Play mode menu.
Tip
To resume PBC playback, stop playback by pressing
(OFF), then press DVD u. PBC playback starts.
19
Playing in various modes
— Repeat play/Shuffle play/Search play
You can set the following play modes:
• Repeat play (page 20)
• Shuffle play (page 20)
• Search play (page 21)
Notes
• The selected play mode is cancelled when the disc
being played is ejected or the unit is turned off.
• When playing a VCD with the PBC function on,
Repeat play or Shuffle play is not available.
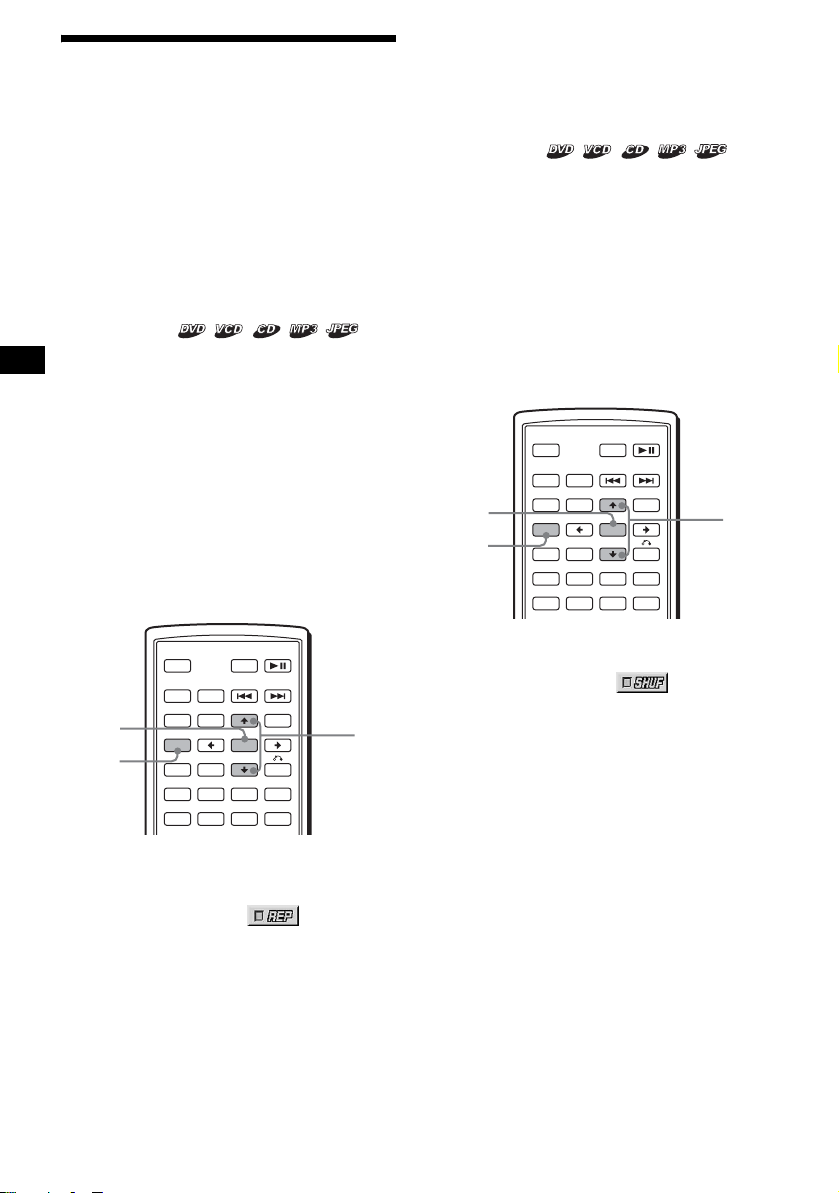
Playing repeatedly
— Repeat play
The unit can repeat a title, chapter, or track when
the item being played reaches the end.
The following repeat options are available:
• TITLE (Title Repeat) - to repeat the current
title.
• CHAPTER (Chapter Repeat) - to repeat the
current chapt er.
• TRACK (Track Repeat) - to repeat the cu rrent
track/image.
• ALBUM (Album Repeat) - to repeat the tracks/
images in the current album.
Note
When setting Repeat play for CD/MP3, operate with
the main unit by pressing (1) (REP) repeatedly.
Tips
• The repeat options differ depending on the disc.
• You can also set Repeat play by pressing (1) (REP)
on the main unit repeatedly.
Playing in random order
— Shuffle play
The unit can play tit le s, chapters or tracks in
random order.
The followi ng shuffle options are available:
• TITLE (Title Shuffle) - to pl ay chapters in the
current title in random order.
• DISC (Disc Shuffle) - to play tracks/images in
the current disc in random order.
• ALBUM (Album Shuffle) - to play tracks/
images in the current album in random order.
Note
When setting Shuffle play for CD/MP3, operate with
the main unit by pressing (2) (SHUF) repeate dly.
ATT DVD
MODE
TOP MENU
LIST
PICTURE
EQZ
Z DSOAFEQ7
SUBTITLE
+
ENTER
–
ANGLE
MENU
M/m
ENTER
SETUP
OFF
SRC
SOUND
SETUP
SYSTEM
MENU
×
AUDIO
ATT DVD
MODE
TOP MENU
LIST
PICTURE
EQZ
Z DSOAFEQ7
SUBTITLE
+
ENTER
–
ANGLE
MENU
ENTER
SETUP
OFF
SRC
SOUND
SETUP
SYSTEM
MENU
×
AUDIO
1 During playback, press (SETUP).
The Play mode men u appears.
2 Press M/m to select (REPEAT),
then press (ENTER).
The Play mode options appear.
3 Press M/m to select the desired option,
then press (ENTER).
Repeat play starts.
To return to normal play
Select “OFF” in step 3.
To turn off the Play mode menu
Press (SETUP).
20
M/m
1 During pl ayback, press (SETUP).
2 Press M/m to select
(SHUFFLE), then press (ENTER).
The Play mode options appear.
3 Press M/m to select the desired option,
then press (ENTER).
Shuffle play starts.
To return to normal play
Select “OFF” in step 3.
To turn off the Play mode menu
Press (SETUP).
Notes
• Title shuffle play for DVD will be cancelled after it is
played once.
• Title shuffle play for DVD will be cancelled if . or
> is pressed during playback.
Tips
• The shuffle opt i ons differ depend i ng on the disc.
• You can also set S huffle play by pressing (2)
(SHUF) on the main unit repeatedly.
Starting playback from a selecte d
point
— Search play
You can quickly locate a de si red point by
specifying the title, chapter, elapsed time of the
title (using the time code), or track.
The following search options are available
depending on the di sc:
DVD:
• TITLE starts playing from the
selected title.
• CHAPTER starts playing from the
selected chapter.
• TIME/TEXT starts playing from the
point according to the input time code.
VCD:
• TRACK starts playing from the
selected track.
CD:
• TR ACK starts playing from the selected track.
MP3:
• TR ACK starts playing from the selected track.
ATT DVD
MODE
TOP MENU
LIST
PICTURE
EQZ
Z DSOAFEQ7
SUBTITLE
MENU
+
ENTER
–
ANGLE
VOL
PTY
DSPL
0
M/m
TA
+
–
ENTER
SETUP
Number
buttons
CLEAR
OFF
SRC
SOUND
SETUP
SYSTEM
MENU
×
AUDIO
123
456
789
CLEAR
1 During playback, press (SETUP).
The Play mode menu appears.
2 Press M/m to select the desired search
item, then press (ENTER).
The search item s dif f er depe nd in g on th e di sc .
)
12(67
018(034
T 1:35:55
1
)
PLAY
DVDVIDEO
JPEG:
• ALBUM starts playing from the
selected album.
• IMAGE starts playing from the
selected image.
Note
When locating a track for CD/MP3, press the number
buttons to enter track number, then press (ENTER).
The number in parentheses indicates the tot al
number of items selected.
3 Press the number bu ttons to e nter title
number, chapter number, track
number, or the elapsed time of the
title.
For example, to find a desired point at 2
hours, 10 minutes, and 20 seconds afte r t he
beginning, just ente r “2:10:20.”
To clear the numbers already input, press
(CLEAR).
4 Press (ENTER).
Playback starts from the selected point.
To tur n off th e Play mode menu
Press (SETUP).
21
Various DVD operations
Changing the audio channels
When playing a DVD recorded in multiple audio
formats (PCM, Do l by Di gi t al , or DTS), you can
change the audio format. If the DVD is record ed
with multilingual tracks, you can als o change t he
language.
With VCDs, you can select the sound from the
right or left channel and listen to the sound of the
selected channel through both the right and left
speakers. For example, w hen playing a disc
containing a song with the vocals on the right
channel and the inst ruments on the lef t channel,
you can hear the instruments from both speakers
by selecting the left channel.
OFF
SRC
ENTER
SETUP
SYSTEM
MENU
AUDIO
SOUND
SETUP
SYSTEM
MENU
×
AUDIO
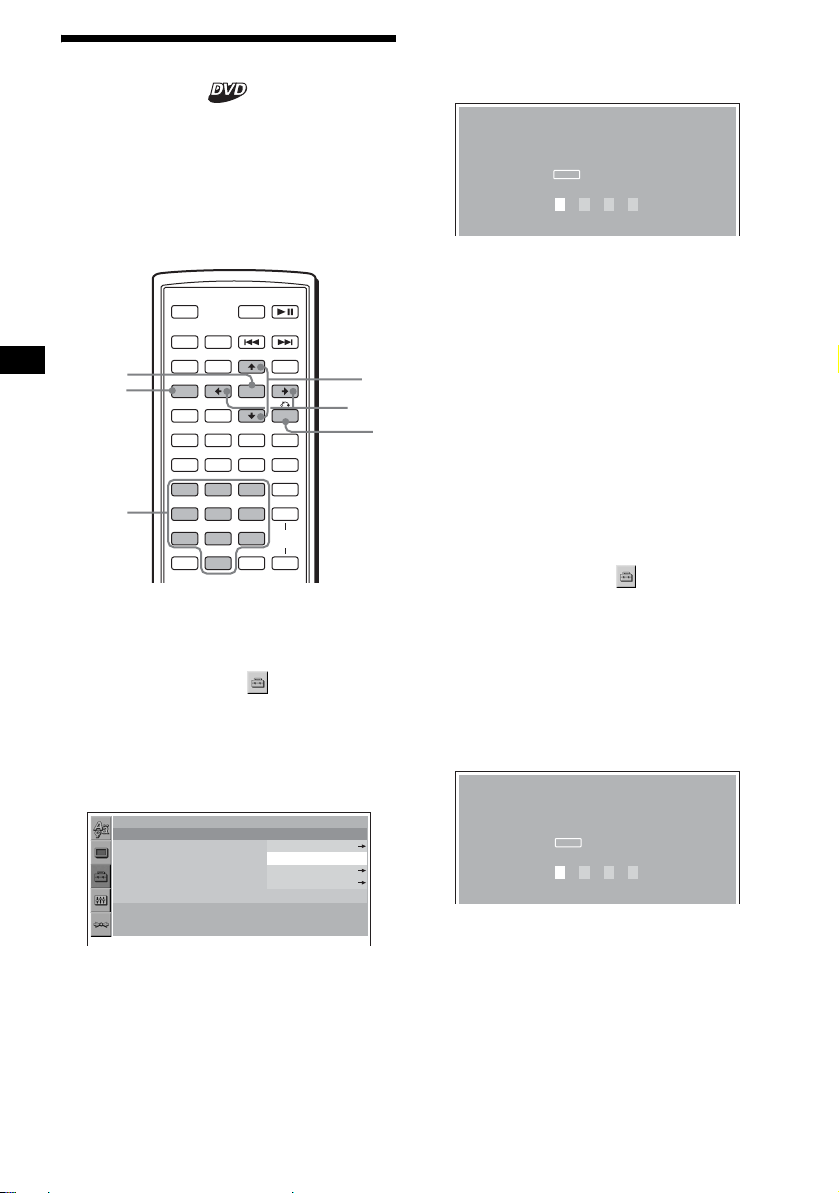
During playback, press (AUDIO)
repeatedly to select the desired audio
channels.
1:ENGLISH DolbyD
Audio sound setti ngs differ depending on the
disc as follows:
ATT DVD
MODE
TOP MENU
LIST
PICTURE
EQZ
Z DSOAFEQ7
SUBTITLE
+
ENTER
–
ANGLE
MENU
M/m
</,
VCD:
STEREO*: Standard stereo sound
1/L: Left channel sound (monaural)
2/R: Right channel sound (monaural)
* The default setting
Note
You may not be able to change the audio channels
depending on disc.
Tip
You can also change the settings by selecting
“AUDIO” in the Play mode menu (page 13).
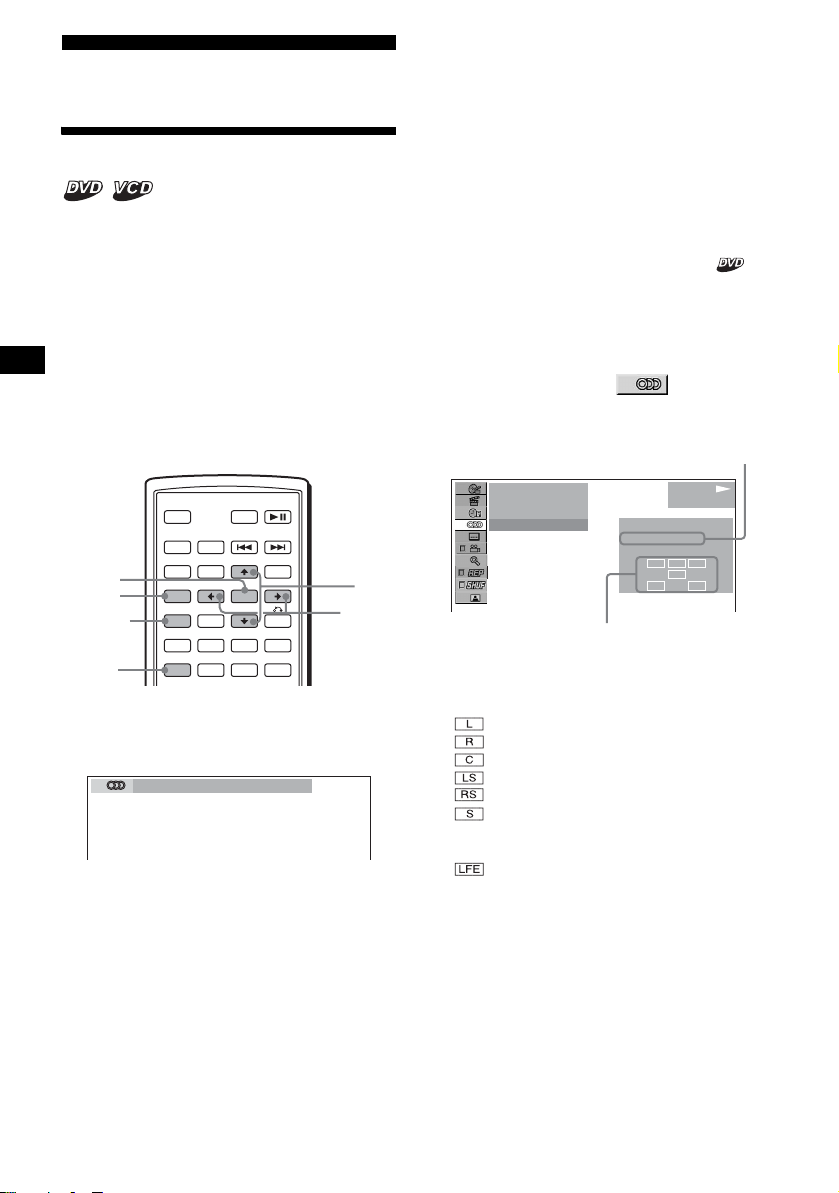
Checking the program format
You can check the numbe r o f ch annels and
component positi on on the DVD being played.
1 During pl ayback, press (SETUP).
The Play mode menu appears.
2 Press
then press (ENTER).
The program format appears.
The letters in the program format display
represent the foll owing sound components
and its positions:
to select (AUDIO) ,
M/m
Current audio format*
)
12(67
)
018(034
T 01:35:55
1: ENGLISH
Current program format*
PLAY
DVDVIDEO
PROGRAMFORMAT
DOLBY DIGITAL
3 / 2. 1
L C
LFE
LSRRS
2
: Front (left)
: Front (right)
: Centre
: Rear (left)
: Rear (right)
: Rear (monaural): The rear component
of the Dolby Surround processed signal
and the Dolby Digital sig nal
: Low Frequency Effect signal
1
DVD:
The audio language sw i t ches among the
avail able languages.
When 4 digits appear, input the language code
correspondin g to the desired language
(page 53).
When the same language is displayed two or
more times, the DVD is recorded in multiple
audio formats.
22
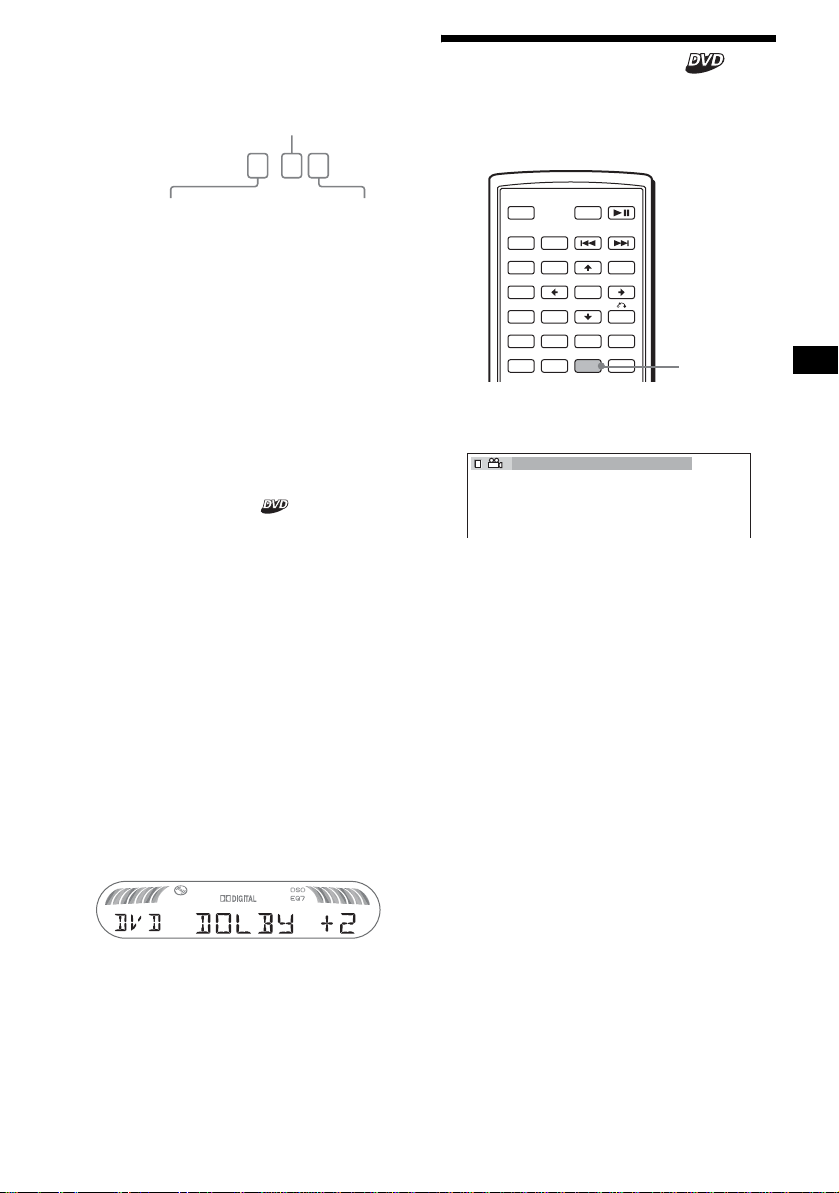
When “DOLBY DIGITA L” is applied, the
program format name and channel numbers
appear as follows:
Example: Dolby Digital 5.1 ch
Rear component × 2
DOLBY DIGITAL
Front component × 2 +
Center component × 1
*1 “PCM,” “DTS,” or “DOLBY DIGITAL” appears
depending on the disc.
*2 Appears only when the “DOLBY DIGITAL” format is
applied.
3 / 2 . 1
LFE component × 1
To turn off the Play mode menu
Press (SETUP).
Tip
For Dolby Digital and DTS, “LFE” is always enclosed
in a solid line regardless of the LFE signal component
being output.
Adjusting the audio output level
— DVD level adjustment
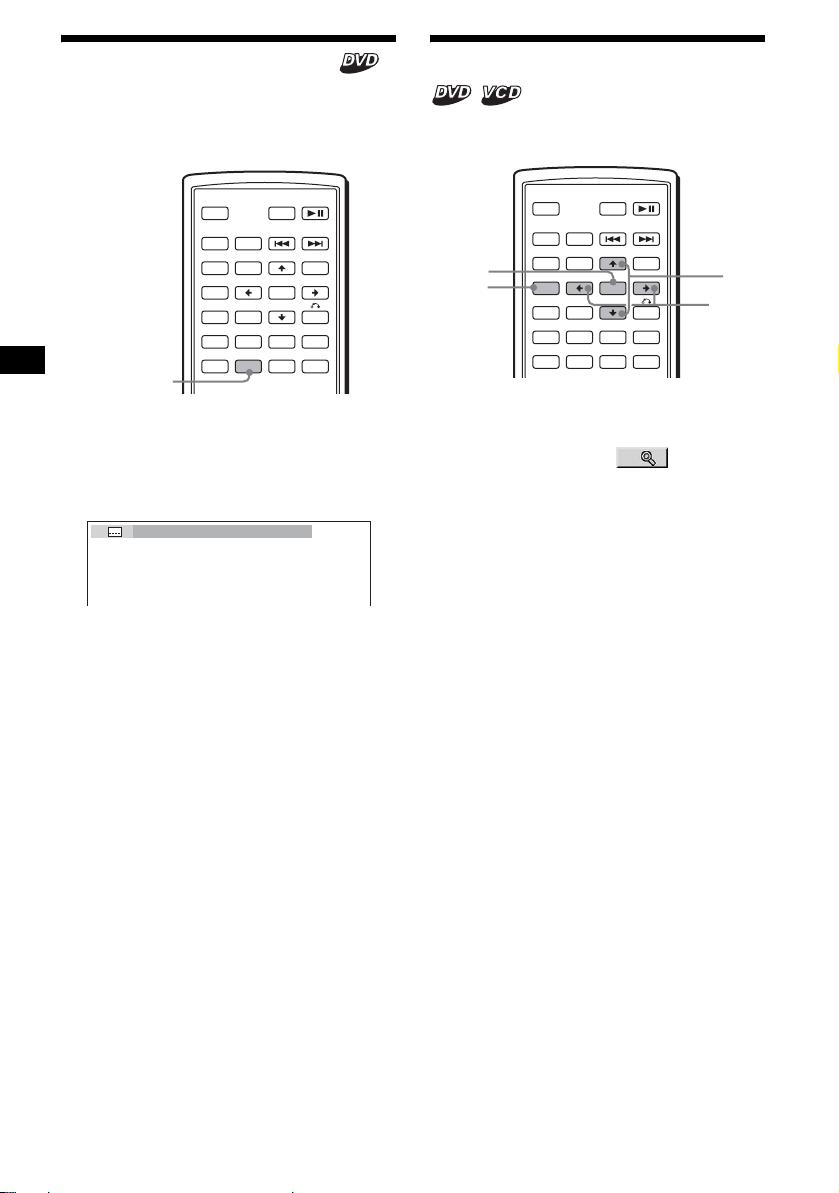
Changing the angles
You can change the viewing angle if various
angles (multi-angles) for a scene are recorded on
a DVD.
OFF
SRC
SOUND
SETUP
SYSTEM
MENU
×
AUDIO
Press (ANGLE) repeatedly to select the
desired angle number.
2(2
ATT DVD
MODE
TOP MENU
LIST
PICTURE
EQZ
Z DSOAFEQ7
SUBTITLE
)
+
ENTER
–
ANGLE
MENU
ANGLE
The audio output level for DVD video differs
depending on the rec or ded audio format (PC M,
Dolby Digital, or DTS). You can adjust the
output level of PCM, Do lby Digita l o r DTS
separately to reduce th e volume level differences
between disc and source.
1 Press (SYSTEM MENU).
2 Press M/m repeatedly to select “DVD
LVL,” then press (ENTER).
3 Press , to set to “ADJ-ON,” then
press (ENTER).
4 Press </, to select “DOLBY ,” “DTS”
or “PCM.”
5 Press M/m to adjust the output level,
then press (ENTER).
Note
You can adjust the output level only when a disc is
inserted in the unit.
Tip
The output level is adjustable from –6 dB to +6 dB.
The angle changes.
Note
Depending on the DVD, you may not be able to
change the angles, even if multi-angles are recorded.
Tip
You can also change the viewing angle by selecting
“ANGLE” in the Play mode menu (page 13).
23
Displaying the subtitles
Y ou can turn the subtitles on or off, or change the
subtitle langua ge if more are recorded on the
DVD.
Magnifying pictures
You can magnify pictures .
OFF
SRC
SOUND
SETUP
SYSTEM
MENU
×
AUDIO
ATT DVD
MODE
TOP MENU
LIST
PICTURE
EQZ
Z DSOAFEQ7
SUBTITLE
+
ENTER
–
ANGLE
MENU
SUBTITLE
1 During playback, press (SUBTITLE).
The subtitle language appears.
2 Press (SUBTITLE) repeatedly to select
the desired language.
1:ENGLISH
Available languages will vary, depending on
the disc.
When 4 digits appear, input the language code
correspondin g to the desired language
(page 53).
To turn off the subtitles
Press (SUBTITLE) repeatedly to select “OFF.”
Note
Depending on the DVD, you may not be able to
change (or turn off) the subtitles, even if multilingual
subtitles are recorded.
Tip
You can also change the subtitle language by
selecting “SUBTITLE” on the Play mode menu
(page 13), or the DVD menu (page 19).
ATT DVD
MODE
TOP MENU
LIST
PICTURE
EQZ
Z DSOAFEQ7
SUBTITLE
+
ENTER
–
ANGLE
MENU
M/m
</,
ENTER
SETUP
OFF
SRC
SOUND
SETUP
SYSTEM
MENU
×
AUDIO
1 During pl ayback, press (SETUP).
The Play mode menu appears.
2 Press M/m to select (CENTER
ZOOM), then press (ENTER).
The current opt i on appears.
3 Press M/m to select the desired option
(ZOOM×1, ×2*, ×4*), then press
(ENTER).
The picture is magnified.
* The picture becomes grainy.
To shift the frame position
After magnifying the picture, press </M/m/,.
T o restore th e original scale
Select “ZOOM×1” i n step 3.
To turn off the Play mode menu
Press (SETUP).
Notes
• Depending on the DVD, you may not be able to
change the magnification .
• If you resume playback, the picture returns to its
original scale.
24
Changing the picture quality
— Picture EQ
You can select picture quality suitabl e for the
interior brightness of the car.
You can set “PICTURE E Q ” t o “LIGHT OFF,”
“LIGHT ON,” or “AUTO” in “CUSTOM
SETUP” (page 31). The o pt ions (be lo w ) fo r ea ch
setting differ. If you set “PICTURE EQ” to
“AUTO,” the available options switch
automatically depending on whether the light is
on or off.
The following setting options are available.
• NORMAL - normal picture quality.
•Daytime*
•Sunset*
• Shine*
when sunlight r eflects on the moni to r).
•Night*
your driving at night.
• Midnight*
“Night” setting.
• Theater*
when you want to enjoy a bright monitor at
night.
• CUSTOM - user-adjustable settings.
*1 Available when “PICTURE EQ” in “CUSTOM
*2 Available when “PICTURE EQ” in “CUSTOM
1
- suitable in a bright place.
1
- suitable w h en it gets little dark .
1
- suitable in a very bright place (e.g.
2
- darkens the monitor to not distract
2
- darkens the moni tor more t han the
2
- brightens the monitor; suitable
SETUP” is set to “LIGHT OFF,” or “AUTO” and the
light is of f.
SETUP” is set to “LIGHT ON,” or “AUTO” and the
light is on .
Adjusting the custom settings
You can store your own use r-adj us table settings
for different picture t ones.
1 During playback, press (SETUP).
The Play mode menu appears.
2 Press M/m to select (PICTURE
EQ), then press (ENTER).
The setting items appear.
1
001
002:35
Daytime
Sunset
Shine
CUSTOM
NORMAL
NORMAL
PLAY
DVDVIDEO
3 Press M/m to select “CUSTOM,” then
press (ENTER).
4 Press M/m to select the setting item,
then press </, to adjust the level.
USER CUSTOM SETUP
Color
Bright
Contrast
Tint
Select: Set:
RETURN
Cancel:
0
0
0
0
ATT DVD
MODE
TOP MENU
LIST
PICTURE
EQZ
Z DSOAFEQ7
SUBTITLE
+
ENTER
–
ANGLE
MENU
M/m
</,
ENTER
SETUP
PICTURE
EQ
OFF
SRC
SOUND
SETUP
SYSTEM
MENU
×
AUDIO
During playback, press (PICTURE EQ)
repeatedly to select the desired
setting.
Daytime
Tip
You can also change the picture quality by selecting
“PICTURE EQ” in Play mode menu (page 13).
5 Press (ENTER).
Tip
Adjustments for “LIGHT OFF” and “LIGHT ON” can be
stored separately.
25
Locking discs
— Parental control
You can lock a disc, or set playback restrictions
according to a prede t ermined level such as
viewer age. Restricted playback scenes are
blocked or replaced with different scenes when a
parental control compatible DVD is played.
Setting the parental control on
OFF
SRC
ENTER
SETUP
Number
buttons
SOUND
SETUP
SYSTEM
MENU
×
AUDIO
123
456
789
CLEAR
1 Press (SETUP) while playback is
stopped.
The set up menu ap pe ars.
2 Press M/m to select (CUSTOM
SETUP), then press (ENTER).
The setting items appear.
3 Press M/m to select “PARENTAL
CONTROL,” t h en press (ENTER).
The parental cont rol options appea r.
CUSTOM SETUP
PARENTAL CONTROL :
MUTI–DISC RESUME :
MP3/JPEG :
SLIDE SHOW TIME :
PLAY LIST PLAY :
PICTURE EQ :
ATT DVD
MODE
TOP MENU
LIST
PICTURE
EQZ
Z DSOAFEQ7
SUBTITLE
MENU
+
ENTER
–
ANGLE
VOL
PTY
DSPL
0
TA
+
–
PLAYER
PASSWORD
OFF
ON
OFF
AUTO
M/m
</,
O
4 Press M/m to select “ON t,” then
press (ENTER).
The password setting di splay appears.
PARENTAL CONTROL
Enter a new 4–digit password,
ENTER
then press .
PASSWORD
5 Press the number buttons to enter
your password, then press (ENTER).
The conformation display appears.
6 To confirm, press the number buttons
to enter your password again, then
press (ENTER).
Parental control is set.
To turn off the Setup menu
Press (SETUP).
Setting the parental control off
1 Press (SETUP) while playback is
stopped.
The set up menu appears.
2 Press M/m to select (CUSTOM
SETUP), then press (ENTER).
The setting it em s ap pear.
3 Press M/m to select “PARENTAL
CONTROL,” th en pr ess (ENTER).
The parental control options appear.
4 Press M/m to select “OFF t,” then
press (ENTER).
The display to ente r your password appears.
PARENTAL CONTROL
Enter password,
ENTER
then press .
PASSWORD
26
5 Press the number buttons to enter
your password, then press (ENTER).
“Parental control is canceled” appear s.
If a wrong number i s en t ered, press < to
move the cursor and ente r the number again.
Changing the area and its movie
rating level
You can set the restriction leve ls depending on
the area and its movie rat i ngs .
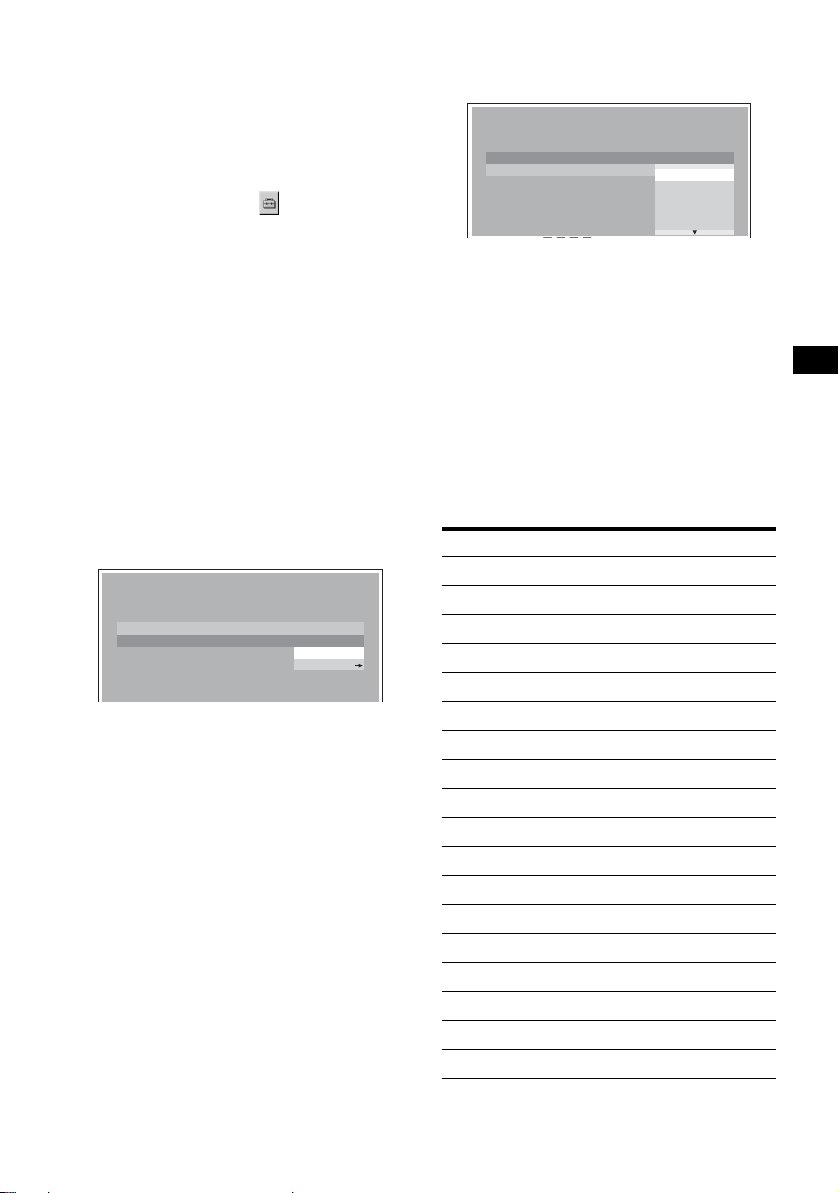
7 Press M/m to select “LEVEL,” then
press (ENTER).
The rating options appear.
1 Press (SETUP) while playback is
stopped.
The set up menu appe ars.
2 Press M/m to select (CUSTOM
SETUP), th en press (ENTER).
The setting ite m s appear.
3 Press M/m to select “PARENTAL
CONTROL,” then press (ENTER).
The parental cont r ol o pt i ons appear.
4 Press M/m to select “PLAYER t,” then
press (ENTER).
When the parental control is already set to on,
the display to en te r your password appear s.
To change the settings, enter your password
number, then press (ENTER).
If a wrong number is e nt ered, press < to
move the cursor and enter the number again.
5 Press M/m to select “STANDARD,”
then press (ENTER).
The standard op tions appear.
CUSTOM SETUP
LEVEL :
STANDARD :
8:
USA
USA
OTHER
6 Press M/m to select th e desi red area to
apply its movie ratings, then press
(ENTER).
The area is selected.
When you want to select the standard on t he
“Area code list” (page 27), select “OTHERS
t,” then enter its code number using the
number buttons.
CUSTOM SETUP
LEVEL :
STANDARD :
8:
8:
7:
NC17
6:
R
5:
4:
PG13
The lower the number, the strict er the
restriction level.
8 Press M/m to select the desired rating,
then press (ENTER).
Parental control setting is complete.
To tur n off th e Setup menu
Press (SETUP).
Note
When you play discs which do not have the parental
control, playback cannot be restricted on this unit.
Area code list
Standard Code numbe r
Argentina 2044
Australia 2047
Austria 2046
Belgium 2057
Brazil 2070
Canada 2079
Chile 2090
China 2092
Denmark 2115
Finland 2165
France 2174
Germany 2109
India 2248
Indonesia 2238
Italy 2254
Japan 2276
Korea 2304
Malaysia 2363
continue to next page t
27
Standard Code number
Mexico 2362
Netherlands 2376
New Zealand 2390
Norway 2379
Pakistan 2427
Philippines 2424
Portugal 2436
Russia 2489
Singapore 2501
Spain 2149
Sweden 2499
Switzerland 2086
Thailand 2528
United Kingdom 2184
Changing the password
1 Press (SETUP) while playback is
stopped.
The Setup menu appe ar s.
2 Press M/m to select (CUSTOM
SETUP), then press (ENTER).
The setting items appear.
3 Press M/m to select “PARENTAL
CONTROL,” t h en press (ENTER).
The parental cont rol options appea r.
4 Press M/m to select “PASSWORD t,”
then press (ENTER).
The display to enter your password appears.
5 Press the number buttons to en ter
your 4-digit password, then press
(ENTER).
When a wrong num ber i s ent ered, p ress < to
move the cursor and enter the number again.
6 Press the number buttons to en ter a
new 4-digit password, then press
(ENTER).
7 To confirm, press the number button
to enter your new 4-digit password
again, then press (ENTER).
Settings and Adjustments
Using the Setup menu
By using the Setup me nu, you can make various
adjustments to items, such as picture and sound.
You can also set a langu age for the subtitle and
the on-scree n display, among othe r t hings. For
details on each setup items , see pages from 29 to
32.
Note
Playback settings stored in the disc take priority over
the Setup menu settings, and not all the functions
described may work.
OFF
SRC
ENTER
SETUP
SOUND
SETUP
SYSTEM
MENU
×
AUDIO
Basic operation
Example: When y ou w ant to change the aspect
ratio (“MONITOR TYPE”) to “4:3 PAN SCAN.”
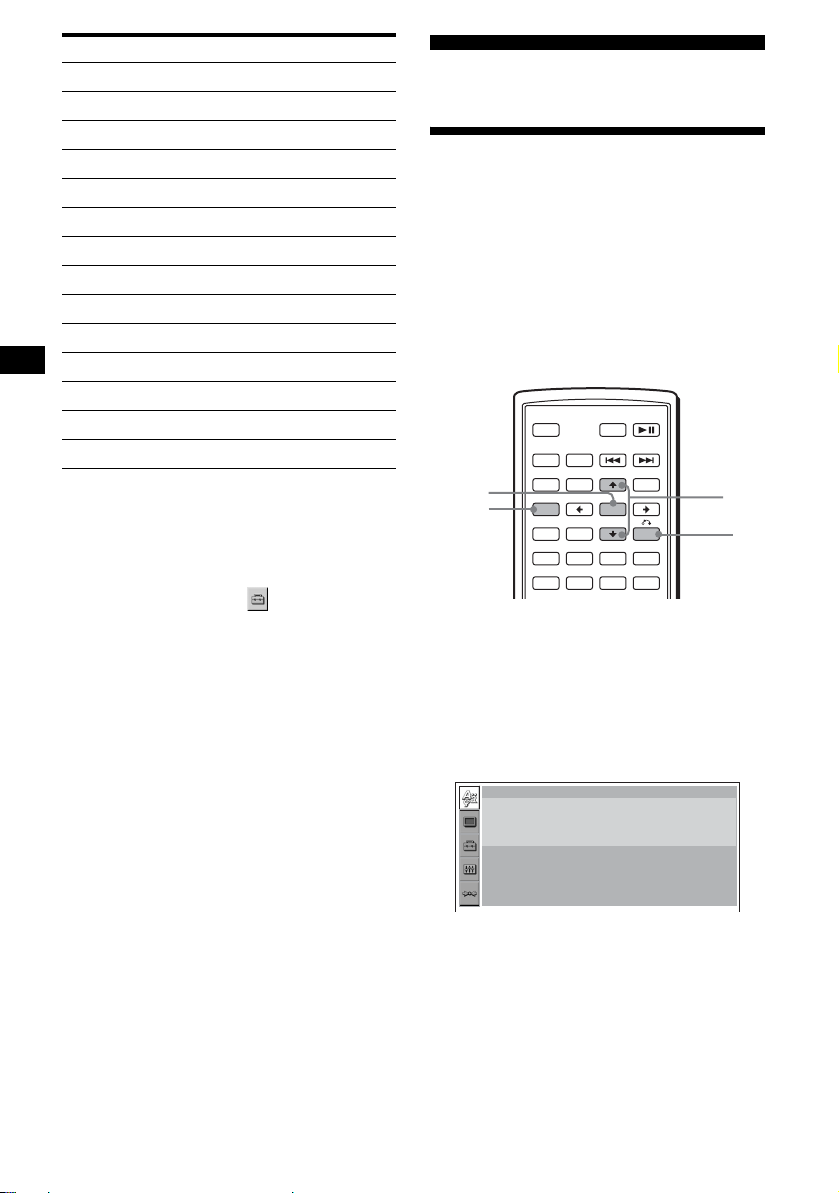
1 Press (SETUP) while playback is
stopped.
The Setup menu appears.
LANGUAGE SETUP
OSD :
MENU :
AUDIO :
SUBTITLE
ATT DVD
MODE
TOP MENU
LIST
PICTURE
EQZ
Z DSOAFEQ7
SUBTITLE
:
+
ENTER
–
ANGLE
MENU
ENGLISH
ENGLISH
ORIGINAL
AUDIO FOLLOW
M/m
O
To return to the previous display
Press O.
To turn off the Setup menu
Press (SETUP).
28
2
Press M/m to s e lect (SCREEN
SETUP), th en press (ENTER).
The setup display appears.
SCPEEN SETUP
MONITOR TYPE :
SCREEN SAVER :
16:9
ON
3 Press M/m to select “MONITOR TYPE,”
then press (ENTER).
The monitor type options appear.
SCPEEN SETUP
MONITOR TYPE :
SCREEN SAVER :
4:3 LETTER BOX
16:9
16:9
4:3 PAN SCAN
4 Press M/m to select “4:3 PAN SCAN,”
then press (ENTER).
The setting is appl ie d and setup is complete .
To return to the previous display
Press O.
To turn off the Setup menu
Press (SETUP).
To reset all the setting items
— Reset
1 Select (RESET) in step 2, then
press (ENTER).
2 Press M to select “YES ,” then press
(ENTER).
All the settings* on the Setup menu return to
the default settings.
* Excluding parental control settings.
Setting the display language
or sound track
— Language set up
“LANGUAGE SETUP” allows you to set the
desired languag e f or the on-screen disp la y or
sound track accordingly.
Select (LANGUAGE SETUP) in the Setup
menu, then select the desired setting item.
For details on the set up pr ocedures, see “Using
the Setup menu” o n pa ge 28.
OSD (On-Screen Display)
Switches the display language on the screen.
MENU
Switches the lan gua ge for the menu on the disc.
AUDIO
Switches the language of the sound track.
When you select “ORIGINAL,” the language
given priority in the disc is selected.
SUBTITLE
Switches the language of the subtitle recorded on
the disc.
When you select “AUDIO FOLLOW,” the
language for the subtitles changes according to
the language yo u selected for the sound track.
Note
When you select a language in “MENU,” “SUBTITLE,”
or “AUDIO” that is not recorded on the disc, one of the
recorded languages will be automatically selected.
Tip
If you select “OTHERS t” in “MENU ,” “SUBTITLE,” or
“AUDIO,” select and enter a language code from
“Language code list” (page 53) using the number
buttons.
T o cancel resetting
Select “NO” in step 2 .
Note
Do not turn off the unit while resetting the Setup menu
item as it takes a few seconds to complete.
29
Setting the screen
— Screen setup
“SCREEN SETUP” allows you to adjust the
setting for the connected monitor.
Select (SCREEN SETUP) in the Setup
menu, then select the desired setting item.
For details on the setup procedures, see “Using
the Setup menu” on page 28.
Setting items with “*” i n the tables below a re the
default settings.
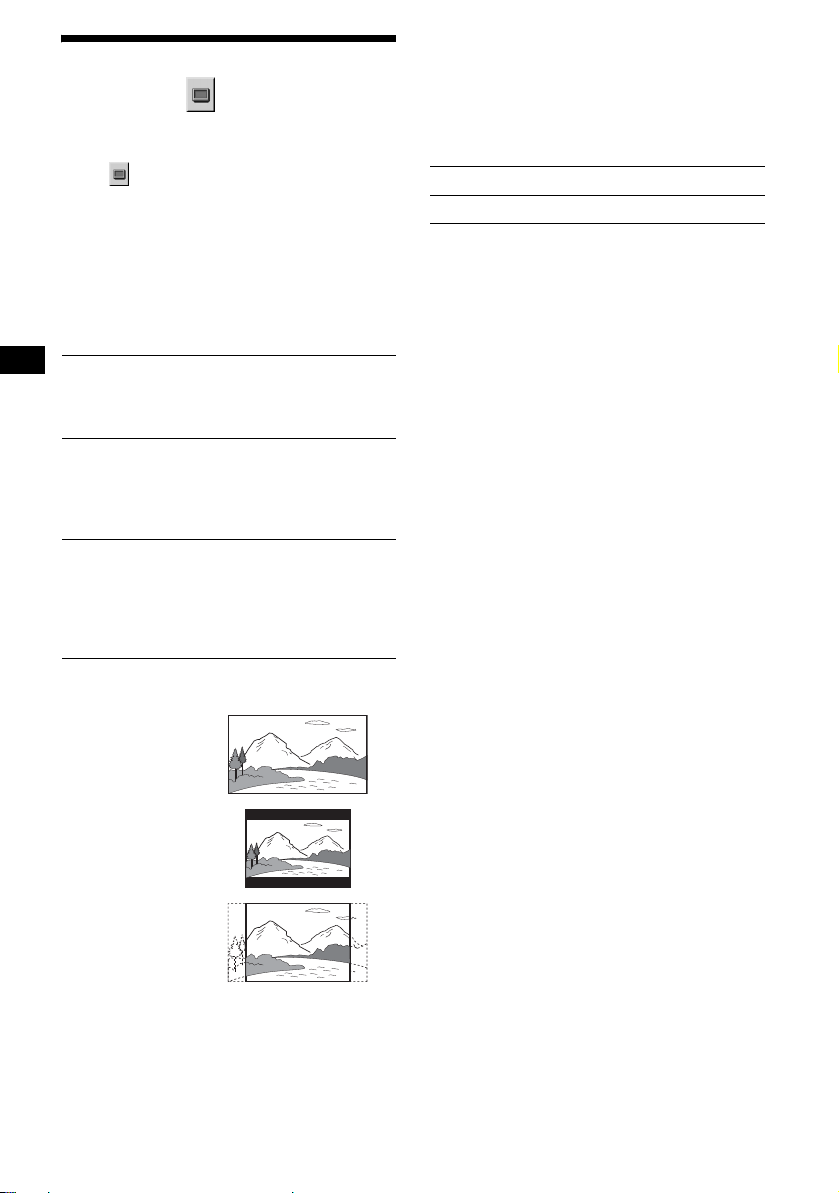
MONITOR TYPE
Selects the aspect ratio of the connected monitor
(4:3 standard o r wide).
16:9* Displays the wide picture.
4:3
LETTER
BOX
4:3
PAN SCAN
Select this when you connect a
wide-screen monitor or a monitor
with a wide mode function.
Displays a wide picture with
bands on the upper and lower
portions of the screen.
Select this when you connect a
4:3 screen monit or.
Displays a wide picture on the
entire scree n and automatica l ly
cuts off the portions that do not
fit.
Select this when you connect a
4:3 screen monit or.
SCREEN SAVER
Turns the screen saver on and off. The scr een
saver image appears when you leave the system
in stop mode for 5 minutes. The screen save r will
help prevent your display devic e fr om becoming
damaged (afterimage). Press DVD u to turn
off the screen saver.
ON Turns on the screen saver.
OFF* Turns off the screen saver.
16:9
4:3 LETTER BOX
4:3 PAN SCAN
Note
Depending on the DVD, “4:3 LETTER BOX” may be
selected automatically instead of “4:3 PAN SCAN,”
and vice versa.
30
 Loading...