

Sony MEX-BT3850U, MEX-BT2850 Operating Instructions Manual
4-158-429-61(1)
Bluetooth
®
Audio System
To cancel the demonstration (DEMO) display, see page 7.
Operating Instructions
GB
MEX-BT3850U
©2010 Sony Corporation

Be sure to install this unit in the dashboard of
the car for safety. For installation and
connections, see the supplied installation/
connections manual.
This label is located on the bottom of the
chassis.
iPod is a trademark of Apple Inc., registered in
the U.S. and other countries.
iPhone is a trademark of Apple Inc.
MPEG Layer-3 audio coding technology and
patents licensed from Fraunhofer IIS and Thomson.
This product is protected by certain intellectual
property rights of Microsoft Corporation. Use or
distribution of such technology outside of this
product is prohibited without a license from
Microsoft or an authorized Microsoft subsidiary.
The Bluetooth word mark and logos are owned
by the Bluetooth SIG, Inc. and any use of such
marks by Sony Corporation is under license.
Other trademarks and trade names are those of
their respective owners.
ZAPPIN is a trademark of Sony Corporation.
Windows Media and the
Windows logo are trademarks
or registered trademarks of
Microsoft Corporation in the
United States and/or other countries.
Content providers are using the digital rights
management technology for Windows Media
contained in this device (“WM-DRM”) to protect
the integrity of their content (“Secure Content”) so
that their intellectual property, including copyright,
in such content is not misappropriated.
This device uses WM-DRM software to play
Secure Content (“WM-DRM Software”). If the
security of the WM-DRM Software in this device
has been compromised, owners of Secure Content
(“Secure Content Owners”) may request that
Microsoft revoke the WM-DRM Software’s right
to acquire new licenses to copy, display and/or
play Secure Content. Revocation does not alter the
WM-DRM Software’s ability to play unprotected
content. A list of revoked WM-DRM Software is
sent to your device whenever you download a
license for Secure Content from the Internet or
from a PC. Microsoft may, in conjunction with
such license, also download revocation lists onto
your device on behalf of Secure Content Owners.
Note on the lithium battery
Do not expose the battery to excessive heat such as
direct sunlight, fire or the like.
2

Warning if your car’s ignition has no
ACC position
Be sure to set the Auto Off function (page 29).
The unit will shut off completely and
automatically in the set time after the unit is
turned off, which prevents battery drain.
If you do not set the Auto Off function, press
and hold (SOURCE/OFF) until the display
disappears each time you turn the ignition off.
3

Table of Contents
Getting Started
Playable discs on this unit . . . . . . . . . . . . . . . . . 6
Notes on Bluetooth . . . . . . . . . . . . . . . . . . . . . . 6
Resetting the unit. . . . . . . . . . . . . . . . . . . . . . . . 6
Canceling the DEMO mode . . . . . . . . . . . . . . . 7
Preparing the card remote commander . . . . . . . 7
Setting the clock . . . . . . . . . . . . . . . . . . . . . . . . 7
Detaching the front panel . . . . . . . . . . . . . . . . . 7
Attaching the front panel . . . . . . . . . . . . . . . 7
Quick Guide for Bluetooth function
3 steps to Bluetooth function. . . . . . . . . . . . . . . 8
Buttons and icons . . . . . . . . . . . . . . . . . . . . . . . 9
1 Pairing . . . . . . . . . . . . . . . . . . . . . . . . . . . . 10
2 Connection . . . . . . . . . . . . . . . . . . . . . . . . . 10
3 Handsfree calling and Music streaming . . . 11
Location of controls and basic
operations
Main unit. . . . . . . . . . . . . . . . . . . . . . . . . . . 12
Card remote commander RM-X304 . . . . . . 14
Searching for a track . . . . . . . . . . . . . . . . . . . . 15
Searching a track by name
— Quick-BrowZer . . . . . . . . . . . . . . . . . . . 15
Searching a track by listening to track passages
— ZAPPIN™ . . . . . . . . . . . . . . . . . . . . . . . 16
Radio
Storing and receiving stations . . . . . . . . . . . . . 16
Storing automatically — BTM . . . . . . . . . . 16
Storing manually. . . . . . . . . . . . . . . . . . . . . 16
Receiving the stored stations . . . . . . . . . . . 16
Tuning automatically . . . . . . . . . . . . . . . . . 17
RDS . . . . . . . . . . . . . . . . . . . . . . . . . . . . . . . . . 17
Overview. . . . . . . . . . . . . . . . . . . . . . . . . . . 17
Selecting PTY. . . . . . . . . . . . . . . . . . . . . . . 18
Setting CT. . . . . . . . . . . . . . . . . . . . . . . . . . 18
CD
Display items . . . . . . . . . . . . . . . . . . . . . . . 18
Repeat and shuffle play . . . . . . . . . . . . . . . 18
USB devices
Playing back a USB device. . . . . . . . . . . . . . . 19
Display items . . . . . . . . . . . . . . . . . . . . . . . 19
Repeat and shuffle play . . . . . . . . . . . . . . . 20
iPod
Playing back iPod . . . . . . . . . . . . . . . . . . . . . . 20
Display items . . . . . . . . . . . . . . . . . . . . . . . 21
Setting the play mode . . . . . . . . . . . . . . . . . . . 21
Repeat and shuffle play . . . . . . . . . . . . . . . 22
Operating an iPod directly
— Passenger control . . . . . . . . . . . . . . . . . . . . 22
Bluetooth (Handsfree calling and
Music streaming)
Bluetooth operations. . . . . . . . . . . . . . . . . . . . 23
Pairing. . . . . . . . . . . . . . . . . . . . . . . . . . . . . . . 23
About Bluetooth icons . . . . . . . . . . . . . . . . 24
Connection . . . . . . . . . . . . . . . . . . . . . . . . . . . 24
To switch the Bluetooth signal output of this
unit to on . . . . . . . . . . . . . . . . . . . . . . . . . . 24
Connecting a cellular phone. . . . . . . . . . . . 24
Connecting an audio device . . . . . . . . . . . . 25
Handsfree calling . . . . . . . . . . . . . . . . . . . . . . 25
Receiving calls . . . . . . . . . . . . . . . . . . . . . . 25
Making calls. . . . . . . . . . . . . . . . . . . . . . . . 25
Call transfer . . . . . . . . . . . . . . . . . . . . . . . . 25
Voice Dial Activation . . . . . . . . . . . . . . . . 26
Music streaming . . . . . . . . . . . . . . . . . . . . . . . 26
Listening to music from an audio
device . . . . . . . . . . . . . . . . . . . . . . . . . . . . . 26
Operating an audio device with this
unit . . . . . . . . . . . . . . . . . . . . . . . . . . . . . . . 27
Deleting registration of all paired devices . . . 27
4

Other functions
Changing the sound settings . . . . . . . . . . . . . . 28
Adjusting the sound characteristics . . . . . . 28
Customizing the equalizer curve
— EQ3 . . . . . . . . . . . . . . . . . . . . . . . . . . . . 28
Adjusting setup items — SET. . . . . . . . . . . . . 29
Using optional equipment . . . . . . . . . . . . . . . . 30
Auxiliary audio equipment . . . . . . . . . . . . . 30
External microphone XA-MC10 . . . . . . . . 30
Additional Information
Precautions . . . . . . . . . . . . . . . . . . . . . . . . . . . 31
Notes on discs. . . . . . . . . . . . . . . . . . . . . . . 31
Playback order of MP3/WMA/AAC
files . . . . . . . . . . . . . . . . . . . . . . . . . . . . . . . 31
About iPod . . . . . . . . . . . . . . . . . . . . . . . . . 32
About Bluetooth function . . . . . . . . . . . . . . 32
Maintenance . . . . . . . . . . . . . . . . . . . . . . . . . . 33
Removing the unit . . . . . . . . . . . . . . . . . . . . . . 34
Specifications . . . . . . . . . . . . . . . . . . . . . . . . . 35
Troubleshooting. . . . . . . . . . . . . . . . . . . . . . . . 36
Error displays/Messages . . . . . . . . . . . . . . . 38
Support site
If you have any questions or for the latest support information on this
product, please visit the web site below:
http://www.sony-asia.com/section/support
http://www.sony-asia.com/caraudio/
Provides information on:
• Models and manufacturers of compatible digital audio players
• Supported MP3/WMA/AAC files
• Models and manufacturers of compatible cellular phones and the FAQ
about Bluetooth function
5
Getting Started
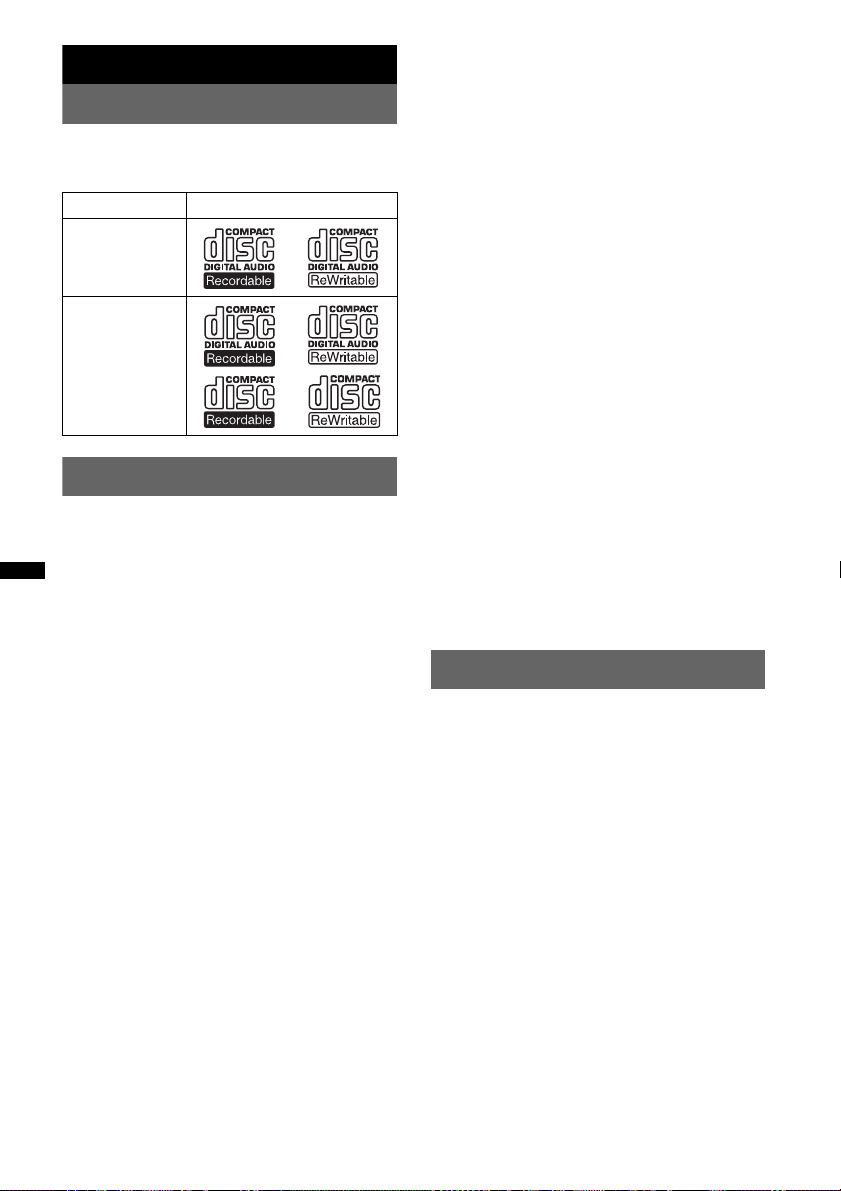
Playable discs on this unit
This unit can play CD-DA (also containing CD
TEXT) and CD-R/CD-RW (MP3/WMA/AAC
files (page 31)).
Type of discs Label on the disc
CD-DA
Radio frequency exposure
RF signals may affect improperly installed or
inadequately shielded electronic systems in cars,
such as electronic fuel injection systems, electronic
antiskid (antilock) braking systems, electronic speed
control systems or air bag systems. For installation
or service of this device, please consult with the
manufacturer or its representative of your car. Faulty
installation or service may be dangerous and may
invalidate any warranty that may apply to this
device.
Consult with the manufacturer of your car to ensure
that the use of your cellular phone in the car will not
affect its electronic system.
Check regularly that all wireless device equipment
in your car is mounted and operating properly.
MP3
WMA
AAC
Notes on Bluetooth
Caution
IN NO EVENT SHALL SONY BE LIABLE FOR
ANY INCIDENTAL, INDIRECT OR
CONSEQUENTIAL DAMAGES OR OTHER
DAMAGES INCLUDING, WITHOUT
LIMITATION, LOSS OF PROFITS, LOSS OF
REVENUE, LOSS OF DATA, LOSS OF USE OF
THE PRODUCT OR ANY ASSOCIATED
EQUIPMENT, DOWNTIME, AND
PURCHASER’S TIME RELATED TO OR
ARISING OUT OF THE USE OF THIS
PRODUCT, ITS HARDWARE AND/OR ITS
SOFTWARE.
IMPORTANT NOTICE!
Safe and efficient use
Changes or modifications to this unit not expressly
approved by Sony may void the user’s authority to
operate the equipment.
Please check for exceptions, due to national
requirement or limitations, in usage of Bluetooth
equipment before using this product.
Driving
Check the laws and regulations on the use of cellular
phones and handsfree equipment in the areas where
you drive.
Always give full attention to driving and pull off the
road and park before making or answering a call if
driving conditions so require.
Emergency calls
This Bluetooth car handsfree and the electronic
device connected to the handsfree operate using
radio signals, cellular, and landline networks as well
as user-programmed function, which cannot
guarantee connection under all conditions.
Therefore do not rely solely upon any electronic
device for essential communications (such as
medical emergencies).
Remember, in order to make or receive calls, the
handsfree and the electronic device connected to the
handsfree must be switched on in a service area with
adequate cellular signal strength.
Emergency calls may not be possible on all cellular
phone networks or when certain network services
and/or phone features are in use.
Check with your local service provider.
Resetting the unit
Before operating the unit for the first time, or
after replacing the car battery or changing the
connections, you must reset the unit.
Detach the front panel (page 7) and press the
RESET button (page 12) with a pointed object,
such as a ball-point pen.
Note
Pressing the RESET button will erase the clock setting
and some stored contents.
Connecting to other devices
When connecting to any other device, please read its
user guide for detailed safety instructions.
6
Canceling the DEMO mode
Detaching the front panel
You can cancel the demonstration display which
appears during turning off.
1 Press and hold the select button.
The setup display appears.
2 Press the select button repeatedly
until “DEMO” appears.
3 Rotate the control dial to select
“DEMO-OFF.”
4 Press and hold the select button.
The setup is complete and the display returns
to normal reception/play mode.
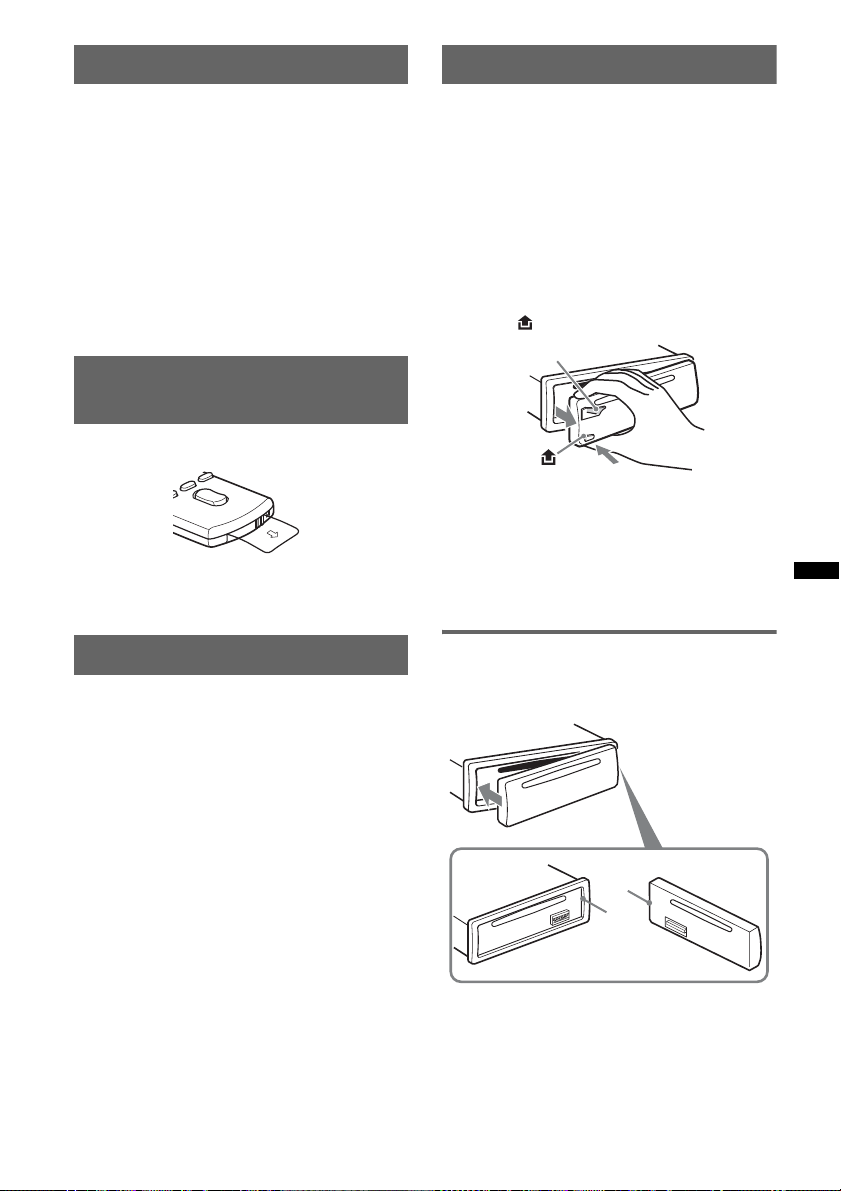
Preparing the card remote
commander
Remove the insulation film.
Tip
For how to replace the batter y, see page 33.
Setting the clock
The clock uses a 12-hour digital indication.
1 Press and hold the select button.
The setup display appears.
2 Press the select button repeatedly
until “CLOCK-ADJ” appears.
3 Press (SEEK) +.
The hour indication flashes.
4 Rotate the control dial to set the hour
and minute.
To move the digital indication, press (SEEK)
–/+.
5 After setting the minute, press the
select button.
The setup is complete and the clock starts.
To display the clock, press (DSPL). Press
(DSPL) again to return to the previous display.
Tip
You can set the clock automatically with the RDS
feature (page 18).
You can detach the front panel of this unit to
prevent theft.
Caution alarm
If you turn the ignition switch to the OFF
position without detaching the front panel, the
caution alarm will sound for a few seconds.
The alarm will only sound if the built-in
amplifier is used.
1 Press and hold (SOURCE/OFF).
The unit is turned off.
2 Press , then pull it off towards you.
(SOURCE/OFF)
Notes
• Do not drop or put excessive pressure on the front
panel and display window.
• Do not subject the front panel to heat/high
temperature or moisture. Avoid leaving it in a parked
car or on a dashboard/rear tray.
• Do not detach the front panel during playback of the
USB device, otherwise USB data may be damaged.
Attaching the front panel
Engage part A of the front panel with part B of
the unit, as illustrated, and push the left side into
position until it clicks.
A
B
Note
Do not put anything on the inner surface of the front
panel.
7
Quick Guide for Bluetooth function
For full details on operation, see “Bluetooth (Handsfree calling and Music streaming)” (page 23) and
the Bluetooth device operating instructions.
3 steps to Bluetooth function
Pairing
1
First, register (“pair”) Bluetooth device (cellular phone, etc.) with this unit. Pairing is no longer
required after the first time.
Connection
2
Sometimes pairing allows to connect automatically. To use the device after pairing is made, start
the connection.
Handsfree calling/Music streaming
3
You can talk handsfree and listen to music when the connection is made.
Support site
http://www.sony-asia.com/section/support
http://www.sony-asia.com/caraudio/
8
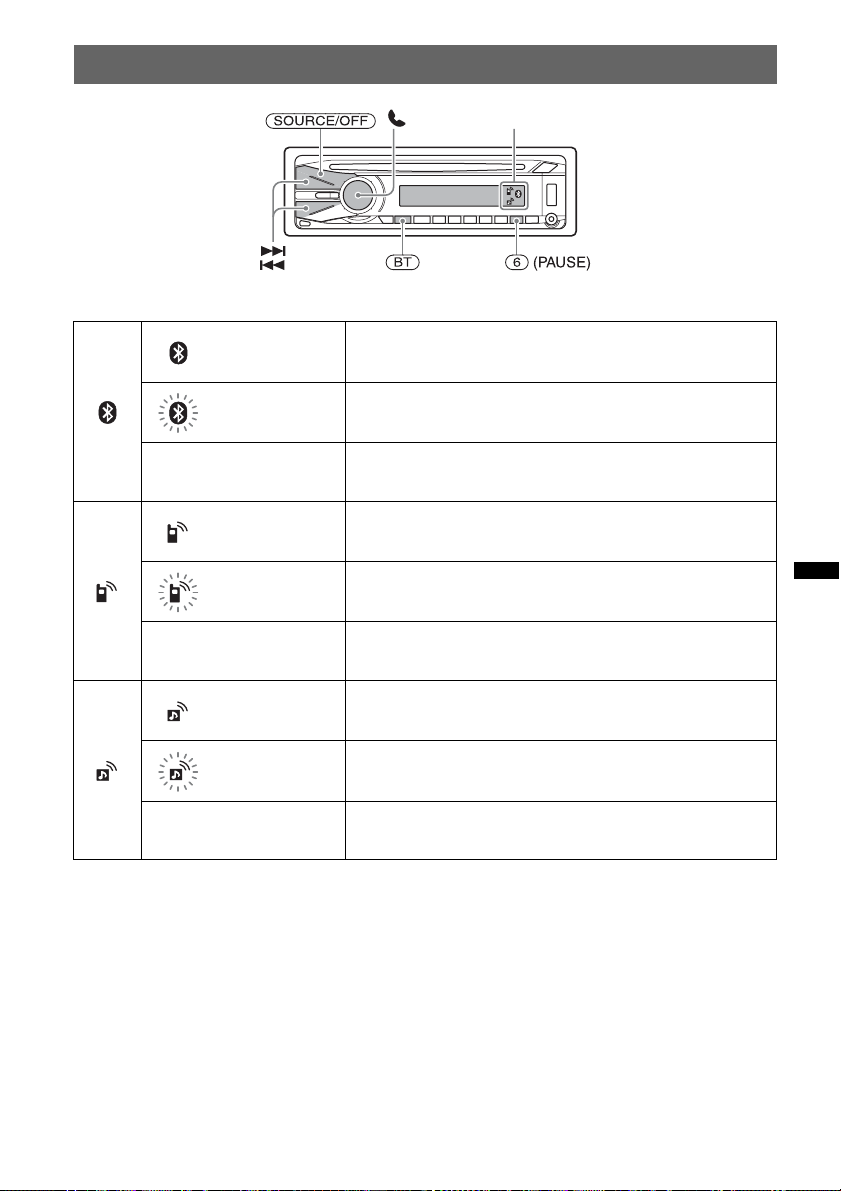
Buttons and icons
Icon status descriptions
Lit Bluetooth signal on
Flashing Pairing standby mode
None Bluetooth signal off
Lit Cellular phone connection successful
Flashing Unit connecting to cellular phone
Icons
None No connection
Lit Audio device connection successful
Flashing Unit connecting to audio device
None No connection
9

1 Pairing
Operated
equipment
1
2
3
4
5
6
2 Connection
Operation
Press and hold (BT) for about 5 seconds.
t
Search for this unit.
Select “XPLOD”.
Input passkey “0000”.
Follow display directions.
(Pairing successful)
Operated
equipment
1
2
Note
You can connect from this unit to a Bluetooth device (page 24).
If you cannot connect from this unit to the Bluetooth device, start pairing again.
Operation
Press and hold (BT) for about 3 seconds.
t
Connect to this unit using a cellular phone.
t
Connect to this unit using an audio device.
t
10
3 Handsfree calling and Music streaming
Handsfree calling
To do Operation
Receive a call/end a call Press .
Reject a call Press and hold for 2 seconds.
Redial 1 Press (SOURCE/OFF).
t
2 Press and hold for 3 seconds.
To transfer a call Press and hold for 2 seconds.
Music streaming
To do Operation
Listen 1 Press (SOURCE/OFF).
t
2 Press Start playback on the audio device.
Play back/pause (AVRCP)* Press (6) (PAUSE).
Skip tracks (AVRCP)* Press ./>.
* The operation may differ depending on the audio device.
11

Location of controls and basic operations
9 q;q
q
q
q
q
q
q
Main unit
2
1 83 4 5 6 7
SEEK
SEEK
MODE
SOURCE
OFF
ZAP
a
/
T
C
E
L
E
S
/
R
E
T
N
E
H
S
U
P
BLUETOOTH
BT
d
s
ALBM
123456PTY
f
REP MICSHUF PAUSE
g
SCRL
DSPL
AUX
h
j
Front panel removed This section contains instructions on the location
qlqk
of controls and basic operations.
For details, see the respective pages.
A SEEK +/– buttons
CD/USB:
To skip tracks (press); skip tracks
RESET
continuously (press, then press again within
about 1 second and hold); reverse/fastforward a track (press and hold).
Radio:
To tune in stations automatically (press); find
a station manually (press and hold).
Bluetooth audio device*
1
:
To skip tracks (press).
B (BACK)/MODE button page 15, 16,
21, 22
Press to: Return to the previous display/
select the radio band (FM/AM)/select the
play mode of iPod.
Press and hold to: Enter/cancel the passenger
control.
C SOURCE/OFF button*
2
Press to turn on the power/change the source
(Radio/CD/USB/AUX/Bluetooth audio/
Bluetooth phone).
Press for 1 second to turn off the power.
Press for 2 seconds or more to turn off the
power and the display disappears.
12

D Control dial/select / (handsfree)
button
To adjust volume (rotate); select setup items
(press and rotate); receive/end a call (press).
E Disc slot
Insert the disc (label side up), playback
starts.
F Display window
G Z (eject) button
To eject the disc.
H USB connector page 19, 20
To connect to the USB device.
I (front panel release) button page 7
J (BROWSE) button page 15
To enter the Quick-BrowZer mode.
K ZAP button page 16
To enter ZAPPIN™ mode.
L Receptor for the card remote
commander
M BT (BLUETOOTH) button page 23
For Bluetooth signal on/off, pairing.
N PTY button page 18
To select PTY in RDS.
O Number buttons
CD/USB:
(1)/(2): ALBM –/+ (during MP3/WMA/
AAC playback)
To skip albums (press); skip albums
continuously (press and hold).
(3): REP*
2
page 18, 20, 22
(4): SHUF page 18, 20, 22
(6): PAUS E
To pause playback. To cancel, press
again.
Radio:
To receive stored stations (press); store
stations (press and hold).
Bluetooth audio device*
1
:
(6): PAUS E
To pause playback. To cancel, press
again.
Bluetooth phone:
(5): MIC page 25
P DSPL (display)/SCRL (scroll) button
page 17, 18, 19, 21, 22
To change display items (press); scroll the
display item (press and hold).
Q AUX input jack page 30
To connect a portable audio device.
R RESET button (located behind the front
panel) page 6
S Microphone page 25
Note
Do not cover the microphone, the handsfree
function may not work properly.
*1 When a Bluetooth audio device (supports AVRCP
of Bluetooth technology) is connected. Depending
on the device, certain operations may not be
available.
*2 This button has a tactile dot.
Note
When ejecting/inser ting a disc, keep any USB devices
disconnected to avoid damage to the disc.
13
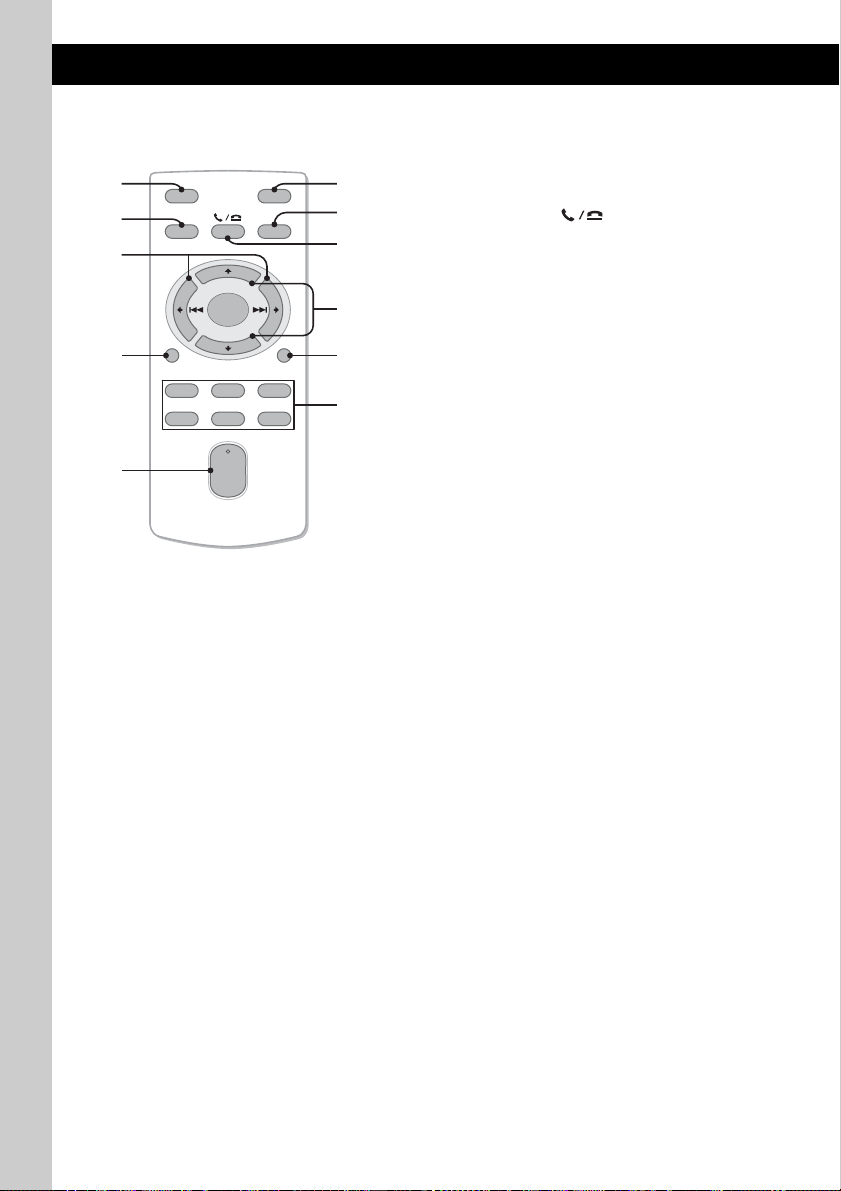
Card remote commander
RM-X304
1
2
3
OFF
SOURCE
SEL
ATT
MODE
+
6
7
8
9
–
VOL
SCRL
0
qa
+
–
4
DSPL
132
465
5
Remove the insulation film before use (page 7).
A OFF button
To turn off; stop the source.
B SOURCE button
To turn on; change the source (Radio/CD/
USB/AUX/Bluetooth audio/Bluetooth
phone).
C < (.)/, (>) buttons
To control Radio/CD/USB/Bluetooth audio,
the same as (SEEK) –/+ on the unit.
Setup, sound setting, etc., can be operated by
< ,.
D DSPL (display) button
To change display items.
E VOL (volume) +*/– button
To adjust volume.
F ATT (attenuate) button
To attenuate the sound. To cancel, press
again.
G MODE button
Press to select the radio band (FM/AM)/
select the play mode of iPod.
Press and hold to enter/cancel the passenger
control.
H SEL (select)/ (handsfree) button
The same as the select button on the unit.
I M (+)/m (–) buttons
To control CD/USB, the same as (1)/(2)
(ALBM –/+) on the unit.
Setup, sound setting, etc., can be operated by
M m.
J SCRL (scroll) button
To scroll the display item.
K Number buttons
To receive stored stations (press); store
stations (press and hold).
* This button has a tactile dot.
Note
If the unit is turned off and the display disappears, it
cannot be operated with the card remote commander
unless (SOURCE/OFF) on the unit is pressed, or a disc
is inserted to activate the unit first.
14

Searching for a track
Searching a track by name
— Quick-BrowZer
You can search for a track in a CD or USB device
easily by category.
(BACK)
Control dial/
select button
(BROWSE)
SEEK +/–
1 Press (BROWSE).
The unit enters the Quick-BrowZer mode,
and the list of search categories appears.
2 Rotate the control dial to select the
desired search category, then press it
to confirm.
3 Repeat step 2 until the desired track is
selected.
Playback starts.
To return to the previous display
Press (BACK).
To exit the Quick-BrowZer mode
Press (BROWSE).
Searching by skip items
— Jump mode
When many items are in a category, you can
search the desired item quickly.
1 Press (SEEK) + in Quick-BrowZer mode.
The following display appears.
A Current item number
B Total item number in the current layer
Then the item name will appear.
2 Rotate the control dial to select the desired
item, or one near the desired item.
It skips in steps of 10% of the total item
number.
3 Press the select button.
The display returns to the Quick-BrowZer
mode and the selected item appears.
4 Rotate the control dial to select the desired
item and press it.
Playback starts if the selected item is a track.
To cancel Jump mode
Press (BACK) or (SEEK) –.
Note
When entering the Quick-BrowZer mode, the repeat/
shuffle setting is canceled.
15

Searching a track by listening to
track passages — ZAPPIN™
While playing back short track passages in a CD
or USB device in sequence, you can search for a
track you want to listen to.
ZAPPIN mode is suitable for searching for a
track in shuffle or shuffle repeat mode.
Select button
ZAP
1 Press (ZAP) during playback.
After “ZAPPIN” appears in the display,
playback starts from a passage of the next
track.
The passage is played for the set time, then a
click sounds and the next passage starts.
Tra ck
The part of each track to
playback in ZAPPIN mode.
2 Press the select button or (ZAP) when
a track you want to listen is played
back.
The track that you select returns to normal
play mode from the beginning.
To search a track by ZAPPIN mode again,
repeat steps 1 and 2.
Tips
• You can select the playback time from about 6
seconds/9 seconds/30 seconds (page 29). You
cannot select the passage of the track to playback.
• Press (SEEK) +/– or (1)/(2) (ALBM –/+) in ZAPPIN
mode to skip a track or album.
Radio
Storing and receiving stations
Caution
When tuning in stations while driving, use Best
Tuning Memory (BTM) to prevent an accident.
Storing automatically — BTM
1 Press (SOURCE/OFF) repeatedly until
“TUNER” appears.
To change the band, press (MODE)
repeatedly. You can select from FM1, FM2,
FM3, AM1 or AM2.
2 Press and hold the select button.
The setup display appears.
3 Press the select button repeatedly
until “BTM” appears.
4 Press (SEEK) +.
The unit stores stations in order of frequency
on the number buttons.
A beep sounds when the setting is stored.
Storing manually
1 While receiving the station that you
want to store, press and hold a
number button ((1) to (6)) until
“MEM” appears.
Note
If you try to store another station on the same number
button, the previously stored station will be replaced.
Receiving the stored stations
1 Select the band, then press a number
button ((1) to (6)).
16
Tuning automatically
1 Select the band, then press (SEEK) +/–
to search for the station.
Scanning stops when the unit receives a
station. Repeat this procedure until the
desired station is received.
Tip
If you know the frequency of the station you want to
listen to, press and hold (SEEK) +/– to locate the
approximate frequency, then press (SEEK) +/–
repeatedly to fine adjust to the desired frequency
(manual tuning).
RDS
Overview
FM stations with Radio Data System (RDS)
service send inaudible digital information along
with the regular radio program signal.
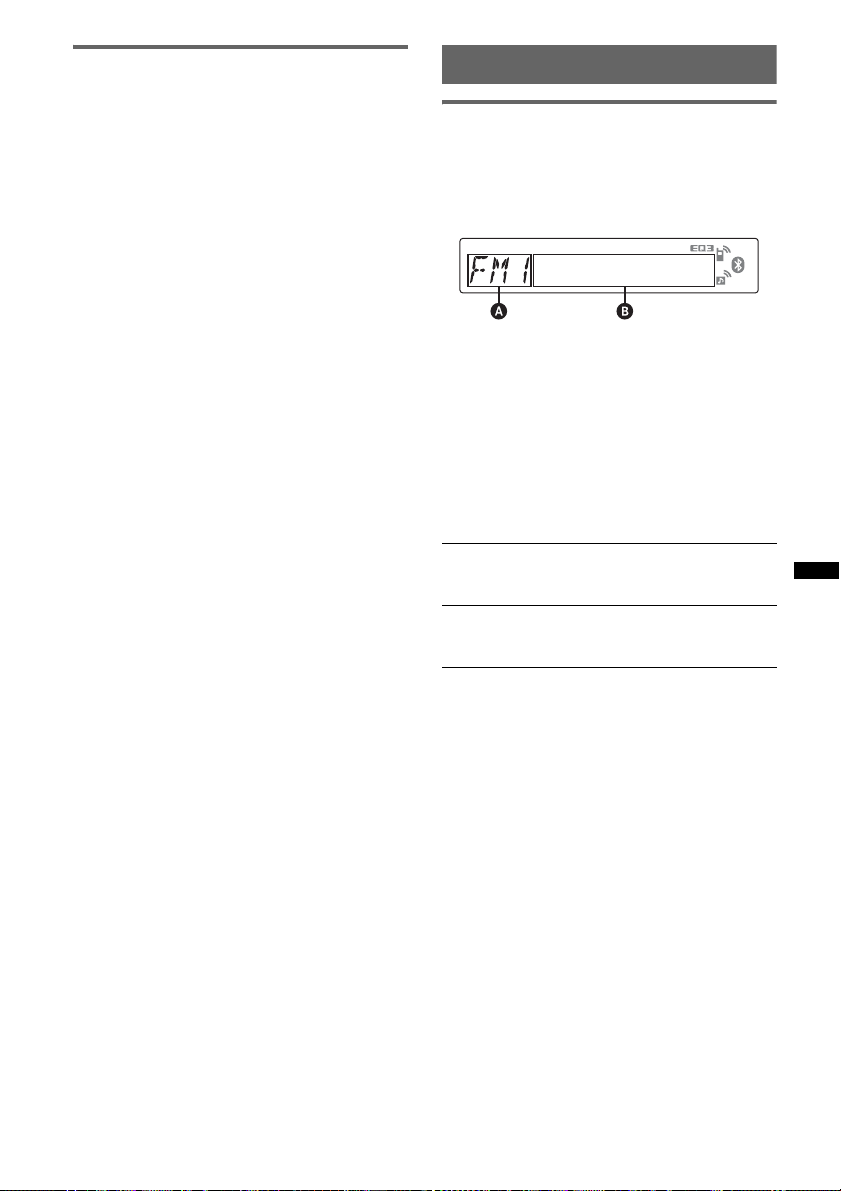
Display items
A Radio band, Function
B Program service name, Clock, Frequency*,
Preset number
* While receiving the RDS station, “ *” is displayed on
the left of the frequency indication.
To change display items B, press
RDS services
This unit automatically provides RDS services as
follows:
PTY (Program Types)
Displays the currently received program type.
Also searches your selected program type.
CT (Clock Time)
The CT data from the RDS transmission sets
the clock.
Notes
• Depending on the country/region, not all RDS
functions may be available.
• RDS will not work if the signal strength is too weak,
or if the station you are tuned to is not transmitting
RDS data.
(DSPL)
.
17
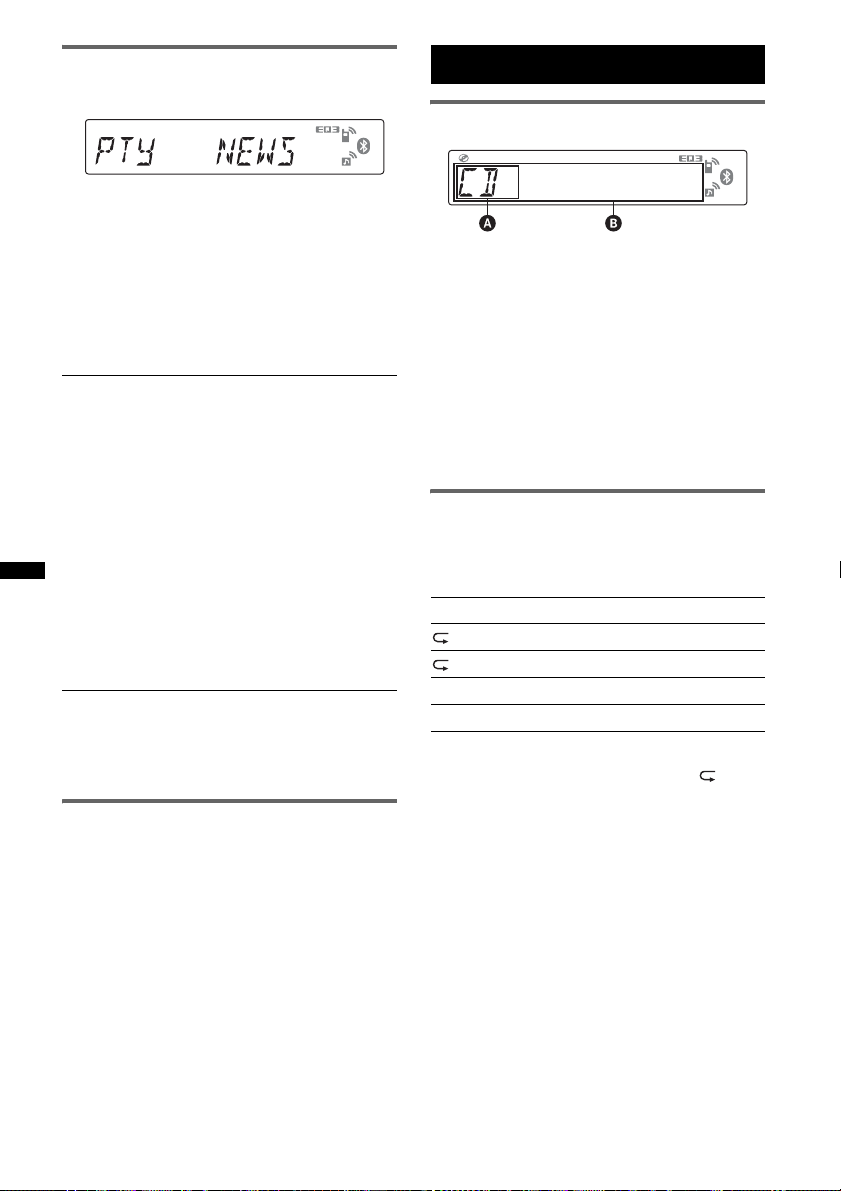
Selecting PTY
1 Press (PTY) during FM reception.
The current program type name appears if the
station is transmitting PTY data.
2 Press (PTY) repeatedly until the
desired program type appears.
3 Press (SEEK) +/–.
The unit starts to search for a station
broadcasting the selected program type.
Type of programs
NEWS (News), AFFAIRS (Current Affairs),
INFO (Information), SPORT (Sports),
EDUCATE (Education), DRAMA (Drama),
CULTURE (Culture), SCIENCE (Science),
VARIED (Varied), POP M (Pop Music),
ROCK M (Rock Music), EASY M (M.O.R.
Music), LIGHT M (Light classical),
CLASSICS (Serious classical), OTHER M
(Other Music), WEATHER (Weather),
FINANCE (Finance), CHILDREN (Children’s
program), SOCIAL A (Social Affairs),
RELIGION (Religion), PHONE IN (Phone In),
TRAVEL (Travel), LEISURE (Leisure), JAZZ
(Jazz Music), COUNTRY (Country Music),
NATION M (National Music), OLDIES (Oldies
Music), FOLK M (Folk Music), DOCUMENT
(Documentary)
Notes
• You cannot use this function in countries/regions
where no PTY data is available.
• You may receive a different radio program from the
one you select.
Setting CT
1 Set “CT-ON” in setup (page 29).
Notes
• The CT function may not work even though an RDS
station is being received.
• There might be a difference between the time set by
the CT function and the actual time.
CD
Display items
A Source
B Track name*
name*
Track number/Elapsed playing time, Clock
*1 The information of a CD TEXT, MP3/WMA/AAC is
displayed.
*2 Album number is displayed only when the album is
changed.
To change display items B, press (DSPL).
Tip
Displayed items may differ depending on model, disc
type, recording format and settings.
Repeat and shuffle play
1 During playback, press (3) (REP) or
(4) (SHUF) repeatedly until the
desired setting appears.
Select To play
TRACK track repeatedly.
ALBUM* album repeatedly.
SHUF ALBUM* album in random order.
SHUF DISC disc in random order.
* When an MP3/WMA/AAC is played.
To return to normal play mode, select “ OFF”
or “SHUF OFF.”
1
, Disc/artist name*1, Artist
1
, Album number*2, Album name*1,
18
USB devices
For details on the compatibility of your USB
device, visit the support site.
Support site
http://www.sony-asia.com/section/support
http://www.sony-asia.com/caraudio/
• MSC (Mass Storage Class) and MTP (Media
Transfer Protocol) type USB devices compliant
with the USB standard can be used.
• Corresponding codec is MP3 (.mp3), WMA
(.wma) and AAC (.m4a).
• Backup of data in a USB device is
recommended.
Note
Connect the USB device after starting the engine.
Depending on the USB device, malfunction or damage
may occur if it is connected before starting the engine.
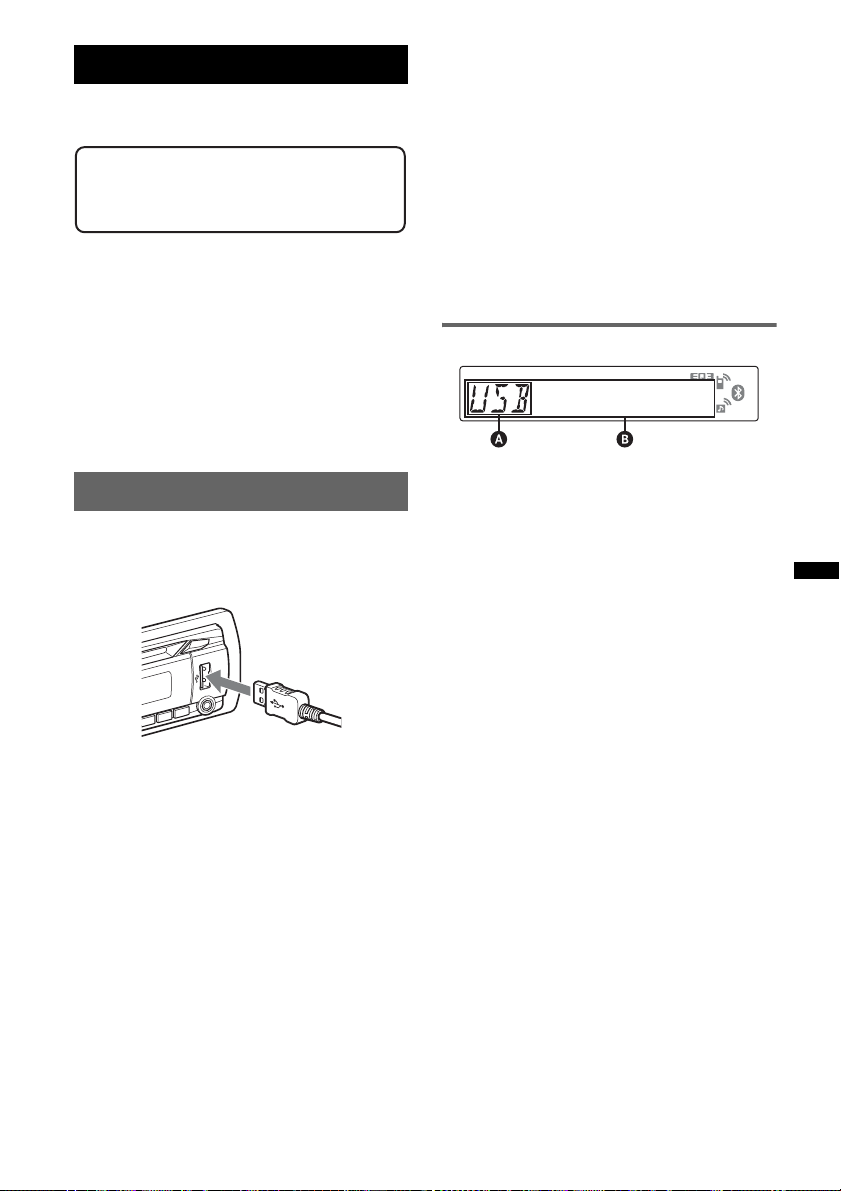
Playing back a USB device
1 Connect the USB device to the USB
connector.
When using a cable, use the one supplied with
the USB device to connect.
Playback starts.
If a USB device is already connected, to start
playback, press (SOU RCE/OFF) repeatedly until
“USB” appears.
Press (SOURCE/OFF) for 1 second to stop
playback.
Removing the USB device
1 Stop the USB device playback.
2 Remove the USB device.
If you remove your USB device during
playback, data in the USB device may be
damaged.
Notes
• Do not use USB devices so large or heavy that they
may fall down due to vibration, or cause a loose
connection.
• Do not detach the front panel during playback of the
USB device, otherwise USB data may be damaged.
• This unit cannot recognize USB devices via a USB
hub.
Display items
A Source
B Track name, Artist name, Album number*,
Album name, Track number/Elapsed playing
time, Clock
* Album number is displayed only when the album is
changed.
To change display items B, press (DSPL).
Notes
• Displayed items will differ, depending on the USB
device, recorded format and settings. For details,
visit the support site.
• The maximum number of displayable data is as
follows.
– folders (albums): 128
– files (tracks) per folder: 500
• Do not leave a USB device in a parked car, as
malfunction may result.
• It may take time for playback to begin, depending on
the amount of recorded data.
• DRM (Digital Rights Management) files may not be
played.
• During playback or fast-forward/reverse of a VBR
(Variable Bit Rate) MP3/WMA/AAC file, elapsed
playing time may not display accurately.
• Playback of the following MP3/WMA/AAC files is not
supported.
– lossless compression
– copyright-protected
19
Repeat and shuffle play
1 During playback, press (3) (REP) or
(4) (SHUF) repeatedly until the
desired setting appears.
Select To play
TRACK track repeatedly.
ALBUM album repeatedly.
SHUF ALBUM album in random order.
SHUF DEVICE device in random order.
After 3 seconds, the setting is complete.
To return to normal play mode, select “ OFF”
or “SHUF OFF. ”
iPod
For details on the compatibility of your iPod, see
“About iPod” on page 32 or visit the support site.
In these Operating Instructions, “iPod” is used as
a general reference for the iPod functions on the
iPod and iPhone, unless otherwise specified by
the text or illustrations.
Support site
http://www.sony-asia.com/section/support
http://www.sony-asia.com/caraudio/
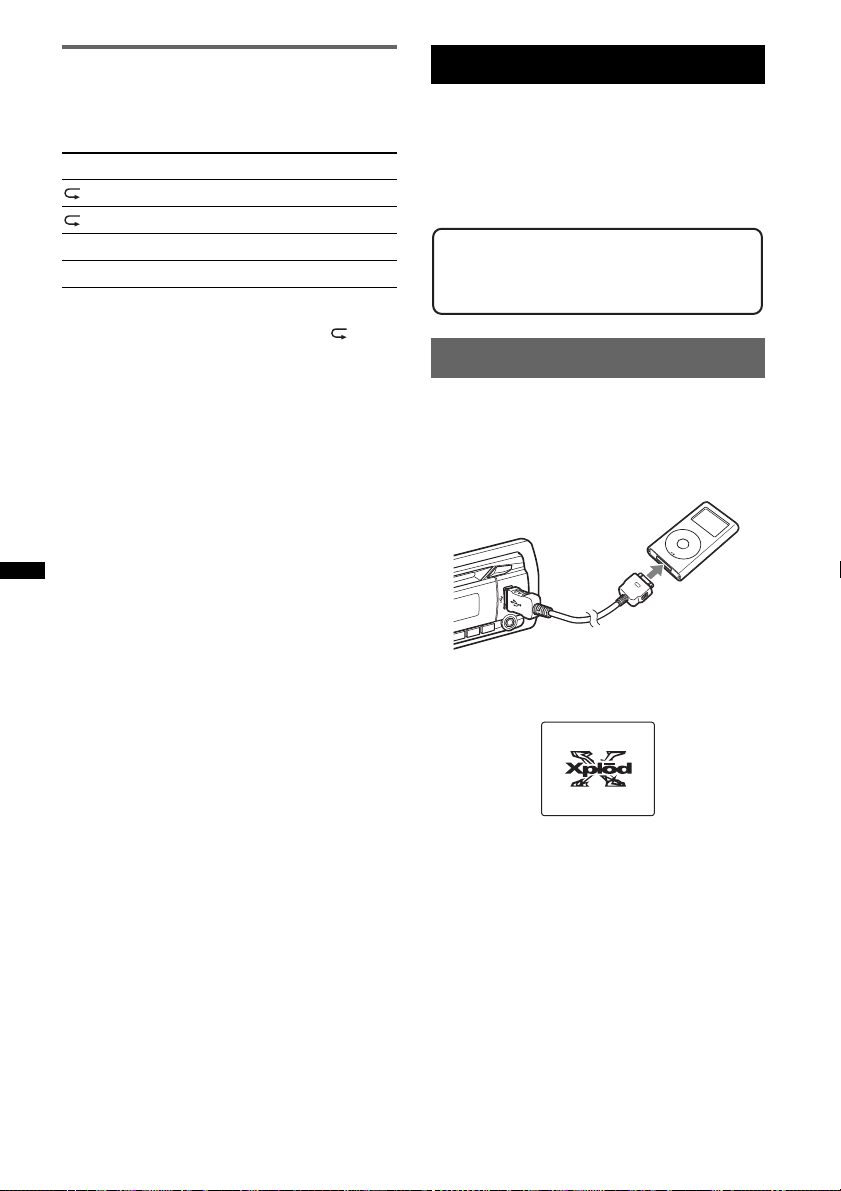
Playing back iPod
Before connecting the iPod, turn down the
volume of the unit.
1 Connect the iPod to the USB
connector via the dock connector to
USB cable.
M
E
N
U
>
.
20
The iPod will turn on automatically, and the
display will appear on the iPod screen as
below.*
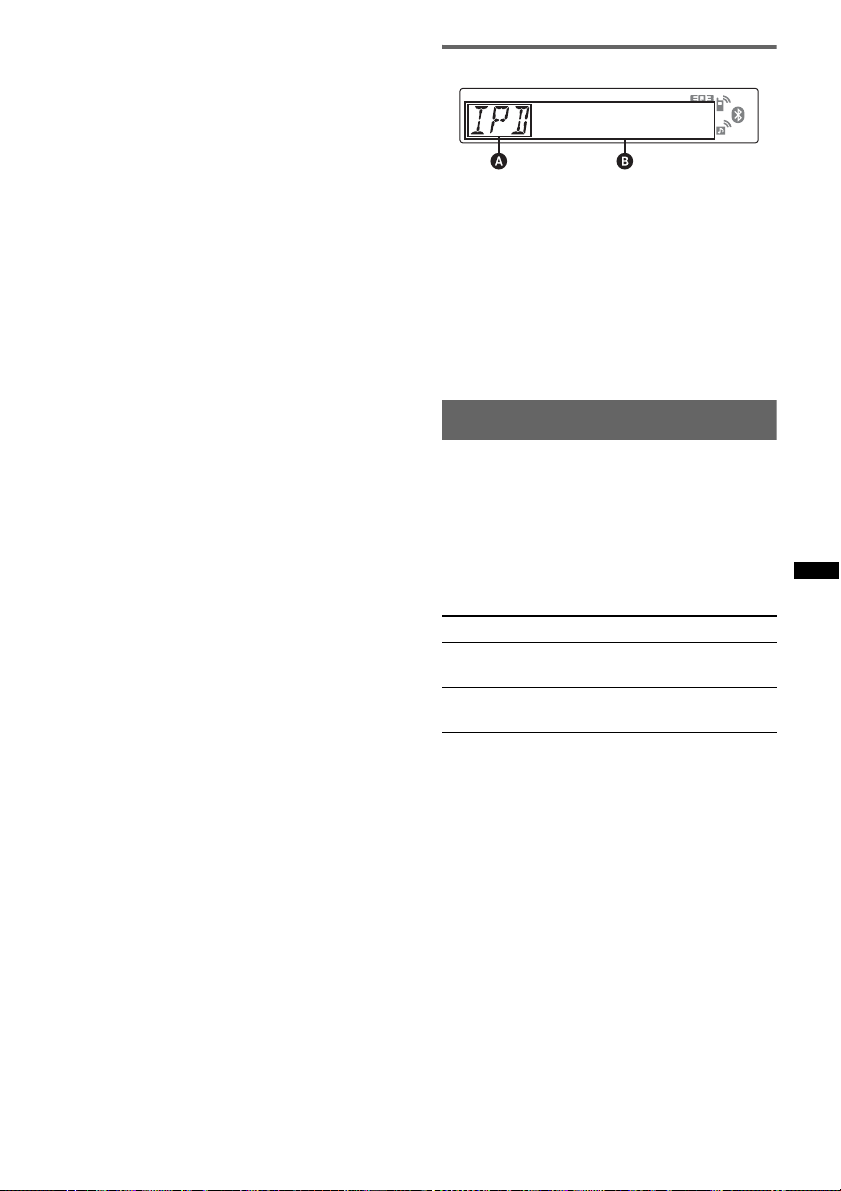
Tip
We recommend the RC-100IP USB cable (not
supplied) to connect the dock connector.
The tracks on the iPod start playing
automatically from the point last played.
If an iPod is already connected, to start
playback press (SOURCE/OFF) repeatedly
until “USB” appears. (“IPD” appears in the
display when iPod is recognized.)
* In the case of an iPod touch or iPhone being
connected, or that the iPod was last played back
using passenger control, the logo will not appear on
the screen.
2 Press (MODE) to select the play mode.
The mode changes as follows:
RESUMING t ALBUM t TRACK t
PODCAST* t GENRE t PLAYLIST
t ARTIST
* May not appear depending on iPod setting.
3 Adjust the volume.
Press (SOURCE/OFF) for 1 second to stop
playback.
Removing the iPod
1 Stop the iPod playback.
2 Remove the iPod.
Caution for iPhone
When you connect an iPhone via USB, telephone
volume is controlled by iPhone itself. In order to avoid
sudden loud sound after a call, do not increase the
volume on the unit during a telephone call.
Notes
• Do not detach the front panel during playback of the
iPod, otherwise data may be damaged.
• This unit cannot recognize iPod via a USB hub.
Tips
• When the ignition key is turned to the ACC position,
and the unit is on, the iPod will be recharged.
• If the iPod is disconnected during playback, “NO
DEV” appears in the display of the unit.
Display items
A Source (iPod) indication
B Track name, Artist name, Album name, Track
number/Elapsed playing time, Clock
To change display items B, press (DSPL).
Tip
When album/podcast/genre/artist/playlist is changed,
its item number appears momentarily.
Note
Some letters stored in iPod may not be displayed
correctly.
Setting the play mode
1 During playback, press (MODE).
The mode changes as follows:
ALBUM t TRACK t PODCAST* t
GENRE t PLAYLIST t ARTIST
* May not appear depending on iPod setting.
Skipping albums, podcasts, genres,
playlists and artists
To Press
Skip (1)/(2) (ALBM –/+)
Skip
continuously
[press once for each]
(1)/(2) (ALBM –/+)
[hold to desired point]
Resuming mode
When the iPod is connected to the dock
connector, the mode of this unit changes to
resuming mode and playback starts in the mode
set by the iPod.
In resuming mode, the following buttons do not
function.
– (3) (REP)
– (4) (SHUF)
21
Repeat and shuffle play
1 During playback, press (3) (REP) or
(4) (SHUF) repeatedly until the
desired setting appears.
Select To play
TRACK track repeatedly.
ALBUM album repeatedly.
PODCAST podcast repeatedly.
ARTIST artist repeatedly.
PLAYLIST playlist repeatedly.
GENRE genre repeatedly.
SHUF ALBUM album in random order.
SHUF PODCAST podcast in random order.
SHUF ARTIST artist in random order.
SHUF PLAYLIST playlist in random order.
SHUF GENRE genre in random order.
SHUF DEVICE device in random order.
After 3 seconds, the setting is complete.
To return to normal play mode, select “ OFF”
or “SHUF OFF.”
Operating an iPod directly
— Passenger control
You can operate an iPod connected to the dock
connector directly.
1 During playback, press and hold
(MODE).
“MODE IPOD” appears and you will be able
to operate the iPod directly.
To change the display item
Press (DSPL).
The display items change as follows:
Track name t Artist name t Album name t
MODE IPOD t Clock
To exit the passenger control
Press and hold (MODE).
Then “MODE AUDIO” will appear and the play
mode will change to “RESUMING.”
Notes
• The volume can be adjusted only by the unit.
• If this mode is canceled, the repeat setting will be
turned off.
22

Bluetooth (Handsfree calling
and Music streaming)
Bluetooth operations
To use the Bluetooth function, the following
procedure is necessary.
1 Pairing
When connecting Bluetooth devices for the
first time, mutual registration is required. This
is called “pairing.” This registration (pairing)
is required only for the first time, as this unit
and the other devices will recognize each
other automatically from the next time. You
can pair up to 8 devices. (Depending on the
device, you may need to input a passkey for
each connection.)
2 Connection
To use the device after pairing is made, start
the connection. Sometimes pairing allows to
connect automatically.
3 Handsfree calling/Music streaming
You can talk handsfree and listen to music
when the connection is made.
Pairing
First, register (“pair”) a Bluetooth device
(cellular phone, etc.) and this unit with each
other. You can pair up to 8 devices. Once pairing
is established, there is no need for pairing again.
1 Place the Bluetooth device within 1 m
(3 ft) of this unit.
2 Press and hold (BT) until “ ” flashes
(about 5 seconds).
The unit enters pairing standby mode.
flashing
3 Set the Bluetooth device to search for
this unit.
A list of detected devices appears in the
display of the device to be connected. This
unit is displayed as “XPLOD” on the device
to be connected.
Support site
http://www.sony-asia.com/section/support
http://www.sony-asia.com/caraudio/
DR-BT30Q
XPLOD
XXXXXXX
4 If Passkey* input is required on the
display of the device to be connected,
input “0000.”
Input passkey.
XXXX
This unit and the Bluetooth device memorize
each other’s information, and when pairing is
made, the unit is ready for connection to the
device.
“ ” flashes and then stays lit after pairing is
complete.
continue to next page t
“0000”
23

5 Set the Bluetooth device to connect to
this unit.
“ ” or “ ” appears when the connection is
made.
* Passkey may be called “passcode,” “PIN code,” “PIN
number” or “Password,” etc., depending on the
device.
Note
Pairing standby mode is not released until the
connection is made.
About Bluetooth icons
The following icons are used by this unit.
lit:
flashing:
off:
lit:
flashing:
off:
lit:
flashing:
off:
Bluetooth signal on
Pairing standby mode
Bluetooth signal off
Connection successful
Connecting
No connection
Connection successful
Connecting
No connection
Connection
If pairing has already been achieved, start
operation from here.
To switch the Bluetooth signal
output of this unit to on
To use the Bluetooth function, switch the
Bluetooth signal output of this unit to on.
1 Press and hold (BT) until “ ” lights
(about 3 seconds).
Bluetooth signal is switched to on.
Connecting a cellular phone
1 Be sure that both this unit and the
cellular phone are switched to
Bluetooth signal on.
2 Connect to this unit using the cellular
phone.
“ ” appears when the connection is made.
Connecting the last-connected
cellular phone from this unit
1 Be sure that both this unit and the cellular
phone are switched to Bluetooth signal on.
2 Press (SOURCE/OFF) repeatedly until “BT
PHONE” appears.
3 Press (handsfree).
“ ” flashes while the connection is being
made. And then “ ” stays lit when the
connection is made.
Note
While streaming Bluetooth audio, you cannot connect
from this unit to the cellular phone. Connect from the
cellular phone to this unit instead. A connecting noise
may be heard over playback sound.
Tip
With Bluetooth signal on: when the ignition is switched
to on, this unit reconnects automatically to the lastconnected cellular phone. But automatic connection
also depends on the cellular phone’s specification. If
this unit does not reconnect automatically, connect
manually.
24
Connecting an audio device
1 Be sure that both this unit and the
audio device are switched to
Bluetooth signal on.
2 Connect to this unit using the audio
device.
“ ” appears when the connection is made.
Mic Gain adjustment
You can switch between two volume levels
(“LOW” or “HI”) to set a suitable level for the
other party during a call.
1 Press (5) during a call.
The item changes as follows:
MIC-LOW y MIC-HI
Note
The microphone of this unit is located on the rear of
the front panel (page 12). Do not cover the
microphone with tape, etc.
Connecting the last-connected audio
device from this unit
1 Be sure that both this unit and the audio device
are switched to Bluetooth signal on.
2 Press (SOURCE/OFF) repeatedly until “BT
AUDIO” appears.
3 Press (6).
“ ” flashes while the connection is being
made. And then “ ” stays lit when the
connection is made.
Handsfree calling
Check that the unit and cellular phone are
connected beforehand.
Receiving calls
When receiving a call, a ring tone is output from
your car speakers.
1 Press (handsfree) when a call is
received with a ring tone.
The phone call starts.
To end a call
Press (handsfree) again.
To reject an incoming call, press and hold
(handsfree) for 2 seconds.
Making calls
In the case of making calls from this unit, redial
is used.
1 Press (SOURCE/OFF) repeatedly until
“BT PHONE” appears.
2 Press and hold (handsfree) for 3
seconds or more.
The phone call starts.
To end a call
Press (handsfree) again.
To call another phone, use your cellular phone,
and then transfer the call.
For call transfer details, check the following.
Call transfer
In order to activate/deactivate the appropriate
device (this unit/cellular phone), check the
following.
1 Press and hold (handsfree) or use
your cellular phone.
For details on cellular phone operation, refer to
your cellular phone manual.
Note
Depending on the cellular phone, handsfree
connection may be cut off when call transfer is
attempted.
25

Voice Dial Activation
You can activate voice dialing with a cellular
phone connected to this unit by saying the voice
tag stored on the cellular phone, then make a call.
1 Press (SOURCE/OFF) repeatedly until
“BT PHONE” appears.
2 Press (handsfree).
The cellular phone enters voice dialing mode.
3 Say the voice tag stored on the cellular
phone.
Your voice is recognized, and the call is
made.
Notes
• Check that unit and cellular phone are connected
beforehand.
• Store a voice tag on your cellular phone beforehand.
• If you activate voice dialing with a cellular phone
connected to this unit, this function may not always
work in some cases.
• Noises such as the engine running may interfere
with sound recognition. In order to improve
recognition, operate under conditions where noise is
minimized.
• Voice dialing may not work in some situations,
depending on the effectiveness of the cellular
phone’s recognition function. For details, see the
support site (page 23).
Tips
• Speak in the same way as you did when you stored
the voice tag.
• Store a voice tag while seated in the car, via this unit
with “BT PHONE” source selected.
Music streaming
Listening to music from an audio
device
You can listen to music of an audio device on this
unit if the audio device supports A2DP
(Advanced Audio Distribution Profile) of
Bluetooth technology.
1 Turn down the volume on this unit.
2 Press (SOURCE/OFF) repeatedly until
“BT AUDIO” appears.
3 Operate the audio device to start
playback.
4 Adjust the volume on this unit.
Adjusting the volume level
The volume level is adjustable for any difference
between the unit and the Bluetooth audio device.
1 Start playback of the Bluetooth audio device at
a moderate volume.
2 Set your usual listening volume on the unit.
3 Press the select button repeatedly until “BTA”
appears, and rotate the volume control dial to
adjust the input level (–8 dB to +18 dB).
26

Operating an audio device with this
unit
You can perform the following operations on this
unit if the audio device supports AVRCP (Audio
Video Remote Control Profile) of Bluetooth
technology. (The operation differs depending on
the audio device.)
To Press
Play (6) (PAUSE)* on this unit.
Pause (6) (PAUSE)* on this unit.
Skip tracks SEEK –/+ (
* Depending on the device, it may be necessar y to
press twice.
Operations other than the above should be
performed on the audio device.
Notes
• During audio device playback, information such as
track number/time, playback status, etc., of a
connected audio device is not displayed on this unit.
• Even if the source is changed on this unit, playback
of the audio device does not stop.
Tip
You can connect a cellular phone that suppor ts A2DP
(Advanced Audio Distribution Profile) as an audio
device and listen to music.
each track]
./>) [once for
Deleting registration of all
paired devices
1 Press and hold (SOURCE/OFF) for 1
second to turn off the power.
2 If “ ” lights, press and hold
(BT) until “ ” turns off.
3 Press and hold the select button.
4 Press the select button repeatedly
until “BT INIT” appears.
5 Press (SEEK) +.
Initializing starts.
It takes 3 seconds to cancel all registration.
Do not turn off the power while “INITIAL” is
flashing.
27
Other functions
Changing the sound settings
Adjusting the sound
characteristics
1 Press the select button repeatedly
until the desired item appears.
2 Rotate the control dial to adjust the
selected item.
3 Press (BACK).
The setting is complete and the display
returns to normal reception/play mode.
The following items can be set (follow the page
reference for details):
Customizing the equalizer curve
— EQ3
“CUSTOM” of EQ3 allows you to make your
own equalizer settings.
1 Select a source, then press the select
button repeatedly to select “EQ3.”
2 Rotate the control dial to select
“CUSTOM.”
3 Press the select button repeatedly
until “LOW,” “MID” or “HI” appears.
4 Rotate the control dial to adjust the
selected item.
The volume level is adjustable in 1 dB steps,
from –10 dB to +10 dB.
EQ3
Selects an equalizer curve from 7 music types
(XPLOD, VOCAL, EDGE, CRUISE, SPACE,
GRAVITY, CUSTOM or OFF).
1
LOW*
, MID*1, HI*1 (page 28)
BAL (Balance)
Adjusts the sound balance between the left and
right speakers.
FAD (Fader)
Adjusts the relative level between the front and
rear speakers.
2
SUB*
(Subwoofer volume)
Adjusts the subwoofer volume.
AUX *3 (AUX level)
Adjusts the volume level for each connected
auxiliary equipment: “+18 dB” – “0 dB” – “–8
dB.”
This setting negates the need to adjust the
volume level between sources.
4
BTA*
(BT-Audio level)
Adjusts the volume level for each connected
Bluetooth audio device: “+18 dB” – “0 dB” –
“–8 dB.”
This setting negates the need to adjust the
volume level between sources (page 26).
*1 When EQ3 is activated.
*2 “ATT” is displayed at the lowest setting, and can be
adjusted up to 21 steps.
*3 When AUX source is activated (page 30).
*4 When Bluetooth audio source is activated
(page 26).
Repeat steps 3 and 4 to adjust the equalizer
curve.
To restore the factory-set equalizer curve,
press and hold the select button before the
setting is complete.
5 Press (BACK).
The setting is complete and the display
returns to normal reception/play mode.
Tip
Other equalizer types are also adjustable.
28
Adjusting setup items — SET
1 Press and hold the select button.
The setup display appears.
2 Press the select button repeatedly
until the desired item appears.
3 Rotate the control dial to select the
setting (example “ON” or “OFF”).
4 Press and hold the select button.
The setup is complete and the display returns
to normal reception/play mode.
Note
Displayed items will differ, depending on the source
and setting.
The following items can be set (follow the page
reference for details):
CLOCK-ADJ (Clock Adjust) (page 7)
CT (Clock Time)
Activates the CT function: “ON,” “OFF”
(page 17, 18).
BEEP
Activates the beep sound: “ON,” “OFF.”
AUX -A*1 (AUX Audio)
Activates the AUX source display: “ON,”
“OFF” (page 30).
A.OFF (Auto Off)
Shuts off automatically after a desired time
when the unit is turned off: “NO,” “30S
(Seconds),” “30M (Minutes),” “60M (Minutes).”
1
MIC*
(Microphone)
– “EXT”: to automatically switch to the external
microphone when it is connected.
– “INT”: to select only the internal microphone.
B.OUT (Black Out)
Turns off the illumination automatically for any
source (e.g., during radio reception/CD
playback, etc.) if no operation is performed for 5
seconds: “ON,” “OFF.”
To bring the light back on, press any button on
the unit. (When activated, remote operation is
unavailable.)
DEMO
(Demonstration)
Activates the demonstration: “ON,” “OFF.”
DIM (Dimmer)
Changes the display brightness: “ON,” “OFF.”
A.SCRL (Auto Scroll)
Scrolls long items automatically: “ON,” “OFF.”
LOCAL (Local Seek Mode)
– “ON”: to only tune into stations with stronger
signals.
– “OFF”: to tune normal reception.
MONO*
Z.TIME (Zappin Time)
LPF (Low Pass Filter)
LPF NORM/REV (Low Pass Filter Normal/
Reverse)
HPF (High Pass Filter)
LOUD (Loudness)
DM+
BTM (page 16)
BT INIT*
*1 When the unit is turned off.
*2 When FM is received.
2
Selects monaural reception mode to improve
poor FM reception: “ON,” “OFF.”
Selects the playback time for the ZAPPIN
function.
– “Z.TIME-1 (about 6 seconds),” “Z.TIME-2
Selects the subwoofer cut-off frequency: “OFF,”
“80Hz,” “100Hz,” “120Hz,” “140Hz,” “160Hz.”
Selects the subwoofer phase: “NORM,” “REV.”
Selects the front/rear speaker cut-off frequency:
“OFF,” “80Hz,” “100Hz,” “120Hz,” “140Hz,”
“160Hz.”
Reinforces bass and treble for clear sound at low
volume levels: “ON,” “OFF.”
Activates the DM+ function: “ON,”“OFF.”
(Monaural Mode)
(about 9 seconds),” “Z.TIME-3 (about 30
seconds).”
1
(Bluetooth Initialize) (page 27)
29
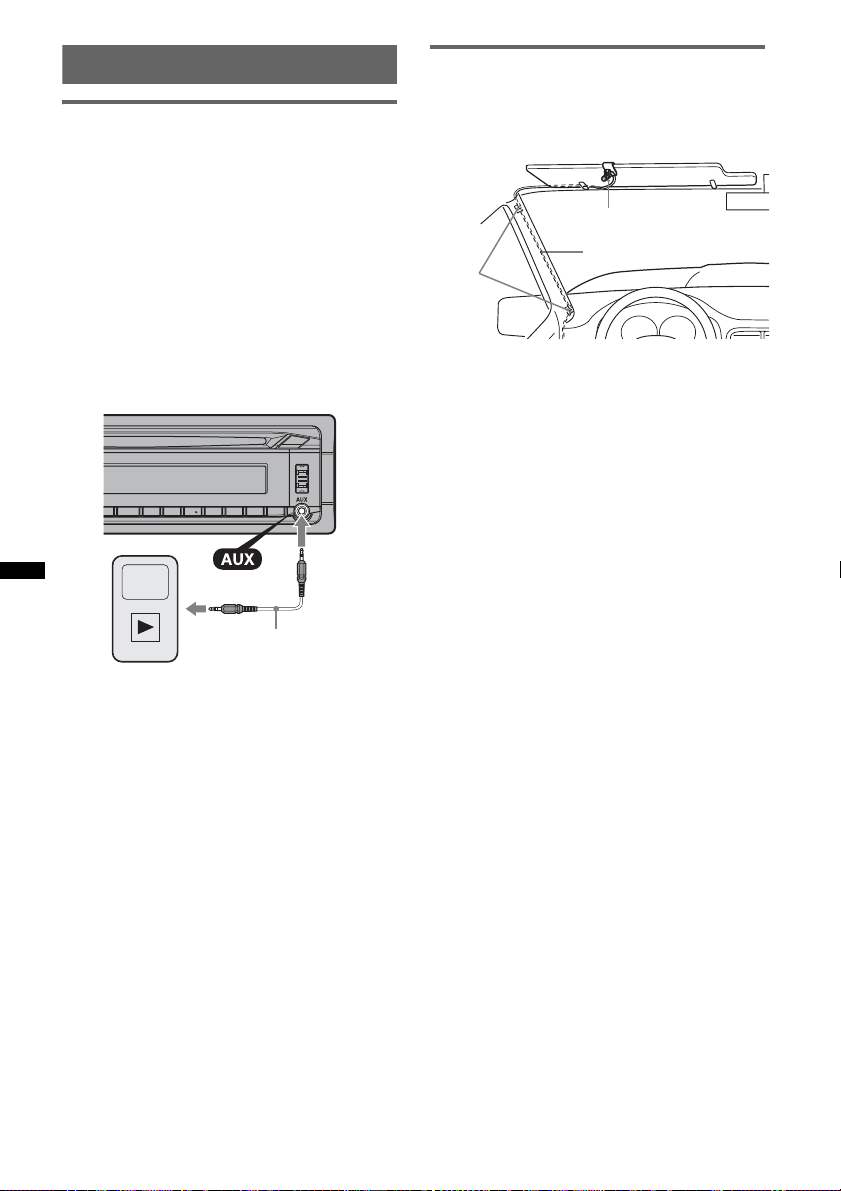
Using optional equipment
Auxiliary audio equipment
By connecting an optional portable audio device
to the AUX input jack (stereo mini jack) on the
unit and then simply selecting the source, you
can listen on your car speakers. The volume level
is adjustable for any difference between the unit
and the portable audio device. Follow the
procedure below:
Connecting the portable audio
device
1 Turn off the portable audio device.
2 Turn down the volume on the unit.
3 Connect to the unit.
Connecting cord*
(not supplied)
External microphone XA-MC10
By connecting an optional external microphone
to the microphone input connector, you can
improve audio quality while talking through this
unit.
External microphone
Connecting cord
Clamps
Tip
You can set the priority of the microphones (page 29).
Note
Connect XA-MC10 as the external microphone. You
may not be able to call or malfunction may occur if
another device is connected.
* Be sure to use a straight type plug.
Adjust the volume level
Be sure to adjust the volume for each connected
audio device before playback.
1 Turn down the volume on the unit.
2 Press (SOURCE/OFF) repeatedly until “AUX”
appears.
After that, “AUX FRONT IN” appears.
3 Start playback of the portable audio device at a
moderate volume.
4 Set your usual listening volume on the unit.
5 Adjust the input level (page 28).
30
 Loading...