

Sony KV-28FS20U User Manual
R
Trinitron Colour
Television
4-205-420-62
420542062
Instruction Manual
GB
GB
GB
This Instruction Manual has been produced using
Totally chlorine free (TCF) 100% Re-cycled paper
to comply with our commitment to the use of
environmentally friendly materials in our products.
KV-28FS20U
© 2000 by Sony Corporation Printed in UK

NOTICE FOR CUSTOMERS IN THE UNITED KINGDOM
A moulded plug complying with BS1363 is fitted to this equipment for your safety and
convenience.
Should the fuse in the plug supplied need to be replaced, a 5 AMP fuse approved by ASTA
or BSI to BS 1362 (i.e. marked with or ) must be used.
When an alternative type of plug is used it should be fitted with a 5 AMP FUSE, otherwise
the circuit should be protected by a 5 AMP FUSE at the distribution board.
If the plug supplied with this equipment has a detachable fuse cover, be sure to attach the
fuse cover after you change the fuse. Never use the plug without the fuse cover. If you
should lose the fuse cover, please contact your nearest Sony service station.
How to replace the Fuse
Open the fuse compartment with a blade screwdriver, and replace the fuse.
• IMPORTANT
If the plug supplied is not suitable for the socket outlet in your home, it should be cut off
and an appropriate plug fitted in accordance with the following instructions:
The wires in this mains lead are coloured in accordance with the following code:
Blue Neutral
Brown Live
As the colours of the wires in the mains lead of this apparatus may not correspond with
the coloured markings identifying the terminals in your plug, proceed as follows:
The wire which is coloured blue must be connected to the terminal which is marked with
the letter N or coloured black. The wire which is coloured brown must be connected to
the terminal which is marked with the letter L or coloured red. Do not connect either wire
to the earth terminal in the plug which is marked by the letter E or by the safety earth
symbol or coloured green or green and yellow.
ASA
T
FUSE
WARNING
• To prevent shock hazard, do not insert the plug cut off from the mains lead into a socket
outlet. This plug cannot be used and should be destroyed.
• To prevent fire or shock hazard, do not expose the unit to rain or moisture.
• Dangerously high voltages are present inside the set. Do not open the cabinet. Refer
servicing to qualified personnel only.
Table of Contents
Table of Contents
Getting Started
Checking the accessories supplied
Inserting batteries into the remote control
Connecting the speakers
Connecting the aerial
Switching on the TV
Automatically tuning the TV
Overview
Overview of the TV set buttons
Overview of the remote control buttons
Additional TV Features
Choosing a language for the TV menu screens
Automatically tuning the TV
Re-arranging the TV channels
Adjusting the picture
Changing picture and sound modes quickly
Adjusting the sound
Setting up Dolby Pro Logic
Changing the screen mode
Using the further programme preset feature
Adjusting the picture rotation
Using the parental lock
Using the sleep timer
Manually tuning the TV
Skipping programme positions
Naming a channel
2
2
3
5
5
6
7
8
9
10
11
12
12
13
14
15
16
17
17
18
19
20
21
Teletext
Switching teletext on and off
Using other teletext functions
Optional Equipment
Connecting equipment to the TV
Additional information when connecting equipment to the TV
Selecting the output source for the scart socket
Using the ‘AV Label Preset’ feature
G
Additional Information
Specifications
Troubleshooting
22
22
23
23
24
25
26
27
1
Getting Started
Follow steps 1-6 to: Check the accessories supplied
Insert batteries into your remote control
Connect the speakers
Connect the aerial to your TV
Plug in and switch on the TV
View programmes on your TV
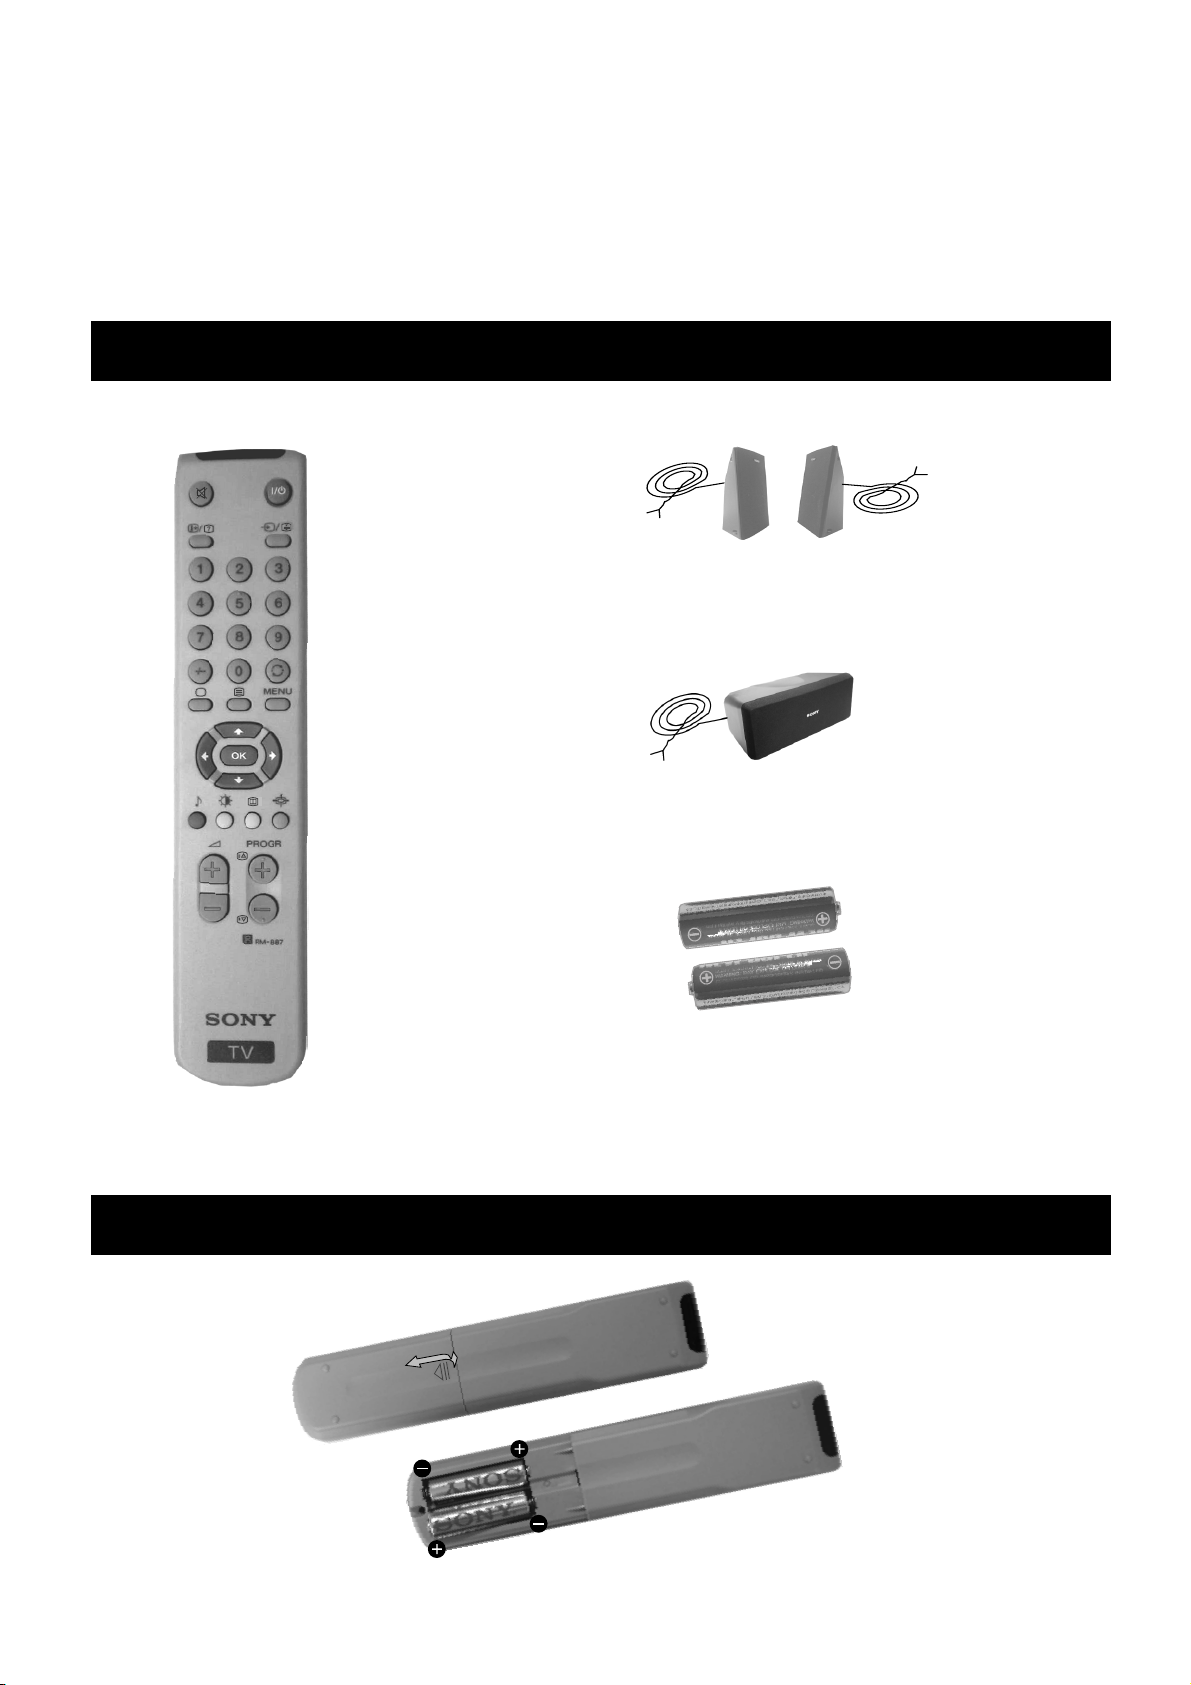
1. Checking the accessories supplied
Surround speakers
Centre speaker
Batteries
Remote control
2. Inserting batteries into the remote control
Always remember to dispose of used batteries in an environmentally friendly way.
2
Getting Started
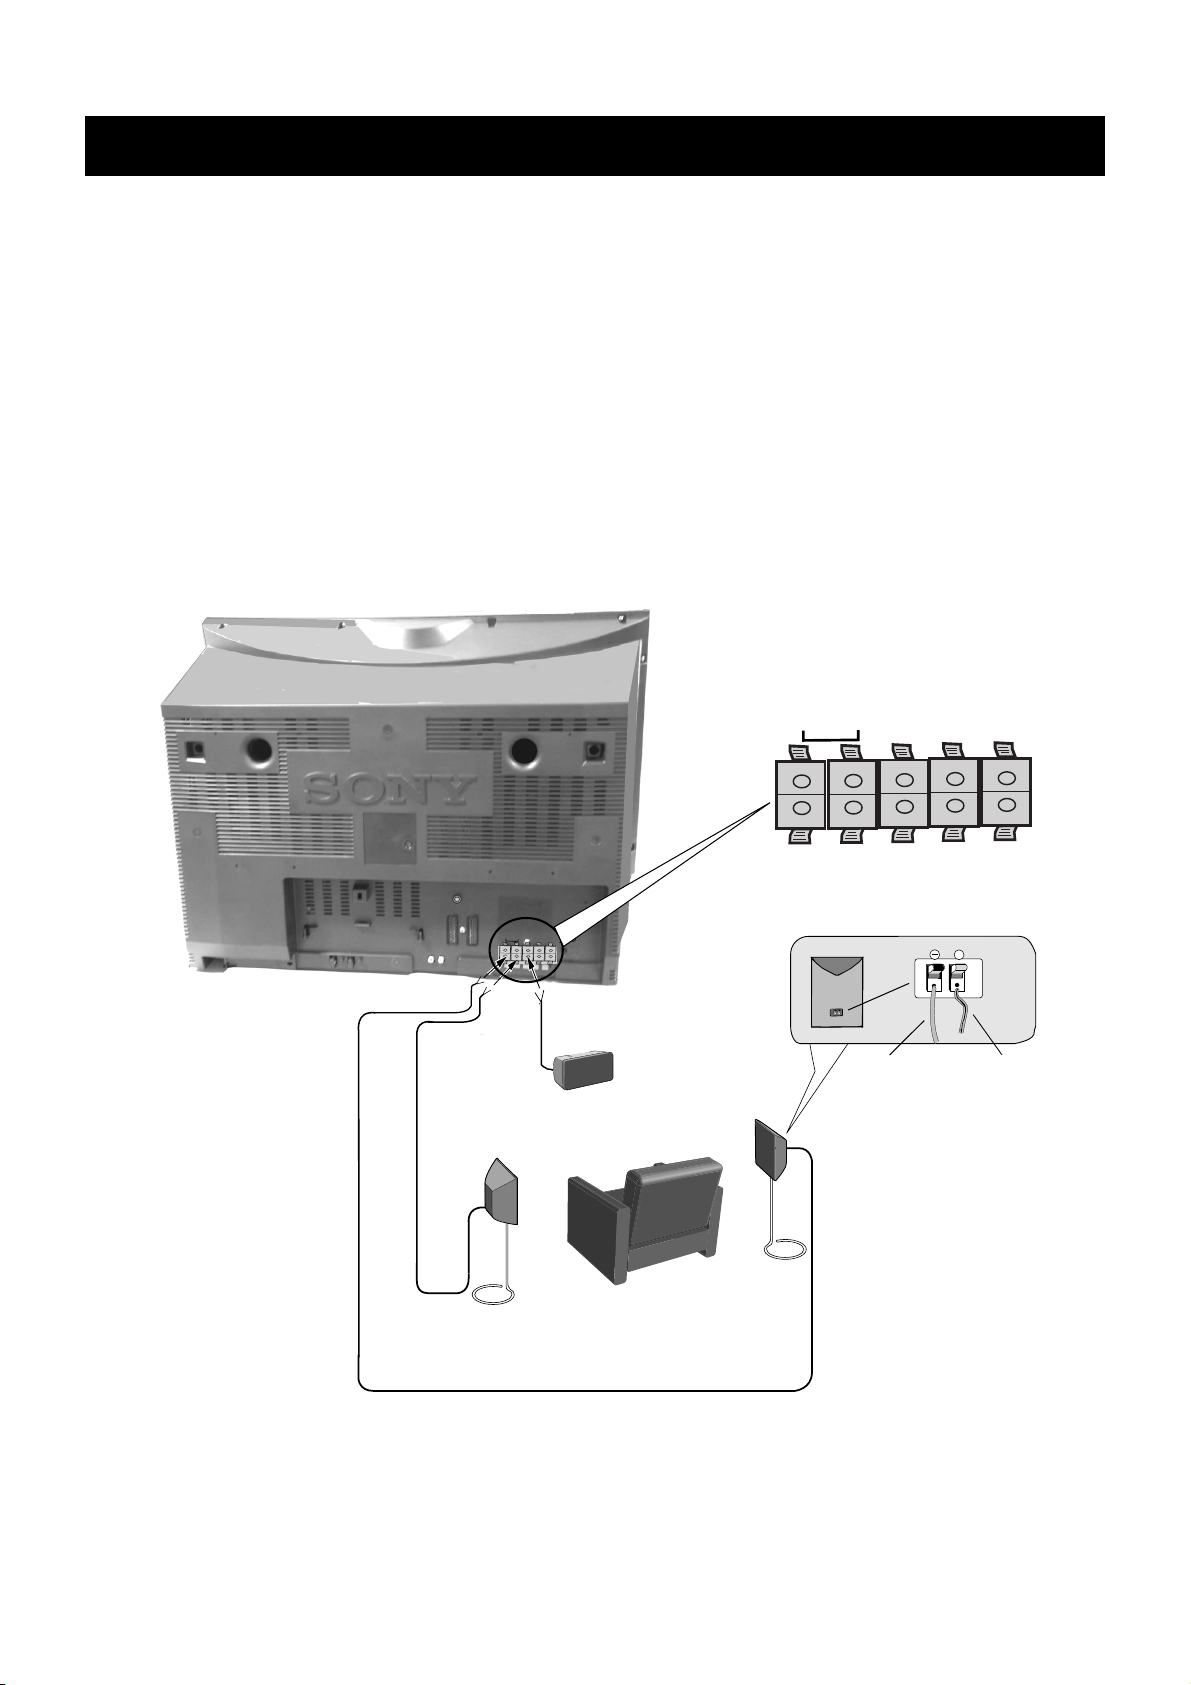
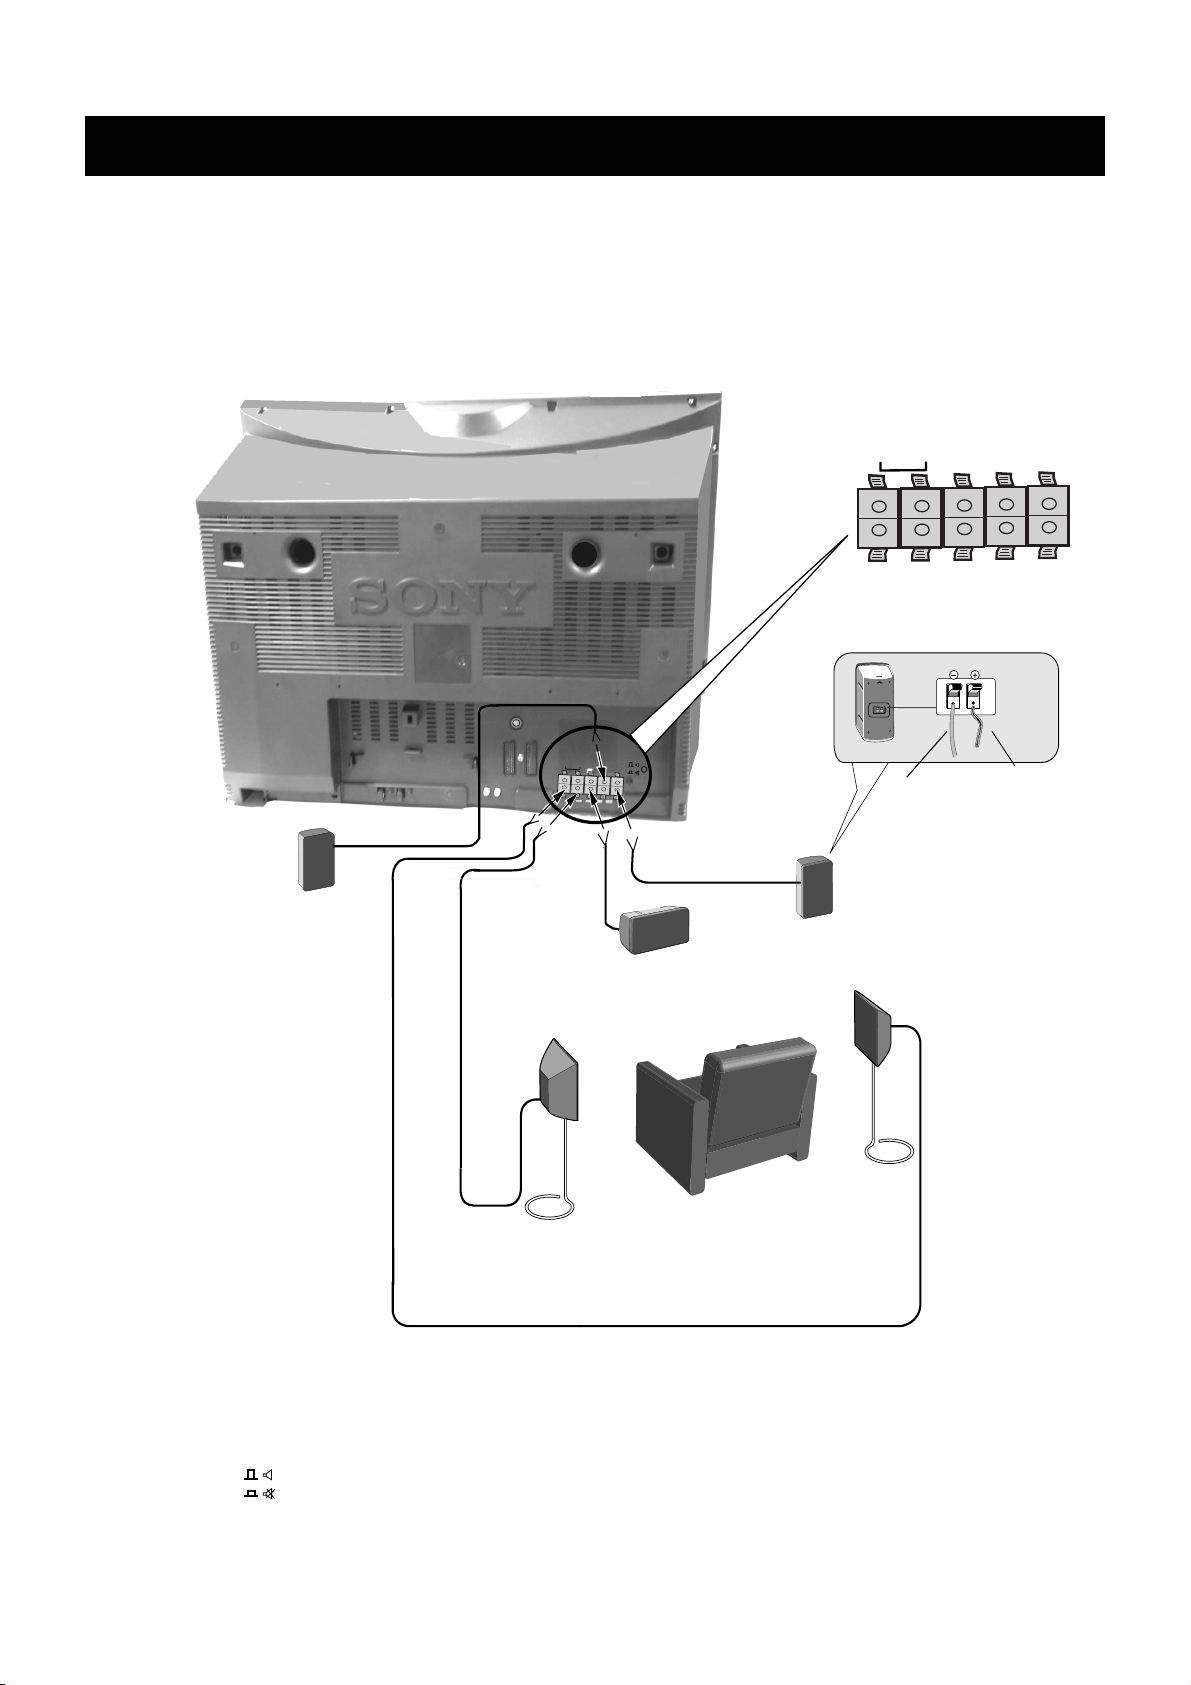
3.1. Connecting the speakers
Before switching on the TV, please connect the speakers to the TV using the leads provided. Connect the striped lead to the red
terminals and the black lead to the black terminals.
Dolby* ProLogic Surround normally requires 5 speakers:
Centre Speaker - to anchor the fixed sounds, like dialogues, to the screen.
Left and Right Front Speakers (incorporated in the TV) - for the normal two channel stereo or bilingual broadcasts.
Surround Speakers - for the special effects created by the surround channels.
To connect the speakers provided:
S
S
C
R
/D
/
L
/G
/
D
/D
S
/I
Centre speaker
Connect black leads to black terminals
S
C
S
D/D
S/I
L/G/
R/D/
Connect striped leads to red terminals
Black
lead
n
o
i
t
i
s
o
p
g
n
i
t
t
i
s
r
u
o
Y
Striped
lead
Surround speakers **
* Manufactured under licence from Dolby Laboratories Licensing Corporation. ‘Dolby’, ‘ProLogic’, and the double D
symbol are trademarks of the Dolby Laboratories Licensing Corporation.
** For the best sound effects, place the surround speakers one meter above your listening position.
3
Getting Started
3.2. Connecting the speakers
To connect your own speakers (when using your own speakers, make sure they are at least 4 ohms impedance and magnetically
shielded)
Connect black leads to black
terminals
S
C
S
Connect striped leads to red
terminals
R/D/
D/D
L/G/
S/I
Right speaker
S
S
C
R
/D
/
L
/
G
/
D
/
D
S
/
I
Centre speaker
Surround speakers
Black
lead
Striped
lead
Left speaker
n
o
i
t
i
s
o
p
g
n
i
t
t
i
s
r
u
o
Y
Note: When you connect your own external left and right speakers you must mute the internal speakers by pressing in
the button marked on the rear of the TV.
4
Getting Started
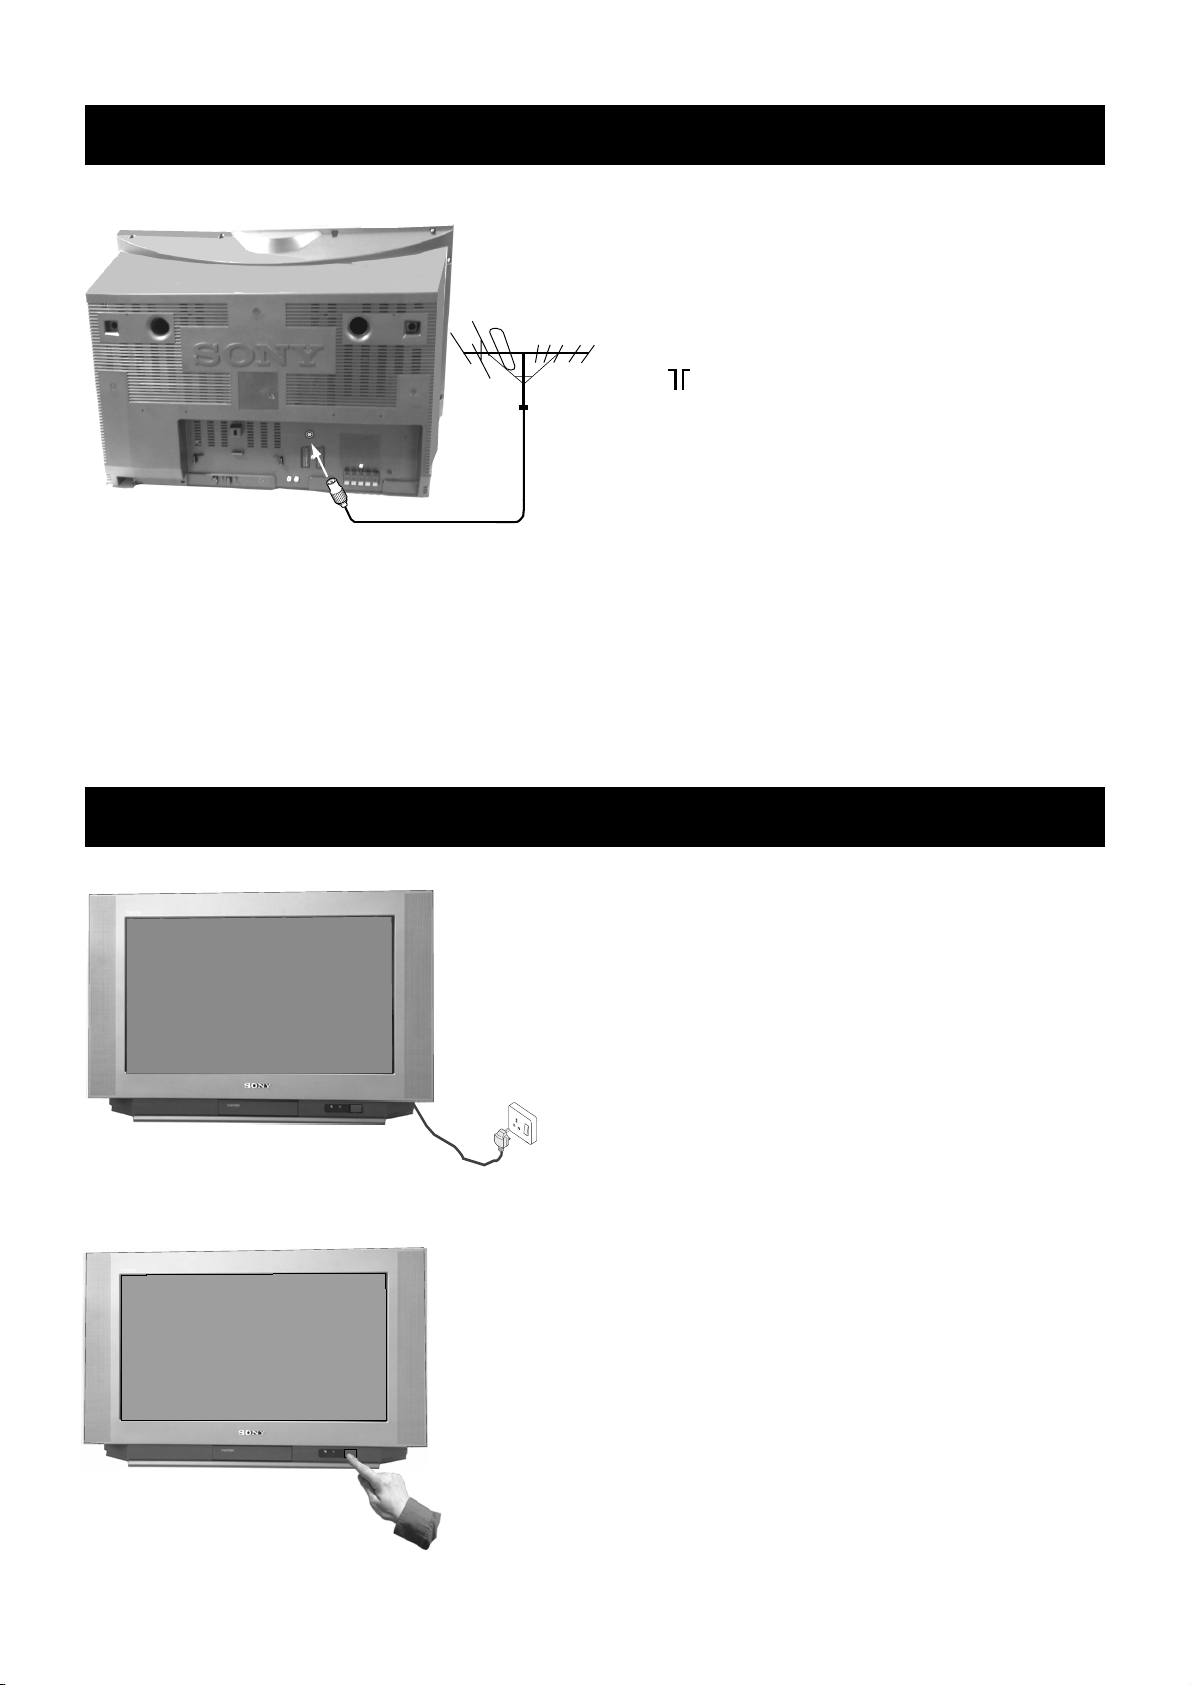
4. Connecting the aerial
Connect your existing aerial to the socket
marked on the rear of the TV.
5. Switching on the TV
Connect the TV plug to the mains socket
(220-240V AC, 50Hz) and switch socket
on.
Push in the on/off switch on the front of the TV.
5
Getting Started
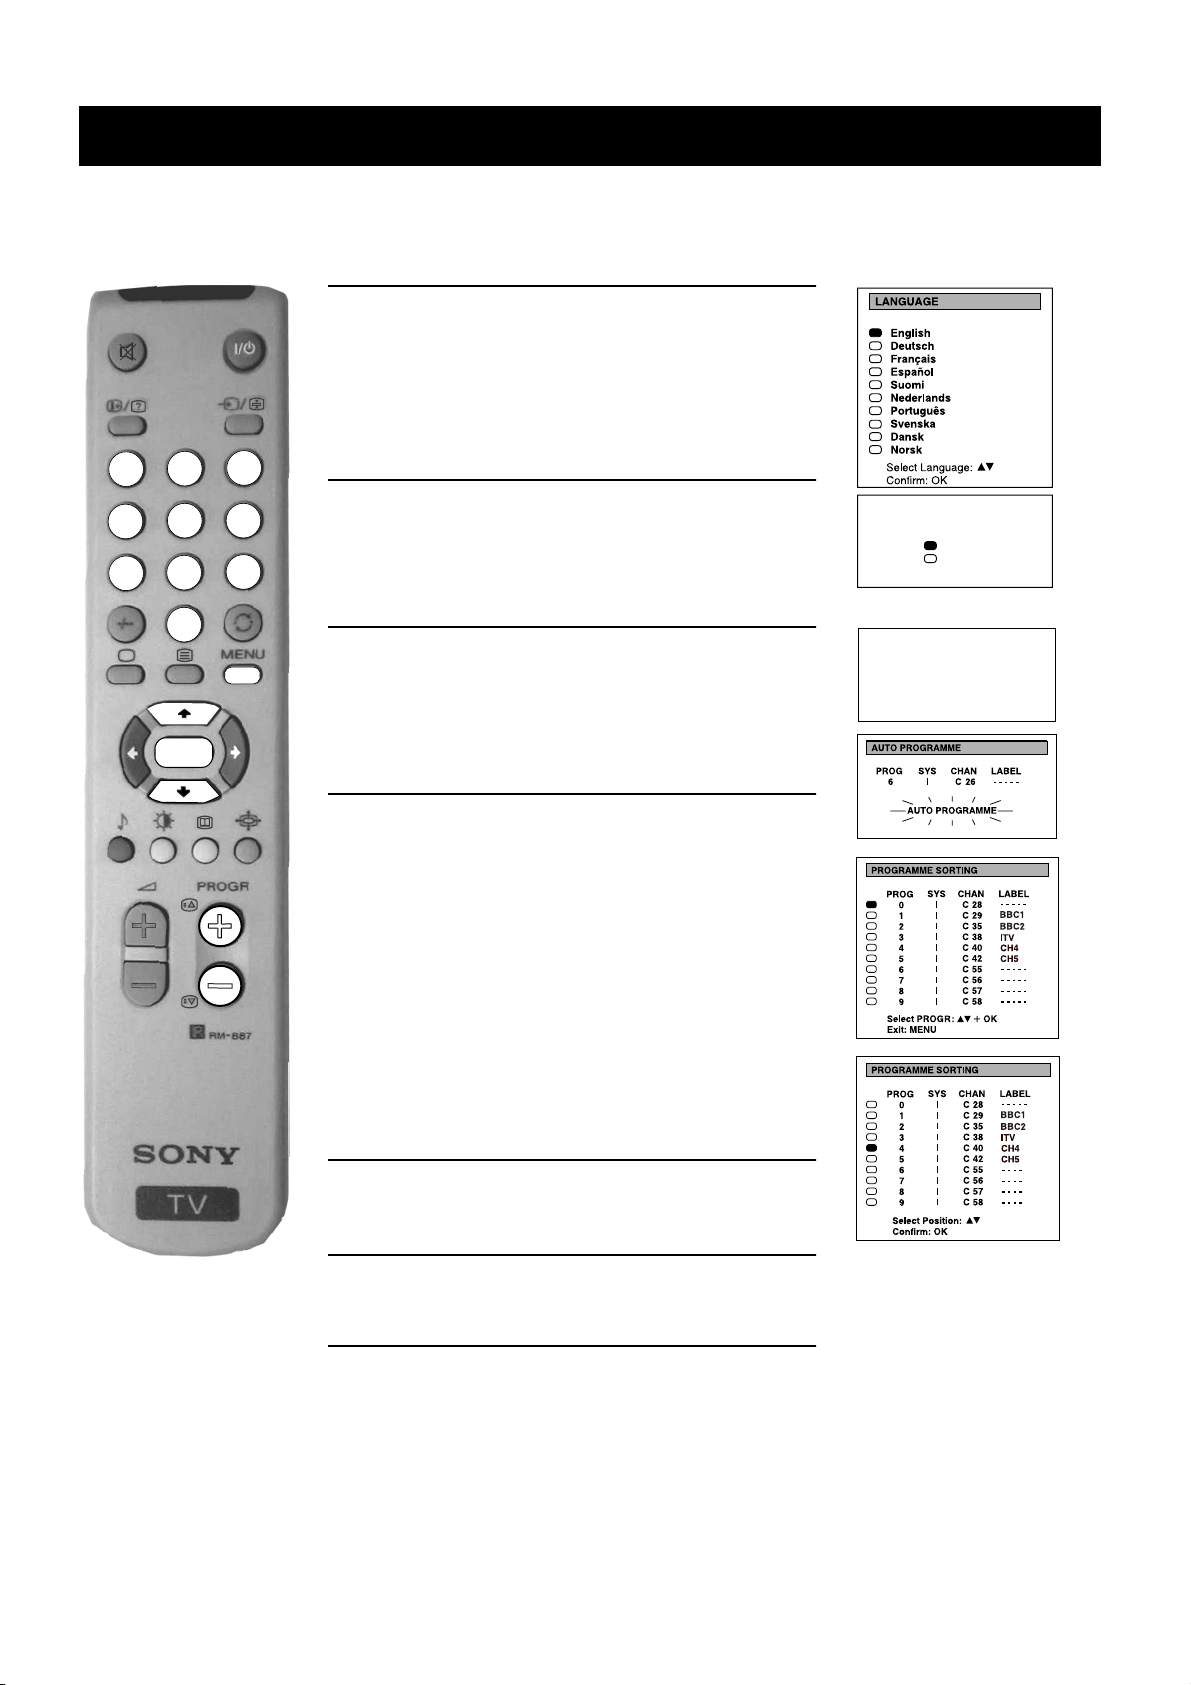
6. Automatically tuning the TV
When you first switch on the TV, the following sequence of menu screens appear on the TV enabling you to 1) choose a language
for the TV menu screens, 2) tune channels to the TV, 3) arrange the channels.
1. When switching on the TV for the first time, the
‘LANGUAGE’ menu appears automatically on the TV
screen enabling you to select in which language you wish
to read the TV menu screens. Press the
the remote control to select your chosen language then
press the OK button to confirm your selection.
3
2
1
.
5
4
8
7
6
9
2. The ‘automatic tuning’ menu appears on the TV screen in
your selected language. Press the
‘YES’ then press the OK button to confirm.
V or v buttons on
V or v buttons to select
Do you want to start
automatic tuning?
Yes
No
Confirm: OK
0
OK
3. Ensure the antenna is connected as instructed, then press
the OK button to confirm. The TV starts to automatically
search and store all available channels for you. Please be
patient and do not press any buttons.
4. When the TV has finished tuning in all available
channels, the ‘PROGRAMME SORTING’ menu appears
on the TV screen enabling you to change the order of the
.
.
channels on your TV.
If you do not wish to use this option, proceed to step 5.
If you wish to change the channel order, press the
buttons on your remote control to select the channel you
want to move, then press the OK button. Press the
buttons to select the new programme number position for
your selected channel then press the OK button to
confirm. The selected channel now moves to its new
programme position. Repeat this procedure if you wish to
sort the order of other channels on your TV.
5. Press the MENU button to remove the menu from the TV
screen.
V or v
V or v
Please confirm that
antenna is connected
Confirm: OK
6. Press the PROGR+/- or the numbered buttons on the
remote control to view the TV channels.
6
Overview
Overview of the TV set buttons
On/Off switch.
Press to switch TV on and off.
Video input button.
Press to select the input
signals from VCR etc.
Volume control buttons.
Press to increase(+)/decrease(-) volume.
Auto tune button.
Press to select the automatic
tuning function.
Programme Up or Down buttons.
Press to increase(+)/decrease(-) channels.
7
 Loading...