

Page 1
R
Projection TV
4-206-027-11(1)
Instruction Manual
Bedienungsanleitung
Mode d’emploi
Οδηγίες Χρήσης
Manuale d’Istruzioni
Gebruiksaanwijzing
Kullanwm Kwlavuzu
GB
DE
FR
GR
IT
NL
TR
KP-41PX1
© 2001 by Sony Corporation
Page 2
Projection TV
Thank you for choosing this Sony projection TV.
Before operating the projection TV, please read this manual thoroughly and retain
it for future reference.
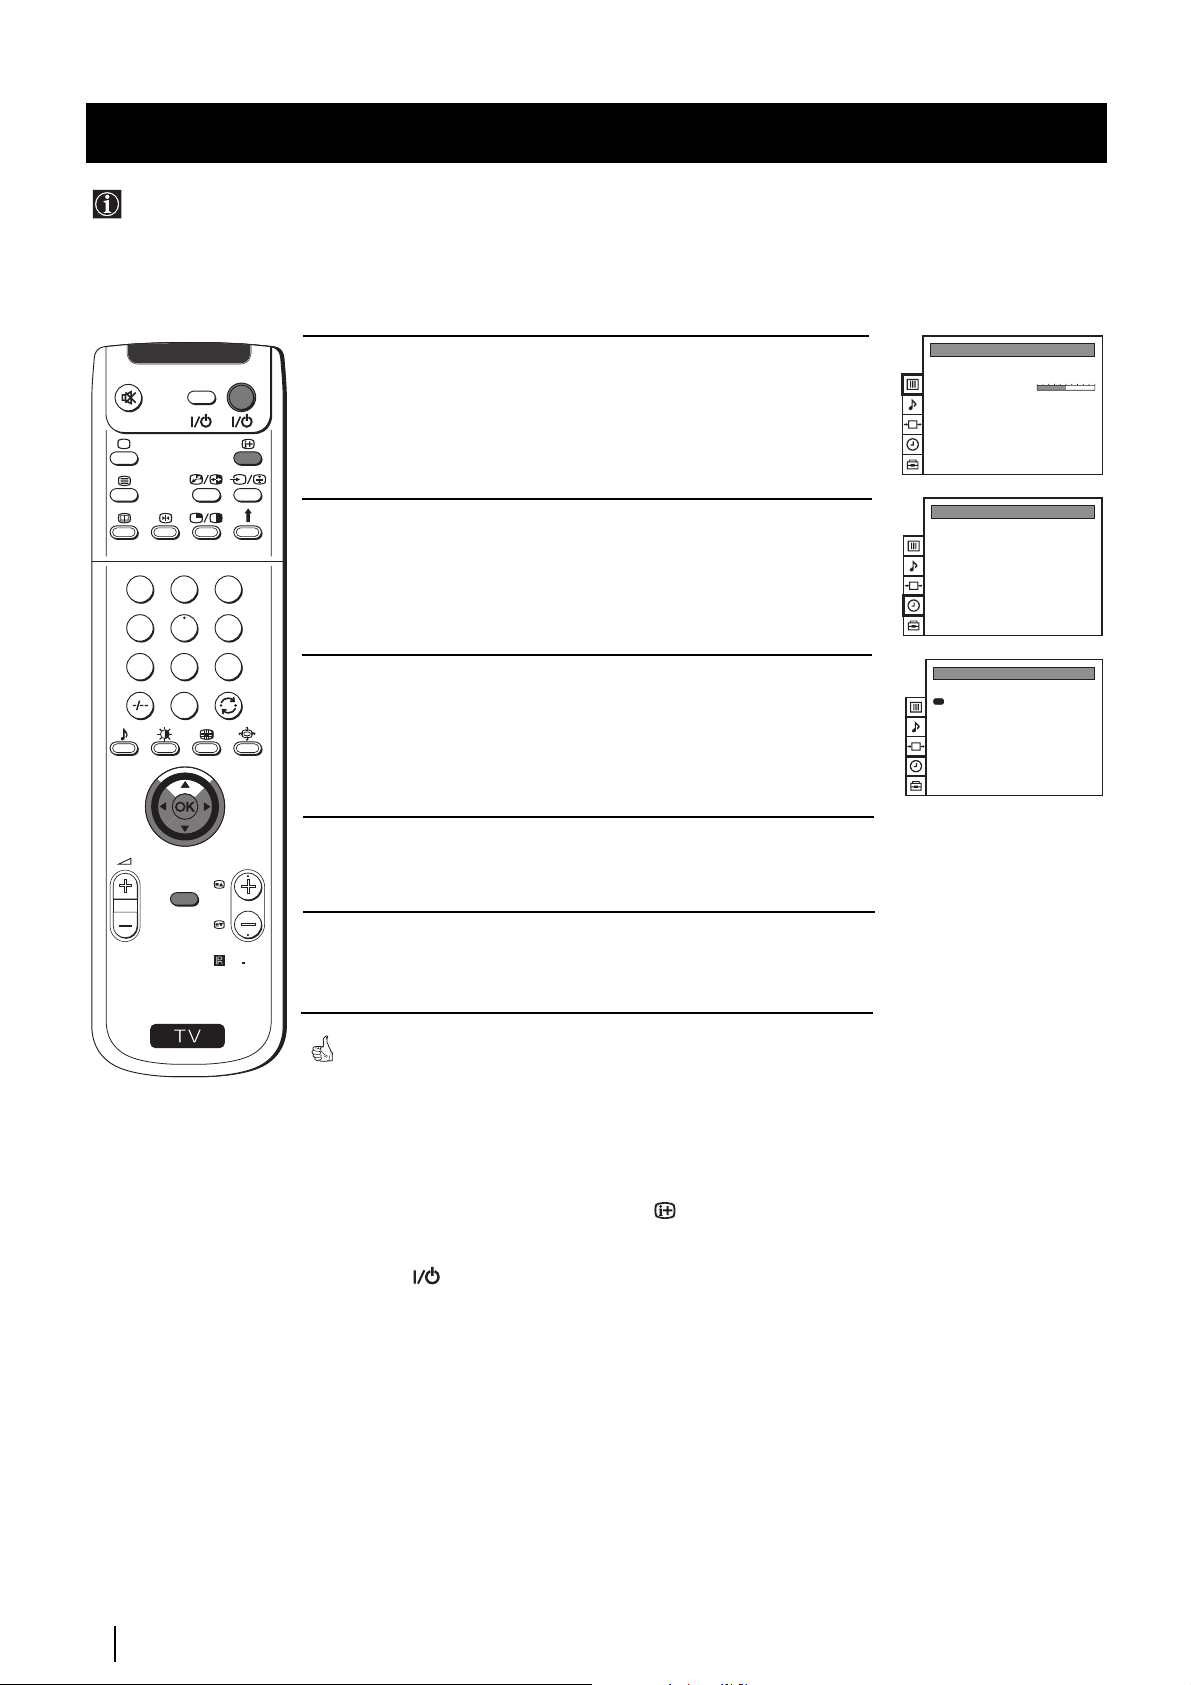
Reading and Understanding this Instruction Manual:
•
Use
Getting Started
with the basic functions.
•
Use
Advanced Operati
of the projection TV set.
•
Symbols used in the manual:
if you wish to install the projection TV set and to get familiar
if you wish to know more about the additional features
Instruction Manual
GB
• I
• Important information.
• Information on a feature.
•
1,2...
• Shaded buttons on the remote control show the buttons you have to press
• Informs you of the result of the instructions.
• The process continues on the next page to get final result.
nforms you of possible hazards.
Sequence of instructions.
MENU
K
to follow the sequence of instructions.
3
Page 3
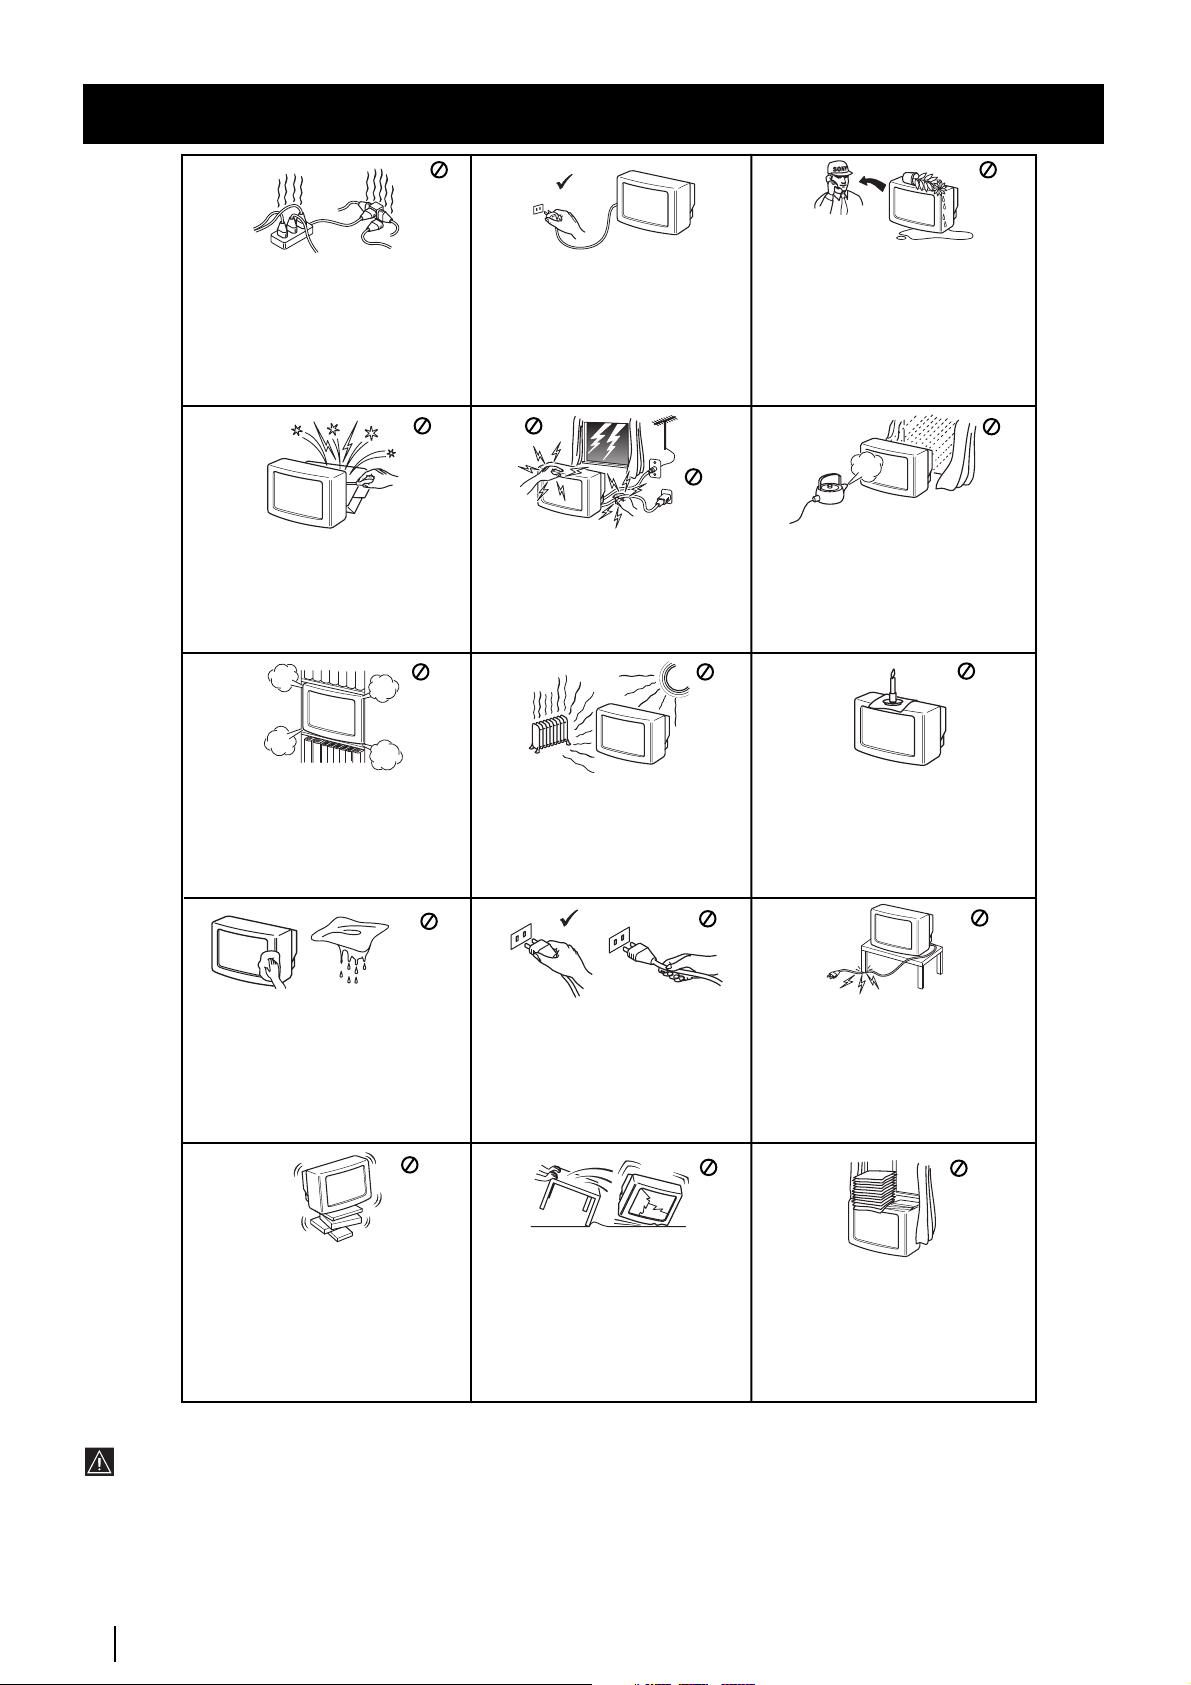
Safety Information
This set is to operate on a 220-240V
AC supply only. Take care not to
connect too many appliances to the
same power socket as this could
result in fire or electric shock.
Do not open the cabinet and the rear
cover of the TV. Refer to qualified
service personnel only.
Do not cover the
ventilation openings of the TV For
ventilation, leave a space of at least
10cm all around the set.
For environmental and safety
reasons, it is recommended that the
TV set is not left in standby mode
when not in use. Disconnect from
the mains.
For your own safety, do not touch
any part of the TV, power lead or
aerial lead during lightning storms.
Never place the TV in hot, humid or
excessively dusty places. Do not
install the TV where it may be
exposed to mechanical vibrations.
Never push objects of any kind into
the set as this could result in a fire or
electric shock. Never spill liquid of
any kind on the set. If any liquid or
solid object does fall through, do not
operate the TV. Have it checked
immediately by qualified personnel.
To prevent fire or shock hazard,
do not expose the TV to rain or
moisture.
To prevent fire, keep inflammable
objects or naked lights (eg candles)
away from the TV.
Clean the TV with a soft, lightly
dampened cloth. Do not use
benzine, thinner or any other
chemicals to clean the TV. Do not
scratch the TV screen. As a safety
precaution, unplug the TV before
cleaning it.
Place the TV on a secure stable
stand. Do not allow children to
climb on to it. Do not place the TV
on its side or face up.
Pull out the power lead by the
plug. Do not pull on the power
lead itself.
Unplug the power lead before
moving the TV. Avoid uneven
surfaces, quick steps or excessive
force. If the set has been dropped or
damaged, have it checked
immediately by qualified service
personnel.
Take care not to place heavy
objects on the power lead as this
could result in damage.
We recommend you wind any
excess lead around the holders
provided on the rear of the TV.
Do not cover the ventilation
openings of the TV with items
such as curtains or newspapers
etc.
Additional Safety Information
•After transporting the projection TV directly from a cold to a warm location, or if the room temperature has changed suddenly,
pictures may be blurred or show poor colour over portions of the picture. This is because moisture has condensed on the mirrors
or lenses inside the projection TV. Let the moisture evaporate before using the projection TV.
•To obtain a clear picture, do not expose the screen to direct illumination or direct sunlight. If possible, use spot lighting directed
down from the ceiling.
•Displaying a still picture for long periods of time, for instance, when operating a video game or personal computer and viewing a
programme in 16:9 mode, may damage the picture tube. To avoid this, keep the picture contrast level low.
•Avoid touching the screen, and take care not to scratch the surface with hard objects.
4
Safety Information
Page 4

Table of Content
Table of Contents
Keys to read this Instruction Manual ............................................................................................3
For your Safety..................................................................................................................................4
Getting Started
Overview
Checking the Accessories Supplied...................................................................................6
Overview of TV Buttons......................................................................................................6
Overview of Remote Control Buttons...............................................................................7
Installation
Inserting Batteries into the Remote Control.....................................................................8
Connecting the Aerial and VCR.........................................................................................8
Switching on the projection TV..........................................................................................8
First Time Operation
S
electing Language...............................................................................................................9
Automatically Tuning the TV using the Remote Control ............................................10
Changing the Programme Order of the TV channel.....................................................11
Adjusting colour Registration (Convergence) ...............................................................12
On Screen display Menus Guide .....................................................................................13
GB
Advanced Operation
Advanced Presetting
Automatically Tuning the TV ..........................................................................................14
Manually Tuning the TV...................................................................................................15
Using the “Further Programme Preset” function..........................................................16
Locking Programmes.........................................................................................................17
Skipping Programme positions........................................................................................18
Labelling a channel ............................................................................................................19
Advanced TV Operation
Adjusting the Picture.........................................................................................................20
Changing the screen mode ...............................................................................................21
Adjusting the Sound ..........................................................................................................22
Using the Sleep Timer........................................................................................................24
Teletext
Viewing Teletext.................................................................................................................25
Optional Connections
Connecting Optional Equipment.....................................................................................26
Using Optional Equipment...............................................................................................27
Smartlink .............................................................................................................................28
Remote Control of other Sony Equipment .....................................................................28
Selecting the output source for the Euro AV connectors .............................................29
Using the “AV Label Preset” function ............................................................................30
Additional Information
Optimum Viewing Area....................................................................................................31
Specifications ......................................................................................................................32
Troubleshooting .................................................................................................................33
Table of Contents
5
Page 5
Getting Started - Overview
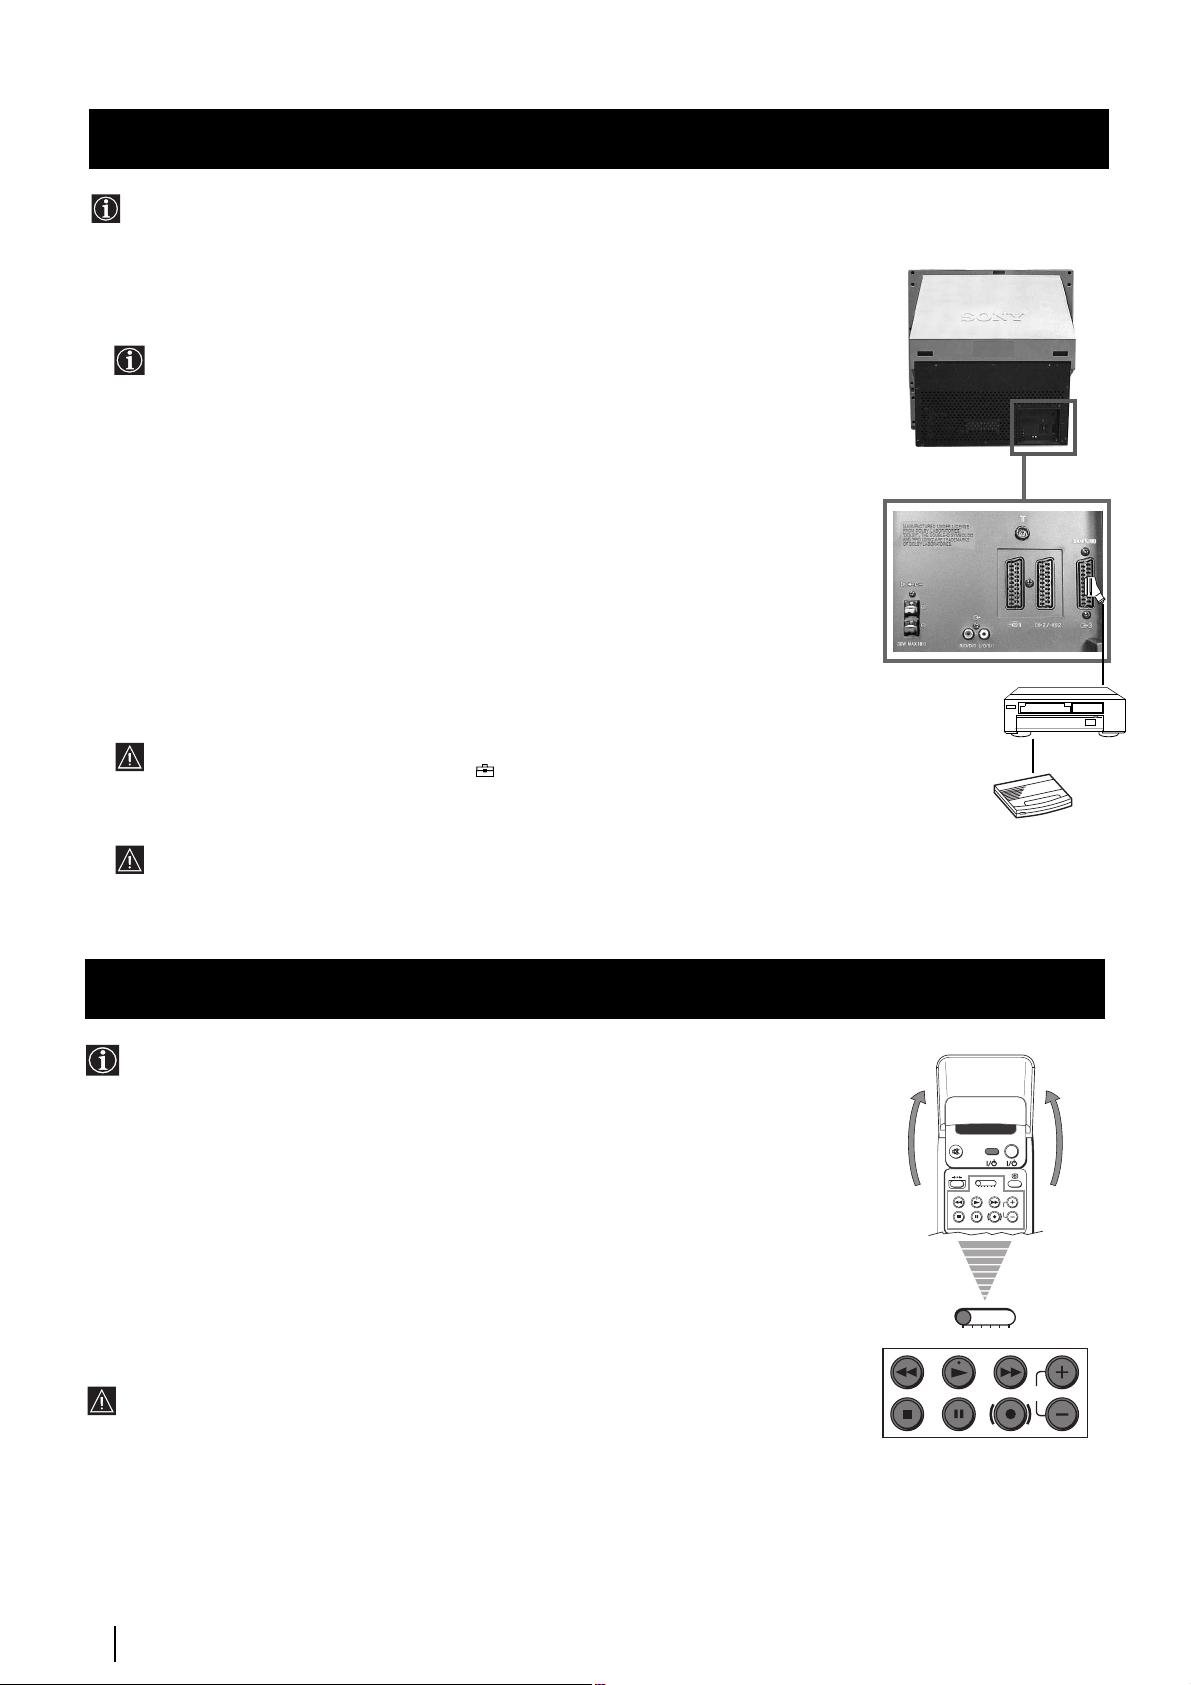
Checking the Accessories Supplied
VIDEO TV
Checking the Accessories Supplied
1
2
3
4
5
6
7
8
9
0
PROGR
MENU
RM
892
S
One Remote Control
(RM-892)
Two batteries (R6 type)
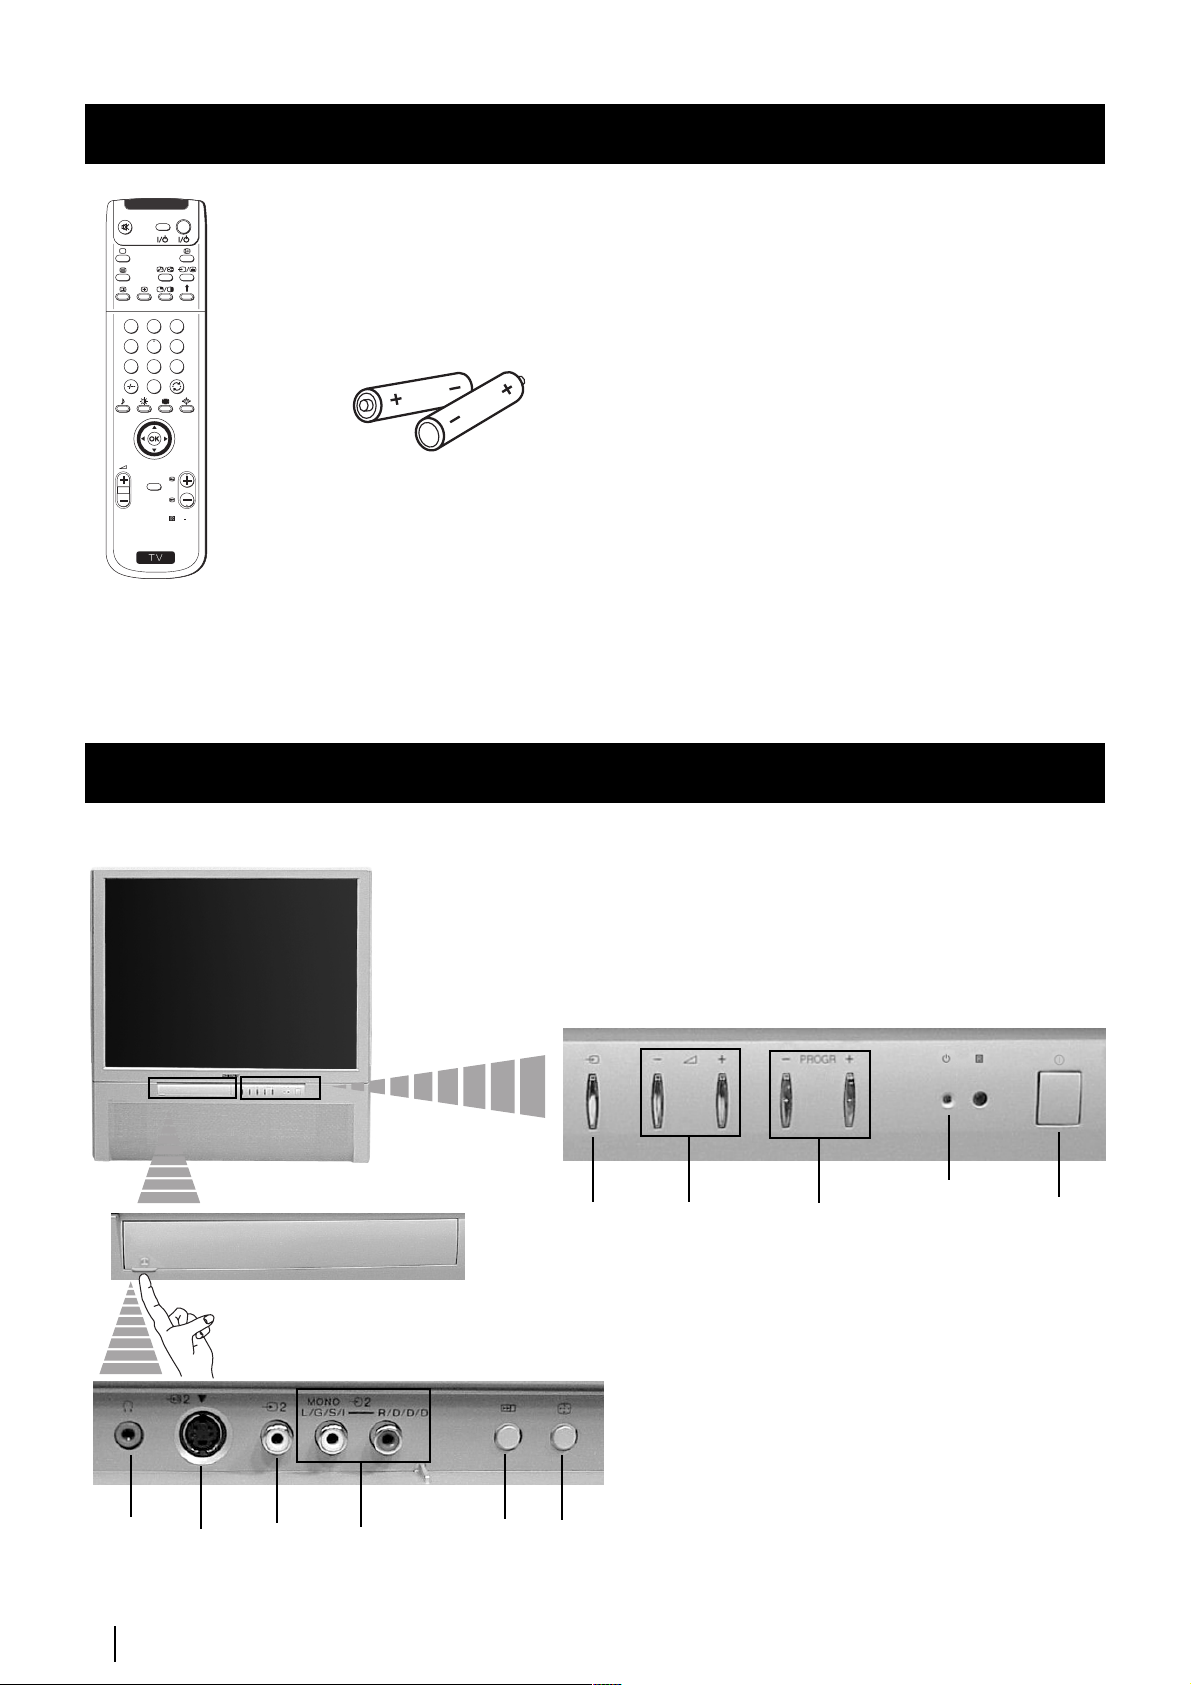
Overview of Projection TV Buttons
Selecting
input
source
Push up the flap on the
front of the projection TV
to reveal the front panel.
Volume
control
buttons
Programme
up or down
buttons
(selects TV
channels)
Standby
indicator
On/Off
Switch
Headphone
jack
S Video
Input
jack
6
Getting Started - Push up
Video
Input
jack
Audio
Input
jacks
Auto
Start up
button
Auto
Convergence
button
Page 6
Getting Started - Overview
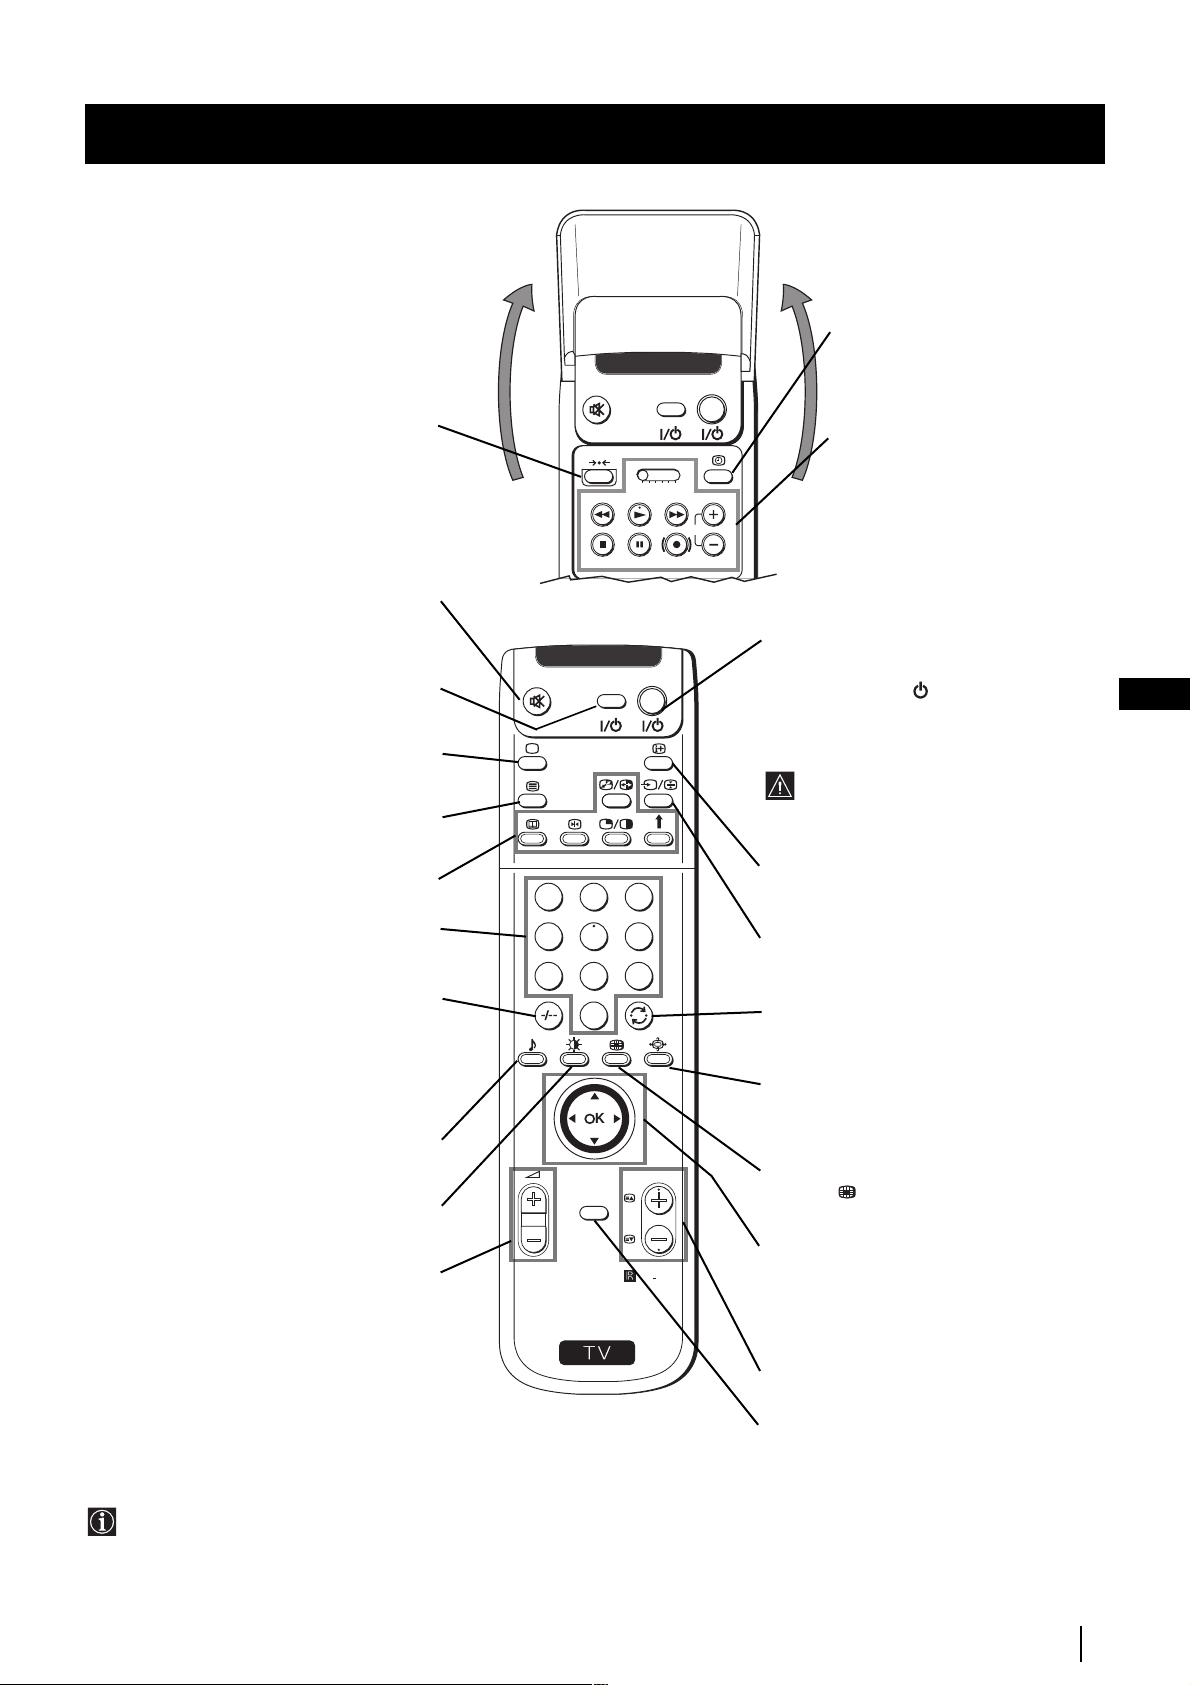
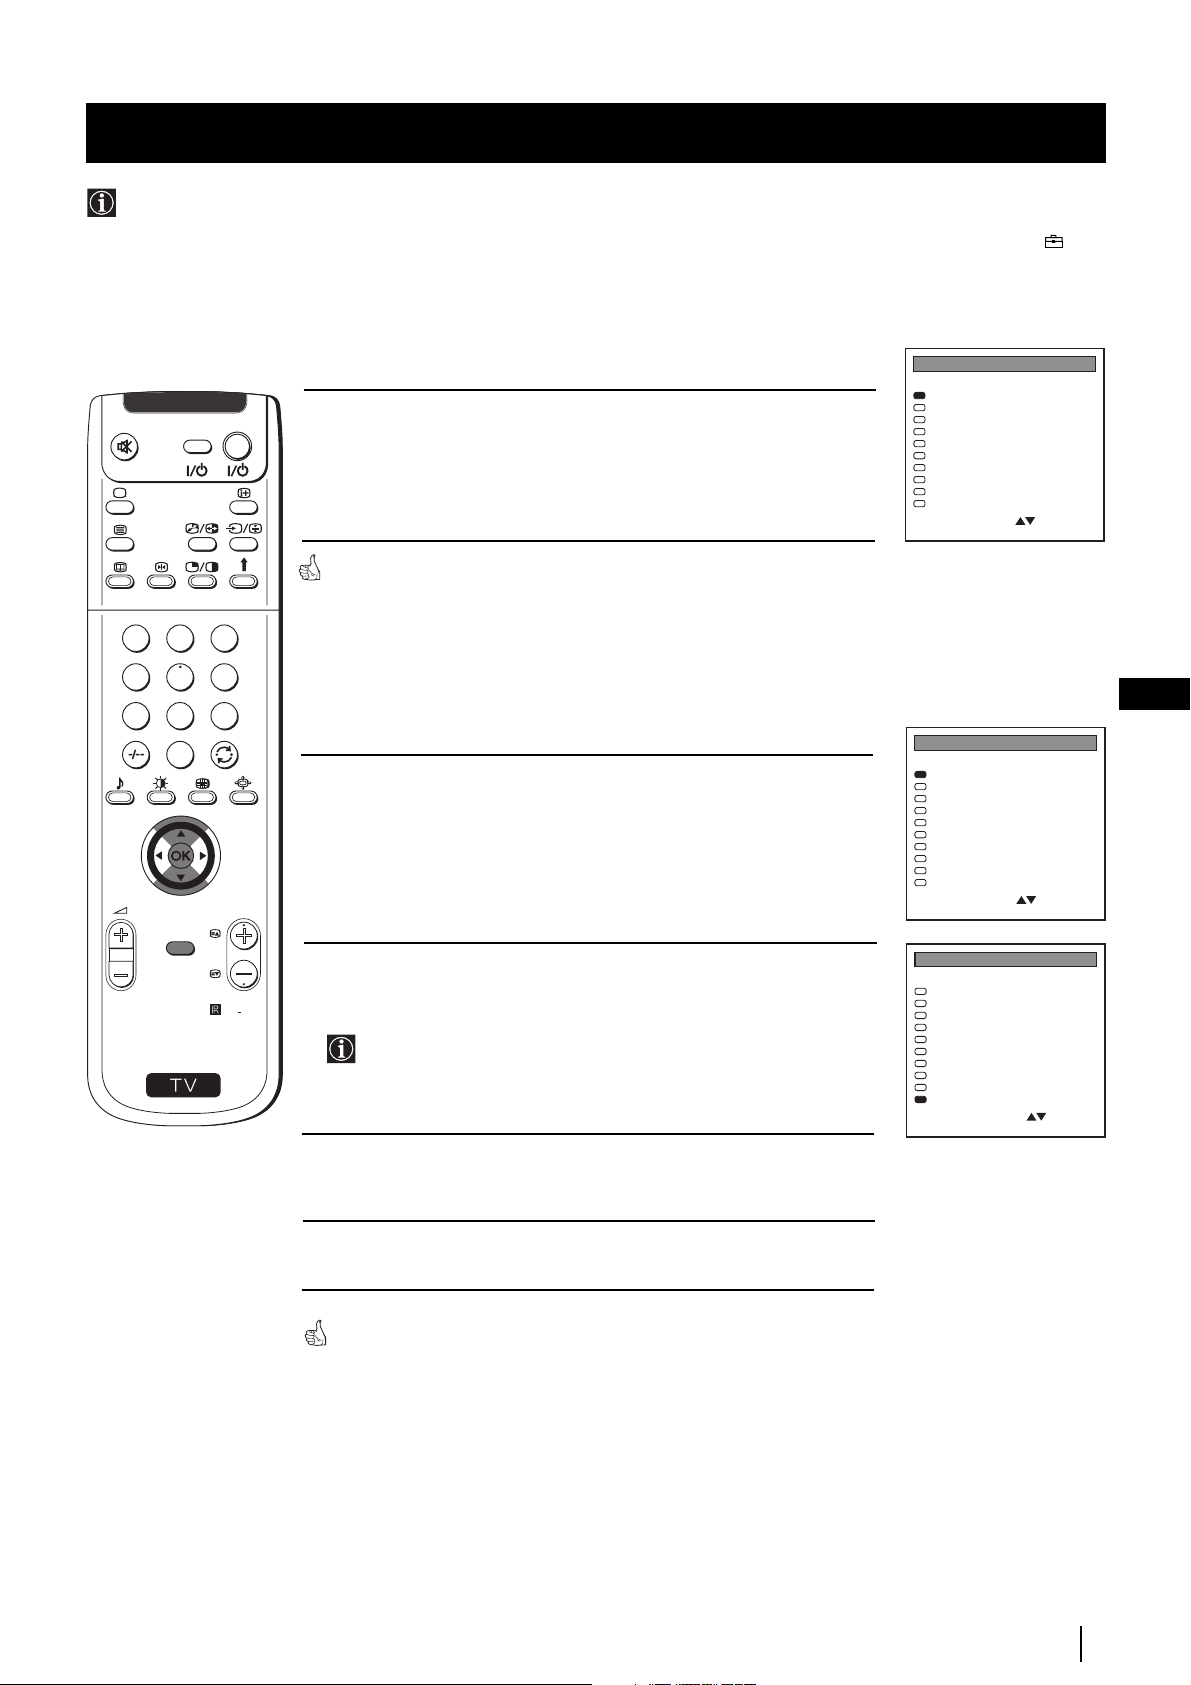
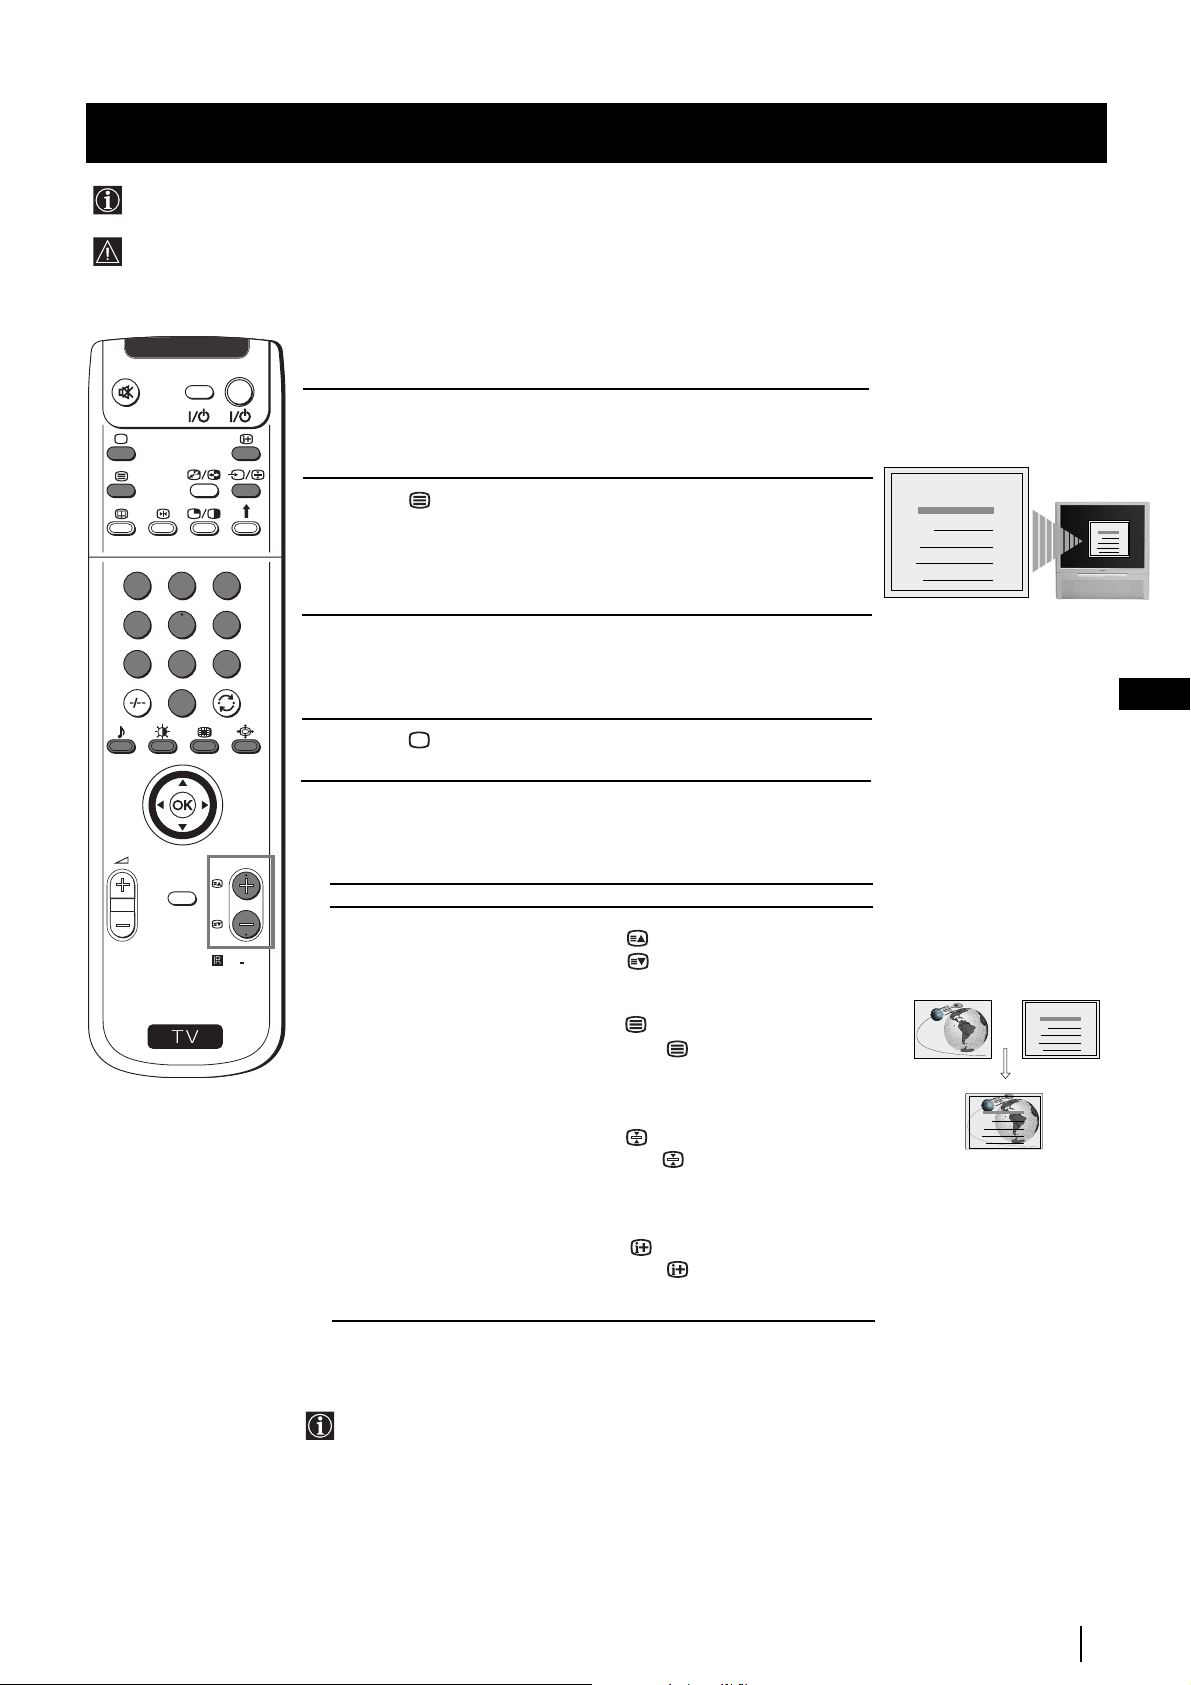
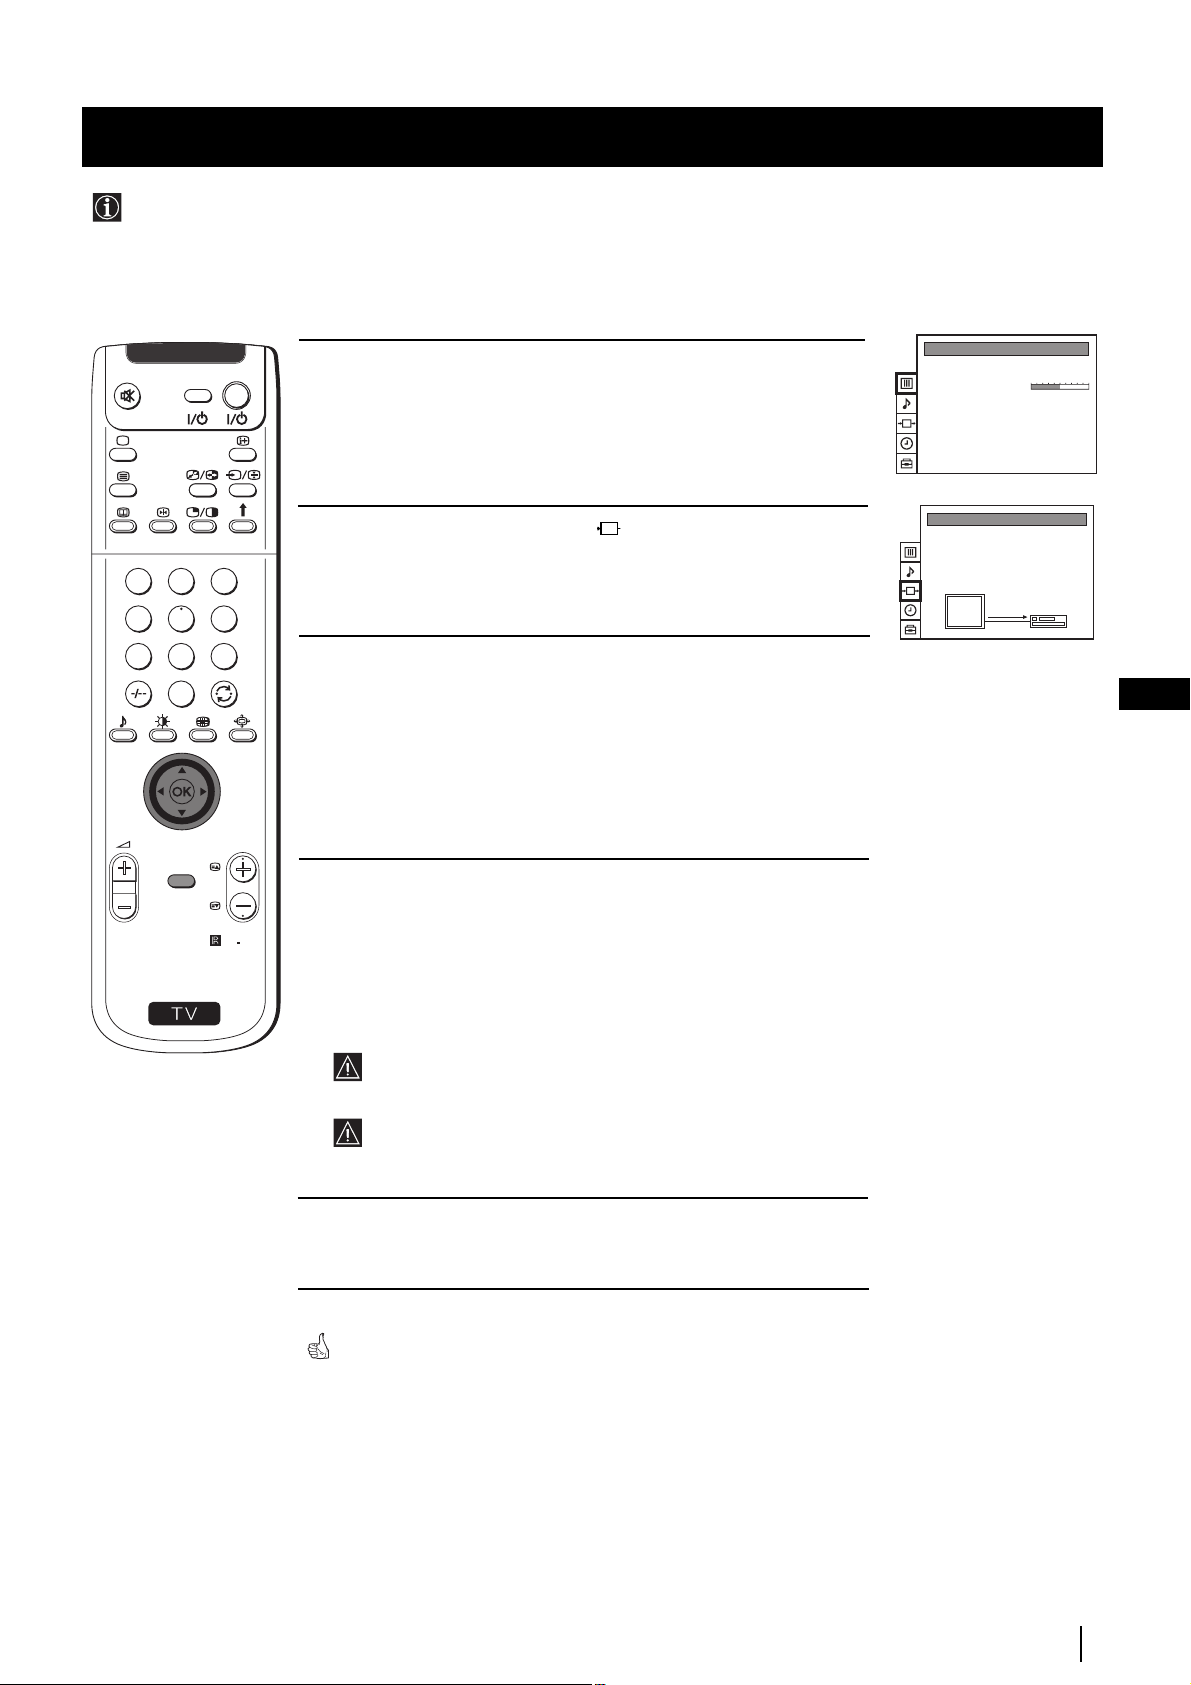
Overview of Remote Control Buttons
Checking the Accessories Supplied
VIDEO TV
Displaying the time
Press to switch the time on or off
(available only when teletext is
broadcast).
This button does not work on this set.
Muting the Sound
Press to mute TV sound.
Press again to restore the sound.
VCR on/off
Press to switch your VCR on or off.
Selecting TV mode
Press to switch off Teletext or video input.
Selecting Teletext
Press to switch on Teletext.
These buttons do not work on this set.
Selecting channels
Press to select channels.
For double-digit programme numbers, e.g.
23, press -/-- first, then the buttons 2 and 3.
If you enter an incorrect first digit, this
should be corrected by entering another digit
(0-9) and then selecting -/-- button again to
enter the programme number of your choice.
Selecting Sound mode
Press repeatedly to change the sound mode.
Selecting Picture mode
Press repeatedly to change the picture mode.
Adjusting TV Volume
Press to adjust the volume of the TV.
1
4
7
S
VIDEO TV
2
5
8
0
K
MENU
VTR 1 2 3 4 DVD
3
6
9
PROGR
RM
892
VCR operation
For more details, please refer to the
section "Remote Control of other
Sony Equipment".
CH
To Temporarily Switch Off projection
TV
Press to temporarily switch off TV (the
standby indicator
red). Press again to switch on TV from
on the set lights up in
GB
standby mode.
To save energy we recommend switching off
completely when TV is not in use.
After 15-30 minutes without a signal
and without any button being pressed,
the set switches automatically into
standby mode.
Displaying On Screen Information
Press to display all on-screen indications.
Press again to cancel.
Selecting Input source
Press repeatedly until the desired input
symbol of the source appears on the screen.
Back to the channel last watched
Press to watch the last channel selected
(watched for at least 5 seconds).
Selecting Screen format
Press repeteadly to change the format of
the screen (for more details, please refer to
the section “Changing the Screen format”).
This button only works in Teletext mode.
associated to this button does not
Function
work with this set.
Joystick for menu selection
4
Scroll Up
$
Scroll Down
Z
Previous menu or selection
z
Next menu or selection
OK
Confirms your selection
Besides TV functions, all coloured buttons as well as green
symbols are also used for Teletext operation. For more details,
please refer to the "Teletext" section of this instruction manual.
Selecting channels
Press to select the next or previous channel.
Displaying the menu system
Press to display the menu on the screen.
Press again to remove the menu display
from the screen.
Getting Started - Overview
7
Page 7
Getting Started - Installation
Inserting Batteries into the Remote Control
Make sure you insert the batteries using the correct polarities.
Always remember to dispose of used batteries in an environmental friendly way.
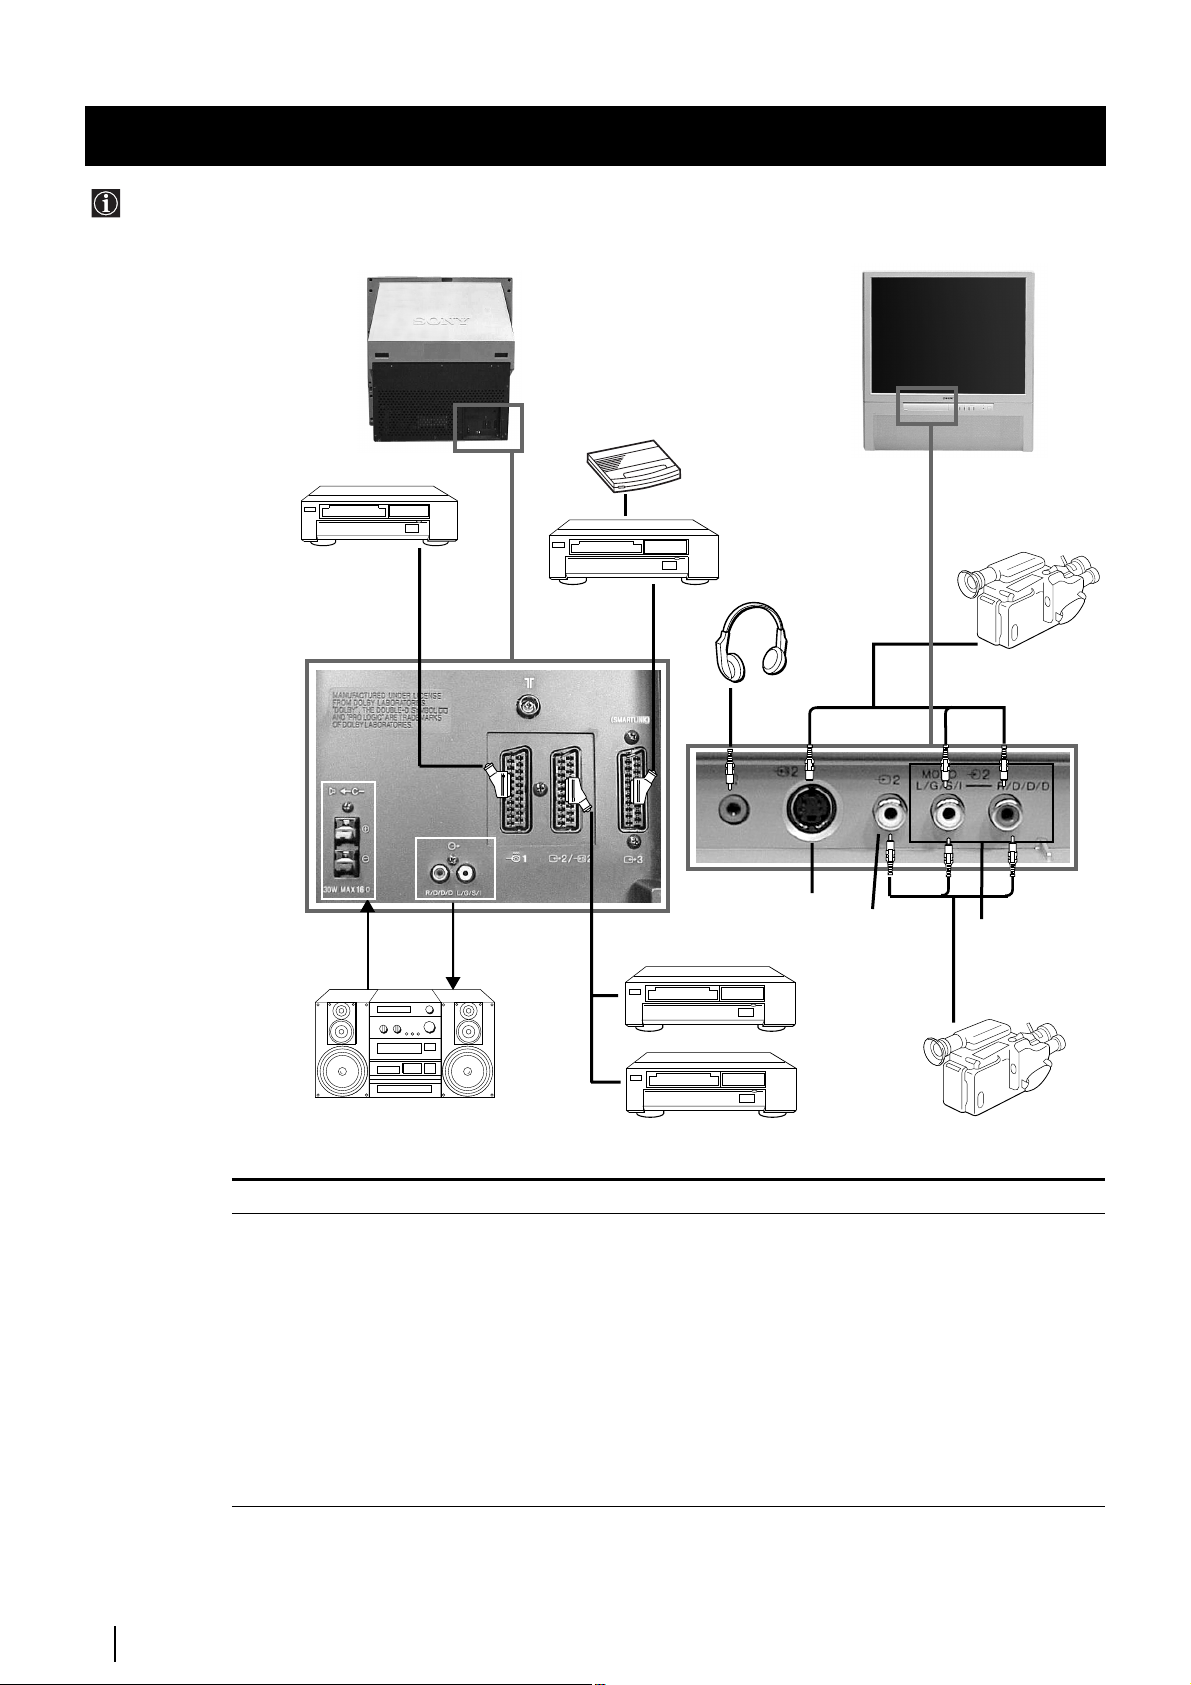
Connecting the Aerial and VCR
VCR
or
The Scart lead is optional.
If you use this optional connection it can improve picture and sound quality when using a VCR.
If you do not use a SCART lead, after automatically tuning the projection TV refer to the “Manually Tuning the TV” section
of this instruction manual, to the tune in the set to the ouput of you VCR. Also refer to your VCR instruction manual to
find out how to find the output channel of your VCR.
OUT IN
Switching on the projection TV
Push in the
switch on the front of the
projection TV.
Connect the projection
TV plug to the
mains socket (220240V AC, 50Hz).
8
Getting Started - Installation
On/Off
Page 8
Getting Started - First Time Operation
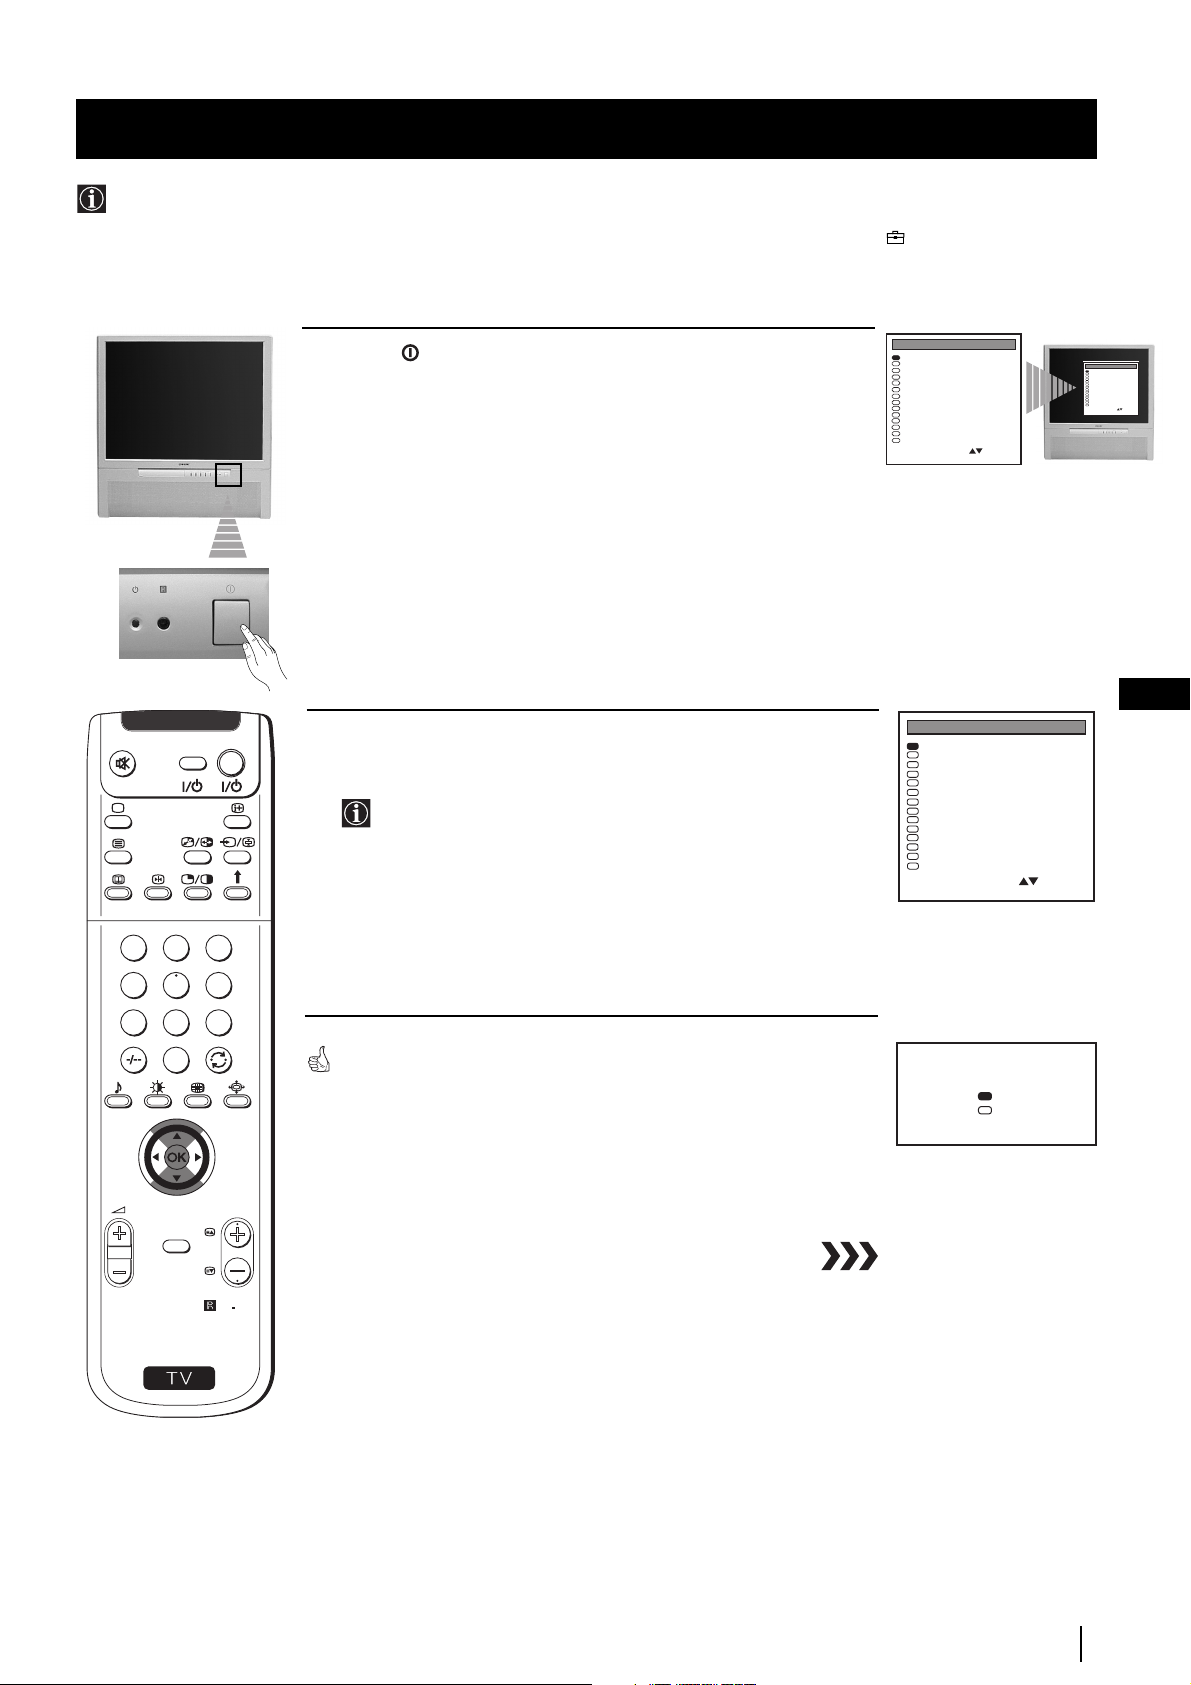
Selecting Language
Use this function to change the language of the menu screens.
The first time that you switch on your projection TV, the Language menu appears automatically.
However, if you need to change the language menu afterwards, select the menu Language in the (PRESET) menu and
proceed in the same way as described below.
VIDEO TV
Press the
1
on/off
button on your projection TV set to switch on your
TV. The first time you press the on/off button on your TV set, the
language menu displays automatically on the TV screen.
Push the joystick on the remote control $ or 4 to select the language,
2
then press OK to confirm your selection.
If you select “French” language, the “Auto Tuning” process
will start searching TV channels on “L” TV system (for France)
and later B/G.
LANGUAGE
English
Deutsch
Français
Español
Suomi
Nederlands
Português
Suenska
Dansk
Norsk
Italiano
Česki
Magyar
Eλλnvιkά
Select Language:
Confirm: OK
LANGUAGE
English
Deutsch
Français
Español
Suomi
Nederlands
Português
Suenska
Dansk
Norsk
Italiano
Česki
Magyar
Eλλnvιkά
Select Language:
Confirm: OK
LANGUAGE
English
Deutsch
Français
Español
Suomi
Nederlands
Português
Suenska
Dansk
Norsk
Italiano
Česki
Magyar
Eλλnvιkά
Select Language:
Confirm: OK
GB
1
4
7
S
MENU
2
3
5
6
8
9
0
The Auto Tuning menu appears on the projection TV screen in the selected
language.
Do you want to start
automatic tuning?
Yes
No
Confirm: OK
PROGR
RM
892
Getting Started - First Time Operation
9
Page 9
Getting Started - First Time Operation
G
O
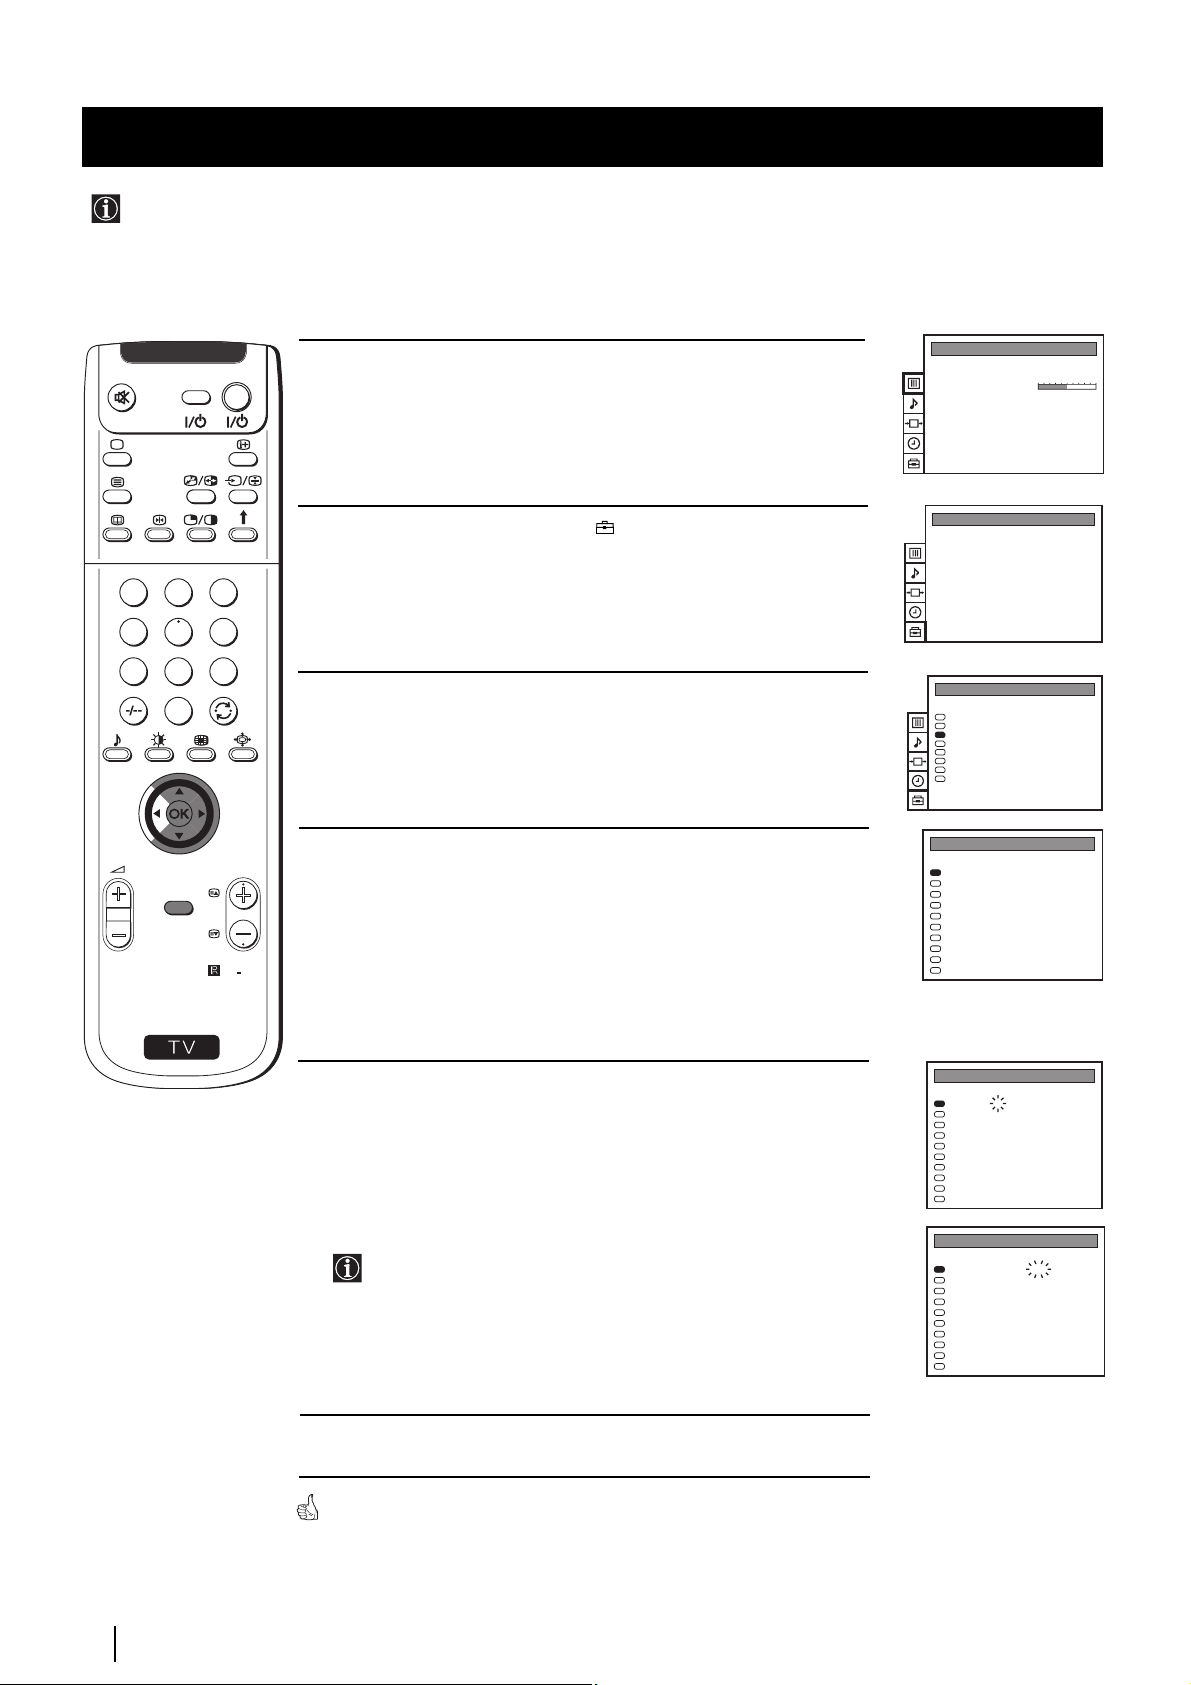
Automatically Tuning the TV using the Remote Control
You need to tune the set to receive channels (TV Broadcast). By following the instructions below, this projection TV
automatically searches and stores all available channels for you.
After having selected the language, a new menu appears automatically on the projection TV screen asking you to
automatically tune the TV. However, if you need to change or repeat the tuning afterwards (e.g. when you move house), select
the menu Auto Programme in the (PRESET) menu and proceed in the same way as described below or, please refer to the
section "Automatically Tuning the TV" of this instruction manual.
1
4
7
S
VIDEO TV
2
5
8
0
MENU
3
6
9
RM
PROGR
892
Press the
1
OK
button on the remote control to select
YES
. A new menu
appears automatically on the screen asking you to check that the
antenna is connected.
Confirm that the antenna is connected and then press the OK button.
2
The automatic tuning starts and the message "AUTO
PROGRAMME" flashes on the screen.
This procedure could take some minutes. Please, be patient and
do not press any button, otherwise the automatic tuning will
not be completed.
When the automatic tuning is finished, the Programme Sorting menu
appears on the screen.
Notes:
• To stop the automatic tuning, press the MENU button.
• If you stop the automatic tuning by pressing the MENU
button, the Programme Sorting menu does not appear
automatically on the screen.
Do you want to start
automatic tuning?
Yes
No
Confirm: OK
Please confirm that
antenna is connected
Confirm: OK
AUTO PROGRAMME
PROG
SYS
1
PROGRAMME SORTING
PROG SYS CHAN LABEL
0
1
2
3
4
5
6
7
8
9
Select PROG: + OK
Exit: MENU
CH
B/G
C 26
AUTO PROGRAMME
B/G
C 28
B/G
C 40
B/G
C 41
B/G
C 31
B/G
C 34
B/G
C 27
B/G
C 47
B/G
C 44
B/G
C 23
B/G
C 35
LABEL
- - - - -
BBC-W
MV-CH
TVE-1
TVE-2
ANT-3
TELE 5
C PLUS
- - - - -
- - - - CNN -
10
Getting Started - First Time Operation
Page 10
Getting Started - First Time Operation
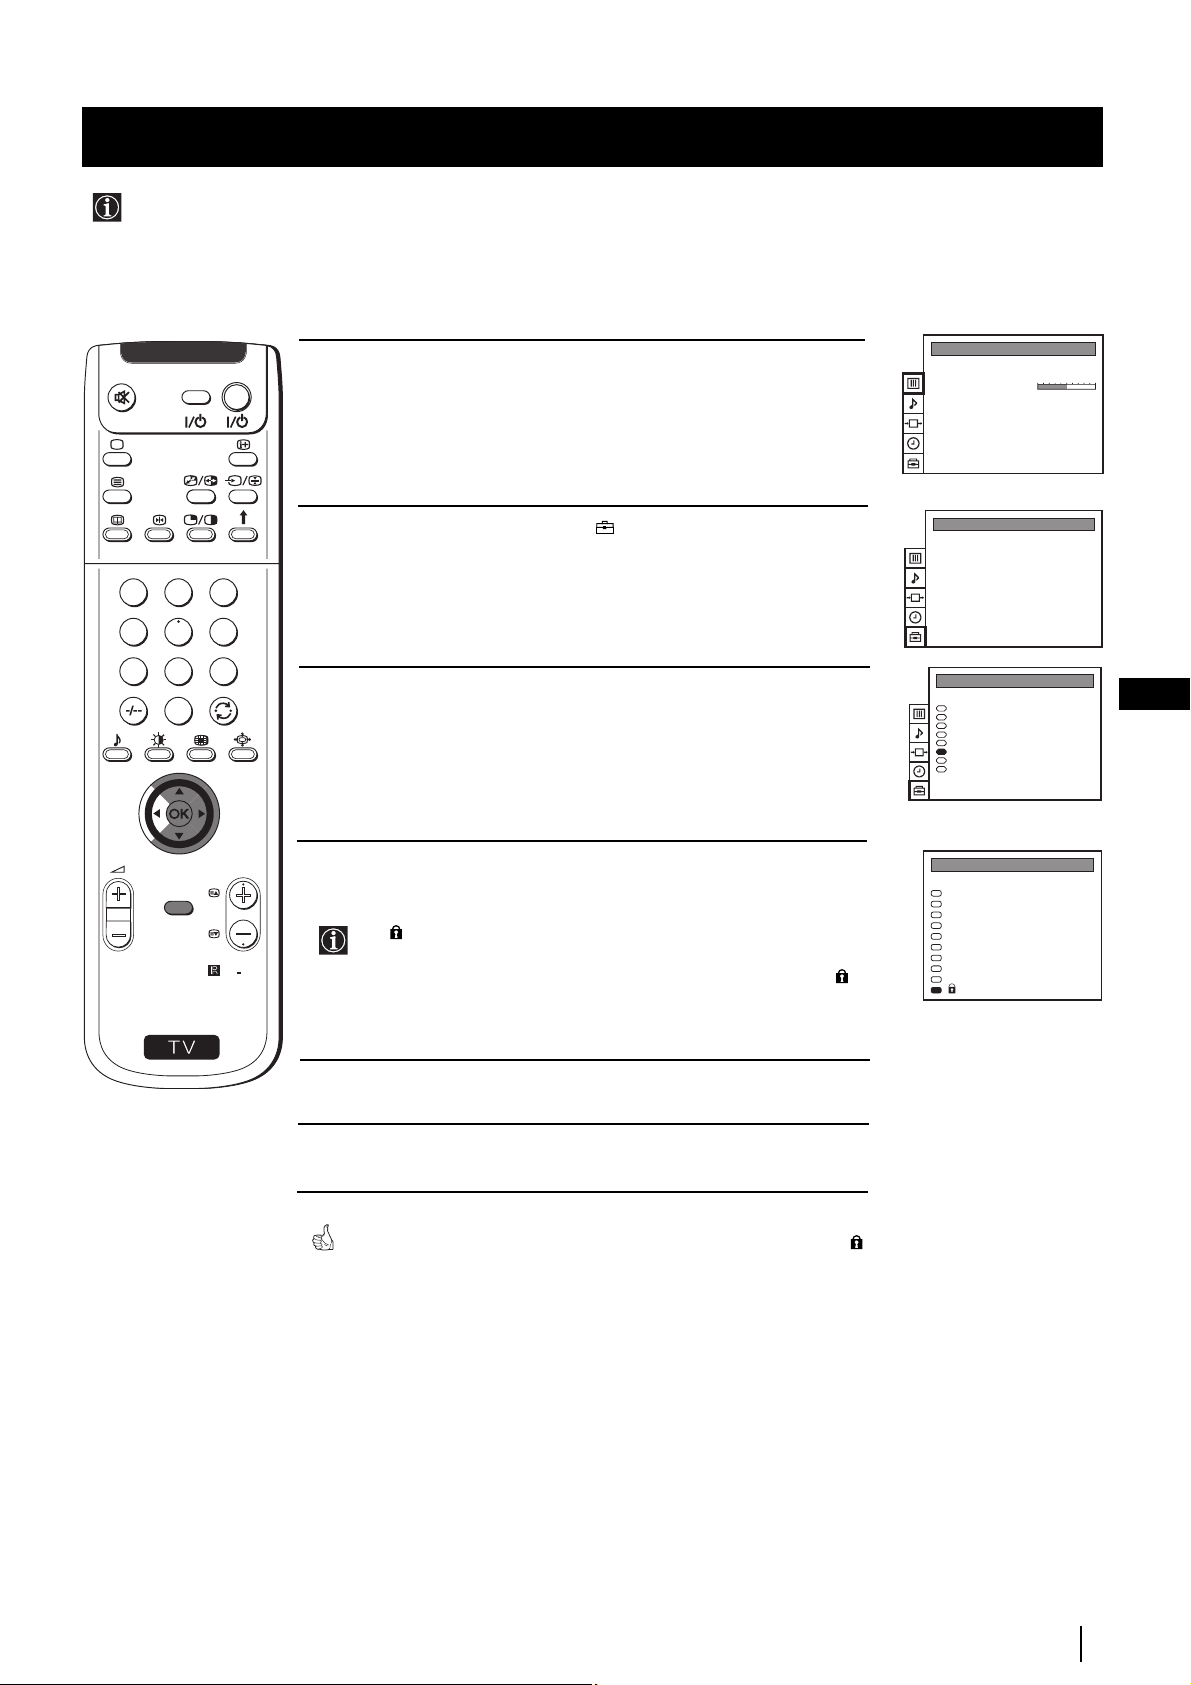
Changing the Programme Order of the TV channels
After all available channels (TV Broadcast) are captioned and stored, a new menu appears automatically on the screen to
change the order in which the channels appear on the screen.
However, if you wish to rearrange the order of the channels afterwards, select the menu Programme Sorting in the
(PRESET) menu and proceed in the same way as described in the b) section of this chapter.
1
4
7
S
VIDEO TV
2
5
8
0
MENU
3
6
9
RM
PROGR
892
a) If you do not wish to change the channel order:
1
Press the MENU button on the remote control to exit and return to the
normal TV screen.
When the automatic tuning is finished, the Programme Sorting menu
appears on the screen.
b) If you wish to change the channel order:
1 Push the joystick on the remote control to $ or 4 to select the
programme number with the channel (TV Broadcast) you wish to
rearrange, then press OK.
2 Push the joystick to $ or 4 to select the new programme number
position for your selected channel (TV Broadcast), then press OK.
The selected channel now moves to its new programme position
and the other channels move accordingly.
PROGRAMME SORTING
PROG SYS CHAN LABEL
B/G
0
1
2
3
4
5
6
7
8
9
Select PROG: + OK
Exit: MENU
PROGRAMME SORTING
PROG SYS CHAN LABEL
0
1
2
3
4
5
6
7
8
9
Select PROG: + OK
Exit: MENU
PROGRAMME SORTING
0
1
2
3
4
5
6
7
8
9
Select Position:
Confirm: OK
B/G
B/G
B/G
B/G
B/G
B/G
B/G
B/G
B/G
B/G
B/G
B/G
B/G
B/G
B/G
B/G
B/G
B/G
B/G
SYS CHAN LABELPROG
B/G
B/G
B/G
B/G
B/G
B/G
B/G
B/G
B/G
B/G
C 28
C 40
C 41
C 31
C 34
C 27
C 47
C 44
C 23
C 35
C 28
C 40
C 41
C 31
C 34
C 27
C 47
C 44
C 23
C 35
C 40
C 41
C 31
C 34
C 27
C 47
C 44
C 23
C 35
C 28
BBC-W
MV-CH
TVE-1
TVE-2
ANT-3
TELE 5
C PLUS
- - - - -
- - - - CNN -
BBC-W
MV-CH
TVE-1
TVE-2
ANT-3
TELE 5
C PLUS
- - - - -
- - - - CNN -
MV-CH
TVE-1
TVE-2
ANT-3
TELE 5
C PLUS
- - - - -
- - - - CNN BBC-W
GB
3 Repeat steps 1 and 2 if you wish to change the order of the other
channels.
4 Press the MENU button to exit and return to the normal TV screen.
Your projection TV is now ready for use.
Getting Started - First Time Operation
11
Page 11
Getting Started - First Time Operation
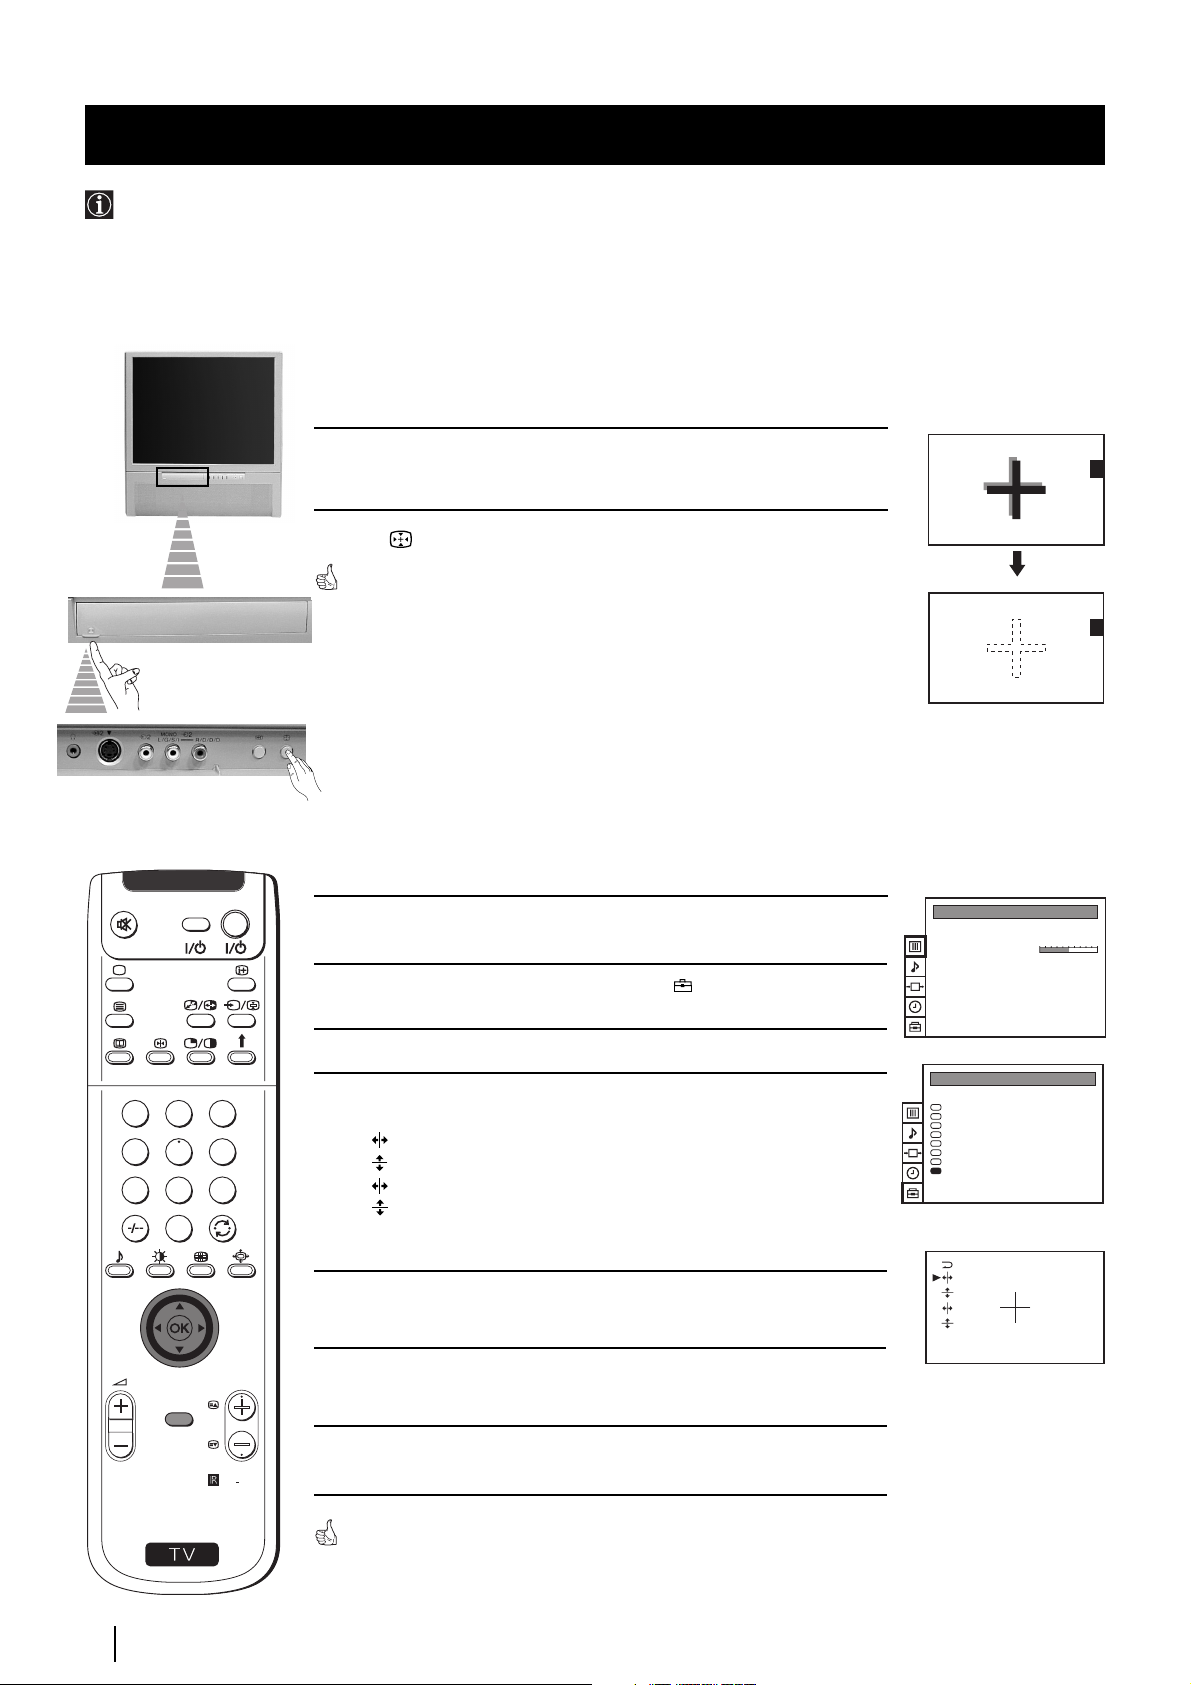
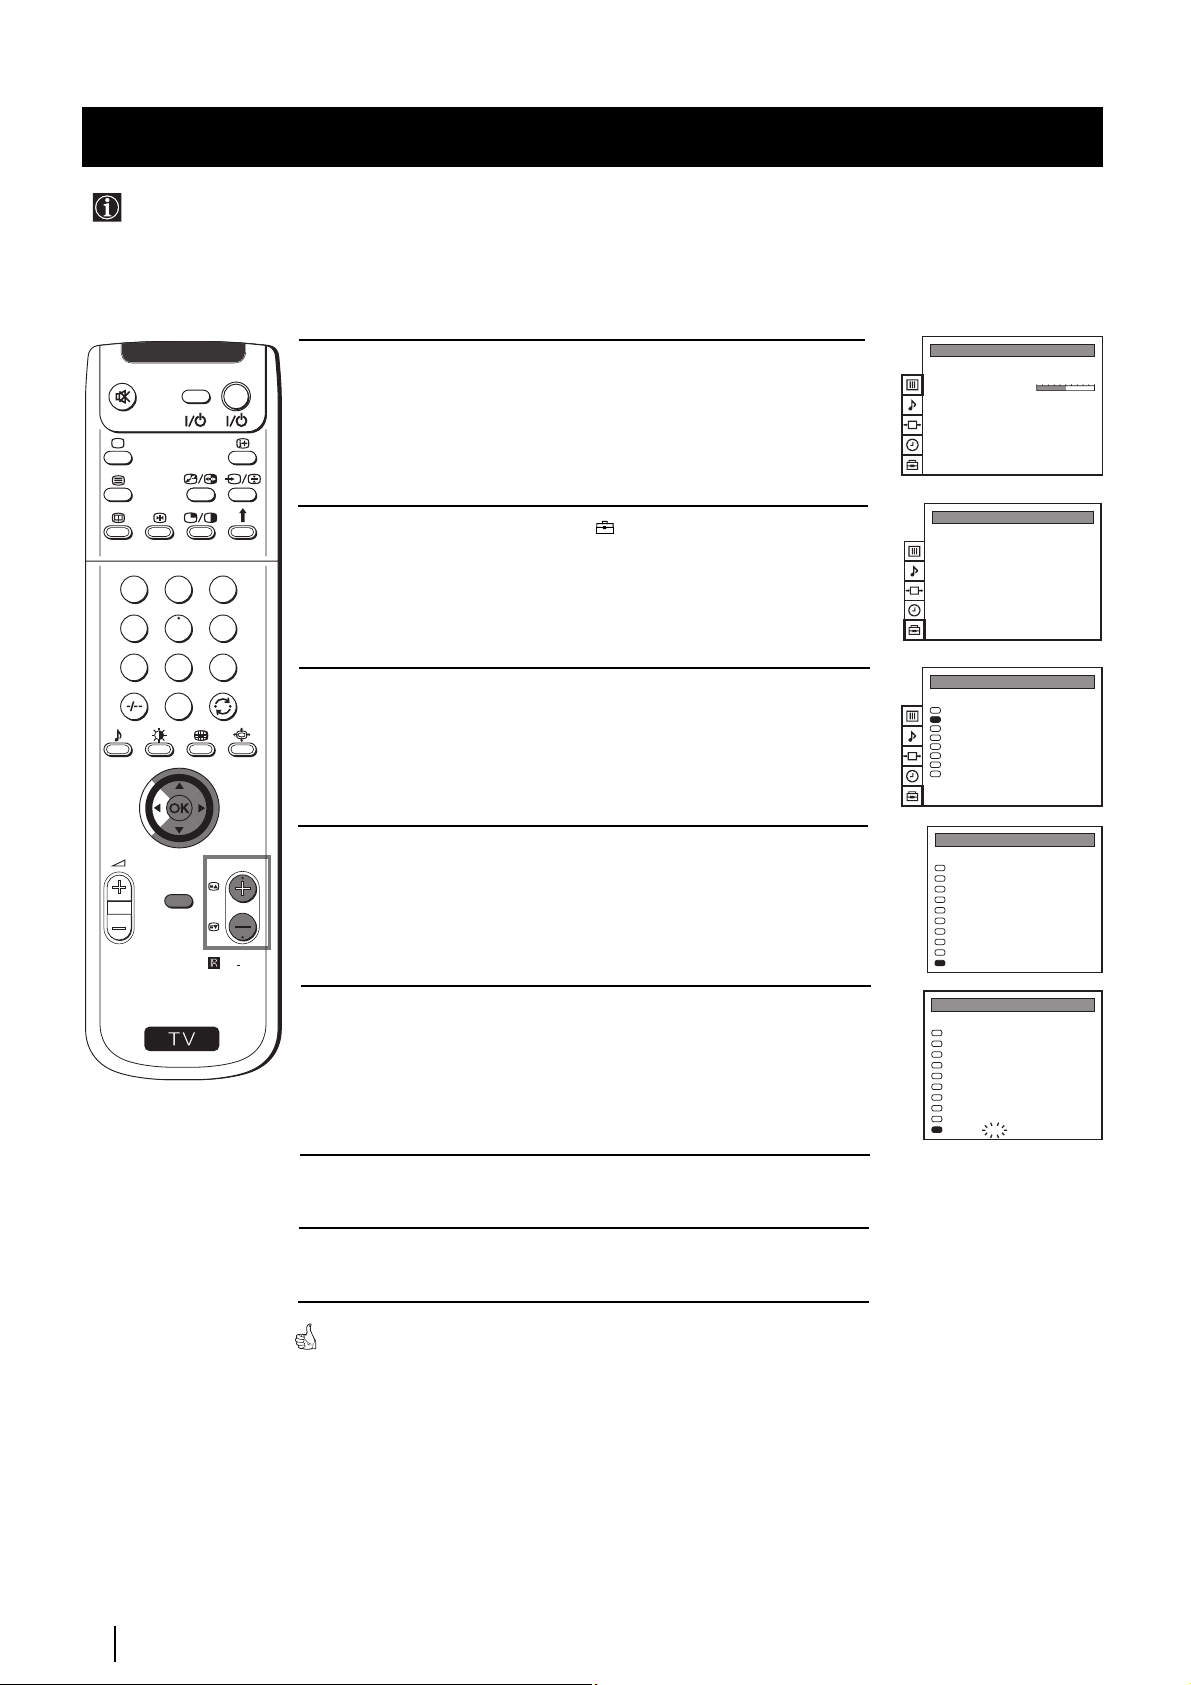
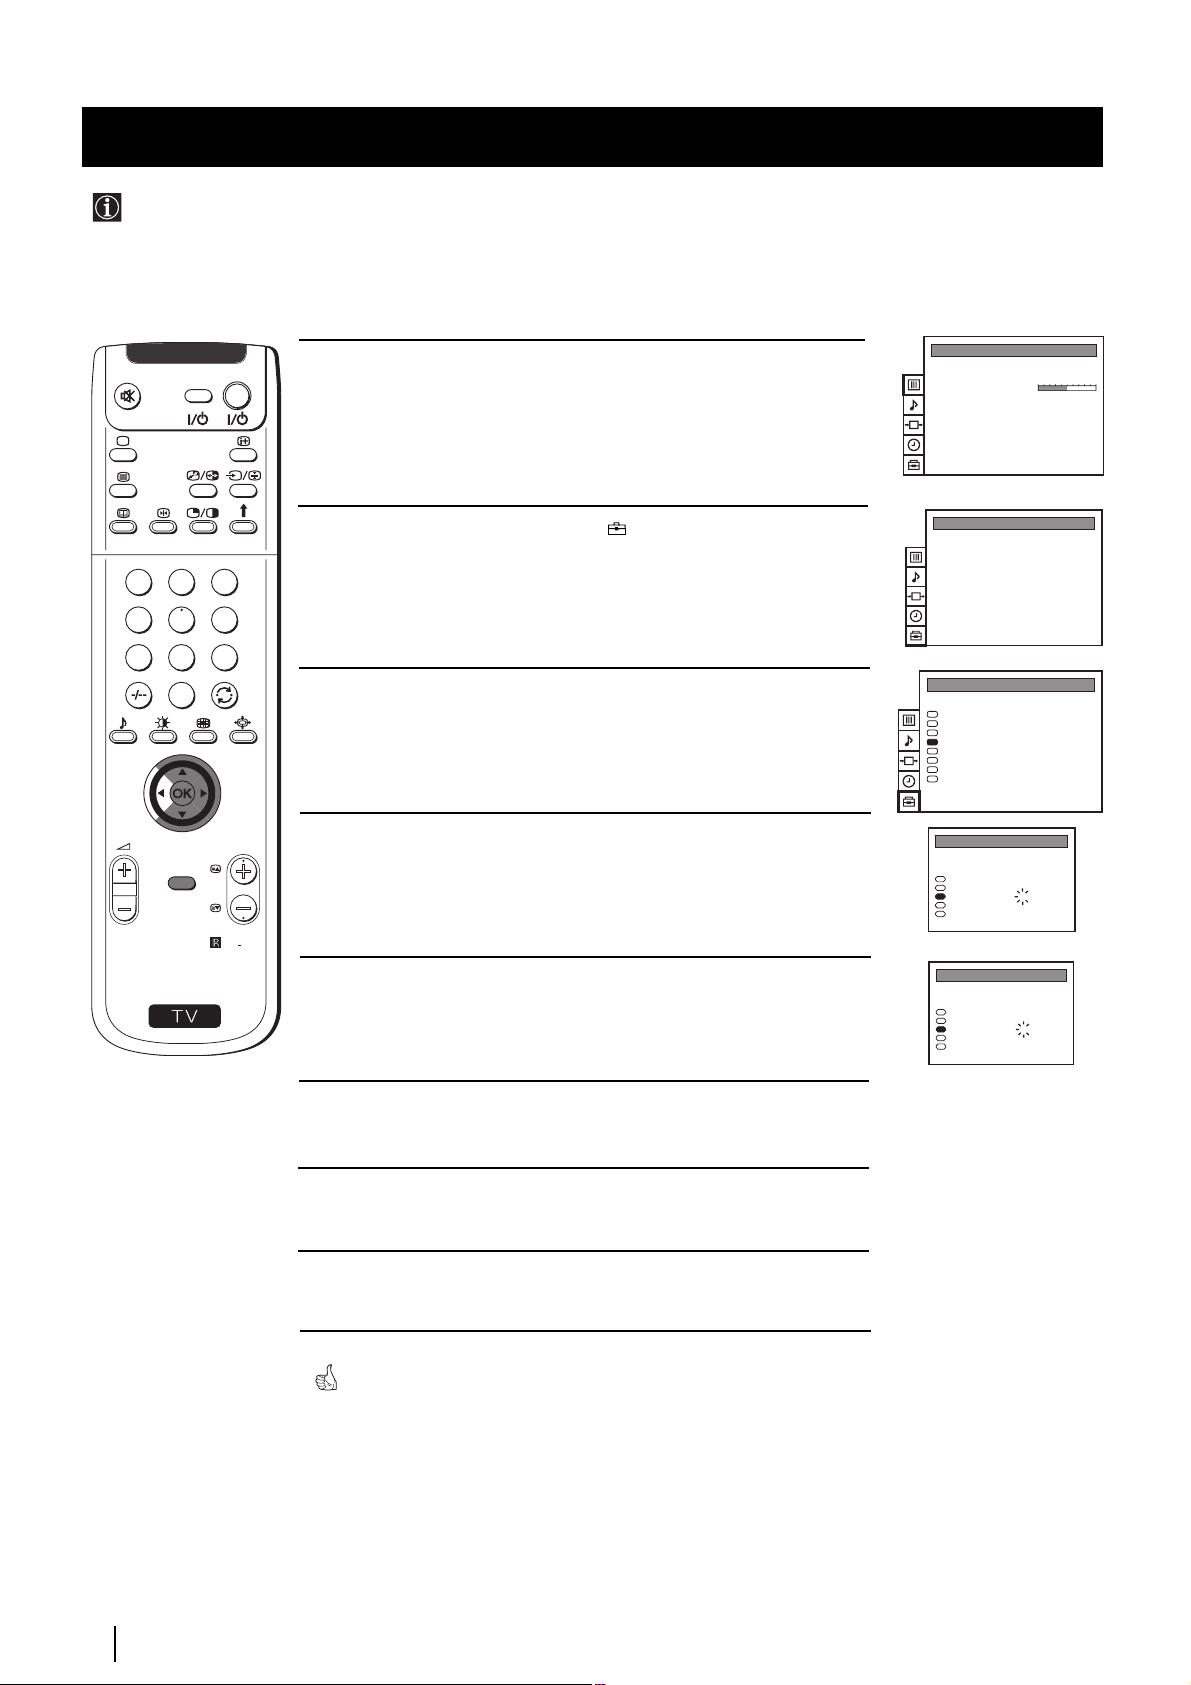
Adjusting Colour Registration (Convergence)
Due to the earth’s magnetism, the picture might become undefined and you could see different colours on the outlines of the
images. In that case, proceed as follows:
Auto converge the Red, Green, and Blue
Lines
1
Push up the flap on the front of the projection TV to reveal the front
control panel.
2 Press button on the projection TV.
The Auto Convergence function works for about 30 seconds. When the white
cross disappears from the screen, your projection TV is ready for use.
Notes:
The Auto Convergence function does not work:
• when no signal is input.
• when the input signal is weak.
• when the screen is exposed to spotlights or direct sunlight.
• when you watch the teletext broadcast.
If you wish a more accurate
convergence adjustment
VIDEO TV
Press the MENU button on the remote control to display the menu on
1
the screen.
PICTURE CONTROL
Picture Mode
Contrast
Reset
Format
Personal
4:3
2 Push the joystick to $ to select the symbol , then push to z to enter
to the PRESET menu.
3 Push the joystick to $ or 4 or 4 to select Convergence, then push to z.
3
4
5
6
7
8
9
0
lines in red and blue) you want to adjust.
: red vertical line (left/right adjustment)
: red horizonta line (up/down adjustment)
: blue vertical line (left/right adjustment)
: blue horizontal line (up/down adjustment)
Then press the OK button.
1
4 Push the joystick to $ or 4 to select “the line” (vertical and horizontal
2
PRESET
Auto Programme
Manual Programme Preset
Further Programme Preset
AV Label Preset
Programme Sorting
Parental Lock
Language
Convergence
5 Push the joystick repeatedly to $ , 4 , Z or z to converge the selected
line with the green line in the centre, then press OK to confirm.
PROGR
MENU
6 Repeat steps 4 and 5 to adjust the other lines, until all the lines have
overlapped to form a white cross.
RM
892
S
12
Getting Started - First Time Operation
7 Press the MENU button to exit and return to the normal TV screen.
Your projection TV is ready for use.
Your projection TV is ready for use.
Page 12
Getting Started - First Time Operation
Adjusting Colour Registration (Convergence)
MENU
Press the MENU button on the remote control to display the menu on the screen.
PICTURE CONTROL
Picture Mode
Contrast
Reset
Format
Personal
4:3
PICTURE CONTROL
Picture Mode
Contrast
Reset
Format
Personal
4:3
(For different adjustments, please refer to
the section "Adjusting the Picture")
SOUND CONTROL
Sound Mode
Balance
Reset
Dolby Virtual
Dual Sound
Volume Offset
Volume
Dual Sound
Speaker
VIDEO CONNECTION
TV Screen
Output
TV
TIMER
Sleep Timer
PRESET
Auto Programme
Manual Programme Preset
Further Programme Preset
AV Label Preset
Programme Sorting
Parental Lock
Language
Convergence
Personal
Off
Mono
0
Mono
Main
[TV - - - - - - -]
[AV1 - - - - - - -]
AV1
Off
SOUND CONTROL
Sound Mode
Balance
Reset
Dolby Virtual
Dual Sound
Volume Offset
Volume
Dual Sound
Speaker
VIDEO CONNECTION
TV Screen
Output
TV
TIMER
Sleep Timer
PRESET
Auto Programme
Manual Programme Preset
Further Programme Preset
AV Label Preset
Programme Sorting
Parental Lock
Language
Convergence
PRESET
Auto Programme
Manual Programme Preset
Further Programme Preset
AV Label Preset
Programme Sorting
Parental Lock
Language
Convergence
Personal
Off
Mono
0
Mono
Main
[TV - - - - - - -]
[AV1 - - - - - - -]
AV1
1:00
Do you want to start
automatic tuning?
Yes
No
Confirm: OK
MANUAL PROGRAMME PRESET
PROG SYS CHAN
LABEL
B/G
0
MV-CH
C 40
B/G
1
TVE-1
C 41
B/G
2
TVE-2
C 31
B/G
3
ANT-3
C 34
B/G
4
TELE 5
C 27
B/G
5
C PLUS
C 47
B/G
6
- - - - -
C 44
B/G
7
- - - - -
C 23
B/G
8
CNN -
C 35
B/G
9
BBC-W
C 28
(For different adjustments, please refer to
the section "Adjusting the Sound")
(For more details, please refer to the
section "Selecting the output source for the
Euro AV connectors")
(For more details, please refer to the
section "Using the Sleep Timer")
(For more details, please refer to the
section "Automatically Tuning the TV
using the Remote Control")
(For more details, please refer to the
section "Manually Tuning the TV")
GB
PRESET
Auto Programme
Manual Programme Preset
Further Programme Preset
AV Label Preset
Programme Sorting
Parental Lock
Language
Convergence
PRESET
Auto Programme
Manual Programme Preset
Further Programme Preset
AV Label Preset
Programme Sorting
Parental Lock
Language
Convergence
PRESET
Auto Programme
Manual Programme Preset
Further Programme Preset
AV Label Preset
Programme Sorting
Parental Lock
Language
Convergence
PRESET
Auto Programme
Manual Programme Preset
Further Programme Preset
AV Label Preset
Programme Sorting
Parental Lock
Language
Convergence
PRESET
Auto Programme
Manual Programme Preset
Further Programme Preset
AV Label Preset
Programme Sorting
Parental Lock
Language
Convergence
FURTHER PROGRAMME PRESET
PROG AFT DECODER
On
0
Off
On
1
Off
On
2
AV1
On
3
Off
On
4
AV2
On
5
Off
On
6
Off
On
7
Off
On
8
Off
On
9
Off
AV LABEL PRESET
INPUT LABEL
- - - - -
AV1
- - - - -
RGB
- - - - -
AV2
- - - - -
YC2
- - - - -
AV3
PROGRAMME SORTING
PROG SYS CHAN LABEL
B/G
0
BBC-W
C 28
B/G
1
MV-CH
C 40
B/G
2
TVE-1
C 41
B/G
3
TVE-2
C 31
B/G
4
ANT-3
C 34
B/G
5
TELE 5
C 27
B/G
6
C PLUS
C 47
B/G
7
- - - - -
C 44
B/G
8
- - - - -
C 23
B/G
9
CNN -
C 35
PARENTAL LOCK
PROG
SYS CHAN LABEL
B/G
0
MV-CH
C 40
B/G
1
TVE-1
C 41
B/G
2
TVE-2
C 31
B/G
3
ANT-3
C 34
B/G
4
TELE 5
C 27
B/G
5
C PLUS
C 47
B/G
6
- - - - -
C 44
B/G
7
- - - - -
C 23
B/G
8
CNN -
C 35
B/G
9
- - - - -
C 28
LANGUAGE
English
Deutsch
Français
Italiano
Nederlands
Polski
Česki
Magyar
Eλλnvιkά
(For more details, please refer to the
section "Using the Further Programme
Preset function")
(For more details, please refer to the
section "Using the AV Label Preset
function")
(For more details, please refer to the
section "Changing the Programme
Order of the TV channels")
(For more details, please refer to the
section "Locking Programmes")
(For more details, please refer to the
section "Selecting Language")
PRESET
Auto Programme
Manual Programme Preset
Further Programme Preset
AV Label Preset
Programme Sorting
Parental Lock
Language
Convergence
(For more details, please refer to the
section "Adjusting Colour Registration
Convergence)"
Getting Started - First Time Operation
13
Page 13

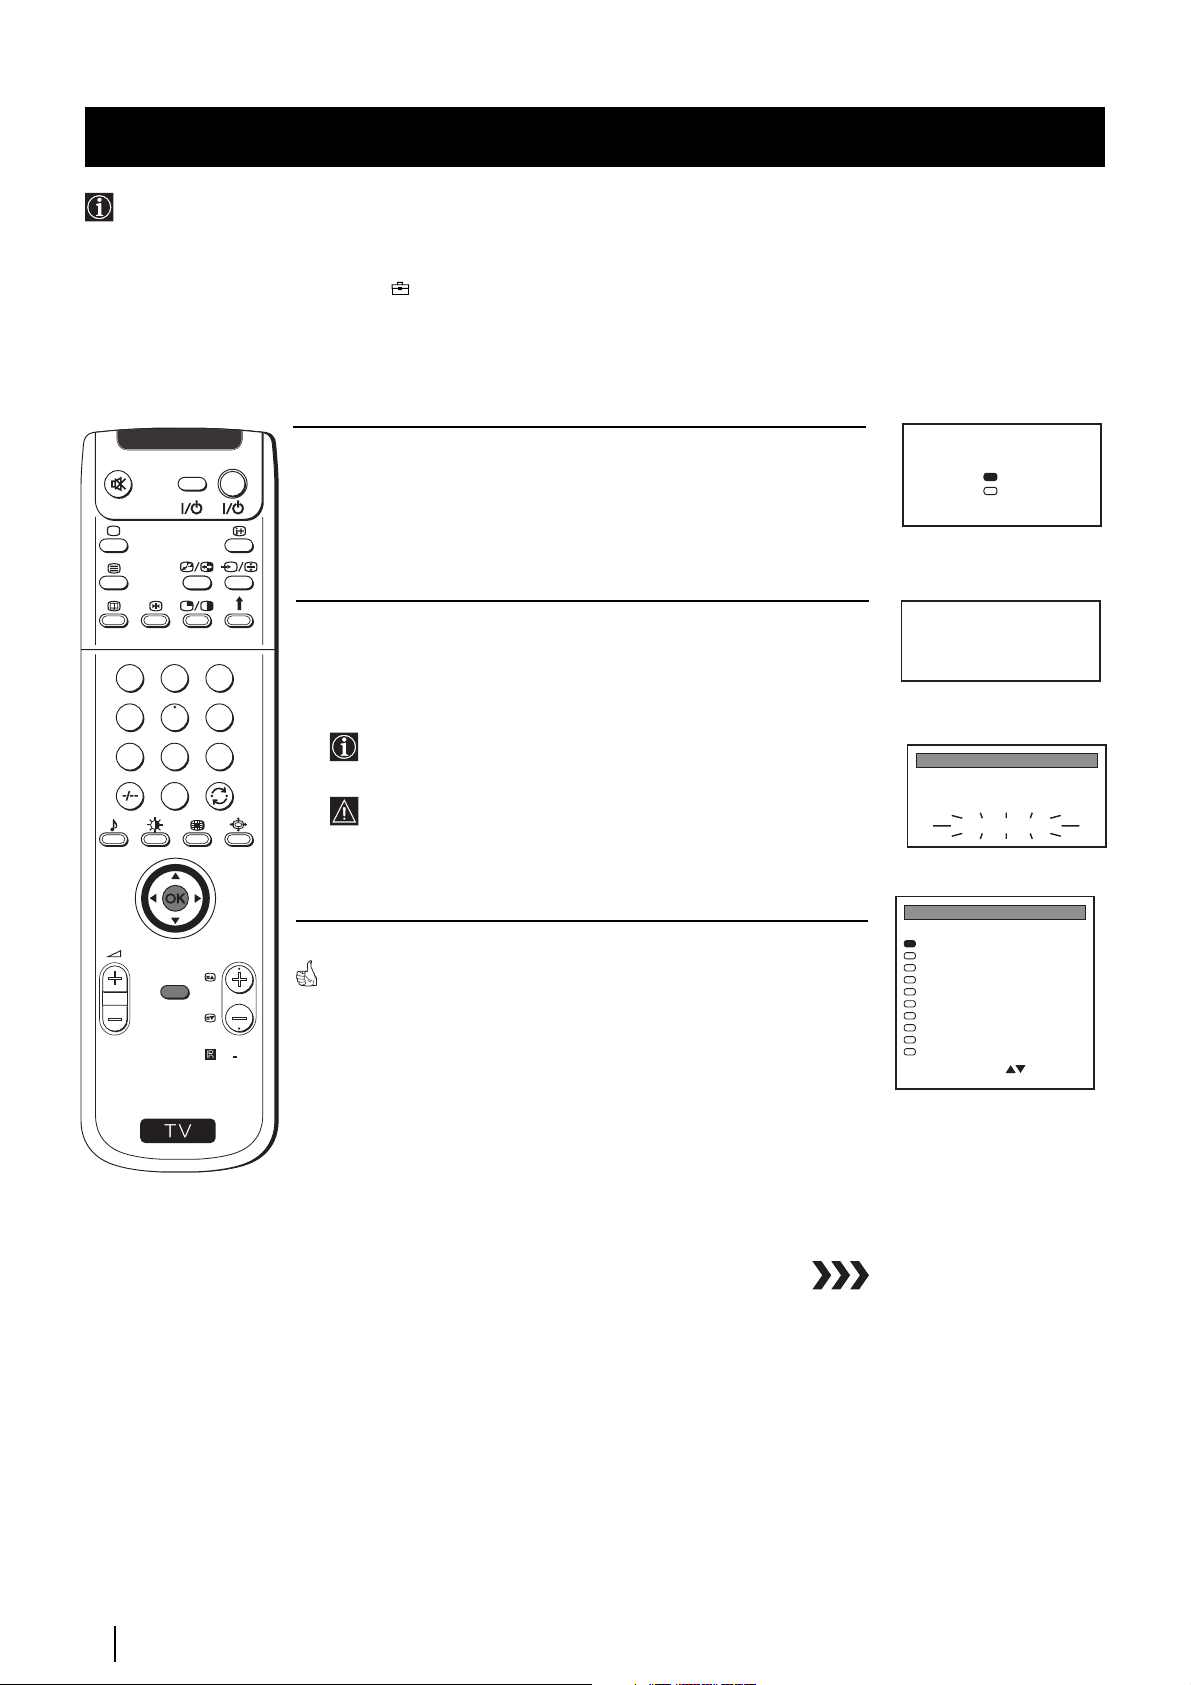
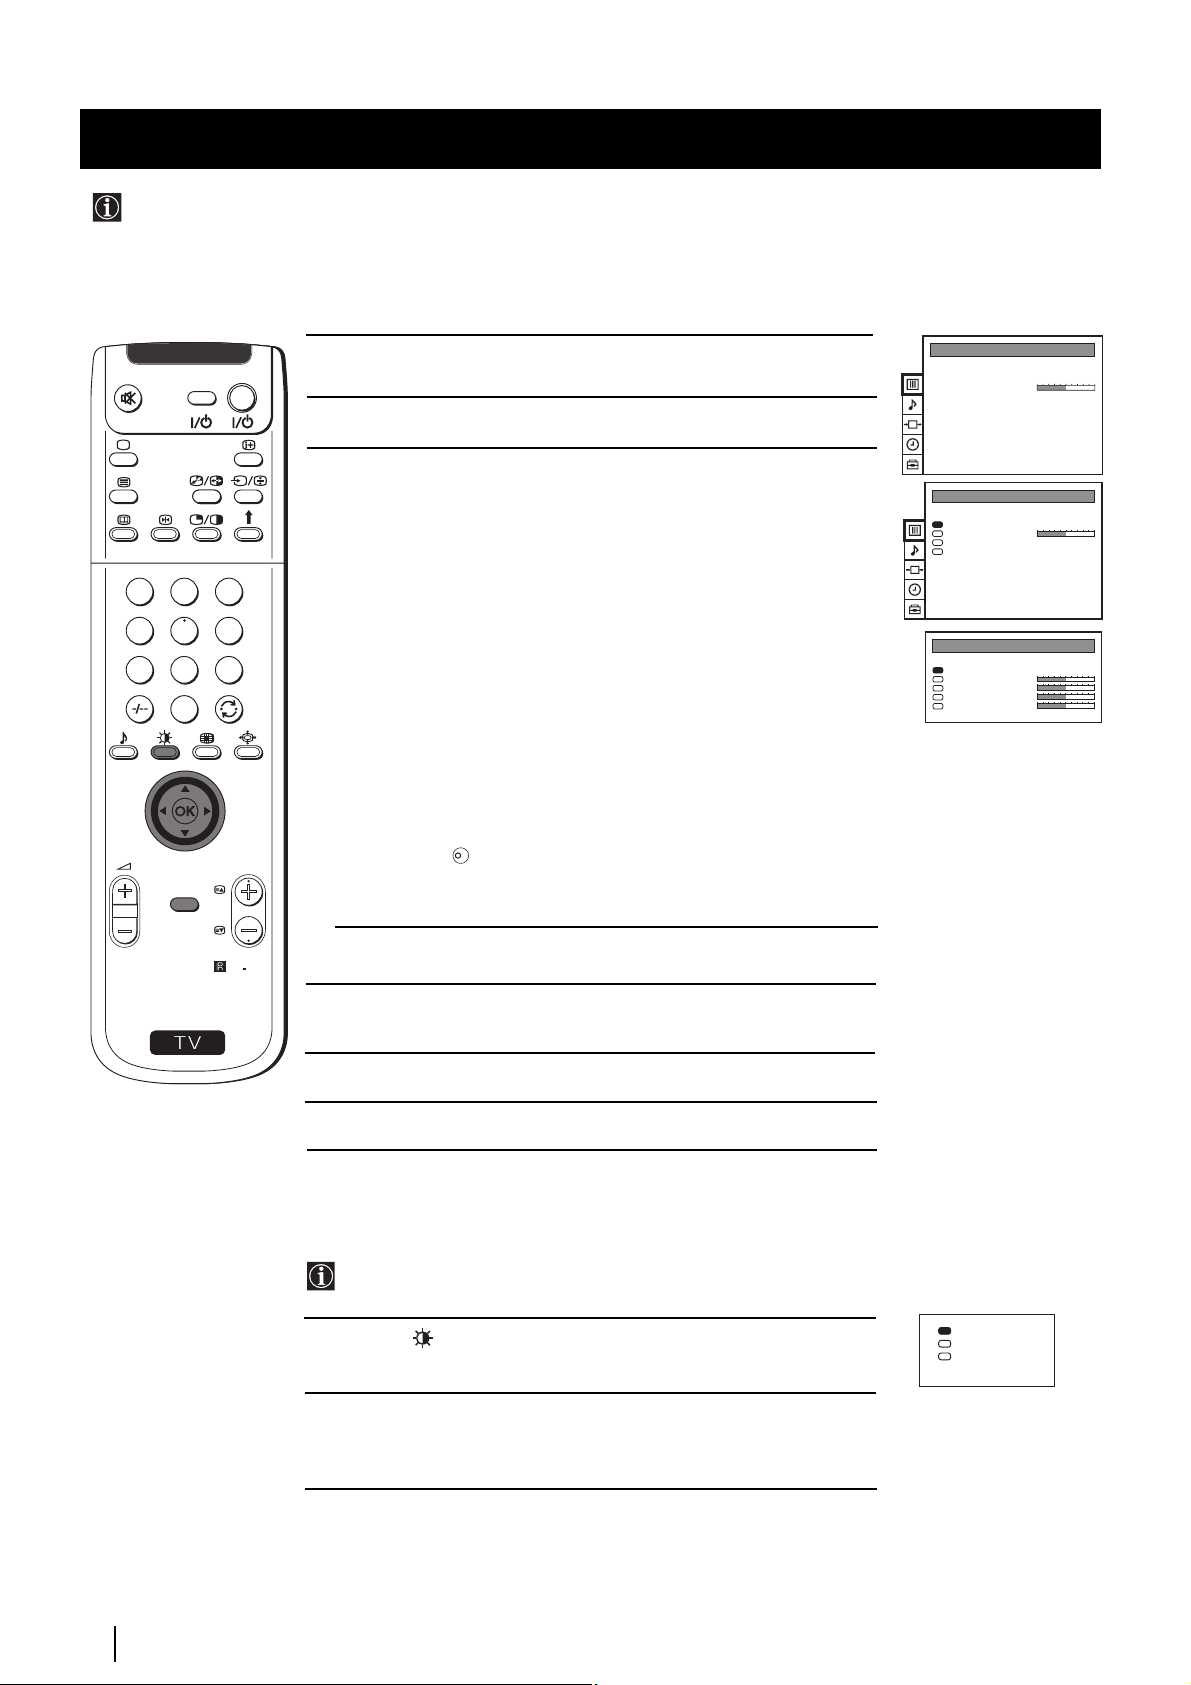
Advanced Operation - Advanced Presetting
Automatically Tuning the TV
Besides the explanation in the section “Automatically Tuning the TV using the Remote Control“, by following the
instructions below, this projection TV also searches and stores automatically all available channels using just one button of
the projection TV set and one button of the remote control.
1 Push up the flap on the front of the projection TV to reveal the front
control panel.
Please confirm that
antenna is connected
Confirm: OK
Please confirm that
antenna is connected
Confirm: OK
AUTO PROGRAMME
PROG
SYS
CH
1
B/G
C 26
AUTO PROGRAMME
LABEL
- - - - -
VIDEO TV
2 Press and hold in the button on the TV set for some seconds, until
a menu appears automatically on the screen asking you to check that
antenna is connected.
3 Confirm that the antenna is connected and then press the OK button
on the remote control.
The automatic tuning starts and the message "AUTO
PROGRAMME" flashes on the screen.
This procedure could take some minutes. Please, be patient and
do not press any button, otherwise the automatic tuning will not
1
2
3
4
5
6
7
8
9
be completed.
When the automatic tuning procedure is complete, the Programme
Sorting menu appears on the screen:
0
• If you do not wish to change the channel order, press the MENU
button on the remote control to exit and return to the normal TV
screen.
• If you wish to change the channel order, proceed in the same way as
described in the chapter "Changing the Programme Order of the TV
channels", section b).
PROGR
MENU
RM
892
S
14
Advanced Operation - Advanced Presetting
Note: To stop the automatic tuning, press the MENU button on the
remote control.
Page 14
Advanced Operation - Advanced Presetting
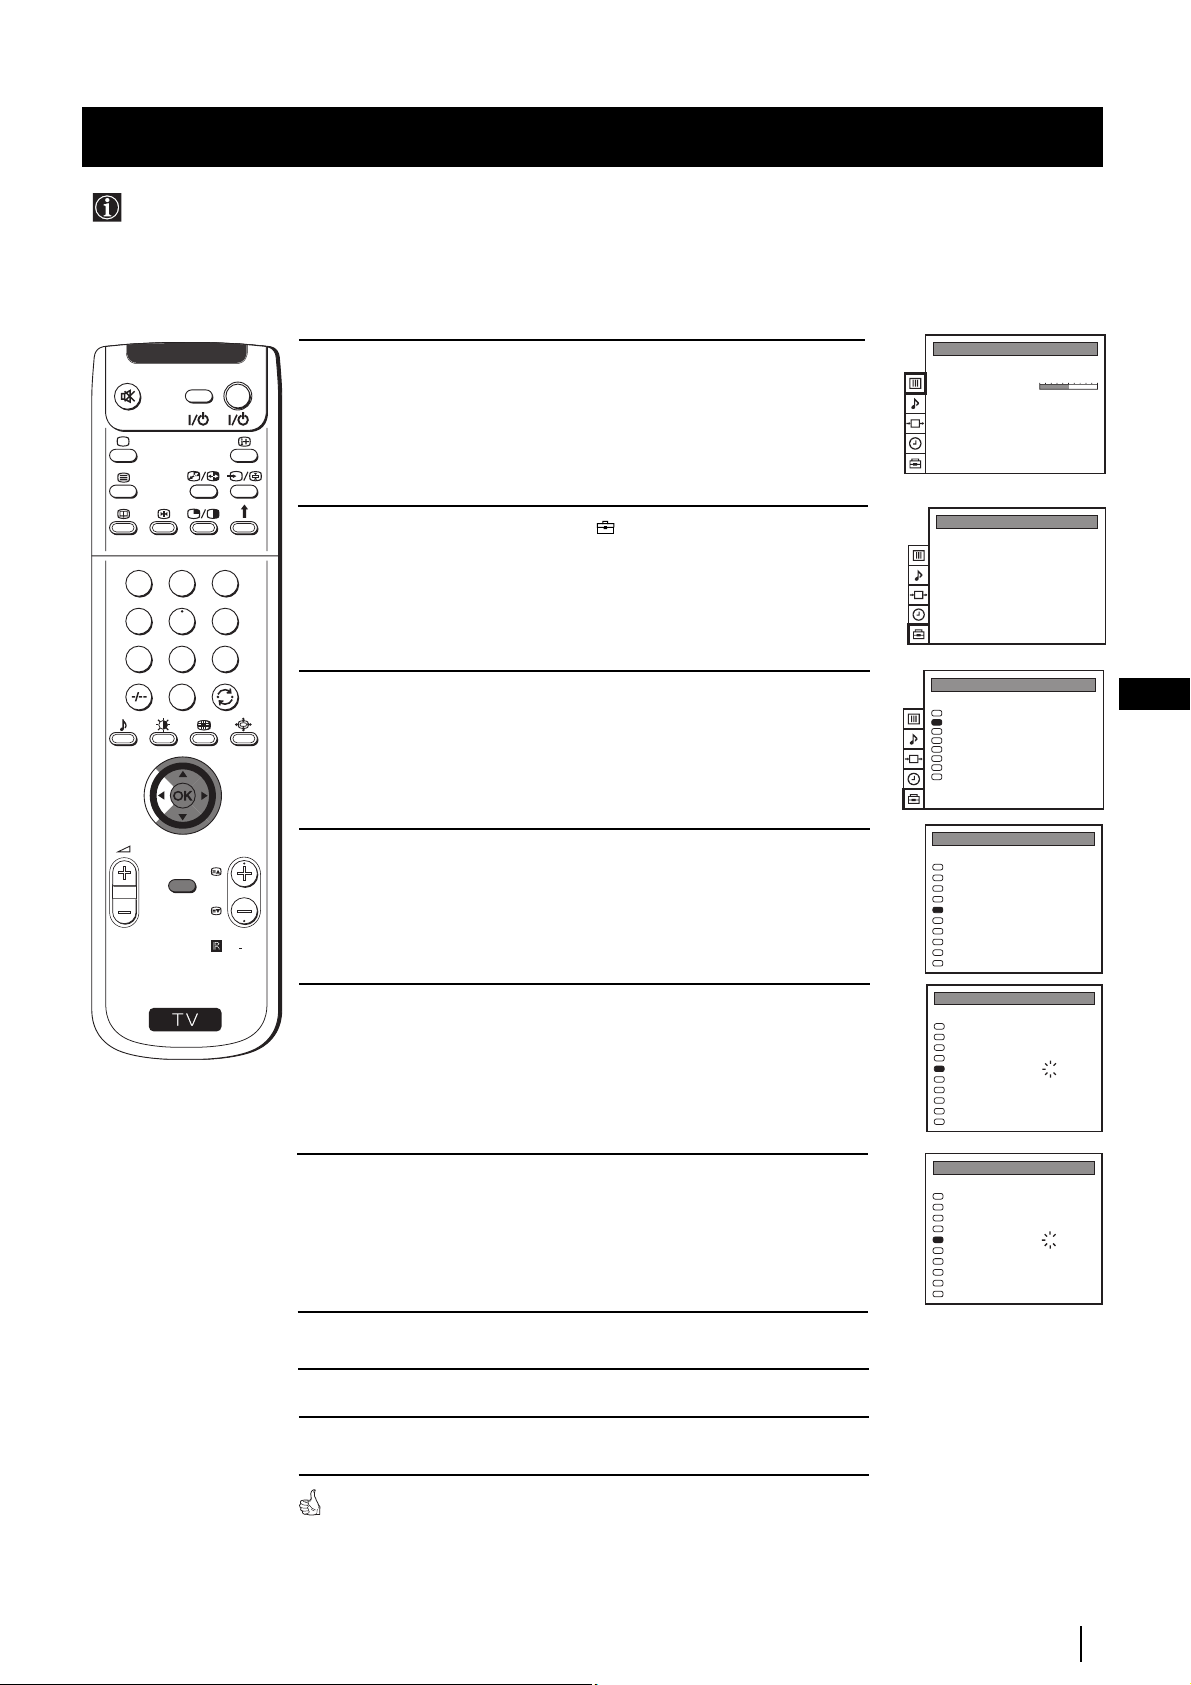
Manually Tuning the TV
Use this function to preset channels or a video input source one by one to the programme order of your choice.
1
4
7
S
VIDEO TV
2
5
8
0
MENU
3
6
9
RM
PROGR
892
1 Press the MENU button on the remote control to display the
menu on the screen.
2 Push the joystick to $ to select the symbol, then push to z to
enter to the PRESET menu.
Push the joystick to $ or 4 to select Manual Programme Preset,
3
then push to z .
Push the joystick to $ or 4 to select on which programme number
4
you want to preset a channel, then push to z.
Push the joystick to $ or 4 to select the TV Broadcast system (B/G
5
for western european countries, D/K for eastern european
countries, L for France or I for United Kingdom) or a video input
source (AV1, AV2...), then push to z.
PICTURE CONTROL
Picture Mode
Contrast
Reset
Format
PRESET
Auto Programme
Manual Programme Preset
Further Programme Preset
AV Label Preset
Programme Sorting
Parental Lock
Language
Convergence
PRESET
Auto Programme
Manual Programme Preset
Further Programme Preset
AV Label Preset
Programme Sorting
Parental Lock
Language
Convergence
MANUAL PROGRAMME PRESET
PROG SYS CHAN
0
1
2
3
4
5
6
7
8
9
MANUAL PROGRAMME PRESET
PROG SYS CHAN
0
1
2
3
4
5
6
7
8
9
Personal
4:3
LABEL
B/G
MV-CH
C 40
B/G
TVE-1
C 41
B/G
TVE-2
C 31
B/G
ANT-3
C 34
B/G
TELE 5
C 27
B/G
C PLUS
C 47
B/G
- - - - -
C 44
B/G
- - - - -
C 23
B/G
CNN -
C 35
B/G
BBC-W
C 28
LABEL
B/G
MV-CH
C 40
B/G
TVE-1
C 41
B/G
TVE-2
C 31
B/G
ANT-3
C 34
B/G
TELE 5
C 27
B/G
C PLUS
C 47
B/G
- - - - -
C 44
B/G
- - - - -
C 23
B/G
CNN -
C 35
B/G
BBC-W
C 28
GB
6 Push the joystick to $ or 4 to select the channel tuning, "C" for
terrestrial channels or "S" for cable channels, then push to z.
Press the number buttons to enter the channel number of the TV
7
Broadcast or push the joystick to 4 or $ to search for the next
available channel.
If you do not wish to store this channel, push the joystick to 4 or $
to continue searching for the desired channel.
8 If this is the desired channel you wish to store, press the OK button.
9 Repeat steps 4 to 8 if you wish to store more channels.
10 Press the MENU button to exit and return to the normal TV screen.
Your projection TV is now ready for use.
Advanced Operation - Advanced Presetting
MANUAL PROGRAMME PRESET
PROG SYS CHAN
0
1
2
3
4
5
6
7
8
9
MANUAL PROGRAMME PRESET
PROG SYS CHAN
0
1
2
3
4
5
6
7
8
9
LABEL
B/G
MV-CH
C 40
B/G
TVE-1
C 41
B/G
TVE-2
C 31
B/G
ANT-3
C 34
B/G
TELE 5
C 27
B/G
C PLUS
C 47
B/G
- - - - -
C 44
B/G
- - - - -
C 23
B/G
CNN -
C 35
B/G
BBC-W
C 28
LABEL
B/G
MV-CH
C 40
B/G
TVE-1
C 41
B/G
TVE-2
C 31
B/G
ANT-3
C 34
B/G
TELE 5
C 27
B/G
C PLUS
C 47
B/G
- - - - -
C 44
B/G
- - - - -
C 23
B/G
CNN -
C 35
B/G
BBC-W
C 28
15
Page 15
Advanced Operation - Advanced Presetting
Using the "Further Programme Preset" function
With this feature you can:
a) Even normally the automatic fine tuning (AFT) is operating, however you can manually fine-tune the TV to obtain a
better picture reception if the picture is distorted or
b) preset the AV3 output for the programme positions of channels with scrambled signals (eg from a pay TV decoder). In
this way a connected VCR records the unscrambled signal.
VIDEO TV
1 Press the MENU button on the remote control to display the menu on
the screen.
2 Push the joystick to $ to select the symbol, then push to z to enter
to the PRESET menu.
1
2
3
4
5
6
7
8
9
3 Push the joystick to $ or 4 to select Further Programme Preset, then
0
push to z .
4 Push the joystick to $ or 4 to select the relevant programme number,
MENU
PROGR
RM
892
then push to z repeatedly to select:
a) AFT or
b) DECODER.
PICTURE CONTROL
Picture Mode
Contrast
Reset
Format
PRESET
Auto Programme
Manual Programme Preset
Further Programme Preset
AV Label Preset
Programme Sorting
Parental Lock
Language
Convergence
PRESET
Auto Programme
Manual Programme Preset
Further Programme Preset
AV Label Preset
Programme Sorting
Parental Lock
Language
Convergence
FURTHER PROGRAMME PRESET
PROG AFT DECODER
0
1
2
3
4
5
6
7
8
9
Personal
4:3
On
Off
On
Off
On
AV1
On
Off
On
AV2
On
Off
On
Off
On
Off
On
Off
On
Off
S
The selected item changes colour.
5 a) AFT
Push the joystick to $ or 4 to fine tune the channel frequency over a
range of -15 to +15, then press the OK button.
Repeat steps 4 and 5a) if you wish to fine tune other channels.
b) DECODER
Push the joystick to $ or 4 to select AV3 and press the OK.
The picture from the decoder connected to the Euro AV :3 on
the back of the projection TV will appear on this programme
number.
Repeat steps 4 and 5b) to preset the AV3 output for other
programme positions.
6 Press the MENU button to exit and return to the normal TV screen.
Your projection TV is now ready for use.
FURTHER PROGRAMME PRESET
PROG AFT DECODER
2
0
1
2
3
4
5
6
7
8
9
FURTHER PROGRAMME PRESET
PROG AFT DECODER
0
1
2
3
4
5
6
7
8
9
Off
On
Off
On
Off
On
Off
On
Off
On
Off
On
Off
On
Off
On
Off
On
Off
On
AV3
On
Off
On
Off
On
Off
On
Off
On
Off
On
Off
On
Off
On
Off
On
Off
Advanced Operation - Advanced Presetting
16
Page 16
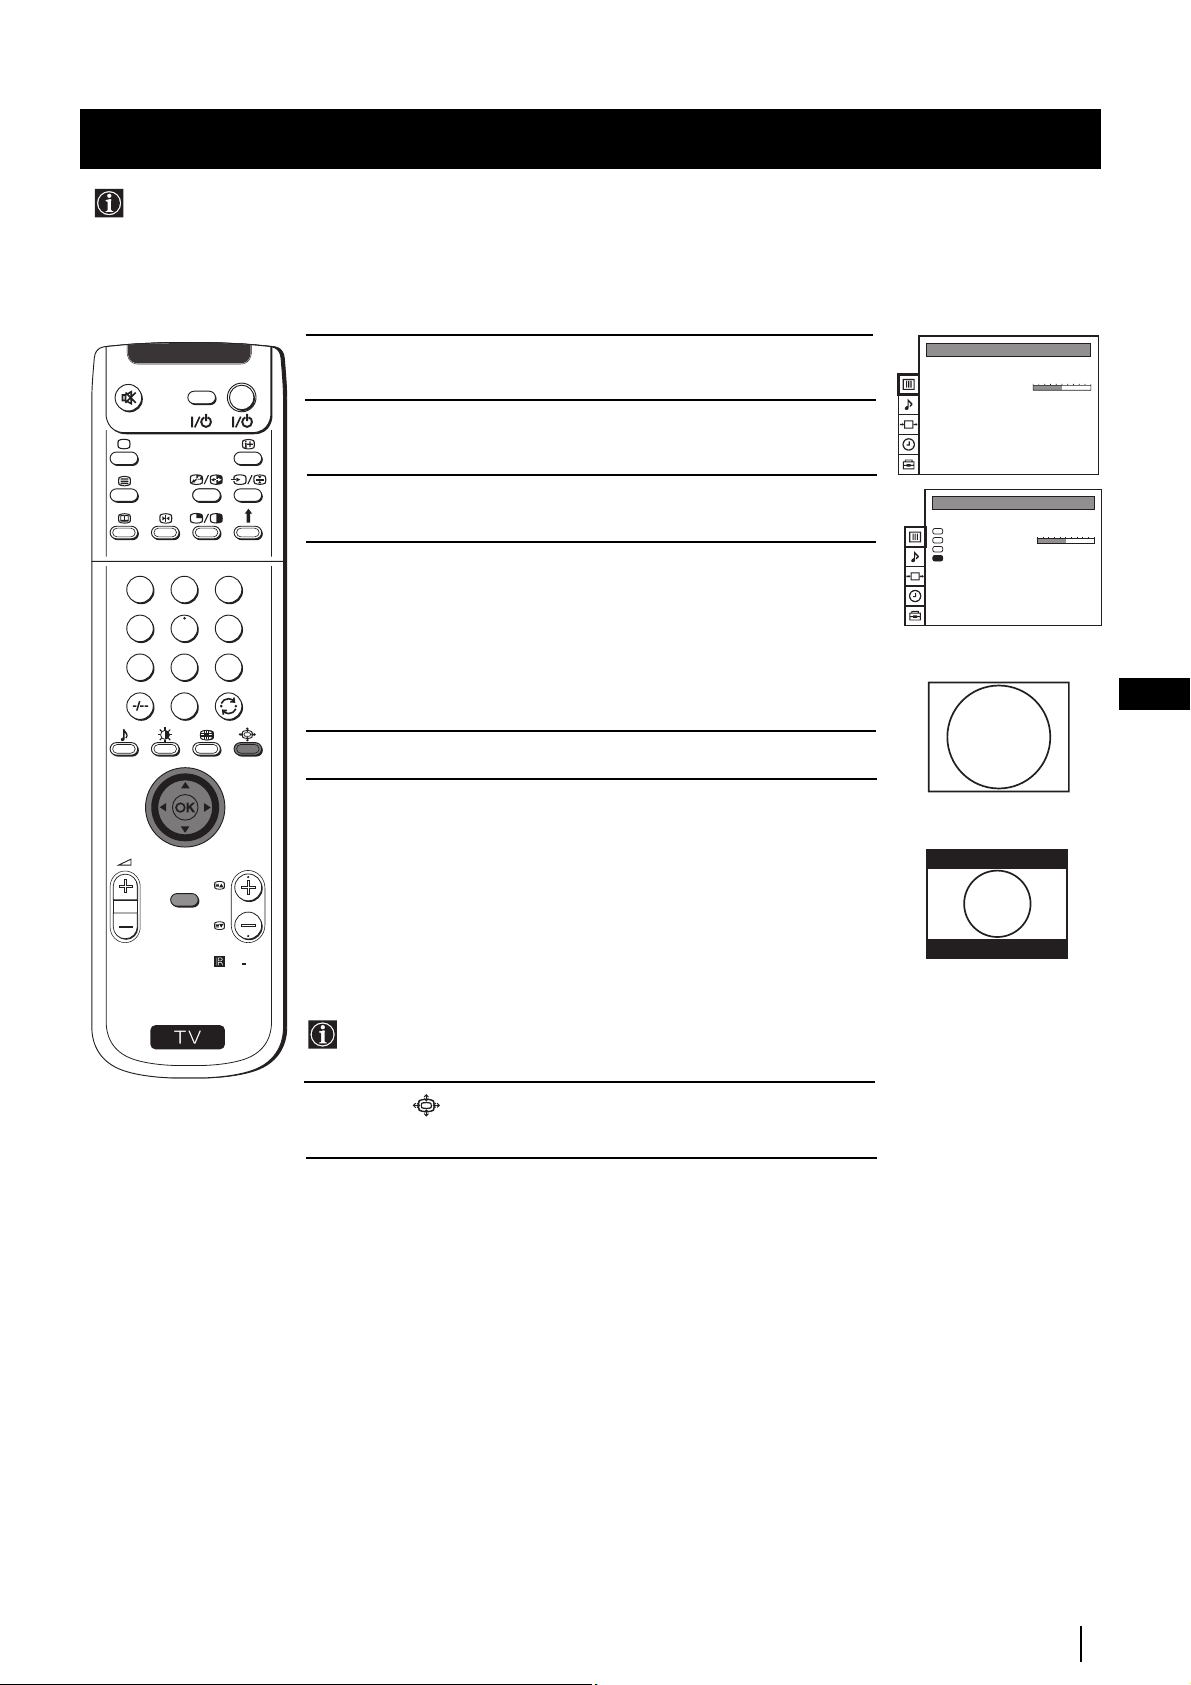
Advanced Operation - Advanced Presetting
Locking Programmes
This feature enables you to prevent undesirable broadcasts appearing on the screen. We suggest you use this function to
prevent children from watching programmes you consider unsuitable.
1
4
7
S
VIDEO TV
2
5
8
0
MENU
3
6
9
PROGR
RM
1 Press the MENU button on the remote control to display the menu on
the screen.
2 Push the joystick to $ to select the symbol, then push to z to enter
to the PRESET menu.
3 Push the joystick to $ or 4 to select Parental Lock, then push to z .
4 Push the joystick to $ or 4 to select the programme number with the
channel you wish to block, then press the OK button.
The symbol appears before the programme position to indicate
892
this programme is now blocked.
To unblock the programme, press the OK button again. The
symbol disappears.
PICTURE CONTROL
Picture Mode
Contrast
Reset
Format
PRESET
Auto Programme
Manual Programme Preset
Further Programme Preset
AV Label Preset
Programme Sorting
Parental Lock
Language
Convergence
PRESET
Auto Programme
Manual Programme Preset
Further Programme Preset
AV Label Preset
Programme Sorting
Parental Lock
Language
Convergence
PARENTAL LOCK
SYS CHAN LABEL
PROG
B/G
0
C 40
B/G
1
C 41
B/G
2
C 31
B/G
3
C 34
B/G
4
C 27
B/G
5
C 47
B/G
6
C 44
B/G
7
C 23
B/G
8
C 35
B/G
9
C 28
Personal
4:3
MV-CH
TVE-1
TVE-2
ANT-3
TELE 5
C PLUS
- - - - -
- - - - CNN -
- - - - -
GB
5 Repeat step 4 if you wish to block other channels.
6 Press the MENU button to exit and return to the normal TV screen.
When you select a blocked programme the screen appears in black, with
symbol.
Advanced Operation - Advanced Presetting
17
Page 17
Advanced Operation - Advanced Presetting
Skipping Programme positions
You can programme this projection TV to skip any unwanted programme numbers when they are selected with the PROGR
+/- buttons. To cancel this function afterwards, proceed in the same way as described below by selecting the appropriate
TV system (B/G, D/K, L or I) instead of "- - -" in step 5.
VIDEO TV
1 Press the MENU button on the remote control to display the menu on
the screen.
2 Push the joystick to $ to select the symbol, then push to z to enter
to the PRESET menu.
1
2
3
4
5
6
7
8
9
3 Push the joystick to $ or 4 to select Manual Programme Preset, then
0
MENU
PROGR
RM
892
push to z .
4 Push the joystick to $ or 4 to select the programme position you want
to skip, then push to z to enter to the SYS column.
PICTURE CONTROL
Picture Mode
Contrast
Reset
Format
PRESET
Auto Programme
Manual Programme Preset
Further Programme Preset
AV Label Preset
Programme Sorting
Parental Lock
Language
Convergence
PRESET
Auto Programme
Manual Programme Preset
Further Programme Preset
AV Label Preset
Programme Sorting
Parental Lock
Language
Convergence
MANUAL PROGRAMME PRESET
PROG SYS CHAN
0
1
2
3
4
5
6
7
8
9
Personal
4:3
LABEL
B/G
MV-CH
C 40
B/G
TVE-1
C 41
B/G
TVE-2
C 31
B/G
ANT-3
C 34
B/G
TELE 5
C 27
B/G
C PLUS
C 47
B/G
- - - - -
C 44
B/G
- - - - -
C 23
B/G
CNN -
C 35
B/G
BBC-W
C 28
S
5 Push the joystick to $ to select “- - -”, then press the OK button to
store.
6 Repeat steps 4 and 5 to skip other unused programme positions.
7 Press the MENU button to exit and return to the normal TV screen.
When changing channels (TV Broadcasts) with the PROGR +/- buttons,
the skipped programme positions do not appear. You can, however, still select
them using the number buttons.
MANUAL PROGRAMME PRESET
PROG SYS CHAN
0
1
2
3
4
5
6
7
8
9
LABEL
B/G
MV-CH
C 40
B/G
TVE-1
C 41
B/G
TVE-2
C 31
B/G
ANT-3
C 34
B/G
TELE 5
C 27
B/G
C PLUS
C 47
B/G
- - - - -
C 44
B/G
- - - - -
C 23
B/G
CNN -
C 35
- - -
BBC-W
C 28
Advanced Operation - Advanced Presetting
18
Page 18
Advanced Operation - Advanced Presetting
Labelling a channel
Names for channels (TV Broadcasts) are usually taken automatically from Teletext if available. You can however name a
channel or an input video source using up to five characters (letters or numbers). Using this function, you can easily
identify which channel (TV Broadcasts) or video source you are watching.
1
4
7
S
VIDEO TV
2
5
8
0
MENU
3
6
9
RM
PROGR
892
1 Press the MENU button on the remote control to display the menu on
the screen.
2 Push the joystick to $ to select the symbol, then push to z to enter
to the PRESET menu.
3 Push the joystick to $ or 4 to select Manual Programme Preset, then
push to z.
4 Push the joystick to $ or 4 to select the programme number with the
channel you wish to name.
5 Push the joystick to z repeatedly until the first element of the LABEL
column is highlighted.
PICTURE CONTROL
Picture Mode
Contrast
Reset
Format
PRESET
Auto Programme
Manual Programme Preset
Further Programme Preset
AV Label Preset
Programme Sorting
Parental Lock
Language
Convergence
PRESET
Auto Programme
Manual Programme Preset
Further Programme Preset
AV Label Preset
Programme Sorting
Parental Lock
Language
Convergence
MANUAL PROGRAMME PRESET
PROG SYS CHAN LABEL
0
1
2
3
4
5
6
7
8
9
MANUAL PROGRAMME PRESET
PROG SYS CHAN LABEL
0
1
2
3
4
5
6
7
8
9
Personal
4:3
B/G
- - - - -
C 40
B/G
- - - - -
C 41
B/G
- - - - -
C 31
B/G
- - - - -
C 34
B/G
- - - - -
C 27
B/G
- - - - -
C 47
B/G
- - - - -
C 44
B/G
- - - - -
C 23
B/G
- - - - -
C 35
B/G
- - - - -
C 28
B/G
- - - - -
C 40
B/G
- - - - -
C 41
B/G
- - - - -
C 31
B/G
- - - - -
C 34
B/G
- - - - -
C 27
B/G
- - - - -
C 47
B/G
- - - - -
C 44
B/G
- - - - -
C 23
B/G
- - - - -
C 35
B/G
- - - - -
C 28
GB
6 Push the joystick to $ or 4 to select a letter or number (select “-” for
a blank), then push to z to confirm this character. Select the other four
characters in the same way.
7 After selecting all the characters, press the OK button.
Repeat steps 4 to 7 if you wish to label other channels.
8
9 Press the MENU button to exit and return to the normal TV screen.
When you select a named channel, the name appears for a few seconds on the
screen.
Advanced Operation - Advanced Presetting
MANUAL PROGRAMME PRESET
PROG SYS CHAN LABEL
B/G
0
1
2
3
4
5
6
7
8
9
B/G
B/G
B/G
B/G
B/G
B/G
B/G
B/G
B/G
C 40
C 41
C 31
C 34
C 27
C 47
C 44
C 23
C 35
C 28
- - - - -
- - - - -
- - - - -
- - - - A- - - -
- - - - -
- - - - -
- - - - -
- - - - -
- - - - -
19
Page 19
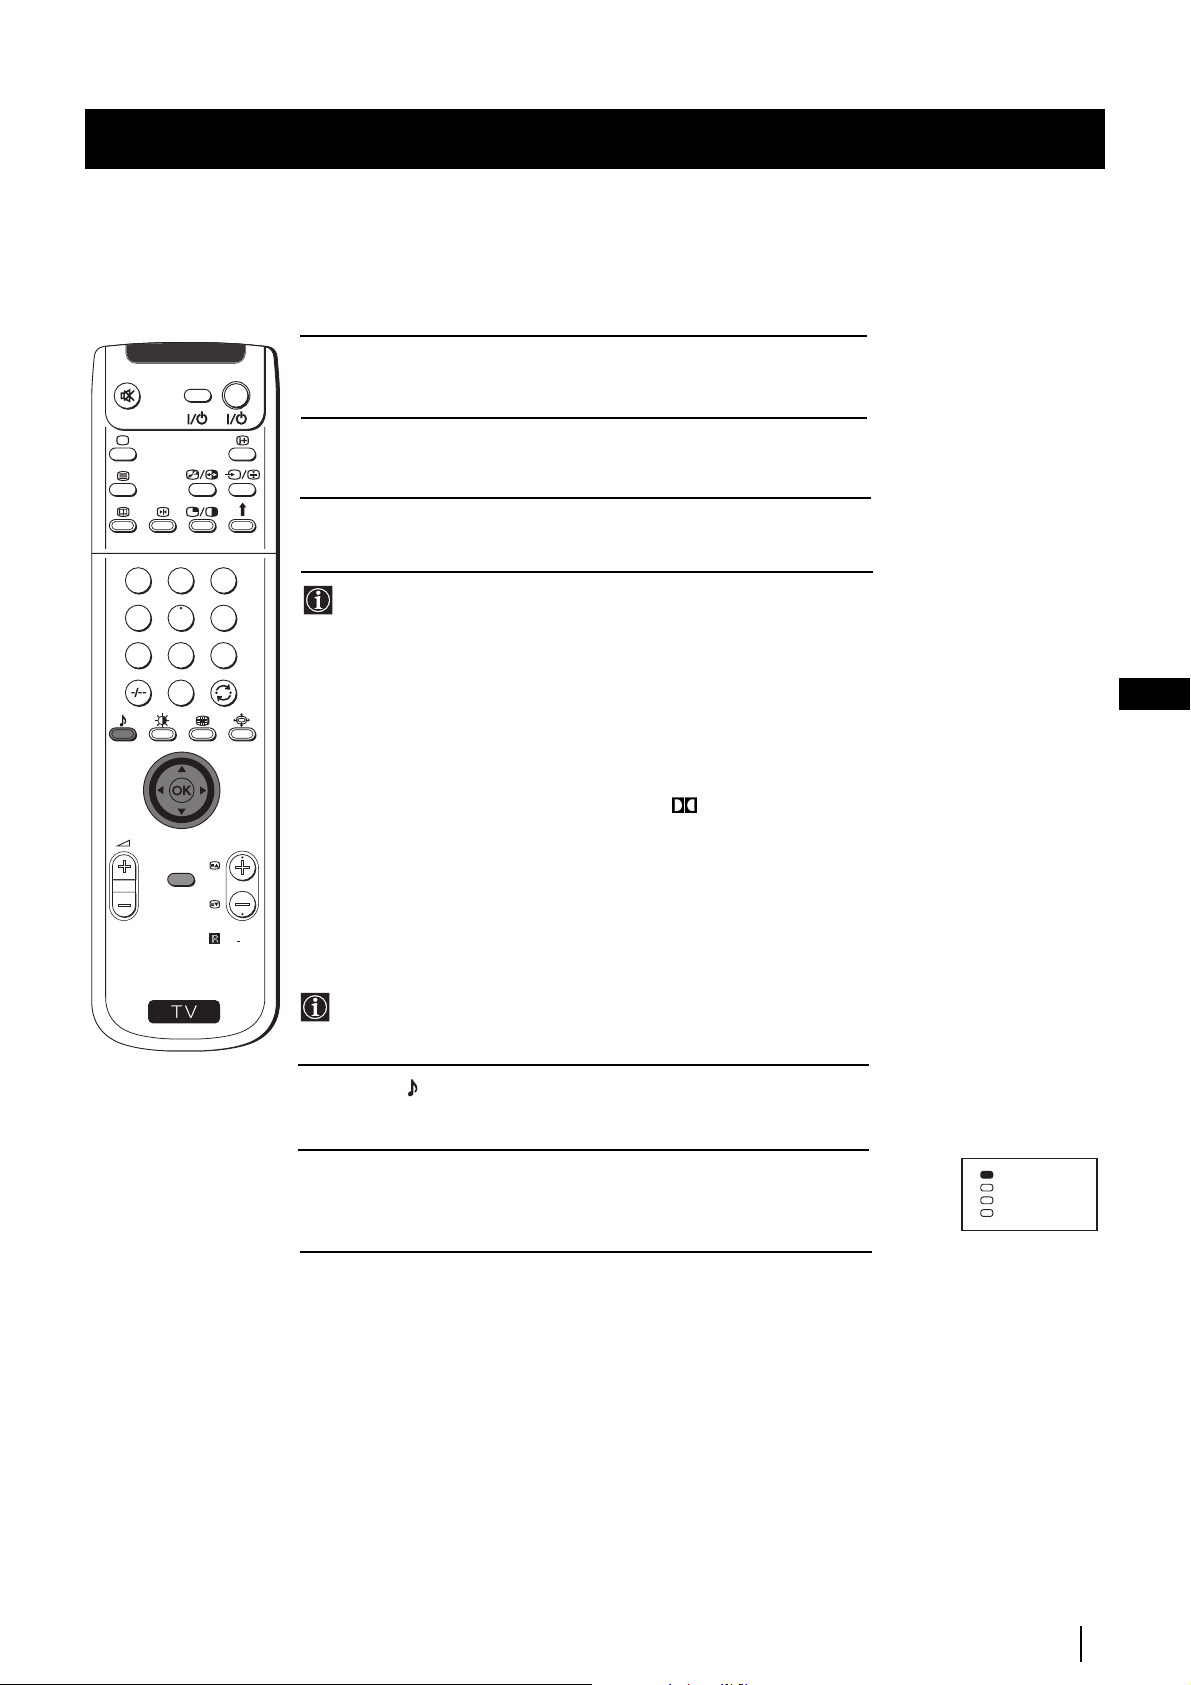
Advanced Operation - Advanced TV Operation
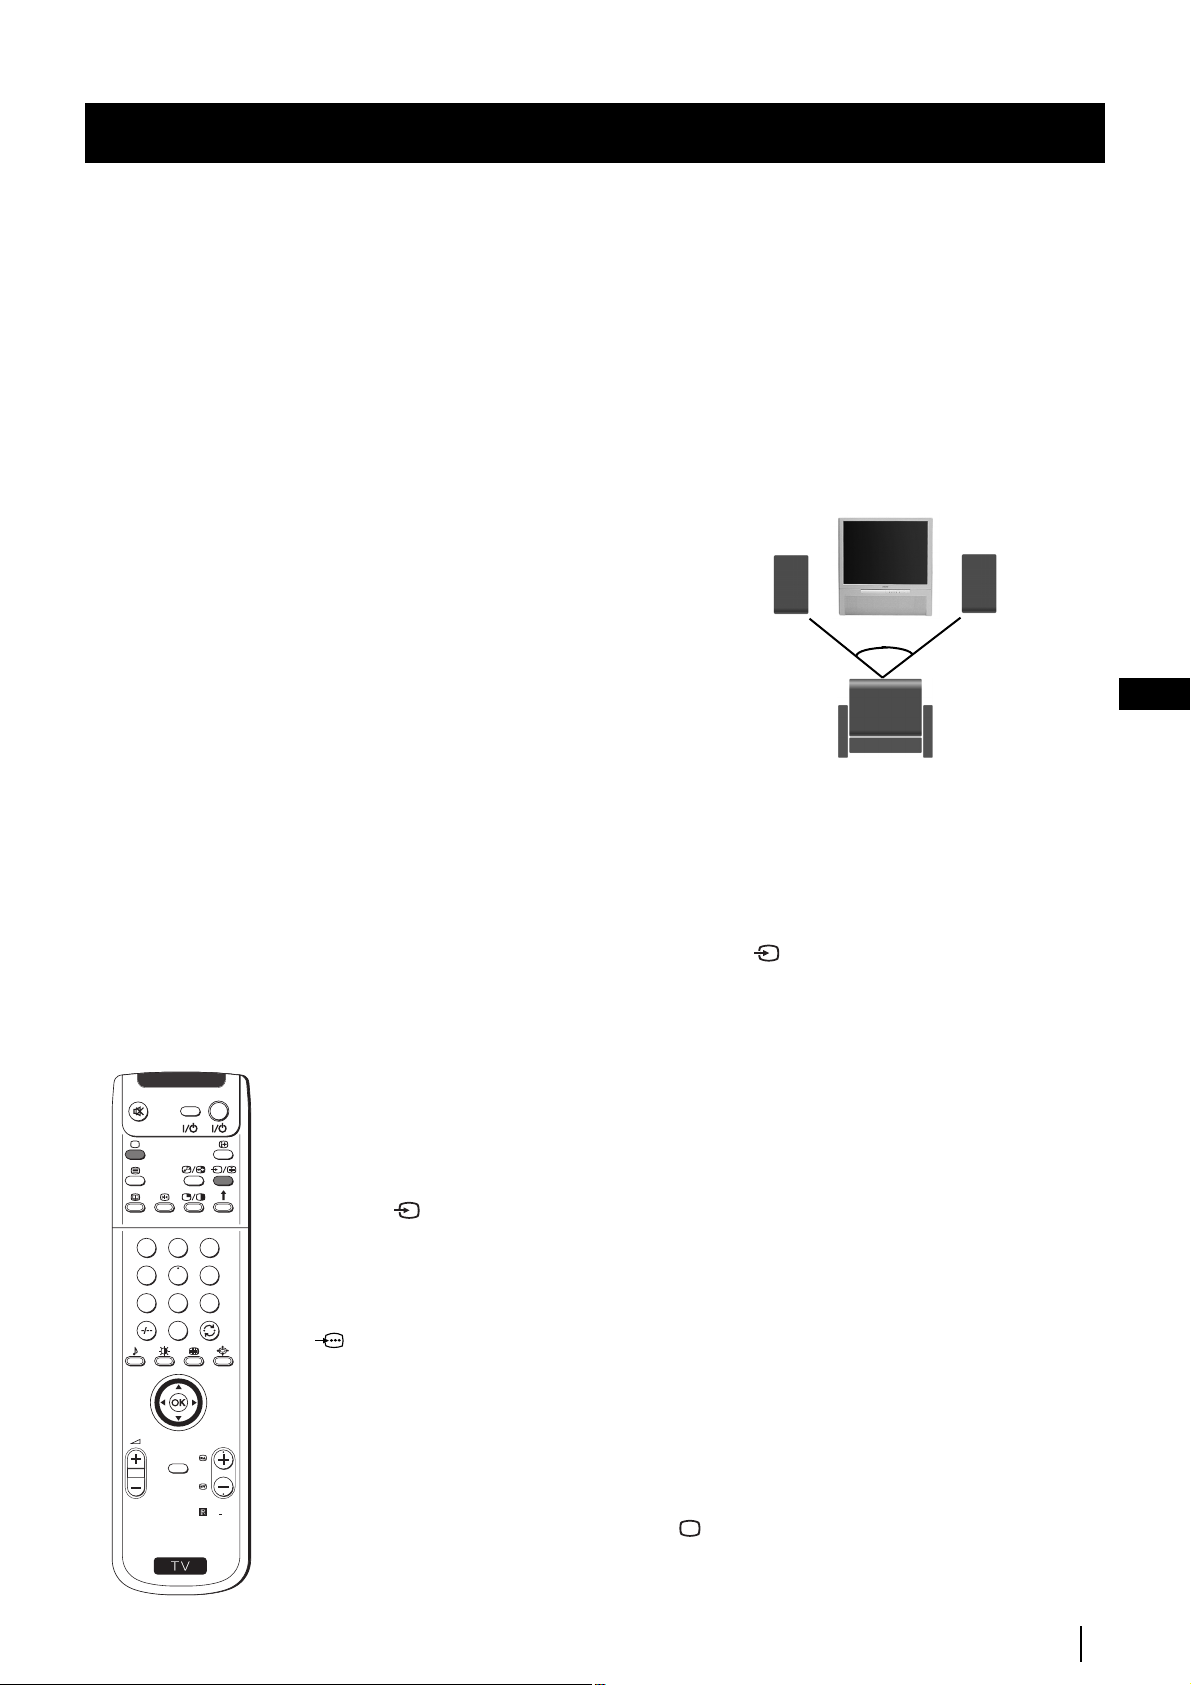
Adjusting the Picture
Although the picture is adjusted at the factory, you can modify it to suit your own taste.
PICTURE CONTROL
Picture Mode
Contrast
Reset
Format
Personal
4:3
VIDEO TV
1 Press the MENU button on the remote control to display the menu
on the screen.
2 Push the joystick z to enter the PICTURE CONTROL menu.
3 Push the joystick to $ or 4 to select the item you wish to change,
then push to z.
Refer to the table below to chose the item and for the effect of
each control:
1
2
3
4
5
6
Picture Mode z Picture Mode z Personal (for individual settings)
z Movie (for films)
z Live (for live broadcast programmes)
7
8
9
0
$ Brightness* Z Darker z Brighter
$ Colour* Z Less z More
$ Sharpness* Z Softer z Sharper
$ Hue** Z Greenish z Reddish
Contrast Z Less z More
K
Mode")
MENU
PROGR
Reset Resets picture to the factory preset levels.
Format (for detalis refer to the section "Changing the Screen
* Can only be altered if Personal Picture Mode is selected.
RM
892
** Only avalaible for NTSC colour signal (e.g: USA video tapes).
PICTURE CONTROL
Picture Mode
Contrast
Reset
Format
PICTURE MODE
Picture Mode
Brightness
Colour
Sharpness
Hue
Personal
4:3
Personal
S
4 Push the joystick to Z or z to alter the selected item, then
press the OK button to store the new adjustment.
5 Repeat steps 3 and 4 to alter the other items.
6 Press the MENU button to exit and return to the normal TV screen.
Changing the Picture Mode Quickly
You can quickly change the Picture Mode without entering the
Picture Control menu screen.
1 Press the button on the remote control to directly access the
Picture Mode.
2 Push the joystick to $ or 4 to select your desired picture mode
(Personal, Movie or Live), then press the OK button to remove the
display from the screen.
Personal
Movie
Live
Advanced Operation - Advanced TV Operation
20
Page 20
Advanced Operation - Advanced TV Operation
Changing the screen mode
Using this Screen Mode feature you can change the aspect ratio of the screen.
PICTURE CONTROL
Picture Mode
Contrast
Reset
Format
Personal
4:3
VIDEO TV
1 Press the MENU button on the remote control to display the menu
on the screen.
2 Push the joystick to z button to enter the PICTURE CONTROL
menu.
3 Push the joystick to $ to select Format.
4 Push the joystick to z repeatedly to select:
1
2
3
4
5
6
• 4:3: conventional 4:3 picture.
PICTURE CONTROL
Picture Mode
Contrast
Reset
Format
Personal
4:3
• 16:9: for 16:9 broadcasts.
7
8
9
0
Press rhe OK button.
GB
5 Press the MENU button to exit and return to the normal TV screen.
4:3
PROGR
MENU
S
RM
892
Changing the Picture Mode Quickly
16:9
You can quickly change the Picture Mode without entering the
Picture Control menu screen.
1 Press the button on the remote control repeatedly to select your
desired format screen mode (4:3 or 16:9).
Advanced Operation - Advanced TV Operation
21
Page 21
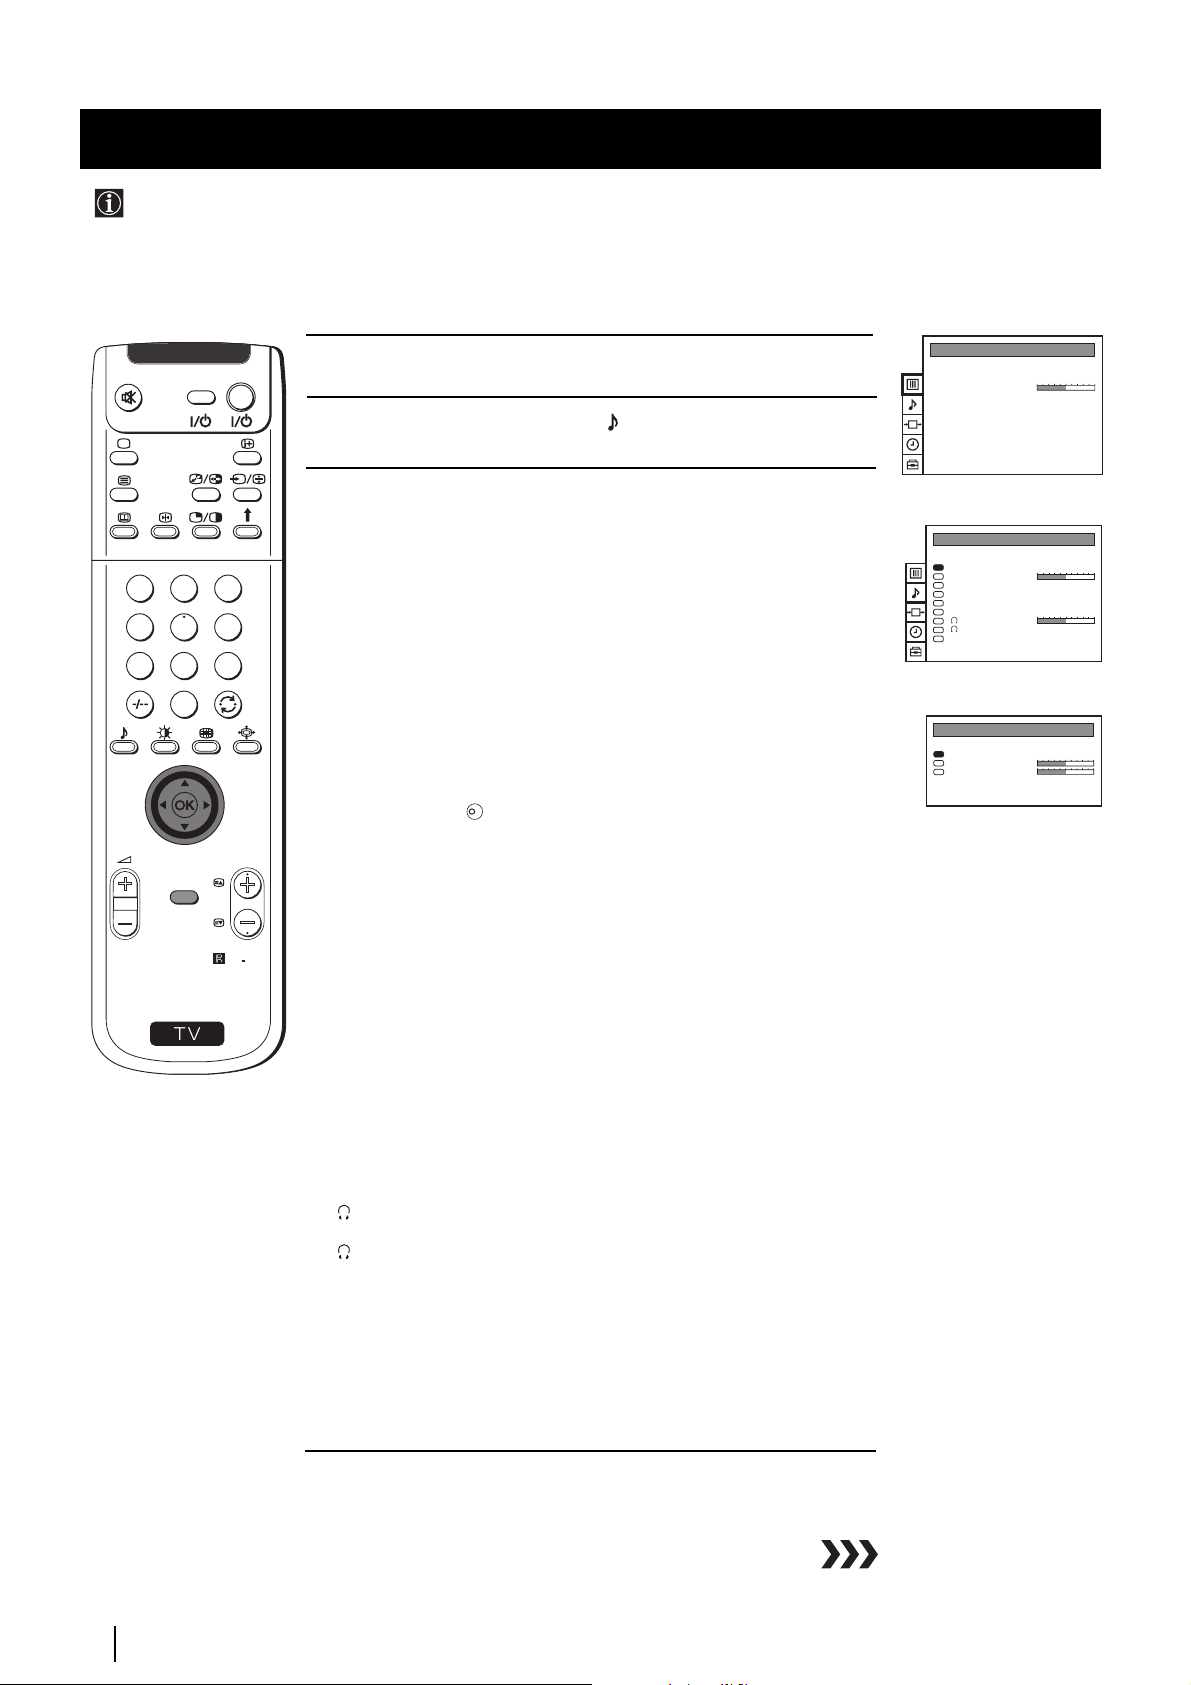
Advanced Operation - Advanced TV Operation
Adjusting the Sound
Although the sound is adjusted at the factory, you can modify it to suit your own taste.
PICTURE CONTROL
Picture Mode
Contrast
Reset
Format
Personal
4:3
VIDEO TV
1 Press the MENU button on the remote control to display the menu
on the screen.
2 Push the joystick to $ to select the symbol, then push to z to enter
to the SOUND CONTROL menu.
3 Push the joystick $ or 4 to select the item you wish to change, then
push to z.
Refer to the table below to chose the item and for the effect of
each control.
1
2
3
Sound Mode z Mode z Personal (for individual settings)
4
5
6
7
8
9
0
$ Treble* Z Less z More
z Rock
z Jazz
z Pop
$ Bass* Z Less z More
Balance Z Left z Right
K
z On: Simulates the sound effect of Dolby Pro Logic
surround.
MENU
PROGR
Reset Resets sound to the factory preset levels.
Dolby** Virtual z Off: Normal
SOUND CONTROL
Sound Mode
Balance
Reset
Dolby Virtual
Dual Sound
Volume Offset
Volume
Dual Sound
Speaker
SOUND MODE
Mode
Treble
Bass
Personal
Off
Mono
0
Mono
Main
Personal
S
RM
892
Dual Sound • For a stereo broadcast:
z Mono
z Stereo
• For a bilingual broadcast:
z Mono (for mono channel if available)
z A (for channel 1)
z B (for channel 2)
Volume Offset Z -12 .......... z +12
The channel volume level can be adjusted over a range
of -12 to +12.
Headphones:
Volume Z Less z More
Dual Sound • For a stereo broadcast:
z Mono
z Stereo
• For a bilingual broadcast:
z Mono (for mono channel if available)
z A (for channel 1)
z B (for channel 2)
Speaker
z Main: sound from projection TV set
z Centre in: sound from external amplifier
* Can be only altered if "Personal" mode is selected.
Advanced Operation - Advanced TV Operation
22
Page 22
Advanced Operation - Advanced TV Operation
VIDEO TV
press the OK button to store the new adjustment.
5 Repeat steps 3 and 4 to alter the other items.
6 Press the MENU button to exit and return to the normal TV screen.
1
2
4 Push the joystick Z or z to alter the selected item, then
3
4
5
6
7
8
9
0
PROGR
MENU
**This TV has been designed to create “Dolby Surround” sound
effect simulating the sound of four speakers with two speakers,
in case the broadcasted audio signal is a Dolby Surround
encoded programme. Besides that, the sound effect can also be
improved by connecting your external amplifier (for details
refer to “Connecting to external audio Equipment” on page 27).
** Manufactured under license from Dolby Laboratories. “Dolby”,
“Pro Logic” and the double-D symbol are trademarks of
Dolby Laboratories.
GB
S
RM
892
Changing Sound Mode Quickly
You can quickly change Sound mode without entering the Sound
Control menu screen.
1 Press the button on the remote control to directly access to the
Sound Mode.
2 Push the joystick to $ or 4 to select your desired sound mode
(Personal, Rock, Jazz or Pop), then press the OK button to remove
the display from the screen.
Personal
Rock
Jazz
Pop
Advanced Operation - Advanced TV Operation
23
Page 23
Advanced Operation - Advanced TV Operation
Using the Sleep Timer
This function provides an overview of some of the features available on this set.
VIDEO TV
on the screen.
2 Push the joystick to $ button to select the t symbol, then push to z
to enter to the TIMER menu.
1
2
3
4
5
6
7
8
1 Press the MENU button on the remote control to display the menu
9
0
3 Push the joystick to z, then push to Z or z repeatedly to set the time
period delay
PICTURE CONTROL
Picture Mode
Contrast
Reset
Format
TIMER
Sleep Timer
TIMER
Sleep Timer
Personal
4:3
Off
1:00
Off z 0:30 z 1:00..... 4:00 hours
4 Press the OK button.
PROGR
MENU
S
5 Press the MENU button to exit and return to the normal TV screen.
RM
892
One minute before the projection TV switches into standby mode, the
indication "0:01" is displayed on the screen automatically.
Notes: • When watching the TV, press the button on the remote
control to display the time remaining.
• To return to normal operation from standby mode, press the
TV button on the remote control.
Advanced Operation - Advanced TV Operation
24
Page 24
Teletext
Viewing Teletext
Teletext is an information service transmitted by most TV stations.
Make sure to use a TV channel with a strong signal, otherwise teletext errors may occur.
VIDEO TV
Select the TV channel which carries the teletext service you wish to
1
view.
2 Press the button on the remote control to switch on the teletext.
1
2
3
4
5
6
7
8
9
0
3 Input three digits for the page number, using the numbered buttons
on the remote control. (if you have made a mistake, type in any three
digits and then, re-enter the correct page number).
TELETEXT
Index
Programme
News
Sport
Weather
25
153
101
98
TELETEXT
Index
Programme
News
Sport
Weather
25
153
101
98
GB
4 Press the button to switch off teletext.
Using other Teletext functions
PROGR
Selecting Teletext
MENU
TO PRESS THE BUTTON
S
Access the next or preceding page for next page or
RM
892
for the preceding page
Superimpose teletext on to the TV
Press again to cancel teletext
TELETEXT
Index
Programme
News
Sport
Weather
25
153
101
98
mode.
TELETEXTTELETEXT
Index
Programme
25
News
153
Sport
Freeze a teletext page
Weather
101
98
Press again to cancel the
freeze.
Reveal concealed information
(e.g. answer to a quiz) Press again to cancel.
Using Fastext
Fastext lets you access pages with one button stroke.
When Fastext is broadcast, a colour coded menu appears at the
bottom of the teletext page. Press the colour button (red, green,
yellow or blue) on the remote control to access the corresponding
page.
Teletext
25
Page 25
Optional Connections
Connecting Optional Equipment
Using the following instructions, you can connect a wide range of optional equipment to your projection TV.
Rear of projection TV Front of projection TV
Decoder
DVD
VCR
To avoid picture
distortion:
• Do not connect
equipment to F
and Gconnectors
at the same time.
• Do not connect any
equipment on the
front connectors
together with D
connector.
Acceptable input signal
A Centre speaker input.
B No inputs
C Audio/video and RGB signal
D Audio/video and S video signal
E Audio/video signal
F S Video signal
G Video signal
H Audio signal
C
A
Set “Speaker” on the SOUND
CONTROL menu to “Centre in”.
B
Hi-Fi
E
S VHS/Hi8
camcorder
F
D
VCR
DVD
G
H
8mm/Hi8
camcorder
Available output signal
No outputs
Audio signal.
Video/audio displayed on TV tuner.
Video/audio from selected source.
Video/audio from selected source (the same output source as
the :2/q 2 connector)
No output.
No output.
No output.
26
Optional Connections
Page 26
Optional Connections
Using Optional Equipment
Additional Information when connecting equipment
Connecting a VCR
We recommend you connect your VCR to the D or E socket using a scart lead. If you do not have a scart lead, use the “Manually
Tuning the TV” section of this instruction manual to tune in the VCR signal to TV programme number “0”.
If your video supports Smartlink please refer the "Smartlink" section of this instruction manual.
Connecting to External Audio Equipment
1 To listen to the audio of your projection TV on the Hi-Fi equipment:
Plug in your Dolby Prologic system decoder amplifier to the B sockets on the rear of the projection TV if you wish to amplify
the audio output from the TV.
The output level from B sockets can be varied by adjusting the volume of the headphones. Refer to the “Adjusting the sound”
section of this instruction manual to adjust the volume of the headphones.
Right Hi-Fi
Speaker
To enjoy “Dolby Virtual” sound effect through
your Hi-Fi equipment:
Place the speakers of your equipment in front of
your sitting place and besides the TV set but
keeping a distance of 50 cm from each speaker to
the TV set.
Then by using the menu system, select the menu “Sound
Control” and set “Dolby Virtual” to “On”.
Left Hi-Fi
Speaker
~50º
GB
2 To listen to the Dolby amplifier equipment on the projection TV speakers:
Your sitting position
Plug in your Hi-Fi equipment to the A socket on the rear of the projection TV
if you wish to listen to the audio output from your Hi-Fi on the projection TV
speaker. If you have a Dolby amplifier, connect the centre output from your amplifier
to the A socket to use the projection TV as a centre speaker. Refer to the “Adjusting the Sound”
section of this instruction manual and set the option "Speaker" to "Centre in".
For mono equipment
Connect the phono plug to the L/G/S/I socket on the front of the TV and select the 2 input signal using the instructions on
this page below.
Select and View the Input Signal
VIDEO TV
1 Connect your equipment to the designated projection TV socket, as it is indicated on the
previous page.
2 Switch on the connected equipment.
3 Press the button repeatedly on your remote control until the correct input symbol
1
2
3
4
5
6
7
8
9
0
appears on the screen.
Symbol Input signals
kkkk • Audio/video input signal through the Euro AV connector C
• RGB input signal through the Euro AV connector C
KK
KK
• Audio/Video input signal through the Euro AV connector D or the
phono sockets H and G.
MENU
S
PROGR
RM
qqqq
2 • Audio/S Video input signal through the Euro AV connector D or the
sockets H and F.
…………
3 • Audio/Video input signal through the Euro AV connector E.
892
4 To return to the normal TV picture, press the button on the remote control.
Optional Connections
27
Page 27
Optional Connections
VCR
Decoder
Smartlink
Smartlink is a direct link between your projection TV set and a VCR.
For Smartlink you need:
• A VCR which supports Smartlink, NextView Link, Easy Link or Megalogic.
Megalogic is a trademark of Grundig Corporation.
EasyLink is a trademark of Philips Corporation.
• A fully-wired 21 pin SCART cable to connect your VCR to the Euro AV connector :3
(SMARTLINK) on the rear of the Projection TV.
The features of Smartlink are:
• Tuning information such as the channel overview are downloaded from the Projection TV set
to the VCR.
• Direct projection TV recording: While watching TV you need to press just one button on the
VCR to record this programme.
Rear of projection TV
• Projection TV in standby mode: Press the "Play z" button on your VCR to switch the TV
automatically on.
If you have connected a decoder to a VCR which supports Smartlink feature, select the
menu Further Programme Preset in the (PRESET) menu and select DECODER AV3
to each codified channel. For more details, please refer to the section "Using the Further
Programme Preset function" of this instruction manual.
For more information on Smartlink, please refer to the Instruction Manual of your
VCR.
Remote Control of other Sony Equipment
Using the buttons underneath the cover of the remote control you can
control other Sony equipment.
1 Open the cover of the Remote Control.
2 Set the selector VTR 1234 DVD according to the equipment you want to control:
VTR 1 Beta VCR
VTR 2 8 mm VCR
VTR 3 VHS VCR
VTR 4 Digital Video (DCR-VX 1000/9000 E, VHR-1000)
DVD Digital Video Disk
VIDEO TV
VTR 1 2 3 4 DVD
CH
3 Use the buttons underneath the cover on the remote control to operate the
equipment.
• If your video equipment has a COMMAND MODE selector, set this
selector to the same position as the VTR 1234 DVD selector on the
TV Remote Control.
• If the equipment does not have a certain function, the corresponding
button on the remote control does not work.
Optional Connections
28
VTR 1 2 3 4 DVD
CH
Page 28
Optional Connections
Selecting the output source for the Euro AV connectors
Using this function you can record on your VCR any signal coming from an external equipment connected to the Euro AV
connectors :2/q 2 or :3 placed on the rear of the projection TV.
In that case you have to select the output source as described below (if your VCR support Smartlink, this procedure is not
necessary).
VIDEO TV
1 Press the MENU button on the remote control to display the menu on
the screen.
2 Push the joystick to $ to select the symbol, then push to z button
to enter to the VIDEO CONNECTION menu screen.
1
2
3
4
5
6
7
8
9
0
3 Push the joystick to $ or 4 button to highlight:
TV Screen (input source for the TV screen) or
PICTURE CONTROL
Picture Mode
Contrast
Reset
Format
VIDEO CONNECTION
TV Screen
Output
TV
Personal
4:3
[TV - - - - - - -]
[AV1 - - - - - - -]
AV1
GB
Output (output source available for :2/q 2 and :3 Euro
AV connectors).
Push the joystick to z to confirm.
PROGR
MENU
4 Push the joystick to Z or z repeteadly to select the desired source:
S
RM
892
TV Screen TV, AV1, RGB, AV2, YC2 or AV3
Output TV, AV1, AV2, YC2, AV3 or AUTO
Then press the OK button to confirm.
If you select "AUTO", the output signal will always be the same
one that is displayed on the screen.
If you have connected a decoder, please remember to change
back the Output to "TV" for correct unscrambling.
5 Press the MENU button to exit and return to the normal TV screen.
The selected signal is available for your optional equipment connected to
the appropriate Euro AV connector.
Optional Connections
29
Page 29
Optional Connections
Using the AV Label Preset feature
This function enables you to designate a name to the optional equipment you have connected to the sockets of this
projection TV. This name can be up to 5 characters (letters or numbers).
1
4
7
S
VIDEO TV
2
5
8
0
MENU
3
6
9
RM
PROGR
892
1 Press the MENU button on the remote control to display the menu on
the screen.
2 Push the joystick to $ to select the symbol, then push to z to
enter to the PRESET menu screen.
3 Push the joystick to $ or 4 to select AV Label Preset, then push
to z.
4 Push the joystick to $ or 4 select the input source you wish to name
(eg AV2), then push to z to highlight the first element of the LABEL
column.
5 Push the joystick to $ or 4 to select a letter or number (select “-” for
a blank) then push to z to confirm this character. Select the other four
characters in the same way.
PICTURE CONTROL
Picture Mode
Contrast
Reset
Format
PRESET
Auto Programme
Manual Programme Preset
Further Programme Preset
AV Label Preset
Programme Sorting
Parental Lock
Language
Convergence
PRESET
Auto Programme
Manual Programme Preset
Further Programme Preset
AV Label Preset
Programme Sorting
Parental Lock
Language
Convergence
AV LABEL PRESET
INPUT LABEL
AV1
RGB
AV2
YC2
AV3
AV LABEL PRESET
INPUT LABEL
AV1
RGB
AV2
YC2
AV3
- - - - -
- - - - -
- - - - -
- - - - -
- - - - -
- - - - -
- - - - A- - - -
- - - - -
- - - - -
Personal
4:3
Optional Connections
30
6 After selecting all the characters, press the OK button.
7 Repeat steps 4 to 6 if you wish to label other input sources.
8 Press the MENU button to exit and return to the normal TV screen.
Whenever the equipment with the labeled input is selected for use, the
name appears for a few seconds on the screen.
Page 30
Additional Information
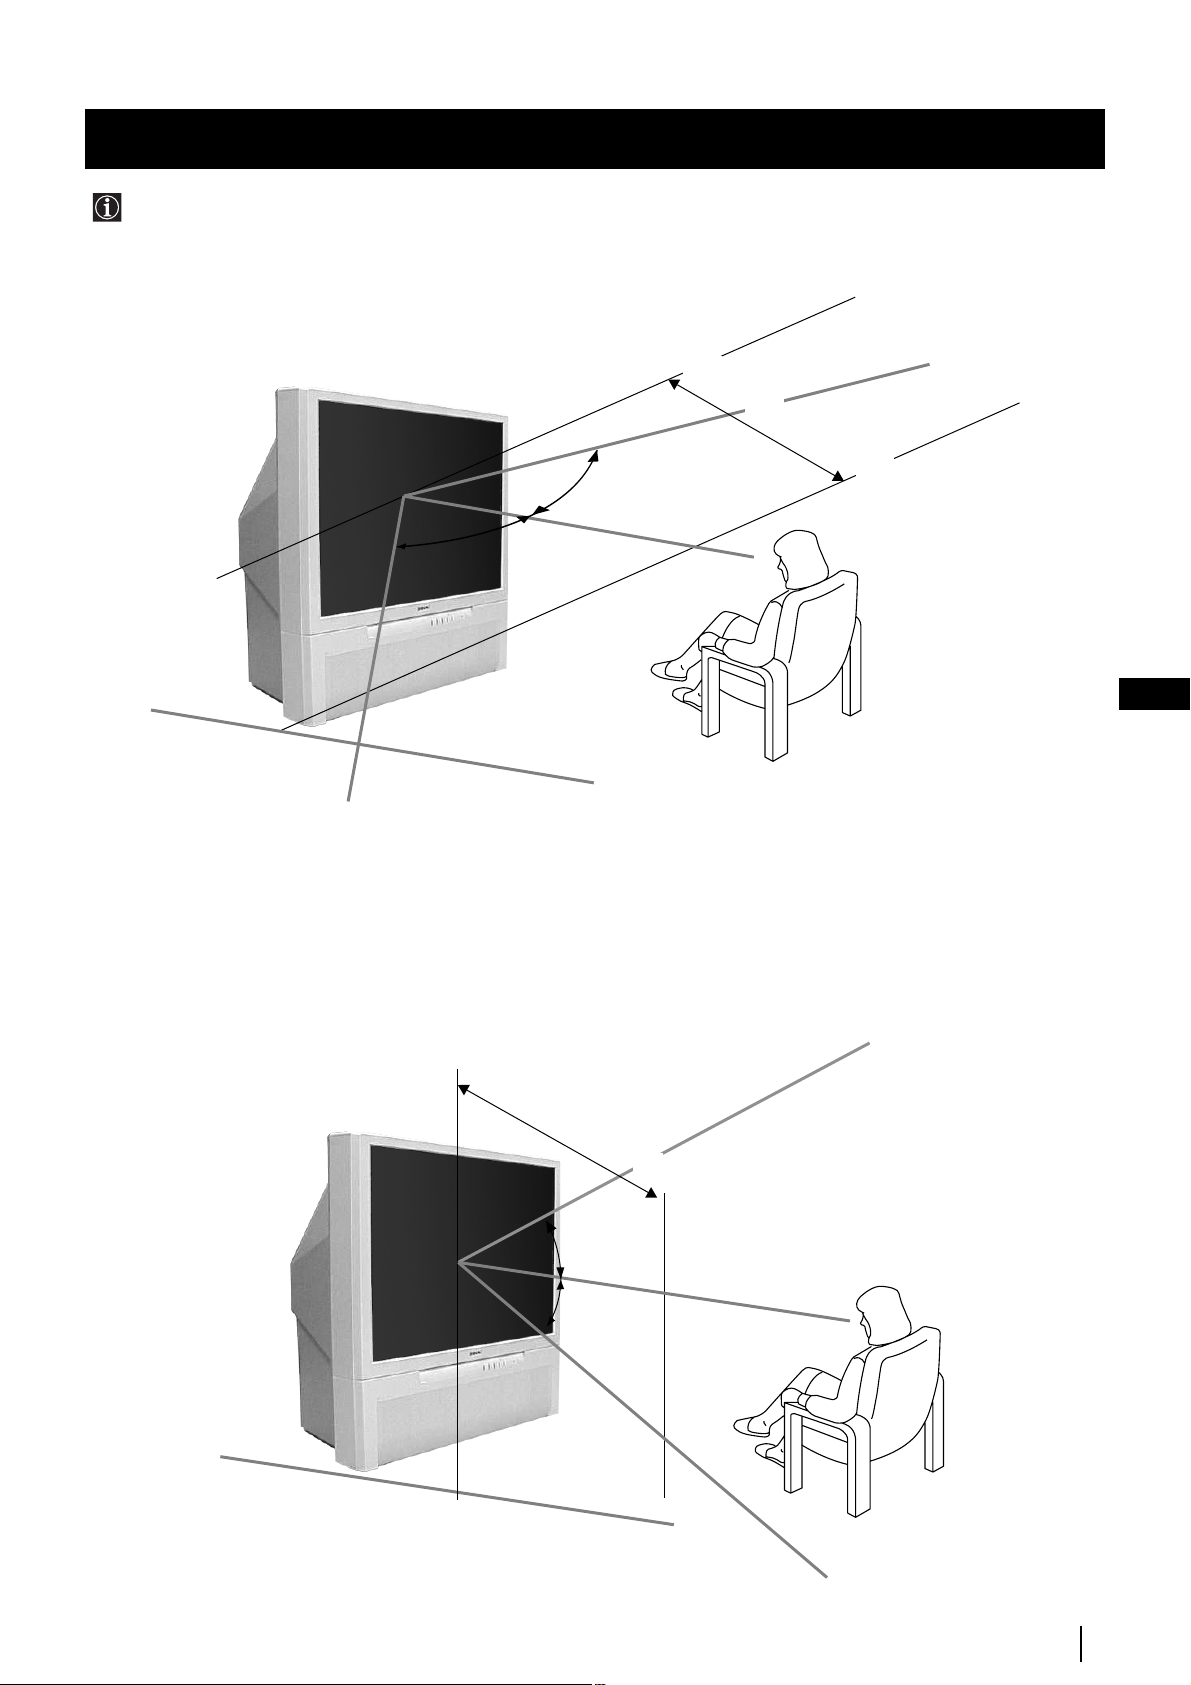
Optimum Viewing Area
For the best picture quality, try to position the projection TV so that you can view the screen from within the areas
shown below.
Horizontal viewing area
2.1m (Minimum optimum distance)
75º
75º
GB
(Optimum viewing position)
Vertical viewing area
2.1m (Minimum optimum distance)
27.5°
27.5°
(Optimum viewing position)
Additional Information
31
Page 31

Additional Information
Specifications
TV system
B/G/H, D/K, I, L
Colour system
PAL, SECAM
NTSC 3.58, 4.43 (only Video In)
Channel coverage
VHF: E2-E12
UHF: E21-E69
CATV: S1-S20
HYPER: S21-S41
D/K: R1-R12, R21-R69
L: F2-F10, B-Q, F21-F69
I: UHF B21-B69
Projected picture size
41 inches
Approx. 130 measured diagonally
Rear Terminals
• Centre speaker input terminals (2
• (L, R) audio outputs (phono jacks)
• :1/ 21-pin Euro connector (CENELEC
• :2/q 2 21-pin Euro connector (CENELEC
(SMARTLINK)
Front Terminals
C
terminals)
standard) including audio/video
input, RGB input, TV audio/video
output.
standard) including audio/video
input, S video input, selectable
audio/video output
• :3 21-pin Euro connector (CENELEC
standard) including audio/video
input, selectable audio / video
output (selectable the same output
source as :2/q 2 connector) and
Smartlink interface
…2 video input - phono jack
2
audio inputs - phono jacks
q2 S video input - 4 pin DIN
Headphones jack - minijack stereo
Sound output
2 x 30 W (music power)
2 x 15 W (RMS)
Centre SP input
30 W (RMS) (using as the centre speaker)
Power consumption
145 W
Standby Power consumption
0.7 W
Dimensions (w x h x d)
Approx. 948 x 992 x 511 mm
Weight
Approx. 43 kg
Accessories supplied
1 Remote Control (RM-892)
2 Batteries (IEC designated)
Other features
Digital Comb filter (High resolution)
TELETEXT, Fastext, TOPtext
NICAM
Sleep Timer
Smartlink
Dolby Virtual
Design and specifications are subject to change without notice.
Ecological Paper - Totally Chlorine Free
Additional Information
32
Page 32

Additional Information
Troubleshooting
Here are some simple solutions to the problems which may affect the picture and sound.
Problem
No picture (screen is dark), no sound.
Poor or no picture (screen is dark),
but good sound.
Poor picture quality when watching a
RGB video source.
Good picture, no sound
Solution
• Plug the projection TV in.
• Press the
• If the indicator is on, press TV button or a programme
number button on the remote control.
• Check the aerial connection.
• Turn the projection TV off for 3 or 4 seconds and then turn it
on again using the
TV.
• Using the MENU system, select the Picture Adjustment
display.
Adjust the brightness, picture and colour balance levels.
• From the Picture Adjustment display select Reset to return
to the factory settings.
• Press the button repeatedly on the remote control until
the RGB symbol is displayed on the screen.
• Press the +/- button on the remote control.
• If is displayed on the screen, press the button on the
control.
• Check that "Main" speaker is selected on the SOUND
CONTROL menu.
button on the front of the projection TV.
button on the front of the projection
GB
No colour on colour programmes
Distorted picture when changing
programmes or selecting teletext
Noisy picture when viewing TV channel
Remote control does not function
The standby indicator on the set
flashes.
• If you continue to have these problems, have your TV serviced by qualified personnel.
• NEVER open the casing yourself.
• Using the MENU system, select the Picture Adjustment
display. Adjust the colour balance.
• From the Picture Adjustment disply select Reset to return to
the factory settings.
• Turn off any equipment connected to the 21 pin Euro
connectors on the rear of the TV.
• Adjust Fine Tuning (AFT) to obtain better picture reception.
For details, please refer to the section "Using the Further
Programme Preset function"
• Replace the batteries.
• Contact your nearest Sony service centre.
Additional Information
33
Page 33

RückprojektionsFernseher
Wir gratulieren Ihnen zum Kauf Ihres Sony Rückprojektions-Fernseher.
Lesen Sie bitte vor der Inbetriebnahme des Gerätes diese Anleitung sorgfältig
durch und bewahren Sie sie gut auf.
Über diese Bedienungsanleitung
•
Verwenden Sie den Teil Inbetriebnahme beim Aufstellen und um sich mit den
Grundfunktionen des Gerätes vertraut zu machen.
•
Verwenden Sie den Teil Zusatzfunktionen, falls Sie die Sonder- und
Zusatzfunktionen des Gerätes interessieren.
•
In der Anleitung verwendete Symbole:
•
• Wichtiger Hinweis
Mögliche Gefahren
Bedienungsanleitung
DE
• Information zu einer Funktion
•
1,2...
Eine Aufzählung von Bedienschritten
MENU
K
• Farblich hervorgehobene Tasten auf der Fernbedienung beziehen sich auf
die zu drückenden Tasten, um eine Bedienfolge auszuführen.
• Resultat einer Bedienung.
• Text geht auf der nächsten Seite weiter.
3
Page 34

Sicherheitsmaßnahmen
Betreiben Sie das Fernsehgerät
ausschließlich an 220 - 240 V
Wechselstrom. Um Feuergefahr oder
die Gefahr eines elektrischen
Schlages zu vermeiden, verwenden
Sie nicht zu viele Geräte an der
gleichen Steckdose.
Aus Umweltschutz- und
Sicherheitsgründen empfiehlt es
sich, das Fernsehgerät nicht im
Bereitschaftsmodus zu lassen,
wenn es nicht benutzt wird.
Schalten Sie es am Netzschalter aus.
Um Feuergefahr oder die Gefahr eines
elektrischen Schlages zu vermeiden,
stecken Sie niemals irgendwelche
Gegenstände in das Gerät. Schütten Sie
niemals irgendeine Flüssigkeit in das Gerät
hinein. Benutzen Sie das Fernsehgerät nicht
weiter, wenn Flüssigkeiten oder
Fremdkörper in das Gerät gelangen. Lassen
Sie das Gerät sofort von qualifiziertem
Fachpersonal überprüfen.
Öffnen Sie nicht das Gehäuse des
Gerätes. Überlassen Sie dies stets nur
qualifiziertem Fachpersonal.
Bedecken Sie nicht die
Lüftungsöffnungen des
Fernsehgeräts. Lassen Sie um
das ganze Gerät für die Luftzufuhr
mindestens 10 cm Platz.
Reinigen Sie das Fernsehgerät mit
einem weichen, feuchten Tuch.
Verwenden Sie kein Reinigungsbenzin,
Verdünner, Lösungsmittel oder andere
Chemikalien zum Reinigen. Verkratzen
Sie nicht den Bildschirm. Als
Vorsichtsmassnahme stecken sie das
Fernsehgerät vor dem Reinigen aus.
Während eines Gewitters
fassen Sie nicht das Netzkabel oder
das Antennenkabel des
Fernsehgerätes an.
Stellen Sie das Fernsehgerät
nicht an Orten auf, die Hitze,
Feuchtigkeit oder übermäßig viel
Staub ausgesetzt sind. Stellen Sie das
Fernsehgerät nicht an einem Ort auf,
an dem es Erschütterungen
ausgesetzt ist.
Ziehen das Netzkabel nur am
Stecker heraus. Ziehen Sie nicht
am Kabel.
Um Feuergefahr oder die
Gefahr eines elektrischen
Schlages zu vermeiden, setzen
Sie das Gerät nicht Regen oder
sonstiger Feutigkeit aus.
Um Feuergefahr zu vermeiden
halten Sie brennbaren
Gegenstände oder offenes Licht
(z.B. Kerzen) fern vom
Fernsehgerät.
Achten Sie darauf das keine schweren
Gegenstände auf dem Netzkabel liegen
und es dadurch beschädigt wird.
Darum empfehlen wir Ihnen das Kabel
zu straffen, wickeln sie es um die auf
der Rückseite des Fernsehgerätes
angebrachten Kabelhalter.
Bevor Sie das Gerät an einem anderen
Stellen Sie das Fernsehgerät auf
einen sicheren stabilen Ständer.
Verhindern Sie das Kinder hinauf
steigen können. Legen Sie das Gerät
nicht auf die Seite oder den
Bildschirm.
Aufstellungsort platzieren, ziehen Sie
den Netzstecker. Vermeiden Sie beim
Transport den Gang über unebene
Flächen, schnelle hastige Schritte oder
übermäßige Gewalt. Falls das
Fernsehgerät heruntergefallen oder
beschädigt wurde, lassen Sie es sofort
durch qualifiziertes Fachpersonal
überprüfen.
Bedecken Sie nicht die
Lüftungsöffnungen des
Fernsehgerätes mit Gegenständen
wie Vorhängen, Zeitungen usw.
Zusätzliche Sicherheitsmaßnahmen
•Wenn Sie den Rückprojektions- Fernseher direkt von einem kalten in einen warmen Raum bringen, oder die Raumtemperatur sich
plötzlich ändert, dann können die Bilder verschwommen oder in einigen Bildschirmzonen mit schlechter Farbqualität
erscheinen-. Das ist darauf zurückzuführen, dass sich innerhalb des Gerätes die Feuchtigkeit auf den Spiegeln oder
Linsen kondensiert hat. Warten Sie bis die Feuchtigkeit verdampft, bevor Sie den Rückprojektions- Fernseher in Betrieb nehmen.
•Um scharfe Bilder zu sehen, lassen Sie keine direkte Beleuchtung auf den Bildschirm einwirken.
Verwenden Sie nach Möglichkeit eine von der Decke ausgehende Beleuchtung.
•Die Dauereinstellung des Bildes während einer längeren Zeitspanne, z.B. bei Verwendung von Videospielen oder als
Personalcomputer und das Betrachten von Programmen in Format 16:9 kann die Bildröhre schädigen. Um dies zu verhindern,
belassen Sie den Bildkontrast niedrig.
•Berühren Sie den Bildschirm nicht, um Kratzer auf der Oberfläche zu vermeiden.
4
Sicherheitsmaßnahmen
Page 35

Inhaltsverzeichnis
Inhaltsverzeichnis
Über diese Bedienungsanleitung ...................................................................................................3
Zu Ihrer Sicherheit............................................................................................................................4
Als erstes
Auf einen Blick
Überprüfen des mitgelieferten Zubehörs.........................................................................6
Auf einen Blick - Tasten am Gerät.....................................................................................6
Auf einen Blick - Fernbedienung.......................................................................................7
Installation
Einlegen der Batterien in die Fernbedienung ..................................................................8
Anschluß der Antenne und des Videorecorders.............................................................8
Einschalten des Fernsehgerätes..........................................................................................8
Erstmalige Inbetriebnahme
Menüsprache wählen ..........................................................................................................9
Automatisches Abspeichern von Sendern mit der Fernbedienung ...........................10
Ordnen der Programmspeicherplätze ............................................................................11
Einstellung der Farbwiedergabe (Konvergenz).............................................................12
Das Menüsystem................................................................................................................13
Weitere Funktionen
Abspeicherung - Zusatzfunktionen
Automatisches Abspeichern von Sendern .....................................................................14
Manuelles Abspeichern von Sendern .............................................................................15
Funktion der “Zusatzfunktionen”...................................................................................16
Die Kindersicherung..........................................................................................................17
Überspringen von Programmspeicherplätzen ..............................................................18
Eingeben eines Namens für einen Kanal........................................................................19
DE
Bedienung des Fernsehgerätes - Zusatzfunktionen
Einstellen des Bildes ..........................................................................................................20
Einstellen des Bildschirmformats ....................................................................................21
Einstellen des Tons ............................................................................................................22
Die automatische Abschaltfunktion................................................................................24
Videotext
Verwenden von Videotext................................................................................................25
Anschlußmöglichkeiten
Anschluß von anderen Geräten .......................................................................................26
Anschluß von anderen Geräten .......................................................................................27
“Smartlink” .........................................................................................................................28
Fernbedienen anderer Sony-Geräte.................................................................................28
Wahl des Ausgangssignals der Eurobuchsen................................................................29
Die Funktion “AV-Benennung”.......................................................................................30
Weitere Informationen
Optimaler Sichtbereich......................................................................................................31
Technische Daten ...............................................................................................................32
Fehlersuche .........................................................................................................................33
Zulassungsschein ...............................................................................................................34
Inhaltsverzeichnis
5
Page 36

Als erstes - Auf einen Blick
Überprüfen des mitgelieferten Zubehörs
VIDEO TV
1
2
3
4
5
6
7
8
9
0
PROGR
MENU
RM
892
S
Eine Fernbedienung
(RM-892)
Zwei Batterien (R6)
Overview of Projection TV Buttons
Auf einen Blick - Tasten am Gerät
Schieben Sie die Abdeckung der
Vordersite des Fernsehgerätes
nach oben, um die vorderen
Buchsen zu zeigen
Taste zur
Wahl des
Videoeingangs
Lautstärkeregelung
Bereitschaftsanzeige
Programmwahl
Netzschalter
(Ein/Aus)
KopfhörerBuchse
S-VideoEingangsbuchse
6
Als erstes - Auf einen Blick
Cinchbuchse,
Videoeingang
Cinchbuchsen,
Audioeingang
Taste zur
erneuten
Initialisierung
des
Fernsehgerätes
Taste für
automatische
Konvergenzeinstellung
Page 37

Als erstes - Auf einen Blick
Auf einen Blick - Fernbedienung
Checking the Accessories Supplied
VIDEO TV
Taste ohne Funktion an diesem Gerät.
VTR 1 2 3 4 DVD
CH
Zeitangabe
Drücken, um die Uhr ein- oder
auszublenden (sie funktioniert nur
wenn der Videotext eingeschaltet
ist)
Bedienung des
Videorecorders
Ausführliche Information finden Sie
im Kapitel “Fernbedienen
anderer Sony-Geräte“
Ton abschalten
Einmal drücken, um Fernsehton
auszuschalten. Nochmals drücken, um Ton
wieder einzuschalten.
Ein-/Ausschalten des Videorecorders
Drücken, um den Videorecorder ein- oder
auszuschalten
TV-Modus
Drücken, um aus dem Videotext oder dem
Videoeingangsmodus in den TV-Modus
zurückzukehren.
Videotext
Drücken, um Videotext einzuschalten.
Tasten ohne Funktion an diesem Gerät
Programmwahl
Mit den Zahlentasten das gewünschte
Programm wählen.
Bei zweistelligen Programmnummern wie
z.B. 23 zuerst -/--, dann die Tasten 2 und 3
drücken. Bei einer Fehleingabe die
Ziffernfolge beliebig ergänzen und nochmals
-/-- und die zwei richtigen Ziffern drücken.
Ton-Modus
Drücken, um den Ton-Modus
umzuschalten.
Bild-Modus
Drücken, um den Bild-Modus
umzuschalten.
Lautstärkeregelung
Mit + oder - die Lautstärke regeln.
1
4
7
S
VIDEO TV
2
5
8
0
K
MENU
3
6
9
RM
PROGR
892
Kurzzeitiges Ausschalten
Drücken, um Gerät in den
Bereitschaftsbetrieb zu schalten.
Bereitschaftsanzeige
leuchtet am Gerät.
Taste nochmals drücken, um Gerät wieder
einzuschalten.
Um Energie zu sparen, sollte das Fernsehgerät
normalerweise vollständig ausgeschaltet
werden.
Das Gerät schaltet sich automatisch in
den Bereitschaftsbetrieb, wenn 30
Minuten kein Fernsehsignal
empfangen wird und keine Taste
gedrückt wird.
Informationsanzeige im Bildschirm
Einmal drücken, um alle Anzeigen im
Bildschirm einzublenden. Nochmals
drücken, um die Anzeigen auszublenden.
Videoeingangs-Modus
Mehrmals drücken, bis das Symbol der
gewünschten Eingangsquelle auf dem
Bildschirm erscheint.
Zurück zum zuletzt betrachteten
Programm
Drücken, um zum zuletzt für mindestens 5
sec. betrachteten Programm zurückzukommen
Einstellen des Bildschirmformats
Wechsel des Bildschirmformats
Mehrmals drücken, um das Bildschirmformat
zu ändern.
Die Fucktion
kann an diesem Fernseher im
Zusammenhang mit dieser Taste nicht
angewendet werden.
Joystick zum Wählen des Menüs
4
Cursor nach oben bewegen
$
Cursor nach unten bewegen
Z
Zurück zum vorherigen Menü oder
zur vorherigen Auswahl
z
Nächstes Menü oder nächste Auswahl
OK
Auswahl bestätigen
DE
Alle farbigen Tasten und die Symbole in grün haben sowohl im
TV-Betrieb als auch im Videotext eine Funktion. Informationen
über Videotext finden Sie im entsprechenden Abschnitt dieser
Bedienungsanleitung.
Programmwahl
Drücken, um das nächste oder vorherige
Programm zu wählen
Menü-System
Drücken, um das Bildschirm-Menü
einzublenden. Nochmals drücken, um das
Menü wieder auszublenden.
Als erstes - Auf einen Blick
7
Page 38

Als erstes - Installation
videodecorder
Einlegen der Batterien in die Fernbedienung
Die mitgelieferten Batterien polaritätsrichtig einlegen.
Entsorgen Sie die verbrauchten Batterien bitte umweltgerecht.
Anschluß der Antenne und des Videorecorders
oder
Die Euro- Buchse ist frei wählbar.
Wenn Sie die frei wählbare Buchse benutzen, kann sich die Bild- und Tonqualität bei Verwendung des Videogerätes
verbessern.
Wenn Sie die Euro- Buchse nicht benutzen, müssen Sie nach der automatischen
Feinabstimmung des Geräts manuell den Kanal des Videosignals feinabstimmen. Lesen Sie hierzu das Kapitel „Manuelle
Abstimmung des Fernsehgerätes“. Lesen Sie ebenfalls das Anleitungshandbuch Ihres Videogerätes, um zu erfahren, wie
Sie den Kanal des Videosignals empfangen können.
OUT IN
Einschalten des Rückprojektions-Fernseher
8
Als erstes - Installation
Das Gerät an das
Netz anschließen
(220-240 V. AC,
50 Hz).
Den Netzschalter
Ein/Aus
Gerät drücken.
am
Page 39

Als erstes - Erstmalige Inbetriebnahme
Menüsprache wählen
Mit dieser Funktion können Sie die Sprache wählen, in der die Menübilder erscheinen sollen. Beim erstmaligen Einschalten
des Gerätes erscheint das Menü LANGUAGE (SPRACHE) automatisch auf dem Bildschirm. Sollten Sie die Sprache zu einem
späteren Zeitpunkt ändern wollen, das Menü Sprache im Menü (SENDERABSPEICHERUNG) wählen und zu Schritt 2
gehen.
LANGUAGE
Das Gerät mit dem Netzschalter
1
Ein/Aus
einschalten. Nun
erscheint beim erstmaligen Einschalten automatisch das Menü
LANGUAGE (SPRACHE) auf dem Bildschirm.
English
Deutsch
Français
Español
Suomi
Nederlands
Português
Suenska
Dansk
Norsk
Italiano
Česki
Magyar
Eλλnvιkά
Select Language:
Confirm: OK
LANGUAGE
English
Deutsch
Français
Español
Suomi
Nederlands
Português
Suenska
Dansk
Norsk
Italiano
Česki
Magyar
Eλλnvιkά
Select Language:
Confirm: OK
Mit dem Joystick auf $ oder 4 die gewünschte Sprache auswählen.
VIDEO TV
1
2
3
4
5
6
7
8
9
0
PROGR
MENU
RM
892
2
Mit der OK-Taste bestätigen.
Wenn Sie als Sprache “Français” (Französisch) auswählen und
später die automatische Feinabstimmung vornehmen, wird
diese beginnen mit dem Fernsehsystem von Frankreich (L) die
Kanäle (Fernsehsender) zu suchen, um danach mit dem System
von Europa (B/G) fortzufahren.
Nun erscheint das Menü Automatisch Abspeichern in der gewählten
Sprache.
LANGUAGE
English
Deutsch
Français
Español
Suomi
Nederlands
Português
Suenska
Dansk
Norsk
Italiano
Česki
Magyar
Eλλnvιkά
Select Language:
Confirm: OK
Automatisches Abspeichern
jetzt starten?
Ja
Nein
Bestätigen: OK
DE
S
Als erstes - Erstmalige Inbetriebnahme
9
Page 40

Als erstes - Erstmalige Inbetriebnahme
G
O
Automatisches Abspeichern von Sendern mit der
Fernbedienung
Bevor Sie fernsehen können, müssen Sie Sender auf Programmspeicherplätze abspeichern. Mit den folgenden Schritten sucht
und speichert Ihr Fernsehgerät automatisch alle zur Verfügung stehenden Sender.
Nach Auswahl der gewünschten Sprache erscheint automatisch ein neues Menü auf dem Bildschirm, das Sie fragt, ob Sie jetzt
automatisch abspeichern möchten. Wenn Sie jedoch das Menü zu einem späteren Zeitpunkt aufrufen möchten (z.B. nach
einem Umzug), finden Sie das Menü Automatisch Abspeichern im Menü (SENDERABSPEICHERUNG). Sie können auch
mit einem Tastendruck am Gerät selbst abspeichern. Siehe dazu «Automatisches Abspeichern von Sendern».
1
4
7
S
VIDEO TV
2
5
8
0
MENU
3
6
9
RM
PROGR
892
Mit der OK-Taste auf der Fernbedienung Ja auswählen.
1
Nun erscheint automatisch ein neues Menü auf dem Bildschirm, das
Sie bittet, den Antennenanschluß zu überprüfen.
Überprüfen Sie, ob die Antenne korrekt angeschlossen ist und
2
bestätigen Sie mit der OK-Taste.
Der automatische Suchlauf startet nun und die Meldung
“AUTOMATISCH ABSPEICHERN” blinkt während der
Dauer des Suchlaufes.
Der Suchlauf kann mehrere Minuten dauern. Haben Sie
Geduld und drücken Sie keine Taste während der Dauer der
Feinabstimmung, oder im gegenteiligen Falle würde er nicht
beendet.
Sobald der Suchlauf beendet ist, erscheint das Menü Programme ordnen auf
dem Bildschirm.
Anmerkungen:
• Sie können den Suchlauf mit der
MENU
-Taste
unterbrechen.
• Falls Sie den Suchlauf mit der
MENU
-Taste
unterbrochen haben, erscheint das Menü
Programme ordnen nicht automatisch auf dem
Bildschirm.
Automatisches Abspeichern
jetzt starten?
Ja
Nein
Bestätigen: OK
Ist die Antenna
angeschlossen
Bestätigen: OK
AUTOMATISCH ABSPEICHERN
PROG
NORM
1
B/GKAC 26
AUTOMATISCH ABSPEICHERN
PROGRAMME ORDNEN
PROG NORM KA NAME
0
1
2
3
4
5
6
7
8
9
Auswählen PROG: + OK
Abbrechen: MENU
B/G
B/G
B/G
B/G
B/G
B/G
B/G
B/G
B/G
B/G
C 28
C 40
C 41
C 31
C 34
C 27
C 47
C 44
C 23
C 35
NAME
- - - - -
BBC-W
MV-CH
TVE-1
TVE-2
ANT-3
TELE 5
C PLUS
- - - - -
- - - - CNN -
10
Als erstes - Erstmalige Inbetriebnahme
Page 41

Als erstes - Erstmalige Inbetriebnahme
Ordnen der Programmspeicherplätze
Nachdem alle zur Verfügung stehenden Sender abgespeichert sind, erscheint automatisch ein neues Menü auf dem
Bildschirm, in dem Sie die Reihenfolge der Sender ändern können.
Falls Sie die Reihenfolge zu einem späteren Zeitpunkt ändern möchten, finden Sie das Menü Programme ordnen in dem
Menü (SENDERABSPEICHERUNG). Beginnen Sie dann bei Abschnitt b) dieses Kapitels.
a) Sie möchten die Reihenfolge der Sender beibehalten
1
4
7
S
VIDEO TV
2
5
8
0
MENU
3
6
9
RM
PROGR
892
1 Die MENU-Taste drücken, um in den normalen TV-Betrieb
zurückzukehren.
Ihr Gerät ist jetzt betriebsbereit
b) Sie möchten die Reihenfolge der Sender ändern
1 Mit dem Joystick der Fernbedienung auf $ oder 4 gehen, um die
Programm- Nummer mit dem Kanal (Fernsehsender) auszuwählen,
dessen Stellung geändert werden soll, und anschließend auf OK
drücken.
2 Mit dem Joystick auf $ oder 4 gehen, um die neue
Programmspeichernummer einzustellen, mit der der gewählte Kanal
gespeichert werden soll, und anschließend auf OK drücken.
Der gewählte Kanal stellt sich um auf den neuen
Programmspeicherplatz, und die übrigen Kanäle werden
entsprechend verschoben.
PROGRAMME ORDNEN
PROG NORM KA NAME
B/G
0
C 28
B/G
1
C 40
B/G
2
C 41
B/G
3
C 31
B/G
4
C 34
B/G
5
C 27
B/G
6
C 47
B/G
7
C 44
B/G
8
C 23
B/G
9
C 35
Auswählen PROG: + OK
Abbrechen: MENU
PROGRAMME ORDNEN
PROG NORM KA NAME
B/G
0
1
2
3
4
5
6
7
8
9
Auswählen PROG: + OK
Abbrechen: MENU
PROGRAMME ORDNEN
0
1
2
3
4
5
6
7
8
9
Position wählen:
Bestätigen: OK
C 28
B/G
C 40
B/G
C 41
B/G
C 31
B/G
C 34
B/G
C 27
B/G
C 47
B/G
C 44
B/G
C 23
B/G
C 35
NORM KA NAMEPROG
B/G
C 40
B/G
C 41
B/G
C 31
B/G
C 34
B/G
C 27
B/G
C 47
B/G
C 44
B/G
C 23
B/G
C 35
B/G
C 28
BBC-W
MV-CH
TVE-1
TVE-2
ANT-3
TELE 5
C PLUS
- - - - -
- - - - CNN -
BBC-W
MV-CH
TVE-1
TVE-2
ANT-3
TELE 5
C PLUS
- - - - -
- - - - CNN -
MV-CH
TVE-1
TVE-2
ANT-3
TELE 5
C PLUS
- - - - -
- - - - CNN BBC-W
DE
3 Falls Sie weitere Sender ordnen möchten, die Schritte 1 und 2
wiederholen.
4 Die MENU-Taste drücken, um in den normalen TV-Betrieb
zurückzukehren.
Ihr Gerät ist jetzt betriebsbereit.
Als erstes - Erstmalige Inbetriebnahme
11
Page 42

Als erstes - Erstmalige Inbetriebnahme
Einstellung der Farbwiedergabe (Konvergenz)
Auf Grund des Erdmagnetismus kann das Bild verschwommen erscheinen, indem sich verschiedene Farben in den
Bildumrissen mischen. In diesem Fall gehen Sie so vor, wie nachfolgend erläutert ist.
Automatische Konvergenz der Linien in
rot, grün und blau.
1
Schieben Sie die Abdeckung der Vordersite des Fernsehgerätes nach
oben, um die vorderen Buchsen zu zeigen.
2 Drücken Sie auf die Taste des Rückprojektions-Fernsehers.
Die etwa 30 Sekunden lange Funktion zur automatischen Konvergenz
beginnt. Sobald das weiße Kreuz auf Ihrem Bildschirm verschwindet ist Ihr
Gerät jetzt betriebsbereit.
Anmerkungen:
Die Funktion Automatische Konvergenz funktioniert nicht:
• wenn kein Eingangssignal anliegt
• wenn das Eingangssignal schwach ist
• wenn der Bildschirm Spotbestrahlung oder direktem Sonnenlicht
ausgesetzt ist
• wenn Videotext verwendet wird
1
4
7
S
VIDEO TV
2
5
8
0
MENU
3
6
9
PROGR
RM
Wenn Sie die Konvergenz genauer
einstellen wollen
1
MENU drücken, um das Menü einzublenden.
2 Mit dem Joystick auf $ gehen, um das Symbol , aufzurufen, und
anschließend auf z gehen, zur Einblendung des Menüs
SENDERABSPEICHERUNG.
BILD - MENÜ
Bild - Modus
Kontrast
Normwerte
Format
Anwender
4:3
3 Mit dem Joystick auf $ oder 4 gehen, zur Konvergenzeinstellung und
anschließend auf z gehen.
4 Mit dem Joystick auf $ oder 4 gehen, um die “Linie” (vertikale und
horizontale Linien in rot und blau), die eingestellt werden soll,
auszuwählen:
: rote vertikale Linie (Einstellung links/rechts)
: rote horizontale Linie (Einstellung oben/unten)
: blaue vertikale Linie (Einstellung links/rechts)
: blaue horizontale Linie (Einstellung oben/unten)
Drücken auf OK.
SENDERABSPEICHERUNG
Automatisch Abspeichern
Manuell Abspeichern
Zusatzfunktionen
AV - Benennung
Programme Ordnen
Kindersicherung
Sprache
Konvergenz
5 Mit dem Joystick mehrmals auf $ , 4 , Z oder z gehen, um die
gewählte Linie mit der grünen Linie in der Mitte abzustimmen.
Zum Bestätigen auf OK drücken.
6 Die Schritte 4 und 5 wiederholen, um die anderen Linien so
einzustellen, dass die Linien sich zu einem weißen Kreuz
überschneiden.
892
7 Die MENÜ-Taste drücken, um in den normalen TV-Betrieb
zurückzukehren.
12
Als erstes - Erstmalige Inbetriebnahme
Ihr Gerät ist jetzt betriebsbereit.
Page 43

Als erstes - Erstmalige Inbetriebnahme
Das Menüsystem
MENU
Betätigen Sie die Taste MENU der Fernbedienung, um das Menü-System aufzurufen.
BILD - MENÜ
Bild - Modus
Kontrast
Normwerte
Format
Anwender
4:3
BILD - MENÜ
Bild - Modus
Kontrast
Normwerte
Format
Anwender
4:3
Ausführliche Information finden Sie im
Kapitel “Einstellen des Bildes”
TON - MENÜ
VIDEO - ANSCHLUSS
Bildschirm
Ausgang
TIMER
Abschaltzeit
SENDERABSPEICHERUNG
Automatisch Abspeichern
Manuell Abspeichern
Zusatzfunktionen
AV - Benennung
Programme Ordnen
Kindersicherung
Sprache
Konvergenz
Ton - Modus
Balance
Normwerte
Dolby Virtual
Zweikan - Ton
Indiv. Lautst.
Lautstärke
Zweikan - Ton
Lautsprecher
TV
Anwender
Aus
Mono
0
Mono
Haupt - LS
[TV - - - - - - -]
[AV1 - - - - - - -]
AV1
Aus
TON - MENÜ
VIDEO - ANSCHLUSS
TIMER
SENDERABSPEICHERUNG
Anwender
Ton - Modus
Balance
Normwerte
Aus
Dolby Virtual
Mono
Zweikan - Ton
0
Indiv. Lautst.
Lautstärke
Mono
Zweikan - Ton
Haupt - LS
Lautsprecher
[TV - - - - - - -]
Bildschirm
Ausgang
[AV1 - - - - - - -]
TV
AV1
1:00
Abschaltzeit
SENDERABSPEICHERUNG
Automatisch Abspeichern
Manuell Abspeichern
Zusatzfunktionen
AV - Benennung
Programme Ordnen
Kindersicherung
Sprache
Konvergenz
Automatisch Abspeichern
Manuell Abspeichern
Zusatzfunktionen
AV - Benennung
Programme Ordnen
Kindersicherung
Sprache
Konvergenz
Automatisches Abspeichern
jetzt starten?
Ja
Nein
Bestätigen: OK
MANUELL ABSPEICHERN
PROG NORM KA
0
1
2
3
4
5
6
7
8
9
NAME
B/G
MV-CH
C 40
B/G
TVE-1
C 41
B/G
TVE-2
C 31
B/G
ANT-3
C 34
B/G
TELE 5
C 27
B/G
C PLUS
C 47
B/G
- - - - -
C 44
B/G
- - - - -
C 23
B/G
CNN -
C 35
B/G
BBC-W
C 28
Ausführliche Information finden Sie im
Kapitel “Einstellen des Tons”
Ausführliche Information finden Sie im
Kapitel “Wahl des Ausgangssignals der
Eurobuchsen”
Ausführliche Information finden Sie im
Kapitel “Die automatische
Abschaltfunktion”
Ausführliche Information finden Sie im
Kapitel “Automatisches Abspeichern von
Sendern mit den Tasten am Gerät”
Ausführliche Information finden Sie im
Kapitel “Manuelles Abspeichern von
Sendern”
DE
SENDERABSPEICHERUNG
Automatisch Abspeichern
Manuell Abspeichern
Zusatzfunktionen
AV - Benennung
Programme Ordnen
Kindersicherung
Sprache
Konvergenz
SENDERABSPEICHERUNG
Automatisch Abspeichern
Manuell Abspeichern
Zusatzfunktionen
AV - Benennung
Programme Ordnen
Kindersicherung
Sprache
Konvergenz
SENDERABSPEICHERUNG
Automatisch Abspeichern
Manuell Abspeichern
Zusatzfunktionen
AV - Benennung
Programme Ordnen
Kindersicherung
Sprache
Konvergenz
SENDERABSPEICHERUNG
Automatisch Abspeichern
Manuell Abspeichern
Zusatzfunktionen
AV - Benennung
Programme Ordnen
Kindersicherung
Sprache
Konvergenz
SENDERABSPEICHERUNG
Automatisch Abspeichern
Manuell Abspeichern
Zusatzfunktionen
AV - Benennung
Programme Ordnen
Kindersicherung
Sprache
Konvergenz
ZUSATZFUNKTIONEN
PROG AFT DEK ODER
Ein
0
Ein
1
Ein
2
Ein
3
Ein
4
Ein
5
Ein
6
Ein
7
Ein
8
Ein
9
AV - BENENNUNG
EINGANG NAME
AV1
RGB
AV2
YC2
AV3
PROGRAMME ORDNEN
PROG
NORM KA NAME
C 28
0
B/G
C 40
1
B/G
C 41
2
B/G
C 31
3
B/G
C 34
4
B/G
C 27
5
B/G
C 47
6
B/G
C 44
7
B/G
C 23
8
B/G
C 35
9
B/G
KINDERSICHERUNG
NORM KA NAME
PROG
B/G
0
C 40
B/G
1
C 41
B/G
2
C 31
B/G
3
C 34
B/G
4
C 27
B/G
5
C 47
B/G
6
C 44
B/G
7
C 23
B/G
8
C 35
B/G
9
C 28
SPRACHE
English
Deutsch
Français
Italiano
Nederlands
Polski
Česki
Magyar
Eλλnvιkά
Aus
Aus
AV1
Aus
AV2
Aus
Aus
Aus
Aus
Aus
- - - - -
- - - - -
- - - - -
- - - - -
- - - - -
BBC-W
MV-CH
TVE-1
TVE-2
ANT-3
TELE 5
C PLUS
- - - - -
- - - - CNN -
MV-CH
TVE-1
TVE-2
ANT-3
TELE 5
C PLUS
- - - - -
- - - - CNN -
- - - - -
Ausführliche Information finden Sie im
Kapitel “Funktion der
“Zusatzfunktionen”
Ausführliche Information finden Sie im
Kapitel “Die Funktion “AV-Benennung””
Ausführliche Information finden Sie im
Kapitel “Ordnen der
Programmspeicherplätze”
Ausführliche Information finden Sie im
Kapitel “Die Kindersicherung”
Ausführliche Information finden Sie im
Kapitel “Menüsprache wählen”
SENDERABSPEICHERUNG
Automatisch Abspeichern
Manuell Abspeichern
Zusatzfunktionen
AV - Benennung
Programme Ordnen
Kindersicherung
Sprache
Konvergenz
Ausführliche Information finden Sie im
Kapitel “Einstellung der Farbwiedergabe
(Konvergenz)”
Als erstes - Erstmalige Inbetriebnahme
13
Page 44

Weitere Funktionen - Abspeicherung - Zusatzfunktionen
Automatisches Abspeichern von Sendern
Als Alternative zum automatischen Abspeichern mit der Fernbedienung können Sie auch mit nur einem Tastendruck am
Gerät und der OK-Taste auf der Fernbediening alle zur Verfügung stehenden Sender automatisch abspeichern lassen.
1 Schieben Sie die Abdeckung der Vordersite des Fernsehgerätes nach
oben, um die vorderen Buchsen zu zeigen.
Ist die Antenna
angeschlossen
Bestätigen: OK
Ist die Antenna
angeschlossen
Bestätigen: OK
AUTOMATISCH ABSPEICHERN
PROG
NORM
1
AUTOMATISCH ABSPEICHERN
B/GKAC 26
NAME
- - - - -
VIDEO TV
2 Die Taste so lange gedrückt halten, bis automatisch ein neues
Menü auf dem Bildschirm erscheint, das Sie bittet, den
Antennenanschluß zu überprüfen.
3 Überprüfen Sie, ob die Antenne korrekt angeschlossen ist und
bestätigen Sie mit der OK-Taste auf der Fernbedienung.
Der automatische Suchlauf startet nun und die Meldung
“AUTOMATISCH ABSPEICHERN” blinkt während der Dauer
des Suchlaufes.
Der Suchlauf kann mehrere Minuten dauern. Haben Sie Geduld
1
2
3
4
5
6
7
8
9
und drücken Sie keine Taste während der Dauer der
Feinabstimmung, oder im gegenteiligen Falle würde er nicht
beendet.
0
Sobald der Suchlauf beendet ist, erscheint das Menü Programme ordnen
auf dem Bildschirm.
• Möchten sie die Reihenfolge der Sender beibehalten, drücken Sie die
MENU-Taste um in den normalen TV-Betrieb zurückzukehren.
• Möchten sie die Reihenfolge der sender ändern, beginnen Sie dann bei
im Kapitel "Ordnen der Programmspeicherplätze", Abschnitt b).
PROGR
MENU
Anmerkungen: Sie können den Suchlauf mit der MENU-Taste
unterbrechen.
RM
892
S
14
Weitere Funktionen - Abspeicherung - Zusatzfunktionen
Page 45

Weitere Funktionen - Abspeicherung – Zusatzfunktionen
Manuelles Abspeichern von Sendern
Verwenden Sie diese Funktion um einen Sender nach dem anderen in der gewünschten Programmreihe einzustellen, sowie die
Kanäle (Fernsehsender) oder einen Anschluß eines Videorecorders.
1
4
7
S
VIDEO TV
2
5
8
0
MENU
3
6
9
PROGR
RM
1 MENU drücken, um das Menü einzublenden.
2 Mit dem Joystick auf $ gehen, um das Symbol aufzurufen, und
anschließend drücken Sie auf z, um das Menü
SENDERABSPEICHERUNG aufzurufen.
3 Mit dem Joystick auf $ oder 4 gehen, um Manuell Abspeichern
aufzurufen, und anschließend gehen Sie auf z .
4 Mit dem Joystick auf $ oder 4 gehen, um die Programmnummer
(Position) zu wählen unter der Sie einen Kanal (Fernsehsender)
abspeichern wollen, und anschließend gehen Sie auf z, um die
Spalte NORM aufzurufen.
5 Mit dem Joystick auf $ oder 4 gehen, um das
Fernsehübertragungs-System abzuspeichern (B/G für die
westeuropäischen Länder, D/K für die osteuropäischen Länder, L
für Frankreich oder I für Großbritannien) oder ein Eingangssignal
eines Videorecorders (AV1, AV2...) und, anschließend, gehen Sie
auf z, um die Spalte KA aufzurufen.
892
6 Mit dem Joystick auf $ oder 4 gehen, um den Kanaltyp
abzuspeichern (“C” für Kanäle auf dem Landwege oder “S” für
Kabelkanäle) und, anschließend, gehen Sie auf z.
BILD - MENÜ
Bild - Modus
Kontrast
Normwerte
Format
SENDERABSPEICHERUNG
Automatisch Abspeichern
Manuell Abspeichern
Zusatzfunktionen
AV - Benennung
Programme Ordnen
Kindersicherung
Sprache
Konvergenz
SENDERABSPEICHERUNG
Automatisch Abspeichern
Manuell Abspeichern
Zusatzfunktionen
AV - Benennung
Programme Ordnen
Kindersicherung
Sprache
Konvergenz
MANUELL ABSPEICHERN
PROG NORM KA
0
1
2
3
4
5
6
7
8
9
MANUELL ABSPEICHERN
PROG NORM KA
0
1
2
3
4
5
6
7
8
9
Anwender
4:3
B/G
C 40
B/G
C 41
B/G
C 31
B/G
C 34
B/G
C 27
B/G
C 47
B/G
C 44
B/G
C 23
B/G
C 35
B/G
C 28
B/G
C 40
B/G
C 41
B/G
C 31
B/G
C 34
B/G
C 27
B/G
C 47
B/G
C 44
B/G
C 23
B/G
C 35
B/G
C 28
NAME
MV-CH
TVE-1
TVE-2
ANT-3
TELE 5
C PLUS
- - - - -
- - - - CNN BBC-W
NAME
MV-CH
TVE-1
TVE-2
ANT-3
TELE 5
C PLUS
- - - - -
- - - - CNN BBC-W
DE
7 Drücken Sie die Nummerntasten, um direkt die Nummer des
Kanals des Fernsehsenders einzugeben, oder mit dem Joystick auf
4 oder $ gehen, um den nächsten verfügbaren Kanal zu suchen.
Wenn Sie diesen Kanal nicht abspeichern wollen, gehen Sie mit
dem Joystick auf 4 oder $, um einen anderen Kanal zu suchen.
Wenn das der Kanal ist, den Sie abspeichern wollen, drücken Sie
8
auf OK.
9 Wiederholen Sie die Schritte 4 bis 8, um weitere Kanäle einzustellen
und abzuspeichern.
10 Die MENU-Taste drücken, um in den normalen TV-Betrieb
zurückzukehren.
Ihr Gerät ist jetzt betriebsbereit
Weitere Funktionen - Abspeicherung - Zusatzfunktionen
MANUELL ABSPEICHERN
MANUELL ABSPEICHERN
PROG NORM KA
PROG NORM KA
B/G
0
C 40
B/G
0
C 40
B/G
1
C 41
B/G
1
C 41
B/G
2
C 31
B/G
2
C 31
B/G
3
C 34
B/G
3
C 34
B/G
4
C 27
B/G
4
C 27
B/G
5
C 47
B/G
5
C 47
B/G
6
C 44
B/G
6
C 44
B/G
7
C 23
B/G
7
C 23
B/G
8
C 35
B/G
8
C 35
B/G
9
C 28
B/G
9
C 28
MANUELL ABSPEICHERN
PROG NORM KA
B/G
0
C 40
B/G
1
C 41
B/G
2
C 31
B/G
3
C 34
B/G
4
C 27
B/G
5
C 47
B/G
6
C 44
B/G
7
C 23
B/G
8
C 35
B/G
9
C 28
NAME
NAME
MV-CH
MV-CH
TVE-1
TVE-1
TVE-2
TVE-2
ANT-3
ANT-3
TELE 5
TELE 5
C PLUS
C PLUS
- - - - -
- - - - -
- - - - -
- - - - -
CNN -
CNN -
BBC-W
BBC-W
NAME
MV-CH
TVE-1
TVE-2
ANT-3
TELE 5
C PLUS
- - - - -
- - - - -
CNN -
BBC-W
15
Page 46

Weitere Funktionen - Abspeicherung - Zusatzfunktionen
Funktion der “Zusatzfunktionen“
Mit dieser Funktion können Sie:
a) das Fernsehgerät außerdem manuell feineinstellen, um einen besseren Bildempfang zu erzielen, wenn das Bild verzerrt
ist, auch wenn normalerweise die automatische Feinabstimmung (AFT) eingeschaltet ist, oder
b) den AV3-Ausgang voreinstellen für die Programmpositionen von Kanälen mit verschlüsselten Signalen, wie z. B. von
einem Pay-TV-Decoder. Auf diese Weise kann ein angeschlossener Videorecorder das unverschlüsselte Signal
aufnehmen.
VIDEO TV
1 MENU drücken, um das Menü einzublenden.
BILD - MENÜ
Bild - Modus
Kontrast
Normwerte
Format
Anwender
4:3
2 Mit dem Joystick auf $ gehen, um das Symbol zu wählen, und
anschließend gehen Sie auf z und wechseln in das Menü
SENDERABSPEICHERUNG.
1
2
3
4
5
6
7
8
9
0
3 Mit dem Joystick auf $ oder 4 gehen, um die Option
Zusatzfunktionen auszuwählen, und anschließend gehen Sie auf z .
4 Mit dem Joystick auf $ oder 4 gehen, um die entsprechende
Programmnummer auszuwählen, und anschließend gehen Sie so oft
auf z bis zum Auswählen von.:
a) AFT, oder
b) DEKODER
PROGR
MENU
Die Farbe der ausgewählten Option wechselt.
SENDERABSPEICHERUNG
Automatisch Abspeichern
Manuell Abspeichern
Zusatzfunktionen
AV - Benennung
Programme Ordnen
Kindersicherung
Sprache
Konvergenz
SENDERABSPEICHERUNG
Automatisch Abspeichern
Manuell Abspeichern
Zusatzfunktionen
AV - Benennung
Programme Ordnen
Kindersicherung
Sprache
Konvergenz
ZUSATZFUNKTIONEN
PROG AFT DEKODER
Ein
0
1
2
3
4
5
6
7
8
9
Aus
Ein
Aus
Ein
AV1
Ein
Aus
Ein
AV2
Ein
Aus
Ein
Aus
Ein
Aus
Ein
Aus
Ein
Aus
S
892
5 a) AFT
Mit dem Joystick auf $ oder 4 gehen, um die Kanalfrequenz auf –15
und + 15 fein einzustellen, und anschließend bestätigen mit der Taste
OK.
Gehen Sie vor wie in Schritt 4 und 5a) erläutert, wenn Sie weitere
Kanäle feineinstellen wollen.
b) DEKODER
Mit dem Joystick auf $ oder 4 gehen, um AV3 auzuwählen und
anschließend bestätigen Sie mit der Taste OK.
Sie können nun einen Decoder an die Eurobuchse :3 an der
Rückseite des Rückprojektions-Fernsehers anschließen, und
das Bild von diesem Decoder erscheint unter dieser
Programmnummer.
Gehen Sie vor, wie unter Schritt 4 und 5b) erläutert, um den
ZUSATZFUNKTIONEN
PROG AFT DEKODER
2
0
Ein
1
Ein
2
Ein
3
Ein
4
Ein
5
Ein
6
Ein
7
Ein
8
Ein
9
ZUSATZFUNKTIONEN
PROG AFT DEKODER
Ein
0
Ein
1
Ein
2
Ein
3
Ein
4
Ein
5
Ein
6
Ein
7
Ein
8
Ein
9
Aus
Aus
Aus
Aus
Aus
Aus
Aus
Aus
Aus
Aus
AV3
Aus
Aus
Aus
Aus
Aus
Aus
Aus
Aus
Aus
RM
AV3-Ausgang für weitere Programmpositionen
voreinzustellen.
6 Die MENU-Taste drücken, um in den normalen TV-Betrieb
zurückzukehren.
Ihr Gerät ist jetzt betriebsbereit.
Weitere Funktionen - Abspeicherung - Zusatzfunktionen
16
Page 47

Weitere Funktionen - Abspeicherung – Zusatzfunktionen
Die Kindersicherung
Mit dieser Funktion können Sie verhindern, dass unerwünschte Sendungen auf dem Fernsehbildschirm angezeigt werden.
VIDEO TV
1 MENU drücken, um das Menü einzublenden.
2 Mit dem Joystick auf $ gehen, um das Symbol auzuwählen, und
anschließend gehen Sie auf z, um in das Menü
SENDERABSPEICHERUNG zu wechseln.
1
2
3
4
5
6
7
8
9
0
3 Mit dem Joystick auf $ oder 4 gehen, um Kindersicherung
auszuwählen und anschließend gehen Sie auf z .
BILD - MENÜ
Bild - Modus
Kontrast
Normwerte
Format
SENDERABSPEICHERUNG
Automatisch Abspeichern
Manuell Abspeichern
Zusatzfunktionen
AV - Benennung
Programme Ordnen
Kindersicherung
Sprache
Konvergenz
SENDERABSPEICHERUNG
Automatisch Abspeichern
Manuell Abspeichern
Zusatzfunktionen
AV - Benennung
Programme Ordnen
Kindersicherung
Sprache
Konvergenz
Anwender
4:3
DE
4 Mit dem Joystick auf $ oder 4 gehen, um die Programmnummer des
KINDERSICHERUNG
NORM KA NAME
PROG
B/G
0
C 40
B/G
1
C 41
B/G
2
C 31
B/G
3
C 34
B/G
4
C 27
B/G
5
C 47
B/G
6
C 44
B/G
7
C 23
B/G
8
C 35
B/G
9
C 28
MV-CH
TVE-1
TVE-2
ANT-3
TELE 5
C PLUS
- - - - -
- - - - CNN -
- - - - -
MENU
PROGR
RM
Kanals auszuwählen, den Sie sperren wollen, und anschließend
bestätigen Sie mit OK.
Das Symbol erscheint vor der Programmposition, um
anzuzeigen, dass dieses Programm gesperrt ist. Wenn Sie die
Sperre des Kanals wieder aufheben wollen, drücken Sie erneut
die Taste OK. Das Symbol wird ausgeblendet.
892
S
5 Gehen Sie wie in Schritt 4 erläutert vor, wenn Sie weitere Kanäle
sperren wollen.
6 Die MENU-Taste drücken, um in den normalen TV-Betrieb
zurückzukehren.
Wenn Sie eine Programmnummer auswählen, die gesperrt ist, erscheint
der Bildschirm in schwarz mit dem Symbol .
Weitere Funktionen - Abspeicherung - Zusatzfunktionen
17
Page 48

Weitere Funktionen - Abspeicherung - Zusatzfunktionen
Überspringen von Programmspeicherplätzen
Mit dieser Funktion können Sie nicht benötigte Programmspeicherplätze überspringen, wenn Sie die Tasten PROGR +/benutzen. Wenn Sie zu einem späteren Zeitpunkt die übersprungene Programmnummer zurückgewinnen wollen, gehen
Sie wie anschließend erläutert vor, aber wählen Sie das richtige TV-System aus (B/G, D/K, L oder I), anstatt “---“ bei Schritt
Nr. 5
1
4
7
S
VIDEO TV
2
5
8
0
MENU
3
6
9
PROGR
RM
1 MENU drücken, um das Menü einzublenden.
2 Mit dem Joystick auf $ gehen, um das Symbol uszuwählen, und
anschließend auf gehen z, um das Menü
SENDERABSPEICHERUNG aufzurufen.
3 Mit dem Joystick auf $ oder 4 gehen, um die Option Manuell
Abspeichern auszuwählen und anschließen auf z gehen.
4 Mit dem Joystick auf $ gehen oder auf 4 , um die Programmposition
auszuwählen, die übersprungen werden soll, und anschließend
wechseln Sie auf z, um in die Spalte NORM zu gelangen.
5 Mit dem Joystick auf $ gehen, um “---“ auszuwählen und
892
anschließend mit der Taste OK bestätigen.
6 Gehen Sie vor, wie in Schritt 4 und 5 erläutert, wenn Sie weitere
Programmpositionen auslassen wollen.
BILD - MENÜ
Bild - Modus
Kontrast
Normwerte
Format
SENDERABSPEICHERUNG
Automatisch Abspeichern
Manuell Abspeichern
Zusatzfunktionen
AV - Benennung
Programme Ordnen
Kindersicherung
Sprache
Konvergenz
SENDERABSPEICHERUNG
Automatisch Abspeichern
Manuell Abspeichern
Zusatzfunktionen
AV - Benennung
Programme Ordnen
Kindersicherung
Sprache
Konvergenz
MANUELL ABSPEICHERN
PROG NORM KA
0
1
2
3
4
5
6
7
8
9
MANUELL ABSPEICHERN
PROG NORM KA
0
1
2
3
4
5
6
7
8
9
Anwender
4:3
NAME
B/G
MV-CH
C 40
B/G
TVE-1
C 41
B/G
TVE-2
C 31
B/G
ANT-3
C 34
B/G
TELE 5
C 27
B/G
C PLUS
C 47
B/G
- - - - -
C 44
B/G
- - - - -
C 23
B/G
CNN -
C 35
B/G
BBC-W
C 28
NAME
B/G
MV-CH
C 40
B/G
TVE-1
C 41
B/G
TVE-2
C 31
B/G
ANT-3
C 34
B/G
TELE 5
C 27
B/G
C PLUS
C 47
B/G
- - - - -
C 44
B/G
- - - - -
C 23
B/G
CNN -
C 35
- - -
BBC-W
C 28
7 Die MENU-Taste drücken, um in den normalen TV-Betrieb
zurückzukehren.
Wenn Sie mit der Taste PROGR +/- einen Kanal (Fernsehsender)
auswählen erscheint dieser nicht. Dieser Kanal kann jedoch gewählt werden
durch Drücken der entsprechenden Programmnummer auf den
Nummerntasten.
Weitere Funktionen - Abspeicherung - Zusatzfunktionen
18
Page 49

Weitere Funktionen - Abspeicherung - Zusatzfunktionen
Eingeben eines Namens für einen Kanal
Die Namen der Kanäle werden in der Regel automatisch vom Videotext übernommen, falls vorhanden. Sie können aber
auch einen Namen für einen Kanal oder eine Videoeingangsquelle eingeben und dafür bis zu fünf Zeichen (Buchstaben
oder Zahlen) verwenden. Auf diese Weise können Sie auf einfache Weise den Kanal (Fernsehsender) oder die Videoquelle
identifizieren, die auf dem Bildschirm erscheint.
1
4
7
S
VIDEO TV
2
5
8
0
MENU
3
6
9
RM
PROGR
892
1 MENU drücken, um das Menü einzublenden.
2 Mit dem Joystick auf $ gehen, um das Symbol auszuwählen und
anschließend auf z gehen, um das Menü
SENDERABSPEICHERUNG aufzurufen.
3 Mit dem Joystick auf $ oder 4gehen, um die Option Manuell
Abspeichern auszuwählen und anschließend auf z gehen.
4 Mit dem Joystick auf $ oder 4 gehen, um den Kanal auszuwählen,
für den Sie einen Namen eingeben wollen.
5 Mit dem Joystick so oft auf z gehen bis die erste Stelle der Spalte
NAME hervorgehoben ist.
6 Mit dem Joystick auf $ oder 4 gehen, um einen Buchstaben oder eine
Zahl auszuwählen (wählen Sie “-“ bei einem Leerzeichen) und
anschließend gehen Sie auf z, um diese Auswahl zu bestätigen.
Wählen Sie die restlichen vier Zeichen genauso aus.
7 Wenn Sie alle Zeichen eingegeben haben, drücken Sie die Taste OK.
Gehen Sie wie in Schritt 4 bis 7 erläutert vor, wenn Sie Namen für
8
weitere Kanäle eingeben wollen.
BILD - MENÜ
Bild - Modus
Kontrast
Normwerte
Format
SENDERABSPEICHERUNG
Automatisch Abspeichern
Manuell Abspeichern
Zusatzfunktionen
AV - Benennung
Programme Ordnen
Kindersicherung
Sprache
Konvergenz
SENDERABSPEICHERUNG
Automatisch Abspeichern
Manuell Abspeichern
Zusatzfunktionen
AV - Benennung
Programme Ordnen
Kindersicherung
Sprache
Konvergenz
MANUELL ABSPEICHERN
PROG NORM KA NAME
0
1
2
3
4
5
6
7
8
9
MANUELL ABSPEICHERN
PROG NORM KA NAME
0
1
2
3
4
5
6
7
8
9
MANUELL ABSPEICHERN
PROG NORM KA NAME
0
1
2
3
4
5
6
7
8
9
Anwender
4:3
B/G
C 40
B/G
C 41
B/G
C 31
B/G
C 34
B/G
C 27
B/G
C 47
B/G
C 44
B/G
C 23
B/G
C 35
B/G
C 28
B/G
- - - - -
C 40
B/G
- - - - -
C 41
B/G
- - - - -
C 31
B/G
- - - - -
C 34
B/G
- - - - -
C 27
B/G
- - - - -
C 47
B/G
- - - - -
C 44
B/G
- - - - -
C 23
B/G
- - - - -
C 35
B/G
- - - - -
C 28
B/G
C 40
B/G
C 41
B/G
C 31
B/G
C 34
B/G
C 27
B/G
C 47
B/G
C 44
B/G
C 23
B/G
C 35
B/G
C 28
- - - - -
- - - - -
- - - - -
- - - - -
- - - - -
- - - - -
- - - - -
- - - - -
- - - - -
- - - - -
- - - - -
- - - - -
- - - - -
- - - - A- - - -
- - - - -
- - - - -
- - - - -
- - - - -
- - - - -
DE
9 Die MENU-Taste drücken, um in den normalen TV-Betrieb
zurückzukehren.
Wenn Sie einen Kanal mit eingegebenem Namen auswählen, erscheint der
Name einige Sekunden lang auf dem Bildschirm.
Weitere Funktionen - Abspeicherung - Zusatzfunktionen
19
Page 50

Bedienung des Fernsehgerätes – Zusatzfunktionen
Einstellen des Bildes
Die Bildqualität ist zwar werkseitig eingestellt. Sie können sie aber Ihren Wünschen gemäß ändern.
1
4
7
S
VIDEO TV
2
5
8
0
MENU
3
6
9
RM
PROGR
892
1 MENU drücken, um das Menü einzublenden.
2 Mit dem Joystick auf z gehen, zum Wechseln in das Menü BILD-
MENÜ.
3 PMit dem Joystick auf $ oder 4 gehen, um die Option auzuwählen,
die geändert werden soll, und gehen Sie anschließend auf z.
In der folgenden Tabelle finden Sie weitere Informationen zu den
einzelnen Funktionen:
Bild-Modus z Bild-Modus z Anwender (individuelle
Einstellungen)
$ Helligkeit* Z Dunkler z Heller
$ Farbe* Z Weniger z Mehr
$ Bildschärfe* Z Weicher z Schärfer
$ Farbton** Z Günlich z Rötlich
Kontrast Z Weniger z Mehr
Normwerte Setzt das Bild auf die werkseitigen Einstellung
K
zurück.
Format (ausführliche Information finden Sie im Kapitel über
“Wechsel des Bildschirmformats” dieser
Bedienungsanleitung).
* Kann nur geändert werden, wenn Sie “Anwender” im “Bild-
Modus” auswählen.
** Steht nur bei NTSC-Farbsystem zur Verfügung (z. B.
nordamerikanische Videofilme)
z Spielfilm (für Spielfilme)
z Live (für Live-Sendungen)
BILD - MENÜ
Bild - Modus
Kontrast
Normwerte
Format
BILD - MENÜ
Bild - Modus
Kontrast
Normwerte
Format
BILD - MODUS
Bild - Modus
Helligkeit
Farbe
Bildschärfe
Farbton
Anwender
4:3
Anwender
4:3
Anwender
4 Mit dem Joystick auf Z oder z gehen, um die Einstellung der
gewählten Option zu ändern, und anschließend auf die Taste OK
drücken, um die neue Einstellung abzuspeichern.
5 Zur Änderung weiterer Einstellungen gehen Sie so vor, wie in dem
Schritt 3 und 4 erläutert.
6 Die MENU-Taste drücken, um in den normalen TV-Betrieb
zurückzukehren.
Schnelles Ändern von
Bildeinstellungen
Sie können den Bildmodus rasch ändern, ohne den Menübildschirm
“Bild-Menü” aufzurufen.
1 Drücken Sie die Taste der Fernbedienung, um direkten Zugang
zu den Optionen des Bildmodus zu haben.
2 Mit dem Joystick auf $ oder 4 gehen, um den gewünschten Bild-
Modus auszuwählen (Anwender, Spielfilm oder Live) und
anschließend die Taste OK drücken, damit das Menü auf dem
Bildschirm ausgeblendet wird.
Anwender
Spielfilm
Live
20
Weitere Funktionen - Bedienung des Fernsehgerätes - Zusatzfunktionen
Page 51

Weitere Funktionen - Bedienung des Fernsehgerätes – Zusatzfunktionen
Einstellen des Bildschirmformats
Diese Funktion ermöglicht das Bildschirmformat zu ändern.
VIDEO TV
1 MENU drücken, um das Menü einzublenden.
2 Mit dem Joystick auf z gehen, um das Menü BILD-MENÜ
BILD - MENÜ
Bild - Modus
Kontrast
Normwerte
Format
Anwender
4:3
aufzurufen.
3 Mit dem Joystick auf $ oder 4 gehen, um Format auszuwählen.
BILD - MENÜ
Bild - Modus
4 Gehen Sie mit dem Joystick mehrere Male auf z, um einen der
folgenden modi auszusuchen:
1
2
3
4
5
6
• 4:3: herkömmliches Bild im Format 4:3.
Kontrast
Normwerte
Format
• 16:9: für Sendungen im Format 16:9.
7
8
9
0
Drücken Sie die Taste OK.
5 Die MENU-Taste drücken, um in den normalen TV-Betrieb
zurückzukehren.
PROGR
MENU
Anwender
4:3
DE
4:3
S
RM
892
Schnelles Ändern von
16:9
Bildeinstellungen
Sie können den Bildmodus rasch ändern, ohne den
Menübildschirm “Bild-Menü” aufzurufen.
1 Drücken Sie mehrmals auf die Taste der Fernbedienung, um die
Option des Bildschirmformats auszuwählen (4:3, oder 16:9).
Weitere Funktionen - Bedienung des Fernsehgerätes - Zusatzfunktionen
21
Page 52

Weitere Funktionen - Bedienung des Fernsehgerätes – Zusatzfunktionen
Einstellen des Tons
Die Tonwerte sind werkseitig auf Normwerte eingestellt. Im Ton-Menü können Sie jedoch das Bild individuell einstellen.
VIDEO TV
1 MENU drücken, um das Menü einzublenden.
2 Mit dem Joystick auf $ gehen, um das Symbol auszuwählen und
BILD - MENÜ
Bild - Modus
Kontrast
Normwerte
Format
Anwender
4:3
anschließend auf z gehen, um das TON-MENÜ aufzurufen.
3 Mit dem Joystick auf $ oder 4 tgehen um die Option einzustellen,
die geändert werden soll, und anschließend auf z gehen.
In der folgenden Tabelle finden Sie weitere Informationen zu den
einzelnen Funktionen:
1
2
3
4
5
6
7
8
9
0
Ton-Modus z Modus z Anwender (für individuelle
Einstellungen)
z Rock
z Jazz
z Pop
$ Höhen* Z Weniger z Mehr
$ Tiefen* Z Weniger z Mehr
Balance Z Links z Rechts
K
Einstellungen zurück
z Ein: Täuscht den Toneffekt “Dolby Pro Logic
Surround” vor.
MENU
PROGR
Normwerte Setzt das Tonwerte auf die werkseitigen
Dolby** Virtual z Aus: Normal
TON - MENÜ
Ton - Modus
Balance
Normwerte
Dolby Virtual
Zweikan - Ton
Indiv. Lautst.
Lautstärke
Zweikan - Ton
Lautsprecher
TON - MODUS
Modus
Höhen
Tiefen
Anwender
Aus
Mono
0
Mono
Haupt - LS
Anwender
S
RM
892
Zweikan.-Ton • Bei einer Stereosendung:
z Mono
z Stereo
• Für zweisprachige Sendungen:
z Mono (Für den Mono-Kanal, falls dieser zur
Verfügung steht)
z A (für den Kanal 1)
z B (für den Kanal 2)
Indiv. Lautst. Z -12 .......... z +12
(Die Lautstärke des Kanals kann individuell
eingestellt werden zwischen –12 und +12)
Kopfhörer:
Lautstärke Z Weniger z Mehr
Zweikan.-Ton • Bei Stereosendungen:
z Mono
z Stereo
• Für zweisprachige Sendungen:
z Mono (Für den Mono-Kanal, falls dieser zur
Verfügung steht)
z A (für den Kanal 1)
z B (für den Kanal 2)
Lautsprecher z Haupt-LS: Ton des Rückprojektions-Fernsehers
z Mittlerer LS: Ton des Außenverstärkers
22
* Nur einstellbar, wenn im “Ton-Modus“ “Anwender” eingestellt ist.
Weitere Funktionen - Bedienung des Fernsehgerätes - Zusatzfunktionen
Page 53

Weitere Funktionen - Bedienung des Fernsehgerätes - Zusatzfunktionen
1
4
7
S
VIDEO TV
2
5
8
0
MENU
3
6
9
RM
PROGR
892
4 Mit dem Joystick auf Z oder z gehen, um die Einstellung der
ausgewählten Option zu ändern, und anschließend drücken Sie auf
die Taste OK, um die neue Einstellung abzuspeichern.
5 Wiederholen Sie den Schritt 3 und 4, um andere Einstellungen zu
ändern.
6 Die MENU-Taste drücken, um in den normalen TV-Betrieb
zurückzukehren.
** Dieser Fernseher wurde entworfen, um den Toneffekt “Dolby
Surround” zu erzeugen, welcher nur mit den beiden
Lautsprechern des Fernsehers den Ton von 4 Lautsprechern
vortäuscht, solange das Tonsignal des Sender “Dolby Surrond”
ist.
Außerdem können Sie den Toneffekt ebenfalls auch dadurch
verbessern, dass Sie einen externen Verstärker anschließen. Für
weitere Einzelheiten lesen Sie das Kapitel “Anschluss einer
externen Audio-Anlage” auf der Seite 27.
** In Lizenz von Dolby Laboratories hergestellt. “Dolby”, “Pro
Logic” und das Doppel-D-Symbol sind Warenzeichen der
Dolby Laboratories.
DE
Schnelles Ändern von Toneinstellungen
Sie können den Ton-Modus rasch ändern, ohne den
Menübildschirm “Ton-Menü” aufzurufen.
1 Drücken Sie die Taste der Fernbedienung, um direkten Zugang zu
haben zu den Optionen des Ton-Modus.
2 Mit dem Joystick auf $ oder 4 gehen, um den gewünschten Ton-
Modus auszuwählen (Anwender, Rock, Jazz oder Pop), und
anschließend drücken Sie auf die Taste OK zum Ausblenden des
Menüs auf dem Bildschirm.
Weitere Funktionen - Bedienung des Fernsehgerätes - Zusatzfunktionen Operation
Anwender
Rock
Jazz
Pop
23
Page 54

Weitere Funktionen - Bedienung des Fernsehgerätes – Zusatzfunktionen
Die automatische Abschaltfunktion
Mit dieser Funktion schaltet sich das Gerät nach der gewählten Zeit selbst in Bereitschaftsbetrieb (Standby).
VIDEO TV
2 Mit dem Joystick auf $ gehen, um das Symbol t auszuwählen, und
anschließend gehen Sie auf z, um das Menü TIMER aufzurufen.
1
2
3
1 MENU drücken, um das Menü einzublenden.
4
5
6
7
8
9
0
3 Mit dem Joystick auf z, und anchließend so oft auf Z oder z gehen,
bis auf dem Bildschirm die gewünschte Abschaltzeit erscheint.
Aus z 0:30 z 1:00..... 4:00 Uhr
BILD - MENÜ
Bild - Modus
Kontrast
Normwerte
Format
TIMER
Abschaltzeit
TIMER
Abschaltzeit
Anwender
4:3
Aus
1:00
4 Drücken Sie auf die Taste OK.
PROGR
MENU
5 Die MENU-Taste drücken, um in den normalen TV-Betrieb
zurückzukehren.
S
RM
892
Eine Minute bevor das Gerät sich in Bereitschaftsbetrieb schaltet, wird
automatisch 0:01 Restzeit eingeblendet.
Anmerkungen: • Drücken Sie die Taste wenn Sie während Sie
fernsehen die verbleibende Restzeit einblenden
möchten.
• Drücken Sie die Taste TV der Fernbedienung,
wenn Sie das Gerät aus dem Bereitschaftsbetrieb
wieder einschalten möchten.
Weitere Funktionen - Bedienung des Fernsehgerätes - Zusatzfunktionen
24
Page 55

Videotext
Verwenden von Videotext
Videotext ist ein Informationsservice, der von den meisten Sendern angeboten wird.
Verwenden Sie bitte einen Sender mit einem starken Empfangssignal, da es ansonsten zu Fehlern in der Wiedergabe des
Videotextes kommen kann.
1
4
7
S
VIDEO TV
2
5
8
0
MENU
3
6
9
RM
PROGR
892
Wählen von Videotext
Den Sender auswählen, auf dem der gewünschte Videotext-Service
1
ausgestrahlt wird.
2 Die Taste auf der Fernbedienung drücken, um den Videotext
einzuschalten.
Index
Programme
News
Sport
Weather
3 Mit den Zahlentasten die gewünschte dreistellige Seitenzahl
eingeben.
Bei einer Fehleingabe, die dreistellige Zahl beliebig ergänzen, dann
die richtige Seitenzahl eingeben.
4 Die Taste drücken, um den Videotext auszuschalten.
Verwenden anderer Videotext-Funktionen
FUNKTION DIE FOLGENDE TASTE DRÜCKEN
Seitenweises Umblättern für die vorherige Seite
für die nachfolgende Seite
Einblenden des Videotextes
über das Fernsehbild nochmals drücken, um den
Videotext auszuschalten.
Automatischen Seitenwechsel bei
Unterseiten stoppen nochmals drücken, um zum
normalen Seitenwechsel
zurückzukehren.
TELETEXT
25
153
101
98
TELETEXTTELETEXT
Index
Programme
News
Sport
Weather
TELETEXT
Index
Programme
News
Sport
Weather
25
153
101
98
25
153
101
98
TELETEXT
Index
Programme
News
Sport
Weather
25
153
101
98
DE
Verborgene Informationen
(z.B. Antwort auf ein Quiz) nochmals drücken, um die
Informationen Informationen wieder zu
verdecken.
Verwenden von TOP-Text
Mit TOP-Text können Sie bequem eine bestimmte Seite aufrufen.
Bei Ausstrahlung von TOP-Text erscheint unten im Bildschirm eine
Farbleiste. Die entsprechende farbige Taste (rot, grün, gelb oder
blau) drücken, um die dazugehörige Seite aufzurufen.
Videotext
25
Page 56

Anschlußmöglichkeiten
Anschluß von anderen Geräten
Anhand der folgenden Anweisungen können Sie viele verschiedene Zusatzgeräte an den Rückprojektions-Fernseher
anschließen:
Rückseite des Geräts Vorderseite des Geräts
Dekoder
DVD
Videorecorder
Um Bildstörungen zu
vermeiden:
• Nie gleichzeitig
Geräte an die
Buchsen F und G
anschließen.
• Nie gleichzeitig
Geräte an die
vorderen Buchsen
und die
Eurobuchse D
anschließen.
Zugelassene Eingangssignale
A Eingangssignal des
B Ohne Eingangssignale
C Audio-/Videoeingangssignale und
D Audio-/Videoeingangssignale und
E Audio-/Videoeingangssignale
C
A
Zentrallautsprechers Im Menü “TonMenü”, “Mittlerer LS” einstellen in
der Option “Lautsprecher”
RGB
Video S
B
Hi-Fi
E
S-VHS/Hi8
Camcorder
F
D
G
Videorecorder
DVD
H
8mm/Hi8
Camcorder
Zur Verfügung stehende Ausgangssignale
Ohne Ausgangssignal
Audio-Ausgangssignal
Vídeo-/Audioausgangssignale des TV-Abstimmers
Vídeo-/Audioausgangssignale der ausgewählten
Quelle
Vídeo-/Audioausgangssignale der ausgewählten Quelle (die
selbe Ausgangsquelle wie die der Buchse :2/q 2 )
26
F Videoeingangssignal S
G Videoeingangssignal
H Audioeingangssignal
Anschlußmöglichkeiten
Ohne Ausgangssignal
Ohne Ausgangssignal
Ohne Ausgangssignal
Page 57

Anschlußmöglichkeiten
Anschluß von anderen Geräten
Zusätzliche Informationen
Anschluß eines Videorecorders
Wir empfehlen Ihnen den Videorecorder über ein Scart kabel an die Eurobuchsen D oder E anzuschließen. Haben Sie kein Scart
kabel, legen Sie das Signal des Videorecorders auf Programmspeicherplatz “0“ ab. Lesen Sie dazu “Manuelles Abspeichern von
Sendern“ in dieser Bedienungsanleitung.
Unterstützt Ihr Video Smartlink, lesen Sie bitte das kapitel "Smartlink" in dieser Bedienungsanleitung.
Anschluß an externe Audiogeräte
1 Wenn Sie die Tonwiedergabe des Rückprojektions-Fernsehers für die Hi-Fi –Anlage verwenden möchten:
Schließen Sie die Hi-Fi – Anlage an die Anschlüsse B hinten am Rückprojektions-Fernseher an, wenn Sie das AudioAusgangssignal verstärken möchten. Die Lautstärke der an B angeschlossenen Anlage kann geändert werden durch
Einstellen der Kopfhörer-Lautstärke. Lesen Sie dazu das Kapitel „Einstellen des Tons“ dieser Bedienungsanleitung.
Lautsprecher Ihrer
Sie können auch den Toneffekt “Dolby Virtual” durch
Ihre Musikanlage genießen:
Stellen Sie hierzu die Lautsprecher Ihrer Musikanlage an
beiden Seiten des Fernsehers auf, indem Sie zwischen
dem Fernseher und jedem Lautsprecher ca. 50 cm
Abstand lassen.
Nachdem die Lautsprecher aufgestellt sind, wählen Sie
mit Hilfe des Menü-Systems das Menü “TON-MENÜ”
aus und dann “Dolby Virtual” in der Stellung “Ein”.
Hi-Fi-Anlage
~50º
2 Wenn Sie die Tonwiedergabe der Dolby-Vertärker für den
Rückprojektions-Fernseher verwenden möchten:
Schließen Sie die Hi-Fi –Anlage an die Anschlüsse A hinten am Fernseher
an, wenn Sie die Tonwiedergabe der Hi-Fi –Anlage für die Lautsprecher des
Optimale Position für den Benutzer
Fernsehgerätes verwenden möchten. Wenn Sie einen Dolby-Verstärker zur Verfügung
haben, schließen Sie das Zentral-Ausgangssignal des Verstärkers an die besagten Anschlüsse
an, damit der Dolby-Verstärker die Funktion des Zentral-Lautsprechers übernimmt. Lesen Sie
dazu das Kapitel “Einstellen des Tons” und wählen Sie “Mittlerer LS” aus in der Option “Lautsprecher”.
Anschluß einer Mono-Anlage
Schließen Sie das Audio-Kabel an die Buchse L/G/S/I vorne am Rückprojektions-Fernseher an, und wählen Sie das
Eingangssignal 2, indem Sie die unten angegebenen Erläuterungen befolgen.
Auswählen und Sehen des Eingangssignals
VIDEO TV
1 Das Zusatzgerät, wie auf der vorhergehenden Seite erläutert , an die entsprechende Buchse des
Rückprojektions-Fernsehers anschließen.
2 Das angeschlossene Zusatzgerät einschalten.
3 Die Taste der Fernbedienung so oft drücken, bis das gewünschte Eingangssymbol auf dem
1
2
3
4
5
6
7
8
9
0
Bildschirm angezeigt wird.
Symbol Eingangssignale
kkkk • Audio-/Videoeingangssignal von der Eurobuchse C.
• Eingangssignal RGB von der Eurobuchse C.
DE
MENU
S
RM
PROGR
KK
KK
• Audio-/Videosignal von der Eurobuchse D oder den Buchsen RCA H und G.
qqqq
2 • Audio-/Videosignal S von der Eurobuchse D oder den Buchsen RCA H und F.
………… 3 • Audio-/Videosignal von der Eurobuchse E.
892
4 Die Taste auf der Fernbedienung drücken, um in den normalen TV-Betrieb zurückzukehren.
Anschlußmöglichkeiten
27
Page 58

Anschlußmöglichkeiten
Videorecorder
Smartlink
Mit Smartlink kann Ihr Rückprojektions-Fernseher mit einem angeschlossenen Videorecorder “kommunizieren”.
Bedingungen dafür sind:
• Ein Videorecoder der Smartlink, NexTView link, Easy Link oder Megalogic unterstützt.
Megaloic ist ein Markenzeichen von Grundig
EasyLink ist ein Markenzeichen von Philips
• Der Anschluß eines vollständig verdrahteten 21-poligen Scartkabels an die Euro-AV-Buchse
:3 (SMARTLINK).
Smartlink kann u.a.:
• Abspeicherinformation, wie z.B. die Sendertabelle vom Rückprojektions-Fernseher an den
angeschlossenen Videorecorder weitergeben.
• Direkte Aufnahme: Während Sie fernsehen reicht ein Tastendruck am Videorecorder, um
die
laufende Sendung aufzunehmen.
• Rückprojektions-Fernseher ist in Bereitschaftsbetrieb: Die Play-Taste z am Videorecorder
drücken, um das Fernsehgerät einzuschalten.
Falls Sie einen Decoder an einem Smartlink-fähigen Videorecorder angeschlossen
haben, im Menü (SENDERABSPEICHERUNG) Zusatzfunktionen wählen und für
jeden kodierten Sender DEKODER AV3 wählen.
Rückseite des Geräts
Ausführliche Information über Smartlink finden Sie in der Bedienungsanleitung Ihres
Videorecorders.
Fernbedienen anderer Sony-Geräte
Mit den Tasten unter der Abdeckung Ihrer Fernbedienung können Sie andere A/V-Geräte
bedienen.
1 Die Abdeckung der Fernbedienung öffnen.
2 Den Schalter VTR 1234 DVD in die gewünschte Position bringen:
VTR 1 Beta Videorecorder
VTR 2 8 mm Videorecorder
VTR 3 VHS Videorecorder
VTR 4 Digital Video (z.B. DCR-VX 1000/9000E, VHR-1000)
DVD Video Disk Player
3 Verwenden Sie die Tasten der Fernbedienung unter der Abdeckung, um die Anlage zu
bedienen.
• Falls das Zusatzgerät einen COMMAND MODE-Schalter hat, diesen Schalter in die gleiche
Position wie beim VTR 1234 DVD-Schalter an der Fernbedie-nung des Fernsehgerätes
stellen.
Dekoder
VIDEO TV
VTR 1 2 3 4 DVD
CH
VTR 1 2 3 4 DVD
CH
28
• Falls das Zusatzgerät eine bestimmte Funktion nicht besitzt, funktioniert die
entsprechende Taste auf der Fernbedienung auch nicht.
Anschlußmöglichkeiten
Page 59

Anschlußmöglichkeiten
Wahl des Ausgangssignals der Eurobuchsen
Verwenden Sie diese Funktion, wenn Sie Eingangssignale von einem Außen-Gerät mit Ihrem an die Eurobuchsen :2/q
2 oder :3 hinten am Fernseher angeschlossenen Videorecorder aufnehmen wollen.
Sie müssen dazu die Ausgangssignal-Quelle auswählen, wie in der Folge erläutert ist. (Wenn Ihr Videorecorder Smartlink
zulässt, ist diese Vorgehensweise nicht notwendig).
VIDEO TV
1 MENU drücken, um das Menü einzublenden.
2 Mit dem Joystick auf $ gehen, um das Symbol auszuwählen, und
anschließend auf z gehen, um das Menü VIDEO-ANSCHLUSS
aufzurufen.
1
2
3
4
5
6
7
8
9
0
3 Mit dem Joystick auf $ oder 4 gehen zur Hervorhebung.
Bildschirm: Für das Eingangssignal des TV-Bildschirms oder,
Ausgang: für das Ausgangssignal des Rückprojektions-
BILD - MENÜ
Bild - Modus
Kontrast
Normwerte
Format
VIDEO - ANSCHLUSS
Bildschirm
Ausgang
TV
Anwender
4:3
[TV - - - - - - -]
[AV1 - - - - - - -]
AV1
DE
Fernsehers, der für die Eurobuchsen :2/q 2 und
:3 zur Verfügung steht.
PROGR
MENU
Mit dem Joystick auf z gehen zur Bestätigung:
4 Mit dem Joystick so oft auf Z oder z gehen bis das entsprechende
RM
892
Signal ausgewählt ist:
S
Bildschirm: TV, AV1, RGB, AV2, YC2 oder AV3
Ausgang: TV, AV1, AV2, YC2, AV3 oder AUTO
Nach der Wahl des Signals, drücken Sie die Taste OK zur
Bestätigung.
Wenn Sie AUTO auswählen, ist das Ausgangssignal immer
gleich wie das auf dem Bildschirm.
Wenn Sie einen Decoder haben, denken Sie bitte daran wieder
das Ausgangssignal in “TV” zu wählen, zu einer korrekten
Dekodierung.
5 Die MENU-Taste drücken, um in den normalen TV-Betrieb
zurückzukehren.
Das ausgewählte Signal steht für die Anlage der Option zur Verfügung,
die an die entsprechende Eurobuchse angeschlossen ist.
Anschlußmöglichkeiten
29
Page 60

Anschlußmöglichkeiten
Die Funktion “AV-Benennung”
Mit dieser Funktion können Sie einen Namen für zusätzliche Geräte eingeben, die Sie an die Buchsen dieses Fernsehgerätes
angeschlossen haben. Dieser Name kann aus bis zu 5 Zeichen (Buchstaben oder Zahlen) bestehen und erscheint auf dem
Fernsehschirm, wenn das Gerät ausgewählt wird.
VIDEO TV
1 MENU drücken, um das Menü einzublenden.
2 Mit dem Joystick auf $ gehen, um das Symbol uszuwählen und
anschließend gehen Sie auf z, um in das Menü
SENDERABSPEICHERUNG zu wechseln.
1
2
3
4
5
6
7
8
9
0
3 Mit dem Joystick auf $ oder 4 gehen, um in das Menü AV-
Benennung zu wechseln und anschließend auf z gehen.
BILD - MENÜ
Bild - Modus
Kontrast
Normwerte
Format
SENDERABSPEICHERUNG
Automatisch Abspeichern
Manuell Abspeichern
Zusatzfunktionen
AV - Benennung
Programme Ordnen
Kindersicherung
Sprache
Konvergenz
SENDERABSPEICHERUNG
Automatisch Abspeichern
Manuell Abspeichern
Zusatzfunktionen
AV - Benennung
Programme Ordnen
Kindersicherung
Sprache
Konvergenz
Anwender
4:3
4 Mit dem Joystick auf $ oder 4 gehen, um die Eingangsquelle
MENU
PROGR
auszuwählen für die Sie einen Namen eingeben wollen (z.B. AV2) ,
und anschließend gehen Sie auf z zur Hervorhebung der ersten
Stelle der Spalte NAME.
AV - BENENNUNG
EINGANG NAME
AV1
RGB
AV2
YC2
AV3
- - - - -
- - - - -
- - - - -
- - - - -
- - - - -
S
RM
5 Mit dem Joystick auf $ oder 4 gehen, um einen Buchstaben oder eine
892
Zahl auszuwählen ( wählen Sie “-“ bei einem Leerzeichen), und
anschließend gehen Sie auf z, um dieses Zeichen zu bestätigen.
Wählen Sie die restlichen vier Zeichen genauso aus.
AV - BENENNUNG
EINGANG NAME
AV1
RGB
AV2
YC2
AV3
- - - - -
- - - - -
A - - - -
- - - - -
- - - - -
6 Wenn Sie alle Zeichen eingegeben haben, drücken Sie die Taste OK.
7 Gehen Sie wie in Schritt 4 bis 6 erläutert vor, wenn Sie für weitere
Eingangsquellen einen Namen eingeben wollen.
8 Die MENU-Taste drücken, um in den normalen TV-Betrieb
zurückzukehren.
Immer wenn Sie das Gerät auswählen, für deren Eingangsquelle Sie einen
Namen eingegeben haben, wird dieser Name einige Sekunden lang auf
dem Bildschirm erscheinen.
Anschlußmöglichkeiten
30
Page 61

Weitere Informationen
Optimaler Sichtbereich
Um das Bild in bester Qualität sehen zu können, sollten Sie versuchen, das Rückprojektions-Fernseher so zu stellen, daß Sie
innerhalb des unten dargestellten Bereichs auf den Fernsehschirm schauen können.
Horizontaler Sichtbereich
2.1m (Optimaler Mindestabstand)
75º
75º
DE
(Optimale Sichtposition)
Vertikaler Sichtbereich
2.1m (Optimaler Mindestabstand)
27.5°
27.5°
(Optimale Sichtposition)
Weitere Informationen
31
Page 62

Weitere Informationen
Technische Daten
Fernsehnorm
B/G/H, D/K, L, I
Farbsystem
PAL, SECAM
NTSC 3.58, 4.43 (nur über Videoeingang)
Kanalbereiche
VHF: E2-E12
UHF: E21-E69
CATV: S1-S20
HYPER: S21-S41
D/K: R1-R12, R21-R69
L: F2-F10, B-Q, F21-F69
I: UHF B21-B69
Bildröhre
41 Zoll
(ca. 103 cm diagonal gemessen)
Anschlüsse, hinten am Gerät
• Eingangsanschlüsse für mittleren
• Audio-Eingänge (Cinchbuchsen)
• :1/ 21-poliger Euro-AV-Anschluss
• :2/q 2 21-poliger Euro-AV-Anschluss
• :3 21-poliger Euro-AV-Anschluss
(SMARTLINK) (Scart), Eingang von Audio-und
Anschlüsse, vorne am Gerät
C
Lautsprecher 2 Anschlüsse
(Scart), Eingang von Audio- und
Videosignalen, RGB-Signalen,
Ausgang von TV-Audio- und
Videosignalen
(Scart), Eingang von Audio- und
Videosignalen, S-Video-Signalen,
Ausgang von wählbar-Audio- und
Videosignalen
Videosignalen, Ausgang von TVAudio- und Videosignalen (wählbar,
entspricht der Ausgangsquelle, die
an der Buchse :2/q 2 anliegt)
und Anschluss Smartlink.
…2 Eingang von Videosignalen - Cinchbuchse
2
Eingang von Audiosignalen - Cinchbuchsen
q2 Eingang von S-Videosignalen - 4 polig DIN
Kopfhörerbuchse - Stereominibuchse
Tonausgang:
2 x 30 W (Musikleistung)
2 x 15 W (RMS)
Mittlerer Lautsprechereingang
30 W (RMS) (bei Verwendung als mittlerer Lautsprecher)
Leistungsaufnahme
145 W
Leistungsaufnahme im Bereitschaftsbetrieb
0.7 W
Abmessungen (B x H x T)
ca. 948 x 992 x 511 mm
Gewicht
ca. 43 kg
Mitgeliefertes Zubehör
1 Fernbedienung (RM-892)
2 Batterien (R6)
Weitere Merkmale
Digitaler kammfilter (hohe Auflösung)
Videotext, Fastext, TOP-Text
NICAM
Automatische Abschaltfunktion
Smartlink
Dolby Virtual
Änderungen, die dem technischen Fortschritt dienen, bleiben vorbehalten.
Recyceltes Papier, chlorfrei
Weitere Informationen
32
Page 63

Weitere Informationen
Fehlersuche
Im folgenden finden Sie Hinweise zum Beheben möglicher Bild- und Tonstörungen.
Problem
Kein Bild (dunkler Bildschirm), kein Ton
Schlechtes oder kein Bild (dunkler
Bildschirm), aber guter Ton
Schlechte Bildqualität bei Betrachten
einer RGB-Videosignalquelle
Gutes Bild, kein Ton
Lösung
• Rückprojektions-Fernseher anschließen.
• Taste vorne am Gerät drücken.
• Falls die Anzeige leuchtet, TV oder eine Zahlentaste
auf der Fernbedienung drücken.
• Antennenanschluß überprüfen.
• Das Rückprojektions-Fernseher mit dem Netzschalter
kurz aus- und wieder einschalten.
• MENU drücken. Bild-Menü wählen. Kontrast, Helligkeit
und Farbe einstellen.
• Im Bild-Menü Normwerte wählen.
• Die Taste auf der Fernbedienung so oft drücken, bis das
Symbol auf dem Bildschirm eingeblendet wird.
• Die Taste +/- auf der Fernbedienung drücken.
• Falls auf dem Bildschirm eingeblendet ist, die Taste
auf der Fernbedienung drücken.
• Überprüfen Sie im Ton-Menü, ob der Hauptlautsprecher
gewählt ist.
DE
Keine Farbe bei Farbsendungen
Verzerrtes Bild, wenn Sie umschalten
oder Videotext wählen
Verrauschtes Bild im TV-Betrieb bei
einem bestimmten Sender
Fernbedienung funktioniert nicht
Bereitschaftsanzeige am Gerät blinkt
• Falls die Probleme weiterhin bestehen sollten, das Fernsehgerät durch einen Fachmann reparieren lassen.
• Öffnen Sie keinesfalls die Rückwand des Fernsehgerätes!
• MENU drücken. Bild-Menü wählen. Farbe einstellen.
• Im Bild-Menü Normwerte wählen.
• Das Gerät, das an der Euro-AV-Buchse hinten am Gerät
angeschlossen ist, ausschalten.
• Im Menü Manuelles Abspeichern AFT AUS wählen und den
Kanal feinabstimmen.
• Batterien austauschen.
• Wenden Sie sich bitte an Ihren nächstgelegenen Sony-Service.
Weitere Informationen
33
Page 64

34
Page 65

Rétroprojecteur
Merci d’avoir choisi ce rétroprojecteur Sony.
Avant d’utiliser votre rétroprojecteur, lisez attentivement ce manuel et conservez-
le pour vous y référer ensuite.
Comment lire ce Mode d’emploi :
• Utilisez
familiariser avec ses fonctions principales.
• Utilisez
caractéristiques complémentaires du rétroprojecteur.
• Symboles utilisés dans ce manuel :
• Risques éventuels.
• Remarques importantes.
• Information concernant la fonction.
Mise en Service
Opérations Ultérieures
si vous désirez installer le rétroprojecteur et vous
si vous désirez mieux connaître les
Mode d’emploi
FR
•1, 2 ...Etapes du mode d’emploi
MENU
K
• Les touches noires de la télécommande indiquent sur quelles touches
appuyer pour exécuter les diverses fonctions.
• Résultat des instructions.
• Marche à suivre pour obtenir le résultat final : voir page suivante.
3
Page 66

Consignes de sécurité
N
u
p
u
à
n
e
Ce modèle fonctionne uniquement
sur tension secteur de 220-240 volts.
Ne connectez pas trop d’appareils
sur la même prise afin de ne pas
risquer un incendie ou un choc
électrique.
Pour des raisons environnementales
et de sécurité, il est recommandé de
ne pas laisser le téléviseur en veille
lorsque vous ne l’utilisez pas. Pour
des périodes prolongées
d’inutilisation, débranchez-le de la
prise de courant.
N’introduisez jamais aucun objet dans
le téléviseur afin de ne pas risquer un
choc électrique. Assurez-vous de ne
jamais renverser de liquide dans
l’appareil. Si un liquide ou un objet
pénétrait dans le téléviseur,
débranchez-le par la prise secteur et ne
l’utilisez plus avant sa vérification par
le service après-vente.
N’ouvrez pas le capot et le boîtier
arrière du téléviseur. Contactez
toujours le service après-vente en cas
de problème.
N’obstruez jamais les orifices d’aératio
du téléviseur. Pour une aération
correcte, laissez toujours un espace libr
d’au moins 10 cm autour de l’appareil
(surtout si vous l’encastrez dans un
meuble).
Nettoyez le téléviseur avec un chiffon
doux légèrement humecté. N’utilisez pas
de produits à base de benzine (essence
industrielle), de diluant ou tous autres
produits chimiques pour nettoyer votre
téléviseur. Ne le frottez pas. Pour plus de
sécurité, débranchez l’appareil avant de
le nettoyer.
Pour votre sécurité, ne touchez
aucune partie du téléviseur, cordon
secteur ou câble d’antenne lors
d’un orage.
e posez jamais le téléviseur dans
n endroit chaud, humide ou trop
oussiéreux. Ne l’installez pas dans
n endroit où il pourrait être soumis
des vibrations mécaniques.
Débranchez le téléviseur par la
fiche d’alimentation. Ne tirez pas
sur le cordon.
Pour écarter tout risque
d’incendie ou d’électrocution,
n’exposez pas le téléviseur à
l’humidité ou à la pluie.
Pour ne pas risquer un incendie,
éloignez du téléviseur tout objet
inflammable ou lumière
incandescente (par exemple des
bougies).
Prenez garde de ne pas placer des
objets lourds sur le cordon
d’alimentation afin de ne pas
l’endommager.
Nous vous recommandons de ne pas
enrouler de cordon trop long autour
des supports à l'arrière du
téléviseur.
Débranchez le téléviseur du courant
Installez le téléviseur sur un meuble
stable. Ne permettez pas aux
enfants de monter dessus. Ne placez
pas le téléviseur sur un côté ou sur
la façade.
secteur avant de le déplacer. D’une
façon générale, pendant son
transport, évitez les vibrations et les
déformations. Si le téléviseur
tombait ou était endommagé, faites
le vérifier immédiatement par le
Ne couvrez pas les zones
d’aération du téléviseur avec des
éléments tels que des rideaux, des
journaux, etc…
service après-vente.
Normes de Sécurité complémentaires
•Si vous faites passer directement le rétroprojecteur d'un endroit froid à un endroit chaud ou s'il se produit un brutal changement
de température dans la pièce où il se trouve, les images peuvent apparaître floues ou les couleurs peuvent devenir de mauvaise
qualité dans certaines parties de l'écran. Ceci provient de l'humidité qui s'est condensée sur les miroirs ou les lentilles. Avant
d'utiliser le rétroprojecteur, attendez que l'humidité se soit évaporée.
•Pour voir des images nettes, n'exposez pas l'écran à l'éclairage direct. Dans la mesure du possible, utilisez un éclairage venant du
plafond.
•Une image fixe pendant un temps prolongé, par ex. lors de l'utilisation de jeux vidéo, d'ordinateurs personnels, de programmes au
format 16/9, une chaîne affichant son logo d’identification peut endommager les tubes cathodiques de façon permanente. Il est
préférable de régler le contraste image à un faible niveau ou changer le contenu de l’image de façon régulière.
•Evitez de toucher l'appareil pour ne pas en rayer la superficie.
4
Consignes de sécurité
Page 67

Table des matières
Table des matières
Comment lire ce Mode d’emploi ...................................................................................................3
Consignes de sécurité...................................................................................................................... 4
Mise en service
Description générale
Vérification des accessoires fournis.................................................................................. 6
Présentation générale des touches du rétroprojecteur................................................... 6
Présentation générale des touches de la télécommande................................................ 7
Installation
Insertion des piles dans la télécommande ......................................................................8
Branchement de l’antenne et du magnétoscope ............................................................. 8
Mise sous tension du rétroprojecteur ...............................................................................8
Première mise en service
Sélection de la langue..........................................................................................................9
Réglage automatique du rétroprojecteur par la télécommande................................. 10
Modification de l’ordre des chaînes................................................................................ 11
Réglage de l’alignement des couleurs (Convergence) ................................................. 12
Guide rapide de déplacement à travers les menus....................................................... 13
Opérations ultérieures
Autres fonctions
Réglage automatique simplifié du rétroprojecteur ...................................................... 14
Réglage manuel du rétroprojecteur ................................................................................15
Fonction de “Présélection (Suite)” ..................................................................................16
Verrouillage de chaînes ....................................................................................................17
Chaînes inutilisées.............................................................................................................18
Identification individuelle d'émetteurs.......................................................................... 19
FR
Autres fonctions du téléviseur
Réglage de l’image............................................................................................................. 20
Sélection du type de format de l'image télévisée.......................................................... 21
Réglage du son................................................................................................................... 22
Déconnexion automatique ...............................................................................................24
Télétexte
Visualisation du télétexte .................................................................................................25
Connexion des équipements en option
Connexion des équipements en option .......................................................................... 26
Utilisation des équipements en option........................................................................... 27
“Smartlink”......................................................................................................................... 28
Télécommande d’autres appareils Sony ........................................................................28
Sélection du signal de sortie des connecteurs Euro AV............................................... 29
Utilisation de la fonction “Libellé d’entrée AV”........................................................... 30
Informations complémentaires
Zone de visualisation optimale ....................................................................................... 31
Spécifications...................................................................................................................... 32
Dépannage.......................................................................................................................... 33
Les principaux émetteurs français ..................................................................................34
Table des matières
5
Page 68

Mise en service - Description générale
Vérification des accessoires fournis
VIDEO TV
Checking the Accessories Supplied
1
2
3
4
5
6
7
8
9
0
PROGR
MENU
RM
892
S
Une télécommande
(RM-892)
Deux piles (type R6)
Overview of Projection TV Buttons
Présentation générale des touches du rétroprojecteur
Poussez vers le haut le couvercle de
la partie frontale du téléviseur pour
voir les connecteurs frontaux
Touche de
sélection
de la
source
d’entrée
Touches
de réglage
du volume
Touches de
sélections
des chaînes
Indicateur
de mise en
veille
(standby)
Interrupteur
Marche/
Arrêt
Prise
Casque
6
Prise
S-Vidéo
Mise en service - Description générale
Prise
Vidéo
Prises
d’entrée
audio
Touche de
mémorisation
automatique et
de réinstallation
Touche pour
"Convergence
automatique"
Page 69

Mise en service - Description générale
Présentation générale des touches de la télécommande
Checking the Accessories Supplied
Voir l'heure
Appuyez sur cette touche pour
activer ou désactiver l'horloge (ne
fonctionne que pendant la
transmission du télétexte).
Pilotage d’autres appareils
Sony
Pour toute information
complémentaire, consultez le
chapitre "Télécommande d'autres
équipements Sony”.
s’éclairera).
Si on n’appuie ni sur une touche du
téléviseur ni sur une touche de la
télécommande, le rétroprojecteur
passera automatiquement en veille
(standby) au bout de 15 à 30 minutes.
associée à cette touche ne
Monter d’un niveau
Baisser d’un niveau
Aller au menu ou à la sélection
précédente
Aller au menu ou à la sélection
suivante
Confirmer la sélection
Touche sans fonction sur cet appareil
Coupure du son
Appuyez sur cette touche pour
couper le son.
Appuyez à nouveau pour le récupérer.
Magnétoscope allumé/ éteint
Appuyez sur cette touche pour allumer
ou éteindre le magnétoscope.
Sélection du mode TV
Appuyez sur cette touche pour désactiver
le télétexte ou une entrée audio/vidéo.
Sélection du télétexte
Appuyez sur cette touche pour afficher le
télétexte.
Touches sans fonction sur cet appareil
Sélection des chaînes
Appuyez sur ces touches pour sélectionner
les chaînes.
Pour des numéros de chaînes à deux chiffres
(23 par exemple) appuyer d’abord sur -/-- et
ensuite sur les touches 2 et 3.
Si vous vous trompez en introduisant le
premier chiffre, introduisez cependant le
deuxième chiffre (de 0 à 9) et répétez ensuite
l’opération.
Sélection du mode de son
Appuyez plusieurs fois sur cette touche
pour changer de mode de son.
Sélection du mode d'image
Appuyez plusieurs fois sur cette touche
pour changer de mode d'image.
Réglage du volume
Appuyez sur cette touche pour régler le
volume.
Afficher le menu
Appuyez sur cette touche pour que le menu
apparaisse sur l’écran. Appuyez à nouveau
sur cette touche pour le désactiver et voir
l’image en cours de diffusion.
Outre les fonctions de télévision, toutes les touches de couleur
et les symboles de couleur verte sont aussi utilisées pour les
opérations du télétexte. Pour tout renseignement
1
4
7
S
VIDEO TV
2
5
8
0
K
MENU
VIDEO TV
VTR 1 2 3 4 DVD
3
6
9
PROGR
RM
892
CH
Eteindre temporairement le
rétroprojecteur
Appuyez sur cette touche pour éteindre
temporairement le rétroprojecteur ( le
voyant de mise en veille
Appuyez à nouveau sur cette touche pour
allumer le rétroprojecteur à partir du mode
veille (standby).
Pour une meilleure économie d’énergie, il est
conseillé d’éteindre complètement l'appareil
lorsqu’on ne l’utilise pas.
Visualisation de l’information
sur l’écran
Appuyez sur cette touche pour présenter
toutes les indications sur écran.
Appuyez à nouveau pour les faire
disparaître.
Sélection de la source d’entrée
Appuyez plusieurs fois sur cette touche
jusqu’à ce que le symbole de la source
d’entrée recherchée apparaisse sur l’écran.
Retour à la dernière chaîne
sélectionnée
Appuyez sur cette touche pour revenir à la
dernière chaîne sélectionnée (la chaîne
précédente doit avoir été visionnée
pendant 5 secondes au moins).
Sélection du format de l’écran
Appuyez sur cette touche pour sélectionner
le format de l'image télévisée. Appuyez
plusieurs fois de suite sur cette touche pour
changer le format de l'image télévisée.
La fonction
fonctionne pas sur ce rétroprojecteur
Sélection du menu
4
$
Z
z
OK
Sélection des chaînes
Appuyez sur cette touche pour sélectionner
la chaîne précédente ou suivante.
FR
Mise en service - Description générale
7
Page 70

Mise en service - Installation
Insertion des piles dans la télécommande
Vérifiez que les piles sont correctement placées.
Respectez l’environnement! Ne jetez les piles usagées que dans les réceptacles prévus à cet effet.
Branchement de l’antenne et du magnétoscope
magnétoscope
ou
Le connecteur Péritel est disponible en option.
Si vous l'utilisez, cette connexion optionnelle peut améliorer la qualité de l'image et du son lorsque vous utilisez le
magnétoscope.
Si vous n'utilisez pas le connecteur Péritel, après avoir mémorisé automatiquement les chaînes sur le rétroprojecteur, vous
devrez mémoriser manuellement le canal du signal vidéo. Pour ce faire, consultez le chapitre "Réglage manuel du
rétroprojecteur". Consultez aussi le mode d'emploi de votre magnétoscope pour voir comment obtenir le canal du signal
vidéo.
OUT IN
Mise sous tension du rétroprojecteur
Appuyez sur
l’interrupteur
Arrêt
situé à l’avant de
votre rétroprojecteur.
Branchez la prise du
rétroprojecteur sur le
secteur (220-240V ca,
50Hz).
8
Mise en service - Installation
Marche/
Page 71

Mise en service - Première mise en service
Sélection de la langue
Cette fonction permet de sélectionner la langue des écrans du menu.
La première fois où vous allumerez le rétroprojecteur, le menu LANGUAGE (LANGUE) apparaîtra automatiquement sur
l’écran. Cependant, si vous devez à nouveau changer la langue des menus au bout d’un certain temps, sélectionnez le menu
Langue sur (PRESELECTION) et procédez comme suit.
LANGUAGE
Appuyez sur l’interrupteur
1
marche/arrêt
du rétroprojecteur
La première fois où vous appuierez sur la touche marche/arrêt du
rétroprojecteur, le menu LANGUAGE (LANGUE) apparaîtra
automatiquement sur votre écran.
English
Deutsch
Français
Español
Suomi
Nederlands
Português
Suenska
Dansk
Norsk
Italiano
Česki
Magyar
Eλλnvιkά
Select Language:
Confirm: OK
LANGUAGE
English
Deutsch
Français
Español
Suomi
Nederlands
Português
Suenska
Dansk
Norsk
Italiano
Česki
Magyar
Eλλnvιkά
Select Language:
Confirm: OK
2
VIDEO TV
Orientez le sélecteur de la télécommande sur $ ou 4 pour sélectionner
la langue et ensuite sur OK pour confirmer la sélection.
Si vous choisissez comme langue le "Français", lorsque vous
réaliserez la mémorisation automatique celle-ci commencera en
cherchant les chaînes (émetteurs TV) du système de télévision
de France (L) et passera ensuite au système d'Europe
occidentale (B/G).
1
2
3
4
5
6
7
8
9
0
Le menu de Mémorisation Automatique apparaît sur l’écran dans la langue
que vous avez choisie.
PROGR
MENU
LANGUAGE
English
Deutsch
Français
Español
Suomi
Nederlands
Português
Suenska
Dansk
Norsk
Italiano
Česki
Magyar
Eλλnvιkά
Select Language:
Confirm: OK
Désirez-vous réaliser un réglage
automatique des chaînes?
Oui
Non
Confirmer: OK
FR
S
RM
892
Mise en service - Première mise en service
9
Page 72

Mise en service - Première mise en service
G
O
Réglage automatique du téléviseur par
la télécommande
Avant de pouvoir recevoir toutes les chaînes (émetteurs TV), vous devez régler le rétroprojecteur. En vous conformant aux
instructions ci-dessous, ce rétroprojecteur recherchera et enregistrera automatiquement toutes les chaînes disponibles.
Après avoir choisi la langue dans laquelle vous désirez lire les menus, un nouveau menu de réglage automatique du
rétroprojecteur apparaît sur l’écran. Cependant, si au bout d’un certain temps, vous désirez reprendre le réglage des chaînes
(par ex. en cas de déménagement), sélectionnez le menu Mémorisation Auto qui se trouve dans (PRESELECTION) et
procédez comme suit ou consultez le chapitre "Réglage automatique simplifié du rétroprojecteur".
1
4
7
S
VIDEO TV
2
5
8
0
MENU
3
6
9
RM
PROGR
892
Appuyez sur la touche OK de la télécommande pour sélectionner
1
Oui
.
Un nouveau menu apparaît sur l’écran pour que vous puissiez vérifier
le branchement de l’antenne.
2
Vérifiez que l’antenne est branchée et, dans ce cas, appuyez sur
Le réglage automatique commence et pendant que le téléviseur
enregistrera toutes les chaînes (les émetteurs TV apparaissent
l’un après l’autre), le message «Recherche...» clignotera sur
l’écran.
Ce processus peut demander quelques minutes. Soyez patient
et n'appuyez sur aucune touche tant que durera le processus
de réglage. Sinon, le processus ne serait pas complet.
Lorsque ce processus de réglage automatique est terminé, le menu «Ordre
des Chaînes» apparaît à l’écran.
Remarque:
• Si vous désirez arrêter le processus de réglage
automatique, appuyez sur la touche
MENU
de la
télécommande.
• Si vous arrêtez le processus de réglage automatique en
appuyant sur la touche
MENU
, le menu «Ordre des
Chaînes» n’apparaîtra pas automatiquement sur l’écran.
OK
Désirez-vous réaliser un réglage
automatique des chaînes?
.
Merci de vérifier que vous
avez connecté votre antenne
MEMORISATION AUTO
PROG
1
ORDRE DES CHAINES
PROG STD CANAL NOM
Oui
Non
Confirmer: OK
Confirmer: OK
STDLCANAL
0
1
2
3
4
5
6
7
8
9
Sélectionner PROG: + OK
Sortir: MENU
C 26
RECHERCHE
L
C 28
L
C 40
L
C 41
L
C 31
L
C 34
L
C 27
L
C 47
L
C 44
L
C 23
L
C 35
NOM
- - - - -
BBC-W
MV-CH
TVE-1
TVE-2
ANT-3
TELE 5
C PLUS
- - - - -
- - - - CNN -
10
Mise en service - Première mise en service
Page 73

Mise en service - Première mise en service
Modification de l'ordre des chaînes
Après avoir réglé toutes les chaînes (émetteurs de télévision) disponibles, un nouveau menu qui vous permet de changer
l’ordre des chaînes sur le rétroprojecteur apparaît automatiquement sur votre écran. Cependant, si vous désirez changer à
nouveau l’ordre des chaînes au bout d’un certain temps, allez à (PRESELECTION) et sélectionnez le menu Ordre des
chaînes, puis procédez de la même manière qu’au paragraphe b) de ce chapitre.
a) Si vous ne désirez pas changer l’ordre des chaînes:
VIDEO TV
1 Appuyez sur la touche MENU de la télécommande pour revenir sur
l’image diffusée.
Le rétroprojecteur est prêt à fonctionner.
1
2
3
4
5
6
7
8
9
0
b) Si vous désirez changer l’ordre des chaînes:
1 Orientez le sélecteur sur $ ou 4 pour sélectionner la chaîne dont vous
désirez changer le numéro. Appuyez ensuite sur la touche OK.
Le changement de l'emplacement d'une chaîne bouleversera
l'ordre des chaînes suivantes. Il faut donc commencer cette
réorganisation dans l'ordre croissant (ex: TF1 sur le numéro 1,
PROGR
MENU
France 2 sur le numéro 2, France 3 sur le numéro 3, etc...)
ORDRE DES CHAINES
PROG STD CANAL NOM
L
0
C 28
L
1
C 40
L
2
C 41
L
3
C 31
L
4
C 34
L
5
C 27
L
6
C 47
L
7
C 44
L
8
C 23
L
9
C 35
Sélectionner PROG: + OK
Sortir: MENU
ORDRE DES CHAINES
PROG STD CANAL NOM
L
0
C 28
L
1
C 40
L
2
C 41
L
3
C 31
L
4
C 34
L
5
C 27
L
6
C 47
L
7
C 44
L
8
C 23
L
9
C 35
Sélectionner PROG: + OK
Sortir: MENU
BBC-W
MV-CH
TVE-1
TVE-2
ANT-3
TELE 5
C PLUS
- - - - -
- - - - CNN -
BBC-W
MV-CH
TVE-1
TVE-2
ANT-3
TELE 5
C PLUS
- - - - -
- - - - CNN -
FR
S
RM
892
2 Orientez le sélecteur sur $ ou 4 pour sélectionner le nouveau numéro
de chaîne sous lequel vous désirez mémoriser le canal sélectionné et
appuyez ensuite sur la touche OK.
Le canal sélectionné passe à son nouveau numéro de chaînes et
les autres canaux changent en conséquence.
ORDRE DES CHAINES
STD CANAL NOMPROG
L
0
1
2
3
4
5
6
7
8
9
Sélectionner la chaîne:
Confirmer: OK
C 40
L
C 41
L
C 31
L
C 34
L
C 27
L
C 47
L
C 44
L
C 23
L
C 35
L
C 28
MV-CH
TVE-1
TVE-2
ANT-3
TELE 5
C PLUS
- - - - -
- - - - CNN BBC-W
3 Reprenez de 1 à 2 si vous désirez réorganiser d’autres chaînes.
4 Appuyez sur la touche MENU pour revenir à l’image télévisée.
Le rétroprojecteur est prêt à fonctionner.
Mise en service - Première mise en service
11
Page 74

Mise en service - Première mise en service
Réglage de l’alignement des couleurs (Convergence)
Du fait du magnétisme terrestre, l'image télévisée peut apparaître mal définie, et les contours des images peuvent présenter
une auréole multicolore. En ce cas, procédez comme indiqué ci-dessous.
Convergence automatique des lignes
rouge, verte et bleue
Poussez vers le haut le couvercle de la partie frontale du
1
rétroprojecteur pour ouvrir le tableau de commande frontal.
2 Appuyez sur la touche du rétroprojecteur.
La fonction "Convergence automatique" démarre et dure pendant 30
secondes environ. Lorsque la croix blanche s'efface de l'écran, le
rétroprojecteur est prêt à fonctionner.
Remarques :
La fonction "Convergence automatique" ne fonctionne pas :
• lorsqu'il n'y a pas de signal d'entrée
• lorsque le signal d'entrée est faible
• lorsque l'écran est exposé à une source de lumière puissante ou à
la lumière solaire directe.
• pendant que vous visualisez le télétexte.
Si vous désirez un réglage plus précis
de la convergence
VIDEO TV
1
Appuyez sur la touche MENU de la télécommande pour que le menu
apparaisse sur l’écran.
CONTROLE DE L'IMAGE
Réglage Image
Contraste
Raz
Ratio
Personnel
4:3
2 Orientez le sélecteur sur $ pour sélectionner le symbole , , et
orientez-le ensuite sur z pour entrer dans le menu PRESELECTION.
3 Orientez le sélecteur sur $ ou 4 pour sélectionner Convergence et
orientez-le ensuite sur z.
1
2
3
4
5
6
4 Orientez le sélecteur sur $ ou 4 pour sélectionner la “ligne” (lignes
verticales et horizontales aux couleurs rouge et bleue) que vous
voulez régler.
7
8
9
0
: ligne verticale rouge (réglage gauche/droite)
: ligne horizontale rouge (réglage haut/bas)
: ligne verticale bleue (réglage gauche/droite)
: ligne horizontale bleue (réglage haut/bas)
Appuyez sur la touche OK.
PRESELECTION
Mémorisation Auto
Mémorisation Manuelle
Présélection (Suite)
Libéllé d'entrée AV
Ordre des chaînes
Verrouillage Parental
Langue
Convergence
5 Orientez le sélecteur sur $ , 4 , Z ou z de façon répétée pour aligner
PROGR
MENU
la ligne sélectionnée avec la ligne verte du centre et appuyez ensuite
sur la touche OK pour confirmer.
6 Pour régler les autres lignes, reprenez de 4 à 5 jusqu'à ce que toutes les
RM
892
S
12
Mise en service - Première mise en service
7 Appuyez sur la touche MENU pour revenir à l’image télévisée.
lignes se superposent de façon à former une croix blanche.
Le rétroprojecteur est prêt à fonctionner
Page 75

Mise en service - Première mise en service
Guide rapide de déplacement à travers les menus
MENU
Appuyez sur la touche MENU de la télécommande pour avoir accès au système des menus.
CONTROLE DE L'IMAGE
Réglage Image
Contraste
Raz
Ratio
Personnel
4:3
CONTROLE DE L'IMAGE
R
églage Image
Contraste
Raz
Ratio
Personnel
4:3
(Pour toute information complémentaire
sur les divers réglages de l’image,
consultez le chapitre «Réglage de
l’image»)
CONTROLE DU SON
Réglage du Son
Balance
Raz
Dolby Virtual
Son Stéréo
Vol. Individuel
Volume
Son Stéréo
Haut - parleur
CONNEXION VIDEO
Ecran TV
Sortie
TV
TEMPORISATION
Temps
PRESELECTION
Mémorisation Auto
Mémorisation Manuelle
Présélection (Suite)
Libéllé d'entrée AV
Ordre des chaînes
Verrouillage Parental
Langue
Convergence
Personnel
Non
Mono
0
Mono
Principal
[TV - - - - - - -]
[AV1 - - - - - - -]
AV1
Non
CONTROLE DU SON
Réglage du Son
Balance
Raz
Dolby Virtual
Son Stéréo
Vol. Individuel
Volume
Son Stéréo
Haut - parleur
CONNEXION VIDEO
Ecran TV
Sortie
TV
TEMPORISATION
Temps
PRESELECTION
Mémorisation Auto
Mémorisation Manuelle
Présélection (Suite)
Libéllé d'entrée AV
Ordre des chaînes
Verrouillage Parental
Langue
Convergencee
PRESELECTION
Mémorisation Auto
Mémorisation Manuelle
Présélection (Suite)
Libéllé d'entrée AV
Ordre des chaînes
Verrouillage Parental
Langue
Convergence
Personnel
Non
Mono
0
Mono
Principal
[TV - - - - - - -]
[AV1 - - - - - - -]
AV1
1:00
Désirez-vous réaliser un réglage
automatique des chaînes?
Oui
Non
Confirmer: OK
MEMORISATION MANUELLE
PROG STD CANAL
NOM
L
0
MV-CH
C 40
L
1
TVE-1
C 41
L
2
TVE-2
C 31
L
3
ANT-3
C 34
L
4
TELE 5
C 27
L
5
C PLUS
C 47
L
6
- - - - -
C 44
L
7
- - - - -
C 23
L
8
CNN -
C 35
L
9
BBC-W
C 28
(Pour toute information complémentaire
sur les divers réglages du son, consultez le
chapitre «Réglage du son»)
(Pour toute information complémentaire
sur les divers réglages du son, consultez le
chapitre «Sélection du signal de sortie des
connecteurs Euro AV.»)
(Pour toute information complémentaire,
consultez le chapitre «Déconnexion
automatique»)
(Pour toute information complémentaire,
consultez le chapitre «Réglage
automatique du téléviseur par la
télécommande»)
(Pour toute information complémentaire,
consultez le chapitre «Réglage manuel du
téléviseur»)
FR
PRESELECTION
Mémorisation Auto
Mémorisation Manuelle
Présélection (Suite)
Libéllé d'entrée AV
Ordre des chaînes
Verrouillage Parental
Langue
Convergence
PRESELECTION
Mémorisation Auto
Mémorisation Manuelle
Présélection (Suite)
Libéllé d'entrée AV
Ordre des chaînes
Verrouillage Parental
Langue
Convergence
PRESELECTION
Mémorisation Auto
Mémorisation Manuelle
Présélection (Suite)
Libéllé d'entrée AV
Ordre des chaînes
Verrouillage Parental
Langue
Convergence
PRESELECTION
Mémorisation Auto
Mémorisation Manuelle
Présélection (Suite)
Libéllé d'entrée AV
Ordre des chaînes
Verrouillage Parental
Langue
Convergence
PRESELECTION
Mémorisation Auto
Mémorisation Manuelle
Présélection (Suite)
Libéllé d'entrée AV
Ordre des chaînes
Verrouillage Parental
Langue
Convergence
PRESELECTION (SUITE)
PROG AFT DECODEUR
Oui
0
Non
Oui
1
Non
Oui
2
AV1
Oui
3
Non
Oui
4
AV2
Oui
5
Non
Oui
6
Non
Oui
7
Non
Oui
8
Non
Oui
9
Non
LIBELLE D'ENTREE AV
ENTREE NOM
AV1
- - - - -
RGB
- - - - -
AV2
- - - - -
YC2
- - - - -
AV3
- - - - -
ORDRE DES CHAINES
PROG STD CANAL NOM
L
0
BBC-W
C 28
L
1
MV-CH
C 40
L
2
TVE-1
C 41
L
3
TVE-2
C 31
L
4
ANT-3
C 34
L
5
TELE 5
C 27
L
6
C PLUS
C 47
L
7
- - - - -
C 44
L
8
- - - - -
C 23
L
9
CNN -
C 35
VERROUILLAGE PARENTAL
PROG
STD CANAL NOM
MV-CH
C 40
L
0
TVE-1
C 41
L
1
TVE-2
C 31
L
2
ANT-3
C 34
L
3
TELE 5
C 27
L
4
C PLUS
C 47
L
5
- - - - -
C 44
L
6
- - - - -
C 23
L
7
CNN -
C 35
L
8
- - - - -
C 28
L
9
LANGUE
English
Deutsch
Français
Italiano
Nederlands
Polski
Česki
Magyar
Eλλnvιkά
(Pour toute information complémentaire,
consultez le chapitre «Fonction de
«Présélection (Suite)»)
(Pour toute information complémentaire,
consultez le chapitre «Utilisation de la
fonction «Libellé d’entrée AV»»)
(Pour toute information complémentaire,
consultez le chapitre «Modification de
l’ordre des chaînes»)
(Pour toute information complémentaire,
consultez le chapitre «Verrouillage de
chaînes»)
(Pour toute information complémentaire,
consultez le chapitre «Sélection de la
langue»)
PRESELECTION
Mémorisation Auto
Mémorisation Manuelle
Présélection (Suite)
Libéllé d'entrée AV
Ordre des chaînes
Verrouillage Parental
Langue
Convergence
(Pour toute information complémentaire,
consultez le chapitre «Réglage de
l’alignement des couleurs
(Convergence)»)
Mise en service - Première mise en service
13
Page 76

Opérations Ultérieures - Autres fonctions
Réglage automatique simplifié du rétroprojecteur
Il vous est possible de régler automatiquement le rétroprojecteur en suivant les explications du chapitre "Réglage
automatique du rétroprojecteur par la télécommande". Mais vous pouvez aussi régler et mémoriser automatiquement toutes
les chaînes (émetteurs TV) disponibles en appuyant sur une seule touche du rétroprojecteur et sur la touche OK de la
télécommande. Si vous désirez changer l’ordre des chaînes, procédez de la même manière qu’au chapitre “Modification de
l’ordre des chaînes, page 11 ~ paragraphe b.
1 Poussez vers le haut le couvercle de la partie frontale du
rétroprojecteur pour ouvrir le panneau de commande frontal.
Merci de vérifier que vous
avez connecté votre antenne
Confirmer: OK
Merci de vérifier que vous
avez connecté votre antenne
Confirmer: OK
MEMORISATION AUTO
PROG
STDLCANAL
C 26
RECHERCHE
NOM
- - - - -
1
VIDEO TV
2 Appuyer sur la touche et la maintenir enfoncée pendant
quelques secondes. Un menu apparaît sur l'écran pour que vous
puissiez vérifier le branchement de l'antenne.
3 Vérifiez que l’antenne est branchée et, en ce cas, appuyez sur la
touche OK de la télécommande.
Le réglage automatique commence et pendant que le téléviseur
enregistrera toutes les chaînes (les émetteurs TV apparaissent l’un
après l’autre), le message «RECHERCHE» clignotera sur l’écran.
Ce processus peut demander quelques minutes. Soyez patient et
1
2
3
4
5
6
7
8
9
n'appuyez sur aucune touche tant que durera le processus de
réglage. Sinon, le processus ne serait pas complet.
Lorsque le processus de réglage automatique est terminé, le menu "Ordre
0
des Chaînes" apparaît à l'écran:
• Si vous ne désirez pas changer l'ordre des chaînes, appuyez sur la
touche MENU de la télécommande pour revenir à l'image télévisée.
• Si vous désirez changer l'ordre des chaînes, procédez de la même
manière qu'au chapitre "Modification de l'ordre des chaînes",
paragraphe b).
PROGR
MENU
RM
892
S
14
Opérations Ultérieures - Autres fonctions
Remarque : Si vous désirez arrêter le processus de réglage automatique,
appuyez sur la touche MENU de la télécommande.
Page 77

Opérations ultérieures - Autres fonctions
Réglage manuel du rétroprojecteur
Utilisez cette fonction pour régler un à un et dans l'ordre des chaînes que vous désirez les canaux (émetteurs TV) ou une entrée
magnétoscope.
VIDEO TV
menu apparaisse sur l’écran.
2 Orientez le sélecteur sur $ pour sélectionner le symbole et
1 Appuyez sur la touche MENU de la télécommande pour que le
orientez-le ensuite sur z pour entrer dans le menu
PRESELECTION.
1
2
3
4
5
6
7
8
9
3 Orientez le sélecteur sur $ ou 4 pour sélectionner Mémorisation
Manuelle et orientez-le ensuite sur z .
0
4 Orientez le sélecteur sur $ ou 4 pour sélectionner le nº de chaîne
(position) sur lequel vous désirez régler un canal (émetteur TV) et
orientez-le ensuite sur z pour accéder à la colonne STD.
PROGR
MENU
CONTROLE DE L'IMAGE
Réglage Image
Contraste
Raz
Ratio
PRESELECTION
Mémorisation Auto
Mémorisation Manuelle
Présélection (Suite)
Libéllé d'entrée AV
Ordre des chaînes
Verrouillage Parental
Langue
Convergence
PRESELECTION
Mémorisation Auto
Mémorisation Manuelle
Présélection (Suite)
Libéllé d'entrée AV
Ordre des chaînes
Verrouillage Parental
Langue
Convergence
MEMORISATION MANUELLE
PROG STD CANAL
0
1
2
3
4
5
6
7
8
9
Personnel
4:3
NOM
L
MV-CH
C 40
L
TVE-1
C 41
L
TVE-2
C 31
L
ANT-3
C 34
L
TELE 5
C 27
L
C PLUS
C 47
L
- - - - -
C 44
L
- - - - -
C 23
L
CNN -
C 35
L
BBC-W
C 28
FR
S
RM
5 Orientez le sélecteur sur $ ou 4 pour sélectionner le système de
892
transmission TV (L pour la France, B/G pour les pays de l'Europe
occidentale, D/K pour les pays de l'Europe de l'est ou I pour la
Grande Bretagne) ou un signal d'entrée magnétoscope (AV1,
AV2...) et orientez-le ensuite sur z pour accéder à la colonne
CANAL.
6 Orientez le sélecteur sur $ ou 4 pour sélectionner le type de canal
(“C” pour les chaînes hertziennes ou “S” pour les chaînes câblées)
et orientez-le ensuite sur z.
Appuyez sur les touches numériques pour introduire directement
7
le numéro du canal de l'émetteur TV ou orientez le sélecteur sur 4
ou $ pour chercher le canal suivant. Répetez cette opération jusqu’à
l’affichage du canal recherché.
Si vous ne désirez pas entrer ce canal en mémoire, orientez le
sélecteur sur 4 ou $ pour chercher un autre canal.
8 Si vous désirez entrer en mémoire ce canal, appuyez sur la touche
OK.
9 Reprenez de 4 à 8 pour régler et entrer en mémoire d'autres canaux.
MEMORISATION MANUELLE
PROG STD CANAL
0
1
2
3
4
5
6
7
8
9
MEMORISATION MANUELLE
PROG STD CANAL
0
1
2
3
4
5
6
7
8
9
MEMORISATION MANUELLE
PROG STD CANAL
0
1
2
3
4
5
6
7
8
9
NOM
L
MV-CH
C 40
L
TVE-1
C 41
L
TVE-2
C 31
L
ANT-3
C 34
L
TELE 5
C 27
L
C PLUS
C 47
L
- - - - -
C 44
L
- - - - -
C 23
L
CNN -
C 35
L
BBC-W
C 28
NOM
L
MV-CH
C 40
L
TVE-1
C 41
L
TVE-2
C 31
L
ANT-3
C 34
L
TELE 5
C 27
L
C PLUS
C 47
L
- - - - -
C 44
L
- - - - -
C 23
L
CNN -
C 35
L
BBC-W
C 28
NOM
L
MV-CH
C 40
L
TVE-1
C 41
L
TVE-2
C 31
L
ANT-3
C 34
L
TELE 5
C 27
L
C PLUS
C 47
L
- - - - -
C 44
L
- - - - -
C 23
L
CNN -
C 35
L
BBC-W
C 28
10 Appuyez sur la touche MENU pour revenir à l’image télévisée.
Le rétroprojecteur est prêt à fonctionner.
Opérations Ultérieures - Autres fonctions
15
Page 78

Opérations ultérieures - Autres fonctions
Fonction de “Présélection (Suite)”
Cette fonction permet :
a) De procéder manuellement à un réglage fin de l'image pour en obtenir une meilleure réception si celle-ci est déformée.
Normalement, la fonction de réglage fin automatique (AFT) est activée.
b) De régler la sortie AV3 pour les numéros de chaîne à signaux codés, comme c'est le cas, par exemple, d'un décodeur de
chaînes payantes. De cette façon, un magnétoscope connecté au rétroprojecteur enregistrera le signal décodé.
VIDEO TV
1 Appuyez sur la touche MENU de la télécommande pour que le menu
apparaisse sur l’écran.
2 Orientez le sélecteur sur $ pour sélectionner le symbole et
orientez-le ensuite sur z pour entrer dans le menu PRESELECTION.
1
2
3
4
5
6
7
8
9
3 Orientez le sélecteur sur $ ou 4 pour sélectionner Présélection
(Suite) et orientez-le ensuite sur z .
0
4 Orientez le sélecteur sur $ ou 4 pour sélectionner le numéro de
chaîne correspondant et orientez-le ensuite en appuyant de façon
répétée sur z pour sélectionner :
PROGR
MENU
RM
892
a) AFT, ou
b) DECODEUR.
L'élément sélectionné change de couleur.
CONTROLE DE L'IMAGE
Réglage Image
Contraste
Raz
Ratio
PRESELECTION
Mémorisation Auto
Mémorisation Manuelle
Présélection (Suite)
Libéllé d'entrée AV
Ordre des chaînes
Verrouillage Parental
Langue
Convergence
PRESELECTION
Mémorisation Auto
Mémorisation Manuelle
Présélection (Suite)
Libéllé d'entrée AV
Ordre des chaînes
Verrouillage Parental
Langue
Convergence
PRESELECTION (SUITE)
PROG AFT DECODEUR
Oui
0
1
2
3
4
5
6
7
8
9
Non
Oui
Non
Oui
AV1
Oui
Non
Oui
AV2
Oui
Non
Oui
Non
Oui
Non
Oui
Non
Oui
Non
Personnel
4:3
S
5 a) AFT
Orientez le sélecteur sur $ ou 4 pour régler le niveau de fréquence
du canal entre –15 et +15 et appuyez ensuite sur la touche OK.
Reprenez de 4 à 5 a) pour procéder au réglage fin d'autres canaux.
b) DECODEUR
Cette fonction ne s'applique que dans le cas de la connexion d'un
magnétoscope Smartlink sur la prise Péritel nº 3 :3. Si vous
n'avez pas de magnétoscope Smartlink, ignorez ce réglage. Si
vous n'avez pas de décodeur, laissez ce réglage sur NON
(position par défaut). Si votre décodeur est connecté sur la prise
Péritel AV1 ou AV2, sélectionner AV1 ou AV2 selon le cas.
Si votre décodeur est connecté sur le magnétoscope,
sélectionnez AV3.
Pour une meilleure commodité d'emploi, nous vous conseillons
de connecter votre décodeur sur la prise Péritélévision du
magnétoscope prévue à cet effet.
La mémorisation automatique des chaînes annule ce réglage.
Orientez le sélecteur sur $ ou 4 pour sélectionner AV3 et appuyez
ensuite sur la touche OK.
6 Appuyez sur la touche MENU pour revenir à l’image télévisée.
Le rétroprojecteur est prêt à fonctionner
PRESELECTION (SUITE)
PROG AFT DECODEUR
2
0
1
2
3
4
5
6
7
8
9
PRESELECTION (SUITE)
PROG AFT DECODEUR
0
1
2
3
4
5
6
7
8
9
Non
Oui
Non
Oui
Non
Oui
Non
Oui
Non
Oui
Non
Oui
Non
Oui
Non
Oui
Non
Oui
Non
Oui
AV3
Oui
Non
Oui
Non
Oui
Non
Oui
Non
Oui
Non
Oui
Non
Oui
Non
Non
Oui
Non
Oui
Opérations ultérieures - Autres fonctions
16
Page 79

Opérations ultérieures - Autres fonctions
Verrouillage de chaînes
Cette fonction permet d'empêcher que l'on puisse obtenir l'image télévisée d'émissions non désirées. Il est conseillé de
l'utiliser, par exemple, pour empêcher que les enfants ne regardent des émissions de télévision qui ne leur conviennent pas.
1
4
7
S
VIDEO TV
2
5
8
0
MENU
3
6
9
PROGR
RM
1 Appuyez sur la touche MENU de la télécommande pour que le menu
apparaisse sur l’écran.
2 Orientez le sélecteur sur $ pour sélectionner le symbole et
orientez-le ensuite sur z pour entrer dans le menu PRESELECTION.
3 Orientez le sélecteur sur $ ou 4 pour sélectionner Verrouillage
Parental et orientez-le ensuite sur z .
4 Orientez le sélecteur sur $ ou 4 pour sélectionner le numéro de
chaîne avec le canal que vous désirez verrouiller et appuyez ensuite
sur la touche OK.
Le symbole apparaît devant le numéro de la chaîne pour
892
indiquer qu'elle est verrouillée à partir de ce moment. Pour la
déverrouiller, appuyez à nouveau sur la touche OK : le symbole
disparaîtra.
CONTROLE DE L'IMAGE
Réglage Image
Contraste
Raz
Ratio
PRESELECTION
Mémorisation Auto
Mémorisation Manuelle
Présélection (Suite)
Libéllé d'entrée AV
Ordre des chaînes
Verrouillage Parental
Langue
Convergence
PRESELECTION
Mémorisation Auto
Mémorisation Manuelle
Présélection (Suite)
Libéllé d'entrée AV
Ordre des chaînes
Verrouillage Parental
Langue
Convergence
VERROUILLAGE PARENTAL
PROG
0
1
2
3
4
5
6
7
8
9
Personnel
4:3
STD CANAL NOM
C 40
MV-CH
L
C 41
TVE-1
L
C 31
TVE-2
L
C 34
ANT-3
L
C 27
TELE 5
L
C 47
C PLUS
L
C 44
- - - - -
L
C 23
- - - - -
L
C 35
CNN -
L
C 28
- - - - -
L
FR
5 Reprenez à 4 si vous désirez verrouiller d'autres chaînes.
6 Appuyez sur la touche MENU pour revenir à l’image télévisée.
Lorsqu'on choisit une chaîne verrouillée, l'écran apparaît en noir avec le
symbole .
Opérations ultérieures - Autres fonctions
17
Page 80

Opérations ultérieures - Autres fonctions
Chaînes inutilisées
Vous pouvez programmer ce rétroprojecteur pour qu'il ignore les numéros de chaîne que vous ne désirez pas utiliser
lorsqu'ils seront sélectionnés à l'aide des touches PROGR +/-. Si vous désirez plus tard récupérer le nº des chaînes omises,
il vous suffira de procéder comme indiqué ci-dessous, mais en choisissant le système de TV approprié (L, B/G, D/K ou I)
au lieu de “---“ à l'étape nº 5.
VIDEO TV
1 Appuyez sur la touche MENU de la télécommande pour que le menu
apparaisse sur l’écran.
2 Orientez le sélecteur sur $ pour sélectionner le symbole et
orientez-le ensuite sur z pour entrer dans le menu PRESELECTION.
1
2
3
4
5
6
7
8
9
3 Orientez le sélecteur sur $ ou 4 pour sélectionner Mémorisation
0
MENU
PROGR
RM
892
Manuelle et orientez-le ensuite sur z .
4 Orientez le sélecteur sur $ ou 4 pour sélectionner le numéro de la
chaîne que vous désirez omettre et orientez-le ensuite sur z pour
accéder à la colonne STD.
CONTROLE DE L'IMAGE
Réglage Image
Contraste
Raz
Ratio
PRESELECTION
Mémorisation Auto
Mémorisation Manuelle
Présélection (Suite)
Libéllé d'entrée AV
Ordre des chaînes
Verrouillage Parental
Langue
Convergence
PRESELECTION
Mémorisation Auto
Mémorisation Manuelle
Présélection (Suite)
Libéllé d'entrée AV
Ordre des chaînes
Verrouillage Parental
Langue
Convergence
MEMORISATION MANUELLE
PROG STD CANAL
0
1
2
3
4
5
6
7
8
9
Personnel
4:3
NOM
L
MV-CH
C 40
L
TVE-1
C 41
L
TVE-2
C 31
L
ANT-3
C 34
L
TELE 5
C 27
L
C PLUS
C 47
L
- - - - -
C 44
L
- - - - -
C 23
L
CNN -
C 35
L
BBC-W
C 28
S
5 Orientez le sélecteur sur $ pour sélectionner “- - -” et appuyez
ensuite sur la touche OK.
6 Reprenez de 4 à 5 pour omettre d'autres numéros de chaîne.
7 Appuyez sur la touche MENU pour revenir à l’image télévisée.
En sélectionnant la chaîne (émetteur TV) grâce à la touche PROGR +/-,
celui-ci ne sera pas visible sur l'écran. Cependant ce canal peut être
sélectionné par les touches numériques en tapant le numéro de la chaîne
correspondante.
MEMORISATION MANUELLE
PROG STD CANAL
0
1
2
3
4
5
6
7
8
9
NOM
C 40
MV-CH
L
C 41
TVE-1
L
C 31
TVE-2
L
C 34
ANT-3
L
C 27
TELE 5
L
C 47
C PLUS
L
C 44
- - - - -
L
C 23
- - - - -
L
C 35
CNN -
L
C 28
BBC-W
- -
-
Opérations ultérieures - Autres fonctions
18
Page 81

Opérations ultérieures - Autres fonctions
Identification individuelle d'émetteurs
Normalement, les noms des chaînes (émetteurs TV), sont obtenus automatiquement par le télétexte si celui-ci est
disponible. Cependant vous pouvez aussi assigner un numéro de 5 caractères maximum (lettres ou chiffres) à un canal ou
à un signal d'entrée magnétoscope. De cette façon, vous pourrez facilement identifier la chaîne (émetteur TV) ou la source
magnétoscope qui apparaît sur l'écran.
1
4
7
S
VIDEO TV
2
5
8
0
MENU
3
6
9
RM
PROGR
892
1 Appuyez sur la touche MENU de la télécommande pour que le menu
apparaisse sur l’écran.
2 Orientez le sélecteur sur $ pour sélectionner le symbole et
orientez-le ensuite sur z pour entrer dans le menu PRESELECTION.
3 Orientez le sélecteur sur $ ou 4 pour sélectionner Mémorisation
Manuelle et orientez-le ensuite sur z.
4 Orientez le sélecteur sur $ ou 4 pour sélectionner le numéro de
chaîne avec le canal que vous désirez nommer.
5 Orientez le sélecteur sur z plusieurs fois de suite jusqu'à ce
qu'apparaisse le premier élément de la colonne NOM.
CONTROLE DE L'IMAGE
Réglage Image
Contraste
Raz
Ratio
PRESELECTION
Mémorisation Auto
Mémorisation Manuelle
Présélection (Suite)
Libéllé d'entrée AV
Ordre des chaînes
Verrouillage Parental
Langue
Convergence
PRESELECTION
Mémorisation Auto
Mémorisation Manuelle
Présélection (Suite)
Libéllé d'entrée AV
Ordre des chaînes
Verrouillage Parental
Langue
Convergence
MEMORISATION MANUELLE
PROG STD CANAL NOM
0
1
2
3
4
5
6
7
8
9
MEMORISATION MANUELLE
PROG STD CANAL NOM
0
1
2
3
4
5
6
7
8
9
Personnel
4:3
L
- - - - -
C 40
L
- - - - -
C 41
L
- - - - -
C 31
L
- - - - -
C 34
L
- - - - -
C 27
L
- - - - -
C 47
L
- - - - -
C 44
L
- - - - -
C 23
L
- - - - -
C 35
L
- - - - -
C 28
L
- - - - -
C 40
L
- - - - -
C 41
L
- - - - -
C 31
L
- - - - -
C 34
L
- - - - -
C 27
L
- - - - -
C 47
L
- - - - -
C 44
L
- - - - -
C 23
L
- - - - -
C 35
L
- - - - -
C 28
FR
6 Orientez le sélecteur sur $ ou 4 pour sélectionner une lettre ou un
chiffre (sélectionnez “-“ pour un espace en blanc) et orientez-le
ensuite sur z pour confirmer ce caractère. Sélectionnez les quatre
autres caractères de la même façon.
7 Lorsque vous aurez sélectionné tous les caractères, appuyez sur la
touche OK.
Reprenez de 4 à 7 si vous désirez identifier d'autres canaux.
8
9 Appuyez sur la touche MENU pour revenir à l’image télévisée.
Lorsque vous sélectionnez une chaîne identifiée, le nom apparaît quelques
secondes sur l'écran.
Opérations ultérieures - Autres fonctions
MEMORISATION MANUELLE
PROG STD CANAL NOM
L
0
1
2
3
4
5
6
7
8
9
- - - - -
C 40
L
- - - - -
C 41
L
- - - - -
C 31
L
- - - - -
C 34
L
A- - - -
C 27
L
- - - - -
C 47
L
- - - - -
C 44
L
- - - - -
C 23
L
- - - - -
C 35
L
- - - - -
C 28
19
Page 82

Opérations ultérieures - Autres fonctions du téléviseur
Réglage de l’image
Bien que l'image ait été réglée en usine, vous pouvez la modifier en fonction de vos préférences.
1
4
7
S
VIDEO TV
2
5
8
0
MENU
3
6
9
RM
PROGR
892
1 Appuyez sur la touche MENU de la télécommande pour que le menu
apparaisse sur l’écran.
2 Orientez le sélecteur sur z pour entrer dans le menu CONTROLE
DE L’IMAGE.
3 Orientez le sélecteur sur $ ou 4 pour sélectionner le paramètre que
vous désirez modifier et orientez-le ensuite sur z.
Le tableau ci-dessous vous permettra de choisir et vous indiquera
l'effet produit sur chaque paramètre:
Réglage z Réglage
Image Image
$ Luminosité* Z plus sombre z plus claire
$ Couleurs* Z moins z plus
$ Netteté* Z plus douce z plus nette
$ Teinte** Z verte z rouge
Contraste Z moins z plus
Raz Restaure les réglages d’image prédéterminés en usine
Format (pour toute information complémentaire, consultez le
K
chapitre “Sélection du type de format de l’image
télévisée” sur ce mode d’emploi).
* Ne peut être modifié qu’après avoir sélectionné “Mode Personnel” de
“Réglage Image”.
** Uniquement disponible sur le système couleur NTSC (par ex. bandes
vidéo américaines)
z Personnel (pour préférences
individuelles)
z Cinéma (pour les films)
z Concert (pour programmes en direct)
CONTROLE DE L'IMAGE
Réglage Image
Contraste
Raz
Ratio
CONTROLE DE L'IMAGE
R
églage Image
Contraste
Raz
Ratio
REGLAGE IMAGE
Réglage Image
Luminosité
Couleurs
Netteté
Teinte
Personnel
4:3
Personnel
4:3
Personnel
4 Orientez le sélecteur sur Z ou z pour modifier le réglage du
paramètre sélectionné et appuyez ensuite sur la touche OK pour
mémoriser ce nouveau réglage.
5 Reprenez 3 et 4 pour modifier les autres réglages.
6 Appuyez sur la touche MENU pour revenir à l’image télévisée.
Changement rapide du mode d'image
Le mode d'image peut être rapidement modifié sans avoir à accéder
au menu “Contrôle de l’image”
1 Appuyez sur la touche de la télécommande pour accéder
directement aux options du mode de l'image.
2 Orientez le sélecteur sur $ ou 4 pour sélectionner le mode d'image
que vous désirez (Personnel, Cinéma ou Concert) et appuyez
ensuite sur la touche OK pour que le menu disparaisse de l'écran.
Opérations ultérieures - Autres fonctions du téléviseur
20
Personnel
Cinéma
Concert
Page 83

Opérations ultérieures - Autres fonctions du téléviseur
Sélection du type de format de l'image télévisée.
Cette fonction permet de modifier le type de format de l'image télévisée.
VIDEO TV
1 Appuyez sur la touche MENU de la télécommande pour que le menu
apparaisse sur l’écran.
CONTROLE DE L'IMAGE
Réglage Image
Contraste
Raz
Ratio
Personnel
4:3
2 Orientez le sélecteur sur z pour entrer dans le menu CONTROLE
DE L’IMAGE.
3 Orientez le sélecteur sur $ pour sélectionner Ratio.
4 Orientez plusieurs fois le sélecteur sur z pour sélectionner l'un des
1
2
3
4
5
6
7
8
9
0
modes suivants :
• 4 : 3 : image 4 : 3 conventionnelle. (Des bandes grises
apparaissent à droite et à gauche de l'écran).
• 16 : 9 : pour émissions en 16 : 9.
Appuyez sur la touche OK.
5 Appuyez sur la touche MENU pour revenir à l’image télévisée.
PROGR
MENU
CONTROLE DE L'IMAGE
R
églage Image
Contraste
Raz
Ratio
Personnel
4:3
4 : 3
FR
S
RM
892
16 : 9
Changement rapide du format de
l'image télévisée
Le mode de format de l'image télévisée peut être rapidement
modifié sans avoir à accéder au menu "Contrôle de l'image".
1 Appuyez plusieurs fois de suite sur la touche de la
télécommande pour sélectionner le type de format de l'image
télévisée (4 : 3 ou 16 : 9).
Opérations ultérieures - Autres fonctions du téléviseur
21
Page 84

Opérations ultérieures - Autres fonctions du téléviseur
Réglage du son
Bien que le son ait été réglé en usine, vous pouvez le modifier en fonction de vos préférences.
VIDEO TV
1 Appuyez sur la touche MENU de la télécommande pour que le menu
apparaisse sur l’écran.
2 Orientez le sélecteur sur $ pour sélectionner le symbole et
CONTROLE DE L'IMAGE
Réglage Image
Contraste
Raz
Ratio
Personnel
4:3
orientez-le ensuite sur z pour entrer dans le menu CONTROLE DU
SON.
3 Orientez le sélecteur sur $ ou 4 pour sélectionner le paramètre que
vous désirez modifier et orientez-le ensuite sur z.
Le tableau ci-dessous vous permettra de choisir et vous indiquera
1
2
3
4
5
6
7
8
9
0
l'effet produit sur chaque paramètre.
Réglage du Son z Mode z Personnnel (pour préférences
individuelles)
z Rock
z Jazz
z Pop
$ Aigus* Z moins z plus
$ Graves* Z moins z plus
Balance Z gauche z droite
K
usine
MENU
Raz Restaure les réglages du son prédéterminés en
PROGR
Dolby** Virtual z Non : Normal
z Oui : Simule l’effet son “Dolby Pro Logic Surround”
CONTROLE DU SON
Réglage du Son
Balance
Raz
Dolby Virtual
Son Stéréo
Vol. Individuel
Volume
Son Stéréo
Haut - parleur
REGLAGE DU SON
Mode
Aigus
Graves
Personnel
Non
Mono
0
Mono
Principal
Personnel
S
RM
892
Son stéréo • Pour émission stéréo :
z Mono
z Stereo
• Pour émissions bilingues :
z Mono (pour canal mono, si disponible)
z A (pour le canal 1)
z B (pour le canal 2)
Vol. Individuel Z -12 .......... z +12
(le volume du canal peut être individuellement
adapté de –12 à +12)
Casque:
Volume Z moins z plus
Son Stéréo • Pour émission stéréo :
z Mono
z Stereo
• Pour émissions bilingues :
z Mono (pour canal mono, si disponible)
z A (pour le canal 1)
z B (pour le canal 2)
Haut-parleur
z Principal : son du rétroprojecteur
z Central : son d’un ampli extérieur
* Ne peut être modifié qu’en sélectionnant "Personnel" sur le Réglage
du Son"
Opérations ultérieures - Autres fonctions du téléviseur
22
Page 85

Opérations ultérieures - Autres fonctions du téléviseur
VIDEO TV
paramètre sélectionné et appuyez ensuite sur la touche OK pour
mémoriser le nouveau réglage.
5 Reprenez de 3 à 4 pour modifier les autres réglages.
6 Appuyez sur la touche MENU pour revenir à l’image télévisée.
1
2
3
4
5
4 Orientez le sélecteur sur Z ou z pour modifier le réglage du
6
7
8
9
0
PROGR
MENU
**Ce téléviseur a été conçu pour créer un effet son “Dolby
Surround” qui imite le son de quatre hauts-parleurs avec les
deux seuls hauts-parleurs du téléviseur, dans la mesure où le
signal audio de l’émetteur est “Dolby Pro Logic Surround”. En
outre, vous pouvez aussi améliorer l’effet sonore en connectant
un ampli externe. Pour de plus amples détails, reportez-vous au
chapitre “Connexion d’une chaîne Hi-Fi extérieure”, page 27).
FR
** Fabriqué sous licence Dolby Laboratories. “Dolby”, “Pro Logic”
et le symbole double D sont des marques de commerce de
Dolby Laboratories.
S
RM
892
Changement rapide du mode de son
Le mode de son peut être rapidement modifié sans avoir à accéder
au menu “Contrôle du Son”
1 Appuyez sur la touche de la télécommande pour accéder
directement aux options du mode de son.
Personnel
Rock
Jazz
Pop
2 Orientez le sélecteur sur $ ou 4 pour sélectionner le mode de son que
vous désirez (Personnel, Rock, Jazz ou Pop) et appuyez ensuite sur
la touche OK pour que le menu disparaisse de l'écran.
Opérations ultérieures - Autres fonctions du téléviseur
23
Page 86

Opérations ultérieures - Autres fonctions du téléviseur
Déconnexion automatique
Vous pouvez sélectionner un laps de temps après lequel le téléviseur pourra passer automatiquement en mode veille
(standby).
CONTROLE DE L'IMAGE
Réglage Image
Contraste
Raz
Ratio
TEMPORISATION
Temp s
Personnel
4:3
Non
VIDEO TV
1 Appuyez sur la touche MENU de la télécommande pour que le menu
apparaisse sur l’écran.
2 Orientez le sélecteur sur $ pour sélectionner le symbole t et
orientez-le ensuite sur z pour entrer dans le menu
TEMPORISATION.
1
2
3
4
5
6
7
8
9
0
3 Orientez le sélecteur sur z, et orientez-le ensuite sur Z ou z plusieurs
fois de suite jusqu'à ce qu'apparaisse sur l'écran le laps de temps
après lequel vous désirez que le téléviseur s'éteigne.
TEMPORISATION
Temps
1:00
Non z 0:30 z 1:00..... 4:00 heures
PROGR
MENU
4 Appuyez sur la touche OK.
S
RM
5 Appuyez sur la touche MENU pour revenir à l’image télévisée.
892
Une minute avant que le rétroprojecteur ne passe en mode veille (standby),
l'indication 0:01 apparaîtra automatiquement sur l'écran.
Remarques : • Pendant que vous regardez la télévision, appuyez sur
la touche de la télécommande pour voir le temps
qui reste avant la déconnexion.
• Pour allumer à nouveau le rétroprojecteur à partir du
mode veille, appuyez sur la touche TV de la
télécommande.
Opérations ultérieures - Autres fonctions du téléviseur
24
Page 87

Télétexte
Visualisation du télétexte
Le télétexte est un service gratuit d’information que diffuse la plupart des chaînes télévisées.
Vérifiez que vous utilisez un canal disposant d’un signal d’émission suffisamment fort pour éviter des erreurs de télétexte.
VIDEO TV
Sélectionnez la chaîne qui diffuse le service télétexte que vous désirez
1
consulter.
2 Appuyez sur la touche de la télécommande pour afficher le
télétexte.
1
2
3
4
5
6
7
8
9
0
3 Entrez le numéro à trois chiffres de la page que vous désirez voir à
l’aide des touches numérotées de la télécommande (si vous vous
trompez, introduisez trois chiffres quelconques et réintroduisez
ensuite le numéro correct de page).
TELETEXT
Index
Programme
News
Sport
Weather
25
153
101
98
TELETEXT
Index
Programme
News
Sport
Weather
25
153
101
98
4 Appuyez sur la touche pour désactiver le télétexte et revenir à
l’image télévisée.
FR
Sélection du télétexte
PROGR
MENU
Autres fonctions du télétexte
POUR APPUYEZ SUR LA TOUCHE
S
Accéder à la page de télétexte pour la page suivante ou
RM
892
suivante ou précédente pour la page précédente
Superposer la page de télétexte
sur la chaîne de télévision Appuyez à nouveau sur la
touche pour désactiver le
TELETEXT
Index
Programme
News
Sport
Weather
25
153
101
98
mode télétexte.
TELETEXTTELETEXT
Conserver à l’écran une page
du télétexte Appuyez à nouveau sur la
Index
Programme
News
Sport
Weather
25
153
101
98
touche pour annuler.
Afficher les informations cachées
(par ex. réponses à un questionnaire) Appuyez à nouveau sur la
touche pour annuler.
Utilisation du Fastext
Le Fastext permet d’avoir accès aux pages de télétexte en appuyant
sur une seule touche.
En Fastext, un menu de codes couleur s’affiche au bas de la page du
télétexte. Appuyez sur la touche de couleur (rouge, verte, jaune ou
bleue) de la télécommande pour accéder à la page correspondante.
Télétexte
25
Page 88

Connexion des équipements en option
Connexion des équipements en option
Vous pouvez raccorder au rétroprojecteur une large gamme d'équipements en option, comme illustré :
Arrière rétroprojecteur Avant rétroprojecteur
Décodeur
DVD
Magnétoscope
Pour éviter des
distorsions de
l'image :
• Ne connectez pas
d'appareils aux
connecteurs F et
G simultanément.
• Ne raccordez
aucun équipement
simultanément
aux connecteurs
frontaux et au
connecteur Péritel
D.
C
A
B
Hi-Fi
Signaux d'entrée acceptés
A Entrée du haut-parleur central
Dans le menu Contrôle du Son, réglez
"Central" dans l'option "Haut-parleur"
B Pas d'entrées
C Signaux audio/vidéo et RVB
D Signaux audio/vidéo et S-vidéo
E Signal audio/vidéo
F Signal S-vidéo
G Signal vidéo
H Signal audio
D
E
F
G
Magnétoscope
DVD
Signaux de sortie disponibles
Pas de sorties
Signal audio
Vidéo/audio du tuner du rétroprojecteur
Vidéo/audio de la source sélectionnée
Vidéo/audio de la source sélectionnée
(même source de sortie que celle du
connecteur Péritel :2/q 2)
Pas de sortie
Pas de sortie
Pas de sortie
Camescope
DV/D8/
S-VHS/Hi8
H
Camescope
8mm/VHS
26
Connexion des équipements en option
Page 89

Connexion des équipements en option
Milleure position pour l’usager
Hauts-parleurs de
votre chaîne Hi-Fi
Utilisation des équipements en option
Informations complémentaires
Connexion d'un magnétoscope
Nous vous conseillons de brancher votre magnétoscope au connecteur Péritel D ou E situé à l'arrière du rétroprojecteur. Si vous
ne disposez pas d'un câble de connecteur Euro, nous vous recommandons de régler le signal du magnétoscope sur le numéro de
chaîne TV “0” en vous reportant à la section “Réglage manuel du téléviseur" de ce mode d'emploi.
Si votre magnétoscope est compatible Smartlink, consultez le chapitre “Smartlink” de ce mode d'emploi.
Connexion d'un équipement audio externe
1 Pour écouter le son du rétroprojecteur à travers l'équipement Hi-Fi
Branchez votre chaîne Hi-Fi sur les prises B situées à l'arrière du rétroprojecteur, si vous désirez amplifier la sortie audio du
rétroprojecteur. Le volume de l'appareil branché aux prises B peut être modifié, en modifiant le réglage du volume du casque.
Consultez le chapitre “Réglage du son” de ce mode d'emploi.
Vous pouvez aussi obtenir l’effet son “Dolby Virtual” par
votre châine Hi-Fi :
Pour cela, placez les haut-parleurs de votre chaîne Hi-Fi de
chaque côté du téleviseur, en laissant environ 50 cm. entre le
téleviseur et chaque haut- parleur.
Lorsque les haut-parleurs sont en place, sélectionnez le menu
“CONTROLE DU SON” grâce au système des menus, et
sélectionnez “Dolby Virtual” sur la position “Oui”.
~50º
2 Pour écouter le son de l'ampli Dolby à travers le rétroprojecteur
Branchez l'équipement Hi-Fi sur les prises A situées sur l'arrière du
rétroprojecteur, si vous désirez écouter le son de l'équipement Hi-Fi par les
haut-parleurs du rétroprojecteur. Si vous disposez d'un amplificateur Dolby Pro-Logic, vous pouvez utiliser les haut-parleurs
du rétroprojecteur comme enceinte centrale : branchez la sortie haut-parleur central de votre ampli sur l’entrée A du
rétroprojecteur et réglez “Central” dans l'option “Haut-parleur” du menu “Réglage du son” (voir page 22).
Connexion d'équipements Mono
Connectez le câble audio au connecteur L/G/S/I situé à l'avant du rétroprojecteur et sélectionnez le signal d'entrée 2, en
suivant les instructions mentionnées ci-dessous.
Sélection et visualisation du signal d'entrée
VIDEO TV
1 Raccordez l'équipement en option au connecteur approprié du rétroprojecteur, comme indiqué à la
page précédente.
2 Allumez l'équipement connecté.
3 Appuyez plusieurs fois sur la touche de la télécommande jusqu'à ce que le symbole d'entrée
1
2
3
4
5
6
7
8
9
0
MENU
RM
S
PROGR
892
correct apparaisse sur l'écran.
Symbole Signaux d'entrée
kkkk • Signal d'entrée audio/vidéo par le connecteur Péritel C
• Signal d'entrée RVB par le connecteur Péritel C
KK
KK
• Signal d'entrée audio/vidéo par le connecteur Péritel D ou les connecteurs RCA H
et G.
qqqq
2 • Signal d'entrée audio/S-vidéo par le connecteur Péritel D et les connecteurs RCA H
et F.
…………
3 • Signal d'entrée audio/vidéo par le connecteur Péritel E.
4 Pour retourner à l'image télévisée normale, appuyez sur la touche de la télécommande.
FR
Connexion des équipements en option
27
Page 90

Connexion des équipements en option
Décodeur
Magnétoscope
Smartlink
Smartlink établit un lien direct entre votre rétroprojecteur et un magnétoscope compatible.
Smartlink fonctionne si :
• Votre magnétoscope prend en charge Smartlink, NexTView Link,
Easy Link, Megalogic, Q- Link, EURO VIEW LINK, T-V LINK ou NexTView download.
Megalogic est une marque déposée de Grundig Corporation.
EasyLink est une marque déposée de Philips Corporation.
Q-Link est une marque déposée de Panasonic Corporation.
EURO VIEW LINK est une marque déposée de Toshiba Corporation.
T-V LINK est une marque déposée de JVC Corporation.
• Vous avez branché votre magnétoscope sur la prise péritélévision
Scart :3 (SMARTLINK) à l‘aide d‘un câble Péritel complet a 21 broches.
Smartlink vous permet :
• De télécharger les informations telles que la liste des chaînes programmées du
rétroprojecteur vers le magnétoscope.
• D‘enregistrer directement la chaîne que vous regardez, il suffit d’appuyer sur la touche
Enregistrement du magnétoscope.
• Rétroprojecteur en mode veille (standby) :
Appuyez sur la touche "Lecture z" du magnétoscope et le rétroprojecteur se mettra
automatiquement en marche.
Si un décodeur est branché sur un magnétoscope qui accepte Smartlink, sélectionnez le
menu Présélection (Suite) sur (PRESELECTION) et sélectionnez DECODEUR en
position AV3 pour chaque canal codé. Après ce réglage, cette information sera envoyée
directement au magnétoscope.
Arrière rétroprojecteur
Pour obtenir des informations détaillées sur Smartlink, reportez-vous au mode d‘emploi
de votre magnétoscope.
Télécommande d‘autres appareils Sony
Grâce aux touches situées sous le cache de la télécommande, vous pouvez contrôler d‘autres
appareils Sony.
1 Ouvrez le cache de la télécommande.
2 Réglez le sélecteur VTR 1234 DVD en fonction de l‘équipement que vous voulez contrôler :
VTR 1 Magnétoscope Beta
VTR 2 Magnétoscope 8 mm
VTR 3 Magnétoscope VHS
VTR 4 Magnétoscope DV (DCR-VX 1000/9000 E, DHR-1000 B par exemple)
DVD Lecteur de DVD
3 Utilisez les touches de la télécommande qui se trouve sous le cache pour contrôler
l‘équipement.
• Si votre équipement vidéo dispose d‘un sélecteur MODE COMMANDE,
réglez-le de la même façon que le sélecteur VTR 1234 DVD de la
télécommande de votre téléviseur.
VIDEO TV
VTR 1 2 3 4 DVD
CH
VTR 1 2 3 4 DVD
CH
28
• Votre télécommande ne pilote que les fonctions communes à votre équipement en option.
Connexion des équipements en option
Page 91

Connexion des équipements en option
Sélection du signal de sortie des connecteurs Euro AV
Utilisez cette fonction si vous désirez enregistrer sur votre magnétoscope (connecté aux connecteurs Péritel :2/q 2 ou
:3 situés à l'arrière du rétroprojecteur) tout signal en provenance d'un équipement externe.
Pour ce faire, il faut sélectionner la source de sortie comme décrit ci-dessous (si votre magnétoscope est compatible
Smartlink cette procédure n'est pas nécessaire).
1
4
7
S
VIDEO TV
2
5
8
0
MENU
3
6
9
RM
PROGR
892
1 Appuyez sur la touche MENU de la télécommande pour que le menu
apparaisse sur l’écran.
2 Orientez le sélecteur sur $ pour sélectionner le symbole et
orientez-le ensuite sur z pour entrer dans le menu CONNEXION
VIDEO.
3 Orientez le sélecteur sur $ ou 4 pour faire ressortir :
Ecran TV pour le signal d'entrée à l'écran TV ou,
Sortie pour le signal de sortie du rétroprojecteur, disponible
pour les connecteurs Péritel :2/q 2 et :3.
Orientez le sélecteur sur z pour confirmer.
4 Orientez le sélecteur sur Z ou z plusieurs fois de suite pour
sélectionner le signal adéquat.
Ecran TV TV, AV1, RGB, AV2, YC2 ou AV3
Sortie TV, AV1, AV2, YC2, AV3 ou AUTO
CONTROLE DE L'IMAGE
Réglage Image
Contraste
Raz
Ratio
CONNEXION VIDEO
Ecran TV
Sortie
TV
Personnel
4:3
[TV - - - - - - -]
[AV1 - - - - - - -]
AV1
FR
Après avoir sélectionné le type de signal, appuyez sur la touche OK
pour confirmer.
Si vous sélectionnez AUTO, le signal de sortie sera toujours le
même que celui qui apparaît sur l'écran.
Si vous avez un décodeur, veuillez vous rappeler, pour un
décodage correct, de sélectionner la Sortie sur “TV”.
5 Appuyez sur la touche MENU pour revenir à l’image télévisée.
Le signal sélectionné est disponible pour l'équipement en option connecté
sur le connecteur Péritel approprié.
Connexion des équipements en option
29
Page 92

Connexion des équipements en option
Utilisation de la fonction “Libellé d’entrée AV”
Cette fonction permet d'assigner un nom de cinq caractères au plus (lettres ou chiffres) à l'équipement en option qui est
connecté aux prises du rétroprojecteur.
VIDEO TV
1 Appuyez sur la touche MENU de la télécommande pour que le menu
apparaisse sur l’écran.
2 Orientez le sélecteur sur $ pour sélectionner le symbole et
orientez-le ensuite sur z pour entrer dans le menu PRESELECTION.
1
2
3
4
5
6
7
8
9
0
PROGR
MENU
RM
3 Orientez le sélecteur sur $ ou 4 pour sélectionner Libellé d’entrée
AV et orientez-le ensuite sur z.
4 Orientez le sélecteur sur $ ou 4 pour sélectionner le signal d'entrée
que vous désirez nommer (par ex. AV2) et orientez-le ensuite sur z
pour faire ressortir le premier paramètre de la colonne NOM.
892
CONTROLE DE L'IMAGE
Réglage Image
Contraste
Raz
Ratio
PRESELECTION
Mémorisation Auto
Mémorisation Manuelle
Présélection (Suite)
Libéllé d'entrée AV
Ordre des chaînes
Verrouillage Parental
Langue
Convergence
PRESELECTION
Mémorisation Auto
Mémorisation Manuelle
Présélection (Suite)
Libéllé d'entrée AV
Ordre des chaînes
Verrouillage Parental
Langue
Convergence
LIBELLE D'ENTREE AV
ENTREE NOM
AV1
RGB
AV2
YC2
AV3
- - - - -
- - - - -
- - - - -
- - - - -
- - - - -
Personnel
4:3
S
5 Orientez le sélecteur sur $ ou 4 pour sélectionner une lettre ou un
chiffre (“-“ pour un espace en blanc) et orientez-le ensuite sur z pour
confirmer ce caractère. Sélectionnez les quatre autres caractères de la
même façon.
6 Lorsque vous aurez sélectionné tous les caractères, appuyez sur la
touche OK.
7 Reprenez de 4 à 6 si vous désirez nommer d'autre signaux d'entrée.
8 Appuyez sur la touche MENU pour revenir à l’image télévisée.
Chaque fois que vous sélectionnerez l'équipement dont le signal d'entrée a
reçu un nom, ce nom apparaîtra sur l'écran pendant quelques secondes.
LIBELLE D'ENTREE AV
ENTREE NOM
AV1
RGB
AV2
YC2
AV3
- - - - -
- - - - A - - - -
- - - - -
- - - - -
Connexion des équipements en option
30
Page 93

Informations complémentaires
Zone de visualisation optimale
Pour obtenir la meilleure qualité d’image, positionnez le rétroprojecteur conformément aux dispositions décrites dans les
illustrations ci-dessous.
Zone de visualisation (horizontale)
75º
75º
2.1m (Distance minimale optimale)
(Position de visualisation
optimale)
FR
Zone de visualisation (verticale) optimale
2.1m (Distance minimale optimale)
27.5°
27.5°
(Position de visualisation
optimale)
Informations complémentaires
31
Page 94

Informations complémentaires
Spécifications
Normes de TV
L, B/G/H, I, D/K
Standard couleur
PAL, SECAM
NTSC 3.58, 4.43 (entrée vidéo seul.)
Couverture de canaux
VHF : E2-E12
UHF : E21-E69
CATV : S1-S20
HYPER : S21-S41
I : UHF B21-B69
L : F2-F10, B-Q, F21-F69
D/K : R1-R12, R21-R69
Voir “Les principaux émetteurs français” en page
suivante.
Tube image
41 pouces Image d’approx. 103 cm diagonale.
Connecteurs arrières
• Bornes d’entrée du haut-parleur
C
central, 2 bornes
• Sorties audio - prises cinch
• :1/ Connecteur Péritel de 21 broches
(norme CENELEC) incluant entrée
audio/vidéo, entrée RVB, sortie
audio/vidéo TV
• :2/q 2 Connecteur Péritel de 21 broches
(norme CENELEC) incluant entrée
audio/vidéo, entrée S-vidéo, Sortie
audio/vidéo sélectionnable
• :3 Connecteur Péritel de 21 broches
(SMARTLINK)
Connecteurs frontaux
…2 entrée audio/vidéo - connecteur RCA
2
entrées audio/vidéo - connecteurs RCA
q2 entrée S vidéo - DIN de 4 broches
Prise pour casque - minijack stéréo
(norme CENELEC) incluant entrée
audio/vidéo, sortie audio/vidéo
(sélectionnable la même source de
sortie que pour le connecteur
:2/q 2) et connection Smartlink
Sortie son
2 x 30 W (puissance musicale)
2 x 15 W (RMS)
Entrée HP central
30 W (RMS) (utilisation comme haut-parleur central)
Consommation
145 W
Consommation en mode veille
0.7 W
Dimensions (l x h x prf.)
Env. 948 x 992 x 511 mm
Poids
Env. 43 kg
Accessoires fournis
Une Télécommande (RM-892)
Deux Piles IEC
Autres fonctionnalités
Filtre en peigne numérique
Télétexte, Fastext
NICAM
Arrêt temporaire
Smartlink
Dolby Virtual
La conception et les spécifications sont susceptibles de modification sans préavis de notre part.
Papier recyclé - Chlore: 0%
Informations complémentaires
32
Page 95

Informations complémentaires
Dépannage
Voici quelques solutions simples qui vous permettront de résoudre des problèmes liés à la qualité de l’image et du son.
Problème
Pas d’image (écran noir), ni de son
Mauvaise image ou pas d’image
(écran noir), mais bonne qualité sonore.
Mauvaise qualité de l’image avec source
vidéo RVB
Bonne image mais pas de son
Solution
• Branchez le rétroprojecteur.
• Appuyez sur la touche située à l’avant du rétroprojecteur.
• Si le voyant est allumé, appuyez sur la touche TV ou
sur un numéro de chaîne de la télécommande.
• Vérifiez que l’antenne est bien branchée.
• Eteignez le téléviseur 3 ou 4 secondes, puis rallumez-le en
appuyant sur l’interrupteur situé à l’avant du
rétroprojecteur.
• Appuyez sur la touche MENU pour activer le menu “Réglage
de l’image” et réglez la luminosité, le contraste et la balance
des couleurs.
• Dans l’écran “Réglage de l’image”, sélectionnez Raz pour
restaurer les paramètres définis par défaut en usine.
• Appuyez plusieurs fois sur la touche de la télécommande
jusqu’à ce que le symbole RVB apparaisse sur l’écran.
• Appuyez sur la touche +/- de la télécommande.
• Si le symbole s’affiche, appuyez sur la touche de
la télécommande.
• Vérifiez que le haut-parleur “Principal” est sélectionné dans
le menu CONTRÔLE DU SON.
FR
Pas de couleur (programmes couleur)
Distorsion de l’image en changeant de
chaînes ou en télétexte
Bruit dans l’image quand vous regardez
une chaîne télévisée.
Télécommande non opérationnelle
L’indicateur de veille clignote
• Si ces problèmes persistent, faites appel à du personnel qualifié.
• N’ouvrez jamais le boîtier du téléviseur vous-même.
• Appuyez sur la touche MENU, pour activer le menu
“Réglage de l’image” et réglez la balance des couleurs.
• Dans l’écran “Réglage de l’image” sélectionnez Raz pour
restaurer les paramètres définis par défaut en usine.
• Eteignez l’équipement branché au connecteur Péritel 21
broches situé à activant le l’arrière du rétroprojecteur.
• Utiliser le réglage fin pour obtenir une meilleure image, pour
toute information complémentaire, consultez le chapitre
“Fonction de “Présélection (Suite)””
• Changez les piles.
• Veuillez contacter le Service Après-vente de votre
revendeur.
Informations complémentaires
33
Page 96

Informations complémentaires
Les principaux émetteurs français
Compte tenu des évolutions, les émetteurs et canaux annoncés ci-après sont donnés à titre d’information et non d’engagement. Pour
la réception de la majorité des émetteurs, l’antenne doit être en “position horizontale”. Lorsqu’elle doit être en “position verticale”,
la lettre V suit le numéro de canal.
EMETTEURS CANAUX
TF1 A2 FR3 CANAL+ ARTE M6
1 ABBEVIUE limeux 63 67 60
2 AJACCIO Coli Chiavari 31 21 24
3 ALBERTVILLE tort du Mont 45 39 42 07V
4 ALENCON Mont d’Amain 48 51 54
5 ALES l’Hermitage 52 60
ALES Mont Boquet 27 21 24 65
6 AMIENS St-Just/DURY 41 47 44 05 ou 10 49 52
7 ANGERS Rochefort 47 44 41 10 51 53
8 ANGOULEME St-Saturnin 31 34
9 ARGENTON/CREUSE Malicornay 46 40 43
10
AURILLAC ALIVERGNE La Bastide
11 AUTUN Bois de Rol 48 51 54
12 AUXERRE Molesmes 37 31 34
13
AVIGNON Mont Ventoux/LE PONTET
14 BAR DE LUC Willeroncourt 51 48 54
15 BASTIA Serra di Pigno 41 47 44
16 BAYONNE La Rhune 64 58 61 07V 56
17 BERGERAC Audrix 37 34 31
18 BESANÇON Lomont/BREGILLE 47 41 44 03V 45
BESANÇON Montfaucon 29 23 26 08V
19 BORDEAUX Bouilac 63 57 60 08 65 43
20 BOULOGNE Mont Lambert 29 34 37 10
21 BOUGES Neuvy 23 26 29 08 21
22 BOURG EN BRESSE ”Ramasse” 38 32
23 BREST Roc Trédudon 27 21 24 10 34
24 BRIVE Lissac 23 29 26 06
25 CAEN ”Brullemail” 48 51 54 04
CAEN Mont Pincon/CHU 22 25 28 09 38 60
26 CANNES Vallarius 63
27 CARCASSONE Pic de Nore 64 58 61 03V
28 CHAMBERY Mont du Chat 29 58 23 08
29 CHAMONIX Aiguille du Midi 25 28 22
30 CHAMPAGNOLLE Le Bulay 58 61 64
31 CHARTES Montlandon 55 50 63 09 47
32 CHAUMONT Chalindray 52 49 55
33 CHERBOURG Olgosville 65 59 62 06 ou 08 35
34 CLERMONT-FERRAND Puy de Côme/ROYAT 22 28 25 05 58 61
35 CLUSES St-Sigismond 56 50 53 06
36 CORTE Antisanti 59 61 54
37 DUON Nuit St-Georges 59 62 65 09 46V 43V
38 DUNQUERQUE Mont de Cats 42 39 45 59 62
39 EPINAL Bois de la Vierge 65 60 63 10V
40 FORBACH Kreutzberg 47 22 25 28
41 GAP Mont Colombis 27 21 24 09
42 GEX Mont Rond 27 21 24 05V
43 GRENOBLE Chamrousse 56 50 53 06 ou 09 59 62
44 GUERET St-Léger 64 58 61 09
45 HIRSON Landouzy 54 48 51
46 HYERES Cap Bénal 65 59 62 06
47 LA BAULE ESCOUBLAC “St-Clare” 38
48 LA ROCHELLE “Mireuil” 48 51
59 LAVAL Mont Rochard 63 57 60
50 LE CREUSOT Mont St-Vincent 35 33 30 67 38 60
51 LE HAVRE Harfleur 46 43 40 05 53
52 LE HAVRE Basse Normandie 35
53 LE MANS Mayer 24 27 21 05V 32
54 LE PUY St-Jean de Nay 63 57 60
55 LENS “Bouvigny” 51 54
56 LESPARRE Ordonnac 39 45 42
57 LILLE Boubigny/LAMBERSART 27 21 24 05 51 54
58 LIMOGES Les Cars 56 50 53 05/07/10
59 LONGWY Bois du châ 52 47 44 08
60 LORIENT “Plaoermeur” 62
61 LYON Fourvière 61 58 64 66 28 22
62 LYON Mont Pilat 46 40 43 10
63 MACON Bois de Cenves 57 55 49
42 45 39 47 54
64 MANTES Mudétour 64 58 61 55 53
54 09V
voir page suivante, SVP...
Informations complémentaires
34
Page 97

Informations complémentaires
Les principaux émetteurs français
EMETTEURS CANAUX
TF1 A2 FR3 CANAL+ ARTE M6
65 MARSEILLE Grande Etoile 29 23 26 05 32 38
66 MARSEILLE Pomègues 40 46 43 57 54
67 MAUBEUGE Rousies 39 42 45 29 32
68 MENDE Truc de Fortino 37/31 34 68
69 MENTON Cap Martin 62 50 56 68
70 MELZ Luttange 37 34 31 05V 39
71 MEZIERES Sury 29 23 26 36
72 MILLAU Levezou 47 44 41 10
73 MONTLUCON “Maregnon” 49 52
74 MONNETTIER MORNEX Mont Saléve 42 45 48 64
75 MONTMELLIAN Le Fort 64 58 61 09
76 MONTPELLIER Saint-Baudille 56 50 53 63 48V
77 MORTAIN Grande Fontaine 50 52 55
78 MORTEAU Monteblon 48 54 51
79 MULHOUSE Belvédère 27 21 24 05 55
80 NANCY Malzéville 23 29 26 08 55 43
81 NANTES Hute Goulaine 23 29 26 09V 21 65
82 NEUF CHATEL Croixdelle 51 48 54 65
83 NEVERS “Challuy” 41
84 NICE Mont Alban/LA MADELEINE 64 58 61 66 ou 32 51
85 NIMES “Bas Rhône” 31 37
86 NIORT Maisonnay 22 28 25 06V 38
87 NIORT Sud Vendée 58
88 ORLEANS Trainou 42 39 45 52 53
89 PARIS Tour Eiffel 25 22 28 06 30 33
PARIS EST Chennevières 43 46 40 53 48 58
PARIS NORD Sannois 45 39 56 59 65 62
PARIS SUD Villebon 49 52 62 65 58 42
90 PARTHENAY Amailoux 52 49 55
91 PERPIGNAN Pic Néoulous 22 25 28 07
92 PIGNANS N D des Anges 46 43 40 56
93 POITIERS “Les Couronneries”
/Hospital des Champs 41 41
94 PORTO VECCHIO Col de Méla 40 34 37
95 PRIVAS Crète Blandine 64 58 61
96 QUIMPER 29 37 31 06
97 REIMS Charleville 29 23 26 36
98 REIMS Hutvillers 43 46 40 09 63
99 RENNES Saint-Pern 39 45 42 07 34 31
100 ROUEN Grande Couronne 23 33 26 07 59 62
101 SAINT ETTIENNE Croix de Guizay 35 30 33 38 65 62
102 SAINT ETTIENNE “Pilat” 46 40 43 10
103 SAINT FLOUR Vabres 52 49 55
104 SAINT GINGOLPH Montpélerin 39 41 63
105 SAINT-MALO 53V 45 42 07
106 SAINT-MARTIN DE BELLE VILLE
Point de la Masse 48 51 54
107 SAINT-NAZAIRE “Pornichet la Ville-Blais” 23 29 26 06
108 SAINT-NAZAIRE “Etoile du Matin” 55 52
109 SAINT-QUENTIN “Gauchy” 30 33
110 SAINT-RAPHAEL Pic de l’Ours 25 28 22 10V
111 SARREBOURG Donon 40 53 50
112 SENS Gisy les Nobles 57 63 60 05
113 SERRES Beaumont 50 53 56 04
114 STRASBOURG Nordhein 62 56 43 10V
115 TARASCON S/ARIEGE Montoulieu 52 55 49 08
116 TOULON Cap Sicié 51 48 54 09 57 60
117 TOULOUSE Pechbonnieu 45 39 42 07
TOULOUSE Pic du Midi 27 21 24 05 32 34
TOULOUSE Acquitaine 47
118 TOURETTE DU CHAHTEAU Mt Vial 54 62 65
119 TOURS Chissay 65 59 62 57
120 TROYES Les riceys 27 24 21 07 29
121 USSEL Meymac 42 45 39
122 UTELLE La Madone 47 44 41
123 VALENCE “St-Romaine de l’Erps” 53
124 VALENCIENNES “marly” 49 34
125 VANNES Moustoir’ AC 50 56 53 05 58
126 VERDUN Septsarges 65 59 62
127 VILLERS COTTEREST Fleury 65V 59V 62V
128 VITTEL Thullières 30 35 32
129 WISSEMBOURG Eselberg 54 48 51
FR
voir page suivante, SVP...
Informations complémentaires
35
Page 98

Informations complémentaires
Les principaux émetteurs français
Répartition Européenne des normes et standards
Informations complémentaires
36
Page 99

32
Τηλεραση
Projection
Ευχαριστούµε που διαλέξατε αυτή την τηλεραση projection Sony.
Πριν λειτουργήσετε την τηλεραση projection, διαβάστε προσεκτικά αυτ το
εγχειρίδιο και φυλάξτε το για µελλοντικές συµβουλές.
Oδηγίες για την ανάγνωση αυτών των οδηγιών:
•
Αν επιθυµείτε να εγκαταστήσετε την τηλεραση projection και να
εξοικειωθείτε µε τισ βασικέσ τησ λειτουργίεσ, προχωρήστε στο τµήµα
“Ξεκινώντας”.
•
Αν επιθυµείτε να γνωρίσετε τα συµπληρωµατικά χαρακτηριστικά τησ
τηλερασησ projection προχωρήστε στο τµήµα
•
Χρησιµοποιούµενα σύµβολα σε αυτ το εγχειρίδιο:
•
•
Πιθανοί κίνδυνοι
Ενδιαφέρουσεσ πληροφορίεσ
“Πρσθετες λειτουργίες”
Οδηγίες Χρήσης
.
GR
•
•
1,2...
MENU
K
•
•
•
Πληροφορίεσ για τη λειτουργία
Σειρά των οδηγιών που πρέπει να εκτελεστούν
Τα πλήκτρα του τηλεχειριστηρίου που έχουν περίγραµµα, δείχνουν
τα πλήκτρα που πρέπει να πιεστούν για την εκτέλεση των διαφρων
οδηγιών.
Πληροφορίεσ για το αποτέλεσµα των οδηγιών.
H διαδικασία ολοκληρώνεται στην επµενη σελίδα.
3
Page 100

Πληρoφoρίες Aσφαλείας
H τηλεραση αυτή λειτουργεί
µνo µε ρεύµα 220-240V AC.
Mην συνδέετε πολλέσ
ηλεκτρικέσ συσκευέσ στην ίδια
πρίζα, διτι κάτι τέτοιο µπορεί
να αποτελέσει αιτία πυρκαγιάσ ή
ηλεκτροπληξίασ.
Για περιβαλλοντικούσ λγουσ και
λγουσ ασφαλείασ,
συστήνουµε να µην αφήνετε την
τηλεραση σε κατάσταση
αναµονήσ ταν αυτή δεν
χρησιµοποιείται. Aποσυνδέστε
την απ την πρίζα.
Ποτέ µην ωθείτε κανενσ είδουσ
αντικείµενα στο εσωτερικ τησ
συσκευήσ, διτι κάτι τέτοιο µπορεί να
αποτελέσει αιτία πυρκαγιάσ ή
ηλεκτροπληξίασ. Ποτέ µην ρίχνετε υγρά
κανενσ είδουσ επάνω στην συσκευή.
Eάν κάποιο αντικειµενο ή υγρ
εισχωρήσει στο εσωτερικ τησ σνσκευήσ,
µην την θέσετε σε λειτουργία. Φροντίστε
για τον άµεσο έλεγχο τησ συσκευήσ απ
ειδικευµένο προσωπικ.
Mην αvοίγετε τo εξωτερικ
περίβληµα και τo πίσω κάλυµµα
τησ τηλερασησ. Για την
συvτήρηση τησ συσκευήσ
απευθυνθείτε µνο σε
εξειδικευµένο προσωπικ.
Mην καλύπτετε τισ
oπέσ εξαερισµού τησ
τηλερασησ.
Για τον αερισµ τησ συσκευησ,
αφήστε χώρο τoυλάχιστov 10 cm
γύρω απ κάθε πλευρά τησ
συσκευήσ.
Kαθαρίστε την τηλεραση µε ένα
απαλ, ελαφρά υγρ ύφασµα. Mην
χρησιµοποιείτε βενζινη, διαλυτικά
χρωµάτων ή άλλα χηµικά για τον
καθαρισµ τησ τηλερασησ. Mην
προξενείτε γρατσουνιέσ στην οθνη
τησ τηλερασησ. Για προληπτικούσ
λγoυσ, αποσυνδέστε την τηλεραση
απ την πρίζα πριν την καθαρίσετε.
Για την δική σασ ασφάλεια, µην
αγγίξετε κανένα τµήµα τησ
τηλερασησ, του καλωδίου
τροφοδοσίασ ρεύµατοσ ή του
καλωδίου τησ κεραίασ κατά την
διάρκεια καταιγίδων.
Mην τοποθετείτε ποτέ την
τηλεραση σε θερµά, υγρά ή
ιδιαίτερα σκονισµένα σηµεία.
Mην τοποθετήσετε την
τηλεραση σε σηµείο που
υπκειται σε κραδασµούσ.
Για να αποσυνδέσετε το
καλώδιο του ρεύµατοσ απ
την πρίζα, τραβήξτε το απ το
φισ. Mην τραβάτε ποτέ το
καλώδιο.
Για αποφυγή του κινδύνου
πυρκαγιάσ ή ηλεκτροπληξίασ
µην εκθέτετε την τηλεραση
σε βροχή ή υγρασία.
Για την αποφυγή πυρκαγιάσ,
κρατήστε τα εύφλεκτα
αντικείµενα και τισ ακάλυπτεσ
πηγέσ φωτσ (π.χ. κεριά) µακριά
απ την τηλεραση.
Mην τοποθετείτε βαριά
αντικείµενα πάνω στο καλώδιο
του ρεύµατοσ, διτι ενδέχεται
να προκληθούν σε αυτ φθορέσ.
Σασ συνιστούµε να τυλίξετε το
πλεονάζον καλώδιο γύρω απο τα
στηρίγµατα που βρίσκονται στο
πίσω µέροσ τησ συσκευήσ.
Πριν µετακινήσετε την τηλεραση
Tοποθετήστε την τηλεραση σε
µια ασφαλή, σταθερή βάση.
Mην επιτρέπετε στα παιδιά να
σκαρφαλώνουν επάνω στηv
τηλεραση. Mηv τoπoθετείτε τηv
τηλεραση στο πλάι, ή µε την
οθνη προσ τα πάνω.
αποσυνδέστε το καλώδιο του
ρεύµατοσ. Kατά την µετακίνηση
αποφύγετε τισ ανώµαλεσ
επιφάνειεσ, τισ γρήγορεσ κινήσεισ
και µην ασκείτε υπερβολική
δύναµη. Eάν η τηλεραση πέσει
κάτω ή προκληθεί σε αυτήν ζηµιά,
φροντίστε για τον άµεσο έλεγχ
τησ απ ειδικευµένο προσωπικ.
Mην καλύπτετε τισ οπέσ
εξαερισµού τησ τηλερασησ µε
υλικά πωσ κουρτίνεσ,
εφηµερίδεσ, κλπ.
Καννες Ασφάλειας
•
Αν µεταφέρετε κατευθείαν την τηλεραση projection απ ένα ψυχρ σε ένα θερµ δωµάτιο, ή αν η θερµοκρασία του δωµατίου
µεταβληθεί ξαφνικά, η εικνα µπορεί να θαµπώσει ή να εµφανιστούν χρωµατικέσ ανωµαλίεσ σε ορισµένα σηµεία. Αυτ
συµβαίνει επειδή έχει συγκεντρωθεί υγρασία στουσ καθρέφτεσ ή στουσ φακούσ στο εσωτερικ τησ συσκευήσ. Αφήστε να
εξατµιστεί η υγρασία προτού χρησιµοποιήσετε την τηλεραση projection.
•
Για να εξασφαλίσετε καθαρή εικνα, µην εκθέσετε την οθνη σε άµεσο φωτισµ ή στο φωσ του ήλιου. Αν είναι δυνατ,
χρησιµοποιήστε φωτιστικά «σποτ» µε δέσµη απ την οροφή προσ το δάπεδο.
•
Η εµφάνιση µιασ ακίνητησ εικνασ για µεγάλο χρονικ διάστηµα κατά τη λειτουργία βιντεοπαιχνιδιού ή προσωπικού υπολογιστή
και η παρακολούθηση προγράµµατοσ φρµα 16:9 µπορεί να προκαλέσει βλάβη στην καθοδική λυχνία. Για να αποφύγετε κάτι
τέτοιο, διατηρήστε χαµηλή τη στάθµη του κοντράστ.
•
Μην ακουµπάτε την επιφάνεια τησ οθνησ, ειδάλλωσ αυτού του τύπου η επαφή µπορεί να καταλήξει σε χαραγµένη οθνη.
4
Καννεσ Ασφάλειασ
 Loading...