

Page 1
R
4-078-836-31(1)
Instruction Manual
Návod k obsluze
Instrukcja obsługi
Kezelési útmutató
Инструкция пo эксплyатации
Инструкции за експлоатация
GB
CZ
PL
HU
RU
BG
KF-50SX100K
©2000 by Sony Corporation
Page 2

Introduction
Thank you for choosing this Sony “Grand Wega” model.
Before operating the set, please read this manual thoroughly and retain it for future reference.
• Symbols used in the manual:
• Informs you of possible hazards.
• Important information.
• Information on a feature.
• 1,2... Sequence of instructions.
MENU
K
• Shaded buttons on the remote control show the
buttons you have to press to follow the sequence
of instructions.
• Informs you of the result of the instructions.
Safety Information
All TV’s operate on extremely high voltages. To prevent fire or electric shock, please follow the safety guidelines indicated in the
blue sheet supplied.
•
When moving the set two persons are needed. DO NOT push speaker nets placed on the both side of the screen to prevent
these parts from deformation and do not grasp the front panels to prevent these parts from breaking off. Support screen
bottom with one hand while grasping the top part with the other hand.
•Do not block or cover the ventilation opening placed on the left bottom rear side of the set. For ventilation, leave a space of at least
10 cm from the wall.
•After transporting the set directly from a cold to a warm location, or if the room temperature has changed suddenly, pictures may
be blurred or show poor colour over portions of the picture. This is because moisture has condensed on the mirrors or lenses inside
the set. Let the moisture evaporate before using the set.
•To obtain a clear picture, do not expose the screen to direct illumination or direct sunlight. If possible, use spot lighting directed
down from the ceiling.
•The screen of this set has an anti-reflection screen coating. To avoid screen degradation, follow the mentioned below:
•To remove dust from the screen surface, wipe with the suplied cleaning cloth or a soft cloth.
•Clean the screen and cabinet with a soft dampened cloth. Do not use any abrasive cleaners. As a safety precaution, unplug the
set before cleaning it.
•Avoid touching the screen, and take care not to scratch the surface with hard objects.
Table of Contents
Introduction ...................................................................................................................................................................................................................... 3
Safety Information............................................................................................................................................................................................................ 3
Overview
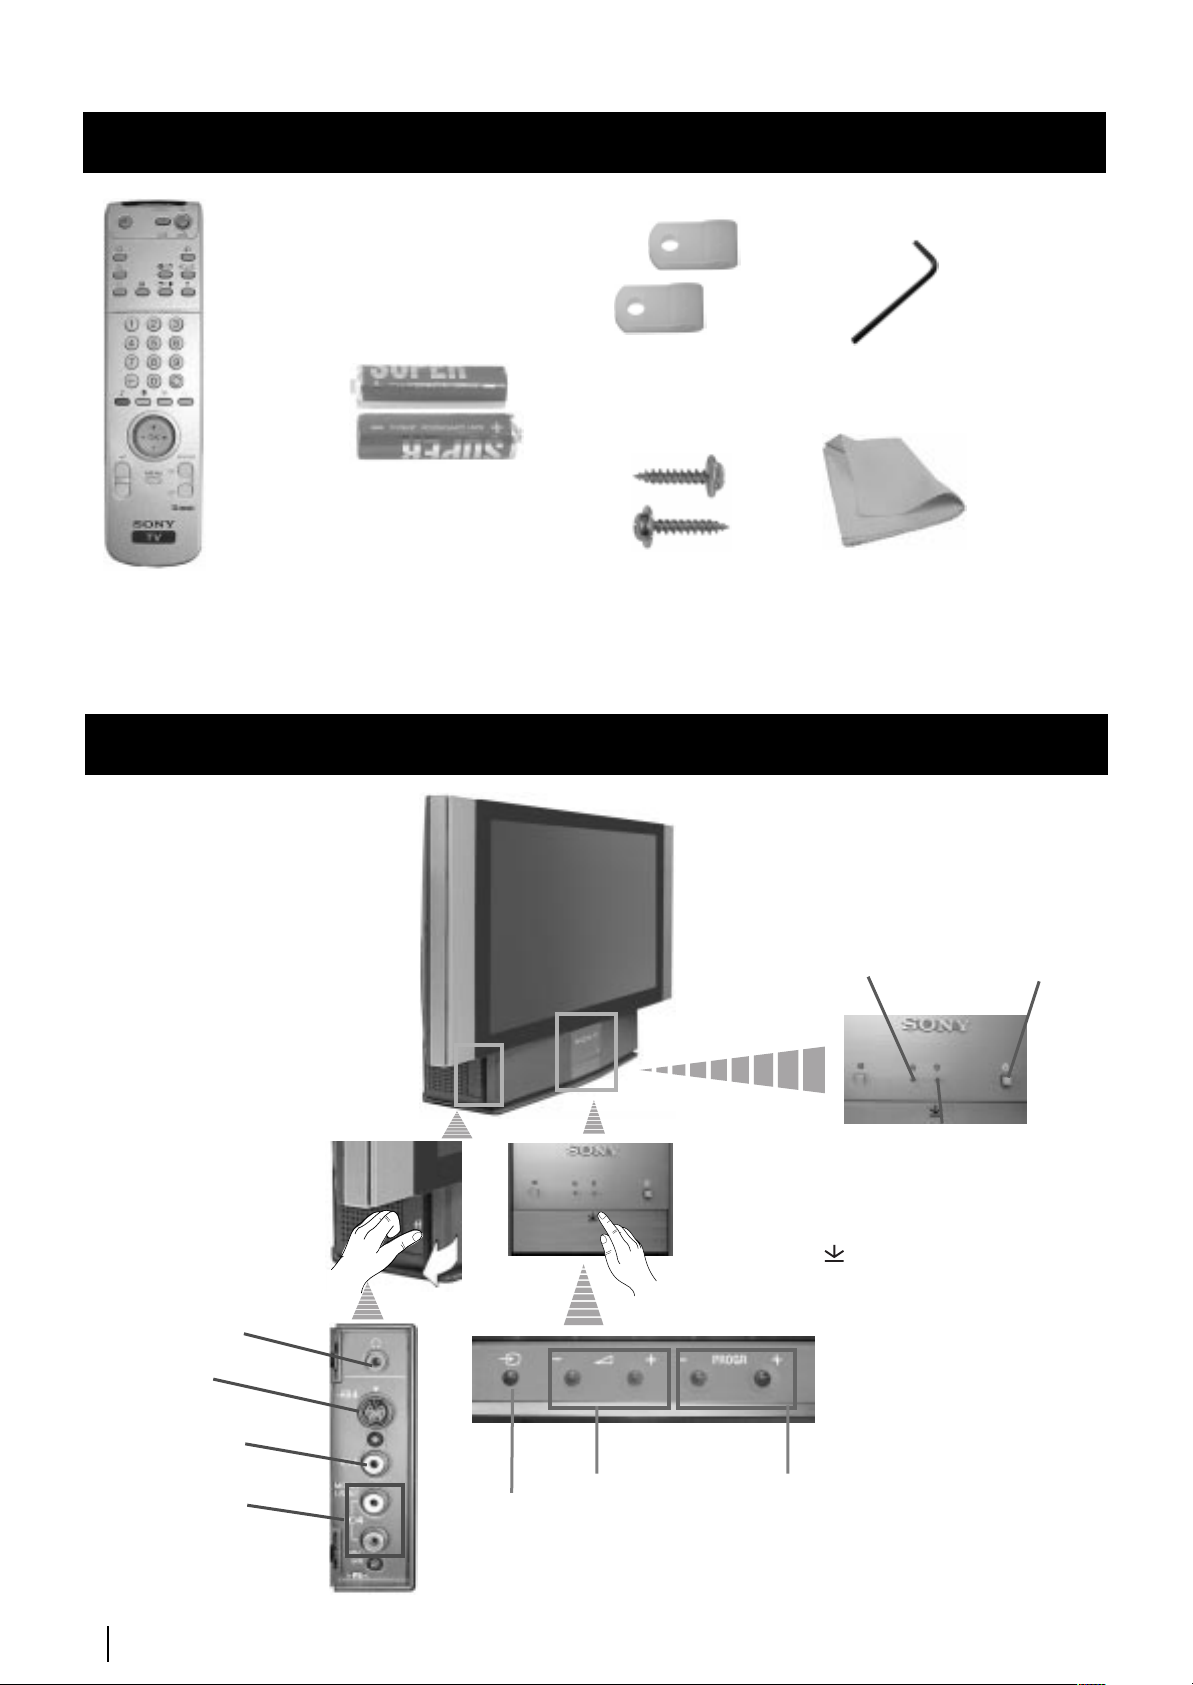
Checking the Accessories Supplied.................................................................................................................................................................. 4
Overview of TV Buttons .................................................................................................................................................................................... 4
Overview of Remote Control Buttons.............................................................................................................................................................. 5
Installation
Inserting Batteries into the Remote Control.................................................................................................................................................... 6
Connecting the Aerial and VCR ....................................................................................................................................................................... 6
Stabilizing the set................................................................................................................................................................................................6
First Time Operation
Switching on the set and Automatically Tuning............................................................................................................................................ 7
Menu System
Changing the Screen Format............................................................................................................................................................................. 9
Introducing the Menu System........................................................................................................................................................................... 9
On Screen display Menus Guide....................................................................................................................................................................10
Using the Menu System:
Adjusting the Picture..................................................................................................................................................................................... 11
Adjusting the Sound......................................................................................................................................................................................12
Using the Features menu............................................................................................................................................................................... 14
Manually Tuning the TV............................................................................................................................................................................... 15
Labelling a channel ........................................................................................................................................................................................ 16
Skipping programme positions.................................................................................................................................................................... 17
Using the “Further Programme Preset” function...................................................................................................................................... 18
Inputting your personal ID........................................................................................................................................................................... 19
Using the Demo Mode................................................................................................................................................................................... 20
Adjusting the H Centre picture for an RGB source................................................................................................................................... 21
Labelling and Selecting the screen format of Input Sources.................................................................................................................... 22
Using Multi PIP (Picture In Picture)............................................................................................................................................................ 23
Using PAP (Picture And Picture)................................................................................................................................................................. 23
Teletext...................................................................................................................................................................................................................... 24
NexTView................................................................................................................................................................................................................. 26
Optional Connections
Connecting Optional Equipment.................................................................................................................................................................... 28
Using Optional Equipment.............................................................................................................................................................................. 29
Smartlink............................................................................................................................................................................................................ 30
Remote Control of other Sony Equipment.................................................................................................................................................... 30
Additional Information
Optimum Viewing Area .................................................................................................................................................................................. 31
Replacing the Lamp.......................................................................................................................................................................................... 32
Specifications.....................................................................................................................................................................................................33
Troubleshooting................................................................................................................................................................................................34
GB
3
Page 3
Overview
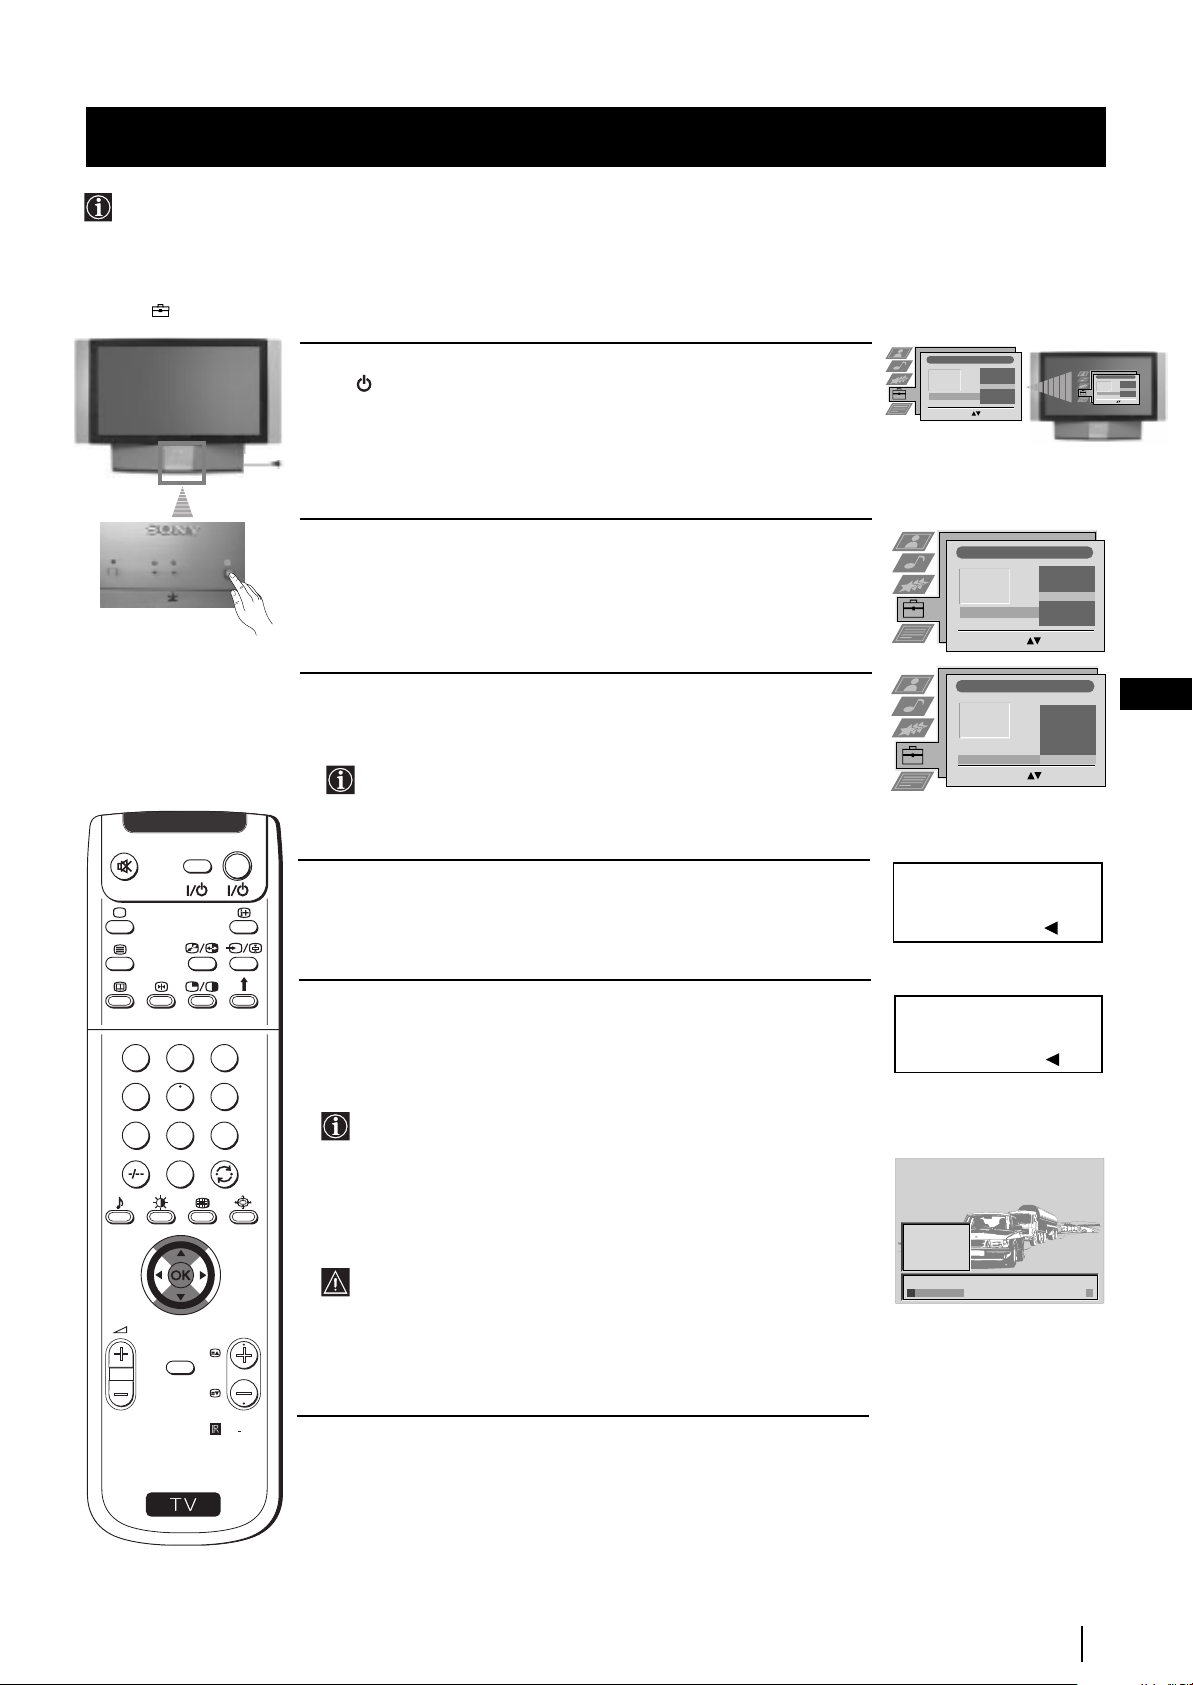
Press on the mark ,
on the front of the set
to reveal the front
connectors.
Checking the Accessories Supplied
s
Two batteries (R6 type)
1 Wrench2 Brackets
One Remote Control
(RM-903)
Overview of TV Buttons
Headphone
jack
S Video
Input jack
2 Screws
(conectores lado izquierdo)
1 Cleaning cloth
Lamp
indicator (see
page 32)
On/Off
Switch
Standby indicator:
• By pressing the
switch off button of
the Remote Control,
standby indicator
lights up in red
colour.
• By pressing the main
switch off on the set,
the standby indicator
lights up in amber
colour.
Video Input
jack
Audio Input
jacks
4
Overview
Selecting
input source
Volume control
buttons
Programme up
or down buttons
(selects TV channels)
Page 4
Overview
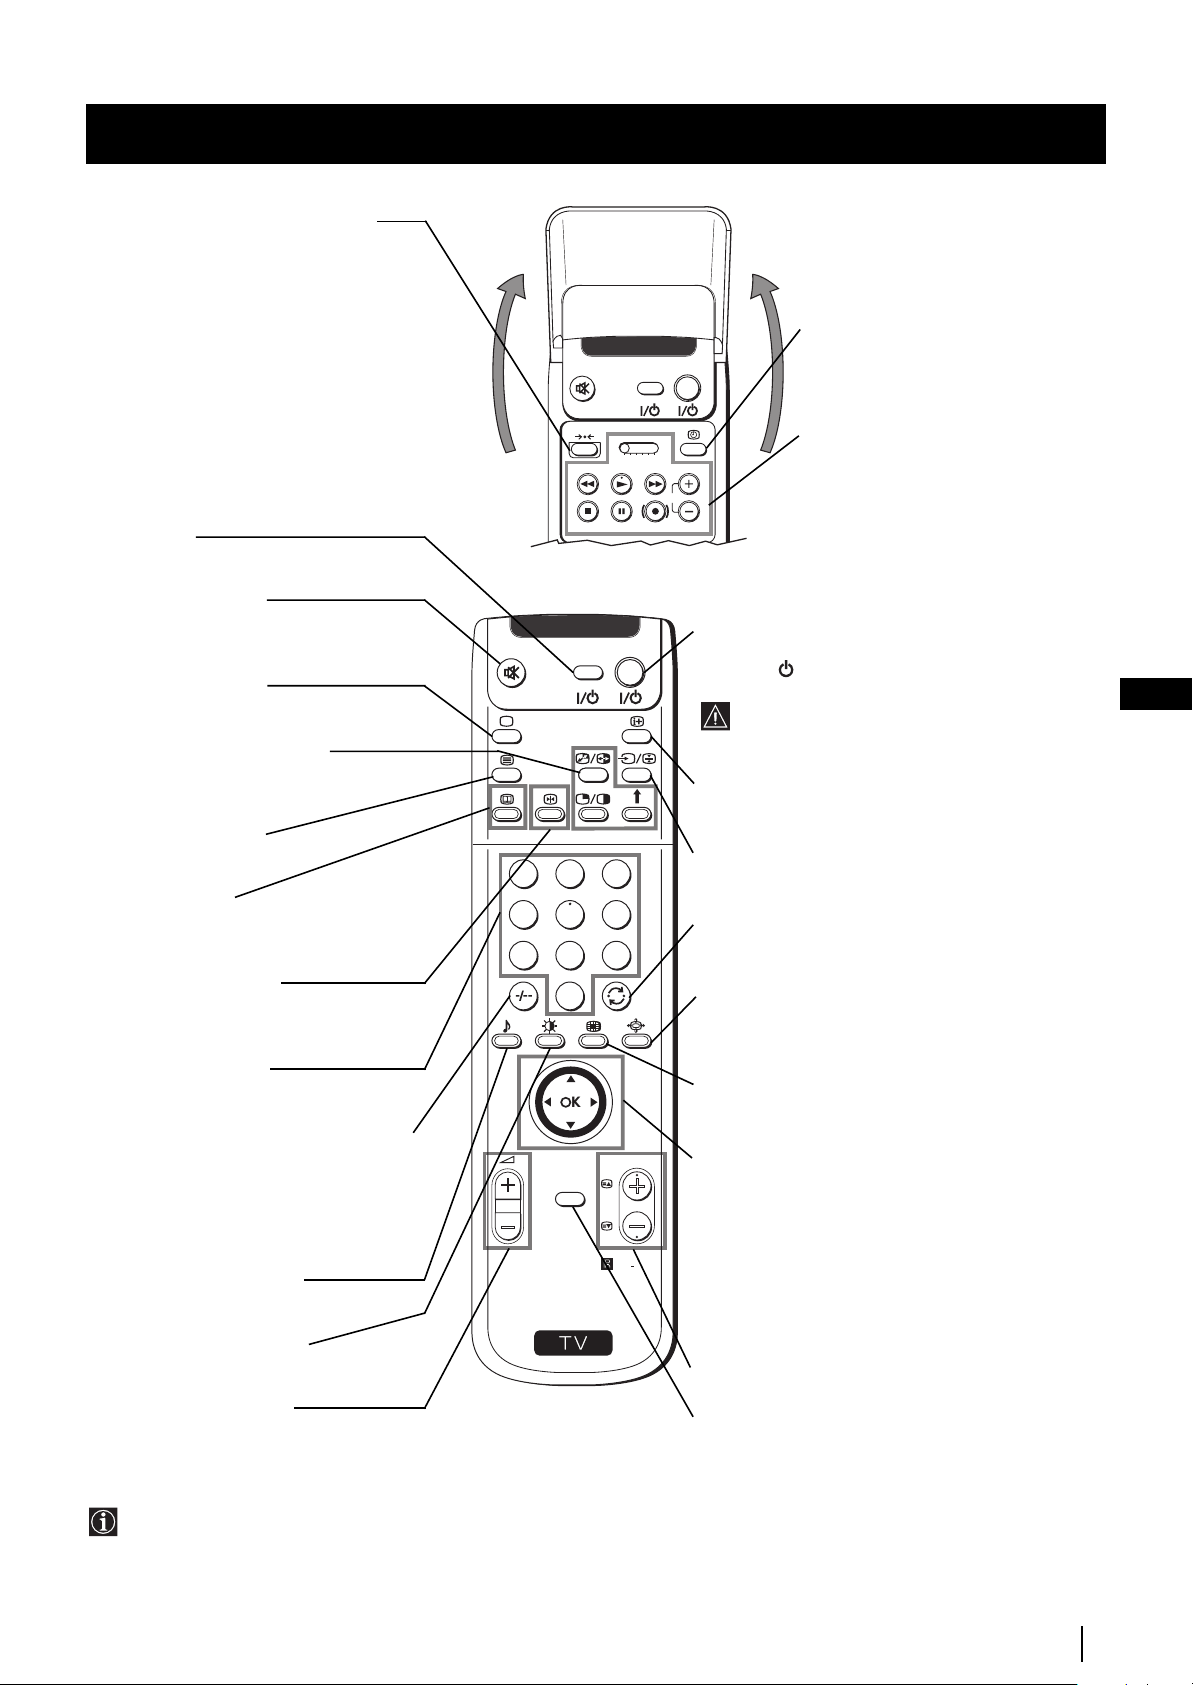
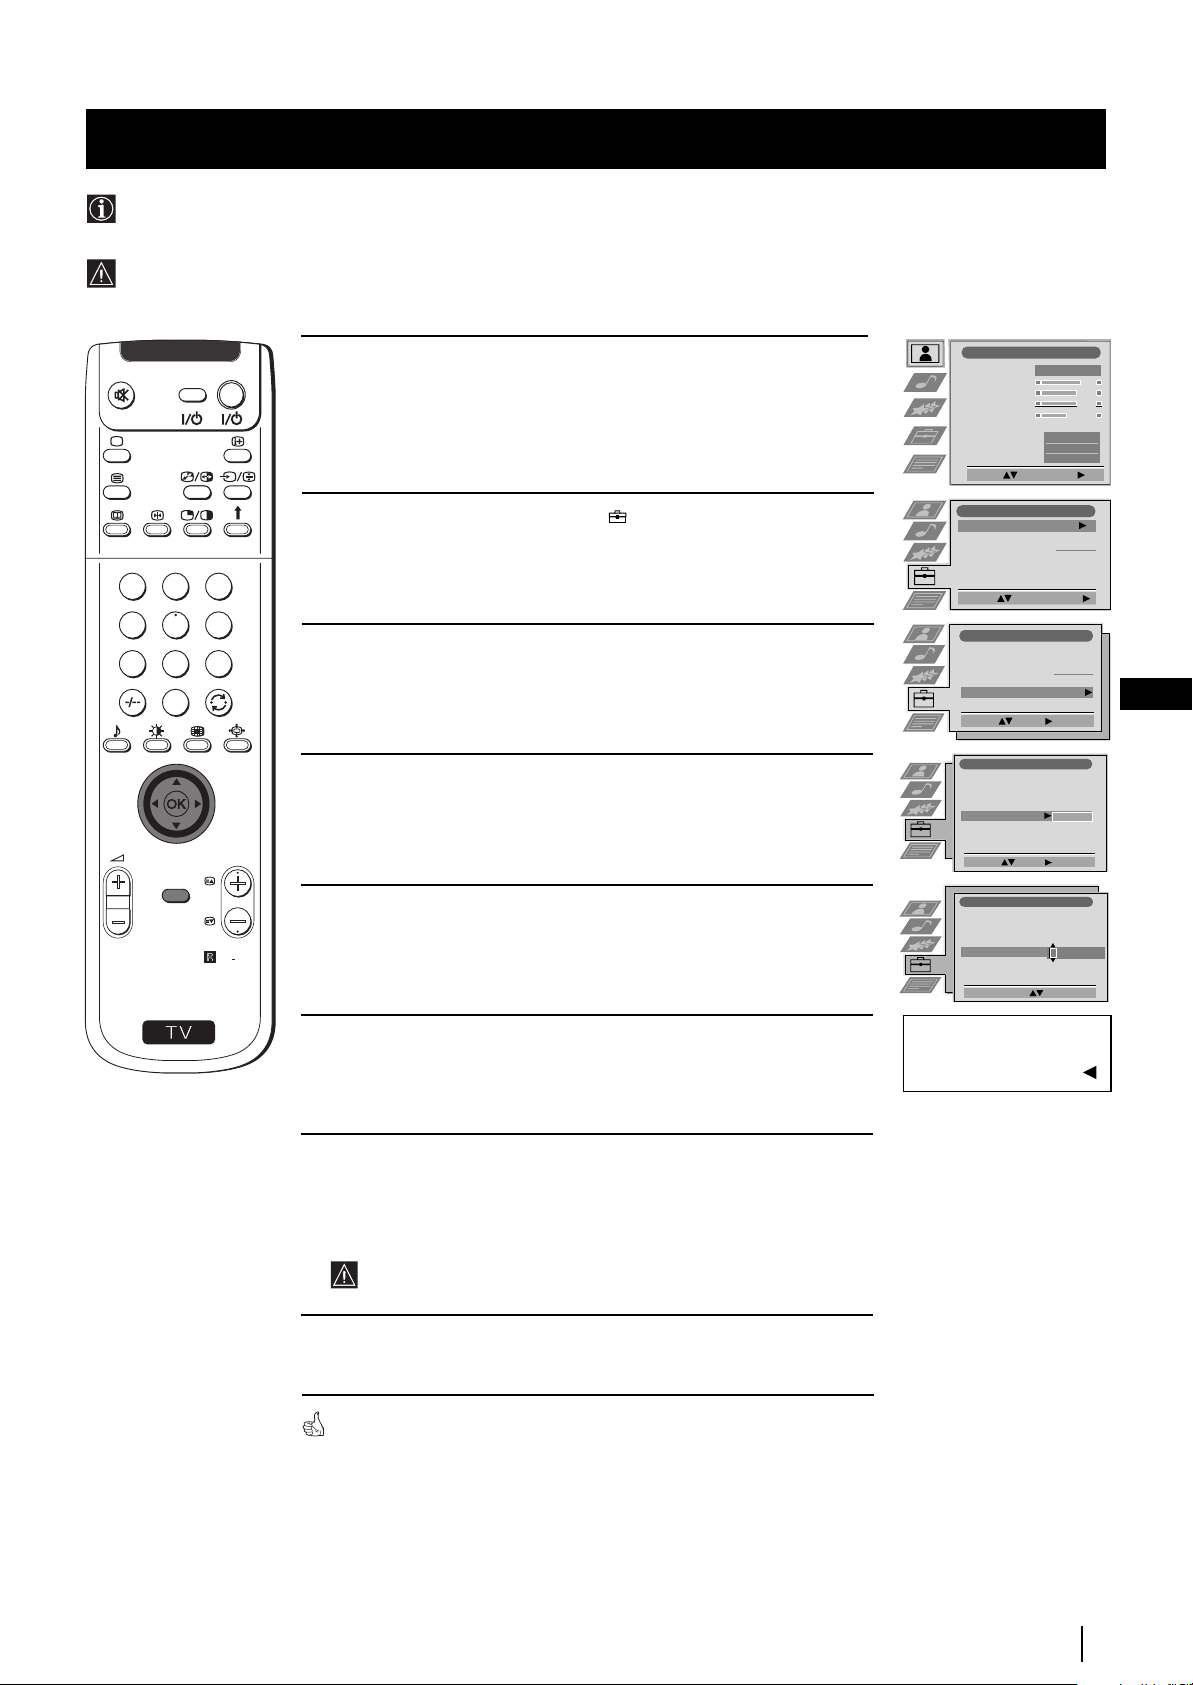
Overview of Remote Control Buttons
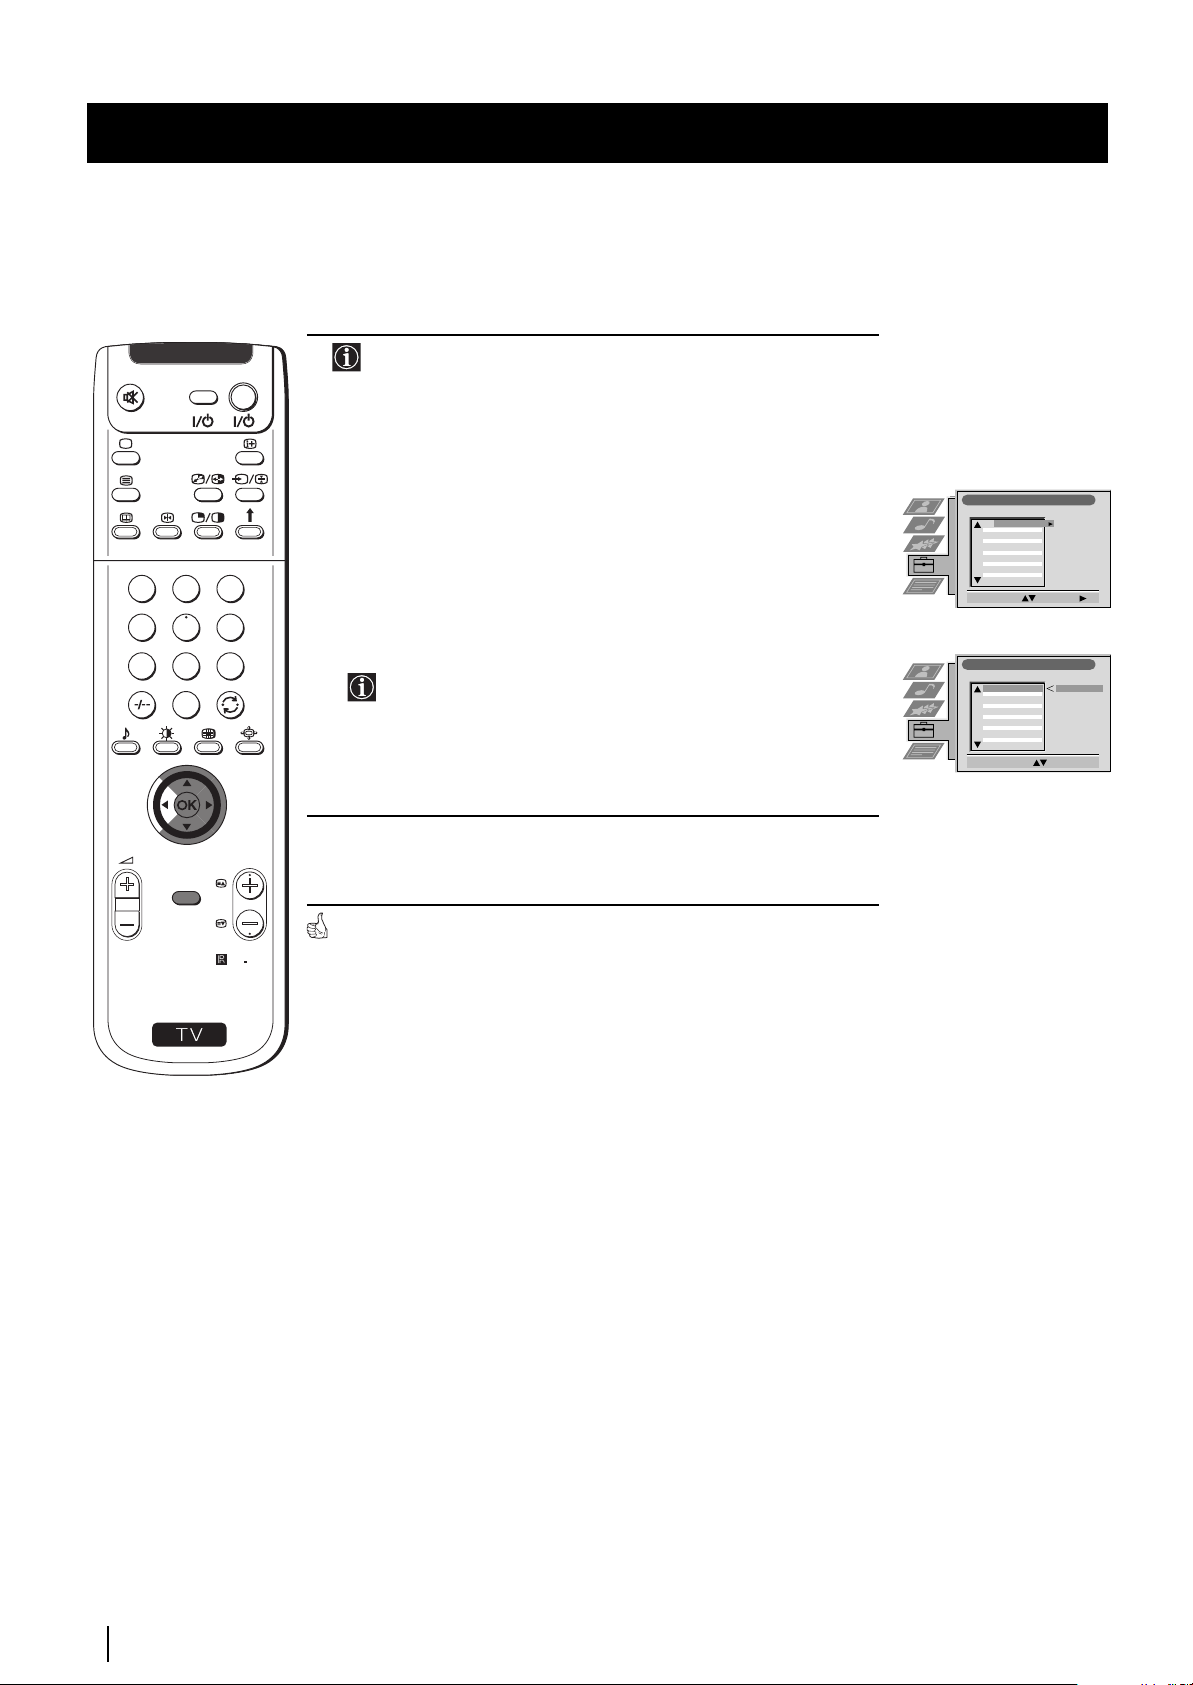
Resetting to factory set levels
Press not only to return picture and sound
settings to factory-set levels, but also to reinstall the set as the first time it was switched
on.
After the "Language/Country" menu
appeared on the screen, proceed in the same
way as described in the section "Switching on
the set and automatically Tuning" of this
instruction manual.
VCR on/off
Press to switch your VCR on or off.
Muting the Sound
Press to mute TV sound.
Press again to restore the sound.
Selecting TV mode
Press to switch off Teletext or video input.
PAP (Picture And Picture)
For more details, please refer to the section
"Using PAP (Picture And Picture)".
Selecting Teletext
Press to switch on Teletext.
Displaying EPG
Press to display the Electronic Programme
Guide (EPG). Press again to switch off EPG.
Freezing the picture
Press to freeze the picture. Press again to
return to the normal picture.
Selecting channels
Press to select channels.
For double-digit programme numbers, e.g.
23, press -/-- first, then the buttons 2 and 3.
If you enter an incorrect first digit, this
should be corrected by entering another digit
(0-9) and then selecting -/-- button again to
enter the programme number of your choice.
Selecting Sound mode
Press repeatedly to change the sound mode.
Selecting Picture mode
Press repeatedly to change the picture mode.
Adjusting TV Volume
Press to adjust the volume of the TV.
1
4
7
S
VIDEO TV
2
5
8
0
K
MENU
VT
R 1 2 3 4 DVD
3
6
9
PROGR
RM
VIDEO TV
CH
903
To Temporarily Switch Off
Press to temporarily switch off TV (the standby
indicator
again to switch on TV from standby mode.
After 15-30 minutes without a signal and
without any button being pressed, the set
switches automatically into standby mode.
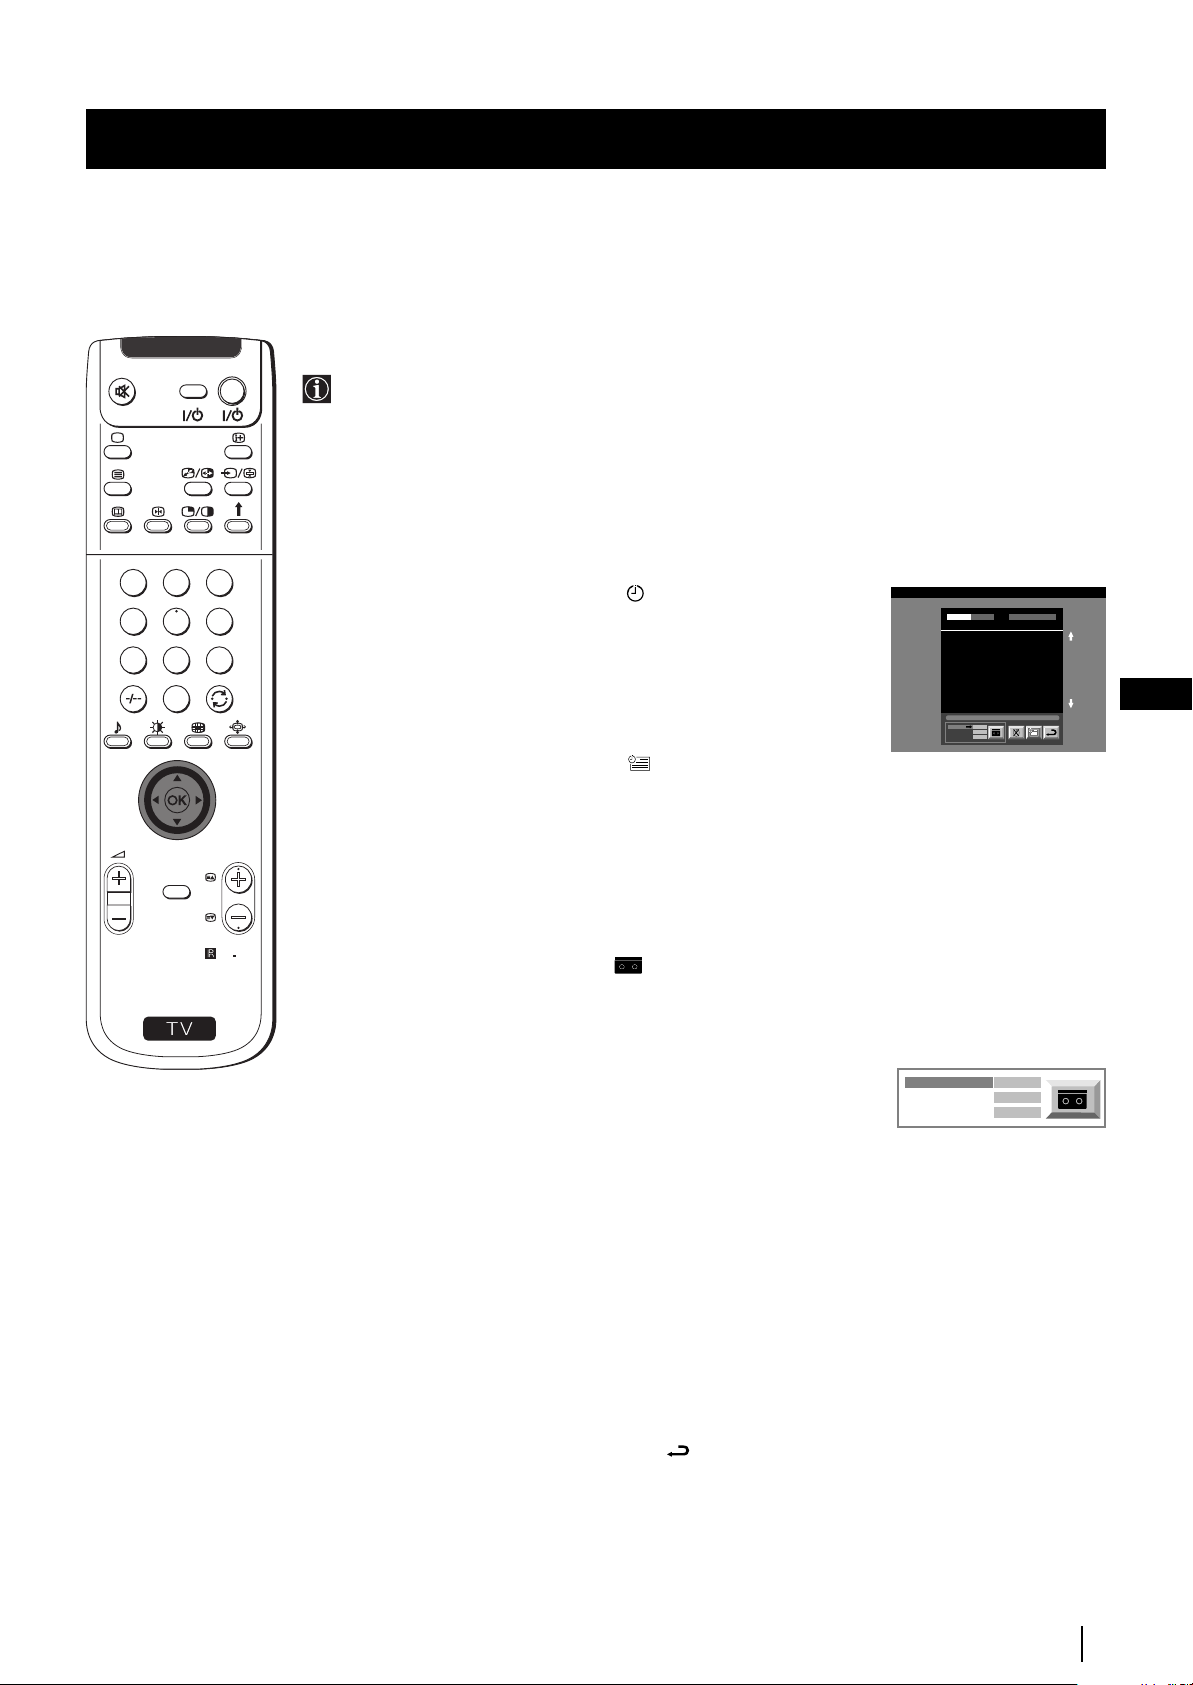
Displaying On Screen Information
Press to display all on-screen indications.
Press again to cancel.
Selecting Input source
Press repeatedly until the desired input symbol of
the source appears on the screen.
Back to the channel last watched
Press to watch the last channel selected (watched for
at least 5 seconds).
Selecting Screen format
Press repeteadly to change the format of the screen
(for more details, please refer to the section
“Changing the Screen format”).
Displaying Multi PIP (Picture In Picture)
Press to display Multi PIP mode. Press again to
cancel.
Joystick for menu selection
• When MENU is switched on:
4 Scroll Up
$ Scroll Down
Z Previous menu or selection
z Next menu or selection
OK Confirms your selection
• When MENU is switched off:
Z Return to the last menu screen.
OK Shows a channel overview
Selecting channels
Press to select the next or previous channel.
Displaying the menu system
Press to display the menu on the screen. Press again
to remove the menu display from the screen.
Displaying the time
Press to switch the time on or off
(available only when teletext is
broadcast).
VCR operation
For more details, please refer to the
section "Remote Control of other
Sony Equipment".
on the set lights up in red). Press
GB
Besides TV functions, all coloured buttons as well as green
symbols are also used for Teletext operation. For more details,
please refer to the "Teletext" section of this instruction manual.
Overview
5
Page 5
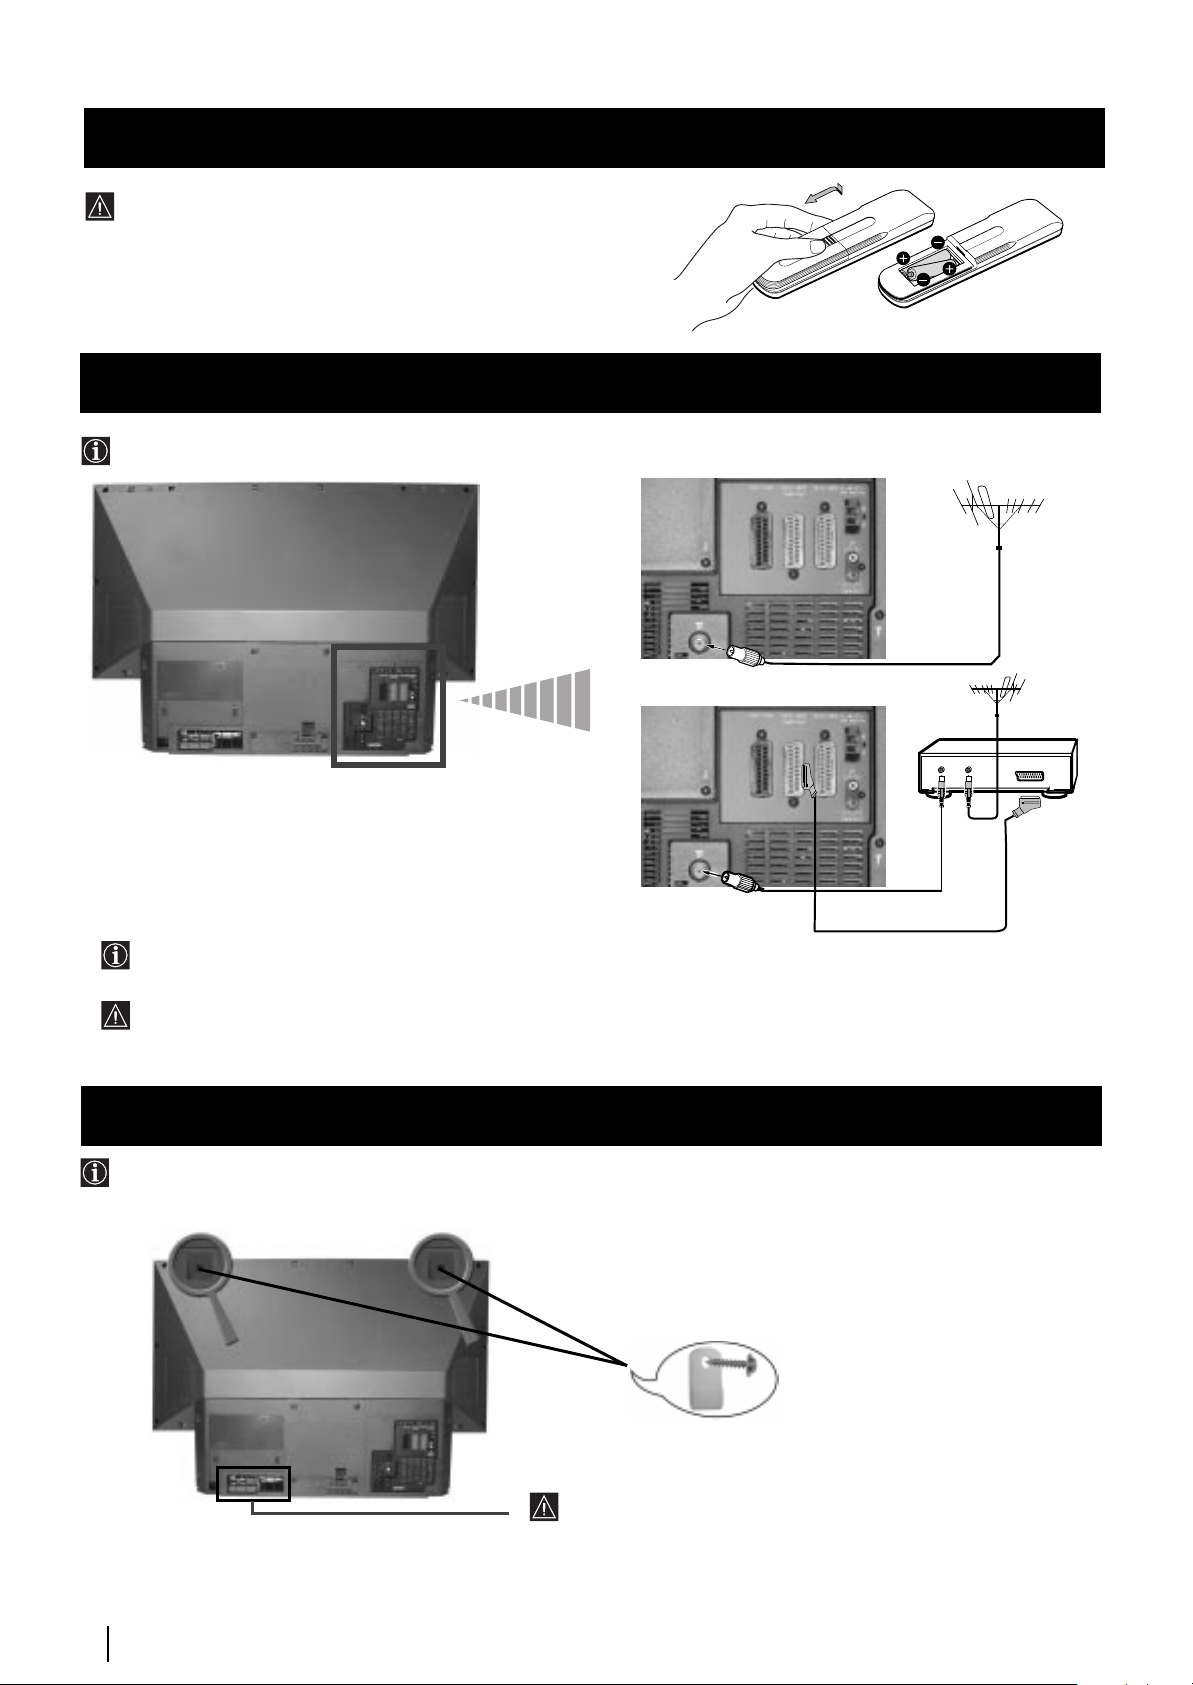
Installation
The Scart lead is optional.
If you use this optional connection it can improve picture and sound quality when using a VCR.
If you do not use a SCART lead, after automatically tuning the set refer to the "Manually Tuning the TV" section of this
instruction manual, to tune in the set to the output of your VCR. Also refer to your VCR instruction manual to find out
how to find the output channel of your VCR.
Inserting Batteries into the Remote Control
Make sure you insert the batteries using the correct
polarities.
Always remember to dispose of used batteries in an
environmental friendly way.
Connecting the Aerial and VCR
Connecting cables are not supplied.
or
Stabilizing the set the set
After setting up, secure the set to a wall, etc., with the supplied brackets, for safety purposes.
1 Mount the two supplied brackets with the screws to the upper rear side of the set.
OUT IN
VCR
Do not block or cover this ventilation opening. For
ventilation, leave a space of at least 10 cm from the wall.
2 Pass a strong cord or a chain through each bracket mounted in 1, and then secure to a wall or a pillar, etc.
6
Installation
Page 6
First Time Operation
Language/Country
Language
Country
Select Language: Confirm: OK
4 Italiano
Français
Español
English
Deutsch
Dansk
Čeština
Language/Country
Language
Country
Select Language: Confirm: OK
4 Italiano
Français
Español
English
Deutsch
Dansk
Čeština
Switching on the set and Automatically Tuning
The first time you switch on your TV, a sequence of menu screen appear on the TV enabling you to 1) choose the language
of the menu screen, 2) choose the country in which you wish to operate the set, 3) search and stores all
available channels (TV Broadcast) and 4) change the order in which the channels (TV Broadcast) appear on the screen.
However, if you need to change the language menu, change the country, change or repeat the tuning (e.g. when you move
house) or rearrange again the order of the channels afterwards, you can do that by selecting the appropriate menu in
the (Set Up)
.
1 Connect the set plug to the mains socket (220-240V AC, 50 Hz). Press
the
on/off button on your set to switch on. The first time you press
this button the Language/Country menu displays automatically on
the screen.
2 Push the joystick on the remote control to $ or 4 to select the
language, then press OK to confirm your selection. From now on all
the menus will appear in the selected language.
3 Push the joystick to $ or 4 to select the country in which you will
operate the set, then press OK to confirm your selection.
Select "Off" instead of a country if you do not want your
Language/Country
Language
Country
Select Language: Confirm: OK
Language/Country
Language
Country
Select Country:
4 Italiano
Français
Español
English
Deutsch
Dansk
Čeština
4
Finland
Denmark
Czech Rep.
Bulgaria
Belgium
Austria
Confirm: OK
GB
Off
channels (TV Broadcasts) stored in a given channel sequence
starting from programme position 1.
TV
D
O
I
E
V
4 The Auto Tuning menu appears on the screen in the selected
language, then press the OK button on the remote control to select
Yes.
5 A new menu appears automatically on the screen asking you to
check that the aerial is connected. Confirm that the aerial is connected
1
2
3
4
5
6
and then press the OK button to start the automatic tuning.
Do you want to start
automatic tuning?
Yes: OK No:
Please confirm that
aerial is connected!
Yes: OK No:
• The TV starts to automatically search and store all available
7
8
9
0
channels (TV Broadcast) for you.
• If you have selected “Off” option in the Country menu and
you make a new autotuning afterwards, the TV Broadcasts
will be stored from the selected programme number.
1
CO2
2
CO3
3
CO4
4
CO7
5
CO8
Searching...
MENU
PROGR
This procedure could take some minutes. Please, be patient and
do not press any button. Otherwise the automatic tuning will
not be completed.
S
RM
903
continued...
First Time Operation
7
Page 7
First Time Operation
6 After all available channels are captured and stored, the
DETV
O
I
V
a) If you do not wish to change the channel order, go to step 7.
Programme Sorting menu appears automatically on the screen
enabling you to change the order in which the channels appear
on the screen.
1
4
7
S
2
0
MENU
b) If you wish to change the channel order:
1Push the joystick on the remote control to $ or 4 to select the
programme number with the channel (TV Broadcast) you wish to
rearrange, then push to z.
3
5
6
8
9
2 Push the joystick to $ or 4 to select the new programme number
position for your selected channel (TV Broadcast), then press OK.
The selected channel now moves to its new programme
position and the other channels move accordingly.
3Repeat steps b1) and b2) if you wish to change the order of the
other channels.
Programme Sorting
PROG CH LABEL
TV 5
C03
1
PRO 7
C05
2
EU-SP
C07
3
SWF
C08
4
RTL
C09
5
SAT
C11
6
MDR
C12
7
DDI
C13
8
DSF
C14
9
RTL 2
C15
10
KAB 1
C16
11
Select Prog: Confirm:
Programme Sorting
PROG CH LABEL
1
TV 5
PRO 7
EU-SP
SWF
RTL
SAT
MDR
DDI
DSF
RTL 2
KAB 1
C03 TV 5
C03
2
C05
3
C07
4
C08
5
C09
6
C11
7
C12
8
C13
9
C14
10
C15
11
C16
Select Position: Move: OK
7 Press the MENU button to exit and return to the normal TV screen.
PROGR
The set is now ready for use.
RM
903
First Time Operation
8
Page 8
First Time Operation - Menu System
Picture Adjustment
Select: Enter Menu:
Picture Mode
Contrast
Brightness
Colour
Sharpness
Reset
AI
Noise Reduction
Colour Tone
Personal
On
Off
Normal
Picture Adjustment
Select: Enter Menu:
Picture Mode
Contrast
Brightness
Colour
Sharpness
Reset
AI
Noise Reduction
Colour Tone
Personal
On
Off
Normal
4:3
4:9
Zoom
Wide
Smart
Joystick:
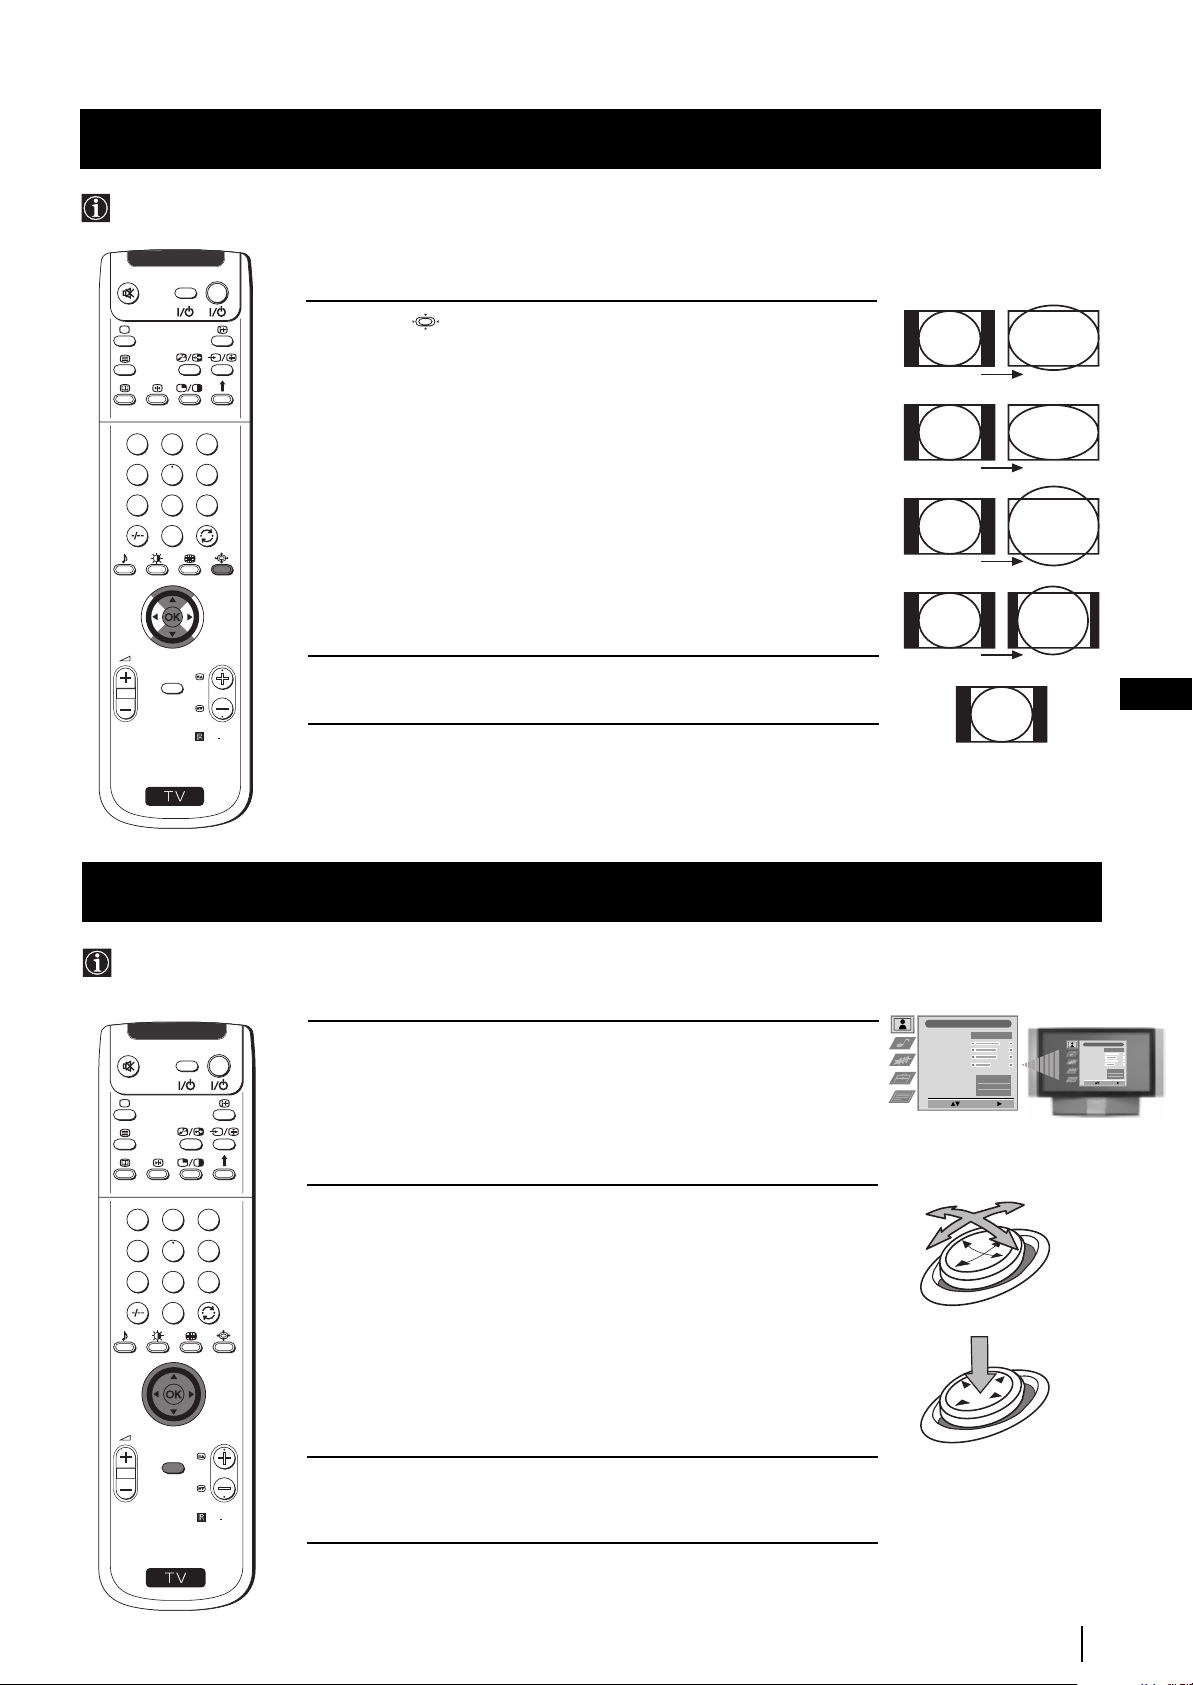
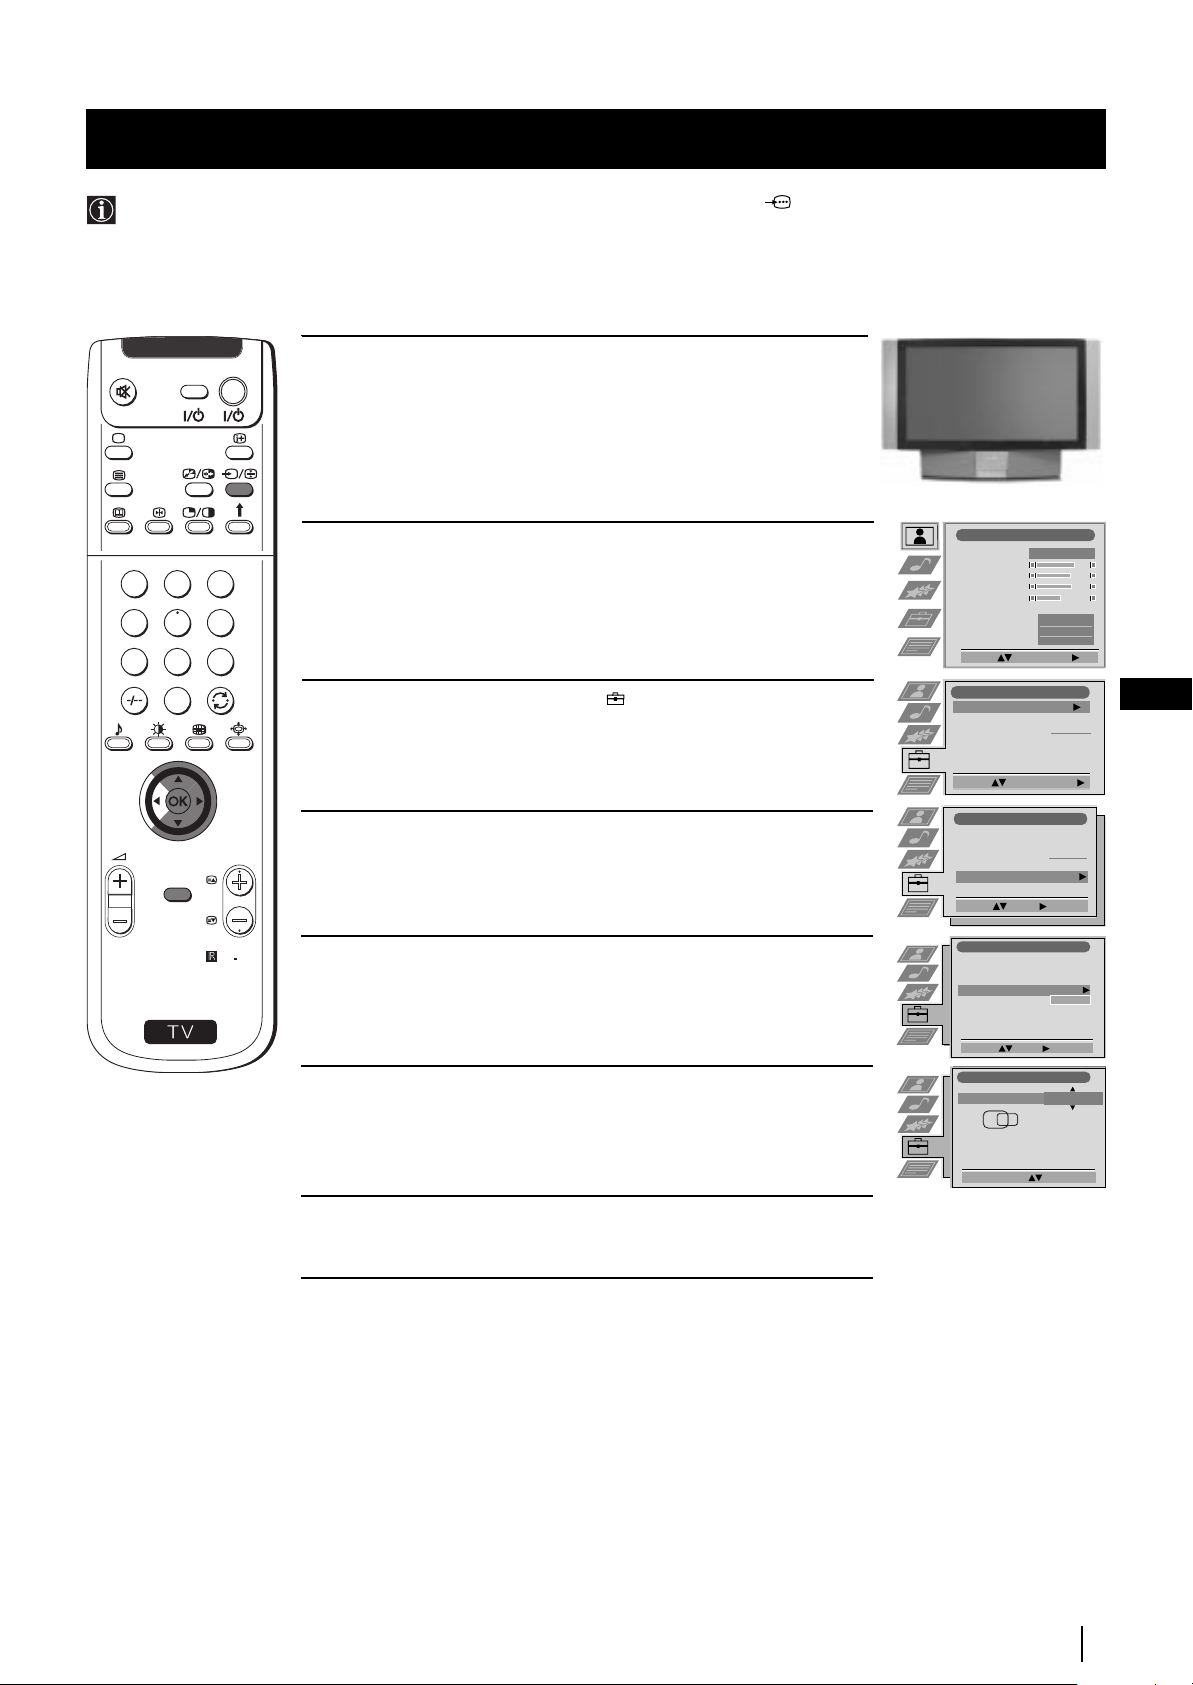
Changing the Screen Format
This feature allows you to change the size of the TV picture.
D
O
I
E
V
TV
1 Press the button on the remote control repeatedly to select one
of the following formats.
Smart: imitation of wide screen effect for 4:3 broadcast.
4:3: conventional 4:3 picture size, full picture information.
1
2
3
4
5
6
7
8
9
0
PROGR
MENU
14:9: compromise between 4:3 and 16:9 picture size.
Zoom: widescreen format for letterbox movies.
Wide: for 16:9 broadcast.
In Smart, Zoom and 14:9 modes parts of the top and bottom of the
screen are cut off. Press $ or 4 to adjust the position of the image on
screen (eg to read subtitles).
2 Press the OK button to confirm your selection.
GB
RM
903
S
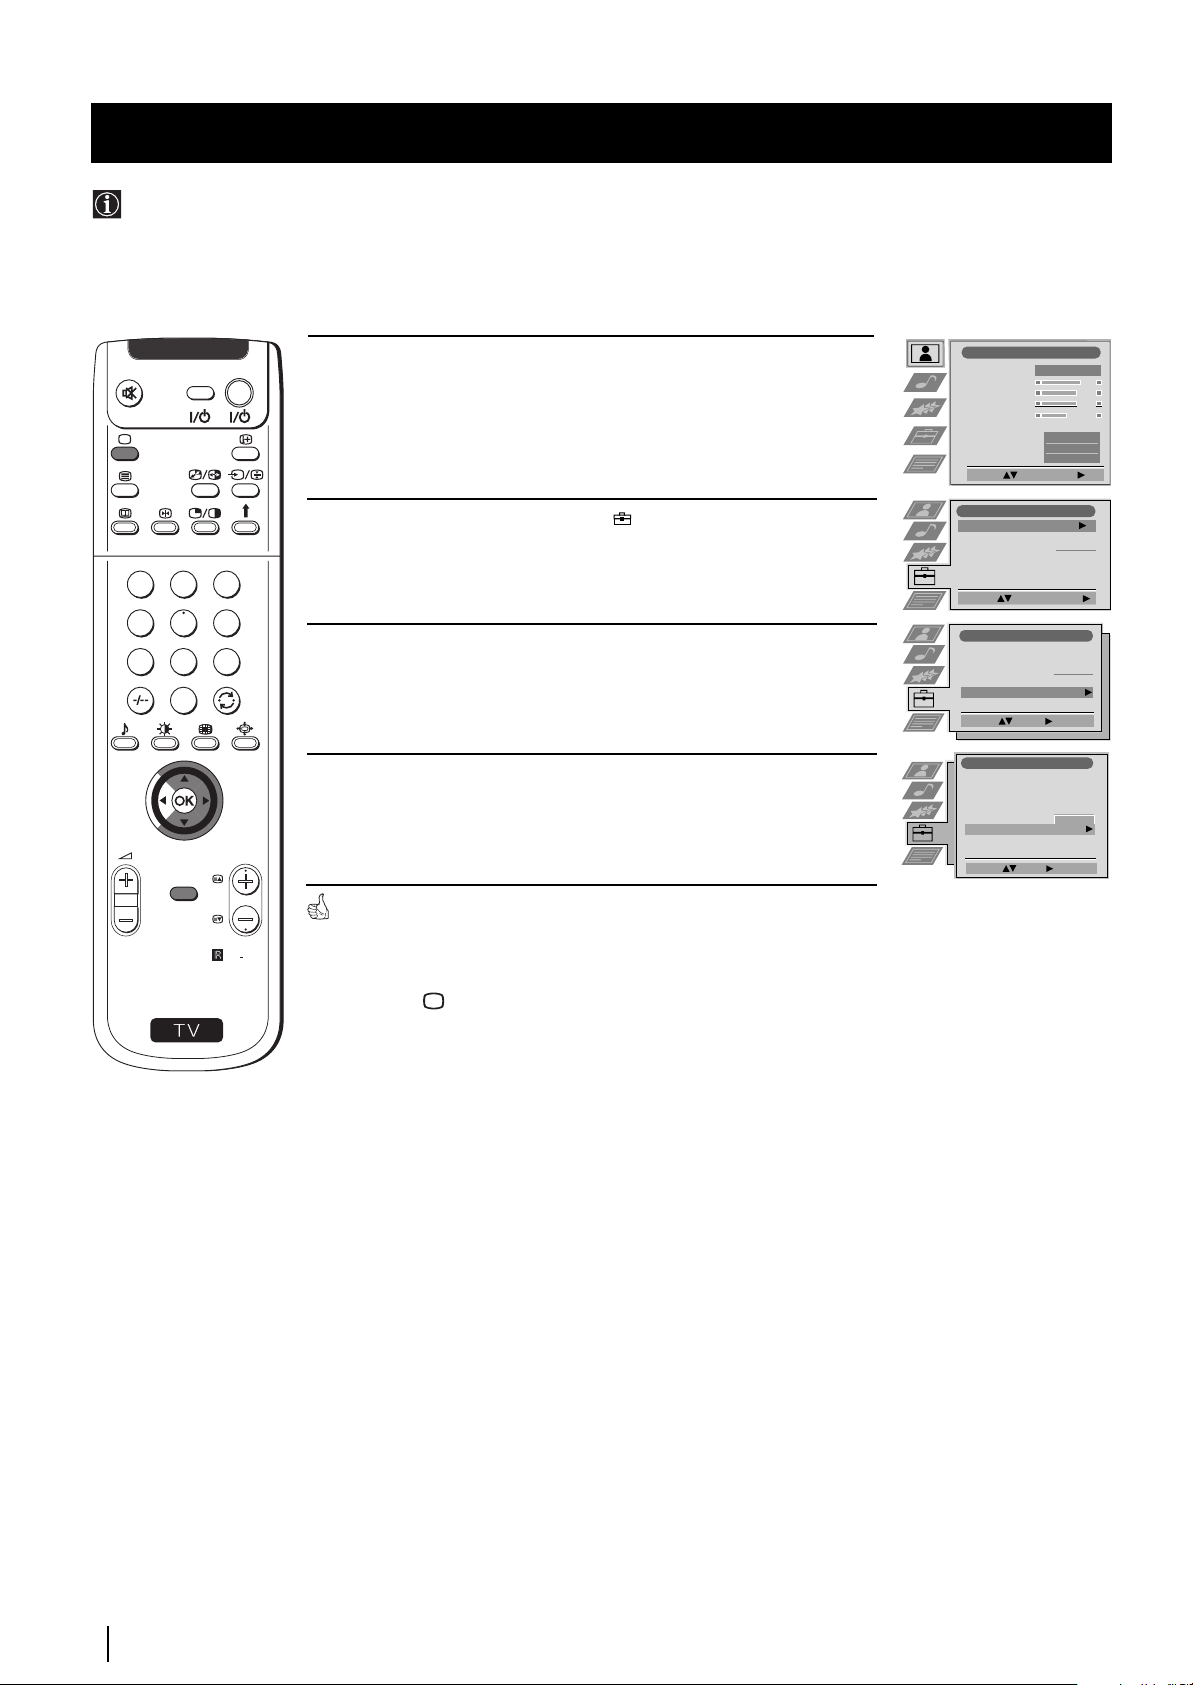
Introducing the Menu system
Your set uses an on-screen menu system to guide you through the operations. Use the following buttons on the
Remote Control to operate the menu system:
1 Press the MENU button to switch the first level menu on.
2 •To higlight the desired menu or option, push the joystick to
4 or $.
•To enter to the selected menu or option, push to z
•To return to the last menu or option, push to Z.
•To alter settings of your selected option, push to $/4/Z or z.
•To confirm and store your selection, press OK.
TV
D
O
I
E
V
1
2
3
4
5
6
7
8
9
0
push to $/4/Z or z
OK
MENU
S
PROGR
RM
press OK
3 Press the MENU button to remove the menu from the screen.
903
First Time Operation - Menu System
9
Page 9

Menu System
On Screen display Menus Guide
Picture Adjustment
Picture Mode
Contrast
Brightness
Colour
Sharpness
Reset
AI
Noise Reduction
Colour Tone
Select: Enter Menu:
Audio Adjustment
Equaliser Mode
Equaliser
Adjustment
Balance
Loudness
Space
Auto Vol. Control
Dual Sound
Volume
Dual Sound
Select: Enter Menu:
Features
Speaker
Auto Format
Format Correction
Sleep Timer
Parental Lock
AV2 Output
Select: Enter Menu:
Set Up
Set Up
Set Up
Auto Tuning
Auto Tuning
Auto Tuning
Programme Sorting
Programme Sorting
Programme Sorting
Select NexTView
Select NexTView
Select NexTView
AV Preset
AV Preset
AV Preset
Manual Set Up
Manual Set Up
Manual Set Up
Select:
Select:
Select:
Personal
Personal
.
0
0
0
Enter Menu:
Enter Menu:
Enter Menu:
On
Off
Normal
Off
Off
Off
Mono
Mono
Normal
- - - - - - -
Picture Adjustment
Picture Mode
Contrast
Brightness
Colour
Sharpness
Reset
AI
Noise Reduction
Colour Tone
Select: Enter:
Audio Adjustment
Equaliser Mode
Equaliser
Adjustment
Balance
Loudness
Space
Auto Vol. Control
Dual Sound
Volume
Dual Sound
Select: Enter:
Features
Main
On
Off
Off
TV
Speaker
Auto Format
Format Correction
Sleep Timer
Parental Lock
AV2 Output
Select: Enter:
Set Up
Auto Tuning
Programme Sorting
Select NexTView
AV Preset
Manual Set Up
Select:
Set Up
Auto Tuning
Programme Sorting
Select NexTView
AV Preset
Manual Set Up
Select:
Personal
Normal
Personal
.
0
0
Mono
Mono
0
Start
- - - - - - -
Start Auto Tuning
- - - - - - -
Enter:
Refer to the section
"Adjusting the Picture”
On
Off
Off
Refer to the section
Off
Off
"Adjusting the Sound”
Main
Refer to the section
Normal
On
"Using the features
Off
Off
menu”
TV
Do you want to start
automatic tuning?
Yes: OK No:
Programme Sorting
PROG CH LABEL
TV 5
C03
1
PRO 7
C05
2
EU-SP
C07
3
SWF
C08
4
RTL
C09
5
SAT
C11
6
MDR
C12
7
DDI
C13
8
DSF
C14
9
RTL 2
C15
10
KAB 1
C16
11
Select Prog: Confirm:
Refer to the section
"Switching on the set
and Automatically
Tuning"
Refer to the section
"Switching on the set
and Automatically
Tuning"
Teletext
Top / Bottom / Full
Text Clear
Reveal
Time Page
Page Overview
Select: Enter:
Refer to the
section "Teletext"
Set Up
Auto Tuning
Programme Sorting
Select NexTView
AV Preset
Manual Set Up
Select:
Enter:
Set Up
Auto Tuning
Programme Sorting
Select NexTView
AV Preset
Manual Set Up
Select:
Enter:
Set Up
Auto Tuning
Programme Sorting
Select NexTView
AV Preset
Manual Set Up
Select:
Enter:
- - - - - - -
- - - - - - -
- - - - - - -
Refer to the
section
“NexTView”
Refer to the
section
"Labelling and
selecting the
screen format
of Input
Sources”
Manual Set Up
Language/Country
Manual Programme Preset
Further Programme Preset
RGB Set Up
Personal ID
Demo
Select: Enter:
Manual Set Up
Language/Country
Manual Programme Preset
Further Programme Preset
RGB Set Up
Personal ID
Demo
Select: Enter:
Manual Set Up
Language/Country
Manual Programme Preset
Further Programme Preset
RGB Set Up
Personal ID
Demo
Select: Enter:
Manual Set Up
Language/Country
Manual Programme Preset
Further Programme Preset
RGB Set Up
Personal ID
Demo
Select: Enter:
Manual Set Up
Language/Country
Manual Programme Preset
Further Programme Preset
RGB Set Up
Personal ID
Demo
Select: Enter:
Manual Set Up
Language/Country
Manual Programme Preset
Further Programme Preset
RGB Set Up
Personal ID
Demo Start
Select: Enter:
- - - - - - -
- - - - - - -
- - - - - - -
- - - - - - -
- - - - - - -
- - - - - - -
Refer to the section
"Switching on the set
and Automatically
Tuning"
Refer to the sections
"Manually Tuning the
TV", "Labelling a
channel" and "Skipping
programme positions"
Refer to the section
"Using the Further
Programme Preset
function"
Refer to the section
"Adjusting the H centre
picture for an RGB
source"
Refer to the section
"Inputting your
personal ID"
Refer to the section
"Using the Demo
Mode"
10
Menu System
Page 10
Menu System
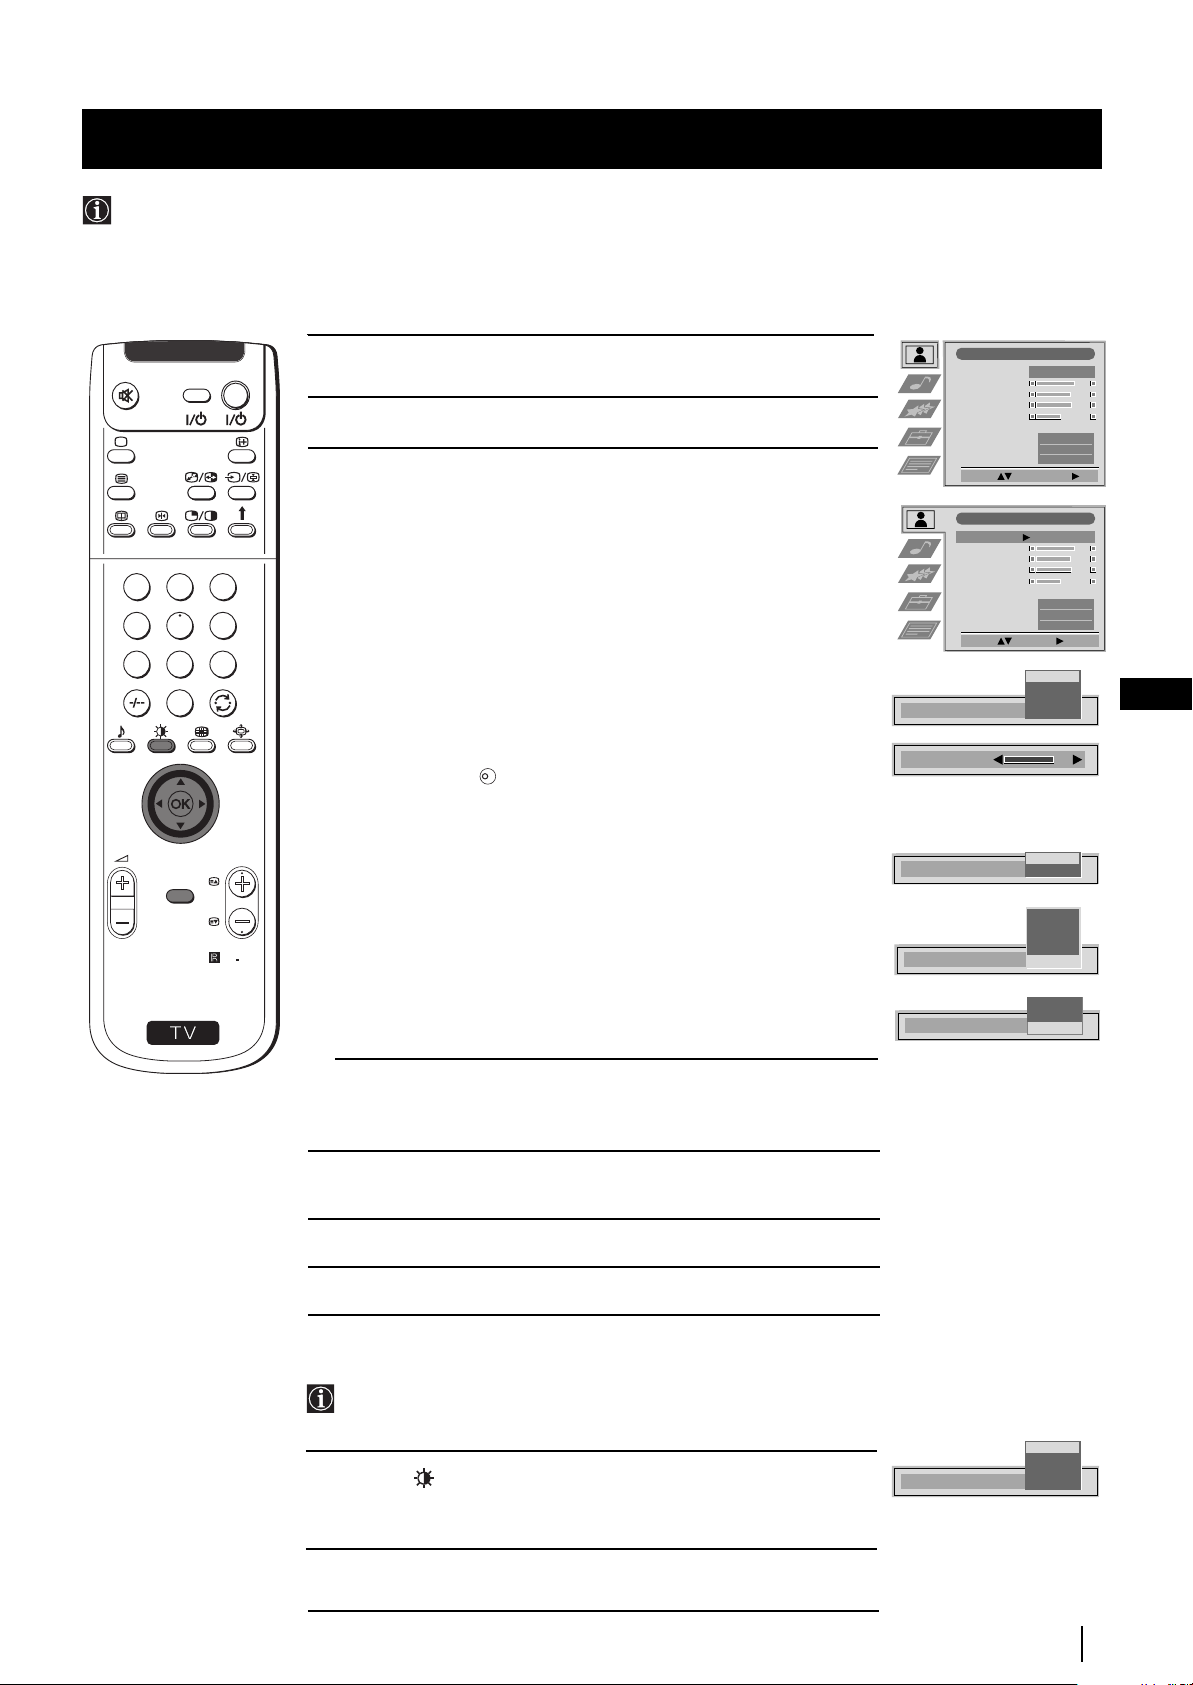
Adjusting the Picture
Although the picture is adjusted at the factory, you can modify it to suit your own taste.
1
4
7
S
MENU
TV
D
O
I
E
V
on the screen.
2 Push the joystick to z to enter the Picture Adjustment menu.
3 Push the joystick to $ or 4 to select the item you wish to change,
1 Press the MENU button on the remote control to display the menu
Picture Adjustment
Picture Mode
Contrast
Brightness
Colour
Sharpness
Reset
AI
Noise Reduction
Colour Tone
Select: Enter Menu:
Personal
Normal
On
Off
then push to z.
Refer to the table below to chose the item and for the effect of
each control:
2
3
5
6
8
9
0
PROGR
RM
903
Picture Mode $ Live (for live broadcast programmes)
Personal (for individual settings)
Movie (for films)
4 Game (for computer games)
Contrast Z Less z More
Brightness
* Z Darker z Brighter
Colour* Z Less z More
Sharpness* Z Softer z Sharper
Hue** Z Reddish z Greenish
Reset Resets picture to the factory preset levels.
K
AI (Artificial 4 Off: Normal
Intelligence) $ On: Automatic optimization of contrast level
according to the TV signal
Noise $ High: High noise reduction.
Reduction Mid: Medium noise reduction.
Low: Low noise reduction.
Auto: Optimum noise reduction automatically
selected.
4 Off: No noise reduction.
Colour Tone $ Warm: Gives a warm tint to the picture.
---Normal: Normal.
4 Cool: Gives a cool tint to the picture.
Picture Adjustment
Picture Mode
Contrast
Brightness
Colour
Sharpness
Reset
AI
Noise Reduction
Colour Tone
Select: Enter:
Picture Mode
Contrast
AI
Noise Reduction
Colour Tone
Personal
Live
Personal
Movie
Game
High
Low
Auto
Warm
Normal
Cool
On
Off
Normal
GB
On
Off
Mid
Off
* Can only be altered if Personal Picture Mode is selected.
** Only avalaible for NTSC colour signal (e.g: USA video tapes).
4 Push the joystick to 4, $, Z or z to alter the selected item, then
press the OK button to store the new adjustment.
5 Repeat steps 3 and 4 to alter the other items.
6 Press the MENU button to exit and return to the normal TV screen.
Changing the Picture Mode Quickly
You can quickly change the Picture Mode without entering the
Picture Control menu screen.
1 Press the button on the remote control repeatedly to directly
access and select your desired picture mode (Live, Personal, Movie,
or Game).
2 Press the OK button to remove the display from the screen.
Picture Mode
Personal
Movie
Game
Menu System
Live
11
Page 11

Menu System
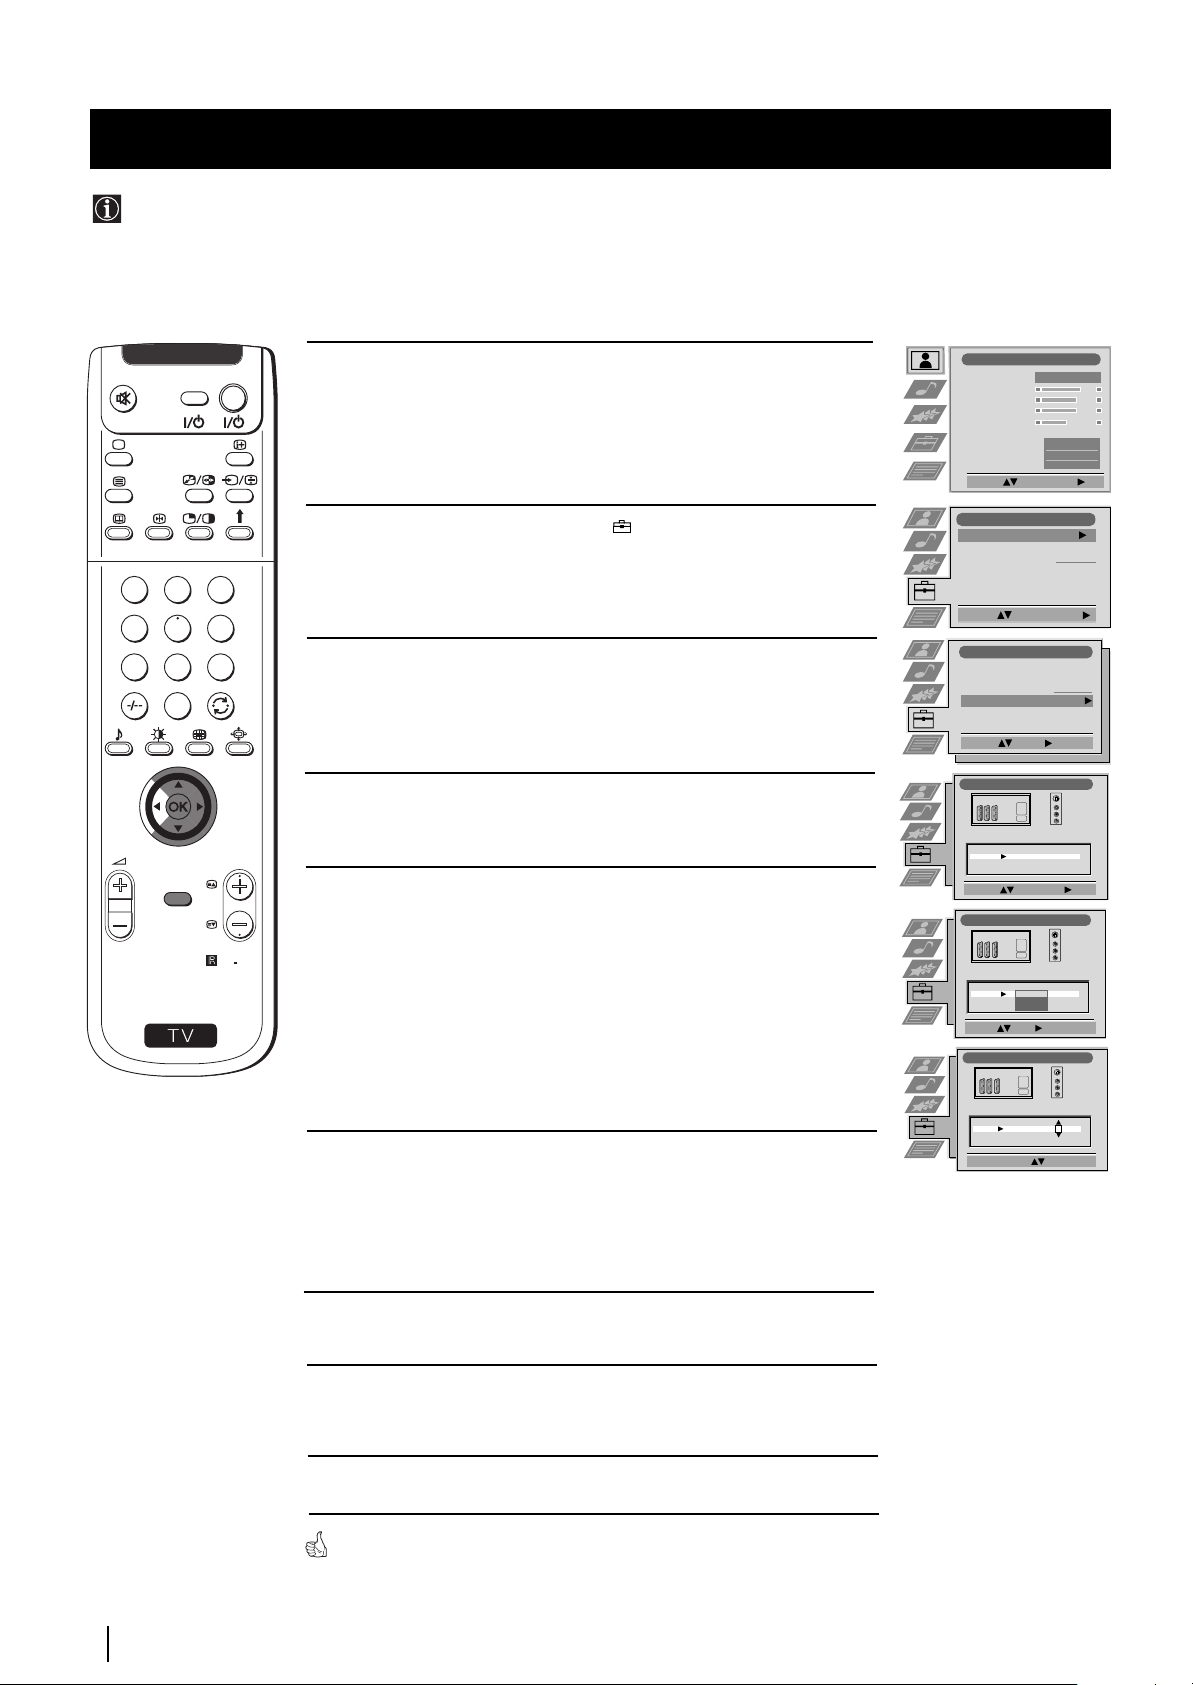
Adjusting the Sound
Although the sound is adjusted at the factory, you can modify it to suit your own taste.
1
4
7
S
MENU
TV
D
O
I
E
V
1 Press the MENU button on the remote control to display the menu
on the screen.
2 Push the joystick to $ to select the symbol, then push to z to
enter to the Audio Adjustment menu.
3 Push the joystick to $ or 4 to select the item you wish to change,
then push to z.
Refer to the table below to chose the item and for the effect of
each control:
2
3
5
6
8
9
0
PROGR
RM
903
Equaliser Mode $ Personal (for individual settings)
Vocal
Jazz
Rock
Pop
4 Flat (fixed setting, cannot be adjusted)
*Equaliser Push to
z or Z to select the frequency band you
Adjustment want to alter and push to $ or 4 to adjust. Finally,
press the OK button to store the new adjustment.
Balance Z Left z Right
Loudness $ Off: normal
4 On: for music broadcasts
Space $ Off: normal
4 On: acoustic sound effect
Auto Vol. $ Off: volume level changes according to the
Control broadcast signal
4 On: volume level of the channels will stay the same
independent of the broadcast signal (e.g. in
case of advertisement)
Dual Sound • For a stereo broadcast:
$ Mono
4 Stereo
• For a bilingual broadcast:
$ Mono (for mono channel if available)
A (for channel 1)
4 B (for channel 2)
Picture Adjustment
Picture Mode
Contrast
Brightness
Colour
Sharpness
Reset
AI
Noise Reduction
Colour Tone
Select: Enter Menu:
Audio Adjustment
Equaliser Mode
Equaliser
Adjustment
Balance
Loudness
Space
Auto Vol. Control
Dual Sound
Volume
Dual Sound
Select: Enter:
Audio Adjustment
Equaliser Mode
Equaliser
Adjustment
Balance
Loudness
Space
Auto Vol. Control
Dual Sound
Volume
Dual Sound
Select Mode: Confirm: OK
Equaliser Adjustment
(Personal)
+
0
–
120 500 1,5K 5 K 10 K
Sel: Adjust: Confirm:OK
Balance
Loudness
Space
Auto V ol. Control
Dual Sound
0
0
0
0
Personal
Personal
.
0
Personal
Personal
.
0
.
Mono
Normal
Mono
Mono
Vocal
Jazz
Rock
Mono
Mono
Off
On
Off
On
On
Off
Off
Off
Off
Pop
Flat
Off
Off
Off
Off
On
A
B
Headphones:
l
Volume Z Less z More
l
Dual Sound • For a stereo broadcast:
$ Mono
Volume
Dual Sound
B
A
4 Stereo
• For a bilingual broadcast:
$ Mono (for mono channel if available)
A (for channel 1)
B (for channel 2)
4 PAP (only when PAP is switched on)
12
* Can only be permanently stored if Personal Equaliser Mode is selected,
the other modes (Vocal, Jazz, Rock or Pop) store until the next mode
change.
continued...
Menu System
Page 12

Menu System
D
O
TV
I
E
V
4 Push the joystick to $, 4, Z or z to alter the selected item, then
press the OK button to store the new adjustment.
5 Repeat steps 3 and 4 to alter the other items.
6 Press the MENU button to exit and return to the normal TV screen.
1
2
3
4
5
6
7
8
9
0
Changing Sound Mode Quickly
GB
You can quickly change Sound mode without entering the Sound
Control menu screen.
Personal
Vocal
Jazz
Rock
Pop
Flat
MENU
PROGR
1 Press the button on the remote control repeatedly to directly
access and select your desired sound mode (Personal, Vocal, Jazz,
Rock, Pop or Flat).
Equaliser Mode
2 Press the OK button to remove the display from the screen.
RM
903
S
Menu System
13
Page 13
Menu System
Using the Features Menu
Using the Features menu you can:
a) Select if you want to listen to the sound from the set directly or through an external amplifier.
b) Adjust automatically the size of picture.
c) Select a time period after which the set switches itself into standby mode.
d)
Lock the buttons on the set. In this way, the set only works by using the remote control buttons.
e) Select the source to be output from the Scart connector :2/q2 (SMARTLINK). In this way you can record from this scart
connector while watching another source. If your VCR supports Smartlink, this procedure is not necessary.
D
O
I
E
TV
V
1 Press the MENU button on the remote control to display the menu
on the screen.
2 Push the joystick to $ to select the symbol, then push to z to
enter to the Features menu.
Picture Adjustment
Picture Mode
Contrast
Brightness
Colour
Sharpness
Reset
AI
Noise Reduction
Colour Tone
Select: Enter Menu:
Personal
Normal
On
Off
3 Push the joystick to $ or 4 to select the desired menu item, then
push to z (see the table below for the effect of each menu item).
4 Push to $ or 4 to select the desired setting and press the OK button
1
2
3
4
5
6
7
8
9
0
PROGR
MENU
RM
903
to store.
5 Press the MENU button to exit and return to the normal TV screen.
Features Effect / Operation
Speaker $ Main (sound from the set)
Auto Format $ Off: Size of picture is not automatically adjusted.
(only for aerial Normal: Size of picture is automatically adjusted
signal) according to the broadcaster information.
to eliminate any dark areas on the TV picture (as
shown on the section “Changing the Screen
Format)”.
Format Correction
(only if Auto Format
is set to “Normal”
or “Full”)
4 Centre In (sound from external amplifier)
4 Full: The set automatically adjusts the picture size
$ Off: 4:3/14:9 is selected.
4 On: Smart mode is selected automatically for
4:3/14:9 broadcast.
Features
Speaker
Auto Format
Format Correction
Sleep Timer
Parental Lock
AV2 Output
Select: Enter:
Speaker
Auto Format
Format Correction
Main
Centre In
Normal
Main
Normal
Off
Full
Off
On
On
Off
Off
TV
S
Sleep Timer
4 Off
10 min.
20 min.
...
$ 90 min.
• One minute before the set switches into standby
mode, the time remaining is displayed on the
screen automatically.
• When watching the TV, press the button on
the remote control to display the time remaining.
• To return to normal operation from standby
mode, press the TV button on the remote
control.
Parental lock $ Off (Normal mode)
4 On (The set can only be switched on using the
remote control, the buttons on the TV do not
work)
AV2 Output $ TV (audio/video signal from the aerial)
(audio/video signal from the Scart
AV1
connector :1/ ).
AV2 (audio/video signal from the Scart
connector :2/q2 (SMARTLINK).
AV3 (audio/video signal from the Scart
connector :3/q3).
4 AV4 (audio/video signal from the connector … 4
placed in the front of the set).
If you have connected a decoder, please remember
to change back the AV2 Output to "TV" for correct
unscrambling.
Sleep Timer
Parental Lock
AV2 Output
10 min
Off
On
TV
AV1
AV2
AV3
AV4
14
Menu System
Page 14
Menu System
Manually Tuning the TV
Use this function to preset channels (TV Broadcast) or a video input source one by one to the programme order of your choice.
1
4
7
S
MENU
D
O
I
E
V
TV
menu on the screen.
2 Push the joystick to $ to select the symbol, then push to z to
1 Press the MENU button on the remote control to display the
enter the Set Up menu.
3 Push the joystick to $ or 4 to select Manual Set Up, then push
to z.
2
3
5
6
4 Push the joystick to $ or 4 to select Manual Programme Preset,
then push to z.
5 Push the joystick to $ or 4 to select on which programme number
8
9
0
you want to preset a channel (for VCR select programme number
"0"), then push twice to z. The column SYS is highlighted.
6 Push the joystick to $ or 4 to select the system for TV Broadcast
and VCR channel (B/G for western european countries, L for
France, I for Great Britain or D/K for eastern european countries)
or a external input source (EXT), then push to z. The column CH
PROGR
is highlighted.
7 Push the joystick to $ or 4 to select the channel tuning, "C" for
terrestrial channels (for TV Broadcast or VCR channel), "S" for
RM
903
cable channels or F for, direct frequency input then push to z.
8 a) If you know the channel number of the TV Broadcast, the VCR
test signal channel or the frequency, press the number buttons
to enter directly the channel number. Then press the OK button
to store.
b) If you do not know the channel number, push the joystyck to $
to select SEARCH and the set starts automatically to search for
the next available TV Broadcast channel or the channel of the
VCR signal. Then press the OK button to store or press $ to
continue searching the desired channel.
c) For external input sources (EXT), push to $ to select the input
source where you have connected your equipment (AV1, AV2,
AV3 or AV4). Then press the OK button to store.
Picture Adjustment
Picture Mode
Contrast
Brightness
Colour
Sharpness
Reset
AI
Noise Reduction
Colour Tone
Select: Enter Menu:
Set Up
Auto T uning
Programme Sorting
Select NexTView
AV Preset
Manual Set Up
Select:
Set Up
Auto T uning
Programme Sorting
Select NexTView
AV Preset
Manual Set Up
Select:
Manual Set Up
Language/Country
Manual Programme Preset
Further Programme Preset
RGB Set Up
Personal ID
Demo
Select: Enter:
Manual Programme Preset
PROG CHSYSSKIP LABEL
1
2
3
4
5
6
7
8
9
10
11
Select: Enter:
PROG CHSYS
SKIP LABEL
Off
1
PROG SYS
SKIP LABEL
Off
1 B/G
PROG SYS
SKIP LABEL
Off
1 B/G
PROG CHSYS
SKIP LABEL
Off
3 EXT
Start Auto Tuning
Enter:
B/G
Off
B/G
Off
Off
Off
Off
Off
Off
Off
Off
Off
Off
B/G
L
I
D/K
EXT
C
S
F
CH
CH
C
AV1
AV2
AV3
AV4
Personal
Start
- - - - - - -
- - - - - - -
- - - - - - -
C09
C10
- -
03
SEARCH
Normal
ARD
BBC
On
Off
GB
9 Repeat steps 4 to 8 a), b) or c) if you wish to store more channels.
10 Press the MENU button to exit and return to the normal TV screen.
The set is now ready for use.
Menu System
15
Page 15
Menu System
Labelling a channel
Names for channels (TV Broadcasts) are usually taken automatically from Teletext if available. You can however name a channel or
an input video source using up to five characters (letters or numbers). Using this function, you can easily identify which channel
(TV Broadcasts) or video source you are watching.
1
4
7
S
MENU
TV
D
O
I
E
V
1Press the MENU button on the remote control to display the
menu on the screen.
2Push the joystick to $ to select the symbol, then push to z to
enter the Set Up menu.
2
3
5
6
8
9
3Push the joystick to $ or 4 to select Manual Set Up, then push
to z.
0
4Push the joystick to $ or 4 to select Manual Programme Preset,
then push to z.
PROGR
5Push the joystick to $ or 4 to select the programme number with
the channel you wish to name.
RM
903
6Push the joystick to z repeatedly until the first element of the
LABEL column is highlighted.
Picture Adjustment
Picture Mode
Contrast
Brightness
Colour
Sharpness
Reset
AI
Noise Reduction
Colour Tone
Select: Enter Menu:
Set Up
Auto T uning
Programme Sorting
Select NexTView
AV Preset
Manual Set Up
Select:
Set Up
Auto T uning
Programme Sorting
Select NexTView
AV Preset
Manual Set Up
Select:
Manual Set Up
Language/Country
Manual Programme Preset
Further Programme Preset
RGB Set Up
Personal ID
Demo
Select: Enter:
Manual Programme Preset
PROG CHSYSSKIP LABEL
1
Off
2
Off
3
Off
4
Off
5
Off
6
Off
7
Off
8
Off
9
Off
10
Off
11
Off
Select: Enter:
PROG SYS
SKIP LABEL
Off
1 B/G
Personal
Start
- - - - - - -
Start Auto Tuning
- - - - - - -
Enter:
- - - - - - -
C09
ARD
B/G
C10
BBC
B/G
CH
C 03
A
Normal
On
Off
16
7Push the joystick to $ or 4 to select a letter, number, "+" or a
blank, then push to z to confirm this character. Select the other
four characters in the same way.
8After selecting all the characters, press the OK button.
9Repeat steps 5 to 8 if you wish to label other channels.
10Press the MENU button to exit and return to the normal TV
screen.
When you select a named channel, the name appears for a few seconds
on the screen.
Menu System
Page 16

Menu System
Picture Adjustment
Select: Enter Menu:
Picture Mode
Contrast
Brightness
Colour
Sharpness
Reset
AI
Noise Reduction
Colour Tone
Personal
On
Off
Normal
Set Up
Auto T uning
Programme Sorting
Select NexTView
AV Preset
Manual Set Up
Select:
Start Auto Tuning
Start
- - - - - - -
Enter:
Set Up
Auto T uning
Programme Sorting
Select NexTView
AV Preset
Manual Set Up
Select:
- - - - - - -
Manual Set Up
Select: Enter:
Language/Country
Manual Programme Preset
Further Programme Preset
RGB Set Up
Personal ID
Demo
- - - - - - -
PROG SYSSKIP LABEL
1 B/G
CH
C 09
ARD
Off
On
Skipping Programme positions
You can programme this set to skip any unwanted programme numbers when they are selected with the PROGR +/buttons. To cancel this function afterwards, proceed in the same way as described below by selecting Off instead of On in step 6.
1
4
7
S
V
2
5
8
0
MENU
I
D
TV
O
E
1 Press the MENU button on the remote control to display the menu
on the screen.
2 Push the joystick to $ to select the symbol, then push to z to
enter the Set Up menu.
3
6
9
3 Push the joystick to $ or 4 to select Manual Set Up, then push
to z.
GB
4 Push the joystick to $ or 4 to select Manual Programme Preset,
then push to z.
PROGR
Manual Programme Preset
5 Push the joystick to $ or 4 to select the programme position you
RM
903
want to skip, then push to z to enter the SKIP column.
PROG CHSYSSKIP LABEL
1
2
3
4
5
6
7
8
9
10
11
Select: Enter:
C09
ARD
B/G
Off
C10
BBC
B/G
Off
Off
Off
Off
Off
Off
Off
Off
Off
Off
6 Push the joystick to $ to select On, then press the OK button to
store.
7 Repeat steps 5 and 6 to skip other unused programme positions.
8 Press the MENU button to exit and return to the normal TV screen.
When changing channels (TV Broadcasts) with the PROGR +/- buttons,
the skipped programme positions do not appear. You can, however, still
select them using the number buttons.
Menu System
17
Page 17
Menu System
Using the "Further Programme Preset" function
With this feature you can:
a) Individually attenuate the strength of a channel signal in case of a strong local aerial signal (striped picture).
b) Individually adjust the volume level of each channel.
c) Even normally the automatic fine tuning (AFT) is operating, however you can manually fine-tune the TV to obtain a better picture
reception if the picture is distorted.
d) Preset the AV output for the programme positions of channels with scrambled signals (eg from a pay TV decoder). In this way
a connected VCR records the unscrambled signal.
1
4
7
S
MENU
TV
D
O
I
E
V
1 Press the MENU button on the remote control to display the menu
on the screen.
2 Push the joystick to $ to select the symbol, then push to z to
enter the Set Up menu.
3 Push the joystick to $ or 4 to select Manual Set Up then push to z
to enter.
2
3
5
6
8
9
0
4 Push the joystick to $ or 4 to select Further Programme Preset,
then push to z.
5 Push the joystick to $ or 4 to select the relevant programme
number, then push to z repeatedly to select:
Picture Adjustment
Picture Mode
Contrast
Brightness
Colour
Sharpness
Reset
AI
Noise Reduction
Colour Tone
Select: Enter Menu:
Set Up
Auto T uning
Programme Sorting
Select NexTView
AV Preset
Manual Set Up
Select:
Start Auto Tuning
Set Up
Auto T uning
Programme Sorting
Select NexTView
AV Preset
Manual Set Up
Enter:
Select:
Personal
Start
- - - - - - -
- - - - - - -
Normal
On
Off
a) ATT (RF attenuator)
Manual Set Up
Language/Country
Manual Programme Preset
Further Programme Preset
RGB Set Up
Personal ID
Demo
Select: Enter:
Further Programme Preset
PROG AFTVO LATT DECODER
1
2
3
4
5
6
7
8
9
10
11
Select: Enter:
PROG AFTVOLATT DECODER
Off
1
On
PROG AFTVOLATT DECODER
1On
- - - - - - -
Off
0
Off
On
Off
0
Off
On
Off
0
Off
On
- 5
PROGR
RM
903
b) VOL (Volume Offset)
c) AFT (Automatic Fine Tuning) or
d) DECODER
The selected item changes colour.
6 a) ATT
Push the joystick to $ to select On, then press the OK button.
Repeat steps 5 and 6 a) to attenuate other channels.
b) VOL
Push the joystick to $ or 4 to adjust the volume level of the channel
over a range of -7 to +7, then press the OK button. Repeat steps 5
and 6b) to adjust the volume level of the other channels.
c) AFT
Push the joystick to $ or 4 to fine tune the channel frequency over
a range of -15 to +15, then press the OK button. Repeat steps 5 and
6c) if you wish to fine tune other channels.
d) DECODER
Push the joystick to $ or 4 to select AV1 (for a decoder connected
to the Scart :1/ ) or AV2 (for a decoder connected to the Scart
:2/q 2 (SMARTLINK)), then press the OK button.
Repeat steps 5 and 6d) to select the AV1 or AV2 output for other
PROG AFTVOLATT DECODER
1 On -5
PROG AFTVOLATT DECODER
1 On -5 2
2
Off
AV1
AV2
programme positions.
18
The picture from the decoder connected to the Scart connector
:1/ or :2/q 2 (SMARTLINK) on the back of the
set will appear on this programme number.
7 Press the MENU button to exit and return to the normal TV screen.
The set is now ready for use.
Menu System
Page 18
Menu System
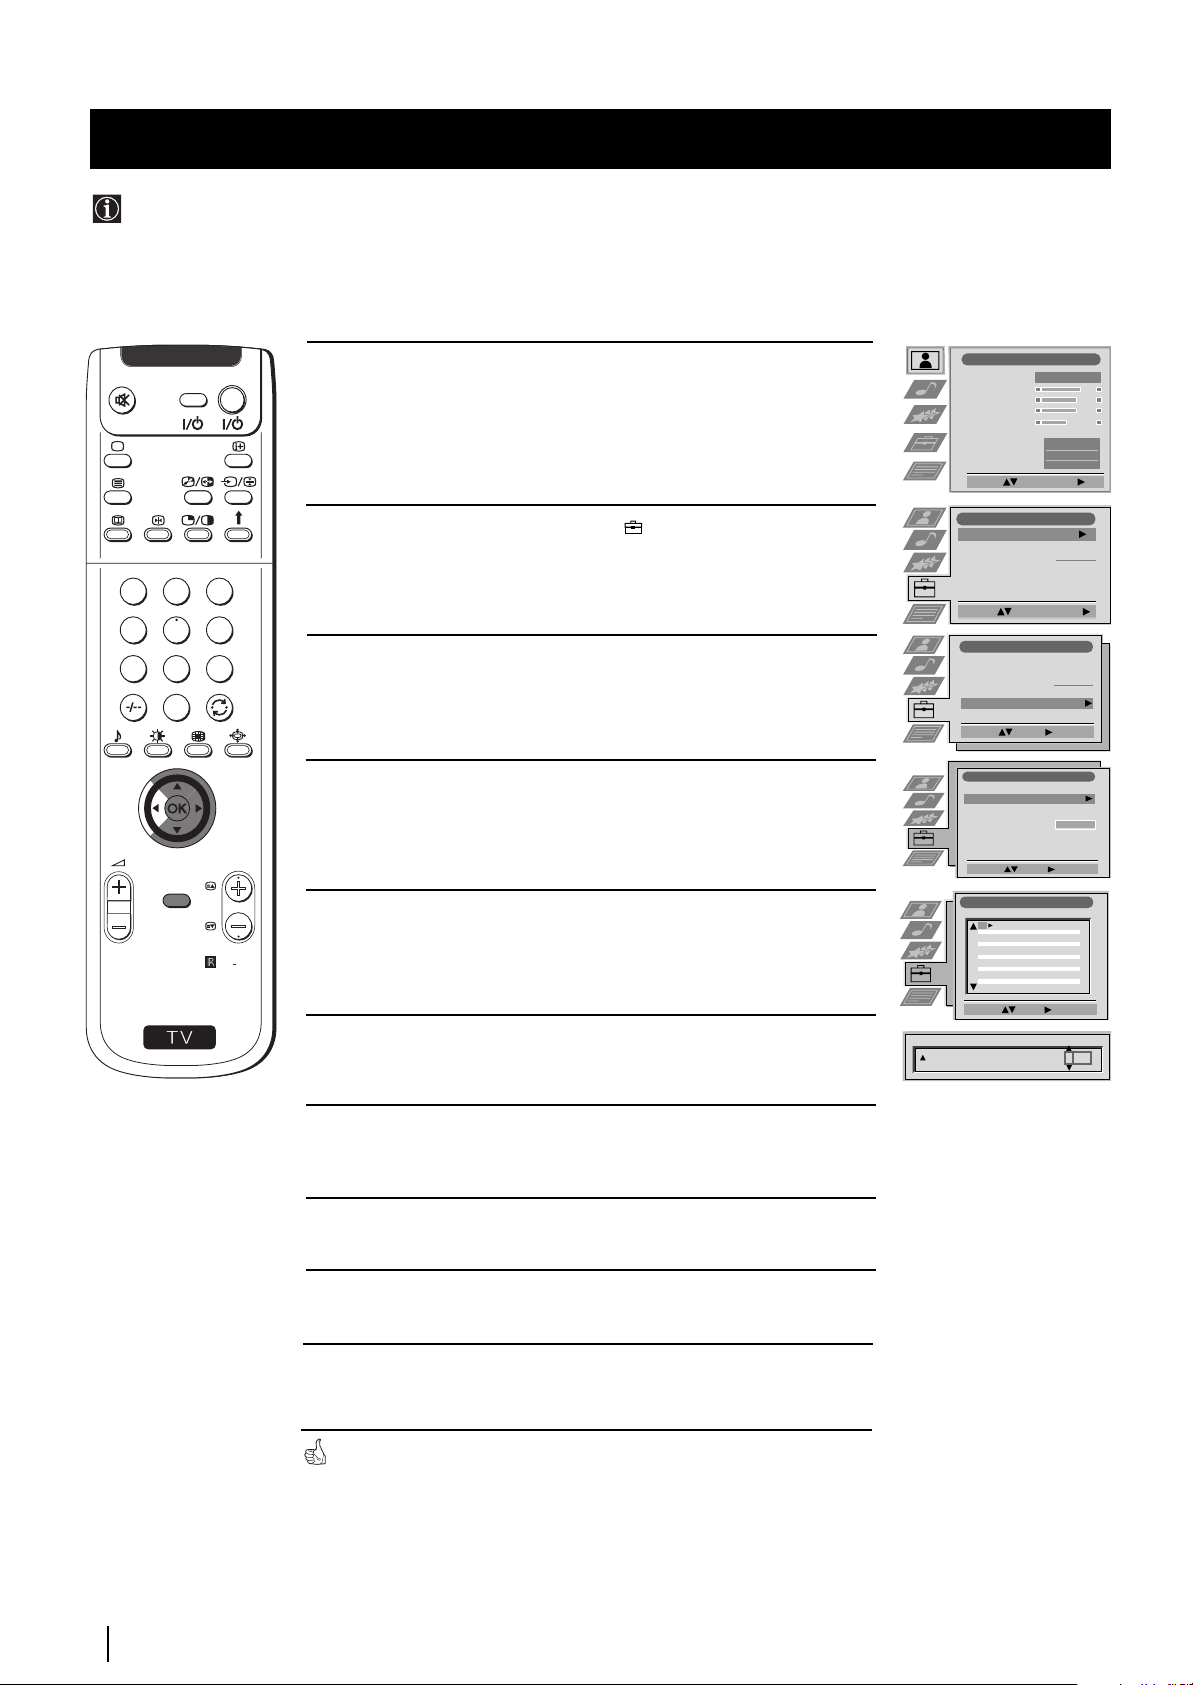
Inputting Your Personal ID
You can programme this set with a personal code, using up to eleven characters (letters and numbers). Then using
this fuction it will be possible to identify your set if it was ever stolen.
This code can only be input once!
Make sure to write it down in this instruction manual.
1
4
7
S
MENU
TV
D
O
I
E
V
1 Press the MENU button on the remote control to display the menu
on the screen.
2 Push the joystick to $ to select the symbol, then push to z to
enter the Set Up menu.
2
3
5
6
8
9
3 Push the joystick to $ or 4 to select Manual Set Up, then push to z.
0
4 Push to $ or 4 to select Personal ID, then push to z.
PROGR
5 Push the joystick to $ or 4 to select a letter, number, + or a blank;
then push to z to confirm this character. Select the other ten
RM
903
characters in the same way.
6 After selecting all the characters, press the OK button. A new menu
appears automatically on the screen asking you to be sure that you
want to save this ID.
Picture Adjustment
Picture Mode
Contrast
Brightness
Colour
Sharpness
Reset
AI
Noise Reduction
Colour Tone
Select: Enter Menu:
Set Up
Auto T uning
Programme Sorting
Select NexTView
AV Preset
Manual Set Up
Select:
Start Auto Tuning
Set Up
Auto T uning
Programme Sorting
Select NexTView
AV Preset
Manual Set Up
Enter:
Select:
Manual Set Up
Language/Country
Manual Programme Preset
Further Programme Preset
RGB Set Up
Personal ID
Demo
Select: Enter:
Manual Set Up
Language/Country
Manual Programme Preset
Further Programme Preset
RGB Set Up
Personal ID
Demo
Select A-Z, 0-9: Store: OK
Are you sure?
Save: OK Cancel:
Personal
Normal
Start
- - - - - - -
- - - - - - -
- - - - - - -
A----------
On
Off
GB
7 a) If you do not wish to store this ID, push the joystick to Z and
repeat steps 4 to 6 to enter a new ID.
b) If you wish to store this ID, press the OK button.
Remember that this code can only be input once.
8 Press the MENU button to return to the normal TV screen.
When you enter the Manual Set Up menu, in the "Personal ID" option the
code you entered above will be displayed. You will not be able to select and
change this option.
Menu System
19
Page 19
Menu System
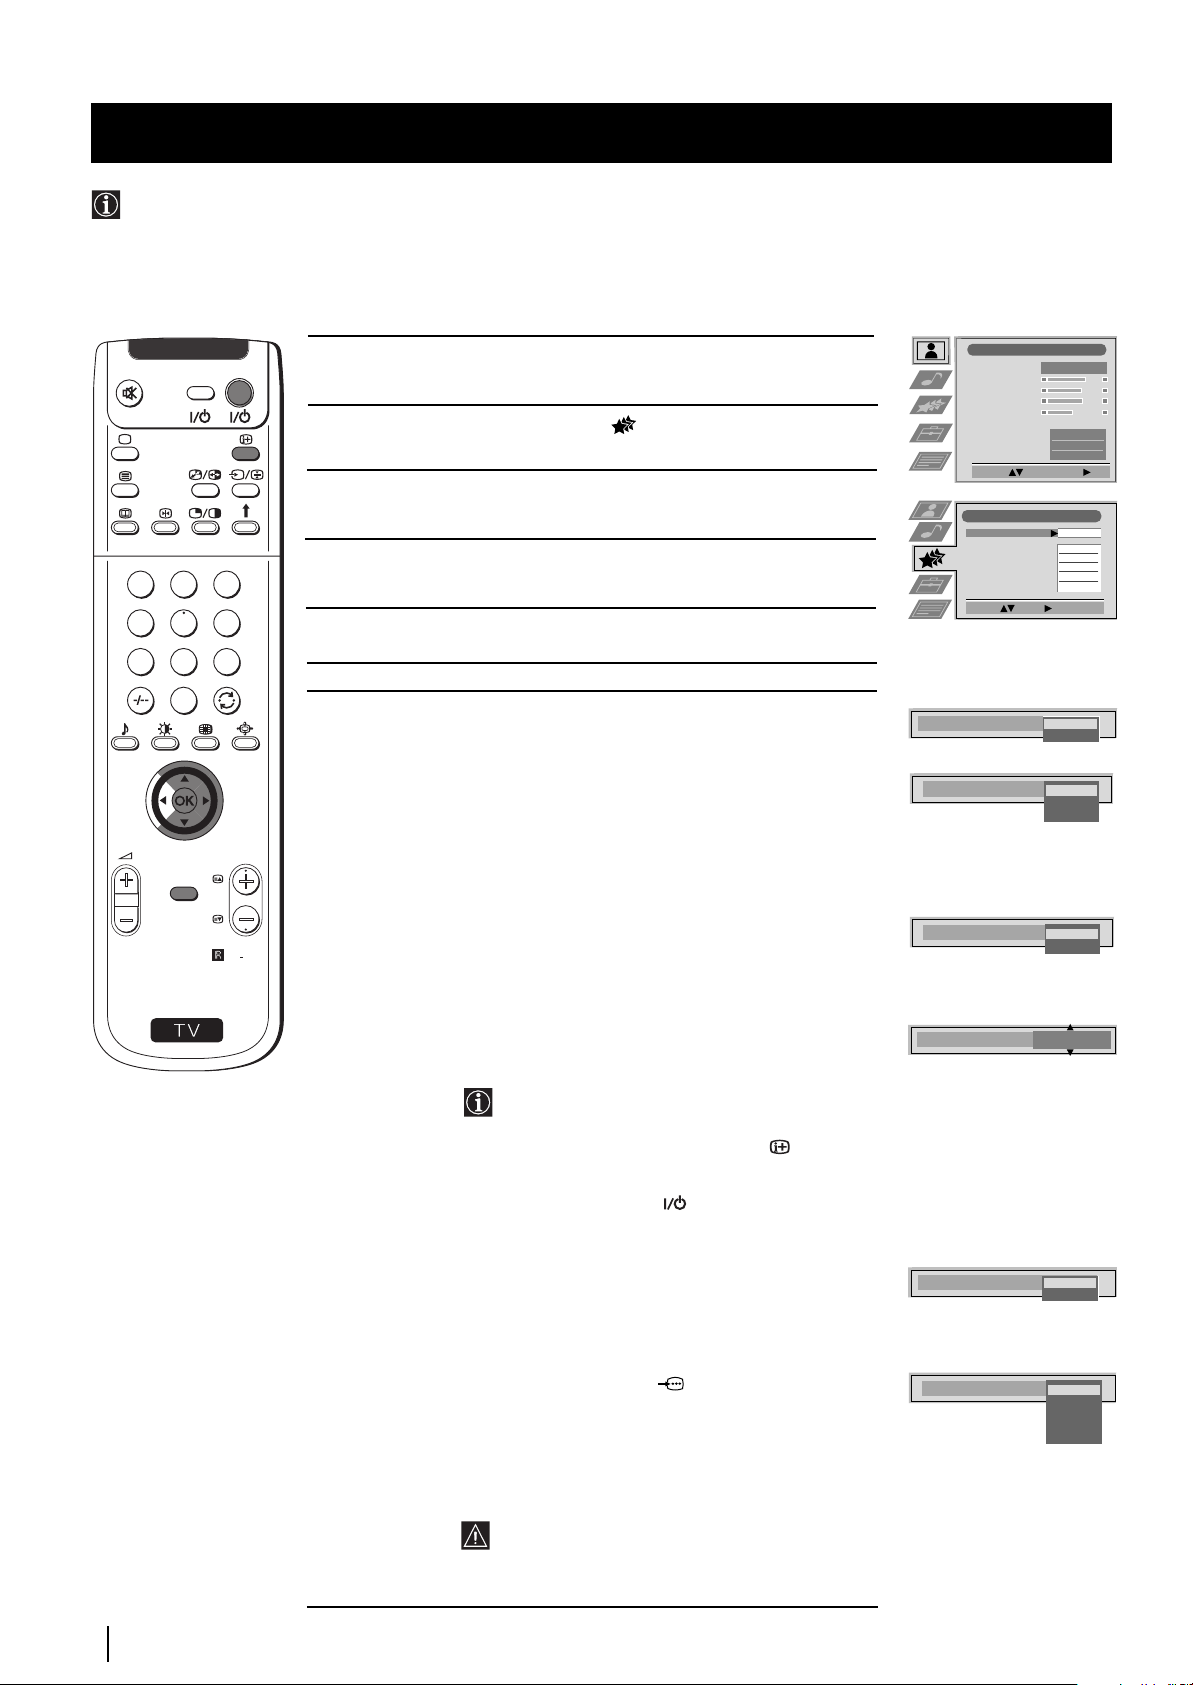
Using the Demo Mode
This function provides an overview of some of the features available on this set.
1
4
7
S
MENU
D
TV
O
I
E
V
1 Press the MENU button on the remote control to display the menu
on the screen.
2 Push the joystick to $ to select the symbol, then push to z to
enter the Set Up menu.
2
3
5
6
3 Push the joystick to $ or 4 to select Manual Set Up, then push to z.
8
9
0
4 Push to $ or 4 to select Demo, then push to z to enter and start
the demonstration.
PROGR
Picture Adjustment
Picture Mode
Contrast
Brightness
Colour
Sharpness
Reset
AI
Noise Reduction
Colour Tone
Select: Enter Menu:
Set Up
Auto T uning
Programme Sorting
Select NexTView
AV Preset
Manual Set Up
Select:
Set Up
Auto T uning
Programme Sorting
Select NexTView
AV Preset
Manual Set Up
Select:
Manual Set Up
Language/Country
Manual Programme Preset
Further Programme Preset
RGB Set Up
Personal ID
Demo Start
Select: Enter:
Start
- - - - - - -
Start Auto Tuning
- - - - - - -
Enter:
- - - - - - -
Personal
Normal
On
Off
The set starts the demonstration and shows most of the
available picture functions.
RM
903
Note:
Press the button on the remote control to stop the Demo mode
and return to the normal TV screen.
20
Menu System
Page 20
Menu System
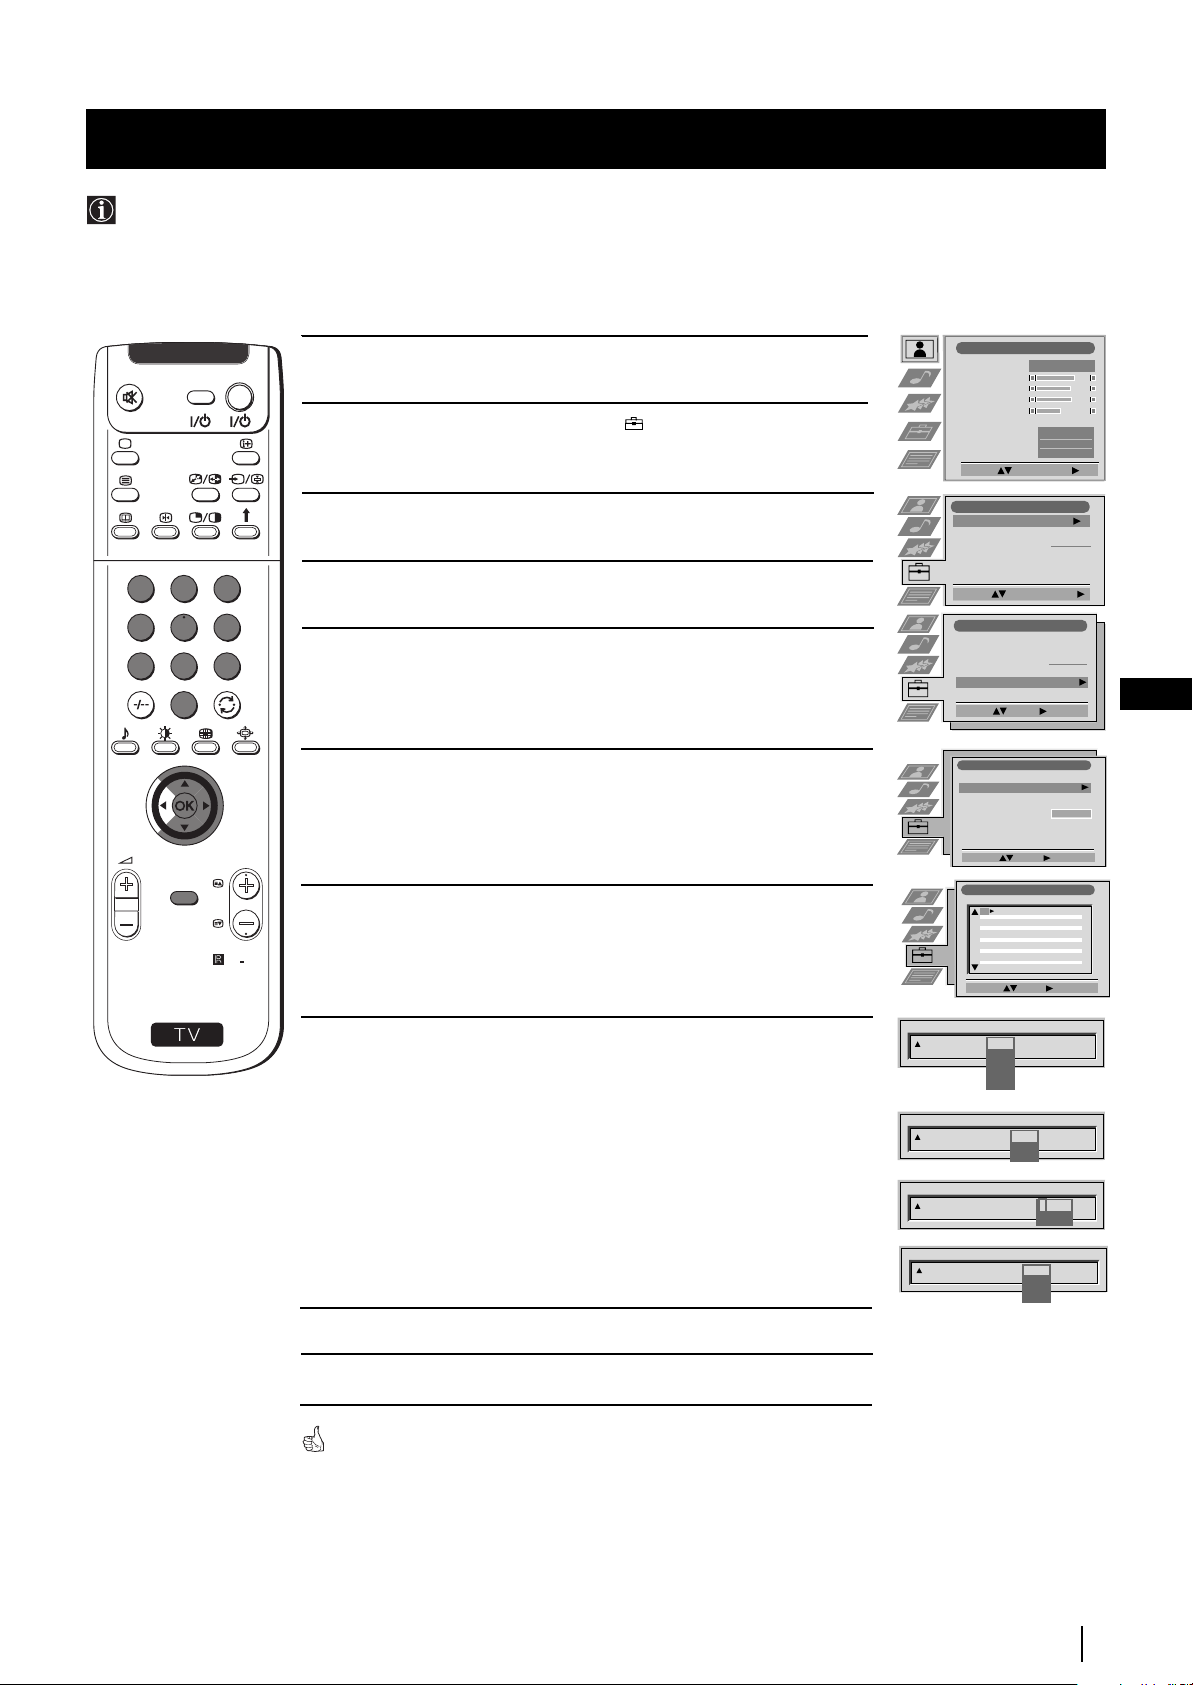
Adjusting the H Centre picture for an RGB source
When connecting an RGB source, such as a DVD player, to the Scart connector :1/ you may need to readjust the H Centre
of the picture.
TV
D
O
I
E
V
1 Press the … button repeatedly on the remote control until the
symbol …1 appears on the screen.
2 Push the MENU button to display the menu on the screen.
1
2
3
4
5
6
7
8
9
0
3 Push the joystick to $ to select the symbol, then push to z to
enter the Set Up menu.
4 Push to $ or 4 to select Manual Set Up then push to z to enter.
PROGR
MENU
… 1
Picture Mode
Contrast
Brightness
Colour
Sharpness
Reset
AI
Noise Reduction
Colour Tone
Set Up
Auto T uning
Programme Sorting
Select NexTView
AV Preset
Manual Set Up
Select:
Set Up
Auto T uning
Programme Sorting
Select NexTView
AV Preset
Manual Set Up
Select:
Picture Adjustment
Select: Enter Menu:
Start
- - - - - - -
Start Auto Tuning
- - - - - - -
Enter:
Personal
Normal
On
Off
GB
S
RM
903
5 Push the joystick to $ or 4 to select RGB Set Up then push to z.
6 Push the joystick to z to enter H Centre, then push to $ or 4 to
Manual Set Up
Language/Country
Manual Programme Preset
Further Programme Preset
RGB Set Up
Personal ID
Demo
Select: Enter:
RGB Set Up
H Centre
- - - - - - -
O
adjust the centre of the picture over a range of -10 to +10. Press
the OK button to store.
Adjust Position: Confirm: OK
7 Press the MENU button to exit and return to the normal TV screen.
RGB Set Up
Menu System
21
Page 21
Menu System
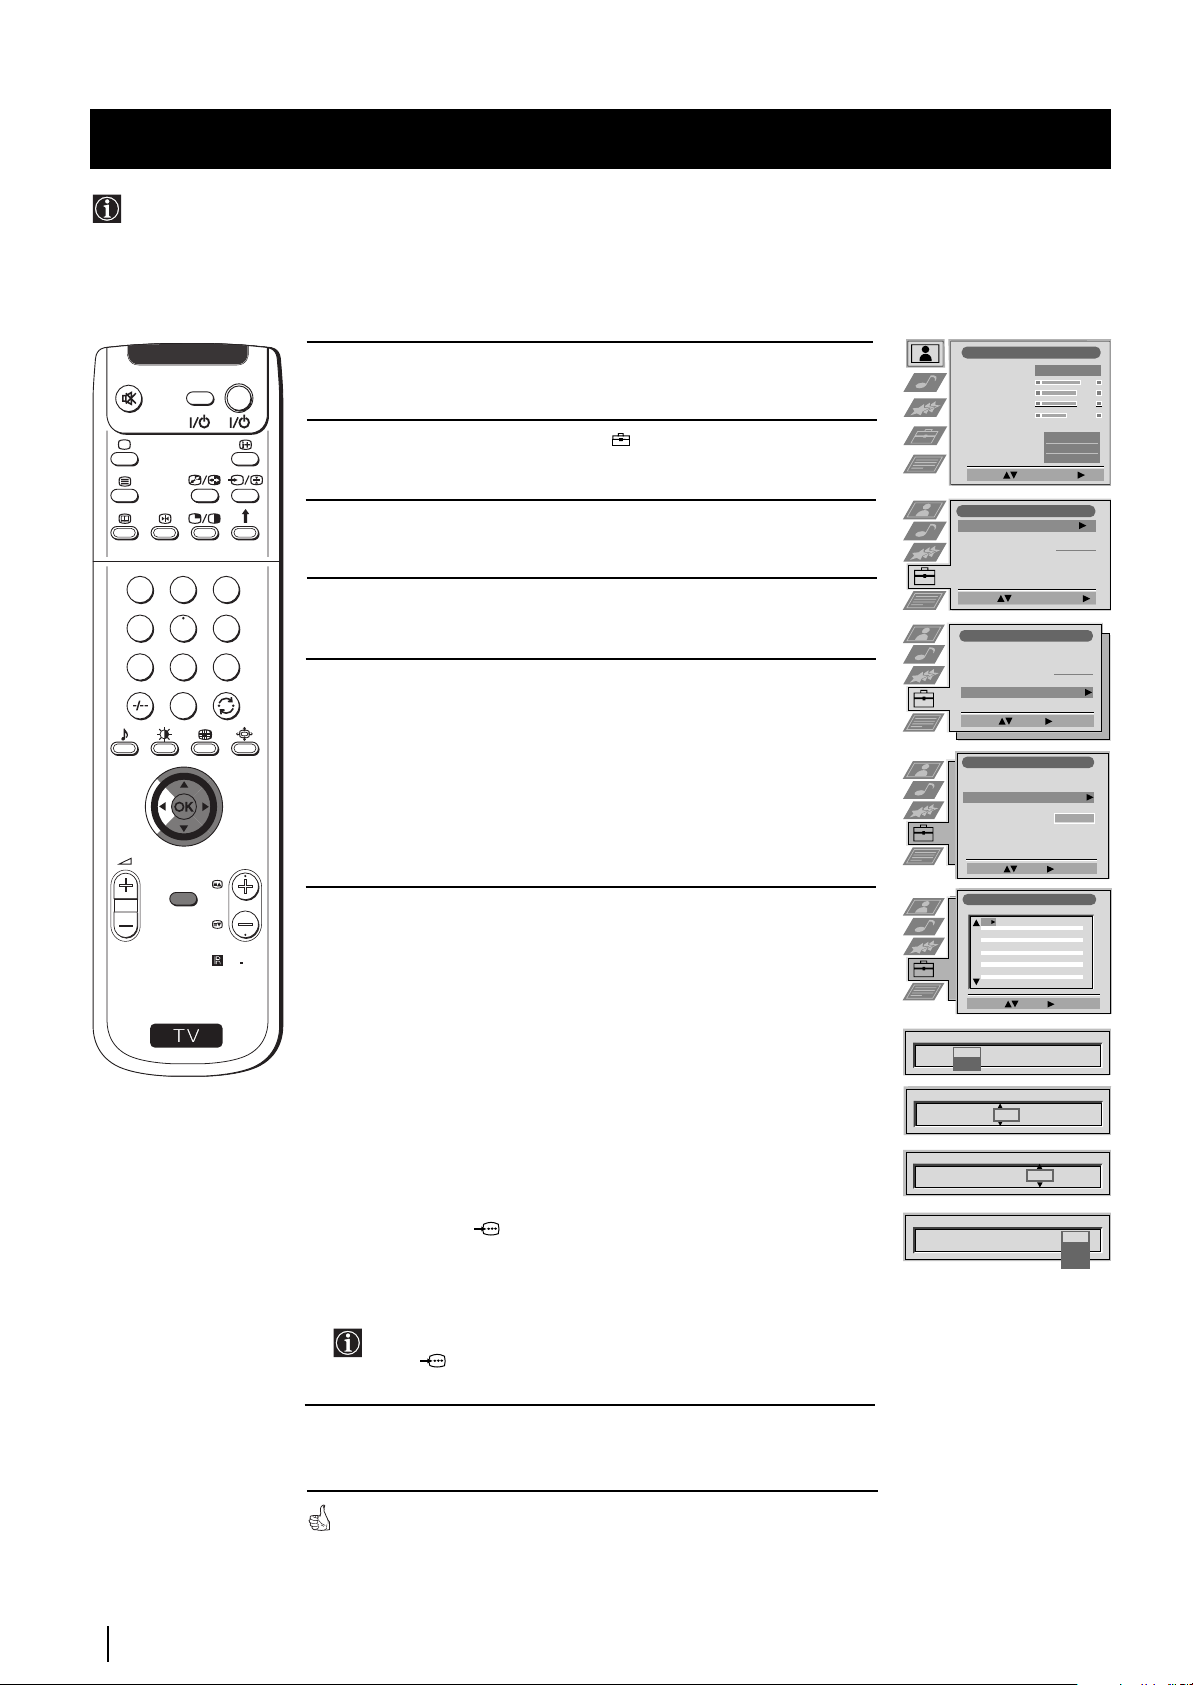
Labelling and Selecting the screen format of Input Sources
This function enables you to select the size of the picture coming from the input source as well as designate a name to the optional
equipment you have connected to the sockets of this set. This name can contain up to 5 characters (letters or numbers).
1
4
7
S
MENU
TV
D
O
I
E
V
1 Press the MENU button on the remote control to display the menu
on the screen.
2 Push the joystick to $ to select the symbol, then push to z to
enter the Set Up menu.
2
3
5
6
8
9
3 Push the joystick to $ or 4 to select AV Preset, then push to z.
0
4 Push the joystick to $ or 4 to select the input source. Then push to z .
PROGR
5 Push the joystick to $ or 4 to select:
Picture Adjustment
Picture Mode
Contrast
Brightness
Colour
Sharpness
Reset
AI
Noise Reduction
Colour Tone
Select: Enter Menu:
Set Up
Auto T uning
Programme Sorting
Select NexTView
AV Preset
Manual Set Up
Select:
Start Auto Tuning
Set Up
Auto T uning
Programme Sorting
Select NexTView
AV Preset
Manual Set Up
Select:
Enter:
AV Preset
INPUT LABEL
AUTO FORMAT
Off
AV1
Off
AV2
Normal
AV3
Full
AV4
Select: Enter:
AV Preset
Personal
Normal
Start
- - - - - - -
- - - - - - -
VIDEO
VIDEO
VIDEO
On
Off
$ Off (size of picture is not automatically adjusted).
RM
903
Normal (size of picture is automatically adjusted according to the
broadcaster information).
4 Full (The set automatically adjusts the picture size to eliminate
any dark areas on the TV picture (as shown on the section
“Changing the Screen Format”).
INPUT LABEL
AUTO FORMAT
Off
Off
Normal
Full
VIDEO
VIDEO
VIDEO
AV1
AV2
AV3
AV4
Select: Next: Confirm: OK
AV Preset
22
Menu System
Next push to z .
6 With the first element of the LABEL column highlighted, push the
joystick to $ or 4 to select a letter, number, "+" or blank;
then push to z to confirm this character. Select the other four
characters in the same way.
7 After selecting all the characters, press the OK button.
8 Repeat steps 4 to 7 if you wish to select the picture size or label other
input sources.
9 Press the MENU button to exit and return to the normal TV screen.
Whenever the equipment with the labeled input is selected for use, the name
appears for a few seconds on the screen
AUTO FORMAT
INPUT LABEL
Off
AV1
AV2
AV3
AV4
Select A-Z, 0-9: Confirm: OK
Off
Normal
Normal
IDEO
V
VIDEO
VIDEO
Page 22
Menu System
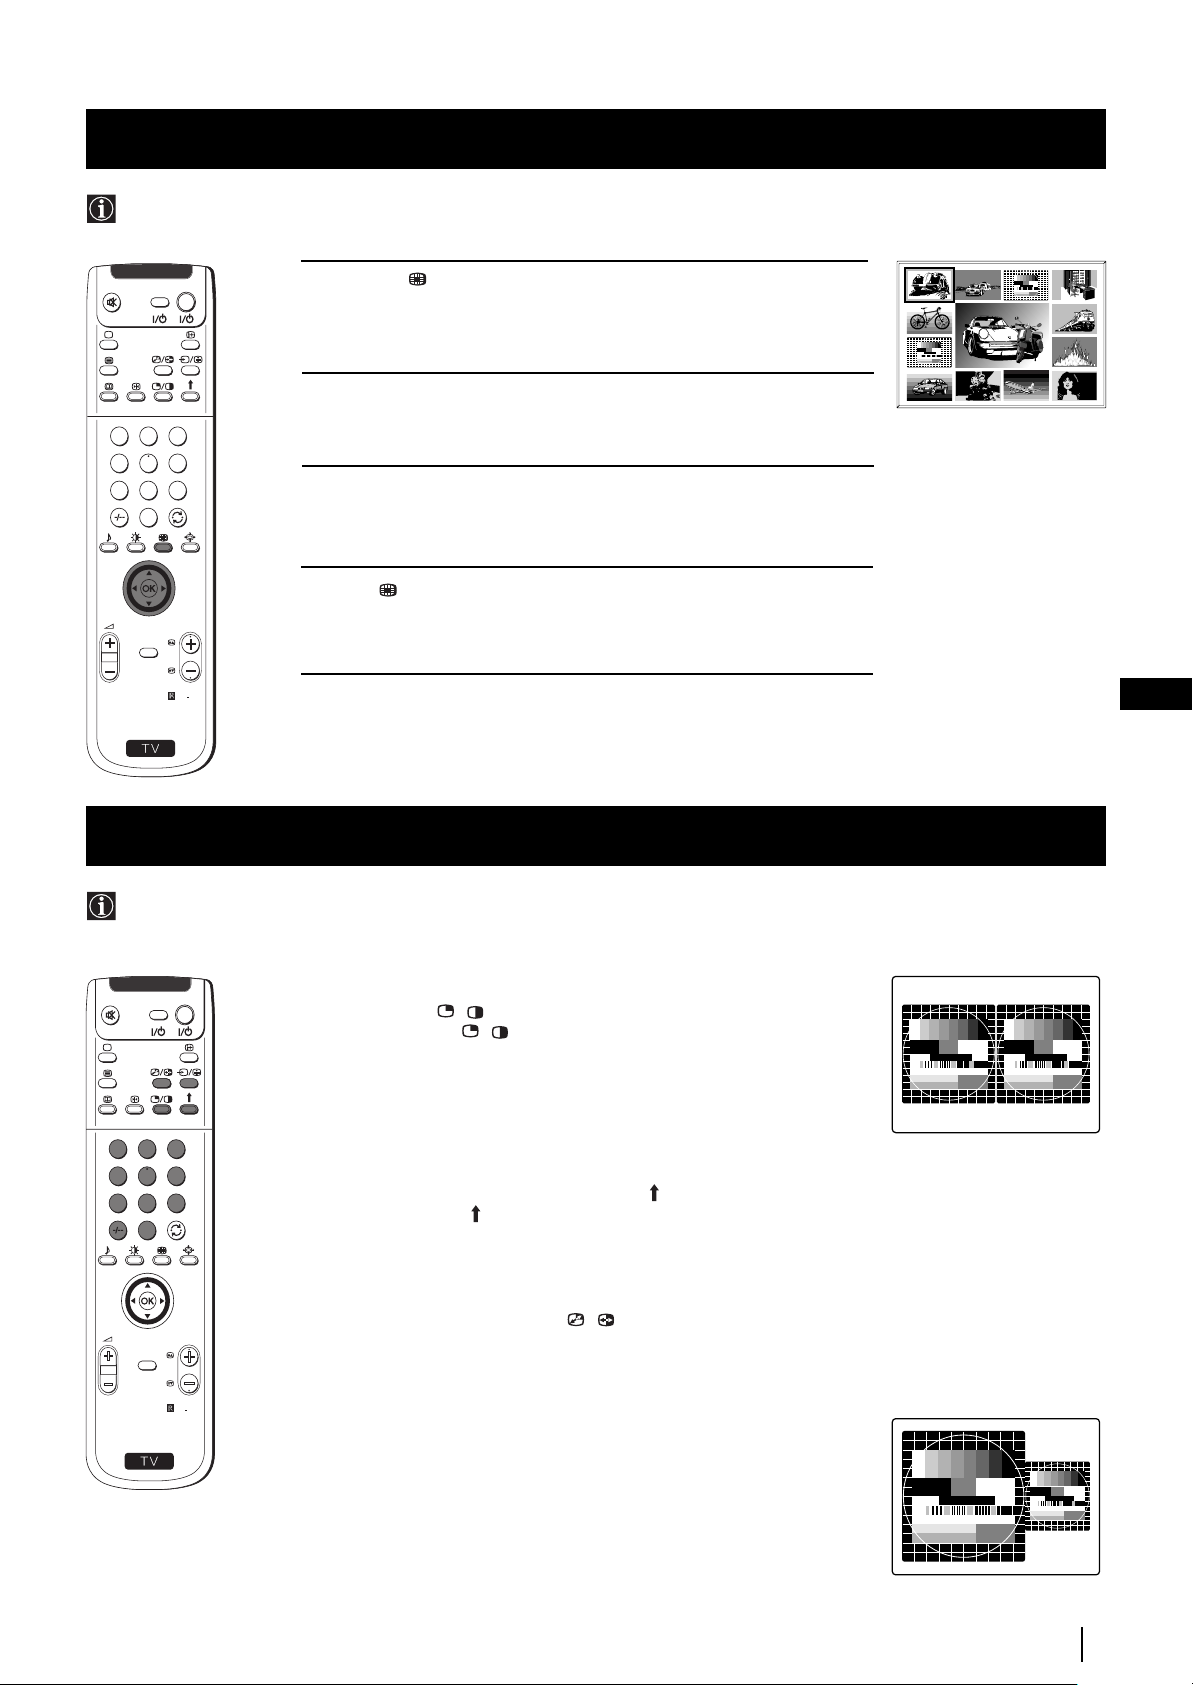
Using Multi PIP (Picture In Picture)
Multi PIP (Picture in Picture) mode displays a succession of 12 still pictures and a 13th that is live. You can manually select which
channel you wish to watch, either full-screen or in the PIP.
03 05
D
TV
O
I
E
V
1 Press the button on the remote control to select the PIP mode.
Now 13 programme positions appear on the screen, with the current
channel in the centre.
2 Push the joystick to $, 4, Z or z to move within the 13 displayed
1
2
3
4
5
6
7
8
9
0
channels.
3 Press the OK button to select the framed channel. The selected
channel moves to the centre.
4 Press to return to the normal TV mode.
PROGR
MENU
02
01 06
13
12
10
11 09 08
04
07
RM
903
S
Using PAP (Picture And Picture)
PAP divides the screen into two for watching two channels simultaneously. One of the pictures can be selected to come from a
video source.
The sound of the left screen comes through the set loudspeakers, the sound of the right screen is selectable via
headphones.
TV
D
O
I
E
V
1
2
3
4
5
6
7
8
9
0
Switching PAP on and off
Press the button / on the remote control to display the two screens
in format 4:3. Press / again to switch PAP off.
Selecting PAP source
1 To change the source of the left screen:
With PAP switched on, press the number buttons (to select a TV
channel) or press … (to select a video source).
2 To change the source of the right screen:
With PAP switched on, press the button on the remote control.
When the symbol appears at the bottom of the right screen,
press the number buttons (to select a TV channel) or press … (to
select a video source).
GB
MENU
S
PROGR
RM
Swapping screens
With PAP switched on, press the / button on the remote control to
swap the two screens.
Zooming the screens
903
With PAP switched on, push the joystick repeatedly to Z or z to
change the size of the two screens.
Selecting the sound of the right screen
You can select the sound of the right screen via headphones. With
PAP switched on, refer to the "Adjusting the Sound" section of this
instruction manual and set the option "l Dual Sound" to "PAP".
Menu System
23
Page 23
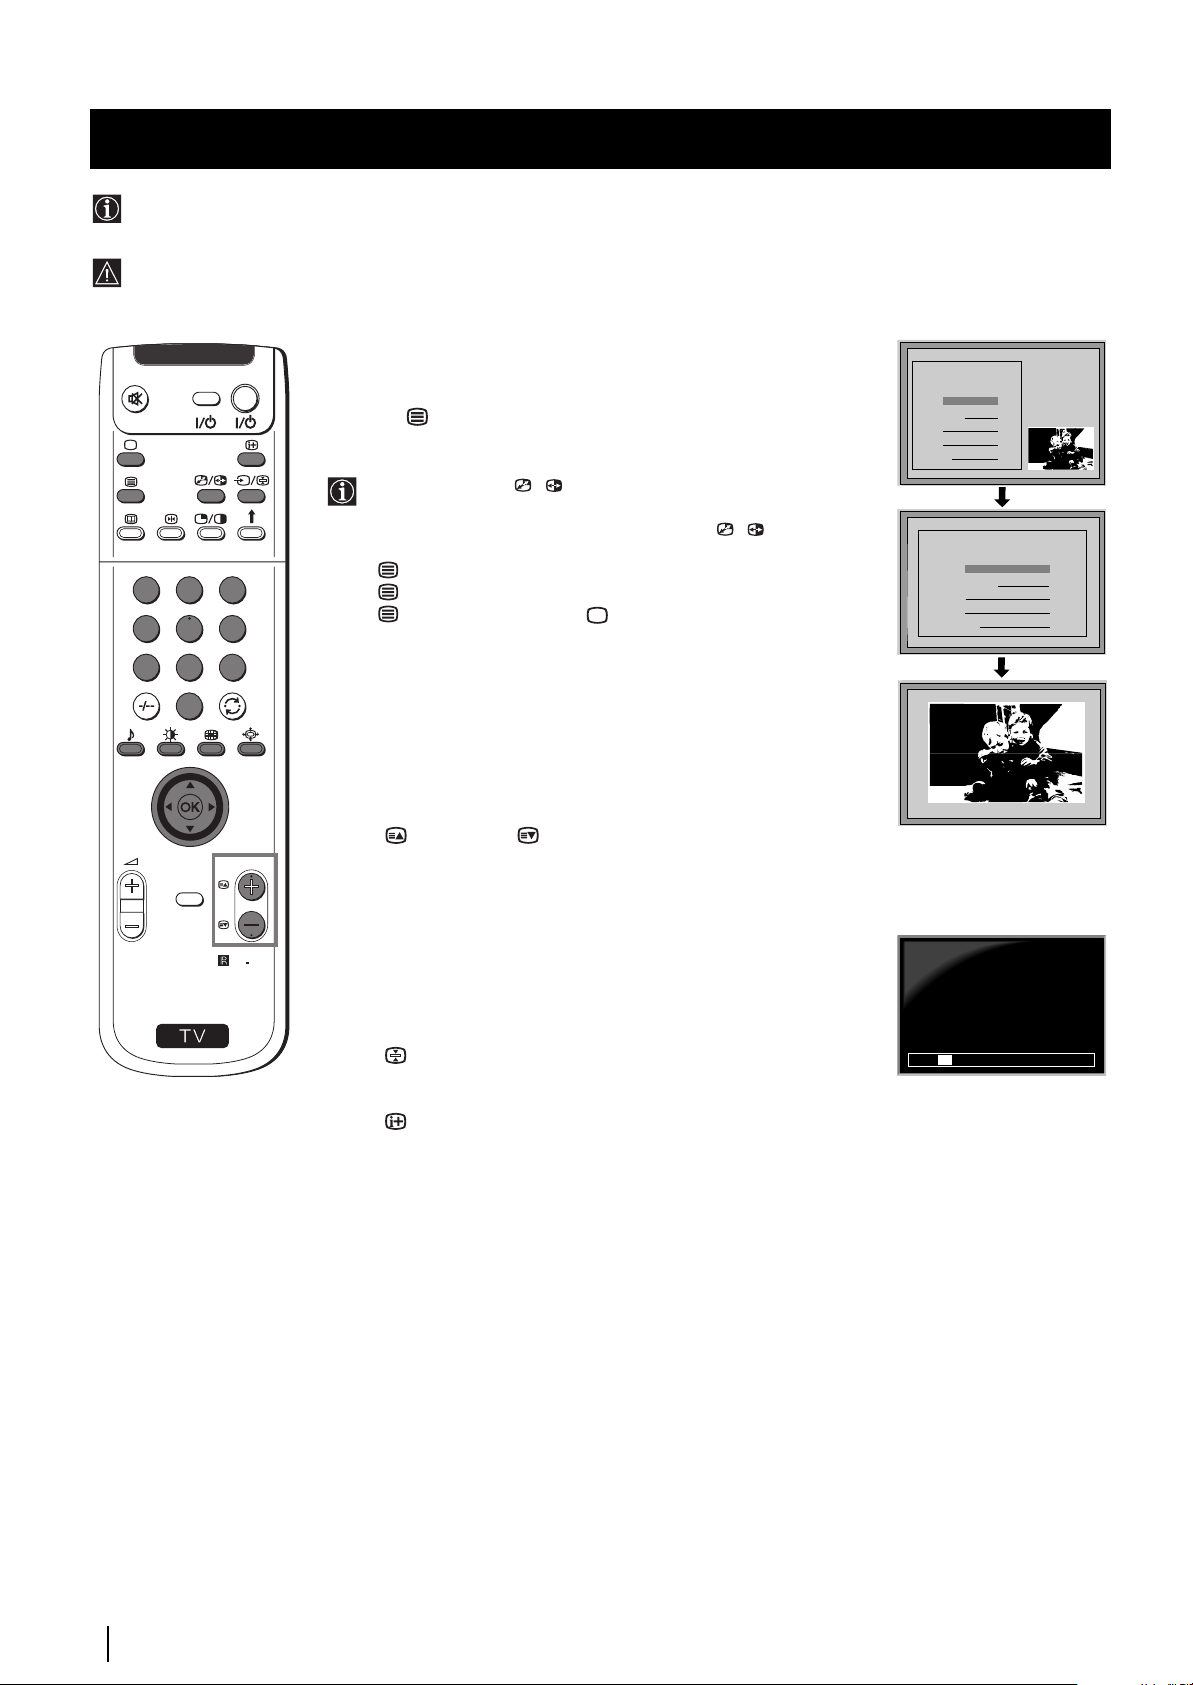
Teletext
Teletext
Most TV channels broadcast information via Teletext. The index page of the teletext service (usually page 100) gives you
information on how to use the service.
! Please use a TV channel with a strong signal, otherwise there may be Teletext errors.
Switching Teletext on and off
D
O
I
TV
E
V
1
2
3
4
5
6
1 Select the TV channel which carries the teletext service you want
to view.
2 Press the button once for Picture and Teletext (P&T). The screen
is divided in two, with the TV channel in the right corner and the
Teletext display on the left.
P&T mode: Press / then press PROGR +/- to change
the channel of the TV screen. Push the joystick to Z or z to
change the size of the TV screen then press / again to
resume normal teletext reception.
3 Press twice to get Teletext only.
4 Press three times for Mix mode.
5 Press a fourth time or press to switch off Teletext.
TELETEXT
Index
Programme
News
Sport
Weather
Index
Index
Index
Index
Index
Index
Index
Index
Programme
Programme
Programme
Programme
Programme
Programme
Programme
Programme
News
News
News
News
News
News
News
News
Sport
Sport
Sport
Sport
Sport
Sport
Sport
Sport
Weather
Weather
Weather
Weather
Weather
Weather
Weather
Weather
25
153
101
98
TELETEXT
TELETEXT
TELETEXT
TELETEXT
TELETEXT
TELETEXT
TELETEXT
TELETEXT
01
25
25
25
25
25
25
25
25
153
153
153
153
153
153
153
153
101
101
101
101
101
101
101
101
98
98
98
98
98
98
98
98
7
S
MENU
8
9
Selecting a Teletext page
Input three digits for the page number using the numbered buttons on
0
the control. If you make a mistake, type in any three digits then re-enter
the correct page number.
Using Other Teletext Functions
TELETEXT
01
Index
Programme
News
Sport
Weather
153
101
25
98
Selecting the next or preceding page
Press the (PROG+) or (PROGR-) buttons on the remote
PROGR
control to select the previous or next page.
Selecting a sub page
A teletext page may consist of several sub pages. In this case, after a
RM
few seconds, an information line is displayed showing the number of
903
subpages.
216-02
Select the sub page by pressing 4 or $.
To freeze a Teletext page
Press the button to freeze the page. Press again to cancel the freeze.
01 03 04 05 06 07 0802
Revealing the index page
Press the button to reveal the index page (normally page 100).
Fastext
(only available if the TV station broadcasts Fastext signals)
When the colour coded menu appears at the bottom of a teletext page,
press a coloured button on the remote control (red, green, yellow or blue)
to access the corresponding page.
24
Using the feature "Page Catching"
1 Press the numbered buttons on the remote control to select a teletext
page which has several page numbers on it (eg the index page).
2 Press the OK button.
3 Push the joystick to 4 or $ to select the desired page number
then press the OK buttons. The requested page is displayed after
some seconds.
continued...
Teletext
Page 24
Teletext
TV
D
O
I
E
V
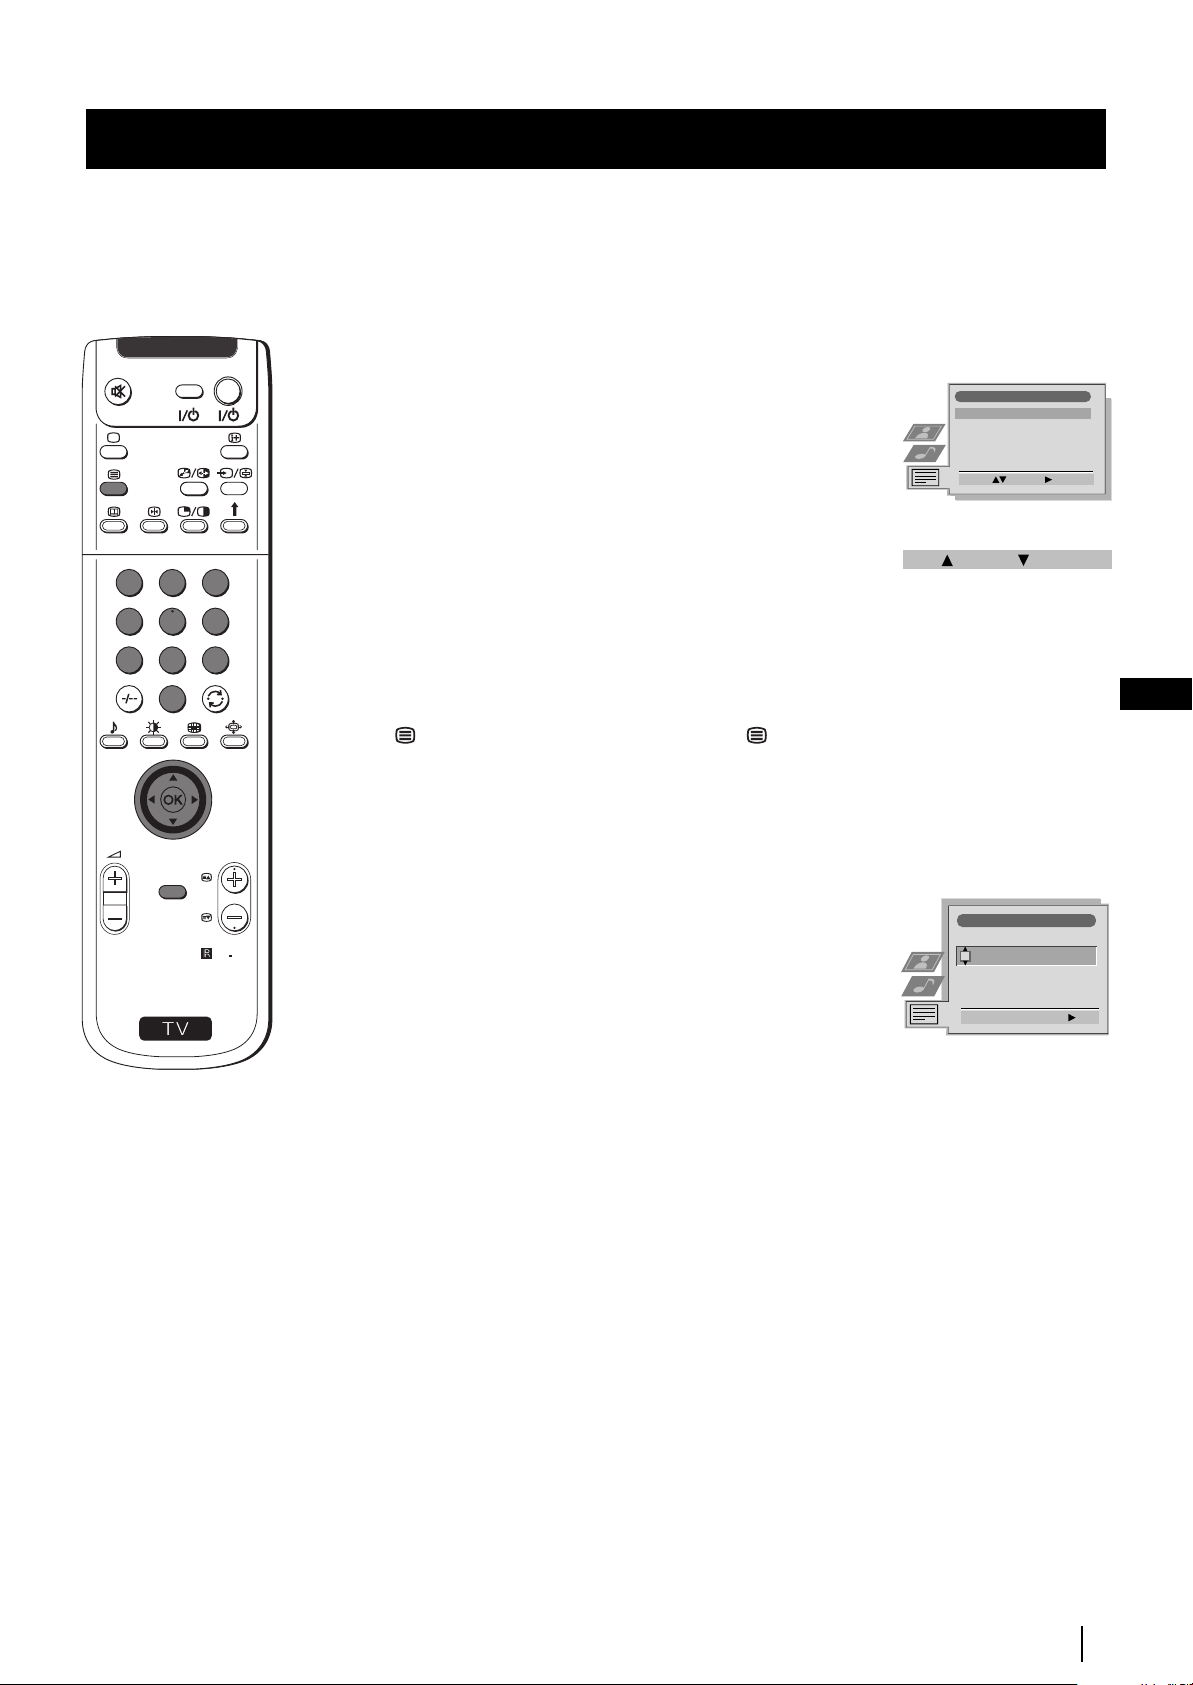
Using the Teletext menu
1 With Teletext switched on, press the MENU button on the remote
control to display the teletext menu on the TV screen.
2 Push the joystick to 4 or $ to select your chosen item, then push to z
to display the relevant sub menu.
3 To remove the teletext menu from the screen, press the MENU
button.
Teletext
Top / Bottom / Full
Text Clear
Reveal
Time Page
Page Overview
Select: Enter:
Top / Bottom / Full
The Top/Bottom/Full sub menu allows you to enlarge different
1
2
3
sections of the Teletext page. Push the joystick 4 to enlarge the
upper half of the screen, push to $ to enlarge the lower half. Press
4
5
6
7
8
9
0
the OK button to restore the page to normal size.
Text Clear
After having selected this function, you can watch a TV channel while
waiting for a requested Teletext page. As soon as the page is available,
the symbol changes colour. To view the page, press .
Top: Bottom: Full: OK
GB
Reveal
Some teletext pages contain hidden information (eg for a quiz),
which you can reveal. The hidden information appears on screen.
PROGR
MENU
RM
903
Time Page
(depending on availability of teletext service)
You can call up a time-coded page such as an alarm page at a time
specified by you. After you have displayed the Time Page sub menu:
Time Page
PAGE TIME
- - : - -– – –
S
1 Press the numbered buttons on the remote control to enter the
three digits of the desired page.
2 Press the numbered buttons again to enter the four digits of the
desired time.
3 Press the OK button to store the desired time. The time is displayed
in the top left corner of the screen. At the requested time the page is
displayed.
Page Overview
(depending on availability of teletext service)
In the Page Overview menu the block and group pages of TOP- Text
are sorted into two columns, so that the customer can easily select this
page. For each block page in the first column, the corresponding
group pages are shown in the second column. Push the joystick 4 or $
to select the desired block page, then push to z to enter to the group
pages column. Push to 4 or $ to select the desired group page .
Finally, press the OK button to display the page.
Select Page: 0-9 Next:
Teletext
25
Page 25
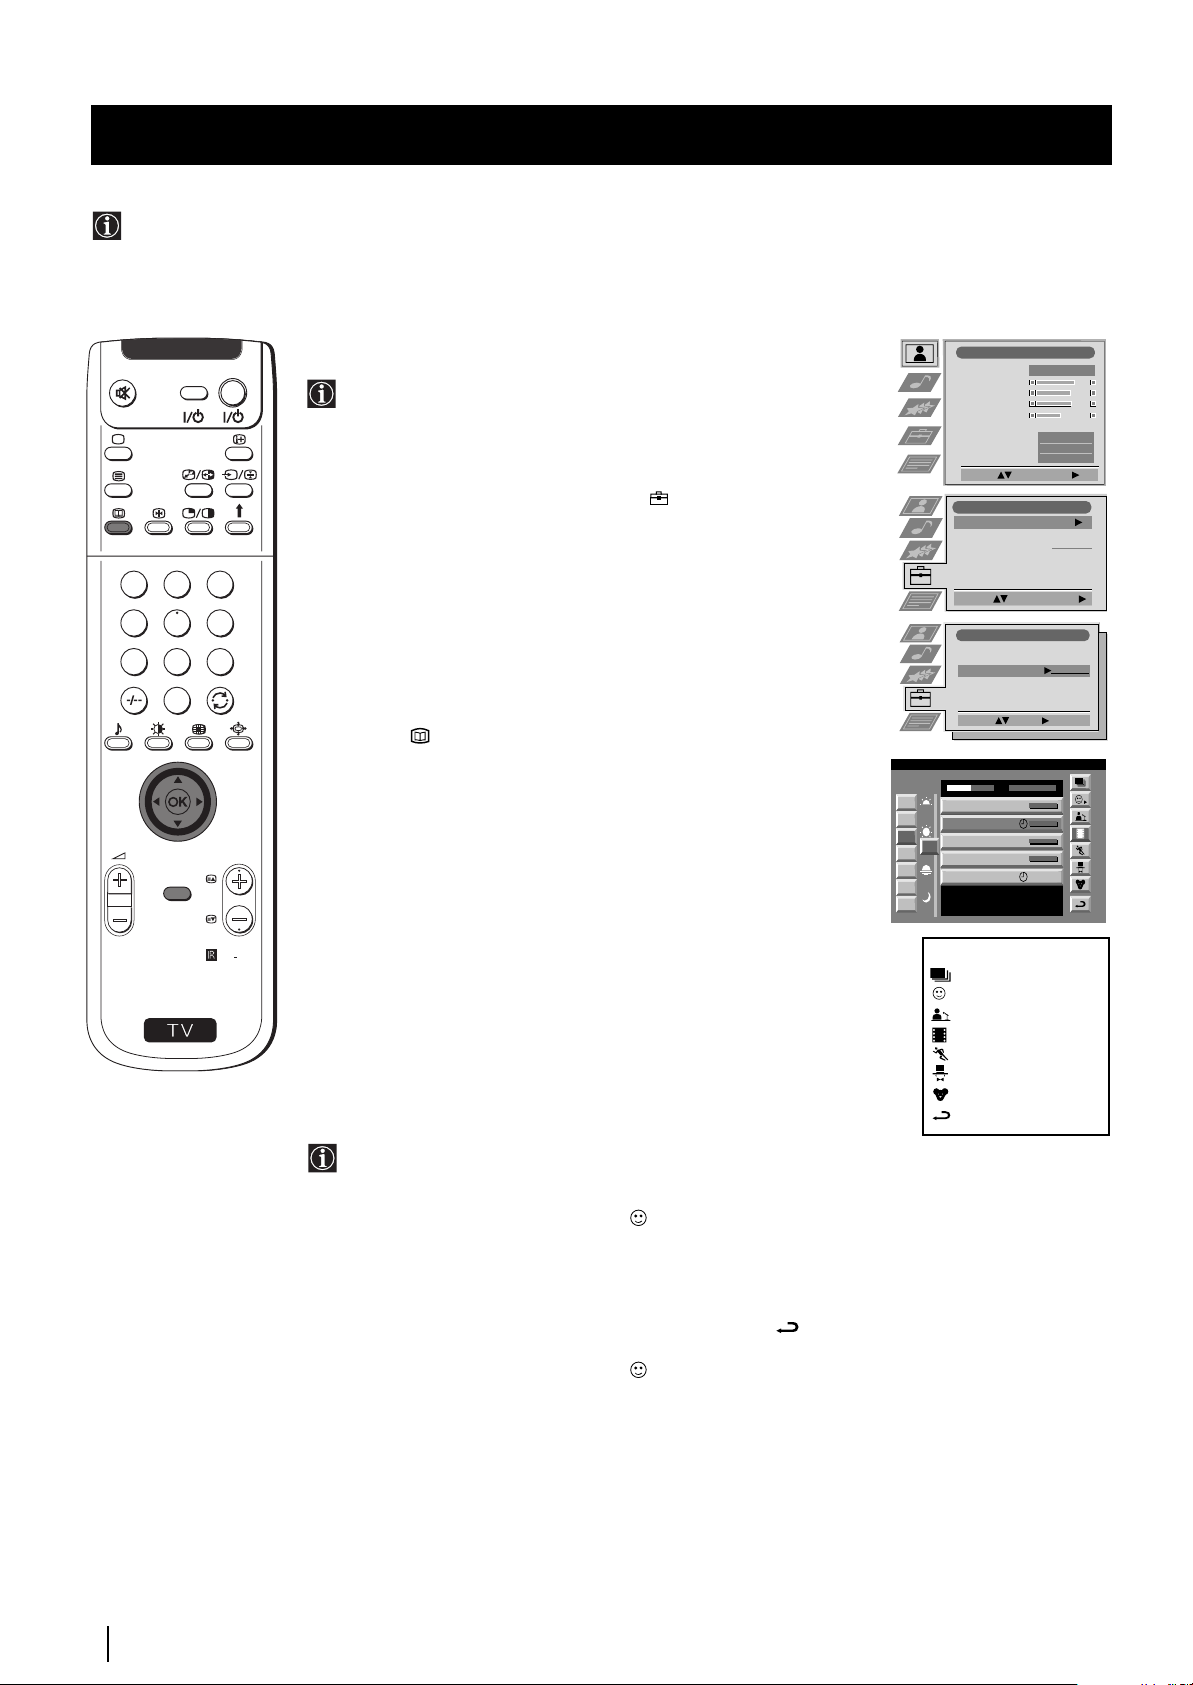
NexTView
NexTView *
* (depending on availability of service)
NexTView is an on-screen electronic programme guide (EPG), providing you with programme information for different
broadcasters.
1
4
7
S
MENU
TV
2
3
5
6
8
9
0
The set automatically selects the best NexTView provider for you.
This provider is available about 30 minutes after the channel tuning.
You can however change this selection of provider if you wish.
1 Press the MENU button on the remote control to display the menu
on the screen.
2 Push the joystick to 4 or $ to select the symbol, then push to z
to enter the Set Up menu.
3 Push to 4 or $ to highlight Select NexTView then push to z. A list
is displayed containing all available NexTView providers.
4 Push to 4 or $ to select the desired provider then press the OK
button to store.
5 Press the MENU button to remove the menu from the screen.
Displaying NexTView
D
Selecting your NexTView provider
O
I
E
V
Picture Adjustment
Picture Mode
Contrast
Brightness
Colour
Sharpness
Reset
AI
Noise Reduction
Colour Tone
Select: Enter Menu:
Set Up
Auto T uning
Programme Sorting
Select NexTView
AV Preset
Manual Set Up
Start Auto Tuning
Select:
Set Up
Auto T uning
Programme Sorting
Select NexTView
AV Preset
Manual Set Up
Enter:
Select:
Personal
Start
- - - - - - -
- - - - - - -
Normal
On
Off
1 Press the button repeatedly on the remote control to switch
PROGR
RM
NexTView on and off.
* In some cases, you may also need to push the joystick to Z to
display the Sony electronic programme guide.
2 Push the joystick to 4, $, Z or z buttons to move the cursor
around the screen.
3 Press the OK button to confirm a selection.
a) If you press the OK button in the date, time or icon (themes)
columns, you change the programme list according to the
903
selection.
b) If you press the OK button in the programme list, you directly
display the channel if the broadcast is currently running, or,
you display the "Long Info" menu if the broadcast is running at
some future time.
Using the "Individual Setting" menu
07 Tue
12:38
7
Tue
8
Wed
9
Thu
12
10
Fri
11
Sat
12
Sun
13
Mon
Star Wars
Super RTL
Werner - Beinhart
Pro 7
Flui grüsst den Rest der Welt
Kabel 1
Once upon a time in the West
Euronews
International News
RTL Plus
Hat der alte Hexenmeister sich doch
einmal fortbegeben, und nun sollen
seine Geister auch nach meinem Willen
leben.
Index
TXT TPS / RINGIER
SWISS
10:35 - 12:45
10:20 - 12:00
10:45 - 10:50
11:00 - 11:20
11:45 - 12:50
Tue 07. 04 .98
full selection list
personal selection
news broadcasts
movies
sports
entertainment
children
return to last menu
26
You can make a personal list of the types of programmes you
wish to view on the programme guide.
1 Push the joystick 4 or $ to select the icon then push to z to
display the "Individual Setting" menu.
2 Push the joystick 4 or $ to select your chosen item on the screen
then press the OK button to confirm your choice.
3 Repeat step 2 for all the items you wish to have in your list.
4 When you have finished the list, push to z to select the icon.
5 Press the OK button to return to the previous menu.
6 Push the joystick 4 or $ to select the icon then press the OK
button again to activate your "Individual Setting" filter.
continued...
NexTView
Page 26
NexTView
1
4
7
S
2
0
MENU
D
TV
O
I
E
V
Using the Long Info menu
With this menu screen, you can set timers or record selected
programmes.
1 Push 4 or $ to select a future programme in the programme list
column.
2 Press the OK button to display the Long Info menu on the TV
screen.
To set the timer
3
5
6
8
9
PROGR
Push the joystick 4 or $ to highlight the icon then press the OK
button repeatedly to "set the timer" or "cancel the timer". If you choose
to set the timer, the programme is marked with a clock symbol and a
message appears on the screen shortly before the programme is due
to start asking whether you wish to still view this programme.
To view the timer table
Push the joystick Z or z to highlight the icon then press the OK
button repeatedly to switch on/off the timer table. This table shows the
programmes on which you have already set a timer. (You can set a timer
on up to 5 programmes).
First nextTView/EPG-Providers in Europe
07 Tue
SWISS TXT TPS / RINGIER nexTView
12:38
Address Mapping
The position of the addresses in the
OSDA is shown in the following diagram.
The position values of the DPW are set
to '0'.
If other values are set, the complete
combination will be scrolled.
Example:
if the DPWC is set to '63', the char-
This channel has been set for a timer
VPS/PDC
On
Speed
SP
Timer Prog
VCR1
Tue 07. 04 .98
GB
To record programmes
(only with Smartlink VCRs)
RM
903
1 Connect your Smartlink VCR.
2 Push the joystick to Z or z to select then press the OK button
to download the information to your VCR.
3 To set up the VCR:
VPS/PDC
Push the joystick Z or z to select VPS/PDC then press the OK
button repeatedly to select On or Off. With this setting on you have
the guaranteed recording of the whole broadcast should there be a
change in the TV programme. This only works if the selected
channel broadcasts a VPS/PDC signal.
Speed
Push the joystick to $ to select Speed then press the OK button
repeatedly to select between SP for standardplay or LP for longplay.
With longplay you can record twice as much on a videotape.
The picture quality however may suffer.
VCR Setup
Push the joystick to $ to select VCR Setup then press the OK
button repeatedly to select which VCR you wish to programme,
namely VCR1 or VCR2.
4 Finally, push the joystick to z to select the icon then press the
OK button to remove the menu from the TV screen.
VPS/PDC
Speed
VCR Setup
On
SP
VCR1
NexTView
27
Page 27
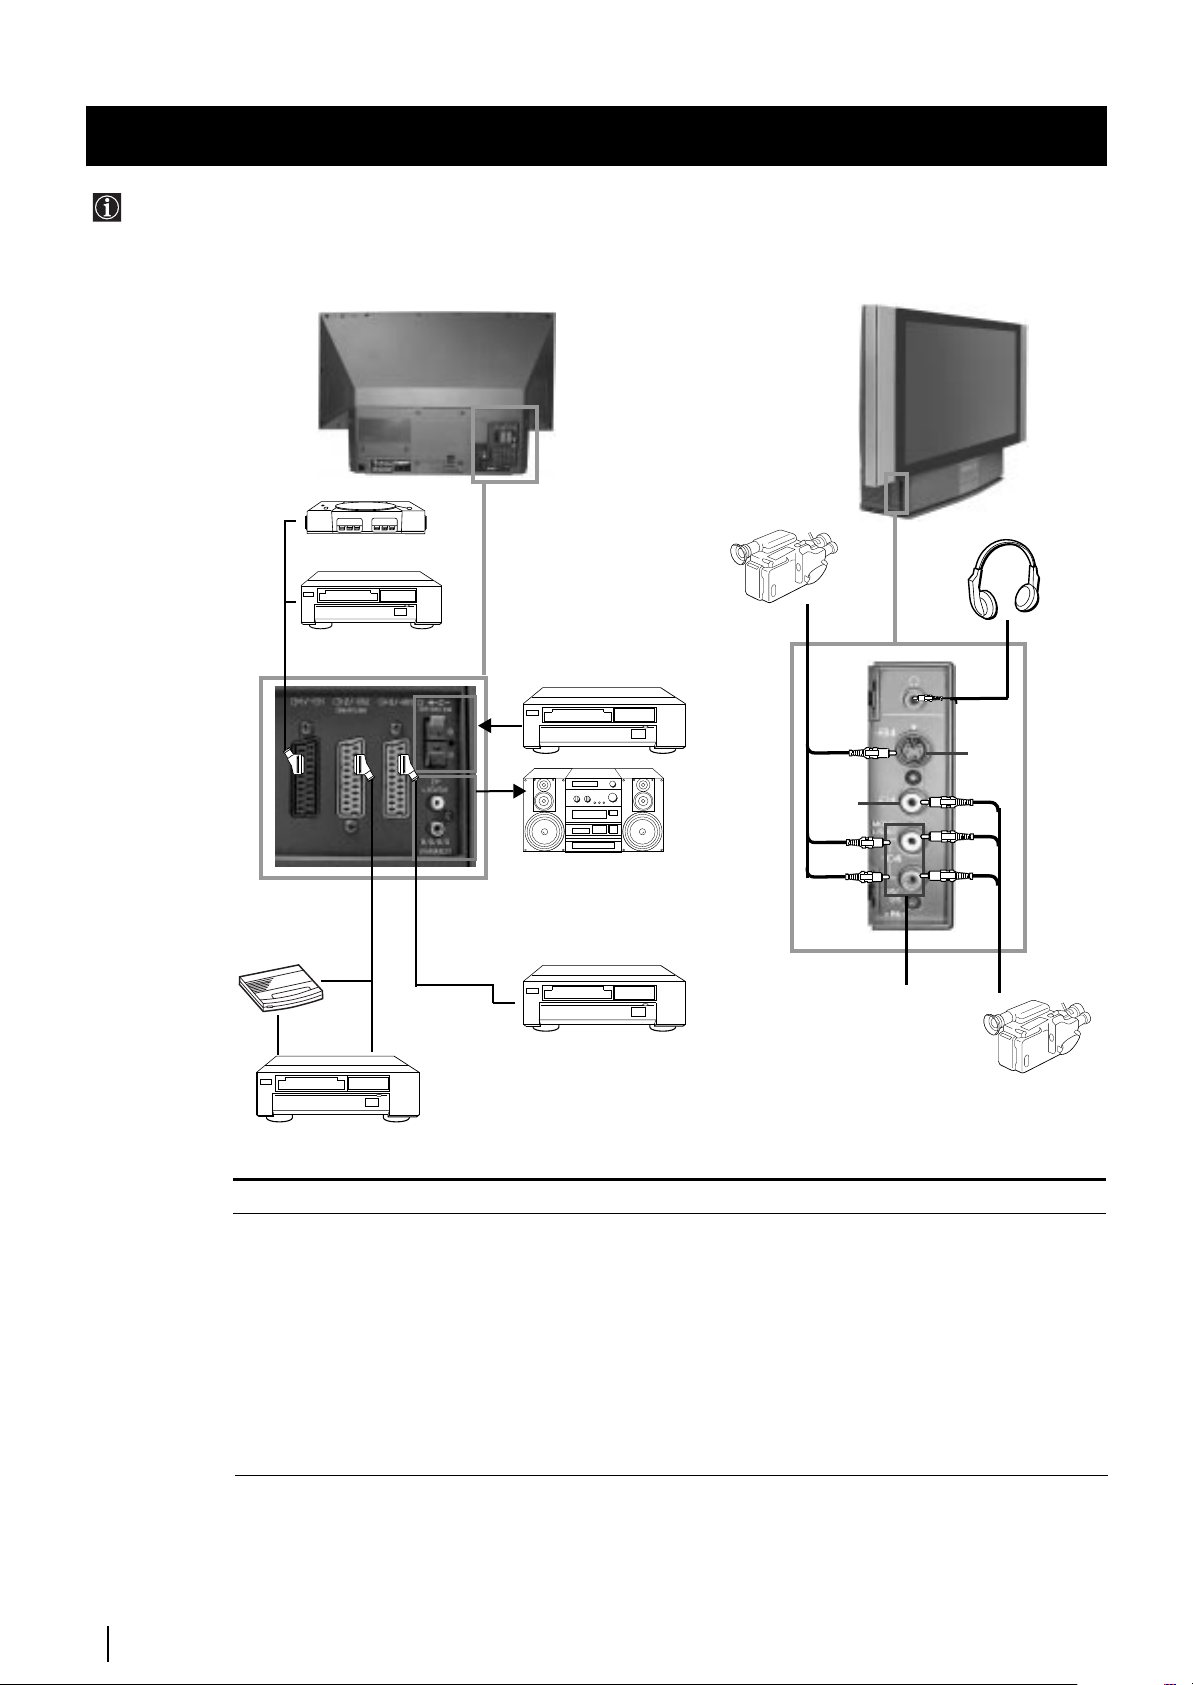
8mm/Hi8/DVC
camcorder
Optional Connections
Connecting Optional Equipment
Using the following instructions, you can connect a wide range of optional equipment to this set.
S.VHS/Hi8/DVC
2
1
“PlayStation”*
camcorder
To avoid picture
distortion:
• Do not connect
equipment to
F and G
connectors at
the same time.
* “PlayStation”
is a product of
Sony
Computer
Entertainment,
Inc.
* “PlayStation”
is a trademark
of Sony
Computer
Entertainment,
Inc.
A
Decoder
DVD
B
VCR
D
E
C
Acceptable input signal
A Audio/video and RGB signal
B Audio/video and S video signal
C Audio/video and S video signal
D Centre speaker input Set “Speaker”
on the Features menu to “Centre in”.
E No inputs
F S Video signal
G Video signal
H Audio signal
I No input
Dolby
Surround
Amplifier
G
Hi-Fi
H
VCR
Available output signal
Video/audio from TV tuner.
Video/audio from selected source.
Video/audio displayed on TV screen (monitor out).
No outputs.
Audio signal.
No output.
No output.
No output.
Audio signal to headphones.
I
F
Optional Connections
28
Page 28
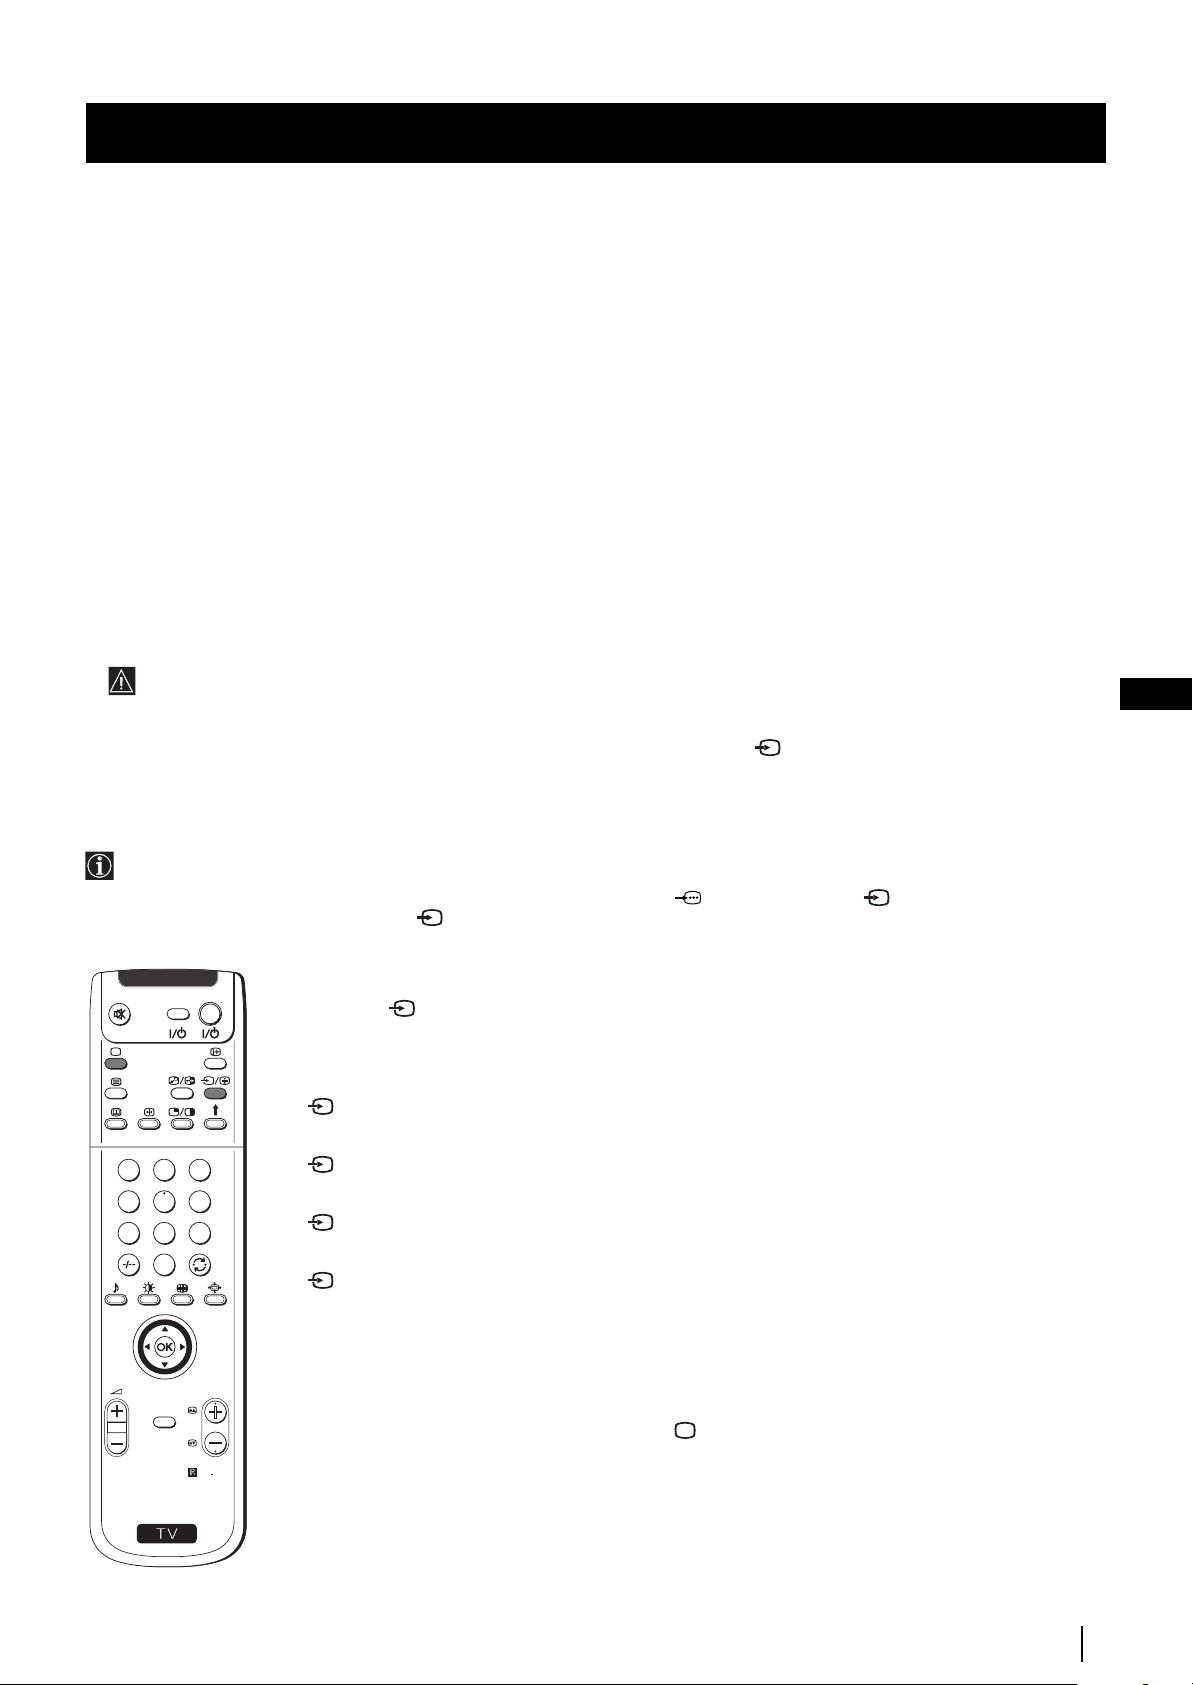
Optional Connections
Using Optional Equipment
Additional Information when connecting equipment
Connecting a VCR
We recommend you connect your VCR to the B or C socket using a scart lead. If you do not have a scart lead, use the “Manually
Tuning the TV” section of this instruction manual to tune in the channel of the VCR test signal to TV programme number “0”.
Also refer to your VCR instruction manual to get the VCR test signal.
If your video supports Smartlink please refer to the "Smartlink" section of this instruction manual.
Connecting to External Audio Equipment
1 To listen to the audio of the set on the Hi-Fi equipment:
Plug in your Hi-Fi equipment to the E sockets on the rear of the set if you wish to amplify the audio output
from the TV.
The output level from E sockets can be varied by adjusting the volume of the headphones. Refer to the “Adjusting the sound”
section of this instruction manual to adjust the volume of the headphones.
2 To listen to the Dolby Prologic system sound on the set speakers:
Plug in your Dolby Prologic system decoder amplifier to the D socket on the rear of the set if you wish to listen to the audio
output from your equipment on the TV speaker. If you have a Dolby amplifier, connect the centre output from your amplifier
to the D socket to use the set as a centre speaker. Refer to the “Using the Features menu” section of this instruction manual
and set the option “Speaker” to “Centre in”.
Remember that the maximum input level of this input is 30 W. Be careful never to over this limit.
For mono equipment
Connect the phono plug to the L/G/S/I socket on the front of the TV and select the 4 input signal using the instructions on
this page below.
GB
Select and View the Input Signal
In order to get the input signal of a connected equipment onto the TV screen, you need to select the symbol of the
connector to which you have connected the device.
e. g. : Your VCR is connected to the connector with the symbol
Y1/ 1. Press the button on the remote control
repeatedly until you see the symbol 1 on the screen.
1 Connect your equipment to the designated socket, as it is indicated on the previous page.
TV
D
O
I
E
V
2 Press the button repeatedly on your remote control until the correct input symbol
appears on the screen.
Symbol Input signals
11
11
• Audio/video input signal through the Scart connector A or * RGB
through Scart connector A.
22
22
1
2
3
4
5
6
7
8
9
0
• Audio/Video input signal through the Scart connector B or * S Video
through Scart connector B.
33
33
• Audio/Video input signal through the Scart connector C or * S Video
through Scart connector C.
44
44
• S Video input signal through the 4-pin DIN connector F or * video input
signal through phono jack G and audio input signal through phono jacks H.
* (automatic detection of the signal according to the connected equipment)
PROGR
MENU
3 Switch on the connected equipment.
4 To return to the normal TV picture, press the button on the remote control.
S
RM
903
Optional Connections
29
Page 29
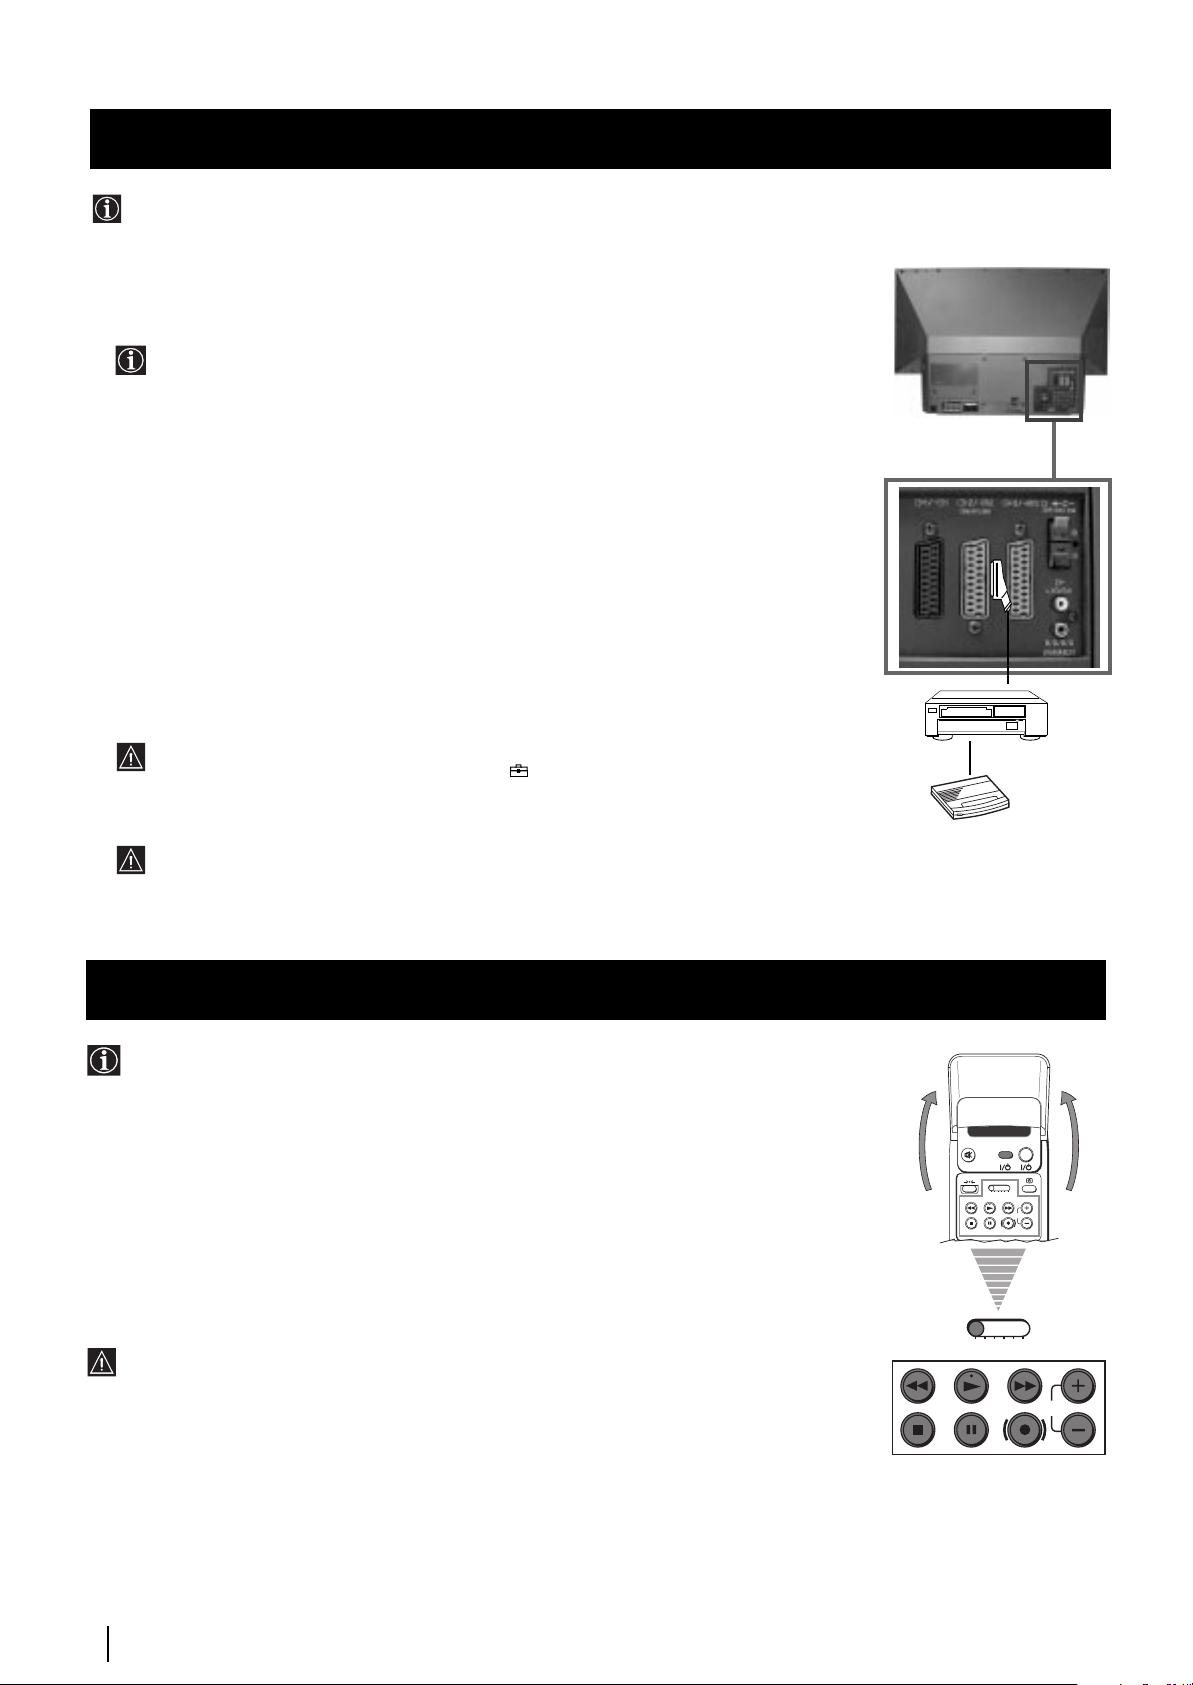
Optional Connections
Smartlink
Smartlink is a direct link between the set and a VCR.
For Smartlink you need:
• A VCR which supports Smartlink, NextView Link, Easy Link or Megalogic.
Megalogic is a trademark of Grundig Corporation.
EasyLink is a trademark of Philips Corporation.
• A fully-wired 21 pin SCART cable to connect your VCR to the Scart connector :2/q2
(SMARTLINK) on the rear of the set.
The features of Smartlink are:
• Tuning information such as the channel overview are downloaded from the set to the VCR.
• Direct recording: While watching TV you need to press just one button on the VCR to record
this programme.
• Automatically switching on: With the set in standby mode, pressing the “Play z” button on
your VCR automatically switches the TV on.
Rear
If you have connected a decoder to a VCR which supports Smartlink feature, select
the menu Further Programme Preset in the (Manual Set Up) menu and select
DECODER AV2 to each coded channel. For more details, please refer to the section
"Using the Further Programme Preset function" of this instruction manual.
For more information on Smartlink, please refer to the Instruction Manual of your
VCR.
Remote Control of other Sony Equipment
Using the buttons underneath the cover of the remote control you can
control other Sony equipment.
1 Open the cover of the Remote Control.
2 Set the selector VTR 1234 DVD according to the equipment you want to control:
VTR 1 Beta VCR
VTR 2 8 mm VCR
VTR 3 VHS VCR
VTR 4 Digital Video (DCR-VX 1000/9000 E, VHR-1000)
DVD Digital Video Disk
3 Use the buttons underneath the cover on the remote control to operate the equipment.
VCR
Decoder
VIDEO TV
VTR 1 2 3 4 DVD
CH
• If your equipment has a COMMAND MODE selector, set this
selector to the same position as the VTR 1234 DVD selector on this set Remote Control.
• If the equipment does not have a certain function, the corresponding
button on the remote control will not work.
30
Optional Connections
VTR 1 2 3 4 DVD
CH
Page 30
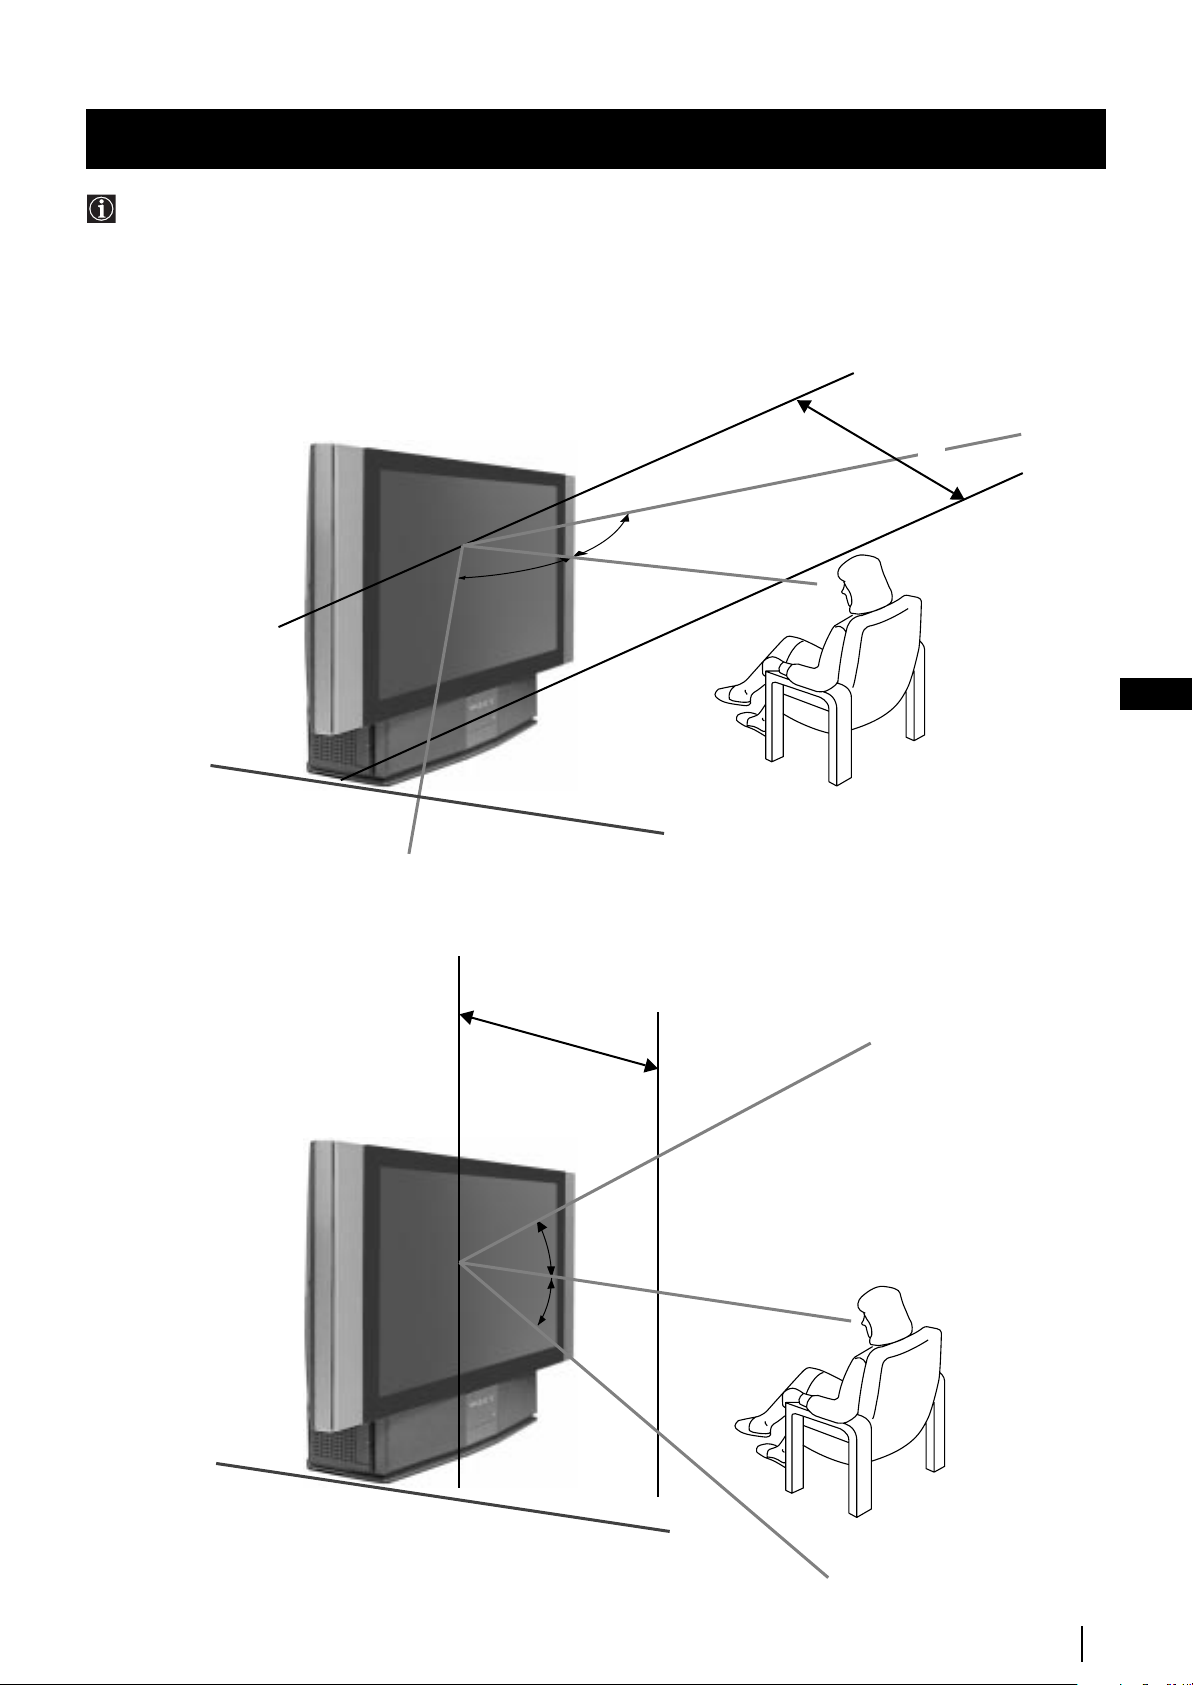
Additional Information
Optimum Viewing Area
For the best picture quality, try to position the set so that you can view the screen from within the areas shown below.
Horizontal viewing area
2 m and more
65º
65º
Vertical viewing area
GB
(Optimum viewing position)
2 m and more
30º
30º
(Optimum viewing position)
Additional Information
31
Page 31

Additional Information
Replacing the Lamp
When the lamp becomes dark or the picture colour is
not normal or the lamp indicator on the set flashes,
replace with a new lamp.
• Use the lamp XL-2000E for replacement. If you use
another lamp, it may cause damage to the set.
• Do not remove the lamp except when replacing it.
• Before replacing the lamp, turn off the power and
disconnect the power cord.
• Replace the lamp after it becomes cool. The front
glass of the lamp remains 100 °C (212 °F) and more
even 30 minutes after the power is turned off.
• Do not place the removed lamp in proximity to
children or flammable material.
• Do not get the removed lamp wet, or insert objects
inside the lamp. It may cause the lamp to explode.
• Do not place near metal or easily flammable objects,
as this may cause fire. Also, do not put your hand
inside the lamp compartment, as you may be burned.
• Attach the new lamp firmly. If it is not firmly
attached, the picture may become dark.
1 Turn off the power and disconnect the power cord.
• If you start changing the lamp without disconnecting
the power cord, the standby indicator
flashes. To continue changing the lamp, disconnect the
power cord.
• Replace the lamp 30 minutes or more after the power
is turned off.
Prepare the new lamp.
on the set
3 Loosen the screw with the object such as a coin and
remove the lamp cover.
4 Loosen two screws and pull out the lamp.
Loosen two screws with the supplied wrench.
Pull out the lamp by the handle.
2 Remove the front panel.
Remove the front panel without moving the set.
Grasping the right side of the front panel with your
fingers, pull it forward. Be careful not to catch your
fingernails.
The lamp is still too hot just after the power is turned
off. Be careful that you don’t touch the front glass or
surrounding area of the lamp or the glass of the lamp
compartment.
5 Attach the new lamp.
Replace the new lamp securely in the lamp receptacle and
fasten the screws tightly.
6 Attach the lamp cover.
Fasten the screw tightly with the object such as a coin.
7 Attach the front panel.
Attach the front panel as it was.
Notes
• Do not touch or stain the front glass of the new lamp or the glass
of the lamp compartment. If the glass become dirty, the picture
quality may deteriorate or the lamp life may shorten.
• Attach the lamp cover firmly. If it is not firmly attached, the
power will not turn on.
• When the lamp burns out, a noise is audible. This does not
represent a damage.
• Consult your nearest Sony service center to obtain a new lamp.
• Always remember to dispose of used lamps in an evironmental
friendly way.
Additional Information
32
Page 32

Additional Information
Specifications
TV system
B/G/H, D/K, I, L
Colour system
PAL, SECAM
NTSC 3.58, 4.43 (only Video In)
Channel coverage
VHF: E2-E12
UHF: E21-E69
CATV: S1-S20
HYPER: S21-S41
D/K: R1-R12, R21-R69
I: UHF B21-B69
L: F2-F10, B-Q, F21-F69
Rear Terminals
• Centre speaker input terminals (2
C
• (L, R) audio outputs (phono jacks)
• :1/ 21-pin Euro connector (CENELEC
• :2/q 2 21-pin Euro connector (CENELEC
(SMARTLINK)
• :3/q 3 21-pin Euro connector (CENELEC
Front Terminals
q 4 S video input - 4 pin DIN
… 4 video input - phono jack
4 audio inputs - phono jacks
Headphones jack - minijack stereo
terminals)
standard)
including audio/video input, RGB
input,
TV audio/video output.
standard) including audio/video
input, S video input,
selectable audio/video output.
standard)
including audio/video input, S video
input,
audio/video output (monitor out).
Sound output
2 x 20 W (music power)
2 x 15 W (RMS)
Centre SP input
30 W (RMS) (using as the centre speaker)
Power consumption
210 W
Standby Power consumption
≤ 1 W
Dimensions (w x h x d)
Approx. 1376 x 898 x 384 mm
Weight
Approx. 43 kg
Accessories supplied
1 Remote Control (RM-903)
2 Batteries (IEC designated)
1 Wrench
2 Brackets
2 Screws
1 Cleaning Cloth
Other features
Digital Comb filter (High resolution)
TELETEXT, Fastext, TOPtext (2000 page TEXT memory)
NexTView
NICAM
Sleep Timer
Smartlink
Noise Reduction
Graphic Equaliser
Personal ID
Design and specifications are subject to change without notice.
Ecological Paper - Totally Chlorine Free
33
Additional Information
33GB34
Page 33

Additional Information
Troubleshooting
Here are some simple solutions to the problems which may affect the picture and sound.
Problem
No picture (screen is dark), no sound.
Poor or no picture (screen is dark),
but good sound.
Poor picture quality when watching a
RGB video source.
Good picture, no sound
No colour on colour programmes
Distorted picture when changing
programmes or selecting teletext
Striped picture
Solution
• Plug the set in.
• Press the
• If the indicator is on in red colour, press TV button on the remote
control.
• Check the aerial connection.
• Check that the selected video source is on.
• Turn the set off for 3 or 4 seconds and then turn it on again using the
button on the front of the set.
• Using the MENU system, select the Picture Adjustment menu. Adjust the
brightness, contrast and colour balance levels.
• Press the button repeatedly on the remote control until the RGB
symbol 1 is displayed on the screen.
• Press the +/- button on the remote control.
• Check that "Main" speaker is selected in the "Features" menu.
• Using the MENU system, select the Picture Adjustment menu. Adjust the
colour balance.
• Turn off any equipment connected to the Scart connectors on the rear of
the set.
• Adjust the RF Atenuator (ATT). For details, please refer to the section
"Using the Further Programme Preset function".
button on the front of the set.
GB
Noisy picture when viewing TV channel
Remote control does not function
The lamp indicator on the set
flashes.
The standby indicator on the set
flashes.
• If you continue to have these problems, have your TV serviced by qualified personnel.
• NEVER open the casing yourself.
• Adjust Fine Tuning (AFT) to obtain better picture reception. For details,
please refer to the section "Using the Further Programme Preset function"
• Replace the batteries.
• Replace the lamp. For details please refer to the section “Replace the
Lamp”
• If you are changing the lamp without disconnecting the power cord, the
standby indicator flashes. To continue changing the lamp, disconnect the
power cord and wait for about 30 minutes.
• Check that the lamp cover is tightly attached.
• If you are not changing the lamp but the standby indicator flashes, contact
your nearest Sony service centre.
Additional Information
34
Page 34

Úvod
MENU
K
Děkujeme Vám za výběr tohoto modelu Sony “Grand Wega”.
Před použitím tohoto aparátu si pozorně přečtěte tuto příručku a zachovejte ji pro budoucí informaci.
• Kódy pro užívání tohoto Návodu k obsluze:
• Potencionální rizika.
• Důležité informace.
• Informace o funkci.
•1,2.. Sekvence k následovným pokynům.
• Stínová tlačítka dálkového ovladače označují tlačítka,
která máte stisknout pro provedení různých pokynů.
• Informace o výsledcích pokynů.
Bezpečnostní opatření
Každý televizor pracuje s velmi vysokým napětím. Abyste zabránili vzniku požáru nebo elektrického výboje, řid’te se prosím
následujícími bezpečnostními instrukcemi.
•Doporučujeme Vám přepravovat aparát za pomoci druhé
osoby tak, že jednou rukou uchopíte spodní část obrazovky
a druhou rukou horní část obrazovky. Vždy dbejte na to,
abyste při přenášení aparátu nemačkali reproduktory
umístěné po stranách obrazovky, ani přední panely, aby
nedošlo k jejich deformaci nebo rozbití.
•Ničím nepřikrývejte nebo neblokujte ventilační drážku, která
se nachází vzadu aparátu, na jeho levé spodní části. Pro
zajištění účinné ventilace, je třeba umístit aparát ve
vzdálenosti nejméně 10 cm od zdi.
•Jestliže se aparát přemístí ze studeného prostředí přímo do
teplého nebo se opakovaně mění teplota místnosti, je
možné, že to způsobí nejasný obraz nebo špatnou kvalitu
barev v některých částech obrazovky. Toto je způsobeno
vlhkostí, která se nashromáždila na zrcátkách nebo na
čočkách uvnitř přístroje. Před užitím aparátu je třeba vlhkost
nechat odpařit.
•Aby byl obraz zřetelný, nevystavujte obrazovku přímému
osvětlení. Pokud možno, použijte bodové stropní osvětlení.
•Tento televizor byl vyroben za použití vysoce přesné technologie.
Přesto však vzhledem ke struktuře zobrazovacího panelu se
mohou objevit černé či světlejší tečky. Nepovažujte toto za
poruchu televizoru je to dáno použitím vysoce přesné a jemné
technologie.
•K obrazovce tohoto aparátu je dodán antireflexní kryt. Aby
nedošlo k poškození obrazovky, řiďte se podle následujících
pokynů:
• Pro setření prachu z obrazovky používejte hadr na čištění, který
je součástí aparátu nebo jiný jemný hadr.
• Obrazovku udržujte jemným, lehce navlhčeným hadrem.
Nepoužívejte brusné pasty. Jako bezpečnostní zaopatření
před každým čištěním odpojte aparát od elektrické sítě.
• Vyvarujte se dotýkání obrazovky, abyste nepoškrábali její
povrch.
Obsah
Úvod ............................................................................................................................................................................................................ 3
Bezpečnostní opatření ................................................................................................................................................................................ 3
Všeobecný popis
Kontrola přídavných doplňků .......................................................................................................................................................... 4
Přehled tlačítek aparátu................................................................................................................................................................... 4
Přehled tlačítek dálkového ovladače............................................................................................................................................... 5
Instalace
Vložení baterií do dálkového ovladače ............................................................................................................................................ 6
Připojení antény a videa .................................................................................................................................................................. 6
Umístění aparátu ............................................................................................................................................................................. 6
První uvedení do chodu
Zapnutí aparátu a automatické naladění ......................................................................................................................................... 7
Režim Menu
Změna formátu zobrazení................................................................................................................................................................ 9
Úvod do režimu Menu na obrazovce .............................................................................................................................................. 9
Stručný návod k volbě Menu......................................................................................................................................................... 10
Použití režimu menu:
Seřízení obrazu............................................................................................................................................................................ 11
Seřízení zvuku ............................................................................................................................................................................. 12
Použití Menu “Spec. funkce” ...................................................................................................................................................... 14
Ruční ladění televizoru ................................................................................................................................................................15
Identifikace jednotlivých vysílacích stanic................................................................................................................................... 16
Vynechávání programových pozic .............................................................................................................................................. 17
Použití funkce “Rozšířené předvolby”......................................................................................................................................... 18
Zavedení Vašeho osobního ID čísla ............................................................................................................................................ 19
Ukázka různých funkcí ................................................................................................................................................................ 20
Seřízení vodorovného centrování obrazu pro videozdroj RGB ................................................................................................... 21
Identifikace a volba formátu zobrazení vstupních signálů .......................................................................................................... 22
Multi obrazy (Multi PIP) ............................................................................................................................................................... 23
Dva obrazy na obrazovce (PAP).................................................................................................................................................. 23
Teletext................................................................................................................................................................................................ 24
NexTView............................................................................................................................................................................................ 26
Přídavná zařízení
Připojení přídavných zařízení......................................................................................................................................................... 28
Použití přídavných zařízení ............................................................................................................................................................ 29
“Smartlink”..................................................................................................................................................................................... 30
Dálková ovládání jiných zařízení Sony........................................................................................................................................... 30
Doplňkové informace
Optimální úhel vidění ....................................................................................................................................................................31
Výměna žárovky ............................................................................................................................................................................ 32
Specifikace .................................................................................................................................................................................... 33
Řešení problémů ........................................................................................................................................................................... 34
CZ
3
Page 35

Všeobecný popis
Kontrola přídavných doplňků
2 baterie (typ R6)
1 Klič2 Držaky
Dálkový ovladač
(RM-903)
Přehled tlačítek aparátu
Vstup pro
sluchátka
Vstup pro příjem
S videa
2 Dva šrouby
Stlačením znaménka na
čelní části aparátu získáte
přístup k ovládacímu
čelnímu panelu.
1 Jeden hadr na čištění
Indikátor
žárovky
Tlačítko
zapnuto/
vypnuto
Ukazatel režimu
dočasného vypnutí
(standby):
• Pokud vypnete aparát
stisknutím tlačítka
dočasného vypnutí na
dálkovém ovladači,
indikátor se rozsvítí
červeně.
• Pokud vypnete aparát
stisknutím hlavního
vypínače, indikátor se
rozsvítí žlutě.
Vstup pro
příjem videa
Vstup pro
příjem audia
Všeobecný popis
4
Tlačítko pro
výběr vstupního
signálu
Tlačítka pro
ovládání hlasitosti
zvuku
Tlačítka pro výběr
následujících nebo
předchozích kanálů
(pro volbu televizní stanice)
Page 36

Všeobecný popis
Přehled tlačítek dálkového ovladače
Opětné seřízení aparátu předstanovené
ve výrobně
Tlačítka dálkového ovladače je třeba
stisknout nejen k opětnému seřízení
obrazu a zvuku, které jsou již
předstanovené ve výrobně, ale také k
zapojení aparátu.
Poté, co se na obrazovce objeví menu
automatického naladění, postupujte tak,
jak je uvedeno v kapitole “Zapnutí aparátu
a automatické naladění” (v bodě 4) v této
příručce Návodu k obsluze.
Zapnutí/Vypnutí videa
Stisknutím se video zapne nebo vypne.
Vypnutí zvuku
Pokud chcete zvuk vypnout, stiskněte
tlačítko.
Zvuk se zapne opětovným stisknutím.
Výběr z režimu TV
Stisknutím se vypne Teletext nebo vstup
do videa.
PAP (2 obrazy na obrazovce)
Podrobnější informace najdete v kapitole
“Dva obrazy na obrazovce (PAP)”.
Výběr z teletextu
Stisknutím se zobrazí teletext.
Zobrazení elektronického průvodce
programů
Stisknutím se zobrazí el. průvodce
programů (EPG). Opětovným stisknutím
se vypne.
Zmrazení obrazu
Stiskem se obraz televizoru zmrazí.
Opětným stisknutím se vrátí normální
obraz televizoru.
Tlačítko pro výběr kanálů
Stisknutím lze zvolit žádaný kanál.
Při volbě programu složeného ze dvou
čísel např. 23, nejdříve stiskněte -/-- a
následovně tlačítka 2 a 3.
Jestliže první číslo, které stisknete není
správné, stiskněte znovu tlačítko (od 0 do
9) a poté znovu opakujte celou operaci.
Výběr specifického zvuku
Opakovaným tisknutím se nastaví
specifický zvuk.
Výběr specifického obrazu
Opakovaným tisknutím se nastaví
spacifický obraz.
Seřízení hlasitosti
Stisknutím se nastaví hlasitost televizoru.
1
4
7
S
VIDEO TV
2
5
8
0
K
MENU
VT
R 1 2 3 4 DVD
3
6
9
PROGR
RM
VIDEO TV
CH
903
Zobrazení času
Stisknutím zapnete nebo vypnete
hodiny (funguje pouze při vysílání z
teletextu).
Ovládádní videa
Podrobnější informaci najdete v
kapitole “Dálková ovládání jiných
zařízení Sony”.
Dočasné vypnutí televizoru
Stiskem se televizor dočasně vypne (časový
ukazatel
tlačítko a zapojte televizor časovým spínačem
(standby).
Zobrazení informace na obrazovce
Stisknutím se na obrazovce objeví všechny údaje.
Zmizí opětovným stisknutím.
Výběr vstupního signálu
Tiskněte jej opakovaně, až se na obrazovce objeví
zvolený vstupní signál.
Návrat k poslednímu vybranému kanálu
Stiskněte jej, aby se znovu objevil poslední
zvolený kanál (předchozí kanál by měl být
viditelný po dobu alespoň 5 vteřin).
Výběr formátu zobrazení
Tiskněte jej opakovaně, aby se změnil formát
zobrazení. Obsáhlejší informaci najdete v kapitole
“Změna rozměrů obrazovky”.
Multi obraz (Multi PIP)
Stisknutím se zobrazí druh Multi PIP. Opětovným
stisknutím se vypne.
Páčka pro výběr menu
• Když je MENU zapnuto:
• Když je MENU vypnuto:
Volba kanálů
Stiskněte jej pro volbu předchozího nebo
následujícího kanálu.
se rozsvítí červeně). Stiskněte opět
Televizor se automaticky přepne do
pohotovostního režimu po 15-30 min bez
televizního signálu (standby), pokud se
během této doby nestiskne žádné jiné
tlačítko.
4 Zvýšit jeden stupeň
$ Snížit jeden stupeň
Z
Zvolit menu nebo se vrátit na předchozí volbu
z Zvolit menu nebo zvolit následující volbu
OK Potvrdit volbu
Z
Vstupte přímo do posledního vybraného menu
OK Objeví se všeobecný seznam programů
CZ
Kromě funkcí, které má televize, veškerá barevná
tlačítka se také používají pro operace teletextu.
Podrobnější informace najdete v kapitole “Teletext” v
tomto Návodu k obsluze.
Zapojení režimu menu
Stiskněte jej a menu se objeví na obrazovce.
Znovu stiskněte a tímto se vypojí a objeví se
normální obrazovka.
Všeobecný popis
5
Page 37

Instalace
Vložení baterií do dálkového ovladače
Zkontrolujte, jestli jsou baterie vloženy ve správné pozici.
Berte ohled na životní prostředí. Použitých baterií se zbavujte
způsobem, který životní prostředí nepoškozuje.
Připojení anteny a videa
Přípojné kabely se nedodávají.
nebo
OUT IN
Konektor typu EURO je přídavné zařízení.
Jeho použitím můžete zlepšit kvalitu obrazu a zvuku při použití videa.
Jestliže nepoužijete konektor typu EURO, po automatickém naladění aparátu bude ještě třeba ručně doladit signální
kanál videa. Podrobnější informace najdete v kapitole “Ruční ladění televizoru”. Také můžete zkonzultovat Návod k
obsluze Vašeho videa, kde se dozvíte, jak získat kanál signálu videa.
Umístění aparátu the set
Po u končení nastavení upevněte aparát z bezpečnostních důvodů ke stěně, např. za pomoci držáků, keteré jsou součástí přslušenství.
1 Držáky které jsou součástí příslušenství, příšroubujte na horní zadní stěnu aparátu.
Ničím nepřikrývejte nebo neblokujte ventilační drážku, která se
nachází vzadu aparátu, na jeho levé spodní části. Pro zajištění
účinné ventilace, je třeba umístit aparát ve vzdálenosti
nejméně 10 cm od zdi.
2 Skrz držáky (bod 1) protáhněte sílnou šňůru nebo lanko a připevněte ji na stěnu nebo k opěrné polici apod.
6
Instalace
Page 38

První uvedení do chodu
Language/Country
Language
Country
Select Language: Confirm: OK
4 Italiano
Français
Español
English
Deutsch
Dansk
Čeština
Language/Country
Language
Country
Select Language: Confirm: OK
4 Italiano
Français
Español
English
Deutsch
Dansk
Čeština
Zapnutí aparátu a automatické naladění
Při prvním zapnutí aparátu se na obrazovce objeví sekvence menu, prostřednictvím kterých budete moci 1) vybrat jazyk
menu, 2) vybrat zemi, ve které si přejete používat aparát, 3) hledat a automaticky ukládat všechny použitelné kanály (televizní
stanice) a 4) měnit pořadí, ve kterém se objeví kanály (televizní stanice) na obrazovce.
Nicméně, jestliže budete chtít po nějaké době změnit jazyk menu, zemi, opakovat automatické ladění (např. v případě
přestěhování) nebo znovu změnit pořadí kanálů, můžete to provést výběrem vhodného příslušného menu v (Nastavení).
1 Zapojte aparát do elektrické sítě (220-240 V AC, 50 Hz). Stiskněte
tlačítko zapnutí/vypnutí na čelní straně aparátu, aby se zapnul.
Po prvním stisknutí tohoto tlačítka se na obrazovce automaticky
objeví menu Language/Country (Jazyk/Země).
2 Stiskněte páčku dálkového ovladače směrem $ nebo 4 pro volbu
jazyka a následovně stiskněte tlačítko OK, abyste potvrdili volbu. Od
tohoto okamžiku se veškerá Menu automatického naladění objeví ve
zvoleném jazyce.
3 Stiskněte páčku směrem $ nebo 4 pro volbu země, kde si přejete
používat aparát a dále stiskněte tlačítko OK, abyste potvrdili volbu.
Namísto země volte ”Vyp”, jestliže si nepřejete, aby se kanály
(televizní stanice) ukládaly v předem určeném pořadí, které
Language/Country
Language
Country
Select Language: Confirm: OK
Jazyk/Země
Jazyk
Země
Vyběr zemi: Potvrzení: OK
4 Italiano
Français
Español
English
Deutsch
Dansk
Čeština
4
Finsko
Dánsko
Česká rep.
Bulharsko
Belgie
Rakousko
CZ
Vyp
začíná pozicí programu č. 1.
TV
D
O
I
E
V
4 Menu automatického naladění se na obrazovce objeví ve vybraném
jazyce. Stiskněte tlačítko OK a zvolte Ano.
Přejete si spustit
automatické laděni?
Ano: OK Ne:
5 Na obrazovce se automaticky objeví nové menu, které Vám potvrdí,
je-li zapojená anténa. Zkontrolujte, jestli je anténa zapojena a poté
1
2
3
4
5
6
stiskněte tlačítko OK pro započetí automatického naladění.
Potvrd'te, prosím,
že anténaje připojena
Ano: OK Ne:
• Aparát začíná automaticky ladit a ukládat do paměti všechny
7
8
9
0
příslušné kanály (televizní stanice).
• Pokud v režimu menu “Země” zvolíte “Vyp” a po prvním
uvedení do chodu znovu provedete automatické vyladění,
televizní stanice zůstanou uloženy v paměti od toho čísla
MENU
PROGR
programu, který jste sledovali v daný okamžik.
Tento proces může trvat několik minut. Mějte trpělivost a
nestiskávejte žádné tlačítko během trvání procesu ladění.
Proces by se neuskutečnil.
1
CO2
2
CO3
3
CO4
4
CO7
5
CO8
vyhledávání...
S
RM
903
pokračuje ...
První uvedení do chodu
7
Page 39

První uvedení do chodu
6 Jakmile aparát naladil a uložil do paměti všechny kanály
DETV
O
I
V
a) Jestliže si nepřejete změnit pořadí kanálů, přejděte na bod č. 7.
(televizní stanice), na obrazovce se automaticky objeví Menu
Třídění programů, kterým můžete změnit pořadí, ve kterém se
kanály objeví na obrazovce.
1
4
7
S
2
0
MENU
b) Jestliže si přejete změnit pořadí kanálů:
1 Stiskněte páčku dálkového ovladače směrem $ nebo 4 pro volbu
čísla programu s kanálem (televizní stanicí), jehož pozici chcete
změnit a poté ji stiskněte směrem z.
3
5
6
8
9
2 Stiskněte páčku dálkového ovladače směrem $ nebo 4 pro volbu
nového čísla programu, ve kterém chcete uložit do paměti zvolený
kanál (televizní stanici) a poté stiskněte OK.
Zvolený kanál mění svou novou pozici programu a ostatní
kanály se mění podle něj.
3 Opakujte body č. 1) a 2), jestliže si přejete změnit pozici jiných
televizních kanálů.
PROGR
7 Stiskněte tlačítko MENU a menu zmizí.
Třídění programů
PROG K. NÁZEV
TV 5
C03
1
PRO 7
C05
2
EU-SP
C07
3
SWF
C08
4
RTL
C09
5
SAT
C11
6
MDR
C12
7
DDI
C13
8
DSF
C14
9
RTL 2
C15
10
KAB 1
C16
11
Výběr prog: Potvrzení:
Třídění programů
PROG K. NÁZEV
1
TV 5
PRO 7
EU-SP
SWF
RTL
SAT
MDR
DDI
DSF
RTL 2
KAB 1
C03 TV 5
C03
2
C05
3
C07
4
C08
5
C09
6
C11
7
C12
8
C13
9
C14
10
C15
11
C16
Výběr polohy: Posun: OK
Aparát je připraven k funkci.
RM
903
První uvedení do chodu
8
Page 40

Režim Menu
o
z
Nastavení Obrazu
Výběr: Zadat Menú:
Reźim obrazu
Kontrast
Jas
Barevná sytost
Ostrost
Reset
Umělá inteligence
Redukce šumu
Barevný Tón
Osobní
Zap
Vyp
Normal
Nastavení Obrazu
Výběr: Zadat Menú:
Reźim obrazu
Kontrast
Jas
Barevná sytost
Ostrost
Reset
Umělá inteligence
Redukce šumu
Barevný Tón
Osobní
Zap
Vyp
Normal
Páčka:
Změna formátu zobrazení
Tato funkce Vám umožní změnit formát televizního zobrazení.
D
O
I
E
V
TV
1 Tiskněte opakovaně tlačítko na dálkovém ovladači pro volbu
jednoho z těchto formátů.
Smart: imitace efektu široké obrazovky pro vysílání s poměrem
stran 4:3.
1
2
3
4
5
6
7
8
9
0
4:3: konvenční velikost obrazu 4:3, úplné informace o obrazu.
14:9: kompromis mezi velikostí obrazu 4:3 a 16:9.
Zoom: formát široké obrazovky pro filmy ve formátu poštovní
prihrádky.
Wide: pro vysílání s poměrem stran 16:9.
V režimech Smart, Zoom a 14:9 je odříznuta horní a spodní část
MENU
S
PROGR
RM
obrazovky. Stisknutín
obrazovce (např. proto, abyste mohli číst titulky).
903
2 Stiskněte tlačítko OK pro potvrzení Vaší volby.
4 nebo $ můžete nastavit umístění obrazu na
Úvod do režimu Menu na obrazovce
Tento aparát užívá na obrazovce takový režim Menu, který Vás vede různými operacemi. Použijte následující tlačítka
dálkového ovladače, pomocí kterých můžete volit Menu:
Smart
Wide
Zoom
14:9
4:3
CZ
1
4
7
V
2
5
8
0
MENU
S
I
D
E
O
3
6
9
PROGR
RM
TV
1 Stiskněte tlačítko MENU, aby se Vám ukázal první stupeň menu na
obrazovce.
2 • Pro vyvolání žádaného menu nebo výběru stiskněte páčku
směrem
• Pro vstup do zvoleného menu nebo výběru ji stiskněte směrem z.
• Pro návrat do předešlého menu nebo výběru ji stiskněte
směrem Z.
• Pro změnu nastavení zvoleného výběru ji stiskněte směrem
$/4/Z
• Pro potvrzení a uložení do paměti Vaší volby stiskněte OK.
4 nebo $.
nebo z.
stiskněte směrem
stiskněte směrem $/4/Z nebo
$/4/Z
OK
stiskněte OK
3 Stiskněte tlačítko MENU a menu zmizí.
903
Režim Menu
9
Page 41

Režim Menu
Stručný návod k volbě Menu
Nastavení Obrazu
Reźim obrazu
Kontrast
Jas
Barevná sytost
Ostrost
Reset
Umělá inteligence
Redukce šumu
Barevný Tón
Výběr: Zadat:
Nastavení zvuku
Reźim ekvalizéru
Nastavení
ekvalizéru
Vyvážení
Fyziologie
Prostor
Auto nast. hlas.
Dvojí zvuk
Hlasitost
Dvojí zvuk
Výběr: Zadat Menu:
Spec. funkce
Reproduktor
Auto formát
Úprava formátu
Čas do vypnutí
Rodičovský zámek
Výstrup AV2
Výběr: Zadat Menu:
Set Up
Set Up
Nastavení
Auto Tuning
Auto Tuning
Automatické ladění
Programme Sorting
Programme Sorting
Třídění programů
Select NexTView
Select NexTView
Vyber NexTView
AV Preset
AV Preset
AV předvolby
Manual Set Up
Manual Set Up
Manuální nastavení
Select:
Select:
Výběr: Zadat Menu:
Osobní
0
0
Enter Menu:
Enter Menu:
Osobní
Normal
.
0
Mono
Mono
- - - - - - -
Vyp
Vyp
Vyp
Normal
Zap
Vyp
Hlavní
Nastavení Obrazu
Reźim obrazu
Kontrast
Jas
Barevná sytost
Ostrost
Reset
Umělá inteligence
Redukce šumu
Barevný Tón
Výběr: Zadat:
Nastavení zvuku
Reźim ekvalizéru
Nastavení
ekvalizéru
Vyvážení
Fyziologie
Prostor
Auto nast. hlas.
Dvojí zvuk
Hlasitost
Dvojí zvuk
Výběr: Zadat: OK
Spec. funkce
Reproduktor
Zap
Vyp
Vyp
TV
Auto formát
Úprava formátu
Čas do vypnutí
Rodičovský zámek
Výstrup AV2
Výběr: Zadat:
Nastavení
Automatické ladění
Třídění programů
Vyber NexTView
AV předvolby
Manuální nastavení
Výběr: Start auto. lad.:
Nastavení
Automatické ladění
Třídění programů
Vyber NexTView
AV předvolby
Manuální nastavení
Výběr: Zadat:
Osobní
Obsáhlejší informaci
najdete v kapitole
Zap
Vyp
“Seřízení obrazu”
Normal
Osobní
0
0
Obsáhlejší informaci
.
0
najdete v kapitole
Vyp
Vyp
“Seřízení zvuku”
Vyp
Mono
Mono
Obsáhlejší informaci
Hlavní
najdete v kapitole
Normal
Zap
“Použití Menu “Spec.
Vyp
Vyp
funkce”
TV
Start
- - - - - - -
- - - - - - -
Přejete si spustit
automatické laděni?
Ano: OK Ne:
Třídění programů
PROG K. NÁZEV
TV 5
C03
1
PRO 7
C05
2
EU-SP
C07
3
SWF
C08
4
RTL
C09
5
SAT
C11
6
MDR
C12
7
DDI
C13
8
DSF
C14
9
RTL 2
C15
10
KAB 1
C16
11
Výběr prog: Potvrzení:
Obsáhlejší informaci
najdete v kapitole
“Zapnutí aparátu a
automatické naladění”
Obsáhlejší informaci
najdete v kapitole
“Zapnutí aparátu a
automatické naladění”
Teletext
Horní / Dolní / Plný
Vymazání textu
Odkrýt text
Časovací stránka
Přehledn stránek...
Výběr: Zadat Menu:
Obsáhlejší
informaci najdete
v kapitole
“Teletext”
Nastavení
Automatické ladění
Třídění programů
Vyber NexTView
AV předvolby
Manuální nastavení
Výběr: Zadat:
Nastavení
Automatické ladění
Třídění programů
Vyber NexTView
AV předvolby
Manuální nastavení
Výběr: Zadat:
Nastavení
Automatické ladění
Třídění programů
Vyber NexTView
AV předvolby
Manuální nastavení
Výběr: Zadat:
- - - - - - -
- - - - - - -
- - - - - - -
Obsáhlejší
informaci
najdete v
kapitole
“NexTView”
Obsáhlejší
informaci
najdete v
kapitole
“Identifikace a
volba formátu
zobrazení
vstupních
signálů”
Manuální nastavení
Jazyk/Země
Ruční ladění
Rozšířené předvolby
RGB Nastavení
Osobní ID číslo
Ukázka
Výběr: Zadat:
Manuální nastavení
Jazyk/Země
Ruční ladění
Rozšířené předvolby
RGB Nastavení
Osobní ID číslo
Ukázka
Výběr: Zadat:
Manuální nastavení
Jazyk/Země
Ruční ladění
Rozšířené předvolby
RGB Nastavení
Osobní ID číslo
Ukázka
Výběr: Zadat:
Manuální nastavení
Jazyk/Země
Ruční ladění
Rozšířené předvolby
RGB Nastavení
Osobní ID číslo
Ukázka
Výběr: Zadat:
Manuální nastavení
Jazyk/Země
Ruční ladění
Rozšířené předvolby
RGB Nastavení
Osobní ID číslo
Ukázka
Výběr: Zadat:
Manuální nastavení
Jazyk/Země
Ruční ladění
Rozšířené předvolby
RGB Nastavení
Osobní ID číslo
Ukázka Start
Výběr: Zadat:
- - - - - - -
- - - - - - -
- - - - - - -
- - - - - - -
- - - - - - -
- - - - - - -
Obsáhlejší informaci
najdete v kapitole
“Zapnutí aparátu a
automatické naladění”
Obsáhlejší informaci
najdete v kapitolách
“Ruční ladění
televizoru”,
“Identifikace
jednotlivých vysílacích
stanic” a “Vynechávání
programových pozic”
Obsáhlejší informaci
najdete v kapitole
“Použití funkce
Rozšířené předvolby”
Obsáhlejší informaci
najdete v kapitole
“Seřízení vodorovného
centrování obrazu pro
videozdroj RGB”
Obsáhlejší informaci
najdete v kapitole
“Zavedení Vašeho
osobního ID čísla”
Obsáhlejší informaci
najdete v kapitole
“Ukázka různých
funkcí”
10
Režim Menu
Page 42

Režim Menu
Seřízení obrazu
Ačkoliv je obraz nastaven již v továrně, lze jej přizpůsobit Vašim specifickým požadavkům.
1
4
7
S
MENU
TV
D
O
I
E
V
objeví menu.
2 Stlačte páčku směrem z a vstoupíte do menu Nastavení obrazu.
3 Stlačte páčku směrem $ nebo 4 pro volbu položky, kterou si přejete
1 Stisknout tlačítko MENU na dálkovém ovladači a na obrazovce se
změnit a poté ji stlačte směrem
Přečtěte si následující tabulku a uvidíte obsah každé položky:
Režim obrazu $ Přenos (pro programy v přímém přenosu)
Osobní (pro osobní požadavky)
2
3
5
6
8
9
0
Film (pro filmy)
4 Hry (pro elektronické hry)
Kontrast Z Méně z Více
* Z Tmavší z Světlejší
Jas
Barevná sytost* Z Méně z Více
Ostrost* Z Jemnější z Ostřejší
Barevný tón** Z Červenější z Zelenější
Reset Obnoví tovární naladění obrazu
K
Umělá inteligence 4 Vyp: Normální
z.
Nastavení Obrazu
Reźim obrazu
Kontrast
Jas
Barevná sytost
Ostrost
Reset
Umělá inteligence
Redukce šumu
Barevný Tón
Výběr: Zadat Menú:
Nastavení Obrazu
Reźim obrazu
Kontrast
Jas
Barevná sytost
Ostrost
Reset
Umělá inteligence
Redukce šumu
Barevný Tón
Výběr: Zadat:
Reźim obrazu
Přenos
Osobní
Film
Hry
Osobní
Normal
Osobní
Normal
Zap
Vyp
Zap
Vyp
CZ
$ Zap: Automatická optimalizace stupně kontrastu
podle televizního signálu
PROGR
RM
Redukce šumu
Barevný Tón $ Teplý: Dodá obrazu teplý barevný nádech
903
$ Vysoká: Vysoká úroveň redukce šumu
Strědní: Střední úroveň redukce šumu
Nízká: Nízká úroveň redukce šumu
Auto: Automaticky zvolená úroveň redukce šumu
4 Vyp: Redukce šumu vypnuta
Normal: Normální
4 Stud.: Dodá obrazu studený nádech obrazu
Umělá inteligence
Redukce šumu
Barevný Tón
Vysoká
Střední
Nízká
Auto
Te p l ý
Normal
Stud.
Zap
Vyp
Vyp
*Pouze se může změnit, jestliže zvolíte Osobní v Režim obrazu.
** Dostupný pouze pro barevný systém NTSC (např. videokazety z USA).
4 Stlačte páčku směrem 4, $, Z nebo z pro úpravu seřízení zvolené
položky a poté stisknout tlačítko OK a tím uložit do paměti nové
seřízení.
5 Opakujte body 3 a 4 pro úpravu dalších seřízení.
6 Stiskněte tlačítko MENU a menu zmizí.
Rychlá změna režimu obrazu
Režim obrazu je možné rychle změnit, aniž by se muselo vstoupit do
menu Nastavení obrazu.
1 Opakovaně tiskněte tlačítko na dálkovém ovladači pro přímý
vstup a volbu režimu obrazu, který si přejete (Přenos, Osobní, Film
nebo Hry).
2 Stiskněte tlačítko OK pro návrat na normální obrazovku.
Reźim obrazu
Přenos
Osobní
Film
Hry
Režim Menu
11
Page 43

Režim Menu
Seřízení zvuku
Přestože je zvuk nastaven již v továrně, je možné jej přizpůsobit Vašim specifickým požadavkům.
1
4
7
S
MENU
TV
D
O
I
E
V
1 Stiskněte tlačítko MENU na dálkovém ovladači a menu se objeví na
obrazove.
2 Stlačte páčku směrem $ a zvolte znaménko , dále ji stlačte
měrem
z a tím vstoupíte do menu Nastavení zvuku.
3 Stlačte páčku směrem $ nebo 4 a zvolte položku, kterou si přejete
změnit, poté ji stlačte směrem
zjistíte obsah každé položky:
Režim ekvalizéru $ Osobní (pro osobní požadavky)
2
3
Vocal
Jazz
5
6
Rock
Pop
8
9
0
*Nastavení Stlačit páčku směrem
4 Rovný (není možné upravit)
ekvalizéru rozsahu, který si přejete změnit a poté ji stlačte směrem
$ nebo 4 a upravte. Nakonec stiskněte OK a tím uložíte
nové seřízení.
Vyvážení Z Levé z Pravé
PROGR
RM
903
Fyziologie $ Vyp: Normální
4 Zap: Pro hudební programy
Prostor $ Vyp: Normální
4 Zap: Pro speciální akustické efekty
Auto nast. hlas. $ Vyp: Hlasitost se mění podle vysílacího signálu
4 Zap: Hlasitost kanálů se udržuje nezávisle na
vysílacím signálu (např.reklamní inzeráty)
Dvojí zvuk • Pro stereo vysílání:
$ Mono
4 Stereo
• Pro dvojjazyčné vysílání:
$ Mono (určen pro kanál mono, je-li k dispozici)
A (pro 1. kanál)
4 B (pro 2. kanál)
Sluchátka:
l Hlasitost Z Méně z Více
l Dvojí zvuk • Pro stereo vysílání:
$ Mono
4 Stereo
z. Zkonzultujte následující tabulku a
z nebo Z pro volbu vlnového
Nastavení Obrazu
Reźim obrazu
Kontrast
Jas
Barevná sytost
Ostrost
Reset
Umělá inteligence
Redukce šumu
Barevný Tón
Výběr: Zadat Menú:
Nastavení zvuku
Reźim ekvalizéru
Nastavení
ekvalizéru
Vyvážení
Fyziologie
Prostor
Auto nast. hlas.
Dvojí zvuk
Hlasitost
Dvojí zvuk
Výběr: Zadat: OK
Nastavení zvuku
Reźim ekvalizéru
Nastavení
ekvalizéru
Vyvážení
Fyziologie
Prostor
Auto nast. hlas.
Dvojí zvuk
Hlasitost
Dvojí zvuk
Výběr re
žimu
Nastavení ekvalizéru
(Osobní)
+
0
—
120 500 1,5K 5 K 10 K
Výběr:
Vyvážení
Fyziologie
Prostor
Auto nast. hlas.
Dvojí zvuk
Hlasitost
Dvojí zvuk
Osobní
Zap
Vyp
Normal
Osobní
.
0
Vyp
Vyp
Vyp
0
Mono
Mono
0
Osobní
Vocal
Jazz
Rock
Pop
Rovný
Personal
.
0
Vyp
Vyp
Vyp
Mono
0
Mono
0
: Potvrzení: OK
Nast.: Potvrz.:OK
.
Vyp
Zap
Vyp
Zap
Vyp
Zap
Mono
A
B
B
A
• Pro dvojjazyčné vysílání:
$ Mono (určen pro kanál mono, je-li k dispozici)
A (pro 1. kanál)
B (pro 2. kanál)
4 PAP (pouze je-li PAP zapnut)
12
*Pouze se může trvale uložit do paměti, jestliže jste stanovili Osobní v Režim
ekvalizéru. Ostatní úpravy ( Vocal, Jazz, Rock nebo Pop) zůstávají uloženy
pouze do příští změny režimu ekvalizéru.
pokračuje...
Režim Menu
Page 44

Režim Menu
D
O
TV
I
E
V
4 Stlačit páčku směrem $, 4, Z nebo z pro úpravu seřízení zvolené
položky a poté stiskněte OK pro uložení nového seřízení.
5 Opakujte body 3 a 4 pro úpravu dalších položek.
6 Stisknout tlačítko MENU a menu zmizí z obrazovky.
3
2
1
6
5
4
9
8
7
0
Rychlá změna režimu zvuku
CZ
MENU
PROGR
Režim zvuku je možné rychle změnit, aniž by bylo třeba vstoupit do
menu Nastavení zvuku
.
1 Opakovaně tiskněte tlačítko na dálkovém ovládači pro přímý
vstup a volbu režimu zvuku, který si přejete (Osobní, Vocal, Jazz,
Rock, Pop nebo Rovný).
Reźim ekvalizéru
Osobní
Vocal
Jazz
Rock
Pop
Rovný
2 Stisknout tlačítko OK pro návrat na normální televizní obrazovku.
RM
903
S
Režim Menu
13
Page 45

Režim Menu
Použití menu “Spec. funkce”
Toto menu Vám umožní:
a) Volbu, chcete-li poslouchat zvuk přímo z aparátu nebo prostřednictvím vnějšího zesilovače.
b) Automatické nastavení formátu zobrazení.
c) Volbu časového intervalu, po kterém aparát automaticky přejde do režimu časového vypnutí (standby).
d) Blokovat tlačítka aparátu tak, že bude možné ovládat je pouze dálkovým ovládačem.
e) Volbu výstupních signálů pro konektor typu EURO: :2/q2 (SMARTLINK). Tímto způsobem budete moci nahrávat
prostřednictvím tohoto Eurokonektoru, zatímco budete sledovat vysílání jiného signálu (má-li Vaše video Smartlink,
tento postup není potřeba).
1 Stisknout tlačítko MENU na dálkovém ovládači a menu se objeví na
obrazovce.
2 Stlačte páčku na dálkovém ovládači směrem $ a zvolte znaménko
, poté ji stlačte směrem z a vstoupíte do menu Spec. funkce.
3 Stlačte páčku směrem $ nebo 4 a tím nastavíte volbu menu, které si
přejete a poté ji stlačte směrem z.
(Přečtěte si spodní tabulku a uvidíte obsah každé volby).
4 Stlačit páčku směrem $ nebo 4 pro úpravu seřízení volby a poté
stisknout OK a tím uložit.
5 Stisknout tlačítko MENU a menu zmizí.
Spec. funkce Efekt/Operace
Reproduktor $ Hlavní (zvuk aparátu)
Auto Formát $ Vyp: Velikost obrazu se automaticky nenastavuje.
(pouze pro Normal: Velikost obrazu se automaticky nastavuje
signál z antény) podle informací z vysílacího studia.
Úprava formátu $ Vyp: je vybrán poměr 4:3/14:9.
(pouze je-li Auto 4 Zap: pro vysílání v poměru 4:3/14:9 je automaticky.
Formát zvolen
režim Smart
nastaven na
“Normal” nebo
“Plný”)
Čas do vypnutí 4 Vyp
Rodičovský zámek
Výstup AV2 $ TV (signál audio/video antény)
4 Středový (zvuk vnějšího zesilovače)
4 Plný: Televizor může automaticky nastavit velikost
obrazu, aby tak eliminoval veškerá tmavá místa v
televizním obrazu (jak je popsáno v kapitole “Změna
formátu zobrazení”).
10 min
20 min
...
$ 90 min
• Minutu před tím, než aparát vstoupí do režimu
dočasného vypnutí (standby), zbývající čas se
automaticky objeví na obrazovce.
• Zatímco sledujete televizi,stiskněte tlačítko a tak
se objeví čas, který zbývá do vypnutí.
• Pro zpětné zapnutí aparátu po režimu dočasného
vypnutí, stiskněte tlačítko TV na dálkovém
ovládači.
$ Vyp (normální režim)
4 Zap (tlačítka aparátu nefungují, aparát funguje
pouze použitím dálkového ovládače).
AV1 (signál audio/video konektoru typu EURO
:1/ ).
AV2 (signál audio/video konektoru typu EURO
:
2/q2 SMARTLINK).
AV3 (signál audio/video konektoru typu EURO
:
3/q3).
4 AV4 (signál audio/video konektoru … umístěném na
čelní straně aparátu.
Pokud zapojíte dekodér, nezapomeňte znovu zvolit
Výstup AV2 v režimu “TV” pro správnou dekodifikaci.
Reproduktor
Auto Formát
Úprava formátu
Čas do vypnutí
Rodičovský zámek
Výstrup AV2
1
4
7
S
MENU
D
O
I
E
TV
V
2
3
5
6
8
9
0
PROGR
RM
903
Nastavení Obrazu
Reźim obrazu
Kontrast
Jas
Barevná sytost
Ostrost
Reset
Umělá inteligence
Redukce šumu
Barevný Tón
Výběr: Zadat Menú:
Spec. funkce
Reproduktor
Auto formát
Úprava formátu
Čas do vypnutí
Rodičovský zámek
Výstrup AV2
Výběr: Zadat:
Hlavní
Středový
Normal
10 Min
Osobní
Normal
Hlavní
Normal
Zap
Vyp
Vyp
Vyp
Plný
Vyp
Zap
Vyp
Zap
TV
AV1
AV2
AV3
AV4
Zap
Vyp
TV
14
Režim Menu
Page 46

Režim Menu
Ruční ladění televizoru
Tato funkce slouží pro postupné ladění kanálů (televizních stanic) nebo vstupu do videa podle Vaší volby.
1
4
7
S
MENU
D
O
I
E
V
TV
televizní obrazovce
.
2 Stlačte páčku na dálkovém ovládači směrem $ a zvolte znaménko
1 Stiskněte tlačítko MENU na dálkovém ovladači a menu se objeví na
a poté ji stlačte směrem z pro vstup do menu Nastavení.
3 Stlačte páčku směrem $ nebo 4 a zvolte Manuální nastavení a
poté ji stlačte směrem z.
2
3
5
6
8
9
0
4 Stlačte páčku směrem $ nebo 4 a zvolte Ruční ladění a poté ji
stlačte směrem
z.
5 Stlačte páčku směrem $ nebo 4 pro volbu čísla programu (pozice),
na kterém si přejete naladit televizní stanici nebo kanál videa (pro
kanál videa Vám doporučujeme zvolit číslo programu “0”). Stlačte
páčku dvakrát směrem
z a tím se dostanete do sloupce SYS.
6 Stlačte páčku směrem $ nebo 4 pro volbu systému televizní
stanice a kanálu videa (B/G pro Západní Evropu, L pro Francii, I pro
Velkou Británii nebo D/K pro Východní Evropu) nebo vnějšího
PROGR
vstupního signálu (EXT). Poté stlačte páčku
do sloupce K.
z a tím se dostanete
7 Stlačte páčku $ nebo 4 pro volbu typu kanálu, “C” pro pozemní
vysílání (pro televizní stanice nebo kanál videa), “S” pro kabelové
RM
903
vysílání nebo “F” pro vstupy přímé frekvence. Poté stlačte
páčku z.
8 a) Znáte-li číslo kanálu televizní stanice nebo číslo signálu kanálu
videa nebo číslo frekvence, stiskněte číselná tlačítka pro přímé
uvedení čísla. Poté stiskněte OK
a tím číslo uložíte.
b) Neznáte-li číslo kanálu, stlačte páčku $ pro volbu NAJDI a
aparát začne automaticky hledat následující kanál televizní
stanice nebo kanál signálu videa. Jestliže nechcete uložit tento
kanál, stlačte páčku $ a hledejte jiný kanál. Až najdete ten
kanál, který si přejete uložit, stiskněte tlačítko OK.
c) Pro vnější vstupní signály (EXT), stlačte páčku $ pro volbu
vstupního signálu, ve kterém jste zapojili zařízení (AV1, AV2, AV3
nebo AV4). Poté stisknout OK a tím uložit.
9 Opakujte body 4 až 8 a) b) c) pro všechny další kanály, které si
přejete naladit a uložit.
Nastavení Obrazu
Reźim obrazu
Kontrast
Jas
Barevná sytost
Ostrost
Reset
Umělá inteligence
Redukce šumu
Barevný Tón
Výběr: Zadat Menú:
Nastavení
Automatické ladění
Třídění programů
Vyber NexTView
AV předvolby
Manuální nastavení
Výběr: Start auto. lad.:
Nastavení
Automatické ladění
Třídění programů
Vyber NexTView
AV předvolby
Manuální nastavení
Výběr: Zadat:
Manuální nastavení
Jazyk/Země
Ruční ladění
Rozšířené předvolby
RGB Nastavení
Osobní ID číslo
Ukázka
Výběr: Zadat:
Ruční ladění
PROG K.SYSSKOČ NÁZEV
1
Vyp
2
Vyp
3
Vyp
4
Vyp
5
Vyp
6
Vyp
7
Vyp
8
Vyp
9
Vyp
10
Vyp
11
Vyp
Výběr: Zadat:
PROG K.SYS
SKOČ NÁZEV
Vyp
1
PROG K.SYSSKOČ NÁZEV
PROG K.SYSSKOČ NÁZEV
PROG K.SYSSKOČ NÁZEV
B/G
D/K
EXT
Vyp 1 B/G
Vyp 1 B/G
Vyp 3 EXT
L
I
Osobní
Start
- - - - - - -
- - - - - - -
- - - - - - -
C09
ARD
B/G
C10
BBC
B/G
C
- -
S
F
03
C
NAJDI
AV1
AV2
AV3
AV4
Normal
Zap
Vyp
CZ
10 Stiskněte tlačítko MENU a menu zmizí.
Aparát je připraven k funkci.
Režim Menu
15
Page 47

Režim Menu
Identifikace jednotlivých vysílacích stanic
Obyčejně, je-li k dispozici teletext, jeho prostřednictvím dostanou kanály (televizní stanice) název automaticky. Nicméně,
můžete stanovit název kanálu nebo vstupního signálu videa vy sami. Název může mít maximálně 5 znaků (čísla nebo
písmena). Tímto způsobem budete moci jednoduše zjistit totožnost kanálu (televizní stanice) nebo signálu videa, který se
objeví na obrazovce.
1
4
7
S
2
0
MENU
TV
D
O
I
E
V
1 Stiskněte tlačítko MENU na dálkovém ovládači a menu se objeví na
obrazovce.
2 Stlačte páčku $ zvolte znaménko a posléze ji stlačte směrem
z pro vstup do menu Nastavení.
3
5
6
8
9
3 Stlačte páčku $ nebo 4 pro volbu Manuální nastavení a poté ji
stlačte směrem
z.
4 Stlačte páčku směrem $ nebo 4 pro volbu Ruční ladění a poté ji
stlačte směrem
PROGR
z.
5 Stlačte páčku směrem $ nebo 4 pro volbu čísla programu s
kanálem, kterému chcete dát název.
RM
903
6 Opakovaně stlačte páčku směrem z až se dostanete do první
Nastavení Obrazu
Reźim obrazu
Kontrast
Jas
Barevná sytost
Ostrost
Reset
Umělá inteligence
Redukce šumu
Barevný Tón
Výběr: Zadat Menú:
Nastavení
Automatické ladění
Třídění programů
Vyber NexTView
AV předvolby
Manuální nastavení
Výběr: Start auto. lad.:
Nastavení
Automatické ladění
Třídění programů
Vyber NexTView
AV předvolby
Manuální nastavení
Výběr: Zadat:
Manuální nastavení
Jazyk/Země
Ruční ladění
Rozšířené předvolby
RGB Nastavení
Osobní ID číslo
Ukázka
Výběr: Zadat:
Ruční ladění
PROG K.SYSSKOČ NÁZEV
1
Vyp
2
Vyp
3
Vyp
4
Vyp
5
Vyp
6
Vyp
7
Vyp
8
Vyp
9
Vyp
10
Vyp
11
Vyp
Výběr: Zadat:
PROG K.SYSSKOČ NÁZEV
Vyp 1 B/G
Osobní
Normal
Start
- - - - - - -
- - - - - - -
- - - - - - -
C09
ARD
B/G
C10
BBC
B/G
C 03
A
Zap
Vyp
položky sloupce NÁZEV.
16
Režim Menu
7 Stlačte páčku $ nebo 4 pro volbu písmene, čísla, “+” nebo mezery
a poté ji stlačte směrem
zbývající čtyři znaky stejným způsobem.
z pro potvrzení tohoto znaku. Zvolte
8 Až provedete volbu všech čtyřech znaků, stiskněte tlačítko OK.
9 Opakujte body 5 až 8, chcete-li nazvat další kanály.
10 Stiskněte tlačítko MENU a menu zmizí.
Po zvolení názvu kanálu, název se na obrazovce objeví na několik
vteřin.
Page 48

Režim Menu
Vynechávání programových pozic
Tato funkce umožňuje naprogramovat aparát tak, aby vynechal čísla programů, které si nepřejete, pokud jsou kanály
volené pomocí tlačítka PROGR +/-. Jestliže časem chcete opět používat číslo vynechaného programu, postupujte tak, jak
se následovně popisuje, ale zvolte Vyp namísto Zap v bodě 6.
TV
D
O
I
E
V
1 Stiskněte tlačítko MENU na dálkovém ovládači a menu se objeví na
obrazovce.
2 Stlačte páčku směrem $ a zvolte znaménko a poté ji stlačte
směrem
3
2
1
6
5
4
9
8
7
3 Stlačte páčku směrem $ nebo 4 pro volbu Manuální nastavení a
poté ji stlačte směrem
0
z pro vstup do menu Nastavení.
z.
Nastavení Obrazu
Reźim obrazu
Kontrast
Jas
Barevná sytost
Ostrost
Reset
Umělá inteligence
Redukce šumu
Barevný Tón
Výběr: Zadat Menú:
Nastavení
Automatické ladění
Třídění programů
Vyber NexTView
AV předvolby
Manuální nastavení
Výběr: Start auto. lad.:
Nastavení
Automatické ladění
Třídění programů
Vyber NexTView
AV předvolby
Manuální nastavení
Výběr: Zadat:
Start
- - - - - - -
- - - - - - -
Osobní
Normal
Zap
Vyp
CZ
Manuální nastavení
Jazyk/Země
Ruční ladění
Rozšířené předvolby
RGB Nastavení
Osobní ID číslo
Ukázka
Výběr: Zadat:
PROG K.SYSSKOČ NÁZEV
1 B/G
Vyp
Zap
C 09
- - - - - - -
ARD
MENU
PROGR
RM
4 Stlačte páčku směrem $ nebo 4 pro volbu Ruční ladění a poté ji
stlačte směrem
z.
5 Stlačte páčku směrem $ nebo 4 pro volbu pozice programu, který
903
chcete a poté ji stlačte směrem
z pro vstup do sloupce SKOČ.
S
6 Stlačte páčku směrem $ pro volbu Zap a poté stistknout OK a tím
uložit.
7 Opakujte body 5 a 6 pro všechny další pozice programu, které si
přejete vynechat.
8 Stiskněte tlačítko MENU a menu zmizí.
Pro zvolení kanálu (televizní stanice) tlačítkem PROGR +/-, kanál se
neobjeví, ale může být zvolen stisknutím odpovídajícího čísla
programu prostřednictvím číselných tlačítek na číselné stupnici.
Režim Menu
17
Page 49

Režim Menu
Použití funkce “Rozšířené předvolby”
Tato funkce umožňuje:
a) Zeslabit jednotlivě intenzitu vysílacího signálu, pokud je signál antény příliš intenzívní (čáry na obraze).
b) Seřídit jednotlivě hlasitost každého kanálu.
c) Pokud je zapnuté jemné automatické doladění, je možné také provést jemné ruční doladění a tím získat lepší příjem
obrazu, v případě, že se objeví zkresleně.
d) Vyladit výstup AV pro pozici programů s kodifikovanými signály, jako např. z placeného televizního dekodifikadoru. Tímto
způsobem, video připojené k aparátu nahrává dekodifikovaný signál.
1
4
7
S
MENU
TV
D
O
I
E
V
1 Stiskněte tlačítko MENU na dálkovém ovládači a menu se objeví na
obrazovce.
2 Stlačte páčku směrem $ a zvolte znaménko , poté ji stlačte
směrem
z pro vstup do menu Nastavení.
3 Stlačte páčku směrem $ nebo 4 a zvolte Manuální nastavení a poté
ji stlačte směrem
2
3
5
6
8
9
4 Stlačte páčku směrem $ nebo 4 a zvolte Rozšířené předvolby a
poté ji stlačte směrem
z.
z.
5 Stlačte páčku směrem $ nebo 4 a zvolte odpovídající číslo
0
programu a poté ji opakovaně stlačte směrem
z pro volbu:
Nastavení Obrazu
Reźim obrazu
Kontrast
Jas
Barevná sytost
Ostrost
Reset
Umělá inteligence
Redukce šumu
Barevný Tón
Výběr: Zadat Menú:
Nastavení
Automatické ladění
Třídění programů
Vyber NexTView
AV předvolby
Manuální nastavení
Výběr: Start auto. lad.:
Nastavení
Automatické ladění
Třídění programů
Vyber NexTView
AV předvolby
Manuální nastavení
Výběr: Zadat:
Start
- - - - - - -
- - - - - - -
Osobní
Normal
Zap
Vyp
a) ZESL (zeslabovač)
Manuální nastavení
Jazyk/Země
Ruční ladění
Rozšířené předvolby
RGB Nastavení
Osobní ID číslo
Ukázka
Výběr: Zadat:
Rozšířené předvolby
PROG AFTHLASZESL DEKODÉR
1
2
3
4
5
6
7
8
9
10
11
Výběr: Zadat:
PROG AFTHLASZESL DEKODÉR
Vyp
1
Zap
PROG AFTHL ASZESL DEKODÉR
1 Zap
PROG AF THLASZESL DEKODÉR
1 Zap -5
- - - - - - -
Vyp
0
Vyp
Zap
Vyp
0
Vyp
Zap
Vyp
0
Vyp
Zap
- 5
2
PROGR
RM
903
b) HLAS (hlasitost)
c) AFT (jemné automatické doladění)
d) DEKODÉR
Zvolená položka mění barvu.
6 a) ZESL
Stlačte páčku směrem
Opakujte body 5 a 6 a) pro zeslabení dalších kanálů.
b) HLAS
Stlačte páčku směrem
mezi -7 a +7 a poté stiskněte OK. Opakujte body 5 a 6 b) pro seřízení
stupně hlasitosti dalších kanálů.
c) AFT
Stlačte páčku směrem
mezi -15 a +15 a poté stiskněte tlačítko OK. Opakujte body 5 a 6 c)
pro jemné doladění dalších kanálů.
$ a zvolte Zap a poté stiskněte tlačítko OK.
$ nebo 4 a seřiďte stupeň hlasitosti kanálu
$ nebo 4 a seřiďte stupeň frekvence kanálu
d) DEKODÉR
Stlačte páčku směrem
do konektoru typu EURO
$ nebo 4 a zvolte AV1 (pro dekodér zapojený
:1/ ) nebo AV2 (pro dekodér
zapojený do konektoru typu EURO
:2/q2 (SMARTLINK) a poté
PROG AFTHL ASZESL DEKODÉR
1 Zap -5 2
Vyp
AV1
AV2
stiskněte tlačítko OK. Opakujte body 5 a 6 d) pro volbu výstupu AV1
nebo AV2 v ostatních pozicích programu.
18
Režim Menu
Po zapojení dekodéru k videu, které je zapojeno ke konektoru
typu :1/ nebo :2/q2 SMARTLINK) umístěných na
zadní straně aparátu, obraz tohoto dekodéru se objeví na
tomto čísle programu.
7 Stiskněte tlačítko MENU a menu zmizí z obrazovky.
Aparát je připraven k funkci.
Page 50

Režim Menu
Zavedení Vašeho osobního ID čísla
Můžete aparátu přidělit bezpečnostní kód, maximálně o 11 znacích (písmena nebo čísla). Toto Vám usnadní jeho zpětné
získání v případě krádeže.
Tento kód se může zavést pouze jednou!
Zapište si ho například do tohoto návodu k obsluze, abyste ho nezapomněli!
1
4
7
S
MENU
Nastavení
Automatické ladění
Třídění programů
Vyber NexTView
AV předvolby
Manuální nastavení
Výběr: Start auto. lad.:
Výběr: Zadat:
Určitě?
Nastavení Obrazu
Reźim obrazu
Kontrast
Jas
Barevná sytost
Ostrost
Reset
Umělá inteligence
Redukce šumu
Barevný Tón
Výběr: Zadat Menú:
Nastavení
Automatické ladění
Třídění programů
Vyber NexTView
AV předvolby
Manuální nastavení
Manuální nastavení
Jazyk/Země
Ruční ladění
Rozšířené předvolby
RGB Nastavení
Osobní ID číslo
Ukázka
Výběr: Zadat:
Manuální nastavení
Jazyk/Země
Ruční ladění
Rozšířené předvolby
RGB Nastavení
Osobní ID číslo
Ukázka
Výběr A-Z, 0-9: Ulož: O K
Osobní
Start
- - - - - - -
- - - - - - -
- - - - - - -
A---------
Normal
Zap
Vyp
CZ
TV
D
O
I
E
V
1 Stiskněte tlačítko MENU na dálkovém ovládači a menu se objeví na
obrazovce.
2 Stlačte páčku směrem $ a zvolte znaménko , poté ji stlačte
směrem
2
3
5
6
8
9
3 Stlačte páčku směrem $ nebo 4 a zvolte Manuální nastavení, poté
ji stlačte směrem
0
z pro vstup do menu Nastavení.
z.
4 Stlačte páčku směrem $ nebo 4 a zvolte Osobní ID číslo, poté ji
stlačte směrem
PROGR
z.
5 Stlačte páčku směrem $ nebo 4 pro volbu jednoho písmene, čísla,
903
znaku. Zvolte dalších deset znaků stejným způsobem.
RM
“+” nebo mezery a poté ji stlačte směrem
z pro potvrzení tohoto
6 Po volbě všech znaků stiskněte tlačítko OK. Na obrazovce se
automaticky objeví nové menu, kde se táže, jestli chcete uložit
zavedený kód.
Uložit: OK Zrušit:
7 a) Nechcete-li uložit tento kód, stlačte páčku směrem Z a opakujte
body 4 až 6 pro zavedení nového kódu.
b) Je-li tento kód ten, který chcete uložit, stiskněte tlačítko OK.
Pamatujte, že tento kód se může zavést pouze jednou.
8 Stiskněte tlačítko MENU a menu zmizí.
Když vstoupíte do menu Manuální nastavení, ve volbě Osobní ID
číslo se vždy objeví kód, který jste zavedli a nikdy už nebude možné
znovu vstoupit do této volby.
Režim Menu
19
Page 51

Režim Menu
Ukázka různých funkcí
Tato funkce nabízí celkový pohled na některé z funkcí, které má aparát.
1
4
7
S
MENU
D
TV
O
I
E
V
1 Stiskněte tlačítko MENU a menu se objeví na obrazovce.
2 Stlačte páčku směrem $ a zvolte znaménko , poté ji stlačte
směrem
2
3
5
6
8
9
0
3 Stlačte páčku směrem $ nebo 4 a zvolte Manuální nastavení, poté
ji stlačte směrem z.
z pro vstup do menu Nastavení.
4 Stlačte páčku směrem $ nebo 4 a zvolte Ukázka a poté ji stlačte
směrem
PROGR
z, aby ukázka začala.
Nastavení Obrazu
Reźim obrazu
Kontrast
Jas
Barevná sytost
Ostrost
Reset
Umělá inteligence
Redukce šumu
Barevný Tón
Výběr: Zadat Menú:
Nastavení
Automatické ladění
Třídění programů
Vyber NexTView
AV předvolby
Manuální nastavení
Výběr: Start auto. lad.:
Nastavení
Automatické ladění
Třídění programů
Vyber NexTView
AV předvolby
Manuální nastavení
Výběr: Zadat:
Manuální nastavení
Jazyk/Země
Ruční ladění
Rozšířené předvolby
RGB Nastavení
Osobní ID číslo
Ukázka Start
Výběr: Zadat:
Start
- - - - - - -
- - - - - - -
- - - - - - -
Osobní
Normal
Zap
Vyp
Na obrazovce se začíná ukazovat sekvence s většinou funkcí, které
má aparát.
RM
903
Poznámka:
Stiskněte tlačítko na dálkovém ovládači, tím zastavíte ukázku a
vrátíte se na normální obrazovku.
20
Režim Menu
Page 52

Režim Menu
Seřízení vodorovného centrování obrazu pro videozdroj RGB
Pro zapojení vstupních signálů RGB, stejně jako DVD, do konektoru typu EURO :1/ , je možné, že bude třeba
seřídit vodorovné centrování obrazu.
TV
D
O
I
E
V
1 Opakovaně tiskněte tlačítko … na dálkovém ovládači, až se na
obrazovce objeví znaménko
… 1.
2 Stiskněte tlačítko MENU na dálkovém ovládači a menu se objeví na
3
2
1
6
5
4
9
8
7
0
televizní obrazovce.s
3 Stlačte páčku směrem $ a zvolte znaménko , poté ji stlačte
směrem
z pro vstup do menu Nastavení.
4 Stlačte páčku směrem $ nebo 4 a zvolte Manuální nastavení, poté
PROGR
MENU
ji stlačte směrem
z.
… 1
Nastavení Obrazu
Reźim obrazu
Kontrast
Jas
Barevná sytost
Ostrost
Reset
Umělá inteligence
Redukce šumu
Barevný Tón
Výběr: Zadat Menú:
Nastavení
Automatické ladění
Třídění programů
Vyber NexTView
AV předvolby
Manuální nastavení
Výběr: Start auto. lad.:
Nastavení
Automatické ladění
Třídění programů
Vyber NexTView
AV předvolby
Manuální nastavení
Výběr: Zadat:
Osobní
Normal
Start
- - - - - - -
- - - - - - -
Zap
Vyp
CZ
S
RM
903
5 Stlačte páčku směrem $ nebo 4 a zvolte RGB Nastavení a poté ji
stlačte směrem
z.
6 Stlačte páčku směrem z a zvolte H centr a poté ji stlačte směrem
Manuální nastavení
Jazyk/Země
Ruční ladění
Rozšířené předvolby
RGB Nastavení
Osobní ID číslo
Ukázka
Výběr: Zadat:
RGB Nastavení
H centr
- - - - - - -
O
$ nebo 4 a tak seřídíte mezi -10 a +10 střed obrazu. Stisknout
tlačítko OK a tím uložit.
Nast. polohu: Potvrzení-: OK
7 Stiskněte tlačítko MENU a menu zmizí z obrazovky.
Režim Menu
21
Page 53

Režim Menu
Identifikace a volba formátu zobrazení vstupních signálů
Tato funkce Vám umožní jak zvolení formátu zobrazení přídavného zařízení připojeného k tomuto aparátu, tak stanovení
názvu vstupního signálu složeného z maximálně pěti znaků (písmena a čísla).
1
4
7
S
MENU
TV
D
O
I
E
V
1 Stiskněte tlačítko MENU na dálkovém ovládači a menu se objeví na
obrazovce.
2 Stlačte páčku směrem $ a zvolte znaménko , poté ji stlačte
směrem
2
3
5
6
8
9
3 Stlačte páčku směrem $ nebo 4 a zvolte AV předvolby a poté ji
stlačte směrem
0
z pro vstup do menu Nastavení.
z.
4 Stlačte páčku směrem $ nebo 4 pro volbu vstupního signálu. Poté
PROGR
ji stlačte směrem
5 Stlačte páčku směrem $ nebo 4 pro volbu:
z.
Nastavení Obrazu
Reźim obrazu
Kontrast
Jas
Barevná sytost
Ostrost
Reset
Umělá inteligence
Redukce šumu
Barevný Tón
Výběr: Zadat Menú:
Nastavení
Automatické ladění
Třídění programů
Vyber NexTView
AV předvolby
Manuální nastavení
Výběr: Start auto. lad.:
Nastavení
Automatické ladění
Třídění programů
Vyber NexTView
AV předvolby
Manuální nastavení
Výběr: Zadat:
AV předvolby
VSTUP POP IS
AV1
AV2
AV3
AV4
Výběr: Zadat:
AV předvolby
AUTO FORMÁT
Vyp
Vyp
Normal
Plný
Start
- - - - - - -
- - - - - - -
VIDEO
VIDEO
VIDEO
Osobní
Normal
Zap
Vyp
$ Vyp (Velikost obrazu se automaticky nenastavuje).
RM
903
Normal (Velikost obrazu se automaticky nastavuje podle
informací z vysílacího studia).
4 Plný (Televizor může automaticky nastavit velikost obrazu,
aby tak elimonoval veškerá tmavá místa v televizním
obrazu (jak je popsáno v kapitole “Změna formátu
VSTUP POPIS
AUTO FORMÁT
Vyp
Vyp
Normal
Plný
VIDEO
VIDEO
VIDEO
AV1
AV2
AV3
AV4
Výběr: Zadat:
AV předvolby
zobrazení”).
VSTUP POPIS
Poté ji stlačte směrem
z.
6 U první zvýrazněné složky ve sloupci POPIS stlačte páčku směrem
$ nebo 4 pro volbu písmena, čísla, “+” nebo prázdného místa, a
poté ji stlačte směrem
z pro potvrzení tohoto znaku. Zbývající 4
AUTO FORMÁT
Vyp
Vyp
Normal
Plný
VIDEO
VIDEO
VIDEO
AV1
AV2
AV3
AV4
Zvol: Dále: Potv: OK
AV předvolby
znaky zvolte stejným způsobem.
VSTUP POPIS
AUTO FORMÁT
Vyp
7 Po zvolení všech znaků, stiskněte tlačítko OK.
AV1
AV2
AV3
AV4
Výběr A-Z, 0-9: Potvrzení: OK
Vyp
Normal
Plný
IDEO
V
VIDEO
VIDEO
22
8 Zopakujte kroky 4 až 7, pokud chcete zvolit formát zobrazení nebo
označit názvem další vstupní signály.
9 Stiskněte tlačítko MENU a menu zmizí z obrazovky.
Vždy, když vyberete zařízení, jehož vstupnímu signálu jste udělili
název, tento název se na obrazovce objeví na několik vteřin.
Režim Menu
Page 54

Režim Menu
Multi Obrazy (Multi PIP)
Tato funkce (Multi PIP z angličtiny Multi picture in Picture) zobrazuje posloupnost 12 statických obrazů a jeden třináctý, který
je v pohybu. Je možné zvolit kanál, který si přejete vidět, ať už na celé obrazovce nebo v multi obrazech.
04
03 05
D
TV
O
I
E
V
1 Stiskněte tlačítko na dálkovém ovládači pro volbu obrazů. Na
obrazovce se objeví 13 čísel programů s tím, který jste sledovali
uprostřed.
2 Stlačte páčku směrem $, 4, Z nebo z, což Vám umožní pohyb v
1
2
3
4
5
6
7
8
9
0
těchto 13 programech.
3 Stiskněte tlačítko OK a zvolte kanál označený rámečkem. Tento
kanál se přemístí do středu.
4 Stiskněte tlačítko pro návrat obrazovky do normálního režimu.
PROGR
MENU
02
01 06
13
12
10
11 09 08
07
RM
903
S
Dva obrazy na obrazovce (PAP)
Tato funkce (PAP z angličtiny Picture and Picture) rozděluje obrazovku na dvě části a tím umožňuje sledovat dva kanály
najednou (chcete-li na jedné části se zároveň promítá video).
Zvuk levé části obrazovky přichází z reproduktorů aparátu a zvuk pravé části obrazovky je slyšet prostřednictvím
sluchátek.
TV
D
O
I
E
V
1
2
3
4
5
6
7
8
9
0
Zapojení a vypojení funkce PAP
Stiskněte tlačítko / na dálkovém ovládači a objeví se Vám dvě
obrazovky formátu 4:3, opětovným stisknutím vystoupíte z funkce PAP
a vrátíte se na normální obrazovku.
Volba signálů PAP
1 Pro změnu obrazu na levé části obrazovky:
Se zapnutou funkcí PAP, stiskněte číselná tlačítka na dálkovém
ovládači (pro volbu televizního kanálu) nebo stiskněte tlačítko … (pro
volbu vstupu do videa).
2 Pro změnu obrazu na pravé části obrazovky:
Se zapnutou funkcí PAP, stiskněte tlačítko na dálkovém ovládači.
Až se objeví znaménko na spodní části pravé obrazovky, stiskněte
číselná tlačítka (pro volbu televizního kanálu) nebo stiskněte tlačítko
… (pro volbu vstupu do videa).
CZ
MENU
S
PROGR
RM
Záměna obrazovek
Se zapnutou funkcí PAP, stiskněte tlačítko / na dálkovém ovládači
pro záměnu obou obrazovek.
903
Rozšíření velikosti obrazovek
Se zapnutou funkcí PAP, opakovaně stlačte páčku směrem Z nebo z a
tím rozšíříte velikost obou obrazovek.
Volba zvuku pravé části obrazovky
Se zapnutou funkcí PAP, zkonzultujte kapitolu “Seřízení zvuku” tohoto
návodu k obsluze a upravte “l Dvojí zvuk” v “PAP”.
Režim Menu
23
Page 55

Teletext
Teletext
Teletext je informační služba, kterou užívá většina televizních stanic. Na straně s obsahem služeb teletextu (všeobecně je
to strana 100) je poskytnuta informace o tom, jak se užívá tato služba.
Zvolte televizní stanici se silným signálem, jinak může dojít v teletextu k chybám.
Zapojení a vypojení teletextu
D
O
I
TV
1
4
7
S
MENU
E
V
2
3
5
6
8
9
0
PROGR
RM
1 Zvolte televizní kanál, který vysílá teletext a který si přejete sledovat.
2 Stiskněte tlačítko jednou na dálkovém ovládači a na obrazovce
se objeví obraz a teletext zároveň. Obrazovka se rozdělí na dvě části,
televizní program napravo a stránka teletextu nalevo.
Se zapnutým teletextem a televizní obrazovkou zároveň,
stiskněte tlačítko / a poté stiskněte tlačítka PROGR +/- a
změňte kanál televizní obrazovky. Stlačením páčky směrem Z
nebo z změníte velikost televizní obrazovky. Opětovným
stisknutím tlačítka / obnovíte příjem normálního teletextu.
3 Stisknutím dvakrát získáte pouze teletext.
4 Stisknutím třikrát překryjete teletext televizním obrazem.
5 Stisknutím po čtvrté nebo stisknutím vystoupíte ze služeb
teletextu.
Výběr teletextu
Pomocí číselných tlačítek dálkového ovládače zadejte tři čísla
představující příslušné číslo stránky. V případě, že se zmýlíte, zadejte
jakákoliv tři čísla a poté opět zadejte správná čísla stránky, kterou si
přejete vidět.
Použití dalších funkcí teletextu
Zvolení následující nebo předchozí stránky
Stiskněte tlačítka (PROG +) nebo PROG -) na dálkovém ovládači
a zvolte následující nebo předchozí stránku.
Zvolení podstránky
Jedna stránka teletextu se může skládat z několika podstran. V takovém
případě se během několika vteřin na spodní části obrazovky objeví
informační linka s číslem, kolik podstran obsahuje jedna stránka
903
teletextu. Stlačte páčku směrem 4 nebo $ a zvolte podstranu.
Zablokování teletextové stránky
Stisknutím tlačítka zablokujete jednu stránku a zabráníte tak, aby se
změnila. Opětovným stisknutím se toto zablokování zruší.
Aby se objevila stránka s obsahem
Stisknutím tlačítka se objeví stránka s obsahem (obyčejně je to str.
100).
Fastext
(Je k dispozici pouze za předpokladu, že televizní stanice vysílá signály
Fastext).
Po zobrazení nabídky barevných kódů v dolní části stránky teletextu, na
dálkovém ovládači stiskněte to barevné tlačítko (červené, zelené, žluté
nebo modré), které představuje příslušnou stránku.
Zachycení jedné strany
1 Stiskněte číselná tlačítka na dálkovém ovládači a zvolte tu stránku
teletextu, která má několik čísel (např. sránka s obsahem).
2 Stiskněte tlačítko OK.
3 Stlačte páčku směrem 4 nebo $ pro volbu stránky, kterou si přejete
a poté stiskněte OK. Během několika vteřin se na obrazovce objeví
žádaná stránka.
TELETEXT
Index
Programme
News
Sport
Weather
TELETEXT
TELETEXT
TELETEXT
TELETEXT
TELETEXT
TELETEXT
TELETEXT
TELETEXT
Index
Index
Index
Index
Index
Index
Index
Index
Programme
Programme
Programme
Programme
Programme
Programme
Programme
Programme
News
News
News
News
News
News
News
News
Sport
Sport
Sport
Sport
Sport
Sport
Sport
Sport
Weather
Weather
Weather
Weather
Weather
Weather
Weather
Weather
TELETEXT
01
Index
Programme
News
Sport
Weather
216-02
01 03 04 05 06 07 0802
153
101
25
01
98
25
25
25
25
25
25
25
25
153
153
153
153
153
153
153
153
101
101
101
101
101
101
101
101
98
98
98
98
98
98
98
98
25
153
101
98
24
Teletext
Page 56

Teletext
1
4
7
S
MENU
TV
D
O
I
E
V
Použití Menu teletextu
1 Se zapnutým teletextem, stiskněte tlačítko MENU a menu se objeví
na obrazovce.
2 Stlačte páčku směrem 4 nebo $ a zvolte žádaný výběr, poté ji stlačte
směrem z pro vstup do tohoto výběru.
3 Stiskněte tlačítko MENU a menu teletextu zmizí z obrazovky.
Teletext
Horní / Dolní / Plný
Vymazání textu
Odkrýt text
Časovací stránka
Přehledn stránek...
Výběr: Zadat Menu:
Horní / Dolní / Plný
Tento výběr Vám umožní zvětšit různé části stránky teletextu. Stlačte
páčku směrem 4 pro zvětšení horní poloviny obrazovky nebo ji stlačte
2
3
směrem $ pro zvětšení její dolní poloviny. Stiskněte tlačítko OK pro
znovuzískání běžné velikosti stránky teletextu.
5
6
8
9
0
Vymazání textu
Po zvolení této funkce, zatímco čekáte na žádanou stránku teletextu,
můžete sledovat televizní kanál. Jakmile se tato stránka objeví,
znaménko změní barvu. Stisknutím tlačítka se ukáže žádaná
stránka.
Horní: Dolní: Plný: OK
CZ
Odkrýt text
Některé stránky teletextu obsahují skryté informace, které je možné
odhalit, jako např. řešení hádanky. Po zvolení tohoto výběru, se skrytá
PROGR
informace objeví na obrazovce.
Časovací stránka
(Záleží na tom, jaká služba teletextu je k dispozici).
RM
903
Můžete konzultovat stránku časově kodifikovanou, jako např. časovací
stránku stanovenou na určitou hodinu. Po zvolení tohoto výběru se na
obrazovce objeví podmenu Časovací stránky:
1 Stiskněte číselná tlačítka na dálkovém ovládači a uveďte tři čísla
žádané stránky.
2 Opětovným stisknutím číselných tlačítek uveďte čtyři čísla
požadované hodiny.
3 Stiskněte tlačítko OK a tak uložíte stanovenou hodinu. Hodina se
ukáže na levé horní části obrazovky. Stránka se na obrazovce objeví
v tuto stanovenou hodinu.
Přehled stránek
(Záleží na tom, jaká služba teletextu je k dispozici).
V tomto submenu, zablokované stránky a skupinové stránky TOP-Text
jsou uspořádány ve dvou sloupcích, aby jejich uživatel mohl zvolit svou
stránku snadněji. Pro každou zablokovanou stránku z prvního sloupce
se ve druhém sloupci ukáží jí odpovídající skupinové stránky. Stlačte
páčku směrem 4 nebo $ a zvolte žádanou zablokovanou stránku a poté
ji stlačte směrem z pro vstup do sloupce skupinových stránek. Stlačte
páčku směrem 4 nebo $ a zvolte žádanou skupinovou stránku.
Nakonec stiskněte tlačítko OK a tato stránka se objeví na obrazovce.
Časovací stránek
STR. ČAS
Výběr strany: 0-9 Dále:
- - : - -— — —
Teletext
25
Page 57

NexTView
NexTView
*
* (Záleží na tom, jaká služba je k dispozici)
NexTView je elektronický průvodce programů (EPG), který zahrnuje informaci o programaci různých televizních stanic.
D
O
I
E
V
TV
Aparát automaticky zvolí nejlepšího poskytovatele NexTView.
Tento zásobovatel bude k dispozici po dobu 30 min po naladění
kanálu. Jestli však chcete, můžete poskytovatele změnit.
1 Stiskněte tlačítko MENU na dálkovém ovládači a menu se objeví na
obrazovce.
2 Stlačte páčku směrem 4 nebo $ a zvolte znaménko , poté ji
stlačte směrem z pro vstup do menu Nastavení.
3 Stlačte páčku směrem 4 nebo $ a zvolte Výběr NexTView, posléze
ji stlačte směrem z. Na obrazovce se objeví seznam všech
zásobovatelů, které má NexTView k dispozici.
1
2
3
4
5
6
7
8
9
4 Stlačte páčku směrem 4 nebo $ a zvolte poskytovatele, kterého
chcete a poté stiskněte tlačítko OK.
5 Stiskněte tlačítko MENU a menu z obrazovky zmizí.
Aktivace NexTView
Výběr poskytovatele NexTView
0
1 Opakovaným tisknutím tlačítka na dálkovém ovládači zapnete
nebo vypnete NexTView.
Nastavení Obrazu
Reźim obrazu
Kontrast
Jas
Barevná sytost
Ostrost
Reset
Umělá inteligence
Redukce šumu
Barevný Tón
Výběr: Zadat Menú:
Nastavení
Automatické ladění
Třídění programů
Vyber NexTView
AV předvolby
Manuální nastavení
Výběr: Star t auto. lad.:
Nastavení
Automatické ladění
Třídění programů
Vyber NexTView
AV předvolby
Manuální nastavení
Výběr: Zadat:
* V některých případech také bude nutné stlačit páčku směrem Z,
MENU
aby se objevil Elektronický průvodce programů (EPG) Sony.
2 Stlačte páčku směrem 4, $, Z nebo z pro pohyb kurzorem po
obrazovce.
PROGR
3 Stiskněte tlačítko OK a tím potvrdíte výběr.
a) Stisknete-li tlačítko OK ve sloupcích s datumem, hodinou nebo
07 Tue
12:38
7
Tue
8
Wed
9
Thu
12
10
Fri
11
Sat
12
Sun
13
Mon
SWISS
TXT TPS / RINGIER
Star Wars
Super RTL
10:35 - 12:45
Werner - Beinhart
10:20 - 12:00
Pro 7
Flui gr sst den Rest der Welt
Kabel 1
10:45 - 10:50
Once upon a time in the West
Euronews
11:00 - 11:20
International News
RTL Plus
11:45 - 12:50
Hat der alte Hexenmeister sich doch
einmal fortbegeben, und nun sollen
seine Geister auch nach meinem Willen
leben.
obrazcem (motivem), seznam programů se změní v souladu s
S
RM
903
výběrem.
b) Stisknete-li tlačítko OK v seznamu programů, uvidíte přímo kanál,
je-li to běžné vysílání, nebo se objeví menu “očekávaná vysílání”,
jestliže se vysílání bude konat později.
Osobní nastavení programů
Můžete provést osobní seznam těch typů programů, které si
Rejstřík
úplný sezman pro výběr
osobní výběr
vysílání zpráv
filmy
sport
zábava
děti
návrat do poslední nabídky
přejete sledovat.
Tue 07. 04 .98
Osobní
Normal
Start
- - - - - - -
- - - - - - -
Zap
Vyp
26
1 Stlačte páčku směrem 4 nebo $ a zvolte obrazec , poté ji stlačte
směrem z pro vstup do menu Osobní nastavení.
2 Stlačte páčku směrem 4 nebo $ a na obrazovce zvolte Váš výběr,
poté stiskněte OK pro jeho potvrzení.
3 Opakujte bod 2 a tím zvolíte veškeré položky, které si přejete mít ve
Vašem seznamu.
4 Po dokončení seznamu, stlačte páčku směrem z pro volbu obrazce
.
5 Stiskněte tlačítko OK pro návrat do předchozího menu.
6 Stlačte páčku směrem 4 nebo $ a zvolte obrazec , poté stiskněte
tlačítko OK a tím zaktivujete Vaše osobní nastavení programů.
pokračuje...
NexTView
Page 58

NexTView
D
TV
O
I
E
V
Menu “očekávaná vysílání”
Toto menu Vám umožní nastavit časovač nebo nahrát vybrané
programy.
1 Stlačte páčku směrem 4 nebo $ a v jednom sloupci seznamu
programů zvolte program, který se bude vysílat později.
2 Stiskněte tlačítko OK pro vstup do menu “očekávaná vysílání”.
Nastavení časovače
1
2
3
4
5
6
7
8
9
0
PROGR
MENU
Stlačte páčku směrem 4 nebo $ a zvolte obrazec , poté opakovaně
tiskněte tlačítko OK pro volbu Nast. časovač nebo Zruš časovač.
Zvolíte-li Nast. časovač, program zůstane označen znaménkem hodin a
před tím, než tento program začne, se na obrazovce objeví krátký vzkaz,
který se táže, chcete-li tento program ještě sledovat.
Aby se ukázal naprogramovaný seznam
Stlačte páčku směrem Z nebo z a zvolte obrazec poté opakovaně
tiskněte tlačítko OK pro zapnutí nebo vypnutí naprogramovaného
seznamu. Tento seznam ukáže ty programy, pro které jste nastavili
časovač. (Můžete nastavit časovač celkem pro pět programů).
Nahrávání programů *
* (Pouze, má-li Vaše video Smartlink).
First nextTView/EPG-Providers in Europe
07 Tue
SWISS TXT TPS / RINGIER nexTView
12:38
Address Mapping
The position of the addresses in the
OSDA is shown in the following diagram.
The position values of the DPW are set
to ’0’.
If other values are set, the complete
combination will be scrolled.
Example:
if the DPWC is set to ’63’, the char-
This channel has been set for a timer
VPS/PDC
On
Speed
SP
Timer Prog
VCR1
Tue 07. 04 .98
CZ
1 Zapojte video.
2 Stlačte páčku směrem Z nebo z a zvolte , poté stiskněte OK,
RM
903
aby se informace převedla do videa.
3 Pro nastavení videa:
S
VPS/PDC
Stlačte páčku směrem Z nebo z a zvolte VPS/PDC, poté opakovaně
tiskněte OK a zvolte Zap nebo Vyp.
S tímto nastavením máte zaručené nahrávání celého vysílání i přes
jakékoliv změny v programaci (pouze funguje za předpokladu, že
zvolený kanál vysílá signál VPS/PDC).
Rychlost
Stlačte páčku směrem $ a zvolte Rychlost, poté opakovaně tiskněte
OK a zvolte “SP” (trvání standard) nebo “LP” (dlouhé trvání). Pomocí
dlouhého trvání je možné na videokazetu nahrát dvojnásobek, i když
kvalita obrazu se zhorší.
Nastavení aparátu videa
Stlačte páčku směrem $ a zvolte Nastavení videa, posléze
opakovaně tiskněte tlačítko OK pro volbu videa, které chcete
programovat, buď VCR1 nebo VCR2.
4 Nakonec stlačte páčku směrem z a zvolte obrazec , poté
stiskněte tlačítko OK pro návrat na běžnou obrazovku.
VPS/PDC
Rychlost
Nastavení videa
Zap
SP
VCR1
NexTView
27
Page 59

Přídavná zařízení
Připojení přídavných zařízení
K aparátu je možné připojit různá další zařízení, jak je uvedeno níže.
2
1
“PlayStation”*
kamkordér
S-VHS/Hi8/DVC
Aby se
zabránilo
zkreslení
obrazu:
• Nepřipojujte
zařízení ke
konektorům
F a G
současně.
* “PlayStation”
je výrobek
Sony
Computer
Entertainment,
Inc.
* “PlayStation”
je značka
registrovaná
jako Sony
Computer
Entertainment,
Inc.
A
DVD
Zařízení Dolby
D
E
Dekodér
B
C
videore-kordér
videorekordér
Přijaté vstupní signály
A Signály audio/video a RGB
B Signály audio/video a S video signály
C Signály audio/video a S video signály
D Vstup středového zesilovače. V menu
“Spec.funkce” nastavte volbu
“Reproduktor” v “Středový”.
E Bez vstupů
F S video signál
G Video signál
H Audio signál
I Bez vstupu
Surround
I
F
G
1
2
Hi-Fi
H
kamkordér
8mm/Hi8/DVC
Disponibilní vstupní signály
Video/audio televizního ladiče.
Video/audio zvoleného signálu.
Video/audio, které se zviditelní na obrazovce (výstup z monitoru).
Bez výstupů.
Audio signál.
Bez výstupů.
Bez výstupů.
Bez výstupů.
Audio signál pro sluchátka.
Přídavná zařízení
28
Page 60

Přídavná zařízení
Použití přídavných zařízení
Doplňkové informace
Připojení videa
Připojte video do konektoru typu EURO B nebo C na zadní straně aparátu. Nemáte-li kabel konektoru typu EURO,
doporučujeme Vám naladit signál videa na naprogramované číslo “0”, viz kapitola “Ruční ladění televizoru” v tomto návodu k
obsluze. Také zkonzultujte návod k obsluze Vašeho videa, abyste věděli jak získat kanál test signálu videa.
Přijímá-li Vaše video Smartlink, nahlédněte do kapitoly “Smartlink” v tomto návodu k obsluze.
Připojení externího audio přístroje
1 Poslech zvuku aparátu přes Hi-Fi věž:
Chcete-li zesílit výstup z audia aparátu, připojte Hi-Fi věž do zdířek E na zadní straně aparátu. Hlasitost přístroje
připojeného do zdířek E je možné regulovat střídáním seřízení hlasitosti zvuku ve sluchátkách. Viz kapitola “Seřízení zvuku”
v tomto návodu k obsluze.
2 Poslech zvuku Hi-Fi věže přes aparát:
Chcete-li slyšet zvuk Hi-Fi věže v reproduktorech aparátu, připojte Hi-Fi věž do zdířek D na zadní straně aparátu. Máteli zesilovač Dolby, připojte středový výstup zesilovače do těchto zdířek, aby zesilovač uvedl do chodu středový reproduktor.
Viz kapitola “Použití menu “Spec. funkce” a zvolte Středový ve výběru Reproduktor.
Pamatujte, že maximální vstupní výkon tohoto konektoru je 30 W. Zajistěte, aby jste nepřesáhli tento limit.
Připojení systémů Mono
Připojte kabel audia do konektoru L/G/S/I umístěném na přední části aparátu a zvolte vstupní signál 4, dále postupujte podle
níže uvedených instrukcí.
Volba a sledování vstupního signálu
Aby se na televizní obrazovce objevil vstupní signál zapojeného zařízení, zvolte znaménko toho konektoru, ke kterému jste
zapojili zařízení. Např. pokud jste zapojili zařízení ke konektoru, jehož znaménko je
Y1/ 1, stiskněte několikrát tlačítko
na dálkovém ovládači až se znaménko 1 objeví na obrazovce.
1 Připojte přídavné zařízení do příslušného konektoru v aparátu, jak je uvedeno na předchozí straně.
TV
D
O
I
E
V
2 Opakovaně stiskněte tlačítko na dálkovém ovladači, dokud se na obrazovce neobjeví správné
vstupní znaménko.
Znaménko Vstupní signály
1111 •Vstupní audio/video signál přes konektor typu EURO A nebo * RGB přes konektor
typu EURO A.
1
2
3
4
5
6
7
8
9
0
2222 •Vstupní audio/video signál přes konektor typu EURO B nebo vstupní S video signál
přes konektor typu EURO B.
3333 •Vstupní signál přes konektor typu EURO C nebo * vstupní S video signál přes
konektor typu EURO C.
44
44
• Vstupní S video signál přes 4-pinový konektor F nebo * vstup videa přes konektor
RCA G a audio signál přes konektory RCA H.
* (automatický záznam podle připojeného zařízení)
PROGR
MENU
3 Zapněte připojené zařízení.
4 Pokud se chcete vrátit do běžného režimu zobrazení, stiskněte tlačítko dálkového ovladače.
RM
903
CZ
S
Přídavná zařízení
29
Page 61

Přídavná zařízení
Smartlink
Smartlink je přímé propojení mezi videorekordérem a aparátem.
Smartlink pracuje, pokud:
• má Váš videorekordér k dispozici Smartlink, NexTView, Easy Link nebo Metalogic.
Metalogic je obchodní značka registrovaná jako Grundig Corporation.
EasyLink je obchodní značka registrovaná jako Philips Corporation.
• jste připojili videorekordér přes konektor typu EURO :2/q2 (SMARTLINK) umístěný na
zadní části aparátu pomocí kompletně propojeného 21-pinového kabelu Eurokonektor.
Smartlink nabízí:
• Informace o ladění, např. přehled kanálů, který je přenesen z televizoru do videorekordéru.
• Přímé nahrávání z TV: během sledování televizoru pouze potřebujete stisknout jedno tlačítko
na videorekordéru pro záznam programu.
• Automatické zapnutí: aparát je v režimu časového spínače (standby), stiskněte tlačítko “Play
z ” videorekordéru a aparát se automaticky zapojí.
Zadní část aparátu
Jestliže máte zapojený dekodifikador na video, na které se může zapojit Smartlink, zvolte
menu Rozšířené předvolby v Manuální nastavení a zvolte DEKODÉR. na pozici AV2
pro každý kodifikovaný kanál.
Pro další informace konzultujte kapitolu “Použití funkce “Rozšířené předvolby”.
Podrobnější informace o Smartlinku najdete v návodu k obsluze Vašeho videorekordéru.
Dálkový ovládač a další zařízení Sony
Tlačítky, které jsou pod krytem dálkového ovládače, můžete ovládat další zařízení Sony.
1 Otevřete kryt dálkového ovládače.
2 Nastavte selektor VTR 1234 DVD podle zařízení, které chcete ovládat:
VTR1 Vídeo Beta
VTR2 Vídeo de 8 mm.
VTR3 Vídeo VHS
VTR4 Digitální video (DCR-VX 1000/9000 E, VHR-1000)
DVD DVD
3 Používejte tlačítka, která jsou pod krytem dálkového ovládače pro ovládání zařízení.
videorekorder
Dekodér
VIDEO TV
VTR 1 2 3 4 DVD
CH
• Má-li Vaše zařízení selektor COMMAND MODE, nastavte ho na stejnou pozici jako selektor
VTR 1234 DVD dálkového ovládače aparátu.
• Nemá-li žádnou funkci, příslušné tlačítko na dálkovém ovládači nebude fungovat.
30
Přídavná zařízení
VTR 1 2 3 4 DVD
CH
Page 62

Doplňkové informace
Optimální úhel vidění
Aby kvalita obrazu byla optimální, snažte se umístit aparát tak, aby jste obrazovku sledovali z následovně uvedených úhlů.
Vodorovný úhel obrazu
minimální vzdálenost 2 m
65º
65º
Svislý úhel obrazu
CZ
(pozice doporučená pro uživatele)
minimální vzdálenost 2 m
30º
30º
(pozice doporučená pro uživatele)
Doplňkové informace
31
Page 63

Doplňkové informace
Výměna žárovky
Pokud jsou barvy obrazu nepřirozené nebo žárovka je
tmavá nebo indikátor žárovky aparátu bliká,
vyměňte žárovku za novou.
• Požvejte pouze originální blok výbojky XL-2000E. Při
použití jiné žárovky může dojít k poškození aparátu.
• Žárovku z přístroje nevyjímejte, není-li třeba ji vyměnit
za novou.
• Před výměnou žárovky vypněte televizor a vytáhněte
přívodní kabel ze zásuvky.
• Vyměňte žárovku, jakmile vychladne. Přední sklo
žárovky je rozehřáté na 100˚C (212˚F), nebo více až do
30 minut po vypnutí televizoru.
• Vyměněnou žárovku neodkládejte do dosahu dětí ani
na hořlavé materiály.
• Vyměněnou žárovku nevystavujte vlhkosti, ani do ní
nevkládejte žádné předměty. Mohlo by to zapříčinit
její explozi.
• Do blízkosti otvoru po žárovce nevkládejte žádné
kovové předměty ani hořlavé materiály, protože by to
mohlo zapříčinit požár. Nesahejte rukou do otvoru
pro žárovku, abyste se nepopálili.
• Novou lampu pevně utáhněte. Není-li pevně utažena,
může to zapříčinit ztmavnutí obrazu.
1 Vypněte televizor a vytáhněte přívodní kabel ze
zásuvky.
•
Pokud vyměňujete žárovku bez vytažení přívodního
kabelu ze zásuvky, indikátor dočasného vypnutí
(pohotovostního režimu) aparátu začne blikat.
Chcete-li pokračovat ve výměně žárovky, vytáhněte
přívodní kabel za zásuvky.
• Žárovku vyměňte po uplynutí nejméně 30 minut po
vypnutí televizoru.
• Připravte si novou žárovku.
2 Odstraňte přední panel
3 Uvolněte šroub předmětem jako je např. mince a
odstraňte kryt žárovky.
4 Vyšroubujte dva šrouby a vyjměte žárovku.
Vyšroubujte dva šrouby klíčem z příslušenství.
Vytáhněte žárovku za držák.
Bezprostředně po vypnutí televizoru je žárovka stále
velmi horká. Dbejte na to, abyste se nedotýkali předního.
skla nebo okolí žárovky nebo skla v otvoru pro žárovku.
Odstaňte přední panel, aniž byste pohybovali aparátem.
Uchopte přední panel na straně a posuňte ho směrem
dopředu. Dejte pozor, abyste si přitom nezlomili nehty.
5 Nasate novou žárovku.
Novou žárovku pevně utáhněte oběma šrouby.
6 Nasate kryt žárovky.
Nasaďte kryt žárovky a šrouby pevně utáhněte
předmětem jako je např. mince.
7 Nasate přední panel.
Panel opět umístěte do původní polohy.
Poznámky
• Dbejte na to, abyste se nedotýkali nebo abyste
neposkvrnili přední sklo nové žárovky nebo sklo v otvoru
pro žárovku. Je-li sklo zašpiněné, může se tím zhoršit
kvalita obrazu nebo zkrátit životnost žárovky.
• Pevně utáhněte kryt žárovky. Není-li pevně dotažen,
nelze spustit televizor.
• Při spálení žárovky jsou slyšet zvuky. To však není
znakem poškození televizoru.
• Potřebujete-li novou žárovku, obra'te se na nejbližší
servisní službu Sony.
• Berte ohledy na životní prostředí a použitou žárovku
odhazujte do kontejnerů k tomu určených.
Doplňkové informace
32
Page 64

Doplňkové informace
Specifikace
Systém TV
B/G/H, DK, I, L
Systém kódování barev
PAL, SECAM
NTSC 3.58, 4.43 (pouze pro video vstup)
Rozložení kanálů
VHF: E2-E12
UHF: E21-E69
CATV: S1-S20
HYPER: S21-S41
D/K: R1-R12, R21-R69
I: UHF B21-B69
L: F2-F10, B-Q, F21-F69
Velikost obrazu
50 palců (přibl. 127 cm obraz v úhlopříčce).
Vstupy na zadní straně
• Koncové stanice vstupu středového
C
reproduktoru (2 koncové stanice)
• Výstupy audia (levý pravý) - konektory RCA.
• :1/ 21-pinový konektor typu EURO (norma
CENELEC), včetně vstup pro audio/video, vstup
RGB a výstup audio/video, TV.
• :2/q 2 21-pinový konektor typu EURO (norma
(SMARTLINK)
• :3/q 3 21-pinový konektor typu EURO (norma
Přípojky na přední straně
q 4 S video vstup - 4-pinový DIN
… 4 video vstup - konektor RCA
4 audio vstupy - konektory RCA
zdířka sluchátek - minizdířka stereo
CENELEC), včetně vstupu z audio/video, vstup
z S video volitelný výstup z audio/video.
CELENEC), včetně vstup audio/video, vstup S
video a výstup audio/video (výstup monitoru).
Výstupy zvuku
2 x 20 W (hudební kapacita)
2 x 15 W (RMS)
Vstupy středový reproduktor
30 W (RMS) (používá-li se jako středový reproduktor)
Příkon
210 W
Příkon v pohotovostním režimu (standby)
≤ 1 W
Rozměry (š x v x h)
přibliž. 1376 x 898 x 384 mm
Hmotnost
přibliž. 43 kg
Dodané příslušenství
1 dálkový ovládač, typ RM-903
2 baterie typu IEC
1 Klič
2 Držaky
2 Dva šrouby
1 Jeden hadr na čištění
Další funkce
Filtr digitálního hřebenu (vysoká rezoluce)
TELETEXT, Fastext, TOPtext (pamět’ teletextu 2000 stran)
NexTView
NICAM
Automatické vypojení
Smartlink
Redukce šumu
Grafický ekvalizér
Osobní ID čislo
CZ34CZ
Společnost SONY si vyhrazuje právo na úpravy v designu a technických vlastnostech bez
předchozího upozornění.
Ekologický papír - 100% bez chloru
33 Doplňkové informace
33
Page 65

Doplňkové informace
Řešení problémů
Zde jsou některá řešení problémů, která mohou ovlivnit obraz i zvuk.
Problém
Není obraz (černá obrazovka) a není
zvuk
Špatný nebo žádný obraz (tmavá
obrazovka), ale zvuk je dobrý.
Obraz má špatnou kvalitu při sledování
video zdroje RGB
Dobrý obraz, ale bez zvuku.
Barevné pořady nejsou barevné.
Obraz je zkreslený při změně programu
či při zvolení teletextu
V obrazu se objeví čáry.
Řešení
• Zapojte aparát do zásuvky.
• Stiskněte tlačítko na čelní straně aparátu.
• Pokud svítí indikátor červeně stiskněte tlačítko TV na dálkovém
ovládači.
• Zkontrolujte zapojení antény.
• Vypněte aparát na 3-4 vteřiny a pak jej opět zapněte pomocí tlačítka na
jeho přední části.
• Pomocí Režimu menu zvolte Nastavení obrazu a seřiťe hladiny Kontrast,
Barevná sytost a Jas.
• Stiskněte několikrát tlačítko na dálkovém ovládači, až se objeví
znaménko na obrazovce.
• Stiskněte tlačítko +/- na dálk. ovládači.
• Pomocí Režimu menu zkontrolujte, zda v menu Spec. funkce je zvoleno
Reproduktor v Hlavní.
• Pomocí Režimu menu zvolte Nastavení obrazu a seřiďte stupeň barevné
sytosti.
• Na zadní straně aparátu vypněte zařízení připojené přes 21-kolíkový
Euro-konektor.
• Seřiďte zeslabovač RF (ZESL). K tomu zkonzultujte kapitolu “Použití
funkce “Rozšířené předvolby”.
Šum v obrazu.
Dálkový ovládač nefunguje.
Indikátor žárovky aparátu bliká.
Indikátor pohotovostního stavu
(standby) bliká.
• Pokud se závady nepodařilo odstranit, nechte televizor prověřit oprávněným odborníkem.
• Kryt NIKDY neodnímejte sami.
• Pomocí Režimu menu nastavte lepší příjem obrazu přes jemné doladění
kanálů (AFT). Zkonzultujte kapitolu “Použití funkce “Rozšířené předvolby”.
• Vložte nové baterie.
• Vyměňte žárovku za novou. Obsáhlejší informace naleznete v kapitole
“Výměna žárovky”.
• Vyměňujete-li žárovku bez vytažení přívodního kabelu, indikátor
pohotovostního stavu začne blikat. Chcete-li dokončit výměnu žárovky,
vytáhněte přívodní kabel ze zásuvky a počkejte nejméně 30 minut.
• Přesvěčte se, že kryt žárovky je pevně utažen.
• Pokud neměníte žárovku a přesto bliká indikátor dočaného vypnutí,
obraťte se na nejbližší servisní středisko Sony.
Doplňkové informace
34
Page 66

Wprowadzenie
MENU
K
Dziękujemy za wybór modelu Sony “Grand Wega”.
Przed rozpoczęciem użytkowania tylną wskazane jest wnikliwe zapoznanie się z niniejszą instrukcją obsługi i zachowanie jej
do wykorzystania w przyszłości.
• Symbole używane w niniejszej instrukcji obsługi:
• Potencjalne niebezpieczeństwo.
• Ważna informacja.
• Informacja o działaniu.
•1,2.. Kolejność realizacji instrukcji.
• Zaznaczone na na pilocie przyciski wskazują przyciski
które należy nacisnąć w celu wykonania poszczególnych
funkcji.
• Informacja odnośnie wyniku operacji.
Informacje dotyczące bezpieczeństwa
Wszystkie telewizory pracują z wykorzystaniem bardzo wysokich napięć. By uniknąd pożaru lub porażenia prądem, należy
przestrzegać zasad bezpieczeństwa zamieszczonych w załączonym niebieskim folderze
• W celu przestawienia urządzenia, radzimy zrobić to przy
pomocy drugiej osoby, chwytając jedną ręką za dolną
część zaś drugą za górną część ekranu. NIGDY NIE
wolno chwytać urządzenia naciskając głośniki znajdujące
się po obu stronach ekranu, ani przedniej ścianki obudowy,
by uniknąć ich zniekształcenia bądź zniszczenia.
• Nie wolno blokować lub nakrywać otworu wentylacyjnego
znajdującego się po lewej stronie na dole z tyłu urządzenia.
W celu zapewnienia dobrej wentylacji należy zostawić
przynajmniej 10-centymetrowy odstęp między ścianą a
urządzeniem.
• Gdy przestawia się urządzenie bezpośrednio z zimnego
pomieszczenia do gorącego lub gdy w pomieszczeniu
następuje gwałtowna zmiana temperatury obraz może być
zamazany lub poszczególne jego fragmenty mogą mieć złą
jakość koloru. Spowodowane jest to kondensacją wilgoci
na lustrach lub soczewkach wewnątrz urządzenia. Przed
ponownym włączeniem urządzenia należy poczekać aż
wilgoć wyparuje.
•By osiągnąć ostrość obrazu należy ustawić ekran tak, by światło
nie padało nań bezpośrednio. O ile to możliwe należy używać
oświetlenia sufitowego.
•Urządzenie jest produktem precyzyjnej technologii wytwarzania.
Na ekranie jakkolwiek mogą pojawiać się niewielkie czarne
punkciki lub też jaśniejsze (czerwone, niebieskie lub zielone).
Jest to efekt procesu wytwarzania i nie świadczy o wadliwym
działaniu.
•Ekran niniejszego urządzenia ma warstwę antyodblaskową. By
uniknąć jej uszkodzenia należy przestrzegać następujących
instrukcji:
• Odkurzając ekran należy używać szmatkę do czyszczenia
dostarczoną wraz z urządzeniem lub jakąkolwiek inną z
delikatnego materiału.
• Ekran należy czyścić miękką wilgotną szmatką. Nie używać
żadnych środków do szorowania. Dla własnego
bezpieczeństwa
należy wyłączyć urządzenie ze źródła zasilania przed
przystąpieniem do jego czyszczenia.
• Należy unikać dotykania ekranu by nie porysować jego
powierzchni.
.
Spis treści
Wprowadzenie............................................................................................................................................................................................. 3
Informacje dotyczące bezpieczeństwa ...................................................................................................................................................... 3
Opis ogólny
Sprawdzanie dostarczonych akcesoriów ........................................................................................................................................ 4
Przegląd przycisków urządzenia ..................................................................................................................................................... 4
Przegląd przycisków pilota do zdalnego sterowania .................................................................................................................... 5
Podłączenienie urządzenia
Wkładanie baterii do pilota ............................................................................................................................................................. 6
Podłączanie anteny i magnetowidu................................................................................................................................................. 6
Stabilne umocowanie urządzenie.................................................................................................................................................... 6
Pierwsze uruchomienie urządzenia
Włączanie urządzenia i automatyczne programowanie .................................................................................................................. 7
System menu
Zmiana formatu ekranu ................................................................................................................................................................... 9
Wprowadzenie do systemu menu na ekranie ................................................................................................................................ 9
Krótki przewodnik po systemie menu ........................................................................................................................................... 10
Używanie systemu menu:
Regulacja obrazu ........................................................................................................................................................................ 11
Regulacja dźwięku ...................................................................................................................................................................... 12
Użycie menu “Funkcje” ............................................................................................................................................................... 14
Ręczne programowanie urządzenia ............................................................................................................................................ 15
Identyfikacja poszczególnych kanałów....................................................................................................................................... 16
Pomijanie numerów programów ................................................................................................................................................. 17
Stosowanie funkcji “Dalsze nastawianie” .................................................................................................................................. 18
Wprowadzenie Identyfikatora Osobistego ................................................................................................................................. 19
Przegląd poszczególnych funkcji................................................................................................................................................ 20
Regulacja geometrii obrazu dla źródła RGB ............................................................................................................................... 21
Identyfikacja i wybór formatu ekranu źródeł wejściowych......................................................................................................... 22
Obrazy zwielokrotnione (Multi PIP) ............................................................................................................................................. 23
2 obrazy na ekranie (PAP) ........................................................................................................................................................... 23
Telegazeta ......................................................................................................................................................................................... 24
NexTView............................................................................................................................................................................................ 26
Dodatkowe podłączenia
Podłączanie dodatkowych urządzeń............................................................................................................................................. 28
Zastosowanie dodatkowych urządzeń .......................................................................................................................................... 29
“Smartlink”..................................................................................................................................................................................... 30
Pilot innych urządzeń Sony ........................................................................................................................................................... 30
Informacje dodatkowe
Optymalny kąt oglądania............................................................................................................................................................... 31
Wymiana lampy ............................................................................................................................................................................. 32
Dane techniczne ............................................................................................................................................................................ 33
Rozwiązywanie problemów ........................................................................................................................................................... 34
PL
3
Page 67

Opis Ogólny
Należy nacisnąć znak
z przodu urządzenia by
zobaczyć przednie
gniazda.
Sprawdzanie dostarczonych akcesoriów
Dwie baterie
(typ R6)
1 Klucz2 Element nośny
Pilot do zdalnego
sterowania
(RM-903)
Przegląd przycisków urządzenia
2 śrubki
1 szmatka do
czyszczenia
Wskaźnik lampy
(zobacz str. 32)
Wyłącznik
zasilania
włączony/
wyłączony
Gniazdo do
podłączenia
słuchawek
Gniazdo
wejściowe
video S
Gniazdo
wejściowe video
Gniazda
wejściowe audio
4
Opis Ogólny
Przyciski
wyboru źródła
wejściowego
Przyciski
regulacji
dźwięku
Wskaźnik trybu
czuwania (standby):
• Jeśli urządzenie
zostanie wyłączone
przy użyciu przycisku
trybu czuwania na
pilocie, pojawi się
wskaźnik koloru
czerwonego.
• Jeśli urządzenie
zostanie wyłączone
przy użyciu
wyłącznika, pojawi
się wskaźnik koloru
bursztynowego.
Przyciski wyboru następnego
lub poprzedniego programu
(wybór kanałów telewizyjnych)
Page 68

Opis Ogólny
Przegląd przycisków pilota do zdalnego sterowania
Przywracanie nastawień fabrycznych
Należy go nacisnąć nie tylko w celu
przywrócenia nastawień fabrycznych
obrazu i dźwięku, lecz również przy
ponownym podłączaniu urządzenia tak
jak za pierwszym razem.
Gdy na ekranie pojawi się menu
automatycznego programowania, należy
powtórzyć kroki opisane w rozdziale
“Włączanie urządzenia i automatyczne
programowanie” (punktu 4) znajdującym
się w niniejszej instrukcji obsługi.
Włączanie/Wyłączanie video
Należy go nacisnąć by włączyć lub
wyłączyć video.
Wyłączanie dźwięku
Należy go nacisnąć by wyłączyć dźwięk
Należy go ponownie nacisnąć by włączyć
dźwięk.
Wybór trybu TV
Należy go nacisnąć by telegazeta zniknęła
z ekranu lub by wyłączyć weście video.
2 obrazy na ekranie (PAP)
W celu uzyskania szczegółów należy
przeczytać rozdział “2 obrazy na ekranie
(PAP)”.
Wybór telegazety
Należy go nacisnąć by telegazeta pojawiła
się na ekranie.
Wyświetlenie Elektronicznego Wykazu
Programów
Należy go nacisnąć by wyświetlić
Elektroniczny Wykaz Programów (EPG).
Należy go ponownie nacisnąć by zniknął.
Unieruchamianie obrazu
Należy go nacisnąć by unieruchomić obraz
telewizyjny. Należy go ponownie nacisnąć
by przywrócić normalny obraz TV
.
Wybór kanału
Należy je przyciskać by wybrać
odpowiedni kanał.
W przypadku kanałów o numerze
dwucyfrowym np. 23, należy najpierw
nacisnąć -/--, a następnie przyciski
numeryczne 2 i 3.
W przypadku popełnienia pomyłki
podczas wprowadzania pierwszej cyfry
należy kontynuować operację
wprowadzania drugiej (od 0 do 9), a
następnie powtórzyć całą operację.
Wybór trybu dźwięku
Należy go kilkakrotnie nacisnąć by
zmienić nastawienie trybu dźwięku.
Wybór trybu obrazu
Należy go kilkakrotnie nacisnąć by
zmienić ustawienia obrazu.
Regulacja głośności
Należy go nacisnąć by nastawić głośność.
Wszystkie kolorowe przyciski służą nie tylko do
regulacji telewizora, ale też do obsługi telegazety.
Szersza informacja o ich funkcjach znajduje się w
rozdziale poświęconym telegazecie
1
4
7
S
VIDEO TV
2
5
8
0
K
MENU
VT
R 1 2 3 4 DVD
3
6
9
PROGR
RM
VIDEO TV
CH
903
Czasowe wyłączenie telewizora
Należy go nacisnąć by czasowo wyłączyć telewizor
(Zostanie wyświetlony czerwony wskaźnik trybu
czuwania ). Należy go ponownie nacisnąć by
włączyć telewizor pozostający w trybie czuwania
(standby)
Jeśli w ciągu 15-30 minut nie ma sygnału
telewizyjnego ani też nie zostanie naciśnięty
żaden przycisk telewizor automatycznie
przełączy się na tryb czuwania (standby).
Wyświetlanie menu
Należy go nacisnąć by na ekranie pojawiło się
menu funkcji. Należy go ponownie nacisnąć by
usunąć menu z ekranu i by pojawił się normalny
obraz telewizyjny.
Wybór sygnału wejściowego
Należy go naciskać aż symbol żądanego źródła
sygnału pojawi się na ekranie.
Powrót do ostatniego wybranego kanału
Umożliwia powrót do poprzednio wybranego
kanału (uprzednio wybrany kanał powinien być
wcześniej widoczny na ekranie przez
przynajmniej 5 sekund).
Wybór formatu ekranu
Należy go nacisnąć by oglądać programy w
formacie. Sversza informacja w rozdziale “Zmiana
formato ekranu”.
Obrazy zwielokrotnione (Multi PIP)
Należy go nacisnąć by włączyć opcję Multi PIP.
Należy go ponownie nacisnąć by ją wyłączyć.
Joystick opcji menu
• Gdy MENU jest na ekranie:
4 Przejść na wyższy poziom
$ Przejść na niższy poziom
Z
poprzedniej opcji
z Przejść do następnego menu lub
następnej opcji
OK Potwierdzić wybór opcji
• Gdy MENU nie ma na ekranie:
Z Przechodzi bezpośrednio do ostatnio
wybranego menu
OK Wyświetla całą listę programów
Wybór kanałów
Należy go nacisnąć by wybrać następny lub
poprzedni kanał.
Włączanie systemu menu
SNależy go nacisnąć by menu pojawiło się na
ekranie. Należy go ponownie nacisnąć by menu
zniknęło i pojawił się normalny ekran telewizyjny.
Wyświetlanie godziny
Należy go nacisnąć by włączyć lub
wyłączyć zegar (działa tylko podczas
transmisji telegazety)
Obsługa video
W celu uzyskania szczegółów należy
przeczytać rozdział “Pilot innych
urządzeń Sony”.
.
Przejść do poprzedniego menu lub
PL
Opis Ogólny
5
Page 69

Podłączenia urządzenia
Wkładanie baterii do pilota
Należy upewnić się, że baterie umieszczone zostały zgodnie z
ich biegunowością.
Szanując środowisko naturalne należy wyrzucać zużyte
baterie do specjalnie do tego przeznaczonych pojemników.
Podłączanie anteny i magnetowidu
Do urządzenia nie załączone są kable do tych podłączeń.
lub
OUT IN
Podłączenie do złącza EURO jest fakultatywne.
Jeśli się stosuje fakultatywne podłączenie do złącza EURO może ono podnieść jakość obrazu i dźwięku podczas
używania magnetowidu.
Jeśli się nie używa podłączenia do złącza EURO, po automatycznym zaprogramowaniu urządzenia, należy ręcznie
zaprogramować kanał sygnału video. W tym celu należy przeczytać rozdział “Ręczne programowanie urządzenia“.
Należy również przeczytać instrukcje obsługi magnetowidu by zorientować się jak odnaleźć kanał sygnału video.
Stabilne umocowanie urządzeniathe set
Po zamontowaniu, proszę przy pomocy dostarczonych elementów nośnych, umocować urządzenia na ścianie, itp.,
celem zabezpieczenia go.
1 Oba elementy nośne należy przykręcić śrubami do górnej, tylnej krawędzi urządzenia.
Nie wolno blokować lub nakrywać otworu wentylacyjnego
znajdującego się po lewej stronie na dole z tyłu urządzenia. W
celu zapewnienia dobrej wentylacji należy zostawić przynajmniej
10-centymetrowy odstęp między ścianą a urządzeniem.
2 Proszę przesunąć mocną linkę lub łańcuch do umocowanych elementów nośnych, zgodnie z punktem 1 powyżej, a
następnie umocować na ścianie, kolumnie, itp.
6
Podłączenia urządzenia
Page 70

Pierwsze uruchomienie urządzenia
Language/Country
Language
Country
Select Language: Confirm: OK
4 Italiano
Français
Español
English
Deutsch
Dansk
Čeština
Language/Country
Language
Country
Select Language: Confirm: OK
4 Italiano
Français
Español
English
Deutsch
Dansk
Čeština
Włączanie telewizora i automatyczne programowanie
Gdy urządzenie zostanie włączony po raz pierwszy na ekranie pojawią się menu dzięki którym można: 1) wybrać język w
którym wyświetlane będą wszystkie menu 2) wybrać kraj w którym używane będzie urządzenie, 3) odnaleźć i automatycznie
zapisać wszystkie dostępne kanały (stacje telewizyjne) i 4) zmienić kolejność w której kanały (stacje telewizyjne) pojawiają
się na ekranie.
Jeśli po jakimś czasie zaistnieje potrzeba zmiany języka w którym wyświetlane są menu kraju, automatycznego
programowania (np. przy zmianie miejsca zamieszkania) lub kolejności pojawiania się kanałów, można tego dokonać
wybierając odpowiednie menu w (Ustawienia).
1 Włącz przewód zasilający urządzenia do gniazdka sieciowego (220-
240V AC, 50HZ). Naciśnij przycisk włączony/wyłączony
znajdujący się z przodu urządzenia by je włączyć urządzenie.
Gdy przycisk ten zostanie naciśnięty po raz pierwszy, na ekranie
automatycznie zostanie wyświetlone menu Language/Country
(Język/Kraj).
2 Naciśnij joystick na pilocie w kierunku $ lub 4 by wybrać język, a
następnie naciśnij przycisk OK by potwierdzić wybór. Od tego
momentu wszystkie menu będą wyświetlane w wybranym języku.
3 Naciśnij joystick w kierunku $ lub 4 by wybrać kraj w którym będzie
używane urządzenie, a następnie naciśnij przycisk OK by
potwierdzić wybór.
Wybierz ”Wyłączony” zamiast nazwy kraju jeśli nie chcesz by
kanały (stacje telewizyjne) zostały zapisane w ustalonym
TV
D
O
I
E
V
4 Menu automatycznego programowania zostanie wyświetlone na
porządku który rozpoczyna się pozycją programu numer 1.
ekranie w wybranym języku. Naciśnij przycisk OK by wybrać Tak.
Czy chcesz rozpocząć automatyczne programowanie?
Language/Country
Language
Country
Select Language: Confirm: OK
Język/Kraj
Język
Kraj
Wybierz kraj: Potwierdê: OK
4 Italiano
Français
Español
English
Deutsch
Dansk
Čeština
4
Finlandia
Dania
Czechy
Bułgaria
Belgia
Austria
Wyłączony
PL
Tak: OK Nie:
5 Na ekranie automatycznie pojawi się nowe menu przypominające o
sprawdzeniu czy została podłączona antena. Sprawdź czy antena
1
2
3
została podłączona i wówczas naciśnij przycisk OK by rozpoczęło
Sprwdź, czy antena jest
podłączona
Tak: OK Nie:
się automatyczne programowanie.
4
5
6
7
8
9
0
• Urządzenie rozpoczyna programowanie i automatyczne
zapisywanie wszystkich dostępnych kanałów (stacji
telewizyjnych).
• Jeśli w menu “Kraj” została nastawiona opcja “Wyłączony“
i po pierwszym uruchomieniu urządzenia ponownie
realizowane jest automatyczne programowanie, stacje
1
CO2
2
CO3
3
CO4
4
CO7
5
CO8
wyszukiwanie...
telewizyjne zostaną zapisane począwszy od numeru kanału
odbieranego w danej chwili przez urządzenie.
MENU
S
PROGR
RM
903
Proces dostrajania może potrwać kilka minut. Należy zachować
cierpliwość i nie naciskać żadnych przycisków podczas jego
trwania, gdyż w przeciwnym wypadku nie zostałby on
zakończony.
kontynuuje...
Pierwsze uruchomienie urządzenia
7
Page 71

Pierwsze uruchomienie urządzenia
6 Gdy urządzenie zaprogramuje i zapisze wszystkie kanały (stacje
DETV
O
I
V
a) Jeśli nie ma potrzeby zmiany kolejności programów przejdź do
b) Jeśli chcesz zmienić kolejność kanałów:
1
2
3
4
5
6
7
8
9
0
telewizyjne) na ekranie pojawi się automatycznie menu
Sortowanie programów by można było zmienić kolejność
pojawiania się kanałów na ekranie.
punktu 7.
1 Naciśnij joystick na pilocie kierunku $ lub 4 by wybrać numer
programu kanału (stacji telewizyjnej) którego pozycję chcesz
zmienić, a następnie naciśnij go w kierunku z.
2 Naciśnij joystick w kierunku $ lub 4 by wybrać nowy numer
programu na którym chcesz zapisać wybrany kanał (stację
telewizyjną) a następnie naciśnij OK.
Wybrany kanał zmienia pozycję i pozostałe kanały
dopasowywują swą pozycję do zaszłej zmiany.
3 Powtórz kroki b1) i b2) by przyporządkować pozostałe kanały
telewizyjne.
Sortowanie programów
PROG KAN NAZWA
TV 5
C03
1
PRO 7
C05
2
EU-SP
C07
3
SWF
C08
4
RTL
C09
5
SAT
C11
6
MDR
C12
7
DDI
C13
8
DSF
C14
9
RTL 2
C15
10
KAB 1
C16
11
Wyb. program:
Sortowanie programów
PROG KAN NAZWA
1
TV 5
C03
2
PRO 7
C05
3
EU-SP
C07
4
SWF
C08
5
RTL
C09
6
SAT
C11
7
MDR
C12
8
DDI
C13
9
DSF
C14
10
RTL 2
C15
11
KAB 1
C16
Wybierz poz.:
Potwierdê
C03 TV 5
PrzenieÊ
:
: OK
MENU
S
PROGR
RM
7 Naciśnij przycisk MENU by przywrócić normalny ekran telewizyjy.
903
Urządzenie jest gotowe do użytku.
Pierwsze uruchomienie urządzenia
8
Page 72

System menu
o
Regulacja Obrazu
Wybierz: Wprowadź menu:
Tryb Obrazu
Kontrast
Jasność
Kolor
Ostrość
Zerowanie
Sztuczna intel.
Redukcja zakłóceń
Barwa
Własny
Tak
Auto
Norm
Regulacja Obrazu
Wybierz: Wprowadź menu:
Tryb Obrazu
Kontrast
Jasność
Kolor
Ostrość
Zerowanie
Sztuczna intel.
Redukcja zakłóceń
Barwa
Własny
Tak
Auto
Norm
Joystick:
Zmiana formatu ekranu
Funkcja ta pozwala zmienić typ formatu obrazu telewizyjnego.
D
O
I
E
V
TV
1 Naciśnij kilkakrotnie przycisk na pilocie by wybrać jeden
poniższych formatów:
Smart: imitacja szerokiego ekranu dla programów nadawanych
w formacie 4:3.
4:3: zwyczajny obraz w formacie 4:3, informacja o pełnym
1
2
3
4
5
6
7
8
9
0
obrazie.
14:9: warriant pośredni pomiędzy formatami 4:3 i 16:9.
Zoom: format szerokiekranowy dla filmów panoramicznych.
Wide: dla programów nadawanych w formacie 16:9.
W trybach Smart, Zoom oraz 14:9, górna i dolna część obrazu
zostają odcięte. Naciśnij $ lub 4, aby ustawić pozycję obrazu na
ekranie (np. aby przeczytać napisy).
PROGR
MENU
2 Naciśnij przycisk OK by potwierdzić swój wybór.
RM
903
S
Wprowadzenie do systemu menu na ekranie
(skalowanieobrazu)
Zoom
Smart
Wide
14:9
4:3
PL
Niniejsze urządzenie dysponuje systemem menu wyświetlanych na ekranie by ułatwić nastawianie poszczególnych funkcji.
Należy używać następujących przycisków na pilocie by poruszać się po zestawach nastawiania:
TV
D
O
I
E
V
1 Naciśnij przycisk MENU by został wyświetlony na ekranie pierwszy
poziom menu.
1
2
3
4
5
6
7
8
9
0
2 • By wybrać pożądaną pozycję lub opcję naciśnij joystick w
kierunku
• By wejść do wybranego menu lub jego opcji naciśnij joystick w
kierunku z.
• By powrócić do poprzedniego menu lub jego opcji naciśnij
joystick w kierunku Z.
4 lub $.
stiskněte směrem
Naciśnij w kierunku $/4/Z lub z
$/4/Z
• By zmienić nastawienia wybranej opcji naciśnij joystick w
kierunku $/4/Z
• By potwierdzić i zapisać wybór naciśnij OK.
PROGR
MENU
lub z.
OK
naciśnij OK
3 Naciśnij przycisk MENU by przywrócić normalny ekran telewizyjny.
RM
903
S
System menu
9
Page 73

System menu
Krótki przewodnik po systemie menu
Regulacja Obrazu
Tryb Obrazu
Kontrast
Jasność
Kolor
Ostrość
Zerowanie
Sztuczna intel.
Redukcja zakłóceń
Barwa
Wybierz: Wprowadź menu:
Ustawienia dźwięku
Tryb korektora
Ustawienia
korektora
Balans
Głośność
Przestrzeń
Autom. reg. głośn.
Podw. dźwięk
Głośność
Podw. dźwięk
Wybierz: Wprowadź menu:
Funkcje
Głośnik
Auto Format
Korekta formatu
Sleep Timer
Blokada zabezp.
Wyjście AV2
Wybierz: Wprowadź menu:
Set Up
Set Up
Ustawienia
Auto Tuning
Auto uning
Automat. strojenie
Programme Sorting
Programme Sorting
Sortowanie programów
Select NexTView
Select NexTView
Wybierz NexTView
AV Preset
AV Preset
Nastawianie AV
Manual Set Up
Manual Set Up
Ręczne ustawianie
Select:
Select:
Wybierz: Wprowadź menu:
Własny
Własny
.
0
0
0
Enter Menu:
Enter Menu:
Tak
Auto
Norm
Nie
Nie
Nie
Mono
Mono
Głowny
Normalny
- - - - - - -
Regulacja Obrazu
Tryb Obrazu
Kontrast
Jasność
Kolor
Ostrość
Zerowanie
Sztuczna intel.
Redukcja
Barwa
Wybierz: Wprowadź:
Ustawienia dźwięku
Tryb korektora
Ustawienia
korektora
Balans
Głośność
Przestrzeń
Autom. reg. głośn.
Podw. dźwięk
Głośność
Wybierz: Wprowadź: OK
Funkcje
Głośnik
Auto Format
Tak
Nie
Nie
TV
Korekta formatu
Sleep Timer
Blokada zabezp.
Wyjście AV2
Wybierz: Wprowadź: OK
Ustawienia
Automat. strojenie
Sortowanie programów
Wybierz NexTView
Nastawianie AV
Ręczne ustawianie
Wybierz: Strojenie auto.:
Ustawienia
Automat. strojenie
Sortowanie programów
Wybierz NexTView
Nastawianie AV
Ręczne ustawianie
Wybierz: Wprowadź:
zakłóceń
Podw. dźwięk
Własny
Szersza informacja
w rozdziale
Tak
Auto
“Regulacja obrazu”
Norm
Własny
.
0
0
0
Szersza informacja
Nie
w rozdziale
Nie
Nie
“Regulacja dźwięku”
Mono
Mono
Głowny
Szersza informacja
Normalny
Tak
w rozdziale
Nie
Nie
“Użycie menu Funkcje”
TV
Start
- - - - - - -
- - - - - - -
Czy chcesz rozpocząć automatyczne programowanie?
Tak: OK Nie:
Sortowanie programów
PROG KAN NAZWA
TV 5
C03
1
PRO 7
C05
2
EU-SP
C07
3
SWF
C08
4
RTL
C09
5
SAT
C11
6
MDR
C12
7
DDI
C13
8
DSF
C14
9
RTL 2
C15
10
KAB 1
C16
11
Wyb. program:
Potwierdê
:
Szersza informacja
w rozdziale
“Włączanie urządzenia
i automatyczne
programowanie”
Szersza informacja
w rozdziale
“Włączanie urządzenia
i automatyczne
programowanie”
Telegazeta
Góra / Dół / Cała
Usunięcie tekstu
Odsłanianie
Strona na czas
Przegłąd stron
Wybierz: Wprowadź menu:
Szersza
informacja w
rozdziale
“Telegazeta”
Ustawienia
Automat. strojenie
Sortowanie programów
Wybierz NexTView
Nastawianie AV
Ręczne ustawianie
Wybierz: Wprowadź:
Ustawienia
Automat. strojenie
Sortowanie programów
Wybierz NexTView
Nastawianie AV
Ręczne ustawianie
Wybierz: Wprowadź:
Ustawienia
Automat. strojenie
Sortowanie programów
Wybierz NexTView
Nastawianie AV
Ręczne ustawianie
Wybierz: Wprowadź:
- - - - - - -
- - - - - - -
- - - - - - -
Szersza
informacja w
rozdziale
“NexTView”
Szersza
informacja w
rozdziale
“Identyfikacja
i wybór
formatu
ekranu źródeł
wejściowych”
Ręczne ustawianie
Język/Kraj
Programowanie ręczne
Dalsze nastawianie
Ustawienia RGB
Ident. osobisty
Demo
Wybierz: Wprowadź:
Ręczne ustawianie
Język/Kraj
Programowanie ręczne
Dalsze nastawianie
Ustawienia RGB
Ident. osobisty
Demo
Wybierz: Wprowadź:
Ręczne ustawianie
Język/Kraj
Programowanie ręczne
Dalsze nastawianie
Ustawienia RGB
Ident. osobisty
Demo
Wybierz: Wprowadź:
Ręczne ustawianie
Język/Kraj
Programowanie ręczne
Dalsze nastawianie
Ustawienia RGB
Ident. osobisty
Demo
Wybierz: Wprowadź:
Ręczne ustawianie
Język/Kraj
Programowanie ręczne
Dalsze nastawianie
Ustawienia RGB
Ident. osobisty
Demo
Wybierz: Wprowadź:
Ręczne ustawianie
Język/Kraj
Programowanie ręczne
Dalsze nastawianie
Ustawienia RGB
Ident. osobisty
Demo Start
Wybierz: Wprowadź:
- - - - - - -
- - - - - - -
- - - - - - -
- - - - - - -
- - - - - - -
- - - - - - -
Szersza informacja
w rozdziale
“Włączanie urządzenia
i automatyczne
programowanie”
Szersza informacja w
rozdziale “Ręczne
programowanie
urządzenia”,
“Identyfikacja
poszczególnych
kanałów” i “Pomijanie
numerów programów”
Szersza informacja w
rozdziale “Stosowanie
funkcji Dalsze
nastawianie”
Szersza informacja w
rozdziale “Regulacja
geometrii obrazu dla
źródła RGB”
Szersza informacja w
rozdziale
“Wprowadzenie
Identyfikatora
Osobistego”
Szersza informacja
w rozdziale “Przegląd
poszczególnych
funkcji”
10
System menu
Page 74

System menu
Regulacja obrazu
Pomimo, iż obraz jest ustawiony fabrycznie, możliwa jest jego regulacja zgodnie z własnymi upodobaniami.
1
4
7
S
MENU
TV
D
O
I
E
V
ekranie.
2 Naciśnij joystick w kierunku z by wejść do menu Regulacja obrazu.
3 Naciśnij joystick w kierunku $ lub 4 by wybrać element który chcesz
1 Naciśnij przycisk MENU na pilocie by menu pojawiło się na
zmienić, a następnie naciśnij go w kierunku
Skonsultuj poniższą tabelę by wybrać i zobaczyć efekt działania
poszczególnych elementów menu:
Tryb obrazu $ Żywy (dla programów nadawanych bezpośrednio)
2
3
5
6
8
9
0
Własny (dla indywidualnych upodobań)
Film (dla filmów)
4 Gra (dla gier elektronicznych)
Kontrast Z Mniejszy z Większy
Jasność
* Z Ciemniej z Jaśniej
Kolor* Z Mniej z Więcej
Ostrość* Z Łagodniej z Ostrzej
z.
Regulacja Obrazu
Tryb Obrazu
Kontrast
Jasność
Kolor
Ostrość
Zerowanie
Sztuczna intel.
Redukcja zakłóceń
Barwa
Wybierz: Wprowadź menu:
Regulacja Obrazu
Tryb Obrazu
Kontrast
Jasność
Kolor
Ostrość
Zerowanie
Sztuczna intel.
Redukcja
Barwa
Wybierz: Wprowadź:
Tryb Obrazu
zakłóceń
żywy
Własny
Film
Własny
Własny
Gra
Norm
Norm
Tak
Auto
Tak
Auto
Odcień** Z Czerwonawy z Zielonkawy
Zerowanie Przywraca fabryczne ustawienia obrazu
K
Kontrast
Sztuczna Intel. 4 Nie: Normalna
PROGR
RM
$ Tak: Automatyczna optymalizacja poziomu obrazu
w zależności od sygnału TV
Redukcja zakłóceń
$ Wysoka: silna redukcja zakłóceń
Sztuczna intel.
Średnia: rednia redukcja zakłóceń
Niska: słaba redukcja zakłóceń
poziom redukcji zakłóceń
Auto: automatycznie dobierany, optymalny
Redukcja zakłóceń
4 Wyłączona: brak redukcji zakłóceń
903
Barwa $ Cpł: nadaje obrazowi ciepły odcień
---Norm: normalne ustawienie
Barwa
Wysoka
Średnia
Niska
Auto
Wyłączona
Norm
Zmn.
Tak
Nie
Cpł
PL
4 Zmn.: nadaje obrazowi zimny odcień
*Można zmienić tylko jeśli wybierze się pozycję Własny w Tryb obrazu.
** Dostępny jedynie dla systemu koloru NTSC (np. taśmy video z USA).
4 Naciśnij joystick w kierunku 4, $, Z / z pby zmienić nastawienie
wybranego elementu, a następnie naciśnij przycisk OK by zapisać
nowe ustawienie.
5 Powtórz kroki 3 i 4 by zmienić pozostałe ustawienia.
6 Naciśnij przycisk MENU by przywrócić normalny ekran telewizyjny.
Szybka zmiana trybu obrazu
Tryb obrazu można szybko zmienić bez konieczności wejścia do
menu Regulacja obrazu.
1 Kilkakrotnie naciśnij przycisk na pilocie by móc bezpośrednio
wybrać odpowiednią opcję trybu obrazu (Żywy, Własny, Film lub
Gra).
2 Naciśnij OK by przywrócić normalny ekran telewizyjny.
Tryb Obrazu
żywy
Własny
Film
Gra
System menu
11
Page 75

System menu
Regulacja dźwięku
Pomimo, iż dźwięk jest ustawiony fabrycznie, można go regulować zgodnie z własnymi upodobaniami.
1
4
7
S
MENU
TV
D
O
I
E
V
1 Naciśnij przycisk MENU na pilocie by menu pojawiło się na
ekranie.
2 Naciśnij joystick w kierunku $ by wybrać symbol , a następnie
naciśnij go w kierunku
z aby wejść do menu Ustawienie dźwięku.
3 Naciśnij joystick w kierunku $ lub 4 by wybrać element który chcesz
zmienić, a następnie naciśnij go w kierunku
poniższą tabelą by móc wybrać i zobaczyć efekt działania
poszczególnych elementów zestawu nastawiania:
2
3
5
6
8
9
0
PROGR
RM
903
Tryb korektora $ Własny (dla indywidualnych upodobań)
Wokal
Jazz
Rock
Pop
4 Płaski (wartość stała, nie można jej regulować)
*Ustawienie Naciśnij joystick w kierunku
korektora częstotliwości który chcesz zmienić, a następnie
naciśnij go w kierunku $ lub 4 by nastawić ten zakres.
Na zakończenie naciśnij OK by zapisać nowe nastawienie.
Balans Z Lewy z Prawy
Głośność $ Nie: Normalna
4 Tak: Dla programów muzycznych
Przestrzeń $ Nie: Normalna
4 Tak: Dla specjalnych efektów dźwiękowych
Autom. reg. $ Nie:
głośn. 4 Tak: Natężenie dźwięku kanałów jest stałe
niezależnie od sygnału stacji (np. w reklamach)
Podw. dźwięk • Dla emisji stereo:
• Dla emisji dwujęzycznych:
A (dla kanału 1)
Słuchawki:
l Głośność Z Więcej z Mniej
l Podw. • Dla emisji stereo:
dźwięk $ Mono
Natężenie dźwięku zmienia się w zależności od sygnału stacji
$ Mono
4 Stereo
$ Mono (dla kanału mono, jeśli jest dostępny)
4 B (dla kanału 2)
4 Stereo
z. Zapoznaj się z
z lub Z by wybrać zakres
Regulacja Obrazu
Tryb Obrazu
Kontrast
Jasność
Kolor
Ostrość
Zerowanie
Sztuczna intel.
Redukcja zakłóceń
Barwa
Wybierz: Wprowadź menu:
Ustawienia dźwięku
Tryb korektora
Ustawienia
korektora
Balans
Głośność
Przestrzeń
Autom. reg. głośn.
Podw. dźwięk
Głośność
Podw. dźwięk
Wybierz: Wprowadź: OK
Ustawienia dźwięku
Tryb korektora
Ustawienia
korektora
Balans
Głośność
Przestrzeń
Autom. reg. głośn.
Podw. dźwięk
Głośność
Podw. dźwięk
Wybierz tryb: Potwierdź: OK
Ustawienia korektora
(Własny)
+
0
—
120 500 1,5K 5 K 10 K
Wyb: Ustaw: Potwierdź:OK
Balans
Głośność
Przestrzeń
Autom. reg. głośn.
Podw. dźwięk
Głośność
Podw. dźwięk
0
0
0
0
Własny
Własny
.
0
Własny
Płasky
Personal
.
0
.
Mono
Mono
Mono
Wokal
Rock
Mono
Mono
Tak
Auto
Norm
Nie
Nie
Nie
Jazz
Pop
Nie
Nie
Nie
Nie
Tak
Nie
Tak
Nie
Tak
A
B
B
A
• Dla emisji dwujęzycznych:
$ Mono (dla kanału mono, jeśli jest dostępny)
A (dla kanału 1)
B (dla kanału 2)
4 PAP (tylko gdy funkcja PAP jest włączona)
12
*Możesz trwale zapisać gdy nastawiłeś «Własny» w «Tryb korektora».
Pozostałe opcje (Wokal, Jazz, Rock lub Pop) mogą zostać zapisane
wyłącznie do następnej zmiany trybu korektora.
kontynuuje...
System menu
Page 76

System menu
D
O
TV
I
E
V
4 Naciśnij joystick w kierunku $, 4, Z lub z pby zmienić nastawienie
wybranego elementu, a następnie naciśnij OK by zapisać nowe
nastawienie.
5 Powtórz kroki 3 i 4 by zmienić pozostałe nastawienia.
6 Naciśnij przycisk MENU by przywrócić normalny obraz telewizyjny.
3
2
1
6
5
4
9
8
7
0
Szybka zmiana trybu dźwięku
Tryb dźwięku można szybko zmienić bez konieczności wejścia
do menu «Ustawienie dźwięku»
.
PL
Własny
Wokal
Jazz
Rock
Płasky
Pop
MENU
PROGR
1 Kilkakrotnie naciśnij przycisk na pilocie by móc bezpośrednio
wybrać odpowiednią opcję trybu dźwięku (Własny, Wokal, Jazz,
Rock, Pop lub Płaski).
Tryb korektora
2 Naciśnij przycisk OK by przywrócić normalny obraz telewizyjny.
RM
903
S
System menu
13
Page 77

System menu
Użycie menu “Funkcje”
Menu to pozwala:
a) Wybrać opcję odbioru dźwięku bezpośrednio z urządzenia lub z zewnętrznego wzmacniacza
b) Automatycznie nastawić format obrazu
c) Wybrać okres czasu po upływie którego urządzenie przełączy się automatycznie na tryb czuwania (standby).
d) Zablokować przyciski urządzenia, by działał wyłącznie przy użyciu przycisków pilota.
e) Wybrać źródło wyjściowe ze złącza EURO
programy z wejścia złącza EURO jednocześnie oglądając programy z innego źródła (jeśli podłączone video dysponuje
:
2/q2 (SMARTLINK). Dzięki takiemu podłączeniu można nagrywać
1
4
7
S
MENU
D
O
I
E
TV
V
1 Naciśnij przycisk MENU na pilocie by menu pojawiło się na ekranie.
2 Naciśnij joystick na pilocie w kierunku $ by wybrać pozycję symbolu
, a następnie naciśnij go w kierunku
Funkcje.
z by otworzyć menu
Regulacja Obrazu
Tryb Obrazu
Kontrast
Jasność
Kolor
Ostrość
Zerowanie
Sztuczna intel.
Redukcja zakłóceń
Barwa
Wybierz: Wprowadź menu:
Własny
Norm
Tak
Auto
3 Naciśnij joystick w kierunku $ lub 4 by wybrać opcję menu, a
następnie naciśnij go w kierunku
z.
(Zapoznaj się z poniższą tabelą by zobaczyć efekt działania
poszczególnych opcji).
2
3
4 Naciśnij joystick w kierunku $ lub 4 by zmienić nastawienie
5
6
8
9
0
PROGR
RM
903
wybranej opcji, a następnie naciśnij OK by je zapisać.
5 Naciśnij przycisk MENU by przywrócić normalny ekran telewizyjny.
Funkcje Efekt/Operacja
Głośnik $ Główny (dźwięk z urządzenia)
4 Środkowy (dźwięk z zewnętrznego)
Auto Format $ Wył: Wielkość obrazu nie jest automatycznie
(tylko dla sygnału regulowana
z anteny) Normalny: Wielkość obrazu nie jest automatycznie
zmieniana, w zależność od nadawanego programu.
4 Cały: Telewizor może automatycznie dopasowywać
wielkość obrazu tak, aby zlikwidować wszystkie
ciemme obszary z ekranu (tak jest to opisane w
rozdziale “Zmiana formatu ekranu “).
Korekta formatu $ Nie: Wybrany jest 4:3/14:9
(tylko jeżeli Auto 4 Tak: Tryb Smart jest wybierany automatycznie dla
Format jest programów nadawanych w formacie 4:3/14:9.
ustawiony na
“Normalny” lub “Cały”)
Funkcje
Głośnik
Auto Format
Korekta formatu
Sleep Timer
Blokada zabezp.
Wyjście AV2
Wybierz: Wprowadź: OK
Głośnik
Auto Format
Korekta formatu
Normalny
Głowny
Środkowy
Wył.
Normalny
Cały
Głowny
Nie
Tak
Tak
Nie
Nie
TV
14
System menu
«Sleep Timer» 4 Nie
10 min
20 min
...
$ 90 min
• Minutę zanim urządzenie przełączy się na tryb
czuwania (standby), pozostający do tego momentu
czas zostanie automatycznie wyświetlony na
ekranie.
• Oglądając telewizję naciśnij przycisk by został
wyświetlony czas pozostający do wyłączenia.
• Aby ponownie włączyć urządzenie znajdujące się w
trybie czuwania naciśnij przycisk TV na pilocie.
Blokada zabezp.
$ Nie (tryb normalny)
4 Tak (przyciski urządzenia są zablokowane i działa ono
wyłącznie dzięki przyciskom pilota).
Wyjście AV2 $ TV (sygnał audio/video anteny)
AV1 (sygnał audio/video ze złącza EURO :1/ ).
AV2 (sygnał audio/video ze złącza EURO
:
2/q2 SMARTLINK).
AV3 (sygnał audio/video ze złącza EURO
:
4 AV4 (sygnał audio/video gniazda … 4 znajdującego
się z przodu urządzenia.
Jeśli został podłączony dekoder należy pamiętać o
wyborze Wyjście AV2 w “TV” by mógł on
poprawnie działać.
3/q3).
Sleep Timer
Blokada zabezp.
Wyjście AV2
10 Min
Nie
Tak
TV
AV1
AV2
AV3
AV4
Page 78

Regulacja Obrazu
Wybierz: Wprowadź menu:
Tryb Obrazu
Kontrast
Jasność
Kolor
Ostrość
Zerowanie
Sztuczna intel.
Redukcja zakłóceń
Barwa
Własny
Tak
Auto
Norm
Ustawienia
Automat. strojenie
Sortowanie programów
Wybierz NexTView
Nastawianie AV
Ręczne ustawianie
Start
- - - - - - -
Wybierz: Strojenie auto.:
Ustawienia
Automat. strojenie
Sortowanie programów
Wybierz NexTView
Nastawianie AV
Ręczne ustawianie
- - - - - - -
Wybierz: Wprowadź:
Ręczne ustawianie
Język/Kraj
Programowanie ręczne
Dalsze nastawianie
Ustawienia RGB
Ident. osobisty
Demo
- - - - - - -
Wybierz: Wprowadź:
Programowanie ręczne
PROG KANSYSPOMIŃ NAZWA
C09
C10
ARD
BBC
B/G
B/G
Nie
Nie
Nie
Nie
Nie
Nie
Nie
Nie
Nie
Nie
Nie
1
2
3
4
5
6
7
8
9
10
11
Wybierz: Wprowadź:
PROG KANSYS
Nie
POMIŃ NAZWA
1
B/G
L
I
D/K
EXT
Nie 1 B/G
C
S
F
- -
PROG KANSYSPOMIŃ NAZWA
Nie 1 B/G
03
SZUKAJ
C
PROG KANSYSPOMIŃ NAZWA
Nie 3 EXT
AV1
AV2
AV3
AV4
PROG KANSYSPOMIŃ NAZWA
System menu
Ręczne programowanie urządzenia
Funkcję tę należy użyć, by w dowolnej kolejności, pojedyńczo dostroić programy, (stacje telewizyjne) lub wejście video.
V
1
2
4
5
7
8
0
S
MENU
D
O
I
E
TV
2 Naciśnij joystick na pilocie w kierunku $ by wybrać symbol
1 Naciśnij przycisk MENU na pilocie by menu pojawiło się na ekranie.
, a następnie naciśnij go w kierunk z by pojawiło się menu
Ustawienia.
3
3 Naciśnij joystick w kierunku $ lub 4 by wybrać Ręczne
ustawienie, a następnie naciśnij go w kierunku
z.
4 Naciśnij joystick w kierunku $ lubo 4 by wybrać Programowanie
ręczne, a następnie naciśnij go w kierunku
z.
6
9
5 Naciśnij joystick w kierunku $ lub 4 by wybrać numer programu
(pozycję) pod którym chcesz zapisać stację telewizyjną lub kanał
video (dla kanału video radzimy wybrać numer programu “0”).
Naciśnij 2 razy joystick w kierunku
6 Naciśnij joystick w kierunku $ lub 4 by wybrać system nadawania
(B/G dla Europy zachodniej , L dla Francji, I dla Wielkiej Brytanii lub
z by zaznaczyć kolumnę SYS .
PL
D/K dla Europy wschodniej) lub źródło wejściowe zewnętrzne
PROGR
(EXT). Następnie naciśnij joystick w kierunku
z by zaznaczyć
kolumnę KAN.
7 Naciśnij joystick w kierunku $ lub 4 by wybrać typ kanału, «C» dla
RM
903
kanałów naziemnych (dla stacji telewizyjnych lub kanału video), «S»
dla kanałów telewizji kablowej lub “F” dla sygnałów o
częstotliwości bezpośredniej. Następnie naciśnij joystick w
kierunku
z.
8 a) Znając numer kanału stacji telewizyjnej, sygnału kanału video
lub zakresu, naciskaj przyciski numeryczne by bezpośrednio
wprowadzić ten numer. Następnie naciśnij OK by go zapisać.
b) Nie znając numeru kanału naciśnij joystick w kierunku $ by
wybrać SZUKAJ i urządzenie rozpocznie automatyczne
poszukiwanie kolejnego kanału stacji telewizyjnej lub kanału
video. Jeśli znalezionego numeru nie chcesz zapisać
naciśnij joystick w kierunku $ by znaleźć inny kanał. Kiedy
znaleziony zostanie kanał który pragniesz zapisać naciśnij
przycisk OK.
c) By wybrać zewnętrzne źródła wejściowe (EXT), naciśnij joystick
w kierunku $ by wybrać źródło wejściowe gdzie zostało
podłączone dodatkowe urządzenie (AV1, AV2, AV3 lub AV4).
Następnie naciśnij OK by je zapisać.
9 Powtórz kroki od 4 do 8 a), b) lub c) by znaleźć i zapisać więcej
kanałów.
10 Naciśnij przycisk MENU by przywrócić normalny obraz telewizyjny.
Urządzenie jest gotowe do użytku.
System menu
15
Page 79

System menu
Identyfikacja poszczególnych kanałów
Nazwy kanałów (stacji telewizyjnych) zazwyczaj uzyskuje się automatycznie z telegazety jeśli jest ona dostępna. Kanałowi
lub sygnałowi wejściowemu video można też nadać nazwę składającą się z maks. 5 znaków (liter lub cyfr). Dzięki temu
można z łatwością zidentyfikować kanał (stację telewizyjną) lub źródło video które pojawiają się na ekranie.
1
4
7
S
2
0
MENU
TV
D
O
I
E
V
1 Naciśnij przycisk MENU na pilocie aby menu pojawiło się na
ekranie.
2 Naciśnij joystick w kierunku $ by wybrać symbol , a następnie
naciśnij go w kierunku
Ustawienia.
3
5
6
8
9
3 Naciśnij joystick w kierunku $ lub 4 by wybrać Ręczne
ustawianie, a następnie naciśnij go w kierunku
z by zostało wyświetlone menu
z.
4 Naciśnij joystick w kierunku $ lub 4 by wybrać Programowanie
ręczne, a następnie naciśnij go w kierunku
PROGR
z.
5 Naciśnij joystick w kierunku $ lub 4 by wybrać numer programu z
kanałem któremu chcesz nadać nazwę.
RM
903
6 Kilkakrotnie naciśnij joystick w kierunku z aż zostanie zaznaczony
Regulacja Obrazu
Tryb Obrazu
Kontrast
Jasność
Kolor
Ostrość
Zerowanie
Sztuczna intel.
Redukcja zakłóceń
Barwa
Wybierz: Wprowadź menu:
Ustawienia
Automat. strojenie
Sortowanie programów
Wybierz NexTView
Nastawianie AV
Ręczne ustawianie
Wybierz: Strojenie auto.:
Ustawienia
Automat. strojenie
Sortowanie programów
Wybierz NexTView
Nastawianie AV
Ręczne ustawianie
Wybierz: Wprowadź:
Ręczne ustawianie
Język/Kraj
Programowanie ręczne
Dalsze nastawianie
Ustawienia RGB
Ident. osobisty
Demo
Wybierz: Wprowadź:
Programowanie ręczne
PROG KANSYSPOMIŃ NAZWA
1
Nie
2
Nie
3
Nie
4
Nie
5
Nie
6
Nie
7
Nie
8
Nie
9
Nie
10
Nie
11
Nie
Wybierz: Wprowadź:
PROG KANSYSPOMIŃ NAZWA
Nie 1 B/G
Własny
Start
- - - - - - -
- - - - - - -
- - - - - - -
C09
ARD
B/G
C10
BBC
B/G
C 03
A
Norm
Tak
Auto
pierwszy element w kolumnie NAZWA.
16
System menu
7 Naciśnij joystick w kierunku $ lub 4 by wybrać literę, cyfrę, “+” lub
puste miejsce, a następnie naciśnij go w kierunku
wybór znaku. Pozostałe cztery znaki wybierz w ten sam sposób.
z by potwierdzić
8 Po wybraniu wszystkich znaków naciśnij OK.
9 Powtórz kroki od 5 do 8 jeśli chcesz nadać nazwy pozostałym
kanałom.
10 Naciśnij przycisk MENU by przywrócić normalny obraz telewizyjny.
Gdy wybiera się nazwany kanał, jego nazwa przez kilka sekund
widoczna jest na ekranie.
Page 80

System menu
Regulacja Obrazu
Wybierz: Wprowadź menu:
Tryb Obrazu
Kontrast
Jasność
Kolor
Ostrość
Zerowanie
Sztuczna intel.
Redukcja zakłóceń
Barwa
Własny
Tak
Auto
Norm
Ustawienia
Automat. strojenie
Sortowanie programów
Wybierz NexTView
Nastawianie AV
Ręczne ustawianie
Start
- - - - - - -
Wybierz: Strojenie auto.:
Ustawienia
Automat. strojenie
Sortowanie programów
Wybierz NexTView
Nastawianie AV
Ręczne ustawianie
- - - - - - -
Wybierz: Wprowadź:
Ręczne ustawianie
Język/Kraj
Programowanie ręczne
Dalsze nastawianie
Ustawienia RGB
Ident. osobisty
Demo
- - - - - - -
Wybierz: Wprowadź:
1 B/G
C 09
ARD
Nie
Tak
PROG KANSYSPOMIŃ NAZWA
Pomijanie numerów programów
Urządzenie można zaprogramować w taki sposób by pomijać pozycje programów przy wybieraniu kanałów przyciskami
PROGR +/-. Aby później przywrócić możliwość wybierania pominiętego numeru programu należy ponownie wykonać
opisane tu czynności, przy czym w punkcie 6 należy wybrać Nie zamiast Tak.
V
2
1
5
4
8
7
0
MENU
S
TV
D
O
I
E
1 Naciśnij przycisk MENU na pilocie by menu pojawiło się na ekranie.
2 Naciśnij joystick w kierunku $ by wybrać symbol , a następnie
naciśnij go w kierunku
3
6
9
3 Naciśnij joystick w kierunku $ lub 4 by wybrać Ręczne ustawianie,
a następnie naciśnij go w kierunku
z by pojawiło się menu Ustawienia.
z.
4 Naciśnij joystick w kierunku $ lub 4 by wybrać Programowanie
ręczne, a następnie naciśnij go w kierunku
PROGR
z.
PL
5 Naciśnij joystick w kierunku $ lub 4 by wybrać numer programu
który chcesz pominąć, a następnie naciśnij go w kierunku
RM
903
wybrać kolumnę POMIŃ.
z by
6 Naciśnij joystick w kierunku $ by wybrać Tak, a następnie
naciśnij OK by wybór zapisać.
7 Powtórz kroki 5 i 6 by pominąć inne numery programów.
8 Naciśnij przycisk MENU by przywrócić normalny ekran telewizyjny.
Przy wyborze kanału (stacji telewizyjnej) przy użyciu przycisku
PROGR +/-, pominięty kanał nie pojawi się. Jednakże kanał ten
można wybrać przyciskami numerycznych.
System menu
17
Page 81

System menu
Stosowanie funkcji “Dalsze nastawianie”
Funkcja ta pozwala:
a) Osłabić zgodnie z upodobaniem natężenie sygnału stacji z lokalnej anteny gdy jest on bardzo silny (obraz ma zakłócenia
w postaci prążków).
b) Wyregulować zgodnie z upodobaniem natężenie dźwięku każdego kanału.
c) Nawet gdy automatyczne precyzyjne programowanie (ARC) jest włączone na stałe, można precyzyjnie ręcznie
zaprogramować by poprawić odbiór obrazu gdy ulega on zakłóceniom.
d) Dostroić wyjście AV dla pozycji programów z sygnałem kodowanym, jak np. dekodera telewizji płatnej. Dzięki temu
magnetowid podłączony do urządzenia nagra sygnał dekodowany.
TV
D
O
I
E
V
1 Naciśnij przycisk MENU na pilocie by menu pojawiło się na ekranie.
2 Naciśnij joystick w kierunku $ by wybrać symbol , a następnie
naciśnij go w kierunku
z by wybrać menu Ustawienia.
Regulacja Obrazu
Tryb Obrazu
Kontrast
Jasność
Kolor
Ostrość
Zerowanie
Sztuczna intel.
Redukcja zakłóceń
Barwa
Wybierz: Wprowadź menu:
Własny
Norm
Tak
Auto
1
4
7
S
MENU
3 Naciśnij joystick w kierunku $ lub 4 by wybrać Ręczne ustawianie,
a następnie naciśnij go w kierunku
2
3
5
6
8
9
0
4 Naciśnij joystick w kierunku $ lub 4 by wybrać Dalsze nastawianie,
a następnie naciśnij go w kierunku
5 Naciśnij joystick w kierunku $ lub 4 by wybrać odpowiedni numer
programu, a następnie szybko naciśnij go w kierunku
z.
z.
z by wybrać:
Ustawienia
Automat. strojenie
Sortowanie programów
Wybierz NexTView
Nastawianie AV
Ręczne ustawianie
Wybierz: Strojenie auto.:
Ustawienia
Automat. strojenie
Sortowanie programów
Wybierz NexTView
Nastawianie AV
Ręczne ustawianie
Wybierz: Wprowadź:
Start
- - - - - - -
- - - - - - -
a) ATT (Zmniejszacz RF)
Ręczne ustawianie
Język/Kraj
Programowanie ręczne
Dalsze nastawianie
Ustawienia RGB
Ident. osobisty
Demo
Wybierz: Wprowadź:
Dalsze nastawianie
PROG ARCGŁOSATT DEKODER
1
2
3
4
5
6
7
8
9
10
11
Wybierz: Wprowadź:
PROG ARCGŁOSATT DEKODER
1 Nie
Tak
PROG ARCGŁOSATT DEKODER
1Tak
- - - - - - -
Nie
0
Nie
Tak
Nie
0
Nie
Tak
Nie
0
Nie
Tak
- 5
PROGR
RM
903
b) GŁOS (Własne natężenie dźwięku)
c) ARC
(Automatyczne Precyzyjne Programowanie)
d) DEKODER
Wybrany element zmienia kolor.
6 a) ATT
Naciśnij joystick w kierunku
naciśnij OK. Powtórz kroki 5 i 6 a) by zmniejszyć sygnał innych
kanałów.
b) GŁOS
Naciśnij joystick w kierunku $ lub 4 by naregulować poziom
dźwięku kanału między -7 i +7, a następnie naciśnij OK. Powtórz
kroki 5 i 6 b) by naregulować poziom dźwięku innych kanałów.
c) ARC
$ lub 4 by wybrać a następnie
Naciśnij joystick w kierunku $ lub 4 by naregulować zakres
kanału między -15 i +15, a następnie naciśnij OK. Powtórz kroki
5 i 6 c) by precyzyjnie zaprogramować inne kanały.
PROG ARCGŁOSATT DEKODER
1Tak -5
2
18
System menu
d) DEKODER
Naciśnij joystick w kierunku $ lub 4 by wybrać AV1 (dla dekodera
podłączonego do złącza EURO :1/ ) lub AV2 (dla
dekodera podłączonego do złącza EURO :2/q2
(SMARTLINK), a następnie naciśnij OK. Powtórz kroki 5 i 6 d) by
wybrać wyjście AV1 lub AV2 dla innych programów.
Gdy dekoder podłączony jest do magnetowidu podłączonego
do złącza :1/ nebo :2/q2 SMARTLINK),
znajdujących się w tylnej części urządzenia, znak tego
dekodera pojawi się w danym numerze programu.
7 Naciśnij przycisk MENU by przywrócić normalny obraz telewizyjny.
Urządzenie jest gotowe do użytku.
PROG ARCGŁOSATT DEKODER
1Tak -5 2
Nie
AV1
AV2
Page 82

System menu
Regulacja Obrazu
Wybierz: Wprowadź menu:
Tryb Obrazu
Kontrast
Jasność
Kolor
Ostrość
Zerowanie
Sztuczna intel.
Redukcja zakłóceń
Barwa
Własny
Tak
Auto
Norm
Ustawienia
Automat. strojenie
Sortowanie programów
Wybierz NexTView
Nastawianie AV
Ręczne ustawianie
Start
- - - - - - -
Wybierz: Strojenie auto.:
Ustawienia
Automat. strojenie
Sortowanie programów
Wybierz NexTView
Nastawianie AV
Ręczne ustawianie
- - - - - - -
Wybierz: Wprowadź:
Ręczne ustawianie
Język/Kraj
Programowanie ręczne
Dalsze nastawianie
Ustawienia RGB
Ident. osobisty
Demo
- - - - - - -
Wybierz: Wprowadź:
Ręczne ustawianie
Wybierz A-Z, 0-9: Zapisz: OK
Język/Kraj
Programowanie ręczne
Dalsze nastawianie
Ustawienia RGB
Ident. osobisty
Demo
A---------
Czy na pewno?
Zapis: OK Anulowanie:
Wprowadzenie Identyfikatora Osobistego
Do urządzenia można wprowadzić kod bezpieczeństwa składający się maksymalnie z jedenastu znaków (liter lub cyfr).
Ułatwia to odzyskanie urządzenia w przypadku jego kradzieży.
Kod identyfikujący może zostać wprowadzony tylko raz!
Należy zapisać go w niniejszej instrukcji obsługi aby go nie zapomnieć!
V
1
2
4
7
S
5
8
0
MENU
TV
D
O
I
E
1 Naciśnij przycisk MENU na spilocie by menu pojawiło się na
ekranie.
2 Naciśnij joystick w kierunku $ by wybrać symbol , a następnie
naciśnij go w kierunku
3
6
9
3 Naciśnij joystick w kierunku $ lub 4 by wybrać Ręczne ustawianie,
a następnie naciśnij go w kierunku z.
4 Naciśnij joystick w kierunku $ lub 4 by wybrać Ident. osobisty, a
następnie naciśnij go w kierunku
PROGR
z by wybrać menu Ustawienia.
z.
PL
5 Naciśnij joystick w kierunku $ lub 4 by wybrać literę, cyfrę, “+” lub
RM
903
wybór znaku. Wybierz pozostałe dziesięć znaków w ten sam
sposób.
puste miejsce, a następnie naciśnij go w kierunku
z by potwierdzić
6 Po wyborze wszystkich znaków naciśnij OK. Na ekranie
automatycznie pojawi się nowe menu z potwierdzeniem zapisu
wprowadzonego kodu.
7 a) Jeśli nie chcesz zapisać kodu identyfikującego naciśnij joystick w
kierunku Z i powtórz kroki od 4 do 6 by wprowadzić nowy kod.
b) Jeśli chcesz zapisać kod identyfikujący naciśnij OK.
Pamiętaj, że kod Identyfikacji Osobistej można wprowadzić
tylko raz.
8 Naciśnij przycisk MENU by przywrócić normalny ekran telewizyjny.
Gdy ponownie pojawi się na ekranie menu Ustawianie ręczne w
menu Ident.osobisty zawsze będzie pojawiał się wprowadzony kod
i nie będzie można go zmienić.
System menu
19
Page 83

System menu
Przegląd poszczególnych funkcji
Urządzenie dysponuje możliwością przeglądu niektórych dostępnych funkcji.
1
4
7
S
MENU
D
TV
O
I
E
V
1 Naciśnij przycisk MENU na pilocie by menu pojawiło się na ekranie.
2 Naciśnij joystick w kierunku $ by wybrać symbol , a następnie
naciśnij go w kierunku
Ustawienia.
2
3
5
6
z by pojawiło się na ekranie menu
3 Naciśnij joystick w kierunku $ lub 4 by wybrać menu Ręczne
8
9
ustawianie, a następnie naciśnij go w kierunku
z.
0
4 Naciśnij joystick w kierunku $ lub 4 by wybrać Demo, a następnie
naciśnij go w kierunku
PROGR
z, by rozpoczął się przegląd.
Regulacja Obrazu
Tryb Obrazu
Kontrast
Jasność
Kolor
Ostrość
Zerowanie
Sztuczna intel.
Redukcja zakłóceń
Barwa
Wybierz: Wprowadź menu:
Ustawienia
Automat. strojenie
Sortowanie programów
Wybierz NexTView
Nastawianie AV
Ręczne ustawianie
Wybierz: Strojenie auto.:
Ustawienia
Automat. strojenie
Sortowanie programów
Wybierz NexTView
Nastawianie AV
Ręczne ustawianie
Wybierz: Wprowadź:
Ręczne ustawianie
Język/Kraj
Programowanie ręczne
Dalsze nastawianie
Ustawienia RGB
Ident. osobisty
Demo Start
Wybierz: Wprowadź:
Własny
Start
- - - - - - -
- - - - - - -
- - - - - - -
Norm
Tak
Auto
Na ekranie pojawi się większość funkcji którymi dysponuje
RM
903
urządzenie.
Uwagi:
Naciśnij przycisk na pilocie by przerwać przegląd i przywrócić
normalny ekran telewizyjny.
20
System menu
Page 84

System menu
Regulacja geometrii obrazu dla źródła RGB
Po podłączeniu źródła sygnałów RGB, jak np. DVD (cyfrowy odtwarzacz CD video) do złącza EURO :1/ , może się
okazać konieczna regulacja centrowania poziomego.
TV
D
O
I
E
V
1 Kilkakrotnie naciśnij przycisk … na pilocie aż symbol … 1 pojawi
się na ekranie.
2 Naciśnij przycisk MENU na pilocie by menu pojawiło się na ekranie.
3
2
1
6
5
4
9
8
7
0
3 Naciśnij joystick w kierunku $ by wybrać symbol , a następnie
naciśnij go w kierunku
z by pojawiło się menu Ustawienia.
4 Naciśnij joystick w kierunku $ lub 4 by wybrać Ręczne ustawianie,
PROGR
MENU
a następnie naciśnij go w kierunku
z.
… 1
Regulacja Obrazu
Tryb Obrazu
Kontrast
Jasność
Kolor
Ostrość
Zerowanie
Sztuczna intel.
Redukcja zakłóceń
Barwa
Wybierz: Wprowadź menu:
Ustawienia
Automat. strojenie
Sortowanie programów
Wybierz NexTView
Nastawianie AV
Ręczne ustawianie
Wybierz: Strojenie auto.:
Ustawienia
Automat. strojenie
Sortowanie programów
Wybierz NexTView
Nastawianie AV
Ręczne ustawianie
Wybierz: Wprowadź:
Własny
Start
- - - - - - -
- - - - - - -
Norm
Tak
Auto
PL
S
RM
903
5 Naciśnij joystick w kierunku $ lub 4 by wybrać Ustawienia RGB, a
następnie naciśnij go w kierunku
z.
6 Naciśnij joystick w kierunku z by wybrać Centrow. poziome, a
następnie naciśnij go w kierunku
$ lub 4 aby wyregulować między
Ręczne ustawianie
Język/Kraj
Programowanie ręczne
Dalsze nastawianie
Ustawienia RGB
Ident. osobisty
Demo
Wybierz: Wprowadź:
Ustawienia RGB
Centrow. poziome
- - - - - - -
O
-10 i +10 środek obrazu. Następnie naciśnij OK by go zapisać.
Ustaw pozycję: Potwierdź: OK
7 Naciśnij przycisk MENU by przywrócić normalny ekran telewizyjny.
System menu
21
Page 85

System menu
Identyfikacja i wybór formatu ekranu źródeł wejściowych
Funkcja ta pozwala wybrać typ formatu obrazu dodatkowego sprzętu podłączonego do urządzenia, jak również nadać
sygnałowi wejściowemu nazwę składającą się z maksymalnie pięciu znaków (liter lub cyfr).
1
4
7
S
MENU
TV
D
O
I
E
V
1 Naciśnij przycisk MENU na pilocie by menu pojawiło się na ekranie.
2 Naciśnij joystick w kierunku $ by wybrać symbol , a następnie
naciśnij go w kierunku
2
3
5
6
8
9
3 Naciśnij joystick w kierunku $ lub 4 by wybrać Nastawianie AV, a
następnie naciśnij go w kierunku
0
z by wybrać menu Ustawienia.
z.
4 Naciśnij joystick w kierunku $ lub 4 by wybrać sygnał wejściowy.
Następnie naciśnij go w kierunku
PROGR
z.
5 Naciśnij joystick w kierunku $ lub 4 by wybrać:
Regulacja Obrazu
Tryb Obrazu
Kontrast
Jasność
Kolor
Ostrość
Zerowanie
Sztuczna intel.
Redukcja zakłóceń
Barwa
Wybierz: Wprowadź menu:
Ustawienia
Automat. strojenie
Sortowanie programów
Wybierz NexTView
Nastawianie AV
Ręczne ustawianie
Wybierz: Strojenie auto.:
Ustawienia
Automat. strojenie
Sortowanie programów
Wybierz NexTView
Nastawianie AV
Ręczne ustawianie
Wybierz: Wprowadź:
Nastawianie AV
WE. AV NAZWA
AV1
AV2
AV3
AV4
Wybierz: Wprowadź:
Nastawianie AV
AUTOFORMAT
Wył.
Wył.
Normal.
Cały
Własny
Start
- - - - - - -
- - - - - - -
VIDEO
VIDEO
VIDEO
Norm
Tak
Auto
$ Wył: Wielkość obrazu nie jest automatycznie regulowana
RM
903
Normalny: Wielkość obrazu nie jest automatycznie zmieniana, w
zależność od nadawanego programu.
4Cały: Telewizor może automatycznie dopasowywać
wielkość obrazu tak, aby zlikwidować wszystkie
WE. AV NAZWA
AUTOFORMAT
Wył.
Wył.
Normal.
Cały
VIDEO
VIDEO
VIDEO
AV1
AV2
AV3
AV4
Wybierz: Nast: Potw.: OK
ciemme obszary z ekranu (tak jest to opisane w
rozdziale “Zmiana formatu ekranu “).
Nastawianie AV
22
System menu
Następnie naciśnij joystic w kierunku
z
6 Przy zaznaczonym pierwszym elemencie w kolumnie NAZWA,
naciśnij joystick w kierunku $ lub 4 by wybrać literę, cyfrę, “+” lub
puste miejsce a następnie naciśnij go w ten sam sposób.
7 Gdy wszystkie znaki zostały wybrane naciśnij OK.
8 Powtórz kroki od 4 do 7 jeśli chcesz wybrać format obrazu lub
nazwać pozostałe sygnały wejściowe.
9 Naciśnij przycisk MENU by przywrócić normalny obraz telewizyjny.
Przy każdorazowym wyborze urządzenia którego sygnałowi
wejściowemu została nadana nazwa, pojawi się ona przez kilka
sekund na ekranie.
WE. AV NAZWA
AUTOFORMAT
AV1
AV2
AV3
AV4
Wyb. A-Z, 0-9: Potwierdź: OK
Wył.
Wył.
Normal.
Cały
IDEO
V
VIDEO
VIDEO
Page 86

System menu
Obrazy zwielokrotnione (Multi PIP)
Funkcja ta (Multi PIP po angielsku Multi Picture In Picture) daje przegląd serii 12 statycznych obrazów i trzynastej w ruchu.
Można wybrać kanał który chce się oglądać zarówno w wariancie pełnego ekranu jak i w wariancie obrazu
zwielokrotnionego.
04
03 05
D
TV
O
I
E
V
1 Naciśnij przycisk na pilocie by wybrać wariant obrazu
zwielokrotnionego. Na ekranie pojawi się 13 pozycji programów z
oglądanym programem w środku.
2 Naciskaj joystick w kierunku $, 4, Z lub z, by przemieszczać się po
1
2
3
4
5
6
7
8
9
0
13 programach.
3 Naciśnij OK by wybrać program zaznaczony ramką. Kanał ten
przemieści się na środek.
4 Naciśnij przycisk by przywrócić normalny obraz telewizyjny.
PROGR
MENU
02
13
01 06
12
10
11 09 08
07
RM
903
S
2 obrazy na ekranie (PAP)
Funkcja ta (PAP po angielsku Picture And Picture) dzieli ekran na dwie części by móc oglądać dwa kanały na raz (przy czym
jeden z nich może być kanałem video).
Dźwięk lewej części ekranu pochodzi z głośników urządzenia zaś dźwięk prawej części można odbierać przez słuchawki.
TV
D
O
I
E
V
1
2
3
4
5
6
7
8
9
0
Włączanie i wyłączanie PAP
Naciśnij przycisk / na pilocie by oglądać ekran podzielony na dwie
części w formacie 4:3, naciśnij go ponownie by wyłączyć tryb PAP i
przywrócić normalny ekran telewizyjny.
Wybór źródła PAP
1 By zmienić obraz w lewej części ekranu:
Przy włączonej funkcji PAP, naciskaj przyciski numeryczne na pilocie
(by wybrać kanał telewizyjny) lub naciśnij przycisk … (by wybrać
wejście video).
2 By zmienić obraz w prawej części ekranu:
Przy włączonej funkcji PAP, naciśnij przycisk na pilocie. Gdy
symbol pojawi się w dolnej części prawej strony ekranu naciskaj
przyciski numeryczne (by wybrać kanał telewizyjny) lub naciśnij
przycisk … (by wybrać wejście video).
PL
MENU
S
PROGR
RM
Zamiana części ekranu
Przy włączonej funkcji PAP naciśnij przycisk / na pilocie by
zamienić części ekranu stronami.
903
Powiększenie rozmiarów części ekranów
Przy włączonej funkcji PAP kilkakrotnie naciśnij joystick w kierunku Z
nebo z by zmienić rozmiar obu części ekranu.
Wybór dźwięku prawej części ekranu
Po włączeniu funkcji PAP skonsultuj rozdział “Regulacja dźwięku”
niniejszej instrukcji obsługi i nastawienie “l Podw. Dźwięk” w “PAP”.
System menu
23
Page 87

Telegazeta
Telegazeta
Telegazeta jest usługą informacyjną transmitowaną przez większość stacji telewizyjnych. Strona ze spisem treści telegazety
(zwykle strona 100) dostarcza informacji odnośnie sposobu korzystania z telegazety.
Należy korzystać z telegazety w kanale o silnym sygnale, w przeciwnym wypadku w tekście telegazety mogą pojawić się
błędy.
Włączanie i wyłączanie telegazety
D
O
I
TV
E
V
1
2
3
4
5
6
7
8
9
0
1 Wybierz kanał telewizyjny który transmituje telegazetę z której chcesz
skorzystać.
2 Naciśnij przycisk na pilocie by na ekranie pojawiły się
jednocześnie obraz telewizyjny i telegazeta. Ekran podzieli się
wówczas na dwie części: w prawej części ekranu znajdzie się obraz
telewizyjny zaś w lewej strona telegazety.
Po włączeniu funkcji telegazety i obrazu TV naciśnij przycisk
/ a następnie naciskaj przyciski PROGR +/- by zmienić
kanał na ekranie telewizora. Naciśnij joystick w kierunku Z
lub z by zmienić rozmiar ekranu TV. Ponownie naciśnij
przycisk / by przywrócić normalny odbiór telegazety.
3 Dwukrotnie naciśnij przycisk by na ekranie pojawiła się wyłącznie
telegazeta.
4 Trzykrotnie naciśnij przycisk by nałożyć telegazetę na obraz TV.
5 Czterokrotnie naciśnij przycisk lub naciśnij by wyłączyć
telegazetę.
Wybór strony telegazety
Wprowadź trzy cyfry numeru strony którą chcesz zobaczyć na ekranie
przy użyciu przycisków numerycznych pilota. Przy mylnym wyborze
podaj jakiekolwiek trzy cyfry a następnie wprowadź poprawny numer
strony telegazety.
TELETEXT
Index
Programme
News
Sport
Weather
TELETEXT
TELETEXT
TELETEXT
TELETEXT
TELETEXT
TELETEXT
TELETEXT
TELETEXT
Index
Index
Index
Index
Index
Index
Index
Index
Programme
Programme
Programme
Programme
Programme
Programme
Programme
Programme
News
News
News
News
News
News
News
News
Sport
Sport
Sport
Sport
Sport
Sport
Sport
Sport
Weather
Weather
Weather
Weather
Weather
Weather
Weather
Weather
TELETEXT
01
Index
Programme
News
Sport
Weather
153
101
25
98
01
25
25
25
25
25
25
25
25
153
153
153
153
153
153
153
153
101
101
101
101
101
101
101
101
98
98
98
98
98
98
98
98
25
153
101
98
MENU
S
PROGR
RM
Użycie pozostałych funkcji telegazety
Wybór następnej lub poprzedniej strony
Naciskaj przyciski (PROG +) lub PROG -) na pilocie by wybrać
następną lub poprzednią stronę telegazety.
903
Wybór podstrony
Strona telegazety może się składać z wielu podstron. W tym przypadku,
po kilku sekundach pojawia się linia w dolnej części ekranu informująca
ile podstron zawiera dana strona. Naciśnij wówczas joystick w kierunku
4 lub $ by wybrać odpowiednią podstronę.
Zachowanie strony
Naciśnij przycisk by zachować stronę i uniknąć jej zniknięcia.
Naciśnij ponownie ten sam przycisk by zlikwidować blokadę.
Powrót do strony ze spisem treści
Naciśnij przycisk by na ekranie pojawiła się strona ze spisem treści
(zazwyczaj strona 100).
Fastext
(dostępny wyłącznie gdy stacja TV nadaje sygnały Fastext).
Gdy nadawany jest sygnał Fastext, w dolnej części strony telegazety
pojawia się zestaw stron kodowanych kolorem. Aby wybrać żądaną
stronę naciśnij odpowiedni kolorowy przycisk (czerwony, zielony, żółty
lub niebieski) na pilocie.
Znalezienie strony
1 Naciskaj przyciski numeryczne na pilocie by wybrać poszukiwaną
stronę telegazety o kilkucyfrowym numerze (np. strona ze spisem
treści).
2 Naciśnij OK.
3 Naciśnij joystick w kierunku 4 lub $ by wybrać poszukiwany numer
strony, a następnie naciśnij OK. Poszukiwana strona pojawi się na
ekranie po kilku sekundach.
216-02
01 03 04 05 06 07 0802
24
Telegazeta
Page 88

Telegazeta
1
4
7
S
MENU
TV
D
O
I
E
V
Użycie menu telegazety
1 Po włączeniu funkcji telegazety naciśnij przycisk MENU na pilocie by
na ekranie pojawiło się menu telegazety.
2 Naciśnij joystick w kierunku 4 lub $ by wybrać odpowiednią opcję, a
następnie naciśnij go w kierunku z by menu danej opcji pojawiło się
na ekranie.
Telegazeta
Góra / Dół / Cała
Usunięcie tekstu
Odsłanianie
Strona na czas
Przegłąd stron
Wybierz: Wprowadź menu:
3 By menu telegazety zniknęło z ekranu naciśnij przycisk MENU.
Góra / Dół / Cała
Funkcja ta pozwala zwiększyć poszczególne fragmenty strony
2
3
telegazety. Naciśnij joystick w kierunku 4 by powiększyć górną część
ekranu, lub w kierunku $ by powiększyć dolną część ekranu. Naciśnij
5
6
8
9
0
OK by przywrócić normalny rozmiar strony.
Usunięcie tekstu
Po włączeniu tej funkcji można oglądać kanał telewizyjny czekając na
pojawienie się poszukiwanej strony telegazety. W chwili gdy jest ona już
dostępna symbol zmienia kolor. By wyświetlona została strona
telegazety naciśnij .
Odsłanianie
Niektóre strony telegazety zawierają schowaną informację którą można
PROGR
odsłonić np. rozwiązanie zagadek. Po włączeniu tej funkcji schowana
informacja pojawi się na ekranie.
Góra: Dół: Cała: OK
PL
Strona na czas
RM
903
(Zależy od tego czy telegazeta dysponuje tą funkcją).
Można skonsultować stronę kodowaną czasowo, np. stronę na czas o
określonej godzinie. Po włączeniu tej funkcji gdy strona pojawi się na
ekranie:
1 Naciskaj przyciski numeryczne na pilocie by wprowadzić trzy znaki
pożądanej strony.
2 Naciskaj ponownie przyciski numeryczne by wprowadzić cztery znaki
odpowiedniej godziny.
3 Naciśnij OK by zapisać ustaloną godzinę. Godzina pojawi się w
górnym lewym rogu ekranu. Wyznaczona strona pojawi się na ekranie
o wyznaczonej godzinie.
Przegląd stron
(Zależy od tego czy telegazeta dysponuje tą funkcją).
W tym podmenu, strony bloku i grupy TOP-Text układają się w dwóch
kolumnach by ułatwić użytkownikowi wybór strony. Każdej stronie bloku
pierwszej kolumny odpowiadają grupy stron w drugiej. Naciśnij joystick
w kierunku 4 lub $ by wybrać odpowiednią stronę z bloku, a następnie,
naciśnij go w kierunku z by dostać się do kolumny grup stron. Naciśnij
joystick w kierunku 4 lub $ by wybrać z grupy odpowiednią stronę. Na
zakończenie naciśnij OK by na ekranie pojawiła się wybrana strona.
Strona na czas
STR CZAS
Wybierz stron: 0-9 Nast pna.:
- - : - -— — —
Telegazeta
25
Page 89

NexTView
NexTView
*
* (zależy czy usługa jest dostępna)
NexTView jest Elektronicznym Wykazem Programów (EPG) który zawiera informację o programach różnych stacji
telewizyjnych.
Wybór dostawcy NexTView
D
O
I
E
V
TV
Urządzenie automatycznie wybiera najlepszego dostawcę
NexTView. Dostawca ten będzie do dyspozycji przez 30 minut po
dostrojeniu kanału. Można zmienić dostawcę zgodnie z
upodobaniem.
1 Naciśnij przycisk MENU na pilocie by na ekranie pojawiło się menu.
2 Naciśnij joystick w kierunku 4 lub $ by wybrać symbol , a
następnie naciśnij go w kierunku z by pojawiło się menu Ustawienia.
3 Naciśnij joystick w kierunku 4 lub $ by wybrać Wybierz NexTView,
a następnie naciśnij go w kierunku z. Na ekranie pojawi się lista
wszystkich dostępnych dostawców NexTView.
1
2
3
4
5
6
7
8
9
4 Naciśnij joystick w kierunku 4 lub $ by wybrać dostawcę zgodnie z
upodobaniem, a następnie naciśnij OK.
5 Naciśnij przycisk MENU by przywrócić normalny ekran telewizyjny.
Tryb Obrazu
Kontrast
Jasność
Kolor
Ostrość
Zerowanie
Sztuczna intel.
Redukcja zakłóceń
Barwa
Wybierz: Wprowadź menu:
Ustawienia
Automat. strojenie
Sortowanie programów
Wybierz NexTView
Nastawianie AV
Ręczne ustawianie
Wybierz: Strojenie auto.:
Ustawienia
Włączanie NexTView
0
MENU
S
PROGR
RM
903
1 Naciśnij kilkakrotnie przycisk na pilocie by włączyć lub wyłączyć
funkcję NexTView.
* W niektórych przypadkach konieczne jest również naciśnięcie
joysticka w kierunku Z, by na ekranie pojawił się Elektroniczny
Wykaz Programów (EPG) Sony.
2 Naciśnij joystick w kierunku 4, $, Z lub z by przemieścić kursor na
ekranie.
3 Naciśnij OK by potwierdzić wybór.
a) Jeśli zostanie naciśnięty OK w kolumnach daty, godziny lub
obrazków, lista programów zmieni się zgodnie z wyborem.
b) Jeśli zostanie naciśnięty OK w liście programów, zostanie
pokazany bezpośrednio dany kanał jeśli w danym momencie ma
miejsce emisja programu lub zostanie wyświetlone menu Emisje
przewidywane jeśli emisja ma mieć miejsce później.
Własny wybór programów
Można stworzyć własną listę z rodzajami programów
odpowiadającymi indywidualnym upodobaniom.
Wybierz: Wprowadź:
07 Tue
12:38
SWISS
7
Star Wars
Tue
Super RTL
8
Werner - Beinhart
Wed
Pro 7
9
Flui gr sst den Rest der Welt
Thu
Kabel 1
12
10
Fri
Once upon a time in the West
Euronews
11
Sat
International News
RTL Plus
12
Sun
Hat der alte Hexenmeister sich doch
einmal fortbegeben, und nun sollen
13
seine Geister auch nach meinem Willen
Mon
leben.
Legenda
pełna lista
osobisty wybór
programy informacyjne
filmy
sport
programy rozrywkowe
programy dla dzieci
powrót do poprzedniego menu
Regulacja Obrazu
Automat. strojenie
Sortowanie programów
Wybierz NexTView
Nastawianie AV
Ręczne ustawianie
TXT TPS / RINGIER
Tue 07. 04 .98
10:35 - 12:45
10:20 - 12:00
10:45 - 10:50
11:00 - 11:20
11:45 - 12:50
Własny
Norm
Start
- - - - - - -
- - - - - - -
Tak
Auto
26
1 Naciśnij joystick w kierunku 4 lub $ by wybrać obrazek , a
następnie naciśnij go w kierunku z by pojawiło się menu Ustawienie
własne.
2 Naciśnij joystick w kierunku 4 lub $ by wybrać opcję na ekranie, a
następnie naciśnij OK by potwierdzić wybór.
3 Powtórz krok 2 by wybrać wszystkie elementy które chcesz umieścić
na własnej liście.
4 Po ułożeniu listy naciśnij joystick w kierunku z by wybrać obrazek
.
5 Naciśnij OK by powrócić do poprzedniego menu.
6 Naciśnij joystick w kierunku 4 lub $ by wybrać obrazek , a
następnie naciśnij OK by włączyć własny wybór programów.
kontynuuje...
NexTView
Page 90

NexTView
1
4
7
S
2
0
MENU
D
TV
O
I
E
V
Menu Emisje przewidywane
Menu Emisje przewidywane pozwala nastawić programator lub
wybrać programy do nagrywania.
1 Naciśnij joystick w kierunku 4 lub $ by wybrać w kolumnie z
programami pozycję programu który ma zostać nadany później.
2 Naciśnij OK by pojawiło się menu Emisje przewidywane.
By nastawić programator
Naciśnij joystick w kierunku 4 lub $ by zaznaczyć obrazek , a
3
5
6
8
9
następnie kilkakrotnie naciśnij OK by wybrać Ustaw programator lub
Wyłączenie programatora. Jeśli zostanie wybrane nastawienie Ustaw
programator program zostanie zaznaczony symbolem zegarka, i zanim
się rozpocznie, na ekranie pojawi się wiadomość dotycząca
potwierdzenia czy chcesz ten program oglądać.
First nextTView/EPG-Providers in Europe
07 Tue
SWISS TXT TPS / RINGIER nexTView
12:38
Address Mapping
The position of the addresses in the
OSDA is shown in the following diagram.
The position values of the DPW are set
to ’0’.
If other values are set, the complete
combination will be scrolled.
Example:
if the DPWC is set to ’63’, the char-
This channel has been set for a timer
VPS/PDC
On
Speed
SP
Timer Prog
VCR1
Tue 07. 04 .98
By pojawiła się lista z wybranymi programami
Naciśnij joystick w kierunku 4 lub $ by zaznaczyć obrazek a
następnie kilkakrotnie naciśnij OK by pojawiła się lub zniknęła lista z
wybranymi programami. Na liście tej znajdują się programy z
PROGR
RM
nastawionym programatorem. (Programator może być ustawiony na 5
programów).
By nagrywać programy *
* (Wyłącznie w przypadku gdy magnetowid dysponuje Smartlink).
1 Podłącz magnetowid.
903
2 Naciśnij joystick w kierunku 4 lub $ by wybrać , a następnie
naciśnij OK by informacja została przekazana do magnetowidu.
3 By nastawić magnetowid:
VPS/PDC
Naciśnij joystick w kierunku Z lub z aby wybrać VPS/PDC, a
następnie kilkakrotnie naciśnij OK by wybrać Tak lub Nie. Przy tego
typu nastawieniu zapewnione jest nagranie całej emisji nawet jeśli
nastąpiły zmiany programu. (funkcja ta działa wyłącznie gdy wybrany
kanał emituje sygnał VPS/PDC).
VPS/PDC
Szybkość
Nastawienie magnetowidu
Ta k
SP
VCR1
PL
Szybkość
Naciśnij joystick w kierunku $ by wybrać Szybkość, a następnie
kilkakrotnie naciśnij OK by wybrać “SP” (nagrywanie standard) lub
“LP” (długie nagrywanie). Wariant długiego nagrywania pozwala
podwoić czas trwania kasety video chociaż jakość obrazu może się
pogorszyć.
Nastawienie magnetowidu
Naciśnij joystick w kierunku $ by wybrać Nastawienie
magnetowidu, a następnie kilkakrotnie naciśnij OK by wybrać
magnetowid który się chce zaprogramować, VCR1 bądź VCR2.
4 Na zakończenie naciśnij joystick w kierunku z by wybrać obrazek
, a następnie naciśnij OK by przywrócić normalny ekran
telewizyjny.
NexTView
27
Page 91

Dodatkowe podłączenia
Kamera
8mm/Hi8/DVC
Podłączanie dodatkowych urządzeń
Do urządzenia można podłączyć bardzo wiele rodzajów dodatkowych urządzeń, tak jak jest to przedstawione poniżej.
Kamera
2
1
“PlayStation”*
S-VHS/Hi8/DVC
By uniknąć
zakłóceń
obrazu:
• Nie podłączać
jednocześnie
dodatkowych
urządzeń do
gniazd F i G.
* “PlayStation”
jest produktem
Sony Computer
Entertainment,
Inc.
* “PlayStation”
jest znakiem
firmowym
zarejestrowanym
przez Sony
Computer
Entertainment,
Inc.
A
Dekoder
Magnetowid
B
DVD
C
Zestaw Dolby
Surround
D
E
Zestaw muzyczny
Dopuszczalne sygnały wejściowe
A Sygnały audio/video i RGB
B Sygnały audio/video i video S
C Sygnały audio/video i video S
D Wejście głównego głośnika. W menu
“Funkcje”, należy nastawić opcję
“Głośnik” na “Środkowy”.
E Bez wejść
F Sygnał video S
G Sygnał video
H Sygnał audio
I Bez wejścia
I
F
G
H
Magnetowid
Dyspozycyjne sygnały wyjściowe
Video/audio programów TV.
Video/audio wybranego źródła.
Video/audio wyświetlania na ekranie (wyjście monitora).
Bez wyjść.
Sygnał audio.
Bez wyjścia.
Bez wyjścia.
Bez wyjścia.
Sygnał audio dla słuchawek.
Dodatkowe podłączenia
28
Page 92

Dodatkowe podłączenia
Zastosowanie dodatkowych urządzeń
Szersze informacje o podłączaniu dodatkowego sprzętu
Podłączanie magnetowidu
Zalecamy podłączenie magnetowidu do złącza EURO B lub C z tyłu urządzenia.
W przypadku braku kabla do złącza EURO polecamy dostrojenie sygnału video do kanału numer “0”. W tym celu należy
skorzystać z informacji zawartych w rozdziale “Ręczne programowanie telewizora” niniejszej instrukcji obsługi. Należy
skonsultować również instrukcje obsługi magnetowidu by dowiedzieć się jak uzyskać kanał testowy sygnału video.
Jeśli magnetowid przyjmuje SMARTLINK należy skonsultować rozdział “Smartlink” niniejszej instrukcji obsługi.
Podłączanie zewnętrznego sprzętu audio
1 By słuchać dźwięku urządzenia przez zestaw Hi-Fi:
Jeśli chcesz wzmocnić dźwięk wyjściowy z urządzenia, podłącz zestaw Hi-Fi do gniazd E z tyłu urządzenia Głośność dźwięku
podłączonego urządzenia do gniazd E można regulować zmieniając głośność dźwięku w słuchawkach. W tym celu należy
skorzystać z informacji zawartych w rozdziale “Regulacja dźwięku” niniejszej instrukcji obsługi.
2 By słuchać dźwięku zestawu Dolby Prologic przez urządzenie:
Jeśli chcesz słuchać dźwięk wzmacniacza - dekodera Dolby Prologic przez głośniki urządzenia podłącz zestaw do gniazd D
z tyłu urządzenia. Podłącz główne wyjście wzmacniacza do wyżej wymienionych gniazd by spełniał funkcję głównego głośnika.
W tym celu należy skorzystać z informacji zawartych w rozdziale “Użycie menu “Funkcje” i wybrać “Środkowy” w opcji “Głośnik”.
Pamiętaj, że maksymalna moc wejściowa tego gniazda wynosi 30W. Upewnij się, że nie przekroczysz dopuszczalnej
wartości.
Podłączanie sprzętu Mono
Podłącz kabel audio do gniazda L/G/S/I znajdującego się z przodu urządzenia i wybierz sygnał wejściowy 4, ealizując poniżej
opisane instrukcje.
Wybieranie i oglądanie sygnału wejściowego
Aby na ekranie pojawił się sygnał wejściowy podłączonego sprzętu należy wybrać symbol złącza do którego jest on
podłączony. Np. jeśli sprzęt podłączony jest do złącza o symbolu
Y1/ 1, należy kilkakrotnie nacisnąć przycisk
na pilocie aż symbol 1 pojawi się na ekranie.
1 Podłącz dodatkowe urządzenie do odpowiedniego gniazda urządzenia, tak jak jest to opisane na
TV
D
O
I
E
V
poprzedniej stronie.
2 Naciśnij kilkakrotnie przycisk na pilocie aż na ekranie pojawi się odpowiedni symbol wejścia.
Symbol Sygnały wejściowe
1111 •Sygnał wejściowy audio/video ze złącza EURO A lub *RGB ze złącza EURO A.
2222 •Sygnał wejściowy audio/video ze złącza EURO B lub *Vídeo S ze złącza EURO B.
1
2
3
4
5
6
7
8
9
0
3333 •Sygnał wejściowy ze złącza EURO C lub *Vídeo S ze złącza EURO C.
44
44
• Sygnał wejściowy Video S ze złącza 4- stykowego F lub *wejście video ze złącza
RCA G i sygnał audio ze złącza RCA H.
* (automatyczne wykrywanie sygnału w zależności od podłączonego urządzenia)
3 Włącz podłączone urządzenie.
PL
MENU
S
PROGR
RM
4 By przywrócić normalny ekran telewizyjny naciśnij przycisk na pilocie.
903
Dodatkowe podłączenia
29
Page 93

Dodatkowe podłączenia
Smartlink
Smartlink to bezpośrednie łącze między urządzeniem a magnetowidem.
Do skorzystania z funkcji Smartlink potrzeba:
• Magnetowidu z systemem Smartlink, NexTView Link, Easy Link lub Megalogic.
Megalogic to znak firmowy zarejestrowany przez Grundig Corporation.
EasyLink to znak firmowy Philips Corporation.
• Kompletnego 21-stykowego kabla EURO by podłączyć magnetowid do złącza
EURO :2/q2 (SMARTLINK) znajdującego się z tyłu urządzenia.
Podstawowe funkcje łącza Smartlink są następujące:
• Pozwala na bezpośrednie przekazywanie informacji o zaprogramowaniu (np. listy programów)
z telewizora do magnetowidu.
• Pozwala na bezpośrednie nagrywanie z urządzenia, wystarczy nacisnąć jeden przycisk by
nagrać oglądany program.
• Pozwala na automatyczne włączenie: gdy urządzenie znajduje się w trybie czuwania (standby),
wystarczy nacisnąć przycisk “Play z” na magnetowidzie i telewizor automatycznie się włączy.
Tył
Jeśli do magnetowidu jest podłączony dekoder zgodny z systemem Smartlink, należy
wybrać menu Szukaj w (Ręczne ustawianie) i nastawić DEKODER na pozycję AV2
dla każdego kodyfikowanego kanału. W celu uzyskania więcej
informacji należy skonsultować rozdział “Używanie funkcji “Dalsze nastawianie”.
Szersza informacja o łączu Smartlink znajduje się w instrukcji obsługi magnetowidu.
Pilot innych urządzeń Sony
Używając przyciski znajdujące się pod przykrywką pilota można nastawiać inne urządzenia
Sony.
1 Otwórz przykrywkę pilota.
2 Nastaw przełącznik VTR 1234 DVD zgodnie z urządzeniem które chcesz nastawić:
VTR1 Video Beta
VTR2 Video de 8 mm.
VTR3 Video VHS
VTR4 Video cyfrowe (DCR-VX 1000/9000 E, VHR-1000)
DVD Cyfrowy odtwarzacz CD video
Magnetowid
Dekoder
VIDEO TV
VTR 1 2 3 4 DVD
CH
3 Możesz teraz używać przyciski znajdujące się pod przykrywką pilota by nastawiać
dodatkowe urządzenie.
• Jeśli podłączone urządzenie wyposażone jest w przełącznik COMMAND MODE, ustaw go
w tej samej pozycji co przełącznik VTR 1234 DVD na pilocie niniejszego urządzenia.
• Jeśli podłączone urządzenie nie dysponuje daną funkcją odpowiadający tej funkcji
przycisk na pilocie nie będzie działał.
30
Dodatkowe podłączenia
VTR 1 2 3 4 DVD
CH
Page 94

Informacje dodatkowe
Optymalny kąt oglądania
By osiągnąć optymalną jakość obrazu należy usytuować urządzenie w taki sposób, by móc patrzeć na ekran pod kątem
pokazanym poniżej.
Poziomy kąt patrzenia
minimalna odległość 2 m
65º
65º
Pionowy kąt patrzenia
(zalecana dla widza pozycja)
PL
minimalna odległość 2 m
30º
30º
(zalecana dla widza
pozycja)
Informacje dodatkowe
31
Page 95

Informacje dodatkowe
Wymiana lampy
Jeśli lampa ściemnieje lub kolory obrazu stają się
nienaturalne bądź miga wskaźnik lampy urządzenia,
wymień lampę na nową.
• Jako części za zamiennej użyj lampy XL-2000E. Inna
lampa może spowodować uszkodzenie telewizora.
• Nie należy wyjmować żarówki, za wyjątkiem sytuacji,
gdy się ją wymienia.
• Zanim wymieni się żarówkę, proszę wyłącyzć
zasilanie i odłączyć telewizor od sieci.
• Dopiero jak żarówka wystygnie można ją wymienić.
Przednia szklana część żarówki ma temperaturę
100˚C (212˚F) i lub nawet wyższą przez około 30
minut po wyłączeniu sprzętu.
• Wymontowanej żarówki nie należy kłaść w pobliżu
dzieci lub łatwopalnych materiałów.
• Wymontowanej żarówki nie należy moczyć, wkładać
do niej przedmiotów. Może spowodować je
eksplozję.
• W pobliżu nie powinny znajdować się przedmioty z
metalu lub przedmioty łatwopalne, ponieważ może
wybuchnąć pożar. Ponad to nie należy wkładać rąk
do przegródki na żarówkę, ponieważ można się
poparzyć.
• Proszę porządnie zamontować nową żarówkę. W
przeciwnym wypadku obraz może sciemnieć.
3 Proszę poluzować śrubę przy pomocy np monety i
zdjąć osłonę żarówki.
4 Proszę poluzować dwie śruby i wyciągnąć żarówkę.
Proszę poluzować śruby przy pomocy załączonego klucza.
Proszę wyciągnąć żarówkę trzymając za uchwyt.
1 Proszę wyłączyć zasilanie i odłączyć sprzęt od sieci.
• Jeśli rozpoczynasz wymianę lampy bez odłączenia
przewodu zasilającego miga wskaźnik trybu
czuwania (standby) urządzenia
wymianę lampy odłącz przewód zasilania.
• Demontażu proszę dokonać po upływie co najmniej
30 minut od wyłączenia sprzętu.
• Proszę przygotować nową żarówkę.
By kontynuować
2 Zdejmij przednią ściankę obudowy.
Zdejmij przednią ściankę obudowy bez przesuwania
urządzenia.
Trzymając przednią ściankę z boku pociągnij ją do
siebie palcami. Uważaj, by nie przycisnąć paznokci.
Jest ona nadal za gorąca, zaraz po wyłączeniu
zasilania. Proszę uważać, by nie dotknąć przedniej
szybki lub okolic, lub szklanej przegródki na żarówkę.
5 Proszę założyć nową żarówkę.
Włóż nową lampę i dokręć mocno obie śruby.
6 Proszę założyć osłonę żarówki.
Załóż osłonę lampy i dokręć mocno śrubę przy pomocy
jakiegoś przedmiotu, np. monety.
7 Proszę założyć przednią ściankę obudowy
telewizora.
Załóż przednią ściankę obudowy na swoje miejsce.
Uwagi:
• Nie należy pobrudzić lub dotykać przedniej szybki nowej
żarówki lub szklanej przegródki. Jeżeli szkło ulegnie
zabrudzeniu, może spaść jakość obrazu lub skróci się
żywotność żarówki.
• Proszę porządnie zamocować osłonę żarówki. W
przeciwnym wypadku nie można włączyć zasilania
telewizora.
• Gdy żarówka się przepali, rozlega się przydźwięk. Nie
oznacza to uszkodzenia sprzętu.
• Nową żarówkę można nabyć w najbliżym punkcie
usługowym firmy Sony.
• Szanuj środowisko naturalne gdy wyrzucasz zużytą
lampę.
Informacje dodatkowe
32
Page 96

Informacje dodatkowe
Dane techniczne
System TV
B/G/H, DK, I, L
System koloru
PAL, SECAM
NTSC 3.58, 4.43 (wyłącznie wejście video)
Zakresy kanałów
VHF: E2-E12
UHF: E21-E69
CATV: S1-S20
HYPER: S21-S41
D/K: R1-R12, R21-R69
I: UHF B21-B69
L: F2-F10, B-Q, F21-F69
Rozmiar obrazu
50 cali (Ok. 127 cm po przekątnej).
Gniazda z tyłu
• Gniazda wyjściowe głównego głośnika
C
(2 złącza)
• Wyjście audio (prawy. lewy) - złącza RCA.
• :1/ 2Złącze 21-stykowe EURO (norma CENELEC)
w tym wejścia audio/video, wejście RGB,
wyjście audio/video TV.
• :2/q 2 Złącze 21-stykowe EURO (norma CENELEC)
(SMARTLINK)
• :3/q 3 Złącze 21-stykowe EURO (norma CENELEC)
Gniazda z przodu
q 4 wejście video S - DIN 4- stykowe
… 4 wejście video - złącze RCA
4 wejście audio - złącza RCA
gniazdo słuchawek - gniazdo mini stereo
w tym wejścia audio/video, wejście video S,
wyjście audio video do wyboru.
w tym wejścia audio/video, wejście video S,
wyjście audio/video (wyjście monitora).
Moc wyjściowa dźwięku
2 x 20 W (moc muzyczna)
2 x 15 W (RMS)
Moc wejściowa głównego głośnika
30 W (RMS) (jeśli jest używany jako główny głośnik)
Pobór mocy
210 W
Zużycie energi w trybie czuwania (standby)
≤ 1 W
Wymiary (szer. x wys. x głęb.)
W przybliżeniu 1376 x 898 x 389 mm
Waga
W przybliżeniu 43 kg
Akcesoria w wyposażeniu
Pilot mod. RM-903 (1szt.)
Baterie do pilota (zgodne z normą IEC) (2szt.)
1 Klucz
2 Element nośny
2 śrubki
1 szmatka do czyszczenia
Inne dane
Filtr cyfrowy (wysoka rozdzielczość)
TELETEXT, Fastext, TOPtext (2000 stron telegazety)
NexTView
NICAM
Automatyczne wyłączenie
Smartlink
Cyfrowa redukcja zakłóceń
Korektor graficzny
Identyfikator Osobisty
PL
Wygląd i dane techniczne mogą ulec zmianie bez wcześniejszego uprzedzenia.
Papier Ekologiczny - 100% bez chloru
33 33
Informacje dodatkowe
Page 97

Informacje dodatkowe
Rozwiązywanie problemów
Oto kilka prostych rozwiązań problemów związanych z obrazem i dźwiękiem.
Problem
Brak obrazu ( ekran jest ciemny), brak
dźwięku.
Słaba jakość obrazu lub jego brak, lecz
dobra jakość dźwięku.
Słaba jakość obrazu podczas odbioru
sygnału video RGB.
Dobry obraz, brak dźwięku.
Brak koloru w programach kolorowych.
Obraz ulega zniekształceniu przy
zmianie programu lub przy czytaniu
telegazety.
Rozwiązanie
• Włącz urządzenie do sieci.
• Naciśnij przycisk z przodu urządzenia.
• Jeśli pojawi się czerwony wskaźnik , naciśnij przycisk TV na pilocie.
• Sprawdź podłączenie anteny.
• Wyłącz urządzenie na 3 lub 4 sekundy i ponownie je włącz przez
naciśnięcie przycisku z przodu telewizora.
• Przy pomocy systemu menu wybierz “Regulacja obrazu” i wyreguluj
poziom Kontrast, Kolor i Jasność.
• Naciśnij kilkakrotnie przycisk na pilocie aż symbol 1 pojawi się na
ekranie.
• Naciśnij przycisk +/- na pilocie.
• W sytemie menu sprawdź, czy w menu “Funkcje” jest wybrana w pozycji
“Głośnik” opcja “Główny”.
• W menu wybierz opcję “Regulacja obrazu” i wyreguluj balans kolorów.
• Wyłącz urządzenie podłączone do złącza 21-stykowego EURO z tyłu
telewizora.
PL
Na obrazie pojawiają się paski.
Zakłócenia obrazu.
Nie działa pilot.
Miga wskaźnik lampy urządzenia.
Miga wskaźnik trybu czuwania
(standby) .
• Jeśli w dalszym ciągu występują problemy, oddaj swój telewizor do naprawy wykwalifikowanemu personelowi
technicznemu.
• Nigdy nie otwieraj obudowy.
• Wyreguluj osłabiacz RF (ATT). W tym celu skonsultuj rozdział “Stosowanie
funkcji “Dalsze nastawianie”.
• W systemie menu wyreguluj precyzyjne programowanie kanałów (ARC) by
uzyskać lepszy odbiór obrazu. W tym celu skonsultuj rozdział “Stosowanie
funkcji “Dalsze nastawianie”.
• Zmień baterie.
• Wymień lampę na nową. W tym celu przeczytaj rozdział “Wymiana lampy”.
• Jeśli wymieniasz lampę bez odłączenia przewodu zasilającego miga
wskaźnik trybu czuwania (standby) urządzenia . By kontynuować
wymianę lampy odłącz przewód zasilania i poczekaj ok. 30 minut.
• Sprawdź czy osłona lampy jest mocno dokręcona.
• Jeśli wskaźnik trybu czuwania miga nawet wtedy gdy nie wymieniasz
lampy, skontaktuj się z najbliższą stacją obsługi technicznej Sony.
Informacje dodatkowe
34
34
Page 98

Bevezetés
MENU
K
Köszönjük, hogy ezt a Sony “Grand Wega” típust választotta.
A készülék használata előtt figyelmesen olvassa el ezt az útmutatót és őrizze meg jövőbeni referenciákhoz.
• Az útmutatóban használt jelképek:
• Lehetséges kockázatok
• Fontos információ
• Információ a funkcióról
•1,2.. Követendő utasítás sor
• A távvezérlő árnyékolt gombjai mutatják a különböző
utasítások végrehajtásához megnyomandó gombokat.
• Információ az utasítások eredményéről.
Biztonsági előírások
Minden televízió rendkívül magas feszültségen működik. A tűzveszély és az áramütés megelőzése érdekében tartsa be a mellékelt
kék háromszögben jelzett biztonsági előírásokat.
•A készülék szállításánál ajánljuk, hogy azt egy másik személy
segítségével eszközölje; egyik kezével a képernyő alsó
részénél, másik kezével a felső részénél tartva azt. SOHA ne
tartsa a készüléket a képernyő szélein elhelyezkedő
hangszóróknál, sem az előlapoknál, hogy elkerülje azok
deformálódását vagy törését.
•Ne zárja el vagy fedje le a készülék hátsó balalsó részén lévő
szellőzővájatot. A megfelelő szellőzés biztosítása érdekében
a készülék és a fal között hagyjon legalább 10 cm
távolságot.
•Amennyiben a készüléket hideg helyről közvetlenül meleg
helyre helyezi át vagy a helyiség hőmérsékletében hirtelen
hőmérsékletváltozás áll be, a kép zavaros lehet illetve
néhány helyen rossz színminőséget mutathat. Ez abból
adódik, hogy a nedvesség lecsapódott a készüléken belüli
tükrökön vagy lencséken. A készülék használata előtt
hagyja, hogy a nedvesség elpárologjon.
• Ne tegye ki a képernyőt közvetlen fénynek, hogy tiszta képet
kapjon. Amikor lehetséges, használjon a mennyezetről jövő
megvilágítási pontokat.
• A készülék nagy precizitású technológiával készült. Azonban a
paneles szerkezet tulajdonságai miatt a képernyőn állandó fekete
vagy színes (piros, kék vagy zöld) pontok jelenhetnek meg. Ez
nem jelent működési hibát.
• Ezen készülék képernyője fényvisszaverő réteggel rendelkezik. A
képernyő rongálódásának elkerülése végett kövesse a következő
utasításokat:
• A por eltávolításához a képernyőről használja a készülékhez
mellékelt tisztítőkendőt vagy egy puha rongyot.
• A képernyőt egy megnedvesített puha ronggyal tisztítsa. Ne
használjon súrolószereket. Biztonsági intézkedésként húzza ki
a készüléket annak tisztítása előtt.
• Kerülje a képernyő érintését, hogy a felületet ne karcolja meg.
Tartalomjegyzék
Bevezetés .......................................................................................................................................................................................................................... 3
Biztonsági előírások ........................................................................................................................................................................................................ 3
Általános leírás
A mellékelt tartozékok ellenőrzése................................................................................................................................................................... 4
A készülék gombjainak általános leírása......................................................................................................................................................... 4
A távvezérlő gombjainak általános leírása...................................................................................................................................................... 5
Üzembehelyezés
Az elemek behelyezése a távvezérlőbe........................................................................................................................................................... 6
Az antenna és a video csatlakoztatása ........................................................................................................................................................... 6
A készülék rögzítése........................................................................................................................................................................................... 6
Első üzembehelyezés
A készülék bekapcsolása és automatikus hangolás..................................................................................................................................... 7
Menürendszerek
A kepernyő formátumának változtatása.......................................................................................................................................................... 9
Bevezetés a képernyő menürendszereibe...................................................................................................................................................... 9
Gyors útmutató a menükben való mozgáshoz ............................................................................................................................................ 10
A menürendszerek használata:
A kép beállítása .............................................................................................................................................................................................. 11
A hang beállítása ............................................................................................................................................................................................ 12
A “Jellemzők” menü használata .................................................................................................................................................................. 14
A TV kézi hangolása....................................................................................................................................................................................... 15
Az adók egyéni beazonosítása .................................................................................................................................................................... 16
Programhelyek figyelmen kívül hagyása .................................................................................................................................................... 17
A “További programok tárolása” funkció használata............................................................................................................................... 18
Személyazonosítójának bevitele.................................................................................................................................................................. 19
A különböző funkciók bemutatása........................................................................................................................................................... 20
A kép vízszintes közepének beállítása RGB forráshoz ............................................................................................................................ 21
A bemenő források képformátumának beazonosítása és kiválasztása ................................................................................................ 22
Többszörös kép (Multi PIP)........................................................................................................................................................................... 23
Két kép a képernyőn (PAP)........................................................................................................................................................................... 23
Teletext...................................................................................................................................................................................................................... 24
NexTView................................................................................................................................................................................................................. 26
Választható csatlakozások
Választható készülékek csatlakoztatása....................................................................................................................................................... 28
Választható készülékek használata................................................................................................................................................................ 29
“Smartlink” ......................................................................................................................................................................................................... 30
Egyéb Sony készülékek távvezérlői ............................................................................................................................................................... 30
Kiegészítő információ
Optimális látószög ............................................................................................................................................................................................ 31
Az égő cseréje ................................................................................................................................................................................................... 32
Műszaki jellemzők............................................................................................................................................................................................. 33
Problémamegoldás........................................................................................................................................................................................... 34
HU
3
Page 99

Általános leírás
Nyomja meg a
készülék előlapján
lévő jelet, hogy az
elülső bemenetek
láthatóak legyenek.
A mellékelt tartozékok ellenőrzése
Két darab elem
(R6 tipus)
1 Csavarhúzó2 Rögzítőkar
Egy távvezérlő
2 db csavar
(RM-903)
A készülék gombjainak általános leírása
Fülhallgató
kimenet
S videobemenet
1 db tisztítókendő
lámpakijelző
(lásd 32. oldal)
Bekapcsolás
/Kikapcsolás
gomb
Készenléti üzemmód
(standby) jelző:
• Amennyiben a
készüléket a
távvezérlő készenléti
üzemmód
gombjának
megnyomásával
kapcsolja ki, a kijelző
piros színűen világít.
• Amennyiben a
készülék kikapcsolás
gombjával kapcsolja
azt ki, a kijelző sárga
színűen világít.
Videobemenet
Audio bemenet
4
Általános leírás
A bemenő
forrást
kiválasztó
gomb
Hangerő
szabályozó
gombok
Programhely léptető
gombok (a televízió
csatornákat választja ki)
Page 100

Általános leírás
A távvezérlő gombjainak általános leírása
A gyári értékek visszaállítása
Használja a gyárban meghatározott kép és
hangértékek visszaállításához illetve a
készülék újbóli beüzemeléséhez, mint az
első üzembehelyezéskor.
Miután a automata hangolás menü megjelent
a képernyőn, a használati utasítás “A
készülék bekapcsolása és automatikus
hangolás” (c. fejezet 4) fejezetében leírtak
szerint járjon el.
A video Bekapcsolása/Kikapcsolása
Nyomja meg a video be- és
kikapcsolásához.
A hang elnémítása
Nyomja meg a hang elnémításához.
A hang visszakapcsolásához nyomja meg
újra.
A TV üzemmód kiválasztása
Nyomja meg a teletext vagy a videobemenet
kikapcsolásához.
PAP (két kép a képernyőn)
További részletek a “Két kép a képernyőn
(PAP)” fejezetben találhatók.
A teletext kiválasztása
Nyomja meg a teletext megjelenítéséhez.
Az elektronikus program útmutató
megjelenítése
Nyomja meg az elektronikus program
útmutató (EPG) megjelenítéséhez. Nyomja
meg újra annak eltüntetéséhez.
Képkimerevítés
Nyomja meg a televízió képének
kimerevítéséhez. Nyomja meg újra, hogy
normális TV képet lásson.
Csatornaválasztás
Nyomja meg a csatornák kiválasztásához.
Kétjegyű programhelyek, pl. 23,
kiválasztásához nyomja meg először a -/-gombot, majd a 2-es és a 3-as gombokat.
Ha eltéveszti az első számjegyet, üsse be a
második számjegyet (0-tól 9-ig), majd ezt
követően hajtsa végre újra a műveletet.
A hang üzemmód kiválasztása
Nyomja meg egymás után többször a hang
üzemmód változtatásához.
A kép üzemmód kiválasztása
Nyomja meg egymás után többször a kép
üzemmód kiválasztásához.
Hangerő szabályozás
Nyomja meg a televízió hangerejének
szabályozásához.
1
4
7
S
VIDEO TV
2
5
8
0
K
MENU
VT
R 1 2 3 4 DVD
3
6
9
PROGR
RM
VIDEO TV
CH
903
Az óra megjelenítése
Nyomja meg az óra megjelenítéséhez és
eltüntetéséhez (csak teletext
közvetítéskor működik).
A video működtetése
További részleteket az “Egyéb Sony
készülékek távvezérlői” fejezetben talál.
A televízió ideiglenes kikapcsolása
Nyomja meg a televízió ideiglenes kikapcsolásához
(a készenléti üzemmód jelző
piros színűen
világít). Nyomja meg újra a készenléti üzemmódból
(standby) való bekapcsoláshoz.
Amennyiben 15-30 perc elteltével nincsen
televíziójel és semmilyen gombot nem nyomtak
le, a televízió automatikusan készenléti
üzemmódba (standby) kapcsol.
Információ megjelenítése a képernyőn
Nyomja meg az összes utasítás képernyőn történő
megjelenítéséhez. Nyomja meg újra annak
törléséhez.
A bemenő forrás kiválasztása
Nyomja meg egymás után többször, amíg a kívánt
bemenő forrás jelképe megjelenik a képernyőn.
Az utolsó választott csatornára való visszatérés
Nyomja meg az utolsó választott csatornára való
visszatéréshez (az előző csatorna legalább 5
másodpercig kell képernyőn maradjon előzőleg).
A képernyő méret kiválasztása
Nyomja meg többször egymás után a képernyő
méretének változtatásához. Lásd a “A képernyő
formátumának változtatása” fejezetet.
Többszörös kép (Multi PIP)
Nyomja meg a Multi PIP módozat kiválasztásához.
Nyomja meg újra annak törléséhez.
Joystick menüválasztáshoz
• Ha a MENU aktív
4 Egy szinttel feljebb
$ Egy szinttel lejebb
Z Az előző menübe vagy választásba való
belépés
z A következő menübe vagy választásba való
belépés
OK A választás megerősítése
• Ha a MENU nem aktív:
Z Az utolsó választott menübe való közvetlen
belépés.
OK Általános programlista megjelenítése
Csatornakiválasztás
Nyomja meg az előző vagy a következő csatorna
kiválasztásához.
HU
A televízió funkcióin kívül, minden színes gomb
használható a teletexttel történő műveletekhez is.
További információt a használati utasítás “Teletext”
fejezetében talál.
A menürendszer bekapcsolása
Nyomja meg, hogy a menü megjelenjen a
képernyőn. Nyomja meg újra a kikapcsoláshoz, hogy
normális televízió képernyőt lásson.
Általános leírás
5
 Loading...