

Page 1
A-CC2-100-11 (1)
When printing this document to legal size paper, place a check mark beside the
“Auto-rotate and center pages” option of the Print dialog box. This prints the
document on the center of the page.
Page 2

Table of contents
Getting Started
What is AIBO Entertainment Player Ver. 2.0? . . . . . . . 7
Playing with Navigator/Mind Scope . . . . . . . . . 7
Using the camera . . . . . . . . . . . . . . . . . . . . . . . . 7
Enjoying music and news with the Player . . . . . 8
Have fun with the AIBO robot’s Diary . . . . . . . 8
Display explanation . . . . . . . . . . . . . . . . . . . . . . . . . . . . 9
Connect button/Mode selector buttons . . . . . . . . 10
Minimize button . . . . . . . . . . . . . . . . . . . . . . . . . 10
Battery indicator/Go to Station button . . . . . . . . 10
The AIBO
Checking system requirements . . . . . . . . . . . . . . . . . . . 12
Preparation steps . . . . . . . . . . . . . . . . . . . . . . . . . . . . . . 13
Installing the software . . . . . . . . . . . . . . . . . . . . . . . . . . 14
Starting and ending AIBO Entertainment Player . . . . . 16
®
Entertainment Robot operation modes . . . 11
Uninstalling AIBO Entertainment Player . . . . . . 15
First-time startup . . . . . . . . . . . . . . . . . . . . . . . . 16
Second and subsequent startups . . . . . . . . . . . . . 19
Closing down AIBO Entertainment Player . . . . 19
Using Mind Scope to check the AIBO
Robot’s recognition and current status . . . . . . . . . . . . . . 27
Switching the Mind Scope display . . . . . . . . . . . 27
Using the chat function . . . . . . . . . . . . . . . . . . . . . . . . . . 28
Switching the sound . . . . . . . . . . . . . . . . . . . . . . . . . . . . 29
Monitoring the AIBO
operation and recognition status on the 3D/map display 30
Switching between 3D display and map display . 30
Changing the 3D display angle . . . . . . . . . . . . . . 31
Using the map display to check the position of
things that the AIBO robot remembers . . . . . . . . 31
®
Entertainment Robot’s current
®
Entertainment
Using the Camera
Basic camera operation . . . . . . . . . . . . . . . . . . . . . . . . . . 33
Taking a picture . . . . . . . . . . . . . . . . . . . . . . . . . . . . . . . 34
Shooting a movie . . . . . . . . . . . . . . . . . . . . . . . . . . . . . . 35
Interval recording . . . . . . . . . . . . . . . . . . . . . . . . 36
Viewing the album . . . . . . . . . . . . . . . . . . . . . . . . . . . . . 37
Viewing pictures . . . . . . . . . . . . . . . . . . . . . . . . . 37
Viewing movies . . . . . . . . . . . . . . . . . . . . . . . . . . 38
Using Navigator
Basic Navigator operation . . . . . . . . . . . . . . . . . . . . . . . 21
Talk/Hear/AutoMotion/Rotate buttons and head
control area . . . . . . . . . . . . . . . . . . . . . . . . . . . . . 22
Action/Motion/Chat panel . . . . . . . . . . . . . . . . . 22
Controlling the AIBO
Moving the AIBO robot . . . . . . . . . . . . . . . . . . . 23
Playing with the AIBOne toy and the pink ball . 25
Playing with various motion patterns . . . . . . . . . 26
®
Entertainment Robot . . . . . . . . 23
Using the Player
Basic Player operation . . . . . . . . . . . . . . . . . . . . . . . . . . 40
Listening to music with the AIBO
Robot . . . . . . . . . . . . . . . . . . . . . . . . . . . . . . . . . . . . . . . . 41
Selecting music from a media list . . . . . . . . . . . . 41
Listening to music by giving the AIBO
Entertainment Robot a voice command . . . . . . . 43
Touching the AIBO robot to listen to music . . . . 43
®
Entertainment
®
2
Page 3

Listening to music files via drag & drop . . . . . . 44
Registering music files . . . . . . . . . . . . . . . . . . . . 44
Listening to music by showing the AIBO
®
Entertainment
Robot a registered image (VPR function) . . . . . . . . . . . 46
Registering an image (VPR) . . . . . . . . . . . . . . . . 46
Listening to music by showing the AIBO robot a
registered image . . . . . . . . . . . . . . . . . . . . . . . . . 48
Having the AIBO
®
Entertainment Robot read you
the news or a blog . . . . . . . . . . . . . . . . . . . . . . . . . . . . . 49
Selecting content to read from the media list . . . 49
Starting the reading function by giving a voice
command . . . . . . . . . . . . . . . . . . . . . . . . . . . . . . 50
Starting the reading function by touching the
AIBO robot . . . . . . . . . . . . . . . . . . . . . . . . . . . . . 50
Having the AIBO robot continue to read . . . . . . 51
Registering the URL of an RSS site . . . . . . . . . . 51
Listening to Internet radio . . . . . . . . . . . . . . . . . . . . . . . 54
Listening to Internet radio . . . . . . . . . . . . . . . . . 54
Using a voice command to listen to
Internet radio . . . . . . . . . . . . . . . . . . . . . . . . . . . 55
Registering an Internet radio station . . . . . . . . . . 55
Enjoying motion patterns . . . . . . . . . . . . . . . . . . . . . . . . 57
Playing back a motion pattern . . . . . . . . . . . . . . 57
Getting the AIBO robot to dance (AutoMotion) 58
Having the AIBO
®
Entertainment robot read words and
phrases to you . . . . . . . . . . . . . . . . . . . . . . . . . . . . . . . . 59
Registering words or phrases . . . . . . . . . . . . . . . 59
Having the AIBO robot read to you . . . . . . . . . . 60
Playing a recorded sound through the AIBO
®
Entertainment Robot . . . . . . . . . . . . . . . . . . . . . . . . . . . 61
Recording . . . . . . . . . . . . . . . . . . . . . . . . . . . . . . 61
Playing the recorded sound via the AIBO
®
Entertainment Robot . . . . . . . . . . . . . . . . . . . . . . 62
Creating a playlist . . . . . . . . . . . . . . . . . . . . . . . . . . . . . 63
Creating a playlist . . . . . . . . . . . . . . . . . . . . . . . . 63
Playback with a playlist . . . . . . . . . . . . . . . . . . . . 64
Saving playlist data . . . . . . . . . . . . . . . . . . . . . . . 64
Using the Diary function
Basic Diary operation . . . . . . . . . . . . . . . . . . . . . . . . . . . 67
Reading the AIBO
Reading the AIBO
Diary . . . . . . . . . . . . . . . . . . . . . . . . . . . . . . . . . . 69
Entering a title and comments for the AIBO
Entertainment Robot’s Diary . . . . . . . . . . . . . . . . 70
Uploading the Diary to a blog . . . . . . . . . . . . . . . 70
Having the AIBO
read the Diary . . . . . . . . . . . . . . . . . . . . . . . . . . . 71
Creating a schedule . . . . . . . . . . . . . . . . . . . . . . . . . . . . . 72
Registering a scheduled event . . . . . . . . . . . . . . . 72
Importing schedule data from Microsoft
Outlook
Editing and deleting scheduled events . . . . . . . . 74
Having the AIBO
your schedule . . . . . . . . . . . . . . . . . . . . . . . . . . . . . . . . . 76
Having the AIBO robot announce your
schedule . . . . . . . . . . . . . . . . . . . . . . . . . . . . . . . . 76
Using a voice command to have the AIBO robot
tell you your schedule . . . . . . . . . . . . . . . . . . . . . 76
Touching the AIBO robot to have it tell you
your schedule . . . . . . . . . . . . . . . . . . . . . . . . . . . . 76
®
Entertainment Robot’s Diary . . . . 68
®
Entertainment Robot’s
®
Entertainment Robot
®
®
. . . . . . . . . . . . . . . . . . . . . . . . . . . . . . . 74
®
Entertainment Robot tell you
®
3
Page 4

Setting your Preferences
To change settings . . . . . . . . . . . . . . . . . . . . . . . . . . . . . 78
Network Settings . . . . . . . . . . . . . . . . . . . . . . . . . . . . . . 79
AIBO . . . . . . . . . . . . . . . . . . . . . . . . . . . . . . . . . . . . . . . 80
Diary Settings . . . . . . . . . . . . . . . . . . . . . . . . . . . . . . . . 81
Blog Settings . . . . . . . . . . . . . . . . . . . . . . . . . . . . . . . . . 82
Voice Synthesis . . . . . . . . . . . . . . . . . . . . . . . . . . . . . . . 83
Keyword . . . . . . . . . . . . . . . . . . . . . . . . . . . . . . . . . . . . . 84
3D . . . . . . . . . . . . . . . . . . . . . . . . . . . . . . . . . . . . . . . . . . 85
Movie . . . . . . . . . . . . . . . . . . . . . . . . . . . . . . . . . . . . . . . 86
Troubleshooting
Troubleshooting . . . . . . . . . . . . . . . . . . . . . . . . . . . . . . . 88
Other Information
Words understood by the AIBO® Entertainment
Robot . . . . . . . . . . . . . . . . . . . . . . . . . . . . . . . . . 96
The AIBO robot touch sensor operation . . . . . . 97
Controlling the AIBO
actions with the keyboard . . . . . . . . . . . . . . . . . . 98
®
Entertainment Robot’s
4
Page 5

•Sony® Corporation does not accept any liability whatsoever for
any problems arising between the user and third parties with
regard to pictures and movies taken with the AIBO
Entertainment Robot.
Do not use the AIBO robot to store pictures or movies that can
be damaging or offensive to others.
• At many live events and shows also for entertainment purposes
the taking of pictures and movies is restricted.
• Any pictures or movies taken with the AIBO robot are only for
private use by the individual customer. Do not use the AIBO
robot in breach of copyright or of any rights of third parties.
Unless express permission is granted by law, the transfer and
forwarding of copyrighted pictures and movies is not allowed.
• This software or document is protected by copyright, and distributed
under licenses restricting its use, copying, and distribution. No part of this
software or document may be reproduced in any form by any means and
rental of this software may not be allowed without prior authorization of
Sony Corporation.
• Sony Corporation assumes no responsibility for any inconvenience caused
by misuse or any use not stated in this document.
• The supplied software cannot be used with any device other than those
devices specified herein.
• Some mobile communication devices may not work with the AIBO EYES
feature due to unique configurations. Sony Corporation assumes no
responsibility, in the case that the AIBO EYES feature does not work with
such mobile communication devices.
• The specifications of the supplied software are subject to change without
notice.
®
“OPEN-R” is the standard interface for the
AIBO Entertainment Robot system that Sony is
actively promoting. This interface expands the
capability of the entertainment robot through a
flexible combination of hardware and
interchangeable software to suit various
applications.
The AIBO robot ERS-7M3 conforms to OPEN-R version 1.1.5.
“AIBO”, the AIBO logo , “OPEN-R” and the OPEN-R
logo , “Memory Stick”, and are
trademarks or registered trademarks of Sony Corporation.
Microsoft and Windows are registered trademarks of
Microsoft Corporation in the United States and/or other
countries.
Intel and Pentium are registered trademark or trademark of
Intel Corporation.
Adobe and Adobe Reader are registered trademarks of Adobe
Systems, Inc.
This software contains sound software components licensed
from ARTTeknika,Inc.
All other names of systems, products and services are
trademarks of their respective owners.
The ™ and ® marks are not shown in this document.
Before using this software, please read the accompanying EndUser License Agreement which governs use of this software.
Other information about the AIBO robot is available on the
Internet at the following site:
http://www.aibo.com
Reproduction in whole or in part without written permission is
prohibited. All rights reserved.
5
Page 6

Getting Started
Welcome to the wonderful world of AIBO Entertainment
Player!
This software package utilizes the wireless LAN capability of
your AIBO
wide variety of entertaining functions that operate in
conjunction with your PC.
The following pages will demonstrate basic operation steps to
familiarize you with what the software can do.
®
Entertainment Robot ERS-7M3 to bring you a
Page 7
What is AIBO Entertainment Player Ver. 2.0?
AIBO Entertainment Player Ver. 2.0 makes it possible to freely control your AIBO® Entertainment Robot from your PC.
Responding to your commands, the AIBO robot can perform a variety of actions. You can take a picture or shoot a movie using the
AIBO robot’s built-in camera. You can have the AIBO robot play your favorite music and dance to it. You can find out what the
AIBO robot has recognized and what its current status is by monitoring indicators on the PC screen or by checking its Diary. These
are just some of the features that make living with the AIBO robot a new and rewarding experience.
Getting Started
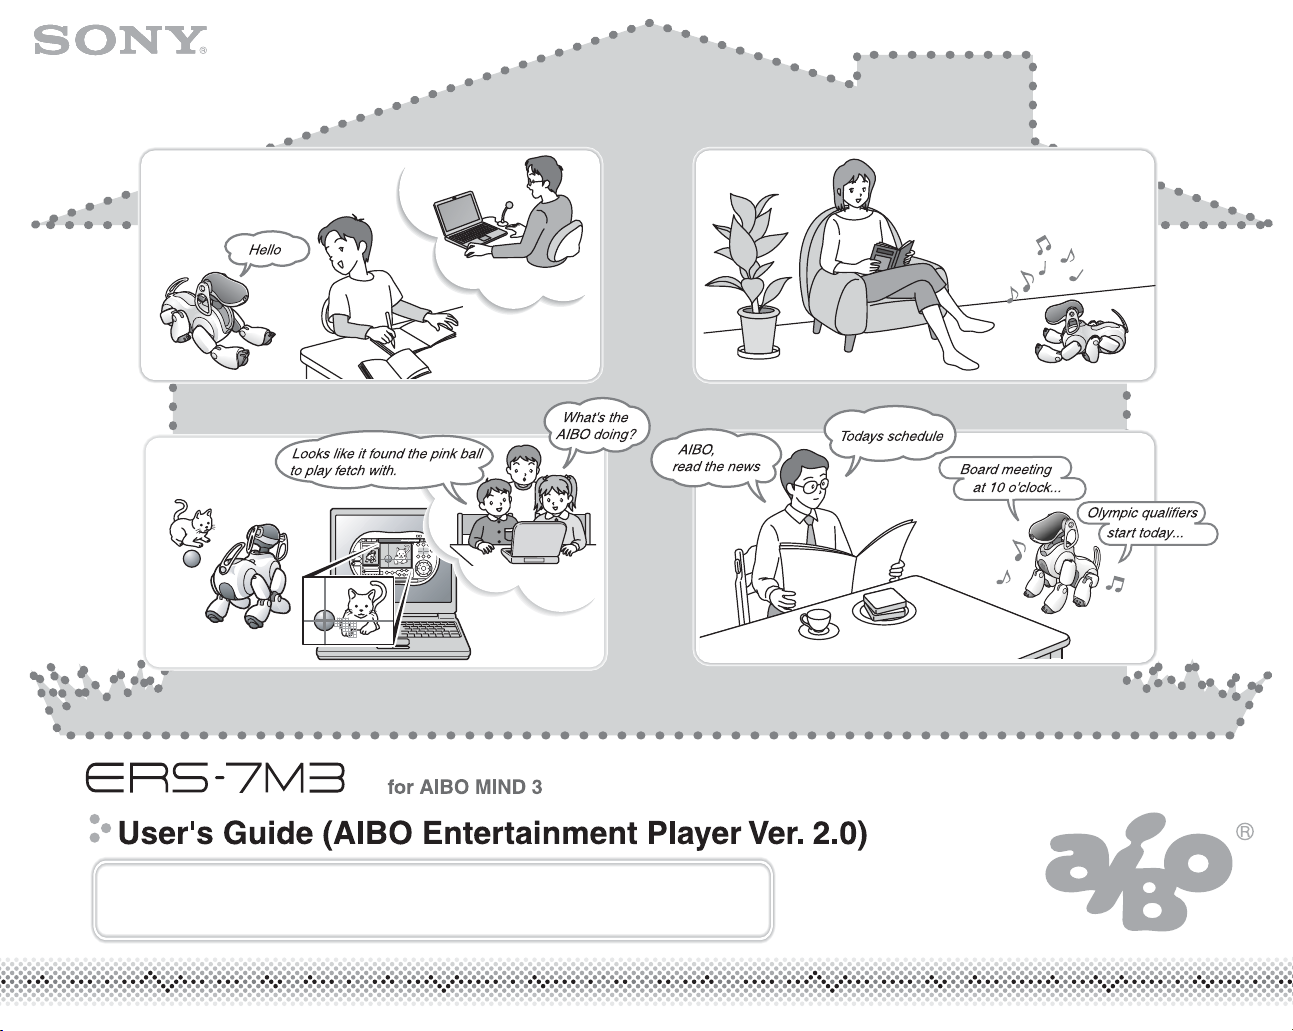
Playing with Navigator/Mind Scope
(page 20)
Normally, your AIBO robot will move about and function on its
own, but with this software, you can remotely control it to do your
bidding. You might operate the AIBO robot to play a game with
friends. Dad in his study might want to use the AIBO robot to
check on what’s happening in the children’s room or to talk to the
kids. The AIBO robot now has a thousand new uses.
You can also check what the AIBO robot has recognized and
what its current status is.
Hey, it’s time
for soccer!
Hey, it’s time
for soccer!
OK!
• Moving the AIBO robot . . . . . . . . . . . . . . . . . . . . . . page 23
• Checking the AIBO robot’s knowledge and
status with Mind Scope . . . . . . . . . . . . . . . . . . . . . . page 27
• Using the chat function . . . . . . . . . . . . . . . . . . . . . . page 28
• Checking on the AIBO robot with the 3D display. . page 30
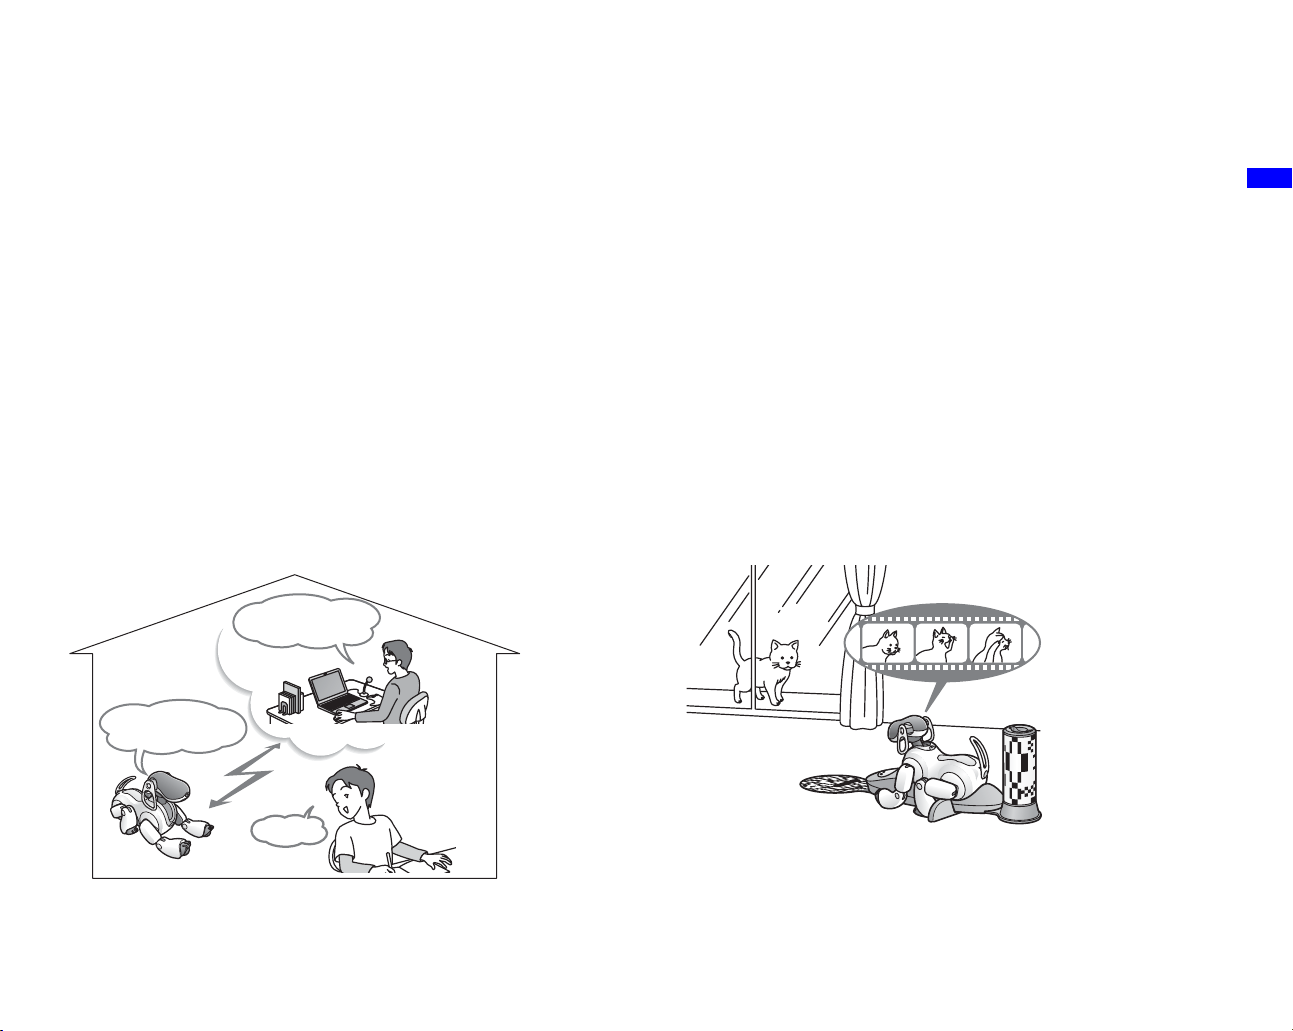
Using the camera (page 32)
Take a still picture or a movie of what’s in the AIBO robot’s
field of vision. You can get a feel for the AIBO robot’s “point
of view”. When you go ou.t, you can have the AIBO robot
keep watch. By combining the house sitting function and
movie function, you can have the AIBO robot start recording
when it detects motion or sound.
• Taking a picture . . . . . . . . . . . . . . . . . . . . . . . . . . . . page 34
• Shooting a movie . . . . . . . . . . . . . . . . . . . . . . . . . . . page 35
•
Viewing pictures and movies taken by the AIBO robot
. . page 37
7
Page 8

Enjoying music and news with the
Player (page 39)
Listen to music files or CDs in your PC, and have the AIBO®
Entertainment Robot dance to the music. Or have the AIBO
robot read you the news from the Internet. There are many
ways of having an enjoyable time with your AIBO robot.
Play music
• Listening to music CDs and music files. . . . . . . . . . page 42
• Listening to music by showing a registered
image to the AIBO robot . . . . . . . . . . . . . . . . . . . . . page 48
• Having the AIBO robot read the news or a blog . . . page 49
• Listening to Internet radio . . . . . . . . . . . . . . . . . . . . page 54
• Enjoying motion patterns (gestures). . . . . . . . . . . . . page 57
• Having the AIBO robot read words or
phrases to you. . . . . . . . . . . . . . . . . . . . . . . . . . . . . . page 59
• Listening to a recorded sound . . . . . . . . . . . . . . . . . page 61
• Creating a playlist. . . . . . . . . . . . . . . . . . . . . . . . . . . page 63
Have fun with the AIBO robot’s
Diary (page 66)
The AIBO robot can wake you up with your favorite music in
the morning. While having breakfast, it helps you check your
schedule for the day.
After you come home, read the AIBO robot’s Diary and write
comments. Finally, upload the Diary to a blog.
Board meeting from ten
Receive guests at three...
• Reading the AIBO robot’s Diary . . . . . . . . . . . . . . . page 68
• Creating a schedule . . . . . . . . . . . . . . . . . . . . . . . . . page 72
• Importing a schedule from Microsoft Outlook . . . . page 74
• Having the AIBO robot tell you your schedule . . . . page 76
Getting Started
zHints
• The various functions of AIBO Entertainment Player work only when the AIBO robot and the PC are linked via a wireless LAN. Before using this
software, please check the wireless LAN connection status.
• AIBO Entertainment Player Ver. 2.0 is software for AIBO MIND 3 software.
8
Page 9

Display explanation
The software has a different display for each function, namely the Navigator screen, Player screen, and Diary screen. Normally,
you will use your PC’s mouse to operate the software, but keyboard shortcuts are also available (page 98).
In this section, some common display elements and functions are explained, using the Navigator screen as an example.
Getting Started
Connect button/
Mode selector buttons
See next page.
Main function
buttons
Source Volume
Adjusts the volume of sound
by the PC and the AIBO
Entertainment Robot. The
maximum volume is
controlled by the switch on
the AIBO robot itself.
®
PC audio button
Switches sound from the PC
speaker on and off.
Illume bar
Changes appearance
according to connection
on/off status and
playback condition.
AIBO audio button
Switches playback sound by the AIBO robot’s speaker on and off.
Minimize button
See next page.
Close button
Closes the software.
Settings button
Displays the settings screen
(page 78).
Help button
Displays this document (AIBO
Entertainment Player User’s Guide
for the AIBO robot ERS-7M3).
Battery indicator/Go to Station
button
See next page.
* While the AIBO robot is on the Energy Station, the number of functions that can be used is limited.
9
Page 10

Connect button/Mode selector
C
/Di
B
buttons
These buttons let you turn the AIBO® Entertainment Robot
connection on and off and select the operation mode for the
AIBO robot.
Windows system tray
(at bottom right of Desktop)
Shown here.
Getting Started
onnect
Turns the wireless LAN connection between the
AIBO robot and the PC ON and OFF.
Remote Control Mode button
Switches the AIBO robot to Remote Control mode.
In this condition, the AIBO robot can be operated
from the PC.
sconnect button
Autonomous Mode
button
Switches the AIBO robot
to Autonomous Monitor
mode. In this condition,
the AIBO robot functions
by itself, but the camera
image and microphone
sound can be monitored
at the PC.
Minimize button
An icon appears in the Windows® system tray.
Click this button.
If the icon is not visible, click here to show
hidden icons.
zHint
Whenever AIBO Entertainment Player is running, the icon for
VAIBO Server (a program to transmit communications to the AIBO
robot) also appears in the Windows task tray. There is no need for you
to operate this icon.
Battery indicator/Go to Station button
Lets you check the battery status and initiate charging.
attery indicator
This indicator lets you check the charge status of
the battery. When the battery is low, the indicator
turns red, and when its charge drops further, the
indicator flashes.
Go to Station/Stop/Release button
Clicking this button causes the AIBO robot to
move to the
Clicking the button will cause the charging to stop.
Energy Station
and charge itself.
This button is shown while the AIBO robot is on
the Energy Station. Clicking the button causes the
AIBO robot to dismount from its Energy Station.
10
Page 11

The AIBO® Entertainment Robot operation modes
You can connect to the AIBO robot while it is in Autonomous mode or in Station mode. While the AIBO robot is connected to
AIBO Entertainment Player, the following modes are available.
* For details on Autonomous mode or Station mode, see the “User’s Guide (Basic)” for the AIBO robot ERS-7M3.
AIBO Entertainment Player
*1
Remote Control mode
• Click (remote control)
button
• Touch head sensor and middle
back sensor for 3 seconds
• Command the AIBO robot with
your voice
• Play back schedule
The AIBO robot moves
according to your
commands.
• Click (Autonomous Mode)
• Touch head sensor for 3
• Do not operate the AIBO robot
Mode indicators
flash blue
button
seconds
for a certain period of time
*3
Autonomous
mode
Station mode
Mode indicators OFF
• Start up AIBO Entertainment Player
• Click (Connect) button
• Close AIBO Entertainment Player
• Click (Disconnect) button
• Connect automatically
*2
Getting Started
• Close AIBO Entertainment Player
• Click (Disconnect) button
*1 If AIBO Entertainment Player is set up to connect automatically at startup (page 79)
*2 If AIBO Entertainment Player is set up to connect periodically (page 79)
3
*
The time interval before returning to Autonomous Monitor mode can be set (page 80)
Autonomous Monitor mode
The AIBO robot moves about freely
under its own volition.
Mode indicator
Mode indicators
turn blue
Solid blue: Autonomous Monitor mode
Flashing blue: Remote Control mode
11
Page 12

Checking system requirements
To use AIBO Entertainment Player, the following system requirements must be met.
PC environment requirements
• Operating system: Microsoft
Internet radio
FTTH/
ADSL/CATV
connection
To Internet
station
Modem
Wireless LAN
access point
PC
• CPU/Memory/HDD
Minimum requirements:
CPU: Intel
Memory: 256 MB or higher
HDD: 120 MB or higher of available capacity
Recommended environment
CPU: Intel Pentium 4 processor, 2 GHz or higher
Memory: 512 MB or higher
HDD: 1 GB or higher of available capacity
• Graphics card:
• Microsoft Direct Sound® compatible sound card
• Wireless LAN function conforming to IEEE802.11b
• “Memory Stick™” media reader/writer
• Internet Connection
®
Windows® XP (SP1, SP2),*1
Microsoft® Windows® 2000 (SP 4)
®
Pentium® III processor, 800 MHz or higher
*2
:
Microsoft® DirectX compatible graphics card
*3
*4
*5
Getting Started
*1
The modem or
access point
must have router
capability.
AIBO Mind 3 “Memory
Stick™” media
*1 In this manual, “Windows” is used to refer to Windows XP and Windows 2000.
*2 This environment is recommended when using the video recording function.
If your system does not meet these requirements, it may cause problems such
as recorded sounds and voices frequently cutting out and video being slow to
refresh.
*3 If your computer connects to an access point via wireless LAN, it must have a
wireless LAN function that conforms to the IEEE802.11b standard.
*4 Only Sony
®
brand products are guaranteed to operate correctly.
*5 To listen to Internet radio, an “always-on” connection to the Internet is
recommended.
Notes
• If a firewall is active on the PC, controlling the AIBO®
Entertainment Robot and viewing images from the AIBO
robot’s camera may not be possible, even if the
connection is established. To use AIBO Entertainment
Player, you should disable the firewall.
If the Windows firewall function of Windows XP SP2
(Service Pack 2) is enabled, the connection to AIBO
Entertainment Player must be authorized the first time the
software is started (page 18).
• Depending on CPU performance and the wireless LAN
environment, music, recorded video and sound may cut
out during playback.
12
Page 13

Preparation steps
To prepare your PC to run AIBO Entertainment Player, please proceed as follows:
Install software
• AIBO WLAN Manager 3
• AIBO Entertainment Player Ver. 2.0
• Additional package for AIBO Entertainment Player Ver. 2.0
(Windows 2000 users only)
• Microsoft
Install Microsoft® Windows Media® Player 9 or 10
(If not already installed on the PC)
Microsoft® Internet Explorer 6 (Windows 2000 users only)
Change network settings using AIBO WLAN Manager 3
Start AIBO Entertainment Player and connect to the
AIBO® Entertainment Robot
*1 AIBO WLAN Manager 3 is software that easily helps setup wireless LAN communication settings for the AIBO robot. This is
required in order to use AIBO Entertainment Player. For details on AIBO WLAN Manager 3, see “User’s Guide (PC·Network)” for
the AIBO robot ERS-7M3 (PDF).
*2 Adobe
Reader is not installed, you can download it from the web site of Adobe Systems (http://www.adobe.com/).
®
DirectX® 9
®
Reader is required to view the “User’s Guide (PC·Network)” for the AIBO robot ERS-7M3 and this document. If the Adobe
For details, see “Installing the software” on page 14.
*
For details, see “User’s Guide (PC·Network) ” for the AIBO robot
ERS-7M3.
For details, see “First-time startup” on page 16.
Getting Started
13
Page 14

Installing the software
This section explains how to install AIBO Entertainment
Player and its related software.
Notes
• AIBO Entertainment Player runs only on Windows XP and
Windows 2000. Other operating system versions are not supported.
• Before starting the installation, log on as Administrator or as a
member of the Administrator group.
• If AIBO Entertainment Player is already installed, the previous
version will first be uninstalled, and then the new version of AIBO
Entertainment Player will be installed. The media list, contents
list, and custom dictionary data will be retained. However, note that
VPR registration data will not be retained.
1 Insert the supplied CD-ROM into the CD-ROM
drive.
The Installer starts automatically, and the “ERS-7M3
Software Installation Menu” screen appears.
2 Click the button corresponding to the software
that you would like to install.
For subsequent steps, follow the on-screen instructions.
zHint
When using Windows 2000, the “Additional package for AIBO
Entertainment Player (Windows 2000 users only)” must be installed.
Getting Started
14
Page 15

3
Install Microsoft® Windows Media® Player 9 or 10
If required, download this software from the Microsoft
web site (http://www.microsoft.com) and install it
according to the instructions on the site. If the software
is already installed, this step is not necessary.
When using Microsoft Windows 2000, proceed to step 4.
When using Microsoft Windows XP, the software
installation process is now complete.
4 Install Microsoft
If required, download this software from the Microsoft
web site (http://www.microsoft.com) and install it
according to the instructions on the site. If the software
is already installed, this step is not necessary.
The software installation process is now complete.
®
Internet Explorer 6.
Uninstalling AIBO Entertainment Player
As an example, this section explains the uninstall procedure
under Windows XP.
Notes
• Before starting the uninstallation process, log on as Administrator
or as a member of the Administrator group.
• When you uninstall the software, any images saved in the album on
your PC will also be deleted.
1 Select “Start” - “Control Panel”.
Double-click “Add or Remove Programs”.
2 Click “AIBO Entertainment Player” and click
“Remove”.
Follow the instructions that appear on the screen to
uninstall the software.
3 When the “Confirm Uninstall” screen appears,
click “OK”.
Getting Started
Follow the instructions that appear on the screen.
4 When the “Uninstall Complete” screen appears,
click “Finished”.
The uninstallation process is now complete.
15
Page 16

Starting and ending AIBO Entertainment Player
When you have installed AIBO Entertainment Player on your
PC and the AIBO
communicate via wireless LAN, you can start AIBO
Entertainment Player.
®
Entertainment Robot is ready to
zHint
For details on connecting the AIBO robot to a wireless LAN, see
“User’s Guide (PC·Network)” for the AIBO robot ERS-7M3 (PDF).
First-time startup
When you start AIBO Entertainment Player for the first time, a
screen appears to select the AIBO robot to connect to.
1 Double-click the icon on the Desktop.
Alternatively, select “Start” c “All Programs”
(“Programs” when using Windows 2000)
Entertainment Player”
When the program starts for the first time, the
“Network” screen appears.
c “AIBO Entertainment Player”.
c “AIBO
Getting Started
16
Page 17

2 Select the AIBO
®
Entertainment Robot to control.
1 Select this option.
If the AIBO robot that you want to connect to has a fixed IP
address or select “Manually set IP address” and enter the IP
address in the “AIBO’s IP Address” field.
2 Click this button.
The software searches for all AIBO robots present on the same
network as the PC.
Only AIBO robots for which “Enable SSDP” in AIBO WLAN
Manager 3 is selected are listed.
3 Click and select the desired AIBO robot from the list when
the search is complete.
4 Click this button to connect to the AIBO robot.
5 If password information has been set in AIBO WLAN Manager
3, enter the required “User ID” and “Password”, and select the
“Send Password Automatically” check box.
6 When the AIBO robot has been selected, click this button.
Getting Started
zHints
• If the desired AIBO robot is not shown in the list, or if it is not found when using “Find” in Windows XP, check whether Universal Plug & Play is
installed, and if the setting to block UPnP framework is enabled in the Windows Firewall. For details on correct settings for communicating with the
AIBO robot via a wireless LAN, see the “User’s Guide (PC·Network)” for the AIBO robot ERS-7M3 (PDF).
• For details on setting items, see the section “Network Settings” (page 79).
• If you don’t know the IP address of the AIBO robot, you can check it using the Clinic mode. For details, see “User’s Guide (PC/Network)” (PDF).
17
Page 18

AIBO Entertainment Player starts and the Navigator
screen appears.
®
When you connect to the AIBO
its mode indicator flashes blue, showing you that the
AIBO robot is connecting to your PC.
The AIBO robot’s current posture and the image
captured by the AIBO robot’s camera are shown on the
screen.
When you connect to the AIBO robot, the
(connect) button changes to green.
Entertainment Robot,
For users of Windows XP SP2 (Service Pack 2)
When the Windows firewall function of Windows XP SP2
(Service Pack 2) is enabled, the firewall will cause the
“Windows Security Alert” screen to appear when AIBO
Entertainment Player is started.
While the firewall function is enabled, viewing images from the
AIBO robot’s camera or controlling the AIBO robot may not be
possible.
Register AIBO Entertainment Player as described below, to
enable a proper connection.
1 At the “Windows Security Alert” screen, click
“Unblock”.
The “Windows Security Alert” screen closes, and the
indication “Connecting to AIBO” is shown on the AIBO
Entertainment Player screen.
2 Click [Cancel] to abort the AIBO Entertainment
Player connection at this stage.
Getting Started
The view of the AIBO robot’s camera
is shown here.
Shows the AIBO robot’s current posture.
After connecting in Remote Control mode, the AIBO
robot waits for you to initiate an action.
3 Click the (Close) button to shut down AIBO
Entertainment Player.
The registration is now complete.
Start AIBO Entertainment Player again.
18
Page 19

zHint
If you have inadvertently clicked “Keep Blocking” on the “Windows
Security Alert” screen, cancel the blocked status as follows.
Closing down AIBO Entertainment Player
1Click “Start” - “Control Panel”.
2Double-click “Windows Firewall”.
3On the “Windows Firewall” screen, click the “Exception” tab.
4Select the “VAIBOserver” check box and click “OK”.
Second and subsequent startups
Double-click the icon on the Desktop.
When you start AIBO Entertainment Player again, it will
automatically connect to the selected AIBO
Robot.
zHint
You can also change the settings so that AIBO Entertainment Player
will not connect automatically at startup. To do this, see the
instructions on page 79.
®
Entertainment
Click the (close) button.
Click this button.
When the connection to the AIBO robot is terminated, the
AIBO robot emits a confirmation sound, and the mode
indicator goes out.
Getting Started
19
Page 20

Using Navigator
Navigator allows you to freely control the AIBO®
Entertainment Robot ERS-7M3. Once you have mastered the
technique, you can make your AIBO robot do a number of fun
things. In addition, Mind Scope lets you check what the AIBO
robot has recognized and what condition it is in.
Page 21

Basic Navigator operation
The Navigator screen is comprised of various controls to remotely operate your AIBO® Entertainment Robot, and you can also use
it to view on your PC what your AIBO robot is “seeing”, what it has recognized, and what its current status is.
A general introduction to the controls and screen sections is given below.
Camera view/Mind scope area
Shows the image from the AIBO
robot’s camera and what the AIBO
robot has recognized.
3D/Map display area and
buttons
The AIBO robot’s motion is
shown here in 3D, along with
locations that the AIBO robot
has memorized. (page 30).
Navigator button
Contents display area
Shows information about
contents being played.
Playback control area
Controls playback of contents
(page 40).
Mind Scope and camera view
on/off button
Each click cycles through the following
settings: Mind Scope & Camera view
Camera view only
Action/Motion/Chat panel
See next page.
c Off.
c
Distance indicator
The distance to an object sensed by
the AIBO robot is represented by
this bar. As the AIBO robot gets
closer, the orange segment
becomes shorter.
Talk/Hear/AutoMotion/
Rotate buttons and
head control area
See next page.
Capture/Album/Movie
buttons
See page 33.
Walk control dial
Lets you control the AIBO robot’s
movement and posture (page 24).
Using Navigator
zHint
The various Navigator controls can only be used while the AIBO robot is in Remote Control mode. While the AIBO robot is in Autonomous Monitor
mode, the AIBO robot operation buttons and areas are not active.
21
Page 22

Talk/Hear/AutoMotion/Rotate
Action/Motion/Chat panel
buttons and head control area
The function of these buttons and area is as follows.
Talk button
When you speak into your PC’s microphone,
the sound is reproduced via the speaker built
into the AIBO
(page 29).
Hear button
Sound picked up by the microphones built into
the AIBO robot is reproduced via the PC
speakers (page 29).
®
Entertainment Robot
AutoMotion button
The AIBO robot
according to the contents being
played.
Rotate button
The AIBO robot
direction it is looking.
Head control area
Controls the movement of
robot
’s head (page 23).
will perform a dance
will turn its body in the
the AIBO
Clicking these buttons displays the following panels.
Action panel
Lets you make the AIBO robot play with the AIBOne toy and
the pink ball (page 25).
Using Navigator
Action button
Motion panel
Lets you control various motion patterns of the AIBO robot
(page 26).
Motion button
Chat panel
Text that you enter here will be spoken by the AIBO robot
(page 28).
Chat button
22
Page 23

Controlling the AIBO® Entertainment Robot
This section describes how you can use the various buttons and
controls to move the AIBO robot.
At first, you should try this out while watching the PC screen
and the AIBO robot at the same time. When you get the hang
of it, you will then be able to have the AIBO robot move out of
sight and play entertaining games with family and friends.
zHint
To use this function, the AIBO robot must be in Remote Control
mode.
Moving the AIBO robot
First, you should master the basics, such as moving the AIBO
robot’s head, having the AIBO robot walk and turn, and change
its posture.
A game idea !
After practicing the AIBO robot’s movements for a while,
why not play a slalom racing game?
Moving the head
The head control area lets you move
freely. The current position is indicated by the green dot . By
clicking somewhere in the head control area or by dragging the
dot with the mouse, you can move the head in this direction.
When you right-click in the area,
ahead.
the AIBO robot
the AIBO robot
Click within this area.
Right-click in area.
Drag with mouse in
desired direction.
’s head
faces straight
Using Navigator
23
Page 24

Walking, turning, changing posture
With the walk control dial, you can make the AIBO®
Entertainment Robot walk exactly as you want. The dial lets you
set the direction and speed of the AIBO robot’s movement. You
can also make the AIBO robot turn and change posture.
Clicking the buttons on the dial has the following effect.
Normal
Slow
Fast
Lie
Stand
Sit
zHints
• When you click once, the AIBO robot will continue to advance
until you click Stop.
• If no other action is carried out for a while after clicking Stop,
the AIBO robot will resume the standing position.
• If you let the AIBO robot walk continuously, the warning “The
AIBO robot has been overloaded” may appear and the AIBO robot
may stop. In this case, wait at least 20 or 30 seconds before making
the AIBO robot start walking again.
Having the AIBO robot turn its body in the
direction it is looking
When you click the (Rotate) button, the AIBO robot will
turn its body in the direction it is currently looking.
Click this button.
Using Navigator
Advance in left
forward direction
Turn left
Reverse
Stop
Advance straight
ahead
Advance in right
forward direction
Tur n r i gh t
24
Page 25

Playing with the AIBOne toy and the pink ball
You can have the AIBO® Entertainment Robot perform kicks
and headers with the pink ball, and have it pick up or drop the
AIBOne toy. Your skill in operating the controls will turn the
AIBO robot into an expert player in no time.
The Action panel is used for these functions.
1 Click the (Action) button.
Click this button.
The Action panel appears.
2 Click the desired button.
The AIBO robot moves as follows.
Repeatedly click the (Search) and (Approach)
buttons until the AIBO robot is close to the desired
object, and then click the other buttons to play.
Search button
Search for the AIBOne toy or the pink ball.
Approach button
Approach the AIBOne toy or the pink ball.
Left leg kick
button
Kick the pink ball
with left leg.
Hold button
Pick up the
AIBOne toy.
Header
button
Do a header
with the pink ball.
Release button
Drop the AIBOne
toy.
Right leg kick
button
Kick the pink ball
with right leg.
Using Navigator
zHints
• Depending on the AIBO robot’s current action, different buttons
will be available.
The symbol for the (Approach) button changes according to
whether the AIBO robot has found the pink ball or the AIBOne toy.
• If the AIBO robot cannot find the pink ball or the AIBOne toy,
clicking the (Hold) button will cause the AIBO robot’s mouth
to open and close.
25
Page 26

Playing with various motion patterns
2 Select the desired motion pattern and click the
(Motion playback) button.
You can have the AIBO® Entertainment Robot perform
various motion patterns by using the Motion panel.
1 Click the (Motion) button.
Click this button
The Motion panel appears.
1Select motion pattern.
2 Click this
button.
Using Navigator
The AIBO robot performs the selected motion pattern.
zHint
The motion patterns listed below the heading “Station motion” in the
listing can also be performed while the AIBO robot is on the Energy
Station.
26
Page 27

Using Mind Scope to check the AIBO® Entertainment Robot’s recognition and current status
Besides showing what the AIBO robot’s camera is seeing, the camera display area can also be used to check what the AIBO robot
has recognized and what its current condition is.
Let’s use Mind Scope to check what the AIBO robot is seeing and how it is processing this information.
Switching the Mind Scope display
Each click of the Mind Scope and camera view on/off button cycles the display through the following settings:
Using Navigator
Mind Scope & Camera view
→ Camera view only → Off
The Mind Scope can be used to check the following items.
The green cross shows that
the AIBOne or pink ball and
pink color were recognized.
Each click of this
button switches the
display.
The blue grid indicates
that a moving object
has been recognized.
Indicates that a face
has been recognized.
When a face continues
to be recognized, the
display zooms in on
this portion.
More information provided by this display:
• When a voice is recognized, the word “VOICE” is
shown in the direction from where the sound came.
• When the AIBO robot has encountered an obstacle,
the display shows “Ouch!”.
• When the AIBO robot has detected a drop, the display
shows “WARNING”.
• When the AIBO robot has picked up the AIBOne, the
display shows “Catch!”. When the AIBO robot has
dropped the AIBOne, the display shows “Release”.
•
When the AIBO robot recognizes the station pole, station
marker, AIBO cards, registered VPR images, favorite
place, or favorite things, the orange frames are shown.
zHint
The verbal expressions used to indicate the status of the AIBO
robot will change as its personality evolves.
27
Page 28

Using the chat function
You can chat with family members or friends via the AIBO®
Entertainment Robot. This is done by having the AIBO robot
speak any text you input at the PC. Sometimes, things might
be easier to say when not face-to-face. In such a case, let the
AIBO robot be your messenger!
The Chat panel is used for this function.
zHint
You can also use the AIBO robot’s microphones to pick up sound and
reproduce it via the speakers of the PC. This lets you have a
conversation with family members or friends via the AIBO robot at a
distance. (page 29)
1 Click the (Chat) button.
2 Enter the text, and click the (Chat playback)
button.
1Enter text here.
2 Click this
button.
The text you typed in will be spoken by the AIBO robot.
Using Navigator
Click this button
The Chat panel appears.
Sorry about
just now
zHints
• After entering text, you can also have the AIBO robot speak it by
pressing the Enter key on the keyboard.
• The AIBO robot’s voice is determined by the settings made under
the “Voice Synthesis” tab in the “Settings” screen. You can change
these settings as desired (page 83).
• Sound reproduced by the AIBO robot itself may be picked up and
interpreted as a voice command. To prevent this, you should avoid
speaking words that are listed in “Words understood by the AIBO
Entertainment Robot” (page 96).
®
28
Page 29

Switching the sound
You can talk into your PC’s microphone and have the sound
reproduced by the speaker built into the AIBO
®
Entertainment
Robot. Conversely, you can reproduce the sound picked up by
the AIBO robot’s microphones via the speakers of your PC.
To switch between these two functions, click the (Talk) or
(Hear) button.
When you turn these functions ON, the color of the respective
button changes to yellow: (Talk), (Hear)
Talk button
The sound from your PC’s microphone is reproduced by the
AIBO robot.
Hear button
The sound from the
microphones of the AIBO robot
is reproduced by the PC.
zHint
The (Talk) button can only be used when the AIBO robot is in
Remote Control mode.
Using Navigator
29
Page 30

Monitoring the AIBO® Entertainment Robot’s current
operation and recognition status on the 3D/map display
The 3D/map display area shows the AIBO robot’s current
status and where its memorized locations are. This is
convenient for checking on the AIBO robot when it is
currently out of view and for knowing where it is located with
regard to known places.
The 3D/map display area operates as follows.
AIBO status area
Shows information about
the current status.
Zoom button
Lets you zoom the 3D display.
Rotate button
Rotates the 3D display.
Move button
Moves the 3D display horizontally or vertically.
Home button
Returns the 3D display to the home position
(default condition).
3D/map tabs
Switch between 3D display
and map display.
3D display area
• When 3D is selected, the display
shows the AIBO robot’s movements
as a three-dimensional graphic.
This lets you see its actions when it
is currently out of view.
For details, see page 85.
• When map is selected, the display
shows locations memorized by the
AIBO robot, and their relation to the
AIBO robot’s current position.
For details, see page 31.
Switching between 3D display and map display
Click the [3D] tab to switch to 3D display, and click the [Map]
tab to switch to map display.
3D display Map display
Using Navigator
30
Page 31

Changing the 3D display angle
Click the (Rotate) or (Move) button and drag the
mouse in the 3D display area to move the 3D display in the
desired direction.
When this function is selected, the button color changes to
yellow: (Rotate), (Move)
Drag mouse in the direction
you want the display to move.
Click these buttons.
Note
The 3D display and the AIBO® Entertainment Robot’s actual
movements may not be exactly synchronized.
Using the map display to check the position of things that the AIBO robot remembers
The map display shows the location of things in the vicinity
that the AIBO robot remembers. The AIBO robot itself is
always in the center.
Shows the view angle when
the AIBO robot’s camera is
horizontal.
Pink ball
AIBOne
Indicates the
position of the
AIBO robot’s head.
Wall detection
position
The double circle indicates a radius of 90 centimeters. Within this
area, the distance and angle of memorized locations are shown
precisely, relative to the AIBO robot’s current position. When a
location moves beyond the inside circle, the distance will be
shown on a reduced scale, and only the angle will be correct.
Indicates a location memorized
by the AIBO robot.
Face detection
position
Voice detection
position
Energy Station
Station pole
When the AIBO robot’s memory of a location begins to fade,
the indication on the map display also becomes fainter.
The following items appear on the map display.
• A trace of the AIBO robot’s
walking path
• Energy Station (when the
AIBO robot is on the station)
• Station pole
Notes
•
The positions of memorized locations are relative to the AIBO robot’s
current position and are approximate.
•
The AIBO robot can only memorize one location for any single item.
•
As time passes, the AIBO robot will gradually forget memorized locations.
•
The AIBO robot may mistake other pink objects for the pink ball or
AIBOne toy when these items are not present.
• Pink ball
•AIBOne
• Voice detection position
• Face detection position
• Wall detection position
Using Navigator
31
Page 32

Using the Camera
The camera built into the AIBO® Entertainment Robot can take
still pictures or movies (video), which is another fun thing to do
with your AIBO robot.
Page 33

Basic camera operation
The Navigator screen also lets you control the camera functions to take pictures and movies. Click the Navigator button to bring up
the Navigator screen. The controls and areas for camera operation are described below.
Camera image area
Shows the view as seen by the AIBO
Entertainment Robot’s camera and recognized
objects.
Head control area
Controls the movement of the AIBO robot’s head
(page 23).
Navigator
button
Movie button
Lets you record the image from
camera as a movie (page 35).
Album button
Gives access to stored pictures and movies
taken with
Capture button
Lets you record the image from
camera as a still picture (page 34).
the AIBO robot
the AIBO robot
(page 37).
the AIBO robot
zHints
• Pictures and movies taken with AIBO Entertainment Player are stored on the hard disk of the PC (page 37).
• Pictures and movies stored in AIBO Entertainment Player album cannot be viewed using the AIBO Photo Album function (which employs the web
browser for viewing pictures taken by the AIBO robot). For details on the AIBO Photo Album function, see the “User’s Guide (PC·Network)” for the
AIBO robot ERS-7M3 (PDF).
• Depending on its operation condition, the AIBO robot may not be able to show a camera image in the image area. In this case, a message is displayed
instead.
®
Using the Camera
’s
’s
33
Page 34

Taking a picture
You can capture the image from the AIBO® Entertainment
Robot’s camera as a still picture. The picture is stored as a
JPEG file in the album.
zHints
• Up to 200 pictures per day can be stored in the album. When the
number of pictures per day exceeds 200 or when available hard
disk space is low, an error message will appear. In such a case, you
should erase pictures that are no longer needed.
• The still picture also contains some Mind Scope information
shown in the camera area (such as face recognition, pink ball/
AIBOne toy detection, moving object detection, station pole
detection).
• Depending on the capture timing, the Mind Scope display contents
may not be included in the stored picture.
Click the (Capture) button to take a picture. You can use
the camera view area to find the best angle for your picture.
Shows the image as seen by the AIBO robot’s camera.
Use the head control
area to adjust the
position of the
AIBO robot’s
head (page 23).
zHint
There may be a slight time lag between clicking the (Capture)
button and the moment when the actual picture is taken.
Image quality
• Depending on the lighting, some flicker artifacts may
appear in the picture or the color spectrum may be slightly
shifted towards red or blue.
• When taking a picture of a fast moving object, the result
may be blurred.
zHint
Pictures and movies taken with AIBO Entertainment Player are
stored on the hard disk of the PC. (page 37)
Using the Camera
Click this button to take the picture.
34
Page 35

Shooting a movie
You can capture the image from the AIBO® Entertainment
Robot’s camera as a movie (video). The movie is stored as a
Windows Media Video (WMV) file or Motion JPEG (AVI) file
in the album.
When the AIBO robot is in House Sitting mode, you can also
automatically record video at preset intervals.
Note
If the remaining space on the hard disk of the PC is low, recording
will stop. In this case, you can not restart the recording.
zHints
• Up to 400 video files can be stored in the album.
• You must first specify the location where the recorded movies are
to be stored (page 86).
• If the CPU performance of the PC is insufficient, there may be
interruptions in the movie sound when recording a movie while
playing music with AIBO Entertainment Player.
• The size of the captured images are as follows.
Hi Res.: 412 × 320 pixels for WMV
412 × 318 pixels for AVI
Standard Res.: 204 × 160 pixels for WMV
204 × 159 pixels for AVI
Low Res.: 104 × 80 pixels for WMV
102 × 79 pixels for AVI
Configure resolution settings in the “AIBO” tab under “Settings”
(page 86).
• The recorded video also contains Mind Scope information as
shown in the camera view area.
• The Mind Scope contents that are recorded will be different
depending on the selected image quality.
Click the (Movie) button to start video recording with the
AIBO robot.
Shows the image as seen by the AIBO robot’s camera.
During recording, information about the recording time
and the recording mode is also shown.
Use the head control
area to adjust the
position of the AIBO
robot’s head
(page 23).
Click this button to
start recording.
To stop recording, click the (Movie) button once more.
Using the Camera
35
Page 36

Interval recording
By selecting “Interval” as the recording method, you can
automatically record visual information at preset intervals.
Also, when interval recording is selected, the AIBO
Entertainment Robot can be set up to automatically perform
continuous recording when it detects motion or sound.
For example, if you have set interval recording to 10 seconds,
the AIBO robot will normally record a frame (image) every 10
seconds, but if it detects motion or sound, it will record
continuously while the motion or sound continues. The
interval recording setting can be selected under the “Movie”
tab in the “Settings” screen (page 86).
About House Sitting mode and interval recording
You can set up the AIBO robot so that interval recording will
be automatically enabled when the AIBO robot is in House
Sitting mode (page 86).
When the AIBO robot detects movement or sound, continuous
recording is enabled at that point. For details on House Sitting
mode, see the “User’s Guide (Basic)” for the AIBO robot
ERS-7M3 (PDF).
zHints
• When the AIBO robot is set to House Sitting mode, recording with
AIBO Entertainment Player is given priority, and recording
continues.
• If the AIBO robot is in House Sitting mode and interval recording
has automatically started, the sensitivity for detecting motion and
sound will be as set in the House Sitting mode. (This includes the
detection sensitivity being set to “off”.)
• If video recording was carried out in House Sitting mode, the
AIBO robot will automatically restart once per day, just before its
wake-up time. After restarting, the recorded video files will be split
and displayed in the album. During the several minutes that are
required for the restarting process, no video recording occurs.
®
Recording pictures and movies
®
• Sony
Corporation does not accept any liability
whatsoever for any problems arising between the user
and third parties with regard to pictures and movies
taken with the AIBO robot.
Do not use the AIBO robot to store pictures or movies
that can be damaging or offensive to others.
• At many live events and shows also for entertainment
purposes the taking of pictures and movies is
restricted.
• Any pictures or movies taken with the AIBO robot are
only for private use by the individual customer. Do not
use the AIBO robot in breach of copyright or of any
rights of third parties. Unless express permission is
granted by law, the transfer and forwarding of
copyrighted pictures and movies is not allowed.
Using the Camera
36
Page 37

Viewing the album
Now, let’s watch some pictures and movies taken by the
®
AIBO
Entertainment Robot. Since these are stored in the
album, you need to click the (Album) button to access the
data.
Click this button
zHints
Pictures and movies in the album are stored in the following locations
on the hard disk of the PC.
• Pictures: Drive C: c “Program Files” c “Sony” c “AIBO
Entertainment Player”
• Movies: Folder selected under “Movie” in the “Settings” screen
c “Album”
Viewing pictures
Click the “Picture” tab. You can view stored pictures one by
one.
Click here.
Shows the date and time when the picture was taken.
Click to move to
Pictures saved in the
album are shown as
thumbnails. Clicking on a
thumbnail image brings
up that picture in full size.
Lets you save the picture with
a name that you specify.
Deletes the displayed picture.
the previous picture
and click to move
to the next picture.
Using the Camera
37
Page 38

Viewing movies
Click the “Movie” tab. A list of stored movies appears. To play a movie, double-click on it or select it and click “Play”. The movie
will be played with a suitable software on the PC.
Click here.
Shows the date when
the movie was
recorded.
Selecting an image
and clicking this button
starts playback.
Double-clicking on the image starts
playback of the movie. Images recorded
with interval recording appear to play
back in fast forward, while sections
recorded continuously (where motion or
sound was detected) appear at normal
speed.
Shows detailed information about the
movie.
Select an image and click here to save
the movie with a name that you specify.
Using the Camera
Select an image and
click here to delete the
movie.
Clicking here displays the “Movie” tab in
the “Settings” screen for changing various
settings for the movie function (page 86).
zHint
Clicking on the “Date list” or “Information list” title field sorts the movies in ascending or descending order of recording date.
38
Page 39

Using the Player
The Player function lets you enjoy music or Internet radio via
your AIBO
to your favorite songs, the AIBO robot can show you some
cool dance moves in rhythm with the music.
You can also have the AIBO robot read you the news or a blog.
®
Entertainment Robot ERS-7M3. While you listen
Page 40

Basic Player operation
Clicking the Player button displays the Player screen. From this screen, you can play music via the AIBO® Entertainment Robot,
select and listen to Internet radio stations, or have the AIBO robot read you the news or a blog.
The controls and areas for the Player function are described below.
Edit contents button
Allows you to edit registered contents.
New contents button
Allows you to register new
contents. (page 55)
Player button
Contents display
area
Information about the
content being played is
shown here.
Playback control area
Used for playing back contents and recording sound.
(page 42, page 61)
Delete contents button
Allows you to delete registered contents.
Properties display area
Shows the playback status.
Media list
A list of media that are available for
the Player is shown here. Media that
cannot be edited are shown with a
symbol.
Contents list
Shows the contents of the respective
media.
Contents that cannot be played are
shown with an “x”.
VPR (Visual Pattern Recognition)
button
Allows you to initiate music playback by
showing the AIBO robot a CD jacket or
other visual information that it has
been taught to recognize (page 46).
AutoMotion button
Causes the AIBO robot to dance
according to the contents being
played (page 57).
zHints
• Music can be played through the AIBO robot’s speaker only if the AIBO robot is in Remote Control mode and the (AIBO audio) button has
been set to ON. While the AIBO robot is in Autonomous Monitor mode, sound will be heard from the PC speakers but not from the AIBO robot’s
speaker.
• The “Artist” and “Album” folders in the playlist show information for music files registered with “Microsoft Windows Media Player”. These are music
files in a format that can be played by Microsoft
Media Player and songs that were downloaded to the PC with digital rights management features cannot be played.
®
Windows Media® Player (WMA, WAV, MP3). Songs that are protected in Microsoft Windows
Using the Player
40
Page 41

Listening to music with the AIBO® Entertainment Robot
The AIBO robot can play your favorite music. There are
several ways that this function can be activated:
• Select from a media list
• Give the AIBO robot a voice command
• Touch the AIBO robot
• Drag & drop music files
• Show the AIBO robot a registered image (page 46)
zHints
• Music can be played through the AIBO robot’s speaker only if the
AIBO robot is in Remote Control mode. While the AIBO robot is
in Autonomous Monitor mode, sound will be heard from the PC
speakers only.
• When the (AutoMotion) button is ON, the AIBO robot will
move in various ways along with the music.
Selecting music from a media list
A music CD inserted in the CD-ROM drive of the PC or music
files registered with AIBO Entertainment Player can be
played.
The following buttons in the playback control area are used.
Using the Player
Playback
control area
(Previous song): Play the previous song.
(Play): Start playback.
(Stop): Stop playback.
(Next song): Play the next song.
(Loop playback off) / (Loop playback on):
Perform loop (repeating) playback within
the contents list.
41
Page 42

Listening to a music CD
Note
AIBO Entertainment Player can only play music CDs in the CD-DA
format. Copy-controlled CDs, CD Extra, and multi-session CDs
cannot be played.
1 Insert the music CD in the CD-ROM drive of the
PC.
2 Select “CD Drive” from the media list and click
the (Play) button.
zHint
You can also play a song by double-clicking its entry in the contents
list.
Listening to music files
To listen to music files registered with AIBO Entertainment
Player, select the folder from the media list and click the
(Play) button.
1Select folder or contents.
Using the Player
1Click CD drive.
2Click
here.
Click here to
stop playback.
The tracks on the
CD are shown here.
Setting this to ON will cause
the AIBO
Robot to move in tune with
the music.
®
Entertainment
The music is played and can be heard from the AIBO
robot’s speaker.
Setting this to ON will cause
the AIBO robot to move in
tune with the music.
2Click
here.
Click here to
stop playback.
zHint
If the (AutoMotion) button is on and you perform an action
from the Navigator screen while listening to music, the
(AutoMotion) will automatically be turned OFF.
42
Page 43

Listening to music by giving the
®
AIBO
Entertainment Robot a voice
Touching the AIBO robot to listen to music
command
Listening to a music CD
When you say “Play CD” to the AIBO robot, a music CD
inserted in the CD-ROM drive of the PC will start playing
from the first track.
Listening to music files
When you say “Play music” to the
AIBO robot, a song from “Album”,
“My Library”, or “Playlist” will be
selected at random for playback.
zHints
• When you say one of the above
commands to the AIBO robot while
it is in Autonomous mode, it will switch to Remote Control mode
and play music.
• While the AIBO robot is playing music, it is not possible to select
another song by voice command.
• If there is no music CD or music file, or if a problem occurred, the
AIBO robot will not play music even if it has correctly identified
the voice command.
• If the check boxes “Play Contents by Voice Recognition” and
“Remote control AIBO via Voice/VPR Recognition” under the
“AIBO” tab in the “Settings” screen are not selected, the AIBO
robot will not play music even if it has correctly identified the
voice command (page 80).
Play music!
You can activate music playback by touching the AIBO robot.
zHint
This function is available only when the AIBO robot is in remote
control mode.
To listen to music
Touch the head sensor and middle back sensor simultaneously.
You should first select the song you want to hear from the
media list.
To stop the music
Touch the head sensor and middle back sensor simultaneously
once more.
To go to the previous song
Touch the head sensor and front back sensor simultaneously.
To go to the next song
Touch the head sensor and rear back sensor simultaneously.
Using the Player
43
Page 44

Listening to music files via drag & drop
You can directly drag & drop a
music file to the playback control
area to play them through the
®
AIBO
Entertainment Robot.
Drag & drop
Registering music files
1 From the media list, select “All Music” and “My
Library”, and click the (New contents)
button.
2Click here.
1 Select
this.
The “Create a new Music Folder” screen appears.
Using the Player
Songs downloaded via the Internet and songs saved from a
music CD onto the PC can be recorded in “My Library” of
AIBO Entertainment Player. You can specify folders
containing music files, or you can directly drag & drop folders.
As an example, the following description explains how to
register sample data supplied with AIBO Entertainment
Player.
Registering music files
zHints
• The maximum number of folders that can be registered is 500.
Each folder can have up to 300 content items.
• AIBO Entertainment Player can play WMA, WAV, and MP3
format music files.
2 Click .
Click here.
The “Browse for Folder” screen appears.
3 Select the folder containing the sample data
(C:\Program Files\Sony\AIBO Entertainment
Player\Sample Music), and click “OK”.
44
Page 45

Directly registering a folder
You can also register the music files in “My Library” by
directly dragging and dropping a folder containing music files
to the media list.
1Click the
2Click here.
The “Create a new Music Folder” screen appears again.
4 Click “OK”.
The name of the selected folder is
automatically entered here. You can
change this to any other title if desired.
Click here.
By selecting this check box, you can add all
music files in the specified folder.
folder
containing
music files.
1 Drag & drop the folder containing music files to
the media list.
Using the Player
Drag & drop
The “Create a new Music Folder” screen appears.
2 Click “OK”.
You can change the title if desired.
Click here.
The music files in the specified folder are registered in
“My Library”.
The music files are added to “My Library”.
45
Page 46

Listening to music by showing the AIBO® Entertainment Robot a registered image (VPR function)
By registering an image such as a CD jacket, postcard, photo,
or similar image in AIBO Entertainment Player, you can have
the AIBO robot play the associated music simply by showing
it the image.
2 Select the location in the “List of Registered
Images” where the image should be stored.
Click on the location so that a red frame is shown.
Select location.
Registering an image (VPR)
Here’s how you can register an image with AIBO
Entertainment Player by showing it to the AIBO robot.
zHints
• Up to 20 images can be registered.
• You should choose an image with distinct features and fairly
complex content. A simple image that resembles others may not be
identified correctly by the AIBO robot.
1 Click the (VPR) button.
AIBO Entertainment player must be in “Remote” mode
in order to access the “VPR Registration” screen.
Using the Player
Click here.
The “VPR Registration” screen appears.
46
Page 47

3 While watching the AIBO
®
Entertainment
Robot camera view as shown on the “VPR
Registration” screen, show the image to the
AIBO robot as illustrated below.
* Take care that the
AIBO robot is not
facing a light source
when showing it the
image.
Hold parallel
Observe the following points.
• Do not hold the image too close to the AIBO robot. The AIBO
robot must be able to see the entire image. The proper distance is
about 3 to 4 in. (8 to 10 cm).
• Hold the image at a right angle to the AIBO robot’s head, so that
the AIBO robot can see the entire image.
• Take care not to obscure parts of the image with your hand or
pieces of clothing.
• The location should not be too dark, and the AIBO robot should
not be facing a light source. Also avoid light reflections that could
make an object hard to identify (for example, a CD jacket).
• When registering an image, the background will also be scanned as
part of the pattern. You should hold the image so that there is no
background, or use a plain-colored wall or a similar background.
4 When the entire image is shown in the camera
view, click “Capture” and then click “Register”.
Before clicking “Capture”, adjust the position of the
image and the angle of the AIBO robot’s head as
necessary, so that the entire image is shown.
When an image has been registered, it is shown in the
“List of Registered Images”.
1 Ensure that the entire
image is shown.
2 Drag the green dot to adjust the
angle of the AIBO robot’s head.
3 When the entire image is shown correctly,
click this button.
4 When the image has been
The “Select Action” screen appears.
When a registered image is
identified, a ! mark appears.
captured, click this button.
Using the Player
47
Page 48

5 Select the song that the AIBO
®
Entertainment
Robot should play when the registered image is
identified, and click “OK”.
1Select song.
2Click here.
Listening to music by showing the AIBO robot a registered image
Now you can show a registered image to the AIBO robot and
have it play the music you selected. When the AIBO robot
identifies the image, it carries out the registered action.
zHints
• Hold the image up and adjust its position and angle so that the
AIBO robot can see it fully.
• If the check boxes “Play Contents by Voice Recognition” and
“Remote control AIBO via Voice/VPR Recognition” under the
“AIBO” tab in the “Settings” screen are not selected, the AIBO
robot will not play music even if it has correctly identified the
image (page 80).
Using the Player
zHint
Besides playing music, you can also register motion patterns or text
to be read.
To register more images, repeat steps 2 - 5.
6 When the registration process is finished, click
“Close”.
48
Page 49

Having the AIBO® Entertainment Robot read you the news or a blog
You can have your AIBO robot read you content from an
Internet news site or a blog.
When (AutoMotion) is On, the AIBO robot will perform
some interesting motion patterns on its own.
Note
In order to have the AIBO robot read you Internet-based news or a
blog, the PC must be connected to the Internet. For optimum results,
an always-on connection such as ADSL, FTTH, or CATV is
recommended.
zHint
Only sites supporting the following versions of RSS* can be read by
the AIBO robot.
Supported versions: RSS 1.0, RSS 2.0, Atom 0.3
* RSS is a technology for distributing updated information about
articles and headlines on a web site. It is often used by news sites,
blogs (web logs), and similar Internet sites.
Selecting content to read from the media list
After selecting the playback genre from the media list, you can
click (Play) to have the AIBO robot read the news or blog
or other information.
It is also possible to directly select an RSS site from the
contents list for reading by the AIBO robot.
1Select RSS site.
When this is On, the
2Click here.
AIBO robot performs
interesting motion
patterns along with
the news.
zHints
• If you touch the front and rear back sensors simultaneously while
the AIBO robot is reading the news, the web browser will open and
show the related news page.
• If you operate the AIBO robot from the Navigator screen while
(AutoMotion) is On and the AIBO robot is reading the news
or a blog, the
(AutoMotion) will be turned off automatically.
Using the Player
49
Page 50

Starting the reading function by
Starting the reading function by
giving a voice command
You can also initiate the news or blog reading by saying
“AIBO, read the news”.
The AIBO
should I read?”. To select the genre, you can answer “News”,
“Sony”, “AIBO”, “Blog”, or “Others”.
The AIBO robot will read RSS sites in this genre, starting
from the top.
®
Entertainment Robot will ask “Which category
zHint
The options “Play Contents by Voice Recognition” and “Remote
control AIBO via Voice/VPR Recognition” under the “AIBO” tab in
the “Settings” screen must be selected. Otherwise the AIBO robot
will not start reading the news or a blog even if it recognizes the
command.
AIBO,
read the news
touching the AIBO robot
You can also initiate the news or blog reading by using the
touch sensors of the AIBO robot.
zHint
This is possible only when the AIBO robot is in Remote mode.
To have the AIBO robot start reading
Touch the head sensor and the middle back sensor.
The RSS site that you want to have the AIBO robot read must
be selected first in the content list.
To have the AIBO robot stop reading
Touch the head sensor and the middle back sensor once more.
Using the Player
To have the AIBO robot read the previous site
Touch the head sensor and the front back sensor.
To have the AIBO robot read the next site
Touch the head sensor and the rear back sensor.
50
Page 51

Having the AIBO robot continue to
Registering the URL of an RSS site
read
You can set up the AIBO robot so that it will ask whether to
continue reading after a certain number of news items have
been read (page 52).
When the AIBO robot asks “Read next?”, you can answer
“Yes” to have the AIBO robot read more news.
If you answer “No”, the AIBO robot will stop reading the
news.
If you answer “Next”, the AIBO robot will start to read the
next site in the contents list.
Stock market
opens high…
zHints
• Up to 300 URLs can be registered for each genre.
• If you copy the URL of an RSS site into the clipboard, it will
automatically be pasted into the input field. You can also perform
the registration by using drag & drop for an icon on the web
browser screen that is linked to an RSS URL.
• When you have registered URLs, you can change the order of RSS
sites in a genre or move a genre.
• To change the order, drag the RSS site with the mouse up or down
and drop it in the desired location.
Using the Player
1 In the media list, select [Net News (RSS)] and
click (New contents).
2Click this button.
1Select [Net News (RSS)].
The “RSS Feeds” screen appears.
51
Page 52

2 Enter the URL and click [Settings].
1Enter the URL of
the RSS site.
2Click this button.
3 Make settings for items to be read, voice
synthesis engine, etc.
By clicking [Test play.], you can verify that the item can
be read correctly.
Select the
check boxes
for items to
be read.
Select a
category
(folder) to
register.
Click here
to test the
reading
function.
Using the Player
The contents list is obtained from the Internet site.
After the number of items set here
has been read, the AIBO
Entertainment Robot will ask
whether to continue reading.
®
Select the
voice
synthesis
engine to
use when
reading
items.
52
Page 53

4 Click [OK].
Using the Player
Click this button.
The RSS site is now registered in AIBO Entertainment
Player.
zHint
When the RSS link for a site has been changed, it may no longer be
possible to connect to a previously registered site. In such a case,
change the URL information to reflect the current condition. To
change a registered URL, select [Net News (RSS)] in the media list
and click (Edit contents).
53
Page 54

Listening to Internet radio
You can listen to Internet radio stations through the AIBO®
Entertainment Robot. If the (AutoMotion) button is ON,
the AIBO robot will move in various ways along with the
sound.
Note
To be able to listen to Internet radio, the PC must be connected to the
Internet. For best results, an “always-on” connection (FTTH/ADSL/
CATV) is recommended.
zHint
With AIBO Entertainment Player, you can listen only to Internet
radio stations that are compatible with Microsoft
Player.
®
Windows Media®
Listening to Internet radio
Select an Internet radio station from the media list and click
the (Play) button. The program currently being broadcast
will be heard.
You can also select the program directly from the contents list.
1Select radio station or program.
Setting this to ON will
2Click here.
Shows copyright information
and other data.
cause the the AIBO
Entertainment Robot to
move according to the
radio sound.
zHints
• If the selected radio station provides information via a web server,
the web browser will open automatically.
• If the
from the Navigator screen while listening to Internet radio, the
(AutoMotion) button is on and you perform an action
(AutoMotion) will automatically be turned OFF.
®
Using the Player
54
Page 55

Using a voice command to listen to Internet radio
You can also start to listen to Internet radio by saying “Play
the radio” to the AIBO
zHint
If the check boxes “Play Contents by Voice Recognition” and
“Remote control AIBO via Voice/VPR Recognition” under the
“AIBO” tab in the “Settings” screen are not selected, the AIBO robot
will not play Internet radio even if it has correctly identified the voice
command (page 80).
®
Entertainment Robot.
Registering an Internet radio station
zHint
You can register up to 100 radio stations.
1 From the media list, select “Radio”, and click the
(New contents) button.
2Click this button.
1Select “Radio”.
2 Enter the URL or the file name (ending in .asx)
for the Internet radio station, and click
“Search”.
Enter the URL of an HTML page that contains a link to
the Internet radio station, or enter the file name (ending
in .asx) for the Internet radio station. When a URL is
entered, a list of radio stations included in that HTML
page is shown.
1 Enter URL of
Internet radio
station.
2 Click this
button.
Using the Player
The “Create New Radio List” screen appears.
A list of programs is retrieved from the Internet.
55
Page 56

3 Click “OK”.
The Internet radio station is registered with AIBO
Entertainment Player.
Using the Player
Click this
button.
zHint
Sometimes the URL (with HTML) or .asx file information for a radio
station may change, and a connection may no longer be possible. In
this case, edit the information for the registered radio station. To
change the name or .asx file information etc., select “Radio” from the
media list, and click the (Edit contents) button.
56
Page 57

Enjoying motion patterns
AIBO Entertainment Player comes with various built-in
®
AIBO
Entertainment Robot motion patterns (gestures).
zHint
You cannot program new motion patterns.
Playing back a motion pattern
Select the motion pattern genre from the media list, select the
motion pattern from the contents list, and click the (Play)
button to have the AIBO robot perform the motion pattern.
1Select genre.
2 Select
motion
pattern.
3Click here.
zHints
• The motion patterns listed in the “Station motion” category can
also be used while the AIBO robot is on the Energy Station.
• Some motion patterns are not associated with a sound.
Using the Player
57
Page 58

Getting the AIBO robot to dance (AutoMotion)
When you set the (AutoMotion) button to ON, the AIBO
robot will perform various dance moves along with the music
or Internet radio sound.
Click here.
zHints
• If music is played for more than 30 minutes continuously with
AutoMotion on, AutoMotion will turn itself OFF automatically.
• During AutoMotion, the AIBO® Entertainment Robot will
automatically assume a different posture at certain intervals.
• If AutoMotion is on and you perform an action from the Navigator
screen, AutoMotion will turn itself off automatically.
Using the Player
58
Page 59

Having the AIBO® Entertainment robot read words and phrases to you
By registering words or phrases as text in AIBO Entertainment
Player, you can have the AIBO robot read them to you. If the
text contains certain keywords that have been specially
registered, the AIBO robot will perform motion patterns that
have been assigned to the keywords, while reading the text.
2 Enter the word or phrase that you want the
AIBO robot to read as text, select the voice
synthesis (text-to-speech) engine, and click
“OK”.
Registering words or phrases
zHint
You cannot input any more characters once you have input the
maximum number allowed.
1 From the media list, select “Voice Synthesis”,
and click the (New contents) button.
2Click this button.
The “Edit Voice Synthesis” screen appears.
1 Select “Voice
Synthesis”.
By clicking “Play”, you can check how the text will be read.
1Enter word or phrase.
3 Click
this
button.
The AIBO robot reads the text.
2Select voice synthesis (text-to-speech) engine.
zHints
• You can change the voice synthesis settings (page 83). This will
change how the AIBO robot reads the text.
• Words that are not registered in the voice synthesis (text-to-speech)
engine cannot be read.
Using the Player
59
Page 60

• Sound reproduced by the AIBO® Entertainment Robot robot itself
may be picked up and interpreted as a voice command. To prevent
this, you should avoid using words that are listed in “Words
understood by the AIBO
®
Entertainment Robot” (page 96).
The entered text is registered under “Voice Synthesis”.
Having the AIBO robot read to you
1 From the media list, select “Voice Synthesis”,
and click the (Play) button.
zWhat is a voice synthesis (text-to-speech) engine?
• A voice synthesis engine (also called text-to-speech engine) is a
special piece of software that transforms text data into audible
speech.
• Microsoft
comes standard with Windows XP.
®
Sam is an English-language text-to-speech engine that
1 Select “Voice
Synthesis”.
3Click here.
The AIBO robot reads the text.
How are you?
2 Select the
text to
read.
Using the Player
60
Page 61

Playing a recorded sound through the AIBO® Entertainment Robot
AIBO Entertainment Player can be used to play your voice or
other recorded sounds back via the AIBO robot.
2 Enter a name for the file, and click “Save”.
Recording
Note
To use this function, a microphone must be connected to the PC (or
the PC must have a built-in microphone).
1 Click the (Record) button.
Using the Player
The “Save as” screen appears.
Click here.
1 Enter file name.
changes to , and recording starts.
Speak into the PC’s microphone.
2Click here.
3 Click the (Record) button once more to stop
recording.
Click here
once more to
stop
recording.
The recorded content is saved as a file with the specified
name in “My Voice”.
61
Page 62

Playing the recorded sound via the
®
AIBO
From the media list, select “My Voice”, select the desired file
from the contents list, and click the (Play) button. The
recorded sound will then be played back through the AIBO
robot’s speaker.
Entertainment Robot
1Select “My Voice”.
2Select file.
3Click here.
How are you
doing?
Using the Player
How are you
doing?
62
Page 63

Creating a playlist
You can freely combine music files, motion patterns, and voice
synthesis actions, to create your original AIBO
Entertainment Robot playlist.
®
Creating a playlist
1 Select “Playlist” and click the (New
contents) button.
2Click this button. 1 Select
“Playlist”.
The “Edit Play List” screen appears.
2 Select the song to add and click “Add”. Enter a
name for the playlist and click “OK”.
1 Select song
to add.
2 Click this button to add the song.
3 Enter name for
playlist.
4 Click this button.
Using the Player
zHint
You can also click in the media library and select a motion pattern
or voice synthesis from the list, to add it to the playlist in the same
way as a song.
The playlist is created.
63
Page 64

Playback with a playlist
From the media list, select the playlist and click the (Play)
button. The AIBO
and perform motion patterns and other registered actions in the
playlist.
®
Entertainment Robot will play the songs
1Select playlist.
1 From the media list, select the playlist created
and right-click on it. Then select “Export” from
the menu that appears.
Using the Player
Click here.
The “Save as” screen appears.
2Click here.
Saving playlist data
A playlist created with AIBO Entertainment Player can be
exported to the PC.
2 Enter the file name and click “Save”.
Click this button.
The playlist is saved on the PC.
64
Page 65

zHint
• To import a playlist stored on the PC into AIBO Entertainment
Player, proceed as follows.
1 Select the playlist from the media list, right-click, and select
[Import] from the menu that appears.
2 Select the desired playlist file (*.aepl) among the files stored on
the PC.
Note
When an RSS net news site has been registered in a playlist, the
AIBO robot may ask “Read next?” depending on the read limit
setting. If you answer “No”, playback of the entire playlist will stop
at this point.
Using the Player
65
Page 66

Using the Diary function
With the Diary function, you can read the contents of the
®
AIBO
Entertainment Robot’s Diary, or you can register
schedule data and have the AIBO robot remind you of
upcoming events.
What did I do on August 1st…?
I’ll check the AIBO’s diary!
Page 67

Basic Diary operation
Clicking the Dairy button displays the Diary screen. At this screen, you can perform functions such as reading the AIBO®
Entertainment Robot’s Diary and uploading the contents of the Diary to your own blog. If you imported schedule data, you can
have the AIBO robot playfully remind you of your entries with motion patterns and/or music. The controls and areas for the Diary
function are described below.
Today is shown in orange.
When you click on a day, a blue frame is shown.
Previous button
Go to previous month.
Monthly schedule display area
The schedule for one month is
shown here.
Days with schedule
entries are denoted by icons.
Days with diary entries
are shown in light orange.
Diary button
Display schedule area
The schedule entries for the day
selected on the monthly calendar
are listed here.
These buttons serve for entering and
editing scheduled events.
(Import):
Import a schedule from Microsoft
(New schedule):
Create a new scheduled event.
(Edit schedule):
Edit a scheduled event.
(Delete schedule):
Delete a scheduled event.
®
Outlook®.
Next button
Go to next month.
Photos taken by the AIBO robot are shown here.
The AIBO robot sometimes also writes a comment
on the photo.
Shows information
about the AIBO robot’s
activity for the day.
Lets you delete the
currently displayed
photo.
Causes the AIBO robot
to upload the Diary to a
blog.
Shows the AIBO robot’s
Diary entry for the day.
You can write comments about
the AIBO robot’s Diary here.
zHints
• The AIBO robot will only inform you of scheduled events if the AIBO robot, the PC
(connected by wireless LAN), and AIBO Entertainment Player are running.
• Set the (AIBO audio) button in AIBO Entertainment Player to ON, and raise the
volume setting on the AIBO robot itself.
• Make sure that the clock settings of the AIBO robot and the PC are matched.
Using the Diary function
67
Page 68

Reading the AIBO® Entertainment Robot’s Diary
The AIBO robot will take a photo and write a Diary entry
every day, at a time when it feels like it. On the Diary screen,
you can read the AIBO robot’s Diary, add comments, or
upload the Diary contents to a blog. You can also have the
AIBO robot read you the Diary.
zHints
• The daily photo and Diary entry of the AIBO robot will be copied
to and registered in AIBO Entertainment Player when the AIBO
robot and the PC are connected via wireless LAN and AIBO
Entertainment Player is started on the next day or later. The photo
and Diary entry for the present day cannot be viewed on the same
day.
• Also without starting AIBO Entertainment Player, the AIBO robot
will store its Diary entries for up to 30 days. At the point when
AIBO Entertainment Player is started the next time, any previously
unregistered entries will be copied in bulk. The AIBO robot will
forget diary entries that are more than 30 days old, and these can no
longer be copied to and registered in AIBO Entertainment Player.
• If multiple AIBO robots are connected to AIBO Entertainment
Player, the Diary contents will not be managed properly.
• If you use maturity control to return the AIBO robot from the
mature AIBO to the puppy stage, the next Diary entry will be reset
to day 1. Diary entries that have been written up to this point will
be kept without changes.
• When a photo has been deleted using the [Delete Photo] button, an
illustration will be shown instead. It is not possible to paste a
different photo to the Diary.
Using the Diary function
68
Page 69

Reading the AIBO
®
Entertainment Robot’s Diary
Let’s see what photos the AIBO robot has taken and what Diary entries it has created. If you have entered your profile data under
[Diary Settings] in [Settings], the AIBO robot may make a special entry in the Diary and decorate the daily photo with unique
flourishes on special days such as your birthday.
zHints
• Depending on the action
pattern and the time the
AIBO robot was active, no
photo may be taken, or a
photo that was taken may not
be added to the Diary. In this
case, an illustration will be
shown instead.
• The AIBO robot may mistake
other pink objects for the pink
ball or AIBOne toy when
these items are not present.
Shows photos taken by the AIBO robot.
The AIBO robot may add a comment to the photo.
Diary title
It is recommended to provide a title here.
Displays the Diary entry
for the previous day.
The AIBO robot’s diary
entry for the day is
shown here.
(This cannot be edited.)
You can enter comments
about the AIBO robot’s
Diary here.
Displays the Diary entry
for the next day.
Using the Diary function
Shows information about the AIBO
robot’s activity during that day.
The top item is the number of days
since the AIBO robot was first activated.
The total active time and distance
traveled for the day are shown next.
The number of times that the pink ball,
AIBOne, and faces were recognized is
expressed as a row of stars.
69
Page 70

Entering a title and comments for
Uploading the Diary to a blog
®
the AIBO
Entertainment Robot’s
Diary
Let’s enter a title and comment for the Diary entry.
You can also enter a title and comment for an older Diary
entry.
zHint
The AIBO robot will not respond to anything you write as a
comment.
Move the cursor to the title
field and directly enter a title.
After adding a title and comment to the Diary entry, let’s
upload it to a blog.
zHint
Before uploading the AIBO robot’s Diary to a blog, you must make
the required blog settings (page 82).
1 Click [Upload].
Using the Diary function
Move the cursor to the comment field
and directly enter a comment
Click this button.
A confirmation message appears.
70
Page 71

2 Click [Yes].
When the upload is successful, a message is shown.
After you have uploaded a Diary entry to a blog, the
upload date will appear in the comment field of the
Diary entry.
Having the AIBO® Entertainment Robot read the Diary
When you say “AIBO, read the diary”, the AIBO robot reads
the most recent Diary entry.
AIBO, read the diary
zHint
The options “Play Contents by Voice Recognition” and “Remote
control AIBO via Voice/VPR Recognition” under the “AIBO” tab in
the “Settings” screen must be selected. Otherwise the AIBO robot
will not start reading the Diary entry even if it recognizes the
command (page 80).
Using the Diary function
71
Page 72

Creating a schedule
Let’s create a schedule in AIBO Entertainment Player.
A scheduled event can be linked to the AIBO
Robot motion pattern and activity. For example, you could
have the AIBO robot wake you with your favorite music every
morning.
It is also possible to import schedule data from Microsoft
Outlook
®
.
®
Entertainment
®
zHints
• The maximum number of schedule entries that can be registered is
10000.
• You can import schedule data from Microsoft Outlook into AIBO
Entertainment Player (page 74), but it is not possible to export
schedule data from AIBO Entertainment Player into Microsoft
Outlook.
Registering a scheduled event
Here’s how you can register a scheduled event in AIBO
Entertainment Player.
1 Select the month and day, and click the
(New schedule) button.
1Select month. 2 Select day. Clicking on a day
causes a blue frame to appear.
Using the Diary function
3 Click this button.
zHint
Click the (Previous) button to go to the previous month.
Click the (Next) button to go to the next month.
The “Scheduler Properties” screen appears.
72
Page 73

2 Make settings for the various items and click “OK”.
1 Enter the name of the event to be shown in the Scheduler.
2 Click and select an icon from the list.
The scheduled event is registered.
3 If you want to have the AIBO
select this check box.
4 Select the event date and time.
5 Set the time before the scheduled event when the AIBO robot should remind you of the
event.
6 Select the music or motion pattern that the AIBO robot should use when reading you the
scheduled event.
Click “Refer to...”, make your selection from the “Select Action” screen, and click “OK”.
Alternatively, click and select an action from the list.
7 To repeat this scheduled event regularly, select the “Recurrence” check box and specify
the repeat interval. If necessary, also specify the date when the event should terminate.
8 When all settings have been made, click this button.
®
Entertainment Robot read you the scheduled event,
Using the Diary function
73
Page 74

Importing schedule data from
Microsoft
®
Outlook
®
Editing and deleting scheduled events
By clicking the (Import) button, you can use schedule
data from Microsoft Outlook in the AIBO Entertainment
Player scheduler.
Click this button.
Notes
• Data can be imported only from Microsoft Outlook 2000 and
Microsoft Outlook 2003.
• In the following cases, the settings will have to be modified or
repeated. For details, see the following section “Editing a
scheduled event”.
− If no start time has been set for an event in Microsoft Outlook,
the event start time will be set to 8:00 AM in the AIBO
Entertainment Player scheduler. Edit this to the correct time, as
required.
− If a recurring event has been set in Microsoft Outlook, only the
first occurrence will be imported into the AIBO Entertainment
Player scheduler. Edit the recurring setting, as required.
− Events for which the alarm has been activated in Microsoft
Outlook will automatically be set to “AIBO announcement” in
the AIBO Entertainment Player scheduler.
You can edit the contents of registered events or delete events
as required.
Editing a scheduled event
1 Select the month and day and select the
scheduled event. Then click the (Edit
schedule) button.
Using the Diary function
1Select month.
2Select day with event to edit.
4 Click this button.
3Select scheduled event.
zHint
You can also select a scheduled event for editing by double-clicking
its entry.
The “Scheduler Properties” screen appears.
74
Page 75

2 Change the settings as required, and click “OK”.
Click this button.
The scheduled event is changed.
Deleting a scheduled event
1 Select the month and day and select the
scheduled event. Then click the (Delete
schedule) button.
1Select month.
Select day with event to delete.
2
4Click this button.
3Select scheduled event.
Using the Diary function
A confirmation message is shown.
2 Click “OK”.
The scheduled event is deleted.
75
Page 76

Having the AIBO® Entertainment Robot tell you your schedule
zHints
• The AIBO robot can only perform this function if the AIBO robot
and the PC are currently connected via wireless LAN, and if AIBO
Entertainment Player is running on the PC.
• Set the (AIBO audio) button in AIBO Entertainment Player
to ON, and raise the volume setting on the AIBO robot itself.
• You can change the voice synthesis settings which determine how
the AIBO robot’s voice sounds (page 83).
Having the AIBO robot announce your schedule
The AIBO robot can remind you of scheduled events at the
respective date and time. The AIBO robot first reads the event
name using a synthesized voice, and then performs music
playback or a preselected motion pattern.
zHints
• The AIBO robot uses the internal clock setting of the PC for
announcing scheduled events.
• If the AIBO robot is in Rest mode at the time of a scheduled event,
it will not announce the event. The event will be announced and
playback will be performed at the PC only.
Using a voice command to have the AIBO robot tell you your schedule
When you say “My schedule” to
the AIBO robot, it will read all
scheduled events from the current
time until and including the next
day.
My schedule
zHint
If the check boxes “Play Contents
by Voice Recognition” and “Remote
control AIBO via Voice/VPR Recognition” under the “AIBO” tab in
the “Settings” screen are not selected, the AIBO robot will not
announce the event even if it has correctly identified the voice
command (page 80).
Touching the AIBO robot to have it tell you your schedule
When you touch the head
sensor and chin sensor, the
AIBO robot will read all
scheduled events from the
current time until and
including the next day.
Using the Diary function
zHint
This function is available
only when the AIBO robot
is in Remote Control mode.
76
Page 77

Setting your Preferences
This section explains how to set various options for AIBO
Entertainment Player.
Page 78

To change settings
Click the (Settings) button to display the “Settings”
screen.
Click this button.
The various tabs give access to the following settings.
• Network Settings
Lets you change settings for the connection to the AIBO
Entertainment Robot.
• AIBO
Lets you change settings for the operation of the AIBO
robot.
• Diary Settings
Lets you register information such as the owner’s name and
the AIBO robot’s name to use in the Diary.
• Blog Settings
Lets you register information about a blog for uploading the
AIBO robot’s Diary.
• Voice Synthesis
Lets you change text-to-speech settings for chat and reading
of text and schedule entries.
• Keyword
Lets you register keywords and link them to motion patterns
that the AIBO robot will perform during chat and reading of
text and schedule entries.
• 3D
Lets you customize the three-dimensional display.
• Movie
Lets you change settings for recording movies.
®
Setting your Preferences
78
Page 79

Network Settings
You can change various settings for the connection to the AIBO® Entertainment Robot.
The system searches for the AIBO robots
within the same network as the PC. You can
then select the AIBO robot to connect to from
the list. Clicking on “Search” will list AIBO
Enter the IP address of the AIBO robot
that you want to connect to.
zHint
If you don’t know the IP address of
the AIBO robot, you can check it
using the Clinic mode. For details,
see “User’s Guide (PC/Network)”
(PDF).
Select the connection method for AIBO
Entertainment Player and the AIBO
robot.
robots within the same network as the PC.
Only AIBO robots for which “Enable SSDP”
has been selected in AIBO WLAN Manager 3
will be listed. Select the AIBO robot that you
want to connect to from the list.
Click this button to connect to the AIBO robot.
If a password has been set in AIBO WLAN
Manager 3, enter the appropriate user ID and
password information here. Enter the same “User
ID” and “Password”, and select the “Send
Password Automatically” check box, you can
have the system perform authentication
automatically when connecting to the AIBO robot.
Setting your Preferences
After changing settings, click this button.
79
Page 80

AIBO
You can change various settings for the AIBO® Entertainment Robot functions such as the camera picture and sound quality.
When this is selected, the AIBO robot
moves its mouth according to the music.
Sets the time delay before the AIBO robot
automatically returns to Autonomous
Monitor mode when no action is taken.
Enables the AIBO robot to respond to voice
commands by playing music, performing
motion patterns, or reading schedule
entries.
Enables the AIBO robot to respond to being
shown registered images by playing music
or reading text.
Enables the AIBO robot to automatically
switch to Remote Control mode when
being talked to or being shown registered
images, or when music or motion patterns
are played.
*3
Causes the AIBO robot to find the Energy
Station and start charging (self-charge
function).
Sets the picture quality for the camera.
Sets the update frequency for the 3D
display of the AIBO robot’s posture.
*2
Sets the sound quality and volume of
the sound played through the AIBO
robot’s speaker.
*1, *2
Adjust this slider if there is a time shift in
the sound from the AIBO robot’s
speaker and the PC speakers.
After changing settings, click this button.
*1 During movie recording, the “Picture Quality” and “Sound Quality” settings cannot be changed.
2
*
If the wireless LAN slows down or occasionally cuts out when the “3D View Quality” or “Sound Quality” is set
to “High” or “High Quality”, try using the “Low” and “Standard Quality” settings.
3
*
If the AIBO robot is in Rest mode or if the Dancer function is active, it will not go into Remote Control mode.
*1
Setting your Preferences
80
Page 81

Diary Settings
You can register up to three owner profiles to be used in the Diary.
The [Diary Setting] screen shows a picture of the owner taken by the AIBO
The owner’s face as remembered by
the AIBO robot is shown here.
Enter the owner’s name here.
Select the owner’s birthday here.
Enter the AIBO robot’s name here.
After making the settings, click this button
to store the information.
®
Entertainment Robot at the time of owner registration.
Setting your Preferences
Notes
• The information entered here will be used only for the AIBO Photo Diary of AIBO Entertainment Player. It has no effect on the actions of the AIBO
robot itself.
• The owner’s name and birthday should be matched to the face photo. The AIBO robot will write its Diary based on this information.
• In the field for the AIBO robot’s name, you should enter the name that you have registered for it.
81
Page 82

Blog Settings
You can specify a blog to which the AIBO® Entertainment Robot’s Diary entries should be uploaded.
zHints
• Before making the blog settings, you must first obtain a blog account. For details regarding blog settings, see the AIBO official web site.
• The blog site must support one of the following specifications: ATOM, Movable Type API, MetaWeblog API, Blogger API.
Click [Test Blog Login]. When log-in is successful, the blog
title is shown here.
Select this check box if you wish to use
GMT (Greenwich Mean Time) when
indicating the blog update time.
Select the blog service name.
Enter the upload URL for the blog.
* This is not the same as the URL for displaying the blog.
The upload URL is specified by the respective blog service.
Enter blog account information here.
Select the blog authentication method.
Be sure to click this button and test whether log-in
to the blog can be performed successfully.
After making the settings, click this button to
store the information.
Setting your Preferences
82
Page 83

Voice Synthesis
You can change various settings for reading of chat messages, text, and schedule entries.
The voice synthesis engine selection for
the chat panel setting in the Navigator
screen and the Player screen are set to
the default.
Selects the voice synthesis (text-tospeech) engine to be used for the chat,
text, and schedule reading functions.
Lets you control the pitch, speed,
accent, and volume for the synthesized
voice used for reading text.
Lets you test the synthesized voice
sound with the current settings. Enter
some sample text and click “Play Test
Voice ”.
Setting your Preferences
After changing settings, click this button.
Make sure that the [Set as default] check
box is selected.
83
Page 84

Keyword
You can change settings for keywords that will prompt certain motion patterns of the AIBO® Entertainment Robot when reading
chat messages, text, or schedule entries.
List of registered keywords
To delete a registered keyword, select
the entry from the “Keyword” list and
click this button.
Enter the keyword here.
Setting your Preferences
Click this button to register a keyword.
After changing settings, click this button.
Select the motion pattern to perform
for this keyword.
84
Page 85

3D
You can customize the 3D display.
Preview the changes here.
Select the color for the AIBO
Entertainment Robot.
After changing settings, click this
button.
®
Setting your Preferences
Change the wall type.
Click “Browse” and select an image file
(.bmp) to use for the wall representation.
Change the floor type.
Click “Browse” and select an image file
(.bmp) to use for the floor
representation.
85
Page 86

Movie
You can change various settings for movie recording.
Select the video file format.
Select this setting to record
continuously from start to finish.
Specify whether sound should also be
recorded during continuous recording.
Select this setting to record
intermittently at certain intervals.
When this setting is selected, you
should also set the recording
interval and specify whether to
switch to continuous recording
when motion or sound is detected.
®
Specify whether the AIBO
Entertainment Robot should
automatically start interval
recording in House Sitting mode.
Specify the interval for creating
new video files. When the time set
here has elapsed, a new video file
is created.
After changing settings, click this
button.
zHint
The “Movie” settings cannot be changed while a recording is in progress.
Specify whether to display the time in the
recorded video.
Specify the interval for recording.
To switch to continuous recording when
motion or sound is detected, select the
check box and set the sensitivity level here.*
High: Even small movements and
low-level sounds are detected.
Normal: Small movements and low-level
sounds are not detected.
Low: Only large movements and
high-level sounds are detected.
Specify the full path to the folder where
recorded video files are to be stored.
You can also click “Browse” and select a folder.
* This sensitivity setting will not become active until the AIBO robot
goes into House Sitting mode. If the AIBO robot is in House Sitting
mode and interval recording has automatically started, the
sensitivity for detecting motion and sound will be as set in the
House Sitting mode. (This includes the detection sensitivity being
set to “off”.)
Setting your Preferences
86
Page 87

Troubleshooting
Check these points if there seems to be a problem.
Page 88

Troubleshooting
If you experience any difficulties, use this guide to check for possible causes before contacting AIBO Customer Link (for customer
support). Also refer to the troubleshooting sections in the “User’s Guide (Basic)” for the AIBO robot ERS-7M3 and the “User’s
Guide (PC·Network)” for the AIBO robot ERS-7M3. Should the problem persist, contact AIBO Customer Link (for customer
support). (See the “User’s Guide (Basic)” for details on AIBO Customer Link (for customer support).)
Symptom
Cannot connect to the AIBO®
Entertainment Robot from the PC.
AIBO Entertainment Player does not
start.
The following message appears when
trying to start the program: “You
need Administrator privileges to run
AIBO Entertainment Player.”
The AIBO robot is not displayed on
the list under the “Network Settings”
tab on the “Settings” screen.
• Cause
• Network settings are incorrect.
• Installed files are damaged.
• If the user is logged in to Windows without Administrator privileges, the AIBO
•
c Remedy
c Check the network settings: see “User’s Guide (PC·Network)” for the AIBO
robot ERS-7M3.
c Click “Search” under the “Network Settings” tab on the “Settings” screen. Check
whether the AIBO robot appears on the list (page 79).
c Uninstall AIBO Entertainment Player and then reinstall the program from the
CD-ROM.
Entertainment Player setup files etc. cannot be updated.
c Log in as a user with Administrator privileges, or allocate Administrator
privileges to the current user, by selecting [Start]
Accounts].
Universal Plug & Play is not installed in Windows XP.
c Install Universal Plug & Play: see “User’s Guide (PC·Network)” for the AIBO
robot ERS-7M3.
c [Control Panel] c [User
Troubleshooting
88
Page 89

Symptom
• Cause c Remedy
The connection between the PC and
the AIBO
®
Entertainment Robot is
interrupted, or data transfer speed
drops.
The video image from the camera
stops.
The Mind Scope or map display does
not appear.
The Diary is not created.
AIBO Entertainment Player does not
reflect words registered for voice
recognition.
The AIBO robot’s movements are
slow when controlled with Navigator.
• There is interference with another access point or wireless LAN.
c Try changing the wireless LAN channel used by the access point: see “User’s
Guide (PC·Network)” for the AIBO robot ERS-7M3.
• Several devices are simultaneously trying to use the access point.
c Wait a while and try again.
• The AIBO robot or the wireless LAN capable PC is too far away from the access
point.
c The range of a wireless LAN will differ depending on the installation
environment. Move the AIBO robot and the wireless LAN compatible PC closer
to the access point.
c This may happen if a microwave oven or similar device is being operated in the
vicinity.
• See “The connection between PC and the AIBO
®
Entertainment Robot is
interrupted, or data transfer speed drops.”.
• An AIBO robot running AIBO Mind 2 is connected.
c AIBO Entertainment Player Version 2.0 is designed for AIBO Mind 3. When
connected to an AIBO robot running AIBO Mind 2, the new and updated features
of AIBO Mind 3 will not be available.
• See “The connection between PC and the AIBO
®
Entertainment Robot is
interrupted, or data transfer speed drops.”.
Troubleshooting
Music playback or reading of text by
the AIBO robot is occasionally
interrupted.
• This may happen when the network is heavily used, or when the PC is performing a
processing-intensive task.
89
Page 90

Symptom
• Cause c Remedy
The AIBO robot’s current posture
and/or the image from the AIBO
robot’s camera are not displayed.
The AIBO
®
Entertainment Robot is
not correctly rendered on the 3D
display.
The outline of still images or movies
has a blue tinge.
When playing a recorded movie, the
sound is choppy or plays as if in fastforward.
• The firewall function of the PC is enabled.
c When the firewall function of the PC is enabled, the AIBO robot’s current posture
or the image from the AIBO robot’s camera may not be displayed, or control of
the AIBO robot may not work. Disable the firewall while using AIBO
Entertainment Player.
• The installed graphics card driver is not the latest version.
c The 3D display of the AIBO robot is implemented using Microsoft
®
DirectX.
Depending on the graphics card, DirectX depends on the driver or the hardware for
image processing. For details, contact the manufacturer of the PC or the graphics
card.
• When switching users in Windows XP, the 3D display may be lost, depending on the
graphics card.
c Restart AIBO Entertainment Player.
• This is due to a design specification of the AIBO robot’s camera. It is not a defect.
• The PC may not have enough processing power.
c Do not use other resource-intensive software on the PC at the same time that you
are running AIBO Entertainment Player.
c Do not play music in AIBO Entertainment Player when recording a movie.
c Under the “AIBO” tab in the “Settings” screen, set “Picture Quality” to “Low”,
and set “Sound Quality” to “Low (MONO 8 kHz 8 bit)” (page 80).
c In some cases, selecting “MotionJPEG (AVI)” as the “Movie Recording Format”
in the “Movie” tab under the “Settings” screen may help (page 86).
• Data transfer speed is low.
c See the section “The connection between PC and the the AIBO
®
Entertainment
Robot is interrupted, or data transfer speed drops”.
Troubleshooting
90
Page 91

Symptom
• Cause c Remedy
AIBO® Entertainment Robot does not
perform an action at the time of an
event that has been registered.
The AIBO robot does not read text
entered in the chat panel.
The AIBO robot does not read
scheduled events after giving the
voice command “My schedule”.
• The AIBO robot and the PC are not linked via wireless LAN.
c Check the network settings: see “User’s Guide (PC·Network)” for the AIBO
robot ERS-7M3.
• The AIBO robot or PC is not turned ON at the time of the scheduled event, or AIBO
Entertainment Player is not running.
c If the AIBO robot or the PC is not turned ON at the time of the scheduled event,
or if AIBO Entertainment Player is not running, the AIBO robot will not be able
to perform an action for a scheduled event. Make sure that all devices are turned
ON and that AIBO Entertainment Player is running.
• Volume setting on the AIBO robot is set to low or no sound.
c Raise the volume setting on the AIBO robot.
•
The (AIBO Audio) button is turned OFF.
c Set the
• Volume is set to minimum.
c Raise the source volume setting (page 9).
• The PC’s clock is not set to the correct time.
c AIBO Entertainment Player uses the internal clock of the PC for time
management. Check whether the clock setting is correct.
• The volume setting on the AIBO robot is set to low or no sound.
c Raise the volume setting at the AIBO robot.
• The (AIBO Audio) button is set to OFF.
c Set the (AIBO Audio) button to ON (page 9).
(AIBO Audio) button to ON (page 9).
Troubleshooting
91
Page 92

Symptom
• Cause c Remedy
While the AIBO® Entertainment
Robot robot is playing music, it
switches to Autonomous Monitor
mode and music playback stops.
Music or radio sounds are suddenly
heard from the AIBO robot.
The Diary is not created. • AIBO Entertainment Player creates the Diary based on data sent from the AIBO
• When the time set in “minutes until returning to Autonomous Mode” has elapsed,
the AIBO robot will switch to Autonomous Monitor mode, even if music is currently
playing.
c Change the time setting to return to Autonomous Monitor mode (max. 120
minutes) (page 80).
• The AIBO robot has identified a sound as a voice command, such as “Play music”
or “Play the radio”, or it has identified an image as a pattern registered for the VPR
function.
c Deselect the check boxes “Play Contents by Voice Recognition” and “Remote
control AIBO via Voice/VPR Recognition” under the “AIBO” tab in the
“Settings” screen. The AIBO robot then will not start music or radio playback
even when it identifies a voice command or an image registered for the VPR
function (page 80).
robot.
c Start AIBO Entertainment Player and the AIBO robot at the same time.
• A proxy server is used and connection to the AIBO robot is not possible.
c The transfer of Diary data from the AIBO robot to AIBO Entertainment Player is
based on the same HTTP protocol as used by web browsers. Check whether a
proxy server is active by opening Internet Explorer and selecting [Internet
Options]
If a proxy server is active, turn the setting off or go into [Advanced] and register
the IP address of the AIBO robot as an address that does not use the proxy server.
• AIBO identification settings have been made.
c If settings to identify the AIBO robot have been made in AIBO WLAN Manager,
these settings must also be made in AIBO Entertainment Player. To do this, select
[Options]
Password Automatically] check box. Then enter the user ID and password
information.
c [Connections] c [LAN Settings] c [Proxy Server].
c [Connection Settings] c [Connection Options] and select the [Send
Troubleshooting
92
Page 93

Symptom
• Cause c Remedy
Diary entry sometimes does not
show photo.
Date of AIBO robot’s Diary entry is
wrong.
Cannot upload AIBO robot’s Diary
entry to a blog.
The AIBO robot does not read the
news or a blog.
• The AIBO robot takes a photo and decides on using it for the Diary according to the
actions that occur on that day. On some days, depending on the action pattern and
the time the AIBO robot was active, the AIBO robot may not take a photo or not use
it for the Diary.
• PC clock or AIBO robot’s clock is not set to correct time.
c Ensure that the clock settings of the PC and the AIBO robot match.
• The PC is not connected to the Internet.
c Check the network settings of the PC.
• Blog settings are not correct.
c Check the “Blog Settings” page, and perform a log-in test for the blog (page 82).
• User ID or password setting is wrong.
c For some blogs, the user ID and password used for logging into the blog with a
web browser and the user ID and password for uploading data to the blog are
different.
• The blog may use a specification not supported by AIBO Entertainment Player.
c For information on blog specifications that are assured to work with AIBO
Entertainment Player, check the official AIBO web site.
• The AIBO robot and the PC are not connected via wireless LAN.
c Check the network settings. (See the AIBO Robot PC Network User’s Guide.)
• The PC is not connected to the Internet.
c Check the network settings of the PC.
• The link to the RSS site has changed, and connection is no longer possible.
c Change the URL information for the RSS site. To change a registered URL, select
[Net News (RSS)] in the media list and click (Edit contents).
• The RSS site version is not supported.
c AIBO Entertainment Player supports only the following RSS versions: RSS 1.0,
RSS 2.0, Atom 0.3.
• The AIBO robot audio output is set to OFF.
c Set the AIBO robot audio output to ON (page 9).
Troubleshooting
93
Page 94

Symptom
AIBO news is not read to the end. • RSS news or blog articles may be distributed in truncated form.
• Cause c Remedy
c If you touch the front and middle back sensors simultaneously while the AIBO
robot is reading the news, the web browser will open and show the related news
page. You can check the full text there.
Troubleshooting
94
Page 95

Other Information
Page 96

Words understood by the AIBO
Entertainment Robot
®
z News playback
AIBO, read the news.
This section lists words (voice commands) that the AIBO
robot can understand when using AIBO Entertainment Player.
For information on words the AIBO robot can understand at
other times, see the “User’s Guide (Basic)” for the AIBO robot
ERS-7M3 and “User’s Guide (PC·Network)” for the AIBO
robot ERS-7M3.
zHints
• While music or Internet radio is being played through the AIBO
robot, voice commands will not be understood.
• If the check boxes “Play Contents by Voice Recognition” and
“Remote control AIBO via Voice/VPR Recognition” under the
“AIBO” tab in the “Settings” screen are not selected, the AIBO
robot will not perform a motion pattern even when it identifies a
voice command (page 80).
z Music playback
Play music.
Plays music (page 43).
z Music CD playback
Play CD.
Plays a music CD from the first track (page 43).
Causes the AIBO robot to read the news or a blog or similar
from the Internet (page 49).
z Internet radio playback
Play the radio.
Plays a randomly selected Internet radio station (page 54).
z Contents playback
Play contents.
Plays the contents previously selected at the PC (page 43).
z Diary playback
AIBO, read the diary.
Causes the AIBO robot to read the Diary it has created
(page 71).
z Schedule playback
My schedule.
Other Information
Causes the AIBO robot to read your schedule from the current
time until and including the next day (page 76).
96
Page 97

The AIBO® Entertainment Robot touch sensor operation
z In Remote Control mode
Touch sensor operation pattern Action
Touch head sensor for 3 seconds Switch to Autonomous mode.
Touch head sensor and front back
sensor
Touch head sensor and middle
back sensor
Touch head sensor and rear back
sensor
Touch front and middle back
sensors
Touch head sensor and chin sensor Read schedule.
z In Autonomous Monitor mode
Touch sensor operation pattern Action
Touch head sensor and middle
back sensor for 3 seconds
Play previous contents.
Start/stop contents playback.
Play next contents.
Open web browser and display
news or blog page being read.
Switch to Remote Control mode.
Other Information
97
Page 98

Controlling the AIBO
®
Entertainment Robot’s actions with the keyboard
Shortcut key Action
Ctrl + D
Ctrl + R Switch to Remote Control mode.
Ctrl + A Switch to Autonomous Monitor mode.
Ctrl + G Start charging/stop charging/leave Energy Station.
Ctrl + O Display “Settings” screen.
Ctrl + H
Ctrl + B Play previous contents.
Ctrl + F Play next contents.
Ctrl + M Turn AutoMotion ON/OFF
Ctrl + P Play contents.
Ctrl + S Stop contents playback.
Ctrl + X
Ctrl + x
Ctrl + C
Ctrl + c
Switch wireless LAN connection between the AIBO
robot and PC on and off.
Display this document (User’s Guide (AIBO
Entertainment Player)).
Change head direction/angle while key is being held.
Shortcut key Action
F1 Reduce walking speed.
F2 Set walking speed to normal.
F3 Increase walking speed.
F4 Lie down.
F5 Sit.
F6 Stand up.
F7 Turns ON/OFF the sound output from the PC speakers.
Turns ON/OFF the sound output from the AIBO
F8
F9 Take a picture.
F11 Decreases the volume.
F12 Increases the volume.
Alt+F4 Close AIBO Entertainment Player.
X Fast. Walk while key is held. Stop when key is released.
x
C
c
X + C
X + c
robot’s speakers. Available only in Remote Control
mode.
Reverse. Walk while key is held. Stop when key is
released.
Turn left. Walk while key is held. Stop when key is
released.
Turn right. Walk while key is held. Stop when key is
released.
Advance in left forward direction. Walk while key is held.
Stop when key is released.
Advance in right forward direction. Walk while key is
held. Stop when key is released.
Other Information
98
Page 99

© 2005 Sony Corporation
 Loading...