

Page 1
User’s Guide
4-675-917-11(1)
Page 2

Notice to Users
©2003 Sony Corporation All rights
reserved. This manual and the software
described herein, in whole or in part, may
not be reproduced, translated or reduced
to any machine-readable form without
prior written approval.
BASED ON TORT, CONTRACT, OR
OTHERWISE ARISING OUT OF OR IN
CONNECTION WITH THIS MANUAL,
THE SOFTWARE, OR OTHER
INFORMATION CONTAINED HEREIN
OR THE USE THEREOF.
THIS DOES NOT AFFECT YOUR
STATUTORY RIGHTS.
EXCEPT AS SPECIFICALLY SET FORTH
IN THE END-USER LICENSE
AGREEMENT, SONY CORPORATION
PROVIDES THIS MANUAL, THE
SOFTWARE AND THE OTHER
INFORMATION CONTAINED HEREIN
“AS IS” WITH NO WARRANTY AND
HEREBY EXPRESSLY DISCLAIMS ANY
IMPLIED WARRANTIES OF
MERCHANTABILITY,
NONINFRINGEMENT OR FITNESS FOR
ANY PARTICULAR PURPOSE WITH
REGARD TO THIS MANUAL, THE
SOFTWARE, OR SUCH OTHER
INFORMATION. IN NO EVENT SHALL
SONY CORPORATION BE LIABLE FOR
ANY INCIDENTAL, CONSEQUENTIAL,
OR SPECIAL DAMAGES, WHETHER
2
Sony Corporation reserves the right to
make any modification to this manual or
the information contained herein at any
time without notice.
The software described herein may also
be governed by the terms of a separate
user license agreement.
This product contains software owned by
Sony Corporation and licensed from third
parties. Use of such software is subject to
the terms and conditions of license
agreements enclosed with this product.
Software specifications are subject to
change without notice and may not
necessarily be identical to current retail
versions.
Page 3

Before using this software, please read the accompanying End-User License
Agreement which governs use of this software.
• This software or document is protected by copyright, and distributed under
licenses restricting its use, copying, and distribution. No part of this software or
document may be reproduced in any form by any means and rental of this
software may not be allowed without prior authorization of Sony Corporation.
• Sony Corporation assumes no responsibility for any inconvenience caused by
misuse or any use not stated in this document.
• The supplied software cannot be used with any device other than those devices
specified herein.
• Some mobile communication devices may not work with AIBO EYES due to
unique configurations. Sony Corporation assumes no responsibility, in the case
that AIBO EYES does not work with such mobile communication devices.
• The specifications of the supplied software are subject to change without notice.
Customer Support
How to contact AIBO Customer Link.
1-800-427-2988 (USA)
E-mail address:
aibosupport@info.sel.sony.com
For more information about “AIBO” ERS-210/220 Series (names of parts,
settings, “Memory Stick” installation, safety precautions, etc.), please refer to
the “AIBO” ERS-210/220 Series Operating Instructions.
3
Page 4

This device complies with Part 15 of the FCC Rules. Operation is subject to the following
two conditions: (1) This device may not cause harmful interference, and (2) this device must
accept any interference received, including interference that may cause undesired operation.
This equipment has been tested and found to comply with the limits for a Class B digital
device, pursuant to Part 15 of the FCC Rules. These limits are designed to provide
reasonable protection against harmful interference in a residential installation. This
equipment generates, uses, and can radiate radio frequency energy and, if not installed and
used in accordance with the instructions, may cause harmful interference to radio
communications. However, there is no guarantee that interference will not occur in a
particular installation. If this equipment does cause harmful interference to radio or television
reception, which can be determined by turning the equipment off and on, the user is
encouraged to try to correct the interference by one or more of the following measures:
• Reorient or relocate the receiving antenna.
• Increase the separation between the equipment and receiver.
• Connect the equipment into an outlet on a circuit different from that to which the receiver
is connected.
• Consult the dealer or an experienced radio/TV technician for help.
You are cautioned that any changes or modifications not expressly approved in this manual
could void your authority to operate this equipment.
Safety Information
Warning
• This product is not intended for children under 8 years of age.
•The AIBO wireless LAN card should be attached to AIBO under the supervision of an
adult with knowledge of the proper procedure.
4
Page 5
“Reproduction in whole or in part without written permission is prohibited.
All rights reserved.”
“OPEN-R” is the standard interface for the entertainment robot
system that Sony is actively promoting. This interface expands the
capability of the entertainment robot through a flexible combination
of hardware and interchangeable software to suit various applications.
“AIBO EYES” conform to OPEN-R version 1.1 (software
specifications).
“AIBO,” the AIBO logo
trademarks of Sony Corporation.
“Memory Stick,” “
Corporation.
Microsoft, Windows and Direct X are registered trademarks of Microsoft
Corporation in the United States and other countries.
All other system names and product names mentioned herein may be the
trademarks or registered trademarks of their respective companies.
In this manual, the “™” and “®” marks have been omitted.
• In this manual, the “ERS-210 Series” is referred to as the “ERS-210”, and the
“ERS-220 Series” is referred to as the “ERS-220.”
For more information on AIBO, please refer to the following Internet site:
http://www.aibo.com/
, “OPEN-R” and the OPEN-R logo are registered
” and “ ” are trademarks of Sony
5
Page 6

Table of Contents
Notice to Users.................................................................................2
Welcome to AIBO EYES .................................................................8
Setup Procedure
Confirming system requirements ...................................................12
AIBO’s network setup....................................................................14
Network setup procedure......................................................... 14
If you have a Memory Stick Reader/Writer ............................ 15
AIBO EYES Setup.........................................................................19
Using AIBO EYES
Using AIBO with the Energy Station [ERA-201P1];
AIBO MAIL...................................................................................32
How to write AIBO MAIL ...................................................... 32
Checking and retrieving AIBO MAIL..................................... 32
Viewing pictures taken by AIBO ...................................................33
AIBO’s position while taking pictures .................................... 34
Taking pictures on command................................................... 35
6
Using AIBO off the Energy Station [ERA-201P1]........30
Page 7

Receiving pictures (photos) AIBO took by e-mail JPEG
attachments [PHOTO command] ....................................... 36
Directly commanding AIBO to take a picture via Voice
command............................................................................ 38
Taking periodic pictures at a set interval [WATCH command]....
Sending AIBO a message or song..................................................43
Having the recipient play back AIBO’s message and song
[MSG command] ............................................................... 44
Playing back the message or song immediately
[PLAY command] .............................................................. 45
How to record a unique message and Voice Signature ............ 46
AIBO e-mail reception notification ...............................................47
Additional Information
Notes on use ...................................................................................50
Troubleshooting .............................................................................52
Appendix
Words understandable to AIBO .....................................................58
List of codes that can be used for AIBO MAIL commands...........60
AIBO’s eye and tail lights ..............................................................62
Error e-mail examples ....................................................................63
List of “WLANCONF.TXT” parameters .......................................66
39
7
Page 8
Welcome to AIBO EYES
AIBO EYES is an AIBO-ware application for the AIBO ERS-210/220 Series. This
software lets you control AIBO from your PC or a mobile communication device,
using e-mail commands.
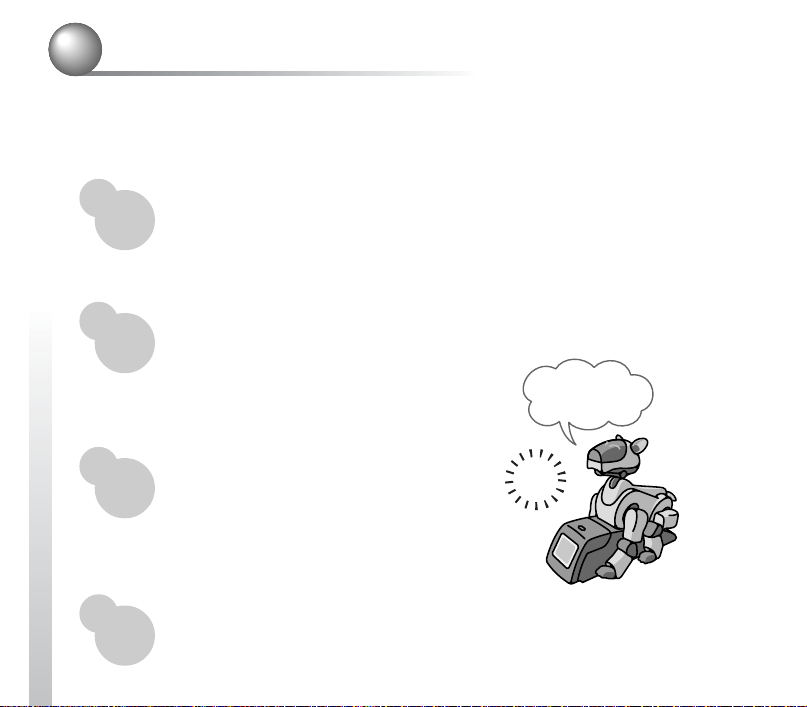
Controlling AIBO by utilizing AIBO MAIL. (page 32)
To control AIBO, simply send a command via e-mail to AIBO.
AIBO will check e-mails at set intervals, and upon receipt will execute the
particular command.
Picture taking by AIBO utilizing your PC or mobile communication
device. (page 33)
AIBO will take pictures upon receipt of AIBO
MAIL or automatically at set intervals, and e-mail
the picture back to you.
It’s Dad.
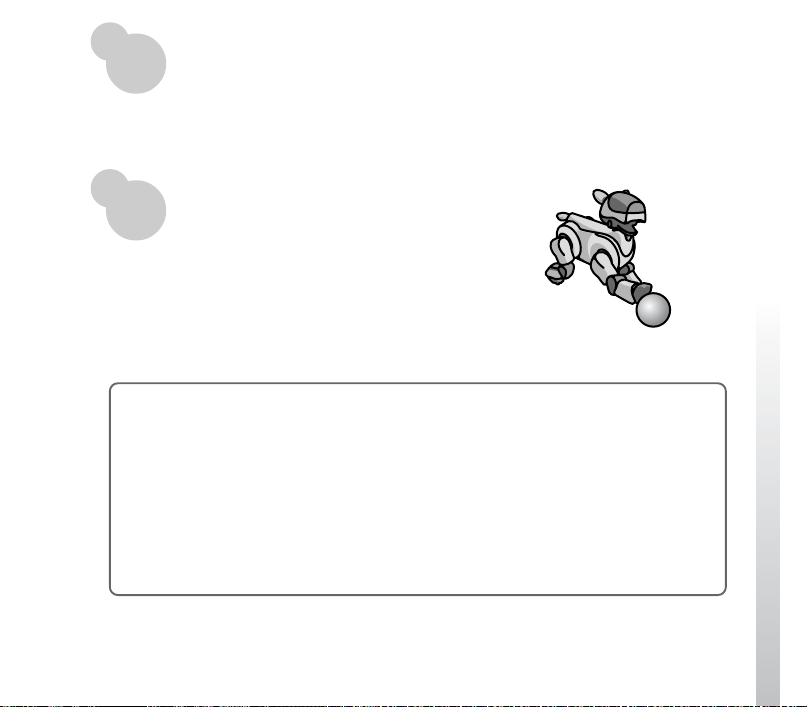
Sending AIBO message. (page 43)
You can send messages or have AIBO play
selected songs to family and friends in close
proximity of AIBO’s location.
You can pre-record messages as well.
AIBO alerts you when it receives e-mail. (page 47)
Upon receiving e-mail, AIBOs indicator light will flash.
8
click
Page 9
AIBO can receive and send e-mails.
Via Wireless LAN, AIBO is always connected to the Internet so it can receive and
send e-mail independent of a PC*.
(*You must be connected to an "always On" broadband connection. For example;
Cable modem, DSL, etc.)
Autonomous mode.
You can also enjoy an autonomous AIBO. AIBO
plays with its favorite pink ball and communicates
with you. When on its Energy Station (separately
available), AIBO alarm can function.
Protection of privacy:
With AIBO EYES, multiple users can send photo command mails to AIBO and view
the pictures AIBO took. To protect your privacy, use “Private Mode” which allows the
following:
• Restriction of Users
AIBO users can be restricted to a maximum of five users.
• User name notification
AIBO will announce the registered user name when notifying you about picture
taking or messages via Voice Signature (page 26).
9
Page 10

10
Page 11
Setup Procedure
To setup AIBO EYES, follow these procedures:
Confirm system requirements (page 12)
v
AIBO’s network setup (page 14)
Connect AIBO to a wireless LAN.
v
AIBO EYES Setup (page 19)
Set up the e-mail address you would like AIBO to
check, and register the users of AIBO EYES.
11
Page 12
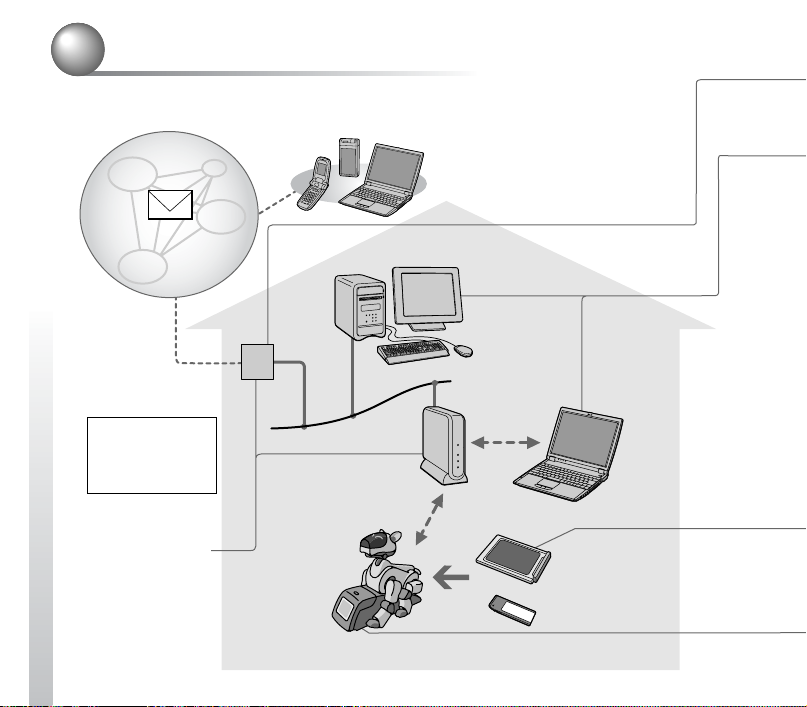
Confirming system requirements
You must have the following systems to use AIBO EYES.
FTTH/ADSL/
CATV line
Either the modem or
the access point
must have a router
function.
12
E-mail server
to Internet
The system must
always be
connected to the
internet.
PC (connected to a wired LAN)
Modem
AIBO Energy Station
ERA-210P1 (optional)
Access point
for wireless
LAN
PC (connected to
a wireless LAN)
AIBO Wireless LAN
Card ERA-201D1
AIBO EYES “Memory Stick”
Page 13

Caution
AIBO EYES cannot be used with a USB-type DSL modem.
A PC is used to setup your network settings for AIBO EYES. The PC can be
connected to the access point via a wired or wireless connection.
•To connect the PC to an access point via a wireless LAN, the PC must have an
IEEE802.11b-compatible wireless LAN adapter.
•A Web browser must be installed.
•You must set up the POP* (receiving) and SMTP (sending) e-mail servers for
your e-mail account.
* The POP server must support the UIDL command (for listing IDs of e-mails). For details
about the UIDL command, consult your provider.
•The “Memory Stick” Reader/Writer is not required, but it can be used to setup
network settings and back up data, etc.
An AIBO Wireless LAN Card ERA-201D1 is also supplied with AIBO EYES
ERF-220AP08. For installation with AIBO ERS-210/220 series, refer to the
operating instructions for your AIBO Wireless LAN Card.
The Energy Station ERA-210P1 is not required, but it is useful for taking pictures
from a stationary point at a regular interval. When AIBO is on the Energy Station,
AIBO will tell the time.
13
Page 14
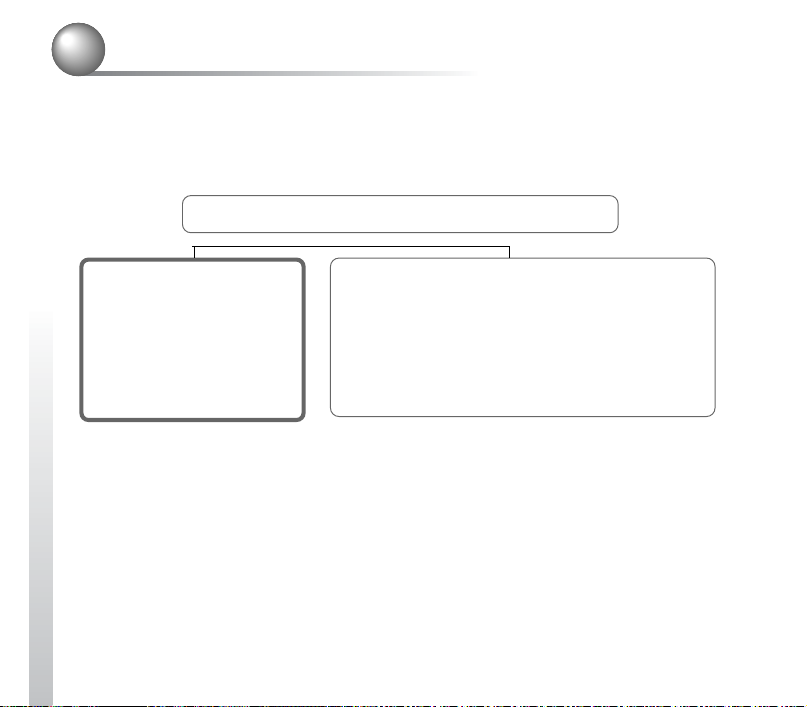
AIBO’s network setup
To connect AIBO to a wireless LAN, you may need to change the default network
settings of the AIBO Wireless LAN Card, PC and the access point.
Network setup procedure
Do you have a Memory Stick Reader/Writer?
14
A) If you have a Memory
Stick Reader/Writer*
You can change the AIBO
EYES “Memory Stick”
settings directly to match
your network.
For settings, see the next
page.
*We recommend that you
use a Sony Memory Stick
Reader/Writer.
B) If you do not have a Memory Stick
Reader/Writer
Please change the settings of your PC and access
point to match AIBO's default configuration in
order to communicate with default setup of the
AIBO Wireless LAN Card.
For settings, see the Operating Instructions
of the AIBO Wireless LAN Card (“AIBO’s
network setup”).
• AIBO EYES can only be used in (A) and (B) of the
four network system samples printed in the
“Wireless LAN Network System.”
•You cannot continue to use AIBO EYES after you
change the settings of your PC and access point to
match the default settings of AIBO. Once you have
successfully finished the setup, please reset the
network to its original setting.
Page 15

If you have a Memory Stick Reader/Writer
You must change the Wireless LAN setting file “WLANCONF.TXT” and adjust to
your network.
1
Insert the AIBO EYES “Memory Stick” into the “Memory Stick”
Reader/Writer.
2
Copy the wireless LAN settings file “WLANCONF.TXT” in the
SAMPLE folder to a parent directory.
Copy “/OPEN-R/SYSTEM/CONF/WLAN/HTML/SAMPLE/WLANCONF.TXT”
to “/OPEN-R/SYSTEM/CONF/WLAN/HTML/”.
3
Edit the copied file “WLANCONF.TXT” by using a text editor.
Settings will be different depending if the DHCP server function* is used. The
DHCP server function automatically assigns IP addresses to devices within your
network.
*For details of the DHCP sever function, see the instructions of your modem or access
point.
15
Page 16

Confirm if the DHCP server function is used in the network.
(This procedure is for Windows XP only. For other operating systems, please refer to
the software help information.)
1 Click the Start button and select Control-Panel.
2 Select Network & Internet Connections, and Network Connections.
3 Right click Network Connection, and select Properties.
4 In "This connection uses the following items" select Internet Protocol
(TCP/IP) and click the Properties button.
5 Confirm the settings.
If Obtain an IP Address automatically is selected,
the DHCP server function is used.
If Use the following IP address is selected,
the DHCP server function is not used.
In this case, you must enter the IP address manually as follows:
Record the PC IP address that is displayed, and then change it to the AIBO IP
address to avoid IP address duplication within the network.
Example: PC IP adress: 192.168.0.10
AIBO IP adress: 192.168.0.11
16
Page 17

1
When the DHCP server function is used in the network
#
# WLAN
#
HOSTNAME=AIBO
ESSID=AIBONET
<
Set the SSID for Wireless LAN access point (less than 32 characters)
WEPENABLE=1
WEPKEY=AIBO2
<
Set the WEPKEY for Wireless LAN access point (less than 5 characters)
APMODE=1
#
# IP network
#
USE_DHCP=1
#
# If DHCP is not used (USE_DHCP=0), you need to specify IP
# network configuration.
#
#USE_DHCP=0
#ETHER_IP=192.168.0.11
#ETHER_NETMASK=255.255.255.0
#IP_GATEWAY=192.168.0.1
#DNS_SERVER_1=192.168.0.1
Lines that start with a sharp symbol (#)
are recognized as a comment line and
are thus ignored.
#
# SSDP
#
SSDP_ENABLE=1
For each parameter, refer to “List of WLANCONF.TXT parameters” on page 64.
17
Page 18
2
When the DHCP server function is not used in the network
#
# WLAN
#
HOSTNAME=AIBO
<
ESSID=AIBONET
Set the SSID for Wireless LAN access point (less than 32 characters).
WEPENABLE=1
WEPKEY=AIBO2
<
Set the WEPKEY for Wireless LAN access point (less than 5 characters).
APMODE=1
#
# IP network
#
#USE_DHCP=1
#
# If DHCP is not used (USE_DHCP=0), you need to specify IP
# network configuration.
#
<
USE_DHCP=0
ETHER_IP=192.168.0.11
ETHER_NETMASK=255.255.255.0
IP_GATEWAY=192.168.0.1
DNS_SERVER_1=192.168.0.1
#
* For confirming the AIBO IP address, refer to page 16.
# SSDP
#
SSDP_ENABLE=1
Delete # at the head of the line.
<
Enter the AIBO IP address*.
<
Enter the sub-net mask for AIBO.
Enter the IP address for the router.
Lines that start with a sharp symbol (#)
are recognized as a comment line and
are thus ignored.
For each parameter, refer to “List of WLANCONF.TXT parameters” on page 64.
18
Page 19
AIBO EYES Setup
After the network setting is completed, you must now register the e-mail address
AIBO will check, along with the registration of AIBO EYES users. When using
AIBO EYES in “Private Mode” (page 24), you can register up to five users that
can communicate via e-mail with AIBO. Setup is performed by using a Web
browser.
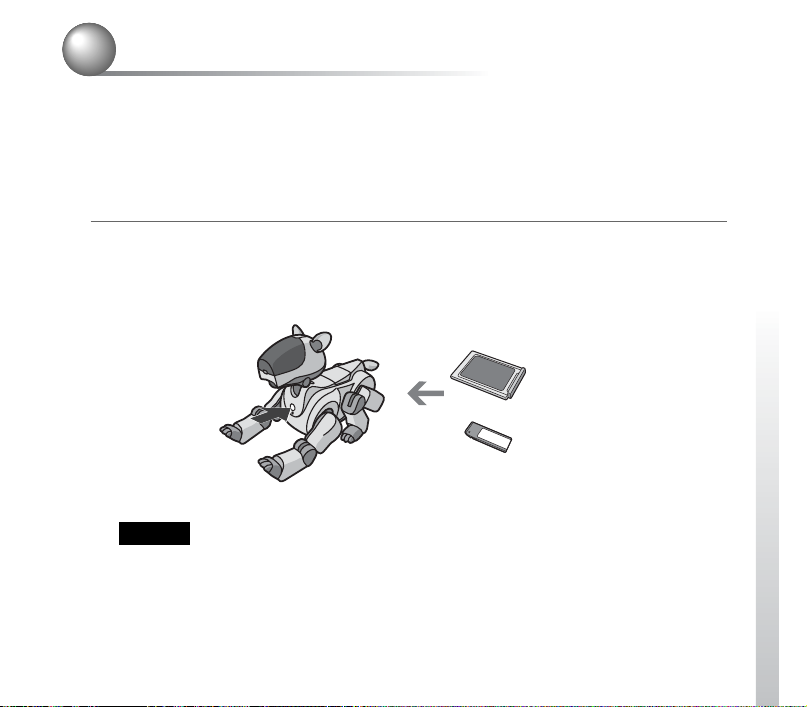
1
Insert the AIBO Wireless LAN Card and AIBO EYES “Memory Stick”
into AIBO, and press the chest pause button on AIBO to activate
AIBO.
AIBO Wireless LAN Card
Pause button
Caution
After you set up the network, if you don’t have an AIBO Wireless LAN Card inside
AIBO and you activate it, the network settings will reset to the default settings (“/OPENR/SYSTEM/CONF/WLAN/HTML/WLANCONF.TXT” file is deleted). In this case,
you will need to perform AIBO’s Network Setup procedure again.
ERA-201D1
AIBO EYES “Memory Stick”
19
Page 20

2
Confirm AIBO’s IP address.
When the “Universal Plug & Play” setting is ON under Windows XP/Windows
Me environment, this step is unnecessary.
An AIBO icon will appear in the “My Network Places” folder. Double-click the
AIBO icon to show “AIBO EYES TOP PAGE”, and then go step 4.
The method for confirming the IP address will vary, depending on whether your
network has a DHCP server function or not (page 16).
When the DHCP server function is used in your network:
1 Start the Web browser on the PC and access the equipment being used as
the router (modem or access point. Refer to your router operation
manual.)
2 Confirm AIBO’s IP address.
For further details, refer to the instruction manual of the equipment being
used as the router.
When the DHCP server function is not used in your network:
Remember the AIBO IP address entered manually at “ETHER_IP” in
“WLANCONF.TXT” (page 18).
20
Page 21

3
Start up the Web browser, and access the URL shown below.
http://XXX.XXX.XXX.XXX
Type in the AIBO IP address confirmed in step 2. (for example; 192.168.0.11)
The AIBO EYES TOP PAGE appears.
4
Click “AIBO Owner Setup”.
The AIBO EYES OWNER SETUP window appears.
21
Page 22

5
Complete the settings on the AIBO EYES OWNER SETUP window.
AIBO EYES Owner Setup
Return to the top page.
E-mail Information
Receiving mail server (POP)
Be sure to enter
these items.
Sending mail server (SMTP)
Owner's e-mail address
Owner's e-mail password
E-mail check interval
User Mode
Private Mode Public Mode
Picture by Voice Command
E-mail address
Other
AIBO clock operating time: Start End
Reboot time
5 min
Message is not sent
7:00 AM 11:00 PM
11:00 PM 10 min
22
Save
Page 23

Check your e-mail software or consult your provider.
The e-mail address AIBO will check.
Password for the above e-mail address.
You can set the desired interval for AIBO to check e-mails (range: 1-60 minutes)
Choose either “Private Mode” (which limits access of users to AIBO EYES) or
“Public Mode”. See next page for each detail.
The User number who receives the e-mail when you call out “Send a mail,” can be
set. The user number (User 1 - User 5) is set by using the AIBO EYES USER
SETUP display (page 26). If you do not want an e-mail sent, select "Message is
not sent."
This sets the time period during which AIBO makes time notifications by sound
and motion every 30 minutes starting on the hour while in Station mode.
(“Never-*”: always OFF / “Always-*”: always ON).
To download and save data, AIBO will automatically restart itself once a day.
Please set the time you would like it to restart.
23
Page 24

• Private Mode
Users of AIBO can be restricted to 5 registered users. This mode is convenient
if you want to limit users who can use photo commands or observe images to
your family or close friends.
In Private Mode, you can also use the
Voice Signature function. This feature
makes AIBO vocally recite the user name
It’s Dad
of the person sending the command before
taking a picture or playing a message.
You can also record each user voice for
click
this Voice Signature function (page 46).
When AIBO receives e-mail from an
unregistered user, AIBO will send an error
e-mail reply to the owner’s e-mail address
(page 64).
• Public Mode
AIBO EYES does not restrict usage to the five registered users in this mode.
This is convenient when utilizing AIBO in public spaces, as it enables multiple
users have AIBO take various pictures. In Public Mode, the Voice Signature
function is not available.
24
Page 25

6
After you have completed the owner settings, click the Save button.
The “Setup is complete” is displayed.
7
Click “Return to the top page”.
The AIBO EYES TOP PAGE is displayed.
This completes the owner setup.
Continue below with the user setup.
8
Click “AIBO User Setup”.
The AIBO EYES USER SETUP window is displayed.
25
Page 26

26
9
Complete the User Setup.
In Private Mode, you can register up to five users.
Set the head angles (page 34)
that pictures are taken with.
You can specify picture-taking
at regular intervals through
AIBO MAIL using the WATCH
command (page 39).
The e-mail address of the user.
In Private Mode, AIBO will vocally
identify the person who sent the
command before taking a picture or
giving the message (Voice Signature
function). The Voice Signature can be
either the default voice or one recorded
by the user.
To use a voice recorded by the user,
select from "User recording 1" through
"User recording 5". To perform the
user recording, see page 46.
When making AIBO take pictures
periodically, you can set the desired
interval. AIBO will then e-mail the
picture to the user. Leave the default
settings (0 hour/0 minutes) if you don’t
want AIBO to perform this periodical
picture-taking feature. You can also
command AIBO to perform this task via
AIBO MAIL’s WATCH command
(page 39). AIBO will automatically
take the first picture after the desired
interval, once you have saved these
settings.
Page 27

10
After the setup is completed, click the Save button.
The “Setup is complete” is displayed.
To confirm the updated settings, click “Return to the top page” to show the
AIBO EYES TOP PAGE and click “AIBO Owner Setup” or “AIBO User
Setup.”
Your settings can be changed whenever you want to update the users or other
settings.
11
Wait a while, and then verify that AIBO is connected to the e-mail
server.
Wait until AIBO checks its e-mail (set via the "Email check interval" setting.
Page 22.) at the set interval.
You can confirm that AIBO is connecting to the e-mail server by observing
AIBO's tail lamp.
When an e-mail check is successfully completed:
ERS-210, ERS-210A , Tail lamp color: Purple
ERS-220, ERS-220A , Tail lamp color: Blue
If you have received e-mail:
ERS-210, ERS-210A , Tail lamp: Purple flashing
ERS-220, ERS-220A , Tail lamp: Blue flashing
If the e-mail server connection fails, AIBO’s tail lamp will turn off.
The setup is now complete. Now you are ready to enjoy AIBO EYES!
27
Page 28

28
Page 29

Using AIBO EYES
After learning how to write AIBO MAIL, let’s send AIBO MAIL
to make AIBO take pictures and convey messages.
click
29
Page 30

Using AIBO with the Energy Station [ERA-201P1];
You can use AIBO EYES with AIBO
sitting on or off of its Energy Station.
Pause Mode
(AIBO not active.)
When you push the pause
button on AIBO’s chest,
AIBO’s power turns off. You
need to put AIBO in this mode
when you are changing
AIBO’s batteries or Memory
Stick.
30
Active Mode
In this mode, AIBO can periodically check
e-mail, receive AIBO Mail and take pictures,
play messages, and notify you of new e-mail.
Autonomous
Mode
AIBO walks around, plays with
its pink ball, and communicates
Caution
•
Do not use AIBO on unstable surfaces
where it may fall or experience severe
vibrations.
•
Do not surround AIBO with objects
that may obstruct its movements.
Mode lamp turns off
with you.
Chest lamp:
Green
Place AIBO
on the
Station
Page 31

Using AIBO off the Energy Station [ERA-201P1]
Take
AIBO off
of the
Station
Mode lamp turns off
Station
Mode
AIBO will have minimal movements
while recharging itself on the Energy
Station. When in this Station Mode,
AIBO will sound an alarm at each hour
and half hour (page 23). It is
convenient to have AIBO sit on the
Energy Station when you are making
AIBO take periodic pictures at
particular angles.
Say
“Cheese”
The AIBO Energy Station [ERA-210P1] is
an option that is separately sold.
• Picture taking, message play-back, e-mail notification are
all features that AIBO can perform, regardless of whether
AIBO is on its Energy Station or not.
• Please refer to page 58 for voice commands that AIBO
can understand when in Autonomous or Station Mode.
When AIBO
is suddenly
picked up.
When
AIBO is
placed on
the floor.
When AIBO
detects a jam
in one of its
joints.
Solution: Press the
head sensor for 3
seconds (ERS-210)/
Press the headtouch sensor in the
front or rear
direction (ERS-220)
Pick-up
Mode lamp lights up
Condition
When AIBO is picked up and held in your
arms, it naturally assumes a posture to
conform to that position. This prevents the
person picking up AIBO from suddenly
being surprised by AIBO’s movements, and
accidentally dropping AIBO.
Caution
When more than two of AIBO’s paws sense
pressure, AIBO will think it has been placed
back on the floor and return to Autonomous
Mode. Please do not touch AIBO’s paws
when you are holding AIBO as AIBO may try
to start walking when it is back in
Autonomous Mode. AIBO cannot take
pictures in this Pick up Condition.
Mode lamp flashes
Jam
Condition
If an object gets jammed in AIBO’s neck or leg
joint, AIBO loosens up all of its joints. This is
to prevent accidental injury in case you catch
your finger in one of its joints. In this
condition, AIBO is unable to take pictures,
playback messages or notify you of new e-mail.
31
Page 32

AIBO MAIL
AIBO MAIL is the e-mail you will send to AIBO, to make it take pictures or send
messages. AIBO MAIL needs to be written along these particular guidelines:
How to write AIBO MAIL
• Use “text format” (not HTML) when creating AIBO MAIL.
•The size of each AIBO MAIL must be less than 10KB per e-mail (no more than
10,000 characters, including the characters in headers.)
To: (owner e-mail address)
Subject: AIBO MAIL
---------------------------------(body text)
PHOTO C1 0 10 (command to AIBO)
AIBO will periodically check the e-mail server.
When there is an AIBO MAIL sent to the
owner’s e-mail address, it will perform the
instructed command.
Always use “AIBO MAIL”.as subject text.
You can use up to 10 commands per one AIBO
MAIL. When using multiple commands, be
sure to use the “return” key to skip to the next
line and write only one command per line. For
further command details, please refer to the
latter pages of this chapter.
You can enter your signature at the end of the
text, and AIBO MAIL will still function.
Checking and retrieving AIBO MAIL
•With AIBO EYES, AIBO can check up to 200 e-mails on the e-mail server. Please ensure
that your e-mails on the server does not exceed 200.
• AIBO will not perform an AIBO MAIL command if that e-mail has already been opened
32
and read (deleted) through other means (for example; reading the e-mail through your PC).
Page 33

Viewing pictures taken by AIBO
With AIBO EYES, you can send photo commands from your PC or mobile
communication device* (*must be able to receive JPEG files). AIBO will perform
the command in the AIBO MAIL that it receives, take a picture, and then send it
back. Up to 10 pictures can be stored on the “Memory Stick”.
Voice Signature function
In Private Mode, AIBO will play the Voice Signature (for example; “It’s Dad”) and
identify the photo command sender. For Voice Signature setup, refer to page 26. For
Recording Voice Signature, refer to page 46.
Caution
• The “Memory Stick” can store up to 10 pictures, and will automatically continue to
delete the oldest picture as you exceed 10 pictures.
• Sony is not responsible for any rights-infringement disputes and other issues that may
arise between you and another person or entity resulting from photographs taken with
AIBO. Do not take any photographs that may infringe on another person’s or entity’s
rights.
About the picture (photo image)
• The picture (photo image) will be sent on JPEG format, and will automatically be
stored on the “Memory Stick”.
• Picture (photo image): Approximately 180 × 140 pixels.
• Depending on the surrounding light, horizontal lines may appear in the photo or the
photo may have a reddish or bluish hue.
•The image may be distorted if AIBO takes a photo of a fast-moving object.
33
Page 34

AIBO's position while taking pictures
AIBO can take pictures in both situations: On its Energy Station (Station Mode) or
Autonomous Mode.
In Station mode
click
AIBO is able to periodically take pictures
of a certain fixed point at desired intervals.
About the angle of AIBO’s color camera
You can position AIBO’s color camera angle (up/down, right/left) using commands in
your AIBO MAIL. Refer to page 37 for details.
Angle for AIBO’s right side
–88 (degree)
When using the voice command to make AIBO take a picture, you cannot change the
34
angle of AIBO’s camera. It will look straight ahead and take the picture.
22
–32
In Autonomous mode
click
If AIBO receives AIBO MAIL
commanding it to take a picture, it will do
so in a standing position upon receiving the
AIBO MAIL.
Color camera
Angle for AIBO’s left side
88 (degree)
Page 35

Taking pictures on command
You can make AIBO take pictures on command. Send an AIBO MAIL with the
photo command when you want AIBO to take the picture. AIBO will respond on
command.
Caution
AIBO will check the e-mail server for e-mails at the desired interval you have intially set
(see AIBO EYES OWNER SETUP window, page 22.) When it acknowledges receipt of
an AIBO MAIL with a photo command, it will take a picture.
The command to use in your AIBO MAIL body text to have AIBO take a picture
and e-mail it back via a JPEG attachment is: PHOTO
35
Page 36

Receiving pictures (photos) AIBO took by e-mail JPEG attachments [PHOTO command]
AIBO will e-mail back the picture (photo) it took as a JPEG attachment.
36
Wireless LAN
access point
click
Modem
AIBO MAIL (Photo)
E-Mail server
Sends back the picture
(photo) as a JPEG via an
e-mail attachment.
Page 37

How to write Photo commands
PHOTO [cue [h_angle v_angle] ]
Select the vertical angle of the color camera between –32
degrees (down) to 20 degrees (up). (Default is 0 degrees.)
Select the horizontal angle of the color camera between –88
degrees (AIBO’s right) to 88 degrees (AIBO’s left).
(Default is 0 degrees.)
You can select the cue you want to use when AIBO takes
the picture (for example; “Say cheese”) Refer to page 60
“Command Parameter List” and enter the command. (If
you omit this, the default command C1: Countdown will
automatically be selected.)
AIBO Mail example for Photo command
Camera angle selection is optional. You can select the
horizontal and vertical angle of the color camera and
include it in the command [h_angle v_angle]. Otherwise,
default settings will be used. You must always include
the cue in the command body text.
Command body text sample:
<Default setting, no camera angle selected>
PHOTO (same as “PHOTO C1 0 0”)
<Default setting, cue selected, no camera angle selected>
PHOTO C4 (same as “PHOTO C4 0 0”)
To:(owner e-mail address)
Subject: AIBO MAIL
----------------------------PHOTO C2 0 10
Always use “AIBO MAIL” as subject text.
AIBO will take the following picture and send it
back via e-mail: Cue command is “Get ready,
I'm gonna take a picture.” Picture angle will be
at 0 degree horizontal angle (facing straight
ahead) and 10 degree raised vertical angle.
37
Page 38

Directly commanding AIBO to take a picture via
Voice command
You can directly command AIBO to take pictures via voice command.
For example, you can have AIBO take a picture of your child and send it to your
mother’s PC or mobile communication device* (*must have JPEG format viewing
capability.)
1
Say “Take a picture” to AIBO.
After giving the command, follow AIBO’s voice instruction.
While AIBO is speaking, you can bypass the guide and instantly make AIBO
start the photo countdown and take a picture if you do the following:
ERS-210, ERS-210A , Press the head sensor.
ERS-220, ERS-220A , Hold the head touch sensor forward or backwards.
38
Take a picture
click
When taking a picture using the voice command, the cue signal and camera angle
can not be set.
• AIBO faces straight forward
and takes a picture.
• In Autonomous mode, AIBO
will stand up first and than
take the picture.
Page 39

2
Say “Send e-mail” to AIBO.
AIBO will send an e-mail (with the JPEG picture attached) to the e-mail
address pre-registered in the AIBO EYES OWNER SETUP window “Picture
by Voice Command” (page 22).
AIBO will send the most recent picture it took via e-mail JPEG attachment.
Taking periodic pictures at a set interval [Watch command]
AIBO will take periodic pictures at a set interval and e-mail them via JPEG
attachment. The picture taking interval can be set in 10 minute increments, starting
with 10 minute as the minimum, and 50 minutes as maximum setting. (If you set a
different increment AIBO will automatically adjust to the next 10 minute interval.
For example, 15 minutes will be adjusted to 20 minutes.)
Caution
When AIBO is in the middle of checking the e-mail server, or is in motion, depending on
the situation, there may be a slight delay in taking the picture. In this case, the picture
might not be taken on the exact timing of the pre-set picture taking interval.
Periodic picture taking by AIBO can be set via each User Setup (by Web browser
setup: for details see page 26) or by AIBO MAIL.
39
Page 40

How to write the Watch commands
WA TCH hour min [cue [h_angle v_angle] ]
Select the vertical angle of the color camera
between –32 degrees (down) to 20 degrees (up).
(Default is 0 degrees.)
Select the horizontal angle of the color camera between
–88 degrees (right) to 88 degrees (left). (Default is 0
degrees.)
You can select the cue you want to use when AIBO takes the
picture (for example; “Say cheese”) Refer to page 60 “Command
Parameter List” and enter the command. (If you omit this, the
default command C1: Countdown will automatically be selected.)
Picture taking intervals can be set in 10 minute increments, starting
with 10 minute as the minimum and 50 minutes as maximum setting.
(If you set a different increment AIBO will automatically adjust to the
next 10 minute interval. For example, 15 minutes will be adjusted to
20 minutes.)
Set the hour interval between 0-23.
Camera angle selection is optional. You can
select the horizontal and vertical angle of the
color camera and include it in the command
[h_angle v_angle]. Otherwise, default settings
will be used. You must always include the
cue in the command body text.
Command body text sample:
<Default setting, no camera angle selected>
WATCH 1 0 (same as “
<Default setting, cue selected, no camera angle
selected>
WATCH 2 30 C4 (same as “
PHOTO 1 0 C1 0 0
WATCH 2 30 C4 0 0
”)
”)
40
Page 41

AIBO MAIL example for a WATCH command
To:(owner e-mail address)
Subject: AIBO MAIL
----------------------------WATCH 1 0 C3 0 0
Always use “AIBO MAIL” as subject text.
AIBO will take the following picture and send
it back via e-mail:
Picture interval is one hour. Cue command is
“Smile”. Picture angle both at 0 degrees for
vertical and horizontal (facing straight ahead).
Cancelling the periodic picture taking function
Simply send a WATCH command AIBO MAIL to AIBO, with body text specifying
the hours and minutes as “0”.
To:(owner e-mail address)
Subject: AIBO MAIL
----------------------------WATCH 0 0
Always use “AIBO MAIL” as subject text.
41
Page 42

Viewing the pictures (photos) on the Memory Stick
The pictures that AIBO takes will be stored on AIBO’s “Memory Stick”. To view
these, you will need a “Memory Stick” reader/writer.
1
Remove the “Memory Stick” from AIBO.
Refer to the AIBO Operating Instruction that came with your AIBO on how to
remove the “Memory Stick” from AIBO.
2
Insert the “Memory Stick” into the “Memory Stick” reader/writer.
For details, refer to the Operating Instructions of the “Memory Stick” reader/writer.
3
Copy/Move the photo data on the “Memory Stick” to your PC.
Copy/Move the JPEG files in “\OPEN-R\APP\PC\PHOTO” of the “Memory
Stick” to your PC.
The photo data has five digit consecutive numbers (“IMG-XXXXX.JPG”).
For details on copying files, refer to the Operating Instruction of your PC.
Memo
If there is no photo file in the folder, the five digit number in the file name will start from
“00000”.
If there are existing photos in the folder, the five digit number in the file name will start
from the next highest number.
4
Remove the “Memory Stick” from the PC.
For details on how to remove the “Memory Stick”, please refer to the Operating
42
Instruction for the PC and its accessories.
Page 43

Sending AIBO a message or song
Using e-mail from your PC or mobile communication device, you can send AIBO
messages or songs that can be played back or performed by AIBO.
You can select a message from pre-recorded messages, or record your own unique
personal message.
You can record up to five unique personal messages and save them as files. You
can then command AIBO to play these back by selecting the particular file and
including it in your AIBO MAIL body text.
For recording instructions, please see page 46.
There are two commands you can choose from to include in the AIBO MAIL body
text, depending on when you want AIBO to play back the message or the song.
• Send AIBO the message or the song and have it play back when
requested by the recipient., MSG
• Send AIBO the message or the song and play back immediately , PLAY
43
Page 44

Having the recipient play back AIBO’s message and song [MSG command]
This command is convenient when the recipient is not near AIBO, and the recipient
can play back the message or song at their convenience.
Caution
You can send up to 100 messages and songs to AIBO. When unplayed messages exceed
100, an error e-mail is sent to the AIBO MAIL (Message command) sender.
• Message sender
Select the message or song and include it in the body text of the AIBO MAIL.
How to write commands
MSG msg
AIBO MAIL example of a MSG command
Include the message or song you would like AIBO to perform, by
selecting the command from “SONG” or “WORD” from page 60
“List of codes that can be used for AIBO MAIL commands”.
44
To:(owner e-mail address)
Subject: AIBO MAIL
----------------------------MSG S1
Always use “AIBO MAIL” as subject text.
Sends message command for AIBO to play
Song 1 (S1): WEDDING MARCH
AIBO’s face LED lights up to indicate receipt of e-mail.
ERS-210, ERS-210A
Green light
ERS-220, ERS-220A
Face side center lights: Blue
Page 45

• When AIBO has received a message command
Press the back sensor (ERS-210, ERS210A) or the back-touch sensor
(ERS-220, ERS-220A) of AIBO.
AIBO will play back the message or song.
To play again:
To play the next
message/song:
(current message/
song will be deleted.)
To stop playing:
Say “One more time” to AIBO.
ERS-210, ERS-210A , Press the back sensor.
ERS-220, ERS-220A , Press the back-touch sensor.
ERS-210, ERS-210A , Press the head sensor.
ERS-220, ERS-220A , Hold the head touch sensor
backward for a few seconds.
Playing back the message or song immediately [PLAY command]
You can use this command when you know that the recipient is near AIBO, and
you want instant play back.
Select the message or song and include it in the body text of AIBO MAIL.
How to write commands
PLAY msg
Include the message or song you would like AIBO to perform,
by selecting the command from “SONG” or “WORD” from page
60 “List of codes that can be used for AIBO MAIL commands”.
45
Page 46

AIBO MAIL example of a PLAY command
To:(owner e-mail address)
Subject: AIBO MAIL
----------------------------PLAY W6
Always use “AIBO MAIL” as subject text.
Sends message command for AIBO to say “I’m
gonna leave now” and play back the message
immediately upon receipt.
How to record a unique message and Voice Signature
You can pre-record a unique voice message (page 43) and also record the Voice
Signature (page 26).
1
Say “Recording Mode” to AIBO.
Another way to record:
ERS-210, ERS-210A , Press the head sensor for more than three seconds.
ERS-220, ERS-220A , Hold the head touch sensor forward or backward for
more than 3 seconds.
2
Follow AIBO's voice instructions.
To skip the voice instructions:
ERS-210, ERS-210A , Press the head sensor.
ERS-220, ERS-220A , Hold the head touch sensor forward or backward.
46
Page 47

AIBO e-mail reception notification
When the owner’s e-mail address receives regular e-mail, AIBO’s tail light will
flash to indicate this. (This is only for regular e-mail and not AIBO MAIL.)
ERS-220, ERS-220A
Tail light will flash blue.
ERS-210, ERS-210A
Tail light will flash
purple.
You have
new e-mail.
AIBO will periodically check for e-mail at the intervals you selected in AIBO
EYES OWNER SETUP window: “E-mail check interval” (page 22). Say “Mail
check” to AIBO, and it will retrieve and say the results to you:
“You have new mail” (1-9 e-mails*)
“Wow, you’ve got lots of mail” (10 or more e-mails*)
“You don’t have any mail”
* AIBO MAIL is not included in this count.
47
Page 48

Caution
You can confirm AIBO’s e-mail server connection via AIBO’s tail lamp.
When e-mail check is successfully completed:
ERS-210, ERS-210A , Tail lamp will light purple.
ERS-220, ERS-220A , Tail lamp will light blue.
When e-mail check is successfully completed and you have new e-mail:
ERS-210, ERS-210A , Tail lamp will flash purple.
ERS-220, ERS-220A , Tail lamp will flash blue.
When communication has failed between AIBO and the e-mail server, AIBO’s tail lamp
will turn off.
48
Page 49

Additional Information
This chapter provides notes on usage and a troubleshooting guide.
49
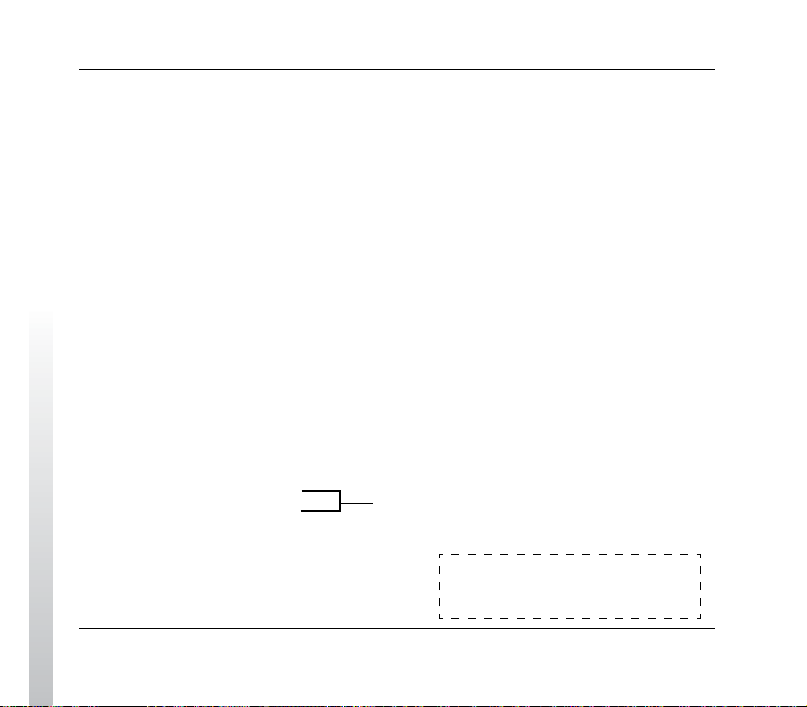
Page 50

Notes on use
The supplied AIBO Programming Memory Stick [ERA-MS06] contains the AIBO
EYES application to be utilized with the AIBO ERS-210 or ERS-220 Series. In
order to protect the data that is currently recorded on the AIBO EYES “Memory
Stick”, please note the following:
• Do not use the AIBO EYES “Memory Stick” for other data storage purposes
with your digital camera, video camera, etc., and only use it with the AIBO ERS210 or ERS-220 Series.
• AIBO EYES is designed exclusively for use with “AIBO” ERS-210/210A/220/
220A and cannot be used with other AIBO models.
•We recommend that you use a Sony “Memory Stick” Reader/Writer.
• Do not touch terminal A with your hand or
metal objects.
• The saved data may be erased or broken if the
“Memory Stick” is used in a place subject to
static electricity or electric noise.
• Do not attach anything other than a dedicated
“Memory Stick” sticker in the area indicated by
B. A stick er has already been attached to the
AIBO-ware “Memory Stick” at the factory.
• Do not bend, drop or apply strong physical
shock to the “Memory Stick.”
• Do not disassemble or modify the “Memory
Stick.”
50
Page 51

•To remove the “Memory Stick” from AIBO while it is still operating, first press
the pause button to stop AIBO’s movements and refer to the AIBO Operating
Instructions.
• Do not let the “Memory Stick” get wet.
• Do not use or store the “Memory Stick” in places subject to:
– Excessively high temperatures, such as a car parked in the sun
– Direct sunlight
– High humidity or corrosive gas
• When carrying or storing the “Memory Stick,” keep it in the supplied case.
• Sony assumes no responsibility for any malfunctions that may occur as a result
of using AIBO EYES in a way not specified in this manual.
• The specifications of this software are subject to change without notice.
Caution
• Do not set the safety switch (for data erase/overwrite protection) of the “Memory Stick” to
“LOCK” position. If you lock this, AIBO will
not be able to store the pictures it has taken.
• If the safety switch of the “Memory Stick” is in
“LOCK” position and you insert this into AIBO
and activate AIBO, it will notify you of the
locked situation and the red eye/face lights will
appear. Press the AIBO pause button on AIBO's
chest to turn AIBO off. Take the “Memory Stick”
out of AIBO and unlock the safety switch. You
are now ready to use AIBO and AIBO's eye light
should turn green when you activate AIBO again.
51
Page 52

Troubleshooting
If you experience any of the following difficulties, use this troubleshooting guide
to correct the problem.
Should the problem persist, please contact AIBO Customer Link. (See page 3 for
details on AIBO Customer Support/Link.)
Symptom Remedy
AIBO does not activate
after releasing the pause
button.
When you press the pause
button, the chest light
rapidly flashes in green
and orange, and AIBO
emits a warning tone.
AIBO emits a sad
melody and does not
activate when the pause
button is released.
52
• The battery pack is not installed.
t Insert the battery pack (see AIBO ERS-210/210A, ERS-
220/220A Operating Instructions.) Restart AIBO by
pressing the pause button again.
•The battery power is low.
t
Recharge the battery pack or replace it with a charged one.
•The battery pack may have over-heated.
t Power AIBO off and wait until the battery pack cools off.
•The inserted “Memory Stick” does not contain AIBO-ware.
• The inserted “Memory Stick” is not compatible for use with
ERS-210, ERS-210A, ERS-220, ERS-220A.
•The AC adaptor and conversion plug is connected to AIBO’s
charging terminal.
t Disconnect the AC adapter and conversion plug from
AIBO, than restart AIBO.
Page 53

Symptom Remedy
The battery pack is
locked and cannot be
ejected.
It takes a long time for
AIBO to start moving.
AIBO tries to walk but it
does not move forward.
AIBO falls often.
After picking AIBO up,
it stops moving its legs
and has very minimal
movement.
The mode indicator
flashes and all limbs
become loose, and AIBO
does not move anymore.
• The program is still running.
tPress AIBO’s chest pause button to stop the program,
then remove the battery pack from AIBO.
• AIBO is loading data from the “Memory Stick.”
Wait a while.
•The floor may be too slippery.
t Place AIBO on a surface that is not too slippery, such as
a low pile carpet.
•The floor may be too slippery, inclined or unstable.
t Place AIBO on a flat surface that is not too slippery.
•
ABIO can sense that it has been picked up and reduces movements.
t
Check that the mode indicator is flashing and place AIBO on
the floor. After a while if AIBO still does not move:
ERS-210, ERS-210A: Press the head sensor for about 3
seconds.
ERS-220, ERS-220A: Hold the head touch sensor
forward or backward for about 3 seconds.
• AIBO’s joint is jammed.
t Place AIBO on the floor.
ERS-210, ERS-210A: Press the head sensor for about 3
seconds.
ERS-220, ERS220A: Hold the head touch sensor
forward or backward for about 3 seconds.
53
Page 54

Symptom Remedy
The chest light flashes in
orange.
AIBO asks to be charged
even with a fully charged
battery pack.
AIBO does not emit any
sound.
AIBO cannot connect to
the e-mail server and the
tail lamp turns off.
• There is a problem with the battery pack.
t Check to ensure that the battery pack is inserted in AIBO
correctly. Should the problem persist, please contact the
AIBO Customer Link.
•With a fully charged battery, AIBO EYES can normally
operate for about 1.5 hours in Autonomous mode. If the
battery pack continues to operate for a much shorter period,
the battery pack may be reaching the end of its service life.
Replace it with a new battery pack.
• The volume may be set to mute.
t Adjust the volume level (see AIBO ERS-210/210A,
ERS-220/220A Operating Instructions.)
•The wireless LAN card is not inserted correctly.
t Insert the wireless LAN card (see the Wireless LAN Card
instruction manual).
• Check the “E-mail Information” settings on the AIBO EYES
OWNER SETUP window (page 22).
• Check the settings for your network.
54
Page 55

Symptom Remedy
After you have told
AIBO to “Send e-mail”
and AIBO has responded
and said it has sent the email, but the recipient
has not yet received the
e-mail.
It takes time for AIBO to
notify you of new e-mail.
The audio is interrupted
while playing back the
message or song.
• The E-mail address settings are incorrect.
t Check “E-mail Information” and “Picture by Voice
Command” settings on the AIBO EYES OWNER
SETUP window (page 22).
• The E-mail check interval you set is too long.
t Check the “E-mail check interval” setting on the AIBO
EYES OWNER SETUP window (page 22) and reduce
the length of the interval.
•You have exceeded the storage limit of the e-mails and you
have more than 200 e-mails on the server.
t With AIBO EYES, AIBO can only check up to 200 e-
mails. Please maintain your server periodically and limit
the number of e-mails within the 200 limit.
AIBO will not perform the AIBO MAIL command if that
e-mail has already been opened and read (deleted)
through other means (for example; reading the e-mail
through your PC).
• Interruption may occur when the network is saturated.
55
Page 56

56
Page 57

Appendix
Words understandable to AIBO
List of codes that can be used for AIBO MAIL commands
AIBO’s eye and tail lights
Error e-mail examples
List of “WLANCONF.TXT” parameters
57
Page 58

Words understandable to AIBO
AIBO can understand the following words in Autonomous mode or Station mode.
AIBO does not understand what you say when:
• AIBO is emitting sounds or is in motion, because it is difficult for AIBO to understand and
hear you.
• AIBO senses it is being carried, or when something is caught in AIBO’s limbs, or it is in
Jam mode.
• AIBO cannot hear you if its environment is noisy. Please speak to AIBO in a quiet
location.
•When the pronunciation of a word is unclear. Try to pronounce each word clearly.
• Calling out to AIBO
AIBO
When you call AIBO’s name (say
“AIBO” to AIBO), it will react and
greet you.
•Greeting
Shake paw
Hello
Bye-bye
58
•Taking a picture
Take a picture
Follow AIBO’s voice guide. (See
page 38.)
Send e-mail
AIBO sends the most recent photo
it took to the registered user. (See
page 38.)
Page 59

•Message playback
• AIBO in action
One more time
AIBO plays back the last message
or song again. (See page 45.)
• Recording
Recording mode
You can record messages or Voice
Signature by following AIBO’s
voice guidance. (See page 46.)
• Notification of new e-mail
arrival
Check e-mail
AIBO will check for new e-mail
and will let you know the result.
Over here, over here
AIBO will come to you, however,
in Station mode, it will decline.
Dance
AIBO will perform a dance.
59
Page 60

List of codes that can be used for AIBO MAIL commands
The following codes are used with the commands in AIBO MAIL.
• In the body text of AIBO MAIL: Following the command, enter the code (code is shown
here in bold type) you selected (for example; “MSG S.SAINTS”, “PLAY W9”).
• For the songs and words, you can select from either the abbreviated codes (code 1: for
example; S1, W1) or the short codes (code 2: for example; S.WEDDING, W.USER1).
PHOTO and WATCH
comand parameters
MSG and PLAY
comand parameters
60
Cue
Code
C1 Countdown (default setting)
C2 Get ready, I'm gonna take a picture
C3 Smile
C4 Say “Cheese”
C5 Gimme a big smile!
C6 OK, we’re gonna take a picture
SONG
Code1 Code2
S1 S.WEDDING/
S2 S.BTHVN/ODE TO JOY
(BEETHOVEN SYMPHONY NO.9)
S3 S.BACH/AIR ON A G-STRING
(BACH ORCHESTRAL SUITE
NO.3 IN D MAJOR)
S4 S.SAINTS/WHEN THE SAINTS
GO MARCHING IN
S5 S.ENERGY/ENERGY FLOW
S6 S.MIAGETE/LOVE LIGHT
S7 S.NAGISA/ON A SUMMER
BEACH
S8 S.SAKURAZAKA/
SAKURAZAKA (CHERRY
BLOSSOM HILL)
WEDDING MARCH
Page 61

S9 S.SAKURA/KIRSHBLUTE
S10 S.SEASON/SEASON IN THE
SUN
S11 S.TSUNAMI/TSUNAMI
S12 S.TRUTH/TRUTH21C
S13 S.FURUSATO/MY HOME
LAND
S14 S.XMASEVE/CHRISTMAS EVE
S15 S.NEWYEAR/JAPANESE NEW
YEAR SONG
WORD
Code1 Code2
W1* W.USER1/User recording 1
W2* W.USER2/User recording 2
W3* W.USER3/User recording 3
W4* W.USER4/User recording 4
W5* W.USER5/User recording 5
W6 W.LEAVING/I’m g onna leave now
W7 W.NOTYET/I can’t leave yet
W8 W.LATE/I’ll be late
W9 W.CALLME/Call me
W10 W.OK/OK
W11 W.NG/That can’t happen
W12 W.THANKS/Thank you
W13 W.SORRY/I’m sorry
W14 W.TOOBAD/Oh, too bad!
W15 W.UNFAIR/Hey. That’s not fair!
W16 W.CONGRATS/Congratulations!
W17 W.HANGIN/Hang in there
W18 W.ITSTIME
W19 W.FAB/You look fabulous
W20 W.LAUGH/Ha, ha, ha
W21 W.HEY/Hey!
W22 W.SCREAM/(Actual screaming voice:
sounds frightened)
W23 W.CRY/Sob, sob, sob
W24 W.LOVE/I love it!
W25 W.PEE/Peeing sound
W26 W.DOG/Arf, arf!
W27 W.AIBO/It’s AIBO!
W28 W.SONY/SONY
* W1-W5 codes are used when you record
your unique message. For recording
instructions, refer to page 46.
/It’s time now, get a move on
61
Page 62

AIBO’s eye and tail lights
Green lamp flashes:
“You have new e-mail”
ERS-210/210A
Tail light (Purple):
Lights up: When AIBO
is connecting to the email server.
Flashes: When new email has arrived.
Face-side lamp flashes:
“You have new e-mail”
62
Tail light (Blue):
Lights up: When AIBO is
connecting to the e-mail
server.
Flashes: When new e-mail
has arrived.
ERS-220/220A
Page 63

Error e-mail examples
When the following errors occur, AIBO will send an error e-mail to either the
AIBO MAIL sender, or the owner’s e-mail address.
• AIBO MAIL command has a grammatical error.
To:(AIBO MAIL sender)
Subject: Re:AIBO MAIL
----------------------------(body text)
100 BAD COMMAND
>PLAY WLEAVING
•When AIBO senses it has been picked up, or has something stuck
(jammed) between its joints, and will not be able to perform the
command.
To:(AIBO MAIL sender)
Subject: Re:AIBO MAIL
----------------------------(body text)
101 COMMAND FAILED
>PHOTO C4 0 0
This line shows there is a grammatical error.
Displays the line where the error exists
(in this case, a period is missing between “W”
and “LEAVING”.)
This line shows that the command has failed.
Displays which command resulted in error.
63
Page 64

• AIBO has more than 100 unplayed AIBO MAILs.
AIBO can only store up to 100 AIBO MAILs. When AIBO’s unplayed messages
exceeds 100, this error e-mail will be sent. You must wait until a message is
played, and re-send your AIBO MAIL again (MSG Command).
To:(AIBO MAIL sender)
Subject: ERROR:AIBO MAIL
----------------------------(body text)
102 TOO MANY MESSAGES
>MSG S.ARIA
Shows AIBO has exceeded 100 unplayed
messages.
Shows the failed message command.
•When in Private Mode, AIBO receives an AIBO MAIL from a nonregistered user.
The copy of the command line from the non-registered user
To:(owner e-mail address)
Subject: ERROR:AIBO MAIL
----------------------------(body text)
200 UNKNOWN USER
From:
>PHOTO C4 0 0
Shows that AIBO has received an AIBO MAIL
from a non-registered user.
Shows e-mail address of the non-registered
user.
Shows the command sent from the nonregistered user.
64
Page 65

• AIBO is unable to stabilize its head (color camera) angle.
When AIBO is in a position where it has difficulties maintaining its head angle and
falls over, this error e-mail will be sent, and AIBO will stop moving. Please check
to ensure that AIBO’s Energy Station is placed on a flat surface, and that AIBO’s
neck joints are not broken.
To:(owner e-mail address)
Subject: ERROR:AIBO MAIL
----------------------------(body text)
300 AIBO SHUTDOWN. HEAD UNSTABLE
Shows that AIBO is unable to stabilize its head
angle.
• The POP server does not support the UIDL command.
AIBO EYES cannot use a POP server that does not support the UIDL command.
If you receive the following error message, verify with your provider whether the
POP server supports the UIDL command or not.
To:(owner e-mail address)
Subject: ERROR:AIBO MAIL
----------------------------(body text)
201 UIDL IS NOT SUPPORTED
Shows that the UIDL command is not
supported.
65
Page 66

List of “WLANCONF.TXT” parameters
The following parameters are for the wireless LAN setting file.
66
HOSTNAME
ESSID
WEPENABLE
WEPKEY
APMODE
ETHER_IP
ETHER_NETMASK
Specifies the name of AIBO for the wireless LAN network
(8 or less characters).
Specifies the name of the wireless LAN network (32 or less
characters.)
Specifies that the WEP system is used (“1”) or not (“0”).
Specifies the WEP key (5 or less characters). It can be used
with 64-bit WEP (WEP40).
Specifies the wireless LAN mode. Be sure to specify the
mode to “1” (connect with Infrastructure Mode) for AIBO
EYES.
Specifies the IP address for AIBO. Only necessary if
“USE_DHCP” is set to “0”.
Specifies the IP sub-net mask for AIBO. Only necessary if
“USE_DHCP” is set to “0”.
Page 67

IP_GATEWAY
Specifies the IP address for the gateway. If the gateway does
not exist in the network, specify the same IP address as
ETHER_IP. Only necessary if “USE_DHCP” is set to “0”.
DNS_SERVER_1
USE_DHCP
SSDP_ENABLE
Specifies the IP address for the DNS server. Only necessary if
“USE_DHCP” is set to “0”.
Specifies that the DHCP (Dynamic Host Configuration
Protocol) is used (“1”) or not (“0”). When this setting is “1”,
the IP address for AIBO is set automatically.
Specifies that the SSDP (Simple Service Discovery Protocol)
is used (“1”) or not (“0”). When this setting is “1” in the
“Universal Plug & Play” mode on Windows XP/Windows
Me, an AIBO icon is displayed in the “My Network Place”
folder. Double clicking the icon allows you to access the
AIBO EYES top page.
67
Page 68

2003 Sony Corporation Printed in Japan
*467591711
(1)
*
 Loading...