

Page 1

3-255-981-13(1)
Mobile DVD Player
Operating Instructi on s
Mode d’emploi
Manual de instrucciones
Owner’s Record
The model and serial numbers are located on the bottom of the unit.
Record these numbers in the spa ce provided below.
Refer to these numbers whenever you call upon your Sony dealer regarding this produc t.
Model No. DVX-11A Serial No.
For installation and connections, see the supplied installation/connections manual.
En ce qui concerne l’installation et les connexions, consulter le manuel
d’installation/raccordement fourni.
Para obtener información sobre la instalación y las conexiones, consulte el ma nua l
de instalación/conexiones suministrado.
US
FR
ES
DVX-11A
© 2003 Sony Corporation
Page 2
Warning
To prevent fire or shock hazard, do not
expose the unit to rain or moisture.
T o avoid electrical shock, do not open the
cabinet. Refer servicing to qualified
personnel only.
CAUTION
The use of optical instruments with this product
will increase eye hazard. As the laser beam used
in this CD/DVD player is harmful to eyes, do not
attempt to disass em ble the cabinet.
Refer servicing to qualified personnel only.
CAUTION
The use of optical instruments with this
product will increase eye hazard.
CAUTION
Use of controls or adjustments or
performance of pr ocedures other than thos e
specified herein may result in hazardous
radiation exposure.
DANGER INVISIBLE
LASER RADIATIONWHEN OPEN.
AVOID DIRECT EXPOSURE TO BEAM.
This equipment has been tested and found to
comply with the limits for a Class B digital
device, pursuant to Part 15 of the FCC Rules.
These limits are designed to provide reasonable
protection against harmful interference in a
residential installation. This equipment
generates, uses, and can radiate radio frequency
energy and, if not insta lled and used in
accordance with the instructions, may cause
harmful interference to radio communications.
However, there is no guarantee that in te rf erence
will not occur in a particular installation. If this
equipment does cause harmful interference to
radio or television reception, which can be
determined by turning the equipment off and on,
the user is encouraged to try to correct the
interference by one or more of the following
measures:
Reorient or relocate the receiving antenna.
Increase the sepa ration between the equipment
and receiver.
Connect the equipment into an outle t on a circuit
different from that to which the receiver is
connected.
Consult the dealer or an experienced radio/T V
technician for help.
CAUTION
You are cautioned that any change or
modifications not exp ressly approved in this
manual could void your authority to operate this
equipment.
2
Page 3

Table of Contents
Welcome! . . . . . . . . . . . . . . . . . . . . . . . . . . . 4
Precautions . . . . . . . . . . . . . . . . . . . . . . . . . . 5
Playable discs . . . . . . . . . . . . . . . . . . . . . . . . 5
Location of controls. . . . . . . . . . . . . . . . . . . . 8
Menu displays . . . . . . . . . . . . . . . . . . . . . . . 10
Resetting the unit. . . . . . . . . . . . . . . . . . . . . 12
Player
Playing discs . . . . . . . . . . . . . . . . . . . . . . . . 12
Resuming playback
— Resume play. . . . . . . . . . . . . . . . . . . . 14
Checking the running time
— Time information. . . . . . . . . . . . . . . . 15
Searching a specif i c point on a disc
— Scan/Slow-motion play/List . . . . . . . 16
Using the menus on DVDs . . . . . . . . . . . . . 17
Using PBC functions
— PBC (Playback control). . . . . . . . . . . 18
Playing in variou s m odes
— Repeat play/Search play. . . . . . . . . . . 18
Sound Adjustments
Changing the audio channels. . . . . . . . . . . . 20
Picture adjustments
Changing the angles . . . . . . . . . . . . . . . . . . 21
Displaying the subtitles. . . . . . . . . . . . . . . . 22
Magnifying pictures. . . . . . . . . . . . . . . . . . . 22
Other Function
Locking dis cs
— Parental control . . . . . . . . . . . . . . . . . 23
Settings and Adjustments
Using the Setup menu . . . . . . . . . . . . . . . . . 26
Setting the display la nguage or sound track
— Language setup . . . . . . . . . . . . . . . . . 27
Setting the screen
— Screen setup. . . . . . . . . . . . . . . . . . . . 27
Custom settings
— Custom setup . . . . . . . . . . . . . . . . . . . 28
Audio settin gs
— Audio setup . . . . . . . . . . . . . . . . . . . . 29
Additional Information
Maintenance . . . . . . . . . . . . . . . . . . . . . . . . 29
Removing the unit. . . . . . . . . . . . . . . . . . . . 30
Notes on discs. . . . . . . . . . . . . . . . . . . . . . . 31
Notes on MP3 files . . . . . . . . . . . . . . . . . . . 31
Specifications . . . . . . . . . . . . . . . . . . . . . . . 33
Troubleshooting . . . . . . . . . . . . . . . . . . . . . 34
Error displays . . . . . . . . . . . . . . . . . . . . . . . 36
Glossary . . . . . . . . . . . . . . . . . . . . . . . . . . . 36
Language code list . . . . . . . . . . . . . . . . . . . 38
Index . . . . . . . . . . . . . . . . . . . . . . . . . . . . . . 39
3
Page 4
Welcome!
Thank you for purchasing this Sony Mobile
DVD Player. Before operating this unit, read this
manual thoroughly and retain it for future
reference.
FEATURING:
• DVD video/D VD-R/R W, CD/CD-R/-R W, VCD
playback compatibility
• 2 A/V outputs (front and rear) and 1 digital
output provided
• DIN size for easy system set with any
monitor(s)
About this manual
• Instructions in this manual describe th e
controls on the card remote commander. You
can also use the controls on the unit if they have
the same or similar names as those on the card
remote commander.
• In this manual, “DVD” is used as the general
term for DVD VIDEO, DVD-R, and DVD-RW.
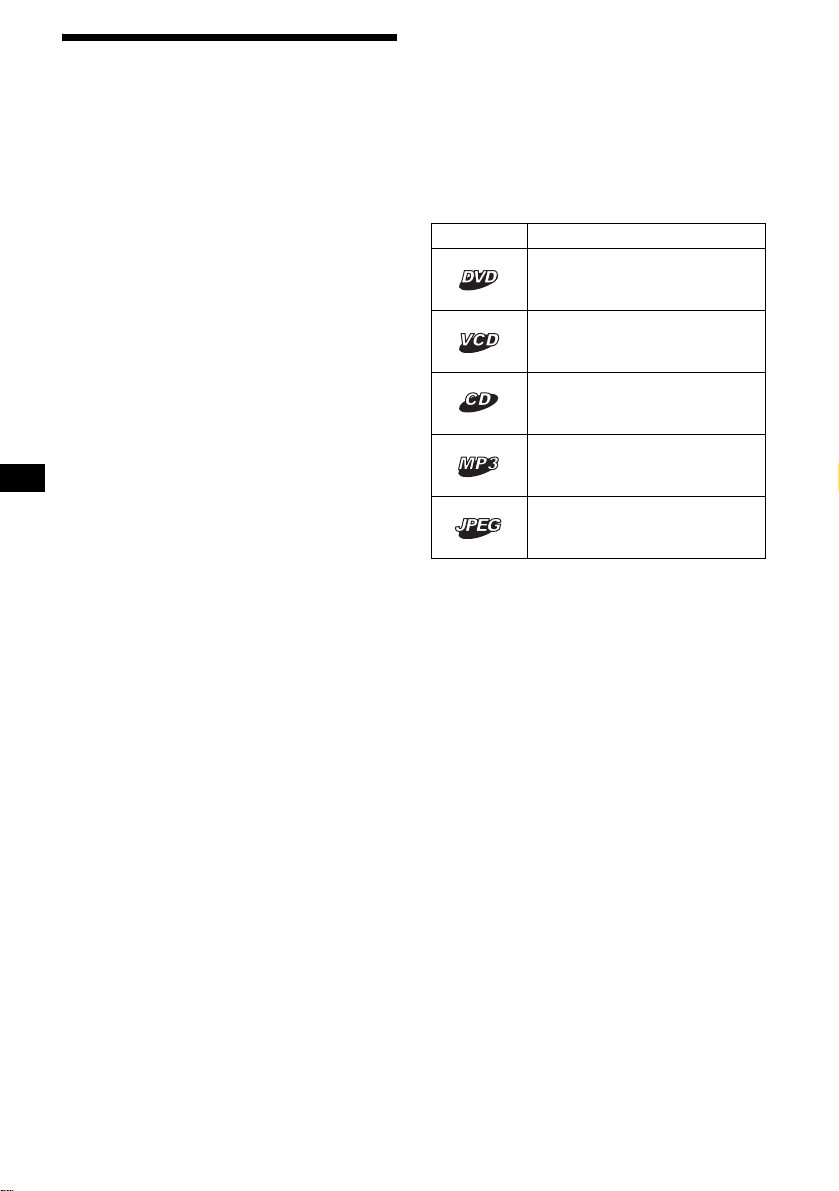
• The meaning of the icons u sed in thi s manual is
described bel ow:
Icon Meaning
Functions available for DVD
VIDEOs or DVD-Rs/DVD-RWs
in video mode
Functions available for Video
CDs or CD-Rs/CD-RWs in video
CD format
Functions available for music
CDs or CD-Rs/CD-RWs in
music CD fo rmat
Functions available for files in
MP3 format stored on CD ROMs/CD-Rs/CD-RWs
Functions available for files in
JPEG format stored on CDROMs/CD-Rs/CD-RWs
4
Page 5
Precautions
Playable discs
If you have any questions or pr obl ems
concerning your unit that are not covered in this
manual, please consult your nearest Sony de al er.
For drivers
• Do not use the cust om functions while driving,
or perform any othe r function which could
divert your attention from the road.
• If your car was pa rked in direct sunlight , a ll ow
the unit to cool off before operating it.
On safety
• Comply with the Traffic Laws in your coun tr y.
• For your safety, the monitor connected to the
FRONT VIDEO OUT turns off automatically
when the parking brake is not applied.
Preventing an accident
The pictures appea r only after you park the ca r
and set the parking brake.
When the car starts moving, the pictures
coming from the FRONT VIDEO OUT
automatically disappear after displaying the
following caution.
The monitor connect ed to the REAR VIDEO
OUT is available while the car is in motion.
The pictures on the screen are turned off, but
CD/MP3 sound can be heard.
For your safety,
the video is blocked.
Do not operate the unit or watch the monitor
while driving.
Moisture condensation
On a rainy day or in a very damp area, moisture
condensation may occur inside the lenses and
display of the unit. Should this occur, the unit
will not operate p roperly. In such a case, remove
the disc and wait for about an hour until the
moisture has evaporated.
To maintain high sound quality
Be careful not to splash juice or other soft drinks
onto the unit or discs.
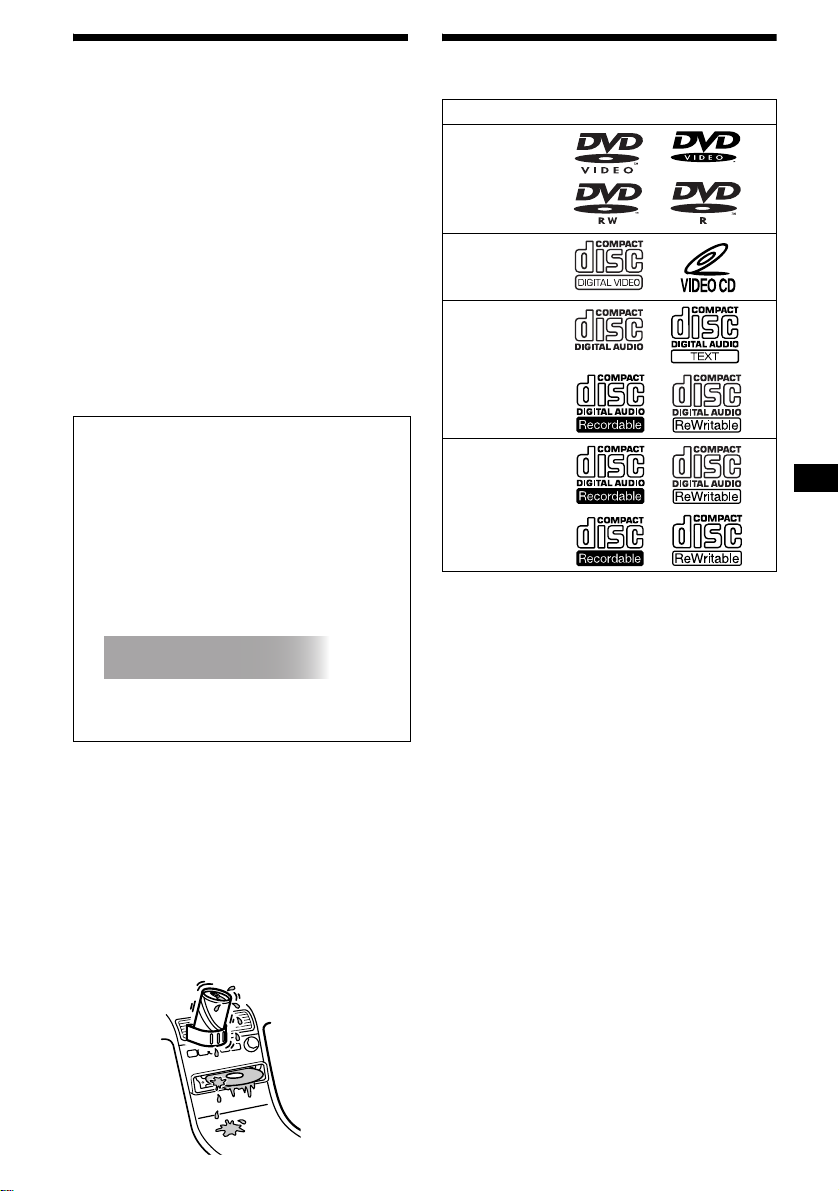
Format of discs
DVD
Video CD
Audio CD/
CD-R/CD-RW
CD-R/CD-RW
(MP3/JPEG)
“DVD VIDEO ,” “DVD-R” and “DVD-RW” are
trademarks.
DVD
A DVD contains both audio and visual data. A 12
7
cm (4
/10 in) disc ca n ho ld 7 ti mes th e a mou nt of
data contained in a CD- ROM, wh ic h equals to 4
consecutive hours of pl ayi ng time (8 hours for
double-sided dis cs ). DVDs are divided int o 4
types: single sided single layer , sin gle sided
double layer, double side d si ngle layer, and
double sided double layer.
Video CD (VCD)
A Video CD can contain both audio and visual
data on a disc the same size as a regular Audio
CD. The playing time is 74 minutes for a
standard 12 cm (4
Audio CD
An Audio CD containing audio data. The playing
time is 74 minutes f or a sta ndard 12 cm ( 4
7
/10 in) CD.
7
/10 in)
CD.
CD-Recordable (CD-R)
With a CD-R, you can edit audio data. You can
write information on a CD-R only once.
CD-Rewritable (CD-RW)
With a CD-RW , you can edit audio data. You can
write information on a CD-RW again and again.
continue to next page t
5
Page 6

CD-Extra
A CD-Extra has two sections (sessions) for audio
and data respectively. You can only play the
section of audio on this unit.
Notes
• This unit conforms to the NTSC color system. A disc
recorded in a color system other than NTSC, such
as PAL or SECAM, cannot be played.
• You can play DVD-Rs/DVD-RWs and CD-Rs/CDRWs designed for audio with this unit. H owever,
depending on the recorded conditions, you cannot
play some discs.
• The discs listed below cannot be played on this unit:
– 8 cm (3 in) discs
– CD-ROM (the data other than the MP3 or JPEG
files)
– CD-G
–Photo-CD
– VSD (Video single disc)
–DVD-ROM
– DVD-RAM
–DVD-Audio
– Active-Audio (Data)
– CD-Extra (Data)
– Mixed CD
– SVCD (Super Video CD)
– DVD-RW recorded in VR mode
Note on transparent discs
12 cm (4 7/10 in) discs containing of only an inner
8 cm (3 in) data portion (the rest is transparent)
cannot be played on this unit.
Music discs encoded with copyright
protection
This unit is designed to play back discs that
conform to the Compact Disc (CD) standard.
Recently, various music discs encode d w ith
copyright protect io n are marketed by some
record companies. Please be aware that am ong
those discs, there are some that do not confor m to
the CD standard and may not be playable and
recordable by this product.
Region code
This syste m is used to protect softw a re
copyrights.
The region code is located on the bottom of the
unit, and only DVDs labeled the identical region
code can be played on t h i s unit.
MODEL NO.
DVD PLAYER
DC : 12V
N E G A T I V E G R O U N D
Region code
DIGITAL OUT
REMOTE SIGNAL IN
TOP
FRONT
REAR
BOTTOM
R
L
VIDEO OUT
AUDIO OUT
DVDs labeled can be also played on this
ALL
CERTIFICATION
Sony Corporation
unit.
If you try to play any other DVD, the message
“Cannot play this di sc.” will appear on the
monitor screen. D epending on the DVD, no
region code may be label ed even though playing
the DVD is prohibited by area restrictions.
Note on playback operations of DVDs
and VCDs
Some playback operations of DVDs and VCDs
may be intentiona lly set by software producers.
Since this unit plays DVDs and VCDs according
to the disc contents the software produc er s
designed, some playback features may not be
available. Also, refer to the instructions supplied
with the DVDs or VCDs.
6
Page 7

Copyrights
This product incorporates copyright protection
technology that is protected by method claims of
certain U.S. pate nt s , ot her intellectual property
rights owned by Macrovision Cor poration, and
other rights owners. U se of this copyright
protection technology must be authorized by
Macrovision Corporation, and is intended for
home and other limited vie w in g us es only unless
otherwise authorized by Macrovision
Corporation. Reverse engineering or disassembly
is prohibited.
Manufactured u nder license from Dol by
Laboratories.
“Dolby” an d t he double-D symb ol are
trademarks of Dolby Laboratories.
Confiden t ial unpublis hed works. Copyright
1992–1997 Dolby Laboratories. All
rights reserved.
“DTS,” “DTS Digital Surround” and “D TS
Digital Out” are trademarks of Digital Theater
Systems, Inc.
7
Page 8
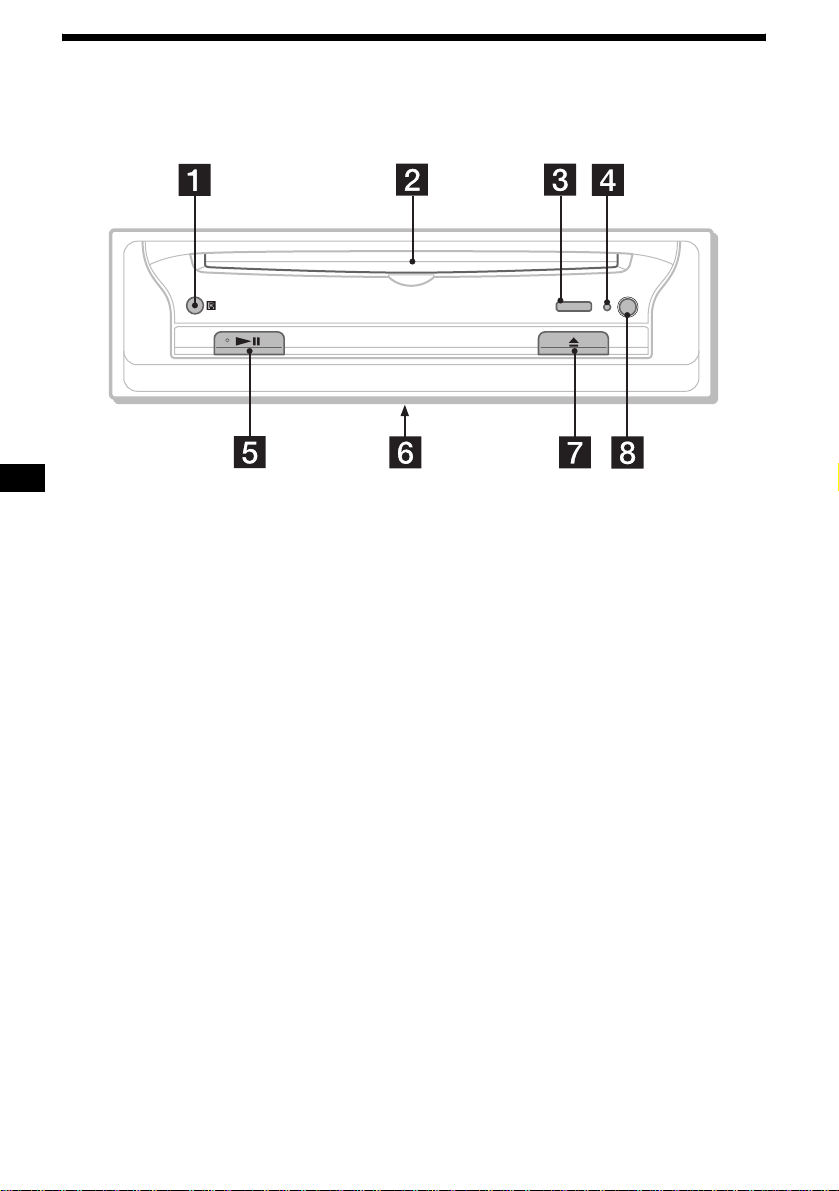
Location of controls
Front panel
DISC IN
OFF
DVX-11A
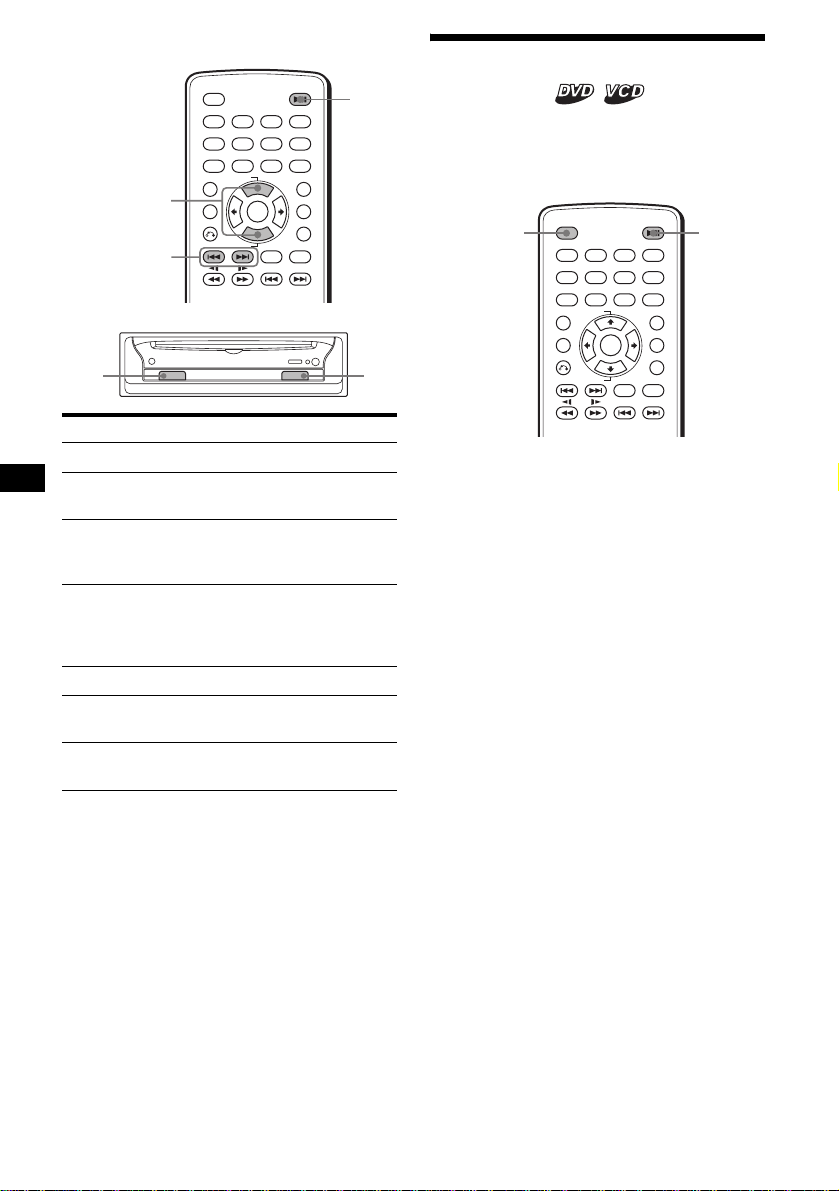
a Receptor for the card remote
commander
b Disc slot
c DISC IN indicator
Lights up in blue when a di sc is stored.
d Reset button
e u (play/pause) button*
1
f Signal select switch
(Located on the bottom of the unit)
See “Operating the unit via connected
monitor” in the Installation/Connections
manual.
g Z (eject) button
h OFF button*
*1 Use the tactile dot as a reference when operating
the unit.
*2 Warning when installing in a car without the
ACC (accessory) position on the ignition key
switch
Be sure to press and hold (OFF) on the unit until
the key illuminations in blue go off.
Otherwise, the unit does not turn off and this
causes battery drain.
2
Note
If the unit is turned off by pressing (OFF) for 2
seconds, press u on the unit to turn on the unit first.
In this case, the card remote commander is not
available to turn on the unit.
Tip
You can eject the disc any time whether the unit is
turned on or not, but you can insert the disc only when
the unit is turned on.
8
Page 9
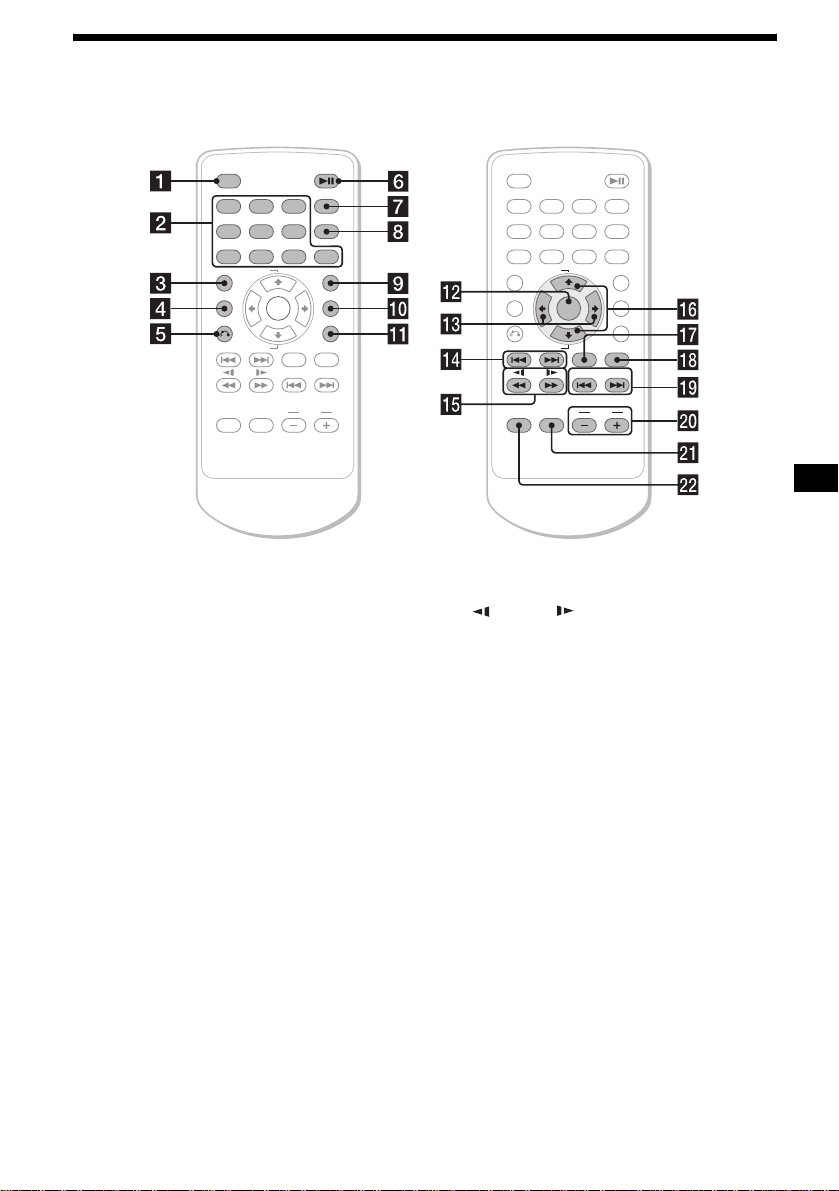
Card remote commander RM-X129
+
–
ENTER
AUDIO
SEEK
–
DISPLAY
CLEAR
0
LIST
SETUP
ANGLE
SUBTITLE
SEEK
123
456
789
TOP MENU
ALBUM
MENU
ALBUM
SOURCE
MODE
For the unit operations:
a OFF button
b Number buttons
c TOP MENU button
Displays the top menu on a DVD.
d MENU button
Displays the menu on a disc.
e O (return) button
Returns to the previous display, or previous
operation.
f u (play/p a use) butto n
g DISPLAY button
Displays current playback status and text
information.
h CLEAR button
Cancels the num bers entered.
i LIST button
Displays the list of playback items.
j SETUP button
Displays the Setu p m enu and Play mode
menu.
k ANGLE button
Changes the viewing angle.
l ENTER button
Applies a setting.
m </, buttons
Move the cursor, or turn the pages .
OFFOFF
1
456
7 890
TOP MENU
ALBUM
MENU
ALBUM–
+
SOURCE
MODE
23
+
ENTER
AUDIO
SEEK–SEEK
VOLVOL
DISPLAY
CLEAR
LIST
SETUP
ANGLE
SUBTITLE
+
n ./> (previous/next) buttons
o m/M (search/slow) buttons
p M ALBUM+/m ALBUM– buttons
Move the cursor, or select the album .
q AUDIO button
Changes the au dio output.
r SUBTITLE button
Changes the subtitle language.
For the Media center/receiver XAV-7W
operations:
These buttons contr ol the optional Media cen te r/
receiver XAV-7W which is connected to this unit.
s .SEEK–/>SEE K+ buttons
t VOL +/– buttons
u MODE button
v SOURCE button
Note
If the unit is turned off by pressing (OFF) for 2
seconds, press u on the unit to turn on the unit first.
In this case, the card remote commander is not
available to turn on the unit.
Tip
Refer to “Replacing the lithium battery” for details on
how to replace the batteries (page 30).
9
Page 10
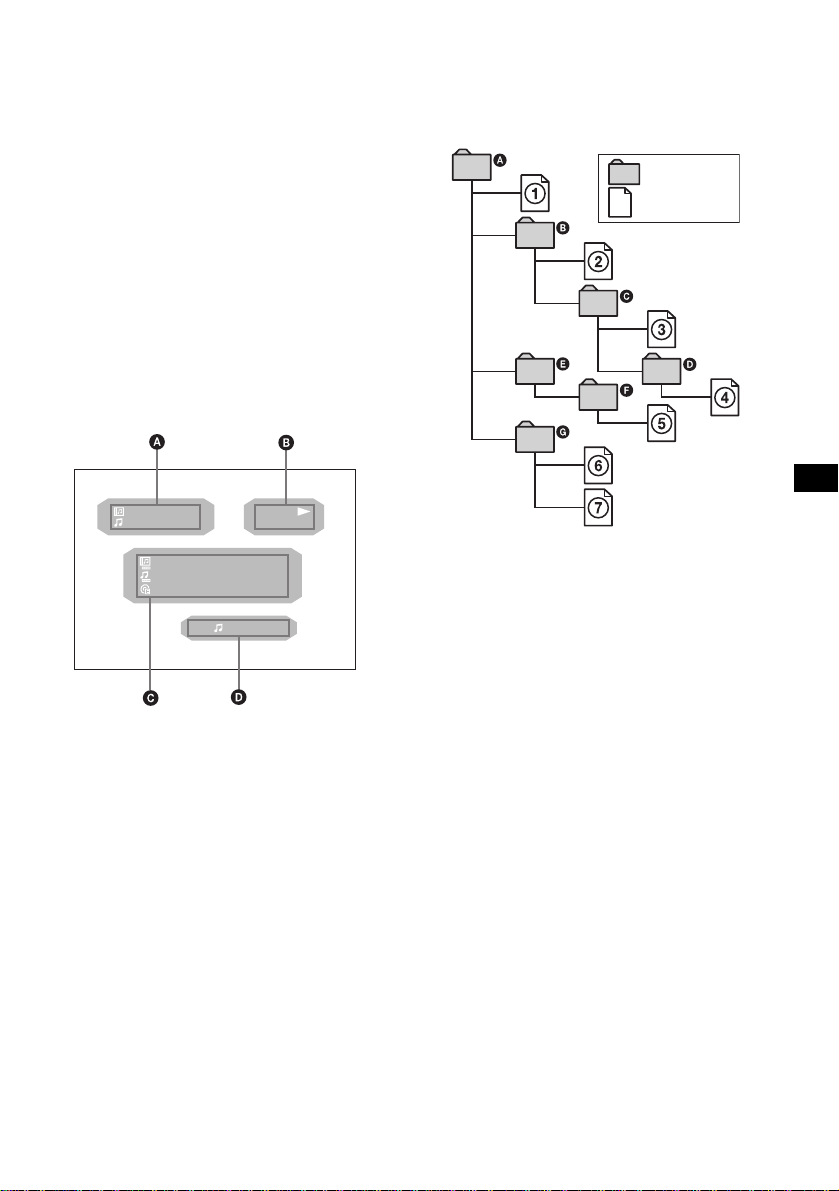
Menu displays
Use the menus of this unit to adjust the various functions and settings for playback.
The displaying menu differs depending on the st at us of the unit.
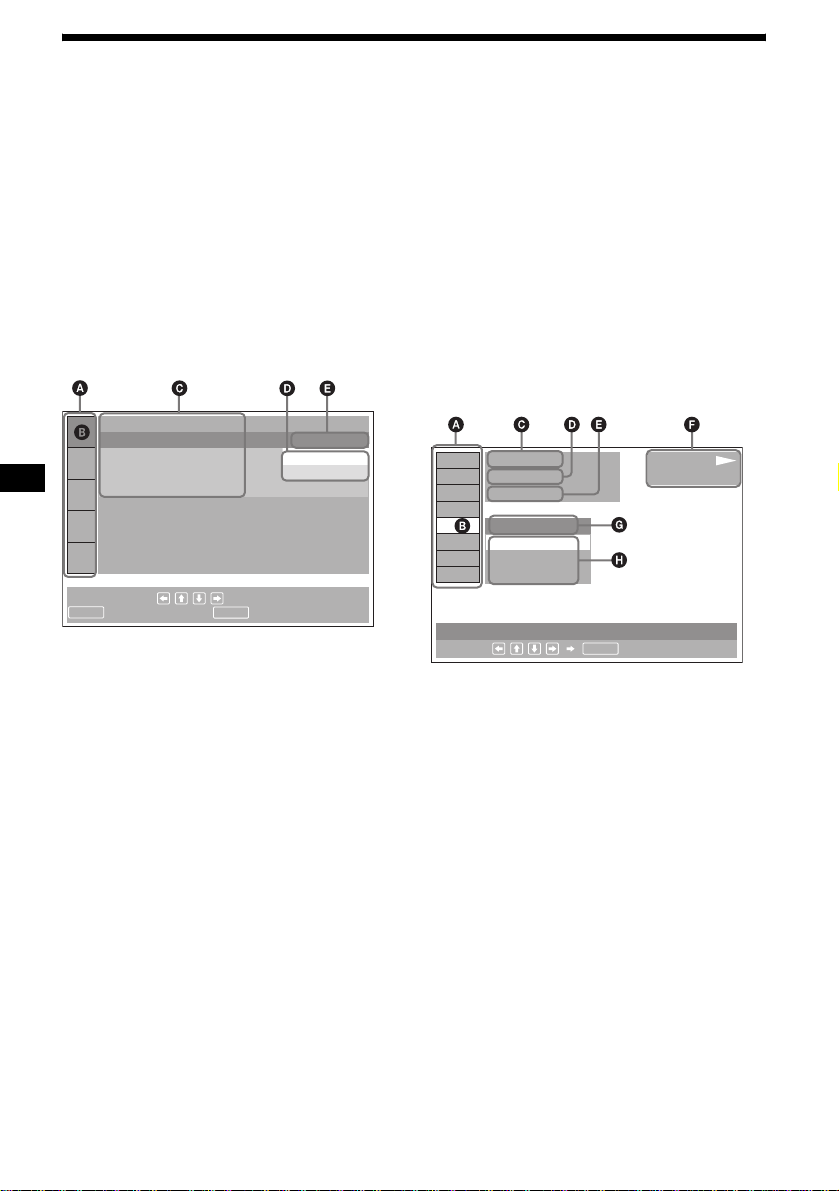
Setup menu
Appears when pressing (SETUP) while
playback is stopped.
T o select the item
Press </M/m/,, then press (ENTER).
To turn off the Setup menu
Press (SETUP).
Example: When “LANGUAGE SETUP” is
selected.
LANGUAGE SETUP
OSD:
MENU:
AUDIO:
SUBTITLE:
To set, press , then
ENTER SETUP
. To quit, press
ENGLISH
JAPANESE
ENGLISH
ENGLISH
A Setup items
B Selected item
C Setting items
D Options
E Current setting
Play mode menu
Appears when pressing (SETUP) during
playback.
To select the item
Press </M/m/,, then press (ENTER).
To turn off the Play mode menu
Press (SETUP).
Note
The items on the menu, and the operation procedures
differ depending on the disc.
Example: When pl aying a DVD
)
12(67
018(034
T 1:35:55
1:ENGLISH
1:ENGLISH
2:FRENCH
3:SPANISH
SUBTITLE
Select :
)
ENTER
PLAY
DVDVIDEO
A Play mode items
B Selected item
C Title number*
D Chapter number*2/Total chapter number*
1
/Total title number*
1
2
E Elapsed playback time
F Playback status (NPLAY, XPAUSE, etc.) /
Disc format
G Current setting
H Options
*1 Displays the track number for VCDs/CDs, album
number for MP3/JPEG files. When playing VCD
with the PBC function on, no indication is
displayed.
*2 Displays the track number for MP3/JPEG files.
10
Page 11
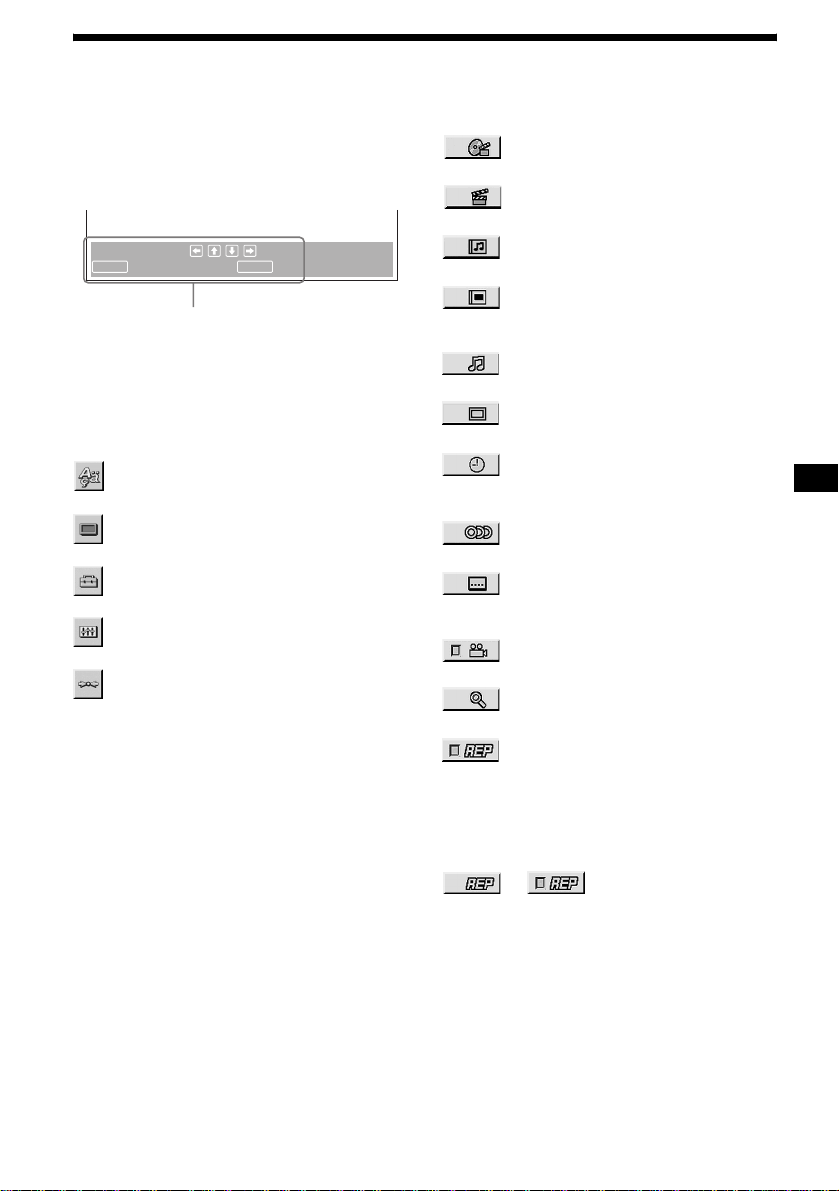
Operation message
Menu operations di ffer depending on the item
selected, and the buttons to be used appear on the
bottom of the menu display to assist your
operations.
To set, press , then
ENTER SETUP
. To quit, press
Selected item name and/or
operation massages appear.
Tip
“Operation not possible” appears when the function is
not available.
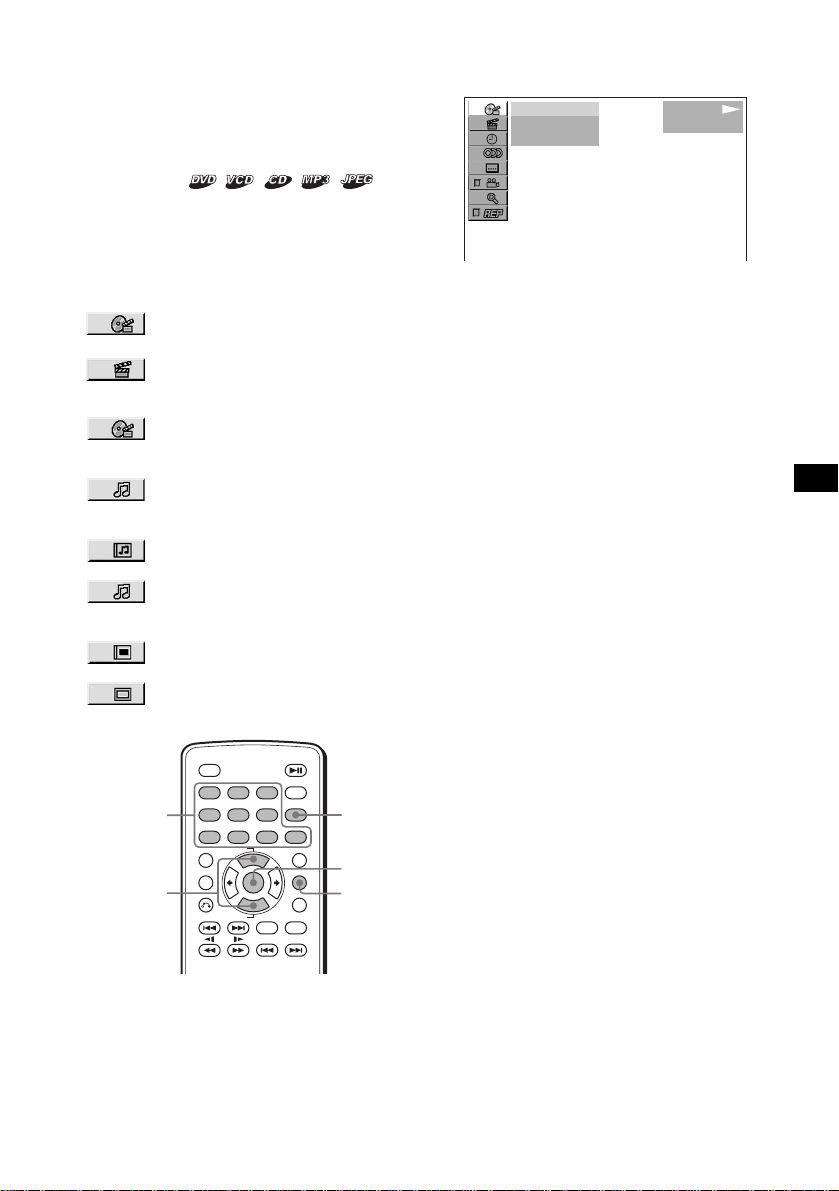
Setup items
LANGUAGE SETUP (page 27)
Switches the languages.
SCREEN SETUP (page 27)
Selects the screen modes.
CUSTOM SETUP (page 28)
Sets the playback operations.
AUDI O SETUP (page 29)
Adjusts the output sound.
RESET (page 26)
Resets all setup items.
Play mode items
TITLE, TRACK (page 19)
Selects the title, or track to be played.
CHAPTER (page 19)
Selects the chapter to be played.
ALBUM (MP3) (page 19)
Selects the album to be di splayed.
ALBUM (JPEG) (page 19)
Selects the image album to be
displayed.
TRACK (page 19)
Selects the track to be played.
IMAGE (page 19)
Selects the image to be displayed.
TIME (page 15)
Checks the elapsed time and the
remaining playba ck time.
AUDIO (page 20)
Changes the audio s et t in g.
SUBTITLE (page 22)
Displays the subtitles.
Changes the subtitle language.
ANGLE (page 21)
Changes the angle .
CENTER ZOOM (page 22)
Magnifies the picture .
REPEAT (pag e 18)
Plays the entire disc (all titles/all tracks/
all albums) repeate dl y, or one chapte r/
track/album repeatedly.
Tip
When “REPEAT” is activa ted, o r “A NGLE” is available,
its check-box lights up in green (e.g.
t
).
11
Page 12
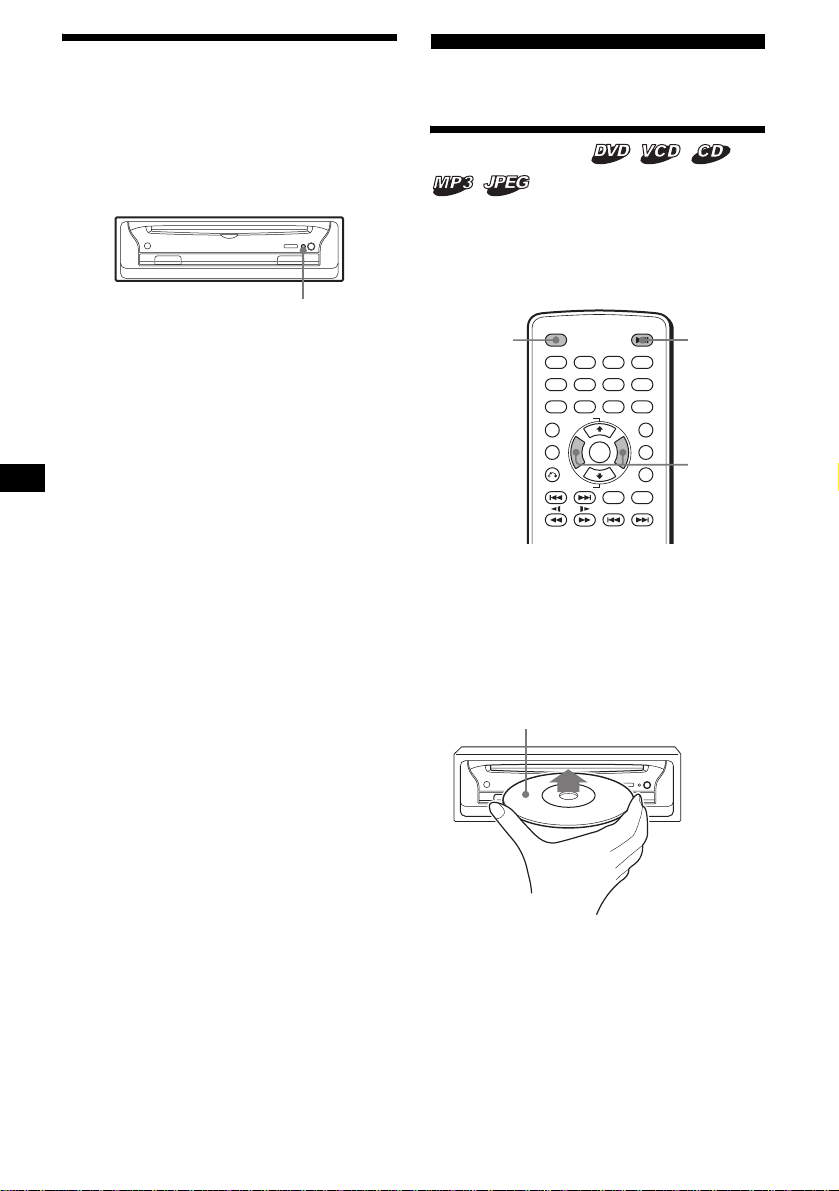
Resetting the unit
Before operating the unit for the first time, or
after replacing the car battery or chan gi ng the
connections, you must reset the unit. Press the
reset button with a pointed object, such as a ballpoint pen.
Player
Playing discs
DISC IN
OFF
Reset button
Notes
• Pressing the reset button will erase some stored
settings.
• The unit performs initial setting for about 10 seconds
after you press the reset button. During this period,
do not insert a disc, otherwise the unit may not be
reset.
Depending on the di sc, some operation s may be
different or restri cted.
Refer to the operating instructions supplied with
your disc.
OFF
1
23
456
789
+
TOP MENU
ALBUM
ENTER
–
ALBUM
AUDIO
SEEK
–
DISPLAY
CLEAR
0
LIST
SETUPMENU
ANGLE
SUBTITLE
SEEK
uOFF
</,
+
1 Turn on your monitor, then select the
input source on your monitor
corresponding to this unit.
When using audio equipment:
Turn on the audio equipment, and s el ect the
appropriate channel for this unit.
2 Insert a disc.
Playback side down
12
Playback starts automatically (Depending on
the disc, press u to start playback).
A menu may appear on t he scr een when a
DVD or VCD is inserted.
For details on these menus, see page 17 for
DVDs, and page 18 for V C Ds.
Page 13
When “MP3/JPEG” on “CUSTOM SETUP”
is set to “JPEG,” a slide show starts
automatically when JPEG fil es are on the dis c
(page 28).
Each time you pr ess </,, the image
rotates every 90º.
Notes
• If a large-size image is rotated, it may take longer to
display.
• A JPEG file is designed to be optimally displayed at
640 × 480 pixels. If displayed in another size, picture
shift (to the left or right) may occur.
When the disc is inserted
Press u to start playback.
To stop playback/to turn off the unit
Press (OFF).
Tip
You cannot insert a disc while the unit is turned off.
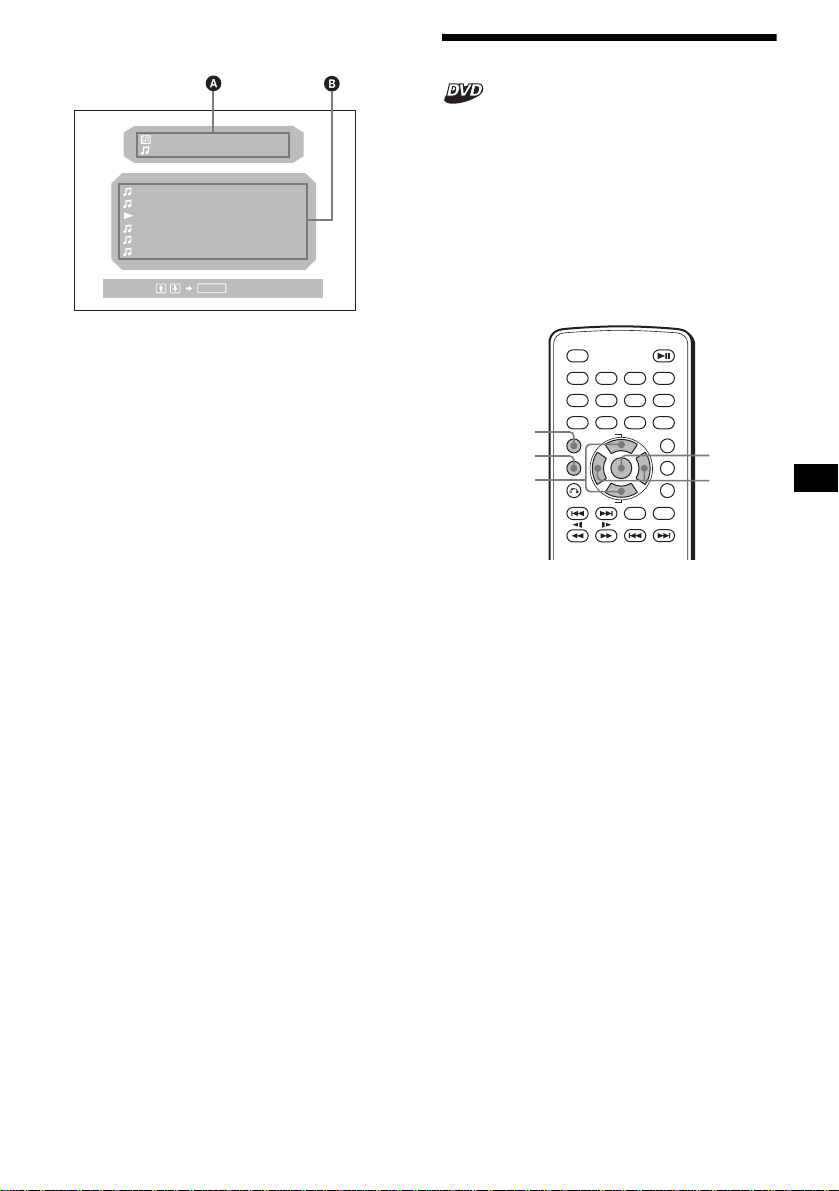
Display items on the CD/MP3 playback
The playback order of MP3 files
The playback or der of albums and tracks (MP3
files) recorded on a disc is as follows:
Structure of disc cont e n ts
Tree 1 Tree 2 Tree 3 Tree 4 Tree 5
ROOT
Album
Track
123
123
:
ALBUM NAME
:
TRACK NAME
:
ID3 INFORMATION
REP 160K
001
001
PLAY
MP3120:42
A Album number*2/Track number/
Elapsed playback time
B Playback status (NPLAY, XPAUSE, etc.)/
Disc format
C Disc name*
ID3 tag information (ver.1 only)*
D Playback mode/Bit rate*2*
*1 “NO DISC NAME” or “NO TRACK NAME” appears
when the disc or track has no name.
*2 Appears only when MP3 files are played.
*3 No indication when VBR (Variable bit rate) is
applied.
1
/Album name*2/Track name/
2
3
To scroll the text information
Press (DISPLAY).
Note
“
” appears in place of the letters other than the
*
alphabet and numbers.
Notes on DVDs with a DTS sound track
The DTS audio signal is being output at all times, a
loud noise may come out from the speakers if you
connect the unit to the audio equipment without a DTS
decoder. This may cause damage to the speakers, or
affect your ears.
When the disc stored MP3 files is inserted, th e
tracks are played sequ entially from
1 through 7
as numbered. Any sub-albums/tracks contained
within a currently selected album take priority
over the next album in the same tree. (Example:
C contains D so
4 is played befor e 5.)
In the MP3 albums list t hat appears when you
press (LIST), the albums are arranged in the
following order: A t B t C t D t F
t G. Albums that do not cont ai n tr acks (such
as album E) do not appear in the list.
Notes
• The playback order may differ depending on the
writing software.
• The playback order may not be applicable if a total
number of albums and tracks on the disc are over
512.
• The unit can play up to 256 albums. Albums more
than first 256 albums cannot be recognized on this
unit.
Tips
• If you add numbers (01, 02, 03, etc.) to the front of
the track file names, the tracks will be played in that
order.
• Since a disc with many trees takes longer to start
playback, it is recommended that you create albums
of no more than two tree levels.
continue to next page t
13
Page 14
Additional operations
OFF
1
23
456
789
+
TOP MENU
ALBUM
M/m
./>
ALBUM
ENTER
–
AUDIO
SEEK
SUBTITLE
–
DISC IN
To Operation
DISPLAY
CLEAR
SEEK
0
LIST
SETUPMENU
ANGLE
u
+
OFF
Zu
Pause Press u
Resume play after
Press u
pause
Go to the ne xt chapt er ,
Press >
track, or scene in
continuous play mode
Go back to the
Press .
previous chapter,
track, or scene in
continuous play mode
Go to the next album Press M*
Go to the previous
Press m*
album
Stop play and remove
Press Z
the disc
* Available only when MP3 or JPEG files are played.
Resuming playback
— Resume play
The unit stores the po i nt w h er e you stopped
playback for up to 2 0 discs, and starts resuming
playback even after the u nit is turned off, or the
disc being played is ej ected.
OFF
1
23
456
789
+
TOP MENU
ALBUM
ENTER
–
ALBUM
AUDIO
SEEK
–
1 During playback, press (OFF) to stop.
2 Press u to resum e playb ack.
Playback starts from the point stopped in
step 1.
To play from the beginning
After setting “MULTI-DISC RESUME” in
“CUSTOM SETUP” to “O FF” (page 28 ), pr ess
Z to eject the disc, then insert the di sc again.
Select the desired chapter on the DVD menu or
the Top menu depending on the disc.
Notes
• MP3 playback will start from the beginning of the last
track that was played.
• To use the resume playback, make sure that
“MULTI-DISC RESUME” in “CUSTOM SETUP” is
set to “ON” (page 28).
• When storing a resume point for the 21st disc, the
stored resume point for the 1st disc is cleared
automatically.
• The resume playback is canceled when the setting
for the parental controls is changed.
• Depending on the disc or scene, you cannot use the
resume playback.
• If parental control is applied, the resume playback
function dose not work. In this case, payback starts
from the begnning of the disc when you insert the
disc.
Tip
When CD, MP3 files, or JPEG files are played, the unit
tentatively stores the resume point for the disc being
played. Once the unit is turned off or the disc is
ejected, the stored resume point for the disc is
cleared.
DISPLAY
CLEAR
0
LIST
SETUPMENU
ANGLE
SUBTITLE
SEEK
uOFF
+
14
Page 15
Checking the running time
— Time information
You can check the playing time and remainin g
time of the current title, chapter , or track.
OFF
1
456
789
TOP MENU
ALBUM
ALBUM
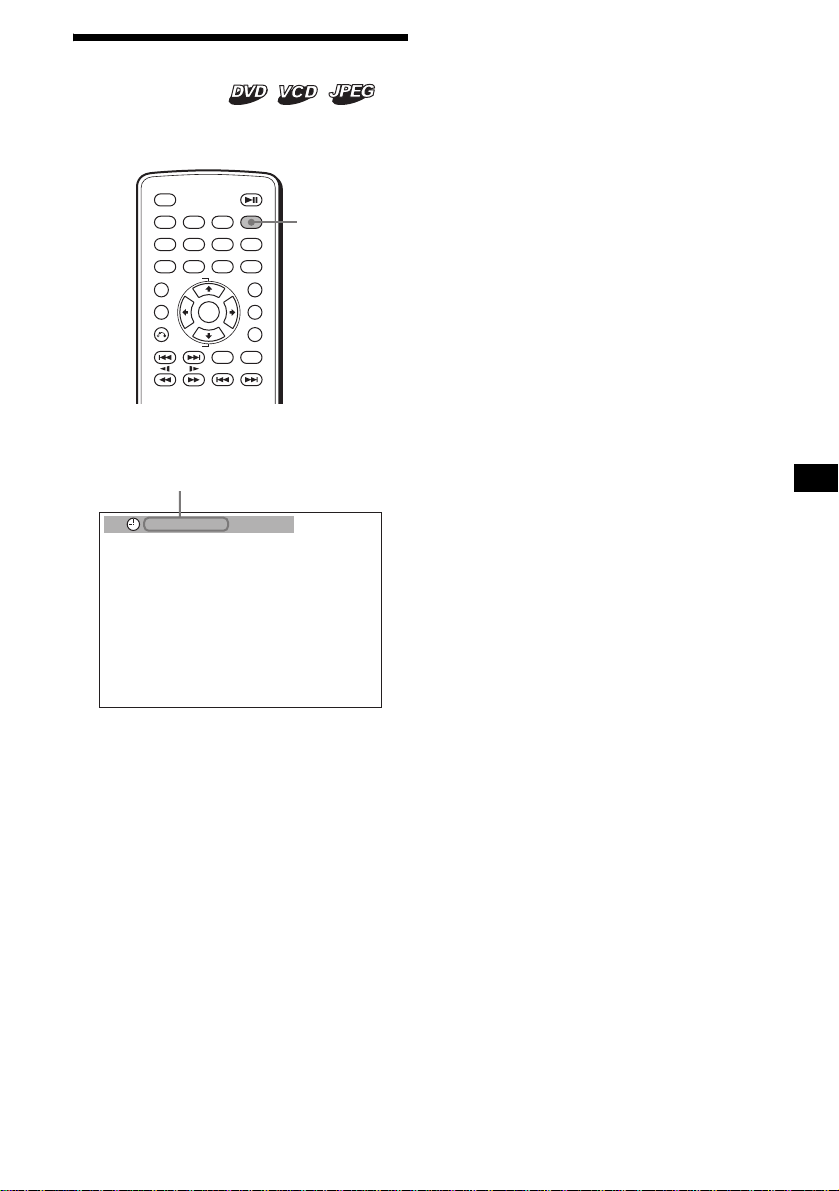
1 During playback, press (DISPLAY).
The current playback information appears.
Time information
T 1:01:57
23
+
ENTER
–
AUDIO
SEEK
–
DISPLAY
CLEAR
0
LIST
SETUPMENU
ANGLE
SUBTITLE
SEEK
DISPLAY
+
2 Press (DSPL) repeatedly to switch the
time information.
Time information differs depending on the
disc as follows:
DVD:
“T **:**:**” - Elapsed playing time of
the current title
“T-
**:**:**
current title
“C
**:**:**
the current chapter
“C-
**:**:**
current chapt er
VCD (without PBC functions):
“T **:**” - Elapsed playing time of the
current track
“T-
**:**
track
“D
**:**
current disc
“D-
**:**
disc
JPEG:
Album number
Image number
” - Remaining time of the
” - Elapsed playing time of
” - Remaining time of the
” - Remaining time of the c urre nt
” - Elapsed playing time of the
” - Remaining time of the c urrent
BRAHMS SYMPHONY
15
Page 16
Searching a specific point on
a disc
— Scan/Slow-motion play/Lis t
You can quickly locate a specific point on a disc
by monitoring the pict ure, playing back slowly,
or selecting from the list.
OFF
1
23
456
789
+
TOP MENU
ALBUM
M/m
/
Note
Depending on the DVD/VCD, you may not be able to
perform some of the operations described.
ALBUM
–
ENTER
AUDIO
SEEK
–
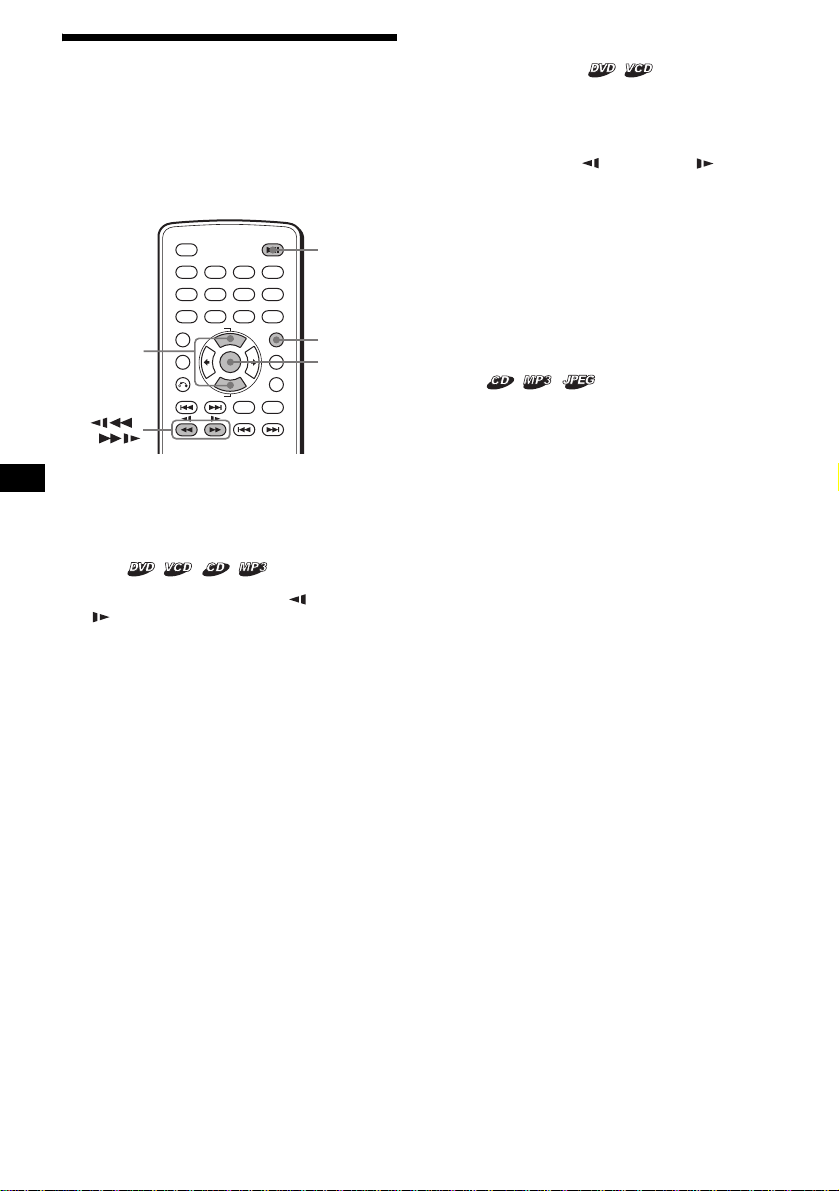
Locating a point quickly
— Scan
During playback, press and hold m or
M , and release at the desired point.
If you press an d hold the button, sear ch in g spee d
increases.
Note
You cannot hear audio while searching.
DISPLAY
CLEAR
0
LIST
SETUPMENU
ANGLE
SUBTITLE
SEEK
u
LIST
ENTER
+
Playing at slow speed
— Slow-motion play
You can play a disc at variou s sl ow speeds.
1 Press u to pause playback.
2 Press and hold m* or M .
Slow playback starts.
* Available only when a DVD is played.
To return to normal playback
Press u.
Notes
• You cannot hear audio during slow-motion play.
• Depending one the disc, pictures may be distorted
during slow-motion play.
Selecting an album and track
— List
You can locate the desired contents on the list of
albums, and tracks/images.
1 During playback, press (LIST)
repeatedly to display the desired list.
Each time you press (LIST), the list changes
as follows:
Album list* t Track/Image lis t t
Normal play mode tAlbum list*
* Appears only when MP3/JPEG files are played.
2 Press M/m to select the desired item
(Album, Track, Image), then press
(ENTER).
Playback starts. When the album is selected,
playback of the 1st track/image on the album
selected starts.
16
Page 17
Display items on the list
Using the menus on DVDs
333:
Select :
333:
331:
TRACK NAME
332:
TRACK NAME
333:
TRACK NAME
334:
TRACK NAME
335:
TRACK NAME
336:
TRACK NAME
ALBUM NAME
TRACK NAME
ENTER
001
002
003
004
005
006
003
003
A Current track/album*1/image*2 number and
name
B The track/album*
*1 Appears only when a MP3 file is played.
*2 Appears only when a JPEG file is played.
Note
“
” appears on the list in place of characters other
*
than alphabet and numbers.
1
/image*2 names
With some DVDs you can use th e original menu,
such as Top menu and DVD menu.
If the DVD contains several titles of tracks and
scenes, you can us e th e Top menu to select the
desired titl e, an d start playing .
If the DVD contains more comprehensive Menu
items such as the audio languages, subtitle
languages, titles, and chapters, etc., you can use
the DVD menu to select the desired item, and
start playing.
TOP MENU
MENU
M/m
OFF
1
456
789
TOP MENU
ALBUM
ALBUM
23
+
ENTER
–
AUDIO
SEEK
–
DISPLAY
CLEAR
0
LIST
SETUPMENU
ANGLE
SUBTITLE
SEEK
ENTER
</,
+
1 During a DVD playback, press
(TOP MENU) or (MENU).
The DVD menu or Top menu appears.
The contents of the menu differ depending on
the disc.
2 Press </M/m/,, or t he nu m ber
buttons to select the desired item,
then press (ENTER).
Note
The items on the menu, and the operation procedures
differ depending on the disc.
17
Page 18
Using PBC functions
— PBC (Playback control)
The PBC menu assists your operation
interactively while a PBC compatible VCD is
played.
OFF
Number
buttons
O
1
456
789
TOP MENU
ALBUM
ALBUM
1 Start playing a PBC compatible VCD.
The PBC menu appears .
2 Press the number buttons to select the
desired item, then pres s (ENTER).
3 Follow the instructions in the menu for
interactive operation s.
To return to the previous dis play
Press O.
Playing without the PBC function
1 During playback, press (OFF).
2 Press the number buttons to select the
desired item, then pres s (ENTER).
“Play without PB C” appears and pl ayback
starts.
The PBC menu does n ot appear during
playback.
Notes
• The items on the menu, and the operation
procedures differ depending on the disc.
• During PBC playback, the track number, playback
time, etc., are not displayed in the Play mode menu.
Tip
To resume PBC playback, eject the disc once, and
insert again. PBC playback starts.
23
+
ENTER
–
AUDIO
SEEK
–
DISPLAY
CLEAR
0
LIST
SETUPMENU
ANGLE
SUBTITLE
SEEK
ENTER
+
Playing in various modes
— Repeat play/Search play
You can set the following pla y m odes:
• Repeat Play (page 18)
• Search Play (page 19)
Notes
• The selected play mode is canceled when the disc
being played is e jected or the unit is turned off.
• Wh en pl aying VCD with the PBC fun cti on on,
Repeat play is not available.
Playing repeatedly
— Repeat play
The unit can repeat a title, chapter, or track when
the item being pla yed reaches the end.
The following repeat options are available:
• TITLE (Ti tle Repeat) - to repe at the current
title.
• CHAPTER (Chapter Repeat) - to repeat the
current chapter.
• TRACK (T rack Repeat) - to repeat the cu rrent
track/image.
• ALBUM (Album Rep eat) - to repeat the tra cks/
images in the cu rrent album.
M/m
1 During playback, press (SETUP).
The Play mode menu appears.
2 Press M/m to select “REP,” then press
(ENTER).
The Play mode options appear.
3 Press M/m to select the desired option,
then press (ENTER).
Repeat play starts.
To return to normal play
Select “OFF” in step 3.
OFF
1
456
789
TOP MENU
ALBUM
ALBUM
23
+
ENTER
–
AUDIO
SEEK
–
DISPLAY
CLEAR
0
LIST
SETUPMENU
ANGLE
SUBTITLE
SEEK
+
ENTER
SETUP
18
Page 19
To turn off the Play mode menu
Press (SETUP).
Tip
The repeat options differ depending on the disc.
Starting playback from the point
selected
— Search play
You can quickly locate a de si red point by
specifying the tit l e, chapter, track.
The following search options are available
depending on the di sc:
DVD:
• TITLE starts playing from the
selected title.
• CHAPTER starts playing from the
selected chapter.
VCD:
• TRACK starts playing from the
selected track.
CD:
• TRACK starts playing from the
selected track.
MP3:
• ALBUM starts playing from the
selected album.
• TRACK starts playing from the
selected track.
JPEG:
• ALBUM starts playing from the
selected album.
• IMAGE starts playing from the
selected image.
2 Press M/m to select the desired search
item, then press (ENTER).
The search item s dif f er depe nd in g on th e di sc .
)
12(67
018(034
T 1:35:55
)
PLAY
DVDVIDEO
The number in parentheses indicates the tot al
number of items selected.
3 Press the number b uttons to ente r title
number, chapter number, track
number, or the elapsed time of the
title, or track.
To clear the numbers already input , pr ess
(CLEAR).
4 Press (ENTER).
Playback starts from the selected point.
To turn off the Play mode menu
Press (SETUP).
Number
buttons
M/m
OFF
1
456
789
TOP MENU
ALBUM
ALBUM
23
+
ENTER
–
AUDIO
SEEK
–
DISPLAY
CLEAR
0
LIST
SETUPMENU
ANGLE
SUBTITLE
SEEK
+
1 During playback, press (SETUP).
The Play mode m enu appears.
CLEAR
ENTER
SETUP
19
Page 20
Sound Adjustments
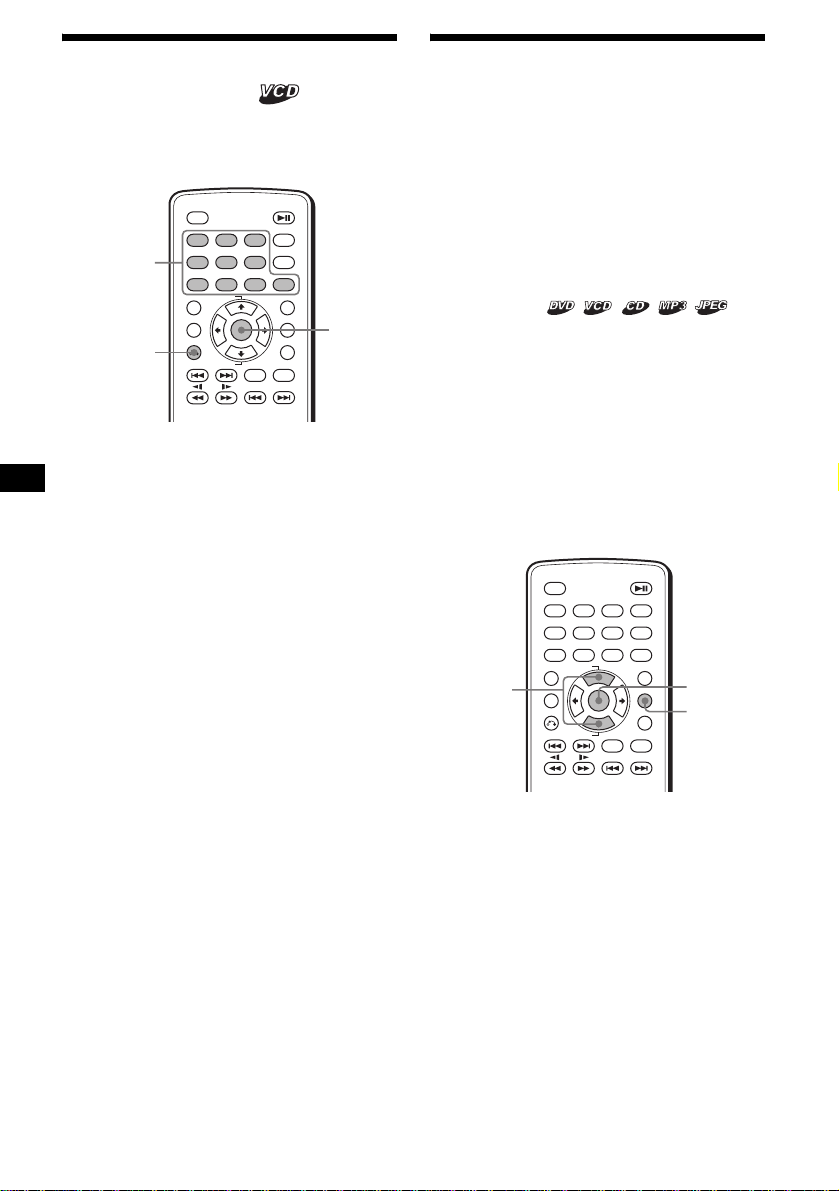
Changing the audio channels
When playing a DVD recorded in multiple audio
formats (PCM, Do l by Di gi t al , or DTS), you can
change the audio format. If the DVD is record ed
with multilingual tracks, you can als o change t he
language.
With VCDs, you can select the sound from the
right or left channel and listen to the sound of the
selected channel through both the right and left
speakers. For example, w hen playing a disc
containing a song with the vocals on the right
channel and the inst ruments on the left channel,
you can hear the instruments from both speakers
by selecting the left channel.
OFF
1
456
789
TOP MENU
ALBUM
M/m
ALBUM
During playback, press (AUDIO)
repeatedly to select the desired audio
channels.
1:ENGLISH DolbyD
23
+
ENTER
–
AUDIO
SEEK
–
DISPLAY
CLEAR
0
LIST
SETUPMENU
ANGLE
SUBTITLE
SEEK
ENTER
SETUP
+
VCD:
STEREO*: Standard stereo sound
1/L: Left channel sound (monaural)
2/R: Right channel sound (mon aural)
* The default setting
Tip
You can also change the settings by selecting
“AUDIO” in the Play mode menu (page 10).
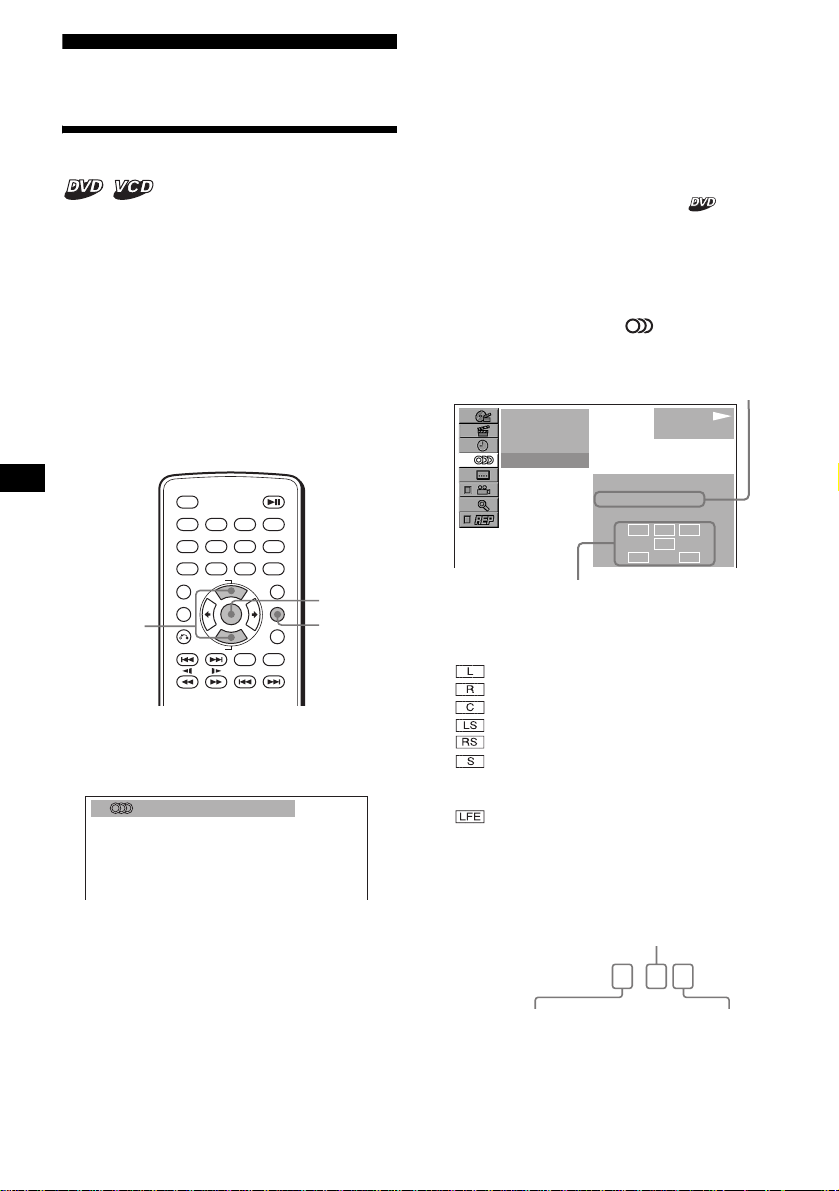
Checking the program format
You can check the numbe r of channels and
component positi on on the DVD being played.
1 During playback, press (SETUP).
The Play mode menu appears.
2 Press
then press (ENTER).
The program format appears.
The letters in the program format display
represent the foll owing sound components
and its positions:
to select “ ” (AUDIO),
M/m
Current audio format*
)
12(67
)
018(034
T 01:35:55
1:ENGLISH
PROGRAM FORMAT
DOLBY DIGITAL
Current program format*
PLAY
DVDVIDEO
3 / 2. 1
L C
LFE
LSRRS
2
:Front (left)
:Front (right)
:Center
:Rear (left)
:Rear (right)
:Rear (monaural): The rear com ponent
of the Dolby Surround processed signal
and the Dolby Digital si gnal
:Low Frequency Effect signal
1
Audio sound setti ngs differ depending on the
disc as follows:
DVD:
The audio language sw i t ches among the
avail able language s.
When 4 digits appear, input the language code
corresponding the desired language
(page 38).
When the same language is displayed two or
more times, the DVD is recorded in multiple
audio formats.
20
When “DOLBY DIGITAL” is applied, the
program format na m e and channel numbers
appear as follows:
Example: Dolby Digital 5.1 ch
Rear component×2
DOLBY DIGITAL
Front component×2 +
Center component×1
3 / 2 . 1
LFE component×1
Page 21
*1 “PCM,” “DTS,” or “DOLBY DIGITAL” appears
depending on the disc.
*2 Appears only when the “DOLBY DIGITAL” format is
applied.
To turn off the Play mode menu
Press (SETUP).
Tip
For Dolby Digital and DTS, “LFE” is always enclosed
in a solid line regardless of the LFE signal component
being output.
Picture adjustments
Changing the angles
You can change the viewing an gl e i f various
angles (multi-angles) for a scene are recorded on
a DVD.
OFF
1
456
789
TOP MENU
ALBUM
ALBUM
23
+
ENTER
–
AUDIO
SEEK
–
DISPLAY
CLEAR
0
LIST
SETUPMENU
ANGLE
SUBTITLE
SEEK
ANGLE
+
Press (ANGLE) repeatedly to select the
desired angle number.
)
2(2
The angle changes.
Tip
You can also change the viewing angle by selecting
“ANGLE” in the Play mode menu (page 10).
Note
Depending on the DVD, you cannot change the angles
even if multi-angles are recorded.
21
Page 22
Displaying the subtitles
Magnifying pictures
You can turn on or off the subtile, or change the
subtitle language if subtitles in one or more
language are recor ded on the DVD.
OFF
1
456
789
TOP MENU
ALBUM
ALBUM
23
+
ENTER
–
AUDIO
SEEK
–
DISPLAY
CLEAR
0
LIST
SETUPMENU
ANGLE
SUBTITLE
SEEK
+
SUBTITLE
1 During playback, press (SUBTITLE).
The subtitle language appears.
2 Press (SUBTITLE) repeatedly to select
the desired language, then press
(ENTER).
01:ENGLISH
The available languages differ depending on
the disc.
When 4 digits appear, input the language code
corresponding to the desired language
(page 38).
To turn off the subtile
Press (SUBTITLE) repeatedly to select “OFF.”
Tip
You can also change the subtitle language by
selecting “SUBTITLE” on the Play mode menu
(page 10) or the DVD menu (page 17).
Note
Depending on the DVD, you cannot change (or turn
off) the subtitles even if multilingual subtitles are
recorded.
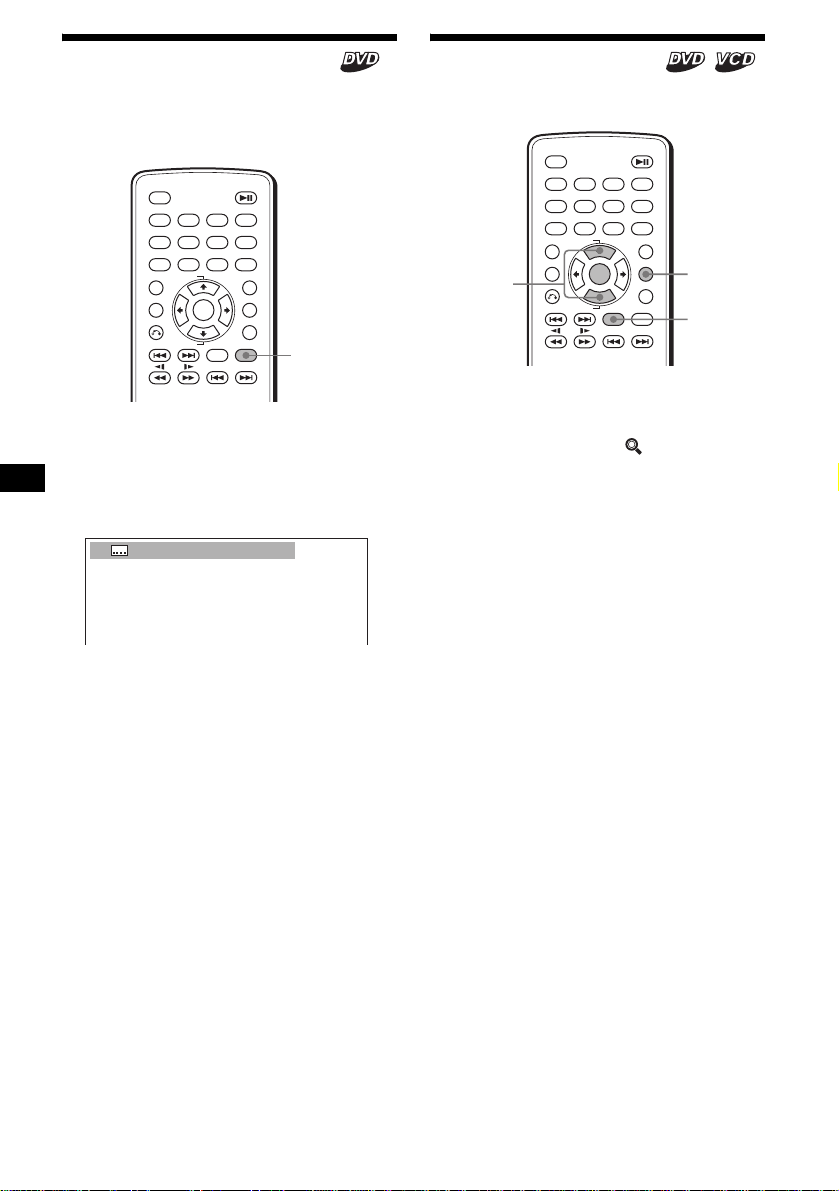
You can magnify pictures .
M/m
OFF
1
456
789
TOP MENU
ALBUM
ALBUM
23
+
ENTER
–
AUDIO
SEEK
–
DISPLAY
CLEAR
0
LIST
SETUPMENU
ANGLE
SUBTITLE
SEEK
SETUP
AUDIO
+
1 During playback, press (SETUP).
The Play mode menu appears.
2 Press M/m to select “ ” (CENTER
ZOOM), then press (ENTER).
The current opt i on appears.
3 Press M/m to select the desired option
(ZOOM× 1, ×1.5, ×2*, ×3*), then press
(ENTER).
The picture is magnified.
* The picture become grainy.
To shift the frame position
After magnifying the picture, press </M/m/,.
To restore the original scale
Select “ZOOM×1” i n step 3.
To turn off the Play mode menu
Press (SETUP).
Notes
• Depending on the DVD, you may not be able to
change the magnification .
• Resume Play (page 14) restores the last
magnification, but the last frame position is cleared.
• In the Play mode menu, a picture is always
displayed in normal size. The picture can be
magnified when the Play mode menu is turned off.
22
Page 23
Other Function
4 Press M/m to select “ON t,” then
press (ENTER).
The password settin g di splay appears.
Locking discs
— Parental control
You can lock the desire d di sc, or set playback
restricti on s according to a predetermined level
such as viewer age. Restricted playback scenes
are blocked or repla ced with different scenes
when a parental control compatible DVD is
played.
Setting the parental control on
OFF
Number
buttons
ENTER
</,
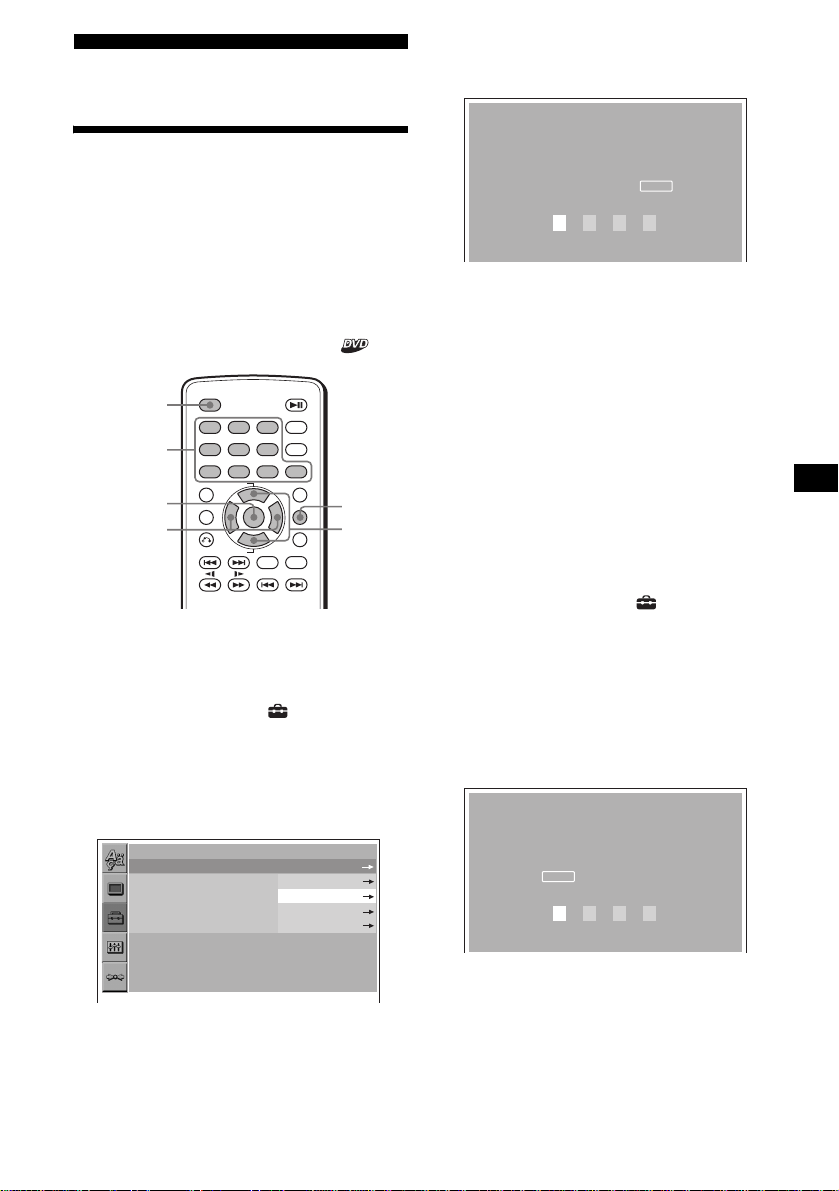
1 Press (SETUP) while playback is being
stopped.
The set up menu appe ars.
2 Press M/m to select “ ” (CUSTOM
SETUP), th en press (ENTER).
The setting ite m s appear.
3 Press M/m to select “PARENTAL
CONTROL,” then press (ENTER).
The parental cont r ol o pt i ons appear.
CUSTOM SETUP
PARENTAL CONTROL:
MULTI-DISC RESUME:
BEEP:
MP3/JPEG:
SLIDE SHOW TIME:
OFF
1
23
456
789
+
TOP MENU
ALBUM
ENTER
–
ALBUM
DISPLAY
CLEAR
0
LIST
SETUPMENU
ANGLE
SUBTITLE
AUDIO
SEEK
+
SEEK
–
PLAYER
PASSWORD
SETUP
M/m
OFF
ON
OFF
PARENTAL CONTROL
Enter a new 4-digit
password, then press .
ENTER
5 Press the number buttons to enter
your password, then press (ENTER).
The conformation display appears.
6 To confirm, press the number buttons
to enter your password again, then
press (ENTER).
Parental contro l i s set.
To turn off the Setup menu
Press (SETUP).
To set the parental control off
1 Press (SETUP) while playback is being
stopped.
The set up menu appears.
2 Press M/m to select “ ” (CUSTOM
SETUP), then press (ENTER).
The setting items appear.
3 Press M/m to select “PARENTAL
CONTROL,” then press (ENTER).
The parental contro l options appear.
4 Press M/m to select “OFF t,” then
press (ENTER).
The display to ente r your password appear s.
PARENTAL CONTROL
Enter password, then
ENTER
press .
5 Press the number buttons to enter
your password, then press (ENTER).
“Parental control is canceled” appears.
If a wrong number is ent ered, press < to
move the cursor and enter the number again.
continue to next page t
23
Page 24
Changing the area and it s m o v ie ra ting
level
You can set the restriction l evels depe nding on
the area and its movie ra t ings.
1 Press (SETUP) while playback is being
stopped.
The set up menu ap pe ars.
2 Press M/m to select “ ” (CUSTOM
SETUP), then press (ENTER).
The setting items appear.
3 Press M/m to select “PARENTAL
CONTROL,” then press (ENTER).
The parental cont rol options appear.
4 Press M/m to select “PLA YER t,” the n
press (ENTER).
When the parental control is a lready se t to on,
the display to enter your password appears.
To change the settings, enter you r password
number, then press (ENTER).
If a wrong numbe r i s en tered, press < to
move the cursor and enter the number again.
5 Press M/m to select “STANDARD,”
then press (ENTER).
The standard opti ons appear.
CUSTOM SETUP
LEVEL:
STANDARD:
8:
USA
USA
OTHERS
7 Press M/m to select “LEVEL,” then
press (ENTER).
The rating options appear.
CUSTOM SETUP
LEVEL:
STANDARD:
8:
8:
NC17
7:
R
6:
5:
PG13
4:
PG
3:
2:
G
1:
The lower the number, the stricter th e
restriction level.
8 Press M/m to select the desired rating,
then press (ENTER).
Parental control settin g is complete.
To turn off the Setup menu
Press (SETUP).
Note
When you play discs which do not have the parental
control, playback cannot be restricted on this unit.
6 Press M/m to select the desired area to
apply its movie ratings, then press
(ENTER).
The area is selected.
When you want to sel ect the standard on t he
“ A rea code list” (pag e25), select “OTHERS
t,” then enter its code number using the
number buttons.
24
Page 25

Area code list Changing the password
Standard Code number
Argentina 2044
Australia 2047
Austria 2046
Belgium 2057
Brazil 2070
Canada 2079
Chile 2090
China 2092
Denmark 2115
Finland 2165
France 2174
Germany 2109
India 2248
Indonesia 2238
Italy 2254
Japan 2276
Korea 2304
Malaysia 2363
Mexico 2362
Netherlands 2376
New Zealand 2390
Norway 2379
Pakistan 2427
Philippines 2424
Portugal 2436
Russia 2489
Singapore 2501
Spain 2149
Sweden 2499
Switzerland 2086
Thailand 2528
United Kingdom 2184
1 Press (SETUP) while playback is being
stopped.
The Setup menu appe ar.
2 Press M/m to select “ ” (CUSTOM
SETUP), then press (ENTER).
The setting items appear.
3 Press M/m to select “PARENTAL
CONTROL,” then press (ENTER).
The parental contro l options appear.
4 Press M/m to select “PASSWORD t,”
then press (ENTER).
The display to ente r your password appear s.
5 Press the number buttons to enter
your 4-digit password, then press
(ENTER).
When a wrong nu mber i s ente red, pres s < to
move the cursor and enter the number again.
6 Press the number buttons to enter a
new 4-digit password, then press
(ENTER).
7 To confirm, press the number button
to enter your new 4-digit password
again, then press (ENTER).
To return to the previous display
Press O.
To turn off the Setup menu
Press (SETUP).
25
Page 26

Settings and Adjustment s
Using the Setup menu
By using the Setup menu, you can make various
adjustments to items, such as picture and s ound.
You can also set a language for the subtitle and
the on-screen dis pl ay, among other t h i ngs. For
details on each setup items, see pages from 27 to
29.
Note
Playback settings stored in the disc take priority over
the Setup menu settings and not all the functions
described may work.
OFF
1
456
789
TOP MENU
ALBUM
M/m
O
ALBUM
Basic operation
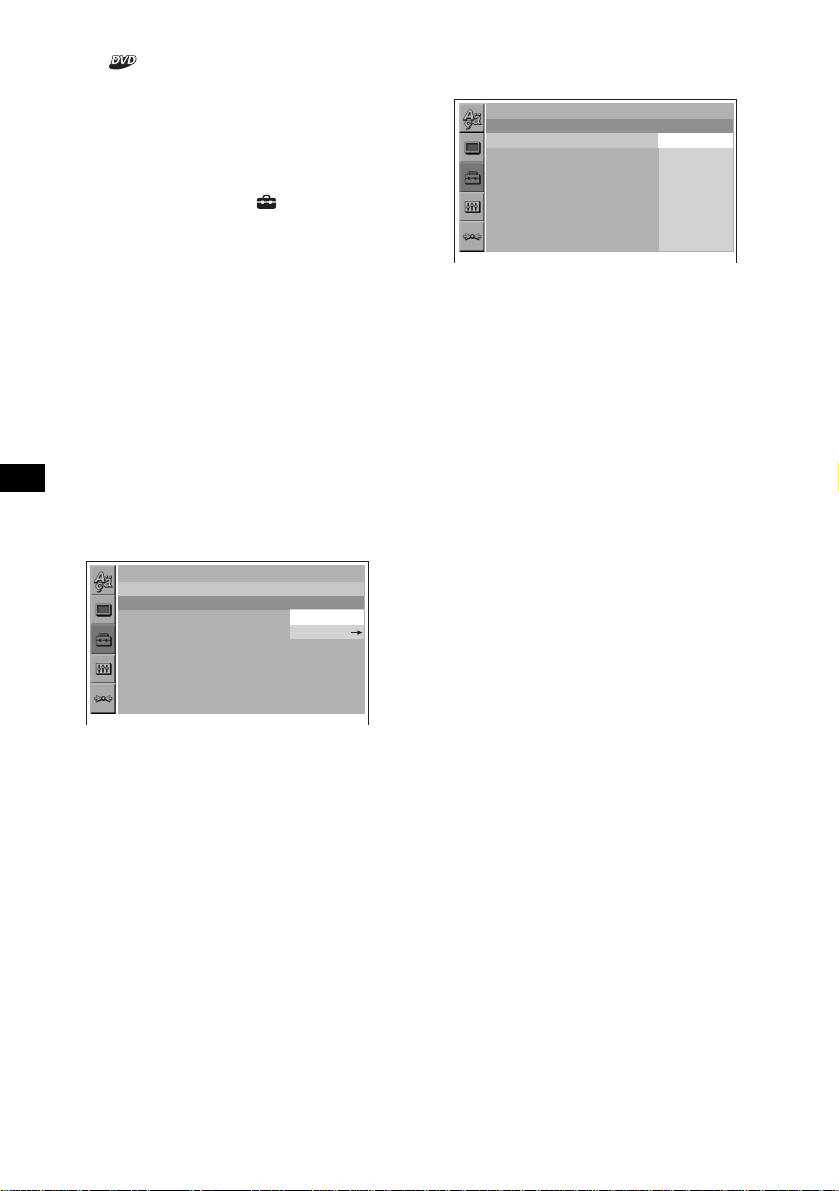
Example: When you want to change the aspect
ratio (“MONITOR TYPE”) to “4:3 PAN SCAN.”
1 Press (SETUP).
The Setup menu appe ar s.
LANGUAGE SETUP
OSD:
MENU:
AUDIO:
SUBTITLE:
23
+
ENTER
–
AUDIO
SEEK
–
AUDIO FOLLOW
DISPLAY
CLEAR
0
LIST
SETUPMENU
ANGLE
SUBTITLE
SEEK
+
ENTER
SETUP
ENGLISH
ENGLISH
ORIGINAL
2 Press M/m to select “ ” (SCREEN
SETUP), then press (ENTER).
The setup display ap pears.
SCREEN SETUP
MONITOR TYPE:
4:3 LETTER BOX
4:3 PAN SCAN
16:9
16:9
3 Press M/m to select “MONITOR TYPE,”
then press (ENTER).
The monitor type options appear.
SCREEN SETUP
MONITOR TYPE:
4:3 LETTER BOX
4:3 PAN SCAN
16:9
16:9
4 Press M/m to select “4:3 PAN SCAN,”
then press (ENTER).
The setting becomes effective and setup is
complete.
To return to the previous display
Press O.
To turn off the Setup menu
Press (SETUP).
To reset all the setting items
— Reset
1 Select “ ” (RESET) in step 2, then
press (ENTER).
2 Press M/m to select “YES,” then press
(ENTER).
All the settings on the Setup menu return to
the default settings .
To cancel resetting
Select “NO” in st ep 2.
Note
Do not turn off the unit while resetting the Setup menu
item as it takes a few seconds to complete.
26
Page 27
Setting the display language
or sound track
— Language setup
“LANGUAGE SETUP” allows you to set the
desired language for the on-scree n di splay or
sound track acco rdingly.
Select “ ” (LANGUAGE SETUP) in the
Setup menu, then select the desired setting item.
For details on the setup procedures, see “Using
the Setup menu” (page 26).
OSD (On-Screen Display)
Switches the displa y language on the scree n.
MENU
Switches the language for the menu on the disc.
AUDIO
Switches the language of the sound track.
When you select “ORI G I NAL,” the language
given priority in the disc is selected.
SUBTITLE
Switches the language of the subt itle record ed on
the disc.
When you select “AUDIO FOLLOW,” the
language for the su bt i tles changes according to
the language you selected for the sound track.
Tip
If you select “OTHERS
and “AUDIO,” select and enter a language code from
“Language code list” (page 38) using the number
buttons.
Note
When you select a language in “MENU,” “SUBTITLE,”
or “AUDIO” that is not recorded on the disc, one of the
recorded languages will be automatically selected.
t
” in “MENU,” “SUBTITLE,”
Setting the screen
— Screen setup
“SCREEN SETUP” allows you to adjust the
setting for the connected monitor.
Select “ ” (SCREEN SETUP) in the Setup
menu, then select the desired setting item.
For details on the set up pr ocedures, see “Using
the Setup menu” (page 26).
The setting items with “*” in the tables belo w are
the default settings.
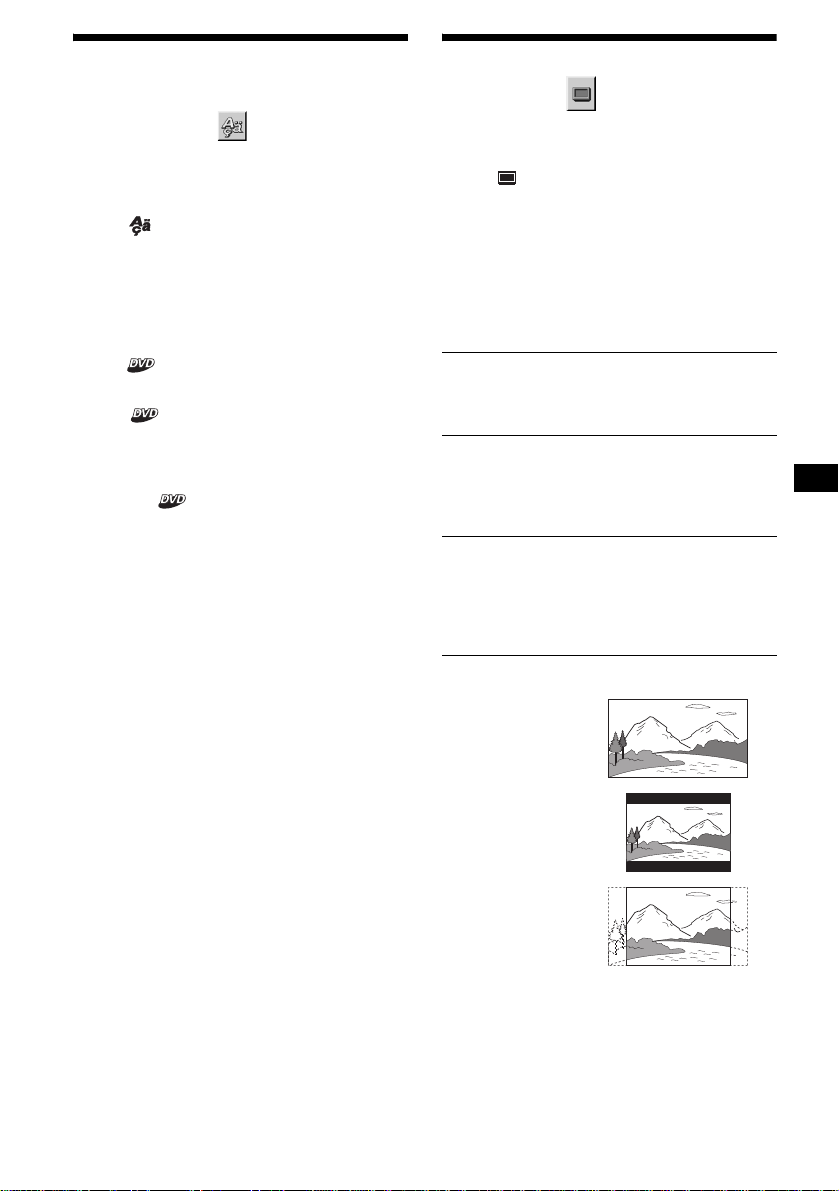
MONITOR TYPE
Selects the aspe ct ratio of the connecte d m onitor
(4:3 standard or wide).
16:9* Displays the wide picture.
4:3
LETTER
BOX
4:3
PAN SCAN
16:9
Select this when you connect a
wide-screen m onitor or a monitor
with a wide mod e function.
Displays a wide pi ct ure with
bands on the upper and lower
portions of the screen.
Select this when you connect a
4:3 screen monitor.
Displays a wide pi ct ure on the
entire screen and automatically
cuts off the portions that do not
fit.
Select this when you connect a
4:3 screen monitor.
4:3 LETTER BOX
4:3 PAN SCAN
Note
Depending on the DVD, “4:3 LETTER BOX” may be
selected automatically instead of “4:3 PAN SCAN,”
and vice versa.
27
Page 28

Custom settings
— Custom setup
“CUSTOM SETUP” allows you to set the
playback conditions of this unit.
Select “ ” (CUSTOM SETUP) in the Setup
menu, then select the desired setting item.
For details on the setup procedures, see “Using
the Setup menu” (page 26).
The setting items with “*” in the tables below are
the default settings.
PARENTAL CONTROL
Sets the playback re stric tions so tha t the un it will
not play inappropr i at e di scs or scenes (page 23).
ON t Sets the parental control on.
OFF t* Sets the parental control off.
PLAYER t Sets the re striction sta ndard
and its level.
PASSWORD t Sets a new 4-digit password.
MUL TI - DIS C RESUME
Stores resume playback points for up to 20
different discs.
ON* Stores the resume settings in
memory for up to 20 discs. (The
settings remain in memory even
if you sele c t “OFF.”)
OFF Cancels storing the resume
settings in memory. Playback
restarts at the resume point only
for the current disc in the unit.
MP3/JPEG
Sets the priority when MP3 files and JPEG files
are on the same disc.
MP3* Takes priority over JPEG files when
playing.
JPEG Takes priority over MP3 files when
playing.
SLIDE SHOW TIME
Sets the time for displaying images on the disc.
5sec Switc hes the images every 5
seconds.
10sec* Switches the im ages every 10
seconds.
20sec Switches the images every 20
seconds.
40sec Switches the images every 40
seconds.
60sec Switches the images every 60
seconds.
FIXED Cancels switching the images.
Note
If parental control is applied, the resume playback
function dose not work. In this case, payback starts
from the begnning of the disc when you insert the disc.
BEEP
Switches the beep setting on or off.
ON* Turns the beep on.
OFF Turns the beep off.
28
Page 29

Audio settings
— Audio setup
“ AUDIO SETUP” allo ws yo u to adju st th e soun d
according to playback conditions an d connected
equipment.
Additional Information
Maintenance
Select “ ” (AUDIO SETUP) in the Setup
menu, then select the desired setting item.
For details on the setup procedures, see “Using
the Setup menu” (page 26).
The setting items with “*” in the tables belo w are
the default settings.
AUDIO ATT (attenuation)
Reduces the audio ou tp ut level if the playback
sound is distorted.
This setting affects the outputs of FRONT/REAR
AUDIO OUT.
OFF* Normally, select this position.
ON Reduces the audio output le vel.
Select this if the playback sound from
the speakers is dist orted.
AUDIO DRC (Dynamic Range Control)
Makes the sound cl ear when t he v olume is tu rned
down when playing a DVD that conforms to
“AUDIO DRC.”
This setting affects the outp uts of FR ONT/REAR
AUDIO OUT.
ST ANDARD*
WIDE
RANGE
DOWNMIX
Switches the method for mixing down to 2
channels when you play a DVD which has rear
sound elements (channels) or is re corded in
Dolby Digital format. For details on the rear
signal components, see “Checking the program
format” (page 20). This setting affects the output
of FRONT/REAR AUDIO OUT.
SURROUND*
NORMAL Select this when the unit is
Normally select this position.
Gives you the feeling of being at
a live performance.
Select this when the unit is
connected to an audio
component that conforms to
Dolby Surround (Pro Logic).
connected to an audio
component that does not
conform to Dolby Surround
(Pro Logic).
Fuse replacement
When replacing the fuse, be sure to use one
matching the amperage rating stated on the
original fuse. If the fuse blows, check the power
connection and replace the fuse. If the fuse blows
again after replacement, there may b e an internal
malfunction. In such a case, consult your neares t
Sony dealer.
Fuse
Warning
Never use a fuse with an amperage rating
exceeding the one supplied with the unit, as this
could damage the unit.
continue to next page t
29
Page 30
Replacing the lithium battery
Under normal conditions, batteries will last
approximately 1 year. (The service life may be
shorter, depending on the con di t io ns of use.)
When the battery becomes weak, the range of the
card remote comm ander becomes shorter.
Replace the battery with a new CR2025 lithium
battery. Use of any other battery may pr es ent a
risk of fire or explosion.
x
+ side up
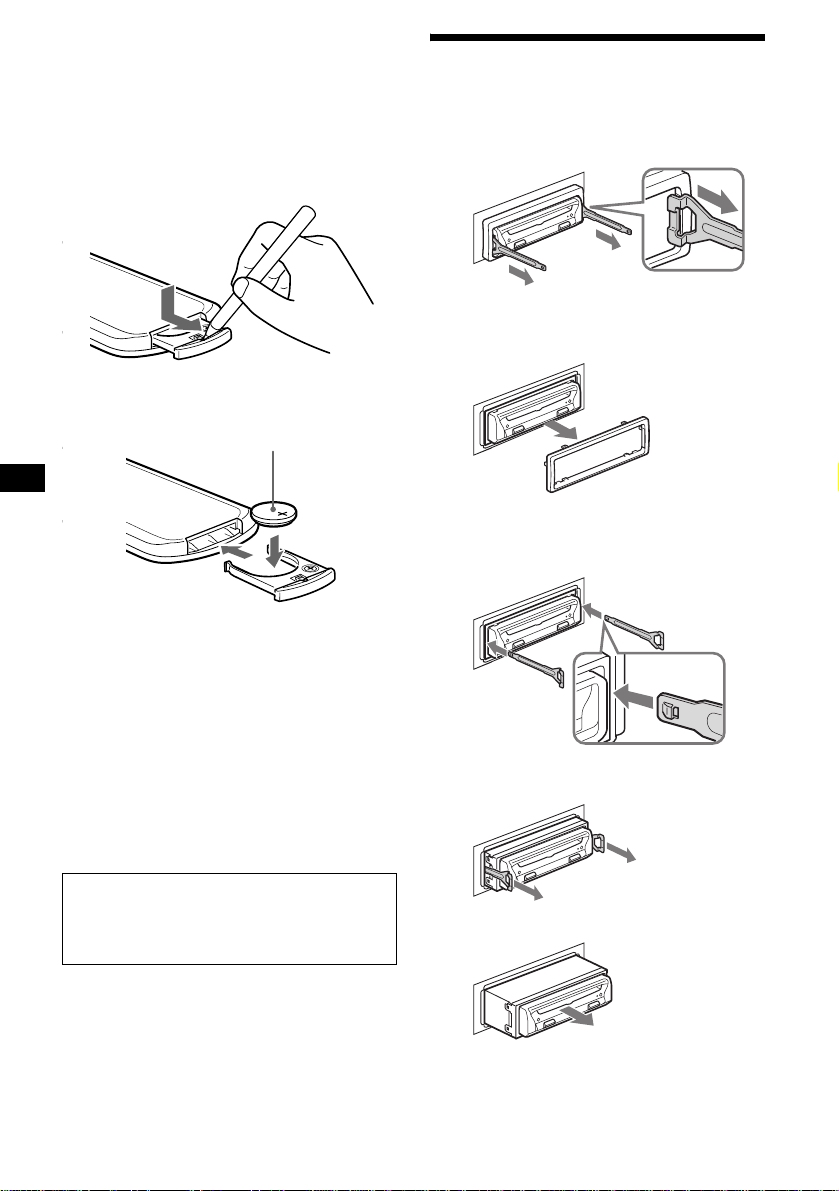
Removing the unit
1 Remove the protection collar.
1Engage the re le ase keys together
with the protection collar.
Orient the release
key correctly.
2Pull out the rele ase keys to remove
the protection collar.
2 Remove the unit.
1Insert both release keys toget h er
until they click.
Face the hook
inwards.
Notes on lithium battery
• Keep the lithium battery out of the reach of
children. Should the battery be swallowed,
immediately consult a doctor.
• Wipe the battery with a dry cloth to assure a
good contact.
• Be sure to obse rve the correct polari ty when
installing the battery.
• Do not hold the battery with metallic tweezers,
otherwise a short -c ir cuit may occur.
WARNING
Battery may explode if mistreated.
Do not recharge, disas se mble, or dispose of
in fire.
30
2Pull the release keys to unseat the
unit.
3Slide the unit out of the mounting.
Page 31

Notes on discs
Notes on MP3 files
• T o kee p the disc cl ean, do no t touc h the surf ace.
Handle the disc by its edge.
• Keep your discs in their cases or disc
magazines when not in use.
Do not subject the discs to heat/high
temperature. Avoid leaving them in parked cars
or on dashboard s/ rear trays.
• Do not attach labels, or use discs with sticky
ink/residue. Such discs may stop spinning
when used, causing a malfunction, or may ruin
the disc.
• Do not use any discs with labels or stickers
attached as this may ca use i nability to read data
correctly (e.g., playback skipping, or no
playback) due to heat shrinking of a sti cker or
label causing a disc to warp.
• Discs with non-standard shapes (e.g., heart,
square, star) cannot be played on this unit.
Attempting to do so may damage the unit. Do
not use such discs.
• Before playin g, clean discs with a
commercially available cleaning cloth. Wipe
each disc from the center out. Do not use
solvents such as ben zine, thinner , co mmercially
available cleaners, or antistatic spray intended
for analog discs.
MP3 (MPEG 1 A udio Layer-3) is a standard
technology and format for compressing a soun d
sequence. Th e fi le i s comp ressed to a bout 1/ 10 of
its original size. Sounds outside the range of
human hearing are compressed wh il e the sounds
we can hear are not compressed.
Notes on discs
You can play MP3 files recorded on CD-ROMs,
CD-Rs, and C D -RWs.
The disc must be in the ISO 9660*
level 2 format, or Joliet or Romeo in the
expansion format.
You can use a dis c recorded in Multi Ses s ion*
1
ISO 9660 Format
*
The most common international standard for
the logical format of files and folders on a
CD-ROM.
There are several specification levels. In
Level 1, file names must be in the 8.3 format
(no more than 8 characters in the name, no
more than 3 characters in the extension
“.mp3”) and in capital letters. Folder names
can be no longer than 8 char act ers. There can
be no more than 8 nested folder levels. Level
2 specifications allow file names up to 31
characters long.
Each folder can have up to 8 tree s.
For Joliet or Romeo in t he expansion format,
make sure of the contents of the writing
software, etc.
2
*
Multi Session
This is a recording method that enables
adding of data using the Track-At-Once
method. Conventional CDs begin at a CD
control area called the Lead-in and end at an
area called Lead-out. A Multi Session CD is a
CD having multiple sessions, with each
segment from Lead -i n t o Lead-out regarded
as a single session.
continue to next page t
1
level 1 or
2
.
31
Page 32

Notes
• With formats other th an ISO 96 60 le v el 1 and l ev el 2,
folder names or file names may not be displayed
correctly.
• When naming, be sure to add the file extension
“.mp3” to the file name.
• If you put the extension “.mp3” to a file other than
MP3, the unit cannot recognize the file properly and
will generate random noise that could damage your
speakers.
• The following discs take a longer time to start
playback.
– a disc recorded with a complicated tree structure.
– a disc recorded in Multi Session.
– a disc to which data can be added.
32
Page 33

Specifications
System
Laser Semiconductor laser
Signal format system NTSC
Audio characteristics*
Frequency response DVD:
Signal-to-noise ratio 102 dB (AUDIO OUT L/R
Harmonic distortion 0.003 %
Wow and flutter Less than detected value
* Measured from the AUDIO OUT jacks.
When you play PCM sound tracks with a 96 kHz
sampling frequency, the output signals from the
DIGITAL OUT jack are converted to 96 kHz
sampling frequency.
5 Hz to 22 kHz
CD:
5 Hz to 20 kHz
jacks only)
(±0.001 % W PEAK)
General
Outputs AUDIO OUT L/R:
Power requirements 12 V DC car battery
Dimensions
Mounting dimensions
Mass Approx. 1.2 kg
Operating temperature –10 ºC to 55 ºC
Operating humidity 25 % to 80 %
Supplied accessories Card rem ote co mmander
Optional accessories Overhead Monitor
Phono jack/2 Vrms/
10 kilohm s
VIDEO OUT:
Phono jack/1.0 Vp-p/
75 ohms
DIGITAL OUT:
Optical output jack/
–18 dBm (wave length:
660 nm)
(negative ground)
Approx. 178 × 50 × 170 mm
(7 1/8 × 2 × 6 3/4 in)
(w/h/d)
Approx. 182 × 53 × 155 mm
1
(7
/4 × 2 1/8 × 6 1/8 in)
(w/h/d)
(2 lb 11 oz)
(14 ºF to 131 ºF)
RM-X129
Parts for installation and
connections (1 set)
XVM-R75, XVM-R70
Headrest Monitor
XVM-H65
Media Center/Receiver
XAV-7W
RCA pin cord
RC-64 (2 m), RC-65 (5 m)
Optical cable
RC-97 (2 m ), 98 (5 m)
Optical adapter
XA-D211
Note
This unit cannot be connected to a digital preamplifier
or an equalizer which is Sony BUS system compatible.
Design and specifications are subject to change
without notice.
33
Page 34

Troubleshooting
The following checklist will help you remedy
problems you may encounter with your un it.
Before going through the checklist below, check
the connect i on and operating procedures .
Power
No power is being supplied to the unit.
• The power connection has not been made
correctly.
t Chec k t he connection. If everything is in
order, check the fuse.
• The car does not have an ACC position.
t Insert a disc to turn on the unit.
Picture
There is no picture/picture noise appears.
• A connection has not been made correctly.
• Check the connection to the connected
equipment, and set the input selector of the
equipment to the source correspondin g t o
this unit .
• The disc is dirty, flawed, or deterior ated.
• The unit is installed at an an gl e o f mo re th an
20°.
• The unit is not installed in a sturdy part of
the car.
• The monitor is connected to the FRONT
AUDIO/VIDEO OUT, and the parking cord
(Light green) is not connected to the parking
brake switch cord, or the parking brake is not
applied.
Picture does not fit in the screen.
The aspect ration is fixed on the DVD.
Sound
There is no sound/sound skips/sound
cracks.
• A connection has not been made correctly.
• Check the connection to the connected
equipment, and set the input selector of the
equipment to the source correspondin g t o
this unit .
• The disc is dirty, flawed, or deterior ated.
• The unit is installed at an an gl e o f mo re th an
20°.
• The unit is not installed in a sturdy part of
the car.
• The unit is in pause playback mo de, or in
slow pla yback mode.
• The unit is in fast forward mode, or in fast
reverse mode.
• The settings fo r the outputs are not m ade
correctly.
Sound is noisy.
Keep cords and cables away from each other.
Sound distortion occurs.
Set “AUDIO ATT” in “AUDIO SETUP” to
“ON” (page 29).
The sound volume is low.
Set “AUDIO ATT” in “AUDIO SETUP” to
“OFF” (page 29).
Operation
The remote does not function.
• There are obstacles between the remote and
the unit, or the remote receptor.
• The distance between the card remote
commander and the unit is too far.
• The card remote commander is not pointed
at the remote sensor, or the receptor on the
unit properly.
• The batteries in the card remote commander
are weak.
The unit does not respond.
t Press the reset button.
The contents of the settings have been
erased.
• The reset button is pressed.
• The battery has replaced, or the powe r cord
is disconnected.
• The power connecti on has not been made
correctly.
No beep sound when pressing buttons.
t Set “BEEP” in “CUSTOM SETUP” to
“ON” (page 28).
A disc cannot be loaded.
• Another disc is al ready loaded.
• The ignition key switch of the car is set to the
OFF position.
The unit does not start playing.
• The disc is inse r ted upside down.
t Insert the disc with the playback surface
down.
• The disc inserted is not applicable.
• The DVD inserted is not applicable due to
the region code.
• Moisture has condensed inside th e uni t .
• The DVD-R, DVD-RW, CD-R, or CD-RW
inserted is not finalized.
34
Page 35

MP3 files cannot be played.
• Recording was not performed according to
the ISO 9660 level 1 or level 2 format, or the
Joliet or Romeo in the expans i on f or m at .
• The MP3 file does not have the extens i on
“.mp3.”
• Files are not stored in MP3 format.
• The unit cannot play files stored in MP3PRO
format.
• The unit cannot play files stored in a format
other than the MPEG1 Audio Layer 3.
• Both MP3 and JP EG files are stored on the
disc.
t Set “MP3/JPEG” in “CUSTOM SETUP”
to “MP3” (page 28).
The JPEG files cannot be played.
• JPEG files do not have the extension “.jpg.”
• Files are not stored in JPEG format.
• Both MP3 and JP EG files are stored on the
disc.
t Set “MP3/JPEG” in “CUSTOM SETUP”
to “JPEG” (page 28).
The title of the MP3 audio album or track is
not correctly displayed.
The player can only display num bers and
alphabet. Other characters are displ ayed as
“
.”
*
The disc does not start playing from the
beginning.
Resume play has ta ken effec t ( page 14).
Playback stops automatically.
While playin g dis cs wit h an aut o pa us e si gnal ,
the unit stops playback at the auto pause
signal.
You cannot perform certain functions.
Depending o n th e di sc, you m ay no t be abl e to
perform operat io ns such as Stop, Search,
Slow-motion play, or Repea t pl ay. For details,
see the operating manual supplied with the
disc.
The language for the sound track cannot be
changed.
• Use the DVD menu instead of the direct
selection button on the card remote
commander (page 17).
• Multilingual tracks are not recorded on the
DVD bein g played.
• The DVD prohibits the changing of the
language for the so und track.
The subtitle la nguage ca nnot be c hanged or
turned off.
• Using the DVD menu inst ead of the direct
selection button on the card remote
commander (page 17).
• Multilingual subtitles a re not re corded on th e
DVD bein g played.
• The DVD prohibits the changing of the
subtitles.
The angles cannot be changed.
• Use the DVD menu instead of the direct
selection button on the card remote
commander (page 17).
• Multi-angles are not recorded on the DVD
being played.
• The DVD prohibits changing of the angles.
35
Page 36

Error displays
Glossary
The following indications appear when a
malfunction occurs in the unit.
Cannot play this disc .
• The disc is not compatible with this unit.
• The DVD is prohibited fo r playback due to
the different region code.
No MP3 or JPEG file
The disc contains no MP3/JPEG file.
Read error
• The unit cannot rea d th e data due to some
problem.
• The data is damaged or corrupted.
Please Press RESET.
The unit cannot operate due to some problem.
t Press the reset button.
If these solutions do not help improve the
situation, consult your nearest Sony dealer.
Chapter
Sections of a pictur e or a music feature tha t a re
smaller than titles. A title is composed of several
chapters. Dep ending on the disc, no ch apters
may be recorded.
Dolby Digital
Digital audio compression technology developed
by Dolby Laboratories. This technology
conforms to 5.1-channel surround sound. The
rear channel is stereo and there is a discr ete
subwoofer chan nel in this format. Dolby D i gi t al
provides the same 5.1 discrete channels of high
quality digi tal audio foun d in Dolby Digita l
cinema audio syste m s. Good channel separatio n
is realized because all of the channel data are
recorded discretely and little deterioration is
realized because all channel data processing is
digital.
Dolby Surround (Pro Logic)
Audio signal processing technology th at D olby
Laboratories developed for surround so und.
When the input signal contains a surround
component, the Pro Logic process outputs the
front, center and rear signals. The rear channel is
monaural.
DTS
Digital audio compression technology that
Digital Theater Systems, Inc. developed. This
technology conforms to 5.1-channel surround
sound. The rear ch annel is stereo and th ere is a
discrete subwoofer channel in this format. DTS
provides the same 5.1 discrete channels of high
quality digital audio.
Good channel separation is realized because all
of the channel da t a is recorded discretely and
little deterioration is realized because all channel
data processing is digital.
36
Page 37

DVD VIDEO
A disc that contains up to 8 hours of moving
pictures e ven though it s di am eter is th e same as a
CD.
The data capacity of a single-layer and singlesided DVD is 4.7 GB (Giga Byte), which is 7
times that of a CD. The data capacity of a
double-layer and single-sided DVD is 8.5 GB , a
single-layer an d double-sided DVD is 9.4 GB,
and double-layer and double-sided DVD is 17
GB.
The picture data uses the MPEG 2 format, one of
the worldwide standards of digital compression
technology. The picture data is compressed to
about 1/40 (average) of i ts or ig inal size. The
DVD als o uses a variable rate co ding technology
that changes the data to be a llocate d acco rding t o
the status of the picture. Audio information is
recorded in a mul ti -channel format, such as
Dolby Digital, allo wing you to enjo y a more re al
audio presence.
Furthermore, various advanced functions such as
the multi-angle, multilingual, and Parental
Control functions are pr ovide d w ith the DVD.
DVD-RW
A DVD-RW is a recordable and rewritable disc
with the same size as the DVD VIDEO. The
DVD-RW can be recorded in two different
modes: VR mode and Video mode. VR (Video
Recording) mode enables various programming
and editing functions, some of which are limited
in the case of V ideo mode . Video mode complies
with DVD VIDEO format and can be played on
other D VD players wh ile a D VD-R W rec orded in
VR mode can only be pla yed on DVD-RW
compliant players. The “DVD-RW” appearing in
this manual, and the on-screen displays refer to
DVD-RWs in VR mode.
Film based software, Video based software
DVDs can be classified as Film based or Video
based software. Fil m based DVDs contain the
same images (24 frames per second) that are
shown at movie theaters. Video based DVDs,
such as television dramas or sit-coms, displays
images at 30 frames (or 60 fields) per second.
JPEG (Joint Photographic Expert Group)
Under the ausp ic es of the Internatio nal
Organization for Sta ndardization (ISO), JPEG is
defined as a universal standa r d format for digital
compression and decompression of still images
for use in computer related systems. Usually, the
compression rate is variable before visible
degradation occurs . Still images are com pressed
about 1/10 to 1/100 original size.
Title
The longest se ct io n of a picture or music fe ature
on a DVD, movie, etc., in video software, or the
entire album in audio software.
Track
Sections of a picture or a music feature on a CD
or VIDEO CD (the length of a song).
37
Page 38

Language code list
The language spellings conform to the ISO 639: 1988 (E/F) standard.
Code Language Code Language Code Language C ode Language
1027 Afar
1028 Abkhazian
1032 Afrikaans
1039 Amharic
1044 Arabic
1045 Assamese
1051 Aymara
1052 Azerbaijani
1053 Bashkir
1057 Byelorussian
1059 Bulgarian
1060 Bihari
1061 Bislama
1066 Bengali; Bangla
1067 Tibetan
1070 Breton
1079 Catalan
1093 Corsican
1097 Czech
1103 Welsh
1105 Danish
1109 German
1130 Bhutani
1142 Greek
1144 English
1145 Esperanto
1149 Spanish
1150 Estonian
1151 Basque
1157 Persian
1165 Finnish
1166 Fiji
1171 Faroese
1174 French
1181 Frisian
1183 Irish
1186 Scots Gaelic
1194 Galician
1196 Guarani
1203 Gujarati
1209 Hausa
1217 Hindi
1226 Croatian
1229 Hungarian
1233 Armenian
1235 Interlingua
1239 Interlingue
1245 Inupiak
1248 Indonesian
1253 Icelandic
1254 Italian
1257 Hebrew
1261 Japanese
1269 Yiddish
1283 Javanese
1287 Georgian
1297 Kazakh
1298 Greenlandic
1299 Cambodian
1300 Kannada
1301 Korean
1305 Kashmiri
1307 Kurdish
1311 Kirghiz
1313 Latin
1326 Lingala
1327 Laothian
1332 Lithuanian
1334 Latvian; Lettish
1345 Malagasy
1347 Maori
1349 Macedonian
1350 Malayalam
1352 Mongolian
1353 Moldavian
1356 Marathi
1357 Malay
1358 Maltese
1363 Burmese
1365 Nauru
1369 Nepali
1376 Dutch
1379 Norwegian
1393 Occitan
1403 (Afan)Oromo
1408 Oriya
1417 Punjabi
1428 Polish
1435 Pashto; Pushto
1436 Portuguese
1463 Quechua
1481 Rhaeto-
Romance
1482 Kirundi
1483 Romanian
1489 Russian
1491 Kinyarwanda
1495 Sanskrit
1498 Sindhi
1501 Sangho
1502 Serbo-Croatian
1503 Singhalese
1505 Slovak
1506 Slovenian
1507 Samoan
1508 Shona
1509 Somali
1511 Albanian
1512 Serbian
1513 Siswati
1514 Sesotho
1515 Sundanese
1516 Swedish
1517 Swahili
1521 Tamil
1525 Telugu
1527 Tajik
1528 Thai
1529 Tigrinya
1531 Turkmen
1532 Tagalog
1534 Setswana
1535 Tonga
1538 Turkish
1539 Tsonga
1540 Tatar
1543 Twi
1557 Ukrainian
1564 Urdu
1572 Uzbek
1581 Vietnamese
1587 Volapük
1613 Wolof
1632 Xhosa
1665 Yoruba
1684 Chinese
1697 Zulu
1703 Not specified
38
Page 39

Index
Numeric
16:9 27
4:3 LETTER BOX 27
4:3 PAN SCAN 27
A
Album (ALBUM) 19
Angle (ANGLE) 21
Area code list 25
Attenuation (AUDIO ATT) 29
Audio (AUDIO) 20, 27
Audio setup (AUDIO SETUP)
29
B
Beep (BEEP) 28
C
Card remote command er 9
Chapter (CHAPTER) 19
Custom setup (CUSTOM
SETUP) 28
D
Display item
CD/MP3 playback 13
List 17
Play mode menu 10
Setup menu 10, 26
Downmix (DOWNMIX) 29
DRC (Dynamic range cont rol)
(AUDIO DRC) 29
DVD menu 17, 27
F
Fuse 29
I
Image (IMAGE) 19
L
Language code list 38
Language setup (LANGUAGE
SETUP) 27
Lithium batt ery 30
Locating
Fast forward 14
Fast reverse 14
List 16
Scan 16
Slow-motion play 16
M
Monitor type (MONITOR
TYPE) 27
MP3 (MP3/JPEG) 28
O
OSD 27
P
Parental control (PARENTAL
CONTROL) 23, 28
PBC (Playback control) 18
Play mode menu 10
Program format 20
R
Region code 6
Repeat play (REPEAT)
Album 18
Chapter 18
Title 18
Track 18
Reset (RESET) 26
Reset but t on 12
Resume play (MULTI-DISC
RESUME) 14, 28
S
Screen setup (SCREEN SETUP)
27
Search play 19
Setup menu 10, 26
Slide show time (SLIDE SHOW
TIME) 28
Subtitle (SUBTITLE) 22, 27
T
Time information (TIME) 15
Title (TITLE) 19
Top menu 17
Track (TRACK) 19
U
Usable discs 5
Z
Zoom (CENTER ZOOM) 22
J
JPEG (MP3/JPEG) 28
39
Page 40

Avertissement
Pour prévenir les risques d’incendie ou
d’électrocution, tenir cet appareil à l’abri
de la pluie ou de l’humidité.
Pour prévenir les risques d’électrocution,
ne pas ouvrir le boîtier. Confier les
réparations de l’appareil à un personnel
qualifié uniquement.
ATTENTION
L’utilisation d’instruments optiques avec ce
produit augmente les risques de lésions oculaires.
Ne pas démonter le boîtier car le f aisceau laser de
ce lecteur de CD/DVD constitue un danger pour
les yeux.
Confier les réparations de l’appareil à un
personnel qualifié uniquement.
ATTENTION
L’utilisation d’instruments optiq ues avec ce
produit augmente les risques de lésions
oculaires.
ATTENTION
L ’uti lisat ion de commandes ou la r éalisat ion
de réglages ou de procédures autres qu e
ceux spécifiés dans le présent mode
d’emploi peut ent raîner l’exposition à de s
radiations dangereuses.
DANGER INVISIBLE
2
LASER RADIATIONWHEN OPEN.
AVOID DIRECT EXPOSURE TO BEAM.
Page 41

Table des matières
Félicitations ! . . . . . . . . . . . . . . . . . . . . . . . . 4
Précautions . . . . . . . . . . . . . . . . . . . . . . . . . . 5
Disques compatibles . . . . . . . . . . . . . . . . . . . 6
Emplacement des commandes. . . . . . . . . . . . 8
Écrans de menu . . . . . . . . . . . . . . . . . . . . . . 10
Réinitialisation de l’appareil . . . . . . . . . . . . 12
Lecteur
Lecture de disques. . . . . . . . . . . . . . . . . . . . 12
Reprise de la lecture
— Reprise de la lecture. . . . . . . . . . . . . . 14
Vérification du temps de lecture
— Informations temporelles. . . . . . . . . . 15
Recherche d’un passage spécifique sur un
disque
— Balayage/Lecture au ralenti/Liste . . . 16
Utilisation du menu avec des DVD. . . . . . . 18
Utilisation des fonctions PBC
— PBC (Contrôle de la lecture) . . . . . . . 18
Divers modes de lecture
— Lecture répétée/ R echerche . . . . . . . . . 19
Réglages du son
Modification des canaux audio . . . . . . . . . . 20
Réglages de l’image
Changement de l’angle de vue . . . . . . . . . . 22
Affichage des sous-titres . . . . . . . . . . . . . . . 22
Agrandissement d’images . . . . . . . . . . . . . . 23
Autre fonction
Verrouillage des disques
— Contrôle parental . . . . . . . . . . . . . . . . 23
Configuration et réglages
Utilisation du menu d e configuration . . . . . 26
Réglage de la langue d’affichage ou de la plage
sonore
— Réglage de la langue . . . . . . . . . . . . . 27
Réglage de l’écran
— Réglage de l’écran . . . . . . . . . . . . . . . 28
Réglages personnalisés
— Réglage personnalisé . . . . . . . . . . . . . 28
Réglages du son
— Réglage audio . . . . . . . . . . . . . . . . . . 29
Informations complémentaires
Entretien . . . . . . . . . . . . . . . . . . . . . . . . . . . 30
Démontage de l’appareil. . . . . . . . . . . . . . . 31
Remarques sur les disques . . . . . . . . . . . . . 32
Remarques sur les fichiers MP3 . . . . . . . . . 33
Spécifications . . . . . . . . . . . . . . . . . . . . . . . 34
Dépannage . . . . . . . . . . . . . . . . . . . . . . . . . 3 5
Affichage des erreurs . . . . . . . . . . . . . . . . . 37
Glossaire . . . . . . . . . . . . . . . . . . . . . . . . . . . 37
Liste des codes de langues . . . . . . . . . . . . . 39
Index . . . . . . . . . . . . . . . . . . . . . . . . . . . . . . 40
3
Page 42

Félicitations !
Nous vous remercions d’avoir fait l’acquisition
de ce lecteur de DVD embarqué Sony. Avant de
le faire fonctionner, lisez attentive ment ce mode
d’emploi et conservez-le pour toute référence
ultérieure.
FONCTIONS :
• Compatibilité de lecture avec les DVD vidéo/
DVD-R/RW, CD/CD-R/-RW, CD vidéo
• 2 sorties A/V (avant et ar ri ère) et 1 sortie
numérique fournies
• Format DIN pour une installation facile du
système quel que soit le(s) moniteur(s)
À propos de ce mode d’emploi
• Les instructions de ce mode d’emploi décrivent
les commandes de la mini-télécommande. Vous
pouvez égalemen t uti li s er les commandes du
lecteur si celles-ci portent le même nom que
celles de la télécommande ou un nom simila ire .
• Le terme générique « DVD » peut être employé
dans ce manuel pour désigner les DVD
VIDÉO, DVD-R et DVD-RW.
• La signification des symboles utilisés dans le
présent mode d’emploi est i ndi quée ci-dessous :
Symbole Signification
Fonctions disponib les pour les
DVD VIDÉO ou les DVD-R et
DVD-RW en mode vidéo
Fonctions disponib les pour les
CD vidéo ou les CD-R (CD
enregistrables) e t CD-RW (CD
réinscriptibles) au format CD
vidéo
Fonctions disponib les pour les
CD audio ou les CD-R et CDRW au format CD audio
Fonctions disponib les pour les
fichiers au format MP3
enregistrés sur des CD-ROM,
CD-R et CD-RW
Fonctions disponib les pour les
fichiers au format JPEG
enregistrés sur des CD-ROM,
CD-R et CD-RW
4
Page 43

Précautions
Si vous avez des questions ou de s pr oblèmes
concernant cet appareil qui ne sont pas a bordés
dans ce mode d’emploi, consultez votre
revendeur Sony.
À l’attention des conducteurs
• N’utilisez pa s les fonctions person nalisées
pendant que vous cond ui sez, ni aucune autre
fonction susceptible de diminuer l’attention
portée à la route.
• Si votre véhicule est resté stationné en p le i n
soleil, laissez l’appareil refroidir avant de
l’utiliser.
Sécurité
• Respectez les réglementations sur le trafic
routier en vigueur dans votre pays.
• Pour votre sécurité, le moniteur raccordé à la
prise FRONT VIDEO OUT s’éteint
automatiquement lorsque le frein à main n’est
pas serré.
Prévention des accidents
Les images n’apparaissent que lorsque le
véhicule est stationné et le frein à main serré.
Dès que le véhicule s e m et en mouvement, les
images provenant de la prise FRONT VIDEO
OUT disparaissent automatiquement après
l’affichage du message suivant.
Le moniteur raccordé à la prise REAR VIDEO
OUT fonctionne dès que le véhicule se met en
mouvement.
Les images ne sont pas visibles sur l’écran, mais
il est possible d’ écouter le son du CD/MP3.
Pour conserver un son de haute q ualit é
Veillez à ne pas renverser de jus de fruit ou de
boissons sucrées sur l’appar eil ou sur les d isques.
For your safety,
the video is blocked.
N’utilisez pas le l ecteur ou ne regardez pas le
moniteur lorsque vous con duisez.
Condensation
Par temps de pluie ou dans des régions très
humides, de l’humidité peut se condenser à
l’intérieur des lentilles et dans la fenêtre
d’affichage de l’appareil. S i ce l a se produit,
l’appareil ne fo nct i o nne pas correcteme nt . D ans
ce cas, retirez le disque et attendez environ une
heure que l’humidité se soit évaporée.
5
Page 44

Disques compatibles
Format des disques
DVD
CD vidéo
CD audio/
CD-R/CD-RW
CD-R/CD-RW
(MP3/JPEG)
« DVD VIDEO », « DVD-R » et « DVD-RW »
sont des marques commerciales.
DVD
Un DVD contient à la fois des d onnées audio et
vidéo. Un disque de 12 cm (4
contenir 7 fois la quantité de données contenue
sur un CD-ROM, ce qui est équivalent à 4 heures
de lecture consécutives (8 heures pour les
disques à deux face s). Il existe quatre types de
DVD : simple face simple couche, simple face
double couche, doub le face simple couche et
double face double couche.
CD vidéo (VCD)
Un CD vidéo peut cont enir à la fois des données
audio et vidéo sur un d i sque du même format
qu’un CD audio normal. La durée de lecture est
de 74 minutes pour un CD standard de 12 cm
7
(4
/10 po).
CD audio
CD audio contenant des données audio. La durée
de lecture est de 74 minutes pour un CD standard
de 12 cm (4
7
/10 po).
CD enregistrable (CD-R)
Avec un CD-R, vous pouvez éditer des données
audio. Vous ne pouvez écrire des informations
qu’une seule fois sur un CD-R.
7
/10 po) peut
CD réinscriptible (CD-RW)
Avec un CD-RW, vous pouvez éditer des données
audio. Sur un CD-RW, vous pouvez écrire des
informations autant de fois que v ous le souh aitez .
CD-Extra
Un CD-Extra comporte deux sections (sessio ns) :
une pour la musiqu e et l’autre pour les données.
Cet appareil ne peut lire que la section audio.
Remarques
• Cet appareil est conforme au standard couleur
NTSC. Un disque enregistré dans un standard
couleur autre que NTSC, comme PAL ou SECAM,
ne peut pas être lu.
• Ce lecteur permet la lecture des DVD-R/DVD-RW et
des CD-R/CD-RW audio. Toutefois selon les
conditions d’enregistrement, il est possible que vous
ne puissiez pas lire certains disques.
• Les disques ci-dessous ne peuvent pas être lus sur
ce lecteur :
– Les disques de 8 cm (3 po)
– Les CD-ROM (les données autres que les fichiers
MP3 ou JPEG)
– Les CD-G
– Les Photo-CD
– Les VSD (Video single disc)
– Les DVD-ROM
– Les DVD-RAM
– Les DVD-Audio
– Les Active-Audio (données)
– Les CD-Extra (données)
– Les CD mixtes
– Les SVCD (Super Video CD)
– Les DVD-RW enregistrés en mode VR
Remarque sur les disques
transparents
Les disques de 12 cm (4 7/10 po) contenant une
portion de données de 8 cm (3 po) uniquement
(le reste est transparent) ne peuvent pa s être lus
sur cet appareil.
6
Page 45

Disques de musique encodés a vec un e
technologie de protection des droits
d’auteur
Cet appareil est conç u pour la lecture de disqu es
conformes à la norme Compact Disc (CD).
Dernièrement, certaines mais ons de disques ont
lancé sur le marché divers ty pes de disques de
musique encodés avec des technologies de
protection des droi ts d’auteur. Notez que, parmi
ces types de disq ues, certains ne son t pas
conformes à la norme C D. La lecture et
l’enregistrement de ces disques peuvent al or s
être impossibles avec cet appareil.
Code local
Ce système vis e à pr oté ge r l es dr oi ts d’ au teur su r
les logiciels.
Le code local est situé sous l’appareil et seuls le s
DVD identifiés par le même code local peuvent
être lus sur cet appareil.
Code local
DVD PLAYER
DC : 12V
AUDIO OUT
R
L
MODEL NO.
N E G A T I V E G R O U N D
DIGITAL OUT
REMOTE SIGNAL IN
TOP
FRONT
REAR
BOTTOM
VIDEO OUT
CERTIFICATION
Sony Corporation
Droits d’auteur
Ce produit intègre une technologie de protection
des droits d’auteur couverte par certains brevets
américains, ainsi que par d’autres droits sur la
propriété intellectuelle détenus par Macrovision
Corporation et d’autres détenteurs. L’emploi de
cette technologi e de protection des droits
d’auteur doit faire l’objet d’une autorisation par
Macrovision Corporation et est exclusivement
réservé à une utilisa tio n da n s le c ercle familial et
à d’autres utilisations de visionnage limitées,
sauf autorisation expresse de Macrovision
Corporation. Le s opérations d’ingéni er i e inverse
et de démontage sont interdites.
Fabriqué sous lice nce de Dolby Laboratories.
Le terme « Dolby » et le sigle double D sont des
marques commerciales de Dolby Laboratories.
Œuvres inédites confidentielles. Droits d’auteur ,
1992–1997 Dolby Laboratories. Tous droits
réservés.
« DTS », « DTS D ig ital Surround » et « DTS
Digital Out » sont des marques commerciales de
Digital Theater Sy st ems, Inc.
Les DVD identifiés par le logo peuvent
ALL
également être lu s sur ce lecteur.
Si vous essayez de lire tout autre DVD, le
message « Cannot play this disc. » (Impossible
de lire ce disque) apparaît sur le moniteur.
Suivant le DVD, il se peut qu’aucune indication
de code local ne soit indiquée même si la lecture
du DVD est soumise à des rest rictions de zone.
Remarque sur les opérations de
lecture des DVD et CD vidéo
Certaines fonctions de lecture des DVD et des
CD vidéo peuvent avoir été intentionnel lement
réglées par les cr éateurs des logic iels. Étant
donné que ce lecteur lit les DVD et les CD vidé o
en suivan t les paramè tres éta blis par l es cr éateur s
du logiciel, il est possible que cert aines fonctio ns
de lecture ne soient pas disponibles. Reportezvous également au mode d’emploi fourni avec
chaque DVD ou CD vidéo.
7
Page 46

Emplacement des commandes
Panneau fron tal
a Récepteur de la mini-télécommande
b Fente du disque
c Témoin DISC IN
S’allume en bleu lorsqu’un disq ue est inséré.
d Touche de réinitialisation
e Touche u (lecture/pause )*
1
f Sélecteur de signal
(Situé sous l’appareil)
Reportez-vous à la section « Utilisation de
l’appareil via le moniteur » dans le manuel
Installation/Raccordements.
g Touche Z (éjection)
h Touche OFF*
*1 Utilisez le point tactile comme référence pour
actionner le lecteur.
*2 Avertissement en cas d’installation de
l’appareil dans un véhicule dont le contact ne
comporte pas de position ACC (accessoires)
Veillez à maintenir la touche (OFF) de l’appareil
enfoncée jusqu’à ce que l’éclairage bleu des
touches disparaisse.
Sinon, le lecteur ne s’éteint pas et la batterie se
décharge.
2
DISC IN
Remarque
Si vous avez éteint le lecteur en appuyant sur (OFF)
pendant 2 secondes, activez-le d’abord en appuyant
sur u de l’appareil. En pareil cas, la minitélécommande ne permet pas de mettre l’appareil
sous tension.
Conseil
Vous pouvez éjecter le disque que le lecteur soit sous
tension ou non, mais vous pouvez insérer un disque
uniquement lorsqu’il est sous tension.
OFF
DVX-11A
8
Page 47

Mini-télécommande RM-X129
+
–
ENTER
AUDIO
SEEK
–
DISPLAY
CLEAR
0
LIST
SETUP
ANGLE
SUBTITLE
SEEK
+
123
456
789
TOP MENU
ALBUM
MENU
ALBUM
SOURCE
MODE
Pour utiliser le lecteur :
a Touche OFF
b Touches numériques
c Touche TOP MENU
Affiche le menu principal d’un DVD.
d Touche MENU
Affiche le menu d’un disque.
e Touche O (précédent)
Permet de revenir à l’écran ou à l’opération
précédent(e).
f Touche u (lecture/pause)
g Touche DISPLAY
Affiche l’état de lecture en cours et les
informations textuelles.
h Touche CLEAR
Annule les numér os sai si s .
i Touche LIST
Affiche la liste des éléments de lecture.
j Touche SETUP
Affiche le menu de configuration et le menu
du mode de lecture.
k Touche ANGLE
Permet de changer d’angle de vue.
l Touche ENTER
Applique un réglage.
m Touches </,
Déplacent le cu rseur ou tournent les pages.
OFFOFF
1
456
7 890
TOP MENU
ALBUM
MENU
ALBUM–
SOURCE
MODE
23
+
ENTER
AUDIO
SEEK–SEEK
VOLVOL
DISPLAY
CLEAR
LIST
SETUP
ANGLE
SUBTITLE
+
n Touches ./> (précédent/suivant)
o Touches m/M (recherche/
ralenti)
p Touches M ALBUM+/m ALBUM–
Déplacent le curseur ou sélectionnent
l’album.
q Touche AUDIO
Permet de changer la sortie audio.
r Touche SUBTITLE
Change la langue des sous-titres.
Pour l’utilisation du récepteur/centre
multimédia XAV-7W :
Ces touches contrôlent le récepteur/centre
multimédi a XAV -7W en opt ion racc ordé à ce lect eur.
s Touches .SEEK–/> SEEK+
t Touches VOL +/–
u Touche MODE
v Touche SOURCE
Remarque
Si vous avez éteint le lecteur en appuyant sur (OFF)
pendant 2 se condes, ac tivez-le d’abord en appuyant
sur u de l’appareil. En pareil cas, la minitélécomma nde ne permet pa s de mettre l’appareil
sous tension.
Conseil
Pour obtenir des informations détaillées sur la façon
de remplacer la pile, reportez-vous à la section
« Remplacement de la pile au lithium » (page 31).
9
Page 48

Écrans de menu
Utilisez les menus de ce lecteur pour ajuster les diverses fonctions et réglages de lecture.
Le menu affiché varie selon l’état du lecteur.
Menu de configuration
Apparaît lorsque vous appuyez sur (SETUP)
alors que la lecture est interrompue.
Pour sélectionner le paramètre souh a ité
Appuyez sur </M/m/,, puis sur (ENTER).
Pour désactiver le menu de configuration
Appuyez sur (SETUP).
Exemple : Si « LANGUAGE SETUP » est
sélectionné.
LANGUAGE SETUP
OSD:
MENU:
AUDIO:
SUBTITLE:
To set, press , then
ENTER SETUP
. To quit, press
ENGLISH
JAPANESE
ENGLISH
ENGLISH
A Paramètres de configuration
B Paramètre sélectionné
C Paramètres de réglage
D Options
E Réglage actuel
Menu du mode de lecture
Apparaît lors que vous appuyez sur (SETUP) en
cours de lecture.
Pour sélectionner le paramètre souhaité
Appuyez sur </M/m/,, puis sur (ENTER).
Pour désactiver le menu du mode de lecture
Appuyez sur (SETUP).
Remarque
Les paramètres du menu et les procédures
d’utilisation varient suivant le disque.
Exemple : Lors de la lecture d’un DVD
)
12(67
018(034
T 1:35:55
1:ENGLISH
1:ENGLISH
2:FRENCH
3:SPANISH
SUBTITLE
Select :
)
ENTER
PLAY
DVDVIDEO
A Paramètres du mode de lecture
B Paramètre sélectionné
C Numéro du titre*
D Numéro du chapitre*2/Nombre total de
chapitres*
1
/Nombre total de titres*
2
1
E Temps de lecture écoulé
F Statut de lecture ( NPLAY, XPAUSE, etc.)/
Format du disque
G Réglage actuel
H Options
*1 Affiche le numéro de plag e pour les CD vidéo/C D
et le numéro d’album pour les fichiers MP3/JPEG.
Aucune indication ne s’affiche pour les CD vidéo
lorsque la fonction PBC est activée.
*2 Affiche le numéro de plag e pour les fichier s MP 3/
JPEG.
10
Page 49

Message opérationnel
Les opérations du menu varient selon le
paramètre sélectionné et les touches à utiliser
apparaissent en bas de l’écran du menu pour vous
assister dans vos opérations.
To set, press , then
ENTER SETUP
. To quit, press
Le nom du paramètre
sélectionné et/ou les messages
Conseil
Le message «Operation not possible» (Opération
impossible) apparaît lorsque la fonction n’est pas
disponible.
Paramètres de configuratio n
LANGUAGE SETUP (page 27)
Permet de changer de l angue.
SCREEN SETUP (page 28)
Permet de sélectio nner les modes d’écr an.
CUSTOM SETUP (page 28)
Permet de régler le s opérations de lecture.
AUDI O SETUP (page 29)
Permet d’ajuster le son émis.
RESET (page 27)
Permet de réinitialiser tous les paramètres
de configuration.
Paramètres du mode de lecture
TITLE, TRACK (page 19)
Permet de sélectionner le titre ou la
plage à lire.
CHAPTER (page 19)
Permet de sélectionner le chapitre à lire.
ALBUM (MP3) (page 19)
Permet de sélectionner l’album à
afficher.
ALBUM (JPEG) (page 19)
Permet de sélectionner l’album
d’images à afficher.
TRACK (page 19)
Permet de sélectionner la plage à lire.
IMAGE (page 19)
Permet de sélectionner l’image à
afficher.
TIME (page 15)
Permet de vérifier le temps écoulé et le
temps de lecture restant.
AUDIO (page 20)
Permet de modifier le réglage audio.
SUBTITLE (page 22)
Permet d’afficher les so us -titres.
Permet de modifier la langue des soustitres.
ANGLE (page 22)
Permet de modifier l’ angle de vue.
CENTER ZOOM (page 23)
Permet d’agrandir l’image.
REPEAT (pag e 19)
Permet de lire en boucle la totalité du
disque (tous les titres/toutes les plages
et tous les albums) ou un seul chapitre,
une seule plage ou un seul album.
Conseil
Lorsque « REPEAT » est activé ou lorsque
« ANGLE » est disponible, sa case s’allume en vert
(ex : ).
t
11
Page 50

Réinitialisation de l’appareil
Avant la pre mière mise en service de l’appare il,
après avoir remplacé la batterie du véhicule ou
modifié les raccordements, vous devez
réinitialiser l’appareil. Appuyez sur la touche de
réinitialisation avec un objet pointu, comme un
stylo à bille.
DISC IN
OFF
Lecteur
Lecture de disques
Suivant les disques, certaines opérations peuvent
varier ou être limitées.
Reportez-vous au mode d’emploi four ni avec
votre disque.
Touche de réinitialisation
Remarques
• Une pression sur la touche de réinitialisation efface
certaines informa t ions mémo r i sée s.
• Le lecteur revient au réglage initial environ 10
secondes après avoir appuyé sur la touche de
réinitialisation. Pendant ce laps de temps, n’insérez
aucun disque sans quoi l’appareil ne serait pas
réinitialisé.
OFF
1
23
456
789
+
TOP MENU
ALBUM
ENTER
–
ALBUM
AUDIO
SEEK
–
DISPLAY
CLEAR
0
LIST
SETUPMENU
ANGLE
SUBTITLE
SEEK
uOFF
</,
+
1 Mettez le moniteur sous tension, puis
sélectionnez la source d’entrée
correspondant au lecteur.
Si vous utilisez un équi pement audio :
Mettez l’équipement audio sous tension et
sélectionnez le canal approprié pour le
lecteur.
2 Insérez un disque.
Face de lecture vers le bas
12
La lecture commence automatiquement
(suivant le disque, appuye z sur u pour
commencer la lect ur e).
Il se peut qu’un menu apparais se sur l’écran
lors de l’insertion d’ un DVD ou CD vidéo.
Pour plus de détails sur ces menus, reportezvous à la page 18 pour les DVD et page 1 8
pour les CD vidéo.
Page 51

Lorsque « MP3/JPEG » est réglé su r «JPEG»
dans « CUSTOM SETUP », un diaporama
démarre automatiquement lorsque le disque
contient des fichiers JPEG (page 29).
À chaque pression sur </,, l’image pivote
de 90 º.
Remarques
• Lorsque la taille de l’image pivotée est volumineuse,
celle-ci peut être longue à s’afficher.
• Les fichiers JPEG sont conçus pour un affichage
optimal à 640
taille différente, l’image risque d’être décalée (vers
la gauche ou la droite).
×480 pixels. S’ils sont affichés à une
Lorsque le disque est ins é r é
Appuyez sur u pour commencer la lecture.
Pour arrêter la lecture/mettre l’appareil hors
tension
Appuyez sur (OFF).
Conseil
Il est impossible d’insérer un disque lorsque l’appareil
est hors tension.
Rubriques d’affichage lors de la lecture
de CD/MP3
Pour faire défiler les informations textuelles
Appuyez sur (DISPLAY).
Remarque
«
» remplace les caractères autres que les lettres
*
de l’alphabet et les chiffres.
Remarques sur les DVD comportant une plage
audio DTS
Le signal audio DTS étant émis en continu, des
parasites puissants peuvent êt re émis par les enceintes
si vous raccordez l’appareil à l’équipement audio sans
décodeur DTS. Ceci risque d’endommager les
enceintes ou de représent er un danger pour votre ouïe.
Ordre de lecture des fichiers MP3
L’ordre de lecture des albums et plages (fichiers
MP3) enregis t rés sur un disque e st le suivant :
Structure du contenu du disque
Hiérarchie 1Hiérarchie 2Hiérarchie 3Hiérarchie 4Hiérarchie
ROOT
Album
Plage
5
123
123
:
ALBUM NAME
:
TRACK NAME
:
ID3 INFORMATION
REP 160K
001
001
PLAY
MP3120:42
A Numéro de l’album*2/Numéro de la plage/
Temps de lecture écoulé
B État de lecture (NPLAY, XPAUSE, etc.)/
Format du disque
C Nom du di sque*
Nom de la plage/Informations des étiquettes
ID3 (ver. 1 uniquement)*
D Mode de lecture/Débit binaire*2*
*1 Les messages « NO DISC NAME » ou « NO
TRACK NAME » apparaissent lorsque le disque ou
la plage ne porte aucun nom.
*2 Apparaît uniquement lors de la lecture de fichiers
MP3.
*3 Aucune indication n’apparaît lorsque le débit
binaire variable est activé.
1
/Nom de l’album*2/
2
3
Lorsque le disque contenant les fichiers MP3 est
inséré, les plage s s ont lu es en séquence de
7 ainsi qu’il est indiqué. Tous les sous-albums et
1 à
toutes les plages contenus dans l’album
sélectionné sont prioritaires sur l’album suivant
de la même hiérarchie. ( Exemple : C contient D
donc
4 est lu avant 5.)
Dans la liste d es albums MP3 s’affichant lorsq ue
vous appuyez sur (LIST), les albums
apparaissent dans l’ordre suivant : A t B t
t D t F t G. Les albums ne
C
comportant aucune plage (comme l’album E)
n’apparaissent pas dans la liste.
Suite à la page suivante t
13
Page 52

Remarques
• Selon le logiciel utilisé pour l’enregistrement, l’ordre
de lecture peut varier.
• L’ordre de lecture ci-dessus peut ne pas s’appliquer
si le nombre total d’albums et de plages du disque
dépasse 512.
• L’appareil peut lire jusqu’à 256 albums. Le lecteur ne
reconnaît pas les albums suivants le 256ème.
Conseils
• Si vous ajoutez des chiffres (01, 02, 03, etc.) avant
les noms de fichiers des plages, les plages seront
lues suivant cet ordre.
• Étant donné qu’un disque comportant de
nombreuses hiérarchies exige un délai plus long
avant le début de la lecture, il est recommandé de
ne pas créer plus de deux hiérarchies dans chaque
album.
Opérations complément aires
OFF
1
456
789
TOP MENU
ALBUM
M/m
./>
ALBUM
Pour Fonctionnement
23
+
ENTER
–
AUDIO
SEEK
–
DISPLAY
CLEAR
0
LIST
SETUPMENU
ANGLE
SUBTITLE
SEEK
+
DISC IN
Faire une pause Appuyez sur u
Reprendre l a lecture
Appuyez sur u
après une pause
Passer au chapitre, à la
Appuyez sur >
plage ou à la scène
suivante en mode de
lecture continue
Revenir au chapitre, à
Appuyez sur .
la plage ou à la scène
précédente en mode de
lecture continue
Passer à l’album
Appuyez sur M*
suivant
Revenir à l’al bum
Appuyez sur m*
précédent
Arrêter la lecture et
Appuyez sur Z
retirer le disque
* Disponible uniquement lors de la lecture de fichiers
14
MP3 ou JPEG.
Reprise de la lecture
— Reprise de la l ecture
Le lecteur enregistre le point d’arrêt du dis que
pour un maximum de 20 disques et reprend la
lecture à partir de ce point même après une mise
hors tension de l’appareil ou si le disque lu est
éjecté.
OFF
1
23
456
789
+
TOP MENU
ALBUM
ENTER
u
ALBUM
–
AUDIO
SEEK
–
1 En cours de lecture, appuyez sur
(OFF) pour arrêter la lecture.
2 Appuyez sur u pour reprendre la
lecture.
La lecture reprend à part ir du point où vous
l’avez interrompue à l’étape 1.
Pour effectuer une lecture depuis le début
OFF
Zu
Après avoir réglé « MULTI-DISC RESUME»
sur « OFF » dans « CUSTOM SETUP »
(page 28), appuyez sur Z pour éjecter le disque,
puis réinsérez-le.
Sélectionnez le chapitre de votre choix dans le
menu du DVD ou dans le menu princi pa l s uivant
le disque.
Remarques
• La lecture d’un fichier MP3 reprend à partir du début
de la dernière plage lue.
• Pour utiliser la fonction de reprise de la lecture,
vérifiez que «MULTI-DIS C RES UME» est réglé sur
« ON » dans « CUSTOM SETUP » (page 28).
• Lorsque vous enregistrez un point de reprise de la
lecture pour un 21ème disque, le point de reprise de
la lecture du premier disque est automatiquement
effacé de la mémoire.
• La fonction de reprise de la lecture est annulée en
cas de modification du réglage du contrôle parental.
• Suivant le disque ou la scène, il est possible que
vous ne puissiez pas utiliser la fonction de reprise de
lecture.
• Lorsque le contrôle parental est activé, la fonction
de reprise de la lecture n’est plus disponible. Dans
ce cas, la lecture re prend au début du disque
lorsque vous insérez celui-ci.
DISPLAY
CLEAR
0
LIST
SETUPMENU
ANGLE
SUBTITLE
SEEK
uOFF
+
Page 53

Conseil
Lors de la lecture de CD, fichiers MP3 ou fichiers
JPEG, le lecteur essaie de mémoriser le point de
reprise pour le disque en cours de lecture. Une fois le
lecteur mis hors tensi on ou le disque éjecté, le point
de reprise de la lecture enregistré pour le disque est
effacé.
Vérification du temps de
lecture
— Informations temporelles
Vous pouvez vérifier le temps de le ct ure ou la
durée restante du titre, du chapitr e ou de la plag e
en cours.
OFF
1
456
789
TOP MENU
ALBUM
ALBUM
23
+
ENTER
–
AUDIO
SEEK
–
DISPLAY
CLEAR
0
LIST
SETUPMENU
ANGLE
SUBTITLE
SEEK
DISPLAY
+
1 En cours de la lecture, appuyez sur
(DISPLAY).
Les informations de lecture actuelles
apparaissent.
Informations temporelles
T 1:01:57
BRAHMS SYMPHONY
Suite à la page suivante t
15
Page 54

2 Appuyez plusieurs fois sur (DSPL)
pour passer à une autre in format io n
temporelle.
Les informations temporelles pouvant être
affichées varient suivant le type de disque de
la façon suiv a nt e :
DVD :
«T **:**:**» - Temps de lecture
écoulé du titre en cou rs
«T-
**:**:**
en cours
«C
**:**:**
écoulé du chapitre en cours
«C-
**:**:**
chapitre en cours
CD vidéo (sans fonctions PBC) :
«T **:**» - Temps de lecture écoulé de
la plage en cours
«T-
**:**
cours
«D
**:**
disque en cours
«D-
**:**
cours
JPEG :
Numéro de l’album
Numéro de l’image
» - Durée restante du titre
» - Temps de lecture
» - Durée restante du
» - Durée restante de la plage en
» - Temps de lecture écoulé du
» - Durée restan te du disque en
Recherche d’un passage
spécifique sur un disque
— Balayage/Lecture au ralenti/Liste
Vous pouvez rechercher rapidement un passage
précis du disque en regardant l’image de lecture,
en effectuant une lectur e au ralenti ou en le
sélectionnant dans la liste.
OFF
1
23
456
789
+
TOP MENU
ALBUM
M/m
/
Remarque
Certaines des opé ra tion s déc rites ci -dess ous peuv en t
ne pas être disponibles avec certains DVD ou CD
vidéo.
ALBUM
ENTER
–
SUBTITLE
AUDIO
SEEK
–
Localiser rapidement un passage
— Balayage
En cours de lecture, ma in te ne z l a to uche m
ou M enfoncée, puis relâchez-l a au point
recherché.
DISPLAY
CLEAR
SEEK
0
LIST
SETUPMENU
ANGLE
u
LIST
ENTER
+
16
Si vous appuyez sur la to uche en la maintenan t
enfoncée, la vitesse de lecture augmente.
Remarque
Aucun son n’est audible au cours de la recherche.
Page 55

Lecture à vitesse lente
— Lecture au ralenti
Vous pouvez lire un disque à différent es vitesses
lentes.
1 Appuyez sur u pour effectuer une
pause de lecture.
2 Appuyez sur m* ou sur M et
maintenez la touche enfoncée.
La lecture au ralenti commence.
* Disponible uniquement lors de la lecture d’un
DVD.
Pour revenir à la lecture normale
Appuyez sur u.
Remarques
• Vous ne pouvez entendre aucun son pendant la
lecture au ralenti.
• Suivant les disques, il est possible que les images
soient déformées pendant la lecture au ralenti.
Sélection d’un album et d’une plage
— Liste
Vous pouvez localiser le contenu de votr e choix
sur la liste des albums et des plages/ima ges.
1 En cours de lecture, appuyez
plusieurs fois sur (LIST) pour afficher
la liste souhaitée.
À chaque pressi on sur (LIST), la liste change
comme suit :
Liste des albu ms* t Liste des plages/images
t Mode de lecture normal tListe des
albums*
* Apparaît uniquement lors de la lecture de
fichiers MP3/JPEG.
2 Appuyez sur M/m pour sélectionner le
paramètre de votre choix (Album,
Plage, Image), puis appuyez sur
(ENTER).
La lecture commence. Lorsque l’album est
sélectionné, la lecture de la première plage/
image de l’album sélectionné commence.
Rubriques d’affichage de la liste
333:
ALBUM NAME
333:
TRACK NAME
331:
TRACK NAME
332:
TRACK NAME
333:
TRACK NAME
334:
TRACK NAME
335:
TRACK NAME
336:
TRACK NAME
Select :
A Plage/album en cours*1/numéro et nom
d’image*
ENTER
2
001
002
003
004
005
006
003
003
B Noms de la plage/de l’album*1/de l’image*
*1 Apparaît uniquement lors de la lecture d’un fichier
MP3.
*2 Apparaît uniquement lors de la lecture d’un fichier
JPEG.
Remarque
» remplace les caractères autres que les lettres
«
*
de l’alphabet et les chiffres dans la liste.
2
17
Page 56

Utilisation du menu avec des
DVD
Sur certains DVD, vous pouvez utiliser le menu
d’origine, comme le menu principal et le menu
DVD.
Si le DVD contient plusieurs titres de plages et
de scènes, vous pouvez utiliser le menu principal
pour sélectionne r l e titre de votre choix et
commencer la lect ur e.
Si le DVD contient des rubriques de menu plus
complètes comme les langues de la bande
sonore, les lan gues des sous -titr es, l es titr es e t les
chapitres, vous pouvez utiliser le menu du DVD
pour sélectionne r l a r ubrique de votre choix et
commencer la lect ur e.
TOP MENU
MENU
M/m
OFF
1
456
789
TOP MENU
ALBUM
ALBUM
23
+
ENTER
–
AUDIO
SEEK
–
DISPLAY
CLEAR
0
LIST
SETUPMENU
ANGLE
SUBTITLE
SEEK
+
1 Pendant la lecture d’un DVD, appuyez
sur (TOP MENU) ou sur (MENU).
Le menu du DVD ou le menu principal
apparaît.
Le contenu du menu diffère suivant les
disques.
2 Appuyez sur </M/m/, ou sur les
touches numériques pour
sélectionner la rubrique de votre
choix, puis appuyez sur (ENTER).
Remarque
Les paramètres du menu et les procédures
d’utilisation varient suivant le disque.
18
ENTER
</,
Utilisation des fonctions PBC
— PBC (Contrôle de la lecture)
Le menu PBC vous assiste de façon interactive
lors de la lecture d’un CD vidéo compatibl e
PBC.
OFF
Touches
numériques
O
1
456
789
TOP MENU
ALBUM
ALBUM
1 Lancez la lecture d’un CD vidéo doté
de fonctions PBC.
Le menu PBC apparaît.
2 Appuyez sur les touches numériques
pour sélectionner le paramètre de
votre choix, appuyez ensuite sur
(ENTER).
3 Suivez les instructions du menu pour
une utilisation interactive.
Pour revenir à l’écran précédent
Appuyez sur O.
Lecture sans fonctions PBC
1 En cours de lecture, appuyez sur
(OFF).
2 Appuyez sur les touches numériques
pour sélectionner le paramètre de
votre choix, puis appuyez sur
(ENTER).
Le message « Play without PBC » (Lecture
sans fonctions PBC) ap par aît et la lecture
commence.
Le menu PBC n’apparaît pas en cours de
lecture.
Remarques
• L es paramètr es du menu et les procédu res
d’utilisation varient suivant le disque.
• Lors de la lecture PBC, le numéro de plage, la durée
de lecture, etc., n’apparaissent pas dans le menu du
mode de lecture.
Conseil
Pour reprendre la lecture PBC, éjectez le disque et
réinsérez-le de nouveau. La lecture PBC reprend
alors.
23
+
ENTER
–
AUDIO
SEEK
–
DISPLAY
CLEAR
0
LIST
SETUPMENU
ANGLE
SUBTITLE
SEEK
ENTER
+
Page 57

Divers modes de lecture
— Lecture répétée/Recherche
Vous pouvez régler les modes de lecture sui vants :
• Lecture répétée (page 19)
• Recherche (page 19)
Remarques
• Le mode de lecture sélectionné est annulé lorsque
le disque en cours de lecture est éjecté ou lorsque
l’appareil est mis hors tension.
• Le mode de lecture répétée n’est pas disponible
pour les CD vidéo lorsque la fonction PBC est
activée.
Lecture en boucle
— Lecture répétée
Le lecteur permet la l ecture en boucle d’un titre,
d’un chapitre ou d’ une plage lorsqu’il/el le se
termine.
Les options de lecture répétée suivantes sont
disponibles :
• TITLE (Répétition du titre) - répète le titre en
cours.
• CHAPTER (Répétition du chapitre) - répète le
chapitre en cours .
• TRACK (Répétition de la plage) - répète la
plage/l’i m age en cours.
• ALBUM (Répétition de l’album) - répète les
plages/images de l’album en cours.
TOP MENU
M/m
1 En cours de lecture, appuyez sur
(SETUP).
Le menu du mode de lecture apparaît.
2 Appuyez sur M/m pour sélectionner
« REP », pui s appuyez sur (ENTER).
Les options du mode de lecture apparaissent.
3 Appuyez sur M/m pour sélectionner
l’option de votre choix, puis appuyez
sur (ENTER).
La lecture répétée commence.
Pour revenir à la lecture normale
Sélectionnez « OFF » à l’étape 3.
OFF
1
456
789
ALBUM
ALBUM
23
+
ENTER
–
AUDIO
SEEK
–
DISPLAY
CLEAR
0
LIST
SETUPMENU
ANGLE
SUBTITLE
SEEK
+
ENTER
SETUP
Pour désactiver le menu du mode de lecture
Appuyez sur (SETUP).
Conseil
Les options de lecture répétée diffèrent suivant le disque.
Lecture à partir d’un passage sélectionné
— Recherche
Vous pouvez rapidement localiser un passage de
votre choix en spéci fiant le titre, le chapitre ou la
plage.
Les options de recherche suivantes sont
disponibles suivant le disque :
DVD :
• TITLE commence la lecture à partir
du titre sélectionné.
• CHAPTER commence la lecture à
partir du chapitre sélectionné.
CD vidéo :
• TRACK commence la lecture à partir
de la plage sélecti onnée.
CD :
• TRACK commence la lecture à partir
de la plage sélecti onnée.
MP3 :
• ALBUM commence la lecture à partir
de l’album sélectionné .
• TRACK commence la lecture à partir
de la plage sélecti onnée.
JPEG :
• ALBUM commence la lecture à partir
de l’album sélectionné .
• IMAGE commence la lecture à partir
de l’image sélectionnée.
Touches
numériques
M/m
OFF
1
456
789
TOP MENU
ALBUM
ALBUM
23
+
ENTER
–
AUDIO
SEEK
–
DISPLAY
CLEAR
0
LIST
SETUPMENU
ANGLE
SUBTITLE
SEEK
CLEAR
ENTER
SETUP
+
1 En cours de lecture, appuyez sur
(SETUP).
Le menu du mode de le ct ur e apparaît.
Suite à la page suivante t
19
Page 58

2 Appuyez sur M/m pour sélectionner
l’option de recherche de votre choix,
puis appuyez sur (ENTER).
Les options de rech erche varient suivant le
disque.
)
12(67
018(034
T 1:35:55
)
PLAY
DVDVIDEO
Le nombre entre pa renthèses indique le
nombre total d’éléments sélectionnés.
3 Appuyez sur les touches numériques
pour saisir le numéro du titre, du
chapitre, de la plage ou le temps
écoulé du titre ou de la plage.
Pour effacer les nombres déj à saisis, appuyez
sur (CLEAR).
4 Appuyez sur (ENTER).
La lecture commence à partir du passage
sélectionné.
Pour désactiver le menu du mode de lecture
Appuyez sur (SETUP).
Réglages du son
Modification des canaux
audio
Lors de la lecture d’un DVD enregistré d ans de
multiples formats audio (PCM, Dolby Digital ou
DTS), vous pouvez modifier le format audio. Si le
DVD est enregistré avec des plages multilingues,
vous pouvez ég al ement modifier la l angue.
Sur les CD vidéo vous pouvez sélectionner le son
provenant du canal droit o u gauche et écouter le
son du canal sélectionné via les deux enceintes
droites et gauches en même temps. Par exemple,
en cours de lectur e d’ un disque contenant un e
chanson dont les paroles proviennent du canal de
droite et la parti e in st rumentale du canal de
gauche, vous pouvez écou te r l a partie
instrumentale à partir des deux enceintes en
sélectionnant le canal de gauche.
M/m
OFF
1
23
456
789
+
TOP MENU
ALBUM
ENTER
–
ALBUM
AUDIO
SEEK
–
DISPLAY
CLEAR
0
LIST
SETUPMENU
ANGLE
SUBTITLE
SEEK
ENTER
SETUP
+
20
En cours de l ectu re, app uy ez pl us ieu r s
fois sur (AUDIO) pour sélectionner les
canaux audio de votre choix.
1:ENGLISH DolbyD
Les réglages sonores varient suivant le type
de disque de la façon suivante :
DVD :
La langue de la bande sonore change selon les
langues disponibles.
Si 4 chiffres s’af fichent, saisissez le code de
langue correspond ant à la langue de votre
choix (page 39).
Lorsque la même langue est affichée deux
fois ou plus, le DVD est enregistr é en
plusieurs format s audio.
Page 59

CD vidéo :
STEREO* : son stéréo standard
1/L : son du canal gauche (mono)
2/R : son du canal dr oi t ( m ono)
* Régla ge par défaut
Conseil
Vous pouvez également modifier les réglages en
sélectionnant « AUDIO » dans le menu du mode de
lecture (page 10).
Vérification du format du programme
Vous pouvez vérifier le nombre de canaux et la
position des composantes sur le DVD en cours de
lecture.
1 En cours de lecture, appuyez sur
(SETUP).
Le menu du mode de lecture apparaît.
2 Appuyez sur
« » (AUDIO), puis appuyez sur
(ENTER).
Le format du pr ogramme apparaît.
12(67
018(034
T 01:35:55
1:ENGLISH
Format du programme actuel*
Les lettres de l’affichage du format de
programme correspondent aux comp osantes
sonores suivantes et à leurs positions :
: Frontale (gauche)
: Frontale (droite)
: Centrale
: Arrière (gauche)
: Arr ière (droite)
: Arrière (mono) : c omp os ant e a rr ièr e du
signal traité par Dol by Surround et
signal Dolby Digital
: Signal d’effet de basse fréque nce
m pour sélectionner
M/
Format audio actuel*
)
)
PROGRAM FORMAT
DOLBY DIGITAL
L C
LSRRS
PLAY
DVDVIDEO
3 / 2. 1
LFE
2
*1 L’indica tion « PCM », « DTS» ou « DOLBY
DIGITAL » apparaît suivant le disque.
*2 Apparaît uniquement lorsque le format « DOLBY
DIGITAL » est appliqué.
Pour désactiver le menu du mode de lecture
Appuyez sur (SETUP).
Conseil
Pour Dolby Digital et DTS, l’indication « LFE » est
toujours affichée dans un cadre en traits continus que
la composante du signal LFE soit émise ou non.
1
Lorsque l’effet «DOLBY DIGITAL » est
appliqué, le nom du format du programme et
les numéros de canaux apparaissent de la
façon suivante :
Exemple : Dolby Digital 5.1 ch
Composante arrière×2
DOLBY DIGITAL
Composante avant×2 +
Composante centrale×1
3 / 2 . 1
Composante
LFE×1
21
Page 60

Réglages de l’image
Changement de l’angle de
vue
Si plusieurs angles de vue (multi-angles) s ont
enregistrés sur le DVD pour une scène, vous
pouvez changer l’angl e de visualisation.
OFF
1
456
789
TOP MENU
ALBUM
ALBUM
Appuyez plusieurs fois sur (ANGLE)
pour sélectionner le numéro de l’angle
souhaité.
)
2(2
23
+
ENTER
–
AUDIO
SEEK
–
DISPLAY
CLEAR
0
LIST
SETUPMENU
ANGLE
SUBTITLE
SEEK
ANGLE
+
Affichage des sous-titres
Si une ou plusieur s l angues ont été enregistrées
sur le DVD, vous pouvez les activer, les
désactiver ou changer la la ngue.
OFF
1
456
789
TOP MENU
ALBUM
ALBUM
1 En cours de lecture, appuyez sur
(SUBTITLE).
La langue des sous-titres apparaît.
2 Appuyez plusieurs fois sur (SUBTITLE)
pour sélectionner la langue de votre
choix, puis appuyez sur (ENTER).
01:ENGLISH
23
+
ENTER
–
AUDIO
SEEK
–
DISPLAY
CLEAR
0
LIST
SETUPMENU
ANGLE
SUBTITLE
SEEK
+
SUBTITLE
L’angle de vue est modifié.
Conseil
Vous pouvez également modifier l’ angle de vue en
sélectionnant « ANGLE » dans le menu du mode de
lecture (page 10).
Remarque
Suivant le DVD, il se peut que vous ne puissiez pas
changer l’angle de vue même si plusieurs angles sont
enregistrés.
22
Les langues disponibles varient suivant le
disque.
Si 4 chiffres s’af fichent, saisissez le code
correspondant à la la ngue de votre choix
(page 39).
Pour désactiver l’affichage des sous-titres
Appuyez plusieurs fois sur (SUBTITLE) pour
sélectionner « OFF ».
Conseil
Vous pouvez également modifier la langue des soustitres en sélectionnant « SUBTITLE » dans le menu du
mode de lecture (page 10) ou le menu DVD (page 18).
Remarque
Suivant le DVD, il se peut que vous ne puissiez pas
modifier les sous-titres même si des sous-titres
multilingues sont enregistrés.
Page 61

Agrandissement d’images
Vous pouvez agrandir des imag es.
Autre fonction
Verrouillage des disques
M/m
OFF
1
456
789
TOP MENU
ALBUM
ALBUM
23
+
ENTER
–
AUDIO
SEEK
–
DISPLAY
CLEAR
0
LIST
SETUPMENU
ANGLE
SUBTITLE
SEEK
SETUP
AUDIO
+
1 En cours de lecture, appuyez sur
(SETUP).
Le menu du mode de lecture apparaît.
2 Appuyez sur M/m pour sélectionner
« » (CENTER ZOOM), puis appuyez
sur (ENTER).
L’option en cours apparaît.
3 Appuyez sur M/m pour sélectionner
l’option de votre choix (ZOOM×1, ×1,5,
×2*, ×3*), puis appuyez sur (ENTER).
L’image est agrandie.
* L’aspect de l’image devient granuleux.
Pour modifier la p os ition de l’im ag e
Après avoir agrandi l’im age, appuyez sur
</M/m/,.
Pour restaurer la taille initiale
Sélectionnez « ZOOM×1 » à l’étape 3.
Pour désactiver le menu du mode de lecture
Appuyez sur (SETUP).
Remarques
• Suivant le DVD, il se peut que vous ne puissiez pas
modifier le grossissement.
• La fonction de reprise de la lecture (page 14)
restaure le dernier agrandissement, mais la dernière
position de l’image n’est pas conservée.
• Dans le menu du mode de lecture, l’image est
toujours affichée à sa taille normale. L’image peut
être agrandie lorsque le menu du mode de lecture
est fermé.
— Contrôle par ental
Vo us pouvez verrouiller le disque de votre choix
ou définir des restri ct i ons de lecture en fonction
d’un niveau prédétermin é comme l’âge de
l’utilisateur. Les scènes de lecture limitées sont
bloquées ou remplacées par des s cènes
différentes lors de la le ct ur e d’un DVD
compatible avec le contrôle parental.
Activation du contrôle parental
OFF
Touches
numériques
ENTER
</,
OFF
1
23
456
789
+
TOP MENU
ALBUM
ENTER
–
ALBUM
AUDIO
SEEK
DISPLAY
CLEAR
0
LIST
SETUPMENU
SETUP
ANGLE
M/m
SUBTITLE
SEEK
+
–
1 Appuyez sur (SETUP) lorsque la
lecture est arrêtée .
Le menu de configuration apparaît.
2 Appuyez sur M/m pour sélectionner
« » (CUSTOM SETUP), puis
appuyez sur (ENTER).
Les paramètres de configuration apparais sent.
3 Appuyez sur M/m pour sélectionner
« PARENTAL CONTROL », puis
appuyez sur (ENTER).
Les options du contrôle parental apparaissent.
CUSTOM SETUP
PARENTAL CONTROL:
MULTI-DISC RESUME:
BEEP:
MP3/JPEG:
SLIDE SHOW TIME:
OFF
ON
OFF
PLAYER
PASSWORD
Suite à la page suivante t
23
Page 62

4 Appuyez sur M/m pour sélectionner
«ON t », puis appuyez sur (ENTER).
L’écran de réglage du mot de passe apparaît.
5 Appuyez sur les touches numériques
pour saisir votre mot de passe, puis
appuyez sur (ENTER).
« Parental control is canceled » apparaît.
PARENTAL CONTROL
Enter a new 4-digit
password, then press .
ENTER
5 Appuyez sur les touches numériques
pour saisir votre mot de passe, puis
appuyez sur (ENTER).
L’écran de con firmation ap paraît.
6 Pour confirmer, appuyez sur les
touches numériques pour saisir une
nouvelle fois votre mot de passe, puis
appuyez sur (ENTER).
Le contrôle parental est défini.
Pour désactiver le menu de configuration
Appuyez sur (SETUP).
Pour désactiver le contrôle parental
1 Appuyez sur (SETUP) lorsque la
lecture est arrêtée .
Le menu de configurati on apparaît.
2 Appuyez sur M/m pour sélectionner
« » (CUSTOM SETUP), puis
appuyez sur (ENTER).
Les paramètres de configuration appara is s ent .
3 Appuyez sur M/m pour sélectionner
« PARENTAL CONTROL », puis
appuyez sur (ENTER).
Les options du contrôle parental app araissent.
4 Appuyez sur M/m pour sélectionner
«OFF t », puis appuyez sur (ENTER).
L’écran de saisie du mot de passe apparaît.
PARENTAL CONTROL
Enter password, then
ENTER
press .
Si vous saisissez un nombre incorrect,
appuyez sur < pour dépl acer le curseur et
saisissez à nouveau le nombre.
Modification de la zone et de son
niveau de classification des films
Vous pouvez régler les niveaux de restri ct ion
selon la zone et sa classifica tio n des films.
1 Appuyez sur (SETUP) lorsque la
lecture est arrêtée.
Le menu de configuration apparaît.
2 Appuyez sur M/m pour sélectionner
« » (CUSTOM SETUP), puis
appuyez sur (ENTER).
Les paramètres de configuration apparaissent.
3 Appuyez sur M/m pour sélectionner
« PARENTAL CONTROL », puis
appuyez sur (ENTER).
Les options du contrôl e parental apparaiss ent .
4 Appuyez sur M/m pour sélectionner
«PLAYER t », puis appuyez sur
(ENTER).
Lorsque le contrôle parental est déjà activ é ,
l’écran de saisie du m ot de passe apparaît.
Pour modifier les réglages, saisissez votre
mot de passe numé ri que, puis appuyez sur
(ENTER).
Si vous saisissez un nombre incorrect,
appuyez sur < pour dépl acer le curseur et
saisissez à nouveau le nombre.
5 Appuyez sur M/m pour sélectionner
« STANDARD », puis appuyez sur
(ENTER).
Les options standa rd apparaissent.
CUSTOM SETUP
LEVEL:
STANDARD:
8:
USA
USA
OTHERS
24
Page 63

6 Appuyez sur M/m pour sélectionner la
zone dont vous souhaitez appliquer la
classification des films, puis a ppuyez
sur (ENTER).
La zone est sélectionnée.
Si vous voulez sélectionn er la classification
standard dans la « Liste des codes de zone »
(page 25) , s électionnez « OTHERS t »,
puis saisissez le code correspond ant à l’aide
des touches numériques.
7 Appuyez sur M/m pour sélectionner
« LEVEL », puis appuyez sur (ENTER).
Les options de classification apparaissent.
CUSTOM SETUP
LEVEL:
STANDARD:
8:
8:
NC17
7:
R
6:
5:
PG13
4:
PG
3:
2:
G
1:
Plus le nombre es t faib le, plus le niveau de
restriction est strict.
8 Appuyez sur M/m pour sélectionner la
classification de votre choix, puis
appuyez sur (ENTER).
Le réglage du contrôle parental est terminé.
Pour désactiver le menu de configuration
Appuyez sur (SETUP).
Remarque
Lorsque vous lisez des disques qui ne comportent pas
de contrôle parental, il est impossible de restreindre la
lecture sur ce lecteur.
Liste des codes de zone
Standard Numéro de code
Allemagne 2109
Argentine 2044
Australie 2047
Autriche 2046
Belgique 2057
Brésil 2070
Canada 2079
Chili 2090
Chine 2092
Corée 2304
Danemark 2115
Espagne 2149
Finlande 2165
France 2174
Inde 2248
Indonésie 2238
Italie 2254
Japon 2276
Malaisie 2363
Mexique 2362
Norvège 2379
Nouvelle-Zélande 2390
Pakistan 2427
Pays-Bas 2376
Philippines 2424
Portugal 2436
Royaume-Uni 2184
Russie 2489
Singapour 2501
Suède 2499
Suisse 2086
Thaïlande 2528
Suite à la page suivante t
25
Page 64

Modification du mot de passe
1 Appuyez sur (SETUP) lorsque la
lecture est arrêtée .
Le menu de configurati on apparaît.
2 Appuyez sur M/m pour sélectionner
« » (CUSTOM SETUP), puis
appuyez sur (ENTER).
Les paramètres de configuration appara is s ent .
3 Appuyez sur M/m pour sélectionner
« PARENTAL CONTROL », puis
appuyez sur (ENTER).
Les options du contrôle parental app araissent.
4 Appuyez sur M/m pour sélectionner
« PASSWORD t », puis appuyez sur
(ENTER).
L’écran de saisie du mot de passe apparaît.
5 Appuyez sur les touches numériques
pour saisir votre mot de passe à 4
chiffres, puis appuyez sur (ENTER).
Si vous saisissez un nombre incorrect,
appuyez sur < pour déplacer le cu rs eur et
saisissez à nouveau le nombre.
6 Appuyez sur les touches numériques
pour saisir un nouveau mot de passe à
4 chiffres, puis appuyez sur (ENTER).
7 Pour confirmer, appuyez sur les
touches numériques pour saisir une
nouvelle fois votre nouveau mot de
passe, puis appuyez sur (ENTER).
Pour revenir à l’écran précédent
Appuyez sur O.
Pour désactiver le menu de configuration
Appuyez sur (SETUP).
Configuration et réglages
Utilisation du menu de
configuration
Le menu de configurati on vous permet de
procéder au ré glag e de di v ers paramè tres tels qu e
les caractéristiques de l’i m age et du son. Vous
pouvez également choisir une langue pour les
sous-titres et les menus à l’écran, entre autres.
Pour de plus amples informations concer nant
chaque paramètre de configuration, reportezvous aux pages 27 à 29.
Remarque
Les réglages de lecture enregistrés sur le disque sont
prioritaires par rapport aux réglages du menu de
configuration et il est possible que les fonctions
décrites ne fonctionnent pas toutes.
OFF
1
456
789
TOP MENU
ALBUM
M/m
O
ALBUM
Fonctionnement de base
Exemple : Vous souhaitez modifier le for m at de
l’image (« MONITOR TYPE ») en « 4:3 PAN
SCAN ».
23
+
ENTER
–
AUDIO
SEEK
–
DISPLAY
CLEAR
0
LIST
SETUPMENU
ANGLE
SUBTITLE
SEEK
ENTER
SETUP
+
26
1 Appuyez sur (SETUP).
Le menu de configuration apparaît.
LANGUAGE SETUP
OSD:
MENU:
AUDIO:
SUBTITLE:
AUDIO FOLLOW
ENGLISH
ENGLISH
ORIGINAL
Page 65

2 Appuyez sur M/m pour sélectionner
« » (SCREEN SETUP), puis
appuyez sur (ENTER).
Le menu de configuration apparaît.
SCREEN SETUP
MONITOR TYPE:
4:3 LETTER BOX
4:3 PAN SCAN
16:9
16:9
3 Appuyez sur M/m pour sélectionner
« MONITOR TYPE », puis appuyez sur
(ENTER).
Les options du t ype de moniteur apparaissen t .
SCREEN SETUP
MONITOR TYPE:
4:3 LETTER BOX
4:3 PAN SCAN
16:9
16:9
4 Appuyez sur M/m pour sélectionner
« 4: 3 PAN SCAN », puis appuyez sur
(ENTER).
Le réglage est activé et la configuration
terminée.
Pour revenir à l’écran précédent
Appuyez sur O.
Pour désactiver le menu de configuration
Appuyez sur (SETUP).
Pour réinitialiser tous les paramètres
de configuration
— Réinitialisation
Réglage de la langue
d’affichage ou de la plage
sonore
— Réglage de la langue
« LANGUAGE SETUP » vous permet de définir
la langue des menus à l’écran ou la plage sonore.
Sélectionnez « » (LANGUAG E SETUP)
dans le menu de configuration, puis sélectionnez
le paramètre de configuration de votre choix.
Pour plus de détails sur les procédures de
réglage, reportez-vous à la section « Utilisation
du menu de configuration » (page 26).
OSD (Menu à l’écran)
Permet de changer la langue des menus à l’écran.
MENU
Permet de change r l a langue du menu du disq ue.
AUDIO
Permet de changer la langue de la plage sonore.
Si vous sélectionnez « ORIGINAL », la langue
par défaut du disqu e est sélectionnée.
SUBTITLE
Permet de changer la langue des sous-titres
enregistrés su r le disque.
Lorsque vous sélec tionnez « A UDIO FOLLOW»,
la langue des sous-titres change selon la langue
que vous av ez sélectionnée pour la pla ge sonore.
Conseil
Si vous sélectionnez «OTHERS
« MENU », « SUBTITLE » et « AUDIO », sélectionnez
et saisissez un code de langue à partir de la « Liste
des codes de langues » (page 39) à l’aide des
touches numériques.
Remarque
Lorsque vous sélectionnez une langue qui n’est pas
enregistrée sur le disque dans «MENU»,
« SUBTITLE » ou « AUDIO», l’une des langues
enregistrées est automatiquement sélectionnée.
t
» dans
1 Sélectionnez « » (RESET) à
l’étape 2, puis appuyez sur (ENTER).
2 Appuyez sur M/m pour sélectionner
« YES », puis appuyez sur (ENTER).
T ous les paramèt res du m enu de co nfi gurati on
sont rétablis à leurs valeurs par défaut.
Pour annuler la réinitialisation
Sélectionnez « NO » à l’étape 2.
Remarque
N’éteignez pas l’appareil lorsque vous réinitialisez le
menu de configuration car l’opération requiert
quelques secondes.
27
Page 66

Réglage de l’écran
Réglages personnalisés
— Réglage de l’écran
« SCREEN SETUP » vous permet d’ef fectu er les
réglages pour le moniteur raccordé.
Sélectionnez « » (SCREEN SETUP) dans le
menu de configuration, puis sélectionnez le
paramètre de configur at ion souhaité.
Pour plus de détails sur les procédures de
réglage, reportez-vous à la section « Utilisation
du menu de configuration » (page 26).
Les paramètres de con figu ra ti on par défaut sont
signalés par « * » dans le s t ableaux ci-après.
MONITOR TYPE
Permet de sélecti onner le format d’écra n du
moniteur raccordé (standard 4:3 ou écra n la rge) .
16:9* Affiche une image large.
4:3
LETTER
BOX
4:3
PAN SCAN
16:9
4:3 LETTER BO X
4:3 PAN SCAN
Remarque
Suivant le DVD, il se peut que « 4:3 LETTER BOX »
soit automatiquement sélectionné au lieu de « 4:3
28
PAN SCAN » et vice-versa.
Sélectionnez ce régl age si vous
raccordez un moniteur à écran
large ou un moniteur disposant
d’une fonction grand écran.
Permet d’afficher une image au
format grand écran avec de s
bandes en haut et en bas de
l’écran.
Sélectionnez cette option lorsque
vous raccordez le lect eur à un
moniteur 4:3.
Permet d’afficher une image au
format grand éc r an sur toute la
surface de l’écran et coupe les
parties excédentaires.
Sélectionnez cette option lorsque
vous raccordez le lect eur à un
moniteur 4:3.
— Réglage personnalisé
« CUSTOM SETUP » vous permet de régler les
conditions de lect ure de cet appareil.
Sélectionnez « » (CUSTOM SETUP) dans le
menu de configur at i on, puis sélectionnez le
paramètre de confi guration de votre choi x.
Pour plus de détails sur les procédures de réglage,
reportez-vous à la section « Utilisation du menu
de configuration » (page 26).
Les paramètres de c onfiguration par défaut sont
signalés par « * » dans l es ta bleaux ci-après.
PARENTAL CONTROL
Définit les restrictions de lecture de sorte que
l’appareil ne lise pas des disques ou des scènes
inapproprié(e )s (page 23) .
ON t Active le contrôle parent al .
OFF t* Désactive le cont rôle
PLAYER t Dé finit le standard de
PASSWORD t Défini t un nouveau mot de
MULTI-DISC RESUME
Enregistre les points de reprise de la lecture pour
maximum 20 disques différents.
ON* Enregistre les réglages de reprise
OFF Annule l’enreg i strement des
Remarque
Lorsque le contrôle parental est activé, la fonction de
reprise de la lecture n’est plus disponible. Dans ce
cas, la lecture reprend au début du disque lorsque
vous insérez celui-ci.
BEEP
Active ou désactive le bip sonore .
ON* Active le bip sono re.
OFF Désactive le bip sonore.
parental.
restriction et s on niveau.
passe à 4 chiffres.
de la lecture en mém oire pour
maximum 20 disques. (Le
réglage reste en mémoire même
si vous sélectionnez « OFF ».)
réglages de reprise de la lecture
en mémoire. La lecture
redémarre au poi nt de reprise
uniquement pour le disque en
cours dans le lecteur.
Page 67

MP3/JPEG
Définit la priorité si le disque contient à la fois
des fichiers MP3 et JPEG .
MP3* Prioritaire sur les fichiers JPEG lors
de la lecture.
JPEG Prioritaire sur les fichiers MP3 lors
de la lecture.
Réglages du son
— Réglage audio
« AUDIO SETUP » vous permet de régler le son
en fonction des co nditions de lecture et de
l’équipement raccordé.
SLIDE SHOW TIME
Définit la durée d’affichage de s images sur le
disque.
5sec Change d’ i m age toutes les 5
secondes.
10sec* Change d’image t out es le s 10
secondes.
20sec Ch ange d’image toutes les 2 0
secondes.
40sec Ch ange d’image toutes les 4 0
secondes.
60sec Ch ange d’image toutes les 6 0
secondes.
FIXED Annule le changemen t d’ i m ages.
Sélectionnez « » (AUDIO SETUP) dans le
menu de configuration, puis sélectionnez le
paramètre de configu ra tion de votre choix.
Pour plus de détails sur les procédures de
réglage, reportez-vous à la section «Utilisation
du menu de configuration » (page 26).
Les paramètres de configuratio n par défaut sont
signalés par « * » dans les tableaux ci-après.
AUDIO ATT (atténuation)
Réduit le niveau de sortie audio si le son de
lecture est défor m é.
Ce réglage agit sur la sortie de la pris e FRONT/
REAR AUDIO OUT.
OFF* Ce réglage est généralement sélectionné.
ON Réduit le niveau de so rt i e audio.
Sélectionnez ce réglage lorsque le son
de lecture provenant des enceintes est
déformé.
AUDIO DRC (Contrôle de plage dynamique)
Cette fonction permet de rendre le son plus clair
lors de la lecture à faible volume d’un DVD doté
de la fonction « AUDIO DRC ».
Ce réglage agit sur la sortie de la pris e FRONT/
REAR AUDIO OUT.
STANDARD*
WIDE
RANGE
Ce réglage est généralement
sélectionné.
Reproduit l’ambian ce sonore
d’une salle de concert.
Suite à la page suivante t
29
Page 68

DOWNMIX
Cette fonction permet de changer la méthode de
mixage vers le son à 2 canaux lors de la l ecture de
DVD av ec des éléments sonores (canaux) arrière
ou enregistrés au form at D ol b y Digital. Pour plus
de détails sur les composantes du signal arrière,
reportez-vous à «Vérification du format du
programme » (page 21). Ce réglage agit sur la
sortie de la prise FRONT/REAR AUDIO OUT.
SURROUND*
NORMAL Sélectionnez cette fonction
Sélectionnez cette fonction
lorsque le lec t eu r est raccordé à
un appareil audio compatible
Dolby Surround (Pro Logic).
lorsque le lec t eu r est raccordé à
un appareil audio qui n’est pas
compatible Dolby Surround
(Pro Logic).
Informations
complémentaires
Entretien
Remplacement du fusible
Lorsque vous remp la cez le fusible, veillez à
utiliser un fusible dont la capacité, en am pères,
correspond à la valeur indi quée sur l’ancien
fusible. Si le fusible fond, vérifiez le
branchement de l’alimentation et remplacez le
fusible. Si le nouveau fusible fond, il est possible
que l’appareil soit défectueux. Dans ce cas,
consultez votre revendeur Son y l e plus proche.
Fusible
Avertissement
Ne jamais utiliser de fusible dont la capacité en
ampères dépa sse celle du fusible fourni avec
l’appareil, car vous risqueriez d’endommager
l’appareil.
30
Page 69

Remplacement de la pile au lithium
Dans des conditions d’utilisation normales, une
pile dure environ 1 an. (En f onction des
conditions d’utili sation, sa durée de vie peu t êt r e
plus courte.) Lorsque la pile est faible, la portée
de la mini-télécommande dimin ue. Remplacez la
pile par une nouvelle pi le au l it hium CR2025.
L ’utili sation de tou t autre type de pile entraîne un
risque d’incendie ou d’explosion.
x
pôle + vers le haut
Démontage de l’appareil
1 Retirez le tour de protection.
1 Insérez les clés de déblocage dans
le tour de protection.
Orientez correctement
la clé de déblocage.
2 Tirez sur les clés de déblocage pour
retirer le tour de protection.
2 Retirez l’appareil.
1 Insérez les deux clés de déblocage
simultanément jusqu’au déclic.
Tournez le crochet
vers l’intérieur.
Remarques sur la pile au lithium
• Tenez la pile au lithium hors de la portée des
enfants. En cas d’ingestion de la pile, consultez
immédiatement un médecin.
• Essuyez la pil e a vec un chi f fon s ec pou r assure r
un bon contact.
• Veillez à respecter la polarité lors de
l’installation de la pile.
• Ne tenez pas la pile avec des pi nces
métalliques, car cela pourrait entraîner un
court-circuit.
ATTENTION
ATTENTION
Utilisée de façon incorrecte, la pile peut
Utilisée de façon incorrecte, la pile peut
exploser. Ne pas la recharger, la démonter ni
exploser. Ne pas la recharger, la démonter ni
la jeter au feu.
la jeter au feu.
2 Tirez sur les clés de déblocage pour
extraire l’appareil.
3 Faites glisser l’appareil en dehors
de son support.
31
Page 70

Remarques sur les disques
• Pour que le disque reste propre, ne touchez pas
sa surface. Saisissez le disque par les bords.
• Rangez vos disques dans leur boîtier ou dans un
chargeur lorsque vous ne vous en servez pas.
Ne soumettez pa s l es disques à des
températures élevées. Évitez de les laisser dans
un véhicule en stat i onnement, sur le tableau de
bord ou la plage arrière.
• Ne collez pas d’étiquettes sur les disques et
n’utilisez pas de disques rendus collan ts par de
l’encre ou des résidus. De tels disques peuvent
s’arrêter de tou rn er en cours de lecture et
provoquer des problèmes de fonctionnement ou
être endommagé s.
• Avant la lecture, nettoyez les disques avec un
chiffon de nettoyage di sponible dans le
commerce. Essuyez chaque disque en partant
du centre vers l’extérieur. N’utilisez pas de
solvants tels que de la benz in e, du diluant, des
produits de nett oyage v end us dans l e comme rce
ou des sprays antistatiques destinés aux disques
analogiques.
• N’utilisez pas de disque comportant des
étiquettes ou des autocollants car ce ci peut
empêcher la lecture correcte des données (ex. :
sauts de lecture ou aucune lecture) en raison
d’une déforma t ion du disque suite au
rétrécissement de l’ét iquette ou de l’autoc ollant
sous l’effet de la chaleur.
• Les disques de forme non standar d ( ex. : en
forme de cœur, de carré ou d’étoile) ne peuvent
pas être lus avec cet appareil. Vous risquez
d’endommager votre a ppa reil si vous essayez
de le faire. N’utili sez pas de tels disque s.
32
Page 71

Remarques sur les fichiers
MP3
La technologie normalisée MP3 (MPEG 1
couche audio 3) est un format de compression de
séquences audi o. Il per m et la compression des
fichiers audio à 1/10 de l eur taille normale. Les
sons qui ne sont pas perçus par l’oreille humaine
sont comprimé s, alo rs que l es so ns au di bl es ne l e
sont pas.
Remarques sur les disques
Ce lecteur permet la lecture de fichiers MP3
copiés sur des disques CD-ROM, CD-R (CD
enregistrab les) et CD-RW (CD réinsc riptibles).
Le disque doit êtr e enregistré soit au for m at ISO
1
9660*
niveau 1 ou 2, soit au format d’extension
Joliet ou Romeo.
Le lecteur peut également lire des disques
enregistrés en multisession*
1
Format ISO 9660
*
Le format IS O 9660 est la norme
internationale la plus utilisée pour
l’organisation de s fich ie rs et des dossiers sur
CD-ROM.
La structure normalisée compte plusieurs
niveaux. Au niveau 1, les noms des fichiers
doivent être écrits en ma j uscules, au format
8,3 (nom de 8 caractères ou moins, extension
de 3 caractères ou moins, ex. « .mp3 »). Les
noms de dossiers ne peuvent compter plus de
8 caractères. La hiérarchie de dossiers ne peut
compter plus de 8 niveaux. La norme de
niveau 2 permet d’établir des noms de fichiers
d’une longueur de 31 caractères maximum.
Chaque dossier peut compter jusqu’à 8
hiérarchies.
Av e c les extensions Joliet et Romeo, vérif iez
bien le contenu du log i ciel de copie et les
autres conditions.
2
*
Multisession
Cette technologie de copie permet l’ajout de
données par la m éthode Track-At-Once. La
partie utile des CD ordinaires commence par
une zone de contrôle, (amorce d’entrée ou
Lead-in) et se te rm ine par une autre zone de
contrôle (amorce de fin ou Lead-out). Un CD
multisession est composé de plusieurs
sessions de copi e di stinctes. Chacune d e ces
sessions commence par une amorce d’entrée
et se termine par une amorce de fin distinc te s.
2
.
Remarques
• Lors de la lecture de disques enregistrés dans
d’autres formats que les formats ISO 9660 niveau 1
et niveau 2, les noms de fichiers et de dossiers
peuvent ne pas s’afficher correctement.
• Lors de l’identification, veillez à ajouter l’extension
« .mp3 » au nom de chaque fichier.
• Si l’extension « .mp3 » est ajoutée au nom d’un
fichier de format autre que MP3, l’appareil ne peut
pas reconnaître ce fichier et génère des parasites
sonores aléatoires qui risquent d’endommager les
enceintes.
• La lecture des types de disques suivants exige un
délai de démarrage plus long :
– disques comportant une hiérarchie de dossiers
complexe ;
– disques enregistrés en multisession ;
– disques auxquels il est possible d’ajouter des
données.
33
Page 72

Spécifications
Système
Laser Laser à semi-conducteu r
Système du format du signal NTSC
Caractéristiques audio*
Réponse en fréquence DVD :
Rapport signal-bruit 102 dB (prises AUDIO
Distorsion harmonique 0,003 %
Pleurage et scintillement En dessous du seuil
* Mesuré à partir des prises AUDIO OUT.
Lorsque vous lisez des plages sonores PCM avec
une fréquence d’échantillonnage de 96 kHz, les
signaux de sortie de la prise DIGITAL OUT sont
convertis dans la fréquence d’échantillonnage de 96
kHz.
5 Hz à 22 kHz
CD :
5 Hz à 20 kHz
OUT L/R uniquement)
mesurable (crête ± 0,001 %
W)
Généralités
Sorties AUDIO OUT L/R :
Alimentation requise Batterie de véhicule 12 V
Dimensions
Dimensions du support
Poids Environ 1,2 kg
Température de fonctionnement
Humidité de fonctionnement
Accessoires fournis Mini-télécommande
Accessoires en option Écran plafonnier
Prise phono/2 V eff./
10 kilohms
VIDEO OUT :
Prise phono/1,0 Vc-c/
75 ohms
DIGITAL OUT :
Prise de sortie numérique /
–18 dBm (longueur d’onde :
660 nm)
CC (masse négative)
Environ 178 × 50 × 170 mm
(7 1/8 × 2 × 6 3/4 po)
(l/h/p)
Environ 182 × 53 × 155 mm
1
(7
/4 × 2 1/8 × 6 1/8 po)
(l/h/p)
(2 liv 11 on)
–10 ºC à 55 ºC
(14 ºF à 131 ºF)
25 % à 80 %
RM-X129
Composants destinés à
l’installation et au
raccordement (1 jeu)
XVM-R75, XVM-R70
Moniteur encastré dans
l’appui-tête XVM-H65
Récepteur/centre
multimédia XAV-7W
Cordon RCA
RC-64 (2 m), RC-65 (5 m)
Câble optique
RC-97 (2 m), 98 (5 m)
Adaptateur optique
XA-D211
34
Remarque
Cet appareil ne doit pas être raccordé à un
préamplificateur numé r i qu e ou à un égali seu r
compatible avec le système BUS Sony.
La conception et les spécifications sont sujettes à
modification sans préavis.
Page 73

Dépannage
La liste de contrôle suivante vous aidera à
remédier aux problèmes que vous pourriez
rencontrer avec cet appareil.
Avant de passer en revue la li s te de contrôle cidessous, vérifiez les procédures de raccordement
et d’utilisation.
Alimentation
L’ap pareil n’est pas alimenté.
• Le raccordement d’alimentation n’est pas
effectué correctem ent.
t Vérifiez le raccordem ent . Si tout est en
ordre, vérifiez le fusible.
• Le véhicule n’est pas équipé d’une position
ACC.
t I nsérez un disque pour activer l’appareil.
Image
Aucune image n’apparaît ou l’image
comporte des parasites.
• Un des raccorde m ents n’est pas effectué
correctement.
• Vérifiez le raccordement à l’équipeme nt
raccordé et comm utez le sélecteur d’entrée
de l’équipement s ur la source correspondant
à cet appareil.
• Le disque est sale, défectueux ou détérioré.
• L’appareil est installé suivant un angle de
plus de 20 °.
• L’appareil n’est pas installé à un endroit
suffisamment stable du véhicule.
• Le moniteur est raccordé à la prise FRONT
AUDIO/VIDEO OUT et le cord o n du frein à
main (vert cl air) n’ est pas ra ccordé au cordon
du capteur du fr ein à main ou le frein à main
n’est pas serré.
L’im age ne remplit pas l’écran.
Le format d’image est fixe sur votre DVD.
Son
Il n’y a pas de son/le son comporte des
distorsions/le son comporte des parasites.
• Un des raccordements n’est pa s effectué
correctement.
• Vérifiez le raccordement à l’équipement
raccordé et co m m utez le sélecteur d’entrée
de l’équipement sur la source correspondant
à cet appareil.
• Le disque est sale, défectueux ou détérioré.
• L’appareil est installé suivant un angle de
plus de 20 °.
• L’appareil n’est pas installé à un e ndr oit
suffisamment stable du vé hi cule.
• Le lecteur se t ro uve en mode de pause ou de
lecture au ralent i.
• Le lecteur se trouve en mode d’avance rapide
ou de retour rapide.
• Les régl ages des sorties sont incorrects.
Le son comporte des parasites.
Éloignez les cordons et les câbles les uns des
autres.
Le son comporte des distorsions.
Réglez « AUDIO ATT » sur « ON » dans
« AUDIO SETUP » (page 29).
Le volume est très faible.
Réglez « AUDIO ATT » sur « OFF » dans
« AUDIO SETUP » (page 29) .
Fonctionnement
La télécommande ne fonctionne pas.
• Des obstacles séparent la télécommande du
lecteur ou du ca pt eur de la télécomm ande.
• La distance entre la mini-t élécommande e t le
lecteur et trop importante.
• La télécommande n’est pas dirigée vers le
capteur de télécommande ou le récepteur de
l’appareil.
• Les piles de la télécommande sont faibles.
Le lecteur ne répond pas.
t Appuyez sur la touche de réinitialisation.
Le contenu des réglages a été effacé.
• La touche de réinitialisation est enfoncée.
• La batterie a été remplacée ou le cordon
d’alimentation est déconnecté.
• Le raccordement d’alimentation n’est pas
effectué correctement.
Aucun bip sonore ne retentit lorsque vous
appuyez sur les touches.
t Réglez « BEEP » sur « ON » dans
« CUSTOM SETUP » (page 28).
Impossibl e d’ introduire un dis que.
• Un autre dis que est déjà en place.
• Le contact du véhicule est réglé en position OFF.
Suite à la page suivante t
35
Page 74

La lecture du disque ne commence pas.
• Le disque est introduit à l’envers.
t Placez le disque sur le plateau de lecture
avec la face de lecture orientée vers le
bas.
• Le disque insé ré ne peut pas être lu.
• Le code local figurant sur le DVD n’est pas
compatible avec le lecteur.
• De l’humidité s’est condensée à l’intérieur
du lecteur.
• Le DVD-R, DVD-RW, CD-R ou CD-RW
inséré n’est pas fina li s é.
Impossible de lire des fichiers MP3.
• L’enregistrement n’ a pas été réalisé selon l a
norme ISO 9660 niveau 1 ou 2, ni au f ormat
d’extension Joliet ou Rom eo.
• Le fichier MP3 ne possède pas l’extension
«.mp3».
• Les fichiers ne sont pas sauvegardés au
format MP3.
• Ce lecteur ne peut pas lire les fichiers
enregistrés au format MP3PRO.
• Ce lecteur ne peut pas lire les fichiers
enregistrés dans un format autre que MPEG1
couche audio 3.
• Le disque contient des fichiers MP3 et JPEG.
t Réglez « MP3/JPEG » dans « CU STOM
SETUP » sur « MP3 » (page 29).
Impossible de lire des fichiers JPEG.
• Les fichiers JPEG ne possèdent pas
l’extension « .j pg ».
• Les fichiers ne sont pas sauvegardés au
format JPEG.
• Le disque contient des fichiers MP3 et JPEG.
t Réglez « MP3/JPEG » sur « JPEG » dans
« CUSTOM SE TUP » (page 29).
Le titre de l’album ou de la plage audio MP3
ne s’affiche pas correctement.
Le lecteur ne peut afficher que les chiffres et
les lettres de l’al phabet. Tout autre caractère
est remplacé par «
La lecture du di sque n e démarr e pas à partir
du début du disque.
La fonction de reprise de la lecture est activée
(page 14).
La lecture s’arrête automatiquement.
Pendant la lect ure de disque comportant un
signal de pause automatique, le lect eur
interrompt la lecture au signal de pause
automatique.
Impossible d’exécuter certaines fonctions.
Suivant le disque, il se peut que vous ne
puissiez pas utiliser certaines fo nctions comme
les fonctions d’arrêt, de recher che, de lecture
au ralenti ou de lecture répétée. Reportez-vous
au mode d’empl oi fourni avec votre disque
pour plus de détails.
».
*
Impossible de changer la la ngue de la
bande sonore.
• Utilisez le menu du DVD au lieu d’utiliser la
touche de sélectio n di recte de la
télécommande (page 18).
• Le DVD en cours de lecture ne contient pas
de bandes sonores multilingues.
• Le DVD ne permet pas de changer la langue
de la bande sonore.
Impossible de changer la langue des soustitres ou de les désactiver.
• Utilisez le menu du DVD au lieu d’utiliser la
touche de sélectio n di recte de la
télécommande (page 18).
• Le DVD en cours de lecture ne contient pas
de sous-titres multilingues.
• Le DVD ne permet pas de changer les soustitres.
Impossible de changer l’angle de vue.
• Utilisez le menu du DVD au lieu d’utiliser la
touche de sélectio n di recte de la
télécommande (page 18).
• Le DVD en cours de lecture ne contient pas
d’angles de vue multiples.
• Le DVD ne permet de chang er l’ angle de
vue.
36
Page 75

Affichage des erreurs
Glossaire
Les indications suivantes apparaissent lorsqu’un
dysfonctionnem ent survient au niveau du lecteur.
Cannot play this disc.
• Le disque est in compatible avec ce lecteur.
• Le DVD ne peut pas être lu en raison d’un
code local différent.
No MP3 or JPEG file
Le disque ne contient aucun fichier MP3/
JPEG.
Read error
• L’appareil ne peut pas lire les données en
raison d’un problème.
• Les données so nt endommagées ou
corrompues.
Please Press RESET.
L’appareil ne peut pas fonctionner en raison
d’un problème.
t Appuyez sur la touche de réinitialisation.
Si ces solutions ne permettent pas d’am éliorer la
situation, consultez votre revendeur Sony le plus
proche.
Chapitre
Sections d’une image ou d’un enregistrement
musical plus courtes que les titres. Un titre
comporte plusieurs chapitres. Suivant le disq ue,
il est possible qu’aucun chapitre ne soit
enregistré.
Dolby Digital
Technologie de compression aud io numérique
mise au point par Dolby Laboratories. Cette
technologie est compatible avec le son
ambiophoniqu e à 5. 1 canaux. Dans ce format , le
canal arrière fonc tio n ne en s tér éo et comp or te un
canal discret pour le haut-parleur d ’extrêmegraves. La technologie Dolby Digital offre les
mêmes canaux 5.1 discrets numériques de grande
qualité audio que l es systèmes audio Dolby
Digital utilisés dans les cinémas. Une séparation
efficace des canaux est re ndue possible par
l’enregistrement distinct des donné es de chaque
canal. En outre, le traitement entièrement
numérique des données garantit une détérioration
minimale du son.
Dolby Surround (Pro Logic)
Technologie de traitement du signa l a udi o mise
au point par Dolby Laboratories pour pro duire
l’effet ambiophonique. Lorsque le signal
d’entrée contient une composante
ambiophonique le traitement Pro Logic émet des
signaux avant, centraux et arri ère. Le canal
arrière fonctionne en mono.
DTS
Technologie de compression aud io numérique
mise au point par Digital Theater Systems, Inc.
Cette te c hnologie e st compat ible avec le son
ambiophoniqu e à 5. 1 canaux. Dans ce format , le
canal arrière fonc tio n ne en s tér éo et comp or te un
canal discret pour le haut-parleur d ’extrêmegraves. Le mode DTS fournit les mêmes 5.1
canaux discrets numériques de grande qualité.
Une séparation efficace d es canaux est rendue
possible par l’e nregistr ement distinct de s
données de chaque canal. En outre, le traitement
entièrement n um érique des données garantit une
détérioration minimale du son.
Suite à la page suivante t
37
Page 76

DVD VIDEO
Type de disque contenant jusqu’à 8 he ur es
d’images animées bien que son diamètre soit le
même que celui d’un CD.
La capacité d’enregistrement d’un DVD à couche
unique et à une seule face est de 4,7 Go (gigaoctets), soit sept fois la capacité d ’un CD. La
capacité d’enregistrement d’un DVD double
couche à une seule face est de 8,5 Go (gigaoctets) ; un DVD à couche uniq ue et à double
couche offre une capacité de 9,4 Go et un DVD
double face double couche une capacité de
17 Go.
Les données d’image utilisent le format MPEG2,
une des normes i nternationales de la technologie
de compression numérique. Les données d’image
sont comprimées à environ 1/40 (en moyenne) de
leur taille d’origine. Le DVD utilise également
une technologie d’ encodage à débit variable qui
modifie l’attribution des données en fonction du
statut de l’image. Le s i nf o r m at i o ns audio sont
enregistrées dans un format multic anal, te l que le
format Dolby Digital, ce qui permet de pr oduire
une ambiance sonore plus réaliste.
En outre, diverses fonctions avancées son t
également disponib le s sur les DVD, en tre autres,
les fonctions d’angle de vue multiples, d e bande
sonore multilin gue et de contrôle parental.
DVD-RW
Un DVD-RW est un disque enregistrable et
réinscriptible de même capacité qu’un DVD
VIDEO. Le DVD-RW peut être enregistré en
deux modes différents : le mode VR et le mode
vidéo. Le mode VR (enr egi st re m ent vidéo) offre
diverses fonctions de pro grammation et de
montage dont certaines sont limitées en mode
vidéo. Le mode vidéo est compatible avec le
format DVD VIDEO et peut être lu sur d’autres
lecteurs DVD alors qu’un DVD-RW enregistré
en mode VR peut êtr e l u uniquement sur des
lecteurs compati bl es DVD-RW. Le terme
« DVD-RW » appara is sant dans ce mode
d’emploi et les menus à l’écran font référence à
des DVD-RW en mode VR.
JPEG (Joint Photographic Expert Group)
Selon l’Organisation Internationale de
Normalisation (ISO), JPEG est défini comme un
format standard universel pour la compression et
la décompression numérique d’images fixes à
utiliser dans des sy st èmes informatiques.
Généralement le taux de compression est
variable avant qu’une dégradati on visible ne
survienne. Les images fixes sont compressées
entre 1/10 et 1/100 de leur taille d’origine.
Logiciels basés sur des films, logiciels
basés sur des vidéos
Il existe deux types de DVD, ceux qui sont basés
sur des films et ce ux qui sont basé s sur des
vidéos. Les DVD basés sur des films contiennent
les mêmes images (24 images par seconde) que
celles diff usées dan s les cinémas. L es DVD ba sés
sur des vidéos comme les téléfilms ou les sitcoms, affichent des images à 30 images (ou 60
champs) par se conde.
Plage
Sections d’une im age ou de musique sur un CD
ou un CD Vidéo (longueur d’une chanson).
Titre
Séquence la plus longue d’images ou de musique
d’un DVD, d’un film, etc. dans un logiciel vidéo
ou la totalité de l’album dans un logiciel audio.
38
Page 77

Liste des codes de langues
L’orthographe des noms de langues est conforme à la norme ISO 639: 1988 (E/F).
Code Langue Code Langue Code Langue Code Langue
1027 Afar
1028 Abkhazian
1032 Afrikaans
1039 Amharic
1044 Arabic
1045 Assamese
1051 Aymara
1052 Azerbaijani
1053 Bashkir
1057 Byelorussian
1059 Bulgarian
1060 Bihari
1061 Bislama
1066 Bengali; Ban gl a
1067 Tibetan
1070 Breton
1079 Catalan
1093 Corsican
1097 Czech
1103 Welsh
1105 Danish
1109 German
1130 Bhutani
1142 Greek
1144 English
1145 Esperanto
1149 Spanish
1150 Estonian
1151 Basque
1157 Persian
1165 Finnish
1166 Fiji
1171 Faroese
1174 French
1181 Frisian
1183 Irish
1186 Scots Gaelic
1194 Galician
1196 Guarani
1203 Gujarati
1209 Hausa
1217 Hindi
1226 Croatian
1229 Hungarian
1233 Armenian
1235 Interlingua
1239 Interlingue
1245 Inupiak
1248 Indonesian
1253 Icelandic
1254 Italian
1257 Hebrew
1261 Japanese
1269 Yiddish
1283 Javanese
1287 Georgian
1297 Kazakh
1298 Greenlandic
1299 Cambodian
1300 Kannada
1301 Korean
1305 Kashmiri
1307 Kurdish
1311 Kirghiz
1313 Latin
1326 Lingala
1327 Laothian
1332 Lithuanian
1334 Latvian; Lettish
1345 Malagasy
1347 Maori
1349 Macedonian
1350 Malayalam
1352 Mongolian
1353 Moldavian
1356 Marathi
1357 Malay
1358 Maltese
1363 Burmese
1365 Nauru
1369 Nepali
1376 Dutch
1379 Norwegian
1393 Occitan
1403 (Afan)Oromo
1408 Oriya
1417 Punjabi
1428 Polish
1435 Pashto; Pushto
1436 Portuguese
1463 Quechua
1481 Rhaeto-
Romance
1482 Kirundi
1483 Romanian
1489 Russian
1491 Kinyarwanda
1495 Sanskrit
1498 Sindhi
1501 Sangho
1502 Serbo-Croatian
1503 Singhalese
1505 Slovak
1506 Slovenian
1507 Samoan
1508 Shona
1509 Somali
1511 Albanian
1512 Serbian
1513 Siswati
1514 Sesotho
1515 Sundanese
1516 Swedish
1517 Swahili
1521 Tamil
1525 Telugu
1527 Tajik
1528 Thai
1529 Tigrinya
1531 Turkmen
1532 Tagalog
1534 Setswana
1535 Tonga
1538 Turkish
1539 Tsonga
1540 Tatar
1543 Twi
1557 Ukrainian
1564 Urdu
1572 Uzbek
1581 Vietnamese
1587 Volapük
1613 Wolof
1632 Xhosa
1665 Yoruba
1684 Chinese
1697 Zulu
1703 Non sp écifié
39
Page 78

Index
Chiffres
16:9 28
4:3 LETTER BOX 28
4:3 PAN SCAN 28
A
Album (ALBUM) 19
Angle (ANGLE) 22
Atténuation (AUDIO ATT) 29
Audio (AUDIO) 20, 27
B
Bip (BEEP) 28
C
Chapitre (CHAPTER) 19
Code local 7
Contrôle parental (PAREN TA L
CONTROL) 23, 28
D
Disques utilisables 6
DRC (Contrôle de plage
dynamique) (AUDIO DRC)
29
Durée du diaporama (SLIDE
SHOW TIME) 29
F
Format du programme 21
Fusible 30
I
Image (IMAGE) 19
Informations temporelles
(TIME) 15
J
JPEG (MP3/JPEG) 29
L
Lecture répétée (REP EAT)
Album 19
Chapitre 19
Plage 19
Titre 19
Liste des codes de langues 39
Liste des codes de zone 25
Localisation
avance rapide 14
balayage 16
lecture au ralenti 17
liste 17
retour rapide 14
M
Menu de configuratio n 10, 26
Menu du DVD 18, 27
Menu du mode de lecture 10
Menu principal 18
Mini-télécommande 9
Mixage aval (DOWNMIX) 30
MP3 (MP3/JPEG) 29
O
OSD 27
P
PBC (Contrôle de la lecture) 18
Pile au lithium 31
Plage (TRACK) 19
R
Recherche 19
Réglage audio (AUDIO SETUP)
29
Réglage de l’écran (SCR E E N
SETUP) 28
Réglage de la langue
(LANGUAGE SETUP) 27
Réglage personnalisé (CUSTOM
SETUP) 28
Réinitialis ation (RESET ) 2 7
Reprise de la lecture (M U LTI-
DISC RESUME) 14, 28
Rubrique d’affichage
lecture de CD/MP3 13
liste 17
Menu de configuration 10, 26
Menu du mode de lecture 10
S
Sous-titre (SUBTITLE) 22, 27
T
Titre (TITLE) 19
Touche de réinitialisation 12
Type de moniteur (MON IT O R
TYPE) 28
Z
Zoom (CENTER ZOOM) 23
40
Page 79

Page 80

Advertencia
Para evitar el riesgo de incendio o
electrocución, no exponga la unidad a la
lluvia ni a la humed a d.
Para evitar recibir descargas eléctricas,
no abra el aparato. Solicit e asi stencia
técnica únicamente a personal
especializado.
PRECAUCIÓN
El uso de instrumentos ópticos con este producto
aumenta el riesgo de sufrir daños oculares. No
intente desmonta r l a carcasa, puesto que el haz
láser utilizado en este reproductor de CD/DVD
es perjudicial pa ra los ojos.
Solicite asistencia téc nica úni cam ente a personal
especializado.
PRECAUCIÓN
El uso de instrumentos ópticos con este
producto aumenta el riesgo de sufrir daños
oculares.
PRECAUCIÓN
La utilización de controles o ajustes, o la
aplicación de procedimientos distintos a los
que se especifican en este manual podría
provocar la exposición a ra di aciones
peligrosas.
DANGER INVISIBLE
2
LASER RADIATIONWHEN OPEN.
AVOID DIRECT EXPOSURE TO BEAM.
Page 81

Table de contenido
¡Bienvenido! . . . . . . . . . . . . . . . . . . . . . . . . . 4
Precauciones . . . . . . . . . . . . . . . . . . . . . . . . . 5
Discos que se pueden reproducir. . . . . . . . . . 6
Ubicación de los controles. . . . . . . . . . . . . . . 8
Pantallas de menú . . . . . . . . . . . . . . . . . . . . 10
Restauración de la unidad . . . . . . . . . . . . . . 12
Reproductor
Reproducción de discos. . . . . . . . . . . . . . . . 12
Reanudación de la reproducción
— Reanudación de la re pr oducción . . . . 14
Comprobación del ti empo de reproducci ón
— Información de tiempo. . . . . . . . . . . . 15
Búsqueda de un punto determinado de un disco
— Exploración/Repr oducción a cámara
lenta/Lista . . . . . . . . . . . . . . . . . . . . . . . . 16
Uso de los menús del DVD. . . . . . . . . . . . . 18
Uso de las funciones PBC
— PBC (control de reproducción) . . . . . 18
Reproducción en diversos modos
— Reproducción r epe t id a/ R eproducción
con búsqueda. . . . . . . . . . . . . . . . . . . . . . 19
Ajustes de sonido
Cambio de los canales de audio. . . . . . . . . . 20
Ajustes de la imagen
Cambio de los ángulos. . . . . . . . . . . . . . . . . 22
Visualización de los subtítulos . . . . . . . . . . 22
Ampliación de imágenes . . . . . . . . . . . . . . . 23
Otras funciones
Bloqueo de discos
— Control de bloqueo. . . . . . . . . . . . . . . 23
Ajustes
Uso del menú Configuración. . . . . . . . . . . . 26
Ajuste de l idioma de la pantalla o pista de
sonido
— Ajuste del idioma . . . . . . . . . . . . . . . . 27
Ajuste de la pantalla
— Ajuste de la pantalla. . . . . . . . . . . . . . 28
Ajustes person al i zados
— Ajuste personalizado . . . . . . . . . . . . . 29
Ajustes de audio
— Ajuste de audio . . . . . . . . . . . . . . . . . 30
Información complementaria
Mantenimiento . . . . . . . . . . . . . . . . . . . . . . 31
Extracción de la unidad. . . . . . . . . . . . . . . . 32
Notas sobre los discos. . . . . . . . . . . . . . . . . 32
Notas sobre los archivos MP3 . . . . . . . . . . 33
Especificaciones . . . . . . . . . . . . . . . . . . . . . 34
Solución de problemas . . . . . . . . . . . . . . . . 3 5
Indicaciones de error. . . . . . . . . . . . . . . . . . 37
Glosario. . . . . . . . . . . . . . . . . . . . . . . . . . . . 37
Lista de códigos de idiomas . . . . . . . . . . . . 39
Índice . . . . . . . . . . . . . . . . . . . . . . . . . . . . . 40
3
Page 82

¡Bienvenido!
Gracias por adquir ir este reproductor de DVD
portátil de Sony. Antes de poner en
funcionamiento esta unidad, lea este manual
detenidamente y guárdelo para consu l tarlo en el
futuro.
CARACTERÍSTICAS:
• Compatibil idad con reprod uctores DVD de
video/DVD-R/RW, CD/CD-R/-RW y VCD
• La unidad dis pone de 2 sal idas de au dio y vide o
(frontal y posteri or ) y de 1 salida digital
• T amaño DIN para un ajus te senci llo del sis tema
con cualquier monitor
Acerca de este manual
• Las instrucciones que se incluyen en este
manual describen los controles del control
remoto de tarjeta. También puede utilizar los
controles de la unidad si poseen los mismos
nombres o nombres similares a los del control
remoto de tarjeta.
• En este manual , “DVD” se u t iliza como
término general para DVD VIDEO, DVD-R y
DVD-RW.
• El significado de los iconos utilizados en este
manual se describe a continuación:
Icono Significado
Funciones d isponi bles para DVD
VIDEO (disco de vide o digita l) o
DVD-R/DVD-RW (disco de
video digital grababl e/
regrabable) en modo video
Funciones disponi bles para
Video CD o CD-R/CD-RW en
formato de CD de video
Funciones disponibles para CD
de música o CD-R/CD - RW en
formato de CD de música
Funciones disponi bles para
archivos en formato MP3
almacenados en CD-ROM/CDR/CD-RW
Funciones disponi bles para
archivos en formato JPEG
almacenados en CD-ROM/CDR/CD-RW
4
Page 83

Precauciones
Si desea realizar al guna consulta o soluc io nar
algún problema relat ivo a la unidad que no se
trate en este manual, póngase en contacto con el
distribuidor Sony más ce rcano a su domicilio.
Para conductores
• No utilice las funciones personal iz adas
mientras conduce, ni realice ninguna otr a
función que pudiese distraer su atención de la
carretera.
• Si el auto estuvo estac ionado bajo la luz d irecta
del sol, deje que la unidad se enfríe antes de
utilizarla.
Seguridad
• Respete las leyes de tránsito de su país.
• Por razones de se g uri dad , e l mo ni to r con ect ad o
a FRONT VIDEO OUT (Salida frontal de
audio y video) se apaga automáticamente
cuando no se util i za el freno de mano.
Evitar un accidente
Las imágenes apar ecen sólo después d e
estacionar el auto y utilizar el freno de ma no.
Cuando el auto comienza a moverse, las
imágenes provenientes de FRONT VIDEO
OUT (Salida fronta l de vi deo) desaparecen
automáticamente después de mostrar la
siguiente ad vertencia.
El monitor conectado a REAR VIDEO OUT
(Salida de audio posterior) funciona mientras el
automóvil está en marcha.
Las imágenes no aparecen en la pantalla, pero
se oye el sonido del CD/ MP3.
Para mantener una alta calidad de sonido
Asegúrese de no derramar jugos ni refresco s
sobre la unidad o lo s discos.
For your safety,
the video is blocked.
No opere la unidad ni mire el monitor mientras
conduce.
Condensación de humedad
En días lluviosos o en zonas muy húmedas, es
posible que se condense humedad den tr o de las
lentes y la pantalla de la unidad. Si esto ocurre, la
unidad no funcionará correctamente. En este
caso, extraiga el disco y espere una hora
aproximadamente hasta que se haya evaporado la
humedad.
5
Page 84

Discos que se pueden
reproducir
Formato de d is c o s
DVD
Video CD
CD de audio/
CD-R/CD-RW
CD-R/CD-RW
(MP3/JPEG)
“DVD VIDEO”, “DVD-R” y “DVD-RW” son
marcas comerciales.
DVD
Los discos DVD contienen tanto datos de audio
como visuales. Un disco de 12 cm puede contener
hasta 7 veces la cantidad de datos de un CD-ROM,
lo que representa 4 horas consecutivas de tiempo de
reproducción (8 horas en el caso de discos de doble
cara). Los DVD se dividen en 4 tipos: una cara de
una capa, una cara de doble capa, dos caras de una
capa y dos caras de doble capa.
Video CD (VCD)
Un Video CD puede contener datos tanto de
audio como visual es en un disco del mism o
tamaño que un CD de audio común. El tiempo de
reproducción es de 74 minutos para un CD
estándar de 12 cm.
CD de audio
Un CD de audio contiene dat os de audio. El
tiempo de reproducción es de 74 minutos para un
CD estándar de 12 cm .
CD grabable (CD-R)
Con un CD-R se pueden editar datos de audio. Se
puede escribir información en un CD-R sólo una
vez.
6
CD reescribible (CD-RW)
Con un CD-RW se pueden editar datos de audio
y se puede escribir información en el CD-RW
una y otra vez.
CD-Extra
Un CD-Extra posee dos secciones (sesiones)
para audio y datos r espectivamente. En esta
unidad sólo se puede reproducir la sec ci ón de
audio.
Notas
• Esta unidad está adaptada al sistema de color
NTSC. No puede reproducir un disco grabado en un
sistema de color que no sea NTSC, como PAL o
SECAM.
• Puede reproducir con esta unidad discos DVD-R/
DVD-RW y CD-R/CD-RW diseñados para audio. Sin
embargo, es posible que no pueda reproducir
algunos discos debido a las condiciones de
grabación.
• No es posible reproducir en esta unidad los
siguientes discos:
– discos de 8 cm
– CD-ROM ( da tos q ue no sea n l o s de ar c hivos MP3
o JPEG)
– CD-G
–Photo-CD
– VSD (disco simple de video)
–DVD-ROM
–DVD-RAM
–DVD-Audio
– Active-Audio (Datos)
– CD-Extra (Datos)
– Mixed CD
– SVCD (Super video CD)
– DVD-RW grabado en modo VR (grabación de
video)
Nota sobre discos transparentes
No es posible reproducir en esta unidad disc os de
12 cm que co nten gan sól o una porc ión i nter ior de
8 cm con datos (el resto es transparent e).
Discos de música codificados con
protección de los derechos de autor
La unidad ha sido dis eñada para reproducir
discos que cumplen con el estándar Compact
Disc (CD). Desde hace poco tiempo, algunas
compañías discográfi cas comerciali zan discos de
música codificados con pr otección de derechos
de autor. Tenga en cuenta que, entre estos discos,
algunos no cumplen con el estándar CD, por lo
que no podrán reproducirse ni grabarse c on este
producto.
Page 85

Código de región
Este sistema se utiliza para proteger los derechos
de copyright del software.
El código de región se en cuentra en la parte
inferior de la unidad y sólo reproducirá los DVD
etiquetados con c ódi gos de región idéntico s.
MODEL NO.
DVD PLAYER
DC : 12V
N E G A T I V E G R O U N D
Código de
región
AUDIO OUT
R
L
REMOTE SIGNAL IN
TOP
FRONT
REAR
BOTTOM
VIDEO OUT
DIGITAL OUT
Los DVD con la etiqueta también pueden
ALL
CERTIFICATION
Sony Corporation
reproducirse en esta unidad.
Si intenta reproduc ir cualquier otro DVD,
aparecerá en la pantalla el mensaje: “Cannot play
this disc.” (No se puede reproducir este disco).
Algunos DVD pueden no presentar la etiqueta de
indicación del códi go de región, aunque su
reproducción esté prohibida por límites de zona.
Nota sobre operaciones de
reproducción de discos DVD y VCD
Es posible que ci ertas operaciones de
reproducción de discos DVD y VCD estén
expresamente determinadas por los productores
de software. Puesto que esta unidad reproduc e
discos DVD y VCD en funció n de l c ontenido
diseñado por los productores de software, ciertas
funciones de re producción pueden n o estar
disponibles. Consulte también las instrucciones
suministradas con los discos DVD o VCD.
Derechos de autor
Este producto incorpora tecnología de protección
de derechos de autor (copyright) amparada por
demandas de ciertas patente s de EE.UU., otros
derechos de propiedad intelectual de
Macrovisi on Corp or ati on y ot ro s pr opie ta rio s. El
uso de dicha tecnología debe contar con la
autorización d e M acrovision Corporation y es
únicamente para uso doméstico y otros usos de
visualización limitados, a menos que
Macrovision Corp oration autorice lo co ntrario.
Está prohibida la ingeniería inversa o el
desmontaje de la unidad.
Fabricado bajo licencia de Dolby Laboratories.
“Dolby” y el símbolo de la doble D son marcas
comerciales de Dolby Laboratories.
Trabajo confidencial no public ado. Copyright
1992
– 1997 Dolby Laboratories. Todos los
derechos reservados.
“DTS”, “DTS Digital Surround” y “DTS Digi ta l
Out” son marcas comerciales d e Digital Th eater
Systems, Inc.
7
Page 86

Ubicación de los controles
Panel frontal
a Receptor del control remoto de tarjeta
b Ranura del disco
c Indicador DISC IN
Se ilumina en azul cuando se almacena un
disco.
d Botón de restauración
e Botón u (reproducir/pausa)*
1
f Selector de señal
(Ubicado en la parte inferior de la unidad)
Consulte la sección “Funcionamiento de la
unidad a través de un monitor conectado” en
el manual de instalación/conexiones.
g Botón Z (expulsar)
h Botón OFF*
*1 Al utilizar la unidad, use el punto en relieve como
referencia.
*2 Advertencia sobre la instalación en un
automóvil sin posición ACC (accesor io s) en el
interruptor de la llave de encendido
Asegúrese de mantener presionado (OFF) en la
unidad hasta que se apaguen las luces de color
azul.
Si no lo hace, la unidad no se apaga y desgasta la
batería.
2
DISC IN
Nota
Si la unidad se apagó presionando (OFF) durante 2
segundos, presione u en la misma para encenderla
primero. En este caso, no podrá utilizarse el control
remoto de tarjeta para encend er la uni da d.
Sugerencia
Podrá expuls ar un disco en cualquier m omento
aunque la unidad esté encendida o no, pero sólo
podrá insertar uno si la unidad está encendida.
OFF
DVX-11A
8
Page 87

Control remoto de tarjeta RM-X129
+
–
ENTER
AUDIO
SEEK
–
DISPLAY
CLEAR
0
LIST
SETUP
ANGLE
SUBTITLE
SEEK
+
123
456
789
TOP MENU
ALBUM
MENU
ALBUM
SOURCE
MODE
Para las operaciones de la unidad:
a Botón OFF
b Botones numéricos
c Botón TOP MENU
Muestra el men ú superior de un DVD.
d Botón MENU
Muestra el menú de un disco.
e Botón O (volver)
Vuelve a la pantalla o a la operación anterior.
f Botón u (reproducir/pausa)
g Botón DISPLAY (mostrar)
Muestra la información de texto y el estado
de reproducción actual.
h Botón CLEAR
Cancela los números introducidos.
i Botón LIST
Muestra la lista de elementos de
reproducción.
j Botón SETUP
Muestra el menú Con figura ci ón y el menú
Modo de reproducción.
k Botón ANGLE
Cambia el ángulo de visualización.
l Botón ENTER
Aplica un ajuste.
m Botones </,
Mueven el cursor o cambi an de páginas.
OFFOFF
1
456
7 890
TOP MENU
ALBUM
MENU
ALBUM–
SOURCE
MODE
23
+
ENTER
AUDIO
SEEK–SEEK
VOLVOL
DISPLAY
CLEAR
LIST
SETUP
ANGLE
SUBTITLE
+
n Botones ./> (anterior/siguiente)
o Botones m/M ( búsqueda/
cámara lenta)
p Botones M ALBUM+/m ALBUM–
Mueven el cu rsor o seleccionan el álbum.
q Botón AUDIO
Cambia la salida de audio.
r Botón SUBTITLE
Cambia el idioma de los subtítulos.
Para las operaciones del receptor o
centro de medios XAV-7W:
Estos botones controlan el receptor o centro de
medios opcional XAV-7W conectado a la unidad.
s Botones .SEEK–/>SEEK+
t Botones VOL +/–
u Botón MODE
v Botón SOURCE
Nota
Si la unidad se apagó presionando (OFF) durante 2
segundos, presione u en la misma para encenderla
primero. En este caso, no podrá utilizarse el control
remoto de tarjeta para encender la unidad.
Sugerencia
Consulte “Sustitución de la pila de litio” para obtener
detalles sobre cómo cambiar las pilas (página 31).
9
Page 88

Pantallas de menú
Utilice los menús de esta unidad para aj ustar las diversas funciones y ajustes de reproducción.
El menú que se muestra di fiere según el estado de la unidad .
Menú Configuración
Aparecerá cu ando presione (SETUP) mientras
se detiene la reproducción.
Para seleccionar un elemento
Presione </M/m/, y luego presione
(ENTER).
Para cerrar el menú Configuración
Presione (SETUP).
Ejemplo: Cuando selecciona “LANGUAGE
SETUP”.
LANGUAGE SETUP
OSD:
MENU:
AUDIO:
SUBTITLE:
To set, press , then
ENTER SETUP
. To quit, press
ENGLISH
JAPANESE
ENGLISH
ENGLISH
A Elementos de configuración
B Elemento seleccionado
C Elementos de aj uste
D Opciones
E Ajuste actual
Menú Modo de reproducción
Aparecerá cuando presione (SETUP) durante la
reproducción.
Para seleccionar un elemento
Presione </M/m/, y luego presione
(ENTER).
Para cerrar el menú Modo de reproducción
Presione (SETUP).
Nota
Los elementos del menú y los procedimientos de
operación varían según el disco.
Ejemplo: Al reproduc ir un DVD
)
12(67
018(034
T 1:35:55
1:ENGLISH
1:ENGLISH
2:FRENCH
3:SPANISH
SUBTITLE
Select :
)
ENTER
PLAY
DVDVIDEO
A Elementos del Modo de reproducción
B Elemento seleccionado
C Número de título*
D Número de capítulo*2/Número total de
capítulos*
1
/Número total de títulos*
2
E Tiempo de reproducción transcurrido
F Estado de reproducción (NPLAY, XPAUSE,
etc.)/Formato de l d is co
G Ajuste actual
H Opciones
*1 Muestra el número de pista de los VCD/CD y el
número de álbum de los archivos MP3/JPEG. Al
reproducir VCD con la función PBC activada, no
aparece ninguna indicación.
*2 Muestra el número de pista de los archivos MP3/
JPEG.
1
10
Page 89

Mensaje de operación
Las operaciones del menú varían según el
elemento seleccionado y los botones que se
utilizarán aparecen en la parte inferior de la
pantalla de menú para asistirlo con las
operaciones.
To set, press , then
ENTER SETUP
. To quit, press
Aparecerá el nombre del
elemento seleccionado y/o los
mensajes de operación.
Sugerencia
Aparecerá el mensaje “Operation not possible”
(Operación imposible) si la función no está disponi ble.
Elementos de configuración
LANGUAGE SETUP (ajuste de id i oma)
(página 27)
Cambia el idioma.
SCREEN SETUP (ajuste de la pantalla)
(página 28)
Selecciona los modos de pantalla.
CUSTOM SETUP (aj uste pers onalizado)
(página 29)
Ajusta las operaciones de reproducción.
AUDIO SETUP (ajuste de audio)
(página 30)
Ajusta el sonido de sali d a.
RESET (página 27)
Restaura todos los elementos de
configuración.
Elementos del Modo de reproducción
TITLE, TRACK (título, pista)
(página 19)
Selecciona el título o la pista que se va a
reproducir.
CHAPTER (capítulo) (página 19)
Selecciona el cap ítulo que se va a
reproducir.
ALBUM (álbum) (MP3) (página 19)
Selecciona el ál bum que se v a a most r ar.
ALBUM (álbum) (JPEG) (página 19)
Selecciona el álbum de imágenes q ue se
va a mostrar.
TRACK (pista) (página 19)
Selecciona la pi st a que se va a
reproducir.
IMAGE (imagen) (página 19)
Selecciona la imagen que se va a
mostrar.
TIME (tiempo) (página 15)
Comprueba el tiempo transcurrido y el
restante de repr oducción.
AUDIO (página 20)
Cambia el valor de audio.
SUBTITLE (subtítulo) (página 22)
Muestra los subtítulos.
Cambia el idioma de los subtítulos.
ANGLE (ángulo) (página 22)
Cambia el ángulo.
CENTER ZOOM (ampliar)
(página 23)
Amplía la ima gen.
REPEAT (repetición ) (página 19)
Reproduce el disco completo (todos los
títulos/pistas/álbumes) en forma
repetida o un capítulo/pista/álbum en
forma repetida.
Sugerencia
Cuando active “REPEAT”, o si está disponible
“ANGLE”, el indicador del icono del menú de control
se ilumina en verde (por ejemplo,
t
).
11
Page 90

Restauración de la unidad
Antes de utilizar la unidad por primera vez, o
después de sustituir la b at er í a de l auto móv il o de
cambiar las conexiones, debe restaurarl a.
Presione el botón d e restauración con un objeto
puntiagudo, como un bolígrafo.
Reproductor
Reproducción de discos
DISC IN
OFF
Botón de restauración
Notas
• Al presionar el botón de restauración se borrarán
algunos ajustes almacenados.
• La unidad realiza los ajustes iniciales durante unos
10 segundos después de presionar el botón de
restauración. Durante este período, no inserte
ningún disco, de lo contrario no se podrá restaurar la
unidad.
Dependiendo del di sco, es posible que algunas
operaciones sean diferentes o esté n pr ohibidas.
Consulte las instrucciones de uso suministradas
con el disco.
OFF
1
23
456
789
+
TOP MENU
ALBUM
ENTER
–
ALBUM
AUDIO
SEEK
–
DISPLAY
CLEAR
0
LIST
SETUPMENU
ANGLE
SUBTITLE
SEEK
uOFF
</,
+
1 Encienda el mon i t o r y seleccione la
fuente de entrada del monitor que
corresponda a esta unidad.
Si utiliza un equipo de audio:
Encienda el equipo d e audio y seleccione el
canal apropiad o para esta unidad.
2 Inserte un disco.
La cara de reproducción hacia abajo
12
La reproducción comi enza automáticament e
(Dependiendo del di sco, presione u para
iniciar la reproducción).
Es posible que aparezca un menú en la
pantalla cuando se inserta un DVD o un VCD.
Si desea obtener más información sobre estos
menús, consulte la página 18 para l os DVD y
página 1 8 para los VCD.
Page 91

Si la opción “MP3/JPEG” del “CUSTOM
Á
SETUP” se ajustó en “JPEG”, la presentación
de diapositivas se inicia automáticamente
cuando el disco contiene archivos JPEG
(página 29).
Cada vez que presione </,, la imagen rota
en intervalos de 90º.
Notas
• Si se gira una imagen de gran tamaño, puede que la
visualización sea más lenta.
• Los archivos JPEG están diseñados para
visualizarse de manera óptima a 640
Si se visualizan a otro tamaño, puede que la imagen
se desplace (a la izquierda o a la derecha).
×480 píxeles.
Cuando se ha insertado el disco
Presione u para iniciar la reproducción.
Para detener la re producción o apaga r la
unidad
Presione (OFF).
Sugerencia
No se puede insertar un disco si la unidad está
apagada.
Elementos de la pantalla en la
reproducción de CD/MP3
Nota
“
*” aparece en lugar de los caracteres que no
pertenezcan al alfabeto ni sean números.
Notas sobre discos DVD con pista de sonido DTS
La señal de audio DTS se emite en todo momento, y
es posible que se emita un ruido fuerte de los
altavoces si conecta la unidad al equipo de audio sin
un decodificador DTS. Esto podría dañar los altavoces
o sus oídos.
Orden de reproducci ón de los ar chiv os
MP3
El orden de reproducción de álbumes y pista s
(archivos MP3) grabados en un disco es el
siguiente:
Estructura del contenido del disco
rbol 1Árbol 2Árbol 3Árbol 4Árbol 5
ROOT
Álbum
Pista
123
123
:
ALBUM NAME
:
TRACK NAME
:
ID3 INFORMATION
REP 160K
001
001
PLAY
MP3120:42
Cuando se inserta el disco que contiene los
A Número de álbum*2/Número de pista/
Tiempo de reproducción transcurrido
B Estado de reproducción (NPLAY, XPAUSE,
etc.)/Formato del di sco
C Nombre del disco*
Nombre de pista/In fo rmación de indicador
ID3 (ver.1 solamente)*
1
/Nombre del ál bum*2/
2
D Modo de reproducción/Velocidad de bits*2*
*1 Si el disco o la pista no tienen nombre, aparecerá
“NO DISC NAME” o “NO TRACK NAME”.
*2 Aparece solam en te cuan do se repr od ucen
archivos MP3.
*3 Cuando se aplica VBR (velocid ad de bits variable)
no se da ninguna indicación.
Para desplazarse por la información del
texto
archivos MP3, las pistas numeradas se
reproducen en forma secuencial desde la
la
7. Cualquier su bálbum o pista contenidos en
el álbum actualmente seleccionado tiene
prioridad sobr e el si guiente álbum del mismo
árbol. (Ejemplo: C contiene D, por lo que,
reproduce antes de
3
En la lista de álbumes MP3 que aparece cuand o
5.)
presiona (LIST), los álbum es se ordenarán de la
siguiente manera: A t B t C t D t F
t G. Los álbumes que no contienen pistas
(como el álbum E) no aparecen en la l is t a.
continúa en la página siguiente t
1 hasta
4 se
Presione (DISPLAY).
13
Page 92

Notas
• El orden de reproducción puede variar según el
software de escritura.
• El orden de reproducción podría no ser aplicable si
hay más de 512 álbumes y pistas en el disco.
• La unidad puede reproducir hasta 256 álbumes.
Esta unidad no reconocerá ningún álbum más allá
de los 256 primeros.
Sugerencias
• Si añade números (01, 02, 03, etc.) delante de los
nombres de archivo de las pistas, los archivos se
reproducirán en este orden.
• Dado que la reproducción de un disco con muchos
árboles demora más para iniciarse, se recomienda
no crear álbumes que contengan más de dos
niveles de árboles.
Operaciones adicionales
OFF
1
456
789
TOP MENU
ALBUM
M/m
./>
ALBUM
Para Operación
23
+
ENTER
–
AUDIO
SEEK
–
DISPLAY
CLEAR
0
LIST
SETUPMENU
ANGLE
SUBTITLE
SEEK
+
DISC IN
Insertar una pausa Presi one u
Reanudar la
Presione u
reproducción de spués
de la pausa
Pasar al capítulo , pis ta
Presione >
o escena siguient e en
el modo de
reproducción continua
Retroceder al capít ulo,
Presione .
pista o escena anterior
en el modo de
reproducción continua
Ir al siguient e álbum Presione M*
Ir al álbum anterior Presione m*
Detener la
Presione Z
reproducción y extraer
el disco
* Sólo disponible cuando se reproducen archivos
14
MP3 o JPEG.
Reanudación de la
reproducción
— Reanudación de la reproducción
La unidad memoriza el punto en el que se detuvo
la reproducción has ta un m áximo de 20 discos y
reanuda la re producci ón aun después d e apaga r la
unidad o de expulsar el di sco que se está
reproduciendo.
OFF
1
23
456
u
789
+
TOP MENU
ALBUM
ENTER
–
ALBUM
SEEK
AUDIO
–
1 Durante la reproducción, presione
(OFF) para detenerla.
2 Presione u para reanudar la
reproducción.
OFF
Zu
La reproducción se inicia desde el punto en el
que se detuvo en el paso 1 .
Para reproducirlo desde el principio
Tras ajustar “MULTI-DISC RESUME” de
“CUSTOM SETUP” en “O FF” (página 29),
presione Z para expulsar el di sco y, a
continuación, in sértelo de nuevo.
Seleccione el capítulo deseado del menú DVD o
del menú superior, según el disco que utilice.
Notas
• La reproducción de MP3 empieza desde el principio
de la última pista reproducida.
• Para utilizar la función de reanudación de
reproducción, asegúr ese de que la opción “MULTIDISC RESUME” de “CUSTOM SETUP” se haya
ajustado en “ON” (página 29).
• Al almacenar el punto de reanudación de
reproducción del disco número 21, se borra
automáticamente el punto de reanudación
correspondiente al pri m er disco.
• La reanudación de reproducción se cancela cuando
se cambia el ajuste del control de bloqueo.
• Dependiendo del disco o la escena, no podrá utilizar
la función de reanudación de reproducción.
• Si se aplica el control de bloqueo, la función de
reanudación de reproducción no funciona. En este
caso, se inicia la reproducción desde el principio del
disco cuando inserta el disco.
DISPLAY
CLEAR
0
LIST
SETUPMENU
ANGLE
SUBTITLE
SEEK
uOFF
+
Page 93

Sugerencia
Cuando se reproducen CD, archivos MP3 o archivos
JPEG, la unidad memoriza tentativamente el punto de
reanudación del disco que se está reproduciendo.
Cuando se apaga la unidad o se expulsa el disco, el
punto de reanudación memorizado del disco se borra.
Comprobación del tiempo de
reproducción
— Información de tiempo
Puede comprob ar el tiem po de reproducción y el
tiempo restante del título, capítulo o pista
actuales.
OFF
1
456
789
TOP MENU
ALBUM
ALBUM
23
+
ENTER
–
AUDIO
SEEK
–
DISPLAY
CLEAR
0
LIST
SETUPMENU
ANGLE
SUBTITLE
SEEK
DISPLAY
+
1 Durante la reproducción, presione
(DISPLAY).
Aparecerá la información de rep roducción
actual.
Información de tiempo
T 1:01:57
BRAHMS SYMPHONY
continúa en la página siguiente t
15
Page 94

2 Presione (DSPL) varias veces para
cambiar la información de tiempo.
La información de tiempo varía según el
disco de la sigui ente manera:
DVD:
“T **:**:**” - Tiempo de reproducción
transcurrido del título actual
“T-
**:**:**
actual
“C
**:**:**
transcurrido del capítulo actual
“C-
**:**:**
capítulo actual
VCD (sin funciones PBC):
“T **:**” - Tiempo de reproducción
transcurrido de la p i st a actual
“T-
**:**
actual
“D
**:**
transcurrido del disco actual
“D-
**:**
actual
JPEG:
Número de álbum
Número de la imagen
” - Tiempo resta nte del tí tulo
” - Tiempo de reproducción
” - Tiempo restante del
” - Tiempo restante de la pista
” - Tiempo de reproducció n
” - Tiempo restante del disco
Búsqueda de un punto
determinado de un disco
— Exploración/Reproducción a cámara lenta/
Lista
Puede localizar rápidamente un punto
determinado de un disco observando la imagen,
reproduciéndola a cámara lenta o
seleccionándola de la lista.
OFF
1
23
456
789
+
TOP MENU
ALBUM
M/m
/
Nota
En función del DVD/VCD, es posible que no pueda
realizar algunas de las operaciones descritas.
ALBUM
ENTER
–
SUBTITLE
AUDIO
SEEK
–
Localización rápida de un punto
— Exploración
Durante la reproducción, mantenga presionada la
tecla m o M y suelte la tecla en el
punto deseado.
DISPLAY
CLEAR
SEEK
0
LIST
SETUPMENU
ANGLE
u
LIST
ENTER
+
16
Si mantiene presionado el botón, la velocidad de
búsqueda aumentará.
Nota
No puede escuchar audio mientras realiza una
búsqueda.
Page 95

Reproducción en ve locidad lenta
— Reproducción a cámara lenta
Puede reproducir un disco a varias velocidades
lentas.
1 Presione u para hacer una pausa en
la reproducción.
2 Mantenga presionada la tecla m*
o M .
Se inicia la reproducción a cámara lenta.
* Esta función sólo está disponible cuando se
reproduce un DVD.
Para volver a la reproducci ón nor m a l
Presione u.
Notas
• No se escuchará el sonido durante la reproducción
a cámara lenta.
• Dependiendo del disco, es posible que las imágenes
se distorsionen durante la reproducción a cámara
lenta.
Selección de un álbum y una pista
— Lista
Puede localizar el c ontenido deseado en la list a
de álbumes y en la lista de pistas/imágenes.
1 Durante la reproducción, presione
(LIST) varias veces para mostra r l a
lista deseada.
Cada vez que presione (LIST), la lista
cambiará de la siguiente forma:
Lista de álbum* t Lista de pista/image n t
Modo de reproducción normal tLista de
álbum*
* Aparece sol amen t e cuan do se reproduce n
archivos MP3/JPEG.
2 Presione M/m para seleccio nar el
elemento deseado (álbum, pista,
imagen) y luego presione (ENTER).
Se inicia la reprod ucción. Cuando se
selecciona el álbum, s e inicia la reproducción
de la primera pist a o imagen del álbum
seleccionado.
Elementos de la pantalla de la lista
333:
ALBUM NAME
333:
TRACK NAME
331:
TRACK NAME
332:
TRACK NAME
333:
TRACK NAME
334:
TRACK NAME
335:
TRACK NAME
336:
TRACK NAME
2
actuales
ENTER
Select :
A Número y nombre de la pista/álbum*1/
imagen*
B Los nombres de la pista/álbum*
*1 Aparece únicamente cuando se reproduce un
archivo MP3.
*2 Aparece únicamente cuando se reproduce un
archivo JPEG.
Nota
*” aparece en la lista en lugar de los caracteres que
“
no son alfabéticos ni numéricos.
001
002
003
004
005
006
003
003
1
/imagen*
2
17
Page 96

Uso de los menús del DVD
Con algunos DVD se puede ut il izar el menú
original, como ser í a el menú superior y m enú
DVD.
Si el DVD contiene varios títulos de pistas y
escenas, puede utilizar el menú superior para
seleccionar el tít ulo que desea y come nzar la
reproducción.
Si el DVD incluye un menú más completo con
elementos como los idiomas del audio, idiomas
de subtítulos, títu los, capítulos, etc., puede
utilizar el menú DVD para seleccionar el
elemento que dese a y comenzar la reproducción.
OFF
1
456
789
TOP MENU
TOP MENU
ALBUM
MENU
M/m
ALBUM
1 Durante la reproducción de un DVD,
presione (TOP MENU) o (MENU).
Aparecerá el menú DVD o el menú superior.
El contenido del me nú varí a según el disco.
2 Presione </M/m/, o los botones
numéricos para selecci onar el
elemento que desea y luego pulse
(ENTER).
Nota
Los elementos del menú y los procedimientos de
operación varían según el disco.
23
+
ENTER
–
AUDIO
SEEK
–
DISPLAY
CLEAR
0
LIST
SETUPMENU
ANGLE
SUBTITLE
SEEK
ENTER
</,
+
Uso de las funciones PBC
— PBC (control de reproducción)
El menú PBC lo asiste con las operaciones en
forma interactiva cuando se r epr oduce un VCD
con funciones PBC.
OFF
Botones
numéricos
O
1
456
789
TOP MENU
ALBUM
ALBUM
1 Inicie la reproducción de un VCD con
funciones PBC.
Aparecerá el menú PBC.
2 Presione los botones numéricos para
seleccionar el elemen to deseado y, a
continuación, pulse (ENTER).
3 Siga las instrucciones del menú para
las operaciones interactivas.
Para volver a la pantalla anterior
Presione O.
Reproducción sin la función PBC
1 Durante la reproducción, pulse (OFF).
2 Presione los botones numéricos para
seleccionar el elemen to deseado y, a
continuación, pulse (ENTER).
Aparecerá “P l ay without PBC”
(Reproducción sin PBC) y se iniciará la
reproducción.
El menú PBC no aparece durante la
reproducción.
Notas
• Los elementos del menú y los procedimientos de
operación varían según el disco.
• Durante la reproducción PBC, el número de pista, el
tiempo de reproducción, etc., no se muestran en el
menú Modo de reproducción.
Sugerencia
Para reanudar la reproducción PBC, expulse el disco
una vez y vuelva a insertarlo. Comenzará la
reproducción PBC.
23
+
ENTER
–
AUDIO
SEEK
–
DISPLAY
CLEAR
0
LIST
SETUPMENU
ANGLE
SUBTITLE
SEEK
ENTER
+
18
Page 97

Reproducción en diversos
modos
— Reproducción repetida/Reproducción con
búsqueda
Puede establecer los siguientes mod os de
reproducción:
• Reproducción repetida (página 19)
• Reproducción c on búsqueda (página 19)
Notas
• El modo de reproducción seleccionado se cancela si
se expulsa el disco que se está reproduciendo o si
se apaga la unidad.
• Al reproducir VCD con la función PBC activada,
Reproducción repetida no estará disponible.
Reproducción repetida
AUDIO
SEEK
–
DISPLAY
CLEAR
0
LIST
SETUPMENU
ANGLE
SUBTITLE
SEEK
+
ENTER
SETUP
— Reproducción repetida
La unidad puede repetir un título, capítulo o pista
cuando el elemen to que se está reproduc ie ndo
llega al final .
Están disponibles las si guientes funciones de
repetición:
• TITLE (Repetición de títulos) - para repetir el
título actual.
• CHAPTER (Repetición de capítulos) - para
repetir el capítulo actual.
• TRACK (Repetición de pistas) - para repetir la
pista o imagen act ual .
• ALBUM (Repetición de álbu mes) - para rep etir
las pistas o imágenes del álbum actual.
OFF
1
23
456
789
+
TOP MENU
ALBUM
M/m
ALBUM
ENTER
–
3 Presione M/m para seleccionar la
opción que desea y, a continuación,
pulse (ENTER).
Se inicia la reproducción repetida.
Para volver a la reproducción normal
Seleccione “OFF” en el paso 3.
Para cerrar el menú Mo do de r ep roducción
Presione (SETUP).
Sugerencia
Las opciones de repetición varían según el disco.
Inicio de la reproducción desde un
punto seleccionado
— Reproducción con búsqueda
Puede localizar rápidamente un punto
determinado especificando el título, el capítulo o
la pista.
Las siguiente s opciones de búsq ueda se
encuentran disponibles en algunos discos:
DVD:
• TITLE inicia la reproducción a partir
• CHAPTER inicia la re producción a
VCD:
• TRACK inicia la reproducción a
CD:
• TRACK inicia la reproducción a
MP3:
• AL BU M in icia la reproducción a
• TRACK inicia la reproducción a
JPEG:
• AL BU M in icia la reproducción a
• IMAGE inicia la reproducción a
del título seleccionado.
partir del capítulo seleccionado.
partir de la pista seleccionada.
partir de la pista seleccionada.
partir del álbum seleccionado.
partir de la pista seleccionada.
partir del álbum seleccionado.
partir de la imagen seleccionada.
continúa en la página siguiente t
1 Durante la reproducción, presione
(SETUP).
Aparecerá el menú Modo de reproducción.
2 Presione M/m para seleccionar “REP”
y, a continuación, pulse (ENTER).
Aparecerán la s opciones del Modo de
reproducción.
19
Page 98

Botones
numéricos
M/m
OFF
1
456
789
TOP MENU
ALBUM
ALBUM
23
+
ENTER
–
AUDIO
SEEK
–
DISPLAY
CLEAR
0
LIST
SETUPMENU
ANGLE
SUBTITLE
SEEK
CLEAR
ENTER
SETUP
+
1 Durante la reproducción, presione
(SETUP).
Aparecerá el menú Modo de reproducci ón.
2 Presione M/m para selecc io nar el
elemento de búsqueda que desea y, a
continuación, pulse (ENTER).
Los elementos de búsqueda varían según el
disco.
)
12(67
018(034
T 1:35:55
)
PLAY
DVDVIDEO
El número entre paréntesis indica el total de
elementos seleccionados.
3 Presione los botones numéricos par a
introducir el número del título, número
del capítulo, número de pista o tiempo
transcurrido del título o pista.
Para borrar los números ya introducidos,
presione (CLEAR).
4 Presione (ENTER).
Comenzará la reproducción desde el punto
seleccionado.
Para cerrar el menú Modo de reproducción
Presione (SETUP).
Ajustes de sonido
Cambio de los canales de
audio
Al reproducir u n DVD gra bado en múltiples
formatos de audio (PCM , D ol by Dig i ta l o DTS),
podrá cambiar el formato de audio . Si el DVD
está grabado con pi st as en varios idiomas,
también podrá cambiar el idioma.
Con los VCD, puede seleccionar el sonido del
canal derecho o izquierdo y escuchar el sonido
del canal selecc ionado a través de los altavoces
derecho e izquier d o. Por ejemplo, al reproducir
un disco que conti ene una canción con el sonido
vocal en el canal derecho y el in strumental en el
izquierdo, es posible seleccionar el canal
izquierdo y escuchar el instrumental por ambos
altavoces.
M/m
Durante la reproducción, presione
(AUDIO) varias veces para seleccionar
los canales de audio que desea .
Los ajustes del sonid o varía n según el disco
de la siguiente m anera:
OFF
1
23
456
789
+
TOP MENU
ALBUM
ENTER
–
ALBUM
AUDIO
SEEK
–
1:ENGLISH DolbyD
DISPLAY
CLEAR
0
LIST
SETUPMENU
ANGLE
SUBTITLE
SEEK
ENTER
SETUP
+
20
DVD:
El idioma del audio cambia entre los idiomas
disponibles.
Si aparecen 4 dígitos, introduzca el código de
idioma correspondiente al idioma que desea
(página 39).
Si el mismo idiom a ap arece dos o más vec es,
significa que el DVD está grabad o en vari os
formatos de au dio.
Page 99

VCD:
STEREO*: Sonido estér eo estándar
1/L: Sonido del canal izquierdo (monofónico)
2/R: Sonido del ca nal derecho (monofónico)
* El ajuste pred ete r m i na do
Sugerencia
También puede cambiar los ajustes seleccionando
“AUDIO” en el menú Modo de reproducción (página 10).
Comprobación del formato de
programa
Puede comproba r el número de canale s y l a
posición de los componentes del DVD que se
está reproducie ndo.
1 Durante la reproducción, presione
(SETUP).
Aparecerá el menú Modo de reproducción.
2 Presione
(AUDIO) y luego pulse (ENTER).
Aparecerá el fo rmato de programa.
Las letras de la pantalla de formato de
programa representan los siguientes
componentes de sonido y sus posici ones:
m para seleccionar “ ”
M/
Formato de audio actual*
)
12(67
)
018(034
T 01:35:55
1:ENGLISH
PROGRAM FORMAT
DOLBY DIGITAL
Formato de programa actual*
PLAY
DVDVIDEO
3 / 2. 1
L C
LFE
LSRRS
2
:Frontal (izquierdo)
:Front al (derecho)
:Central
:Posterior (izquierdo)
:Posterior (derecho)
:Post er io r (m onofónico): Component e
posterior de la señal estéreo proces ada
con Dolby Surround y de la señal Dolby
Digital.
:Efecto de baja frecuencia
Ejemplo: Dolby Digital (5.1 canales)
Componente posterior×2
DOLBY DIGITAL
Componente fr ontal×2 +
Componente central ×1
*1 “PCM”, “DTS” o “DOLB Y DIGITAL” apa re ce segú n
el disco.
*2 Aparece solamente cuando s e aplica el formato
“DOLBY DIGITAL”.
3 / 2 . 1
Componente LFE
(efecto de baja
frecuencia)×1
Para cerrar el menú Mo do de r ep roducción
Presione (SETUP).
Sugerencia
En Dolby Digital y DTS, la indicación “LFE” siempre
aparece dentro de una línea continua
independientemente del componente de señal LFE
emitida.
1
Si se aplica “DOLBY DIGITAL” , el nombre
del formato de programa y los números de
canal aparecen como se indica a
continuación:
21
Page 100

Ajustes de la imagen
Cambio de los ángulos
Si el DVD contiene distin tos ángulos
(multiángulos) para una escena, podrá cambiar el
ángulo de visuali zación.
OFF
1
456
789
TOP MENU
ALBUM
ALBUM
Presione (ANGLE) varias veces para
seleccionar el número de áng ul o que
desea.
)
2(2
23
+
ENTER
–
AUDIO
SEEK
–
DISPLAY
CLEAR
0
LIST
SETUPMENU
ANGLE
SUBTITLE
SEEK
ANGLE
+
Visualización de los
subtítulos
Podrá activar o desactivar los subtítu lo s o
cambiar el idioma de los subtítulos si el DVD
tiene grabados los subtítulos en uno o más
idiomas.
OFF
1
456
789
TOP MENU
ALBUM
ALBUM
1 Durante la reproducción, presione
(SUBTITLE).
Aparecerá el idioma de los subtítulos.
2 Presione (SUBTITLE) v arias veces para
seleccionar el idioma que desea y, a
continuación, pulse (ENTER).
01:ENGLISH
23
+
ENTER
–
AUDIO
SEEK
–
DISPLAY
CLEAR
0
LIST
SETUPMENU
ANGLE
SUBTITLE
SEEK
+
SUBTITLE
El ángulo cambia.
Sugerencia
También puede cambiar el ángulo de visualización
seleccionando “ANGLE” en el menú Modo de
reproducción (página 10).
Nota
Dependiendo del DVD, es posible que no pueda
cambiar los ángulos aunque haya varios ángulos
grabados.
22
Los idiomas disponi bles varían según el
disco.
Si aparecen 4 dígitos, introduzca el código de
idioma correspondiente al idioma que desea
(página 39).
Para desactivar los subtítulos
Presione (SUBTITLE) varias veces para
seleccionar “OFF”.
Sugerencia
También puede cambiar el idioma de los subtítulos
seleccionando “SUBTITLE” en el menú Modo de
reproducción (página 10) o en el menú DVD
(página 18).
Nota
Dependiendo del DVD, es posible que no pueda
cambiar (o desactivar) los subtítulos aunque los tenga
grabados en varios idiomas.
 Loading...