

Page 1

DVD Changer
DVX-100
3-234-623-21(2)
DVD Changer
Operating Instructions
Manual de instrucciones
使用說明書
For installation and connections, see the supplied installation/connections
manual.
Para obtener información sobre la instalación y las conexiones, consulte el manual
de instalación/conexiones suministrado.
關於本機的安裝及線路連接,請參見提供的“安裝線路連接說明書”。
GB
ES
CT
DVX-100
© 2001 Sony Corporation
Page 2

Welcome!
Thank you for purchasing this Sony DVD Changer. Before
operating the unit, please read this manual thoroughly and retain
it for future reference.
2
Page 3
Table of contents
Features................................................................. 4
Precautions............................................................ 4
About This Manual ............................................... 4
This Unit Can Play the Following Discs ............... 5
Notes on handling discs ....................................... 7
Location of controls.............................................. 8
Wireless remote commander............................................ 8
Wired remote commander.............................................. 10
Getting Started
Preparing the wireless remote commander ..... 12
How to load the batteries................................................ 12
Changing the transmitting frequency .............. 13
How to change the transmitting frequency ................. 13
Preparing the DVD changer ............................... 13
How to load discs into a magazine ............................... 13
How to install the disc magazine to start up the DVD
changer .............................................................................. 13
How to remove the disc magazine................................ 14
Playing Discs
Playing a disc ................................ 16
How to play back ............................................................. 16
Resuming Playback ......................................................... 17
Turning off this unit......................................................... 17
Display Screen (Audio CD)
Using repeat functions ................ 19
Repeat Playback ............................................................... 19
A-B-Repeat playback ....................................................... 20
Playing discs at various slow speeds .21
Slow playback .................................................................. 21
Frame by frame ................................................................ 21
Playing tracks in various functions ............ 22
Playing tracks in random order
—Shuffle Playback........................................................... 22
Playing start of tracks in sequence
—Intro Scan Playback ..................................................... 22
Playing your own programme
—Programme Playback .................................................. 23
................................... 18
Other Functions
Using a disc list ............................. 26
Displaying a disc list ...................................................... 26
Displaying a Running Time ......... 27
Displaying a running time............................................. 27
Searching from items .......................... 28
Searching Methods (Title/Chapter/Track/elapsed time
of playback) ...................................................................... 28
Changing the Subtitle Language ............... 29
Using the menus for DVD ........................... 30
Using a Title Menu........................................................... 30
Using a DVD Menu ......................................................... 30
Changing Audio Language ......................... 31
Changing Angles ......................................... 31
Changing the Audio Output Method .32
Stereo/Monaural left/Monaural right ......................... 32
Using the PBC (playback control) functions
........................................................................ 33
Using the PBC functions ................................................. 33
Stopping PBC function.................................................... 33
Activating the PBC functions from normal playback. 34
Changing Setup
Using the Setup Display..................................... 36
Selecting items for setup ................................................. 36
Completing setup changes ................................ 37
DVD Menu Language ............................................ 37
Audio Language
Subtitle Language
Digital Output
Display (Aspect Ratio —horizontal/vertical screen
image ratio)
Parental (initial setup)
Parental setup (Changing the parental level)
Parental setup (Changing your password)
OSD message
Player Language
..................................................... 38
................................................... 39
....................................... 40
.............................................................. 41
............................................ 42
..... 44
......... 44
.................................................. 46
................................... 47
Additional Information
Troubleshooting.................................................. 48
Power ................................................................................. 48
Picture................................................................................ 48
Sound ................................................................................. 49
Operation .......................................................................... 49
Message Display .............................................................. 51
Specifications ...................................................... 52
Index.................................................................... 53
3
Page 4
Features
Precautions
Thank you for purchasing this Sony DVD changer. Here
are some of the features you will enjoy.
The DVX-100 is a DVD changer system comprised of both
a wireless remote commander and a wired remote
commander, a relay box, and a DVD changer. You can
enjoy playing DVDs, Video CDs, and Audio CDs with
your car audio, even if it has no input terminals for an
auxiliary audio. The DVD changer converts audio signals
into RF (Radio Frequency) signals to be received by the
FM tuner of your car audio*.
* You cannot use this unit unless your car audio has an FM tuner.
• 10 discs DVD/Video CD/Audio CD changer
• CD-Extra (Audio)/Mixed CD (Audio)/CD-R (Digital
Audio)/CD-RW (Digital Audio) compatibility
• Support dts/Dolby digital through optical digital
output terminal
• FM modulator equipped for setting up with all master
units.
• Do not watch the monitor, while you are driving. If you
want to watch a DVD or Video CD, stop your car first,
park in a safe place, and enjoy yourself.
• You cannot use this unit unless your car audio has an
FM tuner.
• If the unit does not work, check the connections first. If
everything is in order, check the fuse.
• If you leave your car in direct sunlight, the temperature
inside the car may become very hot. Allow the unit to
cool off before you use it.
• Avoid installing the DVD changer and wired remote
commander in places:
— subject to temperature exceeding 55 °C
— subject to direct sunlight
— near heat sources (such as heaters)
— exposed to rain or moisture
— exposed to excessive dust or dirt
— subject to excessive vibration
If you have any questions or problems concerning your
unit, please counsult your nearest Sony dealer.
About This Manual
Conventions
• Instructions in this manual describe how to use this unit by
using the controls on the supplied wireless remote commander.
• You can also operate with the supplied wired remote
commander, if its controls have the same or similar names of
wireless remote commander.
• The icons on the right are used in this manual:
Icon Meaning
Indicates a DVD function.
Indicates a Video CD function.
Indicates an Audio CD function.
4
Page 5
This Unit Can Play the Following Discs
DVD VIDEOs
Disc logo
Contents
Audio + Video Audio + Video
The “DVD VIDEO” logo is a trademark.
DVD
A DVD disc contains both audio and visual data. A 12
centimetre disc can hold 7 times the amount of data
contained in a CD-ROM, which translates to 4 consecutive
hours of playing time (8 hours for double-sided discs).
DVD discs are divided into 4 types: single sided single
layer, single sided double layer, double sided single layer,
and double sided double layer.
Video CD
A Video CD can contain both audio and visual data on a
disc the same size as a regular Audio CD. The playing
time is 74 minutes for a standard 12 centimetre CD.
Audio CD
An Audio CD containing audio data. The playing time is
74 minutes for a standard 12 centimetre CD.
CD-Recordable (CD-R) for audio use
With a CD-R for audio use, you can edit audio data. You
can write information on a CD-R only once.
CD-Rewritable (CD-RW) for audio use
With a CD-RW for audio use, you can edit audio data. You
can write information on a CD-RW again and again.
Video CDs Audio CDs
Audio
Region code of DVDs you can play on this unit
Your DVD changer has a region code printed on the back
of the unit and will only play DVDs that are labelled with
identical region codes.
DVDs labelled will also play on this unit.
ALL
If you try to play any other DVD, the message “This disc
can’t be played.” will appear on the screen.
Depending on the DVD, the region code indication may
not appear even if the DVD is prohibited by area
restrictions.
Region code
X
MODEL NO
DC 12 VOLTS
NEGATIVE GROUND
Note on the TV colour systems
The colour system differs, depending on your country.
— Your DVD changer conforms to the PAL colour
system. You cannot play discs recorded in other
colour systems such as SECAM and NTSC.
10-DISC DVD CHANGER
10
CD-Extra
A CD-Extra has two sections containing audio and data.
You can only play the section of audio on this unit.
Mixed CD
A Mixed CD has one section containing both audio and
data. You can only play the part of audio on this unit.
Caution
• You can play CD-Rs and CD-RWs designed for audio with this unit, however, depending on the recorded conditions, you
can’t play some discs.
• You CANNOT play these discs on this unit.
— DVD-Audio — DVD-RAM — DVD-ROM — 8 cm discs — DVD-RW
— DVD-R — Active-Audio (Data) — CD-G — Photo-CD — VSD
— CD-Extra (Data) — MixedCD (DATA) — CD-ROM
• This product incorporates copyright protection technology that is protected by method claims of certain U.S. patents and
other intellectual property rights owned by Macrovision Corporation and other rights owners. Use of this copyright
protection technology must be authorized by Macrovision Corporation, and is intended for home and other limited
viewing uses only unless otherwise authorized by Macrovision Corporation. Reverse engineering or disassembly is
prohibited.
continue to next page t
5
Page 6
This Unit Can Play the Following Discs
Note on PBC (Playback Control) (Video CDs)
This player conforms to Ver. 1.1 and Ver. 2.0 of Video CD
standards. You can enjoy two kinds of playback according to the
disc type.
Disc type
Video CDs without
PBC functions
(Ver. 1.1 discs)
Video CDs with
PBC functions
(Ver. 2.0 discs)
You can
Enjoy video playback (moving
pictures) as well as music.
Play interactive software by using
menu screens displayed on the monitor
(PBC Playback), in addition to the
video playback functions of Ver. 1.1
discs. Moreover, you can play highresolution still pictures if they are
included on the disc.
Note on DTS-encoded CDs
When playing DTS*-encoded CDs, excessive noise will be heard
from the analog stereo outputs. To avoid possible damage to the
audio system, the consumer should take proper precautions
when the analogue stereo outputs of this DVD changer are
connected to an amplification system. To enjoy DTS Digital
Surround™ playback, an external 5.1-channel DTS Digital
Surround™ decoder system must be connected to the digital
output of this DVD changer.
* “DTS,” “DTS Digital Surround” and “DTS Digital Out” are
trademarks of Digital Theater Systems, Inc.
Note on CD-R/CD-RW
You can play certain CD-Rs and CD-RWs designed for audio use
(provided the quality of the recording is adequate).
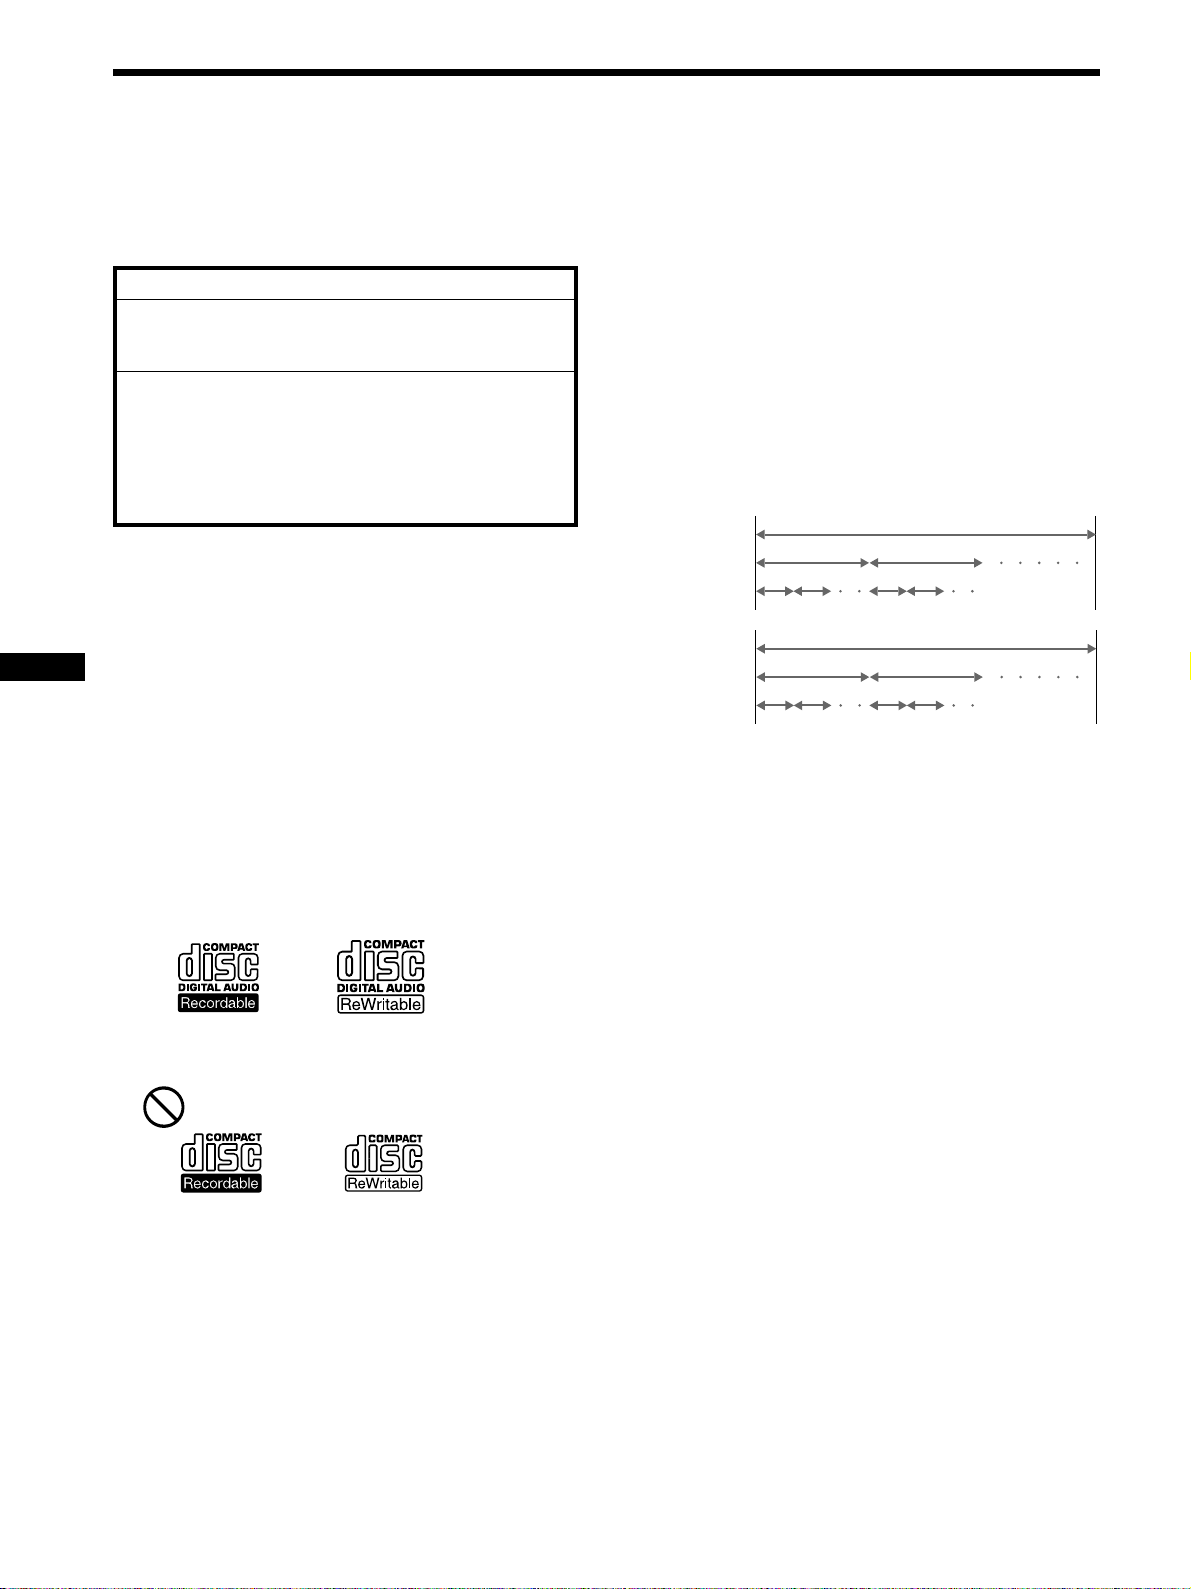
— You can play Digital Audio CD-Rs and CD-RWs bearing
these icons:
Terms for discs
• Title
The longest section of a picture or music feature on a DVD, e.g.,
a movie for video software, or an album for audio software, etc.
• Chapter
Sections of a picture or a music feature that are smaller than
titles. A title is composed of several chapters. Each chapter is
assigned a chapter number enabling you to locate the chapter
you want. Depending on the disc, chapters may not be
recorded.
• Track
Sections of a picture or a music feature on a Video CD/Audio
CD. Each track is assigned a track number enabling you to
locate the track you want.
Disc
DVD
structure
Video CD/
Audio CD
structure
Title
Chapter
Disc
Track
Index
• Index (Audio CD)/Video Index (Video CD)
Numbered points within a track. A number that divides a track
into sections to easily locate the point you want on a Video CD
or an Audio CD. Depending on the disc, no indexes may be
recorded.
• Scene
On a Video CD with PBC (playback control) functions, the
menu screens, moving pictures and still pictures are divided
into sections called “scenes.” Each scene is assigned a scene
number enabling you to locate the scene you want.
— Y ou CANNOT play (non-digital audio) CD-Rs and CD-RWs
bearing these icons:
6
Page 7
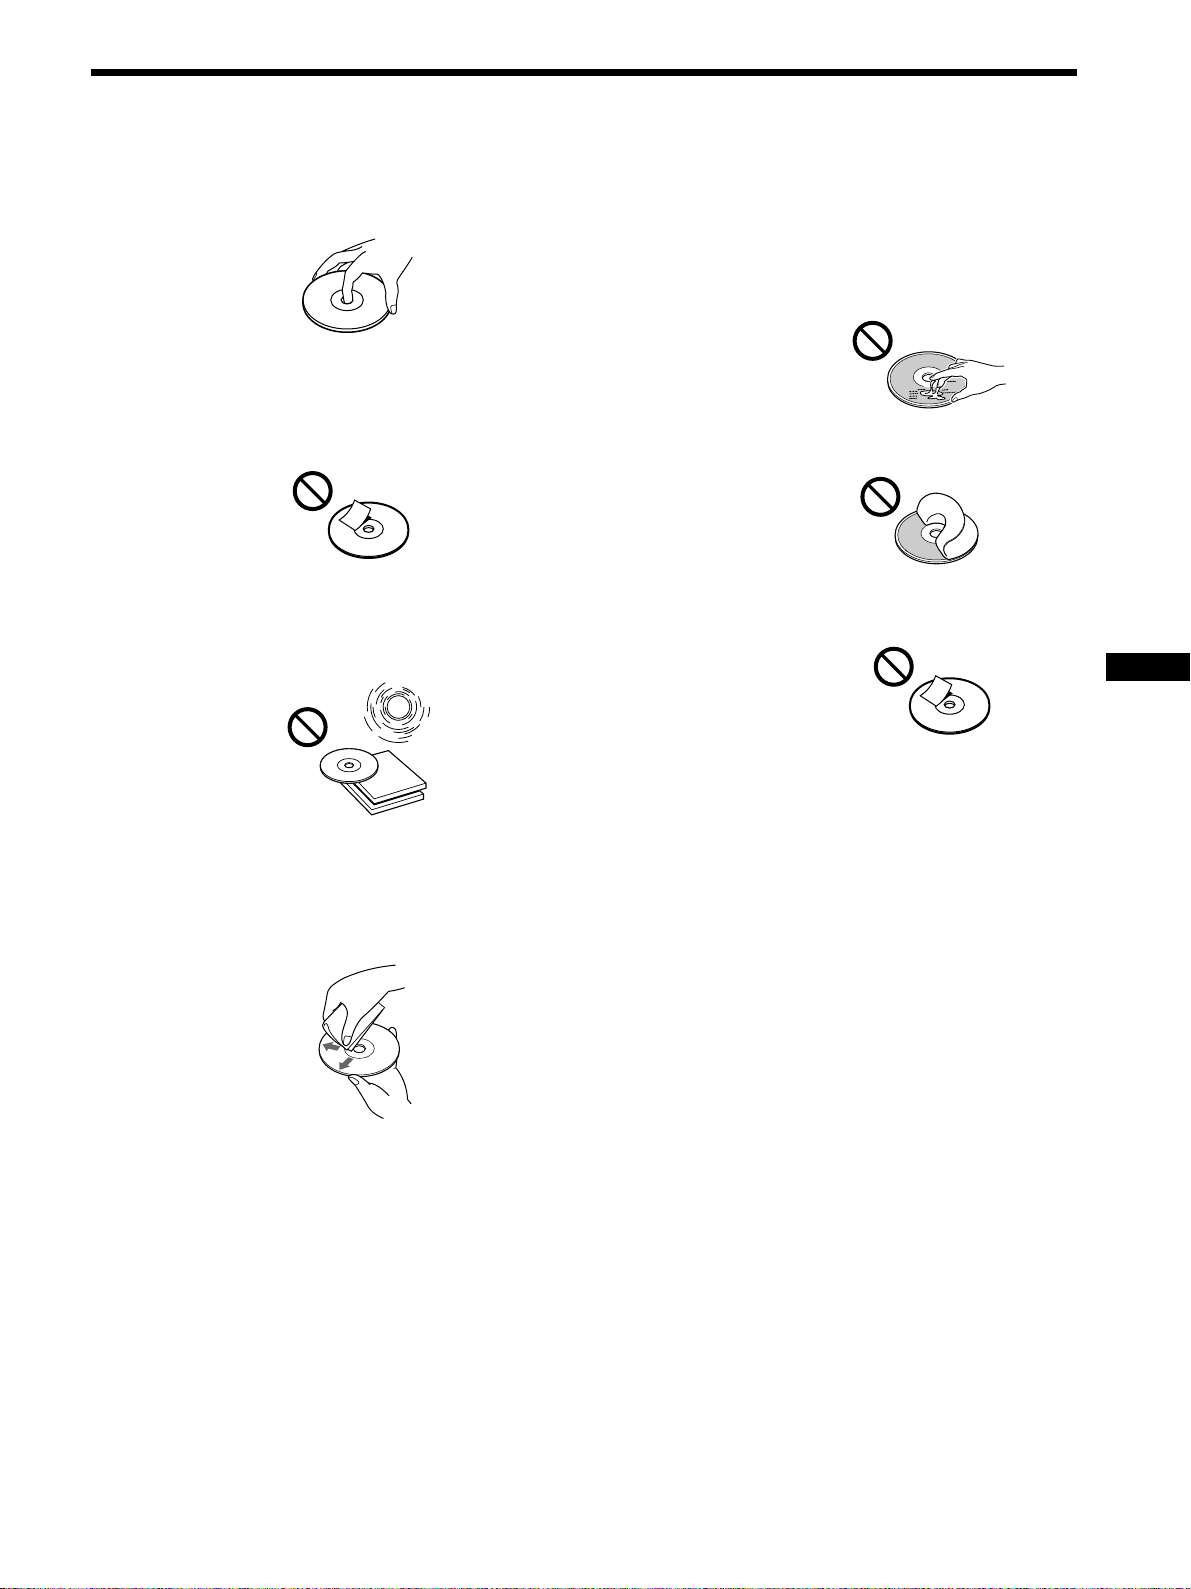
Notes on handling discs
On handling discs
• To keep the disc clean, handle the disc by its edge. Do
not touch the surface.
• Do not stick paper or tape on the disc.
If there is a sticky residue, glue etc., on the disc, remove
it completely before using the disc.
• Do not expose discs to direct sunlight or heat sources
such as hot air ducts.
• Do not leave discs in a car parked in direct sunlight.
Notes on discs
Do not use discs with sticky residue on the surface (e.g.,
second-hand or rental discs with sticky seals, ink, or
peeling stickers). If you use such a disc, the sticky residue
could cause the disc to stop spinning and may cause a
malfunction or ruin the disc.
Discs with sticky residue
or ink
Do not use rental discs with old labels that are beginning
to peel off.
Discs with peeling stickers
Do not use discs with labels or stickers attached.
Discs with labels attached
• After playing a disc, store it in its case.
On cleaning
• Before playing a disc, clean it with a cleaning cloth.
Wipe the disc from the centre out.
• Do not use solvents such as benzine, thinner,
commercially available cleaners or anti-static spray
intended for vinyl LPs.
• Discs with non-standard shapes (e.g., heart, square,
star) cannot be played on this unit. Attempting to do so
may damage the unit. Do not use such discs.
You cannot play 8 cm discs.
7
Page 8
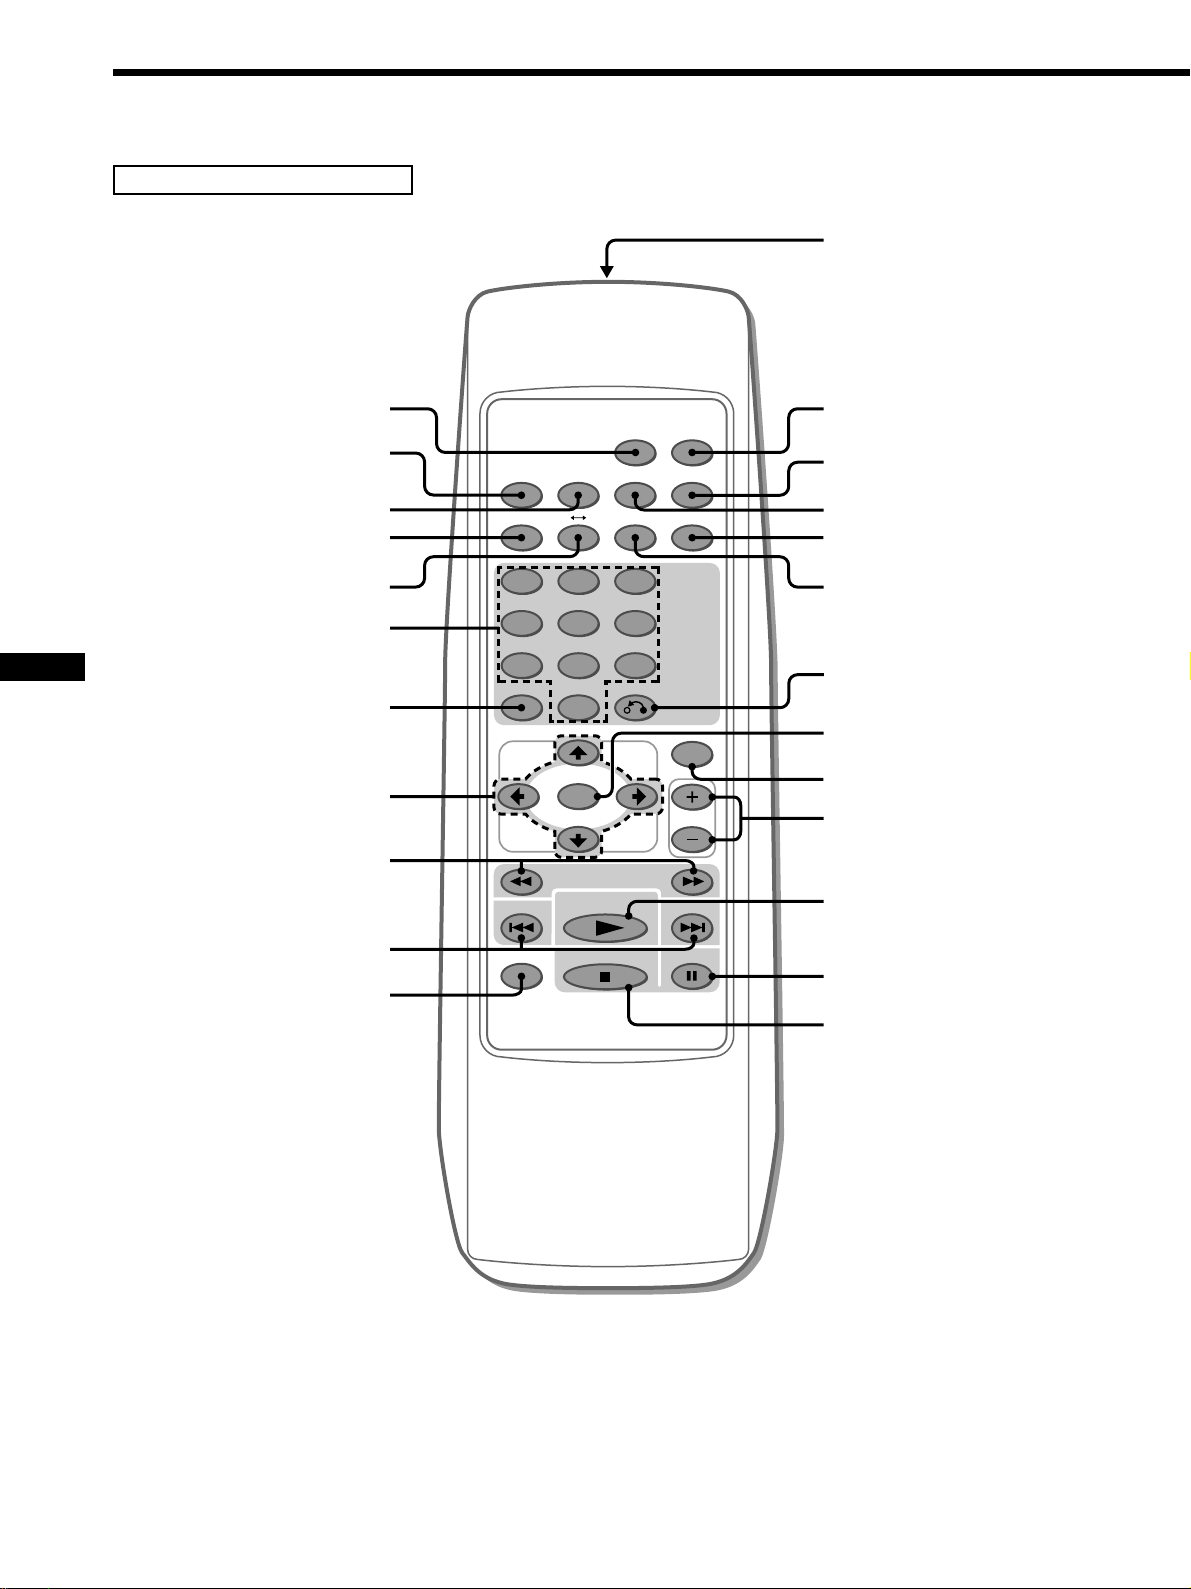
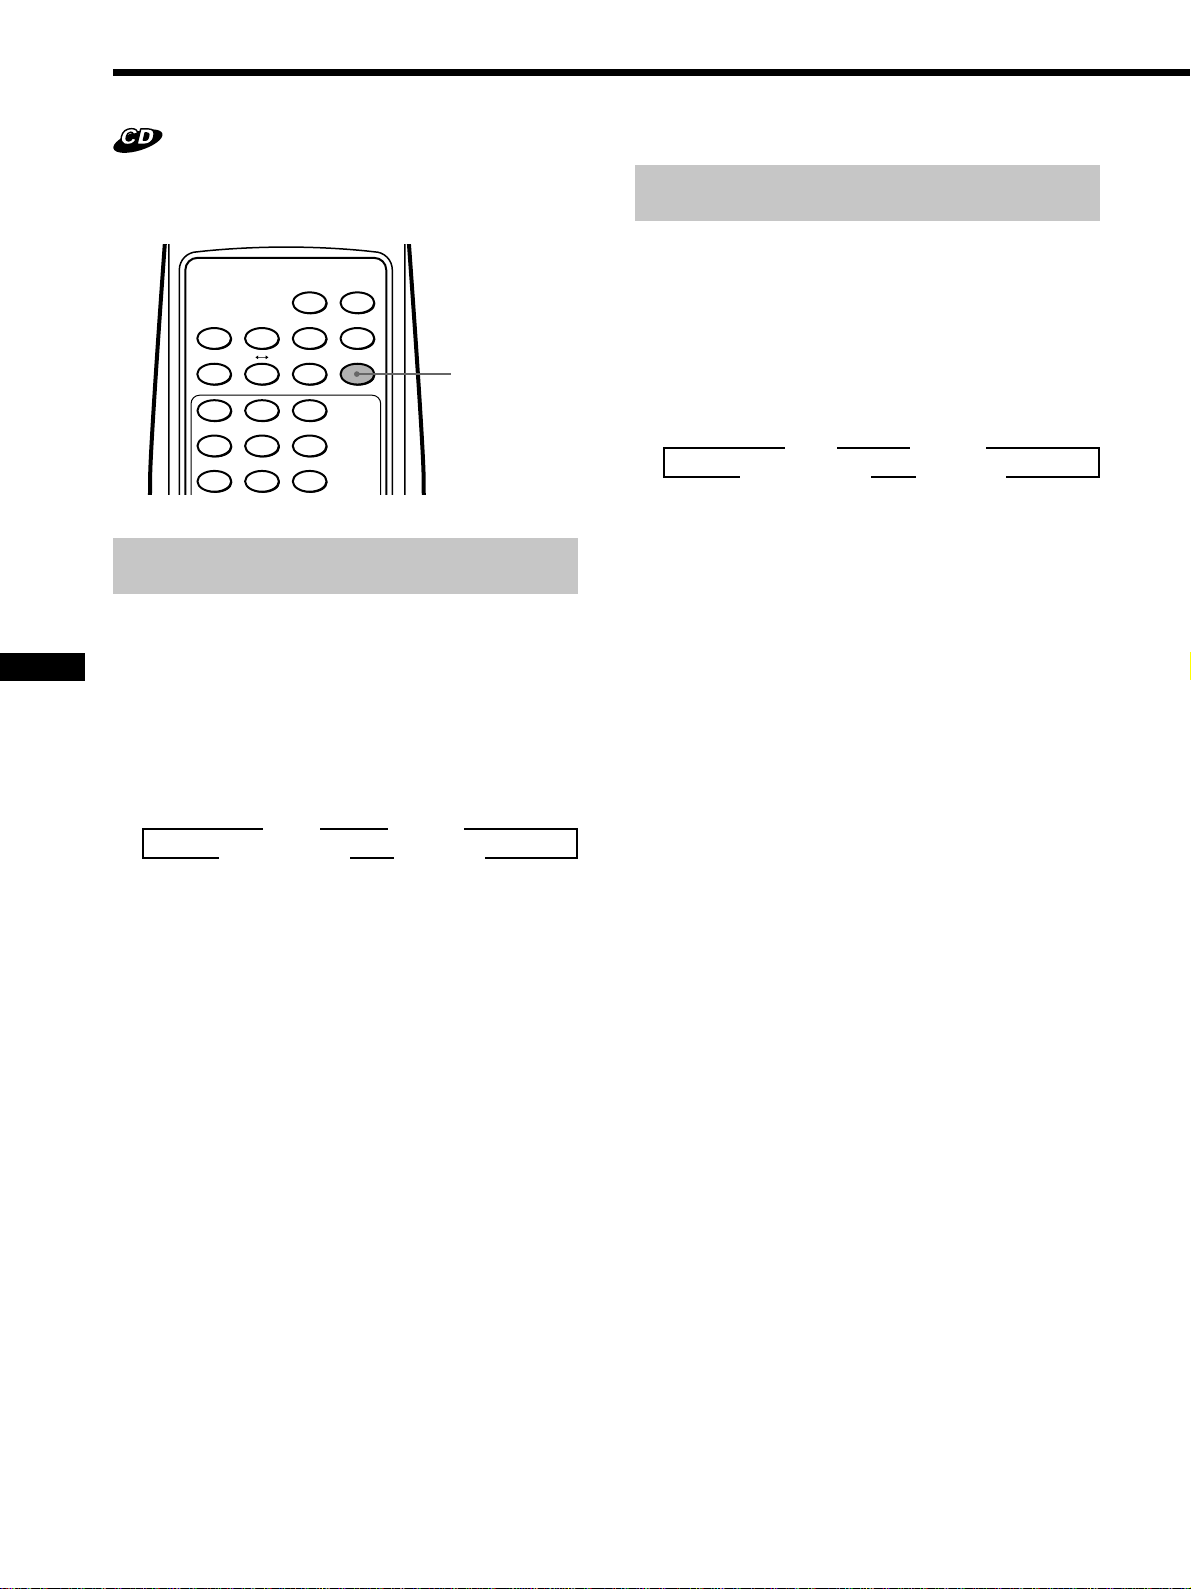
Location of controls
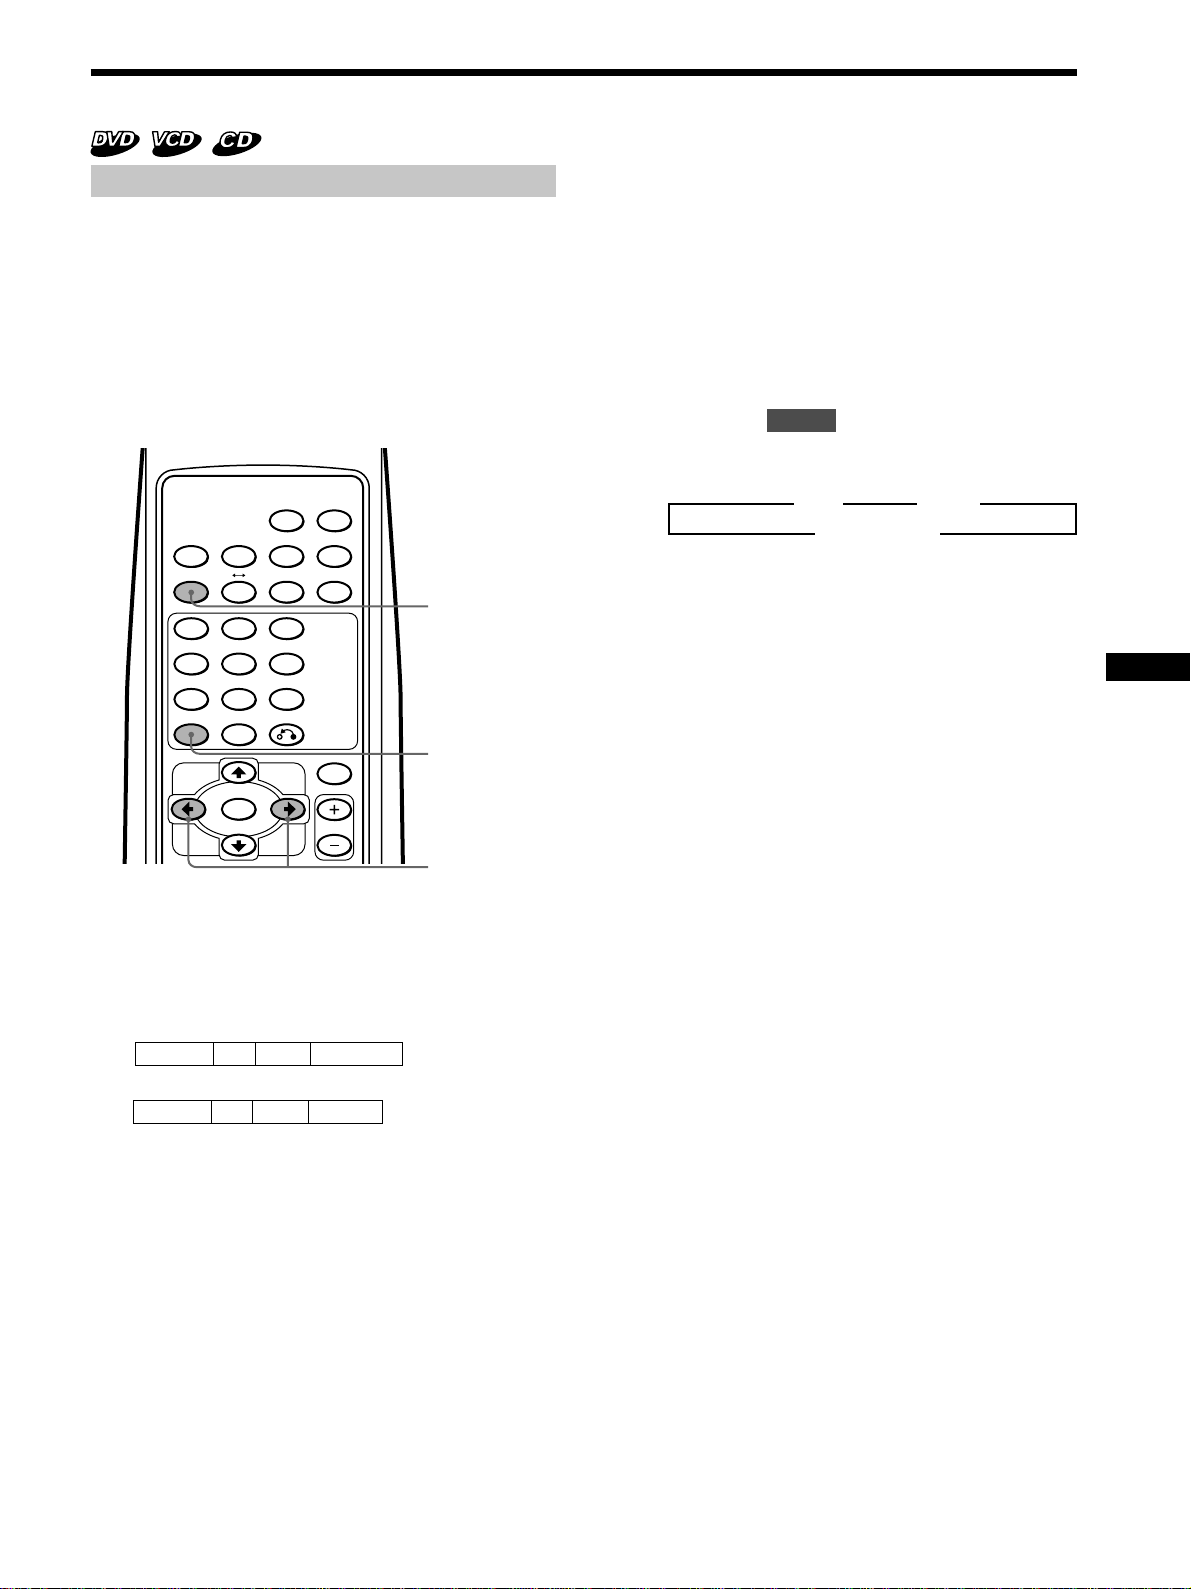
Wireless remote commander
Light emitter
1
2
3
4
5
6
7
8
9
q;
qa
MENU TITLE
ANGLEAUDIOSUB TITLE TIME
PLAY MODE
SEARCHREPEAT
A B
1 2 3
4 5 6
7 8 9
PREV NEXT
SET UP PA USE
RETURNCLEAR
0
LIST
ENTER
DISC
SCAN
PLAY
STOP
qs
qd
qf
qg
qh
qj
qk
ql
w;
wa
ws
wd
8
Page 9

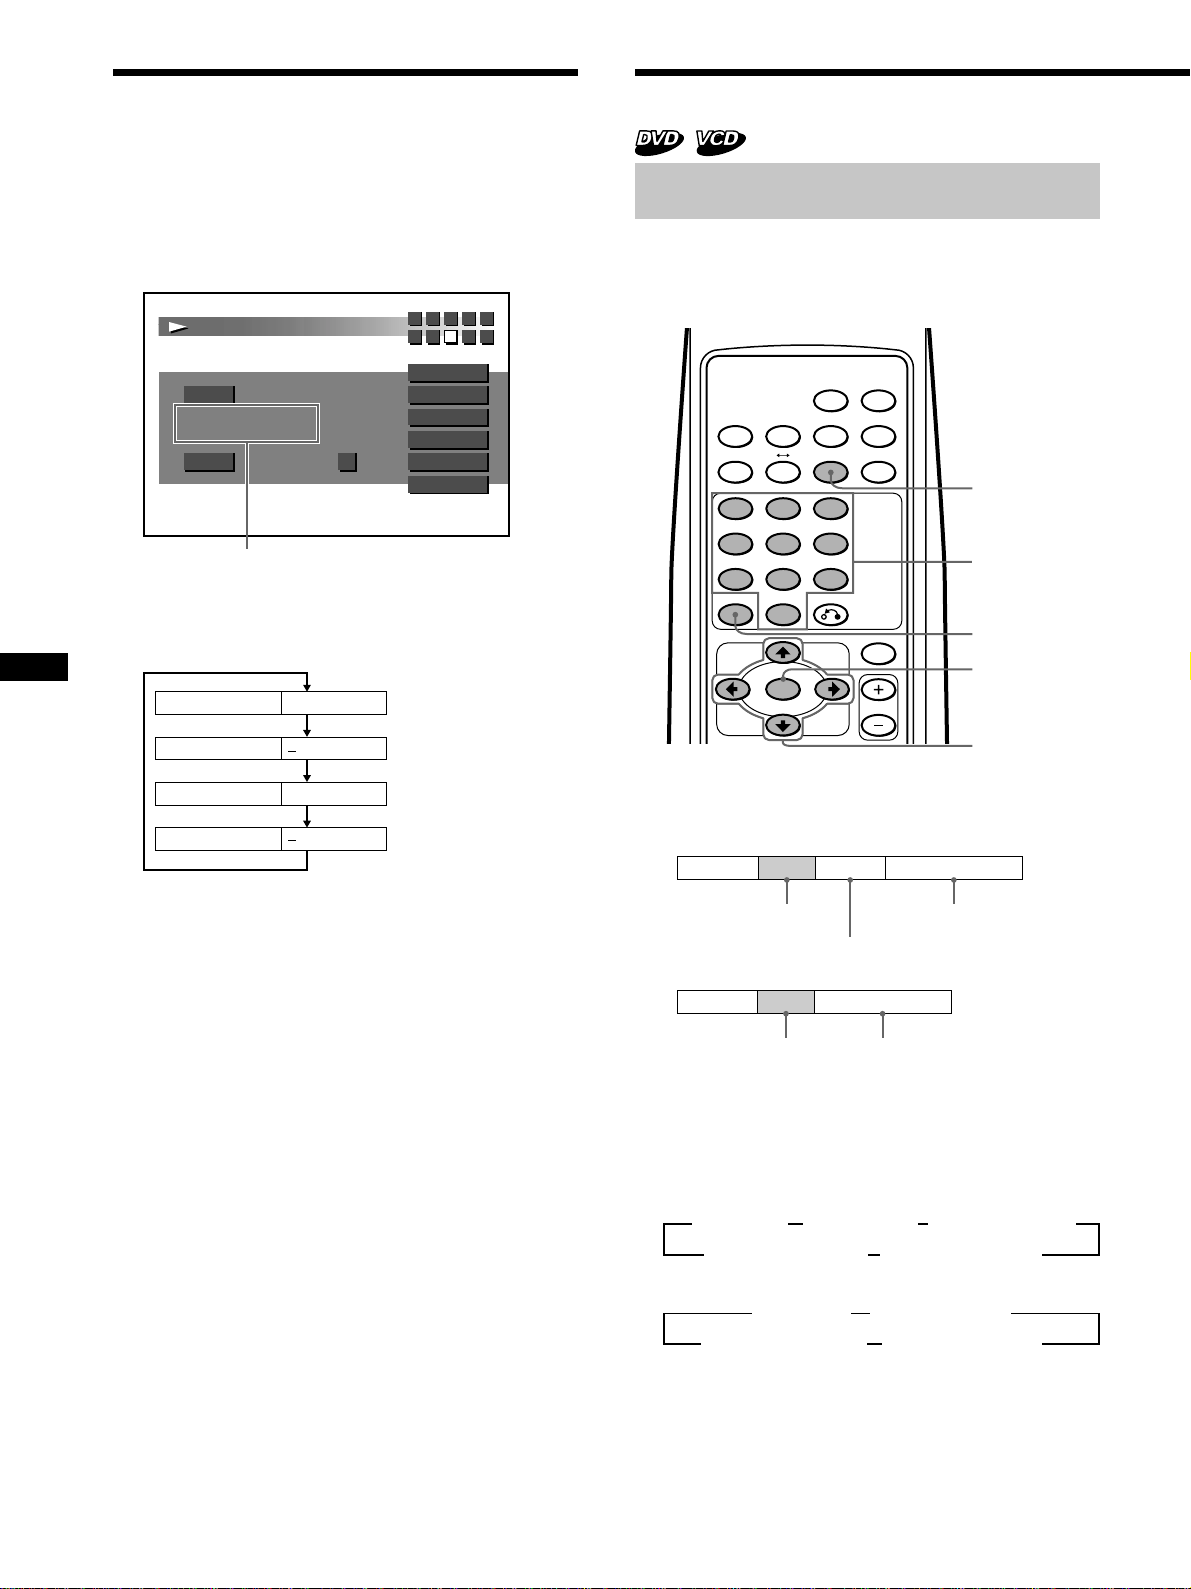
1 MENU button 30, 33, 34
Press MENU to display the recorded DVD and Video
CD menu.
2 SUBTITLE button 29
Press SUBTITLE to change the subtitle languages
while playing a DVD.
3 AUDIO button
• DVD 31
Press AUDIO to change the Audio Language.
• Video CD/Audio CD 32
Press AUDIO to change the Audio Output Method.
4 REPEAT button
• DVD 19
Press REPEAT to play a title or a chapter repeatedly.
• Video CD/Audio CD 19
Press REPEAT to play the entire tracks of a disc or a
track.
5 AyB (A-B repeat) button
• DVD/Video CD 20
Press AyB to play your favorite scene repeatedly.
• Audio CD 20
Press AyB to play your favorite passage of songs.
6 Number buttons 23, 28, 29, 33, 42, 44, 45
Press the number buttons to input numbers.
7 CLEAR button 23, 28, 29, 33, 42, 44, 45
Press CLEAR to clear the wrong number you entered.
8 Cursor buttons 19, 23, 26, 27, 28, 29, 30, 31, 33, 36,
37, 38, 39, 40, 41, 42, 43, 44, 45, 46, 47
Press the cursor buttons to select the items.
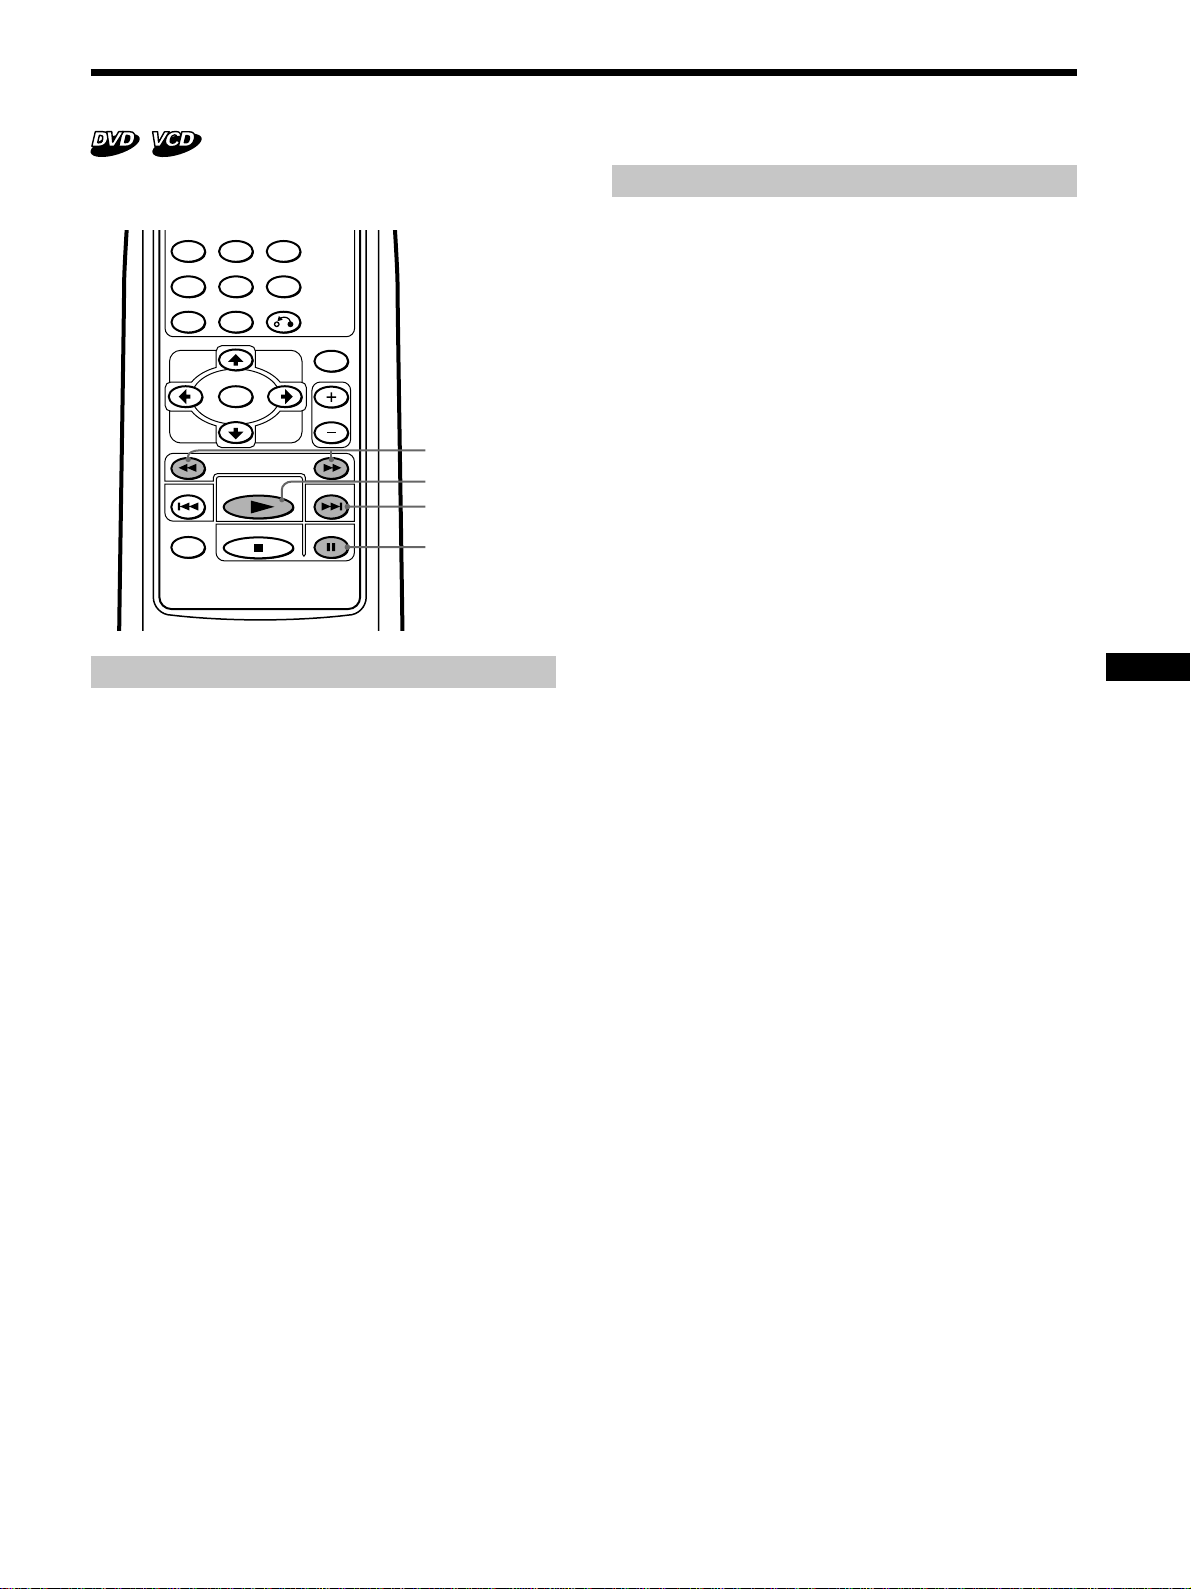
9 SCAN buttons 17, 21
Press M for fast forward playback.
Press m for fast rewind playback.
• DVD/Video CD 21
Press X (PAUSE), then press M/m for slow
playback.
q; PREV/NEXT button 16, 17, 21
Press > to go to the next chapter, track, or scene.
Press . to go back to the previous chapter, track or
scene.
• DVD/Video CD 21
Press X (PAUSE), then press > to play pictures
frame by frame.
qa SET UP button 36, 37, 38, 39, 41, 43, 44, 45, 46, 47
Press SET UP when you want to change the settings,
such as DVD Menu Language, Audio Language,
Subtitle Language, and so on.
qs TITLE button 30
Press TITLE to display the title menu.
qd TIME button 27, 28
Press TIME to display the elapsed/remaining time of
items such as title, chapter, track, and disc.
qf ANGLE button 31
Press ANGLE to select the pictures of a scene viewed
from the multiple angle during a DVD playback.
qg PLAY MODE button 22, 23, 24
• Audio CD
Press PLAY MODE to select your favorite playback
mode.
qh SEARCH button 28, 29
Press SEARCH to specify a desired point on a disc by
title, chapter, track , or time.
qj RETURNO button 26, 27, 36, 37, 38, 39, 41, 42, 43,
44, 45, 46, 47
Press RETURN to come back to the normal playback
mode.
qk ENTER button 23, 24, 26, 27, 28, 29, 30, 31, 32, 33,
37, 38, 39, 40, 41, 42, 43, 44, 45, 46, 47
Press ENTER to execute the items or settings.
ql LIST button 26, 27
Press LIST to display the list of discs contained in the
magazine.
w; DISC (+/–) button 16
Press DISC to select your favorite disc.
wa PLAY button 16, 17, 21, 23, 24, 33, 34, 37, 38, 39, 40,
41, 43, 44, 45, 46, 47
Press PLAY to play a disc.
ws PAUSE button 16, 17, 21
Press PAUSE to pause playback.
wd STOP button 16, 17, 23, 33, 34, 36
Press STOP to stop playback.
Caution
When you want to turn on the unit, you have to press
B/X* on the wired remote commander. See “1 B/X
button” of the wired remote commander (page 10).
* You can also press PLAY on the wireless remote
commander for start-up.
9
Page 10
Location of controls
Wired remote commander
1
Window display
2
1 B/X button 14, 16
— For starting up the unit
Press B/X*
*1 You can also press PLAY on the wireless remote
commander for start-up.
— PLAY/PAUSE
(equivalent to wa and ws on the wireless remote
commander)
2 OFF (power off) button 17
Press OFF to turn off the unit
1
for starting up the unit.
DISC
OFF
4
5
3 DISC (–/+) button 16
(equivalent to w; on the wireless remote commander)
4 SCAN/PREV/NEXT button 16, 17, 18, 21
Press > to go to the next chapter, track, or scene.
Press . to go back to the previous chapter, track or
scene.
• During DVD/Video CD playback
Press B/X (PAUSE), then press > down for fast
forward playback (only 2 times speed available).
Press B/X (PAUSE), then press . down for fast
rewind playback (only 2 times speed available).
3
Press B/X (PAUSE), then press >, the chapter
search function*
*2 Depending on the disc, even if the “You can’t operate this
command now” message appears on the monitor, you may
be able to use the chapter search function (with such discs)
by using the wireless remote commander.
Caution for DVD/Video CD playback
If you want to play a disc at various slow speeds (page 21),
or frame-by-frame (page 21), use the controls of the wireless
remote commander. You cannot perform these functions by
using the wired remote commander.
2
is available.
10
5 Reset button
Press the reset button with a pointed object, such as a
ball point pen in the cases below:
— you use the unit for the first time
— you reconnect the wired remote commander to
the unit
— you cannot activate a button on the wired remote
commander
— the display appears unnatural
Note
The wired remote commander is limited to certain functions only.
For more advanced operations, use the wireless remote
commander.
Page 11

11
Page 12
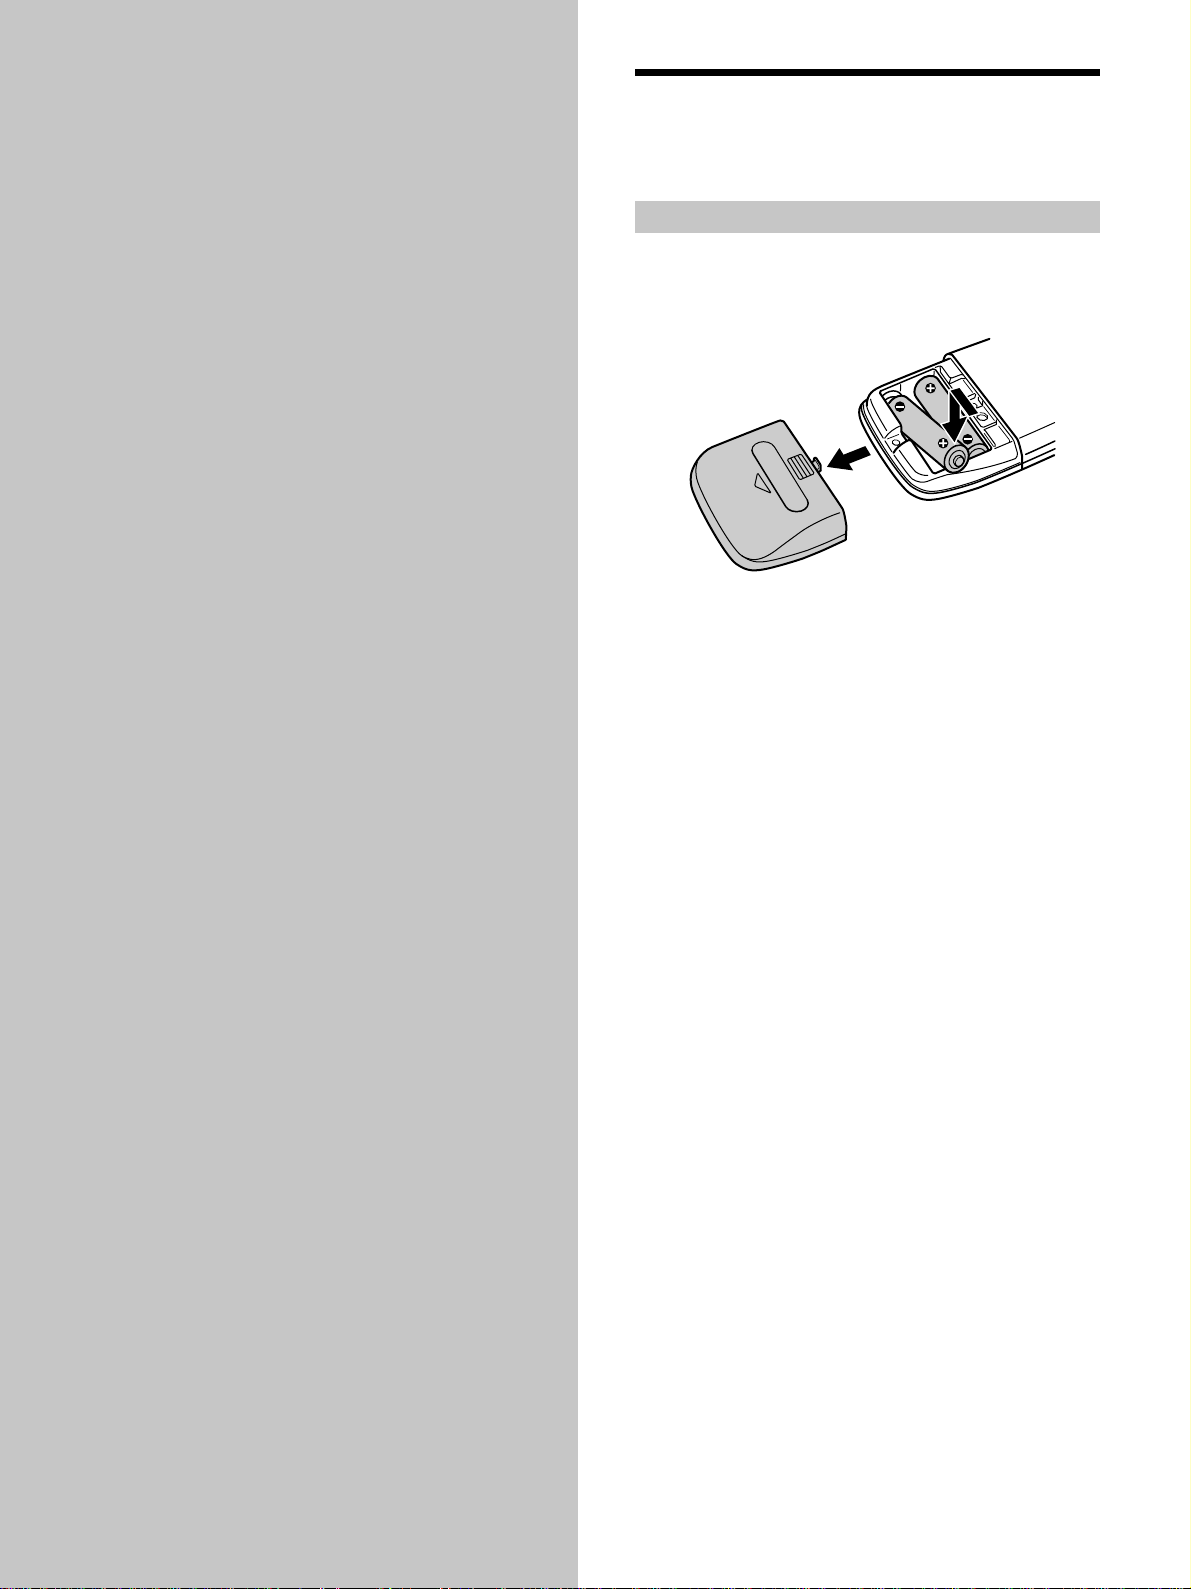
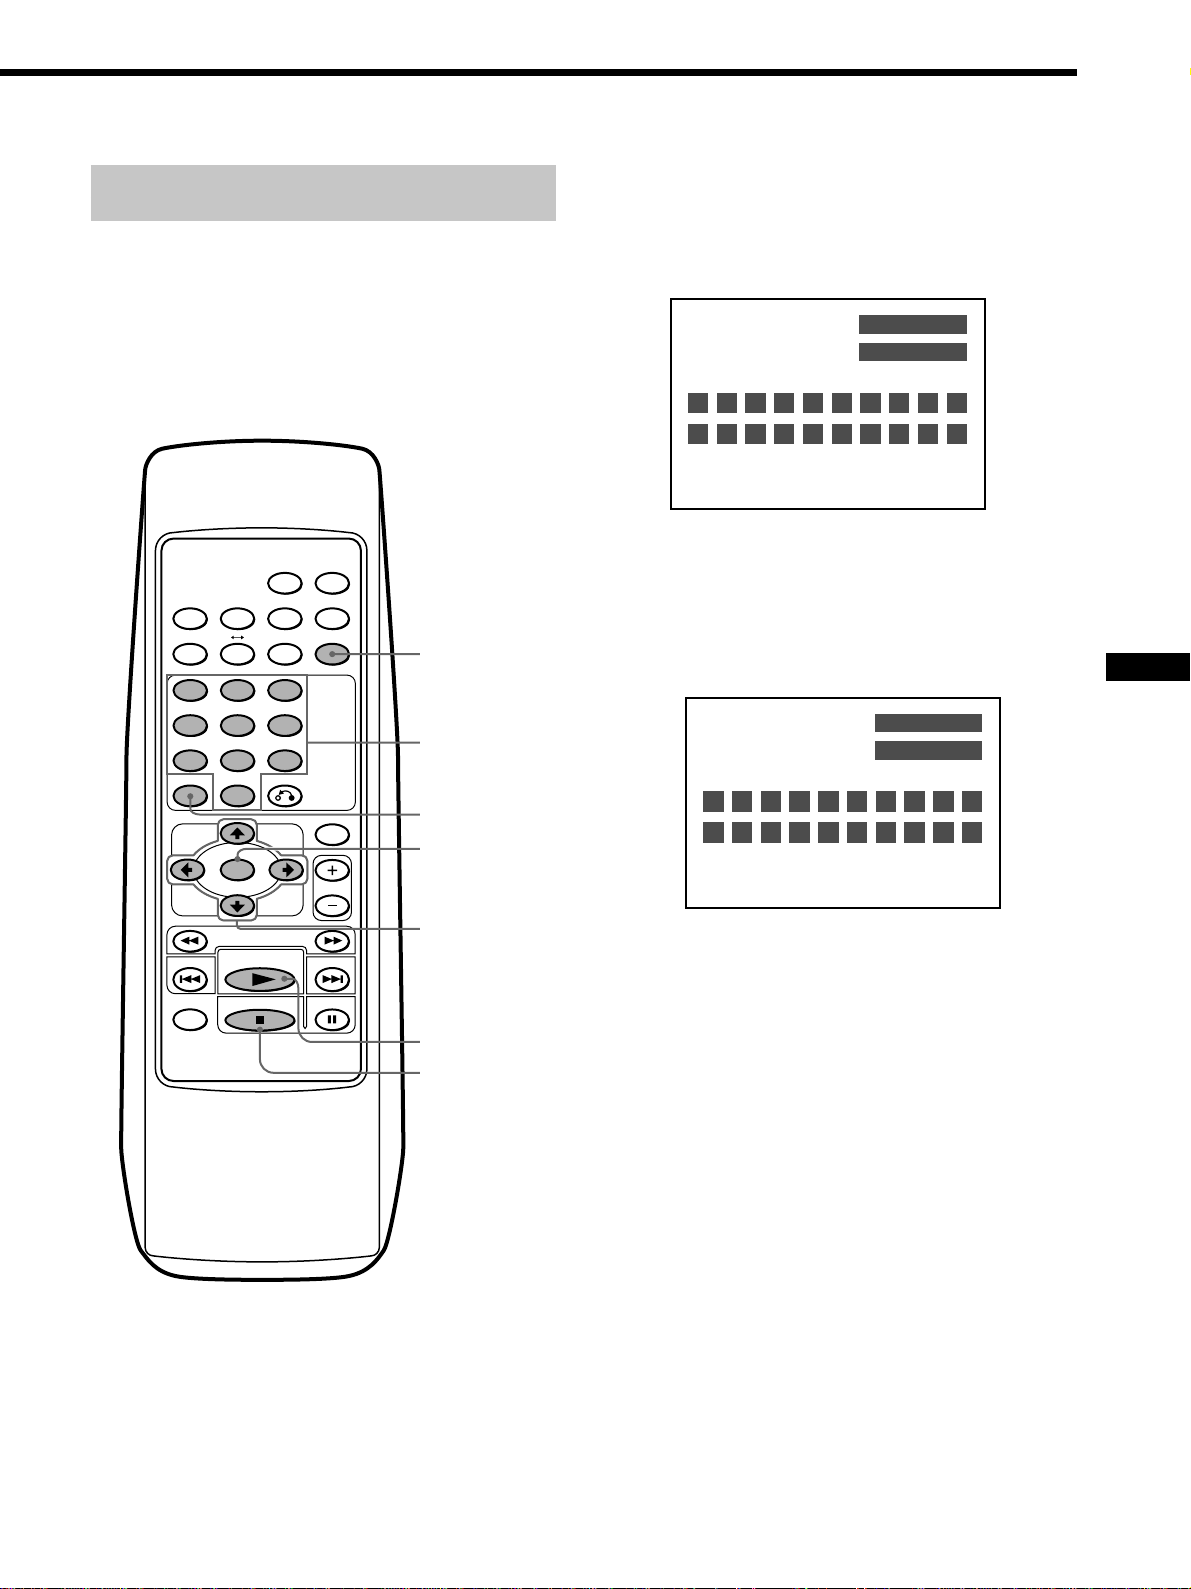
Getting
Started
Preparing the wireless
remote commander
How to load the batteries
This section describes how to prepare
the wired remote commander, the
wireless remote commander, the unit,
and how to change the transmitting
frequency.
1 Press and slide the battery cover to open.
2 Insert two AA (R6) alkaline batteries.
Caution
Be careful to match the + and – ends of the batteries to the
marking inside the compartment.
3 Replace the cover.
Notes
• Do not hold the battery with metallic tweezers, otherwise a
short-circuit may occur.
• Do not leave the remote commander in an extremely hot or
humid place.
• Do not drop any foreign object into the remote commander,
particularly when replacing the batteries.
• If you do not intend to use the remote commander for an
extended period of time, remove the batteries to avoid possible
damage from battery leakage and corrosion.
• When the batteries wear out, dispose of them in a safe manner
that complies with all applicable laws.
12
Page 13
Changing the transmitting
frequency
Preparing the DVD changer
How to change the transmitting
frequency
With this unit, the audio is processed through an FM
tuner for playback. Therefore, signal interference may
occur. In such a case, change the modulated RF signal of
your car stereo as follows.
1 Operate on your car stereo.
1 Turn on your car stereo.
2 Select FM band.
3 Tune the radio to either 88.9 MHz or 88.3 MHz.*
* Tune to the same frequency (88.9 MHz or 88.3 MHz) you
set on the FM modulator of the DVD changer during
installation (Refer to the installation manual supplied with
this unit).
2 Operate on the monitor connected to this DVD
changer.
1 Turn on the monitor.
2 Switch the mode to video.
Note
Read the operation manuals supplied with your car stereo and
monitor.
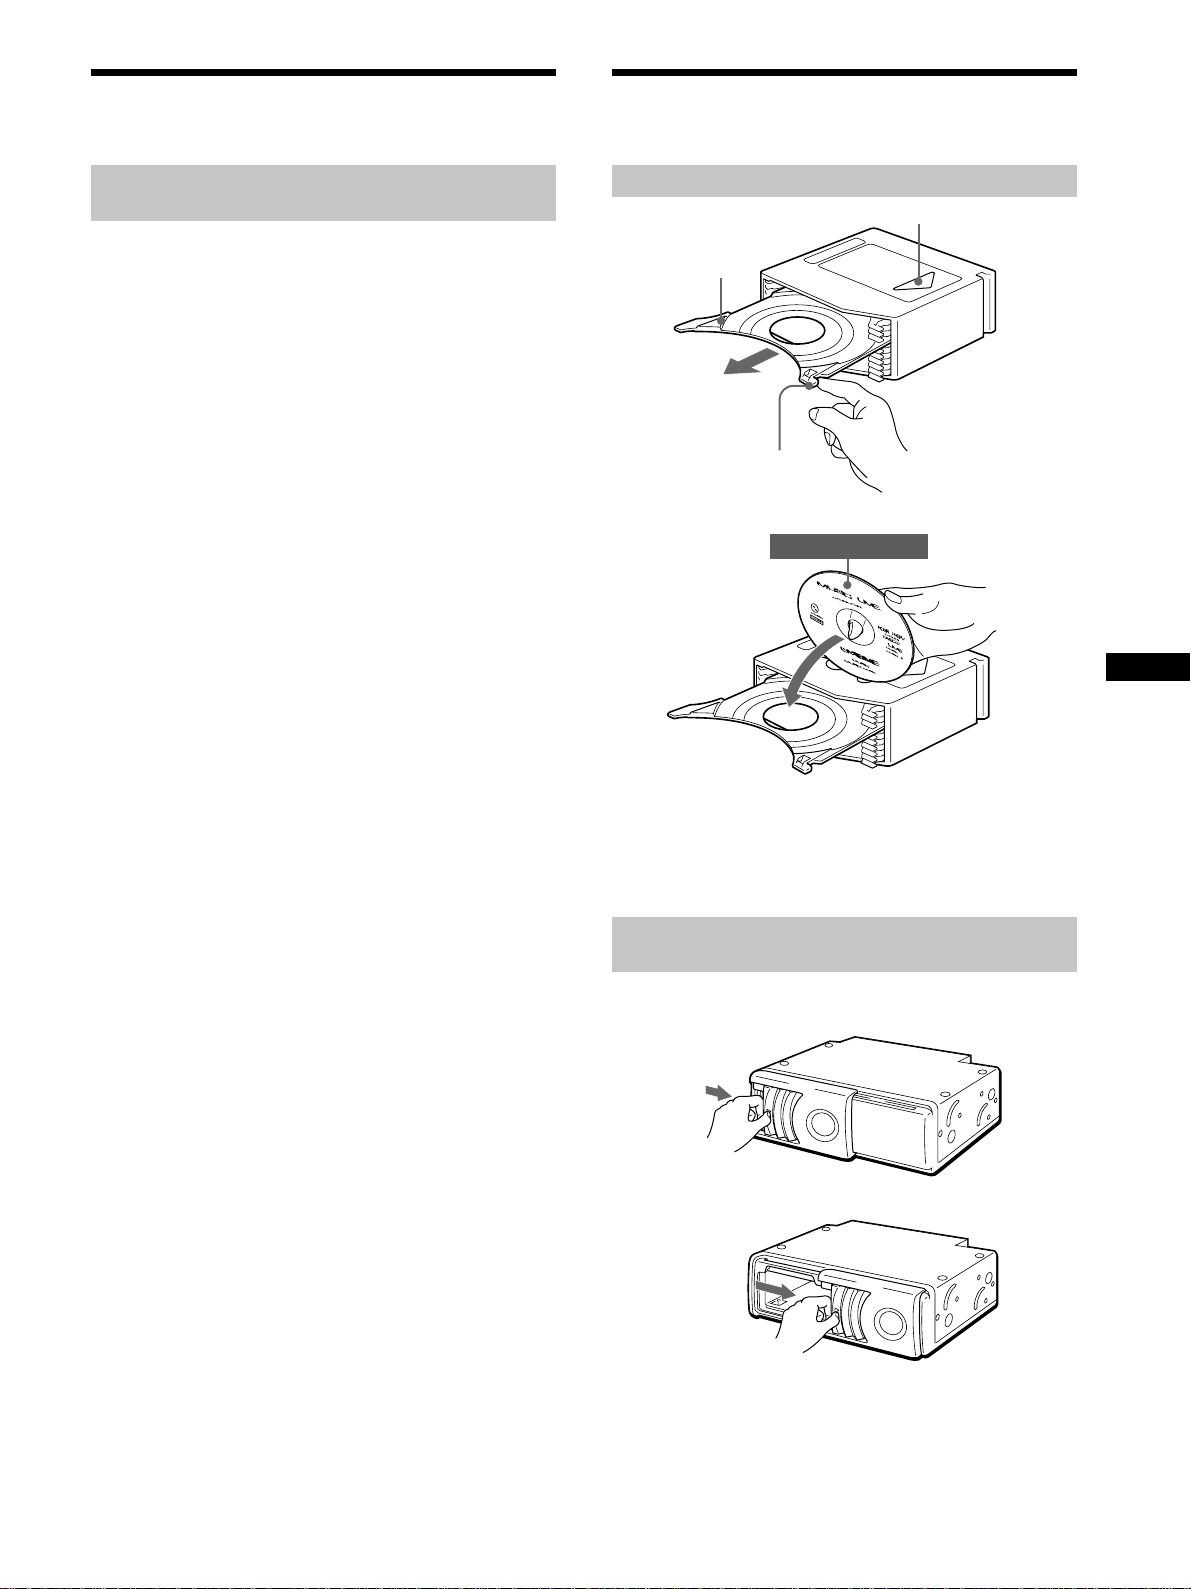
How to load discs into a magazine
With the arrow side facing up
Tray
Tab
x
Labelled side down
There are 10 trays in the magazine:
put only one disc in each tray.
Note
When playing a double-sided disc, put the disc side to be
played up.
How to install the disc magazine to start
up the DVD changer
1 Hold OPEN and unlock.
2 Slide the door toward the right.
Notes
• Open the door fully until you hear the door click.
• To prevent injury, do not insert your hand into the DVD
changer.
continue to next page t
13
Page 14
Preparing the DVD changer
3 Install the disc magazine.
Disc magazine
4 Close the door.
Tip
After you install the disc magazine in the unit, wait until the
unit completes creating the disc list. When the unit completes
the disc list in the magazine:
— the sound of checking discs stops
— the display on the wired remote commander turns off
To start up the DVD changer, proceed with
the operation below.
Press B/X* on the wired remote commander for
start-up.
* You can also press PLAY on the wireless remote
commander for start-up.
The start-up screen appears on the monitor and the unit
starts to play the first disc in the magazine automatically. See
“Playing a disc” (page 16).
B/X
DISC
How to remove the disc magazine
Press Z.
Z (EJECT)
Note
To prevent injury, withdraw your hand, after you press Z.
The disc magazine is ejected swiftly.
If the disc magazine does not lock properly
Press Z to take out the disc magazine, and reinsert it.
Use the unit with the door closed
Otherwise, foreign objects could enter and contaminate the lenses
inside the unit.
Notes on the disc magazine
• Do not leave the disc magazine in locations subject to high
temperature or high humidity, such as on a car dashboard or in
the rear window where the disc magazine will be exposed to
direct sunlight.
• Do not place more than one disc at a time onto a tray, otherwise
the DVD changer and/or the discs may be damaged.
• Do not drop the disc magazine or otherwise subject it to a
violent shock.
When the tray comes out
Under normal use, the trays should not come out of the
disc magazine. However, if they are pulled out of the disc
magazine, it is easy to re-insert them.
OFF
Caution
If you press B/X on the wired remote commander (or PLAY
on the wireless remote commander) before the unit completes
checking the discs, the disc list is not complete.
14
With the cut -away portion of the tray facing you, insert the
right corner of the tray into the slot, then push the left corner
in until it clicks into position.
Note
Do not insert the tray upside down or in the wrong direction.
Page 15

15
Page 16
Playing Discs
This chapter describes how to play a
DVD/Video CD/Audio CD.
Playing a disc
How to play back
Make sure to complete the preparations below:
— preparing the wireless remote commander (page 12)
— changing the transmitting frequency (page 13)
— loading discs into the disc magazine, then installing
the magazine in the unit (page 13)
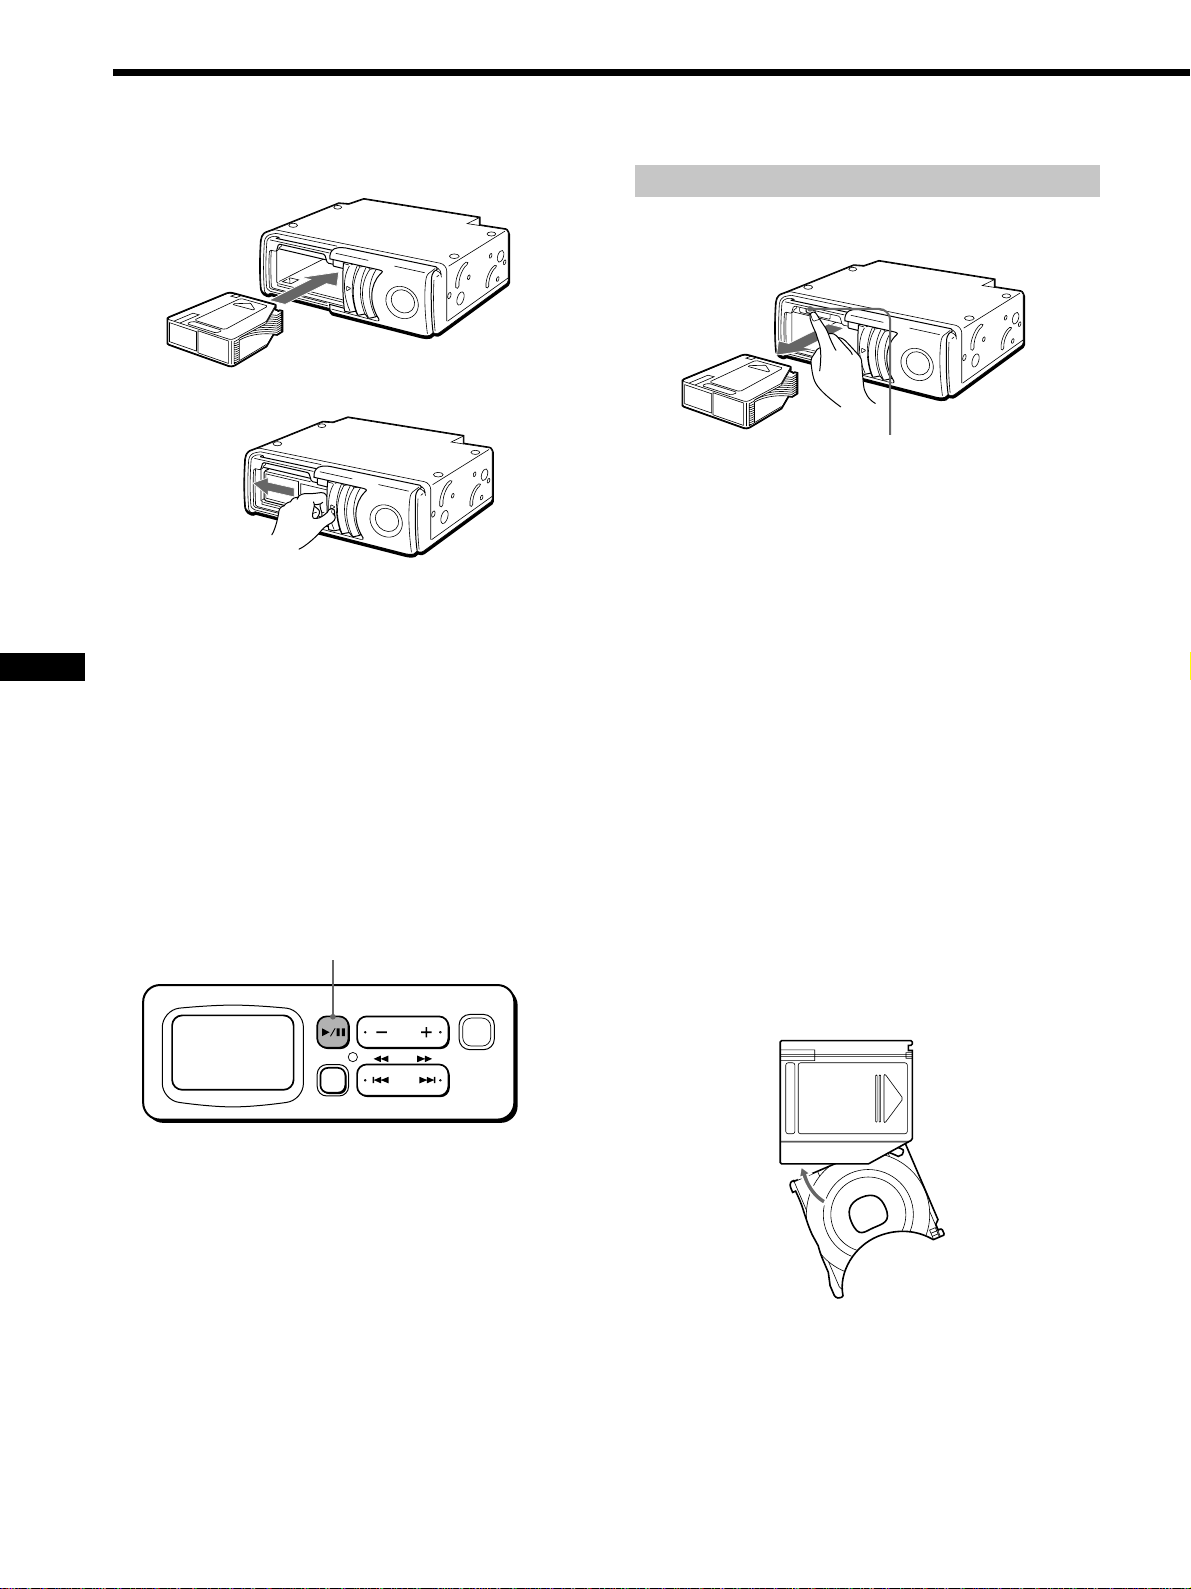
1 Press B/X*
start-up.
*1 You can also press PLAY on the wireless remote
commander for start-up.
After you press B/X on the wired remote
commander (or PLAY on the wireless remote
commander), the start-up screen will appear on the
monitor.
1
on the wired remote commander for
B/X
DISC
OFF
16
The unit automatically starts to play the first disc in
the magazine. If you want to enjoy another disc*
the magazine, follow the step 2.
*2 If you want to select a disc from the disc list, see “Using a
disc list” (page 26).
2
in
2 Press a DISC button (+/–) to select the desired disc.
Press +: to proceed to the next disc.
Press –: to return to the previous disc.
“Changing disc---,” then “Reading disc---” are
displayed on the monitor. The selected disc starts to
play.
Note
The wired remote commander is limited to certain functions only.
See “Wired remote commander” (page 10). For more advanced
operations, use the wireless remote commander.
Page 17
ENTER
LIST
DISC
DISC
CAUTION
If signal interference occurs during playback, change the
modulated RF signal of your car stereo. See “Changing the
transmitting frequency” (page 13) and follow the steps.
SCAN
PREV NEXT
PLAY
SCANm/M
PLAYN
NEXT>
SET UP PA USE
STOP
PAUSEX
STOPx
PREV.
During Playback
To Operation
Stop Press x*
Pause Press X*
Resume playback after pause Press X or N
Go to the next chapter, Press >
track, or scene in
continuous play mode
Go back to the preceding Press .
chapter, track, or scene
continuous play mode
Fast forward Press M*
Fast rewind Press m*
Stop playback and remove the Press Z
disc
*1 If the resume playback function is activated, you can resume
playback later by pressing N. For details, see “Resuming
playback.”
*2 DVD/Video CD
Both the picture and sound stop during pause.
Audio CD
The sound stops and the elapsed time flashes on the screen.
*3 DVD/Video CD
— Each time you press M or m, the playback speed
switches in steps of 2-, 4-, 8-, 16-, and 32 times. The steps
of speed are rough estimates.
— To decrease the playback speed:
press m during fast forward playback.
press M during fast rewind playback.
— To resume normal playback:
press N.
— During fast forwarding (M) and fast rewinding (m),
the sound stops.
Audio CD
— To resume normal playback:
press N.
— During fast forwarding (M) and fast rewinding (m),
the sound stops.
1
2
3
3
Resuming Playback
1 During playback, press x to stop.
The unit memorizes the point where you stopped
playback.
• DVD/Video CD
“x” flashes and “Resume---” is displayed on the
screen.
• Audio CD
The elapsed time of the Audio CD is displayed.*
* See “Display Screen (Audio CD)” (page 18).
Notes
• If you press x twice, the resume playback is deactivated.
• If you eject the magazine and insert it again, the resume
playback is deactivated.
2 Press N to resume playback.
When the resume playback is activated, playback is
resumed from the point you stopped playback. When
the resume playback is deactivated, playback starts
from the beginning.
Turning off this unit
Press OFF*1 on the wired remote commander.
DISC
OFF
OFF
*1 You cannot turn off the power with the wireless remote
commander.
Note
If you press OFF, and then press B/X*2 on the wired remote
commander, playback starts from the point you pressed OFF
(Resuming Playback is activated). When the resume playback is
deactivated, playback starts from the beginning.
*2 You can also press PLAY on the wireless remote commander
for start-up.
17
Page 18
Playing a disc
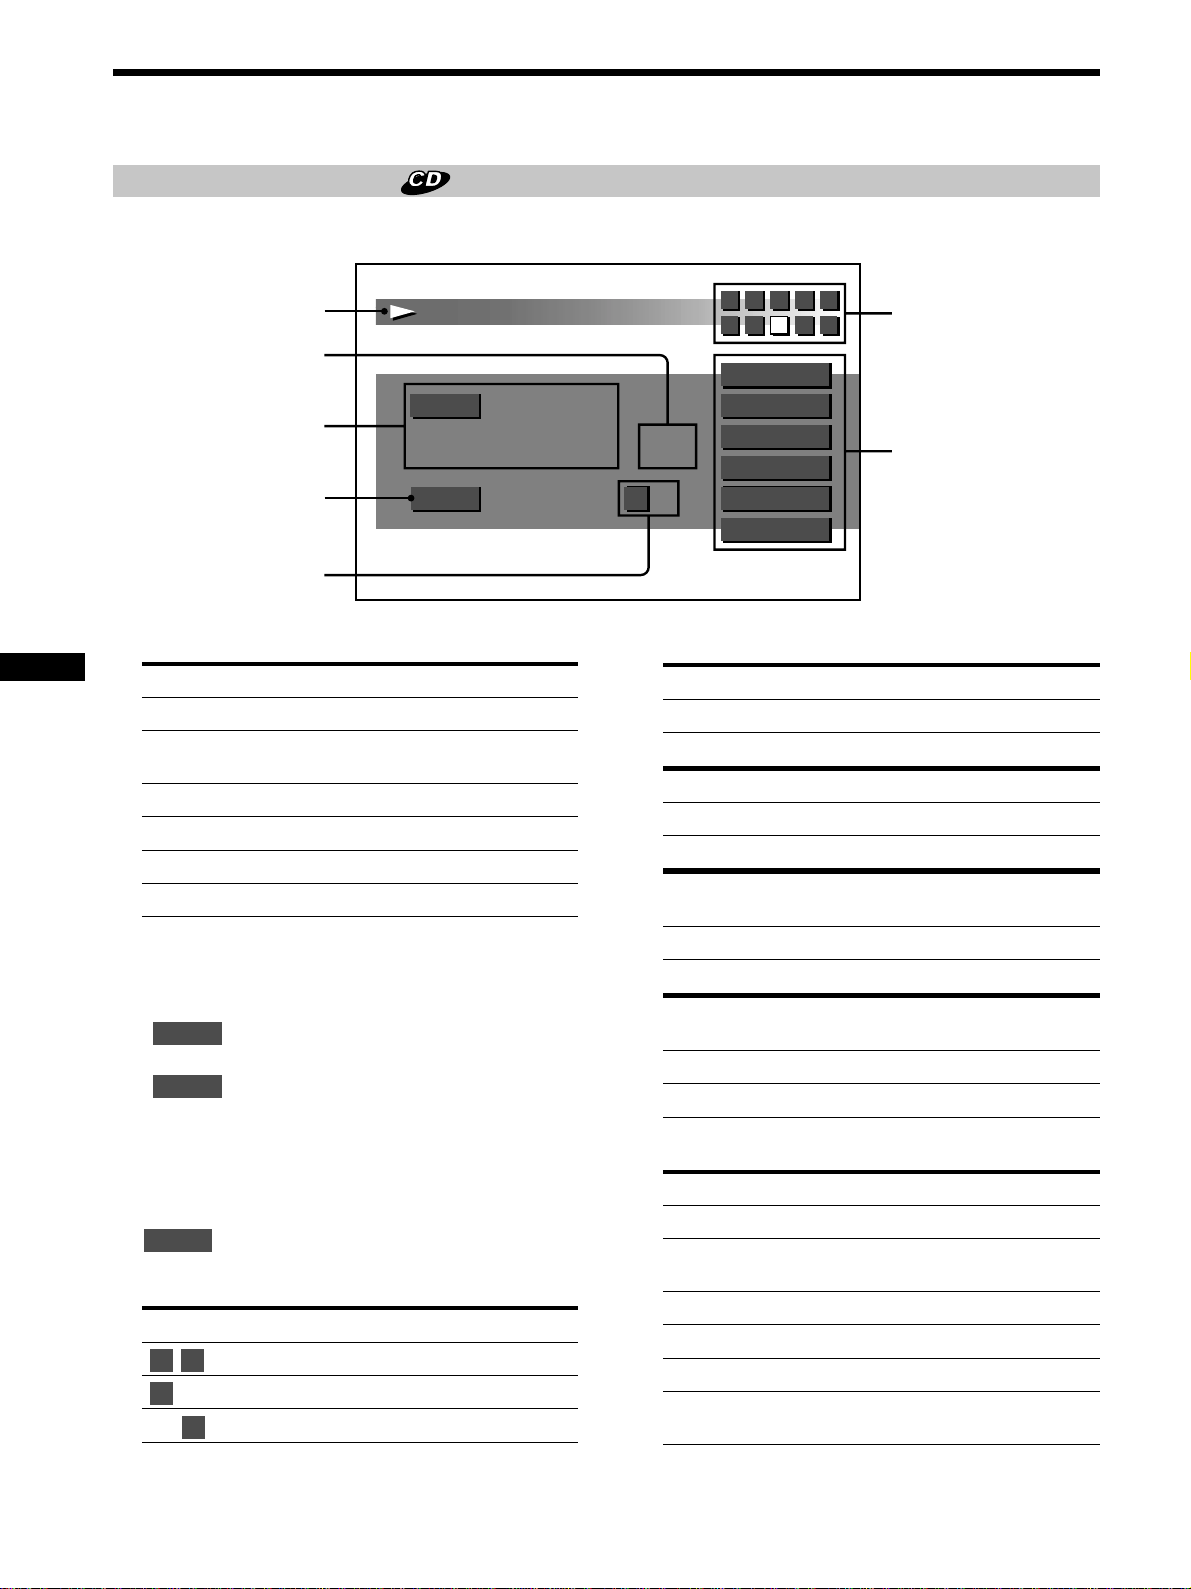
Display Screen (Audio CD)
1
During playback of an Audio CD, this screen appears.
4
6 7 8
5
10
6
2
DISC
TRACK
3
-
00:00:18 02
4
REPEAT L
5
1 During an Audio CD playback
Icon display: Operation:
“H” Play
“s” Stop/Suspend resume
“J” Fast forward
“j” Fast reverse
“L/l” Skip
“S” Pause
2 Track number currently playing
3 Running time of track (see page 27)
•
time* is displayed.
•
track time* is displayed.
* The remaining disc or track time appears with “–”
(minus).
: while elapsed disc time or remaining disc
DISC
TRACK
: while elapsed track time or remaining
4 Illumination for repeat mode (see page
19)
REPEAT
: Repeat playback or A-B-repeat playback.
5 Audio output-type display (see page 32)
Icon display: Operation:
“
“
“
” Stereo
L R
” Monaural (left)
L R
” Monaural (right)
L R
playback
DISC
TRACK
A-B
SCAN
R
SHUFFLE
PROGRAM
7
6 List of discs contained in the magazine
The disc tray you currently selected:
tray number black
background yellow
The Audio disc trays currently not selected:
tray number green
background blue
The disc trays currently containingother-type discs (eg.
DVDs or Video CDs):
tray number white
background blue
The disc trays currently containing no discs or discs notplayable by this unit:
tray number not displayed
background blue
7 Illumination for various playback
Icon display: lights up in yellow Operation: (see page –)
“DISC” Disc-repeat playback (19)
“TRACK” Track-repeat playback
“A-B” A-B-repeat playback (20)
“SCAN” Scan playback (22)
“SHUFFLE” Shuffle playback (22)
“PROGRAM” Programme playback (22,
(19)
23)
18
Page 19
Using repeat functions
Repeat Playback
To return to normal playback
Select “Off” in step 2.
DVD
You can repeat a playing title (Title repeat) or chapter
(Chapter repeat).*
*1 Depending on the disc, you may not be able to use the repeat
function.
1
Video CD/Audio CD
You can repeat all the tracks of a disc (Disc repeat) or a
single track (Track repeat).
MENU TITLE
ANGLEAUDIOSUB TITLE TIME
SEARCHREPEAT
A B
1 2 3
4 5 6
7 8 9
0
ENTER
PLAY MODE
REPEAT
RETURNCLEAR
CLEAR
LIST
DISC
Audio CD
1 During playback, press REPEAT.
2 Press REPEAT to select the repeat mode (Disc, or
4
Track)*
*4 See “Display Screen (Audio CD)” (page 18).
The repeat type (DISC or TRACK) lights up in
yellow, and
running time of track. Each time you press
REPEAT, the repeat mode switches as follows:
.
REPEAT
B DISC B TRACK
lights up in blue under the
Normal playback b
</,
DVD/Video CD
1 During playback, press REPEAT.
The repeat mode is displayed at the top of the screen
for about 5 seconds.*
*2 The selected mode is highlighted in yellow.
• DVD repeat-mode display
Repeat Off Title Chapter
• Video CD repeat-mode display
Repeat Off Disc Track
2 Press REPEAT*
Chapter, Disc, or Track).
*3 You can also press the cursor buttons (B/b) to select the
repeat mode in step 2.
Each time you press REPEAT, the highlight (yellow)
moves.
Notes
• To hide the repeat-mode display immediately after step2, press
CLEAR.
• Depending on the disc or scene, if “You can’t operate this
command now” appears in the display, you cannot use the
repeat function.
2
3
to select the repeat mode (Title,
19
Page 20
Using repeat functions
A-B-Repeat playback
You can repeat a specified segment of a title or track.
DVD/Video CD
You can repeat a specific scene, for example. Depending
on the disc, you may not be able to use the repeat
function.
Audio CD
You can repeat a part of a song, for example.
MENU TITLE
ANGLEAUDIOSUB TITLE TIME
SEARCHREPEAT PLAY MODE
A B
A B
1 2 3
4 5 6
7 8 9
To stop A-B repeat
Press AyB again.
• DVD/Video CD
“ A-B OFF” is displayed at the top of the screen for
about 1 second.
• Audio CD
The indicator “A-B” retrurns in white, and
disappears. The normal playback starts.*
*3 See “Display Screen (Audio CD)” (page 18).
REPEAT
3
1 When you reach the desired starting point (point
A) of the segment you want to repeat, press AyB.
• DVD/Video CD
“A-” is displayed at the top of the screen.
• Audio CD
The “A-” indicator lights up in yellow.*
*1 See “Display Screen (Audio CD)” (page 18).
1
2 When you reach the desired ending point (point B)
of the segment you want to repeat, press AyB
again.
• DVD/Video CD
The display changes to “A-B.”
• Audio CD
The indicator “A-B” lights up in yellow, and
REPEAT
*2 See “Display Screen (Audio CD)” (page 18).
Notes
• The starting and ending points must occur within the same title
(for DVD) or track (for Video CD/Audio CD). They cannot
span two or more titles or tracks.
• The “A-B” display for DVD/Video CD will disappear after
about one second, then the scene or song returns to the starting
point.
• If you set “A-B-Repeat playback,” previous settings such as
“Intro Scan Playback,” and “Disc/Track-Repeat playback” are
set to off.
lights up in blue under the running time.*
2
20
Page 21
Playing discs at various slow speeds
You can play the pictures of DVDs and Video CDs at
various slow speeds. You can enjoy the scene as a picture.
Frame by frame
4 5 6
7 8 9
RETURNCLEAR
0
LIST
ENTER
SCAN
PREV NEXT
SET UP PA USE
PLAY
STOP
DISC
Slow playback
You can play a disc at various slow speeds.
1 Press X to pause the picture.
2 Press M to play slowly forward.
Slow playback starts at 1/16 first.
SCAN
m/M
PLAYN
NEXT>
PAUSEX
You can play freeze frame pictures frame by frame.
1 Press X to pause the picture.
2 Press > to show a frame.
Each time you press >, the images advances by
frame by frame.
Notes
• You cannot hear audio, while using the frame-by-frame
function.
• Depending on the disc or scene, if “You can’t operate this
command now” appears in the display, you cannot use the
frame by frame function.
• Pictures in some discs may be distorted during frame-by-frame
playback.
• . is inactive. You cannot use reverse playback, while
using the frame-by-frame function.
To return to normal playback
Press X or N.
Caution for DVD/Video CD playback
If you want to play a disc at various slow speeds, or frame-byframe, use the controls of the wireless remote commander. You
cannot perform these functions by using the wired remote
commander.
3 Press M or m again to select playback speed.
Each time you press a button, the playback speed
changes as follows:
1/16* y 1/8 y 1/4 y 1/2
* If you press m at 1/16 speed, the picture freezes.
Notes
• You cannot hear audio, while using the slow-playback function.
• Depending on the disc or scene, if “You can’t operate this
command now” appears in the display, you cannot use the
slow-playback function.
• Pictures in some discs may be distorted during slow playback.
To return to normal playback
Press N.
Caution for DVD/Video CD playback
If you want to play a disc at various slow speeds, or frame-byframe, use the controls of the wireless remote commander. You
cannot perform these functions by using the wired remote
commander.
21
Page 22
Playing tracks in various functions
This unit offers various play mode options using the
PLAY MODE button.
MENU TITLE
ANGLEAUDIOSUB TITLE TIME
A B
SEARCHREPEAT PLAY MODE
PLAY MODE
1 2 3
4 5 6
7 8 9
Playing tracks in random order
—Shuffle Playback
This mode plays back the tracks of a disc in random order.
Once all the tracks on the disc have been played, the next
disc is selected.
During an Audio CD playback, press PLAY MODE
one or more times to select SHUFFLE.
Each time you press PLAY MODE, the playback mode
changes as follows:
B SCAN B SHUFFLE
Normal playback b PROGRAM* b
Playing start of tracks in sequence
—Intro Scan Playback
This mode plays the first 10 seconds of each track in
sequence. This is useful for locating a track.
During an Audio CD playback, press PLAY MODE
one or more times to select SCAN.
Each time you press PLAY MODE, the playback mode
changes as follows:
B SCAN B SHUFFLE
Normal playback b PROGRAM* b
* You can switch to PROGRAM only when you complete
making your programme list.
“SCAN” lights up in yellow.
* You can switch to PROGRAM only when you complete
making your programme list.
“SHUFFLE” lights up in yellow.
22
Page 23
Playing your own programme
—Programme Playback
To make your own programme
1 Press x to stop playback.
You can listen to tracks in the order you previously
programmed. First of all, you have to create your own
programme list and register it. Complete the following
steps to create your programme and enjoy playing tracks
on a disc in your favourite order.
MENU TITLE
ANGLEAUDIOSUB TITLE TIME
A B
SEARCHREPEAT
PLAY MODE
PLAY MODE
1 2 3
4 5 6
7 8 9
RETURNCLEAR
Number buttons
0
CLEAR
LIST
ENTER
ENTER
DISC
2 Press PLAY MODE.
The display for making a programme list appears.
Track Program
– –
B:Play(Program Play) Direction:Move Cursor
CLEAR:Track No.Clear 0~9:Track No.Input
ENTER:CFMD
Last Clear
All Clear
3 Press the number buttons or the cursor buttons
(M /m) to input track numbers.
Example 1: To enter “12”
Press 1, then press 2.
“12” appears in the track-number-input display.
Track Program
1 2
B:Play(Program Play) Direction:Move Cursor
CLEAR:Track No.Clear 0~9:Track No.Input
ENTER:CFMD
Last Clear
All Clear
SCAN
PREV NEXT
SET UP P A USE
PLAY
STOP
M/,/m/<
PLAYN
STOPx
Example 2: To enter “8”
Press 8 (or press 0, then press 8).
“-8” appears in the track-number-input display.
Note
If you enter a wrong number, enter the correct number again.
continue to next page t
23
Page 24

Playing tracks in various functions
4 Press ENTER to input the number.
“12” is displayed in the programme list.
1
Track Program
– –
Last Clear
All Clear
12
B:Play(Program Play) Direction:Move Cursor
CLEAR:Track No.Clear 0~9:Track No.Input
ENTER:CFMD
If you input a wrong track and want to clear it, follow the
steps 1 to 2 below .
1 Move the highlight (yellow) to clear the last track
number or all track numbers you already input.
To move “yellow” from: to press
Input-number display Last Clear*
Last Clear*
Last Clear*
All Clear*
Input-number display All Clear*
1
1
2
Input-number display <
All Clear*
Input-number display <
1
2
2
*
2
*
,
M or m
, then
M or m
To play your own programme
1 During playback, press PLAY MODE one or more
times until “PROGRAM” lights up in the display.
Each time you press PLAY MODE, the playback mode
changes as follows:
B SCAN B SHUFFLE
4
Normal playback b PROGRAM*
2 Select PROGRAM*
*4 You can switch to PROGRAM only when you complete
making your programme list .
4
.
b
*1 Select here to clear the last track number in a programme
list.
*2 Select here to clear all track numbers in a programme list.
2 Press ENTER (CLEAR*3).
*3 If you press CLEAR at this point, you can clear only the
last track, even if you select “All Clear.”
To continue to store track numbers, move the highlight
(yellow) to “input-number display.”
5 Repeat steps 3 and 4 to store track numbers in the
desired order.
You can store up to 20 track numbers.
6 Press N to play your programme.
After the last track of your programme is played, the
unit stops automatically.
24
Page 25

25
Page 26
Other
Using a disc list
Functions
This chapter describes how to play a
DVD/Video CD/Audio CD by using
advanced functions.
Displaying a disc list
You can display a list of discs contained in the magazine
to check disc types (DVD/Video CD/Audio CD), to select
a disc, or to set the disc type for current playback.
4 5 6
7 8 9
PREV NEXT
SET UP PA USE
Press LIST.
The disc list appears on the screen.*
*1 If the disc list looks incomplete, you might have pressed
B/X*2 on the wired remote commander for start-up before
the unit ends to check the discs in the magazine. See
“Preparing the DVD changer” (page 13-14).
*2 You can also press PLAY on the wireless remote
commander for start-up.
0
ENTER
SCAN
PLAY
STOP
RETURNCLEAR
LIST
RETURN
LIST
O
ENTER
DISC
M/,/m/<
1
26
Disc List
1. DVD
2. DVD
3. Audio CD
4. Audio CD
5.
Disc type select
DVD Audio CDVideo CD
6. DVD
7. Video CD
8. Video CD
9.
10.
1 Tray numbers and disc types
Trays without a disc type and with “–” mean “no
discs” or “unreadable discs with scratches, sticky
residue, etc.”
2 Disc types you can select
You can only play disc types that are currently
displaying the indicator (Y).
1
2
Page 27
Displaying a Running Time
Title Play 0: 24 :50
Title Remain 1:2 5: 41
Chapter Play 0:01 :48
Chapter Remain 0:03 :26
0:00:12
0:04:45
0:06:32
0:41:15
Track Play
Track Remain
Disc play
Disc Remain
To exit the Disc List
Press LIST or RETURNO.
To select a disc
1 Press the cursor buttons (M/,/m/<) to select the
desired disc tray in the Disc List.
The selected tray is highlighted in yellow.
Yellow
Disc List
1. DVD
2. DVD
3. Audio CD
4. Audio CD
5.
Disc type select
DVD Audio CDVideo CD
6. DVD
7. Video CD
8. Video CD
9.
10.
2 Press ENTER.
The disc you selected starts to play.
To set the disc type for current playback
1 Press the cursor buttons (M/,/m/<) to select the
disc type (DVD/Video CD/Audio CD).
The selected disc type is highlighted in yellow.
Displaying a running time
You can display the running time of DVDs, Video CDs
and Audio CDs.
MENU TITLE
ANGLEAUDIOSUB TITLE TIME
A B
SEARCHREPEAT
PLAY MODE
TIME
1 2 3
4 5 6
7 8 9
RETURNCLEAR
0
RETURN
O
DVD/Video CD
During playback, Press TIME.
The running time is displayed at the top of the screen
for about 5 seconds.
• DVD
1 Press TIME while the running time is displayed.
2 Each time you press TIME, the display switches
as follows:
DVD Audio CDVideo CD
Yellow
2 Press ENTER.
Each time you press ENTER, the indicator (Y)
lights on and off. Make sure to display the indicator
(Y) only for the disc types you want to play back.
3 Press LIST or RETURNO.
Only the selected disc types (marked Y) are
played, all others are skipped.
Notes
• These settings are automatically cancelled once you eject the
magazine.
• When you insert the magazine again, all of three disc types
(DVD/Video CD/Audio CD) are displayed with the indicator
(Y).
• Video CD
1 Press TIME while the running time is displayed.
2 Each time you press TIME, the display switches
as follows:
To exit the display for running time
Press RETURNO.
continue to next page t
27
Page 28
<
Displaying a Running Time
Searching from items
Audio CD
Press TIME.
The running time is displayed in the Display Screen
(Audio CD)*.
Example:
4
6 7 8
DISC
TRACK
DISC
00:00:18 02
00:00:18 02
REPEAT L
Running time
* For details, refer to “Display Screen (Audio CD)” (page 18).
R
TRACK
A-B
SCAN
SHUFFLE
PROGRAM
Each time you press TIME, the display switches as
follows:
Track Play 00:00:12
Track Remain 00:04:45
Disc play 00:06:32
Disc Remain 00:41:15
5
10
Searching Methods (Title/Chapter/Track/
elapsed time of playback)
You can quickly locate a desired point by specifying the
title, chapter, or track, or by entering the elapsed time of
playback.
MENU TITLE
ANGLEAUDIOSUB TITLE TIME
SEARCHREPEAT
A B
PLAY MODE
SEARCH
1 2 3
4 5 6
7 8 9
RETURNCLEAR
Number buttons
0
CLEAR
LIST
ENTER
ENTER
DISC
M/,/m/
1 Press SEARCH, during playback.
The current playback information appears at the top of
the screen for about 5 seconds.
• DVD playback information
Search T:01 C:005
Time
:0:23:41
Title Number
Chapter Number
Elapsed Time of Playback
• Video CD playback information
Search T:03
Track Number
Time
:0:01:55
Elapsed Time of Track
2 Press SEARCH* to select the key item (title number,
chapter number, track number, or the elapsed time
of title or track).
* You can also use the cursor buttons (B/b) to select a key item.
Each time you press SEARCH, the item changes as follows:
• Key items with DVD
B Title number BChapter number B Elapsed time “hour”
Elapsed time “second” b Elapsed time “minute” b
• Key items with Video CD
B Track number B Elapsed time “hour”
Elapsed time “second” b Elapsed time “minute” b
28
Page 29
3 Press the number buttons* to enter title number,
chapter number, track number, or the elapsed time
of the title, or track.
* You can also use the cursor buttons (V/v) to enter numbers.
Press V: to increase the number.
Press v: to decrease the number.
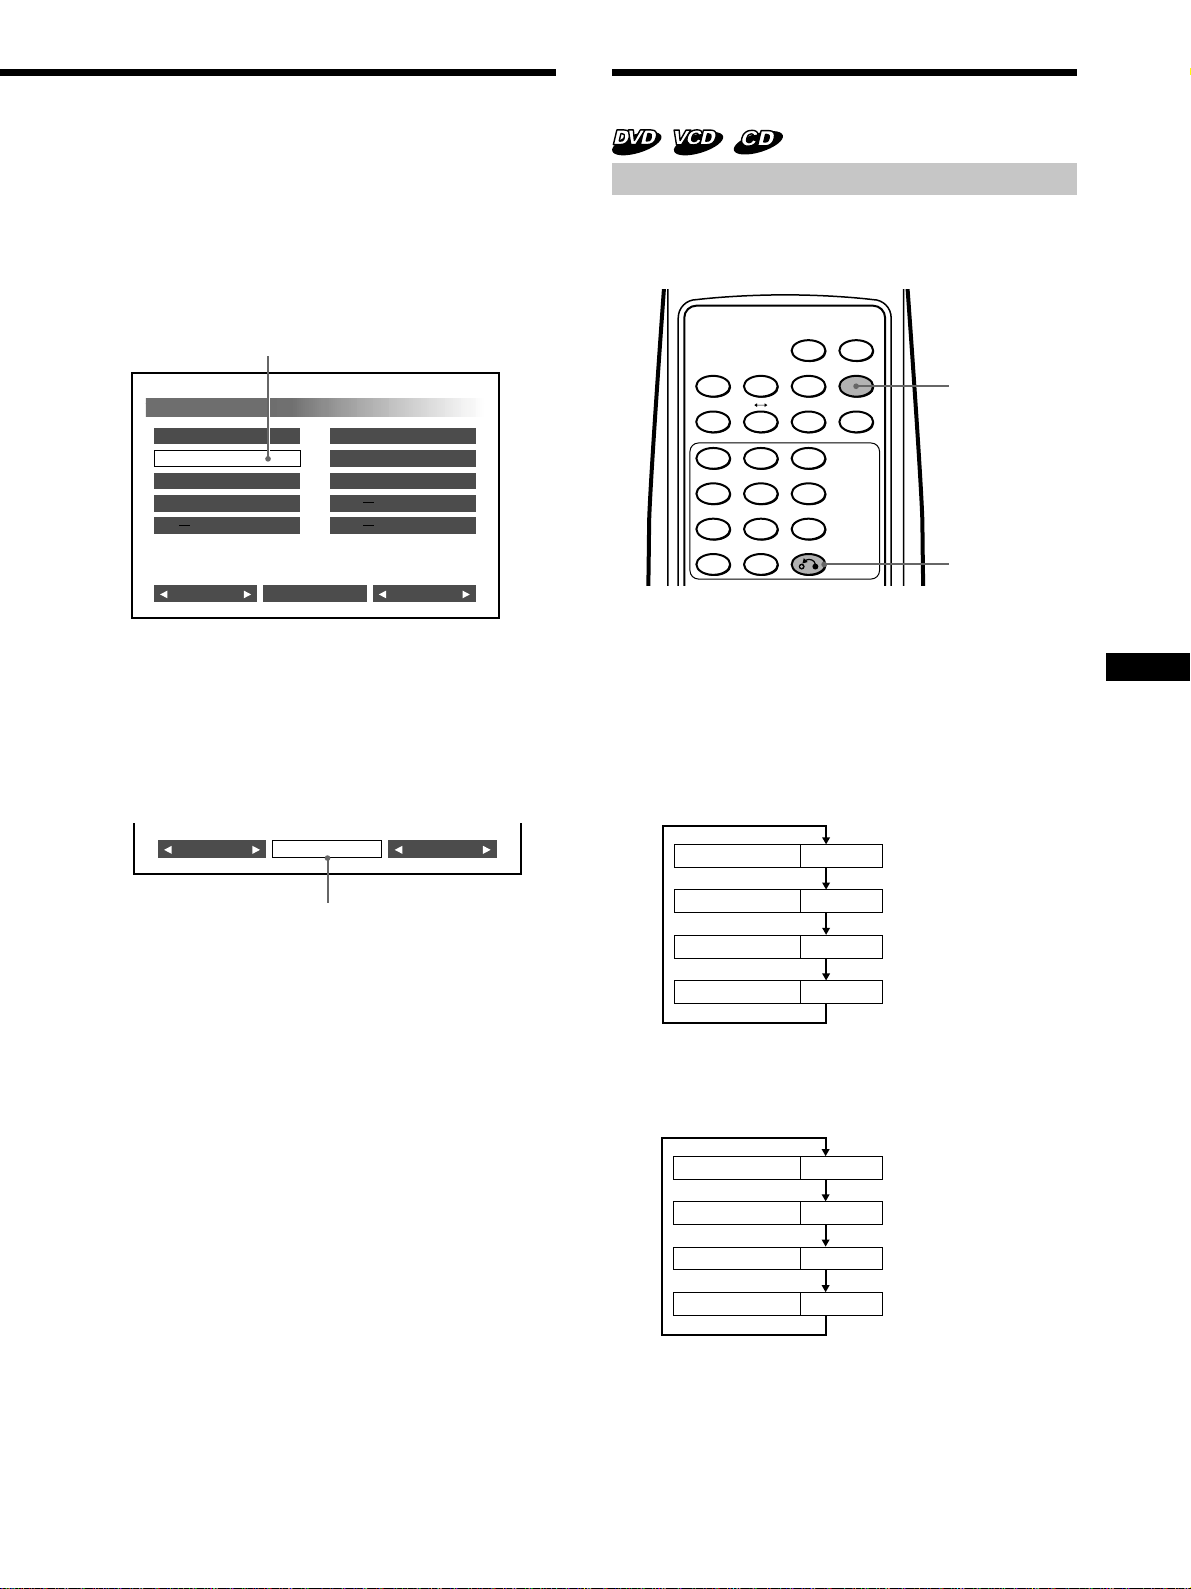
Changing the Subtitle
Language
Some DVDs have recorded subtitles in one or
more languages. You can turn the subtitles on
or off, or change the subtitle language on such
DVDs.
Example: To perform an elapsed time of title search
To start playback from the elapsed time of 1 hour, 21
minutes, and 5 seconds.
1 Press 1.
“1” appears in the “hour” position of display.
Time
:1:--:--
red
2 Press SEARCH or the cursor button (,) to move
the cursor to the “minute” position.
Time
:1:00:--
red
3 Press 2, then press 1.
“21” appears in the “minute” position.
Time
:1:21:--
red
4 Press SEARCH or the cursor button (,) to move
the cursor to the “second” position.
Time
:1:21:00
red
5 Press 5.
“05” appears in the “second” position.
Time
:1:21:05
red
Note
To clear the numbers already input, press CLEAR.
MENU TITLE
ANGLEAUDIOSUB TITLE TIME
SEARCHREPEAT
A B
PLAY MODE
1 2 3
4 5 6
7 8 9
RETURNCLEAR
0
LIST
ENTER
DISC
1 Press SUBTITLE, during playback.
The subtitle language is displayed at the
top of the screen for about 5 seconds.
Example: a subtitle language display
Subtitle
2 Press SUBTITLE*
language, while the subtitle language is
displayed.
*1 You can also press the cursor buttons (V/v) to
select the subtitle language.
Each time you press SUBTITLE, the
language switches within the list of
subtitle languages recorded on the disc.
02.English
1
to select the desired
SUBTITLE
ENTER
M/m
4 Press ENTER.
Playback starts from the designated point.
Notes
• The playback information disappears after about 5 seconds
after each input. Therefore, be sure to complete the operation
for next step while the information is displayed.
• During a DVD playback, even if you press > on the wired
remote commander, you cannot activate the chapter search
function with some discs. Even if “You can’t operate this
command now” message appears on the monitor, you may be
able to use the chapter search function (with such discs) by
using the wireless remote commander.
• Depending on the disc, if “You can’t operate this command
now” appears in the display, you cannot use the search
function (Title/Chapter/Track/elapsed time of playback).
Note
If you want to hide the subtitles, press
SUBTITLE to select “Off.”
3 Press ENTER*
*2 Even if you don’t press ENTER, the subtitle language is
automatically activated about 5 seconds after selecting in
step 2.
2
.
Note
You can also change the subtitle languages by using the DVD
menu (see page 30) or the setup screen*3 (see page 39).
*3 You can change to a specific subtitle language using a setup
screen, only if the language is included in both the disc and
the setup screen.
29
Page 30
Using the menus for DVD
<
With some DVDs you can use the original menu such as
Title menu and DVD menu. You can play your favorite
scene or song by selecting titles of songs and scenes
during a DVD playback. You can select an item, subtitle
language, audio language etc. by selecting a DVD menu.
The contents of title menus and DVD menus differ,
depending on the DVD. There may be some DVDs which
have no recorded menus.
MENU TITLE
TITLE
MENU
A B
ANGLEAUDIOSUB TITLE TIME
SEARCHREPEAT
PLAY MODE
1 2 3
4 5 6
7 8 9
RETURNCLEAR
0
LIST
ENTER
DISC
ENTER
Using a DVD Menu
Some DVDs have more comprehensive Menu that
includes such things as the audio languages, subtitle
languages, titles, and chapters, etc.
1 During a DVD playback, press MENU.
The DVD menu is displayed.
2 Press the cursor buttons (V/b/v/B) to select the
desired item.
3 Press ENTER*
*1 If additional selection screens appear, repeat step 2 and 3.
Notes
• Some DVDs do not have a DVD menu and on some DVDs,
the contents of the DVD menu and title menu are the same.
• On some DVDs, “DVD Menu” may be expressed as
“MENU.”
• Some DVDs, “Press ENTER” may be expressed as “Press
SELECT” in step 3.
• The contents of the DVD menu differ, depending on the
DVD.
• Read the instruction manual supplied with a DVD.
1
.
M/,/m/
Using a Title Menu
Some DVDs have a title menu. You can select and play
back a title from the menu.*
*1 Titles are the longest sections of a picture or music feature on a
DVD, e.g., a movie, or an album for audio software, etc.
1
1 During a DVD playback, press TITLE.
The title menu*
*2 The contents of title menus differ, depending on the DVD.
2
is displayed.
2 Press the cursor buttons (V/b/v/B) to select the
desired title.
3 Press ENTER.
The title you selected starts to play.
Notes
• Some DVDs do not have a title menu and on some DVDs, the
contents of the title menu and the DVD menu are the same.
• On some DVDs, “DVD menu” may be expressed as “MENU.”
• On some DVDs, “Press ENTER” may be expressed as “Press
SELECT” in step 3.
• The contents of the DVD menu differ, depending on the DVD.
• Read the instruction manual supplied with the DVD.
To end or drop the DVD menu operation
Press MENU.
If the resume playback is activated*
from the point you displayed the DVD menu in step 1.
*2 Some DVDs may not resume playback when you press
MENU. In such a case, refer to the instruction manuals
supplied with the discs.
2
, the disc plays
30
Page 31

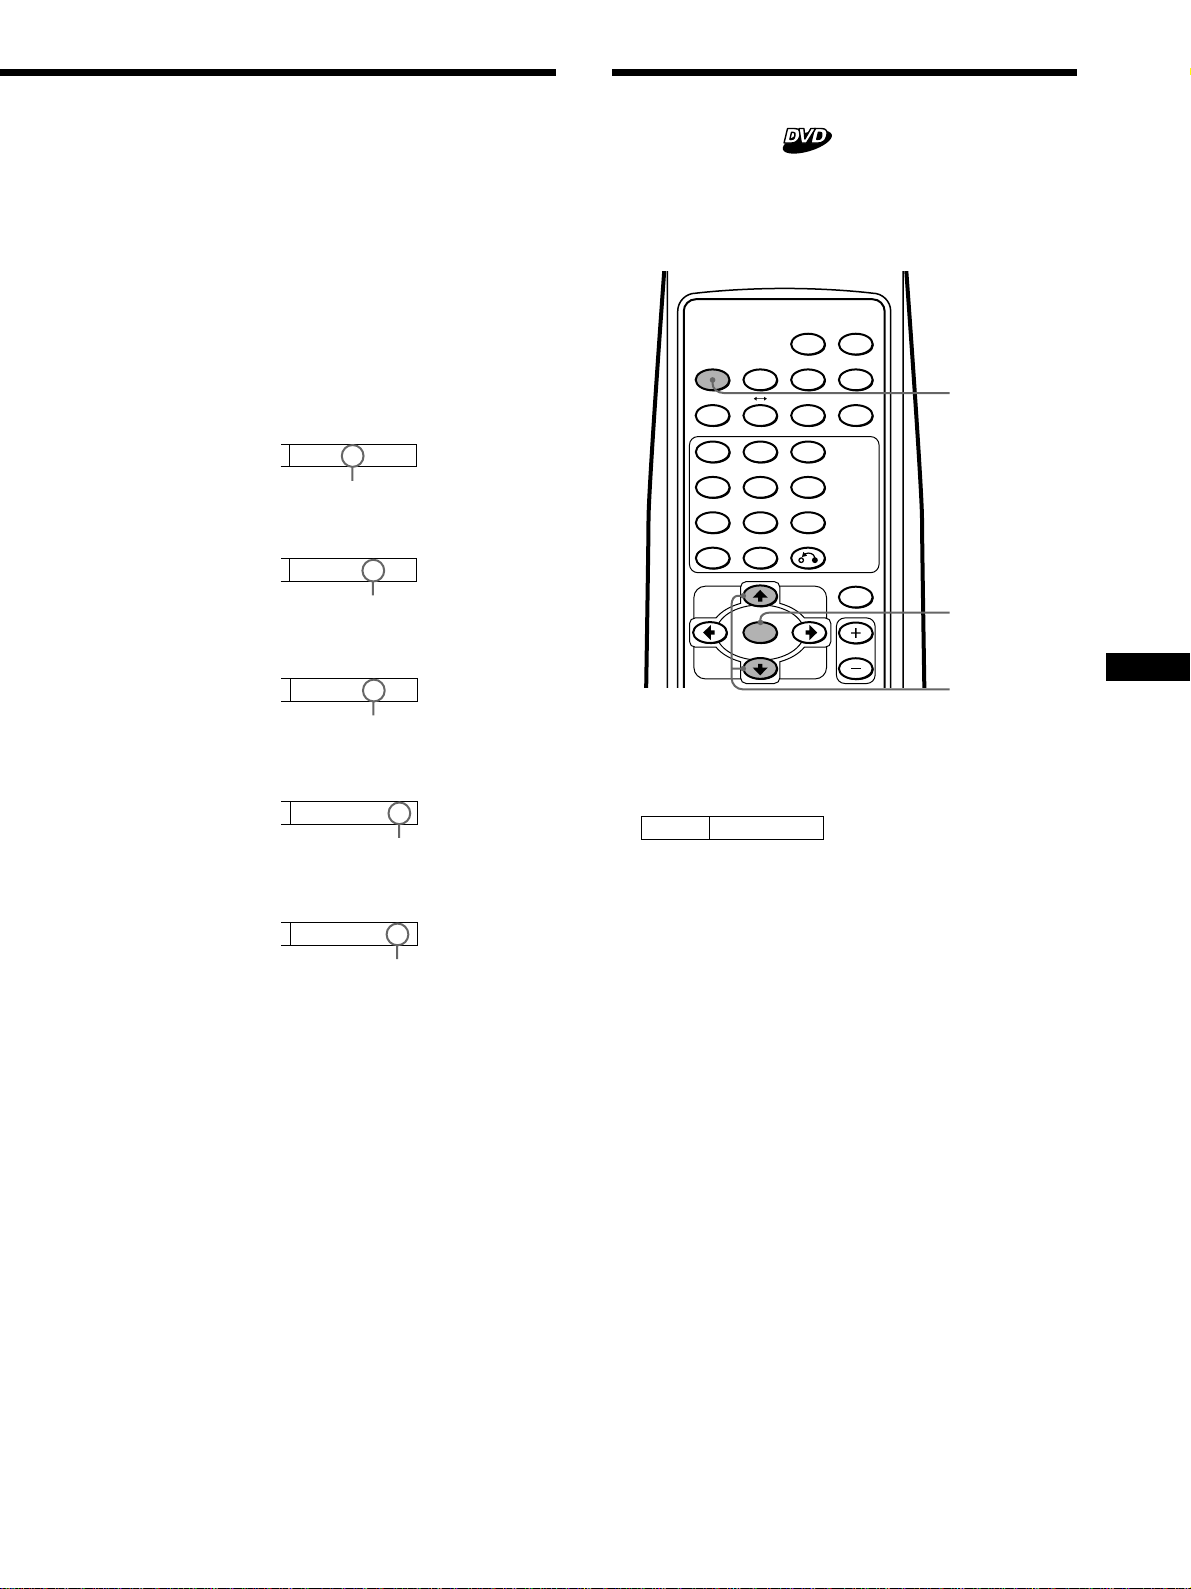
Changing Audio Language
Changing Angles
Some DVDs have multiple audio languages you can
choose from.
MENU TITLE
ANGLEAUDIOSUB TITLE TIME
A B
SEARCHREPEAT
PLAY MODE
AUDIO
1 2 3
4 5 6
7 8 9
RETURNCLEAR
0
LIST
ENTER
DISC
ENTER
M/m
1 During playback, press AUDIO.
The current audio language is displayed at the top of
the screen for about 5 seconds.
Example: an audio language display
Audio
01.English Dolby Digital
2 Press AUDIO*
language.
*1 Be sure to press the button while the audio language is
displayed at the top of the screen. You can also use the cursor
buttons (V/v) to select a language.
Each time you press AUDIO, the audio language
switches between the available languages recorded on
the disc.
3 Press ENTER*
*2 Even if you don’t press ENTER, the audio language is
automatically activated about 5 seconds after selecting in
step 2.
Notes
• You can switch the audio language only if multiple audio
languages are recorded on the DVD.
• You can also change the audio languages by using the DVD
menu (see page 30) or the setup screen*3 (see page 38).
*3 You can change to a specific audio language using a setup
screen, only if the language is included in both the disc and the
setup screen.
1
to select the desired audio
2
.
Some DVDs have multiple alternative angles recorded for
certain scenes.
MENU TITLE
ANGLEAUDIOSUB TITLE TIME
A B
SEARCHREPEAT
PLAY MODE
ANGLE
1 2 3
4 5 6
7 8 9
RETURNCLEAR
0
LIST
ENTER
ENTER
DISC
M/m
1 During playback of a scene recorded with multiple
angles, press ANGLE.
The number of the currently selected angle is
displayed at the top in the screen for about 5 seconds.
Example: an angle number display
Angle 1 /4
2 Press ANGLE*
number, while the angle number is displayed.
*1 You can also use the cursor buttons (V/v) to select an angle
number.
Each time you press ANGLE, the angle number
changes.
3 Press ENTER*
*2 Even if you do not press ENTER, the angle number is
automatically activated about 5 seconds after you selected
in step 2.
Notes
• You can switch the angle only if multiple angles are recorded
on the DVD.
• The total number of recorded angles differs depending on the
DVD and scene.
• You can only switch the angle during normal playback. You
cannot switch the angle while using slow playback or the
frame-by-frame function.
• When the selected scene with multi angles appears, the angle is
automatically switched to the angle number you selected in
step 2.
2
The angle number you have currently
selected/the total number of multiple
alternative angles
1
to select your favorite angle
.
31
Page 32

Changing the Audio Output Method
Stereo/Monaural left/Monaural right
You can change the audio output method (Stereo/
Monaural left/Monaural right) during Video CD or
Audio CD playback.
MENU TITLE
ANGLEAUDIOSUB TITLE TIME
SEARCHREPEAT
A B
1 2 3
4 5 6
7 8 9
RETURNCLEAR
0
ENTER
PLAY MODE
LIST
DISC
AUDIO
ENTER
Audio CD
1 During playback, press AUDIO.
2 Press AUDIO to select the desired output method
(Stereo/Monaural left/Monaural right), while the
output method is displayed.
Each time you press AUDIO, the output method
switches as follows:
• Audio CD*
B Stereo (“
2
*
The audio output method is activated when you select it in
step 2. You do not need to press ENTER.
2
”) BMonaural left (“
L R
Monaural right (“
L R
” ) b
L R
” )
Video CD
1 During playback, press AUDIO.
The current output method is displayed at the top of
the screen for about 5 seconds.
Example: an output method display
Audio L/R
2 Press AUDIO to select the desired output method
(Stereo/Monaural left/Monaural right), while the
output method is displayed.
Each time you press AUDIO, the output method
switches as follows:
• Video CD
B Stereo (“Audio L/R”) B Monaural right (“Audio R/R”)
Monaural left (“Audio L/L”) b
3 Press ENTER*
*1 Even if you do not press ENTER, the output method is
automatically be activatd about 5 seconds after selecting it
in step 2.
1
.
32
Page 33

Using the PBC (playback control) functions
Using the PBC functions
During playback of a PBC compatible Video CD, the PBC
funcions are automatically activated and you can display
the PBC menu. If you do not want to use the PBC
functions, see “Stopping the PBC functions.”
MENU TITLE
ANGLEAUDIOSUB TITLE TIME
SCAN
PLAY
PLAY MODE
SEARCHREPEAT
RETURNCLEAR
LIST
DISC
A B
1 2 3
4 5 6
7 8 9
0
ENTER
PREV NEXT
MENU
SEARCH
Number buttons
CLEAR
ENTER
M/,/m/<
PLAYN
Note
If you enter a wrong number, press CLEAR. All the input
numbers are cleared.
3 Press ENTER.
If additional selection screens appear, repeat steps 2
(1 and 2) to 3.
Note
The PBC menus differ, depending on the Video CD. Read the
instruction manual supplied with the Video CD.
Stopping the PBC functions
1 During Video CD playback, press STOP.
Playback stops.
“x” flashes for 1 second, and “Resume---” is
displayed. Resuming playback (page 17) is activated.
“x” flashes for 1
second in step 1 and 2 “PBC” disappears in step 3
Resume
...
PBC
STOP
SET UP PA USE
STOPx
1 During Video CD playback, press MENU.
The PBC menu is displayed.
2 While the PBC menu screen is displayed, press the
number buttons to enter the number of the desired
item.
The current PBC item is displayed at the top of the
screen for about 5 seconds.
Example: to enter the item number, “10”
1 Press 1.
“-1”* appears at the upper left of the screen.
* Complete the next operation before “-1” disappears.
2 Press STOP.
“Resume---” disappears, and “x” flashes for 1 second.
Resuming playback stops.
3 Press STOP again.
“PBC” at the upper right of the screen disappears.
4 Press PLAY.
Playback starts.
Note
Depending on the Video CD, some of the contents may not be
played if the PBC functions are not activated.
2 Press 0.
“10” appears at the upper left of the screen.
33
Page 34

Using the PBC (playback control) functions
Activating the PBC functions from normal
playback
1 During normal playback of a Video CD, press STOP.
Playback stops.
“x” flashes for 1 second, and “Resume---” is
displayed. Resuming playback (page 17) is activated.
2 Press STOP.
“x” flashes for 1 second and “Resume---” disappears.
Resuming playback stops.
3 Press STOP again.
“PBC” at the upper right of the screen appears.
4 Press PLAY.
PBC playback starts.
Note
If the PBC menu screen is not displayed, press MENU to
display it.
34
Page 35

35
Page 36

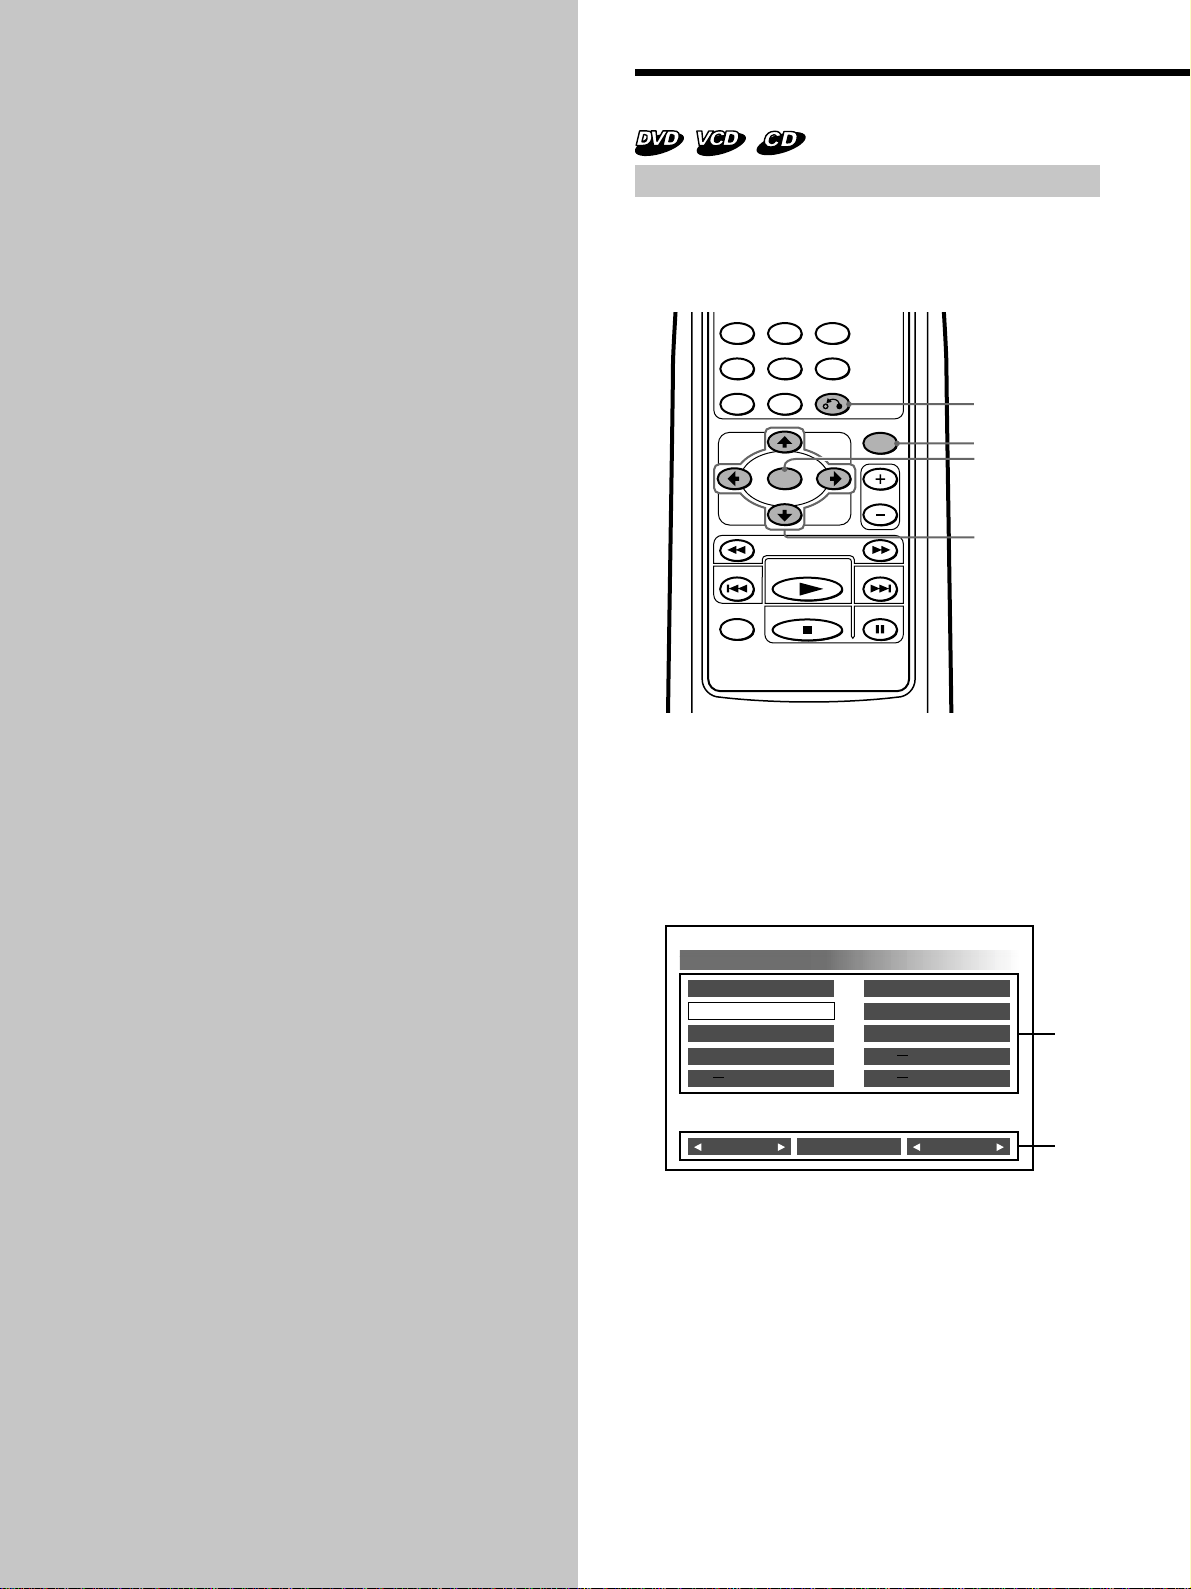
Changing
Using the Setup Display
Setup
This chapter describes how to set up
and adjust the player using the onscreen setup menu. Most settings and
adjustments need to be set when you
first use the changer.
Selecting items for setup
1 Press STOP to stop playback.
2 Press SET UP.
The setup screen is displayed: the currently selected
item is highlighted in yellow.
Set Up
DVD Menu Language
Audio Language Original
Subtitle Language
Digital Output
Display
Parental
OSD Message
Player Language
Original
Original
LPCM
4:3 Letter Box
8
On
English
3 Press the cursor buttons (V/v) to select the desired
item for setup change.
4 Refer to the following pages to complete your
setup.
If you selected “---” in step 3: see:
“DVD Menu Language” page 37
“Audio Language” page 38
“Subtitle Language” page 39
“Digital Output” page 40
“Display” (Aspect Ratio) page 41
“Parental” page 42
“OSD Message” page 46
“Player Language” page 47
Note
If you want to return to the setup screen (see step 2) while
completing your setup change, press RETURNO or B. You
can return here.
36
Page 37

Completing setup changes
DVD Menu Language
You can change the display language of the DVD menu.
1 See “Selecting items for setup” (page 36) first.
Follow the steps 1 to 4 on page 36, then proceed below
to complete your setup.
2 Select “DVD Menu Language,” then press ENTER.
The setup screen for the DVD menu language is
displayed:
The currently selected language is highlighted in yellow.
DVD Menu Language
Original
Japanese
English
Chinese
Italian
French
German
Korean
To end or drop the setup change and
resume playback
1 Press SET UP.
The playback screen with the indicator “x” on
appears. Resuming playback is still activated.
2 Press PLAY to start playback.
• DVD/Video CD
The disc plays from the beginning*.
* If the resume playback is still activated, the disc
plays from the point you stopped playback.
• Audio CD
The disc plays from the point you stopped
playback.
Notes
• If you want to return to the setup screen (page 36) while
completing the setup change, press RETURNO or B.
• When you set the cursor to “Original,” the DVD displays
the original language of the disc.
• The number of languages differs, depending on the DVD.
Some discs contain only 1 language.
• If you select a language that is not stored on a disc, the
default language is displayed.
• Read the instruction manual supplied with the DVD.
3 Press the cursor buttons (V/v) to select the desired
language.
4 Press ENTER.
The setup screen reappears automatically.
You can check the desired language under “DVD
Menu Language.”
Set Up
DVD Menu Language
Audio Language Original
Subtitle Language
Digital Output
Display
Parental
OSD Message
Player Language
English
Original
LPCM
4:3 Letter Box
8
On
English
37
Page 38

Completing setup changes
Audio Language
You can change the audio language of a DVD.
1 See “Selecting items for setup” (page 36) first.
Follow the steps 1 to 4 on page 36, then proceed below
to complete your setup.
2 Select “Audio Language,” then press ENTER.
The setup screen for the DVD audio language is
displayed:
The currently selected language is highlighted in yellow.
Audio Language
Original
Japanese
English
Chinese
Italian
French
German
Korean
3 Press the cursor buttons (V/v) to select the desired
language.
4 Press ENTER.
The setup screen reappears automatically.
You can check the desired language under “Audio
Language.”
To end or drop the setup change and resume
playback
1 Press SET UP.
The playback screen with the indicator “x” on
appears. Resuming playback is still activated.
2 Press PLAY to start playback.
• DVD/Video CD
The disc plays from the beginning*.
* If the resume playback is still activated, the disc plays
from the point you stopped playback.
• Audio CD
The disc plays from the point you stopped
playback.
Notes
• If you want to return to the setup screen (page 36) while
completing the setup change, press RETURNO or B.
• When you set the cursor to “Original,” the DVD plays in the
original audio language of the disc.
• Some discs may contain only 1 audio language. The number of
languages stored on each disc differs, depending on the DVD.
• If you select an audio language not stored on a disc, the default
audio language will be played.
• Read the instruction manual supplied with the DVD.
• You can also change the audio language by using the DVD
menu or the setup screen.
If you change the audio language by using the DVD menu or
by pressing AUDIO, the change is temporary and the setup
setting is not changed.
Set Up
DVD Menu Language
38
English
Audio Language Original
Subtitle Language
Digital Output
Display
Parental
OSD Message
Player Language
Original
Bitstream
4:3 Letter Box
On
English
8
Page 39

Subtitle Language
You can change the subtitle language of a DVD. If you do
not want to display the subtitles, you can also hide them.
1 See “Selecting items for setup” (page 36) first.
Follow the steps 1 to 4 on page 36, then proceed below
to complete your setup.
2 Select “Subtitle Language,” then press ENTER.
The setup screen for the subtitle language is displayed:
The currently selected language is highlighted in yellow.
To end or drop the setup change and resume
playback
1 Press SET UP.
The playback screen with the indicator “x” on
appears. Resuming playback is still activated.
2 Press PLAY to start playback.
• DVD/Video CD
The disc plays from the beginning*
*2 If the resume playback is still activated, the disc plays
from the point you stopped playback.
• Audio CD
The disc plays from the point you stopped
playback.
2
.
Subtitle Language
Original Off
Japanese
English
Chinese
Italian
French
German
Korean
3 Press the cursor buttons (V/v) to select the desired
language*
*1 If you do not want to display the subtitle language, select “Off.”
With some discs, you cannot hide the subtitle language.
1
.
4 Press ENTER.
The setup screen reappears automatically.
You can check the desired language under “Subtitle
Language.”
Set Up
DVD Menu Language
Audio Language Original
Subtitle Language
Digital Output
Display
Parental
OSD Message
Player Language
Original
Italian
LPCM
4:3 Letter Box
8
On
English
Notes
• If you want to return to the setup screen (page 36) while
completing the setup change, press RETURNO or B.
• Some discs may contain only 1 subtitle language. The number
of languages stored on each disc differs, depending on the
DVD.
• If you select a subtitle language not stored on a disc, the default
subtitle language will be played.
• Read the instruction manual supplied with the DVD.
• You can also change the subtitle language by using the DVD
menu or the setup screen.
If you change the subtitle language by using the DVD menu
or by pressing the SUBTITLE button, the change is temporary
and the setup setting is not changed.
39
Page 40

Completing setup changes
Digital Output
You can change the audio output system. Select the
correct setting for the connected digital audio devices.
LPCM
Select “LPCM, ” if your digital audio device is not
equipped with a Dolby digital decoder. When audio
signals in Dolby digital format are played, they are
converted to linear PCM format before being output.
Bitstream
Select “Bitstream,” if your digital audio device is
equipped with a Dolby digital decoder. Dolby digital
format audio signals are directly output without
modification.
For DTS-format audio signals
Connect a digital audio device equipped with a DTS
decoder, then select “Bitstream.”*
*1 Do not select “LPCM.” If you do so, audio will not be output.
1
1 See “Selecting items for setup” (page 36) first.
Follow the steps 1 to 4 on page 36, then proceed below
to complete the setting.
2 Select “Digital Output,” then press ENTER.
The setup screen for digital output is displayed:
The currently selected item is highlighted in yellow.
Digital Output
LPCM
Bitstream
3 Press the cursor buttons (V/v) to select the desired
audio output (LPCM/Bitstream).
4 Press ENTER.
The setup screen reappears automatically. You can
check the desired audio output under “Digital
Output.“
Set Up
DVD Menu Language
Audio Language Original
Subtitle Language
Digital Output
Display
Parental
OSD Message
Player Language
Caution
Improper settings may cause noise harmful to your ears and
damage your speakers. Read the instruction manual supplied
with the digital audio device you connected.
To end or drop the setup change and resume
playback
1 Press SET UP.
The playback screen with the indicator “x” on
appears. Resuming playback is still activated.
2 Press PLAY to start playback.
• DVD/Video CD
The disc plays from the beginning*
*2 If the resume playback is still activated, the disc plays
from the point you stopped playback.
• Audio CD
The disc plays from the point you stopped
playback.
Note
If you want to return to the setup screen (page 36) while
completing the setup change, press RETURNO or B.
English
Original
Bitstream
4:3 Letter Box
8
On
English
2
.
40
Page 41

Display (Aspect Ratio —horizontal/vertical
screen image ratio)
A monitor has two types of aspect ratio: the normal type
with a 4:3 horizontal-to-vertical screen ratio, and a wide
type with a 16:9 ratio. Some DVDs also have multiple
types of aspect ratio as follows:
4:3 Letter Box
When using a normal monitor,
select 4:3 Letter Box. If you play a
16:9-wide-image DVD on a normal
monitor, the images are compressed
vertically.
4:3 Pan & Scan
When using a normal monitor,
select 4:3 Pan & Scan. If you play a
16:9-wide-image DVD on a normal
monitor, the images are cropped at
the left and right.
3 Press the cursor buttons (V/v) to select the desired
aspect ratio (4:3 Letter Box/4:3 Pan & Scan/16:9
Widescreen)*
*2 The aspect ratio types differ, depending on your monitor and the
disc.
2
.
4 Press ENTER.
The setup screen reappears automatically.
You can check the desired aspect ratio type under
“Display.”
Set Up
DVD Menu Language
Audio Language Original
Subtitle Language
Digital Output
Display
Parental
OSD Message
Player Language
English
Original
Bitstream
4:3 Pan&Scan
8
On
English
16:9 Widescreen
When using a wide monitor, select
16:9 Widescreen. If you play a 16:9wide-image DVD, the images are
played at full size*1.
*1 To play images at full size, set your monitor to “Full” or to
the corresponding mode. For details, read the instruction
manual supplied with your monitor.
You can select the desired aspect ratio from those
compatible with your monitor.
1 See “Selecting items for setup” (page 36) first.
Follow steps 1 to 4 on page 36, then proceed below to
complete your setup.
2 Select “Display,” then press ENTER.
The setup screen for changing the aspect-ratio is
displayed:
The currently selected item is highlighted in yellow.
Display
Letter Box
4:3
4:3
Pan&Scan
16:9
Widescreen
To end or drop the setup change and resume
playback
1 Press SET UP.
The playback screen with the indicator “x” on
appears. Resuming playback is still activated.
2 Press PLAY to start playback.
• DVD/Video CD
The disc plays from the beginning*
*3 If the resume playback is still activated, the disc plays
from the point you stopped playback.
• Audio CD
The disc plays from the point you stopped
playback.
Notes
• If you want to return to the setup screen (page 36) while
completing the setup change, press RETURNO or B.
• If you select an aspect ratio not stored on the disc, another
aspect ratio stored on the disc will be selected during playback.
• If you use a normal monitor to play a 16:9-wide-image DVD,
the images will appear unnatural.
• When you use a wide monitor in “Full” or an equivalent mode
and set this unit to “4:3 Letter Box” or “4:3 Pan & Scan,” the
images will appear unnatural.
• Read the instruction manual supplied with the DVD.
3
.
41
Page 42

Completing setup changes
Parental (initial setup)
Playback of some DVDs can be limited according to a
predetermined level, such as the age of the users. The
Parental control function allows you to set a playback
limitation level. When you use the unit for the first time,
set a password and parental level as described below.
1 See “Selecting items for setup” (page 36) first.
Follow steps 1 to 4 on page 36, then proceed below to
complete your setup.
2 Select “Parental,” then press ENTER.
The setup screen for setting your password is
displayed.
Password
Please input Password
1234567890
4 Press the number buttons to enter your password
(the same 4-digit number in step 3)*
*3 If you enter a wrong number, press CLEAR. All the numbers are
cleared.
The message screen is displayed.
Password
Password has been changed
This password is necessary
when you change parental setting.
Please remember this password.
Please press "ENTER" key.
3
again.
5 Press ENTER.
The parental menu screen is displayed.
Parental
Level
Password change
In step 3, the “—” changes to “*” when you input numbers.
3 Press the number buttons*
password (4-digit number)*
*1 You can also press the cursor buttons (B/b), then press
ENTER to select the numbers at the bottom of the screen.
*2 If you enter a wrong number, press CLEAR. All the
numbers are cleared.
1
to enter your
2
.
The screen for password re-entry is displayed.
Password
Please input password again
for confirmation
1234567890
In step 4, the “—” changes to “*” when you input numbers.
6 Press the cursor buttons (V/v) to select “Level.”
7 Press ENTER.
The level setting screen is displayed.
The selected item is highlighted in yellow.
Level
8
7
6
5
4
3
2
1
42
Page 43

The lower the number, the stricter the limitation. Level
4
“8”*
being the least strict, and level “1” the most strict.
Therefore, if you select level “4,“ for example, DVDs with
levels “3,” “2,” and “1” cannot be played. Refer to the
following table. Parental levels of the table are on the
MPAA (Motion Picture Association of America) rating
system.
4
*
If you select level “8,” you can play all discs.
This Unit MPAA Rating System
“8”“—”:
“7”“NC-17”: No one 17 and under admitted
“6”“R”: Restricted
“5”“—”:
“4”“PG-13”: Parents strongly cautioned
“3”“PG”: Parental guidance suggested
“2”“—”:
“1”“G”: General audience
8 Press the cursor buttons (V/v) to select the desired
level.
9 Press ENTER.
The parental menu screen is displayed.
Parental
Level
Password change
To end or drop the setup change and resume
playback
1 Press SET UP.
The playback screen with the indicator “x” on
appears. Resuming playback is still activated.
2 Press PLAY to start playback.
• DVD/Video CD
The disc plays from the beginning*
*5 If the resume playback is still activated, the disc plays
from the point you stopped playback.
• Audio CD
The disc plays from the point you stopped
playback.
Notes
• If you want to return to the setup screen (page 36) while
completing the setup change, press RETURNO or B.
• Don’t forget your password.
• You need to enter the password to change the parental settings.
You cannot play some DVDs unless you enter your password.
• With this unit, you cannot restrict the playback of discs unless
the DVD has a parental level. The parental level is often printed
on the package of a disc.
• Methods of audio-visual restriction differ, depending on the
disc. Sometimes playback is not allowed altogether, other times
only the offensive scenes are skipped. For details, read the
instruction manual supplied with the DVD.
• If you try to play a DVD with a parental level setting which
your parental setup restricts, a prompt screen appears to ask
whether you want to temporarily change your parental level
setting and play the DVD. If you want to do so, follow the
instruction on the screen.
Example : a prompt screen
Parental Level Setting
You need to change player's parental level to play
this disc. Do you want to change it temporarily?
5
.
If you want to check the desired level under
“Parental,“ press RETURNO or B.
NoYes
43
Page 44

Completing setup changes
Parental setup (Changing the parental
level)
To change the parental level after the initial setup has
been performed, follow the steps below.
1 See “Selecting items for setup” (page 36) first.
Follow steps 1 to 4 on page 36, then proceed below to
complete your setup.
2 Select “Parental,” then press ENTER.
The setup screen for registering your password is
displayed.
Password
Please input Password
1234567890
In step 3, the “—” changes to “*” when you input numbers.
3 Press the number buttons*
registered password (4-digit number)*
*1 You can also press the cursor buttons (B/b), then press
ENTER to select the numbers at the bottom of the screen.
*2 If you enter a wrong number, press CLEAR. All the input
numbers are cleared. The screen for password re-entry is
displayed, then enter your pass word.
The screen for the parental menu*3 is displayed.
*3 See step 7 of “Parental” on page 42.
1
to enter your
2
.
6 Press the cursor buttons (V/v) to select the
desired level.
7 Press ENTER.
The parental menu screen reappears.
To end or drop the setup change and
resume playback
1 Press SET UP.
The playback screen with the indicator “x” on
appears. Resuming playback is still activated.
2 Press PLAY to start playback.
• DVD/Video CD
The disc plays from the beginning*
*4 If the resume playback is still activated, the disc
plays from the point you stopped playback.
4
.
• Audio CD
The disc plays from the point you stopped
playback.
Note
If you want to return to the setup screen (page 36) while
completing the setup change, press RETURNO or B.
Parental setup (Changing your
password)
If you want to change your password, follow the steps
below.
1 See “Selecting items for setup” (page 36) first.
Follow the steps 1 to 4 on page 36, then come back
to complete your setup.
Parental
Level
Password change
Note
If you forget your registered password, enter “5534.” Then
complete the following steps. To change your password,
follow the instructions in “Changing your password” on
page 44.
4 Press the cursor buttons (V/v) to select “Level.”
5 Press ENTER.
44
2 Press ENTER, after you selected “Parental.”
The setup screen for registering your password is
displayed.
Password
Please input Password
1234567890
In step 3, the “—” changes to “*” when you input numbers.
Page 45

3 Press the number buttons*
registered password (4-digit number)*
*1 You can also press the cursor buttons (B/b), then press
ENTER to select the numbers at the bottom of the screen.
*2 If you enter a wrong number, press CLEAR. All numbers
you input will be cleared. The screen for password re-entry
is displayed.
1
to enter your
2
.
The screen for the parental menu is displayed.
Parental
Change password
Please input password again
for confirmation
1234567890
Level
Password change
Note
If you forget your registered password, enter “5534,” then
complete the following steps.
4 Press the cursor buttons (V/v) to select “Password
change.”
5 Press ENTER.
The screen for registering your new password is
displayed.
Change password
Please input new password
1234567890
In step 6, the “—” changes to “*” when you input numbers.
6 Press the number buttons to enter your new
password (4-digit number)*
*3 If you enter a wrong number, press CLEAR. All the input
numbers are cleared.
3
.
7 Press ENTER.
The screen for password re-entry is displayed.
In step 8, the “—” changes to “*” when you input numbers.
8 Press the number buttons*
password (the same 4-digit number in step 6)*
4
to enter your
5
again.
*4 You can also press the cursor buttons (B/b), then press
ENTER to select the numbers at the bottom of the screen.
*5 If you enter a wrong number, press CLEAR. All the input
numbers are cleared.
The message screen is displayed.
Change password
Password has been changed
This password is necessary
when you change parental setting.
Please remember this password.
Please press "ENTER" key.
9 Press ENTER.
The parental menu screen reappears.
To end or drop the setup change and resume
playback
1 Press SET UP.
The playback screen with the indicator “x” on
appears. Resuming playback is still activated.
2 Press PLAY to start playback.
• DVD/Video CD
The disc plays from the beginning*
*6 If the resume playback is still activated, the disc plays
from the point you stopped playback.
• Audio CD
The disc plays from the point you stopped
playback.
6
.
Note
If you want to return to the setup screen (page 36) while
completing the setup change, press RETURNO or B.
45
Page 46

Completeing setup
OSD message
You can turn the indicator display of indicators (Example:
N, x, M, m, X) “on” or “off.” The indicators are
displayed when you press the buttons during a DVD or
Video CD playback.
1 See “Selecting items for setup” (page 36) first.
Follow steps 1 to 4 on page 36, then proceed below to
complete your setup.
2 Select “OSD message,” then press ENTER.
The setup screen for OSD message is displayed.
The currently selected item is highlighted in yellow.
OSD Message
On
Off
To end or drop the setup change and resume
playback
1 Press SET UP.
The playback screen with the indicator “x” on
appears. Resuming playback is still activated.
2 Press PLAY to start playback.
• DVD/Video CD
The disc plays from the beginning*.
* If the resume playback is still activated, the disc plays
from the point you stopped playback.
• Audio CD
The disc plays from the point you stopped
playback.
Notes
• If you want to return to the setup screen (page 36) while
completing the setup change, press RETURNO or B.
• If you forget your registered password, enter “5534,” then
complete the following steps.
3 Press the cursor buttons (V/v) to select “On”
(displayed) or “Off” (not displayed).
4 Press ENTER.
The setup screen reappears automatically.
You can check that your selection under “OSD
message.”
Set Up
DVD Menu Language
Audio Language Original
Subtitle Language
Digital Output
Display
Parental
OSD Message
Player Language
Original
Original
LPCM
4:3 Letter Box
8
Off
English
46
Page 47

Player Language
You can change the display language (English/Japanese)
for the setup.
1 See “Selecting items for setup” (page 36) first.
Follow the steps 1 to 4 on page 36, then proceed below
to complete your setup.
2 Select “Player Language,” then press ENTER.
The setup screen for Player Language is displayed.
The currently selected item is highlighted in yellow.
Player Language
Japanese
English
To end or drop the setup change and resume
playback
1 Press SET UP.
The playback screen with the indicator “x” on
appears. Resuming playback is still activated.
2 Press PLAY to start playback.
• DVD/Video CD
The disc plays from the beginning*.
* If the resume playback is still activated, the disc plays
from the point you stopped playback.
• Audio CD
The disc plays from the point you stopped
playback.
Note
If you want to return to the setup screen (page 36) while
completing the setup change, press RETURNO or B.
3 Press the cursor buttons (V/v) to select the desired
language (English/Japanese).
4 Press ENTER.
The setup screen reappears automatically.
You can check the language under “Player language.”
Set Up
DVD Menu Language
Audio Language Original
Subtitle Language
Digital Output
Display
Parental
OSD Message
Player Language
Original
Original
LPCM
4:3 Letter Box
8
On
English
47
Page 48

Additional
Troubleshooting
Information
If you experience any of the following difficulties while
using this unit, use this troubleshooting guide to help
remedy the problem. Should any problem persist, consult
your nearest Sony dealer.
Power
This unit does not turn on.
, Check the connections.
, If you find the connections in order, check the fuse.
If the fuse is blown, replace it with a correctly rated
fuse.
, If the fuse blows again, consult your nearest
Sony dealer.
Picture
There is no picture.
, Check that this unit is connected securely.
, The connecting cord to the monitor is damaged.
Replace it with a new one.
, Make sure the monitor is turned on.
, Make sure the video input is selected on the
monitor to view pictures from this unit.
, While driving a car*, you cannot watch the
pictures.
* To prevent accidents, the front video output is
connected to the parking brake switch cord.
, Stop your car and park in a safe place to watch
the pictures.
Picture noise appears.
, Clean the disc.
Even though you set the aspect ratio by
changing setup (see “Display” (page 41)),
the picture won’t fill the screen.
, The aspect ratio is fixed on your DVD.
48
Page 49

Sound
Operation
There is no sound.
, Check that this unit is connected securely.
, The audio connecting cord is damaged. Replace it
with a new one.
, Make sure the master unit is turned on.
, Pause or Slow-playback function is activated.
Press N to return to normal playback.
, Fast-forward or fast-reverse function is activated.
Press N to return to normal playback.
Sound is noisy.
, Clean the disc.
, Select the correct digital output setting (page 40).
The sound loses its stereo effect when you
play a Video CD or an Audio CD.
, Change the audio output to “Stereo” (page 32).
, Make sure this unit is connected correctly (Refer to
the installation manual supplied with this unit).
The remote commander does not function.
, Remove any obstacles between the remote
commander and this unit.
, Use the remote commander closer to the remote
control sensor.
, Point the light emitters of the commander at the
receptor of the remote control sensor.
, Replace all of the batteries in the remote with new
ones if they are weak.
The disc does not play.
, There is no disc inside.
Insert a disc.
, Insert the disc correctly with the playback side
facing up in the disc tray.
, Clean the disc.
, An incompatible disc is inserted. See “This Unit
Can Play the Following Discs” (page 5).
, Check the region code of the DVD (page 5).
, Moisture has condensed inside this unit. Remove
the disc magazine (page 14) and leave this unit
turned on for about half an hour.
This unit does not play from the beginning
when playing a disc.
, Programme Playback (page 23), Shuffle Playback
(page 22), Repeat Playback (page 19) or A-B Repeat
Playback (page 20) has been selected. Deactivate
such functions above.
, Resume Playback has been selected.
Press x on the remote commander before you start
playing. (page 17)
, When you play a DVD, a title menu or a DVD
menu automatically appears on the monitor.
, When you play a Video CD, the PBC menu display
automatically appears on the monitor.
Playback stops automatically.
, The disc may contain an auto pause signal. While
playing such a disc, the DVD changer stops
playback at the signal.
You cannot perform some functions such as
Stop, Search, Slow-motion Playback, Repeat
Playback, Shuffle Playback or Programme
Playback.
, With some discs, you cannot activate these
functions.
continue to next page t
49
Page 50

Troubleshooting
Messages do not appear on the monitor in
the language you want.
, In the setup display, select the desired language for
the on-screen display in “OSD Message” under
“Changing setup” (page 36).
The language for the sound track cannot be
changed when you play a DVD.
, Multilingual tracks are not recorded on the DVD.
, Changing the language for the track is prohibited
on the DVD.
The subtitle language cannot be changed
when you play a DVD.
, Multilingual subtitles are not recorded on the
DVD.
, Changing the language for the subtitles is
prohibited on the DVD.
The subtitles cannot be turned off when you
play a DVD.
, Depending on the DVD, you may not be able to
turn the subtitles off.
The angles cannot be changed when you
play a DVD.
, Multi-angles are not recorded on the DVD.
, Change the angles at a scene recorded from the
multiple angles (page 31).
, Changing the angles is prohibited on the DVD.
This unit does not operate properly.
, Static electricity, etc., may affect this unit’s
operation.
Press OFF, and then press B/X* on the wired
remote commander to start up the unit.
* You can also press PLAY on the wireless remote
commander for start-up.
50
Page 51

Message Display
During operation, the following messages are displayed to help you understand easily.
Message Display on the monitor
You can’t operate this command now.”
“
“This disc can’t be played.”
“All discs can’t be played.”
“Magazine is not loaded.”
“Magazine empty”
Cause and/or Corrective Action
•The command you made is not available for the DVD during playback.
,With some DVDs, certain operations are prohibited. It depends on each disc.
•The command you made is not available on the screen currently displayed.
,If you advance to the next step on the screen, the command will become available.
•The region code is neither “the code printed on the back of the unit” nor “ALL.”
, Use DVDs with the same region code printed on the back of the unit or “ALL”
(page 5).
•The audio-visual restricted function is activated.
, Change the parental level. See “Parental setup (Changing the parental level)”
(page 44).
•The colour system of the disc is incompatible with the one on your unit.
, Check the colour system of the disc. See “This Unit Can Play the Following Discs”
(page 5) .
•You tried to play a disc that you cannot play on this unit.
,Load a disc that this unit can play.
•You loaded the disc upside down.
,Load the disc properly.
•The disc is dirty.
,Clean the disc.
•Moisture has condensed on the laser lens of this unit.
,Remove the magazine from this unit and wait for about one hour.
•All of the discs in the magazine are those that this unit cannot play.
,Use the discs that this unit can play.
•You didn’t insert the magazine.
,Insert the magazine in this unit.
•There were no discs at all in the magazine.
,Insert a disc in the magazine.
Message Display on the wired
remote commander
E-07”
“
Cause and/or Corrective Action
•During playback, the unit does not start to play. Because of scratches, and sticky
residue, etc., the unit cannot read the disc.
, Clean the disc.
, Change the disc.
51
Page 52

Specifications
DVD changer
Laser Semiconductor laser
Signal format system
PAL
Audio characteristics
Frequency response
5 Hz to 20 kHz
Signal to noise ratio
90 dB
Harmonic distortion
0.01 %
Dynamic range
90 dB
Wow and flutter
below measurable limits
(±0.001 % W PEAK)
General
Power requirements
12V DC car battery
(negative ground)
Outputs
Audio output
Video output
Digital output
RF signal (FM) output
Inputs
Connector of remote control censor
Current drain
1 A (during playback)
Dimensions (approx.)
250 × 80 × 205 mm
(w/h/d) incl. projecting parts
Mass (approx.)
2.5 kg
Operating temperature
–10 ˚C to 55 ˚C
Supplied accessories
Wired remote commander (1)
Wireless remote commander (1)
Remote control sensor (1)
Disc magazine (1)
FM modulator (1)
AA (R6) alkaline batteries (2)
Index label (1)
Parts for installation and connections (1 set)
52
Design and specifications are subject to change without notice.
Page 53

Index
A
Aspect ratio 41
4:3 letter box 41
4:3 Pan & Scan 41
16:9 Wide screen 41
A-B-repeat playback 20
Angle 31
Audio CD 5, 16
Audio output method 32
Audio language 31, 36, 38
B
Batteries 12
Bitstream 40
C
CD-Recordable (CD-R) 5, 6
CD-Rewritable (CD-RW) 5, 6
Chapter 6, 28
D, E
Digital output 36, 40
Disc magazine 13, 14
Disc list 26
Display 41
Display Screen (Audio
CD) 18
Dolby digital 40
DTS 6, 40
DVD 5
DVD menu 30
DVD menu language 37
F, G
Fast forward 17
Fast rewind 17
FM modulator 13, 52
Frame by frame 21
H
Handling discs 7
I, J, K
Index 6, 53
Intro scan playback 22
L, M, N
LPCM 40
Message display 51
Monaural left 32
Monaural right 32
MPAA 43
O
OSD 46
OSD message 36, 46
P, Q
PAL 5
Parental 36, 42
PBC functions 33
Player language 36, 47
Programme playback 23
Prompt screen 43
R
Region code 5
Repeat playback 19
Resuming playback 17
S
Scene 6
SECAM 5
Setup screen 36
Shuffle playback 22
Slow playback 21
Start-up screen 16
Stereo 32
Subtitle language 29, 36, 39
T
Title 6, 29
Title menu 30
Track 6, 19, 28
Transmitting frequency 13
Troubleshooting 48
TV colour system 5
U
Usable discs 5
V, W, X, Y, Z
Video CD 5
Wired remote commander 10,
14, 16, 17
Wireless remote
commander 8, 9, 12, 16, 19,
20, 21, 22, 23, 28, 29, 30, 31, 32,
33
53
Page 54

¡Bienvenido!
Gracias por adquirir este cambiador de DVD de Sony. Antes de
utilizar la unidad, lea este manual atentamente y consérvelo para
consultarlo en el futuro.
2
Page 55

Índice
Características ........................................................ 4
Precauciones .......................................................... 4
Acerca de este manual .......................................... 4
Esta unidad puede reproducir los siguientes
discos................................................................. 5
Notas sobre el manejo de discos .......................... 7
Ubicación de los controles .................................... 8
Control remoto inalámbrico .............................................. 8
Control remoto alámbrico................................................ 10
Procedimientos iniciales
Preparación del control remoto inalámbrico.....12
Cómo colocar las pilas...................................................... 12
Cambio de la frecuencia de transmisión............13
Cómo cambiar la frecuencia de transmisión................. 13
Preparación del cambiador de DVD ...................13
Cómo cargar discos en un cargador............................... 13
Cómo instalar el cargador de discos para encender el
cambiador de DVD ........................................................... 13
Cómo retirar el cargador de discos ................................ 14
Reproducción de discos
Reproducción de un disco .............16
Cómo reproducir............................................................... 16
Reanudación de la reproducción.................................... 17
Para apagar la unidad ...................................................... 17
Pantalla de visualización (Audio CD) .................. 18
Uso de las funciones de
repetición ..................................19
Reproducción repetida..................................................... 19
Reproducción de A-B repetición..................................... 20
Reproducción de discos a diversas velocidades
lentas ................................................21
Reproducción lenta........................................................... 21
Cuadro por cuadro ........................................................... 21
Reproducción de pistas con varias
funciones ................................................. 22
Reproducción de pistas en orden aleatorio
—Reproducción aleatoria ................................................ 22
Reproducción secuencial del inicio de las pistas
—Reproducción con exploración de ingresos .............. 22
Reproducción de su propio programa
—Reproducción de programa......................................... 23
Funciones adicionales
Uso de una lista de discos ............26
Visualización de una lista de discos............................... 26
Visualización de un tiempo de reproducción
....................................................27
Visualización de un tiempo de reproducción ............... 27
Búsqueda a partir de elementos ......... 28
Métodos de búsqueda (título/capítulo/pista/tiempo de
reproducción transcurrido) ............................................. 28
Cambio del idioma de subtítulos ................ 29
Uso de los menús para DVD ........................ 30
Uso de un menú de títulos .............................................. 30
Uso de un menú DVD ...................................................... 30
Cambio del idioma del audio ......................31
Cambio de ángulos ......................................31
Cambio del método de salida de
audio ................................................ 32
Estéreo/Mono izquierdo/Mono derecho ..................... 32
Uso de las funciones PBC (playback control)
...................................................................33
Uso de las funciones PBC ................................................ 33
Detener las funciones PBC............................................... 33
Activación de las funciones PBC desde la reproducción
normal ................................................................................ 34
Cambio del ajuste
Uso de la pantalla de ajuste ............................... 36
Selección de los elementos para el ajuste ...................... 36
Finalizar los cambios de ajuste ........................... 37
DVD Menu Language ............................................. 37
Audio Language
Subtitle Language
Digital Output ........................................ 40
Display (relación de aspecto —proporción horizontal/
vertical de imagen en la pantalla)
Parental (ajuste inicial)
Ajuste del control de bloqueo
(cambio del nivel de control de bloqueo)
Ajuste del control de bloqueo
(cambio de su contraseña) ............................................... 44
OSD Message
Player Language
...................................................... 38
.................................................... 39
......................... 41
............................................ 42
............. 44
................................................... 46
.................................... 47
Información complementaria
Solución de problemas........................................48
Alimentación ..................................................................... 48
Imagen ................................................................................ 48
Sonido ................................................................................. 49
Operación........................................................................... 49
Indicador de mensajes...................................................... 51
Especificaciones ................................................... 52
Índice .................................................................... 53
3
Page 56

Características
Precauciones
Gracias por adquirir este cambiador de DVD de Sony.
Éstas son algunas de las características que disfrutará.
El DVX-100 es un sistema cambiador de discos DVD que
consta de un control remoto inalámbrico y uno alámbrico,
una caja de relés y un cambiador de DVD. Puede disfrutar
de la reproducción de discos DVD, Video CD y Audio CD
en el sistema de sonido de su auto, aunque éste no tenga
terminales de entrada auxiliares de audio. El cambiador
DVD convierte las señales de audio a RF (radiofrecuencia)
que toma el receptor de FM del sistema de sonido del
auto*.
* Esta unidad no puede usarse a menos que el sistema de audio
de su auto tenga un receptor FM.
• Cambiador de DVD/Video CD/Audio CD para 10
discos
• Compatibilidad con CD-Extra (Audio)/Mixed CD
(Audio)/CD-R (Digital Audio)/CD-RW (Digital Audio)
• Admite dts/Dolby digital por medio de un terminal de
salida digital óptica
• Modulador FM equipado para instalarse con cualquier
unidad principal.
• No mire el monitor cuando esté manejando. Si desea
ver un DVD o Video CD, detenga el auto, estaciónelo en
un lugar seguro y disfrute.
• No se puede utilizar esta unidad a menos que el auto
tenga un sintonizador de FM.
• Si la unidad no funciona, compruebe las conexiones
primero. Si todo está en orden, compruebe el fusible.
• Si deja el auto directamente bajo el sol, la temperatura
en su interior puede llegar a ser muy alta. Permita que
se enfríe la unidad antes de utilizarla.
• Evite instalar el cambiador de DVD y el control remoto
alámbrico en lugares:
— que puedan tener temperaturas superiores a los 55 °C
— que estén directamente bajo el sol
— que estén cerca de fuentes de calor (como serían los
calefactores)
— expuestos a la lluvia o la humedad
— expuestos a polvo o suciedad excesivos
— expuestos a vibración excesiva
Si tiene preguntas acerca de esta unidad o problemas con
ella, consulte al proveedor Sony más próximo.
Acerca de este manual
Convenciones
• Las instrucciones de este manual describen cómo usar esta
unidad empleando los controles del control remoto que se
incluye.
• También puede operarla con el control remoto alámbrico
incluido, si los controles tienen los mismos nombres, o
similares, de los del control remoto inalámbrico.
• En este manual se utilizan los iconos que aparecen a la derecha:
Icono Significado
Indica una función de DVD.
Indica una función de Video CD.
Indica una función de Audio CD.
4
Page 57

Esta unidad puede reproducir los siguientes discos
DVD VIDEO Video CD Audio CD
Logotipo
del disco
Contenido
Audio + Video
Audio + Video
El logotipo “DVD VIDEO” es una marca registrada.
DVD
Los discos DVD contienen tanto datos de audio como
visuales. Un disco de 12 centímetros puede contener 7
veces la cantidad de datos de un CD-ROM, lo que
representa 4 horas consecutivas de tiempo de
reproducción (u 8 horas en el caso de discos de doble
lado). Los discos DVD se dividen en cuatro tipos: una cara
de una capa, una cara de doble capa, dos caras de una
capa y dos caras de doble capa.
Video CD
Un Video CD puede contener datos tanto de audio como
visuales en un disco del mismo tamaño que un CD de
audio común. El tiempo de reproducción de un CD
estándar de 12 centímetros es de 74 minutos.
Audio CD
Un Audio CD contiene datos de audio. El tiempo de
reproducción de un CD estándar de 12 centímetros es de
74 minutos.
CD-Grabable (CD-R) para uso de audio
Con un CD-R para uso de audio se pueden editar datos de
audio. Sólo se puede escribir información una vez en un
CD-R.
CD-Reescribible (CD-RW) para uso de audio
Con un CD-RW para uso de audio se pueden editar datos
de audio y se puede escribir información en el CD-RW
una y otra vez.
Audio
Código de región de los DVD que puede
reproducir en esta unidad
Este cambiador de DVD tiene un código de región
impreso en su parte posterior y sólo puede reproducir
discos DVD marcados con el mismo código de región.
Los DVD con la etiqueta también pueden
ALL
reproducirse en esta unidad.
Si intenta reproducir cualquier otro DVD, aparecerá en la
pantalla el mensaje: “No se puede reproducir este disco”.
Es posible, dependiendo del DVD, que no aparezca en él
la indicación de código de región aunque su reproducción
esté prohibida por límites de zona.
Código de región
X
MODEL NO
DC 12 VOLTS
NEGATIVE GROUND
10-DISC DVD CHANGER
10
Nota sobre los sistemas de TV a color
El sistema de color varía según el país.
Este cambiador de DVD está adaptado para el sistema de
color PAL. No puede reproducir discos grabados en otros
sistemas de color, como SECAM y NTSC.
CD-Extra
Los CD-Extra tienen dos secciones que contienen audio y
datos. En esta unidad sólo se puede reproducir la sección
de audio.
Mixed CD
Los Mixed CD tienen una sección que contiene tanto
audio como datos. En esta unidad sólo se puede
reproducir la parte de audio.
Precaución
• Puede reproducir con esta unidad discos CD-R y CD-RW diseñados para audio. Sin embargo, es posible que no pueda
reproducir algunos discos debido a las condiciones de grabación.
• NO ES POSIBLE reproducir los siguientes discos en esta unidad.
— DVD-Audio — DVD-RAM — DVD-ROM — discos de 8 cm — DVD-RW
— DVD-R — Active-Audio (Datos) — CD-G — Photo-CD — VSD
— CD-Extra (Datos) — MixedCD (DATOS) — CD-ROM
• Este producto incorpora tecnología de protección de derechos de autor (copyright) amparada por reclamaciones de
método de ciertas patentes de EE.UU., otros derechos de propiedad intelectual de Macrovision Corporation y otros
propietarios. El uso de dicha tecnología debe contar con la autorización de Macrovision Corporation y es únicamente
para uso doméstico y otros usos de visualización limitados, a menos que Macrovision Corporation autorice lo contrario.
Está prohibida la ingeniería inversa o desmontaje de la unidad.
continuar a la siguiente página t
5
Page 58

Esta unidad puede reproducir los siguientes discos
Nota acerca del PBC (Control de reproducción) (Video CD)
Este reproductor se ajusta a las versiones 1.1 y 2.0 de los
estándares de Video CD. Puede disfrutar de dos tipos de
reproducción según el tipo de disco.
Tipo de disco
Video CD sin
funciones PBC
(discos Versión 1.1)
Video CD con
funciones PBC
(discos Versión 2.0)
Podrá
Disfrutar de reproducción de video
(en movimiento) y de música.
Reproducir software interactivo
empleando las pantallas de menú que
aparecen en el monitor (reproducción
PBC), además de las funciones de
reproducción de video de los discos de
la Versión 1.1. Además puede
reproducir imágenes fijas de alta
resolución si las hay en el disco.
Nota acerca de los CD con codificación DTS
Al reproducir un CD con codificación DTS*, se escuchará un
exceso de ruido en las salidas analógicas de estéreo. Para evitar
posibles daños en el sistema de audio, tome las precauciones
necesarias cuando las salidas analógicas de estéreo de este
cambiador de DVD estén conectadas a un sistema de
amplificación. Para disfrutar de la reproducción DTS Digital
Surround™, debe conectar un sistema decodificador externo DTS
Digital Surround™ de 5.1 canales a la salida digital del
cambiador de DVD.
* “DTS”, “DTS Digital Surround” y “DTS Digital Out” son
marcas comerciales de Digital Theater Systems, Inc.
Nota acerca de los discos CD-R/CD-RW
Puede reproducir algunos CD-R y CD-RW diseñados para uso de
audio (siempre que la calidad de la grabación sea adecuada).
— Puede reproducir los discos CD-R y CD-RW de audio digital
(Digital Audio) que lleven estos iconos:
Términos referidos a los discos
• Título
La sección más larga de un elemento de imagen o de música de
un disco DVD, por ejemplo una película en software de video o
el álbum completo en software de audio, etc.
• Capítulo
Secciones de un elemento de imagen o de una pieza musical
que son menores que los títulos. Un título se compone de
varios capítulos. A cada capítulo se le asigna un número de
capítulo que permite que se localice el que se desea. Algunos
discos pueden no tener capítulos grabados.
• Pista
Secciones de un elemento de imagen o de música en un disco
Video CD o Audio CD. A cada pista se le asigna un número de
que permite encontrar la que se desea.
Disco
Estructura
de un DVD
Estructura
de Video CD
o Audio CD
•Índice (Audio CD) / Índice de video (Video CD)
Puntos numerados en una pista. Número que divide una pista
en secciones para localizar fácilmente el punto que se desee en
un Video CD o Audio CD. Dependiendo del disco, es posible
que no tenga índices grabados.
• Escena
En un Video CD con funciones PBC (control de reproducción),
las pantallas de menú, las imágenes en movimiento y las
imágenes fijas se dividen en secciones denominadas “escenas”.
Cada escena tiene asignado un número que permite localizar la
que se desea.
Título
Capítulo
Disco
Pista
Índice
— NO ES POSIBLE reproducir discos CD-R y CD-RW (que no
sean de audio digital) que lleven estos iconos:
6
Page 59

Notas sobre el manejo de
discos
Manejo de discos
• Para mantener limpio el disco, tómelo por los bordes.
No toque la superficie.
• No pegue papeles o cinta adhesiva en el disco.
Si hubiera algún residuo pegajoso, pegamento, etc. en el
disco, elimínelo por completo antes de utilizar el disco.
• No exponga los discos a la luz solar directa ni a fuentes
de calor como serían los conductos de aire caliente.
• No deje los discos en un auto estacionado bajo la luz
solar directa.
Notas sobre los discos
No utilice discos que tengan residuos pegajosos en la
superficie (como discos de segunda mano o alquilados
que tengan sellos, tinta o etiquetas despegadas pegajosas).
El uso de estos discos puede provocar que el disco deje de
girar y dar como resultado un mal funcionamiento o que
se estropee el disco.
Discos con residuos
pegajosos o tinta
No utilice discos alquilados con etiquetas viejas que estén
empezando a despegarse.
Discos con engomados
que se estén despegando
No utilice discos que tengan pegadas etiquetas o
engomados.
Discos con engomados adheridos
• Después de reproducir un disco, guárdelo en su caja.
Limpieza
• Antes de reproducir un disco, límpielo con un paño.
Pase el paño del centro hacia la parte exterior.
• No utilice disolventes como bencina, diluyente,
limpiadores comerciales ni aerosoles antiestáticos para
discos de vinilo.
• No se pueden reproducir en esta unidad discos de
formas no estándar (por ejemplo, en forma de corazón,
cuadrado o estrella). Tratar de hacerlo puede dañar la
unidad. No utilice este tipo de discos.
No se pueden reproducir discos de 8 cm.
7
Page 60

Ubicación de los controles
Control remoto inalámbrico
Emisor de luz
1
2
3
4
5
6
7
8
9
q;
qa
MENU TITLE
ANGLEAUDIOSUB TITLE TIME
PLAY MODE
SEARCHREPEAT
A B
1 2 3
4 5 6
7 8 9
PREV NEXT
SET UP PA USE
RETURNCLEAR
0
LIST
ENTER
DISC
SCAN
PLAY
STOP
qs
qd
qf
qg
qh
qj
qk
ql
w;
wa
ws
wd
8
Page 61

1 Botón MENU 30, 33, 34
Presione MENU para mostrar el menú DVD o Video
CD grabado.
2 Botón SUBTITLE (subtítulo) 29
Presione SUBTITLE para cambiar los idiomas de los
subtítulos al reproducir un DVD.
3 Botón AUDIO
• DVD 31
Presione AUDIO para cambiar el Idioma del Audio.
• Video CD/Audio CD 32
Presione AUDIO para cambiar el Método de salida
de audio.
4 Botón REPEAT (repetición)
• DVD 19
Presione REPEAT para reproducir repetidamente un
título o capítulo.
• Video CD/ Audio CD 19
Presione REPEAT para reproducir las pistas
completas de un disco o pista.
5 Botón AyB (A-B repetición)
• DVD/Video CD 20
Presione AyB para reproducir repetidamente su
escena favorita.
• Audio CD 20
Presione AyB para reproducir su pasaje favorito
de la canción.
6 Botones numéricos 23, 28, 29, 33, 42, 44, 45
Presione los botones numéricos para ingresar
números.
7 Botón CLEAR (borrar) 23, 28, 29, 33, 42, 44, 45
Presione CLEAR para borrar un número que haya
ingresado equivocadamente.
8 Botones de cursor 19, 23, 26, 27, 28, 29, 30, 31, 33,
36, 37, 38, 39, 40, 41, 42, 43, 44, 45, 46, 47
Presione los botones de cursor para seleccionar
elementos.
9 Botónes SCAN (explorar) 17, 21
Presione M para realizar la reproducción rápida
hacia adelante.
Presione m para la reproducción rápida hacia atrás.
• DVD/Video CD 21
Presione X (PAUSA) y, a continuación, presione
M/m para realizar la reproducción lenta.
q; Botones PREV/NEXT (anterior/siguiente) 16, 17, 21
Presione > para ir al siguiente capítulo, pista o escena.
Presione . para volver al anterior capítulo, pista o
escena.
• DVD/Video CD 21
Presione X (PAUSA) y, a continuación, presione
> para reproducir las imágenes cuadro por
cuadro.
qa Botón SET UP (ajuste) 36, 37, 38, 39, 41, 43, 44, 45,
46, 47
Presione SET UP cuando desee cambiar ajustes como
Idioma del menú DVD, Idioma del audio, Idioma de
los subtítulos, etc.
qs Botón TITLE (título) 30
Presione TITLE para mostrar el menú de títulos.
qd Botón TIME (tiempo) 27, 28
Presione TIME para mostrar el tiempo transcurrido/
restante de elementos tales como el título, capítulo,
pista y disco.
qf Botón ANGLE (ángulo) 31
Presione ANGLE para seleccionar las imágenes de una
escena vista desde varios ángulos durante la
reproducción de un DVD.
qg Botón PLAY MODE (modo de reproducción) 22, 23,
24
• Audio CD
Presione PLAY MODE para elegir su modo de
reproducción preferido.
qh Botón SEARCH (búsqueda) 28, 29
Presione SEARCH (Buscar) para especificar el punto
que desee en un disco, ya sea por título, capítulo, pista
o tiempo.
qj Botón RETURNO (volver) 26, 27, 36, 37, 38, 39, 41,
42, 43, 44, 45, 46, 47
Presione RETURN para volver al modo normal de
reproducción.
qk Botón ENTER (ingresar) 23, 24, 26, 27, 28, 29, 30, 31,
32, 33, 37, 38, 39, 40, 41, 42, 43, 44, 45, 46, 47
Presione ENTER para ejecutar los elementos o ajustes.
ql Botón LIST (lista) 26, 27
Presione LIST para mostrar la lista de discos que
contiene el cargador.
w; Botón DISC (+/–) (disco) 16
Presione DISC para seleccionar su disco favorito.
wa Botón PLAY (reproducir) 16, 17, 21, 23, 24, 33, 34,
37, 38, 39, 40, 41, 43, 44, 45, 46, 47
Presione PLAY para reproducir un disco.
ws Botón PAUSE (pausa) 16, 17, 21
Presione PAUSE para hacer una pausa durante la
reproducción.
wd Botón STOP (parar) 16, 17, 23, 33, 34, 36
Presione STOP para detener la reproducción.
Precaución
Cuando desee encender la unidad debe presionar B/X*
en el control remoto alámbrico. Consulte “1 Botón B/X”
del control remoto alámbrico (página 10).
* También puede presionar PLAY (Reproducir) en el control
remoto inalámbrico para encenderla.
9
Page 62

Ubicación de los controles
Control remoto alámbrico
1
Ventana de visualización
2
1 Botón B/X 14, 16
— Para encender la unidad
Presione B/X*
*1También puede presionar PLAY (Reproducir) en el control
remoto inalámbrico para encenderla.
— PLAY/PAUSE
(equivalente a wa y ws ws en el control remoto
inalámbrico)
2 Botón OFF (apagado) 17
Presione OFF para apagar la unidad
1
para encender la unidad.
DISC
OFF
4
5
3 Botón DISC (–/+) (disco) 16
(equivalente a w; en el control remoto inalámbrico)
4 Botón SCAN/PREV/NEXT (explorar/anterior/
siguiente) 16, 17, 18, 21
Presione > para ir al siguiente capítulo, pista o escena.
Presione . para volver al anterior capítulo, pista o
escena.
• Durante la reproducción de un DVD/Video CD
Presione B/X (PAUSA) y, a continuación, presione
> hacia abajo para realizar la reproducción rápida
hacia adelante (sólo cuenta con doble velocidad).
Presione B/X (PAUSA) y, a continuación, presione
. hacia abajo para realizar la reproducción
rápida hacia atrás (sólo cuenta con doble velocidad).
Presione B/X (PAUSA) y, a continuación, presione
>, se activa la función de búsqueda de capítulo*
*2Dependiendo del disco, incluso si en el monitor aparece el
mensaje “You can’t operate this command now”, es
posible que pueda utilizar la función de búsqueda de
capítulo (con discos de ese tipo) utilizando el control
remoto inalámbrico.
Precaución para la reproducción de DVD/Video CD
Si desea reproducir un disco a varias velocidades lentas
(página 21) o cuadro por cuadro (página 21), utilice los
controles del control remoto inalámbrico. No se pueden
realizar estas funciones empleando el control remoto
alámbrico.
3
2
.
10
5 Botón de reinicio
Presione el botón de reinicio con un objeto con punta,
como por ejemplo un bolígrafo, en los siguientes
casos:
— está utilizando la unidad por primera vez
— ha vuelto a conectar el control remoto alámbrico a
la unidad
— ha descubierto que no puede activar algún botón
en el control remoto alámbrico
— la visualización tiene un aspecto anormal
Nota
El control remoto alámbrico está limitado a sólo algunas
funciones. Para las operaciones avanzadas, utilice el control
remoto inalámbrico.
Page 63

11
Page 64

Procedimientos
iniciales
Preparación del control
remoto inalámbrico
Cómo colocar las pilas
Esta sección describe cómo preparar
el control remoto alámbrico, el
inalámbrico, la unidad y cómo
cambiar la frecuencia de transmisión.
1 Presione y deslice la tapa del compartimiento de
pilas para abrirla.
2 Inserte dos pilas alcalinas tamaño AA (R6).
Precaución
Cuide que los extremos + y – de las pilas coincidan con las
marcas que hay en el interior del compartimiento.
3 Vuelva a colocar la tapa.
Notas
• Nunca sostenga las pilas utilizando pinzas metálicas ya que
podría producirse un cortocircuito.
• No deje el control remoto en lugares extremadamente cálidos o
húmedos.
• No deje caer objetos extraños en el interior del control remoto,
particularmente al sustituir las pilas.
• Si no va a utilizar el control remoto durante un largo tiempo,
extraiga las pilas para evitar posibles daños por fugas y
corrosión de las mismas.
• Cuando se desgasten las pilas, deshágase de ellas de un modo
seguro que cumpla con las leyes en vigor.
12
Page 65

Cambio de la frecuencia de
Preparación del cambiador
transmisión
Cómo cambiar la frecuencia de
transmisión
Con esta unidad, el audio se procesa a través de un
sintonizador de FM para su reproducción. Por tanto,
puede existir interferencia de señales. En tal caso, cambie
la señal de RF modulada del equipo de sonido de su auto
en la siguiente forma.
1 Realice lo siguiente en el equipo de sonido de su
auto.
1 Encienda el equipo de sonido de su auto.
2 Seleccione la banda de FM.
3 Sintonice la radio a 88,9 MHz o a 88,3 MHz.*
* Sintonice a la misma frecuencia (88,9 MHz o a 88,3 MHz)
que fijó en el modulador FM del cambiador de DVD
durante la instalación (consulte el manual de instalación
que viene incluido con la unidad).
2 Realice lo siguiente en el monitor conectado al
cambiador de DVD.
1 Encienda el monitor.
2 Cambie el modo a video.
de DVD
Cómo cargar discos en un cargador
Con el lado que tiene la flecha hacia arriba
Bandeja
Lengüeta
x
El lado con la etiqueta hacia abajo
Nota
Lea los manuales de operación que recibió con el equipo de
sonido de su auto y con el monitor.
Hay 10 bandejas en el cargador:
ponga sólo un disco en cada
bandeja.
Nota
Cuando reproduzca un disco de doble lado, ponga hacia
arriba el lado que desea reproducir.
Cómo instalar el cargador de discos para
encender el cambiador de DVD
1 Sostenga OPEN (abrir) y desbloquéelo.
2 Deslice la puerta hacia la derecha.
Notas
• Abra la puerta completamente hasta que oiga que produce
un clic.
• Para evitar posibles lesiones, no inserte la mano en el
cambiador de DVD.
continuar a la siguiente página t
13
Page 66

Preparación del cambiador de DVD
3 Instale el cargador de discos.
Cargador de discos
4 Cierre la puerta.
Recomendación
Después de instalar el cargador de discos en la unidad,
espere a que ésta termine de crear la lista de discos. Cuando
la haya creado por completo:
— deja de oirse el sonido de revisión de los discos
— se apaga la visualización en el control remoto alámbrico
Para activar el cambiador de DVD, siga este
procedimiento.
Presione B/X* en el control remoto alámbrico para
encender la unidad.
* También puede presionar PLAY (Reproducir) en el control
remoto inalámbrico para encenderla.
Aparecerá la pantalla de inicio en el monitor y la unidad
comenzará automáticamente a reproducir el primer disco del
cargador. Consulte “Reproducción de un disco” (página 16).
B/X
DISC
Cómo retirar el cargador de discos
Presione Z.
Z (EJECT) (expulsar)
Nota
Para evitar una lesión, retire la mano después de presionar Z.
El cargador del disco se expulsa rápidamente.
Si el cargador de discos no ajusta correctamente
Presione Z para extraer el cargador y vuelva a insertarlo.
Utilice la unidad con la puerta cerrada
De otro modo, pueden entrar objetos y contaminar las lentes que
hay en el interior.
Notas sobre el cargador de discos
• No deje el cargador de discos en lugares expuestos a altas
temperaturas o niveles de humedad, como el tablero del auto o
el medallón trasero, donde quedaría expuesto a la luz solar
directa.
• No ponga más de un disco a la vez en cada bandeja, de otro
modo podrían dañarse el cambiador DVD, los discos o ambos.
• No deje caer el cargador de discos ni lo someta a golpes fuertes.
Cuando la bandeja se salga
En condiciones normales de uso, las bandejas no deben
salirse del cargador. Sin embargo, si se tira de ellas y se las
saca, es fácil volver a insertarlas.
OFF
Precaución
Si presiona B/X en el control remoto alámbrico (o PLAY en
el control remoto inalámbrico) antes de que la unidad
termine de revisar los discos, la lista de discos no estará
completa.
14
Mantenga el extremo recortado de la bandeja hacia usted e
inserte en la ranura la esquina a su derecha, luego inserte la
esquina de la izquierda hasta que ajuste en su sitio con un
clic.
Nota
No inserte la bandeja de cabeza o en otra dirección.
Page 67

15
Page 68

Reproducción
Reproducción de un disco
de discos
Este capítulo describe cómo
reproducir un disco DVD/Video CD/
Audio CD.
Cómo reproducir
Asegúrese de llevar a cabo estos preparativos:
— Preparación del control remoto inalámbrico
(página 12)
— Cambio de la frecuencia de transmisión (página 13)
— Carga de discos en el cargador de discos e instalación
de los mismos en la unidad (página 13)
1 Presione B/X*
para encender la unidad.
*1También puede presionar PLAY (Reproducir) en el control
remoto inalámbrico para encenderla.
Después de presionar B/X en el control remoto
alámbrico (o PLAY en el control remoto inalámbrico),
aparecerá en el monitor la pantalla de inicio.
1
en el control remoto alámbrico
B/X
DISC
OFF
16
La unidad comenzará automáticamente a reproducir
el primer disco del cargador. Si desea escuchar el
2
disco *
*2Si desea seleccionar un disco de la lista de discos, consulte
del cargador, siga el paso 2.
“Uso de una lista de discos” (página 26).
2 Presione uno de los botones DISC (+/–) para
seleccionar el disco deseado.
Presione +: para avanzar al siguiente disco.
Presione –: para volver al disco anterior.
En el monitor aparecerá “Changing disc---” y, a
continuación, “Reading disc---”. Empezará a
reproducirse el disco seleccionado.
Nota
El control remoto alámbrico está limitado a sólo algunas
funciones. Consulte “Control remoto alámbrico” (página 10).
Para las operaciones avanzadas, utilice el control remoto
inalámbrico.
Page 69

LIST
ENTER
DISC
SCAN
PREV NEXT
PLAY
DISC
SCANm/M
PLAYN
NEXT>
SET UP PA USE
STOP
PAUSEX
STOPx
PREV.
Durante la reproducción
Para Operación
Parar Presione x*
Poner en pausa Presione X*
Reanudar la reproducción Presione X o N
después de la pausa
Pasar al capítulo, pista o Presione >
escena siguiente en modo de
reproducción continua
Retroceder al capítulo, pista o Presione .
escena anterior en modo de
reproducción continua
Avance rápido Presione M*
Regreso rápido Presione m*
Detener la reproducción y Presione Z
extraer el disco
*1 Si está activada la función de reanudar la reproducción, puede
reanudar la reproducción más tarde presionando N. Para
conocer más detalles, consulte “Reanudación de la
reproducción”.
*2 DVD/Video CD
Durante la pausa se detienen tanto las imágenes como el
audio.
Audio CD
Se detiene el sonido y el tiempo transcurrido parpadea en la
pantalla.
*3 DVD/Video CD
— Cada vez que presione M o m, la velocidad de
reproducción cambia en múltiplos de 2, 4, 8, 16 y 32. Los
pasos de velocidad son cálculos aproximados.
— Para reducir la velocidad de reproducción:
presione m durante la reproducción rápida hacia
adelante.
presione M durante la reproducción rápida hacia atrás.
— Para reanudar la reproducción normal:
presione N.
— Durante el avance rápido (M) y el retroceso rápido
(m) no habrá sonido.
Audio CD
— Para reanudar la reproducción normal:
presione N.
— Durante el avance rápido (M) y el retroceso rápido
(m) no habrá sonido.
1
2
3
3
PRECAUCIÓN
Si hay interferencia de la señal durante la reproducción, cambie la
señal de RF modulada del equipo de sonido de su auto. Consulte
“Cambio de la frecuencia de transmisión” (página 13) y siga los
pasos que se indican.
Reanudación de la reproducción
1 Presione x durante la reproducción para detenerla.
La unidad memorizará el punto en el cual detuvo la
reproducción.
• DVD/Video CD
“x” parpadea y en la pantalla aparece
“Resume---”.
• Audio CD
Se muestra el tiempo transcurrido del Audio CD.*
* Consulte “Pantalla de visualización (Audio CD)” (página
18).
Notas
• Si presiona x dos veces, se desactivará la reanudación de la
reproducción.
• Si expulsa el cargador y vuelve a insertarlo, también se
desactivará la reanudación de la reproducción.
2 Presione N para reanudar la reproducción.
Cuando está activada la reanudación de la
reproducción, ésta se reanuda desde el punto en el que
la detuvo. Cuando está desactivada, la reproducción
comienza desde el principio.
Para apagar la unidad
Presione OFF*1 en el control remoto alámbrico.
DISC
OFF
OFF
*1No se puede apagar la unidad con el control remoto
inalámbrico.
Nota
Si presiona OFF (Apagar) y después B/X*2 en el control remoto
alámbrico, la reproducción comienza desde el punto en el que
presionó OFF (se activa la Reanudación de la reproducción).
Cuando la opción Reanudación de la reproducción está
desactivada, la reproducción comienza desde el principio.
*2También puede presionar PLAY (Reproducir) en el control
remoto inalámbrico para encenderla.
17
Page 70

Reproducción de un disco
Pantalla de visualización (Audio CD)
Durante la reproducción de un Audio CD, aparece esta pantalla.
1
6 7 8
4
5
10
6
2
DISC
TRACK
3
-
00:00:18 02
4
REPEAT L
5
1 Durante la reproducción de un Audio CD
Indicación de icono: Operación:
“H” Reproducción
“s” Detener/suspender
reanudación de la
reproducción
“J” Avance rápido
“j” Retroceso rápido
“L/l” Salto
“S” Pausa
2 Número de pista que se está
reproduciendo
DISC
TRACK
A-B
SCAN
R
SHUFFLE
PROGRAM
7
6 Lista de los discos contenidos en el
cargador
La bandeja de disco seleccionada en este momento:
número de bandeja negro
fondo amarillo
Las bandejas de disco no seleccionadas en este
momento:
número de bandeja verde
fondo azul
Las bandejas de disco que tienen discos de otro tipo (por
ejemplo DVD o Video CD) en este momento:
número de bandeja blanco
fondo azul
3 Tiempo de duración de la pista (consulte
la página 27)
•
transcurrido o restante* del disco.
•
transcurrido o restante* de la pista.
* El tiempo restante del disco o la pista aparece con un
símbolo “–” (menos).
: cuando se esté mostrando el tiempo
DISC
TRACK
: cuando se esté mostrando el tiempo
4 Iluminación para los modos de repetición
(consulte la página 19)
REPEAT
: Reproducción repetida o A-B repetición.
5 Indicación del tipo de salida de audio
(consulte la página 32)
Indicación de icono: Operación:
“
“
“
” Estéreo
L R
” Mono (izquierdo)
L R
” Mono (derecho)
L R
18
Las bandejas de disco que en este momento están vacías
o tienen discos que no puede reproducir esta unidad:
número de bandeja no se muestra
fondo azul
7 Iluminación de distintos tipos de
reproducción
Indicación de icono: Operación:
se ilumina en amarillo (consulte la página –)
“DISC” Reproducción repetida
de disco (19)
“TRACK” Reproducción repetida
de pista (19)
“A-B” Reproducción de
A-B repetición (20)
“SCAN” Reproducción en
exploración (22)
“SHUFFLE” Reproducción aleatoria
(22)
“PROGRAM” Reproducción de
programas (22, 23)
Page 71

Uso de las funciones de repetición
Reproducción repetida
DVD
Puede reproducir un título (repetición Title) o capítulo
(repetición Chapter) que se estén reproduciendo.*
*1 Dependiendo del disco, es posible que no pueda utilizar la
función de repetición.
1
Video CD/Audio CD
Puede repetir todas las pistas de un disco (repetición Disc)
o una sola pista (repetición Track).
MENU TITLE
ANGLEAUDIOSUB TITLE TIME
SEARCHREPEAT
A B
1 2 3
4 5 6
7 8 9
0
PLAY MODE
REPEAT
RETURNCLEAR
CLEAR
LIST
Para volver a la reproducción normal
Seleccione “Off” en el paso 2.
Audio CD
1 Presione REPEAT durante la reproducción.
2 Presione REPEAT para seleccionar el modo de
repetición (Disc o Track)*
*4 Consulte “Pantalla de visualización (Audio CD)”
(página 18).
El tipo de repetición (DISC o TRACK) se ilumina
en amarillo y
REPEAT
tiempo de duración de la pista. Cada vez que
presione REPEAT, el modo de repetición alterna de
la siguiente forma:
B DISC B TRACK
Reproducción normal b
4
.
se ilumina en azul bajo el
ENTER
DISC
</,
DVD/Video CD
1 Presione REPEAT durante la reproducción.
Se muestra el modo de repetición en la parte superior
de la pantalla durante aproximadamente 5
segundos.*
*2 El modo seleccionado se resalta en amarillo.
• Indicación de modo de reproducción de DVD
Repeat Off Title Chapter
• Indicación de modo de repetición de Video CD
Repeat Off Disc Track
2 Presione REPEAT*
repetición (Title, Chapter, Disc o Track).
*3 También puede presionar los botones de cursor (B/b) para
seleccionar el modo de repetición en el paso 2.
Cada vez que presione REPEAT, el resaltado (amarillo)
cambiará de lugar.
Notas
• Para ocultar la indicación de modo de reproducción
inmediatamente después del paso 2, presione CLEAR.
• Dependiendo del disco o escena, si en la indicación aparece
“You can’t operate this command now”, no será posible utilizar
la función de repetición.
2
3
para seleccionar el modo de
19
Page 72

Uso de las funciones de repetición
Reproducción de A-B repetición
Puede repetir un segmento específico de un título o pista.
DVD/Video CD
Puede repetir una escena específica, por ejemplo.
Dependiendo del disco, es posible que no pueda usar la
función de repetición.
Audio CD
Puede repetir parte de una canción, por ejemplo.
MENU TITLE
ANGLEAUDIOSUB TITLE TIME
SEARCHREPEAT PLAY MODE
A B
A B
1 2 3
4 5 6
7 8 9
Para detener la A-B repetición
Presione de nuevo AyB.
• DVD/Video CD
Se indicará “ A-B OFF” en la parte superior de la
pantalla durante aproximadamente un segundo.
• Audio CD
El indicador “A-B” vuelve a quedar blanco y
desaparecerá. Comenzará la reproducción normal.*
*3 Consulte “Pantalla de visualización (Audio CD)” (página 18).
REPEAT
3
1 Cuando llegue al punto de inicio (punto A) del
segmento que desea repetir, presione AyB.
• DVD/Video CD
Se muestra “A-” en la parte superior de la pantalla.
• Audio CD
El indicador “A-” se ilumina en amarillo.*
*1 Consulte “Pantalla de visualización (Audio CD)” (página
18).
1
2 Cuando llegue al punto final que desea (punto B)
del segmento que quiere repetir, presione AyB de
nuevo.
• DVD/Video CD
La indicación cambia a “A-B”.
• Audio CD
El indicador “A-B” se ilumina en amarillo y
REPEAT
duración.*
*2 Consulte “Pantalla de visualización (Audio CD)” (página
18).
Notas
• Los puntos de inicio y final deben estar dentro del mismo título
(en el caso de un DVD) o pista (en el caso de Video CD/Audio
CD). No pueden abarcar dos o más títulos o pistas.
• La indicación “A-B” para DVD/Video CD desaparecerá
después de aproximadamente un segundo, a continuación, la
escena o canción volverá al punto de inicio.
• Si establece “Reproducción de A-B repetición”, se desactivarán
los ajustes anteriores como “Reproducción con exploración de
introducciones” y “Reproducción repetida de pista”.
se ilumina en azul bajo el tiempo de
2
20
Page 73

Reproducción de discos a diversas velocidades lentas
Puede reproducir las imágenes de los DVD y Video CD a
diversas velocidades lentas. Puede disfrutar de la escena
como si fuera una imagen fija.
4 5 6
7 8 9
RETURNCLEAR
0
LIST
ENTER
SCAN
PREV NEXT
PLAY
DISC
SCAN
m/M
PLAYN
NEXT>
SET UP PA USE
STOP
PAUSEX
Reproducción lenta
Puede reproducir un disco a varias velocidades lentas.
1 Presione X para hacer una pausa en las imágenes.
2 Presione M para reproducir hacia adelante
lentamente.
La reproducción lenta comienza a 1/16.
Cuadro por cuadro
Puede reproducir imágenes de cuadros congelados en
cuadro por cuadro.
1 Presione X para hacer una pausa en las imágenes.
2 Presione > para mostrar un cuadro.
Cada vez que presione >, las imágenes avanzarán
cuadro por cuadro.
Notas
• No podrá escuchar el sonido cuando esté usando la función
cuadro por cuadro.
• Dependiendo del disco o escena, si en la indicación aparece
“You can’t operate this command now”, no será posible utilizar
la función de cuadro por cuadro.
• En algunos discos, las imágenes pueden verse distorsionadas al
usar la reproducción de cuadro por cuadro.
• . está inactivo. No puede usar la reproducción en
sentido inverso mientras esté usando la función cuadro
por cuadro.
Para volver a la reproducción normal
Presione X o N.
Precaución para la reproducción de DVD/Video CD
Si desea reproducir un disco a varias velocidades lentas o cuadro
por cuadro, utilice los controles del control remoto inalámbrico.
No se pueden realizar estas funciones empleando el control
remoto alámbrico.
3 Presione M o m de nuevo para seleccionar la
velocidad de reproducción.
Cada vez que presione un botón, la velocidad de
reproducción cambiará de la siguiente forma:
1/16* y 1/8 y 1/4 y 1/2
* Si presiona m a velocidad de 1/16, la imagen se
congelará.
Notas
• No podrá escuchar el sonido cuando esté usando la función de
reproducción lenta.
• Dependiendo del disco o escena, si en la indicación aparece
“You can’t operate this command now”, no será posible utilizar
la función de reproducción lenta.
• En algunos discos, las imágenes pueden verse distorsionadas al
usar la reproducción lenta.
Para volver a la reproducción normal
Presione N.
Precaución para la reproducción de DVD/Video CD
Si desea reproducir un disco a varias velocidades lentas o cuadro
por cuadro, utilice los controles del control remoto inalámbrico.
No se pueden realizar estas funciones empleando el control
remoto alámbrico.
21
Page 74

Reproducción de pistas con varias funciones
Esta unidad ofrece varias opciones de modo de
reproducción por medio del botón PLAY MODE (modo
de reproducción).
MENU TITLE
ANGLEAUDIOSUB TITLE TIME
SEARCHREPEAT PLAY MODE
A B
PLAY MODE
1 2 3
4 5 6
7 8 9
Reproducción de pistas en orden aleatorio
—Reproducción aleatoria
Este modo reproduce las pistas de un disco en orden
aleatorio. Una vez que se hayan reproducido todas las
pistas del disco, se selecciona el siguiente disco.
Durante la reproducción de un Audio CD, presione
PLAY MODE (Modo de reproducción) una o más
veces para seleccionar SHUFFLE (Aleatorio).
Cada vez que presione PLAY MODE, el modo de
reproducción cambiará de la siguiente forma:
B SCAN B SHUFFLE
Reproducción normal b PROGRAM* b
Reproducción secuencial del inicio de las
pistas
—Reproducción con exploración de
ingresos
Este modo reproduce secuencialmente los primeros 10
segundos de cada pista. Esto es útil para localizar una
pista.
Durante la reproducción de un Audio CD, presione
PLAY MODE (Modo de reproducción) una o más
veces para seleccionar SCAN.
Cada vez que presione PLAY MODE, el modo de
reproducción cambiará de la siguiente forma:
B SCAN B SHUFFLE
Reproducción normal b PROGRAM* b
* Sólo puede pasar a PROGRAM cuando haya terminado de
hacer su lista de programa.
“SCAN” se ilumina en amarillo.
* Sólo puede pasar a PROGRAM cuando haya terminado de
hacer su lista de programa.
“SHUFFLE” se ilumina en amarillo.
22
Page 75

Reproducción de su propio programa
—Reproducción de programa
Para hacer su propio programa
1 Presione x para detener la reproducción.
Puede escuchar las pistas en el orden que programó
previamente. Primero, debe crear su propia lista de
programa y registrarla. Siga los pasos que se muestran a
continuación para crear su programa y disfrutar la
reproducción de las pistas de un disco en el orden que
prefiera.
MENU TITLE
ANGLEAUDIOSUB TITLE TI ME
A B
SEARCHREPEAT
PLAY MODE
PLAY MODE
1 2 3
4 5 6
7 8 9
RETURNCLEAR
Botones
numéricos
0
CLEAR
LIST
ENTER
ENTER
SCAN
PREV NEXT
SET UP P A USE
PLAY
STOP
DISC
M/,/m/<
PLAYN
STOPx
2 Presione PLAY MODE.
Aparecerá la indicación de creación de una lista de
programa.
Track Program
– –
B:Play(Program Play) Direction:Move Cursor
CLEAR:Track No.Clear 0~9:Track No.Input
ENTER:CFMD
Last Clear
All Clear
3 Presione los botones numéricos o los de cursor
(M/m) para ingresar números de pista.
Ejemplo 1: para ingresar “12”
Presione 1 y luego 2.
Aparece “12” en la indicación de ingreso de números
de pistas.
Track Program
1 2
B:Play(Program Play) Direction:Move Cursor
CLEAR:Track No.Clear 0~9:Track No.Input
ENTER:CFMD
Ejemplo 2: para ingresar “8”
Presione 8 (o presione 0 y luego 8).
Aparece “-8” en la indicación de ingreso de números
de pistas.
Nota
Si ingresa un número equivocado, ingrese de nuevo el número
correcto.
Last Clear
All Clear
continuar a la siguiente página t
23
Page 76

Reproducción de pistas con varias funciones
4 Presione ENTER para ingresar el número.
Se mostrará “12” en la lista del programa.
1
Track Program
– –
Last Clear
All Clear
12
B:Play(Program Play) Direction:Move Cursor
CLEAR:Track No.Clear 0~9:Track No.Input
ENTER:CFMD
Si ingresa una pista incorrecta y desea borrarla, siga los
pasos 1 y 2 que se muestran a continuación.
1 Mueva el resaltado (amarillo) para borrar el último
número de pista o todos los números de pista que ya
ingresó.
Para mover el a presione
“amarillo” desde:
Indicación de Borrar última*
números ingresados
Borrar última*
Borrar última*
Borrar todas*
Indicación de Borrar todas*
números ingresados M o m
1
1
2
Indicación de <
números ingresados
Borrar todas*
Indicación de <
números ingresados
1
2
2
*
2
*
,
M o m
, y luego
Para reproducir su propio programa
1 Durante la reproducción, presione PLAY MODE una
o más veces hasta que “PROGRAM” se ilumine en
la pantalla.
Cada vez que presione PLAY MODE, el modo de
reproducción cambiará de la siguiente forma:
B SCAN B SHUFFLE
4
Reproducción normal b PROGRAM*
2 Seleccione PROGRAM*
*4 Sólo puede pasar a PROGRAM cuando haya terminado de
hacer su lista de programa.
4
.
b
*1 Seleccione aquí para borrar el último número de pista de
una lista de programa.
*2 Seleccione aquí para borrar todos los números de pista de
una lista de programa.
2 Presione ENTER (CLEAR*3).
*3 Si presiona CLEAR en este momento, sólo puede borrar la
última pista, aunque seleccione “Borrar todas”.
Para seguir almacenando números de pista, mueva el
resaltado (amarillo) a “indicación de ingreso de números”.
5 Repita los pasos 3 y 4 para almacenar números de
pista en el orden que desee.
Puede almacenar hasta 20 números de pista.
6 Presione N para reproducir su programa.
Después de que se reproduzca la última pista de su
programa, la unidad se detendrá automáticamente.
24
Page 77

25
Page 78

Funciones
Uso de una lista de discos
adicionales
Este capítulo describe cómo
reproducir un disco DVD/Video CD/
Audio CD utilizando las funciones
avanzadas.
Visualización de una lista de discos
Puede mostrar una lista de los discos que contiene el
cargador para verificar los tipos de disco (DVD/Video
CD/Audio CD), para seleccionar un disco o para
establecer el tipo de disco para la reproducción actual.
4 5 6
7 8 9
PREV NEXT
SET UP PA USE
0
ENTER
SCAN
PLAY
STOP
RETURNCLEAR
LIST
DISC
RETURN
LIST
ENTER
M/,/m/<
O
Presione LIST.
La lista de discos aparecerá en la pantalla.*
*1Si la lista de discos parece estar incompleta, es posible que
haya presionado B/X*2 en el control remoto alámbrico
para el inicio antes de que la unidad haya terminado de
revisar los discos que hay en el cargador. Consulte
“Preparación del cambiador de DVD” (página 13-14).
*2También puede presionar PLAY (Reproducir) en el control
remoto inalámbrico para encenderla.
Disc List
1. DVD
2. DVD
3. Audio CD
4. Audio CD
5.
Disc type select
DVD Audio CDVideo CD
1 Números de las bandejas y tipos de disco
Las bandejas sin tipo de disco y con “–” indican “no
tiene disco” o “disco ilegible con arañazos, residuos
pegajosos, etc”.
2 Tipos de disco que puede seleccionar
Sólo puede reproducir discos de los tipos que estén
en este momento mostrando el indicador (Y) .
6. DVD
7. Video CD
8. Video CD
9.
10.
1
1
2
26
Page 79

Visualización de un tiempo
Title Play 0: 24 :50
Title Remain 1:2 5: 41
Chapter Play 0:01 :48
Chapter Remain 0:03 :26
0:00:12
0:04:45
0:06:32
0:41:15
Track Play
Track Remain
Disc play
Disc Remain
de reproducción
Para salir de la Lista de discos
Presione LIST o RETURNO.
Para seleccionar un disco
1 Presione los botones de cursor (M/,/m/<) para
seleccionar en la Lista de discos la bandeja que desee.
La bandeja seleccionada se resalta en amarillo.
Amarillo
Disc List
1. DVD
2. DVD
3. Audio CD
4. Audio CD
5.
Disc type select
DVD Audio CDVideo CD
6. DVD
7. Video CD
8. Video CD
9.
10.
2 Presione ENTER.
Empezará a reproducirse el disco que seleccionó.
Para establecer el tipo de disco para la
reproducción actual
1 Presione los botones de cursor (M/,/m/<) para
seleccionar el tipo de disco (DVD/Video CD/Audio
CD).
El tipo de disco seleccionado se resalta en amarillo.
Visualización de un tiempo de reproducci ón
Puede mostrar el tiempo de reproducción de discos DVD,
Video CD y Audio CD.
MENU TITLE
ANGLEAUDIOSUB TITLE TIME
A B
SEARCHREPEAT
PLAY MODE
TIME
1 2 3
4 5 6
7 8 9
RETURNCLEAR
0
RETURN
O
DVD/Video CD
Presione TIME durante la reproducción.
Se muestra el tiempo de reproducción en la parte
superior de la pantalla durante aproximadamente 5
segundos.
• DVD
1 Presione TIME cuando se esté mostrando el
tiempo de reproducción.
2 Cada vez que presione TIME, el indicador
alternará de la siguiente forma:
2 Presione ENTER.
Cada vez que presione ENTER, el indicador (Y) se
enciende y se apaga. Asegúrese de mostrar el
indicador (Y) sólo para los tipos de disco que
desea reproducir.
3 Presione LIST o RETURNO.
Sólo los tipos de disco seleccionados (marcados como
Y) se reproducirán, todos los demás se omitirán.
Notas
• Estos ajustes se cancelarán automáticamente cuando expulse el
cargador.
• Cuando vuelva a insertar el cargador, los tres tipos de disco
(DVD/Video CD/Audio CD) aparecerán con el indicador
(Y).
DVD Audio CDVideo CD
Amarillo
• Video CD
1 Presione TIME cuando se esté mostrando el
tiempo de reproducción.
2 Cada vez que presione TIME, el indicador
alternará de la siguiente forma:
Para salir del indicador de tiempo de
reproducción
Presione RETURNO.
continuar a la siguiente página t
27
Page 80

<
Visualización de un tiempo de reproducción
Búsqueda a partir de
elementos
Audio CD
Presione TIME.
Se muestra el tiempo de reproducción en la pantalla
de visualización (Audio CD)*.
Ejemplo:
4
6 7 8
DISC
TRACK
DISC
00:00:18 02
00:00:18 02
REPEAT L
R
TRACK
A-B
SCAN
SHUFFLE
PROGRAM
tiempo de reproducción
* Para obtener detalles, consulte “Pantalla de visualización
(Audio CD)” (página 18).
Cada vez que presione TIME, el indicador alternará de
la siguiente forma:
Track Play 00:00:12
Track Remain 00:04:45
Disc play 00:06:32
Disc Remain 00:41:15
5
10
Métodos de búsqueda (título/capítulo/
pista/tiempo de reproducción transcurrido)
Puede ubicar rápidamente un punto especificando el
título, capítulo o pista, o ingresando el tiempo de
reproducción transcurrido.
MENU TITLE
ANGLEAUDIOSUB TITLE TIME
SEARCHREPEAT
A B
PLAY MODE
SEARCH
1 2 3
4 5 6
7 8 9
RETURNCLEAR
Botones
numéricos
0
CLEAR
LIST
ENTER
ENTER
DISC
M/,/m/
1 Presione SEARCH durante la reproducción.
Se muestra la información de reproducción actual en
la parte superior de la pantalla durante
proximadamente 5 segundos.
• Información de reproducción de DVD
Search T:01 C:005
Time
:0:23:41
Número del título
Número del capítulo
Tiempo de reproducción
transcurrido
• Información de reproducción de Video CD
Search T:03
Número de pista
Time
:0:01:55
Tiempo de la pista
transcurrido
2 Presione SEARCH* para seleccionar el elemento
clave (número del título, número del capítulo,
número de pista o tiempo transcurrido del título o
pista).
* También puede emplear los botones de cursor (B/b) para
seleccionar un elemento clave.
Cada vez que presione SEARCH, el elemento alternará de la
siguiente forma:
• Elementos clave para DVD
B
Número de título
Tiempo transcurrido “segundos”
• Elementos clave para Video CD
Tiempo transcurrido “segundos” b Tiempo transcurrido “minutos” b
B
Número de capítulo
B
Número de pista
B
Tiempo transcurrido “horas”
b
Tiempo transcurrido “minutos”
B
Tiempo transcurrido “horas”
b
28
Page 81

3 Presione los botones numéricos* para ingresar el
número del título, número del capítulo, número de
pista o tiempo transcurrido del título o pista.
* También puede usar los botones de cursor (V/v) para
ingresar números.
Presione V: para aumentar el número.
Presione v: para disminuir el número.
Ejemplo: para realizar una búsqueda de tiempo transcurrido
de un título
Para comenzar la reproducción a partir de un tiempo
transcurrido de 1 hora, 21 minutos y 5 segundos.
1 Presione 1.
Aparece “1” en la posición de “horas” del indicador.
Time
:1:--:--
rojo
2 Presione SEARCH o el botón de cursor (,) para
mover el cursor a la posición de “minutos”.
Time
:1:00:--
rojo
3 Presione 2 y luego 1.
Aparece “21” en la posición de “minutos”.
Time
:1:21:--
rojo
4 Presione SEARCH o el botón de cursor (,) para
mover el cursor a la posición de “segundos”.
Time
:1:21:00
rojo
5 Presione 5.
Aparece “05” en la posición de “segundos”.
Time
:1:21:05
rojo
Nota
Para borrar los números ya ingresados, presione CLEAR.
4 Presione ENTER.
Comenzará la reproducción desde el punto señalado.
Notas
• La información de reproducción desaparece aproximadamente
5 segundos después de cada ingreso. Por ello, asegúrese de
completar la operación para el siguiente paso mientras se esté
mostrando la información.
• Durante la reproducción de un DVD, aunque presione > en
el control remoto alámbrico, no podrá activar la función de
búsqueda de capítulo en algunos discos. Incluso si en el
monitor aparece el mensaje “You can’t operate this command
now”, es posible que pueda utilizar la función de búsqueda de
capítulo (con discos de ese tipo) utilizando el control remoto
inalámbrico.
• Dependiendo del disco, si en la indicación aparece “You can’t
operate this command now”, no será posible utilizar la función
de búsqueda (título/capítulo/pista/tiempo de reproducción
transcurrido).
Cambio del idioma de
subtítulos
Algunos DVD tienen grabados subtítulos en uno o más
idiomas. En tales DVD puede activar o desactivar los
subtítulos o cambiar el idioma en que aparecen.
MENU TITLE
ANGLEAUDIOSUB TITLE TIME
SEARCHREPEAT
A B
PLAY MODE
1 2 3
4 5 6
7 8 9
RETURNCLEAR
0
LIST
ENTER
DISC
1 Presione SUBTITLE durante la reproducción.
Se muestra el idioma de los subtítulos en la parte
superior de la pantalla durante aproximadamente 5
segundos.
Ejemplo: una indicación de idioma de los subtítulos
Subtitle
2 Presione SUBTITLE*
deseado mientras se esté mostrando el idioma de
los subtítulos.
*1 También puede presionar los botones de cursor (V/v) para
seleccionar el idioma de los subtítulos.
Cada vez que presione SUBTITLE, el idioma alterna a
lo largo de la lista de los idiomas de subtítulos que
están grabados en el disco.
Nota
Si desea ocultar los subtítulos, presione SUBTITLE para
seleccionar “Off”.
3 Presione ENTER*
*2Aunque no presione ENTER (Intro), el idioma de los
subtítulos se activa automáticamente unos 5 segundos
después de hacer la selección en el paso 2.
Nota
También puede cambiar el idioma de los subtítulos utilizando el
menú DVD (consulte la página 30) o la pantalla de ajuste*
(consulte la página 39).
*3 Sólo puede cambiar a un determinado idioma de subtítulos
utilizando una pantalla de ajuste si el idioma está incluido
tanto en el disco como en la pantalla de ajuste.
02.English
2
.
1
para seleccionar el idioma
SUBTITLE
ENTER
M/m
3
29
Page 82

Uso de los menús para DVD
<
Con algunos DVD se puede utilizar el menú original,
como sería el menú de títulos y menú DVD. Puede
reproducir su escena o canción favoritas seleccionando
títulos de canciones y escenas durante la reproducción de
un DVD. Puede elegir un elemento, el idioma de los
subtítulos, el idioma del audio, etc. seleccionando un
menú DVD. Los contenidos de los menús de títulos y los
menús DVD son distintos dependiendo de cada disco. Es
posible que haya discos DVD que no tengan menús
grabados.
MENU TITLE
TITLE
MENU
A B
ANGLEAUDIOSUB TITLE TIME
SEARCHREPEAT
PLAY MODE
1 2 3
4 5 6
7 8 9
RETURNCLEAR
0
LIST
ENTER
DISC
ENTER
M/,/m/
Uso de un menú de títulos
Algunos DVD tienen un menú de títulos. Puede
seleccionar y reproducir un título del menú.*
*1 Los títulos son las secciones más largas de un elemento de
imagen o música de un DVD, por ejemplo, una película o un
álbum de software de audio, etc.
1
1 Durante la reproducción de un DVD, presione TITLE
(Título).
Se muestra el menú de títulos.*
*2 Los contenidos de los menús de títulos son distintos
dependiendo del DVD.
2
Uso de un menú DVD
Algunos DVD tienen un menú más completo que incluye
elementos como los idiomas del audio, idiomas de los
subtítulos, títulos, capítulos, etc.
1 Durante la reproducción de un DVD, presione
MENU.
Aparece el menú DVD.
2 Presione los botones de cursor (V/b/v/B) para
seleccionar el elemento deseado.
3 Presione ENTER*
*1 Si aparecen otras pantallas de selección, repita el paso 2
y 3.
Notas
• Algunos DVD no tienen menú DVD y, en algunos, el
contenido del menú DVD y el menú de títulos son iguales.
• En algunos DVD, el “Menú DVD” puede presentarse como
“MENU”.
• En algunos DVD “Presione ENTER” puede aparecer como
“Presione SELECT” en el paso 3.
• El contenido del menú DVD puede ser distinto
dependiendo del DVD.
• Lea el manual de instrucciones que viene incluido con el
DVD.
Para finalizar o abandonar la operación del
menú DVD
Presione MENU.
Si está activada la reanudación de reproducción*
disco se reproducirá desde el punto que indicó en el
menú DVD en el paso 1.
*2 Es posible que algunos DVD no reanuden la reproducción
al presionar MENU. En tal caso, consulte los manuales de
instrucciones que recibió con los discos.
1
.
2
, el
2 Presione los botones de cursor (V/b/v/B) para
seleccionar el título deseado.
3 Presione ENTER.
Empezará a reproducirse el título que seleccionó.
Notas
• Algunos DVD no tienen menú de títulos y, en algunos, el
contenido del menú de títulos y el menú DVD son iguales.
• En algunos DVD, el “menú DVD” puede presentarse como
“MENU”.
• En algunos DVD “Presione ENTER” puede aparecer como
“Presione SELECT” en el paso 3.
• El contenido del menú DVD puede ser distinto dependiendo
del DVD.
• Lea el manual de instrucciones que viene incluido con el DVD.
30
Page 83

Cambio del idioma del
audio
Cambio de ángulos
Algunos DVD tienen varios idiomas del audio que puede
seleccionar.
MENU TITLE
ANGLEAUDIOSUB TITLE TIME
A B
SEARCHREPEAT
PLAY MODE
AUDIO
1 2 3
4 5 6
7 8 9
RETURNCLEAR
0
LIST
ENTER
DISC
ENTER
M/m
1 Presione AUDIO durante la reproducción.
El idioma del audio actual se muestra en la parte
superior de la pantalla durante aproximadamente 5
segundos.
Ejemplo: una indicación de idioma del audio
Audio
01.English Dolby Digital
2 Presione AUDIO*
audio que desea.
*1 Asegúrese de presionar el botón mientras el idioma del
audio se está mostrando en la parte superior de la pantalla.
También puede usar los botones de cursor (V/v) para
seleccionar un idioma.
Cada vez que presione AUDIO, el idioma del audio
alterna entre los idiomas disponibles que están
grabados en el disco.
1
para seleccionar el idioma del
Algunos DVD tienen varios ángulos alternos grabados
para algunas escenas.
MENU TITLE
ANGLEAUDIOSUB TITLE TIME
A B
SEARCHREPEAT
PLAY MODE
ANGLE
1 2 3
4 5 6
7 8 9
RETURNCLEAR
0
LIST
ENTER
ENTER
DISC
M/m
1 Presione ANGLE durante la reproducción de una
escena grabada con varios ángulos.
El número del ángulo seleccionado actualmente se
muestra en la parte superior de la pantalla durante
aproximadamente 5 segundos.
Ejemplo: indicación de un número de ángulo
Angle 1 /4
2 Presione ANGLE*
ángulo preferido mientras se esté mostrando el
número de ángulo.
*1 También puede usar los botones de cursor (V/v) para
seleccionar un número de ángulo.
Cada vez que presione el botón ANGLE, cambiará el
número del ángulo.
El número de ángulo que tiene seleccionado
actualmente/el número total de ángulos
distintos o alternos
1
para seleccionar su número de
3 Presione ENTER*
*2 Aunque no presione ENTER, el idioma del audio se
activa automáticamente unos 5 segundos después de hacer
la selección en el paso 2.
2
.
Notas
• Sólo puede cambiar de idioma del audio si hay varios idiomas
grabados en el DVD.
• También puede cambiar los idiomas del audio utilizando el
menú DVD (consulte la página 30) o la pantalla de ajuste*
(consulte la página 38).
*3 Sólo puede cambiar un idioma del audio específico utilizando
una pantalla de ajuste si el idioma está incluido tanto en el
disco como en la pantalla de ajuste.
3
3 Presione ENTER*
*2 Aunque no presione ENTER, el número del ángulo se
activará automáticamente unos 5 segundos después de que
haga la selección en el paso 2.
2
.
Notas
• Sólo puede cambiar el ángulo si hay varios ángulos grabados
en el DVD.
• La cantidad total de ángulos grabados puede ser distinta
dependiendo del DVD.
• Sólo puede cambiar de ángulo durante la reproducción normal.
No puede cambiar el ángulo cuando esté usando la
reproducción lenta o la función cuadro por cuadro.
• Cuando aparezca la escena con varios ángulos elegida, el
ángulo cambiará automáticamente al que seleccionó en el paso
2.
31
Page 84

Cambio del método de salida de audio
Estéreo/Mono izquierdo/Mono derecho
Puede cambiar el método de salida de audio (Estéreo/
Mono izquierdo/Mono derecho) durante la reproducción
de un Video CD o Audio CD.
MENU TITLE
ANGLEAUDIOSUB TITLE TIME
SEARCHREPEAT
A B
1 2 3
4 5 6
7 8 9
RETURNCLEAR
0
ENTER
PLAY MODE
LIST
DISC
AUDIO
ENTER
Audio CD
1 Presione AUDIO durante la reproducción.
2 Presione AUDIO para seleccionar el método de
salida deseado (Estéreo/Mono izquierdo/Mono
derecho) cuando se esté mostrando el método de
salida.
Cada vez que presione AUDIO, el método de salida
alterna de la siguiente forma.
• Audio CD*
B Estéreo (“
2
*
El método de salida de audio se activa cuando lo
selecciona en el paso 2. No necesita presionar ENTER.
2
”) B Mono izquierdo (“
L R
Mono derecho (“
L R
L R
”) b
”)
Video CD
1 Presione AUDIO durante la reproducción.
El método de salida actual se muestra en la parte
superior de la pantalla durante aproximadamente 5
segundos.
Ejemplo: una indicación de método de salida
Audio L/R
2 Presione AUDIO para seleccionar el método de
salida de audio (Estéreo/Mono izquierdo/Mono
derecho) mientras se esté mostrando el método de
salida.
Cada vez que presione AUDIO, el método de salida
alternará de la siguiente forma:
• Video CD
B Estéreo (“Audio L/R”) B Mono derecho (“Audio R/R”)
Mono izquierdo (“Audio L/L”)b
3 Presione ENTER*
*1Aunque no presione ENTER, el método de salida se
activará automáticamente unos 5 segundos después de
seleccionarlo en el paso 2.
1
.
32
Page 85

Uso de las funciones PBC (playback control)
Uso de las funciones PBC
Durante la reproducción de un Video CD compatible con
PBC, las funciones PBC se activan automáticamente y
puede mostrar el menú PBC. Si no desea usar las
funciones PBC, consulte “Detener las funciones PBC”.
MENU TITLE
ANGLEAUDIOSUB TITLE TIME
SCAN
PLAY
STOP
PLAY MODE
SEARCHREPEAT
RETURNCLEAR
LIST
DISC
A B
1 2 3
4 5 6
7 8 9
0
ENTER
PREV NEXT
SET UP PAUSE
MENU
SEARCH
Botones
numéricos
CLEAR
ENTER
M/,/m/<
PLAYN
2 Presione 0.
Aparece “10” en la esquina superior izquierda de
la pantalla.
Nota
Si ingresó un número equivocado, presione CLEAR. Se
borrarán todos los números ingresados.
3 Presione ENTER.
Si aparecen más pantallas de selección, repita los pasos
2 (1 y 2) a 3.
Nota
Los menús PBC serán distintos dependiendo del Video CD. Lea
el manual de instrucciones que recibió con el Video CD.
Detener las funciones PBC
1 Presione STOP durante la reproducción del Video CD.
Se detiene la reproducción.
”x” parpadea durante un segundo y aparece
“Resume---”. Se activa la reanudación de la
reproducción (página 17).
“x” parpadeará
durante un segundo
en los pasos 1 y 2
...
Resume
“PBC” desaparece en el paso 3
PBC
STOPx
1 Presione MENU durante la reproducción del Video
CD.
Aparecerá el menú PBC.
2 Presione los botones numéricos para ingresar el
número del elemento deseado mientras la pantalla
de menú PBC se está mostrando.
El elemento PBC actual se muestra en la parte superior
de la pantalla durante aproximadamente 5 segundos.
Ejemplo: para ingresar el número de elemento “10”
1 Presione 1.
Aparece “-1”* en la esquina superior izquierda
de la pantalla.
* Concluya la siguiente operación antes de que “-1”
desaparezca.
2 Presione STOP.
Desaparecerá “Reanudar---” y “x” parpadea durante
un segundo.
Reanudación tras detener la reproducción.
3 Presione STOP nuevamente.
Desaparecerá “PBC” de la esquina superior derecha de
la pantalla.
4 Presione PLAY.
Comenzará la reproducción.
Nota
Dependiendo del Video CD, es posible que no se reproduzca
parte del contenido si no están activadas las funciones PBC.
33
Page 86

Uso de las funciones PBC (playback control)
Activación de las funciones PBC desde la
reproducción normal
1 Presione STOP durante la reproducción normal de
Video CD.
Se detiene la reproducción.
“x” parpadea durante un segundo y aparece
“Resume---”. Se activa la reanudación de la
reproducción (página 17).
2 Presione STOP.
“x” parpadea durante un segundo y “Resume---”
desaparece. Se desactiva la reanudación de la
reproducción.
3 Presione STOP nuevamente.
Aparecerá “PBC” en la esquina superior derecha de la
pantalla.
4 Presione PLAY.
Comenzará la reproducción PBC.
Nota
Si no aparece la pantalla de menú PBC, presione MENU para
mostrarla.
34
Page 87

35
Page 88

Cambio del
Uso de la pantalla de ajuste
ajuste
Este capítulo describe cómo
configurar y ajustar el reproductor
usando el menú de ajuste en pantalla.
La mayoría de las configuraciones y
ajustes deben fijarse la primera vez
que utilice el cambiador.
Selección de los elementos para el ajuste
1 Presione STOP para detener la reproducción.
2 Presione SET UP.
Se mostrará la pantalla de ajuste: el elemento
seleccionado actualmente estará resaltado en amarillo.
Set Up
DVD Menu Language
Audio Language Original
Subtitle Language
Digital Output
Display
Parental
OSD Message
Player Language
Original
Original
LPCM
4:3 Letter Box
8
On
English
3 Presione los botones de cursor (V/v) para
seleccionar el elemento cuyo ajuste desea cambiar.
4 Consulte las siguientes páginas para concluir el
ajuste.
Si seleccionó “---” en el paso 3: consulte:
“DVD Menu Language”
(idioma del menú DVD) página 37
“Audio Language”
(idioma del audio) página 38
“Subtitle Language”
(idioma de los subtítulos) página 39
“Digital Output”
(salida digital) página 40
“Display” (Aspect Ratio)
(pantalla, relaciones de
aspecto) página 41
“Parental”
(control de bloqueo) página 42
“OSD Message” (mensaje OSD) página 46
“Player Language”
(idioma del reproductor) página 47
Nota
Si desea volver a la pantalla de ajuste (consulte el paso 2)
cuando esté terminando su cambio de ajuste, presione
RETURNO o B. Puede volver aquí.
36
Page 89

Finalizar los cambios de ajuste
DVD Menu Language
Puede cambiar el idioma en que se muestra el menú DVD.
1 Consulte primero “Selección de los elementos para
el ajuste” (página 36).
Siga los pasos 1 a 4 de la página 36 y luego continúe
abajo para concluir el ajuste.
2 Seleccione “DVD Menu Language” y presione
ENTER.
Aparecerá la pantalla de ajuste del idioma del menú
DVD:
El idioma seleccionado actualmente estará resaltado en
amarillo.
DVD Menu Language
Original
Japanese
English
Chinese
Italian
French
German
Korean
Para terminar o abandonar el cambio de
ajuste y reanudar la reproducción
1 Presione SET UP.
Aparecerá la pantalla de reproducción con el
indicador “x”. La reanudación de la reproducción
aún está activada.
2 Presione PLAY para iniciar la reproducción.
• DVD/Video CD
El disco se reproduce desde el principio*.
* Si aún está activada la reanudación de la reproducción,
el disco se reproducirá a partir del punto en el que
detuvo la reproducción.
• Audio CD
El disco se reproducirá desde el punto en el que
detuvo la reproducción.
Notas
• Si desea volver a la pantalla de ajuste (página 36) mientras está
terminando un cambio de ajuste, presione RETURNO o B.
• Cuando se coloca el cursor en “Original”, el DVD muestra el
idioma original del disco.
• La cantidad de idiomas variará dependiendo del DVD.
Algunos discos sólo contienen un idioma.
• Si selecciona un idioma que no esté almacenado en el disco, se
muestra el idioma predeterminado.
• Lea el manual de instrucciones que recibió con el DVD.
3 Presione los botones de cursor (V/v) para
seleccionar el idioma deseado.
4 Presione ENTER.
La pantalla de ajuste reaparecerá automáticamente.
Puede marcar el idioma que desee en “DVD Menu
Language”.
Set Up
DVD Menu Language
Audio Language Original
Subtitle Language
Digital Output
Display
Parental
OSD Message
Player Language
English
Original
LPCM
4:3 Letter Box
8
On
English
37
Page 90

Finalizar los cambios de ajuste
Audio Language
Puede cambiar el idioma del audio de un DVD.
1 Consulte primero “Selección de los elementos para
el ajuste” (página 36).
Siga los pasos 1 a 4 de la página 36 y luego continúe
abajo para concluir el ajuste.
2 Seleccione “Audio Language” y presione ENTER.
Aparecerá la pantalla de ajuste del idioma del audio:
El idioma seleccionado actualmente estará resaltado en
amarillo.
Audio Language
Original
Japanese
English
Chinese
Italian
French
German
Korean
3 Presione los botones de cursor (V/v) para
seleccionar el idioma deseado.
4 Presione ENTER.
La pantalla de ajuste reaparecerá automáticamente.
Puede marcar el idioma que desee en “Audio
Language”.
Para terminar o abandonar el cambio de
ajuste y reanudar la reproducción
1 Presione SET UP.
Aparecerá la pantalla de reproducción con el
indicador “x”. La reanudación de la reproducción
aún está activada.
2 Presione PLAY para iniciar la reproducción.
• DVD/Video CD
El disco se reproducirá desde el principio*.
* Si aún está activada la reanudación de la
reproducción, el disco se reproducirá a partir del
punto en el que detuvo la reproducción.
• Audio CD
El disco se reproducirá desde el punto en el que
detuvo la reproducción.
Notas
• Si desea volver a la pantalla de ajuste (página 36) mientras está
terminando un cambio de ajuste, presione RETURNO o B.
• Cuando se coloca el cursor en “Original”, el DVD se reproduce
en el idioma original del audio del disco.
• Algunos discos sólo contienen un idioma. La cantidad de
idiomas almacenados es distinta dependiendo del DVD.
• Si selecciona un idioma del audio que no esté almacenado en el
disco, se reproducirá el idioma original del audio.
• Lea el manual de instrucciones que recibió con el DVD.
• También puede cambiar el idioma del audio utilizando el menú
DVD o la pantalla de ajuste.
Si cambia el idioma del audio utilizando el menú DVD o
presionando AUDIO, el cambio será temporal y no se
cambiará el valor del ajuste.
Set Up
DVD Menu Language
38
English
Audio Language Original
Subtitle Language
Digital Output
Display
Parental
OSD Message
Player Language
Original
Bitstream
4:3 Letter Box
On
English
8
Page 91

Subtitle Language
Puede cambiar el idioma de los subtítulos de un DVD. Si
no desea que aparezcan los subtítulos, también puede
ocultarlos.
1 Consulte primero “Selección de los elementos para
el ajuste” (página 36).
Siga los pasos 1 a 4 de la página 36 y luego continúe
abajo para concluir el ajuste.
2 Seleccione “Subtitle Language” y presione ENTER.
Aparecerá la pantalla de ajuste del idioma de los
subtítulos:
El idioma seleccionado actualmente estará resaltado en
amarillo.
Subtitle Language
Original Off
Japanese
English
Chinese
Italian
French
German
Korean
3 Presione los botones de cursor (V/v) para
seleccionar el idioma deseado*
*1 Si no desea que aparezca el idioma de los subtítulos,
seleccione “Off”. En algunos discos no se puede ocultar el
idioma de los subtítulos.
1
.
Para terminar o abandonar el cambio de
ajuste y reanudar la reproducción
1 Presione SET UP.
Aparecerá la pantalla de reproducción con el
indicador “x”. La reanudación de la reproducción
aún está activada.
2 Presione PLAY para iniciar la reproducción.
• DVD/Video CD
El disco se reproduce desde el principio*
*2Si aún está activada la reanudación de la
reproducción, el disco se reproducirá a partir del
punto en el que detuvo la reproducción.
• Audio CD
El disco se reproducirá desde el punto en el que
detuvo la reproducción.
Notas
• Si desea volver a la pantalla de ajuste (página 36) mientras está
terminando un cambio de ajuste, presione RETURNO o B.
• Algunos discos sólo contienen subtítulos en un idioma. La
cantidad de idiomas almacenados es distinta dependiendo del
DVD.
• Si selecciona un idioma de subtítulos que no esté almacenado
en el disco, se reproducirán los subtítulos en el idioma
predeterminado.
• Lea el manual de instrucciones que recibió con el DVD.
• También puede cambiar el idioma de los subtítulos utilizando
el menú DVD o la pantalla de ajuste.
Si cambia el idioma de los subtítulos utilizando el menú DVD
o presionando el botón SUBTITLE, el cambio será temporal y
no se cambiará el valor del ajuste.
2
.
4 Presione ENTER.
La pantalla de ajuste reaparecerá automáticamente.
Puede marcar el idioma que desee en “Subtitle
Language”.
Set Up
DVD Menu Language
Audio Language Original
Subtitle Language
Digital Output
Display
Parental
OSD Message
Player Language
Original
Italian
LPCM
4:3 Letter Box
8
On
English
39
Page 92

Finalizar los cambios de ajuste
Digital Output
Puede cambiar el sistema de salida de audio. Seleccione
los ajustes correctos para los dispositivos de audio digital
que tenga conectados.
LPCM
Seleccione “LPCM” si su dispositivo de audio digital no
está equipado con un decodificador Dolby digital.
Cuando se reproduzcan señales de audio en formato
Dolby digital, se convertirán a formato lineal PCM antes
de darles salida.
Bitstream
Seleccione “Bitstream” (flujo de bits) si su dispositivo de
audio digital está equipado con un decodificador Dolby
digital. Se dará salida a las señales de audio en formato
Dolby digital directamente sin modificarlas.
Para señales de audio en formato DTS
Conecte un dispositivo de audio digital equipado con
decodificador DTS y luego seleccione “Bitstream”.*
*1 No seleccione “LPCM”. Si lo hace, no habrá salida de audio.
1
1 Consulte primero “Selección de los elementos para
el ajuste” (página 36).
Siga los pasos 1 a 4 de la página 36 y luego continúe
abajo para concluir el ajuste.
2 Seleccione “Digital Output” y presione ENTER.
Aparecerá la pantalla de ajuste de la salida digital:
El elemento seleccionado actualmente estará resaltado en
amarillo.
Digital Output
LPCM
Bitstream
3 Presione los botones de cursor (V/v) para seleccionar
la salida de audio deseada (LPCM/Bitstream).
4 Presione ENTER.
Reaparecerá la pantalla de ajuste automáticamente.
Puede marcar la opción de salida de audio que desea
en “Digital Output”.
Set Up
DVD Menu Language
Audio Language Original
Subtitle Language
Digital Output
Display
Parental
OSD Message
Player Language
Precaución
El ajuste inadecuado puede causar ruidos perjudiciales a los
oídos y dañar sus altavoces. Lea el manual de instrucciones que
recibió con el dispositivo de audio digital que conectó.
Para terminar o abandonar el cambio de
ajuste y reanudar la reproducción
1 Presione SET UP.
Aparecerá la pantalla de reproducción con el
indicador “x”. La reanudación de la reproducción
aún está activada.
2 Presione PLAY para iniciar la reproducción.
• DVD/Video CD
El disco se reproduce desde el principio*
*2Si aún está activada la reanudación de la
reproducción, el disco se reproducirá a partir del
punto en el que detuvo la reproducción.
• Audio CD
El disco se reproducirá desde el punto en el que
detuvo la reproducción.
Nota
Si desea volver a la pantalla de ajuste (página 36) mientras está
terminando un cambio de ajuste, presione RETURNO o B.
English
Original
Bitstream
4:3 Letter Box
8
On
English
2
.
40
Page 93

Display (relación de aspecto —proporción
horizontal/vertical de imagen en la
pantalla)
Los monitores tienen dos tipos de relaciones de aspecto: el
tipo normal con una relación de 4:3 horizontal-a-vertical y
un tipo ancho con una relación de 16:9. Algunos DVD
también tienen los diversos tipos de relaciones de aspecto
siguientes:
4:3 Letter Box
Cuando esté usando un monitor
normal, seleccione 4:3 Letter Box. Si
reproduce una imagen ancha de 16:9
de DVD en un monitor normal, las
imágenes se comprimirán
verticalmente.
4:3 Pan & Scan
Cuando esté usando un monitor
normal, seleccione 4:3 Pan & Scan. Si
reproduce un DVD de imagen 16:9
en un monitor normal, las imágenes
se recortarán a izquierda y der echa.
16:9 Widescreen
Cuando esté utilizando un monitor
ancho, seleccione 16:9 Widescreen.
Si reproduce un DVD de imagen
16:9, las imágenes se reproducen a
tamaño completo*1.
*1 Para reproducir las imágenes a tamaño completo, ajuste su
monitor a “Full” o al modo correspondiente. Para obtener
detalles, lea el manual de instrucciones que recibió con el
monitor.
Puede seleccionar la relación de aspecto que desee de
entre las que sean compatibles con su monitor.
1 Consulte primero “Selección de los elementos para
el ajuste” (página 36).
Siga los pasos 1 a 4 de la página 36 y luego continúe
abajo para concluir el ajuste.
2 Seleccione “Display” y presione ENTER.
Aparecerá la pantalla para cambiar la relación del
aspecto:
El elemento seleccionado actualmente estará resaltado en
amarillo.
Display
Letter Box
4:3
4:3
Pan&Scan
16:9
Widescreen
3 Presione los botones de cursor (V/v) para
seleccionar la relación de aspecto que desee (4:3
Letter Box/4:3 Pan & Scan/16:9 Widescreen)*
*2Los tipos de relación de aspecto serán distintos
dependiendo de su monitor y del disco.
2
.
4 Presione ENTER.
La pantalla de ajuste reaparecerá automáticamente.
Puede marcar el tipo de relación de aspecto que desee
en “Display”.
Set Up
DVD Menu Language
Audio Language Original
Subtitle Language
Digital Output
Display
Parental
OSD Message
Player Language
Para terminar o abandonar el cambio de
ajuste y reanudar la reproducción
1 Presione SET UP.
Aparecerá la pantalla de reproducción con el
indicador “x”. La reanudación de la reproducción
aún está activada.
2 Presione PLAY para iniciar la reproducción.
• DVD/Video CD
El disco se reproducirá desde el principio*
*3Si aún está activada la reanudación de la
reproducción, el disco se reproducirá a partir del
punto en el que detuvo la reproducción.
• Audio CD
El disco se reproducirá desde el punto en el que
detuvo la reproducción.
Notas
• Si desea volver a la pantalla de ajuste (página 36) mientras está
terminando un cambio de ajuste, presione RETURNO o B.
• Si selecciona una relación de aspecto que no esté almacenada
en el disco, durante la reproducción se seleccionará otra que sí
lo esté.
• Si utiliza un monitor normal para reproducir un DVD de
imagen 16:9, las imágenes tendrán un aspecto anormal.
• Cuando utilice un monitor de pantalla ancha en “Full” o un
modo equivalente y ajuste esta unidad a “4:3 Letter Box” o
“4:3 Pan & Scan”, las imágenes tendrán un aspecto anormal.
• Lea el manual de instrucciones que recibió con el DVD.
English
Original
Bitstream
4:3 Pan&Scan
8
On
English
3
.
41
Page 94

Finalizar los cambios de ajuste
Parental (ajuste inicial)
Es posible limitar la reproducción de ciertos DVD según
un nivel predeterminado, como sería la edad de los
usuarios. La función “Control de bloqueo” permite
establecer un nivel de limitación de reproducción.
Cuando utilice la unidad por primera vez, establezca una
contraseña y nivel de bloqueo como se describe a
continuación.
1 Consulte primero “Selección de los elementos para
el ajuste” (página 36).
Siga los pasos 1 a 4 de la página 36 y luego continúe
abajo para concluir el ajuste.
2 Seleccione “Parental” y presione ENTER.
Aparecerá la pantalla de ajuste para establecer la
contraseña.
Password
Please input Password
4 Presione los botones numéricos para ingresar
nuevamente su contraseña (el mismo número de 4
dígitos del paso 3)*
*3 Si ingresa un número equivocado, presione CLEAR. Se
borrarán todos los números.
Se mostrará la pantalla de mensajes.
Password
Password has been changed
This password is necessary
when you change parental setting.
Please remember this password.
Please press "ENTER" key.
3
.
5 Presione ENTER.
Se muestra la pantalla de control de bloqueo.
Parental
Level
1234567890
En el paso 3, “—” cambia a “*” cuando se ingresan los números.
3 Presione los botones numéricos*
contraseña (número de cuatro dígitos)*
*1 También puede presionar los botones de cursor (B/b) y
después presionar ENTER (Intro) para seleccionar los
números en la parte inferior de la pantalla.
*2 Si ingresa un número equivocado, presione CLEAR.
Se borrarán todos los números.
1
para ingresar su
2
.
Volverá a aparecer la pantalla para volver a ingresar la
contraseña.
Password
Please input password again
for confirmation
1234567890
Password change
6 Presione los botones de cursor (V/v) para
seleccionar “Level” (nivel).
7 Presione ENTER.
Se muestra la pantalla de ajuste de nivel.
El elemento seleccionado se resalta en amarillo.
Level
8
7
6
5
4
3
2
1
En el paso 4, “—” cambia a “*” cuando se ingresan los números.
42
Page 95

Cuanto menor sea el número, más estricta será la
4
limitación. El nivel “8”*
es el menos estricto y el “1” el más
estricto. Por tanto, si selecciona el nivel “4”, por ejemplo, no
se podrán reproducir DVD con niveles “3”, “2” y “1”.
Consulte la siguiente tabla. Los niveles de control de bloqueo
de la tabla están en el sistema de clasificación de la MPAA
(Motion Picture Association of America, asociación de
productores de cine de Estados Unidos).
4
Si selecciona el nivel “8”, podrá reproducir cualquier
*
disco.
Esta unidad Sistema de clasificación MPAA
“8”“—”:
“7”“NC-17”: No se admite a ningún menor de
“6”“R”: Restringida
“5”“—”:
“4”“PG-13”: Enérgica advertencia para los
“3”“PG”: Se sugiere que los padres ofrezcan
“2”“—”:
“1”“G”: Público en general
17 años
padres
su orientación
8 Presione los botones de cursor (V/v) para
seleccionar el nivel deseado.
9 Presione ENTER.
Se muestra la pantalla de control de bloqueo.
Parental
Level
Password change
Para terminar o abandonar el cambio de
ajuste y reanudar la reproducción
1 Presione SET UP.
Aparecerá la pantalla de reproducción con el
indicador “x”. La reanudación de la reproducción
aún está activada.
2 Presione PLAY para iniciar la reproducción.
• DVD/Video CD
El disco se reproduce desde el principio*
*5Si aún está activada la reanudación de la
reproducción, el disco se reproducirá a partir del
punto en el que detuvo la reproducción.
• Audio CD
El disco se reproducirá desde el punto en el que
detuvo la reproducción.
Notas
• Si desea volver a la pantalla de ajuste (página 36) mientras está
terminando un cambio de ajuste, presione RETURNO o B.
• No olvide su contraseña.
• Es necesario que ingrese la contraseña para cambiar los ajustes
de control de bloqueo. No podrá reproducir algunos DVD a
menos que ingrese la contraseña.
• Con esta unidad no puede restringir la reproducción de discos
a menos que el DVD tenga un nivel de control de bloqueo. El
nivel de control de bloqueo con frecuencia está impreso en el
empaque de los discos.
• Los métodos de restricción audiovisual son distintos
dependiendo del disco. En algunas ocasiones no se permite la
reproducción totalmente, en otras, sólo se omiten las escenas
que se consideran ofensivas. Para obtener detalles, lea el
manual de instrucciones que recibió con el DVD.
• Si intenta reproducir un DVD con un ajuste de control de
bloqueo restringido por sus ajustes de control de bloqueo,
aparecerá una pantalla pidiéndole si desea cambiar
temporalmente el ajuste del nivel de control de bloqueo y
reproducir el DVD. Si desea hacerlo, siga las instrucciones en la
pantalla.
Ejemplo: pantalla de advertencia
5
.
Si desea marcar el nivel deseado en “Parental”,
presione RETURNO o B.
Parental Level Setting
You need to change player's parental level to play
this disc. Do you want to change it temporarily?
NoYes
43
Page 96

Finalizar los cambios de ajuste
Ajuste
del control de bloqueo
(cambio del nivel de control de bloqueo)
Para cambiar el nivel de control de bloqueo después de
que se ha realizado el ajuste inicial, siga los pasos que se
muestran a continuación.
1 Consulte primero “Selección de los elementos para
el ajuste” (página 36).
Siga los pasos 1 a 4 de la página 36 y luego continúe
abajo para concluir el ajuste.
2 Seleccione “Parental” y presione ENTER.
Aparecerá la pantalla de ajuste para registrar la
contraseña:
Password
Please input Password
1234567890
En el paso 3, “—” cambia a “*” cuando se ingresan los números.
3 Presione los botones numéricos*
contraseña registrada (númer o de cuatr o dígitos)*2.
*1 También puede presionar los botones de cursor (B/b) y
después presionar ENTER (Intro) para seleccionar los
números en la parte inferior de la pantalla.
*2 Si ingresa un número equivocado, presione CLEAR. Se
borrarán todos los números ingresados. Volverá a aparecer
la pantalla para volver a ingresar la contraseña. Ingrese su
contraseña entonces.
Aparecerá la pantalla para el menú de control de
bloqueo*
*3 Consulte el paso 7 de “Control de bloqueo” en la página
42.
Parental
3
.
1
para ingresar su
5 Presione ENTER.
6 Presione los botones de cursor (V/v) para
seleccionar el nivel deseado.
7 Presione ENTER.
Reaparecerá la pantalla del menú de contr ol de bloqueo.
Para terminar o abandonar el cambio de
ajuste y reanudar la reproducción
1 Presione SET UP.
Aparecerá la pantalla de reproducción con el
indicador “x”. La reanudación de la reproducción
aún está activada.
2 Presione PLAY para iniciar la reproducción.
• DVD/Video CD
El disco se reproduce desde el principio*
*4Si aún está activada la reanudación de la
reproducción, el disco se reproducirá a partir del
punto en el que detuvo la reproducción.
4
.
• Audio CD
El disco se reproducirá desde el punto en el que
detuvo la reproducción.
Nota
Si desea volver a la pantalla de ajuste (página 36) mientras está
terminando un cambio de ajuste, presione RETURNO o B.
Ajuste del control de bloqueo (cambio de
su contraseña)
Si desea cambiar su contraseña, siga los pasos que se
muestran a continuación.
1 Consulte primero “Selección de los elementos para
el ajuste” (página 36).
Siga los pasos 1 a 4 de la página 36 y luego vuelva
para concluir el ajuste.
2 Presione ENTER después de haber seleccionado
“Parental”.
Aparecerá la pantalla de ajuste para registrar la
contraseña:
Level
Password change
Nota
Si olvida su contraseña registrada, ingrese “5534”. Luego r ealice
los siguientes pasos. Para cambiar su contraseña, siga las
instrucciones de “Cambio de su contraseña” en la página 44.
4 Presione los botones de cursor (V/v) para
seleccionar “Level” (nivel).
44
Password
Please input Password
1234567890
En el paso 3, “—” cambia a “*” cuando se ingresan los números.
Page 97

3 Presione los botones numéricos*
1
para ingresar su
contraseña registrada (númer o de 4 dígitos)*
*1 También puede presionar los botones de cursor (B/b) y
después presionar ENTER (Intro) para seleccionar los
números en la parte inferior de la pantalla.
*2 Si ingresa un número equivocado, presione CLEAR. Se
borrarán todos los números que ingresó. Reaparecerá la
pantalla para volver a ingresar la contraseña.
Aparecerá la pantalla para el menú de control de
bloqueo.
2
.
Change password
Please input password again
for confirmation
1234567890
Parental
Level
Password change
Nota
Si olvida su contraseña registrada, ingrese “5534” y realice los
pasos siguientes.
4 Presione los botones de cursor (V/v) para
seleccionar “Cambio de contraseña”.
5 Presione ENTER.
Aparecerá la pantalla para registrar la nueva
contraseña:
Password
Please input Password
En el paso 8, “—” cambia a “*” cuando se ingresan los números.
8 Presione los botones numéricos*
4
para ingresar
nuevamente su contraseña (el mismo número de 4
dígitos del paso 6)*
*4 T ambién puede presionar los botones de cursor (B/b) y
después presionar ENTER (Intro) para seleccionar los
números en la parte inferior de la pantalla.
*5 Si ingresa un número equivocado, presione CLEAR. Se
borrarán todos los números.
5
.
Se mostrará la pantalla de mensajes.
Change password
Password has been changed
This password is necessary
when you change parental setting.
Please remember this password.
Please press "ENTER" key.
9 Presione ENTER.
Reaparecerá la pantalla del menú de control de
bloqueo.
1234567890
En el paso 6, “—” cambia a “*” cuando se ingresan los números.
6 Presione los botones numéricos para ingresar su
nueva contraseña (número de cuatro dígitos)*
*3 Si ingresa un número equivocado, presione CLEAR. Se
borrarán todos los números.
3
7 Presione ENTER.
Volverá a aparecer la pantalla para volver a ingresar la
contraseña.
Para terminar o abandonar el cambio de
ajuste y reanudar la reproducción
1 Presione SET UP.
Aparecerá la pantalla de reproducción con el
indicador “x”. La reanudación de la reproducción
aún está activada.
2 Presione PLAY para iniciar la reproducción.
.
• DVD/Video CD
El disco se reproduce desde el principio*
*6Si aún está activada la reanudación de la
reproducción, el disco se reproducirá a partir del
punto en el que detuvo la reproducción.
6
.
• Audio CD
El disco se reproducirá desde el punto en el que
detuvo la reproducción.
Nota
Si desea volver a la pantalla de ajuste (página 36) mientras está
terminando un cambio de ajuste, presione RETURNO o B.
45
Page 98

Finalizar los cambios de ajuste
OSD Message
Puede activar o desactivar el que se muestren los
indicadores (por ejemplo: N, x, M, m, X). Los
indicadores se muestran cuando presiona los botones
durante la reproducción de un DVD o Video CD.
1 Consulte primero “Selección de los elementos para
el ajuste” (página 36).
Siga los pasos 1 a 4 de la página 36 y luego continúe
abajo para concluir el ajuste.
2 Seleccione “OSD Message” y presione ENTER.
Aparecerá la pantalla de ajuste del mensaje OSD.
El elemento seleccionado actualmente estará resaltado en
amarillo.
OSD Message
On
Off
Para terminar o abandonar el cambio de
ajuste y reanudar la reproducción
1 Presione SET UP.
Aparecerá la pantalla de reproducción con el
indicador “x”. La reanudación de la reproducción
aún está activada.
2 Presione PLAY para iniciar la reproducción.
• DVD/Video CD
El disco se reproducirá desde el principio*.
* Si aún está activada la reanudación de la
reproducción, el disco se reproducirá a partir del
punto en el que detuvo la reproducción.
• Audio CD
El disco se reproducirá desde el punto en el que
detuvo la reproducción.
Notas
• Si desea volver a la pantalla de ajuste (página 36) mientras
está terminando un cambio de ajuste, presione RETURNO
o B.
• Si olvida su contraseña registrada, ingrese “5534” y realice
los pasos siguientes.
3 Presione los botones de cursor (V/v) para seleccionar
“On” (se muestran) u “Of f” (no se muestran).
4 Presione ENTER.
La pantalla de ajuste reaparecerá automáticamente.
Puede marcar su selección en “OSD Message”.
Set Up
DVD Menu Language
Audio Language Original
Subtitle Language
Digital Output
Display
Parental
OSD Message
Player Language
Original
Original
LPCM
4:3 Letter Box
8
Off
English
46
Page 99

Player Language
Puede cambiar el idioma en que se muestra el ajuste
(inglés/japonés).
1 Consulte primero “Selección de los elementos para
el ajuste” (página 36).
Siga los pasos 1 a 4 de la página 36 y luego continúe
abajo para concluir el ajuste.
2 Seleccione “Player Language” y presione ENTER.
Aparecerá la pantalla de ajuste del Idioma del
reproductor.
El elemento seleccionado actualmente estará resaltado en
amarillo.
Player Language
Japanese
English
Para terminar o abandonar el cambio de
ajuste y reanudar la reproducción
1 Presione SET UP.
Aparecerá la pantalla de reproducción con el
indicador “x”. La reanudación de la reproducción
aún está activada.
2 Presione PLAY para iniciar la reproducción.
• DVD/Video CD
El disco se reproducirá desde el principio*.
* Si aún está activada la reanudación de la
reproducción, el disco se reproducirá a partir del
punto en el que detuvo la reproducción.
• Audio CD
El disco se reproducirá desde el punto en el que
detuvo la reproducción.
Nota
Si desea volver a la pantalla de ajuste (página 36) mientras está
terminando un cambio de ajuste, presione RETURNO o B.
3 Presione los botones de cursor (V/v) para
seleccionar el idioma deseado (inglés o japonés).
4 Presione ENTER.
La pantalla de ajuste reaparecerá automáticamente.
Puede marcar el idioma en “Player Language”.
Set Up
DVD Menu Language
Audio Language Original
Subtitle Language
Digital Output
Display
Parental
OSD Message
Player Language
Original
Original
LPCM
4:3 Letter Box
8
On
English
47
Page 100

Información
Solución de problemas
complementaria
Si se encuentra con cualquiera de las siguientes
dificultades al emplear esta unidad, utilice esta guía de
solución de problemas para resolver el problema. Si el
problema persiste, consulte con el proveedor Sony más
próximo.
Alimentación
La unidad no se enciende.
, Compruebe las conexiones.
, Si encuentra que las conexiones están correctas,
revise el fusible. Si el fusible está fundido,
reemplácelo por otro fusible con las características
adecuadas.
, Si el fusible se funde de nuevo, consulte al
proveedor Sony más próximo.
Imagen
La imagen no aparece.
, Compruebe que la unidad está correctamente
conectada.
, El cable de conexión al monitor está dañado.
Reemplácelo por uno nuevo.
, Asegúrese de que el monitor esté encendido.
, Asegúrese de que esté seleccionada en el monitor
la entrada de video para ver imágenes de esta
unidad.
, Cuando esté manejando el auto* no puede ver
imágenes.
* Para evitar accidentes, la salida de video frontal está
conectada al cable de conmutación del freno de
estacionamiento.
, Detenga el auto y estaciónelo en un lugar
seguro para ver imágenes.
48
Se produce ruido de imagen.
, Limpie el disco.
Aunque establezca la relación de aspecto
cambiando el ajuste (consulte “Display”
(Pantalla) (página 41)), la imagen no llenará
la pantalla.
, La relación de aspecto en el DVD es fija.
 Loading...