

Page 1
SONY,
3-858-410-12 (1)
Digital Still
Camera
Operating Instructions
Before operating the unit, please read this manual thoroughly, and
retain it for future reference.
DSC-FI
©1996 by Sony Corporation
Page 2

WARNING
To prevent fire or shock
hazard, do not expose the
unit to rain or moisture.
CM.*now fOMcawcrtNCMNKortisw •»«(».
OU MOr M(MDA ODVCn <QM MCll
*o u8>it-Mam:tAau »««n tma
pwrin «MMClNarOOUAUrCO »«vcc ff mkjnncl
This symbol is intended
to alert the user to the
presence of uninsulated
"dangerous voltage"
within the product's
enclosure that may be of
sufficient magnitude to
constitute a risk of
electric shock to persons.
This symbol is intended
to alert the user to the
presence of important
operating and
maintenance (servicing)
Instructions in the
literature accompanying
the appliance.
Owner's Recor(d
The model and serial numbers are
located on the bottom. Record the
serial number in the space provided
below. Refer to these numbers
whenever you call upon your Sony
dealer regarding this product.
Model No. DSC-Fl
Serial No.
________________________
For the Customers in the U.S.A.
WARNING
This equipment has been tested and fouird
to comply with the limits for a Class B
digital device, pursuant to Part 15 of the
FCC Rules. These limits are designed to
provide reasonable protechon against
harmful interference in a residential
installation. This equipment generates, uses,
and can radiate radio frequency energy and,
if not installed and used in accordance with
the instructions, may cause harmful
interference to radio commuiucations.
However, there is no guarantee that
interference will not occur in a particular
installation. If this equipment does cause
harmful interference to radio or television
reception, which can be determined by
turning the equipment off and on, the user
is encouraged to try to correct the
Interference by one or more of the following
measures:
— Reorient or relocate the receiving
antenna.
— Increase the separation between the
equipment and receiver.
— Connect the equipment into an outlet on
a circuit different from that to which the
receiver is connected.
— Consult the dealer or an experienced
radio/TV technician for help.
This device complies with Part 15 of the
FCC Rules. Operation is subject to the
following two conditions: (1) This device
may not cause haraiful interference, and (2)
this device must accept any interference
received, including interference that may
cause undesired operation.
CAUTION
You are cautioned that any changes or
modifications not expressly approved in this
manual could void your authority to
operate this equipment.
m-
I ‘ '
1: ■
i»:-
•V'-»nWT^^1Wr«V''
■ ■'io-
6;,.;
Page 3

For the customers
in the United States
and Canada
DISPOSAL OF LITHIUM ION
BATTERY AND VANADIUMLITHIUM BATTERY.
LITHIUM ION BATTERY AND VANADIUM-LITHIUM BATTERY. DISPOSE OF PROPERLY.
You can return your unwanted lithium ion
batteries and vanadium-lithium batteries to
your nearest Sony Service Center or Factory
Service Center.
Note: In some areas the disposal of lithium
ion batteries and vanadium-lithium
batteries in household or businc-ss
trash may be prohibited.
For the fkiny Service Center nearest you call
1-800-222-SONY (United States only).
For the SONTY Factory Service Center
nearest you call
410-499-SONY (Canada only).
Caution: Do not handle damaged or
For the Customers in CANADA
CAUTION
TO PREVEhJT ELECTRIC SHOCK, DO
NOT USE THIS TOLARIZED AC PLUG
WITH AN EXTENSION CORD,
RECEPTACLE OR OTHER OUTLET
UNLESS THE BLADES CAN BE FULLY
INSERTED TO PREVENT BLADE
EXPOSURE.
leaking lithium ion batteries and
vanadium-lithium batteries.
Be sure to read the
following before using
your camera.
Trial recording
Before you record one-time events,
you may want to make a trial
recording to make sure that the
camera is working correctly.
No compensation for
contents of the recording
Contents of the recording cannot be
compensated for if recording or
playback is not made due to a
malfunction of the camera, video
tape, etc.
Precaution on copyright
Television programs, films, video
tapes, and other materials may be
copyrighted. Unauthorized
recording of such materials may be
contrary to the provision of the
copyright laws.
• IBM PC/AT is a registered trademark
of International Business Machines
Corporation of the U.S.A.
• MS-DOS and Windows are registered
trademarks licensed to Microsoft
Corporation, registered in the U.S.A.
and other countries.
• Macintosh is a trademark licensed to
Apple Computer, Inc., registered in
the U.S.A. and other countries.
• All other product names mentioned
herein may be the trademarks or
registered trademarks of their
respective companies.
Furthermore, and "®" are not
mentioned in each case in this manual.
Page 4

Table of contents
Basic Operations
Recording and playing back images............................6
1 Install a battery
2 Record images......................................................................................... 9
3 Play back images...................................................................................13
Printing the recorded images.....................................16
Using personal computers
Selecting menus...........................................................22
How to select menus..........................................................................................22
Menu chart.........................................................................................................24
........................................................................................
..........................................
20
6
Various ways of recording
Recording images continuously (CONTINUOUS)..........................................26
Recording images prior to and after pressing the shutter button
(TIME MACHINE)...........................................................................................27
Recording 9 images on a single page (MULTI SCREEN)...............................28
Selecting image quality (IMAGE QUALITY)
Adjusting exposure (EXPOSURE)...................................................................30
Selecting shutter speed (SHUTTER SPEED)
Adjusting brightness of the flash (FLASH ADJ).............................................
Setting the date and time (DATE).....................................................................33
..........................................
................................................
..................................................
26
29
Various ways of playback............................................35
Playing back multiple images at a time (SEARCH).........................................35
Enlarging a part of the image (ZOOM)
Playing back images in a continuous loop (SLIDE SHOW)............................37
............................................................
31
32
r:
'r,,
36
ri::h
■?. -t
Page 5

Protecting images........................................................39
Preventing accidental erasure (PROTECT)......................................................39
Deleting images (DELETE).............................................................................4Ü
Using image data with other equipment
Equipment you can connect to your camera.....................................................42
Watching images on a TV screen
Printing the recorded images
Using image data on a personal computer (SERIAL)
Using image data on the equipment compatible with infrared data
communication system (TRANSFER)
Power sources
Power sources for this camera
Tips for using the rechargeable lithium ion battery..........................................48
..............................................................
Additional information
Precautions........................................................................................................50
Troubleshooting................................................................................................51
Warning and notice messages
Specifications.....................................................................................................55
Parts identification........................................................................................... 57
Glossary.............................................................................................................59
Index..................................................................................................Back cover
As you read through this manual, buttons and settings on the camera
are shown in capital letters.
e.g., Press the MENU/EXECUTE jog dial.
.....................................................................
............................................................................43
.............................................................
..........................................................................
...............................................
...........................................................................
.................
......................................
42
43
44
46
48
48
50
53
Page 6
Recording and playing back images
What you need
Do not hold the
Digital Still
Camera
AC power adapter
AC-DSC1 (supplied)
1^
Rechargeable
lithium ion
battery
LIP-10
(supplied)
camera by the LCD
screen.
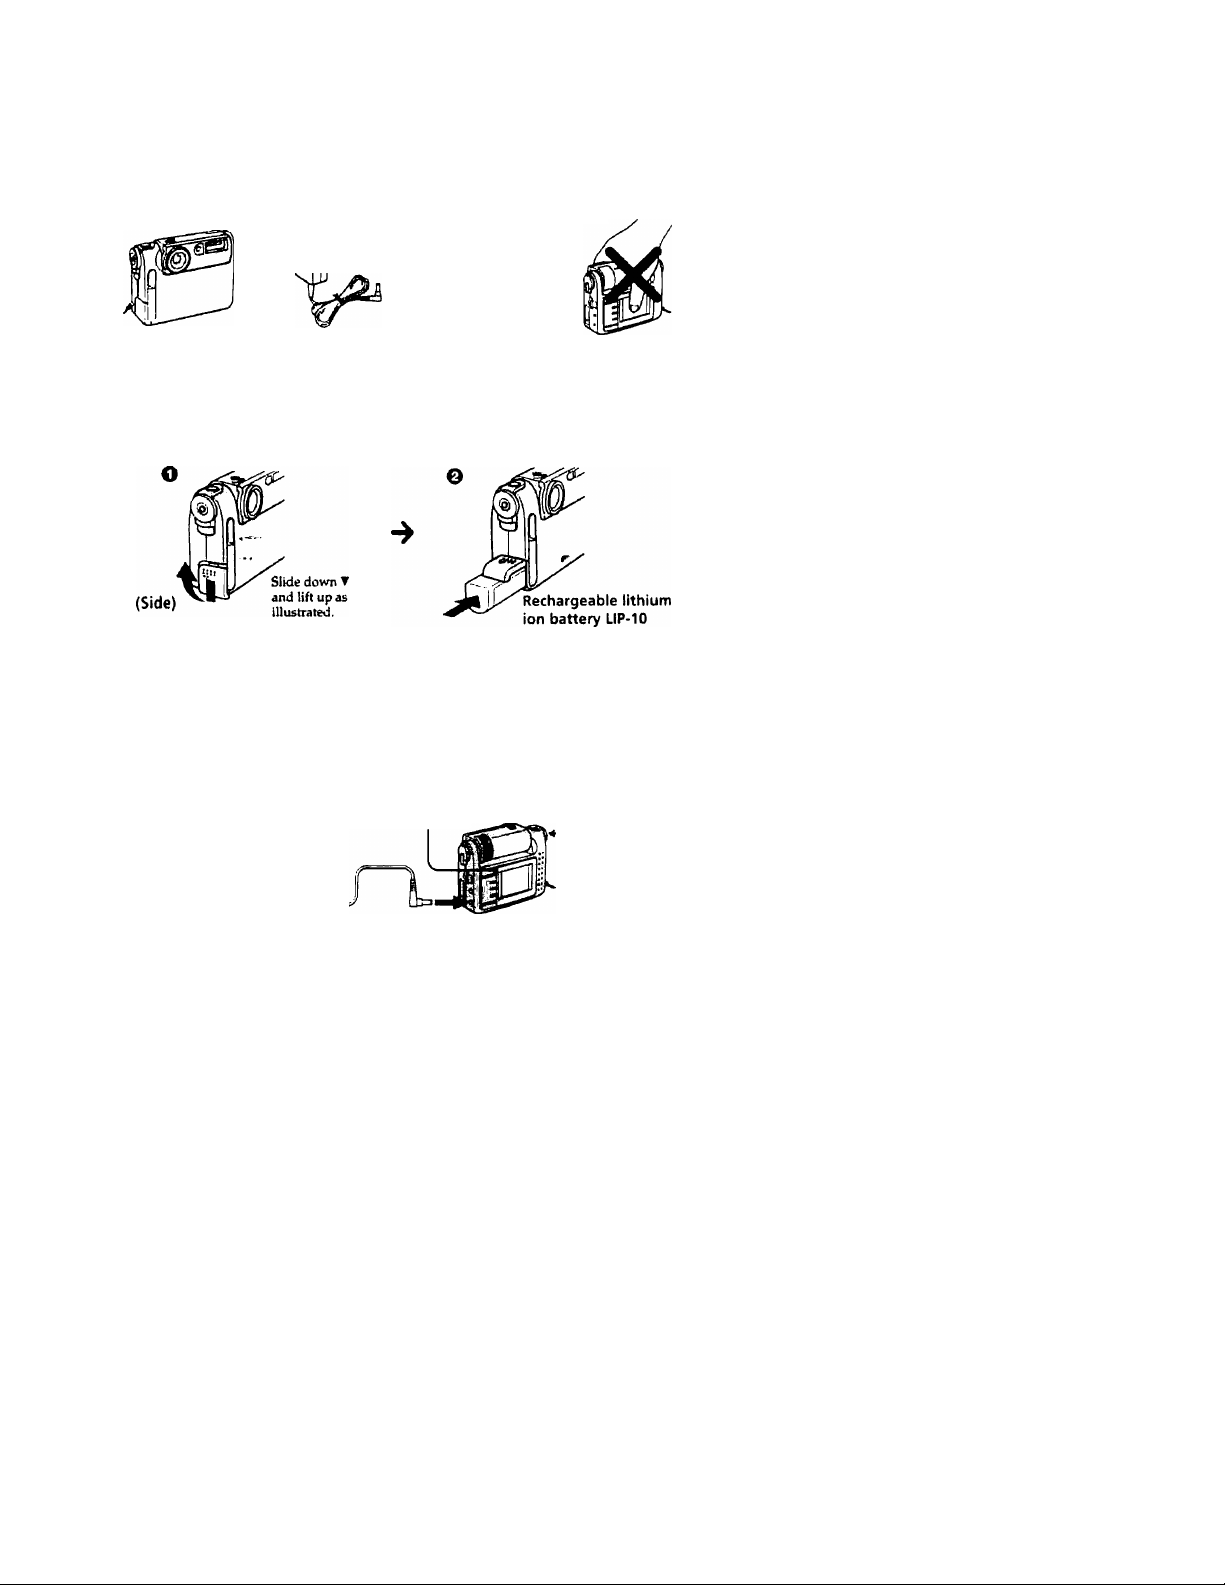
Install a battery.
Use the rechargeable lithium ion battery LIP-10 (supplied) and the AC power adapter
AC-DSCl (supplied).
O Open the lid of the battery compartment.
O Install the rechargeable lithium ion battery and close the lid.
O Connect the AC power adapter to the camera and a wall outlet.
Set the POWER/Function dial on the camera to "OFF" and connect the AC power
adapter AC-DSCl (supplied) to a wall outlet, setting up its plug.
Set the POWER/
, Function dial to
“OFF."
to a wall
outlet
AC power
adapter
AC-DSCl
(supplied)
CHARGE lamp
DC IN 6V
Page 7

о start charging.
Set the POWER/Function dial on the camera U) "CAMERA [A]” (automatic recordinji;),
then sot it to "OFF." (While keeping the center button pressed, turn the POWER/
Function dial.) By switching the setting of the POWER/Function dial from "CAMERA
iS" to "OPT/' you can start charging.
It takes about 8 hours to fully charge the battery when the battery is empty. You can
start using the camera when you charge the battery for 2 hours.
The CHARGE lamp, however, may not go off when the charge is completed due to
operations during charging. If the CHARGE lamp does not go off after about 8 hours
of charging, set the POWER/function dial to "CAMERA ^nd check the remaining
battery indicator. If you see the <i I mark on the LCD screen, this means the battery
is fully charged. See page 10 to check the LCD indications.
Using AC power adapter
For long recording and playback
indoors, use the camera on house
current, using the AC power adapter.
to a wall
outlet
AC power
adapter
AC-DSC1
(supplied)
‘ij'To use the rechargeable battery
prior to full charge
When you want to use the camera with
the rechargeable lithium ion battery, you
can use the battery before it is fully
charged, disconnecting the AC power
adapter from the DC IN 6V jack of the
camera. Battery life, however, is shorter
depending on charging time.
''^'Battery life (approx, minutes)
Battery
Rechargeable
lithium ion
battery
(LIP-10)
Recording*’
20 35
Playback*”
c
c
5
to
3
Q.
Q>
5'
to
O'
(1)
3
to
<T>
DC IN 6V
<^'Auto power-off function
l( you leave the camera in standby mt)de
for about 2 minutes (during recording) or
about 4 minutes (during playback) while
the power is on. the camera tmns off
automatically. To resume power, set the
P(WER /Function dial to "OFF," and
then set it to "CAMERA" or "PLAY," or
press the shutter button gently. Auto
power-off dues not function when you
use the AC power adapter.
a) Battery life when continuing typical
recording under the temperature of 77"F
(25°C). If you repeat entering standby
mode, turning power on and off, etc., the
actual battery life nray be shorter.
b) Battery life when playing back images on
the LCD screen of the camera.
ij' W/jen to charge rechargeable
battery
When you press DISPLAY during
recording, the remainmg battery indicator
appears on the LCD screen.
100% 75% 50%
25% 0%
Continue to the next page ■> y
Page 8

Il/Vote on the remaining battery
indicator
To check the remaining battery, turn on
the power first and wait for about 20
seconds or more. Then press DISPLAY. If
you press DISPLAY soon after the poweron, the battery condition is still unstable,
and more than the actual remaining is
displayed.
ONotes
• When you use the camera on the
rechargeable lithium ion battery, make
sure to use the fully charged one, which
pre\’ents you from missing to record
one-time events due to batteiy shortage.
•The charging time and battery life vary
depending on temperature and
circumstances of use.
•If you set the POWER/Function dial to
"CAMERA" or "PLAY,"charging is
suspended. To resume charging, set the
dial to "CAMERA (S»" then set it to
"OFF."
• If you use the camera with the AC
power adapter and the rechargeable
lithium ion battery is already installed
into the camera, the power is turned off
when you disconnect the plug from the
DC IN jack of the camera. To resume
power, set the POWER /Function dial
to "OFF," and then set it to "CAMERA"
or "PLAY," or press the shutter button
gently.
• If you remove the rechargeable lithium
ion battery or disconnect the AC power
adapter during recording or playback,
image data may get damaged. Make
sure to set the POWER/Function dial to
"OFF" first, then remove the
rechargeable lithium ion battery or
disconnect the AC power adapter.
BIf “CHARGE BATTERY“ is displayed
If "CHARGE BATTERY" is displayed
while using the camera, and the power is
turned off automatically, stop using the
rechargeable battery in the camera. Use
the AC power adapter instead or replace
the battery with the fully charged one.
You can turn on the power again with
the discharged battery, but the battery
soon becomes dead and the power is
turned off abruptly before the camera
shuts off normally. This may cause the
data damage. Make sure to use the AC
power adapter or replace the battery
with the charged one.
BNote on replacing the battery pack
When you replace the rechargeable
lithium ion battery LIP-10 with a new
one, do not press the shutter button, or
turn on or off the power by changing the
settings of the POWER/Function dial
until the replacement is completed.
Memory data for date & time settings
may be erased.
If the settings are erased, ©replace the
rechargeable lithium ion battery with a
new one, ©charge the battery, then
©set the clock again, (page 33)
.>>UMtiM(K«Cny4
Page 9
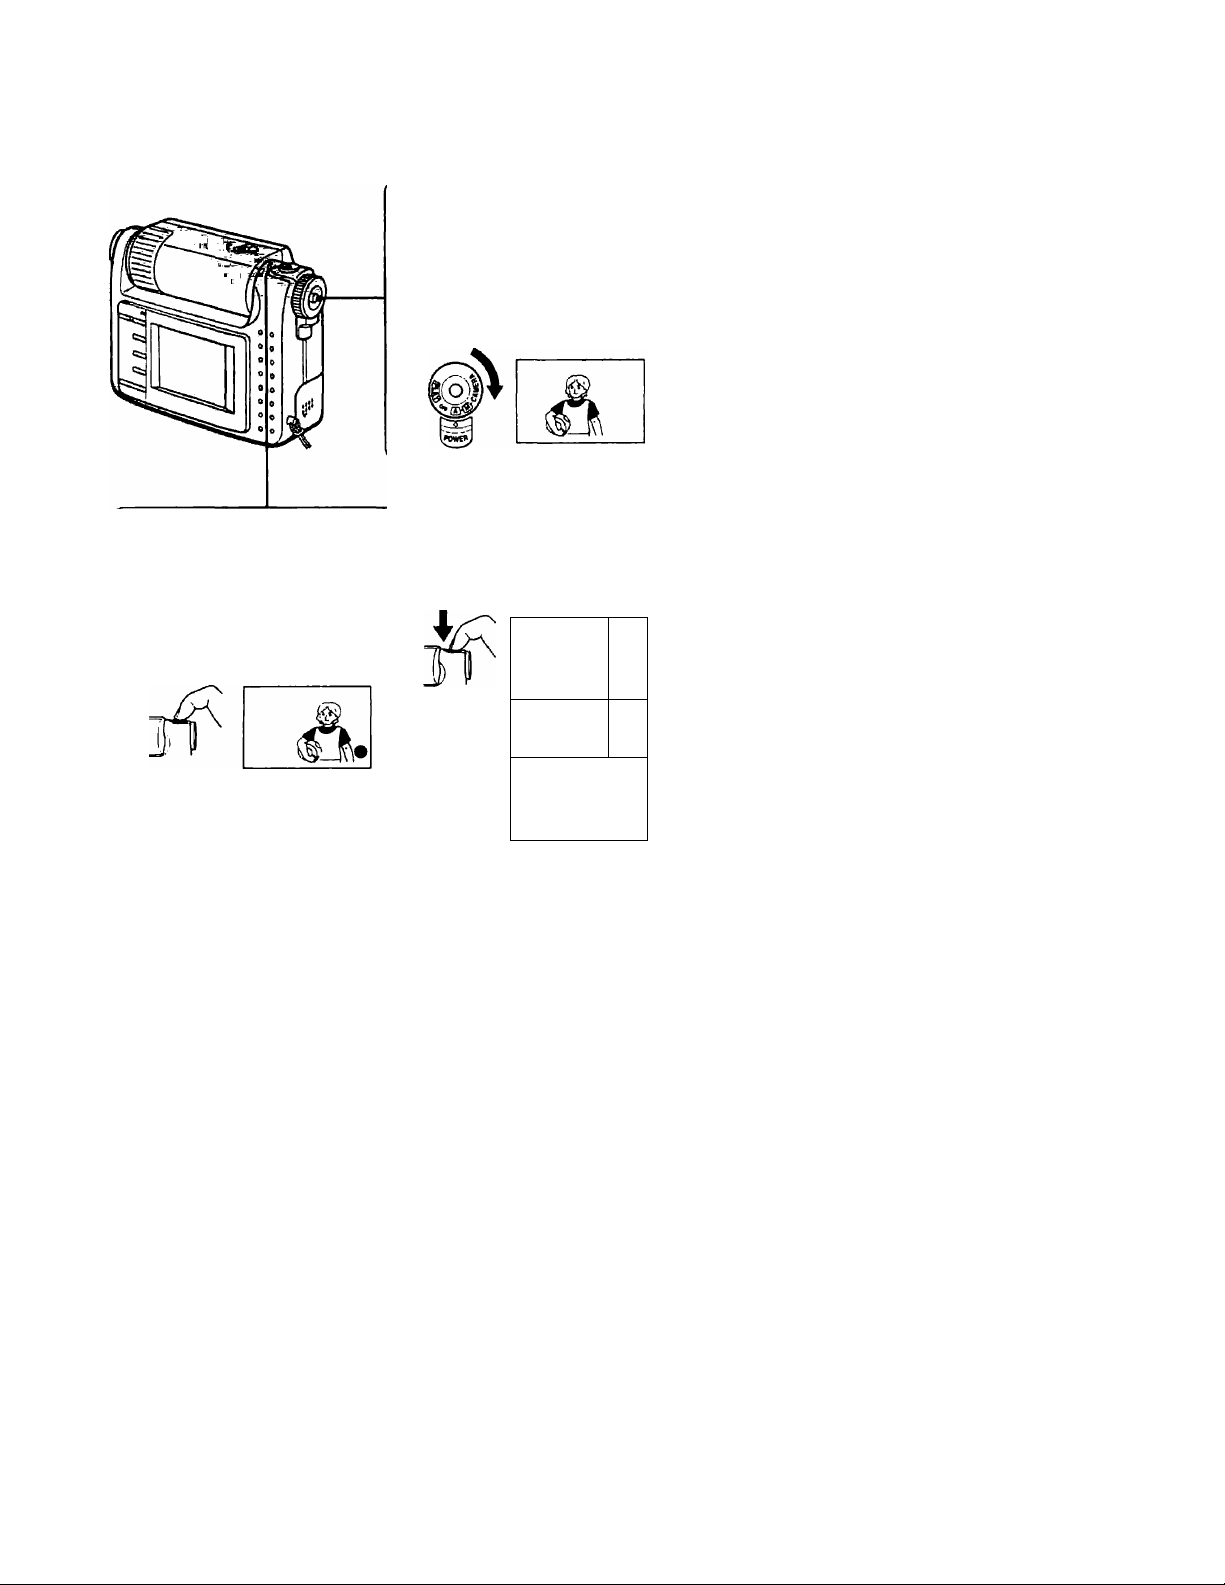
Q Record images.
The automatic adjustment function enables you to shoot images easily.
While keeping the center
button pressed, turn and
set the POWER/Function
dial to "CAMERA [S"
(automatic recording).
The image caphrred by the lens
appears on the LCD screen.
O Press the shutter button
halfway down.
Continuous automatic
adjustments of exposure are
frozen and the AE (auto
exposure) lock indicator (•)
appears on the LCD screen.
O Press the shutter button
fully down.
The image displayed on the LCD is
recorded and stored in memory.*
11
After about 2
seconds, the still
image changes
to a new image
captured by the
lens. Then you
can record
another image.
‘Image quality is set to "STANDARD"
and you can store up to 58 pictures.
4 The r
of rec
imag
umber
orded
es
Page 10

The indicators during recording
Every time you press DISPLAY during
recording, the indications on the LCD
screen change as follows: "Simplified
indicatiox\s" —» "Detailed indications"
—» "No indication. " Tlie indicators on
the screen are not recorded.
Simplified indications
Remaining
battery
indicator
(page 7)
Remaining MEM
(memory) indicator
IMAGE QUALITY
indicators (page 29)
FINE; Fine mode
STD: Standard mode
SNAP: Snapshot mode
Automatic recording and manual recording
Recording mode is different
depending on the setting of the
function dial.
n "CAMERA |A]'' (Automatic
recording)
The AE (Auto Exposure) function
and AWB (Automatic White
Balance) function adjust exposure,
shutter speed, brightness of the
flash, etc. automatically. Image
quality is set to "STANDARD."
n "CAMERA [^" (Manual recording)
You can select exposure, shutter
speed, recording mode, image
quality, etc., manually in the
CAMERA MENU.
Using the flash
Press FLASH. The CHARGE lamp
flashes and the image disappears from
the LCD screen. After about 12
seconds, the image appears again and
the flash indicator ( i ) is displayed.
Then you can shoot images using the
flash.
.Nl/.
^CHARGE
FLÀ'SIf'
Detailed indications
ST[
MEM 12/60-
-40
No. of stored images/No. of
images that can be stored
in the camera*
('total oi stored images and
images that can be stored)
Oate/time indicators displayed when
DISPLAY is pressed (page 33)
111:25 AM
10
"K
If you press FLASH while the flash
indicator is displayed, flash mode is
released, and the flash indicator
disappears. If you do not press the
shutter button within about 3 minutes
after the flash indicator appears on the
LCD screen, flash mrxie is also
released.
If the exposure warning indicator ( iii )
appears on the LCD screen, we
recommend you to use the flash.
Page 11
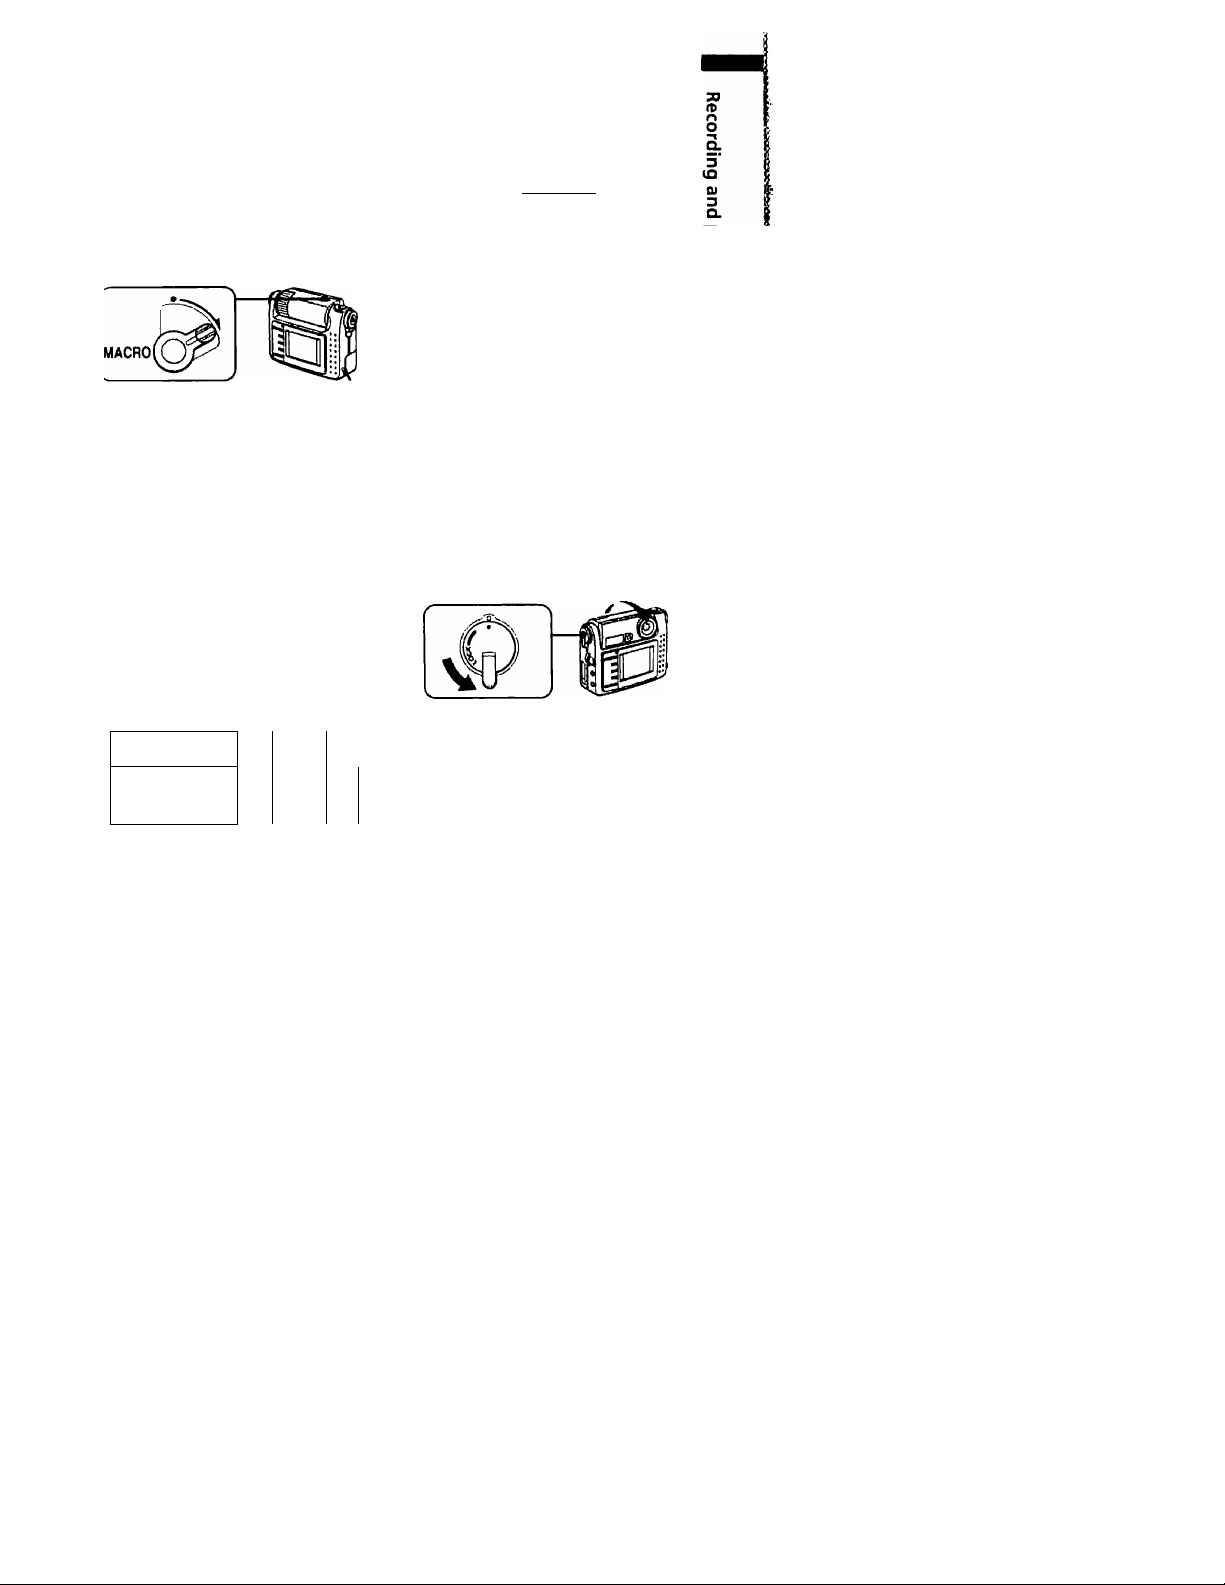
Recording images in macro
Turn the MAQIO lever in the
direction of the arrow. The macro
indicator ( A) appears on the LCD
screen. You can shoot a subject that is
about 3 inches (8 cm) to 9 inches (25
cm) away from the lens surface in
macro mode. If you turn the MACRO
lever in the opposite direction of the
arrow until it clicks, maao mode is
released and you can record images in
normal mode.
Adjust the focus on the LCD screen
using the MACRO lever.
OTo adjust the focus precisely
Connect the VIDEO OLTT jack of the
camera to the video-in jack of the TV, and
then check if the subject is in focus on the
TV screen, (page 43)
Using the self-timer
With the self-timer about 10 seconds
after you press the shutter button, the
subject is recorded.
3 Press the shutter button fully.
The shutter is released in about 10
seconds and the image is recorded.
During the
10-second
countdown,
the indicator -|^□ □ □ □ □ | O
disappears
from the
screen one by
one.
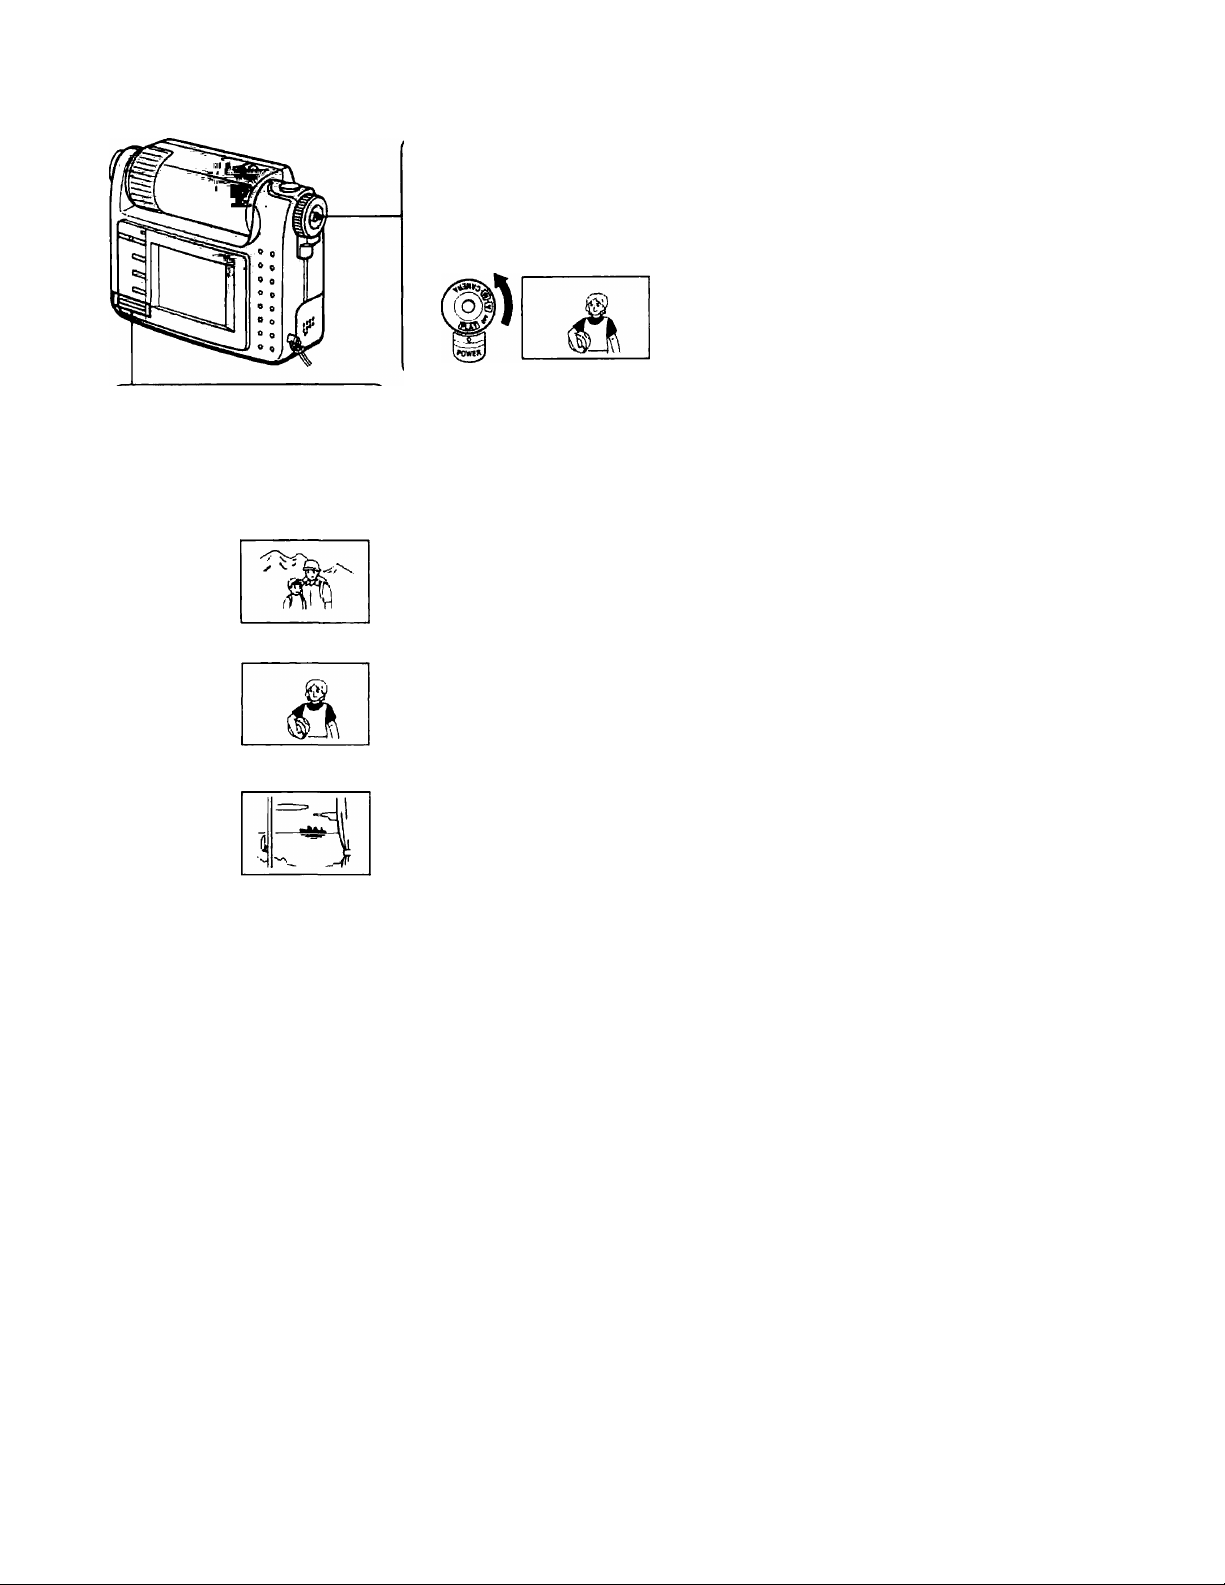
Changing the lens orientation — Face to face shooting
You can shoot yourself by placing
yourself and the LCD screen face to
face. Turn the LCXK lever in the
direction of the arrow until the marks
(•) are aligned so that you can release
the lever, and rotate the lens at about
180°. You can lock the lens angle by
turning the LOCK lever in the opposite
direction of the arrow.
The images displayed on the LCD
screen are mirror images. But they are
stored in memory in the same way as
you see through the lens.
1 Press SELF TIMER.
The self-timer indicator (0) Ls
liisplayed on the LCD screen.
/
------------------------------SELF TIMER
2 Press the shutter button halfway
down.
The AE lock indicator (•) appears
on the LCD screen.
7^75!—n*SSjr:r:
Page 12
Recording the current
image while displaying the
image already recorded at
a time (Review)
You can record an image captured by
the lens while displaying the image
already stored in memory. Press
!◄/■ while the image captured by the
lens is displayed on the LCD screen.
The image
005
the lens
-----
%
Image number
I’ress \</M, to change
the image.
When you press EXIT, the LCD screen
returns to the normal display, i.e., the
image captured by the lens. If you do
not press any button for 10 seconds or
more, the screen also returns to the
normal display.
12
Page 13
Q Play back images.
mJ
X
m
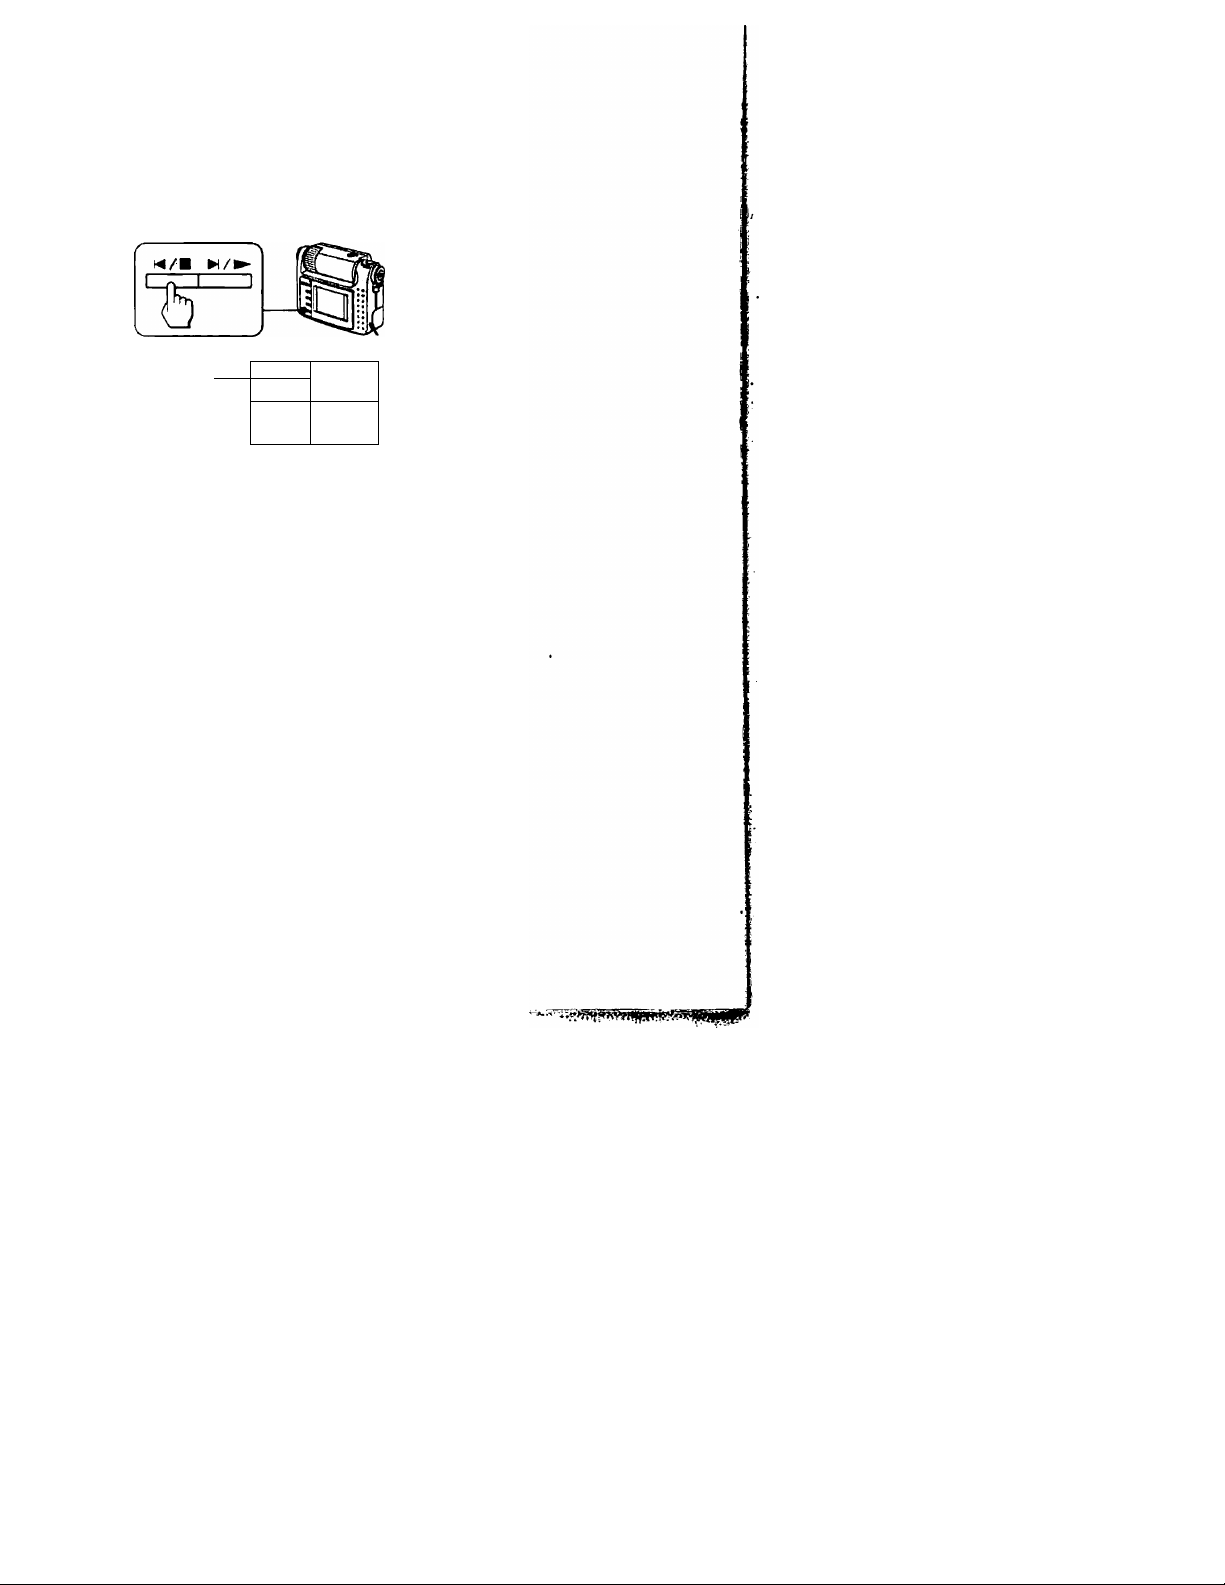
O Scroll the images, using
the !◄/■, ►!/►.
Each time you press !◄/■, the
previously recorded image is
displayed on the LCD screen.
Each time you press ►!/►, the
next image is displayed.
N/l
15
O While keeping the center
button pressed, turn and
set the POWER/Function
dial to “PLAY."
The last recorded Image
appears on the LCD screen.
3
to
01
3
Q.
Q>
'<
3*
VO
cr
0>
n
3'
0)
VO
n
Continue to the next page
13
Page 14

The indicators during playback
Every lime you press DISPLAY while
playing back an image, the indications
on the LCD screen change as follovys:
"Simplified indications" —* "Detailed
indications" —► "No indication. "
Simplified indications
Image
number
Adjusting the brightness of the LCD screen
Use the BRIGHT -.-/-dial on the
bottom of the camera.
- 1 II '' 14- BRIGHT
Deleting the recorded images
Select "DELETE" in the PLAY MENU.
For details, see page 40.
Protecting images
To prevent accidental erasure, you can
protect specific images. Select
"PROTECT" in the PLAY MENU. For
details, see page 39.
Detailed indications
Recording
date of the
playback
image
14
IMAGE QUALITY
indicators (page 29)
FINE: Fine mode
STD; Standard mode
SNAP: Snapshot mode
S' D 058—
X 112.25.1996 1
number
(During SLIDE
SHOW: Image
number of the
picture being
played back/
Total number
of images
available for
playback)
ONote
If no image Is recorded in memory, "NO
IMAGE" appears on the LCD screen.
Rotating the screen
Each time you press ROTATE, you can
rotate the image by 90°. This function
enables you to change the direction of
the image during playback.
Page 15
k.-1
------
mm
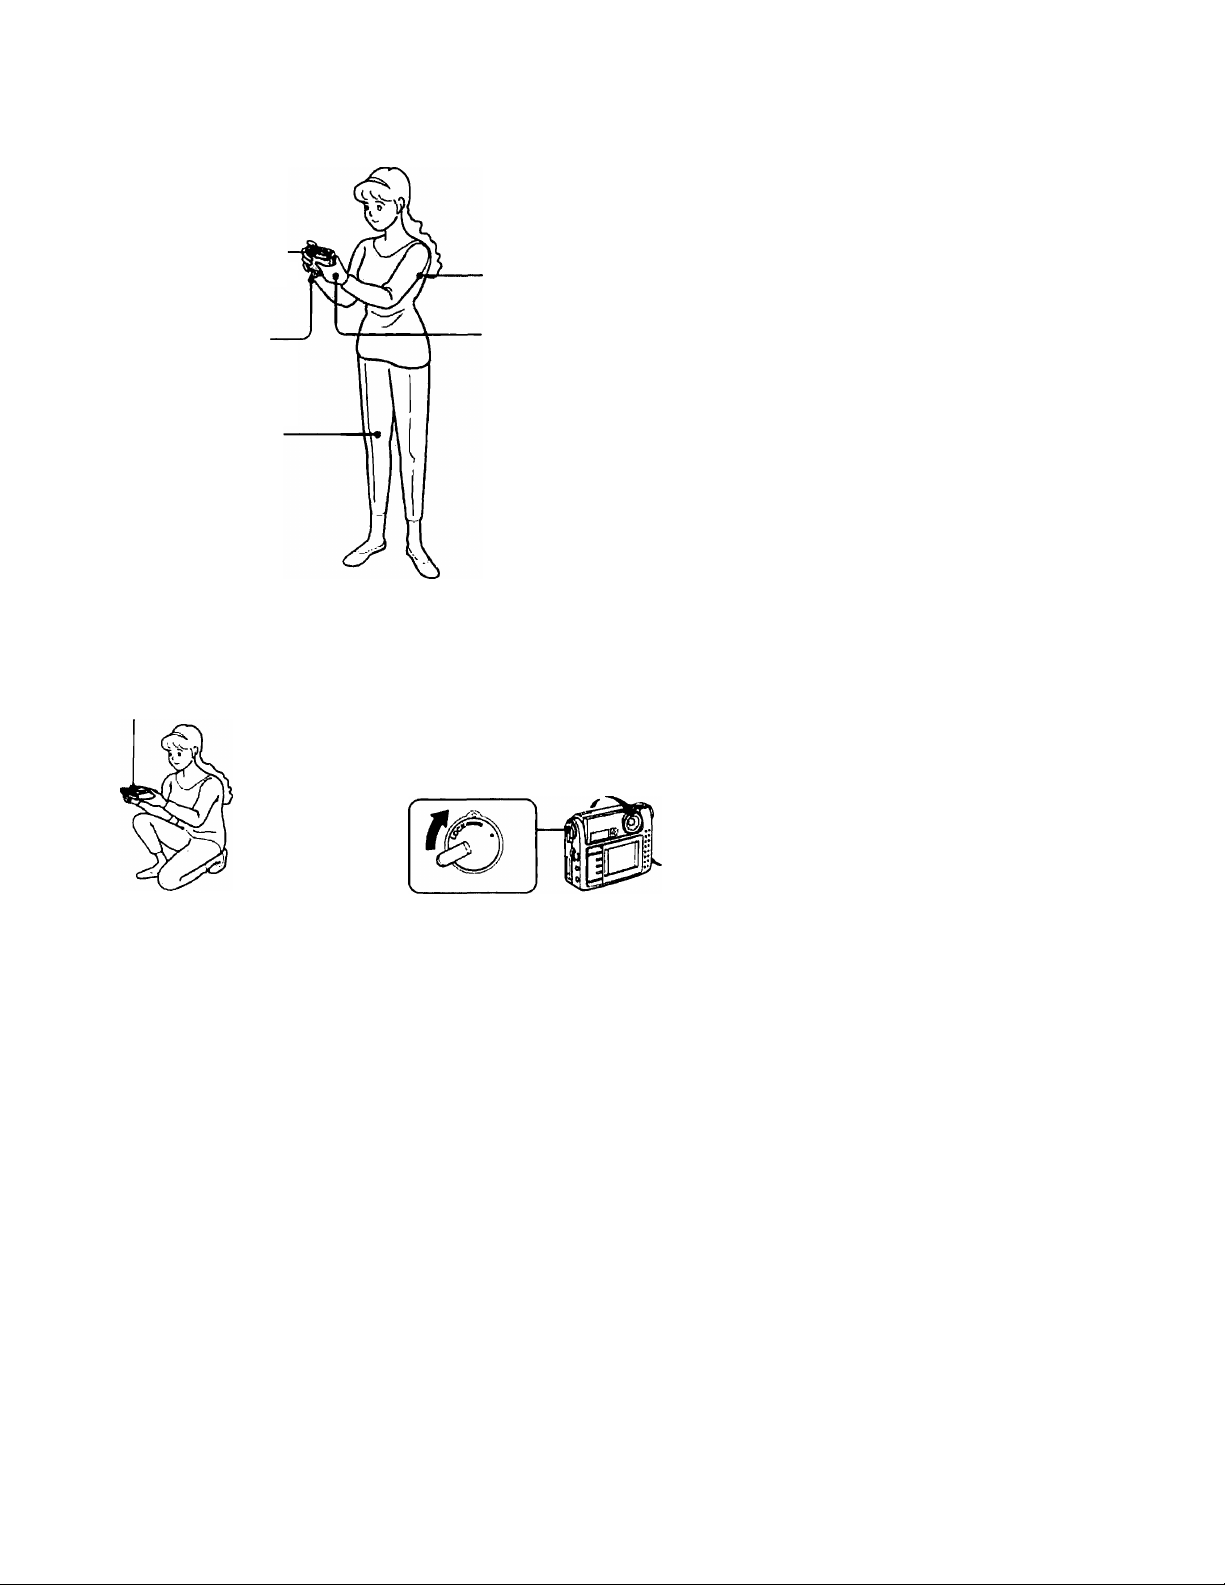
Hints for better shooting
Por hand-held shots, do not move the camera. Stand steady on your feet.
Fix the LCD screen so that
you can see the screen best
Adjust the lens angle to be
able to catch the subject
best. Keep your fingers away
from the lens and flash
Pass your right hand
through the hand strap.
Stand steady on your feet
with toes pointing out.
Place your elbows
against your side.
Place your left hand
on the side of the
camera to support it.
33
rt>
Q.
5’
(O
0)
3
Q.
TO_
Qi
»<,
5’
to
O'
OJ
3
0)
iO
m
Recording in a low
position
Adjust the lens
angle upward.
Adjusting the lens angle
Turn the LOCK lever until the marks
(•) are aligned so that you can release
the lever, and adjust the lens angle.
You can lock the lens angle at any
position you want by turning the
LOCK lever in the direction of the
15
Page 16
im
Printing the recorded images
You can print the images recorded by the camera using the Digital Color Printer DPP*
M55 (not supplied). Use the PLAY MENU of the camera to operate the printer. For
details, see the instruction manual of the printer.
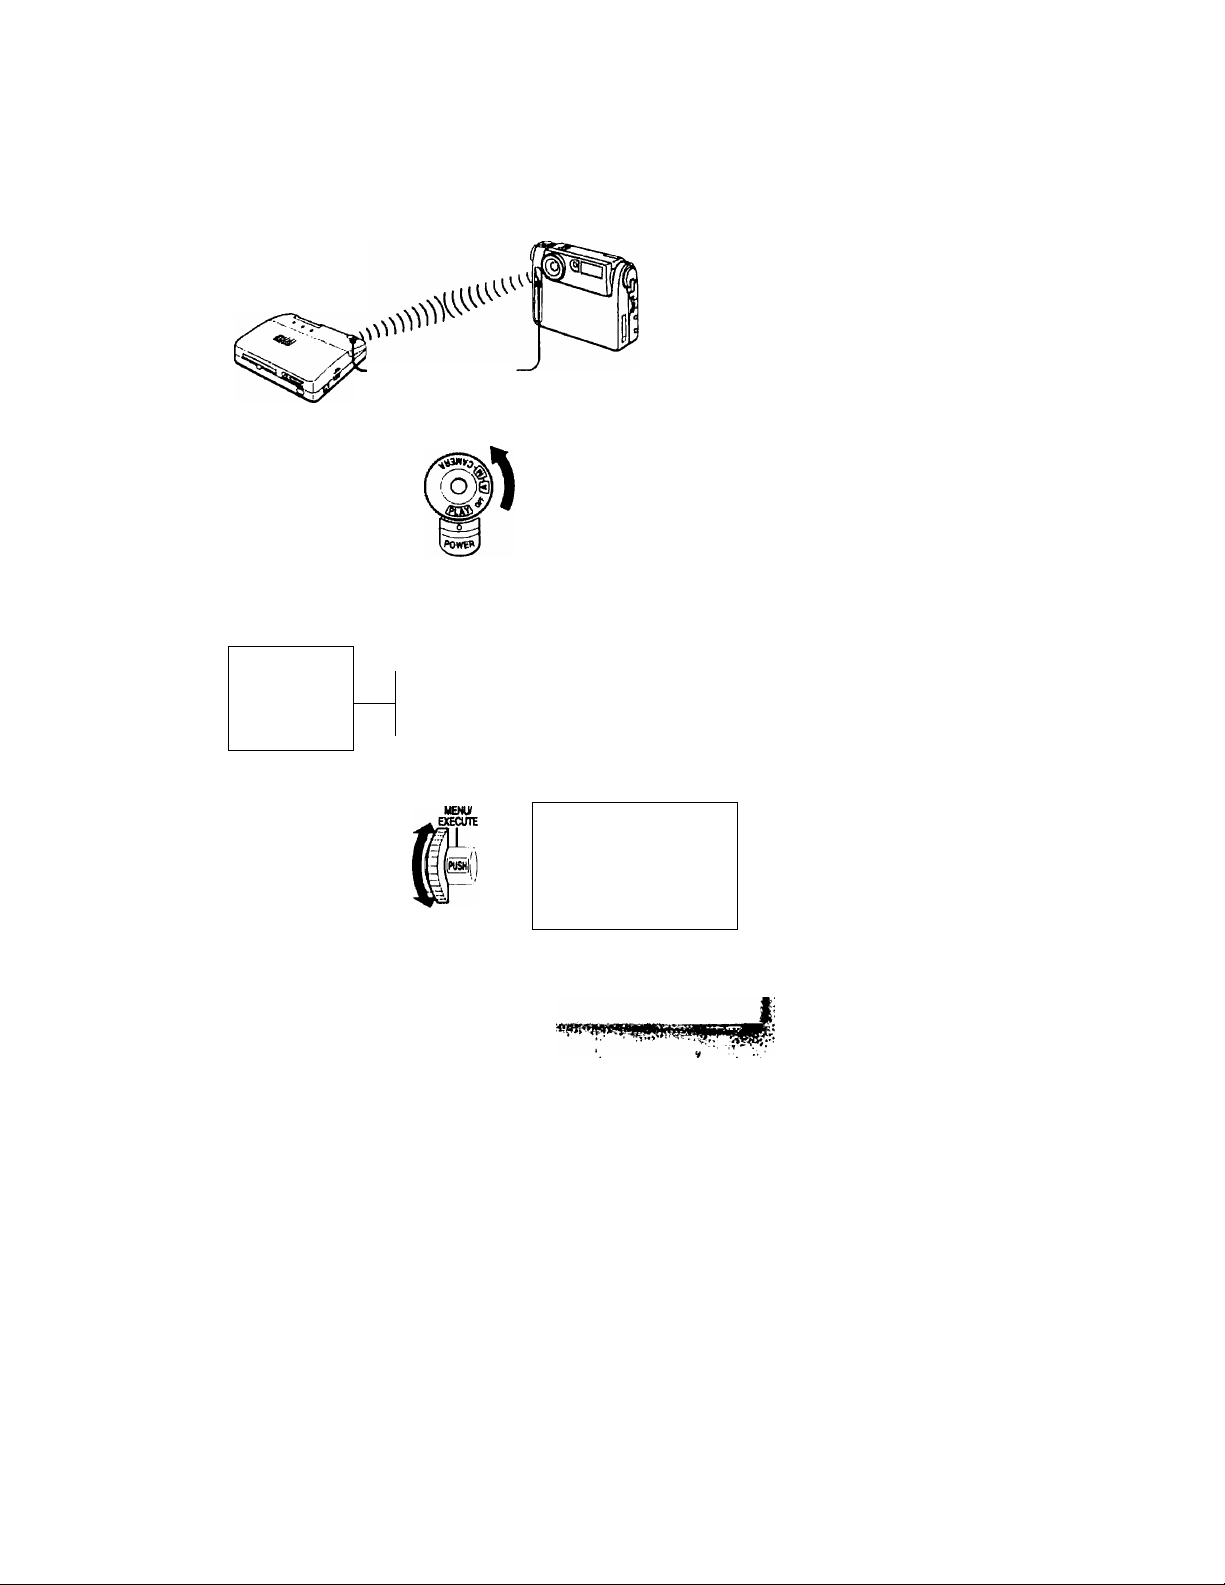
O Turn on the power of the printer. Place them so that the infrared
port of each equipment faces the other.
Digital Color Printer DPP-M55
-----
Infrared port
Controllable area of the infrared ray is about
4-12 Inches (10 - 30 cm) in terms of straight line distance and 15
degrees right and left each in terms of angle.
O While keeping the center
button pressed, turn and
set the function dial to
"PLAY."
O Press the MENU/EXECUTE jog dial.
The PLAY MENU appears on the LCD screen.
MBW/
EXECUTE
jRral
—-
lie
J
the selected item is highlighted (cursor).
PLAY MENU
-SEARCH
ZOOM
SLIDE SHOW
PROTECT
DELETE
■•'TRANSFER
O Turn the MENU/EXECUTE jog dial to select "PRINT.
PLAY MENU
PRINT
DATE
WIRELESS
SERIAL 9600
Digital Still
Cameta
01.01
ON
16
Page 17
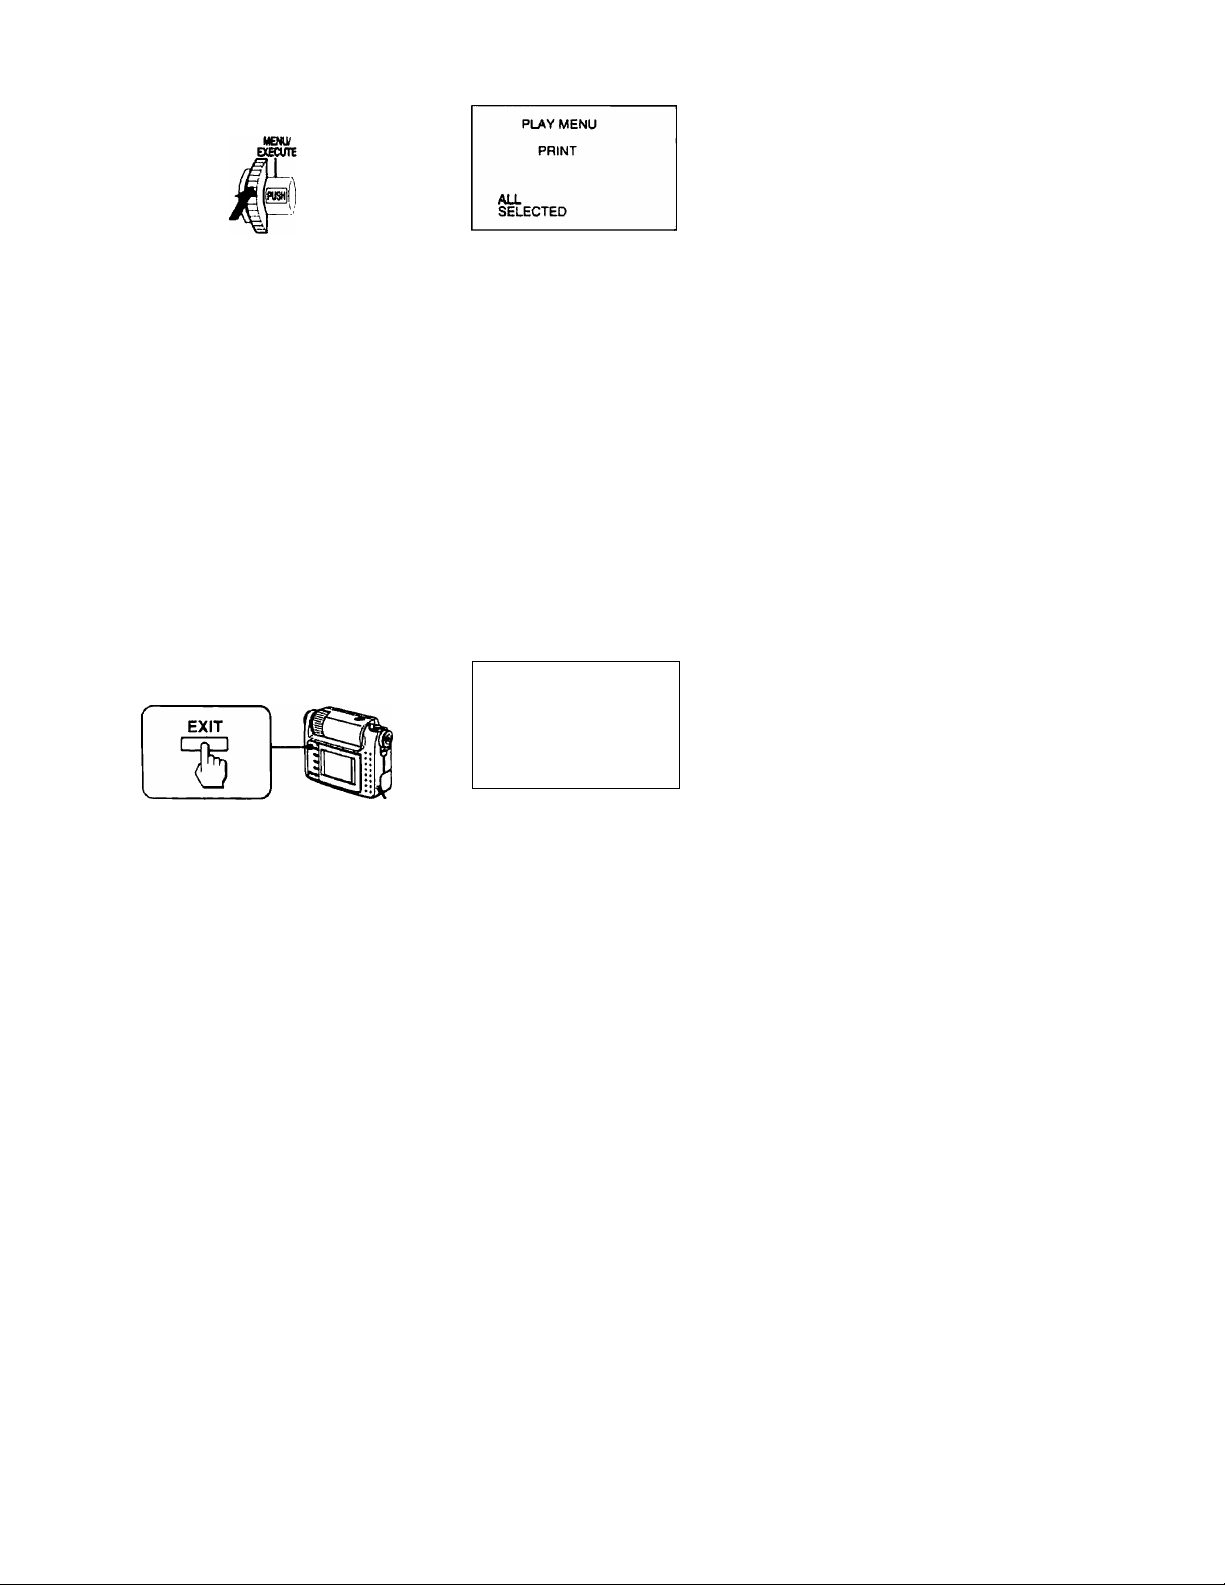
O Press the MENU/EXECUTE jog dial again.
The PRINT menu apjjears on the LCD screen.
O Select the images you want to print.
Printing all the images
Turn the MENU/EXECUTE jog dial to select "ALL" and press the MENU/
EXECUTE jog dial.
Printing the selected images
© Turn the MENU/EXECUTE jog dial to select
''SELECTED" and press the
MENU/EXECUTE jog dial.
® Select the image, and specify it as the image
to print.
Turn the MENU/EXECUTE jog dial to select
the image you want to print, and
press the MENU/EXECUTE jog dial to
specify the image as the one to print. The
image number of the specified image appears
highlighted. (If you press the MENU/
EXECUTE jog dial again, the image is no
longer the image to print.)
® Press EXIT.
The PRINT EXECUTE screen appears on the
LCD screen.
Screen for selecting an image
PRESS EXIT
AFTER SELECT
Screen for starting printing (PRINT EXECUTE screen)
CANCEL
EXECUTE
QTY
DATE NONE
PRINT
PLAY MENU
PRINT
003
-o
—I
5’
5’
(£3
r*
3"
m
“t
n>
n
O
a
n
a
3
0)
(O
0)
01
TFFtlrrvrrSSSWRWieie--^
--------
Continue to the next page ->
17
SMP-
Page 18

O Set the number of print copies, and select printing with your
choice of date and time.
(D To set the number of print copies, select "QTY" in the PRINT menu, and turn
the jog dial to set the number. Press the MENU/EXECUTE jog dial.
To select printing with date or with date & time, select "DATE" or "DATE &
TIME" and press the MENU/EXECUTE jog dial.
(D Turn the jog dial to set the number of print.
Turn the jog dial
Upward Increases
Downward Decreases
(D When you have finished the settings, press the MENU/EXECUTE jog dial.
No. of print copies
(up to 25 copies)
(minimum 1 copy)
Date and time
Settings scroll in the
order of "NONE" -* "DATE"
-» "DATE & TIME."
Settings scroll in the order
of 'T)ATE & TIME" —► "DATE"
—"NONE."
O Select "EXECUTE" in the PRINT menu and press the MENU/EXECUTE
jog dial.
O Insert print paper into the paper outlet of the printer sheet by
sheet.
Printing starts.
When printing is completed, the LCD screen
returns to the PLAY MENU.
To suspend printing
Press EXIT.
To stop operation during the above procedures, also press EXIT.
PRINTING
001/020
The current print number/
Total print numbtfT
18
Page 19

To print a number of printouts at a time
When you want to print a number of printouts, we recommend you to use an
automatic feeder specially designed for the printer. If you attach an automatic feeder to
the printer, the print paper is loaded automatically, which saves you from inserting the
paper sheet by sheet.
If the printer suspends printing, the print paper in the automatic feeder may have run
short. For details, refer to the instruction manual of the printer and automatic feeder.
U Notes
•Controllable area of the infrared ray is about 4 -12 inches (10-30 cm) in terms of straight
line distance and 15 degrees right and left each in terms of angle. Do not place the printer
and camera outside the area or place them loo close, which may interrupt transferring or
results in noises.
•Do not cover the infrared port with your hand or any other objects.
• Infrared rays cannot pass through a wall, opaque glass, etc. If they pass through glass, etc.,
the controllable distance becomes short.
to
<D
■0
5‘
3
zr
n
OL
(V
CL
i'
HI
n>
19
Page 20

Using personal computers
To design, edit, and manipulate images from the camera using a personal computer,
use the personal computer connecting kit DSKIT-PCIW (for Windows) or DSKITPCIM (for Macintosh) that is supplied with the camera. A personal computer
connecting kit includes a connecting cable and application software that enables you to
utilize image data transmitted from the camera. For details on configuration, refer to
the instruction mfmual of the personal computer connecting kit that is also supplied
with the camera.
[T| If you have a personal computer compatible with an
infrared data communication system (IBM POAT
compatible PC)
Personal
Digital Still
Camera
computer
{{((j
^ 1 1 1.—wnr
[k
Infrared port
Place the infrared port located on the front parwl of the digital still camera and that of
the personal computer face to face so that you can transmit image data from the
camera to the computer or vice versa.
If you have a personal computer that has a serial port (an
RS-232C port for IBM PC/AT compatible PC or a modem/
printer port for Macintosh)
Digital Still
Camera
Connecting cable
I
to DIGITAL I/O
port
to serial port or modem/
printer port
j
«-►r
20
----
Personal
computer
fi
S-
ifi-
i?-
r "
Page 21

Connect your personal computer to the DIGITAL I/O port of the camera, using the
connecting cable supplied with the personal computer connecting kit. For details, see
"Using image data on a personal computer" (page 44).
to
•o
■O
3
tp
;;;
o
3
£L
n
o
3
c
21
Page 22

p^5electing menus
How to select menus
Must operations are made using the
menu screens. Once you've learned
how to use the menus, you can do
most operations of the camera.
1 While keeping the center button of
the function dial pressed, set the
dial to "CAMERA iMl" or "PLAY "
^ Press the MENU/EXECUTE jog
dial.
The item you want is selected, and
the menu of that item appears on
the LCD screen.
Function of the MENU/ EXECUTE jog dial
Position of the
function dial
CAMERA IM
PLAY
Menu
CAMERA
MENU
PLAY MENU
2 Press the MENU/EXECUTE jog
dial.
The menu appears on the LCD
screen.
Selected item is high
lighted (cursor)
I CAMFFtA MPNU
EXPOSURE
SH.SPEED
REC MODE
QUALITY
PUSH ADJ
<^ATE
To the next Current settings
page (mode)
AUTO
AUTO
STD
AUTO
01. 01
Turn
Press
To select an item in the menu
Turn upward
Turn downward
To move the cursor
upward
To move the cursor
downward
To move on the LCD screen
Turn upward To move left
Turn downward To move right
To select an image
Turn upward An image with the
Turn downward An image with the
lower number
appears
higher number
appears
To input the number
Turn upward
Turn downward
To increase
number
To decrease
number
! tst
3 Turn the MENU/EXECUTE jog
dial so that the cursor moves to
the item you want to .select.
22
Page 23

To enter selection
Press the MENU/EXECUTE jog dial. If
you press the jog dial again after you
select an item, selection is canceled.
To cancel menu operations
Press EXIT. The LCD screen shows the
previous settings. If the CAMERA MENU
or the PLAY MENU is displayed when
you press EXIT, an image captured by the
lens or the playback image appears on the
screen
cn
2.
n
a
3’
to
3
n
3
c
.->/i.UUaiUlWVI9)>Srr
23
Page 24

Menu chart
The Digital Still
Camera has two
menus; CAMERA
MENU and PLAY
MENU. These menus
are displayed on the
LCD scrt*en.
Refer to the pages
indicated in () for
details.
CAMERA MENU
Tills menu is used io sot
the shooting conditions
and various recording
modes. Set the function
dial to "CAMERA P."
CAMERA MENU
EXPOSUflS
SH.SPEED
REC MODE
QUALITY
flash ADJ
AOATE
Turn theNtENU/
EXECLTEjogdialto
turn the pages over.
CAMERA MENU
t WIRELESS
SERIAL
AUTO
AUTO
STD
AUTO
01.01
OFF
9600
EXPOSURE
CAMERA MENU
SHUTTER SPEED
AUTO 1/100
1/7.5 1/250
1/15 1/500
1/30 1/1000
CAMERA MENU
REC MODE
8INGU.£
CONTINUOUS
TIME MACHINE
MULTI SCREEN
CAMERA MENU
IMAGE QUALITY
FINE
STANDARD
SNAPSHOT
FLASH ADJ
CAMERA MENU
DATE & TIME
06.22.199$
2:25 PM OK
CAMERA MENU
WIRELESS
OFF
ON
EXPOSURE menu
To adjust exposure
when you shoot a
subject with the light
source behind. (30)
SHUTTER SPEED
menu
To select the shutter
speed. (31)
REC (recording)
MODE menu
To select the mode to
record images prior to
and after pressing the
shutter button, etc. (26)
IMAGE QUALITY
menu
To change the picture
quality at the time of
recording. (29)
FLASH ADJ
(adjustment) menu
To adjust brighmess of
the flash. (32)
DATE & TIME menu
To adjust date and time
recorded with an
image. (33)
WIRELESS menu
To enable or disable
infrared data
communication (44)
24
CAMERA MENU
SERIAL SPEED
9600
19200
33A00
SERIAL SPEED menu
To set the
communication speed
through the RS-232C
port. (45)
Page 25

PLAY MENU
This menu is used to set
various ways of
playback, those in
processing the recorded
images and enabling/
disabling infrared data
communication. Set the
function dial to "PLAY.”
№
SLIDE SHOW
PROTECT
DELETE
*transfer
Turn the MENU/
EXECUTE jog dial to
turn the pages over.
PUT MENU
♦PRINT
DATE
WiftaESS
SERIAL
]□
001 002 003
004 OM 0Ó6
PUY MENU
SUDE SHOW
Aa
SELECTED
INTERVAL 03 SEC
PRESS EXrr
AFTER SELECT
PLAY MENU
DELETE
ALL
SELECTED
PLAY MENU
TRANSFER
RECEIVE
SEND ALL
SEND SELECTED
PLAY MENU
PRINT
ALL
SELECTED
-DATE & TIME menu (33)
-WIRELESS menu (44)
SERIAL SPEED menu (45)
SEARCH menu
To display 6 recorded
images on the LCD
screen for image
searching. (35)
ZOOM menu
To enlarge a part of the
recorded image. (36)
SLIDE SHOW menu
To display all or
selected images in
order automatically.
(37)
PROTECT menu
To protect specific
images from accidental
erasure. (39)
DELETE menu
To delete all or selected
images. (40)
TRANSFER menu
To send and receive
data to and fixim the
other equipment that
has an infrared data
communication system
compatible with that of
this camera. (46)
PRINT menu
To print images on a
digital color printer
that has an infrared
data communication
system compatible
with that of this
camera. (43)
«✓ »
2.
n
a
3
to
3
3
c
25
Page 26

Various ways of
recording
Recording images continuously
(CONTINUOUS)
When you press the shutter button,
you can continuously record 4 images
in STANDARD mode or 6 images in
SNAPSHOT mode.
2 Select “REC MODE" and press the
MENU/EXECUTE jog dial.
The REC MODE menu appears on
the LCD screen.
CAMERA MENU
REC MODE
SINGLE
CONTINUOUS
TIME MACHINE
MULTI SCREEN
> ’
To capture high-speed
action in sports.
I’rt-ss llie shuller
biitUm. ,
MENU/EXECUTE
jog dial
Set the function dial to "CAMERA
[0!" and press the MENU/
EXECUTE jog dial.
The CAMERA MENU appears on
the LCD screen.
CAMERA MENU
EXPOSURE AUTO
SH.SPEED
ПЕС MODE
QUALITY
FLASH ADJ
4. DATE 01.01
Recording cuntinuou&ly
at about 0.2 second
intervals.
Shutter button
EXIT
Function dial
AUTO
STD
AUTO
l! SINGLE: When pressing the
shutter button once, you can
record a single image,
n CONTINUOUS ( ); When
pressing the shutter button
once, you can record 4 images
(when image quality is set to
"STN" (standard)) or 6 images
("SNAP" (snapshot))
continuously at about 0.25
.second intervals.
n TIME MACHINE ( r'^): When
pressing the shutter button
once, you can record some of
the previous and the next
images continuously at about
05 se«>nd intervals.
^ MULTI SCREEN ( ): When
pressing the shutter button
once, you can record 9 images
continuously on a single page.
3 Select "CONTINUOUS" and pre.ss
the MENU/EXECUTE jog dial.
The screen returns to the
CAMERA MENU.
CAMERA MENU
EXPOSURE
SH.SPEED
REC MODE СЭ
QUALITY
FLASH ADJ
+DATE 01.pi
AUTO
AUTO
Sip
AUrO
I
iil:
T*-!'
i
26
Page 27

Press EXIT,
The CAMERA MENU disnppears
from the LCD screen.
5 Press the shutter button.
As soon as you press the shutter
button, you can record 4 images
(in ''ST.ANDARD"mode) orb
images (in "SNAPSHOT" mode)
continuously at about 0.2 second
inter\'als.
V/mage quality (STANDARD,
SNAPSHOT, and FINE)
Thi.s camera has 3 image quality mcnies.
For details, see "Selecting image quality"
on page 29.
■^To cancel CONTINUOUS mode
Select "SINGLE" on the REC MODE
menu. When you cancel TIME
MACHINE mode and MULTI SCREEN
mixte, select "SINGLE"
UNotes
• During CONTINUOUS recording, you
cannot do the folloveing operations:
- Flash recording
- Selecting "FINE" mode on the
IMAGE QUALITY menu
- Setting exposure automatically by
pressing the shutter button halfway
down
• If you try to select CONTINUOUS
recording modi? when there are not
enough memory pages remaining,
"NOT ENOUGH MEMORY" appears
on the LCD screen and you cannot
select this mode.
Recording images
prior to and after
pressing the shutter
button (TIME MACHINE)
You can record images prior to and
after pressing the shutter button by
storing images continuously in a buffer
memorw
To select the best shot
among several images.
Press the shutter button.
Recording the
previous and
following imnge.s
at about 0.5 second
intervals.
1 Select "TIME MACHINE" on the
REC MODE menu.
Press the shutter button halfway
down.
Images are stored in memory at
0.5 second interx'als. The images
on the LCD .screen also changes at
0.5 second inteiA’als (when you
release the shutter button, storing
of imagra stops.)
Press the shutter button fully
down.
You can record images (4 images
in total in STANDARD mode and
6 images in total in S.NAPSHOT
mode) prior to and after pressing
the shutter button at 0.5 second
intervals.
><
1Ú
0)
3
Continue to the next page
27
Page 28

Image
quality
SNAP 3 images 3 images
(SNAPSHOT)
STD 2 images 2 image
(STANDARD)
Q/Vores
• During TIME MACHINE rmirding,
you cannot do the following operations:
- Flash recording
- Self-timer recording
- Selecting "FINE" mode on the
IMAGE QUALITY menu
- Fixing exposure automatically by
pressing the shutter button halfway
down
• If you try to select TIME MACHINE
recording mode when there are not
enough memory pages remaining,
"NOT ENOUGH MEMORY" appears
on the LCD screen and you cannot
select this mode.
Previous Next
Recording 9 images on
a single page
(MULTI SCREEN)
As smn as you press the shutter
button, you can record 9 images in
succession on a single page.
Want to see high-speed
action on a single page
1 SelcHTt " M U LTl SCREEN " on the
REC MODE menu.
2 Press the shutter button halfway
down, and then press it down
fully.
As soon as you press the shutter
button, you can record 9 images
continuously (as in the flow
show'n in the above illustration) on
a single page at 1 /15 second
intervals.
28
UNote
During MULTI SCREEN recording, you
cannot do the following operations:
- Flash recording
- Fixing the exposure automatically by
pressing the shutter button halfway
down
if'ti.;:
m'-
Page 29

Selecting image quality (IMAGE QUALITY)
Yni) can select one of three available
imaRe quality modes. The number of
images you con record is different
depending on which image quality
mode you select.
Shutter button
MENU/EXECUTE
jog dial
EXIT
Set the function dial to "CAMERA
!M]" and press the MENU/
EXECUTE jog dial.
The CAMERA MENU appears on
the LCD screen.
CAMERA MENU
EXPOSURE AUTO
SH.SPEED AUTO
REC MODE
QUALITY
FLASH ADJ
4. DATE
Select "QUALITY" and press
MENU/EXECUTE jog dial.
The IMAGE QUALITY' menu
appears on the LCD screen.
CAMERA MENU
IMAGE QUALITY
FINE
STANDARD
SNAPSHOT
Function dial
STD
AUTO
01.01
(FINE)
Tl STANDARD (STD)
Use this mode as a standard
image quality. When
"CAMERA (automatic
recording) is selected, the
image quality mode is set to
"STD." (58 images can be
recorded at maximum.)
1 SNAPSHOT (SNAP):
Use when giving priority to the
number of shots to be
recorded. (108 images can be
stored at t maximum.)
Select the image quality and press
the MENU/EXECUTE jog dial.
The screen returns to the
CAMERA MENU.
CAMERA MENU
EXPOSURE AUTO
SH.SPEED
REC MODE
QUAUTY
FLASH ADJ
+DATE
AUTO
SNAP-
AUTO
01.01
Selected mode
4 Press EXIT.
The CAMERA MENU disappears
from the screen.
QNote
When you select CONTINUOUS or TIME
MACHINE mode, vou cannot select
"HNE"
■ii' What is the difference In the
image quality mode?
An image is compressed in the JPEG
format before recording. The memory
capacity allocated to each image is
different depending on the image quality
as follows (the number of pixels is 640 x
480 regardless of image quality mode
and data volume before compression is
about 450 kB):
'<
(O
C
C
i/>
t
cu
V»
rD
r>
O
a.
5'
"I FINE (FINE):
Use this mode when giving
priority to image quality. (30
images can be stored at
maximum.)
RNE mode
STANDARD mode 64 kB
SNAPSHOT mode 32 kB
120 kB
29
Page 30

Adjusting exposure
(EXPOSURE)
You can record images, adjusting the
brightness of the subject,
The subject is too dark or
bright against the
background because of
backlighting, a light source
near by, etc.
Shutter button
Set the function dial to "CAMERA
iK^" and press the MENU/
EXECUTE jog dial.
The CAMERA MENU appears on
the LCD screen.
CAMERA MENU
EXPOSURE
SH.SPEED
REC MODE
QUALITY
FLASH ADJ
+ DATE
AUTO
AUTO
STD
AUTO
01.01
Turn the MENU/EXECUTE jog
dial to adjust exposure, using the
cursor pointer on the screen.
Adjust exposure, checking
brightness of background.
4 Press the MENU/EXECUTE jog
dial.
The screen returns to the
CAMERA MENU.
CAMERA MENU
EXPOSURE -1—
SH.SPEED AUTO
REC MODE
QUALITY STD
FLASH ADJ AUTO
+DATE
Newly adjusted value
01.01
5 Press EXIT.
The CAMERA MENU disappears
from the screen.
2 Select "EXPOSURE" and press the
MENU/EXECUTE jog dial.
The EXPOSURE menu appears on
the LCD screen.
Current value
30
Page 31

Selecting shutter speed (SHUTTER speed)
The shutter speed is automatically
adjusted during automatic recording.
You can also manually fix the shutter
•ipeed.
To compensate for a
background light, a light
source such as a
fluorescent light, and
action speed of the subject.
Shutter button
Set the function dial to "CAMERA
and press the MENU/
EXECUTE jog dial.
The CAMERA MENU appears on
the LCD screen.
CAMERA MENU
EXPOSURE AUTO
SH.SPEED
REC MODE
QUALITY
FLASH ADJ
+ DATE
Select "SH. SPEED" and press the
MENU/EXECUTE jog dial.
The SHUTTER SPEED menu
appears on the LCD screen.
AUTO
STD
AUTO
01.01
Auto
1/7.5
1/15
1/30
1/100 Shooting with
1/250
1/500
1/1000
The best shutter speed
is selected
automatically
according to the
brightness of the
subject
Shooting with a dark
background such as
twilight or night
scenery
Shooting indoors
flickering light such as
a fluorescent light
Shooting a subject with
high-speed action
3 Select a shutter speed and press
the MENU/EXECUTE jog dial.
The screen returns to the
CAMERA MENU.
CAMERA MENU
EXPOSURE
SH.SPEED
REC MODE
QUALITY
FLASH ADJ
4. DATE
Shutter speed newly set
AUTO
1/15STD
AUTO
01.01
4 Press EXIT.
The CAMERA MENU disappears
from the screen.
Continue to the next page ■>
*<
<
Q>
5'
c
vt
$
tu
W»
fl>
n
O
O.
5'
CAMERA MENU
SHUTTER SPEED
AUTO 1/100
1/7 5 1/250
1/15 1/500
1/30 1/1000
31
Page 32

ONotes
• When you fix the shutter speed, the
image qualit)' of certain subjects
whose brightness does not meet
that shutter speed may deteriorate.
• When you shoot a very bright
subject at high speed, streaks may
appear on the upper and lower
sides of the LCD screen This does
not indicate a malfunction.
• When you set the shutter speed to
1 /7.5 or 1 /15, you cannot use a
flash. To record a subject with a
flash, you must select a shutter
speed other than 1 /7.5 and
1/15.
,%<.yiL-.-TL~r<r.>
Adjusting brightness of the flash (flash adj)
You can adjust brightness of the flash.
The brightness you want is
not gained with a standard
flash adjustment because
of positioning of the
subjects.
Shutter button
Set the function dial to "CAMERA
ImI" and press the MENU/
EXECUTE jog dial.
The CAMERA MENU appears on
the screen.
32
CAMERA MENU
EXPOSURE AUTO
SH.SPEED AUTO
REC MODE
QUAUTY
FLASH ADJ AUTO
4. DATE
Select "FLASH ADJ" and press the
MF.NU/EXECUTE jog dial.
Tile FLASH AD] menu appears on
the LCD screen.
Current flash adjustment value
STD
01.01
Page 33

3 Turn the MENU/EXECUTE jog
dial to adjust the brightness of
flash, using the cursor pointer on
the screen.
Press (he MENU/EXECUTE jog
dial.
The screen returns to the
CAMERA MENU.
CAMERA MENU
EXPOSURE
SHSPEED
REC MODE
QUALITY
FLASH ADJ
4. DATE
Newly selected value
AUTO
STD
AUTO
01.01
•1—
5 Press EXIT.
Tlw CAMERA MENU disappears
from the LCD screen.
■<i*' Hints for setting the flash
adjustment
When the subject or background is dark,
the flash adjustment may become too
high. In thus case, adjust the flash level
downwards. On the other hand, when the
^uh|ect or background is bright, the flash
.id)ustmenl may become too low. In thus
L<use, adju.sl the flash adjustment
iipvvards To .set the flash adjustment
properly, we recommend you to do a trial
a’cording.
fUNote
When you set the shutter speed to 1 /7.5
nr 1 /15, you cannot use a flash. To record
,1 subject with a flash, you must select a
shutter spit'd other than 1 /7.5 and
1/13.
Setting the date and
time (DATE)
Set the date and time before recording.
You can record the date and time that
can be displayed on the LCD screen
with the image. At the time of printing,
you can choose to print them with the
image on the PRINT menu.
Set the date and time according to the
following procedure.
Shutter button
Set the function dial to "CAMERA
[0" or "PLAY" and press the
MENU/EXECUTE jog dial.
The CAMERA MENU or PLAY
MENU appears on the LCD screen.
CAMERA MENU
EXPOSURE
SH.SPEEO
REC MODE
QUALITY
FLASH ADJ
4-DATE
Select "DATE" and press the
MENU/EXECUTE jog dial.
The DATE & TIME menu appears
on the LCD screen. "MONTH" is
highlighted.
CAMERA MENU
DATE & TIME
08.22.1996
2:25 PM
Continue to the next page •> 33
AUTO
AUTO
STD
AUTO
01.01
OK
<
QJ
1
o‘
c
iA
$
tu
»<
n
n
o
a
5’
(O
Page 34

Set the "MONTH."
© Press the MENU/EXECUTE
jog dial.
The color of the cursor on the
month changes, which shows
you can change the month.
@ Set the month, turning the
MENU/EXECUTE jog dial.
@ Press the MENU/EXECUTE
jog dial.
The color of the cursor on the
month returns to the initial
OTo set another item
Turn the MENU/EXECUTE jog
dial to select another item.
4 Set the "DAY," "YEAR,"
"HOUR" and "MINUTE" in the
same way as the month.
CAMERA MENU
DATE & TIME
08.22 1996
2:25 PM
D Select "OK" and press the MENU/
EXECUTE jog dial at the
announcement of the time on the
radio, etc.
The screen returns to the
CAMERA MENU or PLAY MENU
and the clock starts.
OK
y Memory back-up of the clock da ta
The camera uses the rechargeable lithium
ion battery LIP-10 for storing cUkL data
in memory. The clock in the camera
works correctly for about 7 months with
fully charged LIP-IO. Though the clock
continues to work for about 2 months
even after the battery i.s used up, it is
recommended that you always use the
camera with the fully charged battery.
When changing rechargeable lithium ion
batterie.s, replace them within 10 minutes.
Tlie clock works correctly without the
battery tor 10 minutes. If the clock data is
lost, set the date and time again after
charging tlie batter)'.
6 Press EXIT.
The CAMERA MENU or PLAY
MENU disappears from the LCD
34
Page 35

>^Various ways of
playback
Playing back multiple
images at a time
(SEARCH)
You can play back b recorded images
at a time. You can also select a spedfic
imago from the (S images and enlarge it
to full-size.
To search for an image you
want from all the recorded
images.
MENU/EXECUTE
Set the function dial to "PLAY"
and press the MEMU/EXECUTE
jog dial.
Tie Pl.A'i MENU appears on the
LCD screen.
PLAY MENU
SEARCH
ZOOM
SLIDE SHOW
PROTECT
DELETE
^transfer
Select "SEARCH"and press the
MENU/EXECUTE jog dial,
ft images are displayed at a time
(SE.ARCH screen).
Image Showing the position of
number an image whose number
is highlighted
Enlarging a specific image you want to full size
1 Select an image bv turning the
MENU/EXECUTE jog dial.
2 Press the MENU/EXECUTE jog
dial.
Selected image is enlaged to full
size.
Displaying the other images
Scroll the recorded images, using the
N/B, ►!/► buttons.
H/B Displaying images that have
lower image numbers*
►!/► Displaying images that have
higher image numbers*
‘ Scrolling images in the unit of 6 images
on the SEARCI1 .screen.
Returning to the SEARCH screen
Press EXIT.
Returning to the normal playback screen
Press EXIT twice. TIie PLAY MENU
disappears from the LCD screen and
the screen returns to the normal
playback.
< <
0) Ш
о о
с с
$ $
Ш СИ
VC
«л 1Л
О о
Ш г»
< о
S'Sl
X- ^
aj I
35
Page 36

Enlarging a part of the image (zoom)
You can double the size of a part of
the playback picture.
Move the frame to the position
you want bv turning the MENU/
EXECUTE jog dial.
You can move the frame right and
left.
Moving the frame up and down
Press ROTATE and change the
direction of the arrow to up and
down. Then turn the MENU/
EXECUTE jog dial.
If you press ROTATE again, you
can return the direction of the
arrow to right and left.
Set the function dial to "PLAY"
and press the MENU/EXECUTE
jog dial.
The PLAY MENU appears on the
LCD screen.
PLAY MENU
SEARCH
ZOOM
SLIDE SHOW
PROTECT
DELETE
4. TRANSFER
2 Select "ZOOM" and press the
MENU/EXECUTE jog dial.
A frame appears in the center of
the screen, (A zooming frame
screen)
Press the MENU/EXECUTE jog
dial.
The part you mark is doubled. The
part to enlarge can be moved in
the same way as explained in step
3.
Page 37

Enlarging a part of another image
Select another image, using N/H or
The center part of another
image is enlarged.
◄/■ l>isplaying images that have
lower image numbers
►!/!► Displapng images that have
higher image numbers
Canceling the ZOOM screen
Press EXIT,
Returning to the normal playback screen from a ZOOM screen
Press EXIT twice. The PLAY MENU
disappears frctm the LCD screen and
the screen returns to the normal
playback.
Playing back images in a
continuous loop
(SLIDE SHOW)
Playing back all or selected images
recorded in succession automatically.
For a presentation, etc.
MENU/EXECUTE
Set the function dial to "PLAY"
and press the MENU/EXECUTE
jog dial.
The PLAY MENU appears on the
LCD screen.
Select "SLIDE SHOW" and press
the MENU/EXECUTE jog dial.
The SLIDE SHOW menu appears
on the LCD screen.
<
0)
o'
c
$
01
•<
O)
*<
CT
Ol
PLAY MENU
SLIDE SHOW
ALL
SELECTED
INTERVAL 03 SEC
"I ALL: I’laying back all the
images automatically
"1 SELECTED: Playing back
programed images
automatically
3 INTERVAL: Setting the inter\’al
of changing images between 1
to 20 seconds.
Continue to next page ->
37
Page 38

Set the intervals.
© Select "INTERVAL" and press
the MENU/EXECUTE jog dial.
® Set the intervals by turning the
MENU/EXECUTE jog dial.
® Press MENU/EXECUTE jog
dial.
Select the images to play back.
Playing back all the images
Select "ALL" and press the
MENU/EXECLTTE jog dial.
Playing back selected
images
® Select "SELECTED" and press
the MENU/EXECUTE jog dial.
® Select the image you want bv
turning the MENU/EXECUTE
jog dial and enter the selection
by pressing the jog dial. (If you
press the jog dial again,
entering is canceled.)
SLIDE SHOW
001 002
PRESS EXIT
AFTER SELECT
Repeat step ® to program the
images.
® Press EXIT.
Playback starts automatically in
numerical order from the image
with the lower number. When the
screen displays the last image,
playback of the first image starts
again and playback is continued
until you stop it.
Pausing automatic playback
Press H/B. When you press ►!/►
again, automatic playback starts again.
When you press !◄/■, the screen
return.«; to the one which was
displayed before automatic playback
starts.
Returning to the normal playback screen from a SLIDE SHOW menu
Press EXIT.
Press ►!/► to start automatic
playback.
PLAY MENU
SUDE SHOW
► iSTART/PAUSE
-• :STOP
EXIT:MENU
38
Page 39

^Protecting images
Preventing accidental
erasure (protect)
To prevent accidental erasure, you can
protect all or selected images.
MENU/EXECUTE
jog dial Function dial
Set the function dial to "PLAV"
and press the MENU/EXECUTE
jug dial.
The PLAY MENU appears on the
LCD screen.
PLAY MENU
SEARCH
ZOOM
SLIDE SHOW
PROTECT
DELETE
^TRANSFER
Select the images you want to
protect.
Select the image you want to
protect by turning the MENU/
EXECUTE jog dial and enter the
selection by pressing the jog dial.
The protect mark (o-n) appears on
the LCD screen. (If you press the
jog dial again, entering is
canceled.)
If you want to protect more
images, repeat this step.
PROTECT
PRE SS EXIT
AH ER SELECT
Protect mark
Press EXIT.
The screen returns to the PLAY
MENU.
003
■o
o
(P
a
3
3
ÙI
to
0)
w
fii
'<
or
u
.Select "PROTECT" and press the
MENU/EXECUTE jog dial.
The PROTECT menu appears on
the LCD SCREEN.
PROTECT
PRESS EXIT
AFTER SELECT
39
Page 40

Deleting images
(DELETE)
You can delete ail or selected images
you do not want to keep any longer.
MENU/EXECUTE
jog dial
Set the function dial to "PLAY"
and press the NiENU/EXECLJTE
jog dial.
The PLAY MENU appears on the
LCD screen.
PLAY MENU
SEARCH
ZOOM
SLIDE SHOW
PROTECT
DELETE
♦TRANSFER
Function dial
3 Select the images you want to
delete.
Deleting all the images
Select "ALL" and press the
MENU/EXECUTE jog dial.
The DELETE EXECUTE screen
appears on the LCD screen.
Deleting selected images
® Select "SELECTED" and press
the MENU/EXECUTE jog
dial.
Select the image you want to
delete by turning the MENU/
EXECUTE jog dial and enter it
into memory by pressing the
jog dial. The number of the
selected image turns negative.
If you press the jog dial again,
entering is canceled.
If you want to delete more
images, repeat step ®.
Select "DELETE" and press the
MENU/EXECUTE jog dial.
The DELETE menu appears on the
LCD screen.
PLAY MENU
DELETE
ALL
SELECTED
3 ALL; To delete all the images.
3 SELECTED: To delete selected
images only.
40
The DELETE EXECUTE
screen appears on the LCD
screen.
PLAY MENU
DELETE
CANCEL
EXECUTE
4 Select "EXECUTE" and press the
MENU/EXECUTE jog Hal.
The selected images are deleted.
If.;
Page 41

ONotes
• When ytju select "SELECTED," you
cannot select a protected image for
deleting. When you select "ALL" and a
proteded image is included in the
images vou want to delete,
"PROTECTED IMAGES REMAIN"
appears on the LCD screen and you
cannot delete it. In order to delete
protected images, cancel their
protection first.
• Once you delete an image, you cannot
restore it. Check the images to delete
carefully before deleting them.
41
Page 42

Using image data with
other equipment
Equipment you can connect to your camera
You cnn send or receive image data to
or from other equipment, using the
VIDEO OUT jack, infrared port and
DIGITAL I/O port on the camera.
Using infrared data
communication
(equipment in the
area of the
chart)
Connecting to the VIDEO
OUTPUT jack
TV
Use to monitor the recorded
images and "SLIDESHOW."
(.17)
Digital still camera
You can copy the recorded
images. (46)
Other infrared data
communication
equipment
You can process the image
data, etc. (46)
UNotes
• Before making cortnections, turn off
each equipment. After connections are
completed, turn on each equipment.
• When you use the camera for a long
time, connecting to other equipment,
u.w the AC power adapter
42
Connecting
to the
DIGITAL
I/O port
Personal computer
You can desigrt, edit, and
manipulate itttages. (44)
c
Color video printer
You can print the recorded
images. (43)
Digital color printer
You can print the recorded
inuges. (16)
Refer to the pages in ()
for details.
Page 43

Watching images on a TV screen
Printing the recorded images
Cnnnect the camera to the TV that has
a \ idet' jack. You can enjoy a "SLIDF
hHOW" on the TV' screen. When
shooting an image in macro, you can
adjust the focus more easily on the TV
screen
TV
Set thoTV'/Vrono
input .чо1счЧ In
"VIDEO."
tn the \'IDEOOUT Digital Still
Camera
1 Connect the VIDEO OUT jack of
the camera to the video input jack
of the TV.
2 Set the TV/VIDEO input select on
the TV to "VroEO."
3 Start playback on the camer.t.
Playback picture appears on the
TV scrc4.‘ti
IIA/otes
• You cannot use a TV that has an
.tntenna {aerial) connector only,
• When the function dial is .set to
"С'.ЛМЕКА" and the lens is rotatt’d to
the s.ime side as the LCD screen {(ace to
face shtmiing), the image appears
upside-down on the TV screen.
You can transmit image data from this
camera to a printer compatible with an
infrared data communication system
or through a video input jack. The
printer prints image data.
The followings are the procesures to
print the recorded images, using a
color video printer. The procedures to
print them on a printer compatible
with the infrared data communication
system are shown in 'Printing the
recorded images" on page 16.
TV
Watching ,in image
Color video
printer
Printing images
tn the VIDEO OLT
1
Connect the VIDEO OLT jack of
the camera to the video input jack
of the printer.
Digital Still
Camera
2 Start playback on the camera.
Playback picture appears on the
TV screen,
Continue to the next page ■>
43
Page 44

3 The printer receives image data
from the camera and starts
printmg.
For the detailed procedures, refer
to the instruction manual of the
printer.
Using image data on a
personal computer
(SERIAL)
You can send image data from the
camera to a personal computer that
has a serial port of IBM PC/AT
compatible PC or a modem or printer
port of Macintosh, using the supplied
personal computer connecting kit.
For the detailed prixredures to use
image data on a personal computer
that is compatible with infrared data
communication system, refer to the
instruction manual of the personal
computer connecting kit.
Personal computer connecting kit
The following are supplied with the kit:
• a connecting cable that is for exclusive
use for connecting a personal computer
to the camera, and,
• application software to receive image
data from the camera to a personal
computer and utilize them on a
personal computer,
Personal computer
To install application
software and utilize
image data received
from the camera
44
to the serial ^
port or the ^
mixtem port
to the digital I/O
port
Connecting
cable
Digital Still Camera
Page 45

Connect the DIGITAL I/O port of
the camera to the serial port of
IBM rc/AT compatible PC or to
the modem or printer port of
Macintosh, using the supplied
connecting cable.
Install the supplied application
software into the personal
computer.
Change menu settings to enable
the camera to transmit or receive
signals through the DIGITAL I/O
port.
© Set the function dial to
"CAMERA P" or "PLAY"
and press the MENU /
EXECUTE jog dial,
The first page of the CAMERA
MENU or P1.AY MENU
appears on tlie LCD screen.
® Turn the MENU/EXECUTE
jog dial to make the second
page of the CAMERA MENU
or PL.AY MENU appear on the
LCD screen.
CAMERA MENU
•tWlRELESS
SERIAL 9600
@ Select "WIRELESS ON" and
press the MENU/EXECUTE
jog dial.
The WIRELESS menu appears
on the LCD screen.
CAMERA MENU
WIRELESS
OFF
ON
OFF
"1 OFF: To select the
communications through
the DIGITAL I/O port.
"I ON: To select the
communications using the
infrared port.
® Select "OFF" and press the
MENU/EXECUTE jog dial.
The screen returns to the
second page of the CAMERA
MENU or PLAY MENU.
Select the communication speed
through the serial port or modem
or printer p>orl.
© Select "SERIAL SPEED" and
press the MENU/EXECUTE
jog dial.
The SERl.AL SPEED menu
appears on the LCD screen.
CAMERA MENU
SERIAL SPEED
9600
19200
38400
@ Select the communication
speed (bps) to match Hie
personal computer and press
the MENU/EXECUTE jog dial.
The screen returns to the
CAMERA MENU or the PLAY
MENU.
5 Operate the personal computer to
receive image data from the
camera and utilize them.
For operation of the personal
computer, refer to the Instruction
manual of the personal computer
connecting kit.
ONote
While you are operating the personal
computer, you cannot operate the camera.
3
to
(O
XI
■ S'
3'
0)
rt)
Q.
OJ
Ci)
t
3P
o
ft)
c
3
n
3
45
Page 46

Using image data on the
equipment compatible
with infrared data
communication system
(TRANSFER)
You can transmit image data to or
receive from another digital still
camera, using infrared data
communication system.
Equipment compatible with
infrared data communication
system such as another digital
still camera
Transferring
infrared data
Digital Still
Camera DSC-F1
Place the infrared port of this
camera and that of the other
equipment to be used for
transferring face to face.
(Controllable area is about 4-12
inches (10 - 30 cm) In terms of
straight line distance and 15
degrees right and left each in
terms of angle.)
n Notes
• Place the infrared ports within the
controllable area. Do not place
them outside the area nor place
them too close, which may
interrupt transferring or cause
noises.
• Do not cover the infrared port with
your hand or any other objects.
• Infrared rays cannot pass through a
wall, opaque glass, etc. if they pass
through glass, etc., the controllable
46
distance becomes short.
2 Select "TRANSFER" and press the
MRNU/HXECUTE jog dial.
The TRANSFER menu appears on
the LCD screen.
PLAY MENU
TRANSFER
RECEIVE
SEND ALL
SEND SELECTED
Cl RECEIVE: To receive image data
from the other equipment.
□ SEND ALL: To send all the
image data to the other
equipment.
1 SEND SELECTED: To send
selected image data only to
the other equipment.
3 Select the images to send.
To receive
Select "RECEIVE" and press the
MENU/EXECUTE jog dial.
To send all the image data
Select "SEND ALL" and press the
MENU/EXECUTE jog dial.
To send selected image data
only
© Select "SEND SELECTED" and
press the MENU/EXECUTE
jog dial.
® Select the image data to .send
by turning the MENU/
EXECUTE jog dial and enter
them into memory by pres.sing
the jog dial. (If you press the
jog dial again, entering is
canceled.)
If you want to select more
images, repeat step ®.
TRANSFER
002
001
PRESS EXIT
AFTER SELECT
003
Page 47

(D Press EXIT.
The TRANSFER EXECUTE
menu appears on the LCD
screen.
PLAY MENU
TRANSFER
CANCEL
EXECUTE
4 Prepare the equipment to receive
or to transmit image data.
To receive data on your
camera
Set the camera into data receiving
standby mode, then start
transmitting irom the other
equipment.
To transmit data from your
camera
Set the other equipment into data
receiving standby mode, then start
transmitting from the camera.
5 Select "EXECUTE" and press the
MENU / EXECUTE jog dial.
Data transfer starts.
“RECV" or "SEND"
appears.
to
to
,o
•5'
3
3'
(U
0)
Ql
(U
0)
I
S’
3*
o
!■¥
3-
ID
■n
(t>
c_
3
tD
3
47
Page 48

^Poiver sources
Power sources for this
camera
You can operate the camera on the
following two power sources;
"I Rechargeable lithium ion battery
1.IP-10 (page 6)
3 1 louse current, using the AC power
adapter AC-DSCl (page 7)
QOn the AC power adapter
Use only the supplied adapter AC-DSCl.
Do not use any other AC power adapter.
Polarity of the plug
ONote
Do not pull on the cord of the AC power
adapter. If you pull it forcibly, the plug
may disconnect from the wall outlet.
If you extend the cord fully to reach a
wall outlet, the plug may easily become
disconnected.
Tips for using the rechargeable lithium ion battery
On charging
Recharge the battery whenever you
like
You do not have to discharge it before
recharging.
Recharge the battery before use.
The battery is always discharging even
when it is not in use after charging.
Therefore, you should charge the
battery right before using the camera.
On recording with batteries
Have sufficient battery power to do
2 to 3 times as much recording as
you have planned.
On battery life
Battery life is shorter in a cold
environment
Battery efficiency is decreased, and the
battery is used up more cpoickly, if you
are recording in a cold environment
(lower than 50° F (10° C)). To make the
battery life longer, it is recommended
to tty the following:
• Keep the battery warm in a pocket,
etc., and install it right before using
the camera. When using a body
warmer, be careful the warmer does
not touch the battery.
• Charge the battery as follows: Install
the battery into the camera and
connect the AC power adapter to
the camera and a wall outlet.
You should charge the battery at
temperatures from 50 °F to 86°F
(from 10 C° to 30° C). Lower
temperatures require a longer
charging time.
48
Page 49

If the battery is new or has not been
used for a long time, it may not be
charged completely until you charge
and discharge it several time.
Battery care
Keep the battery in a cool place.
Remove the battery from the camera if
you do not use the camera for a long
time, and keep it in a cool place.
On the terminals
Always keep the terminals clean.
If any solid objects or liquid fall onto
the terminals, remove or wipe it
a)mpleldv with a cotton swab, etc.
Then repeatedly install and remove the
battenr a few times. This improves the
contact condition.
When to ciispose of the battery pack?
'i ou can discharge and charge the
battery about 300 times repeatedly at
normal temperatures. If the battery life
is reduced by about half, replace if
with a new batter)’ pack.
*D
o
49
Page 50

Additional information
Precautions
On moisture condensation
If the camera is brought directly from a
cold to a warm location, or is placed in
a very damp room, moisture may
condense inside or outside the camera.
Should this occur, the camera will not
operate properly. In this case, remove
the rechargeable lithium ion battery
and open the lid of the battery
compartment and wait about an hour
for the moisture to evaporate.
How to prevent moisture
condensation
When bringing the camera from a cold
place to a warm place, put the camera
in a plastic bag and allow it to adapt to
room conditions over a period of time.
® Be sure to tightly seal the plastic
bag containing the camera.
@ Remove the bag when the air
temperature inside it has reached
the temperature surrounding it
(about 1 hour).
On cleaning
Cleaning the LCD screen
Wipe the screen surface with the
cleaning cloth (supplied) or a LCD
cleaning kit (not supplied) to remove
fingerprints, dust, etc.
Cleaning the camera surface
Clean the camera surface with a soft
cloth slightly moistened with water.
Do not use any type of solvent such as
alcohol or benzene as it may mar the
finish of the casing.
If you have any questions or problems
concerning your camera, please
coasult your nearest Sony dealer.
Using your camera abroad
Power sources
You can use your camera in any
country with the supplied AC power
adapter within lOU V to 24U V .AC. 50/
60 Hz. If the plug of the AC power
adapter does not match the wall
outlet, use an AC plug adapter.
Watching the playback picture on TV
If you want to view the playback
picture on a TV, you need a TV having
a video input jack and a video
connecting cable.
The color system of the TV must be the
same as that of your digital still
camera. TV color systems differ from
country to country. Check the
following list:
NTSC system countries
Bahama Islands, Bolivia, Canada,
Central America, Chile, Colombia,
Ecuador, Jamaica, Japan, Korea,
Mexico, Peru, Surinam, Taiwan, the
Philippines, the U.S.A., Venezuela, etc.
PAL system countries
Australia, Austria, Belgium, China,
Denmark, Finland, Germany, Great
Britain, Holland, Hong Kong, Italy,
Kuwait, Malaysia, New Zealand,
Norway, Portugal, Singapore, Spain,
Sweden, Switzerland, Thailand, etc.
PAL-M system country
Brazil
PAL-N system countries
.Argentina, Paraguay, Uruguay
SECAM system countries
Bulgaria, Czech Republic, France,
Guiana, Hungary, Iran, Iraq, Monaco,
Poland, Russia, Slovak Republic,
Ukraine, etc.
50
Page 51

Troubleshooting
Should any problem persist after you have made these checks, consult your nearest
Simy dealer If warning and notice messages appear on the LCD screen, see page 53.
Symptom
The camera does not
work.
\ ou cannot record
images
The picture is out of
locus.
The picture is noisy.
The picture is too dark.
Cause/Solution
•The rechargeable battery is dead {the indicator
appears on the LCD screen).
♦ Charge the rechargeable lithium ion battery.
• The AC power adapter is not connected securely.
^ Conned it to the DC IN 6V jack of the camera and
a wall outlet firmly, (page 6)
•The built-in micro computer does not work properly.
♦ Disconnect any power sources and reconnect it
after one minute. Then turn the power on by
setting the POWER/Function dial to "C.AMERA"
or "PLAY." If the camera still does not function
properly, press RESET at the bottom, using a
sharp-pointed object. (If you press RESET, all the
settings in memory return to the default.)
• The POWER/Function dial is not sot to "CaNMERA."
♦ Set the function dial to "CAMERA [A]” or
"CAMERA Ml."
• .Memories are full.
Delete certain images you do not want to keep,
and then start recording, (page 40)
• The rechargeable battery' is dead (the l^Ji indicator
appears on the LCD screen).
♦ Charge the rechargeable lithium ion battery.
•The MACRO lever is set to the macro recording
position.
♦ Turn the lever to the normal recording position,
(page 11)
•The camera is placed near a TV or other equipment
that uses strong magnets.
* Place the camera away from Ihe TV, etc.
• You are shooting a subject wilh the light source
behind the subject or light is insufficient.
.Adjust exposure, (page 30)
♦ .Adjust brightness of the LCD screen, (page 14)
Q.
5'
>
Q.
3
5L
5'
o
3
Ql
5'
3
Continue to the next page ■>
51
Page 52

Symptom Cause/Solution
The date is not
recorded or printed.
Vertical streaks appear
when shooting a very
bright subject.
The battery life
deteriorates too fast.
You cannot play back
the images.
• The rechargeable lithium ion battery is fully
discharged.
Charge the rechargeable battery and set the date
and time again, (page 6,33)
• "NO DATE" is set on the PRINT menu.
♦ Change the setting on the PRINT menu to "D.ATE"
or "DATE & TIME." (page 18)
• The smear phenomenon.
♦ The camera is not malfunctioning.
• Charging of the rechargeable battery is not enough.
♦ Charge the battery fully, (page 6)
• The rechargeable battery has ser\'ed its time.
♦ Replace the battery with a new one. (page 6)
• The function dial is not set to "PLAY."
Set the function dial to "PLAY."
• The rechargeable battery is dead.
Charge the rechargeable battery, (page 6)
When you set the
POW'ER/Function dial
to "CAMERA" or
"PLAY," the camera
does not turn on or
work correctly.
\'ou cannot delete an
image.
Yt)U cannot send or
receive the imago data
using infrared data
communication system.
52
• Malfunction occurred since you switched the
POWER/Functiondial repeatedly.
♦ Set the POWER/Function dial to "OFF," and then
set it to "CAMERA" or "PLAY," or press the
shutter button gently.
• The image is protected.
♦ Cancel the protection of the image on the
PROTECT menu, (page 39)
•The infrared ports of the equipment are nut placed
face to face.
♦ Place them face to face, (page 16,46)
• The equipment to receive the data is placed out of the
remote controllable area or there is an obstacle
between the infrared ports of the equipment and the
camera.
Place the equipment within 4-12 inches (10 - .30
cm) from the camera and remove an obstacle.
(page 16,46)
Page 53

Warning and notice messages
Various missages appear on the LCD screen. Check them with the following list.
Message
CHARGE B.ATTERY
(The indicator
appears.)
SAVING
N/A IN CONTINUOUS
REC MODE
N/AI\’HNEIMAGE
QUALlPi
NOT ENOUGH
MEMORY
PROTECTED
PROTECTED IMAGES
REMAIN
Meaning/Remedy
• No power remaining in the rechargeable lithium ion
battery.
Charge the rechargeable lithium ion battery.
(page 6)
ONote
If "CHARGE BATTERY" is displayed while using the camera,
and the power is turned off automatically, stop using the
rechargeable battery. Use the AC power adapter instead or
replace the battery with the fully charged one.
• While the camera is storing an image into memory,
vou cannot press the shutter button to record another
image.
♦ Wait until the message goes out and press the
shutter again, (page 9)
• When IMAGE QUALIT»' mode is set to "FINE," you
cannot set CONTINUOUS mode.
♦ Change IMAGE QUALITY mode to
"STANDARD" or "SNAI’SHOT." (page 29)
• When REC MODE is set to "CONTINUOUS," you
caimot set IMAGE QUALITY' mode to "FINE.”
♦ Change CONTINOJOUS mexie to "SINGLE," or
change IMAGE QUALITY mode to "STANDARD"
or "SNAPSHOT." (pages 26,29)
• You have already used all the memories for recording.
Delete pictures you do not want to keep, and then
start recording, (page 40)
•Tile picture is protected.
♦ Cancel the protectir>n on the PROTECT menu and
then delete the picture, (page !i9)
• Even if you select ".ALL" on the DELETE menu, you
cannot delete the protected image.
♦ Cancel the protection on the PROTECT menu and
then delete the picture, (page 3*^)
Continue tu the next page ■>
53
r
Page 54

Message Meaning/Remedy
0
• Failed in playing back images.
♦ Set the POWER/Function dial to "OFF" and then
to "PLAY" again, and play back the images again.
PRINT ERROR
TRANSFER (RECV)
ERROR
TRANSFER (SEND)
ERROR
ERROR IN
IMAGE RLE
• There may be some troubles in the printing operation. :
Check the printer. Also check if the equipment is
placed within the controllable area of the infrared
ray. Then start printing again.
• Failed in infrared transfer of image data, or the *
equipment is out of the controllable area of the
inJfrared ray, or no capacity remains in the built-in
memory.
Check the remaining memory in the receiver. Also
check if the equipment is placed within the
controllable area of the infrared ray. Then start •
transferring again. j
• Image data are defective.
♦ 1 Delete the image with @ mark, using the i
DELETE menu, (page 40) ;
2 If the message still appears on the screen, ;■
initialize the stored images as below. {[
If you initialize the stored images, all the images stored P
in memory are lost. Before initialization, make sure to
copy the images you want to store on your computer,
etc.
How to initialize the stored images (INITIALIZE)
O Set the function dial to "CAMERA" or "PLAY."
O While keeping the MENU /EXECUTE jog dial pressed, press RESET at the bottom
of the camera.
The INITIALIZE (image initialization) screen appears.
0
Select "EXECUTE" and press the MENU/EXECUTE jog dial.
'iNmALI2TNG" appears on the screen.
When initialization is completed, the screen returns to the CAMERA MENU or the
PLAY MENU.
DA/ote h
54
Page 55

Specifications
System
Recording format
(jPfC. bast'd I/Field recordinj:
Video signal
\TSC‘ color, EIA standards
Image device
1 /3-inch CCD (totid number of square
pixels: h4il X 480), square grid, primary
color filter, all the picture demenLs
reading lormat
Lens
I = 4.8 mm (35 mm, when converted mto
.1 35 mm still camera)
I’.mnmg focus (0.7 m - «)
Macro ttl.lIH m - 0.25 m)
F - 2.1)
Photometric system
FFL system
Exposure control
Automatic exposure
White balance
\utomatic
Data compression system • Maximum
number of pictures stored
I pec:
ri\E mode (121) kU) Max. 30pictures
ST.5N'DARD (t>4 kB) Max. 58 piclure.s
S\APi>HC3T (.32 kB) Max, 108 pictures
Data format
Picture MD based
Full-size screen; f>4() x 480 (VGA)
Scri'err Kt) X w)
Memory
Built-in 4MB flash memory
Flash
Controlable distance; 1.0 m - 3.0 m,
automatic flash control system
Shutter speed
( AMI K.A [Al mode; aulorrviitic
(1/30- I
L.AMiqCA M; mi>de‘ selectable (1/7.5-
1 ' 1000 seconds)
LCD screen Screen size
1.8 inch (27q fno wide x 220 line long)
LCD panel
TFT
Total dot number
ft 1,380 dots
Input ancJ output connectors
Video output
Minijack. 1 Vp-p, 75Ì2 unbalanced
Digital I/O port
9-pin proprietary connector
RS232C based, 9.6 Kbps - 38.4 Kbps
Infrared port
IrDA 1.1 based, 9.6 Kbps -1.152 Mbps
General
Power requirements
External power input jack: DC ftV
AC power adapter AC-DSC1
(supplied)
I’ower requirements
100 to 240 V AC, 50/60 Hz
Rated input capadtv
14 -19 VA
Output voltage
DC ftV. l.OA
Dimensions
Approx.] X 10 */4 X 27^/(t in.
(4tS X 2ft x7l) mm) (w/h/d)
Mass
Approx. 3.6 oz. (100 g)
Rechargeable lithium ion battery LIP-
10 (supplied)
Maximum voltage 4.2 V UXT
Nominal voltage 3.6 V DC
Capacity 750 mAh
Dimensions
Approx. ''/)<• X 26 '/:x *’/is in.
(17.1) X 67.0 X 17.2 mm) (w/h/d)
Mass 1.2 oz (35 g)
Battery life
iiee "Batter>' life” (page 7)
Power consumption
During shooting: 4.1 W
During playback; 2.8 W
Operation temperature
32''F to - UU*F (0“C to +4ira
Storage temperature
-4"F to 141)"F (-2l)'C to ftlFC)
Cxmtinuo to the next page
55
Page 56

Dimensions
Approx. 4 '/»x3 1 ’’/h in.
(102x77.8x40.8 mm) (w/h/d)
Mass
•Approx. 9.9 oz. (280 g) (excluding
batteries)
Supplied accessories
Video conrwcting cable (1)
Rechargeable lithium ion battery LlP-10
(1)
AC power adapter AC-DSCl (1)
Carry'ing case (1)
Hand strap (1)
Cleaning cloth (1)
Personal computer connecting
kit(l)
DSKIT-PCl W (for Windows)
DSKIT-PCIM (for Macintosh)
Optional accessories
Digital color printer DPP-M55
Your dealer may not handle some of the
above listed accessories. Please ask the
dealer for detailed information about the
accessories in your country.
Design and specifications are subject to
change without nohce.
56
Mmm
Page 57

Parts identification
See pages in () for more details.
Lens
MACRO lever (11)
POWER/Function
dial
Infrared port (16, 20,
46)
Hook for hand
strap
Lid of banery
compartment (6)
Flash sensor
Flash emitter
Using a tripod
Make sure that the length of the tripod
screw is less than 2.2 inches (5.5 mm).
Continue to the next page ■>
57
Cs. t
Page 58

LOCK lever
(11,15)
EXIT button (17)
MENU/EXECUTE
jog dial (16)
VIDEO OUT jack
(43)
DIGITAL I/O
port (44)
DC IN 6V jack
(6)
Shutter button
(9)
FLASH button
(10)
Flash CHARGE
lamp (10)
LCD screen
SELF TIMER
button (11)
ROTATE button (14)
DISPLAY button (10)
!◄/■, ►l/►-buttons
(12, 13, 35-38)
58
Page 59

Glossary
Scv pii>;es in () for more details.
AE (Automatic Exposure) (9)
The AE function enables you to shoot a
subject clearly, adjusting shutter speed,
iris, etc., automatically, regardless of
shooting conditions.
Automatic recording (9)
Recording, using the AE (Automatic
Exposure) and AWB (Automatic
White Balance) function.You cannot
adjust shutter speed or select
CONTINUOUS recording mode, etc.
AWB (Automatic White
Balance) (10)
The .AWB function enables you to
shoot a subject in its best tone, to meet
light source or shooting conditions.
Backlighting (30, 32)
A subject to record is Uw dark because
.1 strong light siiurce such as the sun
exists behind the subject. Adjust
brightness of the object on the
EXPOSURE and FLASH ADI menu.
CONTINUOUS recording mode
(26)
.As MHin as you press the shutter
hiitton. you can record multiple
images continuously. Besides
CONTINUOUS recording mode, there
are TIME MACHINE mode and
MULTI SCREEN mcxle in REC MODE.
Infrared data communication
system (46)
1 he system to send/receive image
data, etc., at high speed using infrared
rays. Besides this camera, certain
jx'rstiual computers and digital printer
are Compatible with this system.
JPEG (29)
An image data compression system
adopted by this digital still camera.
JPEG is an abbreviation of [oint
Photographic Experts Group who
standardii’t4i a compression system for
still images produced from natural
pictures.
Manual recording (10)
You can adjust the shutter speed,
exposure, etc., on the CAMERA
MENU.
MULTI SCREEN mode (28)
As 5СЮП as you press the shutter
button, you can record 9 images in
succession on a single page. Useful to
check high-speed action on a single
page.
NTSC system (50)
Color TV system adopted by )apan,
the U.S.A., etc. The pictures recorded
on the NTSC system can bo played
back on NTSC system-based TV only.
PAL system (50)
Color TV system adopted by European
countries, etc. The pictures recorded
on the PAL system can be played back
on P.AL system-based TV only.
SEARCH screen (35)
The screen to display Ь images al a
time. Useful lor searching for the
image you want.
SECAM system (50)
Color TV system adopted by Russia
and East European countrie-s, etc. Tlie
pictures recorded on the SECAM
system can be played back on SECAM
system-based TV only
SLIDE SHOW (37)
Playing back the images in numerical
order in succession automatically.
TIME MACHINE mode (27)
The mode to record some prvvitnis and
next image.s together with the present
one. Use to record the best shot among
some pieces of images.
59
>
C2.
Q.
5‘
3
SL
5'
о
3
0)
5’
3
Page 60

Index
AC power adapter
h, 7, 48
Adjusting brightness
LCD screen 14
flash 32
AE (Automatic Exposure)
9
Auto power-off function
7
Automatic recording 9
AWB (Automatic White
Balance) 10
B
Battery life 7
Camera menu 24
Charging 6,7
Cleaning 50
Connecting
TV 43
personal computer 44
printer 43
D
Deleting 40
Exposure 30
I
Image quality 29
Indicators on the LCD
screen 10
Infrared data
communication 20,46
M
Manual recording 10
Menu 22,24,25
Messages 53
Moisture condensation
50
Multi screen 28
N
Notice messages 53
NTSC system 50
PAL system 50
Personal computer 20,44
Play menu 25
Playing back 13
Power sources
house current 7
rechargeable lithium
ion battery 6
Printing 16
Printing the date and time
18
Protect 39
S
Search 35
SECAM system 50
Self timer 11
Serial speed 45
Setting the date and time
33
Shutter speed 31
Slideshow 37
Time machine 27
Tripod 57
Transfer 46
Troubleshoohng 51
TV color system 50
U
Using abroad 50
W
Warning messages 53
Z
Zoom 36
Face to face shooting 11
Flash adjustment 32
Hand strap 57
Sony Corporation Printed in Japan
Rechargeable lithium ion
battery 6
Recording 9
Recording mode 26
Recording in macro 11
Review 12
Remaining battery
indicator 7
Rotating an image 14
«WWW«!
i: •
••-♦»I'*
li
h • • *
a :
:
■ = ■■ 'vis
■* *
■ t: .yy
*
■ .
. i-f
-
 Loading...