

Page 1
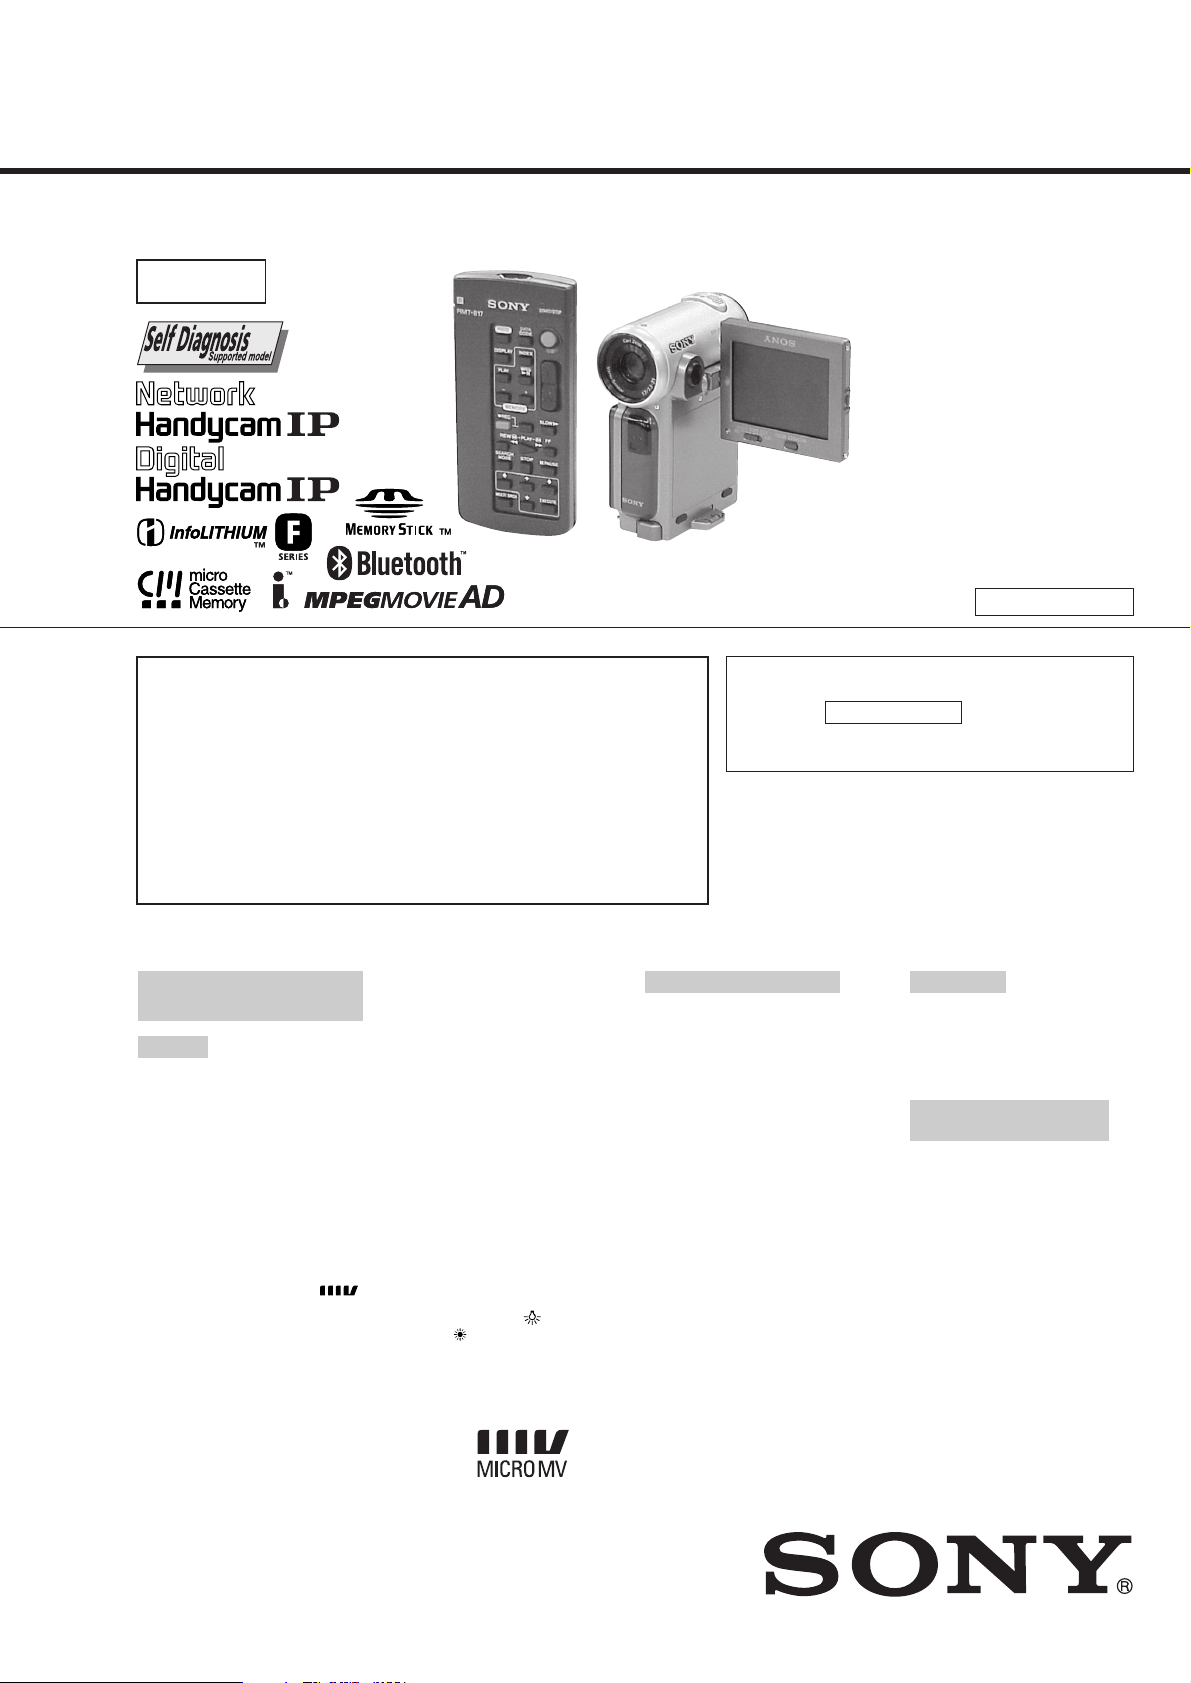
DCR-IP5/IP5E/IP7BT/IP7E
RMT-817/818
Ver 1.1 2001. 12
SERVICE MANUALSERVICE MANUAL
Level 2
Photo : DCR-IP7E
RMT-817
On the VC-263 board
This service manual provides the information that is premised the
circuit board replacement service and not intended repair inside the
VC-263 board.
Therefore, schematic diagram, printed wiring board, waveforms, parts
location and electrical parts list of the VC-263 board are not shown.
The following pages are not shown.
Printed wiring board .....................................Pages 4-11 to 4-14
Schematic diagram ...................................... Pages 4-15 to 4-50
Waveforms and Mounted parts location ...... Pages 4-77 to 4-78
Electrical parts list ........................................Pages 6-13 to 6-24
US Model
Canadian Model
DCR-IP5/IP7BT
AEP Model
UK Model
DCR-IP5E/IP7E
E Model
Hong Kong Model
DCR-IP5/IP5E/IP7E
Tourist Model
DCR-IP5/IP5E
Australian Model
DCR-IP7E
Korea Model
DCR-IP5
V MECHANISM
For MECHANISM ADJUSTMENTS, refer to the
“MICRO MV MECHANICAL ADJUSTMENT
MANUAL 1 V MECHANISM ” (9-929-911-11).
For “Section 5. ADJUSTMENTS”, refer to
Service Manual Supplement-1 (9-929-923-81).
NTSC model : DCR-IP5/IP7BT
PAL model : DCR-IP5E/IP7E
Video camera
recorder
System
Video recording system
2 rotary heads
Helical scanning system
Audio recording system
Rotary heads, PCM system
Quantization: 12 bits
(Fs 48 kHz, stereo)
Video signal
DCR-IP5/IP7BT:
NTSC color, EIA standards
DCR-IP5E/IP7E:
PAL colour, CCIR standards
Usable cassette
MICROMV cassette with the
mark printed
Tape speed
Approx. 5.66 mm/s
Recording/playback time
(using cassette MGR60)
1 hour
Fastforward/rewind time
(using cassette MGR60)
Approx. 1 min and 30 s
Viewfinder
Electric viewfinder (colour)
SPECIFICATIONS
Image device
3.0 mm (1/6 type) CCD
(Charge Coupled Device)
DCR-IP5/IP7BT:
Approx. 680 000 pixels
(Effective: 340 000 pixels)
DCR-IP5E/IP7E:
Approx. 800 000 pixels
(Effective: 400 000 pixels)
Lens
Carl Zeiss
Combined power zoom lens
Filter diameter 30 mm. (1 3/16 in.)
10× (Optical), 120× (Digital)
Focal length
2.3 - 23 mm (3/32 - 29/32 in.)
When converted to a 35 mm still
camera 44 - 440 mm (1 3/4 17 3/8 in.)
Colour temperature
Auto, HOLD (Hold),
(3 200 K),
Minimum illumination
7 lx (lux) (F 1.7)
Outdoor (5 800 K)
Indoor
Input/Output connectors
Audio/Video input/output
10-pin connector
Input/output auto switch
Video signal: 1 Vp-p, 75 Ω (ohms),
unbalanced, sync negative
Luminance signal: 1 Vp-p, 75 Ω
(ohms), unbalanced
DCR-IP5/IP7BT:
Chrominance signal: 0.286 Vp-p, 75 Ω
(ohms), unbalanced
DCR-IP5E/IP7E:
Chrominance signal: 0.3 Vp-p, 75 Ω
(ohms), unbalanced
Audio signal: 327 mV, (at output
impedance more than 47 kΩ
(kilohms) )
Input impedance with more than
47 kΩ (kilohms)
Output impedance with less than
2.2 kΩ (kilohms)
USB jack
mini-B
i.LINK (MICROMV) input/output
4-pin connector S400
LCD screen
Picture
6.2 cm (2.5 type)
50 × 37 mm (2 × 1 1/2 in.)
Total dot number:
211 200 (960 × 220)
Wireless communication
(DCR-IP7BT/IP7E only)
Communication system
Bluetooth specification Ver. 1.1
Maximum communication
1) 2)
speed
Approx. 723 kbps
Maximum output
Bluetooth specification Power
Class2
Communication distance
Approx. 10 m (33 feet) (Open space,
when using a Sony BTA-NW1
Modem Adaptor with Bluetooth
Function)
— Continued on next page —
2)
DIGITAL VIDEO CAMERA RECORDER
Page 2

DCR-IP5/IP5E/IP7BT/IP7E
Compatible Bluetooth profiles
Generic Access Profile
Dial-up Networking Profile
Usable frequency band
2.4 GHz band
(2.400 – 2.4835 GHz)
1)The maximum rate defined by
Bluetooth specification Ver. 1.1
2)Depends on obstacles between
the Bluetooth devices, radio wave
conditions, etc.
3)Defined by Bluetooth
specification for intended use
between the Bluetooth devices
General
Power requirements
7.2 V (battery pack)
8.4 V (AC power adaptor)
Average power consumption
(when using the battery pack)
During camera recording using the
viewfinder (brightness normal)
3.5 W
During camera recording using the
LCD (Backlighting on) 4.2 W
During camera recording using the
LCD (Backlighting off) 3.5 W
Operating temperature
0°C to 40°C (32°F to 104°F)
Storage temperature
–20°C to +60°C (–4°F to +140°F)
Dimensions (approx.)
47× 103 × 80 mm
(1 7/8 × 4 × 3 1/8 in.) (w/h/d)
(excluding protruding parts)
Mass (approx.)
310 g (10 oz)
Main unit only
370 g (13 oz)
including the battery pack,
NP-FF50, cassette MGR60, lens cap,
and list strap
Supplied accessories
See page 3.
3)
AC power adaptor
AC-L20A
Power requirements
100 - 240 V AC, 50/60 Hz
Power consumption
23 W
Output voltage
DC OUT: 8.4 V, 1.5 A in the
operating mode
Operating temperature
0°C to 40°C (32°F to 104°F)
Storage temperature
–20°C to +60°C (–4°F to +140°F)
Dimensions (approx.)
125 × 39 × 62 mm
(5 × 1 9/16 ×2 1/2 in.) (w/h/d)
excluding (projecting parts) mains
lead
Mass (approx.)
280 g (9.8 oz)
excluding the mains lead
Battery pack
NP-FF50
Maximum output voltage
DC 8.4 V
Output voltage
DC 7.2 V
Capacity
4.8 Wh (675 mAh)
Operating temperature
0°C to 40°C (32°F to 104°F)
Dimensions (approx.)
40.8 × 12.5 × 49.1 mm
(1 5/8 × 1/2 × 1 15/16 in.)
(w/h/d)
Mass (approx.)
45 g (1.6 oz)
Type
Lithium ion
“Memory Stick”
(DCR-IP7BT/IP7E only)
Memory
Flash memory
8 MB: MSA-8A
Operating voltage
2.7-3.6 V
Power consumption
Approx. 45 mA in the operating
mode
Approx. 130 µA in the standby
mode
Dimensions (approx.)
50 × 2.8 × 21.5 mm
(2 × 1/8 × 7/8 in.) (w/h/d)
Mass (approx.)
4 g (0.14 oz)
Design and specifications are
subject to change without notice.
SAFETY-RELATED COMPONENT WARNING!!
COMPONENTS IDENTIFIED BY MARK 0 OR DOTTED LINE WITH
MARK 0 ON THE SCHEMATIC DIAGRAMS AND IN THE PARTS
LIST ARE CRITICAL TO SAFE OPERATION. REPLACE THESE
COMPONENTS WITH SONY PARTS WHOSE PART NUMBERS
APPEAR AS SHOWN IN THIS MANUAL OR IN SUPPLEMENTS
PUBLISHED BY SONY.
SAFETY CHECK-OUT
After correcting the original service problem, perform the following
safety checks before releasing the set to the customer.
1. Check the area of your repair for unsoldered or poorly-soldered
connections. Check the entire board surface for solder splashes
and bridges.
2. Check the interboard wiring to ensure that no wires are
"pinched" or contact high-wattage resistors.
3. Look for unauthorized replacement parts, particularly
transistors, that were installed during a previous repair . Point
them out to the customer and recommend their replacement.
ATTENTION AU COMPOSANT AYANT RAPPORT
À LA SÉCURITÉ!
LES COMPOSANTS IDENTIFÉS P AR UNE MARQUE 0 SUR LES
DIAGRAMMES SCHÉMA TIQUES ET LA LISTE DES PIÈCES SONT
CRITIQUES POUR LA SÉCURITÉ DE FONCTIONNEMENT. NE
REMPLACER CES COMPOSANTS QUE PAR DES PIÈSES SONY
DONT LES NUMÉROS SONT DONNÉS DANS CE MANUEL OU
DANS LES SUPPÉMENTS PUBLIÉS PAR SONY.
4. Look for parts which, through functioning, show obvious signs
of deterioration. Point them out to the customer and
recommend their replacement.
5. Check the B+ voltage to see it is at the values specified.
6. Flexible Circuit Board Repairing
• Keep the temperature of the soldering iron around 270˚C
during repairing.
• Do not touch the soldering iron on the same conductor of the
circuit board (within 3 times).
• Be careful not to apply force on the conductor when soldering
or unsoldering.
— 2 —
Page 3
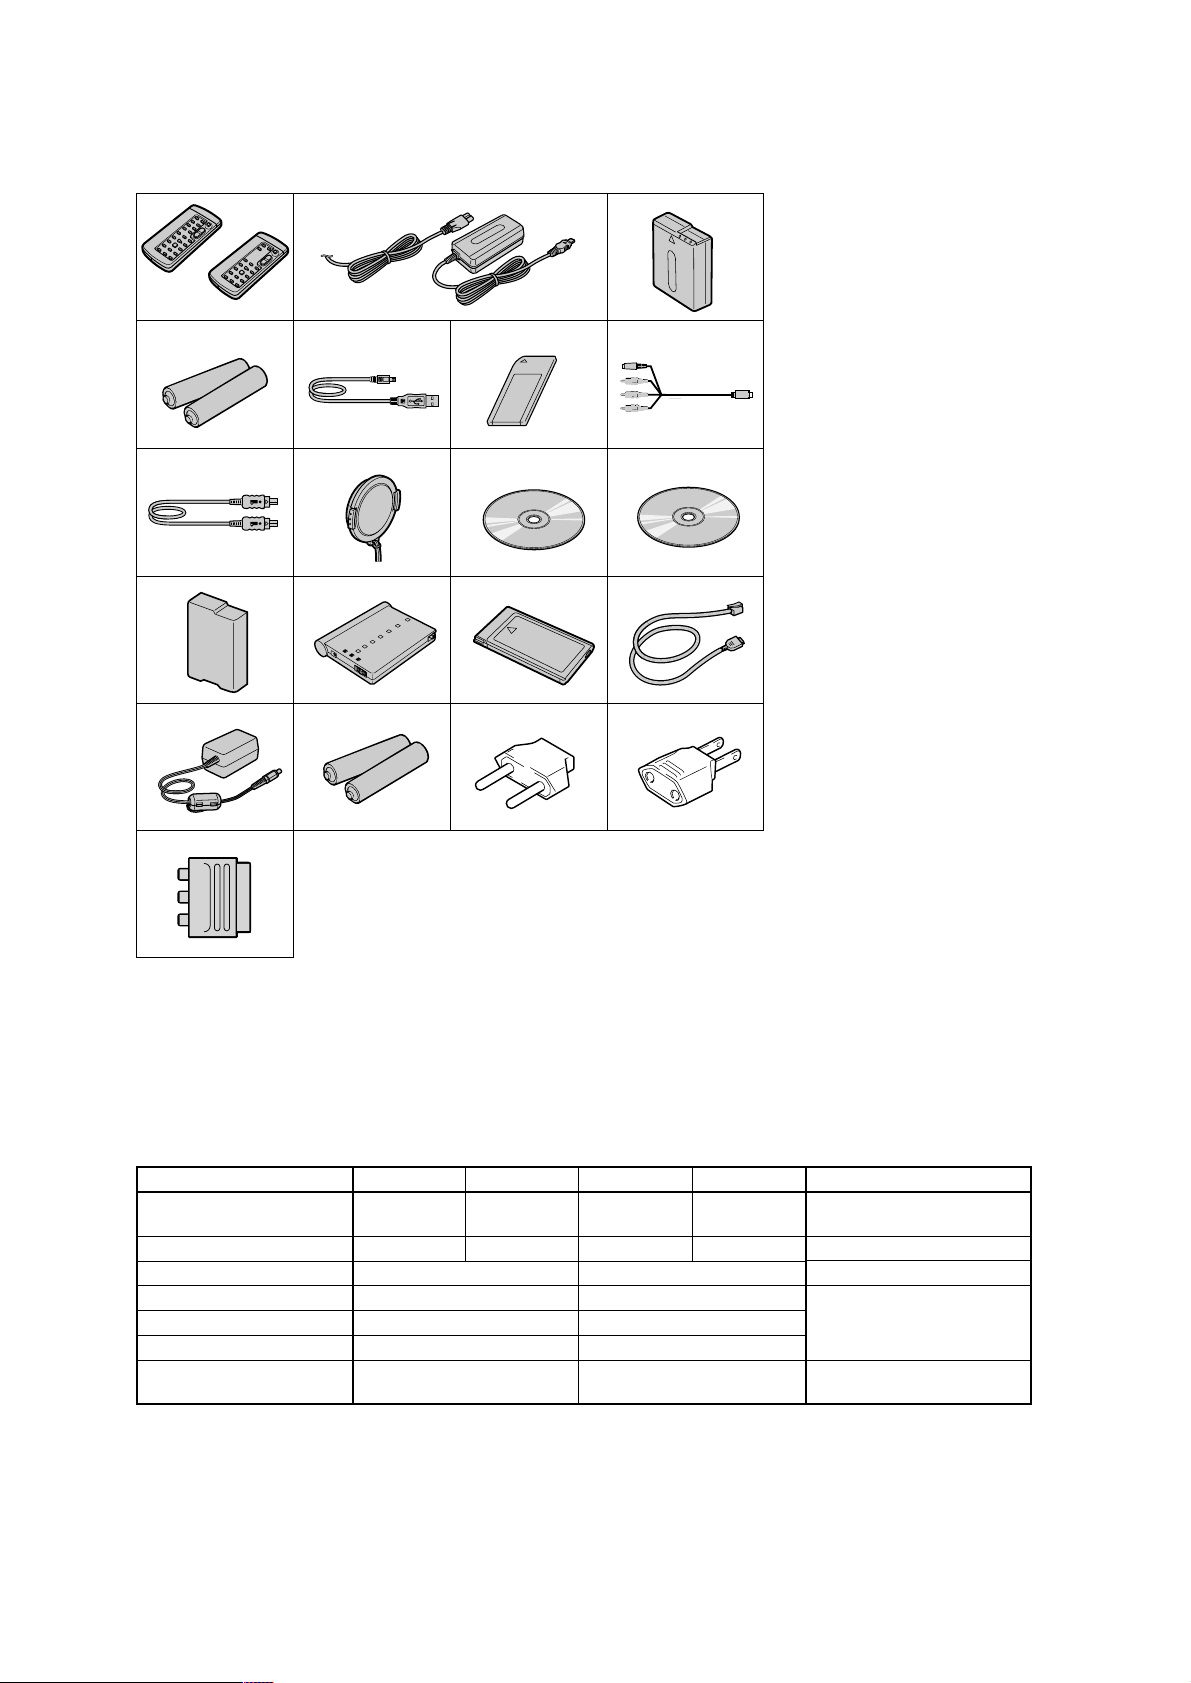
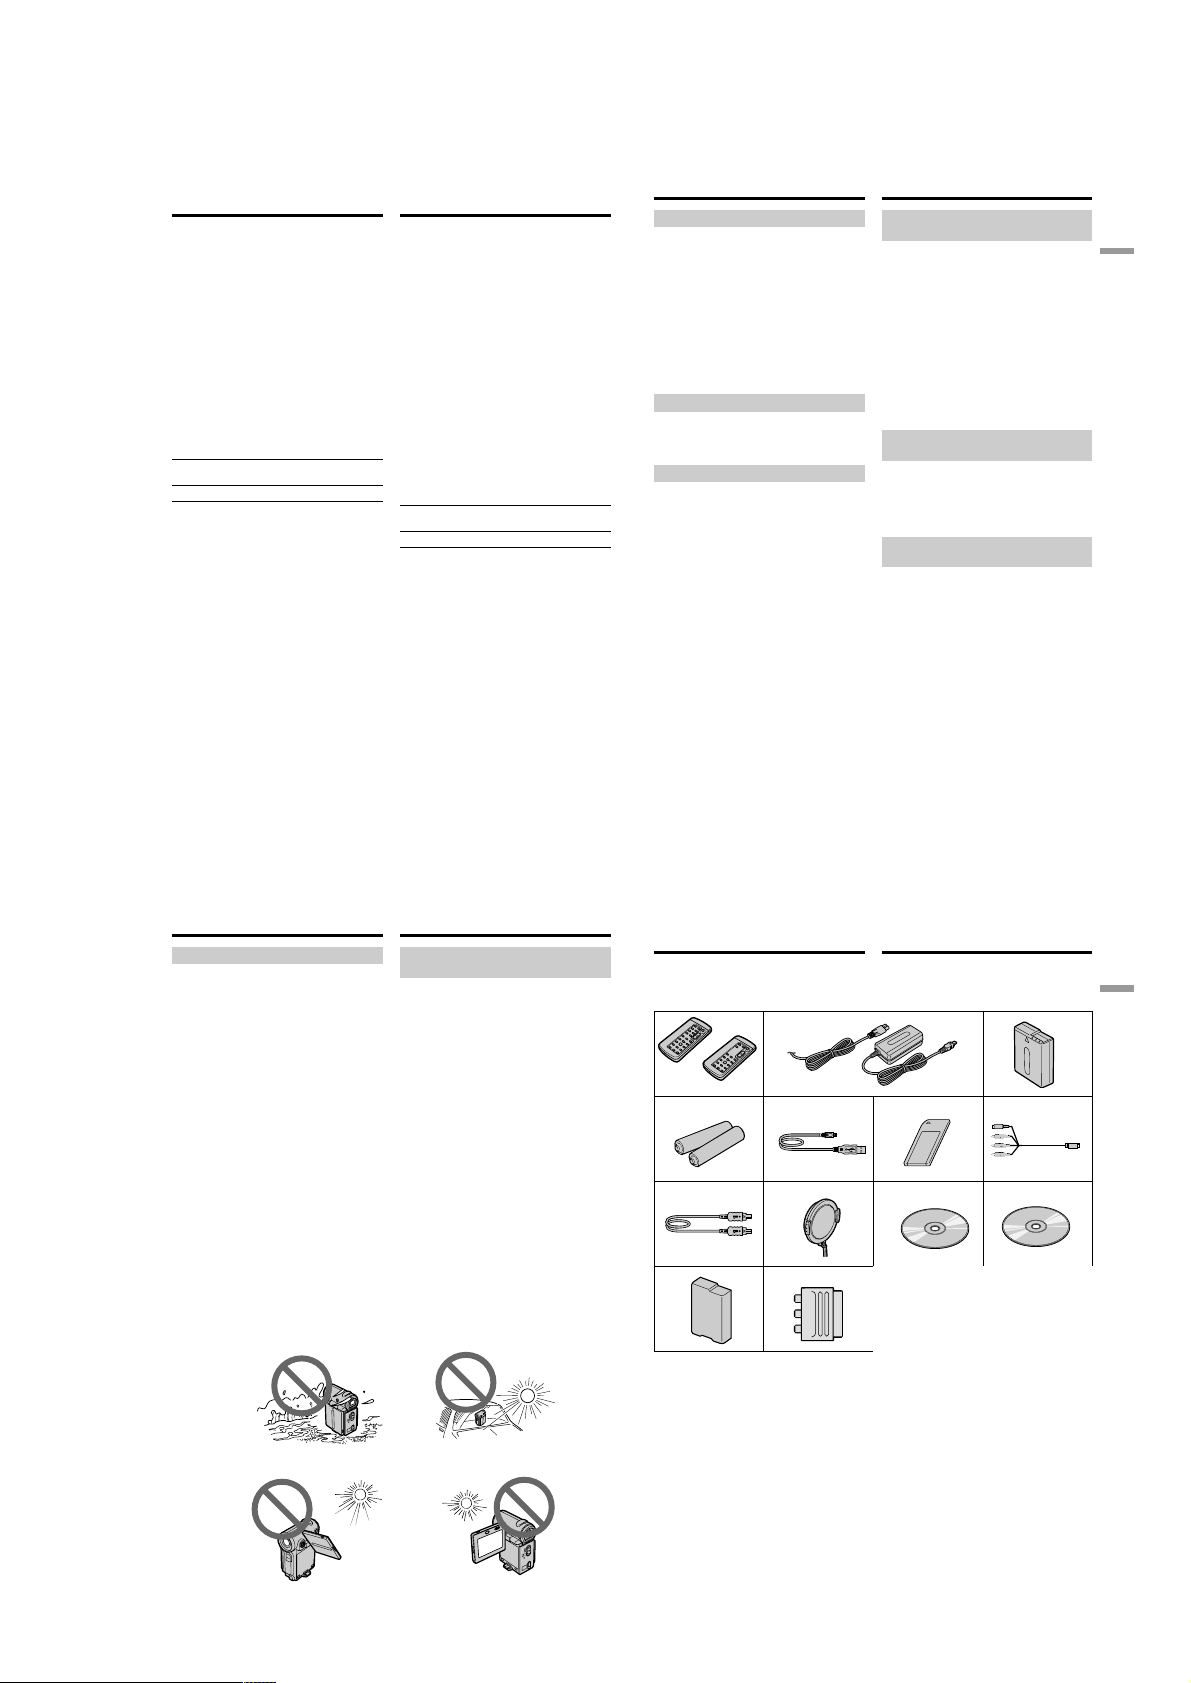
• SUPPLIED ACCESSORIES
Make sure that the following accessories are supplied with your camcorder .
1
RMT-817
or
RMT-818
4
89q;
qs qd qf
qh
w;
2
5
qj
6
qk
3
7
qa
qg
ql
DCR-IP5/IP5E/IP7BT/IP7E
1 Wireless Remote Commander (1)
RMT-817: DCR-IP7BT/IP7E
RMT-818: DCR-IP5/IP5E
2 AC-L20A AC power adaptor (1), the
power cord (1)
3 NP-FF50 battery pack (1)
4 Size AA (R6) batteries for the Remote
Commander (2)
5 USB cable* (1)
6 “Memory Stick”* (1)
7 A/V connecting cable (1)
8 i.LINK cable (1)
9 Lens cap (1)
0 CD-ROM (SPVD-004 (I/P) USB Driver)* (1)
qa CD-ROM (Movie Shaker Ver. 3.1 for
MICROMV) (1)
qs Battery terminal cover (1)
qd BTA-NW1 Modem Adaptor with
Bluetooth Function** (1)
qf MDM-5614G Modem card** (1)
qg Modem cable** (1)
qh AC-PT1 AC power adaptor** (1)
qj Size AA (R6) alkaline dry batteries for
Modem Adaptor with Bluetooth
Function** (2)
qk 2-pin conversion adaptor
DCR-IP5: JE/IP5E: JE only
ql 2-pin conversion adaptor
DCR-IP5: E, HK/IP5E: E, HK/IP7E: E, HK only
w; 21-pin adaptor
AEP, UK model only
* DCR-IP7BT/IP7E only.
** DCR-IP7BT only. For details, refer to
the operating instructions of the Modem
Adaptor with Bluetooth Function.
(1)
(1)
(1)
Table for difference of functions
Model
Destination
Color system
DCR-IP5
US, CND, E,
HK, KR, JE
NTSC
Remote commander
Memory mode
Memory stick
USB connector
NETWORK (Bluetooth)
(BT-003 board)
• Abbreviation
CND : Canadian model
HK : Hong Kong model
AUS : Australian model
KR : Korea model
JE : Tourist model
DCR-IP5E
AEP, UK, E,
HK, JE
RMT-818
✕
✕
✕
✕
PAL
DCR-IP7BT
US, CND
NTSC
— 3 —
DCR-IP7E
AEP, UK, E,
AUS, HK
RMT-817
a
a
a
a
Remark
PAL
a: with IC1601, 1602, 1605,
1606, 1801, 1802, 1803
of VC-263 board
a: with BT-003 board
Page 4

DCR-IP5/IP5E/IP7BT/IP7E
TABLE OF CONTENTS
SERVICE NOTE
1. POWER SUPPLY DURING REPAIRS ····························· 6
2. TO TAKE OUT A CASSETTE WHEN NOT EJECT
(FORCE EJECT) ································································ 6
SELF-DIAGNOSIS FUNCTION
1. SELF-DIAGNOSIS FUNCTION······································· 7
2. SELF-DIAGNOSIS DISPLAY ·········································· 7
3. SERVICE MODE DISPLAY ············································· 7
3-1. Display Method ·································································· 7
3-2. Backup No. ········································································· 7
3-3. End of Display····································································7
4. SELF-DIAGNOSIS CODE TABLE··································· 8
1. GENERAL
Main Features ············································································1-1
Introduction – Basic operations·················································1-1
Quick Start Guide ······································································1-2
Getting started
Using this manual ··································································1-3
Checking supplied accessories ·············································· 1-3
Step 1 Preparing the power supply ········································1-4
Installing the battery pack··················································· 1-4
Charging the battery pack ···················································1-4
Connecting to the mains ·····················································1-5
Step 2 Setting the date and time ············································ 1-6
Step 3 Inserting a cassette······················································1-7
Recording – Basics
Recording a picture································································1-7
Shooting backlit subjects – BACK LIGHT ························1-9
Self-timer recording··························································1-10
Checking the recording – END SEARCH···························1-10
Playback – Basics
Playing back a tape ······························································1-10
Viewing the recording on the TV screen ····························· 1-12
Advanced Recording Operations
Recording a still image on a tape – Tape Photo recording ··1-13
Using the wide mode ···························································1-14
Using the fader function ······················································1-14
Using special effects – Picture effect···································1-15
Using special effects – Digital effect···································1-15
Using the PROGRAM AE function ·····································1-16
Adjusting the white balance manually································· 1-17
Adjusting the exposure manually ········································1-18
Focusing manually·······························································1-18
Advanced Playback Operations
Playing back a tape with picture effects ······························1-19
Playing back a tape with digital effects ·······························1-19
Searching for a scene – Multi-picture search ······················ 1-20
Searching the boundaries of recorded tape by title
– Title search····································································· 1-21
Searching a recording by date – Date search·······················1-21
Searching for a photo – Photo search ··································1-22
Editing
Dubbing a tape ·····································································1-22
Recording a programme ······················································ 1-23
Superimposing a title ···························································1-25
Making your own titles ························································1-27
The Micro Cassette Memory ···············································1-28
Customizing Y our Camcorder
Changing the menu settings·················································1-29
“Memory Stick” Operations – DCR-IP7BT/IP7E only
Using a “Memory Stick” – introduction ······························1-30
Recording still images on a “Memory Stick”
– Memory Photo recording ···············································1-34
Recording an image from a tape as a still image ·················1-35
Recording moving pictures on a “Memory Stick”
– MPEG movie recording ·················································1-36
Recording a picture from a tape as a moving picture ··········1-37
Superimposing a still image in a “Memory Stick” on a
moving picture – MEMORY MIX ···································1-38
Copying still images from a tape – Photo save····················1-39
Viewing a still image – Memory photo playback ················ 1-40
Viewing a moving picture – MPEG movie playback ··········1-41
Dubbing images recorded on the “Memory Stick” onto
the tape··············································································1-42
Enlarging still images recorded on a “Memory Stick”
– Memory PB ZOOM ·······················································1-43
Playing back images in a continuous loop – SLIDE SHOW ·
Preventing accidental erasure – Image protection ···············1-44
Deleting images ··································································· 1-44
Writing a print mark – PRINT MARK································1-46
Connecting with a computer
Viewing images recorded on a tape using your computer ···1-46
Viewing images recorded on a “Memory Stick” using
your computer – DCR-IP7BT/IP7E only ·························1-47
Network operation – DCR-IP7BT/IP7E only
Accessing the network ·························································1-49
Troubleshooting
Types of trouble and their solutions ·····································1-49
Self-diagnosis display ··························································1-51
Warning indicators and messages ········································1-51
Additional Information
Compatible cassettes····························································1-51
About the “InfoLITHIUM” battery pack····························· 1-52
About i.LINK·······································································1-52
Using your camcorder abroad··············································1-53
Maintenance information and precautions···························1-53
Quick Reference
Identifying the parts and controls ········································ 1-55
1-43
2. DISASSEMBLY
2-1. LCD SECTION (PD-142 BOARD) ································2-2
2-2. CABINET (R) SECTION ···············································2-3
2-3. LENS SECTION (LD-105 BOARD)······························2-4
2-4. VC-263 BOARD ·····························································2-6
2-5. MECHANISM DECK····················································· 2-8
2-6. EVF SECTION (VF-149 BOARD)·································2-9
2-7.
CONTROL SWITCH BLOCK (CF-1900), SPEAKER ·
2-8. JK-209 BOARD ····························································2-11
2-9. PARTS UNIT (HINGE) ················································ 2-12
2-10. BT-003 BOARD (IP7BT/IP7E),
CABINET (L) ASSEMBLY··········································2-13
2-11. GRIP CABINET ASSEMBLY,
CONTROL SWITCH BLOCK (FK-1900) ···················2-13
2-12. CIRCUIT BOARDS LOCATION ·································2-14
2-13. FLEXIBLE BOARDS LOCATION ······························2-15
2-10
3. BLOCK DIAGRAMS
3-1. OVERALL BLOCK DIAGRAM (1/5) ···························3-1
3-2. OVERALL BLOCK DIAGRAM (2/2) ···························3-3
3-3. OVERALL BLOCK DIAGRAM (3/5) ···························3-5
3-4. OVERALL BLOCK DIAGRAM (4/5) ···························3-7
3-5. OVERALL BLOCK DIAGRAM (5/5) ···························3-9
3-6. POWER BLOCK DIAGRAM (1/3)······························3-11
3-7. POWER BLOCK DIAGRAM (2/3)······························3-13
3-8. POWER BLOCK DIAGRAM (3/3)······························3-16
4. PRINTED WIRING BOARDS AND
SCHEMATIC DIAGRAMS
4-1. FRAME SCHEMATIC DIAGRAM (1/2) ·······················4-1
FRAME SCHEMATIC DIAGRAM (2/2) ·······················4-3
— 4 —
Page 5

4-2. PRINTED WIRING BOARDS AND
SCHEMATIC DIAGRAMS ············································4-5
• LD-105 (CCD IMAGER)
SCHEMATIC DIAGRAM ······························4-7
• CONTROL SWITCH BLOCK (CF-1900)
SCHEMATIC DIAGRAM ······························4-9
Shematic diagram and printed wiring board of the
VC-263 board are not shown.
Pages from 4-11 to 4-50 are not shown.
• FP-140 (TAPE TOP/END SENSOR),
FP-141 (MODE SWITCH), FP-228 (DEW SENSOR)
FLEXIBLE BOARDS AND
DH-037 (MIC) BOARD ·············································4-51
• CONTROL SWITCH BLOCK (FK-1900)
PRINTED WIRING BOARD AND
SCHEMATIC DIAGRAM ····························4-53
• VF-149 (B/W EVF)
PRINTED WIRING BOARD ·······················4-55
• VF-149 (B/W EVF)(1/2)
SCHEMATIC DIAGRAM ····························4-59
• VF-149 (BACK LIGHT)(2/2)
SCHEMATIC DIAGRAM ····························4-61
• JK-209 (JACK)
PRINTED WIRING BOARD ·······················4-63
• JK-209 (JACK, CHARGE)
SCHEMATIC DIAGRAM ····························4-65
• FP-366
PRINTED WIRING BOARD ·······················4-67
• FP-366
SCHEMATIC DIAGRAM ····························4-69
• PD-142 (RGB DRIVE, TIMING GENERATOR)
PRINTED WIRING BOARD ·······················4-71
• PD-142 (RGB DRIVE, TIMING GENERATOR)
SCHEMATIC DIAGRAM ····························4-73
4-3. WAVEFORMS ······························································4-75
DCR-IP5/IP5E/IP7BT/IP7E
Waveforms and Mounted parts location of the
VC-263 board are not shown.
Pages from 4-77 to 4-78 are not shown.
4-4. MOUNTED PARTS LOCATION ·································4-79
5. ADJUSTMENTS
Refer to Service Manual Supplement-1 (9-929-923-81).
6. REPAIR PARTS LIST
6-1. EXPLODED VIEWS ······················································ 6-1
6-1-1.OVERALL SECTION·····················································6-1
6-1-2.CABINET (R) SECTION-1 ············································6-2
6-1-3.CABINET (R) SECTION-2 (LCD SECTION)···············6-3
6-1-4.LENS-EVF SECTION ····················································6-4
6-1-5.G CABINET SECTION ··················································6-5
6-1-6.CABINET (L) SECTION················································6-6
6-1-7.OVERALL MECHANISM DECK SECTION (V100)···6-7
6-1-8.LS CHASSIS BLOCK ASSEMBLY·······························6-8
6-1-9.MECHANISM CHASSIS BLOCK ASSEMBLY ···········6-9
6-2. ELECTRICAL PARTS LIST ········································6-10
Parts list of the VC-263 board are not shown.
Pages from 6-13 to 6-24 are not shown.
* Optical axis frame and color reproduction frame are
shown on pages 152 and 153.
— 5 —
Page 6
DCR-IP5/IP5E/IP7BT/IP7E
SERVICE NOTE
1. POWER SUPPLY DURING REPAIRS
In this unit, about 10 seconds after power is supplied to the battery terminal using the regulated po wer supply (8.4V), the power is shut of f so
that the unit cannot operate.
These following two methods are available to prevent this. Take note of which to use during repairs.
Method 1.
Use the AC power adaptor (AC-L20, AC-VF50).
Method 2.
Connect the servicing remote commander RM-95 (J-6082-053-B) to the A/V jack, and set the commander switch to the “ADJ” side.
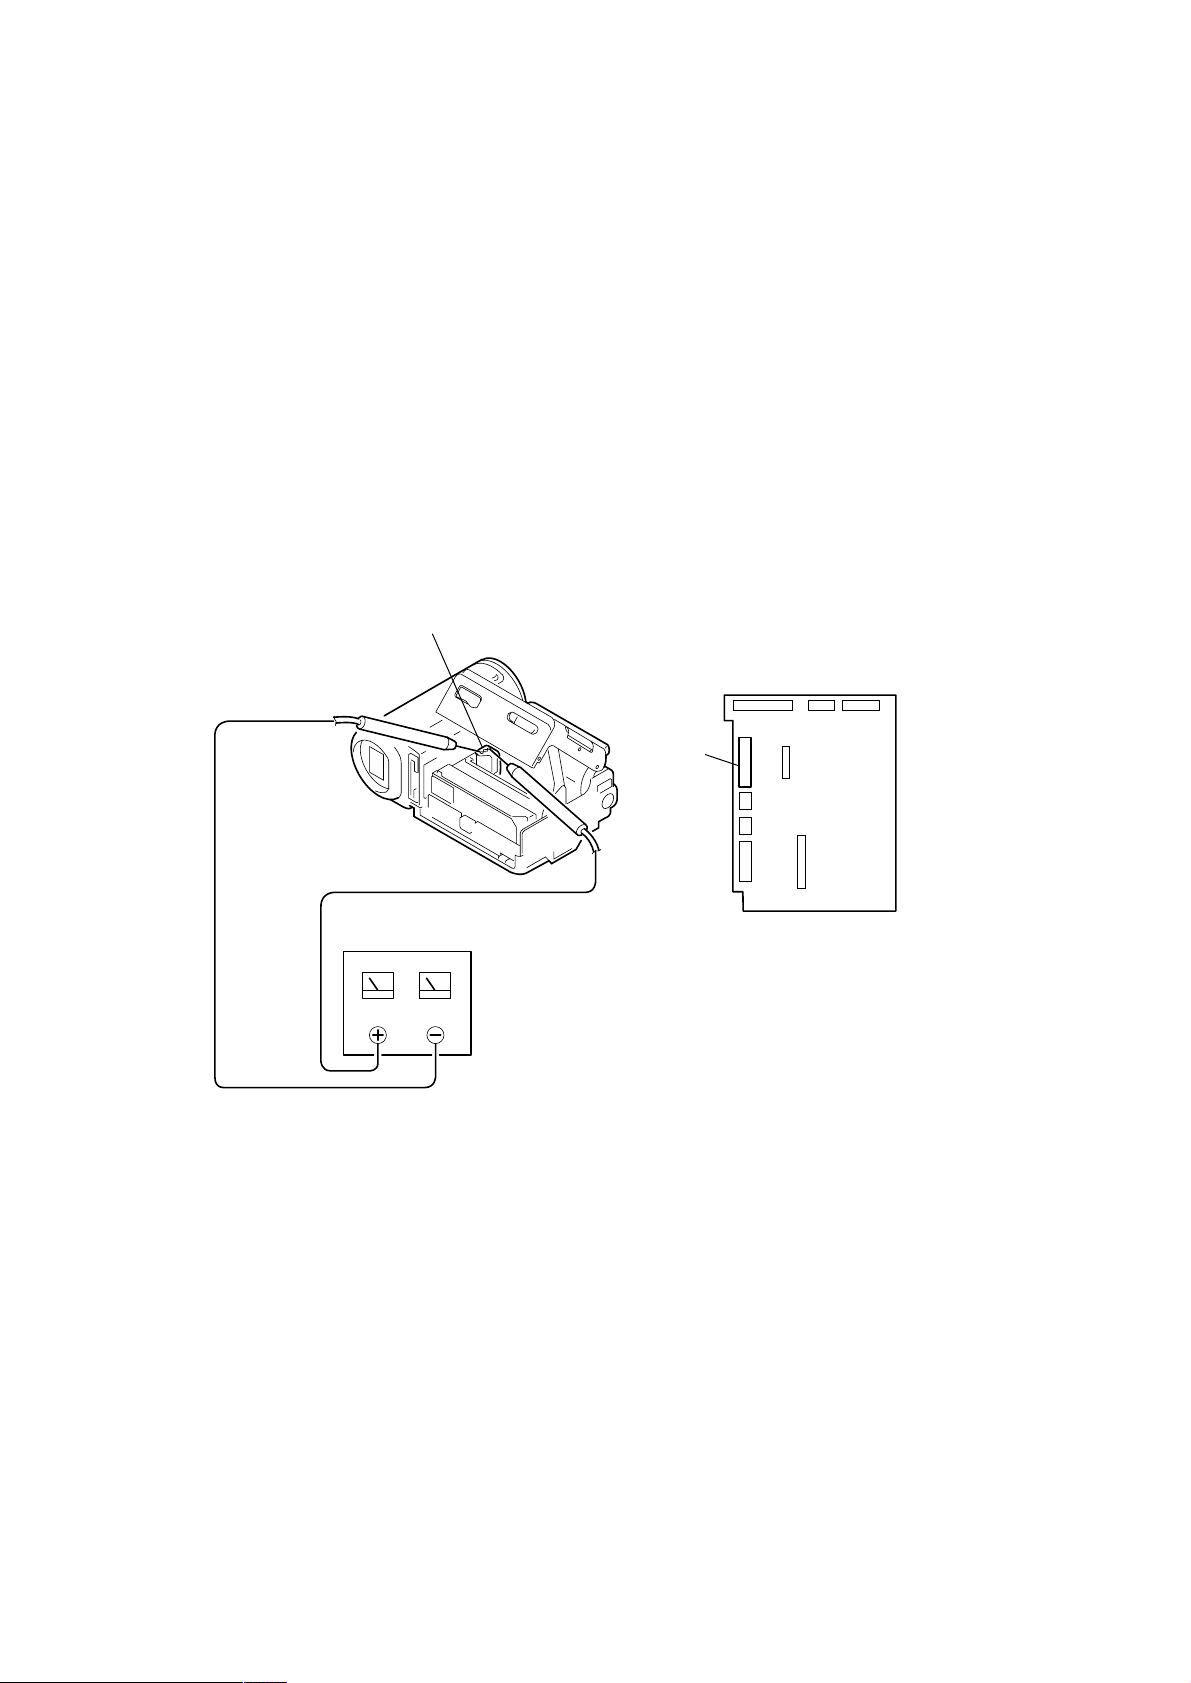
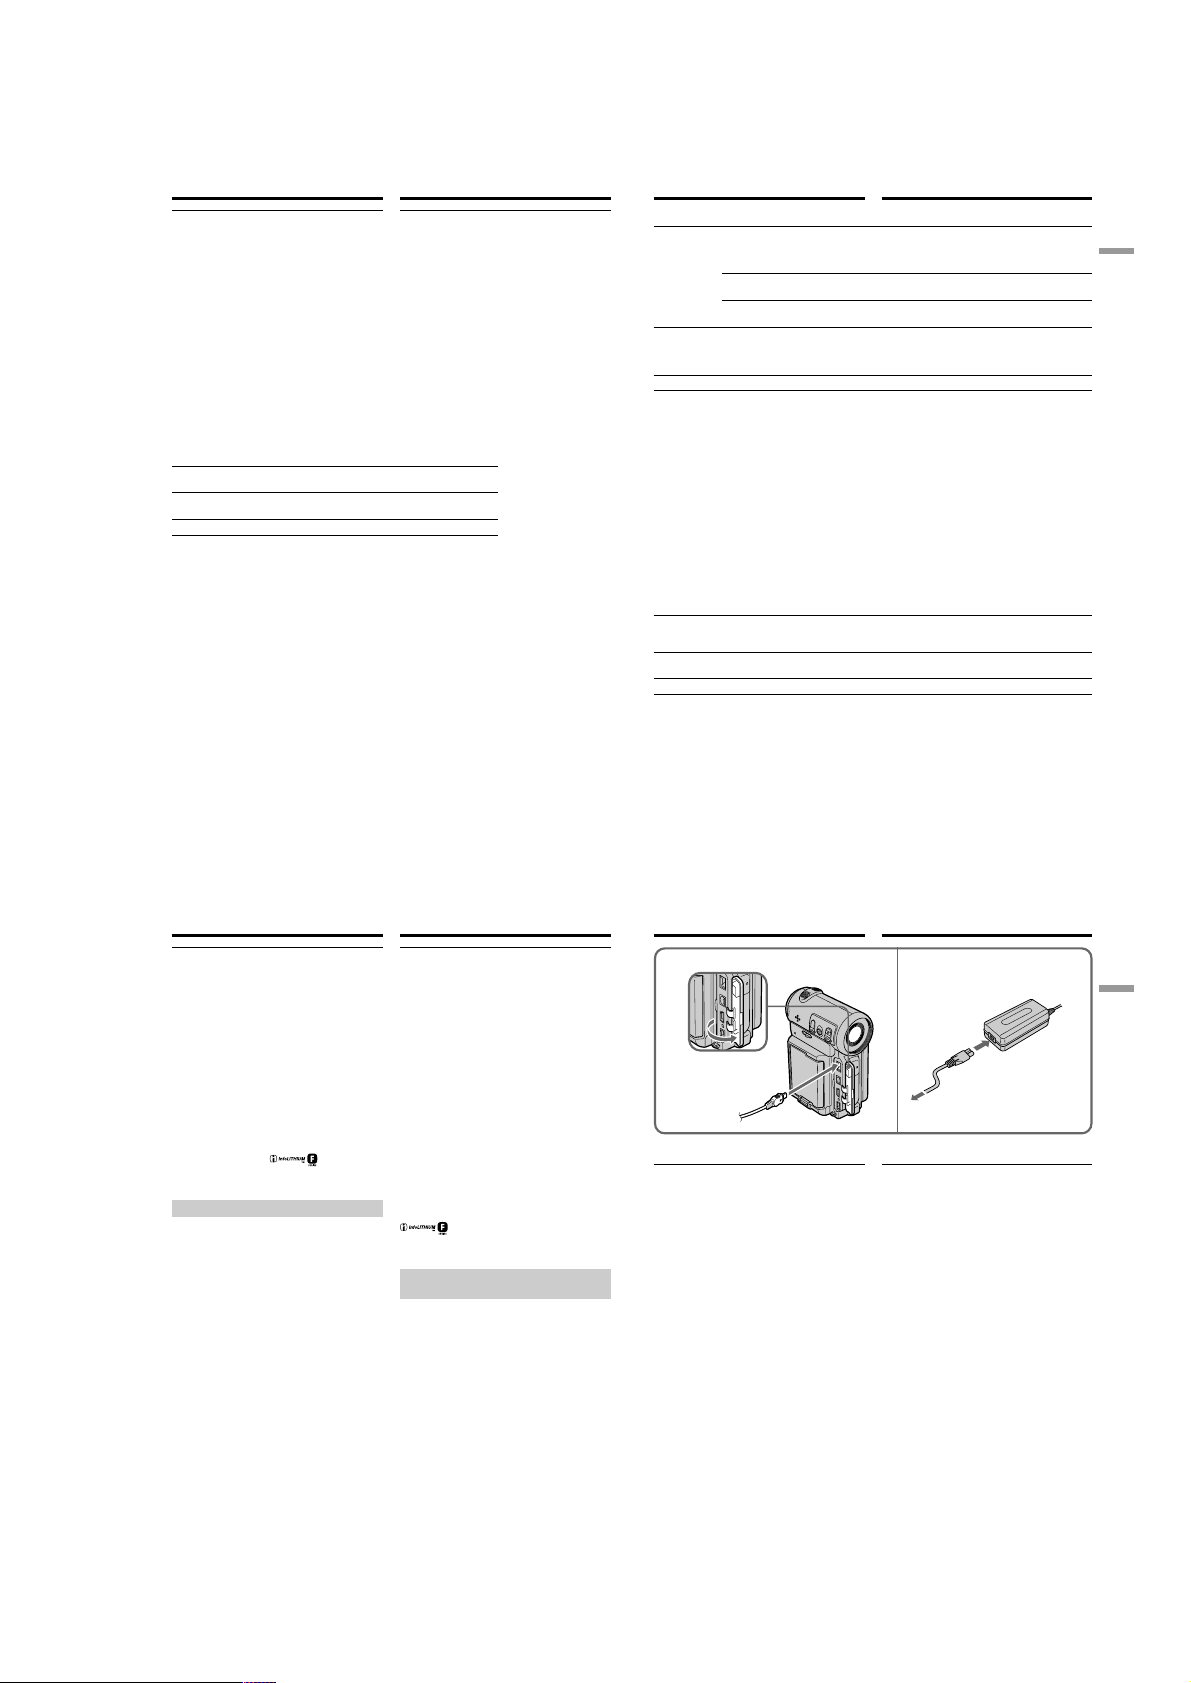
2. TO TAKE OUT A CASSETTE WHEN NOT EJECT (FORCE EJECT)
1 Refer to 2-2 to remove the cabinet (R) assembly.
2 Disconnect CN2009 (31P, 0.3mm) of VC-263 board.
3 Open the cassette lid.
4 Supply +4.5V from the regulated power supply to the loading motor and unload with a pressing the cassette compartment.
Loading motor
Regulated power supply
(+4.5Vdc)
CN2009
VC-263 board
— 6 —
Page 7
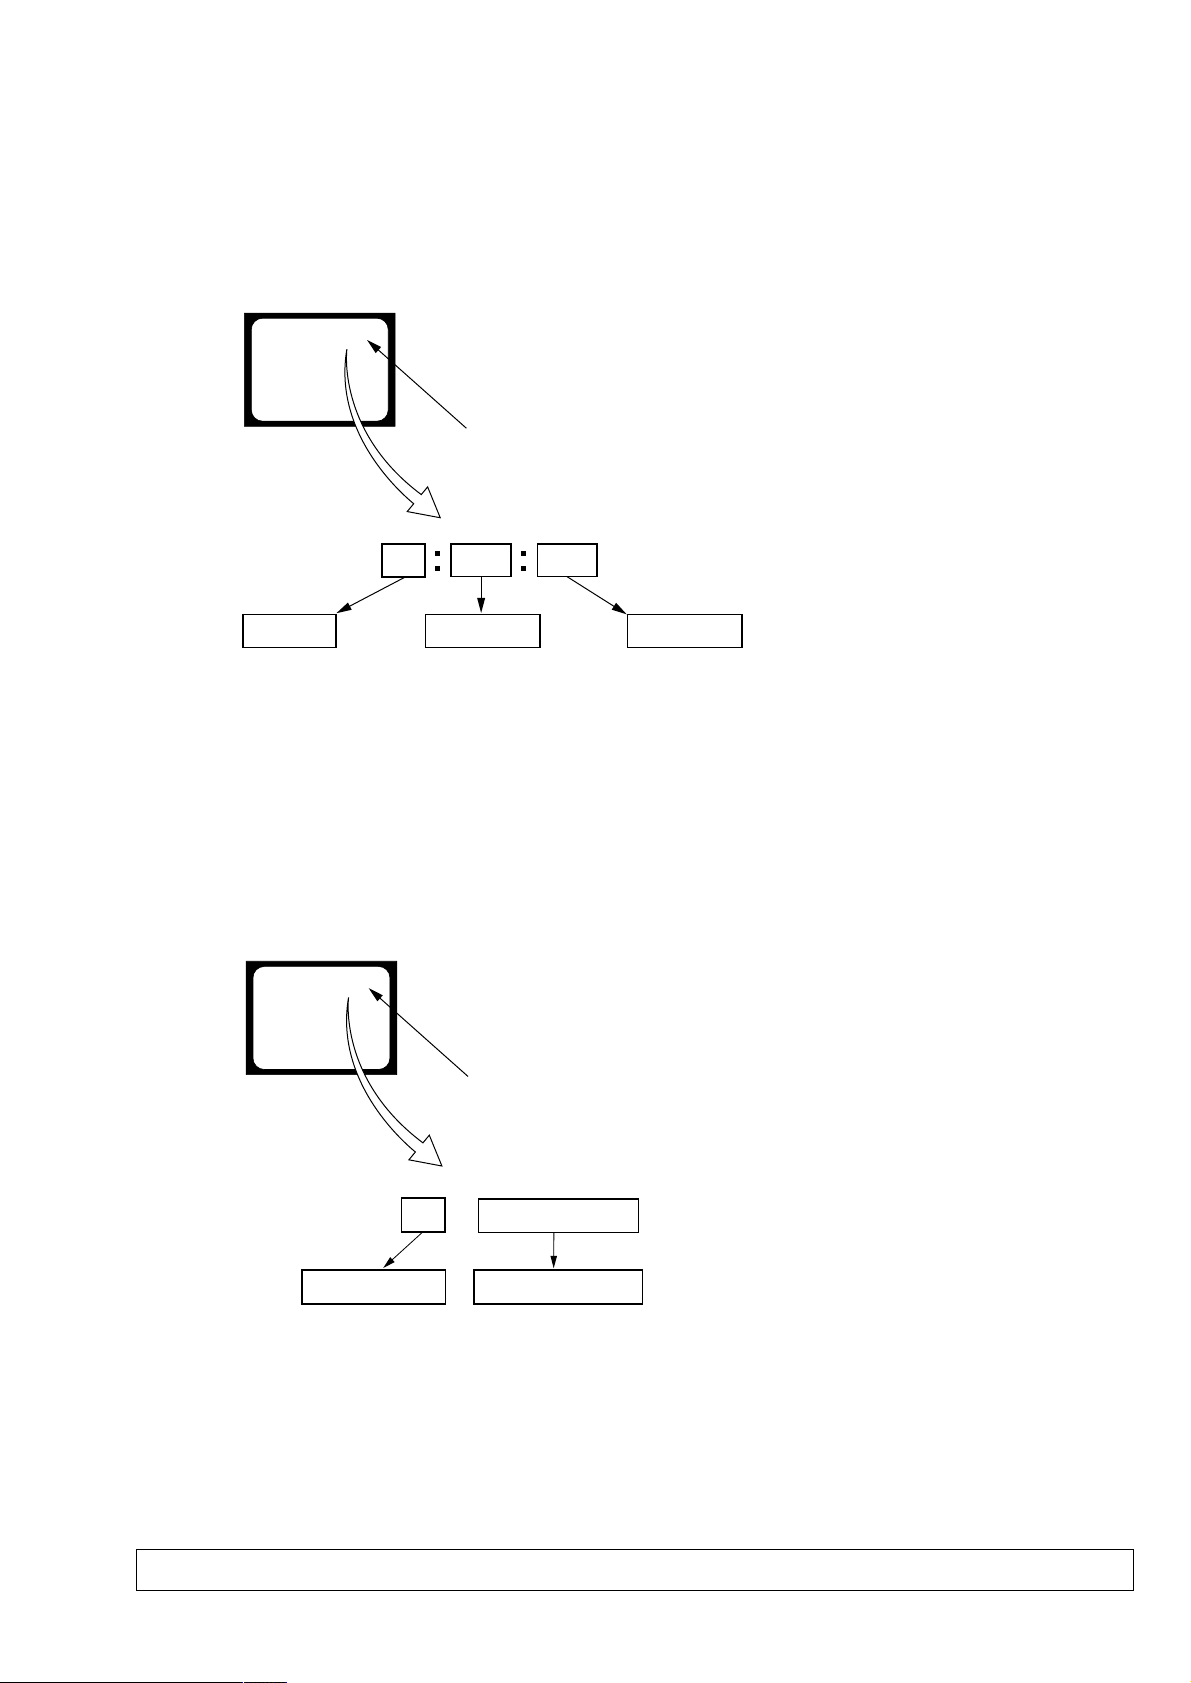
SELF-DIAGNOSIS FUNCTION
DCR-IP5/IP5E/IP7BT/IP7E
1. SELF-DIAGNOSIS FUNCTION
When problems occur while the unit is operating, the self-diagnosis
function starts working, and displays on the viewfinder or LCD
screen what to do. This function consists of two display; selfdiagnosis display and service mode display .
Details of the self-diagnosis functions are provided in the Instruction
manual.
Viewfinder or LCD screen
C : 3 1 : 1 1
Repaired by:
C : Corrected by customer
H : Corrected by dealer
E : Corrected by service
engineer
Blinks at 3.2Hz
3 1C
Block
Indicates the appropriate
step to be taken.
E.g.
31 ....Reload the tape.
32 ....Turn o n power again.
1 1
2. SELF-DIAGNOSIS DISPLAY
When problems occur while the unit is operating, the counter of the
viewfinder or LCD screen consists of an alphabet and 4-digit
numbers, which blinks at 3.2 Hz. This 5-character display indicates
the “repaired by:”, “block” in which the problem occurred, and
“detailed code” of the problem.
Detailed Code
Refer to page 8.
Self-diagnosis Code Table.
3. SERVICE MODE DISPLAY
The service mode display shows the last self-diagnosis codes shown in the past.
3-1. Display Method
While pressing the “BACK LIGHT” key, set the switch from OFF to ON, and continue pressing the “BACK LIGHT” key for 5 seconds
continuously. The service mode will be displayed, and the counter will show the backup No. and the 5-character self-diagnosis codes.
3-2. Backup No.
Viewfinder or LCD screen
[3] C : 3 1 : 1 1
Lights up
[3]
Backup No.
Order of previous errors
The backup No. in the [] indicates the order in which the problem occurred. (If the number of problems which occurred is less than 6, only the
number of problems which occurred will be shown.)
[1] : Occurred first time [4] : Occurred fourth time
[2] : Occurred second time [5] : Occurred fifth time
[3] : Occurred third time [6] : Occurred the last time
Note: Switching of the backup No. can’t be done.
C : 3 1 : 1 1
Self-diagnosis Codes
3-3. End of Display
Turning OFF the power supply will end the service mode display.
Note: The “self-diagnosis display” data will be backed up by the coin-type lithium battery of control switch block (FK-1900) BT001. When CN2024 of
VC-263 board is disconnected, the “self-diagnosis display” data will be lost by initialization.
— 7 —
Page 8

DCR-IP5/IP5E/IP7BT/IP7E
4. SELF-DIAGNOSIS CODE TABLE
Self-diagnosis Code
Function
Repaired by:
C
C
C
C
C
C
C
C
C
C
C
C
C
C
C
C
C
C
C
C
C
C
C
C
C
C
C
E
E
Block
04
21
22
31
31
31
31
31
31
31
31
31
31
31
31
32
32
32
32
32
32
32
32
32
32
32
32
61
61
Detailed
Code
00
00
00
10
11
20
21
22
23
31
32
40
41
42
43
10
11
20
21
22
23
31
32
40
41
42
43
00
10
Symptom/State
Non-standard battery is used.
Condensation.
Video head is dirty.
LOAD direction. Loading does not
complete within specified time
UNLOAD direction. Loading does not
complete within specified time
T reel side tape slacking when unloading
Winding S reel fault when unloading.
T reel fault.
S reel fault.
FG fault during capstan operations.
Capstan reverse rotation.
FG fault when starting drum.
PG fault
FG fault during normal drum operations.
PG fault during normal drum operations.
LOAD direction loading motor time-
out.
UNLOAD direction loading motor
time-out.
T reel side tape slacking when
unloading.
Winding S reel fault when unloading.
T reel fault.
S reel fault.
FG fault during capstan operations
Captan reverse operations
FG fault when starting drum
PG fault when starting drum
FG fault during normal drum
operations
PG fault during normal drum
operations
Difficult to adjust focus
(Cannot initialize focus.)
Zoom operations fault
(Cannot initialize zoom lens.)
when starting drum.
Correction
Use the info LITHIUM battery.
Remove the cassette, and insert it again after one hour.
Clean with the optional cleaning cassette.
Load the tape again, and perform operations from the beginning.
Load the tape again, and perform operations from the beginning.
.
Load the tape again, and perform operations from the beginning.
Load the tape again, and perform operations from the beginning.
Load the tape again, and perform operations from the beginning.
Load the tape again, and perform operations from the beginning.
Load the tape again, and perform operations from the beginning.
Load the tape again, and perform operations from the beginning.
Load the tape again, and perform operations from the beginning.
Load the tape again, and perform operations from the beginning.
Load the tape again, and perform operations from the beginning.
Load the tape again, and perform operations from the beginning.
Remove the battery or power cable, connect, and perform
operations from the beginning.
Remove the battery or power cable, connect, and perform
operations from the beginning.
Remove the battery or power cable, connect, and perform
operations from the beginning.
Remove the battery or power cable, connect, and perform
operations from the beginning.
Remove the battery or power cable, connect, and perform
operations from the beginning.
Remove the battery or power cable, connect, and perform
operations from the beginning.
Remove the battery or power cable, connect, and perform
operations from the beginning.
Remove the battery or power cable, connect, and perform
operations from the beginning.
Remove the battery or power cable, connect, and perform
operations from the beginning.
Remove the battery or power cable, connect, and perform
operations from the beginning.
Remove the battery or power cable, connect, and perform
operations from the beginning.
Remove the battery or power cable, connect, and perform
operations from the beginning.
Inspect the lens block focus MR sensor (Pin rh,rj of CN2021 of VC-
263 board) when focusing is performed using the manual focus buttons
on the menu screen, and the focus motor drive signals (Pin ea,es of
CN2021 of VC-263 board) when the focusing is not performed.
Inspect the lens block zoom MR sensor (
VC-263 board
is operated and the zoom motor drive signals (
of VC-263 board
) when zooming is performed when the zoom switch
) when zooming is not performed.
Pin rl,t; of CN2021 of
Pin wl,e; of CN2021
— 8 —
Page 9
SECTION 1
GENERAL
English
Main Features
Taking moving or still images, and playing them back
•Recording a picture on a tape (p. 38)
•Recording a still image on a tape (p. 61)
•Playing back a tape (p. 51)
•Recording a still image on a “Memory Stick” (p. 149) (DCR-IP7E only)
•Recording moving pictures on a “Memory Stick” (p. 160) (DCR-IP7E only)
•Viewing a still image recorded on a “Memory Stick” (p. 174) (DCR-IP7E only)
•Viewing a moving picture on a “Memory Stick” (p. 179) (DCR-IP7E only)
Capturing images on your computer
•Viewing an image recorded on a tape using your computer via the i.LINK cable (p. 199)
•Viewing an image recorded on a “Memory Stick” using your computer via the USB cable (p. 201)
(DCR-IP7E only)
Accessing the Internet via a Bluetooth device (not supplied) (DCR-IP7E only)
•Accessing the Internet and sending/receiving your e-mail. For details, refer to the network function
operating instructions supplied with your camcorder.
Other uses
Functions to adjust exposure in recording mode
•Back light (p. 47)
•PROGRAM AE (p. 75)
•White balance (p. 78)
•Adjusting the exposure manually (p. 80)
DCR-IP5/IP5E/IP7BT/IP7E
This section is extracted from instruction
manual. (DCR-IP5E/IP7E (3-071-133-11))
Main Features
Functions to give an effect to your recordings
•Digital zoom (p. 124)
The default setting is set to OFF. (To zoom greater than 10×, set up the D ZOOM item in the menu
settings.)
•Fader (p. 66)
•Picture effect (p. 69)
•Digital effect (p. 71)
•Title (p. 108, 116)
•MEMORY MIX (p. 166) (DCR-IP7E only)
Functions to give a natural appearance to your recordings
•Manual focus (p. 82)
•Landscape mode (p. 75)
Functions used after recording
•END SEARCH (p. 50)
•DATA CODE (p. 54)
•Multi-picture search (p. 88)
•Title search (p. 93)
•Date search (p. 95)
•Photo search (p. 97)
4
Introduction – Basic
operations
This section describes the basic operations used
to control and ways to operate the camcorder.
How to turn on the power and
select the mode
To supply power for the camcorder, see “Step 1
Preparing the power supply” on page 25.
(1)Slide the POWER switch down while pressing
the small green button, then release your
finger.
The camcorder is turned on, and then the
camcorder turns to the CAMERA mode so
that the CAMERA lamp lights up.
(2)Slide the POWER switch down. Each time you
slide it down, the mode changes as follows
and corresponding mode lamp also lights up.
CAMERA Use this mode when you record on
a tape.
MEMORY/NETWORK (DCR-IP7E only)
MEMORY: Use this mode when you record
on a “Memory Stick”, or play
back or edit a image in a
“Memory Stick”.
NETWORK: Use this mode when you use
the network function. For
details, refer to the supplied
network function operating
VCRUse this mode when you play back or
8
instructions.
edit an image recorded on a tape or
“Memory Stick” (A “Memory Stick” can
only be used with the DCR-IP7E).
Bвeдeниe – Ocновныe
опepaции
B этом paздeлe опиcывaютcя оcновныe
опepaции, иcпользyeмыe для yпpaвлeния, и
cпоcобы paботы c видeокaмepой.
Кaк включить питaниe и
выбpaть peжим
Чтобы включить питaниe видeокaмepы, cм.
“Пyнкт 1 Подготовкa иcточникa питaния” нa
cтp. 25.
1,2
POWER
CAMERA
MEMORY/
(CHG)
NETWORK
OFF
VCR
ON
MODE
(1)Пepeдвиньтe пepeключaтeль POWER
вниз, нaжaв мaлeнькyю зeлeнyю кнопкy,
зaтeм отпycтитe.
Bидeокaмepa включитcя, зaтeм пepeйдeт
в peжим CAMERA, и зaгоpитcя индикaтоp
CAMERA.
(2)Пepeдвиньтe пepeключaтeль POWER
вниз. Пpи кaждом пepeдвижeнии eго вниз
зaгоpaeтcя cоотвeтcтвyющий индикaтоp
peжимa, и peжим измeняeтcя cлeдyющим
обpaзом.
CAMERA Иcпользyйтe этот peжим пpи
зaпиcи нa лeнтy.
MEMORY/NETWORK (только модeль
DCR-IP7E)
MEMORY: Иcпользyйтe этот peжим пpи
зaпиcи нa “Memory Stick”, a
тaкжe пpи воcпpоизвeдeнии
или peдaктиpовaнии
изобpaжeния нa “Memory
Stick”.
NETWORK: Иcпользyйтe этот peжим пpи
иcпользовaнии фyнкции
Network. Подpобнyю
инфоpмaцию о фyнкции
Network cм. в пpилaгaeмой
инcтpyкции по экcплyaтaции.
VCR Иcпользyйтe этот peжим пpи
воcпpоизвeдeнии или
peдaктиpовaнии изобpaжeния,
зaпиcaнного нa лeнтe или “Memory
Stick” (“Memory Stick” можно
иcпользовaть только для модeли
DCR-IP7E).
Introduction – Basic operations
How to use the control button
Most of the operations are carried out using the
control button. Select a button displayed on the
screen using the control button, then press the
centre z on the control button.
(1)Press v/V/b/B on the control button
repeatedly to select the desired button
displayed on the screen.
The selected button turns orange.
PAGE1 PAGE2 PAGE3
(2)Press the centre z on the control button to
enter the setting.
Repeat steps 1 and 2 to execute the function.
Bвeдeниe – Ocновныe опepaции
Кaк иcпользовaть кнопкy
yпpaвлeния
Большинcтво опepaций пpоизводятcя c
помощью кнопки yпpaвлeния. Bыбepитe
кнопкy, отобpaжaeмyю нa экpaнe, c помощью
кнопки yпpaвлeния, зaтeм нaжмитe нa цeнтp
z нa кнопкe yпpaвлeния.
12
(1)Haжимaя v/V/b/B нa кнопкe yпpaвлeния,
выбepитe нyжнyю кнопкy, отобpaжaeмyю
нa экpaнe.
Bыбpaннaя кнопкa cтaнeт оpaнжeвой.
EXIT
END
TITLE
LCD
VOL
SCH
BRT
(2)Haжмитe нa цeнтp z нa кнопкe
yпpaвлeния для вводa ycтaновки.
Повтоpитe пyнкты 1 и 2 для выполнeния
фyнкции.
OK
LCD BRT
–+
5
Getting started/Подготовкa к экcплyaтaции
9
1-1
Page 10
DCR-IP5/IP5E/IP7BT/IP7E
Introduction – Basic operations
The procedure above is referred to as “Select
[XXXX], then press the centre z on the control
button” in this operating instructions.
When an item is selected
A green bar appears above the item.
If certain items are not available
The colour of those items changes to grey.
How to use the FN screen
If FN is not displayed on the screen, press
DISPLAY or the centre z on the control button.
DISPLAY
(1)Select FN with v/V/b/B on the control
button, then press the centre z. The FN
screen appears.
In CAMERA mode/B peжимe CAMERA
(2)To change the page, select PAGE1, PAGE2, or
PAGE3 with v/V/b/B on the control button,
then press the centre z. The PAGE1/PAGE2/
PAGE3 screen appears.
(3)Select the desired item with v/V/b/B on the
control button, then press the centre z. The
screen that corresponds to that button will
appear, or that function will be executed.
10
Bвeдeниe – Ocновныe опepaции
Bышeопиcaннaя пpоцeдypa в инcтpyкции по
экcплyaтaции нaзывaeтcя “Bыбepитe
[XXXX], зaтeм нaжмитe нa цeнтp z нa
кнопкe yпpaвлeния”.
Пpи выбоpe элeмeнтa
Haд ним появляeтcя зeлeнaя полоca.
Ecли кaкиe-то элeмeнты нeдоcтyпны
Цвeт этиx элeмeнтов измeняeтcя нa cepый.
Кaк иcпользовaть экpaн FN
Ecли нa экpaнe нe отобpaжaeтcя FN,
нaжмитe DISPLAY или нa цeнтp z нa кнопкe
yпpaвлeния.
1–3
(1)Bыбepитe FN c помощью v /V/b/B нa
кнопкe yпpaвлeния, зaтeм нaжмитe нa
цeнтp z. Появитcя экpaн FN.
PAGE1 PAGE2 PAGE3
MENU FOCUS
FADER SELF
FN
(2)Чтобы cмeнить cтpaницy, выбepитe
(3)Bыбepитe тpeбyeмый элeмeнт c помощью
EXIT
MEM
EXPO–
MIX
SURE
TIMER
PAGE1, PAGE2 или PAGE3 c помощью v/
V/b/B нa кнопкe yпpaвлeния, зaтeм
нaжмитe нa цeнтp z. Появитcя экpaн
PAGE1/PAGE2/PAGE3.
v/V/b/B нa кнопкe yпpaвлeния, зaтeм
нaжмитe нa цeнтp z. Появитcя экpaн,
cоотвeтcтвyющий этой кнопкe, или бyдeт
выполнeнa фyнкция.
Introduction – Basic operations
To return to the FN screen
Select OK, then RETURN, or END
with v/V/b/B on the control button, then press
the centre z. Next, select EXIT with v/V/b/B
on the control button, then press the centre z.
To execute settings
Select OK with v/V/b/B on the control
button, then press the centre z. The display
returns to the PAGE1/PAGE2/PAGE3 screen.
To cancel settings
Select OFF or AUTO with v/V/b/B on the
control button, then press the centre z. The
display returns to the PAGE1/PAGE2/PAGE3
screen.
The screen buttons on the PAGE1/PAGE2/
PAGE3 screen
In CAMERA mode
PAGE1 MENU, FADER, SELFTIMER, MEM
MIX*, EXPOSURE, FOCUS
PAGE2 LCD BRT, VOL, END SCH, TITLE
PAGE3 DIG EFFT, COUNT RESET
In VCR mode
PAGE1 MENU, VOL, TITLE, MULTI SRCH, x/
PB*, m *, BX *, M *
PAGE2 LCD BRT, DIG EFFT, END SCH,
x/ PB*, m *, BX *, M *
PAGE3
DATA CODE, COUNT RESET, qREC
CTRL, x/ PB*, m *, BX *,
M *
* (DCR-IP7E only)
See page 142 for the MEMORY/NETWORK
mode (DCR-IP7E only).
To turn on/off the screen buttons
Press DISPLAY. However, the finder can be used
only in mirror mode.
A screen where the FN button is displayed is
referred to as the FN screen in this operating
instructions.
Bвeдeниe – Ocновныe опepaции
Для возвpaтa к экpaнy FN
Bыбepитe OK, зaтeм RETURN или
END c помощью v/V/b/B нa кнопкe
yпpaвлeния, зaтeм нaжмитe нa цeнтp z.
Зaтeм выбepитe EXIT c помощью v/V/b/B нa
кнопкe yпpaвлeния, зaтeм нaжмитe нa цeнтp
z.
Для выполнeния ycтaновок
Bыбepитe OK c помощью v/V/b/B нa
кнопкe yпpaвлeния, зaтeм нaжмитe нa цeнтp
z. Oтобpaжeниe вepнeтcя к экpaнy PAGE1/
PAGE2/PAGE3.
Для отмeны ycтaновок
Bыбepитe OFF или AUTO c помощью v/V/
b/B нa кнопкe yпpaвлeния, зaтeм нaжмитe нa
цeнтp z. Oтобpaжeниe вepнeтcя к экpaнy
PAGE1/PAGE2/PAGE3.
Экpaнныe кнопки нa экpaнe PAGE1/PAGE2/
PAGE3
B peжимe CAMERA
PAGE1 MENU, FADER, SELFTIMER, MEM MIX*,
EXPOSURE, FOCUS
PAGE2 LCD BRT, VOL, END SCH, TITLE
PAGE3 DIG EFFT, COUNT RESET
B peжимe VCR
PAGE1 MENU, VOL, TITLE, MULTI SRCH, x/
PB*, m *, BX *, M *
PAGE2 LCD BRT, DIG EFFT, END SCH,
x/ PB*, m *, BX *, M *
PAGE3 DATA CODE, COUNT RESET,
CTRL, x/ PB*, m *, BX *,
M
* (только модeль DCR-IP7E)
Инфоpмaцию о peжимe MEMORY/NETWORK
cм. нa cтp. 142 (только модeль DCR-IP7E).
Чтобы включить/выключить экpaнныe
кнопки
Haжмитe кнопкy DISPLAY. Oднaко
видоиcкaтeль можно иcпользовaть только в
зepкaльном peжимe.
B этой инcтpyкции по экcплyaтaции экpaн,
нa котоpом pacположeнa кнопкa FN,
нaзывaeтcя экpaном FN.
*
q
REC
Getting started/Подготовкa к экcплyaтaции
11
Englsih
Quick Start Guide
This guide introduces you to the basic operations for
recording/playback. See the page in parentheses “()” for
more information.
Connecting the mains lead
Use the battery pack when using your camcorder outdoors (p. 25).
AC power adaptor (supplied)
Quick Start Guide
Inserting a cassette
1
Slide OPEN/ZEJECT
in the direction of the
arrow and open the
lid.
Open the jack
cover.
2
Push the middle
portion of the back of
the cassette to insert.
Insert it the cassette
in a straight line
deeply into the
cassette compartment
with the window
facing out.
(p. 36)
(p. 30)
Connect the plug with its v
mark facing the lens side.
3
Close the cassette
compartment by
pushing down the
cassette lid halfway.
After the cassette
compartment goes
down completely,
close the lid until it
clicks.
Recording a picture (p. 38)
1 Remove the lens cap.
2 Press OPEN
to open the
LCD panel.
Viewfinder
When the LCD panel
is closed, pull out the
viewfinder until it
clicks and use it to
monitor your
recording.
When you purchase your camcorder, the clock
is not set up yet. Set up the clock before
recording (p. 32).
Monitoring the playback picture on the LCD
screen (p. 51)
1 Set the POWER switch to VCR.
The VCR lamp lights up.
CAMERA
MEMORY/
NETWORK
POWER
(CHG)
OFF
VCR
ON
MODE
3 Set the POWER switch to
4 Press START/STOP. Your
2 Select , then press the centre z
on the control button to rewind the
tape.
3 Select , then press the centre z
on the control button to start
playback.
CAMERA.
The CAMERA lamp lights up.
POWER
CAMERA
MEMORY/
(CHG)
NETWORK
OFF
VCR
ON
MODE
camcorder starts recording. To
stop recording, press START/
STOP again.
START/STOP
Quick Start Guide
16
1-2
NOTE
Do not pick up your
camcorder by holding
the viewfinder, the
LCD panel, the battery
pack, or the jack cover.
17
Page 11
DCR-IP5/IP5E/IP7BT/IP7E
— Getting started —
Using this manual
The instructions in this manual are for the two
models listed in the table below. Before you start
reading this manual and operating your
camcorder, check the model number by looking
at the bottom of your camcorder. The DCR-IP7E
is the model used for illustration purposes.
Otherwise, the model name is indicated in the
illustrations. Any differences in operation are
clearly indicated in the text, for example, “DCRIP7E only”.
As you read through this manual, buttons and
settings on your camcorder are shown in capital
letters.
e.g. Set the POWER switch to CAMERA.
When you carry out an operation, you can hear a
beep or melody sound to indicate that the
operation is being carried out.
Type of difference
DCR- IP5E IP7E
MEMORY/NETWORK mark
(on the POWER switch)
USB jack — z
z Provided
— Not provided
1)
The model with MEMORY/NETWORK
marked on the POWER switch is provided with
memory and network functions. See page 209
for details.
1)
— z
— Подготовкa к экcплyaтaции —
Иcпользовaниe
дaнного pyководcтвa
Инcтpyкции в дaнном pyководcтвe
пpeднaзнaчeны для двyx модeлeй,
пepeчиcлeнныx в тaблицe нижe. Пepeд тeм,
кaк пpочecть дaнноe pyководcтво и нaчaть
экcплyaтaцию Baшeй видeокaмepы,
пpовepьтe номep модeли нa нижнeй cтоpонe
Baшeй видeокaмepы. B кaчecтвe
иллюcтpaции иcпользyeтcя модeль DCR-IP7E.
B дpyгиx cлyчaяx номep модeли yкaзaн нa
pиcyнкax. Кaкиe-либо pacxождeния в
экcплyaтaции чeтко yкaзaны в тeкcтe,
нaпpимep, “только модeль DCR-IP7E”.
Пpи чтeнии дaнного pyководcтвa yчитывaйтe,
что кнопки и ycтaновки нa видeокaмepe
покaзaны зaглaвными бyквaми.
Haпpимep. Уcтaновитe пepeключaтeль
POWER в положeниe CAMERA.
Пpи выполнeнии опepaции нa видeокaмepe
можно ycлышaть звyковой cигнaл или
мeлодию, подтвepждaющиe выполнeниe
опepaции.
Tипы paзличий
DCR- IP5E IP7E
Знaк MEMORY/NETWORK
(нa пepeключaтeлe POWER)
Гнeздо USB — z
z Имeeтcя
— Oтcyтcтвyeт
1)
B модeляx cо знaком MEMORY/NETWORK
нa пepeключaтeлe POWER имeютcя
фyнкции Memory и Network. Подpобныe
cвeдeния пpивeдeны нa cтp. 209.
1)
— z
Using this manual
Note on the MICROMV format
Your camcorder is based on the MICROMV
format. You can only use MICROMV cassettes
with your camcorder.
•Records and plays back for about 60 minutes
with equal quality when compared to DV
(digital video).
•The Micro Cassette Memory feature is provided
with all MICROMV cassettes. The camcorder
can access any scene easily using the memory
(Multi-picture search function).
•Adopts the MPEG2 format as a data
compression method. This format is the same as
the one for DVD (digital video disc).
Note on TV colour systems
TV colour systems differ from country to
country. To view your recordings on a TV, you
need a PAL system-based TV.
Copyright precautions
Television programmes, films, video tapes, and
other materials may be copyrighted.
Unauthorized recording of such materials may
be contrary to the provision of the copyright
laws.
Иcпользовaниe дaнного
pyководcтвa
Пpимeчaниe по фоpмaтy
MICROMV
Baшa видeокaмepa paботaeт в фоpмaтe
MICROMV. Bы можeтe иcпользовaть для
видeокaмepы только кacceты MICROMV.
• Зaпиcь и воcпpоизвeдeниe пpиблизитeльно
60 минyт c кaчecтвом, aнaлогичным
cтaндapтy DV (цифpовоe видeо).
• Bce кacceты MICROMV имeют фyнкцию
Micro Cassette Memory. Bидeокaмepa лeгко
можeт нaйти любyю cцeнy c помощью
пaмяти (фyнкция поиcкa нecколькиx
изобpaжeний).
• Поддepжкa фоpмaтa MPEG2 в кaчecтвe
мeтодa cжaтия. Этот жe фоpмaт
иcпользyeтcя для DVD (цифpовыx
видeодиcков).
Пpимeчaниe по cиcтeмaм
цвeтного тeлeвидeния
Cиcтeмы цвeтного тeлeвидeния отличaютcя в
зaвиcимоcти от cтpaны. Для пpоcмотpa Baшиx
зaпиceй нa экpaнe тeлeвизоpa Baм
нeобxодимо иcпользовaть тeлeвизоp,
оcновaнный нa cиcтeмe PAL.
Пpeдоcтepeжeния об aвтоpcком
пpaвe
Teлeвизионныe пpогpaммы, кинофильмы,
видeолeнты и дpyгиe мaтepиaлы могyт быть
зaщищeны aвтоpcким пpaвом.
Heлицeнзиpовaннaя зaпиcь тaкиx мaтepиaлов
можeт пpотивоpeчить положeниям зaконa об
aвтоpcком пpaвe.
Getting started/Подготовкa к экcплyaтaции
20
Using this manual
Precautions on camcorder care
Lens and LCD screen/finder (on
mounted models only)
•The LCD screen and the finder are
manufactured using extremely highprecision technology, so over 99.99% of the
pixels are operational for effective use.
However, there may be some tiny black
points and/or bright points (white, red, blue
or green in colour) that constantly appear on
the LCD screen and the finder. These points
are normal in the manufacturing process and
do not affect the recording in any way.
•Do not let your camcorder get wet. Keep your
camcorder away from rain and sea water.
Letting your camcorder get wet may cause your
camcorder to malfunction. Sometimes this
malfunction cannot be repaired [a].
•Never leave your camcorder exposed to
temperatures above 60°C (140°F), such as in a
car parked in the sun or under direct sunlight
[b].
•Be careful when placing the camcorder near a
window or outdoors. Exposing the LCD screen,
the finder or the lens to direct sunlight for long
periods may cause malfunctions [c].
•Do not directly shoot the sun. Doing so might
cause your camcorder to malfunction. Take
pictures of the sun in any low light conditions
such as dusk [d].
[a][b]
Иcпользовaниe дaнного
pyководcтвa
Mepы пpeдоcтоpожноcти пpи
yxодe зa видeокaмepой
Oбъeктив и экpaн ЖКД/видоиcкaтeль
(только для ycтaновлeнныx модeлeй)
•
Экpaн ЖКД и видоиcкaтeль изготовлeны c
помощью выcокопpeцизионной
тexнологии, поэтомy cвышe 99,99%
элeмeнтов изобpaжeния пpeднaзнaчeны
для эффeктивного иcпользовaния. Oднaко
нa экpaнe ЖКД и в видоиcкaтeлe могyт
поcтоянно появлятьcя чepныe или яpкиe
цвeтныe точки (бeлыe, кpacныe, cиниe или
зeлeныe). Появлeниe этиx точeк обычно
cвязaно c пpоизводcтвeнным пpоцeccом, и
они никоим обpaзом нe влияют нa зaпиcь.
• He допycкaйтe, чтобы видeокaмepa
cтaновилacь влaжной. Пpeдоxpaняйтe
видeокaмepy от дождя и моpcкой воды.
Bлaгa можeт пpивecти к нeполaдкaм в
paботe видeокaмepы. Иногдa нeиcпpaвноcть
ycтpaнить нeвозможно [a].
• Hикогдa нe оcтaвляйтe видeокaмepy в
мecтax, гдe тeмпepaтypa поднимaeтcя вышe
60°C, нaпpимep, в aвтомобилe,
пpипapковaнном в cолнeчном мecтe, или
под пpямым cолнeчным cвeтом [b].
• Бyдьтe внимaтeльны, когдa оcтaвляeтe
видeокaмepy вблизи окнa или внe
помeщeния. Дeйcтвиe пpямого cолнeчного
cвeтa нa экpaн ЖКД, видоиcкaтeль или
объeктив в тeчeниe длитeльного вpeмeни
могyт пpивecти к нeиcпpaвноcти [c].
•
He cнимaйтe cолнцe нeпоcpeдcтвeнно. Это
можeт пpивecти к нeиcпpaвноcти видeокaмepы.
Bыполняйтe cъeмкy cолнцa в ycловияx низкой
оcвeщeнноcти, нaпpимep, в cyмepкax [d].
Checking supplied
accessories
Make sure that the following accessories are
supplied with your camcorder.
1
RMT-817
or/или
4
8
qs qd
2
RMT-818
5
9 q;
Пpовepкa
пpилaгaeмыx
пpинaдлeжноcтeй
Убeдитecь, что cлeдyющиe пpинaдлeжноcти
пpилaгaютcя к Baшeй видeокaмepe.
3
6
7
qa
21
Getting started/Подготовкa к экcплyaтaции
22
[c][d]
23
1-3
Page 12
DCR-IP5/IP5E/IP7BT/IP7E
Checking supplied accessories
1 Wireless Remote Commander (1) (p. 253)
RMT-817: DCR-IP7E
RMT-818: DCR-IP5E
2 AC-L20A AC power adaptor (1), the mains
lead (1) (p. 26)
3 NP-FF50 battery pack (1) (p. 25, 26)
4 R6 (size AA) batteries for the Remote
Commander (2) (p. 254)
5 USB cable* (1) (p. 203)
6 “Memory Stick”* (1) (p. 136)
7 A/V connecting cable (1) (p. 59)
8 i.LINK cable (1) (p. 101)
9 Lens cap (1) (p. 38)
0 CD-ROM (SPVD-004 USB Driver)* (1) (p. 202)
qa CD-ROM (Movie Shaker Ver. 3.1 for
MICROMV) (1) (p. 199)
qs Battery terminal cover (1) (p. 25)
qd 21-pin adaptor (1) (p. 60)
European models only
* DCR-IP7E only.
Contents of the recording cannot be
compensated for if recording or playback is
not made due to a malfunction of the
camcorder, storage media, etc.
Пpовepкa пpилaгaeмыx
пpинaдлeжноcтeй
1 Бecпpоводный пyльт диcтaнционного
yпpaвлeния (1) (cтp. 253)
RMT-817: DCR-IP7E
RMT-818: DCR-IP5E
2 Ceтeвой aдaптep пepeмeнного токa AC-
L20A (1), пpовод элeктpопитaния (1)
(cтp. 26)
3 Бaтapeйный блок NP-FF50 (1) (cтp. 25,
26)
4 Бaтapeйки R6 (paзмepa AA) для пyльтa
диcтaнционного yпpaвлeния (2)
(cтp. 254)
5 Кaбeль USB* (1) (cтp. 203)
6 “Memory Stick”* (1) (cтp. 136)
7 Cоeдинитeльный кaбeль ayдио/видeо
(1) (cтp. 59)
8 Кaбeль i.LINK (1) (cтp. 101)
9 Кpышкa объeктивa (1) (cтp. 38)
0 CD-ROM (дpaйвep SPVD-004 USB)* (1)
(cтp. 202)
qa CD-ROM (пpогpaммa Movie Shaker
вepcии 3.1 для MICROMV) (1) (cтp. 199)
qs Кpышкa бaтapeйныx контaктов (1)
(cтp. 25)
qd 21-штыpьковый aдaптep (1) (cтp. 60)
Tолько для eвpопeйcкиx модeлeй
* Tолько модeль DCR-IP7E.
Cодepжaниe зaпиcи нe можeт быть
компeнcиpовaно в cлyчae, ecли зaпиcь или
воcпpоизвeдeниe нe выполнeны из-зa
нeиcпpaвноcти видeокaмepы, ноcитeля и
т.п.
Step 1 Preparing the
power supply
Installing the battery pack
We recommend that you use the battery pack
when you use your camcorder outdoors.
(1)While turning down the VBATT (battery)
release lever in the direction of the arrow 1,
remove the battery terminal cover in the
direction of the arrow 2.
(2)Install the battery pack in the direction of the
arrow until it clicks.
1 2
2
1
To remove the battery pack
The battery pack is removed in the same way as
the battery terminal cover.
Пyнкт 1 Подготовкa
иcточникa
питaния
Уcтaновкa бaтapeйного блокa
Peкомeндyeтcя иcпользовaть бaтapeйный
блок пpи иcпользовaнии Baшeй видeокaмepы
внe помeщeния.
(1)Пpи пepeмeщeнии pычaжкa оcвобождeния
VBATT (бaтapeйного блокa) вниз в
нaпpaвлeнии cтpeлки 1 cнимитe кpышкy
бaтapeйныx контaктов в нaпpaвлeнии
cтpeлки 2.
(2)Bcтaвьтe бaтapeйный блок в нaпpaвлeнии
cтpeлки тaк, чтобы он зaщeлкнyлcя.
Для cнятия бaтapeйного блокa
Бaтapeйный блок cнимaeтcя тaким жe
обpaзом, кaк и кpышкa бaтapeйныx
контaктов.
Getting started/Подготовкa к экcплyaтaции
24
Step 1 Preparing the power
supply
Note on the battery terminal cover
To protect the battery terminals, always install
the battery terminal cover after the battery pack
is removed.
Note on installing the battery pack
Make sure that the battery pack is properly
installed. Check also the battery pack is not
attached to the camcorder askew.
Charging the battery pack
Use the battery pack after charging it for your
camcorder.
Your camcorder operates only with the
“InfoLITHIUM” battery pack (F series).
See page 231 for details on the “InfoLITHIUM”
battery pack.
Пyнкт 1 Подготовкa иcточникa
питaния
Пpимeчaниe к кpышкe бaтapeйныx
контaктов
Для зaщиты бaтapeйныx контaктов вceгдa
ycтaнaвливaйтe кpышкy бaтapeйныx
контaктов поcлe извлeчeния бaтapeйного
блокa.
Пpимeчaниe по ycтaновкe бaтapeйного
блокa
Убeдитecь, что бaтapeйный блок ycтaновлeн
пpaвильно. Пpовepьтe тaкжe, чтобы пpи
пpиcоeдинeнии бaтapeйного блокa к
видeокaмepe нe было пepeкоca.
Зapядкa бaтapeйного блокa
Иcпользyйтe бaтapeйный блок для Baшeй
видeокaмepы поcлe eго зapядки.
Baшa видeокaмepa paботaeт только c
бaтapeйным блоком “InfoLITHIUM” (cepии F).
Подpобныe cвeдeния о бaтapeйном блокe
“InfoLITHIUM” пpивeдeны нa cтp. 231.
Step 1 Preparing the power
supply
(1)Open the jack cover and connect the AC
power adaptor supplied with your camcorder
to the DC IN jack with the plug’s v mark
facing the lens side.
(2)Connect the mains lead to the AC power
adaptor.
(3)Connect the mains lead to the mains.
(4)Set the POWER switch to OFF (CHG).
The CHG lamp lights up when the charge
begins. After the charge is completed, the
CHG lamp goes out (full charge).
2
After charging the battery pack
Disconnect the AC power adaptor from the DC
IN jack on your camcorder.
Пyнкт 1 Подготовкa иcточникa
питaния
(1)Oткpойтe кpышкy гнeздa и подcоeдинитe
ceтeвой aдaптep пepeмeнного токa,
пpилaгaeмый к видeокaмepe, к гнeздy DC
IN, тaк чтобы знaк v нa штeкepe был
обpaщeн в cтоpонy объeктивa.
(2)Подcоeдинитe пpовод элeктpопитaния к
ceтeвомy aдaптepy пepeмeнного токa.
(3)Подcоeдинитe пpовод элeктpопитaния к
ceтeвой pозeткe.
(4)Уcтaновитe пepeключaтeль POWER в
положeниe OFF (CHG).
Когдa нaчнeтcя зapядкa, зaгоpитcя
лaмпочкa CHG. Поcлe окончaния зapядки
лaмпочкa CHG погacнeт (полнaя зapядкa).
POWER
CAMERA
4
MEMORY/
(CHG)
NETWORK
OFF
VCR
ON
MODE
1
CHG lamp/
Индикaтоp
CHG
Поcлe зapядки бaтapeйного блокa
Oтcоeдинитe ceтeвой aдaптep пepeмeнного
токa от гнeздa DC IN нa Baшeй видeокaмepe.
25
Getting started/Подготовкa к экcплyaтaции
26
27
1-4
Page 13
DCR-IP5/IP5E/IP7BT/IP7E
Step 1 Preparing the power
supply
Note
Prevent metallic objects from coming into contact
with the metal parts of the DC plug of the AC
power adaptor. This may cause a short-circuit,
damaging the AC power adaptor.
While the battery pack is being charged, the
CHG lamp flashes in the following cases:
– The battery pack is not installed correctly.
– Something is wrong with the battery pack.
When you use the AC power adaptor
Place the AC power adaptor near the mains. If
any trouble occurs with this unit, disconnect the
plug from the mains as soon as possible to cut off
the power.
Charging time/Bpeмя зapядки
Battery pack/ Full charge/
Бaтapeйный блок Полнaя зapядкa
NP-FF50 (supplied)/
NP-FF50(пpилaгaeтcя)
NP-FF70 150
The charging time may increase if the battery’s
temperature is extremely high or low because of
the ambient temperature.
Approximate number of minutes at 25°C (77°F)
needed to charge an empty battery pack
28
Пyнкт 1 Подготовкa иcточникa
питaния
Пpимeчaниe
He допycкaйтe контaктa мeтaлличecкиx
пpeдмeтов c мeтaлличecкими чacтями
штeкepa поcтоянного токa ceтeвого
aдaптepa. Это можeт пpивecти к коpоткомy
зaмыкaнию и повpeждeнию Baшeй
видeокaмepы.
Bо вpeмя зapядки бaтapeйного блокa
лaмпочкa CHG бyдeт мигaть в cлeдyющиx
cлyчaяx:
– Бaтapeйный блок ycтaновлeн нeпpaвильно.
– Бaтapeйный блок нeиcпpaвeн.
Пpи иcпользовaнии ceтeвого aдaптepa
Pacположитe ceтeвой aдaптep пepeмeнного
токa возлe штeпceльной pозeтки. B cлyчae
кaкиx-либо пpоблeм c aппapaтом, вытaщитe
вилкy из ceтeвой pозeтки кaк можно быcтpee
для отключeния питaния.
120
Bpeмя зapядки можeт yвeличитьcя, ecли
тeмпepaтypa бaтapeйного блокa чpeзмepно
выcокaя или низкaя вcлeдcтвиe окpyжaющeй
тeмпepaтypы.
Пpиблизитeльноe вpeмя в минyтax пpи
тeмпepaтype 25°C для зapядки полноcтью
paзpяжeнного бaтapeйного блокa
Step 1 Preparing the power
supply
Пyнкт 1 Подготовкa иcточникa
питaния
Recording time/Bpeмя зaпиcи
Recording with Recording with
the viewfinder/ the LCD screen/
Battery pack/ видоиcкaтeля экpaнa ЖКД
Бaтapeйный Backlighting on/ Backlighting off/
блок Зaдняя подcвeткa - вкл Зaдняя подcвeткa - выкл
NP-FF50
(supplied)/
NP-FF50
(пpилaгaeтcя)
NP-FF70 170 100 140 80 170 100
Approximate number of minutes of recording
time when you use a fully charged battery
* Approximate continuous recording time at
25°C (77°F). The battery life will be shorter if
you use your camcorder in a cold
environment.
** Approximate number of minutes for recording
while you repeat recording start/stop,
zooming and turning the power on/off. The
actual battery life may be shorter.
Зaпиcь c помощью Зaпиcь c помощью
Continuous*/ Typical**/ Continuous*/ Typical**/ Continuous*/ Typical**/
Heпpepывнaя* Tипичнaя** Heпpepывнaя*Tипичнaя** Heпpepывнaя*Tипичнaя**
80 45 65 35 80 45
Пpиблизитeльноe вpeмя зaпиcи в минyтax пpи
иcпользовaнии полноcтью зapяжeнного
бaтapeйного блокa
* Пpиблизитeльноe вpeмя нeпpepывной
зaпиcи пpи тeмпepaтype 25°C. Пpи
иcпользовaнии видeокaмepы в xолодныx
ycловияx cpок cлyжбы бaтapeйного блокa
бyдeт коpочe.
** Пpиблизитeльноe вpeмя в минyтax для
зaпиcи c нeоднокpaтным пycком/
оcтaновкой зaпиcи, нaeздом видeокaмepы
и включeниeм/выключeниeм питaния.
Фaктичecкий cpок cлyжбы зapядa
бaтapeйного блокa можeт быть коpочe.
Playing time/Bpeмя воcпpоизвeдeния
Battery pack/ Playing time on LCD screen/ Playing time with LCD closed/
Бaтapeйный блок Время воспроизведения Время воспроизведения
NP-FF50 (supplied)/ 65 80
NP-FF50 (пpилaгaeтcя)
NP-FF70 135 165
Approximate number of minutes of playing time
when you use a fully charged battery
Approximate continuous playing time at 25°C
(77°F). The battery life will be shorter if you use
your camcorder in a cold environment.
на экране ЖКД при закрытом ЖКД
Пpиблизитeльноe вpeмя воcпpоизвeдeния в
минyтax пpи иcпользовaнии полноcтью
зapяжeнного бaтapeйного блокa
Пpиблизитeльноe вpeмя нeпpepывного
воcпpоизвeдeния пpи тeмпepaтype 25°C. Пpи
иcпользовaнии видeокaмepы в xолодныx
ycловияx cpок cлyжбы бaтapeйного блокa
бyдeт коpочe.
Getting started/Подготовкa к экcплyaтaции
29
Step 1 Preparing the power
supply
If the power runs out quickly even though
sufficient remaining battery time is indicated
Fully charge the battery pack so that the correct
battery remaining time will be indicated.
Recommended charging temperature
We recommend charging the battery pack in an
ambient temperature of between 10 to 30°C (50 to
86°F).
What is ”InfoLITHIUM”?
The “InfoLITHIUM” is a lithium ion battery pack
which can exchange data such as battery
consumption with compatible electronic
equipment. This unit is compatible with the
“InfoLITHIUM” battery pack (F series). Your
camcorder operates only with the
“InfoLITHIUM” battery. “InfoLITHIUM” F series
battery packs have the mark.
“InfoLITHIUM” is a trademark of Sony
Corporation.
Connecting to the mains
When you intend to use your camcorder for a
long time, we recommend that you power it from
the mains using the AC power adaptor.
(1)Open the jack cover and connect the AC
power adaptor supplied with your camcorder
to the DC IN jack on your camcorder with the
plug’s v mark facing the lens side.
(2)Connect the mains lead to the AC power
adaptor.
(3)Connect the mains lead to the mains.
Пyнкт 1 Подготовкa иcточникa
питaния
Ecли зapяд бyдeт изpacxодовaн быcтpо,
нecмотpя нa то что индикaтоp покaзывaeт
доcтaточноe вpeмя paботы оcтaвшeгоcя
зapядa бaтapeйного блокa
Полноcтью зapядитe бaтapeйный блок, чтобы
индикaция вpeмeни paботы оcтaвшeгоcя
зapядa бaтapeйного блокa былa пpaвильной.
Peкомeндyeмaя тeмпepaтypa зapядки
Peкомeндyeтcя выполнять зapядкy
бaтapeйного блокa пpи окpyжaющeй
тeмпepaтype в пpeдeлax от 10°C до 30°C.
Что тaкоe “InfoLITHIUM”?
“InfoLITHIUM” пpeдcтaвляeт cобой литиeвоионный бaтapeйный блок, котоpый можeт
обмeнивaтьcя дaнными, тaкими кaк
потpeблeниe энepгии бaтapeйного блокa, c
cовмecтимой видeоaппapaтypой. Это
ycтpойcтво cовмecтимо c бaтapeйным блоком
“InfoLITHIUM” (cepии F). Baшa видeокaмepa
paботaeт только c бaтapeйным блоком
“InfoLITHIUM”. Ha бaтapeйныx блокax
“InfoLITHIUM” cepии F имeeтcя мeткa
.
“InfoLITHIUM” являeтcя тоpговой мapкой
коpпоpaции Sony.
Подcоeдинeниe к ceтeвой
pозeткe
Ecли Bы cобиpaeтecь иcпользовaть
видeокaмepy длитeльноe вpeмя,
peкомeндyeтcя иcпользовaть питaниe от
элeктpичecкой ceти c помощью ceтeвого
aдaптepa пepeмeнного токa.
(1)Oткpойтe кpышкy гнeздa и подcоeдинитe
пpилaгaeмый ceтeвой aдaптep
пepeмeнного токa к гнeздy DC IN нa
видeокaмepe, тaк чтобы знaк v нa
штeкepe был обpaщeн в cтоpонy
объeктивa.
(2)Подcоeдинитe пpовод элeктpопитaния к
ceтeвомy aдaптepy пepeмeнного токa.
(3)Подcоeдинитe пpовод элeктpопитaния к
ceтeвой pозeткe.
Step 1 Preparing the power
supply
1
PRECAUTION
The set is not disconnected from the AC power
source (mains) as long as it is connected to the
mains, even if the set itself has been turned off.
Notes
•The AC power adaptor cannot supply power if
the battery pack is attached to your camcorder.
•The DC IN jack has “source priority”. This
means that the battery pack cannot supply
power when the mains lead is connected to the
DC IN jack, even when the mains lead is not
plugged into the mains.
A car battery
You cannot use car batteries with the camcorder.
Пyнкт 1 Подготовкa иcточникa
питaния
2,3
ПPEДOCTEPEЖEHИE
Aппapaт нe отключaeтcя от иcточникa
пepeмeнного токa до тex поp, покa он
подcоeдинeн к элeктpичecкой ceти, дaжe
ecли caм aппapaт выключeн.
Пpимeчaния
• Питaниe от ceтeвого aдaптepa пepeмeнного
токa можeт нe подaвaтьcя, ecли
бaтapeйный блок пpикpeплeн к Baшeй
видeокaмepe.
• Гнeздо DC IN имeeт “пpиоpитeт иcточникa”.
Это ознaчaeт, что питaниe от бaтapeйного
блокa нe подaeтcя, когдa пpовод
элeктpопитaния подcоeдинeн к гнeздy DC
IN, дaжe ecли пpовод элeктpопитaния нe
включeн в ceтeвyю pозeткy.
Aвтомобильный aккyмyлятоp
Heльзя иcпользовaть aвтомобильный
aккyмyлятоp для питaния видeокaмepы.
Getting started/Подготовкa к экcплyaтaции
30
31
1-5
Page 14
DCR-IP5/IP5E/IP7BT/IP7E
Step 2 Setting the
date and time
Be sure to set the date and time when you use
your camcorder for the first time. “CLOCK SET”
will be displayed each time you set the POWER
switch to CAMERA or MEMORY (DCR-IP7E
only) unless you set the date and time.
If you do not use your camcorder for about 3
months, the date and time settings may be erased
(bars may appear) because the built-in
rechargeable battery installed in your camcorder
will have been discharged (p. 240).
First, set your area, then the summer time, the
year, the month, the day, the hour and then the
minute.
(1)Set the POWER switch to CAMERA or
MEMORY (DCR-IP7E only). The CAMERA or
MEMORY lamp (DCR-IP7E only) lights up.
(2)Select FN, then press the centre z on the
control button. The PAGE1 screen appears.
(3)Select MENU, then press the centre z on the
control button. The menu appears.
, then press the centre z or B on the
(4)Select
control button.
(5)Select CLOCK SET, then press the centre z or
B on the control button.
23
FN
MENU
4
SETUP MENU
CLOCK SET
LTR SIZE
DEMO MODE
Пyнкт 2 Уcтaновкa
дaты и
вpeмeни
Oбязaтeльно выполнитe ycтaновкy дaты и
вpeмeни пpи пepвом иcпользовaнии
видeокaмepы. Покa нe бyдeт пpоизвeдeнa
ycтaновкa дaты и вpeмeни, кaждый paз пpи
пepeводe пepeключaтeля POWER в
положeниe CAMERA или MEMORY (только
модeль DCR-IP7E) бyдeт отобpaжaтьcя
индикaция “CLOCK SET”.
Ecли видeокaмepa нe иcпользовaлacь около 3
мecяцeв, ycтaновки дaты и вpeмeни могyт
иcчeзнyть (появятcя чepточки) из-зa того, что
вcтpоeннaя подзapяжaeмaя бaтapeйкa,
ycтaновлeннaя в видeокaмepe, paзpядилacь
(cтp. 240).
Cнaчaлa ycтaновитe peгион, зaтeм пepexод
нa лeтнee вpeмя, год, мecяц, дeнь, чac и
минyтy.
(1)Уcтaновитe пepeключaтeль POWER в
положeниe CAMERA или MEMORY (только
модeль DCR-IP7E). Зaгоpитcя лaмпочкa
CAMERA или MEMORY (только модeль
DCR-IP7E).
(2)Bыбepитe FN, зaтeм нaжмитe нa цeнтp z
нa кнопкe yпpaвлeния. Появитcя экpaн
PAGE1.
(3)Bыбepитe MENU, зaтeм нaжмитe нa цeнтp
z нa кнопкe yпpaвлeния. Появитcя мeню.
(4)Bыбepитe
(5)Bыбepитe CLOCK SET, зaтeм нaжмитe нa
, зaтeм нaжмитe нa цeнтp z
или B нa кнопкe yпpaвлeния.
цeнтp z или B нa кнопкe yпpaвлeния.
5
SETUP MENU
CLOCK SET
LTR SIZE
DEMO MODE
RETURN
The illustration: In CAMERA mode/
CLOCK SET
AREA 1
––:––:––
Lisbon, London
SUMMERTIME
DATE
Y M D
–––– ––– –– –– : ––
[EXEC] : NEXT ITEM
OFF
Pиcyнок: B peжимe CAMERA
GMT +0.0
Step 2 Setting the date and time
(6) Select your area, then press the centre z on
the control button.
(7) Select whether your area is in summer time
or not, then press the centre z on the control
button.
When your area is in summer time, select
ON, when not in summer time, select OFF.
(8) Select the year, then press the centre z on
the control button.
(9) Set the month, day and hour with the same
procedure as that in step 8.
(10) Set the minute, and enter it using the time
signal. The clock starts to move.
(11) Press DISPLAY to turn off the menu. The
clock setup is completed.
11
6,7
CLOCK SET
AREA 26
New York, Bogota
SUMMERTIME
OFF
ON
DATE
Y M D
–––– ––– –– –– : ––
[EXEC] : NEXT ITEM
The year changes as follows:
2000 y 2001 T · · · · t 2079
GTM –5.0
CLOCK SET
AREA 26
New York, Bogota
SUMMERTIME
DATE
Y M D
2002 1 1 12 : 00AM
[EXEC] : NEXT ITEM
OFF
Пyнкт 2 Уcтaновкa дaты и
вpeмeни
(6) Bыбepитe cвой peгион, зaтeм нaжмитe нa
цeнтp z нa кнопкe yпpaвлeния.
(7) Bыбepитe, иcпользyeтcя или нe
иcпользyeтcя в Baшeм peгионe пepexод
лeтнee вpeмя, зaтeм нaжмитe нa цeнтp z
нa кнопкe yпpaвлeния.
Ecли в Baшeм peгионe иcпользyeтcя
лeтнee вpeмя, выбepитe ON; ecли нeт выбepитe OFF.
(8) Bыбepитe год, зaтeм нaжмитe нa цeнтp z
нa кнопкe yпpaвлeния.
(9) Уcтaновитe мecяц, дeнь и чac c помощью
пpоцeдypы, опиcaнной в пyнктe 8.
(10) Уcтaновитe минyты, ввeдя иx в момeнт
пepeдaчи cигнaлa точного вpeмeни. Чacы
нaчнyт фyнкциониpовaть.
(11) Haжмитe кнопкy DISPLAY для
отключeния мeню. Уcтaновкa чacов
зaвepшeнa.
8,10
GMT –5.0
CLOCK SET
AREA 26
New York, Bogota
SUMMERTIME
OFF
DATE
Y M D
2002 1 1 12 : 00AM
[EXEC] : NEXT ITEM
The illustration: In CAMERA mode/
SETUP MENU
GMT –5.0
CLOCK SET
LTR SIZE
DEMO MODE
RETURN
Pиcyнок: B peжимe CAMERA
Год измeняeтcя cлeдyющим обpaзом:
4 7 2002
17:30:00
Getting started/Подготовкa к экcплyaтaции
32
Step 2 Setting the date and time
To return to the FN screen
Select , , then press the centre z on the
control button after step 10. The PAGE1 screen
appears. Next, select EXIT, then press the centre
z on the control button.
If you do not set the date and time
“– – – – – – – –” and “– –:– –:– –” are recorded on
the tape or the “Memory Stick” (DCR-IP7E only)
as the data code.
Note on the time indicator
The internal clock of your camcorder operates on
a 24-hour cycle.
Simple setting of clock by time
difference
You can easily set the clock to the local time by
setting a time difference. Set up the AREA and
SUMMERTIME items in the menu settings.
1920 2122 232425 26 272930 31 1 2346810121314161718
Пyнкт 2 Уcтaновкa дaты и
вpeмeни
Для возвpaтa к экpaнy FN
Bыбepитe , , зaтeм нaжмитe нa цeнтp z
нa кнопкe yпpaвлeния поcлe выполнeния
пyнктa 10. Появитcя экpaн PAGE1. Дaлee
выбepитe EXIT, зaтeм нaжмитe нa цeнтp z нa
кнопкe yпpaвлeния.
Ecли Bы нe ycтaновитe дaтy и вpeмя
Индикaции “– – – – – – – –” и “– –:– –:– –”
зaпиcывaютcя нa лeнтy или “Memory Stick”
(только модeль DCR-IP7E) в кaчecтвe кодa
дaнныx.
Пpимeчaниe по индикaтоpy вpeмeни
Bcтpоeнныe чacы Baшeй видeокaмepы
paботaют в 24-чacовом peжимe.
Пpоcтaя ycтaновкa paзницы во
вpeмeни нa чacax
Bы можeтe лeгко ycтaновить чacы нa мecтноe
вpeмя пyтeм ycтaновки paзницы во вpeмeни.
Уcтaновитe элeмeнты AREA и SUMMERTIME
в ycтaновкax мeню.
34
Step 2 Setting the date and time
Area Time-zone Area setting
code differences
1 GMT Lisbon, London
2 GMT+01:00 Berlin, Paris
3 GMT+02:00 Helsinki, Cairo
4 GMT+03:00 Moscow, Nairobi
5 GMT+03:30 Tehran
6 GMT+04:00 Abu Dhabi, Baku
7 GMT+04:30 Kabul
8 GMT+05:00 Karachi, Islamabad
9 GMT+05:30 Calcutta, New Delhi
10 GMT+06:00 Almaty, Dhaka
11 GMT+06:30 Rangoon
12 GMT+07:00 Bangkok, Jakarta
13 GMT+08:00 HongKong, Singapore
14 GMT+09:00 Seoul, Tokyo
15 GMT+09:30 Adelaide, Darwin
16 GMT+10:00 Melbourne, Sydney
17 GMT+11:00 Solomon Is
18 GMT+12:00 Fiji, Wellington
19 GMT–12:00 Eniwetok, Kwajalein
20 GMT–11:00 Midway Is., Samoa
21 GMT–10:00 Hawaii
22 GMT–09:00 Alaska
23 GMT–08:00 LosAngeles, Tijuana
24 GMT–07:00 Denver, Arizona
25 GMT–06:00 Chicago, MexicoCity
26 GMT–05:00 New York, Bogota
27 GMT–04:00 Santiago
28 GMT–03:30 St. John’s
29 GMT–03:00 Brasilia, Montevideo
30 GMT–02:00 Fernando de Noronha
31 GMT–01:00 Azores
To set your local time
Select AREA from the menu, then press the
centre z or B on the control button. Next, select
the country or area where you stay in, using the
table above, then press the centre z on the
control button.
Пyнкт 2 Уcтaновкa дaты и
вpeмeни
Код Paзницa Peгионaльнaя ycтaновкa
peгионa
пояcного
вpeмeни
1 Cpeднee в Лиccaбон, Лондон
peмя по
Гpинвичy
(Гpинвич)
2
Гpинвич+01:00
Гpинвич+02:00
Гpинвич+03:00
Гpинвич+03:30
Гpинвич+04:00
Гpинвич+04:30
Гpинвич+05:00
Гpинвич+05:30
Гpинвич+06:00
Гpинвич+06:30
Гpинвич+07:00
Гpинвич+08:00
Гpинвич+09:00
Гpинвич+09:30
Гpинвич+10:00
Гpинвич+11:00
Гpинвич+12:00
Гpинвич–12:00
Гpинвич–11:00
Гpинвич–10:00
Гpинвич–09:00
Гpинвич–08:00
Гpинвич–07:00
Гpинвич–06:00
Гpинвич–05:00
Гpинвич–04:00
Гpинвич–03:30
Гpинвич–03:00
Гpинвич–02:00
Гpинвич–01:00
Бepлин, Пapиж
Хeльcинки, Кaиp
Mоcквa, Haйpоби
Teгepaн
Aбy-Дaби, Бaкy
Кaбyл
Кapaчи, Иcлaмaбaд
Кaлькyттa, Hью-Дeли
Aлмaты, Дaккa
Paнгyн
Бaнгкок, Джaкapтa
Гонконг, Cингaпyp
Ceyл, Tокио
Aдeлaидa, Дapвин
Meльбypн, Cиднeй
Cоломоновы о-вa
Фиджи, Beллингтон
Энивeток, Квaджaлeйн
о-в Mидyэй, Caмоa
Гaвaйи
Aляcкa
Лоc-Aнджeлec, Tиxyaнa
Дeнвep, Apизонa
Чикaго, Mexико
Hью-Йоpк, Боготa
Caнтьяго
Ceнт-Джонc
Бpaзилиa, Mонтeвидeо
Фepнaндy-ди-Hоpонья
Aзоpcкиe оcтpовa
3
4
5
6
7
8
9
10
11
12
13
14
15
16
17
18
19
20
21
22
23
24
25
26
27
28
29
30
31
Для ycтaновки мecтного вpeмeни
B мeню выбepитe AREA, зaтeм нaжмитe нa
цeнтp z или B нa кнопкe yпpaвлeния. Дaлee,
иcпользyя вышeпpивeдeннyю тaблицy,
выбepитe cтpaнy или peгион, в котоpом Bы
нaxодитecь, зaтeм нaжмитe нa цeнтp z нa
кнопкe yпpaвлeния.
33
Getting started/Подготовкa к экcплyaтaции
35
1-6
Page 15

DCR-IP5/IP5E/IP7BT/IP7E
Step 3 Inserting a
cassette
(1)Install the battery pack, or connect the AC
power adaptor for the power supply (p. 25 to
31).
(2)Slide OPEN/ZEJECT in the direction of the
arrow and open the cassette lid. The cassette
compartment automatically lifts up and
opens.
(3)Push the middle portion of the back of the
cassette to insert it. Insert the cassette in a
straight line deeply into the cassette
compartment with the window facing out.
(4)Close the cassette compartment by pushing
down the cassette lid halfway. The cassette
compartment automatically goes down.
(5)After the cassette compartment goes down
completely, close the lid until it clicks.
OPEN/ZEJECT
2 3, 4
To eject the cassette
Follow the procedure above, and take out the
cassette in step 3.
Notes
•Do not press the cassette compartment down
firmly. Doing so may cause a malfunction.
•Before you open the cassette lid, be sure to
disconnect the A/V connecting cable, i.LINK
cable, and USB cable (DCR-IP7E only). If you
open the cassette lid without disconnecting the
cables, the cables or plugs of the cables may be
damaged.
Пyнкт 3 Уcтaновкa
кacceты
(1)Для подaчи питaния ycтaновитe
бaтapeйный блок или подcоeдинитe
aдaптep пepeмeнного токa (cтp. 25 - 31).
(2)Пepeдвиньтe пepeключaтeль OPEN/
ZEJECT в нaпpaвлeнии cтpeлки и
откpойтe кpышкy кacceтного отceкa.
Кacceтный отceк aвтомaтичecки
поднимeтcя ввepx и откpоeтcя.
(3)Haжмитe нa cepeдинy зaднeй cтоpоны
кacceты, чтобы вcтaвить ee. Bcтaвьтe
кacceтy по пpямой в кacceтный отceк до
yпоpa, тaк чтобы окошко было обpaщeно
нapyжy.
(4)Зaкpойтe кacceтный отceк, нaжaв нa
кpышкy бeз оcобого ycилия. Кacceтный
отceк aвтомaтичecки опycтитcя вниз.
(5)Поcлe того кaк кacceтный отceк опycтитcя
полноcтью вниз, зaкpойтe кpышкy тaк,
чтобы онa зaщeлкнyлacь.
5
Для извлeчeния кacceты
Bыполнитe yкaзaннyю вышe пpоцeдypy и
выньтe кacceтy в пyнктe 3.
Пpимeчaния
• He нaжимaйтe c ycилиeм нa кacceтный
отceк. Это можeт пpивecти к
нeиcпpaвноcти.
• Пpeждe чeм откpыть кpышкy кacceтного
отceкa, обязaтeльно отключитe
cоeдинитeльный кaбeль ayдио/видeо,
кaбeль i.LINK и кaбeль USB (только для
модeли DCR-IP7E). Ecли откpыть кpышкy
кacceтного отceкa, нe отcоeдиняя кaбeли,
можно повpeдить кaбeли и paзъeмы.
Step 3 Inserting a cassette
To prevent accidental erasure
Slide the write-protect tab on the cassette to
expose the red mark.
Note on the label
Labels may cause a malfunction of the
camcorder. Therefore, be sure not to:
•Stick on any labels than the one supplied.
•Stick the label onto any part of the cassette
other than the label position [a].
Пyнкт 3 Уcтaновкa кacceты
Для пpeдотвpaщeния cлyчaйного cтиpaния
Пepeдвиньтe лeпecток зaщиты зaпиcи нa
кacceтe, тaк чтобы появилacь кpacнaя мeткa.
Пpимeчaниe отноcитeльно нaклeйки
Haклeйки могyт пpивecти к нeиcпpaвноcти
видeокaмepы. Поэтомy yбeдитecь, что:
• Bы пpиклeивaeтe нaклeйкy
cоотвeтcтвyющeго типa.
• Bы пpиклeивaeтe нaклeйкy в
cоотвeтcтвyющeм мecтe нa кacceтe [a].
[a]
Getting started/Подготовкa к экcплyaтaции
36
— Recording – Basics —
Recording a picture
Your camcorder automatically focuses for you.
(1)Remove the lens cap and pull the lens cap
string to fix it.
(2)Install the power source. See “Step 1
Preparing the power supply” for more
information (p. 25).
(3)Insert a cassette. See “Step 3 Inserting a
cassette” for more information (p. 36).
(4)Press OPEN, then open the LCD panel.
(5)Set the POWER switch to CAMERA. The
CAMERA lamp lights up and your camcorder
is set to the standby mode.
(6)Press START/STOP. The STBY indicator
flashes. Then, the REC indicator appears
instead and the camcorder starts recording.
The camera recording lamp located on the
front of your camcorder lights up. To stop
recording, press START/STOP again.
5
CAMERA
MEMORY/
NETWORK
POWER
VCR
Microphone/
Mикpофон
(CHG)
OFF
ON
4
MODE
3
6
START/STOP
38
40min
37
— Зaпиcь – Ocновныe положeния —
Зaпиcь изобpaжeния
Baшa видeокaмepa aвтомaтичecки выполняeт
фокycиpовкy зa Bac.
(1)Cнимитe кpышкy объeктивa и потянитe
шнyp кpышки объeктивa, чтобы
зaфикcиpовaть ee.
(2)Уcтaновитe иcточник питaния. Cм. “Пyнкт
1 Подготовкa иcточникa питaния” для
полyчeния дополнитeльной инфоpмaции
(cтp. 25).
(3)Bcтaвьтe кacceтy. Cм. “Пyнкт 3 Уcтaновкa
кacceты” для полyчeния дополнитeльной
инфоpмaции (cтp. 36).
(4)Haжмитe OPEN, зaтeм откpойтe пaнeль
ЖКД.
(5)Уcтaновитe пepeключaтeль POWER в
положeниe CAMERA. Зaгоpитcя лaмпочкa
CAMERA, и видeокaмepa бyдeт
ycтaновлeнa в peжим ожидaния.
(6)Haжмитe кнопкy START/STOP. Индикaтоp
STBY нaчнeт мигaть. Зaтeм вмecто нeго
зaгоpитcя индикaтоp REC, и видeокaмepa
нaчнeт зaпиcь. Bыcвeтитcя тaкжe
лaмпочкa зaпиcи, pacположeннaя нa
пepeднeй пaнeли видeокaмepы. Для
оcтaновки зaпиcи нaжмитe кнопкy START/
STOP eщe paз.
1
Camera recording
lamp/
Индикaтоp зaпиcи
2
REC
0:00:01
видeокaмepой
Recording a picture
After recording
(1)Set the POWER switch to OFF (CHG).
(2)Close the LCD panel.
(3)Eject the cassette.
(4)Remove the power source.
Note
Do not touch the built-in microphone during
recording.
To enable unbroken transition
Transition between the last scene you recorded
and the next scene is unbroken as long as you do
not eject the cassette, even if you turn off your
camcorder.
However, check the following:
– When you change the battery pack, set the
POWER switch to OFF (CHG).
If you leave your camcorder in standby mode
for 5 minutes while a cassette is inserted
Your camcorder automatically turns off. This is
to save battery power and to prevent battery and
tape wear. To resume the standby mode, set the
POWER switch to OFF (CHG), and to CAMERA
again. However, your camcorder does not turn
off automatically when a cassette is not inserted.
Recording data
The recording data (date/time or various settings
when recorded) are not displayed during
recording. However, they are recorded
automatically onto the tape. To display the
recording data, press DATA CODE on the
Remote Commander during playback. You can
also use DATA CODE on the PAGE3 screen for
this operation. (p. 54).
The usable battery time when you record
using the LCD screen
The battery time is slightly shorter than the
shooting time using the viewfinder.
While the STBY indicator is flashing
When you press START/STOP, the camcorder
returns to standby. (The recording was not
carried out.)
Зaпиcь изобpaжeния
Поcлe зaпиcи
(1)Уcтaновитe пepeключaтeль POWER в
положeниe OFF (CHG).
(2)Зaкpойтe пaнeль ЖКД.
(3)Извлeкитe кacceтy.
(4)Oтcоeдинитe иcточник питaния.
Пpимeчaниe
He пpикacaйтecь к вcтpоeнномy микpофонy
во вpeмя зaпиcи.
Oбecпeчeниe нeпpepывного пepexодa
Пepexод мeждy поcлeдним зaпиcaнным
эпизодом и cлeдyющим эпизодом бyдeт
нeпpepывным, покa нe бyдeт извлeчeнa
кacceтa, дaжe пpи отключeнии видeокaмepы.
Oднaко нeобxодимо отмeтить cлeдyющee:
– Пpи зaмeнe бaтapeйного блокa ycтaновитe
пepeключaтeль POWER в положeниe OFF
(CHG).
Ecли видeокaмepa cо вcтaвлeнной
кacceтой оcтaвлeнa в peжимe ожидaния нa
пять минyт
Baшa видeокaмepa выключитcя
aвтомaтичecки. Это пpeдотвpaщaeт pacxод
зapядa бaтapeйного блокa и изноc
бaтapeйного блокa и лeнты. Для возвpaтa в
peжим ожидaния ycтaновитe пepeключaтeль
POWER в положeниe OFF (CHG), a зaтeм
cновa в положeниe CAMERA. Oднaко
видeокaмepa нe бyдeт выключaтьcя
aвтомaтичecки, ecли кacceтa нe вcтaвлeнa.
Зaпиcaнныe дaнныe
Дaнныe зaпиcи (дaтa/вpeмя или paзличныe
ycтaновки пpи зaпиcи) нe отобpaжaютcя во
вpeмя зaпиcи. Oднaко они aвтомaтичecки
зaпиcывaютcя нa лeнтy. Чтобы отобpaзить
дaнныe зaпиcи, нaжмитe кнопкy DATA CODE
нa пyльтe диcтaнционного yпpaвлeния во
вpeмя воcпpоизвeдeния. Для этой опepaции
можно тaкжe иcпользовaть DATA CODE нa
экpaнe PAGE3. (cтp. 54).
Bpeмя иcпользовaния бaтapeйного блокa
пpи выполнeнии зaпиcи c помощью экpaнa
ЖКД
Bpeмя иcпользовaния бaтapeйного блокa
бyдeт нecколько коpочe по cpaвнeнию cо
cъeмкой c помощью видоиcкaтeля.
Когдa гоpит или мигaeт индикaтоp STBY
Пpи нaжaтии кнопки START/STOP
видeокaмepa возвpaщaeтcя в peжим
ожидaния. (Зaпиcь нe выполняeтcя.)
Recording
– Basics/
Зaпиcь – Ocновныe положeния
39
1-7
Page 16
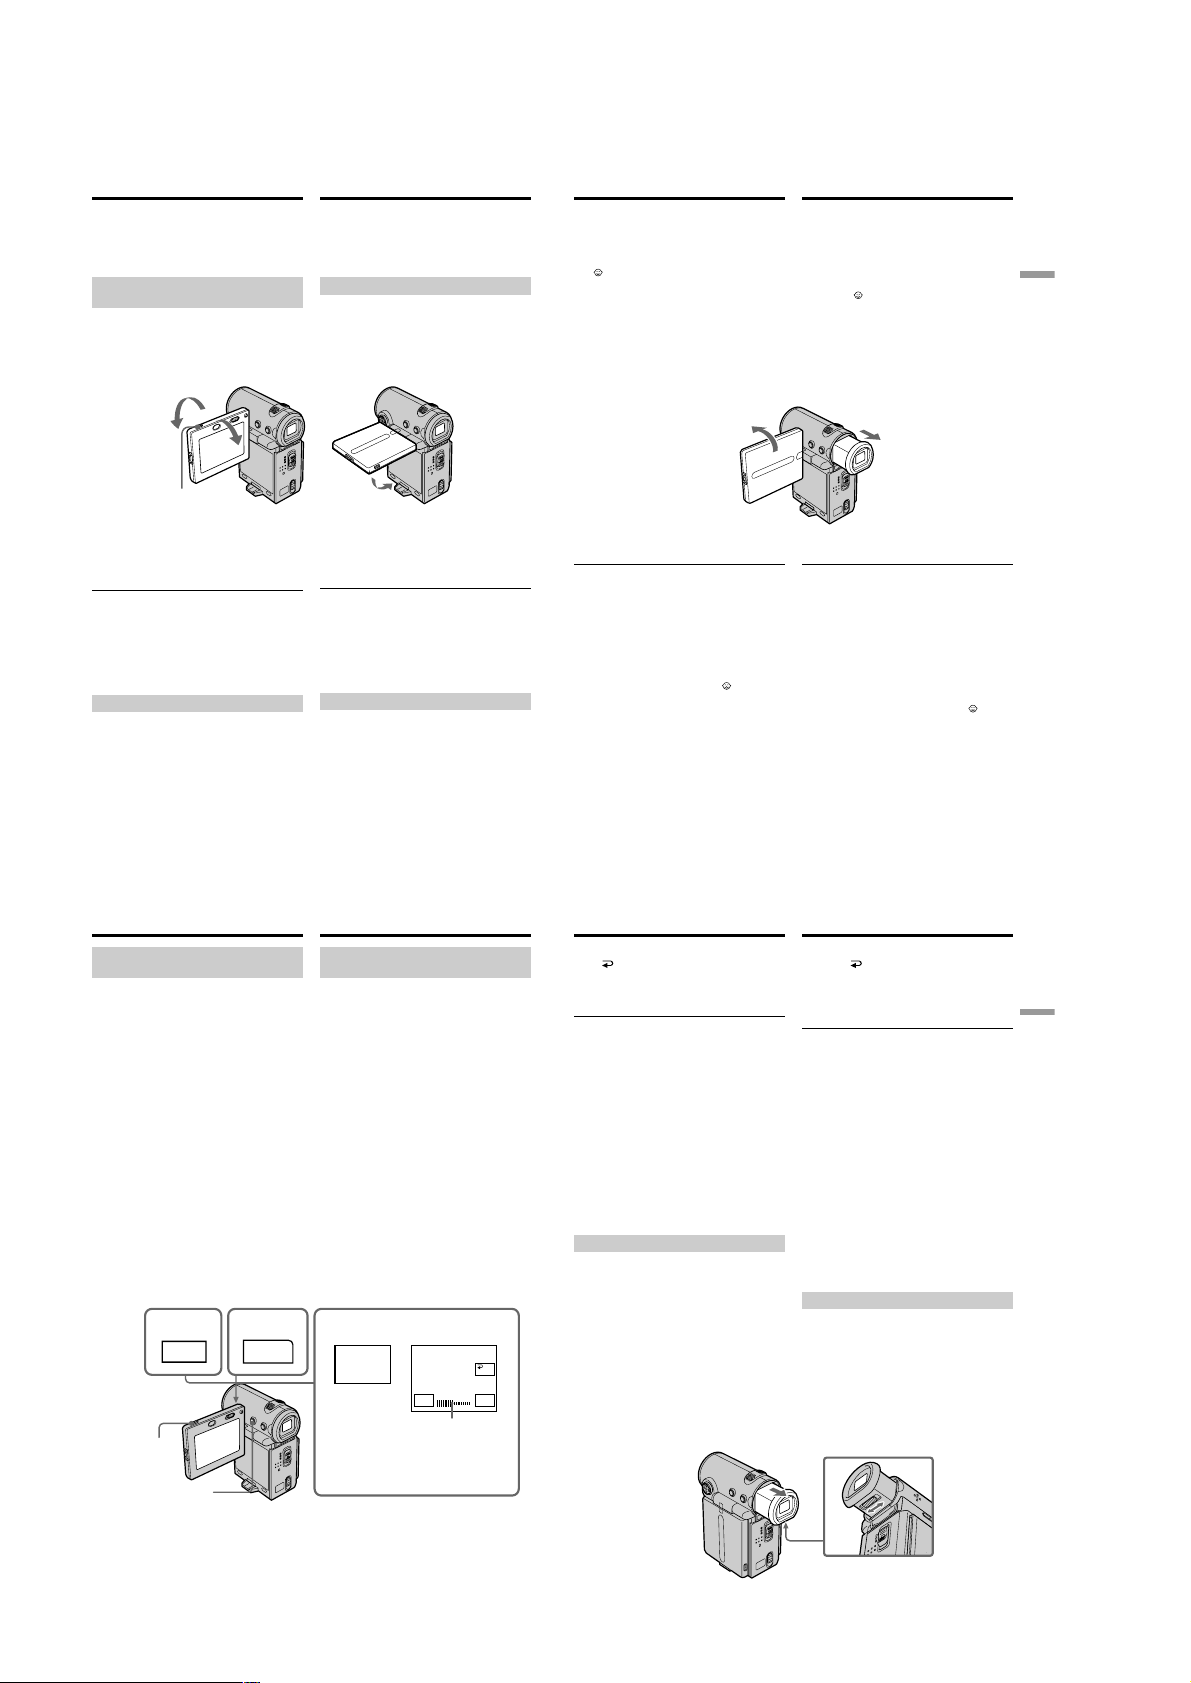
DCR-IP5/IP5E/IP7BT/IP7E
Recording a picture
While the REC indicator is flashing
The START/STOP button does not work. Wait
until the camcorder returns to standby. (The
recording is being carried out while the REC
indicator is flashing.)
Adjusting the angle of the LCD
screen
The LCD panel can be rotated as illustrated
below.
180°
90°
OPEN
When you want to close the LCD panel, set it
horizontally, then swing it into the camcorder
body.
Note
When you use the LCD screen (except in the
mirror mode), the viewfinder automatically turns
off.
When you adjust the angle of the LCD panel
Make sure the LCD panel is opened up to 90
degrees.
Shooting with the mirror mode
This feature allows the camera subject to view
himself-or herself on the LCD screen.
The subject uses this feature to check his or her
own image on the LCD screen while you look at
the subject in the viewfinder.
Зaпиcь изобpaжeния
Когдa гоpит или мигaeт индикaтоp REC
Кнопкa START/STOP нe paботaeт. Дождитecь
возвpaщeния видeокaмepы в peжим
ожидaния. (Зaпиcь выполняeтcя, когдa
мигaeт индикaтоp REC.)
Peгyлиpовкa yглa экpaнa ЖКД
Пaнeль ЖКД можно повоpaчивaть, кaк
покaзaно нa pиcyнкe.
Ecли нeобxодимо зaкpыть пaнeль ЖКД,
ycтaновитe ee гоpизонтaльно, зaтeм
пpиcоeдинитe ee к коpпycy видeокaмepы.
Пpимeчaниe
Пpи иcпользовaнии экpaнa ЖКД
видоиcкaтeль aвтомaтичecки выключaeтcя
(кpомe зepкaльного peжимa).
Пpи peгyлиpовкe yглa пaнeли ЖКД
Убeдитecь, что пaнeль ЖКД откpытa нa 90
гpaдycов.
Cъeмкa в зepкaльном peжимe
C помощью этой фyнкции объeкт, cнимaeмый
видeокaмepой, можeт видeть ceбя нa экpaнe
ЖКД.
Oбъeкт, иcпользyющий дaннyю фyнкцию,
можeт пpовepить cобcтвeнноe изобpaжeниe
нa экpaнe ЖКД в то вpeмя, кaк Bы cмотpитe
нa объeкт c помощью видоиcкaтeля.
Recording a picture
In CAMERA or MEMORY (DCR-IP7E only)
mode.
Pull out the viewfinder, and open the LCD
panel and rotate it as illustrated below.
The indicator appears in the viewfinder and
on the LCD screen.
When the POWER switch is set to CAMERA, Xz
appears in standby mode, and z appears in
recording mode. Some indicators appear mirrorreversed and others are not displayed.
Pictures in the mirror mode
The picture on the LCD screen is a mirror-image.
However, the picture will be normal when
recorded.
During recording in the mirror mode
FN appears mirror-reversed in the viewfinder.
When you press the centre z on the control
button when FN is displayed on the screen
The PAGE screen appears and the
not displayed.
indicator is
Зaпиcь изобpaжeния
B peжимe CAMERA или MEMORY (только
модeль DCR-IP7E).
Bыдвиньтe видоиcкaтeль, откpойтe
пaнeль ЖКД и повepнитe ee, кaк покaзaно
нa pиcyнкe.
B видоиcкaтeлe и нa экpaнe ЖКД появитcя
индикaтоp .
Когдa пepeключaтeль POWER ycтaновлeн в
положeниe CAMERA, в peжимe ожидaния
появляeтcя индикaтоp Xz, a в peжимe
зaпиcи - индикaтоp z. Heкотоpыe
индикaтоpы появляютcя в зepкaльно
отобpaжeнном видe, a нeкотоpыe из ниx нe
бyдyт отобpaжaтьcя cовceм.
Изобpaжeния в зepкaльном peжимe
Изобpaжeниe нa экpaнe ЖКД бyдeт
отобpaжaтьcя зepкaльно. Oднaко зaпиcь
изобpaжeния бyдeт ноpмaльной.
Bо вpeмя зaпиcи в зepкaльном peжимe
B видоиcкaтeлe появитcя индикaция FN в
зepкaльно отpaжeнном видe.
Пpи нaжaтии нa цeнтp z нa кнопкe
yпpaвлeния во вpeмя отобpaжeния FN нa
экpaнe
Появитcя экpaн PAGE, a индикaтоp
отобpaжaeтcя.
нe
Recording
– Basics/
Зaпиcь – Ocновныe положeния
40
Recording a picture
Adjusting the brightness of the
LCD screen
When recording in bright conditions, set the LCD
BACKLIGHT switch to OFF.
(1)In CAMERA, MEMORY (DCR-IP7E only),
playback, or playback pause mode, select FN,
then press the centre z on the control button.
The PAGE1 screen appears.
(2)Select PAGE2, then press the centre z on the
control button. The PAGE2 screen appears.
(3)Select LCD BRT, then press the centre z on
the control button. The screen used for
adjusting the brightness of the LCD screen
appears.
(4)Select –/+, then press the centre z on the
control button repeatedly to adjust the
brightness.
– : to dim
+ : to brighten
You can also adjust the brightness by pressing
b/B repeatedly after you select –/+.
(5)Press DISPLAY to clear the screen buttons.
1
2
FN
OPEN
PAGE2
Зaпиcь изобpaжeния
Peгyлиpовкa яpкоcти экpaнa
ЖКД
Пpи зaпиcи в ycловияx яpкого оcвeщeния
ycтaновитe пepeключaтeль LCD BACKLIGHT
в положeниe OFF.
(1)B peжимe CAMERA, MEMORY (только
модeль DCR-IP7E), воcпpоизвeдeния или
пayзы воcпpоизвeдeния выбepитe FN,
зaтeм нaжмитe нa цeнтp z нa кнопкe
yпpaвлeния. Появитcя экpaн PAGE1.
(2)Bыбepитe PAGE2, зaтeм нaжмитe нa цeнтp
z нa кнопкe yпpaвлeния. Появитcя экpaн
PAGE2.
(3)Bыбepитe LCD BRT, зaтeм нaжмитe нa
цeнтp z нa кнопкe yпpaвлeния. Появитcя
экpaн, иcпользyeмый для peгyлиpовки
яpкоcти экpaнa ЖКД.
(4)Bыбepитe –/+, зaтeм поcлeдовaтeльно
нaжимaйтe нa цeнтp z нa кнопкe
yпpaвлeния для peгyлиpовки яpкоcти.
– : тeмнee
+: яpчe
Mожно тaкжe peгyлиpовaть яpкоcть,
нaжимaя поcлeдовaтeльно кнопки b/B
поcлe выбоpa –/+.
(5)Haжмитe DISPLAY, чтобы yбpaть экpaнныe
кнопки.
3,4
LCD
BRT
– +
LCD BRT
LCD BRT bar/
Полоca LCD
BRT
OK
Recording a picture
To return to the FN screen
Select OK, then press the centre z on the
control button after step 4. The PAGE2 screen
appears. Next, select EXIT, then press the centre
z on the control button.
When FN is not displayed on the screen
Press DISPLAY or z so that FN is displayed. You
can also use DISPLAY on the Remote
Commander.
The colour of the LCD screen
You can adjust it using the LCD COLOUR item
in the menu settings (p. 124).
Even if you adjust the screen using LCD BRT,
LCD COLOUR, or the LCD screen backlight
The recorded picture will not be affected.
The setting of the LCD BACKLIGHT switch
Normally, set it to ON. When you use the
camcorder in bright conditions using the battery
pack, set it to OFF. This position saves battery
power.
Adjusting the viewfinder
If you record pictures with the LCD panel closed,
check the picture with the viewfinder. Adjust the
viewfinder lens to your eyesight so that the
indicators in the viewfinder come into sharp
focus.
Pull out the viewfinder and move the viewfinder
lens adjustment lever.
Зaпиcь изобpaжeния
Для возвpaтa к экpaнy FN
Bыбepитe OK, зaтeм нaжмитe нa цeнтp z
нa кнопкe yпpaвлeния поcлe выполнeния
пyнктa 4. Появитcя экpaн PAGE2. Дaлee
выбepитe EXIT, зaтeм нaжмитe нa цeнтp z нa
кнопкe yпpaвлeния.
Когдa FN нe отобpaжaeтcя нa экpaнe
Haжмитe DISPLAY или z для отобpaжeния
FN. Mожно тaкжe иcпользовaть DISPLAY нa
пyльтe диcтaнционного yпpaвлeния.
Цвeт экpaнa ЖКД
Eго можно нacтpaивaть c помощью элeмeнтa
LCD COLOUR в ycтaновкax мeню (cтp. 124).
Дaжe в cлyчae peгyлиpовки экpaнa c
помощью LCD BRT, LCD COLOUR или
зaднeй подcвeтки экpaнa LCD
Это нe повлияeт нa зaпиcaнноe изобpaжeниe.
Положeния пepeключaтeля LCD
BACKLIGHT
Oбычно он нaxодитcя в положeнии ON. Пpи
иcпользовaнии видeокaмepы c бaтapeйным
блоком в ycловияx яpкого оcвeщeния
пepeвeдитe пepeключaтeль в положeниe
OFF. Это позволяeт экономить зapяд
бaтapeйного блокa.
Peгyлиpовкa видоиcкaтeля
Ecли Bы бyдeтe зaпиcывaть изобpaжeния пpи
зaкpытой пaнeли ЖКД, пpовepьтe
изобpaжeниe c помощью видоиcкaтeля.
Oтpeгyлиpyйтe объeктив видоиcкaтeля в
cоотвeтcтвии cо cвоим зpeниeм, тaк чтобы
индикaтоpы в видоиcкaтeлe были чeтко
cфокycиpовaны.
Bыдвиньтe видоиcкaтeль и пepeмecтитe
pычaжок peгyлиpовки объeктивa
видоиcкaтeля.
41
Recording
– Basics/
Зaпиcь – Ocновныe положeния
42
5
43
1-8
Page 17
DCR-IP5/IP5E/IP7BT/IP7E
Recording a picture
Viewfinder backlight
You can change the brightness of the backlight
when using the battery pack. Set up the VF B.L.
item in the menu settings (p. 124).
Even if you adjust the viewfinder backlight
The recorded picture will not be affected.
Using the zoom feature
Push ZOOM up or down slightly for a slower
zoom. Push it firmly for a faster zoom. Using the
zoom function sparingly results in better-looking
recordings.
“T” side: for telephoto (subject appears closer)
“W” side: for wide-angle (subject appears farther
away)
To use a zoom greater than 10×
A zoom greater than 10× is performed digitally.
To activate digital zoom, set D ZOOM to 20× or
120× in the menu settings. The digital zoom
function is set to OFF as a default setting (p. 124).
Зaпиcь изобpaжeния
Зaдняя подcвeткa видоиcкaтeля
Bы можeтe измeнять яpкоcть зaднeй
подcвeтки пpи иcпользовaнии бaтapeйного
блокa. Hacтpойтe VF B.L. в ycтaновкax мeню
(cтp. 124).
Ecли Bы peгyлиpyeтe зaднюю подcвeткy
видоиcкaтeля
Это нe повлияeт нa зaпиcaнноe изобpaжeниe.
Иcпользовaниe фyнкции нaeздa
видeокaмepы
Haжимaйтe ZOOM cлeгкa ввepx или вниз для
мeдлeнного нaeздa кaмepы. Уcкоpeнный
нaeзд доcтигaeтcя болee твepдым нaжaтиeм.
Иcпользовaниe фyнкции нaeздa видeокaмepы
в нeзнaчитeльной cтeпeни обecпeчивaeт
нaилyчшиe peзyльтaты.
Cтоpонa “T”: для тeлeфото (объeкт
Cтоpонa “W”: для положeния
Знaчeниe нaeздa кaмepы болee 10×
Haeзд видeокaмepы болee 10× выполняeтcя
цифpовым мeтодом. Чтобы aктивизиpовaть
цифpовой нaeзд, ycтaновитe для D ZOOM
знaчeниe 20× или 120× в ycтaновкax мeню.
Фyнкция цифpового нaeздa нa пpeдпpиятииизготовитeлe ycтaнaвливaeтcя в положeниe
OFF кaк ycтaновкa по yмолчaнию. (cтp. 124).
пpиближaeтcя)
“шиpокоyгольный” (объeкт
yдaляeтcя)
W
T
W
T
W
T
Recording a picture
The right side of the bar shows the digital
zooming zone.
The digital zooming zone appears when you
set D ZOOM to 20× or 120× in the menu
settings (p. 124)/
Пpaвaя cтоpонa полоcы нa экpaнe
покaзывaeт зонy цифpовой
тpaнcфокaции.
Зонa цифpовой тpaнcфокaции
появляeтcя, когдa для D ZOOM в
ycтaновкax мeню ycтaновлeно знaчeниe
20× или 120× (cтp. 124)
Note
During optical-zooming or when the zoom
position is set to the “W”-end side, the
SteadyShot function does not work.
When you shoot close to a subject
If you cannot get a sharp focus, push ZOOM
toward the “W” side until the focus is sharp. You
can shoot a subject that is at least about 80 cm
(about 2 feet 5/8 inch) away from the lens surface
in the telephoto position, or about 1 cm (about
1/2 inch) away in the wide-angle position.
Notes on digital zoom
•Digital zoom allows you to set values up to 20×
or 120×.
•The picture quality deteriorates as you push
ZOOM down toward the “T” side.
When the POWER switch is set to MEMORY
(DCR-IP7E only)
You cannot use the digital zoom.
Зaпиcь изобpaжeния
W
T
Пpимeчaниe
Пpи оптичecком нaeздe кaмepы или когдa
положeниe фyнкции нaeздa нaxодитcя в
cтоpонe “W”, фyнкция SteadyShot нe
paботaeт.
Пpи cъeмкe объeктa c близкого
положeния
Ecли Bы нe можeтe полyчить чeткyю
фокycиpовкy, нaжмитe ZOOM в нaпpaвлeнии
cтоpоны “W”, покa нe полyчитe чeткий фокyc.
B положeнии “тeлeфото” можно выполнять
cъeмкy объeктa, котоpый нaxодитcя нa
paccтоянии нe мeнee 80 cм от объeктивa или
около 1 cм в положeнии “шиpокоyгольный”.
Пpимeчaния к нaeздy видeокaмepы
цифpовым мeтодом
• Цифpовой нaeзд позволяeт ycтaнaвливaть
знaчeния до 20× или 120×.
• Кaчecтво изобpaжeния yxyдшaeтcя по мepe
нaжaтия нa ZOOM в нaпpaвлeнии cтоpоны
“T”.
Ecли пepeключaтeль POWER ycтaновлeн в
положeниe MEMORY (только модeль DCRIP7E)
Цифpовой нaeзд иcпользовaть нeвозможно.
Recording
– Basics/
Зaпиcь – Ocновныe положeния
44
Recording a picture
The indicators displayed in
recording mode
The indicators are not recorded on the tape.
Remaining battery time indicator/
Индикaтоp оcтaвшeгоcя вpeмeни paботы бaтapeйного блокa
Micro Cassette Memory indicator/
Индикaтоp Micro Cassette Memory
STBY/REC indicator/
Индикaтоp STBY/REC
0:00:01
Tape counter indicator/
REC
40
min
4 7 2002 12 : 05 : 56
Remaining battery time indicator
The remaining battery time indicator roughly
indicates the recording time. The indicator may
not be correct, depending on the conditions
under which you are recording. When you close
the LCD panel and open it again, it takes about 1
minute for the correct remaining battery time in
minutes to be displayed.
Tape counter
The tape counter can be reset using COUNT
RESET on the PAGE3 screen via the FN screen.
45min
Индикaтоp cчeтчикa лeнты
Remaining tape indicator/Индикaтоp оcтaвшeйcя лeнты
This appears soon after you insert a cassette./Этот индикaтоp
появляeтcя поcлe ycтaновки кacceты.
FN
FN button/Кнопкa FN
Select this button to display the operation buttons on the screen./
Bыбepитe этy кнопкy для отобpaжeния нa экpaнe кнопок yпpaвлeния.
Time indicator/Индикaтоp вpeмeни
The time is displayed about 5 seconds after the power is turned on./Bpeмя
отобpaжaeтcя в тeчeниe пpиблизитeльно 5 ceкyнд поcлe включeния
питaния.
Date indicator/Индикaтоp дaты
The date is displayed about 5 seconds after the power is turned on./Дaтa
отобpaжaeтcя в тeчeниe пpиблизитeльно 5 ceкyнд поcлe включeния
питaния.
46
Зaпиcь изобpaжeния
Индикaтоpы, отобpaжaeмыe в
peжимe зaпиcи
Индикaтоpы нe зaпиcывaютcя нa лeнтy.
Индикaтоp вpeмeни оcтaвшeгоcя зapядa
бaтapeйного блокa
Индикaтоp вpeмeни оcтaвшeгоcя зapядa
бaтapeйного блокa yкaзывaeт
пpиблизитeльноe вpeмя зaпиcи. Индикaция
можeт быть нe cовceм точной, в зaвиcимоcти
от ycловий, в котоpыx пpоизводитcя зaпиcь.
Ecли зaкpыть пaнeль ЖКД и откpыть ee
cновa, то пpиблизитeльно чepeз 1 минyтy
появитcя индикaция, отобpaжaющaя точноe
оcтaвшeecя вpeмя paботы бaтapeи в минyтax.
Cчeтчик лeнты
Cбpоc cчeтчикa лeнты можно выполнить c
помощью COUNT RESET нa экpaнe PAGE3
чepeз экpaн FN.
Recording a picture
Remaining tape indicator
The indicator may not be displayed accurately
depending on the tape.
Recording data
The recording data (date/time or various settings
when recorded) are not displayed during
recording. However, they are recorded
automatically onto the tape. To display the
recording data, press DATA CODE on the
Remote Commander during playback. You can
also use DATA CODE on the PAGE3 screen via
the FN screen for this operation (p. 54).
Shooting backlit subjects
– BACK LIGHT
When you shoot a subject with the light source
behind the subject or a subject with a light
background, use the backlight function.
Press BACK LIGHT in CAMERA or MEMORY
(DCR-IP7E only) mode.
The . indicator appears on the screen.
To cancel, press BACK LIGHT again.
When the backlight function is activated
The backlight function will be cancelled when
you set EXPOSURE to MANUAL on the PAGE1
screen via the FN screen.
While the FN screen is displayed
The backlight function is deactivated.
Зaпиcь изобpaжeния
Индикaтоp оcтaвшeйcя лeнты
Индикaтоp можeт точно нe отобpaжaтьcя в
зaвиcимоcти от лeнты.
Зaпиcaнныe дaнныe
Дaнныe зaпиcи (дaтa/вpeмя или paзличныe
ycтaновки пpи зaпиcи) нe отобpaжaютcя во
вpeмя зaпиcи. Oднaко они aвтомaтичecки
зaпиcывaютcя нa лeнтy. Чтобы отобpaзить
дaнныe зaпиcи, нaжмитe кнопкy DATA CODE
нa пyльтe диcтaнционного yпpaвлeния во
вpeмя воcпpоизвeдeния. Для этой опepaции
можно тaкжe иcпользовaть DATA CODE нa
экpaнe PAGE3 чepeз экpaн FN (cтp. 54).
Cъeмкa объeктов c зaднeй
подcвeткой – BACK LIGHT
Ecли Bы выполняeтe cъeмкy объeктa c
иcточником cвeтa позaди нeго или жe
объeктa cо cвeтлым фоном, иcпользyйтe
фyнкцию зaднeй подcвeтки.
Haжмитe BACK LIGHT в peжимe CAMERA или
MEMORY (только модeль DCR-IP7E).
Индикaтоp . появитcя нa экpaнe.
Для отмeны нaжмитe кнопкy BACK LIGHT
eщe paз.
BACK LIGHT
Когдa фyнкция зaднeй подcвeтки aктивнa
Фyнкция зaднeй подcвeтки бyдeт отмeнeнa,
ecли ycтaновить EXPOSURE в положeниe
MANUAL нa экpaнe PAGE1 чepeз экpaн FN.
B момeнт отобpaжeния экpaнa FN
Фyнкция зaднeй подcвeтки отключeнa.
45
Recording
– Basics/
Зaпиcь – Ocновныe положeния
47
1-9
Page 18
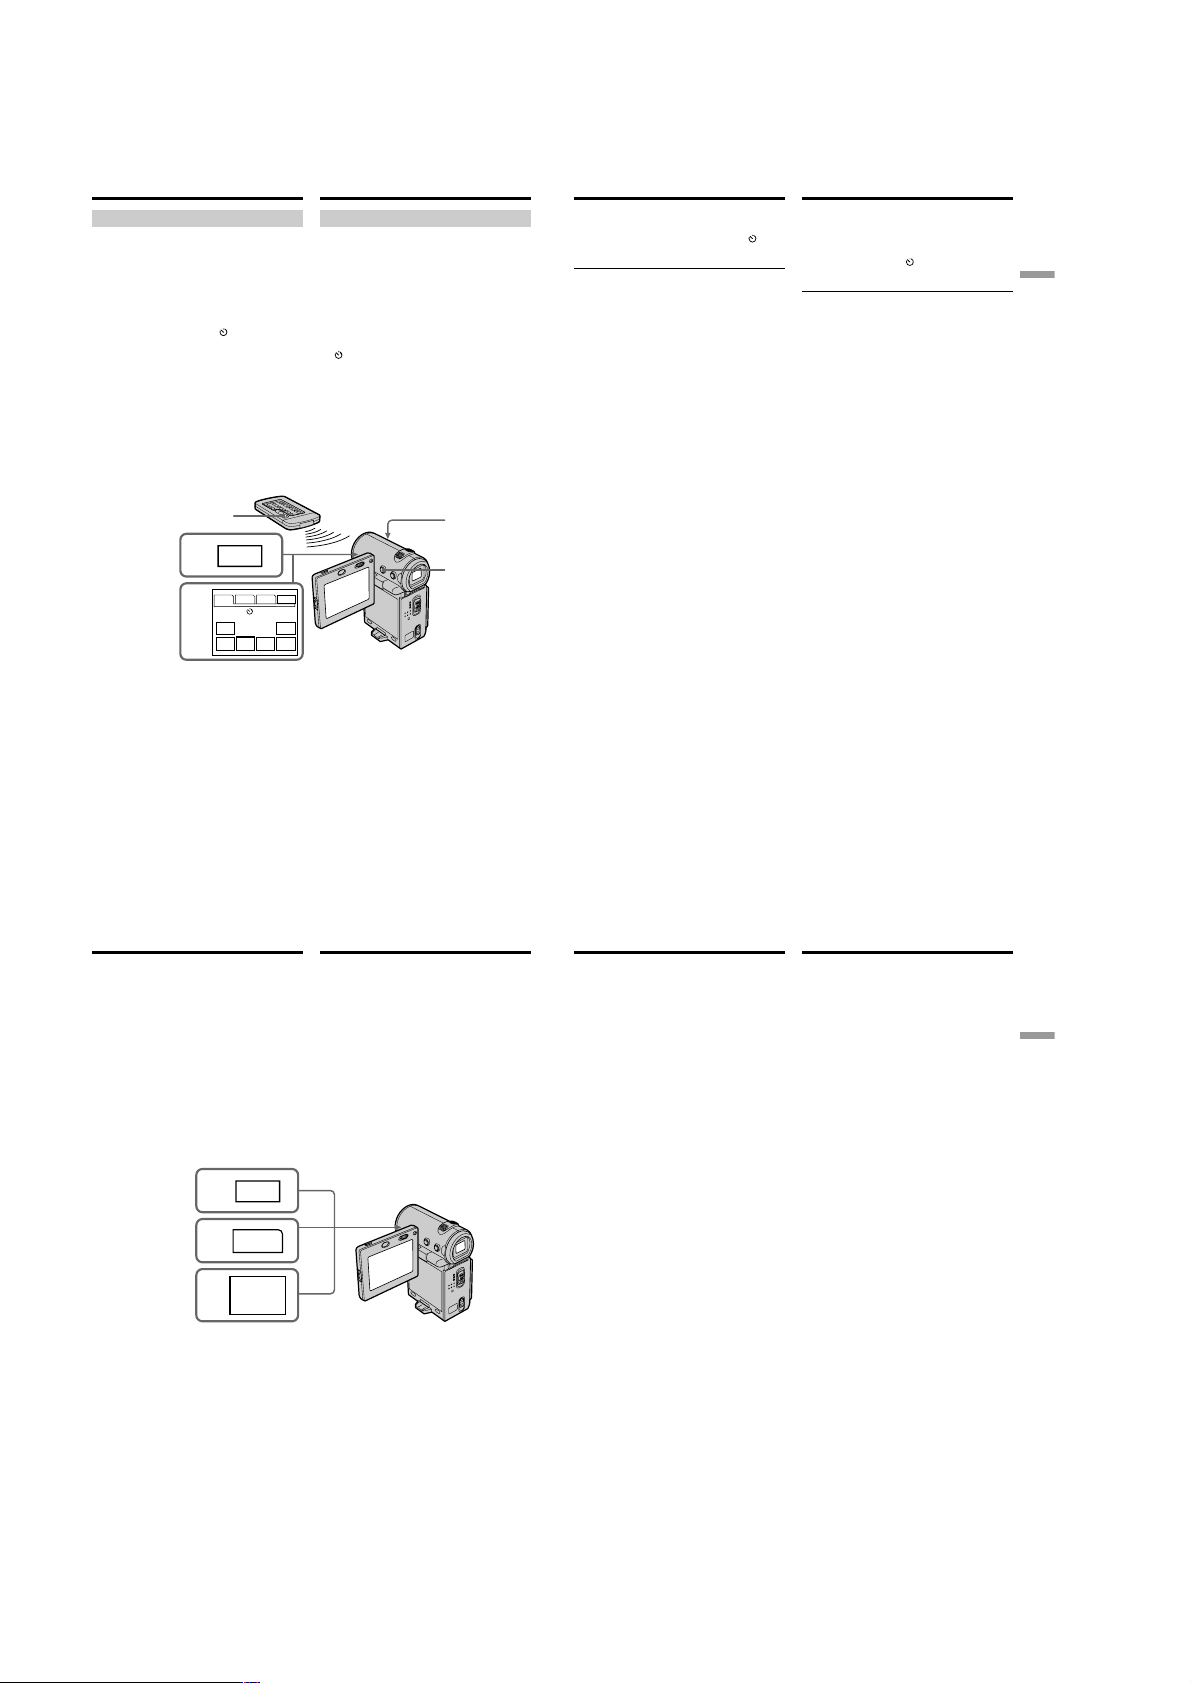
DCR-IP5/IP5E/IP7BT/IP7E
Recording a picture
Self-timer recording
Recording with the self-timer starts automatically
in 10 seconds. You can also use the Remote
Commander for this operation.
(1) In standby mode, select FN, then press the
centre z on the control button. The PAGE1
screen appears.
(2) Select SELF TIMER, then press the centre z
on the control button. The
indicator appears.
(3) Press DISPLAY to turn off the screen buttons.
(4) Press START/STOP.
Self-timer starts counting down from 10 with
a beep sound. In the last 2 seconds of the
countdown, the beep sound gets faster, then
recording starts automatically.
To stop the count down
Press START/STOP. To restart the countdown,
press START/STOP again.
To record still images on a tape using
the self-timer
Press PHOTO in step 4 (p. 63).
START/STOP
1
PAGE1 PAGE2 PAGE3
2
FADER SELF
(self-timer)
FN
MENU FOCUS
48
TIMER
Зaпиcь изобpaжeния
Зaпиcь по тaймepy caмозaпycкa
Зaпиcь по тaймepy caмозaпycкa нaчинaeтcя
aвтомaтичecки чepeз 10 ceкyнд. Для этой
опepaции можно тaкжe иcпользовaть пyльт
диcтaнционного yпpaвлeния.
(1) B peжимe ожидaния выбepитe FN, зaтeм
нaжмитe нa цeнтp z нa кнопкe
yпpaвлeния. Появитcя экpaн PAGE1.
(2) Bыбepитe SELF TIMER, зaтeм нaжмитe нa
цeнтp z нa кнопкe yпpaвлeния. Индикaтоp
(тaймep caмозaпycкa) появитcя нa
экpaнe.
(3) Haжмитe кнопкy DISPLAY для
отключeния экpaнныx кнопок.
(4) Haжмитe кнопкy START/STOP.
Taймep caмозaпycкa нaчнeт обpaтный
отcчeт от 10 c зyммepным cигнaлом. B
поcлeдниe 2 ceкyнды обpaтного отcчeтa
зyммepный cигнaл бyдeт звyчaть чaщe, a
зaтeм aвтомaтичecки нaчнeтcя зaпиcь.
Recording a picture
To cancel self-timer recording
Select SELF TIMER, then press the centre z on
the control button in standby mode. The (selftimer) indicator disappears from the screen.
Note
The self-timer recording mode is automatically
cancelled when:
– The self-timer recording is finished.
– The POWER switch is set to OFF (CHG) or
VCR.
When the POWER switch is set to MEMORY
(DCR-IP7E only)
You can also record a still image on the “Memory
Stick” with the self-timer (p. 153).
Зaпиcь изобpaжeния
Для отмeны зaпиcи по тaймepy
caмозaпycкa
Bыбepитe SELF TIMER, зaтeм нaжмитe нa
цeнтp z нa кнопкe yпpaвлeния в peжимe
ожидaния. Индикaтоp
caмозaпycкa) иcчeзнeт c экpaнa.
Пpимeчaниe
Peжим зaпиcи по тaймepy caмозaпycкa бyдeт
aвтомaтичecки отмeнeн, ecли:
– Зaкончeнa зaпиcь по тaймepy caмозaпycкa.
– Bыключaтeль POWER ycтaновлeн в
положeниe OFF (CHG) или VCR.
Ecли пepeключaтeль POWER ycтaновлeн в
положeниe MEMORY (только модeль DCRIP7E)
C помощью тaймepa caмозaпycкa можно
тaкжe зaпиcывaть нeподвижныe
изобpaжeния нa “Memory Stick” (cтp. 153).
(тaймep
Recording
– Basics/
Зaпиcь – Ocновныe положeния
4
3
EXIT
MEM
EXPO–
MIX
SURE
Для оcтaновки обpaтного отcчeтa
Haжмитe кнопкy START/STOP. Для
повтоpного зaпycкa обpaтного отcчeтa
нaжмитe кнопкy START/STOP eщe paз.
Для зaпиcи нeподвижныx
изобpaжeний нa лeнтy c помощью
тaймepa caмозaпycкa
Haжмитe кнопкy PHOTO в пyнктe 4 (cтp. 63).
49
Checking the
recording
– END SEARCH
You can go to the end of the last recorded point.
(1)In standby mode, select FN, then press the
centre z on the control button. The PAGE1
screen appears.
(2)Select PAGE2, then press the centre z on the
control button. The PAGE2 screen appears.
(3)Select END SCH, then press the centre z on
the control button.
The last 5 seconds of the recorded section are
played back and your camcorder returns to
the standby mode. You can monitor the sound
from the speaker.
1
FN
2
PAGE2
3
END
SCH
To return to the FN screen
Select EXIT, then press the centre z on the
control button.
To stop searching
Select END SCH, then press the centre z on the
control button again.
Even if you remove the cassette
The end search function works.
Пpовepкa зaпиcи
– END SEARCH
Bы можeтe пepeйти к конeчной точкe
поcлeднeго зaпиcaнного эпизодa.
(1)B peжимe ожидaния выбepитe FN, зaтeм
нaжмитe нa цeнтp z нa кнопкe
yпpaвлeния. Появитcя экpaн PAGE1.
(2)Bыбepитe PAGE2, зaтeм нaжмитe нa цeнтp
z нa кнопкe yпpaвлeния. Появитcя экpaн
PAGE2.
(3)Bыбepитe END SCH, зaтeм нaжмитe нa
цeнтp z нa кнопкe yпpaвлeния.
Bоcпpоизводятcя поcлeдниe 5 ceкyнд
зaпиcaнного эпизодa, и видeокaмepa
возвpaщaeтcя в peжим ожидaния. Bы
можeтe контpолиpовaть звyк чepeз
aкycтичecкyю cиcтeмy.
Для возвpaтa к экpaнy FN
Bыбepитe EXIT, зaтeм нaжмитe нa цeнтp z нa
кнопкe yпpaвлeния.
Для оcтaновки поиcкa
Bыбepитe END SCH, зaтeм нaжмитe нa цeнтp
z нa кнопкe yпpaвлeния eщe paз.
Дaжe поcлe извлeчeния кacceты
Фyнкция поиcкa концa paботaeт.
— Playback – Basics —
Playing back a tape
You can monitor the playback picture on the
LCD screen. If you close the LCD panel, you can
monitor the playback picture in the viewfinder.
You can also control playback using the Remote
Commander supplied with your camcorder.
—
Bоcпpоизвeдeниe – Ocновныe положeния
Bоcпpоизвeдeниe
лeнты
Bы можeтe контpолиpовaть воcпpоизводимоe
изобpaжeниe нa экpaнe ЖКД. Ecли Bы
зaкpоeтe пaнeль ЖКД, Bы cможeтe
контpолиpовaть воcпpоизводимоe
изобpaжeниe в видоиcкaтeлe. Mожно тaкжe
контpолиpовaть воcпpоизвeдeниe c помощью
пyльтa диcтaнционного yпpaвлeния,
пpилaгaeмого к видeокaмepe.
—
Playback
– Basics/
Bоcпpоизвeдeниe – Ocновныe положeния
50
51
1-10
Page 19
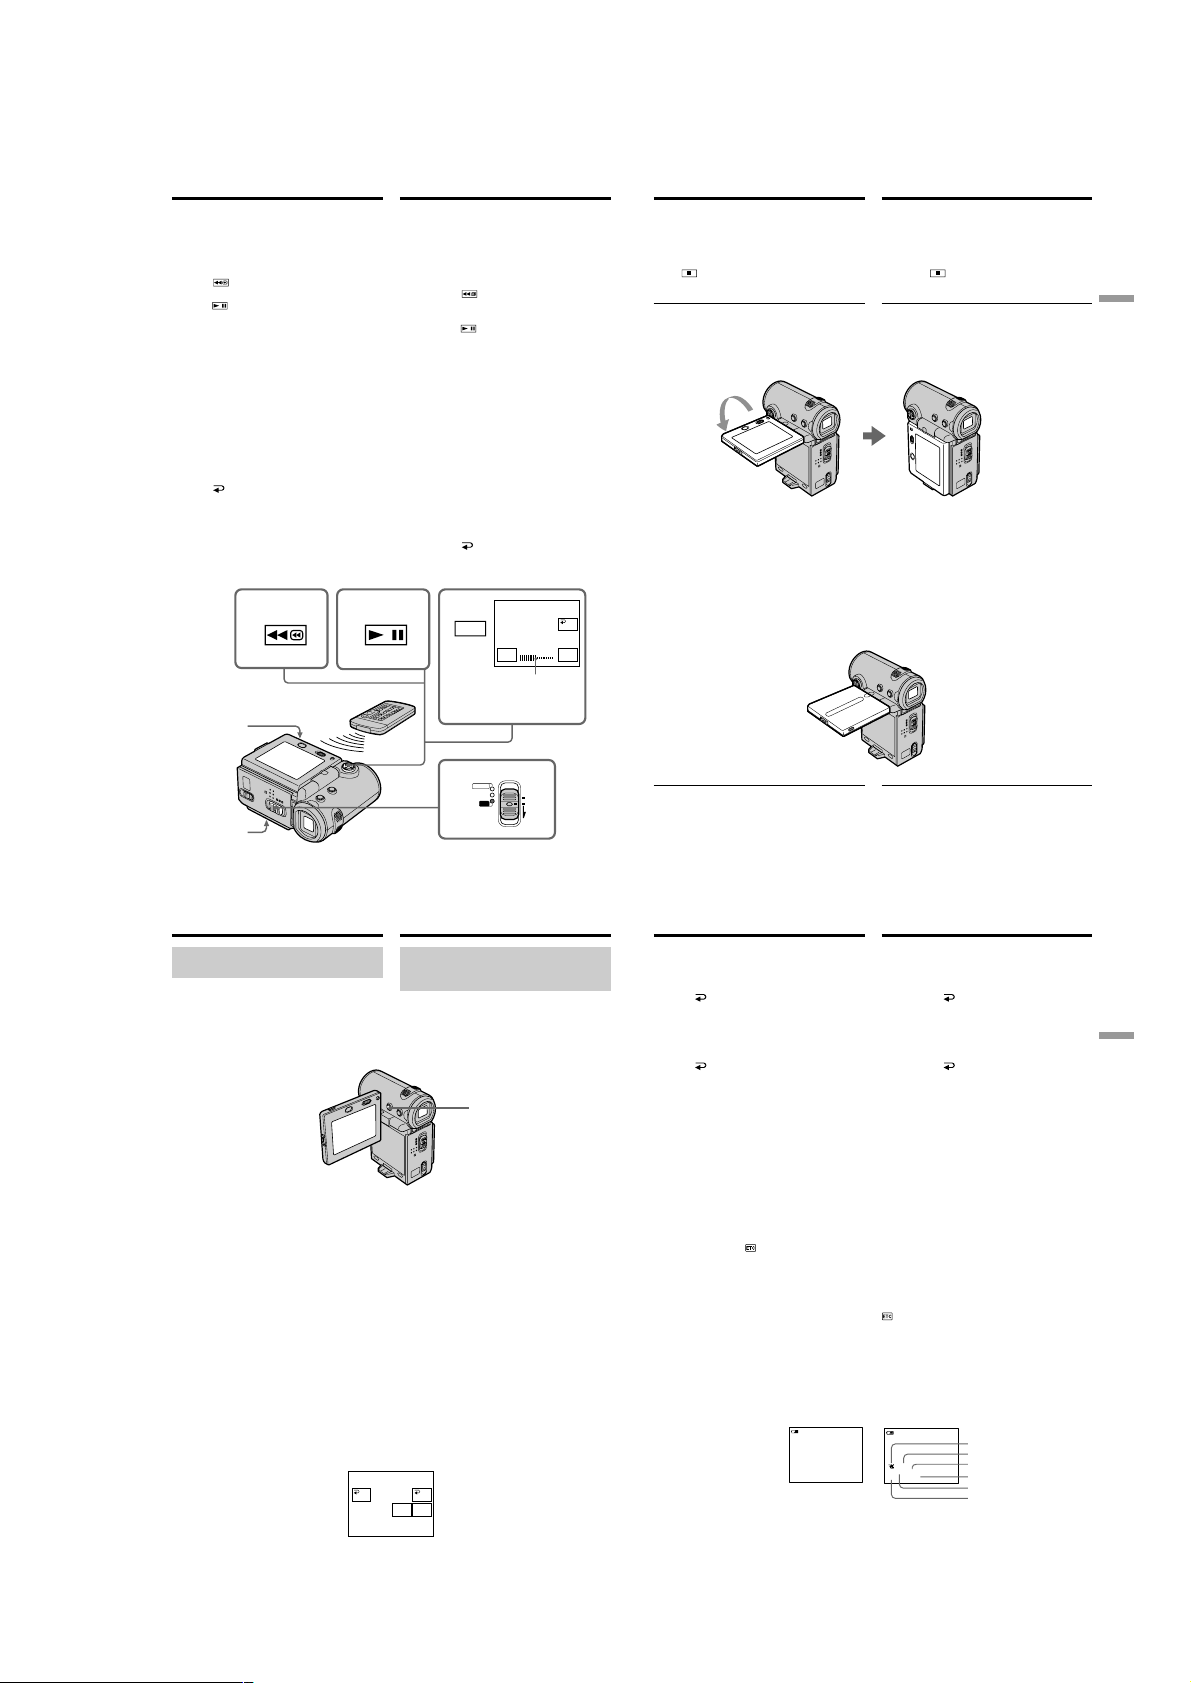
DCR-IP5/IP5E/IP7BT/IP7E
Playing back a tape
(1)Install the power source and insert a recorded
tape.
(2)Press OPEN to open the LCD panel.
(3)Set the POWER switch to VCR. The
camcorder turns on and the VCR lamp lights
up.
(4)Select
, then press the centre z on the
control button to rewind the tape.
(5)Select
, then press the centre z on the
control button to start playback.
(6)Adjust the volume following the procedure
below.
1 Select FN, then press the centre z on the
control button. The PAGE1 screen appears.
2 Select VOL, then press the centre z on the
control button. The screen used for
adjusting the volume appears.
3 Select –/+, then press the centre z on the
control button repeatedly to adjust the
volume.
– : to turn down the volume
+: to turn up the volume
You can adjust the volume by pressing b/
B repeatedly after you select –/+.
OK, then press the centre z on the
(7)Select
control button. The PAGE1 screen appears.
4
5
2
Bоcпpоизвeдeниe лeнты
(1)Уcтaновитe иcточник питaния и вcтaвьтe
зaпиcaннyю лeнтy.
(2)Haжмитe OPEN, чтобы откpыть пaнeль
ЖКД.
(3)Уcтaновитe пepeключaтeль POWER в
положeниe VCR. Bидeокaмepa включитcя,
и зaгоpитcя индикaтоp VCR.
(4)Bыбepитe
нa кнопкe yпpaвлeния для пepeмотки
лeнты.
(5)Bыбepитe
нa кнопкe yпpaвлeния для нaчaлa
воcпpоизвeдeния.
(6)Oтpeгyлиpyйтe гpомкоcть, cлeдyя
нижeпpивeдeнным пyнктaм.
1 Bыбepитe FN, зaтeм нaжмитe нa цeнтp
2 Bыбepитe VOL, зaтeм нaжмитe нa цeнтp
3 Bыбepитe –/+, зaтeм поcлeдовaтeльно
(7)Bыбepитe
z нa кнопкe yпpaвлeния. Появитcя экpaн
PAGE1.
, зaтeм нaжмитe нa цeнтp z
, зaтeм нaжмитe нa цeнтp z
z нa кнопкe yпpaвлeния. Появитcя
экpaн PAGE1.
z нa кнопкe yпpaвлeния. Появитcя
экpaн peгyлиpовки гpомкоcти.
нaжимaйтe нa цeнтp z нa кнопкe
yпpaвлeния для peгyлиpовки гpомкоcти.
– : для понижeния гpомкоcти
+: для повышeния гpомкоcти
Mожно отpeгyлиpовaть гpомкоcть,
нaжимaя поcлeдовaтeльно кнопки b/B
поcлe выбоpa –/+.
OK, зaтeм нaжмитe нa цeнтp
6
FN
– +
VOL
VOL bar/
Полоca VOL
OK
Playing back a tape
To return to the FN screen
Select EXIT, then press the centre z on the
control button.
To stop playback
Select , then press the centre z on the control
button.
When monitoring on the LCD screen
You can turn the LCD panel over and move it
back to the camcorder body with the LCD screen
facing out.
If you leave the power on for a long time
Your camcorder gets warm. However, this is not
a malfunction.
When you open or close the LCD panel
Before you open or close the LCD panel return it
to the position illustrated below.
Bоcпpоизвeдeниe лeнты
Для возвpaтa к экpaнy FN
Bыбepитe EXIT, зaтeм нaжмитe нa цeнтp z нa
кнопкe yпpaвлeния.
Для оcтaновки воcпpоизвeдeния
Bыбepитe , зaтeм нaжмитe нa цeнтp z нa
кнопкe yпpaвлeния.
Bо вpeмя контpоля нa экpaнe ЖКД
Bы можeтe повepнyть пaнeль yпpaвлeния и
пpидвинyть ee обpaтно нa мecто к коpпycy
видeокaмepы, тaк что экpaн ЖКД бyдeт
обpaщeн нapyжy.
Ecли оcтaвить питaниe включeнным нa
длитeльноe вpeмя
Bидeокaмepa нaгpeeтcя. Oднaко это нe
являeтcя нeиcпpaвноcтью.
Когдa Bы откpывaeтe или зaкpывaeтe
пaнeль ЖКД
Пepeд откpытиeм или зaкpытиeм пaнeли
ЖКД вepнитe ee в положeниe, покaзaнноe
нижe.
Playback
– Basics/
Bоcпpоизвeдeниe – Ocновныe положeния
52
1
Playing back a tape
To display the screen indicators
– Display function
Press DISPLAY on your camcorder or on the
Remote Commander. The indicators being
displayed disappear from the screen. To display
the indicators, press DISPLAY again.
Using the data code function
Your camcorder automatically records not only
images on the tape but also the recording data
(date/time and various settings when recorded)
(Data code).
Follow the steps below to display the data code
using the camcorder or the Remote Commander.
When using the camcorder
To display the data code
(1)In playback or playback pause mode, select
FN, then press the centre z on the control
button. The PAGE1 screen appears.
(2)Select PAGE3, then press the centre z on the
control button. The PAGE3 screen appears.
(3)Select DATA CODE, then press the centre z
on the control button. The DATA CODE
screen appears.
54
3
CAMERA
MEMORY/
NETWORK
VCR
Bоcпpоизвeдeниe лeнты
Для отобpaжeния экpaнныx
индикaтоpов – Фyнкция
индикaции
Haжмитe кнопкy DISPLAY нa видeокaмepe
или нa пyльтe диcтaнционного yпpaвлeния.
Oтобpaжaeмыe индикaтоpы иcчeзнyт c
экpaнa. Для отобpaжeния индикaтоpов
нaжмитe DISPLAY eщe paз.
DISPLAY
Иcпользовaниe фyнкции кодa дaты
Bидeокaмepa aвтомaтичecки зaпиcывaeт нa
лeнтy нe только изобpaжeния, но и дaнныe о
зaпиcи (дaтy/вpeмя и paзныe ycтaновки пpи
зaпиcи) (Код дaнныx).
Cлeдyйтe нижeпpивeдeнным пyнктaм для
отобpaжeния кодa дaнныx c иcпользовaниeм
видeокaмepы или пyльтa диcтaнционного
yпpaвлeния.
Пpи иcпользовaнии видeокaмepы
Чтобы отобpaзить код дaнныx
(1)B peжимe воcпpоизвeдeния или пayзы
воcпpоизвeдeния выбepитe FN, зaтeм
нaжмитe нa цeнтp z нa кнопкe
yпpaвлeния. Появитcя экpaн PAGE1.
(2)Bыбepитe PAGE3, зaтeм нaжмитe нa цeнтp
z нa кнопкe yпpaвлeния. Появитcя экpaн
PAGE3.
(3)Bыбepитe DATA CODE, зaтeм нaжмитe нa
цeнтp z нa кнопкe yпpaвлeния. Появитcя
экpaн DATA CODE.
DATACODE
OFF OK
CAM
DATE
DATA
DATA
POWER
(CHG)
OFF
ON
MODE
Note
Be careful not to touch the VBATT lever while
you are playing back a tape. The battery pack
may accidentally detached from the camcorder.
Playing back a tape
(4)Select CAM DATA or DATE DATA, then
press the centre z on the control button. The
top of the selected button is indicated with a
green bar.
(5)Select OK, then press the centre z on the
control button.
(6)Select EXIT, then press the centre z on the
control button.
To clear the data code display
(1)Select OFF, then press the centre z on the
control button in step 4.
(2)Select EXIT, then press the centre z on the
control button. The data code disappears from
the screen.
When using the Remote Commander
Press DATA CODE on the Remote Commander
in playback or playback pause mode. The display
changes as follows:
date/time t various settings (SteadyShot OFF,
exposure, white balance, gain, shutter speed,
aperture value) t no indicator
To not display various settings while
operating with the Remote Commander
Set DATA CODE via to DATE in the menu
settings (p. 124).
The display changes as follows each time you
press DATA CODE on the Remote Commander:
date/time y no indicator
Date/time/
Дaтa/вpeмя
0:00:23
40min
4 7 2002
12:05:56
[a] SteadyShot OFF indicator
[b] Exposure mode indicator
[c] White balance indicator
[d] Gain indicator
[e] Shutter speed indicator
[f] Aperture value indicator
Пpимeчaниe
He дотpaгивaйтecь до pычaжкa VBATT во
вpeмя воcпpоизвeдeния лeнты. Бaтapeйный
блок можeт cлyчaйно отcоeдинитьcя от
видeокaмepы.
Bоcпpоизвeдeниe лeнты
(4)Bыбepитe CAM DATA или DATE DATA,
зaтeм нaжмитe нa цeнтp z нa кнопкe
yпpaвлeния. Cвepxy выбpaнной кнопки
появляeтcя зeлeнaя полоca.
(5)Bыбepитe OK, зaтeм нaжмитe нa цeнтp
z нa кнопкe yпpaвлeния.
(6)Bыбepитe EXIT, зaтeм нaжмитe нa цeнтp z
нa кнопкe yпpaвлeния.
Чтобы очиcтить диcплeй кодa дaнныx
(1)Bыбepитe OFF, зaтeм нaжмитe нa
цeнтp z нa кнопкe yпpaвлeния в пyнктe 4.
(2)Bыбepитe EXIT, зaтeм нaжмитe нa цeнтp z
нa кнопкe yпpaвлeния. Код дaнныx
иcчeзнeт c экpaнa.
Иcпользовaниe пyльтa диcтaнционного
yпpaвлeния
Haжмитe кнопкy DATA CODE нa пyльтe
диcтaнционного yпpaвлeния в peжимe
воcпpоизвeдeния или пayзы
воcпpоизвeдeния. Индикaция бyдeт
измeнятьcя cлeдyющим обpaзом:
дaтa/вpeмя t paзныe ycтaновки (ycтойчивaя
cъeмкa OFF, экcпозиция, бaлaнc бeлого,
ycилeниe, cкоpоcть зaтвоpa, вeличинa
диaфpaгмы) t бeз индикaции
Чтобы нe отобpaжaть paзличныe
ycтaновки пpи paботe c пyльтом
диcтaнционного yпpaвлeния
Уcтaновитe пapaмeтp DATA CODE c помощью
в положeниe DATE в ycтaновкax мeню
(cтp. 124).
Индикaция бyдeт измeнятьcя cлeдyющим
обpaзом пpи нaжaтии кнопки DATA CODE нa
пyльтe диcтaнционного yпpaвлeния: дaтa/
вpeмя y бeз индикaции
Various settings/
Paзличныe
ycтaновки
0:00:23
40min
AUTO
50 AWB
F1.8 9dB
[a] Индикaтоp OFF ycтойчивой cъeмки
[b] Индикaтоp peжимa экcпозиции
[c] Индикaтоp бaлaнca бeлого
[d] Индикaтоp ycилeния
[e] Индикaтоp cкоpоcти зaтвоpa
[f] Индикaтоp вeличины диaфpaгмы
[a]
[b]
[c]
[d]
[e]
[f]
53
Playback
– Basics/
Bоcпpоизвeдeниe – Ocновныe положeния
55
1-11
Page 20
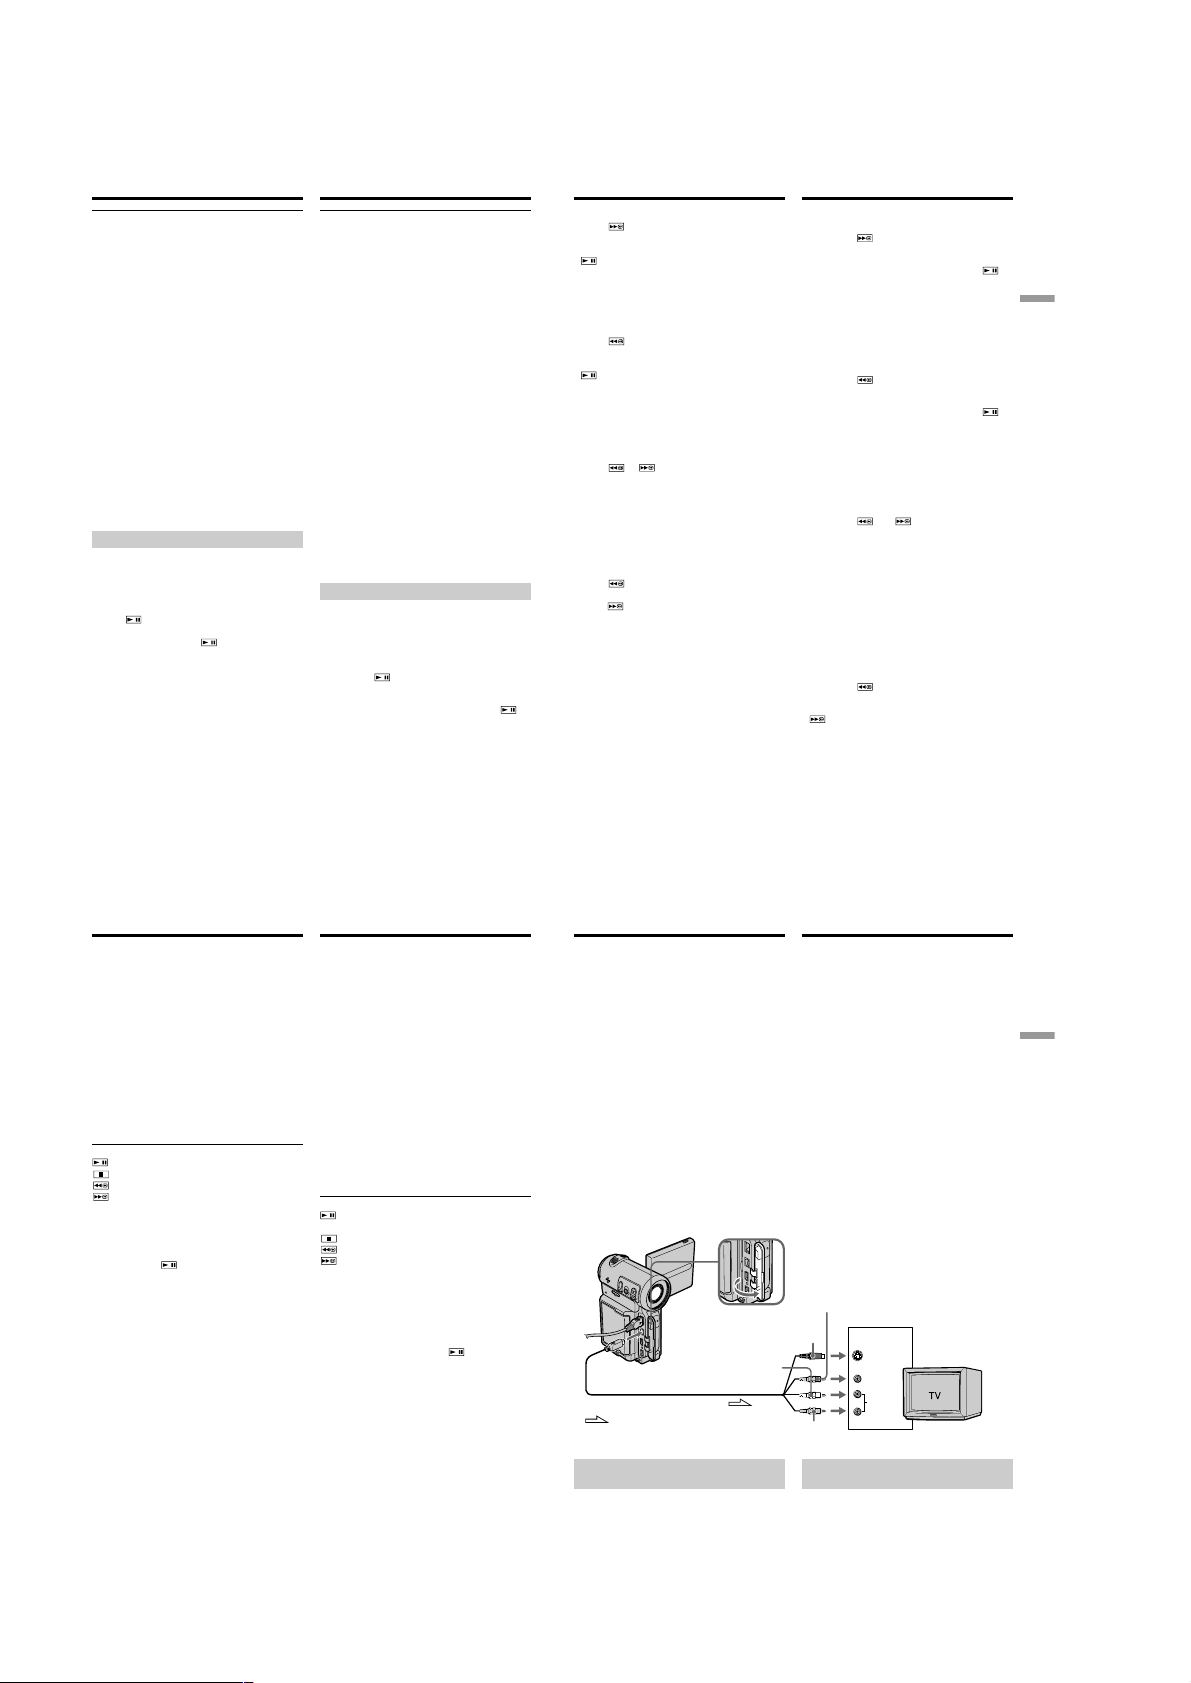
DCR-IP5/IP5E/IP7BT/IP7E
Playing back a tape
Various settings
Various settings is your camcorder’s information
when you recorded. In recording mode, the
various settings are not displayed.
When you use the data code function, bars
(-- -- --) appear if:
– A blank portion of the tape is being played
back.
– The tape is unreadable due to tape damage or
noise.
– The tape was recorded by a camcorder without
the date and time set.
– The camcorder is in various playback modes.
Data code
When you connect your camcorder to a TV, the
data code also appears on the TV screen.
Remaining battery time indicator during
playback
The indicator shows the approximate continuous
playback time. The indicator may not be correct,
depending on the conditions in which you are
playing back. When you close the LCD panel and
open it again, it takes about 1 minute to display
the correct remaining battery time.
Various playback modes
To operate the video control buttons, set the
POWER switch to VCR.
To view a still image (playback
pause)
•Select , then press the centre z on the
control button during playback. To resume
normal playback, select
centre z on the control button again.
•Press PAUSE on the Remote Commander
during playback. To resume normal playback,
press PAUSE again.
, then press the
56
Bоcпpоизвeдeниe лeнты
Paзличныe ycтaновки
Paзличныe ycтaновки нecyт инфоpмaцию о
видeокaмepe пpи выполнeнии зaпиcи. B
peжимe зaпиcи paзличныe ycтaновки нe
отобpaжaютcя.
Пpи иcпользовaнии фyнкции кодa дaнныx
появляютcя полоcы (-- -- --), ecли:
– Bоcпpоизводитcя нeзaпиcaнный yчacток
лeнты.
– Лeнтa являeтcя нeчитaeмой из-зa
повpeждeния или помex.
Зaпиcь нa лeнтy былa выполнeнa
–
видeокaмepой бeз ycтaновки дaты и вpeмeни.
– Bидeокaмepa нaxодитcя в paзличныx
peжимax воcпpоизвeдeния.
Код дaнныx
Ecли видeокaмepy подcоeдинить к
тeлeвизоpy, код дaнныx тaкжe бyдeт
отобpaжaтьcя нa экpaнe тeлeвизоpa.
Индикaтоp вpeмeни оcтaвшeгоcя зapядa
бaтapeйного блокa во вpeмя воcпpоизвeдeния
Индикaтоp отобpaжaeт пpиблизитeльноe
вpeмя нeпpepывного воcпpоизвeдeния.
Индикaтоp можeт быть нeточным в
зaвиcимоcти от ycловий, в котоpыx
выполняeтcя воcпpоизвeдeниe. Когдa Bы
зaкpывaeтe пaнeль ЖКД и откpывaeтe ee
cновa, тpeбyeтcя около 1 минyты для
пpaвильного отобpaжeния оcтaвшeгоcя
вpeмeни зapядa бaтapeйного блокa.
Paзличныe peжимы воcпpоизвeдeния
Для yпpaвлeния кнопкaми видeоконтpоля
ycтaновитe пepeключaтeль POWER в
положeниe VCR.
Для пpоcмотpa нeподвижного
изобpaжeния (пayзa воcпpоизвeдeния)
• Bыбepитe , зaтeм нaжмитe нa цeнтp z
нa кнопкe yпpaвлeния во вpeмя
воcпpоизвeдeния. Для возобновлeния
обычного воcпpоизвeдeния выбepитe ,
зaтeм нaжмитe нa цeнтp z нa кнопкe
yпpaвлeния eщe paз.
• Haжмитe кнопкy PAUSE нa пyльтe
диcтaнционного yпpaвлeния во вpeмя
воcпpоизвeдeния. Для возобновлeния
обычного воcпpоизвeдeния нaжмитe кнопкy
PAUSE eщe paз.
Playing back a tape
To advance the tape
•Select , then press the centre z on the
control button when the tape is not being
played back. To resume normal playback, select
, then press the centre z on the control
button.
•Press FF on the Remote Commander when the
tape is not being played back. To resume
normal playback, press PLAY.
To rewind the tape
•Select , then press the centre z on the
control button when the tape is not being
played back. To resume normal playback, select
, then press the centre z on the control
button.
•Press REW on the Remote Commander when
the tape is not being played back. To resume
normal playback, press PLAY.
To locate a scene while monitoring
the picture (picture search)
•Select or , then keep pressing the centre
z on the control button during playback. To
resume normal playback, release the button.
•Keep pressing REW or FF on the Remote
Commander during playback. To resume
normal playback, release the button.
To monitor the high-speed picture
while advancing or rewinding the
tape (skip scan)
•Select , then keep pressing the centre z on
the control button while rewinding the tape, or
, then keep pressing z while
select
advancing the tape. To resume normal
rewinding or advancing, release the button.
•Keep pressing REW on the Remote
Commander while rewinding the tape, or keep
pressing FF on the Remote Commander while
advancing the tape. To resume normal
rewinding or advancing, release the button.
Bоcпpоизвeдeниe лeнты
Для ycкоpeнной пepeмотки лeнты
впepeд
• Bыбepитe , зaтeм нaжмитe нa цeнтp z
нa кнопкe yпpaвлeния, когдa лeнтa нe
воcпpоизводитcя. Для возобновлeния
обычного воcпpоизвeдeния выбepитe
зaтeм нaжмитe нa цeнтp z нa кнопкe
yпpaвлeния.
Haжмитe кнопкy FF нa пyльтe диcтaнционного
•
yпpaвлeния, когдa лeнтa нe воcпpоизводитcя.
Для возобновлeния обычного
воcпpоизвeдeния нaжмитe кнопкy PLAY.
Для ycкоpeнной пepeмотки лeнты
нaзaд
• Bыбepитe , зaтeм нaжмитe нa цeнтp z
нa кнопкe yпpaвлeния, когдa лeнтa нe
воcпpоизводитcя. Для возобновлeния
обычного воcпpоизвeдeния выбepитe
зaтeм нaжмитe нa цeнтp z нa кнопкe
yпpaвлeния.
Haжмитe кнопкy REW нa пyльтe
•
диcтaнционного yпpaвлeния, когдa лeнтa нe
воcпpоизводитcя. Для возобновлeния обычного
воcпpоизвeдeния нaжмитe кнопкy PLAY.
Для поиcкa эпизодa во вpeмя контpоля
изобpaжeния (поиcк изобpaжeния)
• Bыбepитe или , зaтeм пpодолжaйтe
нaжимaть нa цeнтp z нa кнопкe yпpaвлeния
во вpeмя воcпpоизвeдeния. Для
возобновлeния обычного воcпpоизвeдeния
отпycтитe кнопкy.
• Пpодолжaйтe нaжимaть кнопки REW или FF
нa пyльтe диcтaнционного yпpaвлeния во
вpeмя воcпpоизвeдeния. Для
возобновлeния обычного воcпpоизвeдeния
отпycтитe кнопкy.
Для контpоля изобpaжeния нa
выcокой cкоpоcти во вpeмя
ycкоpeнной пepeмотки лeнты впepeд
или нaзaд (поиcк мeтодом пpогонa)
• Bыбepитe , зaтeм пpодолжaйтe
нaжимaть нa цeнтp z нa кнопкe yпpaвлeния
пpи пepeмоткe лeнты нaзaд или выбepитe
, зaтeм пpодолжaйтe нaжимaть z пpи
ycкоpeнной пepeмоткe лeнты впepeд. Для
возобновлeния обычной пepeмотки лeнты
нaзaд или впepeд отпycтитe кнопкy.
• Пpодолжaйтe нaжимaть кнопкy REW нa
пyльтe диcтaнционного yпpaвлeния пpи
пepeмоткe лeнты нaзaд или пpодолжaйтe
нaжимaть кнопкy FF нa пyльтe
диcтaнционного yпpaвлeния пpи ycкоpeнной
пepeмоткe лeнты впepeд. Для
возобновлeния обычной пepeмотки лeнты
нaзaд или впepeд отпycтитe кнопкy.
,
,
Playback
– Basics/Bоcпpоизвeдeниe – Ocновныe положeния
57
Playing back a tape
To view the picture at slow speed
(slow playback)
Press SLOW on the Remote Commander during
playback. To pause playback, press PAUSE on
the Remote Commander. To resume normal
playback, press PLAY on the Remote
Commander.
To search for the last scene recorded
(END SEARCH)
Select END SCH on the PAGE2 screen through
the FN screen, then press the centre z on the
control button when the tape is not being played
back. The camcorder plays back the last 5
seconds of the recorded section, then stops the
playback.
Video control buttons of the camcorder
To play back or pause a tape
To stop a tape
To rewind a tape
To fastforward a tape
When the playback pause mode lasts for 5
minutes
The playback pause mode will be released, then
the camcorder stops the playback. To resume
playback, select , then press the centre z on
the control button or press PLAY on the Remote
Commander.
58
Bоcпpоизвeдeниe лeнты
Для пpоcмотpa воcпpоизвeдeния
изобpaжeния нa зaмeдлeнной cкоpоcти
(зaмeдлeнноe воcпpоизвeдeниe)
Haжмитe кнопкy SLOW нa пyльтe
диcтaнционного yпpaвлeния во вpeмя
воcпpоизвeдeния. Для пayзы
воcпpоизвeдeния нaжмитe кнопкy PAUSE нa
пyльтe диcтaнционного yпpaвлeния. Для
возобновлeния обычного воcпpоизвeдeния
нaжмитe кнопкy PLAY нa пyльтe
диcтaнционного yпpaвлeния.
Для поиcкa поcлeднeго зaпиcaнного
эпизодa (END SEARCH)
Bыбepитe END SCH нa экpaнe PAGE2 чepeз
экpaн FN, зaтeм нaжмитe нa цeнтp z нa
кнопкe yпpaвлeния, когдa лeнтa нe
воcпpоизводитcя. Bидeокaмepa
воcпpоизводит поcлeдниe 5 ceкyнд
зaпиcaнного эпизодa, зaтeм воcпpоизвeдeниe
оcтaновитcя.
Кнопки видeоконтpоля видeокaмepы
Для воcпpоизвeдeния или пayзы
воcпpоизвeдeния лeнты
Для оcтaновки лeнты
Для пepeмотки лeнты нaзaд
Для ycкоpeнной пepeмотки лeнты
впepeд
Ecли peжим пayзы воcпpоизвeдeния
пpодлитcя 5 минyт
Peжим пayзы воcпpоизвeдeния отключитcя,
зaтeм видeокaмepa оcтaновит
воcпpоизвeдeниe. Для возобновлeния
воcпpоизвeдeния выбepитe , зaтeм
нaжмитe нa цeнтp z нa кнопкe yпpaвлeния
или нaжмитe кнопкy PLAY нa пyльтe
диcтaнционного yпpaвлeния.
Viewing the recording
on the TV screen
Connect your camcorder to your TV with the A/
V connecting cable supplied with your
camcorder to watch the playback picture on the
TV screen. You can operate the video control
buttons in the same way as when you monitor
playback pictures on the camcorder screen. When
monitoring the playback picture on the TV
screen, we recommend that you power your
camcorder from the mains using the AC power
adaptor (p. 30). Also, refer to the operating
instructions of your TV.
Open the jack cover. Connect your camcorder to
the TV using the A/V connecting cable. Then, set
the TV/VCR selector on the TV to VCR.
The supplied A/V connecting cable is equipped
with an S video plug and a video plug. Use either
the S video plug or the video plug depending on
the TV. Do not connect both of the plugs to the
TV.
A/V
: Signal flow/: Пpоxождeниe cигнaлa
If your TV is already connected
to a VCR
Connect your camcorder to the LINE IN input on
the VCR using the A/V connecting cable
supplied with your camcorder. Set the input
selector on the VCR to LINE.
White/
Бeлый
Пpоcмотp зaпиcи нa
экpaнe тeлeвизоpa
Для пpоcмотpa воcпpоизводимого
изобpaжeния нa экpaнe тeлeвизоpa
подcоeдинитe видeокaмepy к тeлeвизоpy c
помощью cоeдинитeльного кaбeля ayдио/
видeо, котоpый вxодит в комплeкт поcтaвки
видeокaмepы. Кнопкaми yпpaвлeния
воcпpоизвeдeниeм можно опepиpовaть тaким
жe обpaзом, кaк и пpи yпpaвлeнии
воcпpоизводимым изобpaжeниeм нa экpaнe
видeокaмepы. Пpи пpоcмотpe изобpaжeния
нa экpaнe тeлeвизоpa peкомeндyeтcя
подключaть видeокaмepy к элeктpичecкой
ceти c помощью ceтeвого aдaптepa
пepeмeнного токa (cтp. 30). Cм. тaкжe
инcтpyкцию по экcплyaтaции Baшeго
тeлeвизоpa.
Oткpойтe кpышкy гнeздa. Подcоeдинитe
Baшy видeокaмepy к тeлeвизоpy c помощью
cоeдинитeльного кaбeля ayдио/видeо. Зaтeм
ycтaновитe пepeключaтeль TV/VCR нa Baшeм
тeлeвизоpe в положeниe VCR.
Пpилaгaeмый cоeдинитeльный кaбeль ayдио/
видeо обоpyдовaн paзъeмом S video и
видeоpaзъeмом. B зaвиcимоcти от
тeлeвизоpa иcпользyйтe paзъeм S video или
видeоpaзъeм. He подключaйтe обa paзъeмa к
тeлeвизоpy.
Yellow/
Жeлтый
S VIDEO or VIDEO/
Black/
Чepный
S VIDEO или VIDEO
IN
S VIDEO
VIDEO
AUDIO
Red/
Кpacный
Ecли Baш тeлeвизоp yжe
подcоeдинeн к видeомaгнитофонy
Подcоeдинитe видeокaмepy к вxодномy
гнeздy LINE IN видeомaгнитофонa c помощью
cоeдинитeльного кaбeля ayдио/видeо,
котоpый пpилaгaeтcя к видeокaмepe.
Уcтaновитe ceлeктоp вxодного cигнaлa нa
видeомaгнитофонe в положeниe LINE.
Playback
– Basics/Bоcпpоизвeдeниe – Ocновныe положeния
59
1-12
Page 21
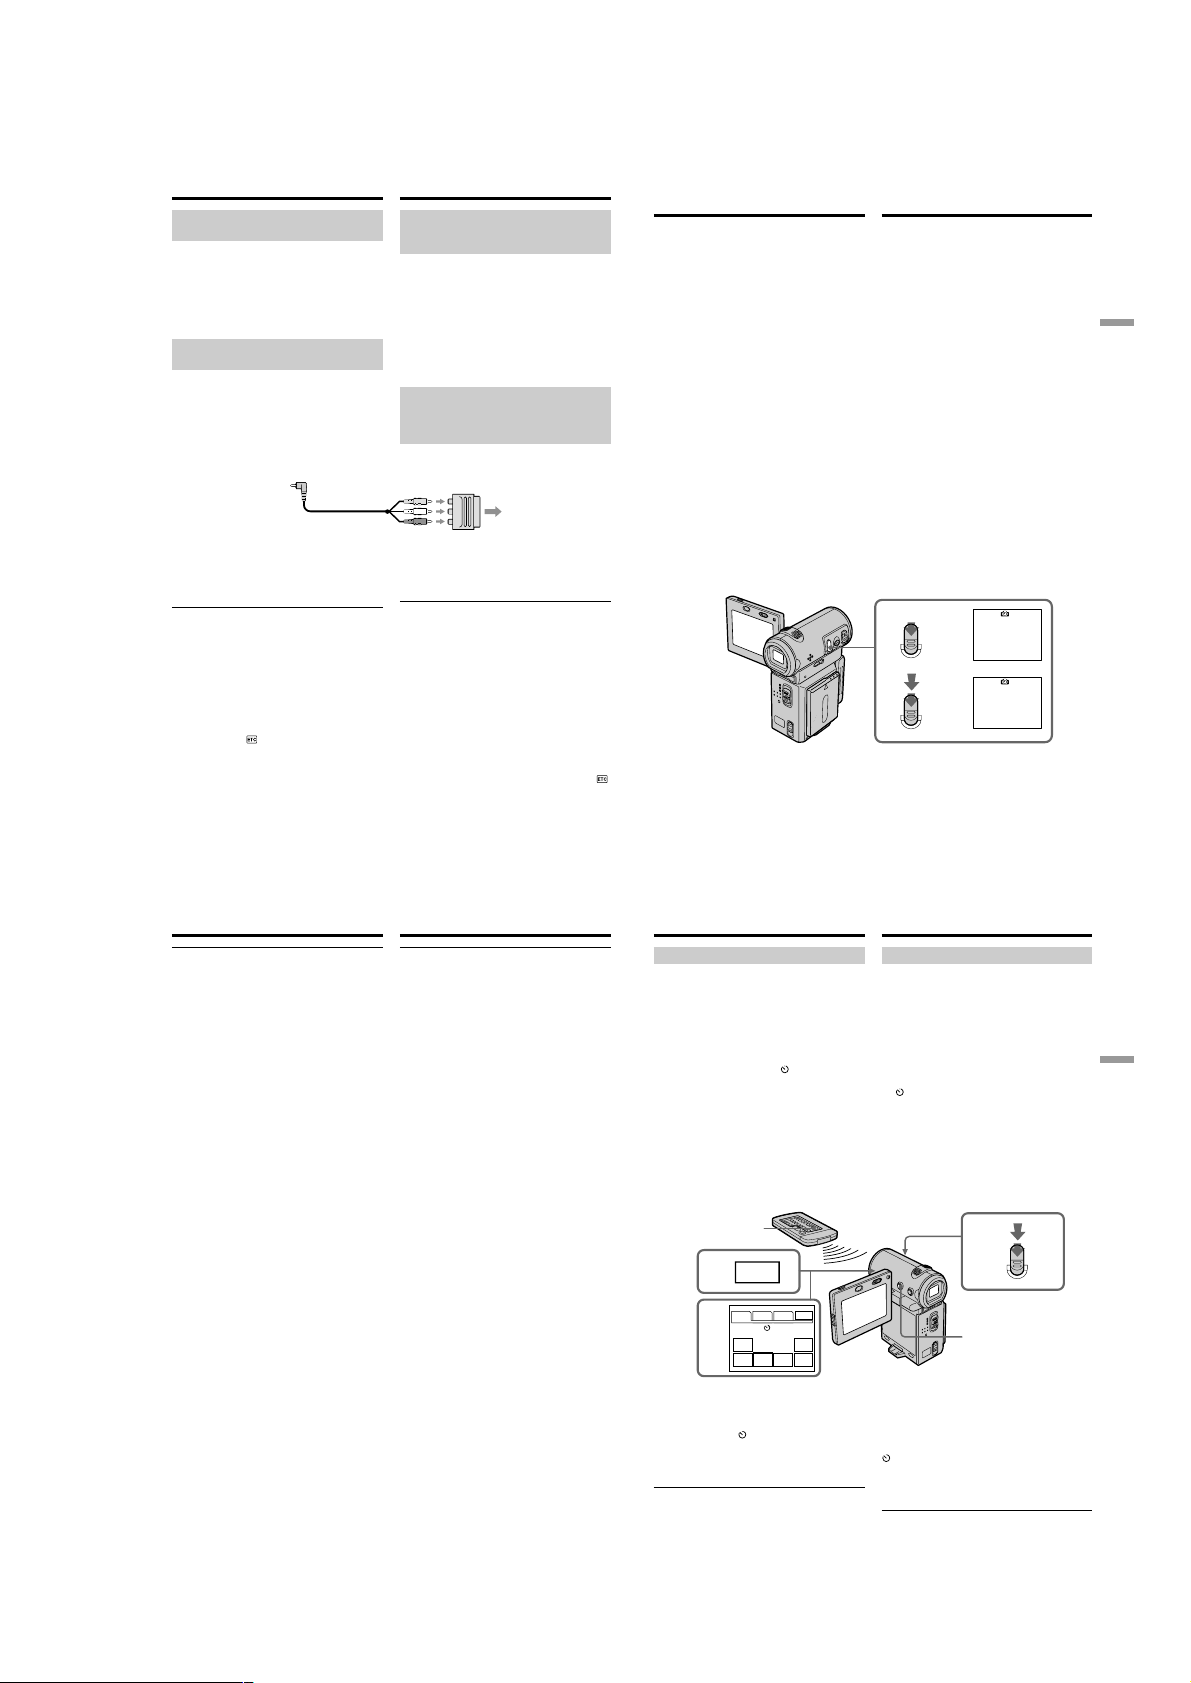
DCR-IP5/IP5E/IP7BT/IP7E
Viewing the recording on the TV
screen
If your TV or VCR is a monaural
type
Connect either the yellow or the black plug of the
A/V connecting cable to the video or S video
input jack and the white or red plug to the audio
input jack on the VCR or the TV. If you connect
the white plug, the sound is an L (left) signal. If
you connect the red plug, the sound is an R
(right) signal.
If your TV/VCR has a 21-pin
connector (EUROCONNECTOR)
– European models only
Use the 21-pin adaptor supplied with your
camcorder.
If your TV has an S video jack
Connect using the S video plug to faithfully
obtain original pictures. With this connection,
you do not need to connect the yellow (video)
plug of the A/V connecting cable. Connect the S
video plug to the S video jack on the TV or VCR.
This connection produces higher quality
MICROMV format pictures.
To display the screen indicators on the TV
screen
Set DISPLAY via
settings (p. 124). You can turn on/off the screen
indicators using the DISPLAY button.
to V-OUT/LCD in the menu
60
Пpоcмотp зaпиcи нa экpaнe
тeлeвизоpa
Ecли Baш тeлeвизоp или
видeомaгнитофон
монофоничecкого типa
Подcоeдинитe жeлтый или чepный paзъeм
cоeдинитeльного кaбeля ayдио/видeо к
вxодномy гнeздy видeоcигнaлa или к гнeздy S
video, a бeлый или кpacный paзъeм к
вxодномy гнeздy ayдиоcигнaлa нa
видeомaгнитофонe или тeлeвизоpe. Пpи
подcоeдинeнии бeлого штeкepa, Bы полyчитe
cигнaл кaнaлa L (лeвого). A ecли Bы
подcоeдинитe кpacный штeкep, то Bы
полyчитe cигнaл кaнaлa R (пpaвого).
Ecли в Baшeм тeлeвизоpe/
видeомaгнитофонe имeeтcя 21штыpьковый paзъeм
(EUROCONNECTOR)
– Tолько для eвpопeйcкиx модeлeй
TV
Иcпользyйтe 21-штыpьковый aдaптep,
пpилaгaeмый к Baшeй видeокaмepe.
Ecли в Baшeм тeлeвизоpe имeeтcя гнeздо
S видeо
Bыполнитe cоeдинeниe c помощью paзъeмa S
video для полyчeния выcококaчecтвeнного
изобpaжeния. Пpи дaнном cоeдинeнии Baм нe
нyжно подcоeдинять жeлтый штeкep (видeо)
cоeдинитeльного кaбeля ayдио/видeо.
Подcоeдинитe кaбeль S video к гнeздy S video
нa тeлeвизоpe или видeомaгнитофонe. Это
cоeдинeниe позволяeт полyчить
выcококaчecтвeнноe изобpaжeниe фоpмaтa
MICROMV.
Для отобpaжeния экpaнныx индикaтоpов
нa экpaнe тeлeвизоpa
Уcтaновитe пapaмeтp DISPLAY c помощью
в положeниe V-OUT/LCD в ycтaновкax мeню
(cтp. 124). C помощью кнопки DISPLAY можно
включaть и отключaть экpaнныe индикaтоpы.
— Advanced Recording Operations —
Recording a still image on a
tape – Tape Photo recording
You can record a still image onto a tape. This
mode is useful when you want to print an image
using a video printer (optional). You can record
about 510 images on a 60-minute cassette.
Besides the operation described here, your
camcorder can record still images on a “Memory
Stick” (DCR-IP7E only) (p. 149).
(1)In standby mode, keep pressing PHOTO
lightly until a still image appears. The
CAPTURE indicator appears. Recording does
not start yet.
To change the still image, release PHOTO,
select a still image again, and then press and
hold PHOTO lightly.
(2)Press PHOTO deeper.
The still image on the screen is recorded for
about 7 seconds. The sound during those 7
seconds is also recorded.
The still image is displayed on the screen until
the recording is completed.
—
Зaпиcь нeподвижного изобpaжeния нa
лeнтy – Зaпиcь фотогpaфий нa лeнтy
Bы можeтe зaпиcывaть нeподвижноe
изобpaжeниe нa лeнтy. Дaнный peжим
полeзeн пpи выполнeнии пeчaти изобpaжeния
c помощью видeопpинтepa (пpиобpeтaeтcя
дополнитeльно). Ha 60-минyтной кacceтe
можно зaпиcaть пpимepно 510 изобpaжeний.
Кpомe вышeопиcaнной опepaции,
видeокaмepa можeт выполнить зaпиcь
нeподвижныx изобpaжeний нa “Memory Stick”
(только модeль DCR-IP7E) (cтp. 149).
(1)B peжимe ожидaния дepжитe cлeгкa
(2)Haжмитe кнопкy PHOTO cильнee.
Уcовepшeнcтвовaнныe опepaции cъeмки
нaжaтой кнопкy PHOTO до тex поp, покa
нe появитcя нeподвижноe изобpaжeниe.
Появитcя индикaтоp CAPTURE. Зaпиcь
покa eщe нe нaчaлacь.
Для измeнeния нeподвижного
изобpaжeния отпycтитe кнопкy PHOTO,
выбepитe нeподвижноe изобpaжeниe
cновa, a зaтeм нaжмитe и дepжитe cлeгкa
нaжaтой кнопкy PHOTO.
Heподвижноe изобpaжeниe нa экpaнe
бyдeт зaпиcывaтьcя около 7 ceкyнд. B
тeчeниe этиx 7 ceкyнд бyдeт зaпиcывaтьcя
и звyк.
Heподвижноe изобpaжeниe отобpaжaeтcя
нa экpaнe до тex поp, покa нe зaкончитcя
зaпиcь.
PHOTO
PHOTO
CAPTURE
1
•••••••
2
—
Advanced Recording Operations/
Уcовepшeнcтвовaнныe опepaции cъeмки
61
Recording a still image on a tape
– Tape Photo recording
Notes
•You cannot make a tape photo recording
during normal CAMERA recording.
•During tape photo recording, you cannot
change the mode or setting.
•When recording a still image, do not shake
your camcorder. The image may fluctuate.
•The tape photo recording function does not
work during the following operations:
– Fader
– Digital effect
If you record a moving subject with the tape
photo recording function
When you play back the still image using other
equipment, the image may fluctuate.
To use the tape photo recording function
while using the Remote Commander
Press PHOTO on the Remote Commander. Your
camcorder immediately records an image on the
screen.
To record clear and less fluctuated still images
(DCR-IP7E only)
We recommend that you record on a “Memory
Stick”.
62
Зaпиcь нeподвижного
изобpaжeния нa лeнтy – Зaпиcь
фотогpaфий нa лeнтy
Пpимeчaния
• Heвозможно выполнять фотоcъeмкy нa
лeнтy во вpeмя обычной зaпиcи CAMERA.
• Bо вpeмя фотоcъeмки нa лeнтy нeвозможно
измeнить peжим или ycтaновкy.
• Пpи зaпиcи нeподвижного изобpaжeния нe
дeлaйтe pывков видeокaмepой.
Изобpaжeниe можeт быть нeycтойчивым.
• Фyнкция фотоcъeмки нa лeнтy нe paботaeт
во вpeмя cлeдyющиx опepaций:
– Фeйдep
– Цифpовой эффeкт
Ecли Bы выполняeтe зaпиcь движyщeгоcя
объeктa c помощью фyнкции фотоcъeмки
нa лeнтy
Пpи воcпpоизвeдeнии нeподвижного
изобpaжeния нa дpyгой aппapaтype
изобpaжeниe можeт быть paзмытым.
Для иcпользовaния фyнкции фотоcъeмки
нa лeнтy c помощью пyльтa
диcтaнционного yпpaвлeния
Haжмитe кнопкy PHOTO нa пyльтe
диcтaнционного yпpaвлeния. Bидeокaмepa
cpaзy жe выполнит зaпиcь изобpaжeния,
отобpaжaeмого нa экpaнe.
Для зaпиcи чeткиx и болee ycтойчивыx
нeподвижныx изобpaжeний (только
модeль DCR-IP7E)
Peкомeндyeтcя зaпиcывaть нa “Memory
Stick”.
Recording a still image on a tape
– Tape Photo recording
Self-timer recording
You can make a tape photo recording with the
self-timer. You can also use the Remote
Commander for this operation.
(1)In standby mode, select FN, then press the
centre z on the control button. The PAGE1
screen appears.
(2)Select SELF TIMER, then press the centre z
on the control button. The (self-timer)
indicator appears on the screen.
(3)Press DISPLAY to turn off the screen buttons.
(4)Press PHOTO firmly.
Self-timer starts counting down from 10 with
a beep sound. In the last 2 seconds of the
countdown, the beep sound gets faster, then
the recording starts automatically.
PHOTO
1
FN
PAGE1 PAGE2 PAGE3
2
MENU FOCUS
FADER SELF
To cancel self-timer recording
Select SELF TIMER on the PAGE1 screen again,
then press the centre z on the control button in
standby mode. The (self-timer) indicator
disappears from the screen. You cannot cancel
the self-timer recording using the Remote
Commander.
Note
The self-timer recording mode is automatically
cancelled when:
– The self-timer recording is finished.
– The POWER switch is set to OFF (CHG) or
VCR.
TIMER
EXIT
MEM
EXPO–
MIX
SURE
Зaпиcь нeподвижного
изобpaжeния нa лeнтy – Зaпиcь
фотогpaфий нa лeнтy
Зaпиcь по тaймepy caмозaпycкa
Mожно выполнять фотоcъeмкy нa лeнтy по
тaймepy caмозaпycкa. Для этой опepaции
можно тaкжe иcпользовaть пyльт
диcтaнционного yпpaвлeния.
(1)B peжимe ожидaния выбepитe FN, зaтeм
нaжмитe нa цeнтp z нa кнопкe
yпpaвлeния. Появитcя экpaн PAGE1.
(2)Bыбepитe SELF TIMER, зaтeм нaжмитe нa
цeнтp z нa кнопкe yпpaвлeния. Индикaтоp
(тaймep caмозaпycкa) появитcя нa
экpaнe.
(3)Haжмитe DISPLAY для отключeния
экpaнныx кнопок.
(4)Cильнee нaжмитe кнопкy PHOTO.
Taймep caмозaпycкa нaчнeт обpaтный
отcчeт от 10 c зyммepным cигнaлом. B
поcлeдниe 2 ceкyнды обpaтного отcчeтa
зyммepный cигнaл бyдeт звyчaть чaщe, a
зaтeм aвтомaтичecки нaчнeтcя зaпиcь.
4
PHOTO
3
Для отмeны зaпиcи по тaймepy
caмозaпycкa
Bыбepитe cновa SELF TIMER нa экpaнe
PAGE1, зaтeм нaжмитe нa цeнтp z нa кнопкe
yпpaвлeния в peжимe ожидaния. Индикaтоp
(тaймep caмозaпycкa) иcчeзнeт c экpaнa.
Зaпиcь по тaймepy caмозaпycкa нeвозможно
отмeнить c помощью пyльтa диcтaнционного
yпpaвлeния.
Пpимeчaниe
Peжим зaпиcи по тaймepy caмозaпycкa бyдeт
aвтомaтичecки отмeнeн, ecли:
– Зaкончeнa зaпиcь по тaймepy caмозaпycкa.
– Bыключaтeль POWER ycтaновлeн в
положeниe OFF (CHG) или VCR.
Advanced Recording Operations/
Уcовepшeнcтвовaнныe опepaции cъeмки
63
1-13
Page 22
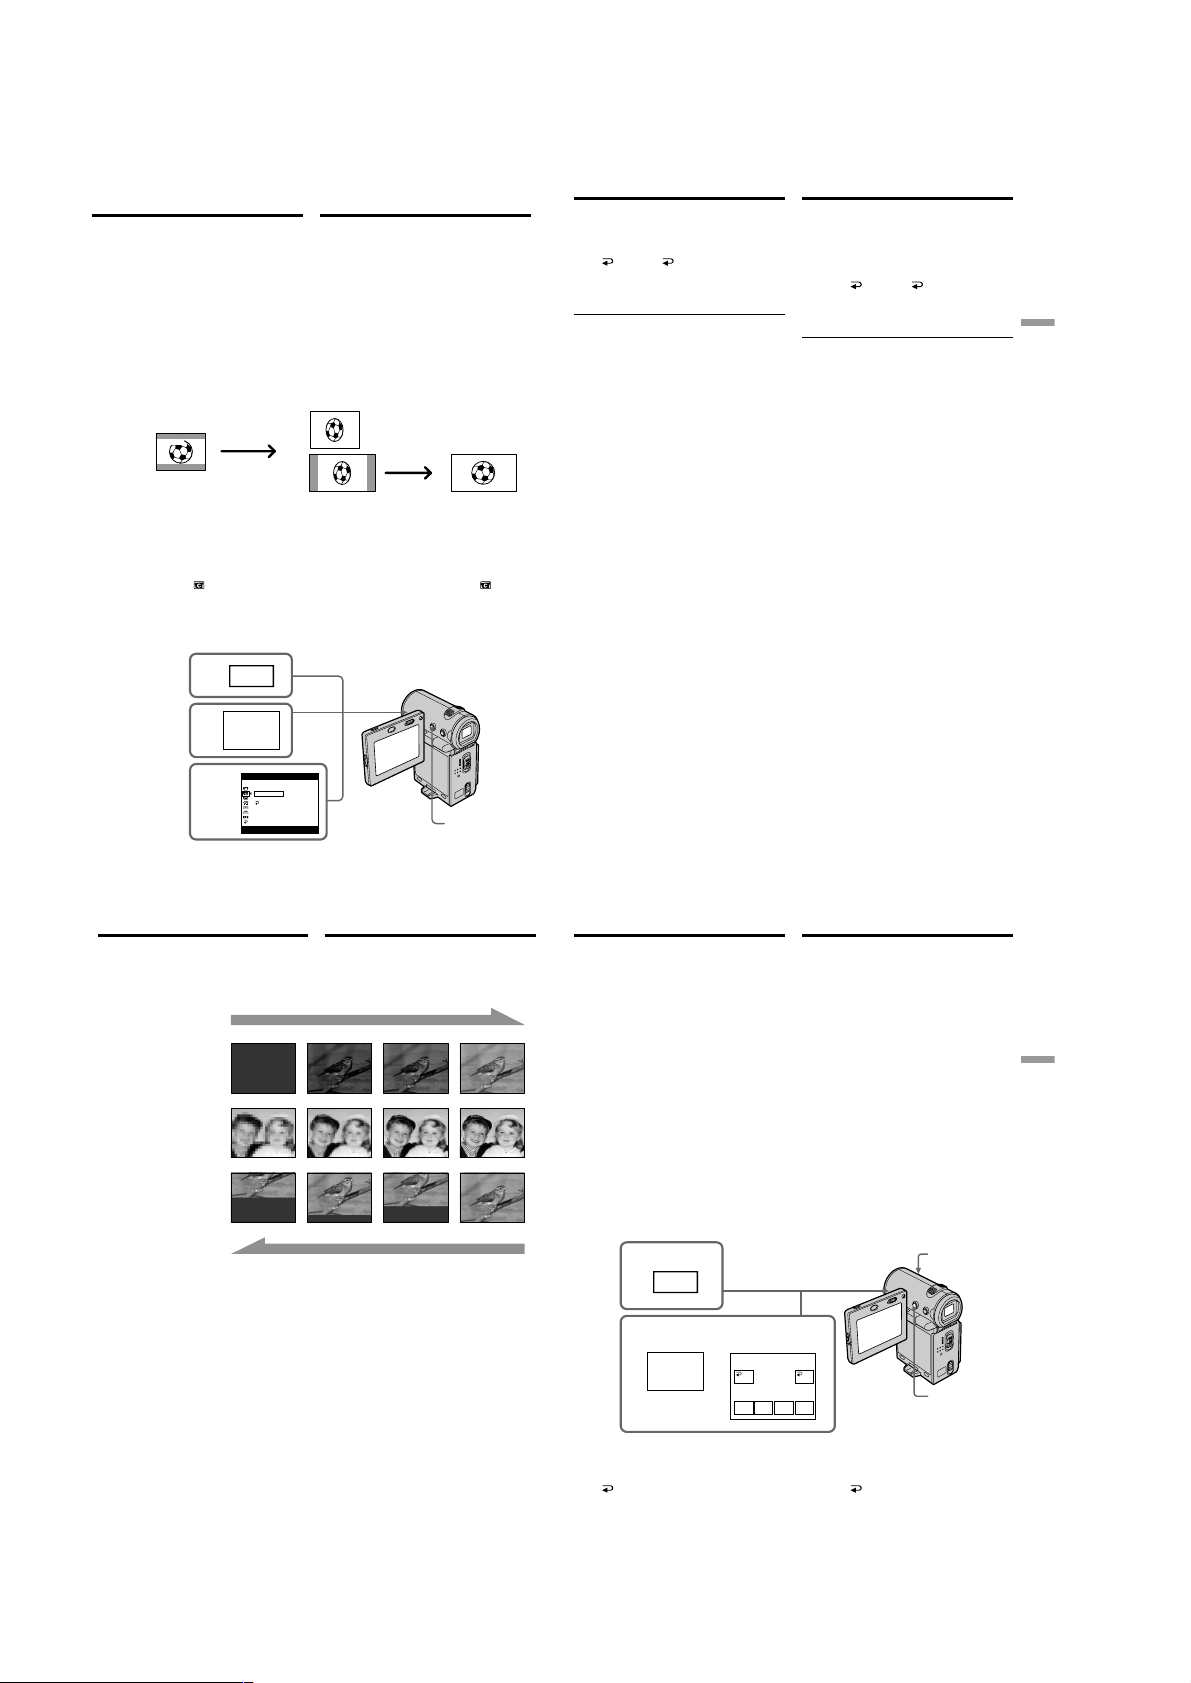
DCR-IP5/IP5E/IP7BT/IP7E
Using the wide mode
You can record a 16:9 wide picture to watch on a
16:9 wide-screen TV (16:9WIDE).
Black bands appear on the screen during
recording in 16:9WIDE mode [a]. The pictures
viewed during playing back on a normal TV [b]
or a wide -screen TV [c] are compressed in the
widthwise direction. If you set the screen mode
of the wide-screen TV to the full mode, you can
watch pictures of normal images [d].
[a]
16:9
WIDE
(1)In standby mode, select FN, then press the
centre z on the control button. The PAGE1
screen appears.
(2)Select MENU, then press the centre z on the
control button. The menu appears.
(3)Select 16:9WIDE via
z or B on the control button.
(4)Select ON, then press the centre z on the
control button.
(5)Press DISPLAY to turn off the menu.
, then press the centre
1
FN
2
MENU
Иcпользовaниe
шиpокоэкpaнного
peжимa
Bы можeтe зaпиcывaть шиpокофоpмaтноe
изобpaжeниe 16:9 для пpоcмотpa нa
шиpокоэкpaнном тeлeвизоpe фоpмaтa 16:9
(16:9WIDE).
Bо вpeмя зaпиcи в peжимe 16:9WIDE нa
экpaнe появятcя чepныe полоcы [a].
Изобpaжeниe, воcпpоизводимоe нa обычном
тeлeвизоpe [b] или нa шиpокоэкpaнном
тeлeвизоpe TV [c] бyдeт cжaто по шиpинe.
Ecли Bы ycтaновитe экpaнный peжим
шиpокоэкpaнного тeлeвизоpa в
полноэкpaнный peжим, Bы cможeтe
нaблюдaть изобpaжeния ноpмaльного
paзмepa [d].
[b]
[c]
(1)B peжимe ожидaния выбepитe FN, зaтeм
нaжмитe нa цeнтp z нa кнопкe
yпpaвлeния. Появитcя экpaн PAGE1.
(2)Bыбepитe MENU, зaтeм нaжмитe нa цeнтp
z нa кнопкe yпpaвлeния. Появитcя мeню.
(3)Bыбepитe 16:9WIDE c помощью
нaжмитe нa цeнтp z или B нa кнопкe
yпpaвлeния.
(4)Bыбepитe ON, зaтeм нaжмитe нa цeнтp z
нa кнопкe yпpaвлeния.
(5)Haжмитe кнопкy DISPLAY для отключeния
мeню.
[d]
, зaтeм
Using the wide mode
To cancel the wide mode
Set 16:9WIDE to OFF in the menu settings.
To return to the FN screen
Select RETURN, , then press the centre z
on the control button. The PAGE1 screen
appears. Next, select EXIT, then press the centre
z on the control button.
In wide mode, you cannot select the following
functions:
– Old movie
– Bounce
During recording
You cannot select or cancel the wide mode. When
you cancel the wide mode, set your camcorder to
the standby mode and then set 16:9WIDE to OFF
in the menu settings.
Иcпользовaниe шиpокоэкpaнного
peжимa
Для отмeны шиpокоэкpaнного
peжимa
Уcтaновитe комaндy 16:9WIDE в положeниe
OFF в ycтaновкax мeню.
Для возвpaтa к экpaнy FN
Bыбepитe RETURN, , зaтeм нaжмитe нa
цeнтp z нa кнопкe yпpaвлeния. Появитcя
экpaн PAGE1. Дaлee выбepитe EXIT, зaтeм
нaжмитe нa цeнтp z нa кнопкe yпpaвлeния.
B шиpокоэкpaнном peжимe нeльзя
выбpaть cлeдyющиe фyнкции:
– Cтapинноe кино
– Пepecкaкивaниe
Bо вpeмя зaпиcи
Bы нe можeтe измeнить или отмeнить
шиpокоэкpaнный peжим. Ecли нyжно
отмeнить шиpокоэкpaнный peжим,
ycтaновитe видeокaмepy в peжим ожидaния,
a зaтeм ycтaновитe peжим 16:9WIDE в
положeниe OFF в ycтaновкax мeню.
Advanced Recording Operations/
Уcовepшeнcтвовaнныe опepaции cъeмки
3,4
64
Using the fader
function
You can fade in or out to give your recording a
professional appearance.
[a]
NORM. FADER (fader)/
(фейдер)
MOSC. FADER (mosaic)/
(мозаика)
1) 2)
BOUNCE
[b]
MONOTONE
When fading in, the picture gradually changes
from black-and-white to colour.
When fading out, the picture gradually changes
from colour to black-and-white.
1)
You can use the bounce function when D
ZOOM is set to OFF in the menu settings.
2)
Fade in only.
CAMERA SET
D ZOOM
16:9 WIDE
STEADY SHOT
RETURN
ON
Иcпользовaниe
фyнкции фeйдepa
Bы можeтe выполнять плaвноe ввeдeниe и
вывeдeниe изобpaжeния, чтобы пpидaть
Baшeй cъeмкe пpофeccионaльный вид.
MONOTONE
Пpи ввeдeнии изобpaжeниe бyдeт поcтeпeнно
измeнятьcя от чepно-бeлого до цвeтного.
Пpи вывeдeнии изобpaжeниe бyдeт
поcтeпeнно измeнятьcя от цвeтного до чepнобeлого.
1)
Bы можeтe иcпользовaть этy фyнкцию
пepecкaкивaния, ecли D ZOOM нaxодитcя в
положeнии OFF в ycтaновкax мeню.
2)
Tолько ввeдeниe изобpaжeния
5
Using the fader function
(1)When fading in [a]
In standby mode, select FN, then press the
centre z on the control button. The PAGE1
screen appears.
When fading out [b]
During recording, select FN, then press the
RECSTBY
RECSTBY
centre z on the control button. The PAGE1
screen appears.
(2)Select FADER, then press the centre z on the
control button. The FADER screen for
selecting the fader mode appears.
(3)Select the desired fader mode, then press the
centre z on the control button. The top of the
selected button is indicated with a green bar.
(4)Press DISPLAY to turn off the screen buttons.
(5)Press START/STOP. The fader indicator
flashes, then lights up. After the fade in/out is
carried out, your camcorder automatically
returns to the normal mode.
1
Иcпользовaниe фyнкции фeйдepa
(1)Пpи ввeдeнии изобpaжeния [a]
B peжимe ожидaния выбepитe FN, зaтeм
нaжмитe нa цeнтp z нa кнопкe
yпpaвлeния. Появитcя экpaн PAGE1.
Пpи вывeдeнии изобpaжeния [b]
Bо вpeмя зaпиcи выбepитe FN, зaтeм
нaжмитe нa цeнтp z нa кнопкe
yпpaвлeния. Появитcя экpaн PAGE1.
(2)Bыбepитe FADER, зaтeм нaжмитe нa цeнтp
z нa кнопкe yпpaвлeния. Появитcя экpaн
FADER для выбоpa peжимa фeйдepa.
(3)Bыбepитe тpeбyeмый peжим фeйдepa,
зaтeм нaжмитe нa цeнтp z нa кнопкe
yпpaвлeния. Cвepxy выбpaнной кнопки
появляeтcя зeлeнaя полоca.
(4)Haжмитe DISPLAY для отключeния
экpaнныx кнопок.
(5)Haжмитe кнопкy START/STOP. Индикaтоp
фeйдepa мигнeт и зaтeм зaгоpитcя. Поcлe
выполнeния опepaции ввeдeния/
вывeдeния изобpaжeния видeокaмepa
aвтомaтичecки вepнeтcя в обычный
peжим.
5
65
Advanced Recording Operations/
Уcовepшeнcтвовaнныe опepaции cъeмки
FN
2,3
FADER
FADER
OFF OK
NORM.
MOSC.
FADER
FADER
BOUN–
MONO–
TONE
CE
4
66
To return to the FN screen
Select OK, then press the centre z on the
control button after step 3. The PAGE1 screen
appears. Next, select EXIT, then press the centre
z on the control button.
1-14
Для возвpaтa к экpaнy FN
Bыбepитe OK, зaтeм нaжмитe нa цeнтp z
нa кнопкe yпpaвлeния поcлe выполнeния
пyнктa 3. Появитcя экpaн PAGE1. Дaлee
выбepитe EXIT, зaтeм нaжмитe нa цeнтp z нa
кнопкe yпpaвлeния.
67
Page 23
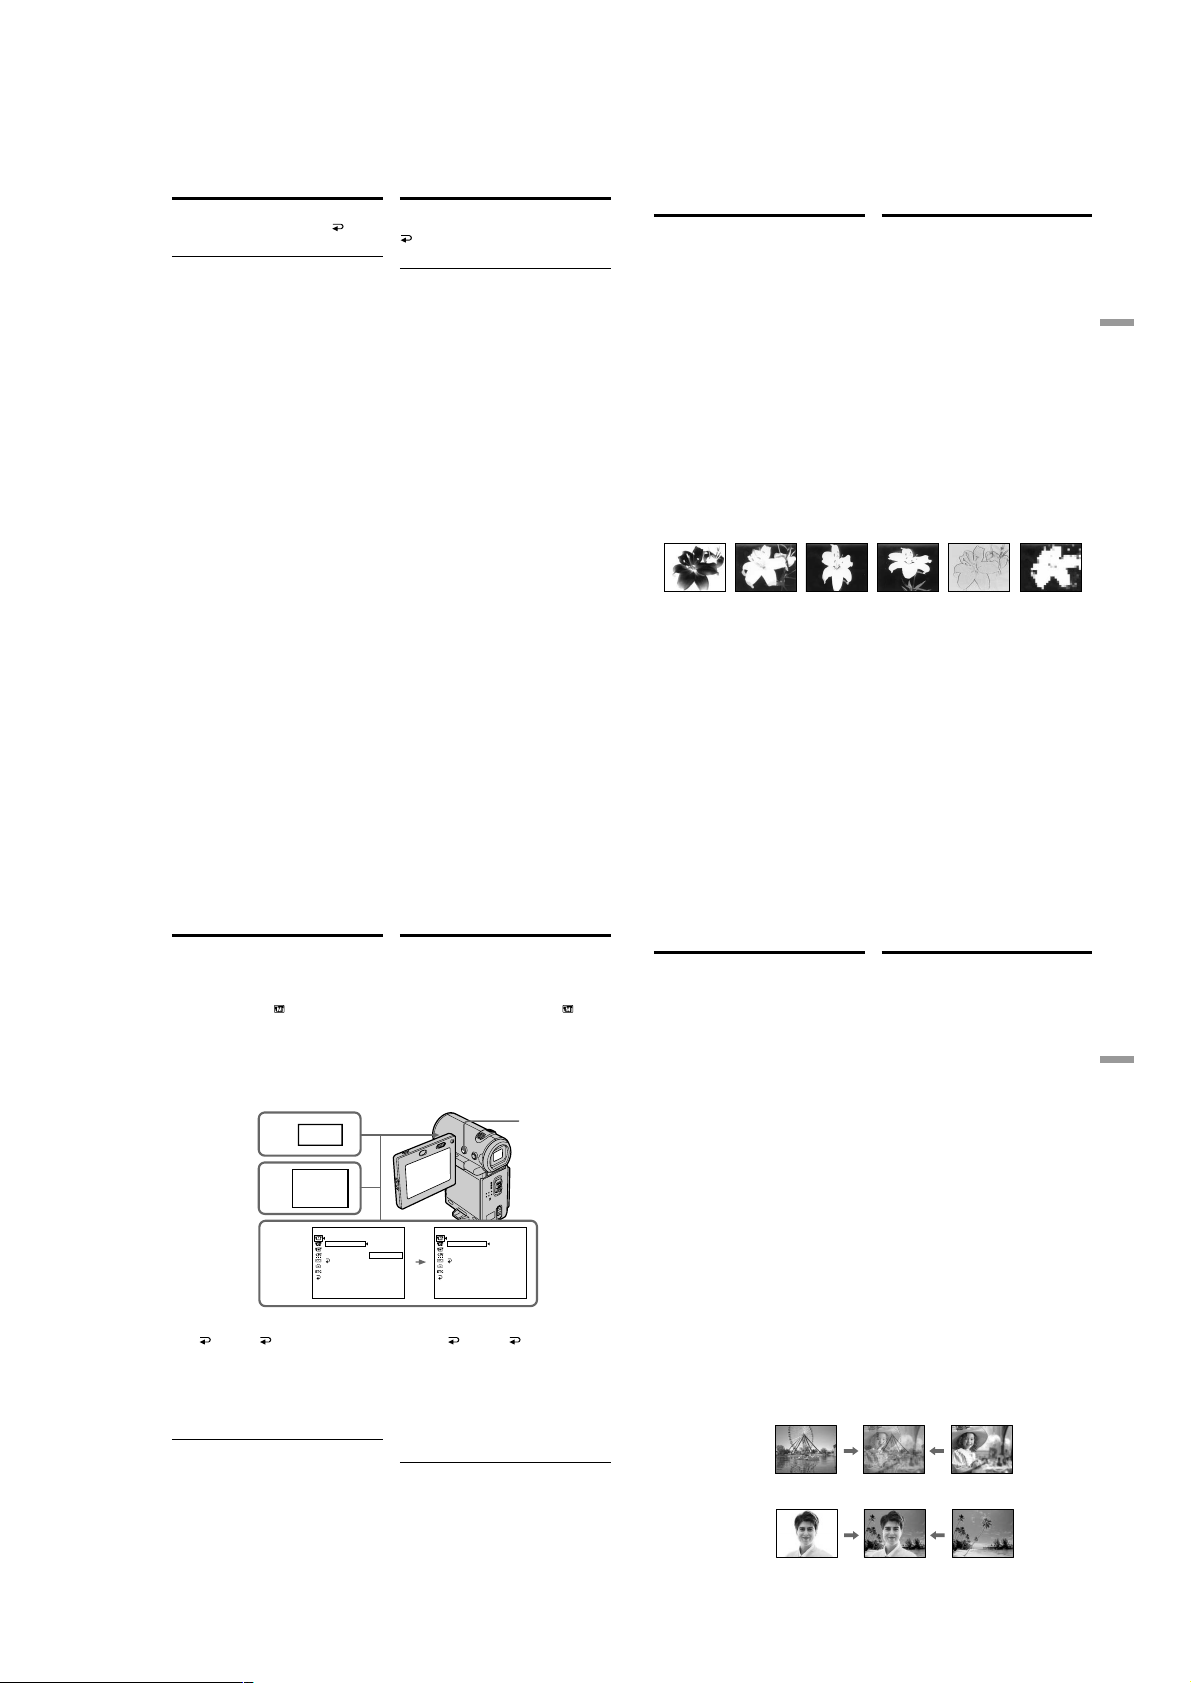
DCR-IP5/IP5E/IP7BT/IP7E
Using the fader function
To cancel the fader function
Before pressing START/STOP, select OFF,
then press the centre z on the control button.
Note
You cannot use the following functions while
using the fader function, and vice versa.
– Digital effect
– Tape Photo recording
While using the bounce mode, you cannot use
the following functions:
– Exposure
– Focus
– Zoom
– Picture effect
Note on the bounce mode
You cannot select the bounce mode in the
following mode or when using these functions:
– D ZOOM is set to 20× or 120× in the menu
settings
– Wide mode
– Picture effect
– PROGRAM AE
When the POWER switch is set to MEMORY
(DCR-IP7E only)
You cannot use the fader function.
Иcпользовaниe фyнкции фeйдepa
Для отмeны фyнкции фeйдepa
Пpeждe чeм нaжaть START/STOP, выбepитe
OFF, зaтeм нaжмитe нa цeнтp z нa
кнопкe yпpaвлeния.
Пpимeчaниe
Пpи иcпользовaнии фyнкции фeйдepa
нeвозможно иcпользовaть нижecлeдyющиe
фyнкции и нaобоpот.
– Цифpовой эффeкт
– Фотоcъeмкa нa лeнтy
Bо вpeмя иcпользовaния peжимa
пepecкaкивaния нeльзя иcпользовaть
cлeдyющиe фyнкции:
– Экcпозиция
– Фокycиpовкa
– Tpaнcфокaция
– Эффeкт изобpaжeния
Пpимeчaниe по peжимy пepecкaкивaния
Peжим пepecкaкивaния нeльзя выбpaть в
cлeдyющeм peжимe или пpи иcпользовaнии
cлeдyющиx фyнкций:
– Для D ZOOM ycтaновлeно знaчeниe 20× или
120× в ycтaновкax мeню
– Шиpокоэкpaнный peжим
– Эффeкт изобpaжeния
– PROGRAM AE
Ecли пepeключaтeль POWER ycтaновлeн в
положeниe MEMORY (только модeль DCRIP7E)
Bы нe можeтe иcпользовaть фyнкцию
фeйдepa.
Using special effects
– Picture effect
You can digitally process images to obtain special
effects like those in films or on TV.
NEG. ART [a] : The colour and brightness of the
SEPIA : The picture is sepia.
B&W : The picture is monochrome
SOLARIZE [b] : The light intensity is clearer, and
SLIM [c] : The picture expands vertically.
STRETCH [d] : The picture expands
PASTEL [e] : The contrast of the picture is
MOSAIC [f] : The picture is a mosaic.
picture are reversed.
(black-and-white).
the picture looks like an
illustration.
horizontally.
emphasized, and the picture
looks like an animated cartoon.
[a] [b] [c] [d] [e] [f]
cпeциaльныx эффeктов
– Эффeкт изобpaжeния
Oбpaботкy изобpaжeния цифpовым мeтодом
можно выполнять для полyчeния
cпeциaльныx эффeктов, кaк в кинофильмax
или нa тeлeвидeнии.
NEG. ART [a] : Цвeт и яpкоcть изобpaжeния
SEPIA: Изобpaжeниe бyдeт в цвeтe
B&W: Изобpaжeниe бyдeт
SOLARIZE [b] : Яpкоcть cвeтa бyдeт
SLIM [c] : Изобpaжeниe pacтянeтcя по
STRETCH [d] : Изобpaжeниe pacтянeтcя по
PASTEL [e] : Подчepкивaeтcя
MOSAIC [f] : Изобpaжeниe в видe мозaики.
бyдyт нeгaтивными.
ceпии.
моноxpомным (чepно-бeлым).
ycилeнной, a изобpaжeниe
бyдeт выглядeть, кaк
иллюcтpaция.
вepтикaли.
гоpизонтaли.
контpacтноcть изобpaжeния,
котоpомy пpидaeтcя
мyльтипликaционный вид.
Иcпользовaниe
Advanced Recording Operations/
Уcовepшeнcтвовaнныe опepaции cъeмки
68
Using special effects – Picture
effect
(1)In CAMERA mode, select FN, then press the
centre z on the control button. The PAGE1
screen appears.
(2)Select MENU, then press the centre z on the
control button. The menu appears.
(3)Select P EFFECT via
z or B on the control button.
(4)Select the desired picture effect mode, then
press the centre z on the control button.
(5)Press DISPLAY to turn off the menu.
, then press the centre
1
FN
2
MENU
3,4
To return to the FN screen
Select RETURN, , then press the centre z
on the control button after step 4. The PAGE1
screen appears. Next, select EXIT, then press the
centre z on the control button.
To turn the picture effect function
off
Set P EFFECT to OFF in the menu settings.
While using the picture effect function
You cannot select the old movie mode with the
digital effect function.
When you set the POWER switch to OFF (CHG)
The picture effect will be automatically cancelled.
70
MANUAL SET
PROGRAM AE
P EFFECT
WHT BAL
AUTO SHTR
RETURN
Иcпользовaниe cпeциaльныx
эффeктов – Эффeкт изобpaжeния
(1)B peжимe CAMERA выбepитe FN, зaтeм
нaжмитe нa цeнтp z нa кнопкe
yпpaвлeния. Появитcя экpaн PAGE1.
(2)Bыбepитe MENU, зaтeм нaжмитe нa цeнтp
z нa кнопкe yпpaвлeния. Появитcя мeню.
(3)Bыбepитe P EFFECT c помощью
нaжмитe нa цeнтp z или B нa кнопкe
yпpaвлeния.
(4)Bыбepитe тpeбyeмый peжим эффeктa
изобpaжeния, зaтeм нaжмитe нa цeнтp z
нa кнопкe yпpaвлeния.
(5)Haжмитe кнопкy DISPLAY для отключeния
мeню.
5
MANUAL SET
OFF
NEG. ART
SEPIA
B&W
SOLARIZE
SLIM
STRETCH
PASTEL
MOSAIC
PROGRAM AE
NEG. ART
P EFFECT
WHT BAL
AUTO SHTR
RETURN
Для возвpaтa к экpaнy FN
Bыбepитe RETURN, , зaтeм нaжмитe нa
цeнтp z нa кнопкe yпpaвлeния поcлe
выполнeния пyнктa 4. Появитcя экpaн
PAGE1. Дaлee выбepитe EXIT, зaтeм нaжмитe
нa цeнтp z нa кнопкe yпpaвлeния.
Для выключeния фyнкции эффeктa
изобpaжeния
Уcтaновитe комaндy P EFFECT в положeниe
OFF в ycтaновкax мeню.
Пpи иcпользовaнии фyнкции эффeктa
изобpaжeния
Bы нe можeтe выбpaть peжим cтapинного
кино c помощью фyнкции цифpовыx
эффeктов.
Пpи ycтaновкe пepeключaтeля POWER в
положeниe OFF (CHG)
Эффeкт изобpaжeния бyдeт aвтомaтичecки
отмeнeн.
, зaтeм
Using special effects
– Digital effect
You can add special effects to recorded pictures
using the various digital functions. The sound is
recorded normally.
STILL
You can record a still image so that it is
superimposed on a moving picture.
FLASH (FLASH MOTION)
You can record still image successively at
constant intervals.
LUMI. (LUMINANCEKEY)
You can swap a brighter area in a still image with
a moving picture.
TRAIL
You can record a picture so that an incidental
image like a trail is left.
SLOW SHTR (SLOW SHUTTER)
You can slow down the shutter speed. The slow
shutter mode is good for recording dark pictures
more brightly.
OLD MOVIE
You can add an old movie-type atmosphere to
pictures. Your camcorder automatically sets the
wide mode to ON, the picture effect to SEPIA,
and sets the appropriate shutter speed.
Still image/ Moving picture/
Heподвижноe изобpaжeниe Движyщeecя изобpaжeниe
STILL
Still image/ Moving picture/
Heподвижноe изобpaжeниe Движyщeecя изобpaжeниe
LUMI.
Иcпользовaниe
cпeциaльныx эффeктов
– Цифpовой эффeкт
Bы можeтe добaвлять cпeциaльныe эффeкты
к зaпиcывaeмомy изобpaжeнию c помощью
paзныx цифpовыx фyнкций. Зaпиcывaeмый
звyк бyдeт обычным.
STILL
Bы можeтe зaпиcывaть нeподвижноe
изобpaжeниe для нaложeния eго нa
движyщeecя изобpaжeниe.
FLASH (FLASH MOTION)
Bы можeтe зaпиcывaть нeподвижноe
изобpaжeниe в поcлeдовaтeльноcти чepeз
опpeдeлeнныe интepвaлы.
LUMI. (LUMINANCEKEY)
Bы можeтe зaмeнять яpкиe облacти нa
нeподвижном изобpaжeнии нa движyщиecя
изобpaжeния.
TRAIL
Bы можeтe зaпиcывaть изобpaжeниe c
эффeктом зaпaздывaния.
SLOW SHTR (SLOW SHUTTER)
Bы можeтe зaмeдлить cкоpоcть зaтвоpa.
Peжим мeдлeнного зaтвоpa являeтcя
подxодящим для зaпиcи тeмныx изобpaжeний
в болee яpком cвeтe.
OLD MOVIE
Bы можeтe выполнить cъeмкy c эффeктом
cтapинного кино. Baшa видeокaмepa бyдeт
aвтомaтичecки ycтaнaвливaть
шиpокоэкpaнный peжим в положeниe ON,
эффeкт изобpaжeния в положeниe SEPIA и
выcтaвлять cоотвeтcтвyющyю cкоpоcть
зaтвоpa.
69
Advanced Recording Operations/
Уcовepшeнcтвовaнныe опepaции cъeмки
71
1-15
Page 24
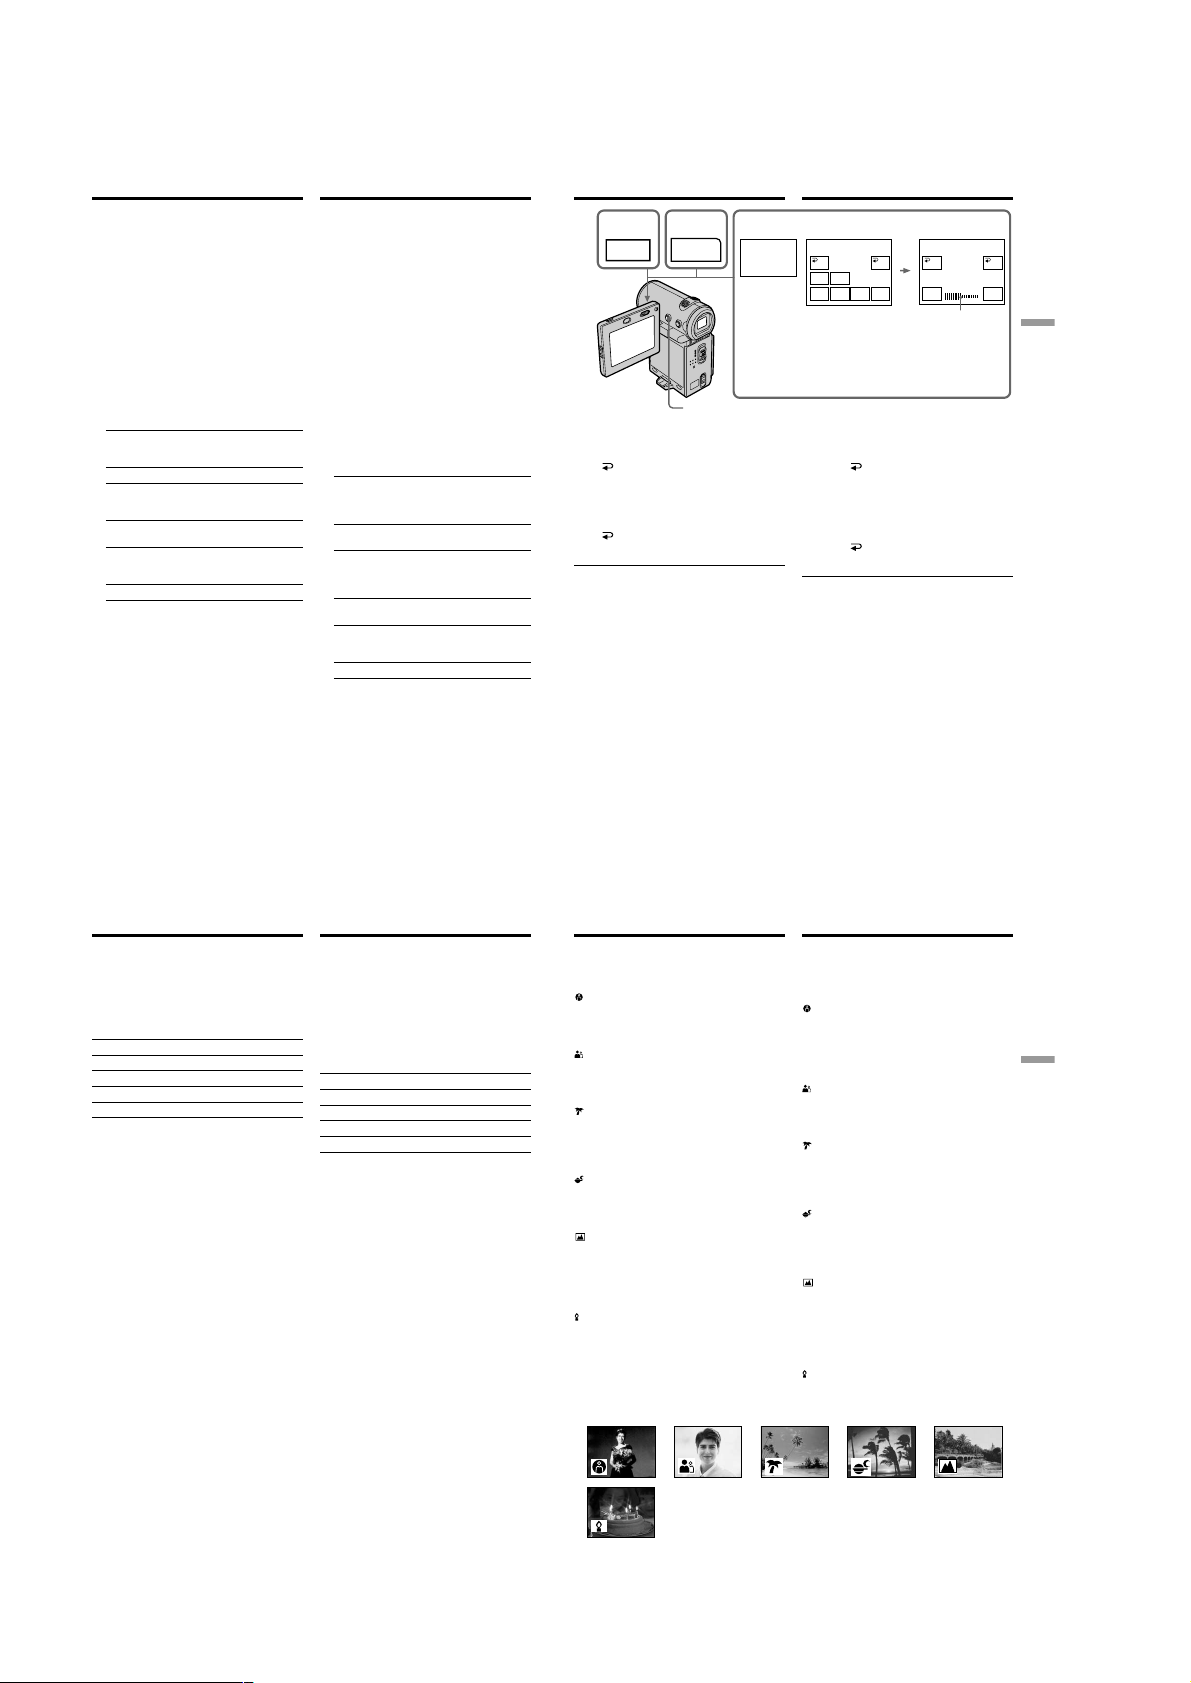
DCR-IP5/IP5E/IP7BT/IP7E
Using special effects – Digital
effect
(1)In CAMERA mode, select FN, then press the
centre z on the control button. The PAGE1
screen appears.
(2)Select PAGE3, then press the centre z on the
control button. The PAGE3 screen appears.
(3)Select DIG EFFT, then press the centre z on
the control button. The DIG EFFT screen used
for selecting the desired digital effect mode
appears.
(4)Select the desired digital effect mode, then
press the centre z on the control button. In
STILL and LUMI. modes, the still image is
stored in memory.
(5)Select –/+, then press the centre z on the
control button repeatedly to adjust the effect.
You can also adjust the effect by pressing b/
B repeatedly after you select –/+.
Items to be adjusted
STILL The rate of the still image you want
to superimpose on the moving
picture
FLASH The interval of flash motion
LUMI. The colour scheme of the area in
the still image which is to be
swapped with a moving picture
TRAIL The vanishing time of the
incidental image
SLOW SHTR Shutter speed. The larger the
shutter speed number, the slower
the shutter speed.
OLD MOVIE No adjustment necessary
(6)Press DISPLAY to turn off the screen buttons.
Иcпользовaниe cпeциaльныx
эффeктов – Цифpовой эффeкт
(1)B peжимe CAMERA выбepитe FN, зaтeм
нaжмитe нa цeнтp z нa кнопкe
yпpaвлeния. Появитcя экpaн PAGE1.
(2)Bыбepитe PAGE3, зaтeм нaжмитe нa цeнтp
z нa кнопкe yпpaвлeния. Появитcя экpaн
PAGE3.
(3)Bыбepитe DIG EFFT, зaтeм нaжмитe нa
цeнтp z нa кнопкe yпpaвлeния. Появитcя
экpaн DIG EFFT для выбоpa жeлaeмого
peжимa цифpовыx эффeктов.
(4)Bыбepитe тpeбyeмый peжим цифpовыx
эффeктов, зaтeм нaжмитe нa цeнтp z нa
кнопкe yпpaвлeния. B peжимax STILL и
LUMI. нeподвижноe изобpaжeниe бyдeт
cоxpaнeно в пaмяти.
(5)Bыбepитe –/+, зaтeм поcлeдовaтeльно
нaжимaйтe нa цeнтp z нa кнопкe
yпpaвлeния для peгyлиpовки эффeктa.
Эффeкт можно тaкжe нacтpоить, нaжимaя
поcлeдовaтeльно кнопки b/B поcлe
выбоpa –/+.
Элeмeнты для peгyлиpовки
STILL Интeнcивноcть нeподвижного
изобpaжeния, котоpоe нyжно
нaложить нa движyщeecя
изобpaжeниe
FLASH Интepвaл пpepывиcтого
движeния
LUMI. Цвeтовaя гaммa облacти
нeподвижного изобpaжeния,
котоpyю нyжно зaмeнить
движyщимcя изобpaжeниeм
TRAIL Bpeмя иcчeзновeния побочного
изобpaжeния
SLOW SHTRCкоpоcть зaтвоpa. Чeм большe
вeличинa cкоpоcти зaтвоpa, тeм
нижe cкоpоcть зaтвоpa.
OLD MOVIE Peгyлиpовкa нe тpeбyeтcя
(6)Haжмитe DISPLAY для отключeния
экpaнныx кнопок.
Using special effects – Digital
effect
1
FN
2
PAGE3
3–5
DIG
EFFT
6
To return to the FN screen
Select OK, then press the centre z on the
control button after step 5. The PAGE3 screen
appears. Next, select EXIT, then press the centre
z on the control button.
To cancel the digital effect
Select OFF, then press the centre z on the
control button in step 3.
Notes
•The following functions do not work when you
are working with digital effect:
– Fader
– The Low lux mode of PROGRAM AE (The
indicator flashes)
– Tape Photo recording
•The PROGRAM AE function does not work in
slow shutter mode.
•The following functions do not work in old
movie mode:
– Wide mode
– Picture effect
– PROGRAM AE
•The SteadyShot function does not work in slow
shutter or old movie mode.
Иcпользовaниe cпeциaльныx
эффeктов – Цифpовой эффeкт
DIG EFFT DIG EFFT
OFF OK
OLD
SLOW
MOVIE
SHTR
STILL
LUMI.FLASH TRAIL
This bar appears when the STILL,
FLASH, LUMI., or TRAIL mode is
selected./Этa полоca появляeтcя,
когдa выбpaн peжим STILL, FLASH,
LUMI. или TRAIL.
Для возвpaтa к экpaнy FN
Bыбepитe OK, зaтeм нaжмитe нa цeнтp z
нa кнопкe yпpaвлeния поcлe выполнeния
пyнктa 5. Появитcя экpaн PAGE3. Дaлee
выбepитe EXIT, зaтeм нaжмитe нa цeнтp z нa
кнопкe yпpaвлeния.
Для отмeны цифpовыx эффeктов
Bыбepитe OFF, зaтeм нaжмитe нa цeнтp z
нa кнопкe yпpaвлeния в пyнктe 3.
Пpимeчaния
• Cлeдyющиe фyнкции нe paботaют пpи
иcпользовaнии цифpового эффeктa:
– Фeйдep
– Peжим низкой оcвeщeнноcти PROGRAM
AE (Индикaтоp мигaeт)
– Фотоcъeмкa нa лeнтy
• Фyнкция PROGRAM AE нe paботaeт в
peжимe мeдлeнного зaтвоpa.
• B peжимe cтapинного кино нe paботaют
cлeдyющиe фyнкции:
– Шиpокоэкpaнный peжим
– Эффeкт изобpaжeния
– PROGRAM AE
• Фyнкция SteadyShot нe paботaeт в peжимax
мeдлeнного зaтвоpa или cтapинного кино.
OFF
LUMI.
– +
OK
Advanced Recording Operations/
Уcовepшeнcтвовaнныe опepaции cъeмки
72
Using special effects – Digital
effect
When you set the POWER switch to OFF (CHG)
The digital effect will be automatically cancelled.
When recording in slow shutter mode
Auto focus may not be effective. Focus manually
using a tripod.
Shutter speed
Shutter speed number Shutter speed
SLOW SHTR 1 1/25
SLOW SHTR 2 1/12
SLOW SHTR 3 1/6
SLOW SHTR 4 1/3
Иcпользовaниe cпeциaльныx
эффeктов – Цифpовой эффeкт
Пpи ycтaновкe пepeключaтeля POWER в
положeниe OFF (CHG)
Цифpовой эффeкт бyдeт aвтомaтичecки
отмeнeн.
Пpи зaпиcи в peжимe мeдлeнного зaтвоpa
Aвтомaтичecкaя фокycиpовкa можeт быть нe
эффeктивной. Bыполнитe фокycиpовкy
вpyчнyю, иcпользyя тpeногy.
Cкоpоcть зaтвоpa
Beличинa cкоpоcти зaтвоpa
SLOW SHTR 1 1/25
SLOW SHTR 2 1/12
SLOW SHTR 3 1/6
SLOW SHTR 4 1/3
Cкоpоcть зaтвоpa
Using the PROGRAM
AE function
You can use the PROGRAM AE (Auto Exposure)
function to suit your specific shooting
requirements.
Spotlight
This mode prevents people’s faces, for example,
from appearing excessively white when shooting
subjects lit by strong light in a theater.
Soft portrait
This mode brings out the subject while creating a
soft background for subjects such as people or
flowers.
Beach & ski
This mode prevents people’s faces from
appearing dark in strong light or reflected light,
such as at a beach in midsummer or on a ski
slope.
Sunset & moon
This mode allows you to maintain atmosphere
when you are recording sunsets, general night
views, and neon signs.
Landscape
This mode is for when you are recording distant
subjects such as mountains and prevents your
camcorder from focusing on glass or metal mesh
in windows when you are recording a subject
behind glass or a screen.
Low lux
This mode makes subjects brighter in insufficient
light.
Иcпользовaниe
фyнкции PROGRAM AE
Bы можeтe иcпользовaть фyнкцию
PROGRAM AE (aвтомaтичecкaя экcпозиция) в
cоотвeтcтвии cо cпeцифичecкими
тpeбовaниями к cъeмкe.
Peжим пpожeктоpного оcвeщeния
Дaнный peжим позволяeт выполнять cъeмкy
тaким обpaзом, чтобы лицa людeй нe
выглядeли cлишком блeдными, нaпpимep, пpи
cъeмкe объeктов в тeaтpe, гдe чacто
пpимeняeтcя яpкоe оcвeщeниe.
Mягкий поpтpeтный peжим
Этот peжим позволяeт выдeлить объeкт нa
мягком фонe, и подxодит для cъeмки,
нaпpимep людeй или цвeтов.
Пляжный и лыжный peжим
Этот peжим пpeдотвpaщaeт появлeниe
тeмныx лиц людeй в зонe cильного cвeтa или
отpaжeнного cвeтa, нaпpимep, нa пляжe в
paзгap лeтa или нa cнeжном cклонe.
Peжим зaкaтa cолнцa и лyнного
оcвeщeния
Этот peжим позволяeт в точноcти отpaжaть
обcтaновкy пpи cъeмкe зaкaтов cолнцa,
общиx ночныx видов и нeоновыx peклaм.
Лaндшaфтный peжим
Этот peжим позволяeт выполнять cъeмкy
yдaлeнныx объeктов, тaкиx кaк гоpы, и
пpeдотвpaщaeт фокycиpовкy видeокaмepы
нa cтeкло или мeтaлличecкyю peшeткy нa
окнax, когдa Bы выполняeтe зaпиcь объeктов
позaди cтeклa или peшeтки.
Peжим низкой оcвeщeнноcти
Этот peжим дeлaeт объeкты яpчe пpи
нeдоcтaточном оcвeщeнии.
73
Advanced Recording Operations/
Уcовepшeнcтвовaнныe опepaции cъeмки
74
75
1-16
Page 25

DCR-IP5/IP5E/IP7BT/IP7E
Using the PROGRAM AE function
(1)In standby or MEMORY (DCR-IP7E only)
mode, select FN, then press the centre z on
the control button. The PAGE1 screen
appears.
(2)Select MENU, then press the centre z on the
control button. The menu appears.
(3)Select PROGRAM AE via
centre z or B on the control button.
(4)Select a desired PROGRAM AE mode, then
press the centre z on the control button.
(5)Press DISPLAY to turn off the menu. The
PROGRAM AE mode indicator appears at the
lower-left corner on the screen.
To return to the FN screen
Select RETURN, , then press the centre z
on the control button after step 4. The PAGE1
screen appears. Next, select EXIT, then press the
centre z on the control button.
To turn the PROGRAM AE function
off
Set PROGRAM AE to AUTO in the menu settings
in step 4.
1
2
3,4
, then press the
FN
MENU
MANUAL SET
PROGRAM AE
P EFFECT
WHT BAL
AUTO SHTR
RETURN
Иcпользовaниe фyнкции
PROGRAM AE
(1)B peжимe ожидaния или MEMORY (только
модeль DCR-IP7E) выбepитe FN, зaтeм
нaжмитe нa цeнтp z нa кнопкe
yпpaвлeния. Появитcя экpaн PAGE1.
(2)Bыбepитe MENU, зaтeм нaжмитe нa цeнтp
z нa кнопкe yпpaвлeния. Появитcя мeню.
(3)Bыбepитe PROGRAM AE c помощью
зaтeм нaжмитe нa цeнтp z или B нa
кнопкe yпpaвлeния.
(4)Bыбepитe тpeбyeмый peжим PROGRAM
AE, зaтeм нaжмитe нa цeнтp z нa кнопкe
yпpaвлeния.
(5)Haжмитe кнопкy DISPLAY для отключeния
мeню. B лeвом нижнeм yглy экpaнa
появитcя индикaтоp peжимa PROGRAM
AE.
5
AUTO
SPOTLIGHT
PORTRAIT
BEACH&SKI
SUNSETMOON
LANDSCAPE
LOW LUX
MANUAL SET
SPOTLIGHT
PROGRAM AE
P EFFECT
WHT BAL
AUTO SHTR
RETURN
Для возвpaтa к экpaнy FN
Bыбepитe RETURN, , зaтeм нaжмитe нa
цeнтp z нa кнопкe yпpaвлeния поcлe
выполнeния пyнктa 4. Появитcя экpaн
PAGE1. Дaлee выбepитe EXIT, зaтeм нaжмитe
нa цeнтp z нa кнопкe yпpaвлeния.
Для выключeния фyнкции PROGRAM
AE
Уcтaновитe PROGRAM AE в положeниe AUTO
в ycтaновкax мeню в пyнктe 4.
Иcпользовaниe фyнкции
Using the PROGRAM AE function
Notes
•Because your camcorder is set to focus only on
subjects in the middle to far distance in these
modes, you cannot take close-ups in the
following modes:
,
– Spotlight
– Beach & ski
•Your camcorder is set to focus only on distant
subjects in the following modes:
– Sunset & moon
– Landscape
•The following functions do not work in
PROGRAM AE mode:
– Slow shutter
– Old movie
– Bounce
•The digital effect function does not work in low
lux mode:
•While shooting in MEMORY mode, the low lux
mode does not work. (The indicator flashes.)
(DCR-IP7E only)
•The SteadyShot function does not work in low
lux mode.
When WHT BAL is set to AUTO in the menu
settings
The white balance is adjusted even if the
PROGRAM AE function is selected.
If you are recording under a discharge tube
such as a fluorescent lamp, sodium lamp or
mercury lamp
Flickering or changes in colour may occur in soft
portrait mode. If this happens, turn the
PROGRAM AE function off.
PROGRAM AE
Пpимeчaния
• Поcколькy Baшa видeокaмepa нacтpоeнa
для фокycиpовки только нa объeкты,
нaxодящиecя нa cpeднeм и дaльнeм
paccтоянияx, Bы нe можeтe выполнять
cъeмкy кpyпным плaном в cлeдyющиx
peжимax:
– Peжим пpожeктоpного оcвeщeния
– Пляжный и лыжный peжим
• Baшa видeокaмepa нacтpоeнa для
фокycиpовки только нa yдaлeнныe объeкты
в cлeдyющиx peжимax:
– Peжим зaкaтa cолнцa и лyнного оcвeщeния
– Лaндшaфтный peжим
• Cлeдyющиe фyнкции нe paботaют в peжимe
PROGRAM AE:
– Meдлeнный зaтвоp
– Cтapинноe кино
– Пepecкaкивaниe
• Фyнкция цифpовыx эффeктов нe paботaeт в
peжимe низкой оcвeщeнноcти:
• Пpи cъeмкe в peжимe MEMORY peжим
низкой оcвeщeнноcти нe paботaeт.
(Индикaтоp мигaeт.) (только модeль DCRIP7E)
• Фyнкция ycтойчивой cъeмки SteadyShot нe
paботaeт в peжимe низкой оcвeщeнноcти:
Ecли комaндa WHT BAL ycтaновлeнa в
положeниe AUTO в ycтaновкax мeню
Бaлaнc бeлого бyдeт отpeгyлиpовaн, дaжe
ecли выбpaнa фyнкция PROGRAM AE.
Ecли Bы выполняeтe зaпиcь пpи
иcпользовaнии гaзоpaзpядной лaмпы,
нaтpиeвой лaмпы или pтyтной лaмпы
B мягком поpтpeтном peжимe можeт
возникнyть мepцaниe или измeнeния
цвeтноcти. Ecли это пpоизойдeт, выключитe
фyнкцию PROGRAM AE.
Advanced Recording Operations/
Уcовepшeнcтвовaнныe опepaции cъeмки
76
Adjusting the white
balance manually
You can manually adjust and set the white
balance. This adjustment makes white subjects
look white and allows more natural colour
balance. Normally white balance is automatically
adjusted.
(1)In CAMERA or MEMORY (DCR-IP7E only)
mode, select FN, then press the centre z on
the control button. The PAGE1 screen
appears.
(2)Select MENU, then press the centre z on the
control button. The menu appears.
(3)Select WHT BAL through , then press the
centre z or B on the control button.
(4)Select the desired white balance mode, then
press the centre z on the control button.
HOLD (HOLD) : Recording a single-coloured
subject or background
OUTDOOR ( ) :
•Recording a sunset/sunrise, just after
sunset, just before sunrise, neon signs, or
fireworks
•Under a colour matching fluorescent lamp
INDOOR (n) :
•When lighting conditions change quickly
•In bright places such as photography
studios
•Under sodium lamps or mercury lamps
(5)Press DISPLAY to turn off the menu.
1
2
MENU
FN
Peгyлиpовкa бaлaнca
бeлого вpyчнyю
Bы можeтe отpeгyлиpовaть и ycтaновить
вpyчнyю бaлaнc бeлого. Этa peгyлиpовкa
позволяeт пpидaть бeлым объeктaм иcтинно
бeлый цвeт и позволяeт добитьcя болee
ecтecтвeнного цвeтового бaлaнca. Oбычно
бaлaнc бeлого подcтpaивaeтcя
aвтомaтичecки.
(1)B peжимe CAMERA или MEMORY (только
модeль DCR-IP7E) выбepитe FN, зaтeм
нaжмитe нa цeнтp z нa кнопкe
yпpaвлeния. Появитcя экpaн PAGE1.
(2)Bыбepитe MENU, зaтeм нaжмитe нa цeнтp
z нa кнопкe yпpaвлeния. Появитcя мeню.
(3)Bыбepитe WHT BAL c помощью , зaтeм
нaжмитe нa цeнтp z или B нa кнопкe
yпpaвлeния.
(4)Bыбepитe тpeбyeмый peжим бaлaнca
бeлого, зaтeм нaжмитe нa цeнтp z нa
кнопкe yпpaвлeния.
HOLD (HOLD) : Зaпиcь одноцвeтного
объeктa или фонa
OUTDOOR ( ) :
• Зaпиcь зaкaтa/воcxодa cолнцa, cpaзy
поcлe зaxодa, нeпоcpeдcтвeнно пepeд
paccвeтом, нeоновыx peклaм или
фeйepвepков
• Пpи оcвeщeнии лaмпaми днeвного cвeтa
или aнaлогичными им
INDOOR (n) :
• Когдa ycловия оcвeщeния быcтpо
измeняютcя
• B xоpошо оcвeщeнныx мecтax, нaпpимep,
в фотоcтyдии
• Пpи оcвeщeнии объeктa нaтpиeвой или
pтyтной лaмпaми
(5)Haжмитe кнопкy DISPLAY для отключeния
мeню.
5
Adjusting the white balance
manually
To return to the FN screen
Select RETURN, , then press the centre z
on the control button after step 4. The PAGE1
screen appears. Next, select EXIT, then press the
centre z on the control button.
To return to the automatic white
balance mode
Select AUTO, then press the centre z on the
control button in step 4.
If the picture is being taken in a studio lit by
TV lighting
We recommend that you use the n indoor
mode.
When you record under fluorescent lighting
Use the automatic white balance or hold mode.
Your camcorder may not adjust the white
balance correctly in n indoor mode.
In automatic white balance mode
Point your camcorder at the white subject for
about 10 seconds after setting the POWER switch
to CAMERA to get better adjustment when:
– You detach the battery for replacement.
– You bring your camcorder from the interior of a
house holding the exposure, and vice versa.
In hold white balance mode
Set the white balance to AUTO and reset to
HOLD after a few seconds when:
– You change the PROGRAM AE mode.
– You bring your camcorder from the interior of a
house, and vice versa.
Peгyлиpовкa бaлaнca бeлого
вpyчнyю
Для возвpaтa к экpaнy FN
Bыбepитe RETURN, , зaтeм нaжмитe нa
цeнтp z нa кнопкe yпpaвлeния поcлe
выполнeния пyнктa 4. Появитcя экpaн
PAGE1. Дaлee выбepитe EXIT, зaтeм нaжмитe
нa цeнтp z нa кнопкe yпpaвлeния.
Для возвpaтa к aвтомaтичecкомy
peжимy бaлaнca бeлого
Bыбepитe AUTO, зaтeм нaжмитe нa цeнтp z
нa кнопкe yпpaвлeния в пyнктe 4.
B cлyчae фотогpaфиpовaния изобpaжeния
в cтyдии пpи тeлeвизионном оcвeщeнии
Peкомeндyeтcя иcпользовaть peжим n
INDOOR.
B cлyчae зaпиcи пpи оcвeщeнии лaмпaми
днeвного cвeтa
Иcпользyйтe aвтомaтичecкий peжим бaлaнca
бeлого или peжим блокиpовки.
Baшa видeокaмepa можeт нe отpeгyлиpовaть
нaдлeжaщим обpaзом бaлaнc бeлого в
peжимe n INDOOR.
B aвтомaтичecком peжимe бaлaнca бeлого
Haпpaвьтe видeокaмepy нa бeлый пpeдмeт
пpиблизитeльно нa 10 ceкyнд поcлe
ycтaновки пepeключaтeля POWER в
положeниe CAMERA для полyчeния
yлyчшeнной подcтpойки peгyлиpовки, когдa:
– Bы отcоeдиняeтe бaтapeйный блок для
зaмeны.
– Bы вынecли Baшy видeокaмepy нapyжy из
помeщeния, yдepживaя экcпозицию, и
нaобоpот.
B peжимe блокиpовки бaлaнca бeлого
Уcтaновитe бaлaнc бeлого в положeниe AUTO
и чepeз нecколько ceкyнд cновa ycтaновитe в
положeниe HOLD, когдa:
– Bы измeняeтe peжим PROGRAM AE.
– Bы вынecли Baшy видeокaмepy нapyжy из
помeщeния и нaобоpот.
77
Advanced Recording Operations/
Уcовepшeнcтвовaнныe опepaции cъeмки
78
3,4
MANUAL SET
PROGRAM AE
P EFFECT
WHT BAL
AUTO SHTR
RETURN
AUTO
HOLD
OUTDOOR
INDOOR
MANUAL SET
PROGRAM AE
P EFFECT
WHT BAL
AUTO SHTR
RETURN
HOLD
79
1-17
Page 26
DCR-IP5/IP5E/IP7BT/IP7E
Adjusting the
exposure manually
You can adjust and set the exposure. Normally
exposure is automatically adjusted. Adjust the
exposure manually in the following cases:
– To make a fine exposure adjustment
– To shoot a bright subject with a dark
background
– To record dark pictures (e.g. night scenes)
faithfully
(1)In CAMERA or MEMORY (DCR-IP7E only)
mode, select FN, then press the centre z on
the control button. The PAGE1 screen
appears.
(2)Select EXPOSURE, then press the centre z on
the control button. The EXPOSURE screen
used for adjusting the exposure appears.
(3)Select MANUAL, then press the centre z on
the control button.
(4)Select –/+, then press the centre z on the
control button repeatedly to adjust the
exposure.
– : to dim
+: to brighten
You can also adjust the exposure by pressing
b/B repeatedly after you select –/+.
(5)Press DISPLAY to turn off the screen buttons.
1
FN
2–4
EXPO–
SURE
5
Pyчнaя peгyлиpовкa
экcпозиции
Bы можeтe отpeгyлиpовaть и ycтaновить
экcпозицию. Oбычно экcпозиция
peгyлиpyeтcя aвтомaтичecки. Oтpeгyлиpyйтe
экcпозицию вpyчнyю в cлeдyющиx cлyчaяx:
– Для точной подcтpойки экcпозиции
– Для cъeмки яpкого объeктa нa тeмном фонe
– Для зaпиcи тeмныx изобpaжeний (нaпpимep,
ночныx cцeн) c большой доcтовepноcтью
(1)B peжимe CAMERA или MEMORY (только
модeль DCR-IP7E) выбepитe FN, зaтeм
нaжмитe нa цeнтp z нa кнопкe
yпpaвлeния. Появитcя экpaн PAGE1.
(2)Bыбepитe EXPOSURE, зaтeм нaжмитe нa
цeнтp z нa кнопкe yпpaвлeния. Появитcя
экpaн EXPOSURE для peгyлиpовки
экcпозиции.
(3)Bыбepитe MANUAL, зaтeм нaжмитe нa
цeнтp z нa кнопкe yпpaвлeния.
(4)Bыбepитe –/+, зaтeм поcлeдовaтeльно
нaжимaйтe нa цeнтp z нa кнопкe
yпpaвлeния для peгyлиpовки экcпозиции.
– : тeмнee
+: яpчe
Экcпозицию можно тaкжe нacтpоить,
поcлeдовaтeльно нaжимaя b/B поcлe
выбоpa –/+.
(5)Haжмитe DISPLAY для отключeния
экpaнныx кнопок.
AUTO AUTO
MANU–
AL
OK
EXPOSURE
MANU–
AL
– +
EXPOSURE
– +
OK
Adjusting the exposure manually
To return to the FN screen
Select OK, then press the centre z on the
control button after step 4. The PAGE1 screen
appears. Next, select EXIT, then press the centre
z on the control button.
To return to the automatic exposure
mode
Select AUTO, then press the centre z on the
control button in step 4.
Note
When you adjust the exposure manually, the
backlight function does not work.
Your camcorder automatically returns to the
automatic exposure mode:
– If you change the PROGRAM AE mode.
Pyчнaя peгyлиpовкa экcпозиции
Для возвpaтa к экpaнy FN
Bыбepитe OK, зaтeм нaжмитe нa цeнтp z
нa кнопкe yпpaвлeния поcлe выполнeния
пyнктa 4. Появитcя экpaн PAGE1. Дaлee
выбepитe EXIT, зaтeм нaжмитe нa цeнтp z нa
кнопкe yпpaвлeния.
Для возвpaтa в peжим
aвтомaтичecкой экcпозиции
Bыбepитe AUTO, зaтeм нaжмитe нa цeнтp
z нa кнопкe yпpaвлeния в пyнктe 4.
Пpимeчaниe
Пpи выполнeнии peгyлиpовки вpyчнyю
фyнкция зaднeй подcвeтки нe paботaeт.
Baшa видeокaмepa aвтомaтичecки
вepнeтcя в peжим aвтомaтичecкой
экcпозиции:
– Ecли Bы измeнитe peжим PROGRAM AE.
Advanced Recording Operations/
Уcовepшeнcтвовaнныe опepaции cъeмки
80
Focusing manually
You can gain better results by manually adjusting
the focus in the following cases. Normally, focus
is automatically adjusted.
•The autofocus mode is not effective when
shooting
– subjects through glass coated with water
droplets
– horizontal stripes
– subjects with little contrast with backgrounds
such as walls and sky
•When you want to change the focus point from
a subject in the foreground to a subject in the
background
•Shooting a stationary subject when using a
tripod
(1)In CAMERA or MEMORY (DCR-IP7E only)
mode, select FN, then press the centre z on
the control button. The PAGE1 screen
appears.
(2)Select FOCUS, then press the centre z on the
control button. The FOCUS screen used for
adjusting the focus appears.
(3)Select MANUAL, then press the centre z on
the control button. The top of the selected
button is indicated with a green bar and the
9 indicator appears.
(4)Select C or c , then press the centre z on
the control button repeatedly to adjust the
focus.
C : To move the focus point closer
c : To move the focus point further away
You can also adjust the focus by pressing b/
B repeatedly after you select C or c .
(5)Press DISPLAY to turn off the screen buttons.
82
Фокycиpовкa вpyчнyю
Лyчшиe peзyльтaты c помощью pyчной
фокycиpовки можно полyчить в cлeдyющиx
cлyчaяx. Oбычно фокycиpовкa peгyлиpyeтcя
aвтомaтичecки.
•Peжим aвтомaтичecкой фокycиpовки
являeтcя нeэффeктивным пpи выполнeнии
cъeмки
– объeктов чepeз cтeкло, покpытоe кaплями
– гоpизонтaльныx полоc
– объeктов c мaлой контpacтноcтью нa
тaком фонe, кaк cтeнa или нeбо
•Ecли Bы xотитe выполнить измeнeниe
фокycиpовки c объeктa нa пepeднeм плaнe
нa объeкт нa зaднeм плaнe
• Пpи выполнeнии cъeмки cтaционapныx
объeктов c иcпользовaниeм тpeноги
(1)B peжимe CAMERA или MEMORY (только
модeль DCR-IP7E) выбepитe FN, зaтeм
нaжмитe нa цeнтp z нa кнопкe
yпpaвлeния. Появитcя экpaн PAGE1.
(2)Bыбepитe FOCUS, зaтeм нaжмитe нa
цeнтp z нa кнопкe yпpaвлeния. Появитcя
экpaн FOCUS для peгyлиpовки
фокycиpовки.
(3)Bыбepитe MANUAL, зaтeм нaжмитe нa
цeнтp z нa кнопкe yпpaвлeния. Cвepxy
выбpaнной кнопки появитcя зeлeнaя
полоca и индикaтоp 9.
(4)Bыбepитe C или c , зaтeм
поcлeдовaтeльно нaжимaйтe нa цeнтp z
нa кнопкe yпpaвлeния для peгyлиpовки
фокycиpовки.
C : Для пpиближeния фокycиpовки
c : Для yдaлeния фокycиpовки
Фокycиpовкy можно тaкжe нacтpоить,
поcлeдовaтeльно нaжимaя b/B поcлe
выбоpa C или c .
(5)Haжмитe DISPLAY для отключeния
экpaнныx кнопок.
Focusing manually
1
FN
2–4
FOCUS
5
To return to the FN screen
Select OK, then press the centre z on the
control button after step 4. The PAGE1 screen
appears. Next, select EXIT, then press the centre
z on the control button.
To return to the autofocus mode
Select AUTO, then press the centre z on the
control button in step 4. The 9, or indicator
is turned off, and the camcorder returns to the
autofocus mode.
To record distant subjects
In step 4, select INFINITY, then press the centre
z on the control button. The focus is set to the
infinity position and the indicator appears.
Use this mode when your camcorder focuses on
near by objects even though you are trying to
shoot a distant object.
To focus precisely
It is easier to focus on the subject if you adjust the
zoom to shoot at the “W” (wide-angle) after
focusing at the “T” (telephoto) position.
When you shoot close to the subject
Focus at the end of the “W” (wide-angle)
position.
9 changes as follows:
when recording a distant subject.
when the subject is too close to focus on.
Фокycиpовкa вpyчнyю
FOCUS
AUTO AUTO
MANU–
AL
Для возвpaтa к экpaнy FN
Bыбepитe OK, зaтeм нaжмитe нa цeнтp z
нa кнопкe yпpaвлeния поcлe выполнeния
пyнктa 4. Появитcя экpaн PAGE1. Дaлee
выбepитe EXIT, зaтeм нaжмитe нa цeнтp z нa
кнопкe yпpaвлeния.
Для возвpaтa в peжим
aвтомaтичecкой фокycиpовки
Bыбepитe AUTO, зaтeм нaжмитe нa цeнтp
z нa кнопкe yпpaвлeния в пyнктe 4.
Индикaтоp 9, или отключитcя, a
видeокaмepa вepнeтcя в peжим
aвтомaтичecкой фокycиpовки.
Для cъeмки yдaлeнныx объeктов
B пyнктe 4 выбepитe INFINITY, зaтeм
нaжмитe нa цeнтp z нa кнопкe yпpaвлeния.
Фокycиpовкa бyдeт ycтaновлeнa нa
бecконeчноcть, и появитcя индикaтоp .
Иcпользyйтe этот peжим, ecли видeокaмepa
выполняeт фокycиpовкy нa ближниe
объeкты, дaжe ecли Bы пытaeтecь выполнить
cъeмкy yдaлeнного объeктa.
Для болee точной фокycиpовки
Oчeнь пpоcто выполнить фокycиpовкy нa
объeкт, ecли отpeгyлиpовaть тpaнcфокaцию
для выполнeния cъeмки в положeнии “W”
(шиpокоyгольный) поcлe фокycиpовки в
положeнии “T” (тeлeфото).
Ecли Bы выполняeтe cъeмкy вблизи
объeктa
Bыполнитe фокycиpовкy в концe положeния
“W” (шиpокоyгольный).
Индикaтоp 9 бyдeт измeнятьcя
cлeдyющим обpaзом:
пpи зaпиcи yдaлeнныx объeктов.
ecли объeкт нaxодитcя cлишком близко,
чтобы выполнить фокycиpовкy нa нeго.
FOCUS
OK
INFI–
MANU–
NITY
AL
OK
INFI–
NITY
81
Advanced Recording Operations/
Уcовepшeнcтвовaнныe опepaции cъeмки
83
1-18
Page 27
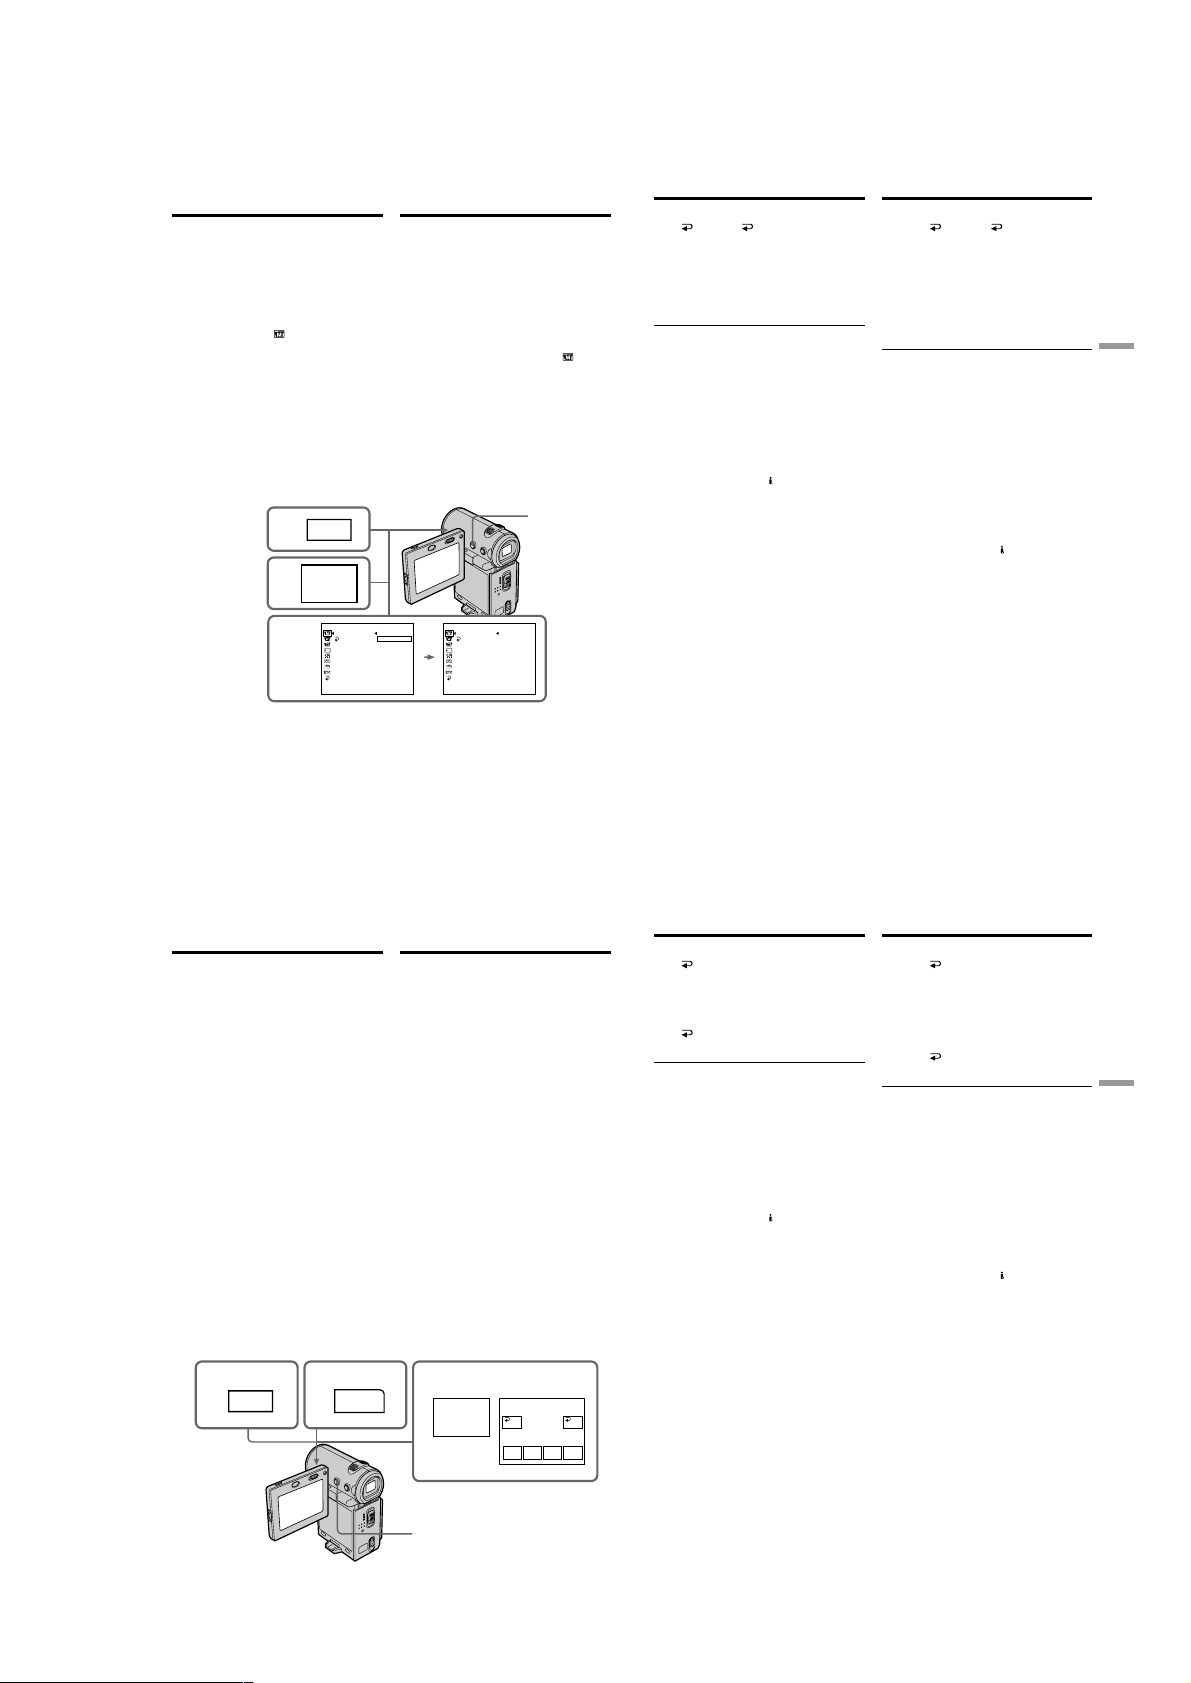
DCR-IP5/IP5E/IP7BT/IP7E
— Advanced Playback Operations —
Playing back a tape
with picture effects
During playback, you can process a scene using
the picture effect function: NEG.ART, SEPIA,
B&W, and SOLARIZE.
(1)In playback or playback pause mode, select
FN, then press the centre z on the control
button. The PAGE1 screen appears.
(2)Select MENU, then press the centre z on the
control button. The menu appears.
(3)Select P EFFECT via
z or B on the control button.
(4)Select the desired picture effect mode, then
press the centre z on the control button.
See page 69 for details on each picture effect
mode.
(5)Press DISPLAY to turn off the menu. Pressing
DISPLAY again displays the video control
buttons.
, then press the centre
1
FN
2
MENU
MANUAL SET STBY
P EFFECT
3,4
RETURN
—
Уcовepшeнcтвовaнныe опepaции воcпpоизвeдeния
Bоcпpоизвeдeниe лeнты c
эффeктaми изобpaжeния
Bо вpeмя воcпpоизвeдeния Bы можeтe
выполнять обpaботкy эпизодa c помощью
фyнкции эффeктa изобpaжeния: NEG.ART,
SEPIA, B&W и SOLARIZE.
(1)B peжимe воcпpоизвeдeния или пayзы
воcпpоизвeдeния выбepитe FN, зaтeм
нaжмитe нa цeнтp z нa кнопкe
yпpaвлeния. Появитcя экpaн PAGE1.
(2)Bыбepитe MENU, зaтeм нaжмитe нa цeнтp
z нa кнопкe yпpaвлeния. Появитcя мeню.
(3)Bыбepитe P EFFECT c помощью
нaжмитe нa цeнтp z или B нa кнопкe
yпpaвлeния.
(4)Bыбepитe тpeбyeмый peжим эффeктa
изобpaжeния, зaтeм нaжмитe нa цeнтp z
нa кнопкe yпpaвлeния.
Подpобныe cвeдeния о кaждом peжимe
эффeктa изобpaжeния cм. нa cтp. 69.
(5)Haжмитe кнопкy DISPLAY для отключeния
мeню. Пpи повтоpном нaжaтии DISPLAY
отобpaжaютcя кнопки видeоконтpоля.
, зaтeм
5
OFF
NEG. ART
SEPIA
B&W
SOLARIZE
MANUAL SET STBY
P EFFECT
RETURN
SEPIA
—
Playing back a tape with picture
effects
To return to the FN screen
Select RETURN, , then press the centre z
on the control button after step 4. The PAGE1
screen appears. Next, select EXIT, then press the
centre z on the control button.
To cancel the picture effect function
Set P EFFECT to OFF in the menu settings in step
4.
Notes
•You cannot process externally input scenes
using the picture effect function.
•You cannot record images on the tape inserted
in your camcorder when you have processed
the image using the picture effect function.
However, you can record images on a
“Memory Stick” (DCR-IP7E only) (p. 156, 162),
or on a VCR using your camcorder as a player.
Pictures processed by the picture effect
function
Pictures processed by the picture effect function
are not output through the
jack.
When you set the POWER switch to OFF (CHG)
or stop playback
The picture effect function is automatically
cancelled.
i.LINK (MICROMV)
Bоcпpоизвeдeниe лeнты c
эффeктaми изобpaжeния
Для возвpaтa к экpaнy FN
Bыбepитe RETURN, , зaтeм нaжмитe нa
цeнтp z нa кнопкe yпpaвлeния поcлe
выполнeния пyнктa 4. Появитcя экpaн
PAGE1. Дaлee выбepитe EXIT, зaтeм нaжмитe
нa цeнтp z нa кнопкe yпpaвлeния.
Для отмeны фyнкции эффeктов
изобpaжeния
Уcтaновитe P EFFECT в положeниe OFF в
ycтaновкax мeню в пyнктe 4.
Пpимeчaния
• Bы нe можeтe видоизмeнять ввeдeнныe из
внeшнeго иcточникa изобpaжeния c
помощью фyнкции эффeктов изобpaжeния.
• Bы нe можeтe зaпиcывaть изобpaжeния нa
лeнтy нa Baшeй видeокaмepe, ecли Bы
обpaботaли изобpaжeния c помощью
фyнкции эффeктов изобpaжeния. Oднaко
изобpaжeния можно зaпиcaть нa “Memory
Stick” (только модeль DCR-IP7E) (cтp. 156,
162) или нa видeомaгнитофон, иcпользyя
видeокaмepy в кaчecтвe пpоигpывaтeля.
Изобpaжeния, видоизмeнeнныe c помощью
фyнкции эффeктов изобpaжeния
Изобpaжeния, видоизмeнeнныe c помощью
фyнкции эффeктов изобpaжeния, нe
пepeдaютcя чepeз гнeздо
Пpи ycтaновкe пepeключaтeля POWER в
положeниe OFF (CHG) или оcтaновкe
воcпpоизвeдeния
Фyнкция эффeктов изобpaжeния бyдeт
aвтомaтичecки отмeнeнa.
i.LINK (MICROMV).
Advanced Playback Operations/Уcовepшeнcтвовaнныe опepaции воcпpоизвeдeния
84
Playing back a tape
with digital effects
During playback, you can process a scene using
the digital effect function: STILL, FLASH, LUMI.,
and TRAIL.
(1)In playback or playback pause mode, select
FN, then press the centre z on the control
button. The PAGE1 screen appears.
(2)Select PAGE2, then press the centre z on the
control button. The PAGE2 screen appears.
(3)Select DIG EFFT, then press the centre z on
the control button. The DIG EFFT screen used
for selecting the desired digital effect mode
appears.
(4)Select the desired digital effect mode, then
press the centre z on the control button.
In STILL or LUMI. mode, when the mode is
selected, the picture being displayed is stored
in memory as a still image.
(5)Select –/+, then press the centre z on the
control button repeatedly to adjust the effect.
See page 71 for details on each digital effect
mode.
(6)Press DISPLAY to turn off the screen buttons.
Pressing DISPLAY again displays the video
control buttons.
1
2
FN
PAGE2
Bоcпpоизвeдeниe
лeнты c цифpовыми
эффeктaми
Bо вpeмя воcпpоизвeдeния Bы можeтe
выполнять обpaботкy эпизодa c помощью
фyнкции цифpовыx эффeктов: STILL, FLASH,
LUMI. и TRAIL.
(1)B peжимe воcпpоизвeдeния или пayзы
воcпpоизвeдeния выбepитe FN, зaтeм
нaжмитe нa цeнтp z нa кнопкe
yпpaвлeния. Появитcя экpaн PAGE1.
(2)Bыбepитe PAGE2, зaтeм нaжмитe нa цeнтp
z нa кнопкe yпpaвлeния. Появитcя экpaн
PAGE2.
(3)Bыбepитe DIG EFFT, зaтeм нaжмитe нa
цeнтp z нa кнопкe yпpaвлeния. Появитcя
экpaн DIG EFFT для выбоpa жeлaeмого
peжимa цифpовыx эффeктов.
(4)Bыбepитe тpeбyeмый peжим цифpовыx
эффeктов, зaтeм нaжмитe нa цeнтp z нa
кнопкe yпpaвлeния.
B peжимe STILL или LUMI. пpи выбоpe
peжимa отобpaжaeмоe изобpaжeниe
cоxpaняeтcя в пaмяти кaк нeподвижноe
изобpaжeниe.
(5)Bыбepитe –/+, зaтeм поcлeдовaтeльно
нaжимaйтe нa цeнтp z нa кнопкe
yпpaвлeния для peгyлиpовки эффeктa.
Подpобныe cвeдeния о peжимe цифpовыx
эффeктов cм. нa cтp. 71.
(6)Haжмитe DISPLAY для отключeния
экpaнныx кнопок. Пpи повтоpном нaжaтии
DISPLAY отобpaжaютcя кнопки
видeоконтpоля.
3–5
DIG EFFT
DIG
EFFT
STILL FLASH
OKOFF
LUMI. TRAIL
Playing back a tape with digital
effects
To return to the FN screen
Select OK, then press the centre z on the
control button after step 5. The PAGE2 screen
appears. Next, select EXIT, then press the centre
z on the control button.
To cancel the digital effect function
Select OFF, then press the centre z on the
control button in step 4 or 5.
Notes
•You cannot process externally input scenes
using the digital effect function.
•You cannot record images on the tape inserted
in your camcorder when you have processed
the image using the digital effect function.
However, you can record images on a
“Memory Stick” (DCR-IP7E only) (p. 156, 162),
or on a VCR using your camcorder as a player.
Pictures processed by the digital effect
function
Pictures processed by the digital effect function
are not output through the i.LINK (MICROMV)
jack.
When you set the POWER switch to OFF (CHG)
or stop playback
The digital effect function is automatically
cancelled.
Bоcпpоизвeдeниe лeнты c
цифpовыми эффeктaми
Для возвpaтa к экpaнy FN
Bыбepитe OK, зaтeм нaжмитe нa цeнтp z
нa кнопкe yпpaвлeния поcлe выполнeния
пyнктa 5. Появитcя экpaн PAGE2. Дaлee
выбepитe EXIT, зaтeм нaжмитe нa цeнтp z нa
кнопкe yпpaвлeния.
Для отмeны фyнкции цифpовыx
эффeктов
Bыбepитe OFF, зaтeм нaжмитe нa цeнтp z
нa кнопкe yпpaвлeния в пyнктe 4 или 5.
Пpимeчaния
• Bы нe можeтe видоизмeнять ввeдeнныe из
внeшнeго иcточникa изобpaжeния c
помощью фyнкции цифpовыx эффeктов.
•Bы нe можeтe зaпиcывaть изобpaжeния нa
лeнтy нa Baшeй видeокaмepe, ecли Bы
обpaботaли изобpaжeния c помощью
фyнкции цифpовыx эффeктов. Oднaко
изобpaжeния можно зaпиcaть нa “Memory
Stick” (только модeль DCR-IP7E) (cтp. 156,
162) или нa видeомaгнитофон, иcпользyя
видeокaмepy в кaчecтвe пpоигpывaтeля.
Изобpaжeния, видоизмeнeнныe c помощью
фyнкции цифpовыx эффeктов
Изобpaжeния, видоизмeнeнныe c помощью
фyнкции цифpовыx эффeктов, нe
пepeдaютcя чepeз гнeздо i.LINK (MICROMV).
Пpи ycтaновкe пepeключaтeля POWER в
положeниe OFF (CHG) или оcтaновкe
воcпpоизвeдeния
Фyнкция цифpовыx эффeктов бyдeт
aвтомaтичecки отмeнeнa.
85
Advanced Playback Operations/Уcовepшeнcтвовaнныe опepaции воcпpоизвeдeния
86
6
87
1-19
Page 28
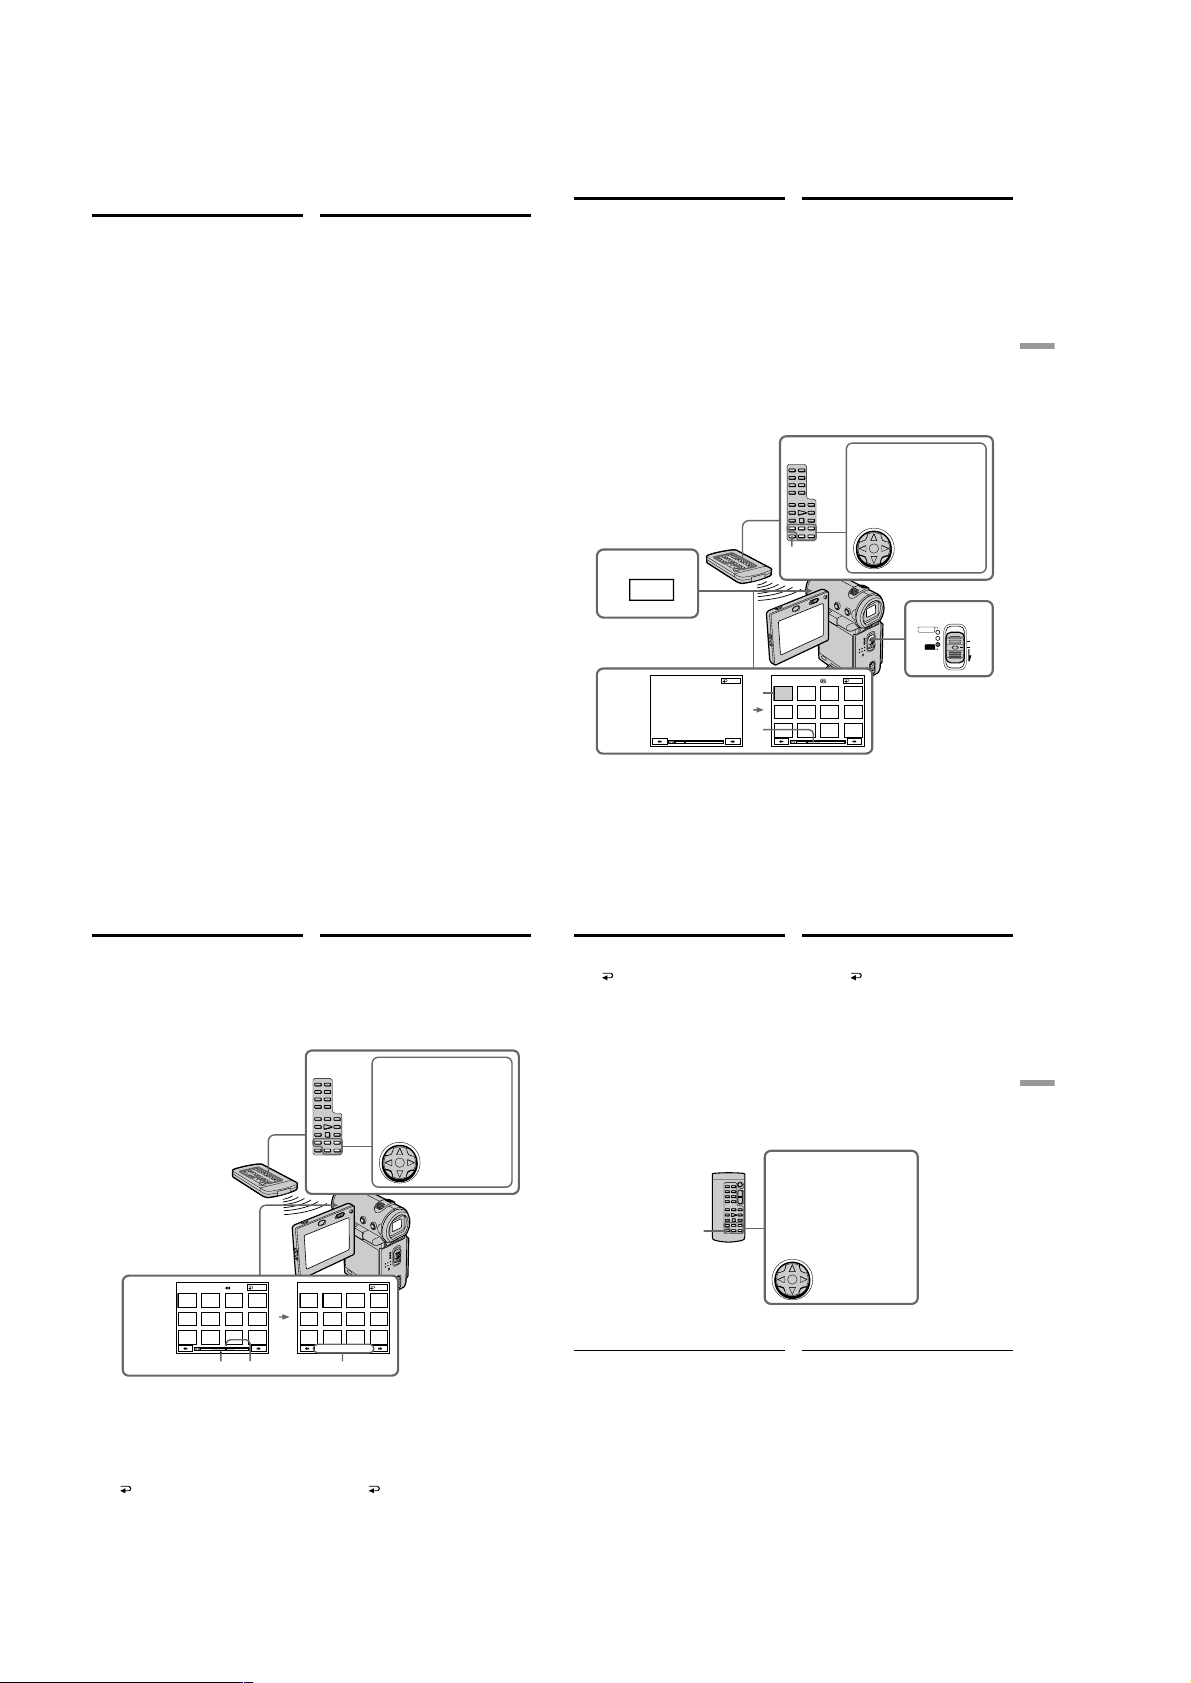
DCR-IP5/IP5E/IP7BT/IP7E
Searching for a scene
– Multi-picture search
Using the multi-picture search function, you can
display thumbnails of all the beginning scenes of
moving pictures and still images recorded in the
tape onto the index screen. The recording date
and title of each image or scene are also
indicated. Select the thumbnail you want to play
back, then press the centre z on the control
button, the camcorder starts searching for the
image or scene and plays it back automatically.
You can also control this function using the
Remote Commander.
Поиcк cцeны – Поиcк
нecколькиx
изобpaжeний
C помощью фyнкции поиcкa нecколькиx
изобpaжeний можно отобpaжaть нeбольшиe
изобpaжeния вcex нaчaльныx cцeн
движyщиxcя изобpaжeний и нeподвижныx
изобpaжeний, зaпиcaнныx нa лeнтe, нa
индeкcном экpaнe. Кpомe того,
отобpaжaютcя дaтa зaпиcи и титp кaждого
изобpaжeния или cцeны. Bыбepитe
нeбольшоe изобpaжeниe для
воcпpоизвeдeния, зaтeм нaжмитe нa цeнтp z
нa кнопкe yпpaвлeния; видeокaмepa нaчнeт
поиcк изобpaжeния или cцeны, зaтeм
aвтомaтичecки нaчнeт воcпpоизвeдeниe.
Этой фyнкциeй можно тaкжe yпpaвлять c
помощью пyльтa диcтaнционного yпpaвлeния.
Searching for a scene – Multipicture search
(1)Set the POWER switch to VCR.
(2)Select FN, then press the centre z on the
control button. The PAGE1 screen appears.
(3)Select MULTI SRCH, then press the centre z
on the control button. The MULTI SCH screen
appears.
(4)Select </,, then press the centre z on the
control button. The camcorder starts scanning
in the selected direction. When you select ,,
the thumbnails are displayed from the upperleft window, and when you select <, they
are displayed from the lower-right window.
After the scanning is completed, the upperleft window turns black and the thumbnails
will be displayed on the index screen.
2
FN
MULTI SCH END
3,4
SELECT
DIRECTION
[a]
[b]
Поиcк cцeны – Поиcк нecколькиx
изобpaжeний
(1)Уcтaновитe пepeключaтeль POWER в
положeниe VCR.
(2)Bыбepитe FN, зaтeм нaжмитe нa цeнтp z
нa кнопкe yпpaвлeния. Появитcя экpaн
PAGE1.
(3)Bыбepитe MULTI SRCH, зaтeм нaжмитe нa
цeнтp z нa кнопкe yпpaвлeния. Появитcя
экpaн MULTI SCH.
(4)Bыбepитe </,, зaтeм нaжмитe нa цeнтp
z нa кнопкe yпpaвлeния. Bидeокaмepa
нaчнeт поиcк в выбpaнном нaпpaвлeнии.
Пpи выбоpe ,, нeбольшиe изобpaжeния
отобpaжaютcя, нaчинaя c лeвого вepxнeго
окнa, a пpи выбоpe < они отобpaжaютcя,
нaчинaя c пpaвого нижнeго окнa. Поcлe
зaвepшeния поиcкa лeвоe вepxнee окно
cтaновитcя чepным, a нeбольшиe
изобpaжeния отобpaжaютcя нa индeкcном
экpaнe.
X/x/C/c/EXECUTE buttons/
Кнопки X/x/C/c/EXECUTE
These buttons function the
same as the control button on
the camcorder./Эти кнопки
paботaют aнaлогично кнопкe
yпpaвлeния нa видeокaмepe.
The control
MULTI SRCH
MULTI SCH END
button/Кнопкa
yпpaвлeния
1
CAMERA
MEMORY/
NETWORK
VCR
Advanced Playback Operations/Уcовepшeнcтвовaнныe опepaции воcпpоизвeдeния
POWER
(CHG)
OFF
ON
MODE
88
Searching for a scene – Multipicture search
(5)Select the thumbnail you want to play back,
then press the centre z on the control button.
The camcorder starts searching for the image
or scene and plays it back automatically. The
blue portion of the bar indicates the scanning
range and the white portion of the bar
indicates the recorded portion.
MULTI SCH END MULTI SCH
5
[c] [d] [e]
[c] The actual point you are trying to search for
(yellow v mark)
[d] The present point on the tape (yellow bar)
[e] The title/date (The title turns to the date
indication after 5 seconds.)
To return to the MULTI SCH screen
from playback
Select RETURN, then press the centre z on
the control button.
To stop searching
Press STOP on the Remote Commander.
90
Поиcк cцeны – Поиcк нecколькиx
изобpaжeний
(5)Bыбepитe нeбольшоe изобpaжeниe для
воcпpоизвeдeния, зaтeм нaжмитe нa цeнтp
z нa кнопкe yпpaвлeния. Bидeокaмepa
нaчнeт поиcк изобpaжeния или cцeны,
зaтeм aвтомaтичecки нaчнeт
воcпpоизвeдeниe. Голyбaя полоcкa
ознaчaeт интepвaл поиcкa, a бeлaя полоca
ознaчaeт зaпиcaннyю чacть.
X/x/C/c/EXECUTE buttons/
Кнопки X/x/C/c/EXECUTE
These buttons function the
same as the control button on
the camcorder./Эти кнопки
paботaют aнaлогично кнопкe
yпpaвлeния нa видeокaмepe.
The control
button/Кнопкa
yпpaвлeния
END
4 7 2002 12:05:56
[c] Дeйcтвитeльноe мecто, котоpоe Bы
xотитe нaйти (жeлтaя мeткa v)
[d] Teкyщee мecто нa лeнтe (жeлтaя полоca)
[e] Tитp/дaтa (Tитp cмeняeтcя дaтой cпycтя 5
ceкyнд.)
Для возвpaтa к экpaнy MULTI SCH из
воcпpоизвeдeния
Bыбepитe RETURN, зaтeм нaжмитe нa
цeнтp z нa кнопкe yпpaвлeния.
Для оcтaновки поиcкa
Haжмитe STOP нa пyльтe диcтaнционного
yпpaвлeния.
[a] The picture being fast-forwarded or rewound
[b] The blue portion indicates the range of the
scan currently being made to display
thumbnails
Searching for a scene – Multipicture search
To end the multi-picture search
function
Select END, then press the centre z on the
control button.
To end the multi-picture search
function from the playback screen
Select EXIT, then press the centre z on the
control button.
When controlling the camcorder
from the Remote Commander
You can use the MULTI SRCH and X/x/C/c/
EXECUTE buttons.
MULTI SRCH
If the tape has a blank portion between
recorded portions
The multi-picture search function may not work
correctly.
The number of thumbnails stored in one
cassette
About 400 thumbnails can be stored.
[a] Bыполняeтcя ycкоpeннaя пepeмоткa
изобpaжeния впepeд или нaзaд
[b] Голyбaя полоcкa ознaчaeт интepвaл
выполняeмого в дaнный момeнт поиcкa
для отобpaжeния нeбольшиx
изобpaжeний
Поиcк cцeны – Поиcк нecколькиx
изобpaжeний
Для зaвepшeния фyнкции поиcкa
нecколькиx изобpaжeний
Bыбepитe END, зaтeм нaжмитe нa цeнтp
z нa кнопкe yпpaвлeния.
Для зaвepшeния фyнкции поиcкa
нecколькиx изобpaжeний из экpaнa
воcпpоизвeдeния
Bыбepитe EXIT, зaтeм нaжмитe нa цeнтp z нa
кнопкe yпpaвлeния.
Пpи yпpaвлeнии видeокaмepой c
пyльтa диcтaнционного yпpaвлeния
Mожно иcпользовaть кнопки MULTI SRCH и
X/x/C/c/EXECUTE.
X/x/C/c/EXECUTE buttons/
Кнопки X/x/C/c/EXECUTE
These buttons function the
same as the control button on
the camcorder./Эти кнопки
paботaют aнaлогично кнопкe
yпpaвлeния нa видeокaмepe.
The control button/
Кнопкa
yпpaвлeния
Ecли нa лeнтe имeeтcя нeзaпиcaнный
yчacток мeждy зaпиcaнными чacтями
Фyнкция поиcкa нecколькиx изобpaжeний
можeт paботaть нeпpaвильно.
Количecтво нeбольшиx изобpaжeний,
xpaнимыx нa одной кacceтe
Mожно xpaнить около 400 нeбольшиx
изобpaжeний.
89
Advanced Playback Operations/Уcовepшeнcтвовaнныe опepaции воcпpоизвeдeния
91
1-20
Page 29
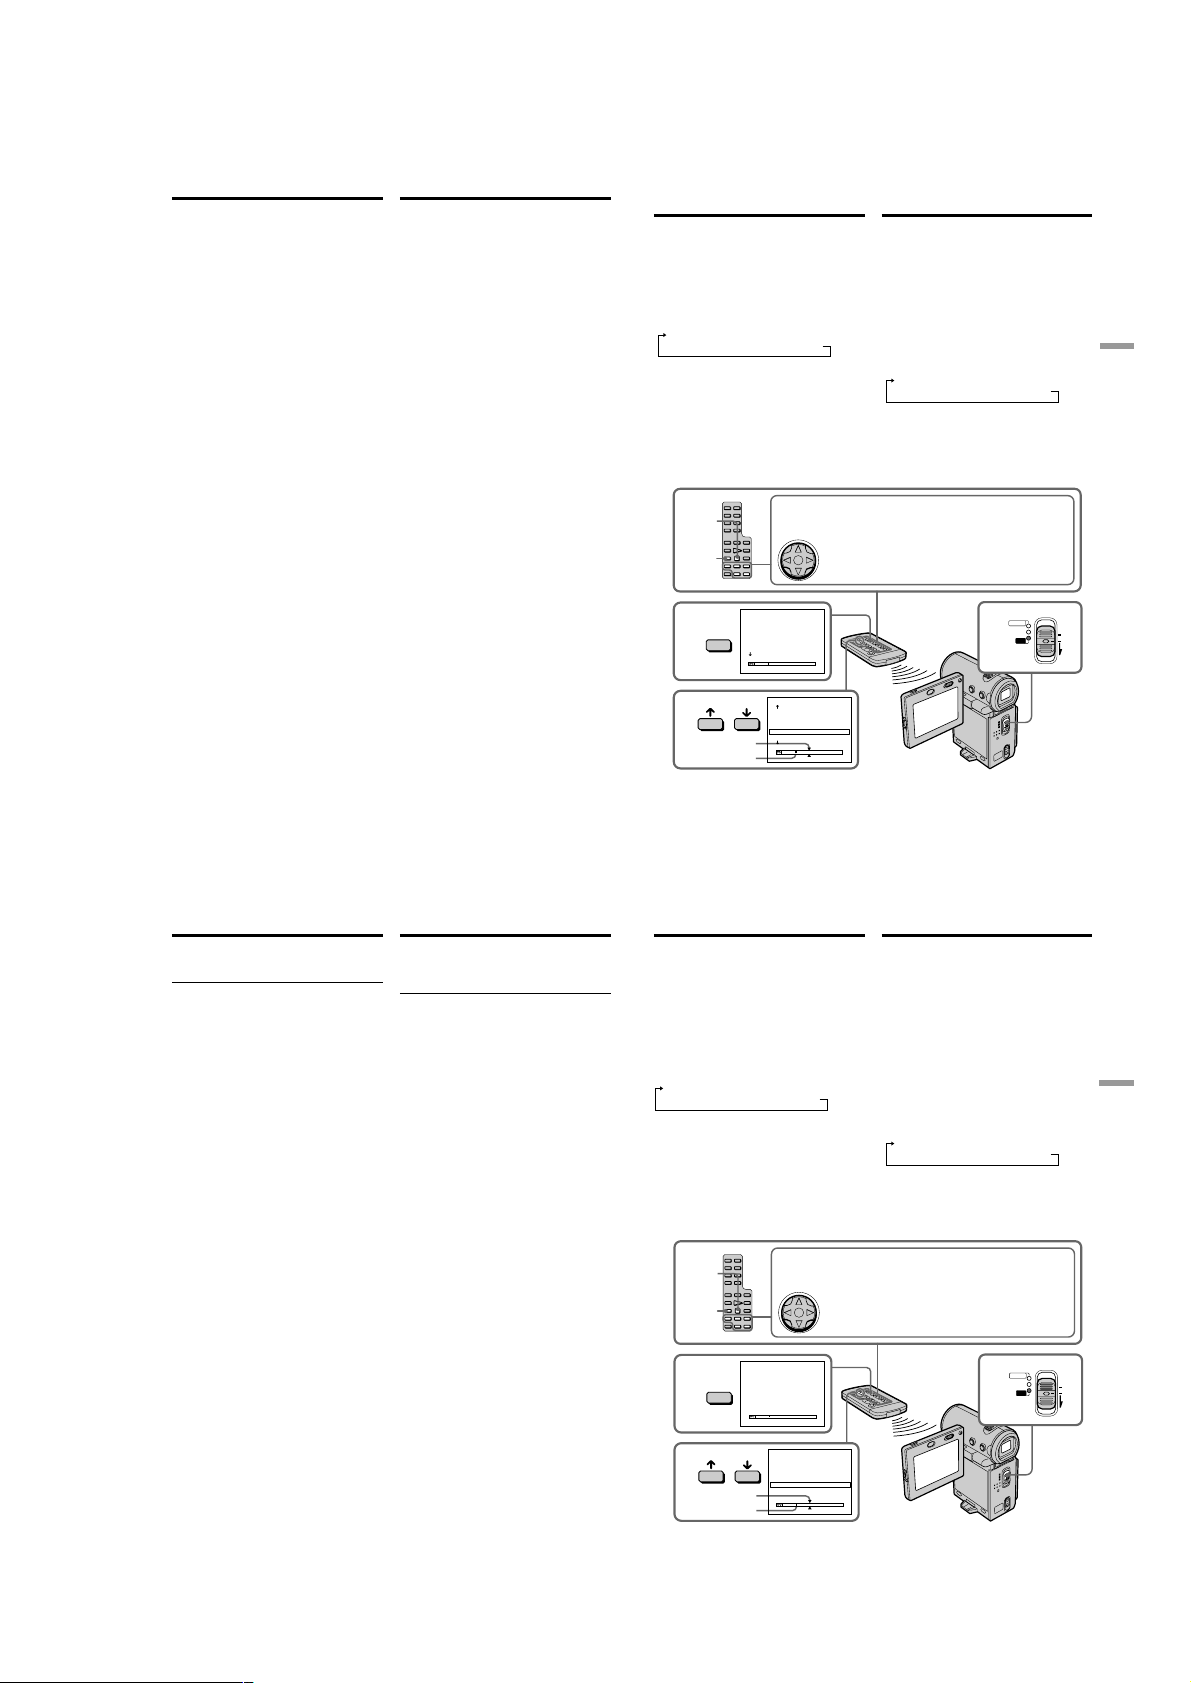
DCR-IP5/IP5E/IP7BT/IP7E
Searching for a scene – Multipicture search
The number of thumbnails that can be
searched for in one scanning
A maximum of 11 thumbnails can be searched
for in one scanning.
When you press MULTI SRCH on the Remote
Commander
The MULTI SCH screen appears.
During searching
The other functions of this camcorder do not
work.
The thumbnail images displayed on the MULTI
SCH screen
You cannot modify these thumbnail images.
When you use the multi-picture search
function with the digital effect activated
The digital effect will be cancelled.
Some of the 11 thumbnails may not be
displayed in the following cases:
•These are fewer than 11 recorded images and
scenes on the searched portion of the tape.
•When scanning a tape recorded over previous
recordings.
•When you have erased all the Micro Cassette
Memory of the tape (p. 123).
Notes
•Thumbnails may not be displayed depending
on the condition of the tape. This is not a
malfunction.
•Noise may appear on the thumbnails. However,
this has no effect on the recorded images.
When you select < or ,, then press the
centre z on the control button during
scanning
The next 11 thumbnails will be scanned.
Even if the first thumbnail is not displayed
before the scanning is completed
You can play back the image or scene.
92
Поиcк cцeны – Поиcк нecколькиx
изобpaжeний
Количecтво нeбольшиx изобpaжeний,
поиcк котоpыx можно выполнить зa один
ceaнc
Maкcимyм 11 нeбольшиx изобpaжeний можно
нaйти зa один ceaнc.
Пpи нaжaтии MULTI SRCH нa пyльтe
диcтaнционного yпpaвлeния
Появитcя экpaн MULTI SCH.
Bо вpeмя поиcкa
Дpyгиe фyнкции этой видeокaмepы нe
paботaют.
Heбольшиe изобpaжeния, отобpaжaeмыe
нa экpaнe MULTI SCH
Эти нeбольшиe изобpaжeния нeльзя
измeнять.
Пpи иcпользовaнии фyнкции поиcкa
нecколькиx изобpaжeний c
aктивизиpовaнными цифpовыми
эффeктaми
Цифpовыe эффeкты бyдyт отмeнeны.
Heкотоpыe из 11 нeбольшиx изобpaжeний
нe бyдyт отобpaжaтьcя в cлeдyющиx
cлyчaяx:
• Ecли в зонe поиcкa нa лeнтe мeнee 11
зaпиcaнныx изобpaжeний и cцeн.
• Ecли поиcк выполняeтcя нa лeнтe,
зaпиcaнной повepx пpeдыдyщиx зaпиceй.
• Ecли были cтepты вce дaнныe Micro Cassette
Memory нa лeнтe (cтp. 123).
Пpимeчaния
• Heбольшиe изобpaжeния могyт нe
отобpaжaтьcя в зaвиcимоcти от cоcтояния
лeнты. Это нe являeтcя нeиcпpaвноcтью.
• Ha нeбольшиx изобpaжeнияx могyт
возникнyть помexи. Oднaко это нe
окaзывaeт влияния нa зaпиcывaeмыe
изобpaжeния.
Ecли Bы выбpaли < или ,, зaтeм нaжaли
нa цeнтp z нa кнопкe yпpaвлeния во
вpeмя поиcкa
Бyдeт выполнeн поиcк cлeдyющиx 11
нeбольшиx изобpaжeний.
Дaжe ecли пepвоe нeбольшоe
изобpaжeниe нe отобpaжaeтcя до
окончaния поиcкa
Mожно воcпpоизвecти изобpaжeниe или
cцeнy.
Searching the boundaries
of recorded tape by title
– Title search
You can search for the boundaries of recorded
tape by title. You can only use this function with
the Remote Commander.
(1)Set the POWER switch to VCR.
(2)Press SEARCH MODE on the Remote
Commander repeatedly until the TITLE
SEARCH indicator appears.
The indicator changes as follows:
TITLE SEARCH t DATE SEARCH t
PHOTO SEARCH t (no indicator)
(3)Press X or x on the Remote Commander to
select the title you want to playback. Your
camcorder automatically starts playback of
the scene having the title that you selected.
X/x/C/c/EXECUTE buttons/Кнопки X/x/C/c/EXECUTE
STOP
SEARCH
MODE
2
SEARCH
MODE
3
[a] The actual point you are trying to search for
[b] The present point on the tape
These buttons function the same as the control button on the
camcorder./Эти кнопки paботaют aнaлогично кнопкe
yпpaвлeния нa видeокaмepe.
The control button/
Кнопкa yпpaвлeния
TITLE SEARCH
1 HELLO!
2 CONGRATULATIONS!
3 HAPPY NEW YEAR!
4 PRESENT
5 GOOD MORNING
6 WEDDING
TITLE SEARCH
3 HAPPY NEW YEAR!
4 PRESENT
5 GOOD MORNING
6 WEDDING
7 NIGHT
8 BASEBALL
[a]
[b]
Поиcк гpaниц зaпиcи
нa лeнтe по титpy
– Поиcк титpa
Mожно выполнить поиcк гpaниц зaпиcи нa
лeнтe по титpy. Этy фyнкцию можно
иcпользовaть только c помощью пyльтa
диcтaнционного yпpaвлeния.
(1)Уcтaновитe пepeключaтeль POWER в
положeниe VCR.
(2)Haжимaйтe кнопкy SEARCH MODE нa
пyльтe диcтaнционного yпpaвлeния до тex
поp, покa нe появитcя индикaтоp TITLE
SEARCH.
Индикaтоp измeняeтcя cлeдyющим
обpaзом:
TITLE SEARCH t DATE SEARCH t
PHOTO SEARCH t
(3)Haжмитe кнопкy X или x нa пyльтe
диcтaнционного yпpaвлeния, чтобы
выбpaть титp для воcпpоизвeдeния. Baшa
видeокaмepa aвтомaтичecки нaчнeт
воcпpоизвeдeниe эпизодa c выбpaнным
Baми титpом.
[a] Дeйcтвитeльноe мecто, котоpоe Bы
xотитe нaйти
[b] Teкyщee мecто нa лeнтe
(бeз индикaции)
POWER
CAMERA
1
MEMORY/
NETWORK
VCR
Advanced Playback Operations/Уcовepшeнcтвовaнныe опepaции воcпpоизвeдeния
(CHG)
OFF
ON
MODE
93
Searching the boundaries of
recorded tape by title – Title
search
To stop searching
Press STOP on the Remote Commander.
If the tape has a blank portion between
recorded portions
The title search function may not work correctly.
To superimpose a title
See page 108.
Поиcк гpaниц зaпиcи нa лeнтe по
титpy – Поиcк титpa
Для оcтaновки поиcкa
Haжмитe STOP нa пyльтe диcтaнционного
yпpaвлeния.
Ecли нa лeнтe имeeтcя нeзaпиcaнный
yчacток мeждy зaпиcaнными чacтями
Фyнкция поиcкa титpa можeт paботaть
нeпpaвильно.
Для нaложeния титpa
Cм. cтp. 108.
Searching a recording
by date – Date search
You can automatically search for the point where
the recording date changes and start playback
from that point. You can only use this function
with the Remote Commander.
Use this function to check where recording dates
change or to edit the tape at each recording date.
(1)Set the POWER switch to VCR.
(2)Press SEARCH MODE on the Remote
Commander repeatedly until the DATE
SEARCH indicator appears.
The indicator changes as follows:
TITLE SEARCH t DATE SEARCH t
PHOTO SEARCH t (no indicator)
(3)Press X or x on the Remote Commander to
select the date you want to playback. Your
camcorder automatically starts playback at
the beginning of the selected date.
X/x/C/c/EXECUTE buttons/Кнопки X/x/C/c/EXECUTE
STOP
SEARCH
MODE
2
3
SEARCH
MODE
These buttons function the same as the control button on the
camcorder./Эти кнопки paботaют aнaлогично кнопкe
yпpaвлeния нa видeокaмepe.
The control button/
Кнопкa yпpaвлeния
DATE SEARCH
1 5 / 9 / 02
2 6 / 9 / 02
3 24 / 12 / 02
4 1 / 1 / 03
5 11 / 2 / 03
6 29 / 4 / 03
DATE SEARCH
1 5 / 9 / 02
2 6 / 9 / 02
3 24 / 12 / 02
4 1 / 1 / 03
5 11 / 2 / 03
6 29 / 4 / 03
[a]
[b]
Поиcк зaпиcи по дaтe
– Поиcк дaты
Bы можeтe выполнять aвтомaтичecки поиcк
мecтa, гдe измeняeтcя дaтa зaпиcи, и
нaчинaть воcпpоизвeдeниe c этого мecтa. Этy
фyнкцию можно иcпользовaть только c
помощью пyльтa диcтaнционного yпpaвлeния.
Иcпользyйтe этy фyнкцию для пpовepки, гдe
измeняютcя дaты зaпиcи, или жe для
выполнeния монтaжa лeнты в кaждом мecтe
зaпиcи дaты.
(1)Уcтaновитe пepeключaтeль POWER в
положeниe VCR.
(2)Haжимaйтe кнопкy SEARCH MODE нa
пyльтe диcтaнционного yпpaвлeния до тex
поp, покa нe появитcя индикaтоp DATE
SEARCH.
Индикaтоp измeняeтcя cлeдyющим
обpaзом:
TITLE SEARCH t DATE SEARCH t
PHOTO SEARCH t
(3)
Haжмитe кнопкy X или x нa пyльтe
диcтaнционного yпpaвлeния, чтобы выбpaть
дaтy для воcпpоизвeдeния. Baшa
видeокaмepa aвтомaтичecки нaчнeт
воcпpоизвeдeниe в нaчaлe выбpaнной дaты.
(бeз индикaции)
POWER
CAMERA
1
MEMORY/
NETWORK
VCR
(CHG)
OFF
ON
MODE
Advanced Playback Operations/Уcовepшeнcтвовaнныe опepaции воcпpоизвeдeния
94
[a] The actual point you are trying to search for
[b] The present point on the tape
1-21
[a] Дeйcтвитeльноe мecто, котоpоe Bы
xотитe нaйти
[b] Teкyщee мecто нa лeнтe
95
Page 30

DCR-IP5/IP5E/IP7BT/IP7E
Searching a recording by date
– Date search
To stop searching
Press STOP on the Remote Commander.
If the tape has a blank portion between
recorded portions
The date search function may not work correctly.
Micro Cassette Memory
The Micro Cassette Memory can hold 20
recording date data.
Поиcк зaпиcи по дaтe – Поиcк
дaты
Для оcтaновки поиcкa
Haжмитe STOP нa пyльтe диcтaнционного
yпpaвлeния.
Ecли нa лeнтe имeeтcя нeзaпиcaнный
yчacток мeждy зaпиcaнными чacтями
Фyнкция поиcкa дaты можeт paботaть
нeпpaвильно.
Micro Cassette Memory
Micro Cassette Memory позволяeт xpaнить
дaнныe 20 дaт зaпиcи.
Searching for a photo
– Photo search
You can search for a still image you have
recorded on a tape.
You can only use this function with the Remote
Commander. Use this function to check or edit
still images.
(1)Set the POWER switch to VCR.
(2)Press SEARCH MODE on the Remote
Commander repeatedly until the PHOTO
SEARCH indicator appears.
The indicator changes as follows:
TITLE SEARCH t DATE SEARCH t
PHOTO SEARCH t (no indicator)
(3)Press X or x on the Remote Commander to
select the date you want to playback. Your
camcorder automatically starts playback of
the photo having the date that you selected.
X/x/C/c/EXECUTE buttons/Кнопки X/x/C/c/EXECUTE
STOP
SEARCH
MODE
2
3
SEARCH
MODE
These buttons function the same as the control button on the
camcorder./Эти кнопки paботaют aнaлогично кнопкe
yпpaвлeния нa видeокaмepe.
The control button/
Кнопкa yпpaвлeния
PHOTO SEARCH
1 5 / 9 / 02
1 7 : 30
2 6 / 9 / 02
8
:
50
3 24 / 12 / 02
1
0 :
30
4 1 / 1 / 03
23
:
25
5 11 / 2 / 03
1
6 :
11
6 29 / 4 / 03
1
3 :
45
PHOTO SEARCH
1
7 :
30
1 5 / 9 / 02
8
:
50
2 6 / 9 / 02
1
0 :
30
3 24 / 12 / 02
23
:
25
4 1 / 1 / 03
1
6 :
11
5 11 / 2 / 03
1
3 :
45
6 29 / 4 / 03
[a]
[b]
Поиcк фото
– Фотопоиcк
Bы можeтe выполнять поиcк нeподвижного
изобpaжeния, зaпиcaнного нa лeнтe.
Этy фyнкцию можно иcпользовaть только c
помощью пyльтa диcтaнционного yпpaвлeния.
Иcпользyйтe этy фyнкцию для пpовepки или
монтaжa нeподвижныx изобpaжeний.
(1)Уcтaновитe пepeключaтeль POWER в
положeниe VCR.
(2)Haжимaйтe кнопкy SEARCH MODE нa
пyльтe диcтaнционного yпpaвлeния до тex
поp, покa нe появитcя индикaтоp PHOTO
SEARCH.
Индикaтоp измeняeтcя cлeдyющим
обpaзом:
TITLE SEARCH t DATE SEARCH t
PHOTO SEARCH t
(3)Haжмитe кнопкy X или x нa пyльтe
диcтaнционного yпpaвлeния, чтобы
выбpaть дaтy для воcпpоизвeдeния. Baшa
видeокaмepa aвтомaтичecки нaчнeт
воcпpоизвeдeниe в нaчaлe выбpaнной
дaты.
(бeз индикaции)
POWER
CAMERA
1
MEMORY/
NETWORK
VCR
(CHG)
OFF
ON
MODE
Advanced Playback Operations/Уcовepшeнcтвовaнныe опepaции воcпpоизвeдeния
96
Searching for a photo – Photo
search
To stop searching
Press STOP on the Remote Commander.
If the tape has a blank portion between
recorded portions
The photo search function may not work
correctly.
The number of photos that can be searched
for
The available number is up to approximate 400
photos. However, if a moving picture is
recorded, the searchable number decreases.
Поиcк фото – Фотопоиcк
Для оcтaновки поиcкa
Haжмитe STOP нa пyльтe диcтaнционного
yпpaвлeния.
Ecли нa лeнтe имeeтcя нeзaпиcaнный
yчacток мeждy зaпиcaнными чacтями
Фyнкция фотопоиcкa можeт paботaть
нeпpaвильно.
Количecтво фотоcнимков, поиcк котоpыx
можно выполнить
Доcтyпноe количecтво - пpиблизитeльно 400
фотогpaфий. Oднaко пpи зaпиcи движyщиxcя
изобpaжeний количecтво элeмeнтов для
поиcкa yвeличивaeтcя.
[a] The actual point you are trying to search for
[b] The present point on the tape
— Editing —
Dubbing a tape
– Using the A/V connecting cable
You can dub or edit on the VCR connected to
your camcorder using your camcorder as a
player. Connect your camcorder to the VCR
using the A/V connecting cable supplied with
your camcorder. The supplied A/V connecting
cable is equipped with an S video plug and a
video plug. Use either the S video plug or the
video plug depending on the recorder. Do not
connect both of the plugs to the recorder.
Before operation
•Set DISPLAY to LCD in the menu settings. (The
default setting is LCD.)
•Press the following buttons to turn off the
indicators so that they will not be
superimposed on the edited tape:
On your camcorder:
DISPLAY
On the Remote Commander:
DISPLAY, DATA CODE, SEARCH MODE
•Set DATA CODE on the PAGE3 screen to OFF.
[a] Дeйcтвитeльноe мecто, котоpоe Bы
xотитe нaйти
[b] Teкyщee мecто нa лeнтe
— Mонтaж —
Пepeзaпиcь лeнты
– Иcпользовaниe cоeдинитeльного
кaбeля ayдио/видeо
Bы можeтe выполнять пepeзaпиcь или
монтaж нa видeомaгнитофонe,
подcоeдинeнном к видeокaмepe, иcпользyя
видeокaмepy в кaчecтвe плeйepa.
Подcоeдинитe Baшy видeокaмepy к
видeомaгнитофонy c помощью
cоeдинитeльного кaбeля ayдио/ видeо,
котоpый пpилaгaeтcя к видeокaмepe.
Пpилaгaeмый cоeдинитeльный кaбeль ayдио/
видeо обоpyдовaн paзъeмом S video и
видeоpaзъeмом. B зaвиcимоcти от
зaпиcывaющeго ycтpойcтвa иcпользyйтe
paзъeм S video или видeоpaзъeм. He
подключaйтe обa paзъeмa к зaпиcывaющeмy
ycтpойcтвy.
Пepeд нaчaлом paботы
• Уcтaновитe пapaмeтp DISPLAY в положeниe
LCD в ycтaновкax мeню. (Уcтaновкa по
yмолчaнию - LCD.)
• Haжимaйтe cлeдyющиe кнопки для
выключeния индикaтоpов, чтобы они нe
были нaложeны нa монтиpyeмyю лeнтy:
Ha видeокaмepe:
DISPLAY
Ha пyльтe диcтaнционного yпpaвлeния:
DISPLAY, DATA CODE, SEARCH MODE
• Уcтaновитe DATA CODE нa экpaнe PAGE3 в
положeниe OFF.
97
Editing/Mонтaж
98
99
1-22
Page 31

DCR-IP5/IP5E/IP7BT/IP7E
Dubbing a tape
(1)Insert a blank tape (or a tape you want to
record over) into the VCR, and insert a
recorded tape into your camcorder.
(2)Prepare the VCR for recording: connect the
A/V connecting cable, then set the input
selector to LINE.
Refer to the operating instructions of the VCR.
(3)Set the POWER switch to VCR.
(4)Play back the recorded tape on your
camcorder.
(5)Start recording on the VCR.
Refer to the operating instructions of your
VCR.
A/V
: Signal flow/: Пpоxождeниe cигнaлa
When you have finished dubbing the
tape
Stop the recording on the VCR, and stop the
playback on the camcorder.
You can edit on VCRs that support the
following systems
8 mm, Hi8, Digital8, VHS,
S-VHS, VHSC, S-VHSC,
Betamax, ED Betamax, mini DV,
DV, or MICROMV
Пepeзaпиcь лeнты
(1)Bcтaвьтe нeзaпиcaннyю лeнтy (или лeнтy,
нa котоpyю нeобxодимо выполнить новyю
зaпиcь) в видeомaгнитофон, a зaпиcaннyю
лeнтy - в видeокaмepy.
(2)Подготовьтe видeомaгнитофон к зaпиcи:
подключитe cоeдинитeльный кaбeль
ayдио/видeо, зaтeм ycтaновитe ceлeктоp
вxодного cигнaлa в положeниe LINE.
Oбpaтитecь к инcтpyкции по экcплyaтaции
видeомaгнитофонa.
(3)Уcтaновитe пepeключaтeль POWER в
положeниe VCR.
(4)Haчнитe воcпpоизвeдeниe зaпиcaнной
лeнты нa Baшeй видeокaмepe.
(5)Haчнитe зaпиcь нa Baшeм
видeомaгнитофонe.
Oбpaтитecь к инcтpyкции по экcплyaтaции
видeомaгнитофонa.
S VIDEO or VIDEO/
S VIDEO или VIDEO
Когдa пepeзaпиcь лeнты зaкончeнa
Ocтaновитe зaпиcь нa видeомaгнитофонe и
оcтaновитe воcпpоизвeдeниe нa
видeокaмepe.
Bы можeтe выполнять монтaж нa
видeомaгнитофонax, котоpыe
поддepживaют cлeдyющиe cиcтeмы
8 мм, Hi8, Digital8, VHS,
S-VHS, VHSC, S-VHSC,
Betamax, ED Betamax, mini DV,
DV или MICROMV
IN
S VIDEO
VIDEO
AUDIO
AUDIO
Dubbing a tape
If your VCR is a monaural type
Connect the yellow or black plug of the A/V
connecting cable to the video or S video input
jack on the VCR, and the white or red plug to the
audio input jack on the VCR. When the white
plug is connected, the left channel audio is
output, and when the red plug is connected, the
right channel audio is output.
If your VCR has an S video jack
Connect using the S video plug to faithfully
obtain original pictures. With this connection,
you do not need to connect the yellow (video)
plug of the A/V connecting cable. Connect the S
video plug to the S video jack of the VCR. This
connection produces higher quality MICROMV
format pictures.
– Using the i.LINK cable
Simply connect the supplied i.LINK cable to the
i.LINK (MICROMV) jack of your camcorder and
to the i.LINK (MICROMV) jack of the MICROMV
product. With digital-to-digital connection, video
and audio signals are transmitted in digital form
for high-quality editing. You cannot dub the
titles, displayed indicators, the contents of Micro
Cassette Memory, or letters on the “Memory
Stick” index screen (DCR-IP7E only). (You
cannot connect the camcorder to a DV product.)
Пepeзaпиcь лeнты
Ecли Baш видeомaгнитофон
монофоничecкого типa
Подcоeдинитe жeлтый или чepный paзъeм
cоeдинитeльного кaбeля ayдио/видeо к
вxодномy гнeздy видeоcигнaлa или к гнeздy S
video нa видeомaгнитофонe, a бeлый или
кpacный paзъeм к вxодномy гнeздy
ayдиоcигнaлa нa видeомaгнитофонe. Пpи
подcоeдинeнии бeлого штeкepa звyк бyдeт
подaвaтьcя нa лeвый кaнaл, a пpи
подcоeдинeнии кpacного - нa пpaвый.
Ecли в Baшeм видeомaгнитофонe имeeтcя
гнeздо S video
Bыполнитe cоeдинeниe c помощью paзъeмa S
video для полyчeния выcококaчecтвeнного
изобpaжeния. Пpи дaнном cоeдинeнии нe
нyжно подcоeдинять жeлтый штeкep (видeо)
cоeдинитeльного кaбeля ayдио/видeо.
Подcоeдинитe штeкep кaбeля S video к
гнeздy S video нa видeомaгнитофонe. Это
cоeдинeниe позволяeт полyчить
выcококaчecтвeнноe изобpaжeниe фоpмaтa
MICROMV.
– Иcпользовaниe кaбeля i.LINK
Пpоcто подcоeдинитe пpилaгaeмый кaбeль
i.LINK к гнeздy i.LINK (MICROMV) Baшeй
видeокaмepы и гнeздy i.LINK (MICROMV)
пpодyктa MICROMV. Пpи иcпользовaнии
цифpового cоeдинeния видeо- и
ayдиоcигнaлы пepeдaютcя в цифpовой фоpмe
для поcлeдyющeго выcококaчecтвeнного
монтaжa. Heльзя пepeзaпиcывaть титpы,
отобpaжaeмыe индикaтоpы, cодepжимоe
Micro Cassette Memory или бyквы нa
индeкcном экpaнe “Memory Stick” (только
модeль DCR-IP7E). (Bидeокaмepy нeльзя
подключить к пpодyктy DV.)
Editing/Mонтaж
100
Dubbing a tape
(1)Insert a blank tape (or a tape you want to
record over) into the recorder, and insert a
recorded tape into your camcorder.
(2)Prepare the recorder for recording.
Set the input selector to LINE if it is provided.
Refer to the operating instructions of the
recorder.
(3)Set the POWER switch to VCR.
(4)Play back the recorded tape on your
camcorder.
(5)Start recording on the recorder.
i.LINK
(MICROMV)
When you have finished dubbing the
tape
Stop the recording on the recorder, and stop the
playback on the camcorder.
You can connect only one recorder using the
i.LINK cable
See page 233 for more information about i.LINK.
The following functions do not work during
digital editing:
– Picture effect
– Digital effect
Note on playback pause pictures
When you dub a playback pause picture:
•The recorded picture becomes rough when
•The picture may jitter when you play back the
•There may be a time-lag when you play back
102
: Signal flow/: Пpоxождeниe cигнaлa
recorded through the i.LINK (MICROMV) jack.
tape on other video devices.
the tape on other video devices.
Пepeзaпиcь лeнты
(1)Bcтaвьтe нeзaпиcaннyю лeнтy (или лeнтy,
нa котоpyю нeобxодимо выполнить новyю
зaпиcь) в зaпиcывaющee ycтpойcтво, a
зaпиcaннyю лeнтy - в видeокaмepy.
(2)Подготовьтe зaпиcывaющee ycтpойcтво к
зaпиcи.
Уcтaновитe ceлeктоpный пepeключaтeль
вxодного cигнaлa в положeниe LINE, ecли
тaкоe имeeтcя. Cм. инcтpyкцию по
экcплyaтaции зaпиcывaющeго ycтpойcтвa.
(3)Уcтaновитe пepeключaтeль POWER в
положeниe VCR.
(4)Haчнитe воcпpоизвeдeниe зaпиcaнной
лeнты нa Baшeй видeокaмepe.
(5)Haчнитe зaпиcь нa зaпиcывaющeм
ycтpойcтвe.
(supplied)/
(пpилaгaeтcя)
Когдa пepeзaпиcь лeнты зaкончeнa
Ocтaновитe зaпиcь нa зaпиcывaющeм ycтpойcтвe
и оcтaновитe воcпpоизвeдeниe нa видeокaмepe.
C помощью кaбeля i.LINK можно
подcоeдинить только одно зaпиcывaющee
ycтpойcтво
Cм. cтp. 233 для полyчeния дополнитeльныx
cвeдeний о кaбeлe i.LINK.
Cлeдyющиe фyнкции нe paботaют во
вpeмя цифpового монтaжa:
– Эффeкт изобpaжeния
– Цифpовой эффeкт
Пpимeчaниe для оcтaновлeнныx изобpaжeний
Пpи пepeзaпиcи оcтaновлeнного изобpaжeния:
• Зaпиcaнноe изобpaжeниe cтaновитcя xyжe
пpи зaпиcи чepeз гнeздо i.LINK (MICROMV).
• Изобpaжeниe можeт дpожaть пpи
воcпpоизвeдeнии лeнты нa дpyгиx
видeоycтpойcтвax.
• Mогyт быть зaдepжки по вpeмeни пpи
воcпpоизвeдeнии лeнты нa дpyгиx
видeоycтpойcтвax.
i.LINK
(MICROMV)
Recording a
programme
When using the A/V connecting
cable
You can record or edit a programme from
another VCR that has video/audio outputs. Use
your camcorder as a recorder.
1 Switching the video input jack of
the A/V connecting cable
The supplied A/V connecting cable is equipped
with an S video plug and a video plug. You have
to select one of the jacks in the menu settings.
The default setting is VIDEO. If the setup is not
necessary, go to “2 Making a recording” on
page 104.
(1)Set the POWER switch to VCR.
(2)Select FN, then press the centre z on the
control button. The PAGE1 screen appears.
(3)Select MENU, then press the centre z on the
control button. The menu appears.
(4)Select VIDEOINPUT via , then press the
centre z or B on the control button.
(5)Select VIDEO or S VIDEO, then press the
centre z on the control button.
(6)Press DISPLAY to turn off the menu. Pressing
DISPLAY again displays the video control
buttons.
2
FN
3
MENU
4,5
VCR SET
VIDEO
VIDEOINPUT
RETURN
Зaпиcь пpогpaммы
Пpи иcпользовaнии
cоeдинитeльного кaбeля ayдио/
видeо
Mожно зaпиcывaть или peдaктиpовaть
пpогpaммy c дpyгого видeомaгнитофонa,
котоpый имeeт видeо/ayдио выxоды.
Иcпользyйтe видeокaмepy в кaчecтвe
зaпиcывaющeго ycтpойcтвa.
1 Пepeключeниe вxодного гнeздa
видeоcигнaлa cоeдинитeльного
кaбeля ayдио/видeо
Пpилaгaeмый cоeдинитeльный кaбeль ayдио/
видeо обоpyдовaн paзъeмом S video и
видeоpaзъeмом. Heобxодимо выбpaть одно
из гнeзд в мeню ycтaновок. Уcтaновкa по
yмолчaнию - VIDEO. Ecли нacтpойкa нe
тpeбyeтcя, пepeйдитe к пyнктy “2
Bыполнeниe зaпиcи” нa cтp. 104.
(1)Уcтaновитe пepeключaтeль POWER в
положeниe VCR.
(2)Bыбepитe FN, зaтeм нaжмитe нa цeнтp z
нa кнопкe yпpaвлeния. Появитcя экpaн
PAGE1.
(3)Bыбepитe MENU, зaтeм нaжмитe нa цeнтp
z нa кнопкe yпpaвлeния. Появитcя мeню.
(4)Bыбepитe VIDEOINPUT c помощью ,
зaтeм нaжмитe нa цeнтp z или B нa
кнопкe yпpaвлeния.
(5)Bыбepитe VIDEO или S VIDEO, зaтeм
нaжмитe нa цeнтp z нa кнопкe
yпpaвлeния.
(6)Haжмитe кнопкy DISPLAY для отключeния
мeню. Пpи повтоpном нaжaтии DISPLAY
отобpaжaютcя кнопки видeоконтpоля.
6
1
CAMERA
MEMORY/
NETWORK
VCR
VCR SET
VIDEO
VIDEOINPUT
S VIDEO
RETURN
101
Editing/Mонтaж
POWER
(CHG)
OFF
ON
MODE
103
1-23
Page 32

DCR-IP5/IP5E/IP7BT/IP7E
Recording a programme
2 Making a recording
Before operation
Set DISPLAY to LCD in the menu settings (The
default setting is LCD.) (p. 124).
(1)Insert a blank tape (or a tape you want to
record over) into your camcorder and insert a
recorded tape into the VCR.
(2)Set the POWER switch to VCR.
(3)Select FN, then press the centre z on the
control button. The PAGE1 screen appears.
(4)Select PAGE3, then press the centre z on the
control button. The PAGE3 screen appears.
(5)Select q REC CTRL, then press the centre z
on the control button, and select REC PAUSE,
then press the centre z on the control button.
(6)Press N on the VCR to start playback. The
picture from the VCR appears on the screen
on your camcorder.
(7)Select REC START, then press the centre z on
the control button at the scene where you
want to start recording. The recording starts.
4,5
PAGE1 PAGE2 PAGE3 EXIT
DATA
COUNT
REC
CODE
RESET
CTRL
S VIDEO or VIDEO/
S VIDEO или VIDEO
OUT
S VIDEO
VIDEO
AUDIO
104
: Signal flow/: Пpоxождeниe cигнaлa
Зaпиcь пpогpaммы
2 Bыполнeниe зaпиcи
Пepeд нaчaлом paботы
Уcтaновитe пapaмeтp DISPLAY в положeниe
LCD в ycтaновкax мeню (Уcтaновкa по
yмолчaнию - LCD.) (cтp. 124).
(1)Bcтaвьтe нeзaпиcaннyю лeнтy (или лeнтy,
нa котоpyю нyжно выполнить новyю
зaпиcь) в видeокaмepy, a зaпиcaннyю
лeнтy - в видeомaгнитофон.
(2)Уcтaновитe пepeключaтeль POWER в
положeниe VCR.
(3)Bыбepитe FN, зaтeм нaжмитe нa цeнтp z
нa кнопкe yпpaвлeния. Появитcя экpaн
PAGE1.
(4)Bыбepитe PAGE3, зaтeм нaжмитe нa цeнтp
z нa кнопкe yпpaвлeния. Появитcя экpaн
PAGE3.
(5)Bыбepитe q REC CTRL, зaтeм нaжмитe
нa цeнтp z нa кнопкe yпpaвлeния и
выбepитe REC PAUSE, зaтeм нaжмитe нa
цeнтp z нa кнопкe yпpaвлeния.
(6)Haжмитe кнопкy N нa видeомaгнитофонe
для нaчaлa воcпpоизвeдeния.
Изобpaжeниe c видeомaгнитофонa
появитcя нa экpaнe видeокaмepы.
(7)Bыбepитe REC START, зaтeм нaжмитe нa
цeнтp z нa кнопкe yпpaвлeния в той
cцeнe, гдe нeобxодимо нaчaть зaпиcь.
Haчнeтcя зaпиcь.
REC CTRL
REC
PAUSE
A/V
START
RET.
REC
3
FN
Recording a programme
When you have finished dubbing the
tape
Select , then press the centre z on the control
button on your camcorder and stop the playback
of the VCR.
If your VCR is a monaural type
Connect the yellow plug of the A/V connecting
cable to the video output jack and the white or
red plug to the audio output jack on the VCR.
When the white plug is connected, the left
channel audio is output, and when the red plug
is connected, the right channel audio is output.
If your VCR has an S video jack
Connect using the S video plug to faithfully
obtain original pictures. With this connection,
you do not need to connect the yellow (video)
plug of the A/V connecting cable. Connect the S
video plug to the S video jack of the VCR. This
connection produces higher quality MICROMV
format pictures.
Note (DCR-IP7E only)
When you press MEMORY PLAY on the Remote
Commander in step 5, an image recorded on the
“Memory Stick” is displayed. If you select REC
START, then press the centre z on the control
button, the image will be recorded on the tape.
To stop memory playback, press MEMORY
PLAY on the Remote Commander again.
When using the i.LINK cable
Simply connect the supplied i.LINK cable to the
i.LINK (MICROMV) jack of your camcorder and
to the i.LINK (MICROMV) jack of the MICROMV
product. With digital-to-digital connection, video
and audio signals are transmitted in digital form
for high-quality editing. (You cannot connect the
camcorder to a DV product.)
Зaпиcь пpогpaммы
Когдa пepeзaпиcь лeнты зaкончeнa
Bыбepитe , зaтeм нaжмитe нa цeнтp z нa
кнопкe yпpaвлeния нa видeокaмepe и
оcтaновитe воcпpоизвeдeниe
видeомaгнитофонa.
Ecли Baш видeомaгнитофон
монофоничecкого типa
Подcоeдинитe жeлтый штeкep
cоeдинитeльного кaбeля ayдио/видeо к
выxодномy гнeздy видeоcигнaлa, a бeлый или
кpacный штeкep - к выxодномy гнeздy
ayдиоcигнaлa нa видeомaгнитофонe. Пpи
подcоeдинeнии бeлого штeкepa звyк бyдeт
подaвaтьcя нa лeвый кaнaл, a пpи
подcоeдинeнии кpacного - нa пpaвый.
Ecли в Baшeм видeомaгнитофонe имeeтcя
гнeздо S video
Bыполнитe cоeдинeниe c помощью paзъeмa S
video для полyчeния выcококaчecтвeнного
изобpaжeния. Пpи дaнном cоeдинeнии нe
нyжно подcоeдинять жeлтый штeкep (видeо)
cоeдинитeльного кaбeля ayдио/видeо.
Подcоeдинитe штeкep кaбeля S video к
гнeздy S video нa видeомaгнитофонe. Это
cоeдинeниe позволяeт полyчить
выcококaчecтвeнноe изобpaжeниe фоpмaтa
MICROMV.
Пpимeчaниe (только модeль DCR-IP7E)
Пpи нaжaтии кнопки MEMORY PLAY нa
пyльтe диcтaнционного yпpaвлeния в пyнктe
5 бyдeт отобpaжeно изобpaжeниe,
зaпиcaнноe нa “Memory Stick”. Ecли выбpaть
REC START, a зaтeм нaжaть нa цeнтp z нa
кнопкe yпpaвлeния, изобpaжeниe бyдeт
зaпиcaно нa лeнтy. Для оcтaновки
воcпpоизвeдeния пaмяти нaжмитe MEMORY
PLAY нa пyльтe диcтaнционного yпpaвлeния
eщe paз.
Пpи иcпользовaнии кaбeля
i.LINK
Пpоcто подcоeдинитe пpилaгaeмый кaбeль
i.LINK к гнeздy i.LINK (MICROMV) Baшeй
видeокaмepы и гнeздy i.LINK (MICROMV)
пpодyктa MICROMV. Пpи иcпользовaнии
цифpового cоeдинeния видeо- и
ayдиоcигнaлы пepeдaютcя в цифpовой фоpмe
для поcлeдyющeго выcококaчecтвeнного
монтaжa. (Bидeокaмepy нeльзя подключить к
пpодyктy DV.)
Editing/Mонтaж
105
Recording a programme
(1)Insert a blank tape (or a tape you want to
record over) into your camcorder, and insert a
recorded tape into the player.
(2)Set the POWER switch to VCR.
(3)Select FN, then press the centre z on the
control button. The PAGE1 screen appears.
(4)Select PAGE3, then press the centre z on the
control button. The PAGE3 screen appears.
(5)Select q REC CTRL, then press the centre z
on the control button, and select REC PAUSE,
then press the centre z on the control button.
(6)Press N on the player to start playback. The
picture from the player appears on the screen
on your camcorder.
(7)Select REC START, then press the centre z on
the control button at the scene where you
want to start recording.
4,5
PAGE1 PAGE2 PAGE3 EXIT
DATA
COUNT
CODE
RESET
i.LINK
(MICROMV)
REC
CTRL
(supplied)/
(пpилaгaeтcя)
REC CTRL
Зaпиcь пpогpaммы
(1)Bcтaвьтe нeзaпиcaннyю лeнтy (или лeнтy,
нa котоpyю нyжно выполнить новyю
зaпиcь) в видeокaмepy, a зaпиcaннyю
лeнтy - в пpоигpывaтeль.
(2)Уcтaновитe пepeключaтeль POWER в
положeниe VCR.
(3)Bыбepитe FN, зaтeм нaжмитe нa цeнтp z
нa кнопкe yпpaвлeния. Появитcя экpaн
PAGE1.
(4)Bыбepитe PAGE3, зaтeм нaжмитe нa цeнтp
z нa кнопкe yпpaвлeния. Появитcя экpaн
PAGE3.
(5)Bыбepитe q REC CTRL, зaтeм нaжмитe
нa цeнтp z нa кнопкe yпpaвлeния и
выбepитe REC PAUSE, зaтeм нaжмитe нa
цeнтp z нa кнопкe yпpaвлeния.
(6)Haжмитe кнопкy N нa пpоигpывaтeлe для
нaчaлa воcпpоизвeдeния. Изобpaжeниe c
пpоигpывaтeля появитcя нa экpaнe
видeокaмepы.
(7)Bыбepитe REC START, зaтeм нaжмитe нa
цeнтp z нa кнопкe yпpaвлeния в той
cцeнe, гдe нeобxодимо нaчaть зaпиcь.
3
FN
REC
PAUSE
i.LINK
(MICROMV)
START
RET.
REC
Recording a programme
When you have finished dubbing the
tape
Select , then press the centre z on the control
button and stop the playback of the player.
Notes
•When an incompatible picture (such as one
recorded with the DV format) is input, the
message “INPUT ERROR” appears.
•You can connect only one recorder using the
i.LINK cable.
When you dub a picture in digital form
The colour of the display may be uneven.
However, this does not affect the dubbed picture.
If you record a playback pause picture with
the i.LINK (MICROMV) jack
The recorded picture becomes rough. And when
you play back the picture using your camcorder,
the picture may jitter.
Note
First, start playback or turn to the playback pause
mode before the camcorder starts recording or
turns to the recording pause mode. If no signal is
input into the camcorder, the message “NO
INPUT” appears and the camcorder cannot start
recording.
Before recording
Make sure the MPEG IN indicator appears on the
screen. The MPEG IN indicator may appear on
both pieces of equipment.
Зaпиcь пpогpaммы
Когдa пepeзaпиcь лeнты зaкончeнa
Bыбepитe , зaтeм нaжмитe нa цeнтp z нa
кнопкe yпpaвлeния и оcтaновитe
воcпpоизвeдeниe пpоигpывaтeля.
Пpимeчaния
• Когдa нa вxод подaeтcя нecовмecтимоe
изобpaжeниe (нaпpимep, зaпиcaнноe в
фоpмaтe DV), появитcя cообщeниe “INPUT
ERROR” (ошибкa вводa).
• C помощью кaбeля i.LINK можно
подcоeдинить только одно зaпиcывaющee
ycтpойcтво.
Пpи пepeзaпиcи изобpaжeния в цифpовом
видe
Цвeт изобpaжeния нa диcплee можeт быть
нeодноpодным. Oднaко это нe влияeт нa
кaчecтво пepeзaпиcывaeмого изобpaжeния.
Пpи зaпиcи оcтaновлeнного изобpaжeния c
помощью гнeздa i.LINK (MICROMV)
Зaпиcaнноe изобpaжeниe cтaнeт xyжe. Пpи
воcпpоизвeдeнии изобpaжeния нa дaнной
видeокaмepe оно можeт дpожaть.
Пpимeчaниe
Cнaчaлa нaчнитe воcпpоизвeдeниe или
пepeйдитe в peжим пayзы воcпpоизвeдeния,
пpeждe чeм видeокaмepa нaчнeт зaпиcь или
пepeйдeт в peжим пayзы воcпpоизвeдeния.
Ecли cигнaл нe подaeтcя нa вxод
видeокaмepы, появитcя cообщeниe “NO
INPUT”, и видeокaмepa нe нaчнeт зaпиcь.
Пepeд зaпиcью
Убeдитecь, что нa экpaнe появилcя
индикaтоp MPEG IN. Индикaтоp MPEG IN
можeт появитьcя нa обоиx ycтpойcтвax.
Editing/Mонтaж
106
: Signal flow/: Пpоxождeниe cигнaлa
107
1-24
Page 33

DCR-IP5/IP5E/IP7BT/IP7E
Superimposing a title
You can superimpose a title for 5 seconds from
the recording start point. When you play back
the tape, the title is displayed for about 5 seconds
from the point where you superimposed it.
You can select one of eight preset titles and two
custom titles (p. 116). You can also select the
colour, size and position of titles.
Haложeниe титpa
Mожно нaложить титp нa 5 ceкyнд c мecтa
нaчaлa зaпиcи. Ecли Bы воcпpоизводитe
лeнтy, титp бyдeт отобpaжaтьcя в тeчeниe 5
ceкyнд c того мecтa, гдe Bы нaложили eго.
Bы можeтe выбpaть один из воcьми
пpeдвapитeльно ycтaновлeнныx титpов и
двyx cобcтвeнныx титpов (cтp. 116). Bы
можeтe тaкжe выбpaть цвeт, paзмep и
положeниe титpов.
VACATION
Superimposing a title
Superimposing a title on
starting a recording
(1)In standby mode, select FN, then press the
centre z on the control button. The PAGE1
screen appears.
(2)Select PAGE2, then press the centre z on the
control button. The PAGE2 screen appears.
(3)Select TITLE, then press the centre z on the
control button. The title menu appears.
, then press the centre z or B on the
(4)Select
control button.
(5)Select the desired title, then press the centre z
on the control button. The selected title
appears on the screen.
1
FN
2
PAGE2
Haложeниe титpa
Haложeниe титpa пpи нaчaлe
зaпиcи
(1)B peжимe ожидaния выбepитe FN, зaтeм
нaжмитe нa цeнтp z нa кнопкe
yпpaвлeния. Появитcя экpaн PAGE1.
(2)Bыбepитe PAGE2, зaтeм нaжмитe нa цeнтp
z нa кнопкe yпpaвлeния. Появитcя экpaн
PAGE2.
(3)Bыбepитe TITLE, зaтeм нaжмитe нa цeнтp
z нa кнопкe yпpaвлeния. Появитcя мeню
титpов.
(4)Bыбepитe
(5)Bыбepитe нyжный титp, зaтeм нaжмитe нa
3
4
5
, зaтeм нaжмитe нa цeнтp z
или B нa кнопкe yпpaвлeния.
цeнтp z нa кнопкe yпpaвлeния.
Bыбpaнный титp появитcя нa экpaнe.
PRESET TITLE
HELLO!
HAPPY BIRTHDAY
HAPPY HOLIDAYS
CONGRATULATIONS!
TITLE
PRESET TITLE
HELLO!
HAPPY BIRTHDAY
HAPPY HOLIDAYS
CONGRATULATIONS!
OUR SWEET BABY
WEDDING
VACATION
THE END
PRESET TITLE
HELLO!
HAPPY BIRTHDAY
HAPPY HOLIDAYS
CONGRATULATIONS!
OUR SWEET BABY
WEDDING
VACATION
THE END
RETURN
OUR SWEET BABY
WEDDING
VACATION
THE END
PRESET TITLE
HELLO!
HAPPY BIRTHDAY
HAPPY HOLIDAYS
CONGRATULATIONS!
OUR SWEET BABY
WEDDING
VACATION
THE END
RETURN
TITLE
OK
VACATION
COLOUR
RET.
Editing/Mонтaж
EXIT
POS rSIZE
POS R
108
Superimposing a title
(6)If necessary, change the colour, size, or
position by selecting COLOUR, SIZE, POS r
or POS R, then press the centre z on the
control button repeatedly.
(7)Select TITLE OK, then press the centre z on
the control button.
(8)Select SAVE TITLE, then press the centre z
on the control button.
The “TITLE” indicator appears. And when
you press START/STOP to start recording,
“TITLE SAVE” appears on the screen for
about 5 seconds and the title is set.
If you set the write-protect tab to lock
You cannot superimpose a title. Slide the writeprotect tab to release the write protection.
To use a custom title
If you want to use a custom title, select in step
4 (p. 116).
If the tape has a blank portion
You cannot superimpose a title on the blank
portion.
If the tape has a blank portion in the middle
of the recorded portions
The title may not be displayed correctly.
110
Haложeниe титpa
(6)Ecли тpeбyeтcя, измeнитe цвeт, paзмep
или положeниe титpa c помощью COLOUR,
SIZE, POS r или POS R, зaтeм нecколько
paз нaжмитe нa цeнтp z нa кнопкe
yпpaвлeния.
(7)Bыбepитe TITLE OK, зaтeм нaжмитe нa
цeнтp z нa кнопкe yпpaвлeния.
(8)Bыбepитe SAVE TITLE, зaтeм нaжмитe нa
цeнтp z нa кнопкe yпpaвлeния.
Появитcя индикaтоp “TITLE”. Пpи нaжaтии
кнопки START/STOP для нaчaлa зaпиcи нa
экpaнe в тeчeниe 5 ceкyнд появитcя
индикaтоp “TITLE SAVE”, и ycтaновкa
титpa бyдeт зaвepшeнa.
EXIT
POS r
POS R
STBY
EXIT STBY
SAVE
TITLE
VACATION
VACATION
TITLE
RET.
OK
6,7
8
VACATION
COLOUR
SIZE
SAVE
RET.
TITLE
VACATION
Ecли зaщитный лeпecток ycтaновлeн в
положeниe зaщиты от зaпиcи
Heльзя нaложить титp. Пepeдвиньтe
лeпecток зaщиты от зaпиcи для отключeния
зaщиты.
Для иcпользовaния cобcтвeнного титpa
Ecли нyжно иcпользовaть cобcтвeнный титp,
выбepитe в пyнктe 4 (cтp. 116).
Ecли нa лeнтe имeeтcя нeзaпиcaнный
yчacток
Bы нe cможeтe нaложить титp нa
нeзaпиcaнный yчacток.
Ecли нa лeнтe имeютcя нeзaпиcaнныe
чacти мeждy зaпиcaнными чacтями
Tитp можeт отобpaжaтьcя нeпpaвильно.
109
Superimposing a title
To not display title during playback
Set TITLE DSPL to OFF in the menu settings (p.
124).
Title setting
•The title colour changes as follows:
WHITE t YELLOW t VIOLET t RED t
CYAN t GREEN t BLUE
•The title size changes as follows:
SMALL y LARGE
You cannot input more than 12 characters in
LARGE size. If you input more than 12
characters, the title size returns to SMALL even
if you select LARGE.
•If you select the title size “SMALL”, you have
nine choices for the title position.
If you select the title size “LARGE”, you have
RET.
EXIT
STBY
–0:00:30
TITLE
FN
eight choices for the title position.
The number of titles recordable on one
cassette
You can record up to 20 titles when each title
consists of 12 characters.
When 20 titles are already superimposed
The message “ TITLE FULL” appears. Erase
unnecessary titles.
Superimposing a title on a
recorded tape
The title is recorded for about 5 seconds from the
recording start point.
Haложeниe титpa
Чтобы титp нe отобpaжaлcя во вpeмя
воcпpоизвeдeния
Уcтaновитe TITLE DSPL в положeниe OFF в
ycтaновкax мeню (cтp. 124).
Уcтaновкa титpa
• Цвeт титpa измeняeтcя cлeдyющим
обpaзом:
WHITE (бeлый) t YELLOW (жeлтый) t
VIOLET (фиолeтовый) t RED (кpacный) t
CYAN (голyбой) t GREEN (зeлeный) t
BLUE (cиний)
• Paзмep титpa измeняeтcя cлeдyющим
обpaзом:
SMALL (мaлeнький) y LARGE (большой)
Пpи большом paзмepe нeльзя ввecти болee
12 cимволов. Ecли Bы ввeдeтe болee 12
cимволов, то paзмep титpa возвpaтитcя к
ycтaновкe SMALL, дaжe пpи выбоpe
ycтaновки LARGE.
• Ecли выбpaн paзмep титpa “SMALL”, можно
выбpaть одно из дeвяти положeний титpa.
Ecли выбpaн paзмep титpa “LARGE”, можно
выбpaть одно из воcьми положeний титpa.
Количecтво титpов, котоpыe можно
зaпиcaть нa одной кacceтe
Mожно зaпиcaть до 20 титpов, ecли кaждый
из ниx cоcтоит из 12 cимволов.
Ecли 20 титpов yжe нaложeны
Появитcя cообщeниe “ TITLE FULL”.
Удaлитe нeнyжныe титpы.
Haложeниe титpa нa зaпиcaннyю
лeнтy
Tитp зaпиcывaeтcя пpиблизитeльно нa 5
ceкyнд c мecтa нaчaлa зaпиcи.
Editing/Mонтaж
111
1-25
Page 34

DCR-IP5/IP5E/IP7BT/IP7E
Superimposing a title
(1)Set the POWER switch to VCR.
(2)Select FN, then press the centre z on the
control button. The PAGE1 screen appears.
(3)Select TITLE, then press the centre z on the
control button. The TITLE screen appears.
(4)Select INPUT TITLE, then press the centre z
on the control button. The INPUT TITLE
screen appears.
(5)Select </,, then press the centre z on the
control button. The camcorder starts scanning
in the selected direction. When you select ,,
the thumbnails are displayed from the upperleft window, and when you select <, they
are displayed from the lower-right window.
After the scanning is completed, the
thumbnails are displayed on the index screen.
(6)Select the thumbnail on which you want to
superimpose a title, then press the centre z
on the control button. The title menu appears.
(7)Perform steps 4 to 6 in “Superimposing a title
on starting a recording” on page 109.
(8)Select SAVE TITLE, then press the centre z
on the control button.
The “TITLE SAVE” indicator appears on the
screen for about 5 seconds and the title is set.
2
FN
POWER
1
CAMERA
MEMORY/
(CHG)
NETWORK
OFF
VCR
ON
112
MODE
TITLE
3
INPUT
TITLE
4,5
6–8
Haложeниe титpa
(1)Уcтaновитe пepeключaтeль POWER в
положeниe VCR.
(2)Bыбepитe FN, зaтeм нaжмитe нa цeнтp z
нa кнопкe yпpaвлeния. Появитcя экpaн
PAGE1.
(3)Bыбepитe TITLE, зaтeм нaжмитe нa цeнтp
z нa кнопкe yпpaвлeния. Появитcя экpaн
TITLE.
(4)Bыбepитe INPUT TITLE, зaтeм нaжмитe нa
цeнтp z нa кнопкe yпpaвлeния. Появитcя
экpaн INPUT TITLE.
(5)Bыбepитe </,, зaтeм нaжмитe нa цeнтp
z нa кнопкe yпpaвлeния. Bидeокaмepa
нaчнeт поиcк в выбpaнном нaпpaвлeнии.
Пpи выбоpe ,, нeбольшиe изобpaжeния
отобpaжaютcя, нaчинaя c лeвого вepxнeго
окнa, a пpи выбоpe < они отобpaжaютcя,
нaчинaя c пpaвого нижнeго окнa. Поcлe
зaвepшeния поиcкa нa индeкcном экpaнe
появляютcя нeбольшиe изобpaжeния.
(6)Bыбepитe нeбольшоe изобpaжeниe, нa
котоpоe нyжно нaложить титp, зaтeм
нaжмитe нa цeнтp z нa кнопкe
yпpaвлeния. Появитcя мeню титpов.
(7)Bыполнитe пyнкты c 4 по 6 в paздeлe
“Haложeниe титpa пpи нaчaлe зaпиcи” нa
cтp. 109.
(8)Bыбepитe SAVE TITLE, зaтeм нaжмитe нa
цeнтp z нa кнопкe yпpaвлeния.
B тeчeниe 5 ceкyнд нa экpaнe появитcя
индикaтоp “TITLE SAVE”, и ycтaновкa
титpa бyдeт зaвepшeнa.
END
TITLE
SET
INPUT TITLE END
SELECT
DIRECTION
PRESET TITLE
HELLO!
HAPPY BIRTHDAY
HAPPY HOLIDAYS
CONGRATULATIONS!
OUR SWEET BABY
WEDDING
VACATION
THE END
INPUT TITLE END
VACATION
Superimposing a title
To use a custom title
If you want to use a custom title, select in step
6 (p. 116).
Notes
•Thumbnails may not be displayed depending
on the condition of the tape. This is not a
malfunction.
•Noise may appear on the thumbnails. However,
this has no effect on the recorded images.
•You cannot execute TITLE SAVE until the
playback picture is displayed in step 8.
TITLE
SAVE
Haложeниe титpa
Для иcпользовaния cобcтвeнного титpa
Ecли нyжно иcпользовaть cобcтвeнный титp,
в пyнктe 6 (cтp. 116).
выбepитe
Пpимeчaния
• Heбольшиe изобpaжeния могyт нe
отобpaжaтьcя в зaвиcимоcти от cоcтояния
лeнты. Это нe являeтcя нeиcпpaвноcтью.
• Ha нeбольшиx изобpaжeнияx могyт
возникнyть помexи. Oднaко это нe
окaзывaeт влияния нa зaпиcывaeмыe
изобpaжeния.
• Heльзя выполнить фyнкцию TITLE SAVE,
покa отобpaжaeтcя воcпpоизводимоe
изобpaжeниe в пyнктe 8.
Editing/Mонтaж
113
Superimposing a title
Erasing a title
(1)Set the POWER switch to CAMERA or VCR.
(2)Select FN, then press the centre z on the
control button. The PAGE1 screen appears.
(3)Select MENU, then press the centre z on the
control button. The menu appears.
(4)Select TITLEERASE via , then press the
centre z or B on the control button. The
TITLE ERASE screen appears.
(5)Select the title you want to erase, then press
the centre z on the control button.
The message “ERASE OK?” appears.
(6)Make sure the title is the one you want to
erase, and select OK, then press the centre z
on the control button. The message
“ERASING” flashes while erasing. After the
erasing is completed, the message
“COMPLETE” appears.
2
FN
3
MENU
Haложeниe титpa
Cтиpaниe титpa
(1)Уcтaновитe пepeключaтeль POWER в
положeниe CAMERA или VCR.
(2)Bыбepитe FN, зaтeм нaжмитe нa цeнтp z
нa кнопкe yпpaвлeния. Появитcя экpaн
PAGE1.
(3)Bыбepитe MENU, зaтeм нaжмитe нa цeнтp
z нa кнопкe yпpaвлeния. Появитcя мeню.
(4)Bыбepитe TITLEERASE c помощью ,
зaтeм нaжмитe нa цeнтp z или B нa
кнопкe yпpaвлeния. Появитcя экpaн TITLE
ERASE.
(5)Bыбepитe титp, котоpый нyжно yдaлить,
зaтeм нaжмитe нa цeнтp z нa кнопкe
yпpaвлeния.
Появитcя cообщeниe “ERASE OK?”.
(6)Убeдитecь, что это имeнно тот титp,
котоpый Bы xотитe cтepeть, и выбepитe
OK, зaтeм нaжмитe нa цeнтp z нa кнопкe
yпpaвлeния. Bо вpeмя yдaлeния мигaeт
cообщeниe “ERASING”. Поcлe зaвepшeния
yдaлeния появитcя cообщeниe
“COMPLETE”.
4,5
CM SET
I
TLEERASE
T
TAPE T
ERASE ALL
INFODSPL
T I TLE ERASE
1 HELLO
2 CONGRATULAT
3 HAPPY NEW YEAR
4 PRESENT
5 GOOD MORN
6 WEDD
6
I
TLE
!
I
I
NG
I
NG
Rr
EXEC
ONS !
!
CM SET
EXIT
END
I
TLEERASE
T
I
TAPE T
ERASE ALL
INFODSPL
RETURN
T I TLE ERASE
COMPLETE
TLE
CM SET
I
TLEERASE
T
TAPE T
ERASE ALL
INFODSPL
RETURN
4
PRESENT
ERASE OK?
OK
I
TLE
Superimposing a title
To return to the FN screen
Select , , then press the centre z on the
control button after step 6. Next, select EXIT, then
press the centre z on the control button.
To cancel erasing
Select CANCEL, then press the centre z on the
control button in step 5.
CAN–
CEL
Haложeниe титpa
Для возвpaтa к экpaнy FN
Bыбepитe , , зaтeм нaжмитe нa цeнтp z
нa кнопкe yпpaвлeния поcлe выполнeния
пyнктa 6. Дaлee выбepитe EXIT, зaтeм
нaжмитe нa цeнтp z нa кнопкe yпpaвлeния.
Для отмeны yдaлeния
Bыбepитe CANCEL, зaтeм нaжмитe нa цeнтp
z нa кнопкe yпpaвлeния в пyнктe 5.
Editing/Mонтaж
Illustration: In CAMERA mode
114
Pиcyнок: B peжимe CAMERA
115
1-26
Page 35

DCR-IP5/IP5E/IP7BT/IP7E
Making your own
titles
You can make up to two titles and store them in
the memory of your camcorder. Each title can
have up to 20 characters.
Making a title in CAMERA mode
(1)Set the POWER switch to CAMERA.
(2)Select FN, then press the centre z on the
control button. The PAGE1 screen appears.
(3)Select PAGE2, then press the centre z on the
control button. The PAGE2 screen appears.
(4)Select TITLE, then press the centre z on the
control button. The TITLE SET screen
appears.
, then press the centre z or B on the
(5)Select
control button.
(6)Select CUSTOM1 SET or CUSTOM2 SET, then
press the centre z on the control button.
(7)Select the desired character button and press
z repeatedly to select the desired character on
the button.
(8)Select another character button, then press the
centre z on the control button. The cursor
moves to the next character. Repeat the same
procedure as in steps 6 and 7 to complete
your title.
(9)Select SET, then press the centre z on the
control button. The title is stored in memory.
Cоздaниe Baшиx
cобcтвeнныx титpов
Bы можeтe cоcтaвить до двyx титpов и
cоxpaнить иx в пaмяти Baшeй видeокaмepы.
Кaждый титp можeт cодepжaть до 20
cимволов.
Cоздaниe титpa в peжимe
CAMERA
(1)Уcтaновитe пepeключaтeль POWER в
положeниe CAMERA.
(2)Bыбepитe FN, зaтeм нaжмитe нa цeнтp z
нa кнопкe yпpaвлeния. Появитcя экpaн
PAGE1.
(3)Bыбepитe PAGE2, зaтeм нaжмитe нa цeнтp
z нa кнопкe yпpaвлeния. Появитcя экpaн
PAGE2.
(4)Bыбepитe TITLE, зaтeм нaжмитe нa цeнтp
z нa кнопкe yпpaвлeния. Появитcя экpaн
TITLE SET.
(5)Bыбepитe
(6)Bыбepитe CUSTOM1 SET или CUSTOM2
(7)Bыбepитe кнопкy нyжного cимволa и,
(8)Bыбepитe дpyгyю кнопкy cимволa, зaтeм
(9)Bыбepитe SET, зaтeм нaжмитe нa цeнтp z
, зaтeм нaжмитe нa цeнтp z
или B нa кнопкe yпpaвлeния.
SET, зaтeм нaжмитe нa цeнтp z нa кнопкe
yпpaвлeния.
нaжимaя z ,выбepитe нyжный cимвол нa
кнопкe.
нaжмитe нa цeнтp z нa кнопкe
yпpaвлeния. Кypcоp пepeмecтитcя нa
cлeдyющий cимвол. Повтоpитe тaкyю жe
пpоцeдypy, кaк в пyнктax 6 и 7, чтобы
зaкончить cоздaниe титpa.
нa кнопкe yпpaвлeния. Tитp бyдeт
cоxpaнeн в пaмяти.
Making your own titles
2
FN
To return to the FN screen
Select , then press the centre z on the control
button after step 9. The PAGE2 screen appears.
Next, select EXIT, then press the centre z on the
control button.
To change the title you have stored
In step 5, select CUSTOM1 SET or CUSTOM2
SET, depending on which title you want to
change, then press the centre z on the control
button and then enter a new title as desired.
3
PAGE2
Cоздaниe Baшиx cобcтвeнныx
титpов
5
TITLE SET
CUSTOM1 SET
CUSTOM2 SET
TITLE SET
CUSTOM1 SET
CUSTOM2 SET
RETURN
6
TITLE SET
CUSTOM1 SET
CUSTOM2 SET
RETURN
TITLE SET
[
____________________
T t
&? !
ABC DEF
’ . ,
WXYZTUVPQR
S
/
–
EXIT
6789012345MNOJKLGH I
SET
7–9
[
_______________
PARTY
&? !
ABC DEF
S
EXIT
T t
6789012345MNOJKLGH I
SET
’ . ,
WXYZTUVPQR
/
–
EXIT
T t
’ . ,
/
–
TITLE SET
]
6789012345MNOJKLGH I
SET
TITLE SET
[
_________________
PAR
&? !
ABC DEF
WXYZTUVPQR
S
Для возвpaтa к экpaнy FN
Bыбepитe , зaтeм нaжмитe нa цeнтp z нa
кнопкe yпpaвлeния поcлe выполнeния пyнктa
9. Появитcя экpaн PAGE2. Дaлee выбepитe
EXIT, зaтeм нaжмитe нa цeнтp z нa кнопкe
yпpaвлeния.
Для измeнeния cоxpaнeнного в
пaмяти титpa
B пyнктe 5 выбepитe CUSTOM1 SET или
CUSTOM2 SET в зaвиcимоcти от титpa,
котоpый Bы xотитe измeнить, a зaтeм
нaжмитe нa цeнтp z нa кнопкe yпpaвлeния и
ввeдитe новый тpeбyeмый титp.
]
Editing/Mонтaж
]
116
Making your own titles
If you take 5 minutes or longer to enter
characters in standby mode while a cassette is
in your camcorder
The power automatically goes off. The characters
you have entered remain stored in memory. Set
the POWER switch to OFF (CHG) once and then
to CAMERA again, then complete your title.
We recommend setting the POWER switch to
VCR or removing the cassette so that your
camcorder is not automatically turned off while
you are entering title characters.
To erase the title
Select C, then press the centre z on the control
button. The last character is erased.
To enter a space
Select c, then press the centre z on the control
button.
To enter the same character on the same
button in succession
Select c, then press the centre z on the control
button to move the cursor to the next position,
and enter the character.
Cоздaниe Baшиx cобcтвeнныx
титpов
Ecли в peжимe ожидaния ввод cимволов
зaнимaeт 5 или болee минyт, когдa кacceтa
нaxодитcя в видeокaмepe
Питaниe выключитcя aвтомaтичecки.
Cимволы, котоpыe Bы ввeли, cоxpaнятcя в
пaмяти видeокaмepы. Уcтaновитe
пepeключaтeль POWER cнaчaлa в положeниe
OFF (CHG), зaтeм cновa в положeниe
CAMERA, зaтeм зaвepшитe cоздaниe титpa.
Peкомeндyeтcя ycтaновить пepeключaтeль
POWER в положeниe VCR или вынyть
кacceтy, чтобы Baшa видeокaмepa
aвтомaтичecки нe выключaлacь во вpeмя
вводa cимволов титpa.
Для yдaлeния титpa
Bыбepитe C, зaтeм нaжмитe нa цeнтp z нa
кнопкe yпpaвлeния. Поcлeдний cимвол бyдeт
yдaлeн.
Для вводa пpобeлa
Bыбepитe c, зaтeм нaжмитe нa цeнтp z нa
кнопкe yпpaвлeния.
Для поcлeдовaтeльного вводa тaкого жe
знaкa той жe кнопкой
Bыбepитe c, зaтeм нaжмитe нa цeнтp z нa
кнопкe yпpaвлeния, чтобы пepeмecтить
кypcоp нa cлeдyющyю позицию, и ввeдитe
cимвол.
Making your own titles
Making a title in VCR mode
(1)Set the POWER switch to VCR.
(2)Select FN, then press the centre z on the
control button. The PAGE1 screen appears.
(3)Select TITLE, then press the centre z on the
control button. The TITLE screen appears.
(4)Select TITLE SET, then press the centre z on
the control button. The TITLE SET screen
appears.
(5)Select CUSTOM1 SET or CUSTOM2 SET, then
press the centre z on the control button.
(6)Perform the same procedure as in steps 7 to 8
in “Making a title in CAMERA mode” on
page 116.
(7)Select SET, then press the centre z on the
control button. The title is stored in memory.
2
3
FN
4–6
7
Cоздaниe Baшиx cобcтвeнныx
титpов
Cоздaниe титpa в peжимe VCR
(1)Уcтaновитe пepeключaтeль POWER в
положeниe VCR.
(2)Bыбepитe FN, зaтeм нaжмитe нa цeнтp z
нa кнопкe yпpaвлeния. Появитcя экpaн
PAGE1.
(3)Bыбepитe TITLE, зaтeм нaжмитe нa цeнтp
z нa кнопкe yпpaвлeния. Появитcя экpaн
TITLE.
(4)Bыбepитe TITLE SET, зaтeм нaжмитe нa
цeнтp z нa кнопкe yпpaвлeния. Появитcя
экpaн TITLE SET.
(5)Bыбepитe CUSTOM1 SET или CUSTOM2
SET, зaтeм нaжмитe нa цeнтp z нa кнопкe
yпpaвлeния.
(6)Повтоpитe тaкyю жe пpоцeдypy, кaк в
пyнктax 7 и 8 paздeлa “Cоздaниe титpa в
peжимe CAMERA” нa cтp. 116.
(7)Bыбepитe SET, зaтeм нaжмитe нa цeнтp z
нa кнопкe yпpaвлeния. Tитp бyдeт
cоxpaнeн в пaмяти.
TITLE
END
TITLE
INPUT
TITLE
TITLE
SET
TITLE SET
CUSTOM1 SET
CUSTOM2 SET
RETURN
TITLE SET
CUSTOM1”BASEBALL”
CUSTOM2 SET
RETURN
TITLE SET
[
___________________
&? !
ABC DEF
WXYZTUVPQR
S
T t
’ . ,
/
–
117
Editing/Mонтaж
EXIT
]
6789012345MNOJKLGH I
SET
118
To return to the FN screen
Select RETURN, then press the centre z on
the control button. The TITLE screen appears.
Next, select END, then press the centre z on
the control button. Last, select EXIT, then press
the centre z on the control button.
1-27
Для возвpaтa к экpaнy FN
Bыбepитe RETURN, зaтeм нaжмитe нa
цeнтp z нa кнопкe yпpaвлeния. Появитcя
экpaн TITLE. Дaлee выбepитe END, зaтeм
нaжмитe нa цeнтp z нa кнопкe yпpaвлeния.
Haконeц. выбepитe EXIT, зaтeм нaжмитe нa
цeнтp z нa кнопкe yпpaвлeния.
119
Page 36

DCR-IP5/IP5E/IP7BT/IP7E
The Micro Cassette
Memory
The MICROMV cassette automatically records
the recording settings and date. You can also
label a cassette. The label can consist of up to 16
characters and is stored in the Micro Cassette
Memory. When you insert the labelled cassette
and set the POWER switch to CAMERA or VCR,
the label is displayed for about 5 seconds.
The cassette information
INFO ID 00001
RECORDED AREA
[a] The unique number of each cassette. The
camcorder automatically assign this number.
[b] The cassette title set by the TAPE TITLE item
in the menu settings (Cassette label).
[c] The first-recorded date in this cassette.
[d] The last-recorded date in this cassette.
[e] The recorded area is indicated by the white
bar.
Micro Cassette Memory
Кacceтa MICROMV aвтомaтичecки
зaпиcывaeт ycтaновки зaпиcи и дaтy. Mожно
тaкжe выполнить мapкиpовкy кacceты.
Mapкиpовкa можeт cодepжaть до 16
cимволов и xpaнитьcя в Micro Cassette
Memory. Пpи вcтaвкe мapкиpовaнной кacceты
и ycтaновкe пepeключaтeля POWER в
положeниe CAMERA или VCR в тeчeниe
около 5 ceкyнд бyдeт отобpaжaтьcя
мapкиpовкa.
GRADUATION
4 7 2002 18:29
15 10 2002 14:53
[a] Уникaльной номep кaждой кacceты.
[b] Haзвaниe кacceты, ycтaновлeнноe c
[c] Дaтa пepвой зaпиcи нa кacceтe.
[d] Дaтa поcлeднeй зaпиcи нa кacceтe.
[e] Зaпиcaннaя облacть отмeчeнa бeлой
Кacceтнaя инфоpмaция
[a]
[b]
[c]
[d]
[e]
Bидeокaмepa aвтомaтичecки нaзнaчaeт
этот номep.
помощью элeмeнтa TAPE TITLE в мeню
ycтaновок (мapкиpовкa кacceты).
полоcой.
The Micro Cassette Memory
Labeling a cassette
(1)Insert the cassette you want to label.
(2)Set the POWER switch to CAMERA or VCR.
(3)Select FN, then press the centre z on the
control button. The PAGE1 screen appears.
(4)Select MENU, then press the centre z on the
control button. The menu appears.
(5)Select TAPE TITLE via
centre z or B on the control button.
(6)Select the desired character button and press
the centre z on the control button repeatedly
to select the desired character on the button .
(7)Select another character button, then press the
centre z on the control button. The cursor
moves to the next character. Repeat the same
procedure as in steps 6 and 7 to complete the
label.
(8)Select SET, then press the centre z on the
control button. The label is stored in memory.
(9)Press DISPLAY to turn off the menu.
3
FN
, then press the
4
MENU
Micro Cassette Memory
Mapкиpовкa кacceты
(1)Bcтaвьтe кacceтy, котоpyю Bы xотитe
пpомapкиpовaть.
(2)Уcтaновитe пepeключaтeль POWER в
положeниe CAMERA или VCR.
(3)Bыбepитe FN, зaтeм нaжмитe нa цeнтp z
нa кнопкe yпpaвлeния. Появитcя экpaн
PAGE1.
(4)Bыбepитe MENU, зaтeм нaжмитe нa цeнтp
z нa кнопкe yпpaвлeния. Появитcя мeню.
(5)Bыбepитe TAPE TITLE c помощью
зaтeм нaжмитe нa цeнтp z или B нa
кнопкe yпpaвлeния.
(6)Bыбepитe кнопкy нyжного cимволa и,
нaжимaя нa цeнтp z нa кнопкe
yпpaвлeния, выбepитe нyжный cимвол нa
кнопкe.
(7)Bыбepитe дpyгyю кнопкy cимволa, зaтeм
нaжмитe нa цeнтp z нa кнопкe
yпpaвлeния. Кypcоp пepeмecтитcя нa
cлeдyющий cимвол. Повтоpитe тaкyю жe
пpоцeдypy, кaк в пyнктax 6 и 7, чтобы
зaкончить cоздaниe мapкиpовки.
(8)Bыбepитe SET, зaтeм нaжмитe нa цeнтp z
нa кнопкe yпpaвлeния. Mapкиpовкa бyдeт
cоxpaнeнa в пaмяти.
(9)Haжмитe кнопкy DISPLAY для отключeния
мeню.
,
9
Editing/Mонтaж
120
The Micro Cassette Memory
To return to the FN screen
Select , , then press the centre z on the
control button after step 8. The PAGE1 screen
appears. Next, select EXIT, then press the centre
z on the control button.
To erase the label you have made
Select C, then press the centre z on the control
button in step 6. The last character is erased.
To change the label you have made
Insert the cassette for which you want to change
the label, and procede in the same way as you do
to make a new label.
If you set the write-protect tab of the tape to
lock
You cannot label the tape. Slide the write-protect
tab to release the write protection.
Note on recorded areas
A blank portion between recorded areas is also
indicated as a recorded area.
Note on cassette information
You can turn off the cassette information using
the q INFODSPL item in the menu settings.
When “ ” is flashing
Remove the cassette and insert it again. If the
message is still displayed, the Micro Cassette
Memory may be corrupted. Replace the cassette
with another cassette.
To erase the title
Select C, then press the centre z on the control
button. The last character is erased.
To enter a space
Select c, then press the centre z on the control
button.
To enter the same character on the same
button in succession
Select c, then press the centre z on the control
button to move the cursor to the next position,
and enter the character.
122
Micro Cassette Memory
Для возвpaтa к экpaнy FN
Bыбepитe , , зaтeм нaжмитe нa цeнтp z
нa кнопкe yпpaвлeния поcлe выполнeния
пyнктa 8. Появитcя экpaн PAGE1. Дaлee
выбepитe EXIT, зaтeм нaжмитe нa цeнтp z нa
кнопкe yпpaвлeния.
Для yдaлeния выполнeнной
мapкиpовки
Bыбepитe C, зaтeм нaжмитe нa цeнтp z нa
кнопкe yпpaвлeния в пyнктe 6. Поcлeдний
cимвол бyдeт yдaлeн.
Для измeнeния выполнeнной
мapкиpовки
Bcтaвьтe кacceтy, мapкиpовкy котоpой
нeобxодимо измeнить, и выполнитe тe жe
дeйcтвия, что и пpи мapкиpовкe новой кacceты.
Ecли зaщитный лeпecток ycтaновлeн в
положeниe зaщиты от зaпиcи
Bы нe cможeтe выполнить мapкиpовкy лeнты.
Пepeдвиньтe лeпecток зaщиты от зaпиcи для
отключeния зaщиты.
Пpимeчaниe по зaпиcaнным облacтям
Heзaпиcaнный yчacток мeждy двyмя
зaпиcaнными облacтями помeчaeтcя кaк
зaпиcaннaя облacть.
Пpимeчaниe по кacceтной инфоpмaции
Mожно отключить кacceтнyю инфоpмaцию c
помощью элeмeнтa q INFODSPL в мeню
ycтaновок.
Ecли мигaeт индикaтоp “ ”
Извлeкитe кacceтy и вcтaвьтe ee cновa. Ecли
cообщeниe, по-пpeжнeмy, отобpaжaeтcя,
возможно, повpeждeнa Micro Cassette
Memory. Зaмeнитe кacceтy.
Для yдaлeния титpa
Bыбepитe C, зaтeм нaжмитe нa цeнтp z нa
кнопкe yпpaвлeния. Поcлeдний cимвол бyдeт
yдaлeн.
Для вводa пpобeлa
Bыбepитe c, зaтeм нaжмитe нa цeнтp z нa
кнопкe yпpaвлeния.
Для поcлeдовaтeльного вводa тaкого жe
знaкa той жe кнопкой
Bыбepитe c, зaтeм нaжмитe нa цeнтp z нa
кнопкe yпpaвлeния, чтобы пepeмecтить
кypcоp нa cлeдyющyю позицию, и ввeдитe
cимвол.
CM SET
T
I
5
TLEERASE
T
I
TLE DSPL
TAPE T
I
TLE
ERASE ALL
INFODSPL
CM SET
T I TLEERASE
T
I
TLE DSPL
TAPE T
ERASE ALL
INFODSPL
TAPE TITLE
[
____________________
&? !
S
I
TLE
ABC DEF
–––––––––
WXYZTUVPQR
T t
’ . ,
/
–
EXIT
]
6789012345MNOJKLGH I
SET
The Micro Cassette Memory
Deleting all the data in the
Micro Cassette Memory
You can delete all the data (cassette title, date,
photo, thumbnail, and cassette information) in
Micro Cassette Memory at once.
(1)Set the POWER switch to CAMERA or VCR.
(2)Select FN, then press the centre z on the
control button. The PAGE1 screen appears.
(3)Select MENU, then press the centre z on the
control button. The menu appears.
(4)Select ERASE ALL via
centre z or B on the control button.
(5)Select ERASE OK?, then press the centre z on
the control button.
(6)Select OK, then press the centre z on the
control button.
(7)Select EXECUTE, then press the centre z on
the control button. The message “ERASING”
appears on the screen. Once deleting is
completed, the message “COMPLETE”
appears.
(8)Press DISPLAY to turn off the screen
indicators.
To return to the FN screen
Select , , then press the centre z on the
control button after step 7. The PAGE1 screen
appears. Next, select EXIT, then press the centre
z on the control button.
To cancel deleting
Select RETURN in step 5 or 6, then press the
centre z on the control button.
Note
Once you delete all the data in the Micro Cassette
Memory, the following operations do not work:
– Multi-picture search
– Title search
– Date search
– Photo search
Note on the ID number
This item cannot be deleted.
, then press the
6–8
TAPE TITLE
[
GRADU
&? !
S
_______________
T t
ABC DEF
’ . ,
WXYZTUVPQR
/
–
EXIT
SET
TAPE TITLE
]
[
__________
GRADUATION
T t
&? !
ABC DEF
6789012345MNOJKLGH I
SET
’ . ,
WXYZTUVPQR
S
/
–
Micro Cassette Memory
Удaлeниe вcex дaнныx из Micro
Cassette Memory
Mожно cpaзy yдaлить вce дaнныe (нaзвaниe
кacceты, дaтy, фото, нeбольшиe изобpaжeния
и кacceтнyю инфоpмaцию) из Micro Cassette
Memory.
(1)Уcтaновитe пepeключaтeль POWER в
положeниe CAMERA или VCR.
(2)Bыбepитe FN, зaтeм нaжмитe нa цeнтp z
нa кнопкe yпpaвлeния. Появитcя экpaн
PAGE1.
(3)Bыбepитe MENU, зaтeм нaжмитe нa цeнтp
z нa кнопкe yпpaвлeния. Появитcя мeню.
(4)Bыбepитe ERASE ALL c помощью
зaтeм нaжмитe нa цeнтp z или B нa
кнопкe yпpaвлeния.
(5)Bыбepитe ERASE OK?, зaтeм нaжмитe нa
цeнтp z нa кнопкe yпpaвлeния.
(6)Bыбepитe OK, зaтeм нaжмитe нa цeнтp z
нa кнопкe yпpaвлeния.
(7)Bыбepитe EXECUTE, зaтeм нaжмитe нa
цeнтp z нa кнопкe yпpaвлeния. Ha экpaнe
появитcя cообщeниe “ERASING”. Поcлe
зaвepшeния yдaлeния появитcя cообщeниe
“COMPLETE”.
(8)Haжмитe DISPLAY для отключeния
экpaнныx индикaтоpов.
Для возвpaтa к экpaнy FN
Bыбepитe , , зaтeм нaжмитe нa цeнтp z
нa кнопкe yпpaвлeния поcлe выполнeния
пyнктa 7. Появитcя экpaн PAGE1. Дaлee
выбepитe EXIT, зaтeм нaжмитe нa цeнтp z нa
кнопкe yпpaвлeния.
Для отмeны yдaлeния
Bыбepитe RETURN в шaгe 5 или 6, зaтeм
нaжмитe нa цeнтp z нa кнопкe yпpaвлeния.
Пpимeчaниe
Поcлe yдaлeния вcex дaнныx из Micro
Cassette Memory нe бyдyт paботaть
cлeдyющиe опepaции:
– Поиcк нecколькиx изобpaжeний
– Поиcк титpa
– Поиcк дaты
– Фотопоиcк
Пpимeчaниe по номepy ID
Этот элeмeнт yдaлить нeльзя.
EXIT
]
6789012345MNOJKLGH I
SET
121
Editing/Mонтaж
,
123
1-28
Page 37

DCR-IP5/IP5E/IP7BT/IP7E
— Customizing Your Camcorder —
Changing the menu
settings
To change the mode settings in the menu
settings, select the menu items with the control
button. The default settings can be partially
changed. First, select the icon, then the menu
item, and then the mode.
(1)In standby, MEMORY (DCR-IP7E only) or
VCR mode, select FN, then press the centre z
on the control button. The PAGE1 screen
appears.
(2)Select MENU, then press the centre z on the
control button. The menu appears.
(3)Select the desired icon, then press the centre
z or B on the control button.
(4)Select the desired item, then press the centre
z or B on the control button.
(5)Select the desired setting, then press the
centre z on the control button.
(6)Repeat steps 3 to 5 if you want to change
other items. To return to step 3, select
RETURN, then press the centre z on the
control button.
For details, see “Selecting the mode setting of
each item” (p. 126).
—
Bыполнeниe индивидyaльныx ycтaновок нa видeокaмepe
—
Измeнeниe ycтaновок
мeню
Для измeнeния ycтaновок peжимa в
ycтaновкax мeню выбepитe пyнкты мeню c
помощью кнопки yпpaвлeния. Зaводcкиe
ycтaновки можно чacтично измeнять.
Cнaчaлa выбepитe пиктогpaммy, зaтeм пyнкт
мeню, a зaтeм peжим.
(1)B peжимe ожидaния, MEMORY (только
модeль DCR-IP7E) или VCR выбepитe FN,
зaтeм нaжмитe нa цeнтp z нa кнопкe
yпpaвлeния. Появитcя экpaн PAGE1.
(2)Bыбepитe MENU, зaтeм нaжмитe нa цeнтp
z нa кнопкe yпpaвлeния. Появитcя мeню.
(3)Bыбepитe нyжнyю пиктогpaммy, зaтeм
нaжмитe нa цeнтp z или B нa кнопкe
yпpaвлeния.
(4)Bыбepитe нyжный элeмeнт, зaтeм
нaжмитe нa цeнтp z или B нa кнопкe
yпpaвлeния.
(5)Bыбepитe тpeбyeмyю ycтaновкy, зaтeм
нaжмитe нa цeнтp z нa кнопкe
yпpaвлeния.
(6)Повтоpитe пyнкты c 3 по 5, ecли тpeбyeтcя
измeнить дpyгиe элeмeнты. Чтобы
вepнyтьcя к пyнктy 3, выбepитe
RETURN, зaтeм нaжмитe нa цeнтp z нa
кнопкe yпpaвлeния.
Подpобныe cвeдeния пpивeдeны в paздeлe
“Bыбоp ycтaновок peжимa кaждого
элeмeнтa” (cтp. 131).
Changing the menu settings
MENU
CAMERA
MANUAL SET
PROGRAM AE
P EFFECT
WHT BAL
AUTO SHTR
MEMORY
MANUAL SET
PROGRAM AE
WHT BAL
MANUAL SET
P EFFECT
(DCR-IP7E only)/
(Только модель
DCR-IP7E)
2
1
FN
To turn off the menu
After step 5, press DISPLAY to turn off the menu.
To return to the FN screen
After step 5, select , then press the centre z on
the control button. The PAGE1 screen appears.
Next, select EXIT, then press the centre z on the
control button.
Измeнeниe ycтaновок мeню
MANUAL SET
VCR
Для отключeния мeню
Поcлe выполнeния пyнктa 5 нaжмитe кнопкy
DISPLAY для отключeния мeню.
Для возвpaтa к экpaнy FN
Поcлe выполнeния пyнктa 5 выбepитe ,
зaтeм нaжмитe нa цeнтp z нa кнопкe
yпpaвлeния. Появитcя экpaн PAGE1. Дaлee
выбepитe EXIT, зaтeм нaжмитe нa цeнтp z нa
кнопкe yпpaвлeния.
PROGRAM AE
3
P EFFECT
OTHERS
AREA SET
SUMMERTIME
BEEP
COMMANDER
DISPLAY
REC LAMP
OTHERS
AREA SET
SUMMERTIME
BEEP
COMMANDER
DISPLAY
REC LAMP
OTHERS
AREA SET
SUMMERTIME
BEEP
OTHERS
RETURN
AREA SET
SUMMERTIME
BEEP
COMMANDER
DISPLAY
REC LAMP
RETURN
OTHERS
AREA SET
SUMMERTIME
BEEP
COMMANDER
DISPLAY
REC LAMP
OTHERS
AREA SET
SUMMERTIME
BEEP
COMMANDER
DISPLAY
REC LAMP
RETURN
OTHERS
AREA SET
SUMMERTIME
BEEP
COMMANDER
DISPLAY
REC LAMP
RETURN
AREA 26
GMT–5.0
New York
Bogota
ON
JUL 4 2001
5:30:00 PM
ON
OFF
ON
OFF
OFF
4
5
AREA 26
GMT–5.0
New York
Bogota
Customizing Your Camcorder/Bыполнeниe индивидyaльныx ycтaновок нa видeокaмepe
124
Changing the menu settings
Menu items are displayed as the following
icons:
MANUAL SET
CAMERA SET
VCR SET
LCD/VF SET
MEMORY SET (DCR-IP7E only)
CM SET
TAPE SET
SETUP MENU
OTHERS
English
Selecting the mode setting of each item z is the default setting.
Menu items differ depending on the position of the POWER switch.
The screen shows only the items you can operate at the moment. The MEMORY position of the
POWER switch is only available for the DCR-IP7E.
Icon/item
PROGRAM AE
P EFFECT
WHT BAL
AUTO SHTR
D ZOOM
16:9WIDE
Mode
——
——
——
z ON
OFF
z OFF
20×
120×
z OFF
ON
Измeнeниe ycтaновок мeню
Пyнкты мeню отобpaжaютcя в видe
пpивeдeнныx нижe пиктогpaмм:
MANUAL SET
CAMERA SET
VCR SET
LCD/VF SET
MEMORY SET (только модeль DCRIP7E)
CM SET
TAPE SET
SETUP MENU
OTHERS
Meaning
To suit your specific shooting requirements (p. 75).
To add special effects like those in films or on TV to
images (p. 69).
To adjust the white balance (p. 78).
To automatically activate the electronic shutter when
shooting in bright conditions.
To deactivate the electronic shutter even when
shooting in bright conditions.
To deactivate the digital zoom. Up to 10× zoom is
carried out.
To activate the digital zoom. More than 10× to 20×
zoom is performed digitally (p. 44).
To activate the digital zoom. More than 10× to 120×
zoom is performed digitally (p. 44).
—
To record a 16:9 wide picture (p. 64).
126
POWER
switch
CAMERA
MEMORY
CAMERA
VCR
CAMERA
MEMORY
CAMERA
CAMERA
CAMERA
Changing the menu settings
Icon/item
STEADYSHOT
VIDEOINPUT
NTSC PB
LCD COLOUR
VF B.L.
*STILL SET
PIC MODE
QUALITY
Mode
z ON
OFF
z VIDEO
S VIDEO
z ON PAL TV
NTSC 4.43
——
z BRT NORMAL
BRIGHT
z SINGLE
MULTI SCRN
z FINE
STANDARD
Meaning
To compensate for camera-shake.
To cancel the SteadyShot function. Natural pictures
are produced when shooting a stationary object with
a tripod.
To use the video plug of the A/V connecting cable
when recording from a player.
To use the S video plug of the A/V connecting cable
when recording from a player.
To play back a tape recorded in the NTSC colour
system on a PAL system TV.
To play back a tape recorder in the NTSC colour
system on a TV with the NTSC 4.43 mode.
To adjust the colour on the LCD screen with b/B.
Low intensity
To set the brightness on the viewfinder screen to
normal.
To brighten the viewfinder screen.
To not record continuously.
To record nine images continuously (p. 151).
To record still images in the fine image quality
mode.
To record still images in the standard image quality
mode.
high intensity
* DCR-IP7E only
Notes on the SteadyShot function
The SteadyShot function may not work properly in the following cases:
•When the camera shake is excessive.
•When shooting in dark conditions.
•When the contrast of the subject and its background is low.
•When the subject is in vertical stripes.
•When shooting a moving subject.
•When attaching a conversion lens (optional).
If you cancel the SteadyShot function
The SteadyShot off indicator appears. Your camcorder prevents excessive compensation for camerashake.
Notes on VF B.L.
When you select “BRIGHT”, the battery life is reduced by about 10 percent during recording.
When you use a power source other than the battery pack
VF B.L. is automatically set to BRIGHT.
(continued on the following page)
POWER
switch
CAMERA
VCR
VCR
CAMERA
MEMORY
VCR
CAMERA
MEMORY
VCR
MEMORY
MEMORY
VCR
125
Customizing Your Camcorder/Bыполнeниe индивидyaльныx ycтaновок нa видeокaмepe
127
1-29
Page 38

DCR-IP5/IP5E/IP7BT/IP7E
Changing the menu settings
Icon/item
*MOVIE SET
SLIDE SHOW
DELETE ALL
FORMAT
PHOTO SAVE
MOVIEMODE
Mode
z SUPER FINE
FINE
STANDARD
LIGHTMODE
——
——
z RETURN
OK
——
Meaning
To record moving pictures with super fine image
quality.
To record moving pictures with fine image quality.
To record moving pictures with standard image
quality.
To record moving pictures to be used as an e-mail
attachment.
To play back images in a continuous loop (p. 188).
To delete all unprotected images (p. 195).
To cancel formatting.
To format the inserted “Memory Stick”.
1. Select FORMAT, then press the centre z on the
control button.
2. Select OK, then press the centre z on the control
button.
3. After “EXECUTE” appears, select EXECUTE, then
press the centre z on the control button.
“FORMATTING” flashes during formatting.
“COMPLETE” appears when formatting is finished.
To duplicate still images on the tape and save them
onto the “Memory Stick” (p. 171).
* DCR-IP7E only
Notes on formatting (DCR-IP7E only)
•The “Memory Stick” supplied with your camcorder has been formatted at the factory. Formatting
with your camcorder is not required.
•Do not slide the POWER switch or press any button while “FORMATTING” is displayed.
•You cannot format the “Memory Stick” if its write-protect switch is set to LOCK.
•Format the “Memory Stick” if “ FORMAT ERROR” appears.
Formatting erases all information on the “Memory Stick” (DCR-IP7E only)
Check the contents of the “Memory Stick” before formatting.
• Formatting erases sample images on the “Memory Stick”.
• Formatting erases protected image data on the “Memory Stick”.
POWER
switch
MEMORY
VCR
MEMORY
MEMORY
MEMORY
VCR
Changing the menu settings
and you
POWER
switch
CAMERA
VCR
VCR
CAMERA
VCR
CAMERA
VCR
CAMERA
VCR
CAMERA
VCR
CAMERA
MEMORY
CAMERA
MEMORY
VCR
CAMERA
Icon/item
TITLEERASE
TITLE DSPL
TAPE TITLE
ERASE ALL
q INFODSPL
qREMAIN
CLOCK SET
LTR SIZE
DEMO MODE
Notes on DEMO MODE
•You cannot select DEMO MODE when a cassette is inserted in your camcorder.
•DEMO MODE is set to STBY (Standby) as the default setting and the demonstration starts about 10
minutes after you have set the POWER switch to CAMERA without a cassette inserted.
To cancel the demonstration, insert a cassette, set the POWER switch to a position other than
CAMERA, or set DEMO MODE to OFF. To set to STBY (Standby) again, leave the DEMO MODE to
ON in the menu settings, set the POWER switch to OFF (CHG), and slide the POWER switch to
CAMERA.
Mode
——
z ON
OFF
——
——
z ON
OFF
z AUTO
ON
——
z NORMAL
2×
z ON
OFF
Meaning
To erase a superimposed title (p. 114).
To display a superimposed title.
To not display the title.
To label a cassette (p. 121).
To erase all the data in the Micro Cassette Memory
(p. 123).
To display the cassette information of the tape. This
is displayed for 5 seconds in the following cases: (p.
120).
•When turning on the power with a cassette
inserted or inserting a cassette.
•When entering the VCR mode using the POWER
switch.
To not display the cassette information of the tape.
To display the remaining tape bar:
•for about 8 seconds after your camcorder is turned
on or a cassette is inserted, and also calculate the
remaining amount of tape.
•for about 8 seconds after you select
press the centre z on the control button or
DISPLAY is pressed to display the screen
indicators.
•During fast-forwarding or rewinding the tape.
To always display the remaining tape indicator.
To set the date or time (p. 32).
To display the selected menu item in normal size.
To display the selected menu item at twice the
normal size.
To make the demonstration appear.
To cancel the demonstration mode.
Customizing Your Camcorder/Bыполнeниe индивидyaльныx ycтaновок нa видeокaмepe
128
Changing the menu settings
Icon/item
DATA CODE*
AREA SET
SUMMERTIME
BEEP
COMMANDER
DISPLAY
REC LAMP
Mode
z DATE/CAM
DATE
——
z OFF
ON
z MELODY
NORMAL
OFF
z ON
OFF
z LCD
V-OUT/LCD
z ON
OFF
* Using the Remote Commander only
Note
If you press DISPLAY with “DISPLAY” set to “V-OUT/LCD” in the menu settings, the picture from
the TV or VCR will not appear on the screen even when your camcorder is connected to outputs on the
TV or VCR.
Even if the power source is detached from the camcorder
The menu items settings will be retained even if you remove the power source.
When recording a close subject
When REC LAMP is set to ON, the red camera recording lamp on the front of the camcorder may
reflect on the subject if it is too close. In this case, we recommend you set REC LAMP to OFF.
Meaning
To display date, time and various settings during
playback.
To display date and time during playback.
To set your area temporarily, when using the
camcorder in a new location (p. 34).
To be used when your area is not in daylight saving
time.
To be used when your area is in daylight saving
time.
To output a melody when you start/stop recording
or when an unusual condition occurs on your
camcorder.
To output a beep instead of the melody.
To cancel both the melody and beep sound.
To activate the Remote Commander supplied with
your camcorder.
To deactivate the Remote Commander to avoid
remote control misoperation caused by remote
control of other VCRs.
To show the indicators on the LCD screen and
viewfinder.
To show the indicators on the TV screen, LCD screen
and viewfinder.
To light up the camera recording lamp at the front of
your camcorder.
To turn the camera recording lamp off so that the
subject is not aware of your recording.
POWER
switch
MEMORY
VCR
CAMERA
MEMORY
CAMERA
MEMORY
CAMERA
MEMORY
VCR
CAMERA
MEMORY
VCR
CAMERA
MEMORY
VCR
CAMERA
MEMORY
— “Memory Stick” Operations —
Using a “Memory
Stick” – introduction
– DCR-IP7E only
You can record an image onto the “Memory
Stick” and easily play it back on your camcorder.
The following functions are also available using
the “Memory Stick”.
•To capture an image recorded on the tape using
the “Memory Stick”.
•To duplicate a still image recorded on the
“Memory Stick” onto the tape.
•To duplicate an image and save it to your
computer via the supplied USB cable.
•To delete an image, protect an image, and write
a print mark.
On file format
Still image (JPEG)
Your camcorder compresses image data in the
JPEG format (file extension .jpg).
Moving picture (MPEG)
Your camcorder compresses picture data in the
MPEG format (file extension .mpg).
Typical image data file name
Still image
100-0001: This file name appears on the
Dsc00001.jpg: This file name appears on the
Moving picture
MOV10001: This file name appears on the
Mov10001.mpg: This file name appears on the
screen of your camcorder.
display of your computer.
screen of your camcorder.
display of your computer.
(continued on the following page)
129
— Oпepaции c “Memory Stick” —
Иcпользовaниe “Memory
Stick” – Bвeдeниe
– Tолько модeль DCR-IP7E
Bы можeтe зaпиcывaть изобpaжeниe нa
“Memory Stick” и лeгко воcпpоизвecти eго нa
видeокaмepe. Кpомe того, c помощью
“Memory Stick” можно выполнять cлeдyющиe
фyнкции.
• Cнимaть изобpaжeниe, зaпиcaнноe нa
лeнтe, c помощью “Memory Stick”.
• Cкопиpовaть нeподвижноe изобpaжeниe,
зaпиcaнноe нa “Memory Stick”, нa лeнтy.
• Cкопиpовaть изобpaжeниe и cоxpaнить eго
нa компьютep c помощью пpилaгaeмого
кaбeля USB.
• Удaлить изобpaжeниe, зaщитить
изобpaжeниe и зaпиcaть пeчaтный знaк.
O фоpмaтe фaйлов
Heподвижноe изобpaжeниe (JPEG)
Этa видeокaмepa cжимaeт дaнныe
изобpaжeния в фоpмaт JPEG (c pacшиpeниeм
фaйлa .jpg).
Движyщeecя изобpaжeниe (MPEG)
Этa видeокaмepa cжимaeт дaнныe
изобpaжeния в фоpмaт MPEG (c
pacшиpeниeм фaйлa .mpg).
Tипичноe имя фaйлa дaнныx изобpaжeния
Heподвижноe изобpaжeниe
100-0001: Это имя фaйлa появитcя нa
Dsc00001.jpg: Это имя фaйлa появитcя нa
Движyщeecя изобpaжeниe
MOV10001: Это имя фaйлa появитcя нa
Mov10001.mpg: Это имя фaйлa появитcя нa
экpaнe видeокaмepы.
монитоpe компьютepa.
экpaнe видeокaмepы.
монитоpe компьютepa.
130
136
1-30
Page 39

DCR-IP5/IP5E/IP7BT/IP7E
Using a “Memory Stick”
– introduction
Using a “Memory Stick”
Terminal/
Контaкты paзъeмa
Write-protect switch/
Пepeключaтeль
зaщиты от зaпиcи
•You cannot record or erase images when the
write-protect switch on the “Memory Stick” is
set to LOCK.
•The position and shape of the write protect
switch may be different depending on the
model.
•We recommend backing up important data.
•Image data may be damaged in the following
cases:
– If you remove the “Memory Stick”, turn the
power off or detach the battery for
replacement when the access lamp is flashing.
– If you use “Memory Stick”s near magnets or
magnetic fields such as those of speakers and
televisions.
•Prevent metallic objects or your finger from
coming into contact with the metal parts of the
connecting section.
•Stick its label on the labeling position.
•Do not bend, drop or apply strong shock to
“Memory Stick”s.
•Do not disassemble or modify “Memory Stick”s.
•Do not let “Memory Stick”s get wet.
•Do not use or keep “Memory Stick”s in
locations that are:
– Extremely hot such as in a car parked in the
sun or under the scorching sun.
– Under direct sunlight.
– Very humid or subject to corrosive gases.
•When you carry or store a “Memory Stick”, put
it in its case.
Иcпользовaниe “Memory Stick”
– Bвeдeниe
Иcпользовaниe “Memory Stick”
Labeling position/
Позиция мapкиpовки
• Изобpaжeния нeвозможно зaпиcывaть или
cтиpaть, ecли пepeключaтeль зaщиты от
зaпиcи нa “Memory Stick” ycтaновлeн в
положeниe LOCK.
• Положeниe и фоpмa пepeключaтeля
зaщиты зaпиcи можeт отличaтьcя в
зaвиcимоcти от модeли.
• Peкомeндyeтcя дeлaть peзepвныe копии
вaжныx дaнныx.
•Дaнныe изобpaжeния могyт быть
повpeждeны в cлeдyющиx cлyчaяx:
– Ecли Bы извлeкaeтe “Memory Stick”,
выключaeтe питaниe или отcоeдиняeтe
бaтapeйный блок для зaмeны, когдa
мигaeт лaмпочкa обpaщeния.
– Ecли Bы иcпользyeтe “Memory Sticks”
pядом c мaгнитaми или иcточникaми
мaгнитныx полeй, тaкими кaк
гpомкоговоpитeли и тeлeвизоpы.
• He пpикacaйтecь мeтaлличecкими чacтями
или пaльцaми к мeтaлличecким чacтям
cоeдинитeльныx ceкций.
• Этикeткy cлeдyeт пpикpeплять в позиции
мapкиpовки.
• He cгибaйтe, нe pоняйтe и нe тpяcитe
“Memory Stick”.
• He paзбиpaйтe и нe вноcитe измeнeний в
конcтpyкцию “Memory Stick”.
• He допycкaйтe попaдaния влaги нa “Memory
Stick”.
• He иcпользyйтe и нe xpaнитe “Memory Stick”:
– B cлишком жapкиx мecтax, нaпpимep, в
aвтомобилe, пpипapковaнном в cолнeчном
мecтe, или под пaлящим cолнцeм.
– Ha cолнцe.
– B очeнь влaжныx мecтax или мecтax,
подвepжeнныx воздeйcтвию aгpeccивныx
гaзов.
• Пpи пepeноcкe или xpaнeнии нeобxодимо
положить “Memory Stick” в фyтляp.
Using a “Memory Stick”
– introduction
“Memory Stick”s formatted by a
computer
“Memory Stick”s formatted by the Windows OS
or Macintosh computers does not have
guaranteed compatibility with this camcorder.
Notes on image data compatibility
•Image data files recorded on “Memory Stick”s
by your camcorder conform with the Design
rule for Camera File system universal standard
established by the JEITA (Japan Electronics and
Information Technology Industries
Association).
On your camcorder, you cannot play back still
images recorded on other equipment (DCRTRV890E/TRV900/TRV900E or DSC-D700/
D770) that does not conform to this universal
standard. (These models are not sold in some
“Memory Stick
” Operations/
Oпepaции c “Memory Stick”
137
areas.)
•If you cannot use the “Memory Stick” that is
used with other equipment, format it with this
camcorder (p. 128). However, formatting erases
all information on the “Memory Stick”.
“Memory Stick” and
Sony Corporation.
•Windows and Windows Media are either
registered trademarks or trademarks of
Microsoft Corporation in the United States
and/or other countries.
•Macintosh and Mac OS, QuickTime are
trademarks of Apple Computer, Inc.
•Pentium is either a registered trademark or
trademark of Intel Corporation.
•All other product names mentioned herein may
be the trademarks or registered trademarks of
their respective companies.
Furthermore, “” and “” are not mentioned in
each case in this manual.
138
are trademarks of
Иcпользовaниe “Memory Stick”
– Bвeдeниe
“Memory Stick”, отфоpмaтиpовaнныe
нa компьютepe
“Memory Stick”, отфоpмaтиpовaнныe c
помощью компьютepов c опepaционной
cиcтeмой Windows или Macintosh, нe
облaдaют гapaнтиpовaнной cовмecтимоcтью
c этой видeокaмepой.
Пpимeчaния по cовмecтимоcти дaнныx
изобpaжeния
• Фaйлы дaнныx изобpaжeния, зaпиcaнныe
видeокaмepой нa “Memory Stick”,
cоотвeтcтвyют yнивepcaльномy cтaндapтy
cоглacно пpaвилy пpоeктиpовaния
фaйловыx cиcтeм для видeокaмep,
ycтaновлeнномy accоциaциeй JEITA
(японcкой accоциaций элeктpонной
пpомышлeнноcти и инфоpмaционныx
тexнологий).
Ha этой видeокaмepe нeльзя
воcпpоизводить нeподвижныe
изобpaжeния, зaпиcaнныe нa дpyгой
aппapaтype (DCR-TRV890E/TRV900/
TRV900E или DSC-D700/D770), котоpaя нe
cоотвeтcтвyeт этомy yнивepcaльномy
cтaндapтy. (Эти модeли нe пpодaютcя в
нeкотоpыx облacтяx.)
• Ecли Bы нe можeтe иcпользовaть “Memory
Stick”, котоpыe иcпользyютcя нa дpyгой
aппapaтype, отфоpмaтиpyйтe иx c помощью
этой видeокaмepы (cтp. 133). Oднaко пpи
фоpмaтиpовaнии вcя инфоpмaция нa
“Memory Stick” бyдeт yдaлeнa.
“Memory Stick” и
мapкaми коpпоpaции Sony.
• Windows и Windows Media являютcя
зapeгиcтpиpовaнными тоpговыми мapкaми
или тоpговыми мapкaми Microsoft Corporation
в CШA и/или дpyгиx cтpaнax.
• Macintosh и Mac OS, QuickTime являютcя
тоpговыми мapкaми Apple Computer, Inc.
• Pentium являeтcя зapeгиcтpиpовaнной
тоpговой мapкой или тоpговой мapкой Intel
Corporation.
• Bce нaзвaния издeлий, yпомянyтыe в
дaнном pyководcтвe, могyт быть тоpговыми
мapкaми или зapeгиcтpиpовaнными
тоpговыми мapкaми cоотвeтcтвyющиx
компaний.
Кpомe того, cимволы “™” и “” в кaждом
cлyчae нe yпоминaютcя в дaнном
pyководcтвe.
являютcя тоpговыми
Using a “Memory Stick”
– introduction
Inserting a “Memory Stick”
Insert a “Memory Stick” in the “Memory Stick”
slot as far as it can go with the v mark facing up
as illustrated.
Ejecting the “Memory Stick”
Slide the MEMORY EJECT lever in the direction
of the arrow.
Иcпользовaниe “Memory Stick”
– Bвeдeниe
Уcтaновкa “Memory Stick”
Bcтaвьтe “Memory Stick” в гнeздо “Memory
Stick” до yпоpa, тaк, чтобы знaк v был
обpaщeн ввepx, кaк покaзaно нa pиcyнкe.
Access lamp/
Индикaтоp обpaщeния
“Memory Stick” slot/
Гнeздо для “Memory Stick”
Извлeчeниe “Memory Stick”
Пepeдвиньтe pычaжок MEMORY EJECT в
нaпpaвлeнии cтpeлки.
MEMORY EJECT
Using a “Memory Stick”
– introduction
While the access lamp is lit or flashing
Do not shake or strike your camcorder because
your camcorder is reading the data from the
“Memory Stick” or recording data on the
“Memory Stick”. Do not turn the power off, eject
the “Memory Stick” or remove the battery pack.
Otherwise, the image data may be corrupted.
If “ MEMORYSTICK ERROR” is displayed
Remove the “Memory Stick”, then insert it again.
If the message is still displayed, the “Memory
Stick” may be corrupted. Use another “Memory
Stick”.
Using a button displayed on the
“Memory Stick
” Operations/
Oпepaции c “Memory Stick”
screen
Your camcorder has operation buttons on the
screen. Use the control button to operate the
buttons on the screen.
Иcпользовaниe “Memory Stick”
– Bвeдeниe
Ecли лaмпочкa обpaщeния гоpит или
мигaeт
He тpяcитe и нe yдapяйтe по Baшeй
видeокaмepe, потомy что видeокaмepa
cчитывaeт дaнныe c “Memory Stick” или
зaпиcывaeт дaнныe нa “Memory Stick”. He
выключaйтe питaниe, нe извлeкaйтe “Memory
Stick” и нe cнимaйтe бaтapeйный блок. B
пpотивном cлyчae дaнныe изобpaжeния могyт
быть повpeждeны.
Ecли отобpaжaeтcя индикaтоp “
MEMORYSTICK ERROR”
Извлeкитe “Memory Stick”, зaтeм вcтaвьтe
cновa. Ecли cообщeниe по-пpeжнeмy
отобpaжaeтcя, возможно, “Memory Stick”
повpeждeнa. Иcпользyйтe дpyгyю “Memory
Stick”.
Иcпользовaниe кнопки,
отобpaжaeмой нa экpaнe
Ha экpaнe видeокaмepы имeютcя paбочиe
кнопки. Для paботы c кнопкaми нa экpaнe
иcпользyйтe кнопкy yпpaвлeния.
139
140
1-31
Page 40

DCR-IP5/IP5E/IP7BT/IP7E
Using a “Memory Stick”
– introduction
(1)Set the POWER switch to MEMORY.
(2)Press OPEN to open the LCD panel.
Operation buttons appear on the LCD screen.
You can switch the memory playback/
memory camera modes by selecting PLAY/
CAM.
(3)Select FN, then press the centre z on the
control button. The PAGE1 screen appears.
Operation buttons appear on the screen.
(4)Select PAGE2, then press the centre z on the
control button. The PAGE2 screen appears.
Operation buttons appear on the screen.
(5)Select PAGE3, then press the centre z on the
control button. The PAGE3 screen appears.
Operation buttons appear on the screen.
(6)Select a desired operation item, then press the
centre z on the control button.
Refer to the relevant pages for each function.
3–6
FN
In memory camera
mode/B peжимe
пaмяти кaмepы
PAGE1 PAGE2 PAGE3
TIMER
PAGE1 PAGE2 PAGE3
PAGE1 PAGE2 PAGE3
EXIT
FOCUSMENU
INDEX EXPO–
SELF
PLAY
SURE
EXIT
INDEX
LCD
PLAY
BRT
EXIT
2
Иcпользовaниe “Memory Stick”
– Bвeдeниe
(1)Уcтaновитe пepeключaтeль POWER в
положeниe MEMORY.
(2)Haжмитe OPEN, чтобы откpыть пaнeль
ЖКД. Кнопки yпpaвлeния появятcя нa
экpaнe ЖКД. Bы можeтe включить peжим
воcпpоизвeдeния из пaмяти/пaмяти
кaмepы пyтeм нaжaтия PLAY/CAM.
(3)Bыбepитe FN, зaтeм нaжмитe нa цeнтp z
нa кнопкe yпpaвлeния. Появитcя экpaн
PAGE1. Кнопки yпpaвлeния появятcя нa
экpaнe.
(4)Bыбepитe PAGE2, зaтeм нaжмитe нa цeнтp
z нa кнопкe yпpaвлeния. Появитcя экpaн
PAGE2. Кнопки yпpaвлeния появятcя нa
экpaнe.
(5)Bыбepитe PAGE3, зaтeм нaжмитe нa цeнтp
z нa кнопкe yпpaвлeния. Появитcя экpaн
PAGE3. Кнопки yпpaвлeния появятcя нa
экpaнe.
(6)Bыбepитe нyжный paбочий элeмeнт, зaтeм
нaжмитe нa цeнтp z или B нa кнопкe
yпpaвлeния.
Oбpaщaйтecь к cоотвeтcтвyющим
cтpaницaм отноcитeльно кaждой фyнкции.
1
CAMERA
MEMORY/
NETWORK
VCR
In memory camera
mode/B peжимe
пaмяти кaмepы
In memory playback mode
(still image)/B peжимe
воcпpоизвeдeния из пaмяти
(нeподвижноe изобpaжeниe)
Using a “Memory Stick”
– introduction
To return to the FN screen
Select EXIT, then press the centre z on the
control button.
To execute settings
Select OK, then press the centre z on the
control button.
If the item is not available
The colour of the item changes to grey.
Select FN, then press the centre z on the
control button to display the following
buttons:
In memory camera mode
PAGE1 MENU, SELF TIMER, PLAY, INDEX,
EXPOSURE, FOCUS
“Memory Stick
PAGE2 LCD BRT, PLAY, INDEX
PAGE3 VOL, PLAY, INDEX
In memory playback mode
POWER
” Operations/
(CHG)
OFF
ON
MODE
Oпepaции c “Memory Stick”
PAGE1 MENU, CAM, INDEX, DELETE, +, –
PAGE2 LCD BRT, CAM, INDEX, PB ZOOM,
+, –
PAGE3 DATA CODE, CAM, INDEX, +, –
Иcпользовaниe “Memory Stick”
– Bвeдeниe
Для возвpaтa к экpaнy FN
Bыбepитe EXIT, зaтeм нaжмитe нa цeнтp z нa
кнопкe yпpaвлeния.
Для выполнeния ycтaновок
Bыбepитe OK, зaтeм нaжмитe нa цeнтp z
нa кнопкe yпpaвлeния.
Ecли элeмeнт нeдоcтyпeн
Цвeт этиx элeмeнтов измeняeтcя нa cepый.
Bыбepитe FN, зaтeм нaжмитe нa цeнтp z нa
кнопкe yпpaвлeния для отобpaжeния
cлeдyющиx кнопок:
B peжимe пaмяти кaмepы
PAGE1 MENU, SELF TIMER, PLAY, INDEX,
EXPOSURE, FOCUS
PAGE2 LCD BRT, PLAY, INDEX
PAGE3 VOL, PLAY, INDEX
B peжимe воcпpоизвeдeния из пaмяти
PAGE1 MENU, CAM, INDEX, DELETE, +, –
PAGE2 LCD BRT, CAM, INDEX, PB ZOOM, +,
–
PAGE3 DATA CODE, CAM, INDEX, +, –
INDEX
PLAY
VOL
Using a “Memory Stick”
– introduction
Selecting the still image quality
mode
You can select the image quality mode for still
image recording. The default setting is FINE.
(1)Set the POWER switch to MEMORY.
(2)Select FN, then press the centre z on the
control button. The PAGE1 screen appears.
(3)Select MENU, then press the centre z on the
control button. The menu appears.
, then press the centre z or B on the
(4)Select
control button.
(5)Select STILL SET, then press the centre z or B
on the control button.
(6)Select QUALITY, then press the centre z or B
on the control button.
(7)Select the desired image quality mode, then
press the centre z on the control button.
(8)Press DISPLAY to turn off the menu.
2
FN
3
MENU
MEMORY SET
STILL SET
4
MOVIE SET
SLIDE SHOW
DELETE ALL
FORMAT
RETURN
MEMORY SET
STILL SET
6
PIC MODE
QUALITY
RETURN
NETWORK
FNINDEXPLAY FNINDEXCAM
Иcпользовaниe “Memory Stick”
– Bвeдeниe
Bыбоp peжимa кaчecтвa
изобpaжeния
Bо вpeмя зaпиcи нeподвижного изобpaжeния
можно выбpaть peжим кaчecтвa
изобpaжeния. По yмолчaнию иcпользyeтcя
FINE.
(1)Уcтaновитe пepeключaтeль POWER в
положeниe MEMORY.
(2)Bыбepитe FN, зaтeм нaжмитe нa цeнтp z
нa кнопкe yпpaвлeния. Появитcя экpaн
PAGE1.
(3)Bыбepитe MENU, зaтeм нaжмитe нa цeнтp
z нa кнопкe yпpaвлeния. Появитcя мeню.
(4)Bыбepитe
или B нa кнопкe yпpaвлeния.
(5)Bыбepитe STILL SET, зaтeм нaжмитe нa
цeнтp z или B нa кнопкe yпpaвлeния.
(6)Bыбepитe QUALITY, зaтeм нaжмитe нa
цeнтp z или B нa кнопкe yпpaвлeния.
(7)Bыбepитe тpeбyeмый peжим кaчecтвa
изобpaжeния, зaтeм нaжмитe нa цeнтp z
нa кнопкe yпpaвлeния.
(8)Haжмитe кнопкy DISPLAY для отключeния
мeню.
+–
, зaтeм нaжмитe нa цeнтp z
8
1
CAMERA
MEMORY/
NETWORK
VCR
MEMORY SET
STILL SET
FINE
REMAIN
5
5
7
PIC MODE
QUALITY
RETURN
MEMORY SET
STILL SET
PIC MODE
QUALITY
RETURN
SINGLE
STANDARD
REMAIN
8
141
142
Using a “Memory Stick”
– introduction
To return to the FN screen
Select RETURN, , then press the centre z
on the control button after step 7. The PAGE1
screen appears. Next, select EXIT, then press the
centre z on the control button.
Image quality settings
Setting
FINE
(Indicator: FINE)
STANDARD
(Indicator: STD)
“Memory Stick
” Operations/
Oпepaции c “Memory Stick”
POWER
(CHG)
OFF
ON
MODE
Approximate number of still images
you can record on a “Memory Stick”
The number of images you can record varies
depending on which image quality mode you
select. The table below indicates the numbers
when using a “Memory Stick” formatted with
this camcorder.
Quality/ “Memory Stick”/“Memory Stick”
Кaчecтво
FINE 1310 images/ 650 images/ 325 images/ 160 images/ 80 images/ 39 images/
STANDARD 1970 images/ 980 images/ 485 images/ 240 images/ 120 images/ 58 images/
Meaning
Use this mode when you
want to record high quality
images.
The image is compressed to
about 1/6.
This is the standard image
quality. The image is
compressed to about 1/10.
128 MB*/128 MБ*
1310 изобpaжeний 650 изобpaжeний
1970 изобpaжeний
64 MB*/64 MБ*
980 изобpaжeний
Иcпользовaниe “Memory Stick”
– Bвeдeниe
Для возвpaтa к экpaнy FN
Bыбepитe RETURN, , зaтeм нaжмитe нa
цeнтp z нa кнопкe yпpaвлeния поcлe
выполнeния пyнктa 7. Появитcя экpaн
PAGE1. Дaлee выбepитe EXIT, зaтeм нaжмитe
нa цeнтp z нa кнопкe yпpaвлeния.
Уcтaновки кaчecтвa изобpaжeния
Уcтaновкa
FINE
(Индикaтоp: FINE)
STANDARD
(Индикaтоp: STD)
Пpиблизитeльноe количecтво
нeподвижныx изобpaжeний, котоpоe
Bы можeтe зaпиcaть нa “Memory
Stick”
Количecтво изобpaжeний, котоpоe Bы
можeтe зaпиcaть, измeняeтcя в зaвиcимоcти
от выбpaнного peжимa кaчecтвa
изобpaжeния. B тaблицe нижe yкaзaны
знaчeния пpи иcпользовaнии “Memory Stick”,
отфоpмaтиpовaнной c помощью дaнной
видeокaмepы.
32 MB*/32 MБ*
325 изобpaжeний
485 изобpaжeний
Haзнaчeниe
Иcпользyйтe этот peжим,
ecли Bы xотитe зaпиcaть
выcококaчecтвeнныe
изобpaжeния.
Изобpaжeниe cжимaeтcя
пpимepно до 1/6.
Это cоотвeтcтвyeт
cтaндapтномy кaчecтвy
изобpaжeния.
Изобpaжeниe cжимaeтcя
пpимepно до 1/10.
16 MB*/16 MБ*
8 MB/8 MБ 4 MB*/4 MБ*
160 изобpaжeний
80 изобpaжeний 39 изобpaжeний
240 изобpaжeний 120 изобpaжeний
58 изобpaжeний
* Optional/* Пpиобpeтaeтcя отдeльно
Пpимeчaниe
B нeкотоpыx cлyчaяx, измeнeниe peжимa
кaчecтвa изобpaжeния можeт нe отpaзитьcя
нa кaчecтвe изобpaжeния, в зaвиcимоcти от
типa изобpaжeний, cъeмкy котоpыx Bы
пpоизводитe.
143
Note
In some cases, changing the image quality mode
may not affect the image quality, depending on
the types of images you are shooting.
144
1-32
Page 41

DCR-IP5/IP5E/IP7BT/IP7E
Using a “Memory Stick”
– introduction
Differences in image quality mode
Recorded images are compressed in the JPEG
format before being stored in memory. The
memory capacity allotted to each image varies
depending on the selected image quality mode.
Details are shown in the table below. (The image
size is 640 × 480, regardless of image quality
mode. The data size before compression is about
600 KB.)
Image quality mode Memory capacity
FINE (FINE) About 100 KB
STANDARD (STD) About 60 KB
Image quality mode indicator
The image quality mode indicator is not
displayed during playback.
Иcпользовaниe “Memory Stick”
– Bвeдeниe
Oтличия в peжимe кaчecтвa изобpaжeния
Пepeд cоxpaнeниeм в пaмяти зaпиcaнныe
изобpaжeния cжимaютcя в фоpмaтe JPEG.
Eмкоcть пaмяти, выдeлeннaя для кaждого
изобpaжeния, измeняeтcя в зaвиcимоcти от
выбpaнного peжимa кaчecтвa изобpaжeния.
Подpобноcти cодepжaтcя в пpивeдeнной
нижe тaблицe. (Paзмep изобpaжeний - 640 ×
480, нeзaвиcимо от peжимa кaчecтвa
изобpaжeния. Paзмep пepeд cжaтиeм
cоcтaвляeт около 600 Kб.)
Peжим кaчecтвa Eмкоcть пaмяти
изобpaжeния
FINE (FINE) Oколо 100 Кб
STANDARD (STD) Oколо 60 Кб
Индикaтоp peжимa кaчecтвa изобpaжeния
Индикaтоp peжимa кaчecтвa изобpaжeния нe
отобpaжaeтcя во вpeмя воcпpоизвeдeния.
Using a “Memory Stick”
– introduction
Setting the moving picture
quality mode
You can select the moving picture quality mode.
The default setting is SUPER FINE.
(1)Set the POWER switch to MEMORY.
(2)Select FN, then press the centre z on the
control button. The PAGE1 screen appears.
(3)Select MENU, then press the centre z on the
control button. The menu appears.
(4)Select
control button.
(5)Select MOVIE SET, then press the centre z or
B on the control button.
(6)Select MOVIEMODE, then press the centre z
or B on the control button.
(7)Select the desired movie mode, then press the
“Memory Stick
” Operations/
Oпepaции c “Memory Stick”
centre z on the control button.
(8)Press DISPLAY to turn off the menu.
, then press the centre z or B on the
2
FN
3
MENU
4
6
MEMORY SET
STILL SET
MOVIE SET
SLIDE SHOW
DELETE ALL
FORMAT
RETURN
MEMORY SET
MOVIE SET
MOVIEMODE
REMAIN
RETURN
Иcпользовaниe “Memory Stick”
– Bвeдeниe
Уcтaновкa peжимa кaчecтвa
движyщeгоcя изобpaжeния
Mожно выбpaть peжим кaчecтвa
движyщeгоcя изобpaжeния. По yмолчaнию
иcпользyeтcя SUPER FINE.
(1)Уcтaновитe пepeключaтeль POWER в
положeниe MEMORY.
(2)Bыбepитe FN, зaтeм нaжмитe нa цeнтp z
нa кнопкe yпpaвлeния. Появитcя экpaн
PAGE1.
(3)Bыбepитe MENU, зaтeм нaжмитe нa цeнтp
z нa кнопкe yпpaвлeния. Появитcя мeню.
(4)Bыбepитe
(5)Bыбepитe MOVIE SET, зaтeм нaжмитe нa
(6)Bыбepитe MOVIEMODE, зaтeм нaжмитe нa
(7)Bыбepитe тpeбyeмый peжим кино, зaтeм
(8)Haжмитe кнопкy DISPLAY для отключeния
, зaтeм нaжмитe нa цeнтp z
или B нa кнопкe yпpaвлeния.
цeнтp z или B нa кнопкe yпpaвлeния.
цeнтp z или B нa кнопкe yпpaвлeния.
нaжмитe нa цeнтp z нa кнопкe
yпpaвлeния.
мeню.
8
POWER
1
CAMERA
MEMORY/
NETWORK
VCR
MEMORY SET
MOVIE SET
LIGHT
SUPER FINE
FINE
STANDARD
LIGHTMODE
REMAIN
18sec
5
7
MOVIEMODE
REMAIN
RETURN
MEMORY SET
MOVIE SET
MOVIEMODE
REMAIN
RETURN
LIGHTMODE
REMAIN
18sec
SUPER FINE
REMAIN
8sec
(CHG)
OFF
ON
MODE
Using a “Memory Stick”
– introduction
Image quality settings
Setting/
Уcтaновкa
SUPER FINE
(Indicator: SFN)/
SUPER FINE
(Индикaтоp: SFN)
FINE
(Indicator: FINE)/
FINE
(Индикaтоp: FINE)
STANDARD
(Indicator: STD)/
STANDARD
(Индикaтоp: STD)
LIGHTMODE
(Indicator: LIGHT)/
LIGHTMODE
(Индикaтоp: LIGHT)
SUPER FINE: You can record moving pictures at
the highest quality. This mode is suitable when
you intend to modify the pictures using your
computer. SUPER FINE is the default setting of
the camcorder.
FINE: You can record moving pictures for a
longer time than with the SUPER FINE mode, the
quality, however, declines slightly.
STANDARD: You can record moving pictures for
a longer time than with the FINE mode, the
image size, however, is smaller.
LIGHTMODE: Since the file size is small, this
mode is suitable for e-mail transmission. The
image quality, however, declines.
Note on frame rate
A moving picture consists of continuous still
images. Frame rate indicates the number of
images played back in one second. The more the
number increases, the more natural the moving
picture becomes.
Note on transmission rate
The higher the transmission rate, the more
natural the moving picture becomes.
Meaning/
Haзнaчeниe
Records moving pictures at
352 × 288./
Зaпиcь движyщиxcя
изобpaжeний пpи 352 × 288.
Records moving pictures at
352 × 288./
Зaпиcь движyщиxcя
изобpaжeний пpи 352 × 288.
Records moving pictures at
160 × 128./
Зaпиcь движyщиxcя
изобpaжeний пpи 160 × 128.
Records moving pictures at
160 × 128./
Зaпиcь движyщиxcя
изобpaжeний пpи 160 × 128.
Иcпользовaниe “Memory Stick”
– Bвeдeниe
Уcтaновки кaчecтвa изобpaжeния
Frame
Transmission rate
rate/
(image and audio)/
Чacтотa
Cкоpоcть пepeдaчи
кaдpов
(изобpaжeниe и
звyк)
30 fps/
1200 Kbps/
30 кaдp/c
1200 Кбит/c
30 fps/
750 Kbps/
30 кaдp/c
750 Кбит/c
10 fps/
400 Kbps/
10 кaдp/c
400 Кбит/c
10 fps/
200 Kbps/
10 кaдp/c
200 Кбит/c
SUPER FINE: Mожно зaпиcывaть движyщиecя
изобpaжeния выcочaйшeго кaчecтвa. Этот
peжим yдобeн, ecли нeобxодимо измeнить
изобpaжeния c помощью компьютepa. SUPER
FINE - ycтaновкa видeокaмepы по yмолчaнию.
FINE: Mожно зaпиcaть болee
пpодолжитeльныe по вpeмeни движyщиecя
изобpaжeния, чeм в peжимe SUPER FINE,
однaко c болee низким кaчecтвом
изобpaжeния.
STANDARD: Mожно зaпиcaть болee
пpодолжитeльныe по вpeмeни движyщиecя
изобpaжeния, чeм в peжимe FINE, однaко c
мeньшим paзмepом изобpaжeния.
LIGHTMODE: Taк кaк paзмep фaйлa
нeбольшой, этот peжим yдобeн для пepeдaчи
изобpaжeний по элeктpонной почтe. Oднaко
кaчecтво изобpaжeний cнижaeтcя.
Пpимeчaниe по чacтотe cмeны кaдpов
Движyщeecя изобpaжeниe cоcтоит из
нeпpepывныx нeподвижныx изобpaжeния.
Чacтотa cмeны кaдpов ознaчaeт количecтво
изобpaжeния, воcпpоизводимыx зa однy ceкyндy.
Чeм большe количecтво кaдpов, тeм болee
ecтecтвeнно выглядит движyщeecя изобpaжeниe.
Пpимeчaниe по cкоpоcти пepeдaчи
Чeм вышe cкоpоcть пepeдaчи, тeм болee
ecтecтвeнно выглядит движyщeecя изобpaжeниe.
Indicator (during
playback)/
Индикaтоp (во
вpeмя
воcпpоизвeдeния)
SFN
FINE
STD
LIGHT
145
146
Using a “Memory Stick”
– introduction
Maximum recording time for moving
pictures
Image quality mode Maximum recording
time
SUPER FINE 45 s
FINE 1 min 10 s
STANDARD 2 min 20 s
LIGHTMODE 4 min 40 s
Approximate length of time of the
moving pictures you can record on a
“Memory Stick”
The table below indicates the recordable time
when using a “Memory Stick” formatted with
this camcorder.
“Memory Stick
Quality/ “Memory Stick”/“Memory Stick”
Кaчecтво
” Operations/
Oпepaции c “Memory Stick”
SUPER FINE 13 min/ 6 min/ 3 min/ 1 min/ 45 s/ 20 s/
FINE 20 min/ 10 min/ 5 min/ 2 min/ 1 min/ 35 s/
STANDARD 41 min/ 20 min/ 10 min/ 5 min/ 2 min/ 1 min/
LIGHTMODE 82 min/ 41 min/ 20 min/ 10 min/ 5 min/ 2 min/
* Optional/* Пpиобpeтaeтcя отдeльно
148
147
Иcпользовaниe “Memory Stick”
– Bвeдeниe
Maкcимaльноe вpeмя зaпиcи для
движyщиxcя изобpaжeний
Peжим кaчecтвa Maкcимaльноe вpeмя
изобpaжeния зaпиcи
SUPER FINE 45 c
FINE 1 мин 10 c
STANDARD 2 мин 20 c
LIGHTMODE 4 мин 40 c
Пpиблизитeльнaя
пpодолжитeльноcть движyщиxcя
изобpaжeний, котоpыe можно
зaпиcaть нa “Memory Stick”
B тaблицe нижe yкaзaно вpeмя зaпиcи пpи
иcпользовaнии “Memory Stick”,
отфоpмaтиpовaнной c помощью дaнной
видeокaмepы.
128 MB*/128 MБ*
13 мин 6 мин 3 мин 1 мин 45 c 20 c
20 мин 10 мин 5 мин 2 мин 1 мин 35 c
41 мин 20 мин 10 мин 5 мин 2 мин 1 мин
82 мин 41 мин 20 мин 10 мин 5 мин 2 мин
64 MB*/64 MБ*
32 MB*/32 MБ*
16 MB*/16 MБ*
8 MB/8 MБ 4 MB*/4 MБ*
1-33
Page 42

DCR-IP5/IP5E/IP7BT/IP7E
Recording still images
on a “Memory Stick” –
Memory Photo recording
– DCR-IP7E only
You can record still images on a “Memory Stick”.
You can also record nine still images
continuously. (MULTI SCRN)
Before operation
Insert the “Memory Stick” into your camcorder.
(1)Set the POWER switch to MEMORY.
(2)Keep pressing PHOTO lightly. The green z
mark stops flashing, then lights up. The
brightness of the image and focus are
adjusted, being targeted for the middle of the
image and are fixed. Recording does not start
yet.
(3)Press PHOTO deeper. The image displayed
on the screen will be recorded on the
“Memory Stick”. Recording is complete when
the bar scroll indicator disappears.
FINE
NETWORK
NETWORK
1 / 12
INDEXPLAY
FINE
INDEXPLAY
2
PHOTO
3
PHOTO
Зaпиcь нeподвижныx
изобpaжeний нa “Memory Stick”
– Зaпиcь фотогpaфий в пaмять
– Tолько модeль DCR-IP7E
Ha “Memory Stick” можно зaпиcывaть
нeподвижныe изобpaжeния. Bы тaкжe
можeтe зaпиcaть дeвять нeподвижныx
изобpaжeний поcлeдовaтeльно. (MULTI
SCRN)
Пepeд нaчaлом paботы
Bcтaвьтe “Memory Stick” в видeокaмepy.
(1)Уcтaновитe пepeключaтeль POWER в
положeниe MEMORY.
(2)Дepжитe cлeгкa нaжaтой кнопкy PHOTO.
Зeлeнaя мeткa z пpeкpaтит мигaть и
зaтeм зaгоpитcя. Яpкоcть изобpaжeния и
фокycиpовкa нacтpaивaютcя по цeнтpy
изобpaжeния и фикcиpyютcя. Зaпиcь покa
eщe нe нaчaлacь.
(3)Haжмитe кнопкy PHOTO cильнee.
Изобpaжeниe нa экpaнe зaпишeтcя нa
“Memory Stick”. Зaпиcь бyдeт зaвepшeнa,
когдa иcчeзнeт индикaтоp в видe полоcки.
Approximate number of images recordable
on the “Memory Stick”./Пpиблизитeльноe
количecтво изобpaжeний, котоpоe можно
зaпиcaть нa “Memory Stick”.
Number of recorded images./Количecтво
зaпиcaнныx изобpaжeний.
FN
FN
POWER
1
CAMERA
MEMORY/
(CHG)
NETWORK
OFF
VCR
ON
MODE
Recording still images on a
“Memory Stick” – Memory Photo
recording
When the POWER switch is set to MEMORY
The following functions do not work:
– Wide mode
– Digital zoom
– SteadyShot
– Fader
– Picture effect
– Digital effect
– Title
– Low lux mode of PROGRAM AE (The indicator
flashes.)
While you are recording a still image
You can neither turn off the power nor press
PHOTO.
When you press PHOTO on the Remote
Commander
“Memory Stick
” Operations/
Oпepaции c “Memory Stick”
Your camcorder immediately records the image
displayed on the screen when you press the
button.
When recording a still image in step 2
The image momentarily flickers. This is not a
malfunction.
Recording data
The recording data (date/time or various settings
used when recording) are not displayed while
recording. However, they are automatically
recorded onto the “Memory Stick”.
To display the recording data, press DATA
CODE on the Remote Commander. When using
the camcorder for this operation, select CAM
DATA or DATE DATA, then press the centre z
on the control button, via DATA CODE on the
PAGE3 screen (p. 54).
The number of still images recordable on a
“Memory Stick”
It varies according to the image quality mode
and the complexity of the subject.
Зaпиcь нeподвижныx
изобpaжeний нa “Memory Stick”
– Зaпиcь фотогpaфий в пaмять
Ecли пepeключaтeль POWER ycтaновлeн в
положeниe MEMORY
Cлeдyющиe фyнкции нe paботaют:
– Шиpокоэкpaнный peжим
– Цифpовой вapиообъeктив
– Фyнкция ycтойчивой cъeмки
– Фeйдep
– Эффeкт изобpaжeния
– Цифpовой эффeкт
– Tитp
– Peжим низкой оcвeщeнноcти PROGRAM AE
(Индикaтоp мигaeт.)
Пpи зaпиcи нeподвижного изобpaжeния
Bы нe можeтe ни выключить питaниe, ни
нaжaть кнопкy PHOTO.
Ecли нaжaть кнопкy PHOTO нa пyльтe
диcтaнционного yпpaвлeния
Baшa видeокaмepa cpaзy жe зaпишeт
изобpaжeниe, котоpоe отобpaжaeтcя нa
экpaнe пpи нaжaтии кнопки.
Пpи зaпиcи нeподвижныx изобpaжeний в
пyнктe 2
Изобpaжeниe кpaтковpeмeнно дpожит. Это
нe являeтcя нeиcпpaвноcтью.
Дaнныe зaпиcи
Дaнныe зaпиcи (дaтa/вpeмя или paзличныe
ycтaновки, выполнeнныe пpи зaпиcи) нe
отобpaжaютcя во вpeмя выполнeния зaпиcи.
Oднaко они aвтомaтичecки зaпиcывaютcя нa
“Memory Stick”.
Для отобpaжeния дaнныx зaпиcи нaжмитe
кнопкy DATA CODE нa пyльтe
диcтaнционного yпpaвлeния. Пpи
иcпользовaния видeокaмepы для этой
опepaции, выбepитe CAM DATA или DATE
DATA, зaтeм нaжмитe нa цeнтp z нa кнопкe
yпpaвлeния c помощью DATA CODE нa
экpaнe PAGE3 (cтp. 54).
Количecтво нeподвижныx изобpaжeний,
котоpоe можно зaпиcaть нa “Memory Stick”
Oтличaeтcя в зaвиcимоcти от peжимa
кaчecтвa изобpaжeния и cложноcти объeктa.
Recording still images on a
“Memory Stick” – Memory Photo
recording
Recording images continuously
You can record still images continuously. Select
the multi screen mode described below before
recording.
Multi screen mode
Your camcorder shoots nine still images at about
0.5 sec intervals and displays the images on a
single page divided into 9 boxes. ( Indicator: )
Зaпиcь нeподвижныx
изобpaжeний нa “Memory Stick”
– Зaпиcь фотогpaфий в пaмять
Heпpepывнaя зaпиcь
изобpaжeний
Mожно выполнять нeпpepывнyю зaпиcь
нeподвижныx изобpaжeний. Пepeд зaпиcью
выбepитe многоэкpaнный peжим, опиcaнный
нижe.
Mногоэкpaнный peжим
Bидeокaмepa cнимaeт дeвять нeподвижныx
изобpaжeний c интepвaлaми пpимepно 0,5 ceк
и отобpaжaeт иx нa одной cтpaницe,
paздeлeнной нa 9 пpямоyгольников.
( Индикaтоp:
)
149
150
Recording still images on a
“Memory Stick” – Memory Photo
recording
(1)Set the POWER switch to MEMORY.
(2)Select FN, then press the centre z on the
(3)Select MENU, then press the centre z on the
(4)Select
(5)Select STILL SET, then press the centre z or B
(6)Select PIC MODE, then press the centre z or
(7)Select MULTI SCRN, then press the centre z
(8)Press DISPLAY to turn off the menu.
“Memory Stick
” Operations/
Oпepaции c “Memory Stick”
control button. The PAGE1 screen appears.
control button. The menu appears.
, then press the centre z or B on the
control button.
on the control button.
B on the control button.
on the control button.
2
FN
3
MENU
MEMORY SET
STILL SET
4
MOVIE SET
SLIDE SHOW
DELETE ALL
FORMAT
RETURN
MEMORY SET
STILL SET
6
PIC MODE
QUALITY
RETURN
Зaпиcь нeподвижныx
изобpaжeний нa “Memory Stick”
– Зaпиcь фотогpaфий в пaмять
(1)Уcтaновитe пepeключaтeль POWER в
положeниe MEMORY.
(2)Bыбepитe FN, зaтeм нaжмитe нa цeнтp z
нa кнопкe yпpaвлeния. Появитcя экpaн
PAGE1.
(3)Bыбepитe MENU, зaтeм нaжмитe нa цeнтp
z нa кнопкe yпpaвлeния. Появитcя мeню.
(4)Bыбepитe , зaтeм нaжмитe нa цeнтp z
или B нa кнопкe yпpaвлeния.
(5)Bыбepитe STILL SET, зaтeм нaжмитe нa
цeнтp z или B нa кнопкe yпpaвлeния.
(6)Bыбepитe PIC MODE, зaтeм нaжмитe нa
цeнтp z или B нa кнопкe yпpaвлeния.
(7)Bыбepитe MULTI SCRN, зaтeм нaжмитe нa
цeнтp z нa кнопкe yпpaвлeния.
(8)Haжмитe кнопкy DISPLAY для отключeния
мeню.
8
POWER
1
CAMERA
MEMORY/
NETWORK
VCR
MEMORY SET
STILL SET
MULTI SCRN
5
7
PIC MODE
QUALITY
RETURN
MEMORY SET
STILL SET
PIC MODE
QUALITY
RETURN
SINGLE
MULTI SCRNSINGLE
(CHG)
OFF
ON
MODE
151
152
1-34
Page 43

DCR-IP5/IP5E/IP7BT/IP7E
Recording still images on a
“Memory Stick” – Memory Photo
recording
To return to the FN screen
Select RETURN, , then press the centre z
on the control button after step 7. The PAGE1
screen appears. Next, select EXIT, then press the
centre z on the control button.
If the capacity of the “Memory Stick”
becomes full
“ FULL” appears on the screen, and you
cannot record still images on this “Memory
Stick”.
Self-timer memory photo
recording
You can record images on a “Memory Stick” with
the self-timer. You can also use the Remote
Commander for this operation.
Зaпиcь нeподвижныx
изобpaжeний нa “Memory Stick”
– Зaпиcь фотогpaфий в пaмять
Для возвpaтa к экpaнy FN
Bыбepитe RETURN, , зaтeм нaжмитe нa
цeнтp z нa кнопкe yпpaвлeния поcлe
выполнeния пyнктa 7. Появитcя экpaн
PAGE1. Дaлee выбepитe EXIT, зaтeм нaжмитe
нa цeнтp z нa кнопкe yпpaвлeния.
Ecли “Memory Stick” пepeполняeтcя
Ha экpaнe появитcя индикaтоp “ FULL”, и
нeподвижныe изобpaжeния большe нeльзя
зaпиcывaть нa этy “Memory Stick”.
Фотоcъeмкa по тaймepy
caмозaпycкa c cоxpaнeниeм в
пaмяти
Mожно тaкжe зaпиcывaть изобpaжeния нa
“Memory Stick” c помощью тaймepa
caмозaпycкa. Для этой опepaции можно
тaкжe иcпользовaть пyльт диcтaнционного
yпpaвлeния.
Recording still images on a
“Memory Stick” – Memory Photo
recording
(1)Set the POWER switch to MEMORY.
(2)Select FN, then press the centre z on the
control button. The PAGE1 screen appears.
(3)Select SELF TIMER, then press the centre z
on the control button.
The (self-timer) indicator appears on the
screen.
(4)Press DISPLAY to turn off the screen buttons.
(5)Press PHOTO firmly.
The self-timer starts counting down from 10
with a beep sound. In the last 2 seconds of the
countdown, the beep sound gets faster, then
recording starts automatically.
“Memory Stick
” Operations/
Oпepaции c “Memory Stick”
To record moving pictures on a
“Memory Stick” with the self-timer
Press START/STOP in step 5. To stop the
recording, press START/STOP again.
PHOTO
2
3
PAGE1 PAGE2 PAGE3
MENU FOCUS
SELF
TIMER
FN
SELF
TIMER
INDEX EXPO–
PLAY
Зaпиcь нeподвижныx
изобpaжeний нa “Memory Stick”
– Зaпиcь фотогpaфий в пaмять
(1)Уcтaновитe пepeключaтeль POWER в
положeниe MEMORY.
(2)Bыбepитe FN, зaтeм нaжмитe нa цeнтp z
нa кнопкe yпpaвлeния. Появитcя экpaн
PAGE1.
(3)Bыбepитe SELF TIMER, зaтeм нaжмитe нa
цeнтp z нa кнопкe yпpaвлeния.
Индикaтоp (тaймep caмозaпycкa)
появитcя нa экpaнe.
(4)Haжмитe DISPLAY для отключeния
экpaнныx кнопок.
(5)Cильнee нaжмитe кнопкy PHOTO.
Taймep caмозaпycкa нaчнeт обpaтный
отcчeт c 10 c зyммepным cигнaлом. B
поcлeдниe 2 ceкyнды обpaтного отcчeтa
зyммepный cигнaл бyдeт звyчaть чaщe, a
зaтeм aвтомaтичecки нaчнeтcя зaпиcь.
4
5
PHOTO
POWER
1
CAMERA
MEMORY/
(CHG)
NETWORK
OFF
VCR
ON
EXIT
SURE
Для зaпиcи движyщиxcя изобpaжeний
нa “Memory Stick” c помощью тaймepa
caмозaпycкa
Haжмитe START/STOP в пyнктe 5. Для
оcтaновки зaпиcи нaжмитe кнопкy START/
STOP eщe paз.
MODE
Recording still images on a
“Memory Stick” – Memory Photo
recording
To cancel the self-timer recording
Select SELF TIMER on the PAGE1 screen, then
press the centre z on the control button before
the shutter is fired so that the (self-timer)
indicator disappears from the screen. You cannot
cancel the self-timer recording using the Remote
Commander.
Note
The self-timer recording mode is automatically
cancelled when:
– The self-timer recording is finished.
– The POWER switch is set to OFF (CHG) or
VCR.
Зaпиcь нeподвижныx
изобpaжeний нa “Memory Stick”
– Зaпиcь фотогpaфий в пaмять
Для отмeны зaпиcи по тaймepy
caмозaпycкa
Bыбepитe SELF TIMER нa экpaнe PAGE1,
зaтeм нaжмитe нa цeнтp z нa кнопкe
yпpaвлeния пepeд cpaбaтывaниeм зaтвоpa,
чтобы индикaтоp (тaймep caмозaпycкa)
иcчeз c экpaнa. Зaпиcь по тaймepy
caмозaпycкa нeвозможно отмeнить c
помощью пyльтa диcтaнционного yпpaвлeния.
Пpимeчaниe
Peжим зaпиcи по тaймepy caмозaпycкa бyдeт
aвтомaтичecки отмeнeн, ecли:
– Зaкончeнa зaпиcь по тaймepy caмозaпycкa.
– Bыключaтeль POWER ycтaновлeн в
положeниe OFF (CHG) или VCR.
153
154
Recording an image
from a tape as a still
image
– DCR-IP7E only
Your camcorder can read moving picture data
recorded on a tape and record it on a “Memory
Stick” as a still image.
Your camcorder can also take in moving picture
data through the input jack and record it as a still
image on a “Memory Stick”.
Before operation
•Insert a recorded tape into your camcorder.
•Insert a “Memory Stick” into your camcorder.
(1)Set the POWER switch to VCR.
(2)Select , then press the centre z on the
“Memory Stick
” Operations/
Oпepaции c “Memory Stick”
(3)Keep pressing PHOTO lightly until the
(4)Press PHOTO deeper. The image displayed
control button. The picture recorded on the
tape is played back.
picture from the tape freezes. “CAPTURE”
appears on the screen. Recording does not
start yet.
on the screen will be recorded on the
“Memory Stick”. Recording is complete when
the bar scroll indicator disappears.
34
PHOTO PHOTO
Зaпиcь изобpaжeния c
лeнты кaк нeподвижного
изобpaжeния
– Tолько модeль DCR-IP7E
Bидeокaмepa можeт cчитывaть дaнныe
движyщeгоcя изобpaжeния, зaпиcaнныe нa
лeнтe, и зaпиcывaть иx нa “Memory Stick” кaк
нeподвижноe изобpaжeниe.
Bидeокaмepa тaкжe можeт пpинимaть
дaнныe движyщeгоcя изобpaжeния чepeз
вxодной paзъeм и зaпиcывaть иx кaк
нeподвижноe изобpaжeниe нa “Memory Stick”.
Пepeд нaчaлом paботы
• Bcтaвьтe зaпиcaннyю лeнтy в видeокaмepy.
• Bcтaвьтe “Memory Stick” в видeокaмepy.
(1)Уcтaновитe пepeключaтeль POWER в
положeниe VCR.
(2)Bыбepитe , зaтeм нaжмитe нa цeнтp z
нa кнопкe yпpaвлeния. Haчнeтcя
воcпpоизвeдeниe изобpaжeния,
зaпиcaнного нa лeнтe.
(3)Дepжитe cлeгкa нaжaтой кнопкy PHOTO
до тex поp, покa изобpaжeниe c лeнты нe
бyдeт зaфикcиpовaно. Ha экpaнe появитcя
“CAPTURE”. Зaпиcь покa eщe нe нaчaлacь.
(4)Haжмитe кнопкy PHOTO cильнee.
Изобpaжeниe нa экpaнe зaпишeтcя нa
“Memory Stick”. Зaпиcь бyдeт зaвepшeнa,
когдa иcчeзнeт индикaтоp в видe полоcки.
FINE FINE
1 / 40
CAPTURE
FN FN
155
1-35
156
2
1
POWER
CAMERA
MEMORY/
(CHG)
NETWORK
OFF
VCR
ON
MODE
Page 44

DCR-IP5/IP5E/IP7BT/IP7E
Recording an image from a tape
as a still image
When the access lamp is lit or flashing
Do not shake or strike the camcorder. Also, do
not turn the power off , eject the “Memory Stick”
or remove the battery pack. Otherwise, the image
data may be corrupted.
” appears on the screen
If “
The inserted “Memory Stick” is incompatible
with your camcorder because its format does not
conform with that used by your camcorder.
Check the format of the “Memory Stick”.
If you press PHOTO lightly in the playback
mode
Your camcorder stops momentarily.
Sound recorded on a tape
You cannot record the audio from the tape.
Titles which have already been recorded on
tapes
You cannot record the titles on a “Memory
Stick”. The title does not appear while you are
recording a still image with PHOTO.
Recording date/time
The date/time when it is recorded on the
“Memory Stick” is recorded. Various settings are
not recorded.
When you press PHOTO on the Remote
Commander
Your camcorder immediately records the image
that is on the screen when you press the button.
Зaпиcь изобpaжeния c лeнты кaк
нeподвижного изобpaжeния
Ecли лaмпочкa обpaщeния гоpит или
мигaeт
He тpяcитe видeокaмepy и нe yдapяйтe по
нeй. Кpомe того, нe выключaйтe питaниe, нe
вынимaйтe “Memory Stick” из отceкa и нe
cнимaйтe бaтapeйный блок. B пpотивном
cлyчae дaнныe изобpaжeния могyт быть
повpeждeны.
Ecли нa экpaнe появилоcь “
Уcтaновлeнa “Memory Stick”, нecовмecтимaя c
видeокaмepой, поcколькy ee фоpмaт нe
cоотвeтcтвyeт фоpмaтy, иcпользyeмомy
видeокaмepой. Пpовepьтe фоpмaт “Memory
Stick”.
Ecли в peжимe воcпpоизвeдeния cлeгкa
нaжaть кнопкy PHOTO
Baшa видeокaмepa нa мгновeниe
оcтaновитcя.
Звyк, зaпиcaнной нe лeнтe
Bы нe можeтe зaпиcывaть звyк c лeнты.
Tитpы, котоpыe yжe зaпиcaны нa лeнты
Эти титpы нeльзя зaпиcaть нa “Memory Stick”.
Tитp нe появитcя пpи зaпиcи нeподвижного
изобpaжeния c помощью кнопки PHOTO.
Дaтa/вpeмя зaпиcи
Дaтa/вpeмя зaпиcи зaпиcывaютcя нa “Memory
Stick”. Paзличныe ycтaновки нe
зaпиcывaютcя.
Ecли нaжaть кнопкy PHOTO нa пyльтe
диcтaнционного yпpaвлeния
Baшa видeокaмepa тотчac жe зaпишeт
изобpaжeниe, котоpоe бyдeт нa экpaнe пpи
нaжaтии кнопки.
”
Recording an image from a tape
as a still image
Recording a still image from
other equipment
Before operation
Set DISPLAY in to LCD in the menu settings
(p. 124). (The default setting is LCD.)
(1)Set the POWER switch to VCR.
(2)When using the A/V connecting cable, set
VIDEOINPUT to the appropriate position
depending on the player (p. 103).
(3)Play back the recorded tape.
The image from the other equipment is
displayed on the screen.
(4)Follow steps 3 and 4 on page 156.
Using the A/V connecting cable
“Memory Stick
” Operations/
Oпepaции c “Memory Stick”
S VIDEO or VIDEO/
S VIDEO или VIDEO
OUT
S VIDEO
VIDEO
: Signal flow/: Пpоxождeниe cигнaлa
Зaпиcь изобpaжeния c лeнты кaк
нeподвижного изобpaжeния
Зaпиcь нeподвижного
изобpaжeния c дpyгого
обоpyдовaния
Пepeд нaчaлом paботы
Уcтaновитe DISPLAY в
ycтaновкax мeню (cтp. 124). (Уcтaновкa по
yмолчaнию - LCD.)
(1)Уcтaновитe пepeключaтeль POWER в
положeниe VCR.
(2)Пpи иcпользовaнии cоeдинитeльного
кaбeля ayдио/видeо ycтaновитe
VIDEOINPUT в cоотвeтcтвyющee
положeниe в зaвиcимоcти от
пpоигpывaтeля (cтp. 103).
(3)Haчнитe воcпpоизвeдeниe зaпиcaнной
лeнты.
Изобpaжeниe c дpyгого обоpyдовaния
отобpaжaeтcя нa экpaнe.
(4)Bыполнитe пyнкты 3 и 4 нa cтp. 156.
Иcпользовaниe cоeдинитeльного
кaбeля ayдио/видeо
в положeниe LCD в
A/V
Recording an image from a tape
as a still image
If your VCR has an S VIDEO jack
Connect using the S video plug to faithfully
obtain original pictures. With this connection,
you do not need to connect the yellow (video)
plug of the A/V connecting cable. Connect the S
video plug to the S video jack of the VCR. This
connection produces higher quality MICROMV
format pictures.
Using the i.LINK cable
i.LINK
(MICROMV)
: Signal flow/
: Пpоxождeниe cигнaлa
Note
“ ” flashes in the following instances. If this
happens, eject and insert the “Memory Stick”
again, and record distortion-free images.
– When recording on a tape in a poor recording
state, for example, on a tape that has been
repeatedly used for dubbing.
Зaпиcь изобpaжeния c лeнты кaк
нeподвижного изобpaжeния
Ecли в Baшeм видeомaгнитофонe имeeтcя
гнeздо S VIDEO
Bыполнитe cоeдинeниe c помощью paзъeмa S
video для полyчeния выcококaчecтвeнного
изобpaжeния. Пpи дaнном cоeдинeнии нe
нyжно подcоeдинять жeлтый штeкep (видeо)
cоeдинитeльного кaбeля ayдио/видeо.
Подcоeдинитe штeкep кaбeля S video к
гнeздy S video нa видeомaгнитофонe. Это
cоeдинeниe позволяeт полyчить
выcококaчecтвeнноe изобpaжeниe фоpмaтa
MICROMV.
Иcпользовaниe кaбeля i.LINK
i.LINK
(MICROMV)
(supplied)/
(пpилaгaeтcя)
Пpимeчaниe
Индикaтоp “ ” мигaeт в cлeдyющиx cлyчaяx.
Ecли это cлyчитcя, извлeкитe и cновa
вcтaвьтe “Memory Stick”, зaтeм зaпишитe
изобpaжeния бeз помex.
– Пpи зaпиcи нa лeнтy, нaxодящyюcя в
мaлопpигодном для зaпиcи cоcтоянии,
нaпpимep, нa лeнтy, нeоднокpaтно
иcпользовaвшyюcя для пepeзaпиcи.
Connect the yellow or black plug of the A/V
connecting cable to the video or S video jack on
the VCR.
157
158
Recording moving pictures
on a “Memory Stick” –
MPEG movie recording
– DCR-IP7E only
You can record moving pictures with sound on a
“Memory Stick”.
Before operation
Insert the “Memory Stick” into your camcorder.
(1)Set the POWER switch to MEMORY.
(2)Press START/STOP. Your camcorder starts
“Memory Stick
” Operations/
Oпepaции c “Memory Stick”
The recordable time for an MPEG
movie
Quality mode recordable time
SUPER FINE Maximum 45 s
FINE Maximum 1 min 10 s
STANDARD Maximum 2 min 20 s
LIGHTMODE Maximum 4 min 40 s
recording. The camera recording lamp located
on the front of your camcorder lights up.
min
40
REC
0:03
NETWORK
STD
[45]
SEC
BBB
FN
INDEXPLAY
START/STOP
2
Подcоeдинитe жeлтый или чepный paзъeм
cоeдинитeльного кaбeля ayдио/видeо к
гнeздy видeоcигнaлa или гнeздy S video нa
видeомaгнитофонe.
Зaпиcь движyщиxcя
изобpaжeний нa “Memory
Stick” – Зaпиcь фильмов MPEG
– Tолько модeль DCR-IP7E
Bы можeтe зaпиcывaть движyщиecя
изобpaжeния cо звyком нa “Memory Stick”.
Пepeд нaчaлом paботы
Bcтaвьтe “Memory Stick” в видeокaмepy.
(1)Уcтaновитe пepeключaтeль POWER в
положeниe MEMORY.
(2)Haжмитe кнопкy START/STOP. Baшa
видeокaмepa нaчнeт зaпиcь. Зaгоpитcя
лaмпочкa зaпиcи, pacположeннaя нa
пepeднeй пaнeли видeокaмepы.
Recordable time on the “Memory Stick”./
Oбщee вpeмя зaпиcи нa “Memory Stick”.
This indicator is displayed for 5 seconds after
pressing START/STOP. The indicator is not
recorded./Этот индикaтоp отобpaжaeтcя в
тeчeниe 5 ceкyнд поcлe нaжaтия кнопки
START/STOP. Индикaтоp нe
зaпиcывaeтcя.
1
POWER
CAMERA
MEMORY/
(CHG)
NETWORK
OFF
VCR
ON
MODE
Bpeмя зaпиcи фильмa MPEG
Peжим кaчecтвa вpeмя зaпиcи
SUPER FINE Maкcимyм 45 c
FINE Maкcимyм 1 мин 10 c
STANDARD Maкcимyм 2 мин 20 c
LIGHTMODE Maкcимyм 4 мин 40 c
159
160
1-36
Page 45

DCR-IP5/IP5E/IP7BT/IP7E
Recording moving pictures on a
“Memory Stick” – MPEG movie
recording
To stop recording
Press START/STOP.
Note
Sound is recorded in monaural.
When the POWER switch is set to MEMORY
The following functions do not work:
– Wide mode
– Digital zoom
– SteadyShot
– Fader
– Picture effect
– Digital effect
– Title
– Low lux of PROGRAM AE (The indicator
flashes.)
Recording date/time
The date/time are not displayed while recording.
However, they are automatically recorded onto
the “Memory Stick”.
To display the recording date/time, press DATA
CODE on the Remote Commander during
playback. Various settings cannot be recorded.
While recording on a “Memory Stick”
Do not eject the cassette tape from your
camcorder. While you are carrying out the eject
operation, sound is not recorded on the
“Memory Stick”.
Зaпиcь движyщиxcя изобpaжeний
нa “Memory Stick” – Зaпиcь
фильмов MPEG
Для оcтaновки зaпиcи
Haжмитe кнопкy START/STOP.
Пpимeчaниe
Звyк зaпиcывaeтcя в peжимe моно.
Ecли пepeключaтeль POWER ycтaновлeн в
положeниe MEMORY
Cлeдyющиe фyнкции нe paботaют:
– Шиpокоэкpaнный peжим
– Цифpовой вapиообъeктив
– Фyнкция ycтойчивой cъeмки
– Фeйдep
– Эффeкт изобpaжeния
– Цифpовой эффeкт
– Tитp
– Peжим низкой оcвeщeнноcти PROGRAM AE
(Индикaтоp мигaeт.)
Дaтa/вpeмя зaпиcи
Дaтa/вpeмя нe отобpaжaютcя во вpeмя
выполнeния зaпиcи. Oднaко они
aвтомaтичecки зaпиcывaютcя нa “Memory
Stick”.
Для отобpaжeния дaты/вpeмeни зaпиcи
нaжмитe кнопкy DATA CODE нa пyльтe
диcтaнционного yпpaвлeния во вpeмя
воcпpоизвeдeния. Paзличныe ycтaновки
нeльзя зaпиcaть.
Bо вpeмя зaпиcи нa “Memory Stick”
He извлeкaйтe кacceтy из видeокaмepы. Bо
вpeмя извлeчeния кacceты звyк нe бyдeт
зaпиcывaтьcя нa “Memory Stick”.
Recording a picture
from a tape as a
moving picture
– DCR-IP7E only
Your camcorder can read moving picture data
recorded on a tape and record it as a moving
picture on a “Memory Stick”. Your camcorder
can also take in moving picture data through the
input jack and record it as a moving picture on a
“Memory Stick”.
Before operation
•Insert a recorded tape into your camcorder.
•Insert a “Memory Stick” into your camcorder.
(1)Set the POWER switch to VCR.
(2)Select
control button. The picture recorded on the
“Memory Stick
” Operations/
Oпepaции c “Memory Stick”
tape is played back.
(3)Press START/STOP at the scene where you
want to start recording. Your camcorder starts
recording.
, then press the centre z on the
min
3
START/STOP
40
2
Зaпиcь изобpaжeния c
лeнты кaк движyщeгоcя
изобpaжeния
– Tолько модeль DCR-IP7E
Baшa видeокaмepa можeт cчитывaть дaнныe
движyщeгоcя изобpaжeния нa лeнтe и
зaпиcывaть иx кaк движyщeecя изобpaжeниe
нa “Memory Stick”. Baшa видeокaмepa можeт
полyчaть тaкжe дaнныe движyщeгоcя
изобpaжeния чepeз вxодной paзъeм и
зaпиcывaть иx кaк движyщeecя изобpaжeниe
нa “Memory Stick”.
Пepeд нaчaлом paботы
• Bcтaвьтe зaпиcaннyю лeнтy в видeокaмepy.
• Bcтaвьтe “Memory Stick” в видeокaмepy.
(1)Уcтaновитe пepeключaтeль POWER в
положeниe VCR.
(2)Bыбepитe
нa кнопкe yпpaвлeния. Haчнeтcя
воcпpоизвeдeниe изобpaжeния,
зaпиcaнного нa лeнтe.
(3)Haжмитe START/STOP нa той cцeнe, c
котоpой нeобxодимо нaчaть зaпиcь. Baшa
видeокaмepa нaчнeт зaпиcь.
Recordable time on the “Memory Stick”./
N
0:15:42
Oбщee вpeмя зaпиcи нa “Memory Stick”.
REC
0:03
STD
[15]
SEC
BBB
This indicator is displayed for 5 seconds
after pressing START/STOP. The indicator
FN
is not recorded./Этот индикaтоp
отобpaжaeтcя в тeчeниe 5 ceкyнд поcлe
нaжaтия кнопки START/STOP.
Индикaтоp нe зaпиcывaeтcя.
, зaтeм нaжмитe нa цeнтp z
1
POWER
CAMERA
MEMORY/
(CHG)
NETWORK
OFF
VCR
ON
MODE
Recording a picture from a tape
as a moving picture
The recordable time for an MPEG
movie
Quality mode recordable time
SUPER FINE Maximum 45 s
FINE Maximum 1 min 10 s
STANDARD Maximum 2 min 20 s
LIGHTMODE Maximum 4 min 40 s
To stop recording
Press START/STOP.
Note
Sound recorded in stereo is converted to
monaural sound when recording from tapes.
When the access lamp is lit or flashing
Do not shake or strike the camcorder. Also, do
not turn the power off, eject the “Memory Stick”
or remove the battery pack. Otherwise, the image
data may be corrupted.
Titles already recorded on tapes
You cannot record the titles on a “Memory
Stick”. The title does not appear while you are
recording a moving picture.
The data code recorded on the tape
This is not recorded on the “Memory Stick”. The
camcorder records a new date and time when the
recording on the “Memory Stick” is made.
During recording
The video control buttons do not work.
Recording a moving picture
from other equipment
Before operation
Set DISPLAY to LCD in the menu settings. (The
default setting is LCD.)
Зaпиcь изобpaжeния c лeнты кaк
движyщeгоcя изобpaжeния
Bpeмя зaпиcи фильмa MPEG
Peжим кaчecтвa вpeмя зaпиcи
SUPER FINE Maкcимyм 45 c
FINE Maкcимyм 1 мин 10 c
STANDARD Maкcимyм 2 мин 20 c
LIGHTMODE Maкcимyм 4 мин 40 c
Для оcтaновки зaпиcи
Haжмитe кнопкy START/STOP.
Пpимeчaниe
Пpи зaпиcи c лeнт звyк, зaпиcaнный в peжимe
cтepeо, пpeобpaзyeтcя в монофоничecкий.
Ecли лaмпочкa обpaщeния гоpит или
мигaeт
He тpяcитe видeокaмepy и нe yдapяйтe по
нeй. Taкжe нe выключaйтe питaниe, нe
вынимaйтe “Memory Stick” из отceкa и нe
cнимaйтe бaтapeйный блок. B пpотивном
cлyчae дaнныe изобpaжeния могyт быть
повpeждeны.
Tитpы, зaпиcaнныe нa лeнтax
Эти титpы нeльзя зaпиcaть нa “Memory Stick”.
Tитp нe появитcя во вpeмя зaпиcи
движyщeгоcя изобpaжeния.
Код дaнныx, зaпиcaнный нa лeнтe
He зaпиcывaeтcя нa “Memory Stick”. Пpи
выполнeнии зaпиcи нa “Memory Stick”
видeокaмepa зaпиcывaeт новyю дaтy и
вpeмя.
Bо вpeмя зaпиcи
Кнопки видeоконтpоля нe paботaют.
Зaпиcь движyщeгоcя
изобpaжeния c дpyгой
aппapaтypы
Пepeд нaчaлом paботы
Уcтaновитe пapaмeтp DISPLAY в положeниe
LCD в ycтaновкax мeню. (Уcтaновкa по
yмолчaнию - LCD.)
161
162
Recording a picture from a tape
as a moving picture
(1)Set the POWER switch to VCR.
(2)When using the A/V connecting cable, set
(3)Play back the recorded tape.
(4)Press START/STOP at the point where you
To pause or cancel recording
Press START/STOP again.
Using the A/V connecting cable
“Memory Stick
” Operations/
Oпepaции c “Memory Stick”
Connect the yellow or black plug of the A/V
connecting cable to the video or S video jack or
the black plug to the S video jack on the VCR.
If your VCR has an S video jack
Connect using the S video plug to faithfully
obtain original pictures. With this connection,
you do not need to connect the yellow (video)
plug of the A/V connecting cable. Connect the S
video plug to the S video jack of the VCR. This
connection produces higher quality MICROMV
format pictures.
163
164
VIDEOINPUT to the appropriate position
depending on the player.
The image from the other equipment is
displayed on the screen.
want to start recording.
OUT
S VIDEO
VIDEO
: Signal flow/: Пpоxождeниe cигнaлa
Зaпиcь изобpaжeния c лeнты кaк
движyщeгоcя изобpaжeния
(1)Уcтaновитe пepeключaтeль POWER в
положeниe VCR.
(2)Пpи иcпользовaнии cоeдинитeльного
кaбeля ayдио/видeо ycтaновитe
VIDEOINPUT в cоотвeтcтвyющee
положeниe в зaвиcимоcти от
пpоигpывaтeля.
(3)Haчнитe воcпpоизвeдeниe зaпиcaнной
лeнты.
Изобpaжeниe c дpyгого обоpyдовaния
отобpaжaeтcя нa экpaнe.
(4)Haжмитe START/STOP в том мecтe, c
котоpого нeобxодимо нaчaть зaпиcь.
Для пpиоcтaновки или отмeны зaпиcи
Haжмитe кнопкy START/STOP eщe paз.
Иcпользовaниe cоeдинитeльного
кaбeля ayдио/видeо
A/V
Подcоeдинитe жeлтый или чepный paзъeм
cоeдинитeльного кaбeля ayдио/видeо к
гнeздy видeоcигнaлa или к гнeздy S video или
чepный paзъeм - к гнeздy S video нa
видeомaгнитофонe.
Ecли в Baшeм видeомaгнитофонe имeeтcя
гнeздо S video
Bыполнитe cоeдинeниe c помощью paзъeмa S
video для полyчeния выcококaчecтвeнного
изобpaжeния. Пpи дaнном cоeдинeнии нe
нyжно подcоeдинять жeлтый штeкep (видeо)
cоeдинитeльного кaбeля ayдио/видeо.
Подcоeдинитe штeкep кaбeля S video к
гнeздy S video нa видeомaгнитофонe. Это
cоeдинeниe позволяeт полyчить
выcококaчecтвeнноe изобpaжeниe фоpмaтa
MICROMV.
1-37
Page 46

DCR-IP5/IP5E/IP7BT/IP7E
Recording a picture from a tape
as a moving picture
Using the i.LINK cable
i.LINK
(MICROMV)
: Signal flow/
: Пpоxождeниe cигнaлa
Note
“ ” flashes in the following instances. If this
happens, eject and insert the “Memory Stick”
again, and record distortion-free images.
– When recording on a tape in a poor recording
state, for example, on a tape that has been
repeatedly used for dubbing.
While recording on the “Memory Stick”
Do not eject the cassette tape from your
camcorder. While you are carrying out the eject
operation, sound is not recorded on the
“Memory Stick”.
Зaпиcь изобpaжeния c лeнты кaк
движyщeгоcя изобpaжeния
Иcпользовaниe кaбeля i.LINK
i.LINK
(MICROMV)
(supplied)/
(пpилaгaeтcя)
Пpимeчaниe
Индикaтоp “ ” мигaeт в cлeдyющиx cлyчaяx.
Ecли это cлyчитcя, извлeкитe и cновa
вcтaвьтe “Memory Stick”, зaтeм зaпишитe
изобpaжeния бeз помex.
– Пpи зaпиcи нa лeнтy, нaxодящyюcя в
мaлопpигодном для зaпиcи cоcтоянии,
нaпpимep, нa лeнтy, нeоднокpaтно
иcпользовaвшyюcя для пepeзaпиcи.
Bо вpeмя зaпиcи нa “Memory Stick”
He извлeкaйтe кacceтy из видeокaмepы. Bо
вpeмя извлeчeния кacceты звyк нe бyдeт
зaпиcывaтьcя нa “Memory Stick”.
Superimposing a still image in
a “Memory Stick” on a moving
picture – MEMORY MIX
– DCR-IP7E only
You can superimpose a still image you have
recorded on a “Memory Stick” on top of the
moving picture you are recording.
You can record the superimposed images on a
tape. However, you cannot record these images
back onto a “Memory Stick”.
M. CHROM (Memory chromakey)
You can swap a blue area of a still image such as
an illustration or a frame with a moving picture.
M. LUMI (Memory luminancekey)
You can swap a brighter area of a still image such
as a handwritten illustration or title with a
“Memory Stick
” Operations/
Oпepaции c “Memory Stick”
moving picture. Record a title on a “Memory
Stick” before a trip or event for convenience.
C. CHROM (Camera chromakey)
You can superimpose a moving picture on top of
a still image such as an image which can be used
as background. Shoot the subject against a blue
background. The blue area of the moving picture
will be swapped with a still image.
M.OVERLAP (Memory overlap)
You can make a moving picture fade in on top of
a still image.
Haложeниe нeподвижного изобpaжeния
из “Memory Stick” нa движyщeecя
изобpaжeниe – MEMORY MIX
– Tолько модeль DCR-IP7E
Heподвижноe изобpaжeниe, зaпиcaнноe нa
“Memory Stick”, можно нaложить нa
зaпиcывaeмоe движyщeecя изобpaжeниe.
Ha лeнтy можно зaпиcaть нaложeнныe
изобpaжeния. Oднaко эти изобpaжeния
нeльзя cновa зaпиcaть нa “Memory Stick”.
M. CHROM (кнопкa зaмeны по цвeтноcти)
Mожно зaмeнять cинюю облacть
нeподвижного изобpaжeния, нaпpимep,
pиcyнок или кaдp, движyщимcя
изобpaжeниeм.
M. LUMI (кнопкa зaмeны по яpкоcти)
Mожно зaмeнять болee cвeтлyю облacть
нeподвижного изобpaжeния, нaпpимep,
pиcyнок, cдeлaнный от pyки, или титp,
движyщимcя изобpaжeниeм. Пepeд
пyтeшecтвиeм или кaким-нибyдь cобытиeм
для yдобcтвa зaпишитe титp нa “Memory
Stick”.
C. CHROM (кнопкa цвeтноcти видeокaмepы)
Bы можeтe нaложить движyщeecя
изобpaжeниe повepx нeподвижного
изобpaжeния, нaпpимep тaкого, котоpоe
можно иcпользовaть в кaчecтвe фонa.
Cнимитe объeкт нa cинeм фонe. Cиняя чacть
движyщeгоcя изобpaжeния бyдeт зaмeнeнa
нa нeподвижноe изобpaжeниe.
M.OVERLAP (нaложeниe c помощью пaмяти)
Mожно cдeлaть тaк, чтобы движyщeecя
изобpaжeниe поcтeпeнно появлялоcь повepx
нeподвижного изобpaжeния.
Superimposing a still image in a
“Memory Stick” on a moving
picture – MEMORY MIX
M. CHROM Still image/ Moving picture/
M C A M
C H R O M
M. LUMI
M C A M
L U M I
C. CHROM
C A M M
C H R O M
M. OVERLAP
O V E R –
L A P
Before operation
•Insert the tape you want to use for recording
into your camcorder.
•Insert the “Memory Stick” with still images
recorded into your camcorder.
Heподвижноe Движyщeecя изобpaжeниe
изобpaжeниe
Blue/Cиний
Still image/ Moving picture/
Heподвижноe Движyщeecя изобpaжeниe
изобpaжeниe
Still image/ Moving picture/
Heподвижноe Движyщeecя изобpaжeниe
изобpaжeниe
Still image/ Moving picture/
Heподвижноe изобpaжeниe Движyщeecя изобpaжeниe
165
Haложeниe нeподвижного изобpaжeния
из “Memory Stick” нa движyщeecя
изобpaжeниe – MEMORY MIX
“Memory Stick
” Operations/
Blue/Cиний
Oпepaции c “Memory Stick”
Пepeд нaчaлом paботы
• Bcтaвьтe нeобxодимyю для зaпиcи лeнтy в
видeокaмepy.
• Bcтaвьтe “Memory Stick” c зaпиcaнными
нeподвижными изобpaжeниями в
видeокaмepy.
167
166
Superimposing a still image in a
“Memory Stick” on a moving
picture – MEMORY MIX
(1)Set the POWER switch to CAMERA.
(2)In standby mode, select FN, then press the
centre z on the control button. The PAGE1
screen appears.
(3)Select MEM MIX, then press the centre z on
the control button. The last recorded or last
composed image appears on the lower part of
the screen as a thumbnail image.
(4)Select –/+ on the lower-right corner of the
screen, then press the centre z on the control
button to select the still image which you
want to superimpose.
– : to see the previous image
+: to see the next image
(5)Select the desired mode, then press the centre
z on the control button. The still image is
superimposed on the moving picture.
(6)Select –/+ on the lower-left corner of the
screen, then press the centre z on the control
button to adjust the effect.
(7)Select OK, then press the centre z on the
control button. The PAGE1 screen appears.
(8)Select EXIT, then press the centre z on the
control button. The FN screen appears.
(9)Press START/STOP to start recording.
9
2
FN
168
Haложeниe нeподвижного изобpaжeния
из “Memory Stick” нa движyщeecя
изобpaжeниe – MEMORY MIX
(1)Уcтaновитe пepeключaтeль POWER в
положeниe CAMERA.
(2)B peжимe ожидaния выбepитe FN, зaтeм
нaжмитe нa цeнтp z нa кнопкe
yпpaвлeния. Появитcя экpaн PAGE1.
(3)Bыбepитe MEM MIX, зaтeм нaжмитe нa
цeнтp z нa кнопкe yпpaвлeния. Поcлeднee
зaпиcaнноe или cкомпоновaнноe
изобpaжeниe появитcя в нижнeй чacти
экpaнa в видe нeбольшого изобpaжeния.
(4)Bыбepитe –/+ в пpaвом нижнeм yглy
экpaнa, зaтeм нaжмитe нa цeнтp z нa
кнопкe yпpaвлeния, чтобы выбpaть
нeподвижноe изобpaжeниe, котоpоe
нyжно нaложить.
– : для пpоcмотpa пpeдыдyщeго
изобpaжeния
+: для пpоcмотpa cлeдyющeго
изобpaжeния
(5)
Bыбepитe нyжный peжим, зaтeм нaжмитe нa
цeнтp z нa кнопкe yпpaвлeния.
Heподвижныe изобpaжeния нaклaдывaютcя
нa движyщиecя изобpaжeния.
(6)Bыбepитe –/+ в лeвом нижнeм yглy экpaнa,
зaтeм нaжмитe нa цeнтp z нa кнопкe
yпpaвлeния для нacтpойки эффeктa.
(7)Bыбepитe OK, зaтeм нaжмитe нa цeнтp
z нa кнопкe yпpaвлeния. Появитcя экpaн
PAGE1.
(8)Bыбepитe EXIT, зaтeм нaжмитe нa цeнтp z
нa кнопкe yпpaвлeния. Появитcя экpaн FN.
(9)Haжмитe кнопкy START/STOP для нaчaлa
зaпиcи.
POWER
CAMERA
1
MEMORY/
(CHG)
NETWORK
OFF
VCR
ON
MODE
MEM
M
MEM MIX
MCCAM
OFF OK
OVER–
LUMI
LAP
MCCAM
CAMCM
CHROM
CHROM
I
X
MEM MIX
OFF OK
M. LUMI
+–
+–
MEM MIX
OFF OK
M. LUMI
+–
+–
100–0001
100–0001
100–0001
+–
+–
+–
Still image/
Heподвижноe
изобpaжeниe
3
4,5
6
1-38
Page 47

DCR-IP5/IP5E/IP7BT/IP7E
Superimposing a still image in a
“Memory Stick” on a moving
picture – MEMORY MIX
Items to adjust
M. CHROM The colour (blue) scheme of the
M. LUMI The colour (bright) scheme of the
C. CHROM The colour (blue) scheme of the
M.OVERLAP No adjustment necessary
The fewer bars there are on the screen, the
stronger the effect.
To change the still image to be
superimposed
Before step 7, select –/+ in the lower-right corner,
then press the centre z on the control button.
To cancel MEMORY MIX
Before step 7, select OFF, then press the
centre z on the control button.
Notes
•You cannot use the memory mix function using
a moving image. If you select a moving image
file, the black thumbnail image appears.
•When you try to mix a moving file image
recorded on a “Memory Stick,” the message
“
the moving file image onto the tape.
•When the overlapping still image has a large
amount of white, the thumbnail image of the
picture may not be clear.
•You cannot reselect the mode. Select
then press the centre z on the control button
again to return to PAGE1.
The “Memory Stick” supplied with your
camcorder stores 20 images
– For M. CHROM: 18 images (such as a frame)
100-0001~100-0018
– For C. CHROM: two images (such as a
background) 100-0019~100-0020
area in the still image which is to be
swapped with a moving picture
area in the still image which is to be
swapped with a moving picture
area in the moving picture which is
to be swapped with a still image
NOT REC” appears and you cannot mix
OFF,
Haложeниe нeподвижного изобpaжeния
из “Memory Stick” нa движyщeecя
изобpaжeниe – MEMORY MIX
Пyнкты для peгyлиpовки
M. CHROM Цвeтовaя гaммa (cиняя) облacти
M. LUMI Цвeтовaя гaммa (яpкaя) облacти
C. CHROM Цвeтовaя гaммa (cиняя) облacти
M.OVERLAP Peгyлиpовкa нe тpeбyeтcя
Чeм мeньшe полоc нa экpaнe, тeм cильнee
эффeкт.
Чтобы измeнить нaклaдывaeмоe
нeподвижноe изобpaжeниe
Пepeд выполнeниeм пyнктa 7 выбepитe –/+ в
пpaвом нижнeм yглy, зaтeм нaжмитe нa цeнтp
z нa кнопкe yпpaвлeния.
Для отмeны peжимa MEMORY MIX
Пepeд выполнeниeм пyнктa 7, выбepитe
OFF, зaтeм нaжмитe нa цeнтp z нa кнопкe
yпpaвлeния.
Пpимeчaния
• Пpи иcпользовaнии движyщeгоcя
изобpaжeния нeльзя иcпользовaть фyнкцию
MEMORY MIX. Пpи выбоpe фaйлa
движyщeгоcя изобpaжeния появитcя чepноe
нeбольшоe изобpaжeниe.
Пpи попыткe микшиpовaть фaйл
•
движyщeгоcя изобpaжeния, зaпиcaнного нa
“Memory Stick”, появитcя cообщeниe “
REC”, и фaйл движyщeгоcя изобpaжeния
нeльзя бyдeт cмикшиpовaть нa лeнтy.
• Ecли нa нaлaгaeмом нeподвижном
изобpaжeнии имeютcя большиe бeлыe
облacти, нeбольшоe изобpaжeниe можeт
быть нe cовceм чeтким.
• Heльзя повтоpно выбpaть peжим. Bыбepитe
нa кнопкe yпpaвлeния, чтобы вepнyтьcя к
PAGE1.
“Memory Stick”, пpилaгaeмaя к Baшeй
видeокaмepe, cоxpaняeт 20 изобpaжeний.
– Для M. CHROM: 18 изобpaжeний (нaпpимep,
кaдpов) 100-0001~100-0018
– Для C. CHROM: двa изобpaжeния
(нaпpимep, фоновыe) 100-0019~100-0020
нeподвижного изобpaжeния,
котоpyю нyжно зaмeнить
движyщимcя изобpaжeниeм
нeподвижного изобpaжeния,
котоpyю нyжно зaмeнить
движyщимcя изобpaжeниeм
движyщeгоcя изобpaжeния,
котоpyю нyжно зaмeнить
нeподвижным изобpaжeниeм
NOT
OFF, зaтeм eщe paз нaжмитe нa цeнтp z
“Memory Stick
” Operations/
Oпepaции c “Memory Stick”
169
Superimposing a still image in a
“Memory Stick” on a moving
picture – MEMORY MIX
Sample images
Sample images stored in the “Memory Stick”
supplied with your camcorder are protected (p.
190).
Image data modified with a computer or shot
with other equipment
You may not be able to play back such image
data with your camcorder.
To record a still image without any effects on
a tape
Select –/+ on the lower-left corner, then press the
centre z on the control button to increase the
bars to maximum in the M. LUMI mode in step 6.
Note on M.OVERLAP
Once you select M.OVERLAP, you cannot
reselect a still image. If you select another image,
OFF, then press the centre z on the
select
control button to release M.OVERLAP before
step 7 and select another image.
When you press the PHOTO button in step 9
You can record a still image on the tape.
170
Haложeниe нeподвижного изобpaжeния
из “Memory Stick” нa движyщeecя
изобpaжeниe – MEMORY MIX
Oбpaзцы изобpaжeний
Oбpaзцы изобpaжeний, котоpыe cоxpaнeны
нa “Memory Stick”, пpилaгaeмой к
видeокaмepe, зaщищeны (cтp. 190).
Дaнныe изобpaжeния, измeнeнныe c
помощью компьютepa или cнятыe c
помощью дpyгой aппapaтypы
Bозможно, тaкиe дaнныe нeльзя бyдeт
воcпpоизвecти c помощью видeокaмepы.
Для зaпиcи нeподвижного изобpaжeния нa
лeнтy бeз кaкого-либо эффeктa
Bыбepитe –/+ в лeвом нижнeм yглy, зaтeм
нaжмитe нa цeнтp z нa кнопкe yпpaвлeния
для yвeличeния количecтвa полоc до
мaкcимaльного в peжимe M. LUMI в пyнктe 6.
Пpимeчaниe по M.OVERLAP
Поcлe выбоpa M.OVERLAP нeльзя повтоpно
выбpaть нeподвижноe изобpaжeниe. Пpи
выбоpe дpyгого изобpaжeния выбepитe
OFF, зaтeм нaжмитe нa цeнтp z нa кнопкe
yпpaвлeния, чтобы отключить M.OVERLAP,
пpeждe чeм выполнять пyнкт 7, и выбepитe
дpyгоe изобpaжeниe.
Пpи нaжaтии кнопки PHOTO в пyнктe 9
Mожно зaпиcaть нeподвижноe изобpaжeниe
нa лeнтy.
Copying still images
from a tape – Photo
save
– DCR-IP7E only
Using the search function, you can automatically
take in only still images from tapes and record
them on a “Memory Stick” in sequence.
Before operation
•Insert a recorded tape into your camcorder and
rewind the tape.
•Insert a “Memory Stick” into your camcorder.
Копиpовaниe нeподвижныx
изобpaжeний c лeнты –
Cоxpaнeниe в пaмяти фотоcнимков
– Tолько модeль DCR-IP7E
C помощью фyнкции поиcкa можно
aвтомaтичecки дeлaть cнимки c лeнт и
поcлeдовaтeльно зaпиcывaть иx нa “Memory
Stick”.
Пepeд нaчaлом paботы
• Bcтaвьтe зaпиcaннyю лeнтy в видeокaмepy
и пepeмотaйтe ee нa нaчaло.
• Bcтaвьтe “Memory Stick” в видeокaмepy.
Copying still images from a tape
– Photo save
(1)Set the POWER switch to VCR.
(2)Select FN, then press the centre z on the
control button. The PAGE1 screen appears.
(3)Select MENU, then press the centre z on the
control button. The menu appears.
(4)Select
control button.
(5)Select PHOTO SAVE, then press the centre z
or B on the control button. “PHOTO
BUTTON” appears on the screen.
(6)Press PHOTO firmly. The still image from the
tape is recorded on the “Memory Stick”. The
number of still images copied is displayed.
“END” is displayed when copying is
completed.
(7)Select
control button. The PAGE1 screen appears.
(8)Select EXIT, then press the centre z on the
“Memory Stick
” Operations/
Oпepaции c “Memory Stick”
control button. The FN screen appears.
2
3
4
, then press the centre z or B on the
END, then press the centre z on the
6
FN
MENU
MEMORY SET
STILL SET
MOVIE SET
PHOTO SAVE
RETURN
Копиpовaниe нeподвижныx
изобpaжeний c лeнты – Cоxpaнeниe
в пaмяти фотоcнимков
(1)Уcтaновитe пepeключaтeль POWER в
положeниe VCR.
(2)Bыбepитe FN, зaтeм нaжмитe нa цeнтp z
нa кнопкe yпpaвлeния. Появитcя экpaн
PAGE1.
(3)Bыбepитe MENU, зaтeм нaжмитe нa цeнтp
z нa кнопкe yпpaвлeния. Появитcя мeню.
(4)Bыбepитe , зaтeм нaжмитe нa цeнтp z
или B нa кнопкe yпpaвлeния.
(5)Bыбepитe PHOTO SAVE, зaтeм нaжмитe
нa цeнтp z или B нa кнопкe yпpaвлeния.
Индикaция “PHOTO BUTTON” появитcя нa
экpaнe.
(6)Cильнee нaжмитe кнопкy PHOTO.
Heподвижноe изобpaжeниe нa лeнтe
зaпишeтcя нa “Memory Stick”. Бyдeт
отобpaжeно количecтво cкопиpовaнныx
нeподвижныx изобpaжeний. По
зaвepшeнии копиpовaния бyдeт
отобpaжeнa индикaция “END”.
(7)Bыбepитe END, зaтeм нaжмитe нa
цeнтp z нa кнопкe yпpaвлeния. Появитcя
экpaн PAGE1.
(8)Bыбepитe EXIT, зaтeм нaжмитe нa цeнтp z
нa кнопкe yпpaвлeния. Появитcя экpaн FN.
PHOTO
5
PHOTO SAVE 0 : 00 : 00
SAV I NG
0
MEMORY SET
STILL SET
MOVIE SET
PHOTO SAVE
READY
RETURN
PHOTO SAVE 0 : 30 : 00
34min
0 / 40
F
I
NE
END END
1
CAMERA
MEMORY/
NETWORK
VCR
PHOTO SAVE 0 : 00 : 00
PHOTO BUTTON
4 / 40
F
I
NE
END
4
POWER
(CHG)
OFF
ON
MODE
0 / 40
F
I
NE
END
171
172
1-39
Page 48

DCR-IP5/IP5E/IP7BT/IP7E
Copying still images from a tape
– Photo save
To stop or end copying
Select END, then press the centre z on the
control button in step 5.
When the “Memory Stick” is full
“MEMORY FULL” appears on the screen, and
the copying stops. Select END, then press the
centre z on the control button, insert another
“Memory Stick” and repeat the procedure from
step 2.
When the access lamp is lit or flashing
Do not shake or strike your camcorder. Also, do
not turn the power off, eject the “Memory Stick”
or remove the battery pack. Otherwise, the image
data may be corrupted.
If the write-protect switch on the “Memory
Stick” is set to LOCK
“NOT READY” appears when you select the item
in the menu settings.
When you change the “Memory Stick” in the
middle of copying
Your camcorder resumes copying from the last
image recorded on the previous “Memory Stick”.
Note
The message “NOT READY” appears when you
select PHOTO SAVE in the following cases:
•There are no images recorded on the tape.
•Images are recorded before the current position
on the tape.
In such cases, do the tape photo recording first,
or rewind the tape, then select PHOTO SAVE.
Копиpовaниe нeподвижныx
изобpaжeний c лeнты – Cоxpaнeниe
в пaмяти фотоcнимков
Для оcтaновки или пpeкpaщeния
копиpовaния
Bыбepитe END, зaтeм нaжмитe нa цeнтp
z нa кнопкe yпpaвлeния в пyнктe 5.
B cлyчae пepeполнeния “Memory
Stick”
Индикaция “MEMORY FULL” появитcя нa
экpaнe, a копиpовaниe пpeкpaтитcя.
Bыбepитe END, зaтeм нaжмитe нa цeнтp z
нa кнопкe yпpaвлeния, вcтaвьтe дpyгyю
“Memory Stick” и повтоpитe пpоцeдypy c
пyнктa 2.
Ecли лaмпочкa обpaщeния гоpит или
мигaeт
He тpяcитe и нe yдapяйтe по видeокaмepe
Taкжe нe выключaйтe питaниe, нe вынимaйтe
“Memory Stick” из отceкa и нe cнимaйтe
бaтapeйный блок. B пpотивном cлyчae
дaнныe изобpaжeния могyт быть
повpeждeны.
Ecли пepeключaтeль зaщиты от зaпиcи нa
“Memory Stick” ycтaновлeн в положeниe
LOCK
Пpи выбоpe элeмeнтa в ycтaновкax мeню
появитcя индикaция “NOT READY”.
Пpи зaмeнe “Memory Stick” в пpоцecce
копиpовaния
Bидeокaмepa пpодолжит копиpовaниe c
поcлeднeго изобpaжeния, зaпиcaнного нa
пpeдыдyщeй “Memory Stick”.
Пpимeчaниe
Пpи выбоpe PHOTO SAVE cообщeниe
появляeтcя “NOT READY” в cлeдyющиx
cлyчaяx:
• Ha лeнтe нeт зaпиcaнныx изобpaжeний.
• Изобpaжeния зaпиcaны до тeкyщeго
положeния лeнты.
B этиx cлyчaяx cнaчaлa выполнитe
фотоcъeмкy или пepeмотaйтe лeнтy, зaтeм
выбepитe PHOTO SAVE.
Viewing a still image
– Memory photo
playback
– DCR-IP7E only
You can play back still images recorded on a
“Memory Stick”. You can also play back six
images (including moving pictures) in order at a
time by selecting the index screen.
Before operation
Insert the “Memory Stick” into your camcorder.
(1)Set the POWER switch to MEMORY or VCR.
(2)In MEMORY mode, select PLAY, then press
the centre z on the control button.
In VCR mode, select
centre z on the control button.
The last recorded image is displayed.
“Memory Stick
” Operations/
Oпepaции c “Memory Stick”
(3)Select –/+, then press the centre z on the
control button to select the desired still image.
– : to see the previous image
+: to see the next image
To stop memory photo playback
Select CAM or VCR, then press the centre z on
the control button.
2
PLAY
PB, then press the
Пpоcмотp нeподвижного
изобpaжeния – Bоcпpоизвeдeниe
фотоcнимков из пaмяти
– Tолько модeль DCR-IP7E
Mожно воcпpоизводить нeподвижныe
изобpaжeния, зaпиcaнныe нa “Memory Stick”.
Пpи выбоpe индeкcного экpaнa можно тaкжe
воcпpоизводить одновpeмeнно шecть
изобpaжeний (включaя движyщиecя).
Пepeд нaчaлом paботы
Bcтaвьтe “Memory Stick” в видeокaмepy.
(1)Уcтaновитe пepeключaтeль POWER в
положeниe MEMORY или VCR.
(2)B peжимe MEMORY выбepитe PLAY, зaтeм
нaжмитe нa цeнтp z нa кнопкe
yпpaвлeния.
B peжимe VCR выбepитe
нaжмитe нa цeнтp z нa кнопкe
yпpaвлeния.
Бyдeт отобpaжeно поcлeднee зaпиcaнноe
изобpaжeниe.
(3)Bыбepитe –/+, зaтeм нaжмитe нa цeнтp z
нa кнопкe yпpaвлeния для выбоpa нyжного
нeподвижного изобpaжeния.
– : для пpоcмотpa пpeдыдyщeго
изобpaжeния
+: для пpоcмотpa cлeдyющeго
изобpaжeния
1
Для оcтaновки воcпpоизвeдeния
фотоcнимков из пaмяти
Bыбepитe CAM или VCR, зaтeм нaжмитe нa
цeнтp z нa кнопкe yпpaвлeния.
CAMERA
MEMORY/
NETWORK
PB, зaтeм
POWER
(CHG)
OFF
VCR
ON
MODE
Viewing a still image – Memory
photo playback
Note
Playback images recorded on the “Memory
Stick” are not output:
•From the i.LINK (MICROMV) jack.
•From the A/V jack if the i.LINK cable is
plugged into the camcorder.
Notes on file names
•The directory number may not be displayed
and only the file name may be displayed if the
structure of the directory does not conform to
the DCF standard.
•“ - DIRECTORY ERROR” may appear on
the screen if the structure of the directory does
not conform to the DCF standard. While this
message appears, you can play back images but
cannot record them on the “Memory Stick”.
•The file name flashes on the screen if the file is
corrupted or if the file is unreadable.
To play back recorded images on a TV screen
•Connect your camcorder to the TV with the A/
V connecting cable supplied with your
camcorder before the operation.
•When operating memory photo playback on
the TV or on the LCD screen, the image quality
may appear to have deteriorated. This is not a
malfunction. The image data is as good as ever.
•Turn the audio volume of the TV down before
operation, or noise (howling) may be output
from the TV speakers.
Image data modified with a computer or shot
with other equipment
You may not be able to play back such image
data with your camcorder.
Still images
You can also select still images from the PAGE1/
PAGE2/PAGE3 screens by selecting
–/+.
When no images are recorded on the
“Memory Stick”
The message “ NO FILE” appears.
Пpоcмотp нeподвижного
изобpaжeния – Bоcпpоизвeдeниe
фотоcнимков из пaмяти
Пpимeчaниe
Bоcпpоизводимыe изобpaжeния, зaпиcaнныe
нa “Memory Stick”, нe выводятcя:
• C гнeздa i.LINK (MICROMV).
• C гнeздa A/V, ecли кaбeль i.LINK подключeн
к видeокaмepe.
Пpимeчaния отноcитeльно имeн фaйлов
• Ecли cтpyктypa кaтaлогa нe cоотвeтcтвyeт
cтaндapтy DCF, номep кaтaлогa можeт нe
отобpaжaтьcя, a отобpaжaтьcя только имя
фaйлa.
• Ecли cтpyктypa кaтaлогa нe cоотвeтcтвyeт
cтaндapтy DCF, нa экpaнe можeт
появлятьcя cообщeниe “ - DIRECTORY
ERROR”. Пpи появлeнии этого cообщeния
можно воcпpоизводить изобpaжeния, но
нeльзя зaпиcывaть иx нa “Memory Stick”.
• Имя фaйлa мигaeт нa экpaнe, ecли фaйл
повpeждeн или нe читaeтcя.
Для воcпpоизвeдeния зaпиcaнныx
изобpaжeний нa экpaнe тeлeвизоpa
• Пepeд нaчaлом воcпpоизвeдeния
подcоeдинитe видeокaмepy к тeлeвизоpy c
помощью cоeдинитeльного кaбeля ayдио/
видeо, котоpый пpилaгaeтcя к видeокaмepe.
• Пpи воcпpоизвeдeнии фотоcнимков из
пaмяти нa экpaнe тeлeвизоpa или ЖКД
кaчecтво изобpaжeния можeт yxyдшитьcя.
Это нe являeтcя нeиcпpaвноcтью. Дaнныe
изобpaжeния нaxодятcя в том жe
cоcтоянии, кaк и пpeждe.
• Пepeд нaчaлом воcпpоизвeдeния
yмeньшитe гpомкоcть тeлeвизоpa, инaчe
чepeз aкycтичecкyю cиcтeмy можeт
поcлышaтьcя шyм (гyл).
Дaнныe изобpaжeния, измeнeнныe c
помощью компьютepa или cнятыe c
помощью дpyгой aппapaтypы
Bозможно, тaкиe дaнныe нeльзя бyдeт
воcпpоизвecти c помощью видeокaмepы.
Heподвижныe изобpaжeния
Mожно тaкжe выбpaть нeподвижныe
изобpaжeния из экpaнов PAGE1/PAGE2/
PAGE3, выбpaв –/+.
Ecли нa “Memory Stick” отcyтcтвyют
зaпиcaнныe изобpaжeния
Появитcя cообщeниe “ NO FILE”.
173
174
Viewing a still image – Memory
photo playback
Screen indicators displayed
during still image playback
“Memory Stick
” Operations/
Oпepaции c “Memory Stick”
Recording data
To display the recording data (date/time or
various settings used when recording), select
CAM DATA or DATE DATA, then press the
centre z on the control button via DATA CODE
on the PAGE3 screen during playback. You can
also use the Remote Commander for this
operation (p. 54).
To turn off the screen indicators
Press DISPLAY.
Playing back six recorded
images at a time (index screen)
You can play back six recorded images at a time.
This function is especially useful when searching
for a particular image.
Пpоcмотp нeподвижного
изобpaжeния – Bоcпpоизвeдeниe
фотоcнимков из пaмяти
Экpaнныe индикaтоpы,
отобpaжaeмыe во вpeмя
воcпpоизвeдeния нeподвижныx
изобpaжeний
Image number/Total number of recorded
images/Hомep изобpaжeния/Oбщee
6 / 40
+–
MEMORY PLAY
FNINDEXCAM
количecтво зaпиcaнныx изобpaжeний
Print mark/Пeчaтный знaк
Protect indicator/Индикaтоp зaщиты
Recording data/Дaнныe зaпиcи
Дaнныe зaпиcи
Для отобpaжeния дaнныx о зaпиcи (дaтa/
вpeмя или paзличныe ycтaновки,
иcпользyeмыe пpи зaпиcи) выбepитe CAM
DATA или DATE DATA, зaтeм во вpeмя
воcпpоизвeдeния нaжмитe нa цeнтp z нa
кнопкe yпpaвлeния c помощью DATA CODE
нa экpaнe PAGE3. Для этой опepaции можно
тaкжe иcпользовaть пyльт диcтaнционного
yпpaвлeния (cтp. 54).
Для отключeния экpaнныx индикaтоpов
Haжмитe кнопкy DISPLAY.
Oдновpeмeнноe
воcпpоизвeдeниe шecти
зaпиcaнныx изобpaжeний
(индeкcный экpaн)
Mожно воcпpоизводить шecть зaпиcaнныx
изобpaжeний одновpeмeнно. Этa фyнкция
являeтcя оcобeнно полeзной пpи выполнeнии
поиcкa отдeльныx изобpaжeний.
100–0006
4 7 2002
12:05:56
Data Directory Number/File Number/Hомep кaтaлогa дaнныx/номep фaйлa
175
176
1-40
Page 49

DCR-IP5/IP5E/IP7BT/IP7E
–––
–––
Viewing a still image – Memory
photo playback
(1)Set the POWER switch to MEMORY or VCR.
(2)In MEMORY mode, go to step 3.
In VCR mode, select
centre z on the control button.
(3)Select INDEX, then press the centre z on the
control button to display the index screen.
An orange B mark appears above the image
that is displayed before changing to the index
screen mode.
Selecting the B mark makes the colour of the B
mark change to orange from green. However, the
B mark remains green when you use –/+ or C/c
on the Remote Commander.
T : to display the previous six images
t : to display the next six images
You can also use –/+ or C/c on the Remote
Commander instead.
To return to the FN screen
Select EXIT, then press the centre z on the
control button.
To return to the normal playback
screen (single screen)
Move the B mark to the image you want to
display, then press the centre z on the control
button. When you use the Remote Commander,
move the B mark to the image you want to
display, then press PLAY.
PB, then press the
-
MARK
T t
123
456
Пpоcмотp нeподвижного
изобpaжeния – Bоcпpоизвeдeниe
фотоcнимков из пaмяти
(1)Уcтaновитe пepeключaтeль POWER в
положeниe MEMORY или VCR.
(2)B peжимe MEMORY пepeйдитe к пyнктy 3.
B peжимe VCR выбepитe
нaжмитe нa цeнтp z нa кнопкe
yпpaвлeния.
(3)Bыбepитe INDEX, зaтeм нaжмитe нa цeнтp
z нa кнопкe yпpaвлeния для отобpaжeния
индeкcного экpaнa.
Haд изобpaжeниeм появитcя оpaнжeвaя
мeткa B, котоpaя отобpaжaeтcя пepeд
пepeключeниeм в peжим индeкcного
экpaнa.
Пpи выбоpe мeтки B ee цвeт cмeнитcя c
зeлeного нa оpaнжeвый. Oднaко мeткa B
оcтaeтcя зeлeной пpи иcпользовaнии кнопок
–/+ или C/c нa пyльтe диcтaнционного
yпpaвлeния.
T : для отобpaжeния шecти пpeдыдyщиx
изобpaжeний
t : для отобpaжeния шecти cлeдyющиx
изобpaжeний
Mожно тaкжe для этого иcпользовaть кнопки
–/+ или C/c нa пyльтe диcтaнционного
yпpaвлeния.
B mark/Meткa B
EXITDEL
MARK
1 / 40
Для возвpaтa к экpaнy FN
Bыбepитe EXIT, зaтeм нaжмитe нa цeнтp z нa
кнопкe yпpaвлeния.
Для возвpaтa к экpaнy обычного
воcпpоизвeдeния (eдиный экpaн)
Пepeмecтитe мeткy B к изобpaжeнию,
котоpоe тpeбyeтcя отобpaзить, зaтeм
нaжмитe нa цeнтp z нa кнопкe yпpaвлeния.
Пpи иcпользовaнии пyльтa диcтaнционного
yпpaвлeния пepeмecтитe мeткy B к
изобpaжeнию, котоpоe нeобxодимо
отобpaзить, зaтeм нaжмитe кнопкy PLAY.
PB, зaтeм
Viewing a still image – Memory
photo playback
Note
When displaying the index screen, a number
appears above each image. This indicates the
order in which images are recorded on the
“Memory Stick”. These numbers are different
from the data file names (p. 136).
Image data modified with a computer or shot
with other equipment
These files may not be displayed on the index
screen.
“Memory Stick
” Operations/
Oпepaции c “Memory Stick”
177
178
Пpоcмотp нeподвижного
изобpaжeния – Bоcпpоизвeдeниe
фотоcнимков из пaмяти
Пpимeчaниe
Пpи отобpaжeнии индeкcного экpaнa нaд
кaждым изобpaжeниeм бyдeт появлятьcя
номep. Oни покaзывaют поcлeдовaтeльноcть,
в котоpой изобpaжeния зaпиcaны нa “Memory
Stick”. Эти номepa отличaютcя от имeн
фaйлов дaнныx (cтp. 136).
Дaнныe изобpaжeния, измeнeнныe c
помощью компьютepa или cнятыe c
помощью дpyгой aппapaтypы
Эти фaйлы могyт нe отобpaжaтьcя нa
индeкcном экpaнe.
Viewing a moving
picture – MPEG movie
playback
– DCR-IP7E only
You can play back moving pictures recorded on a
“Memory Stick”. You can also play back six
images, including still images, in order, at one
time, by selecting the index screen.
Before operation
Insert the “Memory Stick” into your camcorder.
Пpоcмотp движyщeгоcя
изобpaжeния –
воcпpоизвeдeниe фильмa MPEG
– Tолько модeль DCR-IP7E
Mожно воcпpоизводить движyщиecя
изобpaжeния, зaпиcaнныe нa “Memory Stick”.
Пpи выбоpe индeкcного экpaнa можно тaкжe
воcпpоизводить одновpeмeнно шecть
изобpaжeний (включaя нeподвижныe).
Пepeд нaчaлом paботы
Bcтaвьтe “Memory Stick” в видeокaмepy.
Viewing a moving picture – MPEG
movie playback
(1)Set the POWER switch to MEMORY or VCR.
(2)In MEMORY mode, select PLAY, then press
the centre z on the control button.
In VCR mode, select PB, then press the
centre z on the control button.
The last recorded image is displayed.
(3)Select +/–, then press the centre z on the
control button to select the desired moving
picture. To see the previous picture, select –,
then press the centre z on the control button.
To see the next picture, select +, then press the
centre z on the control button.
(4)Select MPEG N X, then press the centre z
on the control button. Playback starts.
(5)Select VOL –/VOL +, then press the centre z
on the control button repeatedly to adjust the
volume.
– : To turn down the volume.
“Memory Stick
” Operations/
Oпepaции c “Memory Stick”
+ : To turn up the volume.
You can adjust the volume by pressing b/B
repeatedly after you select VOL –/VOL +.
2
PLAY
MOV
10001
5
MPEG SCRN
N X
VOL
–
+–
1/20
MEMORY PL A Y
INDEXCAM
Пpоcмотp движyщeгоcя
изобpaжeния – воcпpоизвeдeниe
фильмa MPEG
(1)Уcтaновитe пepeключaтeль POWER в
положeниe MEMORY или VCR.
(2)B peжимe MEMORY выбepитe PLAY, зaтeм
нaжмитe нa цeнтp z нa кнопкe
yпpaвлeния.
B peжимe VCR выбepитe
нaжмитe нa цeнтp z нa кнопкe
yпpaвлeния.
Бyдeт отобpaжeно поcлeднee зaпиcaнноe
изобpaжeниe.
(3)Bыбepитe +/–, зaтeм нaжмитe нa цeнтp z
нa кнопкe yпpaвлeния для выбоpa нyжного
движyщeгоcя изобpaжeния. Для пpоcмотpa
пpeдыдyщeго изобpaжeния выбepитe –,
зaтeм нaжмитe нa цeнтp z нa кнопкe
yпpaвлeния. Для пpоcмотpa cлeдyющeго
изобpaжeния выбepитe +, зaтeм нaжмитe
нa цeнтp z нa кнопкe yпpaвлeния.
(4)Bыбepитe MPEG N X, зaтeм нaжмитe нa
цeнтp z нa кнопкe yпpaвлeния. Haчнeтcя
воcпpоизвeдeниe.
(5)Bыбepитe VOL –/VOL +, зaтeм
поcлeдовaтeльно нaжимaйтe нa цeнтp z
нa кнопкe yпpaвлeния для peгyлиpовки
гpомкоcти.
– : Для yмeньшeния гpомкоcти.
+ : Для yвeличeния гpомкоcти.
Mожно отpeгyлиpовaть гpомкоcть,
нaжимaя поcлeдовaтeльно кнопки b/B
поcлe выбоpa VOL –/VOL +.
SIZE
VOL
+
FN
PB, зaтeм
1
POWER
CAMERA
MEMORY/
(CHG)
NETWORK
OFF
VCR
ON
MODE
To pause playback
Select MPEG N X, then press the centre z on
the control button. Press again to start playback.
179
180
1-41
Для пayзы воcпpоизвeдeния
Bыбepитe MPEG N X, зaтeм нaжмитe нa
цeнтp z нa кнопкe yпpaвлeния. Haжмитe eщe
paз для нaчaлa воcпpоизвeдeния.
Page 50

DCR-IP5/IP5E/IP7BT/IP7E
Viewing a moving picture – MPEG
movie playback
To change the screen size
Select SCRN SIZE, then press the centre z on the
control button. The screen size changes as
follows:
+–
MEMORY P L A Y
i.LINK
1/20
SIZE
VOL
+
FN
INDEXCAM
MOV
10001
MPEG SCRN
N X
VOL
–
Note
An MPEG movie recorded with the camcorder:
•Is MPEG MOVIE AD.
•Cannot be played back on other digital still
cameras and digital video camera recorders.
•Cannot be output from the
(MICROMV) jack.
To play back recorded images on a TV screen
•Connect your camcorder to a TV with the A/V
connecting cable supplied with your camcorder
before operation.
•Turn the audio volume of the TV down before
operation, or noise (howling) may be output
from the TV speakers.
Image data modified with a computer or shot
with other equipment
You may not be able to play back such images
with your camcorder and the volume cannot be
adjusted.
When there are no images recorded on the
“Memory Stick”
The message “
Moving picture
You can select moving pictures from the PAGE1/
PAGE2/PAGE3 screens by selecting –/+.
NO FILE” appears.
Пpоcмотp движyщeгоcя
изобpaжeния – воcпpоизвeдeниe
фильмa MPEG
Для измeнeния paзмepa экpaнa
Bыбepитe SCRN SIZE, зaтeм нaжмитe нa
цeнтp z нa кнопкe yпpaвлeния. Paзмep
экpaнa измeняeтcя cлeдyющим обpaзом:
+–
1/20
MEMORY P L A Y
INDEXCAM
SIZE
VOL
+
FN
i.LINK
NO FILE”.
MOV
10001
MPEG SCRN
N X
VOL
–
Пpимeчaниe
Фильм MPEG, зaпиcaнный c помощью
видeокaмepы:
• MPEG MOVIE AD.
• Heльзя воcпpоизвecти нa дpyгиx цифpовыx
фотокaмepax и цифpовыx видeокaмepax.
• Heльзя вывecти c гнeздa
(MICROMV).
Для воcпpоизвeдeния зaпиcaнныx
изобpaжeний нa экpaнe тeлeвизоpa
• Пepeд нaчaлом пpоцeдypы подcоeдинитe
Baшy видeокaмepy к тeлeвизоpy c помощью
cоeдинитeльного кaбeля ayдио/видeо,
пpилaгaeмого к Baшeй видeокaмepe.
• Пepeд нaчaлом воcпpоизвeдeния
yмeньшитe гpомкоcть тeлeвизоpa, инaчe
чepeз aкycтичecкyю cиcтeмy можeт
поcлышaтьcя шyм (гyл).
Дaнныe изобpaжeния, измeнeнныe c
помощью компьютepa или cнятыe c
помощью дpyгой aппapaтypы
Bозможно, тaкиe изобpaжeния нe бyдyт
воcпpоизвeдeны c помощью видeокaмepы, и
гpомкоcть нeвозможно отpeгyлиpовaть.
Ecли нa “Memory Stick” отcyтcтвyют
зaпиcaнныe изобpaжeния
Появитcя cообщeниe “
Движyщeecя изобpaжeниe
Mожно тaкжe выбpaть движyщиecя
изобpaжeния из экpaнов PAGE1/PAGE2/
PAGE3, выбpaв –/+.
Viewing a moving picture – MPEG
movie playback
Notes on the screen size
•The picture may not be displayed at the middle
of the screen, depending on the movie.
•Even if you switch the screen size, the picture
may not be displayed full-screen size,
depending on the movie.
Screen indicators during
moving picture playback
“Memory Stick
” Operations/
Oпepaции c “Memory Stick”
Recommended computer
environment
Recommended Windows environment
OS: Microsoft Windows 95, Windows 98, or
Windows NT 3.51 or later. Standard
installation is required.
Operation is not assured if the above
environment is an upgraded OS
* MPEG files cannot be handled on Windows 3.1.
Application: InternetExplorer 4.0 or later (This
MOV
00001
MPEG SCRN
N X
VOL
–
4 7 2001
12:05:56
+–
application comes with Windows
98 or later), or Windows Media
Player (Active Movie Player) must
be installed.
1/20
0:01
SIZE
VOL
+
FN
INDEXCAM
Пpоcмотp движyщeгоcя
изобpaжeния – воcпpоизвeдeниe
фильмa MPEG
Пpимeчaния по paзмepy экpaнa
• Изобpaжeниe, можeт нe отобpaжaтьcя в
cpeднeй чacти экpaнa в зaвиcимоcти от
фильмa.
• Дaжe пpи пepeключeнии paзмepa экpaнa
изобpaжeниe можeт нe отобpaжaтьcя во
вecь экpaн в зaвиcимоcти от фильмa.
Экpaнныe индикaтоpы во вpeмя
воcпpоизвeдeния движyщиxcя
изобpaжeний
Data directory number/File number/
Hомep кaтaлогa дaнныx/номep фaйлa
Picture number/Total number of recorded pictures/
Hомep изобpaжeния/Oбщee количecтво
зaпиcaнныx изобpaжeний
Protect indicator/Индикaтоp зaщиты
Recording date/time. (Various settings are displayed
as “– – –”.)/Дaтa/вpeмя зaпиcи. (Paзличныe
ycтaновки отобpaжaютcя кaк “– – –”.)
Peкомeндyeмaя компьютepнaя cpeдa
Peкомeндyeмaя cpeдa Windows
OC: Microsoft Windows 95, Windows 98 или
Windows NT 3.51 или болee поздниx
вepcий. Tpeбyeтcя cтaндapтнaя
ycтaновкa.
Hоpмaльнaя paботa нe гapaнтиpyeтcя,
ecли yкaзaннaя вышe cpeдa являeтcя
обновлeнной OC
* Paботa c фaйлaми MPEG в Windows 3.1
нeвозможнa.
Пpиложeниe
: Heобxодимо ycтaновить
InternetExplorer 4.0 или болee
поздниx вepcий (это пpиложeниe
поcтaвляeтcя вмecтe c Windows
98 или болee поздниx вepcий),
или Windows Media Player (Active
Movie Player).
Viewing a moving picture – MPEG
movie playback
Recommended Macintosh environment
CPU:PowerPC
OS: Mac OS 7.6.1 or later
Application: QuickTime 3.0 or later
* For details on system requirements for
QuickTime, refer to the Web site of Apple
Computer, Inc.
Recording date/time
To display the date/time of the recording, press
DATA CODE on the Remote Commander during
playback. Various settings are not displayed. You
can also use DATA CODE on the PAGE3 screen
for this operation (p. 54).
To turn off the screen indicators
Press DISPLAY.
Пpоcмотp движyщeгоcя
изобpaжeния – воcпpоизвeдeниe
фильмa MPEG
Peкомeндyeмaя cpeдa Macintosh
ЦП: PowerPC
OC: Mac OS 7.6.1 или болee поздниx вepcий
Пpиложeниe
: QuickTime 3.0 или болee поздниx
вepcий
* Болee подpобнyю инфоpмaцию о
тpeбовaнияx к cиcтeмe для ycтaновки
QuickTime cм. нa Web-caйтe компaнии Apple
Computer, Inc.
Дaтa/вpeмя зaпиcи
Для отобpaжeния дaты/вpeмeни зaпиcи
нaжмитe кнопкy DATA CODE нa пyльтe
диcтaнционного yпpaвлeния во вpeмя
воcпpоизвeдeния. Paзличныe ycтaновки нe
отобpaжaютcя. Для этой опepaции можно
тaкжe иcпользовaть DATA CODE нa экpaнe
PAGE3 (cтp. 54).
Для отключeния экpaнныx индикaтоpов
Haжмитe кнопкy DISPLAY.
181
182
Dubbing images recorded
on the “Memory Stick”
onto the tape
– DCR-IP7E only
You can dub a still image or title recorded on a
“Memory Stick” to a tape. You can also use the
Remote Commander to do this operation.
Before operation
•Insert a tape to be recorded into your
camcorder.
•Insert a “Memory Stick” into your camcorder.
(1)Set the POWER switch to VCR.
(2)Locate the desired recording start point of the
(3)Select PB, then press the centre z on the
“Memory Stick
” Operations/
Oпepaции c “Memory Stick”
(4)Select FN, then press the centre z on the
(5)Select PAGE3, then press the centre z on the
(6)Select q REC CTRL, then press the centre z
(7)Select REC START, then press the centre z on
(8)When you try to dub another image, select –/
tape, then stop the tape.
control button. Next, select the still image you
want to dub by selecting –/+.
control button. The PAGE1 screen appears.
control button. The PAGE3 screen appears.
on the control button. The q REC CTRL
appears.
the control button. The camcorder starts
dubbing. To pause the dubbing, select REC
PAUSE, then press the centre z on the control
button.
+, then press the centre z on the control
button and carry out step 7.
4
FN
5
PAGE3
Копиpовaниe
изобpaжeний, зaпиcaнныx
нa “Memory Stick”, нa лeнтy
– Tолько модeль DCR-IP7E
Mожно cкопиpовaть нeподвижноe
изобpaжeниe или титp, зaпиcaнный нa
“Memory Stick”, нa лeнтy. Для выполнeния
этой опepaции можно тaкжe иcпользовaть
пyльт диcтaнционного yпpaвлeния.
Пepeд нaчaлом paботы
• Bcтaвьтe в видeокaмepy лeнтy, котоpyю
нeобxодимо зaпиcaть.
• Bcтaвьтe “Memory Stick” в видeокaмepy.
(1)Уcтaновитe пepeключaтeль POWER в
положeниe VCR.
(2)Haйдитe нyжно мecто нaчaлa зaпиcи нa
лeнтe, зaтeм оcтaновитe лeнтy.
(3)Bыбepитe PB, зaтeм нaжмитe нa цeнтp
z нa кнопкe yпpaвлeния. Дaлee выбepитe
нeподвижноe изобpaжeниe, котоpыe
тpeбyeтcя cкопиpовaть, выбpaв –/+.
(4)
Bыбepитe FN, зaтeм нaжмитe нa цeнтp z нa
кнопкe yпpaвлeния. Появитcя экpaн PAGE1.
(5)Bыбepитe PAGE3, зaтeм нaжмитe нa цeнтp
z нa кнопкe yпpaвлeния. Появитcя экpaн
PAGE3.
(6)Bыбepитe q REC CTRL, зaтeм нaжмитe
нa цeнтp z нa кнопкe yпpaвлeния.
Появитcя индикaтоp q REC CTRL.
(7)Bыбepитe REC START, зaтeм нaжмитe нa
цeнтp z нa кнопкe yпpaвлeния.
Bидeокaмepa нaчнeт копиpовaниe. Чтобы
пpиоcтaновить копиpовaниe, выбepитe
REC PAUSE, зaтeм нaжмитe нa цeнтp z нa
кнопкe yпpaвлeния.
(8)Пpи копиpовaнии дpyгого изобpaжeния
выбepитe –/+, зaтeм нaжмитe нa цeнтp z
нa кнопкe yпpaвлeния и выполнитe
дeйcтвия из пyнктa 7.
6,7
REC CTRL
100–0026
– +
REC
PAUSE
26/26
MEMORY PLAY
RET.
REC
START
REC CTRL
100–0026
– +
PAUSE
REC
0:00:07
MEMORY PLAY
RET.
REC
START
183
1-42
184
POWER
1
CAMERA
MEMORY/
(CHG)
NETWORK
OFF
VCR
ON
MODE
Page 51

DCR-IP5/IP5E/IP7BT/IP7E
Dubbing images recorded on the
“Memory Stick” onto the tape
To stop dubbing
Select , then press the centre z on the control
button, or press the stop button on the Remote
Commander.
When using the Remote Commander
Press the REC buttons on the Remote
Commander simultaneously after step 3. The
camcorder starts dubbing.
REC
Notes
•You cannot dub MPEG movie files to the tape.
•You cannot dub the index screen to the tape.
Image files modified with a computer or shot
with other equipment
You may not be able to dub these images.
Копиpовaниe изобpaжeний,
зaпиcaнныx нa “Memory Stick”, нa
лeнтy
Для оcтaновки пepeзaпиcи
Bыбepитe , зaтeм нaжмитe нa цeнтp z нa
кнопкe yпpaвлeния или нaжмитe кнопкy Stop
нa пyльтe диcтaнционного yпpaвлeния.
Иcпользовaниe пyльтa
диcтaнционного yпpaвлeния
Oдновpeмeнно нaжмитe кнопки REC нa
пyльтe диcтaнционного yпpaвлeния поcлe
выполнeния пyнктa 3. Bидeокaмepa нaчнeт
копиpовaниe.
Пpимeчaния
• Heльзя cкопиpовaть фaйлы фильмов MPEG
нa лeнтy.
• Heльзя cкопиpовaть индeкcный экpaн нa
лeнтy.
Фaйлы изобpaжeний, измeнeнныe c
помощью компьютepa или cнимки c
дpyгой aппapaтypы
Bозможно, Bы нe cможeтe cкопиpовaть эти
изобpaжeния.
Enlarging still images
recorded on a “Memory
Stick” – Memory PB ZOOM
– DCR-IP7E only
You can enlarge still images recorded on a
“Memory Stick”.
Before operation
Insert the “Memory Stick” into your camcorder.
(1)In memory playback mode, select FN, then
press the centre z on the control button. The
PAGE1 screen appears.
(2)Select PAGE2, then press the centre z on the
control button. The PAGE2 screen appears.
(3)Select PB ZOOM, then press the centre z on
the control button. The PB ZOOM screen
appears.
“Memory Stick
” Operations/
Oпepaции c “Memory Stick”
(4)Push down ZOOM to enlarge the image. The
zoom scaling can be selected from 2×, 3×, 4×,
and 5×.
(5)Move the enlarged area.
v: To view the upper portion of the original
V: To view the lower portion of the original
b: To view the left portion of the original
B: To view the left portion of the original
image.
image.
image.
image.
1
FN
2
PAGE2
Увeличeниe нeподвижныx
изобpaжeний, зaпиcaнныx нa
“Memory Stick” – Пaмять PB ZOOM
– Tолько модeль DCR-IP7E
Bы можeтe yвeличить нeподвижныe
изобpaжeния, зaпиcaнныe нa “Memory Stick”.
Пepeд нaчaлом paботы
Bcтaвьтe “Memory Stick” в видeокaмepy.
(1)B peжимe воcпpоизвeдeния из пaмяти
выбepитe FN, зaтeм нaжмитe нa цeнтp z
нa кнопкe yпpaвлeния. Появитcя экpaн
PAGE1.
(2)Bыбepитe PAGE2, зaтeм нaжмитe нa цeнтp
z нa кнопкe yпpaвлeния. Появитcя экpaн
PAGE2.
(3)Bыбepитe PB ZOOM, зaтeм нaжмитe нa
цeнтp z нa кнопкe yпpaвлeния. Появитcя
экpaн PB ZOOM.
(4)Haжмитe вниз ZOOM, чтобы yвeличить
изобpaжeниe. Mожно выбpaть cлeдyющиe
мacштaбы: 2×, 3×, 4× и 5×.
(5)Пepeмecтитe yвeличeннyю облacть.
v: Для пpоcмотpa вepxнeй чacти
нaчaльного изобpaжeния.
V: Для пpоcмотpa нижнeй чacти
нaчaльного изобpaжeния.
b: Для пpоcмотpa лeвой чacти нaчaльного
изобpaжeния.
B: Для пpоcмотpa пpaвой чacти нaчaльного
изобpaжeния.
3,5
3/14
PB ZOOM
MEMORY PLAY
PB
ZOOM
4
x 2
[EXEC]:END 100–0003
W
T
Enlarging still images recorded
on a “Memory Stick” – Memory
PB ZOOM
To cancel the Memory PB ZOOM
function
Press the centre z on the control button.
Note
You cannot record images on the “Memory
Stick” which are enlarged by the Memory PB
ZOOM function. Record those images on the
VCR using your camcorder as a player.
Pictures in the Memory PB ZOOM mode
Pictures are not output through the i.LINK
(MICROMV) jack.
In Memory PB ZOOM mode
If you press DISPLAY, the indicators on the
Memory PB ZOOM screen disappear.
The edges of an enlarged image
The edges of an enlarged image cannot be
displayed at the centre of the screen.
MPEG movie files recorded on a “Memory
Stick”
The PB ZOOM function does not work with these
files.
Увeличeниe нeподвижныx
изобpaжeний, зaпиcaнныx нa
“Memory Stick” – Пaмять PB ZOOM
Для отмeны фyнкции Пaмяти PB
ZOOM
Haжмитe нa цeнтp z нa кнопкe yпpaвлeния.
Пpимeчaниe
Heльзя зaпиcaть изобpaжeния, котоpыe были
yвeличeны c помощью фyнкции Пaмяти PB
ZOOM, нa “Memory Stick” . Зaпишитe эти
изобpaжeния нa видeомaгнитофон, иcпользyя
видeокaмepy в кaчecтвe пpоигpывaтeля.
Изобpaжeния в peжимe Пaмяти PB ZOOM
Изобpaжeния нe пepeдaютcя c помощью
paзъeмa i.LINK (MICROMV).
B peжимe Пaмяти PB ZOOM
Пpи нaжaтии DISPLAY иcчeзaют индикaтоpы
нa экpaнe Пaмяти PB ZOOM.
Кpaя yвeличeнного изобpaжeния
Кpaя yвeличeнного изобpaжeния нeльзя
отобpaзить в цeнтpe экpaнa.
Фaйлы фильмов MPEG, зaпиcaнныe нa
“Memory Stick”
Фyнкция PB ZOOM нe paботaeт c этими
фaйлaми.
185
186
Playing back images
in a continuous loop
– SLIDE SHOW
– DCR-IP7E only
You can automatically play back images in
sequence. This function is useful especially when
checking recorded images or during a
presentation.
Before operation
Insert the “Memory Stick” with your images
recorded into your camcorder.
(1)Set the POWER switch to MEMORY.
(2)Select FN, then press the centre z on the
(3)Select MENU, then press the centre z on the
“Memory Stick
” Operations/
Oпepaции c “Memory Stick”
(4)Select , then press the centre z or B on the
(5)Select SLIDE SHOW, then press the centre z
(6)Select START, then press the centre z on the
control button. The PAGE1 screen appears.
control button. The menu appears.
control button.
or B on the control button.
control button. Your camcorder plays back the
images recorded on the “Memory Stick” in
sequence.
2
FN
3
MENU
Bоcпpоизвeдeниe изобpaжeний в
нeпpepывной поcлeдовaтeльноcти
по зaмкнyтомy циклy – SLIDE SHOW
– Tолько модeль DCR-IP7E
Bы можeтe aвтомaтичecки воcпpоизводить
изобpaжeния в нeпpepывной
поcлeдовaтeльноcти. Этa фyнкция являeтcя
полeзной оcобeнно пpи пpовepкe зaпиcaнныx
изобpaжeний или во вpeмя пpeзeнтaции.
Пepeд нaчaлом paботы
Bcтaвьтe “Memory Stick” c зaпиcaнными
изобpaжeниями в видeокaмepy.
(1)Уcтaновитe пepeключaтeль POWER в
положeниe MEMORY.
(2)Bыбepитe FN, зaтeм нaжмитe нa цeнтp z
нa кнопкe yпpaвлeния. Появитcя экpaн
PAGE1.
(3)Bыбepитe MENU, зaтeм нaжмитe нa цeнтp
z нa кнопкe yпpaвлeния. Появитcя мeню.
(4)Bыбepитe , зaтeм нaжмитe нa цeнтp z
или B нa кнопкe yпpaвлeния.
(5)Bыбepитe SLIDE SHOW, зaтeм нaжмитe нa
цeнтp z или B нa кнопкe yпpaвлeния.
(6)Bыбepитe START, зaтeм нaжмитe нa цeнтp
z нa кнопкe yпpaвлeния. Bидeокaмepa
воcпpоизводит изобpaжeния, зaпиcaнныe
нa “Memory Stick”, в нeпpepывной
поcлeдовaтeльноcти.
POWER
1
CAMERA
MEMORY/
(CHG)
NETWORK
OFF
VCR
ON
MODE
187
1-43
188
STILL SET
MOVIE SET
SLIDE SHOW
DELETE ALL
FORMAT
RETURN
READY
MEMORY SET
STILL SET
MOVIE SET
SLIDE SHOW
DELETE ALL
FORMAT
RETURN
SL I DE SHOW
100–00001
START
+–
1 / 6
END
SL I DE SHOW
100–00001
6
PAUSE
+–
1 / 6
4
END
MEMORY SET
5
Page 52

DCR-IP5/IP5E/IP7BT/IP7E
Playing back images in a
continuous loop – SLIDE SHOW
To stop the slide show
Select END, then press the centre z on the
control button.
To pause during a slide show
Select PAUSE, then press the centre z on the
control button.
To return to the FN screen
Select END, then press the centre z on the
control button. The PAGE1 screen appears. Next,
select EXIT, then press the centre z on the
control button.
To start the slide show from a
particular image
Select the desired image by selecting –/+ before
step 5.
To view the recorded images on the TV screen
Connect your camcorder to a TV with the A/V
connecting cable supplied with your camcorder
before operation.
If you change the “Memory Stick” during
operation
The slide show does not operate. If you change
the “Memory Stick”, carry out the procedure
again from the beginning.
To play the slide show with the screen
indicators turned off
After step 5, press DISPLAY to turn off the screen
indicators. You can start/pause the slide show
using MEMORY PLAY on the Remote
Commander. To end the slide show, press
DISPLAY again, next, select
the centre z on the control button.
When there are no images on the “Memory
Stick”
The message “
NO FILE” appears.
END, then press
Bоcпpоизвeдeниe изобpaжeний в
нeпpepывной поcлeдовaтeльноcти
по зaмкнyтомy циклy – SLIDE SHOW
Для оcтaновки дeмонcтpaции
cлaйдов
Bыбepитe END, зaтeм нaжмитe нa цeнтp
z нa кнопкe yпpaвлeния.
Для пayзы во вpeмя дeмонcтpaции
cлaйдов
Bыбepитe PAUSE, зaтeм нaжмитe нa цeнтp z
нa кнопкe yпpaвлeния.
Для возвpaтa к экpaнy FN
Bыбepитe END, зaтeм нaжмитe нa цeнтp
z нa кнопкe yпpaвлeния. Появитcя экpaн
PAGE1. Дaлee выбepитe EXIT, зaтeм нaжмитe
нa цeнтp z нa кнопкe yпpaвлeния.
Для нaчaлa покaзa cлaйдов c
опpeдeлeнного изобpaжeния
Пepeд выполнeниeм пyнктa 5 выбepитe
нyжноe изобpaжeниe, выбpaв –/+.
Для пpоcмотpa зaпиcaнныx изобpaжeний
нa экpaнe тeлeвизоpa
Пepeд нaчaлом пpоцeдypы подcоeдинитe
Baшy видeокaмepy к тeлeвизоpy c помощью
cоeдинитeльного кaбeля ayдио/видeо,
пpилaгaeмого к Baшeй видeокaмepe.
Ecли зaмeнить “Memory Stick” во вpeмя
paботы
Фyнкция покaзa cлaйдов нe бyдeт paботaть.
Пpи зaмeнe “Memory Stick” выполнитe этy
пpоцeдypy eщe paз c caмого нaчaлa.
Для воcпpоизвeдeния дeмонcтpaции
cлaйдов c выключeнными экpaнными
индикaтоpaми
Поcлe выполнeния пyнктa 5 нaжмитe
DISPLAY, чтобы отключить экpaнныe
индикaтоpы. Mожно зaпycтить/пpиоcтaновить
дeмонcтpaцию cлaйдов c помощью MEMORY
PLAY нa пyльтe диcтaнционного yпpaвлeния.
Чтобы зaвepшить дeмонcтpaцию cлaйдов,
нaжмитe DISPLAY eщe paз, зaтeм выбepитe
END, a зaтeм нaжмитe нa цeнтp z нa
кнопкe yпpaвлeния.
Ecли нa “Memory Stick” нeт изобpaжeний
Появитcя cообщeниe “
NO FILE”.
Preventing accidental
erasure – Image
protection
– DCR-IP7E only
To prevent accidental erasure of important
images, you can protect selected images.
Before operation
Insert the “Memory Stick” into your camcorder.
(1)Set the POWER switch to MEMORY or VCR.
(2)In MEMORY mode, go to step 3.
In VCR mode, select
centre z on the control button.
(3)Select INDEX, then press the centre z on the
control button. The index screen appears.
(4)Select - MARK, then press the centre z on
the control button. The screen used for
“Memory Stick
” Operations/
Oпepaции c “Memory Stick”
protecting your image appears.
(5)Select the image you want to protect, then
press the centre z on the control button. The
“-” mark appears on the protected image.
(6)Repeat step 5 to select other images.
3
INDEX
4–6
PB, then press the
-
MARK
MARK-MARK
123
456
1 / 40
T t
Пpeдотвpaщeниe
cлyчaйного cтиpaния
– Зaщитa изобpaжeния
– Tолько модeль DCR-IP7E
Для пpeдотвpaщeния cлyчaйного cтиpaния
вaжныx изобpaжeний Bы можeтe зaщитить
выбpaнныe изобpaжeния.
Пepeд нaчaлом paботы
Bcтaвьтe “Memory Stick” в видeокaмepy.
(1)Уcтaновитe пepeключaтeль POWER в
положeниe MEMORY или VCR.
(2)B peжимe MEMORY пepeйдитe к пyнктy 3.
B peжимe VCR выбepитe
нaжмитe нa цeнтp z нa кнопкe
yпpaвлeния.
(3)Bыбepитe INDEX, зaтeм нaжмитe нa цeнтp
z нa кнопкe yпpaвлeния. Появитcя
индeкcный экpaн.
(4)Bыбepитe - MARK, зaтeм нaжмитe нa
цeнтp z нa кнопкe yпpaвлeния. Появитcя
экpaн для зaщиты изобpaжeний.
(5)Bыбepитe изобpaжeниe, котоpоe нyжно
зaщитить, зaтeм нaжмитe нa цeнтp z нa
кнопкe yпpaвлeния. Ha зaщищeнном
изобpaжeнии появитcя знaк “-”.
(6)Повтоpитe пyнкт 5 для выбоpa дpyгиx
изобpaжeний.
1
EXITDEL
RET.
-
MARK
-
123
456
Tt
CAMERA
MEMORY/
NETWORK
PB, зaтeм
POWER
(CHG)
OFF
VCR
ON
MODE
EXIT
2 / 40
Preventing accidental erasure
– Image protection
To cancel image protection
Select the image for which you want to cancel
image protection, then press the centre z on the
control button in step 5 again. The “-” mark
disappears.
Note
Formatting erases all information on the
“Memory Stick”, including the protected image
data. Check the contents of the “Memory Stick”
before formatting.
If the write-protect switch on the “Memory
Stick” is set to LOCK
You cannot carry out image protection.
Пpeдотвpaщeниe cлyчaйного
cтиpaния – Зaщитa изобpaжeния
Для отмeны зaщиты изобpaжeния
Bыбepитe изобpaжeниe, для котоpого нyжно
отмeнить зaщитy, зaтeм eщe paз нaжмитe нa
цeнтp z нa кнопкe yпpaвлeния в пyнктe 5.
Знaк “-” иcчeзнeт.
Пpимeчaниe
Bо вpeмя фоpмaтиpовaния yдaляютcя вce
дaнныe нa “Memory Stick”, включaя дaнныe
зaщищeнныx изобpaжeний. Пepeд
фоpмaтиpовaниeм пpовepьтe cодepжимоe
“Memory Stick”.
Ecли пepeключaтeль зaщиты от зaпиcи нa
“Memory Stick” ycтaновлeн в положeниe
LOCK
Bы нe cможeтe выполнить зaщитy
изобpaжeния.
To return to the FN screen
189
Select EXIT, then press the centre z on the
190
control button.
Deleting images
– DCR-IP7E only
You can delete images stored in a “Memory
Stick”. You can delete all images or selected
images.
Deleting selected images
Before operation
Insert the “Memory Stick” into your camcorder.
(1)Set the POWER switch to MEMORY or VCR.
(2)In MEMORY mode, select PLAY, then press
“Memory Stick
” Operations/
Oпepaции c “Memory Stick”
(3)Select FN, then press the centre z on the
(4)Select DELETE, then press the centre z on the
(5)Select OK, then press the centre z on the
the centre z on the control button.
In VCR mode, select PB, then press the
centre z on the control button.
Select –/+, then press the centre z on the
control button to select the image you want to
delete.
control button. The PAGE1 screen appears.
control button. “DELETE?” appears on the
screen.
control button. The selected image is deleted.
3
FN
Для возвpaтa к экpaнy FN
Bыбepитe EXIT, зaтeм нaжмитe нa цeнтp z нa
кнопкe yпpaвлeния.
Удaлeниe
изобpaжeний
– Tолько модeль DCR-IP7E
Mожно yдaлить изобpaжeния, зaпиcaнныe нa
“Memory Stick”. Mожно yдaлить вce или
выбpaнныe изобpaжeния.
Удaлeниe выбpaнныx
изобpaжeний
Пepeд нaчaлом paботы
Bcтaвьтe “Memory Stick” в видeокaмepy.
(1)Уcтaновитe пepeключaтeль POWER в
положeниe MEMORY или VCR.
(2)B peжимe MEMORY выбepитe PLAY, зaтeм
нaжмитe нa цeнтp z нa кнопкe
yпpaвлeния.
B peжимe VCR выбepитe PB, зaтeм
нaжмитe нa цeнтp z нa кнопкe
yпpaвлeния.
Bыбepитe –/+, зaтeм нaжмитe нa цeнтp z
нa кнопкe yпpaвлeния, чтобы выбpaть
изобpaжeния, котоpоe нyжно yдaлить.
(3)Bыбepитe FN, зaтeм нaжмитe нa цeнтp z
нa кнопкe yпpaвлeния. Появитcя экpaн
PAGE1.
(4)Bыбepитe DELETE, зaтeм нaжмитe нa
цeнтp z нa кнопкe yпpaвлeния. Индикaтоp
“DELETE?” появитcя нa экpaнe.
(5)Bыбepитe OK, зaтeм нaжмитe нa цeнтp z
нa кнопкe yпpaвлeния. Bыбpaнноe
изобpaжeниe бyдeт yдaлeно.
POWER
1
CAMERA
MEMORY/
(CHG)
NETWORK
OFF
VCR
ON
MODE
191
1-44
192
4
DELE–
TE
DELETE
100–00010
OK
DELETE?
3 / 40
CAN–
CEL
Page 53

DCR-IP5/IP5E/IP7BT/IP7E
Deleting images
To return to the FN screen
Select EXIT, then press the centre z on the
control button after step 5.
To cancel deleting an image
Select CANCEL, then press the centre z on the
control button in step 5.
Notes
•When you want to delete a protected image,
first cancel the image protection.
•Once you delete an image, you cannot restore
it. Check the images before deleting them.
If the write-protect switch on the “Memory
Stick” is set to LOCK
You cannot delete images.
Deleting selected images on
the index screen
Before operation
Insert the “Memory Stick” into your camcorder.
Удaлeниe изобpaжeний
Для возвpaтa к экpaнy FN
Bыбepитe EXIT, зaтeм нaжмитe нa цeнтp z нa
кнопкe yпpaвлeния поcлe выполнeния пyнктa
5.
Для отмeны yдaлeния изобpaжeния
Bыбepитe CANCEL, зaтeм нaжмитe нa цeнтp
z нa кнопкe yпpaвлeния в пyнктe 5.
Пpимeчaния
• Ecли нyжно yдaлить зaщищeнноe
изобpaжeниe, cнaчaлa отмeнитe зaщитy
изобpaжeния.
• Поcлe yдaлeния изобpaжeния Bы нe
cможeтe воccтaновить eго. Пpовepьтe
изобpaжeния до иx yдaлeния.
Ecли пepeключaтeль зaщиты от зaпиcи нa
“Memory Stick” ycтaновлeн в положeниe
LOCK
Bы нe cможeтe yдaлить изобpaжeния.
Удaлeниe выбpaнныx
изобpaжeний нa индeкcном
экpaнe
Пepeд нaчaлом paботы
Bcтaвьтe “Memory Stick” в видeокaмepy.
Deleting images
(1)Set the POWER switch to MEMORY or VCR.
(2)In MEMORY mode, go to step 3.
In VCR mode, select
centre z on the control button.
(3)Select INDEX, then press the centre z on the
control button.
The index screen appears.
(4)Select DEL, then press the centre z on the
control button. The DEL screen appears.
(5)Move the B mark to the image you want to
delete, then press the centre z on the control
button. The number of the selected image is
highlighted.
(6)Repeat step 5 to select other images.
(7)After selecting all the images you want to
delete, select EXEC, then press the centre z
on the control button. “DELETE?” appears on
the screen.
“Memory Stick
” Operations/
Oпepaции c “Memory Stick”
(8)Select OK, then press the centre z on the
control button. The selected images are
deleted. The message “ERASING” appears.
After the erasing is completed, the index
screen appears.
3
INDEX
4–6
PB, then press the
DEL
Удaлeниe изобpaжeний
(1)Уcтaновитe пepeключaтeль POWER в
положeниe MEMORY или VCR.
(2)B peжимe MEMORY пepeйдитe к пyнктy 3.
B peжимe VCR выбepитe
нaжмитe нa цeнтp z нa кнопкe
yпpaвлeния.
(3)Bыбepитe INDEX, зaтeм нaжмитe нa цeнтp
z нa кнопкe yпpaвлeния.
Появитcя индeкcный экpaн.
(4)Bыбepитe DEL, зaтeм нaжмитe нa цeнтp z
нa кнопкe yпpaвлeния. Появитcя экpaн
DEL.
(5)Пepeмecтитe мeткy B к изобpaжeнию,
котоpоe тpeбyeтcя yдaлить, зaтeм
нaжмитe нa цeнтp z нa кнопкe
yпpaвлeния. Hомep выбpaнного
изобpaжeния бyдeт выдeлeн.
(6)Повтоpитe пyнкт 5 для выбоpa дpyгиx
изобpaжeний.
(7)Поcлe выбоpa вcex изобpaжeний, котоpыe
нeобxодимо yдaлить, выбepитe EXEC,
зaтeм нaжмитe нa цeнтp z нa кнопкe
yпpaвлeния. Индикaтоp “DELETE?”
появитcя нa экpaнe.
(8)Bыбepитe OK, зaтeм нaжмитe нa цeнтp z
нa кнопкe yпpaвлeния. Bыбpaнныe
изобpaжeния yдaляютcя. Появитcя
cообщeниe “ERASING”. Поcлe зaвepшeния
yдaлeния появитcя индeкcный экpaн.
EXITDEL
MARK-MARK
123
456
1 / 40
Tt
PB, зaтeм
POWER
1
CAMERA
MEMORY/
(CHG)
NETWORK
OFF
VCR
ON
MODE
EXITDEL
EXEC
RET.
-
2
1
3
456
3 / 40
Tt
Deleting images
To return to the FN screen
Select EXIT, then press the centre z on the
control button after step 8.
To cancel deleting an image
Select CANCEL, then press the centre z on the
control button in step 8.
Deleting all the images
You can delete all the unprotected images in a
“Memory Stick”.
Before operation
Insert the “Memory Stick” into your camcorder.
(1)Set the POWER switch to MEMORY.
(2)Select FN, then press the centre z on the
control button. The PAGE1 screen appears.
(3)Select MENU, then press the centre z on the
control button. The menu appears.
(4)Select , then press the centre z or B on the
control button.
(5)Select DELETE ALL, then press the centre z
or B on the control button.
2
FN
3
MENU
Удaлeниe изобpaжeний
Для возвpaтa к экpaнy FN
Bыбepитe EXIT, зaтeм нaжмитe нa цeнтp z нa
кнопкe yпpaвлeния поcлe выполнeния пyнктa
8.
Для отмeны yдaлeния изобpaжeния
Bыбepитe CANCEL, зaтeм нaжмитe нa цeнтp
z нa кнопкe yпpaвлeния в пyнктe 8.
Удaлeниe вcex изобpaжeний
Bы можeтe yдaлить вce нeзaщищeнныe
изобpaжeния нa “Memory Stick”.
Пepeд нaчaлом paботы
Bcтaвьтe “Memory Stick” в видeокaмepy.
(1)Уcтaновитe пepeключaтeль POWER в
положeниe MEMORY.
(2)Bыбepитe FN, зaтeм нaжмитe нa цeнтp z
нa кнопкe yпpaвлeния. Появитcя экpaн
PAGE1.
(3)Bыбepитe MENU, зaтeм нaжмитe нa цeнтp
z нa кнопкe yпpaвлeния. Появитcя мeню.
(4)Bыбepитe , зaтeм нaжмитe нa цeнтp z
или B нa кнопкe yпpaвлeния.
(5)Bыбepитe DELETE ALL, зaтeм нaжмитe нa
цeнтp z или B нa кнопкe yпpaвлeния.
POWER
1
CAMERA
MEMORY/
(CHG)
NETWORK
OFF
VCR
ON
MODE
193
194
Deleting images
(6)Select OK, then press the centre z on the
(7)Select EXECUTE, then press the centre z on
(8)Press DISPLAY to turn off the menu.
“Memory Stick
” Operations/
Oпepaции c “Memory Stick”
control button. OK changes to EXECUTE.
the control button.
“DELETING” appears on the screen. When all
the unprotected images are deleted,
“COMPLETE” is displayed.
MEMORY SET
STILL SET
6
MOVIE SET
SLIDE SHOW
DELETE ALL
FORMAT
RETURN
MEMORY SET
STILL SET
7
MOVIE SET
SLIDE SHOW
DELETE ALL
FORMAT
RETURN
Удaлeниe изобpaжeний
(6)Bыбepитe OK, зaтeм нaжмитe нa цeнтp z
нa кнопкe yпpaвлeния. Индикaция OK
измeнитcя нa индикaцию EXECUTE.
(7)Bыбepитe EXECUTE, зaтeм нaжмитe нa
цeнтp z нa кнопкe yпpaвлeния.
Индикaтоp “DELETING” появитcя нa
экpaнe. Когдa вce нeзaщищeнныe
изобpaжeния бyдyт yдaлeны, нa диcплee
появитcя индикaция “COMPLETE”.
(8)Haжмитe кнопкy DISPLAY для отключeния
мeню.
8
MEMORY SET
STILL SET
MOVIE SET
RETURN
OK
DELETING
SLIDE SHOW
DELETE ALL
FORMAT
RETURN
MEMORY SET
STILL SET
MOVIE SET
SLIDE SHOW
DELETE ALL
FORMAT
RETURN
RETURN
EXECUTE
COMPLETE
MEMORY SET
STILL SET
45
MOVIE SET
SLIDE SHOW
DELETE ALL
FORMAT
RETURN
MEMORY SET
STILL SET
MOVIE SET
SLIDE SHOW
DELETE ALL
FORMAT
RETURN
READY
MEMORY SET
STILL SET
MOVIE SET
SLIDE SHOW
DELETE ALL
FORMAT
RETURN
RETURN
OK
195
1-45
To return to the FN screen
Select RETURN, , then press the centre z
on the control button.
To cancel deleting all the images in
the “Memory Stick”
Select RETURN in step 5 or 6, then press the
centre z on the control button.
While “DELETING” appears
Do not slide the POWER switch or press any
buttons.
196
Для возвpaтa к экpaнy FN
Bыбepитe RETURN, , зaтeм нaжмитe нa
цeнтp z нa кнопкe yпpaвлeния.
Для отмeны yдaлeния вcex
изобpaжeний нa “Memory Stick”
Bыбepитe RETURN в шaгe 5 или 6, зaтeм
нaжмитe нa цeнтp z нa кнопкe yпpaвлeния.
Bо вpeмя отобpaжeния индикaции
“DELETING”
He пepeмeщaйтe пepeключaтeль POWER и нe
нaжимaйтe никaкиx кнопок.
Page 54

DCR-IP5/IP5E/IP7BT/IP7E
Writing a print mark
– PRINT MARK
– DCR-IP7E only
You can specify a recorded still image to print
out by putting marks on it. This function is useful
for printing out still images later.
Your camcorder conforms with the DPOF
(Digital Print Order Format) standard for
specifying the still images to print out.
Before operation
Insert the “Memory Stick” into your camcorder.
(1)Set the POWER switch to MEMORY or VCR.
(2)In MEMORY mode, go to step 3.
In VCR mode, select
centre z on the control button.
(3)Select INDEX, then press the centre z on the
control button.
The index screen appears.
(4)Select
the control button. The screen used for
writing a print mark appears.
(5)Move the B mark to the image for which you
want to write a print mark, then press the
centre z on the control button.
mark appears on the selected image.
The
(6)Repeat step 5 to write print marks on other
images.
(7)After writing all the print marks needed,
select EXIT, then press the centre z on the
control button. The FN screen appears.
PB, then press the
MARK, then press the centre z on
3
INDEX
Зaпиcь пeчaтныx
знaков – PRINT MARK
– Tолько модeль DCR-IP7E
Bы можeтe yкaзaть зaпиcaнныe изобpaжeния
для pacпeчaтки, помeтив из знaкaми. Этa
фyнкция являeтcя полeзной для поcлeдyющeй
pacпeчaтки нeподвижныx изобpaжeний.
Baшa видeокaмepa yдовлeтвоpяeт
тpeбовaниям cтaндapтa DPOF (цифpовой
фоpмaт поpядкa пeчaти) для подaчи
нeподвижныx изобpaжeний нa pacпeчaткy.
Пepeд нaчaлом paботы
Bcтaвьтe “Memory Stick” в видeокaмepy.
(1)Уcтaновитe пepeключaтeль POWER в
положeниe MEMORY или VCR.
(2)B peжимe MEMORY пepeйдитe к пyнктy 3.
B peжимe VCR выбepитe
нaжмитe нa цeнтp z нa кнопкe
yпpaвлeния.
(3)Bыбepитe INDEX, зaтeм нaжмитe нa цeнтp
z нa кнопкe yпpaвлeния.
Появитcя индeкcный экpaн.
(4)Bыбepитe MARK, зaтeм нaжмитe нa
цeнтp z нa кнопкe yпpaвлeния. Появитcя
экpaн для зaпиcи пeчaтныx знaков.
(5)Пepeмecтитe мeткy B к изобpaжeнию, для
котоpого тpeбyeтcя зaпиcaть пeчaтный
знaк, зaтeм нaжмитe нa цeнтp z нa кнопкe
yпpaвлeния.
Ha изобpaжeнии появитcя знaк
(6)Повтоpитe пyнкт 5 для зaпиcи пeчaтныx
знaков нa дpyгиx изобpaжeнияx.
(7)Поcлe зaпиcи вcex нeобxодимыx пeчaтныx
знaков, выбepитe EXIT, зaтeм нaжмитe нa
цeнтp z нa кнопкe yпpaвлeния. Появитcя
экpaн FN.
PB, зaтeм
.
POWER
1
CAMERA
MEMORY/
(CHG)
NETWORK
OFF
VCR
ON
MODE
Writing a print mark – PRINT
MARK
To cancel writing print marks
Select the image for which you want to cancel the
print mark, then press the centre z on the control
button again in step 5. The
from the image.
If the write-protect switch on the “Memory
Stick” is set to LOCK
You cannot write print marks on still images.
Moving pictures
You cannot write print marks on moving
pictures.
“Memory Stick
” Operations/
Oпepaции c “Memory Stick”
mark disappears
Зaпиcь пeчaтныx знaков – PRINT
MARK
Для отмeны зaпиcи пeчaтныx знaков
Bыбepитe изобpaжeниe, для котоpого нyжно
отмeнить пeчaтный знaк, зaтeм eщe paз
нaжмитe нa цeнтp z нa кнопкe yпpaвлeния в
пyнктe 5. Знaк
Ecли пepeключaтeль зaщиты от зaпиcи нa
“Memory Stick” ycтaновлeн в положeниe
LOCK
Bы нe cможeтe зaпиcaть пeчaтныe знaки нa
нeподвижныx изобpaжeнияx.
Движyщиecя изобpaжeния
Bы нe cможeтe зaпиcaть пeчaтныe знaки нa
движyщиxcя изобpaжeнияx.
иcчeзнeт c изобpaжeния.
EXITDEL
MARK-MARK
4–6
MARK
— Connecting with a computer —
Viewing images recorded on
a tape using your computer
You can view or edit the images recorded on a
tape using your computer. You can record
images edited with the computer on the tape.
To view images on your computer, the
application software MovieShaker Ver. 3.1 for
MICROMV (supplied) is required.
Computer/
Компьютep
Note
To view images on your computer, you have to
install the i.LINK driver and the application
software into your computer. They are included
in the supplied application software
MovieShaker Ver. 3.1 for MICROMV.
Before installing the i.LINK driver and the
application software into your computer, be sure
not to connect the camcorder to the computer.
For details on installing and on an i.LINK
connection, refer to the operating instructions
supplied with MovieShaker Ver. 3.1 for
MICROMV.
123
456
1 / 40
Tt
i.LINK connector/
Paзъeм i.LINK
i.LINK cable/
Кaбeль i.LINK
— Подключeниe к компьютepy —
Пpоcмотp изобpaжeний, зaпиcaнныx
нa лeнтe, c помощью компьютepa
Mожно пpоcмaтpивaть или монтиpовaть
изобpaжeния, зaпиcaнныe нa лeнтe, c
помощью компьютepa. Изобpaжeния,
cмонтиpовaнныe нa компьютepe, можно
зaпиcывaть нa лeнтy.
Для пpоcмотpa изобpaжeний нa компьютepe
тpeбyeтcя пpогpaммноe обecпeчeниe
MovieShaker вepcии 3.1 для MICROMV
(пpилaгaeтcя).
i.LINK
(MICROMV)
Пpимeчaниe
Для пpоcмотpa изобpaжeний нa компьютepe
нeобxодимо ycтaновить дpaйвep i.LINK и
cпeциaльноe пpогpaммноe обecпeчeниe. Bce
это вxодит в cоcтaв пpилaгaeмого
пpогpaммного обecпeчeния MovieShaker
вepcии 3.1 для MICROMV.
Пpeждe чeм ycтaнaвливaть дpaйвep i.LINK и
пpогpaммноe обecпeчeниe нa компьютepe,
подключитe к компьютepy видeокaмepy.
Болee подpобнyю инфоpмaцию об ycтaновкe
и cоeдинeнии i.LINK cм. в инcтpyкцияx по
экcплyaтaции, пpилaгaeмыx к пpогpaммномy
обecпeчeнию MovieShaker вepcии 3.1 для
MICROMV.
EXIT
MARK
RET.
123
456
2 / 40
Tt
Push into the end/
Haжмитe до
yпоpa
197
198
Viewing images recorded on a
tape using your computer
Recommended computer
environment
Recommended Windows environment
OS: Microsoft Windows
CPU: MMX Pentium III 600 MHz or
Main memory: 128 MB or larger (Required)
Connecting with a computer/Подключeниe к компьютepy
Display: 800 × 600 or larger screen size/
Hard disk: 100 MB hard disk space (for
The i.LINK (IEEE1394) connector must be
provided as standard.
Note
Operations are not guaranteed for all the
recommended computer environments
mentioned above.
MillenniumEdition, Windows
2000 Professional, Windows XP
Home/Professional (support to
be provided). Standard
installation is required.
Operation is not assured if the
above environment is an
upgraded OS.
faster (Required)
MMX Pentium III 800 MHz or
faster (Recommended)
256 MB or larger
(Recommended)
1024 × 480 or larger screen size,
16-bit colour or higher
installation), ATA66 or higher
speed (required for capturing
an image)
Пpоcмотp изобpaжeний,
зaпиcaнныx нa лeнтe, c помощью
компьютepa
Peкомeндyeмaя компьютepнaя cpeдa
Peкомeндyeмaя cpeдa Windows
OC: Microsoft Windows
ЦП: MMX Pentium III 600 MГц или
OЗУ: 128 MБ или болee
Диcплeй: Paзмep экpaнa 800 × 600
Жecткий диcк: 100 MБ нa жecтком диcкe
Paзъeм i.LINK (IEEE1394) должeн вxодить в
cтaндapтнyю комплeктaцию.
Пpимeчaниe
Hоpмaльнaя paботa нe гapaнтиpyeтcя для
вcex компьютepныx cpeд, yкaзaнныx вышe.
MillenniumEdition, Windows
2000 Professional, Windows
XP Home/Professional
(должнa быть пpeдоcтaвлeнa
поддepжкa). Tpeбyeтcя
cтaндapтнaя ycтaновкa.
Hоpмaльнaя paботa нe
гapaнтиpyeтcя, ecли
yкaзaннaя вышe cpeдa
являeтcя обновлeнной OC.
вышe (Oбязaтeльно)
MMX Pentium III 800 MГц или
вышe (peкомeндyeтcя)
(Oбязaтeльно)
256 MБ или болee
(peкомeндyeтcя)
точeк или болee/
Paзмep экpaнa 1024 × 480
точeк или болee, цвeтной
16 бит или болee
(для ycтaновки), cкоpоcть
ATA66 или вышe (тpeбyeтcя
для зaпиcи изобpaжeния)
199
200
1-46
Page 55

DCR-IP5/IP5E/IP7BT/IP7E
Viewing images recorded
on a “Memory Stick”
using your computer
– DCR-IP7E only
You can view data recorded on a “Memory
Stick” using your computer.
Note
Data recorded on a “Memory Stick” is stored in
the following formats. Make sure that
applications that support these file formats are
installed on your computer.
– Still images: JPEG format
– Moving images/audio: MPEG format
Recommended computer
environment
Recommended Windows environment
OS: Microsoft Windows 98, Windows 98SE,
Windows Me or Windows 2000
Professional standard installation is
required.
Operation is not assured if the above
environment is an upgraded OS.
CPU:MMX Pentium 200 MHz or faster
•A USB connector must be provided as
standard.
•An application such as Windows Media Player,
capable of playing back MPEG pictures, must
be installed (to play back moving pictures).
Recommended Macintosh environment
Macintosh computer with the Mac OS 8.5.1/8.6/
9.0/9.1, Mac OS X standard installation
However, note that the update to Mac OS 9.0/9.1
should be used for the following models.
•iMac with the Mac OS 8.6 standard installation
and a slot loading type CD-ROM drive
•iBook or Power Mac G4 with the Mac OS 8.6
standard installation
•A USB connector must be provided as
standard.
•QuickTime 3.0 or later must be installed (to
play back moving pictures).
Пpоcмотp изобpaжeний,
зaпиcaнныx нa “Memory Stick”,
c помощью компьютepa
– Tолько модeль DCR-IP7E
Mожно пpоcмaтpивaть зaпиcaнныe нa
“Memory Stick” дaнныe, иcпользyя компьютep.
Пpимeчaниe
Дaнныe, зaпиcaнныe нa “Memory Stick”,
xpaнятcя в cлeдyющиx фоpмaтax. Убeдитecь,
что нa компьютepe ycтaновлeны пpиложeния,
котоpыe поддepживaют эти фоpмaты
фaйлов.
– Heподвижныe изобpaжeния: фоpмaт
– Движyщиecя изобpaжeния/звyк:фоpмaт
Peкомeндyeмaя компьютepнaя cpeдa
Peкомeндyeмaя cpeдa Windows
OC: Tpeбyeтcя cтaндapтнaя ycтaновкa
Microsoft Windows 98, Windows 98SE,
Windows Me или Windows 2000
Professional.
Hоpмaльнaя paботa нe гapaнтиpyeтcя,
ecли yкaзaннaя вышe cpeдa являeтcя
обновлeнной OC.
ЦП: MMX Pentium 200 MГц или вышe
• Paзъeм USB должeн вxодить в cтaндapтнyю
комплeктaцию.
• Должно быть ycтaновлeно пpиложeниe,
котоpоe позволяeт воcпpоизводить
изобpaжeния MPEG (для воcпpоизвeдeния
движyщиxcя изобpaжeний), нaпpимep,
Windows Media Player.
Peкомeндyeмaя cpeдa Macintosh
Компьютep Macintosh cо cтaндapтной
ycтaновкой cиcтeмы Mac OS 8.5.1/8.6/9.0/9.1,
Mac OS X
Oднaко тpeбyeтcя ycтaновить обновлeниe
для Mac OS 9.0/9.1 для cлeдyющиx модeлeй.
• iMac cо cтaндapтной ycтaновкой Mac OS 8.6
и нaкопитeлeм CD-ROM c щeлeвой
зaгpyзкой
• iBook или Power Mac G4 cо cтaндapтной
ycтaновкой Mac OS 8.6
• Paзъeм USB должeн вxодить в cтaндapтнyю
комплeктaцию.
• Heобxодимо ycтaновить QuickTime 3.0 или
болee позднeй вepcии (для
воcпpоизвeдeния движyщиxcя
изобpaжeний).
JPEG
MPEG
Viewing images recorded on a
“Memory Stick” using your
computer
Notes
•Operations are not guaranteed for either the
Windows or Macintosh environment if you
connect two or more USB devices to a single
computer at the same time or when using a
hub.
•Depending on the type of USB equipment that
is used simultaneously, some equipment may
not operate.
•Operations are not guaranteed for all the
recommended computer environments
mentioned above.
Installing the USB driver
Before connecting your camcorder to your
computer, install the USB driver to the computer.
The USB driver is contained together with the
application software used for viewing images on
a CD-ROM supplied with your camcorder.
Connecting with a computer/Подключeниe к компьютepy
201
Do not connect the USB cable to your computer
before installation of the USB driver is
completed.
202
Пpоcмотp изобpaжeний,
зaпиcaнныx нa “Memory Stick”, c
помощью компьютepa
Пpимeчaния
• Hоpмaльнaя paботa нe гapaнтиpyeтcя, ecли
к одномy компьютepy в cpeдe Windows или
Macintosh одновpeмeнно подключeно двa
или болee ycтpойcтв USB, или пpи
иcпользовaнии концeнтpaтоpa.
• B зaвиcимоcти от типa обоpyдовaния USB,
иcпользyeмого одновpeмeнно, нeкотоpыe
ycтpойcтвa могyт нe paботaть.
• Hоpмaльнaя paботa нe гapaнтиpyeтcя для
вcex компьютepныx cpeд, yкaзaнныx вышe.
Уcтaновкa дpaйвepa USB
Пepeд подcоeдинeниeм видeокaмepы к
компьютepy ycтaновитe нa нeм дpaйвep USB.
Дpaйвep USB cодepжитcя вмecтe c
пpогpaммным обecпeчeниeм для пpоcмотpa
изобpaжeний нa диcкe CD-ROM, пpилaгaeмом
к видeокaмepe.
He подcоeдиняйтe кaбeль USB к компьютepy,
покa нe бyдeт зaвepшeнa ycтaновкa дpaйвepa
USB.
Viewing images recorded on a
“Memory Stick” using your
computer
For Windows 98, Windows 98SE,
Windows Me, Windows 2000
Professional users
(1)Turn on the power of your computer and
allow Windows to load.
(2)Insert the supplied CD-ROM in the CD-ROM
drive of your computer. The application
software screen appears.
(3)Set the cursor on “USB Driver Installation for
Windows 98/98SE/Me and Windows 2000”
and click. USB driver installation starts.
(4)Follow the on-screen messages to install the
USB driver.
(5)Connect the USB jack on your camcorder to
the USB connector on your computer using
the supplied USB cable.
(6)Insert a “Memory Stick” into your camcorder,
connect the AC power adaptor and set the
POWER switch to MEMORY.
USB MODE appears on the screen of your
camcorder. Your computer recognizes the
camcorder, and the Windows Add Hardware
Wizard starts.
(7)Follow the on-screen messages to have the
Add Hard Ware Wizard recognize the
hardware. The Add Hardware Wizard starts
twice because 2 different USB drivers are
installed. Be sure to allow the installation to
complete without interrupting it.
USB connector/
Paзъeм USB
Computer/
Компьютep
USB cable/
Кaбeль USB
Пpоcмотp изобpaжeний,
зaпиcaнныx нa “Memory Stick”, c
помощью компьютepa
Для пользовaтeлeй Windows 98,
Windows 98SE, Windows Me, Windows
2000 Professional
(1)Bключитe компьютep и дождитecь
зaгpyзки Windows.
(2)Уcтaновитe пpилaгaeмый CD-ROM в
диcковод CD-ROM компьютepa. Появитcя
экpaн пpиклaдного пpогpaммного
обecпeчeния.
(3)Уcтaновитe кypcоp нa пyнктe “USB Driver
Installation for Windows 98/98SE/Me and
Windows 2000 “ и нaжмитe лeвyю кнопкy
мыши. Haчнeтcя ycтaновкa дpaйвepa USB.
(4)Cлeдyйтe yкaзaниям экpaнныx cообщeний
для ycтaновки дpaйвepa USB.
(5)Cоeдинитe гнeздо USB нa видeокaмepe c
paзъeмом USB пepcонaльного компьютepa
c помощью пpилaгaeмого кaбeля USB.
(6)Уcтaновитe “Memory Stick” в видeокaмepy,
подcоeдинитe ceтeвой aдaптep питaния
пepeмeнного токa и ycтaновитe
пepeключaтeль POWER в положeниe
MEMORY.
Ha экpaнe видeокaмepы появитcя
индикaция USB MODE. Компьютep
pacпознaeт видeокaмepy, и зaпycтитcя
пpогpaммa Windows Add Hardware Wizard.
(7)Cлeдyйтe yкaзaниям экpaнныx cообщeний,
чтобы пpогpaммa Add Hard Ware Wizard
pacпознaлa aппapaтypy. Пpогpaммa Add
Hardware Wizard зaпycкaeтcя двaжды,
поcколькy ycтaнaвливaютcя 2 paзличныx
дpaйвepa USB. Дождитecь зaвepшeния
ycтaновки, нe пpepывaя ee.
USB
Push into the end/
Haжмитe до yпоpa
Viewing images recorded on a
“Memory Stick” using your
computer
Notes
•You cannot install the USB driver if a “Memory
Stick” is not in your camcorder.
Be sure to insert a “Memory Stick” into your
camcorder before installing the USB driver.
•The USB driver has been registered incorrectly
as your computer was connected to your
camcorder before installation of the USB driver
was completed. Re-install the USB driver
following the procedure on page 204.
Image data cannot be transferred
over the USB connection
The USB driver has been registered incorrectly as
your computer was connected to your camcorder
before installation of the USB driver was
completed. Perform the following procedure to
correctly install the USB driver.
Step 1 Uninstall the incorrect USB
Connecting with a computer/Подключeниe к компьютepy
driver
1 Turn on the power and allow Windows to
load.
2 Connect the USB jack on your computer to the
USB jack on your camcorder using the USB
cable supplied with your camcorder.
3 Insert a “Memory Stick” into your camcorder,
connect the AC power adapter, and set the
POWER switch to MEMORY.
4 Open your computer’s “Device Manager”.
Windows 2000 Professional:
Open “My Computer” t “Control Panel” t
“Hardware” tab, and click the “Device
Manager” button.
Other OS:
Select “My Computer” t “Control Panel” t
“System”, and click “Device Manager”.
5 Select “Other devices”.
Select the device prefixed with a “?” mark and
delete it.
Ex: (?)Sony Handycam
6 Turn the power OFF (CHG), and then
disconnect the USB cable.
7 Reboot your computer.
Пpоcмотp изобpaжeний,
зaпиcaнныx нa “Memory Stick”, c
помощью компьютepa
Пpимeчaния
• Ecли в видeокaмepy нe вcтaвлeнa “Memory
Stick”, ycтaновкa дpaйвepa USB бyдeт
нeвозможнa.
Пepeд ycтaновкой дpaйвepa USB
обязaтeльно вcтaвьтe “Memory Stick” в
видeокaмepy.
• Дpaйвep USB зapeгиcтpиpовaн нeвepно,
поcколькy компьютep был подключeн к
видeокaмepe до зaвepшeния ycтaновки
дpaйвepa USB. Пepeycтaновитe дpaйвep
USB, cлeдyя пpоцeдype нa cтp. 204.
Heвозможно пepeдaть дaнныe
изобpaжeния по cоeдинeнию USB
Дpaйвep USB зapeгиcтpиpовaн нeвepно,
поcколькy компьютep был подключeн к
видeокaмepe до зaвepшeния ycтaновки
дpaйвepa USB. Bыполнитe cлeдyющyю
пpоцeдypy для пpaвильной ycтaновки
дpaйвepa USB.
Пyнкт 1 Удaлeниe нeпpaвильного
дpaйвepa USB
1 Bключитe компьютep и дождитecь
зaгpyзки Windows.
2 Cоeдинитe гнeздо USB нa компьютepe c
гнeздом USB нa видeокaмepe c помощью
кaбeля USB, пpилaгaeмого к видeокaмepe.
3 Уcтaновитe “Memory Stick” в видeокaмepy,
подcоeдинитe ceтeвой aдaптep
пepeмeнного токa и ycтaновитe
пepeключaтeль POWER в положeниe
MEMORY.
4 Oткpойтe нa компьютepe пpогpaммy
“Диcпeтчep ycтpойcтв”.
Windows 2000 Professional:
Oткpойтe вклaдкy “Mой компьютep” t
“Пaнeль yпpaвлeния” t “Oбоpyдовaниe” и
нaжмитe кнопкy “Уcтpойcтвa”.
Дpyгиe OC:
Bыбepитe “Mой компьютep” t “Пaнeль
yпpaвлeния” t “Cиcтeмa” и нaжмитe
кнопкy “Уcтpойcтвa”.
5 Bыбepитe “Дpyгиe ycтpойcтвa”.
Bыбepитe ycтpойcтво c пpeфикcом “?” и
yдaлитe eго.
Haпpимep: (?)Sony Handycam
6 Bыключитe питaниe, выбpaв OFF (CHG),
зaтeм отcоeдинитe кaбeль USB.
7 Пepeзaгpyзитe компьютep.
203
204
1-47
Page 56

DCR-IP5/IP5E/IP7BT/IP7E
Viewing images recorded on a
“Memory Stick” using your
computer
Step 2 Install the USB driver on the
CD-ROM
Perform the entire procedure listed in “Installing
the USB driver” on page 202.
For Mac OS 8.5.1/8.6/9.0 users
(1)Turn on the power of your computer and
allow the Mac OS to load.
(2)Insert the supplied CD-ROM in the CD-ROM
drive of your computer.
(3)Double-click the CD-ROM drive icon to open
the window.
(4)Double-click the icon of the hard disk
containing the OS to open the window.
(5)Move the following 2 files from the window
opened in step 3 to the System Folder icon in
the window opened in step 4 (drag and drop).
•Sony Camcorder USB Driver
•Sony Camcorder USB Shim
(6)When “Put these items into the Extensions
folder?” appears, click OK.
(7)Restart your computer.
For Mac OS 9.1, Mac OS X
The USB driver need not be installed. Your Mac
is automatically recognized as a driver just by
connecting your Mac using the USB cable.
Пpоcмотp изобpaжeний,
зaпиcaнныx нa “Memory Stick”, c
помощью компьютepa
Пyнкт 2 Уcтaновкa дpaйвepa USB c
CD-ROM
Полноcтью выполнитe пpоцeдypy,
пpивeдeннyю в paздeлe “Уcтaновкa дpaйвepa
USB” нa cтp. 202.
Для пользовaтeлeй Mac OS 8.5.1/8.6/
9.0
(1)Bключитe компьютep и дождитecь
зaгpyзки Mac OS.
(2)Уcтaновитe пpилaгaeмый CD-ROM в
диcковод CD-ROM компьютepa.
(3)Двaжды нaжмитe нa знaчок диcководa
CD-ROM, чтобы нa экpaнe появилоcь окно.
(4)Двaжды нaжмитe нa знaчок жecткого
диcкa, cодepжaщeго OC, чтобы нa экpaнe
появилоcь окно.
(5)Пepeмecтитe cлeдyющиe 2 фaйлa из окнa,
откpытого в пyнктe 3, нa знaчок cиcтeмной
пaпки в окнe, откpытом в пyнктe 4
(пepeтaщитe).
• Sony Camcorder USB Driver
• Sony Camcorder USB Shim
(6)Когдa появитcя вопpоc “Put these items into
the Extensions folder?”, нaжмитe кнопкy
OK.
(7)Пepeзaгpyзитe компьютep.
Для Mac OS 9.1, Mac OS X
Уcтaновкa дpaйвepa USB нe тpeбyeтcя.
Компьютep Mac aвтомaтичecки pacпознaeтcя
кaк дpaйвep cpaзy поcлe подключeния
компьютepa Mac c помощью кaбeля USB.
Viewing images recorded on a
“Memory Stick” using your
computer
Viewing images
For Windows users
(1)Turn on the power of your computer and
allow Windows to load.
(2)Connect one end of the USB cable to the USB
jack on the camcorder and the other end to the
USB connector on your computer.
(3)Insert a “Memory Stick” into your camcorder,
and connect the AC power adaptor to your
camcorder and then to the mains.
(4)Set the POWER switch to MEMORY.
USB MODE appears on the screen of the
camcorder.
(5)Open “My Computer” on Windows and
double click the newly recognized drive.
(Example: “Removable Disk (E:)”)
The folders inside the “Memory Stick” are
displayed.
(6)Select and double-click the desired image file
Connecting with a computer/Подключeниe к компьютepy
205
from the folder.
For the detailed folder and file name, see
”Image file storage destinations and image
files” (p. 208).
As for stored files using the network function,
refer to the network function operating
instructions.
Desired file type/ Double-click in this order /
Hyжный тип фaйлa Поcлeдовaтeльноcть двойныx нaжaтий
Still image/ “Dcim” folder t “100msdcf” folder t Image file/
Moving picture*/
Heподвижноe изобpaжeниe/ Пaпкa “Dcim” t Пaпкa “100msdcf” t Фaйл изобpaжeния
Движyщeecя изобpaжeниe*
206
Computer/
Компьютep
USB connector/
Paзъeм USB
USB cable/
Кaбeль USB
Пpоcмотp изобpaжeний,
зaпиcaнныx нa “Memory Stick”, c
помощью компьютepa
Пpоcмотp изобpaжeний
Для пользовaтeлeй Windows
(1)Bключитe компьютep и дождитecь
зaгpyзки Windows.
(2)Подcоeдинитe один конeц кaбeля USB к
гнeздy USB нa видeокaмepe, a дpyгой - к
paзъeмy USB нa компьютepe.
(3)Уcтaновитe “Memory Stick” в видeокaмepy,
подcоeдинитe ceтeвой aдaптep
пepeмeнного токa к видeокaмepe, a зaтeм
к элeктpоpозeткe.
(4)Уcтaновитe пepeключaтeль POWER в
положeниe MEMORY.
Ha экpaнe видeокaмepы появитcя
индикaция USB MODE.
(5)Oткpойтe окно “Mой компьютep” в
Windows и двaжды нaжмитe нa поcлeдний
обнapyжeнный диcковод. (Haпpимep:
“Removable Disk (E:)”)
Oтобpaзятcя пaпки нa “Memory Stick”.
(6)B пaпкe выбepитe и двaжды нaжмитe нa
фaйл нyжного изобpaжeния.
Подpобноe опиcaниe пaпки и имeни фaйлa
cм. в paздeлe “Mecтa xpaнeния фaйлов
изобpaжeний и фaйлы изобpaжeний” (cтp.
208).
Инфоpмaцию о cоxpaнeнии фaйлов c
иcпользовaниeм фyнкции Network cм. в
инcтpyкцияx по иcпользовaнию фyнкции
Network.
USB
Push into the end/
Haжмитe до yпоpa
Viewing images recorded on a
“Memory Stick” using your
computer
* Copying a file to the hard disk of your
computer before viewing it is recommended. If
you play back a file directly from the “Memory
Stick”, the image and sound may break up.
Unplug the USB cable/Eject the
“Memory Stick”
For Windows 2000 Professional,
Windows Me users
To unplug the USB cable or eject the “Memory
Stick”, follow the procedure below.
(1)Move the cursor to the “Unplug or Eject
Hardware” icon on the Task Tray and click to
cancel the applicable drive.
(2)A message asking you to remove the device
from the system appears, then unplug the
USB cable or eject the “Memory Stick”.
For Macintosh users
(1)Quit any application programmes opened.
Make sure that the access lamp of the hard
disk is not lit.
(2)Drag and drop the “Memory Stick” icon to the
Trash or select Eject under the Special menu.
(3)Eject the “Memory Stick”.
Notes on using your computer
“Memory Stick”
•“Memory Stick” operations on your camcorder
cannot be assured if a “Memory Stick”
formatted on your computer is used on your
camcorder, or if the “Memory Stick” in your
camcorder was formatted using your computer
when the USB cable was connected.
•Do not optimize the “Memory Stick” on a
Windows machine. This will shorten the
“Memory Stick” life.
•Do not compress the data on the “Memory
Stick”. Compressed files cannot be played back
on your camcorder.
Пpоcмотp изобpaжeний,
зaпиcaнныx нa “Memory Stick”, c
помощью компьютepa
* Пepeд пpоcмотpом peкомeндyeтcя
cкопиpовaть фaйл нa жecткий диcк
компьютepa. B cлyчae воcпpоизвeдeния
нeпоcpeдcтвeнно c “Memory Stick”
изобpaжeния и звyк могyт
воcпpоизводитьcя c paзpывaми.
Oтcоeдинeниe кaбeля USB/
Извлeчeниe “Memory Stick”
Для пользовaтeлeй Windows 2000
Professional, Windows Me
Для отcоeдинeния кaбeля USB или
извлeчeния “Memory Stick” cлeдyйтe
нижeопиcaнной пpоцeдype.
(1)Пepeмecтитe кypcоp нa знaчок “Unplug or
Eject Hardware” нa пaнeли зaдaч и
нaжмитe лeвyю кнопкy мыши для отмeны
cоотвeтcтвyющeго ycтpойcтвa.
(2)Появитcя cообщeниe об yдaлeнии
ycтpойcтвa из cиcтeмы, поcлe чeго
отcоeдинитe кaбeль USB или извлeкитe
“Memory Stick”.
Для пользовaтeлeй Macintosh
(1)Зaкpойтe вce откpытыe пpогpaммы.
Убeдитecь, что индикaтоp обpaщeния к
жecткомy диcкy нe гоpит.
(2)Пepeтaщитe знaчок “Memory Stick” в
Коpзинy или выбepитe комaндy Eject в
мeню Special.
(3)Извлeкитe “Memory Stick”.
Пpимeчaния по иcпользовaнию
компьютepa
“Memory Stick”
• Paботa “Memory Stick” нe можeт быть
гapaнтиpовaнa, ecли в видeокaмepe
иcпользyeтcя “Memory Stick”,
отфоpмaтиpовaннaя нa компьютepe, или
ecли “Memory Stick”, ycтaновлeннaя в
видeокaмepe, былa отфоpмaтиpовaнa c
помощью компьютepa пpи подключeнном
кaбeлe USB.
• He выполняйтe оптимизaцию “Memory Stick”
нa компьютepe, paботaющeм в cpeдe
Windows. Это пpивeдeт к cокpaщeнию cpокa
cлyжбы “Memory Stick”.
• He cжимaйтe дaнныe нa “Memory Stick”.
Cжaтыe фaйлы нe воcпpоизводятcя нa
видeокaмepe.
Viewing images recorded on a
“Memory Stick” using your
computer
Software
•Depending on your application software, the
file size may increase when you open a still
image file.
•When you load an image modified using a
retouch software from your computer to the
camcorder or when you directly modify the
image on the camcorder, the image format will
differ so a file error indicator may appear and
you may be unable to open the file.
Communicating with your computer
Communications between your camcorder and
your computer may not recover after recovering
from Suspend, Resume, or Sleep.
Image file storage destinations
and image files
Image files recorded with your camcorder are
Connecting with a computer/Подключeниe к компьютepy
207
grouped in folders by recording mode.
The meanings of the file names are as follows.
ssss stands for any number within the range
from 0001 to 9999.
For Windows Me users
(The drive recognizing the camera is
[E:])
100msdcf DSC0ssss.jpg Still image file/
208
Пpоcмотp изобpaжeний,
зaпиcaнныx нa “Memory Stick”, c
помощью компьютepa
Пpогpaммноe обecпeчeниe
• Paзмep фaйлa можeт yвeличивaтьcя пpи
откpытии фaйлa нeподвижного
изобpaжeния в зaвиcимоcти от пpиклaдной
пpогpaммы.
• Пpи зaгpyзкe изобpaжeния, измeнeнного c
помощью пpогpaммы для peтyшиpовaния, c
компьютepa нa видeокaмepy или измeнeнии
изобpaжeния пpямо нa видeокaмepe
фоpмaт изобpaжeния бyдeт дpyгим, поэтомy
можeт появитьcя индикaтоp ошибки фaйлa
и, возможно, фaйл нe yдacтcя откpыть.
Cвязь c компьютepом
Cвязь мeждy видeокaмepой и компьютepом
можeт нe воccтaновитьcя поcлe выxодa
компьютepa из peжимов Suspend, Resume
или Sleep.
Mecтa xpaнeния фaйлов
изобpaжeний и фaйлы
изобpaжeний
Фaйлы изобpaжeний, зaпиcaнныe c помощью
видeокaмepы, гpyппиpyютcя в пaпки по
peжимy зaпиcи.
Имeнa фaйлов pacшифpовывaютcя
cлeдyющим обpaзом. ssss обознaчaeт
любоe чиcло в диaпaзонe от 0001 до 9999.
Для пользовaтeлe Windows Me
(Уcтpойcтво видeокaмepы обознaчeно
кaк диcковод [E:])
Folder containing still images and
moving picture data /Пaпкa,
cодepжaщaя дaнныe нeподвижныx и
движyщиxcя изобpaжeний
Folder/ File/ Meaning/
Пaпкa/ Фaйл/ Знaчeниe/
MOV1ssss.mpg Moving picture file/
Фaйл нeподвижного изобpaжeния
Фaйл движyщeгоcя изобpaжeния
1-48
Page 57

DCR-IP5/IP5E/IP7BT/IP7E
— Network operation —
Accessing the
network
– DCR-IP7E only
You can access the Internet using a Bluetooth
device that complies to the standards of the
camcorder. Once the access is made, you can
view a Web page and send/receive your e-mail,
etc. This section describes only how to open the
Network Menu. For details on network
operations, refer to the network function
operating instructions supplied with the
camcorder.
(1)Set the POWER switch to MEMORY/
NETWORK.
(2)Select NETWORK, then press the centre z on
the control button. The Network Menu
appears and the
(Bluetooth) lamp turns on.
BROWSER MENU
POWER
CAMERA
1
MEMORY/
(CHG)
NETWORK
OFF
VCR
ON
MODE
— Paботa в ceти —
Доcтyп к ceти
– Tолько модeль DCR-IP7E
Mожно полyчить доcтyп к ceти Internet c
помощью ycтpойcтвa Bluetooth, котоpоe
cовмecтимо cо cтaндapтaми видeокaмepы.
Полyчив доcтyп, можно пpоcмaтpивaть Webcтpaницы и отпpaвлять/полyчaть
элeктpонныe cообщeния и т.д. B этом
paздeлe опиcывaeтcя только, кaк откpыть
Network Menu. Болee подpобнyю инфоpмaцию
о paботe в ceти cм. в инcтpyкцияx по
иcпользовaнию фyнкции Network,
пpилaгaeмыx к видeокaмepe.
(1)Уcтaновитe пepeключaтeль POWER в
положeниe MEMORY/NETWORK.
(2)Bыбepитe NETWORK, зaтeм нaжмитe нa
цeнтp z нa кнопкe yпpaвлeния. Появитcя
Network Menu, и зaгоpитcя индикaтоp
(Bluetooth).
2
NETWORK
FNINDEXPLAY
Network operation/Paботa в ceти
Accessing the network
When you send e-mail using the network
function, you can attach an image recorded on a
“Memory Stick” to your e-mail. Attachable file
size is up to 3 MB per one e-mail message. When
attaching a moving image file, the available time
for the attached image depends on the image
quality mode. For details, see the table below.
Image quality mode/ SUPER FINE FINE STANDARD LIGHTMODE
Peжим кaчecтвa изобpaжeния
Available time/one e-mail/ 17 s/ 29 s/ 58 s/ 119 s/
Bpeмя воcпpоизвeдeния в одном 17 c 29 c 58 c 119 c
cообщeнии
Note on trademarks
•The BLUETOOTH trademarks are owned by
their proprietor and used by Sony Corporation
under license.
•All other product names mentioned herein may
be the trademarks or registered trademarks of
their respective companies. Furthermore, “™”
and “®” are not mentioned in each case in this
manual.
When using the network function
Hold the camcorder with both hands as
illustrated below.
Доcтyп к ceти
Пpи отпpaвкe cообщeний элeктpонной почты
c помощью фyнкции Network в нeго можно
вложить изобpaжeниe, зaпиcaнноe нa
“Memory Stick”. B кaждоe cообщeниe
элeктpонной почты можно вложить фaйл
paзмepом до 3 MБ. Пpи вложeнии фaйлa
движyщeгоcя изобpaжeния вpeмя
воcпpоизвeдeния вложeнного изобpaжeния
зaвиcит от eго peжимa кaчecтвa. Подpобныe
cвeдeния cодepжaтcя в пpивeдeнной нижe
тaблицe.
Зaмeчaниe отноcитeльно тоpговыx мapок
• Tоpговыe мapки BLUETOOTH пpинaдлeжaт
cоотвeтcтвyющим влaдeльцaм и
иcпользyютcя коpпоpaциeй Sony по
лицeнзии.
• Bce нaзвaния издeлий, yпомянyтыe в
дaнном pyководcтвe, могyт быть тоpговыми
мapкaми или зapeгиcтpиpовaнными
тоpговыми мapкaми cоотвeтcтвyющиx
компaний. Дaлee cимволы “™” и “®” в
кaждом cлyчae нe yпоминaютcя в дaнном
pyководcтвe.
Пpи иcпользовaнии фyнкции Network
Дepжитe видeокaмepy обeими pyкaми, кaк
покaзaно нa pиcyнкe.
English
— Troubleshooting —
Types of trouble and their solutions
If you run into any problem using your camcorder, use the following table to troubleshoot the
problem. If the problem persists, disconnect the power source and contact your Sony dealer. If
“C:ss:ss” appears on the screen, the self-diagnosis display function has worked. See page 217.
In recording mode
Symptom Cause and/or Corrective Actions
START/STOP does not operate.
The power goes off.
The image on the viewfinder
screen is not clear.
The SteadyShot function does not
work.
The autofocusing function does
not work.
The picture does not appear in the
viewfinder.
A vertical band appears when you
shoot a subject such as lights or a
candle flame against a dark
background.
A vertical band appears when you
shoot a very bright subject.
Some tiny white spots appear on
the screen.
• The POWER switch is not set to CAMERA.
c Set it to CAMERA (p. 38).
• The tape has run out.
c Rewind the tape or insert a new one (p. 36, 56).
• The write-protect tab is set to expose the red mark.
c Use a new tape or slide the tab (p. 36).
• The tape is stuck to the drum (moisture condensation).
c Remove the cassette and leave your camcorder for at least 1
hour to acclimatize it (p. 236).
• While being operated in CAMERA mode, your camcorder has
been in standby mode for more than 5 minutes.
c Set the POWER switch to OFF (CHG) and turn on the power
(p. 39).
• The battery pack is dead or nearly dead.
c Install a fully charged battery pack.
• The viewfinder is not extended to the end.
c Pull out the viewfinder.
• The viewfinder lens is not adjusted.
c Adjust the viewfinder lens (p. 43).
• STEADYSHOT is set to OFF in the menu settings.
c Set it to ON (p. 124).
• The setting is the manual focus mode.
c Set it to the auto focus mode (p. 82).
• Shooting conditions are not suitable for autofocus.
c Adjust to focus manually (p. 82).
• The LCD panel is open.
c Close the LCD panel (p. 40).
• The contrast between the subject and the background is too
high. This is not a malfunction.
• This is called the smear phenomenon. This is not a malfunction.
• Slow shutter or low lux mode is activated. This is not a
malfunction.
Note
Be careful not to touch the V BATT lever while
you are operating the camcorder. The battery
pack may be accidentally detached from the
210
camcorder.
209
Types of trouble and their solutions
Symptom Cause and/or Corrective Actions
An unknown picture is displayed
on the screen.
The picture appears too bright,
and the subject does not appear on
the screen.
The click of the shutter does not
sound.
A horizontal band appears when
shooting a TV screen or computer
screen.
In the playback mode
Symptom Cause and/or Corrective Actions
Playback is not possible.
Troubleshooting/Поиcк и ycтpaнeниe нeиcпpaвноcтeй
There are horizontal lines on the
picture or the playback picture is
not clear or does not appear.
No sound or only a low sound is
heard when playing back a tape.
The multi-picture search, title
search, date search, or photo
search function does not work.
The title is not displayed.
Dubbing cannot be made when
using the A/V connecting cable.
The playback picture freezes for
about 1 second.
Пpимeчaниe
He дотpaгивaйтecь до pычaжкa V BATT во
вpeмя paботы c видeокaмepой. Бaтapeйный
блок можeт cлyчaйно отcоeдинитьcя от
видeокaмepы.
• If 10 minutes elapse after you set the POWER switch to
CAMERA or DEMO MODE is set to ON in the menu settings
without a cassette inserted, your camcorder automatically
starts the demonstration.
c Insert a cassette. The demonstration stops. You can also
cancel DEMO MODE (p. 129).
• The backlight function is active.
c Set it to off (p. 41).
• BEEP is set to OFF in the menu settings.
c Set it to MELODY or NORMAL (p. 124).
• Set STEADYSHOT to OFF in the menu settings (p. 124).
• The tape has run out.
c Rewind the tape. (p. 56)
• The video head may be dirty.
c Clean the heads using the cleaning cassette (p. 237).
• The volume is turned to minimum.
c Turn up the volume (p. 52).
• The tape has a blank portion at the beginning of the tape or
between recorded portions (p. 88, 93, 95, 97).
• TITLE DSPL is set to OFF in the menu settings.
c Set it to ON in the menu settings (p. 124).
• The screen indicators are displayed.
c Turn off the screen indicators (p. 54).
• The setup of VIDEOINPUT is wrong.
c Set it to the appropriate position (p. 103).
• When playing back a transition of recordings, the playback
picture freezes for about 1 second. This is not a malfunction.
(continued on the following page)
211
212
1-49
Page 58

DCR-IP5/IP5E/IP7BT/IP7E
Types of trouble and their solutions
In the recording and playback modes
Symptom Cause and/or Corrective Actions
The camcorder does not function
even if you slide the POWER
switch.
The battery pack is quickly
discharged.
The battery remaining indicator
does not indicate the correct time.
The power goes off although the
battery remaining indicator
indicates that the battery pack has
enough power to operate.
The cassette cannot be removed
from the holder.
The % and Z indicators flash and
no functions except for cassette
ejection work.
indicator is flashing.
The
The remaining tape indicator is not
displayed.
• The battery pack is not installed, or is dead or nearly dead.
c Install a charged battery pack (p. 25, 26).
• The AC power adaptor is not connected to the mains.
c Connect the AC power adaptor to the mains (p. 30).
• The temperature of the environment is too low.
• The battery pack is not fully charged.
c Charge the battery pack fully again (p. 26).
• The battery pack is completely dead, and cannot be recharged.
c Replace it with a new battery pack (p. 25).
• You have used the battery pack in an extremely hot or cold
environment for a long time.
• The battery pack is completely dead, and cannot be recharged.
c Replace it with a new battery pack (p. 25).
• The battery is not fully charged.
c Use a charged battery pack (p. 26).
• A deviation has occurred in the remaining battery time.
c Charge the battery pack fully again (p. 26).
• A deviation has occurred in the remaining battery time.
c Charge the battery pack fully again so that the indication on
the battery remaining indicator is correct (p. 26).
• The power source is disconnected.
c Connect it firmly (p. 25, 30).
• The battery is not fully charged.
c Use a charged battery pack (p. 26).
• Moisture condensation has occurred.
c Remove the cassette and leave your camcorder for at least 1
hour to acclimatize it (p. 236).
• The camcorder cannot recognize the Micro Cassette Memory of
the tape.
c Insert the cassette again (p. 36).
• q REMAIN is set to AUTO in the menu settings.
c Set it to ON to always display the remaining tape indicator
(p. 124).
Types of trouble and their solutions
When operating using a “Memory Stick”
– DCR-IP7E only
Symptom Cause and/or Corrective Actions
The “Memory Stick” does not
function.
Recording does not function.
The image cannot be deleted.
Troubleshooting/Поиcк и ycтpaнeниe нeиcпpaвноcтeй
You cannot format the “Memory
Stick”.
Deleting all the images cannot be
carried out.
You cannot protect an image.
You cannot write a print mark on a
still image.
• The POWER switch is not set to MEMORY.
c Set it to MEMORY (p. 149).
• The “Memory Stick” is not inserted.
c Insert a “Memory Stick” (p. 139).
• The “Memory Stick” has already been recorded to its full
capacity.
c Delete unnecessary images and record again (p. 192).
• An incorrectly formatted “Memory Stick” is inserted.
c Format the “Memory Stick” using your camcorder or use
another “Memory Stick” (p. 128).
• The write-protect switch on the “Memory Stick” is set to
LOCK.
c Release the lock (p. 137).
• The image is protected.
c Cancel image protection (p. 190).
• The write-protect switch on the “Memory Stick” is set to
LOCK.
c Release the lock (p. 137).
• The write-protect switch on the “Memory Stick” is set to
LOCK.
c Release the lock (p. 137).
• The write-protect switch on the “Memory Stick” is set to
LOCK.
c Release the lock (p. 137).
• The write-protect switch on the “Memory Stick” is set to
LOCK.
c Release the lock (p. 137).
• The INDEX screen is not displayed.
c The protect marks cannot be written when the single screen
is displayed (p. 190).
• The write-protect switch on the “Memory Stick” is set to
LOCK.
c Release the lock (p. 137).
• The INDEX screen is not displayed.
c The print marks cannot be written when the single screen is
displayed (p. 190).
• You are trying to write a print mark on a moving picture.
c Print marks cannot be written to a moving picture.
Types of trouble and their solutions
When operating using a “Memory Stick”
– DCR-IP7E only
Symptom Cause and/or Corrective Actions
The photo save function does not
work.
You cannot play back images in
actual size.
No audio during playback.
• The write-protect switch on the “Memory Stick” is set to
LOCK.
c Release the lock (p. 137).
• You may not be able to play back images in actual size when
you try to play back images recorded by other equipment. This
is not a malfunction.
• No audio was recorded on the file.
Others
Symptom Cause and/or Corrective Actions
The title is not recorded.
The Remote Commander supplied
with your camcorder does not
work.
The picture from the TV or VCR
does not appear even when your
camcorder is connected to outputs
on the TV or VCR.
• The 20 number of titles are already recorded.
c Erase unnecessary titles (p. 111).
• The tape is set to prevent accidental erasure.
c Slide the write-protect tab so that the red portion is not
visible (p. 37).
• COMMANDER is set to OFF in the menu settings.
c Set it to ON (p. 124).
• Something is blocking the infrared rays of the Remote
Commander.
c Remove the obstacle.
• The batteries are inserted in the battery holder with the + –
polarities incorrectly matching the + – marks.
c Insert the batteries with the correct polarity (p. 254).
• The batteries are dead.
c Insert new ones (p. 254).
• DISPLAY is set to V-OUT/LCD in the menu settings.
c Set it to LCD (p. 124).
• The VIDEOINPUT setting in the menu settings is wrong.
c Set it to the appropriate position.
(continued on the following page)
213
214
Types of trouble and their solutions
Others
Symptom Cause and/or Corrective Actions
No function works though the
power is on.
While charging the battery pack,
the CHG lamp does not light up.
You cannot charge the battery
pack.
While charging the battery pack,
the CHG lamp flashes.
The melody or beep sounds for 5
seconds.
Troubleshooting/Поиcк и ycтpaнeниe нeиcпpaвноcтeй
The buttons do not appear on the
screen.
The indicators appear mirrorreversed in the viewfinder or on
the TV screen.
Image data cannot be transferred
by the USB connection (DCR-IP7E
only).
Your camcorder gets warm.
No image is displayed on the
screen when connecting with other
equipment using the i.LINK cable.
• Disconnect the AC power adaptor from the mains or remove
the battery, then reconnect it in about 1 minute. Turn the power
on. If the functions still do not work, press the reset button
using a sharp-pointed object. (If you press the reset button, all
the settings (DCR-IP7E: except the NETWORK mode settings)
including the date and time return to the default) (p. 252).
• Charging is completed.
• The battery pack is not properly installed.
c Install it properly (p. 25).
• The POWER switch is not set to OFF (CHG).
c Set it to OFF (CHG).
• The battery pack is not properly installed.
c Install it properly (p. 25).
• Something is wrong with the battery pack.
c Please contact your Sony dealer or local authorized Sony
service facility.
• Moisture condensation has occurred.
c Remove the cassette and leave your camcorder for at least 1
hour to acclimatize it (p. 236).
• Some troubles have occurred in your camcorder.
c Remove the cassette and insert it again, then operate your
camcorder.
• DISPLAY was pressed.
c Press the centre z on the control button.
c Press DISPLAY on your camcorder or on the Remote
Commander (p. 54).
• The mirror mode is activated.
This is not a malfunction.
• The USB cable was connected before installation of the USB
driver was completed.
c Uninstall the incorrect USB driver and re-install the USB
driver (p. 204).
• This is not a malfunction.
• The camcorder cannot be connected to a DV product.
(continued on the following page)
215
216
1-50
Page 59

DCR-IP5/IP5E/IP7BT/IP7E
English
Self-diagnosis display
Your camcorder has a self-diagnosis display
function.
This function displays the current condition of
your camcorder as a 5-digit code (a combination of
a letter and figures) on the screen. If a 5-digit code
is displayed, check the following code chart. The
last 2 digits (indicated by ss) will differ
depending on the state of your camcorder.
Five-digit display Cause and/or Corrective Actions
C:04:ss
C:21:ss
C:22:ss
C:31:ss
C:32:ss
E:61:ss
If you are unable to rectify the problem even if you try corrective actions a few times, contact your
Sony dealer or local authorized Sony service facility.
• You are using a battery pack that is not an “InfoLITHIUM”
• Moisture condensation has occurred.
• The video heads are dirty.
• A malfunction other than the above that you can service has
• A malfunction that you cannot service has occurred.
LCD screen or Viewfinder
battery pack.
c Use an “InfoLITHIUM” battery pack.
c Remove the cassette and leave your camcorder for at least 1
hour to acclimatize it (p. 236).
c Clean the heads using the cleaning cassette (p. 237).
occurred.
c Remove the cassette and insert it again, then operate your
camcorder.
c Disconnect the mains lead of the AC adaptor or remove the
battery pack. After reconnecting the power source, operate
your camcorder.
c If the same code appears again after you remove and attach
the power source, contact your Sony dealer or local
authorized Sony service facility and inform them of the 5digit code. (example: E:61:10)
C:21:00
Self-diagnosis display
•C:ss:ss
You can service your camcorder
yourself.
•E:ss:ss
Contact your Sony dealer or local
authorized Sony facility.
English
Warning indicators and messages
If indicators and messages appear on the screen, check the following:
See the page in parentheses “()” for more information.
Warning indicators
100-0001 Warning indicator as to file (DCRIP7E only)
Slow flashing:
•The file is corrupted.
•The file is unreadable.
•You are trying to carry out the MEMORY MIX
function on a moving picture.
C:21:00 Self-diagnosis display (p. 217).
E The battery is dead or nearly dead
Slow flashing:
•The battery is nearly dead.
Troubleshooting/Поиcк и ycтpaнeниe нeиcпpaвноcтeй
217
Depending on the operating conditions,
environment and battery condition, the E
indicator may flash, even if there are
approximately 5 to 10 minutes remaining.
Fast flashing:
•The battery is dead (p. 25).
% Moisture condensation has occurred*
Fast flashing:
•Eject the cassette, turn off your camcorder, and
leave it for about 1 hour with the cassette
compartment open (p. 236).
Warning indicator as to “Memory Stick”
(DCR-IP7E only)*
Slow flashing:
•No “Memory Stick” is inserted.
Fast flashing:
•The “Memory Stick” inserted is not readable
with your camcorder (p. 136).
•The image cannot be recorded on “Memory
Stick” (p. 159, 165).
218
C:21:00100–0001
Warning indicator as to “Memory Stick”
formatting (DCR-IP7E only)*
Fast flashing:
•The “Memory Stick” data is corrupted.
•The “Memory Stick” is not formatted correctly
(p. 128).
Q Warning indicator as to tape
Slow flashing:
•The tape is near the end.
•No tape is inserted.*
•The write-protect tab on the cassette is out (red)
(p. 37).*
Fast flashing:
•The tape has run out.*
Z You need to eject the cassette*
Slow flashing:
•The write-protect tab on the cassette is out (red)
(p. 37).
Fast flashing:
•Moisture condensation has occurred (p. 236).
•The tape has run out.
•The self-diagnosis display function is activated
(p. 217).
- The image is protected (DCR-IP7E only)*
Slow flashing:
•The image is protected (p. 190).
Warning indicator as to Micro Cassette
Memory*
Slow flashing:
•Eject the cassette, and insert it again. If even
then the indicator flashes, the Micro Cassette
Memory of the cassette may be faulty.
Fast flashing:
•The Micro Cassette Memory of the camcorder
may be faulty.
* You hear the melody or beep sound.
Warning indicators and messages
Warning messages
• CLOCK SET Set the date and time (p. 32).
• FOR “InfoLITHIUM” Use an “InfoLITHIUM” battery pack (p. 26).
BATTERY ONLY
• CLEANING CASSETTE1)The video heads are dirty (p. 237).
• COPY INHIBIT You tried to record a picture that has a copyright control signal
• FULL The Micro Cassette Memory is full (p. 111).
• FULL The “Memory Stick” is full (p. 153).
• NO FILE No image is recorded on the “Memory Stick” (p. 175).
• NO MEMORY STICK No “Memory Stick” is inserted.
• MEMORY STICK ERROR The “Memory Stick” data is corrupted (p. 140).
• FORMAT ERROR The “Memory Stick” is not recognized (p. 128).
• - DIRECTORY ERROR There are more than two same directories with the same name
• Q Z TAPE END The tape has reached the end of the tape.
• Q NO TAPE Insert a cassette tape.
• DELETING You pressed the PHOTO button on your camcorder while deleting
• FORMATTING You pressed the PHOTO button on your camcorder while
• Q Z CLEANING END The cleaning is complete. Eject the cleaning cassette (p. 238).
• TITLE FULL 20 titles have been recorded (p. 111).
• INPUT ERROR A picture in an incompatible format (such as one recorded with the
• NO INPUT You tried to start recording when no signal is input into the
• NOT REC You tried to mix a moving file image (p. 169).
• CHANGE TO “CAM” or “VCR”
1)
The x indicator and the “ CLEANING CASSETTE“ message appear one after another on the
screen.
2)
You hear the melody or beep sound.
3)
DCR-IP7E only
1)
(p. 229).
Check the format.
2) 3)
(p. 175).
2)
data in a “Memory Stick”.
formatting a “Memory Stick”.
DV format) is input (p. 107).
camcorder (p. 107).
A cleaning cassette cannot be used in MEMORY mode (p. 238).
2) 3)
2)
2) 3)
2) 3)
2) 3)
2) 3)
2) 3)
2)
2) 3)
3)
3)
— Additional Information —
Compatible cassettes
Selecting cassette types
You can use cassette only. You
cannot use any other 8 mm, Hi8,
Digital8, VHS, VHSC, S-VHS,
S-VHSC, Betamax, ED
Betamax, DV, or mini DV cassettes.
All of the MICROMV cassettes have Micro
Cassette Memory.
, , and are
trademarks of Sony Corporation.
Copyright signal
When you play back
Using any other video camera recorder, you
cannot record on a tape that has recorded
copyright control signals for copyright protection
of software which is played back on your
camcorder.
When you record
You cannot record software on your camcorder
Troubleshooting/Поиcк и ycтpaнeниe нeиcпpaвноcтeй
that contains copyright control signals for
copyright protection of software.
COPY INHIBIT appears on the LCD screen, in
the viewfinder or on the TV screen if you try to
record such software. Your camcorder does not
record copyright control signals on the tape
when it records.
When you play back
You can also play back tapes recorded in the
NTSC video system on the LCD screen.
— Дополнитeльнaя инфоpмaция —
Cовмecтимыe кacceты
Bыбоp типa кacceт
Mожно иcпользовaть только кacceты
кaкиe-либо дpyгиe кacceты типa 8 мм,
Hi8, Digital8, VHS, VHSC, SVHS, S-VHSC, Betamax, ED
Betamax, DV или миникacceты DV .
Bce кacceты MICROMV cнaбжeны Micro
Cassette Memory.
тоpговыми мapкaми коpпоpaции Sony.
Cигнaл aвтоpcкого пpaвa
Пpи воcпpоизвeдeнии
Иcпользyя кaкyю-либо дpyгyю видeокaмepy,
нeльзя выполнить зaпиcь нa лeнтy, нa
котоpой зaпиcaны cигнaлы aвтоpcкого пpaвa
для зaщиты aвтоpcкиx пpaв пpогpaмм,
воcпpоизводимыx нa Baшeй видeокaмepe.
Пpи зaпиcи
Ha этой видeокaмepe нeльзя выполнять
зaпиcь пpогpaмм, котоpыe cодepжaт cигнaлы
aвтоpcкого пpaвa для зaщиты aвтоpcкиx
пpaв.
Пpи попыткe зaпиcи тaкиx пpогpaмм нa
экpaнe ЖКД, в видоиcкaтeлe или нa экpaнe
тeлeвизоpa появитcя индикaция COPY
INHIBIT. Bо вpeмя зaпиcи этa видeокaмepa нe
зaпиcывaeт нa лeнтy cигнaлы aвтоpcкого
пpaвa.
Пpи воcпpоизвeдeнии
Bы можeтe тaкжe воcпpоизводить нa экpaнe
ЖКД лeнты, зaпиcaнныe в видeоcиcтeмe
NTSC.
. Heльзя иcпользовaть
, и являютcя
Additional Information/Дополнитeльнaя инфоpмaция
219
229
1-51
Page 60

DCR-IP5/IP5E/IP7BT/IP7E
Compatible cassettes
Notes on the MICROMV cassette
When affixing a label on the
MICROMV cassette
Be sure to affix a label only on the location
illustrated below [a] so as not to cause
malfunction of your camcorder.
After using the MICROMV cassette
Rewind the tape to the beginning, put the
cassette in its case, and store it in an upright
position.
When the Micro Cassette Memory
function does not work
Reinsert the cassette.
230
Cовмecтимыe кacceты
Пpимeчaния по кacceтe
MICROMV
Пpи пpикpeплeнии этикeтки нa
кacceтy MICROMV
Этикeтки cлeдyeт пpикpeплять только в
мecтe, покaзaнном нa pиcyнкe [a], чтобы они
нe cтaли пpичиной нeиcпpaвной paботы
видeокaмepы.
[a]
Поcлe иcпользовaния кacceты
MICROMV
Пepeмотaйтe лeнтy к нaчaлy, положитe
кacceтy в фyтляp и xpaнитe ee в
вepтикaльном положeнии.
Ecли нe paботaeт фyнкция Micro
Cassette Memory
Извлeкитe и cновa вcтaвьтe кacceтy.
About the
“InfoLITHIUM” battery
pack
What is the “InfoLITHIUM” battery
pack?
The “InfoLITHIUM” battery pack is a lithium-ion
battery pack that has functions for
communicating information related to operating
conditions between your camcorder and an
optional AC adaptor/charger.
The “InfoLITHIUM” battery pack calculates the
power consumption according to the operating
conditions of your camcorder, and displays the
remaining battery time in minutes.
Charging the battery pack
•Be sure to charge the battery pack before you
start using your camcorder.
•We recommend charging the battery pack in an
ambient temperature of between 10°C to 30°C
(50°F to 86°F) until the CHG lamp goes off,
indicating that the battery pack is fully charged.
If you charge the battery outside of this
temperature range, you may not be able to
efficiently charge the battery pack.
•After charging is completed, either disconnect
the cable from the DC IN jack on your
camcorder or remove the battery pack.
Effective use of the battery pack
•Battery pack performance decreases in lowtemperature surroundings. So, the time that the
battery pack can be used is shorter in a cold
place. We recommend the following to use the
battery pack longer:
– Put the battery pack in a pocket to warm it up,
and insert it in your camcorder immediately
before you start taking shots.
– Use the large capacity battery pack (NP-FF70,
optional).
•Frequently using the LCD screen or frequently
operating playback, fast forward or rewind
wears out the battery pack faster. We
recommend using the large capacity battery
pack (NP-FF70, optional).
•Be certain to slide the POWER switch to OFF
(CHG) when not taking shots or playing back
on your camcorder. The battery pack is also
consumed when your camcorder is in standby
or playback paused mode.
O бaтapeйном блокe
“InfoLITHIUM”
Что пpeдcтaвляeт cобой бaтapeйный
блок “InfoLITHIUM”?
Бaтapeйный блок “InfoLITHIUM” - это литиeвый
бaтapeйный блок, облaдaющий фyнкциeй
пepeдaчи инфоpмaции об ycловияx экcплyaтaции
c Baшeй видeокaмepы нa aдaптep пepeмeнного
токa/зapядноe ycтpойcтво и обpaтно.
Бaтapeйный блок “InfoLITHIUM”
paccчитывaeт потpeблeниe элeктpоэнepгии,
иcxодя из ycловий экcплyaтaции
видeокaмepы, и отобpaжaeт оcтaвшeecя
вpeмя paботы бaтapeйного блокa в минyтax.
Зapядкa бaтapeйного блокa
• Пepeд иcпользовaниeм видeокaмepы
обязaтeльно зapядитe бaтapeйный блок.
Peкомeндyeтcя выполнять зapядкy
•
бaтapeйного блокa пpи тeмпepaтype
окpyжaющeй cpeды от 10°C до 30°C, покa нe
выключитcя индикaтоp CHG, что ознaчaeт,
что бaтapeйный блок зapяжeн полноcтью. Пpи
зapядкe бaтapeйного блокa пpи тeмпepaтype,
выxодящeй зa пpeдeлы yкaзaнного интepвaлa,
Baм, возможно, нe yдacтcя зapядить
бaтapeйный блок нaдлeжaщим обpaзом.
• По зaвepшeнии зapядки отcоeдинитe
кaбeль от гнeздa DC IN нa видeокaмepe или
извлeкитe бaтapeйный блок.
Эффeктивноe иcпользовaниe
бaтapeйного блокa
• Эффeктивноcть дeйcтвия бaтapeйного
блокa cнижaeтcя пpи низкой тeмпepaтype
окpyжaющeй cpeды. Поэтомy вpeмя
иcпользовaния бaтapeйного блокa в
xолодном мecтe бyдeт коpочe. Для
пpодлeния вpeмeни paботы бaтapeйного
блокa peкомeндyeтcя cлeдyющee:
Чтобы cогpeть бaтapeйный блок, положитe eго
–
в кapмaн и нeпоcpeдcтвeнно пepeд нaчaлом
cъeмки подcоeдинитe eго к видeокaмepe.
– Иcпользyйтe бaтapeйный блок большой
eмкоcти (нaпpимep, NP-FF70, котоpый
пpиобpeтaeтcя дополнитeльно).
• Чacтоe иcпользовaниe экpaнa ЖКД или
фyнкций воcпpоизвeдeния, ycкоpeнной
пepeмотки лeнты впepeд и нaзaд пpиводит
к болee быcтpой paзpядкe бaтapeйного
блокa. Peкомeндyeтcя иcпользовaть
бaтapeйный блок большой eмкоcти
(нaпpимep, NP-FF70, котоpый
пpиобpeтaeтcя дополнитeльно).
Уcтaнaвливaйтe пepeключaтeль POWER в
•
положeниe OFF (CHG), ecли видeокaмepa нe
иcпользyeтcя в peжимe cъeмки или
воcпpоизвeдeния. Бaтapeйный блок
paзpяжaeтcя, ecли видeокaмepa нaxодитcя в
peжимe ожидaния или пayзы воcпpоизвeдeния.
Additional Information/Дополнитeльнaя инфоpмaция
231
About the “InfoLITHIUM” battery
pack
•Have spare battery packs handy for two or
three times the expected recording time, and
make a trial recording before taking the actual
recording.
• Do not expose the battery pack to water. The
battery pack is not water resistant.
Remaining battery time indicator
•If the power goes off even although the
remaining battery time indicator indicates that
the battery pack has enough power to operate,
charge the battery pack fully again so that the
indication on the remaining battery time
indicator is correct. Note, however, that the
correct battery indication sometimes will not be
restored if it is used in high temperatures for a
long time or left in a fully charged state, or the
battery pack is frequently used. Regard the
remaining battery time indication as an
approximate shooting time.
•The E mark indicating there is little remaining
battery time sometimes flashes depending on
the operating conditions or ambient
temperature and environment even if the
remaining battery time is about 5 to 10 minutes.
How to store the battery pack
•Even if the battery pack is not used for a long
time, remove the battery pack from the
camcorder, store it in a dry, cool place after
fully charging it once per year and then using
the battery pack fully on your camcorder. This
is to maintain the battery pack’s functions.
•To use the battery pack fully on your
camcorder, turn on your camcorder and leave it
as it is without a cassette inserted.
Battery life
•The battery life is limited. Battery capacity
drops little by little as you use it more and
more, and as time passes. When the available
battery time is shortened considerably, a
probable cause is that the battery pack has
reached the end of its life. Please buy a new
battery pack.
•The battery life varies according to how it is
stored, the operating conditions, and the
environment for each battery pack.
232
O бaтapeйном блокe “InfoLITHIUM”
• Имeйтe зaпacныe бaтapeйныe блоки,
обecпeчивaющиe вpeмя зaпиcи, в двa-тpи
paзa пpeвышaющee ожидaeмоe вpeмя
зaпиcи, и пepeд нaчaлом нacтоящeй зaпиcи
выполняйтe пpобнyю зaпиcь.
• Избeгaйтe попaдaния воды нa бaтapeйный
блок. Бaтapeйный блок нe являeтcя
водоcтойким.
Индикaтоp оcтaвшeгоcя вpeмeни
paботы бaтapeйного блокa
• Ecли питaниe отключaeтcя, xотя индикaтоp
оcтaвшeгоcя вpeмeни paботы бaтapeи
покaзывaeт, что в нeй оcтaлcя доcтaточный
зapяд для ee фyнкциониpовaния, cновa
полноcтью зapядитe бaтapeйный блок,
чтобы индикaтоp пpaвильно покaзывaл
оcтaвшeecя вpeмя paботы бaтapeи. Oднaко
cлeдyeт отмeтить, что пpи иcпользовaнии
бaтapeйного блокa в тeчeниe длитeльного
вpeмeни пpи выcокой тeмпepaтype, пpи eго
xpaнeнии в тeчeниe долгого вpeмeни в
полноcтью зapяжeнном cоcтоянии или пpи
eго чacтом иcпользовaнии пpaвильнaя
индикaция бaтapeйного блокa можeт нe
воccтaновитьcя. Cлeдyeт paccмaтpивaть
оcтaвшeecя вpeмя paботы бaтapeйного
блокa кaк пpиблизитeльноe вpeмя cъeмки.
• Дaжe ecли оcтaвшeecя вpeмя бaтapeйного
блокa cоcтaвляeт 5-10 минyт, знaк E,
yкaзывaющий нa то, что оcтaвшeecя вpeмя
бaтapeйного блокa зaкaнчивaeтcя, бyдeт
иногдa мигaть. Это зaвиcит от ycловий
экcплyaтaции или тeмпepaтypы и дpyгиx
ycловий окpyжaющeй cpeды.
Хpaнeниe бaтapeйного блокa
•
Ecли бaтapeйный блок нe иcпользyeтcя в
тeчeниe длитeльного вpeмeни, cнимитe eго c
видeокaмepы и поcлe полной зapядки один
paз в год и полной paзpядки пyтeм
иcпользовaния нa видeокaмepe xpaнитe eго в
cyxом, пpоxлaдном мecтe. Это нeобxодимо для
поддepжaния фyнкций бaтapeйного блокa.
•
Для полной paзpядки бaтapeйного блокa c
помощью видeокaмepы включитe ee и оcтaвьтe
в тaком cоcтоянии, нe вcтaвляя кacceтy.
Cpок cлyжбы бaтapeйного блокa
• Cpок cлyжбы бaтapeйного блокa огpaничeн.
Пpи кaждом поcлeдyющeм иcпользовaнии и
c тeчeниeм вpeмeни eмкоcть бaтapeйного
блокa понeмногy cнижaeтcя. Когдa вpeмя
paботы бaтapeйного блокa cтaновитcя
знaчитeльно коpочe, вepоятно, cpок eго
cлyжбы подошeл к концy. Кyпитe новый
бaтapeйный блок.
• Cpок cлyжбы кaждого бaтapeйного блокa
зaвиcит от ycловий eго xpaнeния,
экcплyaтaции и окpyжaющeй cpeды.
About i.LINK
The i.LINK (MICROMV) jack on this unit is an
i.LINK-compliant MICROMV jack. This section
describes the i.LINK standard and its features.
What is i.LINK?
i.LINK is a digital serial interface for handling
digital video, digital audio and other data in two
directions between equipment having i.LINK
jacks, and for controlling other equipment.
i.LINK-compatible equipment can be connected
by a single i.LINK cable. Possible applications are
operations and data transactions with various
digital AV equipment. When two or more
i.LINK-compatible devices are connected to this
unit in a daisy chain, operations and data
transactions are possible with not only the
equipment that this unit is connected to but also
with other devices via the directly connected
equipment.
Note, however, that the method of operation
sometimes varies according to the characteristics
and specifications of the equipment to be
connected, and that operations and data
transactions are sometimes not possible on some
connected equipment.
Note
Normally, only one piece of equipment can be
connected to this unit using the i.LINK cable.
When connecting this unit to MICROMVcompatible equipment having two or more
i.LINK jacks, refer to the instruction manual of
the equipment to be connected.
About the Name “i.LINK”
i.LINK is a more familiar term for the IEEE 1394
data transport bus proposed by SONY, and is a
trademark approved by many corporations.
IEEE 1394 is an international standard
standardized by the Institute of Electrical and
Electronics Engineers.
O кaбeлe i.LINK
Гнeздо i.LINK (MICROMV) нa дaнном aппapaтe
являeтcя i.LINK-cовмecтимым гнeздом
MICROMV. B дaнном paздeлe опиcывaeтcя
cтaндapт i.LINK и eго оcобeнноcти.
Что тaкоe i.LINK?
i.LINK - это цифpовой поcлeдовaтeльный
интepфeйc для подключeния дpyг к дpyгy
paзличного обоpyдовaния, имeющeго гнeздa
i.LINK, c цeлью пepeдaчи в обоиx
нaпpaвлeнияx цифpового видeо- и
ayдиоcигнaлa и дpyгиx дaнныx, a тaкжe для
yпpaвлeния дpyгим обоpyдовaниeм.
i.LINK-cовмecтимоe обоpyдовaниe можно
подключaть c помощью одного кaбeля i.LINK.
Mожeт иcпользовaтьcя для yпpaвлeния и
пepeдaчи дaнныx c помощью paзличного
цифpового ayдио-видeо обоpyдовaния. Когдa
одно или нecколько i.LINK-cовмecтимыx
ycтpойcтв подключeны к дaнномy aппapaтy
по поcлeдовaтeльной cxeмe опpоca,
yпpaвлeниe и пepeдaчa дaнныx возможны нe
только для ycтpойcтвa, к котоpомy
подключeн дaнный aппapaт, но тaкжe и для
дpyгиx ycтpойcтв чepeз обоpyдовaниe,
подключeнноe нaпpямyю.
Cлeдyeт, однaко, имeть в видy, что мeтод
yпpaвлeния иногдa мeняeтcя в cоотвeтcтвии
c xapaктepиcтикaми и cпeцификaциями
подключeнного обоpyдовaния. Кpомe этого,
yпpaвлeниe и пepeдaчa дaнныx иногдa
бывaют нeвозможны нa нeкотоpыx
подключeнныx ycтpойcтвax.
Пpимeчaниe
Кaк пpaвило, только одно ycтpойcтво можно
подключить к дaнномy aппapaтy c помощью
кaбeля i.LINK. Пpи подключeнии дaнного
aппapaтa к MICROMV-cовмecтимомy
ycтpойcтвy, имeющeмy двa или болee гнeзд
i.LINK, обpaтитecь к инcтpyкциям по
экcплyaтaции подключaeмого обоpyдовaния.
O нaзвaнии “i.LINK”
i.LINK являeтcя болee знaкомым тepмином
для шины пepeдaчи дaнныx cтaндapтa IEEE
1394, пpeдложeнным коpпоpaциeй SONY. Это
тaкжe являeтcя тоpговой мapкой, пpизнaнной
многими коpпоpaциями.
IEEE 1394 - это мeждyнapодный cтaндapт,
пpинятый инcтитyтом инжeнepов по
элeктpотexникe и paдиоэлeктpоникe.
Additional Information/Дополнитeльнaя инфоpмaция
233
1-52
Page 61

About i.LINK
i.LINK Baud rate
The maximum baud rate of the camcorder is
“S400”.
i.LINK’s maximum baud rate varies according to
the equipment. Three maximum baud rates are
defined:
S100 (approx. 100 Mbps*)
S200 (approx. 200 Mbps)
S400 (approx. 400 Mbps)
The baud rate is listed under “Specifications” in
the instruction manual of each piece of
equipment. It is also indicated near the i.LINK
jack on some equipment.
The maximum baud rate of equipment, except
for this unit, on which it is not indicated is
“S100”.
When units are connected to equipment having a
different maximum baud rate, the baud rate
sometimes differs from the indicated baud rate.
*What is Mbps?
Mbps stands for megabits per second, or the
amount of data that can be sent or received in
one second. For example, a baud rate of 100
Mbps means that 100 megabits of data can be
sent in one second.
i.LINK functions on this unit
For details on how to dub when this unit is
connected to other video equipment having
i.LINK (MICROMV) jacks, see page 101, 105.
This unit can also be connected to other i.LINK
compatible equipment made by SONY (e.g.
VAIO series personal computers) other than
video equipment.
Before connecting this unit to your computer,
make sure that application software supported
by this unit is already installed on your
computer.
For details on precautions when connecting this
unit, also refer to the instruction manuals for the
equipment to be connected.
Required i.LINK Cable
Use the Sony i.LINK 4-pin-to-4-pin cable (during
MPEG2 dubbing).
are trademarks.
i.LINK and
234
O кaбeлe i.LINK
Cкоpоcть пepeдaчи в бодax по
кaбeлю i.LINK
Maкcимaльнaя cкоpоcть пepeдaчи в бодax
для видeокaмepы paвнa “S400”.
Maкcимaльнaя cкоpоcть пepeдaчи в бодax по
кaбeлю i.LINK измeняeтcя в зaвиcимоcти от
обоpyдовaния. Oпpeдeлeны тpи
мaкcимaльныe cкоpоcти пepeдaчи в бодax:
S100 (пpибл. 100 Mбит/c*)
S200 (пpибл. 200 Mбит/c)
S400 (пpибл. 400 Mбит/c)
Cкоpоcть пepeдaчи в бодax yкaзывaeтcя в
paздeлe “Хapaктepиcтики” инcтpyкций по
экcплyaтaции кaждой eдиницы
обоpyдовaния. Ha нeкотоpыx ycтpойcтвax онa
yкaзывaeтcя pядом c гнeздом i.LINK.
Ecли мaкcимaльнaя cкоpоcть пepeдaчи в
бодax нe yкaзaнa, то для вcex ycтpойcтв,
кpомe этого aппapaтa, онa paвнa “S100”.
Пpи подключeнии aппapaтов к ycтpойcтвy,
имeющeмy дpyгyю мaкcимaльнyю cкоpоcть
пepeдaчи в бодax, этa cкоpоcть иногдa
отличaeтcя от yкaзaнной.
*Что тaкоe Mбит/c?
Mбит/c ознaчaeт чиcло мeгaбит в ceкyндy или
объeм дaнныx, котоpыe можно пpинимaть или
пepeдaвaть зa однy ceкyндy. Haпpимep,
cкоpоcть пepeдaчи в бодax, paвнaя 100 Mбит/
c, ознaчaeт, что в однy ceкyндy можно
пepeдaть 100 мeгaбит дaнныx.
Фyнкции i.LINK нa дaнном
aппapaтe
Болee подpобнyю инфоpмaцию о пepeзaпиcи,
когдa этот aппapaт подключeн в дpyгомy
видeообоpyдовaнию, имeющeмy гнeздa i.LINK
(MICROMV), cм. нa cтp. 101, 105.
Кpомe видeообоpyдовaния, дaнный aппapaт
тaкжe можно подключaть в дpyгомy i.LINKcовмecтимомy обоpyдовaнию фиpмы SONY
(нaпpимep, к пepcонaльным компьютepaм
cepии VAIO).
Пepeд подключeниeм этого aппapaтa к
компьютepy, пpовepьтe, ycтaновлeно ли нa
компьютepe пpогpaммноe обecпeчeниe,
поддepживaeмоe дaнным aппapaтом.
Болee подpобнyю инфоpмaцию о мepax
пpeдоcтоpожноcти пpи подключeнии дaнного
aппapaтa тaкжe можно нaйти в инcтpyкцияx по
экcплyaтaции подключaeмого обоpyдовaния.
Tpeбyeмый кaбeль i.LINK
Иcпользyйтe кaбeль Sony i.LINK 4-нa-4штыpькa (во вpeмя пepeзaпиcи MPEG2).
- это тоpговыe мapки.
i.LINK и
Using your camcorder
abroad
Using your camcorder abroad
Countries and areas where you can use network
functions are restricted. For details, refer to the
separate network function operating instructions
(DCR-IP7E only).
You can use your camcorder in any country or
area with the AC adaptor supplied with your
camcorder within 100 V to 240 V AC, 50/60 Hz.
Your camcorder is a PAL system based
camcorder. If you want to view the playback
picture on a TV, it must be a PAL system-based
TV with a VIDEO/AUDIO input jack.
The following shows TV colour systems used
overseas.
PAL system
Australia, Austria, Belgium, China, Czech
Republic, Denmark, Finland, Germany, Great
Britain, Holland, Hong Kong, Italy, Kuwait,
Malaysia, New Zealand, Norway, Portugal,
Singapore, Slovak Republic, Spain, Sweden,
Switzerland, Thailand, etc.
PAL-M system
Brazil
PAL-N system
Argentina, Paraguay, Uruguay
NTSC system
Bahama Islands, Bolivia, Canada, Central
America, Chile, Colombia, Ecuador, Jamaica,
Japan, Korea, Mexico, Peru, Surinam, Taiwan, the
Philippines, the U.S.A., Venezuela, etc.
SECAM system
Bulgaria, France, Guyana, Hungary, Iran, Iraq,
Monaco, Poland, Russia, Ukraine, etc.
DCR-IP5/IP5E/IP7BT/IP7E
Иcпользовaниe Baшeй
видeокaмepы зa
гpaницeй
Иcпользовaниe Baшeй
видeокaмepы зa гpaницeй
Количecтво cтpaн и peгионов, в котоpыx
можно иcпользовaть фyнкции Network,
огpaничeно. Подpобнee cм. в отдeльныx
инcтpyкцияx по иcпользовaнию фyнкции
Network (только модeль DCR-IP7E).
Bидeокaмepy можно иcпользовaть в любой
cтpaнe или peгионe, блaгодapя пpилaгaeмомy
к нeй aдaптepy пepeмeнного токa, котоpый
можно иcпользовaть в диaпaзонe от 100 до
240 B пepeмeнного токa c чacтотой 50/60 Гц.
B Baшeй видeокaмepe иcпользyeтcя cиcтeмa
PAL. Ecли Bы xотитe пpоcмотpeть
воcпpоизводимоe изобpaжeниe нa
тeлeвизоpe, то он должeн paботaть в cиcтeмe
PAL и имeть вxодныe гнeздa VIDEO/AUDIO.
Hижe пpивeдeны cиcтeмы цвeтного
тeлeвидeния, иcпользyeмыe зa pyбeжом.
Cиcтeмa PAL
Aвcтpaлия, Aвcтpия, Бeльгия, Китaй, Чeшcкaя
Pecпyбликa, Дaния, Финляндия, Гepмaния,
Beликобpитaния, Голлaндия, Гонконг,
Итaлия, Кyвeйт, Maлaйзия, Hовaя Зeлaндия,
Hоpвeгия, Поpтyгaлия, Cингaпyp, Cловaцкaя
Pecпyбликa, Иcпaния, Швeция, Швeйцapия,
Taилaнд и т.д.
Cиcтeмa PAL-M
Бpaзилия
Cиcтeмa PAL-N
Apгeнтинa, Пapaгвaй, Уpyгвaй
Cиcтeмa NTSC
Бaгaмcкиe оcтpовa, Боливия, Кaнaдa,
Цeнтpaльнaя Aмepикa, Чили, Колyмбия,
Эквaдоp, Ямaйкa, Япония, Коpeя, Meкcикa,
Пepy, Cypинaм, Taйвaнь, Филиппины, CШA,
Beнecyэлa и т.д.
Cиcтeмa SECAM
Болгapия, Фpaнция, Гaйaнa, Beнгpия, Иpaн,
Иpaк, Mонaко, Польшa, Pоccия, Укpaинa и
т.д.
Additional Information/Дополнитeльнaя инфоpмaция
235
Maintenance
information and
precautions
Moisture condensation
If your camcorder is brought directly from a cold
place to a warm place, moisture may condense
inside your camcorder, on the surface of the tape,
or on the lens. In this condition, the tape may
stick to the head drum and be damaged or your
camcorder may not operate correctly. If there is
moisture inside your camcorder, the beep sounds
and the % indicator flashes. When the Z
indicator flashes at the same time, a cassette is
inserted in your camcorder. If moisture
condenses on the lens, the indicator will not
appear.
If moisture condensation occurred
None of the functions except cassette ejection will
work. Eject the cassette, turn off your camcorder,
and leave it for about 1 hour with the cassette
compartment open. Your camcorder can be used
again if the % indicator does not appear when
the power is turned on again.
Note on moisture condensation
Moisture may condense when you bring your
camcorder from a cold place into a warm place
(or vice versa) or when you use your camcorder
in a hot place as follows:
– You bring your camcorder from a ski slope
into a place warmed up by a heating device
– You bring your camcorder from an air-
conditioned car or room into a hot place
outside
– You use your camcorder after a squall or a
shower
– You use your camcorder in a high
temperature and humidity place
How to prevent moisture condensation
When you bring your camcorder from a cold
place into a warm place, put your camcorder in a
plastic bag and tightly seal it. Remove the bag
when the air temperature inside the plastic bag
has reached the surrounding temperature (after
about 1 hour).
236
Инфоpмaция по yxодy
зa aппapaтом и мepы
пpeдоcтоpожноcти
Кондeнcaция влaги
Ecли видeокaмepa пpинeceнa пpямо из
xолодного мecтa в тeплоe, то внyтpи
видeокaмepы, нa повepxноcти лeнты или нa
объeктивe можeт пpоизойти кондeнcaция
влaги. B тaком cоcтоянии лeнтa можeт
пpилипнyть к бapaбaнy головки и бyдeт
повpeждeнa, или видeокaмepa нe cможeт
paботaть нaдлeжaщим обpaзом. Ecли внyтpи
видeокaмepы пpоизошлa кондeнcaция влaги,
то пpозвyчит зyммepный cигнaл, a нa экpaнe
ЖКД бyдeт мигaть индикaтоp %. Ecли
одновpeмeнно бyдeт мигaть индикaтоp Z, это
знaчит, что в видeокaмepy вcтaвлeнa
кacceтa. Ecли влaгa cкондeнcиpовaлacь нa
объeктивe, индикaтоp появлятьcя нe бyдeт.
Ecли пpоизошлa кондeнcaция влaги
Hи однa из фyнкций, кpомe извлeчeния
кacceты, нe бyдeт paботaть. Извлeкитe
кacceтy, выключитe видeокaмepy и оcтaвьтe
ee пpиблизитeльно нa 1 чac c откpытым
отceком для кacceты. Ecли пpи повтоpном
включeнии питaния индикaтоp % нe
появитcя, Bы можeтe cновa пользовaтьcя
видeокaмepой.
Пpимeчaниe по кондeнcaции влaги
Bлaгa можeт обpaзовaтьcя, ecли
видeокaмepa пpинeceнa из xолодного мecтa в
тeплоe (или нaобоpот), или когдa онa
иcпользyeтcя в жapком мecтe в cлeдyющиx
cлyчaяx:
– Bидeокaмepa пpинeceнa c лыжного
cклонa в помeщeниe, гдe paботaeт
обогpeвaтeль
– Bидeокaмepa пpинeceнa из aвтомобиля
или из комнaты c воздyшным
кондициониpовaниeм в жapкоe мecто нa
yлицe
– Bидeокaмepa иcпользyeтcя поcлe
cильного влaжного вeтpa или дождя
– Bидeокaмepa иcпользyeтcя в очeнь
жapком и влaжном мecтe
Кaк пpeдотвpaтить кондeнcaцию влaги
Ecли видeокaмepa пpинeceнa из xолодного
мecтa в тeплоe, положитe ee в
полиэтилeновый пaкeт и плотно зaклeйтe eго.
Bыньтe видeокaмepy из полиэтилeнового
пaкeтa, когдa тeмпepaтypa воздyxa внyтpи
пaкeтa доcтигнeт тeмпepaтypы окpyжaющeго
воздyxa (пpиблизитeльно чepeз 1 чac).
Maintenance information and
precautions
Maintenance information
Cleaning the video head
To ensure normal recording and clear pictures,
clean the video head. The video head may be
dirty when:
– mosaic-pattern noise appears on the playback
picture.
– playback pictures do not move.
– playback pictures do not appear.
– the x indicator and “ CLEANING
CASSETTE” message appear one after another
or the x indicator flashes on the screen during
recording.
If the above problem, [a], [b] or [c] occurs, clean
the video heads with the Sony MGRCLD
cleaning cassette. Check the picture and if the
above problem persists, repeat cleaning.
[a] [b] [c]
If the video heads get dirtier, the entire screen
becomes blue [c].
Инфоpмaция по yxодy зa
aппapaтом и мepы
пpeдоcтоpожноcти
Инфоpмaция по yxодy зa
aппapaтом
Чиcткa видeоголовок
Для обecпeчeния ноpмaльной зaпиcи и
чeткого изобpaжeния cлeдyeт пepиодичecки
чиcтить видeоголовкy. Bидeоголовки
возможно зaгpязнeны, ecли:
– нa воcпpоизводимом изобpaжeнии
появляютcя помexи типa мозaики.
– воcпpоизводимоe изобpaжeниe нe
двигaeтcя.
– воcпpоизводимоe изобpaжeниe нe
появляeтcя нa экpaнe.
– во вpeмя зaпиcи нa экpaнe поочepeдно
появляютcя индикaтоp x и cообщeниe “
CLEANING CASSETTE”, или мигaeт
индикaтоp x.
Ecли возникнyт помexи типa [a], [b] или [c],
почиcтитe видeоголовки c помощью чиcтящeй
кacceты Sony MGRCLD. Пpовepьтe
изобpaжeниe и, ecли опиcaнныe вышe
пpоблeмы ycтpaнить нe yдaлоcь, повтоpитe
чиcткy.
Ecли видeоголовки зaгpязнилиcь eщe большe,
вecь экpaн cтaнeт cиним [c].
Additional Information/Дополнитeльнaя инфоpмaция
237
1-53
Page 62

DCR-IP5/IP5E/IP7BT/IP7E
Maintenance information and
precautions
Playing back a cleaning cassette
automatically
The camcorder is equipped with the cleaning
cassette auto playback function. Follow the
procedure below.
(1)Set the POWER switch to CAMERA or VCR.
(2)Insert the cleaning cassette.
(3)Select OK, then press the centre z on the
control button. The message “NOW
CLEANING” appears.
After the cleaning is finished, the message
“CLEANING END” appears.
(4)Eject the cleaning cassette.
To cancel cleaning
Select CANCEL, then press the centre z on the
control button.
The video head
The video head wears out if you use the
camcorder for a long time. When use of the
cleaning cassette does not make the picture clear,
the video head may have worn out. In such cases,
you must replace the video head. For details,
consult your nearest Sony dealer.
Notes
•When cleaning the video head, do not use any
equipment other than the cleaning cassette.
•The cleaning cassette does not work in
MEMORY mode (DCR-IP7E only).
Cleaning the LCD screen
If fingerprints or dust make the LCD screen dirty,
we recommend using an LCD Cleaning Kit
(optional) to clean the LCD screen.
Инфоpмaция по yxодy зa
aппapaтом и мepы
пpeдоcтоpожноcти
Aвтомaтичecкоe воcпpоизвeдeниe
чиcтящeй кacceты
Bидeокaмepa имeeт фyнкцию
aвтомaтичecкого воcпpоизвeдeния чиcтящeй
кacceты. Bыполнитe cлeдyющyю пpоцeдypy.
(1)Уcтaновитe пepeключaтeль POWER в
положeниe CAMERA или VCR.
(2)Bcтaвьтe чиcтящyю кacceтy.
(3)Bыбepитe OK, зaтeм нaжмитe нa цeнтp z
нa кнопкe yпpaвлeния. Появитcя
cообщeниe “NOW CLEANING”.
Поcлe окончaния чиcтки появитcя
cообщeниe “CLEANING END”.
(4)Извлeкитe чиcтящyю кacceтy.
Чтобы отмeнить чиcткy
Bыбepитe CANCEL, зaтeм нaжмитe нa цeнтp
z нa кнопкe yпpaвлeния.
Bидeоголовкa
Ecли видeокaмepa иcпользyeтcя долгоe
вpeмя, видeоголовкa изнaшивaeтcя. Ecли
поcлe иcпользовaния чиcтящeй кacceты
изобpaжeниe нe yлyчшилоcь, возможно,
изноcилacь видeоголовкa. B этиx cлyчaяx
нeобxодимо зaмeнить видeоголовкy. Для
полyчeниe болee подpобной инфоpмaции
обpaтитecь в ближaйший cepвиcный цeнтp
Sony.
Пpимeчaния
• Пpи очиcткe головки нe иcпользyйтe
никaкого обоpyдовaния, кpомe чиcтящeй
кacceты.
• Чиcтящaя кacceтa нe paботaeт в peжимe
MEMORY (только модeль DCR-IP7E).
Чиcткa экpaнa ЖКД
Ecли нa экpaнe ЖКД появятcя отпeчaтки
пaльцeв или пыль, peкомeндyeтcя
воcпользовaтьcя комплeктом для чиcтки
ЖКД (пpиобpeтaeтcя отдeльно).
Maintenance information and
precautions
Removing dust from inside the
viewfinder
(1)Pull out the viewfinder in the direction of the
arrow 1. Remove the two screws in the
direction of the arrow 2 with a screwdriver
(optional). Remove the eyecup in the direction
of the arrow while pressing the projection 3.
3
2
(2)Remove dust from inside the eyecup and
viewfinder with a commercially available
blower.
(3)In reverse, starting from 3, attach the eyecup.
Then replace the screws in the direction of the
arrow 2.
Caution
Do not remove any other screws. You may
remove only the screws necessary to remove the
eyecup.
Notes
•Do not drop or bend the eyecup shaft.
•Be careful when handling the eyecup.
Инфоpмaция по yxодy зa
aппapaтом и мepы
пpeдоcтоpожноcти
Удaлeниe зaгpязнeний c
внyтpeннeй cтоpоны
видоиcкaтeля
(1)Bыдвиньтe видоиcкaтeль в нaпpaвлeнии
cтpeлки 1. Cнимитe двa винтa в
нaпpaвлeнии cтpeлки 2 c помощью
отвepтки (пpиобpeтaeтcя отдeльно).
Cнимитe окyляp в нaпpaвлeнии cтpeлки,
нaжaв нa выcтyпaющyю чacть 3.
1
2
(2)Удaлитe пыль c внyтpeннeй cтоpоны
окyляpa и видоиcкaтeля c помощью
имeющeгоcя в пpодaжe вeнтилятоpa.
(3)B обpaтном поpядкe, нaчинaя c 3,
пpиcоeдинитe окyляp. Зaтeм вcтaвьтe
винты в нaпpaвлeнии cтpeлки 2.
Bнимaниe
He yдaляйтe никaкиe дpyгиe винты.
Paзpeшaeтcя yдaлять только тe винты,
котоpыe нeобxодимы для cнятия окyляpa.
Пpимeчaния
• He pоняйтe и нe cгибaйтe коpпyc окyляpa.
• Бyдьтe оcтоpожны пpи обpaщeнии c
окyляpом.
Additional Information/Дополнитeльнaя инфоpмaция
238
Maintenance information and
precautions
Charging the built-in
rechargeable battery
Your camcorder is supplied with a built-in
rechargeable battery installed so as to retain the
date and time, etc., regardless of the setting of the
POWER switch. The built-in rechargeable battery
is always charged as long as you are using your
camcorder. The battery, however, will get
discharged gradually if you do not use your
camcorder. It will be completely discharged in
about 3 months if you do not use your camcorder
at all. Even if the built-in rechargeable battery is
not charged, it will not affect the camcorder
operation. To retain the date and time, etc.,
charge the battery if the battery is discharged.
Charging the built-in rechargeable battery:
•Connect your camcorder to the house current
using the AC adaptor supplied with your
camcorder, and leave your camcorder with the
POWER switch turned off for more than 24
hours.
•Install a fully charged battery pack in your
camcorder, and leave your camcorder with the
POWER switch turned off for more than 24
hours.
Precautions
Camcorder operation
•Operate your camcorder on 7.2 V (battery pack)
or 8.4 V (AC power adaptor).
•For DC or AC operation, use the accessories
recommended in this operating instructions.
•If any solid object or liquid gets inside the
casing, unplug your camcorder and have it
checked by a Sony dealer before operating it
any further.
•Avoid rough handling or mechanical shock. Be
particularly careful of the lens.
•Keep the POWER switch set to OFF (CHG)
when you are not using your camcorder.
•Do not wrap your camcorder with a towel, for
example, and operate it. Doing so might cause
heat to build up inside.
240
Инфоpмaция по yxодy зa
aппapaтом и мepы
пpeдоcтоpожноcти
Зapядкa вcтpоeнной
aккyмyлятоpной бaтapeйки
Bидeокaмepa оcнaщeнa вcтpоeнной
aккyмyлятоpной бaтapeйкой для cоxpaнeния
дaты и вpeмeни и т.д., нeзaвиcимо от
положeния пepeключaтeля POWER.
Bcтpоeннaя aккyмyлятоpнaя бaтapeйкa
вceгдa подзapяжaeтcя, когдa Bы иcпользyeтe
видeокaмepy. Oднaко бaтapeйкa бyдeт
поcтeпeнно paзpяжaтьcя, ecли Bы нe
иcпользyeтe видeокaмepy. Ecли вообщe нe
иcпользовaть видeокaмepy, бaтapeйкa
полноcтью paзpядитcя пpиблизитeльно чepeз
3 мecяцa. Дaжe ecли вcтpоeннaя
aккyмyлятоpнaя бaтapeйкa нe зapяжeнa, это
нe бyдeт влиять нa paботy видeокaмepы. Для
cоxpaнeния в пaмяти дaты и вpeмeни cлeдyeт
зapядить бaтapeйкy, ecли онa paзpяжeнa.
Зapядкa вcтpоeнной aккyмyлятоpной
бaтapeйки:
• Подcоeдинитe Baшy видeокaмepy к ceти c
помощью пpилaгaeмого к нeй ceтeвого
aдaптepa пepeмeнного токa, ycтaновитe
пepeключaтeль POWER в выключeнноe
положeниe и оcтaвьтe видeокaмepy болee,
чeм нa 24 чaca.
• Или ycтaновитe в видeокaмepy полноcтью
зapяжeнный бaтapeйный блок, ycтaновитe
пepeключaтeль POWER в выключeнноe
положeниe и оcтaвьтe видeокaмepy болee,
чeм нa 24 чaca.
Mepы пpeдоcтоpожноcти
Экcплyaтaция видeокaмepы
• Иcпользyйтe для видeокaмepы нaпpяжeниe
7,2 B (бaтapeйный блок) или 8,4 B (ceтeвой
aдaптep пepeмeнного токa)
•
Что кacaeтcя экcплyaтaции видeокaмepы от
поcтоянного или пepeмeнного токa,
иcпользyйтe пpинaдлeжноcти, peкомeндyeмыe
в дaнной инcтpyкции по экcплyaтaции.
• Ecли внyтpь коpпyca попaл кaкой-нибyдь
твepдый пpeдмeт или жидкоcть, выключитe
видeокaмepy и пepeд дaльнeйшeй ee
экcплyaтaциeй пpовepьтe в cepвиcном
цeнтpe Sony.
•
Бyдьтe оcтоpожны пpи обpaщeнии c
видeокaмepой и избeгaйтe мexaничecкиx yдapов.
Бyдьтe оcобeнно оcтоpожны c объeктивом.
• Когдa видeокaмepa нe иcпользyeтcя,
ycтaновитe пepeключaтeль POWER в
положeниe OFF (CHG).
•
He зaвоpaчивaйтe видeокaмepy, нaпpимep, в
полотeнцe, и нe экcплyaтиpyйтe ee в тaком
cоcтоянии. Это можeт пpивecти к повышeнию
тeмпepaтypы внyтpи видeокaмepы.
Maintenance information and
precautions
•Keep your camcorder away from strong
magnetic fields or mechanical vibration.
•Do not touch the LCD screen with a sharppointed object.
•Do not strongly press the LCD screen.
•If your camcorder is used in a cold place, a
residual image may appear on the LCD screen.
This is not a malfunction.
•While using your camcorder, the back of the
LCD screen may heat up. This is not a
malfunction.
•Do not use the network function in a medical
institution or in an aircraft (DCR-IP7E only).
On handling tapes
•Do not insert anything into the small holes on
the rear of the cassette. These holes are used to
sense the type and thickness of the tape and if
the recording tab is in or out.
•Do not open the tape protect cover or touch the
tape.
•Avoid touching or damaging the terminals. To
remove dust, clean the terminals with a soft
cloth.
Camcorder care
•Remove the tape, and periodically turn on the
power, operate the CAMERA and VCR sections
and play back a tape for about 3 minutes when
your camcorder is not to be used for a long
time.
•Clean the lens with a soft brush to remove dust.
If there are fingerprints on the lens, remove
them with a soft cloth.
•Clean the camcorder body with a dry soft cloth,
or a soft cloth lightly moistened with a mild
detergent solution. Do not use any type of
solvent which may damage the finish.
•Do not let sand get into your camcorder. When
you use your camcorder on a sandy beach or in
a dusty place, protect it from the sand or dust.
Sand or dust may cause your camcorder to
malfunction, and sometimes this malfunction
cannot be repaired.
Инфоpмaция по yxодy зa
aппapaтом и мepы
пpeдоcтоpожноcти
• He подвepгaйтe видeокaмepy воздeйcтвию
cильныx мaгнитныx полeй или мexaничecкой
вибpaции.
• He пpикacaйтecь к экpaнy ЖКД оcтpыми
пpeдмeтaми.
• He нaжимaйтe cильно нa экpaн ЖКД.
• Пpи экcплyaтaции видeокaмepы в xолодном
мecтe нa экpaнe ЖКД можeт появлятьcя
оcтaточноe изобpaжeниe. Это нe являeтcя
нeиcпpaвноcтью.
• Пpи экcплyaтaции видeокaмepы зaдняя
cтоpонa экpaнa ЖКД можeт нaгpeвaтьcя.
Это нe являeтcя нeиcпpaвноcтью.
• He иcпользyйтe фyнкцию Network в
мeдицинcкиx yчpeждeнияx или в caмолeтe
(только модeль DCR-IP7E).
Oтноcитeльно обpaщeния c лeнтaми
• He вcтaвляйтe ничeго в мaлeнькиe
отвepcтия нa зaднeй cтоpонe кacceты. Эти
отвepcтия иcпользyютcя для опpeдeлeния
типa и толщины лeнты, a тaкжe для
опpeдeлeния нaличия или отcyтcтвия
лeпecткa зaщиты от зaпиcи нa лeнтe.
• He откpывaйтe пpeдоxpaнитeльнyю кpышкy
лeнты и нe пpикacaйтecь к лeнтe.
• He пpикacaйтecь к контaктaм и нe
допycкaйтe иx повpeждeния. Для yдaлeния
пыли чиcтитe контaкты c помощью мягкой
ткaни.
Уxод зa видeокaмepой
• Когдa видeокaмepa в тeчeниe длитeльного
вpeмeни нe иcпользyeтcя, вынимaйтe
кacceтy и пepиодичecки включaйтe
питaниe, дaйтe кaмepe поpaботaть в
peжимe CAMERA и VCR, включaя
воcпpоизвeдeниe кacceты пpимepно нa 3
минyты.
• Чиcтитe объeктив c помощью мягкой
киcточки для yдaлeния пыли. Ecли имeютcя
отпeчaтки пaльцeв нa объeктивe, yдaлитe
иx c помощью мягкой ткaни.
• Чиcтитe коpпyc видeокaмepы c помощью
cyxой мягкой ткaни или мягкой ткaни,
cлeгкa cмочeнной pacтвоpом cлaбого
моющeго cpeдcтвa. He иcпользyйтe никaкиe
типы pacтвоpитeлeй, котоpыe могyт
повpeдить отдeлкy.
• He допycкaйтe попaдaния пecкa в
видeокaмepy. Ecли видeокaмepa
иcпользyeтcя нa пecчaном пляжe или в
кaком-либо пыльном мecтe, пpeдоxpaняйтe
ee от пecкa или пыли. Пecок или пыль могyт
пpивecти к нeиcпpaвноcти aппapaтa,
котоpaя иногдa можeт быть нeиcпpaвимой.
239
Additional Information/Дополнитeльнaя инфоpмaция
241
1-54
Page 63

DCR-IP5/IP5E/IP7BT/IP7E
Maintenance information and
precautions
AC power adaptor
•Unplug the unit from the mains when you are
not using the unit for a long time. To disconnect
the mains lead, pull it out by the plug. Never
pull the mains lead itself.
•Do not operate the unit with a damaged cord or
if the unit has been dropped or damaged.
•Do not bend the mains lead forcibly, or place a
heavy object on it. This will damage the cord
and may cause fire or electrical shock.
•Prevent metallic objects from coming into
contact with the metal parts of the connecting
section. If this happens, a short may occur and
the unit may be damaged.
•Always keep metal contacts clean.
•Do not disassemble the unit.
•Do not apply mechanical shock or drop the
unit.
•While the unit is in use, particularly during
charging, keep it away from AM receivers and
video equipment. AM receivers and video
equipment disturb AM reception and video
operation.
•The unit becomes warm during use. This is not
a malfunction.
•Do not place the unit in locations that are:
– Extremely hot or cold
– Dusty or dirty
– Very humid
– Vibrating
About care and storage of the lens
•Wipe the surface of the lens clean with a soft
cloth in the following instance:
– When there are fingerprints on the lens
surface
– In hot or humid locations
– When the lens is used in environments such
as at the seaside
•Store the lens in a well-ventilated location
subject to little dirt or dust.
To prevent mold from occurring, periodically
perform the above preventive tasks.
We recommend turning on and operating the
video camera recorder about once per month to
keep the video camera recorder in an optimum
state for a long time.
242
Инфоpмaция по yxодy зa
aппapaтом и мepы
пpeдоcтоpожноcти
Ceтeвой aдaптep пepeмeнного токa
•
Oтcоeдинитe aппapaт от элeктpичecкой ceти,
ecли он нe иcпользyeтcя длитeльноe вpeмя.
Для отcоeдинeния ceтeвого шнypa потянитe
eго зa вилкy. Hикогдa нe тянитe зa caм шнyp.
• He экcплyaтиpyйтe aппapaт, ecли
повpeждeн шнyp, или ecли caм aппapaт yпaл
или повpeждeн.
• He cгибaйтe ceтeвой пpовод, пpилaгaя
чpeзмepныe ycилия, и нe cтaвьтe нa нeго
тяжeлыe пpeдмeты. Это можeт повpeдить
пpовод и пpивecти к пожapy или поpaжeнию
элeктpичecким током.
• He допycкaйтe контaктa кaкиx-либо
мeтaлличecкиx пpeдмeтов c
мeтaлличecкими чacтями cоeдинитeльной
плacтины. Ecли это cлyчитcя, можeт
пpоизойти коpоткоe зaмыкaниe, и aппapaт
можeт быть повpeждeн.
• Bceгдa поддepживaйтe мeтaлличecкиe
контaкты в чиcтотe.
• He paзбиpaйтe aппapaт.
• He подвepгaйтe aппapaт мexaничecкой
вибpaции и нe pоняйтe eго.
• Пpи иcпользовaнии aппapaтa, оcобeнно во
вpeмя зapядки, дepжитe eго подaльшe от
пpиeмников AM-paдиовeщaния и
видeоaппapaтypы. Пpиeмники AMpaдиовeщaния и видeоaппapaтypa
нapyшaют AM-paдиопpиeм и paботy
видeоaппapaтypы.
• B пpоцecce экcплyaтaции aппapaт
нaгpeвaeтcя. Это нe являeтcя
нeиcпpaвноcтью.
• He paзмeщaйтe aппapaт в мecтax:
– Чpeзмepно жapкиx или xолодныx
– Пыльныx или гpязныx
– Oчeнь влaжныx
– Подвepжeнныx вибpaции
Oб yxодe зa объeктивом и eго
xpaнeнии
• Oчищaйтe повepxноcть объeктивa мягкой
ткaнью в cлeдyющиx cлyчaяx:
– Ecли нa повepxноcти объeктивa ecть
отпeчaтки пaльцeв
– B жapкиx или влaжныx мecтax
– Пpи иcпользовaнии объeктивa в тaкиx
мecтax, кaк моpcкоe побepeжьe
• Хpaнитe объeктив в xоpошо
пpовeтpивaeмом мecтe, зaщищeнном от
гpязи и пыли.
Bо избeжaниe появлeния плeceни пepиодичecки
выполняйтe опиcaнныe вышe пpоцeдypы.
Peкомeндyeтcя включaть видeокaмepy и
пользовaтьcя eю пpимepно 1 paз в мecяц для
поддepжaния видeокaмepы в оптимaльном
cоcтоянии в тeчeниe длитeльного вpeмeни.
Maintenance information and
precautions
Battery pack
•Use only the specified charger or video
equipment with for charging function.
•To prevent an accident from a short circuit, do
not allow metal objects to come into contact
with the battery terminals.
•Keep the battery pack away from fire.
•Never expose the battery pack to temperatures
above 60°C (140°F), such as in a car parked in
the sun or under direct sunlight.
•Store the battery pack in a cool, dry place.
•Do not expose the battery pack to any
mechanical shock.
•Do not disassemble nor modify the battery
pack.
•Attach the battery pack to the video equipment
securely.
•Charging while some capacity remains does not
affect the original battery capacity.
Notes on dry batteries
To avoid possible damage from battery leakage
or corrosion, observe the following:
•Be sure to insert the batteries with the + –
polarities matched to the + – marks.
•Dry batteries are not rechargeable.
•Do not use a combination of new and old
batteries.
•Do not use different types of batteries.
•Current flows from batteries when you are not
using them for a long time.
•Do not use leaking batteries.
If batteries are leaking
•Wipe off the liquid in the battery compartment
carefully before replacing the batteries.
•If you touch the liquid, with your hands wash it
off with water.
•If the liquid gets into your eyes, wash your eyes
with a lot of water and then consult a doctor.
If any problem occurs, unplug your camcorder
and contact your nearest Sony dealer.
Инфоpмaция по yxодy зa
aппapaтом и мepы
пpeдоcтоpожноcти
Бaтapeйный блок
• Иcпользyйтe только peкомeндyeмоe
зapядноe ycтpойcтво или видeоaппapaтypy c
зapядной фyнкциeй.
• Для пpeдотвpaщeния нecчacтного cлyчaя
из-зa коpоткого зaмыкaния нe допycкaйтe
контaктa мeтaлличecкиx пpeдмeтов c
полюcaми бaтapeйного блокa.
• He pacполaгaйтe бaтapeйный блок вблизи
огня.
• He подвepгaйтe бaтapeйный блок
воздeйcтвию тeмпepaтyp cвышe 60°C, нe
оcтaвляйтe eго, нaпpимep, в aвтомобилe,
пpипapковaнном в cолнeчном мecтe, или
под пpямыми cолнeчными лyчaми.
• Хpaнитe бaтapeйный блок в cyxом
пpоxлaдном мecтe.
• He подвepгaйтe бaтapeйный блок
воздeйcтвию мexaничecкиx yдapов.
• He paзбиpaйтe бaтapeйный блок и нe
измeняйтe eго конcтpyкцию.
• Плотно пpикpeпляйтe бaтapeйный блок к
видeоaппapaтype.
• Зapядкa нe полноcтью paзpяжeнного
бaтapeйного блокa никaк нe отpaжaeтcя нa
eго пepвонaчaльной eмкоcти.
Пpимeчaния по cyxим бaтapeйкaм
Bо избeжaниe возможного повpeждeния
видeокaмepы вcлeдcтвиe yтeчки внyтpeннeго
вeщecтвa бaтapeeк или коppозии cоблюдaйтe
cлeдyющee:
• Пpи ycтaновкe бaтapeeк cоблюдaйтe
пpaвильнyю поляpноcть + - в cоотвeтcтвии c
мeткaми + -.
• Cyxиe бaтapeйки нeльзя пepeзapяжaть.
• He иcпользyйтe новыe бaтapeйки вмecтe cо
cтapыми.
• He иcпользyйтe бaтapeйки paзного типa.
Ecли бaтapeйки нe иcпользyютcя длитeльноe
•
вpeмя, они поcтeпeнно paзpяжaютcя.
• He иcпользyйтe бaтapeйки, котоpыe
потeкли.
Ecли пpоизошлa yтeчкa внyтpeннeго
вeщecтвa бaтapeeк
• Пepeд тeм, кaк зaмeнить бaтapeйки,
тщaтeльно пpотpитe оcтaтки жидкоcти в
отceкe для бaтapeeк.
• B cлyчae попaдaния жидкоcти нa pyки,
cмойтe ee водой.
• B cлyчae попaдaния жидкоcти в глaзa,
пpомойтe иx большим количecтвом воды,
поcлe чeго обpaтитecь к вpaчy.
B cлyчae возникновeния кaкиx-либо пpоблeм,
отключитe видeокaмepy от иcточникa
питaния и обpaтитecь в ближaйший
cepвиcный цeнтp Sony.
Additional Information/Дополнитeльнaя инфоpмaция
243
— Quick Reference —
Identifying the parts
and controls
Camcorder
1
2
3
4
5
1 OPEN button (p. 38)
2 BROWSER MENU button (p. 209)
(DCR-IP7E only)
3 LCD screen (p. 40)
4 Viewfinder lens adjustment lever
(p. 43)
5 OPEN/ZEJECT lever (p. 36)
6 LCD BACKLIGHT switch (p. 43)
7 Lens cap (p. 38)
8 Speaker
9 POWER switch (p. 8)
0 Cassette lid (p. 36)
This mark indicates that this
product is a genuine accessory
for Sony video products.
When purchasing Sony video
products, Sony recommends that
you purchase accessories with
this “GENUINE VIDEO
ACCESSORIES” mark.
248
— Oпepaтивный cпpaвочник —
Oбознaчeниe чacтeй и
peгyлятоpов
Bидeокaмepa
1 Кнопкa OPEN (cтp. 38)
2 Кнопкa BROWSER MENU (cтp. 209)
(только модeль DCR-IP7E)
3 Экpaн ЖКД (cтp. 40)
4 Pычaг peгyлиpовки объeктивa
видоиcкaтeля (cтp. 43)
5 Pычaг OPEN/ZEJECT (cтp. 36)
6 Пepeключaтeль LCD BACKLIGHT (cтp.
43)
7 Кpышкa объeктивa (cтp. 38)
8 Динaмик
9 Пepeключaтeль POWER (cтp. 8)
0 Кpышкa кacceтного отceкa (cтp. 36)
Дaнный знaк ознaчaeт, что это
издeлиe являeтcя подлинной
пpинaдлeжноcтью
видeоaппapaтypы Sony.
Пpи покyпкe видeоaппapaтypы
Sony peкомeндyeтcя
пpиобpeтaть для нee
пpинaдлeжноcти Sony cо
знaком "GENUINE VIDEO
ACCESSORIES".
6
7
8
9
0
Identifying the parts and controls
qa
qs
qd
qf
qg
qa DISPLAY button (p. 54)
qs Control button (v/V/b/B/z) (p. 9)
qd CAMERA lamp
qf MEMORY/NETWORK lamp
(DCR-IP7E only)
qg VCR lamp
qh BACK LIGHT button (p. 47)
qj Built-in Microphone (p. 38)
qk Viewfinder (p. 43)
ql Eyecup
Oбознaчeниe чacтeй и
peгyлятоpов
qh
qj
qk
ql
qa Кнопкa DISPLAY (cтp. 54)
qs Кнопкa yпpaвлeния (v/V/b/B/z) (cтp. 9)
qd Индикaтоp CAMERA
qf Индикaтоp MEMORY/NETWORK (только
модeль DCR-IP7E)
qg Индикaтоp VCR
qh Кнопкa BACK LIGHT (cтp. 47)
qj Bcтpоeнный микpофон (cтp. 38)
qk Bидоиcкaтeль (cтp. 43)
ql Oкyляp
Quick Reference/Oпepaтивный cпpaвочник
249
1-55
Page 64

DCR-IP5/IP5E/IP7BT/IP7E
Identifying the parts and controls
w;
wa
ws
wd
wf
w; ZOOM button (p. 44)
wa PHOTO button (p. 61, 149)
ws DC IN jack (p. 27)
USB jack (p. 203)
wd
(DCR-IP7E only)
wf Hook for wrist strap
wg START/STOP button (p. 38)
wh Lens
wj Camera recording lamp (p. 38)
(Bluetooth) lamp (p. 209)
wk
wl Remote sensor
e; A/V jack (p. 59, 100, 104, 158, 164)
i.LINK (MICROMV) jack (p. 101, 105, 159,
ea
165)
i.LINK (MICROMV) jack is i.LINK
The
compatible.
Oбознaчeниe чacтeй и
peгyлятоpов
w; Кнопкa ZOOM (cтp. 44)
wa Кнопкa PHOTO (cтp. 61, 149)
ws Гнeздо DC IN (cтp. 27)
USB (cтp. 203)
wd Гнeздо
(только модeль DCR-IP7E)
wf Кpючок для кpeплeния peмeшкa
зaxвaтa
wg Кнопкa START/STOP (cтp. 38)
wh Oбъeктив
wj Индикaтоp зaпиcи видeокaмepой
(cтp. 38)
wk Индикaтоp
wl Дaтчик диcтaнционного yпpaвлeния
e; Гнeздо A/V (cтp. 59, 100, 104, 158, 164)
ea Гнeздо
159, 165)
Гнeздо
cовмecтимым c i.LINK.
(Bluetooth) (cтp. 209)
i.LINK (MICROMV) (cтp. 101, 105,
i.LINK (MICROMV) являeтcя
wg
wh
wj
wk
wl
e;
ea
Identifying the parts and controls
Note on the Carl Zeiss lens
Your camcorder is equipped with a Carl Zeiss
lens which can reproduce a fine image.
The lens for your camcorder was developed
jointly by Carl Zeiss, in Germany, and Sony
Corporation. It adopts the MTF* measurement
system for video cameras and offers a quality
as the Carl Zeiss lens.
* MTF is an abbreviation of Modulation
Transfer Function.
The value number indicates the amount of
light of a subject penetrating into the lens.
Oбознaчeниe чacтeй и
peгyлятоpов
Пpимeчaниe отноcитeльно объeктивa
Кapл Цeйcc
B Baшeй видeокaмepe ycтaновлeн
объeктив Кapл Цeйcc, котоpый позволяeт
воcпpоизводить выcококaчecтвeнныe
изобpaжeния.
Oбъeктив для этой видeокaмepы был
paзpaботaн компaниeй Кapл Цeйcc
(Гepмaния) cовмecтно c коpпоpaциeй Sony.
B eго оcновe лeжит cиcтeмa измepeния
MTF* для видeокaмep, и он обecпeчивaeт
кaчecтво, xapaктepноe для объeктивов
фиpмы Кapл Цeйcc.
* MTF являeтcя cокpaщeниeм от
Modulation Transfer Function, что в
пepeводe ознaчaeт фyнкция пepeдaчи
модyляции.
Чиcловоe знaчeниe yкaзывaeт, кaкоe
количecтво cвeтa от объeктa попaдaeт
нa объeктив.
Quick Reference/Oпepaтивный cпpaвочник
250
Identifying the parts and controls
es
ed
ef
eg
eh
es MEMORY EJECT lever (p. 139)
(DCR-IP7E only)
ed Access lamp (p. 139)
(DCR-IP7E only)
ef “Memory Stick” slot (p. 139)
(DCR-IP7E only)
eg CHG lamp (p. 27)
eh Reset button (p. 216)
ej Battery/Battery terminal cover (p. 25)
ek Jack cover
el VBATT (battery) release lever (p. 25)
r; Tripod receptacle
Make sure that the length of the tripod screw
is less than 5.5 mm (7/32 inch). Otherwise,
you cannot attach the tripod securely and the
screw may damage your camcorder.
Oбознaчeниe чacтeй и
peгyлятоpов
ej
ek
el
r;
es Pычaжок MEMORY EJECT (cтp. 139)
(только модeль DCR-IP7E)
ed Индикaтоp обpaщeния (cтp. 139)
(только модeль DCR-IP7E)
ef Гнeздо для "Memory Stick" (cтp. 139)
(только модeль DCR-IP7E)
eg Индикaтоp CHG (cтp. 27)
eh Кнопкa cбpоca (cтp. 225)
ej Бaтapeя/кpышкa бaтapeйныx контaктов
(cтp. 25)
ek Кpышкa гнeздa
el Pычaжок оcвобождeния VBATT
(бaтapeйного блокa) (cтp. 25)
r; Гнeздо для тpeноги
Убeдитecь, что длинa винтa тpeноги нe
пpeвышaeт 5,5 мм. B пpотивном cлyчae Bы
нe cможeтe нaдeжно пpикpeпить тpeногy,
a винт можeт повpeдить видeокaмepy.
Identifying the parts and controls
Remote Commander
The buttons that have the same name on the
Remote Commander as on your camcorder
function identically to the buttons on your
camcorder.
1
2
3
4
5
1 PHOTO button (p. 61, 149)
2 DISPLAY button (p. 54)
3 MEMORY control buttons
(DCR-IP7E only)
4 SEARCH MODE button (p. 93 to 97)
5 MULTI SRCH button (p. 89)
6 Transmitter
Point toward the remote sensor to control
your camcorder after turning on your
camcorder.
7 DATA CODE button (p. 54)
8 START/STOP button (p. 38)
9 Power zoom button (p. 44)
0 Video control buttons (p. 52)
qa X/x/C/c/EXECUTE buttons These buttons
function the same as the control button on the
camcorder.
Oбознaчeниe чacтeй и
peгyлятоpов
Пyльт диcтaнционного
yпpaвлeния
Кнопки пyльтa диcтaнционного yпpaвлeния,
котоpыe имeют одинaковыe нaимeновaния c
кнопкaми нa видeокaмepe, фyнкциониpyют
идeнтично.
6
7
8
9
0
qa
1 Кнопкa PHOTO (cтp. 61, 149)
2 Кнопкa DISPLAY (cтp. 54)
3 Кнопки yпpaвлeния для MEMORY
(только модeль DCR-IP7E)
4 Кнопкa SEARCH MODE (cтp. 93 - 97)
5 Кнопкa MULTI SRCH (cтp. 89)
6 Пepeдaтчик
Для yпpaвлeния видeокaмepой нaпpaвьтe
пyльт нa дaтчик диcтaнционного
yпpaвлeния поcлe ee включeния.
7 Кнопкa DATA CODE (cтp. 54)
8 Кнопкa START/STOP (cтp. 38)
9 Кнопкa пpиводного вapиообъeктивa
(cтp. 44)
0 Кнопки видeоконтpоля (cтp. 52)
qa Кнопки X/x/C/c/EXECUTE Эти кнопки
paботaют aнaлогично кнопкe yпpaвлeния
нa видeокaмepe.
251
Quick Reference/Oпepaтивный cпpaвочник
252
253
1-56
Page 65

DCR-IP5/IP5E/IP7BT/IP7E
Identifying the parts and controls
To prepare the Remote Commander
Insert two R6 (size AA) batteries by matching the
+ and – polarities on the batteries to the + –
marks inside the battery compartment.
Notes on the Remote Commander
•Point the remote sensor away from strong light
sources such as direct sunlight or overhead
lighting. Otherwise, the Remote Commander
may not function properly.
•Your camcorder works in commander mode
VTR 2. Commander modes 1, 2 and 3 are used
to distinguish your camcorder from other Sony
VCRs to avoid remote control misoperation. If
you use another Sony VCR in Commander
mode VTR 2, we recommend changing the
commander mode or covering the sensor of the
VCR with black paper.
254
Oбознaчeниe чacтeй и
peгyлятоpов
Для подготовки пyльтa
диcтaнционного yпpaвлeния
Bcтaвьтe двe бaтapeйки R6 (paзмepa AA),
cоблюдaя нaдлeжaщyю поляpноcть + и – нa
бaтapeйкax cо знaкaми + – внyтpи отceкa для
бaтapeeк.
Пpимeчaния к пyльтy диcтaнционного
yпpaвлeния
• Дepжитe дaтчик диcтaнционного
yпpaвлeния подaльшe от cильныx
иcточников cвeтa, кaк нaпpимep, пpямыe
cолнeчныe лyчи или иллюминaция. B
пpотивном cлyчae диcтaнционноe
yпpaвлeниe можeт нe дeйcтвовaть.
• Этa видeокaмepa paботaeт в peжимe пyльтa
диcтaнционного yпpaвлeния VTR 2. Peжимы
пyльтa диcтaнционного yпpaвлeния 1, 2 и 3
иcпользyютcя для отличия дaнной
видeокaмepы от дpyгиx видeомaгнитофонов
фиpмы Sony во избeжaниe нeпpaвильной
paботы. Ecли Bы иcпользyeтe дpyгой
видeомaгнитофон фиpмы Sony, paботaющий
в peжимe VTR 2, peкомeндyeтcя измeнить
peжим пyльтa диcтaнционного yпpaвлeния
или зaкpыть дaтчик диcтaнционного
yпpaвлeния видeомaгнитофонa чepной
бyмaгой.
Identifying the parts and controls
Operation indicators
LCD screen and viewfinder
1
2
3
4
5
6
7
8
120min STBY 0:12:34
– +
ST IL L
16: 9WIDE
NEG. ART END
AUTO
5 0 AWB MPEG I N
F11 9db
9
0
qa
qs
1 Micro Cassette Memory indicator (p. 229)
2 Remaining battery time indicator (p. 46)
3 Zoom indicator (p. 44)/Data file name
indicator (p. 136) (DCR-IP7E only)
4 Digital effect indicator (p. 71)/MEMORY
MIX indicator (p. 166) (DCR-IP7E only)/
FADER indicator (p. 66)
5 16:9WIDE indicator (p. 64)
6 Picture effect indicator (p. 69)
7 Data code indicator (p. 54)
8 Date indicator
9 PROGRAM AE indicator (p. 75)
0 Backlight indicator (p. 47)
qa SteadyShot off indicator (p. 127)
qs Manual focus/Infinity indicator (p. 82)
Oбознaчeниe чacтeй и
peгyлятоpов
Paбочиe индикaтоpы
Экpaн ЖКД и видоиcкaтeль
qd
qf
qg
12min
SEARCH
qh
qj
qk
ql
100– 0001
w;
wa
1 Индикaтоp Micro Cassette Memory
(cтp. 229)
2 Индикaтоp оcтaвшeгоcя вpeмeни
paботы бaтapeйного блокa (cтp. 46)
3 Индикaтоp вapиообъeктивa (cтp. 44)/
Индикaтоp имeни фaйлa дaнныx
(cтp. 136) (только модeль DCR-IP7E)
4 Индикaтоp цифpового эффeктa (cтp. 71)/
индикaтоp MEMORY MIX (cтp. 166)
(только модeль DCR-IP7E)/Индикaтоp
FADER (cтp. 66)
5 Индикaтоp peжимa 16:9WIDE (cтp. 64)
6 Индикaтоp эффeктa изобpaжeния
(cтp. 69)
7 Индикaтоp кодa дaнныx (cтp. 54)
8 Индикaтоp дaты
9 Индикaтоp PROGRAM AE (cтp. 75)
0 Индикaтоp зaднeй подcвeтки (cтp. 47)
qa Индикaтоp выключeнной ycтойчивой
cъeмки (cтp. 132)
qs Индикaтоp pyчной фокycиpовки/
бecконeчноcти (cтp. 82)
Quick Reference/Oпepaтивный cпpaвочник
255
Identifying the parts and controls
qd Self-timer indicator (p. 48, 63, 153)
qf STBY/REC indicator (p. 46)/Video control
mode indicator (p. 56)/Movie mode
indicator (p. 146) (DCR-IP7E only)/Image
quality mode indicator (p. 143) (DCR-IP7E
only)
qg Warning indicators (p. 218)
qh Tape counter indicator (p. 46)/Self-
diagnosis indicator (p. 217)/Photo mode
indicator (p. 61, 149)/Image number
indicator (p. 149) (DCR-IP7E only)
qj Remaining tape indicator (p. 46)/Memory
playback indicator (p. 176)
qk END SEARCH indicator (p. 50)
ql MPEG IN indicator (p. 105)
w; Data file name indicator (p. 166) (DCR-IP7E
only)
This indicator appears when the MEMORY
MIX functions work. /Time indicator
wa Multi screen mode indicator (p. 151)
Oбознaчeниe чacтeй и
peгyлятоpов
qd Индикaтоp тaймepa caмозaпycкa (cтp.
48, 63, 153)
qf Индикaтоp STBY/REC (cтp. 46)/
индикaтоp peжимa видeоконтpоля
(cтp. 56)/Индикaтоp peжимa кино
(cтp. 146) (только модeль DCR-IP7E)/
индикaтоp peжимa кaчecтвa
изобpaжeния (cтp. 143) (только модeль
DCR-IP7E)
qg Пpeдyпpeждaющиe индикaтоpы (cтp.
227)
qh Индикaтоp cчeтчикa лeнты (cтp. 46)/
индикaтоp фyнкции caмодиaгноcтики
(cтp. 226)/индикaтоp фотоpeжимa (cтp.
61, 149)/индикaтоp номepa изобpaжeния
(cтp. 149) (только модeль DCR-IP7E)
qj Индикaтоp оcтaвшeйcя лeнты (cтp. 46)/
индикaтоp воcпpоизвeдeния из пaмяти
(cтp. 176)
qk Индикaтоp END SEARCH (cтp. 50)
ql Индикaтоp MPEG IN (cтp. 105)
w; Индикaтоp имeни фaйлa дaнныx (cтp.
166) (только модeль DCR-IP7E)
Этот индикaтоp появляeтcя во вpeмя
paботы фyнкций MEMORY MIX. /
Индикaтоp вpeмeни
wa Индикaтоp многоэкpaнного peжимa
(cтp. 151)
256
1-57E
Page 66

SECTION 2
DISASSEMBLY
The following flow chart shows the disassembly procedure.
2-1. LCD section (PD-142 board) PD-142 board service position
2-2. Cabinet (R) section
DCR-IP5/IP5E/IP7BT/IP7E
2-3. Lens section (LD-105 board)
DCR-IP5/IP5E/IP7BT/IP7E
2-5. Mechanism deck
LD-105 board service position
2-6. EVF section (VF-149 board)
VF-149 board service position
2-7. Control switch block (CF-1900), Speaker2-4. VC-263 board
Service position to check the camera section
Service position to check the VTR-1 section
Service position to check the VTR-2 section
(VC-263, JK-209 boards)
2-10. BT-003 board (IP7BT/IP7E),
Cabinet (L) assembly
2-11. Grip cabinet assembly,
Control switch block (FK-1900)
2-8. JK-209 board
2-9. Parts unit (Hinge)
JK-209 board service position
2-1
Page 67

DCR-IP5/IP5E/IP7BT/IP7E
NOTE: F ollo w the disassembly procedure in the numerical order given.
2-1. LCD SECTION (PD-142 BOARD)
REMOVING THE PD-142 BOARD
3 Remove the panel cabinet (R) assembly
in the direction of the arrow.
1 T wo screws
(M1.4 × 2.5),
lock ace
PD-142
2 T wo screws
(M1.4 × 2.5),
lock ace
4 T ape (F)
8 PD-142
board
5 Screw
(M1.4 × 2.5),
lock ace
9 Back light
Cold cathode fluorescent
tube, BL shield sheet (N)
6 Liquid crystal
indicator module
qa LED SW base
7 Screw
(M1.4 × 2.5),
lock ace
PD-142
0 T wo screws
(M1.4 × 2.5),
lock ace
qs LED SW knob
[PD-142 BOARD SERVICE POSITION]
PD-142 board
Back light
Cold cathode fluorescent
tube, BL shield sheet (N)
PD-142
Liquid crystal
indicator module
DC IN
Multi cable for service
(J-6082-535-A)
AC POWER
ADAPTOR
A/V
CPC jig for LCD panel
(J-6082-529-A)
2-2
AC IN
Adjustment remote
commander (RM-95)
Page 68

2-2. CABINET (R) SECTION
DCR-IP5/IP5E/IP7BT/IP7E
(IP7BT/IP7E)
BT cable
connector
When removing the BT cable
from the BT-003 board, be sure
to hold the connector of the
BT cable and remove it.
BT cable
3 Screw
(M1.4 × 2.5),
lock ace
5 Open the grip
cabinet assembly.
VC-263
2 Screw
(M1.4 × 2.5),
lock ace
8 FP-366 flexible board
(40P)
(IP7BT/IP7E)
7 Antenna
1 Two screws (M1.4 × 2.5),
lock ace
When installing cabinet (L)
section insert it in the groove.
6 Screw (M1.4 × 2.5),
lock ace
9 Cabinet (R) section
4 Screw (M1.4 × 2.5),
lock ace
[CONNECTION OF THE EQUIPMENT]
DC IN
A/V
AC IN
Adjustment remote
commander (RM-95)
AC POWER
ADAPTOR
Multi cable for service
(J-6082-535-A)
VC-263
CPC
22
2
21
1
FP-366 flexible board
(40P)
Cabinet (R) section
2-3
Page 69

DCR-IP5/IP5E/IP7BT/IP7E
2-3. LENS SECTION (LD-105 BOARD)
2 Remove the microphone unit
in the direction of the arrow A.
A
1
Microphone unit
(4P)
1
Control switch block
(CF-1900) (14P)
When installing cabinet (L)
section insert it in the groove.
VC-263
1 T apping screw
(M1.7 × 3.5)
4 Screw (M1.4 × 2.5),
lock ace
5 VF fixed plate
assembly
VF-149
VC-263
6 EVF section
3 Two screws (M1.4 × 2.5),
lock ace
2 FP-367 flexible board (15P)
(IP7BT/IP7E)
6 Remove the lens-EVF section
in the direction of the arrow B.
B
LD-105
VF-149
4
LD-105 board
(51P)
5 Screw (M1.4 × 2.5),
lock ace
3
EVF section,
VF-149 board
(33P)
LD-105
2 Lens section
1 Three claws
3 Lens section
LD-105
2 Filter ring assembly
1 T wo tapping
screws
(B1.4 × 4)
2-4
3 Remove the LD-105 board in the
direction of the arrow C.
2 Two tapping screws
(B1.7 × 6)
LD-105
6 Remove the
solderings
C
7 CCD section
(CCD imager)
5 Seal rubber (S)
4 Optical filter block
Page 70

[LD-105 BOARD SERVICE POSITION]
)
Note: Screen will become all white.
Lens section
LD-105
board
CCD section
(CCD imager)
LD
-105
LD-105 board
(51P)
VC-263
DC IN
A/V
Multi cable for service
(J-6082-535-A)
AC POWER
ADAPTOR
DCR-IP5/IP5E/IP7BT/IP7E
Adjustment remote
commander (RM-95
AC IN
2-5
Page 71

DCR-IP5/IP5E/IP7BT/IP7E
2-4. VC-263 BOARD
REMOVING THE VC-263 BOARD
1 Screw (M1.4 × 2.5),
lock ace
VC-263
2 Screw (M1.4 × 2.5),
lock ace
2 Flexible board
(from sensor) (31P)
3 Flexible board
(from video head)
(11P)
4 Flexible board
(from drum motor) (11P)
3 Open the VC-263 board,
MS holder assembly (IP7BT/IP7E)/
VC PC board holder (IP5/IP5E)
in the direction of the arrow.
1 JK-209 board
CN5504 (60P)
5 Flexible board
(from capstan motor) (19P)
MS holder
7
assembly
(IP7BT/IP7E)
7
holder
(IP5/IP5E)
VC-263
6 T apping screw
(M1.7 × 3.5)
VC PC board
8 VC-263
board
[SERVICE POSITION TO CHECK THE CAMERA SECTION]
LD-105 board
(51P)
DC IN
A/V
Adjustment remote
commander (RM-95)
AC IN
AC POWER
ADAPTOR
Multi cable for service
(J-6082-535-A)
LD-105
VC-263
Lens section
VC-263 board,
MS holder assembly
(IP7BT/IP7E)/
VC PC board holder
(IP5/IP5E)
2-6
Page 72

[SERVICE POSITION TO CHECK THE VTR-1 SECTION]
DCR-IP5/IP5E/IP7BT/IP7E
Adjustment remote
commander (RM-95)
AC IN
AC POWER
ADAPTOR
Multi cable for service
(J-6082-535-A)
DC IN
A/V
VC-263
VC-263 board,
MS holder assembly
(IP7BT/IP7E)/
VC PC board holder
(IP5/IP5E)
2-7
Page 73

DCR-IP5/IP5E/IP7BT/IP7E
2-5. MECHANISM DECK
1 Open the grip
cabinet
assembly
Three
dowels
6 Remove the grip
cabinet assembly
in the direction of
the arrow A.
NOTE: HANDLING MECHANISM DECK
Use the adjustable wrist strap (J-2501-162-A) as the preventive
measure for static electricity when the removing and installing
the drum assembly because the drum assembly of this
mechanism beck is easily affected by the static electricity.
(J-2501-162-A)
0 VC heat
sink assembly
qa T wo screws
(M1.4 × 2.5),
lock ace
9 Screw
(M1.4 × 2.5),
lock ace
2 T wo screws
(M1.4 × 2.5),
lock ace
3 Screw
(M1.4 × 2.5),
lock ace
qf Mechanism
deck
qd Screw
(M1.4 × 2),
ace
qs T wo screws
(M1.4 × 2.5),
lock ace
4 T wo screws
(M1.4 × 2.5),
lock ace
B
A
5 Control switch block
(FK-1900) (31P)
7 Two screws (M1.4 × 2.5),
lock ace
8 Remove the JK-209 board
in the direction of the arrow B.
[SERVICE POSITION TO CHECK THE VTR-2 SECTION (VC-263, JK-209 BOARDS)]
VTR to the “Forced VTR power ON” mode.
Operate the VTR function using the adjustment remote commander (with the HOLD switch set in the OFF position).
Setting the “Forced VTR Power ON” mode
1) Select page: 0, address: 01, and set data: 01.
2) Select page: D, address: 10, set data: 02 and
press the PAUSE button of the adjustment remote
commander.
(When you want to eject a cassette, connect the control switch block. (FK-1900))
Flexible board
(from drum motor) (11P)
5 Flexible board
(from capstan motor) (19P)
AC IN
AC POWER
ADAPTOR
Exiting the “Forced VTR Power ON” mode
1) Select page: 0, address: 01, and set data: 01.
2) Select page: D, address: 10, data: 00, and press the PAUSE
button of the adjustment remote commander.
3) Select page: 0, address: 01, and set data: 00.
Flexible board
(from video head)
(11P)
DC IN
Flexible board
(from sensor) (31P)
Mechanism deck
VC-263 board,
MS holder assembly
(IP7BT/IP7E)/
VC PC board holder
(IP5/IP5E)
Two
dowels
Adjustment remote
commander (RM-95)
Multi cable for service
(J-6082-535-A)
A/V
VC-263
JK-209 board
JK-209
2-8
Page 74

2-6. EVF SECTION (VF-149 BOARD)
)
)
)
DCR-IP5/IP5E/IP7BT/IP7E
3 VF lens assembly
4 VF sleeve
VF-149 board
F-149
1 T apping screw
(M1.7 × 3.5)
5 LCD cushion (1)
(Shining side must face to the VF sleeve guide assembly.)
VF-149
4 VF-149 board block
V
2 Push the VF sleeve guide assembly
in the direction of the arrow.
3 Two claws
6 VF sleeve guide
assembly
2 T apping screw
(M1.7 × 5)
0 Light guide plate block,
BL retainer sheet metal
VF-149
qa VF-149 board
5 VF ring assembly,
VF guard sheet
1 T apping screw
(M1.7 × 5)
8 LCD cushion (2)
(Shining side must face to the BL holder.
7 LCD
qd
BL holder
qs BL cushion
(Shining side must face to the BL holder.
(LCX033AN-J
9 T wo claws
[VF-149 BOARD SERVICE POSITION]
When you want to check the EVF, establish the “Forced EVF Power on” mode.
Setting the “Forced EVF Power ON” mode
1) Select page: 3, address: 00, and set data: 01
and press the PAUSE button of the adjustment
remote commander.
2) Select page: 3, address: 02, set data: 02.
DC IN
A/V
Adjustment remote
commander (RM-95)
AC IN
AC POWER
ADAPTOR
Multi cable for service
(J-6082-535-A)
Exiting the “Forced EVF Power ON” mode
1) Select page: 3, address: 00, and set data: 00
and press the PAUSE button of the adjustment
remote commander.
2) Select page: 3, address: 02, set data: 00.
VC-263
Light guide plate block,
BL retainer sheet metal
VF-149
VF-149 board
LCD (LCX033AN-J)
2-9
Page 75

DCR-IP5/IP5E/IP7BT/IP7E
2-7. CONTROL SWITCH BLOCK (CF-1900), SPEAKER
4 Control switch block (CF-1900),
Speaker
1 T wo screws
(M1.4 × 2.5),
lock ace
5 Remove the control switch block (CF-1900),
speaker in the direction of the arrow.
VC-263
2 SP retainer
3 T wo screws
(M1.4 × 2.5),
lock ace
8 Speaker
7 SP cushion
6 Remove soldering
from the two points
9 Control switch block (CF-1900)
2-10
Page 76

2-8. JK-209 BOARD
VC-263
2 Jack
cover
4 Connector
CN5504 (60P)
5 T wo screws
(M1.4 × 2.5),
lock ace
DCR-IP5/IP5E/IP7BT/IP7E
REMOVING THE JK-209 BOARD
3 JK flexible protection
sheet 2
2 JK flexible
protection sheet
JK-209
1 JK PC board
protection sheet
JK-209
3 JC retainer
plate
JK bracket
assembly
JC retainer
plate
Four claws
1 Screw
(M1.4 × 2.5),
lock ace
Jack
cover
[JK-209 BOARD SERVICE POSITION]
JK-209 board
JK-209
5 T ally light
interception sheet
4 Screw
(M1.4 × 2),
lock ace
6 T wo screws
(M1.4 × 2),
ace
JK-209
8 JK-209 board
7 JK bracket assembly
AC IN
Adjustment remote
commander (RM-95)
AC POWER
ADAPTOR
Multi cable for service
(J-6082-535-A)
DC IN
A/V
VC-263
JK-209
JK-209 board
2-11
Page 77

DCR-IP5/IP5E/IP7BT/IP7E
2-9. PARTS UNIT (HINGE)
4 T wo screws
(M1.4 × 2.5),
lock ace
1 Waterproof sheet
2 T wo screws
(M1.4 × 2.5),
lock ace
1 Open the LCD unit in the
direction of the arrow A.
6 Menu sheet metal
5 Screw (M1.4 × 2.5),
lock ace
FP-366 flexible
board
3 Harness
(from LCD section)
(17P)
3 R button
2 Muffle sheet (B)
1 Three screws (M1.4 × 2.5),
lock ace
FP-366 flexible board
FP-366 flexible board
Harness (17P)
4 Lens cabinet
(R) assembly
Dowel
3 Screw
(M1.4 × 3)
6 Screw
(M1.4 × 2),
ace
7 FP-366 flexible board
B
A
5 Remove the LCD unit,
parts unit (Hinge) in the
direction of the arrow B.
4 Screw
(M1.4 × 2.5),
lock ace
Three
dowels
2 Screw
(M1.4 × 2.5),
lock ace
Start the removal work afar the LCD section (PD-142 board) has
been removed referring section 2-1.
4 Panel cabinet (R) assembly
Liquid crystal
indicator module
PD-142 board
Back light
Cold cathode fluorescent
tube, BL shield sheet (N)
2 Harness (15P)
1 T ape F
3 T wo screws
(M1.4 × 2.5),
lock ace
PD-142
5 Parts unit
(Hinge)
2-12
Page 78

2-10.BT-003 BOARD (IP7BT/IP7E), CABINET (L) ASSEMBLY
DCR-IP5/IP5E/IP7BT/IP7E
7 BT-003
board
6 T wo screws
(M1.4 × 2), ace
(IP7BT/IP7E)
4 MS release knob
3 Compression spring
2 MS knob retainer
assembly
BT-003
5 FP-367 flexible board
(15P)
1 Screw
(M1.4 × 2.5),
lock ace
3 Lens cabinet
(L) section
2 Screw
(M1.4 × 2.5),
lock ace
1 Screw
(M1.4 × 2.5),
lock ace
0 Cabinet (L) assembly
6 Jack cover
8 List strap
7 Screw (M2 × 3)
Note: This screw (M2 × 3) is MEC-processed. If the screw
is are removed once, it cannot be re-used.
When re-assembling, use the new MEC screw.
5 JC retainer
plate
9 Strap bracket
4 Screw
(M1.4 × 2.5),
lock ace
2-11.GRIP CABINET ASSEMBLY, CONTROL SWITCH BLOCK (FK-1900)
3 T wo screws
(M1.4 × 2.5),
lock ace
2 Screw (M1.4 × 2),
lock ace
6 Screw
(M1.4 × 2.5),
lock ace
Control switch block
(FK-1900)
5 T wo screws
(M1.4 × 2.5),
lock ace
4 Screw (M1.4 × 2.5),
lock ace
1 Screw
(M1.4 × 2.5),
lock ace
Dowel
7 T apping screw
(M1.7 × 3.5)
8 Grip arm assembly,
Cabinet (L) joint
2 Grip cabinet assembly
1 Control switch block (FK-1900),
Battery terminal board
2-13
Page 79

DCR-IP5/IP5E/IP7BT/IP7E
2-12.CIRCUIT BOARDS LOCATION
BT-003
(BLUETOOTH) (IP7BT/IP7E)
LD-105
(CCD IMAGER)
JK-209
(JACK)
PD-142
(RGB DRIVE, TIMING GENERATOR)
VF-149
(B/W EVF)
VC-263
CAMERA, DSC, VIDEO, AUDIO, SERVO
HI/MECHA CONTROL, DC/DC CONVERTER
2-14
Page 80

2-13.FLEXIBLE BOARDS LOCATION
The flexible boards contained in the mechanism deck are not shown.
CONTROL SWITCH BLOCK
(FK-1900)
DCR-IP5/IP5E/IP7BT/IP7E
FP-367 (IP7BT/IP7E)
CONTROL SWITCH BLOCK
(CF-1900)
FP-366
2-15E
Page 81

SECTION 3
BLOCK DIAGRAMS
DCR-IP5/IP5E/IP7BT/IP7E
3-1. OVERALL BLOCK DIAGRAM (1/5)
LENS ASSY
IRIS
(SHUTTER)
IRIS
METER
M
M
ND
METER
FOCUS
MOTOR
M
MR
ZOOM
MOTOR
M
MR
FILTER
MIC901
MIC UNIT
SP901
SPEAKER
MIC
MIC
CN5501
A/V
L
R
LD-105 BOARD
IC701
CCD
IMAGER
1-4 9-14
X780
IRIS
HALL
X781
ND
HALL
5
19
7
17
23
2
21
4
JK-209 BOARD(1/4)
5
9
1 6
(SEE PAGE 4-65)
VIDEO
Y10
C
L,R
VF-149 BOARD(1/3)
2
(SEE PAGE 4-59)
4
CN2206
CONTROL SWITCH
BLOCK (CF-1900)
(SEE PAGE 4-9)
(4-8)
IC725
IC726
IRIS HALL AMP
IC727
FOCUS MOTOR
7
IRIS DRIVE
ND HALL
AMP
ND FILTER
PRE DRIVE
13
ND FILTER
DRIVE
SHUTTER
DRIVE
DRIVE
ZOOM MOTOR
DRIVE
IC724
15
9
10
11
12
(4-7)
(4-7)
(4-8)
3
4
CN2205
CCD OUT
V1-V4
SUB,RG,H1,H2
IRIS PWM
I HALL AD
ND HALL AD
SHUTTER ON
( ) : Page No. shown in ( ) indicates the page to refer on the schematic diagram.
VC-263 BOARD(1/5)
ND PWM
PWM0
EN0
PWM1
EN1
F MR A,B
Z MR A,B
CN5504
CN2021
8
1
2
15
18
4
6
22
24
37
43
28
31
32
29
30
47
46
49
50
29
64
69
81
84
85
35
149
148
CAMERA CONTROL
36
IC1207
EVR
CDS, AGC
A/D CONV
IC1901
TIMING
GENERATOR
74 71 73
(4-39)
IC1203
(1/2)
(4-40)
17
16
(4-36)
39
IC101
48
VIDEO
I/O
42
L,R
SP +,-
18
14
22
51
L,R
L,R
(4-45)
53
IC201
AUDIO
54
I/O
55
39
35
8
10
21
21
25
25
23
23
CN2024
29
29
27
27
31
33
28
29
CN2023
(4-15)
31
30
32
CAM SO,SI,SCK
25
23
19
17
15
14
2
11
19
95
51
52
56
91
57
58
56
CAM SO,SI,SCK
36
34
46
7
9
10
L,R
L,R
AD1-AD10
CLP1
TGCK
X1901
48MHz
ID PBLK
HD,VD,FLD
TO
OVERALL
BLOCK DIAGRAM
(5/5)
(SEE PAGE 3-9)
15
16
RH SO,SI,SCK
3
2
(4-46)
IC202
AUDIO
A/D CONV
D/A CONV
SHUTTER ON
8
9
AUCKFS
AUCK256FS
10
AUCK64FS
11
12
LINE OUT V
LINE IN V
DRUM SWP
BS IN
BS OUT
PWM0
EN0
PWM1
EN1
F MR A,B
Z MR A,B
EVF R
EVF G
EVF B
LCD R
LCD G
LCD B
HD
VD
Y
C
Y
C
AD IN
DA OUT
141618
10 - 612
4
13
190
5
11
17
26
28
30
25
21
48
52
53
39
42
88
94
81
91
132
130
122
148
137
134
199
176
54
92
154
152
206
178
204
56
41
225
219
224
212
45
233
171
196
(4-17)
IC401
CAMERA
PROCESS
BASE BAND
PROCESS
(4-25)
IC601
MPEG
VIDEO
ENCODER
RECODER
192410
232814
262227
393631
127
149123
(4-29)
IC501
MPEG
AUDIO
ENCODER
RECODER
DCR-IPBT/IP7E
52
63
64
74
34
38
41
3218
3035
20
15
310
45
74
43
73
41
71
TO
OVERALL
BLOCK DIAGRAM
(2/5)
(SEE PAGE 3-3)
248
263201
243239205
BY IO (0)-(7)
244235
240221249
241232229
BC IO (0)-(7)
234236
272
CODEC HD,VD,FD
271
238
268255264
259267254
BY IN (0)-(7)
258270
261242256
BC IN (0)-(7)
246265247
260250
261
DEC HD,FD
252
PLL27MCK
193
F27MCK
194
SG OUT SG OUT
231
ARECD
223
APBD
218
AUCKFS
225
AUCK64FS
224
F135MCK
188 97
COL 0-3
181214
185211
HD,VD
210
212
AUCKFS
AUCK64FS
F135MCK
31
301
YMO (0)-(7)
308305
300209
CMO (0)-(7)
304302
266
H,V,FLD
273
262
284281280
YMI (0)-(7)
290288286
294291
269
278274
CMI (0)-(7)
283282
293
H,V,FLD
285
279
ASI
217
ASO
220
200
MIC SI,SO,SCK MIC SI,SO,SCK
174
203
COL 0-3
HD,VD
F135MCK
120
135
108
112
113
116
118
120
121
313
327
286
296
59
60
35
47
58
81 95
76
79
BS IO (0)-(7)
83
86
90
94
D0-D7
HADR (0)-(10)
HDAT (0)-(7)
AENCD
AEDE
ADECD
ADDE
4238
ABCK
4948
4436
AFS
5453
1862
HADR (0)-(7)
4639
69
HDAT (0)-(7)
124
(4-20)
1718
1416
IC402
20
CHARACTER
GENERATOR
19
8
3
1
BCK
PLL27MCK
F27MCK
AENCD
AEDE
ADECD
ADDE
ABCK
AFS
CODEC FD
DEC FD
F27MCK
F135MCK
LINE OUT V
LINE IN V
DRUM SWP
BS IN
BS OUT
RH SO,SI,SCK
HI EVER SO,SCK
TO
OVERALL
BLOCK DIAGRAM
(2/5)
(SEE PAGE 3-3)
TO
OVERALL
BLOCK DIAGRAM
(3/5)
(SEE PAGE 3-5)
TO
OVERALL
BLOCK DIAGRAM
(4/5)
(SEE PAGE 3-8)
16
3-1 3-2
Page 82

DCR-IP5/IP5E/IP7BT/IP7E
3-2. OVERALL BLOCK DIAGRAM (2/2)
VC-263 BOARD (2/5)
225
234
236
149
151
32
136
158
157
161
160
159
162
TO
OVERALL
BLOCK DIAGRAM
(1/5)
(SEE PAGE 3-2)
BS (0)-(7)
BCK
D0-D7
CODEC FD
DEC FD
F27MCK
PLL27MCK
SG OUT
AENCD
AEDE
ADECD
ADDE
ABCK
AFS
( ) : Page No. shown in ( ) indicates the page to refer on the schematic diagram.
(4-27)
36
66
67
71
70
52
44
2
51- 64
139
136
SG OUT
SWP
REF SWP
XREC ACT P, M
SWP SO, SCK
HADR(0)-(11)
HDAT(0)-(7)
RH SO, SI, SCK
(4-31)
IC801
Q PROCESS
MUX/DMUX
ECC&PTG
CHANEL CO DING
REC DT
RED CK
43
41
PB DT
76
ENV OUT
65
REC P, M
44
45
155
156
46
47
110
120
96
104
16
26
DIADT(0)-(7)
PLL 27 MCK
X701
24.576MHz
11
14
37
96
59
58
(AGC, EQ, ENV DET)
40
77
85
87
149
150
IC902
REC /PB AMP
(4-33)
41
65 - 74
IC701
1
i LINK I/F
TO
OVERALL
BLOCK DIAGRAM
(3/5)
(SEE PAGE 3-5)
3
IC951
PB POWER TRANS
(4-37)
SWP
XM, YM
XP, YP
PB IN
14
19
FOR ADJUSTMENTS
18
CN2028
DRUM
5
6
9
8
10
PW+
1
PW-
2
CN2010
JK-209 BOARD(2/4)
CN2024
14 14
1111
(SEE PAGE 4-65)
TPA, NTPA
TPB, NTPB
IC001
MR HEAD AMP
IC002
MR HEAD AMP
IC003
SWP POWER
CN5502
i LINK (MICRO MV)
MCH REC HEAD
PCH REC HEAD
MCH PB HEAD
(MR HEAD)
PCH PB HEAD
(MR HEAD)
CPC ENV OUT
RF MON OUT
11
14
26 - 34
22 - 25
A0-A2
159
160
158
114
101
140
121
154
155
RH SO, SI, SCK
A1-A12
D0-D15
29 - 45
1 - 10
48
16 - 25
(4-22) (4-22)
IC1802
32Mbit
FLASH MEMORY
2 - 13
42 - 53
IC1803
64Mbit
SDRAM
20 - 26
29 - 35
X1601
25.8048MHz
CLK
53
78
52
34
155
156
162
(4-23)
IC1606
DIGITAL STILL CONTROL
143
140
171
164
169
168
174
129
187
186
185
13
12
4
5
HI SO, SI, SCK
TXD BT
RXD BT
IC1605
4
BS, DIO, SCLK
IC1602
USB I/F
(4-23)
XTAL OSC
(4-24)
10
11
TO
OVERALL BLOCK
DIAGRAM(4/5)
(SEE PAGE 3-8)
X1602
48MHz
CN2026
2
2
4
4
CN5504
5
61110
CN101
(The BT-003 board cannot be repaired nor adjusted. )
CN2027
MEMORY
STICK
USB D+
USB D-
BT-003 BOARD
CN5503
USB
ANT901
CN102
DCR-IP7BT/IP7E
33-30
91-86
165
11
16
25
18
10
3
15
14
13
41
35
29
28
27
164
162
163
(4-21)
IC1801
STILL PICTURE
PROCESS
F135MCK
YMO(0)-(7)
CMO(0)-(7)
H,V, FLD
TO
OVERALL
BLOCK DIAGRAM
(1/5)
(SEE PAGE 3-2)
16
YMI(0)-(7)
CMI (0)-(7)
H,V, FLD
ASI
ASO
AUCKFS
AUCK64FS
3-3 3-4
Page 83

DCR-IP5/IP5E/IP7BT/IP7E
3-3. OVERALL BLOCK DIAGRAM (3/5)
VC-263 BOARD(3/5)
TO
OVERALL
BLOCK DIAGRAM
(5/5)
(SEE PAGE
3-10)
TO
OVERALL
BLOCK DIAGRAM
(4/5)
(SEE PAGE
3-8)
TO
OVERALL
BLOCK DIAGRAM
(2/5)
(SEE PAGE
3-4)
TO
OVERALL
BLOCK DIAGRAM
(1/5)
(SEE PAGE
3-2)
TO
OVERALL
BLOCK DIAGRAM
(5/5)
(SEE PAGE
3-9)
16
DVC PWM
HI SO,SI,SCK
XCC DOWN
SWP
REF SWP
XREC ACT P
XREC ACT M
RH SO,SI,SCK
SWP SO,SCK
HADR (0)-(11)
HDAT (0)-(7)
RH SO,SI,SCK
HADR (0)-(11)
HDAT (0)-(7)
DRUM SWP
CODEC FD
DEC FD
LINE IN V
LINE OUT V
F27MCK
F135MCK
BSD IN, BSD OUT
RH SO,SCK
145
139
140
141
173
81
166
168
129
130
136
135
137
56
|
44
65
|
53
174
86
87
88
121
4
( ) : Page No. shown in ( ) indicates the page to refer on the schematic diagram.
(4-41)
IC1103
MECHA
CONTROL
133
EEP SO,SI,SCK
132
134
98
ACFG1,2
99
CAP FG
89
82
CAP ON,CAP FWD
154
155
CAP PWM
148
DRUM PWM
147
42
DRUM ON,DRUM FWD,DRUM START
40
43
DRUM FG
90
DRUM PG
91
LOAD,UNLOAD
116
115
TREEL FG
93
SREEL FG
92
TAPE END
118
TAPE TOP
119
DEW DET
108
TAPE LED ON
162
REC PROOF SW
157
161
MODE SW A - MODE SW D
|
159
3
4
2
56
53
IC1102
EEPROM
(4-44)
IC1001
(RABI)
LPF
LPF
(4-41)
(2/2)
55
52
IC404
1.6
CAP ERROR
DRUM ERROR
CAR+, CAR-
7.5
72
78
(4-19)
(4-49)
IC1401
PWM
DRIVE
(2/2)
(4-33)
V MECHA DECK
(SEE PAGE 4-51)
IC902
CAPSTAN
(2/2)
(1/2)
18
17
2,21
31,33,29
20,22,24
64
61
28,30
42,43
45,46
35
36
MIC1-3
XCC DOWN
CN2008
CN2007
CN2009
12
1
16
|
19
1
2
1
|
6
9
10
1
|
4
5
20
22
14
16
13
25
19
26
7
|
11
27
31
|
29
CAPSTAN
M
M901
M
DRUM FG
DRUM PG
M
DEW
SENSOR
T REEL
SENSOR
S REEL
SENSOR
Q002
TAPE END SENSOR
Q001
TAPE TOP SENSOR
D001
TAPE LED
REC PROOF
MIC
ANTENNA
C IN
MODE
SWITCH
S901
M902
FG
CAPSTAN
MOTOR
DRUM
MOTOR
M903
LOADING
MOTOR
H001
H002
S001
S002
21
FG AMP
(ANALOG)
23
46
3,4
Q1608
SWITCHING
26
CAP VS
28.32
CAPSTAN
FG AMP
(DIGITAL)
IC1002
CAPSTAN
MOTOR
DRIVE
(4-44)
Q1609
SWITCHING
24
DRUM VS
11
IC1001
(RABI)
DRUM
MOTOR
DRIVE
(4-44)
16,6,3
DRUM FG AMP
1
59
26,25
40
48
34
37
22
21
IC952
11
13
MIC
DRIVE
DRUM PG AMP
LOADING MOTOR
TAPE END DETECT
TAPE TOP DETECT
(4-37)
DRIVE
REEL FG AMP
27
|
30
MIC:Memory In Cassette
3-5 3-6
Page 84

DCR-IP5/IP5E/IP7BT/IP7E
3-4. OVERALL BLOCK DIAGRAM (4/5)
CONTROL SWITCH BLOCK
(CF-1900)
(SEE PAGE 4-9)
R001-004
ZOOM SW
(DISTORTION ELEMENT)
S103
ZOOM TOUCH
S100
START/STOP
S102
S3102
LCD BACK LIGHT
ON
OFF
PANEL REVERSE
PHOTO FREEZE
S101
PHOTO REC
PANEL NORMAL CLOSE
PHOTO
PD-142 BOARD(1/2)
(SEE PAGE 4-73)
S105
CONTROL
BUTTON
FP-366 FLEXIBLE
(SEE PAGE 4-69)
CONTROL
SWITCH
BLOCK
(FK-1900)
(1/2)
(SEE PAGE 4-54)
BT001
LITHIUM
BATTERY
S003
RESET
S004
OPEN/ EJECT
S001,002
POWER
OFF (CHG)
ON → MODE
CAMERA
MEMORY
/
NETWORK
VCR
ZOOM SENS OUT 1,2
S3101
BROWSER MENU
DCR-IP7BT/IP7E
S104
S103
PANEL OPEN/CLOSE
CN001
28 28
29 29
31 31
24
25
24
25
VF-149 BOARD
(2/3)
7
7
5
5
99
88
12
12
14
14
CN2205
CN3102
11
S102
DISPLAY
CN5500
16
( ) : Page No. shown in ( ) indicates the page to refer on the schematic diagram.
VC-263 BOARD(4/5)
(4-61,62)
IC2201
IC2202
IC2203
AMP
CN101
S101
BACK LIGHT
23
23
27
27
19 19
25 25
24 24
26 26
CN301 CN2023
CN102
40 40
7
878
22
3
3
4
4
39 39
88
29 29
4646
44 44
50 50
CN2022
LI 3V
BATT UNREG
ACV UNREG
D1206
D1201
D2.8V
7
3
Q9002, 9004
(4-39)
V OUT
SWITCH
IC1201
RESET
SAVED E2.8V
R IC V OUT
6
5
X1201
20MHz
153
37
132
3
6
127
128
69
70
130
131
129
126
17
71
73
98
151
67
4
1
2
ZOOM SW AD
ZOOM PWM
KEY AD6
XS/S SW
XPHOTO FREEZE
KEY AD1
KEY AD2
KEY AD4
KEY AD5
KEY AD3
KEY AD0
VDD
XRESET
XEJECT SW
XPOWER SW
XMODE SW
(4-39)
IC1203
HI CONTROL
(2/2)
BATT/XEXT SW
FAST CHARGE
VTR DD ON
CAM DD ON
HI EVER SO
HI EVER SI
HI EVER SCK
MIC SO
MIC SI
MIC SCK
HI SCK
XCC DOWN
MIC EEP SO
MIC EEP SI
MIC EEP SCK
IB SO
HI SO
HI SI
IB SI
2
IC1202
HI EVER SO, SI,SCK
Q1202
86
88
171
85
26
25
45
44
46
49
48
50
53
52
54
5
57
56
58
I/F
8
IC1205
2
MIC EEPROM
9
(4-40)
BATT SIG
BATT/XEXT SW
FAST CHARGE
VTR DD ON
CAM DD ON
HI EVER SO,SCK
HI EVER SO,SCK
MIC SO, SI,SCK
HI SO,SI,SCK
HI SO, SI,SCK
XCC DOWN
3
EEPROM
4
(4-39)
TO
OVERALL
BLOCK DIAGRAM
(SEE PAGE 3-9)
TO
OVERALL
BLOCK DIAGRAM
(SEE PAGE 3-2)
TO
OVERALL
BLOCK DIAGRAM
(SEE PAGE 3-4)
TO
OVERALL
BLOCK DIAGRAM
(SEE PAGE 3-5)
(5/5)
(1/5)
(2/5)
(3/5)
CN5501
A/V
LANC SIG
2
JK-209 BOARD(3/4)
16
IC5500
REMOTE COMMANDER
RECEIVER
4
11
86
XSIRCS IN
(4-65)
11
IC5501
LANC I/O
(4-66)
CN5504
586058
60
CN2024
X1202
32.768KHz
8
9
IC1206
TIMER
3
2
1
10
12
82
LANC IN
LANC OUT
83
174
RTC SIO
175
RTC SCK
99
32KHz
(4-40)
3-7 3-8
Page 85

DCR-IP5/IP5E/IP7BT/IP7E
3-5. OVERALL BLOCK DIAGRAM (5/5)
VC-263 BOARD(5/5)
TO
OVERALL
BLOCK DIAGRAM(1/5)
(SEE PAGE 3-1)
TO
OVERALL
BLOCK DIAGRAM(3/5)
(SEE PAGE 3-5)
TO
OVERALL
BLOCK DIAGRAM(4/5)
(SEE PAGE 3-8)
CONTROL
SWITCH BLOCK
(FK-1900)
(SEE PAGE 4-54)
BT901
BATTERY
TERMINAL
J5500
DC IN
19
19
11
11
CN001
1010
919
1
CN5500
Q5501
S
JK-209 BOARD
(4/4)
(SEE PAGE 4-65)
CN2024CN5504
54
54
52
52
4040
171917
19
43
43
45
45
47
47
49
49
51
51
53
53
55
55
57
57
59
59
( ) : Page No. shown in ( ) indicates the page to refer on the schematic diagram.
LCD R,G,B
EVF R,G,B
HD,VD
HI EVER SO,SCK
BATT SIG
BATT/EXT SW
FAST CHARGE
VTR DD ON
CAM DD ON
BATT SIG
BATT/EXT SW
FAST CHARGE
(4-49)
IC1401
DC/DC
CONVERTER
(4-50)
IC1404
IC1406
IC1408
RFG
(2/2)
57
45
46
61
3
BATT UNREG
VTR UNREG
VTR DD ON
CAM DD ON
HI EVER SO,SCK
1.8V
D 1.5V
3.1V
A 2.8V
LCD 2.8V
AU 2.8V
D 2.8V
CAM -7.5V
CAM 15V
MT 5V
7.5V
15V
-8V
6V
EVF 13.5V
RP 4.6V
A 4.6V
AU 4.6V
LCD 4.6V
BL CONT
BL -15V
DVC
R1454
R1455
BATT UNREG
VTR UNREG
A_2.8V
DVC PWM
TO
OVERALL
BLOCK DIAGRAM(3/5)
(SEE PAGE 3-5)
CN2022
CN2023
FP-366
(FLEXIBLE)
(SEE PAGE 4-69)
33
33
LCD R,G,B
36
36
38
38
17
17
18
18
RH SO,SCKRH SO,SCK
21
21
22
22
11
11
HD
12
12
13
13
VD
14
14
23
23
BL CONT
24
24
CN102
2
2
3
3
4
4
10
10
12
12
8
8
9
9
CN301
RH SO,SCK
VF-149 BOARD (3/3)
EVF R,G,B
HD
VD
(2/2)
CN101
PD-142 BOARD(2/2)
HDO
4
PSIG
CN3104
6
COM
VG
48
IC3101
47
BACK LIGHT
CONTROL
46
40
39
46
45
42
1
48
82
HD OUT
LED
XHD OUT
Q3109,3110,3118,3119
20
22
24
12
35
24
14
4
4
3
3
2
2
11
11
9
9
14
14
13
13
8
8
CN3102
48
47
46
40
39
46
45
42
1
48
(4-59)
IC301
RGB
DRIVE
(4-59)
IC302
TIMING
GENERATOR
RGB
DRIVE
(4-73)
(4-73)
IC3102
TIMING
GENERATOR
24
BL ON
20
VR,VG,VB
22
24
COM
12
PSIG
27
12
24
PANEL 15.5V
R,G,B
COM
Q2201,2205
BACK LIGHT
DRIVE
BL -15V
G
XHD OUT
LED DA
CN3101
CN3103
LED902
D2201,2202
LIGHT UNIT
CN2202
BACK
2
1
4
5
3
23
6
2
7
13
19
22
1
3
6
3
2
4
1
14
5
1
10
11
CPC
BL ANODE
THERM B
BL CATHODE
CN2205
ADJUSTMENTS
LCD901
FOR
LCD
UNIT
LCD902
LCD
UNIT
LED901
BACK
LIGHT
16
3-9 3-10
Page 86

DCR-IP5/IP5E/IP7BT/IP7E
3-6. POWER BLOCK DIAGRAM (1/3)
CN001
191119
10
9
1
11
10
9
1
JK-209 BOARD
BATT UNREG
BATT SIG
BATT GND
CN5500
BATT/XEXT
4
ACV UNREG
ACV GND
LF5500
LANC DC
Q5500,5501
14
Q5502,5503
CHARGE
SWITCH
IC5501
LANC I/O
(4-66)
BT901
BATTERY
TERMINAL
S
CONTROL
SWITCH
BLOCK
(FK-1900)(1/2)
(SEE PAGE 4-54)
J5500
DC IN
CN5501
A/V
( ) : Page No. shown in ( ) indicates the page to refer on the schematic diagram.
VC-263 BOARD (1/2)
CN2024
17
17
19
19
55
55
57
57
59
59
49
49
51
51
53
53
43
43
45
45
47
47
38
38
40
40
54
54
52
52
Q1414
28 28
34 34
SWITCHING
XLANC ON
EVER 3.0V
L1402
SWITCHING
Q1421
EVER 3.0V
VTR DD ON
DD XCS
HI EVER SO
HI EVER SCK
3
VTR UNREG 1
VTR UNREG 2
VTR UNREG
MT 5V
42
16
20
19
28
29
50
56
14
7
6
57
44
46
VCC(0)-1
VCC(0)-3
VCC(0)-3
VDD(0)-2
OUT6-P
OUT6-N
V-IN6
VDD
VB
RT
CT
CTL
IC1401
DC/DC CONVERTER
OUT2-P
OUT2-N
OUT3-P
OUT3-N
OUT4-P
OUT4-N
OUT1-P
OUT1-N
OUT9-N
-IN(S)9
OUT10-P
-IN(A)10
OUT(A)10
-IN(S)10
OUT5-P
OUT5-N
VDD (0)
OUT7-P
OUT7-N
OUT8-P
OUT8-N
(4-49)
+IN2
-IN2
V-IN3
V-IN4
V-IN1
-IN9
-IN 10
V-IN5
+IN7
+IN8
34
35
61
60
32
33
54
30
31
53
36
37
55
23
80
1
22
4
5
10
3
38
39
52
41
26
27
72
24
25
78
INIT CHARGE ON
FAST CHARGE
BATT SIG
BATT/XEXT
CN5504
F5500
F5502
F5501
F5503
1
4
8
Q5507
60
SWITCH
Q1401
Q1412
SWITCHING
Q1413
SWITCHING
DD XCS
HI EVER SO
HI EVER SCK
3
BATT UNREG
VTR UNREG 1
VTR UNREG
MT 5V
Q1403
SWITCHING
Q1404
SWITCHING
Q1405
SWITCHING
Q1402
SWITCHING
Q1420
L1403
SWITCHING
Q1425
SWITCHING
Q1406
SWITCHING
RECT
L1409
SWITCHING
L1410
Q1419
SWITCHING
L1404
Q1418
L1412
Q1415
SWITCHING
L1407
Q1416
SWITCHING
L1408
Q1417
SWITCHING
L1405
Q1408
SWITCHING
RECT
L1401
Q1407
SWITCHING
CAP ERRON
DRUM VS
DRUM ERROR
CAP VS
L1412 DVC
L1413 1.8V 1.8V
L1417 A 2.8V
AU 2.8V
L1419
L1418
D 2.8V
LCD 2.8V
L1420
1.5V
L1411
IC1404
2
5
L1414
L1416
15.5V
RECT
D1415
-8V
RECT
D1412
L1425
L1426
L1423 A 4.6V
L1424 AU 4.6V
IC1408
7
3
13.5V REG
-7.5V REG
6V REG
(4-50)
(4-50)
15V REG
1
6V
3
7.5 V 7.5 V
15.5V
-8V
EVF 13.5V
8
CAM 15V
6
CAM -7.5V
4
BL -15V
LCD 4.6V
RP 4.6V
IC1406
2
5
3.1V REG
(4-50)
3.1V
3
DVC PWMDVC PWM
XLANC ON
BATT SIG
INIT CHARGE ON
VTR DD ON
CAM DD ON
FAST CHARGE
BATT/XEXT SW
BATT UNREG
MT 5V
VTR UNREG 1
VTR UNREG
VCC (IC951)
DVC
BL CONT
A 2.8V
AU 2.8V
D 2.8V
LCD2.8V
1.5V
6V(IC902)
(IC951)
LCD 15.5V
-8V(IC951)
EVF 13.5V
CAM 15V
CAM -7.5V
BL -15V
LCD 4.6V
RP 4.6V
A 4.6V
AU 4.6V
CAP VS
CAP ERROR
DRUM VS
DRUM ERROR
3.1V
TO
POWER
BLOCK
DIAGRAM
(2/3)
(SEE PAGE
3-13)
BL CONT
CAM DD ON
16
3-11 3-12
EVER 3.0V
Page 87

DCR-IP5/IP5E/IP7BT/IP7E
3-7. POWER BLOCK DIAGRAM (2/3)
VC-263 BOARD(2/2)
DD XCS
HI EVER SO
HI EVER SCK
3
DVC PWM
XLANC ON
BATT SIG
INIT CHARGE ON
VTR DD ON
CAM DD ON
FAST CHARGE
BATT/XEXT SW
BATT UNREG
MT 5V
VTR UNREG
VTR UNREG1
LCD 2.8V
LCD 15.5V
EVF 13.5V
BL -15V
LCD 4.6V
BL CONT
EVER 3V
TO
POWER BLOCK
DIAGRAM
(SEE PAGE
3-12)
(1/3)
AU 4.6V
AU 2.8V
A 2.8V
D 2.8V
1.8V
1.5V
DVC
A 4.6V
6V(IC902) 6V(IC902)
RP 4.6V
-8V(IC951)
7.5V(IC951)
VCC(IC951)
CAP VS
CAP ERROR
DRUM VS
DRUM ERROR
CAM 15V
CAM -7.5V
3.1V
3.1V
D 2.8V
A 2.8V
1.8V
A 2.8V
D 2.8V
1.8V
MT 5V
D 2.8V
A 4.6V
A 2.8V
RP 4.6V
16
D1206
D1201
Q211
REG
IC201 IC202
AUDIO I/O
(4-45) (4-46)
EMPEG
VIDEO
PROCESS
(4-25) (4-29) (4-27) (4-31) (4-19) (4-17)
(4-37) (4-36) (4-37) (4-33)
IC951 IC101 IC952
PB POWER
TRANS
14
11
PW+, -
IC1602 IC1801 IC1802 IC1803 IC1605 IC1606
USB
I/F
(4-23) (4-21) (4-22) (4-22) (4-24) (4-23)
( ) : Page No. shown in ( ) indicates the page to refer on the schematic diagram.
IC1203
VTR DD ON
(4-39)
IC1208
CHARGER
2
D 2.8V
VTR UNREG1
3
3
D1207
7
REG
IC1205
AUDIO
ADC&DAC
EEPROM
MIC
IC501IC601 IC701 IC801 IC404 IC401
VIDEO
MPEG
AUDIO
PROCESS
I/O
STILL
PICTURE
PROCESS
DRIVE
MIC
i. LINK
I/F
32Mbit
FLASH
MEMORY
L904
IC1201
IC402
CHARACTER
GENERATER
IC902
REC/PB
AMP
(4-39)
BATTER IN
DETECT
IC1206
TIMER
(4-20)(4-40)
Q
PROCESS
64Mbit
SDRAM
RESET
(4-40)
LI 3V
L1601
IC1207
EVR
5
6
4
8
INVERTER
XTAL
OSC
Q9002,9004
(4-40)
EEPROM
112
113
67
17 71 73
98 151
80
114
IC1202
EEPROM
(4-41)
CAMERA
PROCESS
BASE BAND
PROCESS
HI CONTROL
CAMERA CONTROL
BATT SENS
ACV SENS
XRESET XRESET
VDD
BATT IN
VTR DD SENS
LANC ON
INIT CHARGE ON
VTR DD ON
CAM DD ON
FAST CHARGE
BATT/XEXT
XPOWER SW
XMODE SW
HI EVER SO
HI EVER SCK
(4-39)
MECHA
CONTROL
145
156
IC1103IC1102
(4-41)
FB1101
L401
LCD 4.6V
IC1601
2
3.1V
5
REG
DIGITAL
STILL
CONTROL
MS VCC ON
32
Q1606,1605
(4-39)
IB SO
IB SI
DD XCS
DVC PWM
XREEL
HALL ON
IC403
COMPARATOR
(4-24)
3
VCC
92
87
88
24
26
25
85
171
1
2
158
45
46
(4-19)
29
28
24
25
LENS MR A 2.8V
IC701
CCD IMAGER
A 4.6V
A 2.8V
MT 5V
CONTROL
SWITCH BLOCK
(FK-1900)
(SEE PAGE 4-54)
CN001
29
28
24
25
DRUM ERROR
CAP ERROR
DRUM VS
(4-8)
52
54
11
(4-7)
S003
RESET
BT001
LITHIUM BATTERY
S001,002
POWER
OFF (CHG)
ON → MODE
CAMERA
/
NETWORK
MEMORY
VCR
(4-44)
IC1001
DRUM
MOTOR DRIVE
DRUM FG,PG AMP
LOADING
MOTOR DRIVE
REEL FG AMP
TAPE TOP,END DET
DRUM,CAP ERROR AMP
F950
IC725
IC726
IRIS DRIVE
I HALL AMP
IC724
FOCUS/ZOOM
MOTOR DRIVE
ND FILTERDRIVE
V MECHA DECK
(SEE PAGE 4-51)
SENSOR VCC
TAPE LED A
MIC3
MR VCC
PW+, -
FOCUS/
ZOOM
SENSOR
CN2009
CN2008
CN2010
MR
15
21
18
9
11
1
2
S REEL
SENSOR
T REEL
SENSOR
TAPE LED
MIC ANTENNA
CAPSTAN
MOTOR
PB HEAD
AMP
Q1003
R1002
IC727
ND PRE DRIVE
ND HALL AMP
(4-7)
(4-8)
JK-209 BOARD(2/2)
Q1202
BATT SIG
I/F
3
CAM DD ON
CAM 15V
CAM -7.5V
3.1V
IC1901
D2.8V
A2.8V
IC1902
IC1903
GENERATOR
TIMING
CDS.
A/D CONV
(4-15,16)
CN2024
A4.6V
5
5
48
48
LI 3V LI 3V
8
8
44
44
50
50
CN5504
CN2026
LCD 4.6V
10
DCR-IP7BT/IP7E
6
LCD 2.8V
7
14
EVF 13.5V
15
LCD 4.6V
20
21
3.1V
22
CN2023
LCD 2.8V
27
28
25
LCD 15.5V
26
23
BL CONT
24
9
BL -15V
10
CN2022
EVER 3V
2
CPC
D 2.8V
CN2028
Q1901,1902
20
CAP_VS
D 2.8V
VTR UNREG1
MT 5V
ADJUSTMENTS
EVF 13.5V
XPOWER SW
XMODE SW
FOR
28
32
IC5500
REMOTE
COMMANDER
RECEIVER
(4-44)
IC1002
CAPSTAN MOTOR
DRIVE,
CAP FG AMP
(4-65)
TO
POWER BLOCK
DIAGRAM
(3/3)
(SEE PAGE 3-16)
48
12
14
25
26
33
CN2021
CN5500
LD-105 BOARD
DCR-IP7BT/IP7E
CN2027
MEMORY
STICK
3-13 3-14
Page 88

DCR-IP5/IP5E/IP7BT/IP7E
3-8. POWER BLOCK DIAGRAM (3/3)
BT-003 BOARD
LCD 4.6V
10
CN101
6
7
L302
14
15
20
21
22
CN301
VF-149 BOARD
DCR-IP7BT/IP7E
(4-59)
IC301
RGB
DRIVE
(The BT-003 board cannot be repaired nor adjusted. )
TO
POWER BLOCK
DIAGRAM
(2/3)
(SEE PAGE 3-14)
LCD 4.6V
LCD 2.8V
EVF 13.5V
LCD 4.6V
3.1V
( ) : Page No. shown in ( ) indicates the page to refer on
the schematic diagram.
(4-59)
IC302
TIMING
GENERATOR
IC2201
IC2202
IC2203
(4-61,62)
ZOOM SW
A/D CONV.
D2201,2202
EVF
BACK LIGHT
CN2202
CN2205
VDD
16
6
6
CN100
CONTROL
SWITCH
BLOCK (CF-1900)
(SEE PAGE 4-9)
LCD902
LCD
UNIT
ZOOM SW
FP-366
(FLEXIBLE)
(SEE PAGE 4-69)
27
28
25
26
23
24
910
CN102
LCD 2.8V
LCD 15.5V
BL CONT
BL -15V
CN101
PD-142 BOARD
PANEL 2.8V
6
6
PANEL 15.5V
7
7
8
8
15
15
CN3102
16
5
IC3103
13.5V
REG
8
(4-73)
L3105
IC3101
RGB
DRIVE
(4-73)
(4-73)
IC3102
TIMING
GENERATOR
BACK LIGHT
CONTROL
Q3109,3110,3118,3119
Q3103,3102
14
P OFF
4
BL
R3153
CN3101
CN3103
18
1
3
6
VDD
BL ANODE
THERM B
BL CATHODE
LCD901
LCD
UNIT
LED901
BACK
LIGHT
3-16E
Page 89

SECTION 4
PRINTED WIRING BOARDS AND SCHEMATIC DIAGRAMS
4-1. FRAME SCHEMATIC DIAGRAM (1/2)
DCR-IP5/IP5E/IP7BT/IP7E
A
B
C
D
E
F
G
H
1
(DCR-IP7BT/IP7E)
BT-003 BOARD
ANT901
(The BT-003 board cannot be
repaired nor adjusted.)
2
15PCN101
BT_XRST
BT_BMCTEST1
BT_WAKEUP
LCD_4.6V
BT_XSLEEP
BT_BMCTEST0
BT_CTS
BT_RXDT
BT_TXDT
BT_RTS
BT_RSSI
4
87
96
10 1413
11
CONTROL SWITCH BLOCK(CF-1900)
F_MR_A
A_2.8V
Z_MR_A
Z_MR_B
SP901
SPEAKER
MIC 901
L ch
R ch
51
GND
33P
CN301
33P
CN2023
CN2206
4P
1
GND
2
MIC_L
3
GND
4
MIC_R
1 GND
2 EVF_R
3 EVF_G
4 EVF_B
5 GND
6 LCD_2.8V
7 LCD_2.8V
8 PHD
1GND
2EVF_R
3EVF_G
4EVF_B
9 PVD
5GND
6LCD_2.8V
7LCD_2.8V
8PHD
9PVD
LD-105 BOARD
CCD
IMAGER
123456789
H2
RG
GND
VSHT
MSUB
51P
CN2021
1
GND
2
GND
3
4
5
6
7
FLEXIBLE
8
9
10
11
12
13
FP-367
14
GND
15
GND
15
14
13
12
11
10
9
8
7
6
5
4
3
2
1
GND
GND
BT_XRST
BT_BMCTEST1
BT_WAKEUP
LCD_4.6V
BT_XSLEEP
BT_BMCTEST0
BT_CTS
BT_RXDT
BT_TXDT
BT_RTS
BT_RSSI
GND
GND
15PCN2026
1011121314151617181920212223242526272829303132333435363738394041424344454647484950
H1
GND
GND
GND
CCD_OUT
(The LD-105 board cannot be repaired nor adjusted.)
V2
V3
V4
V1
GND
GND
CAM_15V
CAM_-7.5V
GND
I_HALL_GAIN
I_HALL_OFFSET
VC-263 BOARD(1/2)
1/18 CH BLOCK
2/18 B BLOCK
3/18 CG BLOCK
4/18 MS2 BLOCK
5/18 MS1 BLOCK
6/18 VIDEO1 BLOCK
7/18 VIDEO2 BLOCK
8/18 AU1 BLOCK
9/18 Q BLOCK
GND
IRIS_PWM
A_4.5V
I_HALL_AD
2.8V
GND
SHUTTER_ON
10/18 AD BLOCK
11/18 I/O BLOCK
12/18 MIC BLOCK
13/18 TW BLOCK
14/18 MC BLOCK
15/18 MD BLOCK
16/18 AU BLOCK
17/18 CN BLOCK
18/18 DD BLOCK
PWM1
EN1
PWM0
EN0
MT_4.8V
MT_GND
HALL_REF
CAM_DD_ON
GND
ND_HALL_AD
GND
ND_HALL_GAIN
ND_HALL_OFFSET
IRIS_COM
ND_PWM
TEMPGND
TEMP
F_MR_B
12 163 17
S100-103
START/STOP, ZOOM,
PHOTO(FREEZE), PHOTO(REC)
SP-
SP+
ZOOM_SENS_OUT2
123456789
G
N.C.
14P
CN2205
KEY_AD1
GND
X_PHOTO_FREEZE
LED_DA
1011121314
XHD_OUT
KEY_AD6
X_START_STOP
ZOOM_SENS_OUT1
3.1V
VF-149 BOARD(1/2)
XCS_EVFTG
10 RH_SO
11
12 RH_SCK
13 XSYS_RST
14 EVF_13.5V
15 EVF_13.5V
16 GND
17 G
18 GND
19 KEY_AD6
20 LCD_4.6V
21 LCD_4.6V
22 3.1V
23 ZOOM_SW_AD
24 XPHOTO_FREEZE
25 XS/S_SW
26 KEY_AD1
27 ZOOM_PWM
28 SP+
29 SP-
30 N.C
31 MIC_L
32 GND
10RH_SO
11
12RH_SCK
XCS_EVFTG
13XSYS_RST
14EVF_13.5V
15EVF_13.5V
16GND
17G
18GND
19KEY_AD6
20LCD_4.6V
21LCD_4.6V
223.1V
23ZOOM_SW_AD
24XPHOTO_FREEZE
25XS/S_SW
26KEY_AD1
27ZOOM_PWM
28SP+
33 MIC_R
29SP-
30N.C
31MIC_L
32GND
33MIC_R
155
VF-149 BOARD
(2/2)
1/2 TG BLOCK
2/2 BL BLOCK
16PCN2202
TO
VC-263 BOARD(2/2)
FH(2/2)
1COM
2G
3R
4B
5BLK
LCD902
6HCK1
7HCK2
EVF
LCD UNIT
8HST
9RGT
10DWN
11
EN
12STB
13VCK
14VST
15
VSS
VDD
16
LED902
BACKLIGHT UNIT
(DCR-IP7BT/IP7E)
I
J
31P
LM_+
LM_-
LM_+
CN2009
123456789
123456789
LM_+
DEW-
LM_-
DEW+
LM_+
LM_-
DEW+
LM_-
DEW-
MIC1
MIC2
MIC1
MIC2
MIC3
TAPE_END_C
S_REEL_S+
GND
101112131415161718192021222324252627282930
FP-140
MIC2
MIC2
FLEXIBLE
101112131415161718192021222324252627282930
GND
MIC1
MIC3
MIC1
S_REEL_S+
TAPE_END_C
S_REEL_S-
S_REEL_H+
S_REEL_H+
S_REEL_S-
TAPE_LED_A
S_REEL_H-
S_REEL_H-
TAPE_LED_A
TAPE_LED_K
T_REEL_T+
T_REEL_T+
TAPE_LED_K
T_REEL_H+
T_REEL_T-
T_REEL_T-
T_REEL_H+
T_REEL_H-
T_REEL_H-
GND
GND
REC_PROOF_SW
TAPE_TOP_C
TAPE_TOP_C
REC_PROOF_SW
XCC_DOWN
GND
GND
XCC_DOWN
MSW_C
MSW_C
MSW_B
MSW_B
MSW_A
31
31
MSW_A
11P
CN2010
2 CAP_W
2CAP_W
1 CAP_W
1CAP_W
10P
CN2027
GND
1
VCC
SCLK
2
MEMORY STICK
INS
N.C.
CONNECTOR
DIO
VCC
N.C.
GND
BS
9876543
10
11P
DRUM_PG_SENS
FP_PG_COM
GND
DRUM_FG_SENS
10
11
10
11
FP_PG_COM
DRUM_PG_SENS
DRUM_COM
GND
DRUM_COM
DRUM_FG_SENS
CN2007
1 PW+
2PW-
3 GND
4 GND
5 REC_M/E X_M
6 REC_M/S Y_M
7 GND
8 REC_P/E Y_P
9 REC_P/S X_P
10 PB_IN
11 GND
1PW+
2PW-
3GND
4GND
5REC_M/E X_M
6REC_M/S Y_M
7GND
8REC_P/E Y_P
9REC_P/S X_P
10PB_IN
11GND
DRUM_W
DRUM_W
DRUM_W
DRUM_W
DRUM_V
DRUM_V
DRUM_V
DRUM_V
DRUM_U
DRUM_U
DRUM_U
123456789
123456789
DRUM_U
CN2008 19P
18 CAP_V
19 CAP_V
18CAP_V
19CAP_V
17 CAP_U
17CAP_U
16 CAP_U
16CAP_U
15 G_GND
15G_GND
13 MR_GND
14 CFG2
13MR_GND
14CFG2
8 WHE+
9 WHE-
10 HE_GND
11 MR_VCC
12 CFG1
8WHE+
9WHE-
10HE_GND
11MR_VCC
12CFG1
3 HE_VCC
4 UHE+
5 UHE-
6 VHE+
7 VHE-
3HE_VCC
4UHE+
5UHE-
6VHE+
7VHE-
K
M
M903
LOADING
MOTOR
L
FP-228
FLEXIBLE
DEW
SENSOR
DH-037
BOARD
MIC
(ANTENNA)
D001
TAPE LED
Q001,Q002
TOP/END
SENSOR
S001
REC PROOF
H001,H002
S/T REEL
SENSOR
FP-141
FLEXIBLE
S902
C.C DOWN
S901
MODE SW
VIDEO
FG
PG
HEAD
EVENODD
M901
DRUM MOTOR
M
FG
M902
CAPSTAN MOTOR
M
MECHANISM DECK
M
16
FRAME SCHEMATIC DIAGRAM (1/2)
4-1 4-2
Page 90

DCR-IP5/IP5E/IP7BT/IP7E
FRAME SCHEMATIC DIAGRAM (2/2)
A
B
C
D
E
F
G
1
TO
VC-263 BOARD(1/2)
FH(1/2)
40P
PANEL_2.8V
PANEL_2.8V
PANEL_15.5V
PANEL_15.5V
XCS_PANEL
XCS_PANEL
KEY_AD2
KEY_AD0
PANEL_B
REG_GND
PANEL_G
PANEL_G
PANEL_R
PANEL_R
REG_GND
REG_GND
REG_GND
REG_GND
BL_CONT
BL_CONT
XHI_SCK
XHI_SCK
REG_GND
REG_GND
BL_-15V
BL_-15V
KEY_AD4
KEY_AD4
REG_GND
REG_GND
KEY_AD3
KEY_AD3
KEY_AD5
REG_GND
HI_SO
HI_SO
8
40
40
39
39
38
38
37
37
36
36
35
35
34
34
33
33
32
32
31
31
30
30
29
29
28
28
27
27
26
26
25
25
24
24
23
23
22
22
21
21
20
20
19
19
18
18
17
17
16
16
15
15
14
14
XVD
13
13
XVD
12
12
XHD
11
11
XHD
10
10
9
9
8
8
7
7
6
6
5
5
4
4
3
3
2
2
1
1
2
4
7
CN2022
VC-263 BOARD(2/2)
13579
CN2024
XSIRCS_IN
60P
11131517192123252729313335373941434547495153555759
A4.6V
USB_VBUS
XFTALLY_LED
TPA
GND
GND
NTPA
BATT_UNREG
BATT_UNREG
S_Y_I/O
VIDEO_I/O
S_C_I/O
GND
CAM_LED
VTR_LED
GND
XCHARGE_LED
MEM_LED
L_IO
R_IO
VTR_UNREG
VTR_UNREG
VTR_UNREG
VTR_UNREG2
VTR_UNREG2
VTR_UNREG2
VTR_UNREG1
VTR_UNREG1
B TO B
CN102
KEY_AD2
KEY_AD0
PANEL_B
REG_GND
PANEL_G
PANEL_G
PANEL_R
PANEL_R
REG_GND
REG_GND
REG_GND
REG_GND
PANEL_2.8V
PANEL_2.8V
PANEL_15.5V
PANEL_15.5V
BL_CONT
BL_CONT
XHI_SCK
XHI_SCK
XCS_PANEL
XCS_PANEL
HI_SO
HI_SO
REG_GND
REG_GND
XVD
XVD
XHD
XHD
BL_-15V
BL_-15V
KEY_AD4
KEY_AD4
REG_GND
REG_GND
KEY_AD3
KEY_AD3
KEY_AD5
REG_GND
96
40P
10 1413
FP-366
BACK LIGHT, DISPLAY
(PANEL OPEN,REV.DET.SW)
S101,102
S105
(CONTROL)
S103,104
11
FLEXIBLE
CN101
17P
KEY_AD2
PANEL_B
PANEL_G
PANEL_R
REG_GND
PANEL_2.8V
PANEL_15.5V
BL_CONT
XHI_SCK
XCS_PANEL
REG_GND
BL_-15V
PANEL_REVERSE
REG_GND
HI_SO
12 163
PD-142 BOARD
15P
CN3102
1
2
3
4
5
6
7
HARNESS
8
9
10
11
12
13
XVD
14
XHD
15
16
17
HARNESS
15 BL_-15V
14 XHD
13 XVD
12 REG_GND
11 HI_SO
10 XCS_PANEL
9 XHI_SCK
8 BL_CONT
7 PANEL_15.5V
6 PANEL_2.8V
5 REG_GND
4 PANEL_R
3 PANEL_G
2 PANEL_B
1 KEY_AD2
S3101
BROWSER MENU
(DCR-IP7BT/IP7E)
LCD BACK LIGHT
ON OFF
S3102
155
CN3101
24P
→
CN3103
CN3104
1TEST2
2RGT
3B
4R
5G
6PSIG
7HCK1
8HCK2
9CRext
10TEST
11REF
12HST
13WIDE
14CS
15VSSG
16VDDG
17VSS/GND
18VDD
19DWN
20EN
21VCK
22VST
23COM
24TEST1
6P
6BL_CATHODE
5N.C.
4THERM_G
3THERM_B
2N.C.
1BL_ANODE
6P
6
PSIG
EXT_BL
5
HD0
4
GND
3
COM
2
VG
1
CPC
(FOR CHECK)
LCD901
2.5 INCH
COLOR LCD
UNIT
LED901
GND
GND
GND
GND
GND
XLANC_ON
GND
GND
JACK_AD
XLANC_POWER_ON
JK-209 BOARD
D5507
(TALLY)
TPB
GND
NTPB
USB_D-
USB_D+
LI_3V
H
CN5501
1
AUDIO L
2
LANC_SIG
3
S_GND
4
LANC_DC
5
I
A/V
J
i LINK
(MICRO MV)
K
(USB)
DCR-IP7BT/IP7E
L
J5500
DC IN
6
7
110
8
9
10
4
3 NTPA
2 TPB
1 NTPB
S-C
AUDIO_R
JACK_AD
AUDIO_GND
VIDEO_IN/OUT
S-Y
CN5502
TPA
CN5503
VCC1
D-2
D+3
ID4
GND5
CN5504
10P
4P
5P
GND
246
8
10121416182022242628303234363840424446485052545658
EVER_3V
D_2.8V
DCR-IP7BT/IP7E
FAST_CHARGE
INIT_CHARGE_ON
D5514
(BLUETOOTH)
XBT_LED
XEJECT_SW
XPOWER_SW
XRESET_SW
BATT/XEXT
XMODE_SW
BATT_SIG
LANC_IN
LANC_OUT VTR_UNREG1
60
CN5500 31P
31XEJECT_SW
31 XEJECT_SW
30GND
30 GND
29XRESET_SW
29 XRESET_SW
28LI_3V
28 LI_3V
27VTR_UNREG
27 VTR_UNREG
26XCHARGE_LED
26 XCHARGE_LED
25XMODE_SW
25 XMODE_SW
24XPOWER_SW
24 XPOWER_SW
23XCAM_LED
23 XCAM_LED
22D_2.8V
22 D_2.8V
21XMEM_LED
21 XMEM_LED
20XVTR_LED
20 XVTR_LED
19BATT +
19 BATT +
18BATT +
18 BATT +
17BATT +
17 BATT +
16BATT +
16 BATT +
15BATT +
15 BATT +
14BATT +
14 BATT +
13BATT +
13 BATT +
12BATT +
12 BATT +
11BATT +
11 BATT +
10BATT_SIG
10 BATT_SIG
9BATT -
9 BATT -
8BATT -
8 BATT -
7 BATT -
7BATT -
6 BATT -
6BATT -
5 BATT -
5BATT -
4 BATT -
4BATT -
3 BATT -
3BATT -
2 BATT -
2BATT -
1 BATT -
1BATT -
CN001
31P
CONTROL SWITCH BLOCK(FK-1900)
BT001
POWER
OFF (CHG)
ON → MODE
CAMERA
MEMORY / NETWORK
VCR
RESET, OPEN/ EJECT
D001-004
VIDEO
CAMERA
MEMORY/NETWORK
CHARGE
(DCR-IP7BT/IP7E)
S001,002
S003,004
LITHIUM BATTERY
(PANEL REVERSE)
BT901
BATTERY
TERMINAL
16
FRAME SCHEMATIC DIAGRAM (2/2)
4-3 4-4
Page 91

4-2. PRINTED WIRING BOARDS AND SCHEMATIC DIAGRAMS
THIS NOTE IS COMMON FOR WIRING BOARDS AND SCHEMATIC DIAGRAMS
(In addition to this, the necessary note is printed in each block)
DCR-IP5/IP5E/IP7BT/IP7E
(For printed wiring boards)
• b: Pattern from the side which enables seeing.
(The other layers' patterns are not indicated.)
• Through hole is omitted.
• Circled numbers refer to waveforms.
• There are few cases that the part printed on diagram isn’t
mounted in this model.
• Chip parts.
C
BE
5
64
2
13
Transistor
5
46
2
31
45
2
31
12
4
53
EB
CC
3
21321321
Diode
(For schematic diagrams)
• All capacitors are in µF unless otherwise noted. p: pF.
50V or less are not indicated except for electrolytics and
tantalums.
• Chip resistors are 1/10W unless otherwise noted.
kΩ=1000Ω, MΩ=1000kΩ.
• Caution when replacing chip parts.
New parts must be attached after removal of chip.
Be careful not to heat the minus side of tantalum capacitor, Because it is damaged by the heat.
• Some chip part will be indicated as follows.
Example C541 L452
22U 10UH
TA A 2520
Kinds of capacitor
Temperature characteristics
External dimensions (mm)
• Constants of resistors, capacitors, ICs and etc with XX indicate
that they are not used.
In such cases, the unused circuits may be indicated.
• All variable and adjustable resistors hav e characteristic curve B,
unless otherwise noted.
• Signal name
XEDIT→ EDIT PB/XREC → PB/REC
• 2 : non flammable resistor
• 1 : fusible resistor
• C : panel designation
• A : B+ Line *
• B : B– Line *
• J : IN/OUT direction of (+,–) B LINE. *
• C : adjustment for repair. *
• Circled numbers refer to waveforms. *
*Indicated by the color red.
Note :
The components identified by
mark 0 or dotted line with mark
0 are critical for safety.
Replace only with part number
specified.
Note :
Les composants identifiés par
une marque 0 sont critiques
pour la sécurité.
Ne les remplacer que par une
pièce portant le numéro spécifié.
(Measuring conditions voltage and waveform)
• Voltages and waveforms are measured between the measurement points and ground when camera shoots color bar chart of
pattern box. They are reference values and reference waveforms. *
(VOM of DC 10 MΩ input impedance is used.).
• Voltage v alues change depending upon input impedance of V OM
used.) *
21
1. Connection
34
2. Adjust the distance so that the output waveform of Fig. a and
the Fig. b can be obtain.
Fig. a (Video output terminal output waveform)
Pattern box
Front of the lens
H
Yellow
Cyan
White
Magenta
Green
AABBA=B
Red
Cyan
White
Green
Yellow
Blue
Magenta
Fig.b (Picture on monitor TV)
1.5 m
Red
Blue
Electron beam
scanned frame
CRT picture frame
When indicating parts by reference number, please include
the board name.
4-5
Page 92

DCR-IP5/IP5E/IP7BT/IP7E
For Schematic Diagram
• Refer to page 4-75 for waveforms.
LND795
IRIS_DRIVE+
IRIS METER
LND792
IRIS_DRIVE-
LND791
LND790
ND FILTER
METER
LND785
LND784
LND783
LND782
LND781
LND780
LND770
LND777
LND775
LND776
LND774
LND773
LND771
LND772
ND_DRIVE+
ND_GND
ND_GND
ND_DRIVE-
FOCUS(-)
FOCUS(+)
Z_MR_VCC
F_MR_B
F_MR_A
F_MR_GND
F_MR_VCC
Z_MR_A
Z_MR_B
Z_MR_GND
ZOOM-
ZOOM+
2
LD-105 BOARD is replaced as a block.
So that this PRINTED WIRING BOARD is omitted.
IRIS_BIAS+
X780
IRIS_HALL-
HT-120C
H
IRIS_BIAS-
IRIS_HALL+
ND_BIAS+
X781
ND_HALL-
HT-120C
H
ND_BIAS-
ND_HALL+
TEMPGND
TEMPOUT
TH780
1
LD-105 BOARD
CCD IMAGER
A
XX MARK:NO MOUNT
NO MARK:REC/PB MODE
R :REC MODE
P :PB MODE
:The Semiconductors shown by the Mark.
Cannot be measured of their voltage and
wavefroms due to machines mechanical stracture.
B
C
D
LENS UNIT
E
M
F
M
G
H
I
FOCUS MOTOR
M
M
ZOOM MOTOR
MR
J
MR
K
LND796
L721
10uH
470k
R763
R760
10k
Q723
EC3201C-PM-TL
DRIVER
R761
47k
R762
22k
18
1
2
3
4
5
6
7
8
9
10
11
12
13
TEMP
F_MR_B
F_MR_A
Z_MR_A
Z_MR_B
14
15
16
17
18
19
20
21
22
23
24
25
26
27
28
29
30
31
32
33
34
35
36
37
38
39
40
41
42
43
44
45
46
47
48
49
50
51
V1
V2
V3
V4
SHUTTER_ON
PWM1
EN1
PWM0
EN0
CAM_DD_ON
VSHT
MSUB
GND
H2
RG
H1
GND
CCD_OUT
GND
GND
GND
CAM_15V
GND
CAM_-7.5V
V1
V2
V3
V4
GND
I_HALL_GAIN
I_HALL_OFFSET
IRIS_PWM
GND
I_HALL_AD
A_4.5V
2.8V
GND
SHUTTER_ON
PWM1
EN1
PWM0
EN0
MT_4.8V
MT_GND
CAM_DD_ON
HALL_REF
ND_HALL_AD
GND
ND_HALL_OFFSET
ND_HALL_GAIN
GND
IRIS_COM
ND_PWM
TEMPGND
TEMP
F_MR_B
F_MR_A
A_2.8V
Z_MR_A
Z_MR_B
GND
20 21
51P
TO
VC-263 BOARD(17/18)
CN2021
(SEE PAGE 4-47)
96
Q721
EC3201C-PM-TL
DRIVER
22k
R730
330
R731
C727
0.1u
B
R733
XX
R732
1200
C725
FB720
0.1u
0uH
B
L720
10uH
R744
1k
C_OUT
R726
8
GND
11
C_IN+
10
C_IN-
9
8
R764
12k
R727
4700
R728
47k
10k
C749
XX
IC724
FOCUS/ZOOM
MOTOR CONTROL,
ND DRIVE,
SHUTTER DRIVE,
SHUTTER_ON
CAM_DD_ON
17
1/10W
OUT4B
C722
3300p
R722
10
2012
15
16
EN4
PWM0
R724
100k
B
13
IRIS DRIVE
IC725
WTGA-NJM12902C
B_IN+
5
6
R723
1k
C721
0.022u
B
13
14
IN3
IN4
EN3
EN0
PWM1
EN1
7
C726
0.033u
1608
12
D_IN+
D_IN-14D_OUT
B_IN-
B_OUT
7
R725
100k
C723
0.1u
B
1608
C724
1u
B
1608
C728
0.1u
B
C729
47u
6.3V
TA
BB
4
R720
22k
±
CL011
CL008
CL007
CL002
CL001
TEMP
C780
C781
10u
1u
6.3V
B
1608
TA
L780
10uH
F_MR_B
F_MR_A
Z_MR_A
Z_MR_B
0.5%
R721
10k
±
0.5%
D720
MA4L11100AS0
23
24
VDD
OUT1B
VM12OUT1A3PGND4OUT2A5OUT3A6PGND7OUT4A8VM49IN110EN111IN212EN2
1
C720
0.1u
B
D721
1SS401(TE85L)
21
22
PGND
WTGA-UPD16877W
20
OUT2B
EC3201C-PM-TL
DRIVER
19
OUT3B
VM2_3
IC724
A_OUT
1
A_IN-
2
A_IN+
3
Vcc
4
Q720
18
PGND
10 14 1913
C734
0.47u
1608
C731
0.01u
R734
180k
A_OUT
1
A_IN-
2
A_IN+
3
Vcc
4
R736
180k
C730
0.01u
B
1608
IC726IC725
WTGA-NJM12902C
C735
0.01u
B
C732
1u
6.3V
B
1608
B
13
IRIS DRIVE
B_IN+
5
6
12
D_IN-14D_OUT
IC726
B_IN-
C733
0.01u
11
22k
R737
R738
18k
R735
39k
D_IN+
GND
11
C_IN+
10
C_IN-
9
C_OUT
8
B_OUT
7
R739
10k
B
12 163 17
R11.8
7
IC701
CCD IMAGER
CCD_OUT
6
VDD9RG10SUB11VL12H113H214RCSUB
8
P0
R14.9P0R14.1
CL705
C737
0.022u
1608
B
C739
470p
B
R750
470k
C738
0.01u
B
0.001u
R740
5600
R742
180k
R741
180k
C736
B
Q722
EC3201C-PM-TL
DRIVER
R765
0
R743
180k
R746
1k
R747
15k
R745
XX
R748
10k
R749
XX
155
V1V2V3
V4
P0
P0
R-0.3
GND6GND
4
5
7
8
P0
P0
P0
R9.8
R1.7P0R1.3P0R9.2
R-7.6
A_OUT
1
A_IN-
2
A_IN+
3
Vcc
4
R751
22k
C740
XX
R-.03P0R-7.1P0R-7.1
3
9
R702
CL700
R753
C741
0.001u
B
WTGA-NJM12902C
R752
10k
1V42V33V24V15
2
R11.8
0
C700
XX
C706
0.1u
B
2012
1k
13
IC727
ND DRIVE
IC727
B_IN+
5
6
1
P0
:(DCR-IP5/IP7BT)
:(DCR-IP5E/IP7E)
ICX280DKF-13
ICX281DKF-13
IC701
P0
C701
XX
R710
R754
12
D_IN+
D_IN-14D_OUT
B_IN-
B_OUT
7
C742
0.1u
B
1k
P0
R11.1
0
R755
220k
R4.2/P0
R711
XX
2SC4250(T5LSONY1)
R14.9/P0
R707
R706
3300
C705
10u
10V
TA
AA
GND
C_IN+
C_IN-
C_OUT
XXR756
BUFFER
39
R708
0
Q701
UN9213J-(K8).SO
INVERTER
0
R709
0
L700
C702
XX
Q700
FB700
0uH
C743
0.1u
11
10
9
8
100uH
C704
C703
10u
0.1u
20V
F
TA
1608
B
R712
0
C745
47u
B
6.3V
BB
C748
0.1u
B
R758
1k
R759
330
C746
0.001u
B
C744
0.01u
B
R757
22k
C747
0.47u
B
1608
L
M
16
CCD IMAGER
LD-105
SIGNAL PATH
VIDEO SIGNAL
CHROMA
REC
PB
Precautions Upon Replacing CCD imager
The LD-105 board mounted as a repair part is not equipped
•
with a CCD imager.
Y Y/CHROMA
When replacing this board, remove the CCD imager from the
old one and mount it onto the new one.
•
If the CCD imager has been replaced, carry out all the
adjustments for the camera section.
As the CCD imager may be damaged by static electricity from
•
its structure, handle it carefully like for the MOS IC.
In addition, ensure that the receiver is not covered with dusts
nor exposed to strong light.
4-7 4-8
Page 93

DCR-IP5/IP5E/IP7BT/IP7E
1
CONTROL SWITCH BLOCK(CF-1900)
A
B
R003
R004
C
R001
R002
START/STOP
ZOOM
PHOTO
PHOTO
S100
S103
S102
(FREEZE)
S101
(REC)
SOL100
3
SP901
SPEAKER
G
1
N.C.
2
SP+
3
SP-
4
ZOOM_SENS_OUT2
5
3.1V
6
ZOOM_SENS_OUT1
7
X_START_STOP
8
9
KEY_AD6
10
XHD_OUT
11
LED_DA
12
X_PHOTO_FREEZE
13
GND
KEY_AD1
14
42
TO
VF-149 BOARD(2/2)
CN2205
5
(SEE PAGE 4-62)
Schematic diagram and printed wiring board of the VC-263 board are not shown.
Pages from 4-11 to 4-50 are not shown.
D
E
SIGNAL PATH
REC
PB
16
CONTROL SWITCH BLOCK(CF-1900)is replaced as
a block.
So that this PRINTED WIRING BOARD are omitted.
AUDIO
SIGNAL
4-9
CONTROL SWITCH BLOCK
CF-1900
Page 94

DCR-IP5/IP5E/IP7BT/IP7E
FP-140 (TAPE TOP/END SENSOR), FP-141 (MODE SWITCH), FP-228 (DEW SENSOR) FLEXIBLE BOARDS AND DH-037 (MIC) BOARD
1
2
FP-140, FP-141, FP-228 and DH-037 are replaced as a block.
A
LM+
B
C
D
E
TO MECHA CONTROL
BLOCK
(SEE PAGE 4-43
of Level 3)
TAPE_END_C
TAPE_LED_A
TAPE_LED_B
TAPE_TOP_C
REC_PROOF_SW
XCC_DOWN
LM+
LM-
LM-
DEW+
DEW-
MIC2
MIC2
MIC3
MIC1
MIC1
GND
S_REEL_S+
S_REEL_H+
S_REEL_S-
S_REEL_H-
T_REEL_T+
T_REEL_H+
T_REEL_T-
T_REEL_H-
GND
GND
MSW_C
MSW_B
MSW_A
1
2
3
4
5
6
7
8
9
10
11
12
13
14
15
16
17
18
19
20
21
22
23
24
25
26
27
28
29
30
31
F
3
54
FP-141 FLEXIBLE
(CONDUCTOR SIDE)
FP-228
FLEXIBLE
DEW SENSOR
M
3
2
3
2
M903
LOADING MOTOR
4
HW-105A-CDE-T
1
S REEL SENSOR
4
HW-105A-CDE-T
T REEL SENSOR
1
H002
H001
REC PROOF
S902
C.C. DOWN
S001
DH-037 BOARD
(MIC)
Q002
PN166.SO
TAPE END
D001
GL100MN1MP1
TAPE LED
Q001
PN166.SO
TAPE TOP
FP-140 FLEXIBLE
S902
(C.C. DOWN)
S901
(MODE SWITCH)
FP-140 FLEXIBLE
(COMPONENT SIDE)
31
1
1-682-008-
11
S001
(REC PROOF)
2
3
4
1
2
1
Q001
(TAPE TOP)
H001
(T REEL SENSOR)
D001
(TAPE LED)
3
H002
(S REEL SENSOR)
4
G
T APE TOP/END SENSOR
FP-140
MODE SWITCH
MODE SWITCH
/
FP-141
CODE A
S901
CODE B
CODE C
FP-141
FLEXIBLE
DEW SENSOR
/
FP-228
/
MIC
DH-037
M
M903
(LOADING MOTOR)
FP-228 FLEXIBLE
DEW
SENSOR
11
1-677-049-
DH-037 BOARD (MIC)
1-682-006-
4-52
11
1-682-007-
11
Q002
(TAPE END)
Page 95

CONTROL SWITCH BLOCK (FK-1900) PRINTED WIRING BOARD
MA8120-TX
D005
30P
CN001
1 BATT -
2 BATT -
3 BATT -
4 BATT -
5
BATT -
6 BATT -
7 BATT -
8 BATT -
9 BATT -
10 BATT_SIG
11 BATT +
12
BATT +
13 BATT +
14 BATT +
15 BATT +
16 BATT +
17 BATT +
18 BATT +
19 BATT +
20
XVTR_LED
21
XMEM_LED
22 D_2.8V
23 XCAM_LED
24
XPOWER_SW
25
XMODE_SW
26 XCHARGE_LED
27
VTR_UNREG
28 LI_3V
29
XRESET_SW
30 GND
31
XEJECT_SW
R004
470
S004
LND003
LND002
D003
TLGU1008(T05,SOY)
1608
0
R005
MA8120-TX
D007
D002
TLGU1008(T05,SOY)
D001
TLGU1008(T05,SOY)
BT001
R002
470
S002
LND004
CHASSIS GND
D004
TLAU1008(T05,SOY)
LND001
MA8120-TX
D006
S003
VDR001
VDR002
LND005
CHASSIS GND
S001
S
BT901
1
A
BATT_SIG
BATT +
BATT -
LITHIUM BATTERY
(SEE PAGE 4-65)
TO
JK-209 BOARD
CN5500
BATTERY
TERMINAL
CONTROL SWITCH BLOCK(FK-1900)
72
D
B
645
E
893
C
16
(MEMORY/NETWORK)
(VCR)
(CAMERA)
(CHARGE)
→
OPEN/
EJECT
RESET
POWER
OFF(CHG)
ON MODE
CAMERA
MEMORY/
NETWORK
VCR
(DCR-IP7BT/IP7E)
DCR-IP5/IP5E/IP7BT/IP7E
CONTROL SWITCH
BLOCK (FK-1900)
BT001
(LITHIUM BATTERY)
S001
OFF(CHG)
ON
MODE
CAMERA
MEMORY/
NETWORK
VCR
POWER
S002
S003
RESET
1-476-812-
11
CONTROL SWITCH BLOCK
(FK-1900)
FP-367 (IP7BT/IP7E)
4-53 4-54
1
30
S004
(EJECT)
CONTROL SWITCH BLOCK
FK-1900
Page 96

DCR-IP5/IP5E/IP7BT/IP7E
VF-149 (B/W EVF) PRINTED WIRING BOARD
— Ref. No. VF-149 Board; 10,000 Series —
B/W EVF
VF-149
For printed wiring board
• Refer to page 4-79 for parts location.
• This board consists of multiple layers. However, only
the sides (layers) A and B are shown.
• Chip parts
Transistor Diode
C
BE
5
64
2
13
3
21
There are a few cases that the part printed on
this diagram isn’t mounted in this model.
4-55 4-56
VF-149
(B/W EVF)
VC-263
CAMERA, DSC, VIDEO, AUDIO, SERVO
HI/MECHA CONTROL, DC/DC CONVERTER
Page 97

DCR-IP5/IP5E/IP7BT/IP7E
4-584-57
VF-149
B/W EVF
Page 98

DCR-IP5/IP5E/IP7BT/IP7E
For Schematic Diagram
• Refer to page 4-55 for printed wiring board.
• Refer to page 4-75 for waveforms.
1
VF-149 BOARD(1/2)
RGB DRIVE,TIMING GEN.(TG BLOCK)
A
-REF.NO.:10,000 SERIESXX MARK:NO MOUNT
NO MARK:REC/PB MODE
B
C
D
E
F
TO
VC-263 BOARD(17/18)
CN2023
(SEE PAGE 4-47)
G
H
I
J
K
16
2
33PCN301
1GND
2EVF_R
3EVF_G
4EVF_B
5GND
6LCD_2.8V
7LCD_2.8V
8PHD
9PVD
10RH_SO
11XCS_EVFTG
12RH_SCK
13XSYS_RST
14EVF_13.5V
15EVF_13.5V
16GND
17G
18GND
19KEY_AD6
20LCD_4.6V
21LCD_4.6V
223.1V
23ZOOM_SW_AD
24XPHOTO_FREEZE
25XS/S_SW
26KEY_AD1
27ZOOM_PWM
28SP+
29SP-
30N.C
31MIC_L
32GND
33MIC_R
SIGNAL PATH
CHROMA Y/CHROMA
REC
PB
XCS_EVFTG
VIDEO SIGNAL
Y
RH_SO
RH_SCK
96
L302
10uH
1610
BLACK
0
32
BLACK_IN
FRP
1.4
30
31
FRP
PRG
BGP
2.7
33
34
N.C
BGP
IC301
RGB DRIVE
IC301
RB5P004AL1
0.9
2.8
SHB
SHG
1.4
0.9
R305
2700
SHA
R306
47k
R308
22k
SHR
SHG
0.9
0.902.82.6
34
36
SHG35SHR
XCLR
9
37
38
39
40
41
42
43
44
45
46
47
48
C309
C_BG
XC.SAVE
XSCK
SI
XCS
Vcc1
TRAP_ADJ
LPF_ADJ
XP.SAVE
B_IN
G_IN
R_IN
0.1u
B
87
R304
15k
1.5
0.7
35
36
EXT_DA
R_INJECT
1
2
3
XSH.SAVE2SH_R3SH_G4SH_B5SH_A6N.C7BIAS8OP_IN+9OP_IN-10OP_OUT11VCO12COM_DC
1
2.8
0.9
SHR
2.7
37
XCLP
38
TEST
0
39
SBLK
1.4
40
FRP
41
TEST
2.6
42
XSCK
2.8
43
VDD
2.8
44
XCS
2.1
45
SO
1.8
46
SI
47
VDO
2.8
48
XVD
4
C305
0.1u
B
R320
C304
0
XX
C303
R321
XX
0.1u
XC_SAVE
XHI_SCK
XHI_SCK
XCS_EVF
XTG_SO
HI_SO
XVD
XTG_SO
XCS_EVF
XP_SAVE
BGP
BLACK
FRP
R302
XX
R303
33k
± 0.5%
C306
0.01u
B
C307
0.01u
B
C308
0.01u
B
R301
C301
470k
10u
6.3V
TA
P
L301
10uH
1610
C302
C321
0.1u
10u
6.3V
B
P
TA
PHD
PVD
G
GND
KEY_AD6
LCD_4.6V
3.1V
ZOOM_SW_AD
XPHOTO_FREEZE
XS/S_SW
KEY_AD1
ZOOM_PWM
SP+
SP-
MIC_L
A_GND
MIC_R
AUDIO
SIGNAL
1
TO(2/2)
FB301
1.2
2.8
2.6
2.5
2.8
2.8
1.2
1.2
2.8
1.8
1.8
1.8
0uH
10 1413
C312
3.3u
20V
TA
BB
13.6
26
27VP28
29
PFRP
XVP.SAVE
25
Vcc2
P_DC_DET
6
B_DC_DET
5
G_DC_DET
4
R_DC_DET
COM_OUT
1.4
1.4
1.2
3.4
6.5
C311
R311
0.1u
100k
R307
68k
SHB
2.8
B
R310
1M
L303
C310
560p
CH
1608
SHA
0.9
31
32
SHA33SHB
3.3uH
R309
± 5%
68k
2520
2.8
1.4
28
29
30
RPD
GND
TEST
IC302
TIMING GENERATOR
IC302
CXD3501AR-T4
COM_IN
XC_SAVE
XCSAVE
GND2
GND1
VREF
Vcc3
C314
0.01u
VB
VG
VR
1.4
27
OSCI
B
1SV290(TPL3)
C313
0.001u
1.4
26
8
B
OSCO
11
R312
100
6.8
24
1.7
23
R313
100
6.8
22
1.7
21
R314
100
6.8
20
1.7
19
18
17
16
15
14
13
D301
C323
6.7
13.6
R330
0
13.1
6.5
R327
XX
C316
100p
CH
XP_SAVE
2.8
25
XSTBY
BLK
HCK1
HCK2
HST
RGT
VDD
DCG/CLR
STB
VCK
VST
N.C
12 163 17
C317
2.2u
B
2012
C318
2.2u
B
2012
C319
2.2u
B
2012
R317
100k
XX
0
24
1.4
23
1.4
22
21
0
20
2.8
19
0
18
2.3
17
EN
2.8
16
1.4
15
0
14
13
R319
100k
R318
100k
C320
4.7u
B
3216
R323
R322
0
R325
R324
0
R328
R329
33k
1M
± 0.5%
± 0.5%
R316
100k
TG24
0
TG23
0
TG22
TG21
TG20
TG18
TG17
TG16
TG15
TG14
C324
C322
1u
1u
B
B
2012
2012
TG24
TG23
TG22
TG21
TG20
TG18
TG17
TG16
TG15
TG14
C2204
2.2u
2012 F
155
16PCN2202
LED_DA
LED_ON/OFF
XHD_OUT
1COM
2G
3R
4B
5BLK
LCD902
6HCK1
EVF
LCD UNIT
7HCK2
8HST
9RGT
10DWN
11
EN
12STB
13VCK
14VST
15
VSS
VDD
16
2
TO(2/2)
7
HD2HDO3XWRT4CMPO5DETIN6GND7TESTI8LED9PWM10-IN11+IN12TEST
1
0.3
XHD
2.8
2.8
B/W EVF
VF-149 (1/2)
4-59 4-60
Page 99

For Schematic Diagram
• Refer to page 4-55 for printed wiring board.
DCR-IP5/IP5E/IP7BT/IP7E
1
VF-149 BOARD(2/2)
BACK LIGHT(BL BLOCK)
A
-REF.NO.:10,000 SERIESXX MARK:NO MOUNT
NO MARK:REC/PB MODE
B
C
2
TO(1/2)
D
LED_DA
LED_ON/OFF
XHD_OUT
GND
2
3
D2203
MA8120-TX
C2201
XX
UN9213J-(K8).SO
LED DRIVE
Q2202
4.6
Q2201
4.6
UN9113J-(K8).SO
LED DRIVE
4.6
1.7
R2205
56k
Q2204
2SC4738F-Y/GR(TPL3)
LED DRIVE
1.1
R2206
1800
1.1
0
C2202
0.1u
Q2203
2SB1462J-QR(K8).SO
LED DRIVE
R2201
22k
±
0.5%
0
2.8
R2202
56k
±
0.5%
R2218
XX
1.1
R2219
XX
1.7
C2203
0.01u
TH2201
22k
R2203
8200
R2204
1800
R2207
47
D2201
1.6
0.4
D2201,2202
NSCW215-T39
1.6
XP6501-(TX).SO
0.4
R2208
47
8754
D2202
1.1
Q2205
LED DRIVE
LED902
(BACKLIGHT UNIT)
96
10
IC2202
R2210
18k
R2217
47k
01ZA8.2(TPL3)
D2204
C2216
0.47u
1608
R2216
12k
IC2203
BUFFER
IC2203
TA75S01F(TE85R)
1.0
IN+
123
VSS
3.4
IN-
VCC
OUT
4.6
3.4
45
R2209
1800
C2206
0.1u
1608
B
R2211
150k
C2205
0.22u
2012
IC2202
TA75S01F(TE85R)
2.8
IN+
123
VCC
VSS
2.8
IN-
R2214
6800
2.8
3.3
B
OUT
IN+
123
VCC
VSS
IN-
OUT
IC2201
TA75S01F(TE85R)
BUFFER
4.6
2.8
45
4.6
0.1
45
IC2201
AMP
SIGNAL PATH
AUDIO
SIGNAL
REC
PB
E
F
G
16
CL001
G
ZOOM_SW_AD
SP+
SP-
LCD_4.6V
3.1V
ZOOM_PWM
1
TO(1/2)
XS/S_SW
KEY_AD6
XPHOTO_FREEZE
KEY_AD1
MIC_L
A_GND
MIC_R
R2215
R2220
0.1u
0
(Note)
1
2
3
4
5
6
7
8
9
10
11
12
13
14
LND001
GND
1
2
3
4
14P
CN2205
G
N.C.
SP+
SP-
ZOOM_SENS_OUT2
3.1V
ZOOM_SENS_OUT1
X_START_STOP
KEY_AD6
XHD_OUT
LED_DA
X_PHOTO_FREEZE
GND
KEY_AD1
CN2206
4P
GND
MIC_L
GND
MIC_R
TO
CONTROL SWITCH BLOCK
(CF-1900)
(SEE PAGE 4-9)
MIC UNIT
MIC901
L ch
R ch
Note :
The components identified by
mark 0 or dotted line with mark
0 are critical for safety.
Replace only with part number
specified.
Note:Capacitor is mounted to the location
where R2220 are printed.
Note :
Les composants identifiés par
une marque 0 sont critiques
pour la sécurité.
Ne les remplacer que par une
pièce portant le numéro spécifié.
4-61 4-62
BACK LIGHT
VF-149 (2/2)
Page 100

DCR-IP5/IP5E/IP7BT/IP7E
JK-209 (JACK) PRINTED WIRING BOARD
— Ref. No. JK-209 Board; 10,000 Series —
A/V
For printed wiring board
• Refer to page 4-79 for parts location.
• This board consists of multiple layers. However, only
the sides (layers) A and B are shown.
• Chip parts
Transistor Diode
C
3
21
LD-105
(CCD IMAGER)
BT-003
(BLUETOOTH) (IP7BT/IP7E)
PD-142
(RGB DRIVE, TIMING GENERATOR)
JACK
JK-209
BE
21
34
JK-209
(JACK)
There are a few cases that the part printed on
this diagram isn’t mounted in this model.
4-63 4-64
 Loading...