


2-348-403-21 (1)
FM/MW/LW
Compact Disc Player
Operating Instructi on s
Bedienungsanleitung
Mode d’emploi
Istruzioni per l’uso
Gebruiksaanwijzing
Wichtig!
Bitte nehmen Sie sich etwas Zeit, um den Geräte-Pass vollständig
auszufüllen. Dieser befindet sich auf der hinteren Umschlagseite dieser
Bedienungsanleitung.
Si dichiara che l’apparecchio è stato fabbricato in conformità all’art. 2, Comma l del D.M. 28.08.
1995 n. 548.
For installation and connections, see the supplied installation/connections manual.
Zur Installation und zum Anschluss siehe die mitgelieferte Installations-/Anschlussanleitung.
En ce qui concerne l’installation et les connexions, consulter le manuel d’installation/
raccordement fourni.
Per l’installazione e i collegamenti, fare riferimento al manuale di istruzioni per
l’installazione e i collegamenti in dotazione.
Zie voor het monteren en aansluiten van het apparaat de bijgeleverde handleiding "Installatie
en aansluiting en".
GB
DE
FR
IT
NL
CDX-S2050V CDX-S2050C
CDX-S2050
© 2005 Sony Corporation
Welcome !
Thank you for purchas in g t hi s Sony Compact
Disc Player. You can enjoy your drive with the
following functions .
• CD playback:
You can play CD-DA and CD-R/CD-RW for
audio use.
• Radio receptio n:
–You can store up to 6 stations per band (FM1,
FM2, FM3, MW and LW).
–BT M (Best Tuning Memory) function: the
unit selects strong sig nal stations and stores
them.
•RDS services:
You can use FM station with Ra di o D ata
System (RDS).
Warning if your car’s ignition has no
ACC position
After turning the ignition off, be sure to press
and hold (OFF) on the unit until the display
disappears.
Otherwise, the display does not turn off and
this causes battery drain.
This label is located on the bottom of the
chassis.
2

Table of Contents
Getting Started
Resetting the unit. . . . . . . . . . . . . . . . . . . . . . . . 4
Setting the clock . . . . . . . . . . . . . . . . . . . . . . . . 4
DEMO mode . . . . . . . . . . . . . . . . . . . . . . . . . . . 4
Detaching the front panel . . . . . . . . . . . . . . . . . 4
Attaching the front panel . . . . . . . . . . . . . . . 5
Location of controls and basic
operations
Main unit. . . . . . . . . . . . . . . . . . . . . . . . . . . . 6
Radio
Storing and receiving stations . . . . . . . . . . . . . . 7
Storing automatically — BTM. . . . . . . . . . . 7
Storing manually. . . . . . . . . . . . . . . . . . . . . . 7
Receiving the stored stations . . . . . . . . . . . . 7
Tuning automatically . . . . . . . . . . . . . . . . . . 7
RDS . . . . . . . . . . . . . . . . . . . . . . . . . . . . . . . . . . 7
Overview. . . . . . . . . . . . . . . . . . . . . . . . . . . . 7
Setting AF and TA/TP . . . . . . . . . . . . . . . . . 8
Selecting PTY. . . . . . . . . . . . . . . . . . . . . . . . 8
Setting CT. . . . . . . . . . . . . . . . . . . . . . . . . . . 8
Other functions
Changing the sound settings. . . . . . . . . . . . . . . 9
Adjusting the sound characteri stics
— BAL/FAD/SUB. . . . . . . . . . . . . . . . . . . . 9
Adjusting the eq ualizer curve — E Q 3 . . . . . 9
Adjusting setup items — SET . . . . . . . . . . . . . 9
Using optional remote commanders. . . . . . . . 10
Card remote commander RM-X114. . . . . . 10
Rotary commander RM-X4S. . . . . . . . . . . 10
Additional Information
Precautions . . . . . . . . . . . . . . . . . . . . . . . . . . . 11
Notes on discs . . . . . . . . . . . . . . . . . . . . . . 11
Maintenance . . . . . . . . . . . . . . . . . . . . . . . . . . 12
Removing the unit. . . . . . . . . . . . . . . . . . . . . . 12
Specifications . . . . . . . . . . . . . . . . . . . . . . . . . 13
Troubleshooting . . . . . . . . . . . . . . . . . . . . . . . 13
Error displays/Messages. . . . . . . . . . . . . . . 14
3
Getting Started
DEMO mode
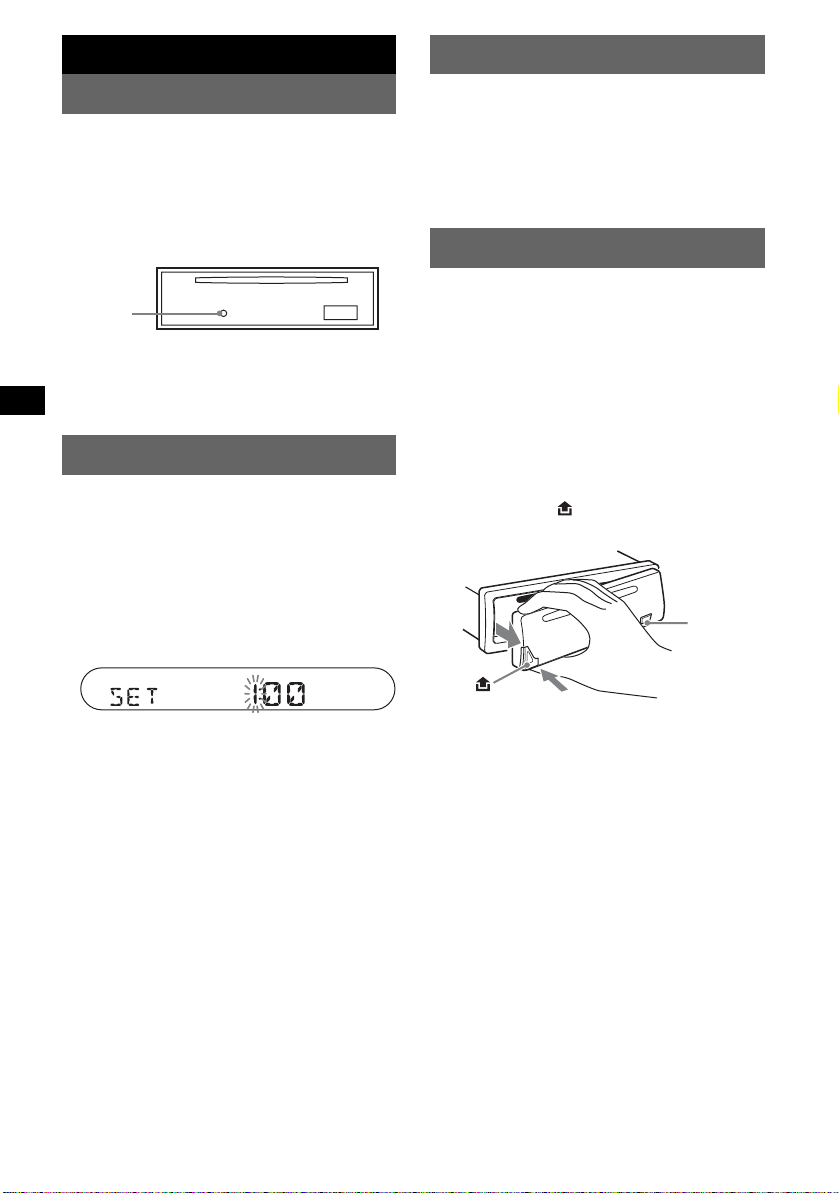
Resetting the unit
Before operating the unit for the first time, or
after replacing the car battery or chan ging the
connections, you must reset the unit.
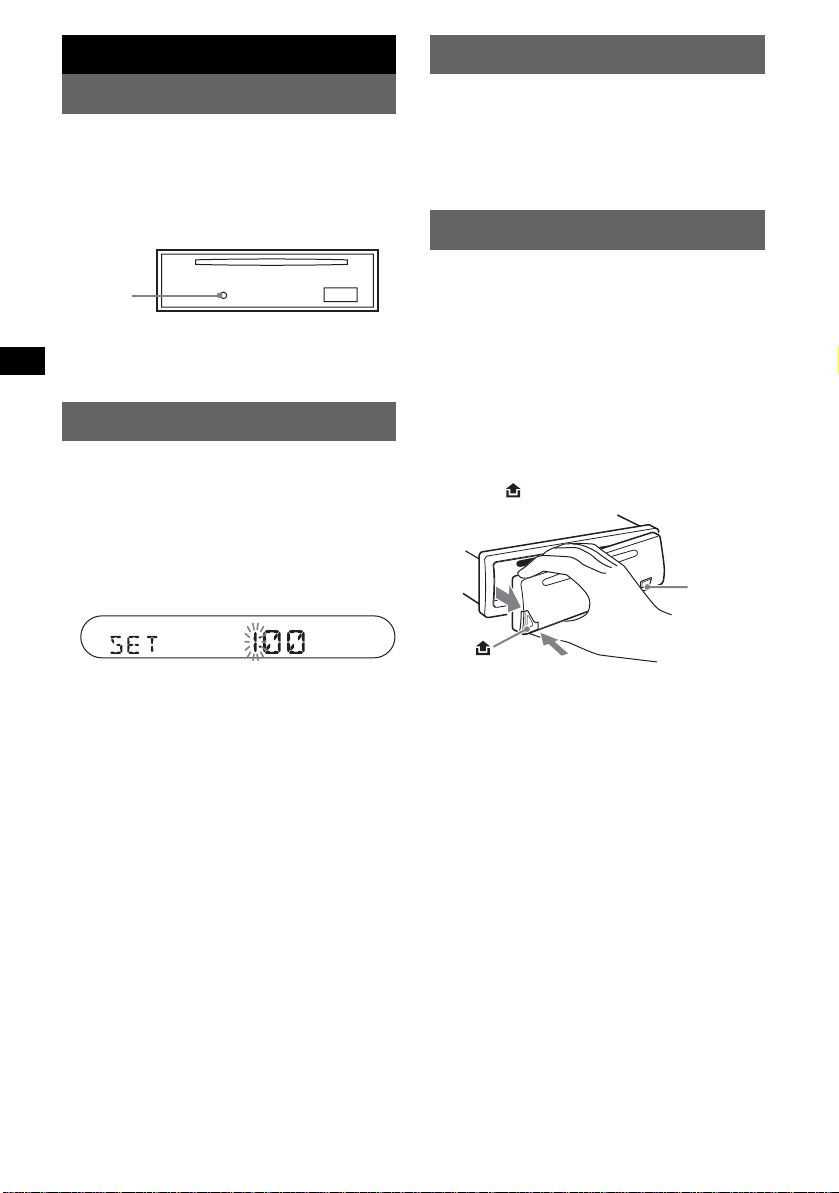
Detach the front panel and press the RESET
button with a pointed o bject, such as a ballpoint
pen.
RESET
button
Note
Pressing the RESET button will er ase the clock setting
and some stored contents.
Setting the clock
The clock uses a 24-hour digital indication .
1 Press and hold (SEL).
The setup display appears.
2 Press (SEL) repeatedly until “CLOCK-
ADJ” appears.
3 Press (DSPL).
The hour indication flashes.
When the unit is turned off, the clock is
displayed first, then demonstration (DEMO)
mode starts the demonstration display.
To cancel the DEMO mode, set “DEMO -OFF”
in setup (
page 9) while the unit is turned off.
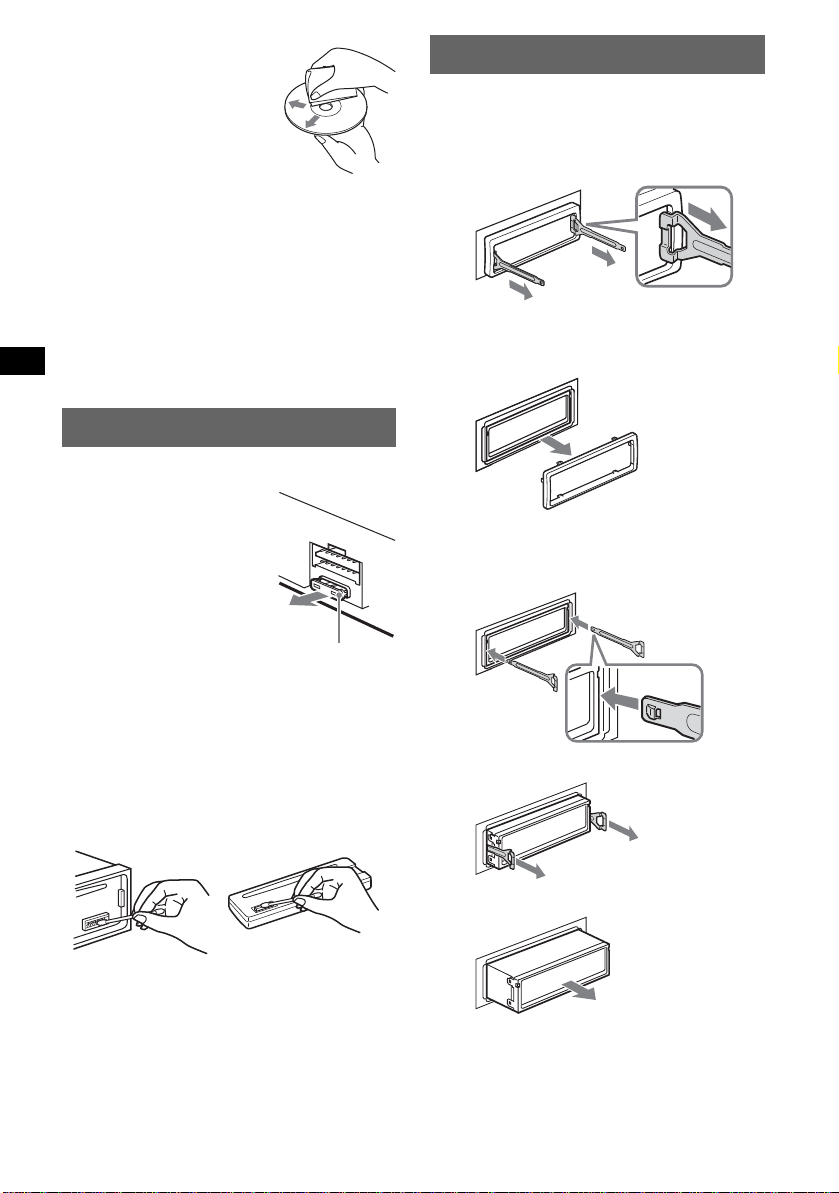
Detaching the front panel
You can detach the front panel of this unit to
prevent theft.
Caution alarm
If you turn the ignition switch to the OFF
position without detaching the front panel, the
caution alarm will sound for a few seconds.
The alarm will only sound if the built-in
amplifier is used.
1 Press (OFF).
The unit is turned off.
2 Press , then pull it off towards you .
(OFF)
4 Press the volume +/– button to set the
hour and minute.
To move the digital ind ica tion, press (DSPL).
5 Press (SEL).
The clock starts and the next setup display
appears.
6 Press and hold (SEL).
The setup is complete.
To display the cloc k, pr ess (DSPL). Press
(DSPL) again to return to the previous display.
Tip
You can set the clock automatically with the RDS
page 8).
feature (
With the card remote commander
In step 2 and 4, to select the item or setting, press M
or m. In step 4, to move the digital indication, press <
or ,.
4
Notes
• Do not drop or put excessive pressure on the front
panel and display window.
• Do not subject the front panel to heat/high
temperature or moisture. Avoid leaving it in a parked
car or on a dashboard/rear tray.
Tip
When carrying the front panel, use the supplied front
panel case.
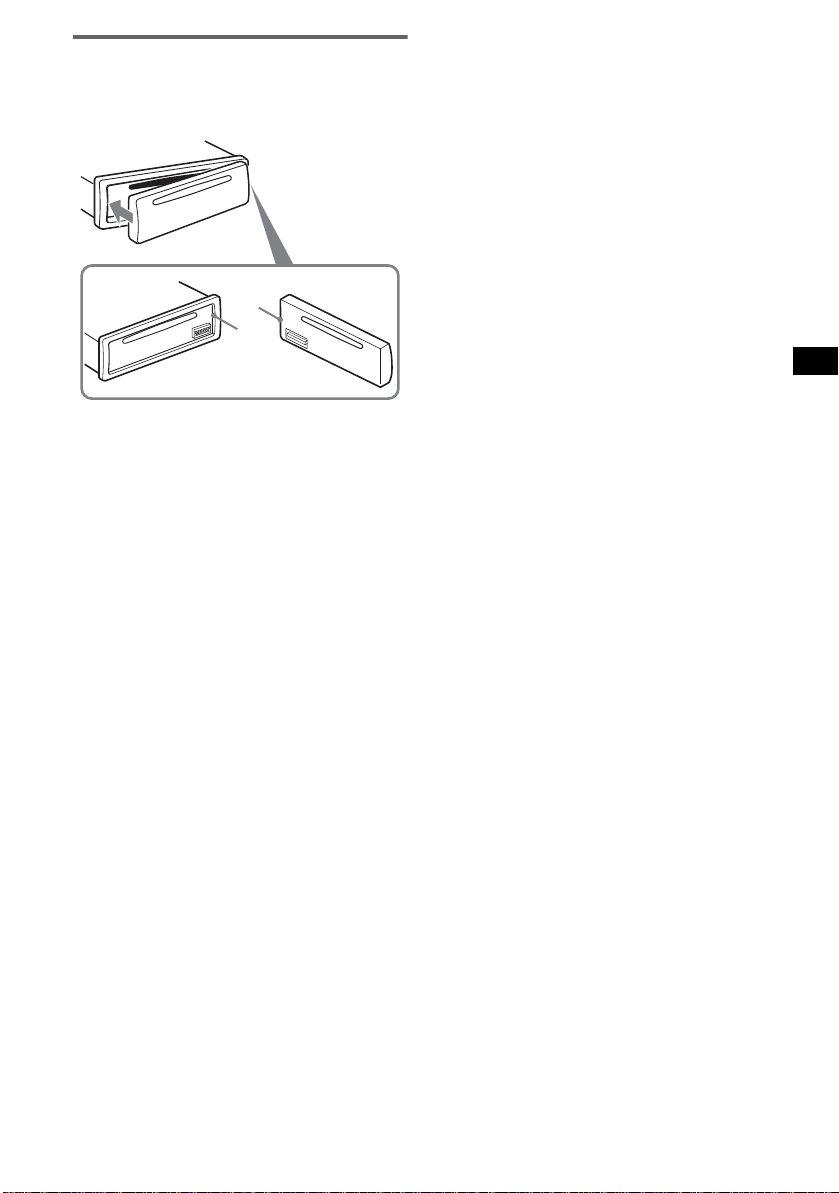
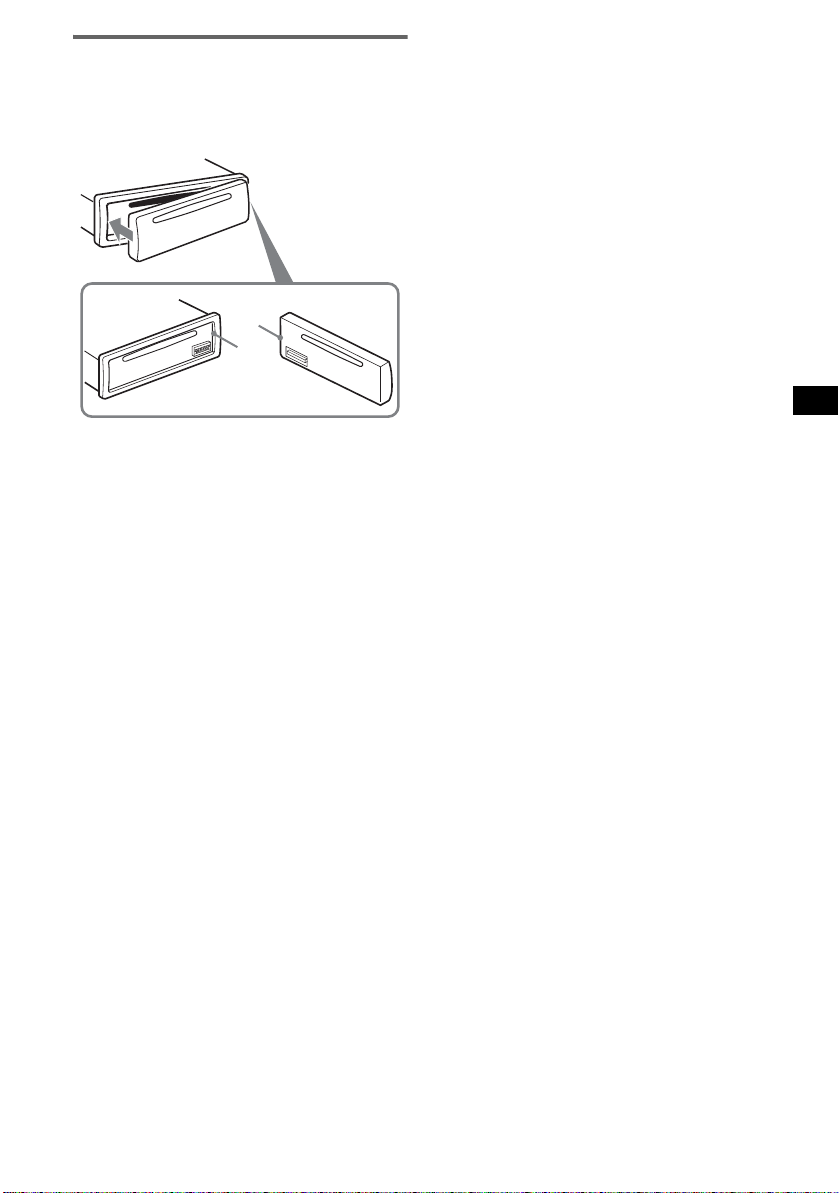
Attaching the front panel
Engage part A of the front panel with part B of
the unit, as illustrated, and push the left side into
position until it clicks.
A
B
Note
Do not put anything on the inner surface of the front
panel.
5
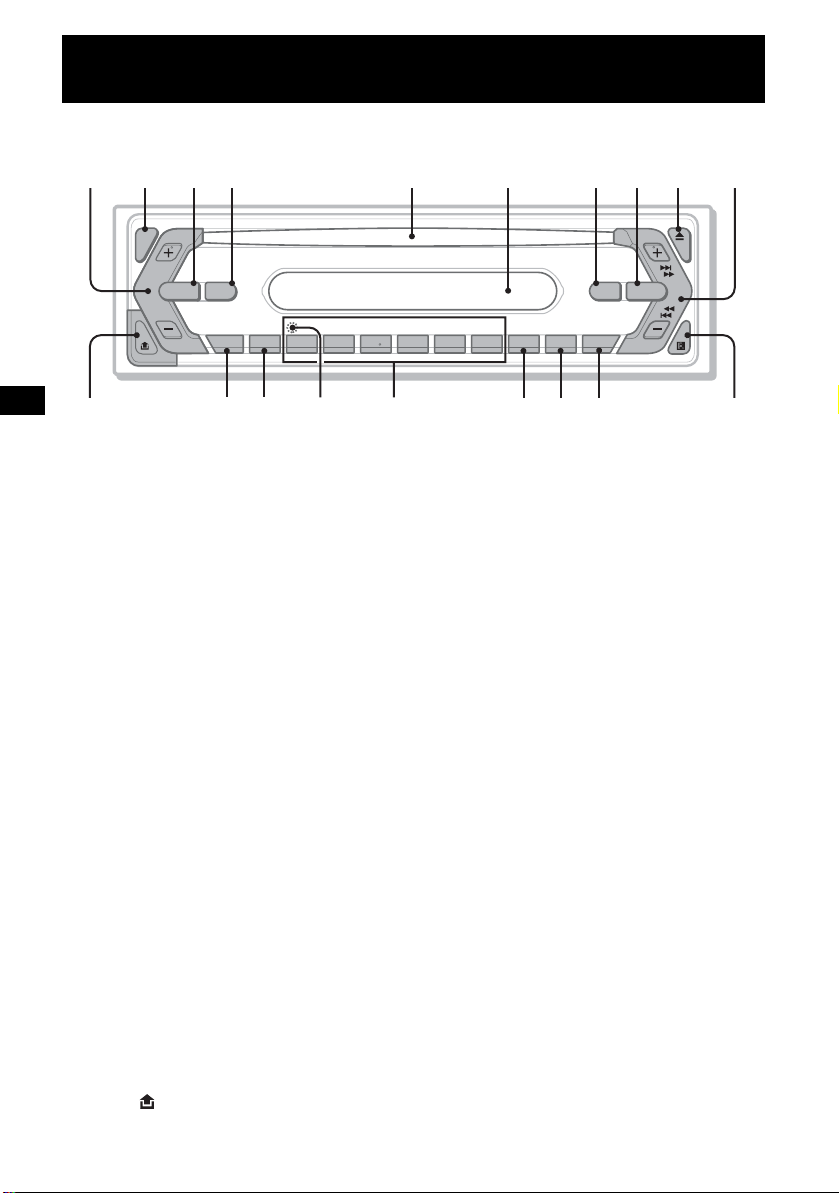
Location of controls and basic operations
Main unit
1234 5 6 7890
SEL
SOURCE MODE
BTMDIM SHUFREP
SENS
DSPL
123456
qs qd qf qg qh qj qk
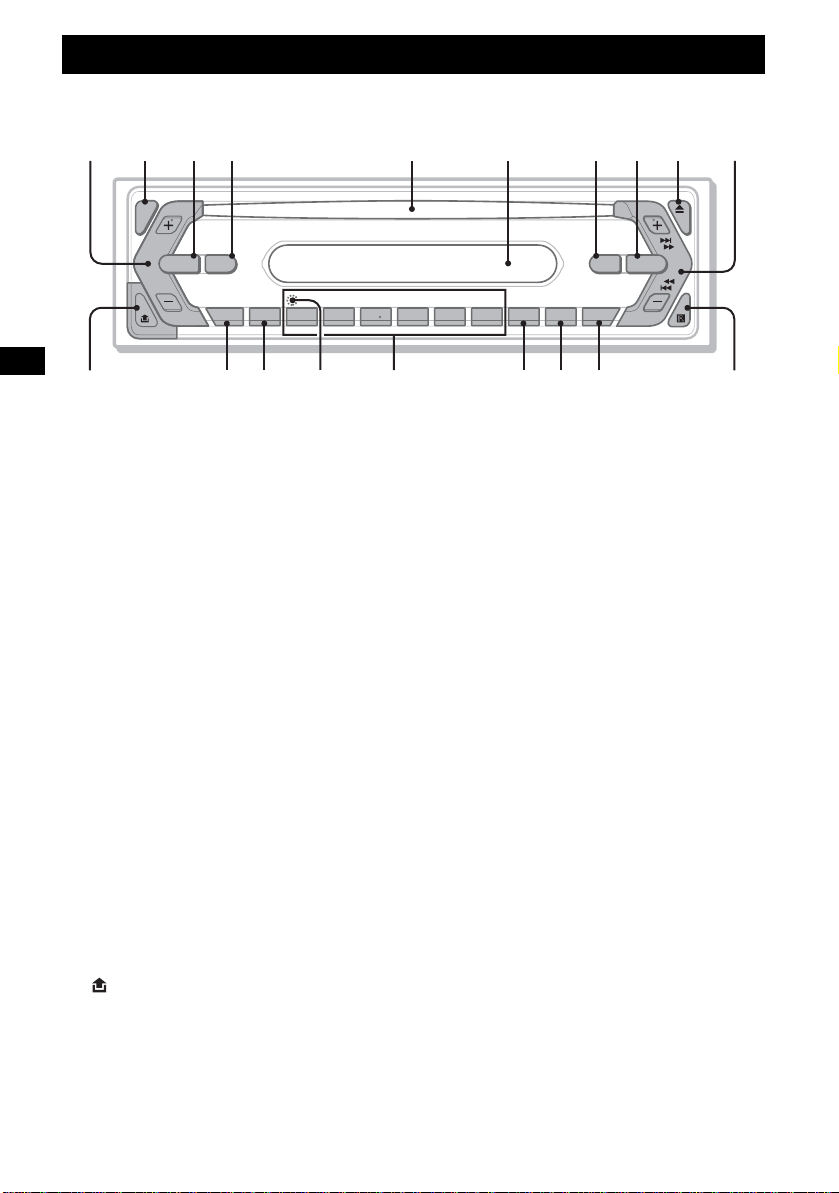
Refer to the pages listed for details.
a Volume +/– button
To adjust volume.
b SEL (select) button 4, 9
To select items.
c SOURCE button
To power on/change the source (Radio/CD).
d MODE button 7
T o select the radio band (FM/MW/LW).
e Disc slot
Insert the disc (l abel side up), pl ayback
starts.
f Display window
g ATT (attenuate) button
To attenuate the s ound. To cancel, press
again.
h EQ3 (equalizer) button 9
To select an equalizer curve (XPLOD,
VOCAL, CLUB, JAZZ, NEW
and CUSTOM).
i Z (eject) button
To eject the disc.
j SEEK +/– button
Radio:
T o tune in stat ions automatica lly (press); f ind
a station manual l y (press and hold).
CD:
To skip tracks (press); fast-forward/reverse a
track (press and ho ld ).
k (front panel release) button 4
l DSPL (display)/DIM (dimmer) b u tton
4, 7
To change display items (press); change the
display brightness (press and hold).
m SENS/BTM button 7
T o improve weak reception: LOCAL/MONO
(press); sta rt the BTM func t ion (press and
6
hold).
AGE, ROCK
SEEK
EQ3ATT
AF/TA
PTY OFF
CDX-S2050V
CDX-S2050C
CDX-S2050
qlqa
n RESET button (located behind the front
panel) 4
o Number buttons
Radio:
To receive store d stations (press); store
stations (press and hold ).
CD:
(3): REP
To play the current track/disc repeatedly.
(4): SHUF
To play the tracks in random order.
p PTY (Programme Type) button 8
To select PTY in RDS.
q AF (Alternative Frequencies)/TA
(Traffic Announcement) button
8
To set AF and TA/TP in RDS.
r OFF button
To power off/stop the sourc e.
s Receptor for the card remote
commander
10
Radio
Storing and receiving
stations
Tip
If you know the frequency of the station you want to
listen to, press and hold (SEEK)
approximate frequency, then press (SEEK)
repeatedly to fine adjust to the desired frequency
(manual tuning).
+/– to locate the
+/–
Caution
When tuning in statio ns w hile driving, use Best
Tuning Memory (BTM) to prevent an accident.
Storing automatically — BTM
1 Press (SOURCE) repeatedly until
“TUNER” appears.
To change the band, press (MODE)
repeatedly. You can select from FM1, FM2,
FM3, MW or LW.
2 Press and hold (BTM) until “BTM”
flashes.
The unit stores s ta ti ons in order of frequency
on the number buttons.
A beep sounds when the setting is stored.
Storing manually
1 While receiving the st at ion tha t you
want to store, press and hold a
number button ((1) to (6)) until
“MEM” appears.
The number button in di cation appears in th e
display.
Note
If you try to store another station on the same number
button, the previous stored station will be replaced.
Tip
When an RDS station is stored, the AF/TA setting is
also stored (
page 8).
Receiving the stored stations
1 Select the band, then pre ss a num ber
button ((1) to (6)).
With the card remote commander
To select preset stations, press M or m.
Tuning automatically
1 Select the band, then press (SEEK) +/–
to search for the station.
Scanning stops when the unit receives a
station. Repeat t hi s procedure until the
desired station is received.
RDS
Overview
FM stations with Ra di o D ata System (RDS)
service send ina udible digital information along
with the regular radio programme signal.
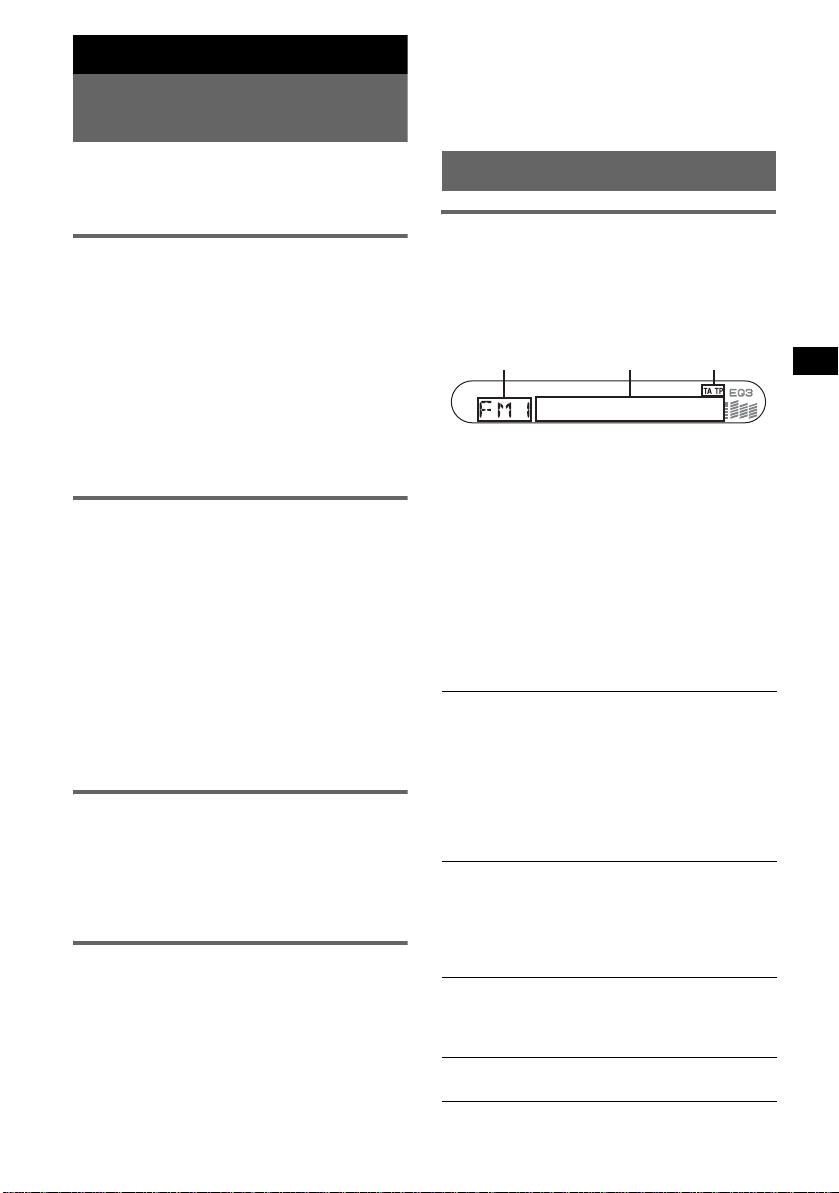
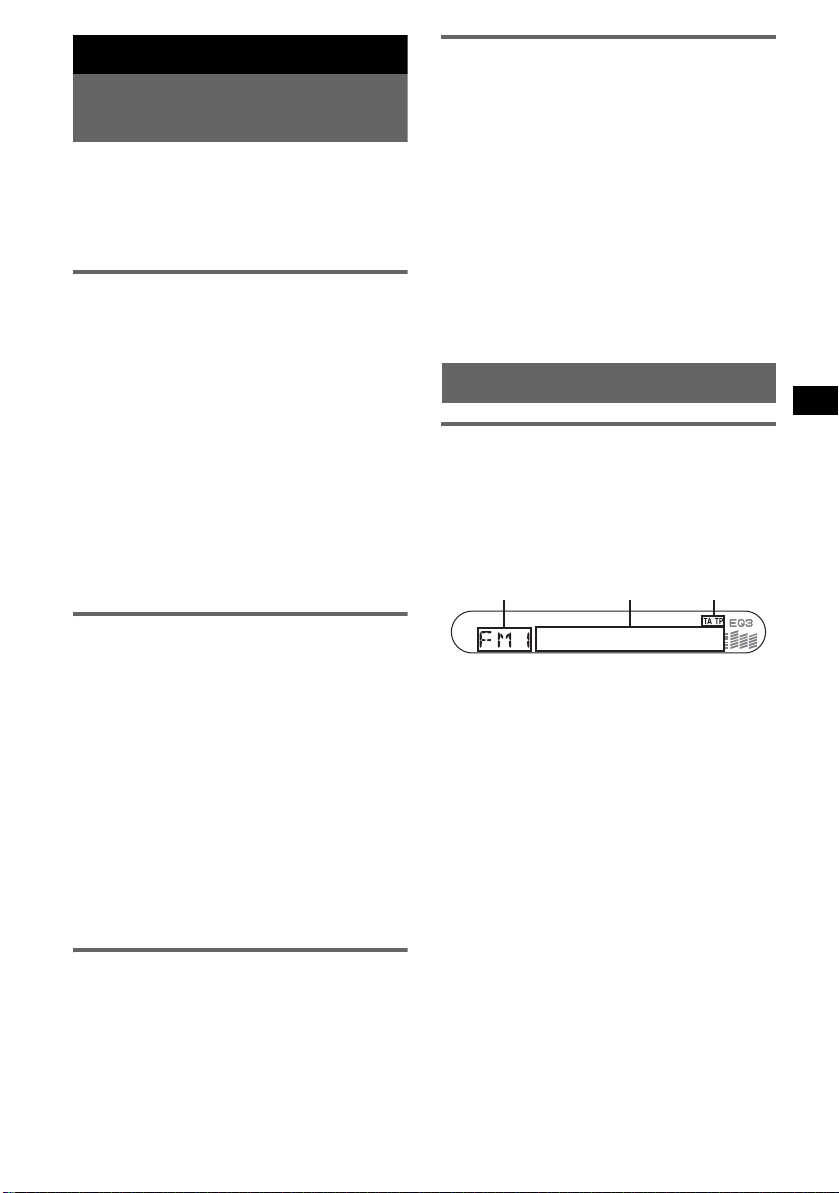
Display items
ABC
A Radio band, Funct ion
B Frequency*
RDS data
C TA/TP*
*1 While receiving the RDS station, “ *” is displayed
on the left of the frequency indication.
*2 “TA” flashes during traffic information. “TP” lights
up while such a station is received.
To change display items B, press (DSPL).
RDS services
This unit automatically pro vides RDS serv ices as
follows:
AF (Alternative
Frequencies)
TA (Traffic
Announcement)/
TP (Traffic
Programme)
PTY (Programme
Types)
CT (Clock Time) The CT data from the RDS
1
(Station name), Clock,
2
Selects and re tu nes the
station with the strongest
signal in a network. By
using this function, you can
continuously listen to the
same programme during a
long-distance drive without
having to retune the same
station manually.
Provides curren t traffic
information/programmes.
Any information/
programme received, will
interrupt the currently
selected source.
Displays the currently
received programme type.
Also searches your selected
programme type.
transmission sets the clock.
continue to next page t
7

Notes
• Depending on the country/region, not all RDS
functions may be available.
• RDS will not work if the signal strength is too weak,
or if the station you are tuned to is not transmitting
RDS data.
Setting AF and TA/TP
1 Press (AF/TA) repeatedly until the
desired setting app ears.
Select To
AF-ON activate AF and deactivate TA.
TA-ON activate TA and deactivate AF.
AF, TA-ON activate both AF and TA.
AF, TA-OFF deactivate both AF and TA.
Storing RDS stations with the AF and
TA setting
You can preset RDS stations along with the AF/
TA setting. If you use the BTM functi on, only
RDS stations are stored with the same AF/TA
setting.
If you preset manually, you can preset both RD S
and non-RDS stations with t he AF/TA s ettin g for
each.
1 Set AF/TA, then store the sta tion with BTM or
manually.
Presetting the volume of traffic
announcements
You can preset the volume level of the traffic
announcements so as to not miss hearing them.
1 Press the volume +/– button repeatedly to
adjust the volume level.
2 Press and hold (AF/TA) until “TA” appears.
Receiving emergency
announcements
With AF or TA on, the emergency
announcements will automatically interrupt the
currently selected source.
Staying with one regional
programme — REG
When the AF function is on: this unit’s factory
setting restricts reception to a specific region, so
you will not be switched to another regional
station with a stronger frequency.
If you lea ve this regional programme’s re ception
area, set “REG-OF F” i n setup (
Note
This function does not work in the UK and in some
other areas.
page 9).
8
Local Link function (UK only)
This function ena b les you to se lect other local
stations in the area, even if the y are not store d on
your number buttons.
1 During FM reception, press a number button
((1) to (6)) on which a local station is stored.
2 Withi n 5 s econ d s, pres s a g ain a num ber button
of the local station.
Repeat this procedure until the local station is
received.
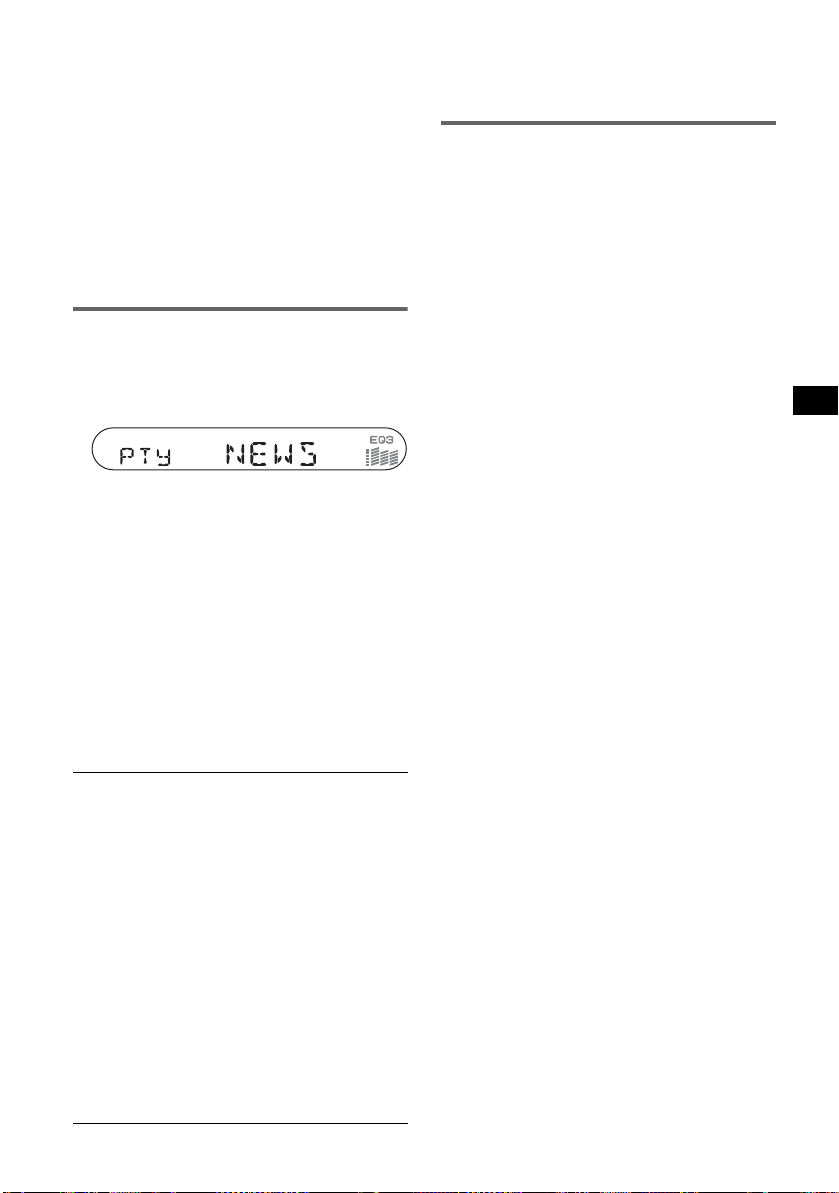
Selecting PTY
1 Press (PTY) during FM reception.
The current progra mme type name appea rs if
the station is transmitting PTY data.
2 Press (PTY) repeatedly until the
desired programme type appears.
3 Press (SEEK) +/–.
The unit start s to search for a station
broadcasting the selected programme type.
With the card remote commander
In step 2, to select the programme type, press M or m.
Type of programmes
NEWS (News), AFFAIRS (Current Aff airs),
INFO (Information), SPORT (Sports),
EDUCATE (Education), DRAMA (Drama),
CULTURE (Culture), SCIENCE (Science),
VARIED (Varied), POP
ROCK
M (Rock Music), EASY M (Easy
Listening), LIGHT
CLASSICS (Classical), OTHER
Music Type), WEATHER (Weather),
FINANCE (Finance), CHILDREN (Children’s
Programmes), SOCIAL
RELIGION (Religion), PHONE
TRAVEL (Travel), LEISURE (Leisure), JAZZ
(Jazz Music), COUNTRY (Country Music) ,
NATION
Music), FOLK
(Documentary)
Note
You cannot use this function in countries/regions
where no PTY data is available.
M (National Music), OLDIES (Oldies
M (Folk Music), DOCUMENT
M (Popular Music),
M (Light Classical),
M (Other
A (Social Affairs),
IN (Phone In),
Setting CT
1 Set “CT-ON” in setup (page 9).
Notes
• The CT function may not work even though an RDS
station is being received.
• There might be a difference between the time set by
the CT function and the actual time.
Other functions
With the card remote commander
In step 3, to adjust the selected item, press < or ,.
Changing the sound
settings
Adjusting the sound
characteristics — BAL/FAD/SUB
You can adjust the balance, fader, and subwoofer
volume.
1 Press (SEL) repeatedly until “BAL,”
“FAD” or “SUB” appears.
The item changes as follows:
1
LOW*
t MID*1 t HI*1 t
BAL (le ft -right) t FAD (front-rear) t
SUB (subwoofer volu me)*
*1 When EQ3 is activated (page 9).
*2 When the audio output is set to “SUB” (page 9).
“A TT ” is d ispla y ed at th e lo west setti ng, and c an
be adjusted up to 20 steps.
2 Press the volume +/– button
repeatedly to adjust the sele ct ed i te m .
After 3 seconds, the setting is complete and
the display retur ns to normal play/reception
mode.
Note
Adjust within 3 seconds of selecting the item.
With the card remote commander
In step 2, to adjust the selected item, press < or ,.
Adjusting the equalizer curve
— EQ3
You can adjust and stor e t he equalizer setti ngs
for different tone ranges.
1 Select a source, then press (EQ3)
repeatedly to select the EQ3 mode.
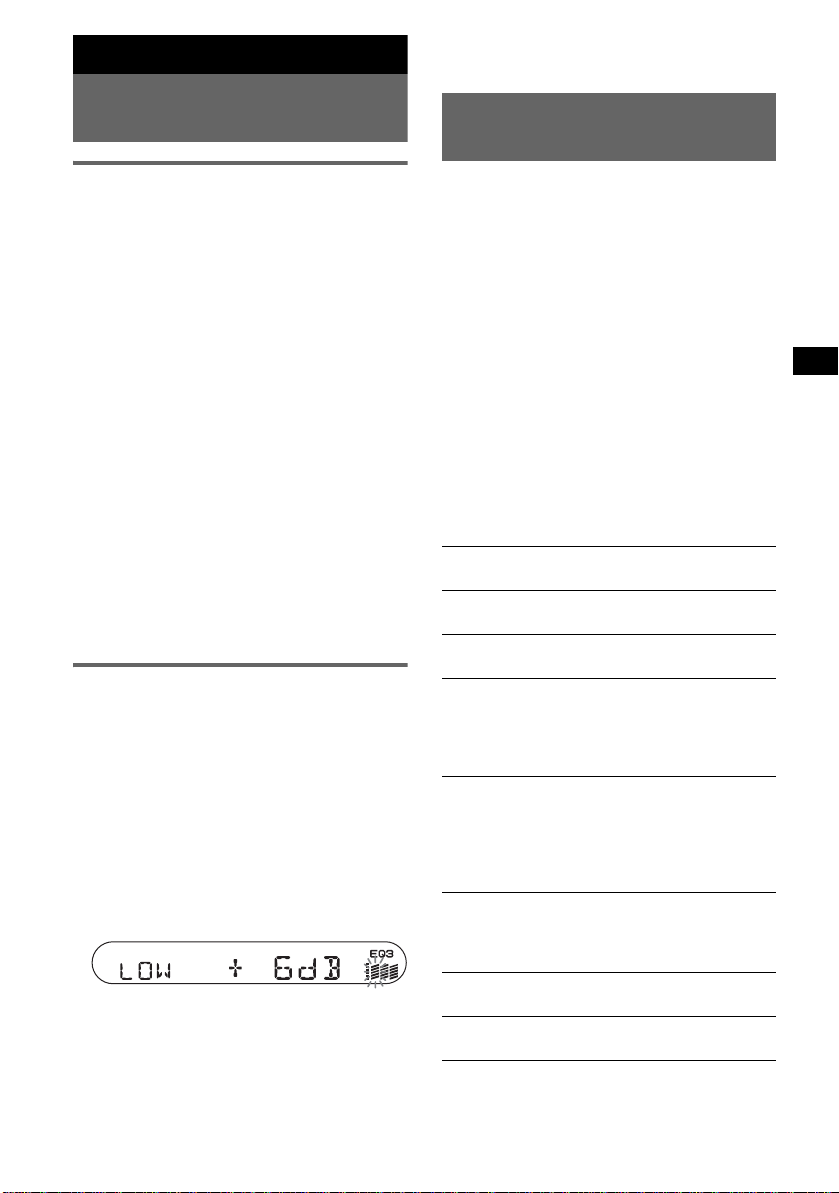
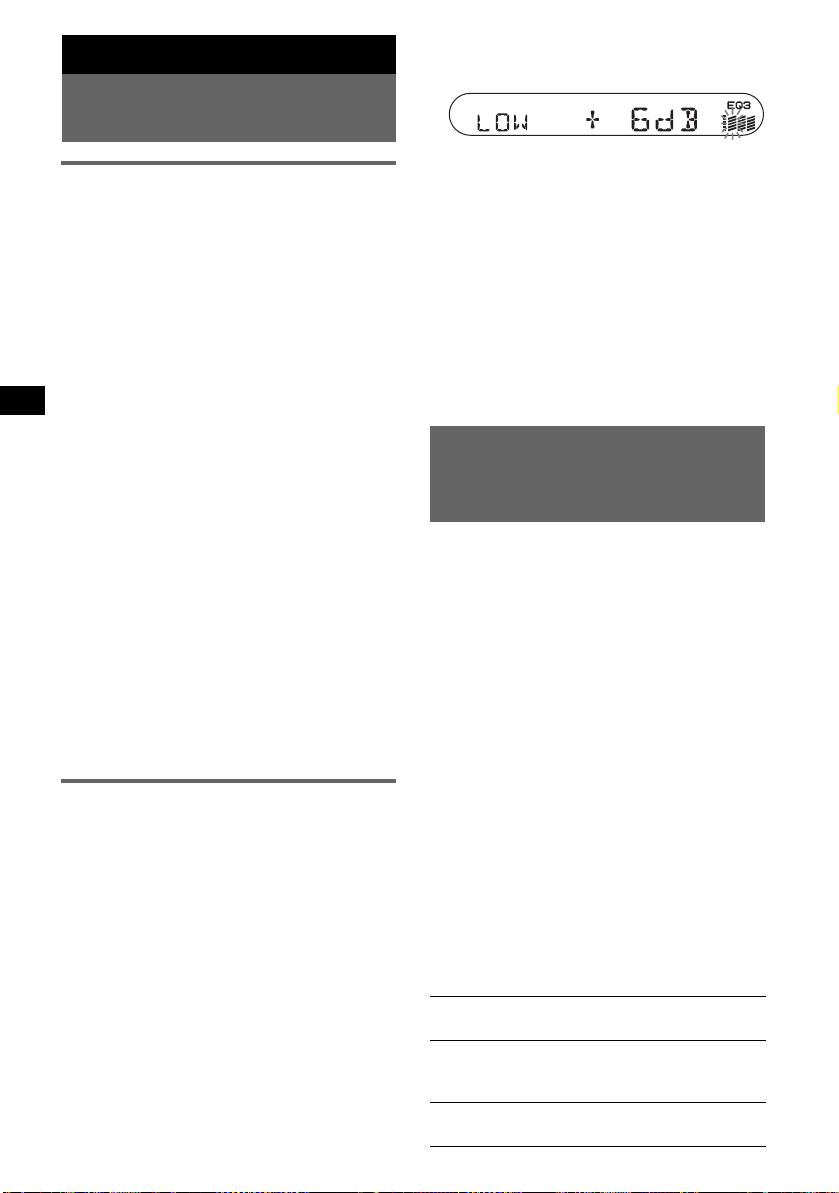
2 Press (SEL) repeatedly until “LOW,”
“MID” o r “HI” appears.
3 Press the volume +/– button
repeatedly to adjust the sele ct ed i te m .
The volume level is adjusta bl e in 1 dB steps,
from –10 dB to +10 dB.
Repeat steps 2 and 3 to adjust the equalizer
curve.
To restore the factory-set equalizer curve,
press and hold (SEL) before the setting is
complete.
After 3 seconds, the setting is complete and
the display retur ns to normal play/reception
mode.
2
Adjusting setup items
— SET
1 Press and hold (SEL).
The setup display appears.
2 Press (SEL) repeatedly until the
desired item appears.
3 Press the volume +/– button to select
the setting (example “ON” or “O FF”).
4 Press and hold (SEL).
The setup is complete and the display returns
to normal play/reception mode.
Note
Displayed items will differ, depending on the source
and setting.
With the card remote commander
In step 2, to select the setup item, press M or m. In
step 3, to select the setting, press < or ,.
The following items can be set (follow the page
reference for details):
“z” indicates the default settings.
CLOCK-ADJ
(Clock Adjust)
CT (Clock
Time)
BEEP To set “BEEP-ON” (
REAR/SUB*
DIM (Dimmer) T o change the brightness of the
ILM-1/ILM-2
(Illumination)
(CDX-S2050C
only)
DEMO*
(Demonstration)
2
REG*
(Regional)
(page 4)
To set “CT-ON” or “CT-OFF”
(z) (page 7, 8).
“BEEP-OFF.”
1
To switch the audio output.
–“REAR”: to output to a
power amplifier.
–“SUB” (
display.
–“DIM-ON”: to dim the
–“DIM-OFF” (
To change the illumination
colour.
–“ILM-1” (
–“ILM-2”: Green
1
To set “DEMO-ON” (
“DEMO-OFF” (page 4).
To set “REG -ON” ( z ) or
“REG-OFF” (page 8).
z): to output to a
subwoofer.
display.
deactivate the dimmer.
continue to next page t
z): to
z): Amber
z) or
z) or
9
3
LPF*
(Low
Pass Filter)
*1 When the unit is turned off.
*2 When FM is received.
T o select the cut- of f frequenc y
“78HZ,” “125HZ” or “OFF”
(
z).
*3 When the audio output is set to “SUB.”
Using optional remote
commanders
Card remote commander
RM-X114
Replacing the lithium battery
Under normal conditions, the battery will last
approximately 1 y ear. (The servi ce life may be
shorter, depending on the conditions of use.)
When the batt ery bec omes wea k, the range o f the
card remote commander becomes shorter.
Replace the battery with a new CR2025 lithium
battery. Use of any other battery may present a
risk of fire or explosion.
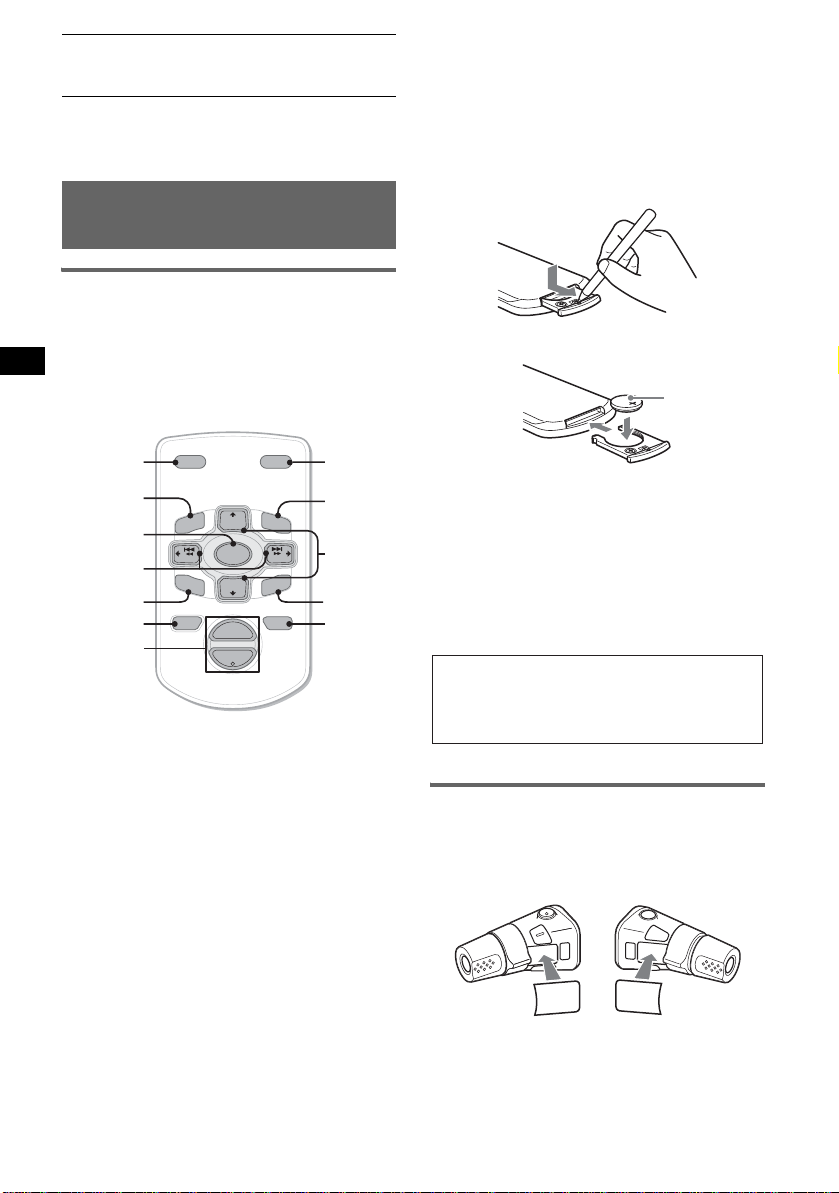
Location of controls
The correspo nding button s on the card remote
commander cont rol the same functi ons as those
on this unit.
*
DSPL MODE
+
PRESET
LIST
+
DISC
MENU
SOURCE
–
SEEK
SOUND
–
DISC
E
PRESET –
+
VOL
–
SEEK
N
ATTOFF
MODE
*
LIST
m/M
*
/
(DISC
+
PRESET
+/ –)
R
E
T
ENTER
*
ATT
DSPL
MENU
SOURCE
</,
(SEEK –/+ )
SOUND
OFF
VOL (+/ –)
The following buttons on the card remote
commander have also different buttons/functions
from the unit.
• </, (SEEK –/+) buttons
To control radio/CD, the same as (SEEK) +/–
on the unit. (F or det ai ls o f ot her op er at io ns, see
“With the card remote commander” on each
pages.)
• SOUND button
The same as (SEL) on the unit.
• M/m (DISC*/PRESET +/–) buttons
For details, see “W ith the card remote
commander” on each pages.
* Not available for this unit.
Note
If the unit is turned off and the display disappears, it
cannot be operated with the card remote commander
unless (SOURCE) on the unit is pressed, or a disc is
inserted to activate the unit first.
x
+ side up
Notes on the lithium battery
• Keep the lithium battery out of the reach of children.
Should the battery be swallowed, immediately
consult a doctor.
• Wipe the battery with a dry cloth to assure a good
contact.
• Be sure to observe the correct polarity when
installing the battery.
• Do not hold the battery with metallic tweezers,
otherwise a short-circuit may occur.
WARNING
Battery may explode if mistreated.
Do not recharge, disassemble, or dispose of
in fire.
Rotary commander RM-X4S
Attaching the label
Attach the indicat io n l abel depending on how
you mount the rotary commander.
D
S
P
S
DSPL
L
E
MODE
L
M
O
D
E
S
E
L
10
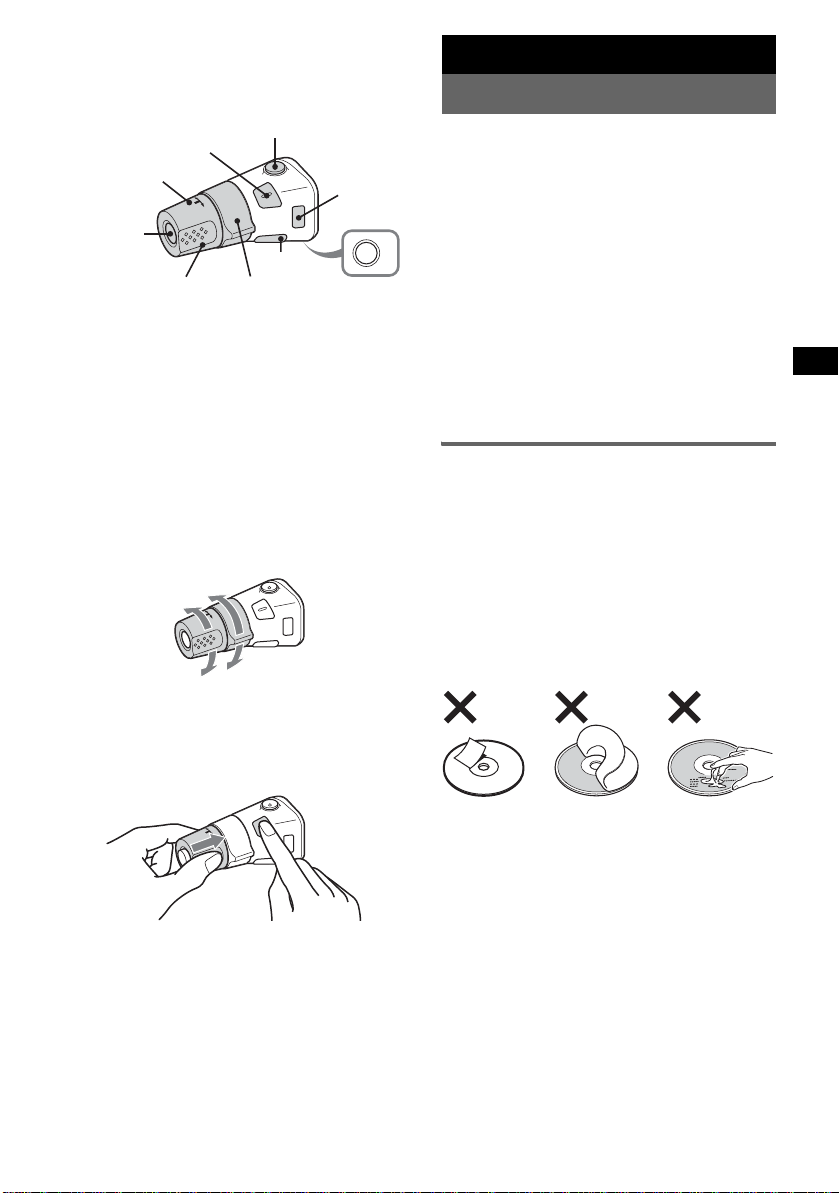
Location of controls
The corresponding buttons on the rotary
commander control the same functions as those
on this unit.
SEL
PRESET
SOURCE
VOL
The following controls on the rotary commander
require a different operation from the un i t.
• PRESET control
To select preset stations (push i n and rotate).
• VOL control
The same as the volume +/ – butt on on the unit
(rotate).
• SEEK/AMS control
The same as (SEEK) +/– on the unit (rotate, or
rotate and hold).
ATT
DSPL
SEEK/AMS
MODE
OFF
OFF
Changing the operative direction
The operative direction of the controls is factoryset as shown below.
To increase
To decrease
If you need to mount the rotary commander on
the right hand side of the steering column, you
can rev erse the operative direction.
1 While pushing the VOL control, press and
hold (SEL).
Additional Information
Precautions
• If your car has been parked in dire ct sunlight,
allow the unit to cool off befor e operating it.
• Power aerial will extend automatically while
the unit is o perating .
Moisture condensation
On a rainy day or in a very dam p area, moisture
condensation may occur inside the lenses and
display of the unit. Should this occur, the unit
will not operate properly. In such a case, remove
the disc and wait for about an hour until the
moisture has eva porated.
To maintain high sound quality
Be careful not to splash jui ce or other soft drinks
onto the unit or discs.
Notes on discs
• To keep a disc clean, do not touch its surface.
Handle the disc by its edge.
• Keep your discs in thei r cases or disc
magazines when no t in us e.
• Do not subject di scs to heat/high temperature.
Avoid leaving them in a pa rked car or on a
dashboard/rear tray.
• Do not attach labels, or use discs wi th sticky
ink/residue. Such discs may stop spi nni ng
when used, causing a m alfunction, or may ruin
the disc.
• Do not use any discs wit h l abels or stickers
attached.
The following malfunctions may result from
using such discs:
–Inability to eject a disc (due to a label or
sticker peeling off and jamming the eject
mechanism).
–Inability to read audio data correctly (e.g.,
playback skippin g, or no playback) due t o
heat shrinking of a st i cker or label causing a
disc to warp.
• Discs with non-standard shap es (e.g., heart,
square, star) can not be played on this un it .
Attempting to do so may damage the unit. Do
not use such disc s.
• You cannot play 8 cm CDs.
continue to next page t
11
• Before play ing, clean the
discs with a commercially
avail able clea ning cloth . Wipe
each disc from the centre out.
Do not use solvents such as
benzine, thinner,
commercially available
cleaners, or antistatic spray
intended for anal ogue discs.
Notes on CD-R/CD-RW discs
• Some CD-Rs/CD-RWs (depending on the
equipment used for it s r ec o r di ng or the
condition of the disc) may not play on this unit.
• You cannot play a CD-R/a CD-RW that is not
finalized.
If you have any questions or proble m s
concerning your unit that are not covered in this
manual, consult yo ur nearest Sony dealer.
Maintenance
Fuse replacement
When replacing the fuse, be
sure to use one matching the
amperage rating stated on the
original fuse. If the fuse
blows, ch eck the power
connection and replace the
fuse. If the fuse bl ows again
after replacem ent, there may
be an internal malfunction. In
such a case, consul t your
nearest Sony dealer.
Fuse (10A)
Removing the unit
1 Remove the protection collar.
1Detach th e front panel (page 4).
2Engage the release keys together with the
protection collar.
Orient the re lease
keys as shown.
3Pull out the release keys to remove the
protection collar.
2 Remove the unit.
1Insert both release keys simultaneously
until they click.
Hook facing
inwards.
Cleaning the connectors
The unit may not functi on pr operly if the
connectors between the unit and the front panel
are not clean. In order to prevent this, detach the
front panel (page 4) and clean the connec t ors
with a cotton swab dipped in alcohol. Do not
apply too much fo rce. Otherwise, th e connectors
may be damaged.
Main unit
Notes
• For safety, turn off the ignition before cleaning the
connectors, and remove the key from the ignition
switch.
• Never touch the connectors directly with your fingers
or with any metal device.
Back of the front panel
12
2Pull the release keys to unseat the unit.
3Slide the unit o ut of the mo unting.

Specifications
CD Player section
Signal-to-noise ratio: 120 dB
Frequency response: 10 – 20,000 Hz
Wow and flutter: Below measu r ab l e li mit
Tuner section
FM
Tuning range: 87.5 – 108.0 MHz
Aerial terminal: External aerial connector
Intermediate frequency : 10.7 MHz/450 kHz
Usable sensitivity: 9 dBf
Selectivity: 75 dB at 400 kHz
Signal-to-noise ratio: 67 dB (stereo) , 69 dB (m ono)
Harmonic distortion at 1 kHz: 0.5 % (stereo),
0.3 % (mono)
Separation: 35 dB at 1 kHz
Frequency response: 30 – 15,000 Hz
MW/LW
Tuning range:
MW: 531 – 1,602 kHz
LW: 153 – 279 kHz
Aerial terminal: External aerial connector
Intermediate frequency : 10.7 MHz/450 kHz
Sensitivity: MW: 30 µV, LW: 40 µV
Power amplifier section
Outputs: Speaker outputs (su r e sea l con ne ctor s)
Speaker impedance: 4 – 8 ohms
Maximum power output: 50 W × 4 (at 4 ohms)
General
Outputs:
Audio outputs terminal (rear/sub switchable)
Power aerial relay control terminal
Power amplifier control terminal
Inputs:
Telephone ATT control terminal
Remote controller input terminal
Aerial input terminal
Tone controls:
Low: ±10 dB at 60 Hz (XPLOD)
Mid: ±10 dB at 1 kHz (XPLOD)
High: ±10 dB at 10 kHz (XPLOD)
Power requirements: 12 V DC car battery
(negative earth)
Dimensions: Approx . 178 × 50 × 178 mm (w/h/d)
Mounting dimensions: Approx. 182 × 53 × 161 mm
(w/h/d)
Mass: Approx. 1.2 kg
Supplied accessorie s:
Parts for installation and connectio ns (1 set )
Front panel case (1)
Optiona l accessories:
Card remote commander: RM-X114
Rotary commander: RM-X4S
Design and specifications are subject to change
without notice.
• Lead-free solder is used for soldering certain
parts.
(more than 80 %)
• Halogenated flame retardants are not used in the
certain printed wiring boards.
• Halogenated flame retardants are not used in
cabinets.
• Packaging cushions do not use polystyrene foam.
Troubleshooting
The following checklist will help you remedy
problems you may encounter with your unit.
Before going thr ough the checklist below, check
the connection and operating procedures.
General
No power is bei ng supplied to the unit.
• Check the connection. If ever ything is in order ,
check the fuse.
• If the unit is turne d off and the display
disappears, it cann ot be operated with the
remote commander.
t Turn on the unit.
The power aerial does not extend.
The power aerial does not have a relay box.
No sound.
• The volume is too low.
• The ATT function is activated, or the Telephone
ATT function (when the interface cable of a car
telephone is connected to the ATT lead) is
activated.
• The position of the fader control (FAD) is not
set for a 2-speak er system.
No beep sound.
• The beep soun d is cancelled (page 9).
• An optional power amp li fier is connected and
you are not using the bu ilt-in amplifier.
The contents of the memory have been
erased.
• The RESET button has be en pressed.
t Store again into the memory.
• The power connectin g lead or battery has be en
disconnected.
• The power connectin g l ead is not connected
properly.
Stored stations and correct time are erased.
The fuse has blown.
Makes noise when the position of the
ignition key is switched.
The leads are not matched correctly with the
car’s accessory power connector.
continue to next page t
13

The display disappears from/does not
appear in the display window.
• The dimmer is set “DIM-ON”(page 9).
• The display disappears if you press and hold
(OFF).
t Press and hold (OFF) again until the
display appears .
• The connectors are dirty (page 12).
CD playback
The disc cannot be loaded.
• Another disc is already loaded.
• The disc has been f orcibly inserted up si de
down or in the wrong way.
The disc does not playback.
• Defective or dirty disc.
• The CD-Rs/CD-RWs are not for audio use
(page 12).
The sound skips.
• Installation is not correct.
t Install the unit at an angle of less than
45° in a sturdy part of the car.
• Defective or dirty disc.
The operation but tons do not function.
The disc will not eject.
Press the RESET button (page 4).
During FM reception, the “ST” indication
flashes.
• Tune i n the frequency ac cu rately.
• The broadcast signal is too weak.
t Press (SENS) to set the monaural receptio n
mode to “MONO-ON.”
An FM programme broadcast in stereo is
heard in monaural.
The unit is in monaural reception mode.
t Press (SENS) until “MONO-OFF” appears.
RDS
The SEEK starts after a few seconds of
listening.
The station is non-TP or has weak sign al .
t Deactivate TA (page 8).
No traffic announcements.
• Activate TA (page 8).
• The station does not broadcast any traffic
announcements despite being TP.
t Tune in an other station.
PTY displays “- - - - - - - -.”
• The current station i s no t an RD S station.
• RDS data has not be en received.
• The station does not specify the progr amme
type.
Radio reception
The stations cannot be received.
The sound is hampered by noises.
• Connect a power aerial control lead (b l ue) or
accessory power supply lead (red) to the power
supply lead of a car’s aerial booster (only when
your car has built-in FM / M W/LW aerial in the
rear/side glass).
• Check the connect i on of the car aerial.
• The auto aerial will not go up.
t C heck the connectio n of the power aerial
control lead.
• Check the frequency.
Preset tuning is not possible.
• Store the correct frequency in the memory.
• The broadcast sign al is too weak.
Automatic tuning is not possible.
• Setting of the local seek mode is not correct.
t Tuning stop s t oo f requently:
Press (SENS) until “LOCAL-ON” appears.
t Tuning does not stop at a station:
Press (SENS) repeatedly until “MONOON” or “MONO-OFF” (FM), or “LOCALOFF” (MW/LW) appears.
• The broadcast sign al is too weak.
t Perform manual tuning.
14
Error displays/Messages
Error displays
The following indications will flash for about 5
seconds, and an ala rm sound will be heard.
ERROR
• The disc is dirty or inserted upside down.
t C l ean or insert the disc correctly.
• The disc cannot pl ay because of some problem.
t Insert another di sc.
FAILURE
The speaker/ampl i fier c onnection is incorr ect.
t See the supplied installation/connections
manual to check the connection.
OFFSET
There may be an internal malfunction.
t Check the connection. If the error indication
remains on in the display, consult your
nearest Sony dealer.
RESET
The unit cannot be op er at ed because of some
problem.
t Press the RESET button (page 4).
If these solutions do not help improve the
situation, consult your nearest Sony dealer.
If you take the unit to be repaired because of CD
playback troubl e, br in g the disc that was used at
the time the problem began.

Messages
L.SEEK +/–
The loca l seek mod e is on during automatic
tuning.
NO AF
There is no alternative frequency for the current
station.
t Press (SEEK) +/– while the station name is
flashing. The unit starts searching for another
frequency with the same PI (Programme
Identification) data (“PI SEEK” appears).
NO TP
The unit will continue searching for a v ail able TP
stations.
“” or “”
During fast-forward or reverse, you have reached
the beginning or the end of th e di sc and you
cannot go any furth er.
15

Willkommen!
Danke, dass Sie sich für diesen CD-Player von
Sony entschieden habe n. Mit diesem Gerät
stehen Ihne n unterwegs folgende Funk ti onen zur
Verfügung.
• CD-Wiedergabe:
Sie können CD-DAs und als Au di o-CDs
konzipierte CD-Rs/ CD - RWs abspielen lassen.
• Radioempfang:
–Für jeden Frequenzbereich (FM1 (UKW1),
FM2 (UKW2), FM3 (UKW3), MW und LW)
können Sie bis zu 6 Sender speichern.
–BTM-Funktion (Best Tuning Memor y -
Speicherbelegungsautomatik): Das Gerät
wählt die Sender mit starken Signalen aus und
speichert diese.
• RDS-Funktionen:
Dieses Gerät unterstützt RDS-Funktionen
(Radio Data Sy st em ) von UKW-Sendern.
Warnhinweis, wenn die Zündung Ihres
Fahrzeugs nicht über eine
Zubehörposition (ACC oder I) verfügt
Nachdem Sie die Zündung ausgeschaltet
haben, halten Sie am Gerät unbedingt (OFF)
gedrückt, bis die Anzeige ausgeblendet wird.
Andernfalls wird die Anzeige nicht
ausgeschaltet und der Autobatterie wird
Strom entzogen.
Dieses Etikett befindet sich an der Unterseite
des Gehäuses.
2

Inhalt
Vorbereitungen
Zurücksetzen des Geräts . . . . . . . . . . . . . . . . . . 4
Einstellen der Uhr . . . . . . . . . . . . . . . . . . . . . . . 4
DEMO-Modus. . . . . . . . . . . . . . . . . . . . . . . . . . 4
Abnehmen der Frontplatte. . . . . . . . . . . . . . . . . 4
Anbringen der Frontplatte. . . . . . . . . . . . . . . 5
Lage und Funktion der Teile und
Bedienelemente und
Grundfunktionen
Hauptgerät. . . . . . . . . . . . . . . . . . . . . . . . . . . 6
Radio
Speichern und Emp fa ngen von Sendern . . . . . . 7
Automatisches Spei chern von Sendern
— BTM. . . . . . . . . . . . . . . . . . . . . . . . . . . . . 7
Manuelles Speichern von Sendern . . . . . . . . 7
Einstellen gespeicherter Sender . . . . . . . . . . 7
Automatisches Einste l len von Sendern. . . . . 7
RDS . . . . . . . . . . . . . . . . . . . . . . . . . . . . . . . . . . 7
Übersicht . . . . . . . . . . . . . . . . . . . . . . . . . . . . 7
Einstellen von AF und TA/TP . . . . . . . . . . . 8
Auswählen des Programmtyps (PTY) . . . . . 9
Einstellen der Uhrzeit (CT). . . . . . . . . . . . . . 9
Weitere Funktionen
Wechseln der Klangeinstellungen . . . . . . . . . 10
Einstellen der Klangeigenschaften
— BAL/FAD/SUB. . . . . . . . . . . . . . . . . . . 10
Einstellen der Equa lizer-Kurve
— EQ3 . . . . . . . . . . . . . . . . . . . . . . . . . . . . 10
Einstellen von Konfigu rationsoptionen
— SET . . . . . . . . . . . . . . . . . . . . . . . . . . . . . . 10
Verwenden gesondert erhältlicher
Fernbedienungen. . . . . . . . . . . . . . . . . . . . . . . 11
Kartenfernbedienung RM-X114 . . . . . . . . 11
Joystick RM-X4S. . . . . . . . . . . . . . . . . . . . 12
Weitere Informationen
Sicherheitsmaßnahmen. . . . . . . . . . . . . . . . . . 13
Hinweise zu CDs . . . . . . . . . . . . . . . . . . . . 1 3
Wartung . . . . . . . . . . . . . . . . . . . . . . . . . . . . . 14
Ausbauen des Geräts. . . . . . . . . . . . . . . . . . . . 14
Technische Daten . . . . . . . . . . . . . . . . . . . . . . 15
Störungsbehebung. . . . . . . . . . . . . . . . . . . . . . 15
Fehleranzeigen/Meldungen . . . . . . . . . . . . 17
3
Vorbereitungen
DEMO-Modus
Zurücksetzen des Geräts
Bevor Sie das Gerät zum ersten Mal benutzen
oder wenn Sie die Autobatterie ausge t auscht
oder die Verbindungen gewechselt haben,
müssen Sie das Ge rät zurücksetzen.
Nehmen Sie die Fron tp la tte ab und drücken Sie
die Taste RESET mit einem spitzen Gegenstand,
wie z. B. einem Kugelschreiber.
Taste
RESET
Hinweis
Wenn Sie die Taste RESET drücken, werden die
eingestellte Uhrzeit und einige weitere gespeicherte
Einstellungen gelöscht.
Einstellen der Uhr
Die Uhr zeigt die Uhrzeit im 24-Stunden-Format
digital an.
1 Halten Sie (SEL) gedrückt.
Die Setup-Anzei ge erscheint.
2 Drücken Sie (SEL) so oft, bis „CLOCK-
ADJ“ angezeigt wird.
3 Drücken Sie (DSPL).
Die Stundenanzei ge blinkt.
W enn das Gerä t au sg eschaltet wird, erscheint
zunächst die Uhrzeit und danach star te t i m
DEMO-Modus die Demo-Anzeige.
Zum Deaktivieren des DEMO-Modus bei
ausgeschaltetem Gerät stellen Sie bei der
Konf iguration „DEMO-OFF“ (
Seite 11) ein.
Abnehmen der Frontplatte
Um einen Diebstahl des Geräts zu verhindern,
kann die Frontplatte abgenommen werden.
Warnton
Wenn Sie den Zündschlüssel in die Position OFF
stellen, ohne die Frontplatte abzunehmen, ertönt
einige Sekunden l ang ein Warnton.
Der Alarm ist nur zu hören, wenn der integrierte
Verstärker verwendet wird.
1 Drücken Sie (OFF).
Das Gerät schaltet sich aus.
2 Drücken Sie und ziehen Sie die
Frontplatte auf sich zu und heraus.
(OFF)
4 Stellen Sie mit der Lautstärk et ast e +/–
die Stunden und Minuten ein.
Zum Verschieben der digitalen Angabe
drücken Si e (DSPL).
5 Drücken Sie (SEL).
Die Uhr beginnt zu la uf en und die nächste
Setup-Anzeige erscheint.
6 Halten Sie (SEL) gedrückt.
Damit ist die Konfiguration ab geschlossen.
Zum Anzeigen de r Uhr drücken Sie (DSPL).
Wenn Sie (DSPL) erneut drücken, erscheint
wieder die vorherig e A nzeige.
Tipp
Mithilfe der RDS-Funktion können Sie die Uhr auch
automatisch einstellen lassen (
Mit der Kartenfernbedienung
In Schritt 2 und 4 drücken Sie zum Auswählen der
Option bzw. Einstellung M oder m. In Schritt 4 drücken
Sie zum Verschieben der digitalen Angabe < oder
,.
Seite 9).
4
Hinweise
• Lasse n Sie die Frontplatte nicht fallen und drü cken
Sie nicht zu stark auf die Frontplatte und das
Display.
• Schützen Sie die Frontplatte vor Hitze bzw. hohen
Temperaturen und vor Feuchtigkeit. Lassen Sie sie
nicht in geparkten Autos, auf dem Armaturenbrett
oder auf der Hutablage liegen.
Tipp
Bewahren Sie die Frontplatte im mitgelieferten
Behälter auf, wenn Sie sie bei sich tragen.
Anbringen der Frontplatte
Setzen Sie Teil A der Frontplatte wie abgebildet
an Teil B am Gerät an und drücken Sie dann die
linke Seite hinein, bis sie mit einem Klicken
einrastet.
A
B
Hinweis
Legen Sie auf der Innenseite der Frontplatte nichts ab.
5
Lage und Funktion der Teile und Bedienelemente und
Grundfunktionen
Hauptgerät
1234 5 6 7890
SEL
SOURCE MODE
BTMDIM SHUFREP
SENS
DSPL
123456
qs qd qf qg qh qj qk
Näheres finden Sie auf den angegebenen Seiten.
a Lautstärketaste +/–
Einstellen der Lautst ärke.
b Taste SEL (Auswählen) 4, 10
Auswählen von Optione n.
c Taste SOURCE
Einschalten/Wechseln der Tonquelle (Radio/
CD).
d Taste MODE 7
Auswählen des Ra di ofrequenzbereichs
(UKW/MW/LW).
e CD-Einschub
Legen Sie eine CD mit der beschrifteten
Seite nach oben ein u nd die Wiedergabe
beginnt.
f Display
g Taste ATT (Dämpfen des Tons)
Dient zum Dämpfen des Tons. Zum Beenden
der Funktion drücken Sie die Taste erneut.
h Taste EQ3 (Equalizer) 10
Auswählen eine r Equalizer-Kurve (XPLOD,
VOCAL, CLUB, JAZZ, NEW
oder CUSTOM).
i Taste Z (Auswerfen)
Auswerfen der CD.
j Taste SEEK +/–
Radio:
Automatisches Einstellen von Sendern
(drücken) bzw. manuelle Sendersuche
(gedrückt halten).
CD:
Überspringen von Titeln (drücken) bzw.
Vorwärts-/Rückwärtssuchen in einem Titel
(gedrückt halten).
k Taste (Löse n der Frontplatte) 4
AGE, ROCK
SEEK
EQ3ATT
AF/TA
PTY OFF
CDX-S2050V
CDX-S2050C
CDX-S2050
qlqa
l Taste DSPL (Display)/DIM (Dimmer) 4,
7
Wechseln der angezeigten In formationen
(drücken) bzw. Ändern der Helligkeit im
Display (gedrückt halten).
m T aste SENS/BT M 7
V erbessern d es Empfangs (LOCAL/MONO drücken) bzw. Starten der BTM-Funktion
(gedrückt halten).
n T aste RESET (befindet sich hinter der
Frontplatte)
4
o Zahlentasten
Radio:
Einstellen gespeicherter Sender (drücken)
bzw. Speichern von Sendern (gedrückt
halten).
CD:
(3): REP
Wiederholtes Wiedergeben des aktuel len
Titels bzw. der CD.
(4): SHUF
Wiedergeben von Titeln in willkürlicher
Reihenfolge.
p Taste PTY (Programmtypauswahl) 9
Auswählen von PTY bei einem RDS-Sender.
q T aste AF (Alternativfrequenzen)/TA
(Verkehrsdurchsagen) 8
Einstellen von AF und TA/TP bei einem
RDS-Sender.
r T aste OFF
Ausschalten/St oppen der Tonquelle.
s Empfänger für die
Kartenfernbedienung 11
6
Radio
Speichern und Empfangen
von Sendern
Achtung
Wenn Sie während der Fahrt Sender einste ll en,
sollten Sie die BTM-Funktion (Best Tuning
Memory - Speicherbelegungsa ut omatik)
verwenden. Andernfalls besteht Unfallgefahr.
Automatisches Speichern von
Sendern — BTM
1 Drücken Sie (SOURCE) so oft, bis
„TUNER“ erscheint.
Zum Wechseln des Frequenzbereichs drücken
Sie mehrmals (MODE). Sie können zwischen
FM1 (UKW1), FM 2 (UKW2), FM3
(UKW3), MW und LW wählen.
2 Halten Sie (BTM) gedrückt, bis „BTM“
blinkt.
Das Gerät speichert die Sender in der
Reihenfolge de r Frequenzen auf den
Zahlentasten.
Ein Signalton ist zu hören und die Einstellung
wird gespeich ert.
Manuelles Speichern von
Sendern
1 Während der zu speichernde Send er
empfangen wird, halten Sie eine
Stationstaste ((1) bis (6)) gedrückt,
bis „MEM“ er scheint.
Die Stationstastenanzeige erscheint im
Display.
Hinweis
Wenn Si e auf der glei chen Stationstaste einen
anderen Sender speichern, wird der zuvor
gespeicherte Sender ersetzt.
Tipp
Wenn ein RDS-Sender gespeichert wir d, wird auch
die AF/TA-Einstellung gespeichert (
Seite 8).
Automatisches Einstellen von
Sendern
1 Wählen Sie den Frequenzbereich aus
und starten Sie mit (SEEK)
Suche nach dem Sender.
Der Suchlauf stopp t, w enn ein Sender
empfangen wird. Wiederholen Sie diesen
Vorgang, bis das Gerät den gewünschten
Sender empfängt.
Tipp
Wenn Sie die Frequenz des gewünschten Senders
kennen, halten Sie (SEEK)
Frequenz in etwa erreicht ist, und drücken dann
(SEEK)
+/– so oft, bis die gewünschte Frequenz
genau eingestellt ist (manuelle Sendersuche).
+/– gedrückt, bis die
+/– die
RDS
Übersicht
UKW-Sender, die RDS (Radio Data System)
unterstützen, strahlen zusammen mit den
normalen Radi oprogramms ignalen ni cht hörbare ,
digitale Informationen aus.
Informationen im Display
ABC
A Radiofrequenzbereich, Funktion
B Frequenz*
RDS-Daten
C TA/TP*
*1 Beim Empfang eines RDS-Senders wird „*“ links
neben der Frequenz angezeigt.
*2 „TA“ blinkt während einer Verkehrsdurchsage. „TP“
leuchtet, wenn ein Sender mit Verkehrsdurchsagen
empfangen wird.
Zum Wechseln der angezeigten Informationen
B drücken Sie (DSPL).
Fortsetzung auf der nächsten Seite t
1
(Sendername), Uhrzeit,
2
Einstellen gespeicherter Sender
1 Wählen Sie den Frequenzbereich aus
und drücken Sie eine Stationstaste
((1) bis (6)).
Mit der Kartenfernbedienung
Zum Auswählen gespeicherter Sender drücken Sie M
oder m.
7

RDS-Funktionen
Mit diesem Gerä t s te h en folgende RDSFunktionen autom atisch zur Verfügung:
AF
(Alternativfrequenzen)
TA
(Verkehrsdurchsagen)/
TP
(Verkehrsfunksender)
PTY (Programm ty pen) Der ger ade empfangene
CT (Uhrzeit) Mit den CT-Daten
Hinweise
• Je nach Land bzw. Region stehen möglicherweise
nicht alle RDS-Funktionen zur Verfügung.
• Die RDS-Funktion arbeitet möglicherweise nicht,
wenn die Sendesignale zu schwach sind oder wenn
der eingestellte Sender keine RDS-Daten ausstrahlt.
In einem Netzwerk wird
der Sender mit den
stärksten Signa le n
ausgew ählt und neu
eingestellt. So können
Sie auch bei einer
langen Fahrt über eine
große Entfernung
hinweg ununterbroche n
denselben Sende r
empfangen, ohne ihn
manuell neu einstellen
zu müssen.
Aktuelle
Verkehrsinformationen
bzw.
Verkehrsfunksender
werden empfangen .
Wenn solche
Informatio nen bzw.
Sendungen empfan gen
werden, wird die gerade
ausgewählte Tonquelle
unterbrochen.
Programmtyp wi rd
angezeigt. Außer dem
kann nach dem
ausgewählten
Programmtyp gesucht
werden.
(Uhrzeitdaten), die von
RDS-Sendern
ausgestrahlt werden,
lässt sich die Uhr
einstellen.
8
Einstellen von AF und TA/TP
1 Drücken Sie (AF/TA) so oft, bis die
gewünschte Einstellung angezeigt
wird.
Auswahl Funktion
AF-ON AF wird aktiviert und TA wird
TA-ON TA wird aktiviert und AF wird
AF, TA-ON AF und TA werden aktiviert.
AF, TA-OFF AF und TA werden deaktiviert.
Speichern von RDS-Sendern
zusammen mit der AF- und TAEinstellung
Sie können zusammen mit den RDS-Sendern die
AF/TA-Einstellung speich ern. Mit der BTMFunktion werden nur RDS-Sender mit de rselben
AF/TA-Einstellung gespeichert.
Beim manuellen Speichern von Sendern können
Sie RDS- und Nicht-RDS-Sender mit
unterschiedlicher AF/TA-Einstellung speichern.
1 Stellen Sie AF/TA ein und speichern Sie die
Sender dann mit BTM oder manuell ab.
Speichern der Lautstärke von
Verkehrsdurchsagen
Sie können die Lautstärke für die
V er kehrsdurc hsagen v orein stellen, s o dass Sie sie
nicht überhö ren.
1 Drücken Sie mehrmals die Lautstärketaste +/–,
um den Lautstärkepegel ei nzustellen.
2 Halten Sie (AF/TA) gedrückt, bi s „TA“
erscheint.
Empfangen von
Katastrophenwarnungen
Wenn AF oder TA akt iviert is t , un te rbrechen
Katastrophenwarnungen automatisch die
ausgewählte Tonquelle.
Unveränderter Empfang eines
Regionalsenders — REG
Wenn die AF-Funktion aktiviert ist: Der
Empfang wird bei diesem Gerät we rkseitig auf
die Regionalsender einer bestimmten Region
beschränkt, so da ss ni cht zu einem anderen
Regionalsender mit einer stärkeren Frequenz
gewechselt wird.
Wenn Sie den Empfangsbereich eines
Regionalprogramms verlassen, stellen Sie bei der
Konf iguration „RE G-O FF“ ein (
Hinweis
Diese Funktion steht in Großbritannien und in einigen
anderen Regionen nicht zur Verfügung.
deaktiviert.
deaktiviert.
Seite 11).
Lokalsenderfunktion (nur
Großbritannien)
Mithilfe dieser Fun kt i on können Sie andere
Lokalsender ausw ählen, auch wenn di ese zuvor
nicht unter einer Stationstaste gespeichert
wurden.
1 Drücken Sie während des UKW-Empfangs
eine Stationstaste ((1) bis (6)), unter der ein
Lokalsender gespeichert is t.
2 Drücken Sie innerhalb von 5 Sekunden erneut
die Stationstaste de s Lokalsenders.
Wiederholen Sie diesen V organg, bis das Gerät
den Lokalsender empf ängt.
Auswählen des Programmtyps
(PTY)
1 Drücken Sie während des UKW-
Empfangs (PTY).
Der Name des aktuellen Programmtyps
erscheint, wenn der Sender PTY-Daten
ausstrahlt.
2 Drücken Sie (PTY) so oft, bis der
gewünschte Programmtyp angezeigt
wird.
3 Drücken Sie (SEEK) +/–.
Das Gerät begin nt , na ch einem Sender zu
suchen, der den ausgewählten Programmtyp
ausstrahlt.
Mit der Kartenfernbedienung
In Schritt 2 drücken Sie zum Auswählen des
Programmtyps M oder m.
Hinweis
Sie können diese Funktion in Ländern/Regionen, in
denen keine PTY-Daten zur Verfügung stehen, nicht
verwenden.
Einstellen der Uhrzeit (CT)
1 Stellen Sie bei der Konfiguration „CT-
ON“ ein (
Hinweise
• Die CT-Funktion steht möglicherweise nicht zur
Verfügung, auch wenn ein RDS-Sender empfangen
wird.
• Die mit der CT-Funktion eingestellte Uhrzeit ist nicht
immer korrekt.
Seite 10).
Programmtypen
NEWS (Nachrichten ), AFFAIRS (Aktuelles
Zeitgeschehen), INFO (Informationen),
SPORT (Sport), EDUCATE (Erziehung und
Bildung), DRAMA (Hörspiele), CULTURE
(Kultur), SCIENCE (Wisse nschaft), VARIED
(Verschiedenes), POP
ROCK
M (Rock-Musik), EASY M
(Unterhaltungsmusik), LIGHT
Klassik), CLASSICS (Klassik), OTHER
(Sonstige Mu si k), WEATHER (Wetter),
FINANCE (Finanzberic hte), CHILDREN
(Kinderprogramme), SOCIAL
(Magazinsendungen), RELIGION (Religion),
PHONE
IN (Hörertelefon), TRAVEL
(Reiseinformationen), LEISURE
(Freizeitprogramm), JAZZ (Jazz), COUNTRY
(Country-Musik), NATION
OLDIES (Oldies), FOLK
DOCUMENT (Dokumentarbeiträge)
M (Pop-Musi k) ,
M (Leichte
M
A
M (Volksmusik),
M (Folk-Musik),
9
Weitere Funktionen
Wechseln der
Klangeinstellungen
Einstellen der Klangeigenschaften
— BAL/F AD/SUB
Sie können die Balan ce, den Fader und die
Lautstärke des Tiefsttonlautsprechers einstellen.
1 Drücken Sie (SEL) so oft, bis „BAL“,
„FAD“ oder „SUB“ angezeigt wird.
Die Anzeige wec h s el t folgendermaßen:
1
LOW*
t MID*1 t HI*1 t
BAL (links-rechts) t FAD (vorne-hinten)
t SUB (Lautstärke des
Tiefsttonlautsprechers)
*1 Wenn EQ3 eingeschalte t ist (Seite 10).
*2 Wenn als Audioausgang „SUB“ eingestellt ist
(Seite 11).
„ATT“ wird bei der niedrigsten Einstellung
angezeigt. Die Lautstärke lässt sich in 20
Stufen einstellen.
2
*
2 Stellen Sie mit der Lautstärk et ast e +/–
die ausgewählte Option ei n.
Nach 3 Sekunden ist die Einstellung
abgeschlossen und im Display erscheint
wieder die Anzei ge für den normalen
Wiedergabemodus bzw. Empfangsmodus.
Hinweis
Nachdem Sie eine Klangoption ausgewählt haben,
müssen Sie innerhalb von 3 Sekunden den
Einstellvorgang beginnen.
Mit der Kartenfernbedienung
In Schritt 2 drücken Sie zum Einstellen der
ausgewählten Option < ode r ,.
Einstellen der Equalizer-Kurve
— EQ3
Sie können die Equaliz er-Eins t el lu ngen für
verschiedene Freque nzbereiche vornehmen und
speichern.
1 Wählen Sie eine Tonquelle aus und
drücken Sie mehrmals (EQ3), um den
EQ3-Modus auszuwählen.
2 Drücken Sie (SEL) so oft, bis „LOW“,
„MID“ oder „HI“ angezeigt wird.
3 Stellen Sie mit der Lautstärk et ast e +/–
die ausgewählte Option ei n.
10
Die Lauts t ä rke lässt sich in Schritten von
1
dB auf einen Wert zwischen –10 dB und
+10 dB einstellen.
Gehen Sie wie in Schritt 2 und 3 vor, wenn
Sie weitere Frequenzbereiche der Equal iz erKurve einstellen wollen.
Wenn Sie die werkseitig eingestellte
Equalizer-Kurve wiederherstellen wollen,
halten Sie (SEL) gedrückt, bevor die
Einstellung abgesc hl ossen ist.
Nach 3 Sekunden ist die Ei nstellung
abgeschlossen und im Display erscheint
wieder die Anzeige für den normalen
Wiedergabemodus bzw. Empfangsmodus.
Mit der Kartenfernbedienung
In Schritt 3 drücken Sie zum Einstellen der
ausgewählten Option < oder ,.
Einstellen von
Konfigurationsoptionen
— SET
1 Halten Sie (SEL) gedrückt.
Die Setup-Anzeige erscheint.
2 Drücken Sie (SEL) so oft, bis die
gewünschte Option angezeigt wird.
3 Wählen Sie mit der Lautstärketaste +/–
die Einstellung aus (beispielsweise
„ON“ oder „OFF“).
4 Halten Sie (SEL) gedrückt.
Die Einstellung ist damit abgeschlossen und
im Display erscheint wieder die Anzeige für
den normalen Wiedergabemodus bzw.
Empfangsmodus.
Hinweis
Die angezeigten Optionen unterscheiden sich je nach
Tonquelle und Einstellung.
Mit der Kartenfernbedienung
In Schritt 2 drücken Sie zum Auswählen der
Konfigurationsoption M oder m. In Schritt 3 drücken
Sie zum Auswählen der Einstellung < oder ,.
Folgende Optionen können eingestellt w er den
(Einzelheiten finden Sie jeweils auf den
angegebenen Seiten):
„z“ gibt die Standardeinstellung an.
CLOCK-ADJ
(Uhr einstellen)
CT (Uhrzeit) Zum Einstellen von „CT-
BEEP Zu m Einstellen von „BEEP -
(Seite 4)
ON“ oder „CT-OFF“ (
(Seite 8, 9).
ON“ (
z) oder „BEEP- O FF“.
z)

REAR/SUB*1Zum Wechseln des
Audioausgangs.
–„REAR“: Ausgabe an einen
Endverstärker.
–„SUB“ (
z): Ausgabe an
einen Tiefsttonlautsprecher.
DIM (Dimmer) Zum W echseln der Hellig keit
im Display.
–„DIM-ON“: Das Display
wird dunkler.
–„DIM-OFF“ (
z): Der
Dimmer wird deaktiviert.
ILM-1/ILM-2
(Beleuchtung)
(nur
CDX-S2050C)
1
DEMO*
(Demo-Modus)
Zum Wechseln der
Beleuchtungsfarbe.
–„ILM-1“ (
z): Gelb
–„ILM-2“: Grün
Zum Einstellen von „DEMO-
ON“ (z) oder „DEMO-OFF“
(Seite 4).
2
REG*
(Regional)
Zum Einstellen von „REGON“ (
z) oder „REG-OFF“
(Seite 8).
3
LPF*
(Niedrigpassfilter)
*1 Bei ausgeschaltetem Gerät.
*2 Wenn ein UKW-Sender empfangen wird.
*3 Wenn als Audioausgang „SUB“ eingestellt ist.
Zum Einstel l en der
Grenzfrequenz auf „78HZ“,
„125HZ“ oder „OF F“ (
z).
Verwenden gesondert
erhältlicher
Fernbedienungen
Kartenfernbedienung RM-X114
Lage und Funktion der
Bedienelemente
Die entsprechenden Tasten auf der
Kartenfernbedienung haben dieselbe Funktion
wie die Tasten an diesem Gerät.
*
DSPL MODE
+
PRESET
+
DISC
MENU
SOURCE
–
SEEK
SOUND
DISC
PRESET –
+
VOL
–
–
E
LIST
SEEK
N
ATTOFF
MODE
*
LIST
m/M
*
(DISC
+
PRESET
+/ –)
R
E
T
ENTER
ATT
DSPL
MENU
SOURCE
</,
(SEEK –/+ )
SOUND
OFF
VOL (+/ –)
/
*
Die folgenden Tasten auf der
Kartenfernbedi enung unterschei den sich
außerdem hinsichtlich ihres Namens und ihrer
Funktion v on denen am Gerät.
• Tasten </, (SEEK –/+)
Zum Steuern von Radio- und CD-Funktionen.
Diese Tasten entsprechen den Tasten
(SEEK)
+/– am Gerät. Einzel heiten zu
weiteren Funktio nen finden Sie unter „Mit de r
Kartenfernbedien ung“ auf den entsprec henden
Seiten.
• Taste SOUND
Entspricht (SEL) am Gerät.
• Tasten M/m (DISC*/PRESET +/–)
Einzelheiten finden Si e unter „Mit der
Kartenfernbedien ung“ auf den entsprec henden
Seiten.
* Bei diesem Gerät nicht verfügbar.
Hinweis
Wenn Sie das Gerät ausschalten und die Anzeige
ausgeblendet ist, können Sie es nicht mit der
Kartenfernbedienung bedienen. Drücken Sie zunächst
(SOURCE) am Gerät oder legen Sie eine CD ein, um
das Gerät zu aktivieren.
Fortsetzung auf der nächsten Seite t
11

Austauschen der Lithiumbatterie
Unter normalen Bedingungen hält die Batterie
etwa 1 Jahr. Die Lebensdauer der Batterie kann
je nach Gebrauch des Geräts jedoch auch kürzer
sein. Wenn die Batterie schwächer wird, verkürzt
sich die Reichweit e der Kartenfernbe dienung.
Tauschen Sie die Batterie gegen eine neue
CR2025-Lithiumbatterie aus. Bei Verwendung
einer anderen Batt erie besteht Feuer- ode r
Explosionsgefahr.
x
Mit der Seite
+ nach oben
Joystick RM-X4S
Anbringen des Aufklebers
Bringen Sie den Aufkleber je nach Mo nt age des
Joysticks an.
D
S
P
L
E
S
MODE
DSPL
Lage und Funktion der
Bedienelemente
Die entsprechenden Tasten auf dem Joystick
haben dieselbe Fu nktion wie die Tasten an
diesem Gerät.
SEL
PRESET
M
O
ATT
L
D
E
S
E
L
MODE
Hinweise zur Lithiumbatterie
• Bewahren Sie die Lithiumbatterie außerhalb der
Reichweite von Kindern auf. Sollte eine
Lithiumbatterie verschluckt werden, ist umgehend
ein Arzt aufzusuchen.
• Wischen Sie die Batterie mit einem trockenen Tuch
ab, um einen guten Kontakt zwischen den
Batteriepolen und -anschlüssen sicherzustellen.
• Achten Sie beim Einlegen der Batterie auf die
richtige Polarität.
• Halten Sie die Batterie nicht mit einer Metallpinzette.
Dies könnte zu einem Kurzschluss führen.
VORSICHT
Die Batterie kann bei falscher Handhabung
explodieren!
Auf keinen Fall darf sie aufgeladen,
auseinander g enommen od er ins Feuer
geworfen werden.
Entsorgungshinweis: Bitte werfen Sie nur
entladene Batter ien in die Sammelboxen beim
Handel oder den Kommunen. Entladen sind
Batterien in der Regel dann, wenn das Gerät
abschaltet und „Batterie leer“ signalisiert oder
nach längerer Gebrauchsdauer der Batte rien
nicht mehr einwandfrei funktioniert.
Um sicherzugehen, kleben Sie die Batteriepole
z. B. mit einem Klebestreifen ab oder geben Sie
die Batterien einzeln in einen Plastikbeutel.
SOURCE
OFF
OFF
VOL
DSPL
SEEK/AMS
Bei den folgenden Bedienelementen am Joystick
ist ein anderes Vorgehen erforderlich als m it den
Tasten am Gerät.
• Regler PRESET
Auswählen ge speicherter Send er (dr ü cken und
drehen).
• Regler VOL
Entspricht der Lautstärketaste +/– am Gerät
(drehen).
• Regler SEEK/AMS
Entspricht (SEEK) +/– am Gerät (drehe n oder
drehen und in dies er Position halten).
Wechseln der Drehrichtung
Die Drehrichtung der Regler ist werkseitig wie in
der folgenden Abbildung zu sehen eingestellt.
Erhöhen
Verringern
Wenn Sie den Joystick rechts von der Lenksäule
anbringen, könne n Si e die Drehrichtung de r
Regler ändern.
12

1 Drücken Sie den Regler VOL nach innen und
halten Sie (SEL) gedrückt.
Weitere Informationen
Sicherheitsmaßnahmen
• Wenn das Fahrzeug längere Zeit in direkt em
Sonnenlicht geparkt war, lassen Sie das Gerät
etwas abkühlen, bevor Sie es eins chalten.
• Motorantenne n w erden automatis ch
ausgefahren, wenn das Gerät eingesch al tet
wird.
Feuchtigkeitskondensation
Bei Regen oder bei se hr hoher Luftfeuchtig keit
kann sich auf de n Li nsen im Inneren des G eräts
und im Display Fe uchtigkeit niederschlagen. In
diesem Fall funktioniert das Gerät nicht mehr
richtig. Nehmen S ie di e CD heraus und warten
Sie etwa eine Stunde, b is di e Feuchtigkeit
verdunstet ist.
So bewahren Sie die hohe
Tonqualität
Achten Sie dara uf , kein e Säfte oder andere
zuckerhaltige Getränke auf das Gerät oder die
CDs zu verschütten.
Hinweise zu CDs
• Berühren Sie nicht die Oberfläch e von C D s ,
damit diese nicht versc hmutzt werden. Fass en
Sie CDs nur am Rand a n.
• Bewahren Sie CDs i n ihrer Hülle oder in den
CD-Magazinen auf , wenn sie nicht abg espielt
werden.
• Schützen Sie CDs vor Hitze bzw. hohen
Temperaturen. Lassen Sie sie nicht in
geparkten Autos, auf dem Armatu renbrett oder
auf der Hutablag e lieg en.
• Bringen Sie ke i ne A ufkleber auf CDs an und
verwenden Sie keine CDs mit Rückständen von
Tinte o der Kl ebstof fen. Solche CDs dreh en sich
beim Betrieb möglic herweise nicht meh r und
führen zu einer Fehl funktion oder kön nen
beschädigt w erden.
• Verwenden Sie keine CDs, an denen Etiketten
oder Aufkleber angebracht sind .
Bei Verwendung solcher CDs kann es zu
folgenden Fehlfunktionen kommen:
–Die CD lässt sich nicht auswerfen, weil sich
ein Etikett oder Aufkleber gelöst hat und den
Auswurfmecha ni sm us blockiert.
Fortsetzung auf der nächsten Seite t
13

–Die Audiodaten werden nicht korrekt gelesen
(z. B. Tonsprünge bei der Wiedergabe, keine
Wiedergabe), weil ein Etikett ode r Aufkleber
durch Wärmeeinwirkung geschrumpft ist und
die CD sich verzogen hat.
• CDs mit außergewöhnli chen Formen (z. B.
herzförmige, quadratische oder sternförmige
CDs) können mit diesem Gerät nicht
wiedergegeben werd en. Fa lls Sie es doch
versuchen, kann da s G er ät beschädigt werden.
Verwenden Sie solche CDs nicht.
• Single-CDs (8-cm-CDs) k önnen ebenfa lls nicht
verwendet werden.
• Reinigen Sie CDs vor dem
Abspielen mit einem
handelsüblichen
Reinigu ngstuch . Wischen Sie
dabei von der Mitte nach
außen. Verwenden Sie keine
Lösungsmittel wie Benzin
oder Verdünner und keine
handelsüblichen
Reinigungsmittel oder Antistatik-Sprays für
Schallplatten.
Hinweise zu CD-Rs/CD-RWs
• Je nach dem Gerät, mit d em die CD-R/CD-RW
bespielt wurde, oder dem Zustand der CD-R/
CD-RW selbst ist eine Wiedergabe mit diesem
Gerät nicht in jedem Fall möglich.
• Eine noch nicht abgeschlossene CD-R/CD-RW
kann nicht wiedergegeben w er den.
Sollten an Ihrem Gerät Probleme auftreten oder
sollten Sie Fragen haben, auf die in dieser
Anleitung ni cht eingeg angen wird, wenden Sie
sich bitte an Ihre n Sony-Händler.
Reinigen der Anschlüsse
Das Gerät funktioniert mögl ic herweise nicht
ordnungsgemäß, wenn die Anschlüs s e zw i schen
dem Gerät und der Fr ontplatte verschmutzt sind.
Um dies zu vermeiden, nehmen Sie die
Frontplatte ab (Seite 4) und reinigen Sie die
Anschlüsse mit einem mit Alkohol
angefeuchteten Wattestäbchen. Drücken Sie
dabei nicht zu fest auf die Anschlüsse.
Andernfalls kön nen sie beschädigt w er d en.
Hauptgerät Rückseite der Frontplatte
Hinweise
• Schalten Sie aus Sicherheitsgründen vor dem
Reinigen der Anschlüsse die Zü ndu ng aus und
ziehen Sie den Schlüssel aus dem Zündschloss.
• Berühren Sie die Anschlüsse unter keinen
Umständen direkt mit den Händen oder einem
Metallgegenstand.
Ausbauen des Geräts
1 Entfernen Sie die Schutzumrandung.
1Nehmen Sie die Frontplatte ab (Seite 4).
2Setzen Sie beide Löseschlüs sel an der
Schutzumrandung an.
Wartung
Austauschen der
Sicherung
Wenn Sie eine Sicherung
austauschen, achten Sie
darauf, eine Ersatzsicherung
mit dem gleichen AmpereW ert wie die
Originalsicher ung zu
verwenden. Dieser ist auf der
Originalsicherung angegeben.
Wenn die Sicherung
durchbrennt, überprüfen Sie
den Stromanschl uss und
tauschen die Sicheru ng aus. Brennt die neue
Sicherung ebenfalls durch, kann eine interne
Fehlfunktion vorliegen. Wenden Sie sich in
einem solchen Fall a n Ihren Sony-Händler.
Sicherung (10 A)
14
Richten Sie die Löseschlüssel wie
in der Abbildung dargest ell t aus.
3Ziehen Sie die Schutzumrandung mithilfe
der Löseschlüssel heraus.
2 Nehmen Sie das Gerät heraus.

1 Setzen Sie beide Löseschlüssel
gleichzeitig so ein, dass sie mit einem
Klicken einrasten.
Der Haken
muss nach
innen weisen.
2 Ziehen Sie an den Löseschlüsseln, um das
Gerät zu lösen.
3 Ziehen Sie das Gerät aus der Ha lt er ung.
Allgemeines
Ausgänge:
Audioausgangsanschl uss ( hinten/
Tiefsttonlautsprecher umschaltbar)
Motorantennen-Steueranschluss
Steueranschluss für Endverstärker
Eingänge:
Steueranschluss für Stu mmschaltung beim
Telefonieren
Fernbedienungseingang
Antenneneingang
Klangregler:
Bässe: ±10 dB bei 60 Hz (XPLOD)
Mitten: ±10 dB bei 1 kHz (XPLOD)
Höhen: ±10 dB bei 10 kHz (XPLOD)
Betriebsspannung: 12 V Gleichstrom, Autobatterie
(negative Erdung)
Abmessungen: ca. 178 × 50 × 178 mm (B/H/T)
Einbaumaß: ca. 18 2 × 53 × 161 mm (B/H/T)
Gewicht: ca. 1,2 kg
Mitgeliefertes Zubehör:
Montageteile und Anschlusszubehör (1 Satz)
Behälter für Frontp la tte (1 )
Sonderzubehör:
Kartenfernbedienung: R M-X 114
Joystick: RM-X4S
Änderungen, die dem technischen Fortschritt dienen,
bleiben vorbehalten.
Technische Daten
CD-Player
Signal-Rauschabstand: 120 dB
Frequenzgang: 10 – 20.000 Hz
Gleichlaufschwankungen: Unterhalb der Messgrenze
Tuner
FM (UKW)
Empfangsbereich: 87,5 – 108,0 MHz
Antennenanschluss: Anschluss für Außenantenne
Zwischenfrequenz: 10,7 MHz/450 kHz
Nutzbare Em pfindlichkeit : 9 dBf
Trennschärfe: 75 dB bei 400 kHz
Signal-Rauschabstand: 67 dB (stereo), 69 dB (mono)
Harmonische Verzerrung bei 1 kHz: 0,5 % (stereo),
0,3 % (mono)
Kanaltrennung: 35 dB bei 1 kHz
Frequenzgang: 30 – 15.000 Hz
MW/LW
Empfangsbereich:
MW: 531 – 1.602 kHz
LW: 153 – 279 kHz
Antennenanschluss: Anschluss für Außenantenne
Zwischenfrequenz: 10,7 MHz/450 kHz
Empfindlichkeit: MW: 30 µV, LW: 40 µV
Endverstärker
Ausgänge: Lautsprecherausgänge (versiegelte
Anschlüsse)
Lautsprecherimpedanz: 4 – 8 Ohm
Maximale Ausgangsleistung: 50 W × 4 (an 4 Ohm)
• Bleifreies Lötmetall wird zum Löten bestimmter Teile
verwendet. (mehr als 80 %.)
• In den Leiterplatten / der Leiterplatte werden keine
halogenierten Flammschutzmittel verwendet.
• Im Gehäuse werden keine halogenierten
Flammschutzmittel verwendet.
• Für das Verpackungsfüllmaterial wird kein
Polystyrenschaum verwendet.
Störungsbehebung
Anhand der folgenden Checkliste können Sie die
meisten Probleme, die möglicherweise an Ihrem
Gerät auftreten, selbst beheben.
Bevor Sie die folgende Chec kl is t e durchgehen,
überprüfen Sie bitte zunächst, ob Sie das Gerät
richtig angeschlossen und bedien t h aben.
Allgemeines
Das Gerät wird nicht mit Strom versorgt.
• Überprüfe n Si e di e Kabelverbindungen. Wenn
die Anschlüsse in Ordnung sind, überprüfen
Sie die Sicherung.
• Wenn Sie das Gerät ausschalten und die
Anzeige ausgeblendet ist, können Sie es nicht
mit der Kartenfernbedienung bedienen.
t Schalten Sie das Gerät e in .
Die Motorantenne wird nicht ausgefahren.
Die Motorantenne hat kein Relaiskästchen.
Fortsetzung auf der nächst en Seite t
15

Es ist kein Ton zu hören.
• Die Lautstärke ist zu niedrig.
• Die Funktion zum Dämpfen des Tons oder die
Stummschaltfunktion zum Telefonieren (wenn
das Schnittstellenkabel eines Autotelefons mit
der ATT-Leitung verbunden ist) ist aktiviert.
• Der Fader-Regler (FAD) ist nicht für ein 2Lautsprecher-System eingestellt.
Kein Signalton ertönt.
• Der Signalton ist dea kt iviert (Seite 10).
• Ein gesondert erhältlicher Endverstär ker is t
angeschlossen und Sie verwenden nic ht den
integrierten Verstärker.
Der Speicherinhalt wurde gelöscht.
• Die Taste RESET wurde gedrückt.
t Speichern Sie die Einstel lu ngen erneut.
• Das Stromversorgun gs kabel wurde gelöst od er
die V erbindung zur Batterie besteht nicht mehr.
• Das Stromversorgungskabel ist nicht richtig
angeschlossen.
Gespeicherte Sender und die korrekte
Uhrzeit werden gelöscht.
Die Sicherung ist durchgebrannt.
Störgeräusche sind zu hören, wenn der
Zündschlüssel gedreht wird.
Die Leitungen sind nicht korrekt an den
Stromanschluss für Zubehörgeräte
angeschlossen.
Die Anzeige wird ausgeblendet bzw.
erscheint nicht im Display.
• Der Dimmer ist auf „DIM-ON“ eingestellt
(Seite 11).
• Die Anzeige wird ausgeblendet, wenn Sie
(OFF) gedrückt halten.
t Halten Sie (OFF) erneut gedrückt , bi s die
Anzeige eingeblendet wird.
• Die Anschlüsse sind verschmutzt (Seite 14).
CD-Wiedergabe
Es lässt sich keine CD einlegen.
• Es ist bereits eine andere CD eingelegt.
• Die CD wurde mit Gewalt falsch herum oder
falsch eingelegt.
Die CD lässt sich nicht abspielen.
• Die CD ist beschädigt oder verschmutzt.
• Die CD-R/CD-RW ist nicht als Audio-CD
konzipiert (Seite 14 ).
Tonsprünge treten auf.
• Das Gerät ist nicht richtig installiert.
t Installieren Sie das G erät in einem Winkel
von unter 45° an einem st abi len Teil des
Fahrzeugs.
• Die CD ist beschädigt oder verschmutzt.
Die Funktionstasten funktionieren nicht.
Die CD lässt sich nicht auswerfen.
Drücken Sie die Taste RESET (Seite 4).
Radioempfang
Sender lassen sich nicht empfangen.
Der Ton ist stark gestört.
• Schließen Sie eine MotorantennenSteuerleitung (blau) oder eine
Stromversorgungsleitung für Zubehörgeräte
(rot) an die Stromversorgungsleitung für den
Antennenverstärker des Fahr zeugs an (nur,
wenn das Fahrzeug mit einer in der Heck-/
Seitenfensterscheibe integrierten UKW/MW/
LW-Antenne ausgestattet ist).
• Prüfen Sie die Verbindung der Autoantenne.
• Die Autoant enne wird nicht ausgefahren.
t Prüfen Sie die Verbindung der
Motorantennen-Steuerleitung.
• Überprüfen Sie die Frequenz.
Gespeicherte Sender lassen sich nicht
einstellen.
• Speichern Sie den/die Sender unter der
korrekten Frequen z ab.
• Das Sendesignal ist zu schwach.
Der automatische Sendersuchlauf
funktioniert nicht.
• Die Einstellung für den lokalen Suchmodus ist
nicht korrekt.
t D er automatische S endersuchlauf st oppt zu
oft:
Drücken Sie (SENS) so oft, bi s „LOCALON“ angezeigt wird.
t Der automatische Sendersuchlauf hält bei
keinem Sender an:
Drücken Sie (SENS) so oft, bi s „MONOON“ oder „MONO-OFF“ (UKW) bzw.
„LOCAL-OFF“ ( MW/LW) erscheint.
• Das Sendesignal ist zu schwach.
t St ellen Sie die Sender manuell ein.
Während des UKW-Empfangs blinkt die
Anzeige „ST“.
• Stellen Sie die Frequenz genau ein.
• Das Sendesignal ist zu schwach.
t D rücken Sie (SENS), um den monauralen
Empfangsmodus auf „MONO-ON“
einzustellen.
Eine UKW-Stereosendung ist nur monaural
zu hören.
Das Gerät ist in den monauralen
Empfangsmodus geschaltet.
t Drücken Sie (SENS) so oft, bis „MONO-
OFF“ angezeigt wird.
RDS
Der Sendersuchlauf (SEEK) startet nach ein
paar Sekunden Radioempfang.
Der Sender ist kein Verkehrsfunksender (TP)
oder die Sendesig nale sind zu schwach.
t Deaktivieren Sie TA (Seite 8).
16

Es sind keine Verkehrsdurchsagen zu
hören.
• Aktivieren Sie TA (Seite 8).
• Der Sender sendet keine Verkehrsdurchsagen,
obwohl es sich um ei nen Verkehrsfunksender
handelt.
t Stellen Sie einen anderen Sender ein.
Bei der PTY-Funktion wird „- - - - - - - -“
angezeigt.
• Der aktuelle Sender ist kein RDS-Sender.
• Es wurden keine RDS-D at en empfangen.
• Der Sender gibt den Programmtyp nicht an.
Fehleranzeigen/Meldungen
Fehleranzeigen
Folgende Anzeigen b linken etwa 5 Sekunden
lang und ein Alarmto n i st zu hören.
ERROR
• Die CD ist verschmutzt oder falsch herum
eingelegt.
t Reinigen Sie die CD bzw. legen Sie sie
korrekt ein.
• Die CD kann aufgrund einer Störung nicht
wiedergegeben werden.
t Legen Sie eine andere CD ein.
FAILURE
Die Lautsprech er-/Verstärkeranschlüsse si nd
nicht korrekt.
t Schlagen Sie in der mitgelieferten
Installations-/Anschlussanleitung nach, wie
die Anschlüsse korrekt vorgenommen
werden müssen.
OFFSET
Es liegt möglicherweise eine interne
Fehlfunktion vor.
t Üb erprüfen Sie die Kabelverbindungen.
Wenn die Fehleranzeige weiterhin im Display
angezeigt wird, wenden Sie sich an einen
Sony-Händler.
RESET
Das Gerät kann wegen ei ner Störung nicht
bedient werden.
t Drücken Sie die Taste RESET (Seite 4).
Meldungen
L.SEEK +/–
Beim automatischen Sendersuchlauf ist der
lokale Suchmodus aktiviert.
NO AF
Für den aktuellen Sender gibt es keine
Alternativfrequenz.
t D rücken Sie (SEEK) +/–, solange der
Sendername blinkt. Das Gerät beginnt dann
mit der Suche nach einer Frequenz mi t
denselben PI-Daten (Programme
Identification - Programmkennung) . „P I
SEEK“ wird angezeigt.
NO TP
Das Gerät suc h t w eiter nach verfügbar en
Verkehrsfunksendern.
„ “ oder „ “
Sie sind beim Vorwärts- oder Rückwärtssuchen
am Anfang bzw. Ende der CD angelangt und
können nicht weitersuchen.
Wenn sich das Problem mit diesen
Abhilfemaßnahmen nicht beheben lässt, wenden
Sie sich an einen Sony-Händler.
Wenn Sie das Gerät aufgrund einer Störung bei
der CD-Wiedergabe zur Reparatur br in gen,
bringen Sie bitte au ch die CD mit, die eingel egt
war, als das Problem zum ersten Mal auftrat.
17

Félicitations !
Nous vous remercions d’avoir fait l’acquisition
de ce lecteur de disq ues compacts Sony. Cet
appareil vous permet de bénéficier des fonctions
suivantes :
• Lecture de CD :
Vous pouvez lire les CD-DA et les CD-R/
CD-R W pou r une utilisation audio.
• Réception radi o :
–Vous pouvez mémoriser jusqu’à 6 stations
pour chaque band e de fréquences (FM1,
FM2, FM3, MW (PO) et LW (GO)).
–Fonction BTM (Bes t Tuning Memory -
mémorisation des meilleurs accords) :
L’appareil sélectionne les stations émettant
des signaux forts et les enregistre.
• Services RDS :
Vous pouvez utiliser une station FM disposant
du système RDS (Radio Data System).
Avertissement au cas où le contact de
votre voiture ne dispose pas d’une
position ACC
Après avoir coupé le moteur, n’oubliez pas de
maintenir la touche (OFF) de l’appareil
enfoncée jusqu’à ce que l’affichage
disparaisse.
Sinon, l’affichage n’est pas désactivé et la
batterie se décharge.
Cette étiquette est située sur la partie inférieure
du châssis.
2

Table des matières
Préparation
Réinitialisation de l’appareil . . . . . . . . . . . . . . . 4
Réglage de l’horloge . . . . . . . . . . . . . . . . . . . . . 4
Mode DEMO. . . . . . . . . . . . . . . . . . . . . . . . . . . 4
Retrait de la façade . . . . . . . . . . . . . . . . . . . . . . 4
Installation de la façade . . . . . . . . . . . . . . . . 5
Emplacement des commandes et
opérations de base
Appareil principal. . . . . . . . . . . . . . . . . . . . . 6
Radio
Réception et mémorisation des stations . . . . . . 7
Mémorisation automatique des stations
— BTM. . . . . . . . . . . . . . . . . . . . . . . . . . . . . 7
Mémorisation manuelle . . . . . . . . . . . . . . . . 7
Réception des stations mémorisées. . . . . . . . 7
Recherche automatique des fréquences . . . . 7
Fonction RDS . . . . . . . . . . . . . . . . . . . . . . . . . . 7
Aperçu. . . . . . . . . . . . . . . . . . . . . . . . . . . . . . 7
Réglages AF et TA/TP . . . . . . . . . . . . . . . . . 8
Sélection du type d’émission (PTY). . . . . . . 9
Réglage CT . . . . . . . . . . . . . . . . . . . . . . . . . . 9
Autres fonctions
Modification des réglages du son . . . . . . . . . . . 9
Réglage des caractéristiques du son
— BAL/FAD/SUB. . . . . . . . . . . . . . . . . . . . 9
Réglage de la courbe d’égaliseur
— EQ3 . . . . . . . . . . . . . . . . . . . . . . . . . . . . . 9
Réglage des paramètres de configuration
— SET . . . . . . . . . . . . . . . . . . . . . . . . . . . . . . 10
Utilisation de télécommandes en option. . . . . 10
Mini-télécommande RM-X114 . . . . . . . . . 10
Satellite de commande RM-X4S . . . . . . . . 11
Informations complémentaires
Précautions . . . . . . . . . . . . . . . . . . . . . . . . . . . 12
Remarques sur les disques. . . . . . . . . . . . . 12
Entretien . . . . . . . . . . . . . . . . . . . . . . . . . . . . . 13
Démontage de l’appareil. . . . . . . . . . . . . . . . . 13
Spécifications . . . . . . . . . . . . . . . . . . . . . . . . . 14
Dépannage . . . . . . . . . . . . . . . . . . . . . . . . . . . 14
Affichage des erreurs et messages . . . . . . . 16
3
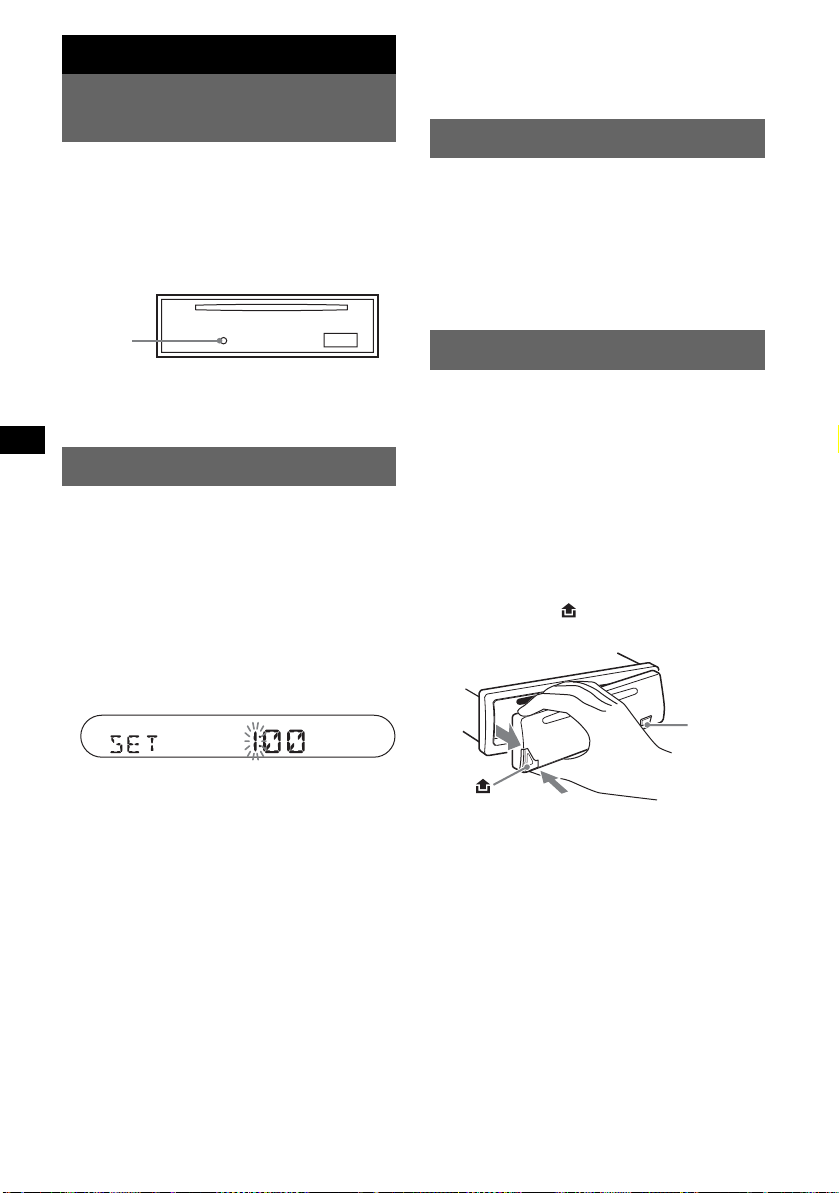
Préparation
Réinitialisation de
l’appareil
Avant la pre mière mise en service d e l’appareil,
après avoir remplacé la batterie du véhicule ou
modifié les raccordements, vous devez
réinitialiser l’appareil.
Retirez la façade et appuyez sur la touche
RESET avec un objet pointu, comme un stylo à
bille.
Touche
RESET
Remarque
Une pression sur la touche RESET remet l’heure à
zéro et efface certaines informations mémorisées.
Réglage de l’horloge
L’horloge fonctionne suivant un cycle de 24
heures.
1 Appuyez sur la touche (SEL) et
maintenez-la enfoncée.
L’écran de configur at io n apparaît.
2 Appuyez plusieurs fois sur (SEL)
jusqu’à ce que l’indication «
ADJ
» apparaisse.
3 Appuyez sur (DSPL).
L’indication des heures clignote.
CLOCK-
Avec la mini-télécommande
Appuyez sur M ou m pour sélectionner le paramètre
ou le réglage à l’étape 2 et 4. A l’étape 4, appuyez sur
< ou , pour déplacer l’indication numérique.
Mode DEMO
Lorsque l’appareil est mis hors tension, l’horloge
s’affiche en premier, puis le mode de
démonstration (DEMO) démarre la
démonstration.
Pour annuler le mode DEMO, réglez « DEMOOFF
» en cours de réglage (page 11) alors que
l’appareil est hors tension.
Retrait de la façade
Vous pouvez retirer la façade de cet appareil pour
le protéger du vol.
Alarme d’avertissement
Si vous mettez la clé de contact en position OFF
sans ôter la façade , l’a larme d’avertissement
retentit pe ndant quelques secondes.
L’alarme est émise uniquement lorsque
l’amplificateur intégré est utilisé.
1 Appuyez sur (OFF).
L’appareil est mis hors tension.
2 Appuyez sur , puis sortez la façade
en tirant vers vous.
(OFF)
4 Appuyez sur la touche de volume +/–
pour régler l’heure et les minutes.
Appuyez sur (DSPL) pour déplacer
l’indication numérique.
5 Appuyez sur (SEL ).
L ’horloge démarre et l’écran de configuration
suivant s’affiche.
6 Appuyez sur la touche (SEL) et
maintenez-la enfoncée.
La configuration est terminée.
Appuyez sur (DSPL) pour afficher l’horloge.
Appuyez de nouveau sur ( D SPL) pour revenir à
l’écran précédent.
Conseil
Vous pouvez régler l’horloge automatiquement au
moyen de la fonction RDS (
page 9).
4
Remarques
• N’exercez pas de pression excessive sur la façade
ni la fenêtre d’affichage.
• N’exposez pas la façade à des températures
élevées ou à l’humidité. Evitez de la lais ser dans un
véhicule en stationnement, sur le tableau de bord ou
la plage arrière.
Conseil
Lorsque vous transportez la façade, glissez-la dans
l’étui fourni à cet effet.

Installation de la façade
Insérez la partie A de la façade dans la partie B
de l’appareil, tel qu’illustré, puis poussez sur le
côté gauche jusqu’au dé clic indiquant qu’elle est
en position.
A
B
Remarque
Ne posez rien sur la face interne de la façade.
5

Emplacement des commandes et opérations de base
Appareil principal
1234 5 6 7890
SEL
SOURCE MODE
BTMDIM SHUFREP
SENS
DSPL
123456
qs qd qf qg qh qj qk
Pour plus de détails, reportez-vous aux numéros de pages indiqués.
a Touche de volume +/–
Permet d’ajuster le volume.
b Touche SEL (sélection) 4, 9, 10
Permet de sélect i onner des paramètres.
c Touche SOURCE
Permet de mettre l’appareil sous tension/
changer la source ( ra d i o/ C D ) .
d Touche MODE 7
Permet de sélectionner la bande radio (FM/
MW (PO)/L W (GO)) .
e Fente pour disque
Insérez le di sque (côt é impri mé v ers le haut);
la lecture démarre.
f Fenêtre d’affichage
g Touche ATT (atténuation du son)
Permet d’atténuer le son. Appuyez de
nouveau sur cette touche pour annuler.
h Touche EQ3 (égaliseur) 9
Permet de sélecti onner une courbe de
l’égaliseur (XPLO D , VOCAL, C LU B,
JAZZ, NEW
AGE, ROCK et CUSTOM).
i Touche Z (éjection)
Permet d’éjecter le disque.
j Touche SEEK +/–
Radio :
Permet de régler des stations
automatiquement (en appuya nt) ou de
trouver une station m anuellement (en
appuyant et en maintenant la touche
enfoncée).
CD :
Permet de sa uter des pl ages (en a ppuya nt) ou
d’avancer ou revenir rapidement dans une
plage (en appuya nt et en m aintenant la
touche enfoncée).
k Touche (dév erroui l lag e de la
6
façade) 4
l To u c h e DSPL (affichage)/DIM
m Touche SENS/BTM 7
n Touche RESET (située derrière la façade)
o Touches numériques
p Touche PTY (type d’émission) 9
q Touche AF (fréquences alternatives)/
r Touche OFF
s Récepteur de la mini-télécommande
SEEK
EQ3ATT
AF/TA
PTY OFF
CDX-S2050V
CDX-S2050C
CDX-S2050
(régulateur de luminosité)
qlqa
4, 7
Permet de modifier les rubriques d’affichage
(en appuyant) et la l um i nosité (en appuya nt
et en maintenant la touche enfoncée).
Permet d’amé liorer une réception faible :
LOCAL/MONO (en appuyant) ; démarrage
de la fonction B T M (en appuyant et en
maintenant la to uche enfoncée).
4
Radio :
Permettent de rec evoir des stations
enregistrées (en appuyant) et de mémoriser
des stations (en appu ya nt et en main te nan t la
touche enfoncée).
CD :
(3) : REP
Permet de lire en boucle la plage ou le disque
en cours.
(4) : SHUF
Permet de lire les plages dans un ordre
aléatoire.
Permet de sélectio nner PTY en RDS.
TA (messages de radioguidage) 8
Permet de régler AF et TA/TP en RDS.
Permet de mettr e l ’appareil hors tens ion/
d’arrêter la source.
10

Radio
Réception et mémorisation
des stations
Attention
Pour régler des stations pendant que vous
conduisez, utilisez la fonction de mémorisation
des meilleurs accords (BTM) afin d’éviter tout
accident.
Mémorisation automatique des
stations — BTM
1 Appuyez plusieurs fois sur (SOURCE)
jusqu’à ce que l’indication «
apparaisse.
Appuyez plusieur s fois sur (MODE) pour
changer de bande. Vous pouvez sélectionner
FM1, FM2, FM3, MW (PO) ou LW (GO).
2 Appuyez sur la touche (BTM) et
maintenez-la enfoncée jusqu’ à ce q ue
«
BTM » clignote.
L’appareil enregistre les stations sur les
touches numériques dans l’ordre des
fréquences.
Un bip retentit lorsque le réglage est
mémorisé.
Mémorisation manuelle
TUNER »
Recherche automatique des
fréquences
1 Sélectionnez la bande, puis appuye z
sur (SEEK)
station.
Le balayage s’interrompt lorsque l’appareil
capte une station. R ecommencez cette
procédure jusqu’ à ce que la station souhai tée
soit captée.
Conseil
Si vous connaissez la fréquence de la station que
vous souhaitez écouter, maintenez la touche
+/– enfoncée pour localiser la fréquence
(SEEK)
approximativement, puis appuyez plusieurs fois sur
(SEEK)
+/– pour la régler avec précision (recherche
manuelle des fréquences).
+/– pour rechercher la
Fonction RDS
Aperçu
Les stations FM disposant du système RDS
(Radio Data System) transmettent des
informations numériques inaudibles en même
temps que le signal normal de leurs émissions
radio.
Rubriques d’affichage
ABC
1 Lorsque vous recevez la station que
vous souhaitez mémoriser, appuyez
sur la touche numérique et maintenezla enfoncée ((1) à (6)) jusqu’à ce que
l’indication «
Le numéro de la touche apparaît da ns l a
fenêtre d’affichage.
Remarque
Si vous essayez de mémoriser une autre station sur la
même touche numérique, la station mémorisée
précédemment est remplacée.
Conseil
Lorsqu’une station RDS est mémorisée, le réglage
AF/TA est également mémorisé (
MEM » s’affiche.
page 8).
Réception des stations
mémorisées
1 Sélectionnez la bande, puis appuyez
sur la touche numérique ((1) à (6)).
Avec la mini-télécommande
Appuyez sur M ou m pour sélectionner des stations
mémorisées.
A Bande radio, fonctionnement
B Fréquence*
horloge, données RDS
C TA/TP*
*1 Lorsque vous captez la station RDS, « * » est
affiché à gauche de l’indication de la fréqu en ce.
*2 L’indication « TA » clignote pendant les messages
de radioguidage. L’indication « TP » s’allume
lorsqu’une de ces stations est captée.
Pour changer de rubrique d’affichage B,
appuyez sur (DSPL).
1
(nom de la station),
2
Suite à la page suivante t
7

Services RDS
Cet appareil propose automatiquement les
services RDS, comme suit :
AF (fréquences
alternatives)
TA (message de
radioguidage)/
TP (programme de
radioguidage)
PTY (types
d’émission)
CT (l’heure) Les données CT (heure)
Remarques
• Selon le pays ou la région où vous vous trouv ez, il
est possible que les services RDS ne soient pas
tous disponibles.
• La fonction RDS ne fonctionne pas correctement si
le signal de retransmission est faible ou si la station
syntonisée ne transmet pas de données RDS.
Permet de sélectionner et de
régler de nouveau la station
ayant le signal le plus fort
sur un réseau. Cette fonction
vous permet d’écoute r l a
même émission en continu
pendant un voyage de
longue distance sa ns avoir à
régler de nouveau ce tte
station manuellement.
Propose les messages/
programmes de
radioguidage dis ponibles à
cet instant. Tout message/
programme reçu int errompt
la source sélectionnée en
cours de diffusion.
Permet d’afficher le type de
l’émission en cours et de
rechercher votre type
d’émission sélectionné.
accompagn ant la
transmission RDS assurent
un réglage de l’horloge.
Réglages AF et TA/TP
1 Appuyez plusieurs fois sur (AF/TA)
jusqu’à ce que le réglage souhaité
s’affiche.
Sélectionnez Pour
AF-ON Activer AF et désactiver TA.
TA-ON Activer TA et désactiver AF.
AF, TA-ON Activer AF et TA.
AF, TA-OFF Désactiver AF et TA.
Mémorisation des stations RDS avec
les réglages AF et TA
Vous po uvez pr érégler des station s RDS avec les
réglages AF/TA. Si vous utilisez la fonction
BTM, seules les stations RDS sont mémorisées
avec les mêmes réglages AF/TA.
Si vous effectuez un préréglage manuel, vous
pouvez prérégler à la fois des stations RDS et
non-RDS, avec leurs réglages AF/TA respectifs.
1 Réglez AF/TA, puis mémorisez la station à
l’aide de la fonction BTM ou manuellement.
Préréglage du volume sonore des
messages de radioguidage
Vous p ouvez prérégler le niveau de volume des
messages de radioguidage de façon à ne manquer
aucune information.
1 Appuyez plusie urs fois sur la touche de
volume +/– pour régler le niveau de volume.
2 Maintenez la touche (AF/TA) enfoncée
jusqu’à ce que l’indication « TA » s’affiche.
Réception de messages d’urgence
Lorsque la fonc tion AF ou TA est activée, les
messages d’urgence interrompent
automatiquement la source sél ectionné e en co urs
de diffusion.
Ecoute continue d’une émission
régionale — REG
Lorsque la fonc tion AF est activée : ce réglage
par défaut rest reint la récepti on à une région
spécifique, afin que l’appa reil ne passe pas
automatiquement à une autre station régionale
dont les signaux s ont plus puissants.
Si vous quittez la zone de réception de cette
émission régi onale, réglez «
cours de réglage (
Remarque
Cette fonction est inopérante au Royaume-Uni et dans
certaines autres régions.
page 10).
REG-OFF » en
Fonction de liaison locale (RoyaumeUni uniquement)
Cette fonction vous per m et de sélectionner
d’autres stations locales de la région, même si
elles ne sont pas associées à vos touches
numériques.
1 En réception FM, appuyez sur une touc he
numérique ((1) à (6)) sur laquelle une
station locale est mémorisée.
2 Dans les 5 secondes qui suivent, appuyez de
nouveau sur la touc he numérique de la st at ion
locale.
Répétez l’opérat i on jusqu’à ce que vous
captiez la station locale.
8

Sélection du type d’émission
(PTY)
1 Appuyez sur (PTY) en cours de
réception FM.
Le nom du type d’émission diffusé apparaît si
la station transmet des données PTY.
2 Appuyez plusieurs fois sur (PTY)
jusqu’à ce que le type d’émission
souhaité apparaisse.
3 Appuyez sur (SEEK) +/–.
L ’appa reil co mmence à recherch er une st atio n
diffusant le type d’émiss i on s él ectionné.
Avec la mini-télécommande
Appuyez sur M ou m à l’étape 2 pour sélectionner le
type d’émission.
Types d’émissions
NEWS (actualités), AFFAIRS (dossiers
d’actualité), INFO (i nformations), SPORT
(sports), EDUCATE (programmes éducatifs ) ,
DRAMA (théâtre), CULTURE (culture),
SCIENCE (science), VARIED (divers),
POP
M (musique popu l aire), ROCK M (rock),
EASY
M (musique légère), LIGHT M (musique
classique légère), CLASSICS (musique
classique), OTHER
musique), WEATHER (météo), FINANCE
(finance), C HILDREN (émissions pour les
enfants), SOCIAL
RELIGION (religion), PHONE
ligne ouv erte), TRAVEL (voyage), LEISURE
(loisirs), JAZZ (m us iq ue jazz), COUNTRY
(musique count ry), NATION
nationale), OLDIES (musique d’autre fois),
FOLK
M (musique folk), DOCUMENT
(documentaires)
Remarque
Cette fonction est inopérante dans certains pays ou
régions où les données PTY ne sont pas disponibles.
M (autres styles de
A (affaires socia les),
IN (émissions
M (musique
Réglage CT
1 Réglez « CT-ON » en cours de réglage
(
page 10).
Remarques
• Il est possible que la fonction CT ne fonctionne pas,
même si une station RDS est captée.
• Il peut y avoir une différence entre l’heure réglée par
la fonction CT et l’heure réelle.
Autres fonctions
Modification des réglages
du son
Réglage des caractéristiques
du son — BAL/FAD/SUB
Vous pouvez régler la balance gauche-droite,
l’équilibre avant-arrière, ainsi que le volume du
caisson de graves.
1 Appuyez plusieurs fois sur (SEL)
jusqu’à ce que l’indication «
«
FAD » ou « SUB » apparaisse.
Le paramètre change dans l’ordre suivant :
1
LOW*
t MID*1 t HI*1 t
BAL (gauche-droite) t FAD (avant-arrière)
t SUB (volume du caiss on de graves)*
*1 Lorsque EQ3 est activé (page 9).
*2 Lorsque la sortie audio est réglée sur « SUB »
(page 10).
« ATT » est affiché sur le réglage inférieur et
peut être ajusté par incréments de 20.
2 Appuyez plusieurs fois sur la touche
de volume +/– pour régler le paramètre
sélectionné.
Le réglage est term in é après 3 secondes et la
fenêtre d’affichage revient au mode de
lecture/réception normale.
Remarque
Effectuez ce réglage dans les 3 secondes après avoir
sélectionné le paramètre.
Avec la mini-télécommande
Appuyez sur < ou , à l’étape 2 pour ajuster le
paramètre sélectionné.
Réglage de la courbe
d’égaliseur — EQ3
Vous pouvez régler et mémoriser les paramètres
de l’égaliseur pour différentes gammes de
tonalité.
1 Sélectionnez une source, puis
appuyez plusieurs fois sur (EQ3) pour
sélectionner le mode EQ3.
2 Appuyez plusieurs fois sur (SEL)
jusqu’à ce que «
«
HI » s’affiche.
LOW », « MID » ou
3 Appuyez plusieurs fois sur la touche
de volume +/– pour régler le paramètre
sélectionné.
BAL »,
2
Suite à la page suivante t
9

Le niveau de volume peut être réglé par
incréments de 1 dB, de – 10 dB à + 10 dB.
Répétez les étapes 2 et 3 pour régler la courbe
de l’égaliseur.
Pour restaure r l a courbe par défaut de
l’égaliseur , ap puy ez sur la touch e (SEL) et
maintenez-la enfoncée avant la fin du réglage.
Après 3 second es , l e réglage est terminé et
l’affichage revient au mode de lecture/
réception normale.
Avec la mini-télécommande
Appuyez sur < ou , à l’étape 3 pour ajuster le
paramètre sélectionné.
Réglage des paramètres
de configuration — SET
1 Appuyez sur la touche (SEL) et
maintenez-la enfoncée.
L’écran de configur at io n apparaît.
2 Appuyez plusieurs fois sur (SEL)
jusqu’à ce que le paramè tre souhaité
s’affiche.
3 Appuyez sur la touche volume +/–
pour sélectionner le paramètre (par
exemple «
4 Appuyez sur la touche (SEL) et
maintenez-la enfoncée.
Le réglage est terminé et la fenêtre
d’affichage revient en mode de lecture/
réception normale.
Remarque
Les paramètres affichés diffèrent selon la source et le
réglage.
Avec la mini-télécommande
Appuyez sur M ou m pour sélectionner le paramètre
de configuration à l’étape 2. Appuyez sur < ou ,
pour sélectionner le paramètre à l’étape 3.
Les paramètres suivants peuvent être réglés
(reportez-vous à la page indiquée pour plus de
détails) :
« z » indique les réglages par défaut.
CLOCK-ADJ
(réglage de
l’horloge)
CT (l’heure) Pour régler « CT-ON » ou
BEEP Pour régler « BEEP-ON » (
ON » ou « OFF »).
(page 4)
« CT-OFF » (
z) (page 8, 9).
ou « BEEP-OFF ».
z)
REAR/SUB*1Pour changer la sor t ie audio.
– « REAR » : pour une sortie
via un amplificateu r de
puissance.
– « SUB » (
z) : pour une sor t ie
via un caisson de graves.
DIM (régulateur
de luminosité)
Pour modifier la luminosité de
l’affichage.
–« DIM-ON » : pour réduire
la luminosité de l’affichage.
–« DIM-OFF » (
z) : pour
désacti ver le régula t eur de
luminosité.
ILM-1/ILM-2
(Eclairage)
(CDX-S2050C
uniquement)
DEMO*
(Démonstration)
2
REG*
(régional)
3
(filtre
LPF*
passe-bas)
*1 Lorsque l’appareil est hors tension.
*2 En réception FM.
*3 Lorsque la sortie audio est réglée sur « SUB ».
Pour modifier la coul eur de
l’éclairage.
–« ILM-1 » (
–« ILM-2 » : vert
1
Pour régler « DEMO-ON » (
ou « DEMO-OFF » (page 4).
Pour régler « REG-O N » (z)
ou « REG-OFF » (pag e 8) .
Pour sélectionn er la fréquence
de coupure « 78H Z »,
« 125HZ » ou « OFF » (
z) : ambre
z).
Utilisation de
télécommandes en option
Mini-télécommande RM-X114
Emplacement des commandes
Les touches de la mini-télécommande
correspondan te s commandent les mêmes
fonctions que celles de cet appare i l.
*
DSPL MODE
+
PRESET
LIST
+
DISC
MENU
SOURCE
–
SEEK
SOUND
DISC
PRESET –
+
VOL
–
SEEK
–
E
MODE
*
LIST
m/M
(DISC
+
PRESET
+/ –)
R
E
T
N
ENTER
ATTOFF
ATT
DSPL
MENU
SOURCE
</,
(SEEK –/+ )
SOUND
OFF
VOL (+/ –)
z)
*
/
*
10

Les touches suiva ntes de la mini-télécommande
sont également différentes des touches ou des
fonction s de l’appareil.
• Touches </, (SEEK –/+)
Pour commander la radio/le lecteur CD, m ême
commande que (SEEK) +/– sur l’appareil.
(Pour plus de détails sur les autres opérations,
reportez-vous à la section «
télécommande
» de chaque page.)
Avec la mini-
• Touche SOUND
Même commande que (SEL) sur l’appareil.
• Touches M/m (DISC*/PRESET +/–)
Pour plus de détails , rep ortez-vous à la section
«
Avec la mini-télécommande » sur chaque
page.
* Non disponible pour cet appareil.
Remarque
Si l’appareil est mis hors tension et que l’affichage
disparaît, il ne peut plus être utilisé avec la minitélécommande sauf si (SOURCE) de l’appareil est
enfoncée ou si un disque est inséré dans le lecteur
pour l’activer.
Remplacement de la pile au lithium
Dans des conditions d’utilisation normales, la
pile dure environ 1 an. (En f onction des
conditions d’utili sation, sa durée de vie peut être
plus courte.) Lorsque la pile est faible, la portée
de la mini-télécommande dimin ue. Remplacez la
pile par une nouvelle pi le au l it hium CR2025.
L ’utili sation de tou t autre type de pile entraîne un
risque d’incendie ou d’explosion.
ATTENTION
Utilisée de façon incorrecte, la pile peut
exploser. Ne pas la recharger, la démonter ni
la jeter au feu.
Satellite de commande RM-X4S
Mise en place de l’étiquette
Apposez l’étiquette d’indication en fonction de
la position de montage du sa tellite de commande.
D
S
P
M
O
D
E
S
E
ATT
DSPL
L
L
MODE
OFF
OFF
L
E
S
MODE
DSPL
Emplacement des commandes
Les touches du satellite de commande
correspondantes commandent les mêmes
fonctions que ce lles de cet appareil.
SEL
PRESET
SOURCE
VOL
SEEK/AMS
x
pôle + vers le
haut
Remarques sur la pile au lithium
• Tenez la pile au lithium hors de la portée des
enfants. En cas d’ingestion de la pile, consultez
immédiatement un médecin.
• Essuyez la pile avec un chiffon sec pour assurer un
bon contact.
• Veillez à respecter la polarité lors de l’installation de
la pile.
• Ne tenez pas la pile avec des pinces métalliques,
car cela pourrait entraîner un court-circuit.
Les commandes suivantes du satellite de
commande sont utilisées différemment de celles
de l’appareil.
• Commande PRESET
Permet de sélectio nner des stations
présélectionnées (appuyez et tourne z).
• Commande VOL
Même commande que la touche volume +/– de
l’appareil (t ourner).
• Commande SEEK/AMS
Même commande que (SEEK) +/– de
l’appareil (tou rner ou tourner et maintenir).
Suite à la page suivante t
11
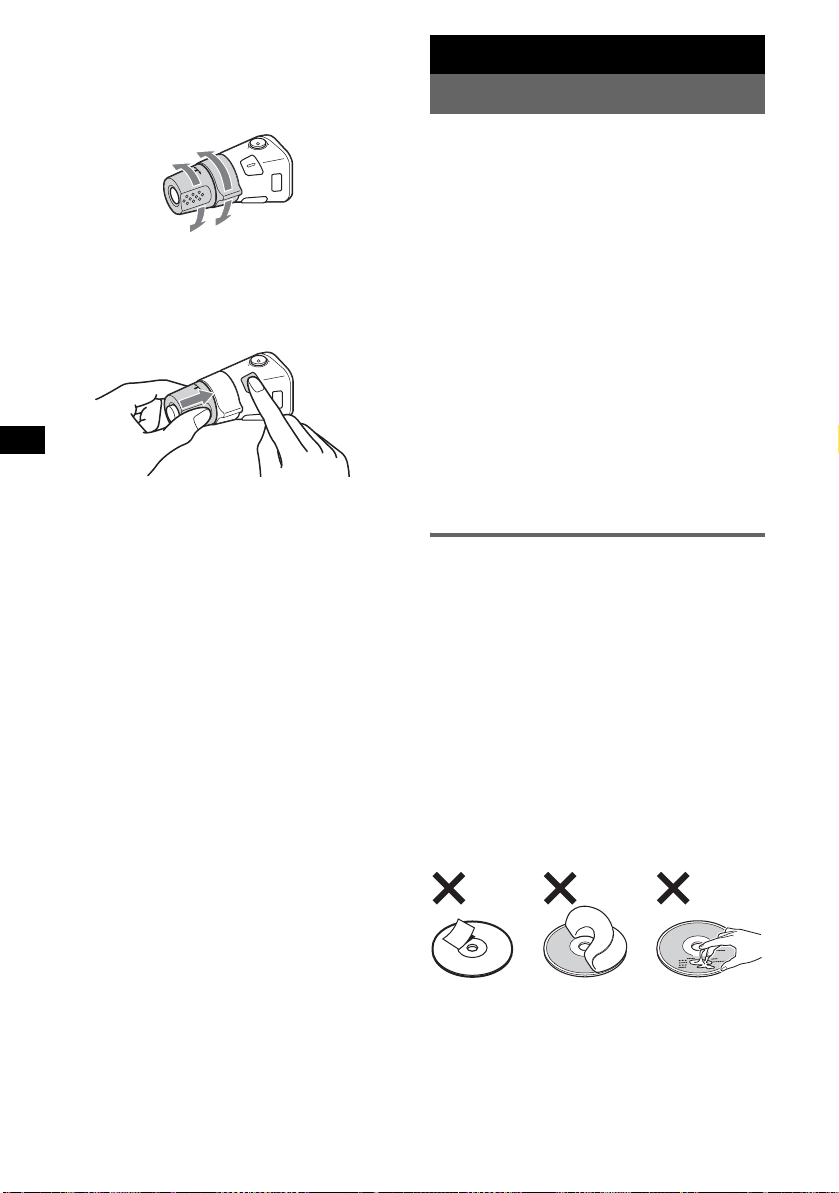
Modification du sens de
fonctionnement
Le sens de fonctionnem ent des commande s es t
réglé par défaut comme indiqué dans
l’illustration ci -dessous.
Pour augmenter
Pour diminuer
Si vous devez monter le satellite de commande
du côté droit de la colonne de direction, vous
pouvez inverser le sens de foncti onnement.
1 Maintenez la touche (SEL) enfoncée tout en
appuyant sur la commande VOL.
Informations complémentaires
Précautions
• Si votre véhicule est resté stationné en plei n
soleil, laissez l’appareil refroidir avant de
l’utiliser.
• L’antenne électrique se déploie
automatiquement lorsque l’appareil est en
fonctionnement.
Condensation
Par temps de pluie ou dans des régions très
humides, de l’humidité peut se condenser à
l’intérieur des lentilles et dans la fenêtre
d’affichage de l’appare il . Si cel a se produit,
l’appareil ne fonctionne pas correctement. Dans
ce cas, retirez le di sque et attendez environ une
heure que l’humi di té se soit évaporée.
Pour conserver un son de haute
qualité
Vei ll ez à ne pas renverser de jus de fruit ni
d’autres bo issons suc rées su r l’ap par eil ou sur l es
disques.
Remarques sur les disques
• Pour que le disque reste propre, ne touchez pas
sa surface. Manipulez le disque en le tenant par
les bords.
• Rangez vos disques dans leurs boîtiers ou dans
des chargeurs lorsque vous ne vous en servez
pas.
• Ne soumettez pas les disques à des
températures élevées. Ev itez de les laisser dans
un véhicule en stationnement, sur le tableau de
bord ou la plage arrière.
• Ne collez pas d’ étiquettes sur les disques et
n’utilisez pas de disques rendus collants par de
l’encre ou des résidus. De tels disque s peuvent
s’arrêter de tourner en cours de l ecture et
provoquer des problèmes de fonctionnement ou
être endommagé s.
12
• N’utilisez pas de disques sur lesquels sont
collés des étiqu ettes ou des autocollants.
L ’utilisation de tels disques peut entraîner les
problèmes de fonctionnement suivants :
–impossibilité d’éjecter un disque parce que
l’étiquette ou l’autocollant se décolle et
bloque le mécanisme d’éjection ;

–erreurs de lecture des données audio (p. ex.
sauts de lecture ou aucune lecture)
provoquées par une défor m ation du disque
suite au rétrécissement de l’étiquette ou de
l’autocollant sous l’effet de la chaleur.
• Les disques de forme non standard (p. ex. en
forme de cœur, de carré ou d’étoil e) ne pe uv e nt
pas être lus ave c cet appareil. Vous risquez
d’endommager votre apparei l si vous essayez
de le faire. N’utilisez pas de tels disq ues.
• Cet appare il ne p er met p a s la l ec tur e des C D d e
8 cm.
• Avant la lecture, nettoyez les
disques avec un chiffon de
nettoyage disponible dans le
commerce. Essuyez chaque
disque en partant du centre
vers l’extérieu r. N’ utilisez pas
de solvants tels que de
l’essence, du diluant, des
nettoyants disponibles dans le
commerce ou des v aporisateurs ant istatiques
destinés aux disques vinyle.
Nettoyage des connecteurs
L’appareil peut ne pas fonctionne r correctement
si les connecteu rs entre l’apparei l e t l a façade
sont souillés. Pour éviter cette situation, enlevez
la façade (page 4) et nettoyez les connecteurs à
l’aide d’un coton-tige imbibé d’alcool. N’exercez
pas une pression trop forte, sinon les connecteurs
peuvent être endommagés.
Appareil principal Arrière de la façade
Remarques
• Pour plus de sécurité, coupez le moteur avant de
nettoyer les connecteurs et retirez la clé du contact.
• Ne touchez jamais les connecteurs directement
avec les doigts ou avec un objet métallique.
Remarques sur les disques CD-R et
CD-RW
• Il est possible que cet appareil ne puisse pas lir e
certains CD-R ou CD-RW (en fonction de
l’appareil utilisé pour l’enregistrement ou de
l’état du disque).
• Cet appareil ne permet pas la lecture des CD-R
ou CD-RW non finalisés.
Si vous avez des questions ou de s pr oblèmes
concernant cet appareil, qui ne sont pas abordés
dans ce mode d’emploi, consultez votre
revendeur Sony.
Entretien
Remplacement du
fusible
Lorsque vous remplacez le
fusible, veillez à utiliser un
fusible dont la capacité, en
ampères, correspond à la
valeur indiquée sur l’anci en
fusible. Si le fusible fond,
vérifiez le branchement de
l’alimentation et remplac ez le
fusible. Si le nouveau fusible
fond également, il es t
possible que l’appareil soit
défectueux. Da ns ce cas, consultez votre
revendeur Sony le plus proche.
Fusible (10 A)
Démontage de l’appareil
1 Retirez le tour de protection.
1 Retirez la façade (page 4).
2 Insérez les clés de déblocage dans le tour
de protection.
Orientez les clés de déblocage
comme illustré.
3 Tirez sur les clés de déblocage pour retirer
le tour de protection.
Suite à la page suivante t
13

2 Retirez l’a p p areil.
1 Insérez les deux clés de d éblocage
simultanément jusqu’au déclic.
Crochet tourné
vers l’intérieur.
2 Tirez sur les clés de déblocage pour
extraire l’ a ppareil.
3 Faites gliss er l’appareil en deho rs de son
support.
Spécifications
Amplificateur de puissance
Sorties : sorties de haut-parleurs (connecteurs de
sécurité)
Impédance des haut-parleurs : 4 à 8 ohms
Puissance de sortie m aximale : 50 W × 4 (à 4 ohms)
Généralités
Sorties :
borne sorties audio (ajust ab le s arr iè r e /c ai sson de
graves)
borne de commande de relais d’antenne électriq ue
borne de commande d’amplifica teu r de pui ssa nc e
Entrées :
borne de commande ATT téléphone
borne d’entrée de télécommande
borne d’entrée de l’antenne
Commande s de tonalité :
graves : ± 10 dB à 60 Hz (XPLOD)
médiums : ± 10 dB à 1 kHz (XPLOD)
aigus : ± 10 dB à 10 kHz (XPLO D )
Alimentation requise : batterie de véhicule 12 V CC
(masse négative)
Dimensions : environ 178 × 50 × 178 mm (l/h/p)
Dimensions du support : environ 182 × 53 × 161 mm
(l/h/p)
Poids : environ 1,2 kg
Accessoires fournis :
composants destinés à l’installation et au
raccordement (1 jeu)
etui pour la façade (1)
Accessoires en option :
mini-télécommande : RM -X114
satellite de commande : RM- X 4 S
La conception et les spécifications sont sujettes à
modification sans préavis.
Lecteur CD
Rapport signal/bruit : 120 dB
Réponse en fréquence : 10 à 20 000 Hz
Pleurage et scintillement : en dessous du seuil
mesurable
Radio
FM
Plage de syntonisation : 87,5 à 108,0 MHz
Borne d’antenne : connecteur d’antenne externe
Fréquence intermédia ire : 10,7 MHz/450 kHz
Sensibilité utile : 9 dBf
Sélectivité : 75 dB à 400 kHz
Rapport signal/bruit : 67 dB (stéréo), 69 dB (mono)
Distorsion harmonique à 1 kHz : 0,5 % (stéréo),
0,3 % (mono)
Séparation : 35 dB à 1 kHz
Réponse en fréquence : 30 à 15 000 Hz
MW (PO)/LW (GO)
Plage de syntonisation :
MW (PO) : 531 à 1 602 kHz
LW (GO) : 153 à 279 kHz
Borne d’antenne : connecteur d’antenne externe
Fréquence intermédia ire : 10,7 MHz/450 kHz
Sensibilité : MW (PO) : 30 µV, LW (GO) : 40 µV
14
• De la soudure sans plomb est utilisée pour le
soudage de certaines pièces. (plus de 80 %)
• Aucun retardateur de flamme halogéné n’est utilisé
dans certaines cartes à circuits imprimés.
• Aucun retardateur de flamme halogéné n’est utilisé
dans la composition des coques.
• Les matériaux d’emballage ne sont pas composés
de mousse de polystyrène.
Dépannage
La liste de contrôle suivante vous aidera à
remédier aux problèmes que vous pourriez
rencontrer avec cet appa reil.
Avant de passer en revue la liste de contrôle cidessous, vérifiez les procédures de raccordement
et d’utilisation.
Généralités
L’appareil n’est pas alimenté.
• Vérifiez le raccordement. Si tout est en ordre,
vérifiez le fusible.
• Si l’appareil est mis hors tension et que
l’affichage disparaît, i l ne peut pas être
commandé avec la télécommande.
t Mettez l’appareil sous tension.

L’antenne électrique ne se déploie pas.
L’antenne électrique ne dispose pas d’ un boîtier
de relais.
Aucun son.
• Le volume est trop fa ible.
• La fonction ATT est acti vé e ou la fo nctio n ATT
téléphone (lorsque le câble d’interface d’un
téléphone embarqué est raccordé au fil ATT)
est activé.
• La position de la commande d’équilibre avantarrière (FAD) n’est pas réglée su r un système à
2 haut-parle urs.
Aucun bip n’est audible.
• Le bip est désactivé (p age 10).
• Un amplificateur de puissance en option est
raccordé et vous n’utili sez pas l’amplificateur
intégré.
Le contenu de la mémoire a été effacé.
• La touche de réinitialisation (RESET) a été
enfoncée.
t Recommencez la procédure
d’enregistrement dans la mémoire.
• Le cordon d’alimentation ou la batterie a été
déconnecté.
• Le cordon d’alimentation n’est pas raccordé
correctement.
Les stations mémorisées et l’heure sont
effacées.
Le fusible a fond u.
Emission de bruit lorsque la po s i t io n de la
clé de contact est modifiée.
Les fils ne sont pas raccordés correctement au
connecteur d’alim entation du véhicu le destiné
aux accessoire s.
L’affichage disparaît de la fenêtre
d’affichage ou il ne s’affiche pas.
• Le régulateur de luminosité est réglé sur
« DIM-ON » (page 10).
• L’affichage disparaît s i vous m aintenez la
touche (OFF) enfoncée.
t Maintenez de nouveau la touche (OFF)
enfoncée jusqu’à c e que l’affichage
apparaisse.
• Les connecteur s s ont sales (page 13).
Lecture de CD
Impossible d’introduire le disque.
• Un autre disque est déjà en place.
• Le disque a été introduit de force à l’envers ou
dans le mauvais sens.
La lecture du disque ne commence pas.
• Le disque est défectueux ou sale.
• Les CD-R/CD-RW ne sont pas destinés à un
usage audio (page 13).
Le son saute.
• L’installation est incorrecte.
t Installez l’appare il suivant un angle de
moins de 45° dans un endroit suffisamment
stable du véhicule .
• Le disque est déf ect ueux ou sale.
Les touches de commande sont
inopérantes.
Le disque ne s’éjecte pas.
Appuyez sur RE SET ( page 4).
Réception radio
Impossible de capter des stations.
Le son comporte des parasites.
• Raccordez u n fil de commande d’antenn e
électrique (bleu) ou un fil d’alimentation
d’accessoire (rouge) au câble d’alimentation de
l’amplificateur d’antenne de la voiture
(uniquemen t si votre voiture est équi pée d’une
antenne FM/MW (PO)/LW (GO) intégrée dans
la vitre arrière/latérale.)
• Vérifiez le raccordement de l’antenn e du
véhicule.
• L’antenne automatique ne se déploie pas.
t Vérifiez le raccordement du câble de
commande de l’antenne électrique.
• Vérifiez la fréque nce.
Impossible de capter une présélection.
• Enregistrez la fréquence correcte dans la
mémoire.
• Le signal capté est trop faible.
Le réglage automatique des stations est
impossible.
• Le réglage du mode de recherche locale est
incorrect.
t La recherche de fréque nces s’arrête trop
souvent :
Appuyez sur (SENS) jusqu’à ce que
l’indica t i on « LOCAL-ON » s’affiche.
t La recherche de fréquences ne s’arrête sur
aucune station :
Appuyez plusieurs fois sur (SENS) jusqu’à
ce que l’indication « MONO-ON »,
« MONO-OFF » (FM) ou « LOCAL-OFF »
(MW (PO)/LW (GO)) s’affiche.
• Le signal capté est trop faible.
t Réglez manuellement la fréquence.
Lors d’une réception FM, l’indication « ST »
clignote.
• Réglez la fréq uence correctem ent.
• Le signal capté est trop faible.
t Appuyez sur (SENS) pour régler le mode
de réception mono sur « MONO-O N ».
Suite à la page suivante t
15
Un programme FM émis en stéréo est
entendu en mono.
L’appareil est en m ode de réception mono.
t Appuyez sur (SENS) ju squ’à ce que
l’indica ti on « MONO-OFF » s’affiche.
Si ces solutions ne permettent pas d’améliorer la
situation, consult ez votre revendeur Sony le plus
proche.
Si vous portez l’appareil à réparer s ui te à un
problème de lecture de CD, apportez le disque
utilisé au moment où ce problème s’est produit.
Fonction RDS
Une recherche (SEEK) commence après
quelques secondes d’écoute.
La station ne diffuse pas de pr ogrammes de
radioguidage (fo nction TP désactivée) ou le
signal capté est faible.
t Désactivez TA (page 8).
Aucun message de radioguidage.
• Activez TA (page 8).
• La station n’émet pas de messages de
radioguidage, alors que TP est activé.
t R égl ez la fréquence pour capter une autre
station.
PTY affiche « - - - - - - - - ».
• La station actuell em ent captée n’est pas une
station RDS.
• Les données RDS n ’ont pas été reçues.
• La station ne spécifie pas le type d’émission.
Affichage des erreurs et
messages
Affichage des erreurs
Les indications suivantes cli gnotent pendant
environ 5 secondes et une alarme retentit.
ERROR
• Le disque est sale ou inséré à l’envers.
t Ne t toye z l e di sque ou insérez-le
correctement.
• Le disque ne peut pas être lu en raison de
certains problè m es.
t Insérez un autre disque.
FAILURE
Les haut-parleur s ou l’amplificateur ne sont pas
raccordés corr ectement.
t R eportez-vous au manuel d’installation et
des raccordements pour vérifier les
raccordements.
OFFSET
Il est possible qu’i l y ait un problème de
fonctionnement.
t Vérifiez le raccordement. Si le message
d’erreur reste affiché, consultez votre
revendeur Sony le plus proche.
RESET
Le lecteur ne peut pa s fonctionner en raison de
certains problèm es .
t Ap puyez sur la touche RESET (pa ge 4).
Messages
L.SEEK +/–
Le mode de recherche locale est activé en cours
de recherche automatique de fréquences.
NO AF
Il n’existe aucune fréquence alternative pour la
station actuelle.
t A ppuyez sur (SEEK) +/– lors que le nom de
la station clignote. L’appareil commence à
rechercher une autre fréquence avec les
mêmes données d’identification de
programme (PI) (l’indication « PI SEEK »
apparaît).
NO TP
L’appareil con ti nue à rechercher le s stations
diffusant des messages de radioguidage.
« » ou « »
Pendant l’avance rapide ou l e retour rapide, vous
avez atteint le début ou la fin du disque et vous ne
pouvez pas aller plus loin.
16


Congratulazioni!
Complimenti per l’acquisto del presente letto re
CD Sony. Utilizzando il presente apparecchio, è
possibile usufrui re del le seguenti funzioni .
• Riproduzione di CD:
È possibile ripr odur re CD- D A e CD- R/CD- RW
per uso audio.
• Ricezione radiofonica:
–È possibile mem orizzare fino a 6 stazi oni per
banda (FM1, FM2, FM3, MW e LW).
–Funzione BTM (Best Tuning Memory,
memorizzazione automatica delle emittenti
con sintonia migliore): l’apparecchio
seleziona e memorizza le stazioni con segnale
forte.
• Servizi R DS:
È possibi le utilizza re le stazioni FM con la
funzione RDS (Radio Data System , sistema
dati radio).
Avvertenza relativa all’installazione su
un’auto sprovvista della posizione
ACC (accessoria) sul blocchetto di
accensione
Dopo avere spento il motore, assicurarsi di
tenere premuto (OFF) sull’apparecchio
finché il display non scompare.
Diversamente, il display non viene disattivato
causando lo scaricamento della batteria.
Questa etichetta è posta nella parte inferiore
esterna.
2

Indice
Operazioni preliminari
Azzeramento dell’apparecchio . . . . . . . . . . . . . 4
Impostazione dell’orologio . . . . . . . . . . . . . . . . 4
Modo DEMO. . . . . . . . . . . . . . . . . . . . . . . . . . . 4
Rimozione del pannello anteriore . . . . . . . . . . . 4
Installazione del pannello anteriore . . . . . . . 5
Individuazione dei comandi e
operazioni di base
Unità principale. . . . . . . . . . . . . . . . . . . . . . . 6
Radio
Memorizzazi one e ricezione delle st azioni . . . . 7
Memorizzazione automatica — BTM . . . . . 7
Memorizzazione manuale. . . . . . . . . . . . . . . 7
Ricezione delle stazioni memorizzate. . . . . . 7
Sintonizzazione automatica . . . . . . . . . . . . . 7
RDS . . . . . . . . . . . . . . . . . . . . . . . . . . . . . . . . . . 7
Presentazione . . . . . . . . . . . . . . . . . . . . . . . . 7
Impostazione di AF e TA/TP . . . . . . . . . . . . 8
Selezione del tipo di pr ogramma (PTY) . . . . 8
Impostazione dell’ora (CT). . . . . . . . . . . . . . 9
Altre funzioni
Modifica delle i m postazioni dell’aud i o . . . . . . 9
Regolazione delle caratteristiche dell’audio
— BAL/FAD/SUB. . . . . . . . . . . . . . . . . . . . 9
Regolazione della curva dell’equalizzatore
— EQ3 . . . . . . . . . . . . . . . . . . . . . . . . . . . . . 9
Regolazione delle voci di impostazione
— SET . . . . . . . . . . . . . . . . . . . . . . . . . . . . . . 10
Uso dei telecomandi opzionali . . . . . . . . . . . . 10
Telecomando a scheda RM-X114 . . . . . . . 10
Telecomando a rotazione RM-X4S . . . . . . 11
Informazioni aggiuntive
Precauzioni . . . . . . . . . . . . . . . . . . . . . . . . . . . 12
Note sui dischi . . . . . . . . . . . . . . . . . . . . . . 12
Manutenzione . . . . . . . . . . . . . . . . . . . . . . . . . 13
Rimozione dell’apparecchio. . . . . . . . . . . . . . 13
Caratteristiche tecniche. . . . . . . . . . . . . . . . . . 14
Guida alla soluzione dei problemi . . . . . . . . . 14
Messaggi e indicazioni di errore . . . . . . . . 16
3

Operazioni preliminari
Modo DEMO
Azzeramento
dell’apparecchio
Prima di utilizzare l’apparecchio per la prima
volta, dopo la sostituzione della batteria dell’auto
o dopo avere effettuato modifiche ai
collegamenti, è necessario azzerare l’apparecchio
stesso.
Rimuovere il pannello ante riore, quindi preme re
il tasto RESET utilizzando un oggetto appuntito,
quale una penna a sfer a.
Tasto
RESET
Nota
Premendo il tasto RESET verranno cancellate le
impostazioni dell’orologio e alcune funzioni
memorizzate.
Impostazione dell’orologio
L’ orologio mostra l’in di cazione digitale dell’ora
in base al sistema de l le 24 ore.
1 Tenere premuto (SEL).
Viene visualizzato il display di impostazione.
2 Premere più volte (SEL) fino a
visualizzare “CLOCK-ADJ”.
3 Premere (DSPL).
L’indicazione de ll’ora lampeggia.
Quando l’apparecchio viene sp en t o, appare
innanzitutto l’orologi o, quindi una dimost razione
(DEMO) nel modo Demo.
Per disattivare il modo DEMO, impostare
“DEMO-OFF” come riportato nella procedura di
impostazione (
spento.
pagina 10) mentre l’apparecchio è
Rimozione del pannello
anteriore
Per evitare il furto dell’apparecchio, è possibile
estrarne il pannello anteriore.
Segnale di avvertimento
Se il blocchetto di accensione viene impos tato
sulla posizione OFF senza che il pannello
anteriore sia stato rimosso, viene emesso per
alcuni secondi un segnale acustico di
avvertimento.
Il segnale viene emesso solo se si utiliz za
l’amplificatore incorp or at o.
1 Premere (OFF).
L’apparecchio si spegne.
2 Premere , quindi estrarre il pannello
anteriore tirandolo verso di sé.
(OFF)
4 Premere il ta sto volume +/– per
impostare l’ora e i minuti.
Per passare dal l’indicazione dell’ora a qu el la
dei minuti e viceversa, premere (DSPL).
5 Premere (SEL).
L ’orologio viene attivato e appare il display di
impostazione successivo.
6 Tenere premuto (SEL).
L’impostazione è completata.
Per visualizzare l’ or ol ogio, premere (DSPL).
Premere di nuovo (DSPL) per tornare al display
precedente.
Suggerimento
È possibile impostare l’orologio automaticamente
tramite la funzione RDS (
Con il telecomando a scheda
Ai punti 2 e 4, per selezionare la voce o
l’impostazione, premere M o m. Al punto 4, per
passare dall’indicazione dell’ora a quella dei minuti e
4
viceversa, premere < o ,.
pagina 9).
Note
• Non fare cadere il pannello anteriore né esercitare
eccessiva pressione su quest’ultimo e sulla finestra
del display.
• Non esporre il pannello anteriore a calore,
temperature elevate o umidità. Evitare di lasciarlo
all’interno di auto parcheggiate e su cruscotti o
ripiani posteriori.
Suggerimento
Durante il trasporto, inserire il pan nello anteriore
nell’apposita custodia in dotazione.

Installazione del pannello
anteriore
Posizionare la se zi one A del pannello anteriore
sulla sezion e B dell’apparecchio, come
illustrato, quindi premere il lato si ni stro fino a
farlo scattare in posizione .
A
B
Nota
Non collocare alcun oggetto sulla superficie interna
del pannello anteriore.
5

Individuazione dei comandi e operazioni di base
Unità principale
1234 5 6 7890
SEL
SOURCE MODE
BTMDIM SHUFREP
SENS
DSPL
123456
qs qd qf qg qh qj qk
Per ulteriori informazioni, fare riferimento alle pagine indicate.
a Tasto volume +/–
Per regolare il volume.
b Tasto SEL (selezione) 4, 9, 10
Per selezionare l e voci .
c Tasto SOURCE
Consente di attivare l’alimentazione/
cambiare sorgente (radio/CD).
d Tasto MODE 7
Per selezionare l a banda radio (FM/ MW/
LW).
e Alloggiamento del disco
Inserire il disc o (lato etichetta verso l’alto).
La riproduzione viene avviata.
f Finestra del display
g Tasto ATT (attenuazione audio)
Per attenuare l’audio. Per disattivare la
funzione, premere di nuovo il tasto.
h Tasto EQ3 (equalizzatore) 9
Per selezionare una curva dell’equalizzatore
(XPLOD, VOCAL, CLUB, JAZZ,
NEW
AGE, ROCK e CUSTOM).
i Tasto Z (espulsione)
Per estrarre il disco.
j Tasto SEEK +/–
Radio:
Per sintonizzare le s ta zioni automaticamente
(premere); individ ua re manual ment e una
stazione (tener e premuto).
CD:
Per saltare i br ani (premere ); riprodurre
rapidamente un brano in avanti/all’indietro
(tenere premuto).
k Tasto (rilascio pannello anteriore)
4
l Ta sto DSPL (display)/DIM (attenuatore
di luminosità)
Per cambiare la voce del display (premere) ;
modificare la luminosità del display (tenere
premuto).
m Tasto SENS/BTM 7
Per migliorare la qualità di ricezione radio:
LOCAL/MONO (premere); attivare la
funzione BTM (tenere premuto).
n Tasto RESET (situato dietro il pannello
anteriore)
o Tasti nu merici
Radio:
Per ricevere le stazio ni memorizzate
(premere); memorizzare le stazioni (tenere
premuto).
CD:
(3): REP
Per riprodurr e ripetutament e i l brano/disco
corrente.
(4): SHUF
Per riprodurre i br ani in ordine casuale.
p Tasto PTY (tipo di programma) 8
Per selezionare PTY in RDS.
q Tasto AF (frequenze alternative)/TA
(notiziari sul traffico)
Per impo stare AF e TA/TP in RDS.
r Tasto OFF
Per disattivare l’alimentazione/arrestare la
sorgente.
s Ricettore del telecomando a scheda
10
AF/TA
PTY OFF
4, 7
4
SEEK
EQ3ATT
CDX-S2050V
CDX-S2050C
CDX-S2050
8
qlqa
6

Radio
Memorizzazione e
ricezione delle stazioni
Attenzione
Per la sintonizz azi one delle stazioni durante la
guida, utilizzare l a funzione BTM (Be st Tuning
Memory, memorizzazione automatica delle
emittenti con sintonia migliore) per evitare
incidenti.
Memorizzazione automatica
— BTM
1 Premere pi ù volte (SOURCE) fino a
visualizzare “TUNER”.
Per cambiare banda, premere più volte
(MODE). È possibile selezionare la banda
FM1, FM2, FM3, MW o LW.
2 Tenere premuto (BTM) finché “BTM”
non lampeggia.
L’apparecchio memorizza le stazioni in
corrispondenz a de i t as ti numerici in base
all’ordine delle frequenze.
Quando l’imp ostazione è stata m em orizzata,
viene emesso un segnale acustico.
Sintonizzazione automatica
1 Selezionare la banda, quindi premere
(SEEK)
+/– per ricercare la stazione.
La ricerca si arr esta non ap pena l’ap parec chio
riceve una stazione. Ripetere questa
procedura fino alla ricezione della stazione
desiderata.
Suggerimento
Se si conosce la frequenza della stazione che si
desidera ascoltare, tenere premuto (SEEK)
individuare la frequenza approssimativa, quindi
premere più volte (SEEK)
esattamente sulla frequenza desiderata
(sintonizzazione manuale).
+/– per sintonizzarsi
+/– per
RDS
Presentazione
L ’RDS ( Radio Data Sy stem, si stema dati radio) è
un servizio ch e consente alle stazioni radio FM
di trasmettere informazioni digitali aggiuntive
oltre al norma le segnale in radiofrequenza.
Voci del display
ABC
Memorizzazione manuale
1 Durante la ricezione della stazione che
si desidera memorizzare, tenere
premuto uno dei tasti numerici (da (1)
a (6)) fino a visualizzare “MEM”.
L’indicazione de l t as t o numerico appare nel
display.
Nota
Se si memorizza un’altra stazione in corrispondenza
dello stesso tasto numerico, la stazione memorizzata
precedentemente viene cancellata.
Suggerimento
Quando si memorizza una stazione RDS, viene inoltre
memorizzata l’impostazione AF/TA (
pagina 8).
Ricezione delle stazioni
memorizzate
1 Selezionare la banda, quindi premere
uno dei tasti numerici (da (1) a (6)).
Con il telecomando a scheda
Per selezionare le stazioni preselezionate, premere M
o m.
A Banda radio, funzione
B Frequenza*
orologio, dati RDS
C TA/TP*
*1 Durante la ricezione di una stazione RDS, “ *”
viene visualizzato a sinistra dell’indicazione della
frequenza.
*2 “ TA” lampeggia durante la ricezione di notiziari sul
traffico. “ TP” si illumina durante la ricezione di una
stazione che fornisce tali informazioni.
Per cambiare la voce del display B, premere
(DSPL).
continua alla pagina successiva t
1
(nome della stazione),
2
7

Servizi RDS
L’apparecchio fornisce autom at i camente i
seguenti servizi RDS:
1 Impostare AF/TA, quindi memorizzare la
stazione mediante la f unz i one BTM oppure
manualmente.
AF (frequenze
alternative)
TA (notiziari sul
traffico)/
TP (programma
sul traffico)
PTY (tipi di
programma)
CT (ora) L’orologio vien e impostato
Note
• A seconda del paese/della regione, è possibile che
non tutte le funzioni RDS siano disponibili.
• La funzione RDS non funziona correttamente
quando il segnale è debole o se la stazione
sintonizzata non trasmette dati RDS.
Consente di selezi onare e
risintonizzar e la st azione
con il segnale più forte
all’interno di una rete.
Utilizzando questa funzione,
è possibile ascoltare in
modo continuo lo ste ss o
programma dura nt e l unghi
viaggi in auto senz a l a
necessità di risintonizzare
ogni volta l a stazione
manualmente.
Fornisce le informazioni/i
programmi correnti sul
traffico. In caso di ricezione
di informazioni/programmi
sul traffico, la sorgente
selezionata vien e i nt errotta.
Consente di visuali zzare il
tipo di programma in fase di
ricezione, nonch é di
ricercare il tipo di
programma selezi onato.
mediante i dati CT della
trasmissione RDS.
Impostazione di AF e TA/TP
1 Premere più volte (AF/TA) fino a
visualizzare l’impostazione desiderata.
Selezionare Per
AF-ON Attivare AF e disattivare TA.
TA-ON Attivare TA e disattivare AF.
AF, TA-ON Attivare AF e TA.
AF, TA-OFF Disattivare AF e TA.
Preimpostazione del volume dei
notiziari sul traffico
È possibile preimpostare il li v e llo del v olume dei
notiziari sul traffico in modo da poterli udire
chiaramente.
1 Premere più volte il tasto volume +/– per
regolare il livello di volume.
2 Tenere premuto (AF/TA) fino a visualizzare
“ TA”.
Ricezione dei notiziari di emergenza
Se una delle funzioni A F o TA è attivata, gli
annunci di emergenza r ic evuti vengono
automaticamente trasmessi durante l’ascolto
della sorg ente selezionata.
Mantenimento di un programma
regionale — REG
Quando la funzio ne AF è attivata: le
impostazioni predefinite di questo apparecchio
limitano la ric ezi one ad una regione sp ecifica, in
modo che la stazione sintonizzata non venga
sostituita da una stazione regionale dal segnale
più potente.
Se si intende lasci ar e tale area di ricezione
regionale, impos tare “RE G-OFF” c ome ri po rtato
nella procedura di impostazione (
Nota
Questa funzione non è disponibile nel Regno Unito e
in altre aree.
pagina 10).
Funzione Local Link (solo per il
Regno Unito)
Questa funzione consente di selezionare altre
stazioni local i della stessa area, an che se non
sono memorizzate in corrispondenza dei tasti
numerici.
1 Durante la ricezi one FM, premere un t asto
numerico (da (1) a (6)) in corrispondenza
del quale è memorizzata una stazione locale.
2 Entro 5 secondi, prem er e nuovamente il tasto
numerico della st azione locale.
Ripetere questa procedura fino alla ricezi one
della stazione locale desiderata.
Memorizzazione di stazioni RDS con
l’impostazione AF e TA
È possibile preselezionare stazioni RDS con
l’impostazione AF/TA. Se viene utilizzata la
funzione BTM, solo l e st azioni RDS vengono
memorizzate con la stessa impostazione AF/TA.
Se viene utilizzata la preselezione manuale, è
possibile preselezionare stazioni RDS e non RDS
con la relativa impostazione AF/TA.
8
Selezione del tipo di
programma (PTY)
1 Premere (PTY) durante la ricezione
FM.

Se la stazione sta trasmettendo dati PTY,
viene vi sualizzato il nome del tipo di
programma corrente.
2 Premere pi ù v ol te (PTY) f ino a qu an do
non viene visualizzato i l tip o di
programma desiderato.
3 Premere (SEEK) +/–.
L ’a pp are cc hi o a v via l a r ic erc a di un a s ta zi one
che trasmette il tipo di programma
selezionato.
Con il telecomando a scheda
Al punto 2, per selezionare il tipo di programma,
premere M o m.
Tipi di programma
NEWS (notiziaro), AFFAIRS (attualità), INFO
(informazioni), SPORT (sport), EDUCATE
(istruzione), DRAMA (teatro), CULTURE
(cultura), SCIENCE (scienza), VARIED (vari),
POP
M (musica pop), ROCK M (musica rock),
EASY
M (musica leggera), LIGHT M (musica
classica leggera), CLASSICS (musica classica),
OTHER
M (altri tipi di musica), WEAT HER
(bollettino meteorologico), FINANCE
(finanza), C HILDREN (programmi per
bambini), SOCIAL
(religione), PHONE
(viaggi), LEISURE (divertimento), JAZZ
(musica jazz), COUNTRY (musica count ry ),
NATION
(musica degli anni ’50/’60), FOLK
folk), DOCUMENT (d ocumentari)
Nota
Non è possibile utilizzare questa funzione nei paesi/
nelle regioni in cui non sono disponibili i dati PTY.
M (musica nazionale), OLDIES
A (sociale), RELIGION
IN (chat show), TRAVEL
M (musica
Altre funzioni
Modifica delle
impostazioni dell’audio
Regolazione delle caratteristiche
dell’audio — BAL/FAD/SUB
È possibile regola re il bilanciament o,
l’attenuatore e il vo lume del subwoofer.
1 Premere più volte (SEL) fino a
visualizzare “BAL”, “FAD” o “SUB”.
La voce cambia come segue:
1
LOW*
t MID*1 t HI*1 t
BAL (sinistro-destro) t FAD (anterioreposteriore)
*1 Se la funzione EQ3 è attivata (pagina 9).
*2 Se l’uscita audio è impostata su “SUB”
t SUB (volume subw oo fer)*
(pagina 10).
“ATT” viene visualizzato in corrispondenza
dell’impostazione con valore inferiore; il volume
può essere impostato in incrementi su un
massimo di 20 valori.
2 Premere più volte il tasto volume +/–
per regolare la voce selezionata .
Dopo 3 secondi, l’impostazione è completata
e il display torna al m odo di riproduzione/
ricezione nor m al e.
Nota
Effettuare la regolazione entro 3 secondi dopo avere
selezionato la voce.
Con il telecomando a scheda
Al punto 2, per regolare la voce selezionata, premere
< o ,.
2
Impostazione dell’ora (CT)
1 Impostare “CT-ON” come riportato
nella procedura di impostazione
(
pagina 10).
Note
• La funzione CT potrebbe non essere disponibile
anche durante la ricezione di una stazione RDS.
• L’ora impostata mediante la funzione CT e l’ora
corrente potrebbero non corrispondere.
Regolazione della curva
dell’equalizzatore — EQ3
È possibile regolare e memorizzare le
impostazioni dell’equalizzatore per differenti
gamme dei toni.
1 Selezionare una sorgente, quindi
premere più volte (EQ3) per
selezionare il modo EQ3.
2 Premere più volte (SEL) fino a
visualizzare “LOW”, “MID” o “HI”.
3 Premere più volte il tasto volume +/–
per regolare la voce selezionata .
È possibile regolare il livello di volume in
increment i di 1 dB da –10 dB a +10 dB.
continua alla pagina successiva t
9

Ripetere i punti 2 e 3 per r egol are la curva
dell’equalizzatore.
Per ripristi na re l’impostazione di fabbrica
della curv a dell’e qualiz zatore , tenere p remuto
(SEL) prima di completare l’impostazione.
Dopo 3 secondi, l’impostazione è completata
e il display torna al m odo di riproduzio ne/
ricezione norm ale.
Con il telecomando a scheda
Al punto 3, per regolare la voce selezionata, premere
< o ,.
Regolazione delle voci di
impostazione — SET
1 Tenere premuto (SEL).
Viene visualizzato il display di impostazione.
2 Premere più volte (SEL) fino a
visualizzare la voce deside rata.
3 Premere il ta sto volume +/– per
selezionare l’impostazione (ad
esempio, “ON” o “OFF”).
4 Tenere premuto (SEL).
L ’impostazio ne è completata e il display torna
al modo di ripro duzione/ricezion e normale.
Nota
Le voci visualizzate variano in base alla sorgente e
all’impostazione.
Con il telecomando a scheda
Al punto 2, per selezionare la voce di impostazione,
premere M o m. Al punto 3, per selezionare
l’impostazione, premere < o ,.
È possibile impostare le seguenti voci (per
ulteriori in formazioni, fare riferimento alle
pagine indicate).
“z” indica l’impostazione predefinita.
DIM
(attenuatore di
luminosità)
Per modificare la luminosità
del display.
–“DIM-ON”: per ridurre la
luminosità del display.
–“DIM-OFF” (
z): per
disattivare l’attenuatore della
luminosità.
ILM-1/ILM-2
(illuminazione)
(solo
CDX-S2050C)
DEMO*
(dimostrazione)
Per camb iare il colore
dell’illuminazione.
–“ILM-1” (
–“ILM-2”: verde
1
Per impostare “DEMO-ON”
(z) o “DEMO-OFF”
z): ambra
(pagina 4).
2
REG*
(regionale)
3
LPF*
(filtro
passa basso)
*1 Se l’apparec chio è spento.
*2 Durante la ricezione FM.
*3 Se l’uscita audio è impostata su “SUB”.
Per impostare “REG-ON” (z)
o “REG-OFF” (pagina 8).
Per selezionare la frequenza di
taglio “78HZ”, “125HZ” o
“OFF” (
z).
Uso dei telecomandi
opzionali
Telecomando a scheda
RM-X114
Individuazione dei comandi
I tasti del telecomando a scheda co rrispondenti a
quelli dell’apparecchio controllano le stesse
funzioni.
CLOCK-ADJ
(pagina 4)
(regolazione
dell’orologio)
CT (ora) Per impost a re “CT-ON” o
BEEP (segnale
acustico)
REAR/SUB
(posteriore/
subwoofer)*
1
“CT-OFF” (
Per impostare “BEEP-ON” (
o “BEEP-OFF”.
Per impostare l’uscita audio.
–“REAR”: per impostare
l’uscita su un amplificatore
z) (pagina 8, 9).
di potenza.
–“SUB” (
z): per impostar e
l’uscita su un subwoofer.
10
*
DSPL MODE
+
PRESET
+
DISC
MENU
SOURCE
–
SEEK
SOUND
DISC
PRESET –
+
VOL
–
–
z)
DSPL
MENU
SOURCE
</,
(SEEK –/+ )
SOUND
OFF
VOL (+/ –)
Il telecomando a scheda dispone inoltre di tasti/
funzioni differenti rispetto a quelli
dell’apparecchio.
E
LIST
SEEK
MODE
*
LIST
m/M
*
/
(DISC
+
PRESET
+/ –)
R
E
T
N
ATTOFF
ENTER
ATT
*

• Tasti </, (SEEK –/+)
Per controllare la radio/il CD; stessa funzione
del tasto (SEEK)
+/– dell’apparecchio (per
ulteriori inform azioni sulle altre operazioni,
vedere la se zione “Con il telecomando a
scheda” nelle rela tive pagine) .
• Tasto SOUND
Stessa funzione del tasto (SEL)
dell’apparecchio.
• Tasti M/m (DISC*/PRESET +/–)
Per ulteriori informazioni, vedere la sezione
“Con il telecomando a scheda” alle pagine
indicate.
* Non disponibile per questo apparecchio.
Nota
Se l’apparecchio viene spento e il display disattivato,
non sarà possibile utilizzare l’apparecchio stesso
mediante il telecomando a scheda a meno che non
venga premuto (SOURCE) sull’apparecchio o inserito
prima un disco per attivare il lettore.
Sostituzione della batteria al litio
In condizioni normali, la batteria dura circa 1
anno. Il ciclo di vita p uò r is ul t ar e pi ù breve in
funzione delle condizioni di utilizzo. Quando la
batteria si scarica, il raggio d’azione del
telecomando a scheda risulta ridott o. Sostituire la
batteria con una batte ria al litio CR2025 nuova.
L’uso di batterie diverse potrebbe comportare il
rischio di incendi o esplosi oni.
Tel ecomando a rotazione
RM-X4S
Applicazione dell’etichetta
Applicare l’etichetta appropriata a seconda della
modalità in cui si desidera montare il
telecomando a rotazione.
D
S
P
M
O
D
E
S
E
ATT
DSPL
L
L
MODE
OFF
OFF
L
E
S
MODE
DSPL
Individuazione dei comandi
I tasti del telecomando a rotazi one corrispondenti
a quelli dell’ apparecchio controllano le stesse
funzioni.
SEL
PRESET
SOURCE
VOL
SEEK/AMS
x
Lato + verso
l’alto
Note sulla batteria al litio
• Tenere la batteria al litio fuori dalla portata dei
bambini. Se la batteria viene ingerita, consultare
immediatamente un medico.
• Pulire la batteria con un panno asciutto per
assicurare un perfetto contatto.
• Assicurarsi di rispettare la corretta polarità durante
l’inserimento della batteria.
• Non afferrare la batteria con pinze di metallo;
diversamente, potrebbe verificars i un corto circuito.
AVVERTENZA
La batteria può esplodere se usata
scorrettamente. Pertanto, non deve ess ere
ricaricata, smontata o gettata nel fuoco.
I comandi del telecomando a rotazione riportati
di seguito consentono di eseguire operazioni
differenti sull’ap parecchio.
• Comando PRESET
Per selezionare le stazioni preselez i onate
(premere e ruotare).
• Comando VOL
Stessa funzione del tasto volume +/–
dell’apparecchio (ruotare).
• Comando SEEK/AMS
Stessa funzione del tasto (SEEK) +/–
dell’apparecchi o (ruotare oppure ruotare e
mantenere in posizione) .
Modifica della direzione operativa
La direzione op er at iva dei comandi è impostata
in fabbrica come illustrato di seguito.
Per aumentare
Per diminuire
continua alla pagina successiva t
11

Se si desidera montare il telecomando a
rotazione sul lato destro del piantone di guida, è
possibile invertire la direzion e operativa dei
comandi.
1 Premendo il comando VOL, tenere premuto
(SEL).
Informazioni aggiuntive
Precauzioni
• Se l’auto è stata parcheggiata sotto la luce
diretta del sole, attendere che l’apparecchio si
raffreddi prima di utili zzarlo.
• L’antenna elettrica si estende automaticamente
durante il funzionamento dell’apparecchio.
Formazione di condensa
Nei giorni di pioggi a o i n zone estremamente
umide, è possibile che all’ inter no del le le nti e del
display dell’apparecchio si formi della condensa.
Di conseguenza, l’a pparecchio potrebbe non
funzionare correttamente. In tal caso, rimuovere
il disco e attendere per circa un’ora fino a quando
l’umidità non sia evaporata completamente.
Per mantenere una qualità audio
elevata
Fare atten zion e a non ve rsar e bibit e o alt ri liq uidi
sull’apparecchio o sui dischi.
Note sui dischi
• Per mantenere puliti i dischi, non toccarne la
superficie. Afferrare i dischi dal bordo.
• Riporre i dischi nell’apposita custo dia o
nell’apposito co ntenitore quando non vengono
utilizzati.
• Non esporre i di schi a calore o a tem perature
elevate. Evitare di lasciarli all’interno di auto
parcheggiate o su cr us cotti/ripiani poster iori.
• Non incollare etichette né utilizzare dischi con
residui di colla o inc hi ostro. Se vengono
utilizzati questi tipi di disco, i residui possono
causare l’arresto del disco, provo cando
problemi di funzionamento o rovinando il disco
stesso.
12
• Non utilizzare dischi su cui sono applicati
etichette o adesivi.
Utilizzando tali dischi, è possibile che si
verifichino i segue n ti pr oble mi di
funzionamento:
–Impossibilità di estrarre il disco (staccandosi
dal disco, l’etichett a o l ’a d es ivo causan o
l’inceppamento del meccanismo di
espulsione).

–Impossibilità di leggere correttamente i dati
audio (ad esempio, la riproduzione salta
oppure è imposs ibile riprodurre) poiché il
restringimento dovuto al calore dell’etichetta
o dell’adesivo ha provocato la deformazione
del disco.
• Non riprodurre dischi dalla forma irregolare (ad
esempio a forma di cuore, quadrato o ste lla)
con questo apparecchio, onde evitare problemi
di funzionamento all’apparecchio stesso. Non
utilizzar e questo genere di dischi.
• Non è possibile ri produrre CD da 8 cm.
• Prima della riproduzi one,
pulire i disch i co n un panno
apposito disponibile in
commercio. Pulire il disco
procedendo da l centro verso
l’esterno. Non utilizzare
solventi quali benzene,
acquaragia, detergenti
disponibili in commercio o
spray antistatici per dischi anal og ic i.
Note sui dischi CD-R/CD-RW
• È possibile che alcuni CD-R/CD-RW (a
seconda dell’ap parecchio utilizzat o per la
registrazione o delle condizioni del disco) no n
possano essere riprodotti mediante il presente
apparecchio.
• Non è possibile ri produrre dischi C D -R/
CD-RW non finalizzati.
Per eventuali domande o problemi riguardant i
l’apparecchio no n t rattati nel presente m anuale,
rivolgersi al più vicino rivendito re S ony.
Manutenzione
Pulizia dei connettori
Se i connettori tra l’apparecchio e il pannello
anteriore son o sp orchi, l’apparecchio potr ebbe
non funzionare correttamente. Per evitare tale
problema, rimuovere il pannello anteriore
(pagina 4), qu in di pul i re i connettori con un
bastoncino di co to ne imbevuto di alcol. Non
esercitare forza eccessiva. Diversamente, i
connettori po t rebbero venire danneggiati.
Unità principale Lato posteriore del
Note
• Per motivi di sicurezza, spegnere il motore prima di
pulire i connettori e rimuovere la chiave dal
blocchetto di accensione.
• Non toccare in alcun caso i connettori direttamente
con le dita o con oggetti di metallo.
pannello anterio re
Rimozione
dell’apparecchio
1 Rimuovere la cornice di protezione.
1 Rimuovere il pa nnello anteriore
(
pagina 4).
2 Inserire le chiavi di rilasc io nella cornic e di
protezione.
Sostituzione del
fusibile
Per la sostituzione del
fusibile, assicurarsi di
utilizzare un fusibile dello
stesso amperaggio di quello
indicato sull’originale. Se il
fusibile si bruci a, cont rollar e i
collegamenti
dell’alimentazione e s ostituire
il fusibile. Se dopo la
sostituzione il fusibile si
brucia di nuovo, è possibile
che si tratti di un problema interno. In tal caso,
rivolgersi al più vicino rivendito re S ony.
Fusibile (1 0 A)
Inserire le chiavi di rilascio nella
direzione corretta, come illustrato.
3 Estrarre le chiavi di rilascio per rimuovere
la cornice di protezione.
continua alla pagina successiva t
13
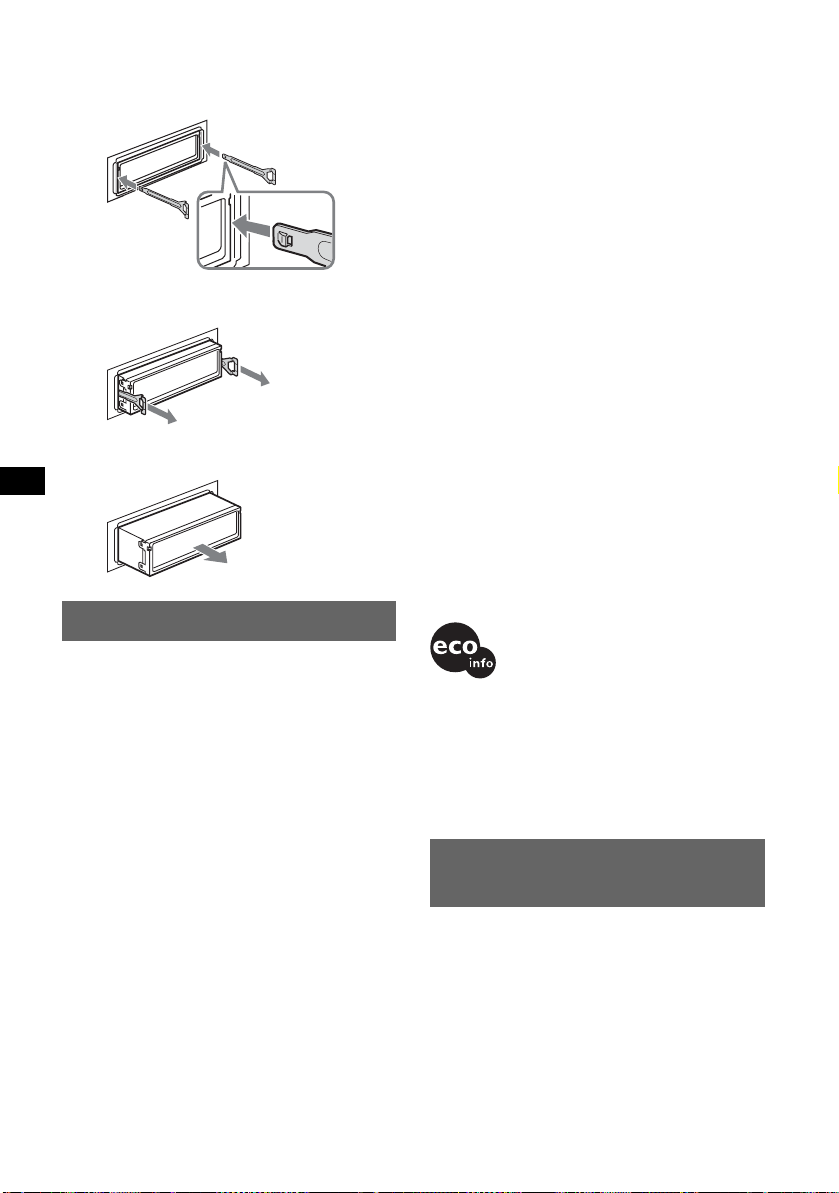
2 Rimuovere l’apparecchio.
1 Inseri r e contemporaneamente entrambe le
chiavi di rilascio fino a far le scattare in
posizione.
Con il gancetto
rivolto verso
l’interno.
2 Estrarre le chiavi di rilascio per sbloccare
l’apparecchio.
3 Rimuovere l’apparecchio dalla struttura
facendolo scorrere.
Caratteristiche tecniche
Amplificatore di potenza
Uscite: Uscite diffusori (connettori a tenuta)
Impedenza diffusori: 4 – 8 ohm
Uscita di potenza massima: 50 W × 4 (a 4 ohm)
Generali
Uscite:
Terminali di uscita audio (impostabile su
posteriore/subwoofer)
Terminale di controllo del relè dell’antenna
elettrica
Terminale di controllo dell’amplificatore di
potenza
Ingressi:
Terminale di controllo ATT del telefono
Terminale di ingresso del telecomando
Terminale di ingresso dell’antenna
Comandi tono:
Bassi: ±10 dB a 60 Hz (XPLOD)
Medi: ±10 dB a 1 kHz (XPLOD)
Alti: ±10 dB a 10 kHz (XPLOD)
Requisiti di alim en t a z ione: Batteria auto da 12 V CC
(massa negativa)
Dimensioni: Circa 178 × 50 × 178 mm (l/a/p)
Dimensioni di montaggio: Circa 182 × 53 × 161 mm
(l/a/p)
Peso: Circa 1,2 kg
Accessori in dotazione:
Elementi per l’insta ll azione e i collegament i (1 set )
Custodia pannello anteriore (1)
Accessori opzionali:
Telecomando a scheda: RM-X114
Telecomando a rotazione: RM-X4S
Il design e le caratteristiche tecniche sono soggetti a
modifiche senza preavviso.
Lettore CD
Rapporto segnale-rumore: 120 dB
Risposta in frequenza: 10 – 20.000 Hz
Wow e flutter: Al di sotto del limite misurabile
Sintonizzatore*
FM
Campo di sintonia: 87.5 – 108.0 MH z
Terminale dell’antenna: Connettore antenna esterna
Frequenza intermedia: 10.7 MHz/450 kHz
Sensibilità utiliz zabile: 9 dBf
Selettività: 75 dB a 400 kHz
Rapporto segnale-rumore: 67 dB (stereo),
69 dB (mono)
Distorsione armonica a 1 kHz: 0,5 % (stereo),
0,3 % (mono)
Separazione: 35 dB a 1 kHz
Risposta in frequenza: 30 – 15.000 Hz
MW/LW
Campo di sintonia:
MW: 531 – 1.602 kHz
LW: 153 – 279 kHz
Terminale dell’antenna: Connettore antenna esterna
Frequenza intermedia: 10.7 MHz/450 kHz
Sensibilità: MW: 30 µV, LW: 40 µV
*
di cui al par. 3 dell’Allegato A al D.M. 25/06/85 e al
par. 3 dell’Allegato 1 al D. M. 27/0 8/8 7
14
• Leghe saldanti prive di piombo sono utilizzate per la
saldatura di determinati componenti. (oltre l’80 %).
• Determinati circuiti stampati non contengono
ritardantialla fiam ma al og en ati.
• Le parti estetiche non contengono ritardanti alla
fiamma alogenati.
• Le protezioni dell’imballaggio non utilizzano
polistirene espanso.
Guida alla soluzione dei
problemi
Fare riferimento alla seguente lista di verifica per
risolver e la ma g gior parte dei problemi che si
potrebbero verificare durante l’uso di questo
apparecchio.
Prima di esaminare l’elenco che segue, verificare
le procedure di co llegam ento e d’uso
dell’apparecchio.

Generali
L’apparecchio non riceve alimentazione.
• Verificare il collegamento. Se i collegamenti
sono corretti, con trollare il fusibi le .
• Se l’apparecc hi o vi ene spento e il display
disattivato, non sarà possibile utilizzare
l’appar e cchio ste sso media nte il tele c omando .
t Accendere l’apparecchio.
L’antenna elettrica non si estende.
L’antenna elettric a non dispone di scatol a a rel è.
Non viene prodotto alcun suono.
• Il volume è troppo basso.
• È attivata la funzione ATT o la funzione A TT di
esclusione del volume (se al cavo ATT è
collegato i l cavo di interfac cia per telefoni per
auto).
• La posizione del comando dell’attenuatore
(FAD) non è impostata per un sistema a 2
diffusori.
Non viene emesso alcun segnale acustico.
• Il segnale acustico è disattivato (pagina 10).
• Un amplificatore di p otenza opzionale è
collegato e l’amplificatore incorporato non
viene utili zzato.
Il contenuto della memoria è stato
cancellato.
• È stato premuto il tasto RESET.
t Reinserire i dati in memoria.
• Il cavo di alimentazione o la bat t eria sono stati
scollegati.
• Il cavo di alimentazione non è collegato
correttamente.
Le stazioni memorizzate e l’ora esatta sono
cancellate.
Si è bruciato il fusibile.
L’audio è disturbato quando la posi zione del
blocchetto di accensione viene modificata.
I cavi non sono collegati correttamente al
connettore di alimentazione accessoria dell’auto.
Il display viene disattivato/non viene
visualizzato nella relativa finestra.
• L’attenuatore di luminosità è impostato su
“DIM-ON” (pagina 10).
• Il display viene disattivato tenendo premuto
(OFF).
t Tenere premuto di nuovo (OFF) per
attivare il display.
• I connettori so no sporchi (pagina 13).
Riproduzione di CD
Non è possibile inserire il disco.
• È già stato carica t o un altro disco.
• Il disco è stato inserito forzatamente in senso
contrario o nel modo sbagliato.
Il disco non viene riprodotto.
• Il disco è difettoso o sporco.
• I CD-R/CD-RW non sono per uso audio
(pagina 13).
L’audio salta.
• L’installazion e non è stata eseguita
correttamente.
t Installare l’apparecchio con un’angolazione
inferiore a 45° in una parte stabile dell’auto.
• Il disco è difetto so o sporco.
I tasti per le operazioni non funzionano.
Il disco non viene espulso.
Premere il tasto RESET (pagina 4).
Ricezione radiofoni ca
Non è possibile ricevere le stazioni.
L’audio è disturbato.
• Collegare il ca vo di controll o (blu) dell’anten na
elettrica o il cavo di alimentazione accessor i a
(rosso) al cavo di alimentazione di un
preamplificatore di an tenne per auto (solo se
l’auto dispone di ant enna FM/MW/LW
incorporata sul vetro posteriore/laterale).
• Verificare il collegamento d ell’antenna
dell’auto.
• L’antenna dell’auto non si estende.
t Verificare il collegamento del cavo di
controllo dell’antenna elettrica.
• Verificare la frequenza.
Non è possibile effet tuare la sintonizz azione
preselezionata.
• Memorizzare la frequenza corretta.
• Il segnal e di t rasmissione è eccessiv amente
debole.
Non è possibile effet tuare la sintonizz azione
automatica.
• L’impostazione relativa al modo di ricerca
locale non è corretta.
t La si ntonizzazione si ar resta troppo
frequentemente.
Premere (SENS) fino a visualizzare
“LOCAL-ON”.
t La si ntonizzazione no n si arresta in
corrispondenza di una stazione:
Premere più volte (SENS) fi no a
visualizzare “MONO-ON” o “MONOOFF” (FM) oppure “LOCAL-OFF” (MW/
LW).
• Il segnal e di t rasmissione è eccessiv amente
debole.
t Esegui re la sintonizzazion e m anuale.
Durante la ricezione FM, l’indicazione “ST”
lampeggia.
• Sintonizzare la frequenza in modo corretto.
• Il segnal e di t rasmissione è eccessiv amente
debole.
t Premere (SENS) per impostare il modo di
ricezione mon ofonico su “MONO-ON”.
continua alla pagina successiva t
15

Un programma FM trasmesso in stereofonia
viene ricevuto in monofonia.
L’apparecchio è impostato sul modo di ricezione
monofonico.
t Premere (SENS) fino a visualizzare
“MONO-OFF”.
RDS
Dopo alcuni secondi di ascolto, viene
avviata la ricerca (SEEK).
La stazione non è TP opp ure il segnale è debole.
t Di sattivare TA (pagina 8).
Nessun notiziario sul traffico.
• Attivare TA (pagina 8).
• La stazione non trasmette notiziari sul traffico
pur essendo una stazione TP.
t S in t oni zzarsi su un’altra st azione.
PTY visualizza “- - - - - - - -”.
• La stazione corrente non è una stazione RDS.
• I dati RDS non vengono ricevuti.
• La stazione non specifica il tipo di program m a.
Messaggi e indicazioni di errore
Indicazioni di errore
Le seguenti indicazion i lam peggiano per circa 5
secondi e viene emesso un segnale acus tico.
ERROR
• Il disco è sporco o è s tato inserito in se nso
contrario.
t Pulire il disco o inserirlo correttamente.
• Il disco non viene rip ro d otto per un problema
non specificato.
t Inserire un altro disco.
FAILURE
Il collegamento del dif fusore/del l’amplific atore è
errato.
t Per verificare i collegamenti, consultare la
guida di installazione/collegamento in
dotazione.
OFFSET
Potrebbe essersi verificato un problema interno.
t Veri f icar e il c oll eg ament o. Se l’ indi cazi one di
errore rimane visualizzata, rivolgersi al più
vicino rivenditore Sony.
RESET
L’apparecchio non funziona a causa di un
problema non spec ificat o.
t Premere il tasto RESET (pagina 4).
Se le solu z ioni ripor tate non risolvono il
problema, rivolgersi al più vicino rivenditore
Sony.
Se l’apparecchi o viene portato in rip ar azione a
causa di un problema con la riproduzione dei
CD, consegnare anche il disco utilizzat o nel
momento in cui il problema si è verificato per la
prima volta.
Messaggi
L.SEEK +/–
Il modo di ricerca locale è attivato durante la
sintonizzazione automatica.
NO AF
Non esiste alcuna frequenza alternativa per la
stazione corr ente.
t Premere (SEEK) +/– mentre il nome della
stazione lampeggia. L’apparecchio avvia la
ricerca di un’altra frequenza con gli stessi dati
PI (Programme Identification, identificativo
programma) (viene visualizzata l’indicazione
“PI SEEK”).
NO TP
L’apparecchio continua la ricerca di stazioni TP
disponibili.
“” o “”
Durante la riproduzione rapida in avanti o
all’indietro, sono stati raggiunti l’in izi o o la fine
del disco e non è possibile andare oltre.
16


Welkom!
Dank u voor de aankoop van deze Sony Compact
Disc Player. U kunt tijdens het rijde n genieten
van de volgende functies.
• CD-weergave:
U kunt CD-DA's en CD-R's/CD-RW's voor
audiogebruik afspelen.
• Radio-ontvangst:
–U kunt maximaal 6 zenders per band ops la an
(FM1, FM2, FM3, MW en LW).
–BTM (Best Tuni ng Memory ) functie: met het
apparaat worden zenders met sterke signalen
geselecteerd en opgeslagen.
• RDS-diensten:
U kunt FM-zenders met RDS (Radio Data
System) gebruiken.
Waarschuwing als het contactslot van
de auto geen ACC-positie heeft
Als de motor is uitgeschakeld, moet u op
(OFF) drukken en deze toets ingedrukt
houden tot het display verdwijnt.
Als u dit niet doet, wordt het display niet
uitgeschakeld en raakt de accu uitgeput.
Dit label bevindt zich onderaan op het toestel.
2

Inhoudsopgave
Aan de slag
Instellingen wissen . . . . . . . . . . . . . . . . . . . . . . 4
Klok instellen. . . . . . . . . . . . . . . . . . . . . . . . . . . 4
DEMO stand . . . . . . . . . . . . . . . . . . . . . . . . . . . 4
Het voorpaneel verwijderen. . . . . . . . . . . . . . . . 4
Het voorpaneel bevestigen . . . . . . . . . . . . . . 5
Bedieningselementen en algemene
handelingen
Hoofdeenheid . . . . . . . . . . . . . . . . . . . . . . . . 6
Radio
Zenders opslaan en ontvangen. . . . . . . . . . . . . . 7
Automatisch opslaan — BTM . . . . . . . . . . . 7
Handmatig opslaan . . . . . . . . . . . . . . . . . . . . 7
Opgeslagen zenders ontvangen. . . . . . . . . . . 7
Automatisch afstemmen . . . . . . . . . . . . . . . . 7
RDS . . . . . . . . . . . . . . . . . . . . . . . . . . . . . . . . . . 7
Overzicht. . . . . . . . . . . . . . . . . . . . . . . . . . . . 7
AF en TA/TP instellen . . . . . . . . . . . . . . . . . 8
PTY selecteren . . . . . . . . . . . . . . . . . . . . . . . 8
CT instellen. . . . . . . . . . . . . . . . . . . . . . . . . . 9
Andere functies
De geluidsinstellingen wijzigen . . . . . . . . . . . . 9
De geluidskenmerken wijzigen
— BAL/FAD/SUB. . . . . . . . . . . . . . . . . . . . 9
De equalizercurve aanpassen — EQ3 . . . . . 9
Instelitems aanpassen — SET. . . . . . . . . . . . . 10
Optionele af st andsbedien i ngen gebruike n . . . 10
Kaartafstandsbediening RM-X114. . . . . . . 10
Bedieningssatelliet RM-X4S . . . . . . . . . . . 11
Aanvullende informatie
Voorzorgsmaatregelen . . . . . . . . . . . . . . . . . . 12
Opmerkingen over discs. . . . . . . . . . . . . . . 12
Onderhoud . . . . . . . . . . . . . . . . . . . . . . . . . . . 13
Het apparaat verwijderen . . . . . . . . . . . . . . . . 13
Specificaties . . . . . . . . . . . . . . . . . . . . . . . . . . 14
Problemen oplossen . . . . . . . . . . . . . . . . . . . . 14
Foutmeldingen . . . . . . . . . . . . . . . . . . . . . . 15
3

Aan de slag
DEMO stand
Instellingen wissen
Voordat u het apparaat voor het eerst gaat
gebruiken of na het vervangen van de accu of het
wijzigen van de aansluitingen, moet u het
apparaat opn i euw instellen.
Verwijder het voorpaneel en druk de RESET
toets in met een puntig voorwerp, zoals een
balpen.
RESET
toets
Opmerking
Als u op de RESET toets drukt, worden de
klokinstelling en bepaalde geheugenfuncties gewist.
Klok instellen
De digitale klok werkt met het 24-uurssysteem.
1 Houd (SEL) ing edrukt .
Het installatievens ter wordt we e rg egeven.
2 Druk herhaaldelijk op (SEL) tot
"CLOCK-ADJ" wordt weergegeven.
3 Druk op (DSPL).
De aanduiding voor de uren gaat knipperen.
Wanneer u het apparaat uitschakelt, wor dt eer st
de klok weergegeven en vervolgens wordt de
demonstratieweergave (DEMO) gestart.
Als u de DEMO stand wilt annuleren, moet u
"DEMO-OFF" instellen bij de instellingen
(
pagina 10) terwijl het apparaat is uitgeschakeld.
Het voorpaneel
verwijderen
U kunt het voorpaneel van het apparaat
verwijderen om diefstal te voorkomen.
Waarschuwingstoon
Wanneer u het contact in de stand OFF zet
zonder het voorpaneel te verwijderen, hoort u de
waarschuwingst oon enkele seconden.
U hoort de waarschuwingstoon alleen a ls de
ingebouwde versterker wordt gebruikt.
1 Druk op (OFF).
Het apparaat wordt ui tgeschakeld.
2 Druk op en trek het voorpaneel
naar u toe.
(OFF)
4 Druk op de v olume toet s +/– om he t uur
en de minuten in te stellen.
Als u de digitale aanduiding wilt verplaatsen,
drukt u op (DSPL).
5 Druk op (SEL).
De klok begint te lopen en het volgende
installatievenster wordt weergegeven.
6 Houd (SEL) ing edrukt .
Het instellen is voltooid.
Als u de klok wilt weergeven, drukt u op
(DSPL). Druk nogmaal s op (DSPL) om terug te
keren naar het vorige display.
Tip
U kunt de klok automatisch instellen met de RDS-
pagina 9).
functie (
Met de kaartafstandsbediening
Als u in stap 2 en 4 het item of de instelling wilt
selecteren, drukt u op M of m. Druk in stap 4 op < of
, om de digitale aanduiding te verpl aat sen.
4
Opmerkingen
• Laat het voorpaneel niet vallen en druk niet te hard
op het voorpaneel en het display.
• Stel het voorpaneel niet bloot aan hitte/hoge
temperaturen of vocht. Laat het voorpaneel niet
achter in een geparkeerde auto of op het
dashboard/de hoede npla nk.
Tip
Neem het voorpaneel mee in de bijgeleverde
beschermhoes.
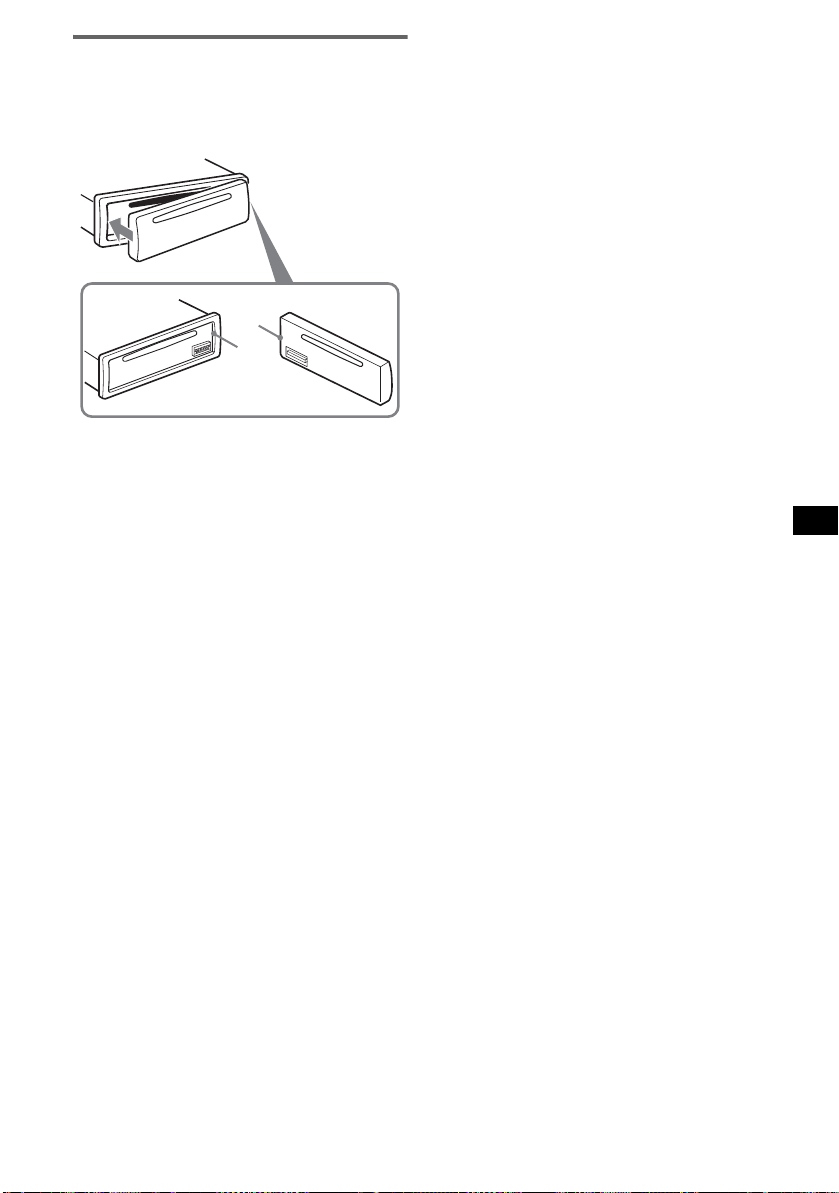
Het voorpaneel bevestigen
Bevestig deel A van het voorpaneel op deel B
van het apparaat, zoals in de afbeelding wordt
weergegeven, en druk op de linkerkant van het
voorpaneel tot die vastklikt.
A
B
Opmerking
Plaats niets op de binnenkant van het voorpaneel.
5

Bedieningselementen en algemene handelingen
Hoofdeenheid
1234 5 6 7890
SEL
SOURCE MODE
BTMDIM SHUFREP
SENS
DSPL
123456
qs qd qf qg qh qj qk
Raadpleeg de volgende pagina 's voor meer details.
a Volume +/– toets
Het volume aanpassen.
b SEL (select eren) toets 4, 9, 10
De items selecteren.
c SOURCE toets
De bron (radio/CD) inschakelen/wijzigen.
d MODE toets 7
De radioband selecteren (F M/MW/LW).
e Discsleuf
Plaats de disc (met het l abe l omhoog) en het
afspelen begint.
f Display
g ATT (dempen) toets
Het geluid dempen. Druk nogmaals op de
toets om te annuleren.
h EQ3 (equalizer) toet s 9
Een equalizercurve (XPLOD, VOCAL,
CLUB, JAZZ, NEW
CUSTOM) selecteren.
i Z (uitwerpen) toets
De disc uitwerpen.
j SEEK +/– toets
Radio:
Automatisch afstemmen op zenders
(drukken); handmatig zoeken naar ze nders
(ingedrukt houden).
CD:
Tracks overslaan (drukken); een track snel
vooruit-/terugspoelen (ingedrukt houden).
k (voorpaneel loslaten) toets 4
AGE, ROCK of
SEEK
EQ3ATT
AF/TA
PTY OFF
CDX-S2050V
CDX-S2050C
CDX-S2050
qlqa
l DSPL (display)/DIM (dimmer) toet s 4,
7
Displayitems wijzigen (drukken); de
helderheid van het display wijzigen
(ingedrukt houden).
m SENS/BTM toets 7
Slechte ontvangst verbeteren: LOCAL/
MONO (drukken); de BTM-functie starten
(ingedrukt houden).
n RESET toets (achter het voorpaneel) 4
o Cijfertoetsen
Radio:
De opgeslagen zenders ontvangen (drukken);
zenders opslaan (ingedrukt houden).
CD:
(3): REP
De huidige track/ di sc herhaaldelijk afs pelen.
(4): SHUF
De tracks in willekeurige volgorde afspelen.
p PTY (programmatype) toet s 8
PTY in RDS selecteren.
q AF (alternatieve frequenties)/TA
(verkeersinformatie) toets
8
AF en TA/TP in RDS instellen.
r OFF toets
De bron uitschakelen/ stoppen.
s Ontvanger voor de
kaartafstandsbediening
10
6

Radio
Zenders opslaan en
ontvangen
Tip
Als u de frequentie weet van de zender waarnaar u
wilt luisteren, houdt u (SEEK)
frequentie ongeveer is bereikt en drukt u herhaaldelijk
op (SEEK)
gewenste frequentie (handmatig afstemmen).
+/– om nauwkeurig af te stemmen op de
+/– ingedrukt tot de
Let op
Als u afstemt op zenders tijdens het rijden, moet
u de BTM-functie (B es t Tuning Mem or y)
gebruiken om ongevallen te vermijden.
Automatisch opslaan — BTM
1 Druk herhaaldelijk op (SOURCE) tot
"TUNER" wordt weergegeven.
Druk herhaaldel ijk op (MODE) om de band
te wijzigen. U kunt FM1, FM2, FM3, MW of
LW selecteren.
2 Houd (BTM) ingedrukt tot "BTM" gaat
knipperen.
Het apparaat slaat de zenders in de volgor de
van frequentie op on der de cijfertoets en.
Er weerklinkt een pieptoon wanneer de
instelling is opgeslagen.
Handmatig opslaan
1 Als u de zender ontvangt die u wilt
opslaan, houdt u een cijfertoets ((1)
tot en met (6)) ingedr u kt tot "MEM "
wordt weergegeven.
De aanduiding voor de ci j fertoets verschijnt
in het display.
Opmerking
Als u een andere zender opslaat onder dezelfde
cijfertoets, wordt de eerder opgeslagen zender
vervangen.
Tip
Als een RDS-zender wordt opgeslagen, wordt de AF-/
TA-instelling ook opgeslagen (
pagina 8).
Opgeslagen zenders ontvangen
1 Selecteer de band en druk vervolgens
op een cijfertoets ((1) tot en met (6)).
Met de kaartafstandsbediening
Druk op M of m om een voorkeurzender te selecteren.
RDS
Overzicht
FM-zenders met de RDS-dienst (Radio Data
System) sturen on wa ar neembare digitale
informatie mee met het gewone
radioprogrammasignaal.
Display-items
ABC
A Radioband, functie
B Frequentie*
gegevens
C TA/TP*
*1 Als u de RDS-zender ontvangt, wordt " *" links van
de frequentieaanduiding weergegeven.
*2 "TA" knippert tijdens verkeersinformatie. "TP" gaat
branden als dergelijke zenders worden ontvangen.
Druk op (DSPL) om de displayitems B te
wijzigen.
RDS-diensten
Dit apparaat biedt op de volgende manier
automatisch RDS-diensten:
AF (alternatieve
frequenties)
1
(zendernaam), klok, RD S-
2
Hiermee wordt de zender
met het sterkste signaal in
een netwerk gese lecteerd
of wordt opnieuw op deze
zender afgestem d. A l s u
deze functie gebruikt, kunt
u onafgebroken naar
hetzelfde programma
luisteren tijdens een lange
rit zonder dat u steeds
handmatig op dezelfde
zender hoeft af te
stemmen.
Automatisch afstemmen
1 Selecteer de band en druk op
(SEEK)
+/– om de zender te zoeken.
Het zoeken stopt zodra een zend er wordt
ontvangen. Herhaal deze procedure tot de
gewenste zender wordt ont vangen.
vervolg op volgende pagina t
7
TA
(verkeersinformatie)/
TP
(verkeersprogramma)
PTY
(programmatypen)
CT (kloktijd) Met de CT-gegevens van
Opmerkingen
• In bepaalde landen/regio's zijn wellicht niet alle
RDS-functies beschikbaar.
• RDS functioneert wellicht niet als het
ontvangstsignaal zwak is of als de zender waarop u
hebt afgestemd, geen RDS-gegevens verzendt.
Hiermee ontvangt u de
huidige
verkeersinformatie/
-programma's. De huidige
bron wordt onderbroken
door eventuele
verkeersinformatie/
-programma's.
Hiermee geeft u het
ontvangen
programmatype weer.
Hiermee zoekt u oo k naar
het geselect eerde
programmatype.
de RDS-uitzending wo rdt
de klok ingesteld.
AF en TA/TP instellen
1 Druk herhaaldelijk op (AF/TA) tot de
gewenste instelling wordt
weergegeven.
Selecteer Actie
AF-ON AF inschakelen en TA
TA-ON TA inschakelen en A F
AF, TA-ON AF en TA inschakelen.
AF, TA-OFF AF en TA uitschakelen.
uitschakelen.
uitschakelen.
2 Houd (AF/TA) ingedrukt tot "TA" verschijnt.
Noodberichten ontvangen
Als AF of TA is ingeschakeld, wordt de
geselecteerde bron automatisch onderbroken
door de noodberichten.
Een regionaal programma
beluisteren — REG
Wanneer de AF-functie is ingesc hakeld: de
fabrieksinstelling van het apparaat beperkt
ontvangst tot een bepaalde regio, zodat er niet
automatisch wordt overgeschakeld naar een
andere regionale zender met een sterkere
frequentie.
Wanneer u het ontvangstgebied van het regionale
programma verlaat, stelt u "REG-OFF" in bij de
instellingen (
Opmerking
Deze functie werkt niet in het Verenigd Koninkrijk en
bepaalde andere gebieden.
pagina 10).
Local Link-functie (alleen voor het
Verenigd Koninkrijk)
Met deze functie kunt u andere lokale zenders in
het gebied selecteren, ook als deze niet zij n
opgeslagen onder de cijfert oetsen.
1 Druk tijdens FM-ontvangst op een cijfertoets
((1) tot en met (6)) waaronder een lokale
zender is opgeslagen.
2 Druk binnen 5 seconden nogmaals op de
cijfertoets van de loka le zender.
Herhaal dit tot de lokale zender wordt
ontvangen.
PTY selecteren
1 Druk op (PTY) tijdens FM-ontvangst.
RDS-zenders met de AF- en TAinstelling opslaan
U kunt RDS-zenders vooraf instellen met de AFen TA-instelling. Al s u de BT M-f unct ie gebr ui kt,
worden alleen RDS-zenders met dezelfde AF-/
TA-instelling opgeslag en.
Als u handmatig vooraf in st elt, kunt u zowel
RDS- als niet-RDS-zen ders ins telle n met de AF-/
TA-instelling.
1 Stel AF/TA in en sla de zender vervolgens met
BTM of handmatig op.
Het volume van verkeersinformatie
instellen
U kunt het volume van de verkeersinformatie
vooraf instellen, zodat u geen enk el bericht mist.
1 Druk herhaald el ij k op de volumetoets +/ – om
het volume aan te passen.
8
De naam van het huidige programmatype
verschijnt als de zender PTY-gegevens
uitzendt.
2 Druk herhaaldelijk op (PTY) tot het
gewenste programmatype verschijnt.
3 Druk op (SEEK) +/–.
Het apparaat gaat zoe ken naar een zender die
het geselecteerde programmatype uitzendt.
Met de kaartafst an ds be die nin g
Druk op M of m om in stap 2 het programmatype te
selecteren.

Programmatypen
NEWS (Nieuws), AFFAIRS (Actualiteiten),
INFO (Informatie), SPORT (Spor t),
EDUCATE (Educatieve programma's),
DRAMA (Toneel), CULTURE (Cultuur),
SCIENCE (Wetenschap), VARIED (Diversen),
POP
M (Populaire m uziek), ROCK M (Rock),
EASY
M (Easy Listening), LIGHT M (Licht
klassiek), CLASSICS (Klassiek), OTHER
(Ander muziektype), WEATHER
(Weerberichten), FINANCE (Financiën),
CHILDREN (Kinderprogramma's), SOCIAL
(Sociale zaken), RE LIG ION (Religie),
PHONE
IN (Phone In), TRAVEL (Reizen),
LEISURE (Ontspanning), JAZZ (Jazz),
COUNTRY (Country), NATION
muziek), OLDIES (Oldies), FOLK
DOCUMENT (Documentaires)
Opmerking
U kunt deze functie niet gebruiken in bepaalde landen/
regio's waar geen PTY-gegevens beschikbaar zijn.
M (Nationale
M
A
M (Folk),
CT instellen
1 Stel "CT-ON" in bij de instellingen
(
pagina 10).
Opmerkingen
• Het is mogelijk dat de CT-functie niet werkt, ook al
wordt er wel een RDS-zender ontvangen.
• Er kan een verschil bestaan tussen de tijd van de
CT-functie en de werkelijke tijd.
Andere functies
De geluidsinstellingen
wijzigen
De geluidskenmerken wijzigen
— BAL/FAD/SUB
U kunt de balans, de fader en het
subwooferv olume regele n.
1 Druk herhaaldelijk op (SEL) tot "BAL",
"FAD" of "SUB" wordt weergegeven.
Het item wordt als volgt gewijzigd:
1
LOW*
t MID*1 t HI*1 t
BAL (links-rechts) t FAD (voor-achter) t
SUB (subwoofervolume)*
*1 Als EQ3 is ingeschakeld (pagina 9).
*2 Als de audio-uitga ng is ing este ld op "SU B"
(pagina 10).
"ATT" wordt weergegeven bij de laagste
instelling en u kunt deze instelling maximaal 20
stappen aanpassen.
2 Druk herhaaldelijk op de volumetoets
+/– om het geselecteerde item aan te
passen.
Na 3 seconden is de instelling voltooid en
keert het display ter ug naar de weergave-/
ontvangststand.
Opmerking
Pas het item aan binnen 3 seconden nadat u het hebt
geselecteerd.
Met de kaartafstandsbediening
Druk in stap 2 op < of , om het ge sel e ct ee r de i tem
aan te passen.
2
De equalizercurve aanpassen
— EQ3
U kunt de equalizer i nstellingen voor
verschillende toonbereiken aanpassen en
opslaan.
1 Selecteer een bron en druk
herhaaldelijk op (EQ3) om de EQ3stand te selecteren.
2 Druk herhaaldelijk op (SEL) tot
"LOW", "MID" of "HI" wordt
weergegeven.
3 Druk herhaaldelijk op de volumetoets
+/– om het geselecteerde item aan te
passen.
Het volume kan worden aangepast in sta pp e n
van 1 dB van –10 dB tot +10 dB.
vervolg op volgende pagina t
9
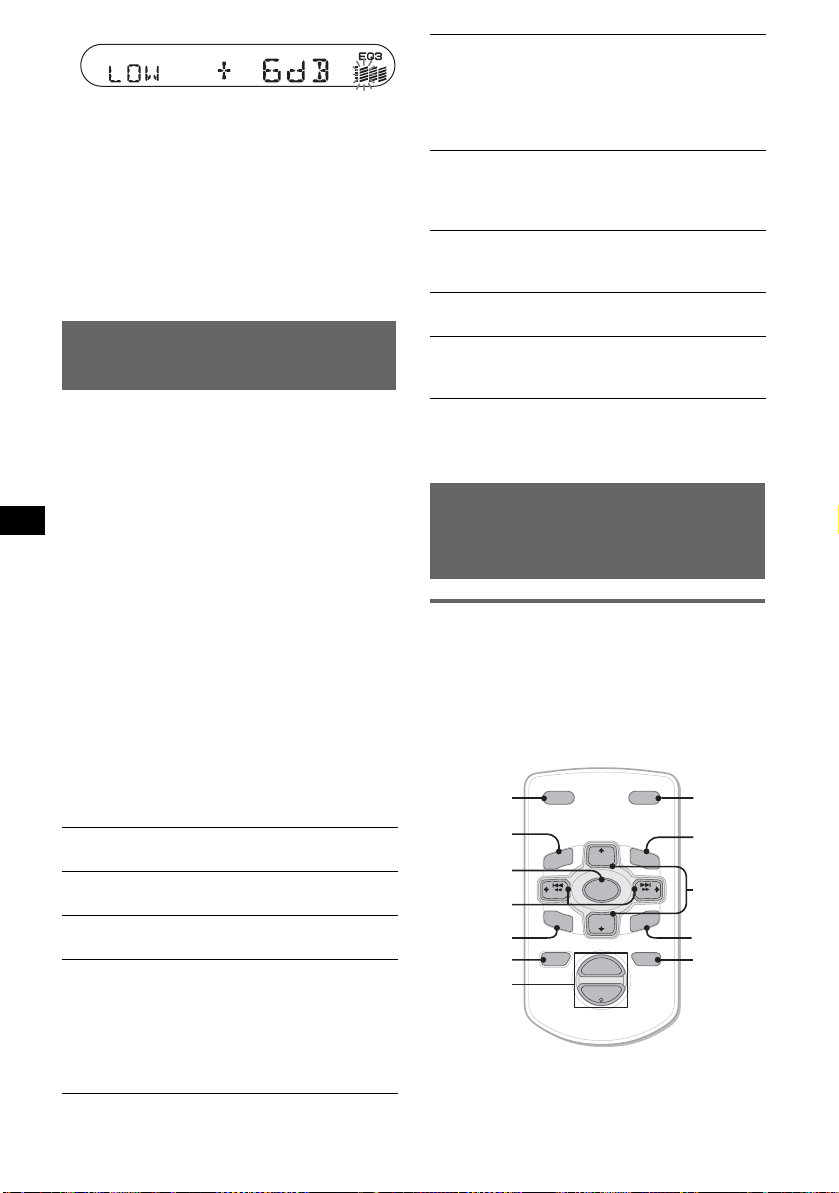
Herhaal stap 2 en 3 om de equalizercurve aan
te passen.
Als u de fabrieksinstelling voor de
equalizercur v e wil t he rstel len, houdt u (SEL)
ingedrukt voordat de instelling is voltooid.
Na 3 seconden is de instelling voltooid en
keert het display terug naar de weergave-/
ontvangststand.
Met de kaartafstandsbediening
Druk in stap 3 op < of , om het geselecteerde item
aan te passen.
Instelitems aanpassen
— SET
1 Houd (SEL) ing edrukt .
Het installatievens ter wordt we e rg egeven.
2 Druk herhaaldelijk op (SEL) tot het
gewenste item wordt weergegeven.
3 Druk op de volumetoets +/– om de
instelling (bijvoorbeeld "ON" of "OFF")
te selecteren.
4 Houd (SEL) ing edrukt .
Als het instellen is voltooid, keert het display
terug naar de norm ale weergave-/
ontvangststand.
Opmerking
De weergegeven items zijn afhankelijk van de bron en
de instelling.
Met de kaartafstandsbediening
Druk in stap 2 op M of m om het instelitem te
selecteren. In stap 3 drukt u op < of , om de
instelling te selecteren.
De volgende instellingen zijn mogelijk (volg de
paginaverwijzing voor meer i nformatie):
"z" geeft de standa ar di nstellingen aan.
CLOCK-ADJ
(klok aanpasse n)
CT (kloktijd) "CT-ON" of "CT-OFF" (
BEEP "BEEP-ON" (
REAR/SUB*
(pagina 4)
instelle n (p agina 8, 9).
OFF" instellen.
1
De audio-uitvoer wijzig en.
–"REAR": om het geluid
via een versterker weer te
geven.
–"SUB" (
z): om het geluid
via een subwoofer w eer te
geven.
z) of "BEEP-
10
z)
DIM (dimmer) De helderheid van het
display regelen.
–"DIM-ON": om het
display te dimmen.
–"DIM-OFF" (
z): om de
dimmer uit te schakelen.
ILM-1/ILM-2
(verlichting)
(alleen voor
CDX-S2050C)
1
DEMO*
(demonstratie)
De verlichtingskleur
wijzigen.
–"ILM-1" (
z): oranje
–"ILM-2": groen
"DEMO-ON" (
z) of
"DEMO-OFF" instellen
(pagina 4).
2
REG*
(regionaal) "REG-ON" (z) of "R EG -
OFF" instellen (pagina 8).
3
LPF*
(laagdoorlaatfilter)
*1 Als het apparaat is uitgeschakeld.
*2 Als FM wordt ontvangen.
*3 Als de audio-uitvoer is ingesteld op "SUB".
De kantelfreq uentie
"78HZ", "125HZ" of "OFF"
(
z) selecteren .
Optionele
afstandsbedieningen
gebruiken
Kaartafstandsbediening
RM-X114
Bedieningselementen
De overeenkomstige toetsen op de
kaartafstandsbediening bedienen dezelfde
functies als die op dit apparaat.
*
DSPL MODE
+
PRESET
LIST
+
DISC
MENU
SOURCE
–
SEEK
SOUND
DISC
PRESET –
+
VOL
–
SEEK
–
E
MODE
*
LIST
m/M
*
/
(DISC
+
PRESET
+/ –)
R
E
T
N
ATTOFF
ENTER
ATT
*
DSPL
MENU
SOURCE
</,
(SEEK –/+ )
SOUND
OFF
VOL (+/ –)
De volgende toetsen op de
kaartafstandsbediening verschillen van de
toetsen op het apparaat of hebben andere functies
dan de toetsen op het apparaat.

• </, (SEEK –/+) toetsen
De radio/CD bedien en, dezelfde functie als
(SEEK) +/– op het appara at . (Zie "Met de
kaartafstandsbedieni ng" op alle pagina ' s voor
meer informatie over and er e handelingen.)
• SOUND toets
Deze toets heef t de zelfde functie als ( SEL ) op
het apparaat .
• M/m (DISC */PRESET +/–) toetsen
Zie "Met de kaarta fs ta ndsbediening" op al l e
pagina's voor meer informatie.
* Niet beschikbaar op dit apparaat.
Opmerking
Als het apparaat wordt uitgeschakeld en het display
verdwijnt, kan het apparaat niet worden bediend met
de kaartafstandsbediening, tenzij op (SOURCE) op
het apparaat wordt gedrukt of er een disc wordt
geplaatst om het apparaat eerst te activeren.
De lithiumbatterij vervangen
In normale omstandigheden gaat de batterij
ongeveer 1 jaar mee. (Afhanke lijk van de
gebruiksomstand i gheden kan de levensduur
korter zijn.) Wanneer de batterij verzwakt, wordt
het bereik van de kaartafstandsbediening kleiner.
Vervang de batteri j doo r een nieuwe CR2025
lithiumbatterij. Bij een andere batterij bestaat er
brand- of explosiegevaar.
WAARSCHUWING
Bij oneigenlijk gebruik kan de batterij
ontploffen.
Probeer niet de batterij op te laden of te
openen; werp ook een lege batterij nooit in
het vuur.
Voor de Klanten in
Nederland
Gooi de batterij niet weg
maar lever deze in als klein
chemisch afval (KCA).
Bedieningssatelliet RM-X4S
Het label bevestigen
Bevestig het label met de aanduidingen op basis
van de manier waarop u de bedieningssatelliet
monteert.
D
S
P
S
DSPL
E
MODE
L
L
M
O
D
E
S
E
L
x
+ zijde
omhoog
Opmerkingen over de lithiumbatterij
• Houd de lithiumbatterij buiten het bereik van
kinderen. Raadpleeg meteen een arts wanneer een
batterij wordt ingeslikt.
• Veeg de batterij schoon met een droge doek voor
een goed contact.
• Houd bij het plaatsen van de batterij rekening met
de juiste polariteit.
• Houd de batterij niet vast me t een metalen tang om
kortsluiting te voorkomen.
Bedieningselementen
De overeenkomstige toetsen op de
bedieningssatelliet bed ienen dezelfde functies als
die op dit apparaat .
SEL
PRESET
SOURCE
VOL
De volgende regelaar s op de bedieningssa t el li et
moeten op een andere manier worden gebruikt
dan de toetsen op het apparaat.
• PRESET regelaar
Vooraf in gestelde zenders selecteren
(indrukken en draaien).
• VOL regelaar
Deze regelaar heeft dezelfde functie al s de
volume +/– toets op het apparaat (draaien).
vervolg op volgende pagina t
ATT
DSPL
SEEK/AMS
MODE
OFF
OFF
11
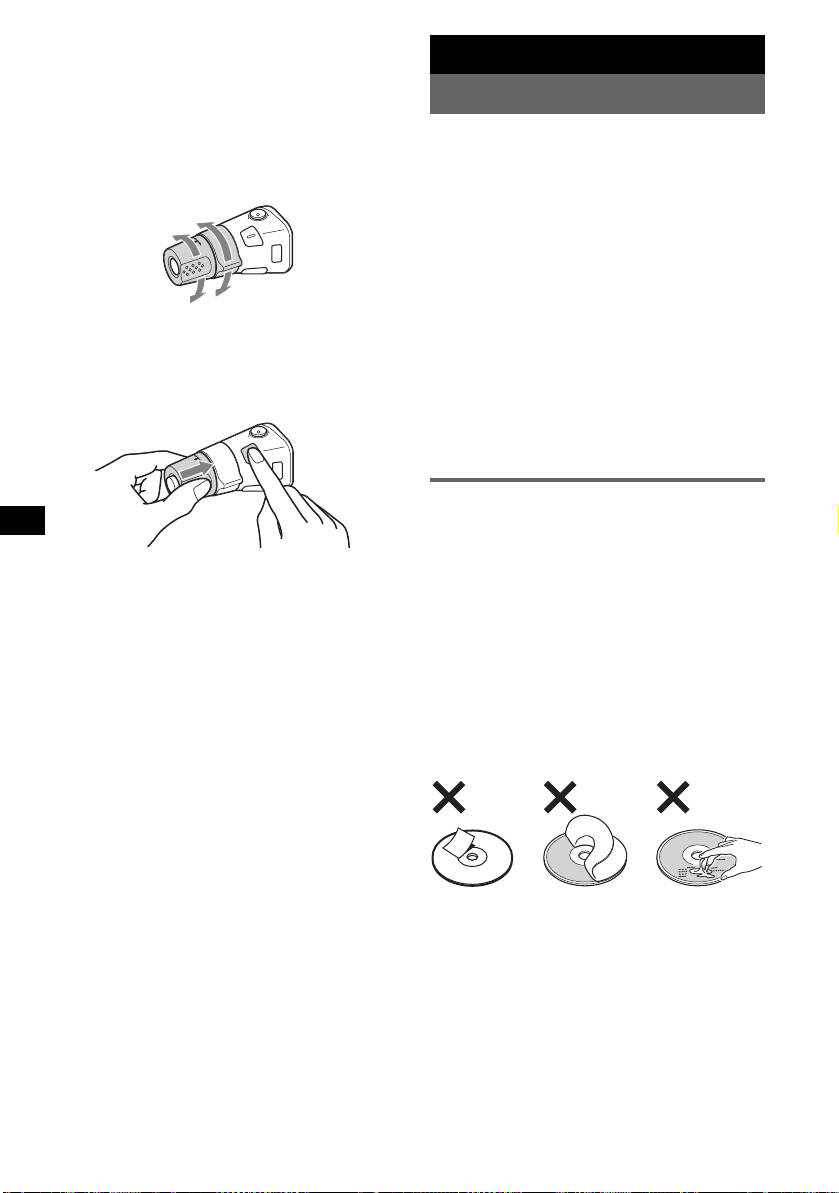
• SEEK/AMS regelaar
Deze regelaar heeft de zelfde functie als
(SEEK) +/– op het apparaat (draaien of draaien
en vasthouden).
Aanvullende informatie
Voorzorgsmaatregelen
De werkingsrichting wijzigen
De werkingsrichting van de bedieningselementen
is in de fabriek inges t el d, zoals hieronder wo r dt
aangegeven.
Verhogen
Verlagen
Als u de bedieningssatelliet rechts op de
stuurkolom moet m onteren, kan de
werkingsric hting worden omgekeerd.
1 Druk de VOL regelaar in en houd (SEL)
ingedrukt.
• Wanneer uw a uto in de volle zon heeft gestaa n ,
moet u eerst het apparaat laten afkoelen voordat
u het gaat gebruiken.
• Een elektrisch bediende antenne schuift
automatisch uit wanneer het apparaat wordt
aangezet.
Condensvorming
Op een regenachtige dag of in een zeer vochtige
omgeving kan vocht condenseren op de lenzen
en het display van het appar aa t. In dit geval kan
de werking van het apparaat worden verstoor d.
Ve rwijder in dit geval de disc en wacht ongeveer
een uur tot alle vocht is verdampt.
Optimale geluidskwaliteit behouden
Let op dat u geen drank j es op het apparaat of de
discs morst.
Opmerkingen over discs
• Raak het oppervlak van de disc niet aan zodat
deze schoon blijft. Pak de disc bij de randen
vast.
• Bewaar de discs in het doosje of de
discmagazijn wanneer u deze niet gebruikt.
• Stel discs niet bloo t aan hitte/hoge
temperaturen . Laat de discs niet acht er in een
geparkeerde auto of op het dashboard/de
hoedenplank.
• Plak geen etiketten op de discs en gebruik geen
discs met klev erige inkt/re sten. Derg elijke dis cs
kunnen stoppe n m et draaien, waardoor de
werking wordt ve rs toor d o f de disc ka n w orde n
beschadigd.
12
• Gebruik geen discs waarop sticker s zi j n
geplakt.
Als u dergelijke discs toch gebruikt, kan dat
leiden tot:
– het niet uitwerpen van een disc (doordat een
sticker losraakt en het uitwerpmechanisme
blokkeert);
– het niet correc t l ezen van audiogegevens
(bijvoorbeeld geluid verspringt of wordt niet
weergegeven) doordat de sticker onder
invloed van de warmte krimpt en de dis c
kromtrekt.

• Discs met afwijkende vormen (bijvoorbeeld
hart, vierkant, ster) kunnen niet met dit
apparaat worden afgespeeld. Als u di t t och
probeert, kan het apparaat worden be schadigd.
Gebruik dergelijke discs nie t.
• U kunt geen 8-cm CD 's afspelen.
• Maak een disc voor het
afspelen altijd schoon met
een in de handel verkrijgbare
doek. Veeg de disc van binnen
naar buiten schoon. Ge br ui k
geen oplosmidd el en zoals
benzine, thinne r en in de
handel verkrijgba re
reinigingsmiddelen of
antistatische s pr ays voor grammofoonpl aten.
Hoofdeenheid Achterkant van het
Opmerkingen
• Uit veiligheidsoverwegingen moet u de motor
uitschakelen en de sleutel uit het contactslot halen
voordat u de aansluitingen reinigt.
• Raak de aansluitingen nooit rechtstreeks aan met
uw vingers of een metalen voorwerp.
voorpaneel
Opmerkingen over CD-R's/CD-RW's
• Sommige CD-R's/CD-R W's (afhankelijk van de
opname-apparatuur of de staat van de disc)
kunnen niet met dit apparaat worden
afgespeeld.
• U kunt geen CD-R/CD-RW afspelen die niet is
gefinaliseerd.
Met alle vragen of problemen met betrekking tot
dit apparaat die niet aan bod komen in deze
gebruiksaanwij zi ng, kunt u terecht bij uw Sonyhandelaar.
Onderhoud
Zekeringen vervangen
Ve rvang een zekering altijd
door een identiek exemplaar.
Als de zekering doorbrandt,
moet u de
voedingsaansluiting
controleren en de zekering
vervangen. Brandt de
zekering vervolgens
nogmaals door, dan kan er
sprake zijn van een defe ct in
het apparaa t. Ra adplee g in dat
geval de dichtstbijzijnde Sony-handelaar.
Aansluitingen schoonmaken
De werking van het apparaat kan worden
verstoord als de aansluitingen tussen het apparaat
en het voorpaneel niet schoon zijn. U kunt dit
voorkomen door het voorpaneel (pagina 4) los te
maken en de aansluitingen t e r ei nigen met een in
alcohol gedrenkt watt enstaafje. Gebruik hi erbij
niet teveel kracht. Anders kunnen de
aansluitingen worden beschadigd.
Zekering (10A)
Het apparaat verwijderen
1 Verwijder de beschermende rand.
1 Maak het voorpaneel los (pagina 4).
2 Bevestig de ontgrendelingssleutels op de
beschermende rand.
Plaats de
ontgrendelingssleutels
zoals wordt aangegeven.
3 Trek de ontgrendelingssleutels naar u toe
om de beschermende rand te verwijderen.
2 Verwijder het apparaat.
1 Plaats beide ontgrendelingssleutels
tegelijkertijd en duw hierop tot deze
vastklikken.
Haakje wijst
naar binnen.
vervolg op volgende pagina t
13

2 Trek de ontgrendelingssleutels naar u toe
om het apparaat los te maken.
3 Schuif het apparaat ui t de houder.
Specificaties
CD-speler
Signaal/ruis-afstand: 120 dB
Frequentiebereik: 10 – 20.000 Hz
Snelheidsfluctuaties: Minder dan meetb are waarden
Voeding: 12 V gelijkstroom accu (negatieve aarde)
Afmetingen: Ongeveer 178 × 50 × 178 mm (b/h/d)
Montage-afmetingen: Ongeveer 182 × 53 × 161 mm
(b/h/d)
Gewicht: Ongeveer 1,2 kg
Bijgeleverde accessoires:
Onderdelen voor installatie en aansluitingen (1 set)
Beschermhoes voorpaneel (1)
Optionele accessoires:
Kaartafstandsbediening: RM-X114
Bedieningssatelliet: RM-X4S
Wijzigingen in ontwerp en technische gegevens
voorbehouden zonder voorafgaande kennisgeving.
• Er wordt loodvrij soldeer gebruikt voor het solderen
van bepaalde onderdelen. (meer dan 80 %)
• Er worden geen gehalogeneerde vlamvertragende
middelen gebruikt in de printplaten.
• Er worden geen gehalogeneerde vlamvertragende
middelen gebruikt in de behuizing.
• Verpakkingskussens bevatten geen
polystyreenschuim.
Tuner
FM
Afstembereik: 87,5 – 108,0 MHz
Antenne-aansluiting: Aansluiting voor externe
antenne
Tussenfrequentie: 10,7 MHz/450 kHz
Bruikbare gevoeligheid: 9 dBf
Selectiviteit: 75 dB bij 400 kHz
Signaal/ruis-afstand: 67 dB (stereo), 69 dB (mono)
Harmonische vervorming bij 1 kHz: 0,5 % (stereo),
0,3 % (mono)
Scheiding: 35 dB bij 1 kHz
Frequentiebereik: 30 – 15.000 Hz
MW/LW
Afstembereik:
MW: 531 – 1.602 kHz
LW: 153 – 279 kHz
Antenne-aansluiting: Aansluiting voor externe
antenne
Tussenfrequentie: 10,7 MHz/450 kHz
Gevoeligheid: MW: 30 µV, LW: 40 µV
Versterker
Uitgangen: Luidsprekeruitgangen (sur e sea l)
Luidsprekerimpedantie: 4 – 8 ohm
Maximaal uitgangsvermogen: 50 W × 4 ( bij 4 ohm)
Algemeen
Uitgangen:
Audio-uitgang (schakelen tussen REAR en SUB)
Relaisaansluiting elektrische antenne
Aansluiting versterker
Ingangen:
Telephone ATT-bedieningsaansluiting
Afstandsbedieningsingang
Antenne-ingang
Toonregeling:
Laag: ±10 dB bij 60 Hz (XPLOD)
Midden: ±10 dB bij 1 kHz (XPLOD)
14
Hoog: ±10 dB bij 10 kHz (XPLOD)
Problemen oplossen
De onderstaand e controlelijst kan u he l pen bij
het oplossen van problemen die zich met het
apparaat kunnen voo rd o en.
Voordat u de onderstaande controlelijst
doorneemt, moet u eerst de aanwijzingen voor
aansluiting en gebruik controleren.
Algemeen
Het apparaat wordt nie t van stroom
voorzien.
• Controleer de aansluiting. Controleer de
zekering wanneer alles in orde is.
• Als het apparaat wor dt ui tg eschakeld en het
display verdwijnt, kan het apparaat niet worden
bediend met de afstandsbediening.
t Schakel het apparaat in.
De elektrisch bediende antenne schuift niet
uit.
De elektrisch bed iende antenne heef t g een
relaisdoos.
Geen geluid.
• Het volume is te laag.
• De ATT-functie is ingeschakeld of de
Telephone A TT-functie (als de interfacekabel of
een autotelefoon is aangesloten op de ATTkabel) is ingeschakeld.
• De positie van de faderregelaar (FAD) is niet
ingesteld op een systeem met 2 luidsprekers.
Geen pieptoon.
• De pieptoon is uitgezet (pagina 10).
• Er is een optionele versterker aangesloten en u
gebruikt de ingebouwde versterker niet.

De geheugeninhoud is gewist.
• De RESET toets is ingedrukt.
t Sl a opnieuw op in het gehe ugen.
• De voedingskabel of de accu is losgekoppeld.
• De voedingskabel is niet goed aangesloten.
Opgeslagen zenders en tijd zijn gewist.
De zekering is doorgebrand.
Maakt geluid wanneer de positie van de
contactsleutel wordt ingeschakeld.
De kabels zijn niet go ed ver bonden met de
voedingsaansluiting voor accessoires van de
auto.
Het display verdwijnt van/verschijnt niet in
het weergavevenster.
• De dimmer is ingesteld op "DIM-ON"
(pagina 10).
• Het display verdwij nt al s u op (OFF) drukt en
deze toets ingedrukt houdt.
t D ruk nogmaals op (OFF) en houd deze
toets ingedrukt tot het display verschijnt.
• De aansluitingen zijn vuil (pagina 13).
CD-weergave
De disc kan niet worden geplaatst.
• Er zit al een disc in he t apparaat.
• De disc is met kracht om gekeerd of in de
verkeerde richting geplaa tst.
De disc wordt niet afgespeeld.
• Disc defect of vuil.
• De CD-R's/CD - RW's zijn niet geschikt voor
audiogebruik (pagina 13).
Het geluid verspringt.
• Het apparaat is niet goed geïnstalleerd.
t Installeer het appa raat in een hoek van
minder dan 45° op een stabiele plaats in de
auto.
• Disc defect of vuil.
De bedieningstoetsen werken niet.
De disc wordt niet uitgeworpen.
Druk op de RESET toets ( pagina 4).
Radio-ontvangst
Radiozenders kunnen niet worden
ontvangen.
Het geluid is gestoord.
• Sluit een antenn ebedieningskabe l ( bl auw) of
hulpvoed i ngskabel (rood ) aan op de
voedingskabel van de auto-antenneversterker
(alleen als uw auto is uitgerust met een FM/
MW/LW-antenne in de achter- of zijruit).
• Controleer de aansluiting van de auto-antenne.
• De auto-antenne schuift niet uit.
t Controleer de aansluiting van de
voedingskabel van de auto-a nt enne.
• Controleer de frequentie.
Er kan niet worden afgestemd op
voorkeurzenders.
• Sla de juiste frequentie op in het gehe ugen.
• Het ontvangstsignaal is te zwa k.
Er kan niet automatisch worden afgestemd
op zenders.
• De lokale zoekfunctie is niet goed ing es teld.
t Het afstemmen wordt te vaak onderbroken:
Druk op (SENS) tot "LOCAL-ON" wordt
weergegeven.
t Het afstemmen stopt niet bij een zender:
Druk herhaaldelijk op (SENS) tot
"MONO-ON", "MONO-OFF" (FM) of
"LOCAL-OFF" (MW/LW) wordt
weergegeven.
• Het ontvangstsignaal is te zwa k.
t Stem handmatig af.
Tijdens FM-ontvangst knippert de
aanduiding "ST".
• Stem nauwkeurig af op de frequentie.
• Het ontvangstsignaal is te zwa k.
t Druk op (SENS) om de mono-
ontvangststand in te stellen op "MONOON".
Een stereo-uitzending van een FMprogramma wordt mono weergegeven.
Het apparaat staat in de mono-ontvangststand.
t D ruk op (SENS) tot "MONO-OFF" wordt
weergegeven.
RDS
SEEK begint na enkele seconden weergave.
De zender is geen TP-zender of heeft een zwak
signaal.
t Schakel TA uit (pagina 8).
Geen verkeersinformatie.
• Schakel TA in (pagina 8).
• De zender is een TP-zender, maar zendt toch
geen verkeersinformatie uit.
t Ste m af op een andere zender.
PTY geeft "- - - - - - - -" weer.
• De huidige zend er is geen RDS-zender.
• Geen RDS-gegevens ontvangen.
• De zender geeft het programmatype niet door.
Foutmeldingen
Foutweergave
De volgende aanduidingen knipperen ongeveer 5
seconden en er weerklinkt een alarm si gnaal.
vervolg op volgende pagina t
15

ERROR
• De disc is vuil of omgekeerd geplaatst.
t R ei ni g de disc of plaats deze op de juiste
manier.
• De disc kan niet worden afgespeeld wegens een
of ander probleem.
t Plaats een andere disc.
FAILURE
De luidspreker/versterker is niet correct
aangesloten.
t R aadpleeg de bijgeleverde
gebruiksaanwijzing voor installatie/
aansluitingen om de aansluiting te
controleren.
OFFSET
Er is wellicht een interne storing.
t Controleer de aansluiting. Als de foutmelding
in het display blijft staan, moet u de
dichtstbijzijnde Sony-handelaar raadplegen.
RESET
Het apparaat werkt niet wegens een probleem.
t Dr uk op de RESET toets (pa gi na 4).
Als deze oplossingen niet helpen, moet u de
dichtstbijzijnde Sony-handelaar raadplegen.
Als u het apparaat ter reparatie wegbrengt omdat
een CD niet goed wordt afg espeeld, kunt u het
beste de disc meenemen waarmee het probleem
is begonnen.
Berichten
L.SEEK +/–
De lokale zoekfunctie is ingeschakeld tijdens
automatisch afstemmen.
NO AF
Er is geen alternatie v e fre quentie v oor de huidig e
zender.
t Druk op (SEEK) +/– terwijl de zendernaam
knippert. Het app araat gaat zoeken naar een
andere frequentie met dezelfde PI-gegevens
(Programme Identification). "PI SEEK"
wordt weergegeven.
NO TP
Het apparaat blijft beschikbare TP-zenders
zoeken.
"" of ""
Tijdens het snel vooruit- of terugspoelen hebt u
het begin of het einde van de disc bereikt en kunt
u niet verder.
16


Bitte kreuzen Sie zunächst die genaue
Modellbezeichnung in dem dafür vorgesehenen Feld
an.
Tragen Sie danach die Seriennummer (SERIAL NO.) in
dem reservierten Feld ein. Sie finden diese auf einem
Aufkleber, der auf dem Gerätegehäuse angebracht ist.
Nehmen Sie den ausgefüllten Geräte-Pass
anschließend unbedingt aus der Bedienungsanleitung
heraus, falls Sie diese im Fahrzeug aufbewahren
möchten. Bitte bewahren Sie den Geräte-Pass an
einem sicheren Ort auf. Er kann im Falle eines
Diebstahls zur ldentifikation lhres Eigentums dienen.
caraudio
Geräte-Pass
Dieser Geräte-Pass dient als Eigentumsnachweis
für Ihr caraudio-Gerät im Falle eines Diebstahls.
Wir empfehlen, den Geräte-Pass nicht im
Fahrzeug aufzubewahren, um Missbrauch zu
verhindern.
Modellbezeichnung
sCDX-S2050V
sCDX-S2050C
sCDX-S2050
Seriennummer (SERIAL NO.)
Sony Corporation Printed in China
 Loading...