

Page 1
FM/MW/LW
Compact Disc
Player
3-810-809-11 (1)
Operating Instructions
Mode d’emploi
Bedienungsanleitung
Istruzioni per l’uso
For installation and connections, see the supplied installation/connections
manual.
En ce qui concerne l’installation et les connexions, consulter le manuel
d’installation/connexions fourni.
Zur Installation und zum Anschluß siehe die mitgelieferte Installations-/
Anschlußanleitung.
Per l’installazione e i collegamenti, fare riferimento al manuale di istruzioni di
installazione/collegamenti in dotazione.
CDX-4100RDS
EN
F
D
I
CDX-5100RDS
1995 by Sony Corporation
Actual total number: Sony CDX-4100/5100RDS (E,F,G,I) 3-810-809-11 (1)
Page 2
Features
EN
General
• Detachable-front panel enables you to take
the front panel away with you when you
leave your car (page 4).
• Caution alarm will be activated if you turn
off the ignition key without removing the
front panel from the unit.
• 24-hour digital clock provided (page 5).
• Swichable two colour (amber and green)
illumination (for the CDX-5100RDS)
(page 13).
• Built-in power amplifier enables you to
enjoy 4-speaker systems (max. output:
20 W × 4 ch (for the CDX-4100RDS), 35 W ×
4 ch (for the CDX-5100RDS)).
• Line outputs for connecting an optional
power amplifier.
• Supplied with the rotary commander (for
the CDX-5100RDS).
CD player section
• 1 bit DAC (Digital-to-Analog Converter) for
clear sound reproduction.
• Quick recovery mechanism for preventing
sound skipping.
• Convenient functions such as the Intro Scan
Function for locating a desired track, the
Repeat Play Function for playing a track
repeatedly, and the Shuffle Play Function
for playing tracks in random order.
Tuner section
• Up to 30 stations can be preset: 18 FM
stations and 6 MW and LW stations.
• BTM (Best Tuning Memory) function
automatically locates and stores the stations
with the strongest signals on the preset
number buttons in order of band frequency
(page 8).
• Information services are available, if an FM
RDS station can be received (page 9).
• Compatible with RDS features such as EON
(Enhanced Other Networks), AF
(Alternative Frequency), TA (Traffic
Announcement), PTY (Programme Type)
and CT (Clock Time) functions (page 9, 10,
11 and 12).
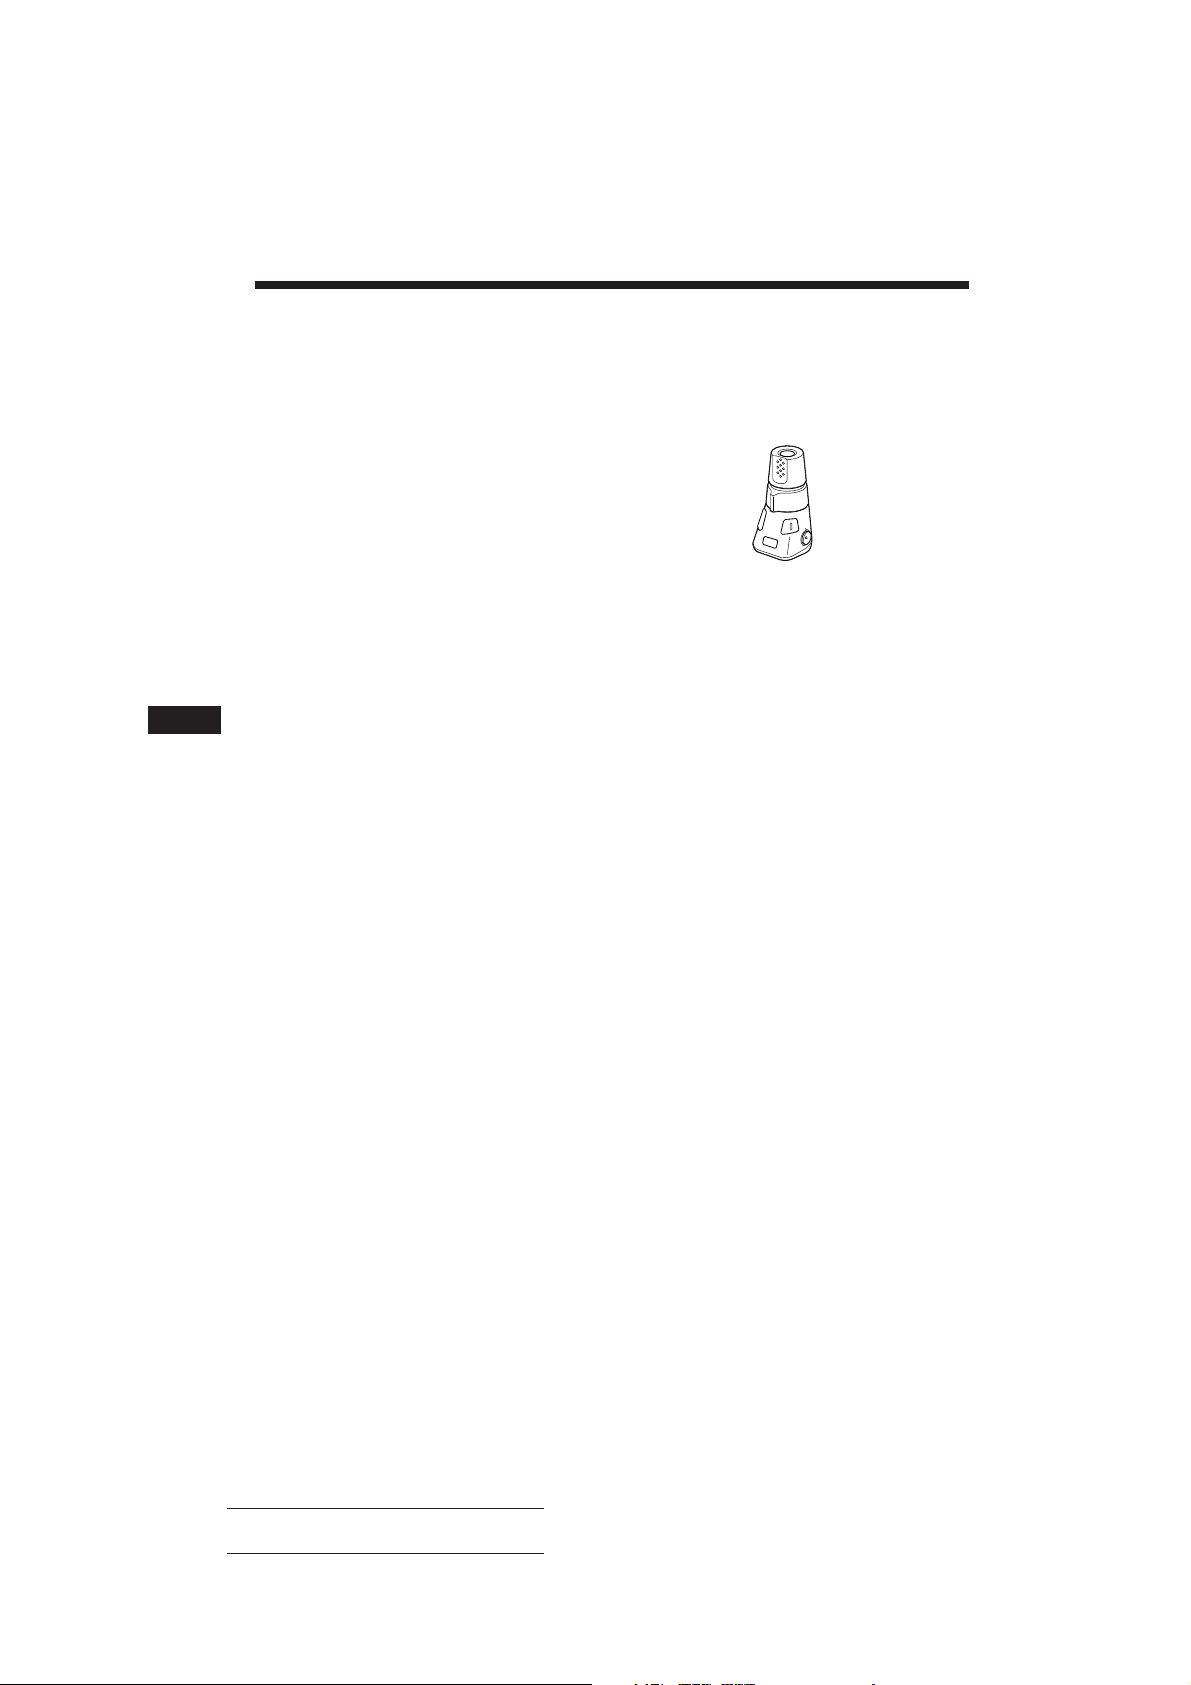
The optional rotary commander
can be used (for the CDX-4100RDS).
You can use the rotary commander (RM-X2S)
which is operated like your car’s wiper or
headlight switch while driving.
2
Actual total number: Sony CDX-4100/5100RDS (E,F,G,I) 3-810-809-11 (1)
Page 3

Table of Contents
Precautions ............................................................... 4
Detaching and Attaching the Front Panel ............ 4
Setting the Clock ...................................................... 5
CD Player Operation
Playing a CD ............................................................. 6
Ejecting the CD ........................................................ 6
Locating the Beginnings of Tracks
— AMS (Automatic Music Sensor)
Function .......................................................... 6
Locating the Desired Part of a Track
— Manual Search Function ............................... 6
Searching for the Desired Track
— Intro Scan Function ........................................ 6
Playing Tracks Repeatedly
— Repeat Play Function..................................... 7
Playing Tracks in Random Order
— Shuffle Play Function .................................... 7
Radio Reception
Searching for Stations Automatically
— Automatic Tuning .......................................... 7
If FM Stereo Reception is Poor
— Monaural Mode .............................................. 7
Tuning in by Adjusting the Frequency
— Manual Tuning ............................................... 8
Memorising Stations Automatically
— BTM (Best Tuning Memory) Function ........ 8
Memorising Only the Desired Stations ................ 8
Receiving the Memorised Stations ........................ 9
RDS Functions
Overview of the RDS Function .............................. 9
Displaying the Station Name ................................. 9
Listening to the Same Programme Without
Manual Retuning if the Location Has Changed
— AF Function .................................................. 10
Listening to Traffic Announcements .................. 10
Selecting the Programme Type ............................ 11
Using RDS Data for Setting the Clock
Automatically .................................................... 12
Other Functions
Adjusting the Sound Characteristics .................. 13
Enjoying Bass and Treble at Low Volume
— Loudness Function ....................................... 13
Muting the Sound Quickly
— Mute Function .............................................. 13
Muting the Beep Tone ........................................... 13
Changing the illumination Colour
(for the CDX-5100RDS) .................................... 13
Maintenance ........................................................... 14
Dismounting the Unit ........................................... 14
Notes on Using the Optional Rotary Commander
RM-X2S (for the CDX-4100RDS) ..................... 15
Location of Controls .............................................. 16
Specifications .......................................................... 17
Troubleshooting Guide ......................................... 18
EN
Actual total number: Sony CDX-4100/5100RDS (E,F,G,I) 3-810-809-11 (1)
3
Page 4
Precautions
• Before operating the unit for the first time or
after replacing the car battery, press the reset
button with a ballpoint pen etc., then operate
the unit.
Do not expose the discs to direct sunlight or
heat sources such as hot air-ducts. Do not leave
them in a car parked in direct sunlight where
there can be a considerable rise in the
temperature inside the car.
EN
Reset button
• If your car was parked in direct sunlight
resulting in a considerable rise in
temperature inside the car, allow the unit to
cool off before operating it.
• If no power is being supplied to the unit,
check the connections first. If everything is in
order, check the fuse.
• If no sound comes from the speakers in
2-speaker systems, set the fader control to the
centre position.
If you have any questions or problems
concerning your unit that are not covered in
this manual, please consult your nearest Sony
dealer.
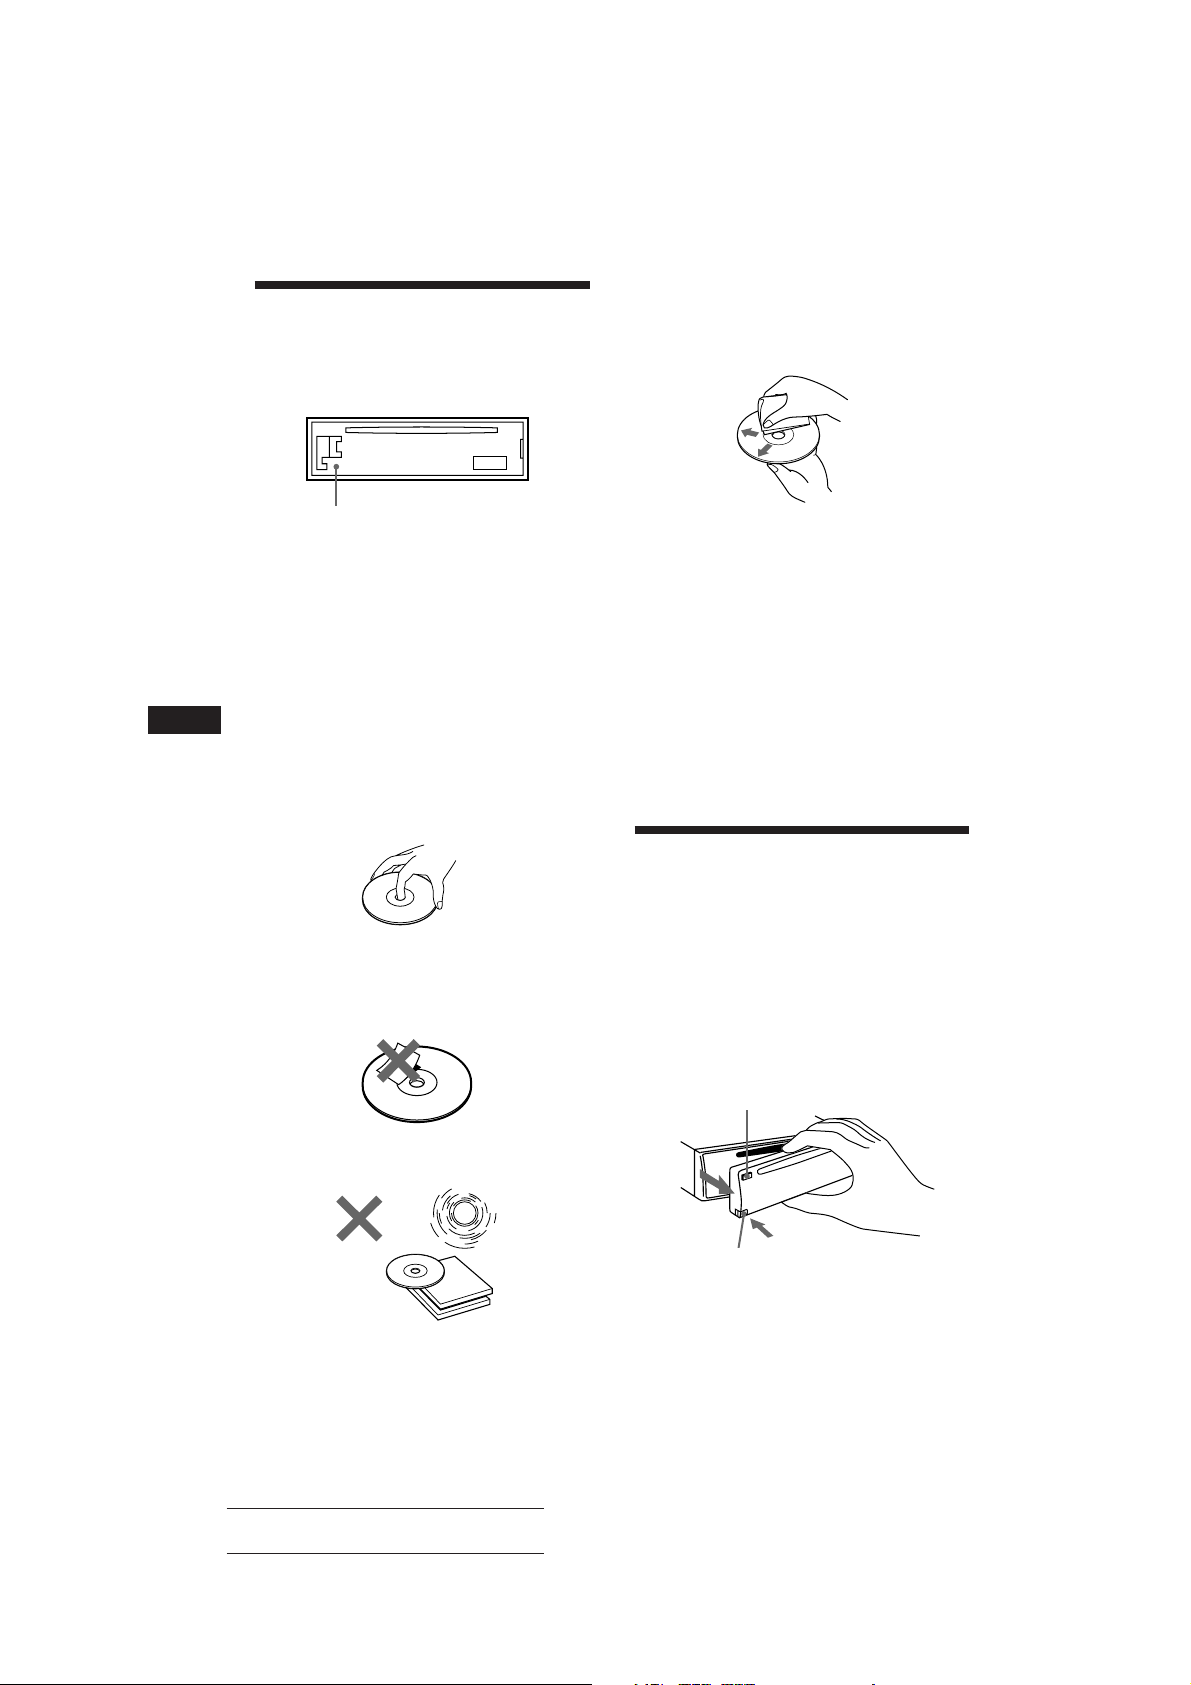
Notes on CDs
A dirty or defective disc may cause sound
dropouts during playback. To enjoy optimum
sound, handle the disc as follows.
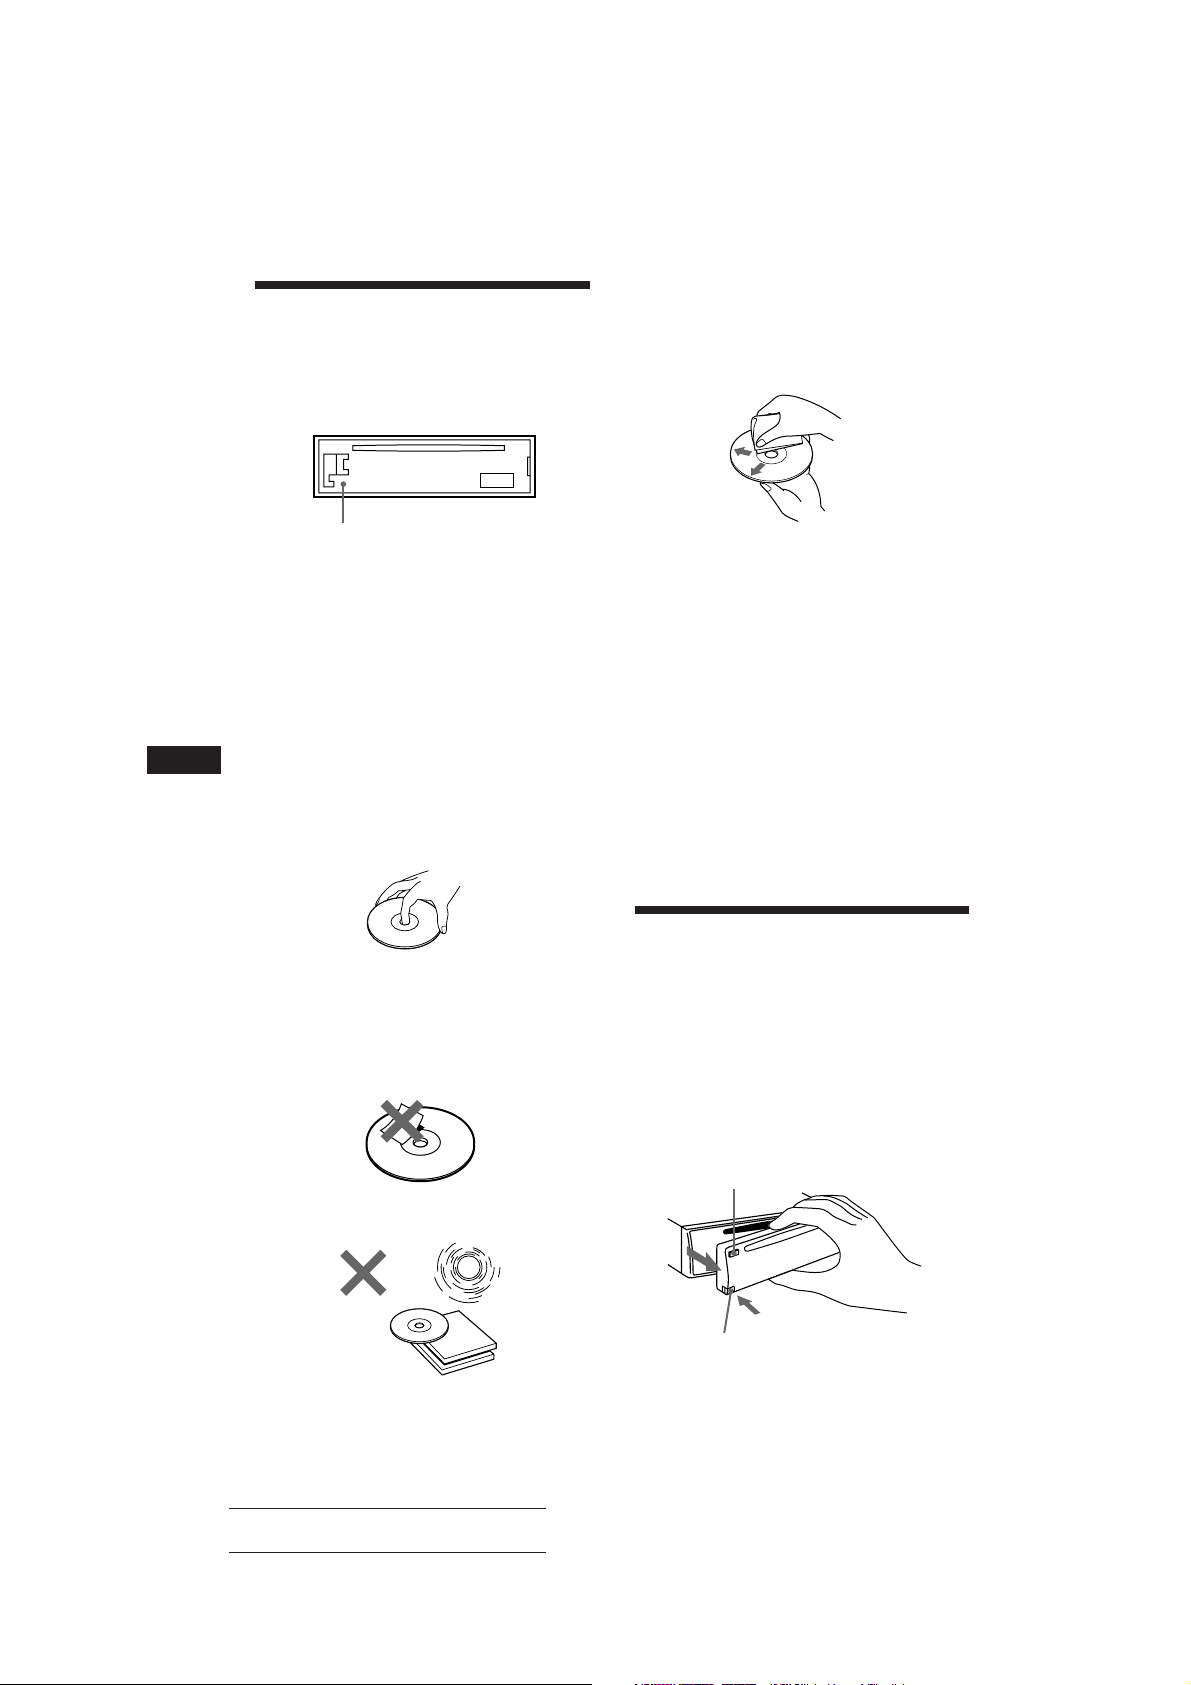
Handle the disc by its edge to keep the disc
clean. Do not touch the surface.
Before playing, clean the discs with an optional
cleaning cloth. Wipe each disc from the centre
of the disc outward.
Do not use solvents such as benzine, thinner,
commercially available cleaners or antistatic
spray intended for analog discs.
Notes on Moisture condensation
On a rainy day or in a very damp area,
moisture may condense on the lenses inside
the CD player. Should this occur, the unit will
not operate properly. In this case, remove the
disc and wait for about an hour until the
moisture has evaporated.
Detaching and Attaching
the Front Panel
The front panel of this unit can be detached in
order to prevent the unit from being stolen.
Detaching the Front Panel
Before detaching the front panel, be sure to
press the OFF button first. Then press the
RELEASE button to open up the front panel
and detach the panel by pulling it towards you
as illustrated.
OFF button
Do not stick paper or tape on the labelled
surface.
RELEASE button
Be sure not to drop the panel after detaching it
from the unit.
4
Actual total number: Sony CDX-4100/5100RDS (E,F,G,I) 3-810-809-11 (1)
Page 5
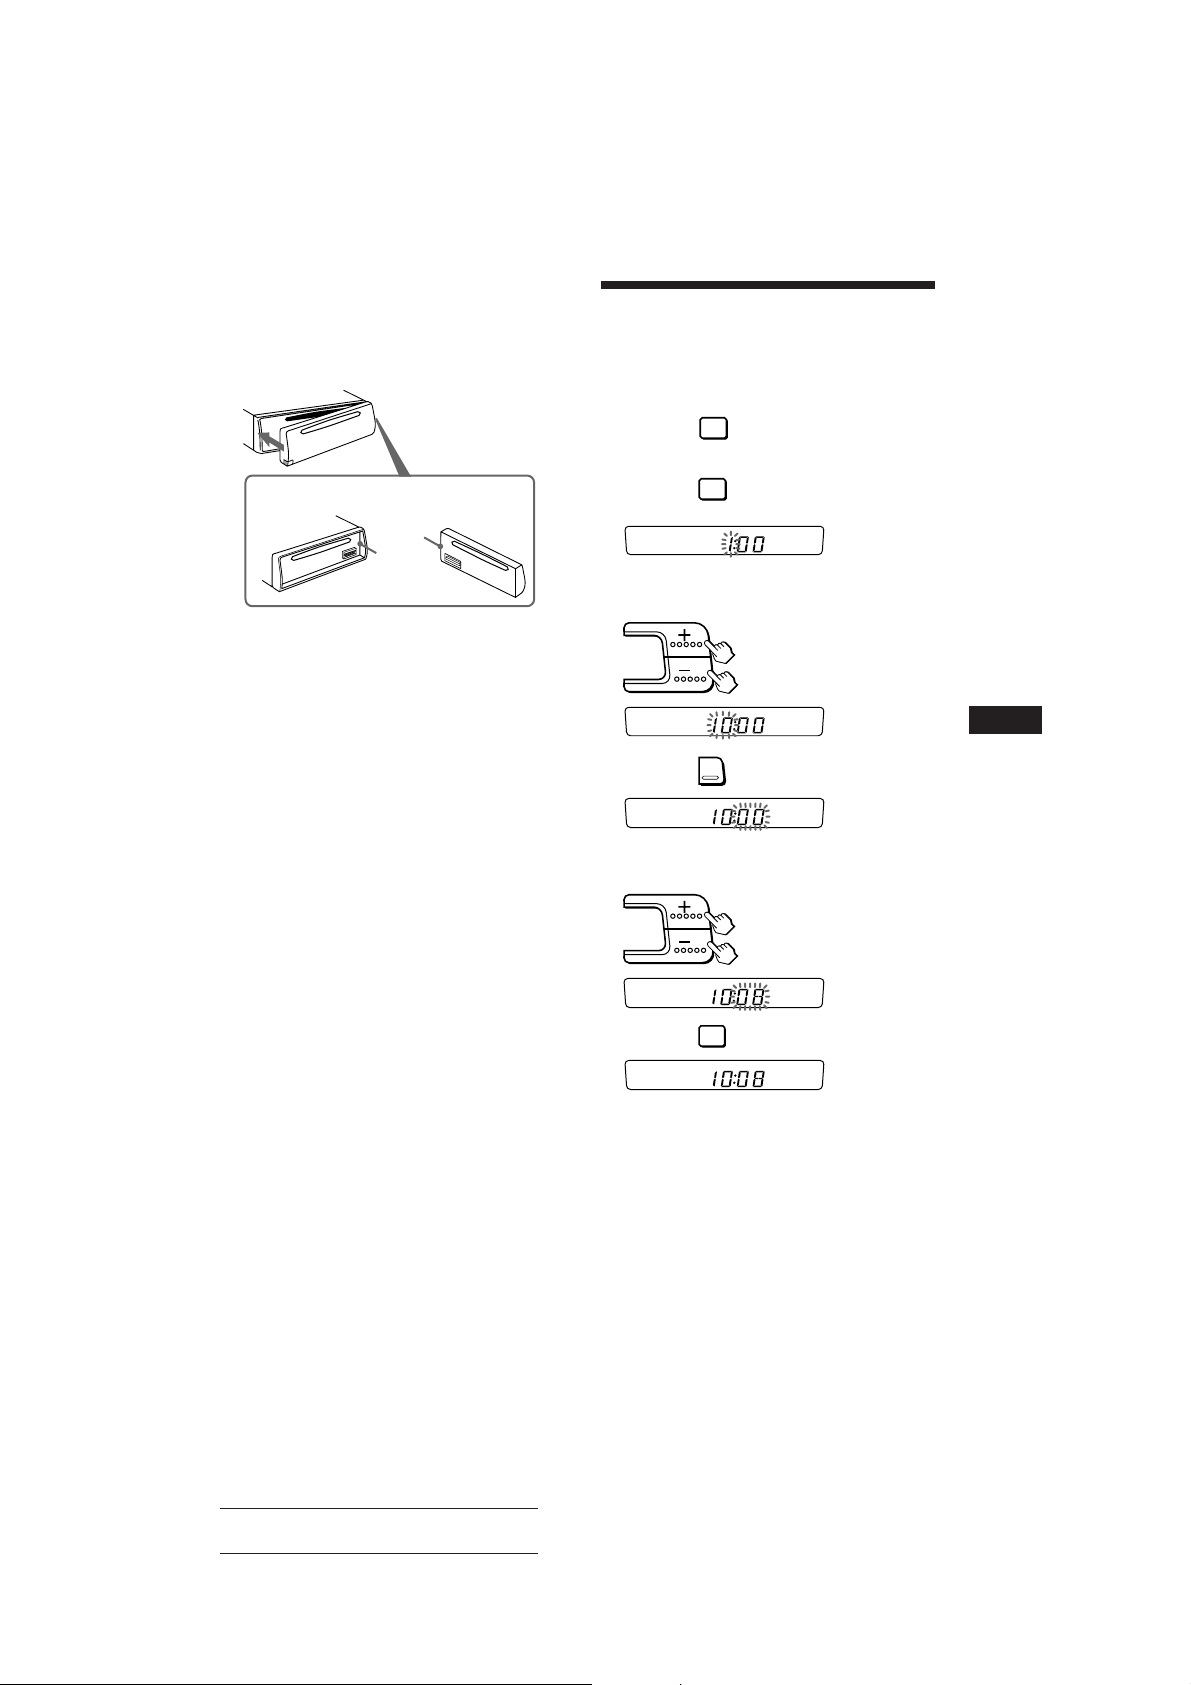
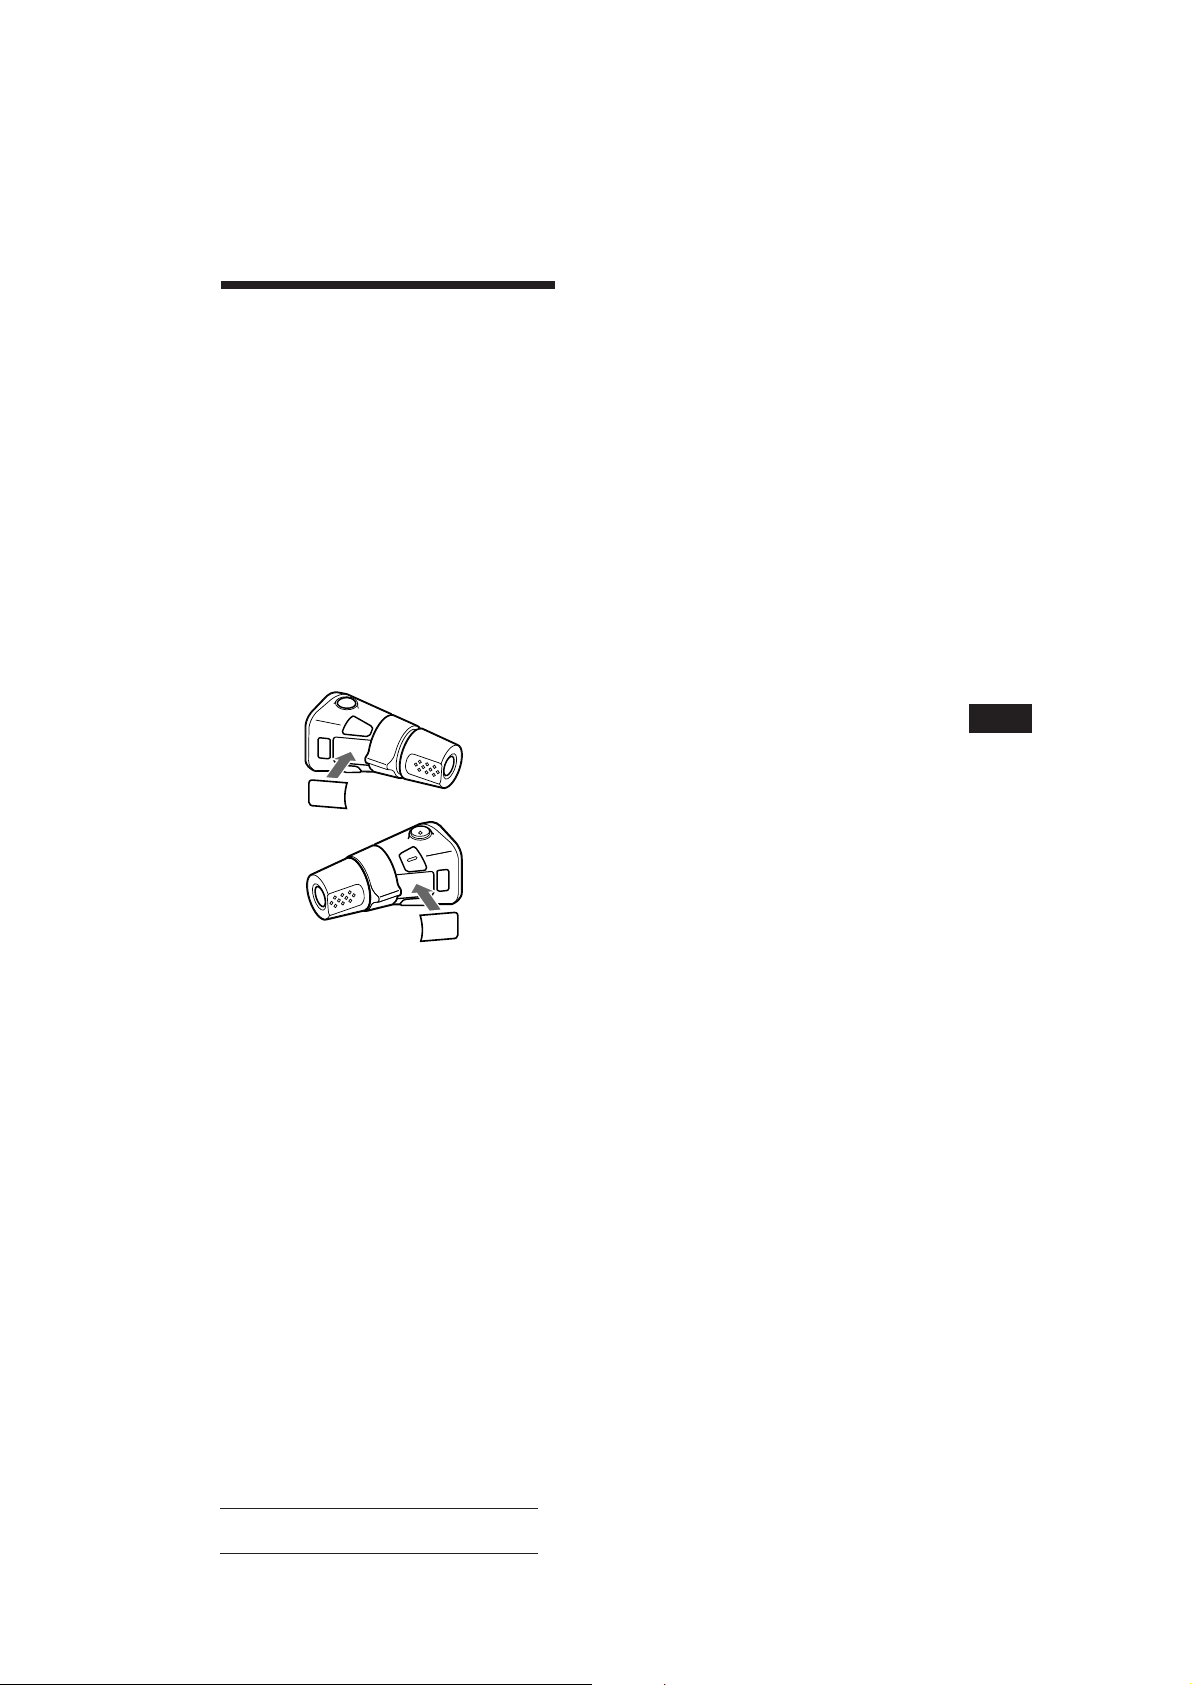
Attaching the Front Panel
DSPL
DSPL
SEL
Apply the right side of the front panel to the
unit by attaching part A of the front panel to
part B of the unit as illustrated, then swing
the left side into the unit until it clicks.
Setting the Clock
The clock has a 24-hour digital indication.
For example, setting it to 10:08
1 Display the time.
(Press the
operation.)
button during unit
A
B
Notes
• Make sure that the front panel is the right way up when
attaching it to the unit as it cannot be attached upside
down.
• Do not press the front panel hard against the unit when
attaching it to the unit. It can easily be attached by
pressing it lightly against the unit.
• When you carry the front panel with you, put it in the
supplied front panel case.
• Do not press hard or give excessive pressure to the
display window of the front panel.
• Before removing the front panel, be sure to turn the
power off. However, if you press the RELEASE button to
detach the panel while the unit is still turned on, the
power will automatically turn off in order to protect the
speakers from being damaged.
• Do not expose the front panel to direct sunlight, heat
sources such as hot air ducts or leave it in a humid place.
Never leave it on the dashboard etc. of a car parked in
direct sunlight where there may be a considerable rise in
temperature inside the car.
Caution Alarm
If you turn the ignition key to the OFF position
without removing the front panel, the caution
alarm will be activated and a beep tone will be
heard for a few seconds (only when the
POWER SELECT switch is set to the A
position).
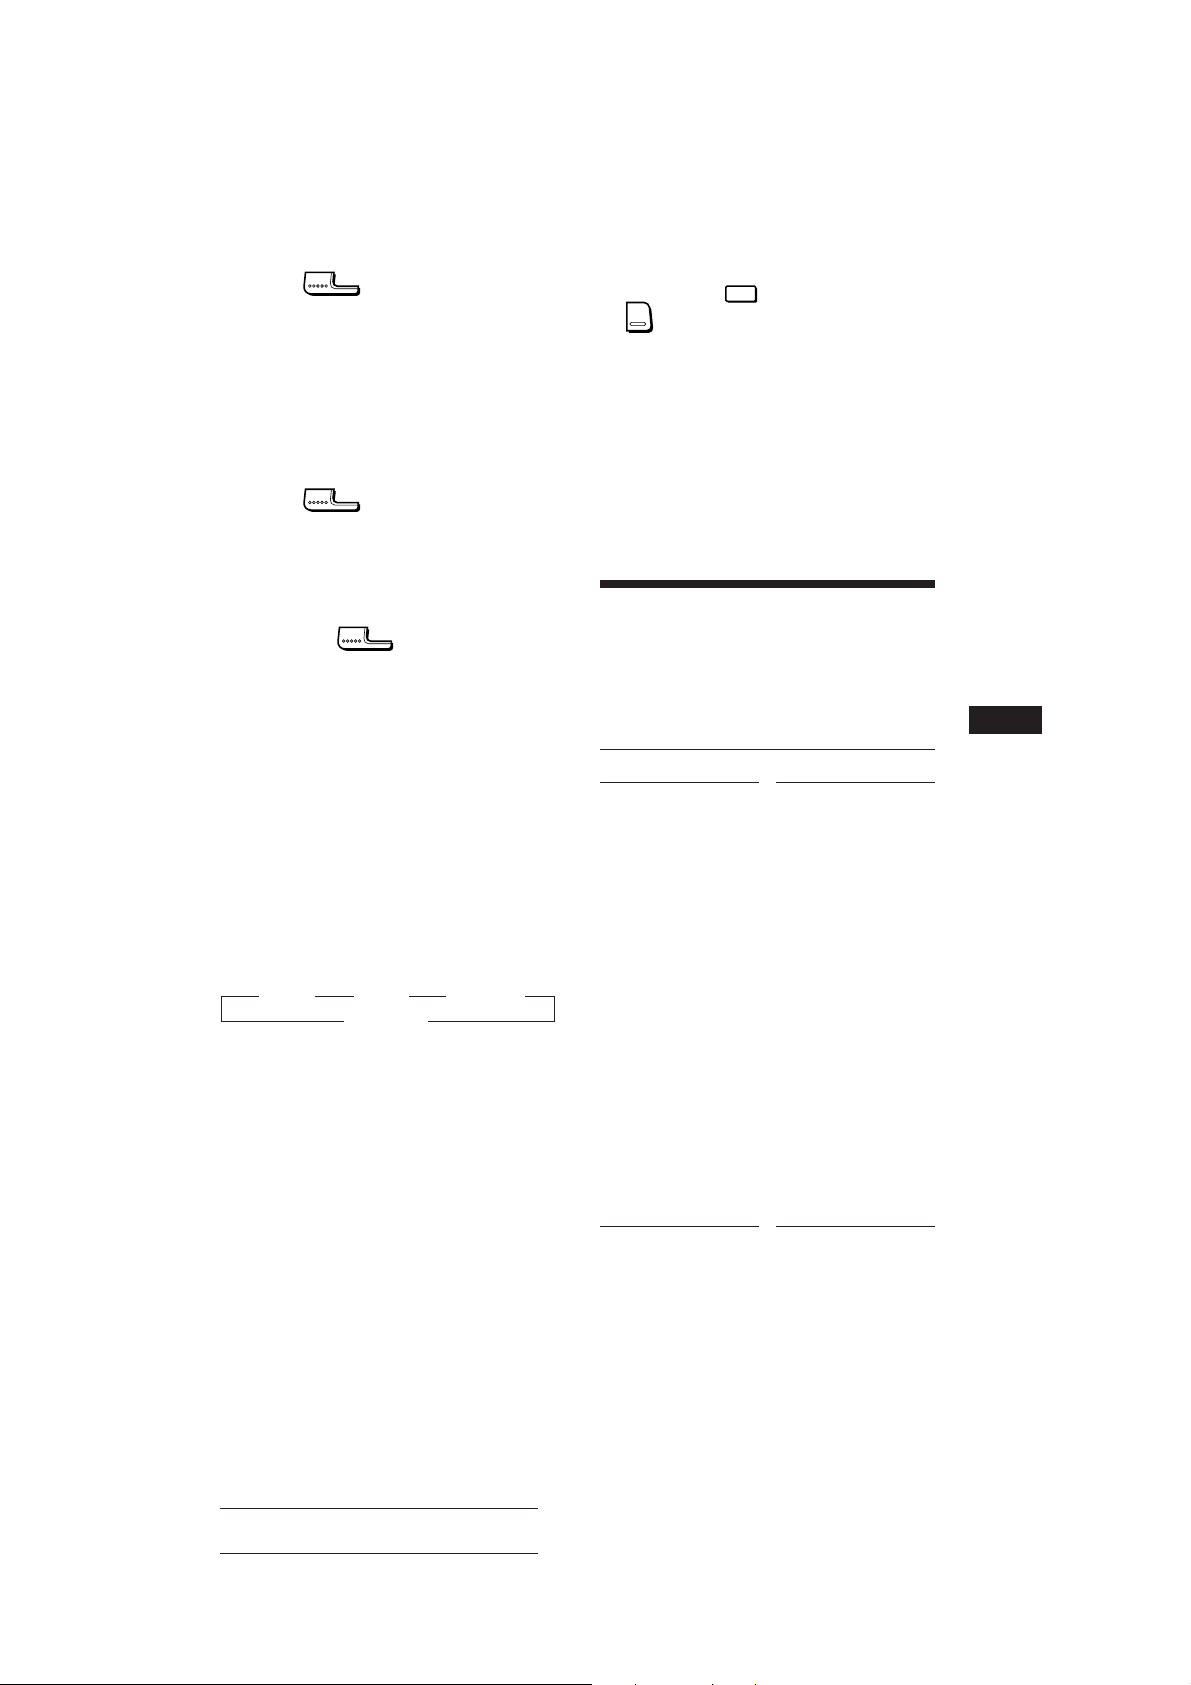
2 Press the
button for more than two
seconds.
The hour digit(s) blinks.
Set the hour digits.
to go forward
to go back
3 Press the
The minute digits blink.
button momentarily.
Set the minute digits.
to go forward
to go back
4 Press the
The clock activates.
Note
If the POWER SELECT switch on the bottom of the unit is
set to the B position, the clock cannot be set unless the
power is turned on. Set the clock after you have turned on
the radio, or started CD playback.
DSPL
button momentarily.
EN
5
Actual total number: Sony CDX-4100/5100RDS (E,F,G,I) 3-810-809-11 (1)
Page 6
EN
CD Player Operation
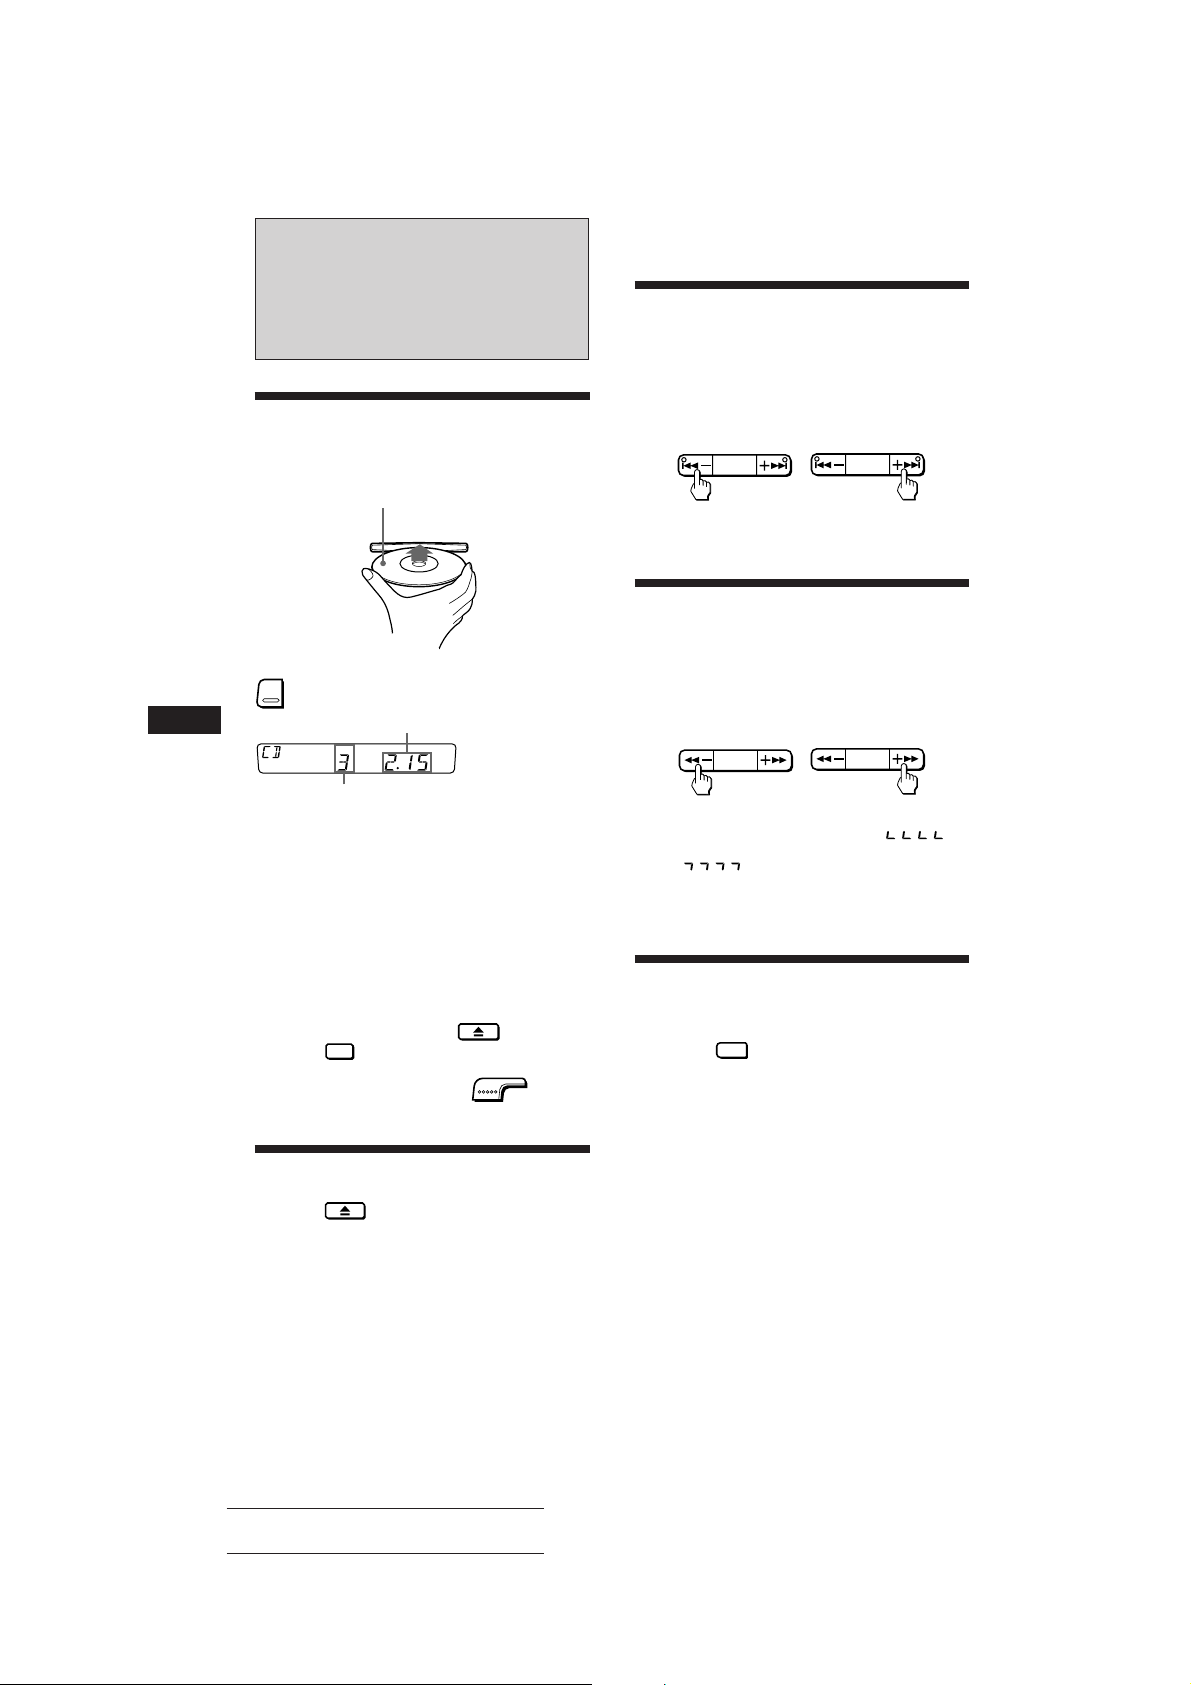
Playing a CD
After inserting the CD, playback will
start from the first track automatically.
Label side up
If a CD is already inserted, press the
button to start playback.
CD
Elapsed playing time
TRACK
Locating the Beginnings
of Tracks
— AMS (Automatic Music Sensor) Function
During playback, press either side of
the AMS/SEEK button once for each
track you wish to skip.
AMS/SEEK
To locate
previous tracks
AMS/SEEK
To locate
succeeding tracks
Locating the Desired Part
of a Track
During playback, press and hold either
side of the PRESET button. Release the
button when you have found the
desired part.
— Manual Search Function
PRESET
PRESET
Track number
When the last track on the CD is
over,
the track number indication will return to “1”,
and playback will continue from the first track
of the CD.
Note
To play a 8 cm CD, use the optional Sony compact disc
single adapter (CSA-8).
To stop playback,
eject the CD by pressing the button or
press the
Playback stops also when you select another
source (radio) by pressing the
OFF
button.
TUNER
button.
Ejecting the CD
Press the button.
Note
If you leave the ejected disc in the disc insertion slot after
you have pressed the 6 button, the disc will automatically
retract into the unit after about 15 seconds in order to
protect it.
To forwardTo reverse
If you reverse to the beginning of the disc, “ ”
appears on the display. Forwarding to the end of the disc
causes “
In either case, you can neither proceed to the previous nor
the following track.
” to be displayed.
Searching for the Desired
Track
Press the
n “INTRO” appears on the display.
The first 10 seconds of all the tracks are played.
When you find the desired track, press the
button once more. The unit returns to normal
playback mode.
— Intro Scan Function
INTRO
1
button during playback.
6
Actual total number: Sony CDX-4100/5100RDS (E,F,G,I) 3-810-809-11 (1)
Page 7
Playing Tracks Repeatedly
— Repeat Play Function
Press the
n “REP 1” appears on the display.
When the currently played track is over, it will
be played again from the beginning.
To cancel this mode, press the button again.
REPEAT
2
button during playback.
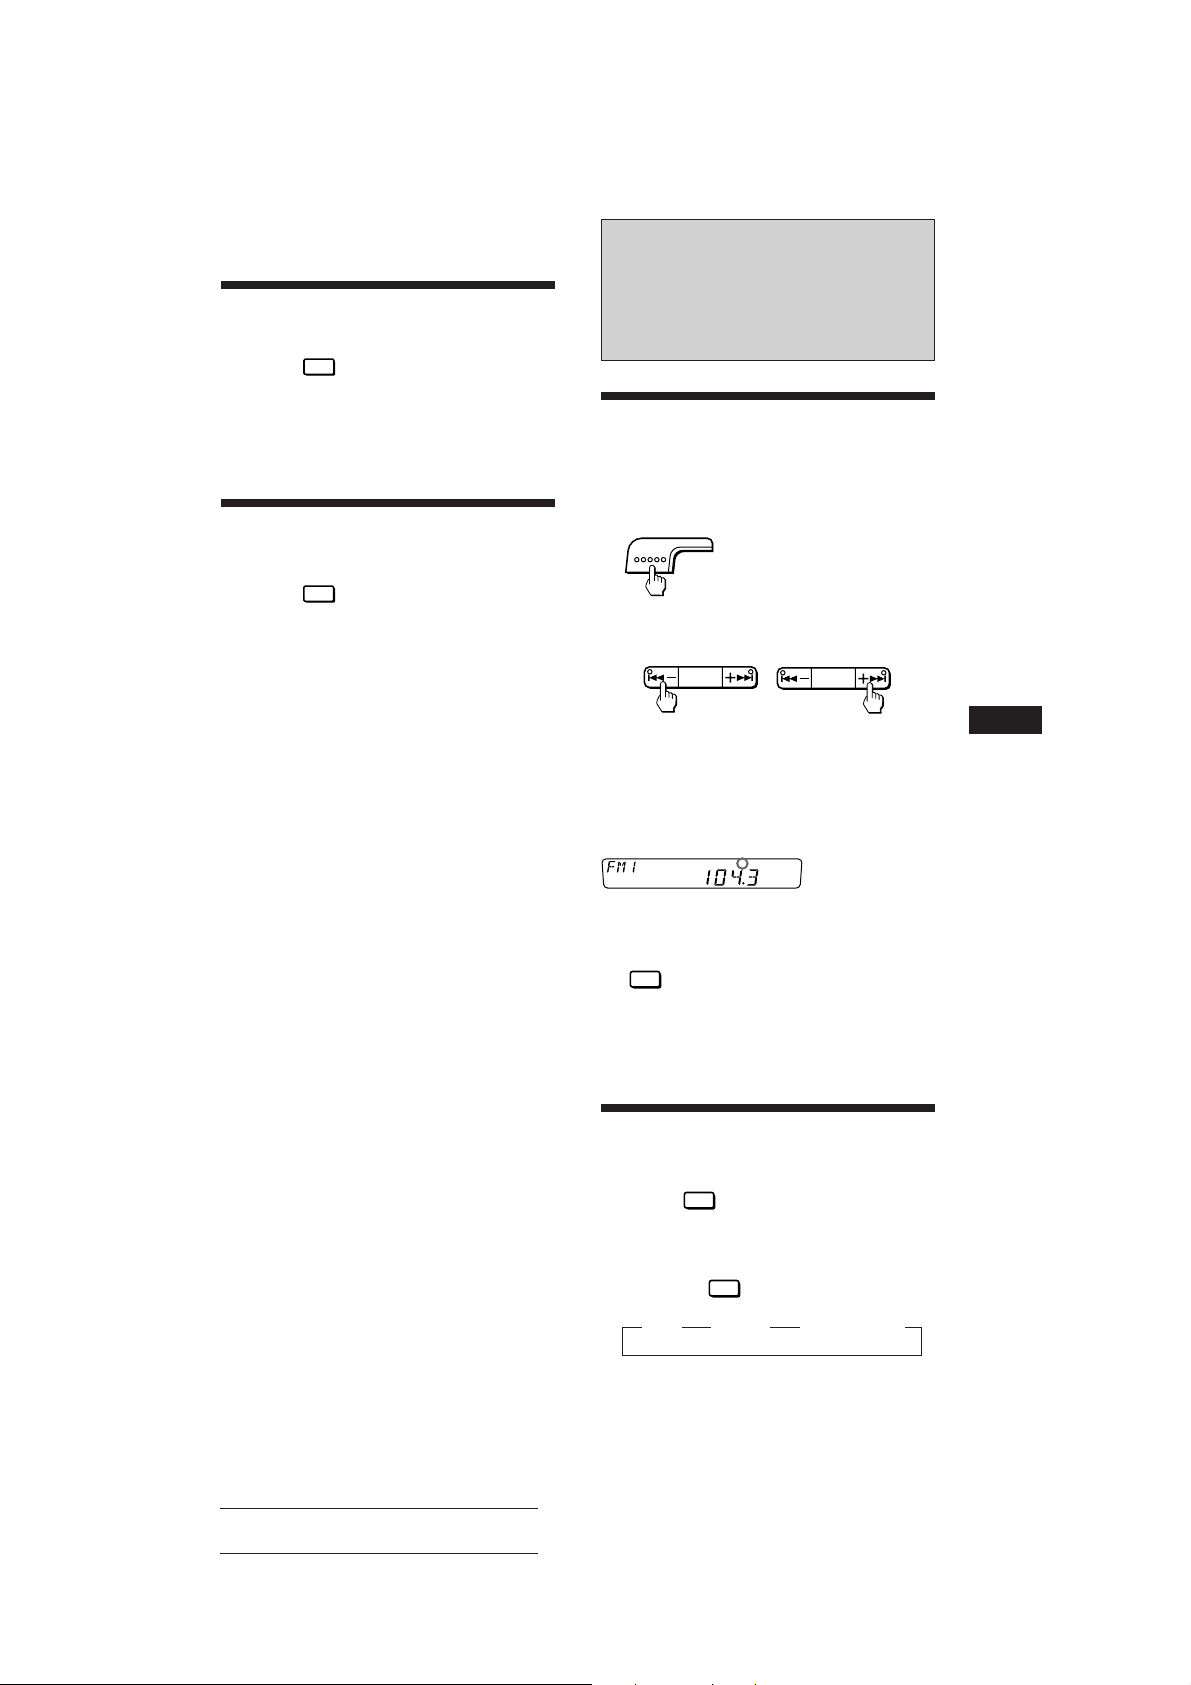
Radio Reception
Searching for Stations
Automatically
— Automatic Tuning
Playing Tracks in Random
Order
Press the
n “SHUF 1” appears on the display.
All tracks on the currently selected disc are
played in random order.
— Shuffle Play Function
SHUF
3
button during playback.
1 Select the desired band.
TUNER
FM1 n FM2 n FM3 n
MW n LW n FM1 n ···
2 Press either side of the AMS/SEEK
button once to search for the next
station (automatic tuning).
AMS/SEEK
The scanning stops when a station is received.
Press either side of the AMS/SEEK button
repeatedly until the desired station is received.
When an FM stereo programme with sufficient
signal strength is tuned in,
ST
the “ST" indication appears.
To keep the automatic tuning from stopping on
stations too frequently (local seek mode), press
BTM
the
indication.
Only the stations with relatively strong signals will be
tuned in. The local seek mode functions only when
automatic tuning is in operation.
button momentarily to get the “LCL”
SENS
AMS/SEEK
For higher frequenciesFor lower frequencies
EN
CD Player Operation/Radio Reception
If FM Stereo Reception is
Poor
Press the
n “MONO” appears on the display.
The sound will improve, but it will be
monaural.
By pressing the
displayed items as follows:
Actual total number: Sony CDX-4100/5100RDS (E,F,G,I) 3-810-809-11 (1)
— Monaural Mode
BTM
SENS
button momentarily.
BTM
SENS
button, you can change the
z LCL z MONO z Normal mode
7
Page 8

Tuning in by Adjusting the
Frequency
1 Select the desired band.
TUNER
2 Press and hold either side of the PRESET
button.
Release the button when the desired station
is received.
— Manual Tuning
PRESET
PRESET
3 FM1, FM2 and FM3 only:
Press preset number button
momentarily, then press again for about
two seconds until you hear a beep tone.
n The station will be stored.
Repeat this operation with preset number
buttons
Notes
• When “AF OFF” is displayed and you activate BTM, the
unit will store only stations not transmitting RDS data.
Depending on reception conditions however, it may
happen that RDS stations are stored.
• When storing only RDS stations (page 10), step 3 is not
necessary.
REPEAT
through 6.
2
INTRO
1
EN
For lower frequencies For higher frequencies
PREVENT ACCIDENTS!
When tuning in during driving, use automatic
tuning or the preset search function (page 9)
instead of manual tuning.
Memorising Stations
Automatically
— BTM (Best Tuning Memory) Function
This function selects from the currently
selected band the stations with the strongest
signals and memorises them in the order of
their band frequency.
1 Select the desired band.
TUNER
BTM
2 Press the
seconds.
• When there is no preset number indicated
in the display window, stations will be
stored on all preset number buttons on
the currently selected band.
• When there is a preset number indicated
in the display window, the unit will store
stations on all preset number buttons
from the one currently displayed.
SENS
button for more than two
Memorising Only the
Desired Stations
1 Select the desired band.
TUNER
2 Tune in the station which you wish to
store on a preset number button.
3 Press and hold the desired preset
number button (
two seconds until you hear a beep tone.
The number of the pressed preset number
button appears in the display window.
Up to 6 stations on each band (FM1, FM2, FM3, MW and
LW) can be stored on the preset number buttons in the
order of your choice. Therefore, 18 stations can be
memorised on FM.
If you try to store another station on the same preset
number button, the previously stored station will be erased.
INTRO
to 6) for about
1
For example, when you select FM1 and preset
number 3 is displayed,
the operation will start from preset number 3 on FM1, and
will stop at preset number 6 on FM3.
8
Actual total number: Sony CDX-4100/5100RDS (E,F,G,I) 3-810-809-11 (1)
Page 9
Receiving the Memorised
Stations
1 Select the desired band.
TUNER
2 Press momentarily the preset number
button (
desired station is stored.
Note
If you press the preset number button for more than two
seconds, the currently received station will be memorised.
To receive the previously memorised station, make sure
that the preset number button is pressed only momentarily.
Press either side of the PRESET button
momentarily to receive other stations
stored in the memory (Preset Search
Function).
INTRO
1
to 6) on which the
PRESET
Press momentarily
1 n 2 n 3 n 4 n 5 n 6 n 1 n ···
PRESET
Press momentarily
1 n 6 n 5 n 4 n 3 n 2 n 1 n ···
RDS Functions
Overview of the RDS
Function
RDS (Radio Data System) is a system which
uses FM radio waves to receive digital signals.
Receiving RDS data with your car stereo unit
allows it to use a variety of services. There are
several ways to use these services. For
instance, you can receive information such as
traffic announcements and station names, or
you can cause the unit to automatically retune
to the strongest signal that is broadcasting the
same programme. So even if you travel a long
distance, it is still possible to listen to the same
programme without having to retune
manually again and again. Another function
allows you to receive traffic announcements
during CD playback.
RDS offers various functions, but depending
on the country or region, not all of these are
available. The following information explains
the RDS functions of this unit.
Notes
• In case of weak signals or other poor reception
conditions, the RDS functions may not work properly.
• If the FM station currently received does not transmit
RDS data, the functions described below will not work.
EN
Radio Reception/RDS Functions
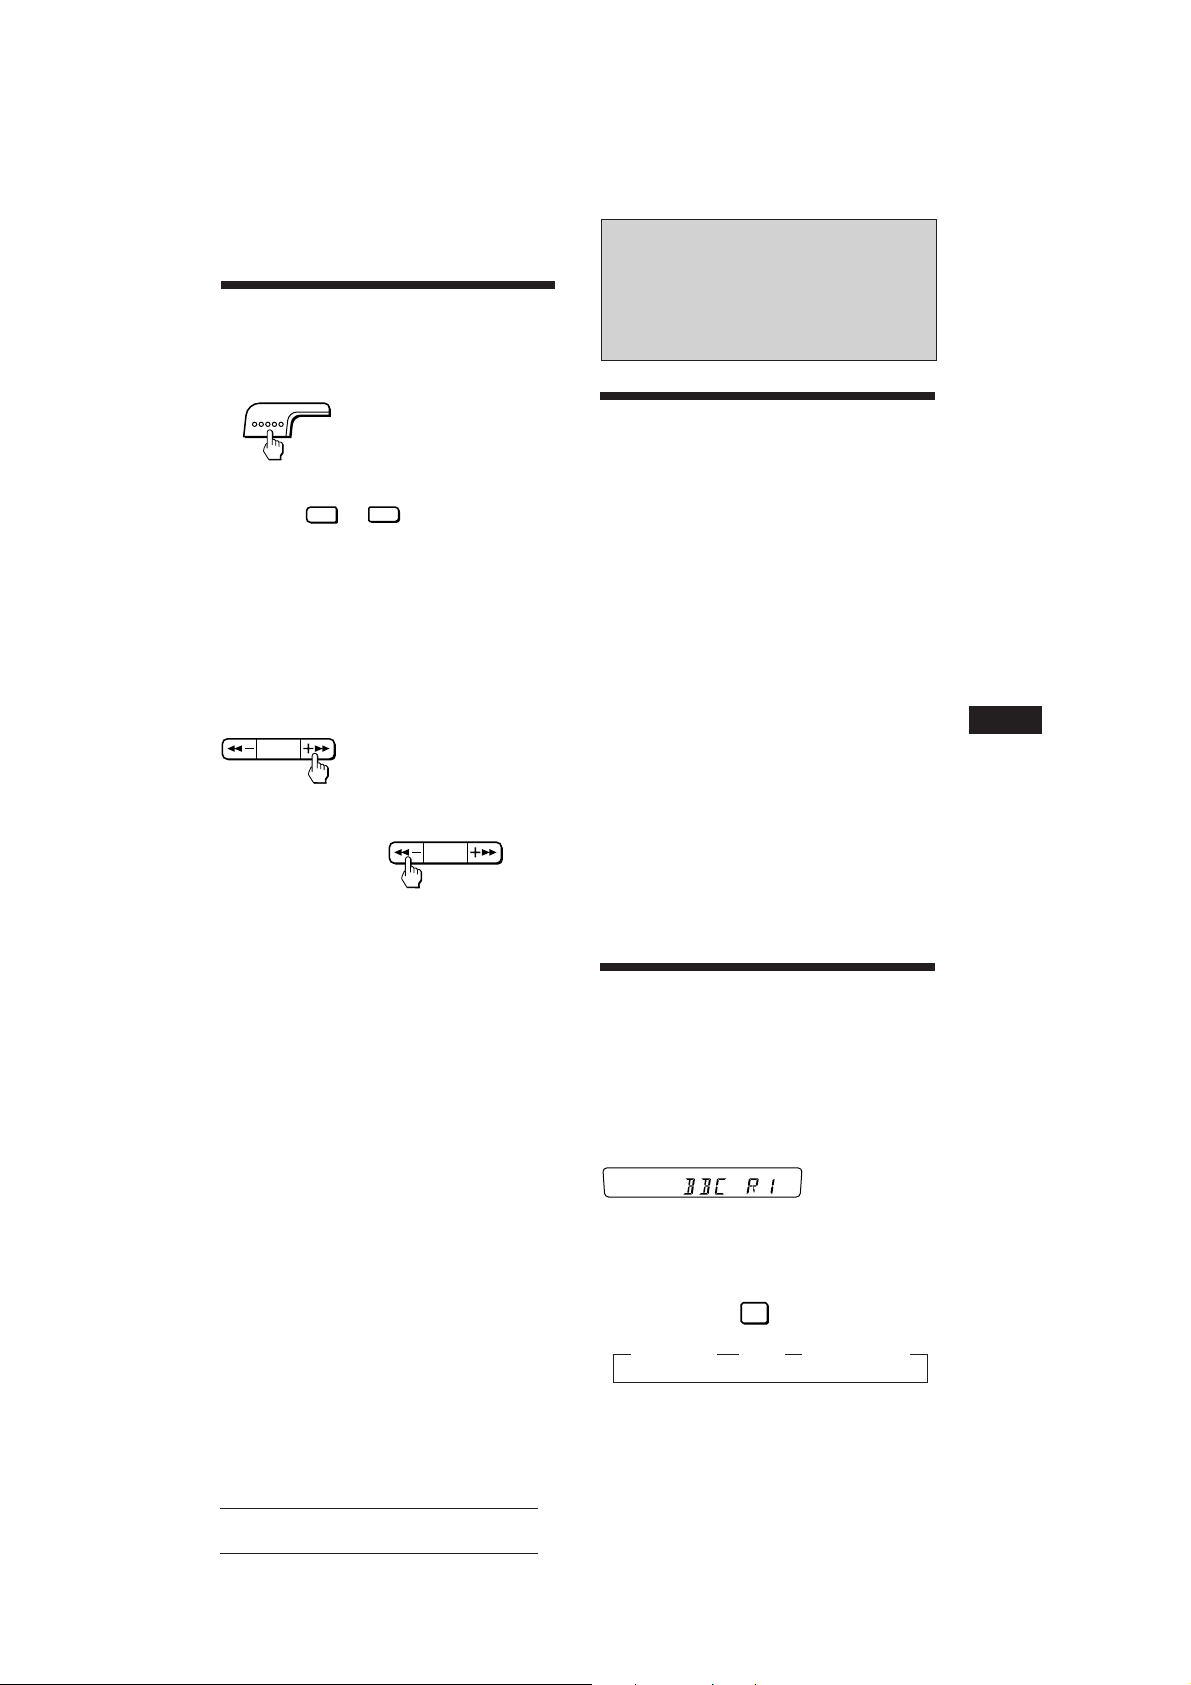
Displaying the Station
Name
By using RDS data, the name of the station
currently received can be displayed.
Select an FM station. n If it is a station
transmitting RDS data, the station
name will appear on the display.
When “*” appears in addition to the usual
frequency indication, an RDS station is being
received.
Changing the displayed items
Each time you press the
change as follows:
z Frequency z Time z Station Name
Actual total number: Sony CDX-4100/5100RDS (E,F,G,I) 3-810-809-11 (1)
DSPL
button, the displayed items
Continue to next page n
9
Page 10
EN
When “NO NAME” is displayed instead of the
station name, the currently received station
does not transmit RDS data. After some
seconds, “NO NAME” will disappear, and the
frequency will be displayed.
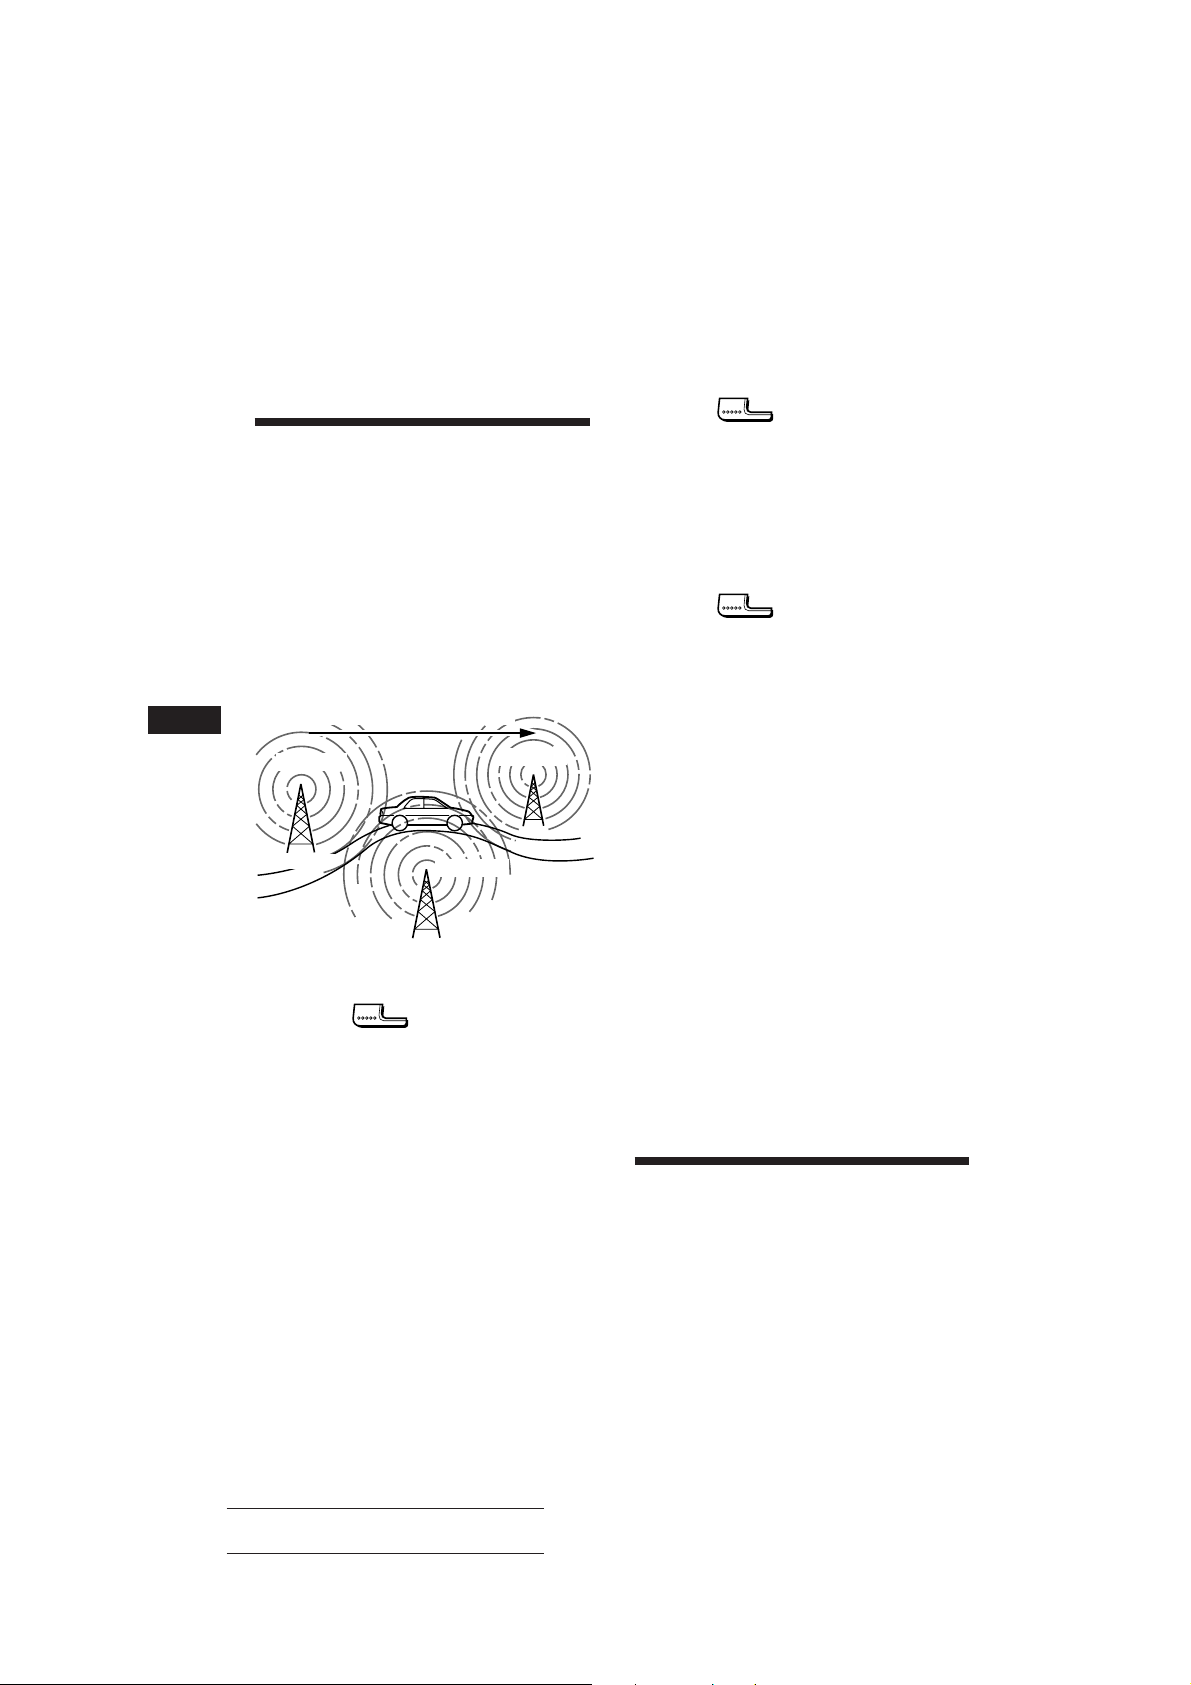
Listening to the Same
Programme Without Manual
Retuning if the Location Has
Changed
Using “AF” (List of Alternative Frequencies),
to automatically tune to that frequency among
the frequencies of the currently received
station, which carries the strongest signal in
the respective region. As result, you can
continuously listen to the same programme
during a long-distance drive without repeated
manual retuning.
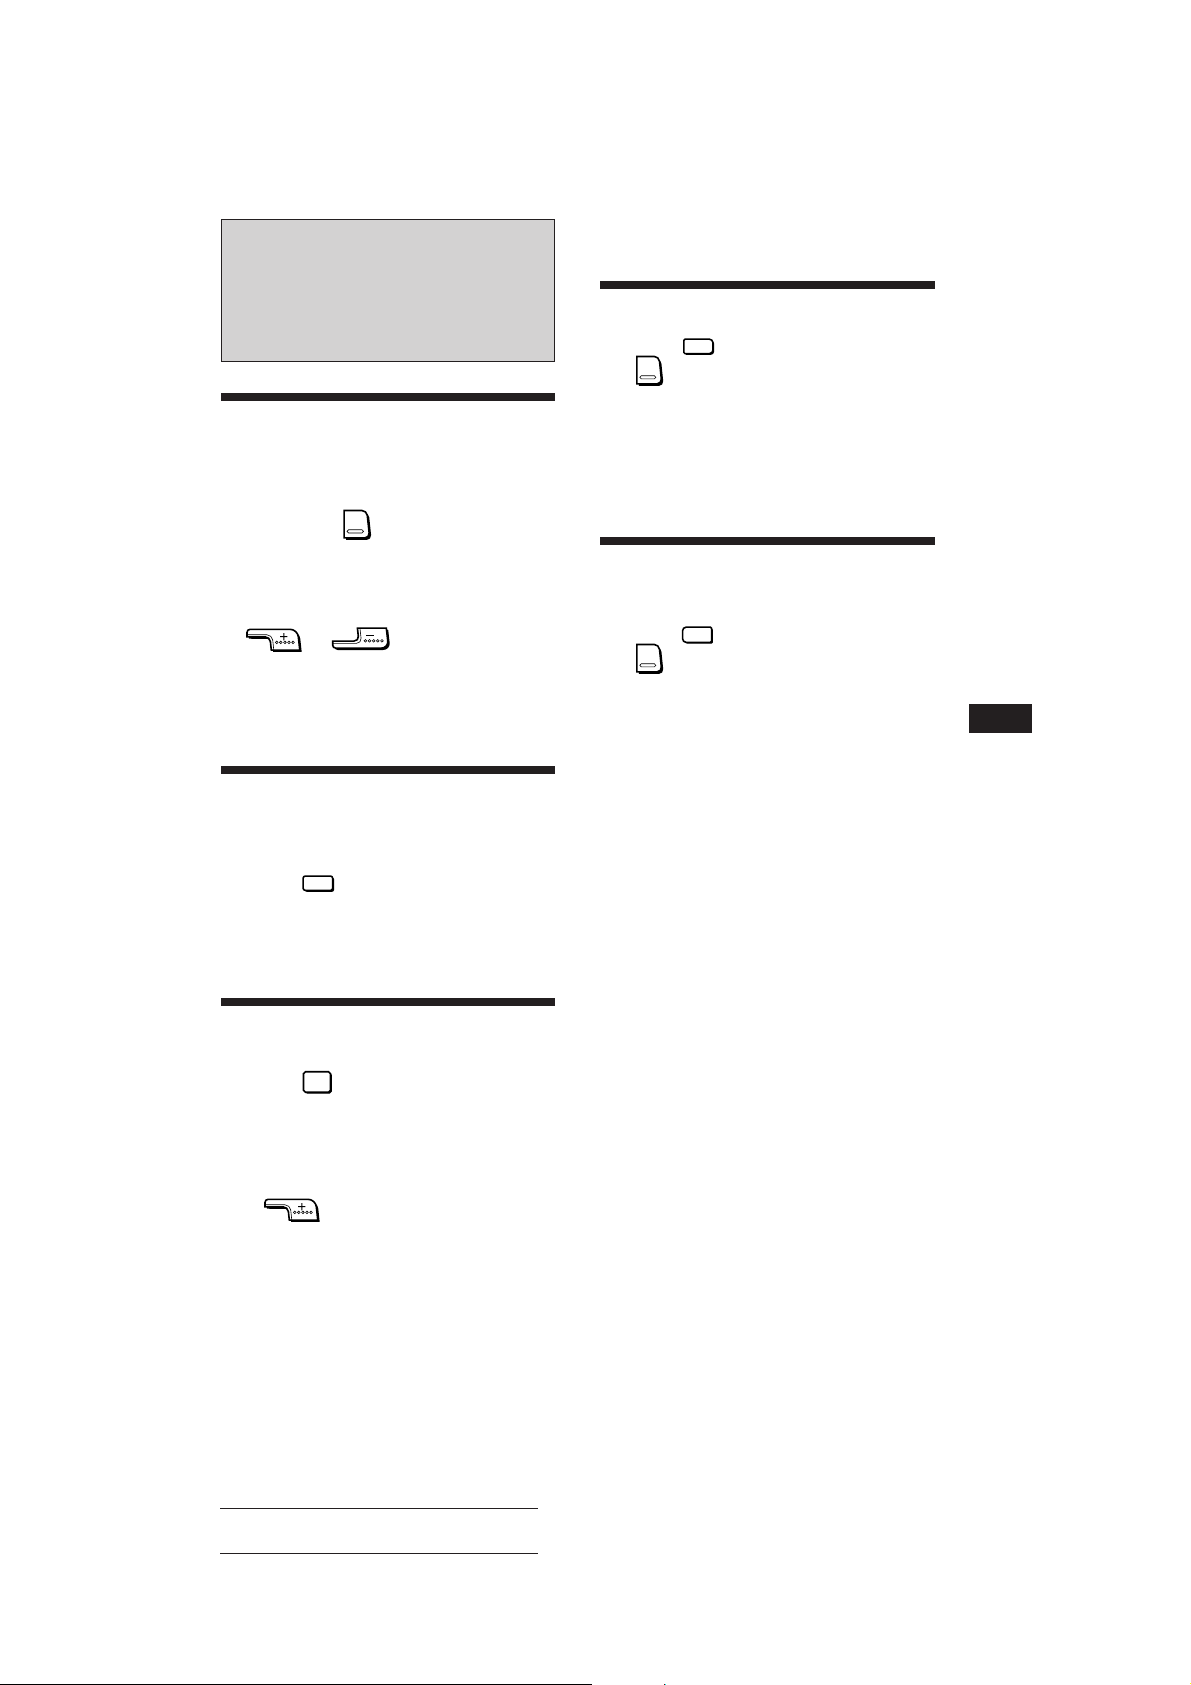
Frequencies change automatically.
98.5 MHz
Station
1 Select an FM station.
2 Press the
displayed.
Notes
• When the currently received frequency is weak and the
same programme cannot be received with another
frequency, “NO AF" will be displayed.
• When automatic tuning (page 7) is activated while “AF”
is displayed, only FM stations which transmit RDS data
will be received.
• When you press the AF/TA button while an MW or LW
station is received, FM1 will be automatically selected.
Getting the Stored RDS Stations
tuned in from the Broadcasting
Networks
When the unit stores an RDS station
transmitting the AF data on a preset number
button, it stores not only its frequency but also
its AF and PI (Programme Identification) data.
— AF Function
102.5 MHz
AF/TA
button to get “AF”
10
96.0 MHz
The unit will store this data in its memory
whether the AF function is ON or OFF.
Using the AF function, you can select a better
signal station by retuning within the same
broadcasting network of the memorised
station.
Press the
AF/TA
button, then press the
preset number button.
Note
If the AF data can find no other station in the memorized
station network, “PI seek” will be displayed, and the unit
will search for a station with the same PI data. If the unit
finds no other station with the same PI data, it will return
to the original station.
Listening to a Regional Programme
Press the
AF/TA
button for more than
two seconds. n “REG” appears on the
display.
To cancel, press again for more than two
seconds.
Note
The initial setting is “Regional ON”.
This function cannot be activated in the United
Kingdom and some other areas.
Local Link Function (United Kingdom only)
When local stations stored on the preset number buttons
are poorly received, or when you want to change to another
local station, use this function to activate automatic search
for other local stations and to tune them in one by one.
Within five seconds after reception starts, press the preset
number button of the local station you want to change, and
keep the button pressed. Repeat this procedure several
times until the desired local station is received.
Storing only RDS stations
The BTM function (page 8) allows the unit to store only
RDS stations on the preset number buttons; activate the
AF function, then press the SENS/BTM button for two
seconds.
When “AF OFF” is displayed and you activate BTM, the
unit will store only stations not transmitting RDS data.
Listening to Traffic
Announcements
By using TA (Traffic Announcement) and TP
(Traffic Programme) data, a station
broadcasting traffic announcements can be
automatically received. Even during CD
playback you can hear traffic announcements,
as the unit continues searching for such a
station, and will automatically change to FM
reception when a traffic announcement starts.
Actual total number: Sony CDX-4100/5100RDS (E,F,G,I) 3-810-809-11 (1)
Page 11
Press the
AF/TA
button to get “TA”
displayed. n The unit will start to
search for traffic information stations.
When a station transmitting a traffic
announcement is found, “TP” will be
displayed. During reception of the
announcement, the “TA” indication will flash.
The blinking will stops when the traffic
announcement is over.
The TA function works also during CD
playback.
Press the
AF/TA
button during CD
playback. n “TA” appears on the
display.
The unit will start to search for traffic
announcements. When an announcement is
received, CD playback will stop, and the traffic
information can be heard.
If you press the
AF/TA
button while an MW
or LW station is received, the unit will
automatically change to FM reception.
Cancelling the Currently Received Traffic
Announcement
Press the AF/TA button momentarily.
Cancelling the TA mode
Press the AF/TA button until “AF/TA OFF” appears on
the display.
Note
If no traffic information stations can be received, “NO TP”
will blink for about four seconds, and then the search for
other stations transmitting traffic announcements will
start.
Each time you press the AF/TA button, the
indication in the display window changes as
follows:
z AF ON z TA ON z AF/TA ON
AF/TA OFF Z
The “EON” Indication
When both “TA” and “EON” are displayed, this means
that in addition to the currently received station, another
station is also broadcasting a traffic announcement.
Presetting the Volume of Traffic
Announcements
It is possible to hear the traffic announcements
at a previously set volume level. For example,
even if the volume is turned to zero, it will
automatically change to the preset level when
a traffic announcement starts. (If the current
volume level is higher than the preset level, the
current level will not change.)
SHUF
2 Press button
SEL
button.
3
while pressing the
When you hear a beep tone, the setting is
complet.
Receiving Emergency Announcements
In case of danger through an emergency or a natural
disaster, RDS stations transmit emergency
announcements to warn the drivers in that area. Such
announcements can be received only when the AF or TA
functions are activated. When an emergency
announcement is received, CD playback will stop, the unit
will automatically change to FM, and the information can
be heard.
Selecting the Programme
Type
Some stations use RDS to distinguish the types
of programmes being broadcast.
The programme types are:
Programme types
News
Current Affairs
Information
Sport
Education
Drama
Culture
Science
Varied
Pop
Rock
Middle of the Road
Light Classical
Serious Classics
Other Music Types
Not specified
(when the station does not
specify the progmamme
type)
Display
NEWS
AFFAIRS
INFO
SPORT
EDUCATE
DRAMA
CULTURE
SCIENCE
VARIED
POP M
ROCK M
M.O.R. M
LIGHT M
CLASSICS
OTHER M
NONE
Continue to next page n
EN
RDS Functions
1 Select an FM station and the desired
volume level.
Actual total number: Sony CDX-4100/5100RDS (E,F,G,I) 3-810-809-11 (1)
11
Page 12
EN
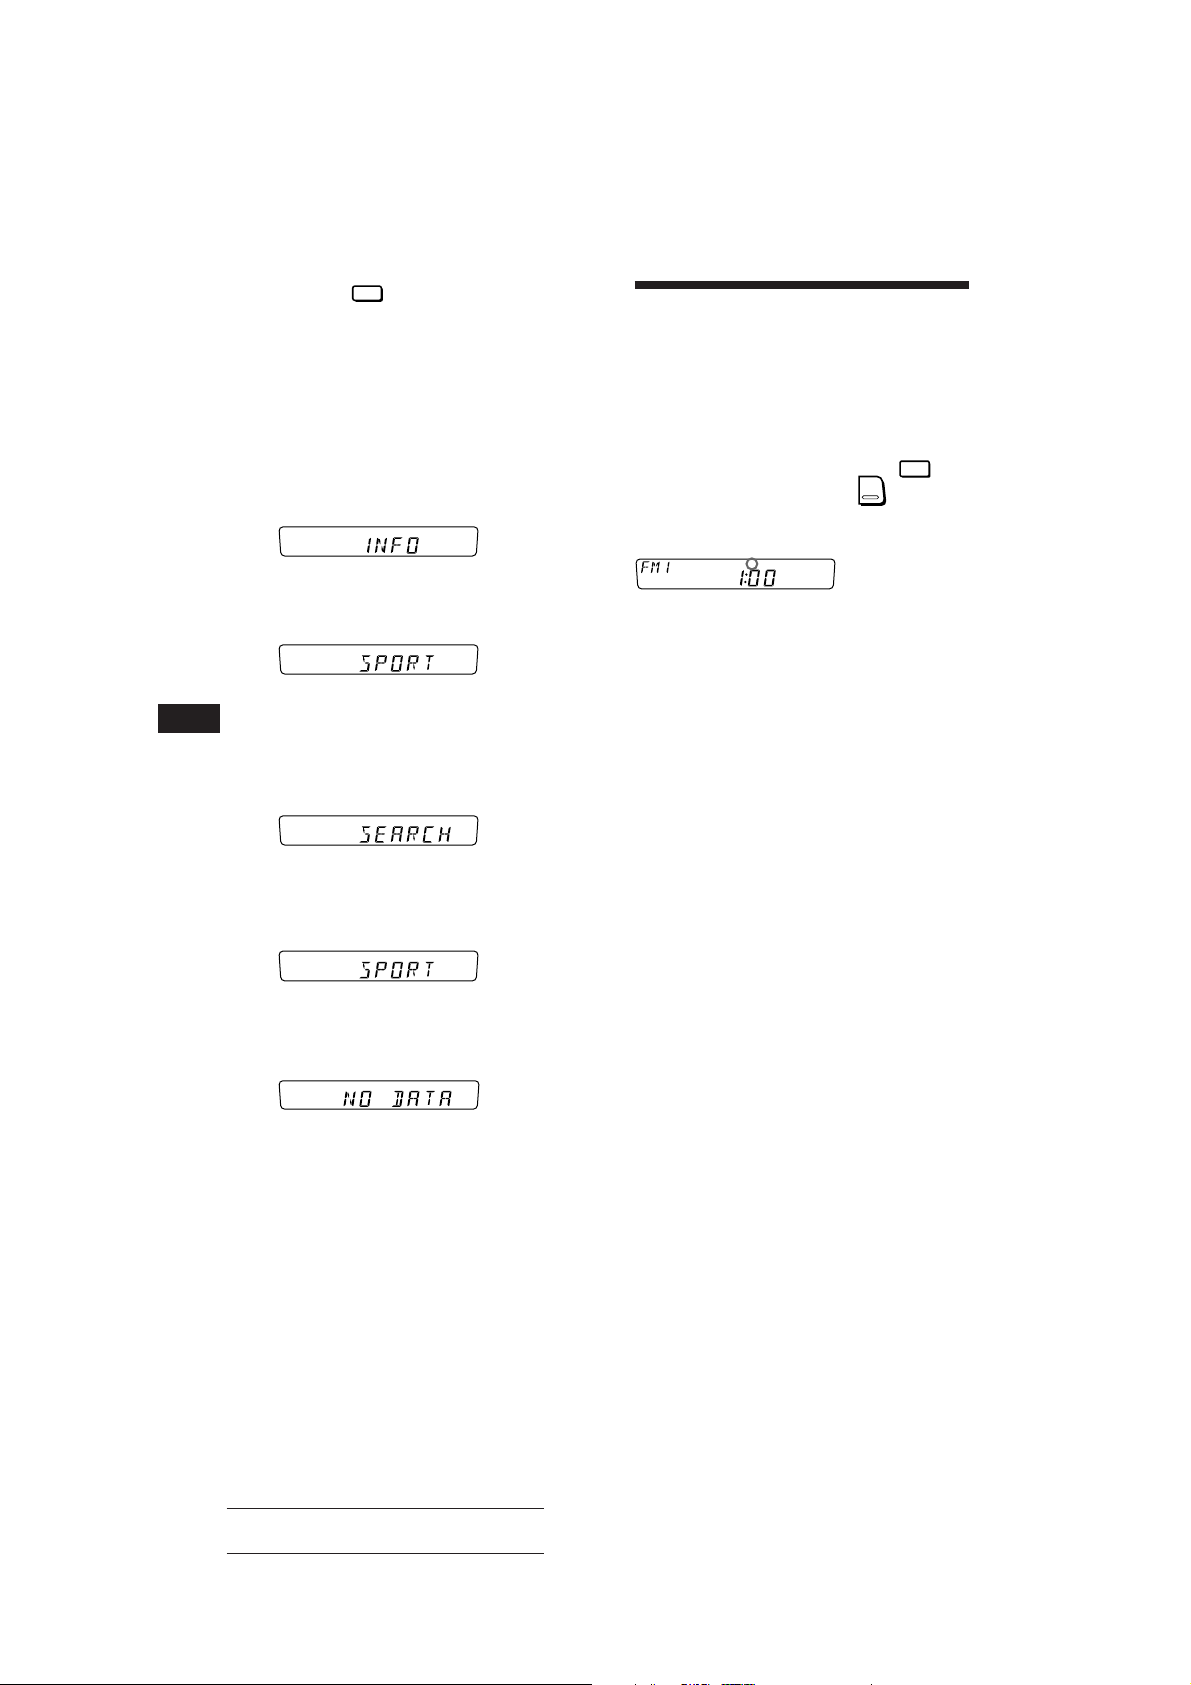
1 Press the
reception. n “PTY” appears on the
display.
If the currently received station is
transmitting PTY (programme type
selection) data, one of the programme type
names shown above will be displayed.
If the currently received station is not an
RDS station, or if the RDS data has not been
read, “- - - - - - - - ” will be displayed. In this
case, you can select “NEWS” or other
programme types by pressing the PTY
button.
PTY
button during FM
2 Press again within five seconds.
The programme types will be displayed in
the order shown above.
3 When the desired programme type is
displayed, press either side of the AMS/
SEEK button. n “SEARCH” will blink in
the display.
The unit will search for stations
broadcasting this programme type.
Using RDS Data for
Setting the Clock
Automatically
By receiving CT (Clock Time) data, the clock
can be set automatically.
REPEAT
During FM reception, press the
button while pressing the
n “CT” will be displayed, and the clock
will be set.
CT
To cancel the CT function, press these buttons
again.
Notes
• The CT function may not work even though an RDS
station is being received.
• The time set by the CT function may not be exact.
SEL
button.
2
4 When a programme of the desired type
is received, the programme type will
again appear in the display for five
seconds.
If the desired programme type cannot be
found, “NO DATA” will be displayed for
five seconds, and the unit returns to the
previous station (programme).
12
Actual total number: Sony CDX-4100/5100RDS (E,F,G,I) 3-810-809-11 (1)
Page 13
Other Functions
Adjusting the Sound
Characteristics
1 Select the item you want to adjust by
pressing the
VOL (volume) n BAS (bass) n TRE
(treble) n BAL (balance) n FAD (fader)
n VOL (volume) n ···
2 Adjust the selected item by pressing the
or button.
Adjust within three seconds after selecting.
(After three seconds the buttons will again
serve as volume control buttons.)
Enjoying Bass and Treble
at Low Volume
— Loudness Function
Press the
appear on the display.
The bass and treble will be boosted.
To cancel, press again.
LOUD
button repeatedly.
SEL
button. n “LOUD” will
Muting the Beep Tone
Press the 6 button while pressing
the
To reactivate the beep tone, press these buttons
once more.
Note
When connecting an optional power amplifier to the LINE
OUT, the beep tone is disabled.
button.
SEL
Changing the Illumination
Colour
Press the
the
You can choose the colour between amber and
green.
(for the CDX-5100RDS)
INTRO
1
button while pressing
button.
SEL
EN
RDS Functions/Other Functions
Muting the Sound Quickly
— Mute Function
Press the
indication flashes.
The sound is muted at once.
To restore the previous volume level, press
again.
This function will be also cancelled when:
— the
— ejecting a CD by pressing the 6 button during CD
playback.
Actual total number: Sony CDX-4100/5100RDS (E,F,G,I) 3-810-809-11 (1)
MUTE
button. n The “MUTE”
or OFF button is pressed.
13
Page 14
Maintenance
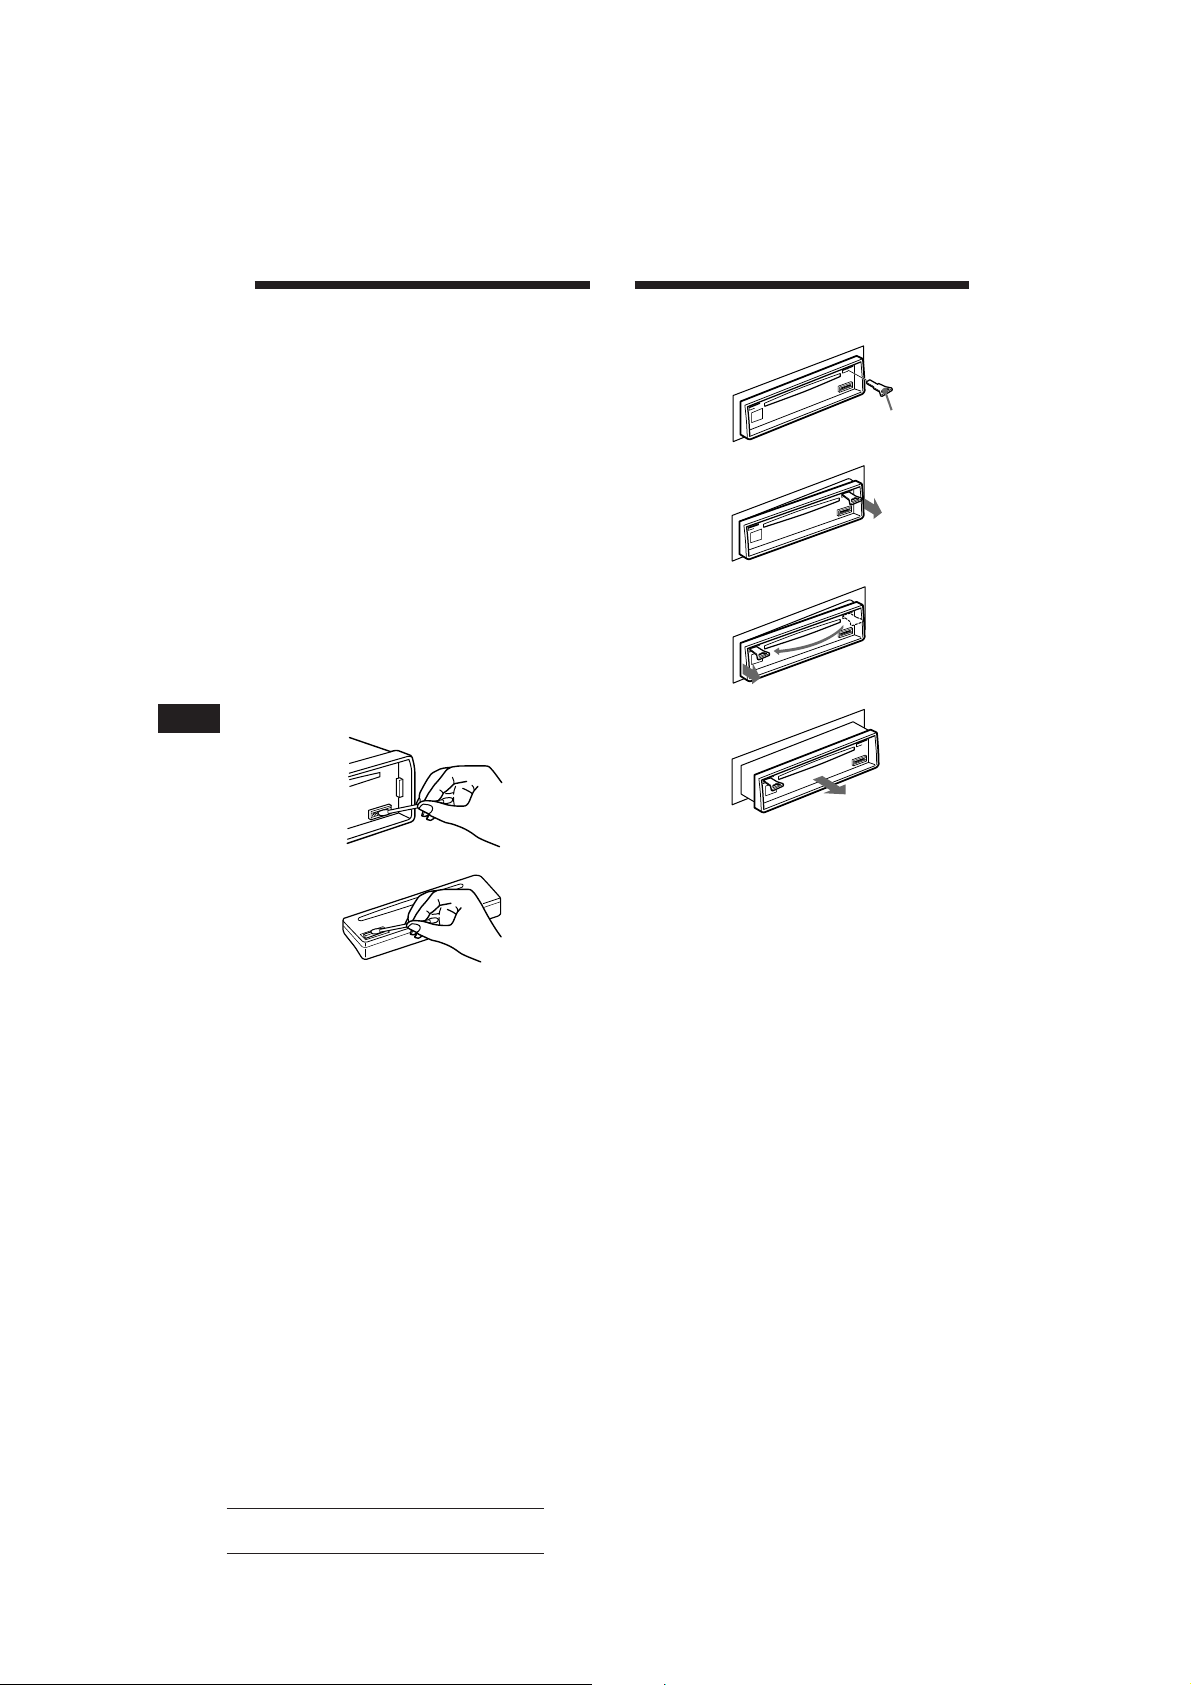
Dismounting the Unit
EN
Fuse Replacement
When replacing the fuse, be sure to use one
with the correct amperage stated on the fuse
case. Never use a fuse whose an amperage
rating exceeds the one supplied with the unit
as this could cause a malfunction of the unit.
Warning
Use a fuse with the specified amperage.
Use of a fuse with higher amperage may cause
serious damage.
Cleaning the Connectors
The unit may not function properly if the
connectors between the unit and the front
panel are not clean. In order to prevent this,
open the front panel by pressing the RELEASE
button, then detach it and clean the connectors
with a cotton swab dipped in alcohol. Do not
apply too much force. Otherwise, the
connectors may be damaged.
Main unit
1
Release key
(supplied)
2
3
4
Back of the front panel
14
Actual total number: Sony CDX-4100/5100RDS (E,F,G,I) 3-810-809-11 (1)
Page 15
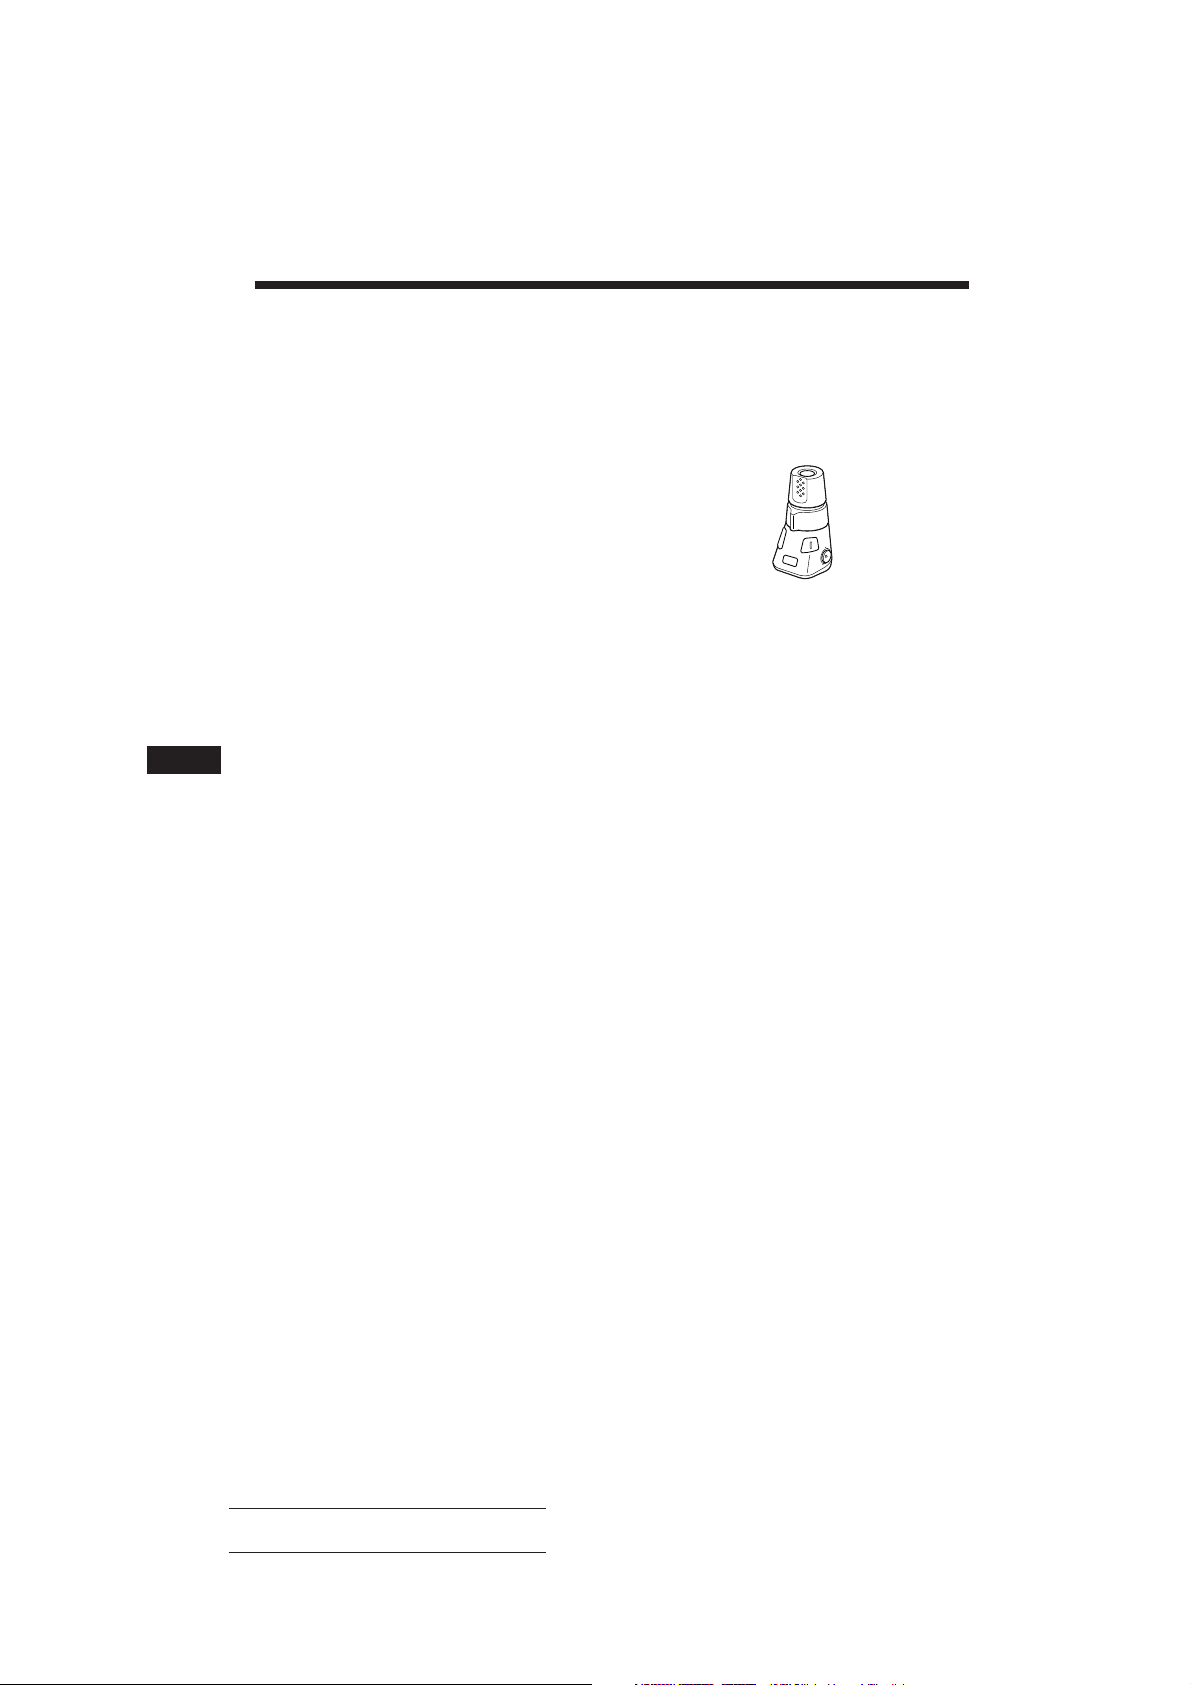
Notes on Using the
Optional Rotary
Commander RM-X2S
(for the CDX-4100RDS)
This unit can be operated with the optional
rotary commander
(RM-X2S).
You can turn on this unit by pressing the
SOURCE button on the rotary commander.
The Rotary Commander Labels
Four button name labels are supplied with the
rotary commander. Attach that label which
matches the functions of the master unit and
the installation position of the rotary
commander.
If you connect this unit, attach the label which
has “DSPL” on it.
DSPL
MODE
SEL
EN
SEL
MODE
DSPL
Attach the appropriate label for the installation
position of the rotary commander.
15
Actual total number: Sony CDX-4100/5100RDS (E,F,G,I) 3-810-809-11 (1)
Page 16
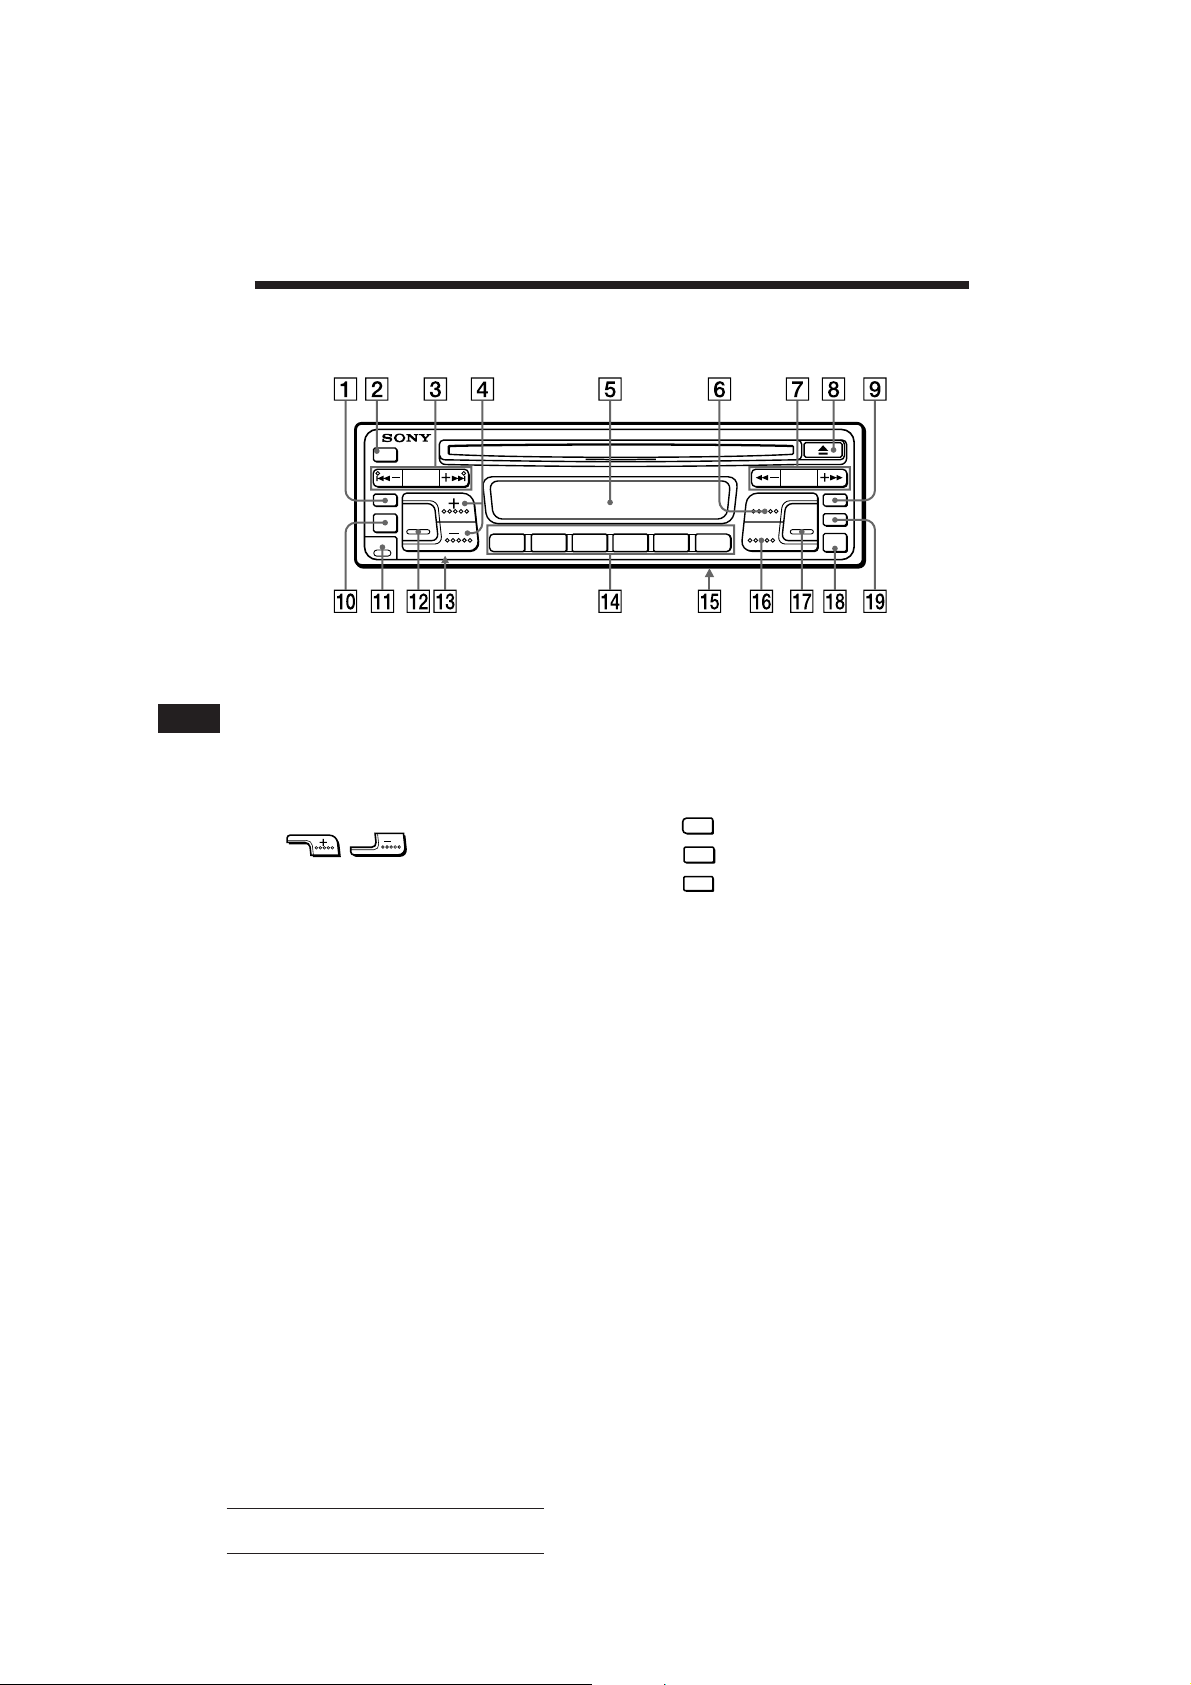
Location of Controls
OFF
AMS/SEEK
LOUD
MUTE
SEL
RELEASE
INTRO2REPEAT3SHUF
1
456
TUNER
AF/TA
PRESET
CD
PTY
BTM
SENS
DSPL
EN
Refer to the pages in r for details.
1 LOUD (loudness) button !£
2 OFF button 46!£
3 AMS/SEEK (Automatic Music Sensor/
automatic tuning) button 67
4 (volume/bass/treble/
balance/fader control) buttons 5!£
5 Display window
6 TUNER (radio on/band select) button
6789
7 PRESET (preset search) button 689
8 6 (eject) button 6!£
9 PTY (Programme Type) button !™
!º MUTE button !£
!¡ RELEASE (front panel release) button
4!¢
!™ SEL (control mode select/character set)
button 5!¡!™!£
!£ Reset button (located on the front side
of the unit hidden by the front panel) 4
!¢ During radio reception:
Preset number buttons 89
During CD playback:
INTRO
INTRO (intro scan) button 6
1
REPEAT
REPEAT (repeat play) button 7
2
SHUF
SHUF (shuffle play) button 7
3
!∞ POWER SELECT switch (located on the
bottom of the unit)
See “POWER SELECT Switch” in the
Installation/Connections manual.
!§ AF/TA (alternative frequency/traffic
announcement) button 0!¡
!¶ CD (CD play) button 6
!• DSPL (display mode change/time set)
button 59
!ª SENS/BTM (sensitivity adjust/Best
Tuning Memory function) button 78
16
Actual total number: Sony CDX-4100/5100RDS (E,F,G,I) 3-810-809-11 (1)
Page 17

Specifications
CD player section
System Compact disc digital audio
system
Signal-to- noise ratio 90 dB
Frequency response 10 – 20,000 Hz
Wow and flutter Below measurable limit
Tuner section
FM
Tuning range 87.5 – 108.0 MHz
Antenna terminal External antenna connector
Intermediate frequency 10.7 MHz
Usable sensitivity 8 dBf
Selectivity 75 dB at 400 kHz
Signal-to-noise ratio 65 dB (stereo),
68 dB (mono)
Harmonic distortion at 1 kHz
0.5 % (stereo),
0.3 % (mono)
Separation 35 dB at 1 kHz
Frequency response 30 – 15,000 Hz
Capture ratio 2 dB
MW/LW
Tuning range MW: 531 – 1,602 kHz
LW: 153 – 281 kHz
Antenna terminal External antenna connector
Intermediate frequency 10.71 MHz/450 kHz
Sensitivity MW: 30 µV
LW: 50 µV
Power amplifier section
Outputs Speaker outputs
(sure seal connectors)
Speaker impedance 4 – 8 ohms
Maximum power output For the CDX-4100RDS
20 W × 4 (at 4 ohms)
For the CDX-5100RDS
35 W × 4 (at 4 ohms)
General
Output lead Power antenna relay
control lead
Power amplifier control
lead
Tone controls Bass ±8 dB at 100 Hz
Treble ±8 dB at 10 kHz
Power requirements 12 V DC car battery
(negative ground)
Dimensions Approx. 188 × 58 × 177 mm
(w/h/d)
Mounting dimension Approx. 178 × 50 × 154 mm
(w/h/d)
Mass Approx. 1.5 kg
Supplied accessories Rotary Commander
RM-X2S (for the
CDX-5100RDS)
Parts for installation and
connections (1set)
Front panel case (1)
Optional accessories Rotary Commander
RM-X2S
RCA pin cord
RC-63 (1 m), RC-64 (2 m),
RC-65 (5 m)
Cleaning cloth XP-CD1
Compact disc single
adapter CSA-8
Design and specifications are subject to change without
notice.
EN
Actual total number: Sony CDX-4100/5100RDS (E,F,G,I) 3-810-809-11 (1)
17
Page 18
Troubleshooting Guide
The following checklist will assist in the correction of most problems which you may encounter with
your unit.
Before going through the checklist below, refer to the connection and operating procedures.
General
Problem
No sound
The contents of the memory
have been erased.
Indications do not appear in the
display window.
No beep tone.
Cause/Solution
• Adjust the volume with the button.
• Set the fader control to the centre position for 2-speaker
systems.
• The power cord or battery has been disconnected.
• The reset button has been pressed.
n Store stations into memory again.
Remove the front panel and clean the connectors. See “Cleaning
the Connectors” of “Maintenance” for details.
• An optional power amplifier is connected to the LINE OUT.
• The beep tone is muted (page 13).
EN
CD playback
Problem
CD cannot be loaded.
Play does not begin.
CD is automatically ejected.
The operation buttons do not
function.
The sound skips due to
vibration.
Radio reception
Problem
Preset tuning is not possible.
Automatic tuning is not possible.
The “ST” indication flashes.
Cause/Solution
• Another CD is already loaded.
• The CD was forcibly inserted upside down.
Dusty disc.
The ambient temperature is more than 50°C.
Press the reset button.
• The unit is installed at an angle of more than 20°.
• The unit is not installed in a sturdy part of the car.
Cause/Solution
• Memorise the correct frequency.
• The broadcast is too weak.
The broadcast is too weak. n Use manual tuning.
• Tune in precisely.
•The broadcast is too weak.
n Press the
BTM
button to enter the MONO mode.
SENS
18
Actual total number: Sony CDX-4100/5100RDS (E,F,G,I) 3-810-809-11 (1)
Page 19

Error displays
The following indications will flash for about five seconds and an alarm sound will be heard.
Display
If the above-mentioned solutions do not help to improve the situation, consult your nearest Sony
dealer.
Cause
CD is dirty or inserted upside down.
The CD player cannot be operated
because of some problem.
Solution
Clean or insert the CD correctly.
Press the reset button.
EN
Actual total number: Sony CDX-4100/5100RDS (E,F,G,I) 3-810-809-11 (1)
19
Page 20
Caractéristiques
Généralités
• Vous pouvez emporter la façade détachable
quand vous quittez votre véhicule (page 4).
• Un avertisseur retentit si vous tournez la clé
de contact sans avoir préalablement enlevé la
façade de l’appareil.
• Horloge numérique à cycle de 24 heures
intégrée (page 5).
• Deux couleurs d’illumination (ambre et
vert) commutables (CDX-5100RDS)
(page 14).
• L’amplificateur de puissance intégré vous
permet de relier un système à 4 haut-parleurs
(puissance max. : 20 W × 4 ca (CDX-4100RS),
35 × 4 ca (CDX5100RDS).
• Les sorties de ligne servent à raccorder un
amplificateur de puissance optionnel.
• Livré avec le satellite de commande
(CDX-5100RDS).
Section lecteur CD
• Un convertisseur numérique-analogique
F
(DAC) de 1 bit améliore la qualité de la
reproduction sonore.
• Mécanisme de reprise rapide de la lecture
pour éviter les pertes de son.
• Fonctions pratiques habituelles telles que le
balayage des intros pour rechercher une
plage, la répétition pour écouter plusieurs
fois une plage et la lecture aléatoire pour
écouter les plages d’un disque dans un ordre
quelconque.
Satellite de commande en option
(CDX-4100RDS)
Possibilité d’utiliser le satellite de commande
(RM-X2S) manœuvrable comme la commande
des essuie-glaces ou des phares pendant la
conduite.
Section tuner
• Possibilité de présélectionner jusqu’à 30
stations: 18 en FM et 6 dans chaque gamme
d’ondes PO et GO.
• La fonction de mémorisation du meilleur
accord (BTM) sert à sélectionner
automatiquement les stations émettant un
signal puissant et à les mémoriser sous les
touches numériques de présélection dans
l’ordre des fréquences (page 8).
• Services d’information disponibles si une
station FM RDS peut être reçue (page 10).
• Compatible avec les fonctions RDS telles que
EON (Enhanced Other Networks), AF
(Alternative Frequency - changement de
fréquence), TA (Traffic Announcement radioguidage), PTY (Type d’émission) et CT
(Clock Time - horloge) (pages 9, 10, 11, 12 et
13).
2
Actual total number: Sony CDX-4100/5100RDS (EFGI) 3-810-809-11(1)
Page 21

Table des matières
Précautions ............................................................... 4
Retrait et pose de la façade ..................................... 4
Réglage de l’horloge ................................................ 5
Fonctionnement du lecteur de
CD
Lecture d’un CD ...................................................... 6
Ejection du CD ......................................................... 6
Recherche des débuts de plage
— Fonction AMS (Automatic Music
Sensor, détecteur automatique
de musique) .................................................... 6
Localisation d'un passage sur une plage
— Fonction de recherche manuelle .................. 6
Recherche d’une plage
— Fonction d’écoute des intros ........................ 6
Répétition
— Lecture répétée des plages ........................... 7
Lecture des plages dans un ordre aléatoire
— Fonction de lecture aléatoire ........................ 7
Réception radio
Recherche automatique des stations
— Accord automatique ...................................... 7
Si la réception FM stéréo n’est pas bonne
— Réception mono ............................................. 8
Accord par réglage de la fréquence
— Accord manuel ............................................... 8
Mémorisation automatique des stations
— Fonction BTM (Best Tuning Memory,
Mémorisation du meilleur accord) .............. 8
Mémorisation de stations particulières ................ 8
Réception des stations mémorisées ...................... 9
Fonctions RDS
Présentation du système RDS ................................ 9
Affichage du nom des stations et émetteurs ..... 10
Ecoute de la même émission sans resyntonisation
manuelle même si le véhicule s’est déplacé
— Fonction AF ................................................... 10
Ecoute des messages relatifs à la circulation
routière ............................................................... 11
Sélection du type d’émission ............................... 12
Utilisation des données RDS pour régler
automatiquement l’horloge de l’appareil ...... 13
Autres fonctions
Réglage du son ....................................................... 13
Pour obtenir un son équilibré même à faible niveau
— Correction physiologique ........................... 13
Coupure rapide du son
— Fonction sourdine ........................................ 13
Coupure des bips sonores .................................... 14
Changer la couleur d’illumination
(CDX-5100RDS) ................................................. 14
Entretien .................................................................. 14
Retrait de l'appareil ............................................... 15
Remarques sur le satellite de commande en
option RM-X2S (CDX-4100RDS) ..................... 15
Nomenclature des touches ................................... 16
Spécifications .......................................................... 17
Guide de dépannage ............................................. 18
F
Actual total number: Sony CDX-4100/5100RDS (EFGI) 3-810-809-11(1)
3
Page 22
Précautions
• Avant la première mise en service de
l’appareil ou après avoir remplacé la batterie
de la voiture, appuyez sur la touche de
réinitialisation à l’aide d’un stylo à bille, etc.,
et faites ensuite fonctionner l’appareil.
N’exposez pas les disques au rayonnement
direct du soleil ou à des sources de chaleur
telles que des conduits d’air chaud et ne les
laissez pas dans une voiture garée en plein
soleil car la température de l’habitacle risque
d’augmenter considérablement.
Touche de réinitialisation
• Si vous avez garé votre voiture en plein soleil et
que la température à l’intérieur a
considérablement augmenté, attendez que
l’appareil se refroidisse avant de vous en servir.
• Si l’alimentation électrique n’arrive pas à
l’appareil, vérifiez d’abord les connexions. Si
elles sont correctes, vérifiez le fusible.
• Si aucun son ne sort des deux haut-parleurs,
réglez le fader (balance avant-arrière) sur la
position centrale.
Pour toute question ou problème au sujet de
F
cet appareil, dont vous ne trouveriez pas
l’explication dans ce mode d’emploi, consultez
votre revendeur Sony.
Remarques sur les CD
Un disque sale ou défectueux peut provoquer
des pertes de son à la lecture. Pour conserver
une qualité sonore optimale, manipulez le
disque comme indiqué ci-dessous.
Saisissez le disque par les bords et n’en
touchez pas la surface de façon à ce qu’il reste
propre.
Ne collez pas de papier ni de ruban adhésif sur
la surface imprimée.
Avant la lecture, essuyez les disques avec un
chiffon de nettoyage en option. Essuyez
chaque disque du centre vers la circonférence.
N'utilisez pas de solvants tels que de la
benzine, du diluant, des produits de nettoyage
vendus dans le commerce ou des
vaporisateurs anti.
Remarque sur la condensation
d'humidité
Les jours de pluie ou dans les régions très
humides, de la condensation risque de se
déposer sur les lentilles du changeur CD et
l’appareil ne fonctionne pas normalement.
Dans ce cas, vous devez enlever le disque et
attendre environ une heure que l’humidité se
soit évaporée.
Retrait et pose de la
façade
Vous pouvez détacher la façade afin d’éviter
que l’appareil ne soit volé.
Retrait de la façade
Avant de détacher la façade, appuyez sur la
touche OFF. Appuyez ensuite sur la touche
RELEASE pour ouvrir la façade. Enlevez-la en
la tirant vers vous, comme indiqué sur
l’illustration.
Touche OFF
Touche RELEASE
Veillez à ne pas laisser tomber la façade
4
lorsque vous la retirez de l’appareil.
Actual total number: Sony CDX-4100/5100RDS (EFGI) 3-810-809-11(1)
Page 23

Pose de la façade
Présentez la partie droite de la façade sur
l’appareil en fixant la partie A de la façade sur
la partie B de l’appareil comme illustré et
faites ensuite pivoter le côté gauche dans
l’appareil jusqu’à ce qu’il s’encliquette.
Réglage de l’horloge
L’horloge fonctionne sur 24 heures.
Par exemple, réglez l’heure sur 10:08.
1 Affichez l’heure.
(Appuyez sur
fonctionne.)
pendant que l’appareil
DSPL
A
B
Remarques
• Vérifiez que la façade est dans le bon sens avant de la
fixer, car elle ne peut pas être fixée dans l’autre sens.
• Ne forcez pas pour fixer la façade sur l’appareil.Une
légère pression est suffisante.
• N’appuyez pas avec force sur l’afficheur de la façade.
• Rangez la façade dans son étui pour la transporter.
• Mettez l’appareil hors tension avant de retirer la façade.
Cependant, si vous appuyez sur la touche RELEASE
quand l’appareil est sous tension, il se met
automatiquement hors tension pour protéger les hautparleurs.
• Ne laissez pas la façade en plein soleil, près de sources de
chaleur comme des conduits d’air chaud ou dans un
endroit humide. Ne la laissez jamais sur le tableau de
bord, etc. d’une voiture garée en plein soleil, car la
température risque d’augmenter considérablement.
Avertisseur
Si vous mettez la clé de contact du véhicule sur
la position OFF (arrêt) sans enlever la façade,
l’avertisseur se déclenche et émet un bip
pendant quelques secondes. (Uniquement si
l’interrupteur POWER SELECT est commuté
sur A.)
2 Appuyez sur
DSPL
pendant plus de deux
secondes.
Les chiffres des heures clignotent.
Réglez l’heure.
pour avancer
pour reculer
3 Appuyez brièvement sur la touche
Les chiffres des minutes clignotent.
Réglez les minutes
pour avancer
pour reculer
4 Appuyez brièvement sur la touche
SEL
DSPL
F
.
.
L’horloge fonctionne.
Remarque
Quand l’interrupteur POWER SELECT sous l’appareil est
réglé sur la position B, vous ne pouvez pas régler l’horloge
si l’appareil est éteint. Allumez la radio ou démarrez la
lecture d’un CD avant de régler l’horloge.
Actual total number: Sony CDX-4100/5100RDS (EFGI) 3-810-809-11(1)
5
Page 24

Fonctionnement du
AMS/SEEK
lecteur de CD
Lecture d’un CD
Introduisez un CD, la lecture commence
automatiquement à partir de la
première Plage.
Etiquette vers le haut
Recherche des débuts de
plage
— Fonction AMS (Automatic Music Sensor,
détecteur automatique de musique)
En cours de lecture, appuyez sur l’un
des deux côtés de la touche AMS/SEEK
autant de fois que vous voulez sauter
de plage.
AMS/SEEK
S’il y a déjà un CD, appuyez sur
pour entamer la lecture.
Temps de lecture écoulé
F
TRACK
Numéro de plage
Quand la dernière plage du CD est
terminée
L’indication du numéro de plage revient sur
“1” et la lecture reprend à partir de la première
plage du CD.
Remarque
Pour écouter un disque de 8 cm, utilisez l'adaptateur Sony
CSA-8 (non fourni).
Pour arrêter la lecture,
appuyez sur ou
La lecture s’arrête également si vous choisissez
une autre source (radio) en appuyant sur
TUNER
.
OFF
, le CD est éjecté.
Ejection du CD
Appuyez sur .
Remarque
Si vous laissez le disque éjecté dans la fente après avoir
appuyé sur la touche 6, il est automatiquement
réintroduit dans l'appareil au bout de 15 secondes environ
par mesure de protection.
Pour aller vers les
plages précédentes
Pour aller vers les
plages suivantes
Localisation d’un passage
CD
sur une plage
— Fonction de recherche manuelle
Pendant la lecture, pressez et
maintenez enfoncé l’un ou l’autre côté
de la touche PRESET. Relâchez cette
touche dès que vous avez trouvé le
passage voulu.
PRESET
Pour reculer
Si vous revenez au début du disque, l’indication
“
jusqu’à la fin du disque, l’indication “
s’affichera.
Dans un cas comme dans l’autre, vous ne pouvez passer à
la plage précédente ou à la plage suivante.
” apparaît sur l’afficheur. Si vous avancez
PRESET
Pour avancer
”
Recherche d’une plage
— Fonction d’écoute des intros
Appuyez sur la touche
lecture. n “INTRO” apparaît à
l’affichage.
Les dix premières secondes de toutes les
plages sont lues. Lorsque vous avez trouvé la
plage que vous cherchez, appuyez sur la
touche une nouvelle fois pour revenir à la
lecture normale.
INTRO
1
pendant la
6
Actual total number: Sony CDX-4100/5100RDS (EFGI) 3-810-809-11(1)
Page 25

Répétition
AMS/SEEK
— Lecture répétée des plages
Appuyez sur la touche
lecture. n “REP 1” apparaît à
l’affichage.
A la fin de la plage écoutée, celle-ci sera
répétée depuis son début.
Pour annuler la fonction, appuyez à nouveau
sur la touche.
REPEAT
2
pendant la
Lecture des plages dans
un ordre aléatoire
— Fonction de lecture aléatoire
Appuyez sur la touche
lecture. n “SHUF 1” apparaît à
l’affichage.
Toutes les plages du disque sélectionné sont
reproduites dans un ordre aléatoire.
SHUF
3
pendant la
Réception radio
Recherche automatique
des stations
— Accord automatique
1 Choisissez la gamme d’ondes voulue.
TUNER
2 Appuyez sur l’un des côtés de la touche
AMS/SEEK pour chercher la station
suivante (accord automatique).
Pour descendre
de fréquence
L’exploration s’arrête lorsque l’accord se fait
sur une station. Appuyez à nouveau sur l’un
des deux côtés de la touche AMS/SEEK
jusqu’à ce que vous captiez la station de votre
choix.
Lorsqu’une station FM émettant avec un signal
suffisamment puissant est syntonisée,
FM1 n FM2 n FM3 n
MW n LW n FM1 n ···
AMS/SEEK
ST
Pour monter
de fréquence
F
Fonctionnement du lecteur de CD/Réception radio
l’indication “ST” s’affiche.
Pour éviter que l’accord automatique s’arrête sur
des stations dont le signal d’émission est trop
faible (mode de recherche locale), appuyez
brièvement sur la touche
l’indication “LCL” s’affiche.
L’accord se fera alors uniquement sur les stations dont le
signal d’émission est suffisamment puissant. Le mode de
recherche locale est uniquement opérant lorsque la fonction
d’accord automatique est activée.
BTM
de façon à ce que
SENS
Actual total number: Sony CDX-4100/5100RDS (EFGI) 3-810-809-11(1)
7
Page 26

Si la réception FM stéréo
TUNER
n’est pas bonne
— Réception mono
Appuyez sur
n “MONO” apparaît à l’affichage.
La qualité sonore s’en trouve améliorée, mais
le son est diffusé en monaural.
En appuyant sur la touche
changer les paramètres affichés selon la séquence
suivante:
z z Mode normalz MONOLCL
BTM
pendant la lecture.
SENS
BTM
SENS
, vous pouvez
Accord par réglage de la
fréquence
1 Choisissez la gamme d’ondes voulue.
F
TUNER
2 Appuyez sur l’un des côtés de la touche
PRESET et maintenez-le enfoncé.
Lâchez la touche quand la station désirée
est atteinte.
Vers les fréquences
inférieures
EVITEZ LES ACCIDENTS!
Lorsque vous conduisez, utilisez de préférence
la fonction de syntonisation automatique ou
les présélections (page 9) plutôt que l’accord
manuel.
— Accord manuel
PRESET
Vers les fréquences
supérieures
PRESET
1 Choisissez la gamme d’ondes voulue.
TUNER
BTM
2 Appuyez sur
secondes
• S’il n’y a pas de numéro de présélection
affiché, les stations seront mémorisées
sous tous les numéros disponibles pour la
gamme d’ondes.
• S’il y a un numéro de présélection affiché,
l’appareil mémorise les stations sous tous
les numéros disponibles à partir de celui
indiqué.
Par exemple, si vous choisissez FM1 et que la
présélection 3 est affichée,
la mémorisation commence au numéro 3 de FM1 et
s’arrêtera au numéro 6 de FM3.
SENS
pendant plus de deux
3 FM1, FM2 et FM3 uniquement:
Appuyez brièvement sur la touche de
présélection
pendant deux secondes environ jusqu’à
ce que vous entendiez une tonalité.
n La station est mémorisée.
Répétez l’opération avec les touches de
présélection
Remarques
• Si l’indication “AF OFF” est affichée et que vous activez
la fonction BTM, l’appareil ne mémorisera que les
stations qui ne transmettent pas de données RDS. Selon
les conditions de réception, toutefois, il se peut que des
stations RDS soient mémorisées.
• Si vous ne mémorisez que des stations RDS (page 10),
l’étape 3 n’est pas nécessaire.
INTRO
, puis de nouveau
1
REPEAT
à 6.
2
Mémorisation de stations
particulières
Mémorisation
1 Choisissez la gamme d’ondes voulue.
automatique des stations
— Fonction BTM (Best Tuning Memory,
Mémorisation du meilleur accord)
Cette fonction recherche dans la gamme
d’ondes sélectionnée les stations offrant le
signal le plus puissant et les mémorise dans
l’ordre de leur fréquence.
2 Accordez la station que vous voulez
mémoriser sous un numéro de
présélection.
8
Actual total number: Sony CDX-4100/5100RDS (EFGI) 3-810-809-11(1)
Page 27

3 Appuyez sur la touche de présélection
INTRO
(
à 6) voulue et maintenez-la
1
enfoncée pendant deux secondes jusqu’à
ce que vous entendiez un bip sonore.
Le numéro de la présélection apparaît dans la
fenêtre d’affichage.
Six stations peuvent être mémorisées sous des touches de
présélection dans chaque gamme d’ondes (FM1, FM2,
FM3, PO et GO) dans l’ordre que vous voulez. Ainsi, vous
disposez de 18 présélections FM.
Si vous mémorisez une station sous le même numéro
qu’une autre présélection, la présélection précédente sera
effacée.
Réception des stations
mémorisées
1 Choisissez la gamme d’ondes voulue.
TUNER
2 Appuyez brièvement sur la touche du
numéro (
mémorisée la station que vous voulez
écouter.
Remarque
Si vous appuyez plus de deux secondes sur la touche
numérique de présélection, la station actuellement captée
est mémorisée. Pour écouter la station mémorisée au
préalable, veillez à n’appuyer que brièvement sur la touche
numérique de présélection.
Appuyez brièvement sur l’un des côtés
de la touche PRESET pour recevoir
d’autres stations présélectionnées
(fonction de recherche des
présélections).
PRESET
INTRO
à 6) sous lequel est
1
Fonctions RDS
Présentation du système
RDS
Le système RDS (système de données radio)
utilise les ondes hertziennes FM pour la
réception de signaux numériques. La réception
de données RDS sur l’installation stéréo de
votre véhicule permet d’accéder à un large
éventail de services. Vous pouvez utiliser ces
services de plusieurs façons. A titre d’exemple,
vous pouvez obtenir diverses informations
telles que des messages relatifs à la circulation
routière et le nom des stations et émetteurs
sélectionnés; vous pouvez également imposer
à votre installation de se syntoniser
automatiquement sur le signal le plus puissant
parmi les émetteurs qui assurent la diffusion
d’une même émission radio. Ainsi, même si le
trajet à parcourir est important, vous pouvez
continuer à écouter la même émission sans
devoir resyntoniser manuellement à plusieurs
reprises le tuner de votre installation. Une
autre fonction vous permet de recevoir les
messages relatifs à la circulation routière au
cours de la lecture du CD.
Le système RDS propose une multitude de
fonctions les plus diverses dont la disponibilité
dépend du pays ou de la région traversée. Les
informations détaillées qui suivent portent sur
les différentes fonctions RDS de cet appareil.
Remarques
• Dans l’éventualité où les signaux reçus seraient faibles
ou les conditions de réception médiocres, les fonctions
RDS sont susceptibles de ne pas donner toute
satisfaction.
• Si l’émetteur FM en cours de réception n’émet aucune
donnée RDS, les fonctions décrites ci-après ne seront pas
opérationnelles.
F
Réception radio/Fonctions RDS
Appuyez brièvement
1 n 2 n 3 n 4 n 5 n 6 n 1 n ···
PRESET
Appuyez brièvement
1 n 6 n 5 n 4 n 3 n 2 n 1 n ···
Actual total number: Sony CDX-4100/5100RDS (EFGI) 3-810-809-11(1)
9
Page 28

Affichage du nom des
AF/TA
stations et émetteurs
Les données RDS permettent d’afficher le nom
de l’émetteur dont la réception est en cours.
Sélectionnez un émetteur FM. n S’il
s’agit d’une station qui émet des
données RDS, son nom s’affichera sur
l’écran.
Changement automatique de fréquence
98,5 MHz
Emetteur
102,5 MHz
96,0 MHz
Si un “*” accompagne l’indication de
fréquence habituelle, le tuner capte une station
RDS.
Modification des éléments d’information affichés
Chaque fois que vous appuyez sur la touche
l’affichage des éléments d’information évolue comme suit:
z Fréquence z Heure z Nom de station
Lorsqu’une succession de “NO NAME”
s’affichent au lieu du nom de l’émetteur, la
F
station captée n’émet aucune donnée RDS. Au
terme d’un délai de quelques secondes, les
“NO NAME” disparaissent et la fréquence
indications de l’émetteur capté s’affiche.
Ecoute de la même émission
sans resyntonisation
manuelle même si le
véhicule s’est déplacé
— Fonction AF
La fonction “AF” (liste des fréquences
alternatives) autorisant la syntonisation
automatique du tuner sur la fréquence
porteuse du signal le plus puissant parmi les
différentes fréquences d’émission de la station
en cours de réception dans chacune des
régions considérées permet d’écouter sans
discontinuer la même émission quelle que soit
la distance parcourue sans devoir procéder à
plusieurs reprises à une resyntonisation
manuelle du tuner.
DSPL
1 Sélectionnez un émetteur FM.
2 Appuyez sur la touche
obtenir l’affichage de l’indication “AF”.
,
Remarques
• Si la fréquence en cours de réception est faible et si le
même programme ne peut être capté par l’intermédiaire
d’autres fréquences, l’indication “NO AF” s’affichera à
l’écran.
• Si la fonction de syntonisation automatique (page 7) est
activée alors que l’indication “AF” s’affiche, seules les
stations FM qui émettent des données RDS seront
reçues.
• Si vous appuyez sur la touche AF/TA alors que le tuner
capte un émetteur PO ou GO, la station FM1 sera
automatiquement sélectionnée.
Syntoniser les stations RDS du
réseau de radiodiffusion
mémorisées
Lorsque l’appareil mémorise sous une touche
de présélection une station RDS transmettant
les données AF, il mémorise à la fois sa
fréquence et ses données AF et PI
(identification de programme).
L’appareil enregistre ces données dans sa
mémoire, que la fonction AF soit activée ou
non.
La fonction AF vous permet de sélectionner
une station émettant un signal plus clair en
resyntonisant dans le réseau de radiodiffusion
de la station mémorisée.
Appuyez sur la touche
ensuite sur la touche de présélection.
Remarque
S’il n’est pas possible de trouver d’autres stations dans le
réseau de la station présélectionnée à l’aide des données
AF, l’indication “PI seek” est affichée et l’appareil
recherche une station avec les mêmes données PI. Si
l’appareil ne trouve pas d’autre station avec les mêmes
données PI, il revient à la station originale.
AF/TA
pour
et
10
Actual total number: Sony CDX-4100/5100RDS (EFGI) 3-810-809-11(1)
Page 29

Ecoute d’une émission régionale
AF/TA
AF/TA
AF/TA
Appuyez sur la touche
AF/TA
pendant
plus de deux secondes. n L’indication
“REG” apparaît à l’écran.
Pour annuler ce choix, appuyez de nouveau
pendant plus de deux secondes sur la même
touche.
Remarque
Le réglage initial est “Regional ON”
Cette fonction ne peut être activée ni au
Royaume-Uni, ni dans certaines autres régions.
Fonction de liaison locale (Royaume-Uni
exclusivement)
Lorsque la réception des émetteurs locaux mémorisés dans
les touches numériques de présélection est médiocre ou si
vous souhaitez passer à un autre émetteur local, utilisez
cette fonction pour activer la recherche automatique
d’autres émetteurs locaux et pour les syntoniser les uns
après les autres.
Dans un délai de cinq secondes après la réception, appuyez
sur la touche numérique de présélection correspondant à
l’émetteur local que vous souhaitez changer et maintenez
cette touche enfoncée. Répétez cette procédure à plusieurs
fois jusqu’à ce que les émetteurs locaux de votre choix
soient captés par l’appareil.
Mémorisation de stations RDS uniquement
La fonction BTM (page 8) permet de ne mémoriser que des
stations RDS dans les touches de présélection; activez la
fonction AF, puis appuyez sur la touche SENS/BTM
pendant deux secondes.
Si l’indication “AF OFF” est affichée et que vous activez la
fonction BTM, l’appareil ne mémorisera que les stations
qui ne transmettent pas de données RDS.
Ecoute des messages
relatifs à la circulation
routière
L’utilisation des données TA (message relatif à
la circulation routière) et TP (émission relative
au trafic) permet de capter automatiquement
certains émetteurs qui diffusent des messages
relatifs à la circulation routière. Vous pouvez
écouter ces messages même lors de la lecture
du CD dans la mesure où l’appareil continue à
chercher tout émetteur de ce type et à passer
automatiquement en mode de réception FM
dès l’amorce d’un message consacré à la
circulation routière.
Appuyez sur la touche
pour
obtenir l’affichage de l’indication “TA”.
n Le tuner part à la recherche
d’émetteurs diffusant des informations
relatives à la circulation routière.
Dès qu’il capte un émetteur transmettant ce
type de message, l’indication “TP” s’affiche.
Durant la réception du message, l’indication
“TA” clignote. Ce clignotement cesse dès que
le message est terminé.
La fonction TA fonctionne également en cours
de lecture d’un CD.
Appuyez sur la touche
lors de la
lecture d’un CD. n L’indication “TA”
apparaît à l’écran.
Le tuner part à la recherche de messages
relatifs à la circulation routière. Dès qu’il capte
un tel message, la lecture du CD est
interrompue afin de permettre l’écoute des
informations transmises par l’émetteur
concerné.
Si vous appuyez sur la touche
alors
que le tuner capte un émetteur PO ou GO,
celui-ci passe automatiquement en mode de
réception FM.
Désactivation des informations de radioguidage
captées
Appuyez brièvement sur la touche AF/TA.
Désactivation du mode TA
Appuyez sur la touche AF/TA jusqu’à ce que l’indication
“AF/TA OFF” apparaisse à l’écran.
Remarque
Si le tuner ne capte aucun émetteur d’information routière,
l’indication “NO TP” clignotera pendant près de quatre
secondes puis le tuner se lancera à la recherche d’autres
stations émettant des messages relatifs à la circulation
routière.
Chaque fois que vous appuyez sur la touche
AF/TA, l’indication dans la fenêtre d’affichage
change comme suit:
z AF ON z AF/TA ONz TA ON
AF/TA OFF Z
L’indication “EON”
Lorsque les indications “TA” et “EON” sont toutes deux
affichées, cela signifie qu’outre la station dont le tuner
diffuse les informations, un autre émetteur est également en
train de diffuser un message relatif à la circulation routière.
F
Fonctions RDS
11
Actual total number: Sony CDX-4100/5100RDS (EFGI) 3-810-809-11(1)
Page 30

PTY
Préréglage du volume des
messages de radioguidage
Vous pouvez écouter ces messages à un niveau
sonore préalablement réglé. Par exemple,
même si vous avez ramené le volume à zéro,
celui-ci passera automatiquement au niveau
présélectionné dès le début de tout message
relatif à la circulation routière. (Si le niveau du
volume sonore de la lecture ou de l’émission
en cours est supérieur à celui du niveau
présélectionné, ce niveau sonore est maintenu).
Emissions
Variétés
Musique légère
Musique classique
Autres types de
musique
Non spécifié
(si la station ne spécifie pas
le type d’émission)
Affichage
M.O.R. M
LIGHT M
CLASSICS
OTHER M
NONE
1 Sélectionnez un émetteur FM et le
niveau du volume sonore souhaité.
2 Appuyez sur
.
SEL
Lorsque vous entendez un bip sonore, le
réglage est terminé.
Réception de messages d’urgence
En cas de danger en rapport avec une situation d’urgence
ou une catastrophe naturelle, les stations RDS émettent
des messages d’urgence pour avertir les conducteurs qui se
déplacent dans la zone concernée. Ces messages ne peuvent
être reçus qu’à la condition que les fonctions AF ou TA
F
aient été préalablement activées. Lors de la réception d’un
message d’urgence, la lecture du CD s’interrompt tandis
que le tuner passe automatiquement en mode de réception
FM afin de vous permettre d’écouter ces informations.
SHUF
3
tout en appuyant sur
Sélection du type
d’émission
Certaines stations font appel au système RDS
pour faire la distinction entre leurs différents
types d’émissions en cours de diffusion.
Les différents types d’émission sont:
Emissions
Informations
Dossiers d’actualité
Information
Sport
Education
Théâtre
Culture
Sciences
Divers
Pop
Rock
Affichage
NEWS
AFFAIRS
INFO
SPORT
EDUCATE
DRAMA
CULTURE
SCIENCE
VARIED
POP M
ROCK M
1 Appuyez sur la touche
réception FM. n L’indication “PTY”
apparaît à l’écran.
Si la station captée diffuse des données PTY
(sélection du type d’émission), l’une des
définitions d’émission indiquées ci-avant
s’affichera à l’écran.
Si la station captée n’est pas une station
RDS ou si aucune donnée RDS n’a été lue,
l’indication “- - - - - - - - ” s’affiche. Dans ce
cas, vous pouvez sélectionner “NEWS” ou
d’autres types d’émissions en appuyant sur
la touche PTY.
en cours de
2 Appuyez de nouveau dans un délai de
cinq secondes.
Les différents types d’émission s’afficheront
dans l’ordre indiqué ci-avant.
3 Dès que le type d’émission de votre
choix s’affiche, appuyez sur l’un ou
l’autre côté de la touche AMS/SEEK.
n L’indication “SEARCH” clignotera à
l’écran.
Le tuner partira à la recherche d’une station
qui diffuse ce type d’émission.
4 Si le tuner capte une émission
correspondant au type voulu, la mention
indiquant le type d’émission s’affichera
de nouveau pendant cinq secondes.
Si le tuner n’arrive pas à trouver une station
diffusant le type d’émission souhaité,
l’indication “NO DATA” s’affichera
pendant cinq secondes et le tuner reviendra
à la station (émission) précédente.
12
Actual total number: Sony CDX-4100/5100RDS (EFGI) 3-810-809-11(1)
Page 31

Utilisation des données RDS
pour régler
automatiquement l’horloge
de l’appareil
La réception de données CT (heure) permet de
régler automatiquement l’horloge de cet
appareil.
En mode de réception FM, appuyez sur
la touche
touche
s’affichera et l’horloge sera
automatiquement réglée.
REPEAT
tout en appuyant sur la
2
. n L’indication “CT”
SEL
CT
Autres fonctions
Réglage du son
1 Choisissez le paramètre que vous voulez
régler en appuyant plusieurs fois sur
VOL (volume) n BAS (grave) n TRE
(aigu) n BAL (balance) n FAD (fader)
n VOL (volume) n ···
2 Réglez le paramètre en appuyant sur
ou .
SEL
.
Pour annuler la fonction CT, appuyez de
nouveau sur ces touches.
Remarques
• La fonction CT est susceptible de ne pas être
opérationnelle même si le tuner capte un émetteur RDS.
• L’heure réglée par l’intermédiaire de la fonction CT
risque de manquer de précision.
Effectuez le réglage dans les trois secondes
suivant la sélection. (Après trois secondes, les
touches serviront à nouveau au réglage du
volume sonore.)
Pour obtenir un son
équilibré même à faible
niveau
Appuyez sur
l’affichage.
Les graves et les aiguës sont renforcées. Pour
annuler cette fonction, appuyez à nouveau sur
la touche.
— Correction physiologique
LOUD
. n “LOUD” apparaît à
Coupure rapide du son
— Fonction sourdine
Appuyez sur
l’affichage.
Le son est coupé immédiatement. Pour le
rétablir, appuyez à nouveau sur la touche.
Cette fonction est également annulée lorsque:
— vous appuyez sur
— vous commandez l’éjection du disque avec la touche 6
pendant la lecture.
MUTE
. n “MUTE” apparaît à
ou OFF.
F
Fonctions RDS/Autres fonctions
Actual total number: Sony CDX-4100/5100RDS (EFGI) 3-810-809-11(1)
13
Page 32

Coupure des bips sonores
Entretien
Appuyez sur 6 tout en appuyant sur
.
SEL
Pour restaurer les bips sonores, appuyez une
nouvelle fois sur ces touches.
Remarque
Le bip sonore est désactivé si vous raccordez un
amplificateur de puissance optionnel à LINE OUT.
Changer la couleur
d’illumination
Appuyez sur
.
SEL
Vous avez le choix entre les couleurs ambre et
verte.
F
INTRO
(CDX-5100RDS)
1
tout en appuyant sur
Remplacement du fusible
Si vous devez remplacer le fusible, utilisez un
fusible dont l’intensité correspond à l’intensité
spécifiée sur le porte-fusibles. N’utilisez en
aucun cas un fusible dont l’intensité est
supérieure à celle du fusible fourni avec
l’appareil, car vous risqueriez de provoquer un
dysfonctionnement.
Avertissement
Utilisez un fusible de l’intensité spécifiée.
L’utilisation d’un fusible d’une intensité
supérieure risque de provoquer de sérieux
dégâts.
Nettoyage des connecteurs
L’appareil ne peut fonctionner correctement si
les connecteurs situés entre l’appareil et la
façade ne sont pas propres. Pour éviter cela,
déposez la façade en appuyant sur la touche
RELEASE et nettoyez-la à l’aide d’un Cotontige imbibé d’alcool. N’exercez pas une
pression trop importante, car vous risqueriez
sinon d’endommager le connecteur.
Appareil principal
14
Dos de la façade
Actual total number: Sony CDX-4100/5100RDS (EFGI) 3-810-809-11(1)
Page 33

Retrait de l'appareil
1
Clé de dégagement
(fournie)
2
3
4
Remarques sur le satellite
de commande en option
RM-X2S
Cet appareil peut être utilisé avec le satellite de
commande (RM-X2S) optionnel.
Vous pouvez mettre l’appareil sous tension en
appuyant sur la touche SOURCE du satellite
de commande.
Etiquettes pour le satellite de
commande
Quatre étiquettes d’identification de touche
sont fournies avec le satellite de commande.
Apposez les étiquettes correspondant aux
fonctions de l’appareil principal et à la position
de montage du satellite de commande.
Dans le cas où vous raccordez cet appareil,
apposez l’étiquette portant l’inscription
“DSPL”.
(CDX-4100RDS)
DSPL
MODE
SEL
F
Autres fonctions
SEL
MODE
DSPL
Apposez l’étiquette correspondant à la position de
montage du satellite de commande.
15
Actual total number: Sony CDX-4100/5100RDS (EFGI) 3-810-809-11(1)
Page 34

Nomenclature des touches
OFF
AMS/SEEK
LOUD
MUTE
SEL
RELEASE
Voyez les pages r pour les détails.
INTRO2REPEAT3SHUF
1
456
TUNER
AF/TA
PRESET
CD
PTY
BTM
SENS
DSPL
1 Touche LOUD (correction physiologigue)
F
!£
2 Touche OFF 46!£
3 Touche AMS/SEEK (fonction de
détection automatique du début des
plages/accord automatique) 67
4 Touches (volume/
grave/aigu/balance/fader) 5!£
5 Fenêtre d’affichage
6 Touche TUNER (radio enclenchée/
sélection de gamme d’ondes) 6789
7 Touche PRESET (sélecteur de
présélection) 689
8 Touche d’éjection 6 6!£
9 Touche PTY (type d'émission) !™
!º Touche MUTE (coupure son) !£
!¡ Touche RELEASE (pour enlever la
façade) 4!¢
!™ Touche SEL (sélection du mode de
commande) 5!™!£!¢
!£ Touche de réinitialisation (à l’avant de
l’appareil, cachée par le panneau
avant) 4
!¢ Pendant la réception radio:
Touches des numéros de présélection
9
Pendant la lecture CD:
Touche
intros) 6
Touche
7
Touche
INTRO
1
INTRO (balayage des
REPEAT
2
REPEAT (lecture répétée)
SHUF
3
SHUF (lecture aléatoire)
7
!∞ Interrupteur d’alimentation (POWER
SELECT) (sous l’appareil)
Voir sous “Interrupteur POWER SELECT”
dans le manuel d’installation/connexions.
!§ Touche AF/TA (fréquence secondaire/
informations routières) 0!¡
!¶ Touche CD (lecture disque) 6
!• Touche DSPL (changement d’affichage/
réglage de l’horloge) 5!º
!ª Touche SENS/BTM (réglage de la
sensibilité/mémorisation du meilleur
accord) 78
16
Actual total number: Sony CDX-4100/5100RDS (EFGI) 3-810-809-11(1)
Page 35

Spécifications
Section lecteur de CD
Système Système audionumérique
de disque compact
Rapport signal/bruit 90 dB
Réponse en fréquence 10 à 20.000 Hz
Pleurage et scintillement Inférieurs à la limite
mesurable
Section tuner
FM
Plage d’accord 87,5 – 108,0 MHz
Entrée antenne Connecteur pour antenne
extérieure
Fréquence intermédiaire 10,7 MHz
Sensibilité utile 8 dBf
Sélectivité 75 dB à 400 kHz
Rapport signal/bruit 65 dB (stéréo),
68 dB (mono)
Distorsion harmonique à 1 kHz
0,5 % (stéréo),
0,3 % (mono)
Séparation 35 dB à 1 kHz
Réponse en fréquence 30 – 15.000 Hz
Taux de capture 2 dB
PO/GO
Plage d’accord PO: 531 – 1.602 kHz
GO: 153 – 281 kHz
Entrée antenne Connecteur pour antenne
extérieure
Fréquence intermédiaire 10,71 MHz/450 kHz
Sensibilité: PO: 30 µV
GO: 50 µV
Généralités
Fil de sortie Fil de commande de relais
pour antenne électrique
Fil de commande
d’amplificateur
Réglages de tonalité Graves: ± 8 dB à 100 Hz
Aiguës: ± 8 dB à 10 kHz
Alimentation Batterie de voiture 12 V
(masse négative)
Dimensions env. 188 × 58 × 177 mm
(l/h/p)
Dimensions de montage env. 178 × 50 × 154 mm
(l/h/p)
Poids env. 1,5 kg
Accessoires fournis Satellite de commande
RM-X2S (CDX-5100RDS)
Pièces de montage et de
raccordement (1 jeu)
Etui pour la façade (1)
Accessoires en option Satellite de commande
RM-X2S
Cordon à fiches RCA
RC-63 (1 m), RC-64 (2 m),
RC-65 (5 m)
Chiffon de nettoyage
XP-CD1
Adaptateur pour disques
single CSA-8
Conception et spécifications modifiables sans préavis.
F
Section amplificateur de puissance
Sorties Haut-parleurs (connecteurs
de sécurité)
Impédance des haut-parleurs
4 – 8 ohms
Puissance maximum CDX-4100RDS
20 W × 4 (sur 4 ohms)
CDX-5100RDS
35 W × 4 (sur 4 ohms)
17
Actual total number: Sony CDX-4100/5100RDS (EFGI) 3-810-809-11(1)
Page 36

Guide de dépannage
La liste de vérifications que voici vous aidera à résoudre la majorité des problèmes que vous
pourriez rencontrer avec cet appareil.
Avant de parcourir cette liste, consultez à nouveau les procédure de raccordement et d’utilisation.
Généralités
Problème
Pas de son
La mémoire est effacée.
Aucune indication n’apparaît
dans la fenêtre d’affichage.
Aucun bip sonore n’est émis.
Lecture de CD
F
Problème
Impossible d’introduire un CD.
La lecture ne commence pas.
Le CD est automatiquement
éjecté.
Les touches d’exploitation ne
fonctionnent pas.
Le son est irrégulier à cause de
vibrations.
Cause/solution
• Réglez le volume en appuyant sur la touche .
• Si vous disposez d’une installation à deux haut-parleurs,
réglez la balance sur la position centrale.
• Le cordon d’alimentation ou la batterie a été débranché.
• Vous avez appuye sur la touche de réinitialisation.
n Recommencez la procédure de mémorisation des stations.
Enlevez la façade et nettoyez les contacts. Voyez “Nettoyage des
connecteurs” de la section “Entretien”.
• Un amplificateur de puissance optionnel est raccordé à LINE
OUT.
• La fonction de bip sonore a été désactivée (page 14).
Cause/solution
• Un CD se trouve déjà à l’intérieur de l’appareil.
• Vous avez introduit le CD à l’envers en forçant.
Disque poussiéreux.
La température ambiante dépasse 50°C.
Appuyez sur la touche de réinitialisation.
• La surface où est posée l’appareil est inclinée à plus de 20°.
• L’appareil n’est pas posé sur une surface stable dans la voiture.
Réception radio
Problème
Impossible de faire une
présélection.
Accord automatique impossible.
L’indication “ST” clignote.
18
Actual total number: Sony CDX-4100/5100RDS (EFGI) 3-810-809-11(1)
Cause/solution
• Mémorisez la fréquence correcte.
• L’émission est trop faible.
Le signal d’émission est trop faible. n Utilisez la syntonisation
manuelle.
• Accordez la station avec plus de précision.
• L’émission est trop faible; n appuyez sur
MONO.
BTM
pour passer en
SENS
Page 37

Affichage d’erreurs
Les indications suivantes clignotent pendant environ cinq secondes et une alarme retentit.
Affichage Solution
Si les solutions ci-dessus ne vous aident pas à résoudre le problème, consultez votre revendeur Sony.
Cause
Le CD est souillé ou a été inséré à
l’envers.
Le lecteur CD ne fonctionne pas à cause
d’un problème quelconque.
Nettoyez ou insérez le CD
correctement.
Appuyez sur la touche de
réinitialisation.
F
Actual total number: Sony CDX-4100/5100RDS (EFGI) 3-810-809-11(1)
19
Page 38

Eigenschaften
Allgemeines
• Frontplatte abnehmbar: Zum Schutz gegen
Diebstahl kann die Frontplatte beim
Verlassen des Fahrzeugs mitgenommen
werden (Seite 4).
• Warnton ertönt, wenn beim Ausschalten der
Zündung die Frontplatte nicht abgenommen
wird.
• Digitaluhr mit 24-Stunden-Anzeige
(Seite 5).
• Zwei Beleuchtungsfarben (bernstein und
grün) wählbar (beim CDX-5100RDS)
(Seite 14).
• Eingebauter Endverstärker für 4-
Lautsprecher-Systeme (max.
Ausgangsleistung 20 W × 4 (beim
CDX-4100RDS), 35 W × 4 (beim
CDX-5100RDS).
• Line-Ausgänge zum Anschluß eines getrennt
erhältlichen Endverstärkers.
• Eine Drehschalter-Fembedienung ist beim
CDX-5100RDS im Lieferumfang inbegriffen.
CD-Spieler
• 1-Bit-DAC (Digital-Analog-Konverter) für
D
exzellente Klangreproduktion.
• Laser-Schnellrückführ-Mechanismus
verhindert Tonaussetzer.
• Verschiedene Komfortfunktionen wie die
Intro-Scan-Funktion zum Suchen
bestimmter Titel, Repeat-Funktionen zum
wiederholten Wiedergeben von Titeln und
Shuffle-Play-Funktionen zum Wiedergeben
von Titeln in willkürlicher Reihenfolge
stehen zur Verfügung.
Drehschalter-Fermbedienung als
Sonderzubehör erhältlich (beim
CDX-4100RDS).
Die Drehschalter-Fernbedienung (RM-X2S),
auch Joystick genannt, können Sie während
der Fahrt auf die gleiche Weise wie den
Scheibenwischer oder Fernlichtschalter
bedienen.
Tuner
• Bis zu 30 Sendestationen im Stationsspeicher
voreinstellbar: 18 UKW-Sendestationen und
jeweils 6 MW- und LW-Sendestationen.
• BTM-Funktion (Best Tuning Memory -
Speicherbelegungsautomatik) sucht und
speichert automatisch die Sendestationen mit
den stärksten Signalen auf den Stationstasten
in der Reihenfolge ihrer Frequenz (Seite 8).
• Informationsdienste, sofern UKW-RDS-
Sender empfangen werden können
(Seite␣ 10).
• RDS-Funktionen wie EON (Enhanced Other
Networks - Empfang anderer Sender), AF
(Alternative Frequency Alternativfrequenz), TA (Traffic
Announcement - Verkehrsdurchsagen),
PTY (Programmtyp) und CT (Clock Time Uhrzeit) stehen zur Verfügung (Seite 10, 11,
12 und 13).
2
Actual total number: Sony CDX-4100/5100RDS (EFGI) 3-810-809-11(1)
Page 39

Inhalt
Sicherheitsmaßnahmen ........................................... 4
Abnehmen und Anbringen der Frontplatte ........ 4
Einstellen der Uhr .................................................... 5
Bedienung des CD-Spielers
Wiedergabe einer CD .............................................. 6
Auswerfen der CD .................................................. 6
Ansteuern des Anfangs von Musikstücken
— AMS-Funktion (Automatic Music Sensor -
Automatischer Musiksensor) ....................... 6
Suchen einer bestimmten Stelle in einem
Musikstück
— Manuelle Suchfunktion ................................. 6
Suchen des gewünschten Titels
— Intro-Scan-Funktion ...................................... 6
Wiederholte Wiedergabe von Titeln
— Repeat-Funktion ............................................ 7
Wiedergabe von Titeln in willkürlicher
Reihenfolge
— Shuffle-Play-Funktion ................................... 7
Radioempfang
RDS-Funktionen
Überblick über RDS ............................................... 10
Anzeigen des Sendernamens ............................... 10
Empfangen der gleichen Sendung ohne
manuelles Neueinstellen des Senders auch
bei einem Ortswechsel
— AF-Funktion ................................................. 10
Empfangen von Verkehrsdurchsagen ................ 11
Auswählen des Programmtyps ........................... 12
Automatisches Einstellen der
Uhrzeit mit RDS ................................................ 13
Weitere Funktionen
Einstellen des Klangs ............................................ 13
Gute Tonqualität auch bei geringer Lautstärke
— Loudness-Funktion ...................................... 13
Stummschalten des Tons
— Stummschaltfunktion .................................. 13
Stummschalten des Signaltons ............................ 14
Wechseln der Beleuchtungsfarbe (beim
CDX-5100RDS) .................................................. 14
D
Automatisches Suchen nach einer Sendestation
— Automatischer Sendersuchlauf ................... 7
Bei schlechtem UKW-Empfang
— Monauraler Modus ........................................ 8
Einstellen einer Sendestation durch Einstellen
der Frequenz
— Manueller Sendersuchlauf ........................... 8
Automatisches Speichern von Sendestationen
— BTM-Funktion (Best Tuning Memory -
Speicherbelegungsautomatik) ..................... 8
Speichern der gewünschten Sendestationen ....... 9
Empfangen der gespeicherten Sendestationen ... 9
Wartung .................................................................. 14
Herausnehmen der Einheit .................................. 15
Hinweise zum Gebrauch des zusätzlich
erhältlichen Joystick RM-X2S (beim
CDX-4100RDS) .................................................. 15
Lage und Funktion der Bedienelemente ............ 16
Technische Daten ................................................... 17
Behebung von Störungen ..................................... 18
3
Actual total number: Sony CDX-4100/5100RDS (EFGI) 3-810-809-11(1)
Page 40

Sicherheitsmaßnahmen
• Bevor Sie das Gerät zum ersten Mal benutzen
oder nachdem Sie die Autobatterie
ausgetauscht haben, drücken Sie mit einem
Kugelschreiber oder etwas ähnlichem die
Rücksetztaste, und benutzen Sie das Gerät
erst dann.
Rücksetztaste
• Wenn Ihr Auto längere Zeit direktem
Sonnenlicht ausgesetzt war, zum Beispiel auf
dem Parkplatz, und die Temperatur im
Inneren sehr hoch ist, lassen Sie das Gerät
zunächst etwas abkühlen, bevor Sie es
benutzen.
• Wenn die Stromversorgung des Geräts
unterbrochen ist, überprüfen Sie zunächst die
Anschlüsse. Sind diese in Ordnung,
überprüfen Sie die Sicherung.
• Wenn bei einem Zwei-Lautsprecher-System
über diese Lautsprecher kein Ton
D
wiedergegeben wird, stellen Sie den FaderRegler in die mittlere Position.
Wenn Sie Fragen haben oder an Ihrem Gerät
Probleme auftreten, die in dieser
Bedienungsanleitung nicht behandelt werden,
wenden Sie sich bitte an Ihren Sony-Händler.
Hinweise zur CDs
Setzen Sie die CD weder direktem Sonnenlicht
noch Wärmequellen wie zum Beispiel
Warmluftauslässen aus. Lassen Sie sie nicht in
einem in der Sonne geparkten Auto liegen,
denn die Temperaturen im Wageninneren
können sehr stark ansteigen.
Reinigen Sie die CD vor dem Abspielen mit
einem im Handel erhältlichen Reinigungstuch,
indem Sie von der Mitte nach außen wischen.
Lösungsmittel wie Benzin, Verdünner oder
handelsübliche, für Analogplatten bestimmte
Reiniger und Antistatiksprays dürfen nicht
verwendet werden.
Hinweis zur
Feuchtigkeitskondensation
An regnerischen und feuchten Tagen kann sich
Kondenswasser auf dem Linsensystem im
Inneren des CD-Spielers niederschlagen. Das
Gerät arbeitet dann nicht mehr einwandfrei.
Nehmen Sie in einem solchen Fall die CD
heraus, und warten Sie etwa eine Stunde lang
ab, bis die Feuchtigkeit verdunstet ist.
Bei verschmutzter oder beschädigter CD kann
es während der Wiedergabe zu Tonaussetzern
kommen. Um einen optimalen Klang zu
gewährleisten, beachten Sie folgendes:
Fassen Sie die CD stets nur am Rand an.
Berühren Sie die Oberfläche der CD nicht, und
halten Sie sie sauber.
Abnehmen und Anbringen
der Frontplatte
Um einem Diebstahl des Geräts vorzubeugen,
kann die Frontplatte abgenommen werden.
Abnehmen der Frontplatte
Vergessen Sie nicht, die Taste OFF zu drücken,
bevor Sie die Frontplatte abnehmen. Dann
geben Sie mit der Taste RELEASE die
Kleben Sie nichts auf die CD.
Frontplatte frei und nehmen sie ab, indem Sie
sie auf sich zu ziehen, wie auf der Abbildung
gezeigt.
4
Actual total number: Sony CDX-4100/5100RDS (EFGI) 3-810-809-11(1)
Page 41

OFF-Taste
DSPL
RELEASE-Taste
Achten Sie darauf, daß die Frontplatte beim
Abnehmen nicht herunterfällt.
Anbringen der Frontplatte
Bringen Sie die rechte Seite der Frontplatte wie
in der Abbildung dargestellt am Gerät an,
indem Sie Teil A der Frontplatte auf Teil B
des Geräts setzen. Drücken Sie dann die linke
Seite an, bis sie mit einem Klicken einrastet.
Einstellen der Uhr
Die Uhr verfügt über eine 24-StundenDigitalanzeige.
Beispiel: Einstellen der Uhr auf 10:08 Uhr
1 Rufen Sie die Uhrzeitanzeige auf.
(Drücken Sie die Taste
Gerät in Betrieb ist.)
2 Drücken Sie die Taste
zwei Sekunden.
Die Stundenziffern blinken.
Stellen Sie die Stunden ein.
vorwärts
rückwärts
, während das
DSPL
DSPL
länger als
A
B
Hinweise
• Achten Sie beim Anbringen der Frontplatte darauf, daß
sie richtigherum ausgerichtet ist. Die Frontplatte kann
nicht andersherum angebracht werden.
• Wenden Sie beim Festdrücken der Frontplatte keine
Gewalt an. Ein leichter Druck reicht aus, um die
Frontplatte am Gerät zu befestigen.
• Bewahren Sie die Frontplatte beim Transportieren im
mitgelieferten Behälter auf.
• Drücken Sie nicht auf das Display an der Vorderseite des
Geräts.
• Beim Drücken der RELEASE-Taste wird das Gerät
automatisch ausgeschaltet, um eine Beschädigung der
Lautsprecher zu vermeiden. Dennoch wird empfohlen,
das Gerät vor Abnehmen der Frontplatte auszuschalten.
• Schützen Sie die Frontplatte vor direktem Sonnenlicht,
vor Wärmequellen wie Heizungen oder
Warmluftauslässen und vor Feuchtigkeit. Wenn das
Fahrzeug in der Sonne geparkt ist, legen Sie sie nicht auf
das Armaturenbrett usw., da sie sich sonst zu stark
erhitzen kann.
Warnton
Wenn der Zündschlüssel in die OFF-Position
gestellt wird, ohne die Frontplatte
abzunehmen, ertönt einige Sekunden lang ein
Warnton (nur wenn der POWER SELECTSchalter auf A steht).
3 Drücken Sie kurz die Taste
Die Minutenziffern blinken.
SEL
.
Stellen Sie die Minuten ein.
vorwärts
rückwärts
4 Drücken Sie kurz die Taste
Die Uhr beginnt zu laufen.
Hinweis
Wenn der POWER SELECT-Schalter auf der
Geräteunterseite auf B gestellt ist, kann die Uhrzeit nur
bei eingeschaltetem Gerät eingestellt werden.
Schalten Sie also das Radio ein bzw. starten Sie die CDWiedergabe, wenn Sie die Uhr einstellen möchten.
.
D
5
Actual total number: Sony CDX-4100/5100RDS (EFGI) 3-810-809-11(1)
Page 42

Bedienung des CDSpielers
Wiedergabe einer CD
Legen Sie eine CD ein. Die Wiedergabe
startet automatisch mit dem ersten
Musikstück.
Mit der beschrifteten Seite nach oben
Ist bereits eine CD eingelegt, drücken
Sie zum Starten die TasteCD.
Verstrichene Spieldauer
TRACK
D
Titelnummer
Wenn der letzte Titel der CD
abgespielt ist
Es wird wieder die Titelnummer „1“
angezeigt, und die Wiedergabe beginnt am
ersten Titel der CD.
Hinweis
Zur Wiedergabe einer 8-cm-CD wird der Sony-Adapter
CSA-8 (nicht mitgeliefert) benötigt.
Ansteuern des Anfangs
von Musikstücken
— AMS-Funktion (Automatic Music Sensor Automatischer Musiksensor)
Während der Wiedergabe drücken Sie so
oft rechts auf die Taste AMS/SEEK, wie
Sie Titel überspringen wollen.
AMS/SEEK
Zum Ansteuern
vorhergehender Stücke
AMS/SEEK
Zum Ansteuern
folgender Stücke
Suchen einer bestimmten
Stelle in einem Musikstück
— Manuelle Suchfunktion
Drücken Sie während der Wiedergabe
eine Seite der Taste PRESET, und halten
Sie sie gedrückt. Lassen Sie die Taste
wieder los, wenn Sie die gewünschte
Stelle gefunden haben.
PRESET
Wenn Sie bis zum Anfang einer CD zurückgehen,
erscheint im Display „
Ende einer CD vorwärtsgehen, erscheint „
Sie können in diesem Falle jedoch weder zum
vorhergehenden noch zum nächsten Musikstück
weiterschalten.
PRESET
VorwärtsRückwärts
“. Wenn Sie bis zum
“.
Stoppen der Wiedergabe
Werfen Sie die CD durch Drücken der Taste
aus, oder drücken Sie die Taste
Die Wiedergabe stoppt auch dann, wenn Sie
TUNER
mit
(Radio).
eine andere Signalquelle wählen
Auswerfen der CD
Drücken Sie die Taste .
Hinweis
Wenn nach Drücken der 6-Taste die CD nicht spätestens
nach ca. 15 Sekunden entnommen wird, zieht sie das Gerät
wieder in das CD-Fach ein, damit sie nicht beschädigt
wird.
OFF
.
Suchen des gewünschten
Titels
Drücken Sie während der Wiedergabe
die Taste
auf dem Display.
Die ersten 10 Sekunden aller Titel werden
angespielt. Wenn der gewünschte Titel erreicht
ist, drücken Sie die Taste nochmals. Das Gerät
schaltet wieder in den normalen
Wiedergabemodus.
— Intro-Scan-Funktion
INTRO
1
. n „INTRO“ erscheint
6
Actual total number: Sony CDX-4100/5100RDS (EFGI) 3-810-809-11(1)
Page 43

Wiederholte Wiedergabe
TUNER
von Titeln
— Repeat-Funktion
Radioempfang
Drücken Sie während der Wiedergabe
die Taste
auf dem Display.
Wenn der gerade wiedergegebene Titel zu
Ende ist, wird er von Anfang an wiederholt.
Um diesen Modus zu beenden, drücken Sie die
Taste nochmals.
REPEAT
. n „REP 1“ erscheint
2
Wiedergabe von Titeln in
willkürlicher Reihenfolge
— Shuffle-Play-Funktion
Drücken Sie während der Wiedergabe
die Taste
auf dem Display.
Alle Titel der gerade ausgewählten CD werden
in willkürlicher Reihenfolge wiedergegeben.
SHUF
3
. n „SHUF 1“ erscheint
Automatisches Suchen
nach einer Sendestation
— Automatischer Sendersuchlauf
1 Wählen Sie den gewünschten
Frequenzbereich (Band). „FM“ auf dem
Display steht dabei für UKW-Sender.
FM1 n FM2 n FM3 n
MW n LW n FM1 n ···
2 Drücken Sie einmal auf die rechte oder
linke Seite der Taste AMS/SEEK. Der
automatische Sendersuchlauf beginnt.
AMS/SEEK
Niedrigere Frequenzen Höhere Frequenzen
Der Sendersuchlauf stoppt, wenn eine
Sendestation empfangen wird. Drücken Sie so
oft auf die rechte oder linke Seite der Taste
AMS/SEEK, bis das Radio die gewünschte
Station empfängt.
Wenn das Gerät einen UKW-Stereosender mit
ausreichender Signalstärke findet,
ST
AMS/SEEK
D
Bedienung des CD-Spielers/Radioempfang
erscheint die Anzeige „ST“.
Damit beim automatischen Sendersuchlauf nicht
zu viele Stationen gefunden werden (lokaler
Suchmodus), drücken Sie kurz die Taste
Anzeige „LCL“ erscheint.
Nur Sender mit relativ starken Signalen können eingestellt
werden. Der lokale Suchmodus funktioniert nur, wenn der
automatische Sendersuchlauf aktiv ist.
BTM
SENS
. Die
Actual total number: Sony CDX-4100/5100RDS (EFGI) 3-810-809-11(1)
7
Page 44

Bei schlechtem UKW-
TUNER
Empfang
Drücken Sie kurz die Taste
n␣ „MONO“ erscheint auf dem Display.
Dadurch wird die Tonqualität besser, aber der
Ton wird zugleich monaural („MONO“).
Wenn Sie die Taste
Display nacheinander folgende Anzeigen
aufrufen:
z LCL z MONO z Normaler Modus
— Monauraler Modus
BTM
SENS
drücken, können Sie im
Einstellen einer
Sendestation durch
Einstellen der Frequenz
— Manueller Sendersuchlauf
1 Wählen Sie den gewünschten
Frequenzbereich (Band).
D
TUNER
2 Halten Sie die rechte oder linke Seite der
Taste PRESET gedrückt.
Lassen Sie die Taste los, wenn das Radio
die gewünschte Sendestation empfängt.
PRESET
Niedrigere Frequenzen Höhere Frequenzen
ACHTUNG - UNFALLGEFAHR!
Wenn Sie während der Fahrt Sender einstellen
wollen, benutzen Sie dazu, um Unfälle zu
vermeiden, bitte den automatischen
Sendersuchlauf und die
Senderspeichersuchfunktion (siehe Seite 9).
Versuchen Sie nicht, Sender manuell
einzustellen!
BTM
SENS
PRESET
Automatisches Speichern
von Sendestationen
.
— BTM-Funktion (Best Tuning Memory Speicherbelegungsautomatik)
Diese Funktion sucht innerhalb des im
Augenblick eingestellten Frequenzbereichs die
Sendestationen mit den stärksten Signalen und
speichert diese in der Reihenfolge ihrer
Frequenzen.
1 Wählen Sie den gewünschten
Frequenzbereich (Band).
BTM
2 Drücken Sie die Taste
zwei Sekunden.
• Wenn im Display keine
Stationstastennummer angezeigt wird,
werden alle Stationstasten mit Sendern im
gerade gültigen Frequenzbereich belegt.
• Wenn im Display eine
Stationstastennummer angezeigt wird,
werden die Stationstasten beginnend mit
der angezeigten Tastennummer mit
Sendern im gerade gültigen
Frequenzbereich belegt.
Wenn Sie zum Beispiel UKW1 (FM1 auf dem
Display) wählen und die Stationstastennummer 3
angezeigt wird,
beginnt der Einstellvorgang auf UKW1 mit der
Stationstaste Nummer 3 und stoppt bei UKW3 (FM3 auf
dem Display) mit der Stationstaste Nummer 6.
SENS
länger als
3 Nur für FM1 (UKW1), FM2 (UKW2) und
FM3 (UKW3):
Drücken Sie erst einmal kurz und dann
nochmals etwa 2 Sekunden lang die
Stationstaste
hören ist. n Die Sendestation wird
gespeichert.
Führen Sie die gleiche Operation auch für
die Stationstasten
Hinweise
• Wenn „AF OFF“ angezeigt wird und Sie BTM
aktivieren, speichert das Gerät nur Sender, die keine
RDS-Daten ausstrahlen. Je nach Empfangsbedingungen
kann es allerdings vorkommen, daß RDS-Sender
gespeichert werden.
• Wenn Sie ausschließlich RDS-Sender abspeichern (siehe
Seite 10), ist Schritt 3 nicht erforderlich.
INTRO
, bis ein Signalton zu
1
REPEAT
bis 6 aus.
2
8
Actual total number: Sony CDX-4100/5100RDS (EFGI) 3-810-809-11(1)
Page 45

Speichern der gewünschten
Sendestationen
1 Wählen Sie den gewünschten
Frequenzbereich (Band).
TUNER
2 Stellen Sie die Sendestation ein, die auf
der entsprechenden Stationstaste
gespeichert werden soll.
3 Halten Sie die gewünschte Stationstaste
INTRO
(
1
gedrückt, bis ein Signalton zu hören ist.
Die Nummer der gedrückten Stationstaste
erscheint auf dem Display.
Bis zu 6 Sendestationen können pro Frequenzbereich
(UKW1, UKW2, UKW3, MW und LW) auf den
Stationstasten gespeichert werden, und zwar in der
Reihenfolge Ihrer Wahl. Das heißt, allein im UKW-Bereich
können Sie 18 Sendestationen speichern.
Wenn Sie auf einer bereits belegten Stationstaste eine
weitere Sendestation speichern, wird die zuvor gespeicherte
Sendestation gelöscht.
bis
6
) etwa 2 Sekunden lang
Drücken Sie kurz die rechte oder linke
Seite der Taste PRESET, um die
gespeicherten Sendestationen der
Reihe nach zu empfangen
(Senderspeichersuchfunktion).
PRESET
Kurz drücken
1 n 2 n 3 n 4 n 5 n 6 n 1 n ···
PRESET
Kurz drücken
1 n 6 n 5 n 4 n 3 n 2 n 1 n ···
D
Radioempfang
Empfangen der
gespeicherten
Sendestationen
1 Wählen Sie den gewünschten
Frequenzbereich (Band).
TUNER
INTRO
2 Drücken Sie kurz die Stationstaste (
6
bis
Sender gespeichert ist.
Hinweis
Wenn Sie die Stationstaste mehr als 2 Sekunden lang
drücken, wird die im Augenblick empfangene Sendestation
auf dieser Taste gespeichert. Um sicherzugehen, daß Sie
auf der entsprechenden Stationstaste auch weiterhin die
einmal gespeicherte Sendestation empfangen, drücken Sie
die Taste nur kurz.
), auf der der gewünschte
1
9
Actual total number: Sony CDX-4100/5100RDS (EFGI) 3-810-809-11(1)
Page 46

AF/TA
RDS-Funktionen
Überblick über RDS
RDS (Radio Data System - Radiodatensystem)
ist ein System, das die mit den normalen
UKW-Signalen gesendeten Digitalsignale
nutzen kann. Wenn Ihr Autoradio diese RDSSignale empfangen kann, stehen Ihnen eine
Reihe von Diensten zur Verfügung, die Sie auf
unterschiedliche Art nutzen können.
Beispielsweise können Sie
Zusatzinformationen wie Verkehrsdurchsagen
oder Sendernamen empfangen, oder Sie
können eine Funktion nutzen, bei der sich das
Gerät automatisch auf die Frequenz einstellt,
mit der Sie den gewünschten Sender in einer
bestimmten Gegend am besten empfangen
können. Das heißt, auch wenn Sie lange
Strecken fahren, können Sie dasselbe
Radioprogramm hören, ohne den Sender
wieder und wieder manuell neu einstellen zu
müssen. Eine weitere Funktion besteht darin,
D
daß Sie während der Wiedergabe einer CD
Verkehrsdurchsagen empfangen können.
RDS ermöglicht mehrere solche Dienste, aber
in unterschiedlichen Ländern oder Gegenden
stehen nicht immer alle dieser Dienste zur
Verfügung. Im folgenden werden die RDSFunktionen dieses Geräts erläutert.
Hinweise
• Im Falle schwacher Signale oder sonstiger ungünstiger
Empfangsbedingungen funktioniert RDS unter
Umständen nicht korrekt.
• Wenn der UKW-Sender, den das Gerät gerade empfängt,
keine RDS-Signale ausstrahlt, stehen die unten
beschriebenen Funktionen nicht zur Verfügung.
Wenn zusätzlich zu der normalen
Frequenzanzeige „*“ auf dem Display
erscheint, wird ein RDS-Sender empfangen.
Umschalten der Anzeigen im Display
Mit jedem Tastendruck auf
Display in der unten gezeigten Reihenfolge:
Frequenz Uhrzeit
z z
Erscheint statt des Sendernamens „NO NAME“
im Display, sendet die gerade empfangene
Sendestation keine RDS-Signale. Nach einigen
Sekunden verschwindet „NO NAME“, und
die Frequenz wird wieder angezeigt.
DSPL
wecheln die Anzeigen im
z
Sendername
Empfangen der gleichen
Sendung ohne manuelles
Neueinstellen des Senders
auch bei einem Ortswechsel
— AF-Funktion
Mit „AF“, einer Liste alternativer Frequenzen,
stellt diese Funktion den Tuner automatisch
auf die Frequenz des gerade ausgewählten
Senders ein, die in der Gegend, in der Sie sich
gerade befinden, am besten empfangen wird.
Auf diese Weise können Sie auch bei einer
längeren Fahrt die gleiche Sendung
empfangen, ohne den Sender immer wieder
manuell neu einstellen zu müssen.
Die Frequenz wechselt automatisch
98,5 MHz
96,0 MHz
Sender
102,5 MHz
Anzeigen des
Sendernamens
Über RDS-Signale kann der Name der gerade
empfangenen Sendestation angezeigt werden.
Wählen Sie einen UKW-Sender aus.
n␣ Wenn dieser Sender RDS-Signale
sendet, erscheint sein Name auf dem
Display.
1 Wählen Sie einen UKW-Sender aus.
2 Drücken Sie die Taste
angezeigt.
10
Actual total number: Sony CDX-4100/5100RDS (EFGI) 3-810-809-11(1)
. „AF“ wird
Page 47

AF/TA
Hinweise
• Wenn die gerade empfangene Frequenz schwach ist und
das gewünschte Programm in der betreffenden Gegend
nicht auf einer besseren Alternativfrequenz ausgestrahlt
wird, so erscheint „NO AF“ für „Keine
Alternativfrequenz“ im Display.
• Wird der automatische Sendersuchlauf (siehe Seite 7)
aktiviert, während „AF“ angezeigt wird, lassen sich nur
UKW-Sender empfangen, die RDS-Signale ausstrahlen.
• Drücken Sie die Taste AF/TA, während ein MW- oder
LW-Sender empfangen wird, wird automatisch UKW1
gewählt.
Speicherung alternativer
Frequenzen beim Einstellen von
RDS-Sendern
Wenn das Gerät einen RDS-Sender, der AFDaten ausstrahlt, auf einer Stationstaste
speichert, werden nicht nur die Frequenz,
sondern auch AF-Daten (AF =
Alternativfrequenz) und PI-Daten (PI =
Programmidentifikation) gespeichert.
Das Gerät speichert diese Daten unabhängig
davon, ob die AF-Funktion aktiviert oder
deaktiviert ist.
Die AF-Funktion wählt gegebenenfalls eine
Sendestation, die den ursprünglich
eingestellten Sender mit stärkeren Signalen
ausstrahlt.
Drücken Sie die Taste
AF/TA
und die
entsprechende Stationstaste.
Hinweis
Wenn mit den AF-Daten keine andere Sendestation für
den gespeicherten Sender gefunden wird, wird „PI seek“
angezeigt, und das Gerät sucht nach einer Sendestation
mit denselben
PI-Daten. Wenn das Gerät keine andere Sendestation mit
denselben PI-Daten findet, kehrt es zur ursprünglichen
Sendestation zurück.
Regionalprogramme
Drücken Sie mehr als zwei Sekunden
lang die Taste
erscheint im Display.
Wollen Sie die Funktion wieder ausschalten,
drücken Sie die Taste nochmals mehr als zwei
Sekunden lang.
Hinweis
Das Gerät ist werkseitig auf „Regional ON“ eingestellt.
Diese Funktion steht in Großbritannien und in
manchen anderen Gebieten nicht zur
Verfügung.
AF/TA
. n „REG“
Local-Link-Funktion (nur Großbritannien)
Wenn Lokalsender, die auf einer Stationstaste
abgespeichert wurden, schlecht empfangen werden oder
wenn ein anderer Lokalsender empfangen werden soll,
aktivieren Sie diese Funktion. Dann sucht das Gerät
automatisch Sender für Sender nach anderen Lokalsendern
und beginnt mit dem Empfang.
Innerhalb von fünf Sekunden, nachdem der Empfang
begonnen hat, drücken Sie die Stationstaste, auf der der
Sender gespeichert ist, den Sie empfangen wollen, und
halten Sie sie gedrückt. Wiederholen Sie dies so oft, bis Sie
den gewünschten Lokalsender empfangen.
Ausschließliches Speichern von RDS-Sendern
Mit der BTM-Funktion (Seite 8) können Sie ausschließlich
RDS-Sender auf den Stationstasten speichern. Aktivieren
Sie die AF-Funktion, und drücken Sie dann zwei Sekunden
lang die Taste SENS/BTM.
Wenn „AF OFF“ angezeigt wird und Sie BTM aktivieren,
speichert das Gerät nur Sender, die keine RDS-Daten
ausstrahlen.
Empfangen von
Verkehrsdurchsagen
Mit Hilfe von TA- (Traffic Announcement Verkehrsdurchsage) und TP-Daten (Traffic
Program - Verkehrsfunk) können Sie einen
Sender, der Verkehrsdurchsagen sendet,
automatisch empfangen, und zwar auch
während der Wiedergabe einer CD, da das
Gerät ständig nach Verkehrsfunksendern
sucht und automatisch auf UKW-Empfang
schaltet, wenn eine Verkehrsdurchsage
beginnt.
Drücken Sie die Taste
wird angezeigt. n Das Gerät beginnt,
nach Verkehrsfunksendern zu suchen.
Wenn ein Verkehrsfunksender gefunden wird,
wird „TP“ angezeigt. Während gerade eine
Verkehrsdurchsage empfangen wird, blinkt
die Anzeige „TA“. Danach stoppt das Blinken
wieder.
Die TA-Funktion arbeitet auch während der
Wiedergabe einer CD.
Drücken Sie während der Wiedergabe
einer CD die Taste
AF/TA
im Display angezeigt.
Das Gerät beginnt, nach einem
Verkehrsfunksender zu suchen. Beginnt eine
Verkehrsdurchsage, stoppt die Wiedergabe
von CD, und die Verkehrsdurchsage ist zu
hören.
. „TA“
. n „TA“ wird
D
RDS-Funktionen
Fortsetzung siehe nächste Seite n
11
Actual total number: Sony CDX-4100/5100RDS (EFGI) 3-810-809-11(1)
Page 48

PTY
Wenn Sie die Taste
AF/TA
drücken, während
ein MW- oder LW-Sender empfangen wird,
wird automatisch auf UKW-Empfang
geschaltet.
Abbrechen der gerade empfangenen
Verkehrsdurchsage
Drücken Sie kurz die Taste AF/TA.
Beenden des TA-Modus
Drücken Sie die Taste AF/TA, bis im Display „AF/TA
OFF“ erscheint.
Hinweis
Wenn der Empfang einer Verkehrsdurchsage nicht möglich
ist, blinkt etwa vier Sekunden lang die Anzeige „NO TP“.
Dann beginnt das Gerät, nach einem anderen
Verkehrsfunksender zu suchen.
Mit jedem Tastendruck auf AF/TA wechselt die
Anzeige im Display fogendermaßen:
z AF ON z AF/TA ONz TA ON
AF/TA OFF Z
Die Anzeige „EON“
Wenn die Anzeigen „TA“ und „EON“ zusammen im
Display erscheinen, bedeutet dies, daß außer dem gerade
empfangenen Sender noch ein weiterer Sender gerade eine
Verkehrsdurchsage sendet.
Voreinstellen der Lautstärke von
D
Verkehrsdurchsagen
Sie können für Verkehrsdurchsagen eine feste
Lautstärke voreinstellen. Das heißt, selbst
wenn Sie die Lautstärke beispielsweise auf
Null gestellt haben, hören Sie eine
Verkehrsdurchsage automatisch in der
voreingestellten Lautstärke. Ist die Lautstärke
im Moment jedoch höher gestellt als die
Voreinstellung für die Verkehrsdurchsage, gilt
auch für die Verkehrsdurchsage die aktuelle
Lautstärke.
1 Wählen Sie einen UKW-Sender aus, und
stellen Sie die gewünschte Lautstärke
ein.
SHUF
2 Drücken Sie die Taste
die Taste
SEL
gedrückt halten.
3
Wenn Sie ein akustisches Signal hören, ist
die Einstellung gespeichert.
Empfang von Katastrophenwarnungen
Besteht wegen eines Unfalls oder eines Naturereignisses
eine Gefahr, so strahlen RDS-Sender
Katastrophenwarnungen aus, um die Autofahrer in der
betroffenen Gegend zu warnen. Solche Warnungen können
Sie nur empfangen, wenn die AF- oder die TA-Funktion
aktiviert ist. Während einer Katastrophenwarnung wird
die Wiedergabe von CD unterbrochen, das Gerät schaltet
automatisch auf UKW-Empfang, und Sie können die
Warnung hören.
12
, während Sie
Auswählen des
Programmtyps
Bestimmte Sender unterscheiden mit Hilfe
ausgestrahlter RDS-Signale die verschiedenen
Typen ihrer Programme.
Es gibt folgende Programmtypen:
Programme
Nachrichten
Aktuelle
Informationssendungen
Informationen
Sport
Bildungsprogramme
Hörspiele
Kulturprogramme
Wissenschaftliche
Sendungen
Sonstiges
Pop
Rock
Middle of the Road
Leichte Klassik
E-Musik
Sonstige
Nicht angegeben
(wenn der Sender den
Programmtyp nicht angibt)
1 Drücken Sie die Taste
einen UKW-Sender empfangen. n␣ Auf
dem Display erscheint „PTY“.
Sendet der gerade empfangene Sender
PTY-Daten (Programmtyp-Daten),
erscheint einer der oben aufgelisteten
Programmtypnamen.
Wenn die gerade empfangene Sendestation
kein RDS-Sender ist oder wenn die RDSDaten nicht gelesen werden, erscheint
„ - - - - - - - -“ im Display. In diesem Fall
können Sie mit der Taste PTY „NEWS“ oder
einen anderen Programmtyp auswählen.
2 Drücken Sie die Taste innerhalb von fünf
Sekunden nochmals.
Die Programmtypen werden in der oben
aufgelisteten Reihenfolge angezeigt.
Display-Anzeige
NEWS
AFFAIRS
INFO
SPORT
EDUCATE
DRAMA
CULTURE
SCIENCE
VARIED
POP M
ROCK M
M.O.R. M
LIGHT M
CLASSICS
OTHER M
NONE
, während Sie
Actual total number: Sony CDX-4100/5100RDS (EFGI) 3-810-809-11(1)
Page 49

3 Wenn der gewünschte Programmtyp
angezeigt wird, drücken Sie die RDSSender oder die linke Seite der Taste
AMS/SEEK. n „SEARCH“ blinkt im
Display.
Das Gerät beginnt, nach einem Sender zu
suchen, der den angegebenen
Programmtyp ausstrahlt.
4 Wenn ein Programm des gewünschten
Typs empfangen wird, erscheint die
Programmtypanzeige nochmals für fünf
Sekunden im Display.
Findet das Gerät keinen Sender, der den
gewünschten Programmtyp ausstrahlt, so
erscheint fünf Sekunden lang „NO DATA“
im Display, und das Gerät schaltet wieder
auf den Empfang des vorhergehenden
Senders/Programms.
Automatisches Einstellen
der Uhrzeit mit RDS
Dieses Gerät kann CT-Daten (CT - Clock Time
= Uhrzeit) empfangen und danach die Uhrzeit
automatisch einstellen.
Während Sie einen UKW-Sender
empfangen, drücken Sie die Taste
und halten dabei die Taste
gedrückt. n „CT“ wird angezeigt, und
die Uhrzeit wird eingestellt.
CT
Danach können Sie die CT-Funktion mit den
gleichen Tasten wieder ausschalten.
Hinweise
• Die CT-Funktion steht nicht immer zur Verfügung,
auch wenn Sie einen RDS-Sender empfangen.
• Die über die CT-Funktion eingestellte Uhrzeit ist nicht
immer korrekt.
REPEAT
2
SEL
Weitere Funktionen
Einstellen des Klangs
1 Wählen Sie die gewünschte Klangoption,
indem Sie die Taste
drücken.
VOL (Lautstärke) n BAS (Baß) n TRE
(Höhen) n BAL (Balance) n FAD (Fader)
n VOL (Lautstärke) n ···
2 Stellen Sie die gewünschte Klangoption
mit der Taste oder ein.
Nachdem Sie eine Klangoption ausgewählt
haben, müssen Sie innerhalb von 3 Sekunden
den Einstellvorgang beginnen. Nach 3
Sekunden dient die Taste wieder nur zur
Regelung der Lautstärke.
Gute Tonqualität auch bei
geringer Lautstärke
— Loudness-Funktion
Drücken Sie die Taste
erscheint auf dem Display.
Baß und Höhen werden verstärkt. Um die
Funktion wieder auszuschalten, drücken Sie
die Taste nochmals.
Stummschalten des Tons
—Stummschaltfunktion
Drücken Sie die Taste
Anzeige „MUTE“ blinkt.
Der Ton wird ohne Verzögerung
stummgeschaltet. Um die vorherige Lautstärke
wieder einzustellen, drücken Sie die Taste
nochmals.
Die Funktion wird auch deaktiviert, wenn:
— die Taste
— durch Drücken der Taste 6 während der Wiedergabe
eine CD ausgeworfen wird.
oder OFF gedrückt wird,
wiederholt
SEL
LOUD
. n␣ „LOUD“
MUTE
. n Die
D
RDS-Funktionen/Weitere Funktionen
Actual total number: Sony CDX-4100/5100RDS (EFGI) 3-810-809-11(1)
13
Page 50

Stummschalten des
Signaltons
Drücken Sie die Taste 6, während Sie
die Taste
Wenn Sie den Signalton wieder einschalten
wollen, drücken Sie diese Tasten nochmals.
Hinweis
Wenn Sie einen zusätzlich erhältlichen Endverstärker an
LINE OUT anschließen, wird der Signalton deaktiviert.
SEL
gedrückt halten.
Wechseln der
Beleuchtungsfarbe
(beim CDX-5100RDS)
Drücken Sie die Taste
die Taste
Sie können zwischen den Farben Bernstein
und Grün wählen.
SEL
gedrückt halten.
D
INTRO
1
, während Sie
Wartung
Austauschen einer Sicherung
Wenn Sie eine Sicherung austauschen, achten
Sie darauf, eine Ersatzsicherung mit dem
korrekten Ampere-Wert zu verwenden. Dieser
ist auf der Sicherung bzw. der Verpackung
angegeben. Verwenden Sie unter keinen
Umständen eine Sicherung mit einem höheren
Ampere-Wert als dem der Sicherung, die
ursprünglich mit dem Gerät geliefert wurde.
Andernfalls kann es zu Schäden am Gerät
kommen.
Vorsicht!
Verwenden Sie ausschließlich eine Sicherung
mit dem angegebenen Ampere-Wert.
Sicherungen mit einem höheren Ampere-Wert
können zu schweren Schäden führen.
Reinigen der Anschlüsse
Das Gerät funktioniert unter Umständen nicht
korrekt, wenn die Anschlüsse zwischen dem
Gerät und der Frontplatte verschmutzt sind.
Um dies zu vermeíden, lösen Sie mit der Taste
RELEASE die Frontplatte. Dann nehmen Sie
sie ab, und reinigen Sie sie mit einem mit
Alkohol getränkten Wattestäbchen. Drücken
Sie dabei nicht zu fest. Andernfalls beschädigt
werden.
am Gerät
Rückseite der
Frontabdeckung
14
Actual total number: Sony CDX-4100/5100RDS (EFGI) 3-810-809-11(1)
Page 51

Herausnehmen der Einheit Hinweise zum Gebrauch
1
des zusätzlich erhältlichen
Joystick RM-X2S
(beim CDX-4100RDS)
Löseschlüssel
(mitgeliefert)
2
3
4
Dieses Gerät können Sie auch mit dem
zusätzlich erhältlichen Joystick RM-X2S
bedienen.
Sie können dieses Gerät einschalten, indem Sie
die Taste SOURCE am Joystick drücken.
Die Aufkleber für den Joystick
Mit dem Joystick werden vier Aufkleber mit
Tastenbezeichnungen geliefert. Bringen Sie
den Aufkleber an, der den Funktionen Ihres
Hauptgeräts und der Montageposition des
Joystick in Ihrem Auto entspricht.
Wenn Sie dieses Gerät anschließen, bringen Sie
den Aufkleber mit der Bezeichnung „DSPL”
an.
DSPL
MODE
SEL
SEL
MODE
DSPL
Bringen Sie den Aufkleber an, der der
Montageposition Ihres Joystick entspricht.
D
Weitere Funktionen
Actual total number: Sony CDX-4100/5100RDS (EFGI) 3-810-809-11(1)
15
Page 52

Lage und Funktion der Bedienelemente
OFF
AMS/SEEK
LOUD
MUTE
SEL
RELEASE
Näheres finden Sie auf den mit r unterlegten Seiten.
INTRO2REPEAT3SHUF
1
456
TUNER
AF/TA
PRESET
CD
PTY
BTM
SENS
DSPL
1 Taste LOUD (Loudness) !£
2 Taste OFF 46!£
D
3 Taste AMS/SEEK (Automatischer
Musiksensor/Sendersuche) 67
4 Taste (Lautstärke-/
Baß-/Höhen-/Balance-/Fader-Regelung)
5!£
5 Display-Fenster
6 Taste TUNER (Radio ein/
Frequenzbereichauswahl) 6789
7 Taste PRESET (Senderspeichersuche)
689
8 Taste 6 (Auswerfen) 6!£
9 Taste PTY (Programmtyp) !™
!º Taste MUTE !£
!¡ Taste RELEASE (Entriegelung der
Frontabdeckung) 45!¢
!™ Taste SEL (Auswählen des
Einstellmodus/Zeichensatz) 5!™!£!¢
!£ Rücksetztaste (an der Gerätevorderseite,
durch Frontplatte verdeckt) 4
!¢ Beim Radioempfang:
Stationstasten 9
Bei der Wiedergabe von CDs:
INTRO
1
Taste INTRO (Intro-ScanFunktion) 6
REPEAT
2
Taste REPEAT (Repeat-Funktion)
7
SHUF
3
Taste SHUF (Shuffle-PlayFunktion) 7
!∞ Stromversorgungs-Wählschalter
(POWER SELECT) (auf Geräteunterseite)
Siehe den Abschnitt „POWER SELECTSchalter“ in der Installations-/
Anschlußanleitung.
!§ Taste AF/TA (Alternativfrequenz/
Verkehrsdurchsage) !º!¡!™
!¶ Taste CD (CD-Wiedergabe) 6
!• Taste DSPL (Änderung des Display-
Modus/Einstellen der Uhr) 5!º
!ª Taste SENS/BTM (Einstellen der
Empfindlichkeit/
Speicherbelegungsautomatik) 78
16
Actual total number: Sony CDX-4100/5100RDS (EFGI) 3-810-809-11(1)
Page 53

Technische Daten
CD-Spieler
System Digitales Compact
Disc-Audiosystem
Signal-Rauschabstand 90 dB
Frequenzgang 10 – 20.000 Hz
Gleichlaufschwankungen unterhalb Meßgrenze
Tuner
UKW
Empfangsbereich 87,5 – 108,0 MHz
Antennenanschluß für Außenantenne
Zwischenfrequenz 10,7 MHz
Nutzbare Empfindlichkeit
8 dBf
Trennschärfe 75 dB bei 400 kHz
Signal-Rauschabstand 65 dB (stereo),
68 dB (mono)
Klirrgrad bei 1 kHz 0,5 % (stereo), 0,3 % (mono)
Kanaltrennung 35 dB bei 1 kHz
Frequenzgang 30 – 15.000 Hz
Gleichwellenselektion 2 dB
MW/LW
Empfangsbereich MW: 531 – 1.602 kHz
LW: 153 – 281 kHz
Antennenanschluß für Außenantenne
Zwischenfrequenz 10,71 MHz/450 kHz
Empfindlichkeit MW: 30 µV
LW: 50 µV
Allgemeines
Ausgangsleitung Steuerleitung für
Motorantenne
Steuerleitung für
Endverstärker
Klangregler Bässe ±8 dB bei 100 Hz
Höhen ±8 dB bei 10 kHz
Stromversorgung 12-V-Gleichstrom-
Autobatterie mit negativer
Erdung
Abmessungen ca. 188 × 58 × 177 mm
(B/H/T)
Einbaumaße ca. 178 × 50 × 154 mm
(B/H/T)
Gewicht ca. 1,5 kg
Mitgeliefertes Zubehör Drehschalter-
Fernbedienung
RM-X2S (beim
CDX-5100RDS)
Montageteile und
Anschlußzubehör (1 Satz)
Behälter für
Frontabdeckung (1)
Sonderzubehör Drehschalter-
Fernbedienung RM-X2S
RCA-Cinchkabel
RC-63 (1 m), RC-64 (2 m),
RC-65 (5 m)
Reinigungstuch XP-CD1
CD-Single-Adapter CSA-8
D
Endverstärker
Ausgänge für Lautsprecher
(versiegelte Anschlüsse)
Lautsprecherimpedanz 4 – 8 Ohm
Max. Ausgangsleistung beim CDX-4100RDS
20 W × 4 (an 4 Ohm)
beim CDX-5100RDS
35 W × 4 (an 4 Ohm)
Änderungen an Design und technischen Daten, die dem
technischen Fortschritt dienen, bleiben vorbehalten.
17
Actual total number: Sony CDX-4100/5100RDS (EFGI) 3-810-809-11(1)
Page 54

Behebung von Störungen
Die meisten Störungen, die unter Umständen an Ihrem Gerät auftreten, können Sie anhand der
folgenden Checkliste selbst beheben.
Bevor Sie die Liste durchgehen, überprüfen Sie noch einmal, ob alle Anschlüsse korrekt
vorgenommen und das Gerät korrekt bedient wurde.
Allgemeines
Problem
Kein Ton
Der Inhalt des Speichers ist
gelöscht.
Im Display-Fenster erscheinen
keine Anzeigen.
Kein Signalton ertönt.
CD-Spieler
D
Problem
Die CD kann nicht geladen
werden.
Die Wiedergabe startet nicht.
Die CD wird automatisch
ausgeworfen.
Die Funktionstasten arbeiten
nicht.
Bei Vibrationen kommt es zu
Tonaussetzern.
Ursache/Abhilfe
• Stellen Sie die Lautstärke mit der Taste ein.
• Stellen Sie bei einem Zwei-Lautsprecher-System den Fader-
Regler auf die mittlere Position.
• Das Stromversorgungskabel oder die Batterie wurde
abgetrennt.
• Die Rücksetztaste wurde gedrückt.
n Die Speicherung erneut vornehmen.
Entfernen Sie die Frontabdeckung, und reinigen Sie die
Anschlüsse (siehe „Reinigen der Anschlüsse“ unter „Wartung“).
• An LINE OUT ist ein zusätzlich erhältlicher Endverstärker
angeschlossen.
• Der Signalton wurde stummgeschaltet (Seite 14).
Ursache/Abhilfe
• Es ist bereits eine CD eingelegt.
• Es wurde versucht, die CD falschherum einzulegen.
Die CD ist verschmutzt.
Die Umgebungstemperatur liegt über 50 °C.
Die Rücksetztaste drücken.
• Das Gerät ist in einem Winkel von mehr als 20 ° eingebaut.
• Das Gerät ist nicht an einem stabilen Wagenteil befestigt.
Radioempfang
Problem
Ein gespeicherter Sender wird
nicht korrekt empfangen.
Der automatische Sendersuchlauf
funktioniert nicht.
Die Anzeige „ST“ blinkt.
Ursache/Abhilfe
• Speichern Sie den Sender mit der korrekten Frequenz ab.
• Das Sendesignal wird zu schwach empfangen.
Das Sendesignal wird zu schwach empfangen.
n Speichern Sie den Sender manuell ab.
• Stellen Sie den Sender exakt ein.
• Das Sendesignal wird zu schwach empfangen. n Drücken Sie
die Taste
BTM
, um in den MONO-Modus zu wechseln.
SENS
18
Actual total number: Sony CDX-4100/5100RDS (EFGI) 3-810-809-11(1)
Page 55

Fehleranzeigen
Folgende Anzeigen blinken etwa 5 Sekunden lang, und ein Alarmton ist zu hören.
Anzeige Ursache
CD ist verschmutzt oder wurde falsch
herum eingelegt.
Der CD-Spieler kann wegen einer
Störung nicht bedient werden.
Wenn Sie das Problem mit den oben genannten Abhilfemaßnahmen nicht lösen können, wenden Sie
sich bitte an Ihren Sony-Händler.
Abhilfe
Reinigen Sie die CD, oder legen Sie sie
richtig herum ein.
Drücken Sie die Rücksetztaste am
Gerät.
D
Actual total number: Sony CDX-4100/5100RDS (EFGI) 3-810-809-11(1)
19
Page 56

Caratteristiche
Caratteristiche generali
• Pannello anteriore asportabile da portare
con sé quando si lascia l’automobile
(pagina 4).
• Suoneria di avvertimento che si attiva
quando si spegne il motore senza aver tolto il
pannello anteriore dall’apparecchio.
• Dotato di orologio digitale a ciclo di 24 ore
(pagina 5).
• Doppia illuminazione (ambra e verde) (per
il modello CDX-5100RDS) (pagina 14).
• Amplificatore di potenza incorporato che
consente di impiegare un sistema a 4
altoparlanti (uscita massima: 20 W × 4 canali
(per il modello CDX-4100RDS), 35 W × 4
canali (per il modello CDX-5100RDS)).
• Uscite in linea per il collegamento ad un
amplificatore di potenza opzionale.
• Fornito di Comando rotatorio (per il
modello CDX-5100RDS).
Sezione lettore CD
• Convertitore da digitale ad analogico
(DAC) da 1bit per una riproduzione chiara
del suono.
• Meccanismo di recupero rapido per evitare
salti di suono.
I
• È possibile usare delle funzioni molto utili
come la funzione di scorrimento delle
introduzioni per la ricerca del brano
desiderato, la funzione di ripetizione per
ascoltare ripetutamente il brano e la
funzione di riproduzione in ordine casuale
per riprodurre i brani in ordine casuale.
E possibile usare il comando
rotatorio (per il modello
CDX-4100RDS).
Il comando rotatorio (RM-X2S) può essere
attivato come i comandi che azionano i
tergicristalli o le luci anteriori dell’auto
durante la guida.
Sezione sintonizzatore
• Possibilità di preselezionare 30 stazioni, 18
stazioni sulla banda FM e 6 stazioni sulle
bande MW e LW.
• Funzione BTM (funzione di memoria della
sintonizzazione migliore) per selezionare e
memorizzare automaticamente le stazioni dal
segnale più forte sui tasti di preselezione in
ordine di frequenza
(pagina 8).
• Possibilità di ricevere i servizi informativi
delle stazioni FM RDS (pagina 9).
• Compatibilità con le funzioni RDS, come le
funzioni EON (altre reti avanzate), AF
(frequenza alternativa), TA (notiziario dul
traffico), PTY (Tipo di programma) e CT
(ora orologio) (pagine 9, 10, 11, 12 e 13).
2
Actual total number: Sony CDX-4100/5100RDS (EFGI) 3-810-809-11(1)
Page 57

Indice
Precauzioni ............................................................... 4
Applicazione e rimozione del pannello
anteriore ............................................................... 4
Regolazione dell’orologio ....................................... 5
Uso lettore a CD
Riproduzione CD ..................................................... 6
Espulsione CD .......................................................... 6
Individuazione dell’inizio dei brani
— Funzione AMS (sensore musicale
automatico) ..................................................... 6
Individuazione della parte desiderate di un brano
— Funzione di ricerca manuale ........................ 6
Ricerca del brano desiderato
— Funzione di scorrimento delle
introduzioni .................................................... 6
Riproduzione ripetuta
— Funzione di ripetizione ................................. 7
Riproduzione di brani in ordine casuale
— Funzione di riproduzione in ordine
casuale ............................................................. 7
Ricezione radio
Per cercare automaticamente le stazioni
— Sintonizzazione automatica ......................... 7
Se la ricezione in FM stereo è di bassa qualità
— Modo monoaurale ......................................... 8
Per sintonizzare regolando la frequenza
— Sintonia manuale ........................................... 8
Memorizzazione automatica delle stazioni
— Funzione di memoria della sintonizzazione
migliore (BTM) ............................................... 8
Memorizzazione delle sole stazioni
desiderate ............................................................. 8
Ricezione delle stazioni memorizzate .................. 9
Funzioni RDS
Presentazione delle funzioni RDS ......................... 9
Visualizzazione del nome della stazione ............. 9
Ascolto dello stesso programma senza effettuare
la sintonia manuale, anche se la frequenza è
cambiata
—Funzione AF................................................... 10
Ascolto di notiziari sul traffico ............................ 11
Selezione del tipo di programma ........................ 12
Uso dei dati RDS per la regolazione automatica
dell’orologio ....................................................... 13
Altre funzioni
Regolazione delle caratteristiche del suono ...... 13
Ascolto dei bassi e degli acuti anche a volume basso
— Funzione di sonorità .................................... 13
Disattivazione rapida audio
— Funzione di disattivazione audio .............. 13
Disattivazione del segnale acustico .................... 14
Commutazione del colore di illuminazione
(per il modello CDX-5100RDS) ....................... 14
I
Manutenzione ........................................................ 14
Rimozione dell’apparecchio ................................ 15
Osservazioni sull’utilizzo del comando rotatorio
opzionale RM-X2S (per il modello
CDX-4100RDS) .................................................. 15
Posizione dei tasti .................................................. 16
Caratteristiche tecniche......................................... 17
Guida alla soluzione di problemi ........................ 18
Actual total number: Sony CDX-4100/5100RDS (EFGI) 3-810-809-11(1)
3
Page 58

Precauzioni
• Prima di usare l’apparecchio per la prima
volta, o dopo aver sostituito la batteria
dell’auto, premere il pulsante di azzeramento
con una penna a sfera o un altro oggetto
simile e usare quindi l’apparecchio.
Non esporre i dischi alla luce solare diretta o a
fonti di calore come prese d’aria calda e non
lasciarli in veicoli parcheggiati al sole dove
può verificarsi un considerevole aumento della
temperatura.
Pulsante di azzeramento
• Se l’automobile è rimasta parcheggiata al sole
e la temperatura interna è aumentata
notevolmente, lasciar raffreddare
l’apparecchio prima di usarlo.
• Se l’apparecchio non riceve alimentazione,
controllare prima i collegamenti. Se tutto è a
posto, controllare il fusibile.
• Se dai diffusori di un sistema a 2 diffusori
non proviene nessun suono, regolare il
comando dell’attenuatore sulla posizione
centrale.
In caso di dubbi o problemi riguardanti
l’apparecchio non contemplati in questo
manuale, rivolgersi al proprio rivenditore
Sony.
I
Note sui CD
Un disco sporco o difettoso può causare cadute
di suono durante la riproduzione. Per poter
ottenere un suono ottimale, maneggiare i
dischi come indicato.
Prendere i dischi per il bordo e, per non
sporcarli, non toccare la superficie.
Prima della riproduzione, pulire i dischi con il
panno apposito opzionale. Pulire i dischi dal
centro verso l’esterno.
Non usare solventi come benzina, acquaragia,
prodotti detergenti reperibili in commercio o
spray antistatici per dischi analogici.
Nota sulla condensazione di
umidità
In giorni piovosi o in zone molto umide,
l’umidità può condensarsi sulle lenti
all’interno del lettore CD e impedire il corretto
funzionamento del lettore.
Se ciò dovesse verificarsi, estrarre il disco e
attendere circa un’ora fino a che l’umidità non
sarà completamente evaporata.
Applicazione e rimozione
del pannello anteriore
Il pannello anteriore può essere staccato per
evitare che l’apparecchio venga rubato.
Rimozione del pannello anteriore
Prima di rimuovere il pannello anteriore
premere il tasto OFF. Quindi premere il tasto
RELEASE per aprire il pannello anteriore ed
estrarlo tirandolo verso di sè come illustrato.
Tasto OFF
Non attaccare carta o nastro adesivo sulla
sporcarli con l’etichetta.
4
Actual total number: Sony CDX-4100/5100RDS (EFGI) 3-810-809-11(1)
Tasto RELEASE
Fare attenzione a non far cadere il pannello
quando lo si stacca dall’apparecchio.
Page 59

Applicazione del pannello
anteriore
Applicare il lato destro del pannello anteriore
all’apparecchio applicando la parte A del
pannelo anteriore alla parte B
dell’apparecchio come mostrato
nell’illustrazione e spingere fino a sentire uno
scatto.
Regolazione dell’orologio
L’orologio digitale indica le 24 ore.
Per esempio, per impostare l’orologio sulle
10:08
1 Visualizzare l’ora.
(Premere il tasto
è in funzione.)
DSPL
quando l’apparecchio
A
B
Note
• Controllare che il pannello anteriore sia nella posizione
corretta quando lo si applica all’apparecchio, perché non
può essere applicato capovolto.
• Non premere con forza il pannello anteriore verso
l’apparecchio quando lo si applica. Il pannello può essere
applicato facilmente premendolo leggermente contro
l’apparecchio.
• Per tramsportare il pannello anteriore, inserirlo
nell’apposita custodia in dotazione.
• Non premere con forza sul display del pannello
anteriore.
• Prima di staccare il pannello anteriore, assicurarsi di
aver spento l’apparecchio. Tuttavia, se si preme il tasto
RELEASE per staccare il pannello quando l’apparecchio
è ancora acceso, l’apparecchio si spegnerà
automaticamente per evitare eventuali dann agli
altoparlanti.
• Non esporre il pannello anteriore alla luce solare diretta o
a fonti di calore come prese d’aria calda e non lasciarlo in
luoghi umidi. Non lasciare mai il pannello anteriore
staccato sul cruscotto o in un altro luogo all’interno di
un’automobile parcheggiata al sole, poiché la temperatura
interna potrebbe aumentare considerevolmente.
Suoneria di avvertimento
Mettendo la chiavetta di accensione sulla
posizione OFF, senza staccare il pannello
anteriore, si attiva la suoneria di avvertimento
e si sente un segnale acustico per alcuni
secondi (solo quando l’interruttore POWER
SELECT è regolato nella posizione A).
2 Premere il tasto
DSPL
per più di due
secondi.
La cifra delle ore lampeggia.
Regolare la cifra dell’ora.
per avanzare
per retrocedere
3 Premere leggermente il tasto
La cifra dei minuti lampeggia.
SEL
.
Regolare la cifra dei minuti.
per avanzare
per retrocedere
4 Premere leggermente il tasto
L’orologio inizia a funzionare.
Nota
Se l’interruttore POWER SELECT in fondo
dell’apparecchio è regolato sulla posizione B e
l’apparecchio è acceso, non è possibile regolare l’orologio.
Regolare l’orologio dopo aver acceso la radio o dopo aver
iniziato la riproduzione CD.
DSPL
.
I
Actual total number: Sony CDX-4100/5100RDS (EFGI) 3-810-809-11(1)
5
Page 60

Uso lettore a CD
Riproduzione CD
Dopo aver inserito un CD la
riproduzione inizierà automaticamente
dal primo brano.
Facciata con l’etichetta verso l’alto
Individuazione dell’inizio
dei brani
— Funzione AMS (sensore musicale
automatico)
Durante la riproduzione, premere uno
dei due lati del tasto AMS/SEEK il
numero di volte corrispondente ai brani
che si desidera saltare.
AMS/SEEK
AMS/SEEK
Se c’è già un CD inserito premere il
tasto CD per avviare la riproduzione.
Tempo di riproduzione trascorso
TRACK
Numero del brano
I
Quando finisce l’ultimo brano del
CD
L’indicazione di numero di brano ritorna a “1”
e la riproduzione ricomincia dal primo brano
del CD.
Nota
Per riprodurre un CD da 8 cm, usare l’adattatore Sony
CSA-8 (non in dotazione).
Per interrompere la riproduzione,
espellere il CD premendo il tasto
oppure il tasto
La riproduzione viene interrotta anche quando
si seleziona un’altra fonte (radio) premendo il
TUNER
tasto
.
OFF
.
Espulsione CD
Premere il pulsante .
Nota
Se, dopo aver premuto il tasto 6, il disco non viene tolto
dall’alloggiamento, dopo circa 15 secondi esso verrà 5 to be
deleted automaticamente ricaricato nell’apparecchio per
evitare che venga danneggiato.
6
Per individuare i
brani precedenti
Per individuare i
brani successivi
Individuazione della parte
desiderata di un brano
— Funzione di ricerca manuale
Durante la riproduzione, premere e
tenere premuto uno dei due lati del
tasto PRESET. Rilasciare il tasto dopo
aver individuato la parte desiderata.
PRESET
Per individuare una
parte precedente
del brano
Se si torna all’inizio di un disco, il display visualizza
“
display visualizza “
In ambedue i casi non è possibile passare nè al brano
precedente, nè a quello successivo.
”. Se si avanza fino alla fine del disco il
PRESET
Per individuare una
parte successiva del
brano
”.
Ricerca del brano
desiderato
— Funzione di scorrimento delle introduzioni
Premere il tasto
riproduzione. n Sul display appare
“INTRO”.
Vengono riprodotti i primi 10 secondi di
ciascun brano. Dopo aver trovato il brano
desiderato, premere di nuovo il tasto.
L’apparecchio torna al modo di riproduzione
normale.
INTRO
1
durante la
Actual total number: Sony CDX-4100/5100RDS (EFGI) 3-810-809-11(1)
Page 61

Riproduzione ripetuta
TUNER
— Funzione di ripetizione
Premere il tasto
riproduzione.
n Sul display appare “REP 1”.
Quando la riproduzione del brano in corso è
terminata, il brano verrà riprodotto di nuovo
dall’inizio.
Per annullare questo modo, premere di nuovo
il tasto.
REPEAT
2
durante la
Ricezione radio
Per cercare
automaticamente le
stazioni
1 Selezionare la banda desiderata.
— Sintonizzazione automatica
Riproduzione di brani in
ordine casuale
— Funzione di riproduzione in ordine casuale
Premere il tasto
riproduzione.
n Sul display appare “SHUF 1”.
Tutti i brani del disco correntemente
selezionato vengono riprodotti una volta in
ordine casuale.
SHUF
3
durante la
FM1 n FM2 n FM3 n
MW n LW n FM1 n ···
2 Premere uno dei due lati del tasto
AMS/SEEK una volta per cercare la
stazione (sintonizzazione automatica).
AMS/SEEK
Per frequenze
inferiori
La ricerca si ferma quando l’apparecchio riceve
una stazione correttamente. Premere
ripetutamente uno dei due lati del tasto fino a
ricevere la stazione desiderata.
Quando viene sintonizzato un programma FM
stereo con sufficiente potenza di segnale
ST
appare l’indicazione “ST”.
Per evitare che la sintonizzazione automatica si
fermi troppo di frequente sulle stazioni (modo di
ricerca locale), premere brevemente il tasto
per visualizzare l’indicazione “LCL”.
Solo le stazioni con segnale relativamente forte possono
essere sintonizzate. Il modo di ricerca locale è attivabile
solo durante la sintonizzazione automatica.
AMS/SEEK
Per frequenze
superiori
BTM
SENS
I
Uso lettore a CD/Ricezione radio
7
Actual total number: Sony CDX-4100/5100RDS (EFGI) 3-810-809-11(1)
Page 62

Se la ricezione in FM
TUNER
TUNER
stereo è di bassa qualità
— Modo monoaurale
Premere brevemente il tasto
n Sul display appare “MONO”.
Il suono migliorerà, ma diventerà monoaurale.
BTM
Premendo il tasto
voce visualizzata nel modo seguente:
z LCL z MONO z Modo Normale
SENS
è possibile cambiare la
Per sintonizzare regolando
la frequenza
1 Selezionare la banda desiderata.
TUNER
2 Tenere premuto uno dei due lati del
tasto PRESET.
I
Quando si riceve la stazione desiderata
rilasciare il tasto.
PRESET
Per frequenze
inferiori
PREVENZIONE DI INCIDENTI!
Durante la guida consigliamo di usare la
sintonizzazione automatica e la
sintonizzazione preselezionata in memoria
(pagina 9) invece della sintonizzazione
manuale.
— Sintonia manuale
PRESET
BTM
SENS
.
Per frequenze
superiori
1 Selezionare la banda desiderata.
BTM
2 Premere il tasto
secondi.
• Quando sul display non é visualizzato
nessun numero di preselezione, le stazioni
della banda selezionata vengono
memorizzate in tutti i tasti di
preselezione.
• Quando sul display é visualizzato un
numero di preselezione, l’apparecchio
memorizza le stazioni sui tasti di
preselezione a partire da quello
visualizzato sul display.
Ad esempio, se si sceglie FM1 ed è visualizzato il
numero di preselezione 3,
l’operazione di memorizzazione inizia dal numero di
preselezione 3 della banda FM1 e si interrompe al numero
di preselezione 6 della banda FM3.
SENS
per più di due
3 Solo in FM1, FM2 e FM3:
Premere brevemente il tasto di
preselezione
seconda volta per circa 2 secondi fino a
sentire un suono. n A questo punto la
stazione sarà memorizzata.
Ripetere l’operazione con i tasti di
preselezione da
Note
• Quando è visualizzata l’indicazione “AF OFF” e si
attiva BTM, l’apparecchio memorizza solo le stazioni che
non trasmettono dati RDS. A seconda delle condizioni
della ricezione, comunque, possono essere memorizzate
stazioni RDS.
• Se si memorizzano soltanto stazioni RDS (Vedere
pagina 10), non é necessario eseguire tale operazione.
INTRO
, quindi premerlo una
1
REPEAT
a 6.
2
Memorizzazione
automatica delle stazioni
— Funzione di memoria della
sintonizzazione migliore (BTM)
Questa funzione consente di selezionare le
stazioni con il segnale più forte all’interno
della banda di frequenza attualmente
selezionata e di memorizzarle in sequenza a
partire dalla frequenza più bassa.
8
Actual total number: Sony CDX-4100/5100RDS (EFGI) 3-810-809-11(1)
Memorizzazione delle sole
stazioni desiderate
1 Selezionare la banda desiderata.
2 Sintonizzare l’apparecchio sulla stazione
che si desidera memorizzare nel tasto di
preselezione.
Page 63

3 Tenere premuto il tasto di preselezione
desiderato (da
due secondi fino a che non si sente un
segnale acustico.
Il numero del tasto di preselezione premuto
appare sul display principale.
Nei pulsanti di preselezione possono essere memorizzate
fino a 6 stazioni per ogni banda (FM1, FM2, FM3, MW e
LW) nell’ordine che si preferisce. Pertanto, sulla banda FM
possono essere memorizzate 18 stazioni.
Se si cerca di memorizzare un’altra stazione sullo stesso
pulsante di preselezione, la stazione memorizzata in
precedenza verrà cancellata.
INTRO
a
1
) per circa
6
Ricezione delle stazioni
memorizzate
1 Selezionare la banda desiderata.
TUNER
2 Premere leggermente il tasto di
preselezione (
memorizzata la stazione desiderata.
Nota
Se si tiene premuto il tasto di preselezione per più di due
secondi, la stazione attualmente ricevuta viene
memorizzata di nuovo. Per ricevere la stazione
memorizzata precedentemente, fare attenzione a premere il
tasto di preselezione solo leggermente.
Premere leggermente uno dei due lati
del tasto PRESET per ricevere le stazioni
nella sequenza memorizzata (funzione
di ricerca preselezionata).
PRESET
Premere brevemente
1 n 2 n 3 n 4 n 5 n 6 n 1 n ···
1 n 6 n 5 n 4 n 3 n 2 n 1 n ···
INTRO
a
1
Premere brevemente
6
PRESET
) in cui è
Funzioni RDS
Presentazione delle
funzioni RDS
L’RDS (Radio Data System) è un sistema che
usa le onde radio FM per ricevere segnali
digitali. La ricezione dei dati RDS sull’
autoradio consente di usufruire di numerosi
servizi, che possono essere utilizzati in vari
modi. Una funzione estremamente utile è
quella che permette di sintonizzarsi
automaticamente sul migliore segnale
disponibile che trasmette il programma scelto
oppure ricevere informazioni relative al
traffico o ai nomi. Pertanto, anche in occasione
di lunghi viaggi, è possibile ascoltare lo stesso
programma senza dover sintonizzare
manualmente l’apparecchio in continuazione.
Un’altra funzione consente di ricevere i notiziari
sul traffico durante la riproduzione di un CD.
L’RDS offre numerose funzioni la cui
disponibilità varia a seconda del paese o della
regione. Qui di seguito vengono fornite
informazioni sulle funzioni RDS di questo
apparecchio.
Note
• In caso di segnale debole o di cattive condizioni di
ricezione, le funzioni RDS potrebbero non funzionare
correttamente.
• Se la stazione FM stereo che si sta ascoltando non
trasmette dati RDS, le funzioni descritte qui di seguito
non funzioneranno.
Visualizzazione del nome
della stazione
Usando i dati RDS, può essere visualizzato il
nome della stazione attualmente ricevuta.
Selezionare una stazione FM. n Se si
tratta di una stazione che trasmette dati
RDS, sul display apparirà il relativo
nome.
I
Ricezione radio/Funzioni RDS
Quando, oltre alla normale indicazione della
frequenza, appare il simbolo “*”, significa che
si sta ricevendo una stazione RDS.
Continua alla pagina sequente n
Actual total number: Sony CDX-4100/5100RDS (EFGI) 3-810-809-11(1)
9
Page 64

Per cambiare gli elementi visualizzati
Ogni volta che viene premuto il tasto
visualizzati cambiano come segue:
z Frequenza z Ora z Nome della stazione
DSPL
Quando invece del nome della stazione viene
visualizzato “NO NAME”, significa che la
stazione ricevuta attualmente non trasmette
dati RDS. Dopo alcuni secondi “NO NAME”
scompare e ricompare l’indicazione della
frequenza.
Ascolto dello stesso
programma senza effettuare
la sintonia manuale, anche
se la frequenza è cambiata
— Funzione AF
La funzione “AF” (frequenza alternativa)
risintonizza automaticamente una stazione
sulla frequenza che, tra quelle ricevute, ha il
segnale più forte nella zona che si sta
attraversando. Pertanto, durante un lungo
viaggio è possibile ascoltare continuamente lo
stesso programma senza dover sintonizzare
manualmente la stazione.
I
Le frequenze cambiano automaticamente
98,5 MHz
, gli elementi
96,0 MHz
Sintonizzazione delle stazioni RDS
memorizzate dalle reti
Quando l’apparecchio memorizza su un tasto
numerico di preselezione una stazione RDS
che trasmette i dati AF, memorizza non solo la
frequenza, ma anche i dati AF e PI (Program
Identification, identificazione programma).
L’apparecchio inserisce questi dati in memoria,
indipendentemente dal fatto che la funzione
AF sia attivata o disattivata.
Utilizzando la funzione AF, è possibile
selezionare una stazione con un segnale
migliore rieffettuando la sintonizzazione nella
stessa rete della stazione memorizzata.
Premere il tasto
AF/TA
, quindi il tasto
numerico di preselezione.
Nota
Se sulla base dei dati AF non si riesce a captare
nessun’altra stazione della rete della stazione memorizzata
appare l’indicazione “PI seek”, e l’apparecchio cerca una
stazione con gli stessi dati PI. Se l’apparecchio non trova
nessun’altra stazione con gli stessi dati PI, ritorna alla
stazione originale.
Ascolto di programmi regionali
Tenere premuto il tasto
di due secondi. n Sul display verrà
visualizzata l‘indicazione “REG”.
Per annullare la funzione, premere di nuovo il
tasto per più di due secondi.
Nota
L’impostazione iniziale è “Regional ON”.
AF/TA
per più
Stazione
102,5 MHz
1 Selezionare una stazione FM.
2 Premere il tasto
“AF”.
Note
• Se la frequenza correntemente sintonizzata è debole e non
è possibile ricevere lo stesso programma su frequenze
diverse, appare l’indicazione “NO AF”.
• Quando viene attivata la sintonia automatica (pagina 7)
mentre è visualizzato “AF”, verranno ricevute solo le
stazioni FM che trasmettono dati RDS.
• Quando si preme il tasto AF/TA durante la ricezione di
una stazione MW o LW, verrà automaticamente
selezionato FM1.
AF/TA
per visualizzare
10
Actual total number: Sony CDX-4100/5100RDS (EFGI) 3-810-809-11(1)
Questa funzione non può essere attivata nel
Regno Unito e in alcune altre aree.
Funzione di collegamento locale (solo Regno
Unito)
Quando le stazioni locali precedentemente memorizzate su
uno dei tasti numerici di preselezione non vengono
ricevute in modo chiaro, oppure quando si desidera passare
a un’altra stazione locale, wtilizzare questa funzione per
attivare la ricerca automatica di altre stazioni locali e
sintonizzarsi su di esse.
Entro cinque secondi dalla ricezione iniziale, premere il
tasto numerico di preselezione della stazione locale alla
quale si desidera passare e tenere il tasto premuto. Ripetere
più volte questa procedura finché non viene ricevuta la
stazione locale desiderata.
Memorizzazione di sole stazioni RDS
La funzione BTM (pagina 8) consente di memorizzare nei
tasti di preselezione solamente stazioni RDS; attivare la
funzione AF e premere il pulsante SENS/BTM per due
secondi.
Quando è visualizzata l’indicazione “AF OFF” e si attiva
BTM, l’apparecchio memorizza solo le stazioni che non
trasmettono dati RDS.
Page 65

Ascolto di notiziari sul
traffico
Usando i dati TA (notiziario sul traffico) e TP
(programma sul traffico), è possibile ricevere
automaticamente una stazione di notiziari sul
traffico. È possibile ascoltare i notiziari sul
traffico anche durante la riproduzione di un
CD, in quanto l’apparecchio continua la ricerca
della stazione che li trasmette e passa
automaticamente alla stazione FM quando
inizia la trasmissione di un notiziario sul
traffico.
Premere il tasto
visualizzare “TA”. n L’apparecchio
inizierà la ricerca di una stazione con
notiziari sul traffico.
Quando viene trovata una stazione che
trasmette notiziari sul traffico, verrà
visualizzata l’indicazione “TP”. Durante la
ricezione del notiziario, l’indicazione “TA”
lampeggerà fino al termine della trasmissione
del notiziario stesso.
La funzione TA è attiva anche durante la
riproduzione di un CD.
Premere il tasto
riproduzione di un CD. n Sul display
apparirà l’indicazione “TA”.
L’apparecchio inizia a cereare notiziari sul
traffico. Quando ne riceve uno, la riproduzione
del CD viene interrotta e viene trasmesso il
notiziario.
Se viene premuto il tasto
ricezione di una stazione MW o LW,
l’apparecchio inizierà automaticamente a
ricevere una stazione FM.
Cancellazione del notiziario sul traffico
correntemente ricevuto
Premere leggermente il tasto AF/TA.
AF/TA
AF/TA
in modo da
durante la
AF/TA
durante la
Indicazione “EON”
Quando sono visualizzate entrambe le indicazioni “TA” ed
“EON”, significa che oltre alla stazione correntemente
ricevuta, anche un’altra stazione sta trasmettendo notiziari
sul traffico.
Ascolto di notiziari sul traffico a un
livello di volume prefissato
È possibile ascoltare i notiziari sul traffico a un
livello di volume prefissato. Ad esempio,
anche se il volume è impostato su zero,
quando inizia un notiziario sul traffico, passerà
automaticamente al livello prefissato. Nel caso
in cui il livello attuale di volume sia più alto di
quello prefissato, il livello attuale non
cambierà.
1 Selezionare una stazione FM e il livello di
volume desiderato.
SHUF
2 Premere il tasto
contemporaneamente il tasto
Quando si avverte un segnale acustico,
significa che la regolazione è stata
completata.
Ricezione di notiziari di emergenza
In una situazione di pericolo dovuta a un’emergenza o a
una catastrofe naturale, le stazioni RDS trasmettono
notiziari di emergenza per avvertire i guidatori che si
trovano in quella zona. Tali annunci possono essere
ricevuti solo se sono attivate le funzioni AF o TA. Quando
viene ricevuto un notiziario di emergenza, la riproduzione
del CD viene interrotta e l’apparecchio passa direttamente
alla banda FM per ricevere il notiziario di emergenza.
3
e tenere premuto
SEL
.
I
Funzioni RDS
Cancellazione del modo TA
Premere il tasto AF/TA finché sul display non viene
visualizzato “AF/TA OFF”.
Nota
Se non è possibile ricevere alcun notiziario sul traffico,
l’indicazione “NO TP” lampeggerà per quattro secondi e
subito dopo inizierà la ricerca di altre stazioni che
trasmettono notiziari sul traffico.
Ogni volta che si preme il tasto AF/TA, il display
cambia nel modo seguente:
z AF ON z TA ON z AF/TA ON
AF/TA OFF
z
Actual total number: Sony CDX-4100/5100RDS (EFGI) 3-810-809-11(1)
11
Page 66

Selezione del tipo di
programma
Alcune stazioni usano i dati RDS per
distinguere i tipi di programmi che
trasmettono.
Esistono i tipi di programmi seguenti:
Tipi di programmi
Giornali radio
Cronaca
Informazione
Sport
Scuola
Teatro
Cultura
Scienza
Varie
Pop
Rock
Leggera
Classica “leggera”
Classica
I
Altri tipi di musica
Non specificato
(quando la stazione
selezionata non specifica il
tipo di programma)
Display
NEWS
AFFAIRS
INFO
SPORT
EDUCATE
DRAMA
CULTURE
SCIENCE
VARIED
POP M
ROCK M
M.O.R. M
LIGHT M
CLASSICS
OTHER M
NONE
2 Premere nuovamente entro cinque
secondi.
I diversi tipi di programma verranno
visualizzati nella sequenza sopra indicata.
3 Quando viene visualizzato il tipo di
programma desiderato, premere uno dei
lati del tasto AMS/SEEK. n L’indicazione
“SEARCH” lampeggerà sul display.
L’apparecchio inizierà a cereare le stazioni
che trasmettono il tipo di programma
scelto.
4 Quando viene ricevuto un programma
del tipo scelto, sul display apparirà
nuovamente per cinque secondi la
descrizione del tipo di programma.
Se non viene ricevuto nessun programma
del tipo scelto, sul display verrà
visualizzata per cinque secondi
l’indicazione “NO DATA” e l’apparecchio
si sintonizzerà sulla stazione (programma)
precedentemente selezionata.
1 Premere il tasto
ricezione FM n Sul display apparirà
l’indicazione “PTY”.
Se la stazione attualmente rieevuta sta
trasmettendo dati PTY (selezione del tipo di
programma), viene visualizzato uno dei tipi
di programma sopra indicati.
Se la stazione attualmente ricevuta non è
una stazione RDS o se i dati RDS non sono
stati letti, sul display viene visualizzata
l’indicazione “- - - - - - - -”. In tal caso
premendo il tasto PTY, è possibile
selezionare “NEWS” o altri tipi di
programma.
PTY
durante la
12
Actual total number: Sony CDX-4100/5100RDS (EFGI) 3-810-809-11(1)
Page 67

Uso dei dati RDS per la
regolazione automatica
dell’orologio
Se si ricevono i dati CT (ora orologio), è
possibile regolare automaticamente l’orologio
di questo apparecchio.
Durante la ricezione FM, premere il
REPEAT
tasto
contemporaneamente il tasto
n Viene visualizzata l’indicazione “CT”
e l’orologio viene regolato.
Per annullare la funzione CT, premere di
nuovo i tasti.
Note
• È possibile che CT non funzioni anche se si sta ricevendo
una stazione RDS.
• È possibile che l’ora impostata con la funzione CT non
sia esatta.
tenendo premuto
2
CT
SEL
.
Altre funzioni
Regolazione delle
caratteristiche del suono
1 Selezionare la caratteristica che si
desidera regolare premendo
ripetutamente il tasto
VOL (volume) n BAS (bassi) n TRE
(acuti) n BAL (bilanciamento) n FAD
(attenuatore) n VOL (volume) n ···
2 Regolare la caratteristica selezionata
premendo il tasto o il tasto
La regolazione va effettuata entro tre secondi
dalla selezione (passati i tre secondi il tasto
avrà di nuovo la funzione di controllo del
volume).
.
Ascolto dei bassi e degli
acuti anche a volume
basso
Premere il tasto
apparirà “LOUD”.
I bassi e gli acuti verranno rafforzati. Per
annullare questa funzione, premere di nuovo il
tasto.
— Funzione di sonorità
LOUD
.
SEL
. n Sul display
I
Funzioni RDS/Altre funzioni
Disattivazione rapida
audio
— Funzione di disattivazione audio
Premere il tasto
“MUTE” lampeggia.
L’audio viene immediatamente disattivato. Per
tornare al livello sonoro precedente premere di
nuovo il tasto.
Talc funzione vicne disattivata anche quando:
— si preme il tasto
— si espelle un CD premendo il tasto 6 durante la
riproduzione.
Actual total number: Sony CDX-4100/5100RDS (EFGI) 3-810-809-11(1)
MUTE
. n L’indicazione
o il tasto OFF.
13
Page 68

Disattivazione del segnale
acustico
Premere il tasto 6 e tenere premuto
contemporaneamente il tasto
Per ottenere di nuovo il segnale acustico,
premere di nuovo questi tasti.
Nota
Quando si collega un amplificatore di potenza opzionale a
LINE OUT, il segnale acustico viene disattivato.
.
SEL
Manutenzione
Sostituzione del fusibile
Quando si sostituisce il fusibile, assicurarsi di
usarne uno con l’amperaggio corretto, indicato
sull’involucro del fusibile. Non usare un
fusibile di amperaggio superiore a quello in
dotazione all’apparecchio, perché potrebbe
causare malfunzionamenti.
Attenzione
Usare solo fusibili con l’ampcraggio
specificato.
L’uso di un fusibile di amperaggio superiore
può causare danni di grossa entità.
Commutazione del colore
di illuminazione
(per il modello CDX-5100RDS)
Premere il tasto
contemporaneamente il tasto
I colori disponibili sono ambra e verde.
I
INTRO
1
e tenere premuto
Pulizia dei connettori
L’apparecchio potrebbe non funzionare
correttamente se i connettori tra l’apparecchio
e il pannello anteriore sono sporchi. Per evitare
ciò, aprire il pannello anteriore premendo il
.
SEL
tasto RELEASE, toglierlo e pulire i connettori
con un bastoncino di cotone imbevuto d’alcol.
Non premere con forza per evitare di
danneggiare il connettore.
Apparecchio principale
Retro del pannello anteriore
14
Actual total number: Sony CDX-4100/5100RDS (EFGI) 3-810-809-11(1)
Page 69

Rimozione
dell’apparecchio
1
2
3
Chiavetta di rilascio
(in dotazione)
Osservazioni sull’utilizzo
del comando rotatorio
opzionale RM-X2S
(per il modello CDX-4100RDS)
L’apparecchio può funzionare con il comando
rotatorio opzionale (RM-X2S).
È possibile accendere l’apparecchio premendo
il tasto SOURCE sul comando rotatorio.
Etichette del comando rotatorio
Assieme a tale comando vengono fornite
quattro etichette. Applicare l’etichetta
corrispondente alle funzioni dell’apparecchio
principale e alla posizione di montaggio del
comando rotatorio.
Quando si collega il comando, applicare
l’etichetta che reca la scritta “DSPL”.
4
MODE
DSPL
SEL
I
Altre funzioni
SEL
MODE
DSPL
Applicare l’etichetta corrispondente alla posizione
di montaggio del comando rotatorio.
Actual total number: Sony CDX-4100/5100RDS (EFGI) 3-810-809-11(1)
15
Page 70

Posizione dei tasti
OFF
AMS/SEEK
LOUD
MUTE
SEL
RELEASE
Per maggiori informazioni, fare riferimento alle pagine nei cerchietti r.
INTRO2REPEAT3SHUF
1
456
TUNER
AF/TA
PRESET
CD
PTY
BTM
SENS
DSPL
1 Tasto LOUD (sonorità) !£
2 Tasto OFF (spegnimento) 46!£
3 Tasto AMS/SEEK (sensore musicale
automatico/sintonizzazione automatica)
I
67
4 Tasti (volume/bassi/
acuti/bilanciamento/attenuatore) 5!£
5 Display
6 Tasto TUNER (accensione radio/
selezione banda) 6789
7 Tasto PRESET (ricerca delle stazioni
preselezionate) 689
8 Tasto 6 (espulsione) 6!£
9 Tasto PTY (tipo di programma) !™
0 Tasto MUTE (disattivazione audio) !£
!¡ Tasto RELEASE (rilascio del pannello
anteriore) 4!¢
!™ Tasto SEL (selezione e impostazione)
5!¡!£!¢
!£ Tasto di azzeramento (situato sulla
parte anteriore dell’apparecchio dietro il
pannello anteriore) 4
!¢ Durante la ricezione radio:
Pulsanti di preselezione 9
Durante la riproduzione di CD:
INTRO
1
Tasto INTRO (scorrimento delle
introduzioni) 6
REPEAT
2
Tasto REPEAT (ripetizione) 7
SHUF
3
Tasto SHUF (riproduzione in
ordine casuale) 7
!∞ Interruttore POWER SELECT (situato sul
fondo dell’apparecchio).
Vedere Interruttore “POWER SELECT” nel
manuale di Installazione/Collegamenti.
!§ Tasto AF/TA (frequenza alternativa/
notiziari sul traffico) !º!¡
!¶ Tasto CD (riproduzione CD) 6
!• Tasto DSPL (cambiamento
visualizzazione/regolazione dell’ora)
50
!ª Tasto SENS/BTM (regolazione
sensibilità/memorizzazione della
sintonia migliore) 78
16
Actual total number: Sony CDX-4100/5100RDS (EFGI) 3-810-809-11(1)
Page 71

Caratteristiche tecniche
Sezione lettore CD
Sistema Sistema audio digitale per
compact disc
Rapporto segnale/rumore
90dB
Risposta in frequenza 10 – 20.000 Hz
Wow e flutter Inferiore al limite
misurabile
Sezione sintonizzatore
FM
Campo di sintonia 87,5 – 108,0 MHz
Terminale antenna Connettore per antenna
esterna
Frequenza intermedia 10,7 MHz
Sensibilità impiegabile 8 dBf
Selettività 75 dB a 400 kHz
Rapporto segnale/rumore65 dB (stereo),
68 dB (mono)
Distorsione armonica a 1 kHz
0,5 % (stereo),
0,3 % (mono)
Separazione 35 dB a 1 kHz
Risposta in frequenza 30 – 15.000 Hz
Rapporto di cattura 2 dB
MW/LW
Campo di sintonia MW: 531 – 1.602 kHz
LW: 153 – 281 kHz
Terminale antenna Connettore per antenna
esterna
Frequenza intermedia 10,71 MHz/450 kHz
Sensibilità MW: 30 µV
LW: 50 µV
Caratteristiche generali
Cavo in uscita Cavo di comando relè per
antenna automatica
Cavo di comando
amplificatore di potenza
Comandi di tono Bassi ±8 dB a 100 Hz
Acuti ±8 dB a 10 kHz
Alimentazione Batteria d’auto da 12 V
CC(massa negativa)
Dimensioni Circa 188 × 58 × 177 mm
(l/a/p)
Dimensioni di montaggio Circa 178 × 50 × 154 mm
(l/a/p)
Peso Circa 1,5 kg
Accessori in dotazione Comando rotatorio
RM-X2S (per il modello
CDX-5100RDS)
Componenti per
installazione e
collegamenti (1 serie)
Custodia per il pannello
anteriore (1)
Accessori opzionali Comando rotatorio
RM-X2S
Cavo a piedini RCA
RC-63 (1 m), RC-64 (2 m),
RC-65 (5 m)
Panno XP-CD1
Adattatore CSA-8
Disegno e caratteristiche tecniche soggetti a modifiche
senza preavviso.
I
Sezione amplificatore di potenza
Uscite Uscite altoparlanti
(connettori a tenuta)
Impedenza altoparlanti 4 – 8 ohm
Potenza di uscita massima
per il modello
CDX-4100RDS
20 W × 4 (a 4 ohm)
per il modello
CDX-5100RDS
35 W × 4 (a 4 ohm)
17
Actual total number: Sony CDX-4100/5100RDS (EFGI) 3-810-809-11(1)
Page 72

Guida alla soluzione di problemi
La lista seguente può essere di aiuto nella soluzione della maggior parte dei problemi che possono
verificarsi durante l’uso dell’apparecchio.
Prima di scorrere la lista, fare riferimento ai procedimenti di collegamento e funzionamento.
Caratteristichc generali
Problema
Suono assente
Il contenuto della memoria è
stato cancellato.
Le indicazioni non appaiono sul
display.
Nessun segnale acustico.
Riproduzione di CD
Problema
Non si riesce a caricare il CD.
I
La riproduzione non inizia.
Il disco viene espulso
automaticamente.
I tasti di controllo non
funzionano.
Salti di suono dovuti a
vibrazioni.
Causa/Soluzione
• Regolare il volume con il tasto .
• Regolare il comando dell’attenuatore sulla posizione centrale
in un sistema a 2 altoparlanti.
• Il cavo di alimentazione o la batteria sono stati scollegati.
• È stato premuto il pulsante di azzeramento.
n Memorizzare di nuovo.
Rimuovere il pannello anteriore e pulire i connettori. (Per
ulteriori dettagli in merito fare riferimento....) a “Pulizia dei
connettori” in “Manutenzione”.
• Un amplificatore di potenza viene collegato a LINE OUT.
• Il segnale acustico viene disattivato (pagina 14).
Causa/Soluzione
• È già inserito un altro CD.
• Il CD è stato inserito a forza capovolto.
Disco impolverato
La temperatura ambiente è superiore a 50°C.
Premere il pulsante di azzeramento.
• L’angolo di installazione dell’apparecchio è superiore a 20°.
• L’apparecchio non è installato su una parte stabile dell’auto.
Ricezione radio
Problema
Non si riesce a sintonizzare le
stazioni preselezionate
Non funziona la sintonizzazione
automatica
L’indicazione “ST” lampeggia.
Causa/Soluzione
• Memorizzare la frequenza corretta.
• La trasmissione è troppo debole.
La trasmissione è troppo debole.
n Usare la sintonia manuale.
• Sintonizzare con precisione.
• La trasmissione è troppo debole. n Premere il tasto
attivare il modo di ricezione monoaurale.
18
Actual total number: Sony CDX-4100/5100RDS (EFGI) 3-810-809-11(1)
BTM
SENS
per
Page 73

Messaggi di errore
Le seguenti indicazioni lampeggiano per circa cinque secondi e si sente un segnale di avvertimento.
Display Soluzione
Se la situazione non migliora con i rimedi suggeriti qui sopra, rivolgersi ad un rivenditore Sony.
Causa
Il CD è sporco o è stato inserito
capovolto.
Il lettore CD non può essere usato a
causa di qualche problema.
Pulire o inserire il CD correttamente.
Premere il pulsante di azzeramento
dell’apparecchio.
I
Actual total number: Sony CDX-4100/5100RDS (EFGI) 3-810-809-11(1)
19
Page 74

Sony Corporation Printed in Thailand
Actual total number: Sony CDX-4100/5100RDS (E,F,G,I) 3-810-809-11 (1)
 Loading...