

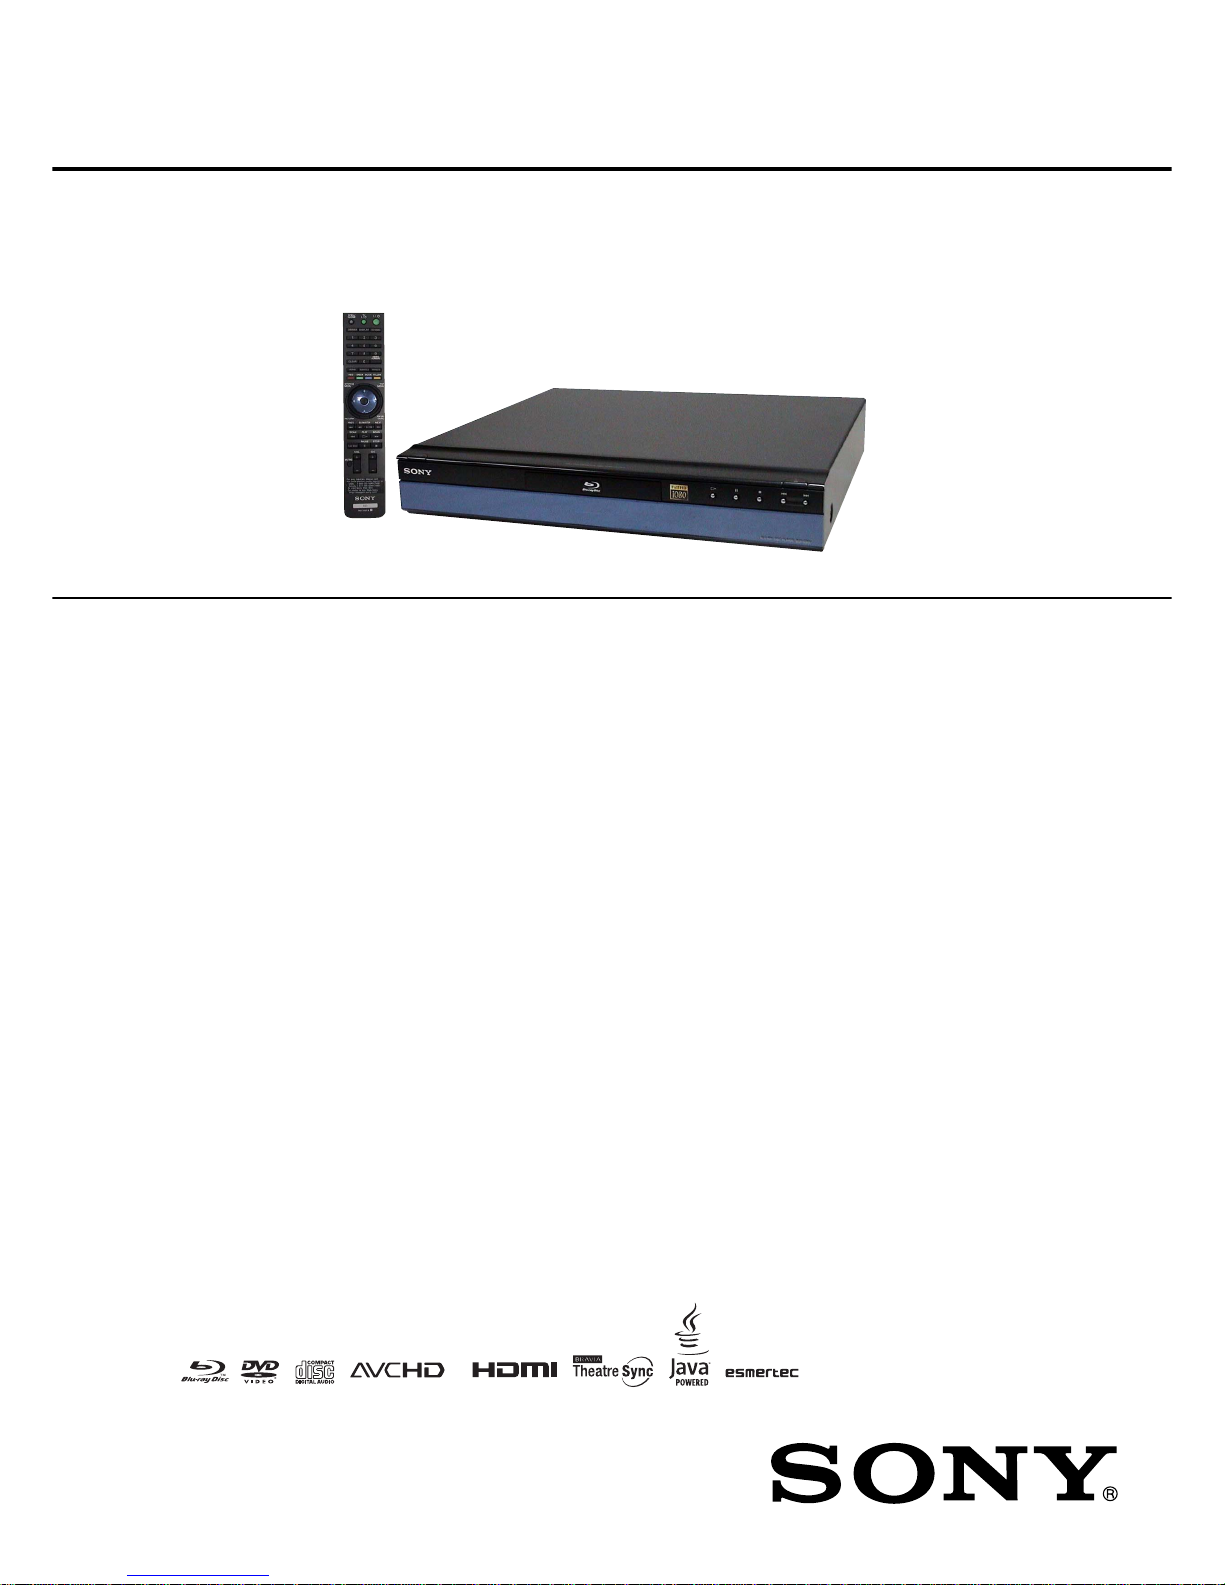
Sony BDP-S300,BDP-S301 Service Manual
SERVICE MANUAL
US Model
AEP Model
UK Model
E Model
Russian Model
Austr alian Model
Singapore Model
Thai Model
BDP-S300
BDP-S300/S301
RMT-B101A/B101P
SPECIFICATIONS
Ver. 1.1 2007.07
Photo: BDP-S300
System
Laser: Semiconductor laser
Outputs
(Jack name: Jack type/Output level/
Load impedance)
AUDIO OUT L/R:
Phono jack/2 Vrms/10 kilohms
DIGITAL OUT (OPTICAL):
Optical output jack/−18 dBm (wave
length 660 nm)
DIGITAL OUT (COAXIAL):
Phono jack/0.5 Vp-p/75 ohms
5.1CH OUTPUT:
Phono jack/2 Vrms/10 kilohms
HDMI OUT:
HDMI 19-pin standard connector
COMPONENT VIDEO OUT(Y, /PB/CB,
P
R/CR
):
Phono jack/Y: 1.0 Vp-p/P
B/CB
, PR/CR:
progressive or interlace
= 0.7 Vp-p/75 ohms
VIDEO: Phono jack/1.0 Vp-p/75 ohms
S VIDEO: 4-pin mini DIN/Y:
1.0 Vp-p, C: 0.286 Vp-p/75ohms
(US, CND)
1.0 Vp-p, C: 0.3 Vp-p (PAL)/75ohms
(Except US, CND, SP)
(SP)
1.0 Vp-p, C: 0.3 Vp-p (PAL)/Y: 1.0
Vp-p, C: 0.286 Vp-p (NTSC)/75ohms
General
Power requirements:
120 V AC, 60 Hz (US, CND)
110–240 V AC, 50/60 Hz (E32)
220–240 V AC, 50/60 Hz
(Except US, CND, E32)
Power consumption: 33 W
Dimensions (approx.):
430 × 79 × 375 mm (17 × 3
1
/8×
14
7
/8in.) (width/height/dept h) incl.
projecting parts
Mass (approx.): 4.5 kg (10 lb)
Operating temperature:
5 °C to 35 °C (41°F to 95°F)
Operating humidity:
25 % to 80 %
Supplied accessories
Specifications and design are subject to
change without notice.
• Video cord (phono plug× 1) (1)
• Stereo audio cord (phono plug× 2) (1)
• HDMI cord (1)
(supplied with BDP-S301 only)
• Power cord (1)
• Remote commander (remote) (1)
• Size AA (R6) batteries (2)
• Plug Adaptor (1) (E32)
• GNU License Information (1)
(Except US, CND)
BLU-RAY DISC PLAYER
TM
•Abbreviation
CND : Canadian model
E32 : Latin American model
SP : Singaporean model
Canadian Model
BDP-S300/S301
– 2 –
WARNING!!
WHEN SERVICING, DO NO T APPR O A CH THE LASER
EXIT WITH THE EYE TOO CLOSELY. IN CASE IT IS
NECESSARY TO CONFIRM LASER BEAM EMISSION,
BE SURE TO OBSERVE FROM A DISTANCE OF
MORE THAN 25 cm FROM THE SURFACE OF THE
OBJECTIVE LENS ON THE OPTICAL PICK-UP BLOCK.
CAUTION
Use of controls or adjustments or performance of procedures
other than those specified herein may result in hazardous radiation exposure.
SAFETY-RELATED COMPONENT WARNING!!
COMPONENTS IDENTIFIED BY MARK 0 OR DO TTED LINE
WITH MARK 0 ON THE SCHEMATIC DIAGRAMS AND IN
THE PARTS LIST ARE CRITICAL TO SAFE OPERATION.
REPLACE THESE COMPONENTS WITH SONY PARTS WHOSE
PART NUMBERS APPEAR AS SHOWN IN THIS MANUAL
OR IN SUPPLEMENTS PUBLISHED BY SONY.
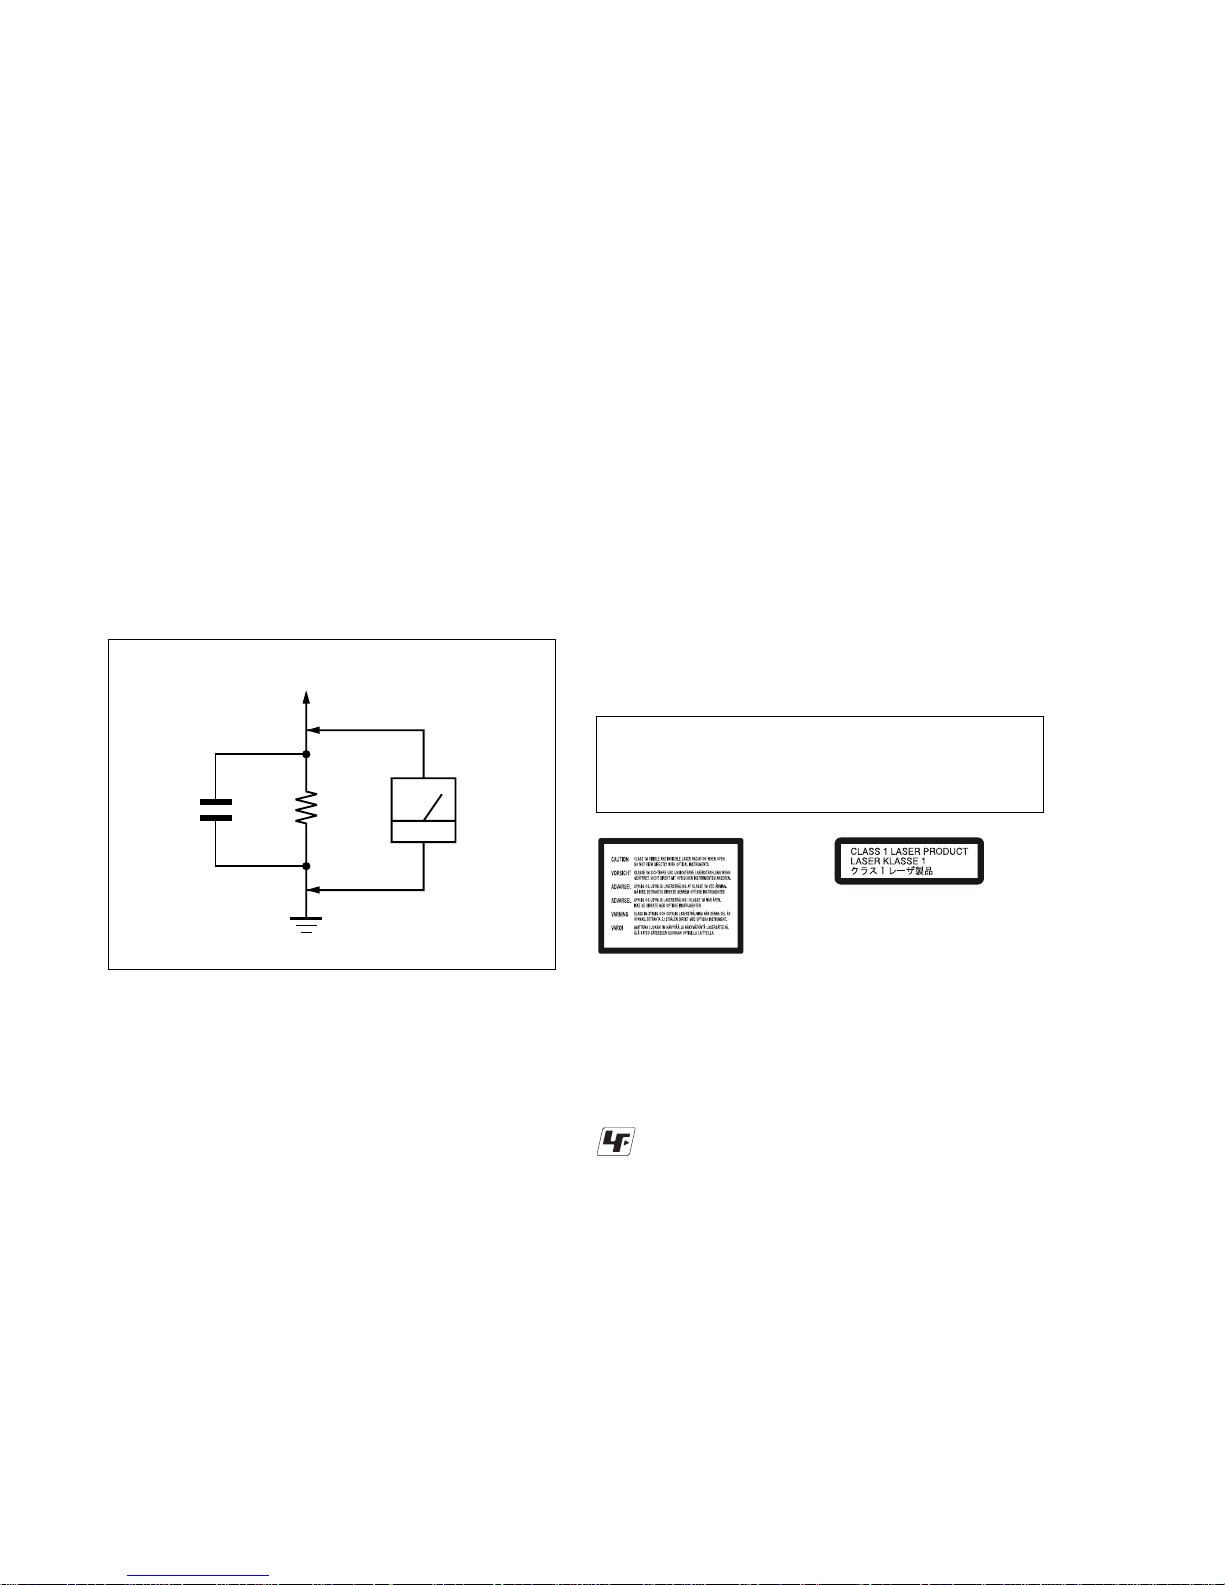
Fig. A. Using an AC voltmeter to check AC leakage.
1.5 k
Ω
0.15 µF
AC
voltmeter
(0.75 V)
To Exposed Metal
Parts on Set
Earth Ground
LEAKAGE TEST
The AC leakage from any exposed metal part to earth
ground and from all exposed metal parts to any exposed metal
part having a return to chassis, must not exceed 0.5 mA (500 microamperes). Leakage current can be measured by any one of
three methods.
1. A commercial leakage tester, such as the Simpson 229 or RCA
WT -540A. Follow the manufacturers' instructions to use these
instruments.
2. A battery-operated AC milliammeter. The Data Precision 245
digital multimeter is suitable for this job.
3. Measuring the voltage drop across a resistor by means of a
VOM or battery-operated AC voltmeter. The “limit” indication is 0.75V, so analog meters must have an accurate lowvoltage scale. The Simpson 250 and Sanwa SH-63T rd are examples of a passive VOM that is suitable. Nearly all battery
operated digital multimeters that have a 2V A C range are suitable. (See Fig. A)
1. Check the area of your repair for unsoldered or poorly-soldered connections. Check the entire board surface for solder
splashes and bridges.
2. Check the interboard wiring to ensure that no wires are
“pinched” or contact high-wattage resistors.
3. Look for unauthorized replacement parts, particularly transistors, that were installed during a previous repair. Point them
out to the customer and recommend their replacement.
4. Look for parts which, though functioning, show obvious signs
of deterioration. Point them out to the customer and recommend their replacement.
5. Check the line cord for cracks and abrasion. Recommend the
replacement of any such line cord to the customer.
6. Check the B+ voltage to see it is at the values specified.
7. Check the antenna terminals, metal trim, “metallized” knobs,
screws, and all other exposed metal parts for AC leakage.
Check leakage as described below.
SAFETY CHECK-OUT
After correcting the original service problem, perform the following
safety checks before releasing the set to the customer:
CAUTION:
The use of optical instrument with this product will increase eye
hazard.
Unleaded solder
Boards requiring use of unleaded solder are printed with the leadfree mark (LF) indicating the solder contains no lead.
(Caution: Some printed circuit boards may not come printed with
the lead free mark due to their particular size.)
: LEAD FREE MARK
Unleaded solder has the following characteristics.
• Unleaded solder melts at a temperature about 40°C higher than
ordinary solder.
Ordinary soldering irons can be used but the iron tip has to be
applied to the solder joint for a slightly longer time.
Soldering irons using a temperature regulator should be set to
about 350°C.
Caution: The printed pattern (copper foil) may peel away if the
heated tip is applied for too long, so be careful!
• Strong viscosity
Unleaded solder is more viscous (sticky , less prone to flow) than
ordinary solder so use caution not to let solder bridges occur
such as on IC pins, etc.
• Usable with ordinary solder
It is best to use only unleaded solder but unleaded solder may
also be added to ordinary solder.
ATTENTION AU COMPOSANT AYANT RAPPORT
À LA SÉCURITÉ!
LES COMPOSANTS IDENTIFIÉS P AR UNE MARQ UE 0 SUR
LES DIAGRAMMES SCHÉMATIQUES ET LA LISTE DES
PIÈCES SONT CRITIQUES POUR LA SÉCURITÉ DE
FONCTIONNEMENT. NE REMPLACER CES COM- POSANTS
QUE PAR DES PIÈCES SONY DONT LES NUMÉROS SONT
DONNÉS DANS CE MANUEL OU DANS LES SUPPLÉMENTS
PUBLIÉS PAR SONY.
This label is located on the laser
protective housing inside the enclosure.
This appliance is classified as a
CLASS1 LASER product. The
CLASS1 LASER PRODUCT
MARKING is located on the laser
protective housing inside the enclosure.

– 3 –
TABLE OF CONTENTS
Section Title Page Section Title Page
SERVICE NOTE
1. DISC REMOVAL PROCEDURE IF THE TRAY
CANNOT BE EJECTED (FORCED EJECTION) .......... 4
2. INSTALLATION METHOD OF EARTH SPRING
(FRONT) ........................................................................ 4
3. INSTALLATION METHOD OF REAR GASKET ............ 4
4. INSTALLATION METHOD OF NON-HALOGENE
TAPE .............................................................................. 5
5. TEST DISC .................................................................... 5
1. GENERAL
This Player Can Play the Following Discs and Files .... 1-1
Main Features................................................................ 1-1
Getting Started .............................................................. 1-2
Basic Operations ........................................................... 1-4
Watching Movie Files .................................................... 1-7
Listening to Music Files ................................................. 1-8
Viewing Photo Files ....................................................... 1-9
Changing the Initial Settings ......................................... 1-10
Additional Information ................................................... 1-13
2. DISASSEMBLY AND REASSEMBLY
2-1. DISASSEMBLY .............................................................. 2-1
2-1-1. Disassembly Flow ......................................................... 2-1
2-1-2. Upper Case ................................................................... 2-1
2-1-3. Tray Cover Assy ............................................................ 2-2
2-1-4. BD Drive (Service Use) ................................................. 2-2
2-1-5. MAIN Board ................................................................... 2-3
2-1-6. AU-258 Board ................................................................ 2-3
2-1-7. Power Block ................................................................... 2-4
2-1-8. Circuit Boards Location ................................................. 2-4
2-2. REASSEMBLY............................................................... 2-5
2-2-1. Upper Case ................................................................... 2-5
2-2-2. Tray Cover Assy ............................................................ 2-5
2-2-3. BD Drive (Service Use) ................................................. 2-6
2-2-4. MAIN Board ................................................................... 2-6
2-2-5. FL-176 Board/FR-271 Board ........................................ 2-7
2-2-6. DC FAN.......................................................................... 2-7
3. BLOCK DIAGRAMS
3-1. Main Diagram ................................................................ 3-1
3-2. Audio Block Diagram ..................................................... 3-3
3-3. FL/FR Block Diagram .................................................... 3-5
3-4. Power 1 Block Diagram ................................................. 3-7
3-5. Power 2 Block Diagram ................................................. 3-9
3-6. Power 3 Block Diagram ................................................. 3-11
3-7. Power 4 Block Diagram ................................................. 3-13
4. SCHEMATIC DIAGRAMS AND PRINTED WIRING
BOARDS
4-1. Frame Schematic Diagram ............................................ 4-1
4-2. Printed Wiring Boards and Schematic Diagrams ......... 4-5
AU-258 (ANALOG AUDIO) Schematic Diagram ........... 4-5
AU-258 Printed Wiring Board ........................................ 4-7
FL-176 Printed Wiring Board ........................................ 4-11
FL-176 (FL/LED) Schematic Diagram .......................... 4-13
FR-271 Printed Wiring Board ........................................ 4-15
FR-271 (SW/IR, INPUT/LED) Schematic Diagram ...... 4-17
5. TROUBLESHOOTING
Main Set, Power Supply Section................................... 5-1
Operation&Display Section ........................................... 5-9
Audio Section ................................................................ 5-13
FL Section ..................................................................... 5-14
6. REPAIR PARTS LIST
6-1. Exploded Views ............................................................. 6-1
6-1-1. Case Assy ................................................................ 6-1
6-1-2. Main Chassis Block .................................................. 6-2
6-1-3. Main Block ................................................................ 6-3
6-2. Electrical Parts List ....................................................... 6-4
– 4 –
SERVICE NOTE
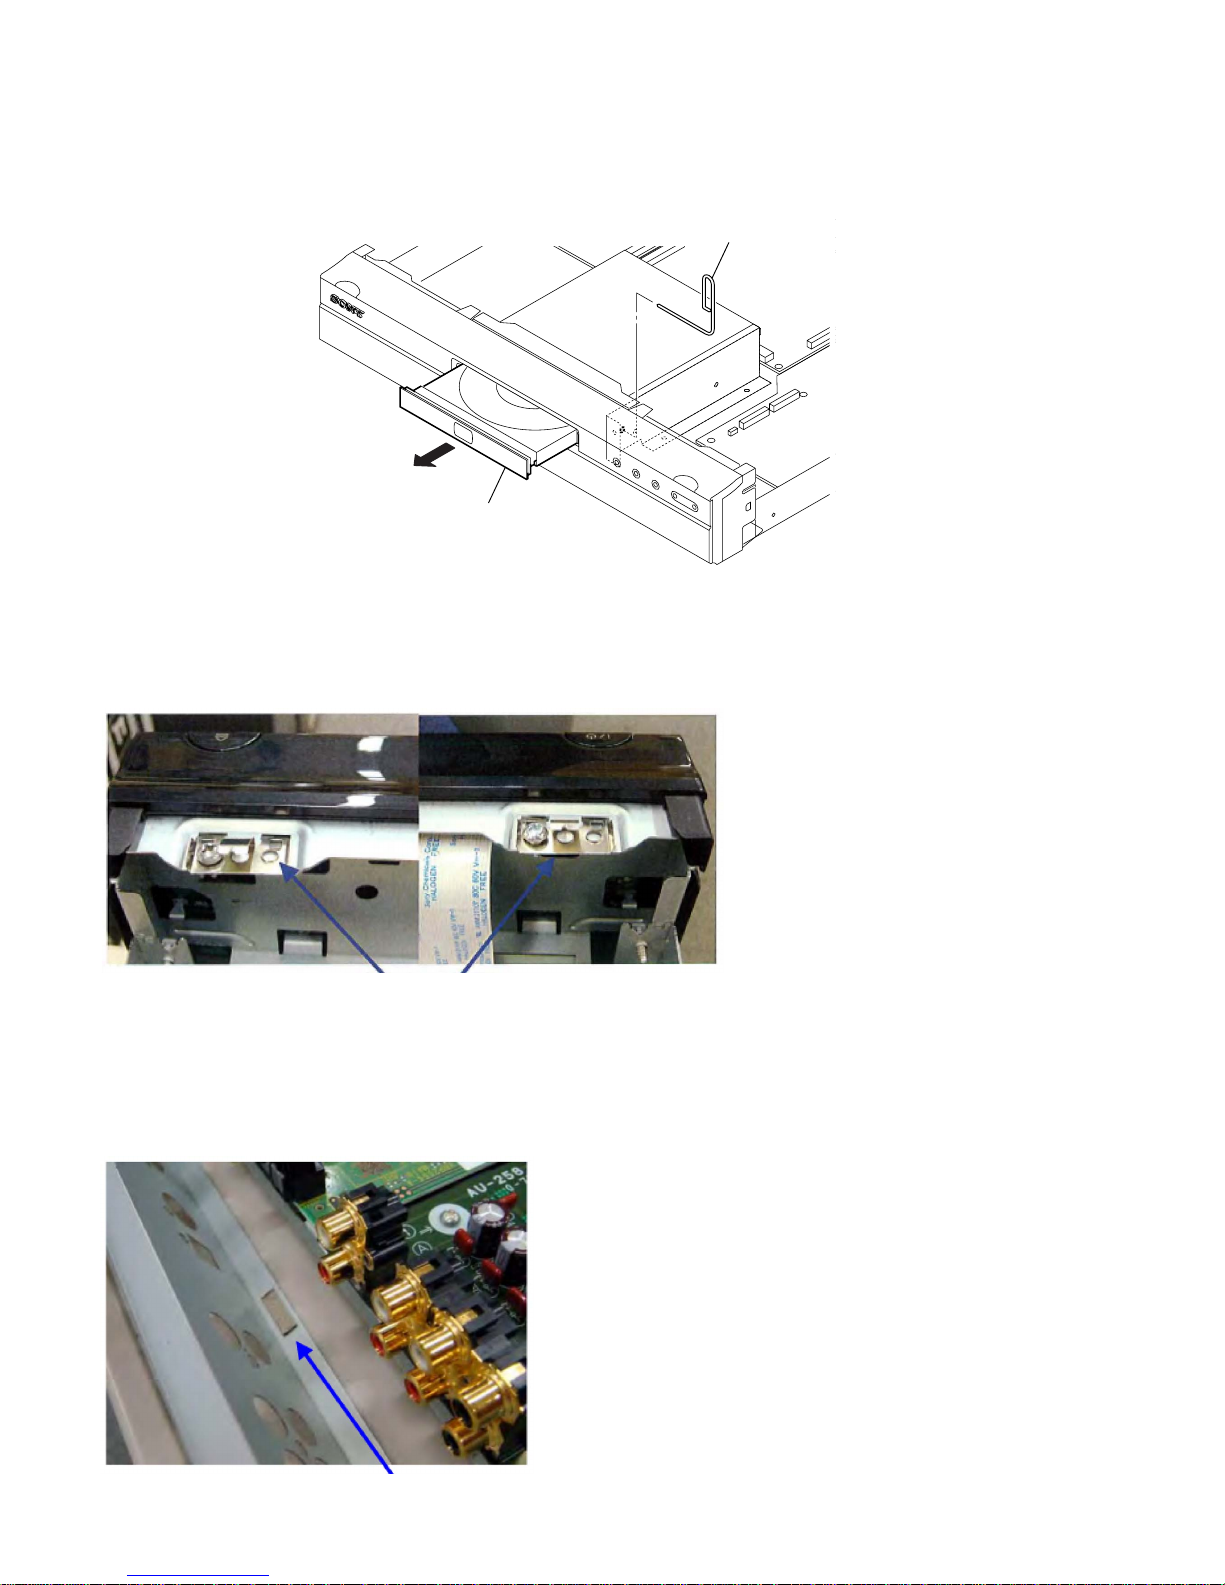
1. DISC REMOVAL PROCEDURE IF THE TRAY CANNOT BE EJECTED (FORCED EJECTION)
1. Remove the upper case. (Refer to page 2-1)
2. Insert a clip in the hole of a drive and open a tray.
clip
tray
2. INSTALLATION METHOD OF EARTH SPRING (FRONT)
1. Please install earth spring (front) at an installation position of right and left in a front frame.
Please be careful to directions of installation.
2. Please fix by for each one place with a screw.
earth spring (front)
3. INSTALLATION METHOD OF REAR GASKET
1. Please remove a rear panel fixed screw and jack fixed screw (total 9 screws) and remove a rear panel.
2. Please stick a rear gasket inside the lower part of a rear panel. Refer to a lower picture. The location of the gasket is between the
optical terminal and the audio terminal.
3. Please install a rear panel in the chassis from the slanting bottom and install a removed screws.
rear gasket

– 5 –
5. TEST DISC
Part No. Description Layer
J-6090-199-A BLX-104 Single Layer
J-6090-200-A BLX-204 Dual Layer
3-702-101-01 CD (YEDS-18)
J-6090-088-A HLX-504 Single Layer (NTSC)
J-6090-089-A HLX-505 Dual Layer (NTSC)
J-6090-077-A HLX-506 Single Layer (PAL)
J-6090-078-A HLX-507 Dual Layer (PAL)
5-1. Operation and Display
Check Items
1) BLX-104
1. Select 23.976Hz 1080p
2. Play “4.Motion pictures”
3. Check whether player can play back or not
4. Check each outputs
Video:
Composite/S Video/ component/HDMI
Audio:
Digital out(Coaxial/Optical)/Audio out/5.1Ch output
* When 1080/24p monitor is nothing, 1080i(59.94Hz or 50Hz) can use instead of 1080/24p.
However this is temporary correspondence.
2) BLX-204
1. Select 1080i(59.94Hz or 50Hz)
2. Play “4.Motion pictures”
3. Check whether player can play back or not
(Check the picture and sound output)
3) CD (YEDS-18)
Check whether player can play back or not
(Check the sound output)
4) HLX-504/505(NTSC) HLX506/507(PAL)
1. After displayed Main Menu, select “1.Video”
2. Play “1.Color Bar 100%”
(Check the picture and sound output)
3. Return to Menu
4. Play “Demonstration 4:3” or “5.Demonstration 16:9”
(Check the picture and sound output)
4. INSTALLATION METHOD OF NON-HALOGENE TAPE
1. Please connect a drive power supply harness after an exchange of a drive and fix by a reuse clamp.
2. Please stick a non-halogene tape so that a power supply harness may be fixed on the drive back.
non-halogene tape
– 6 –
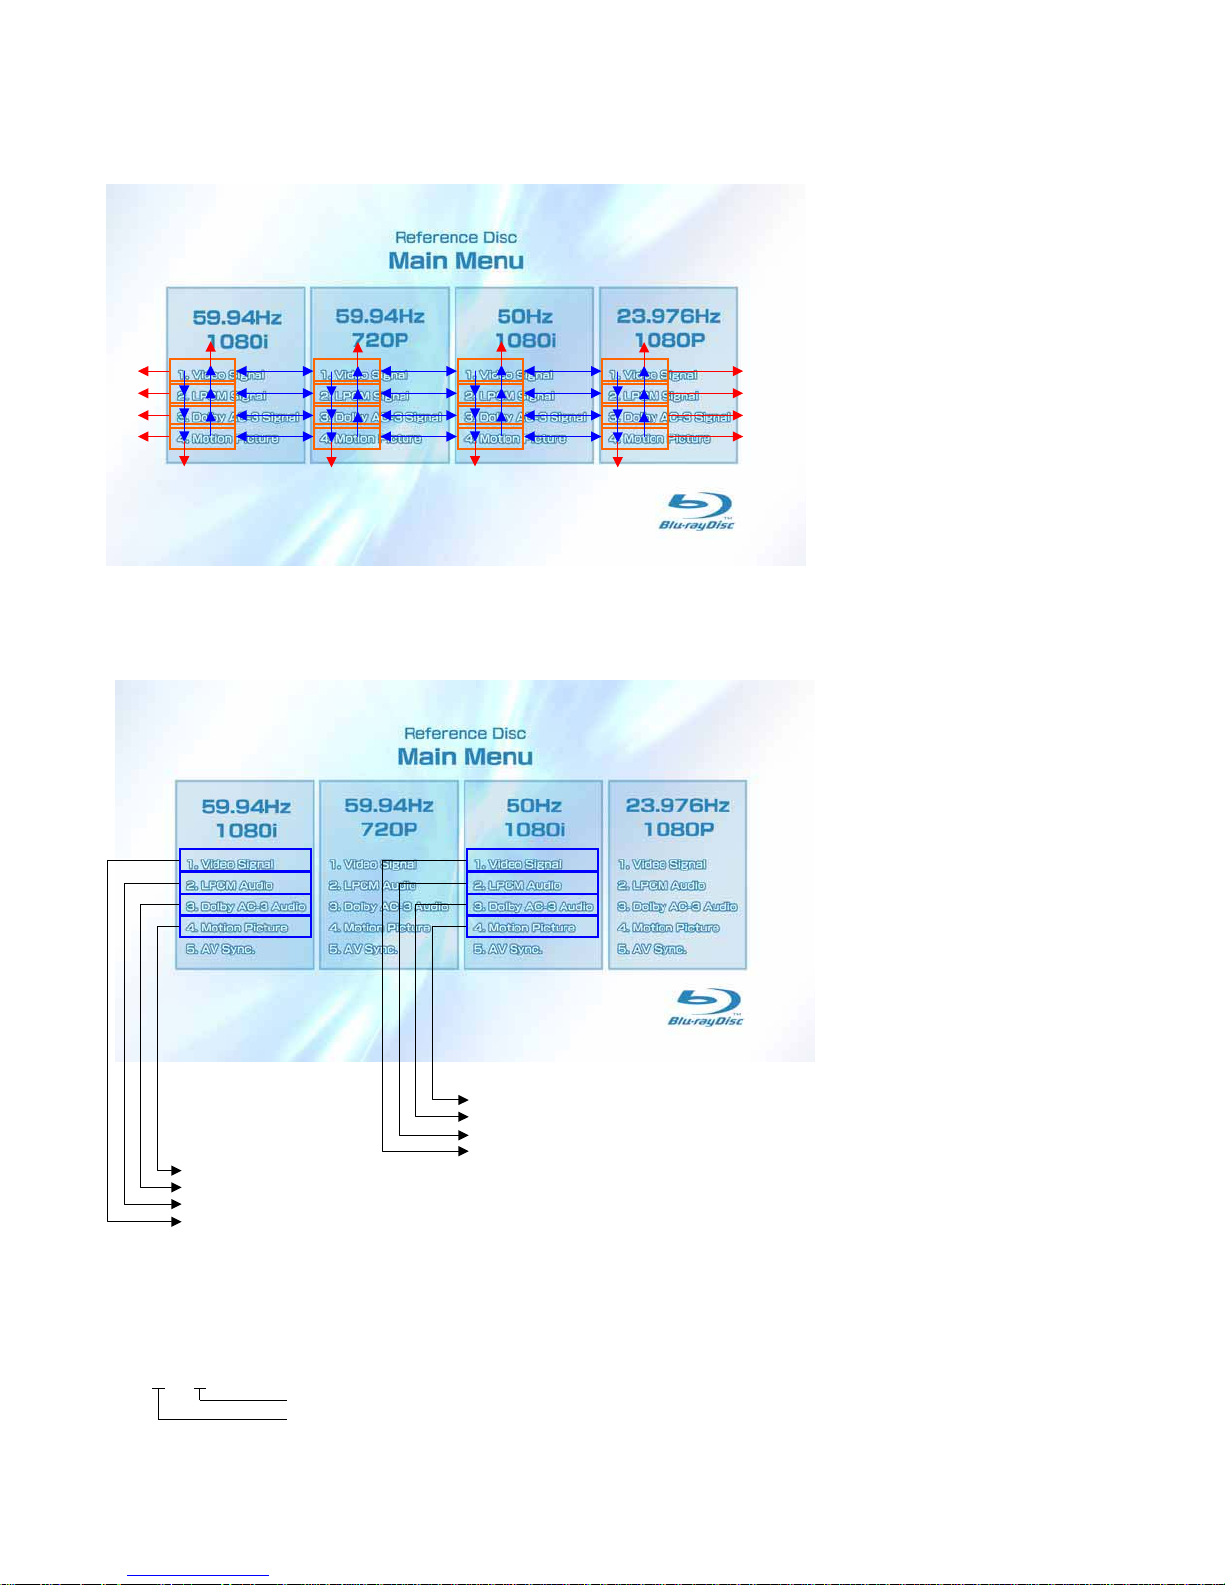
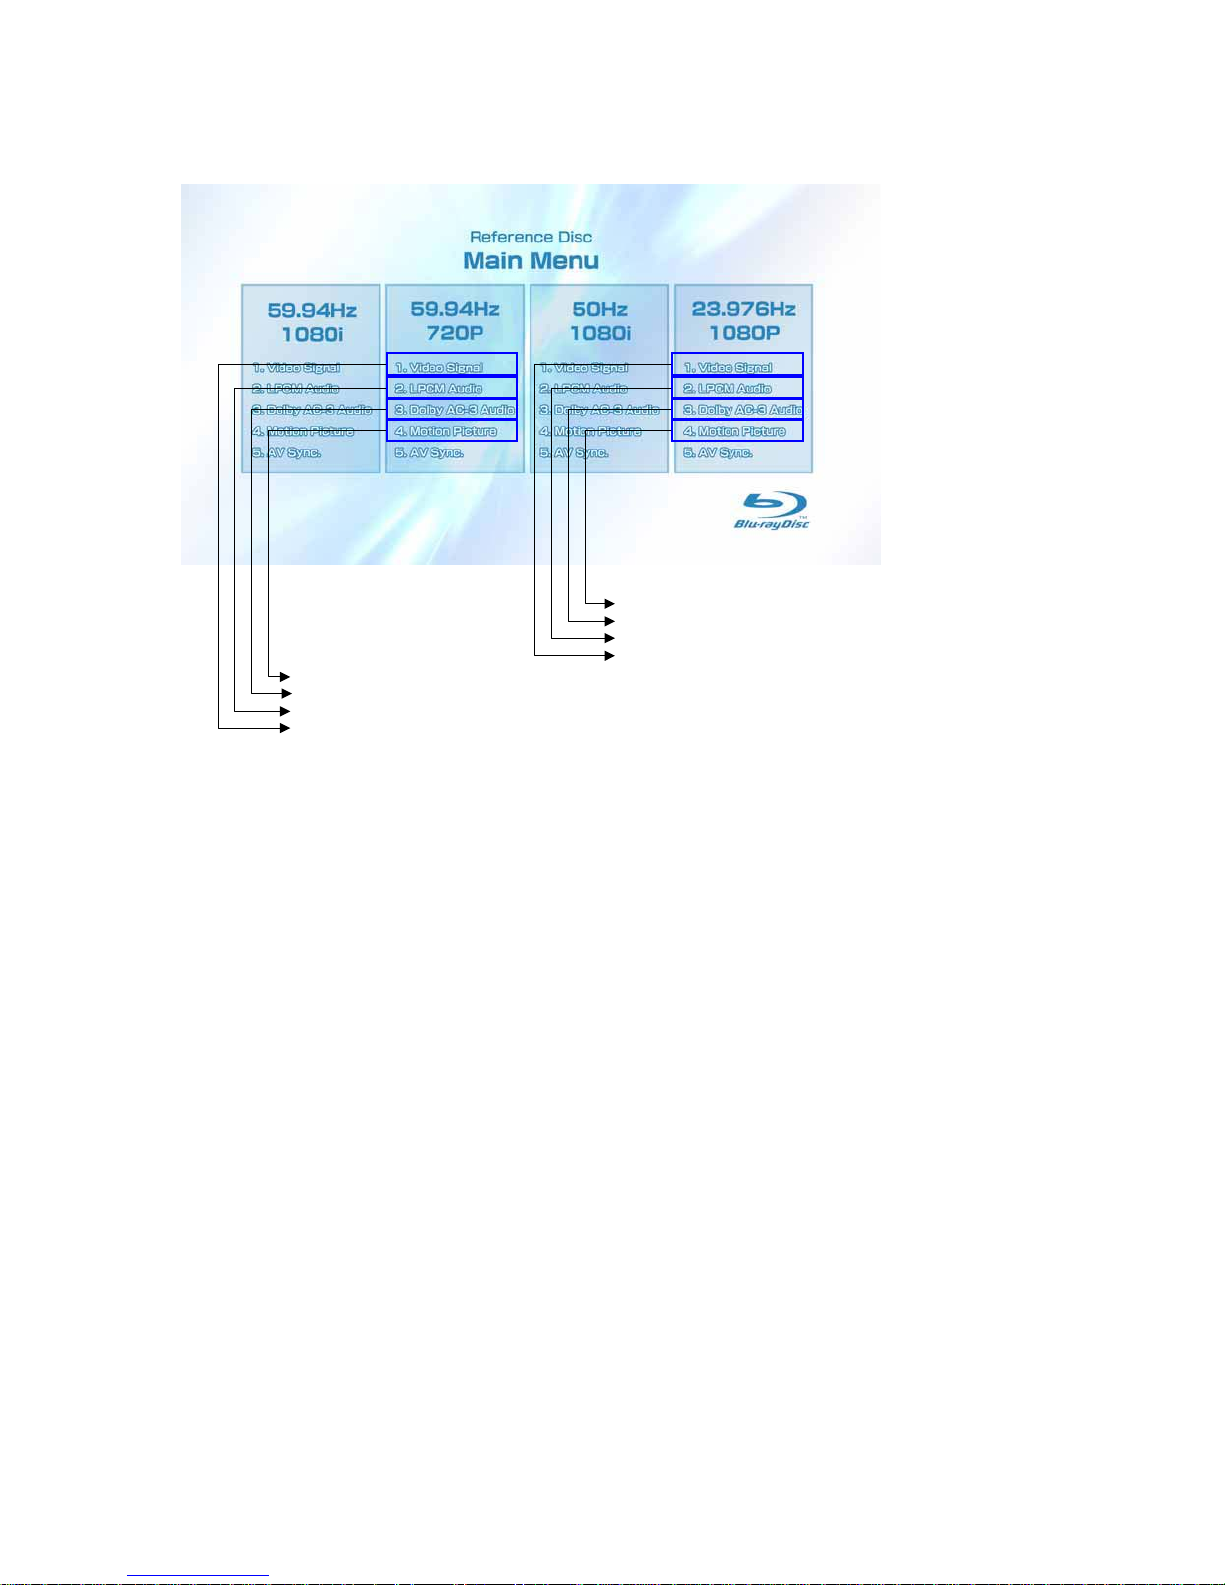
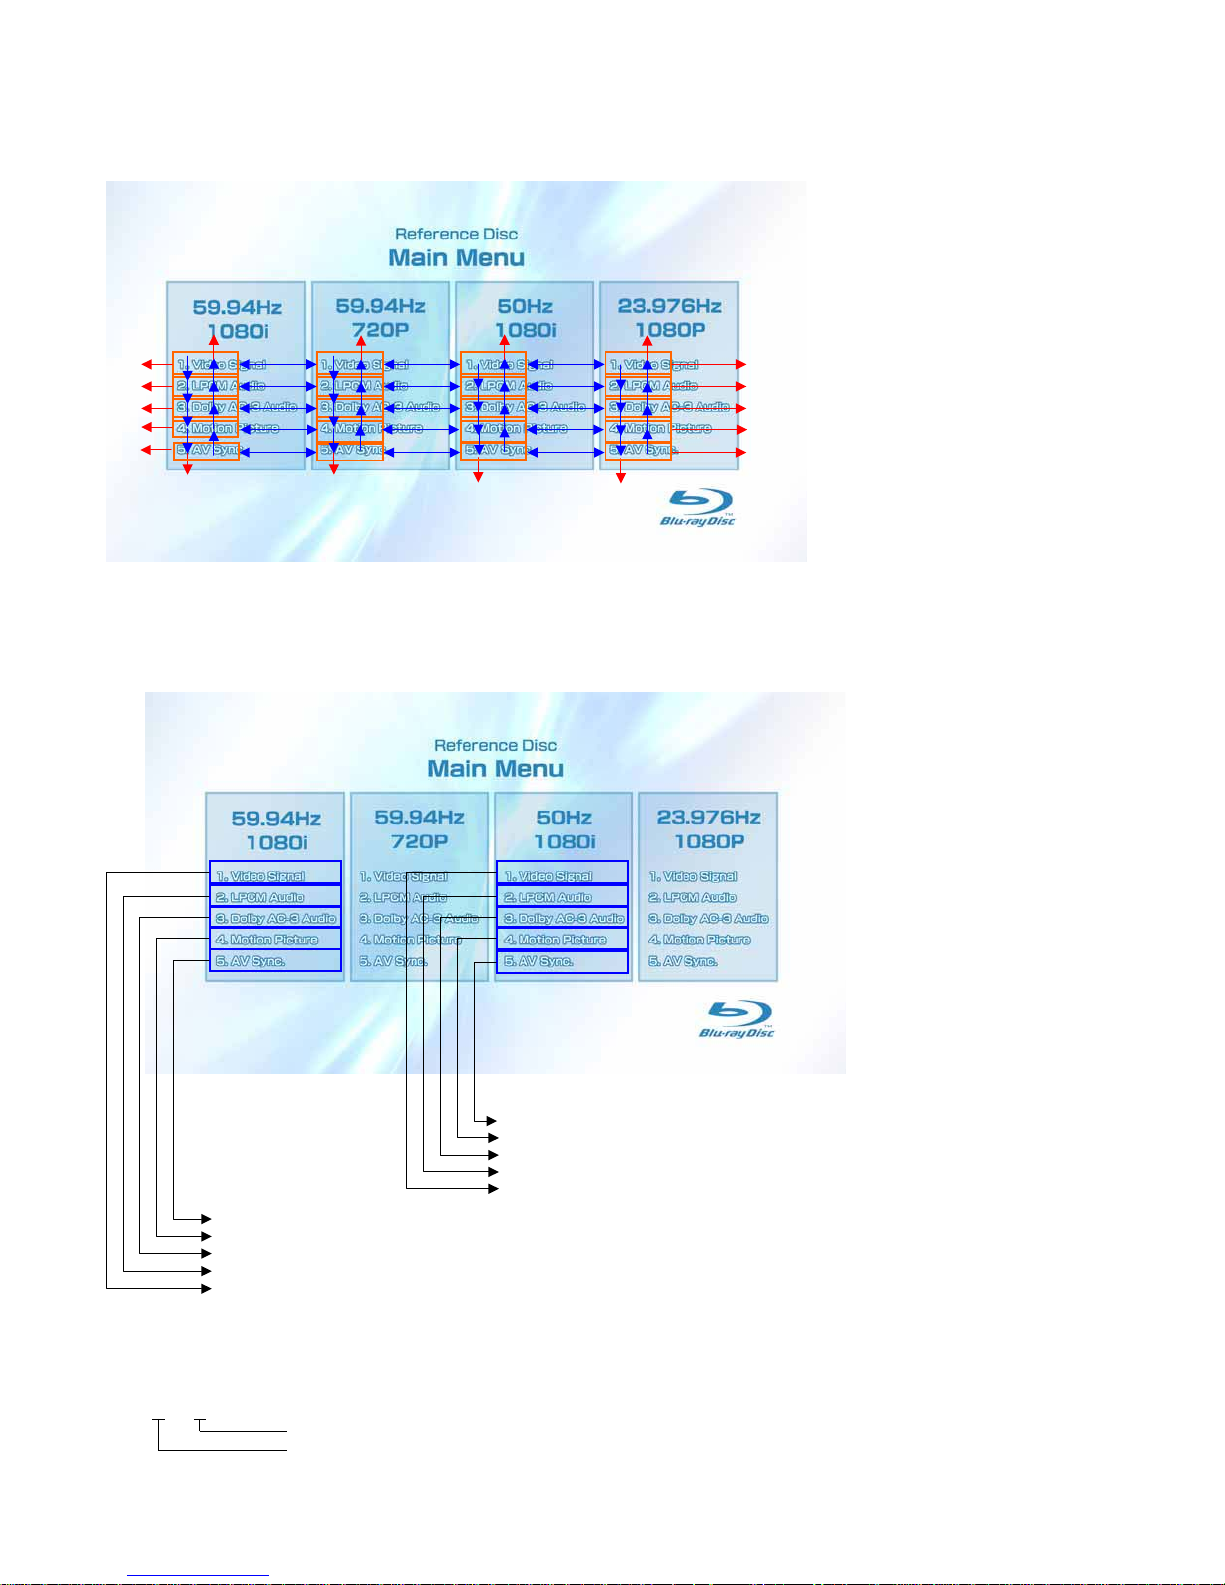
5-1-2. BLX-104 Menu Function (2)
Main Menu
*When returning to Main Menu after playback from each button of 59.94Hz/1080i, 1. Video Signal of 59.94Hz/1080i is selectively
displayed.
* When returning to Main Menu after playback from each button of 50Hz/1080i, 1. Video Signal of 50Hz/1080i is selectively displayed.
* 5. AV Sync does not operate.
Sub_menu1 is displayed
To Main Menu after playback from T2_C1 to T19_C1
To Main Menu after playback of T20_C1
To Main Menu after playback of T21_C1
Sub_menu3 is displayed
To Main Menu after playback from T54_C1 to T60_C1
To Main Menu after playback of T61_C1
To Main Menu after playback of T62_C1
Note:
Txx_ Cxx
Chapter No.
Title No.
X
X
X
X
X
X
X
X
X
X X X
X
X
X
X
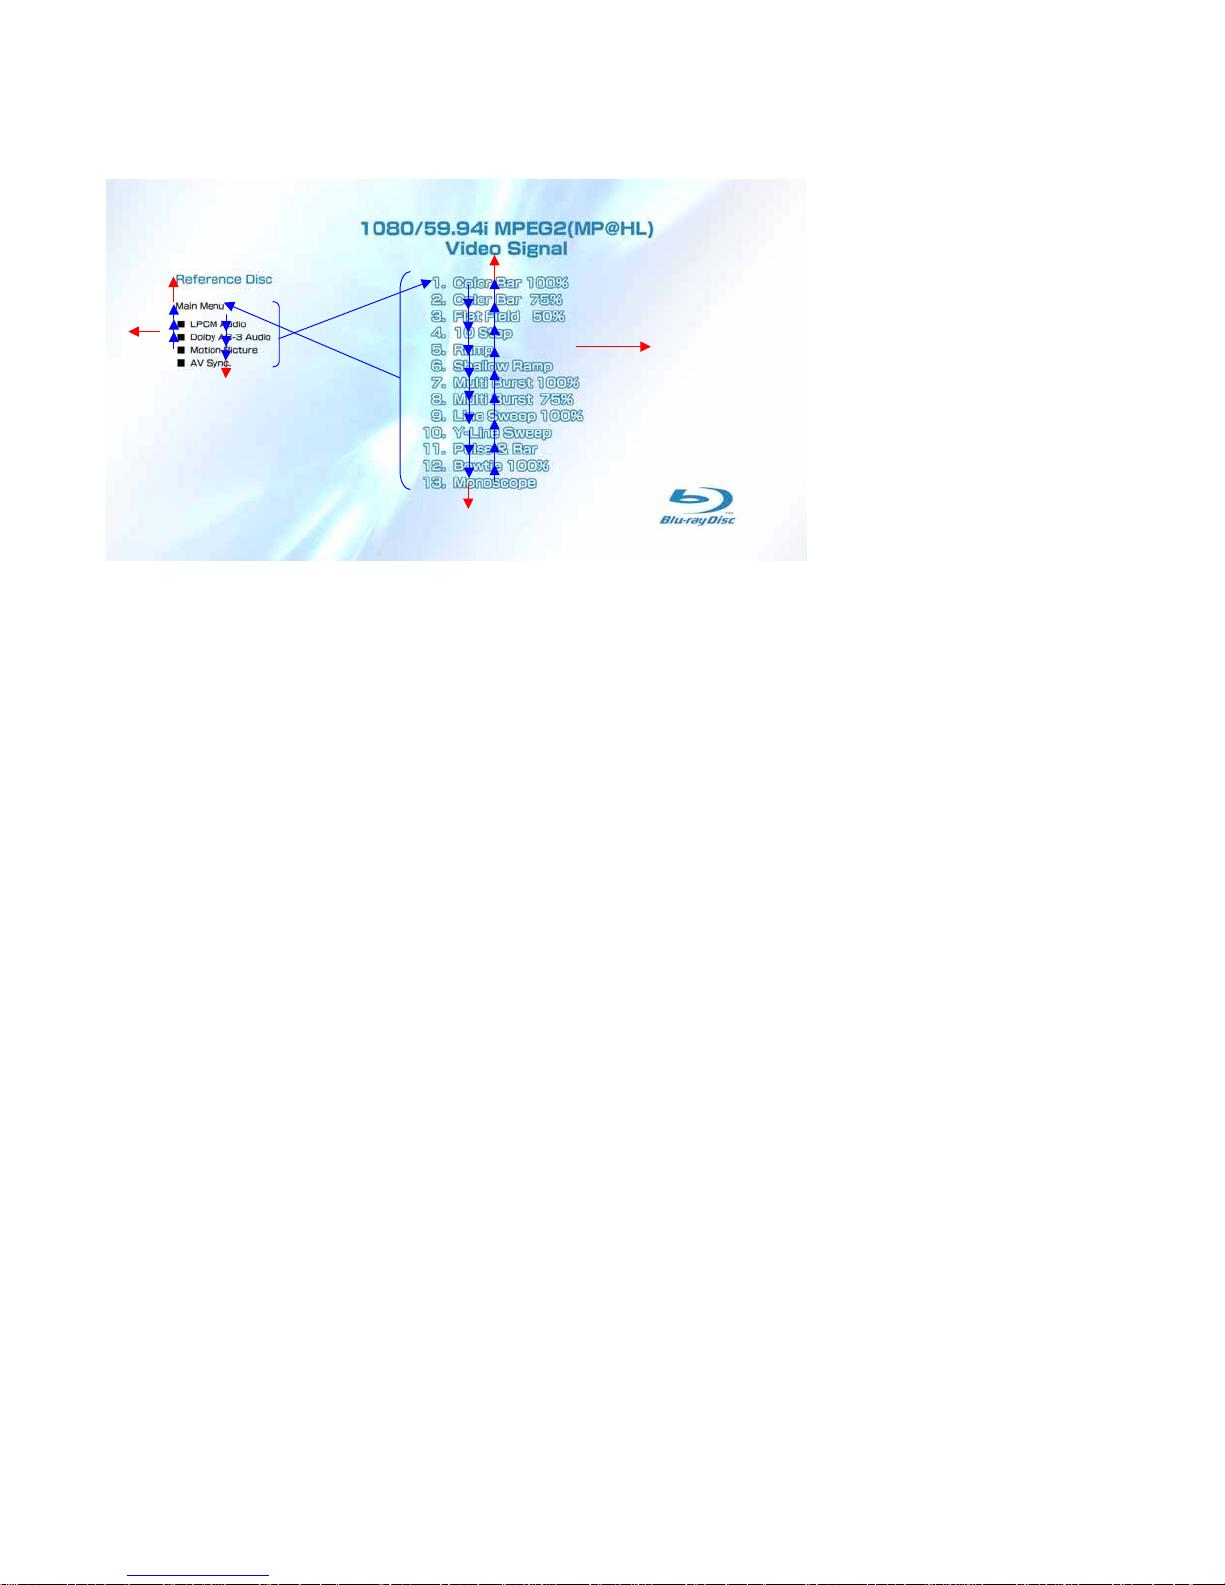
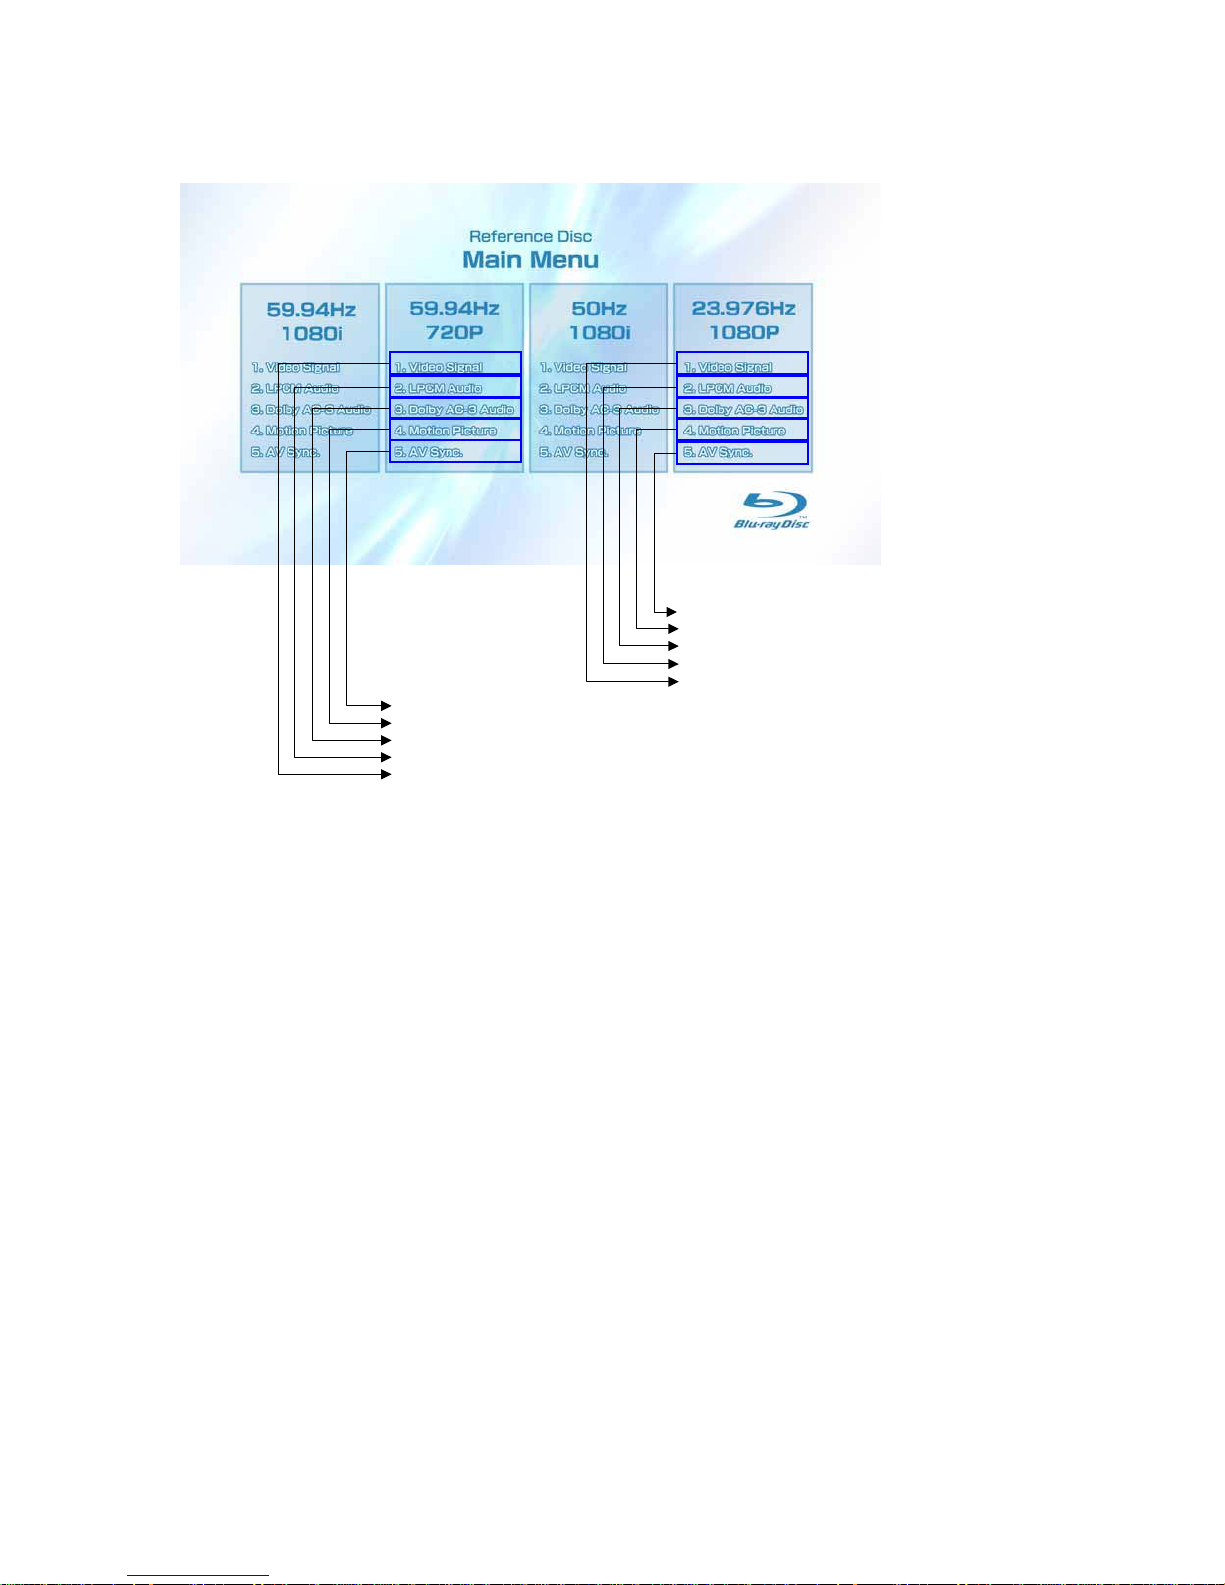
5-1-1. BLX-104 Menu Function (1)
Main Menu
1) When the disc is inserted, 1. Video Signal of 59.94Hz/1080i of the Main Menu is selectively displayed.
– 7 –
5-1-3. BLX-104 Menu Function (3)
Main Menu
* When returning to Main Menu after playback from each button of 59.94Hz/720P, 1. Video Signal of 59.94Hz/720P is selectively
displayed.
* When returning to Main Menu after playback from each button of 23.976Hz/1080P, 1. Video Signal of 23.976Hz/1080P is selectively
displayed.
* 5. AV Sync does not operate.
To Main Menu after playback from T23_C1 to T40_C1
To Main Menu after playback of T41_C1
To Main Menu after playback of T42_C1
Sub_menu2 is displayed
To Main Menu after playback from T44_C1 to T50_C1
To Main Menu after playback of T51_C1
To Main Menu after playback of T52_C1
Sub_menu4 is displayed
– 8 –
5-1-4. BLX-104 Menu Function (4)
Sub menu1
1) At the display of Sub menu1, 1. Color Bar 100% is selectively displayed.
2) Selection of 1. Color Bar 100% t Return to Sub menu1 after seamless playback from T1_C1 to T1_C13. 1. Color Bar 100% is
selectively displayed on Sub menu1 screen.
3) Selection of 2. Color Bar 75% t Return to Sub menu1 after seamless playback from T1_C2 to T1_C13. 1. Color Bar 100% is
selectively displayed on Sub menu1 screen.
4) At the selection of 3 - 13, item 3 mentioned above is executed as the routine.
5) At the display of Sub menu1, Main Menu is selected t Jump to Main Menu. At the display of Main Menu, 1. Video Signal of
59.94Hz/1080i is selectively displayed.
6) Selection of LPCM Audio t Playback from T2_C1 to T19_C1. SubPic that corresponds to Audio stream 1 is forcibly displayed.
During the playback, when audio channel changes, the caption that corresponds to each audio stream is forcibly displayed. Return to
Sub menu1 after playback. 1. Color Bar 100% is selectively displayed on Sub menu1 screen.
7) Selection of Dolby AC-3 Audio t Playback of T20_C1. SubPic that corresponds to Audio stream 1 is forcibly displayed.
During the playback, when audio channel changes, the caption that corresponds to each audio stream is forcibly displayed. Return to
Sub menu1 after playback. 1. Color Bar 100% is selectively displayed on Sub menu1 screen.
8) Selection of Motion Picture t Return to Sub menu1 after playback of T21_C1. 1. ColorBar 100% is selectively displayed on Sub
menu1 screen.
9) At the selection of Main Manu, 1. VideoSignal of 1080/59.94i of Main Menu is selectively displayed.
10) AV Sync does not operate.
X
X
X
X
X
X
– 9 –
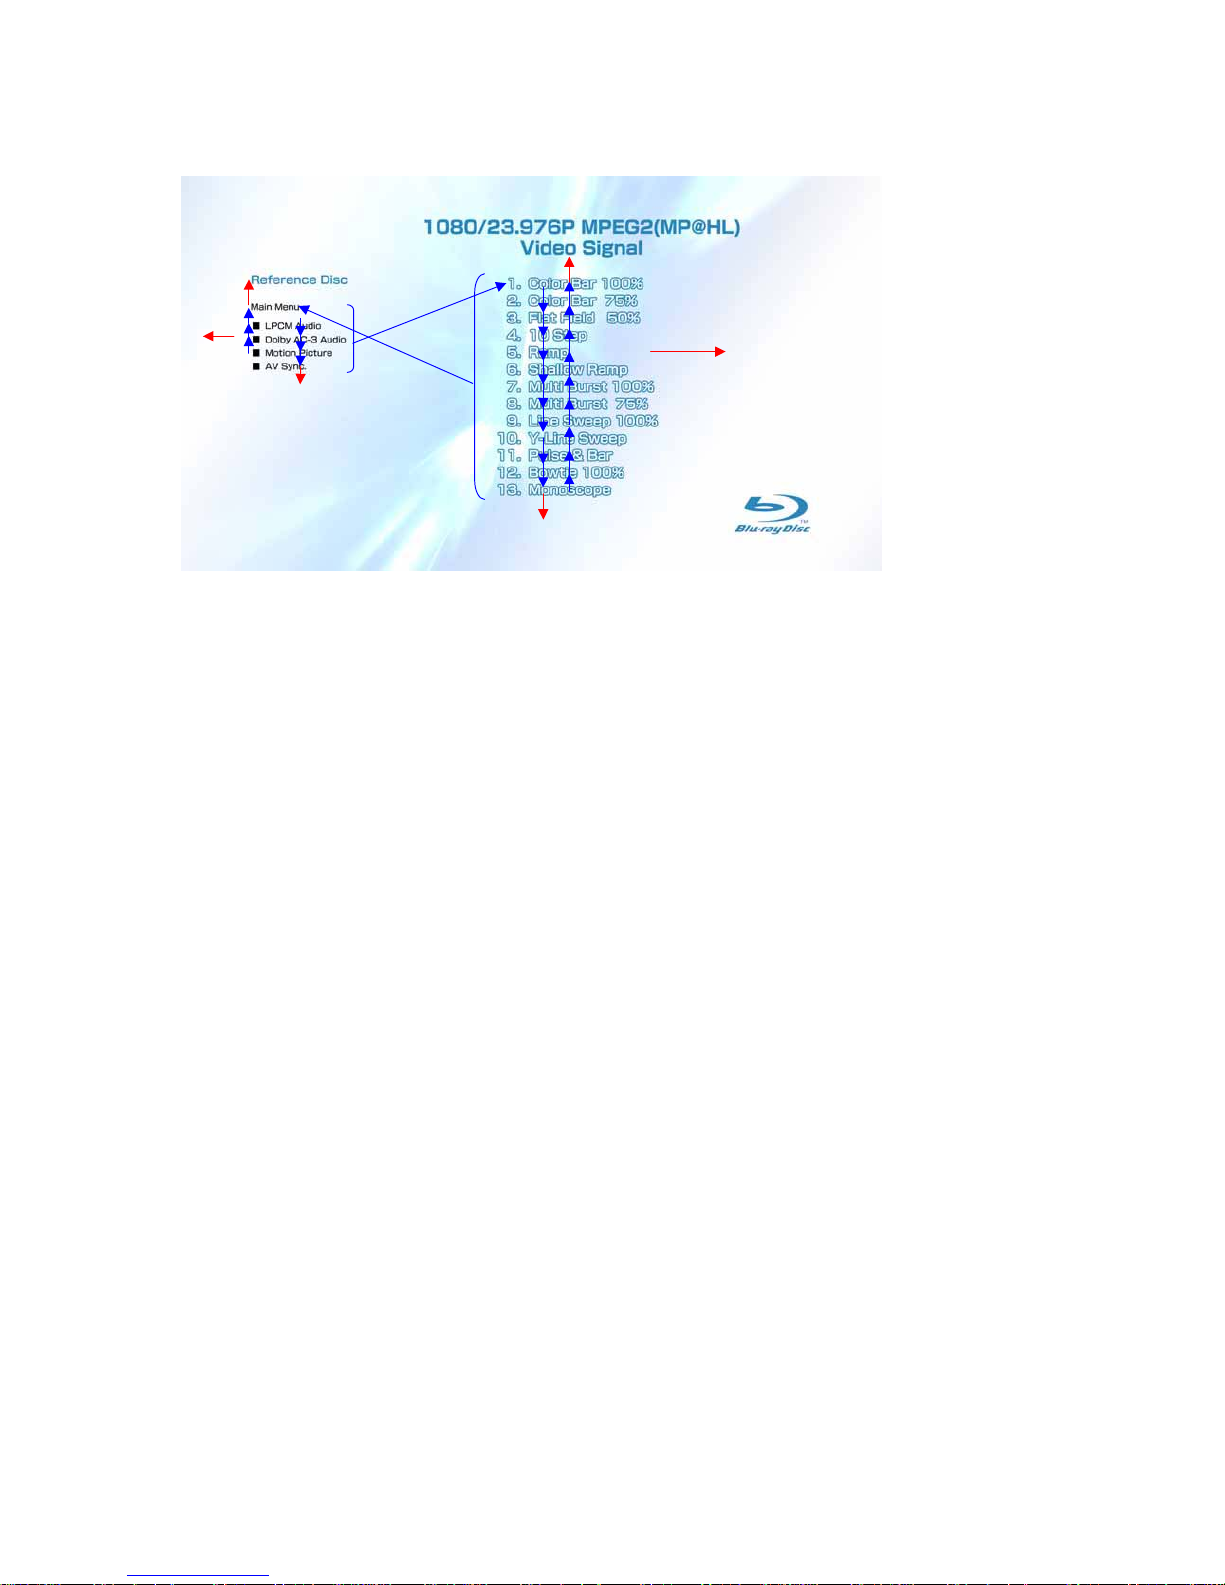
5-1-5. BLX-104 Menu Function (5)
Sub menu2
1) At the display of Sub menu2, 1. Color Bar 100% is selectively displayed.
2) Selection of 1. Color Bar 100% t Return to Sub menu2 after seamless playback from T43_C1 to T43_C13. 1. Color Bar 100% is
selectively displayed on Sub menu2 screen.
3) Selection of 2. Color Bar 75% t Return to Sub menu2 after seamless playback from T43_C2 to T43_C13. 1. Color Bar 100% is
selectively displayed on Sub menu2 screen.
4) At the selection of 3 - 13, item 3 mentioned above is executed as the routine.
5) At the display of Sub menu2, Main Menu is selected t Jump to Main Menu. At the display of Main Menu, 1. Video Signal of
23.976Hz/1080P is selectively displayed.
6) Selection of LPCM Audio t Playback from T44_C1 to T50_C1. SubPic that corresponds to Audio stream 1 is forcibly displayed.
During the playback, when audio channel changes, the caption that corresponds to each audio stream is forcibly displayed. Return to
Sub menu2 after playback. 1. Color Bar 100% is selectively displayed on Sub menu2 screen.
7) Selection of Dolby AC-3 Audio t Playback of T51_C1. SubPic that corresponds to Audio stream 1 is forcibly displayed.
During the playback, when audio channel changes, the caption that corresponds to each audio stream is forcibly displayed. Return to
Sub menu2 after playback. 1. Color Bar 100% is selectively displayed on Sub menu2 screen.
8) Selection of Motion Picture t Return to Sub menu2 after playback of T52_C1. 1. Color Bar 100% is selectively displayed on Sub
menu2 screen.
9) At the selection of Main Manu, 1. Video Signal of 1080/23.976P of Main Menu is selectively displayed.
10) AV Sync does not operate.
X
X
X
X
X
X
– 10 –
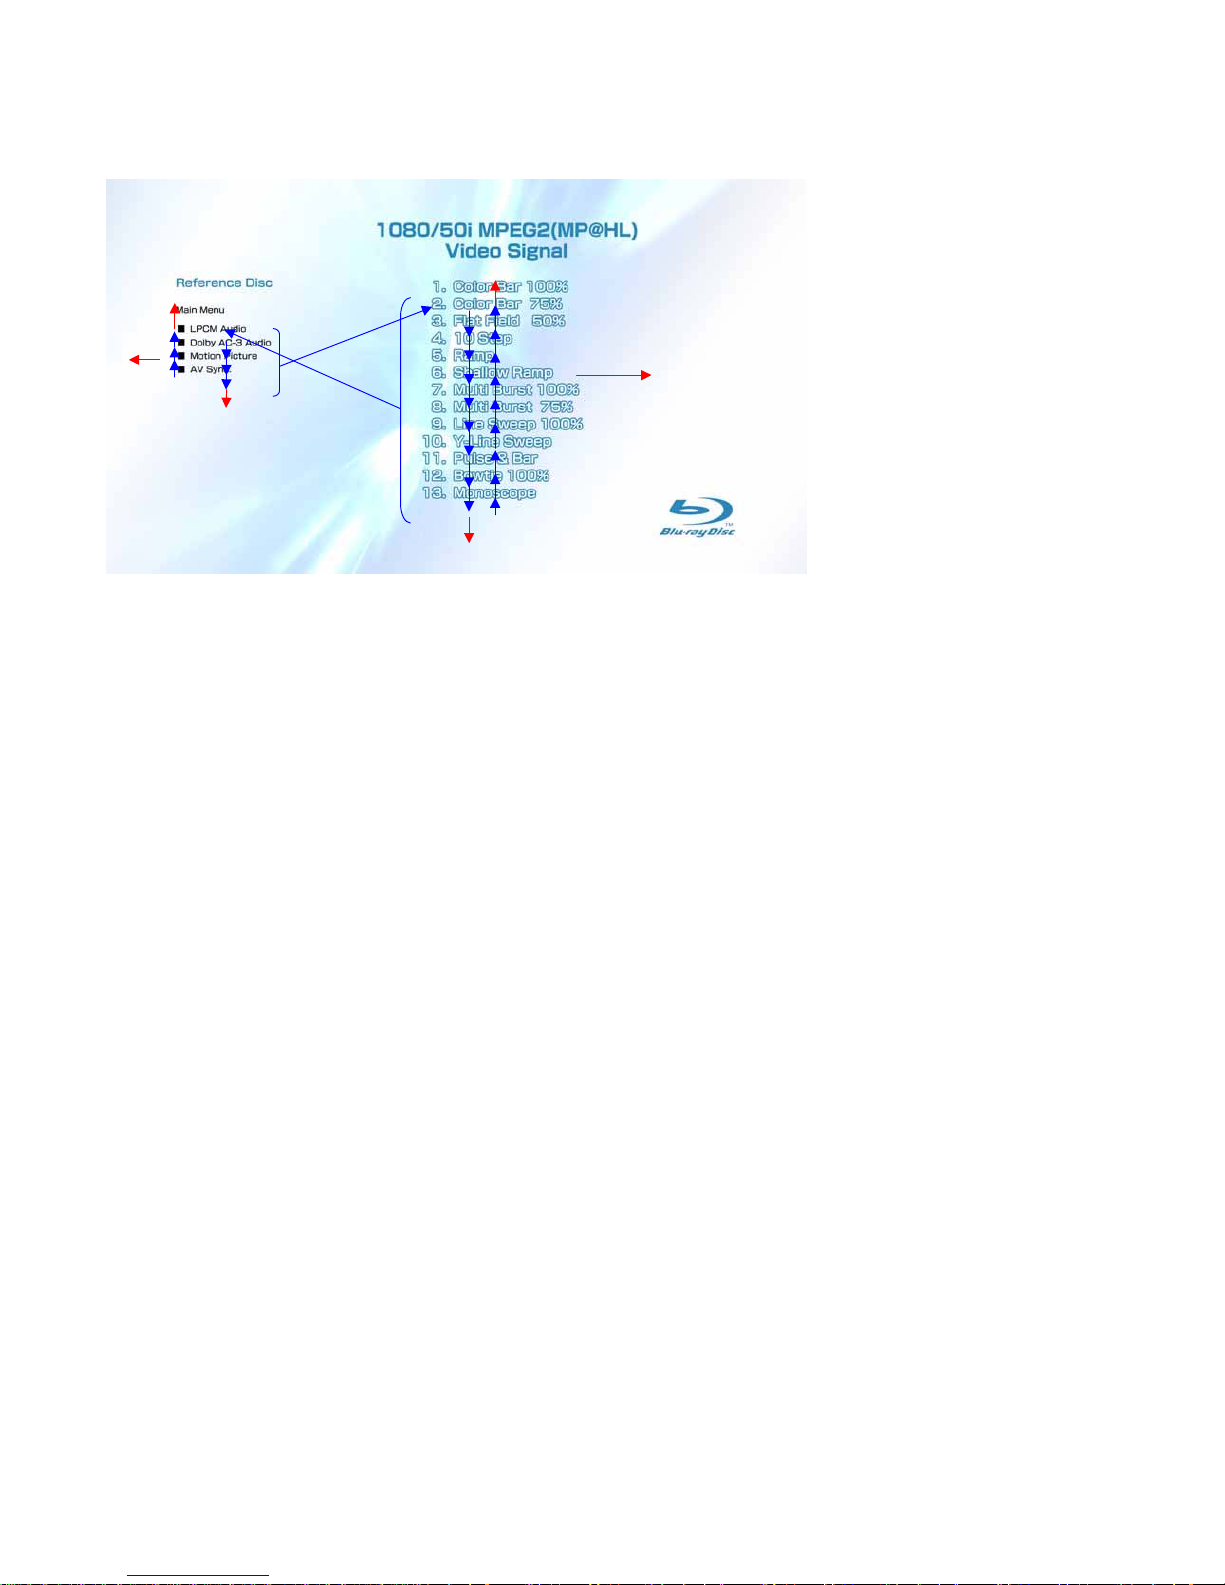
5-1-6. BLX-104 Menu Function (6)
Sub menu3
1) At the display of Sub menu3, 1. Color Bar 100% is selectively displayed.
2) Selection of 1. Color Bar 100% t Return to Sub menu3 after seamless playback from T53_C1 to T53_C13. 1. Color Bar 100% is
selectively displayed on Sub menu3 screen.
3) Selection of 2. Color Bar 75% t Return to Sub menu3 after seamless playback from T53_C2 to T53_C13. 1. Color Bar 100% is
selectively displayed on Sub menu3 screen.
4) At the selection of 3 - 13, item 3 mentioned above is executed as the routine.
5) At the display of Sub menu3, Main Menu is selected t Jump to Main Menu. At the display of Main Menu, 1. Video Signal of 50Hz/
1080i is selectively displayed.
6) Selection of LPCM Audio t Playback from T54_C1 to T60_C1. SubPic that corresponds to Audio stream 1 is forcibly displayed.
During the playback, when audio channel changes, the caption that corresponds to each audio stream is forcibly displayed. Return to
Sub menu3 after playback. 1. Color Bar 100% is selectively displayed on Sub menu3 screen.
7) Selection of Dolby AC-3 Audio t Playback of T61_C1. SubPic that corresponds to Audio stream 1 is forcibly displayed.
During the playback, when audio channel changes, the caption that corresponds to each audio stream is forcibly displayed. Return to
Sub menu3 after playback. 1. Color Bar 100% is selectively displayed on Sub menu3 screen.
8) Selection of Motion Picture t Return to Sub menu3 after playback of T62_C1. 1. Color Bar 100% is selectively displayed on Sub
menu3 screen.
9) At the selection of Main Manu, 1. Video Signal of 1080/50i of Main Menu is selectively displayed.
10) AV Sync does not operate.
X
X
X
X
X
X

– 11 –
5-1-7. BLX-104 Menu Function (7)
Sub menu4
1) At the display of Sub menu4, 1. Color Bar 100% is selectively displayed.
2) Selection of 1. Color Bar 100% t Return to Sub menu4 after seamless playback from T22_C1 to T22_C13. 1. Color Bar 100% is
selectively displayed on Sub menu4 screen.
3) Selection of 2. Color Bar 75% t Return to Sub menu4 after seamless playback from T22_C2 to T22_C13. 1. Color Bar 100% is
selectively displayed on Sub menu4 screen.
4) At the selection of 3 - 13, item 3 mentioned above is executed as the routine.
5) At the display of Sub menu4, Main Menu is selected t Jump to Main Menu. At the display of Main Menu, 1. Video Signal of
59.94Hz/720P is selectively displayed.
6) Selection of LPCM Audio t Playback from T44_C1 to T50_C1. SubPic that corresponds to Audio stream 1 is forcibly displayed.
During the playback, when audio channel changes, the caption that corresponds to each audio stream is forcibly displayed. Return to
Sub menu4 after playback. 1. Color Bar 100% is selectively displayed on Sub menu4 screen.
7) Selection of Dolby AC-3 Audio t Playback of T51_C1. SubPic that corresponds to Audio stream 1 is forcibly displayed.
During the playback, when audio channel changes, the caption that corresponds to each audio stream is forcibly displayed. Return to
Sub menu4 after playback. 1. Color Bar 100% is selectively displayed on Sub menu4 screen.
8) Selection of Motion Picture t Return to Sub menu4 after playback of T52_C1. 1. Color Bar 100% is selectively displayed on Sub
menu4 screen.
9) At the selection of Main Manu, 1. Video Signal of 720/59.94P of Main Menu is selectively displayed.
10) AV Sync does not operate.
X
X
X
X
X
X
– 12 –
5-2-1. BLX-204 Menu Function (1)
Main Menu
1) When the disc is inserted, 1. Video Signal of 59.94Hz/1080i of the Main Menu is selectively displayed.
2-2-2. BLX-204 Menu Function (2)
Main Menu
*When returning to Main Menu after playback from each button of 59.94Hz/1080i, 1. Video Signal of 59.94Hz/1080i is selectively
displayed.
*When returning to Main Menu after playback from each button of 50Hz/1080i, 1. Video Signal of 50Hz/1080i is selectively displayed.
X
X
X
X
X
X
X
X
X
X X X X
X
X
X
X
X
Sub_menu1 is displayed
To Main Menu after playback from T2_C1 to T19_C1
To Main Menu after playback of T20_C1
To Main Menu after playback of T21tT63tT64tT65tT66
Sub_menu3 is displayed
To Main Menu after playback of T54_C1-T60_C1tT83_C1-T94_C1
To Main Menu after playback of T61_C1
To Main Menu after playback of T62tT82
To Main Menu after playback of T67_C1
To Main Menu after playback of T83_C1
Note:
Txx_ Cxx
Chapter No.
Title No.
– 13 –
5-2-3. BLX-204 Menu Function (3)
Main Menu
*When returning to Main Menu after playback from each button of 59.94Hz/720P, 1. Video Signal of 59.94Hz/720P is selectively
displayed.
*When returning to Main Menu after playback from each button of 23.976Hz/1080P, 1. Video Signal of 23.976Hz/1080P is selectively
displayed.
Sub_menu4 is displayed
To Main Menu after playback from T23_C1 to T40_C1
To Main Menu after playback of T41_C1
To Main Menu after playback of T42_C1
Sub_menu2 is displayed
To Main Menu after playback of T44_C1-T50_C1tT71_C1-T81_C1
To Main Menu after playback of T51_C1
To Main Menu after playback of T52_C1tT69
To Main Menu after playback of T68_C1
To Main Menu after playback of T70_C1

– 14 –
5-2-4. BLX-204 Menu Function (4)
Sub menu 1
1) At the display of Sub menu1, 1. Color Bar 100% is selectively displayed.
2) Selection of 1. Color Bar 100% t Return to Sub menu1 after seamless playback from T1_C1 to T1_C13. 1. Color Bar 100% is
selectively displayed on Sub menu1 screen.
3) Selection of 2. Color Bar 75% t Return to Sub menu1 after seamless playback from T1_C2 to T1_C13. 1. Color Bar 100% is
selectively displayed on Sub menu1 screen.
4) At the selection of 3 - 13, item 3 mentioned above is executed as the routine.
5) At the display of Sub menu1, Main Menu is selected t Jump to Main Menu. At the display of Main Menu, 1. Video Signal of
59.94Hz/1080i is selectively displayed.
6) Selection of LPCM Audio t Playback from T2_C1 to T19_C1. SubPic that corresponds to Audio stream 1 is forcibly displayed.
During the playback, when audio channel changes, the caption that corresponds to each audio stream is forcibly displayed. Return to
Sub menu1 after playback. 1. Color Bar 100% is selectively displayed on Sub menu1 screen.
7) Selection of Dolby AC-3 Audio t Playback of T20_C1. SubPic that corresponds to Audio stream 1 is forcibly displayed.
During the playback, when audio channel changes, the caption that corresponds to each audio stream is forcibly displayed. Return to
Sub menu1 after playback. 1. Color Bar 100% is selectively displayed on Sub menu1 screen.
8) Selection of Motion Picture t Return to Sub menu1 after playback of T21_C1. 1. Color Bar 100% is selectively displayed on Sub
menu1 screen.
9) Selection of AV Sync t Return to Sub menu1 after playback of T67_C1. 1. Color Bar 100% is selectively displayed on Sub menu1
screen.
10) At the selection of Main Manu, 1. Video Signal of 1080/59.94i of Main Menu is selectively displayed.
X
X
X
X
X
X

– 15 –
5-2-5. BLX-204 Menu Function (5)
Sub menu 2
1) At the display of Sub menu2, 1. Color Bar 100% is selectively displayed.
2) Selection of 1. Color Bar 100% t Return to Sub menu2 after seamless playback from T43_C1 to T43_C13. 1. Color Bar 100% is
selectively displayed on Sub menu2 screen.
3) Selection of 2. Color Bar 75% t Return to Sub menu2 after seamless playback from T43_C2 to T43_C13. 1. Color Bar 100% is
selectively displayed on Sub menu2 screen.
4) At the selection of 3 - 13, item 3 mentioned above is executed as the routine.
5) At the display of Sub menu2, Main Menu is selected t Jump to Main Menu. At the display of Main Menu, 1. Video Signal of
23.976Hz/1080P is selectively displayed.
6) Selection of LPCM Audio t Playback from T44_C1 to T50_C1 and from T71_C1 to T81_C1. SubPic that corresponds to Audio
stream 1 is forcibly displayed.
During the playback, when audio channel changes, the caption that corresponds to each audio stream is forcibly displayed. Return to
Sub menu2 after playback. 1. Color Bar 100% is selectively displayed on Sub menu2 screen.
7) Selection of Dolby AC-3 Audio t Playback of T51_C1. SubPic that corresponds to Audio stream 1 is forcibly displayed.
During the playback, when audio channel changes, the caption that corresponds to each audio stream is forcibly displayed. Return to
Sub menu2 after playback. 1. Color Bar 100% is selectively displayed on Sub menu2 screen.
8) Selection of Motion Picture t Return to Sub menu2 after playback of T52_C1 and T69. 1. Color Bar 100% is selectively displayed
on Sub menu2 screen.
9) Selection of AV Sync t Return to Sub menu2 after playback of T70_C1. 1. Color Bar 100% is selectively displayed on Sub menu2
screen.
10) At the selection of Main Manu, 1. Video Signal of 1080/23.976P of Main Menu is selectively displayed.
X
X
X
X
X
X

– 16 –
5-2-6. BLX-204 Menu Function (6)
Sub menu 3
1) At the display of Sub menu3, 1. Color Bar 100% is selectively displayed.
2) Selection of 1. Color Bar 100% t Return to Sub menu3 after seamless playback from T53_C1 to T53_C13. 1. Color Bar 100% is
selectively displayed on Sub menu3 screen.
3) Selection of 2. Color Bar 75% t Return to Sub menu3 after seamless playback from T53_C2 to T53_C13. 1. Color Bar 100% is
selectively displayed on Sub menu3 screen.
4) At the selection of 3 - 13, item 3 mentioned above is executed as the routine.
5) At the display of Sub menu3, Main Menu is selected t Jump to Main Menu. At the display of Main Menu, 1. Video Signal of 50Hz/
1080i is selectively displayed.
6) Selection of LPCM Audio t Playback from T54_C1 to T60_C1 and from T84_C1 to T94_C1. SubPic that corresponds to Audio
stream 1 is forcibly displayed.
During the playback, when audio channel changes, the caption that corresponds to each audio stream is forcibly displayed. Return to
Sub menu3 after playback. 1. Color Bar 100% is selectively displayed on Sub menu3 screen.
7) Selection of Dolby AC-3 Audio t Playback of T61_C1. SubPic that corresponds to Audio stream 1 is forcibly displayed.
During the playback, when audio channel changes, the caption that corresponds to each audio stream is forcibly displayed. Return to
Sub menu3 after playback. 1. Color Bar 100% is selectively displayed on Sub menu3 screen.
8) Selection of Motion Picture t Return to Sub menu3 after playback of T62_C1tT82. 1. Color Bar 100% is selectively displayed on
Sub menu3 screen.
9) Selection of AV Sync t Return to Sub menu3 after playback of T83_C1. 1. Color Bar 100% is selectively displayed on Sub menu3
screen.
10) At the selection of Main Manu, 1. Video Signal of 1080/50i of Main Menu is selectively displayed.
X
X
X
X
X
X

– 17 –
5-2-7. BLX-204 Menu Function (7)
Sub menu 4
1) At the display of Sub menu4, 1. Color Bar 100% is selectively displayed.
2) Selection of 1. Color Bar 100% t Return to Sub menu4 after seamless playback from T22_C1 to T22_C13. 1. Color Bar 100% is
selectively displayed on Sub menu4 screen.
3) Selection of 2. Color Bar 75% t Return to Sub menu4 after seamless playback from T22_C2 to T22_C13. 1. Color Bar 100% is
selectively displayed on Sub menu4 screen.
4) At the selection of 3 - 13, item 3 mentioned above is executed as the routine.
5) At the display of Sub menu4, Main Menu is selected t Jump to Main Menu. At the display of Main Menu, 1. Video Signal of
59.94Hz/720P is selectively displayed.
6) Selection of LPCM Audio t Playback from T44_C1 to T50_C1. SubPic that corresponds to Audio stream 1 is forcibly displayed.
During the playback, when audio channel changes, the caption that corresponds to each audio stream is forcibly displayed. Return to
Sub menu4 after playback. 1. Color Bar 100% is selectively displayed on Sub menu4 screen.
7) Selection of Dolby AC-3 Audio t Playback of T51_C1. SubPic that corresponds to Audio stream 1 is forcibly displayed.
During the playback, when audio channel changes, the caption that corresponds to each audio stream is forcibly displayed. Return to
Sub menu4 after playback. 1. Color Bar 100% is selectively displayed on Sub menu4 screen.
8) Selection of Motion Picture t Return to Sub menu4 after playback of T52_C1. 1. Color Bar 100% is selectively displayed on Sub
menu4 screen.
9) Selection of AV Sync t Return to Sub menu4 after playback of T68_C1. 1. Color Bar 100% is selectively displayed on Sub menu4
screen.
10) At the selection of Main Manu, 1. Video Signal of 720/59.94P of Main Menu is selectively displayed.
X
X
X
X
X
X

– 18 –
MEMO
1-1
SECTION 1
GENERAL
This section is extracted from instruction manual (3-196-787-11).
BDP-S300/S301
5
About this manual
Instructions in this manual describe the controls on the remote.
You can also use the controls on the player if they h ave the same
or similar names as those on the remote.
The meanings of the icons used in this manual are described
below:
*MP3 (MPEG-1 Audio Layer III) is a standard format defined by ISO
(International Organization for Standardization)/ IEC (International
Electrotechnical Commission) MPEG which compresses audio data.
Note
The on-screen display illustrations used in this manual may not match
the graphics displayed on your TV screen.
This Player Can Play the
Following Discs and Files
“Blu-ray Disc” is a trademark.
“Blu-ray Disc,” “DVD+RW,” “DVD-RW,” “DVD+R,” “DVDR,” “DVD VIDEO,” and “CD” logos are trademarks.
Supported file formats (DATA DVD only)
DVD+RWs/DVD-RWs/DVD+Rs/DVD-Rs are called “DATA
DVD” in this manual when the discs contain playable files. The
following file formats are supported:
•MPEG-2 PS movie files.
•MP3 music files.
•JPEG* image files.
*JPEG format conforming to UDF (Unive rsal Disk Format).
Notes about BD-ROM compatibility
This player supports BD-ROM P rofile 1 only. Playback of later
versions and BDs other than BD-ROM is not guaranteed. Since
the Blu-ray Disc specifications are new and evol ving, some discs
may not play depending on the disc type and the version.
The audio output differs depending on th e source, connected
output jack, and selected audio settings. For details, see page48.
Icon Meaning
Functions available for BD-ROMs
including DL discs.
Functions available for DVD VIDEOs and
DVD+RWs/DVD+Rs in +VR mode or
DVD-RWs/DVD-Rs in video mode,
including 8 cm discs.
Functions available for DATA DVDs
(DVD+RWs/DVD+Rs/DVD-RWs/DVDRs containing MPEG-2 PS movie files,
MP3* audio tracks, and JPEG image files).
Functions available for music CDs or CDRs/CD-RWs in music CD Format.
BD
DVD
DATA DVD
CD
Disc Format
Blu-ray Disc
DVD VIDEO
DVD-RW/-R
DVD+RW/+R
CD
,continued
6
Examples of discs that the player
cannot play
The player cannot play the following discs:
•BD-REs/BD-Rs.
•BDs w ith cartridge.
• DVD-RWs/DVD-Rs of VR mode.
• DVD-RAMs.
• HD DVDs.
• DVD Audio discs.
• DATA CDs (CD-Rs/CD-RWs other than music CD format).
• CD-ROMs recorded in PHOTO CD format.
•Data part of CD-Extras.
•VCDs/Super VCDs.
• HD layer on Super Audio CDs.
Also, the player cannot play the following discs:
•A BD-ROM/DVD VIDEO with a different region code.
•A disc recorded in a color system other than NTSC, such as
PAL (this player conforms to the NTSC color system).
•A disc that has a non-standard shape (e.g., card, heart).
•A disc with paper or stickers on it .
•A disc that has the adhesive of cellophane tape or a sticker still
left on it.
Notes
•Notes about DVD+RWs/DVD+Rs, DVD-RWs/DVD-Rs, or CD-Rs/
CD-RWs
Some DVD+RWs/DVD+Rs, DVD-RWs/DVD-Rs, or CD-Rs/
CD-RWs cannot be played on this player due to the recording
quality or physical condition of the disc, or the characteristics
of the recording device and authoring software.
The DVD disc will not play if it has not been correctly
finalized. For more information, refer to the operating
instructions for the recording device. Note that some playback
functions may not work with some DVD+RWs/DVD+Rs, even
if they have been correctly finalized. In this case, view the disc
by normal playback.
•Music discs encoded with copyright protection technologies
This product is designed to playback discs that conform to the
Compact Disc (CD) standard. Recently, various music discs
encoded with copyright protection technolo gies are being
marketed by some record companies. Please be aware that
among those discs, there are some that do not conform to the
CD standard and may not be playab le by this product.
•Note on DualD iscs
A DualDisc is a two sided disc product which mates DVD
recorded material on one side with digital audio material on the
other side.
However, since the audio material side does not conform to the
Compact Disc (CD) standard, playback on this product i s not
guaranteed.
•Note about double-layer DVDs
The playback pictures and sound may be momentaril y
interrupted when the layers switch.
About playback of discs recorded in
AVCHD format
This player can play AVCHD format discs.
What is the AVCHD format?
The AVCHD format is a high definition digital video camera
format used to record SD (standard definition) or HD (high
definition) signals of either the 1080i specification*
1
or the 720p
specification*
2
on DVDs, using efficient data compression
coding technology. The MPEG-4 AVC/H.264 format is adop ted
to compress video data, and the Dolby Digital or Linear PCM
system is used to compress audio data. The MPEG-4 AVC/
H.264 format is capable of compressing images at higher
efficiency than that of the conventional image compressing
format. The MPEG-4 AVC/H.264 format enables a high
definition (HD) video signal shot on a digital vide o camera
recorder to be recorded on DVD discs, in the same way as it
would be for a standard definition (SD) television signal.
“AVCHD” and the AVCHD logo are tra demarks of Matsushita Electric
Industrial Co., Ltd. and Sony Corporation.
*
1
A high definition specification which utilizes 1080 eff ective scanning
lines and the interlace system.
*
2
A high definition specification which utilizes 720 effective sca nning
lines and the progressive system.
Notes
•Some AVCHD format discs may not play, depending on the recording
condition.
•The AVCHD format di sc will not play if it has not been correctly
finalized.
TM
7
BD/DVD region code
Your player has a region code printed on the back of the unit and
only will play BD-ROM/DVD VIDEOs (playback only) labeled
with identical region codes. This system is used to protect
copyrights.
DVD VIDEOs labeled will also play on this player.
Depending on the BD-ROM/DVD VIDEO, there may be no region
code indication, even though playing the BD-ROM/DVD VIDEO is
prohibited by area restrictions.
Note on playback operations of BDs/
DVDs
Some playback operations of BDs/DVDs may b e intentionally
set by software producers. Since this player plays BDs/DVDs
according to the disc contents the software producers designe d,
some playback features may not be available. Also, refer to the
instructions supplied with the BDs/DVDs.
Copyrights
This product incorporates copyright protection technolo gy that
is protected by U.S. patents and other intellectual property rights.
Use of this copyright protection techn ology must be authorized
by Macrovision, and is intended for home and other limited
viewing uses only unless otherwise authorized by Macrovision.
Reverse engineering or disassembly is prohibited.
Main Features
Experience the high definition (HD) quality aud io/video output
and the library function of this Blu-ray Disc Player.
BD-ROM playback
BD-ROM is a next generation optical disc format in the HD era.
Featuring massive storage capaci ty of 25 to 50 GB (five times
larger than a DVD) and a high-speed transfer rate of up to 54
Mbps, the format offers not only uncompromised HD quality
video*
1*2
, but also enables rich bonus content on a single disc
and HD quality audio up to 8ch, and interactive operability.
*1A compatible HD display device is necessary to enjoy the same
quality.
*
2
Some discs allow viewing only with an HDMI connection.
24p True Cinema
Movies shot with a film camera consist of 24 frames per second.
Since conventional televisions (both CRT and flat panels)
display frames either at 1/60 or 1/50 second intervals, the 24
frames do not appear at an even pace.
When connected to a TV with 24p capabilities, the player
displays each frame at 1/24 second intervals — the same interval
originally shot with the film camera, thus faithfully reproducing
the original cinema image.
HDMI Control (‘BRAVIA’ Theatre Sync)
‘BRAVIA’ Theatre Sync Function makes operations simple by
connecting Sony components that are compatible with t he
HDMI Control function with an HDMI cord.
BD-J application
The BD-ROM format supports Java for interactive functions.
“BD-J” offers content providers almost unlimited functionality
when creating interactive BD-ROM titles*.
Java and all Java-based trademarks and logos are trademarks or
registered trademarks of Sun Microsystems, Inc. in th e U.S. and
other countries.
Esmertec and Jbed are trademarks or registered trademarks of
Esmertec AG.
© 2000-2007 Esmertec AG
*This player does not support downloadable BD -J content.
Support of uncompressed multi-channel Linear
PCM
In combination with a compatible AV amplifier, the player can
output up to 8ch Linear PCM surround sound*. With a noncompatible amplifier, the player can output 5.1ch analog sig nals
from its 5.1CH OUTPUT jack for high quality audio enjoyment.
*Note that the DIGITAL OUT (COAXIAL or OPTICAL) jack does not
output 8ch signals. You will need an HDMI cord and an HDMIcompatible device that support 8ch signals.
AVCHD format disc playback
The player supports AVCHD format files–high definition
recordings made on AVCHD-compatible camcorders. Your high
definition personal archive is readily playable in HD quality.
ALL
AC IN
VIDEO
OUT
COMPONENT
VIDEO OUT
DIGITAL OUT
PCM/DTS/DOLBY DIGITAL
5.1CH OUTPUT
VIDEO
Y
L
R
AUDIO
OUT
L
R
WOOFER
COAXIAL OPTICAL
FRONT REAR CENTER
P
B
P
R
S VIDEO
HDMI
OUT
1
1
,continued
8
HDMI (High-Definition Multimedia Interface)
digital interface
When connected to an HDMI-equipped display device using a
single HDMI cord, the player can output both SD to HD video
and multi-channel audio signals, in digital form without
degradation.
The HDMI specification supports HDCP (High-bandwidth
Digital Content Protection), a copy prot ection technology that
incorporates coding technology for digital video signals.
Library function for recorded files (For JPEG
image, MP3 audio, MPEG-2 PS movie files
only)
With DATA DVDs created on other DVD devices, three
separate movie/music/photo Title List-browsers allow for easy
sorting, searching and playback including a slideshow.
1-2
9
Getting Started
Getting Started
Follow steps 1 to 7 to hook up and adjust the
settings of the player.
For jack and button names, see “Index to
Parts and Controls” (page 58).
Notes
•Plug cords securely to prevent unw anted noise.
•Refer to the instructions supplied with the components to
be connected.
•You cannot connect this player to a TV that does n ot have
a video input jack.
•Be sure to disconne ct the power cord of each component
before connecting.
•Do not apply too much pressure on the connecting cords.
Pushing against the cabinet wall, etc., may damage the
cord.
Step 1: Unpacking
Check that you have the following items:
•Video cord (phono plug × 1 ) (1)
•Stereo audio cord (phono plug × 2) (1)
• HDMI cord (1)
(supplied with BDP-S301 only)
•Power cord (1)
•Remote command er (remote) (1)
•Size AA (R6) b atteries (2)
• Step 1: Unpacking . . . . . . . . . . . . . . . . . . . . . . .9
• Step 2: Connecting the Video Cords/
HDMI Cord . . . . . . . . . . . . . . . . . . . . . . . . .10
• Step 3: Connecting the Audio Cords . . . . . . . .12
• Step 4: Connecting the Power Cord . . . . . . . . .16
• Step 5: Preparing the Remote . . . . . . . . . . . . .16
• Step 6: Easy Setup. . . . . . . . . . . . . . . . . . . . . .18
• Step 7: Additional Adjustments . . . . . . . . . . . .19
10
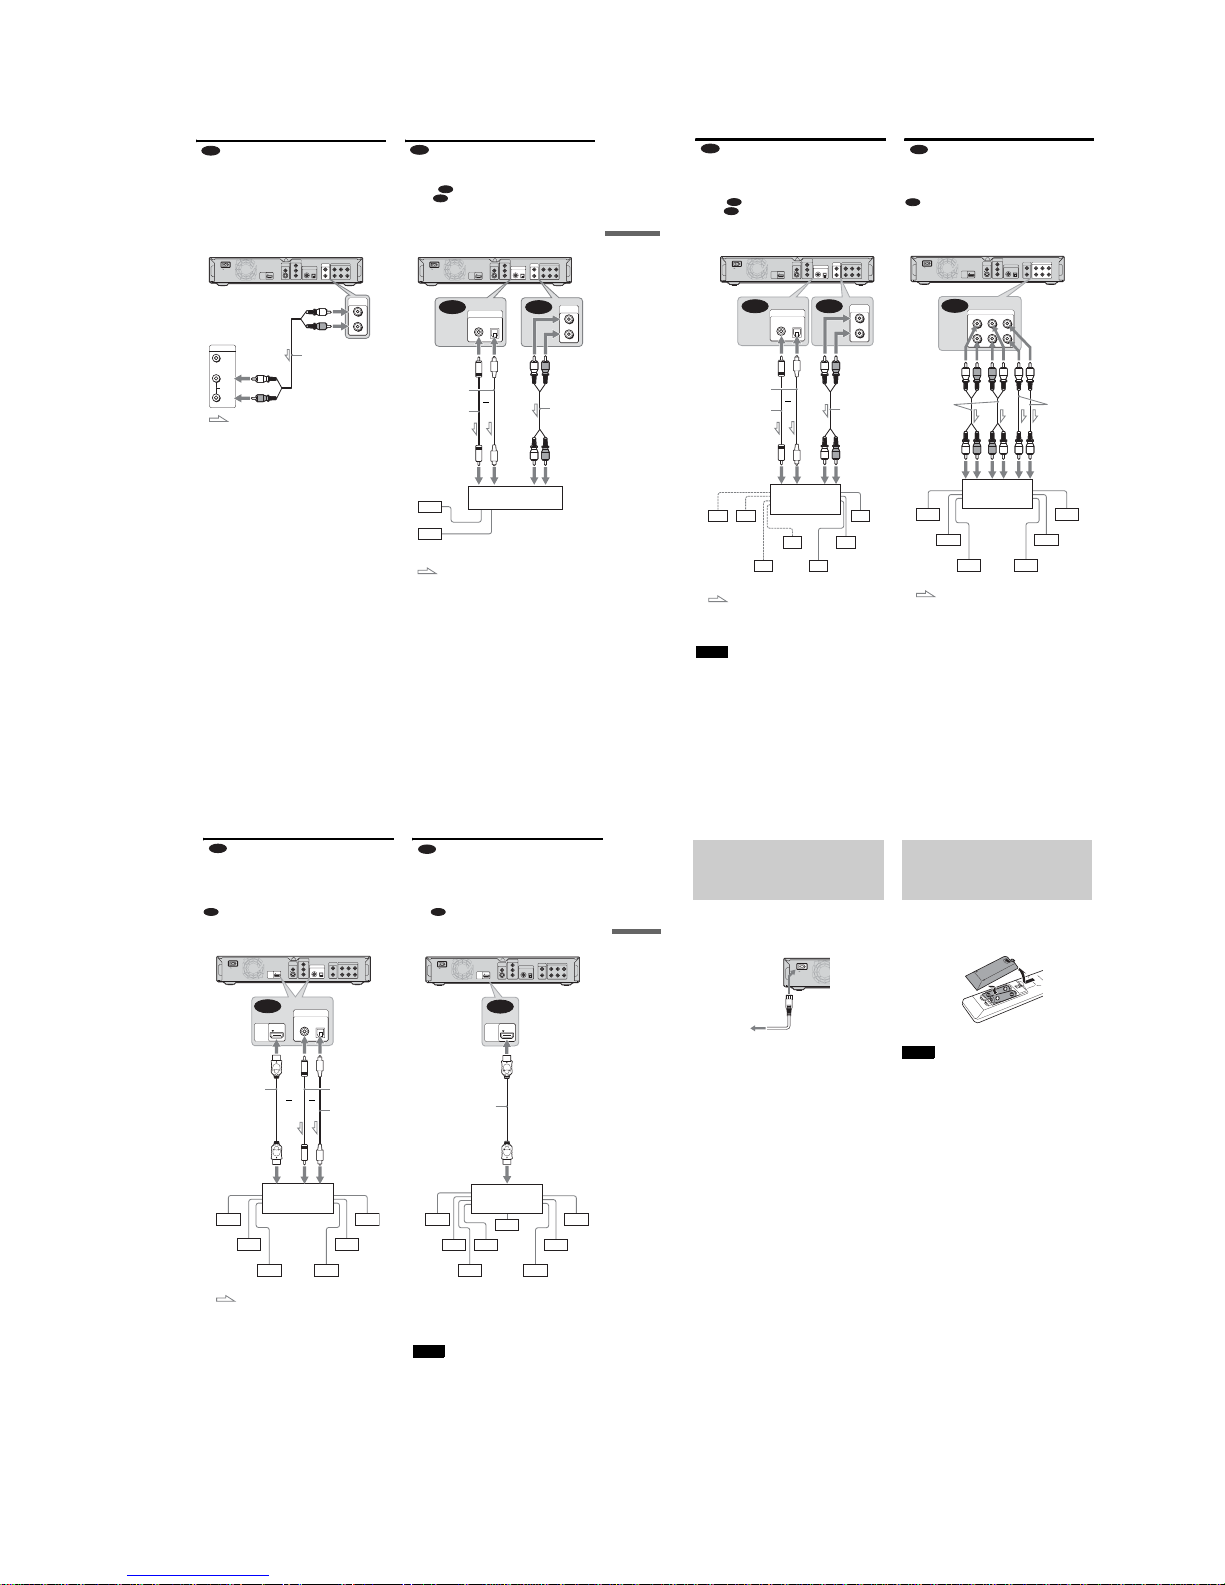
Step 2: Connecting the
Video Cords/HDMI Cord
Connect this player to your TV monitor, projector or AV
amplifier (receiver) using a video cord. Select one of the patterns
A through D, according to the input jack on your TV monitor,
projector or AV amplifier (receiver).
In order to view 1080p progressive signals with a compatible
TV, projector, or monitor with an HDMI input jack, you must
select pattern D. You can use pattern C to view 480p/720p
progressive signals or 1080i interlace signals on a compatible
device with component video input jacks.
A Connecting to a video input jack
Connect the supplied video cord (yellow) to the yellow (video)
jack. You will enjoy standard quality images.
When connecting to a standard 4:3 screen TV
Depending on the disc, the image may no t fit your TV screen. To
change the aspect ratio, see page 45.
Note
Do not connect a VCR, etc., between your TV and the player. If you pass
the player signals via the VCR, you may not receive a clear image on the
TV screen. If your TV has only one audio/video input jack, connect the
player to this jack.
B Connecting to an S VIDEO input jack
Connect using an S VIDEO cord (not supplied). You will enjoy
high quality images.
C Connecting to component video
input jacks (Y, P
B
, PR)
Connect the component via the COMPONENT VIDEO OUT jacks
using a component video cord (not supplied) o r three video cords
(not supplied) of the same kind and length. You will enjoy accurate
color reproduction and high quality image s. You can also enjoy
higher quality pictures from 480p/720 p progressive signals or 1080i
interlace signals, if your TV, projector or AV amplifier (receiver) is
compatible.
AC IN
VIDEO
OUT
COMPONENT
VIDEO OUT
DIGITAL OUT
PCM/DTS/DOLBY DIGITAL
5.1CH OUTPUT
VIDEO
Y
L
R
AUDIO
OUT
L
R
WOOFER
COAXIAL OPTICAL
FRONT REAR CENTER
P
B
P
R
S VIDEO
HDMI
OUT
AUDIO
INPUT
L
R
VIDEO
VIDEO
OUT
VIDEO
S VIDEO
Blu-ray Disc player
to VIDEO OUT
Video cord (supplied)
TV, projector, or AV
amplifier (receiver)
: Signal flow
(yellow)
(yellow)
VCR
Blu-ray Disc player
TV
Connect
directly
AC IN
VIDEO
OUT
COMPONENT
VIDEO OUT
DIGITAL OUT
PCM/DTS/DOLBY DIGITAL
5.1CH OUTPUT
VIDEO
Y
L
R
AUDIO
OUT
L
R
WOOFER
COAXIAL OPTICAL
FRONT REAR CENTER
P
B
P
R
S VIDEO
HDMI
OUT
INPUT
S VIDEO
VIDEO
OUT
VIDEO
S VIDEO
to S VIDEO
S VIDEO cord (not supplied)
TV, projector, or AV
amplifier (receiver)
: Signal flow
Blu-ray Disc player
AC IN
VIDEO
OUT
COMPONENT
VIDEO OUT
DIGITAL OUT
PCM/DTS/DOLBY DIGITAL
5.1CH OUTPUT
VIDEO
Y
L
R
AUDIO
OUT
L
R
WOOFER
COAXIAL OPTICAL
FRONT REAR CENTER
P
B
P
R
S VIDEO
HDMI
OUT
P
R
P
B
Y
COMPONENT
VIDEO IN
COMPONENT
VIDEO OUT
Y
P
B
P
R
to COMPONENT
VIDEO OUT
(green)
(blue)
(red)
(green)
(blue)
(red)
Component video
cord (not supplied)
TV, projector, or AV
amplifier (receiver)
: Signal flow
Blu-ray Disc player
11
Getting Started
D Connecting to an HDMI input jack
Use an HDMI cord to enjoy high quality digital pictures and
sound through the HDMI OUT jack. You will enjoy higher
quality pictures from 480p/1080i, or 1080p (highest among the
player output), if your TV, projector or AV amplifier (receiver)
is compatible.
This Blu-ray Disc player incorporates High-Definition
Multimedia Interface (HDMI™) technology. HDMI, the HDMI
logo and High-Definition Multimedia Interface are trademarks
or registered trademarks of HDMI Licensing LLC.
Notes on connecting to the HDMI OUT jack
Observe the following as improper handling may dam age the
HDMI OUT jack and the connector.
•Carefully align the HDMI OUT jack on the back of the player
and the HDMI connector by checking their shap es. Make sure
the connector is not upside down or tilted.
•Be sure to disconnect the HDMI cord when moving the player.
• If you place the player on the cabinet with the HDMI cord
connected, do not apply too much pressure to the cabinet wall.
It may damage the HDMI OUT jack or the HDMI cord.
•When connecting or di sconnecting, do not screw in or rotate
the HDMI connector.
About indicators for HDMI connection
After the player is turned on, the HD indicator on the front panel
lights up when outputting 720p/1080i/1080p video signals. The
HDMI indicator lights up when an HDMI device is connected.
Notes
•Consumers should note that not all high definition television sets are
fully compatible with this product and may cause artifacts to be
displayed in the picture. In the case of 480/720/1080 progressive scan
picture problems, it is recommended that the user switch the
connection to the ‘standard definition’ output. If there are questions
regarding our TV set compatibility with this model 480p/720p/1080 p
Blu-ray Disc player, please contact our custom er service center.
• If the picture is not cl ear, natural, or to your satisfaction, change the
video output resolution by pressing VIDEO FORMAT (page 46).
•Be sure to use only an HDMI cord that bears the HDMI logo.
About the ‘BRAVIA’ Theatre Sync
features (for HDMI connections only)
By connecting Sony components that are compatible with the
HDMI Control function with an HDMI cord, operation is
simplified as below:
•One-Touch Play (page 21)
You can turn on the player and TV/AV receiver, set the TV/AV
receiver’s input to the player, and start playback w ith one touch
of the H button.
•System Power-Off
When you turn the TV off by using the POWER button on the
TV’s remote, the HDMI compatible components turn off
automatically.
To prepare for the ‘BRAVIA’ Theatre Sync
features
Set “HDMI Control” of “Options” setup to “On” (page52) .
Note
Depending on the connected component, the HDMI Control funct ion
may not work. Refer to the operating ins tructions supplied with the
component.
AC IN
VIDEO
OUT
COMPONENT
VIDEO OUT
DIGITAL OUT
PCM/DTS/DOLBY DIGITAL
5.1CH OUTPUT
VIDEO
Y
L
R
AUDIO
OUT
L
R
WOOFER
COAXIAL OPTICAL
FRONT REAR CENTER
P
B
P
R
S VIDEO
HDMI
OUT
HDMI IN
HDMI
OUT
HDMI cord
(supplied with BDP-S301 only)
Blu-ray Disc player
to HDMI OUT
TV, projector, or AV
amplifier (receiver)
HDM
I
OUT
HDM
I
O
UT
12
Step 3: Connecting the
Audio Cords
Select the connection that best suits your system. Be sure to read
the instructions for the components you wish to connect.
*1
Manufactured under license from Dolby laboratories.
“Dolby,” “Pro Logic,” and the double-D symbol are trademarks of
Dolby Laboratories.
*2
“DTS” and “DTS Digital Surround” are registered trad emarks of
DTS, Inc.
Notes about the HDMI OUT jack
•When you connect the player to an AV amplifier (receiver)
using an HDMI cord, you will need to do one o f the following:
–Connect the AV amplifier (receiver) to a TV with the HDMI
cord.
–Connect the player to the TV with a video cord other than an
HDMI cord (component video cord, S VIDEO cord, or video
cord).
•When connecting to the HDMI OUT jack, carefully align the
HDMI connector with the jack. Do not bend or apply pressure
to the HDMI cord.
• If you change the component connected to the HDMI OUT
jack, change “Audio (HDMI)” in “Audio Setup” to match the
new component (page 47). The player stores the HDMI related
settings for up to five components.
•The HDMI connection is compatible with 2ch Linear PCM
signals (48 to 192 kHz, 16/20/24 bit), and 6 to 8ch Linear PCM
signals (48 to 96 kHz, 16/20/24 bit), in addition to Dolby
Digital and DTS bit stream (5.1ch signals u p to 96 kHz, 16/20/
24bit).
Note
If you connect a component that does not confo rm to the selected audio
signal, a loud noise (or no sound) will come out from the spe akers, which
could damage your ears or speakers.
Connection Your setup
TV
Stereo amplifier (receiver) and
two speakers
AV amplifier (receiver) having a
Dolby
*1
Surround (Pro Logic)
decoder and 3 to 6 speakers
•Surround effects: Dolby Surround
(Pro Logic)
AV amplifier (receiver) with
5.1ch input jacks and 6 speakers
•Surround effects: Dolby Digital
(5.1ch), DTS (5.1ch)
AV amplifier (receiver) with a
digital input jack having a Dolby
Digital or DTS
*2
decoder and 6
speakers
•Surround effects: Dolby Digital
(5.1ch), DTS (5.1ch)
AV amplifier (receiver) with an
HDMI input jack and 8 speakers
•Surround effects: 8ch Linear
PCM
A
B
C
D-1
D-2
D-3
1-3
13
Getting Started
Connecting to your TV
This connection will use your TV’s speakers for sound.
Connecting to a stereo amplifier
(receiver) and 2 speakers
If your stereo amplifier (receiver) only has audio input jacks L
and R, use . If your amplifier (receiver) has a digital input
jack, use .
AC IN
VIDEO
OUT
COMPONENT
VIDEO OUT
DIGITAL OUT
PCM/DTS/DOLBY DIGITAL
5.1CH OUTPUT
VIDEO
Y
L
R
AUDIO
OUT
L
R
WOOFER
COAXIAL OPTICAL
FRONT REAR CENTER
P
B
P
R
S VIDEO
HDMI
OUT
AUDIO
INPUT
L
R
VIDEO
AUDIO
OUT
L
R
to AUDIO OUT L/R
TV
(white)
(red)
(white)
(red)
Stereo audio cord
(supplied)
: Signal flow
Blu-ray Disc player
A
AC IN
VIDEO
OUT
COMPONENT
VIDEO OUT
DIGITAL OUT
PCM/DTS/DOLBY DIGITAL
5.1CH OUTPUT
VIDEO
Y
L
R
AUDIO
OUT
L
R
WOOFER
COAXIAL OPTICAL
FRONT REAR CENTER
P
B
P
R
S VIDEO
HDMI
OUT
B-2 B-1
DIGITAL OUT
PCM/DTS/DOLBY DIGITAL
COAXIAL OPTICAL
AUDIO
OUT
L
R
Optical digital cord
(not supplied)
to DIGITAL OUT
(COAXIAL or OPTICAL)
or
(red)(white)
Stereo audio
cord (supplied)
to audio input
Stereo amplifier (receiver)
[Speakers]
Front (L)
Front (R)
to coaxial or optical
digital input
Coaxial digital cord
(not supplied)
: Signal flow
Blu-ray Disc player
to AUDIO OUT
L/R
(white) (red)
B
B-1
B-2
,continued
14
Connecting to an AV amplifier
(receiver) having a Dolby Surround (Pro
Logic) decoder and 3 to 6 speakers
If your AV amplifier (receiver) only has L and R audio inpu t
jacks, use . If your amplifier (receiver) has a digital input
jack, use .
You can enjoy surround effects only when playing Dolby
Surround audio or multi-channel audio (Dolby Digital or DTS)
discs.
Connecting to an AV amplifier
(receiver) with 5.1ch input jacks and 6
speakers
If your AV amplifier (receiver) has 5.1 channel inputs, use
.
AC IN
VIDEO
OUT
COMPONENT
VIDEO OUT
DIGITAL OUT
PCM/DTS/DOLBY DIGITAL
5.1CH OUTPUT
VIDEO
Y
L
R
AUDIO
OUT
L
R
WOOFER
COAXIAL OPTICAL
FRONT REAR CENTER
P
B
P
R
S VIDEO
HDMI
OUT
DIGITAL OUT
PCM/DTS/DOLBY DIGITAL
COAXIAL OPTICAL
C-2 C-1
AUDIO
OUT
L
R
Coaxial digital cord
(not supplied)
to DIGITAL OUT
(COAXIAL or OPTICAL)
or
to AUDIO OUT
L/R
(red)(white)
Stereo audio
cord (supplied)
(red)(white)
to audio input
to coaxial or optical
digital input
Optical digital cord
(not supplied)
[Speakers] [Speakers]
Rear (L) Rear (R)
Subwoofer
Center
Rear (mono)
Front (L)
Front (R)
AV Amplifier
(receiver) with a
decoder
: Signal flow
Blu-ray Disc player
z
Hint
For correct speaker location, see the operating instruct ions of the
connected components.
Note
When connecting 6 speakers, you do not need the “Rear (mono)” speaker
above.
C
C-1
C-2
AC IN
VIDEO
OUT
COMPONENT
VIDEO OUT
DIGITAL OUT
PCM/DTS/DOLBY DIGITAL
5.1CH OUTPUT
VIDEO
Y
L
R
AUDIO
OUT
L
R
WOOFER
COAXIAL OPTICAL
FRONT REAR CENTER
P
B
P
R
S VIDEO
HDMI
OUT
5.1CH OUTPUT
L
R
WOOFER
FRONT REAR CENTER
D-1
[Speakers] [Speakers]
Rear (L)
Rear (R)
Subwoofer Front (L)
Front (R)
Center
AV amplifier
(receiver) with
5.1ch inputs
: Signal flow
to 5.1CH
OUTPUT
Blu-ray Disc player
to audio input
Stereo audio
cord (one is
supplied)
Monaural
audio cord
(not supplied)
z
Hint
For correct speaker location, see the operating instruct ions of the
connected components.
D-1
D-1
15
Getting Started
Connecting to an AV amplifier
(receiver) with a digital input jack and
6 speakers
If you want to use the Dolby Digital, or DTS decoder func tion
on your AV amplifier (receiver), connect to its digital jack using
. You can enjoy a more realistic audio presence.
Connecting to an AV amplifier
(receiver) with an HDMI input jack and
8 speakers
If your AV amplifier (receiver) accepts 8ch Linear PCM input
with an HDMI connection, you can enjoy the surround sound
using .
AC IN
VIDEO
OUT
COMPONENT
VIDEO OUT
DIGITAL OUT
PCM/DTS/DOLBY DIGITAL
5.1CH OUTPUT
VIDEO
Y
L
R
AUDIO
OUT
L
R
WOOFER
COAXIAL OPTICAL
FRONT REAR CENTER
P
B
P
R
S VIDEO
HDMI
OUT
D-2
DIGITAL OUT
PCM/DTS/DOLBY DIGITAL
COAXIAL OPTICAL
HDMI
OUT
to DIGITAL OUT
(COAXIAL
or OPTICAL)
Coaxial digital cord
(not supplied)
Optical digital cord
(not supplied)
to coaxial or optical
digital input
[Speakers] [Speakers]
Rear (L)
Rear (R)
Subwoofer
Front (L)
Front (R)
Center
AV amplifier
(receiver) having a
decoder
: Signal flow
to HDMI OUT
HDMI cord
(supplied with
BDP-S301 only)
or
to HDMI input
Blu-ray Disc player
or
z
Hint
For correct speaker location, see the operating instruct ions of the
connected components.
D-2
D-2
AC IN
VIDEO
OUT
COMPONENT
VIDEO OUT
DIGITAL OUT
PCM/DTS/DOLBY DIGITAL
5.1CH OUTPUT
VIDEO
Y
L
R
AUDIO
OUT
L
R
WOOFER
COAXIAL OPTICAL
FRONT REAR CENTER
P
B
P
R
S VIDEO
HDMI
OUT
D-3
HDMI
OUT
[Speakers] [Speakers]
Rear1 (L)
Rear1 (R)
Rear2 (L)
Front (L)
Front (R)
Center
AV amplifier
(receiver) with 8ch
outputs
to HDMI OUT
HDMI cord
(supplied with
BDP-S301 only)
to HDMI input
Blu-ray Disc player
z
Hint
For correct speaker location, see the operating instruct ions of the
connected components.
Note
Not all HDMI-compatible AV amplifiers (receivers) accept 8ch Linear
PCM signals. See also the operating instructions supplied with the
connected AV amplifier (receiver).
Rear2 (R)
Subwoofer
D-3
D-3
16
Step 4: Connecting the
Power Cord
After all of the other connections are complete, connect the
supplied power cord to the AC IN terminal of the player. Then
plug the player and TV power cords into the AC outlet.
Step 5: Preparing the
Remote
You can control the player using the supplied r emote. Insert two
Size AA (R6) batteries by matching the 3 and # ends on the
batteries to the markings inside the battery compartment. When
using the remote, point it at the remote sensor on the player
(page58).
AC IN
to AC outlet
to AC IN
Notes
•Do not leave the remote in an extreme ly hot or humid place.
•Do not drop any fore ign object into the remote casing, particularly
when replacing the batteries.
•Do not expose the rem ote sensor to direct sunlight or a lighting
apparatus. Doing so may cause a malfunction.
• If you do not use the rem ote for an extended period of time, remov e the
batteries to avoid possible damage from battery leakage and corrosi on.
1-4
17
Getting Started
If you want to control your TV with the
supplied remote
You can control the volume, input source, and power switch of
your Sony TV with the supplied remote.
To control other TVs with the remote
You can control the volume, input source, and power switch of nonSony TVs as well.
If your TV is listed in the table below, set the appropriate
manufacturer’s code.
1
While holding down TV [/1, press the number
buttons to select your TV manufacturer’s code
(see the table below).
2
Release TV [/1.
◆Code numbers of controllable TVs
If more than one code number is listed, try entering them one at
a time until you find the one that works with your TV.
◆To return the remote to its d efault settings
1
Remove the batteries from the remote.
2
Re-insert the batteries while pressing down 1, 2,
and 3 of the number buttons.
3
Wait for a few seconds.
Note
Depending on the connected unit, you may not be able to control your
TV using all or some of the buttons on the supplied remote.
By pressing You can
TV [/1 Turn the TV on or off.
VOL +/– Adjust the volume of the TV.
TV/VIDEO
Switch the TV’s input source between the
TV and other input sources.
CH +/– Select the channel up and down.
MUTING
Mute the sound (for Sony TV only).
DISPLAY
OPEN/
CLOSE
DIMMER
CLEAR
123
456
7809
TV/VIDEO
AUDIO SUBTITLE
ANGLE
SCAN
MUTING
PLAY MODE
PLAY SCAN
PREV
SLOW/STEP
NEXT
PAUSE
VOL CH
STOP
VIDEO
FORMAT
RED
GREEN
BLUE
YELLOW
TOP
MENU
SYSTEM
MENU
POP UP/
MENU
RETURN
TV
Number
buttons
MUTING
TV \/1
TV/VIDEO
CH +/–
VOL +/–
Manufacturer Code number
Sony 01 (default)
Daewoo 22, 04
Emerson 14
GE 06
Hitachi 02, 04
JVC 09
LG/Gold star 03, 17, 04
MGA/Mitsubishi 13, 04
NEC 04, 12
Panasonic 19
Philips 08, 21
Pioneer 16
RCA 10, 04
R.Shack 05
Samsung 04, 12, 20
Sanyo 11
Sharp 05, 18
Toshiba 07, 18
Zenith 15
18
Step 6: Easy Setup
Follow the steps below to make the minimum number of basic
adjustments for using the player. If you do not complete Easy
Setup, it will appear each time you turn on your player.
Make the settings below in the following order.
a
Turn on the TV.
b
Press [/1 to turn on the player.
The player turns on after a moment.
c
Switch the input selector on your TV so that
the signal from the player appears on your
TV screen.
If the display for OSD language selec tion does not
appear, select “Start” of “Easy Setup” in “Options”
Setup (page 52).
d
Select the OSD language you want to display,
and press ENTER.
This will determine the Audio, Subtitle and BD/
DVD menu languages as well.
e
Select “Start,” and press ENTE R to start
“Easy Setup.”
◆If the above display does not appear
Go to step 6. This display appears only when the player is turned
on for the first time.
f
Select the video output format for the
connected TV, and press ENTER.
For details about the video output, see page 46.
◆ When using the HDMI OUT jack
Select from “Auto,” “480i,” “480p,” “720p,”
“1080i,” “1080p,” or “Source Direct,” then go to
step 8. “TV Type” in step 7 will be set to “16:9”
(wide screen).
◆ When using the jacks other than the HDMI OUT
jack
Select from “S-Video/Video only,” “480i,”
“480p,” “720p,” “1080i” or “Don’t Know.” If
you select “720p” or “1080i,” go to step 8. “TV
Type” in step 7 will be set to “16:9” (wide
screen).
When turned on for the first time
Wait about 90 seconds before the player turns on and starts
Easy Setup. The start-up time will be much shorter once Easy
Setup is completed.
OPEN/
CLOSE
DIMMER
CLEAR
123
456
7809
DISPLAY
TV/VIDEO
AUDIO SUBTITLE
ANGLE
PREV
SLOW/STEP
NEXT
VIDEO
FORMAT
RED
GREEN
BLUE
YELLOW
TOP
MENU
SYSTEM
MENU
POP UP/
MENU
RETURN
TV
"/1
</M/m/,,
ENTER
Confirm Exit
SYSTEM MENU
Select the on-screen display language. Audio, subtitle and BD/DVD menu
language options will be set to the same language as this.
Language
Easy Setup
English
Français
Confirm Exit
SYSTEM MENU
Use to select then press ENTER.
Before using, make some simple
settings for the BD player.
Please use the Initial Setup if you
want to make more detailed settings.
Easy Setup
Start
Cancel
Confirm Exit
SYSTEM MENU
Select [Auto] to automatically match the video output
format with the HDMI-connected TV.
Output Video Format
Easy Setup
Auto
480i
480p
720p
1080i
1080p
Source Direct
Confirm Exit
SYSTEM MENU
Select [Auto] to automatically match the video output
format with the HDMI-connected TV.
Output Video Format
Easy Setup
S-Video/Video only
480i
480p
720p
1080i
Don't Know
19
Getting Started
g
Select the aspect ratio that matches your TV,
and press ENTER.
◆ If you have a wide screen TV or a 4:3 standard TV
with a wide screen mode
Select “16:9” (page 45).
◆ If you have a 4:3 standard TV
Select “4:3” (page 45).
h
Select “Finish Setup,” and press ENTER.
z
Hints
•If you want to reset these setti ngs to their factory defaults, see
“Resetting the Player” (page 53).
•You can re-run “Easy Setup” fr om “Options” Setup (page 52).
Step 7: Additional
Adjustments
The following settings and adjustments are necessary when your
connection applies.
For video connection
◆When using the COMPONENT VIDEO OUT jacks
(Pattern C –page 10)
•Select the video output resolution for your TV by pressing
VIDEO FORMAT (page 46).
◆When using the HDMI OUT jack
(Pattern D –page 11)
•Select the video output resolution for your TV by pressing
VIDEO FORMAT (page 46).
•Select the typ e of video output from the HDMI OUT jack in
“YCbCr/RGBPC (HDMI)” of “Video Setup” (page 45).
For audio connection
◆When using the DIGITAL OUT (OPTICAL or COAXIAL) jack
(Connection , , –page 13 to 15)
•Set “Dolby Digital” and “DTS” in “Audio Setup” (page 47)
according to your AV amplifier’s (receiver’s) decoder.
◆When using the HDMI OUT jack
(HDMI connection of , –page 15)
•Set “Dolby Digital” and “DTS” in “Audio Setup” (page 47)
according to your AV amplifier’s (receiver’s) decoder.
•Select the audio output method from the HDMI OUT jack in
“Audio (HDMI)” of “Audio Setup” (page47).
◆When using the AUDIO OUT (L/R) jacks
(Connection –page 14)
•Set “DTS Downmix” to “Lt/Rt” in “Audio Setup” (page 47).
◆When using the 5.1CH OUTPUT jacks
(Connection –page 14)
•Set “Audio Output Mod e” to “5.1 Channel” in “Speakers”
Setup (page 51), and adjust the “Speaker Setup” setting for
your system.
Notes
• If you connect a component that does not co nform to the selected audio
signal, a loud noise (or no sound) will come out from the speakers,
which could damage your ears or speakers.
• If you connect using the HDMI OUT jack or COMPONENT VIDEO
OUT jacks and the picture does not appear clearly, the connected
display device may not be compatible with the progressive signal s. In
this case, connect the displa y device to the S VIDEO jack or the
VIDEO jack (pattern A or B – see page 10), re-run the “Easy Setup”
from the “Options” Setup (page 52), and select “S-Video/Video only”
in step 6 (page 18). Also, check the above items again to see if any
additional adjustment is required.
Confirm Exit
SYSTEM MENU
Select the screen aspect ratio to match
your TV.
TV Type
Easy Setup
16:9
4:3
Confirm Exit
SYSTEM MENU
Use to select then press ENTER.
Setup is complete!
Enjoy using your BD player!
Easy Setup
Finish Setup
Go Back
B-2 C-2
D-2
D-2
D-3
C-1
D-1
20
Basic
Operations
Most of the BD playback operations are
common to DVD. This section covers BD/
DVD/CD playback in general, together with
the basic operation of the player.
For browsing recorded files on DATA
DVDs*, a separate library function is
available. See also page 32 for movie, 36 for
music, 40 for photo files.
For operations using the remote, a com plete
list is located on page 24.
* DVD+ RWs/DVD+Rs/DVD-RWs/DVD-Rs containing
MPEG-2 PS movie, MP3 audio, or JPEG image files.
Playing a Disc
a
Press \/1.
The player turns on after a moment.
b
Switch the input selector on your TV so that
the signal from the player appears on your
TV screen.
c
Press Z to open the disc tray.
d
Place a disc on the disc tray with the playback
side facing down.
BD
DVD
CD
OPEN/
CLOSE
DIMMER
CLEAR
DISPLAY
TV/VIDEO
AUDIO SUBTITLE
ANGLE
SCAN
MUTING
PLAY MODE
PLAY SCAN
PREV
SLOW/STEP
NEXT
PAUSE
VOL CH
STOP
VIDEO
FORMAT
RED
GREEN
BLUE
YELLOW
TOP
MENU
SYSTEM
MENU
POP UP/
MENU
RETURN
TV
123
456
7809
xX
TOP MENU
POP UP/MENU
</M/m/,, ENTER
Number buttons
Color buttons
Z
\/1
SYSTEM MENU
RETURN
H
Playback side facing down
• Playing a Disc. . . . . . . . . . . . . . . . . . . . . . . . . 20
• Guide to Displays . . . . . . . . . . . . . . . . . . . . . . 22
• Guide to the Remote. . . . . . . . . . . . . . . . . . . . 24
• Checking the Disc Information . . . . . . . . . . . . 26
• Clarifying Low Volume Sounds (Audio DRC) . 27
• Adjusting the Pictures . . . . . . . . . . . . . . . . . . 28
• Locking a Disc . . . . . . . . . . . . . . . . . . . . . . . . 29
1-5
21
Basic Operations
e
Press Z to close the disc tray.
Wait a short while until the disc type appears on the
front panel display.
f
Press H to start playback.
For more information about the remote’s operations,
see page 24.
g
When you finish playing, press Z to open the
disc tray.
h
Remove the disc, and press Z again to close
the disc tray.
i
Press \/1 to turn off the player.
To use the BD’s or DVD’s menu
When you play a BD-ROM, DVD VIDEO, or a finalized
DVD+RW, DVD-RW (Video mode), DVD+R, or DVD-R
(Video mode), you can display the disc’s menu by pressing T OP
MENU or POP UP/MENU. Some BDs/DVDs display the menu
automatically. Either cases, navigate through the menu using
</M/m/,, ENTER, or the number buttons and the color
buttons as indicated by the disc’s on-screen instructions. The BD
menu is operable without interrupting playback.
To play restricted BDs
If “CAN’T PLAY” appears on the front panel display for a BDROM, change the “BD Parental Control” setting (page30).
To play restricted DVDs
For a restricted DVD, the display asks for the password. For
“DVD Parental Control” setting, see page 30.
1
Enter your four-digit password using the number
buttons.
2
Press ENTER to confirm.
To register or change the password, see page 29.
Notes about Resume Play
•Playback starts from the beginning if the title has not been
played or the previous stop point is canceled.
•The stop point is canceled when:
–you change the sett ings on the player.
–you turn off the player (BD-ROM and CD only).
–you press x twice.
–you open the di sc tray.
–you finish a search.
•The player remembers the stop point for one title/track/file
only. On a music CD, playback resumes from the beginning of
the track.
About the screen saver function
To prevent damage to your display device (ghosting), a screen
saver image appears when the player is left unattended, has no
disc inserted, or no title/slideshow is displayed for 15 minutes.
To cancel, press any button on the remote or the player.
About One-Touch Play (for HDMI connections
only)
With one touch of the H button, the player and your TV/AV
receiver automatically turn on and the TV/AV receiver’s input is
switched to the player. Playback starts automatically. To use thi s
function, set “HDMI Control” of “Options” setup to “On”
(page 52).
The TV/AV receiver’s input will also switch to the player
automatically, in the following cases:
–You press H, SYSTEM MENU, TOP MENU, or POP UP/
MENU buttons on the remote.
–A disc with auto playback function is loaded.
Buttons Details
X Pauses playback , or restarts playback from the same
point.
x Stops playback, or cancels the resume point when
pressed twice.
H Starts or restarts playback from the previous stop
point.
22
Guide to Displays
When ‘Select an item, and press ENTER’ appears in this manual,
press the </M/m/, keys on the remote to select the item then
the entry button in the middle. You can operate the player
likewise using displays.
a
Press SYSTEM MENU to turn on the above
“System Menu.”
The player’s start menu appears, with entries to all of
the functions.
b
Select an item, and press ENTER.
Each item leads to the following function displays.
See the pages in parentheses for operations. When
you want to return to the previous display, press
RETURN.
Title List
For DATA DVDs, this display leads further to the Title Lists of
content type. The three Title Lists appear similar and are
operable in a similar way.
Select the Title List you want to view; from “Movies,” “Photos, ”
or “Music,” and press ENTER.
◆Movies
Displays movies/video titles only (page32).
◆Photos
Displays image files only (page 40).
◆Music
Displays music files only (page 36).
A/V Control (page 27)
Adjusts the audio/video settings. Select either “Video Control,”
or “Audio Control,” and press ENTER.
Setup (page 44)
Enters the Setup displays for changing the player’s settings.
Select the related Setup display, and press ENTER.
BD
DVD
DATA DVD
CD
Select Exit
SYSTEM MENU
Search for the part you want to play from a list of the disc's content.
System Menu
Title List
A/V Control
Setup
Select Exit
SYSTEM MENU
Access the BD-R/RE titles.
Title List
Movies
Photos
Music
Select Exit
SYSTEM MENU
Set the playback picture quality.
A/V Control
Video Control
Audio Control
Use to select an item, then press [RR] or
ENTER.
Confirm Exit
SYSTEM MENU
Setup
Video Setup
Audio Setup
Language
Parental Control
Speakers
Options
TV Type
4:3 Video Output
DVD Aspect Ratio
YC
bCr
/RGBPC(HDMI)
24p Output
16:9
Normal
Letter Box
Y, C
b
, C
r
Off
23
Basic Operations
Entering characters
When an on-screen keyboard appears (e.g., when searching for a
title), enter the characters as follows.
a Select the character you want to enter, and
press ENTER.
The character appears in the entry field. If necessary,
select the following items, and press ENTER.
b Repeat step 1 to complete the entry.
c Select “DONE,” and press ENTER to close
the on-screen keyboard.
Note
You cannot use the extended character set.
Items Details
SHFT Switches between upper and lowe r case
characters. Select this before ent ering the
character.
SPC Inserts a space.
DEL Deletes the last character input.
CLR Clears all input characters.
DATA DVD
AB
SHFT
DONE CANCEL
SPC DEL CLR
CDEFGH I J
KLMNOPQRST
UVWXYZ ,.:;
123456
7890
_()
s_
24
Guide to the Remote
The following covers all of the remote’s functions. Refer to the
list when necessary.
Number 5, AUDIO, CH+, and H buttons have a tactile dot. Use the
tactile dot as a reference when operating the player.
OPEN/
CLOSE
DIMMER
CLEAR
123
456
7809
DISPLAY
TV/VIDEO
AUDIO SUBTITLE
ANGLE
SCAN
MUTING
PLAY MODE
PLAY SCAN
PREV
SLOW/STEP
NEXT
PAUSE
VOL CH
STOP
VIDEO
FORMAT
RED
GREEN
BLUE
YELLOW
TOP
MENU
SYSTEM
MENU
POP UP/
MENU
RETURN
TV
A Z OP EN/CLOSE (page 20)
–Opens/closes the disc tray.
TV &/1 (page 17)
–Turns the TV on or to standby mode.
&/1 (page 18)
–Turns on, or sets the player to standby mode.
B DIMMER (page 59)
–Changes the brightness of the front panel display
on the player (when completely darkened,
indicators on the front panel are also turned off
and the FL OFF indicator lights up).
DISPLAY (page 26)
–Displays the disc information on the screen.
TV/VIDEO (page 17)
–Switches between TV and other input sources.
C Number buttons (page 26)
–Enters the title/chapter numbers, etc.
CLEAR
–Clears the entry field.
D VIDEO FORMAT (page 45)
–Changes the video output resolution from the
HDMI OUT jack and the COMPONENT VIDEO
OUT jacks. Press this button repeatedly if no
picture appears.
E AUDIO*
1
(page 49)
–Selects the sound track or the language track on a
BD/DVD.
*1When playing MPEG-2 movie files or MP3 music files on a
DATA DVD, or a music CD, you cannot select the left or
right channel only.
SUBTITLE (page 49)
–Selects the subtitle language on a BD/DVD.
ANGLE
–Switches to other viewing angles when available.
F Color b uttons (RED/GREEN/BLUE/YELLOW)
–Short cut keys for selecting items on some BD’s
menus (can also be used for BD’s Java interactive
operations).
1-6
25
Basic Operations
Playing in various play mode
a During playback, press PLAY MODE
repeatedly.
Available items differ depending on the current title/
track/file or the disc type. To cancel the Play Mode,
press PLAY MODE again. For “Time Search,” see
“Searching using the remote” (page 26).
◆When playing a video or movie title
◆When playing a music track
◆When playing a photo image
G SYSTEM M ENU (page22)
–Enters/exits the player’s start menu (“System
Menu”).
TOP MENU (page 20)
–Opens/closes the BD’s or DVD’s top menu.
POP UP/MENU (page 20)
–Opens/closes the BD’s pop up menu, or the
DVD’s disc menu.
RETURN (page 20, 22)
–Returns to the previous display.
</M/m/, (page 20, 22)
–Moves the highlight to select a displayed item.
Center button (ENTER) (page 20, 22)
–Enters the selected item.
H ./> PR EV/NEXT
–Skips to the previous/next chapter, track, or file.
c/ C SLOW/STEP*
2
–Plays in slow motion or stop motion. To return to
normal play, press H.
•To play in slow motion
Press
C
during playback. When slow motion
play starts, press
C
repeatedly to change the
speed : 1/16 t 1/8 t 1/4 t 1/2 of normal playback
speed.
•To play in stop motion (step by step)
Press X during playback, then press
c
or C
repeatedly.
m/M SCAN*
2
–Scans backwards or forward. The speed changes
when pressed repeatedly.
*2Depending on the disc or file type, the function may not work
or the scan speeds may differ.
H PLAY
–Starts or re-starts playback.
PLAY MODE
–Switches to other play modes (Repeat Play, etc.)
when pressed during playback.
–Searches for a specific point (page 26).
X PAUSE
–Pauses/re-starts playback.
x STOP
–Stops playback.
–Clears the resume point when pressed twice. The
resume point for a title is the last point you
played, the last track for an audio file, or the last
photo for a photo file.
I For TVs operable with the following buttons, see
page 17.
MUTING (page 17)
–Mutes the TV sound.
VOL (volume) +/– (page 17)
–Adjusts the TV volume.
CH (channel) +/– (page 17)
–Selects the TV channels up and down.
Items Details
Repeat Chapter
(BD-ROM/DVD VIDEO
only)
Repeats the current chapter.
Repeat Title Repeats the current title.
Items Details
Repeat Track Repeats the current track.
Repeat All Repeats all the tracks on the disc or the
“Music” Title List.
Random Plays all the tracks on the disc or the
“Music” Title List in a random order.
Items Details
Repeat All Repeats all the files on the disc or
“Photos” Title List.
Random Plays all the files on the disc or “Photos”
Title List in a random order.
BD
DVD
DATA DVD
CD
,continued
26
Searching using the remote
You can search by entering the title/chapter number or the time
code (elapsed time from the beginning of th e disc).
To search for a title or chapter (BD-ROM, DVD
VIDEO only)
1
Enter the title number using the number buttons
while the player is in stop mode.
To search for a chapter, enter the chapter number
during playback. If you make a mistake, press
CLEAR once and re-enter.
2
Press ENTER to start playback.
To search for a specific point
1
During playback, press PLAY MODE repeatedly
until “Time Search” appears.
2
Enter the time code using the number buttons.
Enter the time in minutes and seconds (e.g., ‘12030’
for 1 hour, 20 minutes and 30 seconds). If you make
a mistake, press CLEAR once and re-enter.
3
Press ENTER to start playback.
Note
Depending on the DVD VIDEO/BD-ROM/DATA DVD, these search
functions may not work.
Checking the Disc
Information
You can check the title/chapter/track information including
video transmission rate etc., by pressing DISPLAY. The
information differs depending on the disc type and the player
status.
a
Press DISPLAY.
Example: When playing a DVD VIDEO.
The following information appears:
1 Playback status
2 Disc type
3 Title information
•Currently playing title number/currently playing
chapter number.
•Total number of chapters within the title.
•Total playback time of the title.
4 Elapsed time of the current title
5 Play mode
b
Press DISPLAY again.
The display switches to show the following
information:
1 Chapter information
•Elapsed time of the current chapter.
•Total p layback time of the current chapter.
2 Video transmission rate and the stream
information
BD
DVD
DATA DVD
DISPLAY
OPEN/
CLOSE
DIMMER
CLEAR
123
456
7809
TV/VIDEO
AUDIO SUBTITLE
ANGLE
SCAN
MUTING
PLAY MODE
PLAY SCAN
PREV
SLOW/STEP
NEXT
PAUSE
VOL CH
STOP
VIDEO
FORMAT
RED
GREEN
BLUE
YELLOW
TOP
MENU
SYSTEM
MENU
POP UP/
MENU
RETURN
TV
Number buttons
ENTER
PLAY MODE
BD
DVD
DATA DVD
CD
1-1 2.01.23
Chapters 12
Title Total 2h15m34s
Play
DVD-VIDEO
Repeat Title
1-1 2.01.23
Chapter Time 01.11.56
Chapter Total 2h15m34s
10.03 Mbps
Play
DVD-VIDEO
Repeat Title
27
Basic Operations
z
Hints
•You can check disc inform ation also on the front panel display
(page 59) or the Title List display (page22) .
•You can check the audio information by pressing AUDIO.
Clarifying Low Volume
Sounds (Audio DRC)
Even at low volume, you can make low sounds such as dialogs
more audible.
a
Press SYSTEM MENU during playback.
b
Select “A/V Control,” and press ENTER.
c
Select “Audio Control,” and press ENTER to
turn on the above display.
d
While “Audio DRC” is highlighted, select
from “Max” to “Off” by pressing </,.
e
Press ENTER.
Note
“Audio DRC” is effective only when the disc is a Dolby Digital Blu-ray
Disc or DVD, and:
–“Dolby Digital” in “Audio Setup” is set to “Dow nmix PCM” (page 47)
and the audio signals are output from the DIGITAL O UT (OPTICAL
or COAXIAL) jack or the HDMI OUT jack.
–“Audio (HDMI)” in “Audio Setup” is se t to “PCM” (page 47) and the
audio signals are output from the HDMI OUT jack.
–the audio signals are output from the AUDIO OUT (L/R) jacks or the
5.1CH OUTPUT jacks.
BD
DVD
DATA DVD
Adjusting sound accentual width (dynamic range).
This is effective when playback sound is Dolby Digital.
Audio Control
Off MaxAudio DRC
Convenient when you cannot turn up the volume (e.g., at
night)
28
Adjusting the Pictures
The “cinema tuned” picture preset setting will allow you to
maximize the visual impact of the BD or DVD you are watching
by optimizing the picture settings for different lighting
environments. “Memory” allows you to make your own detailed
adjustments.
a
Press SYSTEM MENU during playback.
b
Select “A/V Control,” and press ENTER.
c
Select “Video Control,” and press ENTER to
turn on the above display.
d
Press </, to select a setting.
e
Press ENTER.
z Hint
The above description applies when the picture setting of your TV (if
any) is set to ‘Standard.’
Note
“Memory” settings do not affect the output from the S VIDEO OUT or
VIDEO OUT jacks.
Fine-tuning the picture to your
preference
a Select from “Memory 1” to “Memory 3” in
step 4 of “Adjusting the Pictures” (page28).
b Select “Detailed Settings,” and press ENTER
to turn on the above display.
To switch to another “Memory,” press RETURN.
c Select each of the picture elements, and
adjust using </,.
◆ To adjust while previewing the effect
Select a setting and press ENTER to switch the
display for the setting. Press </, to adjust
while checking the effect on the background
playback picture. Then press ENTER to save the
adjustment.
Underlined are the default settings for “Memory.”
d Press RETURN.
Items Details
Brighter Room For a room brighter than normal.
Theater Room For a dark room such as a home
theater.
Standard (default) Normally, select this.
Memory (1-3) Select a setting when you want to
use the detailed picture adjustments
you previously made, or when you
want to make a new set. The player
remembers up to three sets (see
page 28).
BD
DVD
DATA DVD
Standard
Detailed Settings
Items Details
White Adjust
(Min~(mid)
~Max)
Adjusts the brightness of white
colors.
Black Adjust
(Min~(mid)
~Max)
Adjusts the richness of dark colors.
Hue
(Green~(mid)
~Red)
Balances the green and the red
colors.
Color Level
(Min~(mid)
~Max)
Adjusts the color saturation.
Use [LL][RR] to set the behavior of film source
input. Press ENTER to preview.
Min Max
Memory1
Green Red
Min Max
White Adjust
Black Adjust
Hue
Color Level
Min Max
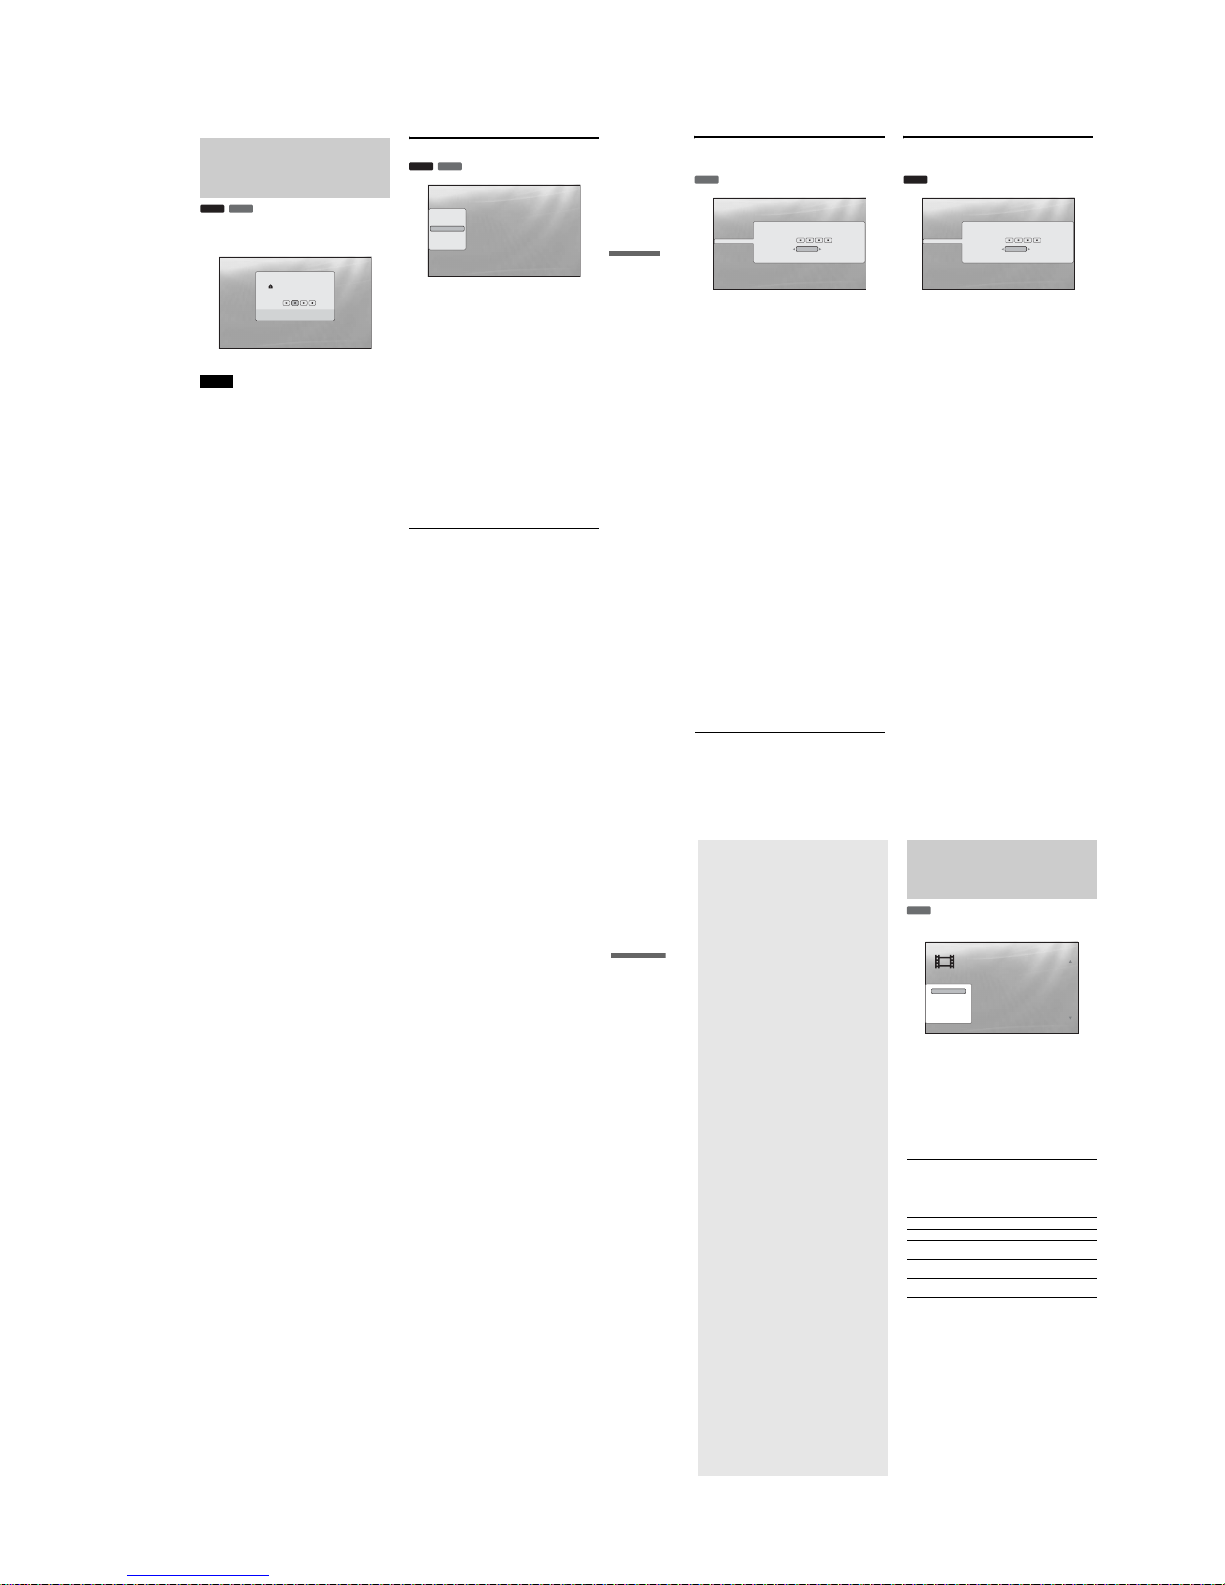
1-7
29
Basic Operations
Locking a Disc
By setting the password and your limit in “Parental Control”
Setup, you can control playback of inappropriate discs.
Notes
•You cannot limit playback if the DVD VIDEO/BD-ROM does not
have the “Parental Control” function.
•If you forget the password, you will have to return all of the player
settings to their factory defaults (page 53).
•The above display does not appear for BD -ROM. If you cannot play a
BD-ROM because of Parental Control, reset “Change Age Restriction”
of “BD Parental Control” (page 50).
Setting/changing the password
a Press SYSTEM MENU.
b Select “Setup,” and press ENTER.
c Select “Parental Control,” and press ENTER
to turn on the above “Parental Control”
Setup.
d Select “Change Password (Set Password),”
and press ENTER.
e Select “Next Screen,” and press ENTER to
turn on the password display.
◆ When you have not yet registered a password
Enter a four-digit password using the number
buttons, and press m. Re-enter it for
confirmation, and press ENTER.
◆ When you have already registered a password
Enter the four-digit password using the number
buttons, and press ENTER. Enter a new pa ssword
and press m, then re-enter it for confirmation, and
press ENTER.
z
Hint
To continue to set “DVD Parental Control,” go to step 4 of “Setting the
Parental Control for DVD VIDEOs” (page 30).
BD
DVD
Parental Control
BD PLAYER
Current Level
Disc Level35
Use the number keys to
enter the password to
turn off the parental
lock.
The password is required when the DVD ex ceeds the
level you set.
BD
DVD
Use to select an item, then press [RR] or
ENTER.
Confirm Exit
SYSTEM MENU
Setup
Video Setup
Audio Setup
Language
Parental Control
Speakers
Options
Change Password
DVD Parental Control
BD Parental Control
Next Screen
Next Screen
Next Screen
,continued
30
Setting the Parental Control for DVD
VIDEOs
a Press SYSTEM MENU.
b Select “Setup,” and press ENTER.
c Select “Parental Control,” and press ENTER
to turn on the “Parental Cont rol” Setup.
d Select “DVD Parental Control,” and press
ENTER.
e Select “Change Level,” and press ENTER to
turn on the above display.
This will set the playback limitation level.
f Enter the password using the number
buttons, and press ENTER.
g Press </, to select the limitation lev el
from “Off” to “Level 8,” and press ENTER.
Note that the lower the value, the stricter the
limitation.
h When the display returns to the “Parental
Control” Setup, select “DVD Parental
Control,” and press ENTER.
i Select “DVD Country Code,” and press
ENTER.
This ensures that you see the scenes intended for
your residential area.
j On the “DVD Country Code” display, enter
the password using the number buttons, and
press ENTER.
k Press </, to select your country code (see
page 69), or press m and enter the code for
your area using the number buttons.
l Press ENTER.
z
Hint
To continue to set “BD Parental Control,” go to step 4 of “Setting the
Parental Control for BD-ROMs” (page 30).
Setting the Parental Control for BDROMs
a Press SYSTEM MENU.
b Select “Setup,” and press ENTER.
c Select “Parental Control,” and press ENTER
to turn on the “Parental Control” Setup.
d Select “BD Parental Control,” and press
ENTER.
e Select “Change Age Restriction,” and press
ENTER to turn on the above display.
For BD-ROMs, the restriction is set by age, not by
level.
f Enter the password using the number
buttons, and press ENTER.
g Press </, to select the age from “0” to
“255,” and press ENTER.
h When the display returns to the “Parental
Control” Setup, select “BD Parental
Control,” and press ENTER.
i Select “BD Country Code,” and press
ENTER.
This ensures that you see the scenes intended for
your residential area.
j On the “BD Country Code” display, enter the
password using the number buttons, and
press ENTER.
k Press </, to select your country code (see
page 69), or press m and enter the code for
your area using the number buttons.
l Press ENTER.
DVD
Use the number keys to enter the password, and press ENTER.
Confirm Exit
SYSTEM MENU
Change Level
Password
Level
Setup
Video Setup
Audio Setup
Language
Parental Control
Speakers
Options
Off
BD
Use the number keys to enter the password, and press ENTER.
Confirm Exit
SYSTEM MENU
Password
Age Restriction
Video Setup
Audio Setup
Language
Parental Control
Speakers
Options
Change Age Restriction
Setup
255
31
Basic Operations
32
Watching Movie
Files
Use the “Movies” Title List to browse
through and sort MPEG-2 PS movie files on
DATA DVDs.
Viewing All Titles
The “Movies” Title List first displays all titles on the disc.
a
Press SYSTEM MENU.
b
Select “Title List,” and press ENTER.
c
Select “Movies,” and press ENTER.
The above “All Movies” display appears, showing
all titles (scrollable by pressing m). From “All
Movies” you can apply items to all titles using the
Browse menu (see below).
To use the Browse menu
Press < after step 3 to display the items for the “Movies” Title
List. For operations, see the pages in parentheses. Availab le
items differ depending on the display.
◆Example: To apply “Sort” to all titles
A Select “Sort,” and press ENTER.
B Select the setting you want to sort by; “Recent first,”
“Oldest first,” “By title (AtZ),” “By title (ZtA),” and
press ENTER.
Items Deta ils
All Movies Lists all titles (as above).
Browse Displays a list of genres, Quicklist, or
folders (page 34).
Search Searches for a title using the on-screen
keyboard (page 34).
Sort Reorders the titles by date or alphabet (see
below).
DATA DVD
List Exit
SYSTEM MENU
Select
1:31
1:02
1:31
1:25
1:33
1:26
1:57
1:36
1:18
1:18
1214 items
All Movies
Spider
Smoother
Sideway
Home
Alpinist
Electricity
Lemon Grove
Bridget
Finding Never-Ever Land
Meet My Mom
All Movies
Browse
Search
Sort
The Browse menu appears when you press <
• Viewing All Titles . . . . . . . . . . . . . . . . . . . . . . 32
• Browsing by Genre, Quicklist, or Folder . . . . . 34
• Searching for a Title . . . . . . . . . . . . . . . . . . . . 34
• Programming Playback (Quicklist). . . . . . . . . 35
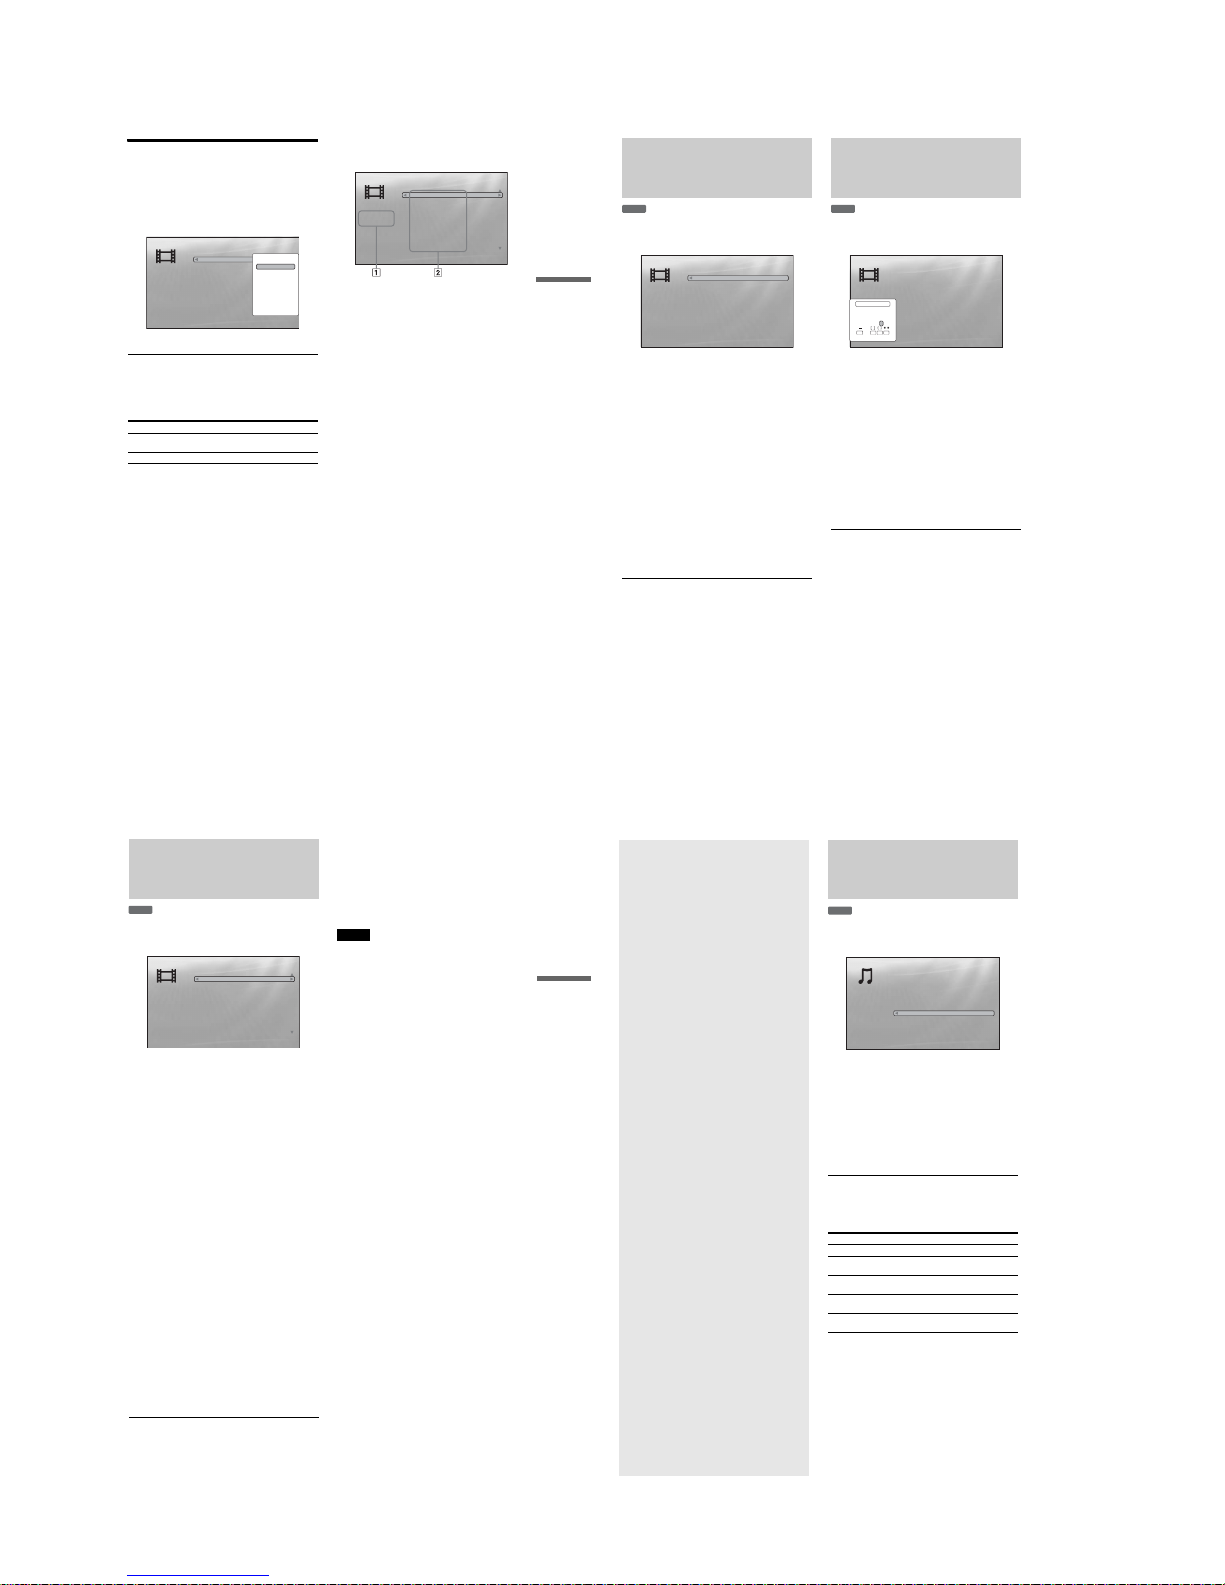
1-8
33
Watching Movie Files
Playing a title
a After step 3 of “Viewing All Titles” above,
select the title you want to play, and press
ENTER or H.
The title starts playing. You can apply other playback
settings to the selected title using the “Options”
menu (see below).
To use the “Options” menu
Press , instead of ENTER in the above step to display the
“Options” menu settings applicable to the title in the given
situation. In the above example, the following items are
available.
◆Example: To apply “Play from Beginn ing” to the selected title
A Select “Play from Beginnin g,” and press ENTER.
To play in other play mode
During playback, press PLAY MODE repeatedly. The selected
item changes with each press: “Time Search” (page 26) —
“Repeat Title” — “Repeat Off”
See page 25 for details.
z
Hint
See page 24 for the remote’s operations.
About the “Movies” (All Movies) Title List
display
1 Detailed information
Displays details about the selected title.
•Date: Displays the recording year.
•Genre: Displays the genre name.
•Format: Displays the coding format.
2 List area
Displays the title names of all content.
Items Details
Play from Beginning Starts play ing the title you selected from
the beginning.
Add to Quicklist Adds the selected title to the Quicklist.
List Exit
SYSTEM MENU
Select
1214 items
1:31
1:02
1:31
1:25
1:33
1:26
1:57
1:36
1:18
1:18
All Movies
Spider
Smoother
Sideway
Home
Alpinist
Electricity
Lemon Grove
Bridget
Finding Never-Ever Land
Meet My Mom
Date : 2006
Genre : Adventure
Format : MPEG
Play from Beginning
Add to Quicklist
Options
The “Options” menu appears when you select a title and
press ,
List Exit
SYSTEM MENU
Select
1:31
1:02
1:31
1:25
1:33
1:26
1:57
1:36
1:18
1:18
1214 items
All Movies
Spider
Smoother
Sideway
Home
Alpinist
Electricity
Lemon Grove
Bridget
Finding Never-Ever Land
Meet My Mom
Date : 2006
Genre : Adventure
Format : MPEG
34
Browsing by Genre,
Quicklist, or Folder
Narrow down the list of titles by selecting the category type (e.g.,
“Folders”), then the category.
a
Press SYSTEM MENU.
b
Select “Title List,” and press ENTER.
c
Select “Movies,” and press ENTER.
d
Press < to turn on the Browse menu.
e
Select “Browse,” and press ENTER.
f
Select the list you want to view from
“Genres,” “Quicklist,” or “Folders,” and
press ENTER.
The list of genres/Quicklist/folders appears as above.
For details about the Quicklist, see “Programming
Playback (Quicklist)” (page 35).
g
Select the genre/Quicklist/folder you want to
view, and press ENTER.
z
Hint
You can select a title and start playback by pressing H or ENTER, or
using the “Options” menu (press ,).
Searching for a Title
You can find the exact title, or titles with a similar name.
a
Press SYSTEM MENU.
b
Select “Title List,” and press ENTER.
c
Select “Movies,” and press ENTER.
d
Press < to turn on the Browse menu.
e
Select “Search,” and press ENTER to turn on
the above display.
f
Enter the title name using the on-screen
keyboard (see page 23).
z
Hint
You can select a title and start playback by pressing H or ENTER, or
using the “Options” menu (press ,).
DATA DVD
ExitConfirm
SYSTEM MENU
Folders
Winter games 2006
Interviews
2 items
DATA DVD
Exit
SYSTEM MENU
Select
1:31
1:02
1:31
1:25
1:33
5 items
Say No
Sea
Sideway
Spider
Stay Alive
Search Results
AB
SHFT
DONE CANCEL
SPC DEL CLR
CDEFGHI J
KLMNOPQRST
UVWXYZ,.:;
123456
7890
_()
s_
Search results are narrowed down as more characters
are entered
35
Watching Movie Files
Programming Playback
(Quicklist)
Play your favorite titles in the order you like by making your
own “Quicklist.”
a
Press SYSTEM MENU.
b
Select “Title List,” and press ENTER.
c
Select “Movies,” and press ENTER.
d
When the “All Movies” Title List appears,
select the title you want to add to th e top of
the “Quicklist,” and press ,.
e
Select “Add to Quicklist” from the “Options”
menu, and press ENTER.
f
Repeat step 4 and 5 to select all the desired
titles.
Select in the order you want to play. You can add the
same title multiple times.
The “Quicklist” can contain up to 25 titles.
g
Press < to turn on the Browse menu.
h
Select “Browse,” and press ENTER.
i
Select “Quicklist,” and press ENTER to turn
on the above display.
The “Quicklist” Title List appears with the
programmed content.
j
Select the title you want to start playback,
and press ENTER.
To remove the title from the “Quicklist”
1
Select the title you want to remove from the
displayed “Quicklist,” and press ,.
2
Select “Remove,” and press ENTER.
z
Hint
You can play the “Quicklist” content in other play modes by pressing
PLAY MODE (page 25).
Note
The “Quicklist” may be cleared after some operations (e.g., opening the
disc tray, or turning off the player etc.).
DATA DVD
The “Quicklist” does not affect the original recording on
the disc
List Exit
SYSTEM MENU
Select
1:31
1:02
1:31
1:25
1:33
1:26
1:57
1:36
1:18
1:18
14 items
Quicklist
Date : 2006
Genre : Adventure
Format : MPEG
Spider
Smoother
Sideway
Home
Alpinist
Electricity
Lemon Grove
Bridget
Finding Never-Ever Land
Meet My Mom
36
Listening to
Music Files
Use the “Music” Title List to browse
through and play the MP3 track files on
DATA DVDs. You can make a “Quicklist”
of your favorites and play in various play
modes.
Viewing All Artists
The “Music” Title List first displays a list of the artist names on
the disc.
a
Press SYSTEM MENU.
b
Select “Title List,” and press ENTER.
c
Select “Music,” and press ENTER.
The above “Artists” display appears, showing all
artist names (scrollable by pressing m). From
“Artists” you can apply items to all tracks using the
Browse menu (see below).
To use the Browse menu
Press < after step 3 to display the items for the “Music” Title
List. For operations, see the pages in parentheses. Availab le
items differ depending on the display.
◆Example: To apply “Sort” to all tracks
A To display the list of tracks, select “All Songs” from the
Browse menu and press ENTER.
B Press < to turn on the Browse menu.
C Select “Sort,” and press ENTER.
D Select the setting you want to sort by; “Recent first,”
“Oldest first,” “By title (AtZ),” “By title (ZtA),” “By
artist (AtZ),” “By artist (ZtA),” and press ENTER.
Items Deta ils
All Songs Lists all tracks (page 37).
Browse Displays a list of artists, albums, genres,
Quicklist, or folders (page 38).
Search Searches for a track using the on-screen
keyboard (page 38).
Sort Reorders the tracks by alphabet, or year,
etc. (see below).
Now Playing Displays the track information and the
playback information during playbac k.
DATA DVD
PlayOptionsMain Menu Exit
SYSTEM MENU
7 items
All Artists
Angela Simpson
Blue Glass
Bohemian Beat
Cela
Classic Remix
Commotion
Count Dra"Q"la
Albums
Albums
Albums
Albums
Albums
Albums
Albums
6
5
6
4
5
2
2
Artists
The Browse menu appears when you press <
PlayOptionsMain Menu Exit
SYSTEM MENU
7 items
All Artists
Angela Simpson
Blue Glass
Bohemian Beat
Cela
Classic Remix
Commotion
Count Dra"Q"la
Albums
Albums
Albums
Albums
Albums
Albums
Albums
6
5
6
4
5
2
2
Artists
• Viewing All Artists . . . . . . . . . . . . . . . . . . . . . 36
• Browsing by Artist, Album, Genre, Quicklist,
or Folder . . . . . . . . . . . . . . . . . . . . . . . . . . 38
• Searching for a Track . . . . . . . . . . . . . . . . . . . 38
• Programming Playback (Quicklist). . . . . . . . . 39
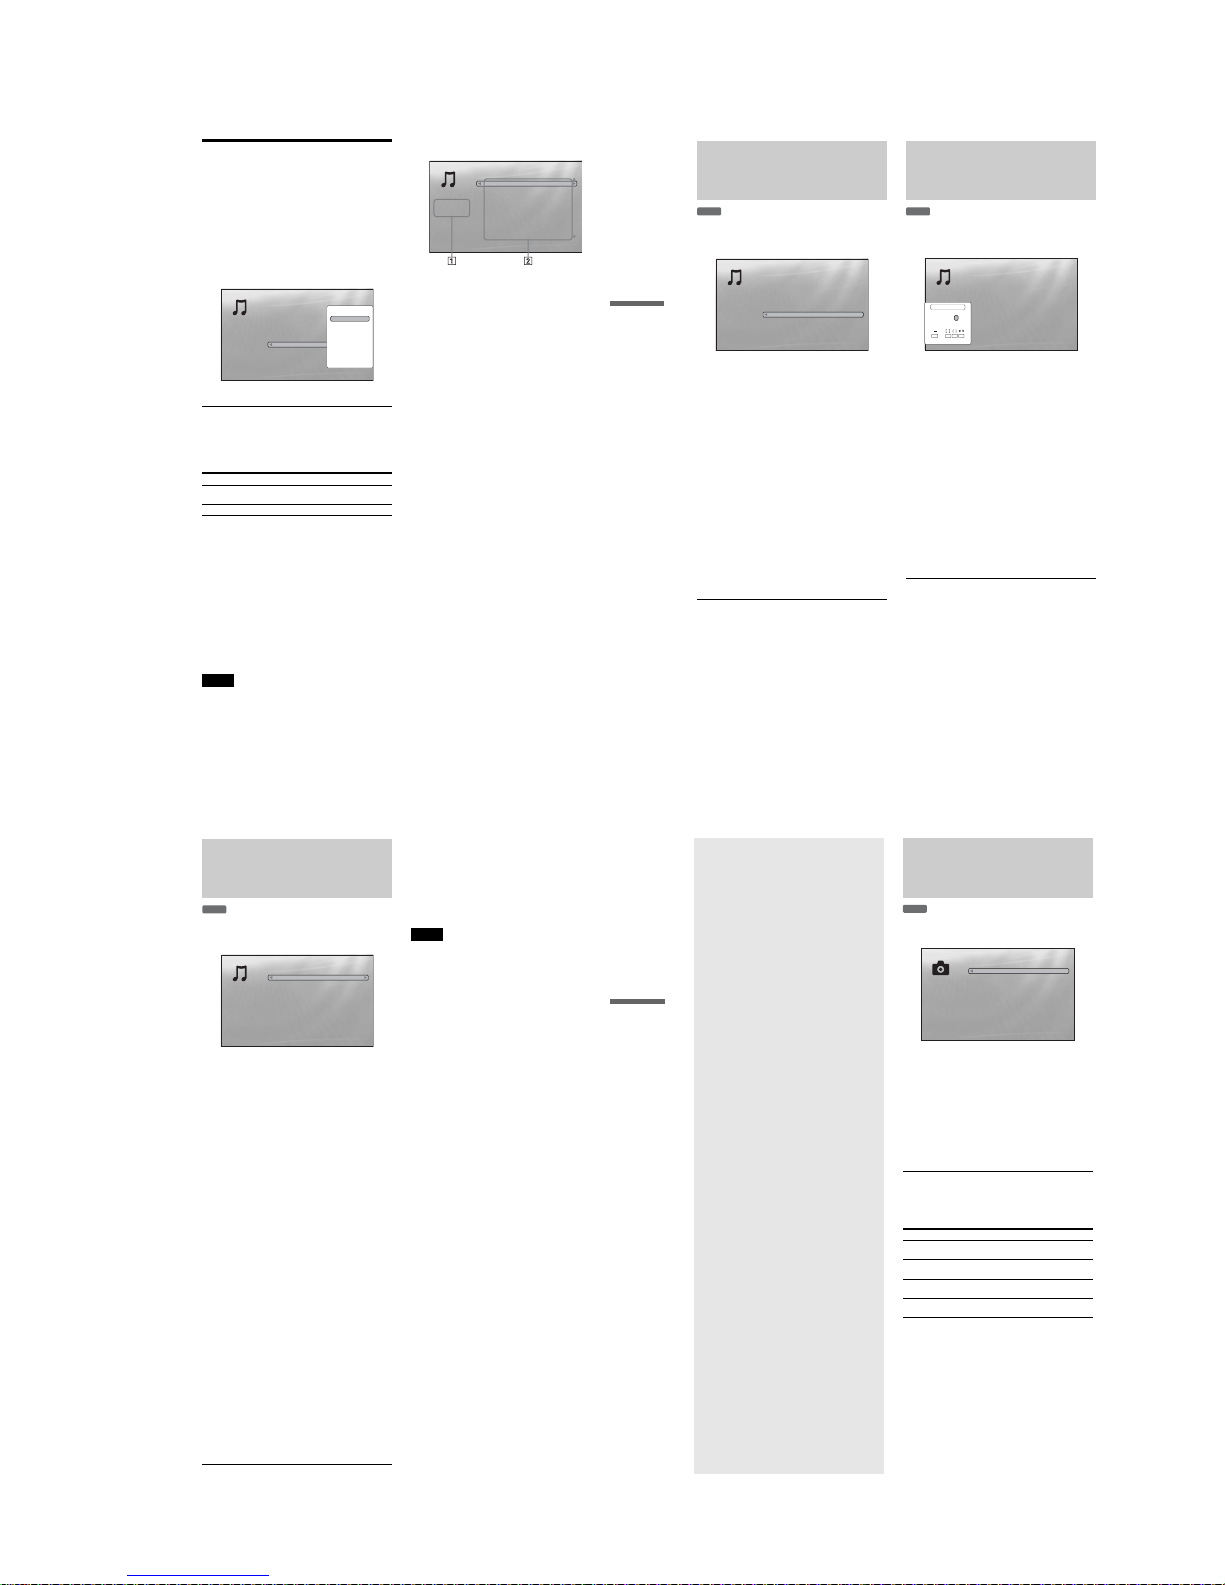
1-9
37
Listening to Music Files
Playing a track
a After step 3 of “Viewing All Artists” above,
narrow down the list of tracks by selecting
the artist, then the album.
To list all tracks, press < and select “All Songs”
from the Browse menu.
b Select the track you want to play, and press
ENTER or H.
The title starts playing. You can apply other playback
settings to the selected track using the “Options”
menu (see below).
To use the “Options” menu
Press , instead of ENTER in the above step to display the
“Options” menu settings applicable to the track in the given
situation. In the above example, the following items are
available.
◆Example: To apply “Play Song” to the selected track
A Select “Play Song,” and press ENTER.
To play in other play mode
During playback, press PLAY MODE repeatedly. The selected
item changes with each press: “Repeat Track” — “Repeat All”
— “Random” — “Repeat Off”
See page 25 for details.
z
Hints
•See page 24 for the rem ote’s operations.
•Even after stopping playback, the player re sumes playback from the
last track you played.
•Depending on the writing software used, the displayed tr ack or album
names may be different from the characters you input.
Notes
•Playback time of MP3 audio tracks may not be displayed correctly.
•If you put an ext ension “.MP3” to a non-MP3 file, the file may
accidentally play on the player. Note that such output may cause the
connected device to malfunction.
•Playback may not start immediat ely after skipping to another album.
•When using the Resume function on MP3 tracks, playback starts from
the beginning of the track.
About the “Music” (All Songs) Title List display
1 Detailed information
Displays details about the selected track.
•Artist: Displays the artist name.
•Album: Displays the album name.
•Genre: Displays the genre name.
•Format: Displays the coding format.
2 List area
Displays overall content.
•Mai n area: Displays the track names.
•Sub area: Displays the total playback time of each
track.
About unplayable audio track files
The player does not play the file if:
–The DATA DVD is not recorded in an MP3 format that
conforms to UDF (Universal Disk Format).
–The audio track file does not have the extension “.MP3.”
–The data is not formatted properly even though it has the
extension “.MP3.”
–The data is not MPEG-1 Audio Layer III data.
–The data is recorded in mp3PRO format.
–The file name contains characters other than numbers and
English alphabet.
Items Details
Play Song Starts playing the track you selected from
the beginning.
Add to Quicklist Adds the selected track to the Quicklist.
PlayOptionsMain Menu Exit
SYSTEM MENU
1214 items
9:31
8:00
7:31
3:55
6:33
5:26
4:57
9:36
6:18
6:18
All Songs
Never Let Me Down (Split Mix)
Policies of Truth
Shout in Rio
Home
Strangled
Rash (Spiritual Mix)
I Feel You (Remix)
Route 57 (Beatmasters Mix)
Free (DJ Remix)
Personal Note
Artist : Deep Green
Album : Splash!
Genre : Alternative
Format : MP3
Play Song
Add to Quicklist
Options
The “Options” menu appears when you select a track
and press ,
PlayOptionsMain Menu Exit
SYSTEM MENU
Artist:Deep Green
Album:Remixes 81-04
Genre:Alternative
Format:MP3
1214 items
9:31
8:00
7:31
3:55
6:33
5:26
4:57
9:36
6:18
6:18
All Songs
Never Let Me Down (Split Mix)
Policies of Truth
Shout in Rio
Home
Strangled
Rash (Spiritual Mix)
I Feel You (Remix)
Route 57 (Beatmasters Mix)
Free (DJ Remix)
Personal Note
Artist : Deep Green
Album : Splash!
Genre : Alternative
Format : MP3
38
Browsing by Artist, Album,
Genre, Quicklist, or Folder
Narrow down the list of tracks by selecting the category type
(e.g., “Genres”), then the category.
a
Press SYSTEM MENU.
b
Select “Title List,” and press ENTER.
c
Select “Music,” and press ENTER.
d
Press < to turn on the Browse menu.
e
Select “Browse,” and press ENTER.
f
Select the list you want to view from
“Artists,” “Albums,” “Genres,” “Quicklist”
or “Folders,” and press ENTER.
The list of artists/albums/genres/Quicklist/folders
appears as above.
For details about the Quicklist, see “Programming
Playback (Quicklist)” (page39).
g
Select the artist/album/genre/Quicklist/
folder you want to view, and press ENTER.
z
Hint
You can select a track from the list of tracks, and start playback by
pressing ENTER or H, or using the “Options” menu (press ,).
Searching for a Track
You can find the exact track, or tracks with a similar name.
a
Press SYSTEM MENU.
b
Select “Title List,” and press ENTER.
c
Select “Music,” and press ENTER.
d
Press < to turn on the Browse menu.
e
Select “All Songs,” and press ENTER.
f
Press < to turn on the Browse menu.
g
Select “Search,” and press ENTER to turn on
the above display.
h
Enter the track name using the on-screen
keyboard (see page 23).
z
Hints
•You can select a track from the search result, and start playback by
pressing ENTER or H, or using the “Options” menu (press ,).
•You can search for a genre, artist, album, or folder name from each
Title List (e.g., “Genres”).
DATA DVD
PlayOptionsMain Menu Exit
SYSTEM MENU
20 items
All Genres
Alternative
Blues
Books And Spoken
Celtic
Classical
Comedy
Country
Dance
Dark
Songs
Songs
Songs
Songs
Songs
Songs
Songs
Songs
Songs
2876
195
16
304
841
32
2
460
60
Genres
Genres without content do not appear in the list
DATA DVD
Exit
SYSTEM MENU
Select
7 items
Raga
Raging Plants
Ragamufin
Ree
Rise
Rose Bed
Rule the World
9:31
8:00
7:31
7:32
6:33
6:34
6:35
Search Results
AB
SHFT
DONE CANCEL
SPC DEL CLR
CDEFGHI J
KLMNOPQRST
U VWX YZ,.:;
123456
7890
_()
R
Search results are narrowed down as more characters
are entered
39
Listening to Music Files
Programming Playback
(Quicklist)
Play your favorite tracks in the order you like by making your
own “Quicklist.”
a
Press SYSTEM MENU.
b
Select “Title List,” and press ENTER.
c
Select “Music,” and press ENTER.
d
Press < to turn on the Browse menu.
e
Select “All Songs,” and press ENTER.
f
When the “All Songs” Title List appears,
select the track you want to a dd to the top of
the “Quicklist,” and press ,.
g
Select “Add to Quicklist” from the “Options”
menu, and press ENTER.
h
Repeat step 6 and 7 to select all the desired
tracks.
Select in the order you want to play. You can add the
same track multiple times.
The “Quicklist” can contain up to 25 tracks.
i
Press < to turn on the Browse menu.
j
Select “Browse,” and press ENTER.
k
Select “Quicklist,” and press ENTER to turn
on the above display.
The “Quicklist” Title List appears with the
programmed content.
l
Select the track you want to start playback,
and press ENTER.
To remove the title from the “Quicklist”
1
Select the track you want to remove from the
displayed “Quicklist,” and press ,.
2
Select “Remove,” and press ENTER.
z Hint
You can play the “Quicklist” content in other play modes by pressing
PLAY MODE (page 25).
Note
The “Quicklist” may be cleared after some operations (e.g., opening the
disc tray, or turning off the player etc.).
DATA DVD
The “Quicklist” does not affect the original recording on
the disc
PlayOptionsMain Menu Exit
SYSTEM MENU
3 items
Quicklist
9:31
8:00
7:31
Never Let Me Down (Split Mix)
Policies of Truth
Shout in Rio
Artist : Deep Green
Album : Splash!
Genre : Alternative
Format : MP3
40
Viewing Photo
Files
Use the “Photos” Title List to view the
JPEG images on DATA DVDs. You can
reorder the files and start playing a
slideshow.
Viewing All Folders
The “Photos” Title List first displays all the folders on the disc.
a
Press SYSTEM MENU.
b
Select “Title List,” and press ENTER.
c
Select “Photos,” and press ENTER.
The above “Folders” display appears, showing all
folders (scrollable by pressing m). From “Folders”
you can apply items to all files using the Browse
menu (see below).
To use the Browse menu
Press < after step 3 to display the items for “Photos” Title List.
For operations, see the pages in parentheses. Ava ilable items
differ depending on the display.
◆Example: To apply “Sort” to all files
A To display the list of all files, select “All Photos” from the
Browse menu and press ENTER.
B Move the highlight to the left most row, and press < to
turn on the Browse menu.
C Select “Sort,” and press ENTER.
D Select the setting you want to sort by; “Recent first,”
“Oldest first,” “By title (AtZ),” “By title (ZtA),” and
press ENTER.
Items Deta ils
All Photos Displays all files in alphabetical order
(page 41).
Browse Displays a list of dates, Quicklist, or
folders (page 42).
Search Searches for a file using the on-screen
keyboard (page 42).
Sort Reorders the files by date or alphabet (see
below).
DATA DVD
ExitConfirm
SYSTEM MENU
Folders
Kurobe-dam 2005
Jungfraujoch 2006
2 items
The Browse menu appears when you press < while on
the leftmost row
• Viewing All Folders. . . . . . . . . . . . . . . . . . . . . 40
• Browsing by Date, Quicklist, or Folder . . . . . . 42
• Searching for a Photo. . . . . . . . . . . . . . . . . . . 42
• Programming a Slideshow Playback (Quicklist)
. . . . . . . . . . . . . . . . . . . . . . . . . . . . . . . . . . 43
 Loading...