

Page 1
3-197-093-11(1)
©2007 Sony Corporation
B l u - r a y D i s c P l a y e r
B D P - S 1 E
O p e r a t i n g I n s t r u c t i o n s
Page 2
WARNING
To reduce the risk of fire or electric
shock, do not expose this apparatus to
rain or moisture.
To avoid electrical shock, do not open
the cabinet. Refer servicing to qualified
personnel only.
The mains lead must be changed only at
a qualified service shop.
Batteries or batteries installed apparatus
shall not be exposed to excessive heat
such as sunshine, fire or the like.
CAUTION
The use of optical instruments with this
product will increase eye hazard. As the
laser beam used in this Blu-ray Disc
player is harmful to eyes, do not attempt
to disassemble the cabinet.
Refer servicing to qualified personnel
only.
Disposal of Old Electrical & Electronic Equipment
(Applicable in the European Union and other
European countries with separate collection
systems)
This symbol on the product or on its packaging
indicates that this product shall not be treated as
household waste. Instead it shall be handed over to
the applicable collection point for the recycling of
electrical and electronic equipment. By ensuring this
product is disposed of correctly, you will help
prevent potential negative consequences for the
environment and human health, which could
otherwise be caused by inappropriate waste handling
of this product. The recycling of materials will help
to conserve natural resources. For more detailed
information about recycling of this product, please
contact your local Civic Office, your household
waste disposal service or the shop where you
purchased the product.
The manufacturer of this product is Sony
Corporation, 1-7-1 Konan Minato-ku
Tokyo, 108-0075 Japan. The Authorized
Representative for EMC and product
safety is Sony Deutschland GmbH,
Hedelfinger Strasse 61, 70327 Stuttgart,
Germany. For any service or guarantee
matters please refer to the addresses
given in separate service or guarantee
documents.
Notes About the Discs
• To keep the disc clean, handle the disc
by its edge. Do not touch the surface.
• Do not expose the disc to direct
sunlight or heat sources such as hot air
ducts, or leave it in a car parked in
direct sunlight as the temperature may
rise considerably inside the car.
• After playing, store the disc in its case.
• Clean the disc with a cleaning cloth.
Wipe the disc from the centre out.
This label is located on the laser
protective housing inside the enclosure.
This appliance is classified as a
CLASS 1 LASER product. The
CLASS 1 LASER PRODUCT
MARKING is located on the laser
protective housing inside the enclosure.
Notice for customers in the United Kingdom
and Republic of Ireland
A moulded plug complying with BS1363 is fitted to
this equipment for your safety and convenience.
Should the fuse in the plug supplied need to be
replaced, a fuse of the same rating as the supplied
one and approved by ASTA or BSI to BS1362, (i.e.,
marked with or mark) must be used.
If the plug supplied with this equipment has a
detachable fuse cover, be sure to attach the fuse
cover after you change the fuse. Never use the plug
without the fuse cover. If you should lose the fuse
cover, please contact your nearest Sony service
station.
Precautions
Safety
• This unit operates on 220 – 240 V AC,
50/60 Hz. Check that the unit’s
operating voltage is identical with your
local power supply.
• To prevent fire or shock hazard, do not
place objects filled with liquids, such
as vases, on the apparatus.
Installing
• Do not install the unit in an inclined
position. It is designed to be operated
in a horizontal position only.
• Keep the unit and discs away from
equipment with strong magnet, such as
microwave ovens, or large
loudspeakers.
• Do not place heavy objects on the unit.
• Do not install this unit in a confined
space, such as a bookshelf or similar
unit.
• Install this unit so that the power cord
can be unplugged from the wall socket
immediately in the event of trouble.
• Do not expose the battery to excessive
heat such as direct sunlight, fire or the
like.
• Do not use solvents such as benzine,
thinner, commercially available disc/
lens cleaners, or anti-static spray
intended for vinyl LPs.
• If you have printed the disc’s label, dry
the label before playing.
2
Page 3

Precautions
On safety
Should any solid object or liquid fall into
the cabinet, unplug the player and have it
checked by qualified personnel before
operating it any further.
On power sources
• The player is not disconnected from the
AC power source (mains) as long as it
is connected to the wall outlet, even if
the player itself has been turned off.
• If you are not going to use the player
for a long time, be sure to disconnect
the player from the wall outlet. To
disconnect the AC power cord (mains
lead), grasp the plug itself; never pull
the cord.
On placement
• Place the player in a location with
adequate ventilation to prevent heat
build-up in the player.
• Do not place the player on a soft
surface such as a rug.
• Do not place the player in a location
near heat sources, or in a place subject
to direct sunlight, excessive dust, or
mechanical shock.
• The transparent part on the front panel
surface is made of glass. Handle with
care.
On cleaning discs, disc/lens
cleaners
Do not use a commercially available
cleaning disc or disc/lens cleaner (wet or
spray type). These may cause the
apparatus to malfunction.
On replacement of parts
In the events that this player is repaired,
repaired parts may be collected for reuse
or recycling purposes.
IMPORTANT NOTICE
Caution: This player is capable of
holding a still video image or on-screen
display image on your television screen
indefinitely. If you leave the still video
image or on-screen display image
displayed on your TV for an extended
period of time you risk permanent
damage to your television screen. Plasma
display panel televisions and projection
televisions are susceptible to this.
If you have any questions or problems
concerning your player, please consult
your nearest Sony dealer.
On operation
• If the player is brought directly from a
cold to a warm location, or is placed in
a very damp room, moisture may
condense on the lenses inside the
player. Should this occur, the player
may not operate properly. In this case,
remove the disc and leave the player
turned on for about half an hour until
the moisture evaporates.
• When you move the player, take out
any discs. If you don’t, the disc may be
damaged.
On adjusting volume
Do not turn up the volume while
listening to a section with very low level
inputs or no audio signals. If you do, the
speakers may be damaged when a peak
level section is played.
On cleaning
Clean the cabinet, panel, and controls
with a soft cloth slightly moistened with
a mild detergent solution. Do not use any
type of abrasive pad, scouring powder or
solvent such as alcohol or benzine.
3
Page 4

Table of Contents
Locking a Disc ....................................................29
Setting/changing the password ..........................29
Setting the Parental Control for
DVD VIDEOs ................................................30
Setting the Parental Control for BD-ROMs ........30
WARNING ...............................................................2
Notes About the Discs ........................................2
Precautions ...........................................................3
Table of Contents .................................................4
About this manual ................................................5
This Player Can Play the Following
Discs and Files
Examples of discs that the player cannot play .....6
About playback of discs recorded in AVCHD
format .............................................................6
BD/DVD region code ...........................................7
Note on playback operations of BDs/DVDs .........7
Copyrights ............................................................7
................................................5
Main Features .......................................................7
Getting Started
Step 1: Unpacking ...............................................9
Step 2: Connecting the Video Cords/HDMI
Cord
.................................................................10
A Connecting to a video input jack ...................10
B Connecting to an S VIDEO input jack ...........10
C Connecting to component video input jacks
(Y, PB/CB, PR/CR) ..........................................10
D Connecting to an HDMI input jack ................11
About the ‘BRAVIA’ Theatre Sync features
(for HDMI connections only) .........................11
Step 3: Connecting the Audio Cords ............12
A
Connecting to your TV ..............................13
B
Connecting to a stereo amplifier (receiver)
and 2 speakers .............................................13
C
Connecting to an AV amplifier (receiver)
having a Dolby Surround (Pro Logic)
decoder and 3 to 6 speakers ........................14
D-1
Connecting to an AV amplifier (receiver)
with 5.1ch input jacks and 6 speakers .........14
D-2
Connecting to an AV amplifier (receiver)
with a digital input jack and 6 speakers ........15
D-3
Connecting to an AV amplifier (receiver)
with an HDMI input jack and 8 speakers ......15
Step 4: Connecting the Mains Lead ..............16
Step 5: Preparing the Remote ........................16
If you want to control your TV with the supplied
remote ..........................................................17
Step 6: Easy Setup ............................................18
Step 7: Additional Adjustments .....................19
Basic Operations
Playing a Disc .....................................................20
Guide to Displays ...............................................22
Entering characters ............................................23
Guide to the Remote .........................................24
Playing in various play mode .............................25
Searching using the remote ...............................26
Checking the Disc Information .......................26
Clarifying Low Volume Sounds
(Audio DRC)
Adjusting the Pictures ......................................28
Fine-tuning the picture to your preference .........28
...................................................27
Watching Movie Files
Viewing All Titles ...............................................32
Playing a title .....................................................33
Browsing by Genre, Quicklist, or Folder .....34
Searching for a Title ..........................................34
Programming Playback (Quicklist) ...............35
Listening to Music Files
Viewing All Artists .............................................36
Playing a track ...................................................37
Browsing by Artist, Album, Genre,
Quicklist, or Folder
......................................38
Searching for a Track .......................................38
Programming Playback (Quicklist) ...............39
Viewing Photo Files
Viewing All Folders ...........................................40
Playing a slideshow ...........................................41
Browsing by Date, Quicklist, or Folder ........42
Searching for a Photo .......................................42
Programming a Slideshow Playback
(Quicklist)
.......................................................43
Changing the Initial Settings
Using the Setup Displays ................................44
Video Setup .........................................................45
Audio Setup .........................................................47
Language .............................................................49
Parental Control .................................................50
Speakers ...............................................................51
Options .................................................................52
Resetting the Player ..........................................53
Additional Information
Troubleshooting .................................................54
Self-Diagnosis Function ...................................57
Index to Parts and Controls ............................58
Front panel .........................................................58
Front panel display ............................................59
Rear panel .........................................................59
Glossary ...............................................................60
Specifications .....................................................61
Language Code List ..........................................62
Parental Control Country/Area Code List ...63
Index ......................................................................63
4
Page 5
About this manual
Instructions in this manual describe the controls on the remote.
You can also use the controls on the player if they have the same
or similar names as those on the remote.
The meanings of the icons used in this manual are described
below:
Icon Meaning
BD
DVD
DATA DVD
CD
* MP3 (MPEG-1 Audio Layer III) is a standard format defined by ISO
(International Organization for Standardization)/IEC (International
Electrotechnical Commission) MPEG which compresses audio data.
Note
The on-screen display illustrations used in this manual may not match
the graphics displayed on your TV screen.
Functions available for BD-ROMs
including DL discs.
Functions available for DVD VIDEOs and
DVD+RWs/DVD+Rs in +VR mode or
DVD-RWs/DVD-Rs in video mode,
including 8 cm discs.
Functions available for DATA DVDs
(DVD+RWs/DVD+Rs/DVD-RWs/DVDRs containing MPEG-2 PS movie files,
MP3* audio tracks, and JPEG image files).
Functions available for music CDs or CDRs/CD-RWs in music CD Format.
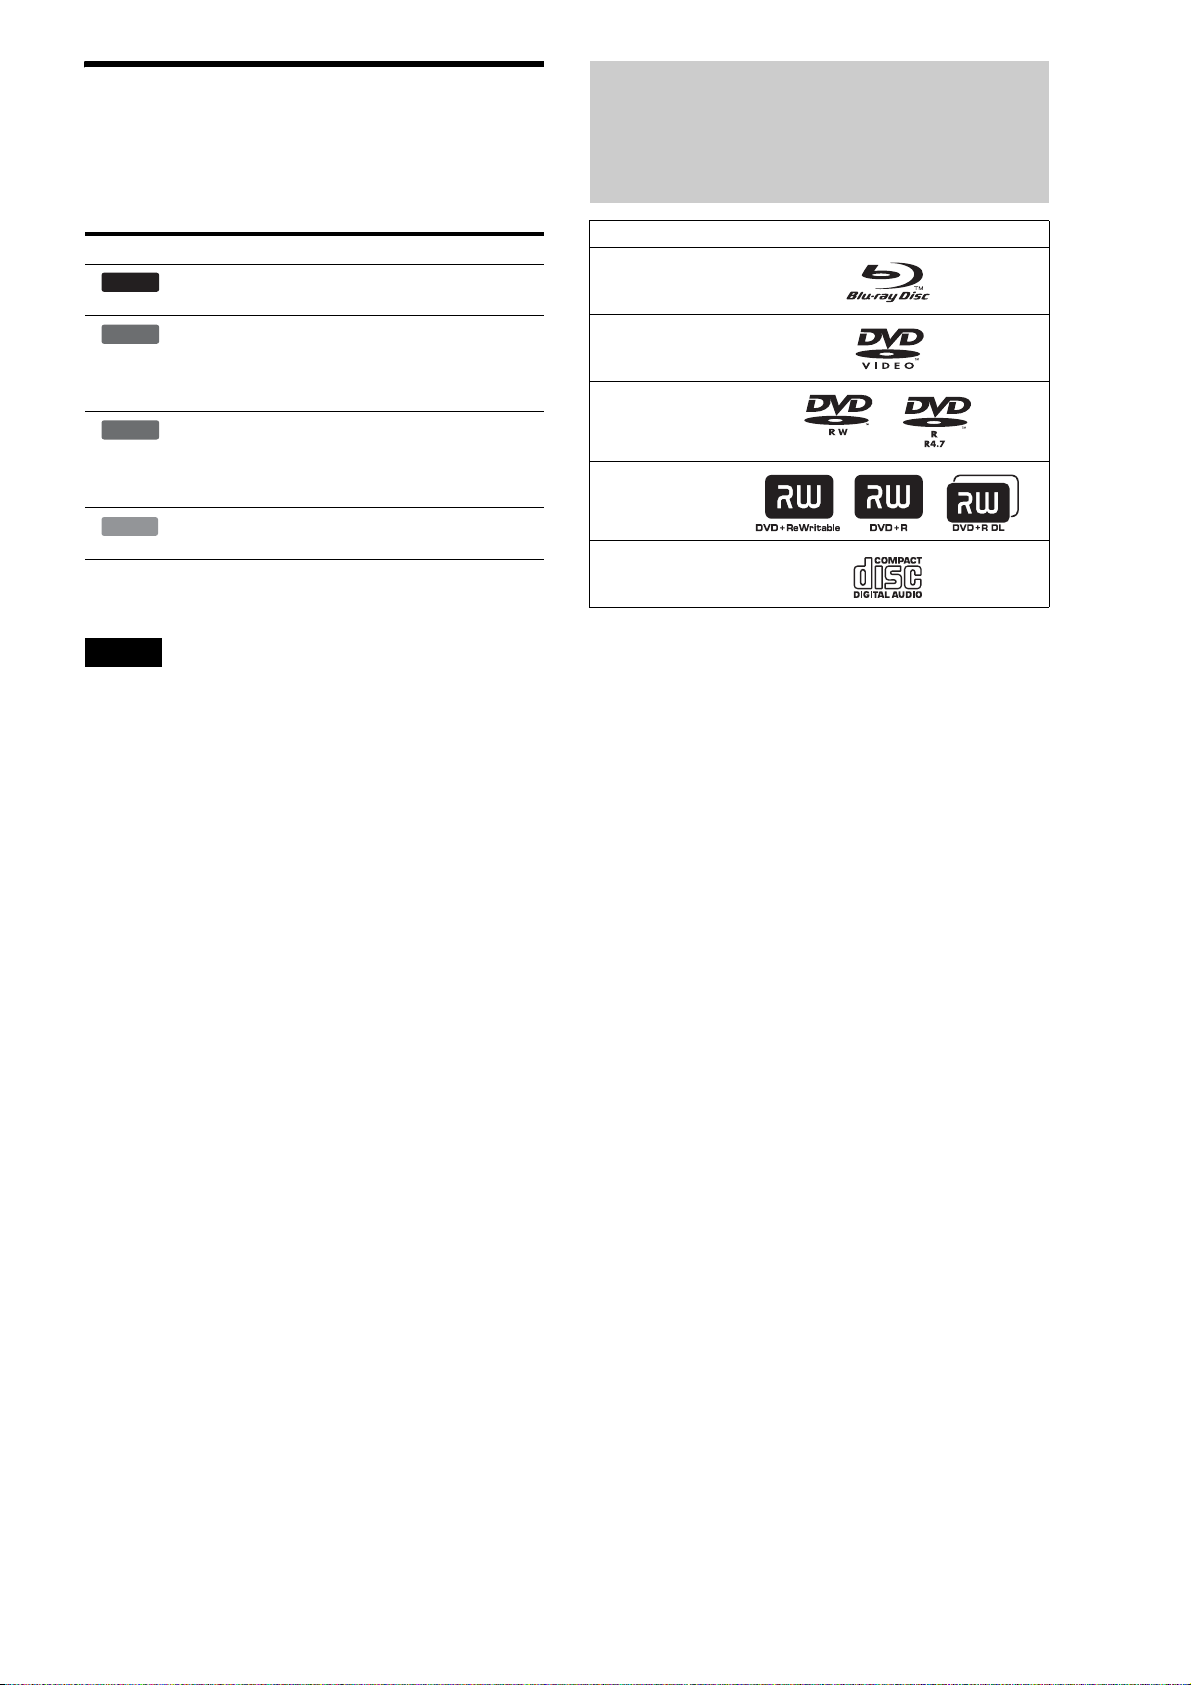
This Player Can Play the Following Discs and Files
Disc Format
Blu-ray Disc
DVD VIDEO
DVD-RW/-R
DVD+RW/+R
CD
“Blu-ray Disc” is a trademark.
“Blu-ray Disc,” “DVD+RW,” “DVD-RW,” “DVD+R,” “DVDR,” “DVD VIDEO,” and “CD” logos are trademarks.
Supported file formats (DATA DVD only)
DVD+RWs/DVD-RWs/DVD+Rs/DVD-Rs are called “DATA
DVD” in this manual when the discs contain playable files. The
following file formats are supported:
• MPEG-2 PS movie files.
• MP3 music files.
• JPEG* image files.
* JPEG format conforming to UDF (Universal Disk Format).
Notes about BD-ROM compatibility
This player supports BD-ROM Profile 1 only. Playback of later
versions and BDs other than BD-ROM is not guaranteed. Since
the Blu-ray Disc specifications are new and evolving, some discs
may not play depending on the disc type and the version.
The audio output differs depending on the source, connected
output jack, and selected audio settings. For details, see page 48.
,continued
5
Page 6

Examples of discs that the player
About playback of discs recorded in
cannot play
The player cannot play the following discs:
• BD-REs/BD-Rs.
• BDs with cartridge.
• DVD-RWs/DVD-Rs of VR mode.
• DVD-RAMs.
• HD DVDs.
• DVD Audio discs.
• DATA CDs (CD-Rs/CD-RWs other than music CD format).
• CD-ROMs recorded in PHOTO CD format.
• Data part of CD-Extras.
• VCDs/Super VCDs.
• HD layer on Super Audio CDs.
Also, the player cannot play the following discs:
• A BD-ROM/DVD VIDEO with a different region code.
• A disc that has a non-standard shape (e.g., card, heart).
• A disc with paper or stickers on it.
• A disc that has the adhesive of cellophane tape or a sticker still
left on it.
Notes
• Notes about DVD+RWs/DVD+Rs, DVD-RWs/DVD-Rs, or CD-Rs/
CD-RWs
Some DVD+RWs/DVD+Rs, DVD-RWs/DVD-Rs, or CD-Rs/
CD-RWs cannot be played on this player due to the recording
quality or physical condition of the disc, or the characteristics
of the recording device and authoring software.
The DVD disc will not play if it has not been correctly
finalized. For more information, refer to the operating
instructions for the recording device. Note that some playback
functions may not work with some DVD+RWs/DVD+Rs, even
if they have been correctly finalized. In this case, view the disc
by normal playback.
• Music discs encoded with copyright protection technologies
This product is designed to playback discs that conform to the
Compact Disc (CD) standard. Recently, various music discs
encoded with copyright protection technologies are being
marketed by some record companies. Please be aware that
among those discs, there are some that do not conform to the
CD standard and may not be playable by this product.
• Note on DualDiscs
A DualDisc is a two sided disc product which mates DVD
recorded material on one side with digital audio material on the
other side.
However, since the audio material side does not conform to the
Compact Disc (CD) standard, playback on this product is not
guaranteed.
• Note about double-layer DVDs
The playback pictures and sound may be momentarily
interrupted when the layers switch.
AVCHD format
This player can play AVCHD format discs.
TM
What is the AVCHD format?
The AVCHD format is a high definition digital video camera
format used to record SD (standard definition) or HD (high
definition) signals of either the 1080i specification*1 or the 720p
specification*
coding technology. The MPEG-4 AVC/H.264 format is adopted
to compress video data, and the Dolby Digital or Linear PCM
system is used to compress audio data. The MPEG-4 AVC/
H.264 format is capable of compressing images at higher
efficiency than that of the conventional image compressing
format. The MPEG-4 AVC/H.264 format enables a high
definition (HD) video signal shot on a digital video camera
recorder to be recorded on DVD discs, in the same way as it
would be for a standard definition (SD) television signal.
“AVCHD” and the AVCHD logo are trademarks of Matsushita Electric
Industrial Co., Ltd. and Sony Corporation.
1
*
A high definition specification which utilizes 1080 effective scanning
lines and the interlace system.
2
A high definition specification which utilizes 720 effective scanning
*
lines and the progressive system.
Notes
• Some AVCHD format discs may not play, depending on the recording
condition.
• The AVCHD format disc will not play if it has not been correctly
finalized.
2
on DVDs, using efficient data compression
6
Page 7
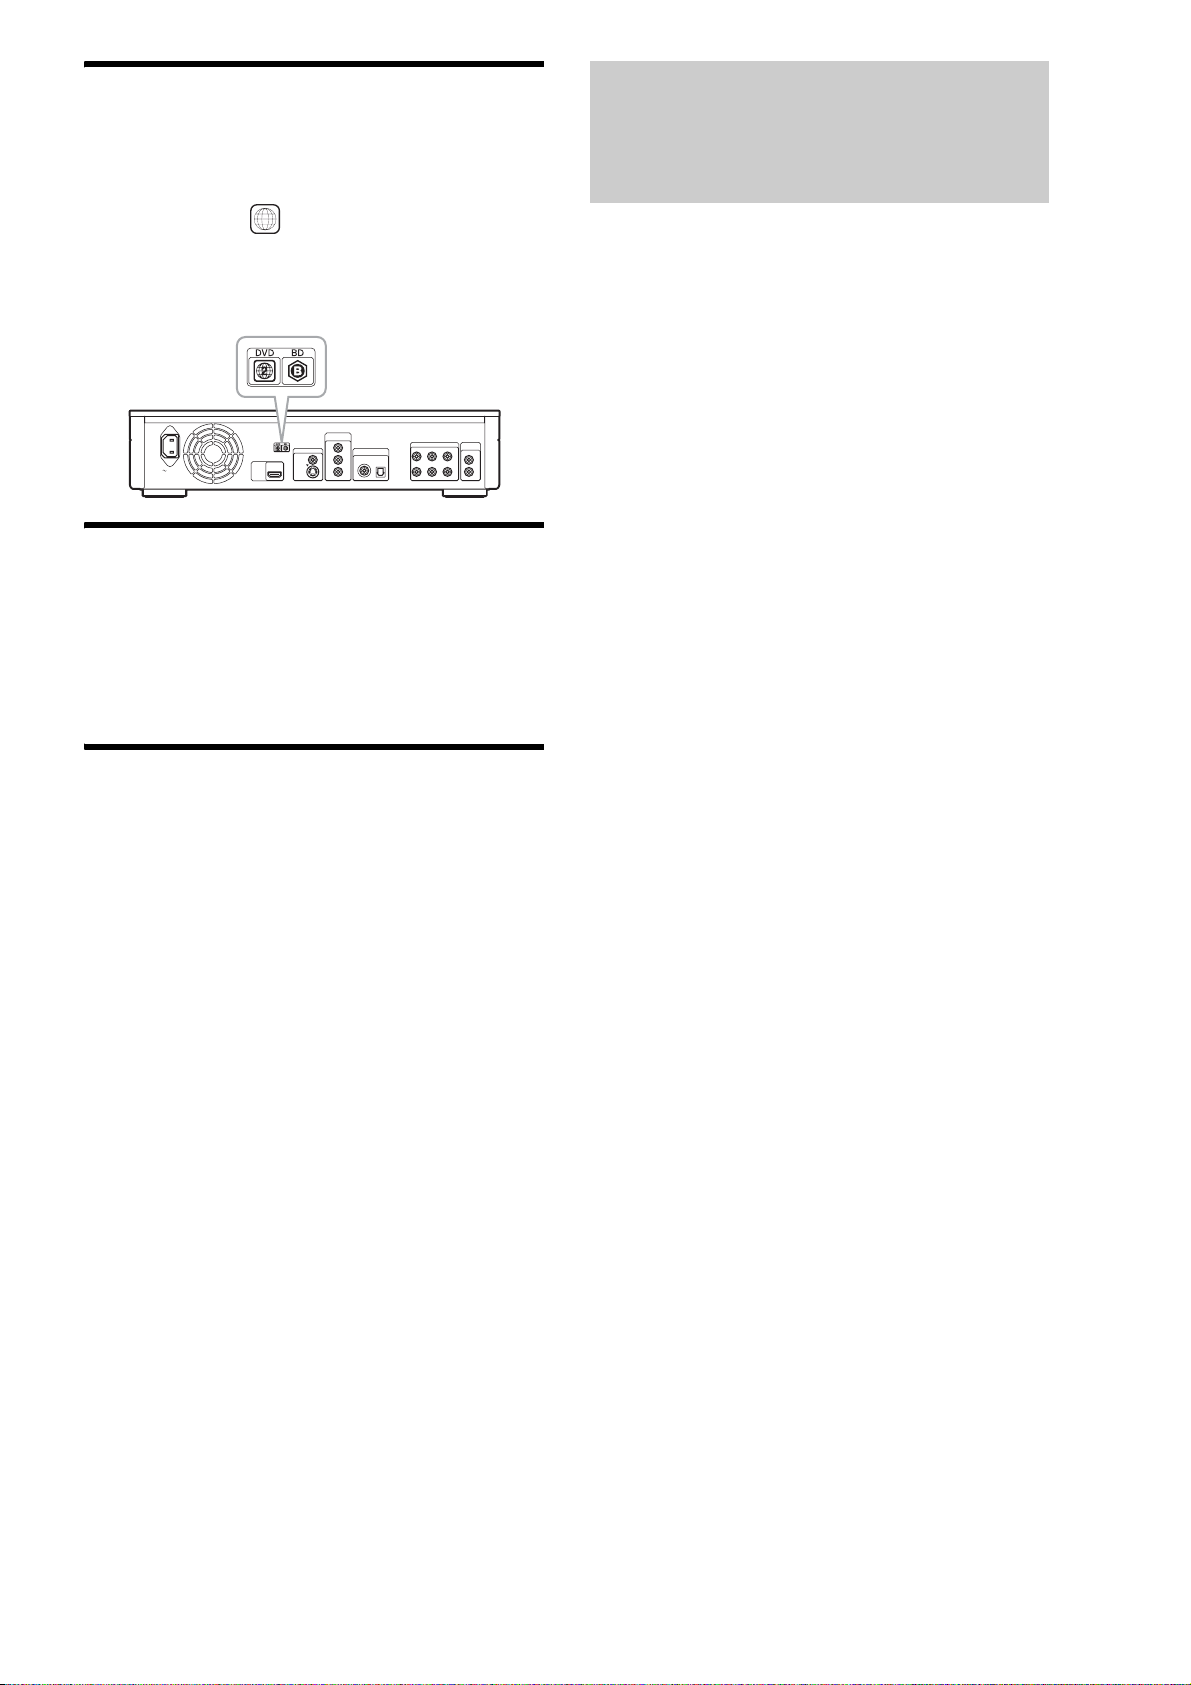
BD/DVD region code
Your player has a region code printed on the back of the unit and
only will play BD-ROM/DVD VIDEOs (playback only) labelled
with identical region codes. This system is used to protect
copyrights.
Main Features
DVD VIDEOs labelled will also play on this player.
ALL
Depending on the BD-ROM/DVD VIDEO, there may be no region
code indication, even though playing the BD-ROM/DVD VIDEO is
prohibited by area restrictions.
COMPONENT
VIDEO OUT
Y
VIDEO OUT
VIDEO
AC IN
HDMI
OUT
S VIDEO
DIGITAL OUT
PCM/DTS/DOLBY DIGITAL
COAXIAL OPTICAL
P
B/CB
P
R/CR
5.1CH OUTPUT
FRONT REAR CENTER
L
R
AUDIO
OUT
L
R
WOOFER
Note on playback operations of BDs/ DVDs
Some playback operations of BDs/DVDs may be intentionally
set by software producers. Since this player plays BDs/DVDs
according to the disc contents the software producers designed,
some playback features may not be available. Also, refer to the
instructions supplied with the BDs/DVDs.
Copyrights
This product incorporates copyright protection technology that
is protected by U.S. patents and other intellectual property rights.
Use of this copyright protection technology must be authorized
by Macrovision, and is intended for home and other limited
viewing uses only unless otherwise authorized by Macrovision.
Reverse engineering or disassembly is prohibited.
Experience the high definition (HD) quality audio/video output
and the library function of this Blu-ray Disc Player.
BD-ROM playback
BD-ROM is a next generation optical disc format in the HD era.
Featuring massive storage capacity of 25 to 50 GB (five times
larger than a DVD) and a high-speed transfer rate of up to 54
Mbps, the format offers not only uncompromised HD quality
1*2
video*
, but also enables rich bonus content on a single disc
and HD quality audio up to 8ch, and interactive operability.
*1A compatible HD display device is necessary to enjoy the same
quality.
2
Some discs allow viewing only with an HDMI connection.
*
24p True Cinema
Movies shot with a film camera consist of 24 frames per second.
Since conventional televisions (both CRT and flat panels)
display frames either at 1/60 or 1/50 second intervals, the 24
frames do not appear at an even pace.
When connected to a TV with 24p capabilities, the player
displays each frame at 1/24 second intervals — the same interval
originally shot with the film camera, thus faithfully reproducing
the original cinema image.
HDMI Control (‘BRAVIA’ Theatre Sync)
‘BRAVIA’ Theatre Sync Function makes operations simple by
connecting Sony components that are compatible with the
HDMI Control function with an HDMI cord (not supplied).
BD-J application
The BD-ROM format supports Java for interactive functions.
“BD-J” offers content providers almost unlimited functionality
when creating interactive BD-ROM titles*.
Java and all Java-based trademarks and logos are trademarks or
registered trademarks of Sun Microsystems, Inc. in the U.S. and
other countries.
Esmertec and Jbed are trademarks or registered trademarks of
Esmertec AG.
© 2000-2007 Esmertec AG
* This player does not support downloadable BD-J content.
Support of uncompressed multi-channel Linear
PCM
In combination with a compatible AV amplifier, the player can
output up to 8ch Linear PCM surround sound*. With a noncompatible amplifier, the player can output 5.1ch analog signals
from its 5.1CH OUTPUT jack for high quality audio enjoyment.
* Note that the DIGITAL OUT (COAXIAL or OPTICAL) jack does not
output 8ch signals. You will need an HDMI cord and an HDMIcompatible device that support 8ch signals.
AVCHD format disc playback
The player supports AVCHD format files–high definition
recordings made on AVCHD-compatible camcorders. Your high
definition personal archive is readily playable in HD quality.
,continued
7
Page 8

HDMI (High-Definition Multimedia Interface)
digital interface
When connected to an HDMI-equipped display device using a
single HDMI cord, the player can output both SD to HD video
and multi-channel audio signals, in digital form without
degradation.
The HDMI specification supports HDCP (High-bandwidth
Digital Content Protection), a copy protection technology that
incorporates coding technology for digital video signals.
Library function for recorded files (For JPEG
image, MP3 audio, MPEG-2 PS movie files
only)
With DATA DVDs created on other DVD devices, three
separate movie/music/photo Title List-browsers allow for easy
sorting, searching and playback including a slideshow.
8
Page 9

Step 1: Unpacking
Getting Started
Follow steps 1 to 7 to hook up and adjust the
settings of the player.
For jack and button names, see “Index to
Parts and Controls” (page 58).
Notes
• Plug cords securely to prevent unwanted noise.
• Refer to the instructions supplied with the components to
be connected.
• You cannot connect this player to a TV that does not have
a video input jack.
• Be sure to disconnect the mains lead of each component
before connecting.
• Do not apply too much pressure on the connecting cords.
Pushing against the cabinet wall, etc., may damage the
cord.
Check that you have the following items:
• Video cord (phono plug × 1) (1)
• Stereo audio cord (phono plug × 2) (1)
• Mains lead (1)
• Remote commander (remote) (1)
• R6 (size AA) batteries (2)
• GNU License Information (English only) (1)
Getting Started
• Step 1: Unpacking . . . . . . . . . . . . . . . . . . . . . . .9
• Step 2: Connecting the Video Cords/
HDMI Cord . . . . . . . . . . . . . . . . . . . . . . . . .10
• Step 3: Connecting the Audio Cords . . . . . . . . 12
• Step 4: Connecting the Mains Lead . . . . . . . . .16
• Step 5: Preparing the Remote . . . . . . . . . . . . .16
• Step 6: Easy Setup. . . . . . . . . . . . . . . . . . . . . .18
• Step 7: Additional Adjustments . . . . . . . . . . . .19
9
Page 10
Step 2: Connecting the Video Cords/HDMI Cord
Connect this player to your TV monitor, projector or AV
amplifier (receiver) using a video cord. Select one of the patterns
A through D, according to the input jack on your TV monitor,
projector or AV amplifier (receiver).
In order to view 1080p progressive signals with a compatible
TV, projector, or monitor with an HDMI input jack, you must
select pattern D. You can use pattern C to view 480p/576p/
720p progressive signals or 1080i interlace signals on a
compatible device with component video input jacks.
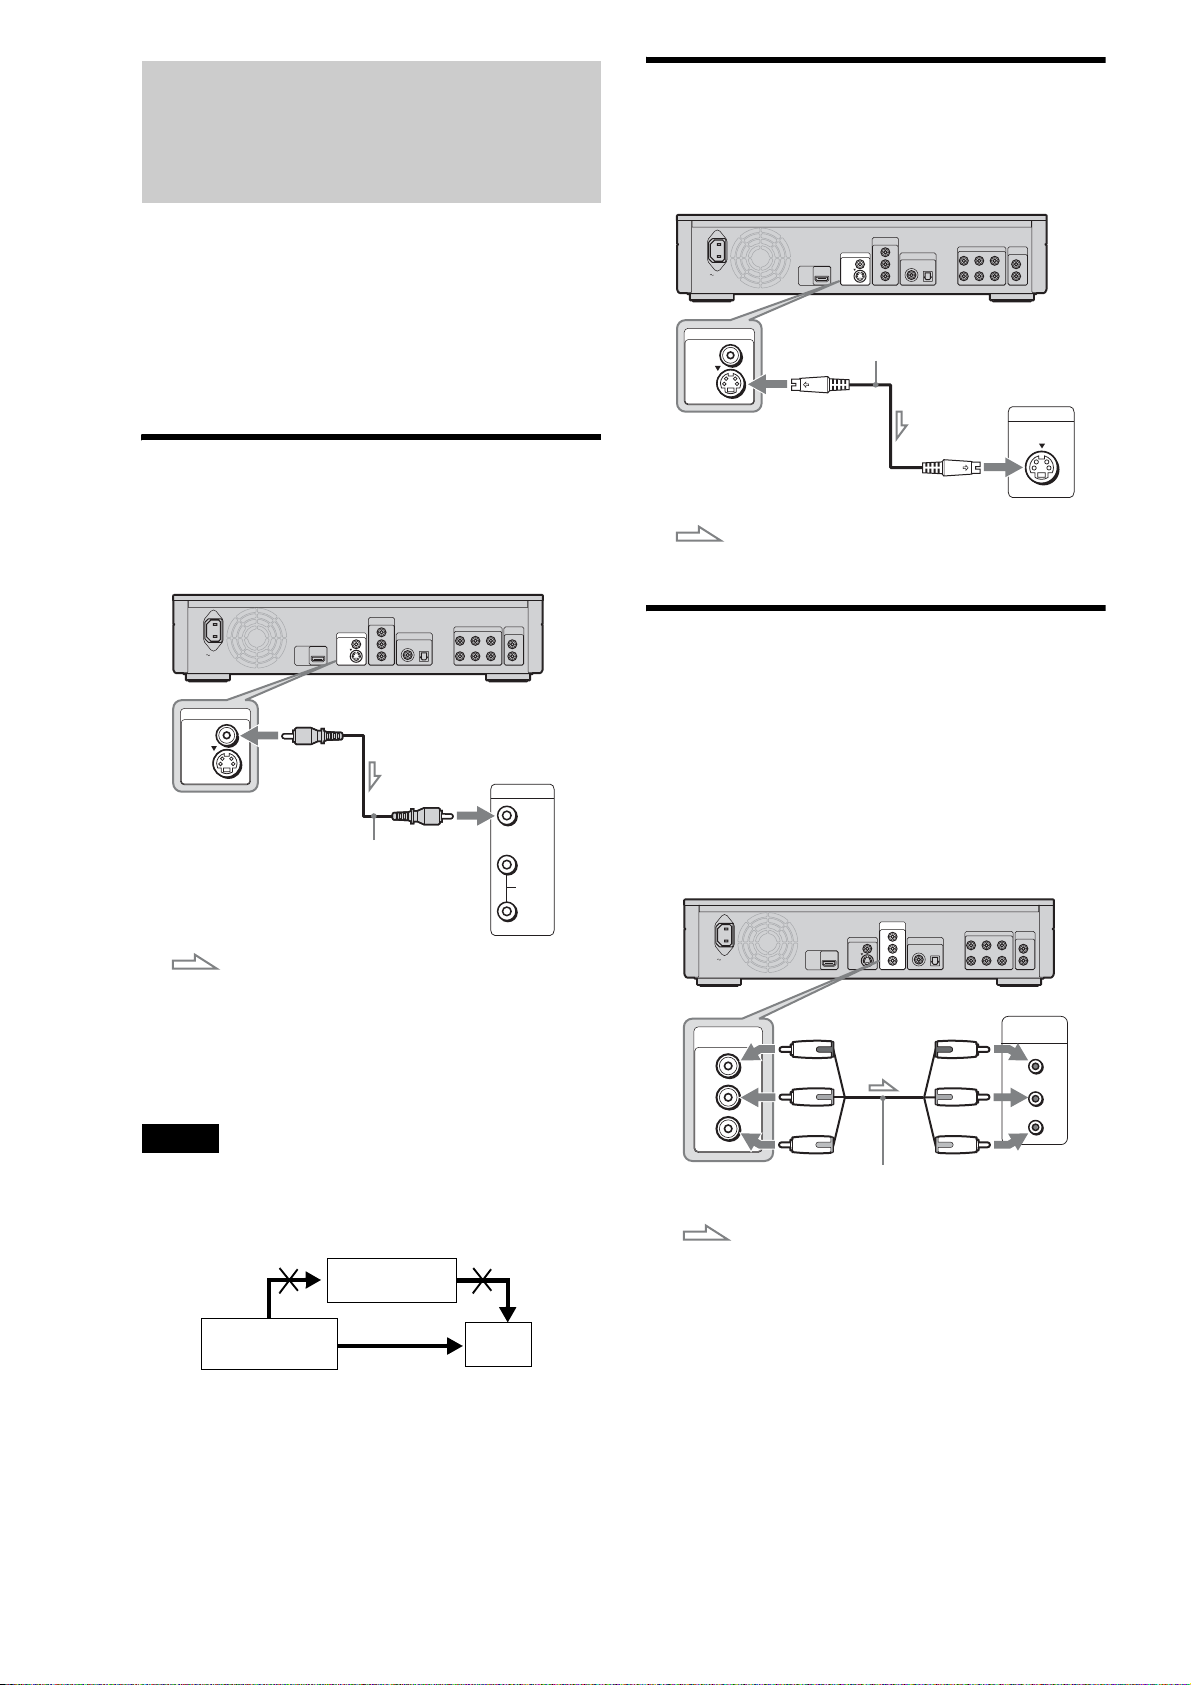
A Connecting to a video input jack
Connect the supplied video cord (yellow) to the yellow (video)
jack. You will enjoy standard quality images.
Blu-ray Disc player
COMPONENT
VIDEO OUT
Y
DIGITAL OUT
PCM/DTS/DOLBY DIGITAL
COAXIAL OPTICAL
P
B/CB
P
R/CR
VIDEO OUT
VIDEO
S VIDEO
AC IN
VIDEO OUT
VIDEO
HDMI
OUT
S VIDEO
to VIDEO OUT
(yellow)
(yellow)
Video cord (supplied)
: Signal flow
When connecting to a standard 4:3 screen TV
Depending on the disc, the image may not fit your TV screen. To
change the aspect ratio, see page 45.
Note
Do not connect a VCR, etc., between your TV and the player. If you pass
the player signals via the VCR, you may not receive a clear image on the
TV screen. If your TV has only one audio/video input jack, connect the
player to this jack.
5.1CH OUTPUT
AUDIO
OUT
FRONT REAR CENTER
L
L
R
R
WOOFER
INPUT
VIDEO
L
AUDIO
R
TV, projector, or AV
amplifier (receiver)
B Connecting to an S VIDEO input jack
Connect using an S VIDEO cord (not supplied). You will enjoy
high quality images.
Blu-ray Disc player
COMPONENT
VIDEO OUT
VIDEO
S VIDEO
AC IN
: Signal flow
VIDEO OUT
Y
VIDEO OUT
VIDEO
HDMI
OUT
S VIDEO
DIGITAL OUT
PCM/DTS/DOLBY DIGITAL
COAXIAL OPTICAL
P
B/CB
P
R/CR
to S VIDEO
S VIDEO cord (not supplied)
5.1CH OUTPUT
AUDIO
OUT
FRONT REAR CENTER
L
L
R
R
WOOFER
INPUT
S VIDEO
TV, projector, or AV
amplifier (receiver)
C Connecting to component video
input jacks (Y, P
Connect the component via the COMPONENT VIDEO OUT jacks
using a component video cord (not supplied) or three video cords
(not supplied) of the same kind and length. You will enjoy accurate
colour reproduction and high quality images. You can also enjoy
higher quality pictures from 480p/576p/720p progressive signals or
1080i interlace signals, if your TV, projector or AV amplifier
(receiver) is compatible.
AC IN
COMPONENT
VIDEO OUT
Y
P
B
/
C
B
P
R
/
C
R
(green)
(blue)
(red)
: Signal flow
B/CB, PR/CR)
COMPONENT
VIDEO OUT
Y
VIDEO OUT
P
B/CB
VIDEO
HDMI
OUT
P
R/CR
S VIDEO
to COMPONENT
VIDEO OUT
Component video
cord (not supplied)
Blu-ray Disc player
PCM/DTS/DOLBY DIGITAL
COAXIAL OPTICAL
L
R
5.1CH OUTPUT
FRONT REAR CENTER
DIGITAL OUT
(green)
(blue)
(red)
TV, projector, or AV
amplifier (receiver)
AUDIO
OUT
L
R
WOOFER
COMPONENT
VIDEO IN
Y
P
B/CB
P
R/CR
10
Blu-ray Disc player
VCR
TV
Connect
directly
Page 11
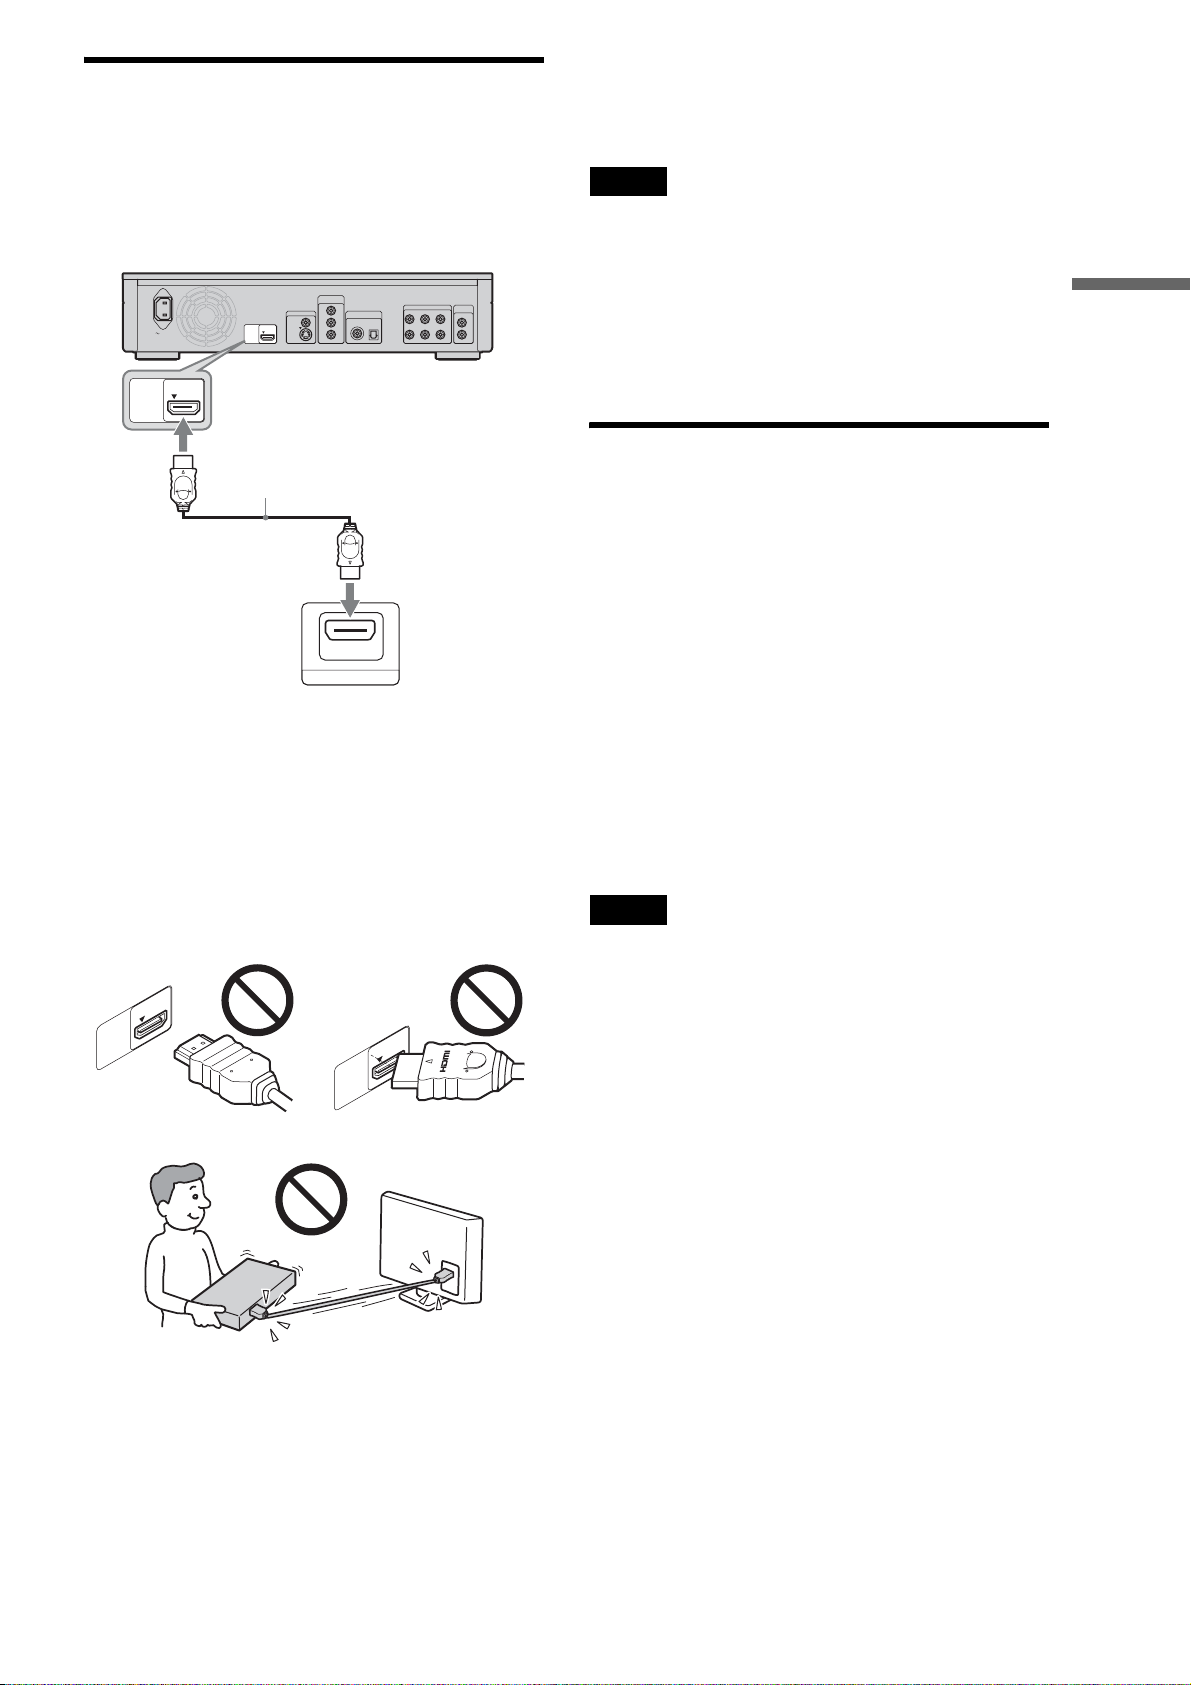
D Connecting to an HDMI input jack
Use a certified Sony HDMI cord (not supplied) to enjoy high
quality digital pictures and sound through the HDMI OUT jack.
You will enjoy higher quality pictures from 480p/576p/1080i, or
1080p (highest among the player output), if your TV, projector
or AV amplifier (receiver) is compatible.
Blu-ray Disc player
COMPONENT
VIDEO OUT
Y
DIGITAL OUT
PCM/DTS/DOLBY DIGITAL
COAXIAL OPTICAL
P
B/CB
P
R/CR
HDMI
OUT
AC IN
VIDEO OUT
VIDEO
HDMI
OUT
S VIDEO
to HDMI OUT
HDMI cord (not supplied)
HDMI IN
This Blu-ray Disc player incorporates High-Definition
Multimedia Interface (HDMI™) technology. HDMI, the HDMI
logo and High-Definition Multimedia Interface are trademarks
or registered trademarks of HDMI Licensing LLC.
Notes on connecting to the HDMI OUT jack
Observe the following as improper handling may damage the
HDMI OUT jack and the connector.
• Carefully align the HDMI OUT jack on the back of the player
and the HDMI connector by checking their shapes. Make sure
the connector is not upside down or tilted.
5.1CH OUTPUT
AUDIO
OUT
FRONT REAR CENTER
L
L
R
R
WOOFER
TV, projector, or AV
amplifier (receiver)
About indicators for HDMI connection
After the player is turned on, the HD indicator on the front panel
lights up when outputting 720p/1080i/1080p video signals. The
HDMI indicator lights up when an HDMI device is connected.
Notes
• Consumers should note that not all high definition television sets are
fully compatible with this product and may cause artifacts to be
displayed in the picture. In the case of 480/576/720/1080 progressive
scan picture problems, it is recommended that the user switch the
connection to the ‘standard definition’ output. If there are questions
regarding our TV set compatibility with this model 480p/576p/720p/
1080p Blu-ray Disc player, please contact our customer service centre.
• If the picture is not clear, natural, or to your satisfaction, change the
video output resolution by pressing VIDEO FORMAT (page 46).
• Be sure to use only an HDMI cord that bears the HDMI logo.
About the ‘BRAVIA’ Theatre Sync features (for HDMI connections only)
By connecting Sony components that are compatible with the
HDMI Control function with an HDMI cord (not supplied),
operation is simplified as below:
• One-Touch Play (page 21)
You can turn on the player and TV/AV receiver, set the TV/AV
receiver’s input to the player, and start playback with one touch
of the H button.
• System Power-Off
When you turn the TV off by using the POWER button on the
TV’s remote, the HDMI compatible components turn off
automatically.
To prepare for the ‘BRAVIA’ Theatre Sync
features
Set “HDMI Control” of “Options” setup to “On” (page 52).
Note
Depending on the connected component, the HDMI Control function
may not work. Refer to the operating instructions supplied with the
component.
Getting Started
HDMI
OUT
I
HDM
UT
O
• Be sure to disconnect the HDMI cord when moving the player.
• If you place the player on the cabinet with the HDMI cord
connected, do not apply too much pressure to the cabinet wall.
It may damage the HDMI OUT jack or the HDMI cord.
• When connecting or disconnecting, do not screw in or rotate
the HDMI connector.
11
Page 12
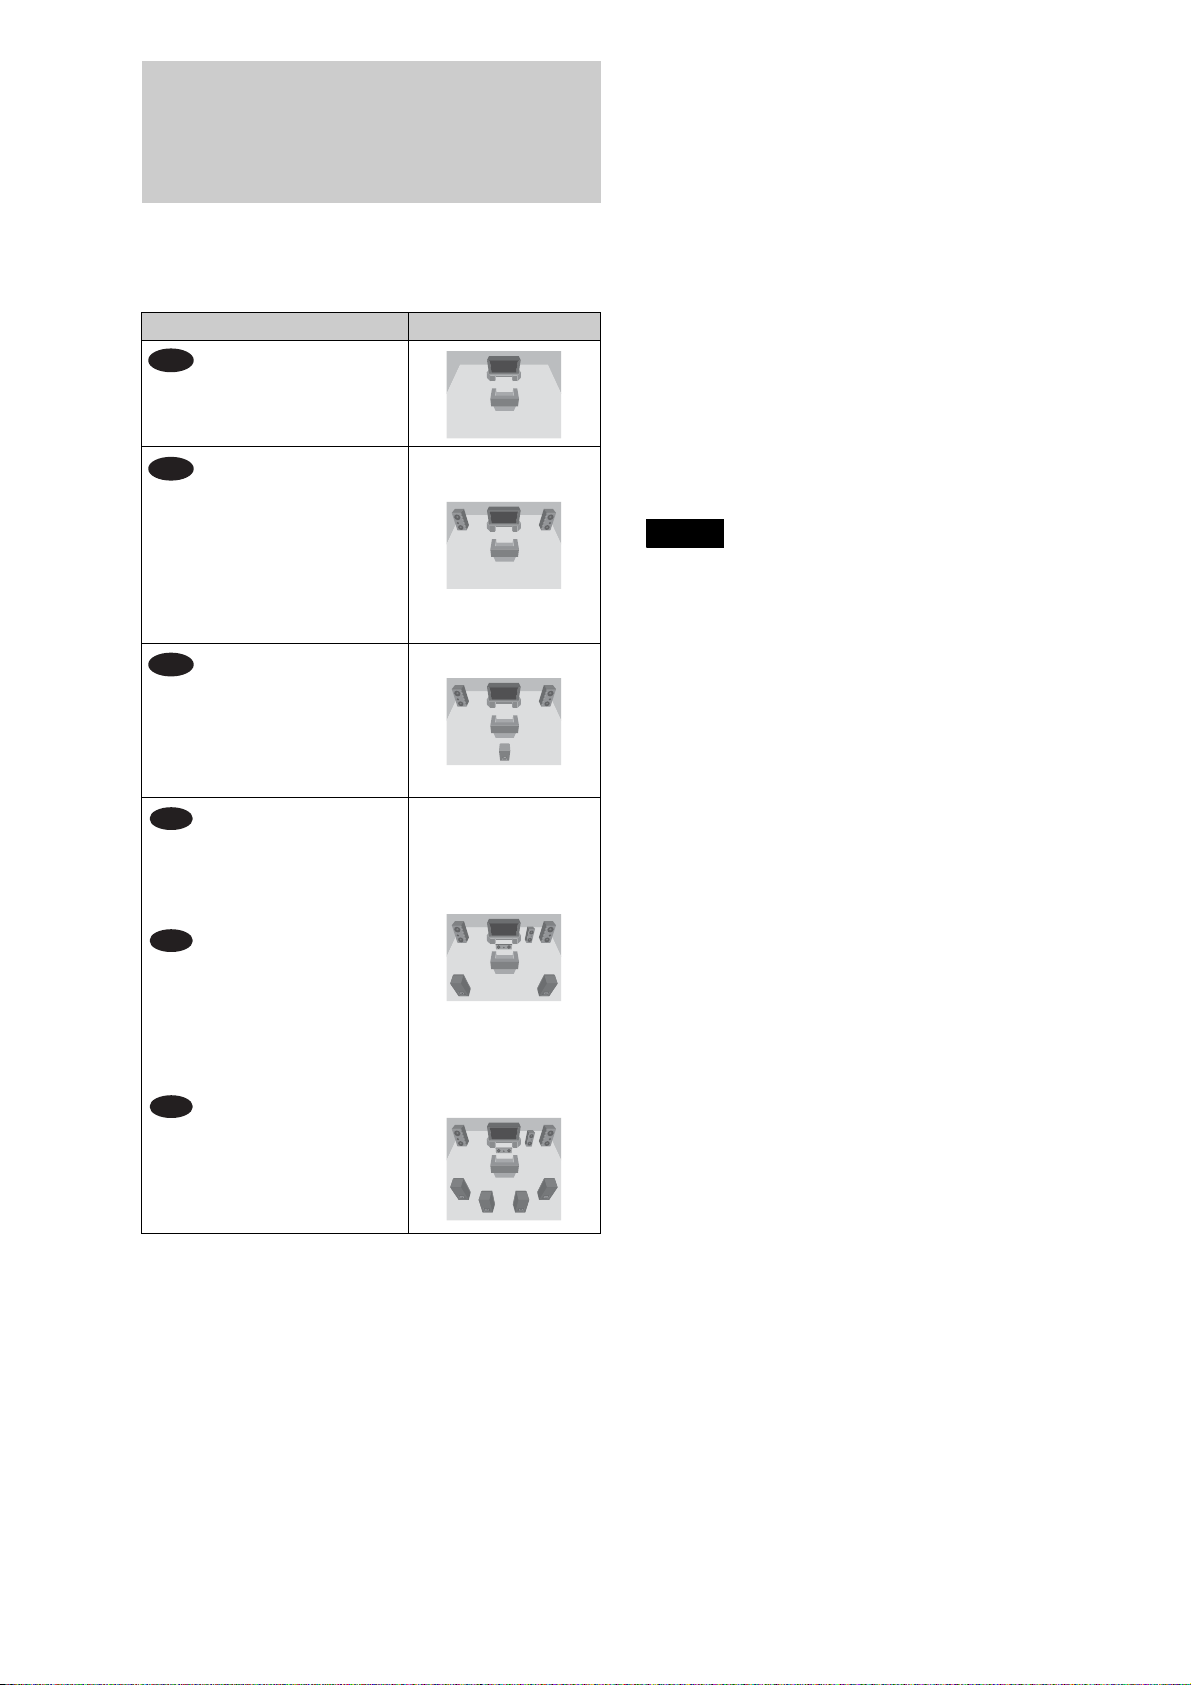
Step 3: Connecting the Audio Cords
Select the connection that best suits your system. Be sure to read
the instructions for the components you wish to connect.
Connection Your setup
A
TV
B
Stereo amplifier (receiver) and
two speakers
Notes about the HDMI OUT jack
• When you connect the player to an AV amplifier (receiver)
using an HDMI cord, you will need to do one of the following:
– Connect the AV amplifier (receiver) to a TV with the HDMI
cord.
– Connect the player to the TV with a video cord other than an
HDMI cord (component video cord, S VIDEO cord, or video
cord).
• When connecting to the HDMI OUT jack, carefully align the
HDMI connector with the jack. Do not bend or apply pressure
to the HDMI cord.
• If you change the component connected to the HDMI OUT
jack, change “Audio (HDMI)” in “Audio Setup” to match the
new component (page 47). The player stores the HDMI related
settings for up to five components.
• The HDMI connection is compatible with 2ch Linear PCM
signals (48 to 192 kHz, 16/20/24 bit), and 6 to 8ch Linear PCM
signals (48 to 96 kHz, 16/20/24 bit), in addition to Dolby
Digital and DTS bit stream (5.1ch signals up to 96 kHz, 16/20/
24bit).
Note
If you connect a component that does not conform to the selected audio
signal, a loud noise (or no sound) will come out from the speakers, which
could damage your ears or speakers.
C
AV amplifier (receiver) having a
*1
Dolby
decoder and 3 to 6 speakers
• Surround effects: Dolby Surround
AV amplifier (receiver) with
5.1ch input jacks and 6 speakers
• Surround effects: Dolby Digital
AV amplifier (receiver) with a
digital input jack having a Dolby
Digital or DTS
speakers
• Surround effects: Dolby Digital
AV amplifier (receiver) with an
HDMI input jack and 8 speakers
• Surround effects: 8ch Linear
Surround (Pro Logic)
(Pro Logic)
D-1
(5.1ch), DTS (5.1ch)
D-2
*2
decoder and 6
(5.1ch), DTS (5.1ch)
D-3
PCM
12
*1
Manufactured under license from Dolby laboratories.
“Dolby,” “Pro Logic,” and the double-D symbol are trademarks of
Dolby Laboratories.
*2
“DTS” and “DTS Digital Surround” are registered trademarks of
DTS, Inc.
Page 13
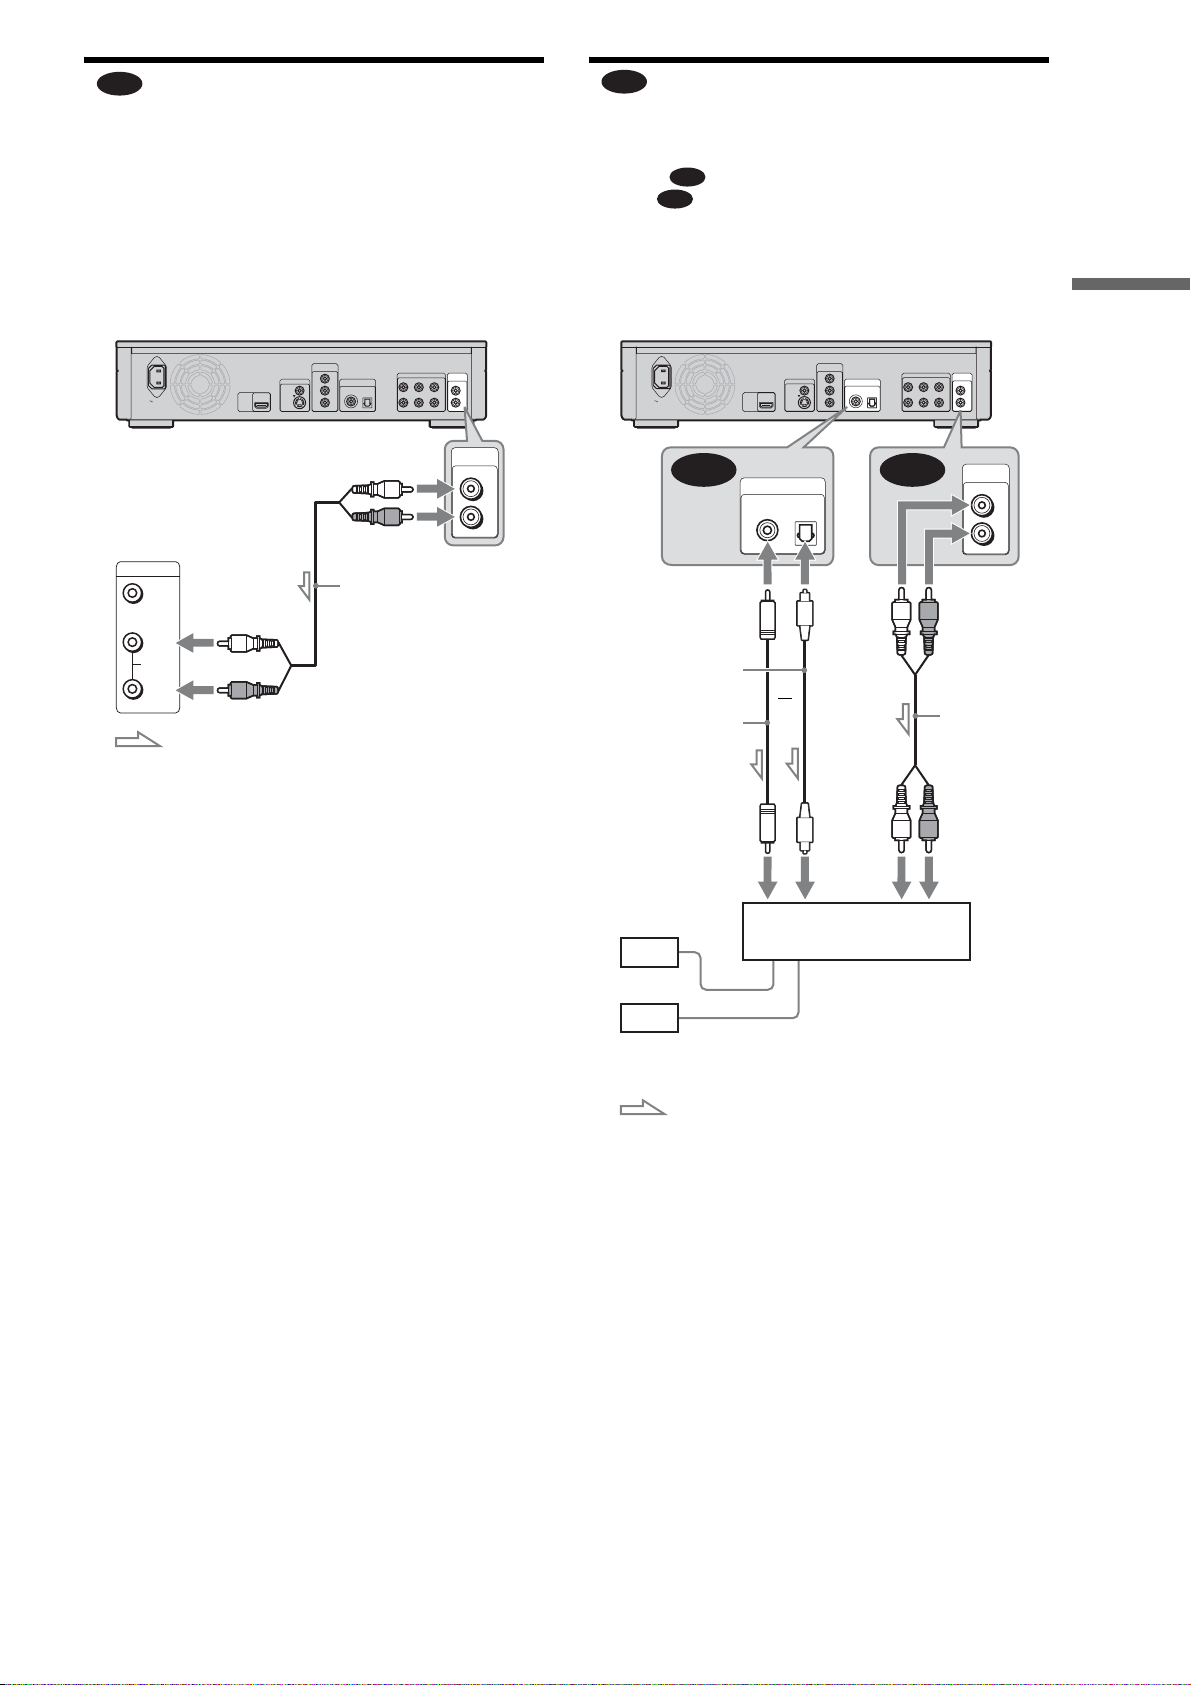
A
Connecting to your TV
This connection will use your TV’s speakers for sound.
B
Connecting to a stereo amplifier
(receiver) and 2 speakers
If your stereo amplifier (receiver) only has audio input jacks L
and R, use . If your amplifier (receiver) has a digital input
jack, use .
B-1
B-2
Getting Started
TV
AC IN
INPUT
VIDEO
L
AUDIO
R
(white)
(red)
: Signal flow
VIDEO OUT
Y
B/CB
R/CR
DIGITAL OUT
PCM/DTS/DOLBY DIGITAL
COAXIAL OPTICAL
Blu-ray Disc player
5.1CH OUTPUT
AUDIO
OUT
FRONT REAR CENTER
L
L
R
R
WOOFER
AUDIO
OUT
to AUDIO OUT
L/R
(red)(white)
Stereo audio
cord (supplied)
L
R
Blu-ray Disc player
S VIDEO
VIDEO OUT
VIDEO
COMPONENT
P
P
COMPONENT
VIDEO OUT
Y
VIDEO OUT
VIDEO
HDMI
OUT
S VIDEO
DIGITAL OUT
PCM/DTS/DOLBY DIGITAL
COAXIAL OPTICAL
P
B/CB
P
R/CR
to AUDIO OUT L/R
FRONT REAR CENTER
(white)
5.1CH OUTPUT
L
R
AUDIO
OUT
L
R
WOOFER
AUDIO
OUT
L
R
AC IN
B-2 B-1
HDMI
OUT
DIGITAL OUT
PCM/DTS/DOLBY DIGITAL
COAXIAL OPTICAL
(red)
Stereo audio cord
(supplied)
to DIGITAL OUT
(COAXIAL or OPTICAL)
Optical digital cord
(not supplied)
or
Coaxial digital cord
(not supplied)
(white) (red)
to coaxial or optical
digital input
to audio input
[Speakers]
Front (L)
Front (R)
Stereo amplifier (receiver)
: Signal flow
,continued
13
Page 14
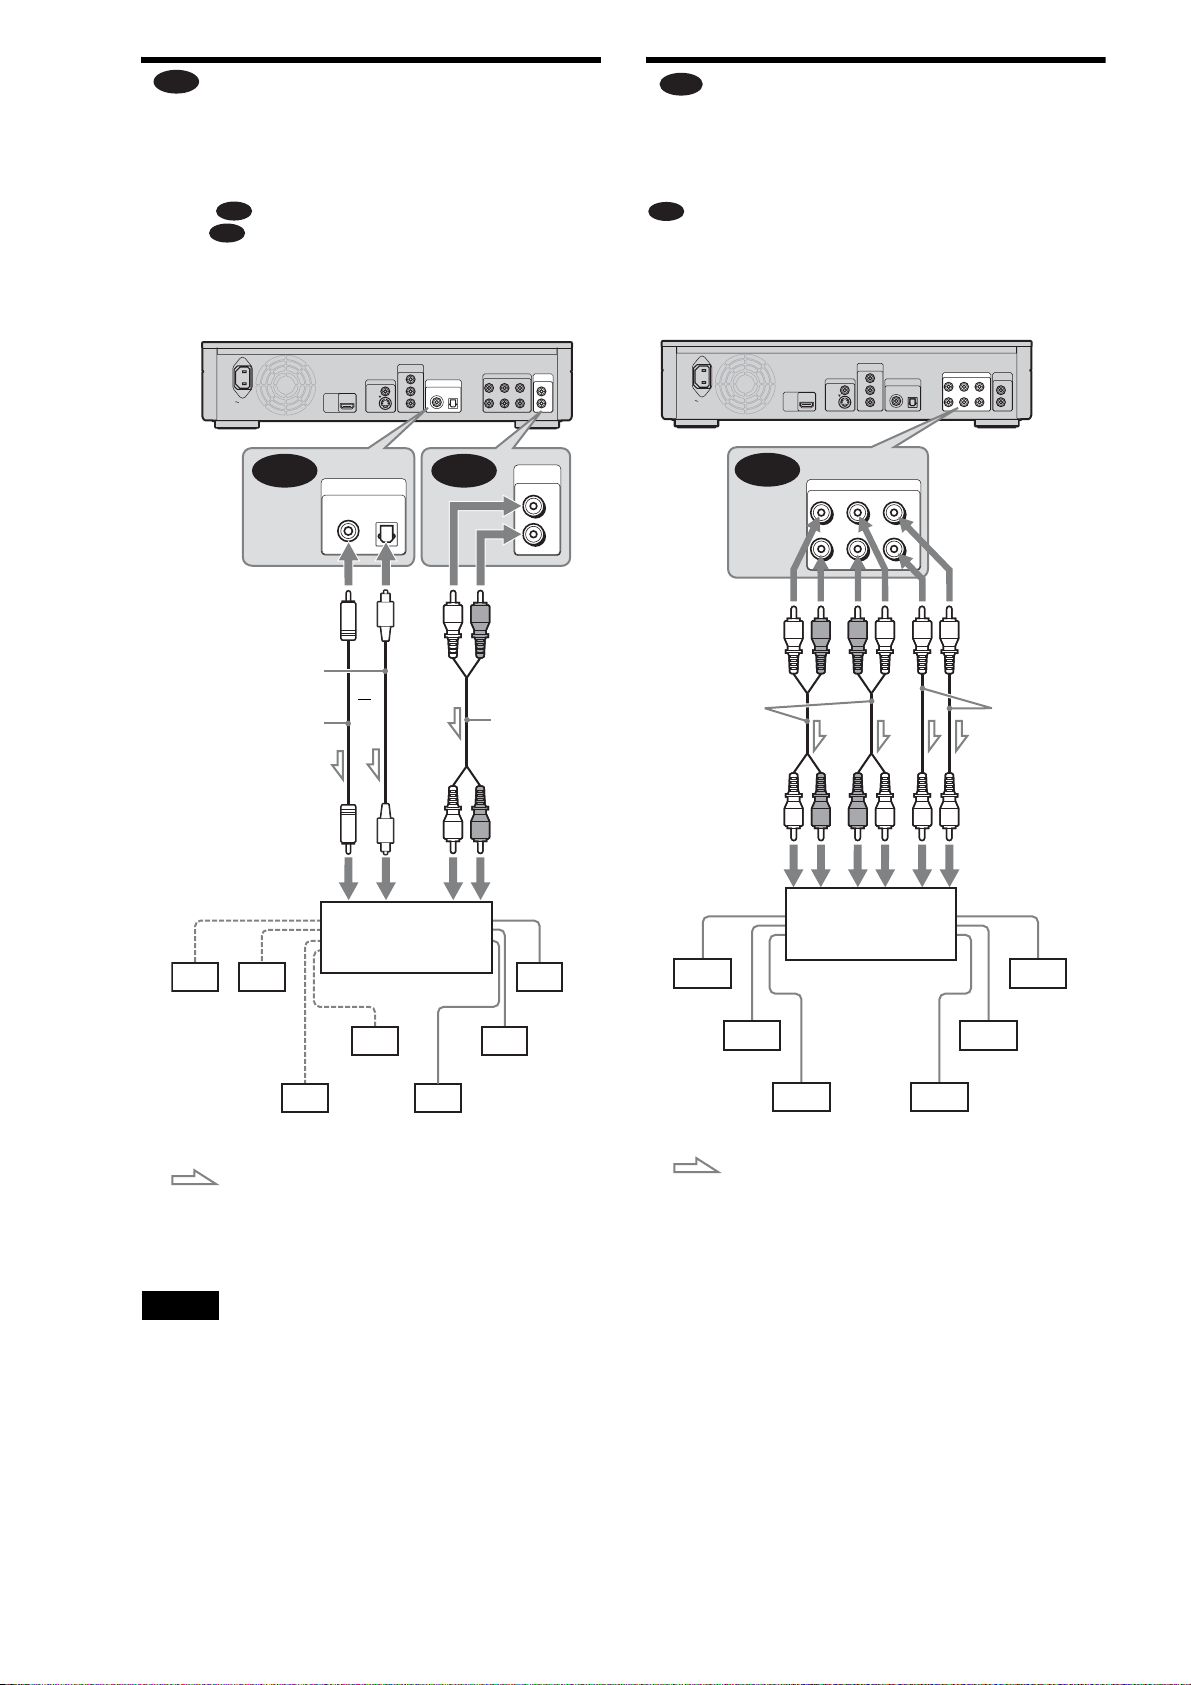
C
Connecting to an AV amplifier
D-1
Connecting to an AV amplifier (receiver) having a Dolby Surround (Pro Logic) decoder and 3 to 6 speakers
If your AV amplifier (receiver) only has L and R audio input
jacks, use . If your amplifier (receiver) has a digital input
jack, use .
You can enjoy surround effects only when playing Dolby
Surround audio or multi-channel audio (Dolby Digital or DTS)
discs.
C-1
C-2
AC IN
C-2 C-1
to DIGITAL OUT
(COAXIAL or OPTICAL)
Optical digital cord
(not supplied)
Coaxial digital cord
(not supplied)
VIDEO OUT
VIDEO
HDMI
OUT
S VIDEO
DIGITAL OUT
PCM/DTS/DOLBY DIGITAL
COAXIAL OPTICAL
or
COMPONENT
VIDEO OUT
Y
P
B/CB
P
R/CR
DIGITAL OUT
PCM/DTS/DOLBY DIGITAL
COAXIAL OPTICAL
Blu-ray Disc player
5.1CH OUTPUT
AUDIO
OUT
FRONT REAR CENTER
L
L
R
R
WOOFER
AUDIO
OUT
L
R
to AUDIO OUT
L/R
(red)(white)
Stereo audio
cord (supplied)
(receiver) with 5.1ch input jacks and 6
speakers
If your AV amplifier (receiver) has 5.1 channel inputs, use
.
D-1
Blu-ray Disc player
COMPONENT
AC IN
to 5.1CH
OUTPUT
Stereo audio
cord (one is
supplied)
D-1
VIDEO OUT
VIDEO
HDMI
OUT
S VIDEO
5.1CH OUTPUT
FRONT REAR CENTER
L
R
VIDEO OUT
Y
P
B/CB
P
R/CR
DIGITAL OUT
PCM/DTS/DOLBY DIGITAL
COAXIAL OPTICAL
WOOFER
5.1CH OUTPUT
FRONT REAR CENTER
L
R
AUDIO
OUT
L
R
WOOFER
Monaural
audio cord
(not supplied)
(red)(white)
to coaxial or optical
digital input
[Speakers] [Speakers]
AV Amplifier
to audio input
(receiver) with a
decoder
Rear (L) Rear (R)
Subwoofer
Centre
Rear (mono)
Front (R)
Front (L)
: Signal flow
Hint
z
For correct speaker location, see the operating instructions of the
connected components.
Note
When connecting 6 speakers, you do not need the “Rear (mono)” speaker
above.
to audio input
[Speakers] [Speakers]
AV amplifier
(receiver) with
5.1ch inputs
Rear (L)
Rear (R)
Centre
Front (R)
Subwoofer Front (L)
: Signal flow
Hint
z
For correct speaker location, see the operating instructions of the
connected components.
14
Page 15
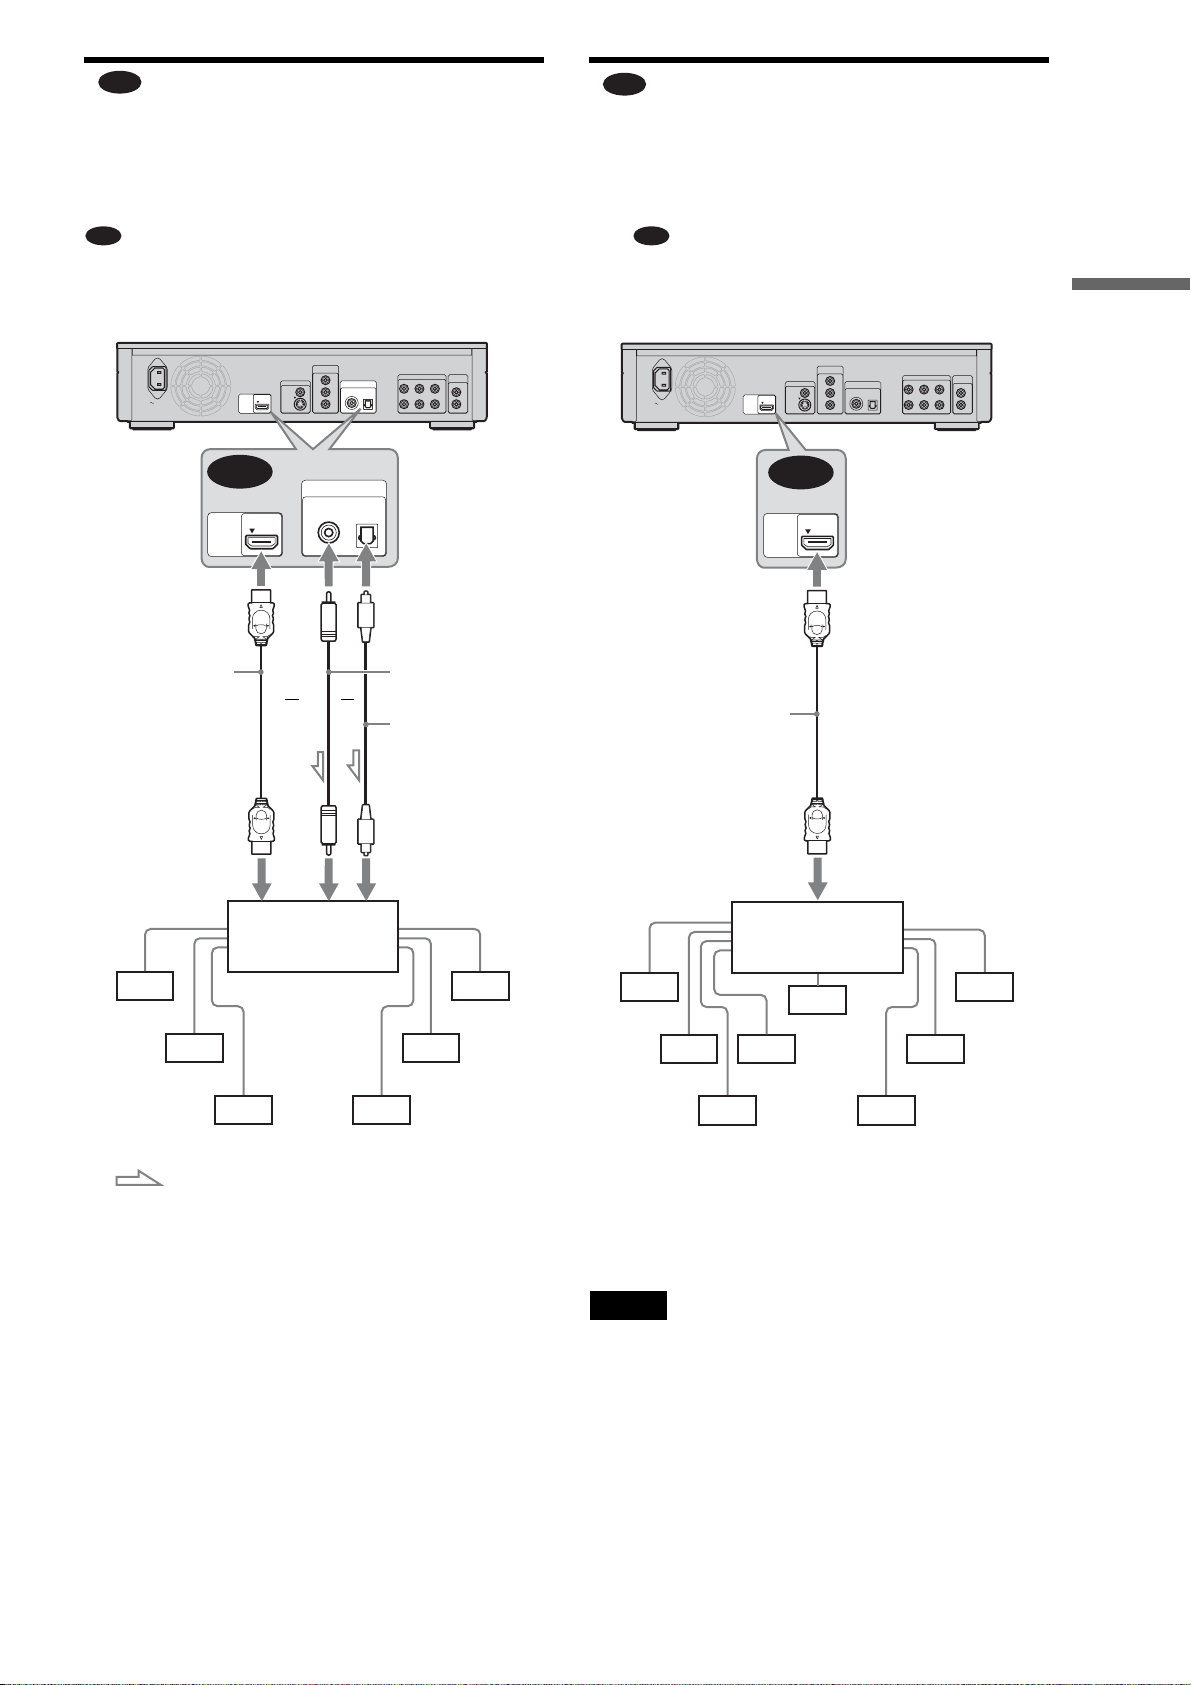
D-2
Connecting to an AV amplifier
D-3
Connecting to an AV amplifier (receiver) with a digital input jack and 6 speakers
If you want to use the Dolby Digital, or DTS decoder function
on your AV amplifier (receiver), connect to its digital jack using
. You can enjoy a more realistic audio presence.
D-2
Blu-ray Disc player
COMPONENT
AC IN
D-2
HDMI
OUT
to HDMI OUT
HDMI cord
(not supplied)
VIDEO OUT
Y
VIDEO OUT
VIDEO
HDMI
OUT
S VIDEO
or
DIGITAL OUT
PCM/DTS/DOLBY DIGITAL
COAXIAL OPTICAL
P
B/CB
P
R/CR
DIGITAL OUT
PCM/DTS/DOLBY DIGITAL
COAXIAL OPTICAL
or
5.1CH OUTPUT
AUDIO
OUT
FRONT REAR CENTER
L
L
R
R
WOOFER
to DIGITAL OUT
(COAXIAL
or OPTICAL)
Coaxial digital cord
(not supplied)
Optical digital cord
(not supplied)
(receiver) with an HDMI input jack and
8 speakers
If your AV amplifier (receiver) accepts 8ch Linear PCM input
with an HDMI connection, you can enjoy the surround sound
using .
D-3
Blu-ray Disc player
COMPONENT
AC IN
HDMI
OUT
HDMI
OUT
to HDMI OUT
HDMI cord
(not supplied)
VIDEO OUT
VIDEO
S VIDEO
D-3
P
P
VIDEO OUT
Y
B/CB
R/CR
DIGITAL OUT
PCM/DTS/DOLBY DIGITAL
COAXIAL OPTICAL
5.1CH OUTPUT
FRONT REAR CENTER
L
R
AUDIO
OUT
L
R
WOOFER
Getting Started
to HDMI input
to coaxial or optical
digital input
[Speakers] [Speakers]
AV amplifier
(receiver) having a
decoder
Rear (L)
Rear (R)
Subwoofer
Front (L)
Centre
Front (R)
: Signal flow
z Hint
For correct speaker location, see the operating instructions of the
connected components.
to HDMI input
[Speakers] [Speakers]
AV amplifier
(receiver) with 8ch
outputs
z
Hint
Rear1 (L)
Rear1 (R)
Rear2 (R)
Rear2 (L)
Subwoofer
Front (L)
Centre
Front (R)
For correct speaker location, see the operating instructions of the
connected components.
Note
Not all HDMI-compatible AV amplifiers (receivers) accept 8ch Linear
PCM signals. See also the operating instructions supplied with the
connected AV amplifier (receiver).
15
Page 16
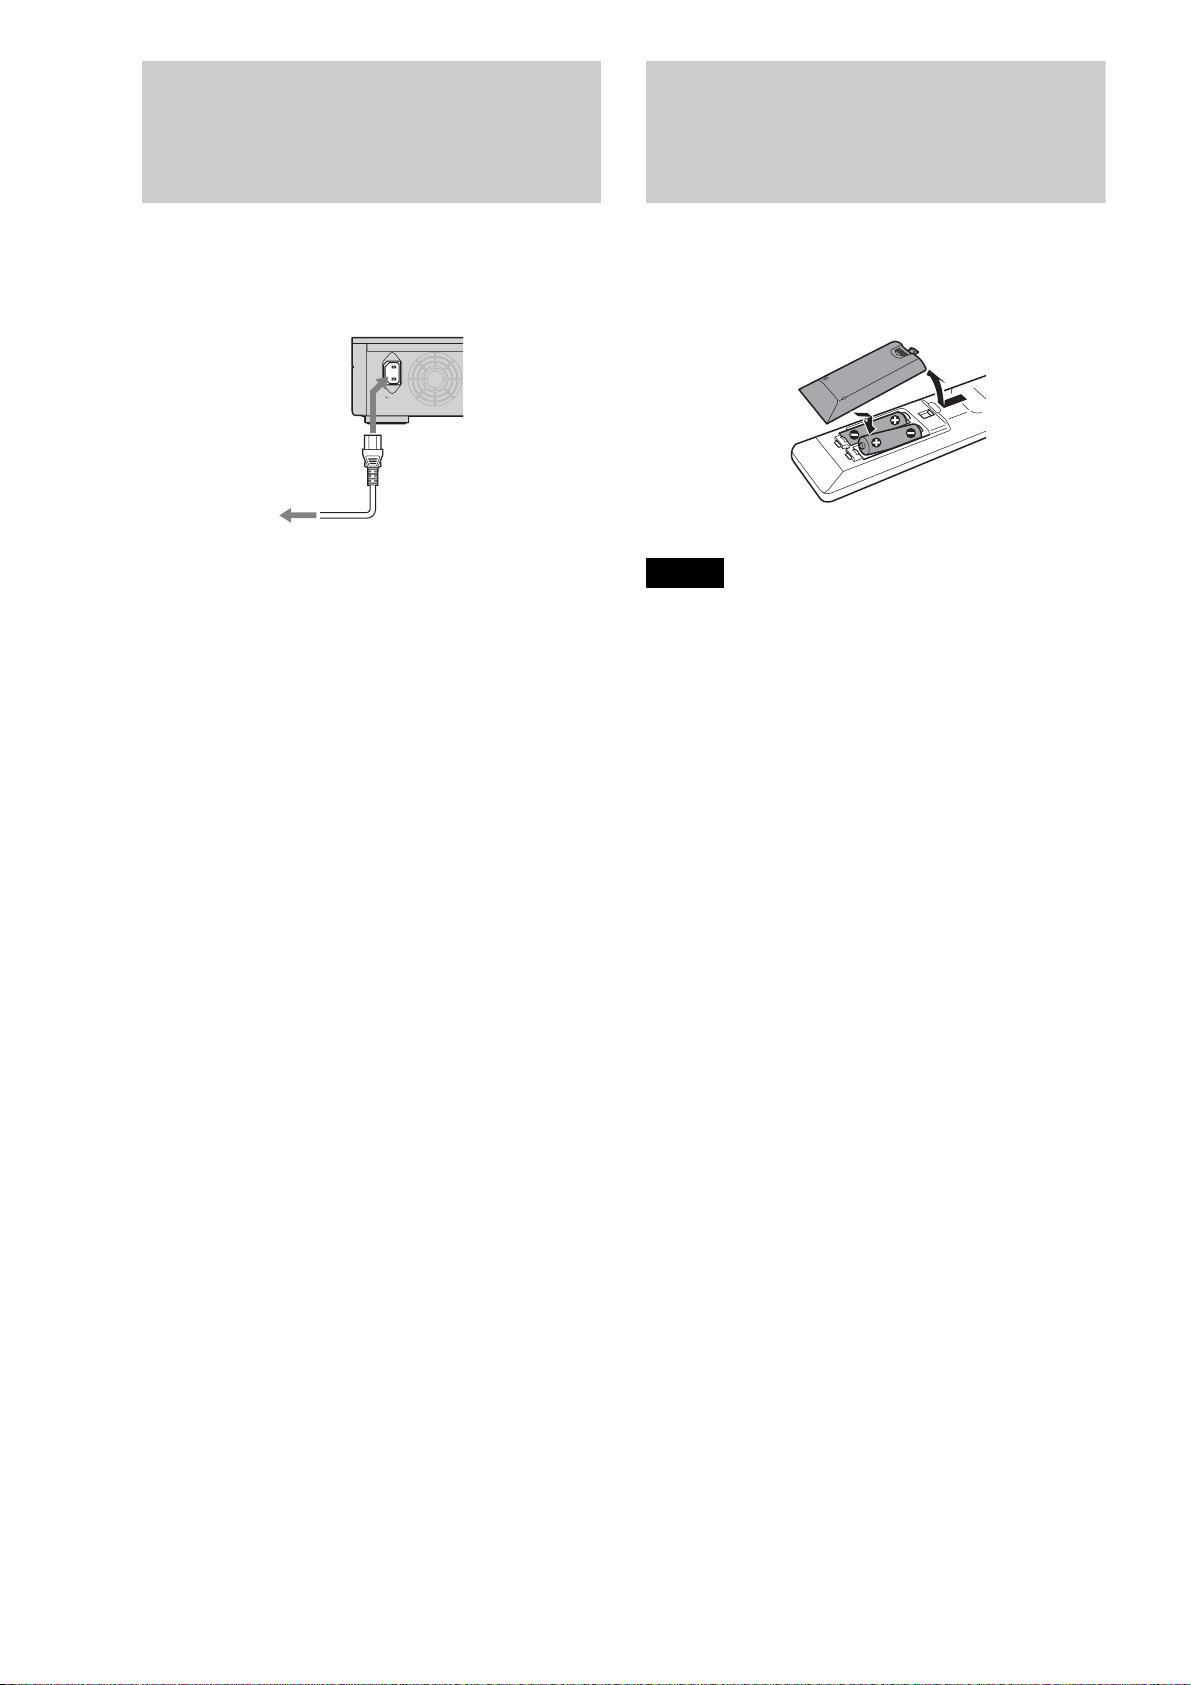
Step 4: Connecting the
Step 5: Preparing the
Mains Lead
After all of the other connections are complete, connect the
supplied mains lead to the AC IN terminal of the player. Then
plug the player and TV mains lead (power cords) into the mains.
AC IN
to AC IN
to mains
Remote
You can control the player using the supplied remote. Insert two
R6 (size AA) batteries by matching the 3 and # ends on the
batteries to the markings inside the battery compartment. When
using the remote, point it at the remote sensor on the player
(page 58).
Notes
• Do not leave the remote in an extremely hot or humid place.
• Do not drop any foreign object into the remote casing, particularly
when replacing the batteries.
• Do not expose the remote sensor to direct sunlight or a lighting
apparatus. Doing so may cause a malfunction.
• If you do not use the remote for an extended period of time, remove the
batteries to avoid possible damage from battery leakage and corrosion.
16
Page 17
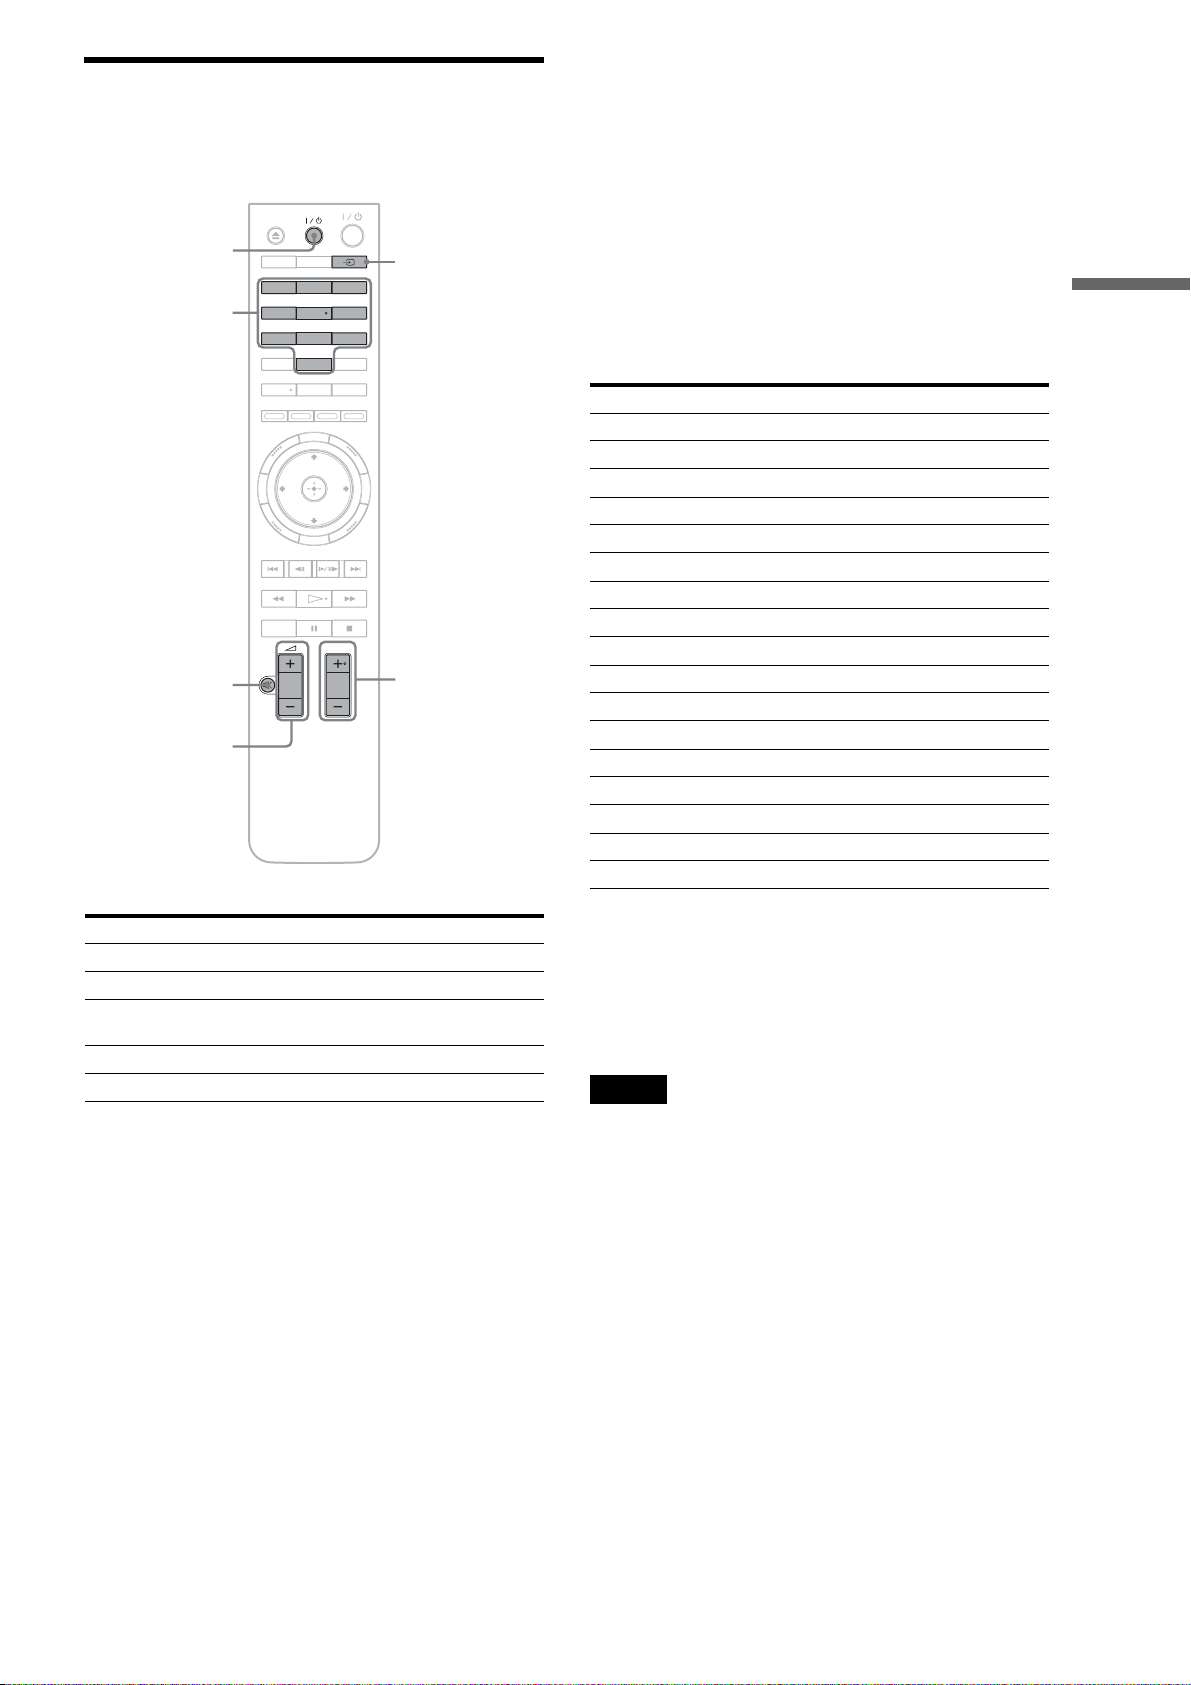
If you want to control your TV with the supplied remote
You can control the volume, input source, and power switch of
your Sony TV with the supplied remote.
TV
TV \/1
Number
buttons
%
2 +/–
DISPLAYDIMMER
123
456
7809
CLEAR
AUDIO SUBTITLE
RED
GREEN
YELLOW
SYSTEM
MENU
RETURN
PLAY MODE
PROG
VIDEO
FORMAT
ANGLE
BLUE
TOP
MENU
POP UP/
MENU
t
PROG +/–
To control other TVs with the remote
You can control the volume, input source, and power switch of nonSony TVs as well.
If your TV is listed in the table below, set the appropriate
manufacturer’s code.
1 While holding down TV [/1, press the number
buttons to select your TV manufacturer’s code
(see the table below).
2 Release TV [/1.
◆Code numbers of controllable TVs
If more than one code number is listed, try entering them one at
a time until you find the one that works with your TV.
Manufacturer Code number
Sony 01 (default)
Aiwa 01
Grundig 11
Hitachi 23, 24, 72
Loewe 06, 45
Nokia 15, 16, 69, 73
Panasonic 17, 49
Philips 06, 07, 08, 23, 45, 72
Saba 12, 13, 36, 43, 74, 75
Samsung 06, 22, 23, 71, 72
Sanyo 25
Sharp 29
Telefunken 12, 13, 36, 43, 74, 75
Thomson 12, 13, 43, 74, 75
Toshiba 38
LG 06
JVC 33
Getting Started
By pressing You can
TV [/1 Turn the TV on or off.
2 +/– Adjust the volume of the TV.
t Switch the TV’s input source between the
TV and other input sources.
PROG +/– Select the channel up and down.
% Mute the sound (for Sony TV only).
◆To return the remote to its default settings
1 Remove the batteries from the remote.
2 Re-insert the batteries while pressing down 1, 2,
and 3 of the number buttons.
3 Wait for a few seconds.
Note
Depending on the connected unit, you may not be able to control your
TV using all or some of the buttons on the supplied remote.
17
Page 18
Step 6: Easy Setup
Follow the steps below to make the minimum number of basic
adjustments for using the player. If you do not complete Easy
Setup, it will appear each time you turn on your player.
Make the settings below in the following order.
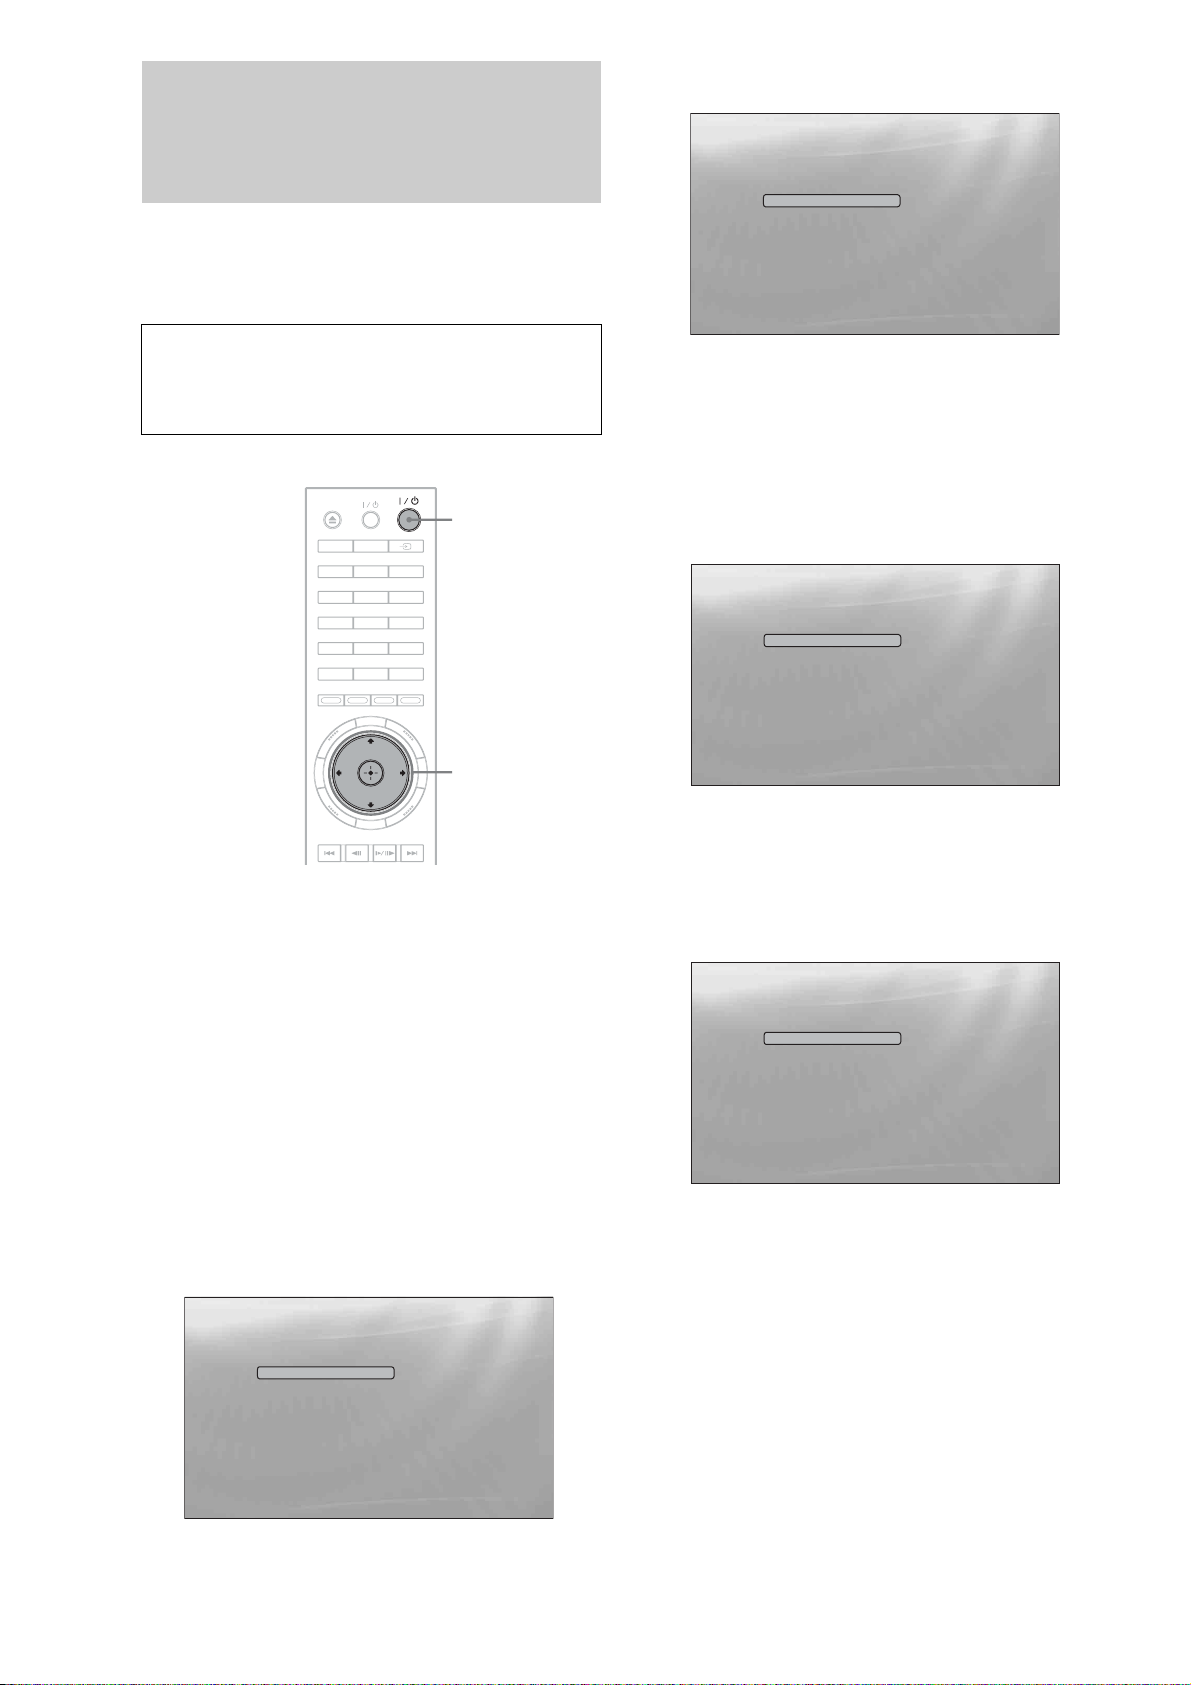
e Select “Start,” and press ENTER to start
“Easy Setup.”
Easy Setup
Before using, make some simple
settings for the BD player.
Start
Cancel
Please use the Initial Setup if you
want to make more detailed settings.
Use to select then press ENTER.
Confirm Exit
SYSTEM MENU
When turned on for the first time
Wait about 90 seconds before the player turns on and starts
Easy Setup. The start-up time will be much shorter once Easy
Setup is completed.
TV
"/1
DIMMER
DISPLAY
123
456
7809
CLEAR
AUDIO SUBTITLE
RED
SYSTEM
MENU
RETURN
GREEN
YELLOW
VIDEO
FORMAT
ANGLE
BLUE
TOP
MENU
POP UP/
MENU
</M/m/,,
ENTER
a Turn on the TV.
◆If the above display does not appear
Go to step 6. This display appears only when the player is turned
on for the first time.
f Select the video output format for the
connected TV, and press ENTER.
For details about the video output, see page 46.
◆ When using the HDMI OUT jack
Easy Setup
Output Video Format
Auto
576i/480i
576p/480p
720p
1080i
1080p
Source Direct
Select [Auto] to automatically match the video output
format with the HDMI-connected TV.
Select from “Auto,” “576i/480i,” “576p/480p,”
“720p,” “1080i,” “1080p,” or “Source Direct,”
then go to step 8. “TV Type” in step 7 will be set
to “16:9” (wide screen).
◆ When using the jacks other than the HDMI OUT
jack
Confirm Exit
SYSTEM MENU
b Press [/1 to turn on the player.
The player turns on after a moment.
c Switch the input selector on your TV so that
the signal from the player appears on your
TV screen.
If the display for OSD language selection does not
appear, select “Start” of “Easy Setup” in “Options”
Setup (page 52).
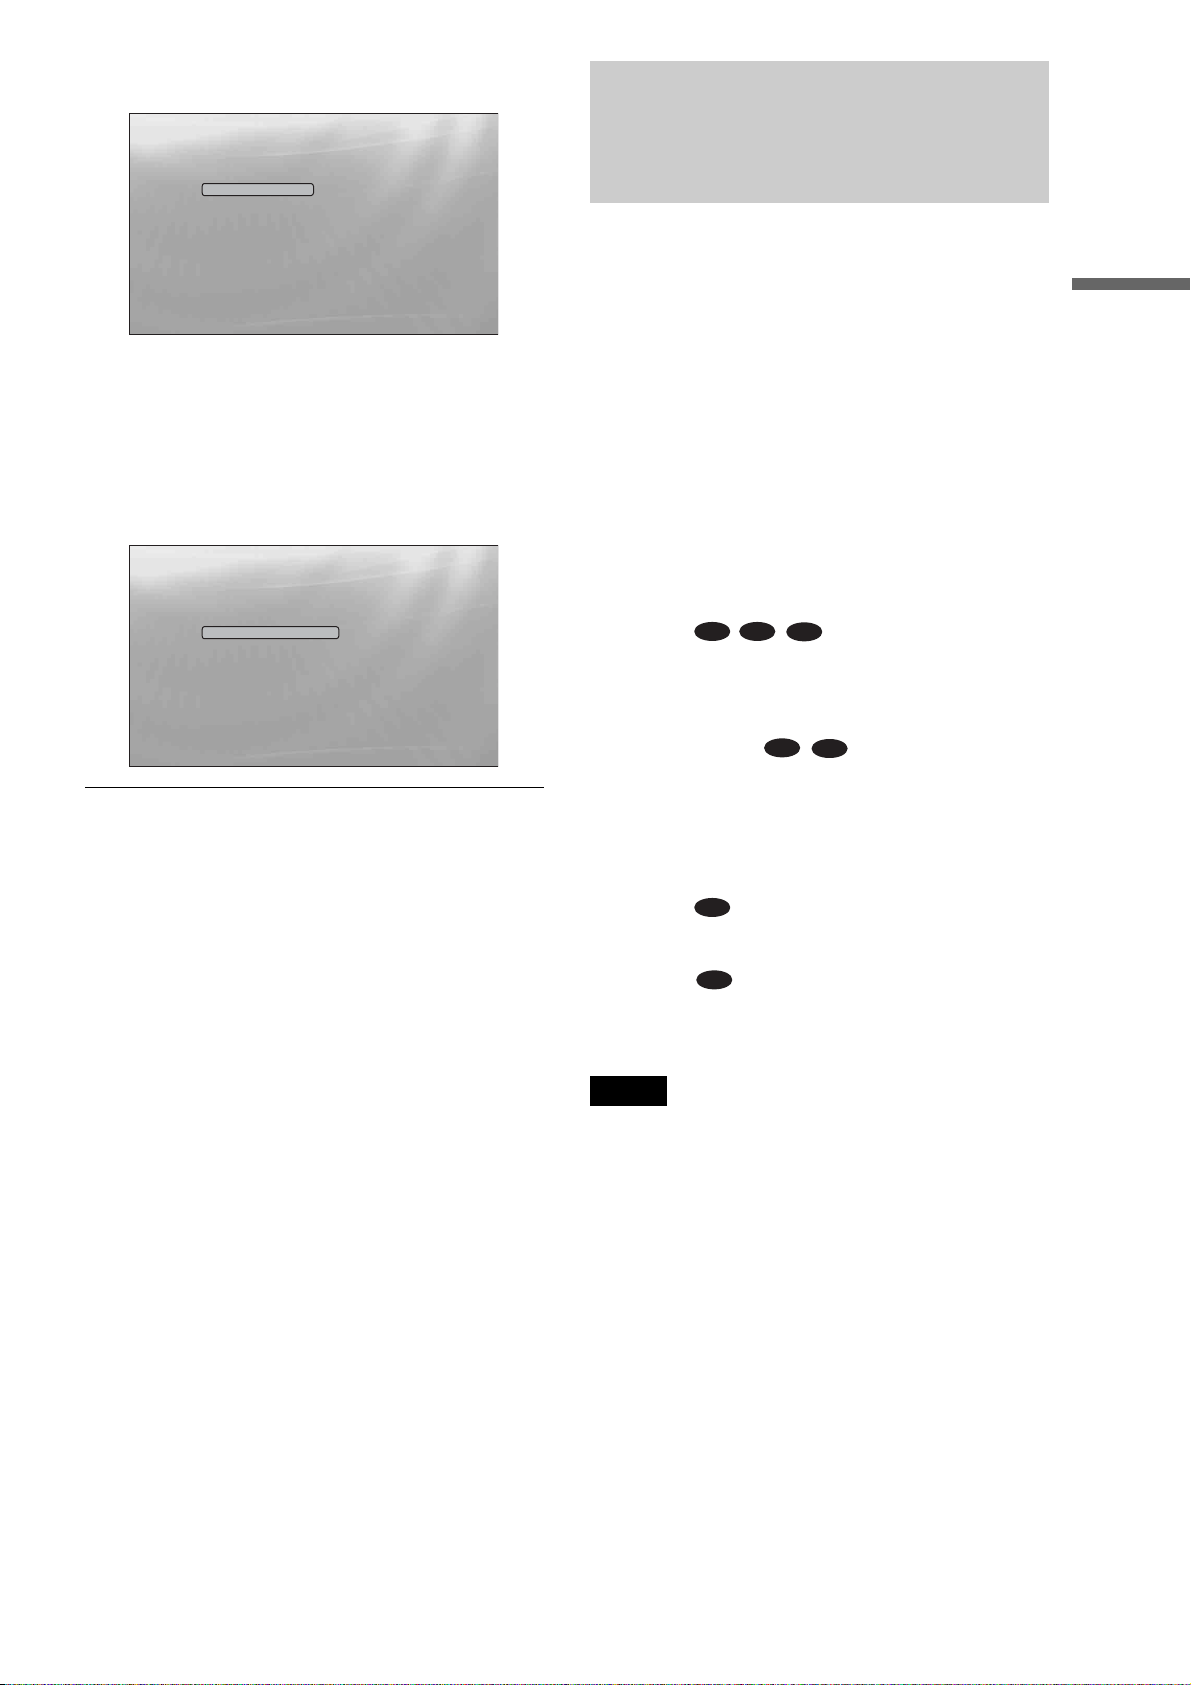
d Select the OSD language you want to display,
and press ENTER.
Easy Setup
Language
English
Français
Deutsch
Italiano
Español
Select the on-screen display language. Audio, subtitle and BD/DVD menu
language options will be set to the same language as this.
This will determine the Audio, Subtitle and BD/
DVD menu languages as well.
Confirm Exit
SYSTEM MENU
Easy Setup
Output Video Format
S-Video/Video only
576i/480i
576p/480p
720p
1080i
Don't Know
Select [Auto] to automatically match the video output
format with the HDMI-connected TV.
Confirm Exit
SYSTEM MENU
Select from “S-Video/Video only,” “576i/480i,”
“576p/480p,” “720p,” “1080i” or “Don’t Know.”
If you select “720p” or “1080i,” go to step 8. “TV
Type” in step 7 will be set to “16:9” (wide
screen).
18
Page 19
g Select the aspect ratio that matches your TV,
and press ENTER.
Step 7: Additional
Easy Setup
TV Type
16:9
4:3
Select the screen aspect ratio to match
your TV.
Confirm Exit
SYSTEM MENU
◆ If you have a wide screen TV or a 4:3 standard TV
with a wide screen mode
Select “16:9” (page 45).
◆ If you have a 4:3 standard TV
Select “4:3” (page 45).
h Select “Finish Setup,” and press ENTER.
Easy Setup
Settings are complete.
Enjoy using your BD player!
Finish Setup
Go Back
Use to select then press ENTER.
Confirm Exit
SYSTEM MENU
z Hints
• If you want to reset these settings to their factory defaults, see
“Resetting the Player” (page 53).
• You can re-run “Easy Setup” from “Options” Setup (page 52).
Adjustments
The following settings and adjustments are necessary when your
connection applies.
For video connection
◆When using the COMPONENT VIDEO OUT jacks
(Pattern C –page 10)
• Select the video output resolution for your TV by pressing
VIDEO FORMAT (page 46).
◆When using the HDMI OUT jack
(Pattern D –page 11)
• Select the video output resolution for your TV by pressing
VIDEO FORMAT (page 46).
• Select the type of video output from the HDMI OUT jack in
“YCbCr/RGBPC (HDMI)” of “Video Setup” (page 45).
For audio connection
◆When using the DIGITAL OUT (OPTICAL or COAXIAL) jack
(Connection , , –page 13 to 15)
• Set “Dolby Digital Output” and “DTS Output” in “Audio
Setup” (page 47) according to your AV amplifier’s (receiver’s)
decoder.
◆When using the HDMI OUT jack
(HDMI connection of , –page 15)
• Set “Dolby Digital Output” and “DTS Output” in “Audio
Setup” (page 47) according to your AV amplifier’s (receiver’s)
decoder.
• Select the audio output method from the HDMI OUT jack in
“Audio (HDMI)” of “Audio Setup” (page 47).
◆When using the AUDIO OUT (L/R) jacks
(Connection –page 14)
• Set “DTS Downmix” to “Lt/Rt” in “Audio Setup” (page 47).
◆When using the 5.1CH OUTPUT jacks
(Connection –page 14)
• Set “Audio Output Mode” to “5.1 Channel” in “Speakers”
Setup (page 51), and adjust the “Speaker Setup” setting for
your system.
B-2 C-2
C-1
D-1
D-2
D-2
D-3
Getting Started
Notes
• If you connect a component that does not conform to the selected audio
signal, a loud noise (or no sound) will come out from the speakers,
which could damage your ears or speakers.
• If you connect using the HDMI OUT jack or COMPONENT VIDEO
OUT jacks and the picture does not appear clearly, the connected
display device may not be compatible with the progressive signals. In
this case, connect the display device to the S VIDEO jack or the
VIDEO jack (pattern A or B – see page 10), re-run the “Easy Setup”
from the “Options” Setup (page 52), and select “S-Video/Video only”
in step 6 (page 18). Also, check the above items again to see if any
additional adjustment is required.
19
Page 20
Playing a Disc
Basic
Operations
Most of the BD playback operations are
common to DVD. This section covers BD/
DVD/CD playback in general, together with
the basic operation of the player.
For browsing recorded files on DATA
DVDs*, a separate library function is
available. See also page 32 for movie, 36 for
music, 40 for photo files.
For operations using the remote, a complete
list is located on page 24.
* DVD+RWs/DVD+Rs/DVD-RWs/DVD-Rs containing
MPEG-2 PS movie, MP3 audio, or JPEG image files.
BD
DVD
Number buttons
SYSTEM MENU
RETURN
CD
TV
Z
DIMMER
DISPLAY
123
456
7809
CLEAR
AUDIO SUBTITLE
RED
SYSTEM
MENU
RETURN
PLAY MODE
X
GREEN
YELLOW
PROG
VIDEO
FORMAT
ANGLE
\/1
BLUE
Colour buttons
TOP
MENU
TOP MENU
</M/m/,, ENTER
POP UP/MENU
POP UP/
MENU
H
x
• Playing a Disc. . . . . . . . . . . . . . . . . . . . . . . . . 20
• Guide to Displays . . . . . . . . . . . . . . . . . . . . . . 22
• Guide to the Remote. . . . . . . . . . . . . . . . . . . . 24
• Checking the Disc Information . . . . . . . . . . . . 26
• Clarifying Low Volume Sounds (Audio DRC) . 27
• Adjusting the Pictures . . . . . . . . . . . . . . . . . . 28
• Locking a Disc . . . . . . . . . . . . . . . . . . . . . . . . 29
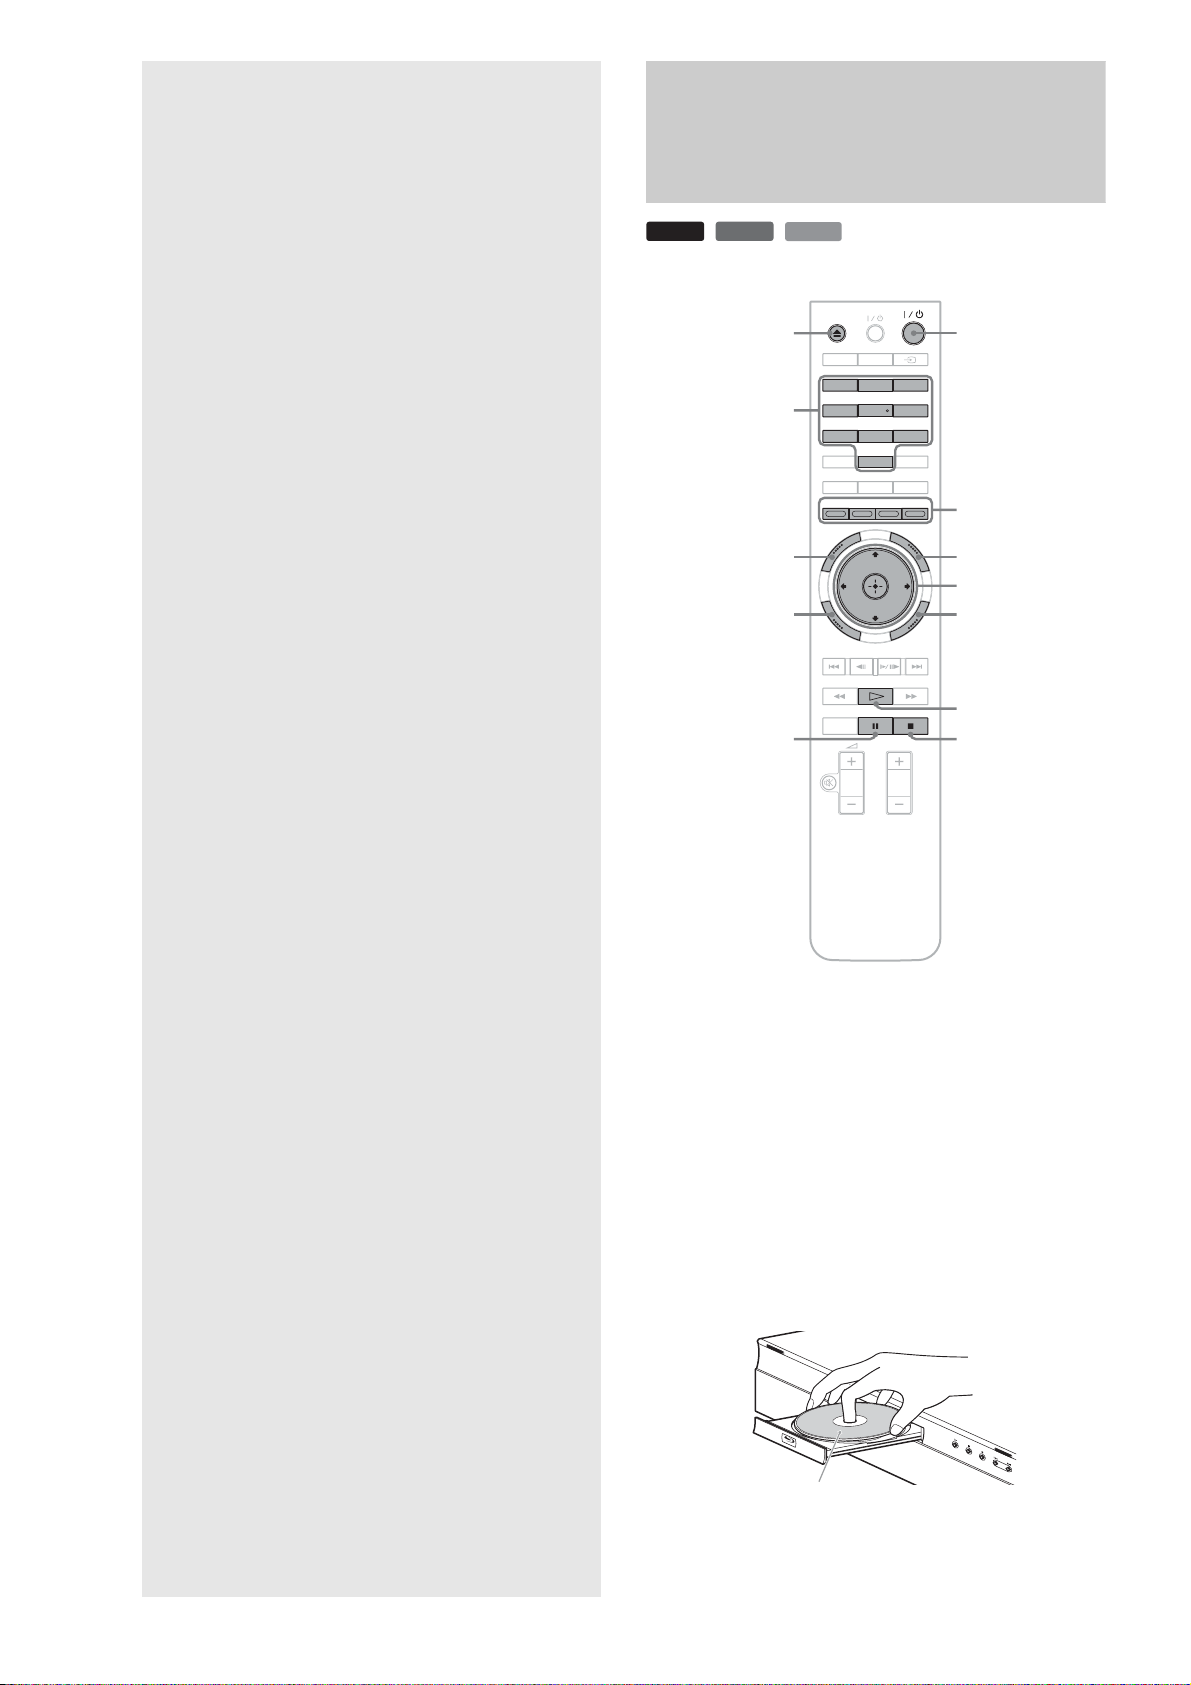
a Press \/1.
The player turns on after a moment.
b Switch the input selector on your TV so that
the signal from the player appears on your
TV screen.
c Press Z to open the disc tray.
d Place a disc on the disc tray with the playback
side facing down.
Playback side facing down
20
Page 21

e Press Z to close the disc tray.
Wait a short while until the disc type appears on the
front panel display.
f Press H to start playback.
For more information about the remote’s operations,
see page 24.
Buttons Details
X Pauses playback, or restarts playback from the same
point.
x Stops playback, or cancels the resume point when
pressed twice.
H Starts or restarts playback from the previous stop
point.
g When you finish playing, press Z to open the
disc tray.
h Remove the disc, and press Z again to close
the disc tray.
i Press \/1 to turn off the player.
About the screen saver function
To prevent damage to your display device (ghosting), a screen
saver image appears when the player is left unattended, has no
disc inserted, or no title/slideshow is displayed for 15 minutes.
To cancel, press any button on the remote or the player.
About One-Touch Play (for HDMI connections
only)
With one touch of the H button, the player and your TV/AV
receiver automatically turn on and the TV/AV receiver’s input is
switched to the player. Playback starts automatically. To use this
function, set “HDMI Control” of “Options” setup to “On”
(page 52).
The TV/AV receiver’s input will also switch to the player
automatically, in the following cases:
– You press H, SYSTEM MENU, TOP MENU, or POP UP/
MENU buttons on the remote.
– A disc with auto playback function is loaded.
Basic Operations
To use the BD’s or DVD’s menu
When you play a BD-ROM, DVD VIDEO, or a finalized
DVD+RW, DVD-RW (Video mode), DVD+R, or DVD-R
(Video mode), you can display the disc’s menu by pressing TOP
MENU or POP UP/MENU. Some BDs/DVDs display the menu
automatically. Either cases, navigate through the menu using
</M/m/,, ENTER, or the number buttons and the colour
buttons as indicated by the disc’s on-screen instructions. The BD
menu is operable without interrupting playback.
To play restricted BDs
If “CAN’T PLAY” appears on the front panel display for a BDROM, change the “BD Parental Control” setting (page 30).
To play restricted DVDs
For a restricted DVD, the display asks for the password. For
“DVD Parental Control” setting, see page 30.
1 Enter your four-digit password using the number
buttons.
2 Press ENTER to confirm.
To register or change the password, see page 29.
Notes about Resume Play
• Playback starts from the beginning if the title has not been
played or the previous stop point is cancelled.
• The stop point is cancelled when:
– you change the settings on the player.
– you turn off the player (BD-ROM and CD only).
– you press x twice.
– you open the disc tray.
– you finish a search.
• The player remembers the stop point for one title/track/file
only. On a music CD, playback resumes from the beginning of
the track.
21
Page 22

Guide to Displays
BD
When ‘Select an item, and press ENTER’ appears in this manual,
press the </M/m/, keys on the remote to select the item then
the entry button in the middle. You can operate the player
likewise using displays.
DVD
DATA DVD
CD
Title List
For DATA DVDs, this display leads further to the Title Lists of
content type. The three Title Lists appear similar and are
operable in a similar way.
Title List
Movies
Photos
Music
Access the BD-R/RE titles.
Select Exit
SYSTEM MENU
System Menu
Title List
A/V Control
Setup
Search for the part you want to play from a list of the disc's content.
Select Exit
SYSTEM MENU
a Press SYSTEM MENU to turn on the above
“System Menu.”
The player’s start menu appears, with entries to all of
the functions.
b Select an item, and press ENTER.
Each item leads to the following function displays.
See the pages in parentheses for operations. When
you want to return to the previous display, press
RETURN.
Select the Title List you want to view; from “Movies,” “Photos,”
or “Music,” and press ENTER.
◆Movies
Displays movies/video titles only (page 32).
◆Photos
Displays image files only (page 40).
◆Music
Displays music files only (page 36).
A/V Control (page 27)
Adjusts the audio/video settings. Select either “Video Control,”
or “Audio Control,” and press ENTER.
A/V Control
Video Control
Audio Control
Set the playback picture quality.
Select Exit
SYSTEM MENU
Setup (page 44)
Enters the Setup displays for changing the player’s settings.
Select the related Setup display, and press ENTER.
22
Video Setup
Audio Setup
Language
Parental Control
Speakers
Options
Use
ENTER.
Setup
TV Type
4:3 Video Output
DVD Aspect Ratio
bCr/RGBPC(HDMI)
YC
24p Output
to select an item, then press [RR] or
16:9
Normal
Letter Box
b, Cr
Y, C
Off
Confirm Exit
SYSTEM MENU
Page 23

Entering characters
DATA DVD
When an on-screen keyboard appears (e.g., when searching for a
title), enter the characters as follows.
s_
AB
CDEFGH I J
KLMNOPQRST
UVWXYZ,.:;
123456
_()
SHFT
DONE CANCEL
a Select the character you want to enter, and
press ENTER.
The character appears in the entry field. If necessary,
select the following items, and press ENTER.
Items Details
SHFT Switches between upper and lower case
characters. Select this before entering the
character.
SPC Inserts a space.
DEL Deletes the last character input.
CLR Clears all input characters.
7890
SPC DEL CLR
Basic Operations
b Repeat step 1 to complete the entry.
c Select “DONE,” and press ENTER to close
the on-screen keyboard.
Note
You cannot use the extended character set.
23
Page 24

Guide to the Remote
A Z (open/close) (page 20)
– Opens/closes the disc tray.
TV &/1 (on/standby) (page 17)
– Turns the TV on or to standby mode.
The following covers all of the remote’s functions. Refer to the
list when necessary.
TV
DIMMER
DISPLAY
123
456
7809
CLEAR
AUDIO SUBTITLE
RED
GREEN
SYSTEM
MENU
RETURN
YELLOW
VIDEO
FORMAT
ANGLE
BLUE
POP UP/
TOP
MENU
MENU
&/1 (on/standby) (page 18)
– Turns on, or sets the player to standby mode.
B DIMMER (page 59)
– Changes the brightness of the front panel display
on the player (when completely darkened,
indicators on the front panel are also turned off
and the FL OFF indicator lights up).
DISPLAY (page 26)
– Displays the disc information on the screen.
t (TV/video) (page 17)
– Switches between TV and other input sources.
C Number buttons (page 26)
– Enters the title/chapter numbers, etc.
CLEAR
– Clears the entry field.
D VIDEO FORMAT (page 45)
– Changes the video output resolution from the
HDMI OUT jack and the COMPONENT VIDEO
OUT jacks. Press this button repeatedly if no
picture appears.
E AUDIO*
1
(page 49)
– Selects the sound track or the language track on a
BD/DVD.
*1When playing MPEG-2 movie files or MP3 music files on a
DATA DVD, or a music CD, you cannot select the left or
right channel only.
PLAY MODE
PROG
Number 5, AUDIO, PROG+, and H buttons have a tactile dot. Use the
tactile dot as a reference when operating the player.
SUBTITLE (page 49)
– Selects the subtitle language on a BD/DVD.
ANGLE
– Switches to other viewing angles when available.
F Colour buttons (RED/GREEN/YELLOW/BLUE)
– Short cut keys for selecting items on some BD’s
menus (can also be used for BD’s Java interactive
operations).
24
Page 25

G SYSTEM MENU (page 22)
– Enters/exits the player’s start menu (“System
Menu”).
TOP MENU (page 20)
– Opens/closes the BD’s or DVD’s top menu.
POP UP/MENU (page 20)
– Opens/closes the BD’s pop up menu, or the
DVD’s disc menu.
RETURN (page 20, 22)
– Returns to the previous display.
</M/m/, (page 20, 22)
– Moves the highlight to select a displayed item.
Centre button (ENTER) (page 20, 22)
– Enters the selected item.
H ./> (previous/next)
– Skips to the previous/next chapter, track, or file.
c/ C (slow/step)*
2
– Plays in slow motion or stop motion. To return to
normal play, press H.
• To play in slow motion
Press
play starts, press
speed : 1/16 t 1/8 t 1/4 t 1/2 of normal playback
speed.
• To play in stop motion (step by step)
Press X during playback, then press
repeatedly.
m/M (scan)*
C during playback. When slow motion
C repeatedly to change the
c or C
2
– Scans backwards or forward. The speed changes
when pressed repeatedly.
*2Depending on the disc or file type, the function may not work
or the scan speeds may differ.
I For TVs operable with the following buttons, see
page 17.
% (muting) (page 17)
– Mutes the TV sound.
2 (volume) +/– (page 17)
– Adjusts the TV volume.
PROG (programme) +/– (page 17)
– Selects the TV channels up and down.
Playing in various play mode
BD
a During playback, press PLAY MODE
◆When playing a video or movie title
Items Details
Repeat Chapter
(BD-ROM/DVD VIDEO
only)
Repeat Title Repeats the current title.
◆When playing a music track
Items Details
Repeat Track Repeats the current track.
Repeat All Repeats all the tracks on the disc or the
Random Plays all the tracks on the disc or the
DVD
DATA DVD
CD
repeatedly.
Available items differ depending on the current title/
track/file or the disc type. To cancel the Play Mode,
press PLAY MODE again. For “Time Search,” see
“Searching using the remote” (page 26).
Repeats the current chapter.
“Music” Title List.
“Music” Title List in a random order.
Basic Operations
H (play)
– Starts or re-starts playback.
PLAY MODE
– Switches to other play modes (Repeat Play, etc.)
when pressed during playback.
– Searches for a specific point (page 26).
X (pause)
– Pauses/re-starts playback.
x (stop)
– Stops playback.
– Clears the resume point when pressed twice. The
resume point for a title is the last point you
played, the last track for an audio file, or the last
photo for a photo file.
◆When playing a photo image
Items Details
Repeat All Repeats all the files on the disc or
“Photos” Title List.
Random Plays all the files on the disc or “Photos”
Title List in a random order.
,continued
25
Page 26

Searching using the remote
Checking the Disc
BD
DVD
DATA DVD
You can search by entering the title/chapter number or the time
code (elapsed time from the beginning of the disc).
TV
DISPLAYDIMMER
123
Number buttons
ENTER
PLAY MODE
456
7809
CLEAR
AUDIO SUBTITLE
RED
GREEN
YELLOW
SYSTEM
MENU
RETURN
PLAY MODE
PROG
VIDEO
FORMAT
ANGLE
BLUE
TOP
MENU
POP UP/
MENU
Information
BD
You can check the title/chapter/track information including
video transmission rate etc., by pressing DISPLAY. The
information differs depending on the disc type and the player
status.
a Press DISPLAY.
DVD
Example: When playing a DVD VIDEO.
DATA DVD
Play
DVD-VIDEO
CD
1-1 2.01.23
Chapters 12
Title Total 2h15m34s
Repeat Title
To search for a title or chapter (BD-ROM, DVD
VIDEO only)
1 Enter the title number using the number buttons
while the player is in stop mode.
To search for a chapter, enter the chapter number
during playback. If you make a mistake, press
CLEAR once and re-enter.
2 Press ENTER to start playback.
To search for a specific point
1 During playback, press PLAY MODE repeatedly
until “Time Search” appears.
2 Enter the time code using the number buttons.
Enter the time in minutes and seconds (e.g., ‘12030’
for 1 hour, 20 minutes and 30 seconds). If you make
a mistake, press CLEAR once and re-enter.
3 Press ENTER to start playback.
The following information appears:
1 Playback status
2 Disc type
3 Title information
• Currently playing title number/currently playing
chapter number.
• Total number of chapters within the title.
• Total playback time of the title.
4 Elapsed time of the current title
5 Play mode
b Press DISPLAY again.
Play
DVD-VIDEO
The display switches to show the following
information:
1-1 2.01.23
Chapter Time 01.11.56
Chapter Total 2h15m34s
10.03 Mbps
Repeat Title
Note
Depending on the DVD VIDEO/BD-ROM/DATA DVD, these search
functions may not work.
26
1 Chapter information
• Elapsed time of the current chapter.
• Total playback time of the current chapter.
2 Video transmission rate and the stream
information
Page 27

z Hints
• You can check disc information also on the front panel display
(page 59) or the Title List display (page 22).
• You can check the audio information by pressing AUDIO.
Clarifying Low Volume Sounds (Audio DRC)
BD
Even at low volume, you can make low sounds such as dialogues
more audible.
DVD
Convenient when you cannot turn up the volume (e.g., at
night)
DATA DVD
Audio Control
Off MaxAudio DRC
Adjusting sound accentual width (dynamic range).
This is effective when playback sound is Dolby Digital.
a Press SYSTEM MENU during playback.
b Select “A/V Control,” and press ENTER.
c Select “Audio Control,” and press ENTER to
turn on the above display.
Basic Operations
d While “Audio DRC” is highlighted, select
from “Max” to “Off” by pressing </,.
e Press ENTER.
Note
“Audio DRC” is effective only when the disc is a Dolby Digital Blu-ray
Disc or DVD, and:
– “Dolby Digital Output” in “Audio Setup” is set to “Downmix PCM”
(page 47) and the audio signals are output from the DIGITAL OUT
(OPTICAL or COAXIAL) jack or the HDMI OUT jack.
– “Audio (HDMI)” in “Audio Setup” is set to “PCM” (page 47) and the
audio signals are output from the HDMI OUT jack.
– the audio signals are output from the AUDIO OUT (L/R) jacks or the
5.1CH OUTPUT jacks.
27
Page 28

Adjusting the Pictures
BD
The “cinema tuned” picture preset setting will allow you to
maximize the visual impact of the BD or DVD you are watching
by optimizing the picture settings for different lighting
environments. “Memory” allows you to make your own detailed
adjustments.
DVD
DATA DVD
Fine-tuning the picture to your preference
Memory1
White Enhancer
Black Enhancer
Hue
Chroma Level
Use [LL][RR] to set the behavior of film source
input. Press ENTER to preview.
a Select from “Memory 1” to “Memory 3” in
step 4 of “Adjusting the Pictures” (page 28).
b Select “Detailed Settings,” and press ENTER
to turn on the above display.
To switch to another “Memory,” press RETURN.
Min Max
Min Max
Green Red
Min Max
Standard
Detailed Settings
a Press SYSTEM MENU during playback.
b Select “A/V Control,” and press ENTER.
c Select “Video Control,” and press ENTER to
turn on the above display.
d Press </, to select a setting.
Items Details
Brighter Room For a room brighter than normal.
Theatre Room For a dark room such as a home
theatre.
Standard (default) Normally, select this.
Memory (1-3) Select a setting when you want to
use the detailed picture adjustments
you previously made, or when you
want to make a new set. The player
remembers up to three sets (see
page 28).
c Select each of the picture elements, and
adjust using </,.
◆ To adjust while previewing the effect
Select a setting and press ENTER to switch the
display for the setting. Press </, to adjust
while checking the effect on the background
playback picture. Then press ENTER to save the
adjustment.
Underlined are the default settings for “Memory.”
Items Details
White Enhancer
(Min~(mid)
Black Enhancer
(Min~(mid)
Hue
(Green~(mid)
Chroma Level
(Min~(mid)
~Max)
~Max)
~Red)
~Max)
Adjusts the brightness of white
colours.
Adjusts the richness of dark colours.
Balances the green and the red
colours.
Adjusts the colour saturation.
d Press RETURN.
e Press ENTER.
z Hint
The above description applies when the picture setting of your TV (if
any) is set to ‘Standard.’
Note
“Memory” settings do not affect the output from the S VIDEO OUT or
VIDEO OUT jacks.
28
Page 29

Locking a Disc
Setting/changing the password
BD
DVD
By setting the password and your limit in “Parental Control”
Setup, you can control playback of inappropriate discs.
Parental Control
Use the number buttons to
enter the password to turn
off parental control.
Current Level
Disc Level
The password is required when the DVD exceeds the
level you set.
BD PLAYER
3
5
Notes
• You cannot limit playback if the DVD VIDEO/BD-ROM does not
have the “Parental Control” function.
• If you forget the password, you will have to return all of the player
settings to their factory defaults (page 53).
• The above display does not appear for BD-ROM. If you cannot play a
BD-ROM becaus e of Parental Control, reset “Chang e Age Restriction”
of “BD Parental Control” (page 30).
BD
DVD
Video Setup
Audio Setup
Language
Parental Control
Speakers
Options
Use
ENTER.
Setup
Change Password
DVD Parental Control
BD Parental Control
to select an item, then press [RR] or
Next Screen
Next Screen
Next Screen
Confirm Exit
SYSTEM MENU
a Press SYSTEM MENU.
b Select “Setup,” and press ENTER.
c Select “Parental Control,” and press ENTER
to turn on the above “Parental Control”
Setup.
d Select “Change Password (Set Password),”
and press ENTER.
e Select “Next Screen,” and press ENTER to
turn on the password display.
◆ When you have not yet registered a password
Enter a four-digit password using the number
buttons, and press m. Re-enter it for
confirmation, and press ENTER.
◆ When you have already registered a password
Enter the four-digit password using the number
buttons, and press ENTER. Enter a new password
and press m, then re-enter it for confirmation, and
press ENTER.
Basic Operations
z Hint
To continue to set “DVD Parental Control,” go to step 4 of “Setting the
Parental Control for DVD VIDEOs” (page 30).
,continued
29
Page 30

Setting the Parental Control for DVD
Setting the Parental Control for BD-
VIDEOs
DVD
Setup
Video Setup
Audio Setup
Language
Parental Control
Speakers
Options
Use the number keys to enter the password, and press ENTER.
a Press SYSTEM MENU.
b Select “Setup,” and press ENTER.
c Select “Parental Control,” and press ENTER
to turn on the “Parental Control” Setup.
d Select “DVD Parental Control,” and press
ENTER.
Change Level
Password
Level
Off
Confirm Exit
SYSTEM MENU
ROMs
BD
Setup
Video Setup
Audio Setup
Language
Parental Control
Speakers
Options
Use the number keys to enter the password, and press ENTER.
a Press SYSTEM MENU.
b Select “Setup,” and press ENTER.
c Select “Parental Control,” and press ENTER
to turn on the “Parental Control” Setup.
d Select “BD Parental Control,” and press
ENTER.
Change Age Restriction
Password
Age Restriction
255
Confirm Exit
SYSTEM MENU
e Select “Change Level,” and press ENTER to
turn on the above display.
This will set the playback limitation level.
f Enter the password using the number
buttons, and press ENTER.
g Press </, to select the limitation level
from “Off” to “Level 8,” and press ENTER.
Note that the lower the value, the stricter the
limitation.
h When the display returns to the “Parental
Control” Setup, select “DVD Parental
Control,” and press ENTER.
i Select “DVD Country Code,” and press
ENTER.
This ensures that you see the scenes intended for
your residential area.
j On the “DVD Country Code” display, enter
the password using the number buttons, and
press ENTER.
k Press </, to select your country code (see
page 63), or press m and enter the code for
your area using the number buttons.
l Press ENTER.
e Select “Change Age Restriction,” and press
ENTER to turn on the above display.
For BD-ROMs, the restriction is set by age, not by
level.
f Enter the password using the number
buttons, and press ENTER.
g Press </, to select the age from “0” to
“255,” and press ENTER.
h When the display returns to the “Parental
Control” Setup, select “BD Parental
Control,” and press ENTER.
i Select “BD Country Code,” and press
ENTER.
This ensures that you see the scenes intended for
your residential area.
j On the “BD Country Code” display, enter the
password using the number buttons, and
press ENTER.
k Press </, to select your country code (see
page 63), or press m and enter the code for
your area using the number buttons.
l Press ENTER.
z Hint
To continue to set “BD Parental Control,” go to step 4 of “Setting the Parental Control for BD-ROMs” (page 30).
30
Page 31

Basic Operations
31
Page 32

Viewing All Titles
Watching Movie Files
Use the “Movies” Title List to browse
through and sort MPEG-2 PS movie files on
DATA DVDs.
DATA DVD
The “Movies” Title List first displays all titles on the disc.
Select
1214 items
1:31
1:02
1:31
1:25
1:33
1:26
1:57
1:36
1:18
1:18
SYSTEM MENU
All Movies
Spider
Smoother
Sideway
Home
All Movies
Browse
Search
Sort
The Browse menu appears when you press <
Alpinist
Electricity
Lemon Grove
Bridget
Finding Never-Ever Land
Meet My Mom
List Exit
a Press SYSTEM MENU.
b Select “Title List,” and press ENTER.
c Select “Movies,” and press ENTER.
The above “All Movies” display appears, showing
all titles (scrollable by pressing m). From “All
Movies” you can apply items to all titles using the
Browse menu (see below).
• Viewing All Titles . . . . . . . . . . . . . . . . . . . . . . 32
To use the Browse menu
Press < after step 3 to display the items for the “Movies” Title
List. For operations, see the pages in parentheses. Available
items differ depending on the display.
Items Details
All Movies Lists all titles (as above).
Browse Displays a list of genres, Quicklist, or
folders (page 34).
Search Searches for a title using the on-screen
keyboard (page 34).
Sort Reorders the titles by date or alphabet (see
below).
◆Example: To apply “Sort” to all titles
A Select “Sort,” and press ENTER.
B Select the setting you want to sort by; “Recent first,”
“Oldest first,” “By title (AtZ),” “By title (ZtA),” and
press ENTER.
32
• Browsing by Genre, Quicklist, or Folder . . . . . 34
• Searching for a Title . . . . . . . . . . . . . . . . . . . . 34
• Programming Playback (Quicklist). . . . . . . . . 35
Page 33

Playing a title
About the “Movies” (All Movies) Title List
display
a After step 3 of “Viewing All Titles” above,
select the title you want to play, and press
ENTER or H.
The title starts playing. You can apply other playback
settings to the selected title using the “Options”
menu (see below).
All Movies
Spider
Smoother
Sideway
Date : 2006
Genre : Adventure
Format : MPEG
Home
Alpinist
Electricity
Lemon Grove
Bridget
Finding Never-Ever Land
Meet My Mom
List Exit
The “Options” menu appears when you select a title and
press ,
1214 items
Options
1:31
1:02
Play from Beginning
1:31
Add to Quicklist
1:25
1:33
1:26
1:57
1:36
1:18
1:18
Select
SYSTEM MENU
To use the “Options” menu
Press , instead of ENTER in the above step to display the
“Options” menu settings applicable to the title in the given
situation. In the above example, the following items are
available.
All Movies
Spider
Smoother
Sideway
Date : 2006
Genre : Adventure
Format : MPEG
Home
Alpinist
Electricity
Lemon Grove
Bridget
Finding Never-Ever Land
Meet My Mom
List Exit
1 Detailed information
Displays details about the selected title.
• Date: Displays the recording year.
• Genre: Displays the genre name.
• Format: Displays the coding format.
2 List area
Displays the title names of all content.
Select
1214 items
1:31
1:02
1:31
1:25
1:33
1:26
1:57
1:36
1:18
1:18
SYSTEM MENU
Watching Movie Files
Items Details
Play from Beginning Starts playing the title you selected from
the beginning.
Add to Quicklist Adds the selected title to the Quicklist.
◆Example: To apply “Play from Beginning” to the selected title
A Select “Play from Beginning,” and press ENTER.
To play in other play mode
During playback, press PLAY MODE repeatedly. The selected
item changes with each press: “Time Search” (page 26) —
“Repeat Title” — “Repeat Off”
See page 25 for details.
z Hint
See page 24 for the remote’s operations.
33
Page 34

Browsing by Genre, Quicklist, or Folder
Searching for a Title
DATA DVD
Narrow down the list of titles by selecting the category type (e.g.,
“Folders”), then the category.
Folders
Winter games 2006
Interviews
2 items
ExitConfirm
SYSTEM MENU
a Press SYSTEM MENU.
b Select “Title List,” and press ENTER.
c Select “Movies,” and press ENTER.
d Press < to turn on the Browse menu.
DATA DVD
You can find the exact title, or titles with a similar name.
Select
5 items
1:31
1:02
1:31
1:25
1:33
Exit
SYSTEM MENU
Search Results
Say No
Sea
Sideway
Spider
s_
AB
CDEFGH I J
KLMNOPQRST
UVWXYZ,.:;
123456
7890
_()
SHFT
SPC DEL CLR
DONE CANCEL
Search results are narrowed down as more characters
are entered
Stay Alive
a Press SYSTEM MENU.
b Select “Title List,” and press ENTER.
c Select “Movies,” and press ENTER.
d Press < to turn on the Browse menu.
e Select “Browse,” and press ENTER.
f Select the list you want to view from
“Genres,” “Quicklist,” or “Folders,” and
press ENTER.
The list of genres/Quicklist/folders appears as above.
For details about the Quicklist, see “Programming
Playback (Quicklist)” (page 35).
g Select the genre/Quicklist/folder you want to
view, and press ENTER.
z Hint
You can select a title and start playback by pressing H or ENTER, or
using the “Options” menu (press ,).
e Select “Search,” and press ENTER to turn on
the above display.
f Enter the title name using the on-screen
keyboard (see page 23).
z Hint
You can select a title and start playback by pressing H or ENTER, or
using the “Options” menu (press ,).
34
Page 35

Programming Playback (Quicklist)
DATA DVD
To remove the title from the “Quicklist”
1 Select the title you want to remove from the
displayed “Quicklist,” and press ,.
2 Select “Remove,” and press ENTER.
z Hint
You can play the “Quicklist” content in other play modes by pressing
PLAY MODE (page 25).
Play your favourite titles in the order you like by making your
own “Quicklist.”
Select
14 items
1:31
1:02
1:31
1:25
1:33
1:26
1:57
1:36
1:18
1:18
SYSTEM MENU
Quicklist
Spider
Smoother
Sideway
Date : 2006
Genre : Adventure
Format : MPEG
The “Quicklist” does not affect the original recording on
the disc
Home
Alpinist
Electricity
Lemon Grove
Bridget
Finding Never-Ever Land
Meet My Mom
List Exit
a Press SYSTEM MENU.
b Select “Title List,” and press ENTER.
c Select “Movies,” and press ENTER.
d When the “All Movies” Title List appears,
select the title you want to add to the top of
the “Quicklist,” and press ,.
Note
The “Quicklist” may be cleared after some operations (e.g., opening the
disc tray, or turning off the player etc.).
Watching Movie Files
e Select “Add to Quicklist” from the “Options”
menu, and press ENTER.
f Repeat step 4 and 5 to select all the desired
titles.
Select in the order you want to play. You can add the
same title multiple times.
The “Quicklist” can contain up to 25 titles.
g Press < to turn on the Browse menu.
h Select “Browse,” and press ENTER.
i Select “Quicklist,” and press ENTER to turn
on the above display.
The “Quicklist” Title List appears with the
programmed content.
j Select the title you want to start playback,
and press ENTER.
35
Page 36

Viewing All Artists
Listening to Music Files
Use the “Music” Title List to browse
through and play the MP3 track files on
DATA DVDs. You can make a “Quicklist”
of your favourites and play in various play
modes.
DATA DVD
The “Music” Title List first displays a list of the artist names on
the disc.
7 items
Artists
Artists
All Artists
All Artists
Angela Simpson
Angela Simpson
Blue Glass
Blue Glass
Bohemian Beat
Bohemian Beat
Cela
Cela
Classic Remix
Classic Remix
Commotion
Commotion
Count Dra"Q"la
Count Dra"Q"la
The Browse menu appears when you press <
7 items
Albums
6
Albums
6
Albums
5
Albums
5
Albums
6
Albums
6
Albums
4
Albums
4
Albums
5
Albums
5
Albums
2
Albums
2
Albums
2
Albums
2
PlayOptionsMain Menu Exit
PlayOptionsMain Menu Exit
SYSTEM MENU
SYSTEM MENU
a Press SYSTEM MENU.
b Select “Title List,” and press ENTER.
c Select “Music,” and press ENTER.
The above “Artists” display appears, showing all
artist names (scrollable by pressing m). From
“Artists” you can apply items to all tracks using the
Browse menu (see below).
• Viewing All Artists . . . . . . . . . . . . . . . . . . . . . 36
• Browsing by Artist, Album, Genre, Quicklist,
or Folder . . . . . . . . . . . . . . . . . . . . . . . . . . 38
To use the Browse menu
Press < after step 3 to display the items for the “Music” Title
List. For operations, see the pages in parentheses. Available
items differ depending on the display.
Items Details
All Songs Lists all tracks (page 37).
Browse Displays a list of artists, albums, genres,
Quicklist, or folders (page 38).
Search Searches for a track using the on-screen
keyboard (page 38).
Sort Reorders the tracks by alphabet, or year,
etc. (see below).
Now Playing Displays the track information and the
playback information during playback.
◆Example: To apply “Sort” to all tracks
A To display the list of tracks, select “All Songs” from the
Browse menu and press ENTER.
B Press < to turn on the Browse menu.
C Select “Sort,” and press ENTER.
D Select the setting you want to sort by; “Recent first,”
“Oldest first,” “By title (AtZ),” “By title (ZtA),” “By
artist (AtZ),” “By artist (ZtA),” and press ENTER.
36
• Searching for a Track . . . . . . . . . . . . . . . . . . . 38
• Programming Playback (Quicklist). . . . . . . . . 39
Page 37

Playing a track
a After step 3 of “Viewing All Artists” above,
narrow down the list of tracks by selecting
the artist, then the album.
To list all tracks, press < and select “All Songs”
from the Browse menu.
b Select the track you want to play, and press
ENTER or H.
The title starts playing. You can apply other playback
settings to the selected track using the “Options”
menu (see below).
All Songs
Never Let Me Down (Split Mix)
Policies of Truth
Shout in Rio
Artist : Deep Green
Album : Splash!
Genre : Alternative
Format : MP3
Home
Strangled
Rash (Spiritual Mix)
I Feel You (Remix)
Route 57 (Beatmasters Mix)
Free (DJ Remix)
Personal Note
The “Options” menu appears when you select a track
and press ,
To use the “Options” menu
Press , instead of ENTER in the above step to display the
“Options” menu settings applicable to the track in the given
situation. In the above example, the following items are
available.
Items Details
Play Song Starts playing the track you selected from
Add to Quicklist Adds the selected track to the Quicklist.
the beginning.
1214 items
Options
9:31
8:00
Play Song
7:31
Add to Quicklist
3:55
6:33
5:26
4:57
9:36
6:18
6:18
PlayOptionsMain Menu Exit
SYSTEM MENU
About the “Music” (All Songs) Title List display
1214 items
9:31
8:00
7:31
3:55
6:33
5:26
4:57
9:36
6:18
6:18
PlayOptionsMain Menu Exit
SYSTEM MENU
Artist:Deep Green
Artist : Deep Green
Album:Remixes 81-04
Album : Splash!
Genre:Alternative
Genre : Alternative
Format:MP3
Format : MP3
All Songs
Never Let Me Down (Split Mix)
Policies of Truth
Shout in Rio
Home
Strangled
Rash (Spiritual Mix)
I Feel You (Remix)
Route 57 (Beatmasters Mix)
Free (DJ Remix)
Personal Note
1 Detailed information
Displays details about the selected track.
• Artist: Displays the artist name.
• Album: Displays the album name.
• Genre: Displays the genre name.
• Format: Displays the coding format.
2 List area
Displays overall content.
• Main area: Displays the track names.
• Sub area: Displays the total playback time of each
track.
About unplayable audio track files
The player does not play the file if:
– The DATA DVD is not recorded in an MP3 format that
conforms to UDF (Universal Disk Format).
– The audio track file does not have the extension “.MP3.”
– The data is not formatted properly even though it has the
extension “.MP3.”
– The data is not MPEG-1 Audio Layer III data.
– The data is recorded in mp3PRO format.
– The file name contains characters other than numbers and
English alphabet.
Listening to Music Files
◆Example: To apply “Play Song” to the selected track
A Select “Play Song,” and press ENTER.
To play in other play mode
During playback, press PLAY MODE repeatedly. The selected
item changes with each press: “Repeat Track” — “Repeat All”
— “Random” — “Repeat Off”
See page 25 for details.
z Hints
• See page 24 for the remote’s operations.
• Even after stopping playback, the player resumes playback from the
last track you played.
• Depending on the writing software used, the displayed track or album
names may be different from the characters you input.
Notes
• Playback time of MP3 audio tracks may not be displayed correctly.
• If you put an extension “.MP3” to a non-MP3 file, the file may
accidentally play on the player. Note that such output may cause the
connected device to malfunction.
• Playback may not start immediately after skipping to another album.
• When using the Resume function on MP3 tracks, playback starts from
the beginning of the track.
37
Page 38

Browsing by Artist, Album, Genre, Quicklist, or Folder
Searching for a Track
DATA DVD
Narrow down the list of tracks by selecting the category type
(e.g., “Genres”), then the category.
Genres
All Genres
Alternative
Blues
Books And Spoken
Celtic
Classical
Comedy
Country
Dance
Dark
20 items
Songs
2876
Songs
195
Songs
16
Songs
304
Songs
841
Songs
32
Songs
2
Songs
460
Songs
60
PlayOptionsMain Menu Exit
SYSTEM MENU
Genres without content do not appear in the list
a Press SYSTEM MENU.
b Select “Title List,” and press ENTER.
c Select “Music,” and press ENTER.
d Press < to turn on the Browse menu.
DATA DVD
You can find the exact track, or tracks with a similar name.
Select
7 items
9:31
8:00
7:31
7:32
6:33
6:34
6:35
Exit
SYSTEM MENU
R
AB
CDEFGH I J
KLMNOPQRST
UVWXYZ,.:;
123456
7890
_()
SHFT
SPC DEL CLR
DONE CANCEL
Search Results
Raga
Raging Plants
Ragamufin
Ree
Rise
Rose Bed
Rule the World
Search results are narrowed down as more characters
are entered
a Press SYSTEM MENU.
b Select “Title List,” and press ENTER.
c Select “Music,” and press ENTER.
d Press < to turn on the Browse menu.
e Select “Browse,” and press ENTER.
f Select the list you want to view from
“Artists,” “Albums,” “Genres,” “Quicklist”
or “Folders,” and press ENTER.
The list of artists/albums/genres/Quicklist/folders
appears as above.
For details about the Quicklist, see “Programming
Playback (Quicklist)” (page 39).
g Select the artist/album/genre/Quicklist/
folder you want to view, and press ENTER.
z Hint
You can select a track from the list of tracks, and start playback by
pressing ENTER or H, or using the “Options” menu (press ,).
e Select “All Songs,” and press ENTER.
f Press < to turn on the Browse menu.
g Select “Search,” and press ENTER to turn on
the above display.
h Enter the track name using the on-screen
keyboard (see page 23).
z Hints
• You can select a track from the search result, and start playback by
pressing ENTER or H, or using the “Options” menu (press ,).
• You can search for a genre, artist, album, or folder name from each
Title List (e.g., “Genres”).
38
Page 39

Programming Playback (Quicklist)
DATA DVD
Play your favourite tracks in the order you like by making your
own “Quicklist.”
Quicklist
Never Let Me Down (Split Mix)
Policies of Truth
Shout in Rio
Artist : Deep Green
Album : Splash!
Genre : Alternative
Format : MP3
The “Quicklist” does not affect the original recording on
the disc
3 items
9:31
8:00
7:31
PlayOptionsMain Menu Exit
SYSTEM MENU
To remove the title from the “Quicklist”
1 Select the track you want to remove from the
displayed “Quicklist,” and press ,.
2 Select “Remove,” and press ENTER.
z Hint
You can play the “Quicklist” content in other play modes by pressing
PLAY MODE (page 25).
Note
The “Quicklist” may be cleared after some operations (e.g., opening the
disc tray, or turning off the player etc.).
Listening to Music Files
a Press SYSTEM MENU.
b Select “Title List,” and press ENTER.
c Select “Music,” and press ENTER.
d Press < to turn on the Browse menu.
e Select “All Songs,” and press ENTER.
f When the “All Songs” Title List appears,
select the track you want to add to the top of
the “Quicklist,” and press ,.
g Select “Add to Quicklist” from the “Options”
menu, and press ENTER.
h Repeat step 6 and 7 to select all the desired
tracks.
Select in the order you want to play. You can add the
same track multiple times.
The “Quicklist” can contain up to 25 tracks.
i Press < to turn on the Browse menu.
j Select “Browse,” and press ENTER.
k Select “Quicklist,” and press ENTER to turn
on the above display.
The “Quicklist” Title List appears with the
programmed content.
l Select the track you want to start playback,
and press ENTER.
39
Page 40

Viewing All Folders
Viewing Photo Files
Use the “Photos” Title List to view the
JPEG images on DATA DVDs. You can
reorder the files and start playing a
slideshow.
DATA DVD
The “Photos” Title List first displays all the folders on the disc.
Folders
Kurobe-dam 2005
Jungfraujoch 2006
The Browse menu appears when you press < while on
the leftmost row
2 items
ExitConfirm
SYSTEM MENU
a Press SYSTEM MENU.
b Select “Title List,” and press ENTER.
c Select “Photos,” and press ENTER.
The above “Folders” display appears, showing all
folders (scrollable by pressing m). From “Folders”
you can apply items to all files using the Browse
menu (see below).
• Viewing All Folders . . . . . . . . . . . . . . . . . . . . . 40
• Browsing by Date, Quicklist, or Folder . . . . . . 42
To use the Browse menu
Press < after step 3 to display the items for “Photos” Title List.
For operations, see the pages in parentheses. Available items
differ depending on the display.
Items Details
All Photos Displays all files in alphabetical order
(page 41).
Browse Displays a list of dates, Quicklist, or
folders (page 42).
Search Searches for a file using the on-screen
keyboard (page 42).
Sort Reorders the files by date or alphabet (see
below).
◆Example: To apply “Sort” to all files
A To display the list of all files, select “All Photos” from the
Browse menu and press ENTER.
B Move the highlight to the left most row, and press < to
turn on the Browse menu.
C Select “Sort,” and press ENTER.
D Select the setting you want to sort by; “Recent first,”
“Oldest first,” “By title (AtZ),” “By title (ZtA),” and
press ENTER.
40
• Searching for a Photo. . . . . . . . . . . . . . . . . . . 42
• Programming a Slideshow Playback (Quicklist)
. . . . . . . . . . . . . . . . . . . . . . . . . . . . . . . . . . 43
Page 41

Playing a slideshow
About the “Photos” (All Photos) Title List
display
a After step 3 of “Viewing All Folders” above,
press < and select “All Photos” from the
Browse menu.
b Select the file you want to start from, and
press ENTER to turn on the “Options”
menu.
c Select “Slideshow,” and press ENTER.
Slideshow starts.
You can apply other playback settings to the selected
file using the “Options” menu (see below).
All Photos
File : DSC00434.jpg
Date : 12/10/2007
Resolution: 293 x 196
Format: JPEG
The “Options” menu appears when you select a file and
press ENTER
1214 items
Options
Slideshow
Add to Quicklist
SYSTEM MENU
ExitConfirm
To use the “Options” menu
Available “Options” menu settings differ depending on the
situation. In the above example of the use of the “Options”
menu, the following items are available.
Items Details
Slideshow Starts playing a slideshow as above.
Add to Quicklist Adds the selected file to the Quicklist for
later slideshow playback.
To play in other play mode
During playback, press PLAY MODE repeatedly. The selected
item changes with each press:
“Repeat All” — “Random” — “Repeat Off”
See page 25 for details.
All Photos
File:Summer of '06.jpg
File : DSC00434.jpg
Date:July/23/2006
Date : 12/10/2007
Resolution:196x298 pixels
Resolution: 293 x 196
Format:JPEG
Format: JPEG
1214 items
ExitConfirm
SYSTEM MENU
1 Detailed information
Displays details about the selected file.
• File: Displays the file name.
• Date: Displays the shooting date.
• Resolution: Displays the picture resolution in width ×
height.
• Format: Displays the recording format.
2 List area
Displays overall photo content in thumbnail.
About unplayable photo files
The player does not play the file if:
– The DATA DVD is not recorded in a JPEG format that
conforms to UDF (Universal Disk Format).
– The photo file is not recorded in a format that conforms to the
DCF*.
– The file has an extension other than “.JPEG.”
– The image is larger than 4,096 (width) × 4,096 (height) in
normal mode, or progressive JPEG.
– The image does not fit the screen (the image is reduced).
– The file name contains characters other than numbers and
English alphabet.
• Even when the above are not applicable, some files may not
play depending on the recording condition or the method (e.g.,
writer software).
• Files may not play on this player if edited on a PC.
* “Design rule for Camera File system”: Image standards for digital
cameras regulated by JEITA (Japan Electronics and Information
Technology Industries Association).
Viewing Photo Files
z Hints
• See page 24 for the remote’s operations.
• Even after stopping playback, the player resumes playback from the
last file you played.
Note
The photos may appear slowly depending on the size and the number of
files.
41
Page 42

Browsing by Date, Quicklist, or Folder
Searching for a Photo
DATA DVD
Narrow down the list of files by selecting the category type (e.g.,
“Date”), then the category.
Year
File:Summer of '06.jpg
Date:July/23/2006
Resolution:196x298 pixels
Format:JPEG
2007
2006
2005
2004
2003
2002
2001
2000
1999
1998
10 items
ExitConfirm
SYSTEM MENU
a Press SYSTEM MENU.
b Select “Title List,” and press ENTER.
c Select “Photos,” and press ENTER.
d Press < to turn on the Browse menu.
DATA DVD
You can find the exact file, or files with a similar name.
Select
7 items
Exit
SYSTEM MENU
Search Results
R_
AB
CDEFGH I J
KLMNOPQRST
UVWXYZ,.:;
123456
7890
_()
SHFT
SPC DEL CLR
DONE CANCEL
Search results are narrowed down as more characters
are entered
a Press SYSTEM MENU.
b Select “Title List,” and press ENTER.
c Select “Photos,” and press ENTER.
e Select “Browse,” and press ENTER.
f Select the list you want to view from “Date,”
“Quicklist,” or “Folders” and press ENTER.
The list of date/Quicklist/folders appears as above.
For details about the Quicklist, see “Programming a
Slideshow Playback (Quicklist)” (page 43).
g Select the date/Quicklist/folder you want to
view, and press ENTER.
z Hint
You can select a file and start slideshow by using “Options” menu (press
,).
d Press < to turn on the Browse menu.
e Select “All Photos,” and press ENTER.
f Move the highlight to the leftmost row, and
press < to turn on the Browse menu.
g Select “Search,” and press ENTER to turn on
the above display.
h Enter the file name using the on-screen
keyboard (see page 23).
z Hint
You can select a file and start slideshow by using “Options” menu (press
,).
42
Page 43

Programming a Slideshow Playback (Quicklist)
DATA DVD
Play a slideshow in the order you like by making your own
“Quicklist.”
Quicklist
File : DSC00434.jpg
Date : 12/10/2007
Resolution: 293 x 196
Format: JPEG
The “Quicklist” does not affect the original recording on
the disc
22 items
ExitConfirm
SYSTEM MENU
m Select “Slideshow” from the “Options”
menu, and press ENTER.
To remove from the “Quicklist”
1 Select the file you want to remove from the
displayed “Quicklist,” and press ENTER.
2 Select “Remove,” and press ENTER.
z Hint
You can play the “Quicklist” content in other play modes by pressing
PLAY MODE (page 25).
Note
The “Quicklist” may be cleared after some operations (e.g., opening the
disc tray, or turning off the player etc.).
Viewing Photo Files
a Press SYSTEM MENU.
b Select “Title List,” and press ENTER.
Select “Photos,” and press ENTER.
c
d Press < to turn on the Browse menu.
e Select “All Photos,” and press ENTER.
f When the “All Photos” Title List appears,
select the file you want to add to the top of the
“Quicklist,” and press ENTER.
g Select “Add to Quicklist” from the “Options”
menu, and press ENTER.
h Repeat step 6 and 7 to select all the desired
files.
Select in the order you want to play. You can add the
same file multiple times.
The “Quicklist” can contain up to 25 files.
i Move the highlight to the leftmost row, and
press < to turn on the Browse menu.
j Select “Browse,” and press ENTER.
k Select “Quicklist,” and press ENTER to turn
on the above display.
The “Quicklist” Title List appears with the
programmed content.
l Select the file you want to start playback, and
press ENTER.
43
Page 44

Using the Setup Displays
Changing the Initial Settings
Select “Setup” from the “System Menu”
when you need to change the settings of the
player (e.g., when changing the connected
device or the audio/video output, etc.).
The last part of this section explains how to
return all of these settings to their factory
defaults.
Note
Playback settings described in this section may not work
when there is any preset playback setting in the disc. The
disc’s playback settings take priority over the player’s
playback settings.
BD
From the “System Menu,” enter the “Setup” displays to change
the settings of the player.
DVD
Video Setup
Audio Setup
Language
Parental Control
Speakers
Options
Use
ENTER.
DATA DVD
TV Type
4:3 Video Output
DVD Aspect Ratio
bCr/RGBPC(HDMI)
YC
24p Output
to select an item, then press [RR] or
CD
Setup
16:9
Normal
Letter Box
b, Cr
Y, C
Off
Confirm Exit
SYSTEM MENU
a Press SYSTEM MENU while the player is
stopped.
b Select “Setup,” and press ENTER.
c Select the “Setup” display you want to use,
from “Video Setup,” “Audio Setup,”
“Language,” “Parental Control,”
“Speakers,” or “Options,” and press
ENTER.
The “Setup” display appears with the related items.
Note that the display switches to the screen saver if
you do not operate for 15 minutes.
• Using the Setup Displays . . . . . . . . . . . . . . . . 44
• Video Setup . . . . . . . . . . . . . . . . . . . . . . . . . . 45
• Audio Setup . . . . . . . . . . . . . . . . . . . . . . . . . . 47
• Language . . . . . . . . . . . . . . . . . . . . . . . . . . . . 49
• Parental Control . . . . . . . . . . . . . . . . . . . . . . . 50
• Speakers. . . . . . . . . . . . . . . . . . . . . . . . . . . . . 51
• Options. . . . . . . . . . . . . . . . . . . . . . . . . . . . . . 52
• Resetting the Player . . . . . . . . . . . . . . . . . . . . 53
d Select the item you want to change, and press
ENTER.
Refer to the explanations in the following sections.
To return to the previous display
Press RETURN.
44
Page 45

Video Setup
Underlined items are the default settings.
TV Type 4:3
– Select your TV type.
4:3 Video Output Full
– Select the display configuration for a 4:3
screen picture on a 16:9 wide screen TV.
DVD Aspect Ratio Letter Box
– Select the display configuration for a 16:9
DVD picture on a 4:3 screen TV (selectable
when “TV Type” is set to “4:3”).
Note that the aspect ratio is fixed on some
discs. For example, a 4:3 letterbox picture
may appear even when “Pan Scan” is
selected.
YCbCr / RGBPC (HDMI) Y, Cb, Cr
– Select the type of output from the HDMI
OUT jack.
–4:3 screen TV.
16:9
– Wide-screen TV, or a TV with a wide mode function.
– Displays a 4:3 screen picture in 16:9 aspect ratio.
Normal
– Displays a 4:3 screen picture in 4:3 aspect ratio with black bands on the sides. Select
this if your TV does not have a 4:3 screen mode.
– Displays a wide picture with black bands on the top and
bottom.
Pan Scan
– Displays a full-height picture on the entire screen, with
trimmed sides.
– Select this when connecting to an HDMI device.
RGB (16-235)
– Select this when connecting to a device with an HDCP-compliant DVI jack.
Changing the Initial Settings
RGB (0-255)
– Select this when connecting to an RGB (0-255) device.
24p Output On
– For connection to a 1080/24p-compatible TV
using the HDMI OUT jack.
Note
“TV Type” and “DVD Aspect Ratio” can be set when video output resolution is 480i/576i or 480p/576p.
– Sends 1920 × 1080p/24 Hz video signals when playing Film-based materials on BD-
ROMs (720p/24 Hz or 1080p/24 Hz). Select this when the connection applies.
Off
– Select this for any other connection.
,continued
45
Page 46

To set the video output resolution
Press VIDEO FORMAT repeatedly to select the desired resolution. Note that the resolution differs depending on the display device,
connecting jack and the source material as below.
Connecting
HDMI OUT COMPONENT VIDEO OUT VIDEO/S VIDEO
Settings
Auto Automatically selects the
576i/480i 480i/576i 480i/576i 480i/576i
576p/480p 480p/576p 480p/576p 480i/576i
720p 720p BD:720p/576i*
1080i 1080i BD:1080i/576i*
1080p 1080p 480i/576i 480i/576i
Source Direct Output differs depending on source
*1 576i when in 50Hz to comply with the international standards.
2
Outputs in the same resolution and frequency as recorded on the disc.
*
3
1080/24p video signals are not output from the COMPONENT VIDEO OUT jacks.
*
jack
recommended resolution acceptable
for your TV.
2
material*
480i/576i 480i/576i
1
, DVD:480p/576i 480i/576i
1
, DVD:480p/576i 480i/576i
Output differs depending on source
material*
3
480i/576i
Notes
• If the picture is not clear, natural or to your satisfaction, try another resolution that suits the disc and your TV/projector, etc. For the details, refer also
to the instruction manual supplied with the TV/projector, etc.
• 480i/576i or 480p/576p video signals may be output when you connect to the COMPONENT VIDEO OUT jacks and play some copy-guarded BDs/
DVDs. To enjoy the HD quality resolution in this case, connect the display device to the HDMI OUT jack using an HDMI cord.
• Even when you select a setting other than “Auto,” the player automatically adjusts the video signals if the TV cannot accept the set resolution.
To output the 1080/24p video signals
A 1080/24p-compatible TV is required for this setting.
1 Set “24p Output” in “Video Setup” to “On” (page 45).
2 Press VIDEO FORMAT repeatedly to select “Auto” or “Source Direct.”
Note
If there is no picture, press VIDEO FORMAT repeatedly until the picture appears correctly.
46
Page 47

Audio Setup
Underlined items are the default settings. Since many factors
affect the type of audio output, see also “About the audio output
signals” on page 48.
Dolby Digital Output Dolby Digital
– Select the audio signals output when playing
Dolby Digital discs. This setting affects the
output from the DIGITAL OUT (COAXIAL
or OPTICAL) jack.
DTS Output DTS
– Select the audio signals output when playing
DTS discs. This setting affects the output
from the DIGITAL OUT (COAXIAL or
OPTICAL) jack.
DTS Downmix Stereo
– Select the type of 2-channel signals when
down-mixed from multi-channel DTS
sources (effective for audio connections
when “DTS Output” is set to “Downmix
PCM”).
Audio (HDMI) Auto
– Select the output method from the HDMI
OUT jack.
– Select this when connecting to a device with a built-in Dolby Digital decoder.
Downmix PCM
– Converts to output Linear PCM signals. Select this when connecting to a device
without a built-in Dolby Digital decoder.
– Select this when connecting to a device with a built-in DTS decoder.
Downmix PCM
– Converts to output Linear PCM signals. Select this when connecting to a device
without a built-in DTS decoder.
– Downmixes multi-channel audio signals for two channel stereo.
Lt/Rt
– Allows you to hear surround sound when the connected device has a built-in Dolby
Pro Logic decoder.
– Normally, select this. Outputs audio signals according to the status of the connected
HDMI device.
PCM
– Converts all audio signals to Linear PCM.
Changing the Initial Settings
,continued
47
Page 48

About the audio output signals
The audio output differs as follows, depending on the source, output jack, and the selected settings.
Jacks/
settings
Disc/source
BD-
Linear PCM 2ch 2ch 2ch 2ch LPCM 2ch LPCM 2ch LPCM 2ch LPCM
ROM
5.1ch
7.1ch 2ch Downmix
AUDIO OUT L/R jacks*
2ch 5.1ch PCM Bitstream PCM*
*52ch Downmix 5.1ch
5.1ch
Downmix
Dolby Digital 2ch Downmix 5.1ch
Dolby Digital Plus 2ch Downmix 5.1ch
Dolby TrueHD 2ch Downmix 5.1ch
DTS 2ch Downmix 5.1ch
DTS-HD 2ch Downmix 5.1ch
DIGITAL OUT (OPTICAL/
1
COAXIAL) jacks*
2ch Downmix
LPCM
2ch Downmix
LPCM
2ch Downmix
LPCM
2ch Downmix
LPCM
2ch Downmix
LPCM
2ch Downmix
LPCM
2ch Downmix
LPCM
2
2ch Downmix
LPCM
2ch Downmix
LPCM
HDMI OUT jack*
4
5.1ch LPCM 5.1ch LPCM
7.1ch LPCM 7.1ch LPCM
3
Auto*
4
Dolby Digital 5.1ch LPCM Dolby Digital
Dolby Digital 7.1ch LPCM*6Dolby Digital
Dolby Digital 7.1ch LPCM*7Dolby Digital
DTS 5.1ch LPCM DTS
DTS 5.1ch LPCM DTS
DVD Linear PCM 2ch 2ch 2ch LPCM 2ch LPCM 2ch LPCM 2ch LPCM
Dolby Digital 2ch Downmix 5.1ch
DTS 2ch Downmix 5.1ch
2ch Downmix
LPCM
2ch Downmix
LPCM
Dolby Digital 5.1ch LPCM Dolby Digital
DTS 5.1ch LPCM DTS
MPEG 2ch 2ch 2ch LPCM — 2ch LPCM 2ch LPCM
CD Linear PCM 2ch 2ch 2ch 2ch LPCM 2ch LPCM 2ch LPCM 2ch LPCM
DTS 2ch Downmix 5.1ch
*1“2 Channel” and “5.1 Channel” are selectable under “Audio Output Mode” in “Speakers” Setup (page 51).
2
*
PCM : when “Dolby Digital Output” or “DTS Output” in “Audio Setup” is set to “Downmix PCM” (page 47).
Bitstream : when “Dolby Digital Output” or “DTS Output” in “Audio Setup” is set to “Dolby Digital” or “DTS” (page 47).
3
Selectable under “Audio (HDMI)” in “Audio Setup” (page 47).
*
4
*
Selectable under “Audio (HDMI)” in “Audio Setup” (page 47). Resulting output may differ depending on the connected HDMI device.
5
When the sampling frequency is 192 kHz, the player downmixes to 2ch signals even if the disc or source is 5.1ch.
*
6
Outputs 7.1ch LPCM signals decoded from Dolby Digital Plus audio stream.
*
7
*
Outputs 7.1ch LPCM signals decoded from Dolby True HD audio stream.
The player outputs up to 7.1ch LPCM when the source sampling frequency is 48 kHz; up to 5.1ch at 96 kHz; up to 2ch at 192 kHz.
2ch Downmix
LPCM
DTS 5.1ch LPCM DTS
48
Page 49

Language
Underlined items are the default settings.
Notes
• When you select a language in “Audio,” “Subtitles,” “BD/DVD Menu”
that is not recorded on the disc, one of the recorded languages is
automatically selected.
• Playback settings stored in the disc take priority over these settings.
OSD English / Français / Deutsch / Italiano / Español
– Select your language for the player on-screen
displays.
Audio English / French / German / Italian / Spanish
– Select the default soundtrack language for
BD-ROMs/DVD VIDEOs.
Subtitles English / French / German / Italian / Spanish
– Select the default subtitle language for BD-
ROMs/DVD VIDEOs.
BD/DVD Menu w/Subtitle Language
– Select the default menu language for BD-
ROMs/DVD VIDEOs.
– Displays the menus and messages in English/French/German/Italian/Spanish.
– Plays the soundtrack in the selected language.
Other
–See “Language Code List” on page 62 and enter the code for your language.
– Displays the subtitles in the selected language.
Other
–See “Language Code List” on page 62 and enter the code for your language.
– Displays BD’s/DVD’s menus in the same language as the subtitle language.
English / French / German / Italian / Spanish
– Displays BD’s/DVD’s menus in the selected language.
Changing the Initial Settings
Other
–See “Language Code List” on page 62 and enter the code for your language.
Subtitle Display On
– Turns on the subtitles.
Off
– Turns off the subtitles.
49
Page 50

Parental Control
This function limits playback of DVD VIDEOs and BD-ROMs.
To activate, see “Locking a Disc” (page 29).
The default settings are underlined.
Notes
• You cannot limit playback if the disc does not have the Parental Control
function.
• If you forget the password for “Parental Control,” you will need to reset
the player (page 53). Note that all the settings you made also return to
their defaults.
Change Password (Set Password) Next Screen
– Set or change the password for the “Parental Control” function. You will be asked for
the password when playing restricted discs or when changing the control level.
DVD Parental Control Change Level
– Set the control level. The display asks for the password if the disc’s pre-determined
level exceeds the limit you set. The default setting is “Off
DVD Country Code
– This ensures that you see the scenes intended for your residential area. The default
setting is “us
BD Parental Control Change Age Restriction
– Set the control level. The display asks for the password if the disc’s pre-determined
age restriction is higher than the age you set. The default setting is “255.”
” (2119).
.”
BD Country Code
– This ensures that you see the scenes intended for your residential area when playing
BD-ROMs. The default setting is “us
” (2119).
50
Page 51

Speakers
The following items are necessary when using the 5.1CH
OUTPUT jacks.
The default settings are underlined.
Audio Output Mode 2 Channel
– For analog connection.
Speaker Setup Next Screen
– This setting affects the output from the
5.1CH OUTPUT jacks.
– Select this when connecting to an AV amplifier (receiver) using the AUDIO OUT (L/
R) jacks.
5.1 Channel
– Select this when connecting to an AV amplifier (receiver) using the 5.1CH OUTPUT
jacks.
1 Select the speaker setting that needs adjusting by pressing M/m.
• “C” (centre speaker): “Yes” or “No”
• “Ls/Rs” (left surround speaker/right surround speaker): “Yes
• “L/R” (left front speaker/right front speaker): “Large
2 Adjust the setting by pressing </,.
• For “C” and “Ls/Rs,” select whether the speakers are included in your system.
• For “L/R,” select the size. This setting is disabled if either of “C” or “Ls/Rs” is set
to “No.”
3 Press ENTER to save the adjustments.
” or “No”
Changing the Initial Settings
” or “Small”
51
Page 52

Options
Underlined items are the default settings.
On Screen Display On
– Select whether to display the playback status
on the screen (Stop, Play, etc.).
Auto Power Off On
– Select whether to activate the “Auto Power
Off” function of the player.
Easy Setup Start
– Re-runs the Easy Setup to make the basic
settings.
HDMI Control On
– Select whether to activate the HDMI Control
function of the player (page 11).
Hybrid Disc Playback Layer BD
– Select the layer priority when playing a
Hybrid Disc. Remove the disc when you
change the setting.
– Displays playback status.
Off
– Playback status is not displayed.
– Turns off the player when the player is left in stop or pause mode without operation
for 30 minutes.
Off
– The player remains turned on with or without operation.
– Press ENTER and see page 18.
– Activates the function.
Off
– Turns off the function.
– Plays BD layer.
DVD
– Plays DVD layer.
CD
– Plays CD layer.
52
Page 53

Resetting the Player
You can return all of the player settings to their factory defaults.
x@/1
HDMI HD FL OFF
a When the power is on, hold down x on the
front panel, and press @/1.
The player turns off, and all of the settings return to
their factory defaults.
Changing the Initial Settings
53
Page 54

Troubleshooting
Additional Information
• Troubleshooting . . . . . . . . . . . . . . . . . . . . . . . 54
If you experience any of the following difficulties while using
the player, use this troubleshooting guide to help remedy the
problem before requesting repairs. Should any problem persist,
consult your nearest Sony dealer.
Power
The power does not turn on.
, Check that the mains lead is connected securely.
, It takes a short while before the player turns on.
Picture
There is no picture/picture noise appears.
, Re-connect the connecting cord securely.
, The connecting cords are damaged.
, Check the connection to your TV (page 10) and switch the
input selector on your TV so that the signal from the player
appears on the TV screen.
, The disc is dirty or flawed.
, If the picture output from your player goes through your
VCR to get to your TV or if you are connected to a
combination TV/VIDEO player, the copy-protection signal
applied to some BD/DVD programmes could affect picture
quality. If you still experience problems even when you
connect your player directly to your TV, try connecting your
player to your TV’s S VIDEO input (page 10).
, The player is connected to an input device that is not HDCP-
compliant (the HDMI indicator on the front panel does not
light up). See page 11.
, If the HDMI OUT jack or the COMPONENT VIDEO OUT
jacks are used for video output, changing the output
resolution may solve the problem (page 46). Press VIDEO
FORMAT repeatedly until the picture appears correctly.
, Depending on the disc, the picture quality may be poor when
the VIDEO FORMAT setting is set to other than “480i,”
even when the player is connected to a progressive or HD
TV using a component cord or an HDMI cord. If this
happens, press VIDEO FORMAT repeatedly to switch to
“480i.”
, When playing a double-layer DVD, the video and audio may
be momentarily interrupted at the point where the layers
switch.
54
• Self-Diagnosis Function . . . . . . . . . . . . . . . . . 57
• Index to Parts and Controls . . . . . . . . . . . . . . 58
• Glossary . . . . . . . . . . . . . . . . . . . . . . . . . . . . . 60
• Specifications . . . . . . . . . . . . . . . . . . . . . . . . . 61
• Language Code List . . . . . . . . . . . . . . . . . . . . 62
• Parental Control Country/Area Code List . . . . 63
• Index . . . . . . . . . . . . . . . . . . . . . . . . . . . . . . . 63
There is no picture or picture noise appears
when connected to the HDMI OUT jack.
, Try the following: 1Turn the player off and on again.
2Turn the connected equipment off and on again.
3Disconnect and then connect the HDMI cord again.
, If the HDMI OUT jack is used for video output, changing the
video output resolution may solve the problem (page 46).
Press VIDEO FORMAT repeatedly until the picture appears
correctly.
Page 55

The picture does not fill the screen, even
(
36)
though the aspect ratio is set in “TV Type”
under “Video Setup.”
, The aspect ratio of the disc is fixed on your BD/DVD. See
page 45.
The dark area of the picture is too dark/the
bright area is too bright or unnatural.
, Set “Video Control” in “A/V Control” to “Standard”
(default) (page 28).
, Adjust each picture setting for “Memory” in “Video
Control” to midpoint (default) (page 28).
Sound
There is no sound.
, The disc is dirty or flawed.
, Re-connect the connecting cord securely.
, The connecting cord is damaged.
, The player is connected to the wrong input jack on the
amplifier (receiver) (page 12).
, The amplifier (receiver) input is not correctly set.
, The player is in pause mode or in Slow-motion Play mode.
, The player is in scan mode.
, If the audio signal does not come through the DIGITAL
OUT (OPTICAL or COAXIAL)/HDMI OUT jack, check
the audio settings (page 47).
, The equipment connected to the HDMI OUT jack does not
conform to the audio signal format, in this case set “Audio
(HDMI)” in “Audio Setup” to “PCM” (page 47).
The sound is not output correctly.
, Check the “Audio Output Mode” in “Speakers” Setup
(page 51) if the AUDIO OUT (L/R) jacks or the 5.1CH
OUTPUT jacks are used for audio connection.
No sound is output from the HDMI OUT jack
, Try the following: 1Turn the player off and on again.
2Turn the connected equipment off and on again.
3Disconnect and then reconnect the HDMI cord.
, The HDMI OUT jack is connected to a DVI device (DVI
jacks do not accept audio signals).
The sound volume is low.
, The sound volume is low on some BDs/DVDs. The sound
volume may improve if you adjust the “Audio Control”
setting in “A/V Control” (page 27).
The disc does not play.
, The disc is turned over. Insert the disc with the playback side
facing down.
, The disc is skewed.
, The player cannot play certain discs (page 6).
, The region code on the BD/DVD does not match the player.
, Moisture has condensed inside the player (page 3).
, The player cannot play a recorded disc that is not correctly
finalized (page 6).
, The movie file size exceeds 2 GB.
, The file on the DATA DVD contains characters other than
numbers and English alphabet.
The MP3 audio track file cannot be played
page
, The DATA DVD is not recorded in the MP3 format that
conforms to UDF (Universal Disk Format).
, The audio track file does not have the extension “.MP3.”
, The data is not formatted properly even though it has the
extension “.MP3.”
, The data is not MPEG-1 Audio Layer III data.
, The player cannot play audio tracks in mp3PRO format.
, Characters other than numbers and English alphabet are
contained in the file name.
The photo file cannot be played
, The disc is dirty or flawed.
, The DATA DVD is not recorded in a JPEG format that
conforms to UDF (Universal Disk Format).
, The file has an extension other than “.JPEG” or “.JPG.”
, The image is larger than 4,096 (width) × 4,096 (height) in
normal mode. (Some progressive JPEG files cannot be
displayed even if the file size is within this specified
capacity.)
, The image does not fit the screen (the image is reduced).
, The photo file format does not conform to DCF* (page 41).
, Characters other than numbers and English alphabet are
contained in the file name.
* “Design rule for Camera File system”: Image standards for digital
cameras regulated by JEITA (Japan Electronics and Information
Technology Industries Association).
.
page 40).
The file name is not correctly displayed.
, The player can only display numbers and alphabet. Other
characters may be displayed differently.
, Depending on the writing software used, the input characters
may be displayed differently.
The disc does not start playing from the
beginning.
, Random Play or Repeat Play is selected (page 25).
, Resume play mode is on (page 20).
Additional Information
Operation
The player starts playing the disc
automatically.
The remote does not function.
, The batteries in the remote are weak (page 16).
, There are obstacles between the remote and the player.
, The distance between the remote and the player is too far.
, The remote is not pointed at the remote sensor on the player.
, The disc features an auto playback function.
Playback stops automatically.
, While playing discs with an auto pause signal, the player
stops playback at the auto pause signal.
,continued
55
Page 56

Some functions such as Stop, Search, Slowmotion Play, Repeat Play, or Random Play
cannot be performed.
, Depending on the disc, you may not be able to do some of
the operations above. Refer to the operating manual that
comes with the disc.
The language for the soundtrack cannot be
changed.
, Try using the BD’s or DVD’s menu instead of the direct
selection button on the remote (page 21).
, Multi-lingual tracks are not recorded on the BD/DVD being
played.
, The BD/DVD prohibits the changing of the language for the
sound track.
The subtitle language cannot be changed or
turned off.
, Try using the BD’s or DVD’s menu instead of the direct
selection button on the remote (page 21).
, Multi-lingual subtitles are not recorded on the BD/DVD
being played.
, The BD/DVD prohibits the changing of subtitles.
The angles cannot be changed.
, Try using the BD’s or DVD’s menu instead of the direct
selection button on the remote (page 21).
, Multi-angles are not recorded on the BD/DVD being played.
, The BD/DVD prohibits changing of the angles.
The disc tray does not open and “LOCK”
appears on the front panel display.
, Contact your Sony dealer or local authorized Sony service
facility.
The disc tray does not open and you cannot
remove the disc even after you press Z.
, Turn on the player.
As soon as “POWER ON” appears on the front panel
display, press x on the player (not the remote) repeatedly
until the tray opens. Repeat the above procedure several
times if the tray does not open on the first try.
“UNPLAYABLE” appears when playing a DATA
DVD.
, See also “The photo file cannot be played” or “The MP3
audio track file cannot be played” (page 55).
, The MP3 audio track/JPEG image file you want to play/view
is damaged.
, The data is not MPEG-1 Audio Layer III data.
, The JPEG image file format does not conform to DCF*
(page 41).
, The JPEG image file has the extension “.JPG” or “.JPEG,”
but is not in JPEG format.
* “Design rule for Camera File system”: Image standards for digital
cameras regulated by JEITA (Japan Electronics and Information
Technology Industries Association).
The player does not accept any button.
, Hold down \/1 on the player for more than five seconds
until the indicators on the front panel display turn off.
The HDMI Control function does not work.
, If the HDMI indicator on the front panel does not light up,
check the HDMI connection (page 11, 15).
, Set “HDMI Control” to “On” (page 52).
, Make sure that the connected component is compatible with
the HDMI Control function. Refer to the operating
instructions of the component for details.
, Check that the mains lead of the connected component is
connected securely.
, Check the connected component’s setting for the HDMI
Control function. Refer to the operating instructions of the
component.
, If you change the HDMI connection, connect and disconnect
the mains lead, or if a power failure occurs, set “HDMI
Control” to “Off,” then set “HDMI Control” to “On”
(page 52).
, For details on the HDMI Control function, see “About the
‘BRAVIA’ Theatre Sync features (for HDMI connections
only)” (page 11).
The display language on the screen switches
automatically.
, When “HDMI Control” is set to “On” (page 52), the display
language on the screen automatically switches according to
the language setting of the connected TV (if you change the
setting on your TV, etc.).
The player does not operate properly.
, When static electricity, etc., causes the player to operate
abnormally, unplug the player.
56
Page 57

Self-Diagnosis Function
When the self-diagnosis function is activated to prevent the
player from malfunctioning, the “ERR” error code appears on
the front panel display indicating the cause.
Error code Cause and/or corrective
AACS ERR AACS read failure.
LSI1 ERR
LSI2 ERR
LSI3 ERR
MEM ERR
FLASH ERR
ROM ERR
action
tRemove the protected disc.
tContact your nearest Sony dealer
or local authorized Sony service
facility and give the error code.
Additional Information
57
Page 58

Index to Parts and Controls
Buttons on the remote and the player have the same function if they have the same or similar name.
For details, see the pages in parentheses.
Front panel
HDMI HD FL OFF
A @/1 (20)
– Turns on the player, or sets to standby mode.
– Lights up in white while the power is on.
B Disc tray (20)
C H, X, x (20)
– Starts, pauses, or stops playback.
D ./> (24)
– Skips to the previous/next chapter or track.
– Scans forward or backwards when held down.
E A (20)
– Opens or closes the disc tray.
– Lights up in white while the power is on.
F HDMI indicator (11)
– Lights up when an HDMI device is connected.
HD indicator (11)
– Lights up when outputting 720p/1080i/1080p
video signals.
FL OFF indicator (24)
– Lights up when the front panel display and other
indicators on the front panel are turned off.
G Remote sensor (16)
H Blu-ray Disc indicator
– Lights up when a BD is recognized.
– Lights up for a few seconds when the player is
turned on.
I Front panel display (59)
Note
The transparent part on the front panel surface is made of glass. Handle
with care.
58
Page 59

Front panel display
A H
– Lights up during playback.
B Playback information
z Hint
You can change the brightness of the front panel display by pressing
DIMMER (page 24).
Rear panel
For connections, see page 10 to 16.
The playback information is displayed as follows.
Example: When playing a DVD VIDEO or a BD-ROM
A Current title number
B Current chapter number
Note that the chapter number is not displayed if the
title’s elapsed time exceeds 10 hours.
C Elapsed time of the title
Additional Information
AC IN
HDMI
OUT
A AC IN terminal (16)
B HDMI OUT jack (11, 12, 15)
C VIDEO OUT (VIDEO/S VIDEO) jacks (10)
D COMPONENT VIDEO OUT (Y, P
B/CB, PR/CR) jacks
(10)
E DIGITAL OUT (COAXIAL/OPTICAL) jacks (13, 14)
COMPONENT
VIDEO OUT
VIDEO
S VIDEO
VIDEO OUT
Y
P
B
/
C
B
P
R
/
C
R
DIGITAL OUT
PCM/DTS/DOLBY DIGITAL
COAXIAL OPTICAL
5.1CH OUTPUT
FRONT REAR CENTER
L
R
WOOFER
AUDIO
OUT
L
R
F 5.1CH OUTPUT (FRONT L/R, REAR L/R, CENTER,
WOOFER) jacks (14)
G AUDIO OUT (L/R) jacks (13, 14)
59
Page 60

Glossary
AACS
“Advanced Access Content System” is a
specification for managing digital
entertainment contents stored on the next
generation of prerecorded and recorded
optical media. The specification enables
consumers to enjoy digital entertainment
content, including high-definition
content.
AVCHD (page 6)
The AVCHD format is a high definition
digital video camera format used to
record SD (standard definition) or HD
(high definition) signals of either the
1080i specification*1 or the 720p
specification*
data compression coding technology.
The MPEG-4 AVC/H.264 format is
adopted to compress video data, and the
Dolby Digital or Linear PCM is used to
compress audio data. The MPEG-4
AVC/H.264 format is capable of
compressing images at higher efficiency
than that of the conventional image
compression format. The MPEG-4
AVC/ H.264 format enables a high
definition (HD) video signal shot on a
digital video camera recorder to be
recorded on DVDs in the same way as
for a standard definition (SD) television
signal.
*1A high definition specification that
utilizes1080 effective scanning lines and
the interlace format.
2
A high definition specification that utilizes
*
720 effective scanning lines and the
progressive format.
BD-J application
The BD-ROM format supports Java for
interactive functions.
“BD-J” offers content providers almost
unlimited functionality when creating
interactive BD-ROM titles.
BD-R
BD-R (Blu-ray Disc Recordable) is a
recordable, write-once Blu-ray Disc,
available in the same capacities as the
BD below. Since contents can be
recorded and cannot be overwritten, a
BD-R can be used to archive valuable
data or storing and distributing video
material.
2
on DVDs, using efficient
BD-ROM (page 5)
BD-ROMs (Blu-ray Disc Read-Only
Memory) are commercially produced
discs and are available in the same
capacities as the BD below. Other than
conventional movie and video contents,
these discs have enhanced features such
as interactive content, menu operations
using pop-up menus (see below),
selection of subtitle display, and
slideshow. Although a BD-ROM may
contain any form of data, most BD ROM
discs will contain movies in High
Definition format, for playback on Bluray Disc players.
Blu-ray Disc (BD) (page 5)
A disc format developed for recording/
playing high-definition (HD) video (for
HDTV, etc.), and for storing large
amounts of data. A single layer Blu-ray
Disc holds up to 25 GB, and a dual-layer
Blu-ray Disc holds up to 50 GB of data.
Chapter (page 25)
Sections of a picture or a music feature
that are smaller than titles. A title is
composed of several chapters.
Depending on the disc, no chapters may
be recorded.
Dolby Digital (page 47)
Digital audio compression technology
developed by Dolby Laboratories. This
technology conforms to multi-channel
surround sound. The rear channel is
stereo and there is a discrete subwoofer
channel in this format. Dolby Digital
provides the same discrete channels of
high quality digital audio found in
“Dolby Digital” theatre surround sound
systems. Good channel separation is
realized because all of the channel data is
recorded discretely and little
deterioration occurs because all channel
data processing is digital.
Dolby Digital Plus (page 48)
Developed as an extension to Dolby
Digital, the audio coding technology
supports 7.1 multi-channel surround
sound.
Dolby Surround (Pro Logic)
(page 47)
Audio signal processing technology that
Dolby Laboratories developed for
surround sound. When the input signal
contains a surround component, the Pro
Logic process outputs the front, centre
and rear signals. The rear channel is
monaural.
Dolby TrueHD (page 48)
Dolby TrueHD is a lossless coding
technology that supports up to 8
channels of multi-channel surround
sound for the next generation optical
discs. The reproduced sound is true to
the original source bit-for-bit.
DTS (page 47)
Digital audio compression technology
that DTS, Inc. developed. This
technology conforms to multi-channel
surround sound. The rear channel is
stereo and there is a discrete subwoofer
channel in this format. DTS provides the
same discrete channels of high quality
digital audio.
Good channel separation is realized
because all of the channel data is
recorded discretely and little
deterioration occurs because all channel
data processing is digital.
DTS-HD (page 48)
DTS-HD is an extended format of the
Coherent Acoustics audio coding
system, which also encompasses DTS
Digital Surround, DTS-ES, and DTS 96/
24. DTS-HD is highly flexible in
supporting the number of discrete
surround sound channels. While 7.1ch
surround sound is planned for Blu-ray
Discs, the audio signals can be
downmixed to 5.1 or 2 channels for
backward compatibility, and the
reproduced audio quality can either be at
the bit rate of DTS Digital Surround or
the lossless mode.
DVD VIDEO (page 5)
A disc format that contains up to eight
hours of moving pictures on a disc the
same diameter as a CD. A single-layer
single sided DVD holds up to 4.7 GB; a
double layer single-sided DVD, 8.5 GB;
a single layer double-sided DVD, 9.4
GB; double-layer double-sided DVD, 17
GB. The MPEG 2 format is adopted for
the efficient video data compression.
The variable rate coding technology that
changes the data to be allocated
according to the status of the picture is
adopted for reproducing high-quality
pictures. Audio information is recorded
in a multi-channel format, such as Dolby
Digital, allowing for a realistic audio
presence.
BD-RE
BD-RE (Blu-ray Disc Rewritable) is a
recordable and rewritable Blu-ray Disc,
available in the same capacities as the
BD below. The re-recordable feature
makes extensive editing and timeshifting applications possible.
60
Page 61

DVD-R (page 5)
A DVD-R is a recordable disc that is the
same size as a DVD VIDEO. Contents
can be recorded only once to a DVD-R,
and will have the same format as a DVD
VIDEO. The DVD-R has two different
modes: VR mode and Video mode.
DVDs created in Video mode have the
same format as a DVD VIDEO, while
discs created in VR (Video Recording)
mode allow the contents to be
programmed or edited.
DVD-RW (page 5)
A DVD-RW is a recordable and
rewritable disc that is the same size as a
DVD VIDEO. The DVD-RW has two
different modes: VR mode and Video
mode. DVDs created in Video mode
have the same format as a DVD VIDEO,
while discs created in VR (Video
Recording) mode allow the contents to
be programmed or edited.
DVD+R (page 5)
A DVD+R (read “plus R”) is a
recordable disc that is the same size as a
DVD VIDEO. Contents can be recorded
only once to a DVD+R, and will have the
same format as a DVD VIDEO.
DVD+RW (page 5)
A DVD+RW (read “plus RW”) is a
recordable and rewritable disc.
DVD+RWs use a recording format that
is comparable to the DVD VIDEO
format.
Film-based software, Video-based
software
DVDs can be classified as Film-based or
Video-based software. Film-based
DVDs contain the same images (24
frames per second) that are shown at
movie theatres. Video-based DVDs,
such as television dramas or sitcoms,
display images at 25 frames/50 fields (30
frames/60 fields) per second.
HDMI (High-Definition Multimedia
Interface)
HDMI is an interface that supports both
video and audio on a single digital
connection. The HDMI connection
carries standard to high definition video
signals and multi-channel audio signals
to AV components such as HDMI
equipped TVs, in digital form without
degradation.
The HDMI specification supports HDCP
(High-bandwidth Digital Contents
Protection), a copy protection
technology for digital entertainment
contents for HDMI.
Interlace format
Interlace format shows every other line
of an image as a single “field” and is the
standard method for displaying images
on television. The even number field
shows the even numbered lines of an
image, and the odd numbered field
shows the odd numbered lines of an
image.
MPEG-2
One of the video data compression
schemes established by the Moving
Picture Experts Group (MPEG), which is
adopted for DVD VIDEOs and digital
broadcasts worldwide. The scheme
specifies MPEG-2 PS (Program Stream)
for recordable media such as a DVD
VIDEO, and MPEG-2 TS (Transport
Stream) for digital broadcasts and other
communications.
Pop-up menu
An enhanced menu operation available
on BD-ROMs. The pop-up menu
appears when MENU is pressed during
playback, and can be operated while
playback is in progress.
Progressive format
Compared to the Interlace format that
alternately shows every other line of an
image (field) to create one frame, the
Progressive format shows the entire
image at once as a single frame. This
means that while the Interlace format can
show 25 or 30 frames (50-60 fields) in
one second, the Progressive format can
show 50-60 frames in one second. The
overall picture quality increases and still
images, text, and horizontal lines appear
sharper.
Title (page 26)
The longest section of a picture or music
feature on a DVD, movie, etc., in video
software, or the entire album in audio
software.
Specifications
System
Laser: Semiconductor laser
Outputs
(Jack name: Jack type/Output level/
Load impedance)
AUDIO OUT L/R:
Phono jack/2 Vrms/10 kilohms
DIGITAL OUT (OPTICAL):
Optical output jack/–18 dBm (wave
length 660 nm)
DIGITAL OUT (COAXIAL):
Phono jack/0.5 Vp-p/75 ohms
5.1CH OUTPUT:
Phono jack/2 Vrms/10 kilohms
HDMI OUT:
HDMI 19-pin standard connector
COMPONENT VIDEO OUT(Y, P
C
B, PR/CR):
Phono jack/Y: 1.0 Vp-p, P
R: progressive or interlace
C
= 0.7 Vp-p/75 ohms
VIDEO: Phono jack/1.0 Vp-p/75 ohms
S VIDEO: 4-pin mini DIN/Y:
1.0 Vp-p, C: 0.3 Vp-p (PAL)/
75 ohms
General
Power requirements:
220-240 V AC, 50/60 Hz
Power consumption: 33 W
Dimensions (approx.):
430 × 106 × 355 mm (width/height/
depth) incl. projecting parts
Mass (approx.): 7.5 kg
Operating temperature:
5 ºC to 35 ºC
Operating humidity:
25 % to 80 %
Supplied accessories
See page 9.
Specifications and design are subject to
change without notice.
B/
B/CB, PR/
Additional Information
61
Page 62

Language Code List
For details, see page 49.
Language (abbr.) Code
Japanese (ja) 1001
English (en) 0514
French (fr) 0618
German (de) 0405
Italian (it) 0920
Spanish (es) 0519
Dutch (nl) 1412
Russian (ru) 1821
Chinese (zh) 2608
Korean (ko) 1115
Greek (el) 0512
Afar (aa) 0101
Abkhazian (ab) 0102
Afrikaans (af) 0106
Amharic (am) 0113
Arabic (ar) 0118
Assamese (as) 0119
Aymara (ay) 0125
Azerbaijani (az) 0126
Bashkir (ba) 0201
Byelorussian (be) 0205
Bulgarian (bg) 0207
Bihari (bh) 0208
Bislama (bi) 0209
Bengali (bn) 0214
Tibetan (bo) 0215
Breton (br) 0218
Catalan (ca) 0301
Corsican (co) 0315
Czech (cs) 0319
Welsh (cy) 0325
Danish (da) 0401
Bhutani (dz) 0426
Esperanto (eo) 0515
Estonian (et) 0520
Basque (eu) 0521
Persian (fa) 0601
Finnish (fi) 0609
Fiji (fj) 0610
Faroese (fo) 0615
Frisian (fy) 0625
Irish (ga) 0701
Scots-Gaelic (gd) 0704
Galician (gl) 0712
Guarani (gn) 0714
Gujarati (gu) 0721
Hausa (ha) 0801
Language (abbr.) Code
Hindi (hi) 0809
Croatian (hr) 0818
Hungarian (hu) 0821
Armenian (hy) 0825
Interlingua (ia) 0901
Interlingue (ie) 0905
Inupiak (ik) 0911
Indonesian (in) 0914
Icelandic (is) 0919
Hebrew (iw) 0923
Yiddish (ji) 1009
Javanese (jw) 1023
Georgian (ka) 1101
Kazakh (kk) 1111
Greenlandic (kl) 1112
Cambodian (km) 1113
Kannada (kn) 1114
Kashmiri (ks) 1119
Kurdish (ku) 1121
Kirghiz (ky) 1125
Latin (la) 1201
Lingala (ln) 1214
Laothian (lo) 1215
Lithuanian (lt) 1220
Latvian (lv) 1222
Malagasy (mg) 1307
Maori (mi) 1309
Macedonian (mk) 1311
Malayalam (ml) 1312
Mongolian (mn) 1314
Moldavian (mo) 1315
Marathi (mr) 1318
Malay (ms) 1319
Maltese (mt) 1320
Burmese (my) 1325
Nauru (na) 1401
Nepali (ne) 1405
Norwegian (no) 1415
Occitan (oc) 1503
Oromo (om) 1513
Oriya (or) 1518
Panjabi (pa) 1601
Polish (pl) 1612
Pashto, Pushto (ps) 1619
Portuguese (pt) 1620
Quechua (qu) 1721
Rhaeto-Romance (rm) 1813
Kirundi (rn) 1814
Romanian (ro) 1815
Kinyarwanda (rw) 1823
Sanskrit (sa) 1901
Sindhi (sd) 1904
Sangho (sg) 1907
Serbo-Croatian (sh) 1908
Language (abbr.) Code
Sinhalese (si) 1909
lovak (sk) 1911
Slovenian (sl) 1912
Samoan (sm) 1913
Shona (sn) 1914
Somali (so) 1915
Albanian (sq) 1917
Serbian (sr) 1918
Siswati (ss) 1919
Sesotho (st) 1920
Sundanese (su) 1921
Swedish (sv) 1922
Swahili (sw) 1923
Tamil (ta) 2001
Telugu (te) 2005
Tajik (tg) 2007
Thai (th) 2008
Tigrinya (ti) 2009
Turkmen (tk) 2011
Tagalog (tl) 2012
Setswana (tn) 2014
Tonga (to) 2015
Turkish (tr) 2018
Tsonga (ts) 2019
Tatar (tt) 2020
Twi (tw) 2023
Ukrainian (uk) 2111
Urdu (ur) 2118
Uzbek (uz) 2126
Vietnamese (vi) 2209
Volapük (vo) 2215
Wolof (wo) 2315
Xhosa (xh) 2408
Yoruba (yo) 2515
Zulu (zu) 2621
62
Page 63

Parental Control
Index
I
Interlace format 61
Country/Area
Code List
For details, see pages 50 and 52.
Area (abbr.) Code
Argentina (ar) 0118
Australia (au) 0121
Austria (at) 0120
Belgium (be) 0205
Brazil (br) 0218
Canada (ca) 0301
Chile (cl) 0312
China (cn) 0314
Denmark (dk) 0411
Finland (fi) 0609
France (fr) 0618
Germany (de) 0405
Hong Kong (hk) 0811
India (in) 0914
Indonesia (id) 0904
Italy (it) 0920
Japan (jp) 1016
Korea, Republic of (kr) 1118
Malaysia (my) 1325
Mexico (mx) 1324
Netherlands (nl) 1412
New Zealand (nz) 1426
Norway (no) 1415
Pakistan (pk) 1611
Philippines (ph) 1608
Portugal (pt) 1620
Russian Federation (ru) 1821
Singapore (sg) 1907
Spain (es) 0519
Switzerland (ch) 0308
Sweden (se) 1905
Taiwan (tw) 2023
Thailand (th) 2008
United Kingdom (gb) 0702
United States of America
(us)
2119
Words in quotations appear in the onscreen displays.
Numerics
5.1CH OUTPUT 14, 51
A
“A/V Control” 22
60
AACS
ANGLE
AUDIO
“Audio Control”
“Audio Output Mode”
“Audio Setup”
AVCHD
24
24
27
51
47
6, 60
B
Batteries 16
Blu-ray Disc
‘BRAVIA’ Theatre Sync
5, 60
11
C
CD 5
Chapter
60
Colour buttons
Connecting
the audio cords
the video cords
24
12
10
D
DIMMER 24
Disc Information
DISPLAY
Display
front panel display
Dolby Digital
“Dolby Digital Output”
Dolby Digital Plus
Dolby TrueHD
60
DTS
“DTS Downmix”
“DTS Output”
DTS-HD
DVD VIDEO
DVD+R
DVD+RW
DVD-R
DVD-RW
61
61
26
24
59
14, 60
47
48, 60
48, 60
47
47
48, 60
60
61
61
L
“Language” 49
M
“Memory” 28
“Movies”
MPEG
“Music”
32
32
36
O
“Options” 52
P
“Parental Control” 50
“Photos”
POP UP/MENU
Pro Logic
Progressive format
40
25
14, 47, 60
61
R
Region code 7
16, 17, 24
Remote
Resetting the Player
53
S
Searching 26, 34, 38, 42
22
“Setup”
Setup Displays
“Slideshow”
“Speaker Setup”
“Speakers”
SUBTITLE
44
41
51
12, 51
24
T
Title 61
Title List
TOP MENU
Troubleshooting
“TV Type”
22
25
54
45
U
Usable discs 5
V
Video based software 61
“Video Control”
“Video Setup”
28
45
Additional Information
E
Easy Setup 18
F
Film based software 61
Front panel display
59
H
HDMI 11, 12, 18, 45, 47, 61
HDMI Control
11, 21, 52
63
Page 64

3-197-093-11 (1)
Printed in Japan
TM
To find out useful hints, tips and information about Sony products and services
please visit: www.sony-europe.com/myproduct
Printed on 70% or more recycled paper
using VOC (Volatile Organic Compound)free vegetable oil based ink.
 Loading...