

SOMFY inteo CHRONIS UNO Installation Manual
The CHRONIS UNO is an individual timer and manual control for AC motor.
The main function of the CHRONIS UNO is "to give controls according to the time".
In that way, one “UP”and one “DOWN”control per day can be programmed.
❏ Weekly timer :
different times can be programmed for every day of the week.
❏ Cosmic function :
the time of the automatic up and down controls are determined according to the season.
❏ SEC function :
Thanks to a specific working mode (chosen by the end user), Chronis gives the impression
that a house is inhabited (automatic controls are sent within a window of +/- 15 minutes
around the programmed times.
®
❏ Main supply : 220-240V 50Hz.
❏ Class II product
❏ Protection index IP40.
❏ Output : ~250V 3A cosφ 0,8.
❏ Output temporisation : activ for 180s.
❏ Environmental conditions for use :
- temperature +5°C to +40°C (no condensation allowed).
- pollution degree typical for usual living space.
❏ Time accuracy : +/- 5 minutes a year.
❏ Power failure : date and time are stored up to 10 days.The
memorized open and closing time are not erased by a power failure.
inteoCHRONIS UNO
INST ALLA TION
guide
Ref.182252B
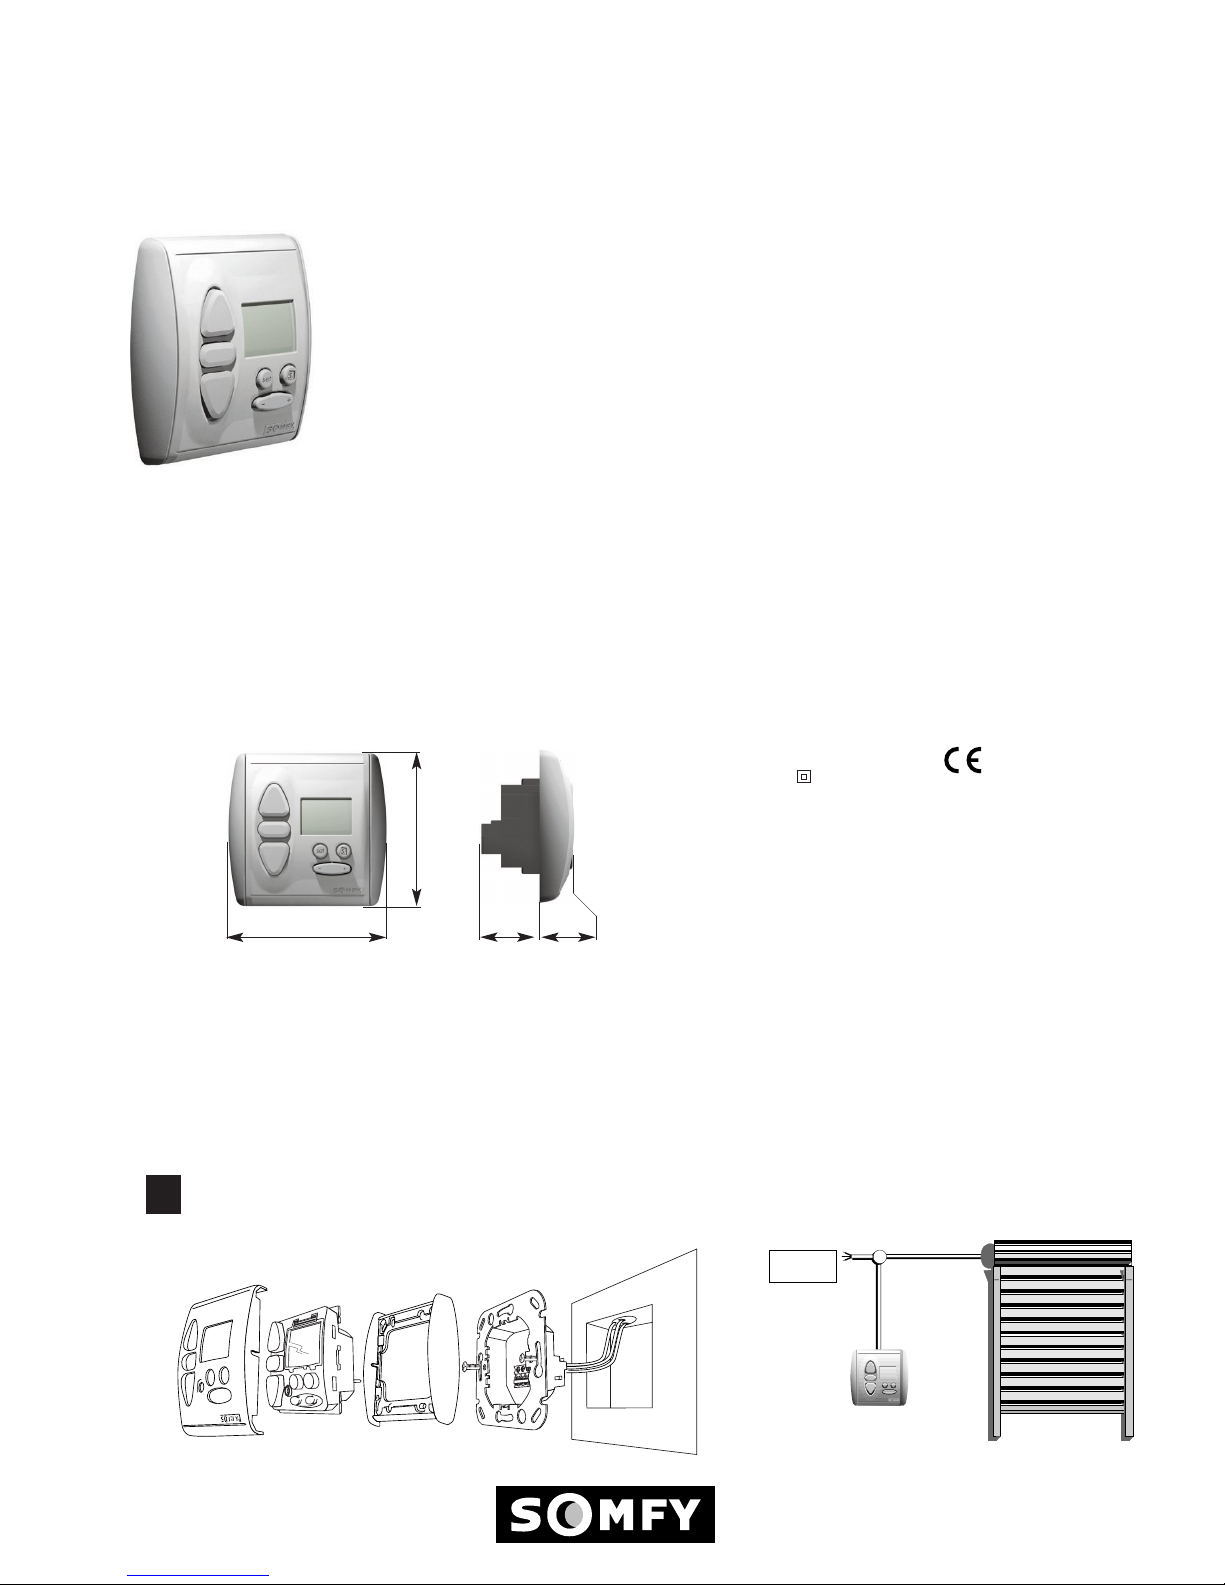
Mounting :
A
1
Installation:
2
80 mm
80 mm
Characteristics:
33 mm
17 mm
EN60730-1
EN50081-1
EN50082-1
Installation allowed only by authorized electrician.
Before connecting the unit, read the instructions carefully.
3 x 1,5 mm
2
4 x 0,75 mm
2
SUPPLY
230V - 50 Hz
CHRONIS UNO
UP button
STOP/IP button
DOWN button
Calendar button
SET button
Adjusting button
Display
Non-binding document. Products and references in this document are subject to change without prior notice. Please consult SOMFY before using such references. © SOMFY 09/99
Basically valid for setting or changing values:
❑ Blinking values can be changed
❑ Always press SET to terminate and store input values
❑ If no input is entered for approxima tely 20 seconds, the input menu is automa tically exited. The settings made up to that point are not stored.
Respect the electrical standards as well as the following points:
❑ disconnect the main before carr ying out any work.
❑ ensure that no forces act on screw terminals after installa tion.
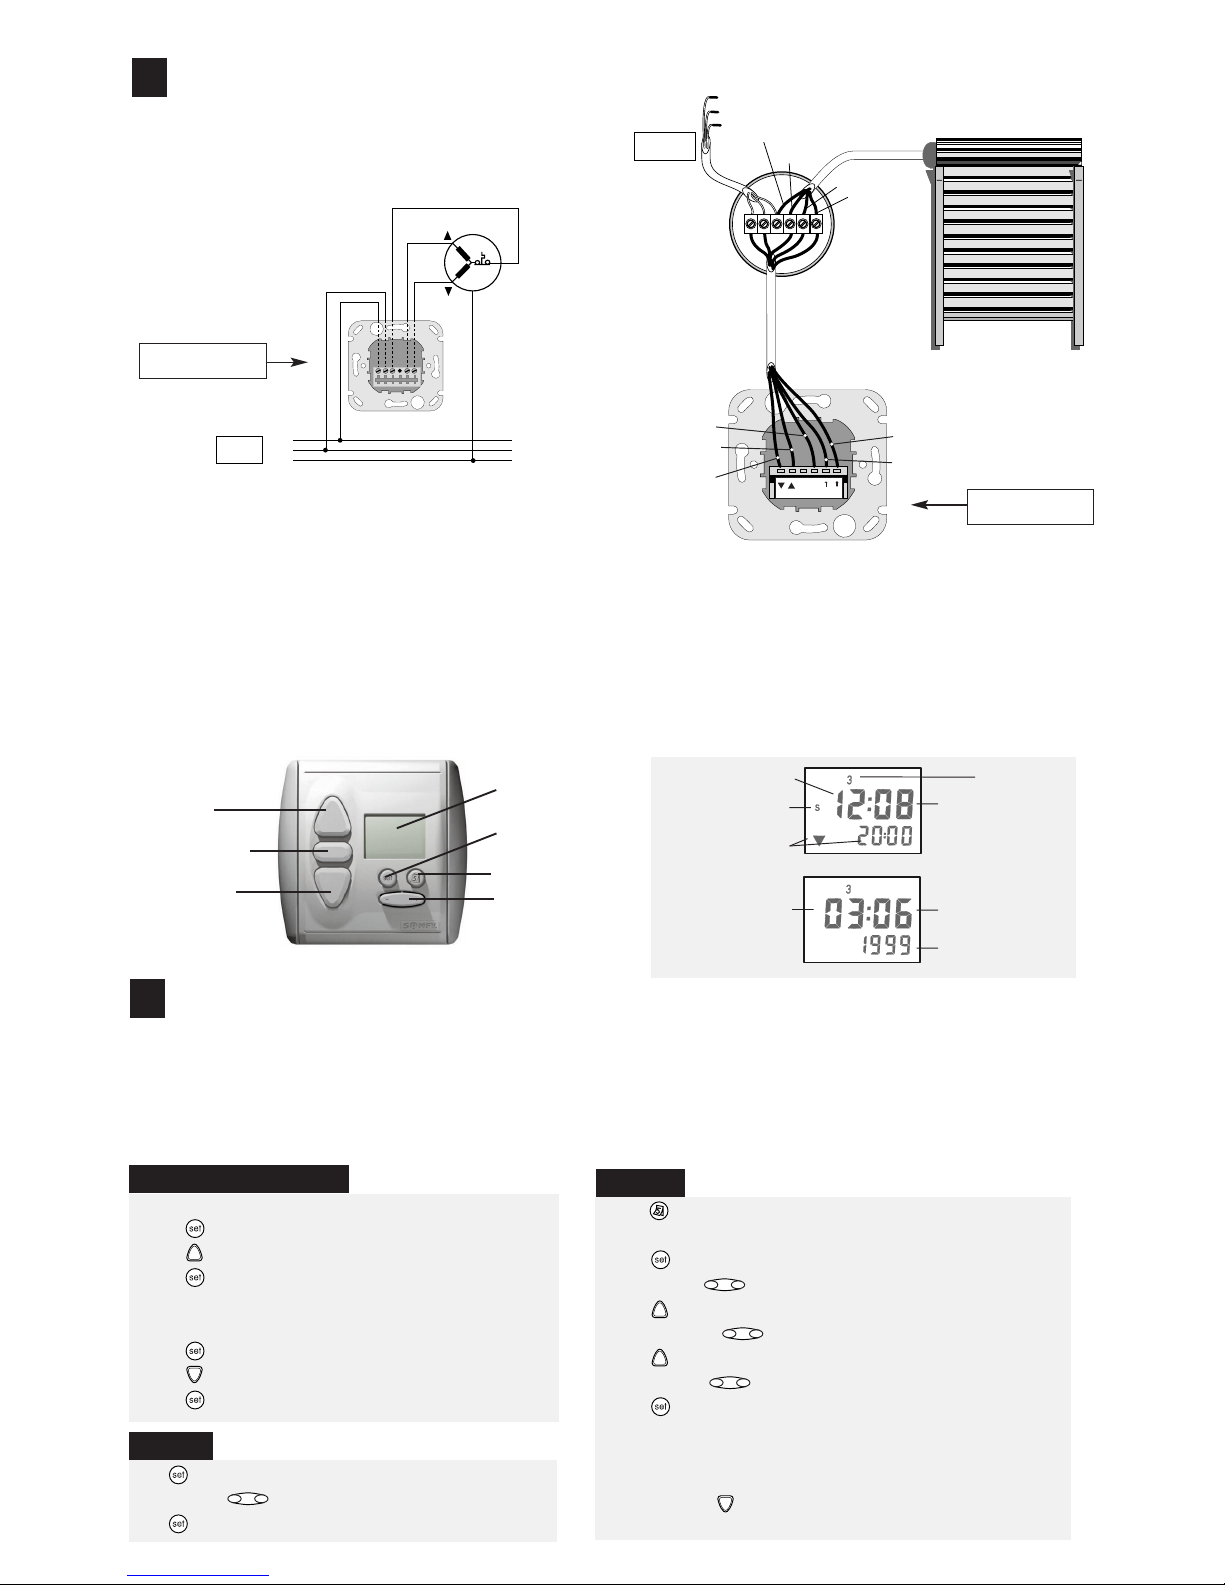
Cabling :
B
Programming:
3
❑ From winter time to summer time
1.
Press briefly ➜ time blinks.
2. Press for longer than 5 seconds ➜ summer time.
3. Press briefly (store) ➜ time display.
❑ From summer time to winter time
1.
Press briefly ➜ time blinks.
2. Press for longer than 5 seconds ➜ winter time.
3. Press briefly (store) ➜ time display.
Press briefly ➜ time blinks.
Set time with
Press briefly (store)
➜ time display stops blinking.
+
-
SET summer or winter time
SET time
1. Press briefly ➜ date display (if no input within 10 sec., the display
returns to the time)
2. Press briefly ➜ day blinks.
3. Set day with
4. Press briefly ➜ month blinks.
5. Set month with
6. Press briefly ➜ year blinks.
7. Set year with
8. Press briefly (store) ➜ year stops blinking, time display.
The day of the week is set automatically.
The day,month, year selection can also be carried out in the opposite
direction using the button.
+-+-+
-
SET date
Before setting the time, summer or winter time setting must be carried out. Factory setting is winter time.
Initial setting operation :
A
Year
Month
Day
Current Day
1 : Monday
2 :Tuesday
3 :Wednesday
4 :Thursday
5 : Friday
6 : Saturday
7 : Sunday
Min
Next automatic control
Hour
Summer/Winter time
SUPPLY
230V 50Hz
Phase
Neutral
Earth
LT motor
DOWN
PE
N
UP
NLN
MAIN
3 wires x 1,5 mm
2
Down
Up
Neutral
Earth
123456
5 wires x 1,5 mm
2
4 wires x 0,75 mm
2
Screw terminal
of the junction box
Neutral
Earth
Phase
1 = Mains phase (L➜)
2 = Mains neutral (
N➜)
3 = Earth
4 = Motor neutral (N)
5 = Motor Up (▲)
6 = Motor Down (▼)
Mains Neutral
Mains Phase
Motor Neutral
Motor UP
Motor DOWN
CHRONIS Uno bracket
“Frontal view”
CHRONIS Uno bracket
“Rear view”
 Loading...