

Page 1

FÜR MESSBAREN ERFOLG
3030
Operating Manual
www.soehnle-professional.com
Page 2

English
Content
1. . . . . . . . . . . . . . . . . . . . . . . . . . . . . . . . . . . . . . . .Introduction . . . . . . . . . . . . . . . . . . . .Page 3
2. . . . . . . . . . . . . . . . . . . . . . . . . . . . . . . . . . . . .Basic Functions . . . . . . . . . . . . . . . . . . . .Page 8
3.0 . . . . . . . . . . . . . . . . . . . . . . . . . . . . . . .Application Programs . . . . . . . . . . . . . . . . . . .Page 13
3.1 . . . . . . . . . . . . . . . . . . . . . . . . . . . . .Weighing and Taring . . . . . . . . . . . . . . . . . . .Page 14
3.2 . . . . . . . . . . . . . . . . . . . . . . . . . . .Totalising and Batching . . . . . . . . . . . . . . . . . . .Page 18
3.3 . . . . . . . . . . . . . . . . . . . . . . . . . . . . . . . . . . . . . . .Counting . . . . . . . . . . . . . . . . . . .Page 23
3.4 . . . . . . . . . . . . . . . . . . . . . . . . . . . . . . . . . . . . . .Checking . . . . . . . . . . . . . . . . . . .Page 29
4. . . . . . . . . . . . . . . . . . . . . . . . . . . . . . . . . .Further Information . . . . . . . . . . . . . . . . . . .Page 33
22
Page 3

English
Thank you for choosing this Soehnle Professional product. All the features of this product were
designed to the state of the art and are optimised for simple and straightforward use. If you have any
queries or experience any problems with the device that are not addressed in the operating
instructions please contact your Soehnle Professional service partner or visit us on the Internet at
www.soehnle-professional.com.
1.1 Notes on the Operating Manual
This Operating Manual is an extract from the reference manual for the 3030 Programming Terminal. Its
purpose is to help you carry out your first steps and simple operations with the scale. This detailed
manual is available to you on the CD supplied so that you can obtain maximum performance from your
new appliance.
It contains complete information on the application programs and the Setting mode, which helps you to
set the scales to meet your specific requirements exactly.
All information refers to the standard version of the 3030 Programming Terminal. Differences may occur
with special versions.
1.2 Description of the appliance
Technical data
• Housing made of stainless steel, protection type IP 67, integrated power supply 230 VAC, optional DC/DC
converter, 12/24/48 V.
• 3 measuring points connectable internally; total of up to 30 measuring points.
• Membrane keyboard with a total of 32 keys, 6 function keys, 4 organisation data keys, alphanumeric keys.
• Display: dot matrix 240 x 128 pixels, backlit and dimmable.
• Memory space: fixed value memory for a total of 400 fixed values, valid for all programs, failsafe, alibi
memory for 2 million inputs optional.
• Ports: 1 x RS 232, additional ports optional, including bus, analogue output 0 - 20 mA.
• Operating temperature: -10 to +40 degrees C
• Calibratable to Precision Class III for n = 6000 e for multirange and multidivision scales.
• Calibratable weighing range 0.1 kg ...120 t.
• Smallest permissible input signal per calibration value = 0.25 µV.
• Load cell power supply, either 5 VDC or 5 VAC, 33 Hz.
33
Page 4

English
1.3 Installation and commissioning
Before connecting up the appliance, make sure that the power supply complies with the specifications on the
appliance's nameplate and the power plug version conforms to local regulations.
Place the connected scales on a level and stable surface. Select an installation site where the appliance is
protected from shocks, vibrations, intense heat or cold, draughts, chemicals and moisture.
The appliance may only be opened by trained service technicians. Before working on the appliance,
unplug the power supply. After power-on, the measured values stabilise after a warm-up period of
30 minutes.
Further information on power-on is provided in the 3030 Operating Manual on the CD.
Connections
Power supply
Ground (GND)
Scale 3
Scale 2
Scale 1
I/O-Port
Ports 1 + 2
Pressure compensation mem
Anybus-Port
1.4 Operating concept, keys and display symbols
The setting options are divided into two function ranges:
Setting mode
Here you can enter user-definable settings on the appliance to adapt the weighing system to your
requirements. For a description, refer to Chapter 2 Setting Mode in the manual.
Program settings
Weighing + taring
Totalising + batching
Counting
Checking
Classifying
Recipes
Weight conversion
Weighing vehicles
I/O port programming
Percentage weighing
44
Terminal
Version
Display
Keypad
Date/time
Organisation data
User password
Reset terminal
Scale
Scale parameterITData transfer
Alibi memory
Port 1
Port 2
Print view
I/O port settings
Fieldbus
Barcode
Service
Only for service
engineers.
Page 5

English
Programming mode
Here, select the required weighing application program. After selecting and activating the application program,
the scale is ready to operate.
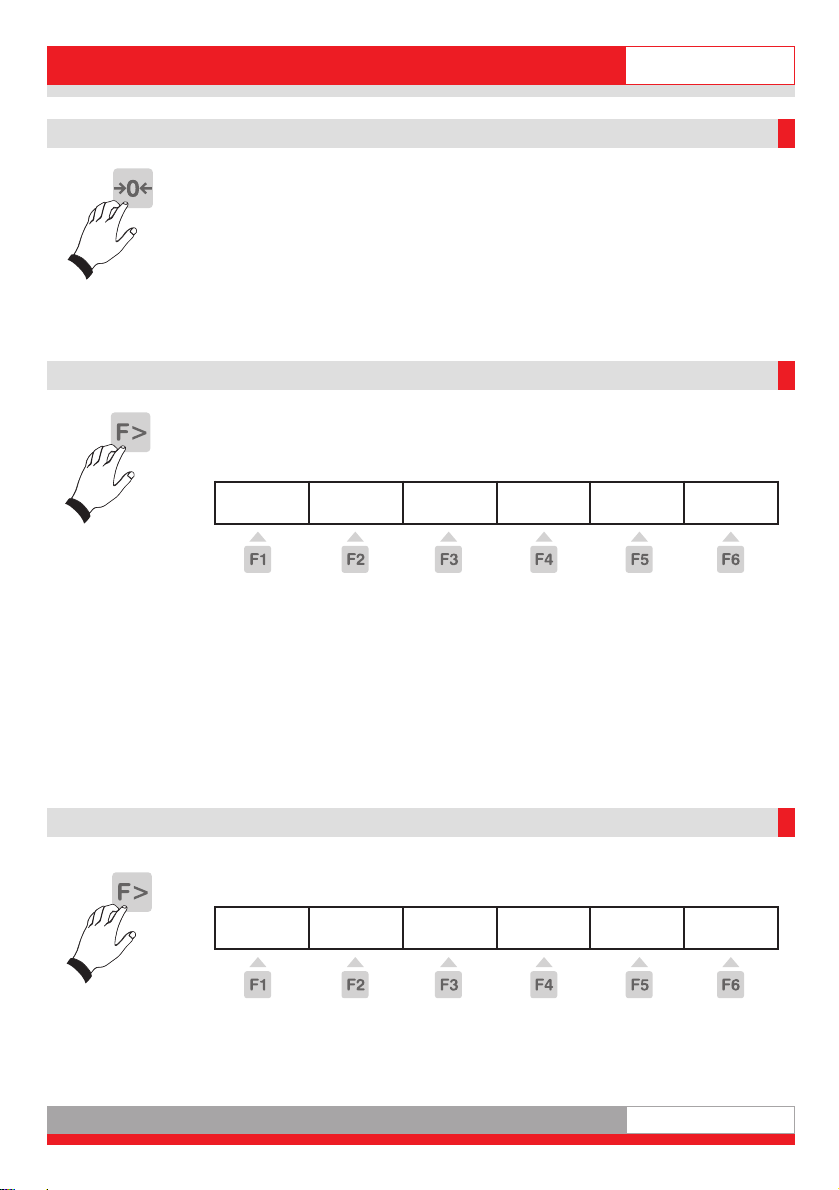
Function keys
Call specific functions by pressing function keys F1 to F6.
...
Navigation with the function keys
The keys are preprogrammed to various functions depending on the program or
situation. The function name appears above the key in the function bar in the
display.Depending on the program, the function keys are programmed to a maximum
of 4 levels.
Roll through the levels by pressing the function change key.
Exit
Continue
Back
Cancel
Clear
Accept
Moves the marking arrow up the list.
Moves the marking arrow down the list.
Exits Setting mode.
Calls the marked menu option.
Returns to the next higher level.
Returns without saving a change.
Clears an input and returns.
Accepts an input or change.
Moves the cursor one step to the right.
Moves the cursor one step to the left.
55
Page 6

English
Input and control keys
Numeric keys to type in numerical values.
...
...
Display
The display shows a number of different views depending on the situation. It is divided into display panes.
Multiple programming of numeric keys to type in alphabetic
characters
Calls organisation data
Clears complete input
Clears last number
Info key, electronic nameplate with calibration data. Calls saved information for
application programs
Function change key
Scale change key
Tare key
Zeroing key
Enter key
Print key
On / Off
Additional display
Information pane
66
Display pane
Function bar
Symbol bar
Additional display: Displays second units, weight values for
counting, differences with setpoint, etc. Press F3 Unit to
activate as required.
Symbol bar: Displays information on the status of the
activated measuring point.
nformation pane: Displays situation-dependent organisation
data, totals for totalising, check special characters, classes for
classifications, operator prompts, switching points.
Display pane: Displays weight values, quantities, unit
characters.
Function bar: Displays function descriptions of the 6 program
med situation-dependent function keys.
Page 7

English
Symbols in the display
symbol bar
Alibi memory capacity 100%
Alibi memory capacity 80%
Alibi memory capacity empty
Keylock
Second unit
Multirange/Multidivision 1
Multirange/Multidivision 2
Multirange/Multidivision 3
Resolution X10 (times 10)
Zero
Hold function active
Unit character
Symbol for standstill
After placing the weighing product on the scale, the scale requires some time to settle.
Until the scale reaches standstill, the unit character (kg, g) is not displayed.
The unit character appears when the scale reaches standstill and a stable value is obtained.
Symbols in the display
information pane
Setpoint reached precisely
Over tolerance
Under tolerance
Within tolerance
Under minimum load
Over upper limit Class 5
77
Page 8

English
2. Basic functions
The basic functions are similar or identical for all application programs.
2.1 Power on/off
Power-on
After power-on and during the run-up phase, the
displayed.
The measuring points are briefly listed as they are detected.
The scale is zeroed after the power-on routine
(this may differ with non calibratable calibration).
After power-on, the last application program activated is reopened.
Zero range limits at power-on
Calibratable: Zero range at power-on 20% of the weighing range.
The default value is -5% to +15% of the weighing range.
Non calibratable: Zero range at power-on -99% to +99% of the weighing range.
If power-on is outside the zero range at power-on, the scale displays error message
Error 50 / 51 Value outside zero range limit.
When the cause for overload or underload is rectified, the scale is zeroed without
having to switch the appliance on and off and is ready to operate.
Response to power failure
The scale returns to the previous settings when power is restored.
Soehnle Professional
logo is
Power-off
Press the On/Off key.
If the activated measuring point is loaded or a menu is open, the scale switches off
only 3 seconds after the On/Off key is pressed.
2.2 Selecting a program
Select one of the application programs from the list.
Press the function change key (F>) to switch to the Setting Functions level.
Gross X 10 Unit Program
Press F5 Program.
You can now choose from 10 different application programs.
Selecting a program: Press arrow key F3 Up or F4 Down. Accept by pressing F6.
88
Setting
mode
Page 9
2.3 Zeroing
Press the zeroing key to correct minor deviations from zero, e.g. caused by
soiling on the scale.
Zero range calibratable and non calibratable:
-1 to +3% of the weighing range.
If zeroing is not possible, the error message "Above zero range limit" or "Below
zero range limit" appears for two seconds in the display.
Zero tracking
Zero tracking automatically corrects minor deviations in the zero display.
2.4 x10 display
Shows the weight value with an additional decimal point at ten times the
resolution.
Press the function change key (F>) to switch to the Setting Functions level.
English
Gross X 10 Unit Program
Press F2 (x10).
Calibratable scale
If the scale is calibrated as calibratable, the ten times resolution is displayed as
long as you hold down the x10 key.
When you release the key, the x10 display is disabled after 5 seconds.
Non calibratable scale
If the scale is calibrated as non calibratable, the ten times resolution appears
constantly in the display. Press the key once to enable the ten times resolution
function. Press the key again to disable the ten times resolution function.
2.5 Gross display
Displays the gross weight when the scale is tared.
Press the function change key (F>) to switch to the Setting Functions level.
Gross X 10 Unit Program
Press F1 Gross.
The display indicates the gross weight and the message "Gross" as long as you
hold down the key.
Setting
mode
Setting
mode
99
Page 10

English
2.6 Organisation data (identifiers)
Organisation data help to assign identifiers to document weighing operations,
e.g. article number, supplier, machine operator.
They are available in all application programs.
The 3030 Programming Terminal has 4 organisation data memories.
Each memory has:
- one user-definable description, e.g. "Article no." (up to 12 characters)
- one user-definable content, e.g. "1234" (up to 28 characters)
The description is entered in Setting mode; the content is entered during a weighing operation. Type the description and content alphanumerically into the numerical keypad.
Four keys "ORG A" to "ORG D" are provided to call the organisation data
memories.
Description Content
1100
Description input
Must be entered in Setting mode. For more information, see the detailed CD manual.
Content input
In Weighing mode, press the associated Org key to type in the content for the organisation data memories. Type the content data alphanumerically into the numerical
keypad (max. 28 characters).
Confirm by pressing F6 Accept.
The description and content are then added to the weighing result as identification.
The content of the organisation data memory is retained until it is overwritten or
cleared.
Page 11

Printout: Press the "Org A", "Org B", "Org C" and "Org D" keys together with F6
Accept to print out (only possible if a print view is saved). Only the organisation
data contained in an entry are printed out.
Show content: Press the associated ORG key.
Clear content: Press the associated ORG key. Press the CL key followed by
F6 Accept.
Info: When a barcode function is used, the organisation data display is disabled.
2.7 Switching between scales
Switch between several connected scales.
The 3030 Programming Terminal has up to three measuring points integrated and
can connect up to a maximum of 30 measuring points. Switchover between the
measuring points is either manual or automatic.
Manual switchover
Press the key with the scale symbol briefly.
The activated measuring points are switched one after the other.
Press the key with the scale symbol and hold down. An input box opens for you to
enter the measuring point number directly and accept it.
Automatic switchover
For a description, see the "Count" function. The display shows the number of the
activated measuring point on the right of the symbol bar. Press the Info keys to
display the calibration and scale data of the activated measuring point.
English
2.8 Unit
Display the weighing result in a second unit. The unit in the display pane is defined
in Setting mode during calibration.
You can activate or deactivate the display of the second unit in the additional
display.
Press the function change key (F>) to switch to the following level.
Gross X 10 Unit Program
Press function key F3 Unit.
Define the second unit in Setting mode for each connected scale. For information
on the Setting mode, see the detailed CD manual.
Setting
mode
1111
Page 12

English
2.9 Alphanumeric input
Use the combined numerical/alphanumeric keypad to type in numerical and alphanumeric inputs (similar
to a mobile phone keypad).
Types of input box
- Display boxes with no type-in option
- Display/type-in boxes with numerical input option
- Display/type-in boxes with alphanumeric input option
Activating input boxes
- Situation-dependent by means of function keys or direct numerical input.
The Input view appears in the display. Existing values are displayed.
The name of the input box is displayed in the symbol bar. A unit character is displayed if the input
refers to a dimension.
Input procedure
1. Numerical boxes
You can type in digits 0 to 9 using the numerical keypad. Input is right-flush. A cursor flashes under the
last digit entered.
Press the C key to clear the digit marked by the cursor. Press the CL key or Cancel function key to clear
the complete input. The Cancel function key ends the input without saving new input values. Existing
values are retained.
The Accept function key accepts the input value and returns to the application program.
In Setting mode, Display/Decimal Separator, you can define whether to have a dot, comma or blank as
default decimal separator. Only the default number of characters can be typed into an input box. Any
other inputs are neither displayed nor accepted.
2. Alphanumeric boxes
You can type in digits 0 to 9 using the numerical keypad. Input is left-flush.
The numeric keys have multiple programming and are assigned letters (upper case) or special
characters.
In addition, there are special character keys (,./ and +-). If you press a numeric key twice within one
second, this activates a rolling function to access a character assigned to this key.
If you do not press the key a second time within one second, the character pressed is accepted and the
cursor moves on to the next position.
Numerical inputs can be made in direct succession without any waiting period, as long as the same
number key is not pressed several times in succession. A cursor flashes under the last position entered.
You can move the cursor by using the arrow keys.
The C key cancels the last character to the left of the cursor or the character under the flashing cursor.
The CL key clears the complete input.
The Cancel function key terminates the input without saving the new input values. Existing values are
retained.
The Accept function key accepts the input value and returns to the application program.
Only the default number of characters can be typed into an input box.
Any other inputs overwrite the last character.
1122
Page 13

3.0 Application programs
The various application programs on the Soehnle 3030 Programming Terminal
offer you a wide range of solutions for weighing operations.
You can adapt the application programs to your specific needs in Setting mode.
For information on this, please refer to the subject of Setting mode in the
detailed CD manual.
Below is a list of the application programs available to you:
1. . . . . . . . . . . . . . .Weighing and taring
2. . . . . . . . . . . . . . .Totalising and batching
3. . . . . . . . . . . . . . .Counting
4. . . . . . . . . . . . . . .Checking
5. . . . . . . . . . . . . . .Classifying
6. . . . . . . . . . . . . . .Recipes
7. . . . . . . . . . . . . . .Weight conversion
8. . . . . . . . . . . . . . .Vehicle weighing bridge
9. . . . . . . . . . . . . . .I/O port programming
10. . . . . . . . . . . . . .Percentage weighing
You will find a description of programs 5 to 10 in the detailed CD manual.
3.0.1 Selecting an application program
English
Switch the appliance on. After the power-on routine, the appliance starts the last
activated application program automatically.
Press the function change key (F>) to switch to the Setting Functions level to
select an application program.
Gross X 10 Unit Program
Press F5 Program. You are now in the Program selection menu.
Selecting a program:
Press arrow key F3 Up or F4 Down.
Press F6 Accept to activate the marked program.
Setting
mode
1133
Page 14

English
3.1. Weighing and taring
Basic functions: Weighing and measuring gross and net weights.
Warning: This description applies to the options Autotare and Totalising tare in
the factory setting. When you activate these options in Setting mode, it affects
the procedures described.
3.1.1 Function keys
The F1 to F6 function keys help you control the functions.
They are programmed in 2 levels.
Switch between the levels by pressing the function change key (F>).
1st level: taring functions
Tare
fix
2st level: setting functions
Gross X 10 Unit Program
Add
Tare
Zw
Tare
Multi
Tare
Setting
mode
3.1.2 Display view
Basic weighting view
1144
Page 15

3.1.3. Weighing without taring
Place weighing product on the scale. The weight is indicated with the message
"Gross".
3.1.4 Manual taring
Measure and tare with a container of unknown weight. Place the empty container
on the scale.
Press the Tare key.
The tare value is saved. The weight display is zeroed. The weight is displayed
with the message "Net".
When the scale is clipped off, the tare weight is displayed with a negative sign.
If you press the Tare key again, the existing value is overwritten, i.e. a new tare
weight placed on the scale is accepted.
The scale can be tared an unlimited number of times until the maximum load is
reached. The tared weight reduces the maximum weighing range accordingly.
Clear tare: By overwriting with a new tare or by pressing the Zeroing key.
Display tare memory: Press Info key, then press the Tare key.
You can clear the tare memory by pressing F2. Press F5 to terminate the display
of the tare memory without saving any changes.
If you want to change the tare memory value, type in the new value into the
numerical keypad and press F6 to accept the manual tare input into the tare
memory.
English
3.1.5 Taring by manual tare input
Tare a known container weight, e.g. with filled container on the scale.
Type the known tare weight into the numerical keypad.
The input appears in the display. The input is displayed in the activated weight
unit.
Press the Tare key.
The input is accepted in the tare memory and the tare weight is subtracted from
the weight displayed. The weight is displayed with the message "Net".
When the scale is clipped off, the tare weight is displayed with a negative sign.
Clear tare:
By overwriting with a new manual tare input or by pressing the Zeroing key.
To display the tare memory, press the Info key, then the Tare key.
Here, you can clear the tare memory by pressing F2. Press F5 to terminate the
display of the tare memory without saving any changes.
If you want to change the tare memory value, type in the new value into the
numerical keypad and press F6 to accept the manual tare input in the tare
memory.
1155
Page 16

English
3.1.6 Multiplicative tare
Tare several containers of the same weight. See the description of the function in the CD manual.
3.1.7 Additive tare
Tare several, even different containers of known weight. See the description of the function in the CD
manual.
3.1.8 Provisional tare
Unknown tare weights are added to the existing tare memory. See the description of the function in the
CD manual.
3.1.9 Automatic taring
Tare the first weight value on the scale automatically. See the description of the function in the CD
manual.
3.1.10 Fixed tare value memory
Known tare weights can be saved to a failsafe memory or called when required. You can save up to 400
reference weight in a failsafe memory.
Each memory location has:
- 3-digit consecutive numbers
- description (plaintext 18 characters)
- tare weight
a) Calling the list of fixed tare values for editing
Press the Info key and then F1 Tare Fixed.
Select from the list.
Browse using the F3 and F4 arrow keys. Call the required fixed value by pressing F6 Edit.
Edit an existing fixed value
Call the marked fixed value for editing by pressing F6.
The Description parameter is marked. Call by pressing F6 Edit. Type the value into the
numerical/alphanumeric keypad. Accept the input by pressing F6. (Clear the input without saving by
pressing F5 Cancel). The Tare Weight parameter is marked. Call by pressing F6 Edit. Type the value
into the numerical/alphanumeric keypad. Accept the input by pressing F6. (Clear the input without
saving by pressing F5 Cancel).
Clearing an existing fixed value
Browse using the F3 and F4 arrow keys. Clear the marked fixed value by pressing F2 Clear.
The resulting gap in the consecutive numbering scheme is closed.
1166
Page 17

English
Saving the new fixed value
Press F1 New.
The memory location number is assigned by the appliance. The first figure in brackets indicates the
number of free memory locations; the second figure shows the memory locations occupied by fixed tare
values. The Description parameter is marked. Call by pressing F6 Edit.
Type the value into the numerical/alphanumeric keypad. Accept the input by pressing F6.
(Clear the input without saving by pressing F5 Cancel). The Tare Weight parameter is marked.
Call by pressing F6 Edit. Type the value into the numerical/alphanumeric keypad.
Accept the input by pressing F6. (Clear the input without saving by pressing F5 Cancel).
Exiting the Fixed Value list
Press F5 Back to exit the list.
b) Calling the list of fixed tare values for taring
In the Taring Functions level, press F1 Tare Fixed. The display shows the last fixed value called.
Selecting from the list
- Browse using the arrow keys. Call the required fixed value by pressing F6 Accept.
- Call directly by typing in the memory location number. Type the article number or the memory location
number into the numerical keypad.
The choice of article number or memory location number is defined in Setting mode.
3.1.11 Error message when taring
Error 06:
Taring not possible.
Possible causes
- Scale empty
- Scale in overload or underload
- Manual tare input with tare value above maximum load.
3.1.12 Display options with the Info key
When you press the Info key, you have the following options:
- F1 Tare Fixed: Display stored fixed tare values.
- Tare key: Display current tare weight.
1177
Page 18

English
3.2 Totalising and batching
Totalising means that the individual pieces are weighed one after the other. The
weight is added in the total memory and the scale is clipped off after each
weighing operation.
Batching means that the weighed pieces remain on the scale.
The weight is added in the total memory and the scale is zeroed without being
clipped off.
A change in measuring point during batching is not possible.
The choice between totalising and batching is defined in Setting mode.
This selection applies to all connected weighing platforms.
As an example, we will only describe the totalising function here.
Total memory with several connected scales
A central total memory is managed for all connected scales.
Total memory capacity: The total memory holds a maximum of 999 entries.
The total memory must then be cleared.
3.2.1 Function keys
The F1 to F6 function keys help you control the functions.
They are programmed in 3 levels. Switch between the levels by pressing the
function change key (F>).
1188
1st level: totalising functions
Sum Cancel Manual Plus
2nd level: taring functions
Tare
fix
3rd level: setting functions
Gross X 10 Unit Program
Add
Tare
Zw
Tare
Multi
Tare
Setting
mode
Page 19

3.2.2 Display view
After the first totalising function, the display changes from basic view to the
total view.
3.2.3 Taring
Taring functions same as for 3.1 Weighing and taring.
3.2.4 Operating the totalising functions
English
Call the totalising functions level by pressing the function change key.
F6 Plus:
Press the Plus key to transfer the weight on the weighing platform to the total
memory. The piece counter and the consecutive number are incremented by 1.
Before requesting the next total, the scale must be clipped off at least to the clip
off factor defined in Setting mode.
A weight value of 0 or a total without clip off results in "Error 55 Place weight on
scale".
If the clip off factor = 0, only a short weight change is required.
F5 Manual:
Press the Manual key to type in weight values and quantities manually.
Type your input into the numerical keypad and confirm by pressing F6 Accept.
When the input window opens, press the function change key (F>) to switch
between calibrated unit, second unit and quantity. Manual inputs are identified
on the printout by the description "Manual".
The piece counter and the consecutive number are incremented by 1.
Weight values are added to the total weight. Quantities are added to the piece
total separately.
1199
Page 20

English
F4 Cancel
Press the Cancel key to cancel or reweigh individual pieces. After pressing the Cancel key, you are
requested to load the scale either with the weight you want to cancel or to type in the consecutive
number of the weight you want to cancel.
For information about the consecutive number, press the key combination Info and F5 Plus.
Type in the consecutive number of the piece you want to cancel into the numerical keypad and confirm
by pressing F6 Accept.
If you do not type in a consecutive number, the scale accepts the weight value when you press F6.
An error message appears if the scale is not loaded.
Cancelling or reweighing are identified on the printout by the description Cancel.
For a cancellation, the consecutive number in incremented by one; the piece counter is decremented
by one. If the piece counter is at 0, no further cancellation is possible and error message Error 48 is
displayed.
F3 Total
Press the Total key to complete the totalising operation.
The display then shows the gross, tare, net and piece totals, and the piece counter and consecutive
number of the last operation.
3.2.5 Selection options for total display
Setting mode function of Total key, description of function in the manual.
- Display, print and clear total.
- Only display totals.
3.2.6 Clip off factor when totalising
(no function when batching)
In Setting mode, you can define (see manual) whether the scale must be clipped off each time you
place an individual piece by 1 to 30 increments.
If the scale is not clipped off, the weight unit is not accepted in the total memory. This prevents operations such as double counting of a piece.
3.2.7 Automatic totalising
See the description of the function in the CD manual.
3.2.8 Assigning and clearing the consecutive number
Every input (Plus, Manual, Cancel) in the total memory is assigned a 4-digit consecutive number.
The consecutive number is reset to the factory setting when the total memory is cleared.
Optionally, you can default resetting the consecutive number in Setting mode:
- deactivated (no reset = factory setting).
- when the Clear Total key is pressed.
- When the appliance is switched off.
- Function key "Clear consec. no."
2200
Page 21

3.2.9 Piece counter
The piece counter only counts operations that are actually totalised. With every
new operation that uses Plus, Manual or Automatic Totalising, the piece counter
is incremented by 1. The piece counter runs up to 999; then an error message
appears. When a cancellation is made, the piece counter is decremented by 1.
The piece counter is automatically zeroed when the total is cleared.
3.2.10 Print keys
The Plus, Manual, Cancel and Total keys can initiate a print operation.
This is dependent on whether a print view was assigned to each of the keys.
For the Total key, the option "Print and clear" must be selected for the total
key function in Setting mode. If you select the "Display only" option, you only
obtain a printout when you press the Print key.
3.2.11 Displaying the current totals
During a totalising operation, you can display the totals reached by pressing the
Info key then the F4 Total key immediately after.
You can clear the totals by pressing F2 and the consecutive number
(if activated in Setting mode) or return to the totalising operation by pressing F6.
When you return, the last totalising operation appears in the information pane of
the display.
English
2211
Page 22

English
3.2.12 Displaying individual pieces
During a totalising operation, you can call individual pieces from the total
memory by pressing the Info key then the F5 Plus key immediately after.
The piece list starts with the most recent entry.
Browse through the list by pressing the arrow keys F3 (older entries) or F4
(more recent entries). You can call the last 50 entries.
Press F5 Back to exit the display of individual pieces and return to the previous
view.
3.2.13 Display options with the Info key
When you press the Info key, you have the following options:
F1 Tare Fixed = Displays stored fixed tare values.
F4 Total = Displays the current contents of the total memory.
F5 Plus = Displays all the current pieces in the total memory.
Tare key = Displays the current tare weight.
2222
Page 23

3.3 Counting
Count parts with the same weight.
The individual part weight (reference weight) is calculated from a small known
quantity of countable parts. The reference weight is then used as the divisor to
calculate the quantity of countable parts from the weight of an unknown quantity.
3.3.1 Function keys
The F1 to F6 function keys help you control the functions.
They are programmed in 4 levels. Switch between the levels by pressing the
function change key (F>).
1st level: counting functions
Ref
10
2nd level: checking functions
Ref
Variab
Ref
Wght
English
Sum Cancel Plus
Ref
Stat
3rd level: taring functions
Tare
fix
4th level: setting functions
Gross X 10 Unit Program
Add
Tare
Zw
Tare
Ref
Fix
Multi
Tare
Piece
Contr.
Start
Setting
mode
2233
Page 24

English
3.3.2 Counting display view
Tip: Activate and deactivate the additional display showing the weight info by pressing F3 Unit in the
Setting Functions level.
3.3.3 Taring
Taring functions same as for 3.1 Weighing and taring.
3.3.4 Counting function
The reference weight is measured by using the following keys in Level 1 Counting Functions:
Function key F1 Ref 10
Calculate the reference weight from a default reference quantity. Place 10 countable parts on the scale,
then press F1 Ref 10. The scale calculates the reference weight and displays "10 pcs". Further parts
placed on the scale are then counted.
Function key F2 Ref Variab
Calculate the reference weight from a freely selectable reference quantity. Place the reference parts on
the scale. Press F2 Ref Variab and type in the quantity of parts into the numerical keypad (1 to 99).
Press F6 Accept. The scale calculates the reference weight and displays the quantity on the scale.
Further parts placed on the scale are then added to the total.
Function key F3 Ref Wght
Default of a known reference weight.
Press the Ref Wght key and type in the known reference weight in the default unit into the numerical
keypad. An existing reference weight is displayed and can be overwritten.
Confirm your input by pressing F6 Accept.
The scale accepts the reference weight and displays the quantity on the scale. You can change the
default unit for the reference weight between g and kg by pressing the F> key.
2244
Page 25

English
New reference weight
Previous reference weights are overwritten with the new reference weight calculated.
Displaying the reference weight
Press F3 Ref Wght in Level 1 Counting Functions.
Weight display during count operation
Press F3 Unit in Level 4 Setting Functions to activate the weight display at the top left of the display.
Terminating the count operation
Clears the saved reference weight to terminate the count operation and returns to the weight display:
Call the reference weight by pressing the Ref Wght key.
Clear by pressing the Clear key.
Accept by pressing the F6 key.
Fixed value memory for reference weights
You can save up to 400 reference weight in a failsafe memory.
Each memory location has:
- 3-digit consecutive numbers
- description (plaintext 18 characters)
- article number (18 digits)
- reference weight
- reference quantity
- tolerance plus
- tolerance minus
a) Calling the list of fixed reference weight values for editing
Press the Info key and then F2 Ref Fixed.
Selecting existing fixed values from the list.
Browse using the F3 and F4 arrow keys.
Call the required fixed value by pressing F6 Edit.
Editing an existing fixed value from the list
Call a marked fixed value for editing by pressing F6.
The Description parameter is marked. Call by pressing F6 Edit. Type in the value using the
numerical/alphanumeric keypad. Accept the input by pressing F6.
(Clear the input without accepting by pressing F5 Cancel).
You can edit other parameters in the same way.
Clearing an existing fixed value.
Browse using the F3 and F4 arrow keys.
Clear the marked fixed value by pressing F6 Cancel.
The gap in the consecutive number scheme is closed.
2255
Page 26

English
Saving the new fixed value
Press F1 New.
The memory location number is assigned by the appliance. The first figure in brackets indicates the
number of free memory locations; the second figure shows the memory locations occupied by fixed
tare values.
The Description parameter is marked. Call it by pressing F6 Edit. Type in the value using the
numerical/alphanumeric keypad. Accept the input by pressing F6. (Clear the input without accepting by
pressing F5 Cancel).You can edit other parameters in the same way.
Exiting the fixed value list
Press F5 Back to exit the list.
b) Calling the list of reference weights for counting
Press F4 Ref Fixed in Level 2 Checking Functions. The display shows the last fixed value called.
Selecting from the list.
- Use the F3 or F4 arrow key to browse through the list until you reach the required memory location.
Confirm the required fixed value by pressing F6 Accept.
- Calling directly by typing in the article number or memory location number.
Type the article number or the memory location number into the numerical keypad (Define whether the
article number or the memory location number is called in Setting mode (see manual). Type in the
article number as search term left-flush; type in the memory location number as search term
right-flush).
Confirm the required fixed value by pressing F6 Accept.
When a fixed value is called, the reference quantity and tolerances for quantity checking are also
accepted, provided these two parameters are also saved.
3.3.5 Totalising and batching
Totalising functions as in 3.2 Totalising and batching.
Totalising different countable parts
Totalising different countable parts can be prevented by enabling the measurement of a
new reference weight only after clearing the total memory using the option "Clear total" in
Setting mode.
3.3.6 Quantity check
The "Quantity check" function allows you to meter bulk goods pouring into a container or to check
quantities.
Example: 1000 countable parts must be filled in a container at a max. tolerance of 3%.
Example: Several batches must be counted to check compliance with quantity.
To call the quantity check function, you must be in Count mode, i.e. you must have defined a reference
weight.
Press the Quant. Check key in Level 2 Checking Functions.
Type the required quantity into the numerical keypad and confirm by pressing F6 Accept.
Type the required tolerance in parts or percent into the numerical keypad and confirm by pressing
F6 Accept.
2266
Page 27

English
Switch between part and percent by pressing the function change key F>. If you wish to define
the plus and minus tolerances separately, activate the "+/- tolerance separate" function in Setting mode.
The display switches to the Count display view. The special characters are activated.
The relevant special character is displayed next to the setpoint depending on the actual weight on the
scale.
Quantity check special character
under tolerance point
within tolerance
Setpoint exactly reached
over tolerance point
You can also display the difference between actual values and setpoint weights at the top left of the
additional display in figures with a + or - sign. Activate the additional display by pressing F3 Unit in Level
4 Setting Functions.
If you activated a memory location containing setpoints and tolerances in the Ref Fixed memory, the
special characters are activated automatically.
A totalising/batching operation (accept in the total memory by pressing the Plus key) interrupts the
display of the quantity check special character until the scale is clipped off. The quantity check special
character is then reactivated.
Displaying the setpoint and tolerance
Press the Info key and then F3 "Quant. Check" or press the "Quant. Check" key in Level 2 Checking
Functions. The current values then appear in the display box.
Switching points for quantity check
See the description of the function in the CD manual.
Data record/Printout within or outside the tolerance
You can inhibit or accept release of a data record if it is outside a specific tolerance band. If a data
record is released outside a tolerance, it is marked by a special
character.
The function is released or inhibited in Setting mode (see manual).
Startmode
When Start mode is activated, the scale freezes the switching point after the switching point is reached.
The scale can then be clipped off without deactivating the switching point, thus preventing the start of an
undesired new operation. Only after you press F6 Start is the freeze state cancelled.
Activate Start mode in Setting mode (see manual).
2277
Page 28

English
3.3.7 Counting with several weighing platforms
If several scales are connected, the reference weight can be measured and
counted on each scale. For best results, we advise you to measure the reference
weight on the scale with the finest resolution.
Select a scale by pressing the Scale key.
After measuring the reference weight, you can switch to a bulk scale with a higher
load capacity in order to count large quantities precisely with the reference weight
determined using the reference scale.
Automatic switchover
You can define a default reference scale in Setting mode.
Switchover from bulk to reference scale and back is then automatic.
Place the reference quantity on the reference scale and press
Ref 10 or Ref Variable. The display switches to the reference scale.
The reference weight is measured and the bulk scale is switched to measuring
bulk. Alternatively, if you want to carry out counting operations on the reference
scale as well as measure the reference weight, then switch from the bulk scale
to the reference scale before measuring the reference weight.
3.3.8 Display options with the Info key
When you press the Info key, you have the following options:
F1 Tare Fixed = Displays stored fixed tare values.
F2 Ref Fixed = Displays the stored reference weights.
F3 Quant. Check = Displays the current setpoint with tolerance.
F4 Total = Displays the current content of the total memory.
F5 Plus = Displays all the current pieces in the total memory.
Tare key = Displays the current tare weight.
2288
Page 29

3.4 Checking
Check whether the weighing product corresponds to a setpoint weight within a
default tolerance band. Example: Several weighing products must be checked for
compliance with the setpoint weight.
This function can also be used for weighing in a default setpoint.
Example: 50 kg must be filled in a container at a max. tolerance of 3%.
After placing the weighing product on the scale, the actual weight and a symbol
appear in the display to visualise a deviation from the setpoint.
3.4.1 Function keys
The F1 to F6 function keys help you control the functions. They are programmed
in three levels. Switch between the levels by pressing the function change
key (F>).
1st level: checking functions
Set point
2nd level: taring functions
Tare
fix
Contr.
Fix
Add
Tare
Zw
Tare
Cancel
Multi
Tare
English
Sum Plus
3rd level: setting functions
Gross X 10 Unit Program
Setting
mode
2299
Page 30

English
3.4.2 Check display view
Tip: An additional way to display the deviation from the setpoint on the calibrated unit is to activate the
additional display by pressing F3 Unit in the Setting Functions level.
3.4.3 Taring
Taring functions same as for 3.1 Weighing and taring.
3.4.4 Checking functions
Type in setpoints.
Press F1 Setpoint in Level 1 Checking Functions. You can now place a sample part on the scale to
accept the setpoint or type in the setpoint into the calibrated unit using the numerical keypad .
Confirm by pressing F6 Accept. Type the required tolerance in parts or percent into the numerical
keypad and confirm by pressing F6 Accept. Switch between part and percent by pressing the F> key.
If you wish to define the plus and minus tolerances separately, activate the "+/- tolerance separate"
function in Setting mode (see CD manual). The display switches to the Check display view. The special
characters are activated. The associated special character is displayed next to the setpoint depending
on the actual weight on the scale.
Check special characters
under tolerance point
within tolerance
Setpoint exactly reached
over tolerance point
3300
Page 31

English
You can also display the difference between actual values and setpoint weights at the top left of the
additional display in figures with a + or - sign. Activate the additional display by pressing F3 Unit in the
Setting Functions level.
If you activated a memory location containing setpoints and tolerances in the Fixed Check memory,
the special characters are activated automatically.
A totalising/batching operation (accept in the total memory by pressing the Plus key) interrupts the
display of the quantity check special character until the scale is clipped off. The check special character
is then reactivated.
Displaying the setpoint and tolerance
You can request the current setpoint used by pressing the key combination Info and F3 Setpoint.
New setpoint
Previous setpoints are overwritten with the new setpoint entered.
Terminating the checking function
Clear the stored setpoint to terminate the check operation and return to the weight display.
Press F1 Setpoint in the Checking Functions level and then press the Clear key.
To change the program, press F5 Program in the Setting Functions level.
Fixed value memory for setpoints
You can store up to 400 setpoints in a failsafe memory.
Each memory location has:
- 3-digit consecutive numbers
- description (plaintext 18 characters)
- article number (18 digits)
- reference weight
- reference quantity
- tolerance plus
- tolerance minus
a) Calling the list of check weight fixed values for editing
Press the Info key and then F2 Check Fixed.
Selecting an existing fixed value from the list.
Browse using the arrow keys.
Call the required fixed value by pressing F6 Edit.
Editing an existing fixed value from the list
Call the marked fixed value for editing by pressing F6.
The Description parameter is marked. Call by pressing F6 Edit. Type in the value using the
numerical/alphanumeric keypad. Accept the input by pressing F6.
(Clear the input without accepting by pressing F5 Cancel).
You can edit other parameters in the same way.
Clearing an existing fixed value.
Browse using the F3 and F4 arrow keys.
Clear the marked fixed value by pressing F6 Cancel.
The gap in the consecutive number scheme is closed.
3311
Page 32

English
Saving the new fixed value
Press F1 New.
The memory location number is assigned by the appliance. The first figure in brackets indicates the
number of free memory locations; the second figure shows the memory locations occupied by fixed tare
values. The Description parameter is marked. Call by pressing F6 Edit. Type in the value using the
numerical/alphanumeric keypad. Confirm the input by pressing F6 (clear without accepting the input by
pressing F5 Cancel). You can edit other parameters in the same way.
Exiting the Fixed Value list
Press F5 Back to exit the list.
b) Calling the list of fixed value check weights for checking
Press the F2 Check Fixed in Level 1 Checking Functions. The display shows the last fixed
value called.
Selecting from the list.
- Browse using the arrow keys. Call the required fixed value by pressing F6 Accept.
- Call directly by typing in the article number or memory location number.
Type in the article number or memory location number into the numerical keypad.
The choice of article number or memory location number is defined in Setting mode (see manual).
When a fixed value is called, the reference quantity and tolerances for quantity checking are also
accepted, provided these two parameters were also saved.
Switching points for checking
See the description of the function in the CD manual.
Data record/Printout within or outside the tolerance
You can inhibit or accept release of a data record if it is outside a specific tolerance band.
If a data record is released outside a tolerance, it is marked by a special character.
The function is released or inhibited in Setting mode (see CD manual).
3.4.5 Totalising and batching
Functions as in 3.2 Totalising and Batching.
3.4.6 Display options with the Info key
When you press the Info key, you have the following options:
F1 Tare Fixed = Displays saved fixed tare values.
F2 Ref Fixed = Displays the saved reference weights.
F3 Quant. Check = Displays the current setpoint with tolerance.
F4 Total = Displays the current content of the total memory.
F5 Plus = Displays all the current pieces in the total memory.
Tare key = Displays the current tare weight.
3322
Page 33

English
4. Further information
You will find further information on the following subjects in the detailed documentation, the 3030
Programming Terminal manual, on the supplied CD:
- Application programs 5 to 10
- Setting mode
- Error messages
- Print
- Barcode
- etc.
3333
Page 34

English
3344
Page 35

English
3355
Page 36

FÜR MESSBAREN ERFOLG
Soehnle Professional GmbH & Co. KG
Manfred-von-Ardenne-Allee 12
Soehnle Professional GmbH & Co. KG
DE-71522 Backnang
Wilhelm-Soehnle-Straße 2
71540 Murrhardt
Telephone +49 (0) 71 91 / 34 53-0
Telefax +49 (0) 71 91 / 34 53-211
Tel efo n +49 (0) 71 92 / 93 19-220
info@soehnle-professional.com
Tel efa x +49 (0) 71 92 / 93 19-211
E-Mail info@soehnle-professional.de
www.soehnle-professional.com
Scales, System Solutions And Special Developments
Waagen, Systemlösungen und spezialentwicklungen
www.soehnle-professional.com
470.051.068 GB Printed in Germany 12/06 Technische Änderungen vorbehalten
470.051.068 GB Printed in Germany 02/09 Subject to technical modifi cations
 Loading...