

Page 1
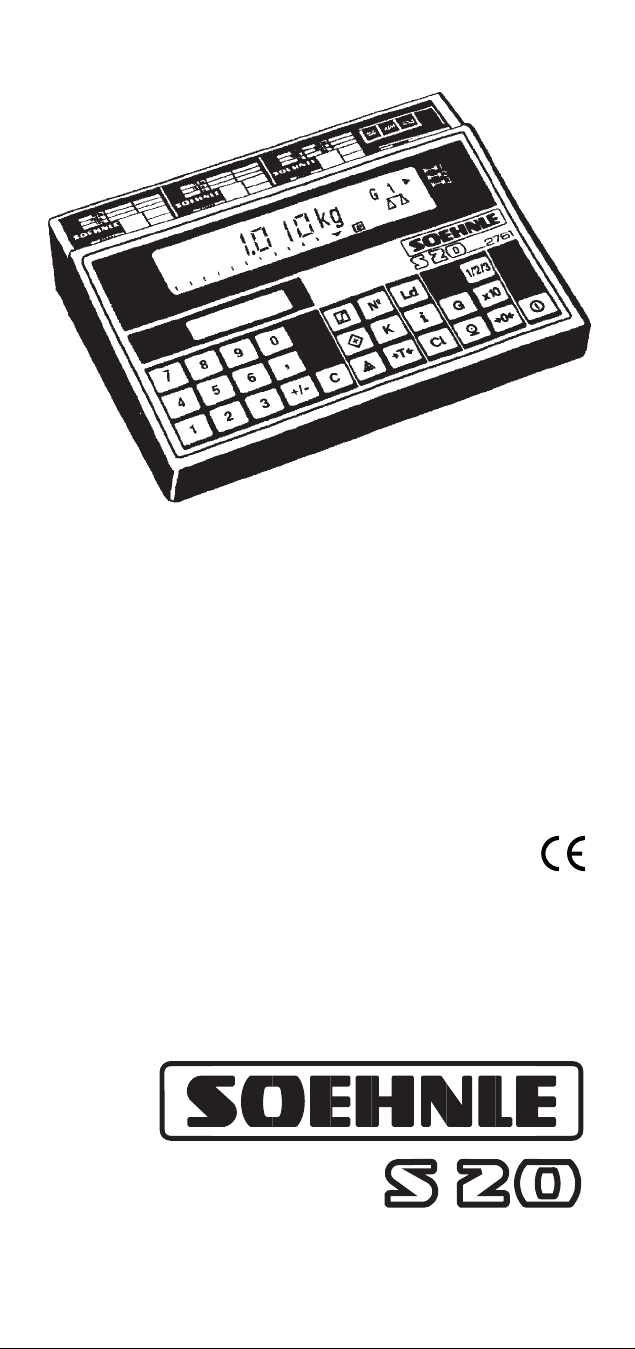
2761
Getting Started and
Operating Instructions
470.620.022 Printed in Germany 2/1998
Subject to technical modifications
Page 2

_
Getting started
1
Set up the weighing platform at the
place required
Use the water level and the adjustable
feet to ensure that the scale is positioned
horizontally.
Fit the indicator or mount on the wall
using the bracket provided.
Connect the device to the mains
The scale is ready for use
The order in which the scales can
be connected
Space for fuse stamp
Serial number
Weighing range (weighing ranges
in the case of multi-range scales)
Range permitted for calibrated
weighing
Calibration value (graduation)
Serial number (scales type, last
digits of year of manufacture,
number).
EU conformity symbol with year
applied
D93-09-155 precision class, no.
of EU admission.
Code of the office quoted
Sign for EU admission
SNR
97
Page 3

On - Off
Switch on (only when the scales are not
loaded)
After the test routine, the main display is
set to zero.
The scales are ready for use.
Switching between the scales
Higher resolution (hold down the key)
Zero setting
Gross weight
Data-transmission (printer/EDP)
Switching between kg and lb
Enter organisational data
Component weighing
Ta re
Switch
Add
Count
Delete input (digit by digit)
Minus sign or hyphen when entering
organisational data
Numeric keyboard with decimal point
(manual entry)
Load values to memory
Recall of stored values input of data
Cancel input of data, clear memory.
The command is executed when the
appropriate function key is pressed
_
Using the scales
2
If you use the display consistently and logically, you will soon discover the universally powerful capacity of the scales. Many functions only require one push
of a button - memory functions are available with just a few frequently used
key sequences.
The clearly laid out keyboard is divided into blocks of keys:
Control keysFunction keys
Numerial keysCommand keys
Numerical keys
Function keys
Command keys
Control keys
Page 4
An acoustic signal confirms that the
entry is correct
Incorrect entries are indicated by means
of five acoustic signals in swift sucession.
Please check that your entry is correct. If
necessary, cancel the command sequence
by pressing the ”CI” key.
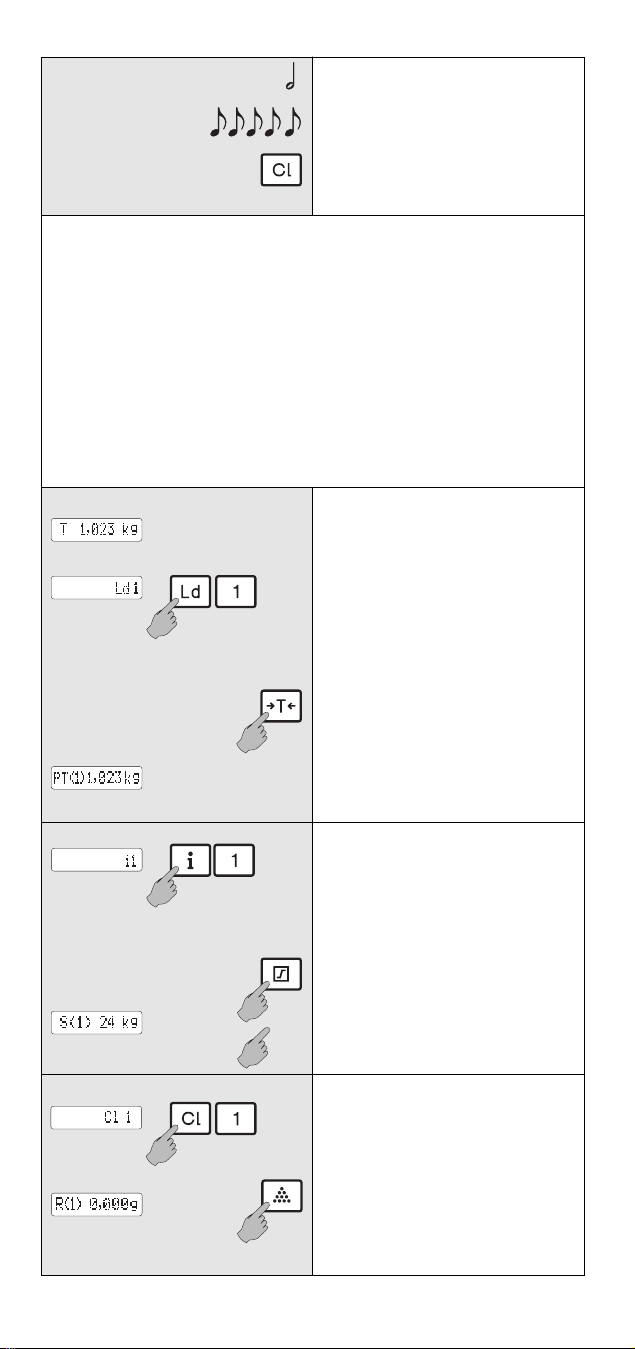
Loading values
Loading the value which is in the secondary display or which has been entered
manually using the numeric keyboard:
Press the ”Ld” command key.
Now enter the number of the memory in
which you wish to store the value.
Confirm your entry by pressing the
appropriate function key (in this case
”Tare”)
The procedure is the same for organisational data memory, limit value memory
and tare memory. The reference weight
memory is only available in counting
mode. Switch over if necessary.
Recall of stored value
Press the ”i” command key and the
number of the memory where the value
you want is stored. Please note that
reference weights can only be called in
counting mode.
Confirm your entry by pressing the
appropriate function key (in this case the
limit memory)
Tare memory values and (in counting
mode) reference weight memory values
are activated by pressing the function key
again (in this case the limit value memory).
Clear memory
Press the ”CI” command key. Then enter
the number of the memory you want to
clear.
Confirm your entry by pressing the
appropriate function key (in this case
Count). Simply overwriting the memory as
described under ”Loading values” also
deletes the current value.
3
The indicator 2761 has a wide range of memory options:
10 tare memories
3 memories for organisational data
3 memories for set points or limit values
in the weighing and counting mode
and in counting mode
40 reference weight memories
These memory options are operated by means of the
numeric keyboard manual entry
and for calling the relevant memory number
command keys for loading, calling and deleting
function keys for activating the function
Page 5

_
Display symbols
main display
secondary display
4
Zero message
Standstill indication
Active range in the case of multi-range scales.
Percentage display
Empty message
Set points activated
Gross weighing
Net weighing
Tare display
When battery is used (accessories): charge level
Status switching and checking
Totals memory
Active scale
Components weighing active
We recommend optimising the reference weight
within this range (wait for idle indicator)
Gross weight
Ta re
Reference weight
Reference weight memory
Set point/limit value memory
Memory for organisational data
Weight totalled memory
Quantity totalled memory
Component weighed totalled memory
Tare memory
K
K
Page 6

If the tare weight is unknown
Determine the tare of the empty container
Scales are ready to perform net weighing
If necessary, clear the tare after unloading
the scale
If the tare weight is known
Place the filled container on the scale.
Enter the tare weight in kg using the
numeric keyboard.
Confirm your entry by pressing the ”T”
function key
The net weight is displayed
Displaying the tare weight
(in the secondary display)
Clearing the tare weight
The gross weight appears in the main
display.
Storing the tare weight
Loading the tare weight which has been
determined or which has been entered
using the numeric keyboard.
Press the ”Ld” command key
Then enter the number of the tare
memory in which you wish to store the
value (there are 10 tare memories (0...9)
available for each connected scale.
Confirm your entry by pressing the ”T”
function key.
If necessary, clear the tare after unloading
the scale.
Recalling a tare memory value
Clearing a tare memory value
Weighing using the tare memory
Place the filled container on the scale.
Then call the tare memory value.
If you press ”T” function key again, the
tare value will be transferred to the current
weighing. The net value appears in the
main display.
_
Weighing with tare
5
Page 7

_
Totalling weights
6
Tare the container if necessary. Place the
items to be weighed on the scale.
Transfer the weight value to the totals
memory.
Take the items take weighed off the scale.
Clear the tare if necessary
If necessary, enter a new tare. Place the
next items to be weighed on the scale.
Transfer the weight value to the totals
memory, etc.
The same container must not be tared
again after totalling to prevent a second
totalling.
Value - including minus values can be
entered by means of the numeric keyboard.
Enter the value
Transfer the value to the totals memory.
Displaying the totals memory.
By houlding the ”+” key the net-, gross-,
tare-total are displayed cyclically in the
secondary display.
Clearing the totals memory
By houlding the ”+” key the net-, gross-,
tare-total are displayed cyclically in the
secondary display.
If a printer is connected the ”+” function
key and the ”CI/+” key combination
activate printing. Printing will take place
according to the printing format definition.
For more detailed information, see
”Printing”.
There is a totals memory available for each connected scale in weighing
mode.
Page 8

_
Weighing using the removal
method
_
*see component weighing
7
Place the filled container on the scale.
If the tare is known , enter it manually if
necessary and tare the weight.
If it is important to determine the
weight of the remainder:
Transfer the weight value to the totals
memory.
Press function key ”T”. The overall weight
appears as the tare weight on the
secondary display.
If parts of original number of pieces are
removed, this is displayed with a minus
sign in the main display.
Determining the remaining quantity
If you have transferred the overall weight
to the totals memory, you can determine
the remaining quantity by pressing the
”+” function key.
The main display returns to ”0” after the
”T” function key has been pressed.
Displaying the contents of the totals
memory
(in the secondary display)
Clearing the totals memory
Clear the tare value after removing the
items from the scale.
If a printer is connected the ”+” function
key and the ”CI/+” key combination
activate printing. Printing will take place
according to the printing format definition.
For more detailed information, see
”Printing”.
When weighing using the removal
method the tare sum and the gross
sum are not correct.
Page 9

_
Components weighing
8
Tare the container if necessary
Place the items to be weighed on the
scale.
Transfer the weight value to the
component weighing memory.
The K-mode is indicated by an arrow.
Place the next items to be weighed on
the scale. Transfer the weight value to
the commission memory, etc.
Place the next items to be weighed on
the scale. Transfer the weight value to
the commission memory, etc.
Organisational data (also with minus
sign) can be entered by the numeric
keyboard.
Enter value
Transfer to the component weighing
memory with „K“.
Displaying the commission memory and
the current number of the component
lying on the scale.
By holding the K-key the K-, gross- and
tare-total are displayed cyclically in the
secondary display.
Clear the total memory and exit the
component weighing function.
By holding the K-key the K-, gross- and
tare-total are displayed cyclically in the
secondary display.
If a printer is connected the ”K” function
key and the ”CI/K” key combination
activate printing. Printing will take place
according to the printing format definition.
For more detailed information, see
”Printing”.
Commissioning is only possible in weighing mode and on one set of scales
K
K
K
K
K
Page 10

_
Switching and checking
in the weighing mode
9
Set points (limit values) can only be set in weighing and counting mode. 3
memories for limit values are available for each connected scale: Entry must be
additive, i.e. the weight of first limit value should be added to the second.
Limit values affect the net weight.
Loading memory
Enter the value for the set point with the
numeric keyboard.
Press the ”Ld” command key, followed
by the number of the memory.
Confirm your entry by pressing the
function key.
Memories 2 and 3 are entered and
displayed in the same way.
Recalling of stored values
Press the ”i” command key and the
number of the memory containing the
value you require.
Confirm your entry with the ” ”
function key.
Weighing with limit values
Tare the container
Place the items to be weighed on the scale.
The relevant symbol goes out when the
appropriate set point/limit value reached.
Clearing memory
Press the ”CI” command key.
Now enter the number of the memory
you wish to delete.
Confirm your entry with the appropriate
function key. Simply overwriting the
memory as described under ”Loading the
memory” also deletes the current value.
Control weighing
Enter the upper and lower tolerance
weights as in ”Loading memory” in S1
and S2. Place the items to be weighed on
the scales. The current weight value and
the tendency symbol appear on the main
display:
Weight is less than set value ”S1”
Weight is within the tolerance ”S1-S2”
Weight is greater than set value ”S2”
Page 11

_
Switching and checking
in the counting mode
10
Loading memory
Enter number of pieces for set point with
the numeric keyboard.
Press the ”Ld” command key, followed
by the number of the memory.
Confirm your entry by pressing the
function key.
Memories 2 and 3 are entered and
displayed in the same way.
Recalling of stored values
Press the ”i” command key and the
number of the memory containing the
value you require.
Confirm your entry with the ” ”
function key.
Counting with limit values
Tare the container
Place the items to be counted on the scale.
The relevant symbol goes out when the
appropriate set point/limit value is reached.
Clearing memory
Press the ”CI” command key.
Now enter the number of the memory
you wish to delete.
Confirm your entry with the appropriate
function key. Simply overwriting the
memory as described under ”Loading the
memory” also deletes the current value.
Control weighing
Enter the upper and lower tolerance
number of pieces as in ”Loading memory”
in S1 and S2. Place the items to be
counted on the scale. The current number
of pieces and the tendency symbol appear
on the main display:
Number of pieces is less than set value ”S1”
Number of pieces is within the tolerance
”S1-S2”
Number of pieces is higher than set value ”S2”
Page 12

_
Counting
11
Switch the scale to counting mode.
Determining the reference weight
Tare the empty container if necessary.
Place the number of items requested by
the scale or enter the reference number
of items required by the numerical key
board, take over with key , place
entered number of items on the scale
and press the ” ” function key. The
average weight of one item is calculated.
The maximum number of pieces to be
counted without error appears in the
secondary display.
If the items are very light, more will be
requested. The display counts backwards
to zero as the items are placed on the
scales. Now press the count key again.
Displaying the reference weight
Entering the reference weight
manually in g.
Storing the current reference weight
The reference weight can be transferred
to
the current counting procedure by
pressing the ” ” function key a
second time.
Counting
The reference weight should be
determined, recalled or entered manually.
Place enough items to be weighed on
the scale so that the required number of
pieces can be met.
Counting with a tare weight
If the tare is unknown the empty
container should first be tared.
After you have switched to the counting
mode, the reference weight should be
determined, recalled or entered manually.
Now fill the container.
The number of items will be displayed.
If the tare is unknown, the filled container
can be placed on the scales immediately
after you have switched to counting mode.
Recall the reference weight or enter it
manually.
Enter the tare weight using the numerical
keyboard.
Call the tare from a tare memory and
confirm it.
The number of items will be displayed.
Terminate the counting procedure
Page 13

_
Totalling quantities
Determine the number of pieces.
Transfer this to the totals memory (in the
secondary display)
Remove the items from the scale.
Clear the tare if necessary.
Determine a new tare if necessary. Place
the next quantity on the scale. Transfer it
to the totals memory, etc.
Known quantities can be entered
manually using the numeric keyboard.
Enter the number of pieces.
Transfer this to the totals memory.
Display the totals memory.
Clear the totals memory.
If a printer is connected the ”+” function
key and the ”CI/+” key combination
activate printing. Printing will take place
according to the printing format definition.
For more detailed information, see
”Printing”.
A shared totals memory is available for all scales in counting mode.
12
Totalling weights:
gross / tare / net per scale possible.
Totalling items:
per scale or by all scales connected
(see user-mode).
Page 14

_
Removal method
13
Unknown number of pieces and item
weight
Determine the number of pieces(without tare)
To determine the remaining number of
pieces: transfer the number of pieces to
the totals memory.
Set the display to zero by pressing the
”T” funktion key.
The removal of items is indicated by a
minus sign.
Press the ”+” function key to determine
the remaining number of pieces.
When you have removed more items, set
the display to zero, etc.
Known number of pieces and item
weight
Place the filled container on the scale.
Enter the reference weight.
Enter the number of pieces using the
numeric keyboard and confirm your entry
by pressing the ”+” function key.
Reset the display to zero by pressing the
”T” function key, then proceed as above.
The totals memory must be deleted after
all items have been removed from the
scale.
Clear the tare.
If a printer is connected the ”+” function
key and the ”CI/+” key combination
activate printing. Printing will take place
according to the printing format definition.
For more detailed information, see
”Printing”.
Page 15

_
Printing
Key functions
Single print
Print - add to totals memory
Print totals and clear memory
Print - add to component weighing
memory
Print totals and clear memory
Entering organisational data
A 40- digit number can be assigned to
each memory of the three organisational
data memories.
Enter the data using the numeric
keyboard.
Press the ”Ld” command key.
Now enter the number of the memory
where you want to store the value.
Confirm your entry by pressing the ”No”
function key.
Recalling stored data
Press the ”i” command key and the
number of the memory containing the
value you want.
Confirm your entry by pressing the ”No”
function key. If an arrow appears, the
number is too long to be displayed.
Clearing stored data
Press the ”CI” command key.
Then enter the number of the memory
you want to delete.
Confirm your entry by pressing the ”N
o
”
function key.
Simply overwriting the memory as
described under ”Entry” also deletes the
current value.
Print with higher resolution
-for scales with internal use-
These additional operating instructions apply to the indicator 2761 if a printer
is attached or if there is a connection to electronic data processing equipment.
14
x10
Page 16

Activating user modification
Press the ”i” key and ”On/Off” at the
same time.
User modification functions
Calibration step selection, forwards
Calibration step selection, backwards
Moving the tens column forward within a
program step, from left to right
Moving pre-assigned values forward
Confirm and transfer the value of the
main indicator and proceed to next CAL
step.
Enter/overwrite values /date,etc.) with the
numeric keyboard. Enter the digits in the
flashing tens column.
Store changes and return to weighing mode.
Main display shows the CAL step and the
pre-assigned value for tape printer.
Secondary display shows help text to
guide the user.
CAL-Step Standard settings Secondary display
1 Hour/Minute Time
2 Day/Month/Year Date
3 0=DD.MM.YY 1=MM.DD.YY Print type
4 00050 empty message
5 0 TAadd.
6 2 Default weighing value
7 3 Default counting value
8 10 Ref. pc.
9 09600 Baudrate
10 0 Parity
11 37/8 Bit
12 0 CR/LF
13 0 STX/ETX
14 1 DIM.on
15 0 Dec.
16 0 EDP
17 2 Printer
18 1 Backlight on/off
19
20 dto.
+- key
21 dto.
CL+- key
22 dto.
K- key
23 dto.
CLK- key
24 dto.
EDP- D
25 2 Timer
26 0 Reset Serial.-No.
27 - not relevant
28 1 Optimization of number of pieces
15
Parameters for printer and interface configuration, data and time and much
more are permanently stored in an internal memory. Access to user modification
is by means of the keyboard and LCD display.
Enter Code-No. as described in
print image definition
P- key
Page 17

Always
column
00
Positioning on
the right side
00XX B XX Gross weight 15 G XXXXX,XX <Unit>
01XX D XX Date 8 XX.XX.XX
02XX d XX Date 1x 8 for pressing tke key just once
03XX E XX Orga-data 1 No. 1 XXX... max. 39 pos.
04XX e XX Titel Org. 1 blank
05XX F XX Orga-data 2 No. 2 XXX... max. 39 pos.
06XX f XX Titel Org. 2 blank
07XX G XX Orga-data 3 No. 3 XXX... max. 39 pos.
08XX g XX Title Org. 3 blank
09XX K XX Components 18 K XX XXXXX,XX <Unit>
10XX k XX Total components 16 K-Total XXXXX,XX <Unit>
11XX L XX Current number 15 Current No. XXXXXXX
12XX N XX Net weight 16 N XXXXX,XX <Unit>
13XX n XX Net weight total 16 N-Total XXXXX,XX <Unit>
14XX P XX Piece 18 PCS XXXXXXX
15XX p XX Total number of pieces 18
Total number of pieces XXXXX,XX
16XX R XX Reference weight 17 REF XXXXX,XX <Unit>
17XX S XX Status for break-over points 5 S XXXX
18XX T XX Tare weight 15 T XXXXX,XX <Unit>
19XX U XX Time 5 XX:XX
20XX u XX Time 1x 5 for pressing tke key just once
21XX Ü XX
Status for overloading, underloading and standstill
4 U XXX
22XX W XX Balance number 2 W X
23XX 0 Attribute 1 Programmation on PC only
24XX 1 Attribute 2 Programmation on PC only
25XX 2 Attribute 3 Programmation on PC only
26XX 3 Attribute 4 Programmation on PC only
27XX 4 Attribute 5 Programmation on PC only
28XX 5 Text 1 Programmation on PC only
29XX 6 Text 2 Programmation on PC only
30XX 7 Text 3 Programmation on PC only
31XX 8 Text 4 Programmation on PC only
32XX 9 Text 5 Programmation on PC only
33XX , Linefeed <LF> line feed (OAH)
34XX ETX/ End of print format <ETX> end of text (03H)
35XX bxx Total gross 16 B-Total XXXXX.XX <Unit>
36XX txx Total tare 16 T-Total XXXXX.XX <Unit>
16
The first programmed data block is displayed (4-digit code number) after the key has
been pressed to activate printing (CAL step 19...24). The incrementing of the tens
column from left to right is achieved using the ”0” key as with user modifications.
Modifications with the numeric keyboard. The displayed value is transferred by pressing
the ”K” key. The next data block is then displayed.
Every print code requires a positioning/beginning of printing. The positioning has to be
additive, that is to say that in case of several data blocks in one line, you should subtract
the positioning of the blocks before. Each line closes with the code ”3.300”. An i.e. line
is programmed with ”3.300”, too. This means, that ”3.300” always creates a new line.
The print image presentation is terminated by ”3.400”. When the values are transferred
using the ”K”-key the display moves forward to the next CAL-step. You return to the
weighing mode by pressing the ”x10”-key.
Printcode
intern
Printcode
PC
Print code
Print code
Positioning
Position
data
Block length
Positioning
Positioning
Positioning on the right sideAlways column 00
Positioning on
the left side
Settings Comment
_
Defining the print image:
data transfer
print code
positioning/beginning of printing
Code of 4 positions:
Digit
<Unit>
Page 18

Indicator
An acoustic signal confirms
that entry was correct
Incorrect entries are indicated
by 5 acoustic signals in swift
succession.
The scale sets the value zero
automatically when it is
switched on. If the scales are
outside the set tolerance
range, -0- is displayed.
Underload: only the
bottom horizontal lines
appear on the display.
Overload: Only the top
horizontal lines appear on
the display. The maximum
weighing range has been
exceeded.
Weight of item too light.
The zero setting range has
been exceeded
Taring is not possible in case
of over- or underloaded
balance
Printing is not possible in case
of over- or underloaded
balance.
kg / lb conversion is blocked
Totals memory occupied
- must be cleared before
commutation -
The connection between the
reference scale and the
indicator is disturbed
Plug and reference scale are
not identical.
Remedy
Check that your entry is
correct - if necessary interrupt
the command sequence by
pressing ”C” or ”CI”.
Remove the items from the
weighing platform. Remove
any dirt. If the scales do not
indicate zero after a couple of
seconds, you should contact
your service partner.
Switch the scales off and on
again. The zero point will be
reset automatically.
Remove some of the items to
be weighed from the scales.
In case of all error indications:
Please contact your
service-partner.
17
_
Malfunctions
Causes and how to eliminate them
Page 19

18
_
Technical information
• The housing is made from pressure-moulded, powder-coated
aluminium (RAL 9006)
• Dimensions 258 x 193 x 73 mm
• Protection type IP 65, dust proof and splash-proof
•
Operated by means of a tactile keypad with acoustic acknowledgement
•
Mains operation with power supply unit, 230 V 50-60Hz, approx. 20VA
• Operating temperature -10° -...- +40°C
• Storage temperature -40° -...- +70°C
• Resetting range -1% -...- +3% of the weighing range
• Resetting range at power-on: -5% ... +15% of the weighing range
• All data is stored securely against power failure
• Serial RS232 (V24) interface bi-directional (please ask for an
interface description)
• Signal output of the set values by means of an open100 mA, 50 V
collector for connection to a controller
_
Product support
If you have any questions about your Soehnle weighing system, you
should first refer to the documentation for the product. If your
questions are still unanswered, contact your local Soehnle service
partner or talk to the manufacturer directly.
Your Soehnle-Partner
Soehnle-Waagen GmbH + Co.
Customer Service Department
P.O. Box 126
D-71535 Murrhardt
Tel. 0 71 92/28-1
Fax 0 71 92/28-601
 Loading...