

Page 1
Admin and Installation Guide
v1.01
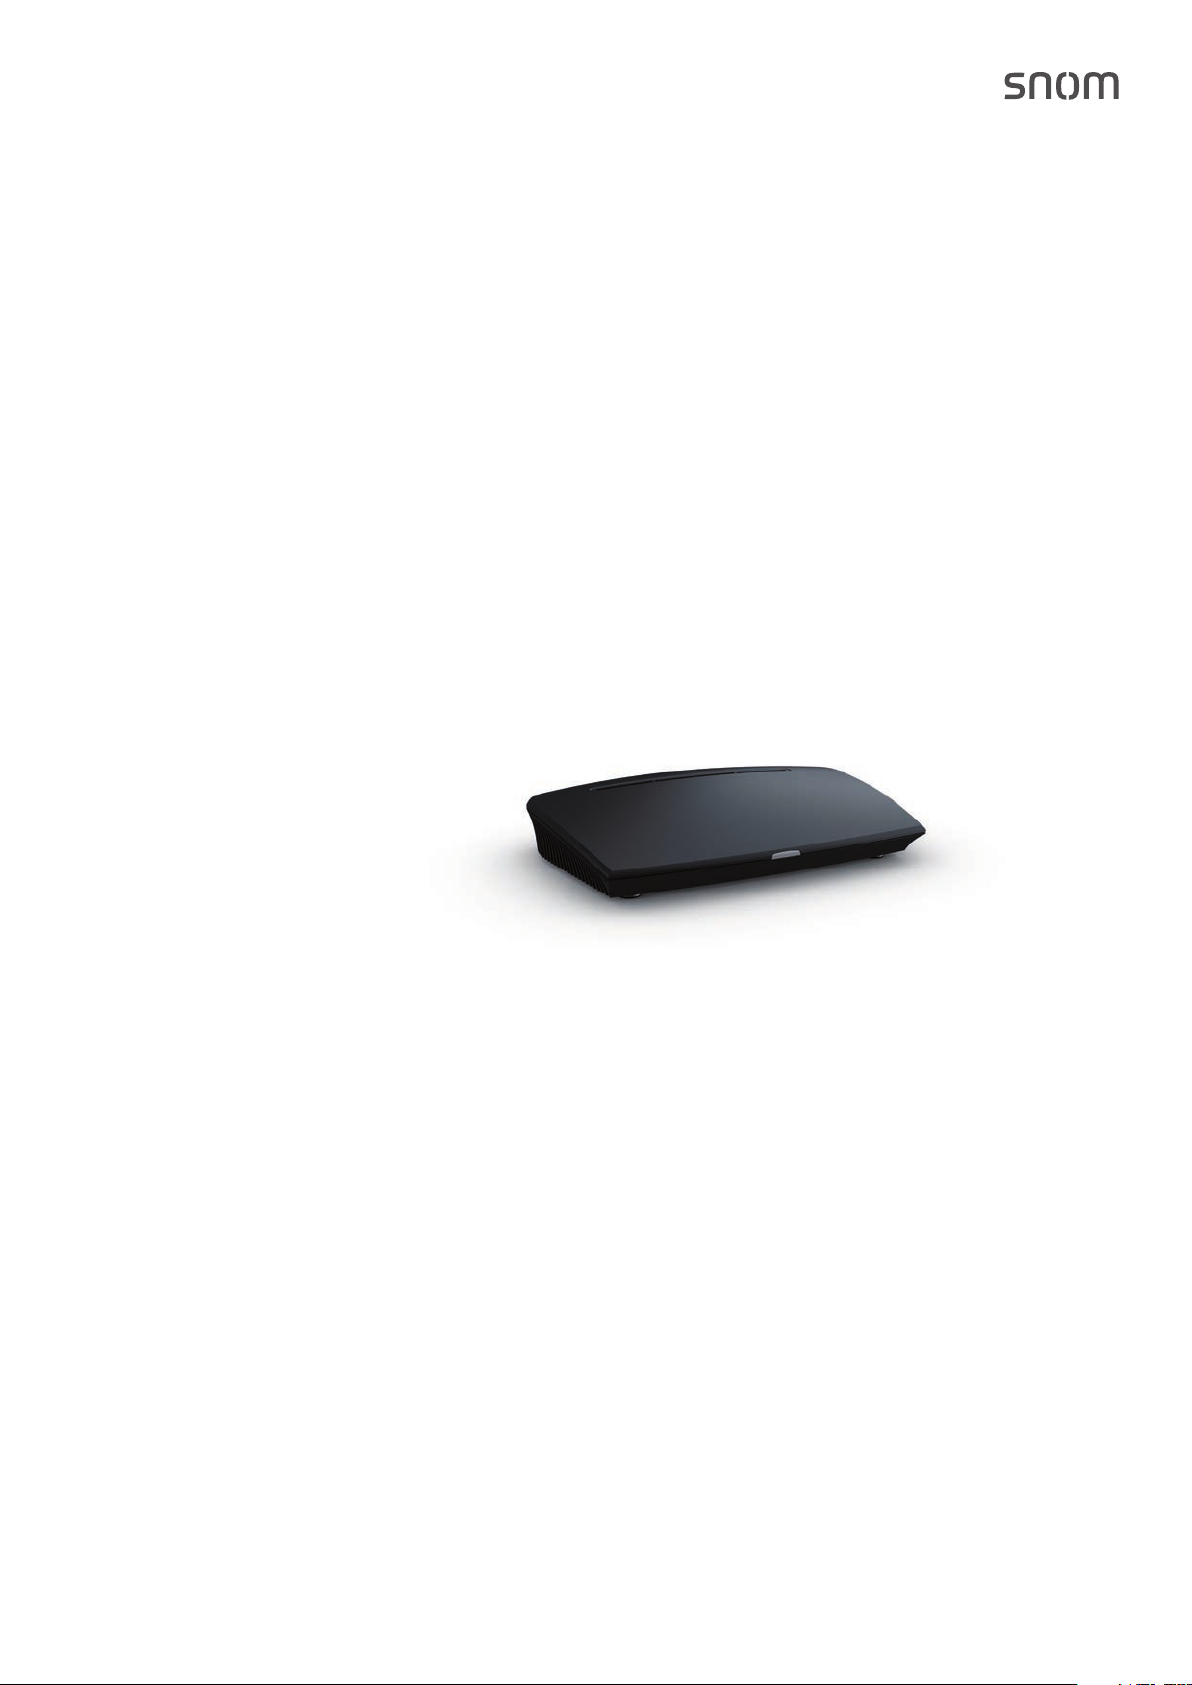
Snom M300
Base station
Page 2

Admin Guide M300
TABLE OF CONTENTS
Copyright, Trademarks, Legal Disclaimers ....................................................................4
Important Information ......................................................................................................5
Suitable and Unsuitable Locations ......................................................................................5
Intended Use ............................................................................................................................5
Safety Precautions .................................................................................................................5
Cleaning ....................................................................................................................................8
Disposal .................................................................................................................................... 8
Standards Conformance .......................................................................................................8
Additional Important Information USA ............................................................................... 9
FCC and Other Information ............................................................................................................................ 11
Regulatory Information Canada .........................................................................................13
IC Number 4979B-X9430 ................................................................................................................................13
Introduction .................................................................................................................... 14
Setting Up ....................................................................................................................... 15
Hardware Setup ....................................................................................................................15
Standing Unit .................................................................................................................................................... 15
Wall Mounting ........................................................................................................................15
User Interface of the Unit ....................................................................................................17
LED Status Indicator ....................................................................................................................................... 17
Reset Key ..........................................................................................................................................................17
Configuring ..................................................................................................................... 18
Preliminary Steps .................................................................................................................18
Finding the IP Address of the Base Station ................................................................................................ 18
Opening the Web User Interface ................................................................................................................... 19
Initial Settings .......................................................................................................................20
Servers .............................................................................................................................................................. 20
Language, Country, and Time/Date .............................................................................................................. 20
Extensions and Handsets ............................................................................................................................... 21
Setting up extension and handset .................................................................................................. 21
Deleting Handset ................................................................................................................................ 23
Deregistering SIP Registrations ...................................................................................................... 23
Central Directory ............................................................................................................ 24
Local Phone Directory .........................................................................................................24
Preparing the Phone Directory File .............................................................................................................24
Downloading the Phone Directory File ........................................................................................................ 27
LDAP ........................................................................................................................................28
v1.01
2
Page 3

Admin Guide M300
Firmware Update ............................................................................................................. 29
Considerations before updating .........................................................................................29
Updating manually ...............................................................................................................29
Using snom's update server .......................................................................................................................... 30
Using your own server ................................................................................................................................... 30
Downloading update files to your server ...................................................................................... 30
Downloading update files to base station and transmitting to wireless devices .................. 31
Updating the base station ................................................................................................................. 32
Updating registered handsets ......................................................................................................... 32
Provisioning updates ...........................................................................................................32
v1.01
3
Page 4

Admin Guide M300 Copyright, Trademarks, Legal Disclaimers
Copyright, Trademarks, Legal Disclaimers
© 2015 Snom Technology Aktiengesellschaft. All Rights Reserved.
Snom, the names of Snom products, and Snom logos are trademarks owned by Snom Technology AG.
All other product names and names of enterprises are the property of their respective owners.
Product specifications are subject to change without notice.
Snom Technology AG reserves the right to revise and change this document at any time, without being
obliged to announce such revisions or changes beforehand or after the fact.
Texts, images, and illustrations and their arrangement in this document are subject to the protection
of copyrights and other legal rights worldwide. Their use, reproduction, and transmittal to third
parties without express written permission may result in legal proceedings in the criminal courts as
well as civil courts.
When this document is made available on snom’s web page, Snom Technology AG gives its
permission to download and print copies of its content for the intended purpose of using it as a
manual. No parts of this document may be altered, modified or used for commercial purposes without
the express written consent of Snom Technology AG.
Although due care has been taken in the compilation and presentation of the information in this
document, the data upon which it is based may have changed in the meantime. Snom therefore
disclaims all warranties and liability for the accurateness, completeness, and currentness of the
information published, except in the case of intention or gross negligence on the part of Snom or
where liability arises due to binding legal provisions.
v1.01
4
Page 5

Admin Guide M300 Important Information
Important Information
Suitable and Unsuitable Locations
Please read the precautions and instructions on how to install the product thoroughly.
• Use only the power adapter supplied with the base station. Other power supplies may damage or
destroy the phone, aect its behavior, or induce noise.
• The product is for indoor installation only. Not for outdoor installation!
• The operational temperature for the product is between -10°C and + 50°C (14°F and 122°F).
• The maximum humidity for the product is 70% noncondensing. Do not install product in rooms
with high humidity (for example, in bathrooms, laundry rooms, damp basements).
• Do not install the product in locations where it may get splashed with water or chemicals.
• Do not install the product in surroundings at risk for explosions and do not use the product in such
surroundings (paint shops, for example).
• Do not install the product near air conditioners or air conditioning vents, radiators, in very dusty
surroundings, or where it is exposed to direct sunlight.
• Avoid placing the device‘s Ethernet cable where people may trip over it. Avoid placing the cable
where it may be exposed to mechanical pressure as this may damage it. If the cable is damaged,
disconnect the device and contact qualified service personnel.
• Proximity to metal surfaces , electric current lines, and water pipes might degrade signal
reception/transmission. We recommend to not install the product directly on metal surfaces and
to maintain a minimum distance of 20 cm (8 Inches) from electric current lines and water pipes.
• Medical devices might be adversely aected. Please consider the technical ramifications when
installing the device in a doctor‘s oce, for example.
• Install the product at a minimum distance of 100 cm (39“) to persons and animals.
Intended Use
This product is designed for use with a Snom M-series telephone. Any other use is considered
unintended use. Any modification or reconstruction not described in the user manual is considered
unintended use.
Safety Precautions
Please read these precautions and the instructions on how to set up and use the device thoroughly
before using it. Save this info sheet and do not give the device to third parties without it. Please also
note the information on the proper disposal of the device.
Avoid placing the device's Ethernet cable where people may trip over it. Avoid placing the cable
where it may be exposed to mechanical pressure as this may damage it. If the cable is damaged,
disconnect the device and contact qualified service personnel.
v1.01
5
Page 6

Admin Guide M300 Important Information
• The product is for indoor installation only. Not for outdoor installation!
• The operational temperature for the product is between -10°C and + 50°C (14°F and 122°F).
• Do not install product in rooms with high humidity (for example, in bathrooms, laundry rooms,
damp basements). Do not immerse product in water and do not spill or pour liquids of any kind
onto or into any parts of it.
• Do not install product in surroundings at risk for explosions and do not use the product in
such surroundings (paint shops, for example). Do not use the product if you smell gas or other
potentially explosive fumes!
• Install the product at a minimum distance of 100 cm (39") to persons and animals.
• Medical devices might be adversely aected. Please consider the technical ramifications when
installing the device in a doctor‘s oce, for example.
• FOR THE USA: Do not use near medical equipment or if you have a pacemaker.
If you have an implanted pacemaker
• Do not use if you have an implanted pacemaker unless the pacemaker manufacturer‘s directions
expressly permit the use of devices emitting pulsating radio frequency signals. Always follow the
manufacturer‘s directions!
• Recommended MINIMUM distance to the device: 100 cm (39'').
• Turn the device o immediately if there is any reason to suspect that interference is taking place.
• FOR THE USA: Do not use if you have a pacemaker.
Additional safety information
Small children
Your device and its enhancements may contain small parts. Keep them out of the reach of small
children.
Operating environment
Remember to follow any special regulations in force in any area, and always switch o your device
when its use is prohibited or when it may cause interference or danger. Use the device only in its
normal operating positions. Do not place credit cards or other magnetic storage media near the
device, because information stored on them may be erased.
Medical devices
Operation of any equipment emitting radio frequency signals may interfere with the functionality of
inadequately shielded medical devices. Consult a physician or the manufacturer of the medical device
to determine if they are adequately shielded from external radio frequency (RF) energy or if you have
any other questions concerning this topic. Switch o your device in health care facilities when signs
posted in these areas instruct you to do so. Hospitals or health care facilities may be using equipment
that could be sensitive to external RF energy.
v1.01
6
Page 7

Admin Guide M300 Important Information
Implanted medical devices
Manufacturers of medical devices recommend that a minimum distance should be maintained
between a wireless device and an implanted medical device, such as pacemakers or cardioverter
defibrillators, to avoid potential interference with the medical device. Persons who have such devices
should:
• Always keep the wireless device more than 100 centimeters (39 inches) from the medical device
when the wireless device is turned on.
• Not carry the wireless device in a breast pocket.
• Hold the wireless device to the ear opposite the medical device to minimize the potential for interference.
• Turn the wireless device o immediately if there is any reason to suspect that interference is
taking place.
• Read and follow the directions of the medical device‘s manufacturer.
• If you have any questions about using your wireless device with an implanted medical device,
consult your health care provider.
SELV (Safety Extra Low Voltage) Compliance
Safety status of Input/Output connections comply with SELV requirements.
Potentially explosive environments
Switch o your device when in any area with a potentially explosive atmosphere and obey all signs
and instructions. Sparks in such areas could cause an explosion or fire resulting in bodily injury or
even death. Switch o the device at refuelling points such as near gas pumps at service stations.
Observe restrictions on the use of radio equipment in fuel depots, storage, and distribution areas;
chemical plants; or where blasting operations are in progress. Areas with a potentially explosive
atmosphere are often but not always clearly marked. They include below deck on boats, chemical
transfer or storage facilities, vehicles using liquefied petroleum gas, and areas where the air contains
chemicals or particles such as grain dust or metal powders.
Sensitive Electronic Equipment
The current state of research concludes that operational DECT phones normally do not adversely
aect electronic equipment. Nevertheless, you should take some precautions if you want to operate
DECT phones in the immediate vicinity of such equipment like sensitive laboratory equipment. Always
keep a minimum distance of 10 cm (3.94“) to the equipment even when the phone is in standby.
Electrical Surges
We recommend the installment of an AC surge arrester in the AC outlet to which this device is
connected to avoid damage to the equipmen t caused by local strikes of lightening or other electrical
surges.
v1.01
7
Page 8

Admin Guide M300 Important Information
Cleaning
Use an anti-static cloth. Please avoid water and liquid or solid cleaning products as they might
damage the surface or internal electronics of the base, charger, and handset.
Disposal
This product is subject to European Directive 2002/96/EC and may not be disposed of
with general household garbage.
If you do not know where you may dispose of the device at the end of its lifespan, contact
your municipality, your local waste management provider, or your seller.
For countries outside the European Union
Disposal of electrical and electronic products in countries outside the European Union should be done
in line with local regulations. Please contact local authorities for further information.
Standards Conformance
This device complies with the essential health, safety, and environmental requirements
of all relevant European directives.
This device is FCC certified and meets US health, safety, and environmental standards.
Unauthorized opening, changing, or modifying the device will cause the warranty to
lapse and may also result in the loss of CE conformity and the FCC certification. In case
of malfunction contact authorized service personnel, your seller, or snom.
• Safety: IEC 60950-1:2005
• Ethernet connector: RJ45 (8P8C)
• Power: Power adapter 5V DC 600 mA
◦ EU: Ten Pao SMPS adapter, model no. S003GV0500060, input 100-240 VAC, output 5V DC 600
mA, coaxial power connector
◦ US: Ten Pao SMPS adapter, model no. S003GU050060, input 100-240 VAC, output 5V DC 600
mA, coaxial power connector
◦ AU: Ten Pao SMPS adapter, model no. S003GS050060, input 100-240 VAC, output 5V DC 600
mA, coaxial power connector
The declaration of conformity can be requested from
Snom Technology AG
Wittestr. 30G
13509 Berlin
Germany
v1.01
8
Page 9

Admin Guide M300 Important Information
Additional Important Information USA
FCC ID: T7HX9430
Intended Use
This device is designed for use with Snom M-series phones. Any other use, modification or
reconstruction of the product is considered unintended use.
Important Safety Information
Follow all instructions and warnings in the user manual, and on the equipment to prevent accidents.
WARNING
Fire, electric shock, or other injury may result if you do not observe the following safety precautions:
• Do not use in or near a bathtub, sink, swimming pool, wet basement, or other water.
• Do not use this or any cordless telephone in the vicinity of a gas leak.
• Do not use in environments subject to explosion hazards, such as auto paint shops.
• Do not use near medical equipment or if you have a pacemaker.
• Unplug from wall outlet before cleaning.
• To prevent overheating, do not block slots and openings in the cabinet or the back or bottom of
equipment. Do not place equipment on beds, sofas, rugs, or other surfaces that generate fibers.
• To prevent overheating, do not place near or over a radiator or in a cabinet without
properventilation.
• To reduce the risk of fire, use only 26 AWG or larger UL-listed or CSA-certified telecommunication
line cord.
• Operate using the power source indicated on the marking label. If you are unsure about the type of
power supply to your home or business, consult your power company.
• Do not place objects on the power cord. Do not step on the power cord.
• To prevent exposure to dangerous voltage, do not push objects through cabinet slots.
• To reduce the risk of electric shock, do not disassemble equipment or open parts other than
specified access doors. Opening or removing parts may expose you to dangerous voltage or other
risks. Incorrect reassembly can cause electric shock when equipment is subsequently used.
• Do not overload wall outlets and extension cords.
• Unplug equipment and contact qualified service if any of the following has occurred:
◦ Power supply cord or plug has been damaged or frayed.
◦ Liquid has been spilled on or in the equipment.
◦ Equipment has been exposed to rain or water.
◦ Equipment does not work normally even when the operating instructions are followed. Adjust
only those controls referred to in the operating instructions. Improper adjustment of other
controls may result in damage and may require extensive work by an authorized service
center.
v1.01
9
Page 10

Admin Guide M300 Important Information
◦ Equipment has been dropped and damaged.
◦ Equipment has exhibited a distinct change in performance.
• Do not put the handset of the telephone next to your ear when the handset is not in normal talk
mode.
• Radio signals transmitted between the handset and base may cause interference with hearing
aids.
• The cord may contain lead, a chemical known to the State of California to cause birth defects or
other reproductive harm. Wash hands after handling.
• Install the product at a minimum distance of 100 cm (39") to persons and animals.
Installation Guidelines
Follow all warnings and instructions.
• Do not install equipment near a bath tub, sink, or shower.
• Operate the equipment using only the power source indicated on the marking label. If you are
unsure of the power supply to your home or business, consult with your power company.
• To avoid interference to nearby appliances, do not place base of the phone on or near a television,
VCR, or microwave oven.
• Do not expose the equipment to direct sunlight.
• Do not place equipment on an unstable cart, stand, or table.
• Adjust only those controls referred to in the operating instructions. Improper adjustment of other
controls may result in damage and may require extensive work to restore equipment to normal
operation.
• The location of the device should be close to a continuous power outlet (an AC outlet that does not
have a switch to interrupt power).
• Keep the device away from sources of electrical noise such as motors or fluorescent lighting.
NOTICE
To avoid damage to the equipment, observe the following precautions:
• Do not expose to water, rain, or moisture.
• Place securely on a stable surface.
• To avoid damage during an electrical storm, equipment should be plugged into a surge protector.
v1.01
10
Page 11

Admin Guide M300 Important Information
Cordless telephone privacy
Cordless telephones are radio devices. Communications between the handset and base of your
cordless telephone are accomplished by means of radio waves which are broadcast over the open
airways. Because of the inherent physical properties of radio waves, your communications can be
received by radio receiving devices other than your own cordless telephone unit. Consequently, any
communications using your cordless telephone may not be private.
Cleaning
Do not clean with liquid or aerosol cleaners, household polish, chemicals, or cleaning agents. To avoid
static shock, do not clean with a dry cloth. Clean with only a damp (not wet) cloth.
Disposal
Disposal of electrical and electronic products should be done in line with local regulations. Please
contact local authorities for further information.
FCC and Other Information
This equipment complies with Parts 68 of the FCC rules and the requirements adopted by the
Administrative Council for Terminal Attachments (ACTA).
This device complies with part 15 of the FCC rules. Operation is subject to the following two
conditions: (1) This device may not cause harmful interference, and (2) This device must accept
any interference received, including interference that may cause undesired operation. Privacy of
communications may not be ensured when using this phone.
These limits are designed to provide reasonable protection against harmful interference in a
residential installation. This equipment generates, uses and can radiate radio frequency energy and,
if not installed and used in accordance with the instructions, may cause harmful interference to radio
communications. However, there is no guarantee that interference will not occur in a particular
installation. If this equipment does cause harmful interference to radio or television reception, which
can be determined by turning the equipment o and on, the user is encouraged to try and correct the
interference by one or more of the following measures:
• Reorient or relocate the receiving antenna.
• Increase the separation between the equipment and receiver.
• Connect the equipment into an outlet or on a circuit dierent from that to which the receiver is
connected.
• Consult the dealer or an experienced radio/TVtechnician for help.
FCC RF exposure warning
To insure the safety of users, the FCC has established criteria for the amount of radio frequency
energy various products may produce depending on their intended usage. This product has been
tested and found to comply with the FCC’s exposure criteria. For body worn operation, the FCC RF
exposure guidelines were also met when used with the accessories supplied or designed for this
product. Use of other accessories may not ensure compliance with FCC RF exposure guidelines and
should be avoided.
v1.01
11
Page 12

Admin Guide M300 Important Information
Caution: To maintain compliance with the FCC’s RF exposure guidelines, the internal antennas used
for this mobile transmitter must provide a separation distance of at least 20 cm from all persons. The
device must not be co-located or operating in conjunction with any other antenna or transmitter.
Caution: Any changes or modifications not expressly approved by the party responsible for
compliance could void the user’s authority to operate this device.
Health and safety information FCC
Exposure to Radio Frequency (RF) Signals
This device is a radio transmitter and receiver. It is designed and manufactured not to exceed the
emission limits for exposure to radio frequency (RF) energy set by the Federal Communications
Commission of the U.S. Government. These limits are part of comprehensive guidelines and establish
permitted levels of RF energy for the general population. The guidelines are based on the safety
standards previously set by both U.S. and international standards bodies:
This product has been shown to be capable of compliance for localized specific absorption rate (SAR)
for uncontrolled environment/general population exposure limits specified in ANSI/IEEE Std. C95.11992 and has been tested in accordance with the measurement procedures specified in FCC/OET
Bulletin 65 Supplement C (2001) and IEEE Std. 1528-2003 (December 2003).
Standards Conformance
This device is FCC certified and meets US health, safety, and environmental standards. The
declaration of conformity can be requested from Snom:
Snom Technology AG
Wittestr. 30G
13509 Berlin
Germany
FCC ID: T7HX9430
Unauthorized opening, changing, or modifying the device will cause the warranty to lapse and may
also result in the loss of the FCC certification. In case of malfunction contact authorized service
personnel, your seller, or Snom.
• Safety: IEC 60950-1:2005
• Connector: RJ45 (8P8C)
• Power: Ten Pao SMPS adapter, model no. S003GU050060, input 100-240 VAC, output 5V DC 600
mA, coaxial power connector
v1.01
12
Page 13

Admin Guide M300 Important Information
Regulatory Information Canada
IC Number 4979B-X9430
Interference information
This device complies with Industry Canada licence-exempt RSS standard(s). Operation is subject
to the following two conditions: (1) this device may not cause interference, and (2) this device must
accept any interference, including interference that may cause undesired operation of the device.
Le présent appareil est conforme aux CNR d’Industrie Canada applicables aux appareils radio
exempts de licence. L’exploitation est autorisée aux deux conditions suivantes: (1) l’appareil ne doit
pas produire de brouillage, et (2) l’utilisateur de l’appareil doit accepter tout brouillage radioélectrique
subi, même si le brouillage est susceptible d’en compromettre le fonctionnement.
Privacy of communications may not be ensured when using this equipment.
La confidentialité des communications ne peut pas être garantie avec cet équipement.
Exposure to Radio Frequency (RF) Signals
This product is a radio transmitter and receiver. It is designed and manufactured not to exceed this
emission limit for exposure to radio frequency (RF) energy set by the Ministry of Health (Canada),
Safety Code 6. These limits are part of comprehensive guidelines and established permitted levels of
RF energy for the general population. These guidelines are based on the safety standards previously
set by international standard bodies. These standards include a substantial safety margin designed to
assure the safety of all persons, regardless of age and health.
This device and its antenna must not be co-located or operating in conjunction with any other antenna
or transmitter.
This device has been shown to be capable of compliance for localized specific absorption rate (SAR)
for uncontrolled environmental / general public exposure limits specific in ANSI/IEEE C95.1-1992 and
had been tested in accordance with the measurement procedures specified in IEEE 1528-2003.
This Class B digital apparatus complies with Canadian ICES-003. / CET appareil numérique de la
classe B est conforme á la norme NMB-003 du Canada.
This product meets the applicable Industry Canada technical specifications. / Le présent matériel est
conforme aux specifications techniques applicables d’Industrie Canada.
v1.01
13
Page 14

Admin Guide M300 Introduction
Introduction
In a typical telephony system, the M-series base station is connected to the local area network (LAN)
which, in turn, is connected to a PBX or an IP Service Provider. The base station converts IP protocol
to DECT protocol and transmits phone calls to and from the DECT handsets.
To be able to use the M-series DECT phones, the base station must be connected to your LAN and the
handset(s) must be registered at the base station. This admin guide covers the manual configuration
of one base station.
For information on provisioning settings, see "Provisioning Guide M700 and M300 Base Stations".
M-series base stations follow most Snom configuration and management schemes. It is
recommended to have a local HTTP/HTTPS server for firmware updates, central configuration
management, and hosting firmware files for base stations, handsets, and repeaters. Handsets and
repeaters are updated over the air by the base station.
Normally the initialization of the base station is completely automatic, using DHCP. If the base station
cannot discover a DHCP server in the subnet, you can set it up manually via its web interface. As
a minimum you will need to enter the IP address, netmask, IP gateway, and DNS server. Your VoIP
service provider or your network may require more data; please ask your provider or your network's
administrator for the requisite input.
v1.01
14
Page 15

Admin Guide M300 Setting Up
Setting Up
Hardware Setup
The M300 can be placed on a desktop, a shelf, or any other flat, even surface or mounted on a wall.
Standing Unit
1. Connect the Ethernet cable to the RJ45 jack on the back of the device.
2. Connect the coaxial connector of the power adapter to the 5V DC jack on the back of the device.
Ethernet 5 V DC
Reset
Reset key
Fig. 1
Wall Mounting
The M300 can be mounted on the wall by simply hanging it on two suitable hooks or screws.
NOTE: Screws and wall anchors are not included in the delivery. Use screws and
wall anchors suitable for your wall.
ø max: 8.8 mm
Holes for wall mounting
98 mm (3.86'')
Fig. 2 Fig. 3
v1.01
(0.35")
ø min: 6.8 mm
(0.27")
Distance to wall
Abstand zur Wand
Distance au mur
Distanza dalla parete
Distancia a la pared
Distância à parede
15
∼ 4 mm (0.16")
Page 16

Admin Guide M300 Setting Up
1. Mark the centers of the two holes on the wall. The centers have to be 98 mm (3.86") apart
horizontally (Fig. 2, above).
Note: When the device is mounted on the wall, the connectors for the Ethernet cable
and the power adapter are on what in this position is the bottom of the device (Fig. 4). It
is therefore advisable to mount the device above the Ethernet jack and the power outlet
in the wall.
Ethernet 5V DC
Fig. 4
2. Drill the holes and insert the wall anchors flush to the wall.
3. Screw in the screws as shown in Fig. 3.
4. Place the two top holes on the back of the device (Fig. 2) over the screws on the wall.
5. Gently pull the base down on the screws until they lock into place.
6. Connect the Ethernet cable to the RJ45 jack on what in this position is the bottom of the device
(Fig. 1).
7. Connect the coaxial connector of the power adapter to the 5V DC jack on what in this position is
the bottom of the device (Fig. 1).
v1.01
16
Page 17

Admin Guide M300 Setting Up
User Interface of the Unit
Status LED
Status LED
Fig. 1
LED Status Indicator
At the front or top of the unit, depending on whether the unit is standing on a flat surface or mounted
on the wall, there is a multicolored LED for status signaling (Fig. 1). After the device is connected to
the network and to the power source, the orange LEDs will begin to blink, indicating that the unit is
booting. When the solid green LEDs come on, the unit is connected to the network and is operational.
LED indicator System state
Solid green Operational
Blinking orange Booting
Blinking red Network or registration failure
O No power
Green, flashing rapidly Software update in progress
Reset Key
The reset key on the back of the unit (see Fig. 2) is used to return the settings to factory defaults. To
perform a factory reset, press the key with a fingernail or an object like the end of a paper clip for at
least 10 seconds.
Reset
Fig. 2
v1.01
17
Page 18

Admin Guide M300 Configuring
Configuring
To be able to use the M-series DECT phones, the base station must be connected to your network's
or your VoIP service provider's PBx, and the handset(s) must be registered at the base station. This
admin guide covers the manual configuration of the base station.
For information on provisioning settings, see "Provisioning Guide M700 and M300 Base Stations".
M-series base stations follow most Snom configuration and management schemes. It is
recommended to have a local HTTP/HTTPS server for firmware updates, central configuration
management, and hosting firmware files for base stations, handsets, and repeaters. Handsets and
repeaters are updated over the air by the base station.
Preliminary Steps
Normally the initialization of the base station is completely automatic, using DHCP. If the base station
cannot discover a DHCP server in the subnet, you can set it up manually via its web interface. As
a minimum you will need to enter the IP address, netmask, IP gateway, and DNS server. Your VoIP
service provider or your network may require more data; please ask your provider or your network's
administrator for the requisite input.
Finding the IP Address of the Base Station
You can use any M65 or M25 handset in the vicinity of the base station to find the base's IP address.
The handset does not need to be registered at the base.
1. Connect the base station to your network
2. Press the menu key
The main menu screen (Fig. 1) will appear on the display.
on the M65 handset or the center of the navigation key on the M25.
Fig. 1 Fig. 2
3. Type *47*. The IP Search screen opens (Fig. 2). If your handset detects more than one base
station within range, check the MAC address on the back of your base station and use the
navigation key to select your base.
v1.01
18
Page 19

Admin Guide M300 Configuring
Opening the Web User Interface
1. Open a web browser on your PC. Enter the IP address, preceded by "http://" in the address bar
(for example: http://192.168.10.115) and press ENTER.
2. Enter your user name and password in the pop-up window. The defaults for both are admin:
Default user name: admin
Default password: admin
Fig. 10
3. Click on OK.
The Home/Status page opens, showing your system information. The vertical menu on the left
side of the window is always the same, no matter which window happens to be open at the time.
Click on a menu item to open that page.
v1.01
19
Page 20

Admin Guide M300 Configuring
Initial Settings
Servers
During the initialization, the default server settings are loaded automatically.
Language, Country, and Time/Date
The Country page contains drop-down menus for the selection of your country, a state or region
within that country, if applicable, and the language to be used on the web interface of the base station.
There are also two checkboxes for the settings Set timezone by country/region and Set DST by
country/region. By default, the checkboxes are ticked. This means that the time zone and the
daylight saving time (DST) are set automatically to the country and, if applicable, the state/region of
that country you selected.
Selecting country, region, and language
1. Select your country from the drop-down menu.
For some countries like the US and Australia, state or region options aecting time zone and DST
settings can also be selected. Select your state/region from the drop-down menu.
2. Select the language for the web interface of the base station from the drop-down menu. The
default is English.
3. If you do not want to select the time zone of the country/region selected in step 1, tick the
checkbox of Set timezone by country/region to disable the automatic setting.
If you want to disable DST, tick the checkbox of Set DST by country/region to uncheck it.
Note: Ticking the checkboxes will result in checking and unchecking them on both the
Country page and the Time page.
When the automatic settings are disabled, time and DST can be set manually on the
Time page.
4. Click on Save.
v1.01
20
Page 21

Admin Guide M300 Configuring
Extensions and Handsets
To be able to use a handset, an extension must have been set up for it on the web interface of the base
station, and the handset must be registered for the extension.
Click on Extensions to open the Extensions and Handsets page. By default, Extensions is visible
(Fig. 1), as indicated by its larger font. Click on the Handset link in Fig. 1 if you want to switch to the
Handsets view (Fig. 2).
Visible page Click
Fig. 1
to view
Click Visible page
to view
Fig. 2
Setting up extension and handset
1. On the Extensions page, click on Add extension (Fig. 1). The Add extension page opens (Fig. 3).
Depending on your PBX, the information you need to enter will vary. Extension setting and Server
selection are mandatory. The remaining settings depend on the requirements of your PBX or VoIP
provider and can be left blank, if nothing is required. Check with your IT administrator or service
provider. As a minimum you will need to:
a. Enter the extension number in the Extension text field.
b. If there is more than one SIP server in your network, select the one you wish to use from the
drop-down menu of Server, if necessary.
c. Click on the checkbox to the left of the Add Handset line.
Fig. 3
v1.01
21
Page 22

Admin Guide M300 Configuring
Fig. 4
d. Click on Save.
2. On the Extensions page, click on the string of capital Fs underneath the IPEI header (Fig. 5).
Fig. 5
3. Enter the IPEI of the handset (Fig. 7).
Fig. 6 Fig. 7
Note: To find the IPEI, open the Settings menu of the handset, select Status, and
scroll down to the IPEI at the end of the handset status. The IPEI consists of a string of
10 decimals and capital letters. Do not enter the colons grouping the characters of the
string into twos.
4. Click on Save.
v1.01
22
Page 23

Admin Guide M300 Configuring
5. In the table on the Extensions page, the IPEI has been added under the IPEI header (Fig. 8). Check
the box to the left of the Idx and click on Start SIP Registration.
Fig. 8
Upon successful registration, the State of the Extension page should now be listed as SIP registered
(Fig. 9).
Fig. 9
Note: You also have to register the handset from the handset itself (Settings menu >
Connectivity > Register). Please consult the handset manual for further information.
Deleting Handset
1. Open the Handset page.
2. Click on the checkbox to the left of the Idx and on the link Delete Handset(s).
Deregistering SIP Registrations
1. Open the Extensions page.
2. Click on the checkbox to the left of the Idx and on the link SIP Delete Extension(s).
v1.01
23
Page 24

Admin Guide M300 Central Directory
Central Directory
The central directory is accessible from all handsets registered at the same base station or in the
same multicell installation. The central directory can be a phone list downloaded to the base station
or an external source like the company LDAP register. It is not possible to add or delete entries or to
edit existing entries on the base station's web interface or on the handsets.
Fig. 28
Local Phone Directory
The local central directory is a phone list downloaded to the base station or to the primary base
station in a multicell installation.
Note: The list cannot be edited on the base station's web interface or on the handsets.
If you need to edit existing entries or if you want to add or delete entries, you must do so in the
original file and download it anew. The entire saved file is overwritten every time you load a file to the
central directory.
Preparing the Phone Directory File
The local central directory loaded onto the base station must adhere to one of two formats. If there is
only one phone number for every name, you can use list type 1. If some of the entries have more than
one phone number associated with a name, use list type 2.
List Type 1
This is a text file containing a list of entries with comma-separated values. Each entry consists of a
name and a phone number. Save the file on your PC or on a server as a normal text file (*.txt).
Valid values:
• Name: A total of 23 characters.
◦ The comma (,) is not allowed because it serves to separate the name and number values of
each entry. Entries with more than one comma-separator will be discarded without warning.
◦ Names with more than 23 characters will be truncated.
v1.01
24
Page 25

Admin Guide M300 Central Directory
• Number: A total of 21 characters.
◦ Valid characters: Digits 0 to 9 and the symbol +. You can use parentheses () around area
codes and/or blank spaces to partition numbers into segments, but they will not be shown on
the handset.
◦ Numbers with more than 21 characters will be discarded without warning.
Examples for valid entries:
Mark,9345
Jack,+493011111111
Kurt Maier (snom),8745
Mary Miller,9856
Miller Mary,9856
Dr. Smith,(917)5550145
Dr. Smith,917 555 0145
Tim Meier,(040)111111111
Examples for invalid entries that will be discarded:
Dr. Smith,917-5550145
Jack,030-11111111
Miller,Mary,9856
List Type 2
This is a list using the format of XML elements. Each entry consists of a name and up to three phone
numbers. If there is only one phone number for a name, leave the values for the other two numbers
empty. Do not remove the elements themselves. Save the file on your PC or on a server as all types
(*.*) or normal text file (*.txt).
Three phone numbers per name are possible. If more than one number is available for a given name,
they can be selected by pressing the right navigation key on the handset.
• Telephone. This is interpreted by the handset as the home phone number represented by the
symbol . If there are no oce or mobile numbers, the home number is presented by the handset
when you select the name.
• Oce. This is interpreted by the handset as the work phone number represented by the
symbol. If entered, the work number is the number presented by the handset when you select the
name.
• Mobile. This is interpreted by the handset as the mobile phone number represented by the
symbol. If entered and if there is no oce number, the mobile number is the number presented
by the phone when you select the name.
Note: Type the phone number with any required prefixes (area code, country code,
operator/auto attendant, etc.). Only the digits 0 to 9 are allowed; do not use spaces,
parentheses, punctuation, or other characters between the digits.
Required elements:
v1.01
25
Page 26

Admin Guide M300 Central Directory
<IPPhoneDirectory>
<DirectoryEntry>
<Name></Name>
<Telephone></Telephone>
<Oce></Oce>
<Mobile></Mobile>
</DirectoryEntry>
</IPPhoneDirectory>
The indentations in the following example are only for demonstration purposes to set the individual
entries apart.
<IPPhoneDirectory>
<DirectoryEntry>
<Name>Name1</Name>
<Telephone>phone number1</Telephone>
<Oce>oce phone number1</Oce>->
<Mobile>mobile phone number1</Mobile>
</DirectoryEntry>
<DirectoryEntry>
<Name>Name2</Name>
<Telephone></Telephone>
<Oce>oce phone number2</Oce>
<Mobile></Mobile>
</DirectoryEntry>
<DirectoryEntry>
<Name>Name3</Name>
<Telephone>phone number3</Telephone>
<Oce> oce phone number3 </Oce>
<Mobile></Mobile>
</DirectoryEntry>
<DirectoryEntry>
<Name>Name4</Name>
<Telephone>phone number4</Telephone>
<Oce></Oce>
<Mobile> mobile phone number4</Mobile>
</DirectoryEntry>
<DirectoryEntry>
<Name>Name5</Name>
<Telephone>phone number5</Telephone>
<Oce></Oce>
<Mobile> </Mobile>>
</DirectoryEntry>
</IPPhoneDirectory>
Work (oce) number is default number first shown
Work number is default number first shown
Work number is default number first shown
No work number, mobile number is shown
No work or mobile number, home phone
shown
number
is
v1.01
26
Page 27

Admin Guide M300 Central Directory
Downloading the Phone Directory File
1. After preparing and saving the file as described in "Preparing the Phone Directory File", click on
Browse (Fig. 29) and select the file on your PC or server (Fig. 30). The name of the file will appear
to the right of the Browse button (Fig. 31).
Fig. 29 Fig. 30
Fig. 31
2. Click on Load (Fig. 31).
3. Reboot the base station to make sure that the changes take eect.
After the file has been downloaded to the base station, the name of the file is not visible on the
Central Directory page anymore. You can view the contents of the imported file on the registered
handsets, but not on the base station.
v1.01
27
Page 28

Admin Guide M300 Central Directory
LDAP
On the Central Directory page, select LDAP from the drop-down menu of Location (see Fig. 28 on
page 24) to open the LDAP server menu (Fig. 32). After saving your input, you may want to reboot
the base station to make sure that the changes take eect.
Fig. 32 Fig. 33
Settings:
• Server: IP address of the LDAP server
• Port: Server port for LDAP
• Sbase: This setting specifies the LDAP search base (the distinguished name of the search
base object) which corresponds to the location in the directory from which the LDAP search is
requested to begin. The criteria depend on the configuration of the LDAP server.
• LDAP Filter: LDAP name filter is the search criteria for name look-ups. The format of the search
filter is compliant to the standard string representations of LDAP search filters (RFC 2254). The
default value is blank.
• Bind: Specifies the bind "username" for LDAP servers when the handset connects to the server. If
the server allows anonymous binds, you can leave the setting blank.
• Password: Specifies the bind "password" for LDAP servers. If the server allows anonymous binds,
you can leave the setting blank.
• Handset identity settings.
◦ Name: Select the LDAP name attribute from the drop-down menu. The options are cn and
sn+givenName. The default setting is cn.
◦ LDAP number attributes: The attributes telephoneNumber, mobile, and homephone are
preset.
v1.01
28
Page 29

Admin Guide M300 Firmware Update
Firmware Update
When first installing the base station, Snom recommends updating to the latest firmware version.
Please go to www.snom.com to see if a new version is available and to download it.
You can either use the Snom M series update server or download the files to your own server and
update the firmware from there.
Note: We recommend to always operate the base station and the connected wireless
devices with the same firmware version.
Although it is possible to update an active live system, we cannot guarantee its
uninterrupted functionality. We therefore recommend performing wireless updates
when the whole system is idle.
Considerations before updating
• On average, it takes 10 - 15 minutes to transmit the firmware file to the wireless devices, but it
could take up to 60 minutes depending on trac (voice trac has priority).
• Using a handset will pause the transfer process to it. It will continue once the handset is back in
idle mode.
• Once the firmware has been transferred, the actual update of each wireless device takes approx.
one minute.
• The M700 can update up to 10, the M300 up to 5 wireless devices at a time. If more devices are
registered with the base, they will be updated successively.
Note: The base station randomly selects the devices for firmware transfer. It is not
possible to assign priority to certain devices.
• Repeaters will start updating automatically when there are no ongoing calls, resulting in a service
interruption of approx. one minute.
• Multicell installations.
◦ The M700 will update all handsets in range, including devices registered on another base
station.
◦ When a user moves from within the range of one base station to another, the update will
continue as long as sucient update capacity is available.
◦ When a multicell installation is fully occupied with firmware transfers, handover/roaming will
fail, i.e., active calls may be lost.
◦ When an update is initiated on one base station, all base stations will perform an update.
Updating manually
Manual updates are perfomed in several steps: Downloading the update files for registered wireless
devices to the base station and transmitting them from the base station to the devices, updating the
base station, and updating the handsets by placing them in their chargers.
v1.01
29
Page 30

Admin Guide M300 Firmware Update
Using snom's update server
Please go to http://wiki.snom.com/FAQ/snom_M/update_using_dect_snom_com for the description
on how to use snom's update server and for downloading the latest firmware versions to your
device(s).
Using your own server
Before starting the update, you must download all required files and save them in folders using the
exact structure described below.
Do not rename the update files as the base station will look for file names that adhere to the
M-series naming scheme. All M-series product names start with a capital M, followed by one to three
numerals. The names of the firmware files also start with the capital M and are followed by one to
three numerals, i.e., M700, M65, M5, etc. The product name is followed by the underscore _ which, in
turn, is followed by a small v and the three-digit firmware version preceded by a zero, i.e., 0323, 0324,
etc.
Examples:
◦ The update file for updating the M700 to version 323 must be named M700_v0323.fwu.
◦ The update file for updating the M65 to version 323 must be named M65_v0323.fwu.
Downloading update files to your server
1. Set up a folder for each M-series product on your http server.
Note: Linux/Unix based HTTP servers are case-sensitive. Since all M-series product
names start with a capital M, the names of the folders must also start with a capital M,
i.e., M700, M65, etc. Naming the folders m700, m65, etc. will cause the downloads to
fail.
2. Download the firmware file for each product you want to update into the respective folder. It is
possible to store multiple firmware versions in a product folder; it is therefore not necessary to
delete older firmware versions before downloading.
v1.01
30
Page 31

Admin Guide M300 Firmware Update
Downloading update files to base station and transmitting to wireless devices
1. Open the web user interface of the base station and click on Firmware Update in the menu on the
left side.
2. In the section Firmware Update Settings, enter the address of your server in the text field of
Firmware update server address.
3. Enter the firmware path in the text field of Firmware path or leave blank, depending on your
setup.
4. The Type section lists all types of the wireless devices currently registered at the base, i.e., M65,
M25, M5, etc. Any types of device not currently registered will not be listed. Enter the three-digit
firmware version, i.e., 323, 324, etc., in the text field of each respective wireless product.
5. Click on Save/Start Update. The base station will download the firmware and transmit it to the
wireless devices. You can monitor the progress of the transfer to each registered handset on the
Extensions page.
a. Handsets will not perform the update until the next time they are placed in the charger.
Note: On average, it takes 10 - 15 minutes to transmit the firmware file to the handset,
but it could take up to 60 minutes depending on trac (voice trac has priority).
The transmission of the file to the handset will pause when the handset is used and
continue as soon as it is idle again.
Progress of firmware
transfer in %; LED on
handset is blinking red.
Firmware has been
transferred and is being
verified (progress in %).
Firmware transfer has
been completed; update
will start the next time the
handset is placed in the
charger.
b. Repeaters will perform the update as soon as there are no active calls in the system.
v1.01
31
Page 32

Admin Guide M300 Firmware Update
Updating the base station
6. In the Update Base Stations section, click on one of the radio buttons. The default is Update this
Base Station Only.
7. Enter the three-digit firmware version for updating the base station in the text field of Required
Version, i.e., 323,324, etc.
8. Click on Start Update.
Updating registered handsets
You have provided the firmware to the handsets registered at the base station in steps 4 and 5, above.
The update of each handset will be performed the next time it is placed in the charger and will take
approximately one minute.
9. Place the handset in the charger to start the firmware update. The LED will flash rapidly, first
green, then red.
If the update was successful, the handset will turn on again, and the web interface will indicate
the completion of the update and the current firmware version on the handset.
Provisioning updates
Please see the separate Provisioning Guide M700/M300 in our Wiki.
v1.01
32
 Loading...