

Page 1
-EN- DSM6/E -
19390292300-dsm6_EN.doc_EN
1
Rev. 01 - 03/01/2012
Read the safety warnings and instructions for the thermodisinfectors in which the rack is used with
care, together with the safety instructions of the producer of the glassware and any other item placed on the
rack. Badly positioned items or glass which shatters during washing may cause dangerous injuries. If
necessary, washing results must be checked and subjected to non-visual inspections.
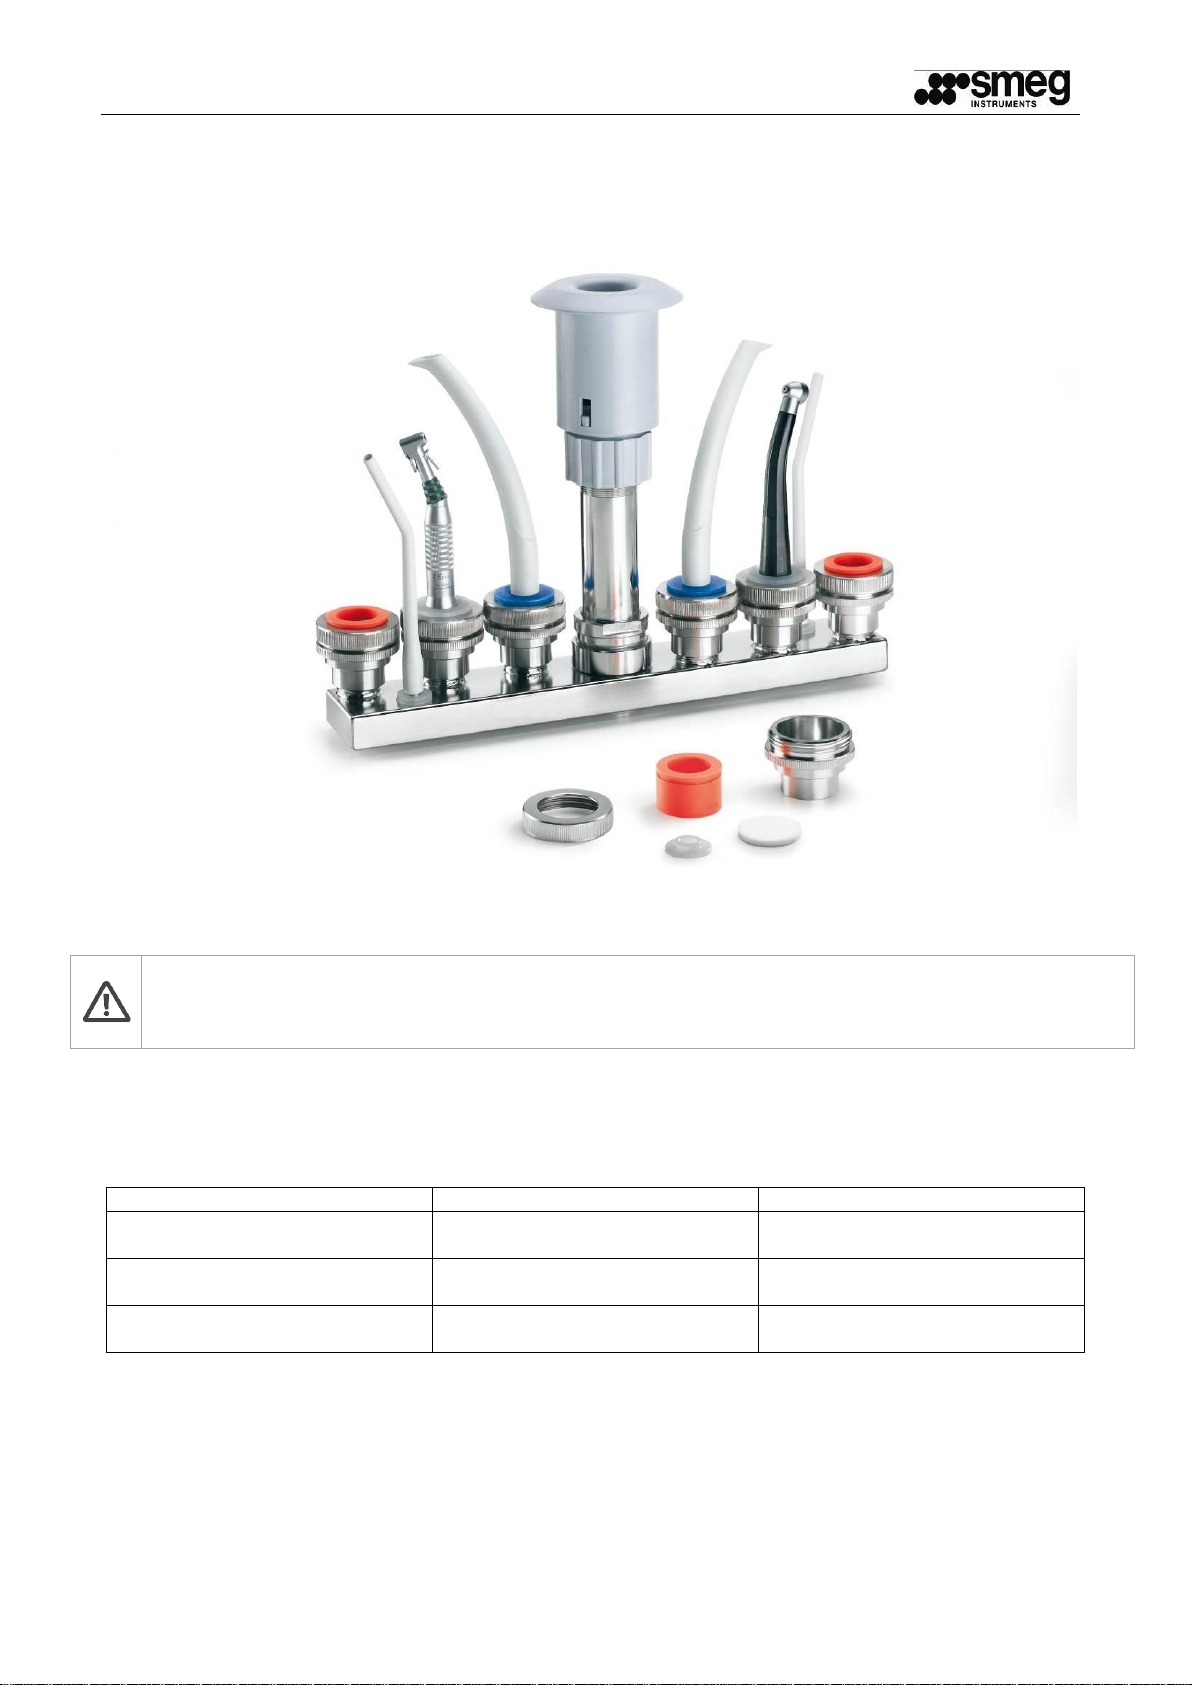
Q.ty
Tipe
Description
6
Adapter ring D.16
Blue interchangeable ring,
diameter 16 mm
6
Adapter ring D. 20
White interchangeable ring,
diameter 20 mm
6
Adapter ring D. 22
Orange interchangeable ring,
diameter 22 mm
DSM6/DSM6E - INSTRUCTIONS FOR ASSEMBLY AND USE
1 LIST OF COMPONENTS SUPPLIED
This component is delivered preassembled and has only to be fixed to the rack.
Note that the rubber rings have different colours depending on their diameters, to ensure an effective grip on
the instruments for washing.
Page 2
-EN- DSM6/E -
19390292300-dsm6_EN.doc_EN
2
Rev. 01 - 03/01/2012
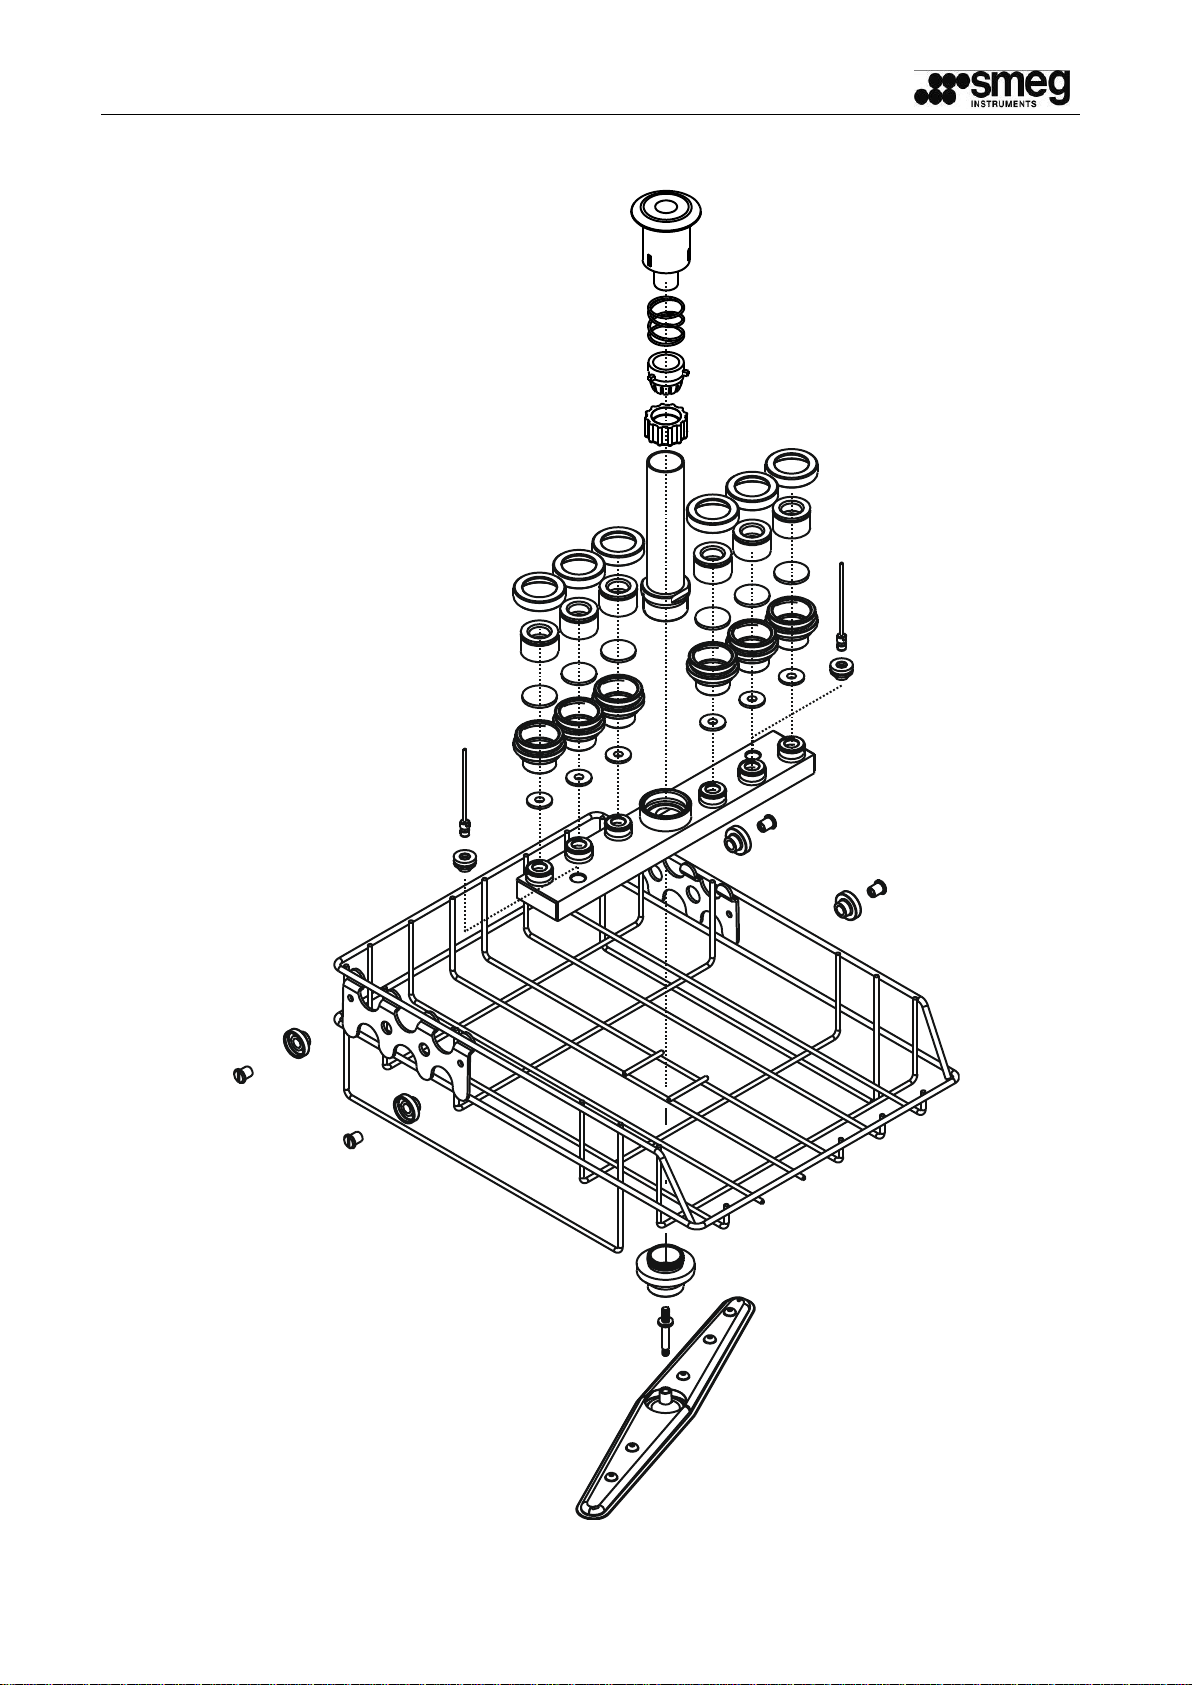
2 BLOW UP DIAGRAM
Page 3

-EN- DSM6/E -
19390292300-dsm6_EN.doc_EN
3
Rev. 01 - 03/01/2012
ILLUSTRATION
PROCEDURE
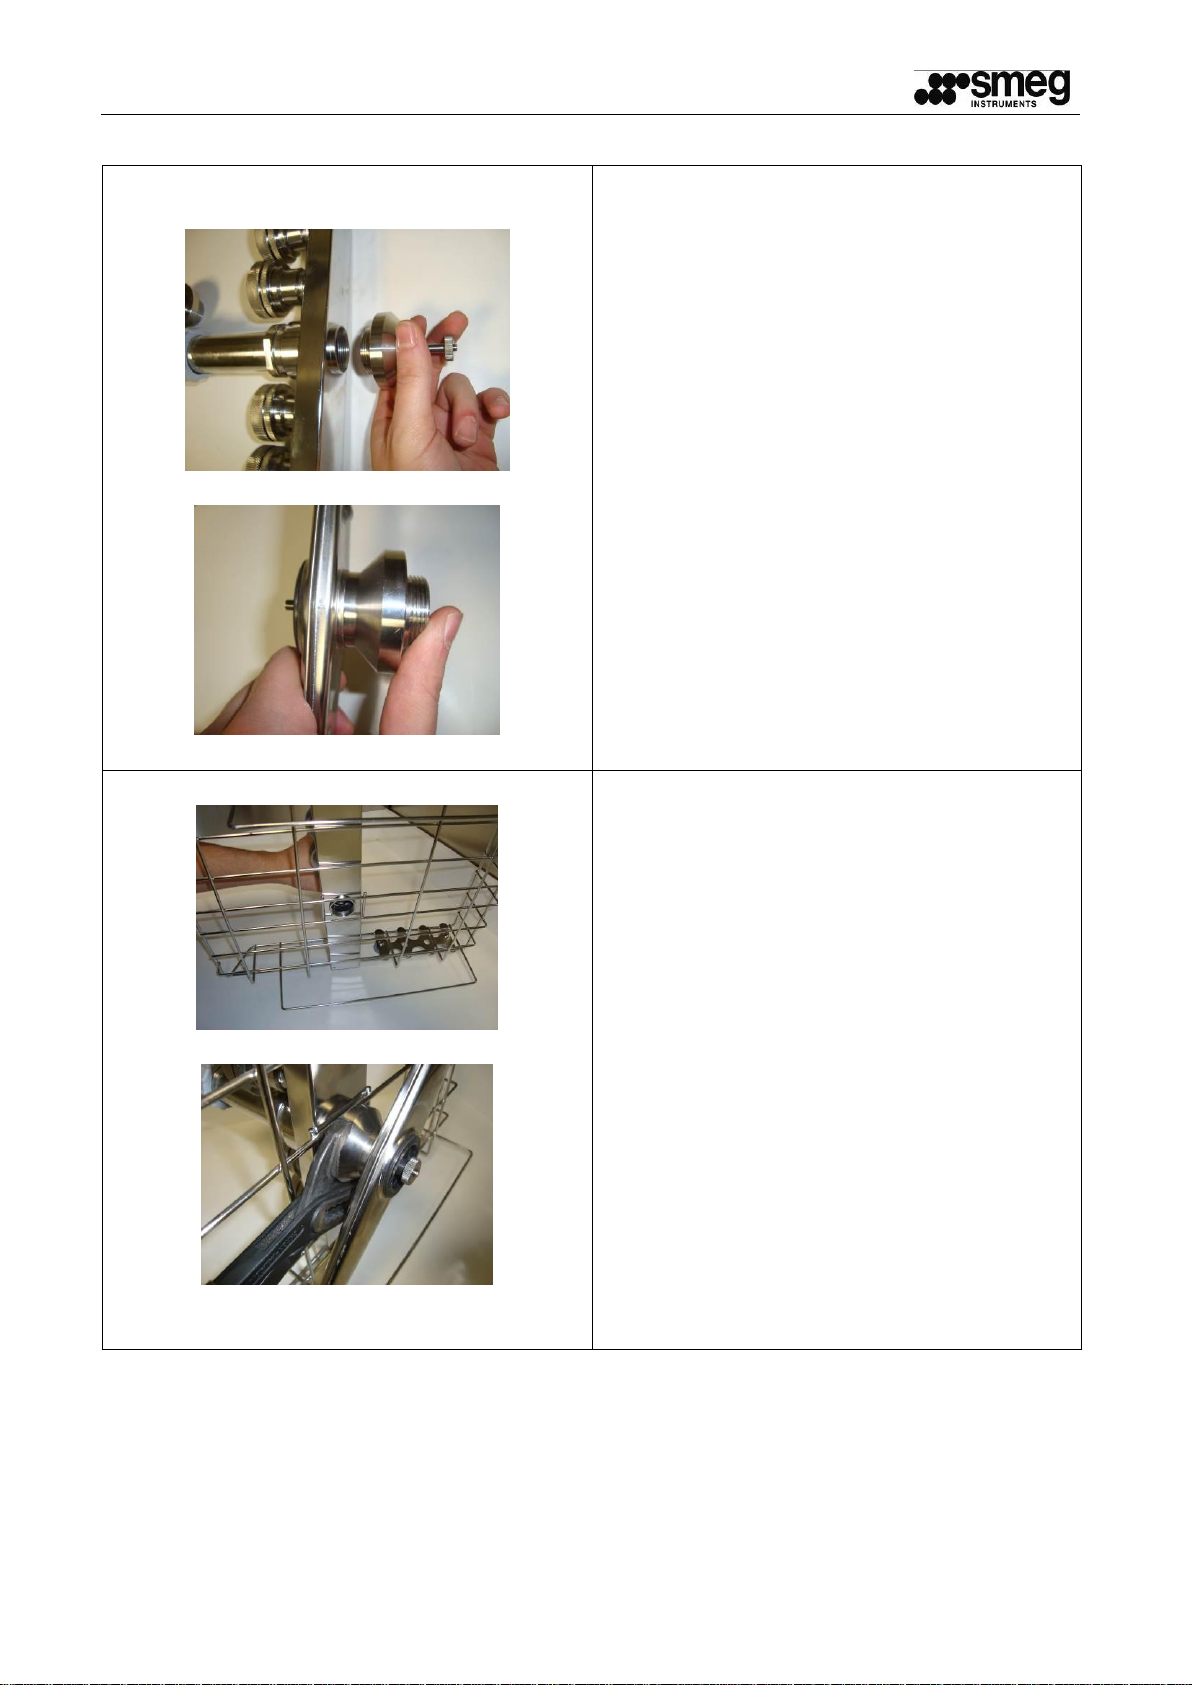
Fig.1
Remove the bottom basket from the appliance
and turn it upside down as shown here, then
unscrew the washer which secures the spray
arm, using tools for assistance if it is stiff.
Fig. 2
Fig.3
Then also unscrew the other block with pliers
(fig.2)
The result is as shown here (fig. 3)
3 ASSEMBLY SEQUENCE
Page 4
-EN- DSM6/E -
19390292300-dsm6_EN.doc_EN
4
Rev. 01 - 03/01/2012
Fig. 4
Fig. 5
Then take the new manifold and unscrew the
ring-nut and its screw (fig. 4), fitting the spray
arm removed previously, and screwing the
screw back into place (fig. 5).
Fig. 6
Fig. 7
Now take the rack and fit the manifold as
shown, also tightening the spray arm ring-nut
(fig.7)
Page 5

-EN- DSM6/E -
19390292300-dsm6_EN.doc_EN
5
Rev. 01 - 03/01/2012
Fig. 8
Fit the two metal nozzles provided in the bag
of spare parts, simply pressing them into
place. The product is now ready for use.
The result is as shown here.
Page 6

-EN- DSM6/E -
19390292300-dsm6_EN.doc_EN
6
Rev. 01 - 03/01/2012
ILLUSTRATION
PROCEDURE
Fig. 9
Also remember that this product is fitted with
special filters to protect the gearing, which must
be replaced regularly.
To do this, simply unscrew the ring-nuts and fit
the new filters, retightening the ring-nut firmly
when done.
Fig 10
Slide the rack into the appliance by hand, taking
great care that the tapered water connection is
positioned as shown here.
4 USE AND PRECAUTIONS
THERE IS A MORE INEXPENSIVE VERSION OF THIS COMPONENT WITH SOME PARTS IN PLASTIC;
ITS OPERATION AND MAINTENANCE ARE JUST THE SAME.
Via Leonardo da Vinci, 4 – 42016 Guastalla (RE) Italy
E-Mail: instruments@smeg.it – www.smeg-instruments.com
Smeg S.p.A.
Instruments Division
Tel. +39 0522 8211 - Fax + 0522 821 592
 Loading...