

Page 1

Instruction Manual
LCD-37L16LCD-37L16
37" LCD TV/MONITOR
Page 2

Thank you very much for your purchase of this product-the most natural
Colour Television Receiver.
To enjoy your set to the full from the very beginning, read this manual carefully
and keep it handy for ready reference.
Page 3
Page 4

SETUPSETUP
Insert The Batteries
1
Remove the battery cover by pressing it and sliding it down.
2
Insert the two 1.5V (AAA size) batteries making sure the polarity (+
or -)of the batteries matches the polarity marks Inside the unit.
3
Replace the battery cover by sliding it in until you hear a click Sound.
Precautions when using batteries
Do not use old and new batteries together.
Do not use different types of batteries (for example, Manganese and
Alkaline batteries) together.
Note that there are chargeable and non-chargeable batteries. Do not
attempt to charge non-chargeable batteries.
Remove the batteries from the remote control unit if you do not intend to use
the unit for a long time.Precautions when using the remote control unit
Do not drop the remote control unit.
Do not subject the remote control unit to physical shocks.
Keep the remote control unit dry. May cause the unit to malfunction.
Replace the batteries with new ones when operation of the unit deteriorates.
TV Installation
-1-
Page 5
SETUPSETUP
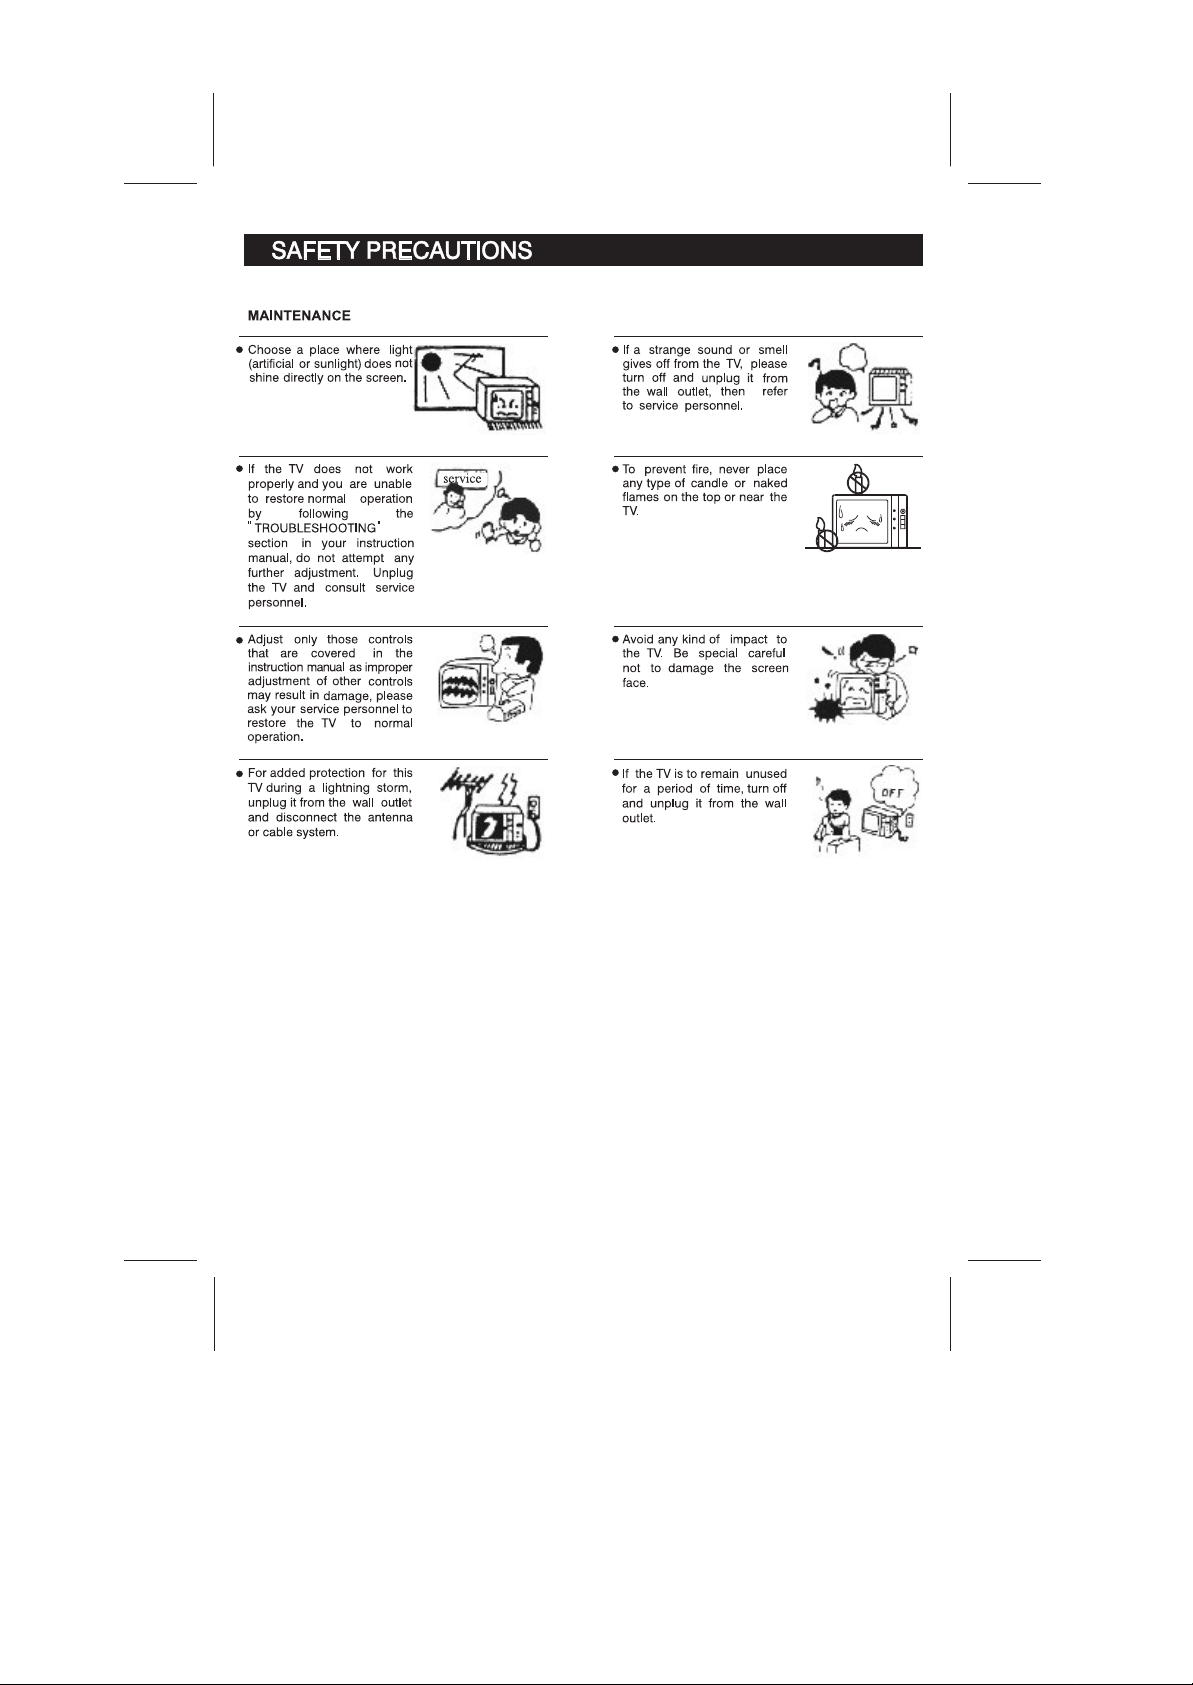
Locate the receiver in the room where direct light does not strike the screen.
Total darkness or a reflection on the picture screen can cause eyestrain. Soft and indirect
lighting is recommended for comfortable viewing.
Allow enough space between the receiver and the wall to permit ventilation.
Avoid excessively warm locations to prevent possible damage to the cabinet or premature
component failure.
This TV operates on AC supply directly, connect the AC plug to the socket at the back of the TV.
Insert the mains plug in the socket having a mains voltage of 100-240V AC.
Do not install the receiver in a location near heat sources such as radiator, air ducts, direct
sunlight, or in a place somewhere like close compartment and close area.Do not cover the
Features
Up to 200 programme memory.
Programme swapping.
Sleep timer.
Original / 16:9/16:9 Zoom / 16:9 Sub /
14:9 picture modes.
When no T V signal is dectected,after 1 5
minutes the T V switches itself automatically
to stand-bymode.
CYS: PAL / S ECAM
SYS: BG/DK / I
HDMI Input (support up to 1080i)
PC Input (support up to 1080i)
NICAM Stereo / AV Stereo
Panel Features
High resolution (1366x768),37" TFT LCD
display.
Brightness: 500cd/m
High-speed response time <8msec.
8-bit color depth,display 16.7M colors.
High contrast ratio (1600:1 T ypital)
Viewing angle:178 (H)/178 (V)(CR>10).
2
00
In The Box
You should have:
Tele vision
Remote control
User Guide
Warranty Card
2 x AAA battery
Stand
Wall mount
-2-
Page 6
FUNCTIONAL PARTSFUNCTIONAL PARTS
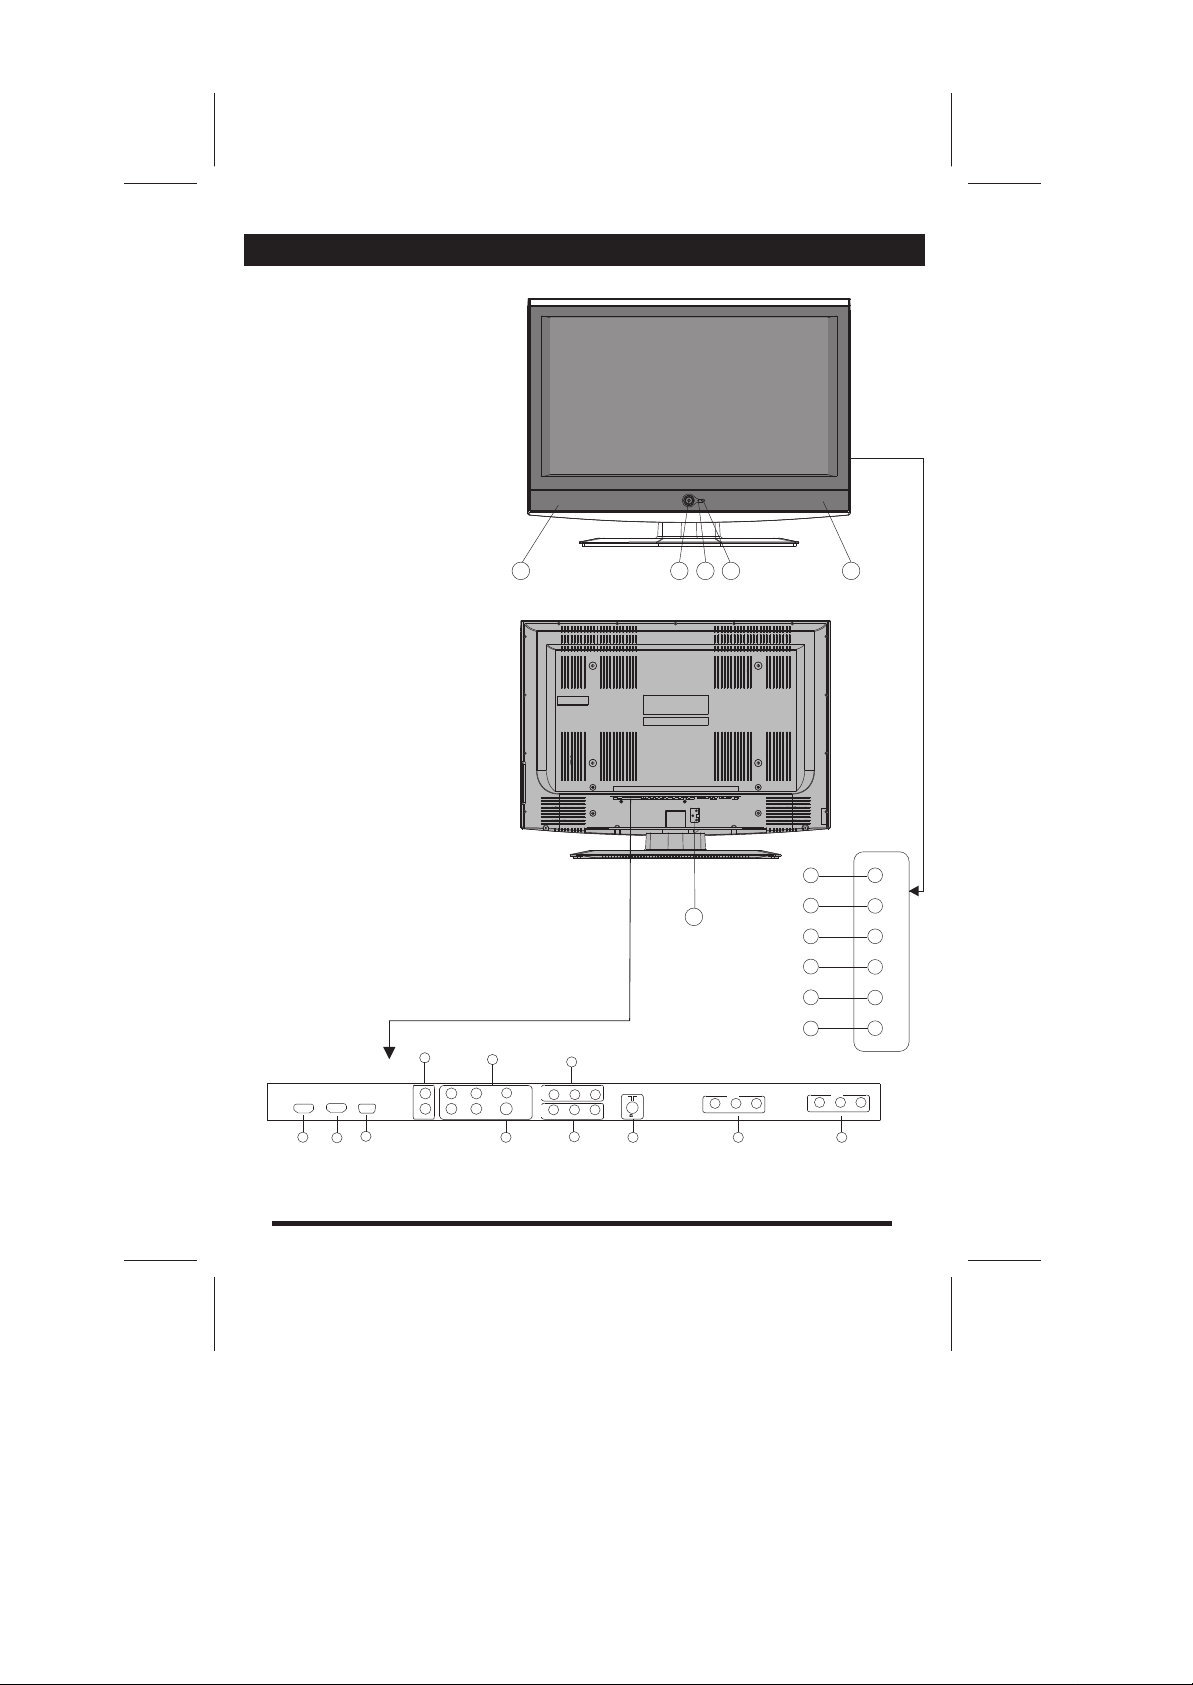
1. ON/OFF Switch
2. Power Indicator
3. Remote Sensor
4. TV / AV
5. MENU
6. VOL.- Button
7. V0L. + Button
8. PROG.- Button
9. PROG.+ Button
10. Speakers
11. AV IN 2
12. AV IN 3
13. Aerial input socket
14. AV IN 1
15. AV OUT
16. S-Video
17. Y Pb/Cb Pr/Cr
18. Audio input (Left & Right)
19. VGA Input
20. HDMI1 Input
21. HDMI2 Input
22. Power cord input
1010 1010
223311
HDMI 2 HDMI 1
2121
44
2222
55
66
77
88
99
1818
VGA
LEFT
AUDIO IN 1
RIGHT
1919
2020
1717
Y
Pb
LEFT
AUDIO IN 2
S-VIDEO
RIGHT
Pr
1616
1414
VIDEO
RIGHT
LEFT
AV IN 1
AV OUT
VIDEO
75 ANT
RIGHT
LEFT
1515
1313
AV IN 3
RIGHT
LEFT
VIDEO
RIGHT
1212
TV/AV
MENU
VOL.-
VOL.+
PROG.-
PROG.+
AV IN 2
VIDEO
LEFT
1111
-3-
Page 7

HDMI CABLE CONNECTIONS HDMI CABLE CONNECTIONS
IMPORTANT INFORMATION Power off both HD player and display before making any
connections. Connect the HDMI cable to the HDMI socket of the TV, connect the other end
to the HDMI output socket of the HD player source.
Connect the HDMI cable to the HDMI socket of the TV. Connect the other end to the HDMI
output socket of the HD player source, HDMI cable will carry both Video and audio signals
from the HD source to the TV.
VIDEO
RIGHT
HDMI 2 HDMI 1
HDMI
LEFT
VGA
Pb
LEFT
LEFT
AUDIO IN 1
AUDIO IN 2
RIGHT
RIGHT
Pr
AV IN 1
Y
AV OUT
S-VIDEO
VIDEO
75 ANT
RIGHT
LEFT
AV IN 3
VIDEO
RIGHT
LEFT
AV IN 2
VIDEO
RIGHT
LEFT
Connect the HDMI cable to the
HDMI input on the TV.
Connect the other end of this
cable to your HD device.
HDMI
Device HDMI
-4-
Page 8

OPERATION INSTRUCTIONS OPERATION INSTRUCTIONS
Remote Control Unit
Sleep
Power
Mute
Q.View
P+
MENU
1 2 3
5
6
--/---
9
TXT Sub.page Reveal Index
Mix Hold SizeCancel
PP
SS
//
Display
V+V-
P-
4
7
8
AV/TV
0
POWER (STAND BY) BUTTON ( )
1
Press this button to turn the TV on/off.
2
MUTE BUTTON ( )
Press once to mute the sound, press again to return to
preset sound level.
3
PROGRAM SELECTION BUTTONS (0-9, -/--)
Press 0-9 digit buttons(one input status:"-"), you can
select one digit program number, if you want to select
two digits program number,you must press the"-/--"
button to set the input status in two inputs model:"--",
at first. then press the two digits number you want to
set.in CATV system you want to watch the channel
from 100-to 125. please press"-/-- " button to set the
inputs status in three input model:"---", at first then
press the three digits number you want to set ,such as
channel 123.please press "-/--" 1and press 2 and 3
when in two or three inputs model.You only want to
select one digit program number , you must press 0
button at first.
PROGRAM UP/DOWN BUTTONS(PROG.+/-)
4
Press the PROG.+ button to select the program
forwards.Press the PROG.- button to select the
program backwards.
5
VOLUME UP/DOWN BUTTONS (VOL.+/-)
Press VOL.+/- buttons to adjust sound level. Or
adjust the volume of each item in the menu status.
6
AUDIO MODE BUTTON (S.S.)
Press this button you can select the sound system
such as BG¡¢ DK ¡¢ I and everything.
QUICK VIEW BUTTON (Q.VIEW)
7
Press this button to return to the previously viewed
program.
PERSONAL PRESETS BUTTON (P.P.)
8
You can set the picture mode in User, Standard,
Mild,Dynamic mode by pressing this button.
9
DISPLAY BUTTON
Press this button to display the settings on the
screen.(e.g. Channel number for TV input,sound
mode,colour system).
SOUND MODE BUTTON(I/II)
10
Press this button, you can select different sound
mode when the source is different.
TV SOURCE
1)MONO: FORCE MONO, MONO.
2)STEREO: FORCE MONO, MONO, STEREO.
3)DUAL: FORCE MONO, MONO, NICAM MAIN,
NICAM SUB, NICAM DUAL.
HDMI SOURCE: STEREO.
YPBPR, SCART, AV, VGA, S-VIDEO SOURCE:
STEREO, L+L, R+R.
-5-
Page 9

OPERATION INSTRUCTIONS OPERATION INSTRUCTIONS
Remote Control Unit
SLEEP BUTTON(SLEEP)
11
Press this button to set the sleep timer. When
the preset length of time has passed, the TV set
Enters standby mode. The time
change(minutes):15,30,45,60,90,120 off.
12
Sleep
Mute
SS
//
P+
MENU
P-
Power
Q.View
1 2 3
5
--/---
TXT Sub.page Reveal Index
Mix Hold SizeCancel
7
6
9
0
PP
Display
V+V-
4
8
AV/TV
MENU BUTTON (MENU)
Press this button to enter the menu screens for
various Optional adjustable settings.
13
TV/AV BUTTON
Press this button to display external video signal
such as TV/ AV IN1/ AV IN 2/ AV IN 3/S-VIDEO/
YPbPr/ VGA/ HDMI-1/ HDMI-2. Press PROG.+/Button to select item and press VOL.+/- button to
enter selected item.
14
REVEAL BUTTON (OPTION)
Press this button to reveal the hidden information
for so me Teletext pages press again to hide the
information.
15
CANCEL BUTTON (OPTION)
Press this button to appear the TV signal on the
background
16
INDEX BUTTON (OPTION)
Press this button to enter the Teletext's index MENU.
17
MIX BUTTON(OPTION)
the button is used as closing /opening the teletext
background.
18
SUB.PAGE BUTTON (OPTION)
Subcode mode,gives,the possibility to select
certain subcode pages of a teletext page.
19
SIZE BUTTON
Press this button you can select differentimage
sizes: Original / 16:9/16:9 Zoom / 16:9 Sub / 14:9.
20
HOLD BUTTON
Press this button to hold the Teletext page no
display to prevent the page from changing.Press
again to release the hold state.
21
TEXT BUTTON
This button is used for entering the teletext MENU.
-6-
Page 10

TELETEXTTELETEXT
Text
PROG.+
SIZE
SIZE
REVEAL
REVEAL
MIX
PROG.-
MIX
MIX
SIZE
MIX
SUB.PAGE
SUB.PAGE
500
-7-
Page 11

TELETEXTTELETEXT
PROG.+
PROG.-
To Cancel TEXT
Press"CANCEL"button to clear the
TEXT.But the page number is still
displayed on the left top of the screen.
NOTICE:However,Teletextis playing all
the same on the background at the time.
Press"CANCEL"button again to resume
the TEXT.
To Freeze TEXT
Press"HOLD"button to hold a Text
page.This means the page will not change
and refresh.
Press the button again to release the hold
state.
To exit Teletext
Press the "TEXT"button.The screen will
Switch to TV mode.
-8-
Page 12

ANALOG MENU SCREENSANALOG MENU SCREENS
1. Plug in the power source. The power indicator will light up. If TV is in stand by mode.
Then Press¡° ¡±key. The picture will display in few minutes.
MENU BUTTON
1.Press menu button to display analog menu ,and press VOL.+/- to select sub menu.
VIDEO AUDIO SETUP TIME OPTIONS
2.After entering an item, you can select the desired adjusting item by the VOL.+/- Buttons
and adjust It by the PROG. +/- buttons.
Video menu
Press the MENU key to invoke the main menu:
use VOL.+/- buttons to select the main icon the
focused icon will be shown as protruded button.
Press the PROG.+/- buttons to go to the
corresponding menu.
Enter VIDEO menu, you can select Picture Mode,
Brightness, Contrast, Sharpness, Color, Color Temp and
N.R. items by pressing PROG.+/- buttons.
Picture Mode
Press the VOL.+/- buttons to change the picture mode.
Such as User, Standard, Mild, Dynamic mode.
Contrast
Press the VOL.+/- buttons to increase/decrease the
contrast of the picture.
Brightness
Press the VOL.+/- buttons to lighten/darken the picture.
Sharpness
Press the button to sharpen or soften the picture.
Saturation
Press the VOL.+/- buttons to increase/decrease the
color saturation.
Tint
Press the button to rectify the tonality of picture.
Color Temp
Press the button to select a suitable color temperature
to display.
The choices are Cold, Normal, Warm.
Noise reduce
Press the button to select off,low,mid,high to
adjusts the dynamic noise reduction level of
image.
-9-
Page 13

ANALOG MENU SCREENSANALOG MENU SCREENS
Advanced menu
Yellow T
Green Tone
Blue Tone
Film mode
Advanced
one
EXIT
Audio menu
Watch
Advanced
This items is to enter advanced picture menu,
press the VOL.+/- buttons to enter the advanced
picture menu.
1.Yellow Tone
This option adjusts the flesh tone level of the image.
The scale of control should be 0-3.
TV
2.Green Tone
This option adjusts the green tone level of the image.
The scale of control should be 0-3.
3.blue Tone
This option adjusts the blue tone level of the image.
The scale of control should be 0-3.
4.Film mode
This option sets the cinema of the image,Auto or off.
Enter Sound menu, you can select Audio Mode,
Volume, Balance and sound mode items by
pressing PROG.+/- Buttons.
Volume
Press the VOL.+/- buttons to adjust the sound
volume .
Balance
Press the VOL.+/- buttons to adjust to the
left to right sound channel volume
Sound Mode
Press the VOL.+/- buttons to select the audio mode.
The audio mode are USER, SPEECH, MOVIE, MUSIC .
Equalizer
A tone control system designed to compensate
for frequency distortion in audio systems.Enter
Equalizer ,you can select 100HZ,500HZ,1.5KHZ,5KHZ
and 10KHZ items by pressing PROG.+ buttons and
change the corresponding value of volume by
pressingVOL.+/ - buttons.
-10-
Page 14

ANALOG MENU SCREENSANALOG MENU SCREENS
Setup menu
Searching
Pos: 1
EXIT Stop
Time menu
Auto tuning
Enter Setup menu, you can search,
and edit channel or favorite program by pressing
PROG.+/- Buttons.
Auto tuning Settings
Press the VOL.+ button Auto tuning status will
be shown when the whole band is search over
the auto tuning process is terminated.
Manual tuning
Press the PROG.+/- buttons to enter the
Manual tuning item Change the channel frequency
data upward or downward sound system,color
system skip AFT manual search by the VOL.+/buttons.
Program lable
Press the VOL.+/- buttons to Edit the current channel
Program Edit
Press VOL.+/- buttons to enter current program edit,
select add or delete current program (equal skip),
then press the menu button backtrack to Edit CH.
Enter Time menu, you can setup sleeptime and edit
current time,off timer ,on timet on timet program.
Sleep Timer
Press PROG.+/-buttons and press VOL.+/- buttons
to Add or Reduce the sleep time.
The time change (minutes):
OFF 0 15 30 ....... 120 OFF
Current timer/off timer/on timer/on timer program :
Press the PROG.+/- buttons and VOL.+/- buttons
enter the current timer/off timer/on timer/on timer
program .You can use 0-9 digit button or VOL.+/buttons to set them.
-11-
Page 15

ANALOG MENU SCREENSANALOG MENU SCREENS
Option Menu
Enter option menu you can setup the osd language ,
Aspect , Menu Background ,Blue screen and key lock .
Select Option menu by press the PROG.+/- buttons and
enter the caption function by pressing VOL.+/buttons, you can adjust the Style function items
by pressing VOL.+/- Buttons.
OSD Language
Press the VOL.+/- and MENU buttons to
select the osd Language.
Aspect
Press the VOL.+/- and MENU buttons to
select the aspect These are 16:9 ,16:9Zoom,
16:9SUB,14:9,Original.
Menu Background
Press the VOL.+/- and MENU buttons to select
Menu Background These are opaque,transparent.
Blue Screen and Keylock
Press the VOL.+/- and MENU buttons to turn
on/off the function items.
-12-
Page 16

PC MODE PC MODE
15 Pin Mini D-Sub Connector
MENU in PC Mode
Enter menu by pressing the "MENU"button
on the remote control.
Picture menu
PC Input typical display modes.
The following table is an illustration of some
of The typical video display modes.
1 640x480 (recommend 60Hz)
2 800x600 (recommend 60Hz)
3 1024x768 (recommend 60Hz)
4 480p
5 576p
6 720p (50/60Hz)
7 1080i (50/60Hz)
Enter menu, you can adjust the picture
phase,H position,V position and Hold
items by pressing PROG.+/- Buttons.
H or V Position
Press the VOL.+/- button to
adjust to the picture horizontal or
vertical position.
-13-
Page 17

HDMI INPUT RESOLUTIONSHDMI INPUT RESOLUTIONS
HDMI Input typical display modes.The
Following table is an illustration Of some Of
the Typical video display modes.
1 640x480 (recommend 60Hz)
2 800x600 (recommend 60Hz)
3 1024x768 (recommend 60Hz)
4 480p
5 576p
6 720p (50/60Hz)
7 1080i (50/60Hz)
YPb Pr Mode(Component input)
The menu of Ypb Pr mode is exactly same as the
menu of HDMI mode.
YPbPr Input typical display modes.
The following table is an illustration of some
of the typical video display modes.
1 480i
2 480p
3 576i
4 576p
5 720p (50/60Hz)
6 1080i (50/60Hz)
-14-
Page 18

SERVICE TIPSSERVICE TIPS
BEFORE CALLING FOR SERVICE, HAVE YOU
CHECKED ( ) THE FOLLOWING CHART
ON SYMPTOMS AND SOLUTIONS?
on
i
t
u
l
Symptoms
No picture, no sound
Poor sound, picture OK
Poor picture, sound OK
Weak picture
Blurred picture
Double image
Lines in picture
Distorted picture
Weak reception on some channels
Horizontal bars
Picture rolls vertically
Poor colour
No colour
Misoperation of Remote control
No Remote control
On Screen Display Control outside the screen
o
S
e
l
b
u
ro
t
on
i
t
a
t
et
s
s
f
y
l
o
b
a
ck
b
o
r
ba
s
p
,
re
on
s
wi
OK
f
n
on
i
i
e
,
l
k
e
o
ect
n
n
br
n
n
o
or
ha
a
c
c
l f
t
eri
al
a
n
a
t
eri
eri
a
a
ere
en
i
k
ck
c
diff
or
e
e
h
h
e-
ry
T
C
C
R
ce
n
a
ppli
a
n
a
as
h
c
ype)
e, su
t
c
l
ro
en
t
r
door
on
n
i
erfe
c
f
t
i
s c
g
(
n
s
i
n
l
i
n
ne
t
u
t
ocal
gh
i
ne
br
bly l
t fi
t
s
ba
u
j
d
ro
P
Adju
Adjus
A
ur
o
l
o
c
ng
i
t
as
ol
dc
r
l
t
a
o
n
l
r
t
o
ro
n
t
bro
o
s
n
s
c
i
o
n
m
c
o
e
r
i
t
rast
t
a
t
yst
lou
s
s
on
o
f
f
i
c
t c
t
k
k i
s
c
ec
Che
Adjus
Ch
Check i
l
t
ro
t
n
ec
r
o
r
"
o
c
c
e
on
t
"
s
i
s
h
i
c
emo
t
i
ch
t
R
i
w
n
i
w
s
s
e
ff
i
r
/o
e
t
n
t
o
f
Ba
Check
-15-
 Loading...