

Page 1
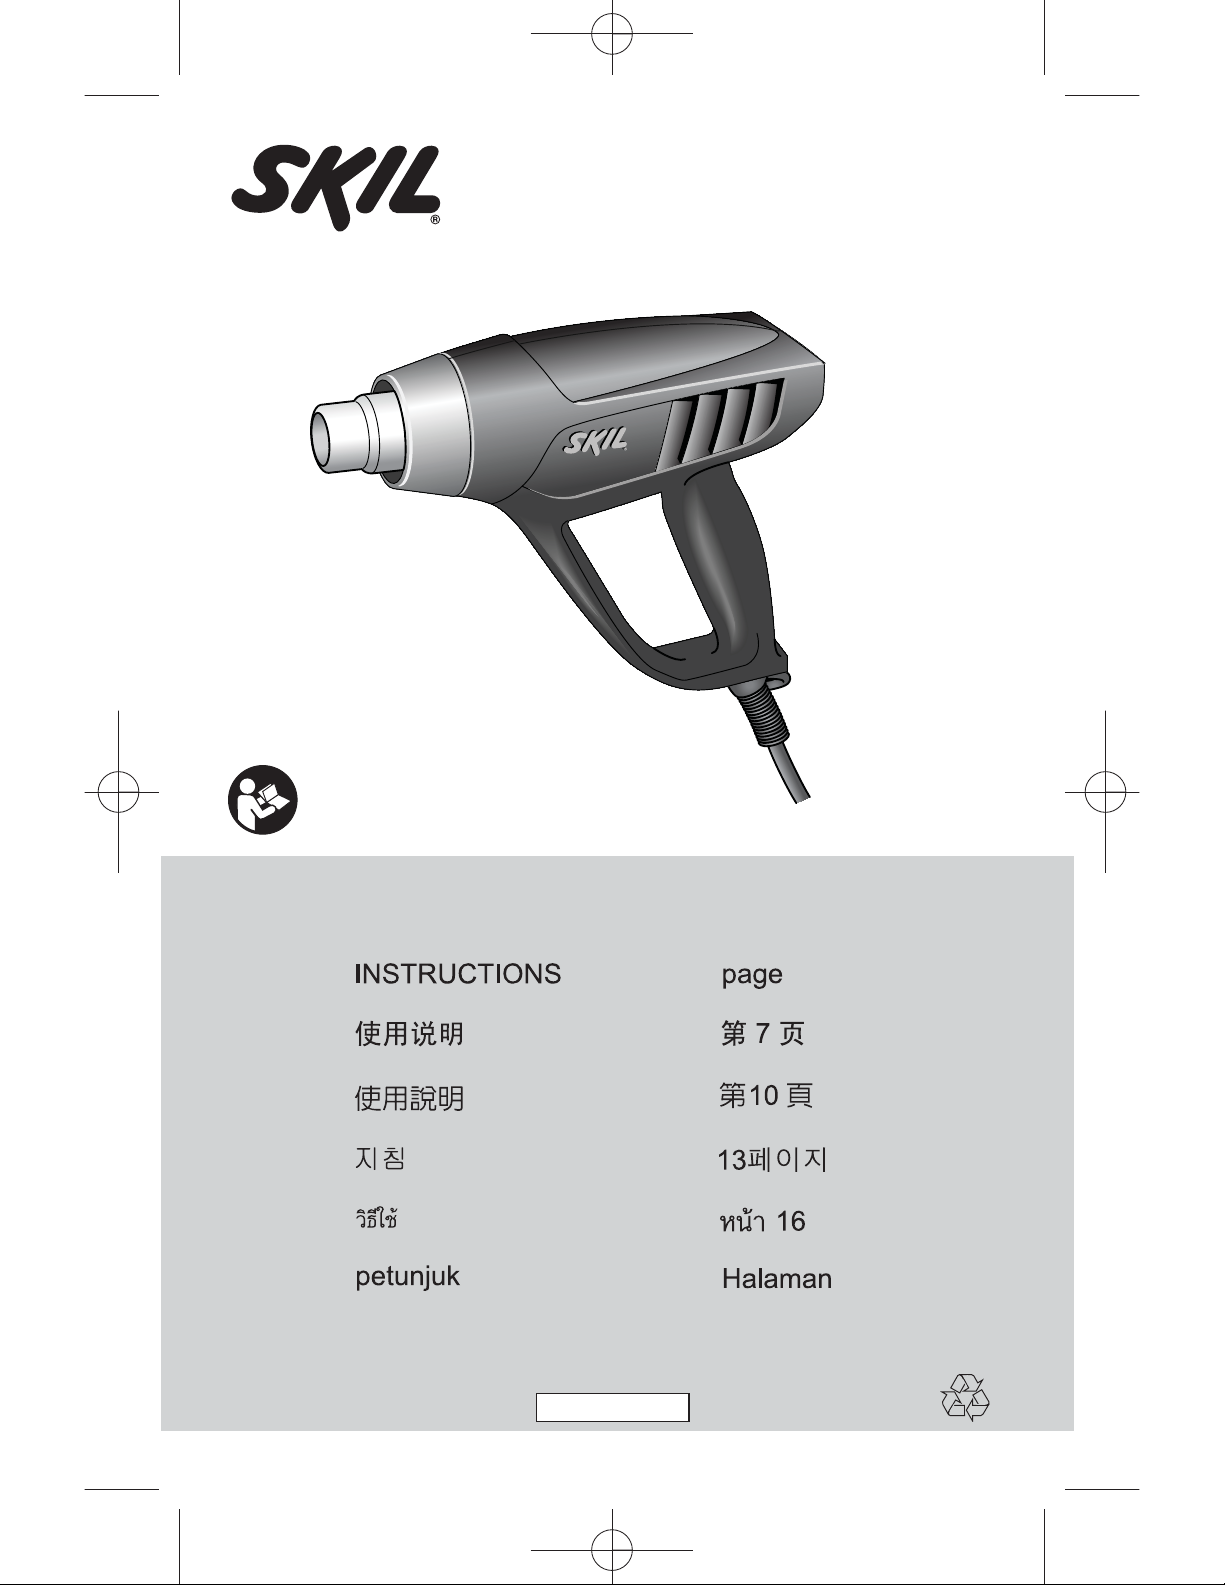
HEAT GUN
8006 (F0158006 . . )
4825 BD Breda - The Netherlands
www.skil-ap.com
12/0906 grebnenjinoK - VB eporuE LIKS
4
18
1619PA0398
Page 2
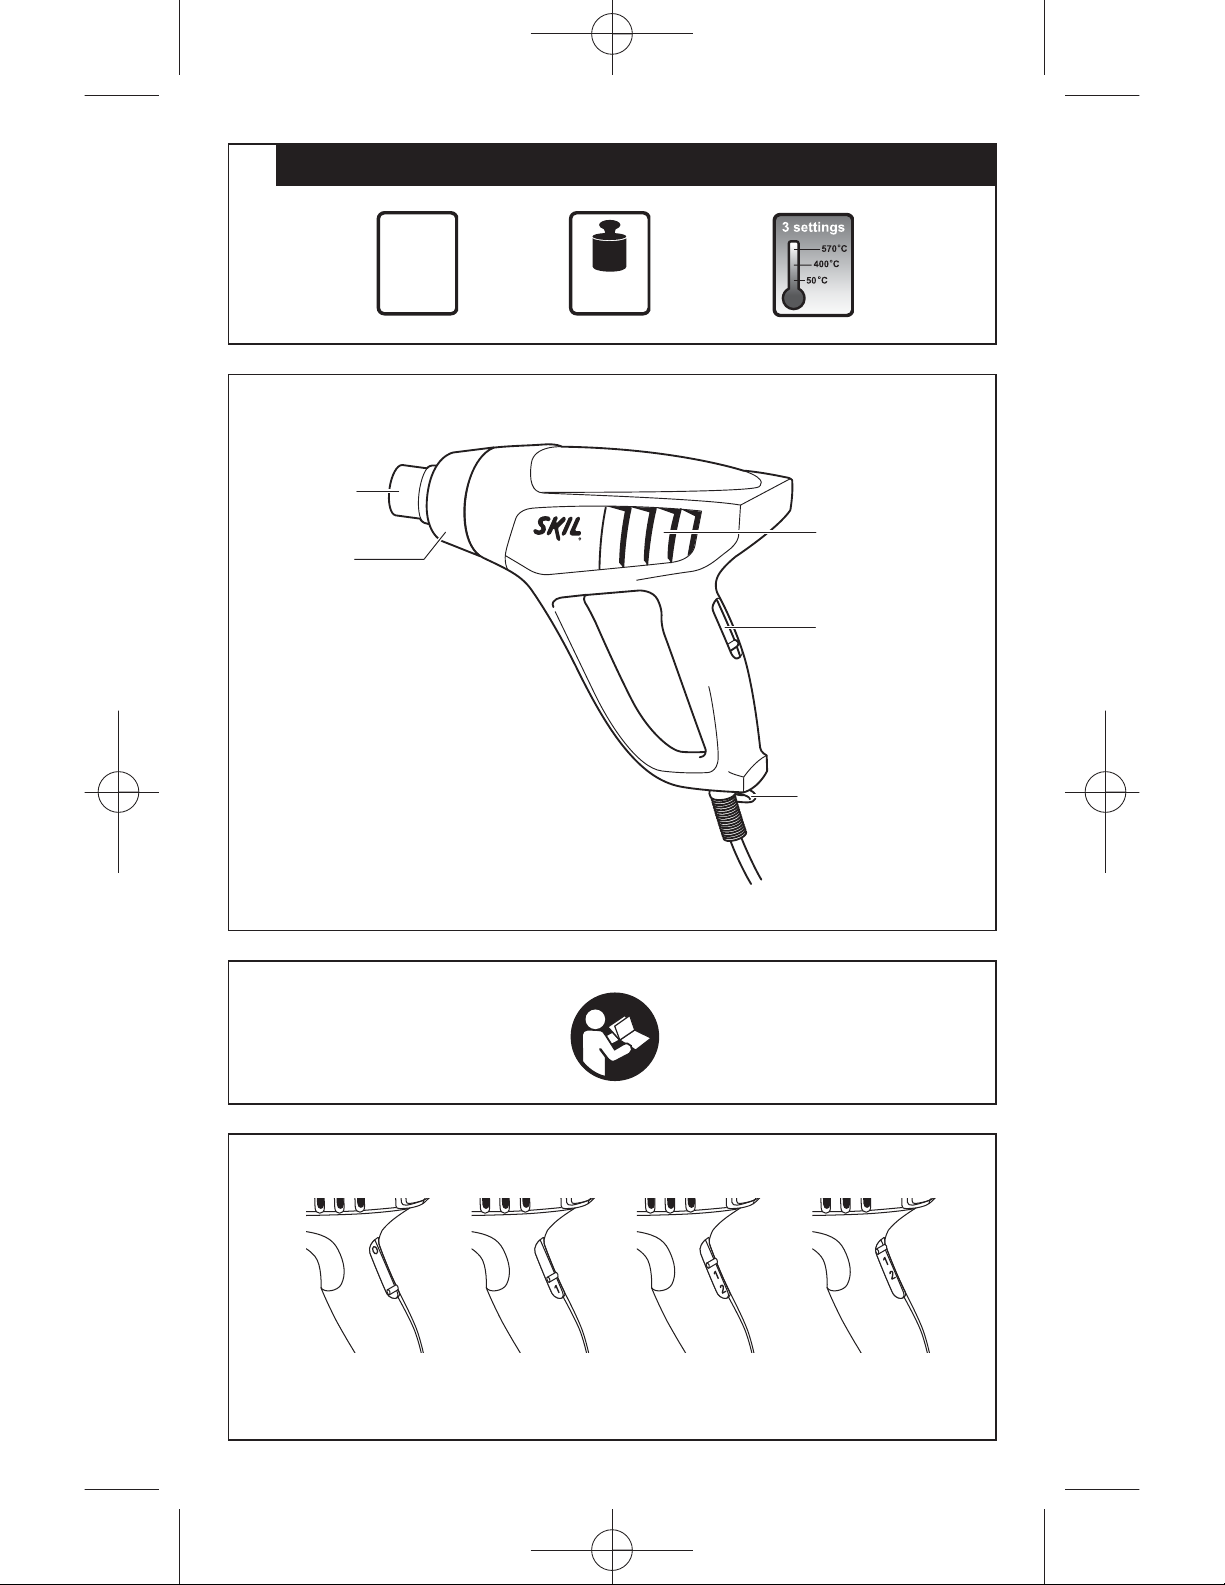
1
2
8003
C
B
1800
Watt
0,8 kg
EPTA 01/2003
E
A
3
4
50°
250 ltr/min
400°
250 ltr/min
D
3
570°
500 ltr/min
2
Page 3
5 6
G
7
8
J
9
11 12
G
F
H
10
F
G
J
13
H
14
H
15
3
Page 4
3008nugtaeH
INTRODUCTION
This tool is intended for the removal of paint, the forming
and welding of plastic, and the warming of heat-shrinkable
tubing; the tool is also suitable for soldering and tinning,
loosening adhesive joints and defrosting water pipes
Read and save this instruction manual (pay special
attention to the safety instructions at the back)
TECHNICAL SPECIFICATIONS
SAFETY
BEFORE USE:
Check the functioning of the tool before each use and, in case
of a defect, have it repaired immediately by aqualified person;
never open the tool yourself
Inspect tool cord and plug before each use and, if
damaged, have them replaced by a qualified person
Use completely unrolled and safety extension cords
Inspect the extension cord periodically and replace it, if damaged
Only use the original SKIL accessories supplied with the tool
Use the tool and its accessories in accordance with this
instruction manual and in the manner intended for the tool;
use of the tool for operations, different from those normally
expected to be performed by the tool, could result in a
hazardous situation
This appliance is not intended for use by persons (including
children) with reduced physical. Sensory or mental capabilities,
or lack of experience and knowledge, unless they have been
given supervision or instruction concerning use of the appliance
by a person responsible for their safety.
Children should be supervised to ensure that they do
not play with the appliance.
Always check that the supply voltage is the same as the
voltage indicated on the nameplate of the tool
Be sure tool is switched off when plugging in
DURING USE:
Handle the tool with care; prevent fire and burns
- do not touch the air outlet/nozzle and the heated
object; they become extremely hot
- do no hold the air outlet/nozzle too close to the object
to be worked on
- do not direct the hot air stream towards the same
surface for too long
- never look down the air outlet/nozzle
- wear protective gloves and use safety glasses
- never direct the hot air stream towards persons or
animals
- never use the tool for drying hair
- do not leave the tool unattended0
- never use the tool in the proximity of inflammable
gases or combustible materials (risk of explosion)
- when working with plastic, paint, varnish and similar
materials, inflammable and poisonous gases may be
produced; inform yourself beforehand about the
materials to be worked on
- take into account, that heat may be transferred to
combustible materials out of eyesight
- to be on the safe side, have a bucket of water or a fire
extinguisher handy, in case any material catches fire
Prevent electrical shock
- never poke anything down the air outlet/nozzle
- avoid body contact with earthed surfaces (e.g. pipes,
radiators, ranges, refrigerators)
- ensure the tool does not get wet
- do not use the tool in damp locations
- when used outdours, connect the tool via a fault
current (FI) circuit breaker with a triggering current of
30 mA maximum, and only use an extension cord
which is intended for outdour use and equipped with
a splashproof coupling-socket
Handle the cord with care
- always keep away the cord from the hot air stream
and the air outlet/nozzle
- keep the cord away from heat, oil and sharp edges
- do not carry the tool by the cord, and do not yank the
cord to disconnect it from the socket
- do not suspend the tool by the cord
Never use the tool in conjunction with chemical solvents
Make sure work area is adequately ventilated
Keep work area clean and well lit
Keep children away from work area
Stay alert; watch what you are doing, use common
sense and do not operate the tool when you are tired
Take a secure stance; do not overreach, especially on
ladders and stages
Ensure that the tool is switched off, before putting it aside
In case of electrical or mechanical malfunction,
immediately switch off the tool and disconnect the plug
AFTER USE:
Switch off the tool and disconnect the plug
Suspend the tool on hanging ring D or set it down on
its rear in an upright position; when doing so, make sure
no combustible materials or inflammable gases are in
the proximity
Allow the tool to cool down for at least 30 minutes before
storage
Store the tool in a dry and locked-up place, out of reach
of children
USE
On/off switch with 3 temperature settings
! check if switch A is in position "0" before
plugging in
- switch on the tool by pushing switch A in desired
position:
1 = 50°C, air stream 250 litres/minute
2 = 400°C, air stream 250 litres/minute
3 = 570°C, air stream 500 litres/minute
- when using it for the first time, some smoke may emit
from the tool; this is normal and will soon cease
- switch off the tool by pushing switch A in position "0"
General use
- determine the right temperature by testing out on an
inconspicuous part of the workpiece; start with a low
temperature setting
- the temperature falls as the distance between the air
outlet/nozzle and the workpiece increases
- the temperature required depends on the material to
be worked on
Stationary use
- set the tool down on its rear in an upright position
- make sure the surface is clean and dustfree; polluted
air damages the motor
- make sure the air stream is directed away from you
- secure the cord to prevent pulling down the tool
4
Page 5

- do not touch the air outlet
- made sure nothing drops into the air outlet
- carefully hold the tool with one hand while switching it
off with the other hand, and then allow it to cool down
-
WARNING: Switch off the tool before the tool with itʼs accessories
is put on itʼs stand position. Because the tool with accessories may
overturn and fire hazard will happen.
Use at hard-to-reach places
- remove ring B thus releasing the metal air outlet
over a greater distance
! pay attention to increased risk of fire and burns
Holding and guiding the tool
- hold the tool with one hand
- keep ventilation slots E uncovered
Standard accessories
- glass protection nozzle F (for deflecting air stream)
- flat nozzle G (for broadening air stream)
- reflector nozzle H (for reflecting air stream)
- reduction nozzle J (for concentrating air stream)
All application examples (except removing paint next
to glass) can be performed without accessories;
however, using the appropriate accessory simplifies the
work and significantly improves the quality of the results
Mounting/removing accessories
- simply fit the accessory onto air outlet C
- remove an accessory by pulling it off to the front after
it has cooled down
! mount an accessory only when the air outlet is
cold, when the switch is in position "0" and when
the plug is disconnected
Constant heat control (overload protection)
Protects heating element from damage when tool is
overloaded without having to stop it and/or let it cool
down for a period of time
- when the temperature gets too high, the heating
element switches itself off, while the motor continues
to run and produces cold air
- when the temperature has fallen down sufficiently
(taking only a few seconds), the heating element will
be switched on automatically
2
5
2
6
2
APPLICATION ADVICE
Removing paint/lacquer
- use a clean, sharp scraper
- scrape firmly, when the paint softens
- experiment to establish the length of time necessary
to apply the heat for optimal results
- scrape the softened paint immediately, or it will
harden again
- keep a 30° to 40° angle between the tool and the
workpiece
- remove paint and debris immediately from the scraper
to prevent them from ignition
- scrape with the grain of the wood, wherever possible
- do not direct the hot air stream towards the same
surface for too long
- dispose of all paint debris safely
- thoroughly clean the work area after completing the job
! be careful when removing layers of paint in old
buildings; in the past the building may have been
painted with paint containing lead, which is highly
poisonous
! exposure to even low levels of lead can cause
serious brain and nervous system damage; young
and unborn children are particularly vulnerable
7
! have lead-based paint removed by a professional
without using a heatgun
OTHER APPLICATION EXAMPLE:
removing (synthetic) wall covering
Removing paint/lacquer next to glass
8
- always use glass protection nozzle F when working
next to glass
- remove the paint with a hand scraper
! do not use the tool for removing paint on metal-
framed windows; metal is heat-conducting which
might lead to breaking of the glass
Removing stickers (use flat nozzle G)
9
- many adhesives become softer when heated, allowing
adhesive bonds to be separated and superfluous
adhesive to be removed
! heat sticker on the upper side
! always take care not to overheat the underlying
surface
OTHER APPLICATION EXAMPLES:
removing linoleum and vinyl carpeting
removing carpet tiles made of synthetic fibres
removing veneers/applying veneer strips
softening/melting tar, tin, bitumen, wax
(use flat nozzle G)
waxing (skis, furniture) (use flat nozzle G)
10
removing resin
loosening rusty/too tightly fastened metal screws, nuts
and bolts
removing candle wax (do not overheat the
underlying surface)
repairing broken candles/restoring bent candles to
their original shape
Shrink fitting
11
- use reflector nozzle H or reduction nozzle J
- select a shrink-fit tube with a diameter matching that
of the workpiece
- heat the shrink-fit tube evenly
OTHER APPLICATION EXAMPLE:
shrink-wrapping
Soldering water pipes
12
This tool is most suitable for working with soft solders
(melting point below 400°)
- use reflector nozzle H
- thoroughly clean both joining sections before soldering
- pre-heat both sections and apply soldering wire
(do not use lead-based soldering wire)
OTHER APPLICATION EXAMPLES:
de-soldering of integrated circuits and other electronic
components (use reduction nozzle J)
releasing old soldered joints (use reduction nozzle J)
Thawing out frozen water pipes
13
- use reflector nozzle H
- heat the frozen area evenly
! do no thaw out water pipes made of PVC
! water pipes are often difficult to distinguish from
gas pipes; heating gas pipes is extremely
dangerous – risk of explosion
OTHER APPLICATION EXAMPLES:
thawing out frozen car locks (use reduction nozzle J)
defrosting freezers (do not damage the plastic
housing)
thawing out ice-covered steps and pavements
5
Page 6

SKIL8003pages 16-03-2004 13:46 Pagina 6
● Shaping plastic tubes
- use reflector nozzle H
- fill the tube with sand and seal it at both ends, to avoid
kinking of the tube
- heat the tube evenly by moving it from side to side
OTHER APPLICATION EXAMPLES:
★ shaping all plastics with a low melting-point
(polyethylene, PVC etc.)
★ shaping all plastics with a high melting-point (acrylic
glass, Plexiglas etc.)
★ shaping and bending carpet tiles made of synthetic
fibres
★ shaping and bending of wood (model-building)
● Welding plastics
- the weld seam must be clean and grease-free
- keep welding rod close to weld seam and apply heat,
until the welding rod gets tacky
- remove heat, when weld seam is filled up
OTHER APPLICATION EXAMPLES:
★ repairing of surfboards, skis and other synthetic sports
goods (use flat nozzle G)
★ welding PVC-materials
★ smoothening blisters after sticking PVC-labels
★ connecting garden hoses (use reflector nozzle H)
● Drying
! only dry with a low or medium temperature setting
(position 1 or 2) and with an increased distance
between the tool and the workpiece
★ drying of paint, varnish, gypsum, mortar and plaster
★ drying wet timber prior to filling
★ drying thickly applied filler or adhesive quickly
★ drying building joints before spraying insulation or
sealant
★ drying joints and cracks in boatbuilding
● Cleaning/disinfecting
★ disinfecting rabbit hutches, dove cotes, etc. (remove
your pet first)
★ combatting ant colonies
★ combatting woodworms and boring beetles (hold the
tool at an adequate distance from the wood)
★ eliminating weeds
● Igniting
★ igniting charcoal (barbecues)
★ setting fire to wood (open fires)
GUARANTEE / ENVIRONMENT
● Always keep tool and cord clean (especially the
ventilation slots E 2)
! disconnect the plug before cleaning
● Never use easy inflammable liquids for cleaning the heat
gun in general and the air outlet/nozzle in particular)
● This SKIL product is guaranteed in accordance with
statutory/country-specific regulations; damage due to
normal wear and tear, overload or improper handling will
be excluded from the guarantee
● In case of a complaint, send the tool undismantled
together with proof of purchase to your dealer or the
nearest SKIL service station
● Dispose of the tool by sorting tool, accessories and
packaging for environment-friendly recycling (the plastic
components are labeled for categorized recycling)
SAFETY INSTRUCTIONS
When using electric tools, the following basic safety precautions should
always be followed to reduce the risk of fire, electric shock and personal
injury. Read all these instructions before attempting to operate this
product. Save these instructions.
1 Check voltage indicated on nameplate
2 Keep work area clean
Cluttered areas and benches invite injuries.
3 Consider work area environment
Do not expose power tools to rain.
Do not use power tools in damp or wet locations.
Keep work area well lit.
Do not use power tools in presence of flammable liquids or gasses.
4 Guard against electric shock
Avoid body contact with earthed surfaces (e.g. pipes, radiators, ranges,
refrigerators).
5 Keep children away
Do not let visitors contact tool or cord; they should be kept away from
work area.
6 Store idle tools
When not in use, tools should be stored in a dry and locked-up place,
out of reach of children.
7 Do not force the tool
It will do the job better and safer at the rate for which it was intended.
8 Use the right tool
Do not force small tools or attachments to do the job of a heavy-duty tool.
Do not use tools for purposes not intended (e.g. do not use a circular
saw for cutting tree limbs or logs).
9 Dress properly
Do not wear loose clothing or jewelry; they can be caught in moving parts.
Rubber gloves and non-skid footwear are recommended when working
outdoors. Wear protective hair covering to contain long hair.
10 Use safety glasses
Also use face or dust mask, if cutting operation is dusty.
11 Connect dust extraction equipment
If devices are provided for the connection of dust extraction and
collection facilities, ensure these are connected and properly used.
12 Do not abuse the cord
Never carry the tool by the cord, never yank the cord to disconnect it from
the socket, and keep the cord away from heat, oil and sharp edges.
13 Secure work
Use clamps or a vise to hold the work; it is safer than using your hand
and it frees both hands to operate the tool.
14 Do not overreach
Keep proper footing and balance at all times.
15 Maintain tools with care
Keep tools sharp and clean for better and safer performance. Follow
instructions for maintenance and changing accessories. Inspect tool
cords and plugs periodically and, if damaged, have them repaired by a
qualified person. Inspect extension cords periodically and replace them,
if damaged. Keep handles dry, clean and free from oil and grease.
16 Disconnect tools
Disconnect tool when not in use, before servicing, or when changing
accessories such as blades, bits and cutters.
17 Remove tool keys
Form the habit of checking to see that keys and adjusting wrenches are
removed from the tool before turning it on.
18 Avoid unintentional starting
Do not carry a plugged-in tool with a finger on the switch. Be sure the
switch is off when plugging in.
19 Outdoor use extension cords
When tool is used outdoors, use only extension cords intended for use
outdoors and so marked.
20 Stay alert
Watch what you are doing, use common sense and do not operate tool
when you are tired.
21 Check damaged parts
Before you use the tool, always carefully check the guarding and other
parts to determine that they will operate properly and perform their
intended functions. Check for alignment of moving parts, binding of
moving parts and breakage of parts. Check for proper mounting of all
parts and any other conditions that may affect their operation. A guard,
switch or other part that is damaged or defective should be properly
repaired or replaced by a qualified person. Do not use tool, if switch
does not turn it on and off.
22 Warning! Use the tool and its accessories in accordance with these
safety instructions and in the manner intended for the particular tool,
taking into account the working conditions and the work to be performed.
Use of the tool for operations, different from those normally expected to
be performed by the particular tool, could result in a hazardous situation.
23 Have the tool repaired by a qualified person
This electric tool is in accordance with the relevant safety rules. Repairs
should only be carried out by qualified persons using original spare
parts, otherwise this may result in considerable danger for the user.
6
Page 7

SKIL8003 Asia.qxd 2004.3.6 2:06 Page 7
7
Page 8

SKIL8003 Asia.qxd 2004.3.6 2:06 Page 8
8
Page 9

SKIL8003 Asia.qxd 2004.3.6 2:06 Page 9
9
Page 10

SKIL8003pages 16-03-2004 13:46 Pagina 23
✎
23
Page 11

SKIL8003pages 16-03-2004 13:46 Pagina 24
 Loading...