

Page 1
TINV
T^K
mending machine
Fast and easy
IMPORTANT SAFEGUARDS
• Before connecting machine, be sure voltage on transformer conforms to your electrical
supply.
-*1
1
• Disconnect machine plug when changing needles, cleaning machine or removing bobbin.
• Disconnect transformer when machine is unattended.
• Because of the up-and-down movement of needle, work carefully and watch sewing area
when operating machine.
• Do not pull fabric while stitching, as this may bend needle causing it to break.
SAVE THESE INSTRUCTIONS
Copyngnt « 1962 THE SINGER COMPANY
All flignu RftMrved Througfioul tn* World
* A Tra<i«fn«r)i ol THE SMCER COMPANY
Mod«4 M100A
SINGER
Page 2
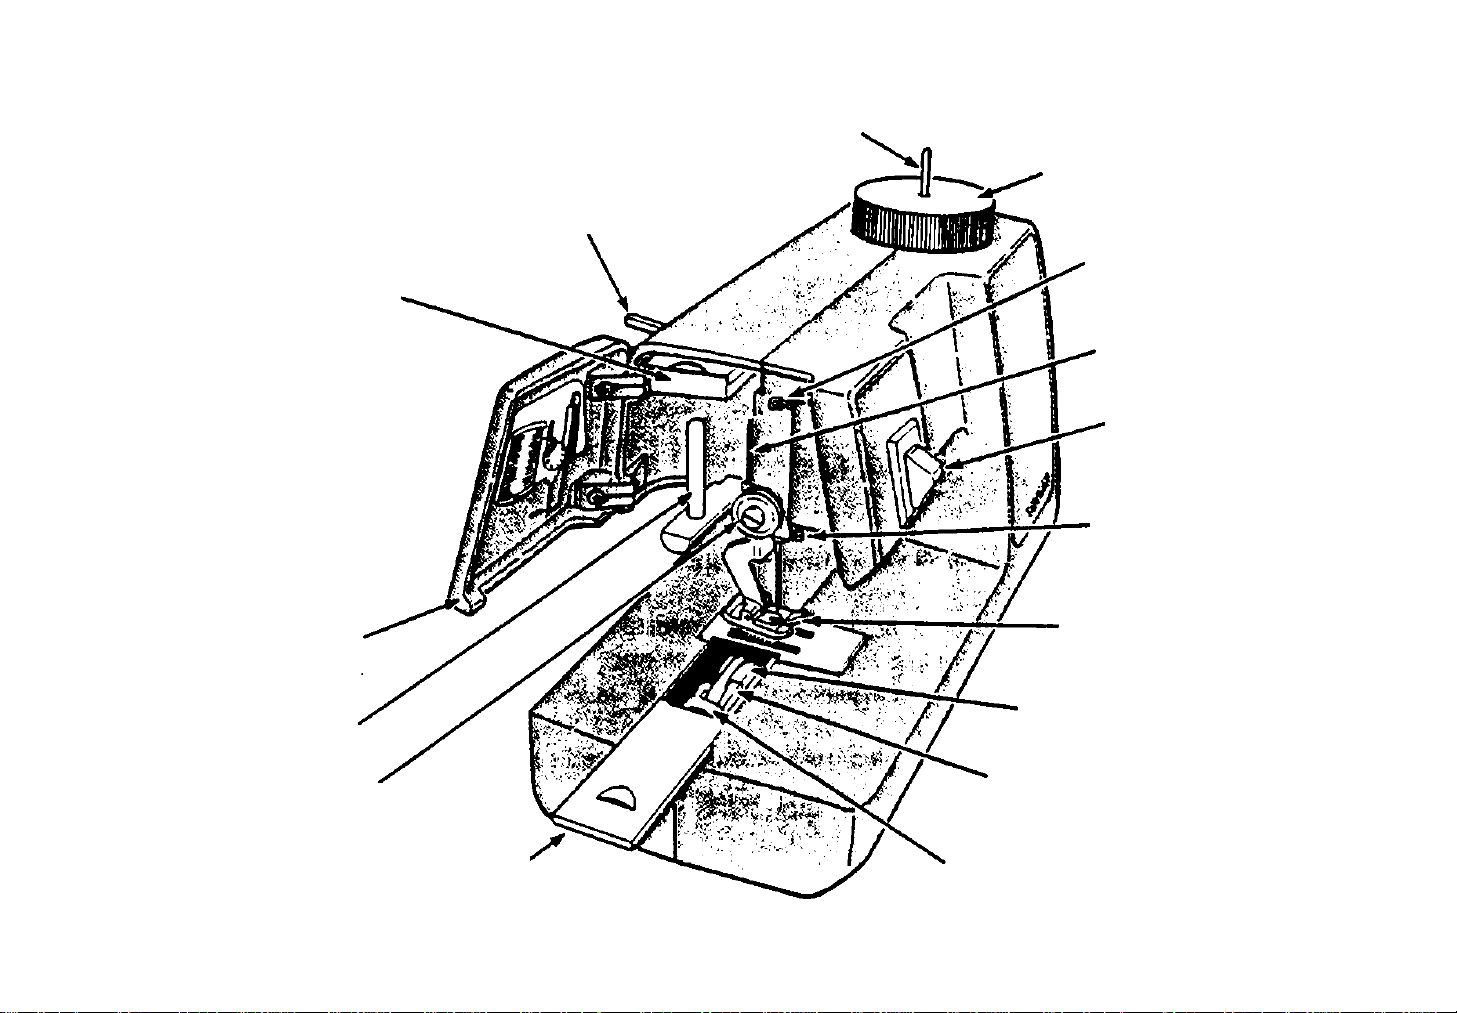
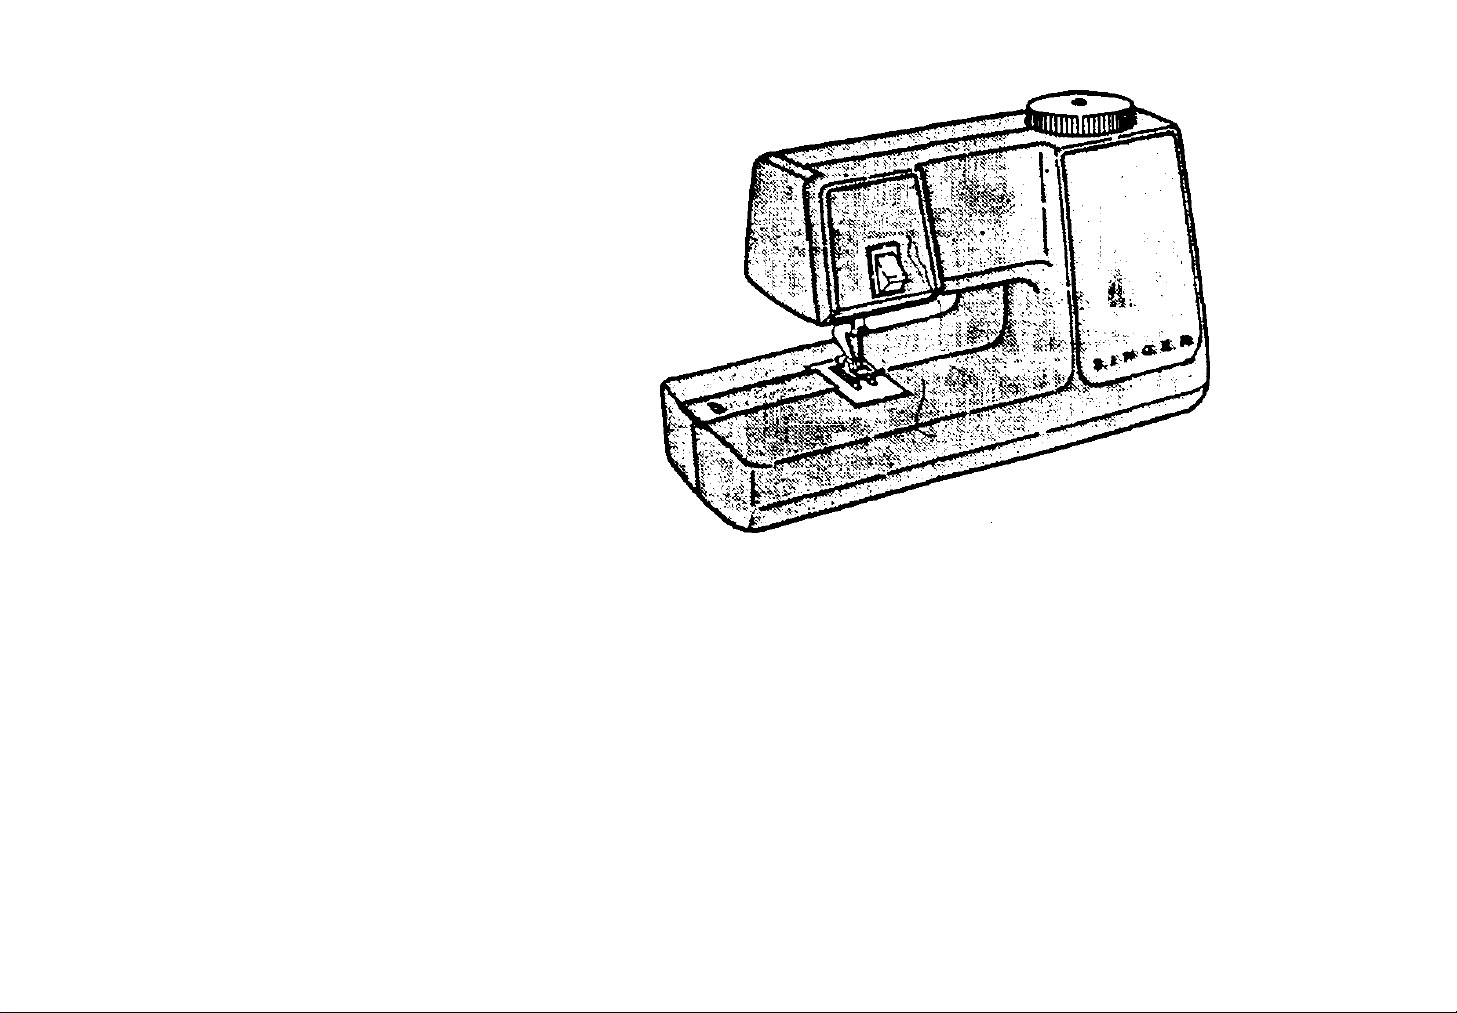
PRINCIPAL PARTS
ACCESSORY TRAY
BOBBIN WINDER PIN
HAND WHEEL
FOOT LEVER
THREAD GUIDE
Containing;
Needle Threader
Needles
Bobbin
Bobbin
Winder Pin
HINGED DOOR
SPOOL PIN
THREAD DISCS
THREAD GUIDE
POST
ON-OFF
SWITCH
NEEDLE CLAMP
SCREW
FOOT
BOBBIN
BOBBIN CASE
BOBBIN CASE CARRIER
SLIDE COVER
-1-
Page 3
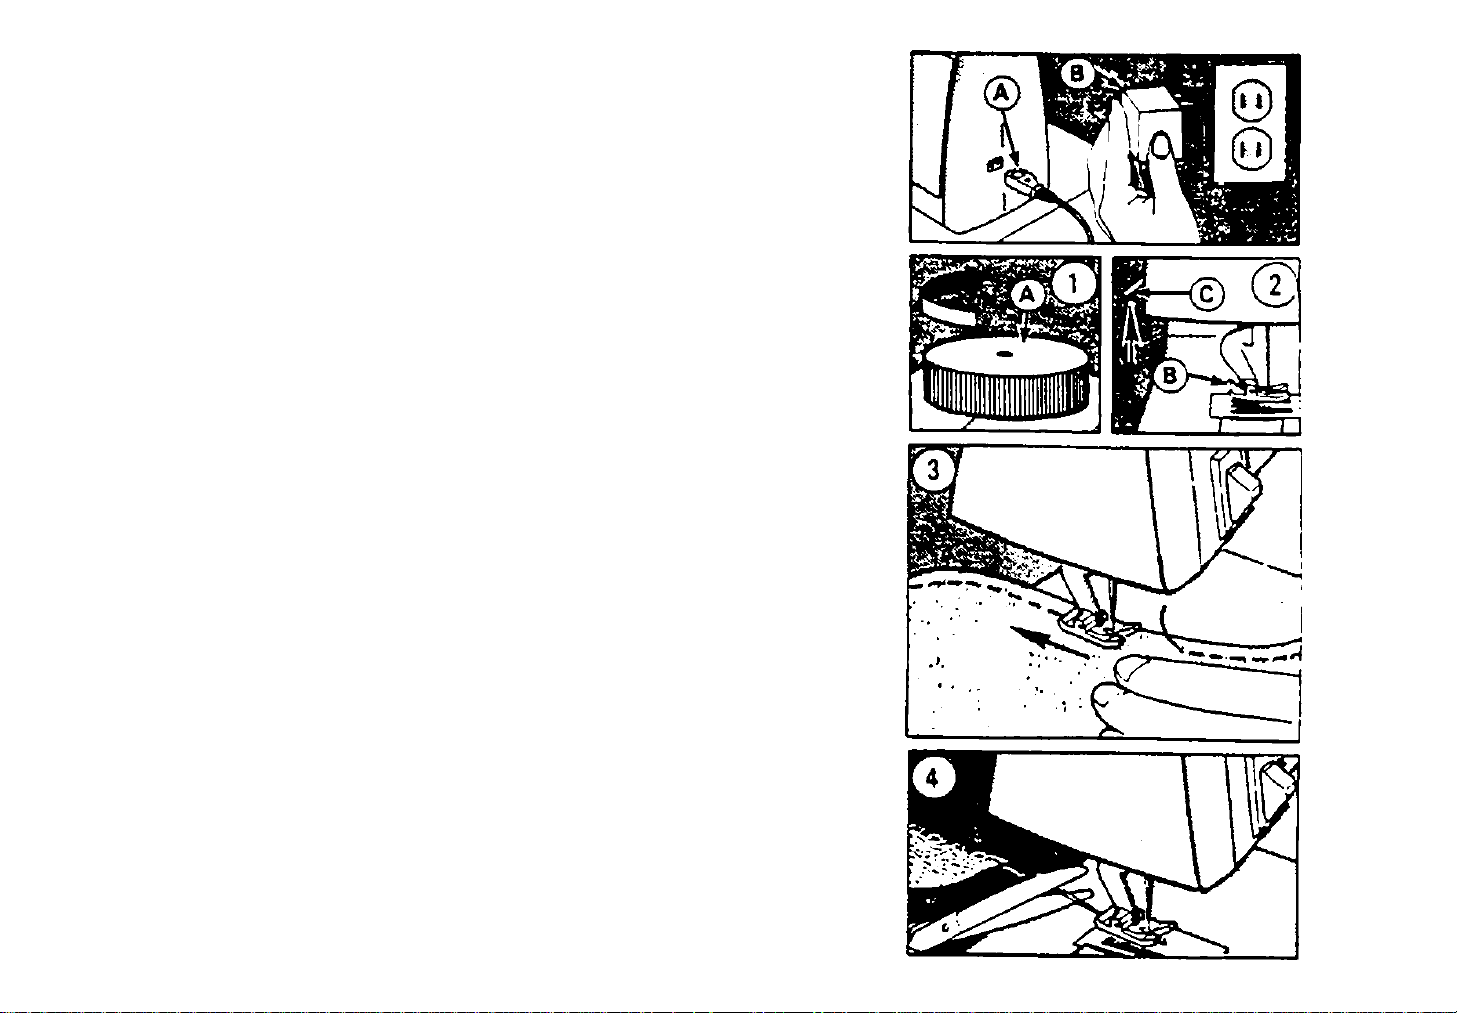
TO CONNECT YOUR MACHINE
Be sure power switch is < OFF ». INSERT machine plug (A) into the
machine socket. CONNECT the transformer (B) to your electrical
outlet.
Check that machine is threaded correctly (see pages 6 and 7).
< This machine is not intended for garment construction.»
TO BEGIN MENDING
1. TURN hand wheel (A) clockwise, raising needle to highest
position.
2. LIFT foot (B) with foot lever (C).
3. POSITION area to be mended under foot.
• TURN hand wheel clockwise, lowering needle into existing
stitches in fabric.
• Lower foot.
• GUlOB fabric toward back of machine.
• TURN machine “ON" and machine will begin operating
Immediately.
• Continue running machine until new stitches overlap
existing stitches.
• When mend is completed, TURN power "OFF".
4. RAISE needle to highest position: LIFT foot.
• MOVE fabric toward back of machine.
• CUT threads 4" (10cm) from edge of fabric.
Your mend Is now completed!
-2-
Page 4

TO WIND THE BOBBIN
1. REMOVE bobbin winder pin (A) from accessory tray behind
door.
• PUSH it down firmly in center of hand wheel.
2. MOVE slide cover to the left.
• LIFT foot with foot lever.
• TURN hand wheel clockwise, moving carrier to the far left.
3. LIFT OUT bobbin case from carrier.
4. RE.MOVE'bobbin (B) from case (C).
5. PLACE spobi of thread, with slit on bottom, on spool pin (D)
behind door so thread unwinds from back of spool.
• LEAD thread from spool through back of thread guide (E).
• BRING thread from guide into center hole of slotted end of
bobbin.
• SLIDE slotted end of bobbin over winder pin and PUSH
DOWN into place.
• CUT excess thread from top of bobbin.
• TURN machine "ON" and slowly GUIDE thread up and
down as bobbin winder turns.
• TURN machine "OFF" before thread winds beyond rims
of bobbin.
• CUT thread 3" (7.5cm) from bobbin.
• REMOVE bobbin from winder pin and REMOVE winder pin
from hand wheel.
• PULL center thread from slotted end of bobbin and trim.
• PLACE bobbin into case as follows:
-3-
Page 5

TO REPLACE THE BOBBIN
Be sure to follow these steps carefully. If bobbin is incorrectly
placed, machine will not stitch properly.
1. With slotted end (A) to the right, PLACE filled bobbin into
case (8).
• LEAVE 3" (7.5cm) of thread outside case.
2. HOLD finger over case opening to keep bobbin m place, and
PULL thread completely into slot (C).
• SNAP thread back between the two metal guides (D).
• PULL 3" (7.5cm) of thread from case.
3. MOVE slide cover to the left.
• TURN hand wheel clockwise, moving carrier to the far left.
• With metal guides facing up, RETURN case to carrier (E).
• CLOSE cover, leaving about 3" (7.5cm) of thread on
outside.
-4-
Page 6

TO CHANGE YOUR NEEDLE
When the needle is broken or dull, replace it as follows:
• OPEN door for better visibility.
• UNTHREAD needle.
• TURN hand wheel clockwise until needle clamp screw (A) is
easy to see.
• LOWER foot.
• HOLD needle with fingers and LOOSEN clamp screw one turn
with screwariver.
• LOWER needle and REMOVE.
• To replace needle: LOWER needle, with flat side to the back
of the machine, into hole under foot, then up into clamp as far
as it will go.
• TIGHTEN needle clamp screw.
For best results, change your needle periodically, using Singer
#3347-14 needles, which may be ordered on the enclosed form.
-5-
Page 7

TO THREAD YOUR MACHINE
When it’s lime to change thread:
• TURN hand wheel clockwise until needle is in its highest
position.
• LOWER foot.
• PLACE thread spool, with slit down, on spool pin behind door.
Thread will unwind from back of spool.
• DRAW thread from spool around back of thread guide post
(A).
• HOLD spool in place; PULL thread between discs from back
to front (8).
• BRING thread up through guide (C) from back to front
• Then BRING thread down through needle from front to back,
pulling 3" (7.5cm)'of thread through needle.
To use needle threader (D). first insert wire loop from back of
needle's eye. Place thread through wire loop. Draw needle
threader, with thread, back through eye.
-6-
Page 8

TO RAISE THE LOWER THREAD
All machines making a lockstitch sew with both an upper and
lower thread. Thè thread coming through the needle's eye is the
upper thread. The thread coming from the bobbin is the lower
thread. Before mending, the lower thread must be brought up to
meet the upper thread. To do this:
1. RAISE foot.
• HOLD upper thread lightly with left hand.
• Slowly TURN hand wheel. 1 revolution clockwise, moving
needle down and up again.
• Gently PULL thread in left hand, drawing up a loop (A) of
lower thread.
2. UNDO loop with your fingers until you find the end of the
lower thread.
3. PULL 6" (15cm) of upper-and lower threads under foot and
toward back of machine.
-7-
 Loading...