

Page 1

Page 2

You must plug in the power cord directly into the wall outlet. Do NOT use an extension cord.
If the power cable or plug has been eroded or damaged, pull the plug to remove it.
Do NOT remove covers or screws unless otherwise stated in this manual in order to avoid
electric shock or exposure to laser radiation (for laser devices).
For the following situations, turn off device and pull the plug to remove the power plug.
- Something has been spilled on the device
- Considering making a request for repair of the device
- Cover of the device has been damaged
If the device uses toner, do NOT burn spilled or discarded toner.
Toner particles may ignite when exposed to a flame.
Use designated store or recycle location to discard the device.
Turn off when not using the device for a long time or before leaving work.
Failure to do so may cause unexpected fire.
Protect device from damp or wet places exposed to rain, snow, etc.
Remove the power cord from the wall outlet before moving the device.
Be careful NOT to damage the power cord while device is being moved.
When unplugging the power cord from the wall outlet, do not pull by the cable. Pull by the plug.
Do NOT let paper clips, staples or other small metal objects fall into the device.
Take caution when removing jammed paper or cleaning inside the device.
For devices that use toner, store toner and cartridge out of reach of children.
Do NOT discard the device or consumables in garbage disposal areas for households.
Use designated store or recycle location to discard the device.
Inside of the device may be extremely hot. Do NOT touch parts labeled “Caution: HOT” or
anywhere near the parts. You may suffer a burn.
This product meets the Standards for High Quality and Performance.
It is strongly recommended to use ONLY authentic parts available at our designated stores.
PLEASE FOLLOW THE INSTRUCTIONS BELOW WHEN USING THIS DEVICE.
Safety Precautions
Warning: Failure to follow the instructions may cause death or critical injuries.
Caution: Failure to follow the instructions may cause minor to critical injury or property damage.
Page 3

Thank you for purchasing a Sindoh product.
This manual provides detailed instructions on the correct use and maintenance of
the device for best quality and to contribute to making your office smooth and efficient.
Please read this manual carefully before using the device and keep it close at hand.
You MUST read the safety precautions before using the device for safe and correct use.
Before Use
Copyrights and Restrictions
1. The contents of this user manual may be subject to change without prior notice. The
Company is not liable for indirect, incidental, or consequential damage caused by the UNIT
handling and operation in any case.
2. Copying or printing paper money in circulation, revenue stamp, bond, stock, bank bill,
check, passport, or driver’s license is forbidden by local laws.
3. Copying or printing of books, scores, pictures, maps, floor plans, photographs with
copyright may be copied for personal use or at home or within the scope permitted by law.
Other illegal reproduction is prohibited by law.
4. The above mentioned list an example only and it may not include the whole content. The
Company holds no liability, whether or not the above list is the whole or correct one. Should
you have questions about the legality of the copying or printing of an object, please seek
legal advice.
Page 4

Table of Contents
ⅰ
Table of Contents
Before Use
1. Introduction -------------------------------------------------------------------------------------------- 1
2. How to Read the User Manual -------------------------------------------------------------------- 2
Symbols -------------------------------------------------------------------------------------------- 2
3. Safety Information ----------------------------------------------------------------------------------- 3
4. Notice --------------------------------------------------------------------------------------------------- 6
5. Precautions -- --------------------------------------------------------------------------------------------- 10
Install the device ---------------------------------------------------------------------------------- 10
Move the device ---------------------------------------------------------------------------------- 10
6. Handling Consumables ------------------------------------------------------------------------------- - 11
7. Precautions in Using the Device -------------------------------------------------------------------- 12
8. Ventilation ---------------------------------------------------------------------------------------------- -- 13
9. Diposal of Batteries ---- -------------------------------------------------------------------------------- 14
10. Turning the Power Switch On or Off --------------------------------------------------------------- 15
Chapter 1. Printer Introduction
1. Specification ------------------------------------------------------------------------------------------- 1-2
2. Names and Functions of the Components ---------------------------------------------------- 1-3
Names and Functions of the Components (Front) --------------------------------------- 1-3
Applicable device model : A410 -------------------------------------------------------------- 1-4
3. Printer Description by Model ---------------------------------------------------------------------- 1-5
4. Installation and Use --------------------------------------------------------------------------------- 1-6
Driver CD ------------------------------------------------------------------------------------------- 1-6
Quick Installation Guide and User Manual ------------------------------------------------- 1-6
Sindoh Website ----------------------------------------------------------------------------------- 1-6
5. Specification for Printer Paper & Feeding ----------------------------------------------------- 1-7
6. Product Certification --------------------------------------------------------------------------------- 1-8
Certified Energy Saving Device -------------------------------------------------------------- 1-8
Page 5

Chapter 2. Printer Installation
1. Unpacking the Printer ------------------------------------------------------------------------------- 2-2
2. Cartridge Preparation ------------------------------------------------------------------------------- 2-3
3. Cartridge Installation -------------------------------------------------------------------------------- 2-5
4. Loading Print Paper --------------------------------------------------------------------------------- 2-6
Loading on the Tray ----------------------------------------------------------------------------- 2-6
Loading on the Multipurpose Tray ----------------------------------------------------------- 2-9
Installing Paper Support ------------------------------------------------------------------------ 2-11
5. Installing Optional Tray 2 --------------------------------------------------------------------------- 2-12
Installing Printer on Tray 2 --------------------------------------------------------------------- 2-13
6. Connecting Cables ---------------------------------------------------------------------------------- 2-14
Connecting USB Cable ------------------------------------------------------------------------- 2-14
Connecting Network Cable -------------------------------------------------------------------- 2-14
7. Installing the Printer Driver ------------------------------------------------------------------------ 2-16
Updating Options Available for the Printer Driver ---------------------------------------- 2-18
8. Printer Settings Check ------------------------------------------------------------------------------ 2-19
Turning on the printer --------------------------------------------------------------------------- 2-19
Printing the System Report Page ------------------------------------------------------------ 2-19
Printing the Network Report Page ----------------------------------------------------------- 2-20
Chapter 3. Using the Printer
1. Using the Control Panel ---------------------------------------------------------------------------- 3-2
Understanding Colors of Power Button and Lamp -------------------------------------- 3-2
Button ---------------------------------------------------------------------------------------------- 3-2
2. Understanding the Printer Setting Menu ------------------------------------------------------- 3-4
Changing Printer Settings with Printer Settings Menu ---------------------------------- 3-4
Restoring to Factory Setting ------------------------------------------------------------------- 3-4
Printing System Report Page ---------------------------------------------------------------- 3-5
3. Cancelling Print Jobs -------------------------------------------------------------------------------- 3-6
Table of Contents
ⅱ
Page 6

Table of Contents
ⅲ
Cancelling with Button on the Control Panel --------------------------------------------- 3-6
Cancelling from My Computer --------------------------------------------------------------- 3-6
4. Menu ---------------------------------------------------------------------------------------------------- 3-7
Paper Settings ------------------------------------------------------------------------------------ 3-10
General Menu Settings ------------------------------------------------------------------------- 3-11
Print Settings -------------------------------------------------------------------------------------- 3-12
Network Settings --------------------------------------------------------------------------------- 3-13
Report ----------------------------------------------------------------------------------------------- 3-16
5. Understanding Printer Messages ---------------------------------------------------------------- 3-17
6. Network Setting -------------------------------------------------------------------------------------- 3-20
Wire Network Setting ---------------------------------------------------------------------------- 3-20
Wireless Network Setting ---------------------------------------------------------------------- 3-21
Wireless Network Connection
----------------------------------------------------------------- 3-21
IP Address Settings
------------------------------------------------------------------------------ 3-23
Wi-Fi Direct Connection
------------------------------------------------------------------------ 3-24
SSID Settings
------------------------------------------------------------------------------------- 3-25
Encryption Method Settings
------------------------------------------------------------------- 3-25
Password Setting
--------------------------------------------------------------------------------- 3-25
7. Changing Print Settings in Print Driver -------------------------------------------------------- 3-26
Entering Default Print Settings ---------------------------------------------------------------- 3-26
For Windows Users ------------------------------------------------------------------------------ 3-26
Using Help ----------------------------------------------------------------------------------------- 3-27
Using Advanced Tab Functions --------------------------------------------------------------- 3-28
Functions in the Print Setting Tab
------------------------------------------------------------ 3-28
Paper Tab
------------------------------------------------------------------------------------------ 3-32
Advanced Tab
------------------------------------------------------------------------------------- 3-36
Print Quality Tab
---------------------------------------------------------------------------------- 3-44
Chapter 4. Printer Management
1. Maintenance of Consumables -------------------------------------------------------------------- 4-2
Page 7

Consumables Status ---------------------------------------------------------------------------- 4-2
2. Printer Maintenance --------------------------------------------------------------------------------- 4-3
Saving Consumables ---------------------------------------------------------------------------- 4-3
Ordering a Consumable ------------------------------------------------------------------------ 4-3
Ordering a Cartridge ----------------------------------------------------------------------------- 4-4
Storing a Cartridge ------------------------------------------------------------------------------- 4-4
3. Replacing Cartridges -------------------------------------------------------------------------------- 4-5
Removing a Used Toner Cartridge ----------------------------------------------------------- 4-5
Drum Cartridge Replacement ----------------------------------------------------------------- 4-8
Cleaning the Printer ----------------------------------------------------------------------------- 4-11
4. Guidelines on Printer Paper ----------------------------------------------------------------------- 4-12
Paper ------------------------------------------------------------------------------------------------ 4-12
Tracing Paper (OHP) ---------------------------------------------------------------------------- 4-12
Envelope ------------------------------------------------------------------------------------------- 4-13
Label Paper --------------------------------------------------------------------------------------- 4-13
Card Stock ----------------------------------------------------------------------------------------- 4-13
Reusable papers -------------------------------------------------------------------------------- 4-14
Chapter 5. Troubleshooting
1. Paper Jam Removal -------------------------------------------------------------------------------- 5-2
104/105 Paper Jam (Under the Cartridge) ------------------------------------------------- 5-3
106 Paper Jam (in Back Exit Area) ---------------------------------------------------------- 5-5
Removing Paper Visible in Exit Area -------------------------------------------------------- 5-5
Removing Paper Not Visible in Exit Area -------------------------------------------------- 5-5
107 Paper Jam (Under the Device, 2-Sided Paper Jam) ------------------------------ 5-7
101 Paper Jam (in Tray 1) --------------------------------------------------------------------- 5-8
102 Paper Jams (in Trays 2) ------------------------------------------------------------------ 5-9
100 Paper Jam (in MPT) ----------------------------------------------------------------------- 5-10
2. Basic Printer Troubleshooting --------------------------------------------------------------------- 5-11
Control Panel Troubleshooting ---------------------------------------------------------------- 5-12
Printer Troubleshooting ------------------------------------------------------------------------- 5-12
Table of Contents
ⅳ
Page 8

Table of Contents
v
Printer Quality Troubleshooting --------------------------------------------------------------- 5-15
Tray 2 Troubleshooting ------------------------------------------------------------------------- 5-18
Other Troubleshooting -------------------------------------------------------------------------- 5-18
Customer Support -------------------------------------------------------------------------------- 5-18
Page 9

1
Before Use
1. Introduction
The user manual provides detailed explanation and precautions on the operation and usage of the
device.
Read the manual carefully before operating the device for user safety and convenience.
Keep the user manual nearby to find it promptly.
Important
- The descriptions of the user manual can be modified without a prior notice.
The company is not responsible for any indirect, special, supplementary, and resultant
damages caused by the device handling and operation.
Duplication or printing to produce an illegal duplicate is prohibited.
Generally, the duplication or printing of bills, revenue stamps, bonds, share certificates,
bank drafts, checks, passports, driver’s licenses, and so on is prohibited in the local law.
The above list is just an example. The details of the above list are not all.
The company is not responsible for whether the above list is the total or correct list.
Receive the local legal counseling if it is questionable about whether the duplication or
printing of an object is legal.
Note
- The features of the user manual may be a bit different from those of the actual device.
Some options may not be usable in a certain country.
Inquire of the local sales representative of the user about the above matter.
A unit can be optional depending on the user’s country.
Inquire of the authorized local service depot about the matter.
- A special type may not be used in a certain country.
Inquire of the local sales representative for further details.
- The two types of size display methods are used in the user manual.
The meter version is applied to the device.
Page 10
2
Before Use
2. How to Read this User Manual
Symbols
The user manual uses following symbols:
Warning
Important safety instruction is introduced.
Not obeying the instruction may cause a serious injury or death.
Be sure to read it. Refer to the caution on the safe use of the device.
Caution
Important safety instruction is introduced.
Not obeying the instruction may cause a minor injury or damage on property Equipment.
Be sure to read it. Refer to the caution on the safe use of the device.
Important
The cautions on the use of the device, the wrong feed of paper, the damage of the original copy,
and the damage of data are explained. Be sure to read it.
The symbol represents the prior information needed before operation.
Note
This symbol represents the description on the function of the device and the action on user
errors.
Reference
The symbol is located in the end of the paragraph, representing the place where the relevant
details are.
[ ]
It represents the message or menu displayed in the device LCD display window.
【 】
It represents the name of each function key displayed in the device control panel and the
`display window.
Page 11

3
Before Use
3. Safety Information
Plug the power cord to the wall outlet which is near the device, which is easily accessible and
properly grounded. Do not use or store the device in the wet or humid environment.
Caution
Danger of Injury
- The product uses laser. The control, adjustment, or execution of the procedure not stated in
the document may cause exposure to harmful electromagnetic wave.
The product uses a printing media heating method so that gas may be emitted from paper
due to heating. In order to prevent the emission of harmful gas, the section addressing the
details on the selection of printing media in the operating instructions should be
understood.
Caution
High Temperature on the Surface
- The inside of the device may be hot. Let the surface cooled down to prevent the damage
caused by a hot part. Touch it later on.
Caution
Damage of Injury
- Follow below instructions to prevent personal injuries or device damage before moving
the device. Switch off the device and then unplug the power cord. Remove all cords and
cables from the device before moving it. Do not lift the optional feeder and device at the
same time. Lift the device first, and then use both side handles to lift the feeder. Use only
the power cord provided with this device or the one approved by the manufacturer.
Caution
Danger of Electric Shock
- In case of accessing the system board or installing a memory option device after installing
the device, do the work after turning off the device and unplugging the power cord.
If another device is connected to the printer, turn off another device and separate the
cable connected to the printer.
Caution
Danger of Electric Shock
- The design test of the product was passed and approved by using the component meeting
the strict international safety standards. The safety function of a part may not be clear.
The corresponding manufacturer is not responsible for the usage of another replacement
part.
Page 12
4
Before Use
Caution
Danger of Injury
- Do not twist or bend the power cord, step on it, or put a heavy object on it. Be careful not
to have the power cord stripped off or overloaded. Do not have the power cord get jammed
into the gap of an object such as furniture or a wall. The misuse of the power cord may
cause fire or electric shock.
Check the power cord regularly. Unplug the power cord from the receptacle for inspection.
Inquire of the service specialist about the service or repair problem not stated in the user
manual
Caution
Danger of Electric Shock
- When cleaning the outside of the Devices, disconnect the power cord from the receptacle
and all the cables connected to the prevent electric shock.
Laser safety
The Center for Devices and Radiological Health (CDRH) prohibits the repair of laser based
optical units in the field. The optical housing unit can only be repaired in a factory or at a
location with the requisite equipment. The laser subsystem is replaceable in the field by a
qualified Customer Engineer. The laser chassis is not repairable in the field. Customer engineers
are therefore directed to return all chassis and laser subsystems to the factory or service depot
when replacement of the optical subsystem is required.
Warning
- Use of controls, or adjustment, or performance of procedures other than those specified
in this manual may result in hazardous radiation exposure.
Warning
- Turn off the main switch and unplug the machine before beginning any of the
procedures in this section. Laser beams can cause serious eye injury.
Page 13
5
Before Use
Internal laser radiation
Maximum Average Radiation Power:0.294mW at the laser aperture of LSU(Laser Scanning
Unit).
Wavelength:770-800 nm
This Product employs a Class 3B laser diode that emits an invisible laser beam.
The laser diode and the scanning polygon mirror are incorporated in LSU.
LSU is NOT A FIELD SERVICE ITEM:
Therefore, LSU should not be opened under any circumstances.
LSU
Page 14

6
Before Use
4. Notice
Noise Level
Followings are measured according to ISO 7779 and determined to meet ISO 9296. Some
modes may not be available in your device.
1 m average sound pressure (dBA)
Printing 49dBA
Copying 53dBA
Standing by < 30dBA
Temperature
Operating Temperature 15.6 C~32.2 C
Shipping and Storage Temperature -40.0
C~60.0 C
Disposal of the Device
Do not dispose the device and Consumables in the same as normal garbage. For disposal
and recycling, contact your dealer.
Power Consumption
Power Consumption of the Product
The below table shows power consumption. Some modes may not be available in your device.
Mode Description
Power Consumption (W)
A413dn,
A418dn.
A411dn,
A416dn.
A410,
A415.
Printing The device is printing paper
with electric input data.
Less 650W Less 550W Less 440W
Stand-by The device is standing by. Less 100W Less 100W Less 100W
Power Saving The device is in the
power-saving mode.
Less 4W Less 2W Less 1.5W
Off The device is off with its power
plug plugged.
Less 0.05W Less 0.05W Less 0.05W
Above power consumption is the hourly average value.
Instant power consumption can be much higher than the average value.
Page 15

7
Before Use
Energy Saver Mode
The device is designed for the energy saver mode.
The energy saver mode is the EPA sleep mode. In the energy saver mode that the device enters
while it is not used for a certain period of time, it reduces power consumption.
By default, the time to activate the energy saver mode is factory.
In the configuration mode, you can change the Energy Saver Mode time to 1 ~ 240 minutes.
If the energy saver mode time is low, you can save energy but the device responses slowly.
If the energy saver mode time is high, the device responses fast but more energy is used.
Deactivated Mode
Even in the deactivated mode, the device consumes power. To stop power consumption fully,
unplug the power cord
Total Energy Usage
It would be useful to calculate the Total energy usage of the device.
Since the electricity bill is charge by watt, to calculate energy use, you have to multiply time
spent in each mode with power consumption.
Total energy usage is the sum of energy use in each mode.
Wireless LAN Specification
This device may be affected by electromagnetic interference. So, it cannot be used for life
saving service.
Condensation
A dramatic change in ambient temperatures can create small water drops in and out of the
device. Remove water drops on the outer surface. To remove water drops inside the device,
open the platen or ADF and wait until they disappear.
EMC Notice
INFORMATION TO THE USER
This equipment has been tested and found to comply with the limits for a Class B digital device,
pursuant to part 15 of the FCC Rules. These limits are designed to provide reasonable
protection against harmful interference when the equipment is operated in a commercial
environment. This equipment generates, uses, and can radiate radio frequency energy and,
if not installed and used in accordance with the instruction manual, may cause harmful
interference to radio communications.
Operation of this equipment in a residential area is likely to cause harmful interference in which
case the user will be required to correct the interference at his own expense.
When measured using a network cable, shielded type was used.
Page 16

8
Before Use
WARNING
Changes or modifications not expressly approved by the manufacturer could void the user’s
authority to operate the equipment.
FCC COMPLIANCE STATEMENT
This device complies with part 15 of the FCC Rules. Operation is subject to the following two
conditions: (1) this device may not cause harmful interference, and (2) this device must accept
any interference received, including interference that may cause undesired operation.
This Class [B] digital apparatus complies with Canadian ICES-003.
Cet appareil num
rique de la classe [B] est conforme la norme NMB-003 du Canada.
WLAN Notice
Exposure to radio frequency radiation
The following notice is applicable if your printer has a wireless network card installed.
The radiated output power of this device is far below the FCC radio frequency exposure limits.
A minimum separation of 20 cm (8 inches) must be maintained between the antenna and any
persons for this device to satisfy the RF exposure requirements of the FCC.
Laser Notice
This machine is certified in the U.S. to conform to the requirements of DHHS21 CFR Subchapter
J for Class 1 laser products, and elsewhere is certified as a Class 1 laser product conforming to
the requirements of IEC 60825-1:2007.
Class 1 laser products are not considered to be hazardous. This machine uses two AIGaAs laser
diodes witha wave length of 775~800nm and an output of 15mW.
The laser system and machine are designed so there is never any human access to laser
radiation above a Class 1 level during normal operation, user maintenance or prescribed service
condition.
Class 1 Laser Product
Page 17

9
Before Use
Laser Safety
CDRH (Center for Devices and Radiological Health) prohibits laser unit repairing on a field.
A laser unit can only be repaired in a factory or necessary places. A laser unit can be replaced
with qualified customer service technician and internal parts of laser unit cannot be replaced
on a field. Therefore, the customer service technician is to return the laser unit to a factory
or service center if laser unit’s parts require replacements.
Caution notations and label
Laser caution label appear on this machine at the following position. Be very careful that an
accident does not occur when operations such as removing paper jam is performed.
NOTICE
Do not remove caution labels or notations. If any caution label or caution notation is soiled,
please clean to make legible. If you cannot make them legible, or if the caution label or
notation is damaged, please contact your service representative.
Page 18

10
Before Use
5. Precautions
Follow below instructions along with Safety Information provided when you purchase the device.
Install the device
Warning
- Install the device where good ventilation is provided.
Ozone is generated while the device is operating. Though the ozone amount is not
dangerous, if the device is used for a long time or a large number of sheets are printed,
sufficient ventilation is needed.
Caution
- Keep the device’s vents a least 10 cm away from walls and other equipment.
- Secure sufficient space around the device for easy ventilation and operation.
- Use the device with temperatures of 10
C ~ 32 C and relative humidity of 20% ~ 80%.
- Do not install or use the device outdoor.
- To scan the 11 x 17 paper, keep the device’s back 15 cm away from surroundings.
Move the device
Warning
- Before moving the device, be sure to unplug the power cord. Use at least two people to
move the device.
- Remove the toner cartridge when moving the device.
- Hold the bottom of the device when moving the device.
Bend your needs enough to protect your spine when lifting the device.
Page 19

11
Before Use
6. Handling Consumables
Caution
- Do not burn toner or drum cartridges. Remaining toners can cause a large fire or burns.
Warning
- Do not use force to open toners or other consumables. Do not inhale toner powder and
keep it away from your skin. Keep toners away from children. If your skin contacts toners,
remove them with flowing water and soap. If you have any skin problem, contact your
doctor.
Important
- Do not touch the green surface of the drum cartage or expose it to the direct sunray. This
may drop printing quality.
- Do not keep drum cartridges or toner cartridges upside down or store them in the slanted
place. This may drop printing quality.
- Do not dismantle drum cartridges or toner cartridges.
- Keep drum cartridges and toner cartridges away from physical impact or vibration.
- Do not unpack drum cartridges and toner cartridges until you are ready to use them.
Page 20

12
Before Use
7. Precautions in Using the Device
Plug the power cord to the wall outlet which is near the device, is easily accessible and is properly
grounded. Do not use or store the device in the wet or humid environment.
Warning
- The fusing unit and its surroundings are very hot while the device is operating.
Make sure not to touch the fusing unit while removing paper jams or checking inside of the
device. This may cause burns.
- Prevent toner power from entering your eyes or mouth while removing paper jams or
replacing toner cartridges. If toner enters your eyes or mouth, wash them away with clean
water and consult your doctor.
- Make sure your hands or clothes are tainted with toner. Wash toner away with cold water if
your hands or clothes are tainted with toner. If hot water is used, stains may remain.
- Use the device only for functions described in this manual.
Page 21

13
Before Use
8. Ventilation
Warning
- Use the device in a place with good ventilation. If the device is used in a place with bad
ventilation, this may be harmful for your health. Ventilate regularly.
- Do not block vents. Inappropriate cooling may lead to high temperatures inside the device,
resulting in malfunction.
- In general, the new device produces a little amount of gas. So, provide good ventilation
during the first use of the device. If the device is operating for a long time, it is
recommended you should be away from the place where the device is installed.
Page 22

14
Before Use
9. Disposal of Batteries
Warning
- Ni-MH batteries are installed for the backup memory. Dispose batteries in an environment
friendly way according to manufacturer’s instruction. To replace batteries, consult the
qualified service technician.
Page 23

15
Before Use
10. Turning the Power Switch On or Off
Connect the Power Cord to this machine.
Connect the Power Cord to the power outlet.
When turning the main power on, press │ of the Power Switch.
A screen appears to show that this machine is in the process of start-up. When the main
screen is displayed, this machine is ready to use.
When turning the main power off, press O of the Power Switch.
Note
- When restarting this machine. turn the Power Switch off and on again after 10 or more
seconds have elapsed. Not doing so may result in an operation failure.
Page 24

16
Before Use
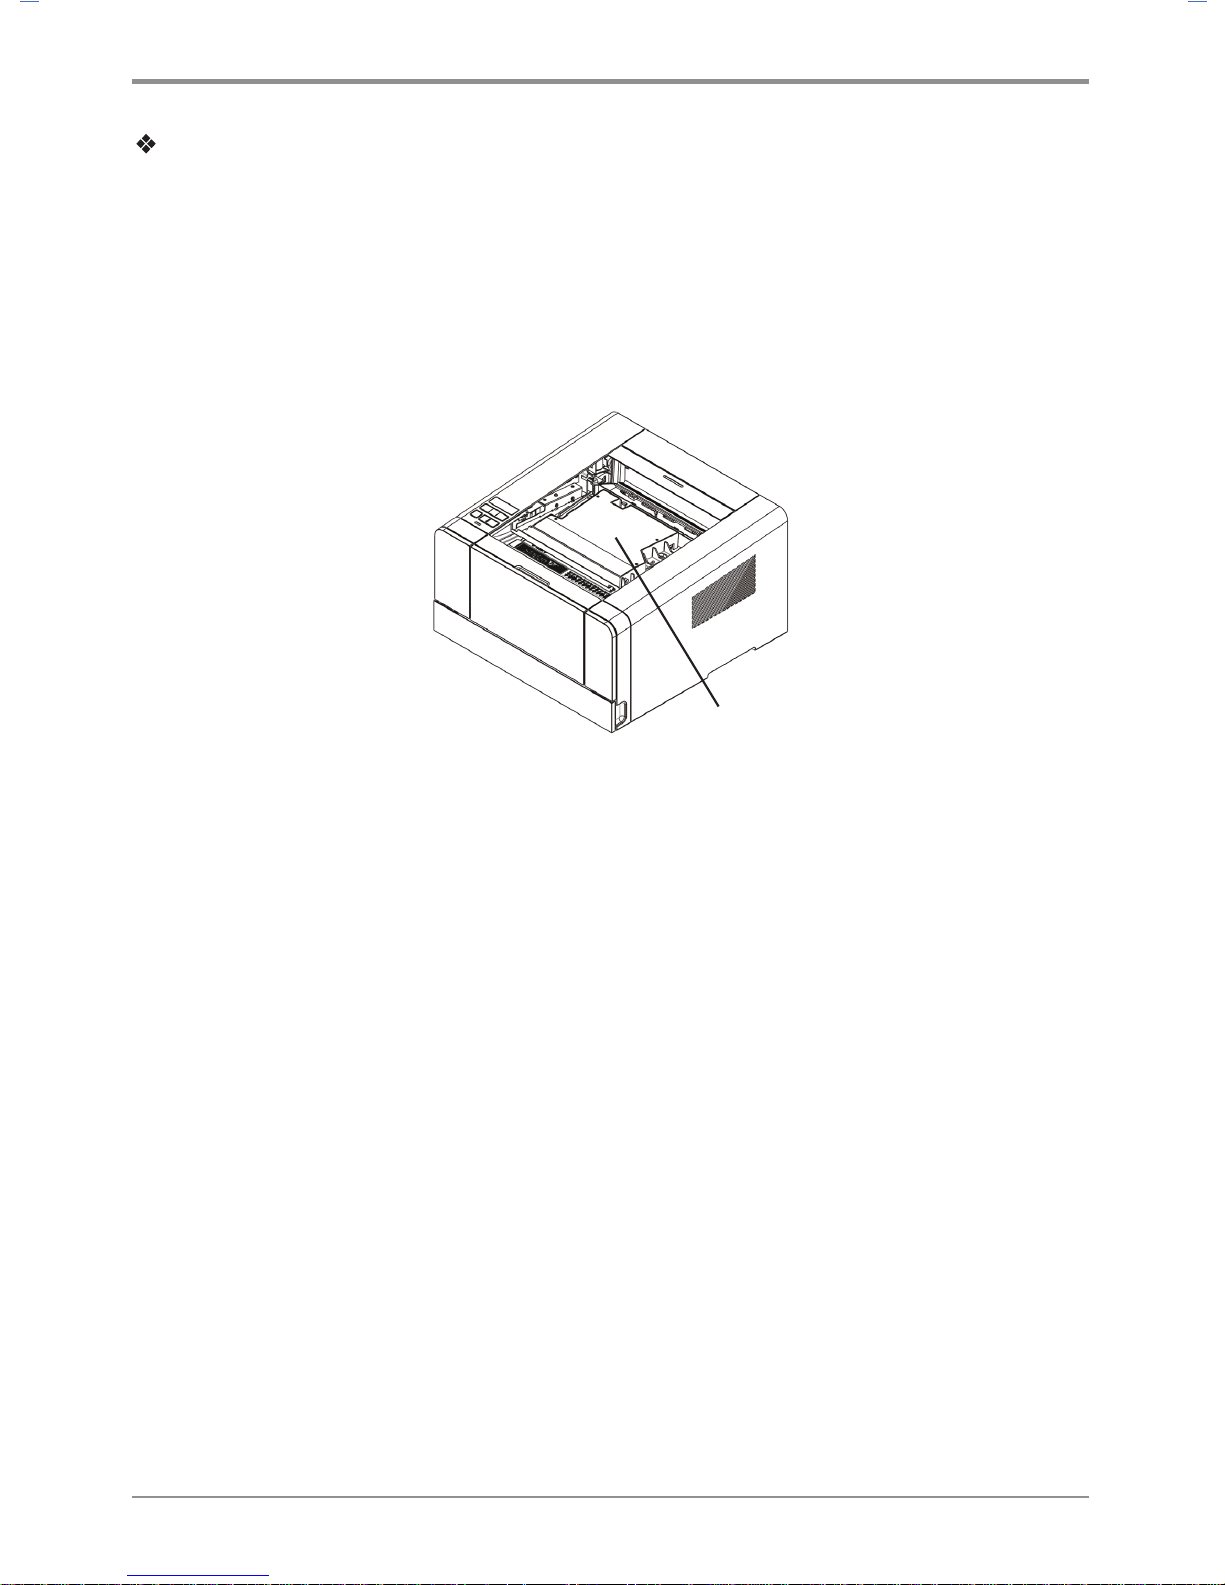
This Product contains the Wi-Fi module that is only compatible with below Sindoh
models :
Printer : A611dn, A616dn, A413dn, A418dn
Multifunction Printer : M611, M612, M412, M417, M411, M416, M610, M615, M616, M617
Wi-Fi module is here(inside).
Precautions
ISince the product can cause a radio interference, it can be used for service related to
human life. Do not expose this product to water, humidity or liquid. Do not expose this
product to direct light, hot temperature or fire.
Warning
- IChanges or modifications not expressly by the manufacturer could void the user’s
authority to operate the equipment.
Caution
- Antenna shall be mounted in such a manner to minimize the potential for human contact
during normal operation. The antenna should not be contacted during operation to avoid
the possibility of exceeding the FCC radio frequency exposure limit.
Page 25

17
Before Use
Precautions
Frequency
IEEE 802.11b : 2400MHz ~ 2484MHz
IEEE 802.11g : 2400MHz ~ 2484MHz
IEEE 802.11n(20MHz) : 2400MHz ~ 2483MHz
IEEE 802.11n(40MHz) : 2400MHz ~ 2483MHz
Antenna Power Density IEEE 802.11b : 10mW(10dbm)/MHz
IEEE 802.11g : 10mW(10dbm)/MHz
IEEE 802.11n(20MHz) : 10mW(10dbm)/MHz
IEEE 802.11n(40MHz) : 10mW(10dbm)/MHz
No. of Channels IEEE 802.11b : 14
IEEE 802.11g : 14
IEEE 802.11n(20MHz) : 14
IEEE 802.11n(40MHz) : 9
Modulation IEEE 802.11b : DSSS/CCK
IEEE 802.11g : OFDM
IEEE 802.11n(20MHz) : OFDM
IEEE 802.11n(40MHz) : OFDM
Power Consumption 5V 500mA(Maximum)
Dimension 37.0mm X 28.0mm X 3.7 mm
Operation Temperature 0 ~ 60 ℃
Storage Temperature -10 ~ 80 ℃
Page 26

Page 27

1
1
Introduction
A413 Series
User Manual
Page 28

Introduction
1-2
1. Specification
Items
Product
A410 Series
Model Name A413dn
Output Speed 36ppm(A4), 38ppm(LT)
Memory 512MB
Resolution 1200dpi
Interface 1 USB/Eathernet 10/100M/1G BASE - TX
Emulation PCL5e/6, PS3
Support Protocols TCP/IP(IPv4, IPv6), LPR, Port9100, DHCP, DHCPv6, ICMP/ICMPv6, DNS,
SNMP, HTTP, WEP, WPA/WPA2, WPS
Tray 250 sheets
Multipurpose tray (MPT) 50 sheets
Cartridge Enclosed : 1,500 sheets
AM : 2,500, 3,000, 5,000, 6,000, 7,500, 9,000 sheets
Duplex (2-sided)
print function
Auto 2-sided printing (Duplex installed)
Product size
(W x D x H)
383 X 386 X 234(mm)
Power rating 220V-240V~, 50/60Hz, 3.2A
Weight 10.8 Kg
Page 29

1-3
Introduction
1
2. Names and Functions of the Components
Names and Functions of the Components (Front)
Description Names of each part Functions
1
Tray 1 Holds 250 sheets .(75g/m²(20lb))
2
Tray 2 Optional tray that holds 250
(75g/m²(20lb)): Additional purchase required if not installed
by default.
3
Multipurpose tray Spread extension tray for standard paper, label paper or
envelops.
4
Front Cover Open the cover to install the cartridge or check the device.
5
Control Panel Buttons, lamp, and LCD display necessary for operation
6
Paper Support Prevents printed paper from falling.
7
Output Bin Paper is dispensed with the printed side facing down.
Printed sheets can be stacked up to 250. (75g/m²(20lb))
8
Handle Use it to move the printer or install the optional tray.
1
2
6
7
3
4
5
8
Page 30

Introduction
1-4
Name and Function of Each Part (Back)
Description Name of Each Part Functions
9 Power connector For plugging in the power cord
10 Power button Button for turning on the printer
11 USB Port connector Connects UBS ports of computer and printer
12 USB Host Port Connection port used for A/S Code Update.
13 Ethernet connector For plugging in the Ethernet cord
14 Back Cover It can be used to remove jammed paper or check inside the printer
15 2-sided printer Automatically prints 2 sides (installed inside the device)
9
10
11
12
13
14
15
Page 31

1-5
Introduction
1
3. Printer Description by Model
The A410 Series printer has the following two basic configurations.
1. Basic configuration 1: Tray 1 (250 sheets) + multipurpose tray (50 sheets)
2. Basic configuration 2: basic configuration 1 + optional tray (250 sheets)
Page 32

Introduction
1-6
4. Installation and Use
Refer to the enclosed CD or our website for more details on installing or using the printer.
Detailed instructions on installing or disassembling the printer, installing and replacing consumables,
feeding paper, or using the driver CD for driver and utilities installation are available.
Driver CD
The driver CD contains the printer driver required to operate your printer.
The CD also contains information on printer utilities, printer-related documents, and the user manual.
Quick Installation Guide and User Manual
The quick installation guide offers easy instructions for installing and using the printer. The user manual
in the CD offers details such as printer installation instructions, how to use the printer as well as
general
messages, functions, and how to handle paper jams.
Sindoh Website
The printer driver or utilities updates, various documents in the driver CD, and other printer-related
information can be downloaded from the Sindoh website: www.sindoh.com
Page 33

1-7
Introduction
1
5. Specification for Printer Paper & Feeding
This is an introduction of specifications for each type of printer paper used in the printer and paper feeding.
Refer to
the printer paper guidelines on pages 4-13, especially on card stock or label paper.
Feeder Feeding per paper type Paper size Weight
Tray 1 Standard paper: 250 sheets
Thick Paper: 100 sheets
A4, A5, JIS B5,
Folio, Letter, Legal,
Executive, Statement
60~105 g/m²
(16~28lb)
Tray 2 (Small) Standard paper: 250 sheets
Thick Paper:100 sheets
A4, A5, JIS B5,
Folio, Letter, Legal,
Executive, Statement
60~105 g/m²
(16~28lb)
Multipurpose
tray
Standard paper: 50 sheets
Envelope: 5 sheets
Label: 15 sheets
Card stock: 5 sheets
Paper size between
76.2 X 127mm (3 x 5 inch) min.
216 X 355.6mm max.
(8.5 x 14 inch)
60~166 g/m²
(16~53 lb)
Card stock 90lb
Duplex (2-sided) printing is as follows.
Paper size Weight Feeder
A4(210X297)
Letter (216X279)
Standard paper
60~90 g/m² (16~24lb)
Stacking into default output tray
Note :1
Load in the Tray 1 the thick paper, and the paper with size of A5 or bigger to the upper limit set
for the paper with intermediate size inside the tray.
For optimized printing quality for papers smaller than size of A5, using multipurpose tray is
recommended.
Caution
-
Multipurpose input tray can hold up to 50 sheets of paper or up to 10 more based on thickness.
Page 34

Introduction
1-8
6. Product Certification
Certified Energy Saving Device
This product has been designed and manufactured for efficient energy use. The energy saving mark is only
given to qualifying products. This mark indicates that the product satisfies energy saving requirements of
the Korean government and is registered as an energy saving product with the Korea Energy Management
Corporation. Products with this mark are 30 - 50% more energy efficient than other products.
Page 35

2-1
Printer Installation
2
Printer Installation
A413 Series
User Manual
Page 36

Printer Installation
2-2
1. Unpacking the Printer
1
Unpack and install the printer in a well ventilated area.
In order for proper operation of the cooling fan, nothing should be in the space within 8cm(3 inches)
from the left, right, and back of the product. Avoid the following places;
A. Exposed to the direct sunlight
B. Close to heating equipment or air-conditioner
C. Dusty place
2
Pull out the printer and other components from the box.
Keep the box and buffer materials in case you need to pack the printer.
3
Remove tape in and on the printer and remove the packing material from the tray.
4
Check if the following components are included.
* Notification of the Enclosed Parts: Main Machine, Driver CD(Including a user guide), Power Cord,
USB Cable, Quick Installation Manual, Cartridge, Ferrite Core(NOT Included in this model)
5
Should you require assistance during installation or if any of components are missing or damaged,
contact the store of purchase.
6
Install printer on a flat surface.
Caution
-
Installing the printer on an uneven floor may cause machine failure or lead to printing of abnormal images.
1. Tray 1 (250 sheets by default)
3. Power cord
2. Enclosed cartridge
4. USB cable
5. Quick Installation Guide
6. The driver CD and
the user manual CD included
Page 37

2-3
Printer Installation
2. Cartridge Preparation
Unpack and install the cartridge in the following order.
1
Cut the bag to the guideline to open it and pull out the cartridge.
Caution
-
If the unpacked cartridge is exposed to direct sunray or strong light, it may be damaged.
Keep the unpacked cartridge in the shade or cover it with newspaper.
-
Do not touch the green drum. Use the handle.
-
Lay a sheet of paper down and put the cartridge on it to prevent the cartridge from being damaged.
2
Remove packing materials from the cartridge.
Caution
-
Do not touch the drum beneath the cartridge.
Page 38

Printer Installation
2-4
3
Hold the unpacked cartridge and shake it so that toner is evenly distributed.
Caution
-
Be careful not to touch the black toner powder
-
Do not touch the green drum beneath the cartridge.
Caution
Page 39

2-5
Printer Installation
3. Cartridge Installation
1
Press the Unlock button on the left side to open the front cover.
2
Install the cartridge in the following order.
A. Hold the cartridge handle. (The back of your hand should be facing down)
B. Align the guides(arrow sticker) of the cartridge to the groove(arrow sticker) of the printer.
C. Push the cartridge into the printer until you hear a click
3
Close the front cover. A click will occur if the cover is properly closed.
If not, the printer may not work properly.
Caution
-
Check if the multipurpose tray is closed.
If you close the front cover while the multipurpose tray is open, it may cause malfunction.
Page 40

Printer Installation
2-6
4. Loading Print Paper
The printer has trays with a capacity of 300 sheets.
If the tray 2 is added, capacity is increased to 1300 sheets.
For more information on capacity, supported size or type, see the table below.
Type Number of sheets Supported size Supported type
Tray 1 250 A4, A5, B5, folio, letter,
legal, executive
Standard paper, Thick paper
Tray 2 250 A4, A5, B5, folio, letter,
legal, executive
Standard paper, Thick paper
Multipurpose Tray 50 Paper size between
76.2X127mm(3x5inch) min.
216X355.6mm (8.5x14inch)
max.
Standard paper, Label paper,
Envelope, Card stock
Loading on the Tray
Load paper on the default or optional tray in the following order.
Important
- When you change paper for Tray 1, check if paper type and size have been changed
correctly in the driver.
1
Remove the tray. (Handles for removing the tray are on either side of the tray)
Page 41

2-7
Printer Installation
2
Hold the width guide tab and width guide together, and push them to the right.
3
Hold both length guide tab and length guide and move them to their maximum position.
4
For Legal paper, set the length guide adjustment lever to “Legal,” and move the length guide wall to its
maximum position.
Caution
-
When paper smaller than A4 size is loaded with the length guide adjustment lever set to “Legal”,
load paper after setting the length guide adjustment lever to “A5~A4” and pushing the length guide
wall in as much as possible to hold it in place.
5
Loosen paper by bending it back and forth and blow air between the sheets.
Do not fold or wrinkle paper.
Length Guide
Length Guide Tab
Length Guide Wall
Length Guide
Adjustment Lever
Width Guide Tab
Width Guide
Page 42

Printer Installation
2-8
Load paper with its edges flat and in correct alignment.
Important
- Do not exceed the maximum height marked on the tray when loading paper.
This may cause paper jams.
6
Load paper up to the marked height.
7
Push paper to the front of the tray with the print side facing down.
Caution
- For label paper, thick paper and other paper smaller than A5, load it to the Thick mark.
8
Hold both width guide tab and width guide and push to the end of paper.
9
Hold both length guide tab and length guide and push to the end of paper.
1
0
Push in the tray all the way into the printer.
Page 43

2-9
Printer Installation
Loading on the Multipurpose Tray
With the multipurpose tray, you can assign the size and type of paper on your computer and
send the job to the printer, allowing you to manually load the correct paper type before printing.
You may also load paper on the standard trays for automatic printing.
To load paper on the multipurpose tray, please follow the instructions below.
1
Hold the top of the tray to pull it out.
2
Pull out the extended support.
3
Unfold the extended support.
Extended Support
Page 44

Printer Installation
2-10
4
Push out both width guides a little wider than the paper to be loaded.
5
Loosen paper by bending back and forth and blow air between the sheets.
Do not fold or wrinkle paper.
Load paper with its edges flat and correct.
-
Do not overload the multipurpose tray to the point where the paper is tightly placed between
the width tabs. Overloading may cause paper jams.
6
Hold the print side facing up on the multipurpose tray and place paper in the center of the tray.
Do not use crumpled or wrinkled paper.
7
Gently push paper to the front.
8
Gently push the width guides towards the paper.
Width Guide
Important
Page 45

2-11
Printer Installation
Installing Paper Support
Paper support helps printed paper on output bin to maintain consistent angle and to be stacked
without paper falling off the tray.
Pull paper support up after installing the printer.
Page 46

Printer Installation
2-12
5. Installing Optional Tray 2
This printer supports optional tray 2 (250 sheets/ 500 sheets).
The optional tray 2 consists of support and tray.
Warning
-
To install the optional tray 2 after installing the printer, check if the printer is switched off,
power cord is unplugged and all cables are disconnected.
1
Remove all packing materials and tapes.
2
Pull tray 2 out. (Handles for pulling out the tray are on either side of the tray)
3
Hold both ends of the support and put it in a place where the printer will be located.
4
Push back the tray until if perfectly fits into the support.
Page 47

2-13
Printer Installation
Installing Printer on Tray 2
Lift the printer by handles on either side and place it on the place it is to be installed.
To install the printer on the optional tray 2, do the following.
1
Align the tab, groove and connector on top of the tray with the bottom of the printer.
2
Place the printer on tray 2. Check if the device fits into tray 2 correctly.
Connector
Groove
Tab
Handle
Page 48

Printer Installation
2-14
6. Connecting Cables
Connecting USB Cable
The printer can be directly connected to the PC via the USB cable.
Applicable device model : A410
Caution
-
While the device is on, do not connect or disconnect any communication ports.
The printer can be connected via the USB cable and its USB port supports the USB standard.
1
Check if the power of the printer, the computer, and the other connected devices is turned off.
2
Connect the printer to the PC via the USB cable. The USB port needs the USB cable.
Check if the symbol on the printer matches that on the cable.
Connecting Network Cable
The printer can be directly connected to the network using a standard network cable.
Follow the instructions below to connect to the network.
Note
-
Most networks use 10BaseT/100BaseTX Fast Ethernet port as the standard.
1
Check whether the power has been turned off on the printer, computer or other connected devices.
2
Use the standard cable compatible with the user network to connect the printer to the LAN or hub.
Page 49

2-15
Printer Installation
3
Switch on the printer.
Page 50

Printer Installation
2-16
7. Installing the Printer Driver
The printer driver is software that enables communication between the PC and printer.
In general, the printer software is installed during the initial setting of the printer. To install the software,
follow the Instructions below.
1
Close all open programs on your PC.
2
Insert the software and user manual CD.
3
Click [Install] on the Basic installation window.
4
Follow instructions on the screen.
① In the Software and Manual menu, click [Install Driver and Software].
② Select the Installation type for driver and utility and click [Next >].
Page 51

2-17
Printer Installation
USB Installation
Select Install USB to install default printer, status monitor.
After installation, you will be able to print via the USB.
Follow instructions in the Connect Device window and click [NEXT
>
].
Network Installation
Select Install Network to install the default printer, status monitor.
Printing can be done via network after it has been installed.
See the network setting for the printer and enter the IP in the IP Address column. Click [NEXT
>
].
※ User Defined Installation allows the user to select a specific driver.
③ When driver has been installed, click [FINISH].
Note
-
See 「Network Setting」 on p. 3-20 for network settings information including
the printer’s IP address.
Page 52

Printer Installation
2-18
Updating Options Available for the Printer Driver
After installing the printer software and options, manual addition of printer driver settings may be necessary.
Windows Users;
1
Click Start then click Execute.
2
Press Start and input Control Printers in the search or execution box.
3
Press Enter or click OK to open the printer folder.
4
Select Printer.
5
Select Settings after clicking Printer with the right button of the mouse.
6
Click the Device Option tab.
7
Add installed hardware options from available options.
8
Click Apply.
Page 53

2-19
Printer Installation
8. Printer Setting Check
Turning on the printer
1
Connect the end of the power cord to the port on the back of the printer and plug the power cord to
the properly grounded wall outlet.
2
Switch on the printer.
When initial warming-up is complete, the message [Ready] will appear to indicate the printer is ready
to receive data.
If the message other than [Ready] appears, see 「Understanding Printer Messages」 p. 3-17.
3
Check your PC and see if other devices are on.
4
Move on to the next step.
Caution
-
Leaving the printer with power switched off for a long time may result in abnormal images.
Printing the System Report Page
Print the system report to see initial settings and check if options are properly installed.
1
Check if the printer is on.
2
Press
【◀】, 【▶】
to enter [Menu].
3
Press
【▶】
to find [Report]. Then press 【OK】.
4
Check whether [System Report] has been selected. Then press【OK】
5
If options are not displayed, switch off the device, unplug the power cord, and then install options again.
6
Check the tray and paper type.
Page 54

Printer Installation
2-20
Printing the Network Report Page
Print the Network Report to check network settings.
See network settings such as IP in the network report to change network settings.
1
Check if the printer is on.
2
Press
【◀】, 【▶】
to enter [Menu].
3
Press
【▶】
to find [Report]. Then press 【OK】
4
Press
【▶】
to find [System Report]. Then press 【OK】
Page 55

Using the Printer
3-1
3
Using the Printer
A413 Series
User Manual
Page 56

Using the Printer
3-2
1. Using the Control Panel
The control panel consists of 1.8-inch monographic LCD with 128 X 32 resolution, 2 arrow navigation keys, 6
hardware keys, 1 LED for indicating status.
Menu available to use on the control panel has been briefly summarized on the back.
Understanding Colors of Power Button and Lamp
The power button and lamp colors on the printer’s control panel indicate a particular status or condition of the
printer.
Lamp Color & Printer Status
Lamp Printer Status
Off Power has been turned off/Printer is in Sleep mode.
White gradually brightening Printer is being heated and in preparation.
White turned on Printer is ON and ready to use.
White turned off Data processing/Printing.
Red turned on User should check the printer.
Button
The 6 buttons on the control panel are used to open the printer, change printer setting or to respond to
printer messages.
Note
- Button actions are shown on the second row of the LCD display.
- During the power saving mode, you can press any of 6 buttons to return.
LCD Window
Menu
Continue
Selet
Lamp
Stop
Return
Page 57

Using the Printer
3-3
Button Function
Press 【
】 Continue button to
Delete message from the control panel (error message, etc.).
Exit power save mode.
Press 【◀】, 【▶】 buttons to
When [Ready] is displayed, the printer becomes offline and enters the menu.
If the printer is offline, it goes to the menu.
Go to the next or previous item in the menu.
Press the 【◀】 or 【▶】 button to enter the number (ex: number of sheets). Press the button
until the desired number appears.
Click on the 【OK】 button,
The menu selected in the second line in the control panel is displayed.
The menu depends on the type.
- When a menu is selected, its item is displayed.
If a new menu item is saved, the printer shows [Saving], and then returns to the menu item.
Press 【
】 Return button to go to the previous menu or menu item.
Pressing 【
】 Stop button in [Printing] status will display [Canceling... ] in the screen and
the current printing job will be cancelled.
Page 58

Using the Printer
3-4
2. Understanding the Printer Settings Menu
Changing printer settings with Printer Settings Menu
1
Press
【◀】, 【▶】
when in [Ready] mode. [Menu] will appear.
2
Operate
【◀】, 【▶】
buttons until the desired menu is displayed.
3
Press 【OK】 button to select the [Menu] or [Menu item] displayed in the second line of the LCD
display window of the control panel.
A. Select [Menu] to open and show the first setting.
B. Select [Menu item] to show its default value. Each menu item has a list of values.
They consist of words, phrases, and numbers or On/Off.
4
Press 【OK】 button to select the value on the second line of the LCD.
A new value is saved when you press 【OK】 button. Press 【
】 button to go to the previous menu.
User defined settings are used until new settings are saved or settings are reset to factory settings.
Change settings to your environments.
Restoring to Factory Setting
To reset the current settings to the factory default settings, select the factory setting menu from the general
setting menu, and follow the steps described below.
Follow the following instructions to restore to the initial factory setting:
1
Check whether the printer is turned on.
2
Press
【◀】, 【▶】
to enter [Menu].
3
Check if [Settings] has been selected.
Then press 【OK】.
4
Press
【▶】
to find [General Menu Settings].
Then press 【OK】.
5
Press
【▶】
to find [Factory Reset].
Then press
【OK】
.
Page 59

Using the Printer
3-5
6
[Reset All Settings/Values] will appear on the LCD.
7
Press 【▶】 to go to [Yes]. Then press [OK].
[Factory Settings being Restored] will appear and [Ready] will be displayed.
Note that all settings will be restored to factory setting.
Printing System Report Page
The system report page shows the current setting (the user-defined setting) such as the menu, currently
installed option, usable printer memory, etc. You can check the printer setting through this page. Should
you need assistance regarding the LCD display window and buttons, see 「Using the Control Panel」 p. 3-2.
1
Check whether or not the printer is turned on.
2
Press
【◀】, 【▶】
to enter [Menu].
3
Press
【▶】
to go to [Report].
Then press 【OK】.
4
Check whether [System Report] has been selected.
Then press [
OK】
.
[System Report Printing] appears while the report is being printed.
When the report is printed, the printer is switched to [Ready].
If another message is displayed while the page is being printed,
refer to 「Understanding Printer Messages」 p. 3-17.
Page 60

Using the Printer
3-6
3. Cancelling Print Jobs
Cancelling with Buttons on the Control Panel
To cancel a print job under processing, [Printing]must be in display.
1
While [Printing] is displayed, press the 【Clear/
】 button.
2
Select [Yes] when [Cancel?] appears.
3
[Cancelling...] will appear and the current printing job will be cancelled.
Cancelling from My Computer
1
Double-click the My Computer icon.
2
Double-click the [Printer] icon.
A list of available printers is displayed.
3
Double-click the printer doing the print job.
The print job list appears.
4
Select jobs you want to cancel.
Note
- Instructions for checking printer status may differ by OS.
For more information, see the User Manual or Help on your OS.
5
Press the [Delete] key.
Page 61

Using the Printer
3-7
4. Menu
Settings
Paper Settings
Default source
Tray 1 size
Tray 1 type
Tray 2 size
Tray 2 type
Tray 3 size
Tray 3 type
Multipurpose tray size
Multipurpose tray type
Paper texture
Paper weight
Substitute A4/LT
General settings
Power save
Auto reset time
Busy P. Sleeptime
Idle P. Sleeptime
Time Setup
Time zone
Boozer
Language
Factory Default
Firmware Update
Print settings
Darkness
Settings priority
Network settings
Wired network
Show IP address
Show IPv6 address
IP address settings
Auto settings
Manual settings
Insert IP address
Page 62

Using the Printer
3-8
Netmask
Gateway
1st DNS address
2nd DNS address
Apply
Show MAC address
Wireless network
On/Off
Show IP address
Show SSID
Connection settings
IP address settings
Auto settings
Manual settings
Insert IP address
Netmask
Gateway
Primary DNS
Secondary DNS
Apply
Show IPv6 address
Show Mac address
Clear saved SSID
Wi-Fi Direct Settings
On/Off
Show Wifi Direct IP
SSID Settings
Encryption Mode
Settings
Password Settings
Show connection list
E-mail transmission
setting
SMTP server
address
SMTP mail address
SMTP password
Page 63

Using the Printer
3-9
SMTP port
E-mail notification of
status
Mail notification
option
Notification option
setting
administrator email
address
Report
System report
Network report
Display error log
Sample page
Print for Fuser
Cleaning
The menu consists of [Settings], [Report], and [Print USB Memory], [Settings] consists of [Paper Settings],
[General Settings], [Print Settings] and [Network Settings].
Page 64

Using the Printer
3-10
Paper Settings
Menu Purpose Value
Tray N
paper size
Tray N paper size
settings
Note
- N can be 1, 2 or 3.
Tray 2 or 3 is displayed
only when optional tray
has been installed.
*A4, A5SEF, B5, Letter, Legal, Executive, Statement,
US Folio, Quatro, G. Letter, G. Legal
Tray N
Paper Type
Tray N paper type
settings
Note
- N can be 1, 2 or 3.
Tray 2 or 3 is displayed
only when optional tray
has been installed.
*Standard paper, Tracing paper, Paper Label
MPT Size MPT Paper Size
Settings
*A4, A5 SEF, A5 LEF, A6 SEF, B5, B6, Letter, Legal,
Executive, Statement, US Folio, Quatro, G. Letter,
G. Legal, Post Card 100 x 148, Post Card 148 x 200,
Post Card 200 x 148, Monarch Envelope, Com9 Envelope,
Com10 Envelope, C5 Envelope, C6 Envelope, DL Envelope
MPT Type MPT Paper Type
Settings
* Standard paper, Tracing paper, Paper label, Vinyl label,
Cardboard, Envelope, Postcard
Paper
texture
Paper texture setting Smooth, *Normal, Rough
* Normal: default setting
Smooth: select this when the texture of the paper is smoother
than normal paper
Select when the printing comes out distorted.
Rough: select this when the texture of the paper is rougher than
normal paper
Select this when toner does not adhere to the printed image.
You can select options for each paper type.
Select the paper type in “T
ray N Type” and “MPT Type”.
Paper
weight
Paper weight settings Lightweight, *Standard weight, Heavy
*Standard weight: Default
Lightweight: Select if paper is thinner than normal paper.
Select if printing come out distorted.
Heavy: Select if paper is thicker than normal.
Select if the toner does not adhere to the printed image.
You can select options for each paper type.
Select the paper type in “T
ray N Type” and “MPT Type”.
Page 65

Using the Printer
3-11
Menu Purpose Value
Assign
Default Tray
Default Tray Settings Select the default tray that will feed paper first; *Tray 1, Tray 2,
Tray 3 or MPT. Trays 2 and 3 only appear when they have been
installed. Tray with the same size and type of paper will auto
-
matically be connected.
To cancel automatic connection, change tray settings so that
each tray has a different setting.
Sustitute
A4/LT
Replace it when the
printing paper size is
different from the paper
feeder size.
Yes or NO
(*) is default factory setting.
Default factory setting may be different according to region.
General Menu Settings
Menu Purpose Value
Power Save Time before entering Power Save mode (min.)
* Auto Power Save Mode: An automatic power
saving mode transition function through
analysis/memory of printer usage patterns
0 ~ 240 (Disabled when 0)
* Auto Power Save Mode
Auto reset time Time setting (in minutes) to change modified
settings or screens to default settings.
Not used, 10 seconds to 600
seconds
Busy P. Sleeptime The set standby time will be applied before
going into Powersave mode if any printing
operation occurred during the time period of
the past week (min)
1 ~ 60
(1*)
Idle P. Sleeptime The set standby time will be applied before
going into Powersave mode if no printing
operation occurred during the time period of
the past week (min)
1 ~ 60
(1*)
Time Setup Device time setting function
Time zone Not used, 10 seconds to 600 seconds
Boozer Boozer on/off settings On/Off
Language Control Panel Language Settings *Korean, English
Factory Default The firmware update through the network Firmware update
No/Yes
Page 66

Using the Printer
3-12
Menu Purpose Value
Firmware Update The firmware update through the network Firmware update
No/Yes
Print Settings
Menu Purpose Value
Print darkness Print darkness settings 1~10, *6
Settings Priority Priority is given to the printer setting or driver
setting.
Priority is given to *Driver
settings/ Printer settings
(*) Asterisk is factory default setting.
Page 67

Using the Printer
3-13
Network Settings
Menu Menu Purpose Value
Wired Network Show IP address Show current IP (IPv4)
address for this printer
000.000.000.000 ~
255.255.255.255
Show IPv6 address Show current IPv6 IP
address
0000:0000:0000:0000:
0000:0000 ~
FFFF:FFFF:FFFF:FFFF:
FFFF:FFFF
IP address
settings
Auto
Settings
Automatically assign IP
address
Manual
Settings
Enter IP address
-> IP address
- Netmask:
Enter Netmask
- Gateway:
Enter Gateway address.
- 1st DNS address:
Enter DNS address
- 2nd DNS address:
Enter DSN address
- Apply:
Apply all settings
* For more information,
see「Network Setting」
p. 3-20.
IP address :
000.000.000.000 ~
255.255.255.255
Netmask :
000.000.000.000 ~
255.255.255.255
Gateway :
000.000.000.000 ~
255.255.255.255
1st DNS address :
000.000.000.000 ~
255.255.255.255
2nd DNS address :
000.000.000.000 ~
255.255.255.255
Show MAC
Address
IP Address Shows the unique MAC
address.
00: 00: 00: 00: 00: 00 ~
FF:FF:FF:FF:FF:FF
Wireless
Network
On/Off Turn Wi-Fi On/Off
* Off ->On after connecting
to wireless AP device to
connect to last AP.
Wifi On
Wifi Off
Show IP address Show current IP address
(IPv4)
000.000.000.000 ~
255.255.255.255
Show SSID Show name of current
Wireless AP device
Connection Settings Show list of available APs.
Select one and connect.
Page 68

Using the Printer
3-14
Menu Menu Purpose Value
Wireless
Network
IP address
settings
Auto
settings
Automatically assign IP
address
Manual
settings
- IP Address :
Enter IP address
- Netmask :
Enter Netmask .
- Gateway:
Enter Gateway address.
- 1st DNS address:
Enter DNS address.
- 2nd DNS address:
Enter DSN address.
- Apply:
Apply all settings.
* For more information, see
「Network Setting」 p. 3-20.
IP Address :
000.000.000.000 ~
255.255.255.255
Netmask :
000.000.000.000 ~
255.255.255.255
Gateway :
000.000.000.000 ~
255.255.255.255
1st DNS Address :
000.000.000.000 ~
255.255.255.255
2nd DNS Address :
000.000.000.000 ~
255.255.255.255
Show IPv6 address Show current IPv6 IP address
of this printer
0000:0000:0000:0000:
0000:0000:0000:0000 ~
FFFF:FFFF:FFFF:FFFF:
FFFF:FFFF:FFFF:FFFF
Show MAC address Show the unique MAC
address of the network device
00: 00: 00: 00: 00: 00~
FF:FF:FF:FF:FF:FF
Clear saved SSID Disconnect from the currently
connected wireless AP device.
Encryption Mode Settings :
NONE
WEP
WPAPSK
WPA2PSK
WPAPSK/WPA2PSK
*See <Wireless
encryption> p.3-22 for
meaning of each setting.
Password Setting :
1)Enter current password
2)Enter new password
3)Confirm new password
* 2) Enter new password
will appear first if there is
no current password.
Wi-Fi
Direct
Setting
On/Off Wi-Fi-Direct on/off setting
Show Wifi
Direct IP
See the Wifi-Direct connection
IP
SSID Setting Setting printer name searched
on the mobile device
Encryption
Mode Settings
Select encryption mode
Password
Setting
Set password for Wi-Fi Direct
Show
connection list
Show mobile device
connected to printer
Page 69

Using the Printer
3-15
Menu Menu Purpose Value
E-mail transmis-
sion setting
SMTP
server address
Select an email server(SMTP
server) to send e-mails
Please inquire e-mail
serveradministrator or
serveiceprovider for
secure accessmethod to
the SMTP server
SMTP mail address
Enter Account (ID) and
password to log into the
serverfor e-mail tranmission.
E-mail address entered can
beused to receive replies for
sent e-mails
E-mail account (ID) and
Password
SMTP password
SMTP port
Select a port number
to connect with e-mail
transmission server
Please inquire E-mail
serveradministrator or
service providerfor port
numbers
E-mail notifica
-
tionof status
Mail notification option
Decide whether to notify
the current device status to
administrator'se-mail
Y
es or NO
Notification option setting
Select when to send an e-mail
to administrator
No tonerReplace drum
cartridgeDevice repairNo
paperPaper jamEjecting
tray is full.
Administrator e-mail
address
Notify the current device
statusAdministrator's e-mail
address
Email address 1
Email address 2
Email address 3
Email address 4
Email address 5
Email address 6
Email address 7
Email address 8
Email address 9
Email address 10
Note
- Use the "SINDOH Network Printer Setup” program to set the IPv6 address.
Page 70

Using the Printer
3-16
Report
Menu Purpose
System Report Shows the specification, setting, and mounted option information of
the printer
Network Report Shows network setting and related information
Print Error Log Show log of recent 10 errors
Print for Fuser Cleaning Print page for cleaning the fuser unit.
Important
- 4 A4 or letter type pages are printed.
- You must have 4 or more sheets of A4 or letter paper on the tray.
-Top four pages on the tray will be printed in order.
Important
- Use 75~90g/m2 for printing.
(Check paper on the tray)
- Do not use thin/thick/reusable paper.
These may cause paper jams.
Fonts List PCL Fonts List Print PCL fonts
PS Fonts List Print PS fonts
Page 71

Using the Printer
3-17
5. Understanding Printer Messages
The LCD of the control panel of this printer is designed to display the current status and problems. This chapter
describes messages and how to respond to them.
Message Description Response
Printing Printing or receiving data
Cancelling... Current job is being cancelled.
Re-insert Cartridge Cartridge has not been properly
installed.
Open the front cover and reinstall
the cartridge.
Front Cover Open The front cover is open. Close the cover.
Ready Printer is ready to receive data and
[Ready] to print.
Send job to printer.
Toner Low The toner is low. Shake the toner to use the remaining toner.
Replace the cartridge.
Reference
- If you don’t replace the cartridge,
quality problems can occur. Also, the printer
will stop after printing a few more sheets.
Change Toner
Cartridge
Toner cartridge is empty.
Replace the cartridge.
Replace with new toner cartridge.
No paper No paper in the tray. Load paper on the tray.
1<xx> Paper Jam Paper jammed. Remove jammed paper.
100 Paper Jam No paper supplied to multi purpose
tray
Check if paper has been properly placed
on the MPT.
101 Paper Jam No paper supplied from Tray 1. Check if paper is properly loaded in Tray.
102 Paper Jam No paper supplied from Tray 2 Check if paper is properly loaded in Tray.
103 Paper Jam No paper supplied from Tray 3. Check if paper is properly loaded in Tray.
104 Paper Jam Jam inside of printer. Open the front cover, pull out the cartridge
and remove the jammed paper from
the feeder.
105 Paper Jam Jam inside of printer. Open the front cover, pull out the cartridge
and remove the jammed paper from
the feeder.
Page 72

Using the Printer
3-18
Message Description Response
106 Paper Jam Jam in exit area. Open back cover and remove jammed
paper from the exit area.
107 Paper Jam Jam inside of duplex. Open duplex cover and remove jammed
paper from duplex feeder.
Replace Drum
Cartridge
Replace drum cartridge. Replace the cartridge with a new one and
reset the drum cartridge counter to have
the message disappear.
Reference
- If you do not replace the cartridge,
quality problems may occur.
Drum Cartridge
Empty
This drum cartridge is empty.
Replace cartridge.
Device disabled.
Replace with a new drum cartridge.
Replace the cartridge with a new one and
reset the drum cartridge counter to have
the message disappear.
Insufficient Memory The original exceeds print capacity. Separate the original for printing.
Output Bin Full The output bin is full of paper. Move the printed paper to another place.
Searching
Wireless AP
Available wireless APs are being
searched
Wait until available wireless APs are found.
Connecting to
Wireless AP...
The connection to the selected
wireless AP is being made.
Wait until the connection is made
Wireless AP Not
Found
No available wireless AP. Check the wireless AP.
If the wireless AP is normal, put it closer
to the device.
Wireless Connection
Failure
Failed to connect to the wireless AP. Check the wireless AP you want to use.
If a password has been entered,
check that the password is correct.
Wi-Fi Connection
Failure
Failed to connect to the wireless AP. Check the wireless AP you want to use.
If a password has been entered,
check that the password is correct.
Password Required Enter the password to the wireless
A P.
Ask the network administrator for
the password for the wireless AP.
Page 73

Using the Printer
3-19
Message Description Response
Wi-Fi Not Connected No wireless AP is connected. Connect to a wireless AP to use wireless
network. See 「Network Setting」 on
p. 3-17 for connecting method.
Other Messages with
Numbers
Check if options are properly installed.
If you are not a printer technician,
contact the Customer Support Center
(☎ 1588-5850) or your place of
purchase.
Warning
- 3XX messages are critical. Be sure
to contact the Customer Support Center
(☎ 1588-5850)or a printer technician.
Page 74

Using the Printer
3-20
6. Network Setting
First, you must set the IP address for network print and control. Basic network set-up can be performed using
the “SINDOH Network Printer Setup” software program in the control panel of the product or the enclosed CD.
Wire Network Setting
First, you must set the IP address for network print and control. The DHCP server automatically allocate or fix
the IP. Also, the IP address can be manually set.
Note
- Use the “SINDOH Network Printer Setup” program to set the IPv6 address.
Using the Control Panel
1
When the printer is ready, press the 【◀】 or 【▶】 button.
2
Press 【◀】 or 【 ▶】 until setting appear, and then press the 【OK】 button.
3
Operate in the order of: Network Settings -> Wired Network -> Setup Connection.
4
① IP Automatic setting: select DHCP and press the 【OK】 button.
② IP Manual setting: select Static, enter the IP Address, Netmask, Gateway suitable for
the network in use, and press the 【OK】 button.
Note
- Use “SINDOH Network Printer Setup” program to set the IPv6 address.
IP Manual Setting
Follow the below instructions to enter the IP address:
① Use 【◀】 or 【 ▶】 to select Network Settings -> Wired Network or Wireless Network
-> Setup Connection -> Select Manual IP Address -> IP Address.
② Use 【◀】 or 【 ▶】 buttons to enter IP
③ Press the 【OK】 button to show the current values and move to the next step.
④ Enter 12-digit address using the same method for Netmask, Gateway, etc.
⑤ Enter all settings for IP address/Netmask/Gateway, etc. And press Apply to apply the manual IP settings.
Page 75

Using the Printer
3-21
Wireless Network Settings
An additional Wi-Fi device is required for accessing wireless network settings(sold separately)
Wireless Network Connection
1
When the printer is ready, press the 【MENU】 button.
2
Press 【◀】 or 【 ▶】 until settings appear, and then press the 【OK】 button.
3
Go to Network Settings -> Wireless Network -> Setup Connection.
Press 【OK】 in Connection Settings to search Wireless networks.
4
Available wireless network devices are displayed.
Select the wireless network AP(SSID), and then press the 【OK】 button.
E.g. When the wireless AP (SSID) is “A40x_AP” it is displayed as follows.
A40x_AP
In front of the AP (SSID), the reception level is displayed.
There are five reception levels.
very Low Low Normal High Very High
Note
- If reception is very poor, the wireless AP will not be found. Although it may be found on other devices,
it may not be found on this product.
5
① If there is no security setting, wireless network setting is complete.
② If the wireless AP has security settings, the wireless network security window appears.
WEP:
Enter the WEP security key for authentication. If a connection is successfully made, wireless network
setting is complete.
Page 76

Using the Printer
3-22
Note
- For WEP, the 64-bit or 128-bit WEP encryption key is used.
WPA/WPA2:
Enter the WPA key. If a connection is successfully made, wireless network setting is complete.
Note
- Just as with WEP, WPA uses TKIP (Temporal Key Integrity Protocol) and AES(Advanced
Encryption Standard) for data encryption.
Enterprise WPA/Enterprise WPA2 (Wireless IEEE802.1x&EAP):
In the case of enterprise WPA/enterprise WPA2, for user authentication, you must enter the user ID
and password. See “Entering Wireless Security Password” and follow the LCD message to enter
the user ID and password. If a connection is successfully made, wireless network setting is complete.
Entering Wireless Security Password
Enter the IP according to the procedures below;
①When the password window appears, enter the password to access the wireless AP.
When characters (upper case English, lower case English, numbers, or symbols) appear by pressing
【◀】or【▶】, enter the 【OK】 button to input.
② To enter text, use the number keypad. Press number keys repeatedly to change
number to upper case -> lower case -> “ ”.
③ Use arrows to enter symbols. Use 【◀】,【▶】 to select a symbol on the control panel and press 【OK】.
To see symbols on the next page, use 【▲】,【▼】 arrow keys.
To modify a value, press [Clear/
] button to erase previous value.
④ Repeat ② and ③ to enter the wireless AP password.
⑤ After entering the password to the last digit, press the 【◀】,【▶】 button to connect with the selected SSID.
⑥ To cancel input, press the 【
】 button. You will go to the upper menu.
Caution
- For your convenience, each password character is displayed. Be careful not to expose the wireless AP
password to others.
Page 77

Using the Printer
3-23
IP Address Settings
First, you must set the IP address for network print and control. The DHCP server can automatically allocate
or fix the IP. Also, the IP address can be manually set.
Note
- Use the “SINDOH Network Printer Setup” Program to manually set an IP address in IPv6 mode.
Using the Control Panel
1
When the printer is ready, press the 【◀】,【▶】 button.
2
Press 【◀】,【▶】 until settings appear, and then press the 【OK】 button.
3
Go to Network Settings -> Wireless Network -> Setup Connection.
4
① IP Automatic Setting: Select DHCP, and then press the 【OK】 button.
② IP Manual Setting: Select Static to type in the IP address, Netmask and Gateway, and then press
the 【OK】 button.
To set the IP address manually, see 「Method for Manual IP Set-up」 p. 3-17.
Note
- Use the “SINDOH Network Printer Setup” Program to manually set an IP address in IPv6 mode.
Using the Network Setting Program
1
Connect the USB cable and turn on the device. The printer should not be connected to the device via
USB cable.
2
Run the network setting utility, “SINDOH Network Setup”
3
In the left window, go to [TCP/IP -> Wireless].
4
For IPv4 configuration, select TCP/IPv4; For IPv6, select TCP/IPv6.
5
① IP Automatic Setting(DHCP): Select [Use Static IP], and then press the 【OK】 button.
② IP Manual Setting: Select [Use DHCP IP] to enter network settings, and then press the 【OK】 button.
Page 78

Using the Printer
3-24
Note
- In the control panel, you can print the Network Report.
- If "SINDOH A610 Series Printer Status Monitor" connected via the USB port is running,
you cannot use the network settings program (SINDOH Network Printer Setup).
If "SINDOH A610 Series Printer Status Monitor" connected via the USB port is currently
running on the bottom left tray of your PC, close it and run the network setting program.
When the device is shipped from the factory, its default network setting uses automatic configuration,
by which an IP is automatically assigned. To change network setting to fixed IP (Manual setting), contact
your network administrator. If the IP address is selected arbitrarily, the device may not be connected to
the network.
Wi-Fi Direct Connection
Wi-Fi Direct technology allows the printer and mobile devices to connect with ease for printing and management.
You can use both wired and wireless networks using Wi-Fi Direct.
Using the control panel
1
When the printer is ready, press the【◀】or【▶】 button.
2
Press 【◀】or【▶】 until Network Settings appear, and press 【OK】.
3
Press button until you see Network Settings -> Wireless Network -> Wi-Fi Direct -> Turn On/Off.
Page 79

Using the Printer
3-25
4
① Select On and press 【OK】.
② You can set to Wi-Fi on your mobile device.
SSID Settings
You can set the name of the printer searched on your mobile device.
1
When the printer is ready, press the【◀】,【▶】 button.
2
Press 【◀】or【▶】 until Network Settings appear, and press 【OK】.
3
Press button until you see Network Settings -> Wireless Network -> Wi-Fi Direct -> SSID Settings
4
Enter SSID (Printer Name) and press 【OK】.
Encryption Method Settings
You can set the encryption method for connecting to the printer.
1
When the printer is ready, press the【◀】,【▶】 button.
2
Press 【◀】or【▶】 until Network Settings appear, and press 【OK】.
3
Press button until you see Network Settings -> Wireless Network -> Wi-Fi Direct -> SSID Settings
4
Select a desired encryption method and press 【OK】.
5
See “IP Encryption Methods” for encryption methods.
Password Setting
You can set the password necessary to connect to the printer.
1
When the printer is ready, press the【◀】,【▶】 button.
2
Press 【◀】or【▶】 until Network Settings appear, and press 【OK】.
3
Press button until you see Network Settings -> Wireless Network -> Wi-Fi Direct -> SSID Settings
4
① Enter new password.
* If a password already exists, a password confirmation page will appear first.
② Re-enter new password to confirm.
③ If new password and the re-entered password match, the new password will be saved.
To enter password, see 「How to Enter Wi-Fi Password」 p. 3-19.
Page 80

Using the Printer
3-26
7. Changing the Print Setting of the Print Driver
You can change settings of the printer driver to use preferred functions.
This section describes functions of the printer driver in detail and provides instructions.
Here, you will be guided on how to utilize the functions of the printer driver and answer any questions you may
have. For easy understanding, functions are explained by each tab of the printer driver. You can also read the
same instructions with the Help function of the driver.
Entering Default Print Settings
For Windows Users
1
Click Start and click Run.
2
Press Start and type “control printers” in the box.
3
Press Enter or click OK to open the printer folder.
Or Follow the below instructions.
Click Windows Start menu.
- Window 2000: Select Settings > Printer.
- Window XP/2003: Select Printer and Fax.
- Window 2008/Vista: Select Control Panel > Hardware and Sound > Printer.
- Window 7: Select Control Panel > Hardware and Sound > Device and Printer.
- Window Server 2008 R2: Select Control Panel > Hardware > Device and Printer.
4
Select SINDOH A413_A418 Series.
5
Right click SINDOH A413_A418 Series with your mouse.
6
Window XP/2003/2008/Vista: Click Print Default Setting.
Window 7, Window Server 2008 R2: Click Print Default Setting from each menu.
Page 81

Using the Printer
3-27
Using Help
1
Open the Default Print Setting window on the computer and press the [F1] key on your keyboard.
2
Or click [Help] in the right bottom of the window.
3
Select “1” and “2” to open the help window on functions provided by the driver.
Page 82

Using the Printer
3-28
Using Advanced Tab Functions
Functions in the Print Setting Tab
Available functions are “Job Type”, “Copies”, “Orientation”, “2 - Booklet” and “Pages per Sheet”.
Open the Default Print Setting window to select the print setting tab to change print settings.
(PS3, PCL5e/6 Printer Driver)
Copies
The driver allows you to print multiple copies. Also, it is possible to collate multiple copies into sets.
In sequence open the default print setting window to select the print setting tab to change below print settings.
(PS3, PCL5e/6 Printer Driver)
Reference
- For the printer models applicable for a specific driver, see the descriptions of the emulation in p. 1-2.
Description
Copies
- You can enter the number of copies you want Adjust using up/down arrows.
Page 83

Using the Printer
3-29
Collate
- Check to print one set. Generally, if you are making two copies of three pages, 2 copies of page 1, 2
copies of page 2, and 2 copies of page 3 will be printed. If you select Collate, Pages 1, 2, 3 will be
printed and pages 1, 2, 3 will be Printed. The application precedes this setting and can provide this
function.
Print Orientation
You can set paper orientation. In “Portrait” mode, pages are printed with the short side facing the top.
In “Landscape” mode, the long side of the paper faces the top. Most applications provide “Page Setting” for
setting paper orientation, which precedes this setting. You can select “180 rotation” to rotate the page by 180
degrees if necessary. To change the following print setting, open the default print setting window and select
the print setting tab.
You can print on both sides of the paper. Select the binding direction of the paper before printing.
Page 84

Using the Printer
3-30
Instructions
1
Select orientation.
Image Orientation Description
1 Side Print Print on one side(general).
Portrait Typically used for books.(Turn pages by the long side)
Landscape Layout used for calendars
2
Click the paper tab to select paper size, source and type.
3
Click OK or Print before exiting the window.
2-Booklet Printing
With this function, you can do duplex(2-sided) printing and then bind printed pages into a book.
How to Use
1
Select 2-Booklet in the Pages per Sheet.
2
Click the paper tab to select paper size, paper source and paper type.
3
Click OK or Print before exiting the window.
4
Fold paper in half and bind it.(You can cut paper in half and bind it.)
Page 85

Using the Printer
3-31
Pages per Sheet
Multiple pages can be printed on one sheet. If the number of pages to be printed is less than that of pages
designated for the sheet, blank pages are printed. The booklet is a special format of 2-up. In booklet printing,
fold output pages to make a book. If poster print is selected in the image driver, “Pages per Sheet” cannot be
selected. Open the Default Print Setting window to select the print setting tab to change below print settings.
Description
Number of Copies for Pages per Sheet
- Select the number of copies for Pages per Sheet
※ SDAPL Printer Driver : 1Sheet, 2Sheet, 4Sheet, 6Sheet, 8Sheet, 9Sheet, 12Sheet, 16Sheet, 25Sheet
※ PS3, PCL5e/6 Printer Driver: 1Sheet, 2Sheet, 4Sheet, 6Sheet, 8Sheet, 9Sheet, 16Sheet
Page Borders
- Check Page Borders to print the page edge on the paper.
First Page - Layout
- From page 2, it can be set. Left and right are available for page 2.
- For page 4 to 25, rows (top/bottom left, top/bottom right) and columns(top/bottom left, top/bottom right)
are available.
[Page 2] [Page 4 ~ 25]
Page 86

Using the Printer
3-32
Paper Tab
Available functions are “Paper Size”, “Print On”, “Custom Size”, “Zoom”, “Tray”, “Media Type” and “More Options”.
To change the settings below, open the Default Print Setting window to select the paper setting tab.
Print On
Regardless of the size of the original, you can print the document to desired paper size.
Useful options(Fit to Paper and Center) are available.
Open the Default Print Setting window to select the paper setting tab to change below print settings.
Zoom
You can zoom in or out the document. Type in or use left/right arrow to decide the zoom ratio.
Click Center to place the document at the center of paper.
Open the Default Print Setting window to select the paper setting tab to change below print settings.
Page 87

Using the Printer
3-33
Tray
User can select the paper tray to use for printing. You will only see the options “Auto select”, “Manual Feed”
and “Tray1”. “Tray2 and 3” are optional. If “Tray 2 and 3” are installed, user can select this from the Tray part
of the paper tab after installing “Tray2 and 3” in the “Device Settings” tab. Open the Default Print Setting
window to select the paper setting tab to change below print settings.
Media Type
User can select the type of paper.
1) Printer Setting: follow the printer setting from the printer setting and driver setting.
Check current settings in Print Settings - Setting Priority.
Caution
- For paper types 2) ~11), make sure you change the driver setting in Print Settings - Setting Priority.
2) Standard paper: select this when using standard paper.
3) Thick paper: select this for thick paper or when toner does not adhere properly to images printed.
4) Very Thick paper: select this when toner still does not adhere properly to images printed after selecting
Thick Paper.
5) Thin paper: select this when using thin paper or when prints come out distorted or paper is crinkled.
Page 88

Using the Printer
3-34
6) Tracing paper: select this to print on tracing sheet(OHP).
7) Label paper: select this for printing on label sheets.
8) Vinyl label: select this for printing on vinyl labels.
9) Envelope: select this for printing on envelopes.
10) Card stock: select this for printing on card stocks.
11) Postcard: select this for printing on postcards.
Caution
- If the select icon is not activated, the tray selection may be incorrect.
Check the tray selection again.
More Options
More options that are available are: “Front Cover”, “Back Cover”, “Slip sheets”, “Margins” and ”Shift From
Binding”. To change the following print settings, open the Default Print Setting screen, click the Paper tab
and click the More Options button.
Description
Front / Back Cover
- With “Front Cover” you can select the tray and paper type. This option provides a blank or printed
cover(not available for SDAPL printer drivers). The Front Cover function cannot be used together
with duplex printing and poster printing.
- With “Back Cover” you can select the tray and paper type. This option provides blank cover or printed
cover(not available for SDAPL printer drivers). The back Cover function cannot be used together with
duplex printing and poster printing.
Page 89

Using the Printer
3-35
(PS3, PCL5e/6 Printer Driver)
Slip sheets
- Insert an additional page after each printed page.
- You can select a different paper type or another tray for slip sheets.
- Slip sheets can be a blank page or a duplicate of a printed page.
- Slip sheets should be the same size as the printed pages.
- If “Pages per Sheet” is set as 2-Booklet in the Paper tab, you cannot add the Use Slip Sheets option.
(PS3, PCL5e/6 Printer Driver)
Reference
- To see which devices can be used for your printer driver, read Emulation on p. 1-2.
Page 90

Using the Printer
3-36
Margin
- You can modify the minimum margin. To use the default margin, select “Printer Margin”.
To use the margin of your choice, select “Custom Margin”. A custom margin cannot be smaller than
the default margin. You cannot use custom margins if 2-Booklet has been selected in “Pages per Sheet”.
- The custom margin cannot be modified for the document to be printed. You can only make modifications
in Default Print Settings in Printer & Fax folder.
Note
- Margin function is supported from the PCL5e/6, PS3 driver
Advanced Tab
“Poster Print”, “Watermark”, “Overlay”, “More Options” and “Settings” are available.
To change the following print settings, open Default Print Settings page and click Advanced Tab.
Note
- Margin function is supported from the PCL5e/6, PS3 driver
Page 91

Using the Printer
3-37
Poster Print
In Poster Print, you can select a page to be enlarged and printed on multiple pages. The printed pages can be
placed side by side to form one large poster. This function is disabled when you select More than One Page on
Each Sheet, Booklet, Front Cover, Back Cover, Slip sheet or Inserted Page (Front/Back Cover). With Poster
Print function, you can print your page on 4, 9. 16 or 25 pages then join them to make one large poster.
How to Use
Select desired page layout (Available layout).
- Poster 2x2: The document is enlarged into 4 pages.
- Poster 3x3: The document is enlarged into 9 pages.
- Poster 4x4: The document is enlarged into 16 pages.
- Poster 5x5: The document is enlarged into 25 pages.
Watermark
With this option, you can print text in the background of an existing document. For example, you can print
“Confidential” or “Internal Use Only” on the first page or on all pages in blurred, large font.
This product provides several watermarks. They can be edited or you can add a new watermark.
Page 92

Using the Printer
3-38
How to Use
Basic Watermark
- Select a watermark from the list. You can see the watermark in Preview.
- Click OK or Print before exiting the print window
Custom Watermark
- Select Create New in the watermark list.
- The new watermark type window appears. Select Text Watermark or Bitmap Image Watermark.
- Text String Watermark: Type in your text in the message box.
You can enter up to 63 characters. Preview is available. You can also select options for the font
such as Bold, Italic, Print Outline Only, Size, Angle, Contrast, and Offset Starting Point.
Page 93

Using the Printer
3-39
- Bitmap Image Watermark: You can enter the name of the watermark, insert a BMP image or adjust
the ratio. You can also adjust the offset starting point (Center, Tile, Top Left Corner, Top Center,
Top Right Corner, Right Side Center, Bottom Right Corner, Bottom Corner Center, Bottom Left Corner,
Left Side Center, Fit to Page) to create your bitmap image watermark.
Note
- Bitmap Image Watermark function is supported from PCL5e/6, PS3 driver.
- Click Add to add the new watermark to the watermark list.
- Click OK or Print before exiting the print screen.
Page 94

Using the Printer
3-40
Edit Watermark
- Click Edit in the “Available Watermark” list. Edit Watermark screen will appear.
(See the Watermark List screen.)
- Select a desired watermark from the watermark list and modify the message and options.
- Click Change to save changes.
- Click OK or Print before exiting the print screen.
Delete Watermark
- Select a desired watermark and click Delete from the watermark list.
(See the watermark list screen.)
- Click OK or Print before exiting the print screen.
Select Apply Watermark
- All Pages: Apply the existing or newly-created watermark to all pages.
- First Page Only: Apply the existing or newly-created watermark to the first page only.
- First Page / Other Pages: Apply the existing or newly-created watermark to the first page and
other pages respectively.
- Odd No. Page / Even No. Page: Apply the existing or newly-created watermark to odd number
pages and even number pages respectively.
Page 95

Using the Printer
3-41
Overlay
You can save an overlay in your hard disk drive and paste on your document before printing.
An Overlay is used instead of a template paper. You can use an overlay same as a ready-made template.
Instead of loading template paper of your company, you can add an overlay to the document and print.
Note
- Overlay function is supported from PCL5e/6, PS3 driver.
Create New Overlay: To use an overlay, create a new overlay with details you want to include.
- Open a file to be used as the overlay (document to be overlaid on the original).
- Open Default Print Setting to change print settings from the software application.
- Click the Advanced tab to select Overlay and select an item from the list.
- Click Overlay and select Create New Overlay.
- Click ‘Save to’ to select location and click Print.
Page 96

Using the Printer
3-42
- Overlay Directory
(e.g. To save the overlay on Drive C, type in“C:\”. A new overlay will be created in C:\.)
- Click OK to open Create Overlay window. Type in overlay description in the Description field.
Check the name of the overlay file and click OK.
(e.g. The file name is 005AD859.OVL.)
- Print the overlay document.
- The overlay is printed on the corresponding location.
Page 97

Using the Printer
3-43
Using an Overlay
- Open the file where the overlay will be applied.
- Open the overlay function to see the created overlay.
- Select an overlay in ‘Select Overlay’ and click OK. In Properties, you can see overlay properties,
delete an overlay and see the saved location. You can select a different overlay for each page
if you have more than two overlays.
- Click OK or Print before exiting the print screen.
More Options
You can open the window for more options:
“Fonts” for the PDL driver, “PostScript” for the PostScript driver, “Mirror Print” for the image driver, and
“Reduce Spool Size” for the image driver.
(SDAPL Printer Driver) (PS3, PCL5e/6 Printer Driver)
Reference
- To see which devices can be used for your printer driver, read Emulation on p. 1-2.
Page 98

Using the Printer
3-44
Description
Reduce Spool Size: The spool size of the image driver is reduced by compression.
Mirror Image: You can print a reverse version of the original as though looking into the mirror.
Settings
You can save current settings, restore previous settings, or reset to the default settings.
Print Quality Tab
Available options are “Resolution”, “Print Text Black”, “Gray Correction”, “Toner Darkness”,
“Save Toner”. To change below print settings, open Default Print Setting and click the print quality tab.
Note
- Gray Correction function is supported from SDAPL driver.
Page 99

Using the Printer
3-45
Resolution
You can select a different resolution for your print job. With this option you can select the resolution Dots
per Inch (DPI or dpi). High resolution provides better print quality but takes longer to send the job to
the printer and to print. Higher resolution requires more memory space. If you see an “Out of Memory” error,
you must select a lower resolution. Available options are 600dpi, 1200dpi, and Photo 1200dpi.
Print Text Black
You can print all texts in black regardless of the color you had selected in the application.
Grey Correction
You can adjust the contrast and darkness of your document. Using User Settings, you can adjust the brightness
and contrast. Default brightness is 0 and default contrast is 2.
Toner Darkness
You can adjust toner contrast level.
Toner Save
You can reduce the amount of toner used for printing.
Page 100

 Loading...