

Page 1

3 Year Guarantee
*Register online within 30
days. Terms & Conditions apply
Garantie de 3 ans
*Enregistrez votre produit en ligne
dans les 30 jours. Sous réserve des
termes et conditions appliquées
3 Jahre Garantie
*Innerhalb von 30 Tagen online
registrieren. Es gelten die Allgemeinen
Geschäftsbedingungen
www.silverlinetools.com
3 años de garantía
*Registre su producto online durante
los primeros 30 días. Se aplican
términos y condiciones
3 anni di garanzia
*Registrare il vostro prodotto
on-line entro 30 giorni. Termini e
condizioni si applicano.
3 jaar garantie
*Registreer uw product binnen 30
dagen online. Algemene voorwaarden
zijn van toepassing
Page 2
R
E
L
V
L
I
S
AIR
R
A
N
I
N
E
E
G
Air Finishing Nailer 64mm
955431
16 Gauge
Air Finishing Nailer 64mm
Cloueuse pneumatique de
finition 64 mm
www.silverlinetools.com
Druckluft-Stauchkopfnagler, 64 mm
Clavadora neumática 64 mm
Chiodatrice di rifinitura pneumatica, 64mm
Pneumatische spijkermachine, 64 mm
Page 3
10
3
1
2
4
9
8
5
11
6
7
2
Page 4

R
E
V
L
I
S
AIR
R
A
N
G
L
I
N
E
E
16 Gauge
Air Finishing Nailer 64mm
English .................. 4
Français ................ 10
®
Deutsch ................. 16
Español ................. 22
Italiano .................. 28
Nederlands ............ 34
www.silverlinetools.com
3
Page 5
GB
Description of Symbols
The rating plate on your tool may show symbols. These represent important
information about the product or instructions on its use.
Wear hearing protection
Wear eye protection
Wear breathing protection
Wear head protection
Wear hand protection
Read instruction manual
Caution!
DO NOT use on scaffolding or ladders!
Important safety devices! Ensure correct function, maintain in
accordance with instructions and DO NOT disable!
DO NOT use with compressed gas cylinders!
Conforms to relevant legislation and safety standards
Environmental Protection
Air tools should not be disposed of with household waste. They
contain traces of oil and other lubricants. Please recycle where
facilities exist. Check with your local authority or retailer for
recycling advice.
Specification
Working pressure .......................5 - 7.5bar (72 - 108psi)
Maximum pressure .................... 7.5bar (108psi)
Air inlet ......................................1⁄4" quick connector
Nail size .....................................16 Gauge, 25 – 64mm
Nail capacity .............................. 100pce
Weight ....................................... 1.85kg
Sound and vibration information:
Sound pressure LPA. ...................87.0dB(A)
Sound power LWA ....................... 100.0dB(A)
Uncertainty K ............................. 2.5dB
Weighted vibration ah ................. 6.5m/s
Uncertainty K ............................. 2m/s
As part of our ongoing product development, specifications of
Silverline products may alter without notice.
The sound intensity level for the operator may exceed 85dB(A) and
sound protection measures are necessary.
2
2
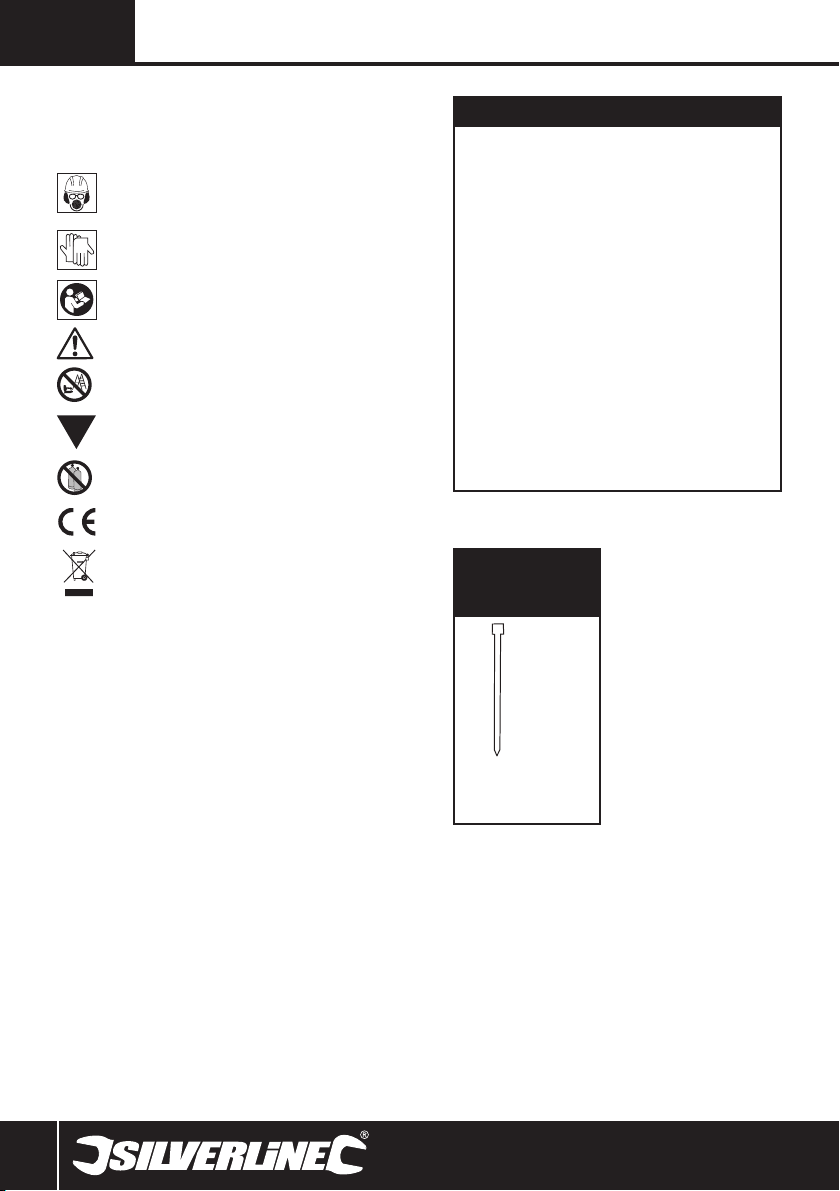
Nail
Specification
- 25mm(1")
- 32mm(1-1⁄4")
- 35mm(1-3⁄8")
- 38mm(1-1⁄2")
- 45mm(1-3⁄4")
- 50mm(2")
- 57mm(2-1⁄4")
- 64mm(2-1⁄2")
Head: 3mm (0.118")
1.6mm x 1.4mm
(0.063") (0.055")
Gauge:16
4
Page 6

955431
Air Finishing Nailer 64mm
WARNING: Always wear ear protection where the sound level exceeds
85dB(A) and limit the time of exposure if necessary. If sound levels are
uncomfortable, even with ear protection, stop using the tool immediately
and check the ear protection is correctly fitted and provides the correct level
of sound attenuation for the level of sound produced by your tool.
WARNING: User exposure to tool vibration can result in loss of sense of
touch, numbness, tingling and reduced ability to grip. Long term exposure
can lead to a chronic condition. If necessary, limit the length of time
exposed to vibration and use anti-vibration gloves. Do not operate the tool
with hands below a normal comfortable temperature, as vibration will have
a greater effect. Use the figures provided in the specification relating to
vibration to calculate the duration and frequency of operating the tool.
Sound and vibration levels in the specification are determined according
to EN60745 or similar international standards. The figures represent
normal use for the tool in normal working conditions. A poorly maintained,
incorrectly assembled, or misused tool, may produce increased levels of
noise and vibration. www.osha.europa.eu provides information on sound
and vibration levels in the workplace that may be useful to domestic users
who use tools for long periods of time.
General Safety
WARNING Read all safety warnings and all instructions. Failure to
follow the warnings and instructions may result in electric shock, fire and/
or serious injury.
WARNING: This appliance is not intended for use by persons (including
children) with reduced, physical or mental capabilities or lack of experience
or knowledge unless they have been given supervision or instruction
concerning use of the appliance by a person responsible for their safety.
Children must be supervised to ensure that they do not play with the
appliance.
Save all warnings and instructions for future reference.
1) Work Area Safety
a) Keep work area clean and well lit. Cluttered or dark areas invite
accidents.
b) Do not operate tools in explosive atmospheres, such as in the
presence of flammable liquids, gases or dust.
c) Keep children and bystanders away while operating a powered
tool. Distractions can cause you to lose control.
2) Personal Safety
a) Stay alert, watch what you are doing and use common sense when
operating a powered tool. Do not use a powered tool while you
are tired or under the influence of drugs, alcohol or medication.
A moment of inattention while operating a powered tool may result in
serious personal injury.
b) Use personal protective equipment. Always wear eye protection.
Protective equipment such as dust mask, non-skid safety shoes, hard
hat, or hearing protection used for appropriate conditions will reduce
personal injuries.
c) Prevent unintentional starting. Ensure the switch is in the off-position
when not operating the tool and make use of other safety features
which prevent unintentional starting.
d) Remove any adjusting key or wrench before turning the powered
tool on. A wrench or a key left attached to a rotating part of the tool
may result in personal injury.
e) Do not overreach. Keep proper footing and balance at all times.
This enables better control of the tool in unexpected situations.
f) Dress properly. Do not wear loose clothing or jewelry. Keep your
hair, clothing and gloves away from moving parts. Loose clothes,
jewelry or long hair can be caught in moving parts.
g) If devices are provided for the connection of dust extraction and
collection facilities, ensure these are connected and properly used.
Use of dust collection can reduce dust-related hazards.
WARNING: User exposure to tool vibration can result in loss of sense of
touch, numbness, tingling and reduced ability to grip. Long term exposure
can lead to a chronic condition. If necessary limit the length of time exposed
to vibration. Use the figures provided in the specification relating to vibration
if provided to calculate the duration and frequency of operating the tool.
The 2002/44/EC directive relating to vibration in the workplace may provide
useful information even for domestic use of tools. In the first instance of
feeling uncomfortable due to vibration STOP using the tool immediately.
WARNING: Always wear ear protection where the sound level exceeds
85dB(A) and limit the time of exposure if necessary. If sound levels are
uncomfortable even with ear protection stop using the tool immediately and
check the ear protection is correctly fitted and provides the right level of
sound attenuation for the level of sound produced by your tool.
3) Tool use and care
a) Maintain tools. Check for misalignment or binding of moving parts,
breakage of parts and any other condition that may affect the
tool’s operation. If damaged, have the tool repaired before use.
Many accidents are caused by poorly maintained tools.
b) Keep cutting tools sharp and clean. Properly maintained cutting tools
with sharp cutting edges are less likely to bind and are easier to control.
c) Use the tool’s accessories and tool bits etc. in accordance with
these instructions, taking into account the working conditions and
the work to be performed. Use of the tool for operations different from
those intended could result in a hazardous situation.
4) Service
a) Have your tool serviced by a qualified repair person using only
identical replacement parts. This will ensure that the safety of the tool
is maintained.
www.silverlinetools.com
5
Page 7

GB
Protect your eyes
• Always wear safety goggles or safety glasses
Protect your hearing
• Always wear ear protection
Protection from vibration
• Hand-held air tools may produce vibration and should not be used for
long periods without a break. Vibration can cause ill health. Gloves may
help to maintain good blood circulation in the fingers.
Protective clothing
• Always wear appropriate protective equipment including but not limited
to overalls, gloves, face mask etc
• It is the user’s responsibility to ensure that other persons in the vicinity
of the work area are also equipped with the appropriate protective
equipment
Use the correct air hose
• Use lightweight hose to connect the tool to the air compressor
• Most air tools should be fitted with a coil hose.
Always disconnect
• Ensure that your air tool has completely stopped functioning before
putting it down
• Disconnect an air tool from the air supply before performing any
servicing, or changing any blades, discs, or other attachments
• Ensure blades, discs or attachments are correctly fitted before
reconnecting to air supply
• Ensure the air tool is switched OFF before connecting to air supply. Be
aware that air tools may hold residual pressure after use. Always bleed
air pressure from the tool after shutting off air supply
Do not abuse the machine
• Do not overload the machine. Allowing the machine to work at its
optimum speed is more efficient and prolongs its service life
• Do not increase air pressure above the recommended level; excessive
pressure leads to wear of moving parts, possible failure and may cause
the machine casing to split
• Do not attempt to modify air tools. Any attempt to modify this air tool
could result in serious injury to you or others, and will invalidate its
warranty
• Do not aim the nailer away from the workpiece when connected to an
air supply
Never operate the tool with the safety mechanism disabled
• Never aim the tool towards other people in the work area or towards the
main reservoir tank of the air compressor
Do not operate the nailer when using ladders or scaffolding
• Never connect this tool to canisters or bottles containing combustible
gases or portable compressed air canisters or cartridges. It is designed to
be used with an air compressor
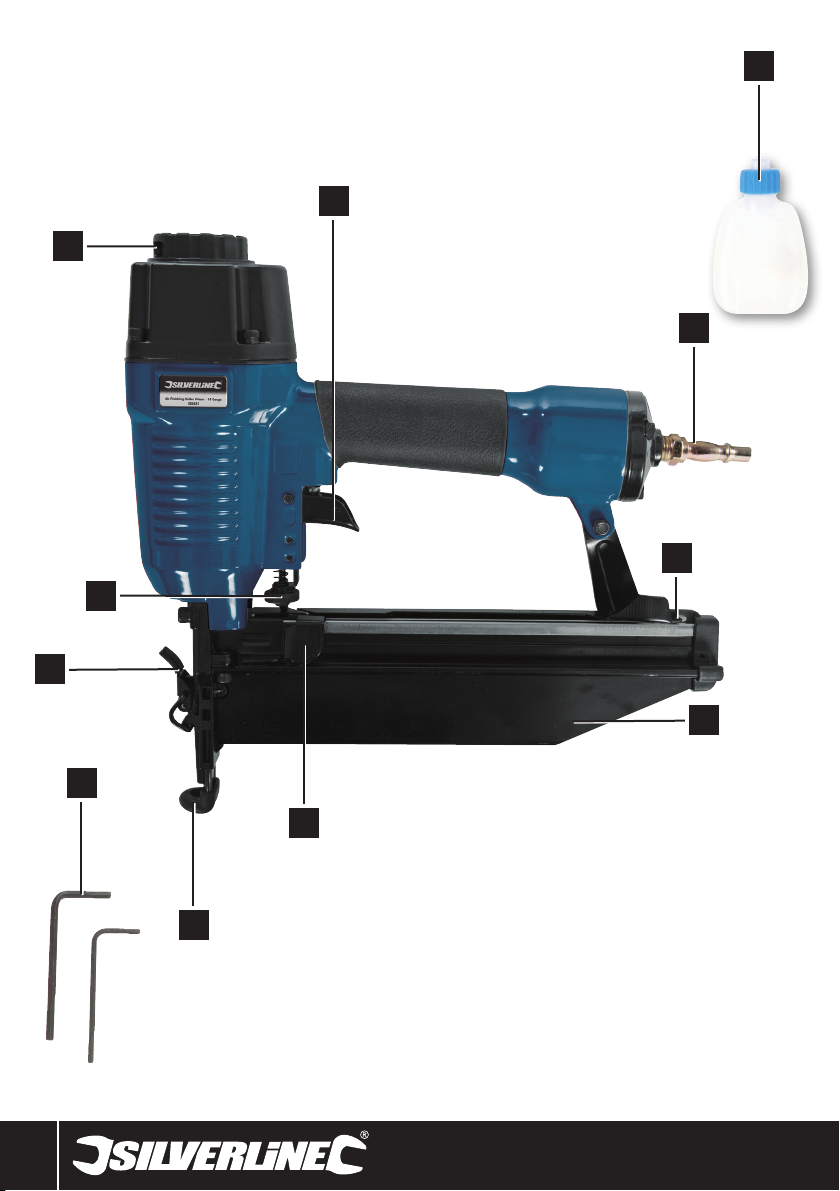
Product FamiliarisationAir Tool Safety
1 Trigger
2 Air Inlet / ¼" BSP Quick Connector
3 Air Tool Oil
4 Magazine Release Catch
5 Magazine Cover
6 Magazine Spring Mechanism
7 Safety Catch
8 Jam Removal Lever
9 Depth Adjuster
10 Exhaust Direction Dial
11 Hex Keys
6
Page 8

Air Finishing Nailer 64mm955431
Unpacking Your Tool
Carefully unpack and inspect your tool. Familiarise yourself with all its
features and functions.
Ensure that all parts of the tool are present and in good condition. If any
parts are missing or damaged, have such parts replaced before attempting
to use this tool.
Before Use
Installing the quick connector
• Fit the Quick Connector (2) to the nailer. The connector is a screw fit
into the Air Inlet. Applying PTFE tape to the screw threads will help to
maintain an air tight seal. Air lines fitted with matching ¼" connectors
will now be a push fit
Recommended air supply
• This tool should be connected to a clean air supply with an in-line oiler
and water separator
• DO NOT allow supply pressure to exceed the maximum stated in the
specification
• Always select the lowest supply pressure suitable for the task. This will
reduce sound and vibration for the operator. It will also decrease wear
of the tool and the chance of tool failure
• Always use an air filter with the machine. Without an air filter, air is
likely to have a higher water content that will rapidly corrode the
internal working parts of this machine and will shorten its working life
significantly. Water collects in the compressor tank and will cause serious
corrosion. The tank must be drained on a daily basis to prevent water
build-up in the air supply
• Ensure all parts of the system (hoses, couplers, etc.) are correctly rated
for the air pressure to be used
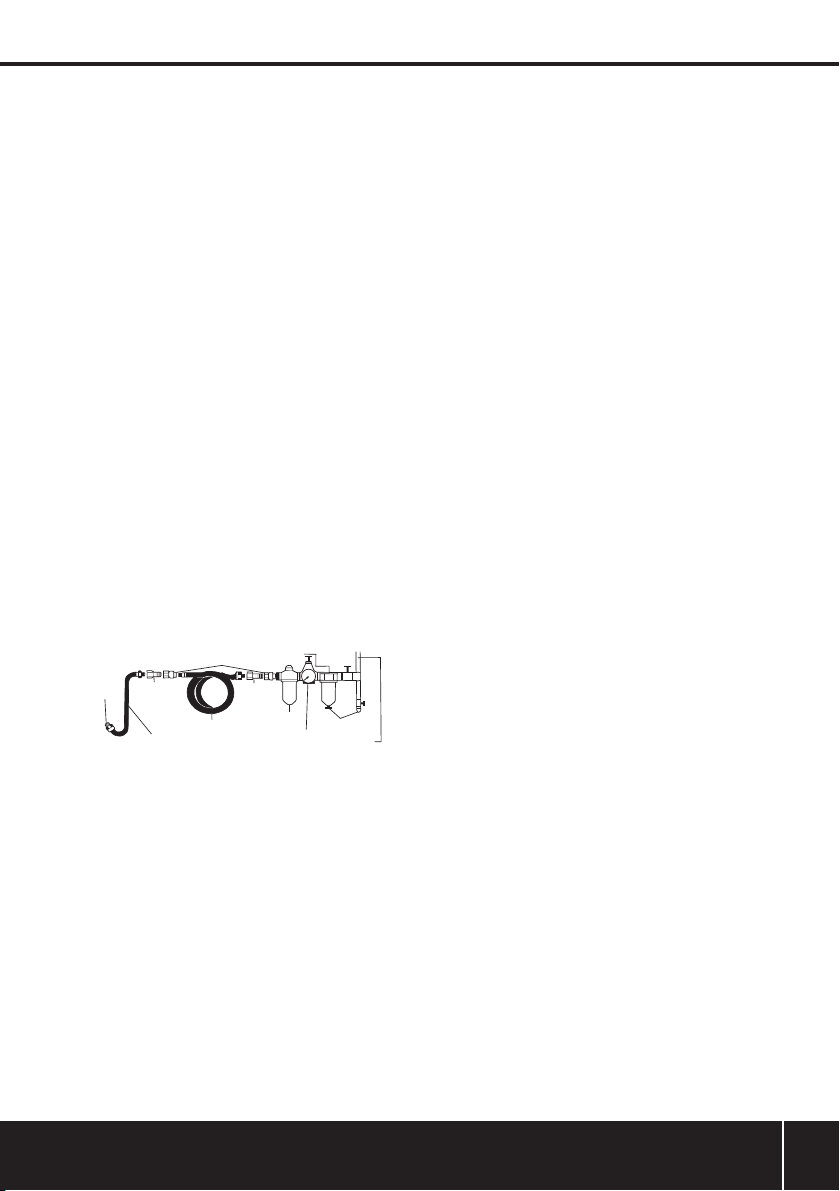
• If an automatic oiler (as per diagram below) is not used, pour two drops
of air tool oil into the air inlet of the quick connector before each use
CAUTION: Only use oil formulated for air or pneumatic tools. Never
substitute other oils which may damage this tool and the compressor or are
not suitable for contact with the operator of the tool. DO NOT use 2-stroke
or automotive oil.
TO YOUR
AIR TOOL
NIPPLE
LEADER HOSE
QUICK COUPLER
RECOIL HOSE
WATER SEPARATION
NIPPLE
OILER
REGULATOR
DRAIN DAILY
AIR SUPPLY
Checking the safety catch
WARNING: Always disconnect the tool from the air supply before any
adjustment or maintenance is carried out.
• Ensure that there are no fasteners in the magazine
• The Safety Catch (7) should move in and out with no obstruction
• Test the safety catch is operating correctly as follows:
1. Connect the tool to the air supply
2. Push the Safety Catch (7) against a piece of wood without pulling the
Trigger (1). The tool should not fire. If the tool fires, it must be repaired
before further use
3. Hold the tool away from the piece of wood. The Safety Catch (7) should
return to the original position
4. Pull the Trigger (1). The tool should not fire. If the tool fires, it must be
repaired before any further use
5. Push the Safety Catch (7) against the piece of wood, but this time pull
the Trigger (1). The tool should fire. This indicates normal operation
Loading the magazine
WARNING: Always disconnect the tool from the air supply before any
loading, adjustment, or maintenance is carried out.
1. Pull back the Magazine Spring Mechanism (6) so it locks by operating
the Magazine Release Catch (4)
2. Insert the strip of nails into the nail loading slot
3. Hold the magazine spring mechanism and operate the magazine
release catch to allow the spring mechanism to move back securing
the nails ready to be fired. Do not allow the spring mechanism to
instantly spring back but control the movement
www.silverlinetools.com
7
Page 9

GB
Operation
WARNING: Ensure your compressed air supply operates within the
pressure range stated in “Specifications”.
Firing trigger
• To operate the nailer, press the Safety Catch (7) against the material.
Holding the nailer firmly by its handle, squeeze the Trigger (1) to fire the
nail into the material
WARNING: Rapidly pressing the firing trigger could cause internal
damage and may invalidate the guarantee.
Exhaust
• Rotate the Exhaust Direction Dial (10) to direct the exhaust air away
from the operator
Nail depth adjustment
IMPORTANT: Always test the fastener will penetrate by the correct
amount.
1. Fire a test nail into a piece of scrap material and examine the
penetration depth of the nail
2. Minor adjustment is made using the Depth Adjuster (9) to adjust for
different size nails and different materials with finer control
3. Major adjustment of the nail depth is made by changing the air
supply pressure. Reducing the air supply pressure will reduce the
depth that the nail penetrates.
WARNING: Always ensure the air pressure is within the range stated in
the ‘Specifications’ section.
Clearing jams
WARNING: Always disconnect the tool from the air supply before any
adjustment or maintenance is carried out.
Fastener jammed in magazine
1. Pull back the Magazine Spring Mechanism (6) so it locks by the
Magazine Release Catch (4)
2. Remove the obstruction using pliers
3. Reload the magazine and close securely
Fastener jammed in plate area
1. Open the Jam Removal Lever (8) and open the nail plate.
2. Remove the obstruction using pliers
3. Close the plate and jam removal lever and check the operation of the
safety lever before using the tool
Maintenance
WARNING: Always disconnect the machine from the air supply before
carrying out any maintenance or cleaning.
Note: Two Hex Keys (11) are provided with this air nailer that are suitable
for partial disassembly of this unit. These may be useful for cleaning,
unjamming and replacing parts. Such disassembly is not covered by this
manual.
WARNING: Never use third party spares with this product. Only use spares
supplied by Silverline or an authorised Silverline stockist or repair centre.
• Keep your machine clean at all times. Dirt and dust will cause internal
parts to wear quickly, and could reduce its service life
• Clean the body of your machine with a soft brush, or dry cloth
• After each use, pour approximately 1.5ml of Air Tool Oil (3) into the Air
Inlet (2)
• If the tool stops working or only works intermittently, pour approximately
1.5ml of lubricating oil into the Air Inlet (2), and connect to air supply.
Operate the tool in short bursts. If this does not free the tool mechanism,
have the tool serviced at an authorised Silverline service centre
Storage
• Store this tool carefully in a secure, dry place out of the reach of children
Disposal
• As with other power tools, air tools should not be disposed of with
household waste
• Air tools may contain traces of tool oil and other lubricants and so must
be recycled accordingly
• Contact your local waste disposal authority for information on the correct
way to dispose of power tools
8
Page 10

Silverline Tools Guarantee
This Silverline product comes with a 3 year guarantee
Register this product at www.silverlinetools.com within 30 days of purchase
in order to qualify for the 3 year guarantee. Guarantee period begins
according to the date of purchase on your sales receipt.
Terms & Conditions
Guarantee period becomes effective from the date of retail purchase as
detailed on your sales receipt.
PLEASE KEEP YOUR SALES RECEIPT
If this product develops a fault within 30 days of purchase, return it to the
stockist where it was purchased, with your receipt, stating details of the fault.
You will receive a replacement or refund.
If this product develops a fault after the 30 day period, return it to:
Silverline Tools Service Centre
PO Box 2988
Yeovil
BA21 1WU, UK
The guarantee claim must be submitted during the guarantee period.
You must provide the original sales receipt indicating the purchase date, your
name, address and place of purchase before any work can be
carried out.
You must provide precise details of the fault requiring correction.
Claims made within the guarantee period will be verified by Silverline Tools
to establish if the deficiencies are related to material or manufacturing of
the product.
Carriage will not be refunded. Items for return must be in a suitably clean and
safe state for repair, and should be packaged carefully to prevent damage or
injury during transportation. We may reject unsuitable or
unsafe deliveries.
All work will be carried out by Silverline Tools or its authorized
repair agents.
The repair or replacement of the product will not extend the period
of guarantee
Defects recognised by us as being covered by the guarantee shall be
corrected by means of repair of the tool, free of charge (excluding carriage
charges) or by replacement with a tool in perfect working order.
Retained tools, or parts, for which a replacement has been issued, will
become the property of Silverline Tools.
Air Finishing Nailer 64mm955431
Registering your purchase
Registration is made at silverlinetools.com by selecting the Guarantee
Registration button. You will need to enter:-
• Your personal details
• Details of the product and purchase information
Once this information is entered your guarantee certificate will be created in
PDF format for you to print out and keep with your purchase.
The repair or replacement of your product under guarantee provides benefits
which are additional to and do not affect your statutory rights as a consumer.
What is covered:
The repair of the product, if it can be verified to the satisfaction of Silverline
Tools that the deficiencies were due to faulty materials or workmanship
within the guarantee period.
If any part is no longer available or out of manufacture, Silverline Tools will
replace it with a functional replacement part.
Use of this product in the EU.
What is not covered:
Silverline Tools does not guarantee repairs required as a result of:
Normal wear and tear caused by use in accordance with the operating
instructions eg blades, brushes, belts, bulbs, batteries etc.
The replacement of any provided accessories drill bits, blades, sanding
sheets, cutting discs and other related items.
Accidental damage, faults caused by negligent use or care, misuse, neglect,
careless operation or handling of the product.
Use of the product for anything other than normal domestic purposes.
Change or modification of the product in any way.
Use of parts and accessories which are not genuine Silverline Tools
components.
Faulty installation (except installed by Silverline Tools).
Repairs or alterations carried out by parties other than Silverline Tools or its
authorized repair agents.
Claims other than the right to correction of faults on the tool named in these
guarantee conditions are not covered by the guarantee.
CE Declaration of Conformity
The undersigned: Mr Darrell Morris
as authorised by: Silverline Tools
Declares that the
Identification code: 955431
Description: Air Finishing Nailer 64mm
Conforms to the following Directives:
• Machinery Directive 2006/42/EC
• EN 792-13:2000+A1:2008
Notified body: Intertek Testing Services, Shanghai, China
The technical documentation is kept by: Silverline Tools
Date: 13/08/13
Signed by:
Director
Name and address of the manufacturer:
Powerbox Ltd., Boundary Way, Lufton Trading Estate, Yeovil, Somerset,
BA22 8HZ, United Kingdom
www.silverlinetools.com
9
Page 11
F
Description des symboles
La plaque signalétique figurant sur votre outil peut présenter des symboles.
Ces symboles constituent des informations importantes relatives au produit
ou des instructions concernant son utilisation.
Port de protection auditive
Port de lunettes de sécurité
Port du masque respiratoire
Port du casque
Port de gants
Lire le manuel d’instructions
Attention!
Ne pas utiliser sur une échelle ou un échafaudage
Important : dispositif de sécurité ! Vérifier son bon
fonctionnement et bon état en accordance avec les
instructions, et NE PAS le désactiver
Ne pas utiliser avec des bouteilles à air comprimé
Conforme à la règlementation et aux normes européennes de
sécurité pertinentes
Protection de l’environnement
Les produits à air comprimé usagés ne doivent pas être jetés
avec les ordures ménagères. Veuillez les recycler dans les
centres prévus à cet effet. Pour de plus amples informations,
veuillez contacter votre municipalité ou point de vente.
Caractéristiques techniques
Pression de fonctionnement : ..... 5 – 7,5 bar
Pression maximale : ................... 7,5 bar
Arrivée d’air : ............................. raccord rapide 1⁄4"
Clous : .......................................Calibre 16 25 – 64 mm
Capacité : .................................. 100 clous
Poids : ....................................... 1,85kg
Informations sur le niveau d’intensité sonore et
vibratoire :
Pression acoustique L
Puissance acoustique L
:. ........... 87,0 dB(A)
PA
: ......... 100,0 dB(A)
WA
Incertitude K : ............................ 2,5 dB
Vibration pondérée ah : ............... 6,5 m/s
Incertitude K : ............................ 2 m/s
Du fait de l’évolution constante de notre développement produit,
les caractéristiques des produits Silverline peuvent changer sans
L’intensité sonore peut dépasser 85 dB(A) et il est nécessaire que
l’utilisateur prenne des mesures de protection auditive.
notification préalable.
2
2
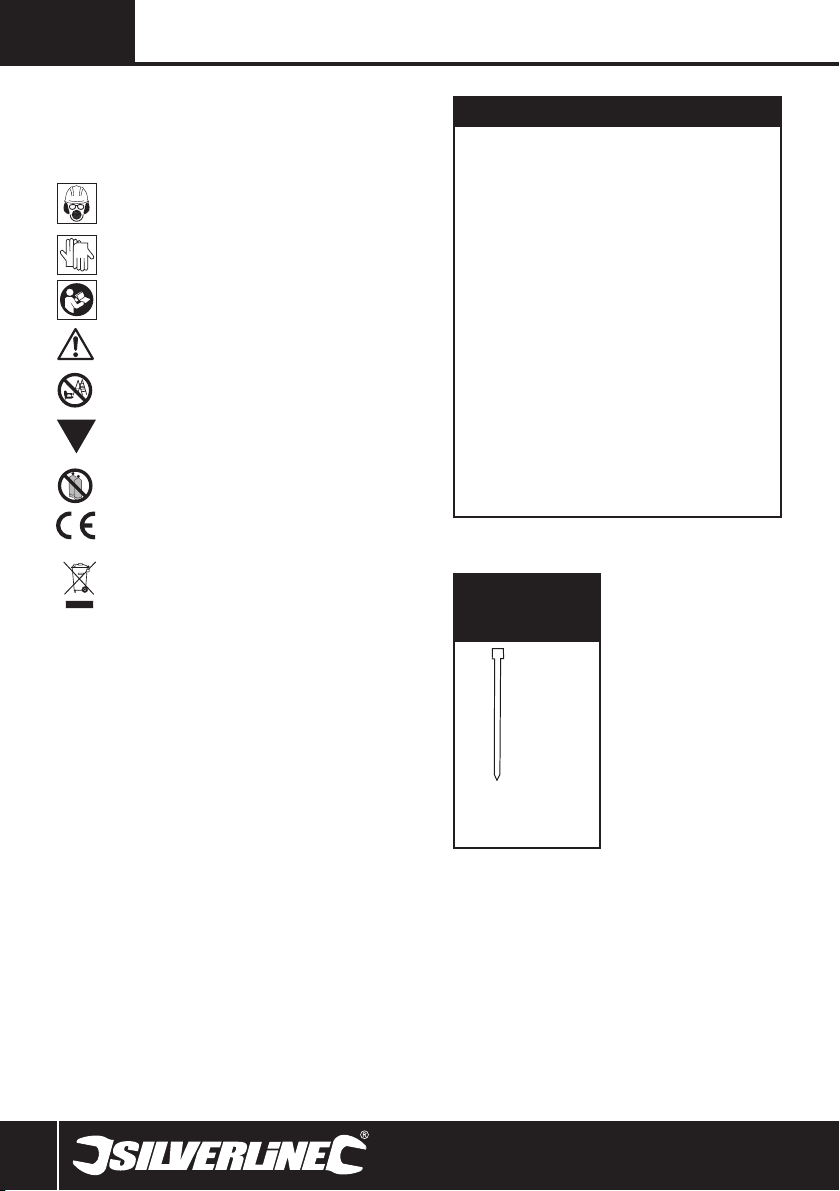
Caractéristiques
des fixations
- 25 mm (1")
- 32 mm (1-1⁄4")
- 35 mm (1-3⁄8")
- 38 mm (1-1⁄2")
- 45 mm (1-3⁄4")
- 50 mm (2")
- 57 mm (2-1⁄4")
- 64 mm (2-1⁄2")
Head: 3 mm (0.118")
1.6 mm x 1.4 mm
(0.063") (0.055")
Gauge:16
10
Page 12

955431 Cloueuse pneumatique de finition 64 mm
ATTENTION : Toujours porter des protections sonores lorsque le niveau
d’intensité est supérieur à 85 dB(A) et limiter le temps d’exposition si
nécessaire. Si l’intensité sonore devient inconfortable, même avec les
protections, arrêter immédiatement d’utiliser l’appareil, vérifier que les
protections soient bien mises et qu’elles soient adéquates avec le niveau
sonore produit par l’appareil.
ATTENTION : L’exposition de l’utilisateur aux vibrations peut engendrer une
perte du toucher, des engourdissements, des picotements et ainsi réduire
la capacité de préhension. De longues expositions peuvent également
provoquer ces symptômes de façon chronique. Si nécessaire, limiter le
temps d’exposition aux vibrations, et porter des gants anti-vibrations. Ne
pas utilisez cet appareil avec vos mains sous des conditions en dessous de
températures normales, car l’effet vibratoire en est accentué. Se référer au
cas de figures des caractéristiques relatives aux vibrations pour calculer le
temps et fréquence d’utilisation de l’appareil.
Les niveaux sonores et vibratoires des caractéristiques techniques
sont déterminés en fonction de la norme EN60745 ou autres normes
internationales. Ces données correspondent à un usage normale de
l’appareil, et ce dans des conditions de travail normales. Un appareil mal
entretenu, mal assemblé ou mal utilisé peut augmenter les niveaux sonores
et vibratoires. Pour plus d’informations sur la directive des émissions
sonores et vibratoires, visitez le site http://osha.europa.eu/fr.
Consignes générales de sécurité
AVERTISSEMENT Veuillez lire l’intégralité des consignes de sécurité et des
instructions. Le non-respect de ces consignes et instructions peut entraîner un
risque de choc électrique, d’incendie et/ou se traduire par des blessures graves.
ATTENTION : Cet appareil n’est pas conçu pour être utilisé par des
personnes (enfants compris) ayant des capacités physiques ou mentales
réduites, ou n’ayant pas la connaissance ou l’expérience requise, à moins
d’être sous la supervision d’une personne responsable de leur sécurité
ou d’avoir reçu les instructions nécessaires. Les enfants ne doivent pas
s’approcher et jouer avec cet appareil.
Veuillez conserver ces instructions et consignes de sécurité pour
référence ultérieure.
1) Sécurité sur la zone de travail
a) Maintenir une zone de travail propre et bien éclairée. Des zones
encombrées et mal éclairées sont sources d’accidents.
b) Ne pas utiliser d’outils dans des environnements explosifs, tels
qu’à proximité de liquides, de gaz ou de poussières inflammables.
c) Eloigner les enfants et les passants pendant l’utilisation d’un
appareil électrique. Ceux-ci peuvent provoquer une perte d’attention
et faire perdre la maîtrise de l’appareil.
2) Sécurité des personnes
a) Rester vigilent et faire preuve de bon sens lors de la manipulation
de l’appareil. Ne pas utiliser un appareil électrique lorsque l’on
se trouve dans un état de fatigue, ou sous l’influence de drogues,
d’alcool ou de médicaments. Un moment d’inattention pendant
l’utilisation d’un outil électrique peut se traduire par des blessures
graves.
b) Porter un équipement de protection approprié. Toujours porter
une protection oculaire. Le port de masque à poussières, chaussures
de sécurité antidérapantes, casque de sécurité et protections antibruit
adaptés aux différentes conditions de travail réduit le risque de
blessures corporelles.
c) Eviter tout démarrage accidentel ou intempestif. S’assurer que
l’interrupteur marche-arrêt soit en position d’arrêt lorsque l’appareil
n’est utilisé.
d) Enlever toute clé et tout instrument de réglage avant de mettre
l’appareil en marche. Une clé ou un instrument de réglage laissé fixé
à un élément en rotation de l’appareil électrique peut entraîner des
blessures physiques
e) Ne pas essayer d’atteindre une zone hors de portée. Se tenir
toujours en position stable permettant de conserver l’équilibre.
Cela permet de mieux contrôler l’appareil électrique dans des situations
inattendues.
f) Porter des vêtements appropriés. Ne pas porter de vêtements
amples ou des bijoux pendants. Eloigner cheveux, vêtements et
gants des pièces en mouvement. Les vêtements amples, les bijoux
pendants et cheveux longs peuvent être happés par les pièces en
rotation
g) Si l’appareil est pourvu de dispositifs destinés au raccord
d’équipements d’extraction et de récupération de la poussière/
sciure, s’assurer qu’ils soient bien fixés et utilisés correctement.
L’utilisation de ces dispositifs peut réduire les risques dus à la
poussière.
ATTENTION : L’exposition de l’utilisateur aux vibrations d’un outil peut
engendrer la perte de sens du toucher, des engourdissements, picotements
et réduire la préhension de l’appareil. Des expositions prolongées peuvent
engendrer l’apparition chronique de ces symptômes. Si nécessaire,
réduisez le temps d’utilisation de l’outil. Utilisez les cas de figure avec
les caractéristiques relatives aux vibrations, si données, pour calculer la
durée et la fréquence de l’utilisation de l’appareil. Les normes directives
2002/44/CE relatives aux vibrations sur le lieu de travail peuvent fournir
des informations pratiques même pour un usage domestique. Si dans
un premier temps vous commencez à sentir inconfortable à cause des
vibrations, ARRÊTER immédiatement l’utilisation de l’appareil.
ATTENTION : Toujours porter des protections auditives lorsque le niveau
sonore excède 85 dB(A) et limiter le temps d’exposition. Si les niveaux
sonores ne sont pas assez atténués avec un casque anti-bruit arrêter
l’utilisation de l’appareil, et vérifiez bien que la protection sonore soit bien
appropriée par rapport au niveau sonore.
3) Utilisation et entretien des appareils
a) Entretien des appareils. Vérifier que les éléments rotatifs
soient bien alignés et non grippés. S’assurer de l’absence de
pièces cassées ou endommagées susceptibles de nuire au bon
fonctionnement de l'appareil. Si l’appareil est endommagé, le faire
réparer avant toute utilisation. De nombreux accidents sont dus à un
mauvais entretien d’un outil.
b) Veiller à ce que les outils de coupe soient tenus affûtés et propres.
Des outils de coupe bien entretenus, aux tranchants bien affûtés, sont
moins susceptibles de se gripper et sont plus faciles à contrôler.
c) Utiliser l’appareil, les accessoires et outils à monter conformément
à ces instructions, en tenant compte des conditions de travail et de
la tâche à réaliser. Toute utilisation d’un appareil autre que celle pour
laquelle il a été conçu peut entraîner des situations à risque.
4) Révision
a) Ne faire réparer votre appareil électrique que par un réparateur qualifié
utilisant uniquement des pièces de rechange identiques.
www.silverlinetools.com
11
Page 13

F
aux outils pneumatiques
Protégez vos yeux
• Portez toujours des lunettes de sécurité.
Protégez votre ouïe
• Portez toujours des protections auditives.
Protégez-vous des vibrations
• Les outils électriques portatifs produisent des vibrations et ne doivent pas
être utilisés pendant de longues périodes sans marquer de pause. Les
vibrations peuvent provoquer des maladies. En conservant la chaleur, des
gants portés par l’utilisateur peuvent permettre de maintenir une bonne
circulation sanguine dans les doigts.
Portez un équipement de protection
• Portez toujours un équipement de protection adapté, comprenant entre
autres une combinaison de travail, des gants, un masque, etc.
• Il est de la responsabilité de l’utilisateur de s’assurer que toute personne
se trouvant à proximité de la zone de travail soit également pourvue d’un
équipement de sécurité approprié.
Utilisez un tuyau flexible d’air comprimé adapté
• Utilisez des tuyaux flexibles légers pour raccorder l’outil au compresseur
d’air.
• La plupart des outils pneumatiques demandent l’utilisation d’un flexible
serpentin ; les flexibles droits ne doivent être employés qu’avec les
pistolets pulvérisateurs.
Débranchez l’outil avant tout changement
• Assurez-vous toujours que votre outil pneumatique se soit complètement
arrêté de fonctionner avant de le déposer.
• Débranchez toujours l’outil de l’alimentation en air comprimé avant tout
travail d’entretien, de réparation ou avant de changer lames, disques et
autres accessoires.
• Assurez-vous que les lames, les disques ou les accessoires soient
correctement installés avant de rebrancher l’appareil à l’alimentation en
air comprimé.
• Assurez-vous toujours que votre outil pneumatique soit en position
éteinte avant de le brancher à l’alimentation en air comprimé. Sachez
que les outils pneumatiques peuvent conserver une pression résiduelle
après utilisation. Purgez toujours la pression d’air de l’outil après avoir
fermé l’alimentation en air comprimé.
Ménagez l’appareil
• Ne surchargez pas l’appareil. En laissant l’appareil fonctionner à sa
vitesse optimale, vous prolongerez sa durée utile et bénéficierez d’un
meilleur rendement.
• N’employez pas une pression d’air comprimé supérieure au niveau
recommandé. Une pression excessive peut entraîner une usure précoce
des pièces en rotation et favoriser les dysfonctionnements. Elle peut
également conduire à une fissure du carter.
• Ne tentez pas de modifier un outil pneumatique. Toute tentative de
modification de votre outil pourrait entraîner des blessures graves sur
vous-même ou les personnes se trouvant autour de vous et annulera
sa garantie.
• Ne dirigez pas l’appareil que vers la pièce de travail, lorsqu’il est branché
sur sa source d’air comprimé.
N’utilisez pas l’appareil si le système de sécurité est désactivé
• Ne dirigez jamais l’appareil vers d’autres personnes aux alentours de la
surface de travail ou vers le réservoir d’air comprimé.
N’utilisez pas l’appareil lorsque vous êtes sur une échelle ou un
échafaudage.
• N’utilisez jamais cet appareil avec des réservoirs contenant des gaz
combustibles, ou des réservoirs et cartouche d’air comprimée. Cet
appareil est iniquement conçu pour être utilisé avec un compresseur.
Se familiariser avec le produitConsignes de sécurité relatives
1 Gâchette
2 Arrivée d’air, raccord rapide BSP ¼"
3 Réservoir d’huile pour appareil à air comprimé
4 Ouverture/fermeture du magasin
5 Couvercle du magasin
6 Mécanisme à ressort du magasin
7 Système de sécurité
8 Levier anti-bourrage
9 Molette de réglage de la profondeur
10 Sortie d’air orientable
11 Clés à six pans
12
Page 14
955431 Cloueuse pneumatique de finition 64 mm
Déballage
Déballez le produit avec soin. Veillez à retirer tout le matériau d’emballage
et familiarisez-vous avec toutes les caractéristiques du produit.
Si des pièces sont endommagées ou manquantes, faites-les réparer ou
remplacer avant d’utiliser l’appareil.
Avant utilisation
Installer le connecteur rapide
• Branchez le raccord rapide (2) sur la cloueuse en le vissant sur l’arrivée
d’air . Appliquez une bande de PTFE sur le filetage pour conserver une
meilleure étanchéité. La ligne d’air se fixe en l’enfilant sur le raccord ¼’’.
Branchement de l’alimentation en air comprimé
• Cet outil doit être branché à une alimentation en air comprimé propre et
sec, pourvue d’un graisseur en ligne et d’un séparateur d’eau.
• Ne laissez pas la pression d’alimentation dépasser la pression maximale
spécifiée. (Voir caractéristiques techniques).
• Choisissez toujours la pression d’air la plus basse adéquate à votre
tâche. Cela permet de réduire l’intensité sonore et les vibrations pour
l’utilisateur, ainsi que de réduire l’usure de l’outil.
• Utilisez toujours un filtre à air. Sans filtre à air, l’air humide et impropre
corrodera les éléments internes de l’outil et réduira considérablement
leur durée de vie. De l’eau s’accumule dans le réservoir du compresseur
et par conséquent ceci présente un grand risque de corrosion. Le
réservoir doit être purgé quotidiennement pour éviter une accumulation
d’eau dans l’air.
• Veillez à ce que toutes les parties du système (conduites souples,
raccords, etc.) soient d’une catégorie adaptée à la pression d’air utilisée.
• Si le graisseur automatique n’est pas utilisé (voir le schéma ci-dessous),
versez deux gouttes d’huile d’appareil pneumatique dans l’évent du
connecteur rapide avant chaque usage.
ATTENTION : Utilisez uniquement une huile pour outils à air comprimé.
Utiliser des huiles différentes peut endommager l’appareil et le
compresseur et peut être dangereux pour l’utilisateur. N’UTILISEZ PAS
d’huile 2 temps ou de l’huile automobile.
SÉPARATION DE L’EAU
RACCORD RAPIDE
COUPLEUR OUTIL
PNEUMATIQUE
RACCORD
TUYAU DE
RACCORDEMENT
FLEXIBLE SERPENTIN
MAMELON
GRAISSEUR
RÉGULATEUR
A PURGER
QUOTIDIENNEMENT
ALIMENTATION EN
AIR COMPRIMÉ
Vérification du système de sécurité
ATTENTION: avant de régler ou d’entretenir l’outil, débranchez-le toujours
de l’alimentation en air comprime.
• Assurez-vous qu’il n’y a aucun consommable dans la recharge.
• Le système de sécurité (7) devrait pouvoir entrer et sortir librement sans
aucune obstruction
• Pour tester le fonctionnement correct du système de sécurité :
1. Branchez l’outil à l’alimentation en air comprimé
2. Appuyez le système de sécurité (7) sur un morceau de bois sans
appuyer sur la gâchette (1). L’outil ne doit pas tirer pour enfoncer un
consommable. Si l’outil tire, il faut le faire réparer avant de l’utiliser
à nouveau
3. Soulevez l’outil du morceau de bois. Le système de sécurité (7) devrait
revenir dans sa position initiale
4. Appuyez sur la gâchette (1). L’outil ne doit pas tirer pour enfoncer de
consommable. Si l’outil tire, il faut le faire réparer avant de l’utiliser
à nouveau
5. Appuyez le système de sécurité (7) sur un morceau de bois, mais cette
fois appuyez sur la gâchette (1). L’outil devrait tirer pour enfoncer un
consommable. Ceci indique un fonctionnement normal.
Remplir le magasin
ATTENTION: Toujours débrancher l’appareil de sa source d’alimentation en
air avant de remplir le magasin
1. Tirez sur le mécanisme à ressort du magasin pour verrouiller le loquet
de verrouillage/déverrouillage du magasin.
2. Insérer la bande de clous dans la fente prévue à cet effet
3. Maintenez le mécanisme à ressort du magasin et activez le loquet (4)
pour permettre au mécanisme à ressort de revenir vers l’arrière tout
en sécurisant les clous pour être tirés. Ne laissez pas le mécanisme à
ressort revenir d’un seul coup, mais contrôlez son mouvement.
www.silverlinetools.com
13
Page 15

F
Instructions d’utilisations
ATTENTION : Assurez-vous que votre alimentation en air comprimé
fonctionne avec la pression requise pour cet appareil. Voir les
caractéristiques techniques.
Tirer sur la gâchette
• Pour utiliser la cloueuse, appliquez le système de sécurité (7) contre le
matériau. Maintenez la cloueuse fermement par la poignée, et appuyez
bien sur la gâchette (1) pour tirer le clou et qu’il s’enfonce dans le
matériau.
ATTENTION : Appuyer rapidement et brièvement sur la gâchette peut
entrainer un endommagement interne et invalider la garantie.
Echappement de l’air comprimé
• En tournant l'ouverture de sortie d’air (10), l'air d'échappement peut
être orienté dans la direction de sorte que l’air ne représente aucun
danger pour l’utilisateur.
Régler la profondeur de clouage
IMPORTANT : Toujours vérifier que le clou soit enfoncé à la bonne
profondeur.
1. Faites un test sur une chute de matériau et vérifiez la profondeur
d’enfoncement.
2. Utilisez la molette de réglage de la profondeur (9) pour un léger
réglage en fonction de la taille du clou et du matériau
3. Pour un réglage plus important, réglez la pression de l’air comprimé
pour changer la profondeur : réduire la pression réduit la profondeur
d’enfoncement.
ATTENTION : Assurez-vous toujours que la pression d’air fournie soit
compatible avec celle indiquée dans les ‘caractéristiques techniques’.
Pointes coincées dans le magasin
ATTENTION : Toujours déconnecter l’outil de l’approvisionnement en air
avant ajustement ou maintenance de l’appareil.
Système de sécurité réservoir
1. Tirez sur le mécanisme à ressort du magasin jusqu’ à ce qu’il
verrouille le loquet de ouverture/fermeture du magasin (4).
2. Enlevez les obstructions avec une pince.
3. Rechargez le magasin et bien le refermer.
Pointes coincées dans le mécanisme de clouage
1. Activez le levier anti-bourrage (8) et ouvrez la plaque
2. Enlevez les obstructions avec une pince.
3. Refermez la plaque et le levier et vérifiez que le système de sécurité
fonctionne bien.
Entretien
ATTENTION : Débranchez toujours l’appareil de sa source en air comprimé
avant d’effectuer l’entretien ou le nettoyage de la cloueuse.
Remarque : 2 Clés à 6 pans (11) sont fournies avec la cloueuse pour
permettre de la démonter partiellement afin de faciliter le nettoyage,
enlever un bourrage ou changer des pièces. Le démontage de l’appareil
n’est pas traité dans ce manuel.
ATTENTION : N’utilisez jamais des pièces de rechanges de fournisseurs
tiers. N’utilisez uniquement les pièces de rechanges fournies par Silverline,
un revendeur Silverline ou un centre de réparation agrée.
• Gardez l’appareil toujours propre. La poussière et la saleté provoque
l’usure prématurée des pièces internes et peut réduire la durabilité de
l’appareil
• Utilisez une brosse souple ou un chiffon sec pour le nettoyage.
• Après chaque utilisation versez quelques gouttes d’huile (1,5 ml) du
réservoir d’huile pour appareil à air comprimé (3) par l’arrivée d’air (2).
• Si l’appareil ne marche plus ou marche par intermittence, versez
quelques gouttes d’huile (1,5 ml) par l’arrivée d’air (2) et branchez
l’appareil sur le compresseur. Faites marcher l’appareil par à coup. Si
cela n’enclenche pas le mécanisme de l’appareil, il doit être réparé par
un centre de réparation agrée.
Rangement
• Ranger cet outil dans un endroit sûr, sec et hors portée des enfants
Recyclage
• Comme tous les autres outils électroportatifs, les outils à air comprimé
ne doivent pas être jetés avec les ordures ménagères.
• Les outils à air comprimé contiennent de l’huile et lubrifiants et doivent
donc être recyclés en conséquence.
• Contactez les autorités locales compétentes en matière de gestion des
déchets pour vous informer de la procédure à suivre pour recycler les
outils électriques et à air comprimé
14
Page 16

955431 Cloueuse pneumatique de finition 64 mm
Garantie Silverline
Ce produit Silverline bénéficie d’une garantie de
3 ans
Enregistrez ce produit sur le site silverlinetools.com dans les 30 jours
suivant l’achat afin de bénéficier de la garantie de 3 ans. La période de
garantie commence à partir de la date d’achat figurant sur votre facture
d’achat.
Enregistrement de votre achat
Visitez silverlinetools.com, sélectionnez le bouton d’enregistrement et
saisissez :
• Vos informations personnelles
• Les informations concernant le produit et l’achat
Vous recevrez le certificat de garantie en format PDF. Veuillez l’imprimer et
le conserver avec votre achat.
Conditions de garantie des outils Silverline
La période de garantie prend effet à compter de la date de l’achat en
magasin, comme indiqué sur votre facture d’achat.
VEUILLEZ CONSERVER VOTRE FACTURE D’ACHAT.
Si ce produit est défectueux pendant les 30 jours qui suivent l’achat,
retournez-le au magasin où vous l’avez acheté, avec votre facture, en
expliquant en détail le problème. Le produit sera remplacé ou vous serez
remboursé(e).
Si ce produit est défectueux après cette période de 30 jours,
retournez-le à :
Silverline Tools Service Centre
PO Box 2988
Yeovil
BA21 1WU, Royaume Uni
Toute demande de service sous garantie doit être soumise pendant la
période de garantie.
Avant toute intervention sous garantie, vous devez présenter la facture
d’achat originale sur laquelle doivent figurer la date d’achat, votre nom, votre
adresse et le lieu d’achat.
Vous devez expliquer en détail la défaillance nécessitant réparation.
Les demandes de service sous garantie faites pendant la période de garantie
seront vérifiées par Silverline Tools pour établir si la défaillance du produit est
liée à un vice de matériau ou de fabrication.
Les frais de port ne seront pas remboursés. Les articles retournés doivent
être convenablement propres et sûrs pour être réparés et devraient être
emballés soigneusement pour éviter tout dommage ou toute blessure
pendant le transport. Nous pouvons refuser les livraisons qui ne sont pas
convenables ou sûres.
Toute intervention sera effectuée par Silverline Tools ou ses agents de
réparation agréés.
La réparation ou le remplacement du produit ne dépassera pas la période
de garantie.
Les anomalies que nous reconnaissons être couvertes par la garantie seront
rectifiées par la réparation de l’outil, sans frais (hormis les frais de port) ou
par son remplacement par un outil en parfait état de fonctionnement.
Les pièces ou les outils remplacés deviendront la propriété de Silverline
Tools.
La réparation ou le remplacement de votre produit sous garantie vous
apporte des avantages ; ces avantages s’ajoutent à vos droits statutaires en
tant que consommateur sans les affecter aucunement.
La présente garantie couvre:
La réparation du produit, s’il peut être vérifié, à la satisfaction de Silverline
Tools, que les défaillances du produit ont été provoquées par un vice de
matériau ou de fabrication au cours de la période de garantie.
Si une pièce n’est plus disponible ou n’est plus fabriquée, Silverline Tools la
remplacera par une pièce de rechange opérationnelle.
Utilisation de ce produit dans l’UE.
La présente garantie ne couvre pas:
Silverline Tools ne garantit pas les réparations nécessaires du produit
engendrées par :
L’usure normale provoquée par l’utilisation conforme aux instructions
d’utilisation, par exemple les lames, les charbons, les courroies, les
ampoules, les batteries, etc.
Le remplacement de tout accessoire fourni tel que les forêts, les lames, les
feuilles abrasives, les outils de coupes et les autres articles associés.
Les dommages et les défaillances accidentels causés par une utilisation ou
un entretien négligent, une mauvaise utilisation, un manque d’entretien ou
une utilisation ou une manipulation imprudente du produit.
L’utilisation du produit à des fins autres que son utilisation domestique
normale.
Le moindre changement ou la moindre modification du produit.
L’utilisation de pièces et d’accessoires qui ne sont pas des composants
véritables de Silverline Tools.
Une installation défectueuse (sauf si l’installation a été réalisée par Silverline
Tools).
Les réparations ou les modifications réalisées par des tiers autres que
Silverline Tools ou ses agents de réparation agréés.
Les demandes de service autres que le droit de rectifier les défaillances de
l’outil indiquées dans ces conditions de garantie ne sont pas couvertes par
cette garantie.
Déclaration de conformité CE
Le soussigné : Mr Darrell Morris
Autorisé par : Silverline Tools
Déclare que le produit :
Code d’identification : 955431
Description : Cloueuse pneumatique de finition 64 mm
Est conforme aux directives suivantes :
• Directive sur les machines 2006/42/CE
• EN 792-13:2000+A1:2008
Organisme notifié : Intertek Testing Services, Shanghai, Chine
La documentation technique est conservée par : Silverline Tools
Date : 13/08/13
Signature :
Directeur général
Nom et adresse du fabricant ou de son représentant agréé :
Powerbox International Ltd, Boundary Way, Lufton Trading Estate, Yeovil,
Somerset, BA22 8HZ Royaume-Uni
www.silverlinetools.com
15
Page 17

D
Beschreibung der Symbole
Auf dem Typenschild des Werkzeugs sind möglicherweise Symbole
abgebildet. Sie vermitteln wichtige Informationen über das Produkt oder
dienen als Gebrauchsanweisung.
Gehörschutz benutzen
Augenschutz benutzen
Atemschutz benutzen
Kopfschutz benutzen
Schutzhandschuhe benutzen
Bedienungsanleitung sorgfältig lesen
Achtung, Gefahr!
NICHT auf Leitern oder Gerüsten verwenden!
Wichtige Schutzvorrichtungen! Ordnungsgemäße Funktion
sicherstellen und gemäß Anleitung pflegen. NICHT deaktivieren!
NICHT mit Druckgasflaschen betreiben!
Erfüllt die einschlägigen Rechtsvorschriften und
Sicherheitsnormen
Umweltschutz
Druckluftwerkzeuge dürfen nicht über den Haushaltsmüll
entsorgt werden. Geräte enthalten Spuren von Öl und anderen
Schmiermitteln. Nach Möglichkeit bitte über entsprechende
Einrichtungen entsorgen. Lassen Sie sich bezüglich der
sachgemäßen Entsorgung von Druckluftwerkzeugen von der
zuständigen Behörde oder dem Händler beraten.
Technische Daten
Empfohlener Arbeitsdruck .......... 5–7,5 bar (72–108 psi)
Max. Arbeitsdruck ...................... 7,5 bar (108 psi)
Druckluftanschluss ....................1⁄4-Zoll-Schnellkupplung
Nagelkaliber und -länge ............. 16 Ga., 25–64 mm
Magazinkapazität....................... 100 Stck.
Gewicht ..................................... 1,85 kg
Geräusch- und Vibrationsinformationen
Schalldruckpegel LPA. ................. 87,0 dB(A)
Schallleistung LWA ...................... 100,0 dB(A)
Unsicherheit K ........................... 2,5 dB
Hand-Arm-Vibration ah ............... 6,5 m/s
Unsicherheit K ........................... 2m/s
Aufgrund der fortlaufenden Weiterentwicklung unserer Produkte
können sich die technischen Daten von Silverline-Produkten ohne
vorherige Ankündigung ändern.
Der Schallintensitätspegel kann für den Bediener 85 dB(A)
übersteigen und Lärmschutzmaßnahmen sind notwendig.
2
2
Befestigungsmittel
- 25 mm(1")
- 32 mm(1-1⁄4")
- 35 mm(1-3⁄8")
- 38 mm(1-1⁄2")
- 45 mm(1-3⁄4")
- 50 mm(2")
- 57 mm(2-1⁄4")
- 64 mm(2-1⁄2")
3.0 mm (0.118")
1.6 x 1.4 mm
(0.063") (0.055")
16 Ga.
16
Page 18

955431 Druckluft-Stauchkopfnagler, 64 mm
WARNUNG: Tragen Sie in Bereichen, wo der Lärmpegel 85 dB(A)
überschreitet, unbedingt angemessenen Gehörschutz und begrenzen Sie
nach Möglichkeit die Belastungsdauer. Sollte trotz Gehörschutz Unbehagen
irgendeiner Art auftreten, beenden Sie die Arbeit unverzüglich und
überprüfen Sie den Gehörschutz auf korrekten Sitz und Funktion und stellen
Sie sicher, dass dieser einen angemessenen Schutz für den Lärmpegel
bietet, der von den verwendeten Werkzeugen ausgeht.
WARNUNG: Bei der Benutzung mancher Werkzeuge wird der Benutzer
Vibrationen ausgesetzt, welche zum Verlust des Tastsinns, zu Taubheitsgefühl,
Kribbeln und zu einer Verminderung der Handgreifkraft führen können.
Langfristige Belastung kann zu chronischen Beschwerden führen. Begrenzen
Sie, falls nötig, die Exposition zu Vibrationen und tragen Sie vibrationsmindernde
Handschuhe. Verwenden Sie dieses Werkzeug nicht mit kalten Händen,
da Vibrationen bei Temperaturen unter dem individuellen Komfortbereich
eine stärkere Wirkung zeigen. Beurteilen Sie die Vibrationsbelastung unter
Zuhilfenahme der Technischen Daten des jeweiligen Werkzeuges und
bestimmen Sie die zulässige Belastungsdauer und -häufigkeit.
Die in den Technischen Daten angegebenen Geräusch- und
Vibrationsinformationen werden nach EN 60745 bzw. vergleichbaren
internationalen Standards bestimmt. Die angegebenen Werte beziehen
sich auf eine normale Benutzung des Werkzeuges unter normalen
Arbeitsbedingungen. Schlecht gewartete, inkorrekt montierte und
unsachgemäß verwendete Werkzeuge können erhöhte Schallpegel und
Vibrationswerte aufweisen. Weitere Informationen zur EU-Vibrationsrichtlinie
und zu Schall- sowie Vibrationsbelastungen, die auch für Heimanwender
relevant sein können, finden Sie auf den Seiten der Europäischen Agentur für
Sicherheit und Gesundheitsschutz am Arbeitsplatz: www.osha.europa.eu.
Allgemeine Sicherheitshinweise
WARNUNG! Lesen Sie alle Sicherheitshinweise und Anweisungen.
Versäumnisse bei der Einhaltung der Sicherheitshinweise und Anweisungen
können elektrischen Schlag, Brand und/oder schwere Verletzungen
verursachen.
WARNUNG! Dieses Gerät darf nicht von Personen (wie z.B. Kindern) mit
eingeschränkten körperlichen oder geistigen Fähigkeiten oder von Personen
ohne Erfahrung im Umgang mit einem solchen Gerät betrieben werden,
außer wenn sie von einer für ihre persönliche Sicherheit verantwortlichen
Person in der Benutzung unterwiesen worden sind und dabei beaufsichtigt
werden. Kinder müssen beaufsichtigt werden, um sicherzustellen, dass sie
das Gerät nicht als Spielzeug verwenden.
Bewahren Sie alle Sicherheitshinweise und Anweisungen für die
Zukunft auf.
1) Arbeitsplatzsicherheit
a) Halten Sie Ihren Arbeitsbereich sauber und gut beleuchtet.
Unordnung oder unbeleuchtete Arbeitsbereiche können zu Unfällen führen
b) Arbeiten Sie mit dem Elektrowerkzeug nicht in
explosionsgefährdeter Umgebung, in der sich brennbare
Flüssigkeiten, Gase oder Stäube befinden. Elektrowerkzeuge
erzeugen Funken, die den Staub oder die Dämpfe entzünden können.
c) Halten Sie Kinder und andere Personen während der Benutzung
des Elektrowerkzeugs fern. Bei Ablenkung können Sie die Kontrolle
über das Gerät verlieren.
2) Sicherheit von Personen
a) Seien Sie aufmerksam, achten Sie darauf, was Sie tun, und
gehen Sie mit Vernunft an die Arbeit mit einem Elektrowerkzeug.
Benutzen Sie kein Elektrowerkzeug, wenn Sie müde sind oder
unter dem Einfluss von Drogen, Alkohol oder Medikamenten
stehen. Ein Moment der Unachtsamkeit beim Gebrauch des
Elektrowerkzeuges kann zu ernsthaften Verletzungen führen.
b) Tragen Sie persönliche Schutzausrüstung und immer eine
Schutzbrille. Das Tragen persönlicher Schutzausrüstung, wie
Staubmaske, rutschfeste Sicherheitsschuhe, Schutzhelm oder
Gehörschutz, je nach Art und Einsatz des Elektrowerkzeuges, verringert
das Risiko von Verletzungen.
c) Vermeiden Sie eine unbeabsichtigte Inbetriebnahme.
Vergewissern Sie sich, dass das Elektrowerkzeug ausgeschaltet
ist, bevor Sie es an die Stromversorgung und/oder den Akku
anschließen, es aufnehmen oder tragen. Wenn Sie beim Tragen
des Elektrowerkzeuges den Finger am Schalter haben oder das Gerät
eingeschaltet an die Stromversorgung anschließen, kann dies zu
Unfällen führen.
d) Entfernen Sie Einstellwerkzeuge oder Schraubenschlüssel, bevor
Sie das Elektrowerkzeug einschalten. Ein Werkzeug oder Schlüssel,
der sich in einem drehenden Geräteteil befindet, kann zu Verletzungen
führen.
e) Vermeiden Sie eine unnatürliche Körperhaltung. Sorgen Sie für
einen sicheren Stand und halten Sie jederzeit das Gleichgewicht.
Auf diese Weise lässt sich das Elektrowerkzeug in unerwarteten
Situationen besser kontrollieren.
f) Tragen Sie geeignete Kleidung. Tragen Sie keine weite Kleidung
oder Schmuck. Halten Sie Haare, Kleidung und Handschuhe fern
von sich bewegenden Teilen. Lockere Kleidung, Schmuck oder lange
Haare können von sich bewegenden Teilen erfasst werden.
g) Wenn Staubabsaug- und -auffangeinrichtungen montiert werden
können, vergewissern Sie sich, dass diese angeschlossen sind und
richtig verwendet werden. Verwendung einer Staubabsaugung kann
Gefährdungen durch Staub verringern.
WARNUNG: Bei der Benutzung mancher Werkzeuge wird der
Benutzer Vibrationen ausgesetzt, welche zum Verlust des Tastsinns, zu
Taubheitsgefühl, Kribbeln und zu einer Verminderung der Handgreifkraft
führen können. Langfristige Belastung kann zu chronischen Beschwerden
führen. Begrenzen Sie gegebenenfalls die Exposition zu Vibrationen.
Beurteilen Sie die Vibrationsbelastung unter Zuhilfenahme der Technischen
Daten des jeweiligen Werkzeuges und bestimmen Sie die zulässige
Belastungsdauer und -häufigkeit. Die EU-Richtlinie 2002/44/EG enthält
Informationen über zulässige Vibrationsbelastung am Arbeitsplatz und kann
auch auf Heimarbeiten angewandt werden. Beenden Sie die Benutzung
eines Werkzeuges sofort, wenn Sie in irgendeiner Art und Weise Unbehagen
aufgrund der Vibrationsbelastung verspüren.
WARNUNG: Tragen Sie in Bereichen, in denen der Lärmpegel 85 dB(A)
überschreitet, unbedingt angemessenen Gehörschutz und begrenzen Sie
gegebenenfalls die Belastungsdauer. Sollte trotz Gehörschutz Unbehagen
irgendeiner Art auftreten, beenden Sie die Arbeit unverzüglich, überprüfen
Sie den Gehörschutz auf korrekten Sitz und Funktion und stellen Sie sicher,
dass dieser einen angemessenen Schutz für den Lärmpegel bietet, der von
den verwendeten Werkzeugen ausgeht.
3) Verwendung und Behandlung des Elektrowerkzeugs
a) Pflegen Sie Elektrowerkzeuge mit Sorgfalt. Kontrollieren Sie, ob
bewegliche Teile einwandfrei funktionieren und nicht klemmen,
ob Teile gebrochen oder so beschädigt sind, dass die Funktion des
Elektrowerkzeuges beeinträchtigt ist. Lassen Sie beschädigte Teile
vor dem Einsatz des Gerätes reparieren. Viele Unfälle haben ihre
Ursache in schlecht gewarteten Elektrowerkzeugen.
b) Halten Sie Schneidwerkzeuge scharf und sauber. Sorgfältig
gepflegte Schneidwerkzeuge mit scharfen Schneidkanten verklemmen
sich weniger und sind leichter zu führen.
c) Verwenden Sie Elektrowerkzeug, Zubehör, Einsatzwerkzeuge usw.
entsprechend diesen Anweisungen. Berücksichtigen Sie dabei die
Arbeitsbedingungen und die auszuführende Tätigkeit. Der Gebrauch
von Elektrowerkzeugen für andere als die vorgesehenen Anwendungen
kann zu gefährlichen Situationen führen.
4) Service
a) Lassen Sie Ihr Elektrowerkzeug nur von qualifiziertem Fachpersonal
und nur mit Original-Ersatzteilen reparieren. Damit wird sichergestellt,
dass die Sicherheit des Elektrowerkzeuges erhalten bleibt.
www.silverlinetools.com
17
Page 19

D
für Druckluftwerkzeuge
Augen schützen
• Tragen Sie immer eine Schutzbrille.
Gehör schützen
• Tragen Sie immer einen Gehörschutz.
Schutz vor Vibrationen
• Tragbare Druckluftwerkzeuge können Schwingungskräfte erzeugen und
sollten nie über längere Zeiträume ohne Pausen verwendet werden.
Vibrationen können gesundheitsschädigend sein. Handschuhe können zu
einer guten Durchblutung der Finger beitragen.
Schutzkleidung
• Tragen Sie stets geeignete Schutzausrüstung einschließlich, aber
nicht beschränkt auf Arbeitsschutzanzüge, Schutzhandschuhe,
Gesichtsmasken usw.
• Es liegt in der Verantwortung des Benutzers, dafür zu sorgen, dass
allen in der Nähe des Arbeitsbereichs befindlichen Personen ebenfalls
angemessene Schutzausrüstung zur Verfügung steht.
Den richtigen Luftschlauch verwenden
• Verwenden Sie zwischen Werkzeug und Kompressorkupplung immer
leichte Schläuche.
• Die meisten Druckluftwerkzeuge sollten mit einem Spiralschlauch
verwendet werden.
Ausschalten nicht vergessen
• Stellen Sie stets sicher, dass der Betrieb des Druckluftwerkzeugs
vollständig eingestellt wurde, bevor Sie es ablegen.
• Trennen Sie Druckluftwerkzeuge stets von der Druckluftquelle, bevor
Sie Wartungsarbeiten daran durchführen oder Klingen, Teller und andere
Aufsätze austauschen.
• Stellen Sie vor dem Anschluss an die Druckluftquelle sicher, dass alle
Klingen, Teller und anderen Aufsätze ordnungsgemäß angebracht sind.
• Stellen Sie stets sicher, dass das Druckluftwerkzeug ausgeschaltet ist,
bevor Sie es an die Druckluftquelle anschließen. Beachten Sie, dass
Druckluftwerkzeuge nach dem Gebrauch noch Restdruck enthalten
können. Lassen Sie nach dem Abstellen der Druckluftquelle stets den
Luftdruck aus dem Gerät ab.
Gerät nicht unsachgemäß verwenden
• Überlasten Sie das Gerät nicht. Der Betrieb bei optimaler Drehzahl
verlängert die Lebensdauer des Werkzeugs und steigert die Effizienz.
• Erhöhen Sie den Luftdruck nicht über das empfohlene Maß hinaus.
Übermäßiger Druck führt zum Verschleiß der beweglichen Teile und
kann zum Ausfall des Geräts führen. Zudem kann das Werkzeuggehäuse
dadurch reißen.
• Versuchen Sie nicht, Druckluftwerkzeuge zu modifizieren.
Modifikationsversuche führen zum Erlöschen der Garantie und können
schwerwiegende Verletzungen des Bedieners oder umstehender
Personen verursachen.
• Halten Sie das Gerät stets auf das Werkstück gerichtet, wenn es mit der
Druckluftversorgung verbunden ist.
Setzen Sie die Schutzvorrichtungen niemals außer Kraft
• Richten Sie das Gerät niemals auf Personen im Arbeitsbereich oder in
Richtung des Druckluftreservoirs des Kompressors.
Verwenden Sie das Gerät nicht auf Leitern oder Gerüsten
• Schließen Sie das Gerät niemals an mit brennbaren Gasen befüllte
Druckbehälter an und betreiben Sie das Gerät nicht mit Druckluftflaschen
oder -patronen. Es ist zum Betrieb mit Kompressoren ausgelegt.
GeräteübersichtZusätzliche Sicherheitshinweise
1 Auslöser
2 Druckluftanschluss/¼-Zoll-Schnellkupplung
3 Spezialöl für Druckluftwerkzeuge
4 Magazinhebel
5 Beladeöffnung
6 Magazinfedermechanismus
7 Sicherheitssperre
8 Schnellverschluss zum Entfernen von Blockaden
9 Eintreibtiefeneinstellung
10 Drehbarer Abluftauslass
11 Innensechskantschlüssel
18
Page 20

955431 Druckluft-Stauchkopfnagler, 64 mm
Auspacken des Gerätes
Packen Sie Ihr Werkzeug vorsichtig aus und überprüfen Sie es. Machen Sie
sich vollständig mit all seinen Eigenschaften und Funktionen vertraut.
Vergewissern Sie sich, dass sämtliche Teile des Werkzeugs vorhanden und
in einwandfreiem Zustand sind. Sollten Teile fehlen oder beschädigt sein,
lassen Sie diese ersetzen, bevor Sie das Werkzeug verwenden.
Vor Inbetriebnahme
Schnellkupplung einbauen
• Montieren Sie die Schnellkupplung (2) am Nagler. Diese wird in den
Drucklufteingang des Gerätes eingeschraubt. Dichten Sie das Gewinde
mit PTFE-Band ein. Das Gerät kann anschließend in Druckluftsysteme mit
passenden Schnellkupplungen eingesteckt werden.
Empfohlene Druckluftversorgung
• Dieses Werkzeug muss an eine Druckluftversorgung mit Druckluftöler
und Wasserabscheider angeschlossen werden.
• Überschreiten Sie niemals den angegebenen maximalen Arbeitsdruck
(siehe „Technische Daten“).
• Verwenden Sie stets den niedrigsten möglichen Luftdruck, um die Schallund Vibrationsbelastung für den Benutzer zu reduzieren. Dies schont
zudem das Werkzeug und beugt Fehlfunktionen vor.
• Verwenden Sie stets trockene, gefilterte Druckluft. Ungefilterte
Druckluft hat einen hohen Feuchtigkeitsgehalt und wird schnell zu
schwerwiegender interner Korrosion des Werkzeuges führen und dessen
Lebensdauer verkürzen. Feuchtigkeitsansammlung im Druckluftbehälter
Ihres Kompressors führt auch dort schnell zu Korrosion. Angesammeltes
Wasser muss täglich aus der Druckluftversorgung abgelassen werden.
• Verwenden Sie ausschließlich Komponenten (wie Schläuche, Verbinder
usw.) die für den Druckbereich des Werkzeuges geeignet sind.
• Geben Sie vor jeder Benutzung einige Tropfen an Druckluftwerkzeugöl in
den Druckluftanschluss des Gerätes, falls Ihre Druckluftversorgung nicht
über einen automatischen Öler (siehe Abb. unten) verfügt.
ACHTUNG! Verwenden Sie ausschließlich Spezialöl für Druckluftgeräte.
Andere Öle könnten das Gerät und den Kompressor beschädigen.
Verwenden Sie niemals Zweitakt- oder KFZ-Öle.
ANSCHLUSSSTÜCK FÜR
DRUCKLUFTGERÄT
FÜHRUNGSSCHLAUCH
SCHNELLKUPPLUNGSADAPTER
NIPPEL
WASSERABSCHEIDUNG
DRUCKLUFTSCHLAUCH
NIPPEL
NEBELÖLER
DRUCKLUFTREGLER
TÄGLICH
ABLASSEN!
DRUCKLUFTZUFUHR
Sicherheitssperre überprüfen
WARNHINWEIS: Trennen Sie das Gerät stets von der Druckluftversorgung,
bevor Sie Einstellungsänderungen vornehmen oder Wartungsarbeiten
durchführen.
• Stellen Sie sicher, dass das Magazin leer ist.
• Die Sicherheitssperre (7) muss sich frei hinein- und herausbewegen
können.
• Kontrollieren Sie die Sicherheitssperre wie folgt auf ordnungsgemäße
Funktion:
1. Schließen das Werkzeug an die Luftversorgung an.
2. Drücken Sie die Sicherheitssperre (7) gegen ein Stück Holz, ohne den
Auslöser (1) zu betätigen. Das Gerät sollte nicht auslösen. Falls das
Gerät dennoch auslöst, muss es vor dem weiteren Gebrauch repariert
werden.
3. Nehmen Sie das Gerät vom Holzstück. Die Sicherheitssperre (7) sollte
jetzt in ihre ursprüngliche Stellung zurückkehren.
4. Betätigen Sie den Auslöser (1). Das Gerät sollte nicht auslösen. Falls
das Gerät dennoch auslöst, muss es vor dem weiteren Gebrauch
repariert werden.
5. Drücken Sie die Sicherheitssperre (7) erneut gegen das Holz, aber
betätigen Sie diesmal den Auslöser (1). Das Gerät sollte jetzt auslösen.
Dies zeigt an, dass das Gerät normal arbeitet.
Magazin bestücken
WARNHINWEIS: Trennen Sie das Gerät stets von der Druckluftversorgung,
bevor Sie es bestücken, Einstellungsänderungen vornehmen oder
Wartungsarbeiten durchführen.
1. Ziehen Sie den Magazinfedermechanismus (6) zurück, so dass er
durch Betätigung des Magazinhebels (4) arretiert wird.
2. Legen Sie einen Nagelstreifen in die Beladeöffnung ein.
3. Halten Sie den Magazinfedermechanismus fest und betätigen Sie den
Magazinhebel, damit der Federmechanismus zurückspringen und
so die Nägel in betriebsbereiter Position halten kann. Lassen Sie den
Federmechanismus nicht zu plötzlich zurückspringen, sondern achten
Sie auf eine kontrollierte Bewegung.
www.silverlinetools.com
19
Page 21

D
Betrieb
WARNHINWEIS: Stellen Sie sicher, dass Ihre Druckluftversorgung
innerhalb des in den „Technischen Daten” angegebenen Druckbereichs
arbeitet.
Auslöser
• Drücken Sie zum Betreiben des Naglers die Sicherheitssperre (7) gegen
das Werkstück. Halten Sie das Gerät gut am Griff fest und betätigen Sie
den Auslöser (1), um einen Nagel in das Werkstück einzutreiben.
WARNHINWEIS: Zu schnelles Betätigen des Auslösers (1) kann Schäden
an den Innenteilen des Gerätes verursachen und zum Erlöschen der
Garantie führen.
Abluft
• Drehen Sie den Abluftauslass (10) so, dass austretende Luft vom
Benutzer wegströmt.
Eintreibtiefe einstellen
WICHTIGER HINWEIS: Vergewissern Sie sich stets, dass das
Befestigungsmittel in der gewünschten Tiefe in das Werkstück
eingetrieben wird.
1. Treiben Sie einen Nagel probeweise in ein Reststück des Werkstoffes
ein und kontrollieren Sie die Eintreibtiefe des Nagels.
2. Geringfügige Änderungen lassen sich über die
Eintreibtiefeneinstellung (9) vornehmen, z.B. Feineinstellungen auf
unterschiedliche Nagelabmessungen und verschiedene Werkstoffe.
3. Für umfangreichere Änderungen der Eintreibtiefe muss der
Zuluftdruck verändert werden. Niedrigerer Druck der Luftversorgung
verringert die Eintreibtiefe.
WARNHINWEIS: Sorgen Sie stets dafür, dass der Luftdruck sich im unter
„Technische Daten“ angegebenen Bereich befindet.
Verklemmungen beseitigen
WARNHINWEIS: Trennen Sie das Gerät stets von der Druckluftversorgung,
bevor Sie Einstellungsänderungen vornehmen oder Wartungsarbeiten
durchführen.
Befestigungsmittel steckt im Magazin fest
1. Ziehen Sie den Magazinfedermechanismus (6) zurück, so dass er
durch den Magazinhebel (4) arretiert wird.
2. Entfernen Sie die Blockade mit einer Zange.
3. Laden Sie das Magazin wieder und verschließen Sie es sicher.
Befestigungsmittel steckt im Plattenbereich fest
1. Öffnen Sie den Schnellverschluss zum Entfernen von Blockaden (8)
sowie die Nagelplatte.
2. Entfernen Sie die Blockade mit einer Zange.
3. Schließen Sie die Platte und den Schnellverschluss wieder
und prüfen Sie vor dem Gebrauch des Gerätes, dass die
Sicherheitssperre ordnungsgemäß funktioniert.
Wartung
WARNHINWEIS: Trennen Sie das Gerät stets von der Druckluftversorgung,
bevor Sie Wartungs- oder Reinigungsarbeiten vornehmen.
Hinweis: Im Lieferumfang sind zwei Innensechskantschlüssel (11)
enthalten, mit denen dieser Druckluftnagler teilweise demontiert werden
kann. Dies kann bei der Reinigung, dem Entfernen von Blockaden und beim
Ersetzen von Teilen notwendig sein. Eine solche Demontage ist durch diese
Bedienungsanleitung jedoch nicht abgedeckt.
WARNHINWEIS: Verwenden Sie für dieses Produkt ausschließlich
durch Silverline oder durch von Silverline zugelassene Fachhändler bzw.
Reparaturwerkstätten vertriebene Ersatzteile und keinesfalls Ersatzteile
anderer Hersteller.
• Halten Sie Ihr Gerät stets sauber. Durch Schmutz und Staub verschleißen
die Innenteile schnell und die Lebensdauer des Gerätes wird verkürzt.
• Säubern Sie das Gerätegehäuse mit einer weichen Bürste oder einem
trockenen Tuch.
• Träufeln Sie nach jedem Gebrauch etwa 1,5 ml Spezialöl (3) in den
Druckluftanschluss (2).
• Falls das Gerät den Betrieb einstellt oder vorübergehend ausfällt, träufeln
Sie einige Tropfen Druckluftwerkzeugöl in den Druckluftanschluss (2)
und schließen Sie das Gerät an die Druckluftquelle an. Betreiben Sie
das Gerät in kurzen Schüben. Falls der Mechanismus danach nicht
wieder anläuft, lassen Sie das Gerät in einer von Silverline zugelassenen
Reparaturwerkstatt warten.
Lagerung
• Bewahren Sie dieses Gerät sorgfältig an einem sicheren, trockenen Ort
außerhalb der Reichweite von Kindern auf.
Entsorgung
• Druckluftwerkzeuge dürfen wie auch Elektrowerkzeuge nicht über den
Hausmüll entsorgt werden.
• Druckluftwerkzeuge können Spuren von Maschinenöl und anderen
Schmierstoffen enthalten und müssen dementsprechend der
Wiederverwertung zugeführt werden.
• Lassen Sie sich von der zuständigen Behörde bezüglich der
ordnungsgemäßen Entsorgung von Druckluftwerkzeugen beraten.
20
Page 22

955431 Druckluft-Stauchkopfnagler, 64 mm
Silverline-Tools-Garantie
Dieser Silverline-Artikel wird mit einer
3-Jahres-Garantie angeboten
Registrieren Sie diesen Artikel unter silverlinetools.com innerhalb von 30
Tagen nach dem Kauf, um die 3-Jahres-Garantie zu aktivieren.
Der Garantiezeitraum beginnt mit dem Kaufdatum auf Ihrem Kaufbeleg.
Registrierung Ihres Kaufs
Gehen Sie auf silverlinetools.com, klicken Sie auf „Registrierung“’ und geben
Sie Folgendes ein:
• Ihre persönlichen Angaben
• Produktdetails und Kaufinformationen
Sobald dieser Artikel registriert worden ist, wird Ihre Garantiebescheinigung
im PDF-Format erzeugt. Bitte drucken Sie sie aus und bewahren Sie sie
zusammen mit Ihrem Produkt auf.
Garantiebedingungen
Der Garantiezeitraum beginnt mit dem Kaufdatum im Einzelhandel, das auf
dem Kaufbeleg angegeben ist.
BITTE BEWAHREN SIE DEN KAUFBELEG AUF!
Falls dieser Artikel innerhalb von 30 Tagen nach dem Kauf einen Defekt
aufweisen sollte, bringen Sie es bitte mit Ihrem Kaufbeleg zu dem
Fachhändler, bei dem es gekauft wurde, und informieren Sie ihn über die
Mängel. Das Gerät wird daraufhin ersetzt oder der Kaufpreis zurückerstattet.
Falls dieser Artikel nach Ablauf von 30 Tagen nach dem Kauf einen Mangel
aufweist, senden Sie es bitte an:
Silverline Tools Service Centre
PO Box 2988
Yeovil
BA21 1WU, Großbritannien
Der Garantieanspruch muss während der Garantiezeit gestellt werden.
Sie müssen den Originalkaufbeleg mit Angabe des Kaufdatums einreichen
und Ihren Namen und Ihre Adresse sowie den Ort des Kaufs angeben, bevor
etwaige Arbeiten durchgeführt werden können.
Sie müssen genaue Angaben über den zu behebenden Defekt machen.
Alle innerhalb der Garantiefrist gemachten Forderungen werden von Silverline
Tools daraufhin überprüft werden, ob es sich bei den Mängeln um einen
Material- oder Fertigungsfehler handelt.
Versandkosten werden nicht zurückerstattet. Alle Artikel sollten sich in
sauberem und sicherem Zustand befinden und sorgfältig verpackt zur
Reparatur eingeschickt werden, um Schäden oder Verletzungen während des
Transports zu vermeiden. Die Annahme unangemessener oder unsicherer
Lieferungen kann von uns verweigert werden.
Alle Arbeiten werden von Silverline Tools oder seinen autorisierten
Reparaturwerkstätten durchgeführt.
Die Reparatur oder der Ersatz des Artikels führt nicht zur Verlängerung des
Garantiezeitraums.
Mängel, bei denen unsere Prüfung ergibt, dass sie unter die Garantie fallen,
werden durch kostenlose Reparatur des Werkzeugs (ohne Versandkosten)
oder Ersatz durch ein Werkzeug in einwandfreiem Zustand behoben.
Einbehaltene Werkzeuge oder Teile, die ersetzt wurden, gehen in den Besitz
von Silverline Tools über.
Die Reparatur bzw. der Ersatz Ihres Artikels unter dieser Garantie erfolgt
zusätzlich zu Ihren gesetzlichen Rechten als Verbraucher und hat keine
nachteiligen Folgen auf diese.
Durch die Garantie abgedeckt ist:
Die Reparatur des Artikels, nachdem zur Zufriedenheit von Silverline Tools
nachgewiesen wurde, dass der Defekt durch fehlerhaftes Material oder
mangelhafte Arbeitsausführung bedingt ist und in den Garantiezeitraum fällt.
Wenn ein Ersatzteil nicht mehr erhältlich ist oder nicht mehr hergestellt wird,
kann Silverline Tools es gegen einen funktionellen Ersatz austauschen.
Verwendung des Artikels innerhalb der EU.
Durch die Garantie nicht abgedeckt ist:
Silverline Tools garantiert keine Reparaturen, die durch Folgendes
erforderlich geworden sind:
Normale Verschleißerscheinungen, die trotz Verwendung entsprechend
der Bedienungsanleitung entstehen, z.B. an Messern, Bürsten, Riemen,
Glühbirnen, Batterien usw.
Ersatz von mitgeliefertem Zubehör wie etwa Bohrspitzen, Klingen,
Schleifblättern, Schneidscheiben und anderen zugehörigen Teilen.
Unfallschäden und Fehler, die durch unsachgemäße Verwendung oder
Wartung, Missbrauch, Nachlässigkeit oder fahrlässige Bedienung oder
Handhabung des Artikels entstanden sind.
Verwendung des Artikels für andere als normale Haushaltszwecke.
Jegliche Veränderungen oder Modifikationen des Artikels.
Die Verwendung von Teilen oder Zubehör, die keine Originalkomponenten
von Silverline Tools sind.
Fehlerhafte Montage (außer, wenn von Silverline Tools vorgenommen).
Reparaturen oder Änderungen, die von anderen als Silverline Tools oder
seinen autorisierten Reparaturwerkstätten durchgeführt wurden.
Ansprüche, die über die Rechte zur Behebung von Mängeln an dem in
diesen Garantiebedingungen genannten Werkzeug hinausgehen.
EG-Konformitätserklärung
Name des Unterzeichners: Mr. Darrell Morris
Bevollmächtigt durch: Silverline Tools
Erklärt hiermit, dass das Produkt:
Ident.-Nr.: 955431
Produktbeschreibung: Druckluft-Stauchkopfnagler, 64 mm
Den folgenden Richtlinien entspricht:
• Maschinenrichtlinie 2006/42/EG
• EN 792-13:2000+A1:2008
Benannte Stelle: Intertek Testing Services, Shanghai, China
Techn. Unterlagen bei: Silverline Tools
Datum: 13.08.2013
Unterzeichnet von:
Geschäftsführender Direktor
Name und Anschrift des Herstellers:
Powerbox International Ltd, Boundary Way, Lufton Trading Estate, Yeovil,
Somerset, BA22 8HZ, Großbritannien
www.silverlinetools.com
21
Page 23

ESP
Descripción de los símbolos
Los símbolos siguientes pueden aparecer en la placa de características
de su herramienta. Éstos representan información importante sobre el
producto o instrucciones relativas a su uso.
Lleve protección auditiva
Lleve protección ocular
Lleve protección respiratoria
Lleve un casco de seguridad
Lleve guantes de seguridad
Lea el manual de instrucciones
¡Peligro!
No utilizar en escaleras o andamios
No utilice esta herramienta si el mecanismo de seguridad no
funciona correctamente o está dañado.
No utilizar con bombonas de gas comprimido
Conforme a las normas de seguridad y la legislación
correspondiente.
Protección medioambiental
No elimine las herramientas neumáticas junto con la basura
convencional. Las herramientas neumáticas contienen restos
de lubricante y deben ser desechadas en puntos de reciclaje
adecuados. Póngase en contacto con la autoridad local
encargada de la gestión de residuos si necesita más información
sobre cómo eliminar este tipo de herramientas correctamente.
Características técnicas
Presión de trabajo ...................... 5 – 7,5 bar (72 – 108 psi)
Presión máxima ......................... 7,5 bar (108 psi)
Entrada de aire .......................... Conector rápido
BSP de 1⁄4"
Longitud del clavo ......................Calibre 16 (25 – 64 mm)
Capacidad del
cargador para clavos ................. 100 pzas
Peso ....................................... 1,85kg
Información sobre ruido y vibración:
Presión acústica LPA. ..................87 dB(A)
Potencia acústica LWA ................. 100 dB(A)
Incertidumbre K ......................... 2,5 dB
Vibración ponderada ah .............. 6,5 m/s
Incertidumbre K ......................... 2 m/s
Como parte de nuestra política de desarrollo de productos, los
datos técnicos de los productos Silverline pueden cambiar sin
El nivel de intensidad sonora para el usuario puede exceder de
85 dB(A). Se recomiendan usar medidas de protección auditiva.
previo aviso.
2
2
Características
de los clavos
- 25 mm (1")
- 32 mm (1-1⁄4")
- 35 mm (1-3⁄8")
- 38 mm (1-1⁄2")
- 45 mm (1-3⁄4")
- 50 mm (2")
- 57 mm (2-1⁄4")
- 64 mm (2-1⁄2")
3 mm (0,118")
1,6 x 1,4 mm
(0,063") (0,055")
Calibre:16
22
Page 24

955431 Clavadora neumática 64 mm
ADVERTENCIA: Utilice siempre protección auditiva cuando el nivel ruido
exceda 85 dB(A) o cuando esté expuesto durante largos periodos de
tiempo. Si por algún motivo nota algún tipo de molestia auditiva incluso
llevando orejeras de protección, detenga inmediatamente la herramienta y
compruebe que las orejeras de protección estén colocadas adecuadamente.
Asegúrese de que el nivel de atenuación y protección de las orejeras sea
adecuado dependiendo del tipo de herramienta y el trabajo a realizar.
ADVERTENCIA: La exposición a la vibración durante la utilización de una
herramienta puede provocar pérdida del sentido del tacto, entumecimiento,
hormigueo y disminución de la capacidad de sujeción. La exposición durante
largos periodos de tiempo puede provocar enfermedad crónica. Si es necesario,
limite el tiempo de exposición a la vibración y utilice guantes anti-vibración.
No utilice la herramienta cuando sus manos estén muy frías, las vibraciones
tendrán un mayor efecto. Utilice los datos técnicos de su herramienta para
evaluar la exposición y medición de los niveles de ruido y vibración.
Los niveles de vibración y ruido están determinados por la directiva
EN60745 y otras directivas internacionales similares. Los datos técnicos
se refieren al uso normal de la herramienta en condiciones normales. Una
herramienta defectuosa, mal montada o desgastada puede incrementar los
niveles de ruido y vibración. Para más información sobre ruido y vibración,
puede visitar la página web www.osha.europa.eu
Instrucciones generales de
seguridad
ADVERTENCIA: Lea todas las advertencias de seguridad e
instrucciones. No respetar estas advertencias e instrucciones puede
causar descargas eléctricas, incendios y/o lesiones graves.
ADVERTENCIA: No permita que los niños, personas discapacitadas
o personas no cualificadas utilicen esta herramienta. Mantenga esta
herramienta fuera del alcance de los niños
Conserve estas instrucciones de seguridad para futuras referencias.
1) Seguridad en el área de trabajo
a) Mantenga el área de trabajo limpia y bien iluminada. Las áreas
desordenadas y oscuras invitan a que se produzcan accidentes.
b) No utilice herramientas eléctricas en atmósferas explosivas, como
por ejemplo en presencia de líquidos, gases o polvos inflamables.
c) Mantenga alejados a los niños y a las personas que se encuentren
a su alrededor mientras esté trabajando con una herramienta
eléctrica. Las distracciones pueden hacerle perder el control de la
herramienta.
2) Seguridad personal
a) Manténgase alerta, fíjese en lo que está haciendo y use el sentido
común cuando esté utilizando una herramienta eléctrica. No
use una herramienta eléctrica si se encuentra cansado o bajo la
influencia de drogas, alcohol o medicamentos. Un momento de
distracción mientras esté utilizando una herramienta eléctrica puede
provocar lesiones corporales graves.
b) Use equipo de protección personal. Use siempre protección ocular.
El uso de equipamientos de seguridad tales como máscara antipolvo,
calzado de seguridad antideslizante, casco duro y protecciones
auditivas adecuadas reducirá el riesgo de lesiones corporales.
c) Evite el arranque accidental. Asegúrese de que el interruptor está en
la posición de apagado antes de enchufar la herramienta.
d) Retire las llaves de ajuste antes de encender la herramienta
eléctrica. Una llave de ajuste que se ha dejado colocada en una parte
móvil de la herramienta eléctrica puede causar lesiones corporales.
e) No adopte posturas forzadas. Manténgase en posición firme y en
equilibrio en todo momento. De este modo, podrá controlar mejor la
herramienta eléctrica en situaciones inesperadas.
f) Vístase adecuadamente. No lleve ropa holgada ni joyas. Mantenga
el pelo, la ropa y los guantes alejados de las piezas móviles. La
ropa holgada, las joyas o el pelo largo pueden quedar atrapados en las
piezas móviles.
g) Si dispone de conexión a sistemas de extracción y recolección
de polvo, asegúrese de que estén conectados y se usen
correctamente. El uso de estos dispositivos puede reducir los riesgos
producidos por la inhalación de polvo.
ADVERTENCIA: La vibración producida al utilizar herramientas eléctricas
durante periodos de tiempo prolongados puede provocar adormecimiento,
hormigueo y disminución de tacto en las manos. Utilizar herramientas
continuamente durante largos periodos de tiempo puede ocasionar lesiones
crónicas. Utilice las indicaciones y los datos de vibración proporcionado
por cada fabricante para calcular el tiempo máximo de exposición. De
acuerdo con la directiva 2002/44/CE todas las áreas de trabajo deben
disponer de información relativa a las vibraciones. PARE inmediatamente
su herramienta eléctrica en caso de notar alguna contradicción.
ADVERTENCIA: Se recomiendan usar medidas de protección sonora
cuando el nivel de intensidad sonora exceda de 80 dB(A). Compruebe
siempre que la protección auditiva esté en buen estado y que el nivel
de atenuación sea el correcto dependiendo del tipo de tarea que vaya a
realizar.
3) Uso y mantenimiento
a) Mantenga sus herramientas. Revise que no haya piezas en
movimiento mal alineadas o trabadas, piezas rotas o cualquier
otra condición que pueda afectar el funcionamiento de la
herramienta. Si encuentra aluna pieza dañada, haga reparar la
herramienta antes de utilizarla. Muchos accidentes son causados por
herramientas eléctricas que carecen de un mantenimiento adecuado.
b) Mantenga las herramientas de corte siempre afiladas y limpias.
Las herramientas de corte correctamente afiladas son menos
propensas a trabarse y son más fáciles de controlar.
c) Utilice la herramienta, los accesorios, brocas etc. de acuerdo
con estas instrucciones, teniendo en cuenta las condiciones y el
trabajo que necesite realizar. El uso de la herramienta eléctrica para
tareas distintas de aquellas para las que fue diseñada podría causar
una situación peligrosa.
4) Servicio
a) Lleve siempre su herramienta eléctrica a un servicio técnico
cualificado y utilice únicamente piezas de recambio idénticas. Esto
garantizará un funcionamiento óptimo y seguro de su herramienta.
www.silverlinetools.com
23
Page 25

ESP
herramientas neumáticas
Protéjase los ojos
• Póngase gafas de protección o anteojos.
Protéjase los oídos
• Póngase protección auditiva.
Protéjase de la vibración
• Las herramientas neumáticas de uso manual pueden producir vibración
y no se deben usar por largos periodos de tiempo sin tomar descanso.
La vibración puede causar enfermedades. Usar guantes puede ayudar a
mantener la buena circulación sanguínea en los dedos.
Equipo de protección
• Lleve siempre equipo de protección adecuado, especialmente lentes o
gafas de seguridad, guantes de seguridad y una mascarilla antipolvo.
• Es responsabilidad del usuario asegurarse de que cualquiera persona
que se encuentre en proximidades de la zona de trabajo disponga
también de un equipo de protección apropiado.
Use el tubo flexible correcto
• Use tubos flexibles ligeros para conectar su herramienta al compresor
de aire.
• La mayoría de las herramientas neumáticas deben usarse con un tubo
espiral, utilice tubo recto únicamente con pistolas neumáticas.
Desconecte siempre la herramienta
• Asegúrese siempre de que su herramienta neumática se haya parado
completamente antes de dejarla en una superficie.
• Desconecte la herramienta neumática del suministro de aire antes de
proceder a efectuar cualquier trabajo de mantenimiento o instalación
de accesorios.
• Asegúrese siempre de que los accesorios estén correctamente instalados
antes de volver a conectar la herramienta al suministro de aire.
• Asegúrese siempre de que la herramienta neumática esté apagada
“OFF” antes de conectarla al suministro de aire. Tenga en cuenta que las
herramientas neumáticas pueden retener presión en el interior después
de ser utilizadas. Purgue siempre la presión neumática de la herramienta
antes de cortar el suministro de aire.
No maneje la máquina de manera abusiva
• No sobrecargue la herramienta de manera abusiva. Intente que la
herramienta funcione a su velocidad adecuada, se prolongará su vida útil
y funcionará con más eficacia.
• No incremente la presión neumática sobre el nivel recomendado, ya que
una presión excesiva causará desgaste de las piezas móviles y un mal
funcionamiento de la herramienta. También podría causar la rotura de la
carcasa de la herramienta.
• No intente modificar las herramientas neumáticas. Cualquier intento de
modificar la herramienta puede provocarle lesiones graves a usted o a
los que le rodean además de invalidar la garantía.
Nunca utilice esta herramienta con el mecanismo de seguridad
desactivado
• Nunca apunte con esta herramienta hacia personas ni hacia el
compresor de aire comprimido.
Nunca utilice esta herramienta en andamios y escaleras
• Nunca conecte esta herramienta a bombonas con gases combustibles o
aire comprimido. Esta herramienta está diseñada para utilizarse con un
compresor.
Características del productoInstrucciones de seguridad para
1 Gatillo
2 Entrada de aire BSP ¼"
3 Aceite lubricante para herramientas neumáticas
4 Cierre del cargador
5 Tapa del cargador
6 Mecanismo con resorte del cargador
7 Cierre de seguridad
8 Palanca para retirar atascos
9 Ajuste de profundidad
10 Salida de aire
11 Llaves hexagonales
24
Page 26

955431 Clavadora neumática 64 mm
Desembalaje
Desembale e inspeccione la herramienta con cuidado. Familiarícese con
todas sus características y funciones.
Asegúrese de que el embalaje contiene todas las partes y que están en
buenas condiciones. Si faltan piezas o están dañadas, solicite su sustitución
antes de utilizar esta herramienta.
Antes de usar
Instalación del conector rápido
• Conecte el conector rápido (2) en la clavadora enroscándolo en la entrada
de aire. Coloque cinta PTFE en las roscas para sellarlas correctamente.
Ahora podrá acoplar racores y conectores de ¼” de forma rápida.
Conexión al suministro de aire comprimido
• Esta herramienta debe conectarse a un suministro de aire limpio con
un filtro de aceite/agua regulador combinado.
• NO EXCEDA NUNCA la presión de aire indicada (vea las especificaciones
técnicas).
• Seleccione siempre la presión más baja para la tarea que vaya a realizar,
de esta forma reducirá el nivel de ruido y vibración, además de alargar la
vida útil de su herramienta.
• Utilice siempre un filtro de aire para evitar que el agua pueda corroer
las partes internas de la herramienta. El agua acumulada en el cargador
del compresor y corroerlo seriamente. El cargador debe ser vaciado
diariamente para evitar que el agua entre en el suministro de aire.
• Asegúrese de que todas las partes y accesorios sean los adecuados para
la presión a utilizar.
• Si no puede utilizar un engrasador automático (tal como se muestra en
la figura inferior), deposite unas gotas de lubricante en la entrada de aire
del conector rápido.
ADVERTENCIA: Utilice sólo aceite lubricante para herramientas neumáticas.
Nunca utilice otro tipo de lubricante ya que podría dañar la herramienta
y ser peligroso para su seguridad. NUNCA utilice aceite lubricante para
automóviles.
CONEXIÓN A LA HERRAMIENTRA
NEUMÁTICA
MANGUERA DE
CONEXIÓN
UNIÓN
ACOPLADOR RÁPIDO
MANGUERA
SEPARACIÓN DEL AGUA
UNIÓN
LUBRICADOR
REGULADOR
DRENAR
DIARIAMENTE
SUMINISTRO DE AIRE
Comprobación del cierre de seguridad
ADVERTENCIA: Desconecte siempre la herramienta de la toma de aire
antes de realizar cualquier ajuste o tarea de mantenimiento.
• Asegúrese de que no haya clavos en el cargador.
• El cierre de seguridad (7) debe moverse hacia dentro y hacia fuera
libremente.
• Para comprobar el funcionamiento del cierre de seguridad:
1. Conecte la herramienta a la toma de aire.
2. Empuje el cierre de seguridad (7) contra una pieza de madera sin
apretar el gatillo (1). La herramienta no debe dispararse. En caso de
que se dispare, deberá repararla antes de usarla.
3. Aleje la herramienta del trozo de madera. El cierre de seguridad (7)
debe volver a la posición inicial.
4. Apriete el gatillo (1). La herramienta no debe dispararse. En caso de
que se dispare, deberá repararla antes de usarla.
5. Empuje el cierre de seguridad (7) contra la pieza de madera, pero esta
vez al apretar el gatillo (1) la herramienta debe dispararse, lo cual
indica un funcionamiento correcto.
Carga del cargador
ADVERTENCIA: Desconecte siempre la herramienta de la toma de aire
antes de realizar cualquier ajuste o tarea de mantenimiento.
1. Tire de mecanismo con resorte del cargador (6) para bloquear el
pestillo de liberación del cargador (4).
2. Inserte los clavos en la ranura en el cargador.
3. Sujete el mecanismo con resorte del cargador y utilice el pestillo
de liberación del cargador para ajustar los clavos correctamente en
el cargador. No suelte que el mecanismo con resorte del cargador
bruscamente, hágalo progresivamente.
www.silverlinetools.com
25
Page 27

ESP
Funcionamiento de la clavadora
ADVERTENCIA: Asegúrese de que el compresor de aire comprimido
cumpla con las especificaciones indicadas en “características técnicas”.
Interruptor de gatillo
• Para accionar la clavadora, simplemente apoye el cierre de seguridad
(7) contra la pieza de trabajo, sujete la herramienta por la empuñadura
y apriete el gatillo (1) para disparar el clavo.
ADVERTENCIA: Apretar el gatillo demasiado rápido puede dañar la
herramienta e invalidar la garantía.
Salida de aire
• La salida de aire (10) puede ajustarse sencillamente girándola sobre sí
misma. Ajústela de manera que el aire producido no afecte al usuario.
Ajuste de profundidad del clavo
IMPORTANTE: Compruebe antes que el clavo penetre a la profundidad
requerida.
1. Dispare la clavadora en un trozo de madera desechable y
compruebe la profundidad de penetración del clavo.
2. Utilice el ajuste de profundidad (9) para ajustar ligeramente la
profundidad de perforación de los clavos con el material que esté
utilizando.
3. Para ajustes más drásticos, utilice la presión de la entrada de aire
para modificar la profundidad de penetración del clavo. Disminuir la
presión reducirá la profundidad de penetración del clavo.
ADVERTENCIA: Asegúrese de que la presión de aire sea compatible con
esta herramienta. (Véase características técnicas).
Desatascar los clavos
ADVERTENCIA: Desconecte siempre la herramienta de la toma de aire
antes de realizar cualquier ajuste o tarea de mantenimiento.
Clavos atascados en el cargador
1. Tire de mecanismo con resorte del cargador (6) para bloquear el
pestillo de liberación del cargador (4).
2. Retire el clavo obstruido con unas tenacillas.
3. Vuelva a cargar el cargador y ciérrelo firmemente.
Clavos atascados en la placa
1. Abra la palanca para retirar atascos (8).
2. Retire el clavo obstruido con unas tenacillas.
3. Vuelva a cerrar la palanca para retirar atascos. Compruebe
el funcionamiento del cierre de seguridad antes de utilizar la
herramienta.
Mantenimiento
ADVERTENCIA: Desconecte la herramienta del suministro de aire antes de
realizar cualquier tarea de limpieza o mantenimiento.
Nota: Esta herramienta incluye 2 llaves hexagonales (11) que le permitirán
desmontar algunas partes de esta herramienta. Esto le resultará útil para
realizar tareas de limpieza y mantenimiento. Tenga en cuenta que el
procedimiento para desmontar esta herramienta no está indicado en este
manual.
ADVERTENCIA: Utilice sólo piezas originales y genuinas suministradas por
Silverline o por su distribuidor oficial más cercano.
• Mantenga la herramienta limpia en todo momento. La suciedad y el polvo
pueden dañar y disminuir la vida útil de su herramienta.
• Limpie el exterior de la herramienta con un paño seco o cepillo suave.
• Una vez limpio, aplique 1,5 ml de aceite lubricante (3) en la entrada de
aire (2).
• Si por algún motivo, la herramienta deja de funcionar o lo hace
intermitentemente, aplique aproximadamente 1,5 ml de aceite lubricante
en la entrada de aire (2) y conéctela al suministro de aire a presión.
Utilice la herramienta durante periodos cortos. Si la herramienta sigue
sin funcionar correctamente, llévela a reparar a un servicio técnico
autorizado.
Almacenaje
• Guarde esta herramienta y accesorios en un lugar seco y seguro fuera
del alcance de los niños.
Eliminación
• No elimine sus herramientas u otro equipo eléctrico o electrónico junto con la
basura convencional. Recíclelos si hay puntos de reciclaje.
• Las herramientas neumáticas contienen restos de lubricante y deben ser
desechadas en puntos de reciclaje adecuados.
• Póngase en contacto con la autoridad local encargada de la gestión de
residuos si necesita más información sobre cómo eliminar este tipo de
herramientas correctamente.
26
Page 28

955431 Clavadora neumática 64 mm
Garantía Silverline Tools
Garantía
Este producto Silverline dispone de una garantía de
3 años.
Registre el producto en www.silverlinetools.com antes de que transcurran
30 días a partir de la fecha de compra para obtener la garantía de 3 años.
El periodo de garantía comienza desde la fecha indicada en su recibo de
compra.
Condiciones
El periodo de garantía entra en vigor a partir de la fecha indicada en el recibo
de compra.
GUARDE EL RECIBO DE COMPRA
En caso de que el producto se averíe antes de que transcurran 30 días
desde la fecha de compra, devuélvalo al distribuidor donde lo compró, junto
con el recibo y los detalles de la avería. Le sustituiremos el producto o le
reembolsaremos el importe.
Si el producto se avería después de que transcurran 30 días desde la fecha
de compra, devuélvalo a:
Servicio Técnico Silverline Tools
PO Box 2988
Yeovil
BA21 1WU, Reino Unido.
La reclamación siempre debe presentarse durante el periodo de garantía.
Antes de poder realizar cualquier trabajo de reparación, deberá entregar el
recibo de compra original en el que se indica la fecha de compra, su nombre,
dirección y el lugar donde lo adquirió.
También deberá indicar claramente los detalles del fallo a reparar.
Las reclamaciones presentadas dentro del periodo de garantía deberán
ser verificadas por Silverline Tools para averiguar si las deficiencias son
consecuencia de los materiales o de la mano de obra del producto.
Los gastos de transporte no son reembolsables. Los productos a devolver
deberán estar limpios y en buenas condiciones para su reparación, debiendo
empaquetarse cuidadosamente con el fin de prevenir daños o lesiones
durante el transporte. Nos reservamos el derecho a rechazar envíos
incorrectos o inseguros.
Todas las reparaciones serán realizadas por Silverline Tools o por un servicio
técnico de autorizado.
La reparación o sustitución del producto no prolongará el periodo de garantía.
Registro del producto
Visite: silverlinetools.com, seleccione el botón de registro e indique:
• Sus datos personales
• Detalles del producto e información de compra
El certificado de garantía le será enviado en formato PDF. Imprímalo y
guárdelo con el producto.
Si los defectos están cubiertos por la garantía, la herramienta será reparada
sin cargo alguno (salvo los gastos de envío), o bien la sustituiremos por una
herramienta en perfecto estado de funcionamiento.
Las herramientas o piezas que hayan sido sustituidas serán propiedad de
Silverline Tools.
La reparación o sustitución del producto bajo garantía aporta beneficios
adicionales a sus derechos legales como consumidor, sin afectarlos.
Qué está cubierto:
Silverline Tools deberá comprobar si las deficiencias se deben a materiales o
mano de obra defectuosos dentro del periodo de garantía.
En caso de que cualquier pieza no estuviera disponible o estuviera fuera
de fabricación, Silverline Tools la sustituirá por una pieza funcional con las
mismas características.
Uso del producto en la Unión Europea.
Qué no está cubierto:
Silverline Tools no garantiza las reparaciones causadas por:
Desgaste normal por uso adecuado de la herramienta, por ejemplo hojas,
escobillas, correas, bombillas, baterías, etc...
La sustitución de cualquier accesorio suministrado: brocas, hojas, papel de
lija, discos de corte y otras piezas relacionadas.
Daño accidental, averías debidas a uso o cuidado negligente, uso incorrecto,
negligencia, funcionamiento o manejo indebido del producto.
Utilizar del producto para una finalidad distinta.
Cualquier cambio o modificación del producto.
El uso de piezas y accesorios que no sean recambios originales de Silverline
Tools.
Instalación incorrecta (excepto si fue realizada por Silverline Tools).
Reparaciones o alteraciones realizadas por servicios técnicos no autorizados
por Silverline Tools.
Las reclamaciones distintas a las indicadas en las presentes condiciones de
garantía no estarán cubiertas.
Declaración de conformidad CE
El abajo firmante: Mr Darrell Morris
Autorizado por: Silverline Tools
Declara que el producto:
Código de identificación: 955431
Descripción: Clavadora neumática 64 mm
Está en conformidad con las directivas:
• Directiva de máquinas 2006/42/CE
• EN 792-13:2000+A1:2008
Organismo notificado: Intertek Testing Services, Shanghai, China
La documentación técnica se conserva en: Silverline Tools
Fecha: 13/08/13
Firma:
Director General
Nombre y dirección del fabricante o representante autorizado:
Powerbox Ltd., Boundary Way, Lufton Trading Estate, Yeovil, Somerset,
BA22 8HZ, Reino Unido.
www.silverlinetools.com
27
Page 29

I
Descrizione dei simboli
La targhetta sul vostro strumento può mostrare simboli. Questi
rappresentano importanti informazioni sul prodotto o le istruzioni sul suo
utilizzo.
Indossare la protezione dell'udito
Indossare occhiali protettivi
Indossare protezione delle vie respiratorie
Indossare una protezione per la testa
Indossare la protezione delle mani
Leggere il manuale di istruzioni
Attenzione!
Non utilizzare su impalcature o scale!
Dispositivi di sicurezza importanti! Garantire il corretto
funzionamento, mantenere a secondo le istruzioni e non
disattivare!
NON utilizzare con bombole di gas compresse!
Conforme alla legislazione e norme di sicurezza
Protezione ambientale
Utensili ad aria non devono essere smaltiti insieme ai
rifiuti domestici. Essi contengono tracce di olio e di altri
lubrificanti. Riciclare dove esistono strutture idonei.
Verificare con le autorità locali o con il vostro rivenditore
per consigli sul riciclaggio
Specifiche tecniche
Pressione di esercizio ............... 5 – 7.5bar (72 – 108psi)
Pressione massima ...................7,5bar (108psi)
Ingresso d’aria .......................... connettore rapido 1⁄4 "
Dimensione chiodo .................... Calibro 16, 25 - 64mm
Capacità chiodo ......................... 100pz
Peso ....................................... 1,85kg
Informazioni sui suoni e sulle vibrazioni:
Pressione sonora LPA. ................. 87,0dB (A)
Potenza sonora LWA .................... 100,0dB (A)
Tolleranza K ...............................2.5dB
Vibrazione ponderata ah ............. 6.5m/s
Tolleranza K ...............................2m/s
Come parte del nostro continuo sviluppo dei prodotti, le specifiche
dei prodotti Silverline possono variare senza preavviso.
Il livello di intensità del suono per l'operatore può superare i 85 dB
(A) e le misure di protezione del suono sono necessari.
2
2
Specifica
Del Chiodo
- 25mm(1")
- 32mm(1-1⁄4")
- 35mm(1-3⁄8")
- 38mm(1-1⁄2")
- 45mm(1-3⁄4")
- 50mm(2")
- 57mm(2-1⁄4")
- 64mm(2-1⁄2")
3.0mm(0.118")
1.6 x 1.4mm
(0.063") (0.055")
16 Ga.
28
Page 30

955431 Chiodatrice di rifinitura pneumatica, 64mm
ATTENZIONE: Indossare sempre protezioni per le orecchie, dove il livello
sonoro supera i 85 dB (A) e limitare il tempo di esposizione, se necessario.
Se i livelli sonori sono scomodi, anche con la protezioni per le orecchie,
smettere di usare lo strumento immediatamente e controllare la protezione
acustica sia montata correttamente e fornisce il corretto livello di
isolamento acustico per il livello del suono prodotto dal vostro strumento.
ATTENZIONE: l'esposizione dell'utente alle vibrazioni dello strumento può
causare la perdita del senso del tatto, intorpidimento, formicolio e riduzione della
capacità di presa. Esposizione a lungo termine può portare ad una condizione
cronica. Se necessario, limitare la lunghezza del tempo esposti a vibrazioni e
utilizzare guanti anti-vibrazione. Non utilizzare lo strumento con le mani sotto
ad una temperatura normale comoda, siccome le vibrazioni avranno un effetto
maggiore. Utilizzare i dati forniti nella specifica relativa alle vibrazioni per
calcolare la durata e la frequenza di funzionamento dello strumento.
I livelli sonori e vibrazioni nella specifica sono determinate a secondo
EN60745 o simili standard internazionali. Le figure rappresentano un
normale utilizzo per lo strumento in normali condizioni di lavoro. Uno
strumento a mal tenuta, montata in modo errato, o usato in modo improprio,
possono produrre un aumento dei livelli di rumore e vibrazioni. www.osha.
europa.eu fornisce informazioni sui livelli sonori e vibrazioni nei luoghi
di lavoro che possono essere utili per gli utenti domestici che utilizzano
strumenti per lunghi periodi di tempo.
Norme generali di sicurezza
AVVERTENZA: Leggere ed assimilare tutte le istruzioni. La non
osservanza delle seguenti istruzioni può causare scosse elettriche, incendi
e/o lesioni gravi.
ATTENZIONE: Questo dispositivo non è destinato ad essere utilizzato da
persone (compresi i bambini) con ridotte capacità fisiche, sensoriali o
mentali o esperienza e/o conoscenza carente, a meno che non siano sotto
la supervisione di una persona responsabile della loro sicurezza o sono
istruiti da queste persone per l'uso del dispositivo. I bambini devono essere
sorvegliati, per assicurarsi che non giochino con l'apparecchio.
Conservare tutte le avvertenze di pericolo e le istruzioni operative per
ogni esigenza futura.
1) Area di lavoro.
a) Mantenere l’area di lavoro pulita e adeguatamente illuminata. Il disordine
e le zone di lavoro non illuminate possono essere fonte di incidenti.
b) Non usare gli elettroutensili in presenza di atmosfere esplosive,
come liquidi, gas e polveri infiammabili.
c) Tenere altre persone e i bambini a distanza di sicurezza durante
l’impiego dell’utensile elettrico. Eventuali distrazioni potrebbero far
perdere il controllo dell’utensile all’operatore.
2) Sicurezza elettrica
a) È importante concentrarsi su ciò che si sta facendo e usare il buon
senso quando si utilizza uno strumento alimentato. Non utilizzare
uno strumento di potenza quando si è stanchi o sotto l'effetto di
droghe, alcol o medicinali. Un attimo di distrazione durante la guida di
uno strumento alimentato può provocare gravi lesioni personali.
b) Utilizzare i dispositivi di protezione. Indossare sempre protezioni
per gli occhi. Dispositivi di protezione come la maschera antipolvere,
scarpe di sicurezza anti-scivolo, casco, oppure protezione acustica nelle
condizioni appropriate potrà ridurre il rischio di ferite.
c) Evitare l'accensione involontaria. Assicurarsi che l'interruttore è in
posizione OFF quando non si utilizza lo strumento e fare uso di altre
caratteristiche di sicurezza che impediscono l'avviamento involontario
d) Rimuovere qualsiasi chiave di regolazione prima di accendere lo
strumento. Una chiave lasciata collegata alla parte sinistra di una parte
rotante della macchina può provocare lesioni personali.
e) Non sbilanciarsi. Tenere i piedi, in equilibrio in ogni momento.
Questo consente un migliore controllo dello strumento in situazioni
impreviste.
f) Indossare un abbigliamento adatto. Non indossare abiti larghi
o gioielli. Tenere i capelli, i vestiti ed i guanti lontani da pezzi in
movimento. Vestiti larghi, gioielli o capelli lunghi potranno impigliarsi
nelle parti in movimento.
g) Se i dispositivi sono previsti per il collegamento di aspirazione
della polvere e di raccolta, assicurarsi che gli stessi siano collegati
e utilizzati correttamente. L'utilizzo di un’aspirapolvere può ridurre i
rischi relativi alla polvere.
ATTENZIONE: l'esposizione dell'utente alle vibrazioni strumento può
causare la perdita del senso del tatto, intorpidimento, formicolio e riduzione
della capacità di presa. Esposizione a lungo termine può portare ad una
condizione cronica. Se necessario, limitare il tempo cui siete esposti a
vibrazioni. Utilizzare i dati forniti nella specifica materia di vibrazioni se
previsto per calcolare la durata e la frequenza di funzionamento dello
strumento. La direttiva 2002/44/CE relativa alle vibrazioni nei luoghi
di lavoro possono fornire informazioni utili anche per strumenti di uso
domestico. Appena vi iniziate a sentire scomodi a causa delle vibrazioni
SMETTERE di usare immediatamente lo strumento.
ATTENZIONE: Indossare sempre protezioni auricolari, dove il livello sonoro
supera i 80 dB e limitare il tempo di esposizione, se necessario. Se i livelli
sonori diventano scomodi, anche con la protezione auricolare smettere di
utilizzare lo strumento immediatamente e controllare la protezione acustica
sia montata correttamente e che fornisce il giusto livello di isolamento
acustico per il livello del suono prodotto dal tuo strumento
3) l'uso dell’utensile e cura
a) Mantenere gli strumenti. Controllare il funzionamento vincolante
delle parti in movimento, la rottura di parti e di ogni altra
condizione che possa influenzare il funzionamento dello
strumento. In caso di danni, riparate lo strumento prima dell'uso.
Molti incidenti vengono causati da una scarsa manutenzione.
b) Mantenere gli utensili da taglio affilati e puliti. Utensili da taglio
correttamente mantenuti con bordi affilati, sono meno soggetti al
bloccaggio e sono più facili da controllare.
c) Utilizzare gli accessori dello strumento, attrezzi, ecc in conformità
con le istruzioni, tenendo conto delle condizioni di lavoro e il lavoro
da svolgere. L'impiego di utensili per usi diversi da quelli consentiti
potrà dar luogo a situazioni pericolosi
4) Assistenza
a) Fare controllare lo strumento da personale specializzato
utilizzando solo pezzi di ricambio originali. Ciò assicurerà che la
sicurezza dell'utensile viene mantenuta.
www.silverlinetools.com
29
Page 31

I
pneumatici
Indossare protezioni per gli occhi
• Indossare sempre gli occhiali di sicurezza o adeguate protezioni per gli
occhi.
Proteggere l’udito
• Indossare sempre protezioni per l'udito.
Protezione contro le vibrazioni
• Gli utensili pneumatici portatili tendono a generare vibrazioni e non
dovrebbero venire usati per lunghi periodi di tempo senza una pausa. Le
vibrazioni possono causare malattie. L’utilizzo di guanti, contribuisce a
una buona circolazione sanguigna delle dita.
Indossare indumenti e scarpe di protezione di tipo idoneo
• Sempre indossare equipaggiamento protettivo compreso ma non limitato
a tute, guanti, mascherina, ecc
• È responsabilità dell'utente assicurarsi che altre persone nelle vicinanze
dell'area di lavoro sono inoltre dotati di un equipaggiamento protettivo
idoneo
Uso di tubi flessibili di tipo idoneo
• Usare tubi leggeri per collegare l'utensile al compressore d’aria.
• La maggior parte degli utensili pneumatici dovrebbero essere montati
con un tubo spirale.
Scollegare l'elettroutensile dalla rete elettrica
• Prima di riporre l'utensile pneumatico è necessario verificare che sia
completamente spento.
• Scollegare gli utensili pneumatici dall'alimentazione prima di procedere
a operazioni di manutenzione o di cambio lame, dischi o di altri accessori.
• Garantire lame, dischi o accessori siano stati inseriti correttamente prima
di ricollegare all' aria
• Assicurarsi sempre di aver spento l’utensile pneumatico prima di
effettuare il collegamento alla rete pneumatica. Considerare sempre che
dopo l'utilizzo gli utensili pneumatici possono trattenere al loro interno
pressione residua. Dopo avere disattivato l'alimentazione pneumatica è
necessario scaricare la pressione presente all'interno dell'utensile.
Evitare di utilizzare l'apparecchio in modo improprio
• Non sovraccaricare la macchina. Permettendo alla macchina di operare
alla velocità ottimale è più efficiente e ne prolunga la durata
• Non aumentare la pressione pneumatica superando i valori raccomandati
poiché la pressione eccessiva causa l'usura dei componenti in
movimento e probabili guasti. Tale iniziativa può anche causare il
distacco del rivestimento esterno della macchina.
• Non tentare di modificare gli utensili pneumatici. Qualunque tentativo di
modificare l’utensile causa l'immediata decadenza della garanzia
• Non puntare la chiodatrice via dal pezzo quando è collegato ad
un'alimentazione di aria
Non utilizzare mai lo strumento con il meccanismo di sicurezza
disabilitato
• Mai puntare lo strumento verso le altre persone presenti nell'area di
lavoro o verso il principale serbatoio del compressore d'aria
Non utilizzare la chiodatrice quando si usano scale o ponteggi
• Non collegare mai questo strumento per taniche o bottiglie contenenti di gas
combustibili o portatili taniche ad aria compressa o cartucce. È progettato per
essere utilizzato con un compressore ad aria
Familiarizzazione con il prodottoSicurezza degli utensili
1 Grilleto
2 Ingresso aria con connettore rapido / ¼" BSP
3 Olio per utensili pneumatici
4 Caricatore con cattura di rilasscioh
5 Vano del caricatore
6 Meccanismo del caricatore a molla
7 Pulsante di sicurezza
8 Leva di rimozione bloccaggio
9 Regolatore di profondità
10 Ghiera direzionale di scarico
11 Chiavi esagonali
30
Page 32

955431 Chiodatrice di rifinitura pneumatica, 64mm
TUBO DI GUIDA
SEPARAZIONE ACQUA
REGOLATORE
Disimballaggio dello strumento
Disimballare con cura e controllare il vostro strumento. Familiarizzarsi con
tutte le sue caratteristiche e funzioni.
Assicurarsi che tutte le parti dello strumento sono presenti e in buone
condizioni. In caso di parti mancanti o danneggiate, avere tali pezzi sostituiti
prima di utilizzare questo strumento.
Prima di utilizzare
Installazione del connettore rapido
• Inserire il connettore rapido (2) alla chiodatrice. Il connettore è un attacco
a vite nella presa d'aria. L'applicazione di nastro in PTFE per la filettatura
della vite vi aiuterà a mantenere un completo sigillo. Linee d'aria installati
con corrispondenti ¼ "connettori saranno ora una spinta in forma
Pressione di esercizio
• Questo strumento deve essere collegato ad una fonte di aria pulita con
un oliatore in linea e separatore d'acqua
• NON lasciare che la pressione di alimentazione supera il massimo
indicato nelle specifiche tecniche
• Selezionare sempre la pressione di alimentazione più bassa adatto per
il compito. Questo ridurrà suono e vibrazioni per l'operatore. Diminuirà
anche l'usura dell'utensile e la probabilità di guasto dell'utensile
• Utilizzare sempre un filtro dell'aria con la macchina. Senza un filtro
aria, l'aria è suscettibile di avere un maggior contenuto di acqua che
rapidamente corrodere le parti interne di lavoro di questa macchina e
ridurrà la sua vita lavorativa in modo significativo. Acqua si raccoglie
nel serbatoio del compressore e causerà corrosione seria. Il serbatoio
deve essere svuotato ogni giorno per evitare l' accumulo dell’acqua
nell'alimentazione dell’acqua
• Assicurarsi che tutte le parti del sistema (tubi flessibili, attacchi, ecc.)
siano dimensionati per la pressione dell'aria da utilizzare
• Se non si utilizza un oliatore automatico (come nel schema di seguito),
versare due gocce di olio dello strumento di aria nella presa d'aria del
connettore rapido prima di ogni utilizzo
ATTENZIONE: Usare solo l’olio formulato per utensili pneumatici o ad
aria. Mai sostituire con altri oli che possono danneggiare lo strumento
e il compressore o non sono adatti per il contatto con l'operatore dello
strumento. NON usare l'olio a 2 tempi o per l’uso automobilistico.
Verifica della sicura
ATTENZIONE: Scollegare sempre l’utensile dall’alimentazione d’aria prima
di eseguire qualsiasi regolazione o manutenzione.
• Assicurarsi che non ci sono elementi di fissaggio nel caricatore
• Il pulsante di sicurezza (7) dovrebbe scorrere liberamente senza
ostruzioni
• Controllare il gancio di sicurezza funzioni correttamente come segue:
1. Collegare lo strumento all'alimentazione dell'aria
2. Spingere il pulsante di sicurezza (7) contro un pezzo di legno senza
premere il grilletto (1). L'utensile non deve sparare. Se l’utensile spara
deve essere riparato prima di qualsiasi ulteriore utilizzo
3. Tenere l'utensile via dal pezzo di legno. Il pulsante di sicurezza
dovrebbe tornare alla posizione originale
4. Premi il grilletto. L'utensile non dovrebbe sparare. Se lo strumento
spara, deve essere riparato prima di qualsiasi ulteriore utilizzo
5. Spingere il pulsante di sicurezza contro il pezzo di legno, ma questa
volta premere il grilletto. Lo strumento dovrebbe sparare. Ciò indica il
normale funzionamento
Riempimento del caricatore
ATTENZIONE: Scollegare sempre l'utensile dalla rete di alimentazione
dell'aria prima del caricamento, la regolazione o la manutenzione viene
effettuata.
1. Tirare indietro il meccanismo del caricatore a molla (6) in modo che si
blocca operando il pulsante di rilascio del caricatore (4)
2. Inserire la striscia di chiodi nel foro di caricazione chiodi
3. Mantenere il meccanismo del caricatore a molla e far operare il
pulsante di rilascio del caricatore per permettere al meccanismo
a molla di scorrere indietro assicurando i chiodi pronti per essere
sparati. Non permettere al meccanismo a molla di scattare all' indietro
ma controllare il movimento.
AL VOSTRO UTENSILE
PNEUMATICO
RACCORDO
ATTACCO RAPIDO
TUBO A RINCOLO
RACCORDO
INGRASSATORE
SCARICA OGNI
GIORNO
www.silverlinetools.com
31
Page 33

I
Operazione
ATTENZIONE: Assicurarsi che l'alimentazione d'aria compressa opera
all'interno del campo di pressione indicato nelle "Specifiche".
Grilletto di Sparo
• Per utilizzare la chiodatrice, premere il pulsante di sicurezza (7) contro
il materiale. Tenendo la chiodatrice saldamente dala maniglia, premere
il grilletto (1) per sparare il chiodo nel materiale
ATTENZIONE: Premendo rapidamente il grilletto sparando potrebbe
causare danni interni e può invalidare la garanzia.
Scarico
• Ruotare la ghiera direzionale di scarico (10) per dirigere l'aria di scarico
lontano dall'operatore
Regolazione di profondità del chiodo
IMPORTANTE: Assicurarsi sempre che il dispositivo penetra alla
profondità corretta.
1. Spara un chiodo di prova in un pezzo di materiale di scarto ed
esaminare la profondità del chiodo
2. Regolazioni minori sono fatte usando il regolatore di profondità (9)
per regolare le dimensioni diverse dei chiodi e diversi materiali con
un controllo più fine
3. Maggiori regolazioni di profondità del chiodo sono fatte cambiando
l'alimentazione di pressione aria. Riducendo la pressione d'aria
diminuirà la penetrazione del chiodo.
ATTENZIONE: assicurarsi sempre che la pressione d'aria sia nel limite
dichiarato nella sezione 'Specifiche Tecniche'.
Rimozione degli inceppamenti
ATTENZIONE: Scollegare sempre l'utensile dalla rete di alimentazione
dell'aria prima di qualsiasi regolazione o prima che la manutenzione viene
effettuata.
Dispositivo di fissaggio inceppato nel caricatore
1. Far scorrere all'indietro il meccanismo del caricatore a molla (6) in
modo che blocca il pulsante di rilascio caricatore (4)
2. Rimuovere l'ostruzione usando delle pinze
3. Ricaricare il caricatore e chiudere in modo sicuro
Dispositivo di fissaggio inceppato nella zona piastra
1. Aprire la leva di rimozione bloccaggio (8) e aprire la piastra del
chiodo
2. Rimuovere l'ostruzione usando delle pinza
3. Chiudere la piastra e la leva di rimozione bloccaggio e controllare il
funzionamento delle leva di sicurezza prima di utilizzare l'utensile
Manutenzione
ATTENZIONE: Scollegare sempre la macchina dalla alimentazione dell'aria
prima di effettuare qualsiasi intervento di manutenzione o pulizia.
NB: Due chiavi esagonali (11) sono dotate di questa chiodatrice pneumatica
che sono adatti per lo smontaggio parziale di questa unità. Questi possono
essere utili per la pulizia, inceppamenti di una macchina e la sostituzione di
parti. Tale smontaggio non è coperto da questo manuale.
AVVERTENZA: Non utilizzare pezzi di ricambio di terze parti con questo
prodotto. Utilizzare solo parti di ricambio forniti da Silverline o un rivenditore
autorizzato o centro di riparazione Silverline.
• Tenere la macchina pulita in ogni momento. Lo sporco e la polvere
potrebbero usurare parti interne velocemente, e potrebbero ridurre la
sua durata
• Pulire il corpo della macchina con una spazzola morbida o un panno
asciutto
• Dopo ogni utilizzo, versare circa 1,5 ml di olio per utensili pneumatici (3)
nella presa d'aria (2)
• Se lo strumento smette di funzionare o funziona a intermittenza, versare
circa 1,5 ml di olio lubrificante nella presa d'aria (2), e collegare ad
alimentazione di aria. Azionare lo strumento in brevi raffiche. Se questo
non libera il meccanismo dello strumento, portate lo strumento presso un
centro di assistenza autorizzato Silverline per la manutenzione
Conservazione
• Conservare con cura questo strumento in un luogo sicuro, asciutto, fuori
dalla portata dei bambini
Smaltimento
• Come con altri utensili elettrici, utensili pneumatici non devono essere smaltiti
con i rifiuti domestici
• Strumenti di aria possono contenere tracce di olio e altri lubrificanti e quindi
devono essere riciclate di conseguenza
• Contattare l'ente locale per lo smaltimento dei rifiuti per informazioni sul
modo corretto di disporre di strumenti elettrici
32
Page 34

955431 Chiodatrice di rifinitura pneumatica, 64mm
Garanzia Silverline Tools
Questo prodotto Silverline è protetto da una garanzia
di 3 anni
Per attivare la garanzia di 3 anni è necessario registrare il prodotto sul
sito www.silverlinetools.com entro 30 giorni dalla data d’acquisto. La data
d’inizio del periodo di garanzia corrisponde alla data d’acquisto riportata sullo
scontrino di vendita.
Registrazione dell'acquisto
Accedere al sito: silverlinetools.com e selezionare il tasto Registrazione
per inserire:
• Informazioni personali
• Dettagli del prodotto e informazioni sull'acquisto
Una volta che queste informazioni sono state inserite, Il vostro certificato
di garanzia sarà inviato per posta elettronica nel formato PDF. Si prega di
stampare e conservare il Certificato insieme alla ricevuta d’acquisto.
Termini & condizioni
Il periodo di garanzia decorre dalla data dell’acquisto presso il rivenditore
indicata sulla ricevuta d’acquisto.
SI PREGA DI CONSERVARE LA RICEVUTA D'ACQUISTO
Nel caso in cui il prodotto risultasse difettoso entro 30 giorni dalla data
d’acquisto, sarà necessario restituirlo al punto vendita presso cui è stato
acquistato, presentando la ricevuta e spiegando chiaramente la natura del
difetto riscontrato. Il prodotto difettoso sarà sostituito o sarà rimborsato
l'importo d'acquisto.
Nel caso in cui il prodotto risultasse difettoso dopo 30 giorni dalla data
d’acquisto, sarà necessario inviare una richiesta di indennizzo in garanzia a:
Silverline Tools Service Centre
PO Box 2988
Yeovil
BA21 1WU, GB
Le richieste di indennizzo devono essere presentate durante il periodo della
garanzia.
Affinché la richiesta sia approvata, è necessario presentare anche la ricevuta
d’acquisto originale, indicando il luogo e la data dell’acquisto del prodotto e il
proprio nome e indirizzo.
Sarà necessario inoltre fornire una descrizione dettagliata del guasto
riscontrato.
Le richieste effettuate durante il periodo di garanzia saranno verificate da
Silverline Tools per stabilire se il difetto del prodotto è dovuto a problemi di
materiali o di lavorazione.
Le spese di spedizione non saranno rimborsate. Tutti i prodotti devono essere
spediti puliti e in condizioni tali da garantire l'esecuzione della riparazione in
modo sicuro. I prodotti devono essere imballati con cura per evitare danni o
lesioni durante il trasporto. Silverline Tools si riserva il diritto di non accettare
prodotti spediti in condizioni non idonee o non sicure.
Le riparazioni saranno eseguite da Silverline Tools o da un centro di
riparazione autorizzato.
La riparazione o la sostituzione del prodotto non estende o rinnova il periodo
di garanzia.
Nel caso in cui determini che il prodotto e il difetto riscontrato sono coperti
dalla garanzia, Silverline Tools provvederà a riparare l'utensile
Dichiarazione di conformità CE
Il sottoscritto: Mr Darrell Morris
come autorizzato di: Silverline Tools
Dichiara che il prodotto:
Codice di identificazione: 955431
Descrizione: Chiodatrice di rifinitura pneumatica, 64mm
Si conforma alle seguenti direttive:
• Direttiva macchina 2006/42/CE
• EN 792-13:2000+A1:2008
gratuitamente (esclusi i costi di spedizione) o, a propria discrezione, a
sostituirlo con un nuovo utensile.
Gli utensili o le parti trattenuti da Silverline Tools in cambio di un prodotto o
componente sostitutivo diventano proprietà di Silverline Tools.
La riparazione o la sostituzione di un prodotto in garanzia estende i diritti del
consumatore previsti per legge, senza modificarli.
Cosa copre la garanzia:
La riparazione del prodotto, nel caso in cui Silverline Tools determini che il
problema sia dovuto a difetti dei materiali o difetti di lavorazione riscontrati
durante il periodo della garanzia.
Nel caso in cui un componente non sia più disponibile o fuori produzione,
Silverline Tools si riserva il diritto di sostituirlo con un componente adeguato.
Prodotti acquistati e utilizzati all’interno dell’Unione Europea.
Cosa non copre la garanzia:
La Garanzia Silverline Tools non copre le riparazioni se il difetto è stato
causato da:
La normale usura dei componenti per via dell’utilizzo del prodotto come
indicato nelle istruzioni d’uso (ad esempio, lame, spazzole, cinghie, lampadine,
batterie, ecc.).
La sostituzione di accessori forniti a corredo, come ad esempio punte, lame,
fogli abrasivi, dischi di taglio e altri componenti correlati.
I danni accidentali, causati dall'uso improprio, dall'abuso e dalla
manipolazione, conservazione e cura inadeguata dell'utensile da parte del
proprietario.
L’uso del prodotto per fini non domestici.
La modifica o alterazione del prodotto.
Difetti causati dall’uso di parti e accessori che non siano componenti originali
Silverline Tools.
Installazione difettosa (fatto salvo quando l'installazione viene eseguita da
Silverline Tools).
Riparazioni o alterazioni eseguite da terze parti che non siano la Silverline
Tools o i centri di riparazione autorizzati da quest'ultima.
Richieste diversi dal diritto alla correzione degli errori con lo strumento
denominato in queste condizioni di garanzia non sono coperti dalla garanzia.
Organismo informato: Intertek Testing Services, Shanghai, China
La documentazione tecnica è conservata da: Silverline Tools
Data: 13/08/13
Firma:
Direttore
Nome e indirizzo del fabbricante oppure persona autorizzata:
Powerbox International Ltd, Boundary Way, Lufton Trading Estate, Yeovil,
Somerset, BA22 8HZ, Regno Unito
www.silverlinetools.com
33
Page 35

NL
Beschrijving symbolen
Op het gegevensplaatje van uw gereedschap kunnen zich symbolen
bevinden. Deze symbolen belangrijke informatie over het product of
instructies voor het gebruik.
Draag gehoorbescherming
Draag een veiligheidsbril
Draag een stofmasker
Draag een veiligheidshelm
Draag handschoenen
Lees de handleiding
Voorzichtig!
Gebruik NIET op ladders of platforms!
Belangrijke veiligheidshulpmiddelen! Zorg voor een goede
werking, onderhoud volgens instructies en MAAK NIET
onbruikbaar!
Gebruik NIET met persgascilinders!
Voldoet aan de relevante wetgeving en veiligheidsnormen
Milieubescherming
Elektrische producten mogen niet met het normale huisvuil
worden weggegooid. Indien de mogelijkheid bestaat, dient u
het product te recyclen. Vraag de plaatselijke autoriteiten of
winkelier om advies betreffende recyclen.
Specificaties
Werkdruk: ..................................5 – 7,5 bar
Maximale druk: .......................... 7,5 bar
Luchtinlaat: ................................1⁄4" snelkoppeling
Spijker maat: ............................. Maat 16, 25-64 mm
Spijker capaciteit: ...................... 100 st.
Gewicht: .................................... 1,85 kg
Geluid en trilling:
Geluidsdruk LPA:. ........................ 87 dB(A)
Geluidsvermogen LWA: ................ 100 dB(A)
Onzekerheid K: ..........................2,5 dB
Trilling ah: ................................... 6,5 m/s
Onzekerheid K: ..........................2 m/s
Met het oog op onze aanhoudende productontwikkeling kunnen
de specificaties van Silverline producten zonder voorafgaande
kennisgeving worden gewijzigd.
Wanneer het geluidsniveau boven de 85 dB (A) reikt, is
gehoorbescherming noodzakelijk.
2
2
De Specificatie
Van de Spijker
- 25 mm(1")
- 32 mm(1-1⁄4")
- 35 mm(1-3⁄8")
- 38 mm(1-1⁄2")
- 45 mm(1-3⁄4")
- 50 mm(2")
- 57 mm(2-1⁄4")
- 64 mm(2-1⁄2")
3 mm (0.118")
1.6 mm x 1.4 mm
(0.063") (0.055")
Gauge:16
34
Page 36

955431 Pneumatische spijkermachine, 64 mm
WAARSCHUWING: Bij een geluidsintensiteit van 85 dB(A) of hoger is het
dragen van gehoorbescherming en het limiteren van de blootstellingstijd
vereist. Bij oncomfortabel hoge geluidsniveaus, zelfs met het dragen van
gehoorbescherming, stopt u het gebruik van de machine onmiddellijk.
Controleer de pasvorm en het geluiddempingsniveau van de bescherming.
WAARSCHUWING: Blootstelling aan trilling resulteert mogelijk in
gevoelloosheid, tinteling en een vermindert gripvermogen. Langdurige
blootstelling kan leiden tot chronische condities. Limiteer de blootstellingsduur
en draag anti-vibratie handschoenen. Vibratie heeft een grotere invloed
op handen met een temperatuur lager dan een normale, comfortabele
temperatuur. Maak gebruik van de informatie in de specificaties voor het
bereken van de gebruiksduur en frequentie van de machine.
Geluid- en trillingsniveaus in de specificatie zijn vastgesteld volgens
EN60745 of een gelijksoortige internationale norm. De waarden gelden
voor een normaal gebruik in normale werkomstandigheden. Een slecht
onderhouden, onjuist samengestelde of onjuist gebruikte machine
produceert mogelijk hogere geluids- en trillingsniveaus. www.osha.europa.
eu biedt informatie met betrekking tot geluids- en trillingsniveaus op de
werkplek wat mogelijk nuttig is voor regelmatige gebruikers van machines.
Algemene veiligheid
WAARSCHUWING Lees alle bediening- en veiligheidsvoorschriften.
Het niet opvolgen van alle voorschriften die hieronder vermeld staan, kan
resulteren in een elektrische schok, brand en/of ernstig letsel.
WAARSCHUWING: De machine is niet geschikt voor gebruik door personen
met een verminderde mentale of fysieke gesteldheid of een gebrek aan
ervaring, tenzij de persoon wordt begeleid of geïnstrueerd door een persoon
verantwoordelijk voor de veiligheid
Bewaar deze voorschriften voor toekomstig gebruik.
1) Veiligheid in de werkruimte
a) Houd de werkruimte schoon en zorg voor een goede verlichting.
Rommelige en donkere ruimtes leiden vaak tot ongelukken.
b) Gebruik het gereedschap niet in explosieve atmosferen, als in de
aanwezigheid van vlam bare vloeistoffen, gassen en stof.
c) Houd kinderen en omstanders uit de buurt wanneer u elektrisch
gereedschap bedient. Door afleiding kunt u de controle over het
gereedschap verliezen.
2) Persoonlijke veiligheid
a) Blijf alert en gebruik uw gezonde verstand wanneer u elektrisch
gereedschap bedient. Gebruik het elektrisch gereedschap niet
wanneer u vermoeid bent of onder invloed bent van drugs, alcohol
of medicijnen. Onoplettendheid tijdens het bedienen van elektrisch
gereedschap kan leiden tot ernstig letsel.
b) Maak gebruik van persoonlijke bescherming. Draag altijd een
veiligheidsbril. Passende bescherming voor de omstandigheden,
zoals een stofmasker, niet-slippende veiligheidsschoenen een helm of
gehoorbescherming, vermindert het risico op persoonlijk letsel.
c) Voorkom onopzettelijk starten. Zorg ervoor dat de schakelaar in de
uit-stand staat wanneer het gereedschap niet gebruikt wordt en maak
gebruik van andere voorzorgsmaatregelen om onopzettelijk starten te
voorkomen
d) Verwijder alle stel- of moersleutels voordat u het elektrische
gereedschap inschakelt. Een moer- of stelsleutel die zich op een
draaiend onderdeel van het elektrische gereedschap bevindt, kan leiden
tot letsel.
e) Reik niet te ver. Blijf altijd stevig en in balans staan. Zo houdt
u meer controle over het elektrische gereedschap in onverwachte
situaties.
f) Draag geschikte kleding. Draag geen loshangende kleding of
sieraden. Houd haren, kleding en handschoenen uit de buurt van
bewegende delen. Loshangende kleding, sieraden en los hangende
haren kunnen vast komen te zitten in bewegende delen.
g) Als er onderdelen voor stofafvoer- en stofverzameling worden
meegeleverd, sluit deze dan aan en gebruik deze op de juiste
wijze. Het gebruik van deze onderdelen kan het risico op stof
gerelateerde ongelukken verminderen.
WAARSCHUWING: Bloodstelling aan trilling kan leiden tot gevoelloosheid,
tintelen en verminderde grip bekwaamheid. Op de lange termijn kan het
leiden tot chronische condities. Limiteer de lengte van blootstelling aan
trilling. Gebruik de gegevens in de specificaties van het gereedschap om de
gebruiksduur en –frequentie te berekenen. De 2002/44-EEG richtlijn met
betrekking tot trilling in de werkruimte bevat mogelijk bruikbare informatie.
Bij een oncomfortabel gebruik ten gevolge van trilling stopt u onmiddellijk
met het gebruik van het gereedschap
WAARSCHUWING: Wanneer het geluidsniveau boven de 85 dB(A) reikt is
het dragen van gehoorbescherming een must. Wanneer geluidsniveaus,
zelfs tijdens het dragen van gehoorbescherming, oncomfortabel hoog zijn,
stop dan met het gebruiken van het gereedschap en controleer of het juiste
dempingsniveau gegeven wordt
3) Gebruik en verzorging
a) Het onderhouden van gereedschap. Controleer op een verkeerde
uitlijning of binden van bewegende onderdelen, beschadiging aan
onderdelen en andere condities wat het gebruik beïnvloed. In geval
van beschadiging, vervangt u het gereedschap onmiddellijk. Vele
ongelukken worden veroorzaakt door slecht onderhouden gereedschap
b) Houd snijwerktuigen scherp en schoon. Goed onderhouden
snijwerktuigen met scherpe messen slaan minder snel vast en zijn
gemakkelijker te bedienen.
c) Gebruik de accessoires in overeenstemming met deze instructies,
waarbij rekening gehouden wordt met de werkomstandigheden en
het uit te voeren werk. Het gebruik van het gereedschap voor taken,
anders dan waarvoor het bestemd is, kan resulteren in gevaarlijke
situaties
4) Onderhoud
a) Laat uw gereedschap onderhouden door een gekwalificeerde
vakman en gebruik alleen identieke vervangstukken.
www.silverlinetools.com
35
Page 37

NL
pneumatisch gereedschap
Bescherm uw ogen
• Draag altijd een veiligheidsbril
Bescherm uw gehoor
• Draag altijd oor bescherming
Bescherm uzelf tegen trillingen
• Pneumatisch handgereedschap kan trillingen veroorzaken. Trillingen
kunnen ziektes veroorzaken. Handschoenen die de handen van de
bediener warm houden kunnen een goede circulatie van het bloed in
de vingers bevorderen. Gebruik handgereedschap niet langdurig zonder
onderbreking
Beschermende uitrusting
• Draag de juiste beschermende uitrusting. Denk daarbij aan overal,
handschoenen, gezichtsbescherming etc.
• Het is de verantwoordelijk van de gebruiken, omstanders te voorzien van
de juiste beschermende uitrusting
Gebruik de correcte luchtslang
• Gebruik lichtgewicht slangen om het gereedschap met de toevoer te
verbinden
• Voor het meeste pneumatische gereedschap dient u een spiraalslang
te gebruiken
Altijd de stekker uit het stopcontact trekken
• Zorg ervoor dat het pneumatisch gereedschap volledig gestopt is met
werken voor u het neerlegt
• Sluit alle pneumatisch gereedschappen af van de luchttoevoer voor
u onderhoudswerkzaamheden verricht of messen, schijven of andere
aanbouwdelen vervangt
• Zorg ervoor dat alle messen, schijven of aanbouwdelen correct bevestigd
zijn voor u de luchttoevoer opnieuw aansluit. Zorg er altijd voor dat uw
pneumatisch gereedschap uit geschakeld is voordat u de luchttoevoer
aansluit
• Houd er rekening mee dat pneumatisch gereedschappen mogelijk
restdruk bevatten na het gebruik. Tap na het afsluiten van de luchttoevoer
altijd de luchtdruk af van het gereedschap
Maak geen verkeerd gebruik van de machine
• Overlaad de machine niet. Door de machine te laten werken op de
optimale snelheid verlengt u de levensduur en verhoogt u de efficiëntie
• Laat de luchtdruk niet boven het aanbevolen niveau stijgen. Een
overmatige druk leidt tot slijtage van de bewegende delen en mogelijk tot
een defect. Teveel druk kan ook een breuk van de behuizing veroorzaken
• Probeer geen pneumatisch gereedschappen te modificeren. Het
modificeren maakt de garantie ongeldig en kan resulteren in ernstig
letsel voor uzelf of personen in uw omgeving.
• Richt de machine niet van het werkstuk af wanneer deze is aangesloten
op een luchtbron
Gebruik de machine niet wanneer het veiligheidsmechanisme niet
functioneert
• Richt de machine niet op personen of de luchtcompressor tank in de
werkruimte
Gebruik de machine niet bij het gebruik van ladders of steigers
• Sluit de machine niet op bussen/flessen met brandbare gassen aan. De
machine is ontworpen voor het gebruik op een luchtcompressor
ProductbeschrijvingVeiligheid bij het gebruik van
1 Trekker
2 Luchtinlaat/ ¼” BSP snelkoppeling
3 Pneumatische gereedschapsolie
4 Magazijnhendel
5 Magazijnkap
6 Magazijn veermechanisme
7 Veiligheidspal
8 Blokkering verwijderingshendel
9 Diepteversteller
10 Uitlaat richting schijf
11 Inbussleutels
36
Page 38

955431 Pneumatische spijkermachine, 64 mm
WATER SCHEIDING
Het uitpakken van uw
gereedschap
Pak het gereedschap voorzichtig uit en inspecteer het zorgvuldig. Oriënteer
uzelf volledig op alle eigenschappen en functies
Controleer of alle onderdelen aanwezig zijn en in goede staat verkeren. Als
er onderdelen ontbreken of beschadigd zijn, zorg dan dat deze vervangen
worden voor u dit toestel / gereedschap gebruikt
Vóór Gebruik
Het aansluiten van de snelkoppeling
• Schroef de snelkoppeling (2) op de luchtinlaat van de machine. Breng
PTFE-tape op de schroefverbinding aan voor het verkrijgen van een
luchtdichte aansluiting. Luchtslangen met bijpassende ¼” koppelingen
kunnen op de koppeling worden gedrukt
Aanbevolen luchttoevoer
• De machine hoort op een schone luchttoevoer met een in-lijn olie en
waterscheider aangesloten te worden
• De maximale luchtdruk in de specificaties MAG NIET overschreden
worden
• Selecteer de laagste toevoerluchtdruk, geschikt voor de tank. Dit
minimaliseert de geluids- en trillingsniveaus. Tevens wordt de slijtage en
de kans op beschadiging verminderd
• Maak te allen tijde gebruik van een luchtfilter. Zonder het gebruik van een
luchtfilter is de waterinhoud groter wat de interne delen van de machine
sneller corrodeert en de gebruiksduur aanzienlijk verslechterd. Om de
ophoping van water te voorkomen leegt u de tank dagelijks
• Zorg ervoor dat slangen, koppelingen, etc. geschikt zijn voor gebruik met
de gebruikte druk
• Wanneer u geen gebruik maakt van een automatische olievoorziening,
giet u een kleine hoeveelheid gereedschapsolie in de luchtinlaat van de
snelkoppeling voor elk gebruik
WAARSCHUWING: Maak enkel gebruik van een geschikt type
gereedschapsolie. Maak geen gebruik van olietypen die de machine en de
compressor mogelijk beschadigen. Maak geen gebruik van 2-taktolie of
voertuig olie
SNELLE KOPPELING
AAN UW
LUCHTHULPMIDDEL
UITSTEEKSEL
LEIDERS SLANG
TERUGSLAG SLANG
UITSTEEKSEL
REGELGEVER
AFVOERKANAAL
DAGELIJKS
LUCHT LEVERING
De veiligheidspal controleren
WAARSCHUWING: Ontkoppel het gereedschap van de luchttoevoer voordat
aanpassingen of onderhoud wordt uitgevoerd.
• Zorg ervoor dat het magazijn vrij is van spijkers
• De veiligheidspal (7) hoort soepel heen en weer te bewegen
• Controleer als volgt of de pal juist functioneert:
1. Sluit de machine op de luchttoevoer aan
2. Duw de veiligheidspal (7) tegen een stuk hout zonder de trekker (1)
over te halen. De machine hoort geen spijker af te vuren. Mocht de
machine toch afvuren, dan moet deze gerepareerd worden voordat hij
weer gebruikt kan worden
3. Houd de machine van het stuk hout vandaan. De veiligheidspal (7)
hoort nu naar de beginstand terug te schieten
4. Haal de trekker (1) over. De machine hoort geen spijker af te vuren.
Mocht de machine toch afvuren, dan moet deze gerepareerd worden
voordat hij weer gebruikt kan worden
5. Duw de veiligheidspal (7) tegen het stuk hout, en haal de trekker (1)
deze keer over. De machine hoort een spijker af te vuren. Dit duidt op
een juiste werking
Het magazijn laden
WAARSCHUWING: Ontkoppel de machine van de luchttoevoer voordat
aanpassingen worden gemaakt, het magazijn geladen wordt, of onderhoud
wordt uitgevoerd
1. Trek het magazijn veermechanisme (6) terug zodat deze op de
magazijnhendel (4) vergrendelt
2. Plaats de spijkers in de laadgleuf
3. Houdt het veermechanisme tegen en ontgrendel de magazijnhendel
zodat het mechanisme terug in de machine schuift. Laat het
mechanisme niet terug schieten, geleid deze beweging
www.silverlinetools.com
37
Page 39

NL
Gebruik
WAARSCHUWING: Zorg ervoor dat de luchttoevoer binnen het drukbereik
van de machine (zie: Specificaties) valt
Het overhalen van de trekker
• Houdt de machine stevig bij het handvat vast, druk de veiligheidspal
(7) tegen het materiaal aan en haal de trekker (1) over voor het afvuren
van een spijker
WAARSCHUWING: Het snel en herhaaldelijk overhalen van de trekker kan
de interne delen van de machine beschadigen, wat de garantie mogelijk
ontkracht
Uitlaat
• Draai de uitlaat richting schijf (10) om de lucht van de gebruiker af
te richten
Spijkerdiepteverstelling
BELANGRIJK: Controleer altijd of de spijker ver genoeg in het materiaal
dringt
1. Vuur een testspijker af in een stuk afvalmateriaal en check de diepte
ingang
2. Kleine aanpassingen worden gemaakt door aan de diepteversteller
(9) te draaien
3. Grote aanpassingen worden gemaakt door het veranderen van de
druk op de luchttoevoer. Het verlagen van de luchtdruk zorgt voor
een verminderde diepte ingang
WAARSCHUWING: Zorg ervoor dat de luchtdruk te allen tijde binnen het
bereik van de machine valt (zie: Specificaties)
Het verwijderen van vastgelopen spijkers
WAARSCHUWING: Ontkoppel de machine van de luchttoevoer voordat u
enige aanpassingen maakt of onderhoud uitvoert
Vastgelopen spijker in het magazijn
1. Trek het magazijn veermechanisme (6) terug zodat deze op de
magazijnhendel (4) vergrendelt
2. Verwijder de vastgelopen spijker met behulp van een tang
3. Herlaad het magazijn en sluit deze
Vastgelopen spijker in het plaatgebied
1. Open de blokkering verwijderingshendel (8) en open de spijkerplaat
2. Verwijder de vastgelopen spijker met behulp van een tang
3. Sluit de plaat en de verwijderingshendel en controleer de werking
van de veiligheidspal voordat u de machine gebruikt
Onderhoud
WAARSCHUWING: Ontkoppel de machine van de luchttoevoer voordat u
enig onderhoud uitvoert
Let op: De machine is voorzien van twee inbussleutels (11), geschikt voor
een gedeeltelijke demontage van de eenheid. De sleutels zijn te gebruiken
bij de schoonmaak, bij het verwijderen van vastgelopen spijkers en bij
het vervangen van onderdelen. De demontage is niet in deze handleiding
beschreven
WAARSCHUWING: Maak enkel gebruik van reserve onderdelen, verstrekt
door Silverline, een geautoriseerde Silverline handelaar of een service
center
• Houd uw machine te allen tijde schoon. Vuil en stof doen de interne
onderdelen snel slijten en verminderen de levensduur van de machine
• Maak de behuizing van de machine met een zachte borstel of droge
doek schoon
• Giet na gebruik een kleine hoeveelheid gereedschapsolie (3) in de
luchtinlaat (2)
• Wanneer de machine stopt met werken, giet u een kleine hoeveelheid
olie in de luchtinlaat (2). Sluit u de machine op de luchttoevoer aan.
Schakel de machine in korte stoten in. Wanneer het mechanisme niet
vrijgegeven wordt, laat u de machine bij een geautoriseerd Silverline
servicecenter nakijken
Opberging
• Berg de machine op een droge en veilige plek, buiten het bereik van
kinderen op.
Verwijdering
• Elektrische en elektronische apparaten mogen niet met uw huishoudelijk
afval worden weggegooid
• Pneumatische machines bevatten mogelijk oliesporen
• Neem contact op met uw gemeente voor informatie betreffende de juiste
verwijdering van elektrisch gereedschap
38
Page 40

955431 Pneumatische spijkermachine, 64 mm
Silverline Tools Garantie
Dit Silverline product komt met 3 jaar garantie.
Registreer dit product binnen 30 dagen van aankoop op
www.silverlinetools.com om in aanmerking te komen voor 3 jaar garantie. De
garantieperiode begint op de datum van aankoop op het ontvangstbewijs.
Het gekochte product registreren
Ga naar: silverlinetools.com, kies Registration (registratie) en voer het
volgende in:
• Uw persoonlijke gegevens
• De gegevens van het product en de aankoop
U ontvangt het garantiebewijs in PDF-vorm. Druk het af en bewaar het
bij het product.
Voorwaarden
De garantieperiode gaat in vanaf de datum van aankoop op het
ontvangstbewijs.
BEWAAR HET ONTVANGSTBEWIJS OP EEN VEILIGE PLAATS
Als dit product binnen 30 dagen van de aankoopdatum een fout heeft, breng
het dan naar de winkelier waar u het heeft gekocht, met uw ontvangstbewijs,
en met vermelding van de details van de storing. U kunt om een nieuwe
vragen of om uw geld terug.
Als dit product na de periode van 30 dagen een fout heeft, stuur het dan naar:
Silverline Tools Service Centre
PO Box 2988
Yeovil
BA21 1WU, GB
Alle claims moeten binnen de garantieperiode worden ingediend.
U moet het originele ontvangstbewijs geven met de datum van aankoop, uw
naam, adres en plaats van aankoop voordat er aan kan worden gewerkt.
U moet nauwkeurige gegevens verschaffen van de fout die verholpen moet
worden.
Claims die binnen de garantieperiode worden ingediend, worden door
Silverline Tools nagelopen om te kijken of het probleem een kwestie is van de
materialen of de fabricage van het product.
De verzendkosten worden niet vergoed. De geretourneerde items moeten
voor de reparatie in een redelijk schone en veilige staat verkeren en moeten
zorgvuldig worden verpakt om schade en letsel tijdens het vervoer te
voorkomen. Ongeschikte en onveilige leveringen kunnen worden afgewezen.
Al het werk wordt uitgevoerd door Silverline Tools of een officiële
reparatiedienst.
De garantieperiode wordt niet door de reparatie of vervanging van het
product verlengd.
Defecten waarvan wij beschouwen dat ze onder de garantie vallen, worden
verholpen door middel van gratis reparatie van het gereedschap (exclusief
verzendingskosten) of door vervanging door een gereedschap in perfecte
staat van werking.
De ingehouden gereedschappen of onderdelen die zijn vervangen, worden
het eigendom van Silverline Tools.
De reparatie of vervanging van het product onder garantie zijn voordelen die
bijkomstig zijn aan uw wettelijke rechten als consument, en hebben daar
geen invloed op.
Wat is gedekt:
De reparatie van het product, mits naar tevredenheid van Silverline Tools kan
worden vastgesteld dat de gebreken het gevolg zijn van defecte materialen of
fabrieksfouten binnen de garantieperiode.
Onderdelen die niet meer verkrijgbaar zijn en die niet meer worden
vervaardigd worden door Silverline Tools vervangen door een functionele
vervanging.
Gebruik van dit product in de EU.
Wat niet is gedekt:
Silverline Tools geeft geen garantie op reparaties als gevolg van:
Normale slijtage veroorzaakt door gebruik in overeenstemming met de
bedieningsinstructies zoals zaagbladen, borstels, riemen, gloeilampen,
batterijen enz.
De vervanging van geleverde accessoires zoals boortjes, zaagbladen,
schuurvellen, snijschrijven en aanverwante producten.
Accidentele schade, storingen veroorzaakt door nalatigheid in gebruik of
verzorging, misbruik, verwaarlozing, onvoorzichtige bediening en hantering
van het product.
Gebruik van het product voor andere doeleinden dan normaal huishoudelijk
gebruik.
Alle soorten wijzigingen en modificaties van het product.
Gebruik van andere onderdelen en accessoires dan de originele onderdelen
van Silverline Tools.
Defecte installatie (behalve wanneer geïnstalleerd door Silverline Tools).
Reparaties of wijzigingen die zijn uitgevoerd door anderen dan Silverline Tools
of diens officiële reparatiediensten.
Behalve claims voor het recht op correctie van fouten van het gereedschap
volgens de bepalingen van deze garantie zijn geen andere claims gedekt.
EG-verklaring van overeenstemming
De ondergetekende: Mr. Darrell Morris
Gemachtigd door: Silverline Tools
Verklaart dat
Identificatienummer: 955431
Beschrijving: Pneumatische spijkermachine, 64 mm
Voldoet aan de volgende richtlijnen:
• Machinerichtlijn 2006/42/EG
• EN 792-13:2000+A1:2008
Keuringsinstantie: Intertek Testing Services, Shanghai, China
De technische documentatie wordt bijgehouden door: Silverline Tools
Datum: 13-08-2013
Handtekening:
Directeur
Naam en adres van fabrikant of gemachtigde:
Powerbox International Ltd, Boundary Way, Lufton Trading Estate, Yeovil, Somerset,
BA22 8HZ Verenigd Koninkrijk
www.silverlinetools.com
39
Page 41

Assembly Diagram
40
Page 42

955431
Parts List
No. Description Qty
1 Set Screw 1
2 Exhaust Cover 1
3 O-Ring 10.6 x 1.8mm 1
4 O-Ring 47.5 x 1.8mm 1
5 Hex Bolt M5 x 25 6
6 Spring Washer M5 6
7 Flat Washer M5 4
8 Air Cap 1
9 Cap Seal 1
10 Spring 1
11 O-Ring 17.8 x 2.5mm 3
12 Head Valve Piston 1
13 O-Ring 49.5 x 2.4mm 1
14 Gasket 1
15 Lining Ring 1
16 O-Ring 53 x 2.65mm 1
17 O-Ring 31.2 x 3.5mm 1
18 Driver Blade Unit 1
19 O-Ring 41.2 x 2.65mm 1
20 Cylinder 1
21 O-Ring 41.2 x 3.55mm 1
22 Bumper 1
23 Body 1
24 Base Bung 1
25 Safety Guide 1
26 Spring Pin 3 x 25mm 2
27 Spring 1
28 Bend Lever 1
29 Adjust Knob 1
30 Lock Nut M4 4
31 Safety 1
32 No-Mar tip 1
33 Switch Unit 1
34 Spring 1
35 Spring Pin 2.5 x 16mm 2
36 Trigger Lever 1
37 Trigger 1
38 Pin 1
39 O-Ring 1.8 x 1.8mm 1
40 Set Screw M4 x 4 1
41 Cover 1
No. Description Qty
42 Spring 1
43 Baffle Board 1
44 Driver Guide 1
45 Lock Plate 1
46 Driver Guide Cover 1
47 Latch Grip 1
48 Quick Release Lever 1
49 Spring Pin 2.5 x 18mm 1
50 E-Ring 3mm 1
51 Pin 1
52 Spring 1
53 Pusher Unit 1
54 Cover Plate 1
55 Orientation Plate 1
56 Nail Guide 2
57 Magazine 1
58 Spring Washer M4 2
59 Hex Bolt M4 x 12 2
60 Set Screw M4 x 10 1
61 Tail Cover 1
62 Spring Pin 3 x 15mm 1
63 Pin 2
64 Clapboard 1
65 Hex Bolt M4 x 10 2
66 Tail Hanger 1
67 Hex Bolt M5 x 18 1
68 Lock Nut M5 1
69 Hand Grip 1
70 Gasket 1
71 End Cap M5 x 20 1
72 Hex Bolt 3
73 Air Plug 1
www.silverlinetools.com
41
Page 43

Parts List
IMPORTANT NOTE: THE PARTS DIAGRAMS SUPPLIED IN THIS MANUAL ARE FOR REFERENCE ONLY. THE MANUFACTURER MAKES NO REPRESENTATION OR
WARRANTY OF ANY KIND TO THE CUSTOMER THAT HE OR SHE IS QUALIFIED TO MAKE ANY REPAIRS TO THE PRODUCT, OR CARRY OUT OTHER ASSEMBLY/
DISASSEMBLY PROCEDURES. THE MANU¬FACTURER EXPRESSLY STATES THAT ALL REPAIRS AND PART REPLACEMENTS MUST BE UNDERTAKEN ONLY
BY A CERTIFIED TECHNICIAN AT AN AUTHORISED SILVERLINE SERVICE CENTRE, AND NOT BY THE CUSTOMER. THE CUSTOMER ASSUMES ALL RISK AND
LIABILITY ARISING THROUGH HIS OR HER REPAIRS TO THE ORIGINAL PRODUCT, REPLACEMENT OF PARTS OR OTHER MODIFICATION OF THE ORIGINAL
PRODUCT. DIAGRAMS ARE FOR ILLUSTRATION PURPOSES ONLY. SILVERLINE DOES NOT SUPPLY SPARE PARTS FOR THIS ITEM.
IMPORTANT : LES DIFFÉRENTES PIÈCES ILLUSTRÉES DANS LE SCHÉMA FIGURANT DANS CE MANUEL NE SONT PRÉSENTÉES QU’À TITRE DE RÉFÉRENCE.
LE FABRICANT N’OFFRE NI IMPLICATION NI GARANTIE QUE SES CLIENTS PUISSENT ÊTRE QUALIFIÉS POUR EFFECTUER DES RÉPARATIONS SUR L’APPAREIL,
OU EFFECTUER LES OPÉRATIONS D’ASSEMBLAGE OU DE DÉSASSEMBLAGE. LE FABRICANT STIPULE EXPRESSÉMENT QUE TOUTE RÉPARATION ET
TOUT REMPLACEMENT DE PIÈCES DOIVENT ÊTRE UNIQUEMENT RÉALISÉS PAR UN TECHNICIEN QUALIFIÉ DANS UN CENTRE DE RÉPARATION AGRÉÉ
SILVERLINE, ET NON PAS PAR LE CLIENT. LE CLIENT ASSUME L’INTÉGRALITÉ DES RISQUES ET DES RESPONSABILITÉS DE SES PROPRES RÉPARATIONS,
REMPLACEMENTS DE PIÈCES ET MODIFICATIONS EFFECTUÉS SUR LE PRODUIT INITIAL. LES SCHÉMAS NE SONT PRÉSENTÉS QU’À TITRE D’ILLUSTRATION.
SILVERLINE NE FOURNIT AUCUNE PIÈCE DE RECHANGE POUR CE PRODUIT.
WICHTIGER HINWEIS: DIE STÜCKLISTEN UND EXPLOSIONSZEICHNUNGEN IN DIESER BETRIEBSANLEITUNG SIND UNVERBINDLICH UND DIENEN LEDIGLICH
ALS REFERENZ. DER HERSTELLER ÜBERNIMMT BEZÜGLICH EIGENMÄCHTIG DURCHGEFÜHRTER REPARATUREN UND/ODER ANDERER MONTAGE-/
DEMONTAGVERFAHREN AM WERKZEUG KEINERLEI GEWÄHRLEISTUNG ODER GARANTIE GEGENÜBER DEM/DER KÄUFER(-IN). DER HERSTELLER WEIST
AUSDRÜCKLICH DARAUF HIN, DASS SÄMTLICHE INSTANDSETZUNGSARBEITEN UND DER AUSTAUSCH VON ERSATZTEILEN AUSSCHLIEßLICH VON EINEM
GEPRÜFTEN TECHNIKER BEI EINER VON SILVERLINE ZUGELASSENEN REPARATURWERKSTATT UND NIEMALS VOM KÄUFER SELBST DURCHZUFÜHREN SIND.
DER KÄUFER ÜBERNIMMT SÄMTLICHE RISIKEN UND JEGLICHE HAFTUNG IM ZUSAMMENHANG MIT EIGENMÄCHTIG DURCHGEFÜHRTEN REPARATUREN
AM ORIGINALPRODUKT SOWIE DEM AUSTAUSCH VON TEILEN UND ANDEREN MODIFIZIERUNGEN DES ORIGINALPRODUKTS. ABBILDUNGEN SIND NUR ZU
ILLUSTRATIONSZWECKEN. NICHT ALLE KOMPONENTEN SIND ALS ERSATZTEILE LIEFERBAR.
ATENCIÓN: LOS DIAGRAMAS INCLUIDOS EN ESTE MANUAL SE OFRECEN ÚNICAMENTE COMO REFERENCIA. EL FABRICANTE NO SE HACE RESPONSABLE
DE LOS DAÑOS OCASIONADOS POR NO SEGUIR LOS PROCEDIMIENTOS DE MONTAJE/DESMONTAJE INDICADOS EN ESTE MANUAL. EL FABRICANTE
TAMPOCO SE HACE RESPONSABLE DE LOS DAÑOS OCASIONADOS DEBIDO A LAS REPARACIONES HECHAS POR EL MISMO USUARIO. EL FABRICANTE
DECLARA EXPRESAMENTE QUE TODAS LA PIEZAS DEBEN DE SER REEMPLAZADAS Y REPARADAS ÚNICAMENTE EN SERVICIOS TÉCNICOS SILVERLINE
AUTORIZADOS. EL USUARIO ASUME TODO EL RIESGO Y RESPONSABILIDAD OCASIONADOS POR REPARACIONES Y MODIFICACIONES DEL PRODUCTO
ORIGINAL REALIZADAS ÚNICAMENTE POR EL MISMO. LOS DIAGRAMAS INCLUIDOS EN ESTE MANUAL SE OFRECEN ÚNICAMENTE COMO ILUSTRACIÓN.
SILVERLINE NO DISPONE DE PIEZAS DE RECAMBIO PARA ESTE PRODUCTO.
42
NOTA IMPORTANTE: I SCHEMI DELLE PARTI FORNITI IN QUESTO MANUALE SONO SOLO COME RIFERIMENTO. IL PRODUTTORE NON RILASCIA ALCUNA
DICHIARAZIONE O GARANZIA DI ALCUN TIPO AL CLIENTE CHE LUI O LEI È QUALIFICATO PER EFFETTUARE RIPARAZIONI AL PRODOTTO, O SVOLGERE
ALTRE MONTAGGIO / PROCEDURE DI SMONTAGGIO. IL PRODUTTORE STABILISCE ESPRESSAMENTE CHE TUTTE LE RIPARAZIONI E SOSTITUZIONE DEI
COMPONENTI DEVONO ESSERE EFFETTUATE SOLO DA UN TECNICO CERTIFICATO PRESSO UN CENTRO DI ASSISTENZA AUTORIZZATO SILVERLINE, E
NON DAL CLIENTE. IL CLIENTE SI ASSUME OGNI RISCHIO E RESPONSABILITÀ DERIVANTI ATTRAVERSO LA SUA RIPARAZIONI AL PRODOTTO ORIGINALE,
SOSTITUZIONE DI PARTI O ALTRA MODIFICAZIONE DEL PRODOTTO ORIGINALE. I DIAGRAMMI SONO SOLO A SCOPO ILLUSTRATIVO. SILVERLINE NON
FORNISCE RICAMBI PER QUESTO ARTICOLO.
BELANGRIJKE MEDEDELING: HET ONDERDELEN DIAGRAM IN DEZE HANDLEIDING IS ENKEL TE GEBRUIKEN ALS VERWIJZING. ALLE MONTAGE EN
DEMONTAGE PROCEDURES HOREN ENKEL DOOR EEN GECERTIFICEERDE TECHNEUT, BIJ EEN GEAUTORISEERD SILVERLINE SERVICE CENTER UITGEVOERD
TE WORDEN. DE KLANT IS VOLLEDIG VERANTWOORDELIJK EN AANSPRAKELIJK VOOR DE RISICO’S EN GEVOLGEN DIE ONTSTAAN BIJ DE DOOR HEM/
HAAR UITGEVOERDE REPARATIES EN/OF AANPASSINGEN AAN HET ORIGINELE PRODUCT. DE FABRIKANT GEEFT IN GEEN ENKEL GEVAL EEN GARANTIE.
DIAGRAMMEN ZIJN SLECHTS TE GEBRUIKEN VOOR ILLUSTRATIEDOELEINDEN. NIET ALLE COMPONENTEN ZIJN ALS RESERVEONDERDELEN BIJ
SILVERLINE VERKRIJGBAAR.
Page 44

955431
Notes
www.silverlinetools.com
43
 Loading...