

Page 1
NL CZ ES PT
DE GB IE FR BE
®
PARA TELEVISOR
®
SSB 50 A1
®
®
TV STEREO SOUNDBAR SSB 50 A1
®
BLUETOOTH
TV-STEREO-SOUNDBAR MIT BLUETOOTH
®
SSB 50 A1
TV STEREO SOUNDBAR
®
Mode d'emploi
Operating instructions
Bedienungsanleitung
DE
BARRE DE SON STÉRÉO BLUETOOTH
TV-STEREO-SOUNDBAR MIT BLUETOOTH
FR BE
GB IE
BLUETOOTH
®
®
®
Gebruiksaanwijzing
Instrucciones de servicio
Návod k obsluze
NL BE
TV STEREO-SOUNDBAR MET BLUETOOTH
BARRE DE SON STÉRÉO BLUETOOTH
ES
CZ
BARRA DE SONIDO ESTÉREO CON BLUETOOTH
TV STEREO SOUNDBAR S BLUETOOTH
Instruções de manejo
PT
BARRA DE SOM TV ESTÉREO COM BLUETOOTH
HOYER Handel GmbH
Tasköprüstraße 3
DE-22761 Hamburg
DEUTSCHLAND
Stand der Informationen · Status of information · Version des informations · Stand van de informatie
Stav informací · Estado de las informaciones · Estado das informações:
04/2018 ID: SSB 50 A1_18_V1.8
IAN 298734 IAN 298734
Page 2

Deutsch....................................................... 2
English...................................................... 12
Français.................................................... 22
Nederlands............................................... 32
éesky........................................................ 42
Español..................................................... 52
Português ................................................. 62
Page 3
Übersicht / Overview / Aperçu de l'appareil / Overzicht / Pįehled / Vista general|/
123
789
B
4
56
15
16
17
18
19
20
21
22
23
24
25
28
33
34
A
27
POWER SOURCE - VOL +
Vista geral
10
32
31
30
29
11
12
26
13
14
27
12
400mm
33 34
4x
4x 4x
Page 4
Inhalt
1. Übersicht ................................................. 2
2. Bestimmungsgemäßer Gebrauch .............3
3. Sicherheitshinweise .................................3
4. Lieferumfang ........................................... 5
5. Vor dem ersten Gebrauch ........................5
5.1 Fernbedienung ............... .......................... 5
5.2 Aufstellen / Wandmontage ....................... 5
5.3 Übersicht - Anschlüsse ............................... 6
5.4 Inbetriebnahme ........................................ 6
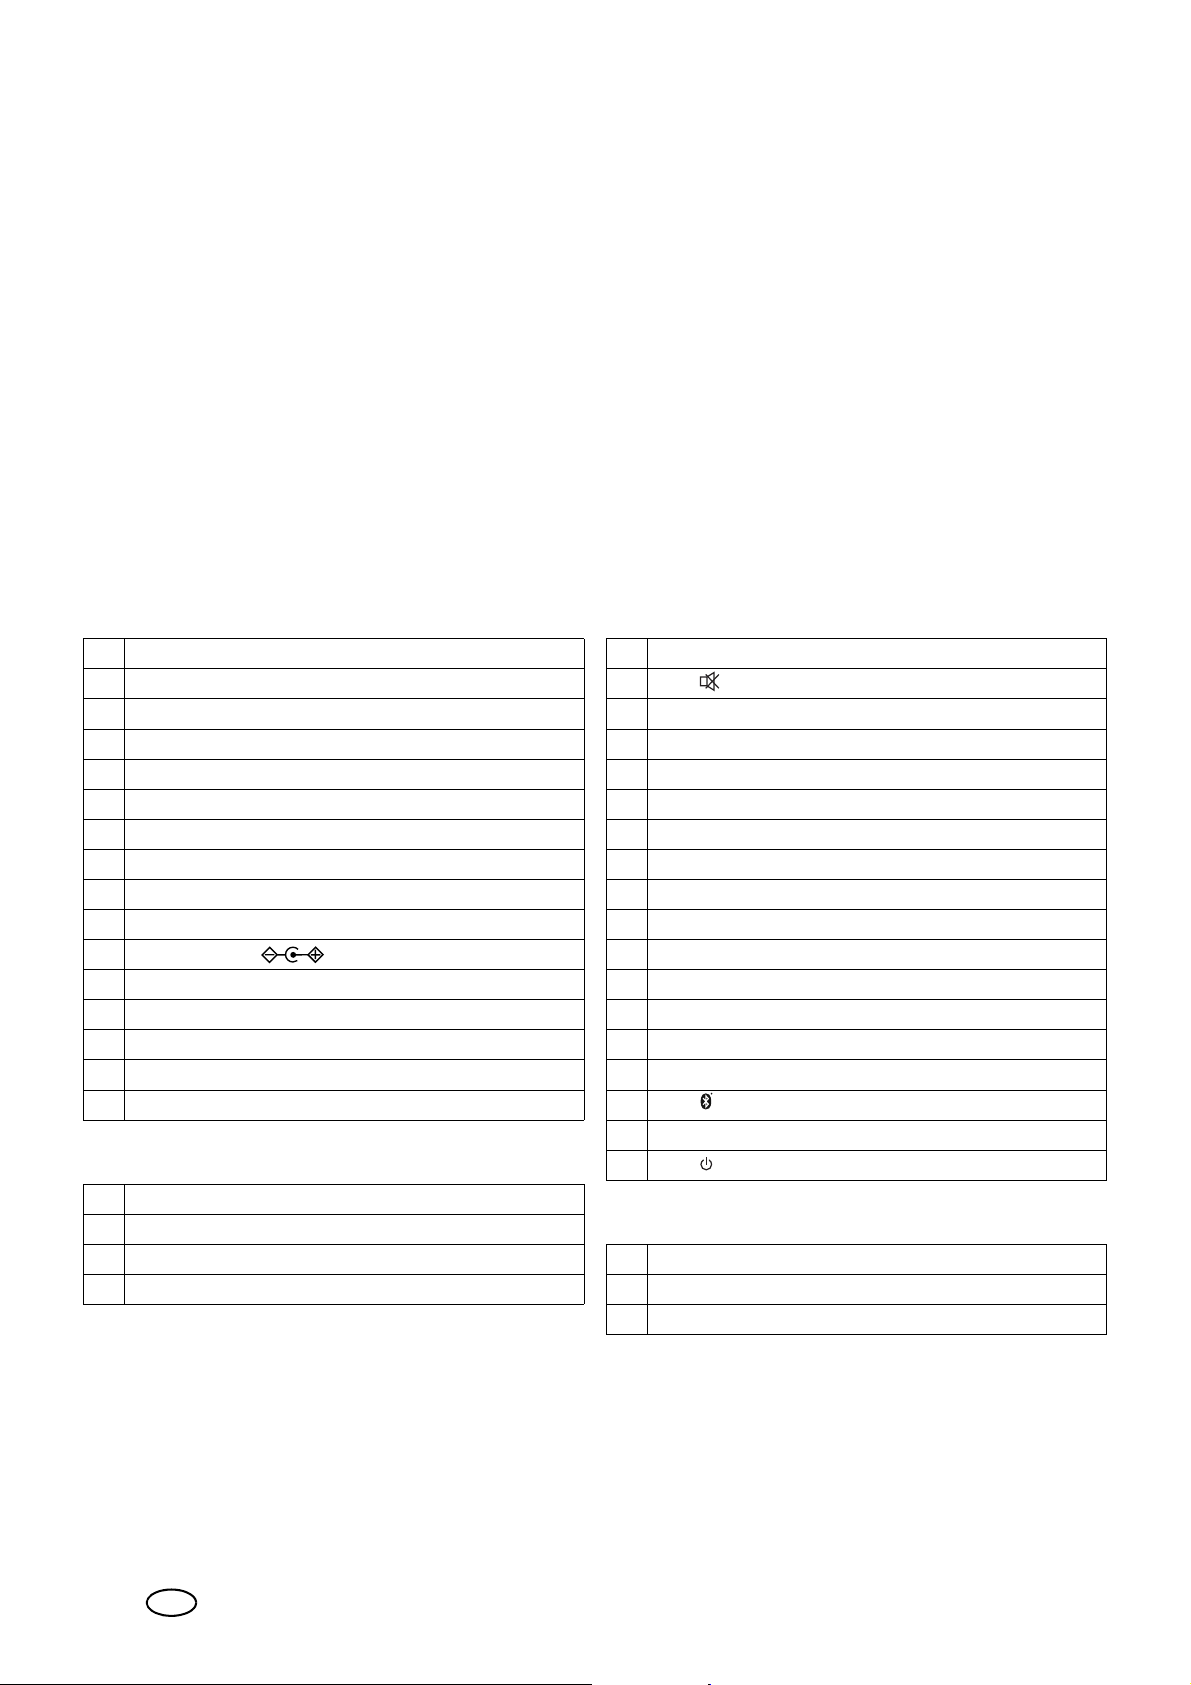
1. Übersicht
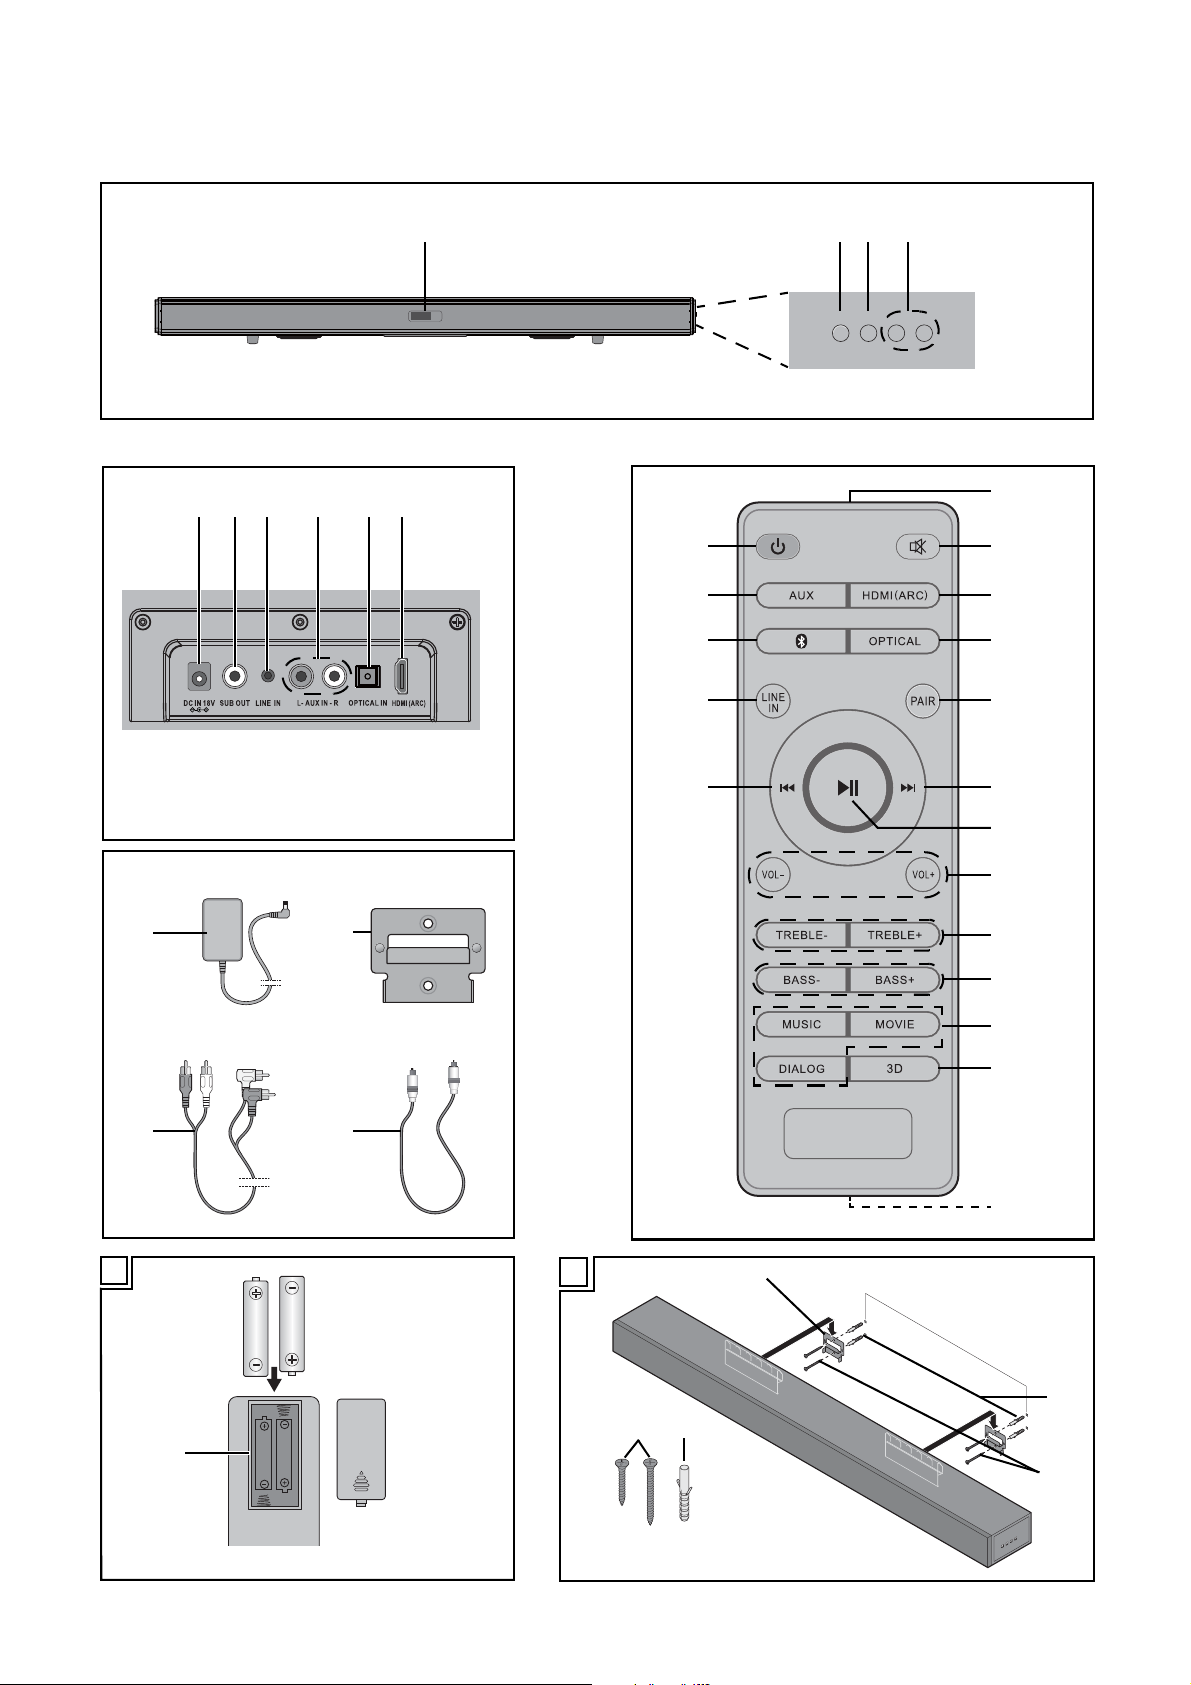
Bitte beachten Sie die Abbildungen auf der Ausklappseite.
Soundbar
1 Display
- -: Standby-Betrieb
LINE: LINE|IN
Hd: HDMI (ARC)
AUX: AUX|IN
bt: Bluetooth
OPtI: OPTICAL
2 Taste POWER
3 Taste SOURCE
4 Tasten VOL –/+
5 Buchse DC IN
6 Buchse SUB OUT
7 Buchse LINE IN
8 Buchsen AUX IN L/R
9 Buchse OPTICAL IN
10 Buchse HDMI (ARC)
Zubehör
®
6. Bedienen .................................................6
6.1 Anschlussart wählen .................................. 6
6.2 Toneinstellungen ....................................... 6
6.3 Bluetooth® .... ........................................... 7
7. Reinigen und Lagern ................................8
8. Entsorgen ................................................8
9. Problemlö sungen .....................................9
10.Technische Daten .....................................9
11.Garantie der HOYER|Handel|GmbH .......10
Service-Center ........................................ 11
Fernbedienung
15 Sende-LED
16 Taste
17 Taste HDMI (ARC)
18 Taste OPTICAL
19 Taste PAIR
20 Taste
21 Taste
22 Tasten VOL –/+
23 Tasten TREBLE –/+
24 Tasten BASS –/+
25 Tasten MUSIC, MOVIE, DIALOG
26 Taste 3D
27 Batteriefach
28 Taste
29 Taste LINE IN
30 Taste
31 Taste AUX
32 Taste
XX
X
WW
I
I
II
11 Netzteil
12 2 Wandhalterungen
13 Stereo-Cinchkabel
14 TOSLINK-Kabel
2
DE
Montage
33 Schrauben (4x 25 mm / 4x 50 mm)
34 Dübel (4)
Bohrschablone (ohne Abbildung)
Page 5
Herzlichen Dank für Ihr
Vertrauen!
Wir gratulieren Ihnen zu Ihrer neuen TV Soundbar Stereo
mit Bluetooth
Für einen sicheren Umgang mit dem Gerät und um den
ganzen Leistungsumfang kennenzulernen:
• Lesen Sie vor der ersten Inbetriebnahme diese Bedienungsanleitung gründlich durch.
• Befolgen Sie vor allen Dingen die Sicherheitshinweise!
• Das Gerät darf nur so bedient werden, wie
in dieser Bedienungsanleitung beschrieben.
• Bewahren Sie diese Bedienungsanleitung als
spätere Referenz auf.
• Falls Sie das Gerät einmal weitergeben, legen Sie bitte diese Bedienungsanleitung dazu. Die Bedienungsanleitung ist Bestandteil
des Produktes.
Wir wünschen Ihnen viel Freude mit Ihrer neuen
TV|Soundbar Stereo mit Bluetooth
®
.
®
!
2. Bestimmungsgemäßer
Gebrauch
Dies ist ein Gerät der Unterhaltungselektronik.
Die|
TV|Soundbar Stereo mit Bluetooth® ist für die Tonwiedergabe von Audiogeräten vorgesehen.
Das Gerät ist für den privaten Gebrauch konzipiert und darf
nicht für gewerbliche Zwecke eingesetzt we rden. Das Gerät
darf nur in Innenräumen benutzt werden.
3. Sicherheitshinweise
Warnhinweise
Falls erforderlich, werden folgende Symbole und W arnhinweise in dieser Bedienungsanleitung verwendet:
GEFAHR! Dieses Symbol , in Verbindung mi t dem
Hinweis „Gefahr“, bedeutet hohes Risiko. Eine
Missachtung der Warnung kann Schaden für Leib
und Leben verursachen.
GEF AH R durch Stromschl ag! Dieses Symbol,
in Verbindung mit dem Hinweis „Gefahr durch
Stromschlag“, bedeutet hohes Risiko. Eine Missachtung der Warnung kann Schaden für Leib und
Leben verursachen.
Warenzeichen
Die Bluetooth
eingetragene Warenzeichen der Bluetooth SIG, Inc.
(Special Interest Group), jegliche Verwendung der War enzeichen durch die Hoyer Handel GmbH erfolgt im Rahmen
einer Lizenz.
Die HDMI
der HDMI Licensing LLC.
®
Wortmarke und das Bluetooth® Logo sind
®
Wortmarke ist eingetragenes Warenzeichen
Das Symbol gibt an, dass der Inhalt der Bedienungsanleitung beachtet werden soll.
WARNUNG! Dieses Symbol, in V erbindung mit
dem Hinweis „Warnung“, bedeutet mittleres Risiko. Eine Missachtung der Warnung kann Verletzungen oder schwere Sachschäden verursachen.
VORSICHT: Geringes Risiko: Missachtung der Warnung
kann leichte V erletzungen oder Sachschäden verursachen.
HINWEIS: Sachverhalte und Besonderheiten, die im Umgang mit dem Gerät beachtet werden sollten.
GEFAHR für Kinder und Personen
mit Einschränkungen
~ Verpackungsmaterial ist kein Kinderspielzeug. Kinder
dürfen nicht mit dem Verpackungsmaterial spielen.
Es|besteht Erstickungsgefahr.
~ Dieses Gerät ist nicht dafür bestimmt, durch P ersonen
(einschließlich Kinder) mit eingeschränkten physischen,
sensorischen oder geistigen Fähigkeiten oder mangels
Erfahrung und/oder mangels Wissen benutzt zu werden, es sei denn, sie werden durch eine für ihre Sicherheit zuständige Person beaufsichtigt oder erhielten von
ihr Anweisungen, wie das Gerät zu benutzen ist.
~ Kinder dürfen nicht mit dem Gerät spielen.
~ Bewahren Sie das Gerät außerhalb der Reichweite
von Kindern auf.
GEFAHR für und durch Haus- und
Nutztiere
~ Vo n Elektrogeräten können Gefahren für Haus- und
Nutztiere ausgehen. Des Weiteren können Tiere auch
einen Schaden am Gerät verursachen. Halten Sie deshalb Tiere grundsätzlich von Elektroger äten fern.
DE
3
Page 6
GEFAHR von Stromschlag durch
Feuchtigkeit
~ Das Gerät darf nicht in extremer Umgebung, z.|B.
Räume mit hoher Luftfeuchte (Badezimmer) verwendet
werden.
~ Schützen Sie das Gerät und das Netzteil vor Feuchtig-
keit, Tropf- und Spritzwasser. Stellen Sie zum Beispiel
keine mit Flüssigkeiten gefüllten Vasen oder Ähnliches
auf oder in die Nähe des Gerätes.
~ Bedienen Sie das Gerät und das Netzteil nicht mit nas-
sen Händen.
~ Ziehen Sie das Netzteil aus der Steckdose, wenn Flüs-
sigkeit in das Gerät gelangt ist.
~ Sollte Flüssigkeit in das Gerät gelangen, lassen Sie vor
einer erneuten Inbetriebnahme das Gerät durch einen
Fachmann prüfen.
GEFAHR durch Stromschlag
~ Nehmen Sie das Gerät nicht in Betrieb, wenn das Ge-
rät, das Netzteil oder das Kabel sichtbare Schäden
aufweist oder wenn das Gerät zuvor fallen gelassen
wurde. Benutzen Sie das Gerät in diesem Fall nicht
mehr, sondern lassen Sie dieses durch eine Fachwerkstatt überprüfen.
~ Öffnen Sie niemals das Gehäuse des Gerätes oder
des Netzteils.
~ Stecken Sie das Netzteil erst dann in eine Steckdose,
wenn das Kabel mit dem Gerät verbunden ist.
~ Schließen Sie das Netzteil nur an eine ordnungsge-
mäß installierte, gut zugängliche Steckdose an, deren
Spannung der Angabe auf dem Typenschild entspricht. Die Steckdose muss auch nach dem Anschließen weiterhin gut zugänglich sein.
~ Achten Sie darauf, dass das Kabel nicht durch scharfe
Kanten oder heiße Stellen beschädigt werden kann.
~ Achten Sie darauf, dass das Kabel nicht eingeklemmt
oder gequetscht wird.
~ Um das Netzteil aus der Steckdose zu ziehen, immer
am Netzteil, nie am Kabel ziehen.
~ Ziehen Sie das Netzteil aus der Steckdose, …
…wenn eine Störung auftritt,
…bevor Sie das Gerät mit dem Netzteil verbinden,
…bevor Sie das Gerät reinigen und
…bei Gewitter.
~ Zur vollständigen Netztrennung muss das Netzteil aus
der Steckdose entfernt werden. Auch im ausgeschalteten Zustand wird immer eine geringe Menge Strom
verbraucht, wenn das Netzteil eingesteckt ist.
~ Um Gefährdungen zu vermeiden, nehmen Sie keine
Veränderungen am Gerät vor. Lassen Sie Reparaturen
nur von einer Fachwerkstatt bzw. im Service-Center
durchführen.
Batterien
~ Beachten Sie beim Einlegen der Batterien die richtige
Polarität.
~ Reinigen Sie Batterie- und ggf. Gerätekontakte vor
dem Einlegen von Batterien.
~ EXPLOSIONSGEFAHR! Batterien dürfen
nicht geladen oder mit anderen Mitteln reaktiviert, nicht auseinandergenommen, ins Feuer
geworfen oder kurzgeschlossen werden.
~ Entfernen Sie die Batterien aus der Fernbedienung,
wenn Sie die Fernbedienung längere Zeit nicht benutzen wollen oder wenn die Batterieleistung erschöpft
ist. Die Batterien könnten auslaufen und die Fernbedienung beschädigen.
~ Setzen Sie Batterien keinen extremen Bedingungen
aus, legen Sie z. B. die Fernbedienung nicht auf Heizkörpern ab und setzen Sie sie nicht direkter Sonneneinstrahlung aus. Es besteht ansonsten erhöhte
Auslaufgefahr.
~ Wenn Batteriesäure ausgelaufen ist, vermeiden Sie
den Kontakt mit Haut, Augen und Schleimhäuten. Spülen Sie bei Kontakt mit der Säure die betroffenen Stellen sofort mit reichlich klarem Wa sser und suchen Sie
umgehend einen Arzt auf.
~ Batterien können beim Verschlucken lebensgefährlich
sein. Bewahren Sie deshalb Batterien für Kleinkinder
unerreichbar auf. Wurde eine Batterie verschluckt,
muss sofort ärztliche Hilfe in Anspruch genommen werden.
~ Neue und gebrauchte Batterien sind von Kindern fern-
zuhalten.
~ Wenn Sie vermuten, die Batterien könnten verschluckt
oder in irgend einen Teil des Körpers gelangt sein, suchen Sie unverzüglich medizinische Hilfe auf.
WARNUNG vor Sachschäden
~ Verwenden Sie für den Netzbetrieb nur das mitgelie-
ferte Original-Steckernetzteil.
~ Wenn Sie Auffälligkeiten bemerken (z.|B. ungewöhnli-
che Geräusche, seltsamer Geruch oder Rauchentwicklung), ziehen Sie sofort das Netzteil aus der
Steckdose. Nutzen Sie das Gerät danach nicht mehr.
~ Wird das Gerät von einem kalten an einen warmen
Ort gebracht, kann Kondensfeuchtigkeit im Gerät entstehen. Lassen Sie das Gerät zum Akklimatisieren ca.
2|Stunden ausgeschaltet.
~
Stellen Sie das Gerät nur auf eine stabile, ebene Fläche.
~ Schützen Sie das Gerät vor Beschädigungen, z. B.
durch:
- Hitze, direkte Sonneneinstrahlung und offene Flammen
- Stöße und ähnliche Gewalteinwirkungen
~ Kerzen und andere offene Flammen müssen
zu jeder Zeit von diesem P rodukt ferngehalten
werden, um das Ausbreiten von Feuer zu verhindern.
~ Decken Sie das Netzteil nicht ab, um eine Überhitzung
zu vermeiden.
~ V erwenden Sie keine scharfen oder scheuernden Reini-
gungsmittel.
~ Das Gerät ist mit rutschfesten Kunststofffüßen ausge-
stattet. Da Möbel mit einer Vielfalt von Lacken und
Kunststoffen beschichtet sind und mit unterschiedlichen
4
DE
Page 7
Pflegemitteln behandelt werden, kann nicht völlig ausgeschlossen werden, dass manche dieser Stoffe Bestandteile enthalten, welche die Kunststofffüße
angreifen und aufweichen. Legen Sie ggf. eine rutschfeste Unterlage unter das Gerät.
~ Beachten Sie bei der Wandmontage:
- Das Befestigungsmaterial muss auf die Beschaffenheit der Wand abgestimmt sein. Verwenden Sie ggf.
anderes Befestigungsmaterial als das Mitgelieferte.
- Ver gewissern Sie sich, dass sich am Montageort in der
Wand k eine Leitungen (z.|B. Strom, Wasser, Gas) be-
finden.
- Lassen Sie ggf. die Wandmontage durch einen Fachmann ausführen.
Hinweise zu Bluetooth
~ Funkwellen sind potentiell in der Lage, den Betrieb von
Herzschrittmachern, (empfindlichen) elektronischen
Geräten und anderen Funkwellen (z. B. WLAN) zu beeinflussen oder gar zu stören. Deshalb beachten Sie
bitte die folgenden Hinweise.
- T räger von Herzschrittmachern sollten einen Abstand
von 20 cm zu diesem Produkt ei nhalten.
- Funkwellen können Störgeräusche z. B. in Mobiltelefonen oder Hörgeräten verursachen.
- Verwenden Sie das Produkt nicht in explosionsgefährdeten Räumen.
- Treten Störungen an anderen Funkeinheiten (z. B.
WLAN) auf, prüfen Sie durch Stromlosschalten der
Soundbar, ob sie die Ursache ist.
- Verwenden Sie das Gerät nicht in der Nähe von Mikrowellengeräten oder Geräten, die Magnetfelder
erzeugen.
®
4. Lieferumfang
1 Soundbar
1 Netzteil|11
1 Fernbedienung
2 Batterien Typ LR3 AAA 1,5 V
1 Stereo-Cinchkabel|13
1TOSLINK-Kabel|14
2x4 Schrauben|33 (25 mm / 50 mm)
4Dübel|34
2 Wandhalterungen|12
1 Bohrschablone
1 Kurzanleitung
1 Wichtige Informationen
1 Bedienungsanleitung
• Entfernen Sie sämtliches Verpackungsmaterial.
• Überprüfen Sie, ob das Gerät unbeschädigt ist.
Bei einer unvollständigen oder defekten Lieferung wenden
Sie sich an das für Sie zuständige Service-Center des Herstellers (siehe “Garantie der HOYER|Handel|GmbH” auf
Seite 10).
Bitte beachten Sie die Abbildungen auf der Ausklappseite.
5. Vor dem ersten Gebrauch
5.1 Fernbedienung
WARNUNG!
~ Beachten Sie beim Einlegen die Polaritätszeichen im
Batteriefach.
1. BILD A: Öffnen Sie das Batteriefach|27, indem Sie
den Deckel in Pfeilrichtung schieben und abheben.
2. Tauschen Sie ggf. die alten Batterien gegen neue.
3. Setzen Sie den Deckel auf das Batteriefach und schieben ihn gegen die Pfeilrichtung, bis er einrastet.
5.2 Aufstellen / Wandmontage
HINWEIS: Wenn Sie das Gerät an einen Fernseher anschließen, platzieren Sie das Gerät möglichst mittig unterhalb des Fernsehers.
Aufstellen
1. Stellen Sie das Gerät auf eine ebene Fläche.
2. Verbinden Sie das Netzteil|11 mit dem Gerät.
Wandmontage
WARNUNG vor Sachschäden!
~ Beachten Sie bei der Wandmontage:
- Das Befestigungsmaterial muss auf die Beschaffen-
heit der Wand abgestimmt sein. Verwenden Sie ggf.
anderes Befestigungsmaterial als das Mitgelieferte.
- Vergewissern Sie sich, dass sich am Montageort in
der Wand keine Leitungen (z.|B. Strom, Wasse r,
Gas) befinden.
- Lassen Sie ggf. die Wandmontage dur ch einen F ach-
mann ausführen.
~ Bei der Verwendung der Wandmontage sollten Sie
HDMI-Winkelstecker verwenden, damit die Stecker
nicht durch Knicke beschädigt werden können.
1. BILD B: Bohren Sie 2 Löcher pro Wandhalterung im
Abstand von 40|cm. Verwenden Sie ggf. die beiliegende Bohrschablone.
2. Wenn Sie die mitgelieferten Dübel|34 verwenden, benutzen Sie einen Bohrer mit 8 mm Durchmesser.
3. Stecken Sie die Dübel|34 in die Bohrlöcher.
4. Befestigen Sie die Wandhalterungen|12 mit den
Schrauben|33 fest an der Wand.
5. Stecken Sie alle verwendeten Kabel in die Anschlüsse
(siehe “Übersicht - Anschlüsse” auf Seite 6).
6. Verbinden Sie das Netzteil|11 mit dem Gerät.
7. Hängen Sie das Gerät in die Wandhalterungen|12.
Beide Wandhalterungen|12 müssen sicher in die Aufnahmen auf der Rückseite des Gerätes greifen.
DE
5
Page 8
5.3 Übersicht - Anschlüsse
6. Bedienen
VORSICHT: Achten Sie darauf, dass die Soundbar und
die anzuschließenden Geräte ausgeschaltet sind, bevor
Sie sie anschließen. Lesen Sie auch die Bedienungsanleitungen der Geräte, die Sie anschließen.
HINWEISE:
• Ein HDMI (ARC)-Kabel für den Eingang
und ein 3,5|mm Stereo-Klinkenkabel für den Eingan g
LINE IN|7
•Der HDMI (ARC)|10 Anschluss kann nur funk-
tionieren, wenn alle Komponenten ARC-fähig sind.
Ggf. müssen alte HDMI-Kabel gegen neue ARC-fähige
Kabel getauscht werden.
Eingang Verwendung
AUX IN|8
LINE IN|7
HDMI
(ARC)|10
OPTICAL
IN|9
Bluetooth
• An der Cinchbuchse des Ausgangs SUB OUT |6 kann
ein Subwoofer angeschlossen werden. Dieser wird automatisch vom Gerät angesteuert.
sind nicht im Lieferumfang enthalten.
Anschluss mit Stereo-Cinchkabel|13, z.|B.
Fernseher, CDPlayer
Anschluss mit
3,5|mm StereoKlinkenkabel, z.|B.
MP3-Player, Telefon
Anschluss mit HDMI
(ARC)-Kabel, z.|B.
an HDMI- ARC Anschluss des Fernsehers, DVD-Player
Anschluss mit
TOSLINK-Kabel|
z.|B. an DigitalReceiver, DVD-Player
Funkverbindung,
®
z.|B. Smartphone
AUX|31 AUX
LINE IN|29 LInE
HDMI
(ARC)|17
14
,
OPTICAL|18 OPtI
HDMI (ARC)|10
Taste Fernbedienung
|30
Display
Hd
bt
5.4 Inbetriebnahme
HINWEIS: Das Gerät bleibt nach dem Ausschalten in Bereitschaft (Standby-Betrieb). In diesem Modus hat das Gerät noch einen geringen Stromverbrauch. Um es vom Netz
zu trennen, ziehen Sie das Netzteil|11 aus der Steckdose.
HINWEISE:
• Alle Einstellungen können Sie bequem mit der Fernbedienung vornehmen. Die Grundfunktionen können Sie
auch mit den Tasten am Gerät ausführen. In der Anleitung wird in der Regel die Bedienung mit der Fernbedienung beschrieben.
• Das Gerät schaltet sich in Standby-Betrieb, …
…wenn innerhalb von 20|Minuten keine Bluetooth
Verbindung aufgebaut wird oder
…wenn es ca. 20|Minuten lang kein oder nur ein sehr
geringes Signal empfängt und nicht bedient wurde.
• Drücken Sie die Taste |32, um das Gerät aus dem
Standby-Betrieb einzuschalten.
• Drücken Sie die Taste |32, um das Gerät in den
Standby-Betrieb zu schalten.
6.1 Anschlussart wählen
1. Drücken Sie eine der Tasten AUX|31, LINE IN|29,
HDMI (ARC)|17, OPTICAL|18 oder |30, um zu
dem gewünschten Anschluss umzuschalten (siehe
“Übersicht - Anschlüsse” auf Seite 6).
2. Am Abspielgerät starten Sie die Wiedergabe, wählen
und steuern die Musiktitel.
6.2 Toneinstellungen
HINWEIS: Änderungen der T oneinstel lungen werden auf
dem Display|1 angezeigt.
- Lautstärke: V00 … V40
-Höhen: t -4 … t 4
-Bässe: b -4 … b 4
Lautstärke regeln
• Drücken Sie während der Wiedergabe die Tasten
VOL|–/+|22 auf der Fernbedienung oder VOL|–/+|4
am Gerät. Sie können die Tasten auch gedrückt halten,
um eine schnellere Änderung der Lautstärke zu bewirken.
Stummschalten
1. Drücken Sie die Taste |16, um den Ton auszuschalten. Die Anzeige der davor eingestellten Lautstärke auf
dem Display|1 blinkt.
2. Um den Ton wieder einzuschalten, drücken Sie erneut die
Taste
|16
oder eine der Tasten
VOL|–/+|22 /|4
®
-
.
• Stecken Sie das Netzteil|11 in eine gut zugängliche
Steckdose. Auf dem Display|1 wird – – angezeigt.
Das Gerät ist nun im Standby-Betrieb.
6
DE
Klangfarbe einstellen
Die Einstellungen werden nicht gespeichert, wenn Sie auf
einen anderen Modus umschalten.
• Drücken Sie eine der Tasten|25, um Voreinstellungen
der Klangfarben für Musik (MUSIC), Film (MOVIE),
oder Sprache (DIALOG) zu wählen.
Page 9
• Steuern Sie mit den Tasten TREBLE –/+|23 die Höhen
aus.
• Steuern Sie mit den T asten
Klangfarbe
BASS –/+|24
Tasten|25
Fernbedienung
die Bässe aus.
Display
Musik MUSIC SOnG
Film MOVIE CInE
Sprache DIALOG dIA
HINWEIS:
Für die Klangfarbe F ilm (
MOVIE
) ist der 3D-Ef-
fekt als V or ein stellung ber eits aktiviert.
3D-Effekt ein-/ausschalten
• Drücken Sie die Taste 3D|26, um den 3D-Effekt ein-/
auszuschalten.
- Wird der 3D-Effekt eingeschaltet, wird 3d kurz im
Display angezeigt.
- Wird der 3D-Effekt ausgeschaltet, wird die gewählte
Klangfarbe (SOnG, CInE oder dIA) im Display ange-
zeigt.
HDMI (ARC) Anschluss
Begriffserklärung
- HDMI steht für High Definition Multimedia Interface.
Über diesen Übertagungsweg können digitale Bildund Tonsignale übertragen werden.
- HDMI (ARC - Audio Return Channel) bedeutet, dass
das Kabel über einen ARC-Kanal verfügt. Über diesen
Kanal können Audiosignale in beide Richtungen gesendet werden.
Folgende moderne Geräte verfügen in der Regel über einen ARC Ausgang: Fernseher, Spiele-Konsolen oder Digital Receiver. Im Folgenden wird der Anschluss an einen
Fernseher beschrieben.
Über den ARC-Kanal des HDMI-Kabels können digitale
Tonsignale vom Quellgerät (z. B. Fernseher) an die Soundbar übertragen werden.
Die Tonübertragung über die
kann nur funktionieren, wenn alle K omponenten AR C-fähig
sind. Sollte die Übertragung nicht gelingen, müssen Sie einen oder ggf. mehrere der unten stehenden Punkte beachten:
• Das alte HDMI-Kabel muss gegen ein neues ARC-fähiges Kabel getauscht werden.
• Nicht jede HDMI-Buchse am Fernseher muss ARC unterstützen. In dem Fall muss das HDMI Kabel am Fernseher
an eine andere - ARC fähige- HDMI Buchse angeschlossen werden. In der Regel sind die entsprechenden HDMI
Buchsen mit ARC beschriftet. Falls nicht, schauen Sie in
die Bedienungsanleitung Ihres Fernsehers.
• Bei einigen Fernsehern muss der digitale Tonausgang
freigeschaltet werden. Wählen Sie den Tonausgang
PCM 2.0 (PCM Stereo). Wird der Tonausgang PCM
2.0 (PCM Stereo) nicht am Fernseher eingestellt, schaltet sich die Soundbar automatisch ab.
HDMI (ARC)
Buchse|10
1. Verbinden Sie die Buchse HDMI (ARC)|10 mithilfe eines ARC-fähigen HDMI-Kabels mit einer HDMI ARC
Buchse Ihres Fernsehers.
2. Schalten Sie die Soundbar mit der Taste |32 ein.
3. Durch Drück en der Taste HDMI (ARC)|17 wählen Sie
den HDMI Eingang.
4. Schalten Sie den Fernseher ein. Beim ersten Verbindungsaufbau kann es einige Sekunden dauern, bis ein
Ton über die Soundbar ausgegeben wird.
HINWEIS:
Wenn Sie den
HDMI (ARC)|10
Anschluss verwenden, wird die Soundbar in der Regel mit der Fernbedienung des angeschlossenen Gerätes ein- und ausgeschaltet.
Das angeschlossene Gerät muss das Pr otokoll CEC (Consumer
Electronic Control) unterstützen.
6.3 Bluetooth
®
Verbindung herstellen
HINWEISE:
• Die Kennung des Gerätes ist „SSB|50|A1“.
• Nach dem Umschalten auf Bluetooth
rät automatisch, eine Verbindung zum letzten gekoppelten Gerät herzustellen.
• Bitte beachten Sie, dass der Verbindungsaufbau je
nach Gerät und darauf verwendeter Software etwas
unterschiedlich verlaufen kann.
1. Drücken Sie die Taste||30, um auf Bluetooth
dung umzuschalten. Auf dem Display|1 wird bt angezeigt.
2. Schalten Sie das Abspielgerät (z.|B. Smartphone) ein
und starten Sie die Bluetooth
®
3. Das Abspielgerät sollte nun die Gerätekennung
„SSB|50|A1“ empfangen. Falls das nicht geschieht,
drücken Sie ca. 1|Sekunde die Taste PAIR|19 auf der
Fernbedienung. Auf dem Display|1 blinkt bt schnell.
4. Stellen Sie am Abspielgerät die Verbindung zur
Soundbar her. Im Falle einer Passwortabfrage geben
Sie „0000“ ein. Beide Geräte sind nun miteinander
verbunden. Auf dem Display|1 wird bt dauerhaft angezeigt und ein akustisches Signal ertönt.
HINWEIS: Abspielgeräte speichern in der Regel die Kennung des Gerätes. Bei einem erneuten V erbindungsaufbau
entfällt dann, bei aktivierter Bluetooth
elle Herstellen der Verbindung.
5. Starten Sie nun am Abspielgerät die Wiedergabe ei-
nes Musiktitels. Der Ton wird von der Soundbar wiedergegeben.
6. Mit den Tasten
WW|28, XX
I
|20 und
I
und steuern Sie die Musiktitel.
®
versucht das Ge-
-Verbindung.
®
-Funktion, das manu-
X/
|21 wählen
II
®
-Verbin-
DE
7
Page 10
Verbindung trennen
Die Ve rbind ung wird getrennt, wenn
…eines der Geräte ausgeschaltet wird;
…die Bluetooth
…die Reichweite (ca. 10 Meter) überschritten wird;
…Sie die Taste PAIR|19 drücken, bis auf dem Dis-
play|1 bt schnell blinkt. In diesem Fall kann gleich
eine neue Verbindung zu einem anderen Gerät aufgebaut werden.
®
-Funktion ausgeschaltet wird;
7. Reinigen und Lagern
GEFAHR durch Stromschlag!
~ Ziehen Sie das Netzteil|11 aus der Steckdose, bevor
Sie das Gerät reinigen. Achten Sie darauf, dass keine
Flüssigkeit in das Gerät eindringt.
• Reinigen Sie das Gerät mit einem leicht feuchten Tuch.
Bei hartnäckiger Verschmutzung können Sie auch etwas milden Reiniger, wie z. B. Spülmittel, verwenden.
Lösungsmittel, Spiritus, Verdünnungen usw. dürfen
nicht verwendet werden, sie können die Oberfläche
des Gerätes beschädigen.
• Wenn Sie das Gerät nicht benutzen, lagern Sie es an
einem Platz, wo weder starke Hitze noch Feuchtigkeit
auf das Gerät einwirken können. Entfernen Sie die Batterie aus der Fernbedienung.
8. Entsorgen
Dieses Produkt unterliegt der europäischen
Richtlinie 2012/19/EU. Das Symbol der
durchgestrichenen Abfalltonne auf Rädern bedeutet, dass das Produkt in der Europäischen
Union einer getrennten Müllsammlung zugeführt werden muss. Dies gilt für das Produkt
und alle mit diesem Symbol gekennzeichneten Zubehörteile. Gekennzeichnete Produkte
dürfen nicht über den normalen Hausmüll entsorgt werden, sondern müssen an einer Annahmestelle für das Recycling von elektrischen und
elektronischen Geräten abgegeben werden. Diese Entsorgung ist für Sie kostenfrei. Schonen Sie die Umwelt und entsorgen Sie fachgerecht. Weitere Informationen erhalten
Sie bei Ihrem lokalen Entsorger oder der Stadt bzw. Gemeindeverwaltung.
Batterien dürfen nicht in den Hausmüll. Verbrauchte Batterien müssen sachgerecht entsorgt werden. Zu diesem Zweck stehen im
batterievertreibenden Handel sowie bei den
kommunalen Sammelstellen entsprechende
Behälter zur Batterie-Entsorgung bereit. Batterien und
Akkus, die mit den folgenden Buchstaben versehen sind,
beinhalten u. a. die Schadstoffe: Cd (Cadmium),
Hg|(Quecksilber), Pb (Blei).
Verpackung
Die V erpackung wur de aus wiederverwertbaren Materialien hergestellt. Entsorgen Sie die Verpackung sortenrein.
Wenn Sie die Verpackung entsorgen möchten, achten Sie
auf die entsprechenden Umweltvorschriften in Ihrem Land.
8
DE
Page 11
9. Problemlösungen
Sollte die Soundbar einmal nicht wie gewünscht funktionieren, gehen Sie bitte erst diese Checkliste durch. Vielleicht
ist es nur ein kleines Problem, das Sie selbst beheben können.
GEFAHR durch Stromschlag!
~ V ersuchen Sie auf k einen Fall, das Gerät selbstständig
zu reparieren.
10.Technische Daten
Modell: SSB 50 A1
Leistung:
Standby Leistungsaufnahme:
Soundbar: Eingang:
Netzteil:
SHEN ZHEN CITY HONG
BEN ELECTRONIC CO., LTD
2x 10|W + 1x 30|W|RMS
< 0,5 W
18,0|V 1,3|A,
Eingang:
100 - 240|V ~
50/60|Hz, 0,8|A|max
Fehler
Keine Funktion
Keine
Blue-
®
tooth
-Verbin-
dung
Keine Musikwiedergabe
Störgeräusche
während des
Betriebes
Soundbar
schaltet sich
aus
Mögliche Ursachen /
Maßnahmen
• Ist die Stromversor gung sichergestellt?
Wird auf dem Display|1 – – ange-
zeigt?
• Bei Anschluss an die Buchse
HDMI|ARC|10 müssen auch das
HDMI Kabel sowie das angeschlossene Gerät (z. B. ein Fernseher) ARCfähig sein. Wenn Ihr Fernseher keinen HDMI Anschluss hat, der ARC-fähig ist, weichen Sie auf eine andere
Anschlussart aus oder tauschen Sie
den Fernseher.
• Altes HDMI-Kabel gegen ei n neues,
ARC-fähiges Kabel tauschen.
• Ist am Abspielgerät (z. B. Fernseher)
das richtige Audiosignal gewählt?
Wählen Sie für den Tonausgang
PCM 2.0 (oder PCM Stereo).
• Ist am Abspielgerät Bluetooth® aktiviert?
• Haben Sie das Gerät ausgeschaltet?
• Besteht eine Bluetooth
®
-Verbindung
zu einem anderen Gerät? Drücken
Sie die Taste PAIR|19, bis auf dem
Display|1 bt schnell blinkt und stellen
die neue Verbindung her.
• Ist die Lautstärk e am Abspielgerät zu
niedrig eingestellt?
• Ist der richtige Anschluss gewählt?
• Ist der Ton zu leise oder ausgeschaltet?
• Bei evtl. auftretenden Stör geräuschen
entfernen Sie ggf. Mobiltelefone,
Tablets oder andere Geräte mit Funkwellenbetrieb aus der näheren Umgebung der Soundbar.
• Zum Einsparen von Energie verfügt
dieses Gerät über eine Ausschaltautomatik. Das Gerät wird automatisch in den Standby-Betrieb
geschaltet, wenn es ca. 20|Minuten
lang kein oder nur ein sehr geringes
Signal empfängt und nicht bedient
wurde.
Modell
EU: HB40-1801300SPA
Schutzklasse des Netzteils:
Ausgang:
18,0|V , 1,3|A,
II
Audioformat: PCM 2.0 (PCM Stereo)
Bluetooth
®
:
Reichweite:
Frequenzbereich:
Sendeleistung:
v4.2 (A2DP, AVRCP)
bis zu 10|m
2402-2480 MHz
< 10|dBm
Eingang:
LINE IN
1x 3,5|mm Stereo-Klinkenbuchse
AUX IN L/R
HDMI (ARC)
OPTICAL IN
2x Cinchbuchse
1x HDMI ARC Buchse
1x TOSLINK-Buchse
Ausgang:
SUB OUT 1x Cinchbuchse
Batterie Fernbedienung: 2x Typ LR3 AAA 1,5|V
Abmessungen (BxHxT): ca. 94 x 8 x 10|cm
(ohne|Wandhalterung)
Gewicht: ca. 2,8 kg
Betriebs- und Lager-
bedingungen:
10 °C bis 35 °C
Luftfeuchtigkeit 40 bis 85%
relativ
DE
9
Page 12
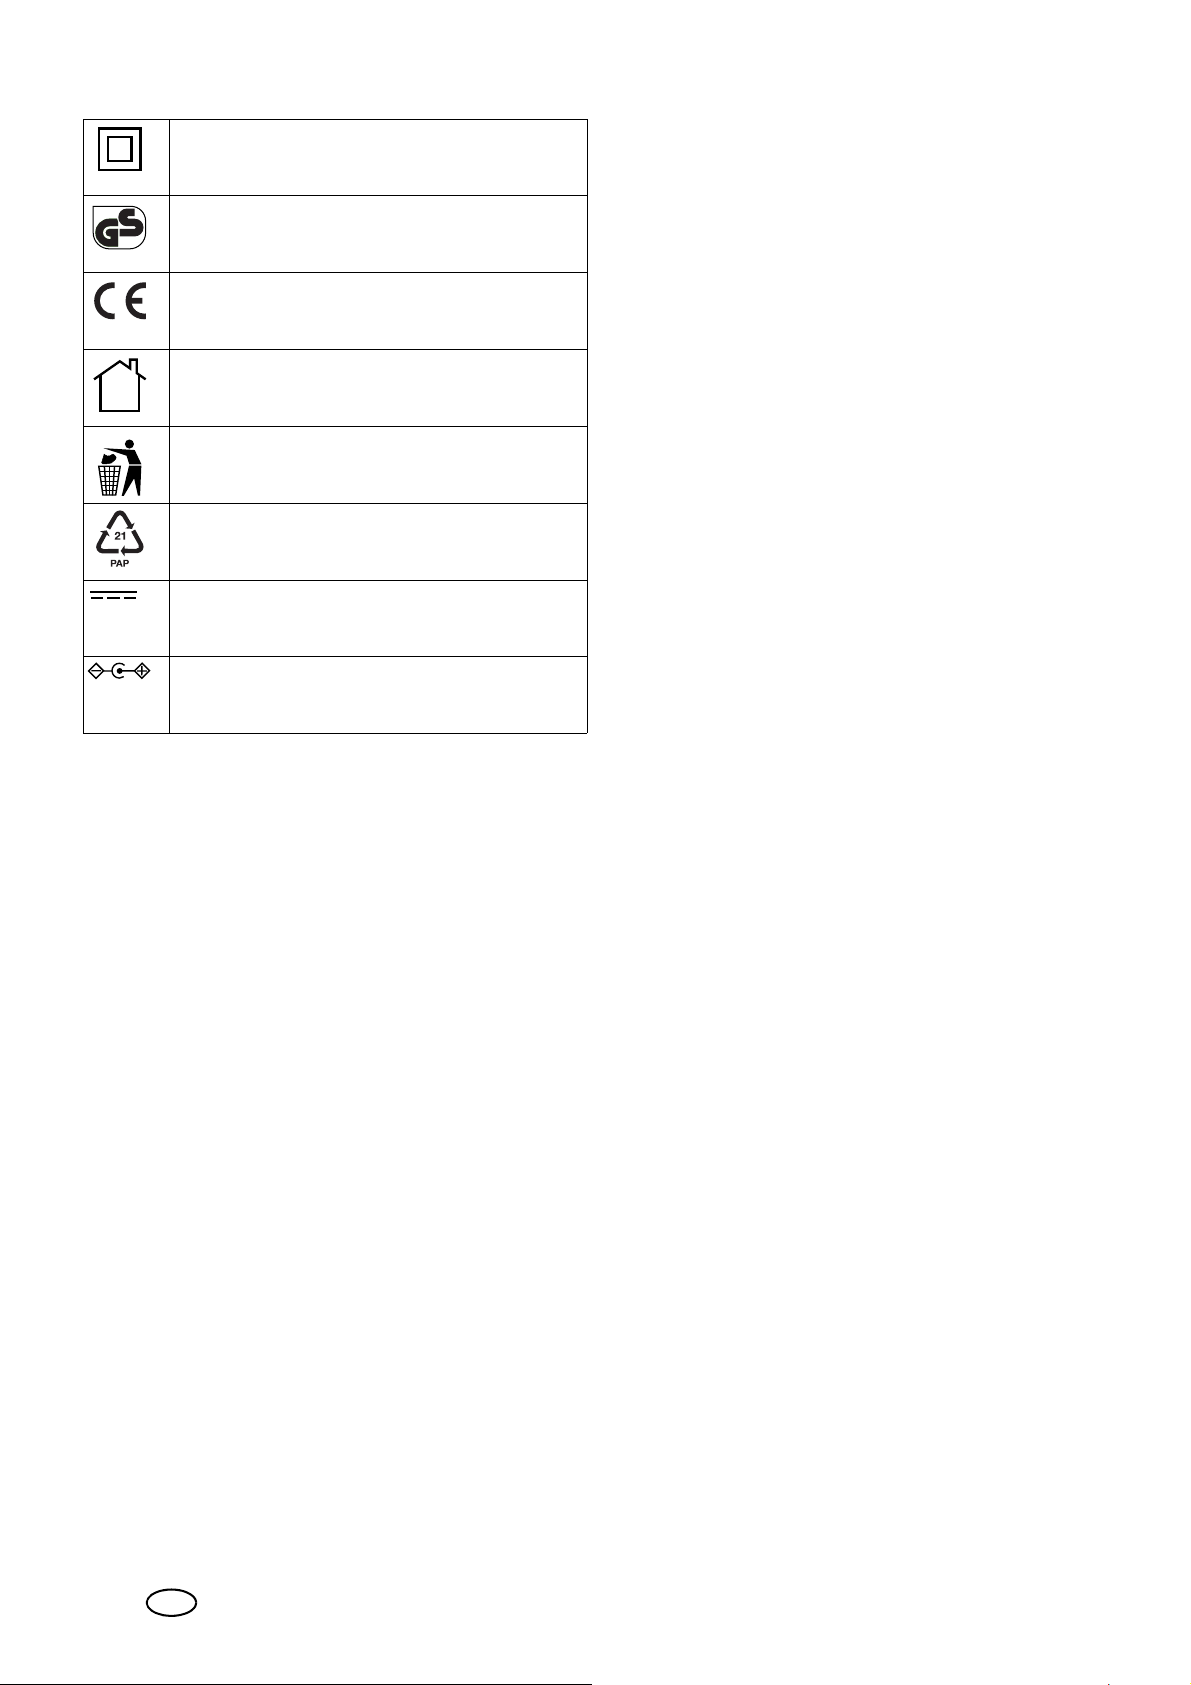
Verwendete Symbole
Schutzisolierung
Geprüfte Sicherheit. Geräte müssen den allgemein
anerkannten Regeln der Technik genügen und gehen
mit dem Produktsicherheitsgesetz (ProdSG) konform.
Mit der CE-Kennzeichnung erklärt die
HOYER|Handel|GmbH die EU-Konformität.
Geräte mit diesem Zeichen dürfen nur im Haus betrieben (trockene Umgebung) wer den
Dieses Symbol erinnert daran, die Verpackung umweltfreundlich zu entsorgen.
Wiederverwertbare Materialien: Pappe (außer Wellpappe)
Gleichstrom
Zeichen für Polarität
Technische Änderungen vorbehalten.
Hinweise zur EU-Konformitätserklärung
Hiermit erklärt die HOYER|Handel|GmbH, dass dieses
Produkt den grundlegenden Anforderungen
- der RE-Richtlinie 2014/53/EU,
- der ErP-Richtlinie 2009/125/EG, sowie
- der ROHS-Richtlinie 2011/65/EU entspricht.
Eine vollständige EU-Konformitätserklärung finden Sie im
Internet unter http://qr.hoyerhandel.com/d/298734
11.Garantie der
HOYER|Handel|GmbH
Sehr geehrte Kundin, sehr geehrter Kunde,
Sie erhalten auf dieses Gerät 3|Jahre Garantie ab K aufdatum. Im
Falle von Mängeln dieses Produkts stehen Ihnen gegen den Verkäufer des Produkts gesetzliche Rechte zu. Diese gesetzlichen
Rechte werden durch unser e im F olgenden dar gestellte Gar antie
nicht eingeschränkt.
Garantiebedingungen
Die Garantiefrist beginnt mit dem Kaufdatum. Bitte bewahren Sie
den Original Kassenbon gut auf. Diese Unterlage wird als Nachweis für den Kauf benötigt.
T ritt innerhalb von drei Jahr en ab dem Ka ufdatum dieses Pr odukts
ein Material- oder Fabrikationsfehler auf, wird das P rodukt von uns
– nach unserer W ahl – für Sie k ostenlos r epariert oder ersetzt. Diese Garantieleistung setzt voraus, dass innerhalb der Dreijahresfrist
das defekte Gerät und der Kaufbeleg (Kassenbon) vorgelegt und
schriftlich kurz beschrieben wird, worin der Mangel besteht und
wann er aufgetreten ist.
Wenn der Defekt von unserer Garantie gedeckt ist, erhalten Sie
das reparierte oder ein neues Produkt zurück. Mit Repara tur oder
Austausch des Produkts beginnt kein neuer Gar antiezeitr aum.
Garantiezeit und gesetzliche Mängelansprüche
Die Garantiezeit wird durch die Gewährleistung nicht verlängert.
Dies gilt auch für ersetzte und reparierte T eile. Eventuell schon beim
Kauf vorhandene Schäden und Mängel müssen sofort nach dem
Auspacken gemeldet werden. Nach Ablauf der Garantiezeit anfallende Reparaturen sind kostenpƃichtig.
Garantieumfang
Das Gerät wurde nach strengen Qualitätsrichtlinien sorgfältig
produziert und vor Auslieferung gewissenhaft geprüft.
Die Garantieleistung gilt für Material- oder Fabrikationsfehler.
Von der Garantie ausgeschlossen sind V erschleißteile, die normaler Abnutzung ausgesetzt sind und Beschädigungen an zerbrechlichen Teilen, z. B.
Schalter , Akk us, Leuchtmittel oder andere Teile, die
aus Glas gefertigt sind.
Diese Garantie verfällt, wenn das Produkt beschädigt, nicht sachgemäß benutzt oder gewartet wurde. Für eine sachgemäße Benutzung des Produkts sind alle in der Bedienungsanleitung
aufgeführten Anweisungen genau einzuhalten. Verwendungszwecke und Handlungen, von denen in der Bedienungsanleitung
abgeraten oder vor denen gewarnt wird, sind unbedingt zu vermeiden.
Das Produkt ist lediglich für den privaten und nicht für den gewerblichen Gebrauch bestimmt. Bei missbräuchlicher und unsachgemäßer Behandlung, Gewaltanwendung und bei
Eingriffen, die nicht von unserem autorisierten Service-Center vorgenommen wurden, erlischt die Garantie.
10
Abwicklung im Garantiefall
Um eine schnelle Bearbeitung Ihres Anliegens zu gewährleisten,
folgen Sie bitte den folgenden Hinweisen:
• Bitte halten Sie für alle Anfragen die Artikelnummer
IAN:|298734 und den Kassenbon als Nachweis für den
Kauf bereit .
• Die Artikelnummer finden Sie auf dem Typenschild, einer
Gravur, auf dem Titelblatt Ihrer Anleitung (unten links) oder
als Aufkleber auf der Rück- oder Unterseite des Gerätes.
DE
Page 13
• Sollten Funktionsfehler oder sonstige Mängel auftreten, kontak-
DE
AT
CH
tieren Sie zunächst das nachfolgend benannte Service-Center
telefonisch oder per E-Mail.
• Ein als defekt erfasstes Produkt können Sie dann unter Beifügung des Kaufbelegs (Kassenbon) und der Angabe, worin
der Mangel besteht und wann er aufgetreten ist, für Sie portofrei an die Ihnen mitgeteilte Service Anschrift übersenden.
Auf www.lidl-service.com kö nnen Sie diese und viele
weitere Handbücher, Produktvideos und Software herunterladen.
Service-Center
Service Deutschland
Tel.: 0800 5435 111
(kostenfrei)
E-Mail: [email protected]
Service Österreich
Tel.: 0820 201 222
(0,15 EUR/Min.)
E-Mail: [email protected]
Service Schweiz
Tel.: 0842 665566
(0,08 CHF/Min.,
Mobilfunk max. 0,40 CHF/Min.)
E-Mail: [email protected]
IAN: 298734
Lieferant
Bitte beachten Sie, dass die folgende Anschrift
ist.
schrift
Kontaktieren Sie zunächst das genannte Service-Center.
HOYER Handel GmbH
Tasköprüstraße 3
DE-22761 Hamburg
DEUTSCHLAND
keine Servicean-
DE
11
Page 14
Contents
1. Overview ..............................................12
2. Intended purpose ..................................13
3. Safety instructions .................................13
4. Items supplied .......................................15
5. Before using for the first time ................15
5.1 Remote control ....................................... 15
5.2 Setting up / Wall mounting ..................... 15
5.3 Overview - Connections .......................... 16
5.4 How to use..................... ... ... ................. 16
6. Operation ........ ......................................16
6.1 Selecting the type of connection ............... 16
1. Overview
Please observe the illustrations on the fold-out page.
Soundbar
1 Display
- -: Standby mode
LINE: LINE IN
Hd: HDMI (ARC)
AUX: AUX IN
bt: Bluetooth
OPtI: OPTICAL
2POWER button
3SOURCE button
4 VOL –/+ buttons
5DC IN socket
6SUB OUT socket
7 LINE IN socket
8AUX IN L/R socket
9 OPTICAL IN socket
10 HDMI (ARC) socket
Accessories
®
6.2 Sound settings ........................................ 16
6.3 HDMI (ARC) connection........................... 17
6.4 Bluetooth®............................................. 17
7. Cleaning and storing .............................18
8. Disposal ................................................18
9. Troubleshooting ........... ..........................18
10.Technical specifications ..........................19
11.Warranty of the HOYER Handel GmbH ..20
Service Centre ............. ....................................... .. 20
Remote control
15 Transmission LED
16 Button
17 HDMI (ARC) button
18 OPTICAL button
19 PAIR button
20
21
22 VOL –/+ buttons
23 TREBLE –/+ buttons
24 BASS –/+ buttons
25 MUSIC, MOVIE, DIALOG, 3D buttons
26 3D button
27 Battery compartment
28
29 LINE IN button
30 Button
31 AUX button
32 Button
XX
X
WW
I
II
button
I
button
button
11 Power unit
12 2 wall brackets
13 Stereo cinch cable
14 TOSLINK cable
12
GB
Installation
33 Screws (4x 25 mm / 4x 50 mm)
34 Rawlplugs (4)
Drilling template (no image)
Page 15
Thank you for your trust!
Congratulations on your new TV Soundbar Stereo with
Bluetooth
For a safe handling of the device and in order to get to
know the entire scope of features:
• Thoroughly read these user instructions prior
• Above all, observe the safety instructions!
• The device should only be used as described
• Keep this copy of the user instructions for fu-
• If you pass the device on to someone else,
We hope you enjoy using your new TV Soundbar Stereo
with Bluetooth
Trademarks
The Bluetooth® word mark and the
tered trademarks of the Bluetooth SIG, Inc. (Special Inter est
Group), any use of the trademark by the Hoyer Handel|GmbH
is effected within the framework of a licence.
The HDMI® word mark is a registered trademark of HDMI
Licensing LLC.
®
.
to initial use.
in these user instructions.
ture reference.
please include this copy of the user instructions. The user instructions are a part of the
product.
®
!
Bluetooth® logo are regis-
The symbol means that the content of the user
instructions must be observed.
2. Intended purpose
This is a consumer electronics device. The
Stereo with Bluetooth
audio devices.
The device is designed for private use and must not be used
for commercial purposes. The device must only be used indoors.
®
is intended for playing sound from
TV Soundbar
3. Safety instructions
Warnings
If necessary, the following symbols and warnings will be
used in these user instructions:
DANGER! This symbol, in combination with the
note “Danger” means a high risk. Failure to observe this warning may result in injury to life and
limb.
DANGER! Risk of electric shock! This symbol,
in combination with the note “Danger! Risk of electric shock” means a high risk. Failure to observe
this warning may result in injury to life and limb.
WARNING! This symbol, in combination with the
note “Warning” means a moderate risk. F ailure to
observe this warning may result in injury or serious
material damage.
CAUTION: low risk: failure to observe this warning may
result in minor injury or material damage.
NOTE: circumstances and specifics that must be observed
when handling the device.
DANGER for children and people
with disabilities
~ Children must not play with packing material. Children
must not play with the packing material. There is a
risk of suffocation!
~ This device is not designed to be used by people (in-
cluding children) with limited physical, sensory or mental capabilities or people without adequate experience
and/or understanding, unless they are supervised by
someone responsible for their safety or are instructed by
them on how to use the device.
~ Children must not play with the device.
~ Keep the device out of the reach of children.
DANGER to and from pets and
livestock
~ Electrical devices can represent a hazard to pets and
livestock. In addition, animals can also cause damage
to the device. For this reason you should keep animals
away from electrical devices at all times.
DANGER! Risk of electric shock due
to moisture
~ The device must not be used in extreme conditions,
e.g. rooms with high humidity (bathrooms).
~ Protect the device and power unit from dampness and
dripping or splashing water. For instance, never place
GB
13
Page 16
vases or something similar filled with liquid on or in
the vicinity of the device.
~ Never touch the device and power unit with wet
hands.
~ Pull the power unit out of the wall socket if liquid gets
into the device.
~ Should liquid enter the device, have it checked by an
expert before starting the device up again.
DANGER! Risk of electric shock
~ Never put the device into operation if there are visible
damages to the device, the power unit or the cable or
if the device has been dropped before. Do not use the
device again, but have it checked by a specialist workshop.
~ Never open the casing of the device or power unit.
~ Connect the cable to the device before plugging the
power unit into a wall socket.
~ Only connect the power unit to a properly installed,
easily accessible wall socket, the voltage of which corresponds to the specifications on the rating plate. The
wall socket must continue to be easily accessible after
the device is plugged in.
~ Ensure that the cable cannot be damaged by sharp
edges or hot surfaces.
~ Ensure that the cable is not trapped or crushed.
~ When removing the power unit from the wall socket,
always pull the power unit and never the cable.
~ Pull the power unit out of the wall socket, …
…if there is a fault,
…before connecting the device to the power unit,
…before you clean the device and
…during thunderstorms.
~ For a complete mains separation, pull the power unit
out of the wall socket. Even if it is switched off, a small
amount of power is always used as long as the power
unit is plugged in.
~ To avoid any risk, do not make modifications to the de-
vice. Repairs must be carried out by a specialist workshop or the Service Centre.
Batteries
~ Be sure to observe the correct polarity when inserting
the batteries.
~ Clean the battery and possibly device terminals before
you insert the batteries.
~ DANGER OF EXPLOSION! Batteries must
not be charged or reactivated by other means,
nor must they be dismantled, thrown into a fire
or short-circuited.
~ Remove the batteries from the remote control if you do
not intend to use the remote control for an extended
period, or if the battery runs out of power. The batteries might leak and damage the remote control.
~ Do not subject batteries to extreme conditions, e.g. do
not place the remote control on radiators or expose it
to direct sunlight. Otherwise, there is an increased
danger of batteries leaking.
~ If battery acid has leaked, avoid contact with the skin,
eyes and mucous membranes. In case of contact with
the acid, rinse the affected area at once with plenty of
clean water and seek medical assistance immediately.
~ Batteries can be life-threatening if swallowed. There-
fore you should store batteries out of the reach of
young children. If a battery has been swallowed, medical assistance must be sought immediately.
~ Keep new and used batteries away from children.
~ If you think the batteries could have been swallowed
or have gotten into any part of the body, seek medical
help immediately.
WARNING! Risk of material
damage
~ Only use the included original power adaptor for
mains operation.
~ If you notice any irregularities (e.g. unusual noises,
strange smells or smoke developing), pull the power
unit out of the wall socket immediately. Do not use the
device any longer.
~ If the device is moved from a cold location to a warm
location, condensate may form in the device. Leave
the device switched off for approx. 2 hours to become
acclimatised.
~ Place the device on a stable, flat surface.
~ Protect the device against damage, e.g. from:
- Heat, direct sunlight and open flames
- Impacts and similar violent effects
~ Candles and other open flames must be kept
away from this product at all times in or der to
prevent the spread of fire.
~ Do not cover the power unit to prevent overheating.
~ Do not use any astringent or abrasive cleaning agents.
~ The device is fitted with non-slip plastic feet. As furni-
ture is coated with a wide array of varnishes and synthetics, and is also treated with different care products,
it cannot be fully ruled out that some of these materials
contain ingredients that could attack and soften the
non-slip plastic feet. If necessary, place a non-slip mat
under the device.
~ Please ensure the following when mounting on a wall:
- The fixing material must be matched to the properties of the wall. If necessary, use fixing material other
than that supplied.
- Make sure that in the installation location there ar e no
pipes or cables in the wall (e.g. electricity, water , gas).
- If necessary, have the wall mounting carried out by
an expert.
Notes on Bluetooth
~ Radio waves are potentially able to affect or even in-
terfere with the operation of heart pacemakers, (sensitive) electronic devices and other radio waves (e.g.
WLAN). Therefore, please observe the following
notes.
- People wearing heart pacemakers, should maintain
a distance of 20 cm to the product.
- Radio waves may cause interferences, e.g. in mobile
phones or hearing aids.
®
14
GB
Page 17
- Do not use the product in areas subject to explosion
hazards.
- In case of any interferences in other radio units (e.g.
WLAN) occur, check by deenergizing the sound bar
if this is the cause.
- Do not use the device in the vicinity of microwave ovens or devices generating magnetic fields.
4. Items supplied
1 soundbar
1power unit|11
1 remote control
2 batteries of type LR3 AA 1.5 V
1 stereo cinch cable|13
1TOSLINK cable|14
2x4 screws|33 (25 mm / 50 mm)
4 rawlplugs|34
2 wall brackets|12
1 drilling template
1 copy of the quick reference guide
1 important information
1 copy of the user instructions
5. Before using for the first
time
5.1 Remote control
WARNING!
~ When inserting the batteries, please note the polarity
markings inside the battery compartment.
1. FIGURE A: open the battery compartment|27 by slid-
ing the lid in the direction of the arrow and lifting it off.
2. If necessary, replace the old batteries with new ones.
3. Place the lid onto the battery compartment and push it
in opposite direction of the arrow until it clicks into
place.
5.2 Setting up / Wall mounting
NOTE: if you connect the device to a television set, place
the device as centrally as possible below the set.
• Remove all packing material.
• Check that the device is undamaged.
If the delivery is incomplete or defective, please contact the
responsible service centre of the manufacturer (see “Warranty of the HOYER Handel GmbH” on page 20).
Please observe the illustrations on the fold-out page.
Setting up
1. Place the device on a level surface.
2. Connect the power unit|11 to the device.
Wall mounting
WARNING! Risk of material damage!
~ Please ensure the following when mounting on a wall:
- The fixing material must be matched to the properties of the wall. If necessary, use fixing material other
than that supplied.
- Make sure that in the installation location there are
no pipes or cables in the wall (e.g. electricity, water,
gas).
- If necessary, have the wall mounting carried out by
an expert.
~ In connection with the wall mounting, use HDMI right
angle plugs so the plugs cannot be damaged by kinks.
1. FIGURE B: drill 2 holes per wall brack et 40 cm apart.
If necessary, use the enclosed drilling template.
2. F or the enclosed rawlplug s|34, use a drill with a diameter of 8 mm.
3. Insert the rawlplugs|34 into the drill holes.
4. F asten the wall brackets|12 firmly to the wall using the
screws|33.
5. Insert all of the cables used into the connections (see
“Overview - Connections” on page 16).
6. Connect the power unit|11 to the device.
7. Hook the device into the wall brackets|12. Both wall
brackets|12 must engage safely into the holder on the
rear of the device.
GB
15
Page 18
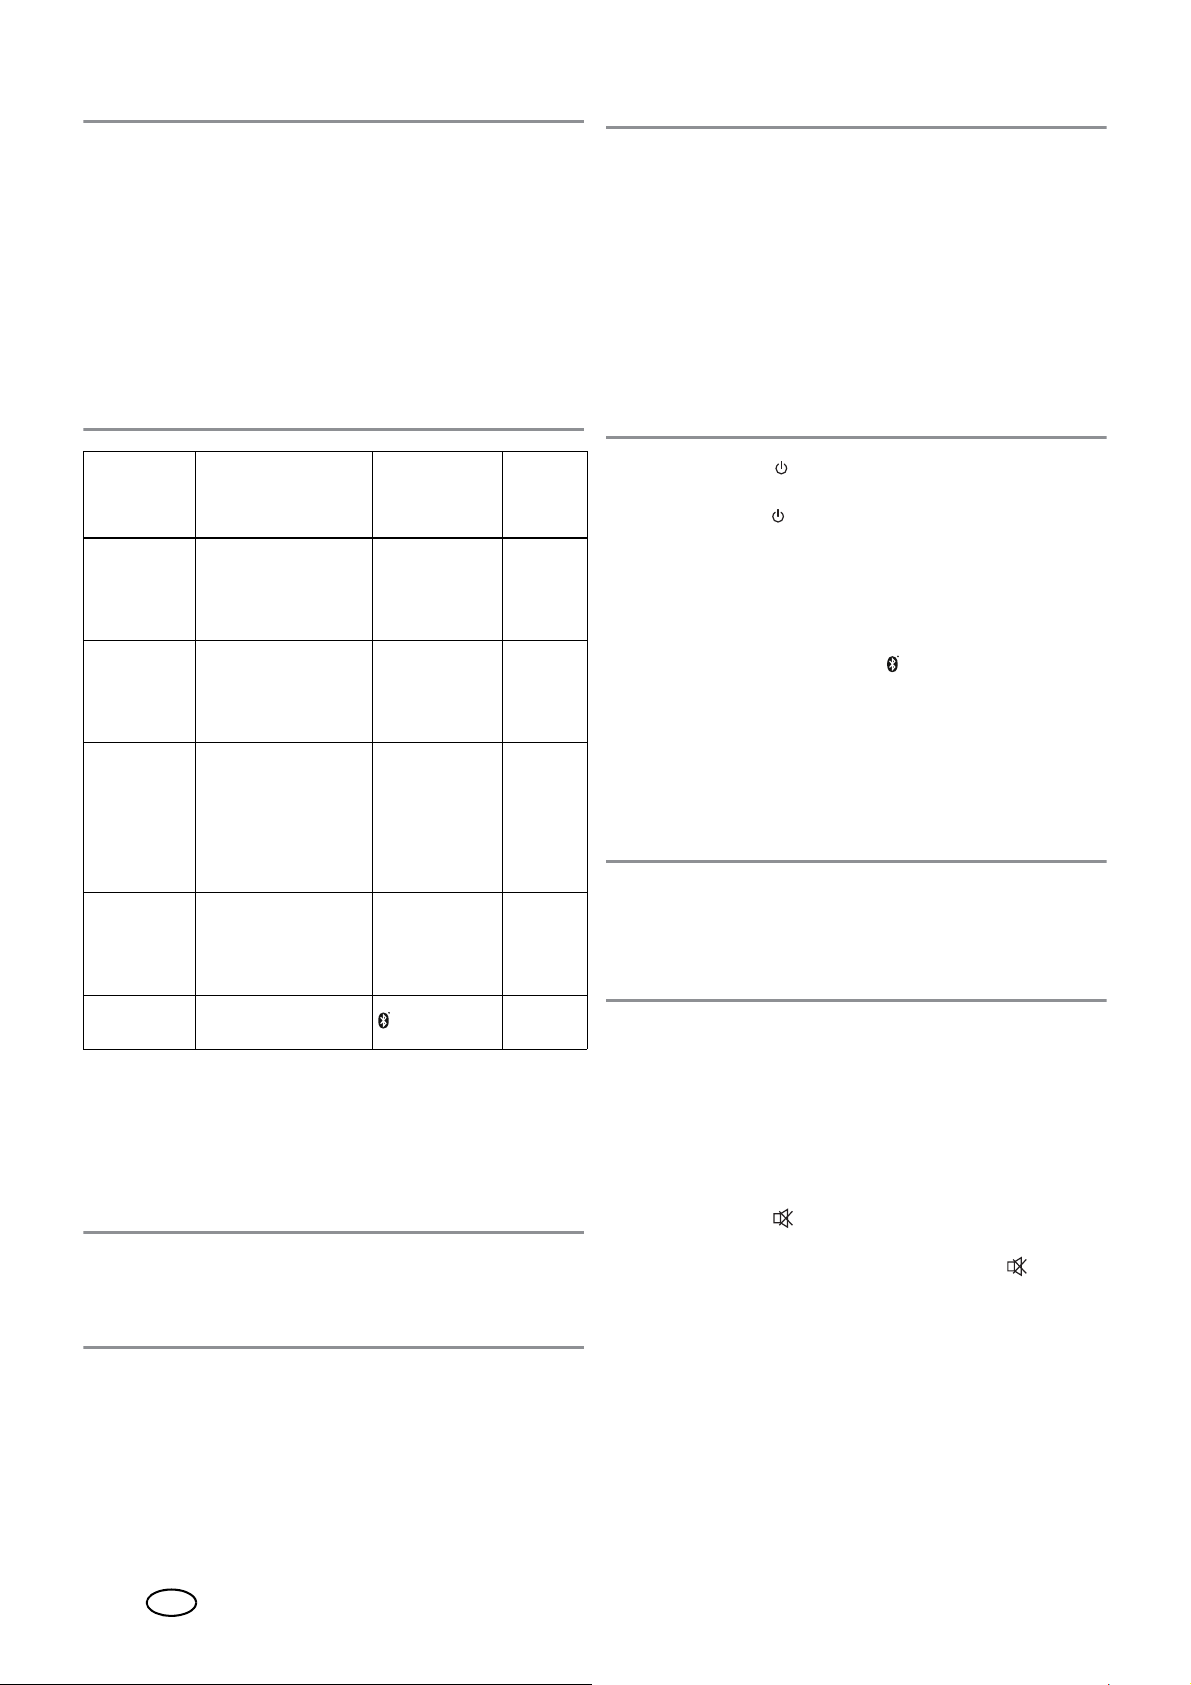
5.3 Overview - Connections
6. Operation
CAUTION: make sure that the soundbar and the devices
to be connected are switched off before you connect them.
Please also read the user instructions for the devices which
you are connecting.
NOTES:
• An HDMI (ARC) cable for the
a 3.5 mm stereo jack cable for the
not included in the items supplied .
•The HDMI (ARC)|10 connection is only able to func-
tion if all components are ARC-enabled. If necessary,
old HDMI cables must be replaced with new ARC-enabled ones.
Input Use
Connection with ste-
AUX IN|8
LINE IN|7
HDMI
(ARC)|10
OPTICAL
IN|9
Bluetooth
• A subwoofer can be connected to the cinch socket of
the SUB OUT|6 output. This is automatically controlled by the device.
reo cinch cable|
e.g. television set,
CD player
Connection with
3.5 mm stereo jack
cable, e.g.
player, telephone
Connection with
HDMI (ARC) cable,
e.g. to the HDMI
ARC connection of
the television set,
DVD player
Connection with
TOSLINK cable|
e.g. to digital receiver, DVD player
Radio connection,
®
e.g. smartphone
HDMI (ARC)|10
13
,
AUX|31 AUX
MP3
LINE IN|29 LInE
HDMI
(ARC)|17
14
,
OPTICAL|18 OPtI
LINE IN|7
Remote
control
button
|30
input and
input are
Display
Hd
bt
NOTES:
• All adjustments can be conveniently carried out with
the remote control. T he basic functions can also be carried out with the buttons on the device. Operation of
the device in the instructions is usually described with
the remote control.
• The device switches to standby mode …
…if no Bluetooth
20|minutes or
…if either no signal or only a very weak signal is re-
ceived for approx. 20 minutes, and the controls
have not been used.
• Press the button |32 to switch on the device from
standby mode.
• P ress the button |32 to switch the device into standby
operation.
®
connection is established within
6.1 Selecting the type of connection
1. Press one of the AUX|31, LINE IN|29, HDMI
(ARC)|17, OPTICAL|18 or buttons|30 to switch to
the desired connection (see “Overview - Connections”
on page 16).
2. On the audio device you can now start playback and
select and control the music tracks.
6.2 Sound settings
NOTE: Changes in the sound settings are shown on the
display|1.
- Volume: V00 … V40
- Treble sounds: t -4 … t 4
- Bass sounds: b -4 … b 4
Controlling the volume
• During playback, press the VOL –/+|22 buttons on
the remote control or VOL –/+|4 on the device. For a
faster change of the volume, you can also keep the
buttons pressed.
5.4 How to use
NOTE: the device remains in standby mode after being
switched off. In this mode, the power consumption of the
device is low . Pull the power unit|11 out of the wall socket
to disconnect it from the mains.
• Connect the power unit|11 with an easily accessible
wall socket. The display|1 shows – –. The device is
now in standby mode.
16
GB
Muting the device
1. P ress the button |16 to mute the volume. The volume
previously set will flash on the display|1.
2. T o switch the sound back on , pr ess the button |
again or one of the
VOL –/+|22 /|4
buttons.
16
Page 19
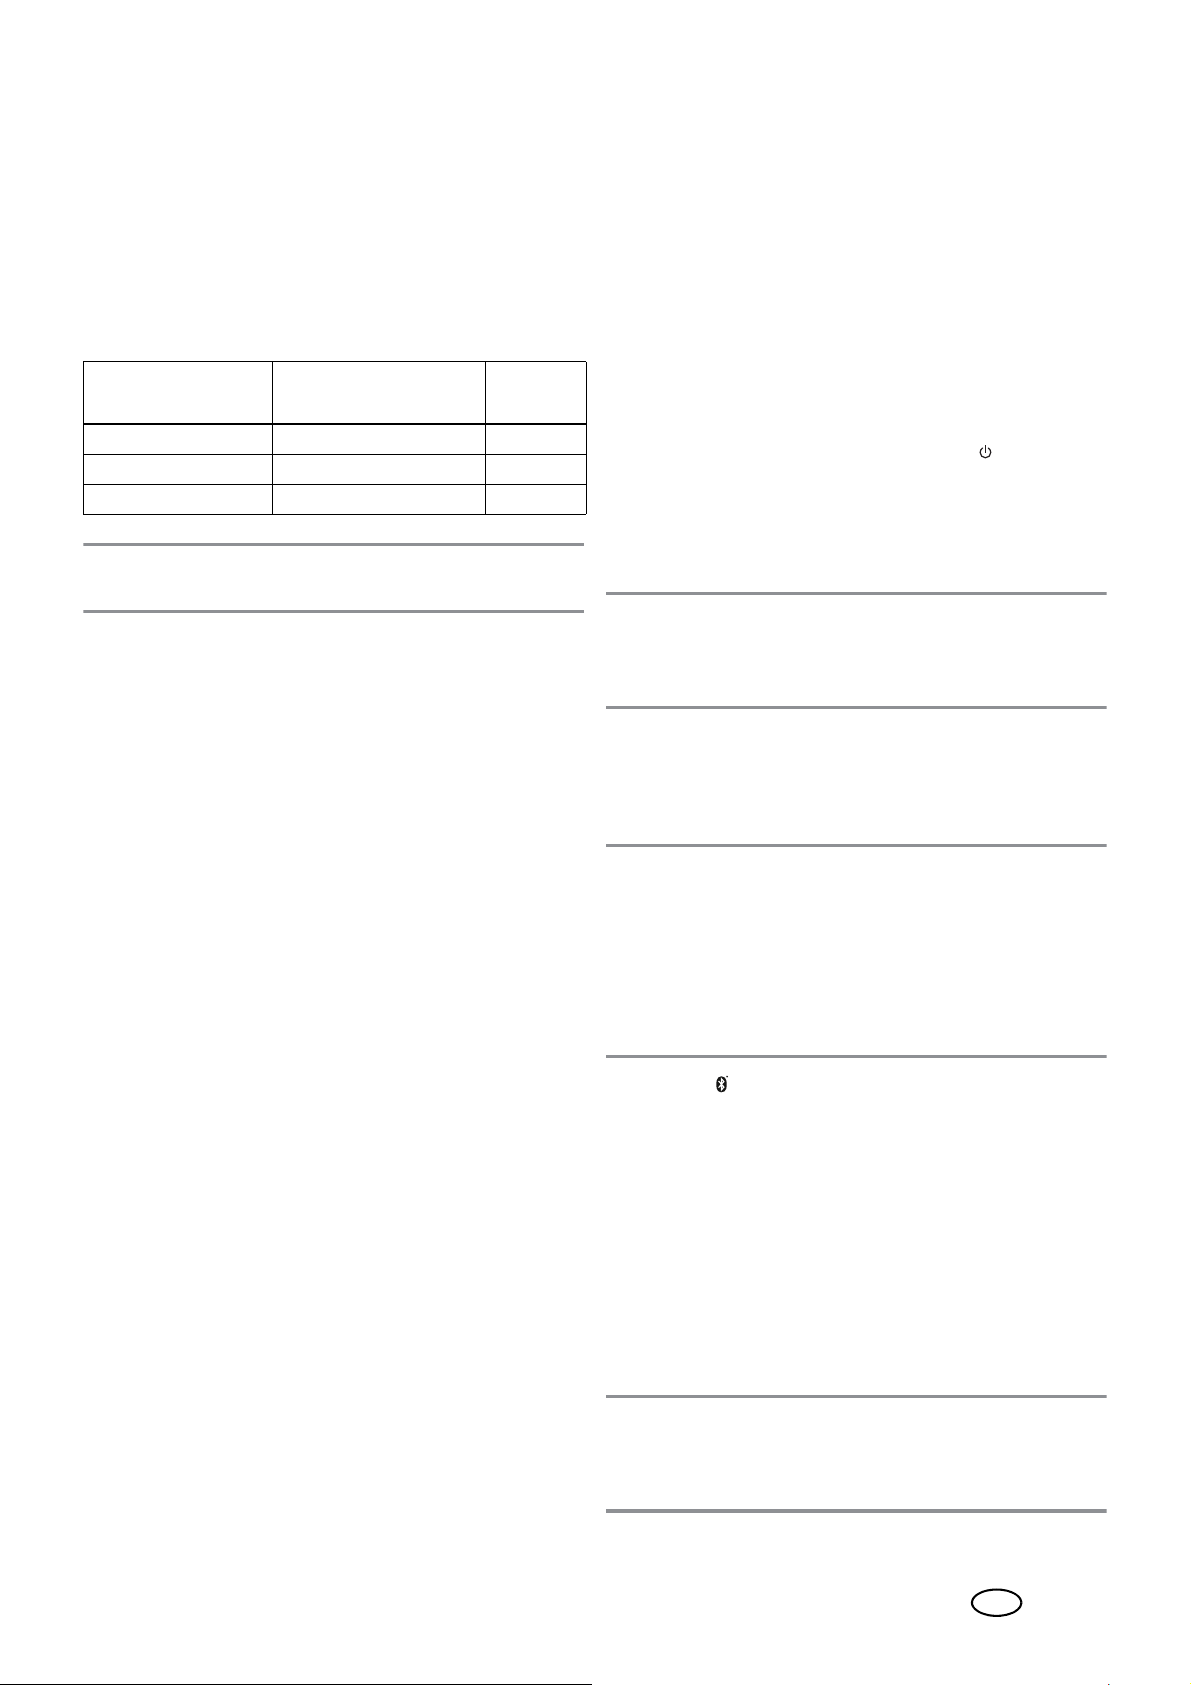
Adjusting the tone quality
The settings are not stored when you change into a different mode.
• P ress one of the buttons|25 to select the pr esets for the
tone quality for music (MUSIC), films (MOVIE) or dialogue (DIALOG).
•Use the TREBLE –/+|23 buttons to adjust the treble
sounds.
•Use the BASS –/+|24 buttons to adjust the bass
sounds.
• Not every HDMI socket on the television set needs to
support ARC. In this case, the HDMI cable on the television set must be connected to another ARC-enabled
HDMI socket. Usually, the respective HDMI sockets are
labelled with ARC. If not, refer to the user instructions
of your television set.
• F or several television sets, the digital audio output must
be activated. Select the audio output PCM 2.0 (PCM
stereo). If the audio output PCM 2.0 (PCM stereo) is
not set on the television set, the soundbar will automatically switch off.
Tone quality
Remote control
buttons|25
Display
Music MUSIC SOnG
Film MOVIE CInE
Language DIALOG dIA
NOTE:
for the movie tone quality (
MOVIE
) the 3D effect is
already preset.
Switching the 3D effect on and off
•Press the 3D|26 button in order to switch the 3D effect
on/off.
- If the 3D effect is switched on, 3d is shown briefly in
the display.
- If the 3D effect is switched off, the selected tone
quality (SOnG, CInE or dIA) is shown in the display.
6.3 HDMI (ARC) connection
Definition
- HDMI stands for High Definition Multimedia Interface.
Via this transmission route, digital images and audio
signals can be transmitted.
- HDMI (ARC - Audio Return Channel) means that the
cable is provided with an ARC channel. Via this channel, audio signals are transmitted in both directions.
The following modern devices are usually provided with an
ARC output: television sets, games consoles or digital receivers. In the following, the connection to a television set
is described.
Via the ARC channel of the HDMI cable, digital audio signals can be transmitted from the source device (e.g. television set) to the soundbar.
The audio transmission via the HDMI (ARC) socket|10
can only work if all components are ARC-enabled. If the
transmission is unsuccessful, you must tak e one or possibly
several of the following items into account:
• The old HDMI cable must be replaced with a new
ARC-enabled cable.
1. Connect the socket HDMI (ARC)|10 by means of an
ARC-enabled HDMI cable to an HDMI ARC socket of
your television set.
2. Switch on the soundbar with the button |32.
3. By pressing the HDMI (ARC) button|17, select the
HDMI input.
4. Switch on the television set. When the co nnection is established for the first time, it may take several seconds
until sound is output from the soundbar.
NOTE:
if you use the
HDMI (ARC)|10
connection, the
soundbar is usually switched on and off via the remote c ontrol
of the connected device. The con nected devic e must support
the CEC (Consumer Electronic Control) pr otocol.
6.4 Bluetooth
®
Establishing connection
NOTES:
• T he identification of the devic e is “SSB|50|A1”.
• After it has been switched over to Bluetooth
vice automatically attempts to establish a connection
with the last paired device.
• Please observe that the establishment process of the
connection may vary slightly depending on the device
and the software used.
1. Press the |30 button to switch over to a Bluetooth
connection. The display|1 shows bt.
2. Switch on the audio device (e.g. smartphone) and start
the Bluetooth
®
connection.
3. The audio devic e will now receive the device identifi-
cation “SSB|50|A1”. If nothing happens, press the
PAIR|19 button on the remote control for approx.
1|second. The display|1 will show bt flashing rapidly.
4. Establish the connection with the soundbar on the au-
dio device. If you are asked for a password, enter
“0000”. Both devices are now interconnected. The display|1 shows bt continuously, and an audio signal
sounds.
NOTE: usually, audio devices r emember the identification
of the device. In this case, it may not be necessary to establish the connection manually again if the Bluetooth
function is activated.
®
, the de-
®
®
GB
17
Page 20
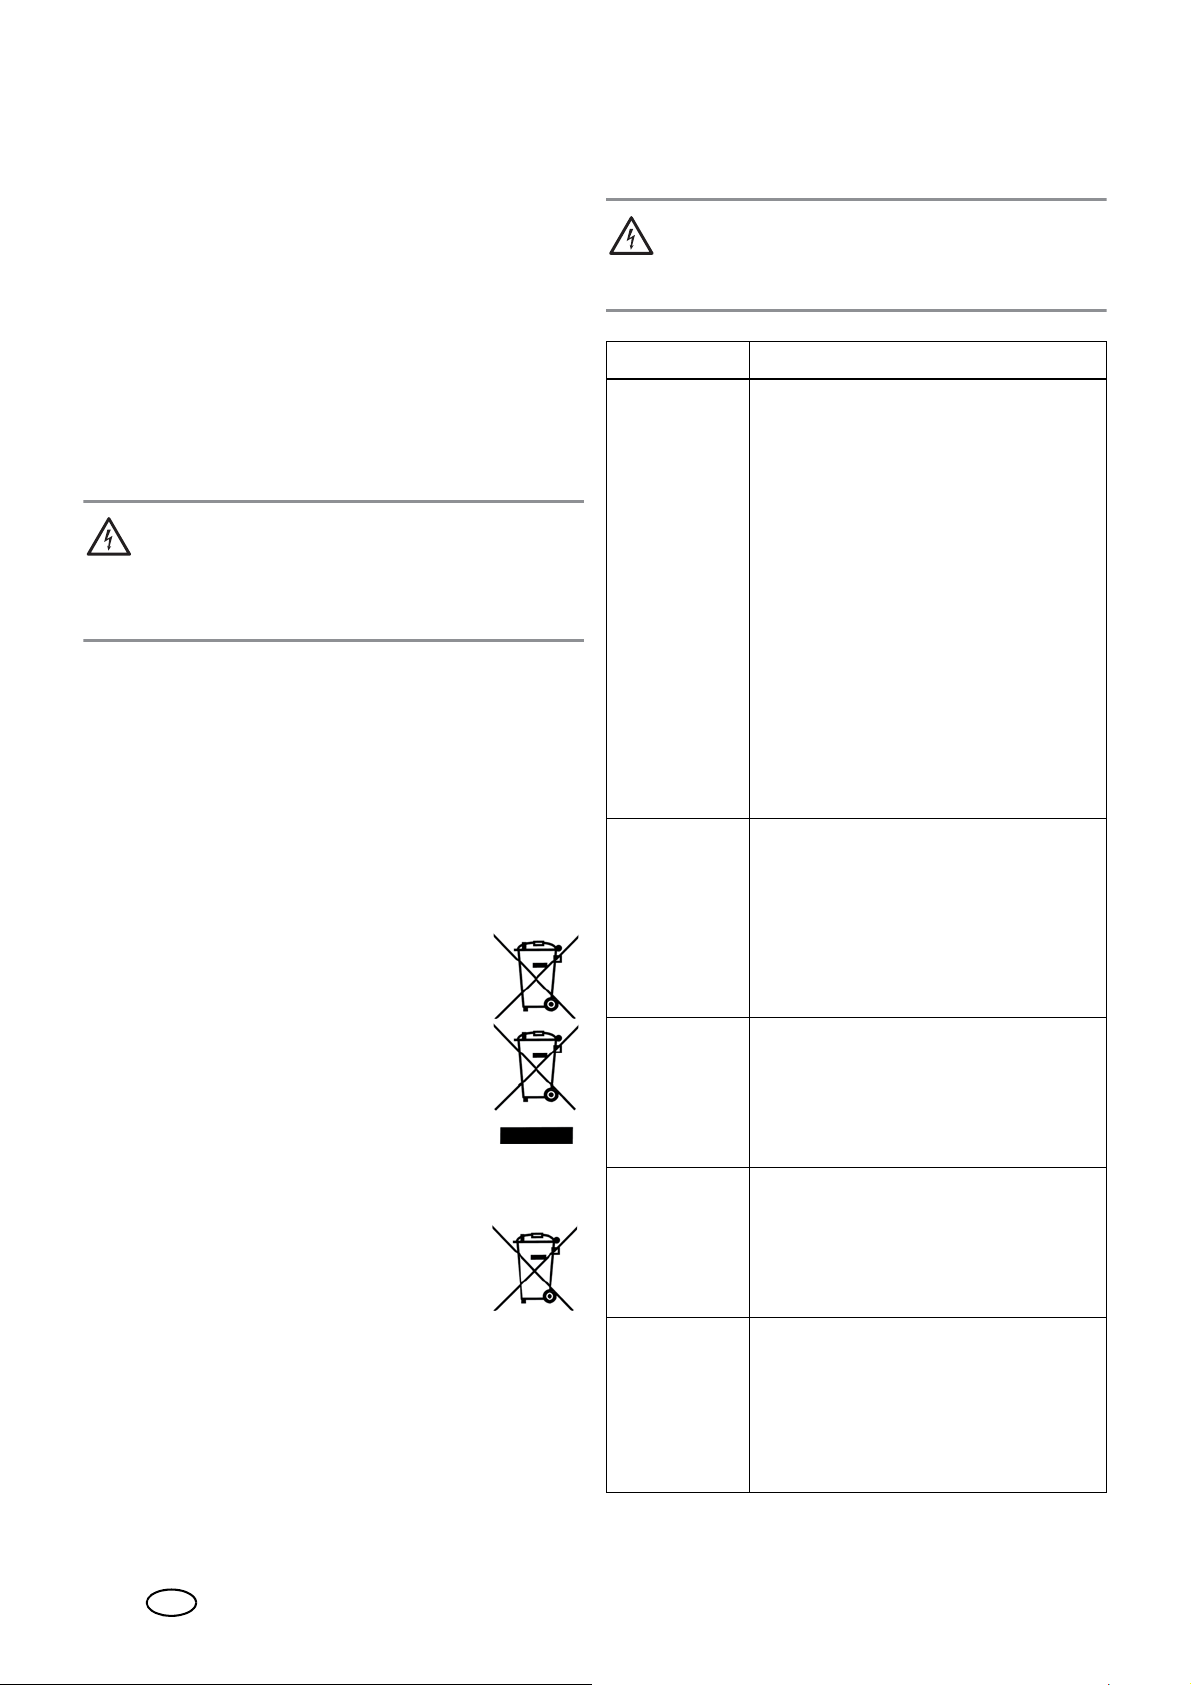
5. Now play a song on the audio device. The sound is
played back from the soundbar.
6. With the I
can select and control the music tracks.
WW|28, XXI|20 and X/II|21 buttons you
Interruption of the connection
The connection is interrupted if
…one of the devices is switched off;
…the Bluetooth
…the range (approx. 10 metres) is exceeded;
…you press the PAIR|19 button until the display|1
shows bt flashing rapidly. In this case, a new connection to another device can be established immediately.
®
function is switched off;
7. Cleaning and storing
DANGER! Risk of electric shock!
~ Pull the power unit|11 out of the wall socket before
you clean the device. Make sure that no liquid gets
into the device.
• Clean the device with a slightly damp cloth. In case of
persistent contamination, you can also use a slightly
more gentle cleaner such as detergent. Solvents, spirits, thinners etc. must not be used, as they can damage
the surface of the device.
• When not using the device, store it in a place where
neither high temperatures nor moisture can affect it.
Remove the battery from the remote control.
8. Disposal
This product is subject to the provisions of European Directive 2012/19/EC. The symbol
showing a wheelie bin crossed through indicates that the product requires separate r efuse
collection in the European Union. This applies
to the product and all accessories marked
with this symbol. Products identified with this
symbol may not be discarded with normal
household waste, but must be taken to a collection point for recycling electric and electronic appliances. Recycling helps to reduce the
consumption of raw materials and protect the environment.
Batteries must not be discarded with your
household waste. Spent batteries must be disposed of properly. Special containers are
available for this purpose in shops selling
batteries and at municipal collection points.
(Rechargeable) batteries marked with the following letters
contain harmful substances such as: Cd (cadmium), Hg
(mercury), Pb|(lead).
Packaging
When disposing of the packaging, make sure you comply
with the environmental regulations applicable in your
country.
9. Troubleshooting
If your soundbar fails to function as required, please try this
checklist first. Perhaps there is only a minor problem, and
you can solve it yourself.
DANGER! Risk of electric shock!
~ Do not attempt to repair the device yourself under any
circumstances.
Fault Possible causes / Action
• Has the device been connected to
the power supply? Is the display|1
showing – –?
• In the case of a connection to the
HDMI ARC|10 socket, the HDMI
cable as well as the connected device (e.g. a television set) must also
be ARC-enabled. If your television
No function
No
Bluetooth®
connection
No music playback
Interferences
during operation
Soundbar
switches itself
off
set is not provided with an ARC-enabled HDMI connection, switch to a
different type of connection or replace the television set.
• Replace the old HDMI cable with a
new, ARC-enabled cable.
• Has the corr ect audio signal been selected at the audio device (e.g. television set)? Select PCM 2.0 (or PCM
stereo) as the audio output.
• Is the Bluetooth® function of the audio device active?
• Did you switch off the device?
•Does a
other device exist?
button until the display|1 shows bt
flashing rapidly, and create the new
connection.
• Is the volume set too low on the audio device?
• Have you selected the correct connection?
• Is the volume too low or switched
off?
• In the case of any possibly occurring
interferences, remove, if necessary,
any mobile phones, tablets or other
devices with radio wave operation
located in the vicinity of the soundbar.
• This device has an automatic shutdown mechanism to save energy.
This device automatically switches to
standby mode if either no signal or
only a very weak signal is received
for approx. 20 minutes, and the controls have not been used.
Bluetooth® connection to an-
Press the PAIR|19
18
GB
Page 21
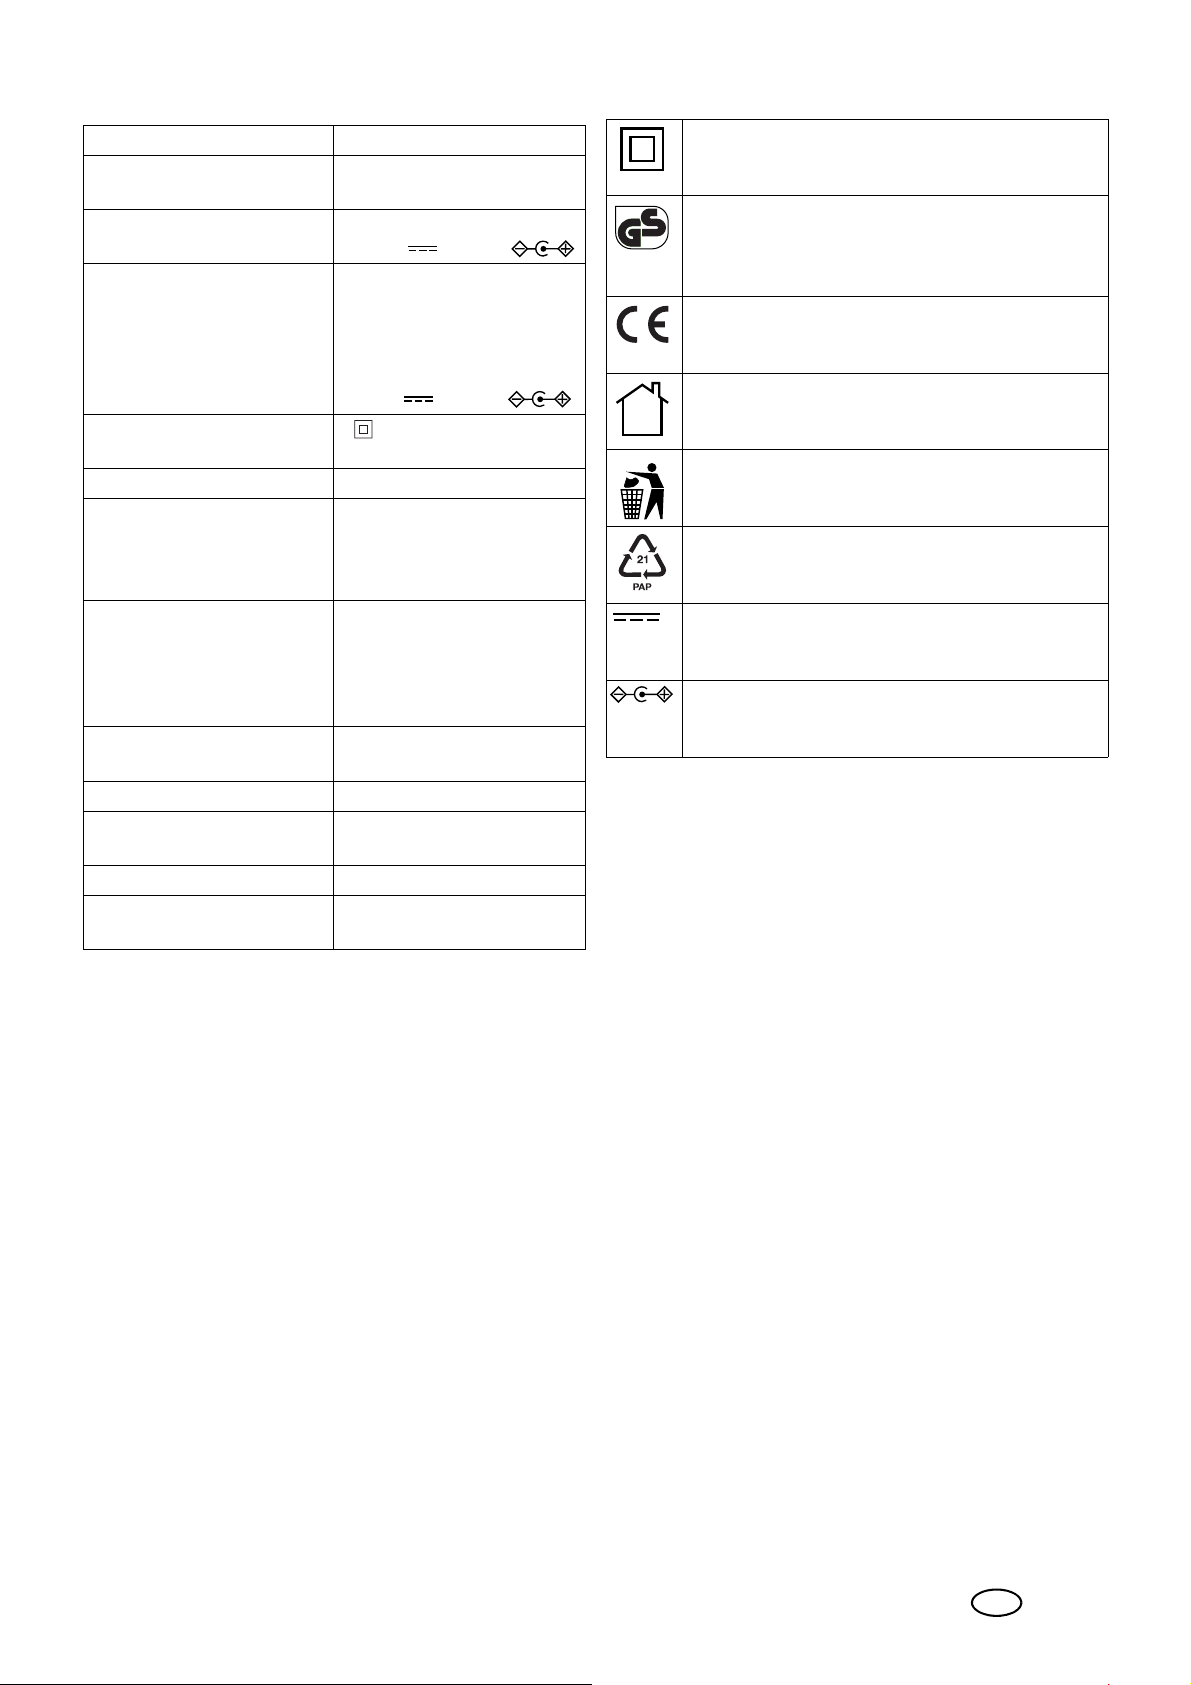
10.Technical specifications
Symbols used
Model: SSB 50 A1
Power rating:
Standby power consumption:
Soundbar: Input:
Power unit:
SHEN ZHEN CITY HONG
BEN ELECTRONIC CO ., L T D
Model
EU: HB40-1801300SPA
Protection class of the power
unit:
Audio format: PCM 2.0 (PCM stereo)
Bluetooth
Range:
Frequency range:
Transmission power:
Input:
LINE IN
AUX IN L/R
HDMI (ARC)
OPTICAL IN
Output:
SUB OUT 1x cinch socket
Battery for the remote control:
Dimensions (WxDxH): approx. 94 x 8 x 10 cm (not
Weight: approx. 2.8 kg
Operation and storage con-
ditions:
®
:
2x 10 W + 1x 30 W RMS
< 0.5 W
18.0 V 1.3 A,
Input:
100 - 240 V ~
50/60 Hz, 0.8 A max
Output:
18.0 V , 1.3 A,
II
v4.2 (A2DP, AVRCP)
up to 10 m
2402-2480 MHz
< 10 dBm
1x 3.5 mm stereo jack socket
2x cinch sockets
1x HDMI ARC socket
1x TOSLINK socket
2x type LR3 AAA 1.5 V
including wall bracket)
10 °C to 35 °C
Relative humidity 40 to 85 %
Double insulation
Certified Safety. Devices must comply with the
generally acknowledged rules of technology and
the German Product Safety Act (Produktsicherheitsgesetz - ProdSG).
With the CE marking, HOYER|Handel GmbH declares the conformity with EU guidelines.
Devices with this symbol may only be operated
indoors (dry environment).
This symbol reminds you to dispose of the packaging in an environmentally friendly manner.
Recyclable materials: car dboard (except corrugated cardboard)
Direct current
Symbol for polarity
Subject to technical modifications.
Notes on the EU declaration of conformity
The firm HOYER Handel GmbH hereby declares that this
product meets the fundamental requirements of
- the RED 2014/53/EC,
- the ErP Directive 2009/125/EC, as well as
- the RoHS Directive 2011/65/EU.
For a complete EU-declaration of conformity, refer to the In-
ternet at http://qr.hoyerhandel.com/d/298734
GB
19
Page 22
11.Warranty of the
GB
IE
MT
CY
HOYER Handel GmbH
Dear Customer,
your device is provided with a 3 year warranty starting with the
purchase date. In the event of product defects, you ar e entitled to
statutory rights against the vendor. These statutory rights are not
restricted by our warranty presented in the following.
Warranty conditions
The warranty period starts with the purchase date. Please keep
the original purchase receipt in a safe place. This document is required to verify the purchase.
If within three years from the purchase date of this product a material or factory defect occurs, the product will be repaired or replaced by us – at our discretion – free of charge to you. This
warranty implies that within the period of three years the defective device and the purchase receipt ar e presented, including a
brief written description of the defect and the time it occurred.
If the defect is covered by our warranty, the repaired or a new
product will be returned to you. No new warranty period starts
with a repair or replacement of the product.
Warranty period and statutory claims for defects
The warranty period is not extended when the warr anty has been
claimed. This also applies to replaced and repaired parts. Any
damages and defects already existing at the time of purchase
must be reported immediately upon unpacking. Repairs arising
after the expiration of the warranty period are subject to a
charge.
Warranty coverage
The device was produced car efull y ac cording to strict quality
guidelines and tested diligently prior to delivery.
The warranty applies to material or factory defects.
Excluded from the warranty are wear parts subject to
normal wear and damages to fragile parts, e.g.
switches, batteries, lamps or other parts manufactured from glass.
• Then, you are able to send a product reported as defective
free of charge to the service address specified to you, including the purchase receipt and the information on the defect
and when it occurred.
Please visit www.lidl-service.com to download this and
many other manuals, product videos and software.
Service Centre
Service Great Britain
Tel.: 0871 5000 720 (£ 0.10/Min.)
E-Mail: [email protected]
Service Ireland
Tel.: 1890 930 034
(0,08 EUR/Min., (peak))
(0,06 EUR/Min., (off peak))
E-Mail: [email protected]
Service Malta
Tel.: 80062230
E-Mail: [email protected]
Service Cyprus
Tel.: 8009 4409
E-Mail: [email protected]
IAN: 298734
Supplier
Please note that the following address is no service address.
First contact the aforementioned Service Centre.
HOYER Handel GmbH
Tasköprüstraße 3
DE-22761 Hamburg
GERMANY
This warranty expires if the product is damaged, not used as intended or not serviced. For the proper oper ation of the product, all
instructions listed in the operating instructions must be observed
carefully. Any form of use and handling that is advised against in
the operating instructions or warned against must always be avoided.
The product is only intended for private and not for c ommercial
use. In the case of incorrect and improper treatment, use of for ce
and interventions not performed by our authorised Service Centre,
the warranty shall cease.
Handling in case of a warranty claim
In order to ensure prompt processing of your matter, please observe the following notes:
• Please keep the article number
chase receipt as a purchase verification for all inquiries.
• The article number can be found on the rating plate, an engraving, the title page of your instructions (in the bottom left),
or as a label on the rear or underside of the device.
• If faulty operation or other defects occur, first contact the Service Centre listed in the following by telephone or email.
IAN: 298734
and the pur-
20
GB
Page 23

GB
21
Page 24
Sommaire
1. Aperçu de l'appareil ..............................22
2. Utilisation conforme ...............................23
3. Consignes de sécurité ............................23
4. Éléments livrés .......................................25
5. Avant la première utilisation ..................25
5.1 Télécommande .................. ..................... 25
5.2 Mise en place / montage mural ............... 25
5.3 Vue d'ensemble des raccords ................... 26
5.4 Mise en service ...................................... 26
6. Utilisation .............................................. 26
6.1 Sélection du type de raccordement ........... 26
1. Aperçu de l'appareil
Veuillez respecter les illustrations situées sur le rabat.
Barre de son
1 Écran
- -: mode veille
LINE: LINE IN
Hd: HDMI (ARC)
AUX: AUX IN
bt: Bluetooth
OPtI : OPTICAL
2 Bouton POWER
3 Bouton SOURCE
4 Boutons VOL –/+
5 Port DC IN
6 Port SUB OUT
7 Port LINE IN
8 Port AUX IN L / R
9 Port OPTICAL IN
10 Port HDMI (ARC)
Accessoires
®
6.2 Réglages du son ..................................... 26
6.3 Prise HDMI (ARC) ...................................27
6.4 Bluetooth® .... ......................................... 27
7. Nettoyage et stockage ...........................28
8. Mise au rebut ........................................28
9. Dépannage .................. ..........................28
10.Caractéristiques techniques ....................29
11.Garantie de HOYER Handel|GmbH .........30
Centre de service ................... ... ............................ 31
Télécommande
15 DEL d'émission
16 Bouton
17 Bouton HDMI (ARC)
18 Bouton OPTICAL
19 Bouton PAIR
20 Bouton
21 Bouton
22 Boutons VOL –/+
23 Boutons TREBLE –/+
24 Boutons BASS –/+
25 Boutons MUSIC, MOVIE, DIALOG
26 Bouton 3D
27 Compartiment à piles
28 Bouton
29 Bouton LINE IN
30 Bouton
31 Bouton AUX
32 Bouton
XX
X
WW
I
I
II
11 Bloc d'alimentation
12 2 fixations murales
13 Câble cinch stéréo
14 Câble TOSLINK
22
FR
Montage
33 Vis (4x 25 mm / 4x 50 mm)
34 Chevilles (4)
Gabarit de perçage (non illustré)
Page 25
Merci beaucoup pour votre
confiance !
Nous vous félicitons pour l'acquisition de votre nouveau téléviseur barre de son stéréo avec Bluetooth
Pour manipuler l'appareil en toute sécurité et vous familiariser avec l’ensemble des ses fonctionnalités :
®
.
2. Utilisation conforme
Cet appareil électronique est destiné au divertissement.
Le
téléviseur barre de son stéréo avec Bluetooth® est conçu
pour restituer des sons depuis des appareils audio.
L'appareil est conçu pour un usage privé et ne peut être utilisé à des fins commerciales. L'appareil doit être utilisé uniquement à l'intérieur.
• Lisez attentivement ce mode d'emploi avant
la première utilisation.
• Respectez en priorité les consignes de sécurité !
• L'appareil ne doit être utilisé qu'aux fins décrites dans ce mode d'emploi.
• Conservez le présent mode d'emploi pour
vous y référer ultérieurement.
• Si vous transmettez l'appareil à un tiers,
n'oubliez pas d'y joindre ce mode d'emploi.
Le mode d'emploi fait partie intégrante du
produit.
Nous vous souhaitons beaucoup de plaisir avec votre nouveau téléviseur barre de son stéréo avec Bluetooth
Marques déposées
La marque verbale Bluetooth
des marques déposées de la société Bluetooth SIG, Inc.
(Special Interest Group) ; toute utilisation des marques déposées par Hoyer Handel GmbH est régie par une licence.
La marque verbale HDMI
société HDMI Licensing LLC.
Le symbole indique que les instructions du
mode d'emploi doivent être respectées.
®
et le logo Bluetooth® sont
®
est une marque déposée de la
®
!
3. Consignes de sécurité
Avertissements
Les avertissements et symboles suivants sont utilisés si nécessaire dans le présent mode d'emploi :
DANGER ! Ce symbole, combiné à la mention
« Danger » , signifie qu'il existe un risque élevé. Un
non-respect de l’avertissement peut provoquer des
blessures graves, voire la mort.
DANGER ! Risque d'électrocution ! Ce sym bole, combiné à la mention « Risque d'électrocution » , signifie qu'il existe un risque élevé. Un nonrespect de l’avertissement peut provoquer des blessures graves, voire la mort.
AVERTISSEMENT ! Ce symbole, combiné à la
mention « Avertissement », signifie qu'il existe un
risque moyen. Un non-respect de l’avertissement
peut provoquer des blessures ou des dommages
matériels graves.
ATTENTION : risque faible : le non-respect de l'avertissement peut provoquer des blessures légères ou entraîner
des dommages matériels.
REMARQUE : remarques et particularités dont il faut tenir
compte en manipulant l'appareil.
DANGER pour les enfants et les
personnes présentant des
déficiences
~ Le matériel d'emballage n'est pas un jouet. Les enfants
ne doivent pas jouer avec le matériel d'emballage.
Ceux-ci présentent un risque d'asphyxie.
~ Cet appareil n'est pas destiné à être utilisé par des per-
sonnes (et par des enfants) présentant des déficienc e s
physiques, sensorielles ou mentales, ni par des personnes ne possédant aucune expérience et connaissance en la matière, sauf si ces pe rsonnes sont
surveillées et supervisées par une personne compétente
qui leur expliquera le fonctionnement de l'appareil.
~ Les enfants ne doivent pas jouer avec l'appareil.
~ Conservez l’appareil hors de portée des enfants.
DANGER pour et provoqué par les
animaux domestiques et d'élevage
~ Les appareils électriques peuvent présenter des dan-
gers pour les animaux domestiques et d'élevage. De
plus, ceux-ci peuvent endommager l'appareil. Maintenez par conséquent les animaux éloignés des appareils électriques.
FR
23
Page 26
DANGER ! Risque d'électrocution en
raison de l'humidité
~ L'appareil ne doit pas être utilisé dans des environne-
ments extrêmes, comme par exemple des pièces dans
lesquelles l'humidité de l'air est importante (salles de
bain).
~ Protégez l'appareil et le bloc d'alimentation de l'humi-
dité, des gouttes et des projections d'eau. Ne posez
par exemple pas de vases remplis de liquides sur ou à
proximité de l'appareil.
~ Ne touchez pas l'appareil et le bloc d'alimentation
avec les mains mouillées.
~ Si du liquide s'est infiltré dans l'appareil, débranchez
le bloc d'alimentation de la prise de courant.
~ Si du liquide a pénétré dans l'appareil, faites vérifier
l'appareil par un spécialiste avant de le remettre en
marche.
DANGER ! Risque d'électrocution
~ Ne mettez pas l'appareil en marche si l'appareil, le
bloc d'alimentation ou le câble présentent des dommages visibles ou si l'appareil a déjà subi une chute.
Dans ce cas, cessez d'utiliser l'appareil, faites-le vérifier par un atelier spécialisé.
~ N'ouvrez jamais le boîtier de l'appareil ou du bloc
d'alimentation.
~ Branchez le bloc d'alimentation à la prise de courant
seulement lorsque le câble est raccordé à l'appareil.
~ Raccordez le bloc d'alimentation uniquement à une
prise de courant correctement installée et acc essible
dont la tension correspond aux indications de la
plaque signalétique. Après avoir branché l'appareil,
la prise de courant doit rester facilement accessible.
~ Veillez à ce que le câble ne soit pas endommagé par
les bords coupants ou les zones chaudes.
~ Veillez à ce que le câble ne soit ni coincé ni écrasé.
~ Pour débrancher le bloc d'alimentation de la prise de
courant, tirez toujours sur le bloc d'alimentation, jamais sur le câble.
~ Débranchez le bloc d'alimentation de la prise de cou-
rant, …
…lorsqu'une panne survient,
…avant de racc order l'appareil au bloc d'alimenta-
tion,
…avant de nettoyer l'appareil et
…en cas d'orage.
~ Pour couper complètement l'appar eil du r éseau, il faut
débrancher le bloc d'alimentation de la prise de courant. Même lorsque l'appareil est arrêté, une petite
quantité de courant continue à être consommée
lorsque le bloc d'alimentation est branché.
~ Si le câble d'alimentation est endommagé, il doit être
remplacé par le fabricant, son service après vente ou
des personnes de qualification similaire afin d'éviter
un danger.
~ Afin d'éviter tout risque d'accident, n'effectuez aucune
modification au niveau de l'appareil. Confiez les réparations uniquement à un atelier spécialisé ou au centre
de service.
Piles
~
Veillez à la polarité corre cte lors de l'insertion des piles.
~ Nettoyez les contacts des piles et, le cas échéant, de
l’appareil avant l'insertion des piles.
~ DANGER ! RISQUE D'EXPLOSION !
piles ne doivent pas être chargées ou r éactivées
d'autres manières, elles ne doivent pas être démontées, jetées au feu ou court-circuitées.
~ Ôtez les piles de la télécommande si vous ne comptez
pas vous en servir pendant une durée prolongée ou
quand les piles sont usées. Les piles risquent sinon de
couler et d'endommager la télécommande.
~ Ne soumettez pas les piles à des conditions extrêmes,
par ex. ne posez pas la télécommande sur des corps
chauds ni sous les rayons du soleil direct. Le risque
d'écoulement devient sinon plus important.
~ Si de l'acide des piles a coulé, évitez tout contact avec
la peau, les yeux et les muqueuses. En cas de contact
avec l'acide, rincez immédiatement les zones touchées
à l'eau claire et consultez immédiatement un médecin.
~ Les piles peuvent être mortelles en cas d'ingestion.
Pour cela, conservez les piles hors de portée des enfants. En cas d'ingestion d’une pile, demandez immédiatement une assistance médicale.
~ Les piles neuves et usagées doivent être gardées hors
de portée des enfants.
~
Sollicitez immédiatement une assistance médicale si vous
craignez que les piles aient pu être ingurgitées ou soient
parvenues dans une partie quelconque du corps.
Les
AVERTISSEMENT : risque de
dommages matériels
~ Pour le fonctionnement sur secteur, n'utilisez que le
bloc d'alimentation enfichable d'origine fourni.
~ Si vous remarquez des anomalies (par ex. bruits anor-
maux, odeur étrange ou émanation de fumée), débranchez immédiatement le bloc d'alimentation de la
prise de courant. Après cela, n'utilisez plus l'appareil.
~ Si l'appareil est transporté d'un endroit froid à un en-
droit chaud, de la condensation peut se former à l'intérieur. Laissez l'appareil éteint pendant env. 2 heures
pour qu'il s'acclimate.
~
Ne posez l'appareil que sur une surface stable et plane.
~ Protégez l'appareil des dommages provoqués par ex.
par :
- la chaleur, les rayons directs du soleil et les flammes
ouvertes
- les chocs et agressions similaires
~ Les bougies et autres flammes nues doivent
être à tout moment tenues éloignées de ce
produit, afin d'éviter la propagation d'un incendie.
~ Ne recouvrez pas le bloc d'alimentation afin d'éviter
toute surchauffe.
~ N’utilisez aucun détergent acide ou décapant.
~
L'appareil est équipé de pieds en plastique antidérapants. Etant donné que les meubles sont recouverts
d'une variété de laques et de matières synthétiques et
sont traités avec différents produits d'entr etien, il ne peut
24
FR
Page 27
pas être totalement exclu que certaines de ces substances contiennent des composants qui attaquent et ramollissent les pieds en plastique antidérapants. Au
besoin, placez un support antidérapant sous l'appar eil.
~ Lors du montage mural de l'appareil, veuillez respec-
ter ceci :
- Le matériel de fixation doit être adapté à la structure
du mur. Au besoin, utilisez un autre matériel de fixation que celui fourni avec l'appareil.
- Assurez-vous qu'aucun câble (par ex. électricité, eau,
gaz) ne passe au niveau de l’emplacement de montage dans le mur.
- Au besoin, faites effectuer le montage mural par un
spécialiste.
Remarques concernant le Bluetooth
~ Les ondes radio sont susceptibles d'influencer ou de
perturber le fonctionnement des stimulateurs cardiaques, des appareils électriques (sensibles) et
d'autres ondes radio (par ex. le Wifi). Veuillez donc
prendre en considération les remarques suivantes.
- Les personnes portant un stimulateur cardiaque
doivent respecter une distance de sécurité de 20 cm
par rapport à ce produit.
- Les ondes radio peuvent créer des interférences sonores, par ex. dans les téléphones portables ou les
appareils auditifs.
- N'utilisez pas le produit dans des pièces présentant
un risque d'explosion.
- Si des interférences surviennent sur d'autres unités
radio (par ex. équipées du Wifi), vérifiez si la barre
de son en est la cause en la mettant hors tension.
- N'utilisez pas l'appareil à proximité de fours à micro-ondes ou d'appareils produisant des champs magnétiques.
®
4. Éléments livrés
1 barre de son
1 bloc d'alimentation|11
1télécommande
2 piles type LR3 AAA 1,5 V
1 câble cinch stéréo|13
1 câble TOSLINK|14
2x4 vis|33 (25 mm / 50 mm)
4 chevilles|34
2 fixations murales|12
1 gabarit de perçage
1 notice succincte
1 informations importantes
1 mode d'emploi
• Ôtez tout le matériau d'emballage.
• Vérifiez que l'appareil est en bon état.
En cas de livraison incomplète ou présentant des défauts,
veuillez vous adresser au centre de service après-vente du
fabricant dont vous dépendez (voir « Garantie de
HOYER Handel|GmbH|» à la page 30).
Veuillez respecter les illustrations situées sur le rabat.
5. Avant la première utilisation
5.1 Télécommande
AVERTISSEMENT !
~ Respectez les signes de polarité lorsque vous insérez
les piles dans le compartiment à piles.
1. FIGURE A : ouvrez le compartiment à piles|27 en faisant glisser le couvercle dans le sens de la flèche et en
le soulevant.
2. Si nécessaire, remplacez les anciennes piles par des
nouvelles.
3. Remettez le couvercle sur le compartiment à piles et
faites-le glisser dans la direction inverse de la flèche
jusqu'à ce qu'il s'enclenche.
5.2 Mise en place / montage mural
REMARQUE : si vous raccordez l'appareil à un téléviseur, placez l'appareil le plus possible au milieu, sous le
téléviseur.
Mise en place
1. Posez l'appareil sur une surface plane.
2. Branchez le bloc d'alimentation|11 à l'appareil.
Montage mural
AVERTISSEMENT : risque de dommages
matériels !
~ Lors du montage mural de l'appareil, veuillez respec-
ter ceci :
- Le matériel de fixation doit être adapté à la structure
du mur. Au besoin, utilisez un autre matériel de fixation que celui fourni avec l'appareil.
- Assurez-vous qu'aucun câble (par ex. électricité,
eau, gaz) ne passe au niveau de l’emplacement de
montage dans le mur.
- Au besoin, faites effectuer le montage mural par un
spécialiste.
~ En cas d'utilisation avec montage mural, vous devez
utiliser des fiches HDMI coudées afin que la fiche ne
puisse pas être pliée et endommagée.
1. FIGURE B : percez 2 trous par fixation murale à une
distance de 40 cm. Utilisez éventuellement le gabarit
de perçage inclus.
2. Si vous utilisez les chevilles|34 incluses dans la livraison, utilisez une perceuse avec un diamètre de mèche
de 8 mm.
3. Insérez les chevilles|34 dans les trous percés.
4. Fixez solidement les fixations murales|12 au mur à
l'aide des vis|33.
5. Branchez tous les câbles utilisés aux prises prévues
(voir « Vue d'ensemble des raccords|» à la page 26).
6. Branchez le bloc d'alimentation|11 à l'appareil.
FR
25
Page 28
7. Accrochez l'appareil aux fixations murales|12. Les
deux fixations murales|12 doivent être correctement
insérées dans les logements se trouvant à l'arrière de
l'appareil.
• Branchez le bloc d'alimentation|11 à une prise de
courant facile d'accès. Sur l'écran|1 s'affiche – –.
L'appareil est alors en mode veille.
5.3 Vue d'ensemble des raccords
ATTENTION : veillez à ce que la barre de son et les appareils à raccorder soient éteints avant de les brancher.
Pensez également à lire le mode d'emploi de l'appareil
que vous raccordez.
REMARQUES:
• Un câble HDMI (ARC) pour l'entrée
un câble jack stéréo 3,5 mm pour l'entrée
sont pas inclus dans la livraison.
• La prise HDMI (ARC)|10 ne peut fonctionner que si
tous les composants sont compatibles avec la fonction
ARC. Les anciens câbles HDMI devront éventuellement
être remplacés par des câbles neufs compatibles avec
la fonction ARC.
Entrée Utilisation
Prise avec câble
AUX IN|8
LINE IN|7
HDMI
(ARC)|10
OPTICAL
IN|9
Bluetooth
• Un subwoofer peut-être br anché à la prise cinch de la
sortie SUB OUT|6. Celui-ci est automatiquement piloté par l'appareil.
cinch stéréo|13,
par ex. pour téléviseur, lecteur CD
prise avec câble
jack stéréo
3,5 mm, par ex.
pour
lecteur MP3,
téléphone
Prise avec câble
HDMI (ARC), par
ex. au port HDMI
ARC du téléviseur,
du lecteur DVD
Prise avec câble
TOSLINK|
ex. récepteur numérique, lecteur DVD
Liaison radio, par
®
ex. smartphone
14
, par
HDMI (ARC)|10
LINE IN|7
Bouton télé-
commande
AUX|31 AUX
LINE IN|29 LInE
HDMI
(ARC)|17
OPTICAL|18 OPtI
|30
Écran
Hd
bt
et
ne
6. Utilisation
REMARQUES :
• Vous pouvez procéder à l'ensemble des réglages facilement à partir de la télécommande. Les touches sur
l'appareil permettent également d'exécuter les fonctions de base. Le manuel décrit généralement l’utilisation de la télécommande.
• L'appareil passe en mode veille, …
…si aucune connexion Bluetooth
bout de 20 minutes ou
…si pendant env. 20 minutes aucun signal n'est reçu
ou seulement un signal très faible est reçu et l'appareil n'a pas été utilisé.
• Appuyez sur la touche |32 pour mettre l'appareil en
marche depuis le mode veille.
• Appuyez sur la touche |32 pour allumer l’appareil
en mode veille (stand-by).
6.1 Sélection du type de
raccordement
1. Appuyez sur l'une des touches AUX|31, LINE
IN|29, HDMI (ARC)|17, OPTICAL|18 ou |30
pour basculer sur l'une des prises (voir « Vue d'ensemble des raccords|» à la page 26).
2. Lancez la lectur e sur l'appareil de lecture, sélectionnez
et contrôlez les titres de musique.
6.2 Réglages du son
REMARQUE : Les changements de réglages du son s'affichent sur l'écran|1.
-Volume : V00 … V40
-Aigus : t -4 … t 4
- Basses : b -4 … b 4
Régler le volume
• Pendant la lecture, appuyez sur les boutons VOL –/
+|22 de la télécommande ou VOL –/+|4 de l'appa-
reil. Vous pouvez aussi maintenir les boutons enfoncés
afin de modifier plus rapidement le volume.
®
n'est établie au
5.4 Mise en service
REMARQUE : une fois arrêté, l'appareil reste en mode
veille. Dans ce mode, l'appareil consomme encor e un peu
d'énergie. Pour couper l'alimentation secteur, débranchez
le bloc d'alimentation|11 de la prise de courant.
26
FR
Fonction muet
1. Appuyez sur le bouton |16 pour couper le son. L'affichage du volume préalablement réglé clignote sur
l'écran|1.
2. Pour rétablir le son, appuyez à nouveau sur le bouton||16 ou sur l'un des boutons VOL –/+|22 /|4.
Page 29
Régler le timbre
Les réglages ne sont pas enregistr és lorsque vous changez
de mode.
• Appuyez sur l'un des boutons|25 pour sélectionner les
réglages par défaut des timbres pour musique
(MUSIC), film (MOVIE) ou langue (DIALOG).
•Avec les boutons TREBLE –/+|23 contrôlez les aigus.
•Avec les boutons BASS –/+|24 contrôlez les basses.
Timbre
Musique MUSIC SOnG
Film MOVIE CInE
Langue DIALOG dIA
REMARQUE :
déjà activé comme réglage par défaut.
pour le timbre cinéma (
Boutons|25
télécommande
MOVIE
Écran
) l’effet 3D est
Activation/désactivation de l’effet 3D
• Appuyez sur le bouton 3D|26 pour activer/désactiver
l’effet 3D.
- Lorsque l’effet 3D est activé, 3d s’affiche brièvement
sur l’écran.
- Lorsque l’effet 3D est désactivé, le timbre sélectionné
(SOnG, CInE ou dIA) s’affiche sur l’écran.
tion ARC. En règle générale, les ports HDMI
correspondants portent l'inscription ARC. Sinon,
consultez le mode d'emploi de votre téléviseur.
• Pour certains téléviseurs, la sortie audio numérique
doit être activée. Sélectionnez la sortie audio PCM 2.0
(stéréo PCM). Si la sortie audio PCM 2.0 (stéréo PCM)
n'est pas réglé au téléviseur, la barre de son s'éteint
automatiquement.
1. Raccordez le port HDMI (ARC)|10 à un port HDMI
ARC de votre téléviseur à l'aide d'un câble HDMI compatible avec la fonction ARC.
2. Allumez la barre de son en appuyant sur la touche |32.
3. Sélectionnez l'entrée HDMI en appuyant sur la touche
HDMI (ARC)|17.
4. Allumez le téléviseur. Lors de la toute première
connexion, il peut s'écouler quelques secondes avant
que la barre de son se mette à fonctionner.
REMARQUE : si vous utilisez la prise HDMI (ARC) |10,
la télécommande de l'appareil raccordé permet généralement d'allumer et d'éteindre la barre de son. L'appareil
raccordé doit êtr e compatible avec le pr otocole CEC (c ommande d'électronique grand public).
6.4 Bluetooth
®
Établir la connexion
6.3 Prise HDMI (ARC)
Explication du terme
- HDMI signifie High Definition Multimedia Interface (Interface Multimédia Haute Définition). Ce type de transmission permet d'échanger des signaux numériques
vidéo et audio.
- HDMI (ARC : Audio Return Channel ou Canal Retour
Audio) signifie que le câble dispose d'un canal ARC.
Des signaux audio peuvent être envoyés dans les deux
directions via ce canal.
Les appareils modernes suivants disposent généralement
d'une sortie ARC : téléviseurs, consoles de jeu ou récepteurs numériques. La connexion à un téléviseur est décrite
ci-après.
Des signaux numériques audio peuvent être transmis de
l'appareil source (par ex. téléviseur) à la barr e de son via
le canal ARC du câble HDMI.
La transmission audio via le port HDMI (ARC)|10 ne peut
fonctionner que si tous les composants sont compatibles
avec la fonction ARC. Si la transmission ne fonctionne pas,
référez-vous à un ou plusieurs des points ci-dessous :
• L'ancien câble HDMI doit être remplacé par un nouveau câble compatible avec la fonction ARC.
• Tous les ports HDMI du téléviseur ne doivent pas obligatoirement être compatibles avec la fonction ARC.
Dans ce cas, le câble HDMI du téléviseur doit être raccordé à un autre port HDMI compatible avec la fonc-
REMARQUES :
• L'identifiant de l'appareil est « SSB|50|A1 ».
• Après le basculement sur le Bluetooth
cherche automatiquement à établir une connexion
avec le dernier appareil auquel il a été couplé.
• Veuillez noter que l'établissement de la connexion peut
varier selon l'appareil et le logiciel qu'il utilise.
1. Appuyez sur le bouton |30 pour basculer sur la
connexion Bluetooth
2. Mettez l'appareil de lectur e (par ex. le smartphone) en
marche et lancez la connexion Bluetooth®.
3. L'appareil de lecture devrait maintenant détecter l'identifiant d'appareil «
puyez env. 1 sec onde sur le bouton
télécommande. Sur l'écran|
4. Établissez sur l'appareil de lecture la connexion à la
barre de son. En cas de demande de mot de passe,
saisissez « 0000 ». Les deux appareils sont maintenant connectés. Sur l'écran|1 s'affiche bt en continu et
un signal sonore retentit.
REMARQUE : les appareils de lecture mémorisent parfois
l'identifiant de l'appareil. Cela évite, lors d'une utilisation
ultérieure, de devoir rétablir manuellement la connexion
lorsque la fonction Bluetooth® est activée.
5. Lancez maintenant la lecture d'un titr e sur l'appareil de
lecture. Le son est alors restitué par la barre de son.
®
. Sur l'écran|1 s'affiche bt.
SSB|50|A1
». Si ce n'est pas le cas, ap-
1
clignote rapidement bt.
®
, l'appareil
PAIR|19
de la
FR
27
Page 30
6. Avec les touches I
pouvez sélectionner et contrôler les titres musicaux.
WW|28, XXI|20 et X/II|21, vous
Désactiver la connexion
La connexion est coupée
…lorsqu'un des appareils est éteint ;
…lorsque la fonction Bluetooth
…lorsque la portée maximale (env. 10 mètres) est
dépassée ;
…Appuyez sur le bouton PAIR|19 jusqu'à ce que bt
clignote rapidement sur l'écran|1. Dans ce cas, une
nouvelle connexion à un autre appareil peut immédiatement être établie.
®
est désactivée ;
7. Nettoyage et stockage
DANGER ! Risque d'électrocution !
~ Débranchez le bloc d'alimentation|11 de la prise de
courant avant de nettoyer l'appareil. Veillez à ce
qu'aucun liquide ne pénètre dans l'appareil.
Le produit est recyclable, soumis à la responsabilité élargie du producteur et doit faire
l'objet d'un tri sélectif.
Emballage
Si vous souhaitez mettre l’emballage au rebut, respectez
les prescriptions environnementales correspondantes de
votre pays.
9. Dépannage
Si la barre de son ne fonctionne pas correctement, procédez dans un premier temps aux tests de cette liste de
contrôle. Il s'agit peut-être seulement d'un problème mineur
que vous pouvez résoudre vous-même.
DANGER ! Risque d'électrocution !
~ N'essayez en aucun cas de réparer l'appareil vous-
même.
Problème Cause possible / solution
• Nettoyez l'appareil avec un chiffon légèremen t humide. En cas de saleté tenace, vous pouvez également
utiliser un peu de nettoyant doux, comme par ex. du
produit vaisselle. N'utilisez pas de dissolvant, d'alcool
à brûler ou de diluant car ces produits peuvent endommager la surface de l'appareil.
• Lorsque vous n'utilisez pas l'appareil, rangez-le dans
un endroit où il ne risque pas d'être endommagé par
une chaleur ou une humidité trop importante. Ôtez la
pile de la télécommande.
8. Mise au rebut
Ce produit est soumis aux exigences de la directive 2012/19/UE.
belle sur roues barrée signifie que, dans
l’Union européenne, le produit doit faire l’objet d’une collecte séparée des déchets. Cela
s’applique au produit et à tous les accessoires
portant ce symbole. Les produits portant ce
symbole ne doivent pas être éliminés avec les
déchets ménagers normaux, mais doivent être
déposés dans un point de collecte chargé du
recyclage des appareils électriques et électroniques. Le recyclage contribue à réduire l’utilisation de matières premières et à protéger l’environnement.
Les piles ne doivent pas être jetées avec les
déchets ménagers. Les piles usagées doivent
être mises au rebut de manière appr opriée. A
cette fin, vous disposez de collecteurs adéquats dans les commerces vendant des piles
ainsi que dans les déchèteries communales.
Les piles et accumulateurs repérés avec les lettres suivantes
contiennent notamment les substances toxiques : Cd (cadmium), Hg (mercure), Pb (plomb).
Le symbole de la pou-
L'appareil ne
fonctionne pas
Pas de
connexion
tooth
Pas de lecture
de musique
Blue-
®
• L'alimentation électrique est-elle établie correctement ? Est-ce que – –
s'affiche sur l'écran|1 ?
• Lors de la connexion au port HDMI
ARC|10, les câbles HDMI et l'appareil connecté (par ex. un téléviseur)
doivent être compatibles avec la
fonction ARC. Si votre téléviseur n'a
pas de prise HDMI compatible avec
la fonction ARC, essayez un autre
type de connexion ou changez de téléviseur.
• Remplacez l'ancien câble HDMI par
un câble neuf compatible avec la
fonction ARC.
• Le bon signal audio est-il sélectionné
sur l'appareil de lecture (par ex. le
téléviseur) ? Pour la sortie audio, sélectionnez PCM 2.0 (ou stéréo
PCM).
• La fonction Bluetooth® est-elle activée
sur l'appareil de lecture ?
• Avez-vous arrêté l'appareil ?
• Une connexion Bluetooth
appareil est-elle active ? Appuyez
sur le bouton PAIR|19, jusqu'à ce
que bt clignote rapidement sur
l'écran|1 et procédez à la nouvelle
connexion.
• Le volume est-il réglé trop bas sur
l'appareil de lecture ?
• La prise adéquate est-elle
sélectionnée ?
• Le son est-il trop faible ou inexistant ?
®
à un autre
28
FR
Page 31
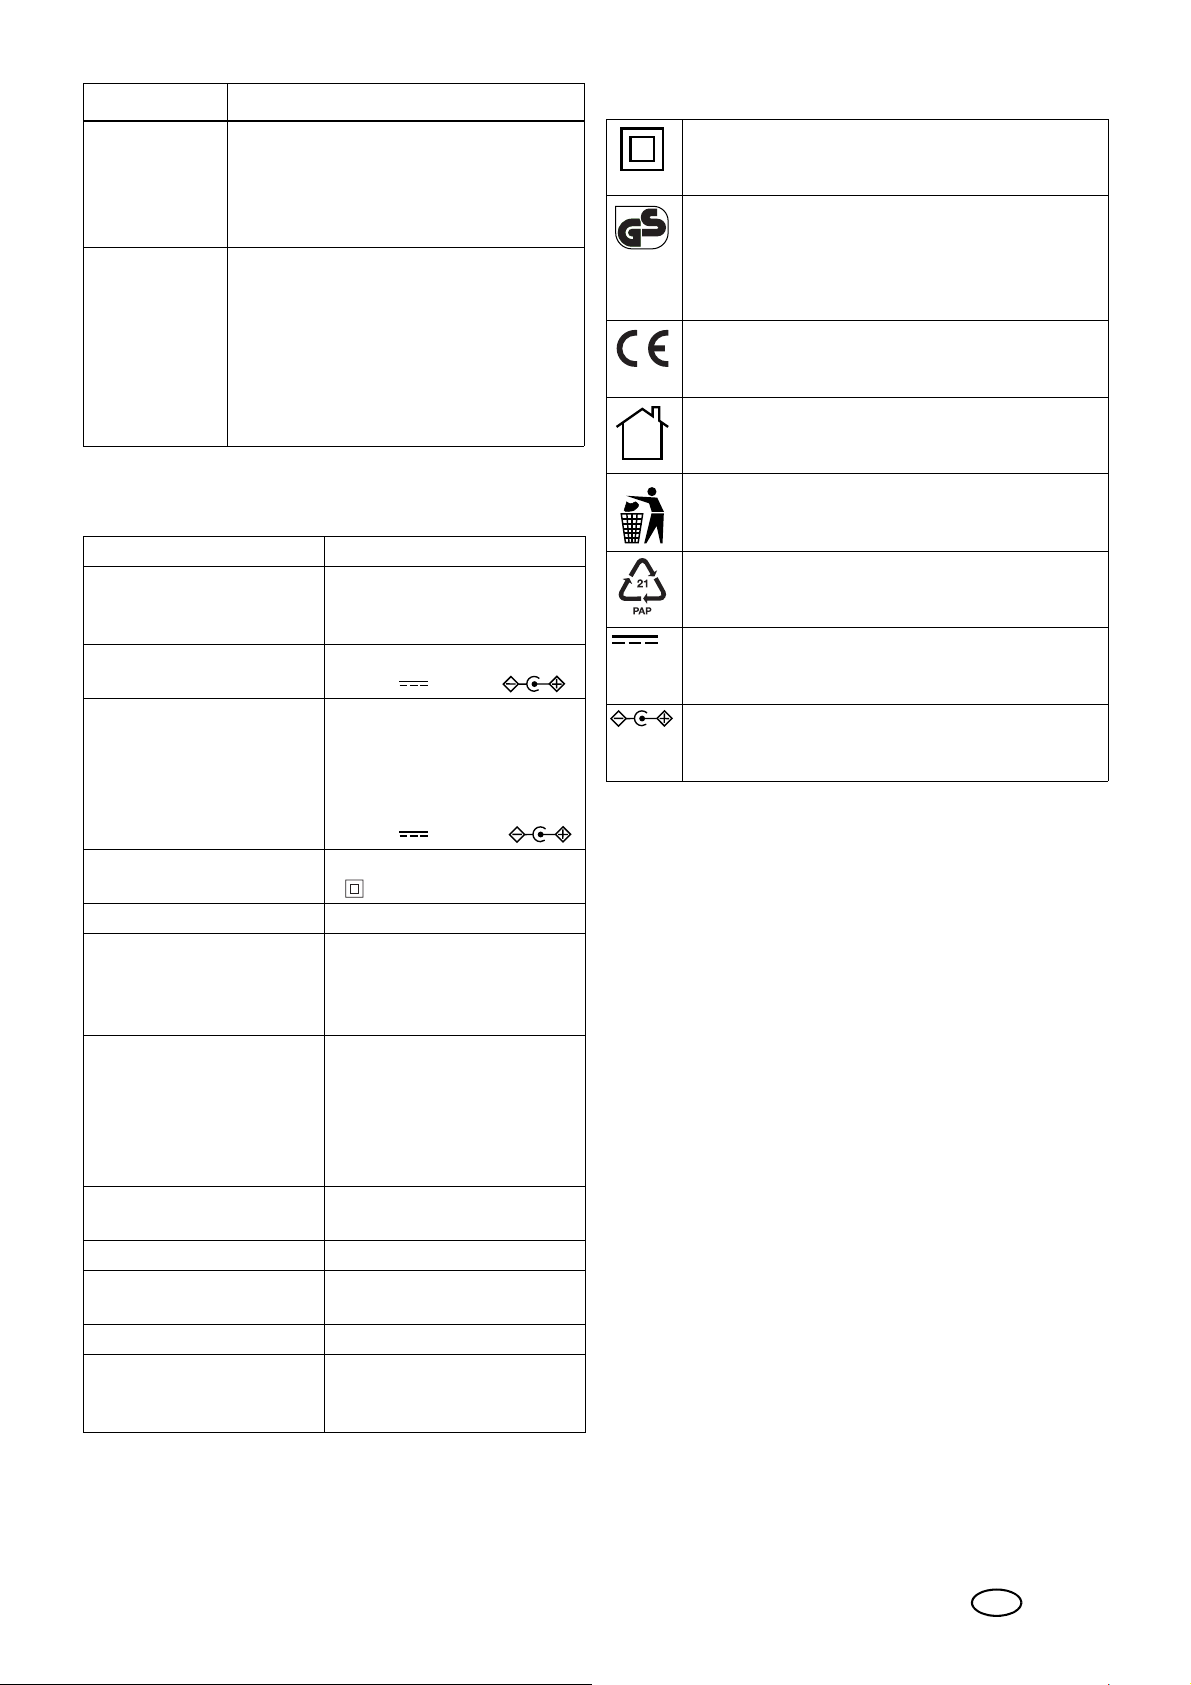
Problème Cause possible / solution
Interférences
sonores pendant le fonctionnement
La barre de son
s'éteint
• En cas d'interférences sonores éventuelles, éloignez de la barre de son
les téléphones portables, tablettes ou
autres appareils émettant des ondes
radio.
• Pour économiser de l'énergie, cet appareil est équipé d'un système d'arrêt automatique. L'appareil est
commuté automatiquement en mode
veille si pendant env. 20 minutes aucun signal n'est reçu ou seulement un
signal très faible est reçu et l'appareil n'a pas été utilisé.
10.Caractéristiques techniques
Symboles utilisés
Isolation de protection
Geprüfte Sicherheit (sécurité contrôlée). Les appareils doivent satisfaire aux Règles techniques
reconnues en vigueur et être conformes à la Loi
sur la sécurité des produits (Produktsicherheitsgesetz/ ProdSG).
Avec ce marquage CE, la société
HOYER|Handel| GmbH déclare la conformité
avec la règlementation de l'Union européenne.
Les appareils portant ce sigle ne doivent être utilisés qu'à l'intérieur des locaux (environnement
sec).
Ce symbole rappelle qu'il faut éliminer l'emballage en respectant l'environnement.
Modèle : SSB 50 A1
Puissance :
Puissance absorbée en
veille :
Barre de son : Entrée :
Bloc d'alimentation :
SHEN ZHEN CITY HONG
BEN ELECTRONIC CO., L TD
Modèle
UE : HB40-1801300SPA
Classe de protection du bloc
d'alimentation :
Format audio : PCM 2.0 (stéréo PCM)
Bluetooth
Portée :
Gamme de fréquence :
Puissance d'émission :
Entrée :
LINE IN
AUX IN L/R
HDMI (ARC)
OPTICAL IN
Sortie :
SUB OUT 1 prise cinch
Pile pour télécommande : 2x type LR3 AAA 1,5 V
Dimensions (larg. x haut. x
prof.) :
Poids : env. 2,8 kg
Conditions de fonctionne-
ment et de stockage :
®
:
2x 10 W + 1x 30 W RMS
< 0,5 W
18,0 V 1,3 A,
Entrée :
100 - 240 V ~
50/60 Hz, 0,8 A max
Sortie :
18,0 V , 1,3 A,
II
v4.2 (A2DP, AVRCP)
jusqu'à 10 m
2402-2480 MHz
< 10 dBm
1 prise jack stéréo de
3,5 mm
2 prises cinch
1 port HDMI ARC
1 prise TOSLINK
env. 94 x 8 x 10 cm
(sans fixation murale)
10 °C à 35 °C
Humidité relative de l'air 40
à 85 %
Matériaux recyclables : carton (hormis le carton
ondulé)
Courant continu
Symboles pour la polarité
Sous réserves de modifications techniques.
Indications relatives à la déclaration de
conformité UE
Par la présente, la société HOYER Handel GmbH déclare
que ce produit remplit les exigences fondamentales
- de la RED 2014/53/CE,
- de la directive ErP 2009/125/CE, et
- de la directive RoHS 2011/65/UE.
V ous trouverez une déclaration de conformité UE complète
sur le site Internet http://qr.hoyerhandel.com/d/298734
FR
29
Page 32

11.Garantie de
HOYER Handel|GmbH
Chère cliente, cher client,
V ous obtenez pour cet appareil une garantie de 3 ans à compter
de la date d’achat. En cas de défauts de ce produit, vous disposez de droits légaux contre le vendeur de ce produit. Ces droits
ne sont pas limités par notre garantie présentée par la suite.
Indépendamment de la garantie commerciale souscrite, le vendeur
reste tenu des défauts de conformité du bien et des vices rédhibitoires dans les conditions prévues aux articles L217-4 à L217-13 du
Code de la consommation et aux articles 1641 à 1648 et 2232
du Code Civil.
Article L217-16 du Code de la consommation
Lorsque l‘acheteur demande au vendeur, pendant le cours de la
garantie commerciale qui lui a été consentie lors de l‘acqu isition
ou de la réparation d‘un bien meuble, une remise en état couverte par la garantie, toute période d‘immobilisation d‘au moins
sept jours vient s‘ajouter à la durée de la garantie qui restait à
courir. Cette période court à compter de la demande d‘intervention de l‘acheteur ou de la mise à disposition pour réparation du
bien en cause, si cette mise à disposition est postérieure à la demande d‘intervention.
Article L217-4 du Code de la consommation
Le vendeur livre un bien conforme au contrat et répond des défauts de conformité existant lors de la délivrance.
Il répond également des défauts de conformité résultant de l‘emballage, des instructions de montage ou de l‘installation lorsque
celle-ci a été mise à sa charge par le contrat ou a été réalisée
sous sa responsabilité.
Article L217-5 du Code de la consommation
Le bien est conforme au contrat :
1. S´il est propre à l‘usage habituellement attendu d‘un bien
semblable et, le cas échéant :
- s‘il correspond à la description donnée par le vendeur et
posséder les qualités que celui-ci a présent ées à l‘acheteur
sous forme d‘échantillon ou de modèle ;
- s‘il présente les qualités qu‘un acheteur peut légitimement
attendre eu égard aux déclarations publiques faites par le
vendeur , par le pr oducteur ou par son représentant, notamment dans la publicité ou l‘étiquetage|;
2. Ou s‘il présente les caractéristiques définies d‘un commun
accord par les parties ou être propre à tout usage spécial recherché par l‘acheteur, porté à la connaissance du vendeur
et que ce dernier a accepté.
Article L217-12 du Code de la consommation
L‘action résultant du défaut de conformité se prescrit par deux ans
à compter de la délivrance du bien.
Article 1641 du Code civil
Le vendeur est tenu de la garantie à raison des défauts cachés de
la chose vendue qui la rendent impropre à l‘u sage au quel on la
destine, ou qui diminuent tellement cet usage que l‘acheteur ne
l‘aurait pas acquise, ou n‘en aurait donné qu‘un moindre prix, s‘il
les avait connus.
Article 1648 1er alinéa du Code civil
L‘action résultant des vices rédhibitoires doit être intentée par l‘acquéreur dans un délai de deux ans à compter de la découverte
du vice.
Conditions de garantie
Le délai de garantie commence à la date d’achat. Conservez le
ticket de caisse d’origine. Ce document sert de justificatif d’achat.
Si au cours des trois années suivant la date d’achat, des défauts
de matériel ou de fabrication apparaissent sur ce produit, celuici vous est, à notre discrétion, réparé ou remplacé gratuitement.
Les conditions pour faire valoir la garantie sont que l’appareil et
la preuve d’achat (ticket de caisse) soient présentés dans un délai
de trois ans et que le défaut ainsi que le moment où il est survenu
soient brièvement décrits par écrit.
Si le défaut est couvert par notre garantie, nous vous renvoyons
le produit réparé ou neuf. La répar ation ou l’échange du produit
ne constitue pas un nouveau commencement de période de la garantie.
Les pièces détachées indispensables à l’utilisation du produit sont
disponibles pendant la durée de la garantie du produit.
Durée de garantie et requêtes légales pour vices de
construction
La durée de garantie n’est pas prolongée par son application.
Ceci est également valable sur les pièces répar ées et remplacées.
Les dommages et les vices déjà présents au moment de l’achat
doivent être signalés immédiatement après le déballage. Après
l’expiration de la garantie, les réparations à effectuer sont
payantes.
Etendue de la garantie
L’appareil a été fabriqué selon des prescriptions de qualité rigoureuses et a été vérifié minutieusement avant livraison.
La garantie s’applique aux défauts de matériel ou de fabrication.
Sont exclus de la garantie les pièces d'usure qui sont
soumises à une usure normale et les dommages subis
par des pièces fragiles, par ex. les interrupteurs, batteries, sources d'éclairage ou d'autres pièces en verre.
Cette garantie est perdue si l’appareil n’a pas été utilisé ou entretenu de manière conforme. Pour une utilisation conforme du produit, respecter précisément toutes les c onsignes présentées dans
le mode d’emploi. Les fins d’utilisation et les actions contre-indiquées ou déconseillées dans le mode d’emploi doivent impérativement être évitées.
Le produit est exclusivement conçu pour un usage privé non c ommercial. La manipulation non autorisée et non conforme, l'utilisation de force et les interventions non effectuées par notre centre
de service autorisé entraînent la perte de garantie.
Déroulement en cas de garantie
Pour assurer un traitement rapide de votre demande, respectez
les éléments suivants :
• Pour toute demande, tenez à disposition le numéro d’article
IAN : 298734 et le ticket de caisse comme preuve
d’achat.
• Vous trouverez les numéros d'article sur la plaque signalétique, une gravure, la page de titre de votre notice (en bas, à
gauche) ou sur l'autocollant apposé à l’arrière ou sur le dessous de l'appareil.
• En cas d’erreur de fonctionnement ou autres pannes, contactez d’abord par téléphone ou par e-Mail le centre de service cité ci-dessous.
• Envoyez ensuite gratuitement à l’adresse de service qu’on
vous a donnée le produit considéré comme défectueux en y
joignant la preuve d’achat (ticket de caisse) et l’indication du
défaut ainsi que du moment où il est survenu.
30
FR
Page 33
Sur www.lidl-service.com, vous pouvez télécharger ce
FR
CH
BE
mode d’emploi ainsi que ceux d’autres produits, des vidéos sur les produits et des logiciels.
Centre de service
Service France
Tel.: 0800 919270
E-Mail: [email protected]
Service Suisse
Tel.: 0842 665566 (0,08 CHF/Min.,
mobile max. 0,40 CHF/Min.)
E-Mail: [email protected]
Service Belgique
Tel.: 070 270 171 (0,15 EUR/Min.)
E-Mail: [email protected]
IAN : 298734
Fournisseur
Attention ! L’adresse suivante n’est pas une adresse de ser-
vice. Contactez d’abord le centre de service cité plus haut.
HOYER Handel GmbH
Tasköprüstraße 3
DE-22761 Hamburg
ALLEMAGNE
FR
31
Page 34
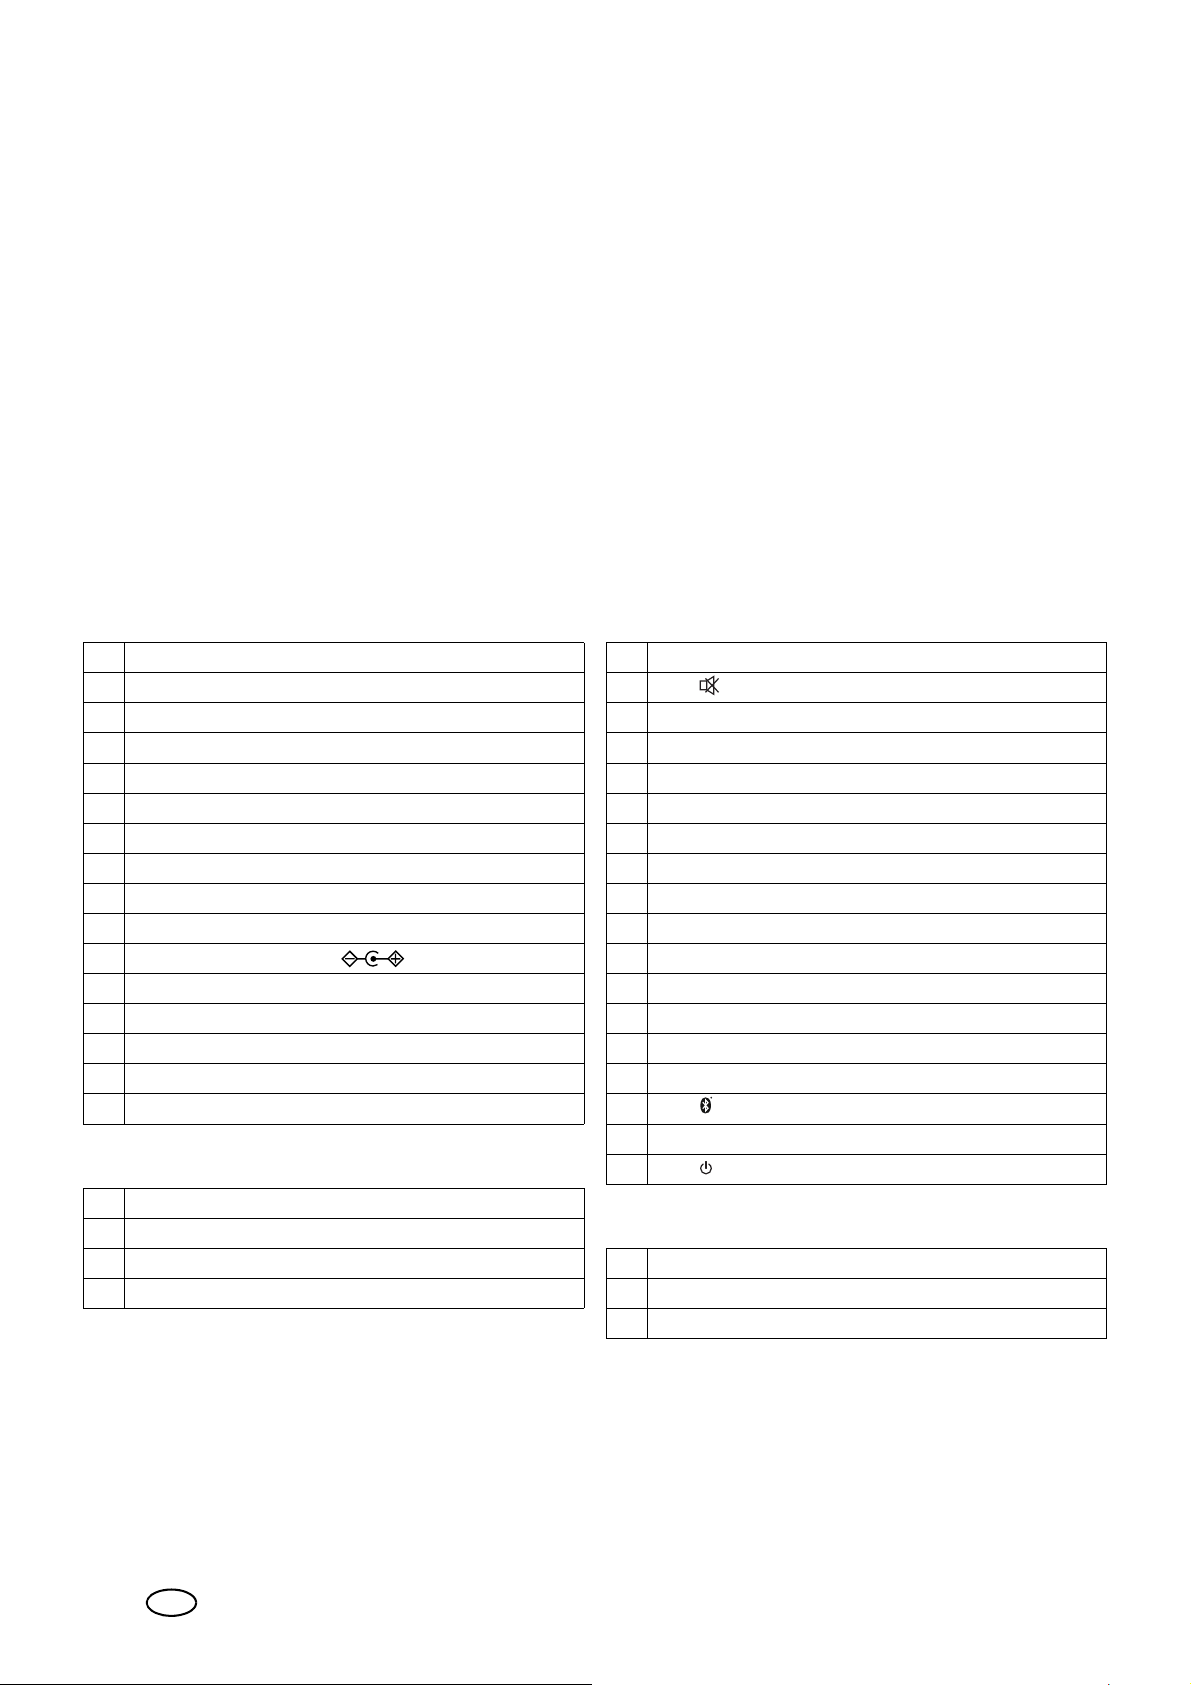
Inhoud
1. Overzicht .. ............................................. 32
2. Correct gebruik ......................................33
3. Veiligheidsinstructies .............................33
4. Levering ................................................35
5. Vóór het eerste gebruik .........................35
5.1 Afstandsbediening.................................. 35
5.2 Plaatsen / wandmontage ........................ 35
5.3 Overzicht – Aansluitingen . ... ... .... ... ... ... .... 36
5.4 Ingebruikname.......................... ... ... ... .... 36
6. Bedienen ............................................... 36
6.1 Soort aansluiting kiezen ... ... ... .... ... ... ... .... 36
1. Overzicht
Neem nota van de afbeeldingen op de uitklapzijde.
Soundbar
1 Display
- -: Stand-by
LINE: LINE IN
Hd: HDMI (ARC)
AUX: AUX IN
bt: Bluetooth
OPtI: OPTICAL
2 Toets POWER
3 Toets SOURCE
4 Toetsen VOL –/+
5 Aansluitopening DC IN
6 Aansluitopening SUB OUT
7 Aansluitopening LINE IN
8 Aansluitopeningen AUX IN L/R
9 Aansluitopening OPTICAL IN
10 Aansluitopening HDMI (ARC)
Toebehoren
®
6.2 Geluidsinstellingen.................................. 36
6.3 HDMI (ARC)-aansluiting........................... 37
6.4 Bluetooth®............................................. 37
7. Reinigen en opbergen ............................38
8. Weggooien .......... .................................. 38
9. Problemen oplossen ..............................38
10.Technische gegevens ..............................39
11.Garantie van HOYER|Handel GmbH .......40
Servicecenters ........................................ 40
Afstandsbediening
15 Verzend-LED
16 Toets
17 Toets HDMI (ARC)
18 Toets OPTICAL
19 Toets PAIR
20 Toets
21 Toets
22 Toetsen VOL –/+
23 Toetsen TREBLE –/+
24 Toetsen BASS –/+
25 Toetsen MUSIC, MOVIE, DIALOG
26 Toets 3D
27 Batterijvak
28 Toets
29 Toets LINE IN
30 Toets
31 Toets AUX
32 Toets
XX
X
WW
I
I
II
11 Netadapter
12 2 wandhouders
13 Stereo-cinchkabel
14 TOSLINK-kabel
32
NL
Montage
33 Schroeven (4x 25 mm/4x 50 mm)
34 Plug (4)
Boorsjabloon (zonder afbeelding)
Page 35
Hartelijk dank voor uw
vertrouwen!
Wij feliciteren u met uw nieuwe TV Soundbar Stereo met
Bluetooth
Om het apparaat veilig te gebruiken en om alle functies
van het apparaat te leren kennen:
• Dient u deze handleiding vóór de eerste in-
• Neemt u steeds de veiligheidsinstructies in
• Het apparaat mag alleen worden bediend
• Bewaar deze handleiding om ze later als re-
• Wanneer u het apparaat ooit aan iemand
Wij wensen u veel plezier met uw nieuwe TV Soundbar
Stereo met Bluetooth
Handelsnaam
Het Bluetooth
registreerde handelsnamen van Bluetooth SIG, Inc.
(Special Interest Group), elk gebruik van de handelsnamen
door Hoyer|Handel|GmbH geschiedt in het kader van een
licentie.
Het HDMI
van HDMI Licensing LLC.
®
.
gebruikname grondig door te lezen.
acht!
zoals in deze handleiding wordt beschreven.
ferentie te kunnen gebruiken.
doorgeeft, dient u deze handleiding bij te
voegen. De handleiding maakt deel uit van
het product.
®
!
®
-woordmerk en het Bluetooth®-logo zijn ge-
®
-beeldmerk is een geregistreerde handelsnaam
2. Correct gebruik
Dit is een apparaat uit de amusementselektronica. DeTV
Soundbar Stereo met Bluetooth
ve van audioapparaten voorzien.
Het apparaat is ontworpen voor privégebruik en mag niet
voor commerciële doeleinden word en gebruikt.
raat mag uitsluitend binnenshuis worden gebruikt.
®
is voor de geluidsweerga-
Het appa-
3. Veiligheidsinstructies
Waarschuwingen
Indien nodig worden de volgende symbolen en waarschuwingen in deze handleiding gebruikt:
GEVAAR! Dit symbool, in combinatie met de aanwijzing “Gevaar”, betekent een hoog risico. Het
niet in acht nemen van de waarschuwing kan tot
letsel leiden.
GEVAAR door een elektrische schok! Dit
symbool, in combinatie met de aanwijzing “Gevaar door een elektrische schok”, betekent een
hoog risico. Het niet in acht nemen van de waarschuwing kan tot letsel leiden.
WAARSCHUWING! Dit symbool, in combinatie
met de aanwijzing “Waarschuwing”, betekent een
gemiddeld risico. Het niet in acht nemen van de
waarschuwing kan verwondingen of ernstige materiële schade veroorzaken.
LET OP: gering r isico: het ni et in acht nemen van de waarschuwing kan lichte verwondingen of materiële schade
veroorzaken.
AANWIJZING: toedrachten en bijzonderheden waarop
tijdens het gebruik van het apparaat moet worden gelet.
Het symbool geeft aan dat de inhoud van de
handleiding in acht dient te worden genomen.
GEVAAR voor kinderen en
personen met beperkingen
~ Verpakkingsmateriaal is geen speelgoed. Kinderen
mogen niet met het verpakkingsmateriaal spelen.
Er bestaat verstikkingsgevaar.
~ Dit apparaat is niet bestemd om door personen (waar-
onder kinderen) te worden gebruikt met beperkte fysieke, sensorische of geestelijke capaciteiten of zonder de
nodige ervaring en/of kennis, tenzij ze worden begeleid door een voor hun veiligheid verantwoordelijke
persoon of tenzij ze aanwijzingen krijgen hoe het apparaat te gebruiken.
~ Kinderen mogen niet met het apparaat spelen.
~ Bewaar het apparaat buiten bereik van kinderen.
GEVAAR voor en door huis- en
gebruiksdieren
~ Er kunnen gevaren voor huis- en gebruiksdieren van
elektrische apparaten uitgaan. Verder kunnen dieren
ook schade aan het apparaat veroorzaken. Houd dieren daarom altijd uit de buurt van elektrische apparaten.
NL
33
Page 36
GEV AAR van een elektrische schok
door vocht
~ Het apparaat mag niet in een extreme omgeving, bijv .
in ruimtes met een hoge luchtvochtigheid (badkamer)
worden gebruikt.
~ Bescherm het apparaat en de netadapter tegen vocht,
druppel- of spatwater. Zet bijvoorbeeld geen met vloeistoffen gevulde vazen of iets dergelijks op of in de
buurt van het apparaat neer.
~ Bedien het apparaat en de netadapter niet met natte
handen.
~ Trek de netadapter uit het stopcontact, indien vloeistof
in het apparaat is terechtgekomen.
~ Wanneer er vloeistof in het apparaat terechtkomt,
dient u het apparaat door een vakman te laten controleren alvorens het opnieuw in gebruik te nemen.
GEVAAR door een elektrische
schok
~ Neem het apparaat niet in gebruik wanneer het appa-
raat, de netadapter of de kabel zichtbaar beschadigd
is of wanneer het apparaat voorheen is gevallen.
Gebruik het apparaat in dat geval niet meer, maar
laat het door een gespecialiseerd bedrijf controleren.
~ Open nooit de behuizing van het apparaat of van de
netadapter.
~ Steek de netadapter pas in een stopcontact wanneer
de kabel met het apparaat verbonden is.
~ Sluit de netadapter uitsluitend aan op een volgens de
voorschriften geïnstalleerde, goed toegankelijk stopcontact, waarvan de spanning overeenkomt met de
gegevens op het typeplaatje. Het stopcontact moet
ook na het aansluiten goed toegankelijk blijven.
~ Let erop dat de kabel niet door scherpe randen of hete
plaatsen kan worden beschadigd.
~ Let erop dat de kabel niet vastgeklemd wordt of be-
kneld raakt.
~ Trek de netadapter altijd aan de adapter uit het stop-
contact en nooit aan de kabel.
~ Trek de netadapter uit het stopcontact, …
…wanneer er zich een storing voordoet,
…voordat u de netadapter op het apparaat aansluit,
…voordat u het apparaat reinigt en
…bij onweer.
~ Om de verbinding met het elektriciteitsnet volledig te
verbreken, moet de netadapter uit het stopcontact worden verwijderd. Ook in uitgeschakelde toestand wordt
altijd een geringe hoeveelheid stroom verbruikt, wanneer de netadapter in het stopcontact zit.
~ Breng geen veranderingen aan het apparaat aan, dit
om gevaar te voorkomen. Laat reparaties alleen door
een gespecialiseerd bedrijf c.q. in het servicecenter
uitvoeren.
Batterijen
~ Let bij het plaatsen van de batterijen op de juiste pola-
riteit.
~ Reinig indien nodig de contactpunten van de batterij
en het artikel alvorens de batterijen te plaatsen.
~ EXPLOSIEGEVAAR! Batterijen mogen niet
worden opgeladen of met andere middelen
worden gereactiveerd, niet worden gedemonteerd, niet in open vuur worden geworpen of
worden kortgesloten.
~ Verwijder de batterijen uit de afstandsbediening, wan-
neer u deze gedurende langere tijd niet wilt gebruiken
of wanneer de batterij helemaal leeg is. De batterijen
kunnen gaan lekken en de afstandsbediening beschadigen.
~ Stel de batterijen niet bloot aan extreme omstandighe-
den, leg de afstandsbediening bijvoorbeeld niet op
verwarmingselementen en stel deze niet bloot aan directe zoninstraling. Anders bestaat er een verhoogd risico op lekkage.
~ Wanneer er batterijzuur is uitgelekt, moet u co ntact
met huid, ogen en slijmvliezen voorkomen. Spoel de
desbetreffende plaatsen bij contact met het zuur direct
met veel schoon water en neem contact op met een
arts.
~ Batterijen kunnen bij inslikken levensgevaarlijk zijn.
Bewaar batterijen daarom op een onbereikbare plaats
voor kleine kinderen. Wanneer er een batterij werd ingeslikt, moet direct contact met een arts worden opgenomen.
~ Nieuwe en gebruikte batterijen moeten uit de buurt
van kinderen worden gehouden.
~ Wanneer u vermoedt dat de batterijen ingeslikt zou-
den kunnen zijn of in enig ander deel van het lichaam
terecht zijn gekomen, raadpleeg dan direct een arts.
WAARSCHUWING voor materiële
schade
~ Gebruik voor de werking met netvoeding uitsluitend
de bijgeleverde originele netadapter.
~ Wanneer u dingen opvallen (bijv. ongebruikelijke ge-
luiden, rare geur of rookontwikkeling), dient u direct
de netadapter uit het stopcontact te trekken. Gebruik
het apparaat daarna niet meer.
~ Wanneer het apparaat van een koude naar een war-
me plaats wordt gebracht, kan er condensvocht in het
apparaat ontstaan. Schakel het apparaat gedurende
ongeveer 2 uren niet in zodat het kan acclimatiseren.
~ Zet het apparaat alleen op een stevige, vlakke onder-
grond.
~ Bescherm het apparaat tegen beschadigingen, bijv.
door:
- hitte, direct zonlicht en open vuur
- schokken en soortgelijke geweldsinwerkingen
~ Kaarsen en andere open vlammen moeten te
allen tijde uit de buurt van dit product worden
gehouden, om het verspreiden van vuur te
voorkomen.
~
Dek de netadapter niet af om oververhitting te voorkomen.
~ Gebruik geen scherpe of schurende schoonmaakmid-
delen.
~ Het apparaat is voorzien van kunststof antislipvoeten.
Omdat meubels zijn gecoat met een grote verscheidenheid van lakken en kunststoffen en worden behan-
34
NL
Page 37
deld met verschillende onderhoudsmiddelen, kan niet
volledig worden uitgesloten dat sommige van deze
stoffen bestanddelen bevatten die de kunststof voeten
aantasten en week maken. Leg indien nodig een antislipmatje onder het apparaat.
~ Let bij montage op de wand op het volgende:
- Het bevestigingsmateriaal moet op de hoedanigheid
van de wand zijn afgestemd. Gebruik indien nodig
ander bevestigingsmateriaal dan het bijgeleverde.
- Verzek er u ervan, dat zich op de montageplaats geen
leidingen (bijv . stroom, water, gas) in de wand bevinden.
- Laat de montage op de wand eventueel uitvoeren
door een vakman.
Aanwijzingen m.b.t. Bluetooth
~ Radiogolven kunnen de werking van pacemakers, (ge-
voelige) elektronische apparaten en andere radiogolven (bijv. wifi) beïnvloeden of zelfs storen. Neem
daarom de volgende aanwijzingen in acht.
- Dragers van pacemakers dienen een afstand van
20|cm tot dit product in acht te nemen.
- Radiogolven kunnen storende geluiden veroorzak en,
bijv. in mobiele telefoons of gehoorapparaten.
- Gebruik het product niet in explosiegevaarlijke ruimtes.
- Wanneer zich storingen in andere draadloze eenheden voordoen (bijv. wifi), dient u te controleren of de
soundbar de oorzaak hiervan is, door de elektriciteit
naar het apparaat te onderbreken.
- Gebruik het apparaat niet in de buurt van magnetrons of van apparaten die magnetische velden genereren.
®
5. Vóór het eerste gebruik
5.1 Afstandsbediening
WAARSCHUWING!
~ Let bij het plaatsen op de polariteitsteken in het batte-
rijvak.
1. AFBEELDING A: open het batterijvak|27 door het
deksel in de richting van de pijl te schuiven en te verwijderen.
2. Vervang, indien nodig, de oude batterijen door nieuwe.
3. Plaats het deksel op het batterijvak en schuif het in tegenovergestelde richting van de pijl, totdat het vastklikt.
5.2 Plaatsen / wandmontage
AANWIJZING: wanneer u het apparaat aansluit op een
televisie, dient u het zoveel mogelijk in het midden onder
de televisie te plaatsen.
Plaatsen
1. Plaats het apparaat op een vlakke ondergrond.
2. Sluit de netadapter|11 op het apparaat aan.
Wandmontage
4. Levering
1 soundbar
1 netadapter|11
1 afstandsbediening
2 batterijen type LR3 AAA 1,5 V
1 stereo-cinchkabel|13
1 TOSLINK-kabel|14
2x4 schroeven|33 (25 mm/50 mm)
4pluggen|34
2 wandhouders|12
1 boorsjabloon
1 korte handleiding
1 belangrijke informatie
1 handleiding
• Verwijder al het verpakkingsmateriaal.
• Controleer of het apparaat onbeschadigd is.
Bij een onvolledige of defecte levering wendt u zich tot het
voor u verantwoordelijke servicecenter van de fabrikant
(zie “Garantie van HOYER|Handel GmbH” op
pagina 40).
Neem nota van de afbeeldingen op de uitklapzijde.
WAARSCHUWING voor materiële schade!
~ Let bij montage op de wand op het volgende:
- Het bevestigingsmateriaal moet op de hoedanigheid
van de wand zijn afgestemd. Gebruik indien nodig
ander bevestigingsmateriaal dan het bijgeleverde.
- Verzeker u ervan, dat zich op de montageplaats
geen leidingen (bijv. stroom, water , gas) in de wand
bevinden.
- Laat de montage op de wand eventueel uitvoeren
door een vakman.
~ Bij montage op de wand dient u de haakse HDMI-stek-
ker te gebruiken, zodat de stekker niet kan worden beschadigd door knikken.
1. AFBEELDING B: boor 2 gaten per wandhouder op
een afstand van 40 cm. Gebruik indien nodig de bijgaande boorsjabloon.
2. Wanneer u de bijgeleverde pluggen|34 gebruikt,
dient u een boor met een diameter van 8 mm te gebruiken.
3. Steek de pluggen|34 in de boorgaten.
4. Bevestig de wandhouders|12 stevig met de schroeven|33 op de wand.
5. Steek alle gebruikte kabels in de aansluitingen (zie
“Overzicht – Aansluitingen” op pagina 36).
6. Sluit de netadapter|11 op het apparaat aan.
NL
35
Page 38
7. Hang het apparaat in de wandhouders|12. Beide
wandhouders|12 moeten goed in de bevestigingspunten aan de achterkant van het apparaat grijpen.
5.3 Overzicht – Aansluitingen
LET OP: let erop dat de soundbar en de aan te sluiten apparaten uitgeschakeld zij n voordat u ze aansluit. Le es ook
de handleidingen van de apparaten die u aansluit.
AANWIJZINGEN:
• Een HDMI (ARC)-kabel voor de ingang
en een 3,5 mm-stereokabel met klinkstekk er voor de ingang
LINE IN|7
•De HDMI (ARC)|10 -aansluiting kan alleen functione-
ren wanneer alle componenten geschikt zijn voor
ARC. Indien nodig moeten oude HDMI-kabels worden
vervangen door nieuwe, voor ARC geschikte kabels.
Ingang Gebruik
AUX IN|8
LINE IN|7
HDMI
(ARC)|10
OPTICAL
IN|9
Bluetooth
• Op de cinchbus van de uitgang SUB OUT|6 kan een
®
subwoofer worden aangesloten. Deze wordt automatisch door het apparaat aangestuurd.
behoren niet tot de leveringsomvang.
Aansluiting met
stereo-cinchkabel|13, bijv. televisie, cd-speler
Aansluiting met
3,5 mm stereokabel met klinkstekkers, bijv.
speler, telefoon
Aansluiting met
HDMI (ARC)-kabel,
bijv . op HDMI ARCaansluiting van de
televisie, dvd-speler
Aansluiting met TOSLINK-kabel|
een digitale ontvanger, dvd-speler
Radioverbinding,
bijv. smartphone
MP3-
14
AUX|31 AUX
LINE IN|29 LInE
HDMI
(ARC)|17
, bijv .
OPTICAL|18 OPtI
HDMI (ARC)|10
Toets
afstands-
bediening
|30
Display
Hd
bt
5.4 Ingebruikname
AANWIJZING: het apparaat blijft na het uitschakelen in
stand-by. In deze modus verbruikt het apparaat nog wat
stroom. Om de stroomtoevoer te onderbreken, trekt u de
netadapter|11 uit het stopcontact.
6. Bedienen
AANWIJZINGEN:
• U kunt alle instellingen gemakkelijk met de afstandsbediening uitvoeren. De basisfuncties kunt u ook met de
toetsen op het apparaat uitvoeren. In de handleiding
wordt in de regel de bediening met de afstandsbediening beschreven.
• Het apparaat schakelt in stand-by, …
…wanneer er binnen 20 minuten geen Bluetooth
binding tot stand wordt gebracht of
…wanneer het gedurende ca. 20 minuten geen of
slechts een zeer gering signaal ontvangt en niet
werd bediend.
•Druk op de toets |32 om het apparaat vanuit standby in te schakelen.
•Druk op de toets |32, om het apparaat naar de
stand-bymodus te schakelen.
6.1 Soort aansluiting kiezen
1. Druk op een van de toetsen AUX|31, LINE IN|29,
HDMI (ARC)|17, OPTICAL|18 of |30, om naar
de gewenste aansluiting om te schakelen (zie “Overzicht – Aansluitingen” op pagina 36).
2. U start het afspelen op het afspeelapparaat en kiest en
regelt de muziektitels.
6.2 Geluidsinstellingen
AANWIJZING: Wijzigingen van de geluidsinstellingen
worden op het display|1 weergegeven.
- Volume: V00 … V40
-Hoge tonen: t -4 … t 4
-Bassen: b -4 … b 4
Volume instellen
• Druk tijdens het afspelen op de toetsen
de afstandsbediening of op
raat. U kunt de toetsen ook ingedrukt houden om een snellere verandering van het volume mogelijk te maken.
VOL –/+|4
Geluid uitschakelen
1. Druk op de toets |16 om het geluid uit te schakelen.
De weergave van het eerder ingestelde volume op het
display|1 knippert.
2. Om het geluid weer in te schakelen, drukt u opnieuw
op de toets |16 of op een van de toetsen VOL –/
+|22 /|4.
Klankkleur instellen
De instellingen worden niet opgeslagen wanneer u naar
een andere modus overschakelt.
VOL –/+|22
op het appa-
®
-ver-
op
• Steek de netadapter|11 in een goed toegank elijk stopcontact. Op het display|1 wordt – – weergegeven. Het
apparaat bevindt zich nu in stand-by.
36
NL
• Druk op een van de toetsen|25 om voorinstellingen
van de klankkleuren voor muziek (MUSIC), film
(MOVIE) of taal (DIALOG) te kiezen.
Page 39
• Moduleer de hoogten met de toetsen
TREBLE –/+|23
• Moduleer de bassen met de toetsen BASS –/+|24.
.
reo) niet op de televisie wordt ingesteld, schak elt de
Soundbar automatisch uit.
Klankkleur
Toetsen|25
afstandsbediening
Display
Muziek MUSIC SOnG
Film MOVIE CInE
Taal DIALOG dIA
AANWIJZING:
voor de klankkleur van de film (
MOVIE
) is
het 3D-effect als voorinstelling al geactiveerd.
3D-effect in-/uitschakelen
•Druk op de toets 3D|26 om zo het 3D-effect in-/uit te
schakelen.
- Als het 3D-effect wordt ingeschakeld, wordt 3d kort
op het display weergegeven.
- Als het 3D-effect wordt uitgeschakeld, wordt de ge-
kozen klankkleur (SOnG, CInE of dIA) op het display
weergegeven.
6.3 HDMI (ARC)-aansluiting
Begripsomschrijving
- HDMI staat voor High Definition Multimedia Interface.
Via deze wijze van overdragen k unnen digitale beelden geluidssignalen worden verzonden.
- HDMI (ARC - Audio Return Channel) betekent dat de
kabel beschikt over een ARC-kanaal. Via dit kanaal
kunnen audiosignalen in beide richtingen worden verzonden.
De volgende moderne apparaten beschikken in de regel
over een ARC-uitgang: televisies, spelconsoles of digitale
receivers. Hierna wordt de aansluiting op een televisie beschreven.
Via het ARC-kanaal van de HDMI-kabel kunnen digitale
geluidssignalen van het bronapparaat (bijv . televisie) naar
de soundbar worden verzonden.
De geluidsoverdracht via de HDMI (ARC)-aansluitopening|10 kan alleen functioneren wanneer alle componenten geschikt zijn voor ARC. Wanneer de overdracht niet
lukt, moet u één of eventueel meerdere van de onderstaande punten in acht nemen:
1. Verbind de aansluitopening HDMI (ARC)|10 met behulp van een voor ARC geschikte HDMI-kabel met een
HDMI ARC-aansluitopening van uw televisie.
2. Schakel de soundbar in met de toets |32.
3. Door te drukken op de toets HDMI (ARC)|17 kiest u
de HDMI-ingang.
4. Schakel de televisie in. Wanneer de verbinding voor
de eerste keer tot stand komt, kan het enkele sec onden
duren voordat er geluid uit de soundbar komt.
AANWIJZING:
wanneer u de
HDMI (ARC)|10
-aansluiting gebruikt, wordt de Soundbar in de re gel met de afstandsbediening van het aangesloten apparaat in- en uitgeschakeld.
Het aangesloten apparaat moet het protocol CEC (Consumer
Electronic Control) ondersteunen.
6.4 Bluetooth
®
Verbinding tot stand brengen
AANWIJZINGEN:
• De ID van het apparaat is “SSB|50|A1”.
• Na het overschakelen op Bluetooth
paraat automatisch een verbinding met het laatst gekoppelde apparaat tot stand te brengen.
• Let erop dat het opbouwen van de verbinding, afhan-
kelijk van het apparaat en de daarbij gebruikte software, verschillend kan verlopen.
1. Druk op de toets |30 om naar de Bluetooth
ding over te schakelen. Op het display|1 wordt bt
weergegeven.
2. Schakel het afspeelapparaat (bijv. smartphone) in en
start de Bluetooth
®
-verbinding.
3. Het afspeelapparaat dient nu de apparaat-ID
“SSB|50|A1” te ontvangen. Wanneer dat niet gebeurt,
drukt u ca. 1 seconde op de toets
standsbediening. Op het display|
4. Breng op het afspeelapparaat de verbinding met de
Soundbar tot stand. W anneer er een wachtwoor d w ordt
gevraagd, voert u “0000” in. Beide apparaten zijn nu met
elkaar verbonden. Op het display|
weergegeven en er weerklinkt een geluidssignaal.
®
probeert het ap-
®
PAIR|19
1
knippert bt snel.
1
wordt bt continu
op de af-
-verbin-
• De oude HDMI-kabel moet door een nieuwe, voor
ARC geschikte kabel worden vervangen.
• Niet elke HDMI-aansluitopening op de televisie hoeft
ARC te ondersteunen. In dat geval moet de HDMI-kabel op een andere, voor ARC geschikte HDMI-aansluitopening van de televisie worden aangesloten. In
de regel staat op de desbetreffende HDMI-aansluitopeningen een vermelding of ze geschikt zijn voor ARC. Is
dat niet het geval, dan dient u dit in de handleiding
van uw televisie na te kijken.
• Bij sommige televisies moet de digitale geluidsuitgang
worden vrijgeschakeld. Kies de geluidsuitgang PCM|2.0
(PCM Stereo). Als de geluidsuitgang PCM|2.0 (PCM ste-
AANWIJZING: afspeelapparaten slaan in de regel de
ID van het apparaat op. Bij het opnieuw opbouwen van de
verbinding vervalt dan bij geactiveerde Bluetooth
®
-functie
het handmatig tot stand brengen van de verbinding.
5. Start nu het afspelen van een muziektitel op het afspeelapparaat. Het geluid van de soundbar wordt
weergegeven.
6. Met de toetsen I
WW|28, XXI|20 en X/II|21 kiest en
regelt u de muziektitels.
NL
37
Page 40
Verbinding verbreken
De verbinding wordt verbroken wanneer
…een van de apparaten uitgeschakeld wordt;
…de Bluetooth
…de reikwijdte (ca. 10 meter) overschreden wordt;
…u op de to ets PAIR|19 drukt tot op het display|1 bt
snel knippert. In dat geval kan direct een nieuwe
verbinding met een ander apparaat tot stand worden gebracht.
®
-functie uitgeschakeld wordt;
9. Problemen oplossen
Wanneer de soundbar een k eer niet functioneert zoals gewenst, doorloopt u eerst deze checklist. Misschien is het
een klein probleem dat u zelf kunt oplossen.
GEVAAR door een elektrische schok!
~ Probeer in geen geval het apparaat zelf te repareren.
7. Reinigen en opbergen
GEVAAR door een elektrische schok!
~ Trek de netadapter|11 uit het stopcontact, voordat u
het apparaat reinigt. Let erop dat er geen vloeistof in
het apparaat binnendringt.
• Reinig het apparaat met een licht vochtige doek. Bij
hardnekkig vuil kunt u ook een mild reinigingsmiddel
gebruiken, zoals bijv. afwasmiddel. Er mogen geen
oplosmiddelen, spiritus, verdunningen enz. worden
gebruikt. Deze kunnen het oppervlak van het apparaat
beschadigen.
• Wanneer u het apparaat niet gebruikt, legt u het op
een plek waar het niet met hitte en vocht in contact
kan komen. Verwijder de batterij uit de afstandsbediening.
8. Weggooien
Dit product valt onder de Europese richtlijn
2012/19/EU. Het symbool van de doorgestreepte afvalton op wieltjes betekent dat het
product in de Europese Unie gescheiden moet
worden weggegooid. Dat geldt voor het product en alle met dit symbool aangeduide accessoires. Aldus aangeduide producten
mogen niet met het normale huisvuil worden
weggegooid, maar moeten bij een innamepunt voor recycling van elektrische en elektr onische apparaten worden afgegeven. Recycling help het
verbruik van grondstoffen te reducer en en het milieu te ontlasten.
Batterijen mogen niet met het huisvuil worden
meegegeven. Lege batterijen moeten op de
juiste wijze worden afgevoerd. Voor dit doel
zijn in winkels die toestellen met batterijen
verkopen en bij de gemeentereiniging vergaarbakken beschikbaar voor het afvoeren van batterijen.
Batterijen en accu’s die met de volgende letters worden
aangeduid, bevatten o.a. de schadelijke stoffen: Cd (cadmium), Hg (kwikzilver), Pb (lood).
Verpakking
Als u de verpakking wilt weggooien, houdt u dan aan de
betreffende milieuvoorschriften in uw land.
Storing
Geen functie
Geen
Blue-
®
tooth
-verbin-
ding
Er klinkt geen
muziek
Storende geluiden tijdens het
gebruik
De Soundbar
schakelt uit
Mogelijke oorzaken /
maatregelen
• Is de stroomvoorziening gewaarborgd? Wordt op het display |1 – –
weergegeven?
• Bij aansluiting op de aansluitopening
HDMI ARC|10
HDMI-kabel evenals het aangesloten
apparaat (bijv. een televisie) geschikt
zijn voor ARC. Wa nneer uw televisie
geen HDMI-aansluiting heeft die geschikt is voor ARC, kiest u een ander
aansluittype of vervangt u de televisie.
• Vervang een oude HDMI-kabel door
een nieuwe kabel die geschikt is
voor ARC.
• Is het juiste audiosignaal op het afspeelapparaat (bijv. televisie) gekozen? Kies als geluidsuitgang
PCM|2.0 (of PCM Stereo).
• Is Bluetooth® op het afspeelapparaat geactiveerd?
• Heeft u het apparaat uitgeschakeld?
• Bestaat er een Bluetooth
met een ander apparaat? Druk op
de toets PAIR|19, tot op het display|1 bt snel knippert en breng de
nieuwe verbinding tot stand.
• Is het volume van het afspeelapparaat te laag ingesteld?
• Is de juiste aansluiting gekozen?
• Staat het geluid te zacht of is het uitgeschakeld?
• W anneer zich evt. stor ende geluiden
voordoen, dient u indien nodig mobiele telefoons, tablets of andere apparaten die draadloos werken uit de
nabije omgeving van de soundbar te
verwijderen.
• Om energie te besparen beschikt dit
apparaat over een automatische uitschakeling. Het apparaat wordt automatisch naar stand-by geschakeld,
wanneer het gedurende ca. 20|minu-
ten geen of slechts een zeer gering
signaal ontvangt en niet werd bediend.
moeten ook de
®
-verbinding
38
NL
Page 41
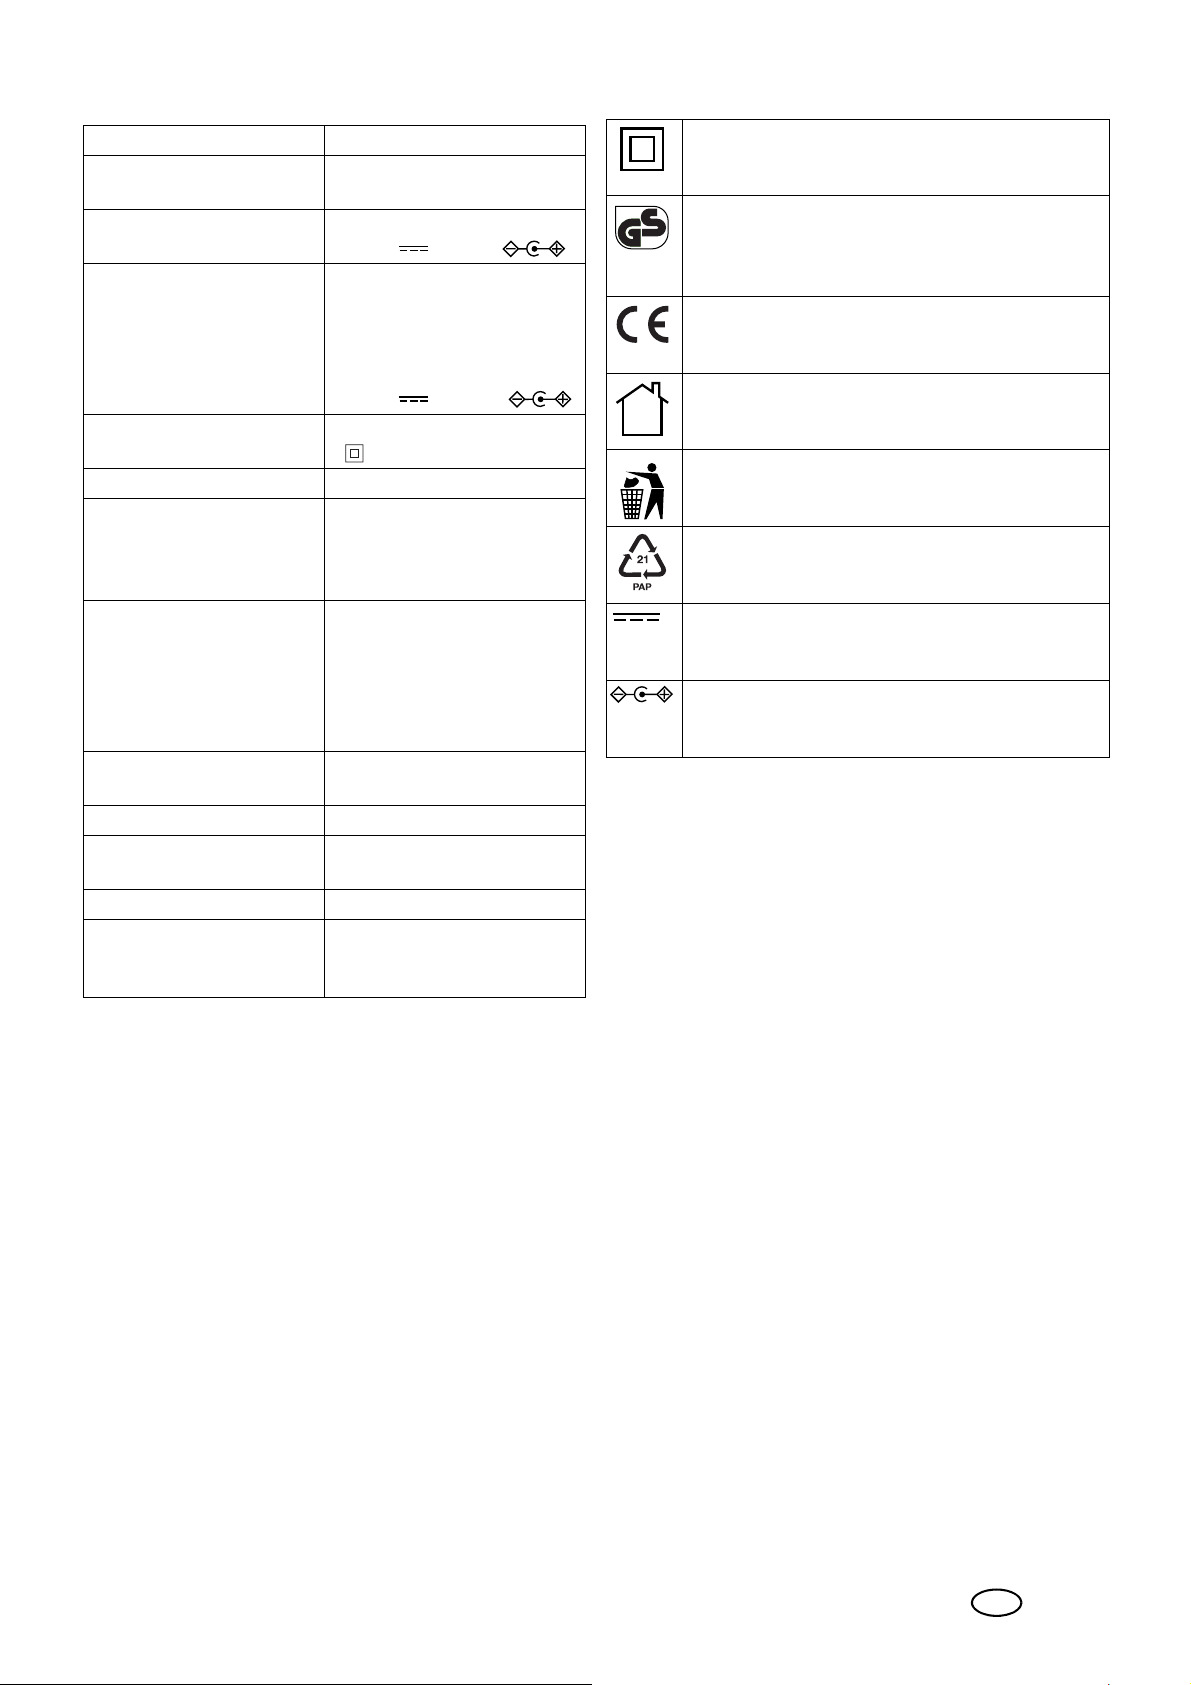
10.Technische gegevens
Gebruikte symbolen
Model: SSB 50 A1
Vermogen:
V erbruik in stand-by:
Soundbar: Ingang:
Netadapter:
SHEN ZHEN CITY HONG
BEN ELECTRONIC CO., L TD
Model
EU: HB40-1801300SPA
Beschermingsklasse
netadapter:
Audioformaat: PCM 2.0 (PCM Stereo)
Bluetooth
Bereik:
Frequentiebereik:
Zendvermogen:
Ingang:
LINE IN
AUX IN L/R
HDMI (ARC)
OPTICAL IN
Uitgang:
SUB OUT 1 x cinchbus
Batterij afstandsbediening: 2x type LR3 AAA 1,5 V
Afmetingen (B x H x T): ca. 94 x 8 x 10 cm (zonder
Gewicht: ca. 2,8 kg
Gebruiks- en opslagom-
standigheden:
®
:
2x 10 W + 1x 30 W RMS
< 0,5 W
18,0 V 1,3 A,
Ingang:
100 - 240 V ~
50/60 Hz, 0,8 A max
Uitgang:
18,0 V , 1,3 A,
II
v4.2 (A2DP, AVRCP)
tot en met 10 m
2402 - 2480 MHz
< 10 dBm
1 x 3,5 mm stereo-aansluitopening voor klinkstekker
2 x cinchbus
1 x HDMI ARC-aansluitopening
1x TOSLINK-bus
wandhouder)
10 °C tot 35 °C
Relatieve luchtvochtigheid 40
tot 85%
Randaarde
Geteste veiligheid. Apparaten moeten aan de algemeen erkende regels van de techniek voldoen
en zijn conform de Wet betreffende productveiligheid (ProdSG).
Met het CE-keurmerk verklaart
HOYER|Handel|GmbH de EU-conformiteit.
Apparaten met dit teken mogen alleen in huis
worden gebruikt (droge omgeving).
Dit symbool herinnert u eraan om de verpakking
op een milieuvriendelijke manier weg te gooien.
Herbruikbare materialen: karton (behalve golfkarton)
Gelijkstroom
Teken voor polari teit
Technische wijzigingen voorbehouden.
Opmerkingen over de EU-conformiteitverklaring
Hiermee verklaart HOYER Handel GmbH dat dit product
voldoet aan de fundamentele eisen van
- de richtlijn (RED) 2014/53/EU,
- de ErP-richtlijn 2009/125/EU, en
- de ROHS-richtlijn 2011/65/EU.
Een volledige EU-conformiteitverklaring vindt u op het inter-
net op http://qr.hoyerhandel.com/d/298734
NL
39
Page 42
11.Garantie van
NL
BE
HOYER|Handel GmbH
Geachte klant,
U heeft op dit apparaat 3 jaar garantie vanaf de koopdatum.
Wanneer dit pr oduct onvolkomenheden vertoont, heeft u wettelijke rechten ten opzichte van de verkoper van het product. Deze
wettelijke rechten worden niet beperkt door onze hiernavolgend
beschreven garantie.
Garantievoorwaarden
De garantietermijn begint op de koopdatum. Bewaar de originele
kassabon goed. Deze bon is nodig als bewijs dat u het apparaat
heeft gekocht.
Wanneer zich binnen drie jaar na de koopdatum van dit product
een materiaal- of fabricagefout voordoet, wordt het product door
ons – naar onze keus – gratis voor u gerepareerd of vervangen.
Deze garantie stelt als voorwaarde, dat het defecte apparaat en
het koopbewijs (kassabon) binnen de termijn van drie jaar wordt
overlegd en dat er kort schriftelijk wordt beschreven, waaruit de onvolkomenheid bestaat en wanneer deze zich heeft voorgedaan.
Wanneer het defect door onze garantie wo r dt gedekt, ontvangt u
het gerepareerde product terug of u krijgt een nieuw exemplaar.
Met reparatie of vervanging van het product begint geen nieuwe
garantieperiode.
• Het artikelnummer vindt u op het typeplaatje, ingegraveerd,
op de titelpagina van uw handleiding (linksonder) of als sticker op de achter- of onderkant van het apparaat.
• Wanneer zich functiestoringen of andere onvolkomenheden
voordoen, neemt u eerst telefonisch of per e-mail contact
op met het hierna genoemde servicecenter.
• Een product dat geregistreerd staat als defect, kunt u dan
met bijvoeging van de aankoopnota (kassabon) en de vermelding waaruit de onvolkomenheid bestaat en wanneer
deze zich heeft voorgedaan, franco naar het serviceadres
sturen dat u is meegedeeld.
Op www.lidl-service.com ku nt u deze en nog veel meer
handleidingen, productvideo's en software downloaden.
Servicecenters
Service Nederland
Tel.: 0900 0400223 (0,10 EUR/Min.)
E-Mail: [email protected]
Service België
Tel.: 070 270 171 (0,15 EUR/Min.)
E-Mail: [email protected]
Garantieperiode en wettelijke
garantieaanspraken wegens gebreken
De garantieperiode wordt door de vrijwaring niet verlengd. Dat
geldt ook voor vervangen en gerepareerde onderdelen. Schades
en onvolkomenheden die eventueel al bij de koop aanwezig waren, moeten direct na het uitpakken worden gemeld. Aan reparaties die zich voordoen na het verstrijken van de gar antieperiode
zijn kosten verbonden.
Omvang van de garantie
Het apparaat werd zorgvuldig gepr oduceerd volgens strenge kwaliteitsrichtlijnen en nauwgezet gecontroleerd vóór levering.
De garantie geldt voor materiaal- of fabricagefouten.
Van de garantie uitgesloten zijn slijtonderdelen die
onderhevig zijn aan normale slijtage en beschadigingen van breekbare onderdelen, bijv. schakelaars, accu's, lichtbronnen of andere onderdelen die van glas
zijn gemaakt.
Deze garantie vervalt, wanneer het product werd beschadigd of
ondeskundig werd gebruikt of onderhouden. Voor een juist gebruik van het product moeten alle instructies die in de handleiding
staan vermeld, nauwkeurig worden nageleefd. Gebruiksdoeleinden en handelingen die in de handleiding worden afgeraden of
waarvoor wordt gewaarschuwd, moeten beslist worden vermeden.
Het product is uitsluitend bedoeld voor particulier gebruik en niet
voor commercieel gebruik. Bij een on ei genlijke of ondeskundige
behandeling, bij gebruikmaking van geweld en bij ingrepen die
niet werden uitgevoerd door ons erkende servicecenter , vervalt de
garantie.
IAN: 298734
Leverancier
Let erop, dat het onderstaande adres geen serviceadres is.
Neem eerst contact op met het bovengenoemde servicecenter.
HOYER Handel GmbH
Tasköprüstraße 3
DE-22761 Hamburg
DUITSLAND
Afhandeling in geval van garantie
Om een snelle behandeling van uw verzoek te waarborgen,
dient u de volgende aanwijzingen te volgen:
• Houd voor alle aanvragen het artikelnummer
IAN: 298734 en de kassabon als bewijs voor de koop bij
de hand.
40
NL
Page 43

NL
41
Page 44
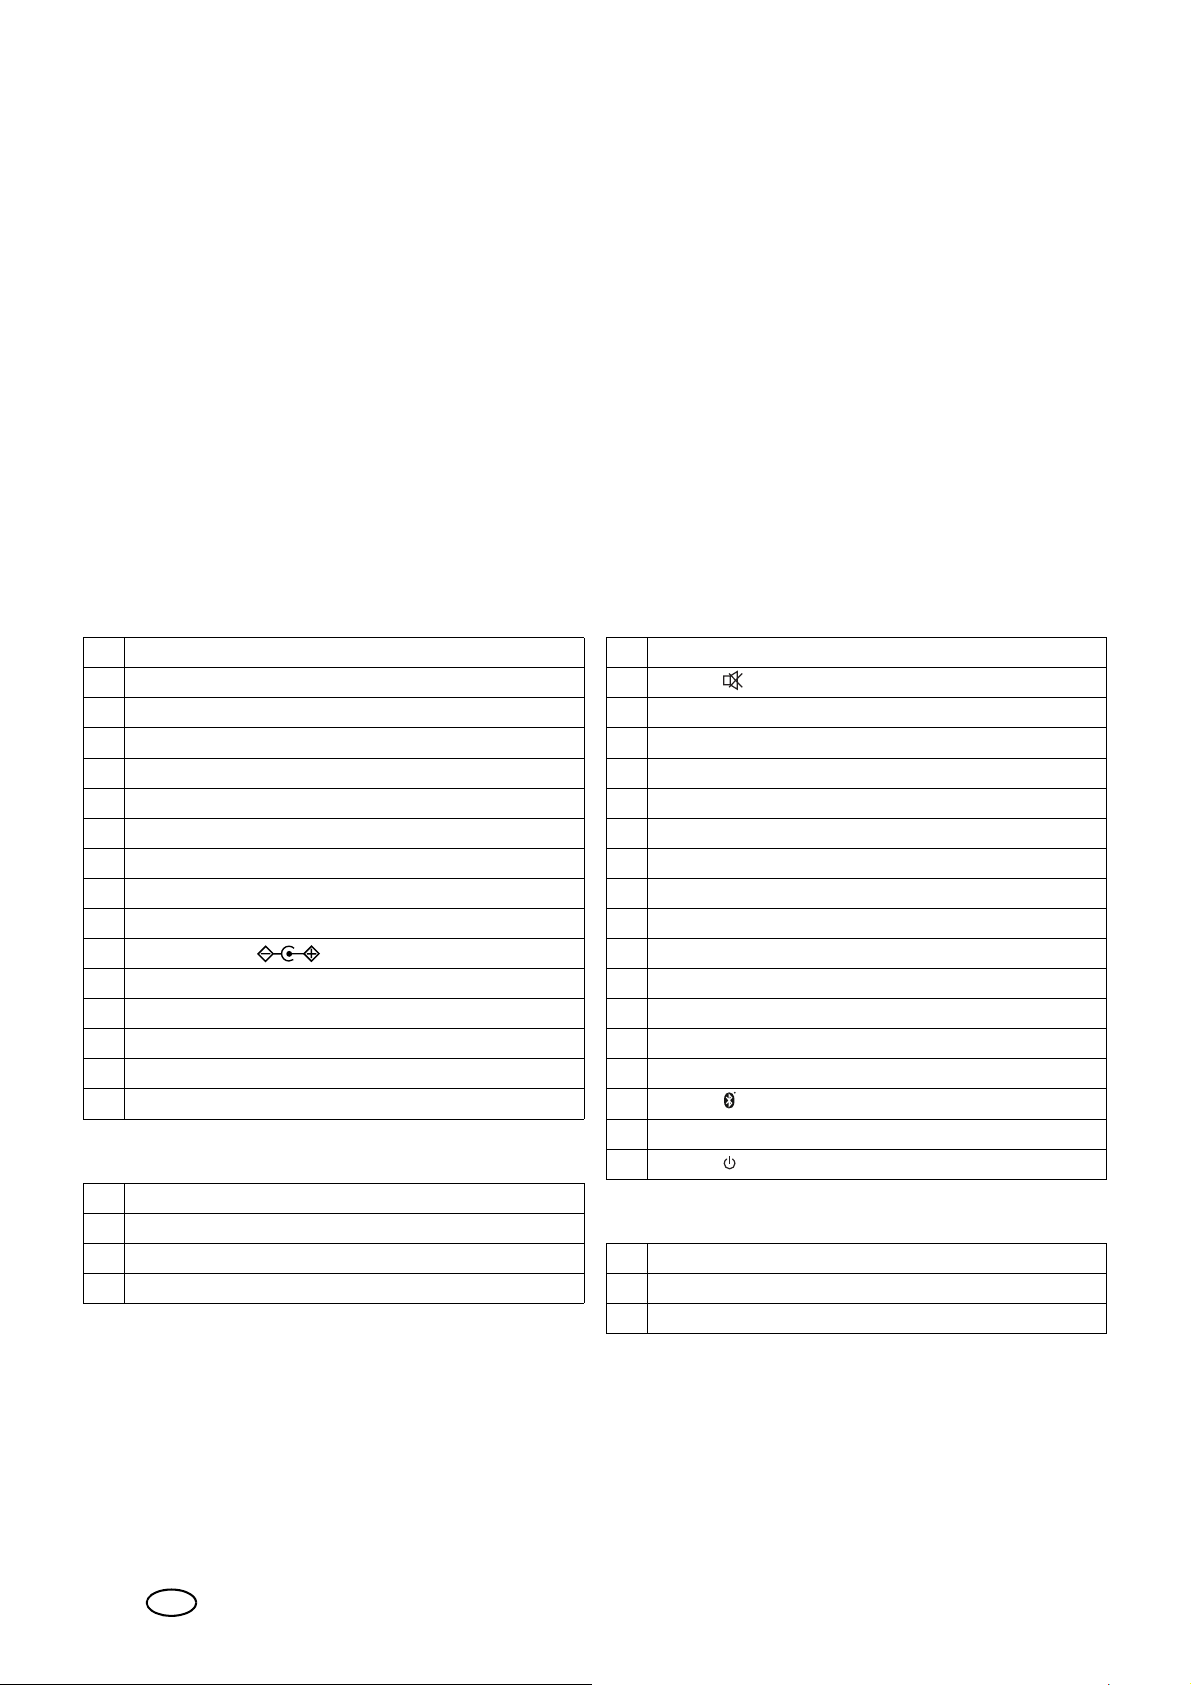
Obsah
1. Pįehled ..................................................... 42
2. Použití k urêenému úêelu .......................... 43
3. Bezpeênostní pokyny ................................ 43
4. Obsah dodávky ........................................ 45
5. Pįed prvním použitím ............................... 45
5.1 Dálkové ovládání ....................................... 45
5.2 Umístøní / montáž na stønu ......................... 45
5.3 Pįehled – pįípojky ...................................... 46
5.4 Uvedení do provozu ................................... 46
6. Obsluha ................................................... 46
6.1 Volba zpŃsobu pįipojení ............................. 46
1. Pįehled
Respektujte prosím zobrazení na vyklápøcí stranø.
Soundbar
1 Displej
- -: režim standby
LINE: LINE IN
Hd: HDMI (ARC)
AUX: AUX IN
bt: Bluetooth
OPtI: OPTICAL
2 Tlaêítko POWER
3 Tlaêítko SOURCE
4 Tlaêítka VOL –/+
5 Zdíįka DC IN
6 Zdíįka SUB OUT
7 Zdíįka LINE IN
8 Zdíįky AUX IN L/R
9 Zdíįka OPTICAL IN
10 Zdíįka HDMI (ARC)
Pįíslušenství
®
6.2 Nastavení zvuku .........................................46
6.3 Pįípojka HDMI (ARC) ..................................47
6.4 Bluetooth® .................................................47
7. éištøní a skladování ................................. 48
8. Likvidace .................................................. 48
9. Įešení problémŃ ....................................... 48
10.Technické parametry ................................ 49
11.Záruka spoleênosti HOYER Handel GmbH . 50
Servisní stįediska .................................................. 50
Dálkové ovládání
15 Dálková dioda LED
16 Tlaêítko
17 Tlaêítko HDMI (ARC)
18 Tlaêítko OPTICAL
19 Tlaêítko PAIR
20 Tlaêítko XXI
21 Tlaêítko XII
22 Tlaêítka VOL –/+
23 Tlaêítka TREBLE –/+
24 Tlaêítka BASS –/+
25 Tlaêítka MUSIC, MOVIE, DIALOG
26 Tlaêítka 3D
27 Pįihrádka na baterie
28 Tlaêítko IWW
Tlaêítko LINE IN
29
30 Tlaêítko
31 Tlaêítko AUX
32 Tlaêítko
11 Napájecí zdroj
12 2 nástønné držáky
13 Stereo kabel cinch
14 Kabel TOSLINK
42
CZ
Montáž
33 Šroubky (4 x 25 mm / 4 x 50 mm)
34 Hmoždinky (4)
Vrtací šablona (bez obrázku)
Page 45
Døkujeme za vaši dŃvøru!
Gratulujeme vám k vašemu novému TV Soundbaru Stereo
s Bluetooth
Pro bezpeêné zacházení s pįístrojem a zachování celého
rozsahu výkonu musíte vødøt:
®
.
2. Použití k urêenému úêelu
Tento pįístroj je spotįební elektronikou. TV Soundbar Ster eo
s Bluetooth
Pįístr oj je urêen pro použití v domácnosti a nesmí se používat
ke komerêním úêelŃm.
Pįístr oj se smí používat pouze v e vnitįních prostorách.
®
je urêen ke zvuk ové r epr odukci audio pįístrojŃ.
•Pįed prvním použitím si pozornø pįeêtøte
tento návod k použití.
•Pįedevším se įiìte bezpeênostními pokyny!
•Pįístroj smíte ovládat pouze tak, jak je po-
psáno v tomto návodu k použití.
• Uschovejte si tento návod k použití pro pozdøjší potįebu.
•Budete-li pįístroj pįedávat dalšímu uživateli,
pįiložte prosím tento návod k použití. Návod
k použití je souêástí výrobku.
Pįejeme vám mnoho spokojenosti s vaším novým
TV|Soundbarem Stereo s Bluetooth
Znaêka zboží
Slovní znaêka Bluetooth
znaêky zboží spoleênosti Bluetooth SIG, Inc. (Special Interest Group), jakékoli použití znaêky zboží spoleêností
Hoyer Handel GmbH probíhá v rámci licence.
®
HDMI
je registrovaná ochranná známka spoleênosti
HDMI Licensing LLC.
®
a logo Bluetooth® jsou zapsané
®
.
3. Bezpeênostní pokyny
Výstražná upozornøní
V pįípadø potįeby jsou v tomto návodu k použití uvedeny
následující symboly a výstražná upozornøní:
NEBEZPEéÍ! T ento symbo l ve spojení s upozornø-
ním „nebezpeêí“ znamená vysoké riziko. Nerespektování výstrahy mŃže mít za následek
poranøní a ohrožení života.
NEBEZPEéÍ úrazu elektrickým proudem!
Tento symbol ve spojení s upozornøním „nebezpe-
êí úrazu elektrickým proudem“ znamená vysok é ri-
ziko. Nerespektování výstrahy mŃže mít za
následek poranøní a ohrožení života.
VÝSTRAHA! Tento symbol ve spojení s upozornø-
ním „výstraha“ znamená stįední riziko. Nerespektování výstrahy mŃže mít za následek zranøní
nebo tøžké vøcné škody.
POZOR: Nízké riziko: Nerespektování výstrahy mŃže mít
za následek lehká zranøní nebo vøcné škody.
UPOZORN÷NÍ: Skuteênosti a zvláštnosti, které by møly
být respektovány pįi zacházení s pįístrojem.
Tento symbol udává, že máte dbát obsahu návodu k použití.
NEBEZPEéÍ pro døti a osoby s
omezením
~ Obalový materiál není hraêka pro døti. Døti si nesmí
hrát s obalovým materiálem. Hrozí nebezpeêí udu-
šení.
~ Tento pįístroj nesmí používat osoby (vêetnø døtí) s ome-
zenými fyzickými, senzorickými nebo duševními vlastnostmi nebo osoby, které mají nedostatek zkušeností a/
nebo znalostí. Mohou jej používat, pokud na nø budou
dohlížet osoby odpovødné za jejich bezpeênost nebo
budou pouêeny, jak pįístroj používat.
~ Døti si s pįístrojem nesmí hrát.
~ Pįístroj uchovávejte mimo dosah døtí.
NEBEZPEéÍ pro domácí a užitková
zvíįata i kvŃli nim
~ Elektrospotįebiêe mohou pįedstavovat nebezp e êí pro
domácí a užitková zvíįata. Kromø toho mohou zvíįata
zpŃsobit škodu na pįístroji. Držte proto zvíįata zásadnø dále od elektrospotįebiêŃ.
NEBEZPEéÍ úrazu elektrickým
proudem kvŃli vlhkosti
~ Pįístroj nesmíte používat v extr émním prostįedí, napį. v
prostorách s vysokou vlhkostí vzduchu (koupelny).
~ Pįístroj a napájecí zdroj chr aĢte pįed vlhkostí, kapající
nebo stįíkající vodou. Nepokládejte napįíklad na pįí-
CZ
43
Page 46
stroj nebo v blízkosti nøj vázy naplnøné tekutinami
nebo podobné nádoby.
~ Neobsluhujte pįístroj a napájecí zdroj mokrýma ruka-
ma.
~ Pokud se do pįístroje dostane kapalina, vytáhnøte na-
pájecí zdroj ze zásuvky.
~ V pįípadø, že se do pįístroje dostane tekutina, nechej-
te pįístroj pįed opøtovným uvedením do provozu zkontrolovat odborníkem.
NEBEZPEéÍ úrazu elektrickým
proudem
~ Pįístroj nepoužívejte, pokud pįístroj, napájecí zdroj
nebo kabel vykazují viditelné škody nebo pokud vám
pįístroj spadl. Pįístroj v tomto pįípadø už nepoužívejte,
nechejte ho pįekontrolovat v opravnø.
~ Nikdy neotevírejte kryt pįístroje nebo napájecího zdro-
je.
~ ZasuĢte napájecí zdroj do zásuvky teprve až po pįi-
pojení kabelu k pįístroji.
~ Pįipojte napájecí zdroj pouze k įádnø nainstalované,
dobįe pįístupné zásuvce, jejíž napøtí odpovídá údaji
na výrobním štítku. Zásuvka musí být také po zapojení
stále dobįe pįístupná.
~ Dávejte pozor na to, aby se kabel nemohl poškodit na
ostrých hranách nebo horkých místech.
~ Dbejte na to, aby nedošlo k pįiskįípnutí nebo pro-
máêknutí kabelu.
~ Pįi vytahování napájecího zdroje ze zásuvky vždy táh-
nøte za napájecí zdroj, nikdy za kabel.
~ Vytáhnøte napájecí zdroj ze zásuvky;
…pokud došlo k poruše,
…pįed pįipojením napájecího zdroje k pįístroji,
…pįedtím než budete pįístroj êistit a
…pįi bouįce.
~ Pro úplné oddø
pojen ze zásuvky. I když je pįístroj vypnutý, spotįebo-
vává se malé množství energie pįi zapojeném
napájecím zdroji.
~ Abyste pįedešli poškozením, neprovádøjte na pįístroji
žádné zmøny. Opravy mohou provádøt jen specializované opravny, popį. servisní stįediska.
lení od sít
ø musí být napájecí zdroj vy-
Baterie
~ Respektujte pįi vložení baterií správnou polaritu.
~ Pįedtím než baterie vložíte, oêistøte kontakty baterií a
pįípadnø kontakty pįístroje.
~ NEBEZPEéÍ VÝBUCHU! Baterie nesmí být
dobíjeny nebo znovu aktivovány jinými prostįedky, rozmontovány, hozeny do ohnø nebo
zkratovány.
~ Když dálkové ovládání delší dobu nepoužíváte nebo
jsou baterie vybité, odstraĢte je z dálkového ovládání.
Baterie by mohly vytéci a poškodit dálkové ovládání.
~ Baterie nevystavujte žádným extrémním podmínkám,
napį. neodkládejte dálkové ovládání na topná tølesa a
nevystavujte ho pįímému sluneênímu záįení. Jinak hrozí zvýšené nebezpeêí vyteêení.
~ V pįípadø, že akumulátorová kyselina vytekla, zamez-
te kontaktu s kŃží, oêima a sliznicí. Pįi kontaktu s kyse-
linou ihned omyjte postižená místa velkým množstvím
êisté vody a neprodlenø vyhledejte lékaįe.
~ Baterie mohou být v pįípadø spolknutí životu nebez-
peêné. Uschovávejte proto baterie mimo dosah malých døtí. V pįípadø spolknutí baterie musí být ihned
vyhledána lékaįská pomoc.
~ Nové i spotįebované baterie uchovávejte mimo dosah
d
ø
tí.
~ Pokud se do mníváte, že baterie byly spolknuty nebo se
dostaly do nøjaké êásti tøla, neprodlenø vyhledejte lékaįskou pomoc.
VÝSTRAHA pįed vøcnými škodami!
~ Pro použití s pįipojením do elektrické sítø používejte
pouze dodaný originální napájecí zdroj.
~ Pokud zpozorujete nápadné projevy (napį. nezvyklé
zvuky, zvláštní zápach nebo tvorbu kouįe), vytáhnøte
ihned napájecí zdroj se zásuvky. Poté pįístr oj už nepoužívejte.
~ Pokud vezmete pįístroj z chladného místa do teplého,
mŃže v pįístroji vzniknout kondenzovaná vlhkost. Nechejte pįístroj pįibližnø 2 hodiny vypnutý.
~ Postavte pįístroj pouze na stabilní, rovnou plochu.
~ ChraĢte pįístroj pįed poškozením, napį. následujícími
vlivy:
-horko, pįímé sluneêní paprsky a otevįený oheĢ,
- nárazy a podobná silová pŃsobení.
~ Svíêky a jiný otevįený oheĢ musíte vždy držet
od tohoto výrobku dál, abyste zabránili rozšíįení ohnø.
~ Napájecí zdroj nikdy nezakrývejte, abyste pįedešli
pįehįátí.
~ Nepoužívejte ostré nebo odírající êisticí prostįedky.
~ Pįístroj je vybaven protiskluzovými plastovými nožka-
mi. Jelikož je nábytek potažen rŃznými laky a umølými
látkami a je ošetįován rŃznými prostįedky, nemŃže být
zcela vylouêeno, že nøkteré z tøchto látek obsahují
složky, které plastové nožky oslabí a zmøkêí. V pįípa-
dø potįeby položte pod pįístroj protiskluzovou podložku.
~ Pįi montáži na stønu respektujte následující:
-UpevĢovací materiál musí být pįizpŃsoben k vlast-
nostem støny. V pįípadø potįeby použijte jiný upevĢovací materiál než ten, který byl dodaný.
-Ujistøte se, že se na místø montáže nenacházejí ve stø-
nø žádná vedení (napį. proud, voda, plyn).
-V pįípadø potįeby nechejte montáž na stønu provést
odborníka.
Informace k Bluetooth
~ Rádiové vlny mohou potenciálnø ovlivnit nebo dokon-
ce rušit provoz kardiostimulátorŃ, (citlivých) elektronických pįístrojŃ a jiných rádiových vln (napį. WLAN).
Proto prosím dbejte následujících pokynŃ.
- Nositelé kardiostimulátorŃ by møli dodržovat 20 cm
odstup od tohoto výrobku.
- Rádiové vlny mohou zpŃsobit rušivé zvuky, napį. v
mobilních telefonech nebo naslouchadlech.
®
44
CZ
Page 47
- Nepoužívejte výrobek v prostorách, kde hrozí exploze.
- Jsou-li rušeny jiné rádiové jednotky (napį. WLAN),
zkontrolujte odpojením Soudbaru z elektrické sítø,
zda není pįíêinou právø Soundbar.
-Pįístroj nepoužívejte v blízkostech mikrovlnných pįí-
strojŃ nebo pįístrojŃ, které vysílají magnetické pole.
4. Obsah dodávky
1 Soundbar
1 napájecí zdroj|
1 dálkové ovládání
2 baterie typu LR3 AAA 1,5 V
1 stereo kabel cinch|
1 kabel TOSLINK|14
2x4 šroubky|33 (25 mm / 50 mm)
4 hmoždinky|
2nástønné držáky|12
1 vrtací šablona
1krátký návod
1dŃležité informace
1 návod k použití
•OdstraĢte veškerý obalový materiál.
• Zkontrolujte, zda není pįístroj poškozený.
11
13
34
5. Pįed prvním použitím
5.1 Dálkové ovládání
VÝSTRAHA!
~ Respektujte pįi vložení znaêku polarity v pįihrádce na
baterie.
1. OBRÁZEK A: Otevįete pįihrádku na baterie|
že vysunete víko ve smøru šipky a odeberete ho.
2. V pįípadø potįeby vymøĢte staré baterie za nové.
3. Nasaìte víko na pįihrádku na baterie a zasuĢte ho
proti smøru šipky, dokud nezapadne.
5.2 Umístøní / montáž na stønu
UPOZORN÷NÍ: Pokud pįístroj pįipojujete k televizi,
umístøte pįístroj pokud možno doprostįed pod televizi.
Umístøní
1. Postavte pįístroj na rovný povrch.
2. Spojte napájecí zdroj|
11 s pįístrojem.
27 tím,
V pįípadø neúplné nebo defektní dodávky se obraĹte na
pįíslušné servisní stįedisko výrobce (viz „Záruka spoleênosti HOYER Handel GmbH“ na stranø|50).
Respektujte prosím zobrazení na vyklápøcí stranø.
Pįipevnøní na stønu
VÝSTRAHA pįed vøcnými škodami!
~ Pįi montáži na stønu respektujte následující:
-UpevĢovací materiál musí být pįizpŃsoben k vlast-
nostem støny. V pįípadø potįeby použijte jiný upevĢovací materiál než ten, který byl dodaný.
- Ujistøte se, že se na místø montáže nenacházejí ve
stønø žádná vedení (napį. proud, voda, plyn).
-V pįípadø potįeby nechejte montáž na stønu provést
odborníka.
~ Pįi použití na stønø byste møli použít zahnutý HDMI
konektor, aby nebyl poškozen zalomením.
1. OBRÁZEK B: Vyvrtejte 2 otvory na nástønný držák
ve vzdálenosti 40 cm od sebe. Použijte pįípadnø pįilo-
ženou vrtací šablonu.
2. P okud použijete dodané hmoždink y|
o prŃmøru 8 mm.
3. ZasuĢte hmoždinky|
4. Upevnøte nástønné držáky|
stønu.
5. ZasuĢte všechny použité kabely do pįípojek(viz „Pįe-
hled – pįípojky“ na stranø|46).
6. Spojte napájecí zdroj|
7. Zavøste pįístroj do nástønných držákŃ|
stønné držáky|
zadní stranø pįístroje.
34 do vyvrtaných otvorŃ.
12 šroubky|33 pevnø na
11 s pįístrojem.
12 se musí pevnø zachytit do míst na
34, použijte vrták
12. Oba ná-
CZ
45
Page 48
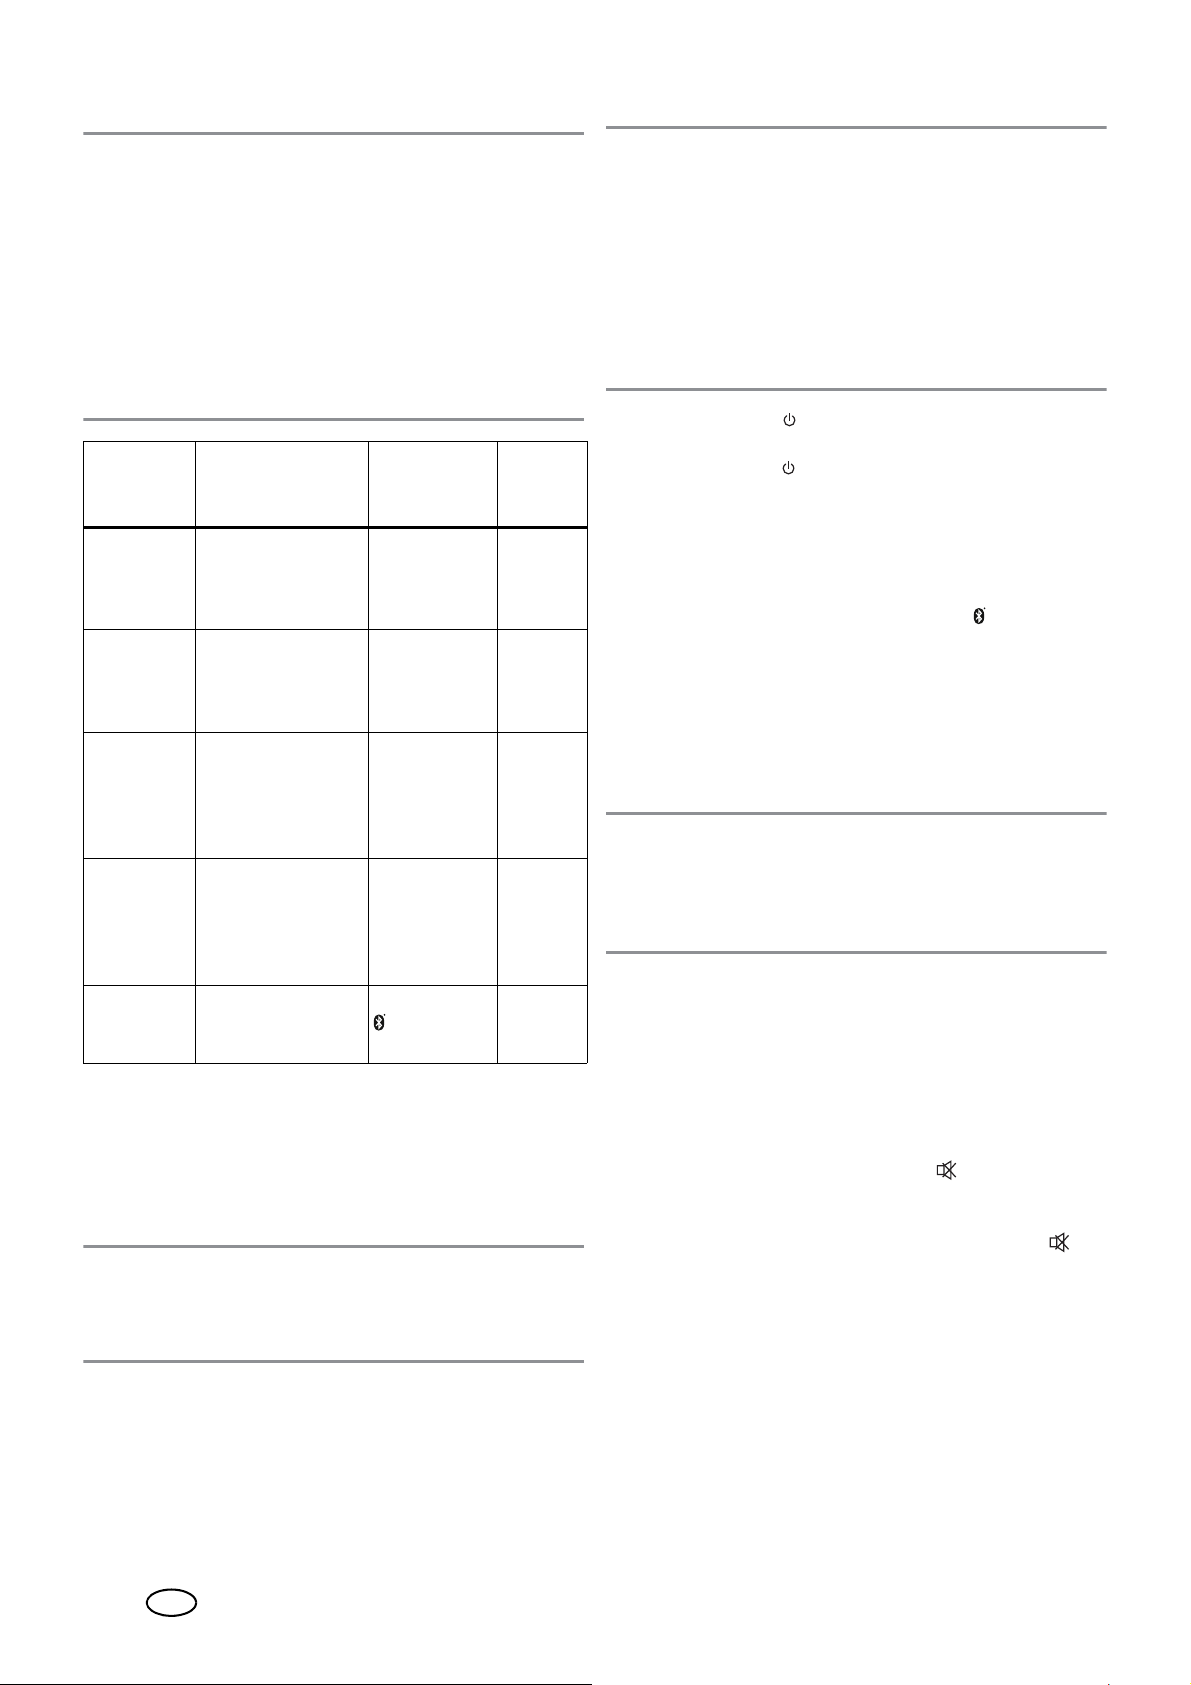
5.3 Pįehled – pįípojky
6. Obsluha
POZOR: Dbejte na to, aby byl Soundbar a pįipojené pįí-
stroje vypnuté, pįedtím než je zapojíte. Pįeêtøte si návody
k použití pįístrojŃ, které zapojujete.
UPOZORN÷NÍ:
• Kabel HDMI (ARC) pro vstup HDMI (ARC)|
3,5|mm stereo kabel jack pro vstup LINE IN|
10 a
7 nejsou
obsaženy v rozsahu dodávky.
•Pįípojka HDMI (ARC)|
10 mŃže fungovat pouze teh-
dy, když všechny komponenty podporují ARC. V pįí-
padø potįeby se musí vymønit staré kabely HDMI za
nové kabely podporující ARC.
Tlaêítko
Vstup Použití
dálkového
Displej
ovládání
Pįípojka se stereo
AUX IN|8
kabelem cinch|
napį. televize, CD
13,
AUX|
31 AUX
pįehrávaê
Pįípojka s 3,5|mm
LINE IN|
stereo kabelem
7
jack, napį. MP3
LINE IN|
29 LInE
pįehrávaê, telefon
Pįípojka s kabelem
HDMI
(ARC)|
HDMI (ARC), napį.
na pįípojce HDMI
10
ARC televize, DVD
HDMI
(ARC)|
17
Hd
pįehr ávaêe
Pįípojka s kabelem
14
OPTICAL
9
IN|
TOSLINK|
na digitálním pįijí-
maêi, DVD pįehráva-
, napį.
OPTICAL|18 OPtI
êi
Rádiové spojení,
Bluetooth
®
napį. chytrý tele-
|
30
bt
fon
•Na zdíįku cinch výstupu SUB OUT|
6 mŃže být napo-
jen subwoofer. Subwoofer je automaticky įízen pįístro-
jem.
5.4 Uvedení do provozu
UPOZORN÷NÍ: Pįístroj zŃstává po vypnutí v pohotovosti
(režim standby). V tomto režimu má pįístr oj stálé ještø malou spotįebu energie. Pro odpojení ze sítø vytáhnøte napájecí zdroj|11 ze zásuvky.
•ZasuĢte napájecí zdroj|
ky. Na displeji|
1 se zobrazí – –. Pįístroj je nyní v reži-
mu standby.
11 do dobįe pįístupné zásuv-
UPOZORN÷NÍ:
• Všechna nastavení mŃžete provést pomocí dálkového
ovládání. Základní funkce mŃžete provést tak é pomocí
tlaêítek na pįístroji. V návodu k použití je zpravidla
popsáno použití s dálkovým ovládáním.
•Pįístroj se pįepne do režimu standby,...
®
…když není pįipojení Bluetooth
navázáno bøhem
20|minut nebo
…pokud nepįijal cca 20 minut žádný nebo jen velmi
slabý signál a nebyl obsluhován.
• Stisknøte tlaêítko |
32, abyste pįístroj pįepnuli z reži-
mu standby.
• Stisknøte tlaêítko |
32, abyste pįístroj pįepnuli do reži-
mu standby.
6.1 Volba zpŃsobu pįipojení
1. Stisknøte jedno z tlaêítek AUX|31, LINE IN|29,
HDMI (ARC)|
17, OPTICAL|18 nebo |30 abyste
pįepnuli na požadované pįipojení (viz „Pįehled – pįí-
pojky“ na stranø|46).
2. Zahajte na r epr odukêním pįístr oji pįehrávání, zvolte a
nastavte hudební skladbu.
6.2 Nastavení zvuku
UPOZORN÷NÍ: Zmøny nastavení zvuku se zobrazí na
displeji|
- Hlasitost: V00 … V40
-Výšky: t -4 … t 4
- Basy: b -4 … b 4
Regulace hlasitosti
• Stisknøte bøhem pįehrávání tlaêítka VOL –/+|22 na
Vypnutí zvuku
1. Pro vypnutí zvuku stisknøte tlaêítko |16. Na disple-
2. Pro opøtovné zapnutí zvuku stisknøte znovu tla êítko |
Nastavení barvy zvuku
Nastavení se neuloží, pokud se pįepnete do jiného režimu.
• Stisknøte jedno z tlaêítek|
•Tlaêítky TREBLE –/+|
• Nastavte tlaêítky BASS –/+|
1.
dálkovém ovládání nebo VOL –/+|
4 na pįístroji. Tla-
êítka mŃžete také držet stisknutá, abyste zmøny hlasitosti dosáhli rychleji.
1 bliká zobrazení hlasitosti, která byla nastavena
ji|
pįedtím.
16
nebo jedno z tlaêítek
VOL –/+
|22 /|4.
25, abyste zvolili pįednasta-
vení barvy zvuku pro hudbu (MUSIC), film (MOVIE)
nebo jazyk (DIALOG).
23 nastavte výšky.
24 basy.
46
CZ
Page 49
Barva zvuku
Tlaêítka|
25 Dálkové
ovládání
Displej
Hudba MUSIC SOnG
Film MOVIE CInE
Jazyk DIALOG dIA
UPOZORN÷NÍ:
Pro barvu zvuku „film“ (
MOVIE
) je 3D
efekt aktivován jako výchozí.
4. Zapnøte televizi. Pįi prvním navazování pįipojení
mŃže trvat nøkolik vte įin, než ze Soundbaru zazní nøjaký zvuk.
UPOZORN÷NÍ:
Když používáte pįípojku
HDMI (ARC)
|10,
Soundbar se vypíná a zapíná zpravidla dálkovým ovládáním pįipojeného pįístroje. Pįipojený pįístroj musí podpor ovat protokol CEC (Consumer Electronic Control).
6.4 Bluetooth
®
Zapnutí/vypnutí 3D efektu
• Pr o zapnutí/vypnutí 3D efektu stisknøte tlaêítko
- Je-li 3D efekt zapnutý, zobrazí se na displeji krátce
3d.
- Je-li 3D efekt vypnutý, zobrazí se na displeji zvolená
barva zvuku (SOnG, CInE nebo dIA).
3D|26
.
6.3 Pįípojka HDMI (ARC)
Vysvøtlení pojmu
- HDMI je zkratka pro High Definition Multimedia Interface. Touto pįenosovou cestou mohou být pįenášeny
digitální obrazové a zvukové signály.
- HDMI (ARC – Audio Return Channel) znamená, že kabel disponuje kanálem ARC. Tímto kanálem mohou
být obousmørnø posílány audio signály.
Následující moderní pįístroje zpravidla disponují výstupem ARC: televize, hrací konzole nebo digitální pįijímaêe.
Níže je popsáno pįipojení k televizi.
Kanálem ARC kabelu HDMI mohou být pįenášeny digitální zvukové signály ze zdrojového pįístroje (napį. televize)
do Soundbaru.
Pįenášení zvuku zdíįkou HDMI (ARC)|
pouze tehdy, když všechny komponenty podporují ARC.
Nezdaįil-li se pįenos, dbejte jednoho pįípadnø více z níže
uvedených bodŃ:
10 mŃže fungovat
Navazování pįipojení
UPOZORN÷NÍ:
• Identifikace pįístroje je „SSB|50|A1“.
•Po pįepnutí na Bluetooth
kouší navázat pįípojení k naposledy pįipojenému pįí-
stroji.
• Respektujte prosím, že navázání pįipojení mŃže probíhat rŃznø v závislosti na pįístroji a používaném softwaru.
1. Stisknøte tlaêítko |
Bluetooth
®
. Na displeji|1 se zobrazí bt.
2. Zapnøte reprodukêní pįístroj (napį. chytrý telefon) a
zahajte pįipojení Bluetooth
3. Reprodukêní pįístroj byl møl nyní pįijímat identifikaci
pįístroje „SSB|50|A1“. Pokud se tak nestalo, stisknøte
na cca 1 vteįinu tlaêítko PAIR|
ovládání. Na displeji|
4. Navažte na reprodukêním pįístroji spojení se Soundbarem. V pįípadø dotazu na heslo zadejte „0000“.
Oba pįístroje jsou nyní spoleênø propojeny. Na displeji|
1 se trvale zobrazí bt a zazní akustický signál.
UPOZORN÷NÍ: Reprodukêní pįístroje zpravidla uloží
identifikaci pįístroje. Pįi novém navazování pįipojení poté
odpadá u aktivované funkce Bluetooth
vání pįipojení.
®
se pįístroj automaticky po-
30, abyste pįepnuli na pįipojení
®
.
19 na na dálkovém
1 rychle bliká bt.
®
manuální navazo-
• Starý kabel HDMI musí být vymønøn za nový kabel
podporující ARC.
• Ne každá zdíįka HDMI na televizi musí podporovat
ARC. V tomto pįípadø musí být kabel HDMI na televizi
pįipojen do jiné zdíįky HDMI podporující ARC. Zpravidla jsou odpovídající zdíįky HDMI opatįeny nápisem
ARC. Pokud ne, podívejte se do návodu k použití vaší
televize.
•U nøkterých televizí musí být digitální výstup zvuku
uvolnøn. Zvolte výstup zvuku PCM 2.0 (PCM Stereo).
Pokud se výstup zvuk u PCM 2.0 (PCM Ster eo) nenastaví na televizi, Soundbar se automaticky vypne.
1. Spojte zdíįku HDMI (ARC)|
10 pomocí kabelu HDMI
podporujícího ARC se zdíįkou HDMI ARC vaší televize.
2. Zapnøte Soundbar tlaêítkem |
3. Stisknutím tlaêítka HDMI (ARC)|
32.
17 zvolte vstup HDMI.
5. Zahajte nyní na reprodukêním pįístroji pįehr ávání hudby. Zvuk bude pįehráván Soundbarem.
6. Tlaêítky I
WW|28, XXI|20 a X/II|21 zvolte a nastavte
hudební skladbu.
Zrušení pįipojení
Pįipojení se zruší, když
…vypnete jeden z pįístrojŃ;
…vypnete funkci Bluetooth
…je pįekroêen dosah (cca 10 metrŃ);
…Stisknøte tlaêítko PAIR|
rychle neblikábt. V tomto pįípadø mŃžete hned navázat nové spojení s dalším pįístrojem.
®
;
19, dokud na displeji|1
CZ
47
Page 50
7. éištøní a skladování
NEBEZPEéÍ úrazu elektrickým proudem!
~ Vytáhnøte napájecí zdroj|
budete pįístroj êistit. Dbejte na to, aby do pįístroje nepronikla žádná tekutina.
• éistøte pįístroj lehce navlhêeným hadįíkem. Pįi neú-
stupném zneêištøní mŃžete použít také trochu jemného
êistiêe jako napį. prostįedku na umývání nádobí. Ne-
používejte rozpouštødla, líh, įedidla apod., mohli byste poškodit povrch pįístroje.
•Pokud pįístroj nepoužíváte, uskladnøte ho na místø,
kde na nøj nemohou pŃsobit vysoké teploty ani vlhkost. Ods traĢte baterie z dálkového ovládání.
11 ze zásuvky,pįedtím než
8. Likvidace
Symbol pįeškrtnuté popelnice na koleêkách
znamená, že výrobek musí být v Evropsk é unii
zavezen na místo sbøru a tįídøní odpadu. To
platí pro výrobek a všechny êásti pįíslušenství
oznaêené tímto symbolem. Oznaêené výrobky nesmí být likvidovány spoleênø s normálním domácím odpadem, ale musí být
zavezeny na místa zabývající se recyklací
elektrických a elektronických zaįízení. Recyklace pomáhá snižovat spotįebu surovin a odlehêuje životnímu prostįedí.
Baterie nesmí být vyhozeny do domácího odpadu. Vybité baterie musí být náležitým zpŃ-
sobem zlikvidovány. Pro tento úêel jsou k
dispozici odpovídající nádoby pro likvidaci
baterií v obchodech s bateriemi a v komunálních sbørných dvorech.
Baterie a akumulátory, které jsou oznaêeny následujícími
písmeny, obsahují mimo jiné škodlivé látky: Cd (kadminum), Hg (rtuĹ), Pb (olovo).
Obal
Chcete-li obal zlikvidovat, įiìte se pįíslušnými pįedpisy k
ochranø životního prostįedí ve vaší zemi.
9. Įešení problémŃ
Pokud by Soundbar nefungoval podle požadavkŃ, pr ojdø-
te si prosím nejdįíve tento kontrolní seznam. Možná se jedná o nepatrný problém, který mŃžete sami odstranit.
NEBEZPEéÍ úrazu elektrickým proudem!
~ V žádném pįípadø se nepokoušejte pįístroj sami opra-
vovat.
Chyba Možné pįíêiny/opatįení
•Je zajištøno napájení proudem?
Bez funkce
Bez pįipojení
Bluetooth
Nepįehrává se
Rušivé zvuky
bøhem provozu
Soundbar k se
vypíná
®
Je|na displeji|
•P
įi pįipojení do zdíįky
musí kabel HDMI a také pįipojený pįí-
stroj (napį. televize) podporovat ARC.
Pokud vaše televize nemá pįíp ojk u
HDMI, která podporuje ARC, zvolte
jiný zpŃsob pįipojení nebo vymøĢte
televizi.
•VymøĢte starý kabel HDMI za nový
podporující ARC.
•Je na reprodukêním pįístroji (napį. te-
levizi) zvolen správný audio signál?
Zvolte pro výstup zvuku PCM 2.0
(nebo PCM Stereo).
•Je na reprodukêním pįístroji aktivova-
né Bluetooth
•Vypnuli jste pįístroj?
• Je navázáno spojení Bluetooth
ným pįístrojem? Stisknøte tlaêítko
PAIR|
19, dokud na displeji|1 ryc hl e
nebliká bt, a navažte nové pįipojení.
• Je hlasitost nastavena pįíliš nízko?
• Je zvoleno správné pįipojení?
• Je zvuk pįíliš potichu nebo vypnutý?
•Pįi eventuálnø vyskytujících se ruši-
vých zvucích odstraĢte pįípadné mobilní telefony, tablety a jiné radiové
pįijímaêe z bližšího okolí Soundbaru.
•K úspoįe energie disponuje tento pįí-
stroj automatickým vypnutím. Pįístroj
se automaticky pįepne do pohotovostního režimu, pokud nepįijal cca
20 minut žádný nebo jen slabý signál a nebyl obsluhován.
1 zobrazeno – –?
HDMI|ARC|10
®
?
®
s ji-
48
CZ
Page 51
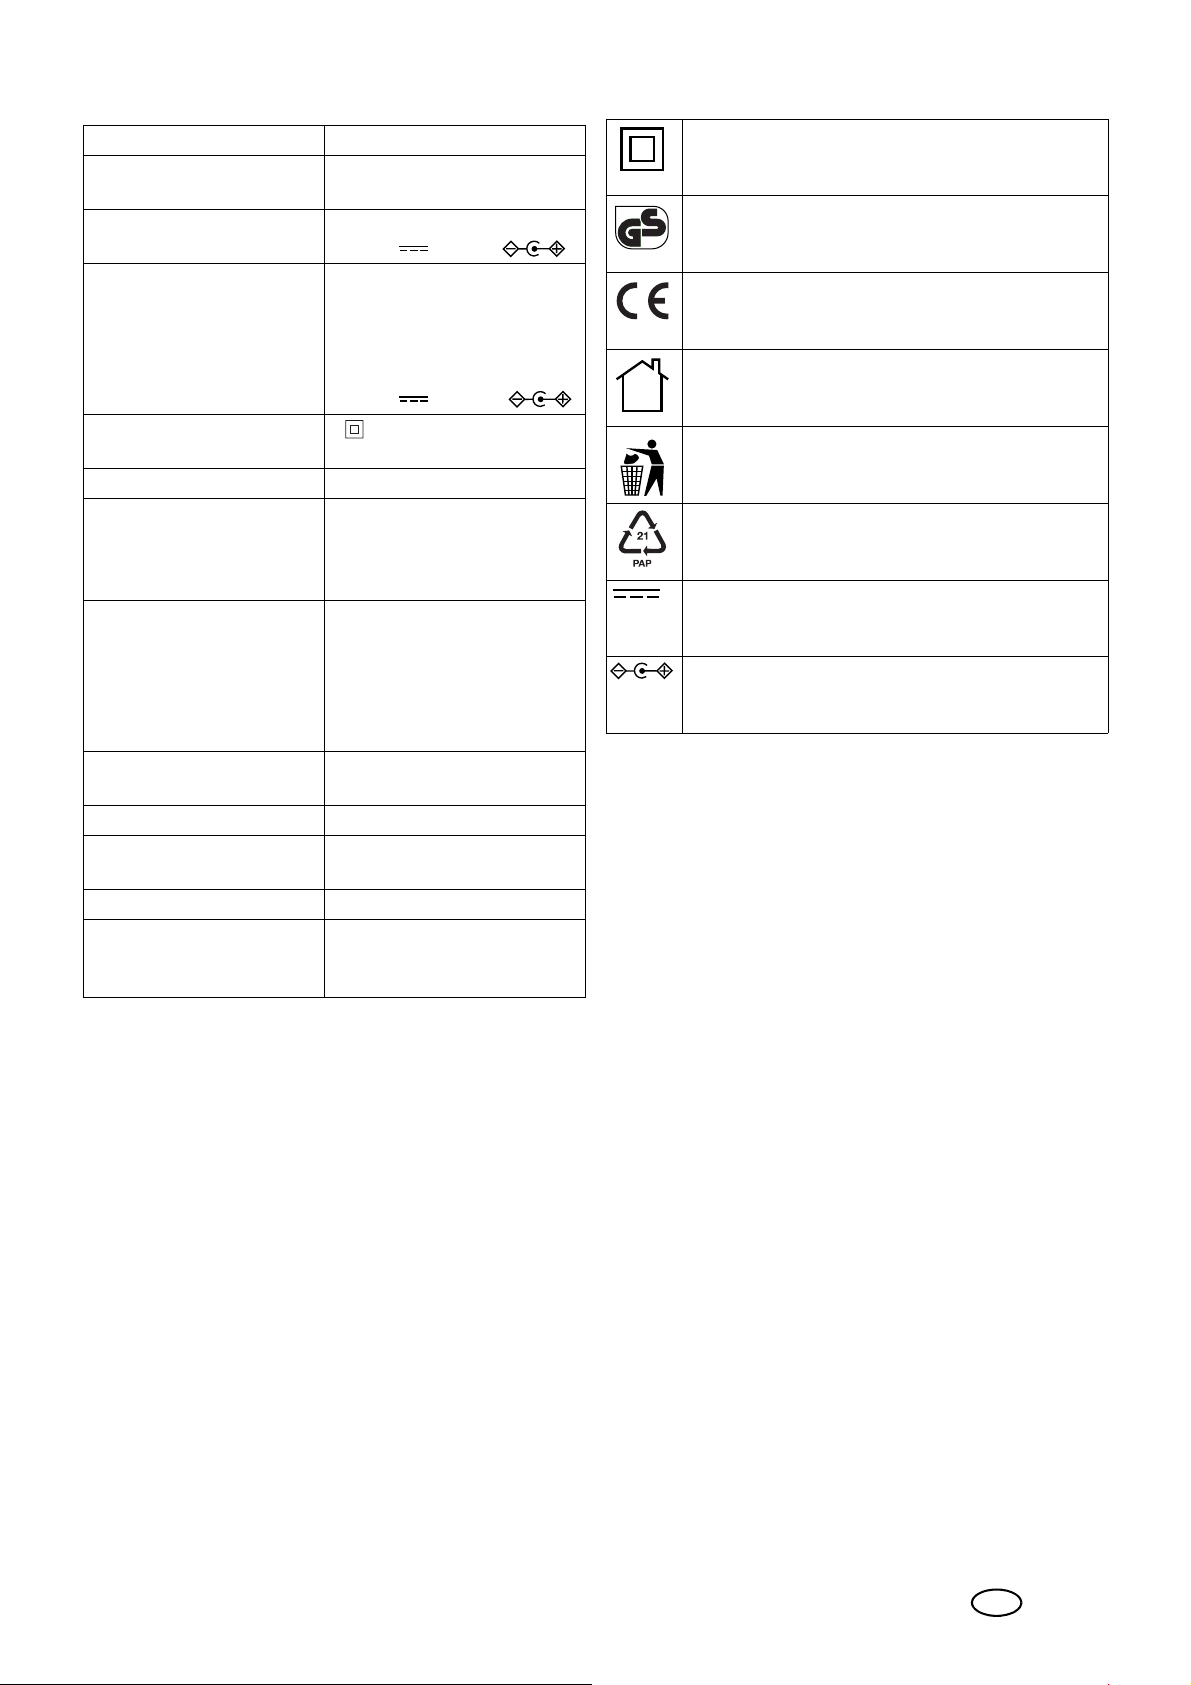
10.Technické parametry
Použité symboly
Model: SSB 50 A1
Výkon:
Spotįeba v re žimu standby:
Soundbar: Vstup:
Napájecí zdroj:
SHEN ZHEN CITY HONG
BEN ELECTRONIC CO., L TD
Model
EU: HB40-1801300SPA
Ochranná tįída napájecího
zdroje:
Audio formát: PCM 2.0 (PCM Stereo)
Bluetooth
Dosah:
Frekvenêní oblast:
Pįenos výkonu:
Vstup:
LINE IN
AUX IN L/R
HDMI (ARC)
OPTICAL IN
Výstup:
SUB OUT 1 x zdíįka cinch
Baterie dálkového ovládání:
Rozmøry (Š x H x V): cca 94 x 8 x 10 cm (bez ná-
Hmotnost: cca 2,8 kg
Podmínky provozu a skla-
dování:
®
:
2x 10 W + 1x 30 W RMS
< 0,5 W
18,0 V 1,3 A,
Vstup:
100–240 V ~
50/60 Hz, 0,8 A max.
Výstup:
18,0 V , 1,3 A,
II
v4.2 (A2DP, AVRCP)
do 10 m
2402–2480 MHz
< 10 dBm
1 x 3,5 mm stereo zdíįka
jack
2 x zdíįka cinch
1 x zdíįka HDMI ARC
1x zdíįka TOSLINK
2 x typ LR3 AAA 1,5 V
stønného držáku)
10 °C až 35 °C
Relativní vlhkost vzduch u 40
až 85 %
Ochranná izolace
Testovaná Bezpeênost. Pįístroje musí vyhovovat
obecnø uznávaným normám techniky a souhlasit
se Zákonem o bezpeênosti výrobku (ProdSG).
Znaêka CE je prohlášením spoleênosti
HOYER|Handel GmbH o splnøní požadavkŃ
podle smørnic EU.
Pįístroje s|tímto symbolem smíte používat pouze
v|domácím (suchém) prostįedí.
T ento symbol upozorĢuje na to, aby byl obal ekologicky zlikvidován.
Recyklovatelné materiály: lepenka (kromø vlnité
lepenky)
Stejnosmørný proud
Znaêky pro polaritu
Technické zmøny vyhrazeny.
Informace k prohlášení o shodø EU
Spoleênost HOYER Handel GmbH tímto pr ohl ašuje, že je
tento výrobek v souladu se základními požadavky
-smørnice o harmonizaci právních pįedpisŃ êlenských
státŃ týkajících se dodávání rádiových zaįízení na trh
2014/53/ES,
-smørnice o stanovení rámce pro urêení požadavkŃ na
ekodesign výrobkŃ spojených se spotįebou energie
2009/125/ES a také
-smørnice o omezení používání nøkterých nebezpeê-
ných látek v elektrických a elektronických zaįízeních
2011/65/EU.
Úplné znøní EU prohlášení o shod ø naleznete na internetu na
http://qr.hoyerhandel.com/d/298734
CZ
49
Page 52
11.Záruka spoleênosti
CZ
HOYER Handel GmbH
Vážená zákaznice, vážený zákazníku,
na tento pįístroj jste získali 3|letou záruku od data nákupu. V pįí-
padø vad tohoto výrobku vám vŃêi prodávajícímu náleží zákonná práva. Tato zákonná práva nejsou naší níže popsanou
zárukou omezena.
Podmínky záruky
Záruêní lhŃta zaêíná datem nákupu. Uschovejte si prosím dobįe ori-
ginál úêtenky. Tento podklad bude vyžadován jako dŃkaz nákupu.
Objeví-li se bøhem tįí let od data nákupu tohoto výrobku chyba
materiálu nebo výrobní chyba, výrobek vám - podle naší volby zdarma opravíme nebo vymøníme. Pįedpokladem pro poskytnutí
záruky je to, že bøhem tįíleté lhŃty bude pįedložen defektní pįí-
stroj a doklad o nákupu (úêtenka) s krátkým popisem toho, v êem
vada spoêívá, a kdy k ní došlo.
Pokud naše záruka kryje závadu, obdržíte opravený nebo nový
výrobek. Opravou nebo výmønou výrobku nezaêíná nová záruê-
ní lhŃta.
Záruêní lhŃta a zákonné nároky na odstranøní
vady
Záruêní lhŃta se poskytnutím záruky neprodlužuje. To platí také
pro náhradní a opravované díly. Pįípadné šk ody a vady vyskytující se již pįi nákupu musíte ihned po rozbalení pįístroje nahlásit.
Po vypršení záruêní lhŃty jsou pįípadné opravy zpoplatnøné.
Na adrese www .lidl-service.com mŃžete stáhnout tuto a
mnohé další pįíruêky, videa a software.
Servisní stįediska
Servis éesko
Tel.: 800143873
E-Mail: [email protected]
IAN: 298734
Dodavatel
Respektujte prosím to, že níže uvedená adresa není adresou
servisu. Nejdįíve kontaktuje výše uvedené servisní stįedisko.
HOYER Handel GmbH
Tasköprüstraße 3
DE-22761 Hamburg
N÷MECKO
Rozsah záruky
Pįístroj byl vyr oben peêlivø podle pįísných smørnic pro kvalitu vý-
robku a pįed dodáním byl svødomitø testován.
Záruka je poskytována pro chybu materiálu a výrobní chybu.
Ze záruky jsou vylouêeny díly podléhající rychlému
opotįebení, které jsou vystaveny bøžnému opotįebení, a poškození kįehkých dílŃ, napį. vypínaêŃ, bate-
rií, osvøtlení nebo sklenøných dílŃ.
T ato záruka propadá, pokud byl výrobek používán poškozený a
nevhodnø nebo tak byl udržován. Pro vhodné použití výrobku
musíte pįesnø dodržovat všechny pokyny uvedené v návodu k použití. Bezpodmíneênø se musíte vyvarovat úêelŃm použití a manipulaci, od kterých jste v návodu k použití zrazováni nebo pįed
kterými jste varováni.
Výrobek je urêen pouze k soukromému, nikoliv komerênímu použití. Pįi neoprávnøném a nevhodném použití, použití síly a pįi zásazích, které nebyly provedeny autorizovaným servisním
stįediskem, záruka zaniká.
PrŃbøh v pįípadø uplatĢování záruky
Pro zajištøní rychlého zpracování vašeho požadavku dbejte prosím následujících pokynŃ:
•Pįipravte si prosím pro všechny dotazy êíslo výrobku
IAN: 298734 a úêtenku jako dŃkaz nákupu.
• éíslo výrobku naleznete na výrobním štítku, na rytinø, na titulní stranø vašeho návodu (dole vlevo) nebo na nálepce na
zadní nebo spodní stranø pįístroje.
• Objeví-li se chyby funkênosti nebo jiné vady, kontaktujte nejdįíve níže uvedené servisní stįedisko telefonicky nebo
e-mailem.
• Výrobek považovaný za defektní mŃžete s pįiloženým dokladem o nákupu (úêtenky) a uvedením, v êem spoêívá závada,
a kdy se objevila, zdarma zaslat na vám sdølenou adresu
servisu.
50
CZ
Page 53

CZ
51
Page 54
Indice
1. Vista general..........................................52
2. Uso adecuado ........................................5 3
3. Indicaciones de seguridad ......................53
4. Volumen de suministro ...........................55
5. Antes del primer uso ..............................55
5.1 Mando a distancia .................................. 55
5.2 Instalación / montaje en la pared ............. 55
5.3 Vista general - Conexiones ....................... 56
5.4 Puesta en servicio.................................... 56
6. Uso ........................................................56
6.1 Selección del tipo de conexión.................. 56
1. Vista general
Tenga en cuenta las figuras de la hoja desplegable.
Barra de sonido
1 Pantalla
- -: modo de espera
LINE: LINE IN
Hd: HDMI (ARC)
AUX: AUX IN
bt: Bluetooth
OPtI: OPTICAL
2 Tecla POWER
3 Tecla SOURCE
4 Teclas VOL –/+
5 Hembrilla DC IN
6 Hembrilla SUB OUT
7 Hembrilla LINE IN
8 Hembrillas AUX I N L/R
9 Hembrilla OPTICAL IN
10 Hembrilla HDMI (ARC)
Accesorios
®
6.2 Ajustes de sonido ....................................56
6.3 Conexión HDMI (ARC) ............................. 57
6.4 Bluetooth®.............................................. 57
7. Limpieza y almacenamiento ...................58
8. Eliminación .............................................58
9. Solución de problemas ...........................59
10.Datos técnicos.........................................59
11.Garantía de HOYER Handel|GmbH..........60
Servicio técnico ....................................................61
Mando a distancia
15 LED de transmisión
16 Tecla
17 Tecla HDMI (ARC)
18 Tecla OPTICAL
19 Tecla PAIR
20 Tecla
21 Tecla
22 Teclas VOL –/+
23 Teclas TREBLE –/+
24 Teclas BASS –/+
25 Teclas MUSIC, MOVIE, DIALOG
26 Tecla 3D
27 Compartimento de las pilas
28 Tecla
29 Tecla LINE IN
30 Tecla
31 Tecla AUX
32 Tecla
XX
X
WW
I
I
II
11 Fuente de alimentación
12 2 soportes de pared
13 Cable cinch estéreo
14 Cable TOSLINK
52
ES
Montaje
33 Tornillos (4x 25 mm / 4x 50 mm)
34 Taco (4)
Plantilla de perforación (sin ilustración)
Page 55
¡Muchas gracias por su
confianza!
Le felicitamos por la compra de su nueva barra de sonido
estéreo para televisor con Bluetooth
Para un manejo seguro del apar ato y para c onocer todas
sus prestaciones:
®
.
2. Uso adecuado
Este es un aparato de electrónica de consumo. La
sonido estéreo para televisor con Bluetooth
ñada para la repr oducción de sonido de aparatos de audio .
El aparato está concebido para el uso doméstico y no se
debe usar para fines industriales. El aparato solo deberá utilizarse en el interior.
barra de
®
ha sido dise-
• Antes de poner en marcha el aparato por
primera vez, lea este manual de instrucciones detenidamente.
• ¡Sobre todo, siga las indicaciones de seguridad!
• El aparato solo se debe emplear de la manera descrita en este manual de instrucciones.
• Conserve este manual de instrucciones como
referencia fut ura.
• En caso de que entregue este aparato a otras
personas, adjunte el manual de instrucciones. El manual de instrucciones forma parte
del producto.
Esperamos que disfrute de su nueva barra de sonido estéreo para televisor con Bluetooth
Marca registrada
La marca denominativa Bluetooth
son marcas registradas de Bluetooth SIG, Inc. (Special Interest Group, Grupo de interés especial), cualquier uso de
la marca registrada por parte de Hoyer Handel GmbH se
realiza en el marco de una licencia.
La marca denominativa HDMI
de HDMI Licensing LLC.
Este símbolo indica que es necesario tener en
cuenta el contenido del manual de instrucciones.
®
.
®
y el logo de Bluetooth®
®
es una marca registrada
3. Indicaciones de seguridad
Indicaciones de advertencia
En este manual de instrucciones encontrará los siguientes
símbolos e indicaciones de advertencia:
¡PELIGRO! Este símbolo, asociado con la indicación "peligro", implica un riesgo elevado. La no
observación del aviso puede causar lesiones mortales.
¡PELIGRO de descarga eléctrica! Este símbolo, asociado con la indicación "peligro de descarga eléctrica", implica un riesgo elevado. La no
observación del aviso puede causar lesiones mortales.
¡ADVERTENCIA! Este símbolo, asociado con la
indicación "advertencia", implica un riesgo medio. La no observación del aviso puede causar lesiones o daños materiales graves.
PRECAUCIÓN: riesgo reducido: la no observación del
aviso puede causar lesiones o daños materiales leves.
NOTA: circunstancias y particularidades que se deben tener en cuenta al usar el aparato.
PELIGRO para niños y personas
discapacitadas
~ El material de embalaje no es ningún juguete. Los ni-
ños no deben jugar con el material de embalaje.
Existe peligro de asfixia.
~ Este aparato no está previsto para ser utilizado por per-
sonas (incluyendo niños) con las capacidades físicas,
sensoriales o mentales disminuidas o que carezcan de
la experiencia y/o de los conocimientos necesarios, a
no ser que sean vigilados por una persona responsable
de su seguridad o reciban de ella las instrucciones
oportunas para el uso del aparato.
~ Los niños no deben jugar con el aparato.
~ Guarde el aparato fuera del alcance de los niños.
PELIGRO para y debido a los
animales de compañía y de granja
~ Los aparatos eléctricos pueden presentar peligros
para los animales de compañía y de granja. Además,
los animales también pueden ocasionar daños en el
aparato. P or ello, como regla general mantenga a los
animales alejados de los aparatos eléctricos.
ES
53
Page 56
PELIGRO de descarga eléctrica
debido a la humedad
~ El aparato no debe utilizarse en entornos extremos, p.
ej., espacios con una elevada humedad del aire (cuartos de baño).
~ Proteja el aparato y la fuente de alimentación contra
la humedad, el goteo y las salpicaduras. No coloque,
por ejemplo, jarrones o similares rellenos de líquido
sobre o cerca del aparato.
~ No utilice el aparato ni la fuente de alimentación con
las manos mojadas.
~ Retire la fuente de alimentación de la toma de corrien-
te si penetra algún líquido en el aparato.
~ En caso de que penetre líquido en el aparato, hágalo
revisar por un especialista antes de volver a ponerlo
en marcha.
PELIGRO de descarga eléctrica
~ No ponga en funcionamiento el aparato si éste, la
fuente de alimentación o el cable presentan daños visibles o si el aparato se ha caído antes al suelo. En este
caso no utilice el aparato hasta que lo haya revisado
un taller especializado.
~ No abra nunca la carcasa del aparato ni de la fuente
de alimentación.
~ Enchufe la fuente de alimentación a la toma de co-
rriente solo cuando el cable esté conectado al aparato.
~ Conecte la fuente de alimentación solo a una toma de
corriente correctamente instalada y fácilmente accesible y cuya tensión corresponda a la especificación indicada en la placa de características. La toma de
corriente debe seguir siendo fácilmente accesible tras
la conexión.
~ Asegúrese de que el cable de conexión no resulte da-
ñado por cantos vivos o superficies calientes.
~ Procure que el cable de c onexión no se pr esione ni se
aplaste.
~ Para sacar la fuente de alimentación de la toma de co -
rriente, tire siempre de la fuente de alimentación, nunca del cable de conexión.
~ Retire la fuente de alimentación de la toma de corrien-
te…
…si se produce una avería,
…antes de conectar la fuente de alimentación al apa-
rato,
…antes de limpiar el aparato y
…en caso de tormenta.
~ Para desconectarla c ompletamente de la red, la fuente
de alimentación debe desenchufarse de la toma de
corriente. Incluso cuando está apagada, la fuente de
alimentación sigue consumiendo una pequeña cantidad de electricidad si está enchufada.
~ Para evitar peligros, no realice ninguna modificación
en el aparato. Las reparaciones solo las debe realizar
un taller especializado o el servicio técnico.
Pilas
~ Coloque las pilas con la polaridad en el sentido co-
rrecto.
~ Limpie los contactos de las pilas y, en su caso, del
aparato antes de colocar las pilas.
~ ¡PELIGRO DE EXPLOSIÓN! No recargue
las pilas o las reactive por otros medios, no las
desmonte, no las tire al fuego ni las cortocircuite.
~ Retire las pilas del mando a distancia, cuando no lo
vaya a utilizar durante mucho tiempo o cuando la capacidad de las pilas se haya agotado. Las pilas podrían sufrir una fuga, lo que provocaría daños en el
mando a distancia.
~ No exponga las pilas a condiciones extremas, p. ej.
no ponga el mando a distancia sobre fuentes de calor
y presérvelo de la luz solar directa. De lo contrario,
existe un alto riesgo de que se produzca una fuga.
~ Si se produce una fuga, evite el contacto del fluido
con la piel, los ojos o las membranas mucosas. Enjuague inmediatamente las zonas que hayan estado en
contacto con el fluido con abundante agua corriente y
visite a un médico de inmediato.
~ Las pilas pueden causar la muerte si se ingieren. Por lo
tanto, guarde las pilas fuera del alcance de los niños.
Si se ingiere una pila, busque de inmediato asistencia
médica.
~ Mantenga las baterías nuevas y usadas fuera del al-
cance de los niños.
~ Si tiene la sospecha de que alguien pueda haberse
tragado las baterías o de que estas hayan penetrado
en cualquier parte del cuerpo, busque asistencia médica de inmediato.
ADVERTENCIA sobre daños
materiales
~ Si enchufa el aparato a la red, utilice exclusivamente
el bloque de alimentación original suministrado.
~ Si detecta algo inusual (p. ej., ruidos extraños, un olor
raro o formación de humo), retire inmediatamente la
fuente de alimentación de la toma de corriente. Después de ello, no vuelva a utilizar el aparato.
~ Si transporta el aparato desde un lugar frío hasta otro
cálido puede generarse una condensación de agua
en el aparato. Deje el aparato apagado durante
aprox. 2 horas para que se aclimatice.
~ Coloque el aparato únicamente sobre una superficie
estable y plana.
~ Proteja el aparato de los siguientes agentes dañinos:
- Calor, luz solar directa o fuego
- Golpes y otras sacudidas violentas
~ Las velas y otras llam as abiertas deben man-
tenerse alejadas en todo momento de este
producto para evitar la propagación de incendios.
~ No cubra la fuente de alimentación para evitar el so-
brecalentamiento.
~ No utilice detergentes abrasivos o que produzcan ara-
ñazos.
54
ES
Page 57
~ El aparato lleva soportes de plástico antideslizantes.
Dado que los muebles están recubiertos con una gran
variedad de lacas y plásticos, y que se tratan con diferentes productos de conservación, puede que algunos
de esos materiales contengan componentes que ataquen y reblandezcan los soportes de plástico. En caso
necesario, coloque debajo del aparato una base de
apoyo antideslizante.
~ Durante el montaje en la pared, tenga en cuenta lo si-
guiente:
- El material de fijación debe ser adecuado para las ca-
racterísticas de la pared. Si es nec esario, utilice un material de fijación distinto del incluido en el suministro.
- Asegúr ese de que en el lugar de montaje en la pared no
haya cables ni tuberías (p. ej., electricidad, agua, gas).
- Si es necesario, deje que sea un especialista quien
realice el montaje en la pared.
Indicaciones acerca de Bluetooth
~ Las ondas de radio son potencialmente capaces de in-
fluir e incluso perturbar el funcionamiento de marcapasos, aparatos electrónicos (sensibles) y otras ondas
de radio (p. ej., WLAN). Por ello, tenga en cuenta las
siguientes indicaciones:
- Los portadores de marcapasos deben mantener una
distancia de 20 cm con este producto.
- Las ondas de radio pueden causar interferencias, p.
ej., en teléfonos móviles o audífonos.
- No utilice el producto en espacios potencialmente
explosivos.
- Si se producen averías en otras unidades de radio
(p. ej., WLAN), compruebe si la barra de sonido es
la causa conectándola sin corriente.
- No utilice el aparato cerca de aparatos micr oondas
o aparatos que generen campos magnéticos.
®
4. Volumen de suministro
1 barra de sonido
1 fuente de alimentación|11
1 mando a distancia
2 pilas tipo LR3 AAA 1,5 V
1 cable cinch estéreo|13
1 cable TOSLINK|14
2x4 tornillos|33 (25 mm / 50 mm)
4tacos|34
2 soportes de pared|12
1 plantilla de perforación
1 instrucciones breves
1 información importante
1 manual de instrucciones
• Retire todo el material de embalaje.
• Compruebe que el aparato no presenta daños.
Si el suministro está incompleto o defectuoso, póngase en
contacto con el servicio técnico responsable del fabricante
(véase “Garantía de HOYER Handel|GmbH” en la página|60).
Tenga en cuenta las figuras de la hoja desplegable.
5. Antes del primer uso
5.1 Mando a distancia
¡ADVERTENCIA!
~ Tenga en cuenta los símbolos de polaridad del com-
partimento de las pilas al colocarlas.
1. ILUSTRACIÓN A: abra el compartimento de las pi-
las|27 desbloqueando la tapa y deslizándola en la dirección de la flecha.
2. Si es necesario, cambie las pilas viejas por unas nuevas.
3. Coloque la tapa en el compartimento de las pilas y
deslícela contra la dirección de la flecha, hasta que
encaje.
5.2 Instalación / montaje en la
pared
NOTA: si conecta el aparato a un televisor, colóquelo a
ser posible en una posición centrada debajo del televisor.
Instalación
1. Coloque el aparato sobre una superficie plana.
2. Conecte la fuente de alimentación|11 al aparato.
Montaje en la pared
¡ADVERTENCIA sobre daños materiales!
~ Durante el montaje en la pared, tenga en cuenta lo si-
guiente:
- El material de fijación debe ser adecuado para las
características de la pared. Si es necesario, utilice
un material de fijación distinto del incluido en el suministro.
- Asegúrese de que en el lugar de montaje en la pa-
red no haya cables ni tuberías (p. ej., electricidad,
agua, gas).
- Si es necesario, deje que sea un especialista quien
realice el montaje en la pared.
~ Al utilizarlo con el montaje en la pared, debe utilizar
el conector angular HDMI, de manera que el enchufe
no pueda dañarse al doblarse.
1. ILUSTRACIÓN B: realice 2 perforaciones por cada
soporte de pared con una separación de 40 cm. Si
necesario, utilice la plantilla de perforación suministrada.
2. Si utiliza los tacos|34 incluidos en el volumen de suministro, use una broca con 8 mm de diámetro.
3. Inserte los tacos|34 en las perforaciones.
4. Fije los soportes de pared|12 firmemente a la pared
con los tornillos|33.
ES
55
Page 58
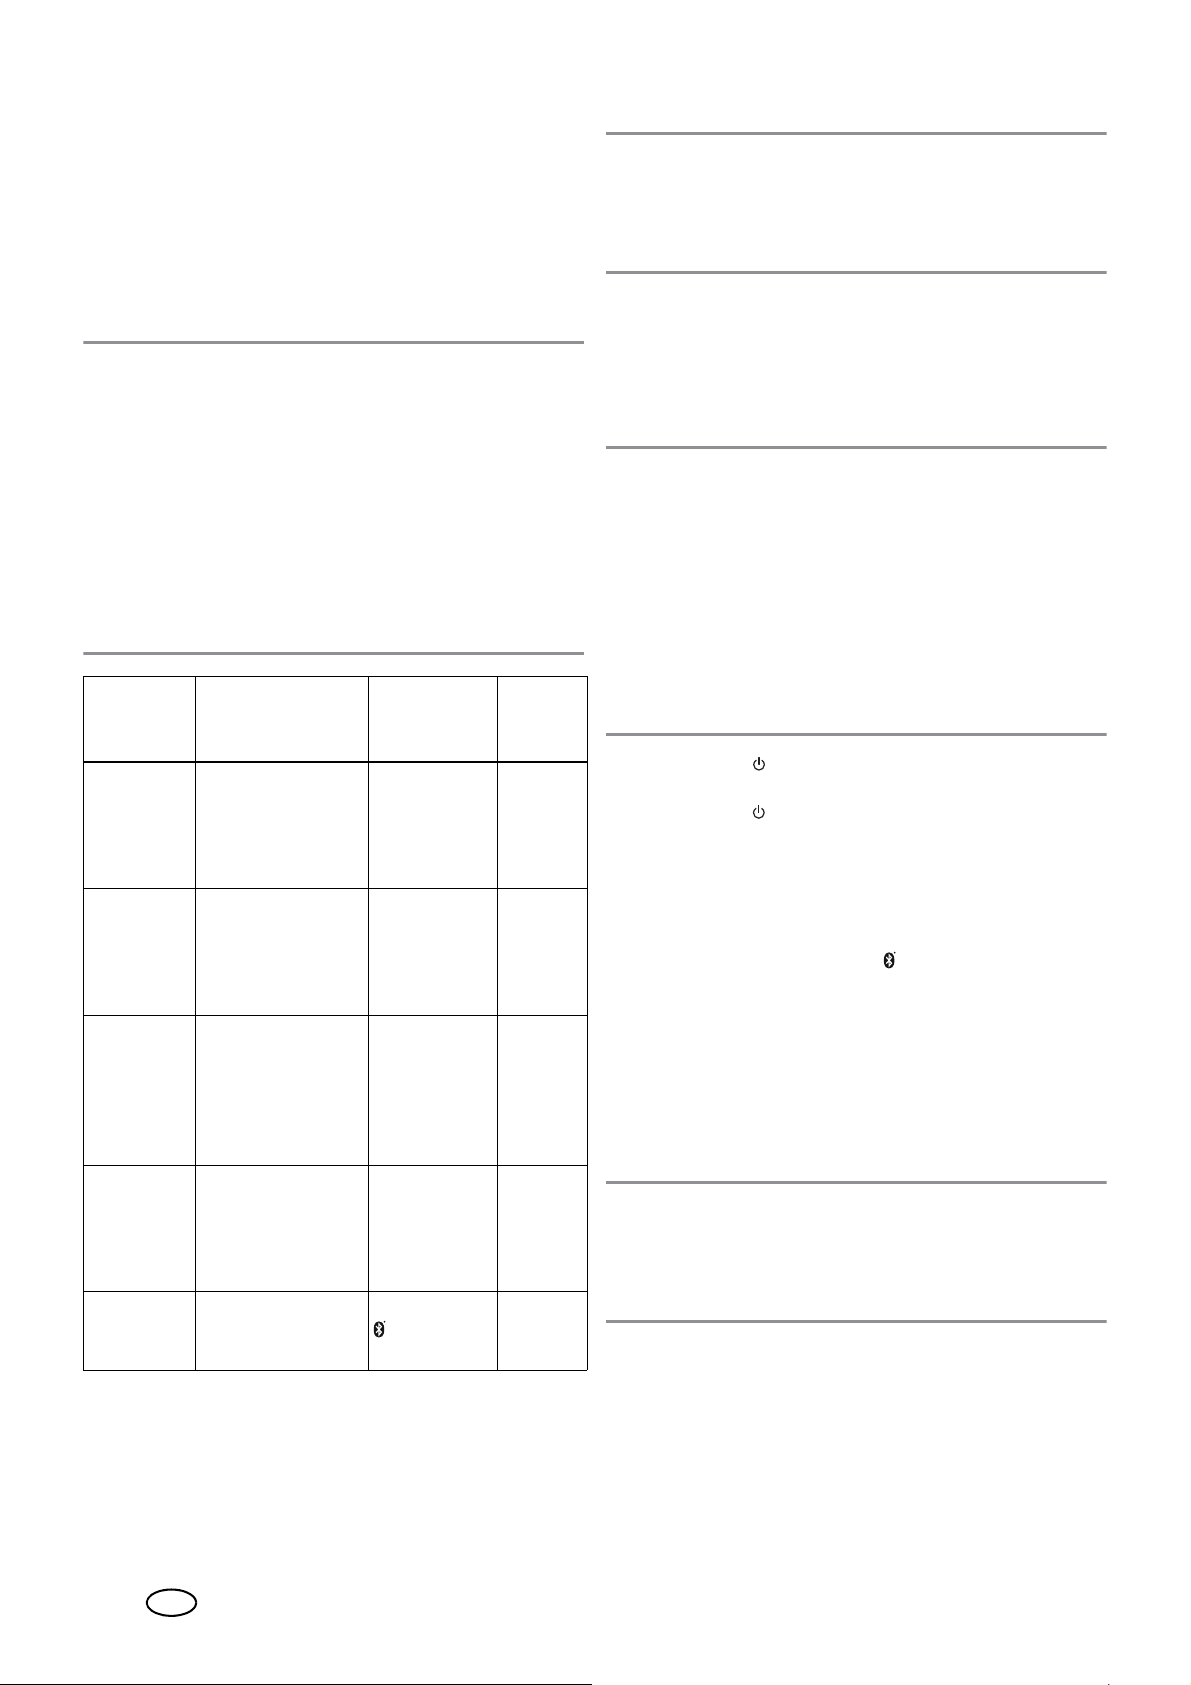
5. Enchufe todos los cables que vayan a utilizarse en las
conexiones (véase “Vista general - Conexiones” en la
página|56).
6. Conecte la fuente de alimentación|11 al aparato.
7. Cuelgue el aparato de los soportes de pared|12. Am-
bos soportes de pared|12 deben sujetarse de forma
segura en los alojamientos de la parte posterior del
aparato.
5.4 Puesta en servicio
NOTA: después de apagarlo, el aparato permanece en
estado de espera (modo de espera). En este modo, el aparato sigue teniendo un consumo eléctrico reducido. Para
desconectarlo de la red, retire la fuente de alimentación|11 de la toma de corriente.
5.3 Vista general - Conexiones
PRECAUCIÓN: procur e que la barra de sonido y los aparatos que vaya a conectar estén apagados antes de conectarlos. Lea también el manual de instrucciones de los
aparatos que desee conectar.
NOTAS:
• El cable HDMI (ARC) para la entrada
el cable de jack estéreo de 3,5 mm para la entrada
|7 no están incluidos en el volumen de suministro.
IN
•La conexión HDMI (ARC)|10 solamente puede fun-
cionar si todos los componentes tienen capacidad
ARC. Si es necesario, los cables HDMI viejos deben
sustituirse por cables nuevos con capacidad ARC.
Entrada Uso
Conexión con cable cinch esté-
AUX IN|8
LINE IN|7
HDMI
(ARC)|10
OPTICAL
IN|9
Bluetooth
• En la hembrilla cinch de la salida SUB OUT|6 es posible conectar un altavoz de graves. Éste será controlado automáticamente por el aparato.
reo|13, p. ej.,
televisor, reproductor de CD
Conexión con cable de jack estéreo
de 3,5 mm, p. ej.,
reproductor de
MP3, teléfono
Conexión con cable HDMI (ARC), p.
ej., a la conexión
HDMI-ARC del televisor, reproductor
de DVD
Conexión con cable
TOSLINK|
en el receptor digital, reproductor de
DVD
Conexió n por ra-
®
dio, p. ej., smartphone
14
, p. ej.,
HDMI (ARC)|10
Tecla del
mando a
distancia
AUX|31 AUX
LINE IN|29 LInE
HDMI
(ARC)|17
OPTICAL|18 OPtI
|30
Pantalla
Hd
bt
y
LINE
• Enchufe la fuente de alimentación|11 a una toma de co-
1
rriente fácilmente accesible. En la pantalla|
tra|
– –
. El aparato está ahora en modo de espera.
se mues-
6. Uso
NOTAS:
• Puede efectuar c ómodamente todos los ajustes con
ayuda del mando a distancia. T ambién puede ejecutar
las funciones básicas con las teclas del aparato. En el
manual se describe por lo general el manejo con el
mando a distancia.
• El aparato se pone en modo de espera…
…si en un intervalo de 20 minutos no se establece
ninguna conexión Bluetooth
…si durante aprox. 20 minutos no recibe ninguna se-
ñal o esta es muy baja y no se ha empleado.
•Pulse la tecla |32 para conectar el aparato desde el
modo de espera.
•Pulse la tecla |32 para poner el aparato en el modo
de espera.
6.1 Selección del tipo de conexión
1. Pulse una de las teclas AUX|31, LINE IN|29, HDMI
(ARC)|17, OPTICAL|18 o |30, para cambiar la
conexión deseada (véase “Vista general - Conexiones” en la página|56).
2. La repr oduc ción, la selección y el co ntr ol de las pist as
de música se inician desde el aparato de reproducción.
6.2 Ajustes de sonido
NOTA: Los cambios de los ajustes de sonido se muestran
en la pantalla|1.
-Volumen: V00 … V40
-Sonidos altos: t -4 … t 4
-Sonidos bajos: b -4 … b 4
Ajuste del volumen
• Pulse durante la reproducción las teclas VOL –/+|22
del mando a distancia o VOL –/+|4 del aparato . También puede mantener pulsadas las teclas para modificar el volumen más rápidamente.
®
o
56
ES
Page 59
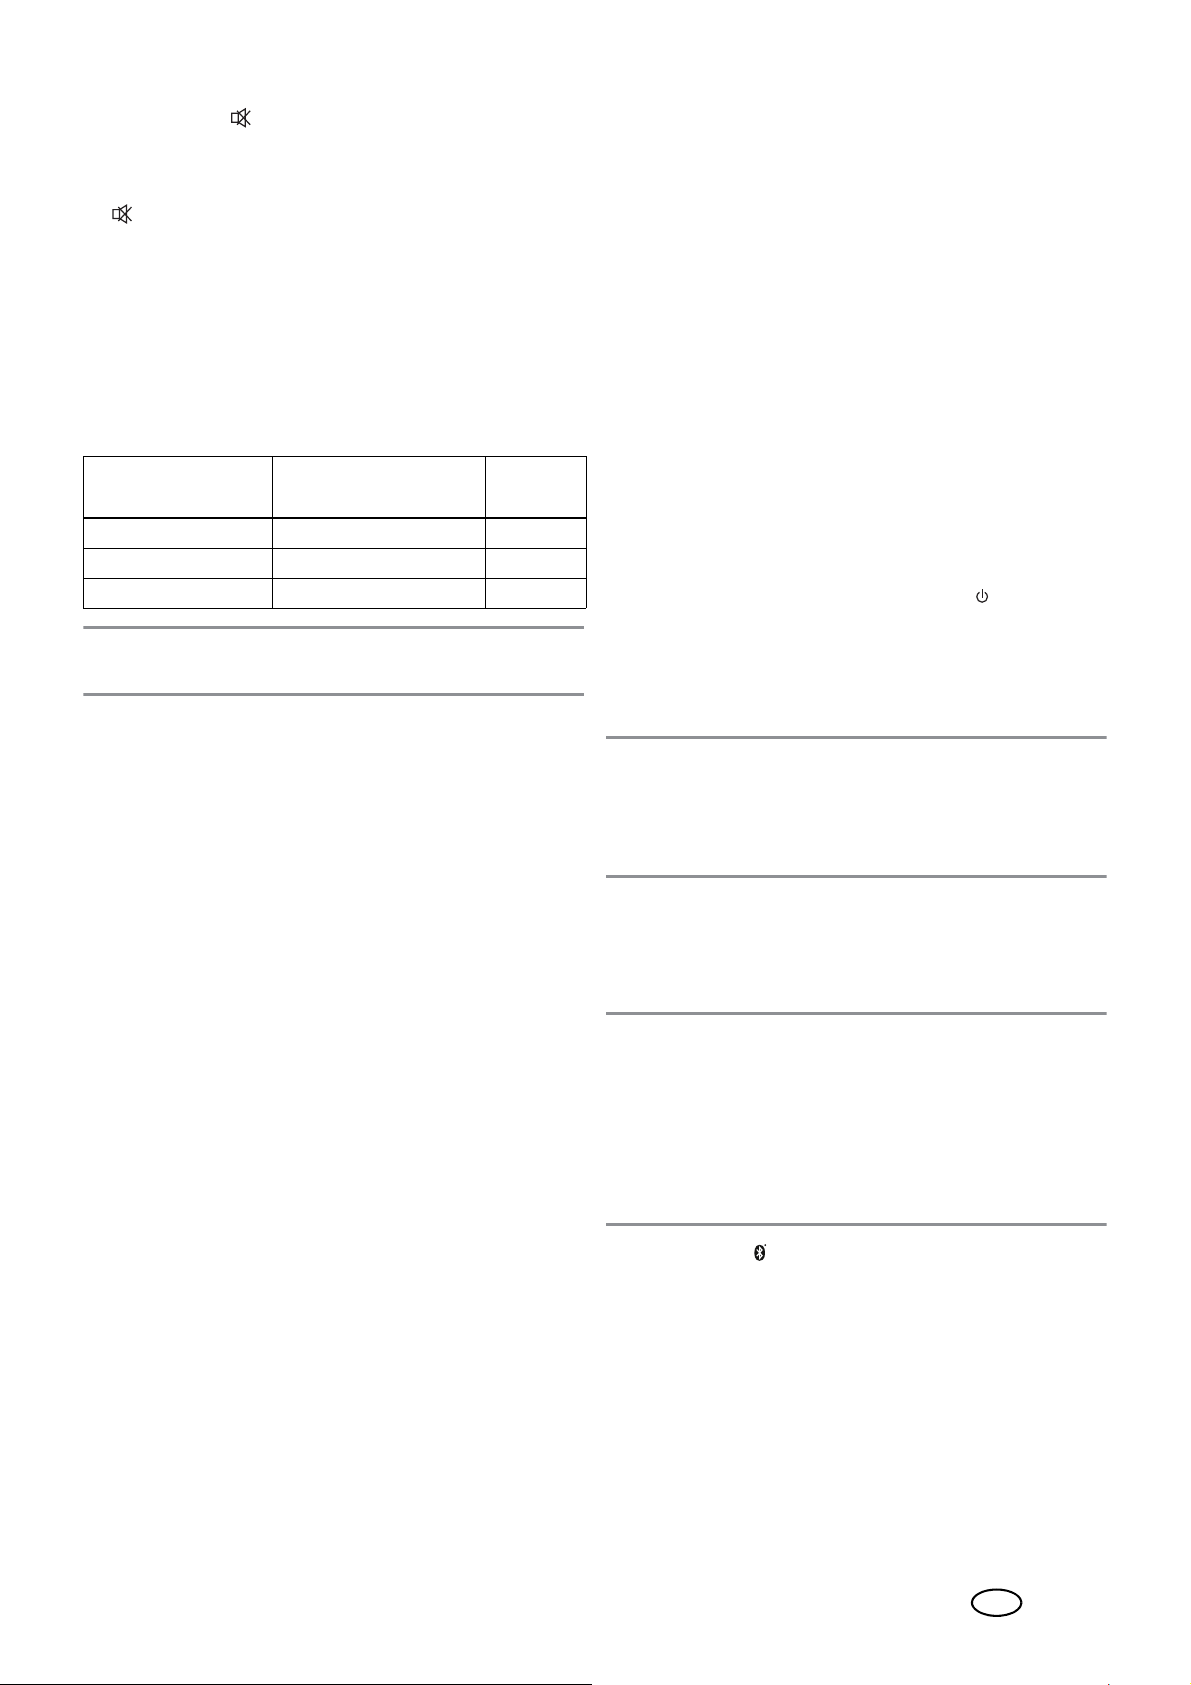
Silenciamiento
1. Pulse la tecla |16 para deshabilitar el sonido. El indicador del volumen ajustado anteriormente en la
pantalla|1 parpadea.
2. Para volver a habilitar el sonido, vuelva a pulsar la tecla
|
16
o una de las teclas
VOL –/+|22 /|4
.
Ajuste de tono
Los ajustes no se guardarán si cambia a otro modo.
• Pulse una de las teclas|25 para seleccionar ajustes
predeterminados de tonos para música (MUSIC), películas (MOVIE) o diálogos (DIALOG).
• Ecualice los sonidos altos con las teclas
• Ecualice los sonidos bajos con las teclas
Tono
Música MUSIC SOnG
Película MOVIE CInE
Idioma DIALOG dIA
NOTA:
está activado como ajuste previo.
para el tono de película (
Teclas|25 mando a
distancia
MOVIE
TREBLE –/+|23
BASS –/+|24
Pantalla
) el efecto 3D ya
Encender/apagar el efecto 3D
•Pulse la tecla 3D|26 para encender/apagar el efecto
3D.
- Si se enciende el efecto 3D, en la pantalla se mostra-
rá brevemente 3d.
- Si se apaga el efecto 3D, el tono seleccionado
(SOnG, CInE o dIA) se mostrará en la pantalla.
lugar, tenga en cuenta alguno o, dado el caso, varios de
los puntos que figuran a continuación:
• El cable HDMI viejo debe sustituirse por un cable nue-
.
vo con capacidad ARC.
• No todas las hembrillas HDMI del televisor deben ser
compatibles con ARC. En ese caso, el cable HDMI del
televisor debe conectarse a otra hembrilla HDMI (con
capacidad ARC). Por lo general, las hembrillas HDMI
correspondientes están etiquetadas como ARC. Si no
es así, consulte el manual de instrucciones de su televisor.
• Par a algunos televisor es es pr eciso activar la salida digi-
.
tal de sonido. Seleccione la salida de sonido PCM|2.0
(PCM Stereo).
Stereo) no está ajustada en el televisor, la barra de sonido se desconecta automáticamente.
1. Conecte la hembrilla HDMI (ARC)|10 con ayuda de
un cable HDMI con capacidad ARC con una hembrilla
HDMI ARC de su televisor.
2. Conecte la barra de sonido con la tecla |32.
3. Pulsando la tecla HDMI (ARC)|17 seleccione la entrada HDMI.
4. Encienda el televisor. Al establecer la conexión por
primera vez pueden pasar unos segundos hasta que
la barra de sonido emita un sonido.
NOTA:
sonido se conectará y desconecta rá por lo general m ediante
el mando a distancia del aparato conectado. E l apar ato conectado debe ser compatible con el pr otocolo CEC (Consumer
Electronic Control).
si utiliza la conexión
Si la salida de sonido PCM 2.0 (PCM
HDMI (ARC)|10
, la barra de
6.3 Conexión HDMI (ARC)
Explicación de definiciones
- HDMI significa Interfaz Multimedia de Alta Definición,
por sus siglas en inglés. A través de esta vía de transmisión es posible transmitir señales digitales de imagen y sonido.
- HDMI (ARC - Canal de Retorno de Audio, por sus siglas en inglés) significa que el cable dispone de un
canal ARC. A través de este canal es posible enviar
señales de audio en ambas direcciones.
Los siguientes aparatos modernos disponen por lo general
de una salida ARC: televisores, videoconsolas o rece ptores digitales. A continuación se describe la conexión a un
televisor.
A través del canal ARC del cable HDMI es posible transmitir señales digitales de sonido desde el aparato fuente
(p. ej., un televisor) a la barra de sonido.
La transmisión de sonido a través de la hembrilla|10
HDMI (ARC) solamente puede funcionar si todos los componentes tienen capacidad ARC. Si la transmisión no tiene
6.4 Bluetooth
®
Establecer la conexión
NOTAS:
• El código de identificación del aparato es "SSB|50|A1".
• Después de cambiar a Bluetooth®, el aparato intenta
establecer automáticamente una conexión con el último aparato que se haya acoplado.
• Tenga en cuenta que el establecimiento de la conexión
puede transcurrir de manera diferente en función del
aparato y del software utilizado en él.
1. Pulse la tecla |30 para cambiar a la conexión Blue-
2. Conecte el aparato de reproducción (p. ej., smart-
3. El aparato de re producción debería recibir el código
®
. En la pantalla|1 se muestra bt.
tooth
phone) e inicie la conexión Bluetooth
de identificación del aparato "
ocurriera, pulse durante aprox. 1 segundo la tecla
PAIR|19 del mando a distancia. En la pantalla|1 par-
padea bt rápidamente.
®
.
SSB|50|A1
". Si esto no
ES
57
Page 60
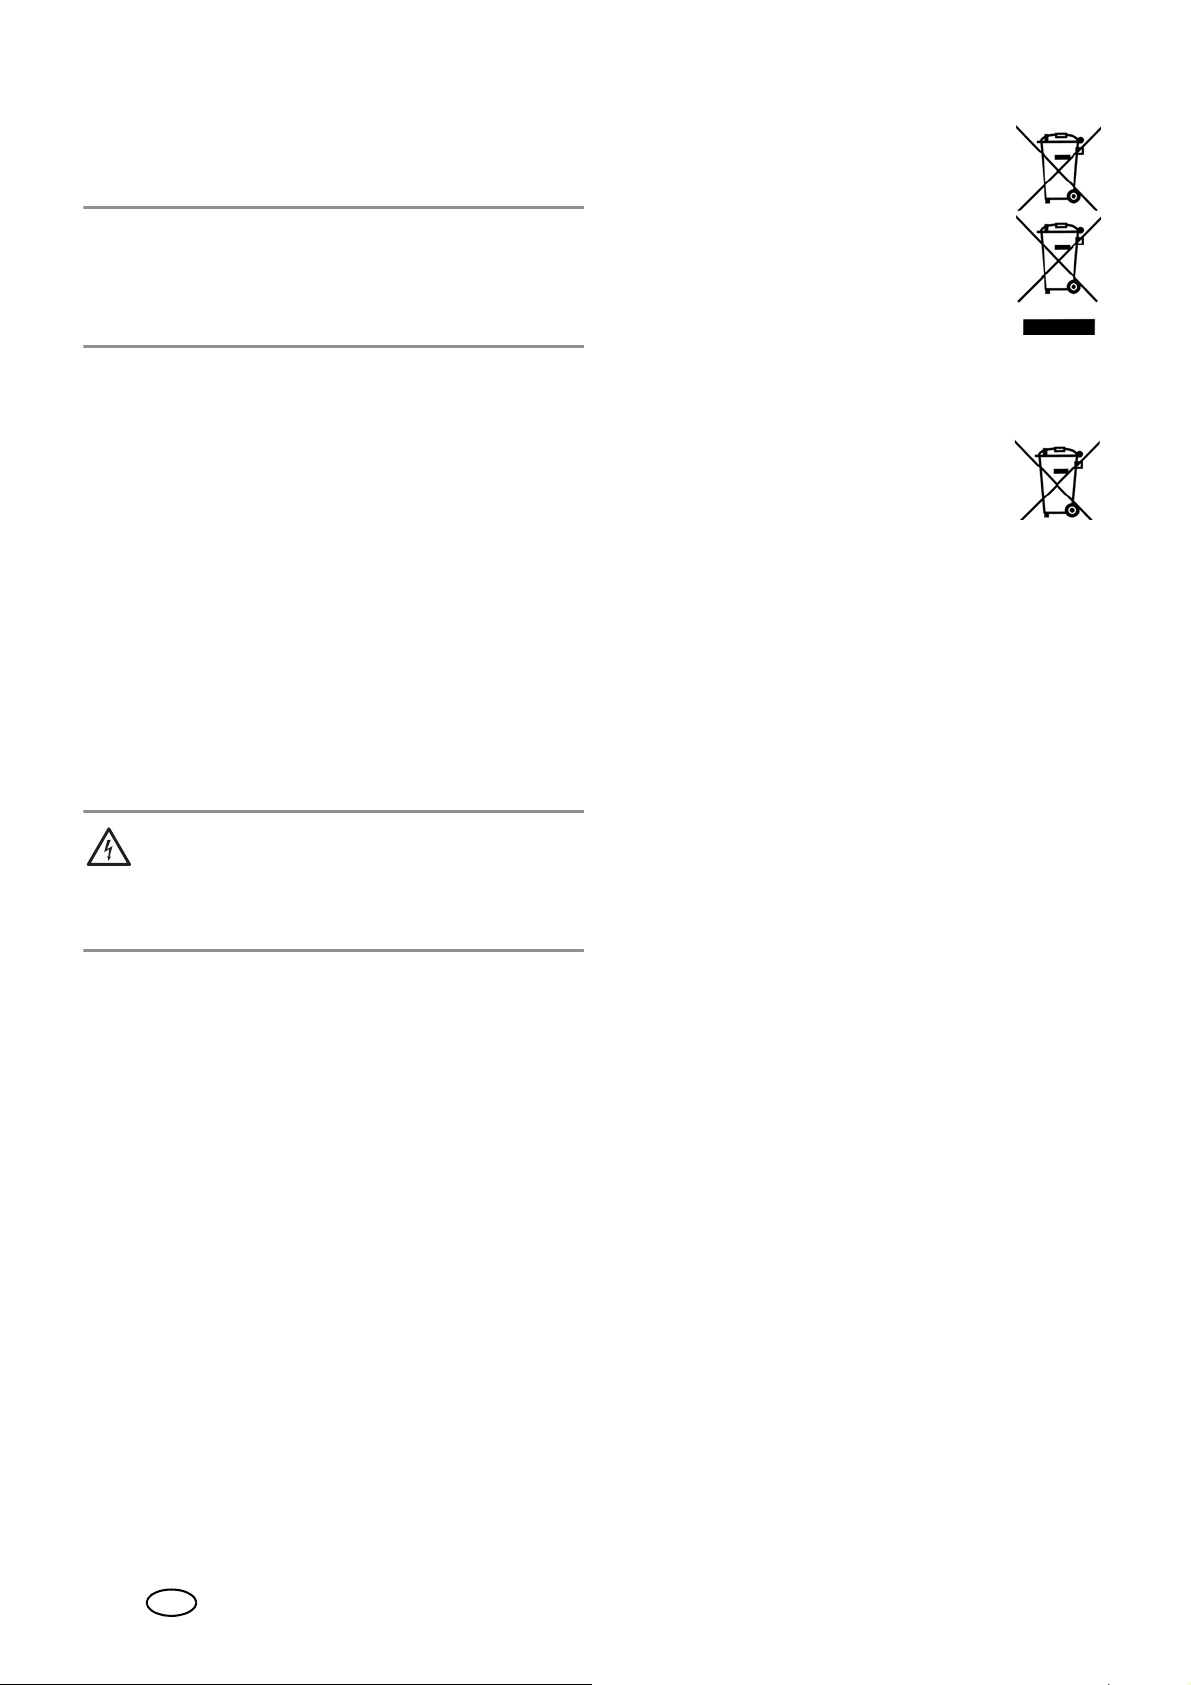
4. Establezca en el aparato de repr oducción la co nexión
con la barra de sonido. Si se solicita una contraseña,
introduzca "0000". Ahora ambos aparatos están conectados entre sí. En la pantalla|1 se muestra bt de
forma continua y se escucha una señal acústica.
NOTA: los aparatos de reproducción guardan generalmente el código de identificación del aparato. Al establecer una nueva conexión se suprime el establecimiento
manual de la conexión con la función de Bluetooth
vada.
5. Ahora inicie la reproducción de una pista de música
en el aparato de reproducción. El sonido es r epr oducido por la barra de sonido.
6. Con las teclas I
leccionar y controlar las pistas de música.
WW|28, XXI|20 y X/II|21 puede se-
®
acti-
Interrumpir la conexión
La conexión se interrumpe cuando
…se desconecta uno de los aparatos;
…se desactiva la función Bluetooth
…se supera el alcance (aprox. 10 metros);
…pulsa la tecla PAIR|19 hasta que en la pantalla|1
bt parpadee rápidamente. En ese caso es posible
establecer directamente una nueva conexión con
otro aparato.
®
;
7. Limpieza y almacenamiento
8. Eliminación
Este producto está sujeto a la Directiva Europea 2012/19/UE. El símbolo del cubo de
basura con ruedas tachado significa que en
la Unión Europea el producto se debe llevar
a un punto de recogida de residuos separado. Esto es válido para el producto y para todos los accesorios que estén marcados con
este símbolo. Los productos marcados no se
deben eliminar con la basura doméstica normal, sino que deben llevarse a un punto de recogida para el reciclado de aparatos eléctricos y
electrónicos. El reciclado ayuda a reducir el consumo de
materias primas y a proteger el medio ambiente.
Las pilas no deben tirarse en la basura doméstica. Las pilas gastadas deben eliminarse adecuadamente. Para este fin, en los c omercios
que distribuyen pilas y en los centros municipales de recogida de desechos se encuentran los c orrespondientes contenedores para la eliminación de las pilas.
Las pilas y baterías que llevan las siguientes letras contienen las sustancias perjudiciales Cd (cadmio), Hg (mercurio), Pb (plomo), entre otras.
Embalaje
Cuando quiera eliminar el embalaje, siga las correspondientes normas de protección medioambiental vigentes en
su país.
¡PELIGRO de descarga eléctrica!
~ Retire la fuente de alimentación|11 de la toma de co-
rriente, antes de limpiar el aparato. Procure que no penetre ningún líquido en el aparato.
• Limpie el aparato con un paño ligeramente humedecido. Para eliminar la suciedad endur ecida puede utilizar también un poco de detergente suave, p. ej.,
lavavajillas. No deben emplearse disolventes, alcohol
ni diluciones, ya que pueden dañar la superficie del
aparato.
• Cuando no utilice el aparato, almacénelo en un lugar
en el que ni el calor fuerte ni la humedad puedan actuar sobre el mismo. Retire la pila del mando a distancia.
58
ES
Page 61
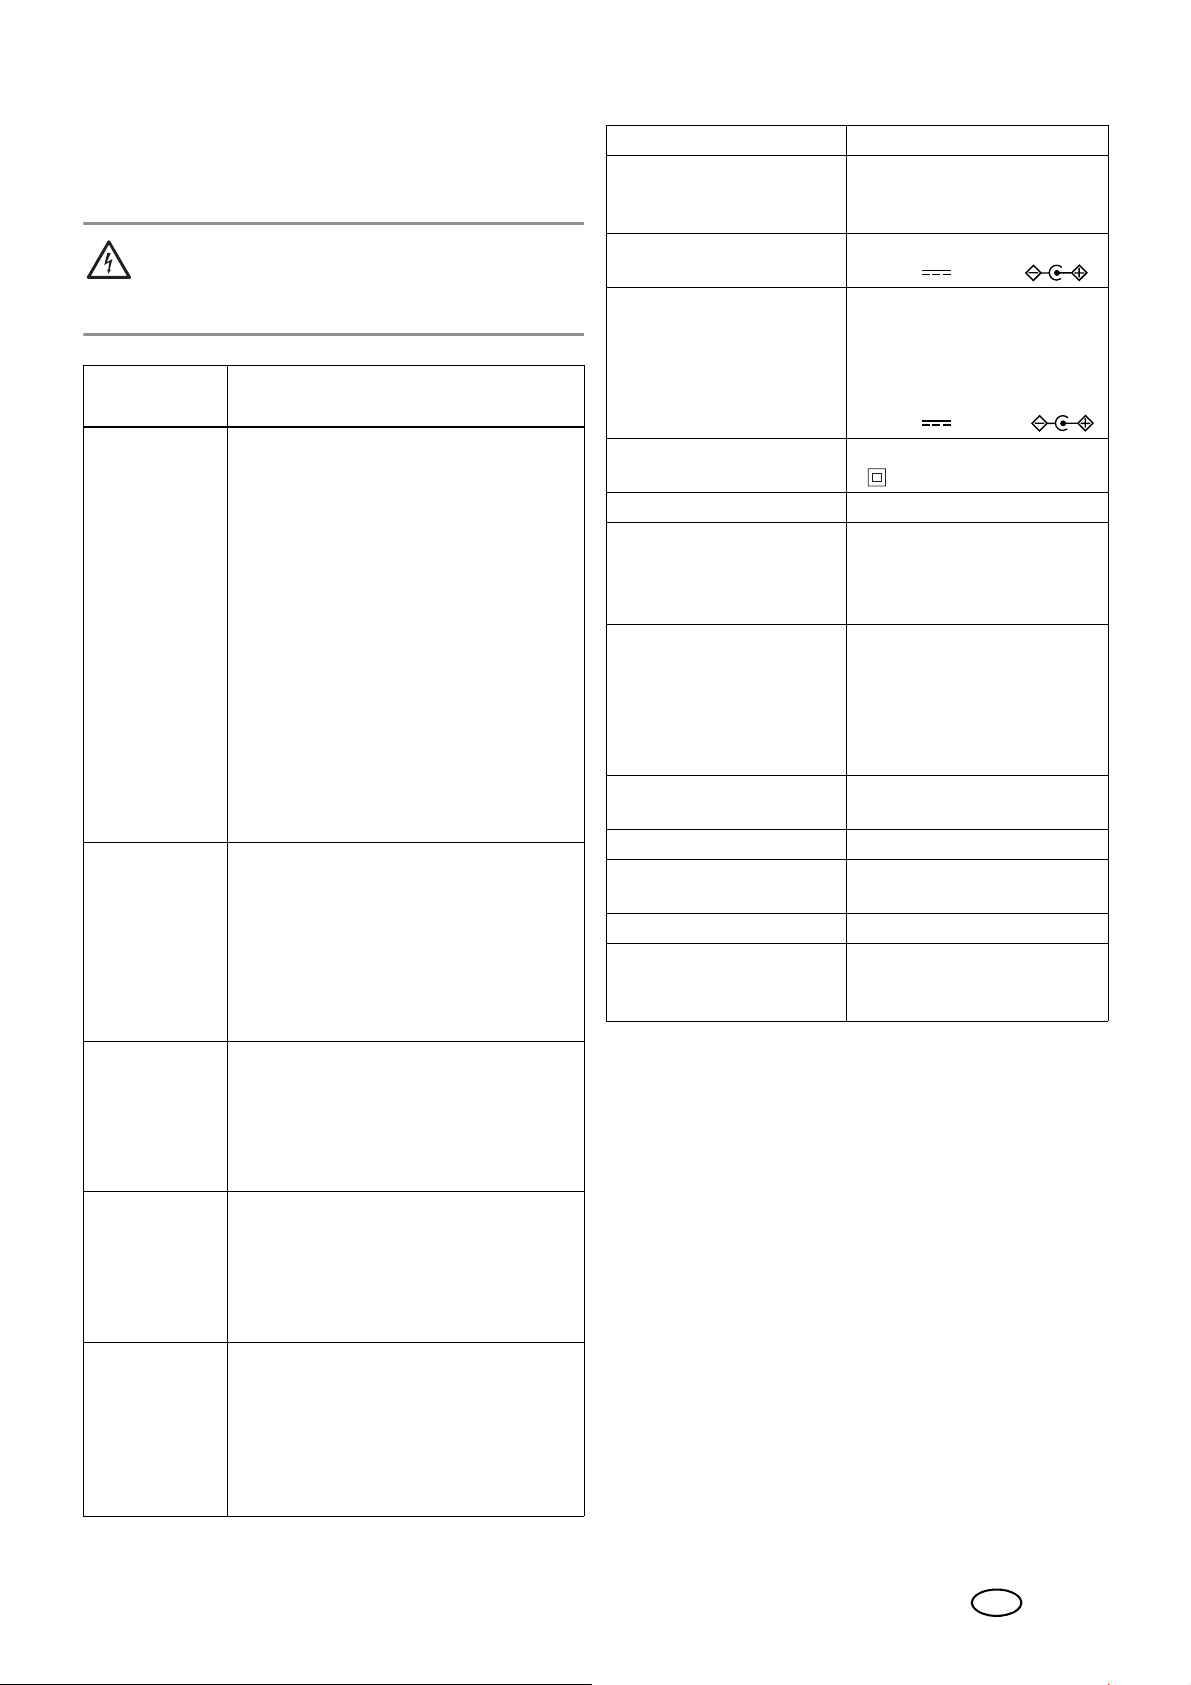
9. Solución de problemas
Si en algún momento la barra de sonido no funciona como
es debido, consulte en primer lugar la siguiente lista. Es
posible que se trate de un problema sin importancia que
usted mismo pueda solucionar.
¡PELIGRO de descarga eléctrica!
~ No intente reparar el aparato usted mismo en ningún
caso.
Avería
No funciona
No hay cone-
Bluetooth
xión
No hay reproducción de música
Interferencias
durante el uso
La barra de sonido se apaga
• ¿Funciona el suministr o de corriente
• Al realizar la conexión a la hembri-
• Sustituya el cable HDMI viejo por un
• ¿Se ha seleccionado en el aparato de re-
• ¿Está activado Bluetooth® en el apa-
• ¿Ha desconectado el aparato?
• ¿Existe una conexión Bluetooth
®
• ¿Está el volumen del aparato de repr o-
• ¿Se ha seleccionado la conexión co-
• ¿El sonido está demasiado bajo o
• En caso de que se produzcan interfe-
• El aparato está equipado con un sis-
Posibles causas|/
medidas a adoptar
eléctri ca? ¿Se muestra en la pantalla|
– –
?
1
lla HDMI ARC|10, el cable HDMI
así como el aparato conectado (p.
ej., un televisor) también deben tener
capacidad ARC. Si su televisor no
tiene conexión HDMI con capacidad
ARC, desvíe a otro tipo de conexión
o cambie el televisor.
cable nuevo con capacidad ARC.
producción (p. ej., televisor) la señal de
audio correcta? Seleccione c omo salida
de sonido PCM 2.0 (o PCM Stereo).
rato de reproducción?
®
con
otro aparato? Pulse la tecla
PAIR|19 hasta que en la pantalla|1
bt parpadee rápidamente y establezca una nueva conexión.
ducción ajustado demasiado bajo?
rrecta?
desactivado?
rencias, aleje todos los teléfonos móviles, tablets u otros aparatos con
funcionamiento por ondas de radio
que puedan encontrarse cerca de la
barra de sonido.
tema de desconexión automática
para ahorrar energía. El aparato
conmuta automáticamente al modo
de espera si durante aprox. 20 minutos no recibe ninguna señal o esta es
muy baja y no se ha empleado.
10.Datos técnicos
Modelo: SSB 50 A1
Potencia:
Consumo de potencia en
espera:
Barra de sonido: Entrada:
Fuente de alimentación:
SHEN ZHEN CITY HONG
BEN ELECTRONIC CO., LTD
Modelo
UE: HB40-1801300SPA
Clase de protección de la
fuente de alimentación:
Formato de audio: PCM 2.0 (PCM Stereo)
Bluetooth
®
:
Alcance:
Gama de frecuencia:
Potencia de emisión:
Entrada:
LINE IN
AUX IN L/R
HDMI (ARC)
OPTICAL IN
Salida:
SUB OUT 1x hembrilla cinch
Pila del mando a distancia: 2 tipo LR3 AAA 1,5 V
Dimensiones (anchura x al-
tura x profundidad):
Peso: aprox. 2,8 kg
Condiciones de funciona-
miento y de almacenamiento:
2x 10 W + 1x 30 W RMS
< 0,5 W
18,0 V 1,3 A,
Entrada:
100 - 240 V ~
50/60 Hz, 0,8 A máximo
Salida:
18,0 V , 1,3 A,
II
v4.2 (A2DP, AVRCP)
hasta 10 m
2402-2480 MHz
< 10 dBm
1x hembrilla de jack estéreo
de 3,5 mm
2x hembrilla cinch
1x hembrilla HDMI ARC
1x hembrilla TOSLINK
aprox. 94 x 8 x 10 cm (sin
soporte de pared)
de 10 °C a 35 °C
Humedad relativa del aire:
de 40 a 85%
ES
59
Page 62
Símbolos empleados
Aislamiento de protección
Seguridad verificada (GS). Los aparatos deben
satisfacer las normas técnicas reconocidas con
carácter general y ser conformes a la Ley alemana de seguridad de productos (ProdSG).
Mediante el marcado CE, HOYER Handel GmbH
declara la conformidad de la UE.
Los aparatos con este símbolo solamente pueden
ser utilizados en el hogar (entorno seco).
Este símbolo recuerda que el embalaje debe eliminarse de forma respetuosa con el medio ambiente.
Materiales reciclables: cartón (excepto cartón
ondulado)
11.Garantía de
HOYER Handel|GmbH
Estimado cliente,
Este aparato tiene un plazo de garantía de 3 años desde la fecha
de compra. Si el producto presenta algún pr oblema, usted tiene
unos derechos legales de garantía frente al vendedor. Estos derechos legales de garantía no quedan limitados por nuestra garantía.
Condiciones de garantía
El periodo de garantía comienza c o n la fe cha de compra. P or fa vor, conserve su recibo de compra original para futuras referencias. Este documento es necesario como prueba de compra.
Si después de los tres primeros años desde la fecha de compra de
este producto aparece un defect o del material o de fabricación,
nosotros lo repararemos o r eemplazaremos (a nuestr o criterio) de
forma gratuita. Esta garantía exige que en el plazo de tres años se
presenten el producto defectuoso y el comprobante de compra (r ecibo), junto con una breve descrip ción por escrito de la deficiencia
y de cuándo ha ocurrido.
Si el defecto está cubierto por nuestra garantía, usted recibirá el
producto reparado o un nuevo producto . Con la r eparación o sustitución del producto no se iniciará un nuevo periodo de garan tía.
Corriente continua
Señal de polaridad
Reserva de modificaciones técnicas.
Notas relativas a la Declaración de conformidad de la UE
Por el presente documento la empresa
HOYER Handel GmbH declar a que este producto cumple
los requisitos básicos de
- la RED 2014/53/CE,
- la Directiva ErP 2009/125/CE, así como de
- la Directiva RoHS 2011/65/UE.
Puede encontrar una declaración de conformidad de la UE
completa en Internet en la dirección
http://qr.hoyerhandel.com/d/298734
Periodo de garantía y reclamaciones legales
La garantía legal no extiende el periodo de garantía comer cial.
Esto también se aplica a las piezas sustituidas y reparadas. Los
posibles daños o defectos que se observen al desempaquetar el
producto, deben ser comunicados inmediatamente. Después de
la expiración del período de garantía, habrán de abonarse las
reparaciones que sea necesario realizar.
Cobertura de la garantía
El aparato ha sido fabricado conforme a unas dire ctivas de calidad
estrictas y ha sido comprobado y c ontr olado antes de su entrega .
La garantía cubre los defectos del material o de fabric ación.
Quedan excluidas de la garantía las piezas de desgaste que están expuestas al desgaste normal y los
daños en piezas frágiles, p. ej., interruptores, baterías, lámparas u otras piezas fabricadas en vidrio.
Esta garantía dejará de tener validez si se daña el producto por un
uso indebido o inadecuado o si el producto ha sido manipulado.
Para garantizar un uso adecuado del producto deben observarse
estrictamente todas las indicaciones que figuran en el manual de
instrucciones. Deberá evitarse el uso indebido y deberán observarse las indicaciones de seguridad que figuran en el manual de instrucciones.
El producto está concebido exclusivamente para el uso doméstico, no para el uso industrial. Si se realiza un uso indebido o inadecuado, si se aplica violencia o si alguien distinto a nuestro
servicio técnico autorizado repara el aparato, la garantía dejará
de tener validez.
60
Tramitación de la garantía
Para garantizar la rapidez en la tramitación de su reclamación,
por favor, siga las siguientes instrucciones:
• Indique en su solicitud el siguiente número de artículo
IAN: 298734 y tenga preparado el recibo como justificante de la compra.
• Encontrará el número de artículo grabado en la placa de ca-
racterísticas, en la portada de las instrucciones (abajo a la
izquierda) o en una etiqueta adhesiva en la parte posterior
o inferior del aparato.
ES
Page 63
• Si aparece algún fallo en el funcionamiento o algún otro de-
ES
fecto, póngase en contacto por teléfono o por correo
electrónico con el servicio técnico que figura más abajo.
• Puede enviar el producto defectuoso de forma gratuita a la
dirección del servicio técnico proporcionada, adjuntando el
comprobante de compra (recibo) y la descripción de la deficiencia, especificando cuándo se ha producido.
En www.lidl-service.com puede usted descar gar este
manual y muchos otros, junto con vídeos y productos de
software.
Servicio técnico
Servicio España
Tel.: 902 59 99 22
(0,08 EUR/Min. + 0,11 EUR/llamada
(tarifa normal))
(0,05 EUR/Min. + 0,11 EUR/llamada
(tarifa reducida))
E-Mail: [email protected]
IAN: 298734
Distribuidor
Tenga en cuenta que esta dirección no es la dirección del
servicio técnico. Póngase en contacto primero con la dirección
del servicio técnico arriba mencionada.
HOYER Handel GmbH
Tasköprüstraße 3
DE-22761 Hamburg
ALEMANIA
ES
61
Page 64
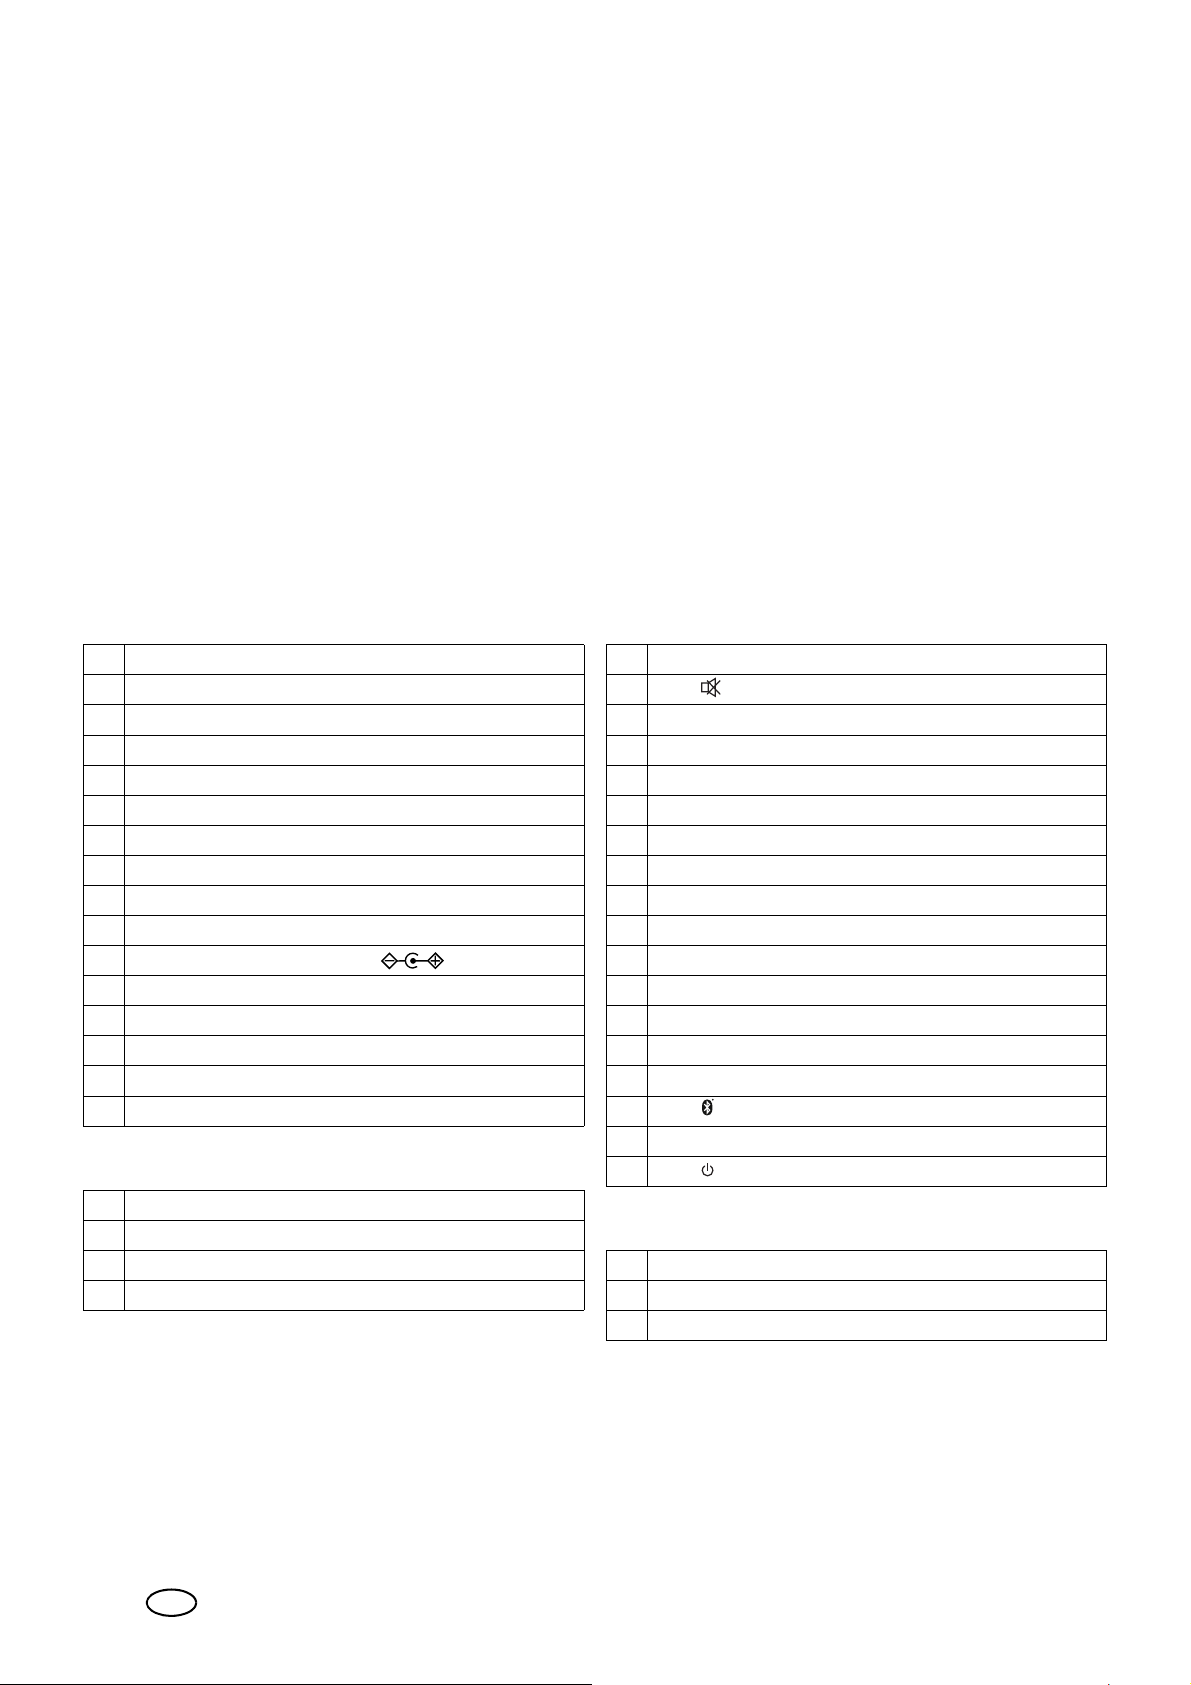
Indice
1. Vista geral .............................................62
2. Utilização correta ..................................6 3
3. Indicações de segurança ........................6 3
4. Material contido nesta embalagem ........65
5. Antes do primeiro uso ...........................65
5.1 Telecomando ......................................... 65
5.2 Instalação / Montagem na parede ........... 65
5.3 Vista geral - Ligações .............................. 66
5.4 Colocação em funcionamento .................. 66
6. Utilização ..............................................66
6.1 Escolher o tipo de ligação ....................... 66
1. Vista geral
Atenda por favor às figuras no lado de abrir.
Soundbar
1 Visor
- -: Modo Standby
LINE: LINE IN
Hd: HDMI (ARC)
AUX: AUX IN
bt: Bluetooth
OPtI: OPTICAL
2 Tecla POWER
3 Tecla SOURCE
4 Teclas VOL –/+
5 Conector de entrada DC IN
6 Conector de entrada SUB OUT
7 Conector de entrada LINE IN
8 Conectores de entrada AUX IN L/R
9 Conector de entrada OPTICAL IN
10 Conector de entrada HDMI (ARC)
Acessórios
®
6.2 Ajustes do som ....................................... 66
6.3 Conexão HDMI (ARC) ............................. 67
6.4 Bluetooth® .... ......................................... 67
7. Limpeza e armazenamento ....................68
8. Eliminar ............... .................................. 68
9. Solução de problemas ...........................68
10.Dados técnicos .......................................69
11.Garantia da HOYER Handel GmbH ........70
Centro de Assistência Técnica .................. 70
Telecomando
15 LED de envio
16 Tecla
17 Tecla HDMI (ARC)
18 Tecla OPTICAL
19 Tecla PAIR
20 Tecla
21 Tecla
22 Teclas VOL –/+
23 Teclas TREBLE –/+
24 Teclas BASS –/+
25 Teclas MUSIC, MOVIE, DIALOG
26 Tecla 3D
27 Compartimento das pilhas
28 Tecla
29 Tecla LINE IN
30 Tecla
31 Tecla AUX
32 Tecla
XX
X
WW
I
I
II
11 Fonte de alimentação
12 2 suportes de parede
13 Cabo Cinch estéreo
14 Cabo TOSLINK
62
PT
Montagem
33 Parafusos (4x 25 mm / 4x 50 mm)
34 Bucha (4)
Matriz de perfuração (sem figura)
Page 65
Obrigado pela sua confiança!
Os nossos parabéns pelo seu novo TV Soundbar Stereo
com Bluetooth
Para utilizar o aparelho c om segurança e conhec er todas
as suas funcionalidades:
• Leia atentamente este manual de instruções
antes da primeira colocação em funcionamento.
• Siga impreterivelmente todas as indicações
de segurança!
• O aparelho só pode ser utilizado conforme
descrito neste manual de instruções.
• Guarde este manual de instruções como
meio de referência posterior.
• Se um dia der este aparelho a outra pessoa,
não se esqueça de lhe entregar este manual
de instruções. O manual de instruções é parte integrante do produto.
Esperamos que o seu novo TV Soundbar Stereo com
Bluetooth
Marca registada
A marca Bluetooth® e o logotipo de
registadas da Bluetooth SIG, Inc. (Special Interest Gr oup),
cada uso das marcas registadas pela Hoyer Handel|GmbH
está autorizado por uma licença.
A marca nominativa HDMI® é uma marca registada da
HDMI Licensing LLC.
®
.
®
seja motivo de grande satisfação!
Bluetooth® são marcas
2. Utilização correta
Este é um aparelho da eletrónica de c onsumo .
TV Soundbar Stereo com Bluetooth® foi previsto para re-
O
produzir o som de aparelhos áudio.
O aparelho foi concebido para o uso privado e não é adequado para fins comer ciais. O apar elho só pode ser utilizado em interiores.
3. Indicações de segurança
Indicações de aviso
Quando for necessário, indicaremos neste manual de instruções os seguintes símbolos e advertência:
PERIGO! Este símbolo, juntamente com a nota
„Perigo“ , designa um risc o elevado. O desrespeito
desta nota pode causar danos corporais ou na
vida de pessoas.
PERIGO devido a choque elétrico!
bolo, juntamente com a nota "P erigo devido a choque
elétrico“, designa um risco elevado. O desrespeito
desta nota pode causar danos corporais ou na vida
de pessoas.
AVISO! Este símbolo, juntamente com a nota "Advertência“, designa um risc o médio. O desrespeito
desta nota pode causar lesões corporais ou graves
danos materiais.
CUIDADO: risco reduzido: não considerar o aviso , pode
causar ferimentos ligeiros ou danos materiais.
NOTA: particularidades e considerações a ter durante o
manejo do aparelho.
Este sím-
O símbolo indica que se deve respeitar o conteúdo do manual de instruções.
PERIGO para crianças e pessoas
com limitações
~ O material de embalagem não é um brinquedo. As
crianças não podem brincar com o material de embalagem. Pois existe o perigo de sufocamento.
~ Este aparelho não se destina a ser utilizado por pes-
soas (incluindo crianças) com uma limitação das suas
capacidades físicas, sensoriais ou mentais e/ou falta
de conhecimentos, a menos que sejam supervisionadas
por uma pessoa responsável pela sua segurança ou recebam dela instruções sobre a forma como o aparelho
deve ser utilizado.
~ As crianças não podem brincar com o aparelho.
~ Guarde o aparelho fora do alcance das crianças.
PERIGO para e causado por
animais domésticos e animais úteis
~ Os aparelhos elétricos podem causar perigos para
animais domésticos e animais úteis. Além disso, os
animais também podem causar danos no aparelho.
Por isso, por princípio mantenha os animais afastados
dos aparelhos elétricos.
PT
63
Page 66
PERIGO de choque elétrico por
humidade
~ O aparelho não pode ser utilizado em ambientes ex-
tremos, como por exemplo em espaços com uma humidade do ar elevada (casas de banho).
~ Proteja o aparelho e a fonte de alimentação da humi-
dade e de pingos e borrifos de água. Por exemplo,
não coloque jarras com água ou coisas semelhantes
sobre ou perto do aparelho.
~ Não utilize o aparelho e a fonte de alimentação com
as mãos molhadas.
~ Se entrar um líquido para dentro do aparelho, desli-
gue a fonte de alimentação da tomada de corrente.
~ Se entrar um líquido para dentro do aparelho, antes
de o voltar a ligar, mande um técnico inspecionar o
aparelho.
PERIGO devido a choque elétrico
~ Não ponha o aparelho a funcionar, quando o apare-
lho, a fonte de alimentação ou o cabo apresentem danos visíveis, ou se ele tiver caído antes. Neste caso,
não utilize mais o aparelho e mande-o verificar numa
oficina especializada.
~ Nunca abra a caixa do aparelho ou da fonte de ali-
mentação.
~ Só ligue a fonte de alimentação a uma tomada de cor-
rente, depois de ter ligado o cabo ao aparelho.
~
Ligue a fonte de alimentação apenas a uma tomada de
corrente devidamente instalada e de fácil acesso, cuja
tensão corresponda à que vem indicada na placa de
características. A tomada de corrente deve permanecer
facilmente acessível depois de feita a ligação.
~ Certifique-se de que o cabo não sofre danos causados
por arestas vivas ou pontos de alta temperatura.
~ Certifique-se de que o cabo não é entalado ou esma-
gado.
~ Para desligar a fonte de alimentação da tomada de
corrente, puxe sempre pela fonte de alimentação e
nunca pelo cabo.
~ Desligue a fonte de alimentação da tomada de corren-
te, …
…se surgir uma avaria,
…antes de ligar o aparelho à fonte de alimentação,
…antes de limpar o aparelho, e
…em caso de trovoada.
~ Para desligar totalmente da corrente, a fonte de ali-
mentação tem de estar removida da tomada de corrente. Mesmo quando desligada, sempre há um
pequeno consumo de corrente quando a fonte de alimentação está encaixada na tomada de corrente.
~ Para evitar riscos, não faça quaisquer modificações
no aparelho. As reparações só podem ser efetuadas
por uma oficina especializada ou no Centro de Assistência Técnica.
Pilhas
~ Ao introduzir as pilhas, coloque-as com a polaridade
correta.
~ Antes de introduzir as pilhas, limpe os contatos das pi-
lhas ou eventualmente do aparelho.
~ PERIGO DE EXPLOSÃO! As pilhas não po-
dem ser recarregadas ou reativadas através
de outros meios, desmontadas, atiradas para
o fogo ou ligadas em curto-circuito.
~ Remova as pilhas do telecomando, quando não ten-
cionar utilizar o telecomando durante muito tempo ou
quando as pilhas estiverem esgotadas. As pilhas poderão verter e danificar o telecomando.
~ Não exponha as pilhas a condições extremas, por
exemplo, não coloque o telecomando sobre aquecedores nem o exponha à luz do sol direta. Isso aumenta o risco de as pilhas verterem.
~ Se as pilhas tiverem vertido ácido, evite o contacto
com a pele, olhos e mucosas. Em caso de contacto
com o ácido, lave imediatamente as partes atingidas
com água doce abundante e dirija-se a um médico.
~
As pilhas podem representar perigo de vida se forem ingeridas. Por isso, guar de as pilhas for a do alcanc e das
crianças. Caso tenha sido engolida uma pilha, é necessário chamar imediatamente a assistência médica.
~ Mantenha as pilhas novas e as usadas fora do alcan-
ce das crianças.
~ Se suspeitar que, eventualmente, as pilhas foram inge-
ridas, ou que se encontram em alguma parte do corpo, procure imediatamente ajuda médica.
AVISO de danos materiais
~ Para a operação com corrente, use somente com o
adaptador para ligação à corrente original fornecido.
~ Se detetar qualquer anomalia (por exemplo, ruídos
anormais, cheiro estranho ou fumo), desligue imediatamente a fonte de alimentação da tomada de corrente. Em tal caso, não utilize mais o aparelho.
~ Quando se leva o aparelho de um lugar frio para um
lugar quente, a humidade pode condensar-se no aparelho. Deixe o aparelho desligado durante aprox.
2|horas para ele se aclimatizar.
~ Coloque o aparelho numa superfície estável e plana.
~ Proteja o aparelho de danos, p. ex., causados por:
- calor, exposição direta ao sol e chamas desprotegidas
- impactos e efeitos semelhantes
~ Velas e outras chamas abertas devem ser
sempre mantidas afastadas deste produto,
para evitar incêndios.
~ Não tape a fonte de alimentação para evitar que
aqueça demasiado.
~
Não utilize produtos de limpeza corrosivos ou abrasivos.
~ O aparelho tem pés antiderrapantes em plástico. Uma
vez que os móveis são cobertos com uma variedade
de vernizes e de plásticos e são tratados com diferentes produtos de conservação, não é possível excluir totalmente que alguns desses produtos contenham
64
PT
Page 67
componentes que ataquem ou amoleçam os pés em
plástico. Se necessário, coloque uma base antiderrapante por baixo do aparelho.
~ Para uma montagem numa parede, ter em atenção:
- O material de fixação deve ser próprio para as características da parede. Se necessário, utilize um
material de fixação diferente do fornecido juntamente com o aparelho.
- Certifique-se de que no local de montagem na parede
não se encontram tubos ou fios (p. ex., eletricidade,
água ou gás).
- Se necessário, mande executar a montagem na parede por um profissional.
Notas referentes ao Bluetooth
~ As ondas de rádio são potencialmente capazes de in-
fluenciar o funcionamento de estimuladores cardíacos,
aparelhos eletrónicos (sensíveis) e outras ondas de rádio (p. ex., WLAN), ou até de as perturbar completamente. Por isso, atenda às notas abaixo.
- Os portadores de estimuladores cardíacos devem
manter-se 20 cm afastados de este produto.
- As ondas de rádio podem causar ruídos, p. ex., nos
telemóveis ou nos aparelhos auditivos.
- Não utilize o produto em áreas potencialmente explosivas.
- Se surgirem perturbações em outras unidades de telecomunicação sem fios (p. ex., no WLAN), verfique se o
Soundbar é a causa disso, desligando-o da corr ente.
- Não utilize o aparelho perto de aparelhos microondas nem de aparelhos, que produzem um campo
magnético.
4. Material contido nesta
embalagem
1 soundbar
1 fonte de alimentação|11
1telecomando
2 pilhas do tipo LR3 AAA 1,5 V
1 cabo Cinch estéreo|13
1 cabo TOSLINK|14
2x4 parafusos|33 (25 mm / 50 mm)
4 buchas|34
2 suportes de parede|12
1 matriz de perfuração
1Instruções breves
1 informações importantes
1manual de instruções
• Remova todo o material de embalagem.
• Verifique se o aparelho apresenta danos.
No caso do fornecimento chegar incompleto ou com danos, dirija-se ao Centro de Assistência Técnica do fabricante (ver “Garantia da HOYER Handel GmbH” na
página 70).
Atenda por favor às figuras no lado de abrir.
5. Antes do primeiro uso
5.1 Telecomando
AVISO!
~ Atenda aos sinais da polaridade no compartimento
das pilhas.
1. FIGURA A: abra a tampa do compartimento das pilhas|27, desbloqueando-a e empurrando-a no sentido
da seta.
2. Se necessário substitua as pilhas usadas por pilhas novas.
3. Coloque a tampa no compartimento das pilhas e feche-a
no sentido contrário ao da seta, até ela encaixar .
5.2 Instalação / Montagem na parede
NOTA: se ligar o aparelho a um televisor, coloque o aparelho tanto quanto possível ao meio do televisor.
Posicionamento
1. Coloque o aparelho sobre uma superfície plana.
2. Ligue a fonte de alimentação|11 ao aparelho.
Montagem na parede
AVISO de danos materiais!
~ Para uma montagem numa parede, ter em atenção:
- O material de fixação deve ser próprio para as ca-
racterísticas da parede. Se necessário, utilize um
material de fixação diferente do fornecido juntamente com o aparelho.
- Certifique-se de que no local de montagem na pare-
de não se encontram tubos ou fios (p. ex., eletricidade, água ou gás).
- Se necessário, mande executar a montagem na pa-
rede por um profissional.
~ Se utilizar montado na parede, use fichas angulares
HDMI, para evitar danificar a ficha devido a dobras.
1. FIGURA B: faça 2 furos para cada suporte de parede, à distância de 40 cm. Utilize, se necessário, a matriz de perfuração anexada.
2. Se utilizar as buchas|34 fornecidas, use uma broca
com 8 mm de diâmetro.
3. Insira as buchas|34 nos orifícios.
4. Fixe à par ede os suportes de parede|12 utilizando os
parafusos|33.
5. Ligue todos os cabos utilizados às respetivas ligações
(ver “Vista geral - Ligações” na página 66).
6. Ligue a fonte de alimentação|11 ao aparelho.
7. Pendure o aparelho nos suportes de parede|12. Os|dois
suportes de parede|
assentos existentes na traseira d o apar elho .
12
têm de encaixar corretamente nos
PT
65
Page 68
5.3 Vista geral - Ligações
6. Utilização
CUIDADO: certifique-se de que o Soundbar e os aparelhos que vai ligar a ele se encontram desligados, antes de
os conectar. Leia também os manuais de instruções dos
aparelhos que vai ligar.
NOTAS:
• Um cabo HDMI (ARC) para a entrada
e um cabo jack estéreo de 3,5 mm para a entrada
|7 não estão contidos nesta embalagem.
IN
•Aligação HDMI (ARC)|10 só pode funcionar, quan-
do todos os componentes sejam compatíveis com
ARC. Eventualmente será necessário trocar os cabos
HDMI por cabos novos compatíveis com ARC.
Entrada Utilização
Conexão por cabo
AUX IN|8
LINE IN|7
HDMI
(ARC)|10
OPTICAL
IN|9
Bluetooth
• Ao conector Cinch da saída SUB OUT|6 pode ser li-
gado um subwoofer. Este é comandado automaticamente pelo aparelho.
Cinch estéreo|13,
p. ex., televisor,
leitor de CD
Conexão com
cabo jack estéreo
de 3,5 mm, p. ex.,
leitor de MP3, telefone
Conexão por cabo
HDMI (ARC), p. ex.,
a uma conexão HDMI- ARC do televisor, leitor de DVD
Conexão por cabo
TOSLINK|
ex., a receptor digital, leitor de DVD
Ligação sem fios,
®
p. ex., Smartphone
14
, p.
HDMI (ARC)|10
Tecla no te-
lecomando
AUX|31 AUX
LINE IN|29 LInE
HDMI
(ARC)|17
OPTICAL|18 OPtI
|30
Visor
Hd
bt
LINE
NOTAS:
• Pode fazer todos os ajustes comodamente através do
telecomando. As funções básicas também podem ser
comandadas através das teclas no aparelho. No manual de instruções, a utilização é descrita em geral
com o telecomando.
• O aparelho muda automaticamente para o modo
Standby, …
…quando não há uma ligação Bluetooth
20 minutos ou
…quando, aprox. durante 20 minutos, só recebe um
sinal muito fraco ou não recebe nenhum sinal e não
houve utilização.
• P rima a tecla |32, para ligar o aparelho a partir do
modo Standby.
• Prima a tecla |32, para ligar o aparelho no modo
Standby.
®
durante
6.1 Escolher o tipo de ligação
1. Prima uma das teclas AUX|31, LINE IN|29, HDMI
(ARC)|17 ou |30, para comutar para o tipo de li-
gação pretendido (ver “Vista geral - Ligações” na
página 66).
2. No leitor, pode iniciar a reprodução, escolher e comandar as faixas de música.
6.2 Ajustes do som
NOTA: As alterações dos ajustes do som são indicadas
no visor|1.
- Volume de som: V00 … V40
-Agudos: t -4 … t 4
-Graves: b -4 … b 4
Regular o volume de som
• Durante a reprodução, prima as teclas VOL –/+|22
no telecomando ou VOL –/+|4 no aparelho. Também
pode manter premidas as teclas para obter uma alteração mais rápida no volume de som.
5.4 Colocação em funcionamento
NOTA: depois de ter sido desligado, o aparelho permanece em estado de espera (modo Standby). Neste modo,
o aparelho ainda tem um consumo reduzido de c orrente.
Para o separar da rede, desligue a fonte de alimentação|11 da tomada de corrente.
• Ligue a fonte de alimentação|11 a uma tomada de
corrente de fácil acesso. No visor|1 aparece – –.
O|aparelho está agora no modo Standby.
66
PT
Cancelar o som
1. Prima a tecla |16, para desligar o som. A indicação
do volume de som ajustado antes pisca no visor|
2. Para ligar novamente o som, prima novamente a tecla
|
16
ou uma das teclas
VOL –/+|22 /|4
1
.
.
Regular o timbre
As regulações não são guardadas na memória, quando se
comuta para outro modo.
• Prima uma das teclas|25 para selecionar as regulações
prévias dos timbres de música (
ou do idioma (
DIALOG
).
MUSIC
), de filme (
MOVIE
)
Page 69
• Regule com as teclas
TREBLE –/+|23
os sons agudos.
• Regule com as teclas BASS –/+|24 os sons graves.
Timbre
Teclas|25 no
telecomando
Visor
Música MUSIC SOnG
Filme MOVIE CInE
Idioma DIALOG dIA
1. Com um cabo HDMI compatível com ARC, conecte o
conector de entrada HDMI (ARC)|10 com um conector de entrada HDMI ARC do seu televisor.
2. Ligue o Soundbar na tecla |32.
3. P r emindo a tecla HDMI (ARC)|17 escolhe a entrada
HDMI.
4. Ligue o televisor. Ao estabelecer-se a ligação pela primeira vez, podem decorrer alguns segundos até sair
som do Soundbar.
NOTA:
para o timbre Filme (
MOVIE
), o efeito 3D já se en-
contra ativado como pré-regulação.
Ligar/desligar o efeito 3D
• Prima a tecla 3D|26 para ligar/desligar o efeito 3D.
- Se ligar o efeito 3D, aparece 3d no visor por pouc o
tempo.
- Se desligar o efeito 3D, aparece no visor o timbre
selecionado (SOnG, CInE ou dIA).
6.3 Conexão HDMI (ARC)
Explicação do termo
- HDMI significa High Definition Multimedia Interface.
Por esta vía de tr ansmissão podem ser enviados sinais
digitais de imagem e de som.
- HDMI (ARC - Audio Return Channel) significa que o
cabo dispõe de um canal ARC. Por este canal é possível enviar sinais áudio nos dois sentidos.
Geralmente, os aparelhos modernos abaixo indicados dispõem de uma saída ARC: televisor , c onsolas de jogos ou Digital Receiver. A seguir descrevemos a ligação a um televisor.
Pelo canal ARC do cabo HDMI é possível transmitir sinais
digitais de som do aparelho fonte (p. ex., um televisor) ao
Soundbar.
A transmissão de som através do conector de entrada
HDMI (ARC)|10 só pode funcionar , no caso de todos os
componentes serem compatíveis com ARC. Se a transmissão não tiver êxito, é indispensável atender a um, ou,
eventualmente, a alguns dos pontos seguintes:
• Troque o cabo HDMI velho por um cabo novo compatível com ARC.
• Nem todos os conectores de entrada HDMI no televisor são compatíveis com ARC. Em tal caso, é necessário ligar o cabo HDMI do televisor a outro conector de
entrada HDMI compatível com ARC. Geralmente, os
respectivos conectores de entrada HDMI já possuem a
inscrição ARC. Se não for o caso, consulte o manual
de instruções do seu televisor.
• Em alguns televisores, é necessário liberar a saída digital do som. Para a saída de som escolha PCM 2.0
(ou PCM Stereo). Se a saída de som PCM 2.0 (PCM
Stereo) não for regulada no televisor, o Soundbar desliga-se automaticamente.
NOTA:
se usar a ligação
HDMI (ARC)|10
, geralmente
pode ligar e desligar o Soundbar com o telecomando do aparelho conetado. O apar elho coneta do tem de ser compatível
com o protocolo CEC (Consumer Electronic C ontr ol).
6.4 Bluetooth
®
Estabelecer a ligação
NOTAS:
• A identificação do aparelho é „SSB|50|A1“.
• Depois de comutar para Bluetooth
ra automaticamente estabelecer ligação com o último
aparelho que esteve emparelhado.
• P or favor tenha em atenção, que o estabelecimento da
ligação depende do tipo do aparelho e do Software
utilizado, e por isso pode tardar um tempo diferente.
1. Prima a tecla |30 para comutar para uma ligação
Bluetooth
®
. No visor|1 aparece bt.
2. Ligue o leitor (p. ex., um Smartphone) e inicie a liga-
ção Bluetooth
®
.
3. Agora o leitor deveria captar a identificação do apa-
relho "SSB|50|A1". Se isto não acontecer, prima durante aprox. 1 segundo a tecla PAIR|19 no
telecomando. No visor|1 pisca bt rapidamente.
4. No leitor, estabeleça a ligação à Soundbar. Se for so-
licitada uma palavra-passe, introduza «0000». Agor a
os dois aparelhos estão conectados um com o outro.
No visor|1 aparece bt de forma constante e ouve-se
um sinal acústico.
NOTA: geralmente, os leitores guardam na memória a
identificação do aparelho. Quando tiver de estabelecer
de novo a ligação, já não será necessário fazê-lo manualmente, se a função Bluetooth® estiver ligada.
5. Inicie agora a reprodução de um título de música no
leitor. O som é reproduzido pelo Soundbar.
6. Com as teclas I
WW|28, XXI|20 e X/II|21 escolha e
comande os títulos de músicas.
®
, o aparelho procu-
PT
67
Page 70
Interromper a ligação
A ligação interrompe-se, quando
…se desliga um dos aparelhos;
…se desliga a função Bluetooth
…se exce de o alcance (aprox. 10 metros);
…se prime a tecla PAIR|19 até piscar rapidamente
no visor|1 bt. Neste caso, é possível fazer logo
uma nova ligação a outro aparelho.
®
;
7. Limpeza e armazenamento
PERIGO devido a choque elétrico!
~ Desligue a fonte de alimentação|11 da tomada de
corrente antes de iniciar a limpeza do aparelho. Não
permita a entrada de quaisquer líquidos para dentro
do aparelho.
• Somente limpar o aparelho com um pano húmido. Se
a sujidade persistir, também pode usar um produto de
limpeza suave, como p. ex., um detergente. Não podem ser utilizados solventes, álcool etílico, diluentes,
etc., porque podem danificar a superfície do aparelho.
• Quando não utilizar o aparelho, guarde-o num local
onde não fique exposto a calor intenso ou humidade.
Retire a pilha do telecomando.
8. Eliminar
Este produto está em conformidade com a diretiva europeia 2012/19/EU . O símbolo do
contentor de lixo com rodas com uma cruz
significa que, na União Europeia, o produto
tem de ser deixado numa recolha de lixo separada. Isto é válido para o produto e para
todos os acessórios com este símbolo. Os pr odutos assinalados não podem ser eliminados
com o lixo doméstico normal, tendo de ser entregues num ponto de recolha para reciclagem de aparelhos eléctricos e electrónicos. A reciclagem
ajuda a reduzir a utilização de matérias-primas e a preservar o ambiente.
As pilhas não devem ser eliminadas juntamente com o lixo doméstico normal. As pilhas usadas têm de ser correctamente
eliminadas. Para esse fim, estão disponíveis
contentores adequados para a eliminação
das pilhas nas lojas que comercializam pilhas e em pontos
de recolha comunitários.
As pilhas e as baterias com as seguintes letras c ontêm, entre outras, as substâncias nocivas: Cd (cádmio), Hg (mercúrio), Pb (chumbo).
Embalagem
Se pretender eliminar a embalagem, respeite as respectivas normas ambientais em vigor no seu país.
9. Solução de problemas
Se o Soundbar não funciona uma vez como deseja, percorra por favor primeiro a lista de verificação. Talvez se
trate apenas de um pequeno problema que você mesmo
poderá resolver.
PERIGO devido a choque elétrico!
~ Nunca tente reparar o aparelho sozinho.
Falha Causas possíveis / Medidas
• O aparelho está ligado à alimentação de corrente? Aparec e n o vis or|1
– – ?
• Quando conectar ao c onector de entrada HDMI ARC|10, o cabo HDMI
e o aparelho conectado (p. ex., um
televisor) também terão de ser compatíveis com ARC. Se o seu televisor
Não funciona
Não existe ligação
Bluetooth
Não há reprodução de música
Ruídos durante
o funcionamento
O Soundbar
desliga-se
não tem conexão HDMI, que seja
compatível com ARC, tente encontrar
outro tipo de conexão ou troque o televisor.
• Troque o cabo HDMI velho por um
cabo novo compatível com ARC.
• Escolheu o sinal de áudio c orreto no
leitor (p. ex., o televisor)? Para a saída de som escolha PCM 2.0 (ou
PCM Stereo).
•O Bluetooth® está ativado no leitor?
• Desligou o aparelho?
•Ainda existe uma ligação
®
a outro aparelho?
PAIR|19 até piscar rapidamente no
visor|1 bt e faça uma ligação nova.
• O volume de som no leitor está regulado demasiado baixo?
• Foi selecionada a ligação correta?
• O som está demasiado baixo ou foi
desligado?
• Se eventualmente apar ecerem ruídos, afaste, se for caso disso, os telemóveis, os Tablets ou outros
aparelhos de radiocomunição das
imediações do Soundbar.
• Este apar elho dispõe de uma função
automática de desligar para poupar
energia. O aparelho é ligado automáticamente no modo Standby,
quando, aprox. durante 20 minutos,
só recebe um sinal muito fraco ou
não recebe nenhum sinal e não houve utilização.
Prima a tecla
Bluetooth®
68
PT
Page 71
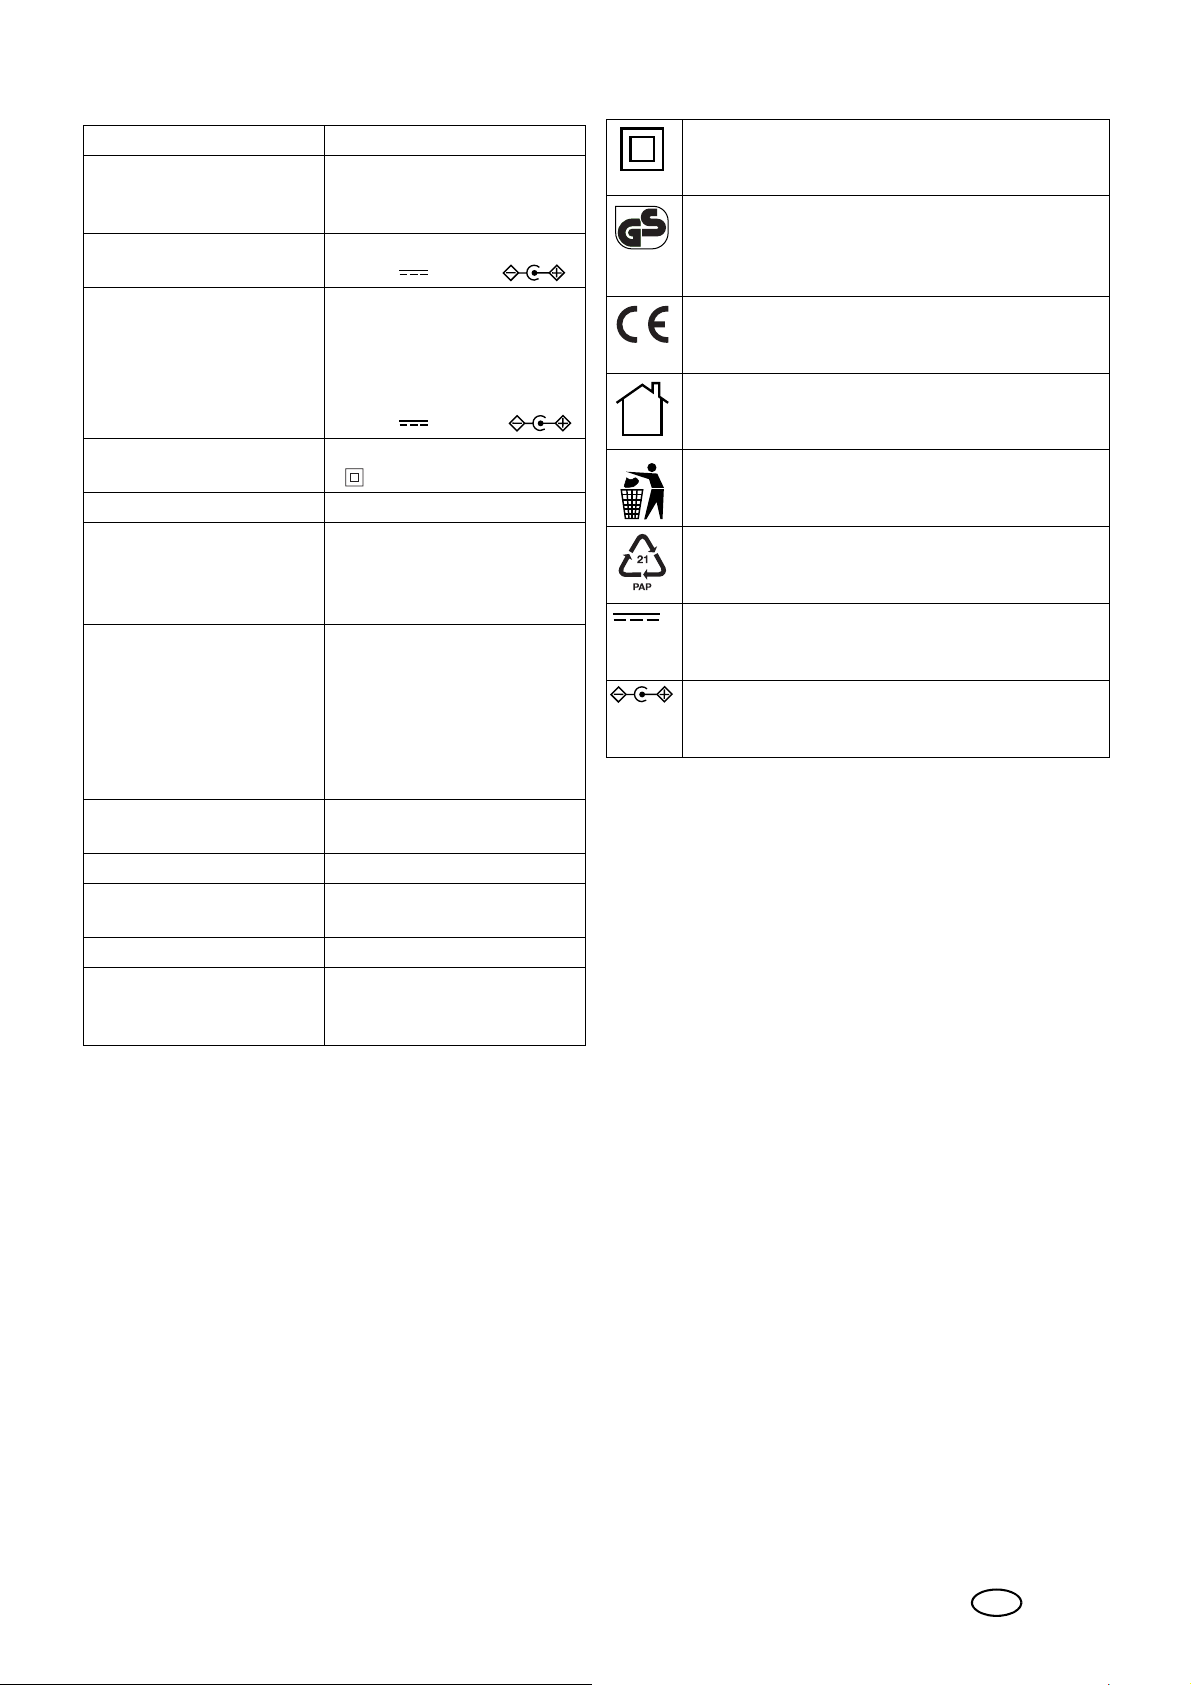
10.Dados técnicos
Símbolos utilizados
Modelo: SSB 50 A1
Potência:
Consumo de potência em
Standby:
Soundbar: Entrada:
Fonte de alimentação:
SHEN ZHEN CITY HONG
BEN ELECTRONIC CO., L TD
Modelo
UE: HB40-1801300SPA
Classe de proteção da fonte
de alimentação:
Formato áudio: PCM 2.0 (PCM Stereo)
Bluetooth
Alcance:
Gama de frequência:
Potência de emissão:
Entrada:
LINE IN
AUX IN L/R
HDMI (ARC)
OPTICAL IN
Saída:
SUB OUT 1 conector de entrada Cinch
Pilha para telecomando: 2x tipo LR3 AAA 1,5 V
Dimensões (larg. x prof. x
alt.):
Peso: aprox. 2,8 kg
Condições de operação e
de armazenagem:
®
:
2x 10 W + 1x 30 W RMS
< 0,5 W
18,0 V 1,3 A,
Entrada:
100 - 240 V ~
50/60 Hz, 0,8 A máx.
Saída:
18,0 V , 1,3 A,
II
v4.2 (A2DP, AVRCP)
até 10 m
2402-2480 MHz
< 10 dBm
1 jack estéreo de 3,5 mm
2 conectores de entrada Cinch
1 conector de entrada HDMI
ARC
1 conector de entrada TOSLINK
aprox. 94 x 8 x 10 cm (sem
suporte de parede)
10 °C até 35 °C
Humidade relativa do ar entre 40 e 85 %
Isolamento de proteção
Segurança Testada. Os aparelhos devem cumprir as regras téc nic as geralmente reconheci das
e devem estar em conformidade com a lei de segurança de produtos (ProdSG).
Com a marcação CE a HOYER|Handel GmbH
declara a conformidade UE.
Os aparelhos com esta marca só podem funcionar em casa (ambiente seco).
Este símbolo recorda que se deve eliminar a embalagem ecologicamente.
Materiais reutilizáveis: cartão (exceto cartão ondulado)
Corrente contínua
Sinais de polaridade
Reservamo-nos o direito a alterações de ordem técnica.
Notas referentes à Declaração de conformidade UE
Pelo presente, a HOYER Handel GmbH declara que este
produto cumpre os requisitos essenciais
- da RED 2014/53/CE,
- da diretiva ErP 2009/125/CE, assim como
- da diretiva RSP 2011/65/UE.
Encontra uma declaração de conformidade UE completa na
Internet, na página http://qr.hoyerhandel.com/d/298734
PT
69
Page 72
11.Garantia da
PT
HOYER Handel GmbH
Estimado Cliente,
A garantia do seu aparelho é de 3 anos a partir da data de compra. Caso este produto apresente deficiências, assistem-lhe direitos legais em relação ao vendedor. Estes direitos legais não são
limitados pela nossa garantia a seguir apresentada.
Condições de garantia
O prazo de garantia tem início na data da compra. Por favor
conserve o talão de caixa original. Este documento é necessário
como comprovativo da compra.
Se, dentro do prazo de três anos, contado a partir da data de compra deste produto, surgir um defeito do material ou de fabrico, nós
procederemos à sua reparação ou substituição – c onforme a nossa
escolha – que será gratuita para si. Esta garantia pressupõe a apr esentação do aparelho com defeito juntamente com o respectivo
comprovativo de compra (talão de caixa) quando dentro do prazo
de três anos, bem como uma breve descrição do defeito e de quando ele surgiu.
Se o defeito estiver coberto pela nossa garantia, o produto será
reparado ou substituído por outro novo. Com a reparação ou
substituição do produto não é iniciado um novo prazo de garantia.
Prazo de garantia e direitos legais a reclamação
por defeito
O prazo de garantia não é pr olong ado co m a prestação da garantia. Isto é válido também para peças substituídas e peças reparadas. Danos e deficiências eventualmente existentes já no
momento da compra devem ser comunicadas imediatamente
após a abertura da embalagem. Depois de decorrido o prazo
de garantia, as reparações estão sujeitas a pagamento.
• O número do artigo encontra-se na placa indicadora do tipo, numa gravação, na página do título do seu manual (em
baixo à esquerda) ou, como autocolante, na traseira ou na
parte inferior do aparelho.
• Caso surjam falhas de funcionamento ou outros defeitos,
contacte em primeiro lugar o centro de assistência técnica a
seguir indicado, por telefone ou por e-mail.
• Poderá depois enviar o artigo considerado com defe ito para
o endereço da assistência técnica que lhe for comunicado,
sem custos de porte para si, juntando o comprovativo de
compra (talão de caixa) e uma descrição do defeito e de
quando o mesmo surgiu.
Em www.lidl-service.com pode descarregar este e muitos outros manuais, vídeos de produtos e software.
Centro de Assistência Técnica
Assistência Portugal
Tel.: 70778 0005 (0,12 EUR/Min.)
E-Mail: [email protected]
IAN: 298734
Fornecedor
Por favor tenha em atenção que o endereço abaixo não é um
endereço da assistência técnica. Contacte em primeiro lu-
gar o centro de assistência técnica acima indicado.
HOYER Handel GmbH
Tasköprüstraße 3
DE-22761 Hamburg
ALEMANHA
Âmbito da garantia
O aparelho foi produzido sob directivas rigorosas de qualidade
e inspeccionado antes da entrega.
A garantia é válida para defeitos materiais ou de fabrico.
Estão excluídas da garantia as peças de desgaste que
estão sujeitas ao desgaste normal e danos em peças
frágeis, como por exemplo interruptores, baterias,
lâmpadas ou outras peças fabricadas em vidro.
Esta garantia perde a validade, se o produto for danificado , não
for utilizado adequadamente, ou não receber a manutenção necessária. Para uma utilização adequada do produto devem ser
cumpridas rigorosamente todas as indicações constantes no manual de instruções. Devem ser absolutamente evitadas utilizações
e acções que sejam desaconselhadas ou para as quais seja advertido no manual de instruções.
O aparelho destina-se apenas a uma utilização privada, não
sendo adequado para uma utilização industrial. A garantia perde a validade no caso de manuseamento impróprio, uso de força, e por intervenções que não tenham sido realizadas pelos
nossos centros de assistência técnica autorizados.
Accionamento da garantia
Para assegurar um processamento rápido do seu caso, siga as
seguintes indicações:
• Sempre que precise de entrar em contacto c om os nossos
serviços, por favor tenha à mão o número do artigo
IAN: 298734 e o talão de caixa como comprovativo da
compra.
70
PT
 Loading...