

Page 1
IAN 113370
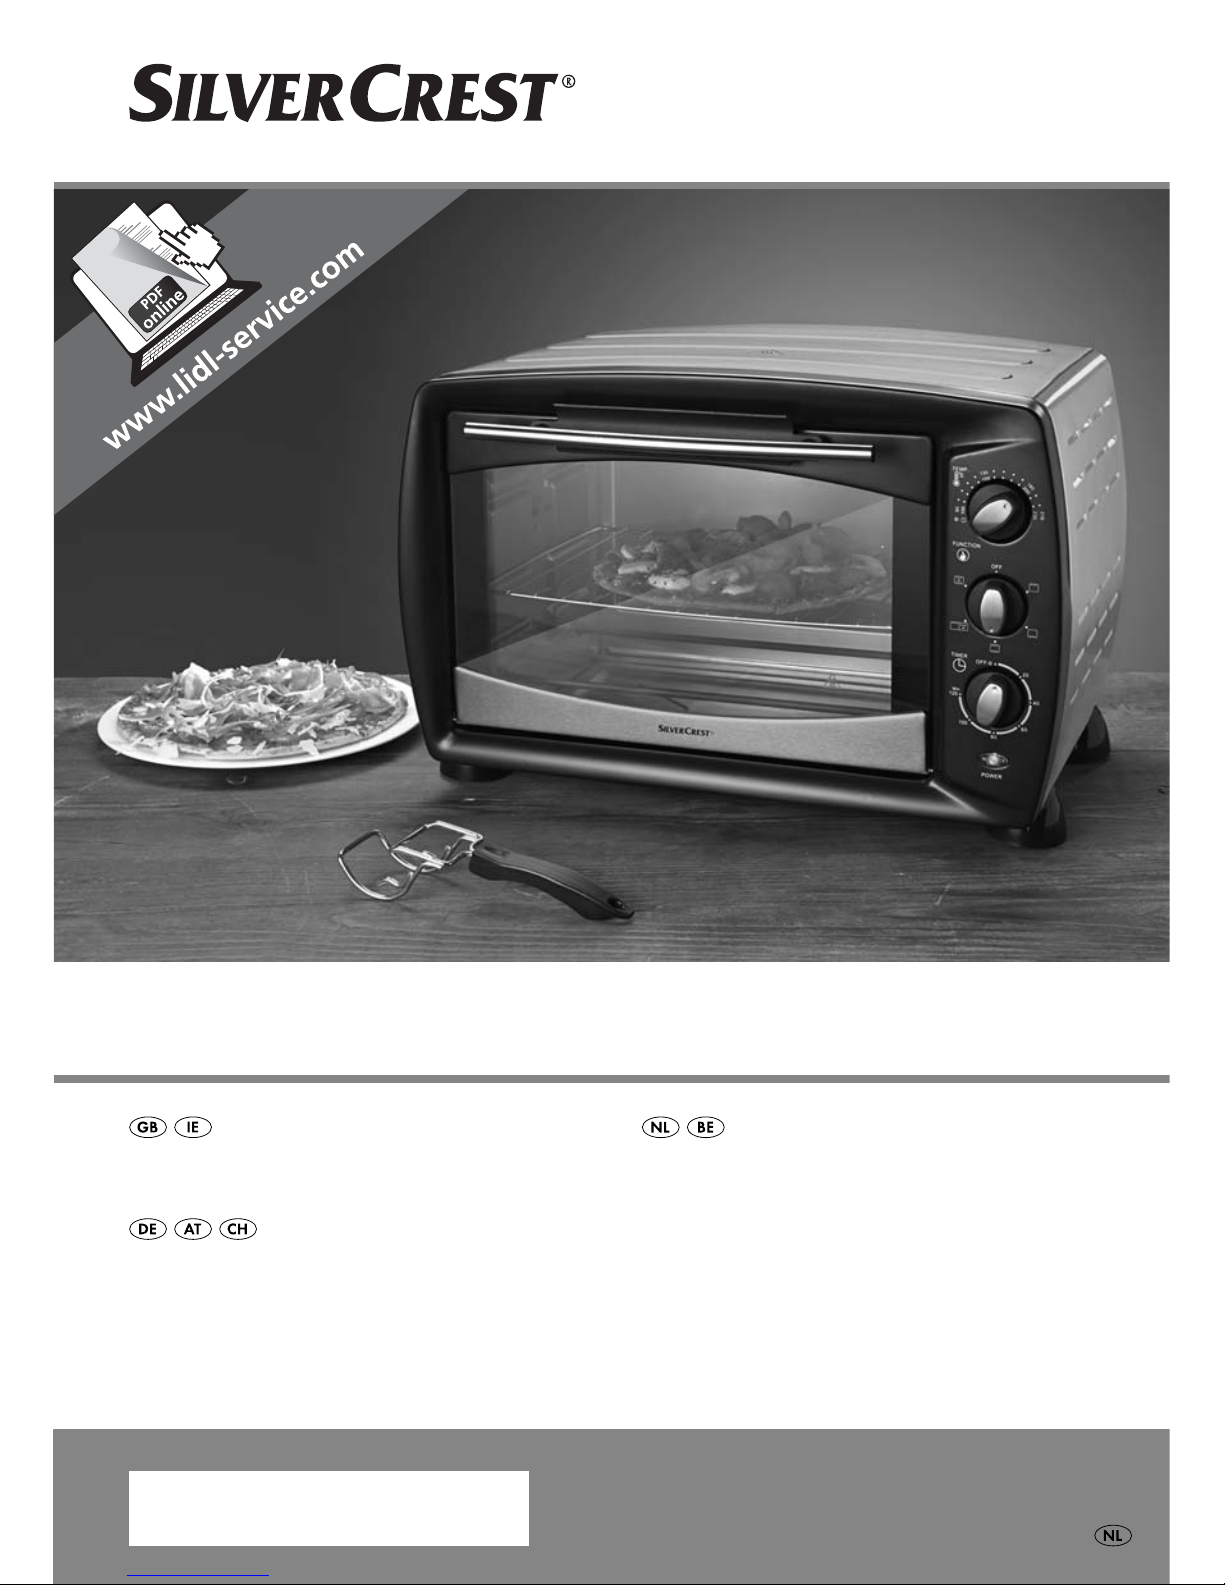
ELECTRIC OVEN & GRILL SGBR 1500 A2
GRILL- UND BACKAUTOMAT
Bedienungsanleitung
ELECTRIC OVEN & GRILL
Operating instructionss
GRILL- EN BAKAUTOMAAT
Gebruiksaanwijzing
Page 2

GB / IE Operating instructions Page 1
NL / BE Gebruiksaanwijzing Pagina 21
DE / AT / CH Bedienungsanleitung Seite 41
Before reading, unfold the page containing the illustrations and familiarise yourself with all functions of
the device.
Vouw vóór het lezen de pagina met de afbeeldingen open en maak u vertrouwd met alle functies van het
apparaat.
Klappen Sie vor dem Lesen die Seite mit den Abbildungen aus und machen Sie sich anschließend mit allen
Funktionen des Gerätes vertraut.
Page 3

B
A
7
9
8
1
2
3
4
5
6
e
w
q
z
tr
0
Page 4

1
SGBR 1500 A2
GB
IE
Contents
Introduction ............................................................2
Proper use .............................................................2
Package contents .......................................................2
Appliance descr
iption ....................................................
2
Technical data ..........................................................2
Safety instructions ......................................................3
Se
tting up .............................................................
6
Using t
he appliance .....................................................
6
Glass door
.........................................................................6
Inserting the crumb tray
...............................................................6
Using the rotisserie ...................................................................7
Using the baking tray/rack ............................................................8
Before first use .........................................................8
Operating the appliance .................................................9
Function switch ......................................................................9
Temperature control ..................................................................9
Timer
.............................................................................9
Grilling and baking .....................................................9
Gr
illing with the rotisserie ...............................................
10
Cleaning and care ......................................................12
Storage ..............................................................12
Troubleshooting .......................................................13
W
arranty and service ..................................................
14
Disposal ..............................................................14
Importer .............................................................14
R
ecipes ...............................................................
15
Page 5

2
SGBR 1500 A2
GB
IE
Introduction
Congratulations on the purchase of your new
appliance.
You have selected a high-quality product.
The operating instructions are part of this product.
They contain important information on safety, usage
and disposal. Before using the product, familiarise
yourself with all handling and safety guidelines.
Use the product only as described and for the
range of applications specified. Please also pass
these operating instructions on to any future
owner(s).
Proper use
The automatic oven and grill is intended for the
heating, cooking and grilling of food.
This appliance is intended solely for use in private
homes. Do not use it for commercial applications.
All other uses are deemed to be improper and may
result in property damage or even in personal injury.
Package contents
♦ Electric Oven & Grill
♦ 1 baking tray
♦ 1 rack
♦ 2 tongs
♦ Rotisserie with 2 clamps
♦ 1 crumb tray
♦ Operating instructions
NOTE
Check contents for completeness and damage
immediately after unpacking. Contact Customer
Services if necessary.
Appliance description
Figure A:
Drive
Temperature control
Function switch
Timer
Control lamp
Glass door
Crumb tray
Lower heating element
Spit fitting
Figure B:
Tongs (baking tray or rack)
- Baking tray
3 Tongs (for spit)
! rack
. Restrainer
0 Skewer clamps
6 Rotisserie
Technical data
Rated voltage: 220 - 240 V ~,
50/60 Hz
Max. power consumption: 1500 W
Page 6

3
SGBR 1500 A2
GB
IE
Safety instructions
DANGER – RISK OF ELECTRIC SHOCK!
► Do not open the housing of the appliance or attempt to repair it.
Doing so can lead to risks and also invalidates the warranty.
Defective appliances should be repaired by the retailer or
authorized personnel only.
► Arrange for defective power plugs and/or cables to be replaced
as soon as possible by a qualified technician or by our Customer
Service Department to avoid the risk of injury.
► Do not allow any liquids to penetrate the housing. Do not expose
the appliance to moisture and do not use it outdoors. Additionally,
do not place fluid-filled receptacles such as flower vases on the
appliance. This increases the risk of fire and of receiving an electric
shock! If liquids permeate into the housing, unplug the appliance
immediately and arrange for it to be repaired by a qualified
technician.
► Never touch the appliance, power cable or power plug with wet
hands. There is a risk of electric shock!
NEVER immerse the appliance in water or other liquids!
Risk of electrocution if residual liquids come into contact with
live components during operation.
Page 7

4
SGBR 1500 A2
GB
IE
WARNING – RISK OF INJURY!
► This appliance may be used by children of the age of 8 years or
more and by persons with reduced physical, sensory or mental
capabilities or lack of experience and/or knowledge if they are
being supervised or have been instructed with regard to the safe
use of the appliance and have understood the potential risks.
► Children must not use the appliance as a plaything.
► Cleaning and user maintenance must not be performed by children
unless they are older than 8 years of age and are supervised.
► Children younger than 8 years of age must be kept away from
the appliance and the power cable.
► Route the power cable in such a way that no one can tread on it
or trip over it.
► Never touch the glass door or the housing during use, these can
get very hot. Use oven gloves or something similar to open the
glass door to avoid being burnt!
► Never touch the heating elements or the viewing window when
the appliance is in use, or before it has cooled down completely.
Do not reach into the cooking chamber when the appliance is in
use. Wait until the appliance has cooled down. Otherwise, you
could be burnt.
► Allow the appliance to cool down after use before transporting it.
► Always use oven gloves or a pot holder if you need to take hold
of the appliance.
Caution! Hot surface!
Page 8

5
SGBR 1500 A2
GB
IE
CAUTION – PROPERTY DAMAGE!
► Do not use an external timer switch or a separate remote control
system to operate the appliance.
► Never leave the appliance unattended during operation.
► Ensure that the appliance, the power cable and the plug do not
come into contact with heat sources such as hotplates or naked
flames.
► Only operate the appliance with the original accessories supplied.
► Do not kink or crush the mains cable.
► To disconnect, always remove the plug itself from the mains
power socket, do not pull on the power cable.
► When the appliance is in use, ensure that there are no easily
inflammable materials in the immediate vicinity (e.g. dishcloths,
oven cloths, etc.).
► Never dry textiles or other objects on or above the appliance.
This increases the risk of fire!
Page 9

6
SGBR 1500 A2
GB
IE
Setting up
WARNING! RISK OF FIRE!
► Never place the appliance beneath wall cup-
boards or next to curtains, cupboard walls or
other flammable objects.
► Always ensure a minimum distance between
the appliance and hanging cupboards, ceilings,
walls or similar of at least 10 cm above the
appliance and 5 cm at the sides. For this
reason the appliance may not be used, for
example, in cupboards or similar. Otherwise
there is likely to be insufficient ventilation for
the appliance, which could cause a fire or
damage.
► Always place the appliance on a heat-resistant
surface. Failure to do so increases the risk of
fire or of it being damaged. The area under
the bottom can discolour and be damaged.
Additionally, if placed on a soft upper surface,
the appliance could cause permanent damage
to it due to pressure indentations.
DANGER – ELECTRIC SHOCK!
► Do not place the appliance immediately ad-
jacent to sources of water, e.g. sinks or basins,
or in damp cellar areas. Otherwise, there is
a risk of receiving an electric shock.
■ Place the appliance on a solid, level and heat-
resistant surface (e.g. stainless steel worktops
or natural stone worktops such as granite).
Ensure there is sufficient ventilation around the
appliance.
■ Clean all components as described in the
section “Cleaning and care”.
Using the appliance
Glass door
ATTENTION! DAMAGE TO PROPERTY!
►
Do not lean on the glass door . Do not
place any objects on the glass door .
This can cause damage to the hinges.
■ If you are cooking especially fatty foodstuffs, this
can result in increased smoke production. In this
case, do not close the glass door completely;
instead, leave it slightly open:
The glass door has a latching position so that
it remains open a little: if you carefully push the
glass door closed, it clicks into this position
shortly before closing completely.
■ When drying fruit (to make dried fruit), the glass
door should remain in the latching position
to ensure that moisture can escape and that the
fruit dries better.
Inserting the crumb tray
■ Push the crumb tray under the lower heating
element so that it rests flat on the bottom of
the appliance.
Page 10
7
SGBR 1500 A2
GB
IE
Using the rotisserie
WARNING! RISK OF INJURY!
► Always use the tongs 3to insert the hot rotis-
serie 6 into the appliance or to remove it.
■ You can use the two skewer clamps 0 to fix the
food onto the rotisserie 6. Loosen the restrainer
. on the skewer clamps 0, push them so that
the food is fixed firmly in between the clamps
and then screw the restrainer . tight again.
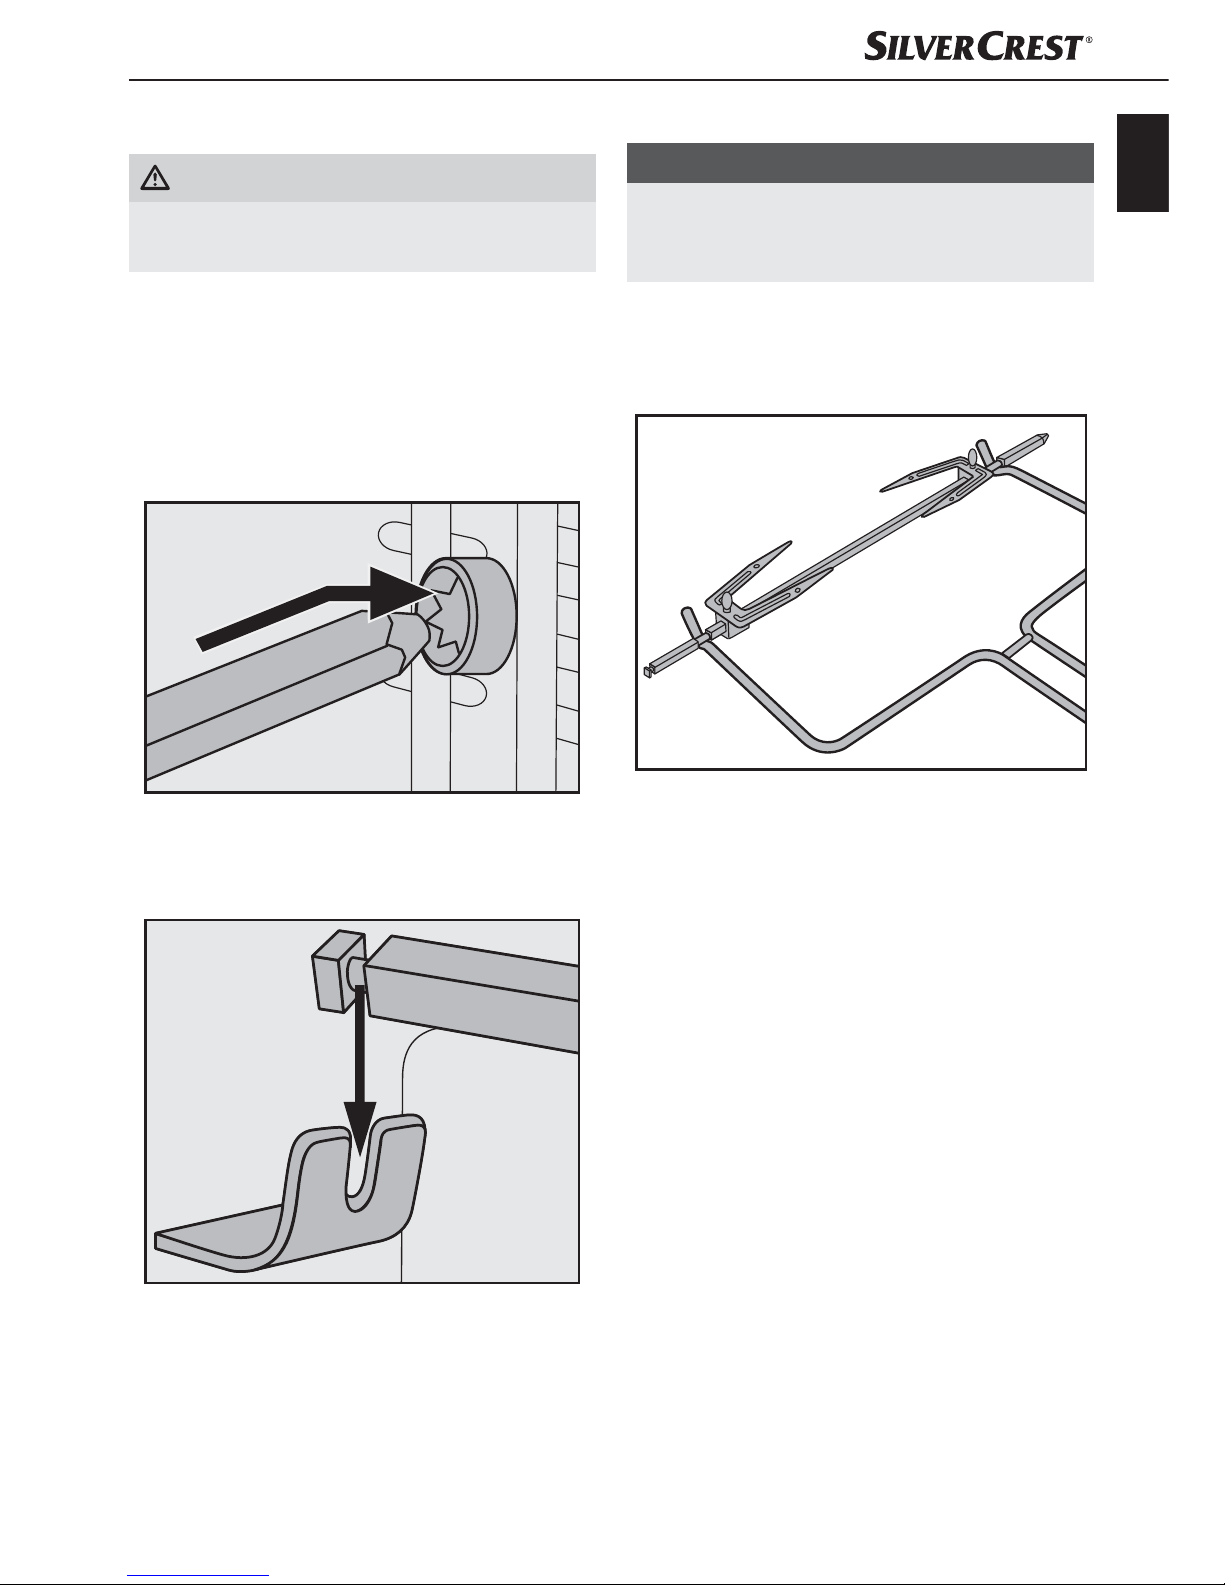
■ First push the end of the rotisserie 6 without the
notch into the drive (Figure 1):
Fig. 1: Push the rotisserie 6 into the drive .
■ Then insert the other end of the rotisserie 6 with
the deep groove in the spit fitting (Figure 2):
Fig. 2: Insert the rotisserie 6 in the spit fitting .
NOTE
► Always slide the baking tray - into the lower
rail when you use the rotisserie 6.
This will collect any drips.
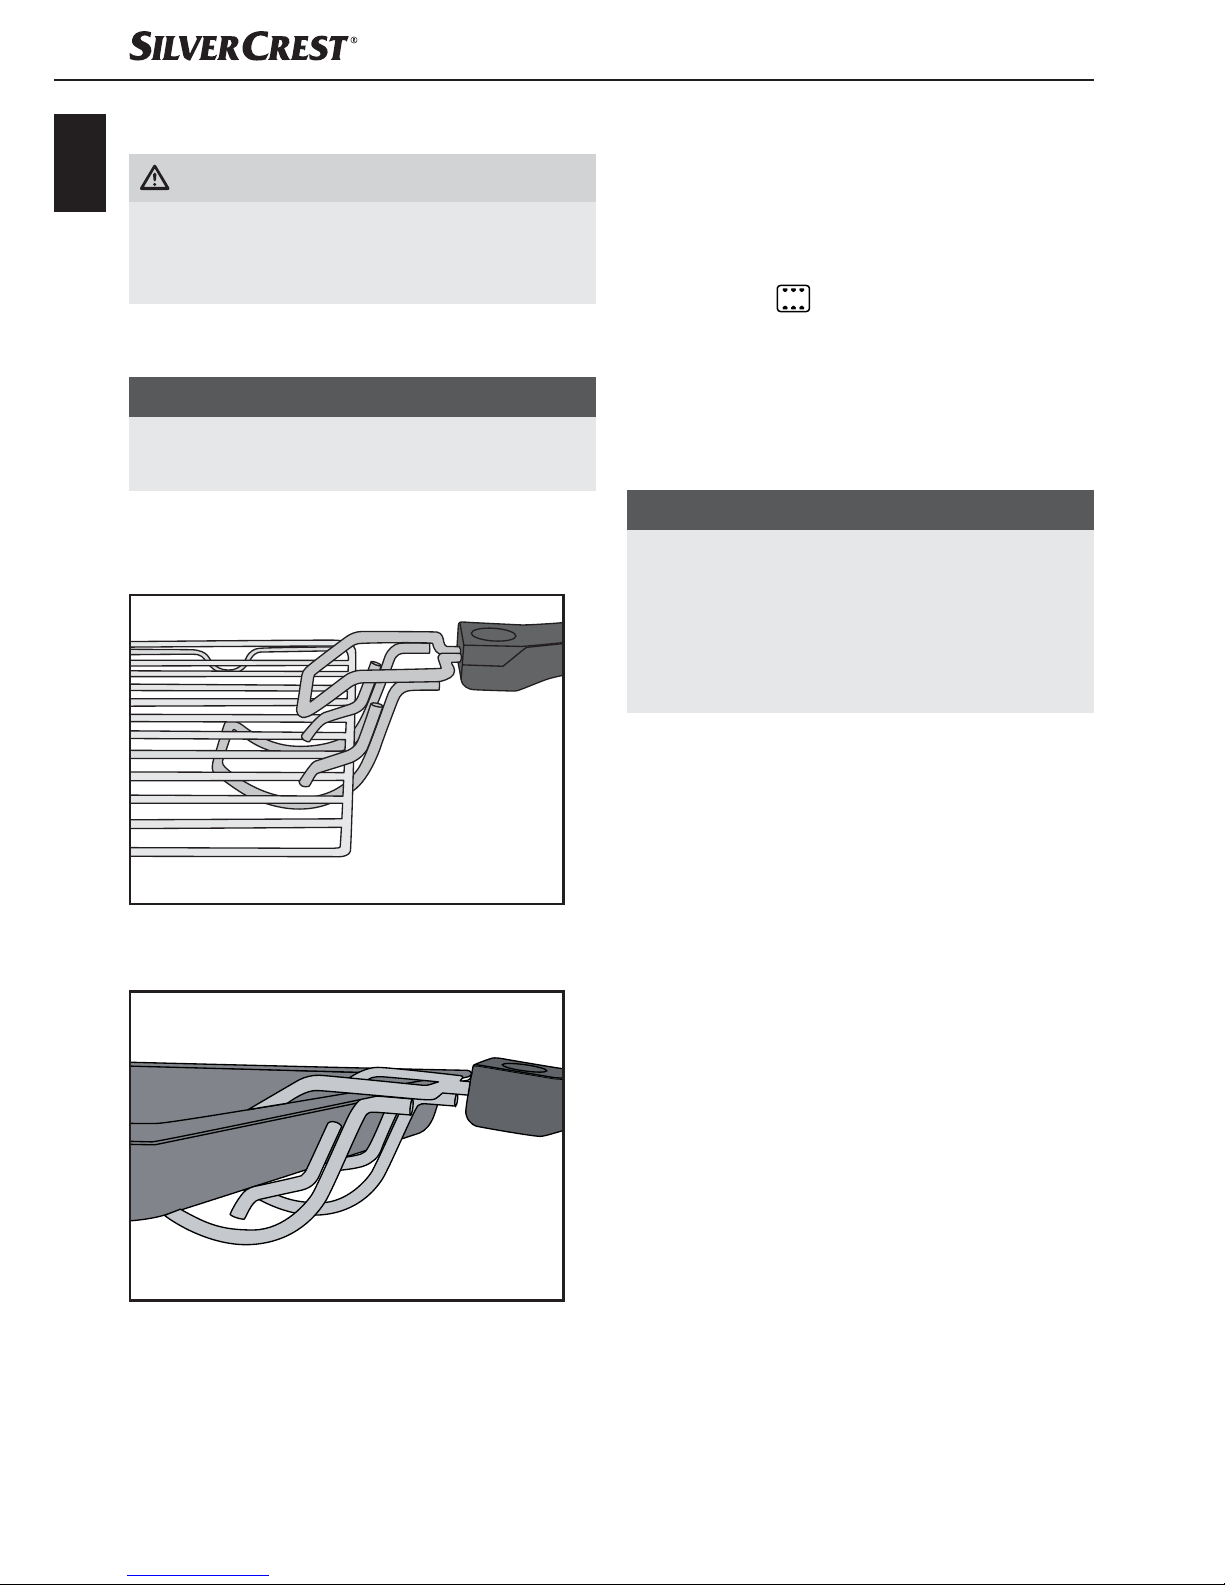
■ To remove the hot rotisserie 6, grip with
the hooks at the end of the tongs 3 into the
recesses on the rotisserie 6 (Figure 3):
Fig. 3: Hooking the tongs 3 onto the rotisserie 6
■ First lift the left-hand side of the rotisserie 6 out
of the spit fitting and then pull the rotisserie 6
from the drive .
Page 11
8
SGBR 1500 A2
GB
IE
Using the baking tray/rack
WARNING! RISK OF INJURY!
► Always use the tongs to insert the hot
baking tray -/the hot rack ! into the appliance or to remove it.
■ Push the baking tray -/the rack ! into one of
the 3 rails in the cooking chamber of the appliance.
ATTENTION! DAMAGE TO PROPERTY!
► Never place the baking tray -/the rack !
directly onto the heating elements .
■ To remove the hot baking tray - or the rack !,
hook the tongs onto them as follows:
Fig. 4: Hooking the tongs onto the rack !
Fig. 5: Hooking the tongs onto the baking
tray -
Before first use
1) Insert the plug into a mains power socket.
2) Turn the temperature control clockwise to
the maximum temperature (to the stop).
3) Turn the function switch to “upper and
lower heat”
.
4) Open the glass door leave this open for this
operation.
5) Remove any installed accessories from the
cooking chamber.
6) Turn the timer to 20 minutes.
NOTE
► The first time the appliance heats up, a
small amount of smoke and odour may be
generated due to production-related residue.
This is normal and is completely harmless.
Provide sufficient ventilation by opening a
window, for example.
The appliance switches off automatically
after 20 minutes.
If you want to interrupt the heating process
prematurely, turn the temperature control
counter-clockwise to the stop and set the
timer to “OFF - 0”.
7) Allow the appliance to cool down, then clean
the appliance as described in the chapter
“Cleaning and care”.
The appliance is now ready for use.
Page 12
9
SGBR 1500 A2
GB
IE
Operating the appliance
Function switch
You can switch on the appliance with the function
switch , and also set 5 different functions:
Symbol Meaning
"Upper heat"
e.g. to gratinate
"Lower heat"
e.g. for baking
"Upper & lower heat"
e.g. for baking a pizza
"Upper heat/hot air/
rotisserie"
e.g. to roast poultry
"Upper & lower heat/hot air"
e.g. to reheat rolls
OFF
"OFF" the appliance is
switched off.
Temperature control
Use the temperature control to set the desired
temperature.
■ If you set the temperature for the functions
“Upper heat”
, “Lower heat” or “Upper &
lower heat”
use the scale marked with “ ”.
■ If you set the temperature for the functions
“Upper heat/hot air/rotisserie”
or
“Upper & lower heat/hot air”
use the scale
marked with “ ”.
Timer
User the timer to set the cooking time.
■
Set the timer to the desired cooking time.
After expiry of the set time a signal tone sounds
and the appliance stops heating.
If the function “Upper heat/hot air/rotisserie”
is selected, the rotisserie 6 will also stop
turning.
Grilling and baking
1) Put the crumb tray into the appliance.
2) Remove the rack ! and baking tray - from
the appliance. If required, cover these with
baking paper or lightly grease the baking tray with suitable baking fat.
NOTE
► Depending on the meal, the oven must be
preheated. Refer to the guidelines in the
respective recipe. Preheating is useful for:
– very short baking times,
– crisp crusts,
– sensitive meals that require a constant
temperature, such as soufflés.
► If no preheating is required, skip step 3).
3) Allow the appliance to heat up for approx.
10 minutes (depending on the temperature
setting) to the required temperature:
– Select the required temperature using the
temperature control . Ensure that you use
the correct scale (see chapter “Temperature
control”).
– Select the required function with the function
switch .
Page 13

10
SGBR 1500 A2
GB
IE
NOTE
► As a general rule, if you are baking or grilling
with hot air you can dispense with a preheating
of the grilling/cooking space.
– Use the timer to set the preheat time
(approx. 10 minutes).
– Close the glass door .
4) Once the warm-up period is finished, place
the foodstuffs on the rack ! or the baking
tray - and slide it in on one of the rails.
Ensure that there is sufficient space between
the foodstuffs and the inner walls/heating
elements of the appliance.
NOTE
► If you wish to prepare food on the rack !
that drips excessively, then slide the baking
tray - onto the bottom rail. By doing this,
dripping fat for example will be caught and
the appliance is then easier to clean.
5) Close the glass door before starting the
grilling or baking process.
6) Use the timer to set the required grilling or
baking time. The maximum grilling or baking
time is 120 minutes.
NOTE
► If the cooking time for the food is less than
20 minutes, first set the timer to 40 minutes
and then turn it back to the required grilling
or baking time.
The control lamp indicates that the appliance is
now switched on. The switch of the timer now
rotates itself anti-clockwise to “OFF - 0”.
The appliance switches off automatically after the
set period, there is a beep and the control lamp
switches off.
NOTE
If you want to interrupt the heating process
prematurely, turn the temperature control
counter-clockwise to the stop and set the timer
to "OFF - 0".
7) After cooking, remove the rack ! or the baking
tray - using the tongs .
8) Set the function switch to “OFF”.
Grilling with the rotisserie
1) Put the crumb tray into the appliance.
2) If inserted, remove the rotisserie 6 from the
appliance.
3) Push the baking tray - onto the lower rail.
4) Fix the food to be grilled with the skewer
clamps 0. Ensure that the food in the cooking
chamber can turn freely without touching the
sides. The rotisserie 6may change its direction
of rotation if the food strikes against a resistance.
The two depressions on the rotisserie 6 must re-
main freely accessible, otherwise you will not be
able to grasp the rotisserie 6 with the tongs 3.
5) Fit the rotisserie 6 in the cooking chamber
(see chapter “Using the rotisserie”)
6) Close the glass door .
Page 14

11
SGBR 1500 A2
GB
IE
NOTE
If you want to interrupt the heating process prematurely, turn the temperature control counterclockwise to the stop and set the timer to
"OFF - 0".
7) Adjust the temperature control to the desired
temperature.
8) Set the function switch to “Upper heat/hot
air/rotisserie”
. Set the timer to the
desired grill time.
The appliance starts the grilling process and
the rotisserie 6 starts turning.
The control lamp indicates that the appliance is
now switched on. The switch of the timer now
rotates itself anti-clockwise to “OFF - 0”.
The appliance switches off automatically after the
set period, there is a beep and the control lamp
switches off.
NOTE
If you want to interrupt the heating process
prematurely, turn the temperature control
counter-clockwise to the stop and set the timer
to "OFF - 0".
9) After the grilling process is completed remove
the rotisserie 6 with the help of the tongs 3.
10) Set the function switch to “OFF”.
EXAMPLE: GRILLED CHICKEN
Ingredients
♦ Grilling chicken (approx. 1.3 kg,
guts removed)
♦ Spices (salt, paprika)
♦ Cooking oil
1) Season the chicken on the inside and outside
with salt and paprika powder. Brush it from
the outside with heat resistant cooking oil.
2) Push the chicken onto the spit and fix it in
place with the skewer clamps 0. Ensure that
the notches on the rotisserie 6 remain free
so that you can remove the rotisserie 6with
the help of the tongs 3. Depending on the
shape of the chicken, it may be necessary
to fasten the wings and legs with a fireproof
string to stop them impacting the sides when
turning.
3) Push the baking tray - onto the lower rail.
4) Preheat the appliance for about 10 minutes
using the function "Upper & lower heat/hot
air"
to 210°C.
5) Put the chicken on the rotisserie into the
appliance using the tongs 3.
6) Set the function switch to “Upper heat/hot
air/rotisserie”
and close the door.
7) Set the timer approx. 80 minutes. The
cooking time can vary depending on the
size and nature of the chicken.
8) Brush the chicken every now and again with
some cooking oil. This will make it crispy.
9) Once the set time is up, carefully remove the
rotisserie with the chicken using the tongs 3.
Loosen the skewer clamps 0 and pull the
chicken off the rotisserie 6.
Page 15

12
SGBR 1500 A2
GB
IE
Cleaning and care
DANGER – ELECTRIC SHOCK!
►
Before cleaning the appliance, disconnect the
plug from the mains power socket!
Risk of electric shock!
NEVER immerse the appliance in water or
any other liquid!
WARNING! RISK OF INJURY!
► Always allow the appliance to cool down
before cleaning it. Otherwise there is a risk
of burns!
■ It is best to clean the appliance and accessories
as soon as they have cooled down. This makes
food residues easier to remove.
ATTENTION! DAMAGE TO PROPERTY!
► Do not use abrasive or aggressive cleaning
materials. These could damage the surface of
the appliance!
► Do not clean the components of the appliance
in a dishwasher!
► Do not clean the cooking chamber with an
oven spray as this may make residues on the
heating elements impossible to remove.
■ Wipe the appliance with a damp cloth. If neces-
sary, put a little mild detergent on the cloth and
wipe this off afterwards with a cloth dampened
with clean water. Dry everything properly.
■ Clean the cooking chamber and the glass door
with a moist cloth
. If necessary, put a little mild
detergent on the cloth and wipe this off afterwards with a cloth dampened with clean water.
Dry everything properly.
■ Clean the tongs /3, the rotisserie 6, the
skewer clamps 0, the restrainer ., the baking
tray -, the rack ! and the crumb tray in
warm soapy water. Dry all parts properly after
cleaning.
Storage
■ Store the cleaned appliance and its accessories
in a clean, dust-free and dry location.
Page 16

13
SGBR 1500 A2
GB
IE
Troubleshooting
Fault Cause Solution
The appliance is not
working.
The mains plug is not connected to the
mains power.
Insert the plug into a mains power
socket.
The mains power socket is defective.
Use a different mains power
socket.
The appliance is defective. Contact Customer Services.
The control lamp
comes on and but the
appliance does not
heat up.
The function switch is set to OFF.
Turn the function switch to the
desired function.
The cooking time of
the food seems very
long
The glass door has been opened often
to check the cooking progress.
Do not open the glass door
any more often than is absolutely
necessary.
The wrong temperature level has been set. Check the temperature settings.
Smoke and smells
develop during use.
There is detergent or food residue on the
heating elements.
Remove the food from the appliance and continue cooking
process with the glass door
open until the smoke stops.
If the malfunction cannot be corrected with the above suggestions, or if you have found some other
kind of malfunction, please contact our Customer Service.
Page 17
14
SGBR 1500 A2
GB
IE
Warranty and service
The warranty provided for this appliance is
3 years from the date of purchase. This appliance
has been manufactured with care and inspected
meticulously prior to delivery. Please retain your
receipt as proof of purchase. In the event of a
warranty claim, please contact your Customer
Service unit by telephone. This is the only way to
guarantee free return of your goods.
The warranty only covers claims for material and
manufacturing defects, not for transport damage,
wearing parts or for damage to fragile components
such as switches or batteries. This appliance is
intended solely for private use and not for commercial purposes.
The warranty shall be deemed void in the case
of misuse or improper handling, use of force and
interventions which have not been carried out by
one of our authorised Service centres.
Your statutory rights are not restricted by this warranty.
The warranty period is not prolonged by repairs
effected under the warranty. This also applies to
replaced and repaired components. Any damage
and defects present at the time of purchase must
be reported immediately after unpacking, but no
later than two days after the date of purchase.
Repairs made after expiry of the warranty period
are chargeable.
Service Great Britain
Tel.: 0871 5000 720 (£ 0.10/Min.)
E-Mail: kompernass@lidl.co.uk
IAN 113370
Service Ireland
Tel.: 1890 930 034
(0,08 EUR/Min., (peak))
(0,06 EUR/Min., (off peak))
E-Mail: kompernass@lidl.ie
IAN 113370
Hotline availability:
Monday to Friday 08:00 - 20:00 (CET)
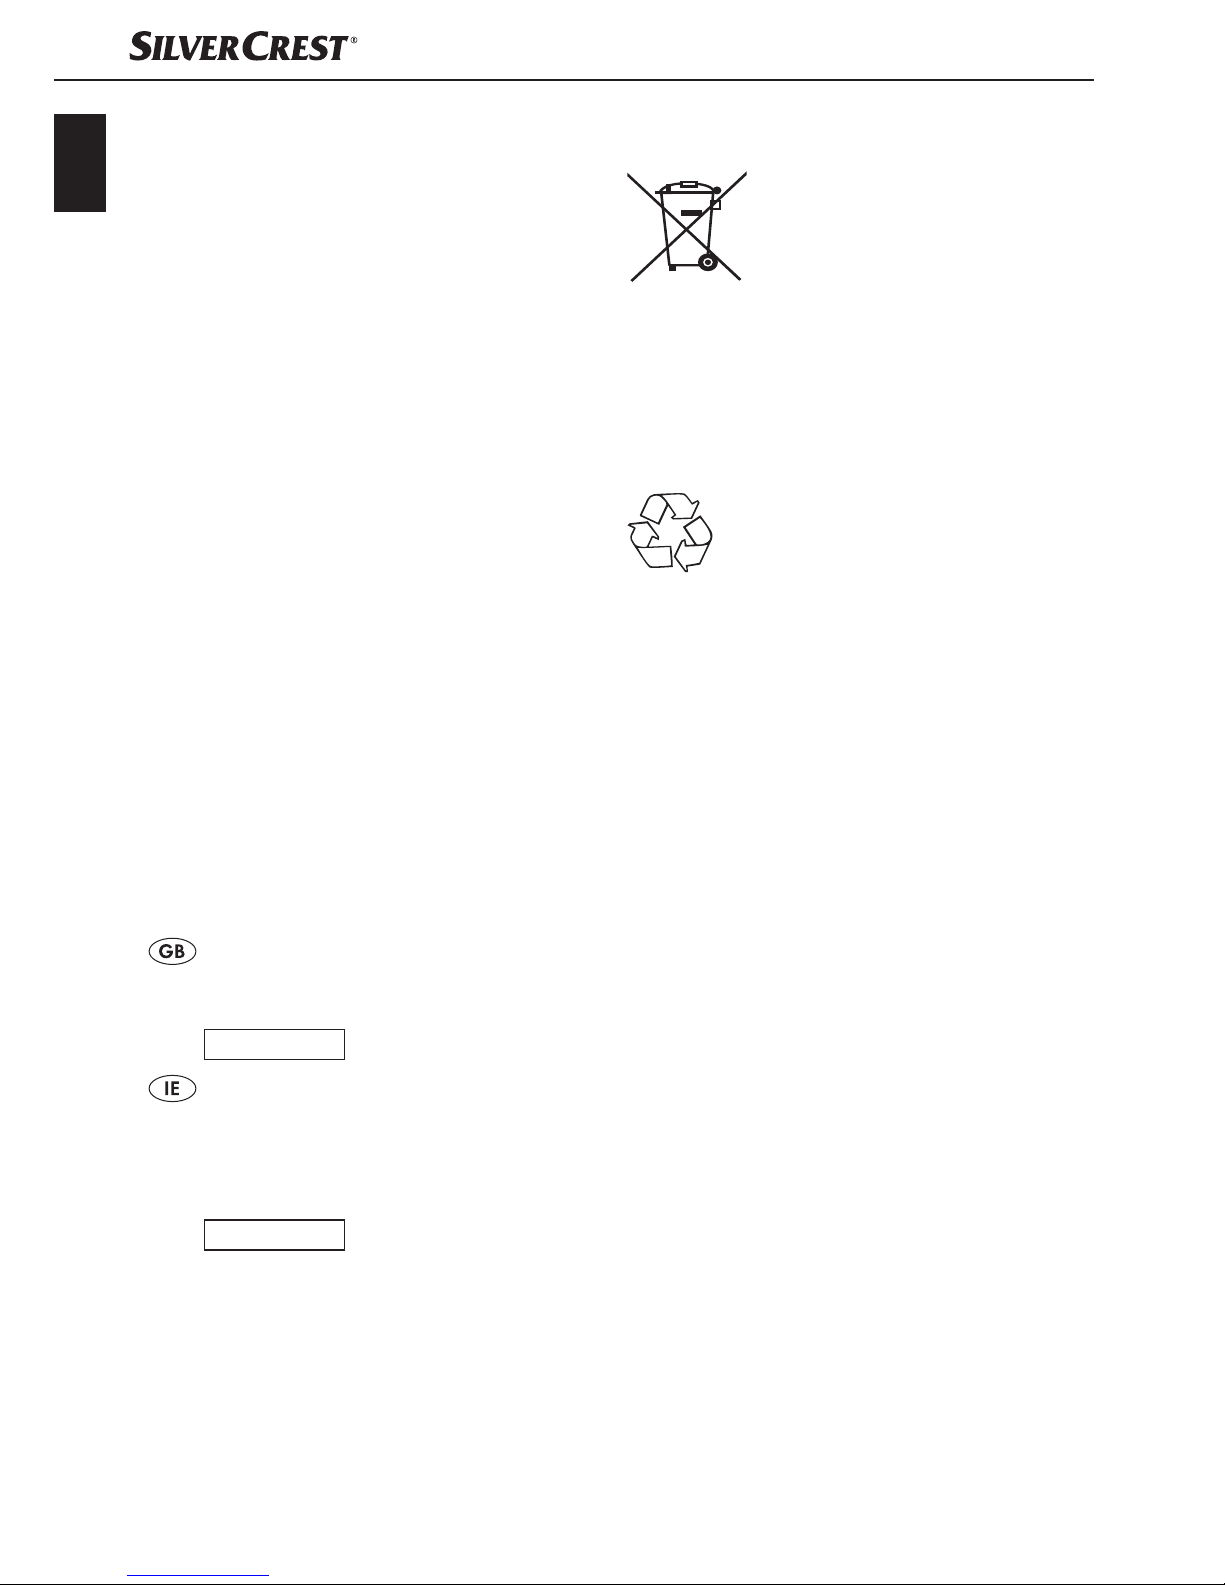
Disposal
Under no circumstance should
the appliance be disposed of
as standard domestic waste.
This product is subject to the
provisions of European Directive 2012/19/EU.
Dispose of the appliance via an approved waste
disposal company or your municipal waste disposal facility. Please observe applicable regulations.
Please contact your waste disposal facility
if you are in any doubt.
The packaging is made of environmen-
tally friendly materials which you can
dispose of at your local recycling centre.
Importer
KOMPERNASS HANDELS GMBH
BURGSTRASSE 21
44867 BOCHUM
GERMANY
www.kompernass.com
Page 18

15
SGBR 1500 A2
GB
IE
Recipes
In this section, we provide you with various sample
recipes for preparing dishes. These examples are
recommendations. Cooking times may vary.
These r
ecipes are provided without guarantee.
All information on ingredients and preparation is
indicative only. Modify the suggested recipes to
taste. We hope you enjoy the recipes and wish
you “bon appetit”!
NOTE
Take note of the preparation guidelines provided
on the food packaging.
Muffins
Ingredients for four people:
♦ 1 cup of flour
♦ 1 teaspoon of baking powder
♦ 1 egg
♦ 1 tablespoon of melted butter
♦ 1 cup of milk
♦ 3 tablespoons of sugar
♦ 1 pinch salt
♦ f
or variations: also nuts, chopped bananas or
chocolate flakes
Preparation:
1) Gradually mix the flour, baking powder, egg,
milk, salt and sugar together in a bowl, one
by one.
2) Melt the butter in a saucepan and mix it into
the dough.
3) Subject to taste, blend in the nuts, chocolate
flakes or mashed bananas.
4) Place the prepared dough into standard muffin
moulds and place them on the baking tray -.
5) Bake the muffins at 220°C on the bottom rail
using top & bottom heat for about 15 minutes.
Hawaiian toast
Ingredients for 4 pieces of toast:
♦ 4 slices of toasting bread
♦ 1–2 tablespoons of remoulade
♦ 120 g cooked ham
♦ 1/2 tin of pineapples
♦ 4 slices of cheese for gratinating
♦ Curry
Preparation:
♦ Toast the bread slices.
♦ Spread the remoulade thinly over the pieces of
toast and lay the slices of cooked ham on top.
♦ Lay one slice of pineapple on each piece of
toast. Season with curry.
♦ Then place a slice of cheese over each of the
pineapple slices.
♦ Lay the Hawaiian toasts on the rack ! and
bake at 200°C for about 8 minutes on the
upper rail using top heat
.
Baking deep-frozen pizza
Preparation:
♦ Place the rack ! on the upper rail in the cooking
chamber.
♦ Place the deep-frozen pizza (without packaging)
onto the rack !.
♦ Bake the pizza, using upper and lower heat, for
about 20 minutes.
♦ Please follow the instructions on the packaging
regarding temperature.
Page 19

16
SGBR 1500 A2
GB
IE
Spritzgebäck cookies
Ingredients:
♦ 125 g butter
♦ 125 g sugar
♦ 1 packet of vanilla sugar
♦ 1 pinch salt
♦ 1 egg
♦ 1 egg white
♦ 250 g flour (type 405)
♦ 1 teaspoon of baking powder
♦ Zest of half a lemon
Preparation:
1) Beat the butter until foamy.
2) Add the sugar, vanilla sugar, lemon zest and
eggs.
3) Mix the flour, baking powder and salt and stir
into the mixture using a mixing spoon.
4) Allow the dough to stand for about 10 minutes.
5) Shape the dough as desired, e.g. with the as-
sistance of a mincer, cookie cutters or a piping
bag.
6) Line the baking tray - with baking paper and
place the cookies on this.
7) Bake the cookies on the top rail of a preheated
oven at 180°C, using top and bottom heat,
for about 10–15 minutes, until they are golden
brown.
NOTE
This quantity of dough is sufficient for several
baking trays -.
Bread rolls
Ingredients:
♦ 300 g flour (or wholemeal flour)
♦ 2 heaped teaspoons of baking powder
♦ 200 g linseeds
♦ 1 egg
♦ 500 g quark or curd cheese
♦ 1 teaspoon of salt
♦ Subject to taste: caraway seeds, onions,
bacon ...
Preparation:
1) Knead all ingredients together well and then
shape into small rolls.
2) Line the baking tray - with baking paper and
place the rolls on this.
3) Bake on the top rail at about 200°C for
around 30 minutes.
NOTE
This quantity of dough is sufficient for several
baking trays -.
Page 20

17
SGBR 1500 A2
GB
IE
Meringues
Ingredients:
♦ 1 egg white
♦ Salt
♦ 45 g sugar
Preparation:
1) Place the chilled egg white into a fat-free mixing
bowl. Ensure that no egg yolk is mixed in with
it or the meringue will not solidify.
2) Beat the egg white at a slow speed, so that the
bubbles formed in the meringue are not too
large.
3) Add a pinch of salt to taste.
4) Gradually add in half of the sugar when the
meringue starts to solidify.
5) Then beat it at the highest speed until stiff.
6) Add the remaining sugar. This allows the
meringue to attain the required solidity.
7) Fill a piping bag fitted with a large star nozzle
with the meringue mixture and squeeze out
rosettes, slithers or other shapes onto a baking
tray - lined with baking paper. Leave a little
space between each shape.
8) Preheat the oven with grill to approx. 100° C
with hot air.
9) Bake the meringues with hot air at approx.
100° C for about 2 hours.
Buttered croutons
Ingredients:
♦ 2 slices of toasting bread
♦ 1 tbsp. butter
Preparation:
1) Cut the bread into small cubes.
2) Melt the butter at low heat in a saucepan and
mix in the cubed bread.
3) Line a baking tray - with baking paper and
distribute the bread cubes evenly on it.
4) Bake the bread cubes at 170°C (top heat)
on the upper rail until golden brown (approx.
15–20 minutes).
NOTE
You can also use herb or garlic butter instead
of regular butter. Baking time is then reduced by
about 5 minutes.
Page 21

18
SGBR 1500 A2
GB
IE
Minced meat baguettes
Ingredients:
♦ 2 baguette rolls
♦ 250 g minced meat (half and half)
♦ 2 tomatoes
♦ 1 onion (diced)
♦ 2 tbsp. tomato purée
♦ 40 g grated Parmesan cheese
♦ 4 slices of cheese
♦ Salt and pepper
Preparation:
1) Slice the baguettes and hollow them out.
2) Mix together the minced meat, tomato paste,
onion, Parmesan, some salt and a little pepper.
3) Shape the minced meat into four equal-sized,
flat burgers and place them on the baguette
halves.
4) Cut the tomatoes into slices and arrange them
on the baguettes.
5) Arrange the cheese slices on the baguettes.
6) Place the baguettes on a baking tray - and
then bake them on the bottom rail at about
230°C in a preheated oven using top and
bottom heat for about 20 minutes.
NOTE
You can also season the minced meat mixture
with basil, chilli or other spices.
Cauliflower (gratinated)
Ingredients:
♦ 1/2 head cauliflower (about 250g)
♦ 3 lemon slices
♦ 1 tbsp. butter
♦ 1 heaped tsp. flour
♦ 1 tbsp. lemon juice
♦ 1 tbsp. slivered almonds
♦ 2 tbsp. gratin cheese (grated)
♦ Salt, pepper, nutmeg
Preparation:
1) Divide the cauliflower into florets and wash
them.
2) Cook the cauliflower with the lemon slices in
boiling, salted water for 8–10 minutes until the
cauliflower is al dente. Retain about 150 ml
of the cooking water before pouring the rest
away.
3) Melt the butter in a saucepan and then brown
the flour, while stirring continuously, for about
1 minute.
4) Continue stirring and pour in the cauliflower
water and let it cook for about 2 minutes. If the
roux gets too solid, gradually add more water
until a creamy consistency is achieved. Season
with lemon juice, nutmeg, salt and pepper.
5) Place the cauliflower in a baking dish (about
14 cm in diameter) and pour the sauce evenly
over it.
6) Sprinkle in the cheese and almond slivers over it.
7) Place the baking dish on the baking tray -.
8) Bake the prepared dish at 200 °C in a preheated oven, using top and bottom heat, for
about 20 minutes on the bottom rail.
Page 22

19
SGBR 1500 A2
GB
IE
Salmon-filled flaky pastries (burek)
Ingredients:
♦ 1 pack of flaky pastry slices (approx. 8 pieces)
♦ 1 pack of smoked salmon, sliced (about 200 g)
♦ 1 lemon
♦ 1 onion
♦ 1 pack of cream cheese (200 g)
♦ Fresh dill
♦ Salt and pepper
♦ 1 egg yolk
Preparation:
1) Separate the puff pastry sheets and, if necessary, allow them to thaw.
2) Mix the cream cheese with salt, pepper and
the juice of one lemon.
3) Finely dice the onion.
4) Add half of the salmon and the onion to the
cream cheese mixture and mix it all coarsely
with a blender.
5) Cut the remaining salmon into thin strips.
6) Add the salmon and the dill to the mixture and
blend all ingredients together.
7) Place individual tablespoonfuls of the mixture
on a flaky pastry sheet and fold them over.
8) Coat the resulting pouch with egg yolk.
9) Place the burek pieces on a baking sheet -.
Leave sufficient space between the individual
pouches because the flaky pastry will expand.
10) Bake the pastries on the lower rail at around
230°C using top and bottom heat for about
25–30 minutes. The flaky pastry should turn
light brown in colour.
NOTE
The stated quantity of pastry is sufficient for
several baking trays -.
Page 23

20
SGBR 1500 A2
Page 24

21
SGBR 1500 A2
NL
BE
Inhoud
Inleiding ..............................................................22
Gebruik in overeenstemming met bestemming ..............................22
Inhoud van het pakket ..................................................22
Pr
oductbeschrijving ....................................................
22
Technische gegevens ...................................................22
Veiligheidsvoorschriften ................................................23
Plaatsen
..............................................................
26
Gebr
uik van het apparaat ...............................................
26
Glaz
en deur ......................................................................
26
Kruimelplaat plaatsen ...............................................................26
Draaispies gebruiken ................................................................27
Bakplaat/grillrooster gebruiken ........................................................28
Vóór de ingebruikname .................................................28
Bediening van het apparaat .............................................29
Functieschakelaar ..................................................................29
T
emperatuurregelaar ................................................................
29
Timer ............................................................................29
Grillen en bakken ......................................................29
Gr
illen met draaispies ..................................................
30
Reiniging en onderhoud .................................................32
Opbergen ............................................................32
Problemen oplossen ....................................................33
Gar
antie en service ....................................................
34
Afvoeren .............................................................34
Importeur ............................................................34
R
ecepten .............................................................
35
Page 25

22
SGBR 1500 A2
NL
BE
Inleiding
Hartelijk gefeliciteerd met de aankoop van uw
nieuw apparaat.
U hebt hiermee gekozen voor een hoogwaardig
product. De gebruiksaanwijzing maakt deel uit van
dit product. Deze bevat belangrijke aanwijzingen
voor veiligheid, gebruik en afvoeren. Lees alle
bedienings- en veiligheidsvoorschriften voordat u
het product in gebruik neemt. Gebruik het product
uitsluitend op de voorgeschreven wijze en voor de
aangegeven doeleinden. Geef alle documenten
mee als u het product doorgeeft aan een derde.
Gebruik in overeenstemming
met bestemming
De grill- en bakautomaat dient uitsluitend voor het
opwarmen, garen en grillen van etenswaren.
Dit apparaat is uitsluitend bestemd voor gebruik in
privéhuishoudens. Gebruik het apparaat derhalve
niet bedrijfsmatig.
Elk ander gebruik geldt als niet in overeenstemming
met de bestemming en kan resulteren in materiële
schade of zelfs lichamelijk letsel.
Inhoud van het pakket
♦ Grill- en bakautomaat
♦ 1 bakplaat
♦ 1 grillrooster
♦ 2 tangen
♦ Draaispies met 2 klemmen
♦ 1 kruimelplaat
♦ Gebruiksaanwijzing
OPMERKING
Controleer de inhoud van het pakket direct na
het uitpakken op volledigheid en schade. Neem
zo nodig contact op met de klantenservice.
Productbeschrijving
Afbeelding A:
Aandrijving
Temperatuurregelaar
Functieschakelaar
Timer
Indicatielampje
Glazen deur
Bevestigde kruimelplaat
Onderste verwarmingselementen
Draaispieshouder
Afbeelding B:
Tang (voor bakplaat en grillrooster)
- Bakplaat
3 Tang (voor draaispies)
! Grillrooster
. Vergrendeling
0 Draaispiesklemmen
6 Draaispies
Technische gegevens
Nominale spanning: 220 - 240 V ~,
50/60 Hz
Max. opgenomen
vermogen: 1500 W
Page 26

23
SGBR 1500 A2
NL
BE
Veiligheidsvoorschriften
GEVAAR – ELEKTRISCHE SCHOK!
► U mag de apparaatbehuizing niet openen of repareren. In dat
geval is de veiligheid niet gegarandeerd en vervalt de garantie.
Laat een defect apparaat alleen door de dealer of erkend vakkundig personeel repareren.
► Laat beschadigde stekkers en snoeren onmiddellijk door erkend
en vakkundig personeel of door de klantenservice vervangen,
zodat risico's worden vermeden.
► Laat geen vloeistoffen in de apparaatbehuizing binnendringen.
Stel het apparaat niet bloot aan vocht en gebruik het niet in de
openlucht. Bovendien mag u geen met vloeistof gevulde voorwerpen, zoals bijv. vazen, op het apparaat plaatsen. Er bestaat
brandgevaar en gevaar voor een elektrische schok! Mocht er
toch vloeistof in de apparaatbehuizing komen, haal dan meteen
de stekker van het apparaat uit het stopcontact en laat het apparaat repareren.
► Pak het apparaat, het snoer en de stekker nooit met natte handen
vast. Er bestaat anders gevaar voor een elektrische schok!
Dompel het apparaat nooit onder in water of in andere vloeistoffen! Er kan levensgevaar ontstaan door een elektrische
schok, wanneer bij gebruik vloeistofresten in aanraking komen
met onderdelen onder spanning.
Page 27

24
SGBR 1500 A2
NL
BE
WAARSCHUWING – LETSELGEVAAR!
► Dit apparaat mag worden gebruikt door kinderen vanaf 8 jaar
en door personen met beperkte fysieke, zintuiglijke of geestelijke
vermogens of gebrek aan ervaring en/of kennis, mits ze onder
toezicht staan of over het veilige gebruik van het apparaat zijn
geïnstrueerd en de daaruit resulterende gevaren hebben begrepen.
► Kinderen mogen niet met het apparaat spelen.
► Reiniging en onderhoud door de gebruiker mogen niet door
kinderen worden uitgevoerd, tenzij ze ouder dan 8 jaar zijn en
onder toezicht staan.
► Houd het apparaat en het bijbehorende snoer buiten bereik van
kinderen jonger dan 8 jaar.
► Leg het snoer zo, dat er niemand op trapt of erover kan struikelen.
► Raak tijdens het gebruik nooit de glazen deur of de behuizing
aan, omdat die zeer heet worden. Gebruik een pannenlap of
iets dergelijks om de glazen deur te openen om verbrandingen
te vermijden!
► Raak nooit de verwarmingselementen of het kijkvenster aan als
het apparaat in bedrijf is of voordat het apparaat is afgekoeld.
Kom tijdens het bedrijf niet met uw handen in de gaarruimte.
Wacht tot het apparaat is afgekoeld. Anders kunt u zich verbranden.
► Laat het apparaat na gebruik eerst afkoelen alvorens het te
transporteren.
► Gebruik bij de omgang met het hete apparaat altijd ovenwanten
of pannenlappen!
Voorzichtig! Heet oppervlak!
Page 28

25
SGBR 1500 A2
NL
BE
LET OP – MATERIËLE SCHADE!
► Gebruik geen externe tijdschakelklok of een separaat systeem
voor afstandsbediening om het apparaat te bedienen.
► Laat het apparaat nooit onbeheerd als het is ingeschakeld.
► Let erop dat het apparaat, het snoer en de stekker nooit in aan-
raking komen met hittebronnen zoals kookplaten of open vuur.
► Gebruik het apparaat alleen met de meegeleverde originele
accessoires.
► Knik of plet het snoer niet.
► Trek het snoer altijd met de stekker uit het stopcontact, trek nooit
aan het snoer zelf.
► Tijdens het bedrijf mogen zich geen licht brandbare materialen
in de onmiddellijke omgeving van de grill- en bakautomaat bevinden (bijv. vaatdoeken, ovenwanten, enz.).
► Droog nooit textiel of voorwerpen boven of in het apparaat.
Er bestaat brandgevaar!
Page 29

26
SGBR 1500 A2
NL
BE
Plaatsen
WAARSCHUWING! BRANDGEVAAR!
► Zet het apparaat nooit onder hangkasten of
in de nabijheid van gordijnen, kastenwanden
of andere licht ontvlambare voorwerpen.
► De afstand van het apparaat tot hangkasten,
plafonds, wanden en dergelijke moet naar
boven minstens 10 cm en aan de zijkanten
minstens 5 cm bedragen. Het apparaat mag
dus niet in bijv. een kast of iets dergelijks
worden geplaatst. Anders is een voldoende
ventilatie van het apparaat niet mogelijk en
kan er brand ontstaan of kan het apparaat
beschadigd raken.
► Plaats het apparaat uitsluitend op een hitte-
bestendige ondergrond. Anders bestaat er
brandgevaar en kan het apparaat beschadigd raken. Het gebied onder de bodem van
het apparaat kan verkleuren en beschadigd
raken. Bovendien kunnen bij een zachte
ondergrond permanente afdrukken in de
ondergrond ontstaan.
GEVAAR - ELEKTRISCHE SCHOK!
► Plaats het apparaat niet in de onmiddellijke
nabijheid van water, bijv. bij een gootsteen,
een badkuip of in vochtige kelderruimtes.
Anders bestaat er gevaar voor een stroomschok.
■ Plaats het apparaat op een stevige, vlakke en
hittebestendige ondergrond (bijv. op een werkblad van roestvrij staal of natuursteen zoals
graniet). Zorg voor voldoende ventilatie
rondom het apparaat.
■ Maak alle onderdelen schoon, zoals beschreven
in het hoofdstuk “Reiniging en onderhoud”.
Gebruik van het apparaat
Glazen deur
LET OP! MATERIËLE SCHADE!
►
Leun niet op de glazen deur . Plaats geen
voorwerpen op de glazen deur . Hierdoor
raken de scharnieren beschadigd.
■ Wanneer u voedsel met veel vet bereidt, kan
er meer rookontwikkeling ontstaan. Sluit in dat
geval de glazen deur niet helemaal, maar
laat deze op een kier openstaan:
De glazen deur heeft een vergrendelings-
stand, zodat deze met een opening ter grootte
van een kier open blijft staan: wanneer u de
glazen deur voorzichtig dichtdoet, blijft deze
kort voor het sluiten in deze stand staan.
■ Ook bij het drogen van fruit om gedroogd fruit
te maken moet de glazen deur in de vergren-
delingsstand blijven staan, zodat het vocht kan
ontsnappen en het fruit beter droogt.
Kruimelplaat plaatsen
■ Schuif de kruimelplaat onder de onderste
verwarmingselementen , zodat deze plat
op de bodem van het apparaat ligt.
Page 30

27
SGBR 1500 A2
NL
BE
Draaispies gebruiken
WAARSCHUWING! LETSELGEVAAR!
► Gebruik altijd de tang 3 om de hete draai-
spies 6 in het apparaat te plaatsen of uit het
apparaat te nemen.
■ Met de beide draaispiesklemmen 0 kunt u het
te grillen product op de draaispies 6 vastzetten.
Maak de vergrendelingen . op de draaispiesklemmen 0 los, verschuif deze zodanig dat het
te grillen product ertussen wordt vastgeklemd
en schroef de vergrendelingen . weer vast.
■ Schuif eerst het uiteinde van de draaispies 6
zonder uitsparing in de aandrijving (afb. 1):
Afb. 1: Draaispies 6 in de aandrijving schuiven
■ Leg vervolgens het andere uiteinde van de
draaispies 6 met de diepe uitsparing in de
draaispieshouder (afb. 2):
Afb. 2: Draaispies 6 in de draaispieshouder
leggen
OPMERKING
► Schuif de bakplaat - altijd in de onderste
geleiding wanneer u de draaispies 6 ge-
bruikt. Zo wordt omlaag druipende vloeistof
opgevangen.
■ Om de hete draaispies 6 te verwijderen, grijpt
u met de haak aan het uiteinde van de tang 3
in de verdiepingen op de draaispies 6(afb. 3):
Afb. 3: Inhaken van de tang 3 onder de
draaispies 6
■ Til eerst de linkerkant van de draaispies 6 uit
de draaispieshouder en trek dan de draai-
spies 6 uit de aandrijving .
Page 31

28
SGBR 1500 A2
NL
BE
Bakplaat/grillrooster gebruiken
WAARSCHUWING! LETSELGEVAAR!
► Gebruik altijd de tang om de hete bak-
plaat -/het hete grillrooster ! in het apparaat te plaatsen of uit het apparaat te nemen.
■ Schuif de bakplaat -/het grillrooster ! in een
van de 3 geleidingen in de gaarruimte van het
apparaat.
LET OP! MATERIËLE SCHADE!
► Leg de bakplaat -/het grillrooster ! nooit
rechtstreeks op de verwarmingselementen .
■ Om de hete bakplaat - of het grillrooster ! te
kunnen uitnemen, haakt u de tang als volgt in:
Afb. 4: Inhaken van de tang bij het grillrooster !
Afb. 5: Inhaken van de tang bij de bakplaat -
Vóór de ingebruikname
1) Steek de stekker in een stopcontact.
2) Draai de temperatuurregelaar met de wijzers
van de klok mee tot aan de aanslag naar de
hoogste temperatuur
.
3) Draai de functieschakelaar naar "Boven- en
onderwarmte"
.
4) Open de glazen deur en laat die voor deze
procedure geopend.
5) Haal eventuele bevestigde accessoires uit de
gaarruimte.
6) Draai de timer naar 20 minuten.
OPMERKING
► Bij de eerste keer opwarmen van het ap-
paraat kunnen restanten van het productieproces lichte rook- en geurontwikkeling
veroorzaken. Dat is normaal en volkomen
ongevaarlijk.
Zorg voor voldoende ventilatie, open bijvoorbeeld een raam.
Het apparaat wordt na 20 minuten automatisch uitgeschakeld.
Wanneer u het verwarmen voortijdig wilt onderbreken, draait u de temperatuurregelaar tot
aan de aanslag tegen de wijzers van de klok
in en zet u de timer op “OFF - 0”.
7) Laat het apparaat afkoelen en reinig het
apparaat zoals beschreven in het hoofdstuk
"Reiniging en onderhoud".
Nu is het apparaat gereed voor gebruik.
Page 32

29
SGBR 1500 A2
NL
BE
Bediening van het apparaat
Functieschakelaar
Met de functieschakelaar kunt u het apparaat
inschakelen en 5 verschillende functies instellen:
Symbool Betekenis
"Bovenwarmte"
bijv. voor gratineren
"Onderwarmte"
bijv. voor het bakken
van taarten
"Boven- en onderwarmte"
bijv. voor het bakken van
pizza's
"Bovenwarmte/
circulatielucht/draaispies"
bijv. om gevleugelte te grillen
"Boven- en onderwarmte/
circulatielucht"
bijv. om broodjes af te bakken
OFF
"OFF": het apparaat is
uitgeschakeld
Temperatuurregelaar
Met de temperatuurregelaar kunt u de gewenste
temperatuur instellen.
■ Wanneer u de temperatuur instelt voor de func-
ties "Bovenwarmte"
, "Onderwarmte" of
"Boven- en onderwarmte" , gaat u uit van de
met " " gemarkeerde schaal.
■ Wanneer u de temperatuur instelt voor de
functies “Bovenwarmte/circulatielucht/draaispiess” of "Boven- en onderwarmte/
circulatielucht" , gaat u uit van de met " "
gemarkeerde schaal.
Timer
Met de timer kunt u de gaartijd instellen:
■ Stel de timer in op de gewenste gaartijd.
Na afloop van de ingestelde tijd klinkt er een
geluidssignaal en stopt het verwarmen.
Als de functie "Bovenwarmte/circulatielucht/
draaispies"
is gekozen, stopt ook het
draaien van de draaispies 6.
Grillen en bakken
1) Leg de kruimelplaat in het apparaat.
2) Neem het grillrooster ! en de bakplaat -
uit het apparaat. Bedek deze desgewenst met
bakpapier resp. bestrijk de bakplaat - met
voor bakken geschikt vet.
OPMERKING
► Afhankelijk van het gerecht moet de oven
worden voorverwarmd. Volg de aanwijzingen in het betreffende recept op.
Voorverwarmen is in elk geval zinvol bij:
– zeer korte baktijden,
– knapperige korsten,
– kwetsbare gerechten die een constante
temperatuur vereisen, zoals bijvoorbeeld
soufflés.
► Wanneer voorverwarmen niet nodig is, kunt
u stap 3 overslaan.
3) Laat het apparaat ca. 10 minuten (al naar gelang de temperatuurinstelling) op de gewenste
temperatuur heet worden:
– Kies de gewenste temperatuur met de tempe-
ratuurregelaar . Gebruik hierbij de juiste
schaal (zie hoofdstuk "Temperatuurregelaar".)
– Kies daarna met de functieschakelaar de
gewenste functie.
Page 33

30
SGBR 1500 A2
NL
BE
OPMERKING
► Wanneer u de functie met circulatielucht kiest,
kunt u in de regel afzien van voorverwaming
van de grill- en gaarruimte.
– Stel met de timer de voorverwarmingstijd
in (ca. 10 minuten).
– Sluit de glazen deur .
4) Als de tijd verstreken is, legt u het grill- resp.
bakgoed op het grillrooster ! resp. op de
bakplaat - en schuift u het in een van de
geleidingen. Let daarbij op voldoende afstand
tussen het grill- resp. bakgoed en de binnenwanden en verwarmingselementen van het apparaat.
OPMERKING
► Als u sterk druppelende levensmiddelen op
het grillrooster ! klaarmaakt, schuif dan
de bakplaat - in de onderste geleiding.
Zodoende wordt bijv. omlaag druipend
vet opgevangen en is het apparaat nadien
gemakkelijker schoon te maken.
5) Sluit de glazen deur voordat u het grillen/
bakken start.
6) Stel met de timer de gewenste grill- resp.
baktijd in. De maximale grill- resp. baktijd
bedraagt 120 minuten.
OPMERKING
► Wanneer de garingstijd van uw grill- resp. bak-
goed minder dan 20 minuten bedraagt, zet
u de timer eerst op 40 minuten en daarna
terug op de gewenste grill- resp. baktijd.
Het indicatielampje geeft aan dat het apparaat
is ingeschakeld. De schakelaar van de timer
beweegt nu tegen de wijzers van de klok in naar
"OFF - 0".
Het apparaat wordt na de ingestelde automatisch
uitgeschakeld, er klinkt een geluidssignaal en het
indicatielampje dooft.
OPMERKING
Wanneer u het verwarmen voortijdig wilt onderbreken, draait u de temperatuurregelaar tot
aan de aanslag tegen de wijzers van de klok in
en zet u de timer op "OFF - 0".
7) Haal na het verwarmen het grillrooster !
resp. de bakplaat - met de tang uit het
apparaat.
8) Zet de functieschakelaar op "OFF".
Grillen met draaispies
1) Leg de kruimelplaat in het apparaat.
2) Als de draaispies 6 is bevestigd, neemt u
deze uit het apparaat.
3) Schuif de bakplaat - in de onderste geleider.
4) Maak het te grillen product vast met de draaispiesklemmen 0. Zorg ervoor dat het te grillen
product vrij in de gaarruimte kan draaien,
zonder ergens tegenaan te stoten. Het kan gebeuren dat de draairichting van de draaispies 6
omkeert wanneer het te grillen product ergens
tegenaan stoot.
De beide verdiepingen die zich op de draaispies 6 bevinden, moeten vrij toegankelijk
blijven, anders kan de draaispies 6 niet met
de tang 3 worden vastgepakt.
5) Bevestig de draaispies 6 in de gaarruimte
(zie hoofdstuk "Draaispies gebruiken").
6) Sluit de glazen deur .
Page 34

31
SGBR 1500 A2
NL
BE
OPMERKING
Wanneer u het verwarmen voortijdig wilt onderbreken, draait u de temperatuurregelaar tot
aan de aanslag tegen de wijzers van de klok in
en zet u de timer op "OFF - 0".
7) Stel op de temperatuurregelaar de gewenste
temperatuur in.
8) Zet de functieschakelaar op “Bovenwarmte/
circulatielucht/draaispies”
.
Stel op de timer de gewenste grilltijd in.
Het apparaat start het grillproces en de draaispies 6 gaat draaien.
Het indicatielampje geeft aan dat het apparaat
is ingeschakeld. De schakelaar van de timer
beweegt nu tegen de wijzers van de klok in naar
"OFF - 0".
Het apparaat wordt na de ingestelde automatisch
uitgeschakeld, er klinkt een geluidssignaal en het
indicatielampje dooft.
OPMERKING
Wanneer u het verwarmen voortijdig wilt onderbreken, draait u de temperatuurregelaar tot
aan de aanslag tegen de wijzers van de klok in
en zet u de timer op "OFF - 0".
9) Haal na het grillen de draaispies 6 met de
tang 3 uit het apparaat.
10) Zet de functieschakelaar op "OFF".
VOORBEELD GRILLKIP
Ingrediënten
♦ Grillkip (ca. 1,3 kg, ontdaan van ingewanden)
♦ Kruiden (zout, paprika)
♦ Spijsolie
1) Kruid de grillkip van binnen en buiten met
zout en paprikapoeder. Bestrijk de kip van
buiten met hittebestendige spijsolie.
2) Schuif de grillkip op de grillspies en maak
hem vast met de draaispiesklemmen 0. Let er
daarbij op dat de verdiepingen op de draaispies 6 vrij blijven, zodat u de draaispies 6
met de tang 3kunt vastpakken. Al naar
gelang de vorm van de grillkip kan het nodig
zijn om de vleugels en pootjes met vuurvast
opbindtouw vast te binden, zodat deze
tijdens het draaien nergens tegenaan stoten.
3) Schuif de bakplaat - in de onderste
geleider.
4) Verwarm het apparaat ca. 10 minuten met
de functie "Boven- en onderwarmte/circulatielucht"
op 210°C voor.
5) Plaats de grillkip op de draaispies met de
tang 3 in het apparaat.
6) Zet de functieschakelaar op "Bovenwarmte/
circulatielucht/draaispies
" en sluit de
deur.
7) Zet de timer op ca. 80 minuten.
De gaartijd kan variëren, al naar gelang de
grootte en toestand van de grillkip.
8) Bestrijk de grillkip tussendoor af en toe met
een beetje spijsolie. Zo wordt hij knapperig.
9) Wanneer de ingestelde tijd is verstreken, haalt
u de grillspies met de grillkip voorzichtig
met de tang 3 uit het apparaat. Maak de
draaispiesklemmen 0 los en trek de grillkip
van de draaispies 6.
Page 35

32
SGBR 1500 A2
NL
BE
Reiniging en onderhoud
GEVAAR - ELEKTRISCHE SCHOK!
►
Haal voor het schoonmaken altijd eerst de
stekker uit het stopcontact! Er bestaat gevaar
voor een elektrische schok!
Dompel het apparaat nooit onder in water
of in andere vloeistoffen!
WAARSCHUWING! LETSELGEVAAR!
► Laat het apparaat na gebruik altijd afkoelen
alvorens het te reinigen. Anders bestaat er
gevaar voor brandwonden!
■ U kunt het apparaat en de accessoires het beste
meteen na het afkoelen reinigen. Dan laten
resten van levensmiddelen zich gemakkelijker
verwijderen.
LET OP! MATERIËLE SCHADE!
► Gebruik geen schurende of bijtende schoon-
maakmiddelen. Deze kunnen de oppervlakken
beschadigen!
► Maak de onderdelen van het apparaat niet
schoon in de vaatwasser!
► Reinig de gaarruimte niet met een ovenspray,
omdat resten op de verwarmingselementen
dan niet meer kunnen worden verwijderd.
■ Veeg het apparaat af met een vochtige doek.
Zo nodig doet u wat mild afwasmiddel op de
doek en veegt u alles na met een doek die is
bevochtigd met schoon water. Droog alles
goed af.
■ Reinig de gaarruimte en de glazen deur met
een vochtige doek. Zo nodig doet u wat mild afwasmiddel op de doek en veegt u alles na met
een doek die is bevochtigd met schoon water.
Droog alles goed af.
■ Reinig de tangen /3, de draaispies 6, de
draaispiesklemmen 0, de vergrendelingen .,
de bakplaat -, het grillrooster ! en de kruimelplaat in warm afwaswater. Droog alle onderdelen na het reinigen goed af.
Opbergen
■ Berg het schoongemaakte apparaat en de
accessoires op een schone, stofvrije en droge
plaats op.
Page 36

33
SGBR 1500 A2
NL
BE
Problemen oplossen
Probleem Oorzaak Oplossing
Het apparaat
werkt niet.
De stekker zit niet in het stopcontact.
Steek de stekker in een
stopcontact.
Het stopcontact is defect. Gebruik een ander stopcontact.
Het apparaat is defect.
Neem contact op met de klantenservice.
Het indicatie-
lampje brandt
maar het apparaat
wordt niet heet.
De functieschakelaar staat op OFF.
Draai de functieschakelaar
naar de gewenste functie.
De gaartijd van de
etenswaren lijkt zeer
lang.
De glazen deur is vaak geopend om de
voortgang van het gaarproces te controleren.
Open de glazen deur niet
vaker dan noodzakelijk.
Er is een verkeerde temperatuur ingesteld.
Controleer de temperatuurinstellingen.
Tijdens het gebruik
treedt er rook- en
geurontwikkeling op.
Op de verwarmingselementen bevinden
zich reinigings- of levensmiddelresten.
Haal de etenswaren uit het
apparaat en ga verder met het
gaarproces met geopende glazen
deur , tot de rookontwikkeling
is verdwenen.
Neem contact op met de klantenservice, als de storingen met de bovenstaande aanwijzingen niet
verholpen kunnen worden, of indien u andere storingen constateert.
Page 37

34
SGBR 1500 A2
NL
BE
Garantie en service
U hebtop dit apparaat 3 jaar garantie vanaf de
aankoopdatum. Het apparaat is met de grootst
mogelijke zorg vervaardigd en voorafgaand aan
de levering nauwkeurig gecontroleerd.
Bewaar de kassabon als bewijs van aankoop.
Neem telefonisch contact op met uw servicepunt, mocht u aanspraak willen maken op de
garantie. Alleen op die manier is een kosteloze
verzending van uw product gegarandeerd.
De garantie geldt uitsluitend voor materiaal- of
fabricagefouten, echter niet voor transportschade,
niet voor onderdelen die onderhevig zijn aan
slijtage of voor beschadigingen van breekbare
delen, bijv. schakelaars of accu's. Het product is
uitsluitend bestemd voor privégebruik en niet voor
bedrijfsmatige doeleinden.
Bij verkeerd gebruik en ondeskundige behandeling,
bij gebruik van geweld en bij reparaties die niet
door ons erkend servicefiliaal zijn uitgevoerd,
vervalt de garantie.
Uw wettelijke rechten worden door deze garantie
niet beperkt.
De garantieperiode wordt door deze waarborg
niet verlengd. Dat geldt ook voor vervangen en gerepareerde onderdelen. Eventueel al bij aankoop
aanwezige schade en gebreken moeten meteen na
het uitpakken worden gemeld, echter uiterlijk twee
dagen na de aankoopdatum. Voor reparaties na
afloop van de garantieperiode worden kosten in
rekening gebracht.
Service Nederland
Tel.: 0900 0400223 (0,10 EUR/Min.)
E-Mail: kompernass@lidl.nl
IAN 113370
Service België
Tel.: 070 270 171 (0,15 EUR/Min.)
E-Mail: kompernass@lidl.be
IAN 113370
Bereikbaarheid hotline:
Maandag t/m vrijdag van 8:00 tot 20:00 uur
(CET)
Afvoeren
Gooi het apparaat in geen
geval weg bij het gewone
huisvuil. Dit product voldoet
aan de Europese richtlijn
2012/19/EU.
Voer het apparaat af via een erkend afvalverwerkingsbedrijf of via uw gemeentereiniging. Neem de
momenteel geldende voorschriften in acht. Neem
bij twijfel contact op met de verantwoordelijke
instantie.
De verpakking bestaat uit milieuvrien-
delijke materialen, die u via plaatselijke
recyclepunten kunt afvoeren.
Importeur
KOMPERNASS HANDELS GMBH
BURGSTRASSE 21
44867 BOCHUM
GERMANY
www.kompernass.com
Page 38

35
SGBR 1500 A2
NL
BE
Recepten
In dit hoofdstuk geven we een paar voorbeelden van
de bereiding van etenswaren. Deze voorbeelden zijn
suggesties. De bereidingstijd kan variëren.
W
ij aanvaarden geen aansprakelijkheid voor de
recepten. Alle gegevens m.b.t. ingrediënten en
bereiding zijn richtwaarden. Vul deze receptsuggesties aan met uw persoonlijke bevindingen. Wij
wensen u in ieder geval een geslaagde en lekkere
maaltijd toe.
OPMERKING
Neem de bereidingsaanwijzingen op de
verpakking van de levensmiddelen in acht.
Muffins
Ingrediënten voor vier personen:
♦ 1 kopje meel
♦ 1 theelepel bakpoeder
♦ 1 ei
♦ 1 eetlepel gesmolten boter
♦ 1 kopje melk
♦ 3 eetlepels suiker
♦ 1 snufje zout
♦ Voor verschillende varianten daarnaast noten,
bananenpartjes of chocovlokken
Bereiding:
1) Meng in een schaal meel, bakpoeder, ei, melk,
zout en suiker langzaam door elkaar.
2) Smelt de boter in een pan smelten roer deze
door het deeg.
3) Naar smaak mengen met noten, chocovlokken
of geprakte bananen.
4) Doe het bereide deeg in hiervoor bestemde
muffinvormpjes en zet deze op de bakplaat -.
5) Bak de muffins op 220 °C met boven- en
onderwarmte ca. 15 minuten op het onderste
niveau.
Hawaïtosti’s
Ingrediënten voor 4 tosti’s:
♦ 4 plakjes brood
♦ 1-2 eetlepels remoulade
♦ 120 g gekookte ham
♦ 1/2 blikje ananas
♦ 4 plakken kaas om te gratineren
♦ Curry
Bereiding:
♦ Rooster de plakjes brood.
♦ Bestrijk ze daarna dun met remoulade en beleg
ze met de gekookte ham.
♦ Leg op elke belegde boterham een schijf ananas.
Kruid het geheel met curry.
♦ Leg daarna op elke schijf ananas een plak kaas.
♦ Leg de hawaïtosti’s op het grillrooster ! en
gratineer ze in de grill- en bakautomaat op het
bovenste niveau bij ca. 200 °C, bovenwarmte
ca. 8 minuten.
Diepvriespizza bakken
Bereiding:
♦ Schuif het grillrooster ! op de bovenste gelei-
dingen van de grill- en bakruimte.
♦ Leg de diepvriespizza zonder verpakking op het
grillrooster ! op de bovenste geleidingen van
de grill- en .
♦ Bak de pizza bij boven- en onderwarmte ca. 20
minuten.
♦ Houd u aan de aanwijzingen voor de tempera-
tuur op de verpakking.
Page 39

36
SGBR 1500 A2
NL
BE
Spritskoekjes
Ingrediënten:
♦ 125 g boter
♦ 125 g suiker
♦ 1 pakje vanillesuiker
♦ 1 snufje zout
♦ 1 ei
♦ 1 eiwitten
♦ 250 g meel (type 405)
♦ 1 theelepel bakpoeder
♦ Geraspte schil van een halve citroen
Bereiding:
1) Roer de boter schuimig.
2) Voeg suiker, vanillesuiker, citroenschil en eieren
toe.
3) Meng meel, bakpoeder en zout en roer dit met
een lepel door het deeg.
4) Laat het deeg ca. 10 minuten rusten.
5) Breng het deeg in de gewenste vorm, bijv. met
behulp van een vleeswolf, uitsteekvormpjes of
een spuitzak.
6) Leg de spritskoekjes op de met bakpapier
beklede bakplaat -.
7) Bak de spritsen in de voorverwarmde oven bij
180 °C boven- en onderwarmte ca. 10-15
minuten op het bovenste niveau goudbruin.
OPMERKING
De hoeveelheid deeg is voldoende voor meerdere
bakplaten -.
Broodjes
Ingrediënten:
♦ 300 g meel (of volkorenmeel)
♦ 2 theelepels bakpoeder
♦ 200 g lijnzaad
♦ 1 ei
♦ 500 g kwark
♦ 1 theelepel zout
♦ Naar smaak karwijzaad, uien, spek ...
Bereiding:
1) Kneed alles goed door elkaar en maak er
kleine broodjes van.
2) Leg de broodjes op de met bakpapier beklede
bakplaat -.
3) Bak bij ca. 200° C bovenwarmte ongeveer
30 minuten op het bovenste niveau.
OPMERKING
De hoeveelheid deeg is voldoende voor meerdere
bakplaten -.
Page 40

37
SGBR 1500 A2
NL
BE
Meringues
Ingrediënten:
♦ 1 eiwitten
♦ Zout
♦ 45 g suiker
Bereiding:
1) Doe het afgekoelde eiwit in een vetvrije roerkom.
Er mag geen eigeel bijkomen, anders wordt het
eierschuim niet stevig.
2) Klop het eiwit op een langzame stand, zodat
er geen grote luchtbellen in het eierschuim
ontstaan.
3) Kruid het schuim met een snufje zout.
4) Voeg de helft van de suiker beetje bij beetje
toe wanneer het eierschuim stevig begint te
worden.
5) Klop het schuim daarna op de hoogste stand
stijf.
6) Voeg de rest van de suiker toe. Daardoor krijgt
het meringueschuim de benodigde stevigheid.
7) Doe het meringueschuim in een spuitzak met
een grote stervormige spuitmond en spuit op
korte afstand roosjes, tongen of andere vormen
op de met bakpapier beklede bakplaat -.
8) De grill- en bakautomaat op ca. 100 °C circulatielucht voorverwarmen.
9) De meringues op het hoogste niveau bij ca.
100 °C circulatielucht ca. 2 uur laten bakken.
Botercroutons
Ingrediënten:
♦ 2 plakjes witbrood
♦ 1 EL boter
Bereiding:
1) Snijd het witbrood in kleine blokjes.
2) Smelt de boter bij laag vuur in een pan en
meng het witbrood erdoor.
3) Bedek de bakplaat - met bakpapier en verdeel
de blokjes witbrood er gelijkmatig over.
4) Bak de blokjes witbrood bij ca. 170 °C
bovenwarmte op het bovenste niveau, tot ze
goudbruin zijn (ca. 15 - 20 minuten).
OPMERKING
U kunt ook kruiden- of knoflookboter gebruiken
in plaats van gewone boter. De baktijd is dan
ca. 5 minuten korter.
Page 41

38
SGBR 1500 A2
NL
BE
Gehaktbaguettes
Ingrediënten:
♦ 2 kleine baguettes
♦ 250 g gehakt (half-om-half)
♦ 2 tomaten
♦ 1 ui, gesnipperd
♦ 2 el tomatenpuree
♦ 40 g geraspte Parmezaanse kaas
♦ 4 plakken kaas
♦ Zout en peper
Bereiding:
1) Snijd de baguettes open en hol ze uit.
2) Meng het gehakt, de tomatenpuree, de ui, de
Parmezaanse kaas, een beetje zout en een
beetje peper door elkaar.
3) Maak van het gehaktmengsel 4 even grote,
zo plat mogelijke schijven en leg die op de
baguettehelften.
4) Snijd de tomaten in plakjes en verdeel ze over
de baguettes.
5) Verdeel de kaas over de baguettes.
6) Leg de baguettes op de bakplaat - en bak
ze bij ca. 230 °C in de voorverwarmde oven
met boven- en onderwarmte ca. 20 minuten
op het onderste niveau.
OPMERKING
U kunt het gehaktmengsel verder op smaak
brengen met basilicum, chilipoeder of andere
kruiden.
Gegratineerde bloemkool
Ingrediënten:
♦ 1/2 bloemkool (ca. 250 g)
♦ 3 schijfjes citroen
♦ 1 EL boter
♦ 1 grote TL bloem
♦ 1 EL citroensap
♦ 1 EL geschaafde amandel
♦ 2 EL gratinkaas (geraspt)
♦ Zout, peper, nootmuskaat
Bereiding:
1) Snij de bloemkool in roosjes en was deze.
2) Kook de bloemkool met de citroenschijfjes in
kokend water met zout 8-10 minuten, zodat de
bloemkool beetgaar is. Vang bij het afgieten
ca. 150 ml van het kookwater op.
3) Laat in een pan de boter smelten en bak de
bloem al roerend ca. 1 minuut.
4) Voeg al roerend het kookwater van de bloemkool toe en laat het ca. 2 minuten koken. Als
het bloemmengsel te dik wordt, voegt u beetje
bij beetje nog wat water toe, tot er een romig
mengsel ontstaat. Kruid het geheel met zout,
peper en nootmuskaat.
5) Leg de bloemkool in een ovenschaal (ca.
14 cm doorsnede) en giet de saus er
gelijkmatig overheen.
6) Strooi de kaas en de geschaafde amandel
erover.
7) Zet de ovenschaal op de bakplaat -.
8) Gratineer de ovenschotel bij ca. 200 °C in de
voorverwarmde oven met boven- en onderwarmte ca. 20 minuten op het onderste niveau.
Page 42

39
SGBR 1500 A2
NL
BE
Bladerdeegpakketjes met zalmvulling
Ingrediënten:
♦ 1 pakje bladerdeegvellen (ca. 8 stuks)
♦ 1 pakje zalm, gerookt, in plakken (ca. 200 g)
♦ 1 citroen
♦ 1 ui
♦ 1 pakje roomkaas (200 g)
♦ Verse dille
♦ Zout en peper
♦ 1 eidooier
Bereiding:
1) Haal de bladerdeegvellen los en laat ze eventueel ontdooien.
2) Meng de roomkaas met zout, peper en het sap
van een citroen.
3) Snipper de ui.
4) Voeg de helft van de zalm en de ui toe aan het
roomkaasmengsel en pureer alles grof met een
staafmixer.
5) Snijd de rest van de zalm in dunne reepjes.
6) Voeg de zalm en de dille toe aan het mengsel
en meng alles door elkaar.
7) Leg steeds een eetlepel van het mengsel op
een bladerdeegvel en vouw het dicht.
8) Bestrijk het gevouwen pakketje met eigeel.
9) Leg de bladerdeegpakketjes op de bakplaat -.
Laat voldoende afstand tussen de pakketjes,
omdat het bladerdeeg rijst.
10) Bak de bladerdeegpakketjes op het onderste
niveau bij ca. 230 °C boven- en onderwarmte
ca. 25-30 minuten. Het bladerdeeg moet een
lichtbruine kleur krijgen.
OPMERKING
De aangegeven hoeveelheid is voldoende voor
meerdere bakplaten -.
Page 43

40
SGBR 1500 A2
Page 44

41
SGBR 1500 A2
DE
AT
CH
Inhaltsverzeichnis
Einleitung .............................................................42
Bestimmungsgemäßer Gebrauch .........................................42
Lieferumfang ..........................................................42
Ger
ätebeschreibung. . . . . . . . . . . . . . . . . . . . . . . . . . . . . . . . . . . . . . . . . . . . . . . . . . . .
42
Technische Daten ......................................................42
Sicherheitshinweise ....................................................43
A
ufstellen ............................................................
46
Benutzung des Ger
ätes .................................................
46
Glas
tür ...........................................................................
46
Krümelblech einlegen ...............................................................46
Drehspieß benutzen .................................................................47
Backblech/Gitterrost benutzen ........................................................48
Vor dem ersten Gebrauch ...............................................48
Bedienen des Gerätes ..................................................49
Funktionsschalter ...................................................................49
T
emperaturregler ...................................................................
49
Timer ............................................................................49
Grillen und Backen .....................................................49
Gr
illen mit Drehspieß ...................................................
50
Reinigung und Pflege ...................................................52
Aufbewahrung ........................................................52
Fehlerbehebung .......................................................53
Gar
antie und Service ...................................................
54
Entsorgung ...........................................................54
Importeur ............................................................54
R
ezepte ..............................................................
55
Page 45

42
SGBR 1500 A2
DE
AT
CH
Einleitung
Herzlichen Glückwunsch zum Kauf Ihres neuen
Gerätes.
Sie haben sich damit für ein hochwertiges Produkt
entschieden. Die Bedienungsanleitung ist Bestandteil dieses Produkts. Sie enthält wichtige Hinweise
für Sicherheit, Gebrauch und Entsorgung. Machen
Sie sich vor der Benutzung des Produkts mit allen
Bedien- und Sicherheitshinweisen vertraut. Benutzen Sie das Produkt nur wie beschrieben und für
die angegebenen Einsatzbereiche. Händigen Sie
alle Unterlagen bei Weitergabe des Produkts an
Dritte mit aus.
Bestimmungsgemäßer
Gebrauch
Der Grill- und Backautomat dient ausschließlich dem
Erhitzen, Garen und Grillen von Speisen.
Dieses Gerät ist ausschließlich für die Benutzung in
privaten Haushalten bestimmt. Nutzen Sie es nicht
gewerblich.
Jede andere Verwendung gilt als nicht bestimmungsgemäß und kann zu Sachschäden oder sogar zu
Personenschäden führen.
Lieferumfang
♦ Grill- und Backautomat
♦ 1 Backblech
♦ 1 Gitterrost
♦ 2 Zangen
♦ Drehspieß mit 2 Klemmen
♦ 1 Krümelblech
♦ Bedienungsanleitung
HINWEIS
Kontrollieren Sie den Lieferumfang direkt nach
dem Auspacken auf Vollständigkeit und Beschädigungen. Wenden Sie sich, wenn nötig, an den
Service.
Gerätebeschreibung
Abbildung A:
Antrieb
Temperaturregler
Funktionsschalter
Timer
Kontrollleuchte
Glastür
eingesetztes Krümelblech
untere Heizstäbe
Drehspießaufnahme
Abbildung B:
Zange (für Backblech und Gitterrost)
- Backblech
3 Zange (für Drehspieß)
! Gitterrost
. Feststeller
0 Drehspießklemmen
6 Drehspieß
Technische Daten
Nennspannung: 220 - 240 V ~,
50/60 Hz
max. Leistungsaufnahme: 1500 W
Page 46

43
SGBR 1500 A2
DE
AT
CH
Sicherheitshinweise
GEFAHR – ELEKTRISCHER SCHLAG!
► Sie dürfen das Gerätegehäuse des Gerätes nicht öffnen oder
reparieren. In diesem Falle ist die Sicherheit nicht gegeben und
die Gewährleistung erlischt. Lassen Sie ein defektes Gerät nur
vom Händler oder autorisiertem Fachpersonal reparieren.
► Lassen Sie beschädigte Netzstecker oder Netzkabel sofort von
autorisiertem Fachpersonal oder dem Kundenservice austauschen, um Gefährdungen zu vermeiden.
► Lassen Sie keine Flüssigkeiten in das Gerätegehäuse gelangen.
Sie dürfen das Gerät keiner Feuchtigkeit aussetzen und nicht im
Freien benutzen. Darüber hinaus dürfen Sie keine mit Flüssigkeiten
gefüllten Gegenstände, wie z. B. Vasen auf dem Gerät abstellen.
Es besteht Brandgefahr und Gefahr eines elektrischen Schlags!
Falls doch einmal Flüssigkeit in das Gerätegehäuse gelangt, ziehen
Sie sofort den Netzstecker des Geräts aus der Netzsteckdose
und lassen Sie es reparieren.
► Fassen Sie Gerät, Netzkabel und -stecker nie mit nassen Händen
an. Es besteht sonst die Gefahr eines elektrischen Schlags.
Tauchen Sie das Gerät niemals in Wasser oder andere Flüssigkeiten! Hier kann Lebensgefahr durch elektrischen Schlag
entstehen, wenn im Betrieb Flüssigkeitsreste auf spannungsführende Teile gelangen.
Page 47

44
SGBR 1500 A2
DE
AT
CH
WARNUNG – VERLETZUNGSGEFAHR!
► Dieses Gerät kann von Kindern ab 8 Jahren sowie von Personen
mit reduzierten physischen, sensorischen oder mentalen Fähigkeiten
oder Mangel an Erfahrung und/oder Wissen benutzt werden,
wenn sie beaufsichtigt oder bezüglich des sicheren Gebrauchs
des Gerätes unterwiesen wurden und die daraus resultierenden
Gefahren verstanden haben.
► Kinder dürfen nicht mit dem Gerät spielen.
► Reinigung und Benutzer-Wartung dürfen nicht durch Kinder
durchgeführt werden, es sei denn, sie sind älter als 8 Jahre und
beaufsichtigt.
► Kinder jünger als 8 Jahre sind von Gerät und Anschlussleitung
fernzuhalten.
► Verlegen Sie das Netzkabel so, dass niemand darauf treten oder
darüber stolpern kann.
► Berühren Sie niemals die Glastür oder das Gehäuse während
der Benutzung, da diese sehr heiß werden. Verwenden Sie zum
Öffnen der Glastür einen Topflappen o.ä., um Verbrennungen zu
vermeiden!
► Berühren Sie niemals die Heizstäbe oder das Sichtfenster während
des Betriebs oder bevor das Gerät abgekühlt ist. Fassen Sie
während des Betriebs nicht in den Garraum. Warten Sie bis das
Gerät abgekühlt ist. Sie könnten sich andernfalls verbrennen.
► Lassen Sie das Gerät nach dem Gebrauch erst abkühlen, bevor
Sie es transportieren.
► Benutzen Sie immer Topfhandschuhe oder Topflappen, wenn Sie
mit dem heißen Gerät hantieren!
Vorsicht! Heiße Oberfläche!
Page 48

45
SGBR 1500 A2
DE
AT
CH
ACHTUNG – SACHSCHADEN!
► Benutzen Sie keine externe Zeitschaltuhr oder ein separates Fern-
wirksystem, um das Gerät zu betreiben.
► Lassen Sie das Gerät während des Betriebes niemals unbeaufsichtigt.
► Stellen Sie sicher, dass das Gerät, das Netzkabel oder der Netz-
stecker nicht mit heißen Quellen, wie Kochplatten oder offenen
Flammen, in Berührung kommen.
► Betreiben Sie das Gerät ausschließlich mit dem mitgelieferten
Originalzubehör.
► Knicken oder quetschen Sie das Netzkabel nicht.
► Ziehen Sie das Netzkabel stets am Stecker aus der Steckdose,
ziehen Sie nicht am Kabel selbst.
► Es dürfen sich während des Betriebs keine leicht brennbaren
Materialien in unmittelbarer Umgebung des Grill- und Backautomaten befinden (z. B. Geschirrhandtuch, Topflappen etc.).
► Trocknen Sie niemals Textilien oder Gegenstände auf, über oder
im Gerät. Es besteht Brandgefahr.
Page 49

46
SGBR 1500 A2
DE
AT
CH
Aufstellen
WARNUNG! BRANDGEFAHR!
► Stellen Sie das Gerät niemals unter Hänge-
schränke oder neben Gardinen, Schrankwänden
oder anderen entzündlichen Gegenständen.
► Der Abstand des Gerätes zu Hängeschränken,
Decken, Wänden oder ähnlichem muss nach
oben hin mindestens 10 cm und seitlich jeweils
5 cm betragen. Daher darf das Gerät z. B.
nicht in Schränke o. ä. gestellt werden. Andernfalls ist keine ausreichende Belüftung des
Gerätes möglich und es könnte einen Brand
verursachen oder beschädigt werden.
► Stellen Sie das Gerät nur auf eine hitzebestän-
dige Unterlage. Andernfalls besteht Brandgefahr und das Gerät kann beschädigt werden.
Der Bereich unter dem Geräteboden kann sich
verfärben und beschädigt werden. Darüber
hinaus können bei einem weichen Untergrund
dauerhafte Abdrücke in der Unterlage entstehen.
GEFAHR - ELEKTRISCHER SCHLAG!
► Stellen Sie das Gerät nicht in unmittelbarer
Nähe von Wasser auf, z. B. an Spülbecken,
Waschwannen oder in feuchten Kellerräumen. Andernfalls besteht die Gefahr eines
Stromschlags.
■ Stellen Sie das Gerät auf einem festen, ebenen
und hitzebeständigen Untergrund (z.B. Edelstahlarbeitsplatten oder Natursteinarbeitsplatten
wie Granit) auf. Sorgen Sie für ausreichende
Belüftung rund um das Gerät.
■ Reinigen Sie alle Teile wie im Kapitel „Reinigung
und Pflege“ beschrieben.
Benutzung des Gerätes
Glastür
ACHTUNG! SACHSCHADEN!
►
Stützen Sie sich nicht auf der Glastür
ab. Stellen Sie keine Gegenstände auf die
Glastür . Das führt zu Beschädigungen an
den Scharnieren.
■ Wenn Sie besonders fetthaltige Speisen zuberei-
ten, kann es zu erhöhter Rauchentwicklung kommen. Schließen Sie in diesem Fall die Glastür
nicht ganz, sondern lassen Sie sie einen Spalt
breit offen stehen:
Die Glastür hat eine Raststellung, so dass
diese einen Spalt breit offen steht: Wenn Sie die
Glastür vorsichtig zuklappen, rastet diese
kurz vor dem Schließen in dieser Stellung ein.
■ Auch beim Trocknen von Obst, um Trockenobst
herzustellen, sollte die Glastür in der Raststellung stehen bleiben, damit die Feuchtigkeit
entweichen kann und das Obst besser trocknet.
Krümelblech einlegen
■ Schieben Sie das Krümelblech unter die
unteren Heizstäbe , so dass es flach auf dem
Geräteboden aufliegt.
Page 50

47
SGBR 1500 A2
DE
AT
CH
Drehspieß benutzen
WARNUNG! VERLETZUNGSGEFAHR!
► Benutzen Sie immer die Zange 3, um den
heißen Drehspieß 6 in das Gerät einzusetzen
oder herauszunehmen.
■ Mit den beiden Drehspießklemmen 0 können
Sie das Grillgut am Drehspieß 6 fixieren.
Lösen Sie die Feststeller . an den Drehspießklemmen 0, verschieben Sie diese so, dass das
Grillgut dazwischen fest geklemmt wird und
schrauben Sie die Feststeller . wieder fest.
■ Schieben Sie zuerst das Ende des Drehspießes 6
ohne Nut in den Antrieb (Abb. 1):
Abb. 1: Drehspieß 6 in den Antrieb schieben.
■ Legen Sie dann das andere Ende des Drehspie-
ßes 6 mit der tiefen Nut in die Drehspießaufnahme (Abb. 2):
Abb. 2: Drehspieß 6 in die Drehspießaufnahme
legen
HINWEIS
► Schieben Sie immer das Backblech - in die
untere Schiene, wenn Sie den Drehspieß 6
verwenden. So werden herunterfallende
Flüssigkeiten aufgefangen.
■ Um den heißen Drehspieß 6 zu entnehmen grei-
fen Sie mit den Haken am Ende der Zange 3 in
die Vertiefungen am Drehspieß 6(Abb. 3):
Abb. 3: Einhaken der Zange 3 beim Drehspieß 6
■ Heben sie zuerst die linke Seite des Drehspießes 6
aus der Drehspießaufnahme und ziehen Sie
dann den Drehspieß 6 aus dem Antrieb .
Page 51

48
SGBR 1500 A2
DE
AT
CH
Backblech/Gitterrost benutzen
WARNUNG! VERLETZUNGSGEFAHR!
► Benutzen Sie immer die Zange , um das hei-
ße Backblech -/den heißen Gitterrost !in
das Gerät einzusetzen oder herauszunehmen.
■ Schieben Sie das Backblech -/den Gitterrost !
in eine der 3 Schienen im Garraum des Gerätes.
ACHTUNG! SACHSCHADEN!
► Legen Sie das Backblech -/den Gitterrost !
niemals direkt auf die Heizstäbe .
■ Um das heiße Backblech - oder den Gitterrost
! entnehmen zu können, haken Sie die Zange
folgendermaßen ein:
Abb. 4: Einhaken der Zange beim Gitterrost !
Abb. 5: Einhaken der Zange beim Backblech -.
Vor dem ersten Gebrauch
1) Stecken Sie den Netzstecker in eine Netzsteckdose.
2) Drehen Sie den Temperaturregler bis zum
Anschlag im Uhrzeigersinn auf die höchste
Temperatur.
3) Drehen Sie den Funktionsschalter auf
„Ober- und Unterhitze“
.
4) Öffnen Sie die Glastür und lassen Sie diese
für diesen Vorgang geöffnet.
5) Entnehmen Sie eventuell eingesetztes Zubehör
aus dem Garraum.
6) Drehen Sie den Timer auf 20 Minuten.
HINWEIS
► Beim erstmaligen Aufheizen des Gerätes
kann es durch fertigungsbedingte Rückstände
zu leichter Rauch- und Geruchsentwicklung
kommen. Das ist normal und völlig ungefährlich.
Sorgen Sie für ausreichende Belüftung, öffnen
Sie zum Beispiel ein Fenster.
Das Gerät schaltet sich nach 20 Minuten
automatisch aus.
Wenn Sie den Heizvorgang vorzeitig
unterbrechen wollen, drehen Sie den
Temperaturregler bis zum Anschlag
gegen den Uhrzeigersinn und stellen Sie
den Timer auf „OFF - 0“.
7) Lassen Sie das Gerät abkühlen und reinigen
Sie das Gerät wie im Kapitel „Reinigen und
Pflegen“ beschrieben.
Das Gerät ist nun betriebsbereit.
Page 52

49
SGBR 1500 A2
DE
AT
CH
Bedienen des Gerätes
Funktionsschalter
Am Funktionsschalter können Sie das Gerät
einschalten, sowie 5 verschiedene Funktionen
einstellen:
Symbol Bedeutung
„Oberhitze“
z.B. zum Überbacken
„Unterhitze“
z.B. zum Kuchenbacken
„Ober- & Unterhitze“
z.B. zum Pizza backen
„Oberhitze/Umluft/Dreh-
spieß“
z.B. um Geflügel zu grillen
„Ober- & Unterhitze/Umluft“
z.B. um Brötchen aufzubacken
OFF
„OFF“
das Gerät ist ausgeschaltet
Temperaturregler
Am Temperaturregler können Sie die gewünschte Temperatur einstellen.
■ Wenn Sie die Temperatur für die Funktionen
„Oberhitze“
, „Unterhitze“ oder „Ober-
& Unterhitze“
einstellen, orientieren Sie sich
an der mit „
“ gekennzeichneten Skala.
■ Wenn Sie die Temperatur für die Funktionen
„Oberhitze/Umluft/Drehspieß“ oder
„Ober- & Unterhitze/Umluft“ einstellen,
orientieren Sie sich an der mit „ “ gekennzeichneten Skala.
Timer
Mit Hilfe des Timers können Sie die Garzeit
einstellen:
■ Stellen Sie die Timer auf die gewünschte
Garzeit. Nach Beendigung der eingestellten
Zeit erklingt ein Signalton und das Gerät stoppt
das Heizen.
Falls die Funktion „Oberhitze/Umluft/Drehspieß“
gewählt ist, stoppt auch das
Drehen des Drehspießes 6.
Grillen und Backen
1) Legen Sie das Krümelblech in das Gerät.
2) Nehmen Sie den Gitterrost ! und das
Backblech - aus dem Gerät. Legen Sie diese
gegebenenfalls mit Backpapier aus bzw.
bestreichen Sie das Backblech - mit zum
Backen geeignetem Fett.
HINWEIS
► Je nach Gericht, muss der Backofen vorge-
heizt werden. Halten Sie sich an die Vorgaben im jeweiligen Rezept. Das Vorheizen ist
auf jeden Fall sinnvoll bei:
– sehr kurzen Backzeiten,
– knusprigen Krusten,
– empfindlichen Gerichten, die eine konstan-
te Temperatur erfordern, wie zum Beispiel
Soufflés.
► Wenn kein Vorheizen nötig ist, überspringen
Sie Handlungsschritt 3).
3) Lassen Sie das Gerät ca. 10 Minuten (je nach
Temperatureinstellung) auf die gewünschte
Temperatur aufheizen:
– Wählen Sie die gewünschte Temperatur mit
dem Temperaturregler . Achten Sie darauf, die korrekte Skala zu benutzen (siehe
Kapitel „Temperaturregler“.)
– Anschließend wählen Sie mit dem Funktions-
schalter die gewünschte Funktion.
Page 53

50
SGBR 1500 A2
DE
AT
CH
HINWEIS
► Falls Sie die Funktion mit Umluft wählen,
können Sie in der Regel auf ein Vorheizen
des Grill- und Garraums verzichten.
– Stellen Sie mit dem Timer die Vorheizzeit
ein (ca. 10 Minuten).
– Schließen Sie die Glastür .
4) Ist die Zeit abgelaufen, legen Sie das Grillbzw. Backgut auf den Gitterrost ! bzw. das
Backblech - und schieben Sie es in eine der
Schienen. Achten Sie dabei auf einen ausreichenden Abstand des Grill- bzw. Backguts zu
den Innenwänden und den Heizstäben des
Geräts.
HINWEIS
► Wenn Sie stark tropfendes Grillgut auf dem
Gitterrost ! zubereiten, dann schieben Sie
das Backblech - in die unterste Schiene. So
wird z.B. herunter tropfendes Fett aufgefangen und das Gerät ist später leichter zu
reinigen.
5) Schließen Sie die Glastür , bevor Sie den
Grill- Backvorgang starten.
6) Stellen Sie mit dem Timer die gewünschte
Grill- bzw. Backzeit ein. Die maximale Grillbzw. Backzeit beträgt 120 Minuten.
HINWEIS
► Wenn die Garzeit Ihres Grill- bzw. Backguts
weniger als 20 Minuten beträgt, stellen Sie
den Timer zunächst auf 40 Minuten und
dann zurück auf die gewünschte Grill- bzw.
Backzeit.
Die Kontrollleuchte zeigt an, dass das Gerät
eingeschaltet ist. Der Schalter des Timers
bewegt sich nun gegen den Uhrzeigersinn auf
„OFF - 0“ zu.
Das Gerät schaltet sich nach der eingestellten Zeit
automatisch aus, ein Signalton erklingt und die
Kontrollleuchte erlischt.
HINWEIS
Wenn Sie den Heizvorgang vorzeitig unterbrechen wollen, drehen Sie den Temperaturregler
bis zum Anschlag gegen den Uhrzeigersinn und
stellen Sie den Timer auf „OFF - 0“.
7) Entnehmen Sie nach dem Heizvorgang den
Gitterrost ! bzw. das Backblech - mit Hilfe
der Zange .
8) Stellen Sie den Funktionsschalter auf „OFF“.
Grillen mit Drehspieß
1) Legen Sie das Krümelblech in das Gerät.
2) Falls eingesetzt, nehmen Sie den Drehspieß 6
aus dem Gerät.
3) Schieben Sie das Backblech - in die unterste
Schiene.
4) Fixieren Sie das Grillgut mit den Drehspießklemmen 0. Achten Sie darauf, dass das Grillgut sich frei im Garraum drehen kann, ohne im
Garraum anzustoßen. Es kann passieren, dass
der Drehspieß 6die Drehrichtung wechselt,
wenn das Grillgut gegen einen Widerstand
stößt. Die beiden Vertiefungen, die sich am
Drehspieß 6 befinden, müssen frei zugänglich
bleiben, ansonsten kann man den Drehspieß
6 nicht mit der Zange 3 greifen.
5) Befestigen Sie den Drehspieß 6 im Garraum
(siehe Kapitel „Drehspieß benutzen“).
6) Schließen Sie die Glastür .
Page 54

51
SGBR 1500 A2
DE
AT
CH
HINWEIS
Wenn Sie den Heizvorgang vorzeitig unterbrechen wollen, drehen Sie den Temperaturregler
bis zum Anschlag gegen den Uhrzeigersinn und
stellen Sie den Timer auf „OFF - 0“.
7) Stellen Sie am Temperaturregler die ge-
wünschte Temperatur ein.
8) Stellen Sie den Funktionsschalter auf „Ober-
hitze/Umluft/Drehspieß“
.Stellen Sie am
Timer die gewünschte Grillzeit ein.
Das Gerät startet den Grillvorgang und der
Drehspieß 6 dreht sich.
Die Kontrollleuchte zeigt an, dass das Gerät
eingeschaltet ist. Der Schalter des Timers
bewegt sich nun gegen den Uhrzeigersinn auf
„OFF - 0“ zu.
Das Gerät schaltet sich nach der eingestellten Zeit
automatisch aus, ein Signalton erklingt und die
Kontrollleuchte erlischt.
HINWEIS
Wenn Sie den Heizvorgang vorzeitig unterbrechen wollen, drehen Sie den Temperaturregler
bis zum Anschlag gegen den Uhrzeigersinn und
stellen Sie den Timer auf „OFF - 0“.
9) Entnehmen Sie nach dem Grillvorgang den
Drehspieß 6 mit Hilfe der Zange 3.
10) Stellen Sie den Funktionsschalter auf „OFF“.
BEISPIEL GRILLHÄHNCHEN
Zutaten
♦ Grillhähnchen (ca. 1,3 kg, ausgenommen)
♦ Gewürze (Salz, Paprika)
♦ Speiseöl
1) Würzen Sie das Grillhähnchen von innen
und außen mit Salz und Paprikapulver. Streichen Sie es von außen mit hitzebeständigem
Speiseöl ein.
2) Schieben Sie das Grillhähnchen auf den
Grillspieß und fixieren Sie es mit den Drehspießklemmen 0. Achten Sie dabei darauf,
dass die Vertiefungen am Drehspieß 6frei
bleiben, damit Sie den Drehspieß 6mit Hilfe
der Zange 3greifen können. Je nach Form
des Grillhähnchens ist es nötig die Flügel
und Schenkel mit einer feuerfesten Bindeschnur zu fixieren, damit diese während des
Drehens nicht anstoßen.
3) Schieben Sie das Backblech - in die
unterste Schiene.
4) Heizen Sie das Gerät ca. 10 Minuten mit
der Funktion „Ober- & Unterhitze/Umluft“
auf 210°C vor.
5) Setzen Sie das Grillhähnchen auf dem
Drehspieß mit Hilfe der Zange 3 in das
Gerät ein.
6) Stellen Sie den Funktionsschalter auf
„Oberhitze/Umluft/Drehspieß“
und
schließen Sie die Tür.
7) Stellen Sie den Timer auf ca. 80 Minuten.
Die Garzeit kann je nach Größe und Beschaffenheit des Grillhähnchens variieren.
8) Bestreichen Sie das Grillhähnchen zwischendurch immer wieder mit etwas Speiseöl. So
wird es knusprig.
9) Wenn die eingestellte Zeit abgelaufen ist,
entnehmen Sie den Grillspieß mit dem Grillhähnchen vorsichtig mit der Zange 3. Lösen
Sie die Drehspießklemmen 0 und ziehen
Sie das Grillhähnchen vom Drehspieß 6.
Page 55

52
SGBR 1500 A2
DE
AT
CH
Reinigung und Pflege
GEFAHR - ELEKTRISCHER SCHLAG!
►
Ziehen Sie vor jeder Reinigung den Netzstecker aus der Netzsteckdose! Es besteht die
Gefahr eines elektrischen Schlages!
Tauchen Sie das Gerät niemals in Wasser
oder andere Flüssigkeiten!
WARNUNG! VERLETZUNGSGEFAHR!
► Lassen Sie das Gerät immer erst abkühlen,
bevor Sie es reinigen. Es besteht sonst Verbrennungsgefahr!
■ Reinigen Sie das Gerät und die Zubehörteile am
besten sofort nach dem Abkühlen. Dann lassen
sich Lebensmittelreste leichter entfernen.
ACHTUNG! SACHSCHADEN!
► Verwenden Sie keine scheuernden oder
aggressiven Reinigungsmittel. Diese können
die Oberfläche beschädigen!
► Reinigen Sie die Teile des Gerätes nicht in der
Spülmaschine!
► Reinigen Sie den Garraum nicht mit einem
Backofenspray, da sich Rückstände auf den
Heizstäben nicht mehr entfernen lassen.
■ Wischen Sie das Gerät mit einem feuchten Tuch
ab. Bei Bedarf geben Sie ein mildes Spülmittel
auf das Tuch und wischen Sie mit einem mit klarem Wasser befeuchteten Tuch nach. Trocknen
Sie alles gut ab.
■ Reinigen Sie den Garraum und die Glastür
mit einem feuchten Tuch. Bei Bedarf geben Sie
ein mildes Spülmittel auf das Tuch und wischen
Sie mit einem mit klarem Wasser befeuchteten
Tuch nach. Trocknen Sie alles gut ab.
■
Reinigen Sie die Zangen /3, den Drehspieß
6, die Drehspießklemmen 0, die Feststeller .,
das Backblech -, den Gitterrost ! und das
Krümelblech in warmem Spülwasser. Trocknen
Sie alle Teile nach der Reinigung gut ab.
Aufbewahrung
■ Bewahren Sie das gereinigte Gerät und seine
Zubehörteile an einem sauberen, staubfreien
und trockenen Ort auf.
Page 56

53
SGBR 1500 A2
DE
AT
CH
Fehlerbehebung
Fehler Ursache Lösung
Das Gerät
funktioniert nicht.
Der Netzstecker ist nicht mit dem Stromnetz
verbunden.
Stecken Sie den Netzstecker in
eine Netzsteckdose.
Die Netzsteckdose ist defekt.
Benutzen Sie eine andere Netzsteckdose.
Das Gerät ist defekt. Wenden Sie sich an den Service.
Die Kontrollleuchte
leuchtet, aber das
Gerät heizt nicht.
Der Funktionsschalter steht auf OFF.
Drehen Sie den Funktionsschalter
auf die gewünschte Funktion.
Die Garzeit der
Speisen erscheint
sehr lang.
Die Glastür wurde sehr oft geöffnet, um
den Garfortschritt zu kontrollieren.
Öffnen Sie die Glastür nicht
öfter, als unbedingt notwendig.
Es ist eine falsche Temperatur eingestellt.
Überprüfen Sie die Temperatureinstellungen.
Während der Benutzung tritt Rauch- und
Geruchsentwicklung
auf.
An den Heizstäben befinden sich Reinigungs- oder Lebensmittelrückstände.
Entnehmen Sie die Speisen aus
dem Gerät und führen Sie den
Garvorgang mit geöffneter
Glastür fort, bis die Rauchent-
wicklung verschwunden ist.
Sollten sich die Störungen nicht mit oben stehenden Fehlerbehebungen beheben lassen, oder wenn
Sie andere Arten von Störungen feststellen, wenden Sie sich bitte an unseren Service.
Page 57

54
SGBR 1500 A2
DE
AT
CH
Garantie und Service
Sie erhalten auf dieses Gerät 3 Jahre Garantie
ab Kaufdatum. Das Gerät wurde sorgfältig
produziert und vor Anlieferung gewissenhaft
geprüft. Bitte bewahren Sie den Kassenbon als
Nachweis für den Kauf auf. Bitte setzen Sie sich
im Garantiefall mit Ihrer Servicestelle telefonisch
in Verbindung. Nur so kann eine kostenlose
Einsendung Ihrer Ware gewährleistet werden.
Die Garantieleistung gilt nur für Material- oder
Fabrikationsfehler, nicht aber für Transportschäden,
Verschleißteile oder für Beschädigungen an zerbrechlichen Teilen, z. B. Schalter oder Akkus. Das Produkt
ist lediglich für den privaten und nicht für den
gewerblichen Gebrauch bestimmt.
Bei missbräuchlicher und unsachgemäßer Behandlung, Gewaltanwendung und bei Eingriffen, die
nicht von unserer autorisierten Service-Niederlassung vorgenommen wurden, erlischt die Garantie.
Ihre gesetzlichen Rechte werden durch diese Garantie nicht eingeschränkt.
Die Garantiezeit wird durch die Gewährleistung
nicht verlängert. Dies gilt auch für ersetzte und reparierte Teile. Eventuell schon beim Kauf vorhandene
Schäden und Mängel müssen sofort nach dem
Auspacken gemeldet werden, spätestens aber zwei
Tage nach Kaufdatum. Nach Ablauf der Garantiezeit anfallende Reparaturen sind kostenpflichtig.
Service Deutschland
Tel.: 0800 5435 111 (Kostenfrei aus dem
dt. Festnetz/Mobilfunknetz)
E-Mail: kompernass@lidl.de
IAN 113370
Service Österreich
Tel.: 0820 201 222 (0,15 EUR/Min.)
E-Mail: kompernass@lidl.at
IAN 113370
Service Schweiz
Tel.: 0842 665566 (0,08 CHF/Min.,
Mobilfunk max. 0,40 CHF/Min.)
E-Mail: kompernass@lidl.ch
IAN 113370
Erreichbarkeit Hotline: Montag bis Freitag von
8:00 Uhr – 20:00 Uhr (MEZ)
Entsorgung
Werfen Sie das Gerät kei-
nesfalls in den normalen
Hausmüll. Dieses Produkt
unterliegt der europäischen
Richtlinie 2012/19/EU.
Entsorgen Sie das Gerät über einen zugelassenen
Entsorgungsbetrieb oder über Ihre kommunale
Entsorgungseinrichtung. Beachten Sie die aktuell
geltenden Vorschriften. Setzen Sie sich im Zweifelsfall mit Ihrer Entsorgungseinrichtung in Verbindung.
Die Verpackung besteht aus umweltfreund-
lichen Materialien, die Sie über die örtlichen Recyclingstellen entsorgen können.
Importeur
KOMPERNASS HANDELS GMBH
BURGSTRASSE 21
44867 BOCHUM
GERMANY
www.kompernass.com
Page 58

55
SGBR 1500 A2
DE
AT
CH
Rezepte
In diesem Kapitel geben wir Ihnen einige Beispiele
für die Zubereitung von Speisen. Diese Beispiele
sind Empfehlungen. Die Zubereitungsdauer kann
variieren.
Rezepte ohne Gewähr. Alle Zutaten- und Zubereitungsangaben sind Anhaltswerte. Ergänzen
Sie diese Rezeptvorschläge um Ihre persönlichen
Erfahrungswerte. Wir wünschen Ihnen auf jeden
Fall gutes Gelingen und guten Appetit.
HINWEIS
Beachten Sie Zubereitungshinweise auf der
Verpackung der Lebensmittel.
Muffins
Zutaten für vier Personen:
♦ 1 Tasse Mehl
♦ 1 Teelöffel Backpulver
♦ 1 Ei
♦ 1 Esslöffel geschmolzene Butter
♦ 1 Tasse Milch
♦ 3 Esslöffel Zucker
♦ 1 Prise Salz
♦ für verschiedene Varianten zusätzlich Nüsse,
zerkleinerte Bananen oder Schokoflocken
Zubereitung:
1) Vermischen Sie in einer Schale Mehl, Backpulver, Ei, Milch, Salz und Zucker langsam
nacheinander.
2) Die Butter in einem Topf schmelzen und mit
dem Teig verrühren.
3) Je nach Geschmack mit Nüssen, Schokoflocken oder zerdrückten Bananen mischen.
4) Den fertigen Teig in typische Muffin-Formen
geben und diese auf das Backblech - stellen.
5) Die Muffins bei 220° C mit Ober- und Unterhitze etwa 15 Minuten auf der unteren Schiene
backen.
Hawaiitoast
Zutaten für 4 Toasts:
♦ 4 Scheiben Toast
♦ 1–2 Esslöffel Remoulade
♦ 120 g gekochter Schinken
♦ 1/2 Dose Ananas
♦ 4 Scheiben Käse zum Überbacken
♦ Curry
Zubereitung:
♦ Die Toastscheiben vortoasten.
♦ Anschließend dünn mit Remoulade bestreichen
und mit dem gekochten Schinken belegen.
♦ Jeweils eine Scheibe Ananas auf den belegten
Toast legen. Mit Curry würzen.
♦ Danach jeweils eine Scheibe Käse oben auf die
Ananas legen.
♦ Die Hawaiitoasts auf den Gitterrost ! legen
und im Grill- und Backautomaten auf der oberen
Schiene bei ca. 200 °C, Oberhitze ca. 8 Minuten überbacken.
Tiefgefrorene Pizza backen
Zubereitung:
♦ Schieben Sie den Gitterrost ! in die obere
Schiene des Grill- und Backraums.
♦ Legen Sie die tiefgefrorene Pizza ohne Verpa-
ckung auf den Gitterrost !.
♦ Backen Sie die Pizza bei Ober- und Unterhitze
ca. 20 Minuten.
♦ Bitte beachten Sie die Verpackungsangaben
bezüglich der Temperatur.
Page 59

56
SGBR 1500 A2
DE
AT
CH
Spritzgebäck
Zutaten:
♦ 125 g Butter
♦ 125 g Zucker
♦ 1 Päckchen Vanillinzucker
♦ 1 Prise Salz
♦ 1 Ei
♦ 1 Eiweiß
♦ 250 g Mehl (Type 405)
♦ 1 Teelöffel Backpulver
♦ abgeriebene Schale einer halben Zitrone
Zubereitung:
1) Die Butter schaumig schlagen.
2) Den Zucker, den Vanillinzucker, die Zitronenschale und die Eier dazugeben.
3) Das Mehl, das Backpulver und das Salz
mischen und mit einem Rührlöffel unter den
Teig rühren.
4) Teig ca. 10 Minuten ruhen lassen.
5) Den Teig in die gewünschte Form, z. B. mit
Hilfe von Fleischwolf, Ausstechformen oder
Spritzbeutel, bringen.
6) Das Spritzgebäck auf das mit Backpapier
ausgelegte Backblech - legen.
7) Das Spritzgebäck im vorgeheizten Backofen
bei ca. 180°C Ober- und Unterhitze, ca.
10–15 Minuten auf der oberen Schiene,
goldgelb backen.
HINWEIS
Die Teigmenge reicht für mehrere Backbleche -.
Brötchen
Zutaten:
♦ 300 g Mehl (oder Vollkornmehl)
♦ gut 2 Teelöffel Backpulver
♦ 200 g Leinsamen
♦ 1 Ei
♦ 500 g Quark
♦ 1 Teelöffel Salz
♦ je nach Geschmack Kümmel, Zwiebeln, Speck
...
Zubereitung:
1) Alles gut durchkneten und kleine Brötchen
daraus formen.
2) Die Brötchen auf das mit Backpapier ausgelegte Backblech - legen.
3) Bei ca. 200° C Oberhitze ungefähr 30 Minuten auf der oberen Schiene backen.
HINWEIS
Die Teigmenge reicht für mehrere Backbleche -.
Page 60

57
SGBR 1500 A2
DE
AT
CH
Baiser
Zutaten:
♦ 1 Eiweiß
♦ Salz
♦ 45 g Zucker
Zubereitung:
1) Das gekühlte Eiweiß in eine fettfreie Rührschüssel geben. Es darf kein Eigelb damit vermischt
werden, sonst wird der Eischnee nicht fest.
2) Das Eiweiß auf langsamer Stufe anschlagen,
damit sich keine zu großen Blasen im Eischnee
bilden.
3) Mit einer kleinen Prise Salz würzen.
4) Die Hälfte des Zuckers nach und nach
zufügen, wenn der Eischnee anfängt fest zu
werden.
5) Dann auf höchster Stufe steif schlagen.
6) Den restlichen Zucker zufügen. Dadurch erhält
die Baisermasse die nötige Festigkeit.
7) Das Baiser in einen Spritzbeutel mit großer
Sternentülle füllen und mit wenig Abstand Rosetten, Zungen oder sonstige Formen auf das
mit Backpapier belegte Backblech - spritzen.
8) Den Grill- und Backautomaten auf ca. 100° C
Umluft vorheizen.
9) Das Baiser auf der oberen Schiene bei ca.
100° C Umluft ca. 2 Stunden backen lassen.
Buttercroutons
Zutaten:
♦ 2 Scheiben Toastbrot
♦ 1 EL Butter
Zubereitung:
1) Schneiden Sie das Toastbrot in kleine Würfel.
2) Schmelzen Sie die Butter bei sanfter Hitze in einem Topf und mischen Sie das Toastbrot unter.
3) Legen Sie ein Backblech - mit Backpapier
aus und verteilen Sie die Toastbrot-Würfel
gleichmäßig darauf.
4) Backen Sie die Toastbrot-Würfel bei ca.
170°C Oberhitze auf er oberen Schiene, bis
Sie goldbraun sind (ca. 15 - 20 Minuten).
HINWEIS
Sie können auch Kräuter- oder Knoblauchbutter
anstatt der normalen Butter verwenden. Die
Backzeit verringert sich dann um ca. 5 Minuten.
Page 61

58
SGBR 1500 A2
DE
AT
CH
Hackfleisch-Baguettes
Zutaten:
♦ 2 Baguette-Brötchen
♦ 250 g Hackfleisch (halb und halb)
♦ 2 Tomaten
♦ 1 Zwiebel (gewürfelt)
♦ 2 EL Tomatenmark
♦ 40 g geriebenen Parmesan
♦ 4 Scheiben Käse
♦ Salz und Pfeffer
Zubereitung:
1) Schneiden Sie die Baguettes auf und höhlen
Sie sie aus.
2) Vermengen Sie das Gehackte, das Tomatenmark, die Zwiebel, den Parmesan, etwas Salz
und etwas Pfeffer.
3) Formen Sie das Hackfleisch zu 4 gleich großen, möglichst flachen, Frikadellen und legen
Sie sie auf die Baguette-Hälften.
4) Schneiden Sie die Tomate in Scheiben und
verteilen Sie sie auf den Baguettes.
5) Verteilen Sie den Käse auf den Baguettes.
6) Legen Sie die Baguettes auf ein Backblech und backen Sie sie bei ca. 230°C im vorgeheizten Backofen bei Ober- und Unterhitze für
ca. 20 Minuten auf der unteren Schiene.
HINWEIS
Sie können das Hackfleisch auch mit Basilikum,
Chili oder anderen Gewürzen abschmecken.
Blumenkohl (überbacken)
Zutaten:
♦ 1/2 Kopf Blumenkohl (ca. 250 g)
♦ 3 Zitronenscheiben
♦ 1 EL Butter
♦ 1 gehäufter TL Mehl
♦ 1 EL Zitronensaft
♦ 1 EL Mandelstifte
♦ 2 EL Gratinkäse (gerieben)
♦ Salz, Pfeffer, Muskat
Zubereitung:
1) Teilen Sie den Blumenkohl in Röschen und
waschen Sie diese.
2) Garen Sie den Blumenkohl mit den Zitronenscheiben in kochendem Salzwasser für 8-10
Minuten, so dass der Blumenkohl bissfest ist.
Fangen Sie beim Abgießen ca. 150 ml des
Kochwassers auf.
3) Lassen Sie in einem Topf die Butter schmelzen
und schwitzen Sie das Mehl unter ständigem
Rühren ca. 1 Minute an.
4) Gießen Sie unter ständigem Rühren das Kochwasser des Blumenkohls hinzu und lassen Sie
es ca. 2 Minuten kochen. Wird die Mehlschwitze zu fest, geben Sie nach und nach noch etwas Wasser hinzu, bis eine sämige Konsistenz
entsteht. Mit Zitronensaft, Salz, Pfeffer und
Muskat würzen.
5) Geben Sie den Blumenkohl in eine Auflaufform
(ca. 14 cm Durchmesser) und gießen Sie die
Sauce gleichmäßig darüber.
6) Streuen Sie den Käse und die Mandelstifte
darüber.
7) Stellen Sie die Auflaufform auf das Backblech
-.
8) Überbacken Sie den Auflauf bei ca. 200°C im
vorgeheizten Backofen bei Ober- und Unterhitze für ca. 20 Minuten auf der unteren Schiene.
Page 62

59
SGBR 1500 A2
DE
AT
CH
Blätterteigtaschen mit Lachsfüllung
Zutaten:
♦ 1 Pck. Blätterteigplatten (ca. 8 Stück)
♦ 1 Pck. Lachs, geräuchert, in Scheiben
(ca. 200 g)
♦ 1 Zitrone
♦ 1 Zwiebel
♦ 1 Pck. Frischkäse (200 g)
♦ frischer Dill
♦ Salz und Pfeffer
♦ 1 Eigelb
Zubereitung:
1) Nehmen Sie die Blätterteigplatten auseinander
und lassen Sie sie gegebenenfalls auftauen.
2) Vermischen Sie den Frischkäse mit Salz, Pfeffer
und dem Saft einer Zitrone.
3) Schneiden Sie die Zwiebel in feine Würfel.
4) Geben Sie die Hälfte des Lachses und die
Zwiebeln zu der Frischkäsemasse und pürieren
Sie alles grob mit einem Stabmixer.
5) Schneiden Sie den restlichen Lachs in feine
Streifen.
6) Geben Sie den Lachs und den Dill zu der
Masse hinzu und vermischen Sie alles.
7) Geben Sie je einen Esslöffel mit der Masse auf
eine Blätterteigplatte und klappen Sie diese
zusammen.
8) Bestreichen Sie die entstandene Tasche mit
Eigelb.
9) Legen Sie die Blätterteigtaschen auf das
Backblech -. Lassen Sie genügend Abstand
zwischen den einzelnen Taschen, da der
Blätterteig aufgeht.
10) Die Blätterteigtaschen auf der unteren Schiene
bei ca. 230° C Ober- und Unterhitze ca.
25-30 Minuten backen lassen. Der Blätterteig
sollte sich leicht braun färben.
HINWEIS
Die angegebene Menge reicht für mehrere
Backbleche -.
Page 63

IAN 113370
KOMPERNASS HANDELS GMBH
BURGSTRASSE 21
44867 BOCHUM
DEUTSCHLAND / GERMANY
www.kompernass.com
Last Information Update · Stand van de informatie
Stand der Informationen:
04 / 2015 · Ident.-No.: SGBR1500A2-022015-1
 Loading...