

Page 1
SET
MODE
CHRONO
STW
CLOCK
Set STW
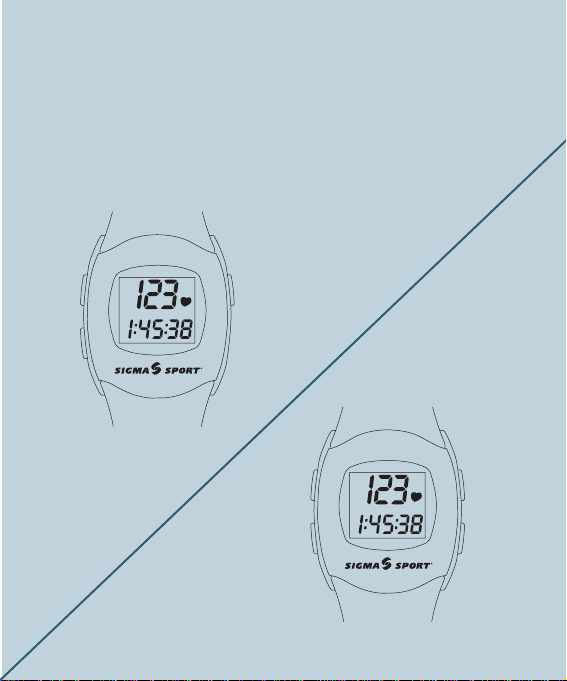
PC 3
STP
Tastenbelegung
SET
MODE
CHRONO
ALARM
STW
MAX
CLOCK
DATE
Sound ON/OFF
Set STW
PC 7
STP
Functions of the operating keys
Commandes
Occupazione dei pulsanti
Funciones de las teclas de selección
Toetsfuncties
PC 3
PC 7
Page 2
Hg
Batterien können nach Gebrauch
zurückgegeben werden.
Batteries can be returned after use.
Le batterie possono essere restituite dopo l’ uso.
Les piles peuvent être redonnées après usage.
Las pilas pueden ser devueltas después de su uso.
Batterijen na gebruik inleveren.
Lighting Systems
Cycle Computer
Locks
Pocket Tools
CO2 Pump
www.sigmasport.com
ContactCycle Accessories
SIGMA SPORT EUROPE:
Dr.-Julius-Leber-Straße 15
D-67433 Neustadt
Tel. ++49-(0)6321-9120-0
Fax ++49-(0)6321-91 20-34
SIGMA SPORT USA:
AMERICA, AUSTRALIA, AFRICA
1926 Miller Drive
Olney, IL 62450, USA
tel. ++1-618-393-7407
tel. 888-744-6277
fax ++1-618-393-6713
SIGMA SPORT ASIA:
7F-1, No.193, Ta-Tun 6th Street
Taichung City, Taiwan, ROC
Tel. ++886-4-2475 3577
Fax ++886-4-2475 3563
Online Manual:
www.sigmasport.com
Printed in Germany: 03/2003
free for US
Page 3
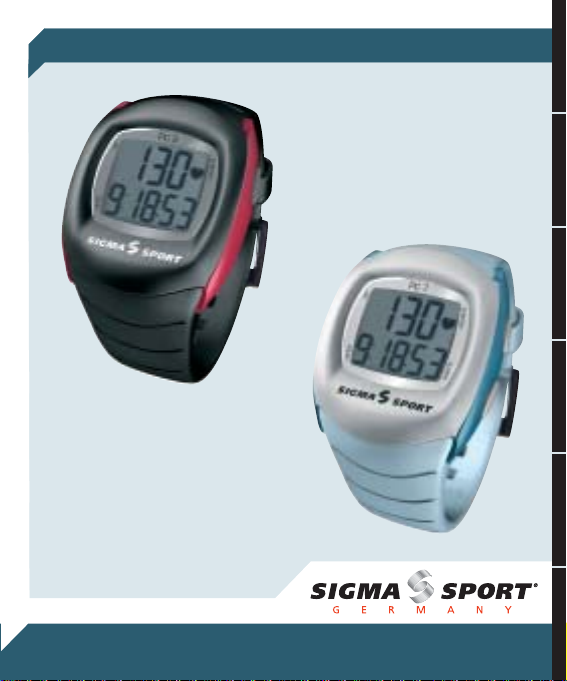
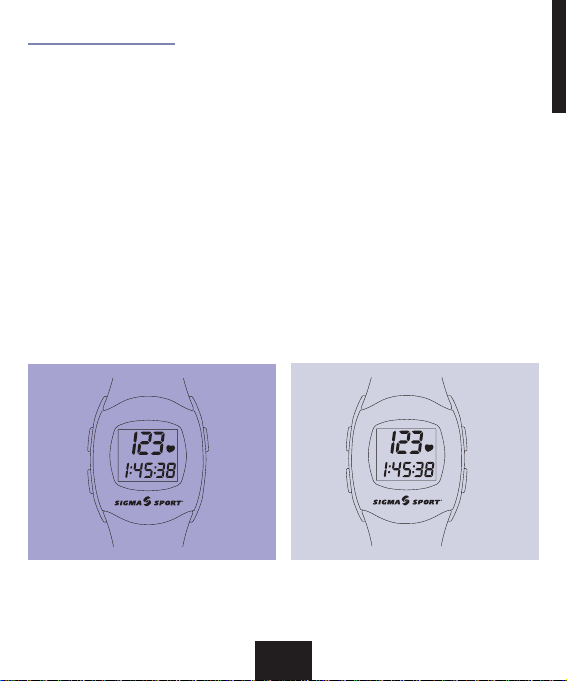
PULSE COMPUTER PC 3/7
deutsch
englishfrançaisitalianoespagñol
www.sigmasport.com
nederlands
Page 4
D – Der richtige Weg zur Funktion
GB – Functions: The way to follow
F – Fonctions: La route à suivre
I – La strada giusta per arrivare alla funzione
E – La ruta a seguir
NL – De juiste weg naar de functies
PC 7 PC 3
CLOCK
Press
MODE
DATE
Press MODE
STW
MODE 1
MAX
Press
MODE
Press
Press
CHRONO
Start/Stop
STW
CLOCK
Press
MODE
STP
Press
CHRONO
Start/Stop
STW
Page 5

Deutsch
DEUTSCH
I Allgemeines
I.1 Verpackungsinhalt Seite 3
I.2 Tragen des Pulscomputers/ Seite 3
Montage der Fahrradhalterung
I.3 Funktionen Seite 4
I.4 Tastenbelegung Seite 5
I.5 Grund-Einstellungen der Uhr Seite 6
II Erklärung und Einstellung der Trainingsfunktionen
II.1 Maximale Herzfrequenz (HF max) –
der Maximaltest Seite 7
II.2 Der richtige Trainingspuls Seite 8
II.3 Einstellung des oberen und unteren Seite 9
Herzfrequenz-Grenzwertes
II.4 Warnhinweise Seite 9
II.5 Kontrollhinweise Seite 10
II.6 Batteriewechsel Seite 10
II.7 Garantie Seite 11
Inhalt:
2
Page 6

I. Allgemeines
Wir empfehlen, vor Erstellung eines individuellen Trainings
grundsätzlich einen Arzt zu konsultieren.
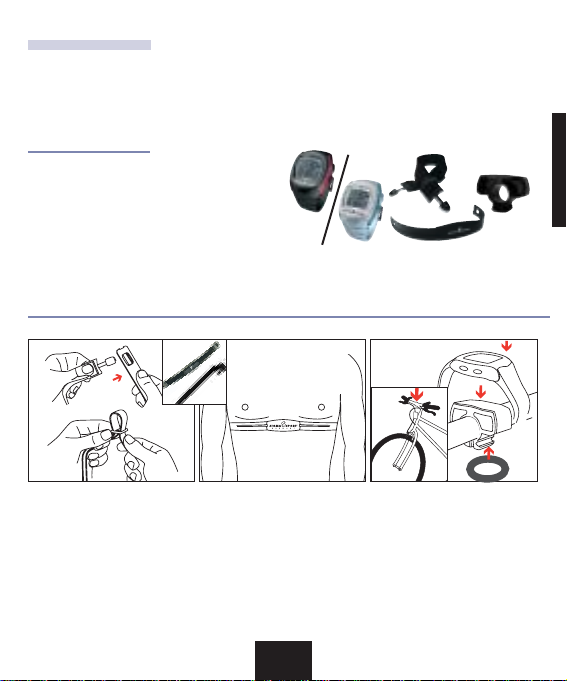
1. Verpackungsinhalt
1 Pulscomputer PC3/PC7
1 Elastischer Gurt
1 Pulsabnehmer mit Sender
1 Fahrradhalterung mit O-Ring
2. Tragen des Puls-Computers/Montage der Fahrradhalterung
A.Der Pulscomputer ist wie eine Armbanduhr am Handgelenk zu
tragen oder an der SIGMA SPORT Fahrradhalterung zu
montieren.
deutsch
3
Page 7

B.Anlegen des Sendergurtes
•Pulsabnehmer mit elastischem Gurt (durch Laschen)
verbinden.
•Gurtlänge über Feststellmechanismus so wählen,
dass der Gurt gut, aber nicht zu eng anliegt.
•Platzierung des Senders bei Herren unterhalb des Brustmuskelansatzes, bei Damen unterhalb des Brustansatzes.
Das SIGMA SPORT Logo muss lesbar nach außen zeigen.
C.Den Gurt frontseitig leicht von der Haut abheben. Gerippte
Zonen (Elektroden) rückseitig des Senders mit EKG-Gel aus
der Apotheke o. alternativ mit Speichel befeuchten.
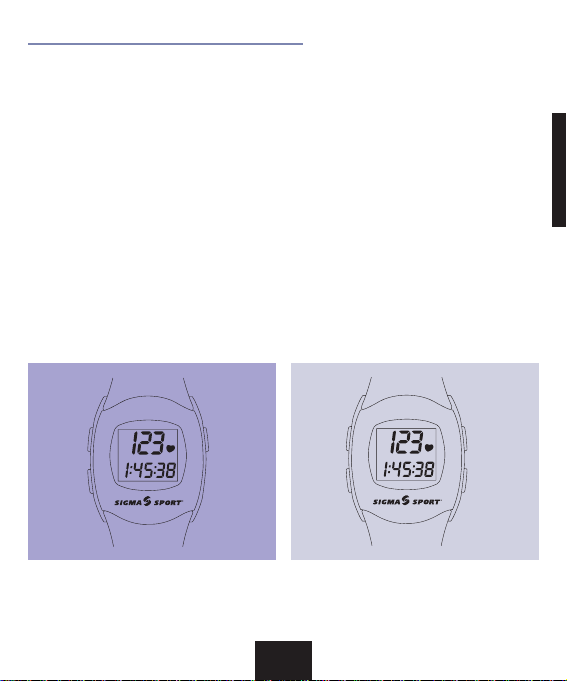
3. Funktionen
PC3/PC7
1. Herzfrequenzanzeige
2. Uhrzeit 12 Std. oder 24 Std. Anzeige einstellbar
3. Stoppuhr
PC7
4. Einstellung des min. (30-179) und max. (240-100)
Herzfrequenz-Grenzwertes
5. Alarmton bei Grenzwertüberschreitung
6. Aktuelle MAX
7. Tages-/Datumsanzeige
4
Page 8
4. Tastenbelegung
PC3
MODE: Displaywechsel zwischen Stoppuhr und Uhrzeit
SET: Einstellung der Uhrzeit
CHRONO: Star t/Stop-Funktion und Nullstellung der Stoppuhr
PC7
MODE: Displaywechsel zwischen Stoppuhr, max. Herz-
frequenz, Uhrzeit und Datum
SET: Einstellung der Uhrzeit, des Datums,
der oberen/unteren Herzfrequenz-Grenzwerte
ALARM: Ein-/Ausschalten des Alarmtons
CHRONO: Star t/Stop-Funktion und Nullstellung der Stoppuhr
deutsch
SET
MODE
STW
CLOCK
PC3
PC 3
PC7
PC 7
STP
CHRONO
Set STW
SET
MODE
STW
MAX
CLOCK
DATE
STP
CHRONO
Set STW
ALARM
Sound ON/OFF
5
Page 9

5. Grund-Einstellungen der Uhr
Uhrzeit (PC3/PC7)
• CLK-Modus (Uhrzeit) durch MODE abrufen.
• SET gedrückt halten, bis erst „hold“ und dann
blinkendes Uhrzeit-Format erscheint.
• Mit SET zwischen 12 und 24 Std - Anzeige wählen
und mit MODE bestätigen und zur Uhrzeit-Einstellung
wechseln
• Mit MODE Stunden und Minuten anwählen und die
jeweils blinkende Position mit SET einstellen.
• Zum Verlassen der Einstellung MODE drücken.
Datum (PC7)
• Datum-Modus durch MODE abrufen.
• SET gedrückt halten, bis erst „hold“ und dann das
blinkende Jahres-Format mit der Voreinstellung 2000
erscheint.
• Mit MODE Jahr, Monat und Tag anwählen und die
jeweils blinkende Position mit SET einstellen.
• Zum Verlassen der Einstellung MODE drücken.
Stoppuhr (PC3/PC7)
• STW-Modus (Stoppuhr) durch MODE abrufen.
• Für Start/Stop jeweils kurz CHRONO drücken
• Nullstellung: CHRONO 2 sec. gedrückt halten.
Alarmton (PC7)
• ALARM Taste kurz drücken zum Ein- oder Ausschalten
des Tons.
6
Page 10

II. Erklärung und Einstellung der
Trainingsfunktionen
Die Herzfrequenz (Hf) oder auch der Puls wird in Schlägen pro
Minute angegeben.
1. Maximale Herzfrequenz (Hf max) – der Maximaltest
Die maximale Herzfrequenz Hf max ist Ihre z.Zt. maximal mögliche
Frequenz bei totaler Ausschöpfung Ihrer körperlichen Leistungsfähigkeit. Die persönliche Hf max ist abhängig von Ihrem Lebensalter, Ihrem Geschlecht, Ihrer Leistungsbereitschaft, Ihrer sportartspezifischen Leistungsfähigkeit und Ihrem körperlichen Zustand.
Die beste Möglichkeit, Ihre persönliche Hf max zu ermitteln, ist
ein Belastungstest. Wir empfehlen, diesen Test beim Arzt
durchzuführen und in regelmäßigen Abständen zur Kontrolle zu
wiederholen.
Die Hf max kann auch mittels einer mathematischen Gleichung
geschätzt werden:
Männer: 210 - „halbes Alter“ - (0.11 x persönliches Gewicht in
Kilogramm) + 4
Frauen: 210 - „halbes Alter“ - (0.11 x persönliches Gewicht in
Kilogramm)
deutsch
7
Page 11

2. Der richtige Trainingspuls
Die Trainingszone ist der Bereich, in dem sich die Herzfrequenz,
während eines effektiven und zielgerichteten Trainings bewegen
darf. Als allgemeine Richtwerte gelten:
65 % von Hf max ist Ihre untere Trainingsgrenze und 80 %
von Hf max sollte Ihre Obergrenze sein.
Die genaue Herzfrequenz-Zone entnehmen Sie bitte dem
Diagramm gemäß Ihrer Zielrichtung.
Zone: Gesundheit 50-70 % der Hf max
Ausrichtung: Wellness für (Wieder-) Einsteiger
Oberer Grenzwert 70 % 105 112 119 126 133 140 147
Unterer Grenzwert 50 % 75 80 85 90 95 100 105
Zone: Fitness 70-80 % der Hf max
Ausrichtung: Fitness für Fortgeschrittene
Oberer Grenzwert 80 % 120 128 136 144 152 160 168
Unterer Grenzwert 70 % 105 112 119 126 133 140 147
Zone: Leistung 80-100 % der Hf max
Ausrichtung: Wettkampf-Training für Leistungs-Sportler
Oberer Grenzwert 100 % 150 160 170 180 190 200 210
Unterer Grenzwert 80 % 120 128 136 144 152 160 168
Bitte beachten Sie immer, daß allgemeine Pläne niemals auf die
persönlichen Belange des Sportlers eingehen können! Daher ist
eine wirklich optimale Trainingsgestaltung nur mit einem gut
ausgebildeten Trainer möglich, der den Sportler persönlich kennt!
Hf max 150 160 170 180 190 200 210
Hf max 150 160 170 180 190 200 210
Hf max 150 160 170 180 190 200 210
8
Page 12

3. Einstellung des oberen und unteren Pulsfrequenz-Grenzwertes
(PC 7)
• Mit MODE den MAX-Modus (Über-bzw. Unterschreitung
des Grenzwertes) aufrufen.
• SET gedrückt halten, bis erst „hold“ und danach der
blinkende obere Grenzwert mit der Zahl 240 erscheint.
• Mit SET den oberen Grenzwert einstellen.
Die Einstellung der Zahlen erfolgt rücklaufend.
• Mit MODE den oberen Herzfrequenz-Grenzwert
bestätigen und den unteren Herzfrequenz-Grenzwert
anwählen und die blinkende Position (30) mit SET
einstellen. (Die Einstellung der Zahlen erfolgt fortlaufend.)
• Zum Verlassen und Bestätigen der Einstellung MODE
drücken.
Bei Überschreitung des oberen Grenzwertes und bei
Unterschreitung des unteren Grenzwertes ertönt ein Alarmton.
4. Warnhinweise (PC 3/PC 7)
• Funktion MAX ist nur aktiv wenn die Stoppuhr (STW)
eingeschaltet ist.
•Vor dem Einstieg in ein Trainingsprogramm bitte
unbedingt den Hausarzt konsultieren, um die
persönlichen Herzfrequenzwerte zu ermitteln.
• Personen mit Defibrillator und/oder Herzschrittmacher
bitte ebenfalls den Arzt vor Gebrauch konsultieren.
•Vor dem Anlegen des Brustgurtes, oberen und unteren
Herzfrequenzwert einstellen!
deutsch
9
Page 13

5. Kontrollhinweise (PC 3/PC 7)
keine Herzfrequenzanzeige:
• Gurt mit Pulsabnehmer wurde falsch angebracht
• Sensor (Elektroden) des Pulsabnehmers sind
verschmutzt oder nicht feucht
• Störeinflüsse durch elektrische Störquellen (Hochspannungsleitungen, Bahnlinien, usw.)
• Senderbatterie ist leer (Art.-Nr. 0342)
Anzeige reagiert träge oder hat Schwarzfärbung:
• Möglich bei Über- oder Unterschreitung der
Anzeige verblasst:
Wasserdichtigkeit:
Der SIGMA SPORT Puls-Computer ist bis zu einer Tiefe von 3
Metern wasserdicht. Tasten dürfen unter Wasser nicht betätigt
werden. Der Gebrauch in Meerwasser sollte vermieden werden,
da Funktionsstörungen auftreten können.
6. Batteriewechsel (PC 3/PC 7)
Batterie im Pulscomputer: CR 2025 oder DL 2025. Batterie im
Pulssender: CR 2032 oder DL 2032. Der SIGMA SPORT PulsComputer ist ein hochtechnisches Messinstrument. Um die
Funktion und Wasserdichtigkeit zu gewährleisten, sollte der
Batteriewechsel vom autorisierten Fachhändler durchgeführt
werden. Durch unsachgemäßen Batteriewechsel kann der PulsComputer beschädigt werden; dadurch erlischt der
Garantieanspruch.
Betriebstemperatur (1 bis 55°C)
• Batterie (Art.-Nr. 270310) schwach, so bald wie
möglich auswechseln
10
Page 14

7. Garantie (PC 3/PC 7)
Es gelten die gesetzlichen Garantiebestimmungen. Die Garantie
beschränkt sich auf Material- und Verarbeitungsfehler. Batterien
sind von der Garantie ausgenommen. Die Garantie ist nur gültig,
wenn
1. der Pulscomputer nicht geöffnet wurde
2. der Kaufbeleg beigefügt ist.
Bitte lesen Sie vor der Reklamation des Pulscomputers die
Bedienungsanleitung nochmals gründlich durch. Sollten Sie auch
dann noch Mängel feststellen, kontaktieren Sie den Händler, bei
dem Sie Ihren Pulscomputer gekauft haben, oder senden Sie den
Pulscomputer mit Kaufbeleg und allen Zubehörteilen, ausreichend
frankiert, an:
SIGMA SPORT
Dr.-Julius-Leber-Straße 15
D-67433 Neustadt/Weinstr.
Bei berechtigten Garantieansprüchen erhalten Sie ein
Austauschgerät. Es besteht nur Anspruch auf das zu diesem
Zeitpunkt aktuelle Modell. Der Hersteller behält sich technische
Änderungen vor.
deutsch
11
Page 15

English
I.1 Kit contents Page 13
I.2 Wearing the heart rate monitor /
Attachment on the bike Page 13
I.3 Functions Page 14
I.4 Functions of the operating keys Page 15
I.5 Basic settings Page 16
II.1 Max Heart rate (Hr max) – the maximum test Page 17
II.2 The right heart rate for training Page 18
II.3 Setting of upper and lower limit of heart rate Page 19
II.4 Warning Page 19
II.5 Malfunction Page 20
II.6 Changing the battery Page 20
II.7 Warranty Page 21
ENGLISH
Contents:
12
Page 16
I. In general
We recommend consulting a doctor before setting up your
personal training-schedule
1. Kit contents
1 Heart rate monitor PC3/PC7
1 Elastic strap
1 Transmitter belt
1 Bicycle mounting bracket
2. Wearing the heart rate monitor/mounting the bicycle bar bracket
A. You can wear the heart rate monitor as a wristwatch or you
can mount it on the handlebar of your bike
english
13
Page 17

B. Positioning the transmitter belt
•Connect the transmitter belt with the elastic strap (via eyelet)
•The elastic band should be adjusted snugly, yet not too tight
to hinder your breathing.
•Men should place the transmitter at the base of the chest
muscle, women at the base of the breast. The SIGMA SPORT
logo must be visible in front and not upside down.
C. Lift the belt slightly from the skin and wet the rear surface of
the conductive ribbed rubber pads with ECG conductive gel or
moisten the pads with saliva.
3. Functions
PC3/PC7
1. Heart rate display
2. 12 / 24 h clock
3. Stopwatch
PC7
4. Setting of lower (30-179) and upper (240-100) limit
5. Alarm if you pass the upper and lower limit
6. Maximum heart rate
7. Date
14
Page 18
4. Functions of the operating keys
PC3
MODE: Changes between stopwatch and clock
SET: Setting the clock
CHRONO: Start/Stop function, reset stopwatch
PC7
MODE: Changes between stopwatch, maximum heart rate,
date and clock
SET: Setting the clock, date, upper/lower limit
ALARM: on/off alarm
CHRONO: Start/Stop function, reset stopwatch
english
SET
MODE
STW
CLOCK
PC3
PC 3
PC7
PC 7
STP
CHRONO
Set STW
SET
MODE
STW
MAX
CLOCK
DATE
STP
CHRONO
Set STW
ALARM
Sound ON/OFF
15
Page 19

5. Basic settings
Set Clock (PC3/PC7)
• Press MODE key until CLK appears at top of display
• Hold SET key for 2 seconds until the word "hold” disappears
and you get the blinking clock format
• Press SET key to select 12 /24 h display and confirm with
MODE.
• Press MODE to select hours and minutes, set flashing section
with SET key.
•To complete and quit the setting press MODE key
Set Date (PC7)
• Press MODE key until date appears in the display
• Press and hold SET key for 2 seconds until the word "hold”
disappears and you get the blinking year format
• Press MODE to select year, month and day, set flashing
section with SET key.
•To quit the setting press MODE 1 key
Stopwatch (PC3/PC7)
• Press MODE to enter STP display
• Press CHRONO to star t and Stop
• Press CHRONO 2 Sec for RESET
Alarm (PC7)
• Press ALARM key for sound on/off
16
Page 20

II. Explaining and setting the
trainings functions
The heart rate (Hr) is displayed in beats per minute.
1. Maximum Heart rate- Maximum test
The maximum heart rate Hr MAX is your present maximum heart
rate if you go to the limits of your capability. The individual Hr max
depends on your age, your sex and your fitness level. The best
way to determine the individual Hr max is a stress test.
We recommend you to see a doctor to do this test and to
repeat it regularly
The Hr max may also be estimated by means of the following
mathematical equation.
Men: 210 – half age – (0.11 x personal weight +4)
Women: 210 – half age – (0.11 x personal weight)
english
17
Page 21

2. The right heart rate for training
The training zone is the variation of the heart rate you want to
train in for an effective training.
An indication is:
65 % of the Hr max is your lower limit for training and 80 %
of the Hr max should be your top limit. You can find out your
estimated heart rate zone looking at the chart in accordance
with your goals.
Zone: General Health 50-70 % of the Hr max
Alignment: Fitness for beginners
Upper limit 70 % 105 112 119 126 133 140 147
Lower limit 50 % 75 80 85 90 95 100 105
Zone: Fitness 70-80 % of Hr max
Alignment: Fitness for advanced users
Upper limit 80 % 120 128 136 144 152 160 168
Lower limit 70 % 105 112 119 126 133 140 147
Zone: Competitive performance 80-100 % Hr max
Alignment: Competition Training for performance athletes.
Upper limit 100 % 150 160 170 180 190 200 210
Lower limit 80 % 120 128 136 144 152 160 168
Please be aware that common training schedules never match the
individual needs of a person. A perfect training schedule can only
be set up by a well-educated trainer, who knows you personally.
Hr max 150 160 170 180 190 200 210
Hr max 150 160 170 180 190 200 210
Hr max 150 160 170 180 190 200 210
18
Page 22

3. Set upper / lower limit (PC7)
•Press MODE key to select max format
•Press SET key until the word "hold” disappears and the
flashing upper limit with 240 is displayed
•Press SET key to set upper limit, the figures run downwards
•Confirm upper limit by pressing MODE key and select
flashing lower limit (30) and press SET key to set it.
•To leave and confirm the setting push MODE key
If you exceed the upper or lower limit you will get an audible
(if turned on) and visual alarm.
4. Warning (PC3/PC7)
•Before you start to train, contact your doctor to analyze your
personal heart rate.
•People using a pacemaker or other such device should
consult a physician prior to starting any exercise program
•(PC7) Before wearing transmitter belt pre-set upper and
lower limit
english
19
Page 23

5. Trouble Shooting (PC3/PC7)
No heart rate display:
•The inside surface of the conductive ribbed rubber pads are
not clean or not moist
•Sources of interference e.g. power lines
•Check battery of the transmitter
LCD display is sluggish or black:
•Possible at temperatures under 34°F or above 131°F
Display fades:
•Battery (Number CR 2025 or DL 2025) weak, change as
soon as possible
Watertightness:
The SIGMA SPORT heart rate monitors and transmitter unit are
water resistant to a 3m depth. The use in sea (salt water) should
be avoided and can cause malfunctions
6. Battery change (PC3/PC7)
Battery in heart rate monitor CR 2025 or DL 2025. Batter y in
transmitter belt CR 2032 or DL 2032 The SIGMA SPORT heart
rate monitor is a very sensitive and technical measuring instrument.
To guarantee the function and the water resistance, the batter y
change has to be done only by an authorized dealer.
Its warranty is void if the watch has been tampered with,
taken apart or ill treated.
20
Page 24

7. Warranty (PC3/PC7)
24 months from date of purchase
The warranty is limited to material and workmanship.
Batteries are not included in the warranty
The warranty is only valid if
1. The heart rate monitor has not been opened
2. The receipt comes with it
Please read the instructions carefully before sending off the
heart rate monitor for a warranty claim. If the equipment still
seems faulty, contact the dealer where you bought it or send it
together with the receipt and all its fittings and with sufficient
postage to:
EUROPE:
SIGMA Elektro GmbH
Dr.-Julius-Leber-Str. 15, 67433 Neustadt/Weinstr., Germany
America:
SIGMA SPORT USA
1926 Miller Drive, Olney, IL 62450 USA
tel. 88-744-6277 free for US
Asia, Australia, South America:
SIGMA SPORT ASIA
7F-1, No. 193, Ta-Tun 6th Street, Taichung City, Taiwan, ROC
tel. ++886-4-2475 3577
Where warranty claims are covered by our guarantee,
replacement equipment will be returned to you free of charge.
Only current models are used. Specifications are subject to change
without notice.
english
21
Page 25

Français
FRANÇAIS
I.1 Contenu de l’emballage Page 23
I.2 Positionnement du cardio-fréquencemètre / Page 23
Montage sur le cintre
I.3 Fonctions Page 24
I.4 Fonctions des touches de sélections Page 25
I.5 Réglages de base (heure, date) Page 26
II.1 La fréquence cardiaque maximale (FC max) – Page 27
test maximum
II.2 La bonne fréquence cardiaque Page 28
pour l’entraînement
II.3 Détermination des limites hautes et basses Page 29
II.4 Mise en garde Page 29
II.5 Contrôles en cas de disfonctionnement Page 30
II.6 Changement des piles Page 30
II.7 Garantie Page 31
Contenu
22
Page 26

I. Généralités
Nous recommandons de consulter un médecin avant de
déterminer votre programme d’entraînement personnel
1. Contenu de l’emballage
1 cardio-fréquencemètre
PC3/PC7
1 Ceinture élastique
1 émetteur thoracique
1 support cintre
2. Positionnement du cardio-fréquencemètre/Montage sur le cintre
A. Le cardio-fréquencemètre peut être porté comme une montre
au poignet ou peut être fixé sur le cintre du vélo grâce à son
support.
23
français
Page 27

B. Positionnement de la ceinture thoracique
•Assembler l’émetteur thoracique avec la ceinture élastique
(grâce aux boucles)
•Régler la tension de la ceinture élastique de façon à ce
qu’elle serre bien le torse sans exagération
•Pour les hommes, placer l’émetteur sous les pectoraux,
pour les femmes, sous la poitrine. Le logo Sigma Sport
doit être visible et à l’endroit.
C. Soulever légèrement la partie frontale de la ceinture et
humecter les bandes conductrices au verso de l’émetteur
avec du Gel Conducteur ECG disponible en pharmacie ou
éventuellement avec de la salive.
3. Fonctions
PC3/PC7
1. Affichage de la fréquence cardiaque
2. Heure 12H ou 24H
3. Chronomètre
PC7
4. Mémorisation des limites hautes (240-100) et basses (30-179)
5. Alarme sonore dès l’atteinte des limites haute et basse
6. Fréquence cardiaque maximale (80-240)
7. Calendrier
24
Page 28

4. Fonctions des touches de sélections
PC 3
MODE: Passage entre les affichages chronomètre et heure
SET: Réglage de l’heure
CHRONO: Fonction Marche/Arrêt, remise à zéro du
chronomètre
PC 7
MODE: Passage entre les affichages chronomètre, fréquence
cardiaque maximale, date et heure
SET: Réglage de l’heure, de la date, des limites haute et
basse
ALARM: Marche/Arrêt de l’alarme sonore
CHRONO: Fonction Marche/Arrêt, remise à zéro du
chronomètre
français
SET
MODE
STW
CLOCK
PC3
PC 3
PC7
PC 7
STP
CHRONO
Set STW
SET
MODE
STW
MAX
CLOCK
DATE
STP
CHRONO
Set STW
ALARM
Sound ON/OFF
25
Page 29

5. Réglages de base
Programmation de l’heure (PC3/PC7)
•Appuyer sur la touche MODE pour accéder à l’écran
CLK (heure).
•Presser et maintenir la touche SET appuyée pendant
2 secondes jusqu’à ce que le message "hold” disparaisse
et que le format de l’heure apparaisse en clignotant
•Appuyer sur SET pour sélectionner l’affichage 12H ou 24H
et confirmer avec MODE .
•Appuyer sur MODE pour sélectionner l’heure et les minutes
et enregistrer le réglage clignotant avec la touche SET.
•Appuyer sur MODE pour terminer l’opération
Programmation de la date (PC7)
•Appuyer sur MODE pour accéder à l’écran DATE.
•Appuyer et maintenir la touche SET appuyée pendant
2 secondes jusqu’à ce que le message "hold” disparaisse
et que le format de la date apparaisse en clignotant
•Appuyer sur MODE pour sélectionner l’année, le mois et
le jour, et confirmer l’affichage clignotant avec SET.
•Pour quitter la programmation appuyer sur MODE
Chronomètre (PC3/PC7)
•Appuyer sur MODE pour accéder à l’écran STP
(chronomètre)
•Appuyer sur SET pour démarrer et arrêter le chronomètre
•Appuyer sur SET pendant 2 secondes pour la remise à zéro
Alarme (PC7)
•Appuyer sur ALARM pour la fonction marche/arrêt de
l’alarme sonore
26
Page 30

II. Explications et programmation des zones
d’entraînement
La fréquence cardiaque (FC) ou le pouls est donné en pulsations
par minute.
1. Fréquence cardiaque maximale (FC max) – Test maximum
La fréquence cardiaque maximale (FC max) représente votre
fréquence cardiaque maximale possible lorsque vous allez
jusqu’au bout de vos capacités physiques. Votre FC max
personnelle dépend de votre âge, de votre sexe et de votre
condition physique. Le meilleur moyen de déterminer votre FC max
personnelle est de procéder à un test d’effort.
Nous vous recommandons de réaliser ce test chez un médecin
du sport et de répéter ce test régulièrement afin de contrôler
votre condition physique.
La FC max peut également être estimée à l’aide d’une équation
mathématique.
Homme: 210 – moitié de l’âge – (0.11 x son poids en
Kilogramme) + 4
Femme: 210 – moitié de l’âge - (0.11 x son poids en
Kilogramme)
français
27
Page 31

2. Le niveau d’entraînement approprié
La zone d’entraînement est la variation de la fréquence cardiaque
que vous avez déterminée dans laquelle vous désirez travailler pour
un entraînement ciblé. Comme valeur indicative:
65% de votre FC max est votre limite d’entraînement inférieure et
80% de votre FC max est votre limite d’entraînement supérieure.
Déterminez votre zone de fréquence cardiaque, en fonction de vos
objectifs, grâce au diagramme.
Zone: Santé 50-70% de la FC max
Objectif: Bien-être et reprise d’entraînement pour les débutants
Limite supérieure 70 % 105 112 119 126 133 140 147
Limite inférieure 50 % 75 80 85 90 95 100 105
Zone: Fitness 70-80% de la FC max
Objectif: Fitness pour pratiquants confirmés
Limite supérieure 80 % 120 128 136 144 152 160 168
Limite inférieure 70 % 105 112 119 126 133 140 147
Zone: Performances sportives 80-100% de la FC max
Objectif: Entraînement de compétition pour les athlètes de haut niveau
Limite supérieure 100 % 150 160 170 180 190 200 210
Limite inférieure 80 % 120 128 136 144 152 160 168
Notez bien qu’un programme général d’entraînement ne prévaudra en
aucun cas à un programme d’entraînement personnalisé. Un programme d’entraînement parfaitement adapté ne peut être réalisé que par
un entraîneur confirmé et qui de surcroit vous connaît personnellement.
FC max 150 160 170 180 190 200 210
FC max 150 160 170 180 190 200 210
FC max 150 160 170 180 190 200 210
28
Page 32

3. Programmation des limites hautes et basses (PC7)
•Appuyer sur MODE pour accéder à l’écran %
(limites haute et basse)
•Appuyer sur SET pendant 2 secondes jusqu’à ce que le
message "hold” disparaisse et que la limite haute apparaisse
avec le chiffre 240 clignotant
•Régler la limite haute avec la touche SET. Les chiffres défilent
en ordre décroissant.
•Confirmer la limite haute avec MODE et régler la limite basse
clignotante (30) avec la touche SET. Les chiffres défilent en
ordre croissant.
•Pour confirmer et quitter la programmation appuyer sur
MODE
Lorsque vous sortirez de la zone cible programmée, une alarme
sonore se déclenchera
4. Mise en garde (PC3/PC7)
•Avant de commencer un programme d’entraînement,
consultez un médecin du sport afin de connaître vos valeurs
de fréquence cardiaques personnelles.
•Les personnes portant un défibrillateur ou un stimulateur
cardiaque, doivent consulter votre médecin avant tout
exercice.
•Avant de porter la ceinture émettrice, programmer les
limites de fréquence cardiaques hautes et basses.
•Les valeurs sont converties automatiquement de Lb en kg
et de kg en Lb
29
français
Page 33

5. Contrôles en cas de disfonctionnement (PC3/PC7)
Pas d’affichage de la fréquence cardiaque:
•Mauvais positionnement de la ceinture thoracique émetteur
•Bandes conductrices au verso de l’émetteur sales ou
insuffisamment humectées
•Présence de sources d’interférences (par ex lignes à haute
tension, lignes électriques chemin de fer, etc…)
•Vérifier la pile de l’émetteur
L’écran s’assombrit ou devient noir:
•Possible par des températures inférieures à 1°C et
supérieures à 55°C
L’affichage de l’écran disparaît:
•Piles hors d’usage. Les remplacer le plus vite possible pile
type DL 2025 ou CR 2025 (référence 270310)
Etanchéité:
Le cardio-fréquencemètre Sigma Sport ainsi que l’émetteur sont
étanches jusqu’à une profondeur de 3 mètres. Les touches de
sélection ne doivent en aucun cas être utilisées sous l’eau.
L’utilisation en eau de mer doit être évitée car cela pourrait
causer des disfonctionnements
6. Changement des piles (PC3/PC7)
Pile de la montre cardio-fréquencemètre: CR 2025 ou DL 2025.
Pile de l’émetteur: CR 2032 ou DL 2032. Le cardio-fréquencemètre
SIGMA SPORT est un instrument de mesure de haute technicité.
Le changement de piles doit impérativement être effectué par un
revendeur spécialisé afin de garantir son bon fonctionnement ainsi
que son étanchéité. Un changement de piles effectué de manière
incorrecte endommagerait le cardio-fréquencemètre et annulerait
sa garantie. Après un changement de pile, le facteur de calcul KCAL
se remet automatiquement sur 00069 et doit être reprogrammé.
30
Page 34

7. Garantie (PC3/PC7)
Garantie selon la loi en vigueur à partir de la date d’achat.
La garantie est limitée au matériel et à la main d’œuvre.
Les piles ne rentrent pas dans la garantie.
La garantie et valable uniquement si:
1. La montre cardio- fréquencemètre n’a pas été ouverte
2. Le ticket de caisse accompagne le retour.
Veuillez lire attentivement les recommandations ainsi que les
conditions de garantie avant de retourner votre cardio-fréquencemètre à notre service SAV. Si votre matériel semble défectueux,
contactez le revendeur chez qui vous l’avez acheté ou renvoyez
le complet, avec le ticket de caisse joint, et suffisamment affranchi
à l’adresse suivante:
Europe:
Dr.-Julius-Leber-Straße 15
67433 Neustadt/Weinstr.
Allemagne
Asia, Australia, South America:
SIGMA SPORT ASIA
7F-1, No. 193, Ta-Tun 6th Street, Taichung City, Taiwan, ROC
tel. ++886-4-2475 3577
En période de garantie, un cardio de remplacement vous sera
retourné gratuitement. Si votre cardio doit être échangé sous
garantie, cela se fera avec un modèle actuel. Le fabricant se
réserve des modifications techniques sans informations préalables.
français
31
Page 35

Italiano
I.1 Contenuto della confezione Pagina 33
I.2 Come portare un computer da polso/ Pagina 33
montaggio sul supporto bici
I.3 Funzioni Pagina 34
I.4 Occupazione dei pulsanti Pagina 35
I.5 Regolazioni di base dell'orologio Pagina 36
II.1 Frequenza cardiaca massima (FC max) - Pagina 37
il valore massimo
II.2 Il polso d'allenamento giusto Pagina 38
II.3 Regolazione del valore limite superiore Pagina 39
ed inferiore della frequenza cardiaca
II.4 Avvertimenti Pagina 39
II.5 Indicazioni di controllo Pagina 40
II.6 Cambio della batteria Pagina 40
II.7 Garanzia Pagina 41
ITALIANO
Contenuto
32
Page 36

I. Generalità
Consigliamo di consultare sempre un medico prima della
configurazione dell'allenamento individuale.
1. Contenuto della confezione
1 computer a polso PC3/PC7
1 cintura elastica
1 rilevatore a polso con
trasmettitore
1 supporto da bici con o-ring
2. Come portare un computer da polso/montaggio sul supporto bici
A. Il computer da polso si porta come un orologio a polso oppure
lo si può fissare sul supporto per bici della SIGMA SPORT.
italiano
33
Page 37

B. Mettere la cintura del trasmettitore
•Collegare il rilevatore polso con la cintura elastica
(attraverso il passante).
•Selezionare la lunghezza della cintura con il meccanismo di
fissaggio in maniera da stringere bene ma non troppo la
cintura.
•I signori posizionano il trasmettitore sotto l'attaccatura del
muscolo pettorale, le signore all'attaccatura del seno. Il logo
SIGMA SPORT deve essere rivolto verso l'esterno ed essere leggibile.
C. Sollevare la cintura sul davanti leggermente dalla pelle.
Inumidire con gel ECG comprato in farmacia o alternativamente
con saliva le zone a coste (elettrodi) sul retro del trasmettitore.
3. Funzioni
PC3/PC7
1. Visualizzazione della frequenza cardiaca
2. Indicazione dell'ora, regolabile a 12 ore o a 24 ore
3. Cronometro
PC7
4. Regolazione del valore limite minimo (30-179) e massimo
(240-100) della frequenza cardiaca
5. Segnale d'allarme in caso d'oltrepassaggio del valore limite
6. MAX attuale
7. Indicazione del giorno e della data
34
Page 38

4. Occupazione dei pulsanti
PC3
MODE: cambio display tra cronometro ed ora
SET: Regolazione dell'ora
CHRONO: Funzione start e stop ed azzeramento del cronometro
PC7
MODE: cambio display tra cronometro, frequenza cardiaca
max., ora e data
SET: Regolazione dell'ora, della data e dei valori limiti
superiori ed inferiori della frequenza cardiaca
ALARM: Innesto e disinnesto del segnale d'allarme
CHRONO: Funzioni start e stop ed azzeramento del cronometro
SET
MODE
STW
CLOCK
PC3
PC 3
PC7
PC 7
STP
CHRONO
Set STW
SET
MODE
STW
MAX
CLOCK
DATE
STP
CHRONO
Set STW
ALARM
Sound ON/OFF
italiano
35
Page 39

5. Regolazioni di base dell'orologio
Ora (PC3/PC7)
•Richiamare il modo CLK (ora) tramite MODE.
•Tenere premuto SET finché appare prima "hold" e poi il
formato lampeggiante dell'ora.
•Selezionare tra visualizzazione a 12 o 24 ore con SET e
confermare con MODE e passare alla regolazione dell'ora.
•Selezionare le ore ed i minuti con MODE e regolare
rispettivamente la posizione lampeggiante con SET.
•Per lasciare la regolazione premere MODE.
Data (PC7)
•Richiamare il modo data tramite MODE.
•Tenere premuto SET finché appare prima "hold" e poi il
formato lampeggiante dell'anno con la preregolazione
dell'anno 2000.
•Selezione l'anno, il mese ed il giorno con MODE e regolare
la rispettiva posizione lampeggiante con SET.
•Per lasciare la regolazione premere MODE.
Cronometro (PC3/PC7)
•Richiamare il modo STW (cronometro) tramite MODE.
•Per start e stop premere brevemente CHRONO.
•Azzeramento: tenere premuto CHRONO per 2 secondi.
Segnale d'allarme (PC7)
•Per innestare o disinnestare il segnale, premere brevemente
il pulsante ALARM.
36
Page 40

II. Spiegazione e regolazione delle
funzioni d'allenamento
Impostare la frequenza cardiaca (fc) o anche il polso in battiti
il minuto.
1. Frequenza cardiaca massima (fc max) - il valore massimo
La frequenza cardiaca massima fc max è la vostra frequenza massima attualmente possibile ad esaurimento totale delle vostre
capacità fisiche. La fc max individuale dipende dalla vostra età, dal
sesso, dalla disponibilità d'impegno, dalla vostra performance specifica del rispettivo sport e dal vostro stato fisco. La miglior possibilità per rilevare la vostra fc max individuale è fare un test sotto
carico.
Raccomandiamo di far fare questo test presso il medico e di
ripeterlo per motivi di controllo ad intervalli regolari.
La fc max può essere calcolata approssimativamente anche con
una formula matematica:
Uomini: 210 - "mezza età" (0,11 x peso individuale in chilogrammi) + 4
Donne: 210 - "mezza età" (0,11 x peso individuale in chilogrammi)
italiano
37
Page 41

2. Il polso giusto per l'allenamento
Parlando di zona d'allenamento s'intendono quei valori nei quali
la frequenza cardiaca può variare per un allenamento effettivo
e mirato. Fungono da valori indicativi generali:
Il 65 % della fc max corrisponde al vostro limite inferiore
d'allenamento ed il 80 % della fc max dovrebbe essere il vostro
limite superiore. Stabilite per favore la vostra zona di frequenza
cardiaca esatta con il diagramma in conformità ai vostri obiettivi
Zona: livello riabilitativo 50-70% della fc max.
Orientamento: wellness per principianti (o chi ricomincia)
Valore limite superiore 70 % 105 112 119 126 133 140 147
Valore limite inferiore 50 % 75 80 85 90 95 100 105
Zona: fitness 70-80% della fc max
Orientamento: fitness per non principianti
Valore limite superiore 80 % 120 128 136 144 152 160 168
Valore limite inferiore 70 % 105 112 119 126 133 140 147
Zona: sport agonistico 80-100% della fc max
Orientamento: allenamento per gare per chi fa sport agnostico
Valore limite superiore100 % 150 160 170 180 190 200 210
Valore limite inferiore 80 % 120 128 136 144 152 160 168
Vi preghiamo di considerare che per programmi generici non
possiamo rispettare gli interessi individuali degli sportivi! Per questo
motivo una configurazione ottimale per l'allenamento è possibile solo
con un allenatore qualificato che conosce personalmente lo sportivo!
fc max 150 160 170 180 190 200 210
fc max 150 160 170 180 190 200 210
fc max 150 160 170 180 190 200 210
38
Page 42

3. Regolazione del valore limite superiore ed inferiore della
frequenza del polso (PC 7)
•Richiamare il modo MAX (oltrepassaggio del valore limite
superiore o inferiore) con MODE.
•Tenere premuto SET finché appare prima "hold" e poi il valore
limite superiore lampeggiante con il numero 240.
•Regolare il valore limite superiore con SET. La regolazione dei
numeri viene fatta in maniera regressiva.
•Confermare il valore limite superiore della frequenza cardiaca
con MODE e selezionare il valore limite inferiore della
frequenza cardiaca e regolare la posizione lampeggiante (30)
con SET. (La regolazione dei numeri viene fatta in modo
progressivo).
•Per lasciare e confermare la regolazione premere MODE.
In caso d'oltrepassaggio del valore limite superiore o inferiore si
sente un segnale d'allarme.
4. Avvertimenti (PC3/PC7)
•La funzione MAX è attiva solo se il cronometro (STW) è
stato innestato.
•Prima di iniziare con il programma d'allenamento consultare
in ogni caso il proprio medico per definire il valore della
frequenza cardiaca personale.
•Persone con defrillatore e/o pace maker consultare per
favore il medico prima dell'uso.
•Prima di allacciare la cintura sul petto regolare il valore
superiore ed inferiore della frequenza cardiaca!
39
italiano
Page 43

5. Indicazioni di controllo (PC3/PC7)
Manca la visualizzazione della frequenza cardiaca
•La cintura con il rilevatore polso è stata allacciata in maniera
sbagliata.
•I sensori (elettrodi) del rilevatore polso sono sporchi oppure
non sono stati inumiditi.
•Interferenze con fonti di disturbo elettriche (cavi ad alta
tensione, ferrovie, ecc.)
•La batteria del trasmettitore è vuota (cod. art. 0342)
Il display reagisce piano oppure si è annerito:
•È possibile in caso di temperature inferiori o superiori alla
temperatura di funzione (1 a 55°C)
Il display è sbiadito:
•La batteria (cod. art. 270310) è debole, sostituire prima
possibile.
Impermeabilità:
Il computer da polso SIGMA SPORT è impermeabile all'acqua fino
ad una profondità di 3 metri. Non si possono premere i pulsanti
sott'acqua. Si consiglia di non utilizzare il computer in acqua salata
visto che altrimenti potrebbero verificarsi difetti nella funzione.
6. Cambio della batteria (PC3/PC7)
Batteria nel computer da polso: CR 2025 oppure DL 2025.
Batteria nel trasmettitore polso: CR 2032 oppure DL 2032.
Il computer da polso SIGMA SPORT è uno strumento di
misurazione altamente tecnologico. Per garantire la funzione
e l'impermeabilità, il cambio della batteria dovrebbe essere
effettuato da un rivenditore specializzato. In caso di cambio
della batteria che non è stato effettuato ad opera d'arte il
computer da polso potrebbe essere danneggiato; in questo
caso il diritto a garanzia viene a meno.
40
Page 44

7. Garanzia (PC3/PC7)
Hanno valore le disposizioni legali di garanzia. La garanzia si limita
a difetti del materiale e della lavorazione. Le batterie sono escluse
dalla garanzia.
La garanzia è valida solo se
1. il computer da polso non è stato aperto e se
2. è stata allegata la ricevuta.
Vi preghiamo di leggere attentamente l'istruzione per l'uso prima
di reclamare il computer da polso. Se anche dopo la lettura doveste costatare difetti contattate il vostro negozio specializzato dove
avete comprato il vostro computer da polso oppure inviate il computer da polso con ricevuta e tutti gli accessori ed affrancatura sufficiente a:
SIGMA SPORT
Dr.-Julius-Leber-Straße 15
67433 Neustadt/Weinstr.
Germania
In caso di diritti di garanzia giustificati vi sarà messo a
disposizione un apparecchio di sostituzione. Il diritto si estende
solo sul modello rispettivamente attuale. Il produttore si riserva
il diritto di effettuare modifiche tecniche.
italiano
41
Page 45

Espagñol
ESPAGNOL
I.1 Contenido del embalaje Página 43
I.2 Posicionamiento del Monitor de Ritmo Cardiaco/ Página 43
Montaje en el manillar
I.3 Funciones Página 44
I.4 Funciones de las teclas de selección Página 45
I.5 Ajustes (hora, fecha) Página 46
II.1 La Frecuencia cardiaca máxima (FC máxima) – Página 47
test máximo
II.2 La buena Frecuencia cardiaca para el Página 48
entrenamiento
II.3 Determinación de los límites alto y bajo Página 49
II.4 Atención Página 49
II.5 Control en el caso de funcionamiento incorrecto Página 50
II.6 Cambio de pilas Página 50
II.7 Garantía Página 51
Contenido
42
Page 46

I. Generalidades
Les recomendamos consulte un médico antes de determinar
el programa de entrenamiento personal
1. Contenido del embalaje
1 Monitor de Ritmo Cardiaco
PC3/PC7
1 Cintura elástica
1 Emisor torácico
1 Soporte al manillar
2. Posicionamiento del Monitor de Ritmo Cardiaco/Montaje en el manillar
A. El Monitor de Ritmo Cardiaco puede ser utilizado como un
reloj de pulsera o puede ser montado en el manillar de la
bicicleta gracias al soporte.
43
espagñol
Page 47

B. Posicionamiento del emisor torácico
•Montar el emisor torácico con la cintura elástica por medio
de los enganches
•Regular la tensión de la cintura elástica pero sin tensión
exagerada.
•Para los hombres posicionar el emisor bajo los pectorales,
para las mujeres bajo el pecho. El logo Sigma Sport debe
ser visible.
C. Se recomienda mojar las bandas conductoras al dorso del
emisor con gel ECG disponible en farmacias o en alternativa
la saliva puede sustituir el gel.
3. Funciones
PC3/PC7
1. Visualización de la Frecuencia cardiaca
2. Hora 12h ó 24h
3. Cronómetro
PC7
4. Memorización de los límites alto (240-100) y bajo (30-179)
5. Alarma sonora al alcanzar los límites alto o bajo
6. Frecuencia cardiaca máxima (80-240)
7. Calendario
44
Page 48

4. Funciones de las teclas de selección
PC3
MODE : Cambio entre pantallas cronómetro y reloj
SET : Ajuste del reloj
CHRONO : Función marcha/stop, puesta a cero del cronómetro
PC7
MODE : Cambio entre pantallas hora, fecha, cronómetro y
frecuencia cardiaca máxima
SET : Ajuste del reloj, fecha, límite alto y bajo
ALARM : ON / OFF alarma
CHRONO : Función marcha/stop, puesta a cero del cronómetro
SET
MODE
STW
CLOCK
PC3
PC 3
PC7
PC 7
STP
CHRONO
Set STW
SET
MODE
STW
MAX
CLOCK
DATE
STP
CHRONO
Set STW
ALARM
Sound ON/OFF
espagñol
45
Page 49

5. Ajustes
Programación de la hora (PC3/PC7)
•Pulsar MODE para acceder a la pantalla CLK (hora)
•Presionar y mantener pulsada la tecla SET durante
2 segundos hasta que la palabra "hold” desaparece y el
formato de la hora aparece parpadeando
•Pulsar SET para seleccionar el modo 12h ó 24h y
confirmar con la tecla MODE
•Pulsar sobre MODE para seleccionar la hora, los minutos
y confirmar vuestro registro parpadeante pulsando la tecla
MODE
Programación de la fecha (PC7)
•Pulsar MODE para acceder a la pantalla fecha
•Presionar y mantener pulsada la tecla SET durante
2 segundos hasta que la palabra "hold” desaparece y el
formato del año aparece parpadeando
•Pulsar sobre MODE para seleccionar el año, el mes y el
día. Meter vuestro registro parpadeante pulsando la tecla
SET
•Para finalizar la operación, pulsar la tecla MODE
Cronómetro (PC3/PC7)
•Pulsar MODE para acceder a la pantalla STW
•Pulsar CHRONO para activar y desactivar el cronómetro
•Pulsar CHRONO durante 2 segundos para la puesta a
cero (RESET)
Audio Tono (PC7)
•Pulsar ALARM para activar y desactivar el sonido
46
Page 50

II. Explicaciones y programación
de las zonas de entrenamiento
La Frecuencia cardiaca (FC) donde el pulso se indica en
pulsaciones por minuto.
1. Frecuencia cardiaca máxima (FC máxima) – Test máximo
La Frecuencia cardiaca máxima (FC máxima) representa su
Frecuencia cardiaca máxima cuando está en el límite de su
capacidad física. Su FC máxima personal depende de su edad,
sexo y condición física. El mejor modo de determinar su FC
máxima personal es proceder a un test de esfuerzo.
Le recomendamos realizar este test con un médico de medicina
deportiva y repetir este test regularmente con el fin de controlar
su condición física.
La FC máxima puede también ser calculada mediante una
ecuación matemática.
Hombre: 210 – "mitad de la edad” –
(0.11 x su peso en Kilos) + 4
Mujer: 210 – "mitad de la edad" –
(0.11 x su peso en Kilos)
espagñol
47
Page 51

2. El nivel de entrenamiento apropiado
La zona de entrenamiento es la variación de la Frecuencia
cardiaca que Ud. tiene determinada en la cual desea trabajar
para un entrenamiento objetivo.
Como valor indicativo :
65% de su FC máxima es el límite bajo de entrenamiento y 80%
de su FC máxima es el límite alto de entrenamiento. Determine
su zona de Frecuencia cardiaca, en función de sus objetivos.
Zona : Salud 50-70% de la FC máxima
Objetivo : Bienestar y vuelta al entrenamiento para los principiantes
Límite alto 70 % 105 112 119 126 133 140 147
Límite bajo 50 % 75 80 85 90 95 100 105
Zona : Fitness 70-80% de la FC máxima
Objetivo : Fitness para practicantes avanzados
Límite alto 80 % 120 128 136 144 152 160 168
Límite bajo 70 % 105 112 119 126 133 140 147
Zona : Prestaciones deportivas 80-100% de la FC máxima
Objetivo : Entrenamiento de competición para los atletas de nivel alto
Límite alto 100 % 150 160 170 180 190 200 210
Límite bajo 80 % 120 128 136 144 152 160 168
Por favor, tome en cuenta que un programa general de entrenamiento no
prevalecerá en ningún caso a un programa personalizado de entrenamiento.
Un programa de entrenamiento perfectamente adaptado sólo puede ser
sugerido por un entrenador titulado y que además le conozca personalmente.
FC máx 150 160 170 180 190 200 210
FC máx 150 160 170 180 190 200 210
FC máx 150 160 170 180 190 200 210
48
Page 52

3. Programación de los límites alto y bajo (PC7)
•Pulsar MODE para acceder a la pantalla %
(limites alto y bajo)
•Presionar y mantener pulsada la tecla SET durante 2
segundos hasta que el mensaje « hold » desaparece y que
el límite alto aparece con el número 240 parpadeando
•Ajustar el límite alto pulsando la tecla SET. Los números
aparecen en orden decreciente.
•Confirmar el límite alto pulsando MODE 1 y ajustar el límite
bajo parpadeante (30) pulsando la tecla SET. Los números
aparecen en orden creciente.
•Para confirmar y finalizar la operación pulsar MODE
Cuando exceda del límite alto o bajo, una alarma sonora se
activará.
4. Atención (PC3/PC7)
•Las funciones KCAL, AVG y MAX se activan sólo cuando el
cronómetro (STW) está activado.
•Antes de empezar un programa de entrenamiento, consulte
un médico de medicina deportiva con el fin de conocer sus
valores de Frecuencias cardiacas personales.
•Para las personas con problemas cardiacos o portadoras
de simuladores cardiacos, consultar con su médico o
preparador físico para establecer un programa de ejercicios
físicos
•Antes de poner el emisor torácico, programar los límites de
Frecuencia cardiaca alto y bajo.
•Los valores son automáticamente convertidos de Lb en Kg.
y de Kg. en Lb
espagñol
49
Page 53

5. Controles en caso de funcionamiento incorrecto. (PC3/PC7)
No se visualiza la Frecuencia cardiaca:
•Posición incorrecta del emisor torácico
•Bandas conductoras al dorso del emisor sucias o
insuficientemente humedecidas
•Presencia de fuentes de interferencias (por ejemplo líneas
de alta tensión, líneas electricas, et….)
•Verificar la pila del emisor
La pantalla se oscurece o aparece negra:
•Posible por temperaturas inferiores a 1ºC y superiores
a 55ºC
La visualización de la pantalla desaparece:
•Pilas agotadas. Sustituirlas lo antes posible.
Pila tipo DL2025 o CR2025 (referencia 270310)
Estanqueidad:
El Monitor de Ritmo Cardiaco Sigma Sport así como el emisor
son estancos hasta una profundidad de 3 metros. Las teclas de
selección no deben en ningún caso ser utilizadas bajo el agua.
La utilización en agua de mar debe ser evitada porque podría
causar un mal funcionamiento.
6. Cambio de las pilas (PC3/PC7)
Pila del reloj: CR 2025 o DL2025. Pila del emisor: CR2032 o
DL2032. El Monitor de Ritmo Cardiaco SIGMA SPORT es un
instrumento de medida, técnico y muy sensible. El cambio de
pilas debe imperativamente ser efectuado por un revendedor
especializado con el fin de garantizar un buen funcionamiento así
como su estanqueidad. Un cambio de pilas efectuado de manera
incorrecta estropearía el Monitor de Ritmo Cardiaco y anularía la
garantía. Después de un cambio de pila, el factor de calculo KCAL
se pone automáticamente en 00069 y debe ser reprogramado.
50
Page 54

7. Garantía (PC3/PC7)
La garantía es valida durante 24 meses a partir de la fecha de
compra. La garantía se limita al material y a la mano de obra.
Las pilas no se consideran en la garantía.
La garantía es válida únicamente si:
1. El Monitor de Ritmo Cardiaco no ha sido abierto.
2. El ticket de compra es incluído en la devolución.
Lea detenidamente las recomendaciones así como las condiciones
de garantía antes de devolver su Monitor de Ritmo Cardiaco à nuestro servicio Post-Venta. Si su material parece defectuoso,
contacte con el revendedor donde lo ha adquirido o devuelvalo
completo por paquete postal con el ticket de compra adjunto a la
siguiente direccion :
Europe:
SIGMA Elektro GmbH
Dr.-Julius-Leber-Straße 15, 67433 Neustadt/Weinstr., Alemania
America:
SIGMA SPORT USA
1926 Miller Drive, Olney, IL 62450 USA
Asia, Australia, South America:
SIGMA SPORT ASIA
7F-1, No. 193, Ta-Tun 6th Street, Taichung City, Taiwan, ROC
En periodo de garantía, un Monitor de sustitución le será
entregado gratuitamente. Si vuestro Monitor debe ser
cambiado en periodo de garantía, se hará con un modelo
actual. El fabricante se reserva las modificaciones técnicas
sin previo aviso.
espagñol
51
Page 55

NEDERLANDS
Nederlands
I.1 Verpakkings inhoud blad 53
I.2 Het dragen van de Pulscomputers/ blad 53
hartslagmeter, montage van de stuurhouder
I.3 Functies blad 54
I.4 Toetsfuncties blad 55
I.5 Basis instellingen van de klok blad 56
II.1 Maximale hartfrequentie (HF max)- blad 57
de maximaal test
II.2 De juiste trainingsfrequentie blad 58
II.3 Instelling van de boven en ondergrens blad 59
van de hartslagfrequentie
II.4 Waarschuwing blad 59
II.5 Controle adviezen blad 60
II.6 Verwisselen van de batterijen blad 60
II.7 Garantie blad 61
Inhoud:
52
Page 56

I. Algemeen
Wij adviseren uw huisarts te raadplegen voor het vaststellen
van uw individuele trainings mogelijkheden.
1. Verpakkings inhoud
1 Pulscomputer PC3/PC7
1 Elastische gordel
1 Signaal zender
1 Fietsstuurhouder met O ring
2. Dragen van de Pulscomputer/hartslagmeter,
montage van de stuurhouder
A. De Pulscomputer / hartslagmeter is te dragen als polsklok of
als klok op de SIGMASPORTstuurhouder te monteren
53
nederlands
Page 57

B. Het dragen van de zendergordel
•Signaal afnemer met de elastische gordel verbinden
•Gordellengte zo afstellen, dat de gordel licht aandrukt
en niet knelt.
•Plaats de gordel onder de aanzet van de borstspieren,
bij dames onder de borstaanzet. Het SIGMA SPORT Logo
moet van voren af leesbaar zijn.
C. De gordel aan de voorkant licht van de huid afhouden en de
geribte zone aan de achterzijde met EKG gel of met speeksel
licht bevochtigen
3. Functies
PC3/PC7
1. Hartfrequentie
2. Klok: 12/24 uurs instelling
3. Stopwatch
PC7
4. Instelling van de min/max hartfrequntie grenswaarden
min. 30-179 / max.240-100
5. Alarmtoon bij overschrijding van de grenswaarden
6. Maximale hartslag
7. Dag en datum aanduiding
54
Page 58

4. Toetsfuncties
PC3
MODE: Display wisselt tussen Stopwatch en Tijd
SET: Instelling van de tijd
CHRONO: Start/Stop functie en nulstelling van de Stopwatch
PC7
MODE: Display wisselt tussen Stopwatch,
Max.Hartfrequentie,
Tijd en Datum
SET: Instelling van Tijd en Datum, onder/boven grenzen
Hartfrequentie
ALARM: IN/UIT schakelen van de Alarmtoon
CHRONO: Start/Stop functie en nulstelling van de Stopwatch
SET
MODE
STW
CLOCK
PC3
PC 3
PC7
PC 7
STP
CHRONO
Set STW
SET
MODE
STW
MAX
CLOCK
DATE
55
STP
CHRONO
Set STW
ALARM
Sound ON/OFF
nederlands
Page 59

5. Basis instelling van de Klok
Tijd (PC3/PC7)
•CLK-Modes (Tijd) door MODE oproepen
•SET ingedrukt houden tot "hold" en de tijd oplicht.
•Met SET kiezen voor 12/24 uur aanduiding, met MODE
bevestigen
•Met MODE Uren en Minuten oproepen en de oplichtende
positie met SET bevestigen
•Om instellingen te verlaten, op MODE drukken
Datum (PC7)
•Datum-modes door MODE oproepen.
•SET ingedrukt houden, tot eerst „hold“ en dan het
oplichtende jaartal 2000 verschijnt.
•Met MODE jaar/maand/en dag aangeven en de positie
met SET bevestigen.
•Om instellingen te verlaten MODE indrukken.
Stopwatch (PC3/PC7)
•STW-Modes ( Stopwatch) door MODE oproepen
•Voor Star t/Stop kort op CHRONO drukken
•Nulstelling: CHRONO 2 sec. ingedrukt houden
Alarm (PC7)
•Alarm toets kort indrukken voor het in/uit schakelen
van de toon.
56
Page 60

II. Verklaring en instelling
van de trainingsfuncties
De hartfrequentie (HF) en ook polsslag wordt in slagen per/minuut aangegeven
1. Maximale hartfrequentie ( Hf max)- de maximaal test
De maximale hartfrequentie Hf max. is uw maximale hartfrequentie die bij een totale inspanning die voor u mogelijk is. De persoonlijke HF max. is afhankelijk van uw lichamelijk conditie. De beste
manier om die grenzen te ontdekken zijn een belastingstest.
Wij adviseren die test te doen onder leiding van een arts en
deze test regelmatig te herhalen om zo uw conditie vast te leggen
zodat u verantwoordt kan sporten .
De HF max. kan ook door een mathematische vergelijking
worden ingeschat:
Mannen: 210 – "helft leeftijd" –
( 0.11 x het persoonlijke gewicht in KG) + 4
Dames: 210 – "helft leeftijd" –
( 0,11 x het pesoonlijke gewicht)
57
nederlands
Page 61

2. De juiste trainingsfrequentie
De trainingszone is het bereik, waarin het hart, dus de
hartfrequentie gedurende een doelgerichte training, een
effektief belasting heeft.
Als algemene richtlijn geldt:
65 % van Hf max is de ondergrens en 80 % van Hf max. is
de bovengrens van het effektieve trainingsgebied. De preciese
hartfrequentie –zone kunt ontlenen aan de Diagram.
Zone: Gezondheid 50-70 % van Hf max.
Uitwerking: Wellness voor de (her) starter
Bovengrens: 70 % 105 112 119 126 133 140 147
Ondergrens: 50 % 75 80 85 90 95 100 105
Zone: Fitness 70-80 % van de Hf max.
Uitwerking: Fitness voor de gevorderde
Bovengrens: 80 % 120 128 136 144 152 160 168
Ondergrens: 70 % 105 112 119 126 133 140 147
Zone: Vermogen 80-100 van Hf max.
Uitwerking: Topsport training voor de prestatie sporter
Bovengrens: 100 % 150 160 170 180 190 200 210
Ondergrens: 80 % 120 128 136 144 152 160 168
Houdt u er rekening mee: algemene sportplanning kan nooit
ingaan op de persoonlijke mogelijkheden. Daarvoor is een optimale
trainingsstructuur nodig die alleen een goedopgeleide Trainer kan
geven en die de sporter ook persoonlijk kent.
HF max 150 160 170 180 190 200 210
HF max 150 160 170 180 190 200 210
HF max 150 160 170 180 190 200 210
58
Page 62

3. Instelling van de boven en ondergrens van de Pulsfrequenties (PC7)
•Met MODE de MAX-MODES (boven/onder grenswaarde oproepen)
•SET ingedrukt houden, tot eerst "hold" en daarna de oplichtende
bovengrens met het getal 240 verschijnt.
•Met SET de bovengrens instellen De instelling van getallen
> teruglopend.
•Met MODE de boven hartfrequentie grenswaarde bevestigen
en de ondergrensfrequentie kiezen en de oplichtende positie
(30) met SET instellen. (De instelling van de getallen volgt
doorlopend)
•Om de instellingen te bevestigen: MODE drukken.
Bij het overschrijden van de boven/onder grenswaarde klingt de
alarmtoon.
4. Waarschuwing (PC3/PC7)
•Funktion Max is dan alleen actief als de stopwatch is
ingeschakeld.
•Voor het opstar ten van uw trainings programma, uw huisarts
consulteren, om uw persoonlijke hartfrequentie vast te stellen.
•Personen met een défibrillator of pacemaker, eerst de huisarts
consulteren.
•Voor het plaatsen van de borstband eesr t de boven en
ondergrens van de hartfrequentie instellen.
59
nederlands
Page 63

5. Controle aanwijzing (PC3/PC7)
Geen hartfrequentie zichtbaar op de display:
•Borstband niet goed geplaatst
•Sensor( elektroden) van de borstband zijn vuil of niet vochtig
•Storing door elektrische stroombronnen
(Hoogspanningsledingen, enz)
•De batterij in de borstband is leeg (art.nr. 0342)
Display reageert traag of is donker gekleurd:
•Mogelijk boven de 55o C of onder 1o C
Display aanduiding zwak:
•Batterij ( Art.nr.270310) zwak, vervangen.
Waterdicht:
De SIGMA SPORT Pulscomputer is tot 3 m. waterdicht. Toetsen
niet onder water gebruiken. Zeewater vermijden, dit veroorzaakt
functie storing.
6. Batterijen verwisselen (PC3/PC7)
Batterijen in de Pulscomputer: CR 2025 of DL 2025. Batterij in de
borstband: CR2032 of DL 2032. De SIGMA SPORT Puls-computer
is een hoog-technisch meet instrument. Om de functies en waterdichtheid te waarborgen, mag het verwisselen van de batterijen
alleen door een vakman worden gedaan. Door onvakkundig verwisselen van de batterijen kan de computer worden beschadigd
en vervalt de garantie.
60
Page 64

7. Garantie (PC3/PC7)
Hier gelden de wettelijke bepalingen. De garantie beperkt zich tot
materiaal en constructie fouten. Batterijen zijn van garantie uitgesloten.
De garantie is dan alleen geldig wanneer:
1. De Pulscomputer niet is geopend
2. Garantie bewijs is bijgevoegd.
Leest u bij weigering eerst nogmaals de gebruiksaanwijzing.
Mochten er toch gebreken zijn, ga dan naar uw leverancier of zend
u de complete Pulscomputer met aankoop bewijs en gefrankeerd
naar:
SIGMA SPORT
Dr.-Julius-Leber-Straße 15
67433 Neustadt/Weinstr.
Germany
Bij vaststelling van gebreken ontvangt u een vervangend en
actueel model. Technische veranderingen voorbehouden.
61
nederlands
 Loading...