

Sierra Sierra, S5030 Quick Manual

Using
Your
Security
System
With
LED Keypad
s5030
(EflT(
o
#.
c
o
+.
g
o
o
Section
E
Qurcr
Guioe
E
Arm,no
E
overvrew
E
-;=;
uirabe,
E
€r-a#rilsfi
idupH$$i
nEi''
f
Ararms
E
-n*iliUilt[#,,'i'
.
I
tr
System Souncis
I
!'sv*te*,
u*ni@e
-
[
.tiailb
E$h@'
,.;,,
I
E,Fite-"selsii
iiu
,'-
!
'ltrot*r,
,,,
,,
,
-
.nt'-
'

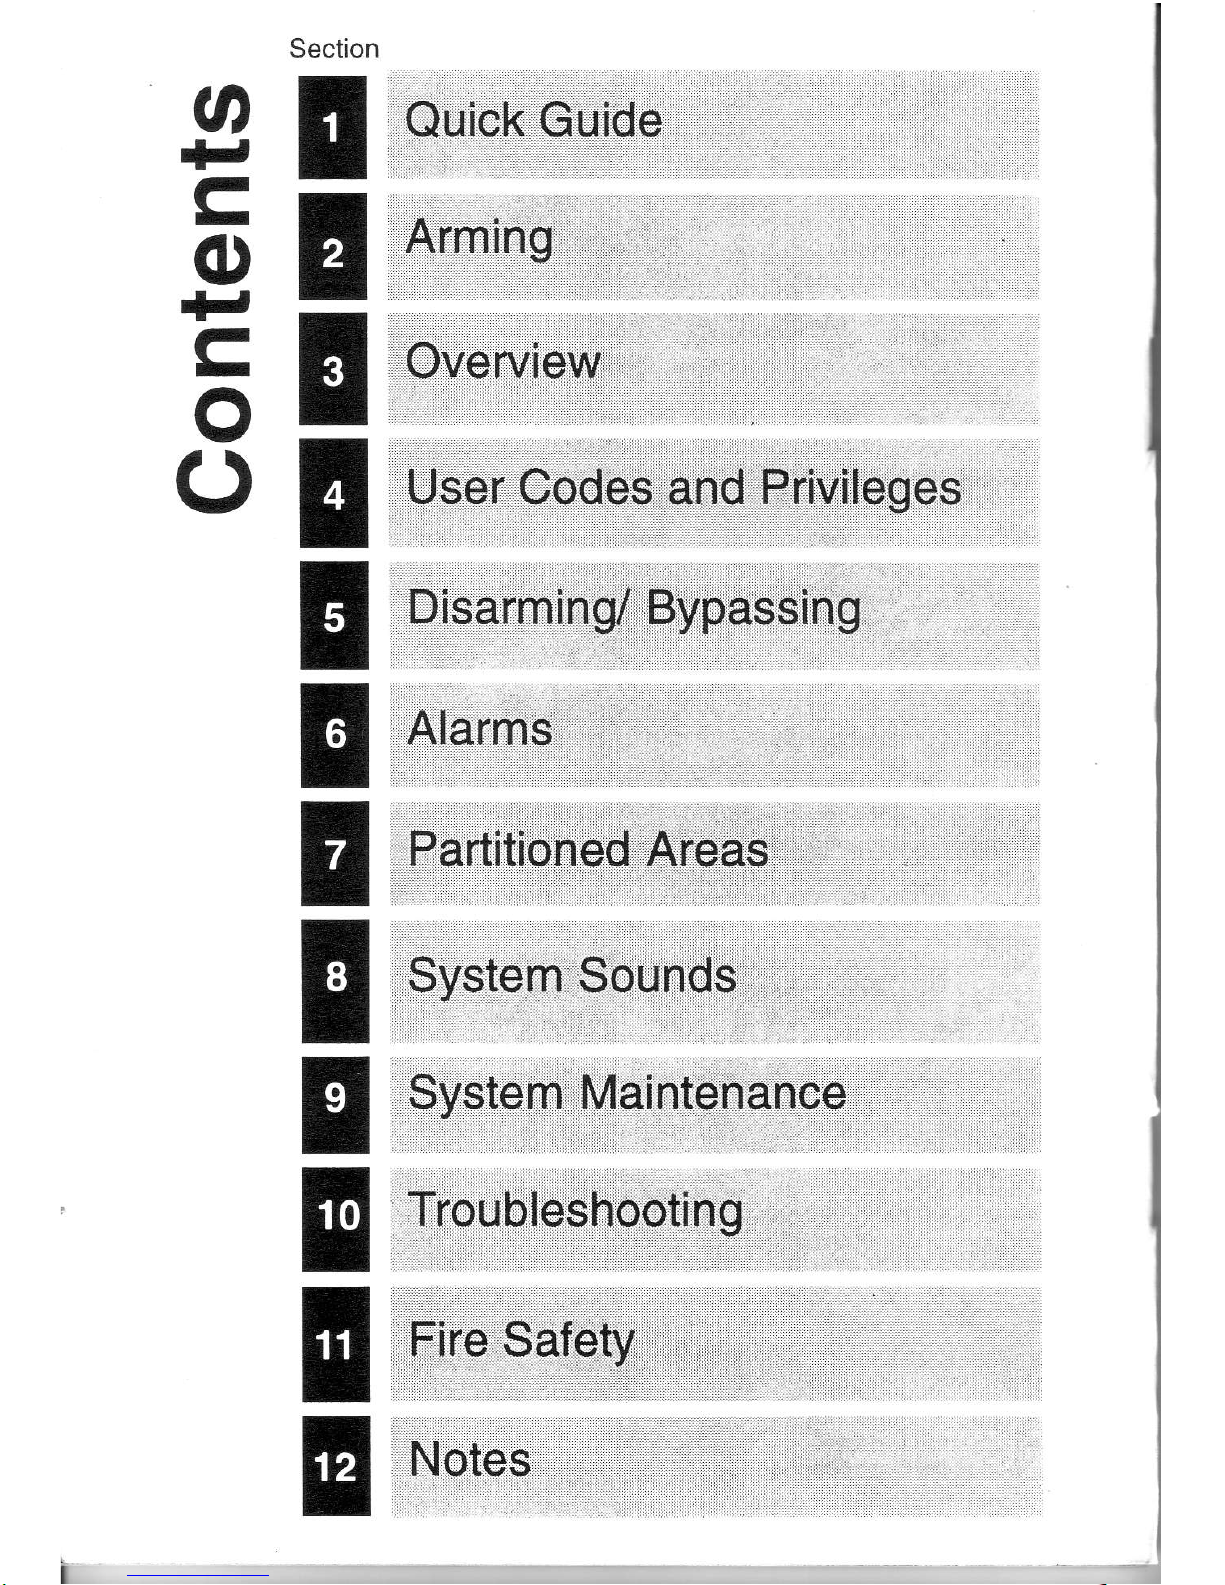
Quick Guide
To
Your
Keypad
The
drawing
below
identifies
and
explains
the important
features
of
your
LED
keypad.
Keypad
Lights
(LEDs)
Describes
the syslem's
status,
sucn
as:
-it
the system
is ready
to arm
-if
an
alarm has
occurred
-if
a zone
is faulted
-other
specialized
information
(See
nex
page.)
Numeric
Keys
Used
to enter
codes
and
perform
otherfunctions
Emergency
Keys
Push
once
to notify
your
monitoring
station
of an
emergency.
(Keys
must
be
pre-programmed.)
Secondary
Function,,Keys,,
Consists
of the labels
beneath
the numeric
keys.
These
keys
allow
you
to change
system
settings.
To
activate,
press
and
hold
the numeric
key
above
the label
for
two
seconds.
o
p
f
(,
Y
.c)
J
a
H
IH
H
E
HMil
ww
IF@E
mm
9
10
11 1213
14
REDY
o
SffiCE
zoNEE
o
'=
C'
i<
.c)
=
a
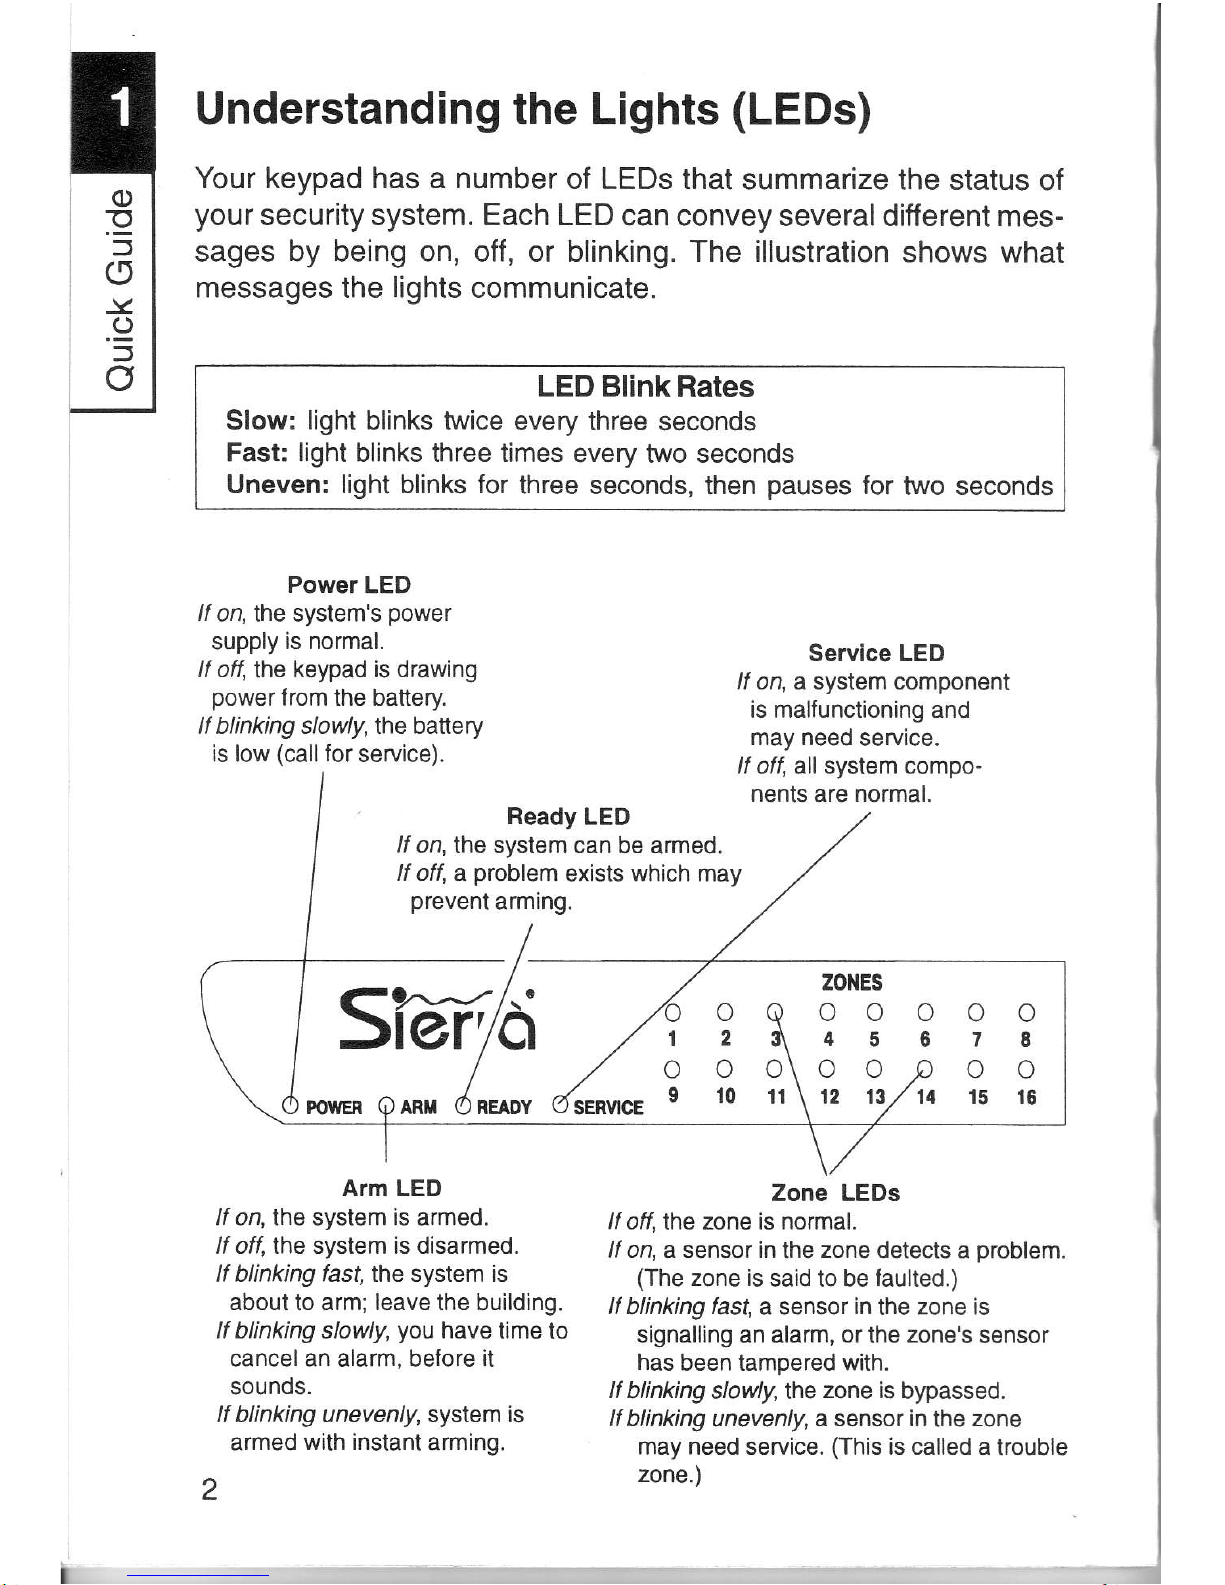
Understanding
the Lights
(LEDs)
Your keypad has a number
of LEDs that
summarize the status
of
your
security system. Each LED
can convey several different
mes-
sages
by
being on, off, or blinking. The illustration
shows what
messages the
lights
communicate.
LED Blink
Rates
Slow:
light
blinks
twice
every three
seconds
Fast: light
blinks three times
every two seconds
Uneven: light blinks for
three seconds, then
pauses
for
two seconds
Power
LED
lf
on,lhe system's
power
supply is normal.
lf off,lhe keypad is drawing
power
from the battery
lf blinking slowly, the battery
is low
(call
for
service).
Ready
LED
/fon,
the system can be
armed
If off , a
problem
exists which may
prevent
arming.
Service LED
/f on, a system component
is malfunctioning and
may need
service.
/f o4
all system compo-
nents are normal.
ZONES
oo
45
oo
12
13
1
o
ienvrce
9
o
11
oo
7E
oo
15 16
_t
Tvl:
o
2
o
t0
o
6
Arm LED
lf on,lhe system is armed.
lf off , lh,e system is disarmed.
It blinking tast, the system is
about to arm; leave the building.
lf blinking slowly,
you
have time
to
cancel an alarm, before
it
sounos.
lf blinking unevenly, system is
armed
with instant arming.
z
Zone LEDS
lf off
,lhe
zone is normal.
/l on, a sensor in
the
zone detects
a
problem.
(The
zone is
said to be
faulted.)
It blinking fast,
a sensor
in
lhe
zone is
signalling
an
alarm, or
lhe
zone's
sensor
has
been tamoered with.
ll blinking
slowly, the
zone is
bypassed.
ll blinking
unevenly,
a sensor in
the
zone
may need service.
(This
is called a
trouble
zone.)

How
the Arming
Modes
Differ
Your
security
system can
be armed in
a number
of ways,
to suit
different
situations.
Below is
a summary
of the
different arming
modes.
lnterior
armed.
lf sensors
detect
movement within
a
building,
an
alarm sounds.
Perimeter
armed. An
alarm
sounds if
sensors detect
an in-
truder at the
building's
perimeter
(doors
and windows),
but not
inside
the
building. When
your
building is
armed this
way,
you
can remain
inside
without
causing an
alarm.
Exil
allowed.
Some
arming methods
require
you
to leave
the
building
before the
system finishes
arming.
Other
arming meth-
ods allow
you
to remain
inside
while
the system is
armed.
In
addition, an
arming method
may
allow
some
persons
to leave,
while
others remain
in
the
building.
Requires
user
code. Not
all methods
require
a user code.
Automatically
arms.
Your system
may
be
programmed
to
automatically
arm
or disarm
at
a
given
time
every day.
With
automatic
arming,
you
do not have
to
press
any keys for
the
system to
arm.
No
entry
allowed. Most
arming
methods
allow a usertime
to
to enter
the building
and cancel
an
alarm before it
sounds.
However, your
system
can be
set to sound
an alarm
the instant
a
perimeter
sensor detects
an intruder.
At the start
of each arming
mode
description,
there is
an alarm
fea-
ture checklist. This
checklist
summarizes
the features
of
each arm-
ing
mode. The
items followed
by an
"X"
are features
of
the arming
mode.
o)
E
L

C')
.=
E
Exit Delays
An exit delay
is the amount of time
you
have to
exit and secure
the building, once
your
security system begins
to arm. These
delays
last from
20
to
255 seconds, depending upon
how
your
system
was
programmed.
During the
exit delay, the Arm LED blinks.
The keypad may beep;
if
so,
it beeps faster during the
last ten seconds.
lf any zones are
faulted
(not
readyto
be armed), the corresponding
zone LED lights.
Full
Interior armed
_X_
Perimeter armed
_X_
Exitallowed
_X_
Requires user code
_x_
Automatically arms
_
No entry allowed
_
Arming
When
your
system is armed
with full arming,
both the
perim-
eter
and interior
zones are
armed.
You are allowed a spe-
cific time
to enter
or exit the
building before
an alarm
sounos.
Quick
Full-Arming.
lf
your
system
is
pro-
grammed
for
quick
full-
arming,
you
do
not need
to enter a user
code.
To
Full-Arm the System:
Make
sure the Ready
LED is lit.
o
Enre,
F.!QID-|E[.
n*it
the building.
To Arm the System
with
Quick
Full-Arming:
(|}
Press and hold tt'"
lHomel
key for 2 seconds.
Exit and
secure
the building.

Home
Interior
armed
_
Perimeter
armed
_X_
Exitallowed
_X_
Requires
user
code
_X_
Automaticallyarms
_
No
entry
allowed
_
With
home-arming, you
can re-
main inside
a
building
while its
perimeter
sensors
(such
as
doors
and windows)
are
armed.
No
alarm sounds
if
a sensor
de-
tects movement
within
the
building.
Your
system
might
be
pro-
grammed
for
a home
arming
exit
delay
option
(see
Section
12).
This
means
that
one
or
more individuals
can leave
the
building
during
the
exit delay.
Quick
Home-Arming.
ll
your
system
is
pro-
grammed
for
quick
home-arming, you
do
not need
to
enter a
user code.
To
Home-Arm
the
System:
Make
sure the
Ready
LED
is lit.
O
Press
lTiorne
l, and
"nterlCF[DlFl.
Ifyour
system
ls
programmed
with
an
exit delay,
you
can now leave.
While
the
system is
home-
armed,
the Arm
LED
is
lit,
and
the interior
LEDs
blink
slowly.
To
Arm
the System
with
Quick
Home-Arming:
G
Press
the fHqmgl
key.
If
your
system
is
programmed
with
an
exit delay,
you
can
now
leave.
The
Arm
LED
lights
and the
interior
zone
LEDs
blink
slowly.

I
E
sl
rl
With instant home-arming, an
alarm
sounds the nsfanf a sen-
sor
on the building's
perimeter
detects a
problem.
The interior
sensors
are not armed.
Before
anyone can open a door
orwindoq
the system mustfirst
be disarmed.
To
prevent
false alarms, use in-
stant
home-arming only
when
you
are sure no system user will
open a
protected
door or win-
dow.
Quick
Instant Home-
Arming.
lf
your
system is
pro-
grammed
for
quick
in-
stant
arming,
you
do not need
to enter a user
code.
Instant
Home-Arming
Interior
armed
Perimeter armed
Exit
allowed
Requires user code
Automatically arms
No entry
allowed
-x_-
x
To
Instant Home-Arm:
Make sure the
Ready
LED is
lit.
OEnter
ffiffi,
uno
press
and
hold
the
p|
linstantl
key for 2
seconds.
Thekeypad
beeps twice.
The Arm
LED and the interior
zone LEDs blink slowlv.
To
Arm the System with
Quick
Instant llome-Arming:
O
Press and hold the
pl
[instant]
key for 2 seconds.
Your system
is now instant-
armed.
The Arm LED and the
interior
zone LEDs blink
slowly.

Ufl
Automatic
(rimed)
'"Ufkn:l_i_
\y
Arming/Disarming
ft#fiffi:il::j:
_l_
No entry
allowed
_
Your system can automatically
arm
and disarm itself
at
preset
times
of
the
day. These
options must
be
programmed
into
your
system.
At two minutes
and again at one
minute before the Automatic
Arming
sequence begins,
the siren
sounds twice. Then, the
exit delay be-
gins.
You
must leave the
building during
the exit delay, or an alarm
sounds.
You can cancel
the
arming
sequence
by entering
your
code
during
the exit delay.
To change the
days and times
that arming and dis-
arming occurs,
contact
your
dealer.
Canceling
an
Arming
Any
arming command with
an
exit delay may be
canceled be-
fore the system is armed.
To
cancel an arming
sequence,
enter a user code during
the exit
delay.
Sequence
To Cancel
an Arming
Sequence:
The Arm
and Zone LEDs
are flashing slowly.
(-
Enterur",
EFffi.
o,
.c
E

o)
.5
E
Keyfob
Functions
Your
security system may
include
one
or
more keyfobs.
Similar
to a
garage-door
opener, a keyfob
is a hand-held
device
that
communicates with
your
system
through
radio wave
transmissions.
Each keyfob
is
assigned its
own user number.
Follow the instructions
below
to use
your
keyfob to arm or
disarm
your
security
sys-
tem, or to send a
panic
message.
To
Arm with Full-Arming:
Press
the red
EBM,lkey
followed by
the
grey
[]
key.
To
Arm with
Home-Arming:
Press
the red
FRMlkey
followed
by the
grey
@l
key.
To Disarm:
Press
the
green
lDlSAFlMl key .
(This
onty works
when the
keyfob is
programmed
to disarm.)
To
Send a Panic
Message:
At
the same
time,
press
and hold the
grey$
andQl
keys for
two seconds.
lf
your
system is
programmed
for
Goof-Proof Arming,
you
will not
be
able to arm
yoursystem
with
the keyfob if
one or more zones
are not
ready. You must first
either
correct
the
problem,
or bypass
the zones
in
question.
Refer to
Section 12 to
see which arming method
was
programmed
into
your
system.
I

Optional Arming
Features
Your
system offers
several
optional arming
features,
described
be-
low. Refer
to
Section 12 to
see which
are installed on
your
system.
Extended
Exit Delay.
This feature
automatically
resets
the
exit de-
lay if
you
re-enter
the building while
the
system is being
armed. You
may re-enter
up to four
times;
each time,
the exit delay
is reset
to its
full
value.
Keypad Lockout.
Designed
to
prevent
an intruderfrom guessing
a
user code,
this option causes
the
system to
slow down if a
series of
invalid
user codes
are entered.
Before
a new code
can be
entered,
the user must wait
through
a delay. The
delay lengthens
as more
invalid codes
are entered.
The keypad
lockout
may not
affect dis-
arming.
Keyswitch
Arming.
This
accessory
(Sierra
55051)
allows
you
to
arm and disarm
the system with
a key. Follow
the instructions
pro-
vided with
the switch.
Quick
Exit. This
option
allows
you
to exit a home-armed
building
without disarming
and
re-arming.
To start
the exit delay,
press
and
hold
the
tFome ]
[quick
exit] key
for 2 seconds,
then exit.
Exit Termination.
This
option
allows
you
to
shorten the
exit delay
by five
seconds by
pressing
a button
located near
your
exit.
Automatic
Home-Arming.
Automatic Home-Arming
allows
you
to remain inside
a building while
its
perimeter
sensors
(such
as
doors and windows)
are
armed. Arming
begins by
entering
your
user code. lf
you
exit the
buiding during
the exit delay,
the sys-
tem arms
both the interior
and
perimeter
zones. However,
if
you
do not
exit the building,
the system
automatically
arms the
perim-
eter zones
only.
(',
.E

L
rg
3
Motion
Sensor
(lnlerior
Protection)
Siren
(Alarm)
Monitoring Station
Your
security system
contains a number
of
detection devices,
such
as magentic contacts,
glassbreak
detectors, smoke detec-
tors, and motion sensors. These devices identify
potential
trouble conditions, and reportthemtothe control
panel.
lf armed,
the
control
panel
sounds an alarm. The control
panel
also com-
municates with
you (through
the keypad) and with a monitoring
station
(through
a telephone
link).
Each
region monitored by
a sensor
(or
group
of
sensors)
is known
as a zone. Most zones will trigger an alarm only when the system is armed. Other sensors, such as smoke detectors, can trigger
an alarm at any time. This is referred to as a 24-hour zone.
Your system's
zones
are
identified
on a label
placed
inside
the
door of
your
keypad.
Monitoring
station
personnel
respond
to
system messages and
notify emergency
personnel
as needed. A monitoring service is
an optional
part
of a security system.
10
lr:
Your Security System
-*in.,
Keypad
t-@
IEEGe]
Ffl
zoNE
-lll

How
Your
Security
System
Works
When an
intruder
enters
the building,
a
detection
device
is trig-
gered.
The
device
sends a
message
to the
control
panel.
The
device
may have
LEDs
(lights)
that
flash.
The
control
panel
responds
by sounding
the alarm.
(Alarm
sounds
vary.
lf
your
system is
programmed
for silent
alarms,
no
sirens
sound.) A message
is
sent
to the keypad
and,
if connected,
to
the
monitoring
station.
The
keypad
blinks its
LEDs
fast. Personnel
at the
monitoring
station confirm
the
alarm and
respond
accordingly.
Some alarms
can
be canceled.
The
instructions
in
Section
6
guide
you
through
the cancellation
procedure.
A-.>E-
Sensor
Triggers Alarm
Monitoring
Station ls Notilied

I
:E
j
Emergency
Keys
Your keypad is equipped with
three
emergency keys. Ihe
keys do not function unless
your
installer
activated
them.
lf
programmed
into
your
sys-
tem, these
keys
are a one-but-
ton wayto
inform
your
monitor-
ing station of
a medical
emer-
gency,
a
fire,
or a crime
in
progress.
When each emer-
gency
key is
pressed,
the key-
pad
beeps.
To Use
Emergency
Keys:
rf To report a medical
emer-
gency, press
and hold
the
@lt"y
for 2 seconds.
rf
To report a fire,
press
and
hold the
I
rtRe
lkey
for 2
seconds.
cO
To report a crime in
!gg!91r,
p."rs
and hold
the
llsElkey
for 2 seconds.
Getting Used
to Your
System
Your security
system can be
programmed
for a learning
period,
that can last from one
to
31
days. Refer to Section 12 to
see
if
this learning
period
was
programmed
into
your
system.
During the
learning
period, your
system does two things differ-
ently.
First,
during
an alarm,
you
will not hear any sirens or bells.
Instead, the keypad beeps. Second, if
you
have
a monitoring
station
hook-up,
your
system does not communicate with the
station.
During the learning
period, you
can
practice
using
your
system
knowing that
you
won't cause a false alarm, and that emer-
gency personnel
won't be needlessly dispatched to
your
building.
After the learning
period
is
over,
your
system
automatically be-
gins
to function
normally. lf
programmed,
sirens and bells sound
during an alarm, and the monitoring station
receives information
over
the telephone
hook-up.
12
k

About
User
Codes
and
User
Numbers
You
can assign
a
different
user
code and
user number
to each
per-
son who
operates
the
systenn.
Your
security
system
supports
up to
60 users.
lf
you prefer,
you
can assign
only
one user
code
and user
numberto
a
group
of
users. This
is not
recommended,
since
it will
then
be
impossible
to determine
which individual gave
a specific
command.
A
user code
is a
secret four-digit
number,
used
to arm
and disarm
the
system, and
possibly
to make
other
changes.
you
cannot
assign
the same
user code
to more
than
one
user number.
lt is
important
to
remember your
user
code,
and to
keep it
secret.
Every individual
who
has
a user code
is
also assigned
a
two-digit
user number.
When
you
change
or
delete
a user code,
you
are
asked for
the user
number.
How
to Enter
a
User
Code
To
enter a
user code,
simply
press
the four numbers
in succession.
Do
not
pause
for
more
than five
seconds
between
numbers.
For
security
reasons,
the
code is
not
displayed.
To
Enter
a User
Code:
(-
Press
the four
digits
of
ttt.EffiElin
succes-
sion. The
keypad
beeps
after
each
keystroke.
How
to
Correct
a
User
Code
Entry
You will
know that
you
entered
an
incorrect
code when
the
system
does
not complete
your
command.
As
a security feature,
your
keypad
does not
beep
or buzz when
incor-
rect user
codes
are entered.
To
Conect
a User
Code
Entry:
(-
Re-enter
ffi
 Loading...