

Page 1
Configuration Tool User Manual
VersiCharge™ AC
Electric vehicle charging station
usa.siemens.com/versicharge
Page 2

Table of Contents
VersiCharge Chargers 3
VersiCharge Basic Charger Configuration 3
Configure a Basic Charger 4
VersiCharge Advanced Charger Configuration 7
Register the Charger 8
Connect the Charger 9
Configure the Charger in Ethernet Mode 11
Configure the Charger in Cellular Mode 14
Configure the Charger in Wi-Fi Mode 17
Appendix – A 20
2
Page 3

Installation Manual | VersiCharge™ AC Configuration Tool
VersiCharge Chargers
VersiCharge Charger models can be either basic or advanced based on features. See Appendix A for the definition and related
part numbers of basic and advanced models. Basic chargers are connected to system through a serial port or a USB port. They
are standalone chargers and not connected to VersiCloud. Advanced chargers are connected over Wi-Fi, Ethernet, or mobile
network to VersiCloud. You can connect to these chargers from a system over their built-in Wi-Fi connection for configuration.
You can configure VersiCharge Chargers with the VersiCharge Configurator application, a Windows application.
The following chargers are basic chargers supported by the VersiCharge Configurator:
• UL Commercial ModBus Only Child Basic 40A (8EM1310-4CF11-0BA0)
• UL Commercial ModBus Only Child Basic 48A (8EM1310-5CF11-0BA0)
• VersiCharge Commercial UL Child 40A (8EM1310-4CF14-0GA0)
• VersiCharge Commercial UL Child 48A (8EM1310-5CF14-0GA0)
The following chargers are advanced chargers supported by the VersiCharge Configurator:
• VersiCharge Commercial UL Parent 40A (8EM1310-4CF14-1GA1)
• VersiCharge Commercial UL Parent 48A (8EM1310-5CF14-1GA1)
Choose the configuration based on the type of charger.
You can click on the help icon on the Configurator application to view the user manual and get help on configuration.
VersiCharge Basic Charger Configuration
The basic charger supports only ModBus RTU protocol for communication. You can configure a basic charger connected to the
serial port or the USB port. Ensure that the charger is connected to a Serial/RS485 adapter or USB/RS485 adapter before
configuration. You can view the serial ports from the Device Manager in Windows.
3
Page 4
VersiCharge™ AC Configuration Tool | User Manual
Configure a Basic Charger
Perform the following steps to configure a basic charger.
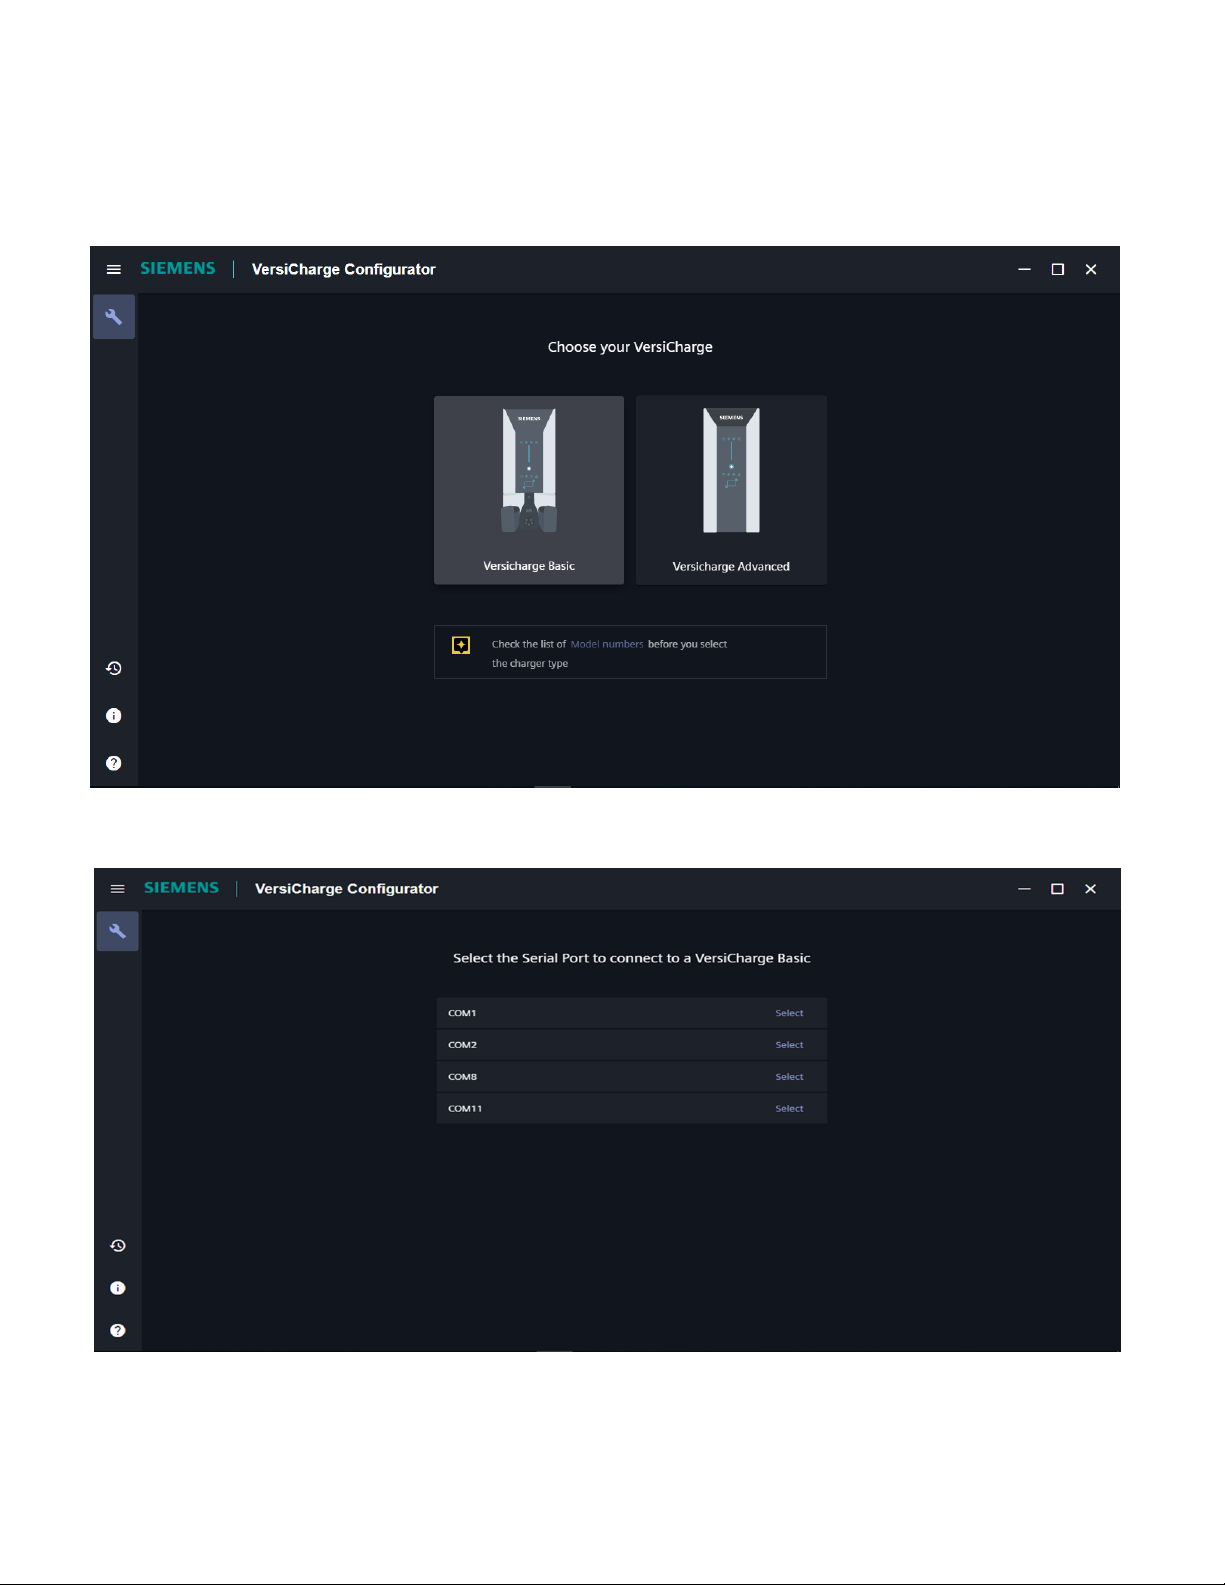
1. Click on VersiCharge-Configurator from the start menu to launch VersiCharge Configurator.
Note: Click Model numbers to view the supported models so that you can choose the type of charger.
2. Click VersiCharge Basic. The list of active serial ports in the system appears in a drop-down list.
4
Page 5

User Manual | VersiCharge™ AC Configuration Tool
3. Select the serial port to which the charger is connected. The tool performs a search and detects the charger.
The following details appear:
• Device Address: The ModBus device address which is used to communicate with the charger. The default value is 2.
The value must be between 1 and 247.
• Serial Number: The unique serial number of the charger. This field is read-only.
• Catalog Number: The catalog number of the charger. This field is read-only.
If the charger you want does not appear, click the Reset Configuration icon on the bottom of the left navigation pane to
restart the configuration.
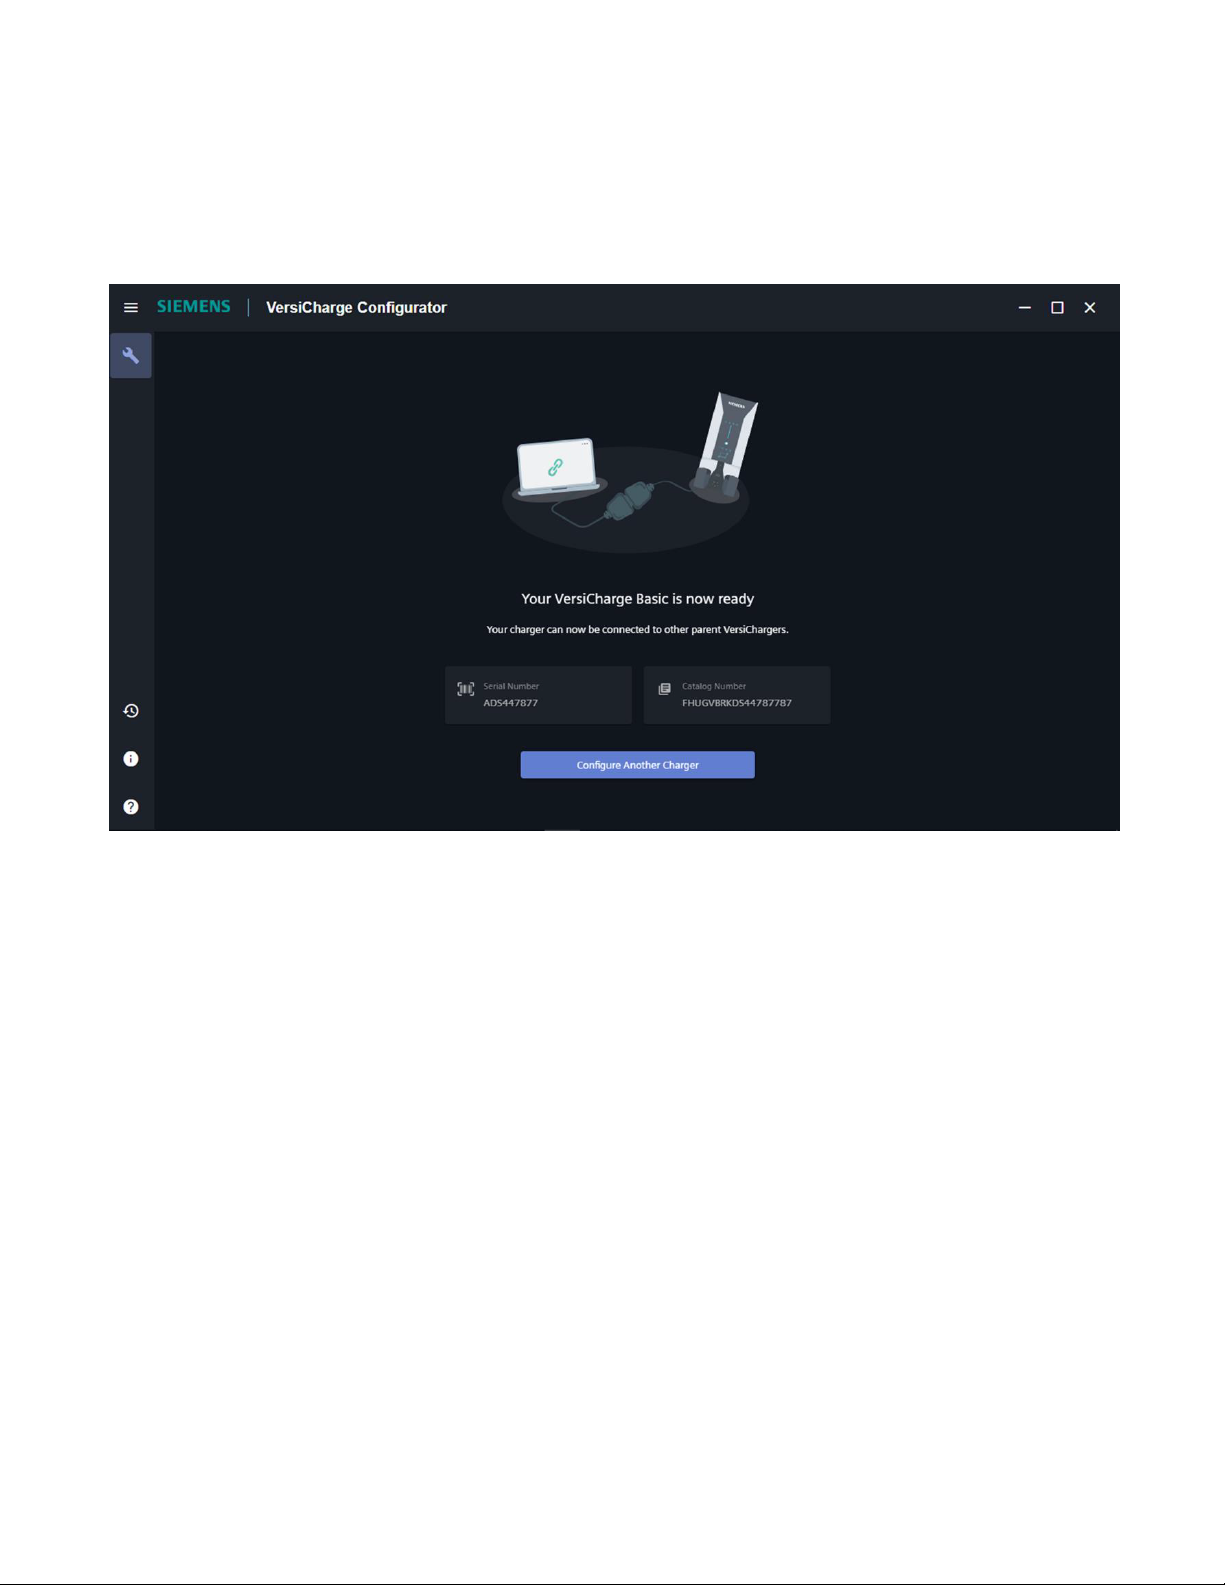
4. To set a ModBus device address other than the default, enter the ModBus device address and click Complete. The charger
does need not to be power cycled for the new ModBus device address to be effective.
5
Page 6
VersiCharge™ AC Configuration Tool | User Manual
5. Click Configure Another Charger to perform the configuration for another charger.
6. After you complete the configuration, log in to VersiCloud and verify whether the charger registration is successful, and the
charger has been mapped to your account.
6
Page 7

User Manual | VersiCharge™ AC Configuration Tool
VersiCharge Advanced Charger Configuration
You can configure the VersiCharge Advanced Charger over the network. Use the following connections to configure the charger:
• Ethernet
• Wi-Fi
• Cellular
VersiCharge Advanced Charger configuration consists of the following tasks:
• Register the Charger
• Connect to the Charger
• Configure the Charger
7
Page 8

VersiCharge™ AC Configuration Tool | User Manual
Register the Charger
Register the charger before the configuration of the advanced charger.
1. Open VersiCharge Configurator.
2. Click VersiCharge Advanced. The Before you Begin screen appears.
3. Select whether you want the tool to verify the status of commissioning in VersiCloud after you complete the configuration.
If you select I have an Internet connection, the tool verifies the configuration in VersiCloud after you complete the configuration.
If you select I will configure offline, you must verify the configuration in VersiCloud after you complete the configuration.
4. Click Continue.
8
Page 9

5. Click Charger Registration Details screen appears.
User Manual | VersiCharge™ AC Configuration Tool
6. Enter the registered Email ID. The Email ID should be registered in VersiCloud before you attempt to configure the charger.
7. Select the time zone of the charger from the drop-down list.
8. Select the VersiCloud geolocation to which the charger belongs. Choose between United States and non-United States.
9. Click Next to continue the configuration and connect to the charger.
Connect the Charger
Perform the following steps to connect to the charger.
1. Register the charger. For more information, see Register the Charger in this manual.
2. Connect to the Wi-Fi endpoint of the charger that you want to configure.
9
Page 10

VersiCharge™ AC Configuration Tool | User Manual
Click Refresh if the endpoint is not visible.
3. The connection successful message appears along with the serial number and catalog number of the charger.
Click Select Different Charger if you connected to the wrong charger.
4. Click Continue to Configure to continue with the configuration.
10
Page 11

User Manual | VersiCharge™ AC Configuration Tool
Configure the Charger in Ethernet Mode
NOTE: Ensure that the Ethernet cable is connected to the charger.
Perform the following steps to configure the charger in the Ethernet mode.
1. Register the charger. For more information, see Register the Charger in this manual.
2. Connect to the charger. For more information, see Connect to the Charger in this manual.
3. Select Ethernet in the Choose Internet Connection screen.
4. Enter the DNS address to connect using the DHCP protocol in the Ethernet Properties screen.
11
Page 12

VersiCharge™ AC Configuration Tool | User Manual
5. Enable Share Internet with other chargers and set the authentication information, if you wish to share the Internet
connection of this charger with other chargers.
6. Click Send to Charger to send the configuration information to the charger. The charger verifies the commissioning and
registration.
12
Page 13

User Manual | VersiCharge™ AC Configuration Tool
7. The following screen appears, if the configuration is successful. The serial number and the catalog number appears on
the screen.
8. Click Configure Another Charger to configure another charger.
8. After you complete the configuration, log in to VersiCloud and verify whether the charger registration is successful, and the
charger has been mapped to your account.
13
Page 14

VersiCharge™ AC Configuration Tool | User Manual
Configure the Charger in Cellular Mode
NOTE: Ensure that you insert the SIM card in the charger before you configure the charger.
Perform the following steps to configure charger in the cellular mode.
1. Register the charger. For more information, see Register the Charger in this manual.
2. Connect to the charger. For more information, see Connect to the Charger in this manual.
3. Select Cellular in the Choose Internet Connection screen.
NOTE: Click check for the devices to view the devices that support LTW cellular configuration.
4. Enter the following details in the Cellular Mode Configuration screen:
• Modem Dial String
• APN
• Authentication Information
The authentication information is not mandatory, if the cellular connection automatically connects to the Internet.
5. Click Next.
14
Page 15

User Manual | VersiCharge™ AC Configuration Tool
6. Enable Share Internet from Cellular Data and set the authentication information if you wish to share the Internet
connection of this charger to other chargers.
7. Click Send to Charger to send the configuration information to the charger. The charger will verify commissioning
and registration.
15
Page 16

VersiCharge™ AC Configuration Tool | User Manual
8. The following screen appears if the configuration is successful. The serial number and the catalog number appears on
the screen. Click Configure Another Charger to configure another charger.
9. After you complete the configuration, log in to VersiCloud and verify whether the charger registration is successful, and the
charger has been mapped to your account.
16
Page 17

User Manual | VersiCharge™ AC Configuration Tool
Configure the Charger in Wi-Fi Mode
1. Register the charger. For more information, see Register the Charger in this manual.
2. Connect to the charger. For more information, see Connect to the Charger in this manual.
3. Select Wi-Fi in the Choose Internet Connection screen.
4. Select the Wi-Fi connection with which you want to connect to the Internet.
5. Enter the password and click Send to Charger. To refresh the list of Wi-Fi networks click Refresh.
If the Wi-Fi is not listed, click Manual Configuration to configure the Wi-Fi. You must enter the SSID and hotspot password to
manually configure the Wi-Fi configuration.
17
Page 18

VersiCharge™ AC Configuration Tool | User Manual
6. Click Send to Device to send the configuration information to the device.
Appendix – A
The charger verifies the information and the Wi-Fi Verification screen appears if the information that you entered is correct.
7. In the Wi-Fi Connection Verification Screen, select the Wi-Fi LED is in Solid White Color if your charger shows a solid Wi-Fi
symbol light.
18
Page 19

User Manual | VersiCharge™ AC Configuration Tool
If you see the Wi-Fi LED blinking with alternate colors, check if the Wi-Fi information you provided is correct and make
necessary changes.
8. The serial number and the catalog number appears on the screen. Click Configure Another Charger to configure
another charger.
9. After you complete the configuration, log in to VersiCloud and verify whether the charger registration is successful, and the
charger has been mapped to your account.
19
Page 20

Appendix – A
The following table lists the supported VersiCharge chargers.
Name of the Charger Type Long Description Part Number
L2 AC VC G3 V1.0
UL Commercial ModBus Only Child
Basic 40A
UL Commercial ModBus Only Child
Basic 48A
VersiCharge Commercial UL Child
40A
VersiCharge Commercial UL Child
48A
Basic
Basic
Basic
Basic
Commercial 40A SP metering
J1772 (20ft) UL RTU-ModBus RFID
Child
L2 AC VC G3 V1.0
Commercial 48A SP metering
J1772 (20ft) UL RTU-ModBus RFID
Child
VersiCharge L2 Single Phase
Commercial EV Charger 40A
with RFID,metering, ModBus,
Wi-Fi and Ethernet, Child unit
VersiCharge L2 Single Phase
Commercial EV Charger 40A
with RFID, metering, ModBus,
Sim Card slot, Wi-Fi and
Ethernet, Parent unit
8EM1310-4CF11-0BA0
8EM1310-5CF11-0BA0
8EM1310-4CF14-0GA0
8EM1310-5CF14-0GA0
VersiCharge Commercial UL Parent
40A
VersiCharge Commercial UL Parent
48A
Published by Siemens Industry, Inc. 2021
Siemens Industry, Inc.
3617 Parkway Ln.
Peachtree Corners, GA 30092
Phone: +1 (800) 333-7421
info.us@siemens.com
usa.siemens.com/versicharge
Article No. SIDS-T40081-00-4AUS
Engineering No. R815081
Printed in USA
All Rights Reserved
© 2020, Siemens Industry, Inc.
The technical data presented in this document is based on an actual case or on
as-designed parameters and, therefore, should not be relied upon for any specific
application and does not constitute a performance guarantee for any projects.
Actual results are dependent on variable conditions. Accordingly, Siemens does
not make representations, warranties, or assurances as to the accuracy, currency
or completeness of the content contained herein. If requested, we will provide
specific technical data or specifications with respect to any customer’s particular
applications. Our company is constantly involved in engineering and
development. For that reason, we reserve the right to modify, at any time, the
technology and product specifications contained herein.
Advanced
Advanced
VersiCharge L2 Single Phase
Commercial EV Charger 40A
with RFID, metering, ModBus,
Sim Card slot, Wi-Fi and
Ethernet, Parent unit
VersiCharge L2 Single Phase
Commercial EV Charger 48A
with RFID, metering, ModBus,
Sim Card slot, Wi-Fi and
Ethernet, Parent unit
8EM1310-4CF14-1GA1
8EM1310-5CF14-1GA1
 Loading...