

Page 1
TK7
EQ.7
SE_TK76_Teil_1_080917.indd 1 18.09.2008 08:40:18
Page 2

de
........................................................2
en
......................................................22
fr
......................................................43
it
......................................................64
nl
......................................................85
ru
....................................................106
SE_TK76_Teil_1_080917.indd 2 18.09.2008 08:40:18
Page 3
2
27-32
15 16 17
35
3 4 5 6 4 7 8
5a
5b
5c
9
10
1
11
12
23
34
22
21
20
19
18
A
SE_TK76_Teil_1_080917.indd 3 18.09.2008 08:40:21
Page 4
13
33
11
14
313029
28 27
32
DC
10 a
b
c
d
B
SE_TK76_Teil_1_080917.indd 4 18.09.2008 08:40:26
Page 5
E
II
I
III IV
25
26
24b 24a24
SE_TK76_Teil_1_080917.indd 5 18.09.2008 08:40:31
Page 6

2
de
Sicherheitshinweise
Die Gebrauchsanleitung bitte sorgfältig
durchlesen, danach handeln und
aufbewahren!
Dieser Espressovollautomat ist für den
Haushalt und die Verarbeitung
haushaltsüblicher Mengen und nicht für
den gewerblichen Gebrauch bestimmt.
r
!
Stromschlaggefahr!
Gerät nur gemäß Angaben auf dem Typenschild anschließen und betreiben.
Nur benutzen, wenn Zuleitung und Gerät
keine Beschädigungen aufweisen.
Gerät nur in Innenräumen bei Raumtemperatur verwenden.
Personen (auch Kinder) mit verminderten
körperlichen Sinneswahrnehmungs- oder
geistigen Fähigkeiten oder mit mangelnder
Erfahrung und Wissen, das Gerät nicht
bedienen lassen, außer sie werden
beaufsichtigt oder hatten eine Einweisung
bezüglich des Gebrauchs des Gerätes
durch eine Person, die für ihre Sicherheit
verantwortlich ist.
Kinder vom Gerät fernhalten. Kinder
beaufsichtigen, um zu verhindern, dass sie
mit dem Gerät spielen.
Im Fehlerfall sofort den Netzstecker ziehen.
Reparaturen am Gerät, wie z. B. eine
beschädigte Zuleitung auswechseln, dürfen
nur durch unseren Kundendienst ausgeführt
werden, um Gefährdungen zu vermeiden.
Gerät oder Netzkabel niemals in Wasser
tauchen.
Nicht in das Mahlwerk greifen.
r
!
Verbrühungsgefahr!
Der Milchschäumer 10 für Milch /
Heißwasser wird sehr heiß. Nach
Benutzung zuerst abkühlen lassen und erst
dann berühren.
Inhalt
Auf einen Blick ............................................3
Vor dem ersten Gebrauch ..........................4
Bedienelemente..........................................5
− Netzschalter O / I ....................................5
− Taste a ....................................................5
− Drehknopf................................................5
− Wähltasten < und > ..............................5
− Display (Displaymeldungen) ...................6
− Taste
start
...............................................8
− Taste °C (Temperatur einstellen und
Kindersicherung) .....................................8
− Taste j Einstellungen ..............................9
− Mahlgrad einstellen .................................9
− Tassenwärmung ......................................9
Menüeinstellungen ...................................10
− Sprache .................................................10
− Wasserhärte ..........................................10
− Entkalken ..............................................10
− Reinigen ................................................10
− Calc‘n‘Clean ..........................................10
− Uhr anzeigen ......................................... 11
− Zeitmodus .............................................11
− Uhr stellen ............................................. 11
− Tassenwärmer ein (nur TK76F09) .........11
− Tassenwärmer aus ................................ 11
− Auto off in .............................................. 11
− Wasserfilter ...........................................11
− Kontrast .................................................12
− Werkseinstellung ...................................12
Zubereitung mit Kaffeebohnen .................12
Zubereitung mit gemahlenem Kaffee .......13
Milchschaum und heiße Milch zubereiten 14
Heißwasser beziehen ...............................14
Pflege und tägliche Reinigung ..................15
− Milchsystem reinigen.............................15
− Brüheinheit reinigen ..............................15
Aufbewahrung Zubehör ............................16
Tipps zum Energiesparen .........................16
Service-Programme .................................16
− Entkalken ..............................................17
− Reinigen ................................................18
− Calc‘n‘Clean ..........................................18
Frostschutz ..............................................19
Zubehör ...................................................19
Einfache Probleme selbst beheben ..........20
Entsorgung und Garantiebedingungen.....21
SE_TK76_Teil_1_080917.indd 2 18.09.2008 08:40:31
Page 7

3
de
Diese Gebrauchsanleitung beschreibt
verschiedene Modelle, die sich in der
Ausstattung unterscheiden.
Bitte auch die beiliegende Kurzanleitung
beachten.
Sie kann in einem speziellen
Aufbewahrungsfach 25 bis zum nächsten
Gebrauch verstaut werden.
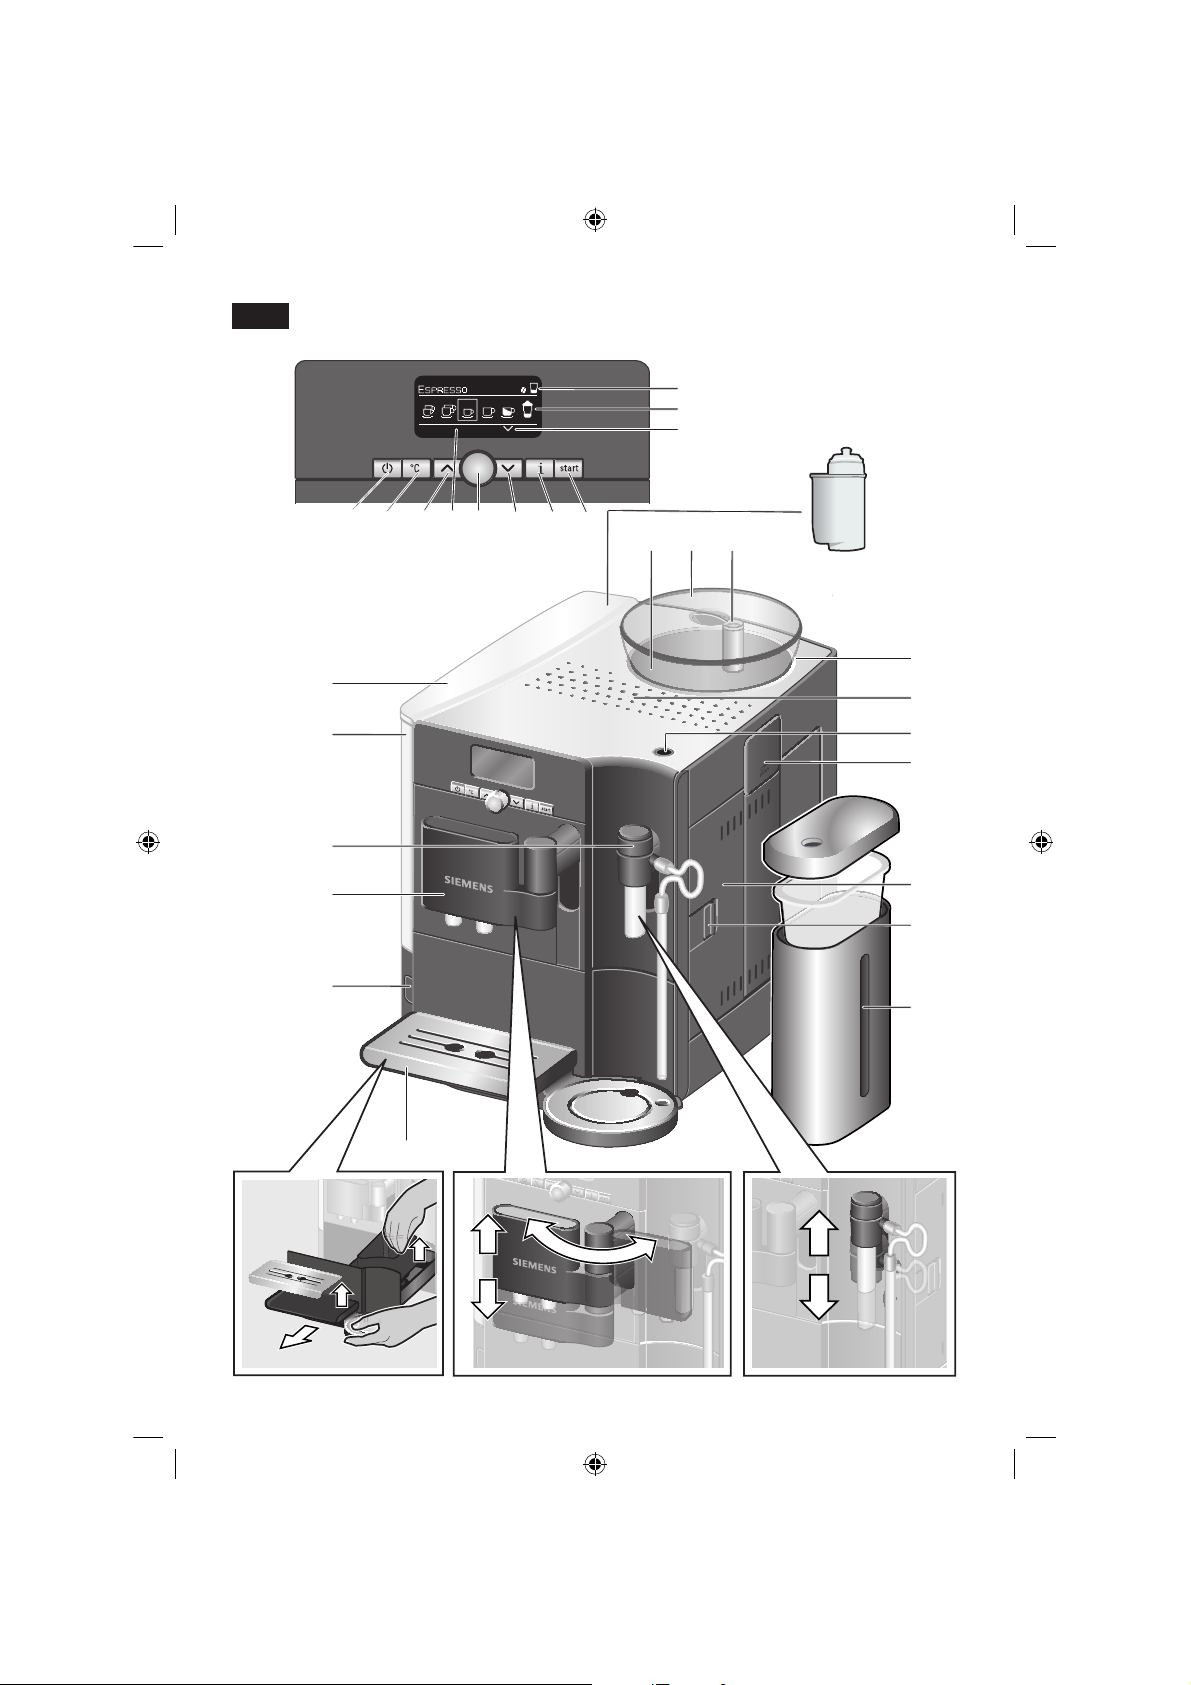
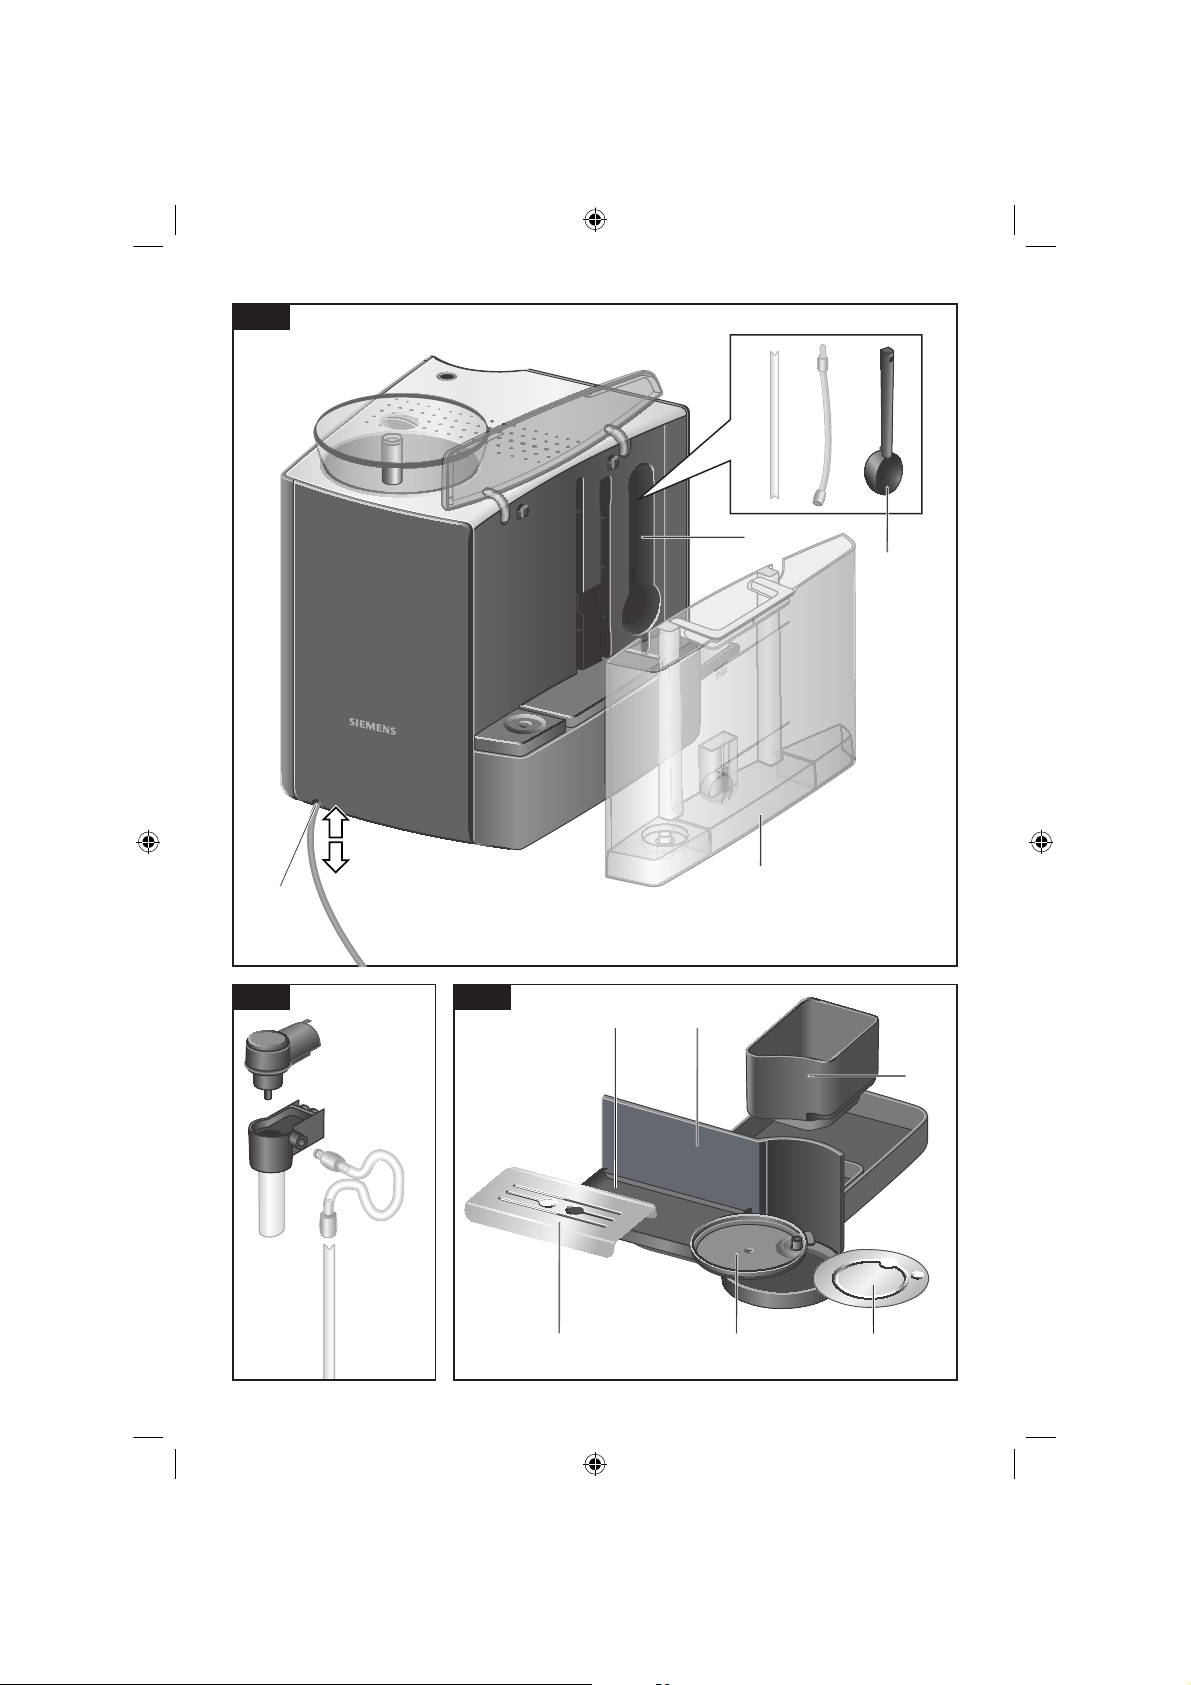
Auf einen Blick
Bilder A, B, C, D und E
1 Netzschalter O / I
2 Taste a
3 Taste °C (Temperatur / Kindersicherung)
4 Wähltasten < >
5 Display
a) Statuszeile
b) Auswahlzeile
c) Navigationszeile
6 Drehknopf für Einstellungen Display
7 Taste j
(Info-Menü)
8 Taste
start
(Getränke / Programme)
9 Kaffeeauslauf höhenverstellbar und
schwenkbar
10 Milchschäumer höhenverstellbar
(Milch / Heißwasserbezug)
a) Oberteil
b) Unterteil
c) Schlauch
d) Milchrohr
11 Abnehmbarer Wassertank
12 Deckel Wassertank
13 Aufbewahrungsfächer
(Pulverlöffel und Zubehör Milchschäumer)
14 Pulverlöffel (Einsetzhilfe für Wasserfilter)
15 Bohnenbehälter
16 Aromadeckel
17 Drehwähler für Mahlgradeinstellung
18 Leuchtring
19 Tassenwärmung
20 Taste für Tassenwärmung beleuchtet
21 Pulverschublade
(Kaffeepulver / Reinigungstablette)
22 Tür zur Brüheinheit
23 Türöffner
24 Brüheinheit
a) Drucktaste
b) Verriegelung
25 Aufbewahrungsfach Kurzanleitung
26 Verschluss Aufbewahrungsfach
27 Blende Tropfschalen
28 Tropfschale Kaffeeauslauf
29 Tropfblech Kaffeeauslauf
30 Tropfschale Milchschäumer
31 Tropfblech Milchschäumer
32 Kaffeesatzbehälter
33 Kabelstaufach
34 Milchbehälter (isoliert)
35 Wasserfilter
Sehr geehrte Kaffeeliebhaberin,
sehr geehrter Kaffeeliebhaber,
Herzlichen Glückwunsch zum Kauf dieses
Espressovollautomaten aus dem Hause
Siemens.
SE_TK76_Teil_1_080917.indd 3 18.09.2008 08:40:31
Page 8
4
de
Vor dem ersten Gebrauch
Allgemeines
Nur reines Wasser ohne Kohlensäure und
vorzugsweise Espresso- oder VollautomatenBohnenmischungen in die entsprechenden
Behälter füllen. Keine glasierten, karamellisierten oder mit sonstigen zuckerhaltigen
Zusätzen behandelte Kaffeebohnen verwenden, sie verstopfen die Brüheinheit.
Bei diesem Gerät ist die Wasserhärte einstellbar. Ab Werk ist die Wasserhärte 4
eingestellt. Die Wasserhärte des
verwendeten Wassers mit beiliegendem
Prüfstreifen feststellen. Wird ein anderer Wert
als Wasserhärte 4 angezeigt, das Gerät nach
Inbetriebnahme entsprechend
programmieren (siehe unter Kapitel
„Menüeinstellungen WASSERHÄRTE“)
Gerät in Betrieb nehmen
Den Espressovollautomat auf eine ebene
und für das Gewicht ausreichende Fläche
stellen.
Info: Das Gerät hat auf der Unterseite vier
Rollen und kann seitlich in einer Bogenform
verschoben werden, um die Bedienung und
Platzierung zu erleichtern.
Netzstecker aus dem Kabelfach 33
ziehen und anschließen. Die Länge kann
durch Zurückschieben und Herausziehen
passend eingestellt werden. Das
Gerät dazu mit der Rückseite z.B. an
die Tischkante stellen und das Kabel
entweder nach unten ziehen, oder nach
oben schieben.
Deckel Wassertank 12 hochklappen.
Wassertank 11 abnehmen, ausspülen
und mit frischem, kaltem Wasser füllen.
Die Markierung „max“ beachten.
Den Wassertank 11 gerade aufsetzen
und ganz nach unten drücken.
Den Deckel Wassertank 12 wieder
schließen.
Bohnenbehälter 15 mit Kaffeebohnen
füllen.
●
●
●
●
●
●
●
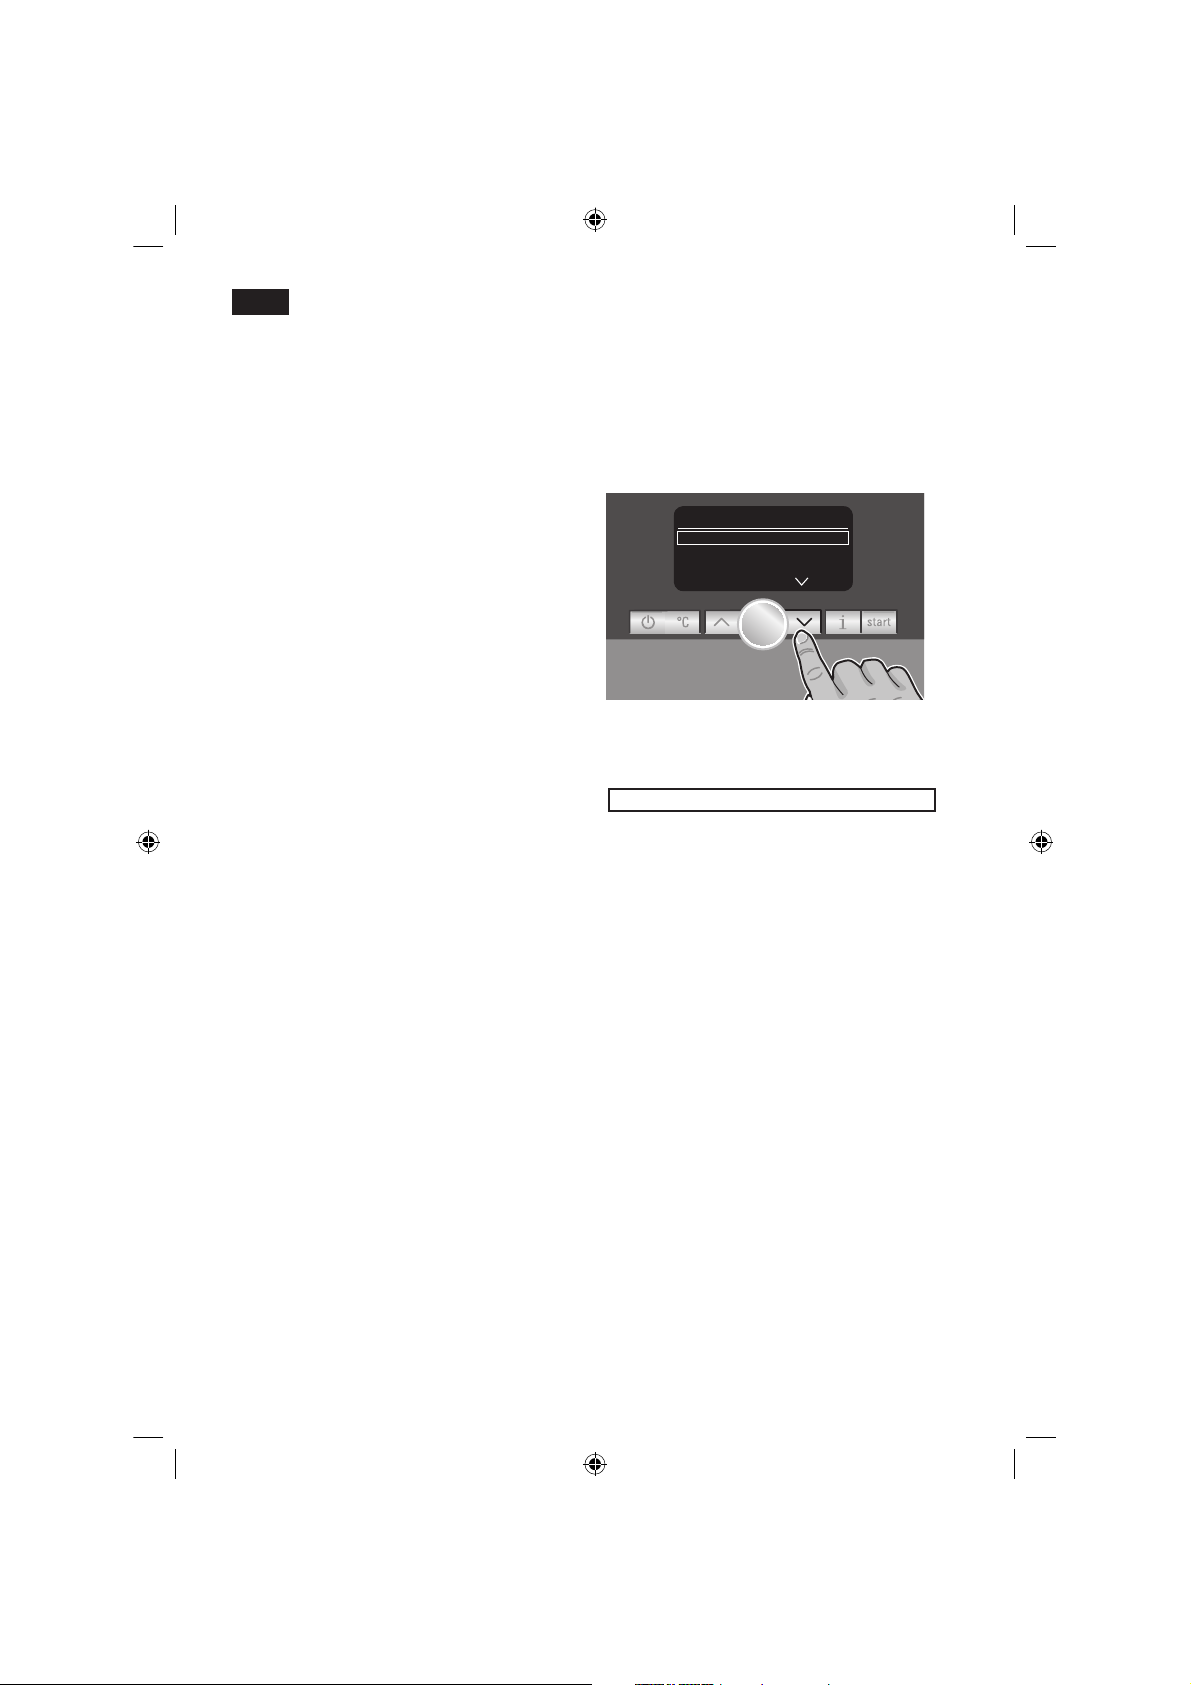
Netzschalter 1 O / I drücken, die Taste 8
start
leuchtet auf und im Display 5
erscheinen verschiedene Sprachen.
Mit den Wähltasten 4 < und > jetzt die
gewünschte Sprache in welcher die
weiteren Displaytexte erscheinen sollen
auswählen.
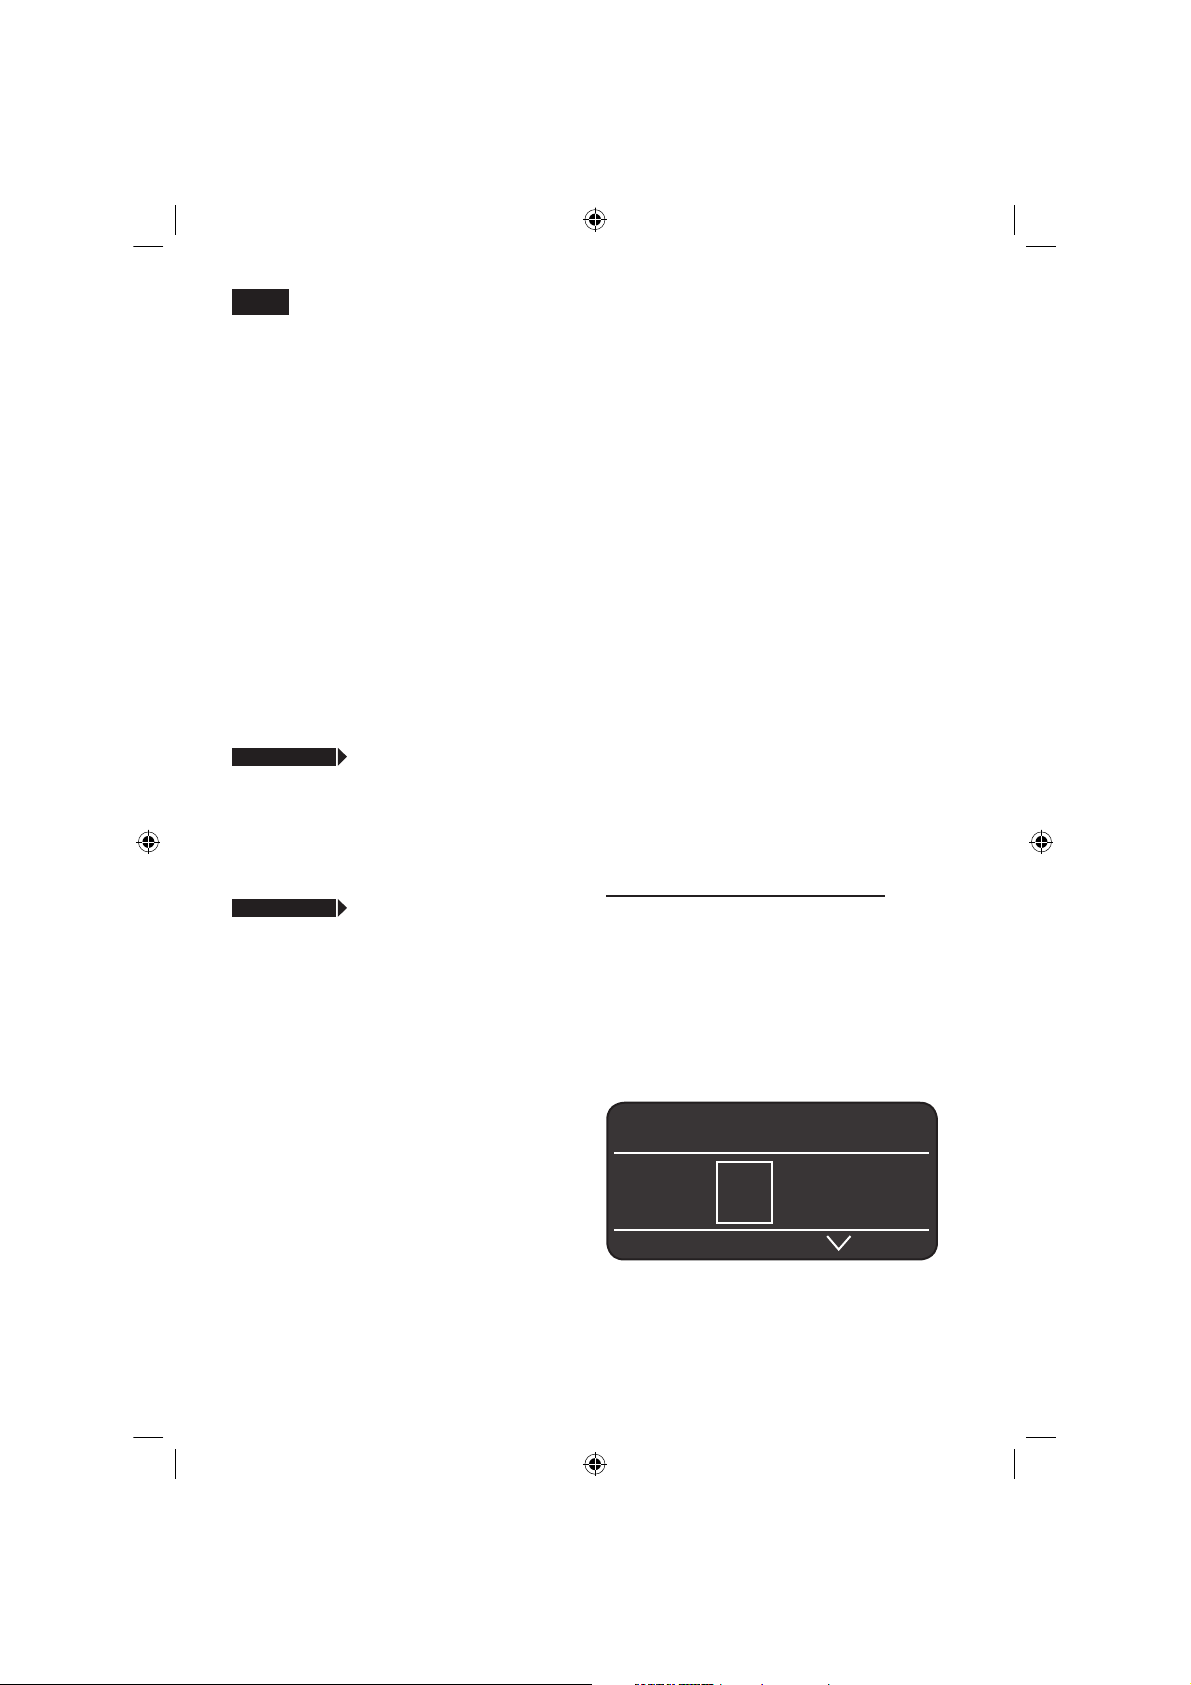
LANG UAGE
DEUTS CH
Ò
START
ENGLISH
PYCCK ИЙ
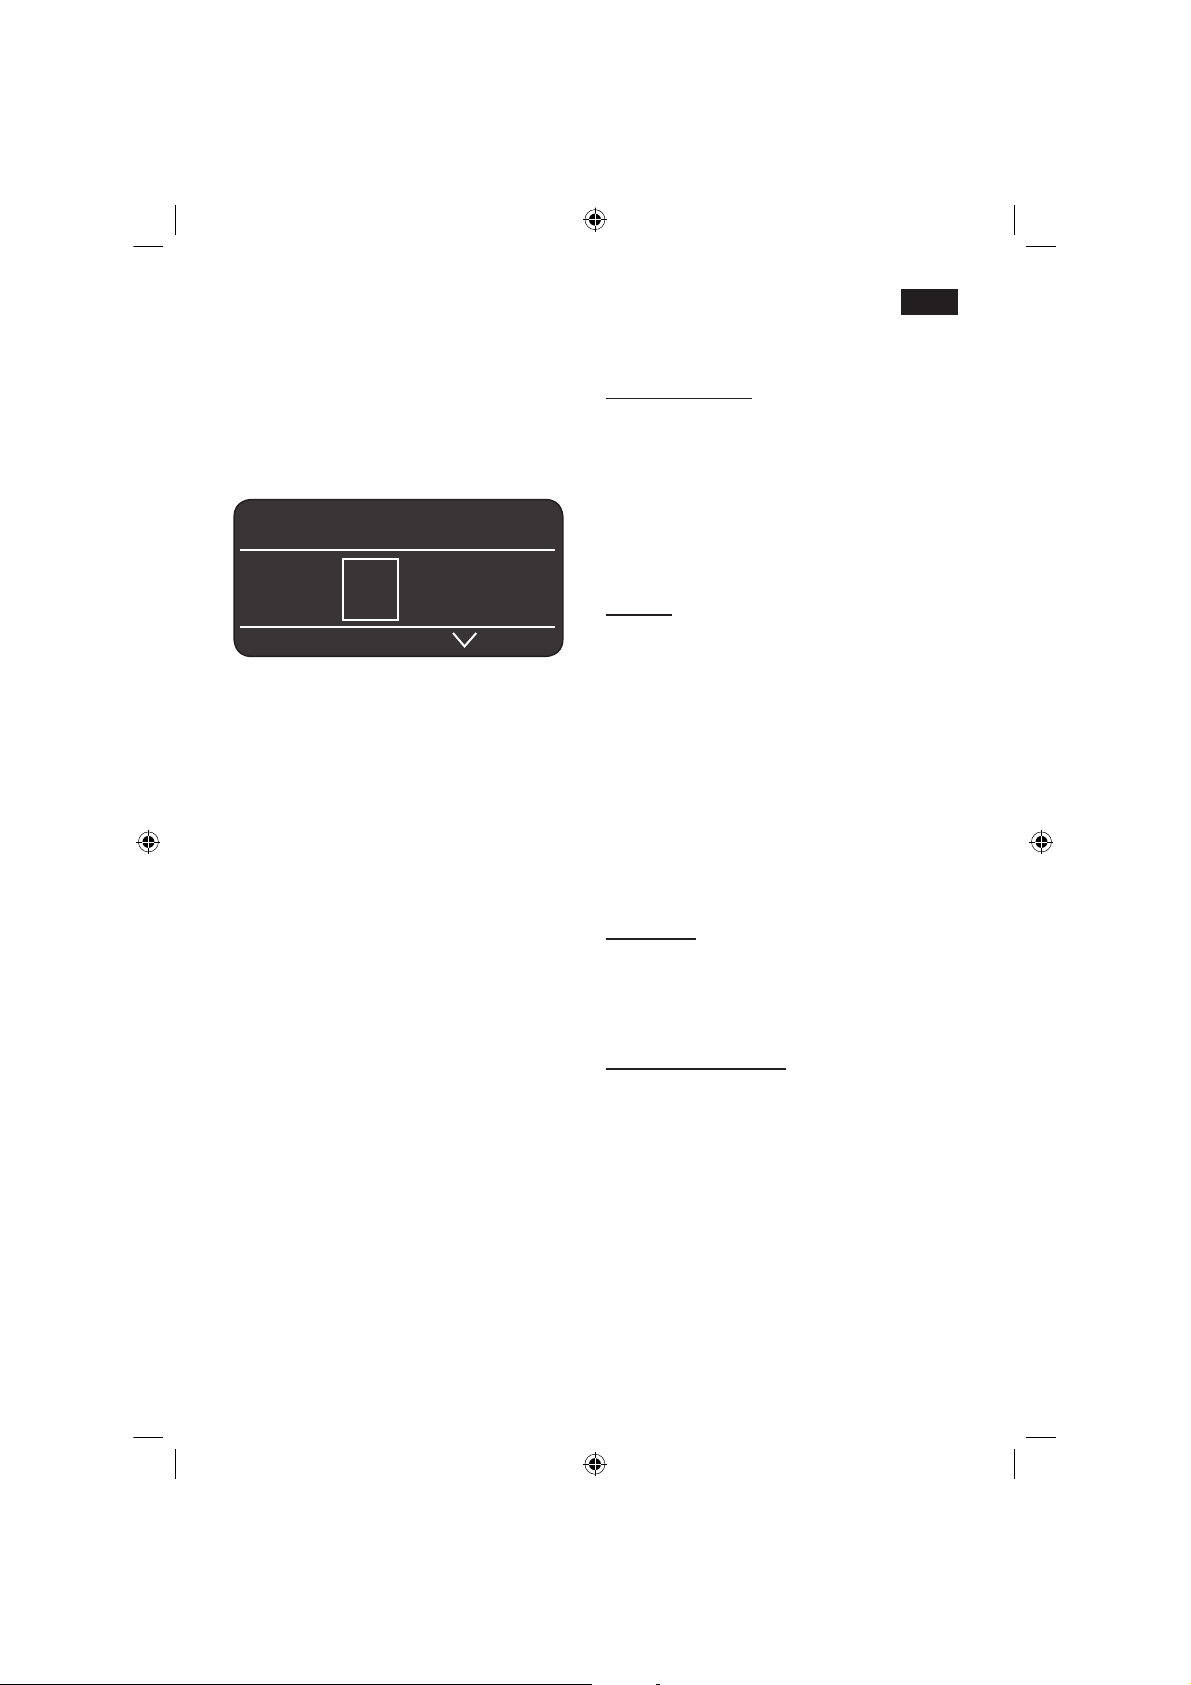
Die gewählte Sprache wird durch einen
Rahmen gekennzeichnet. Es stehen
folgende Sprachen zur Auswahl:
DEUTSCH
E
NGLISH
P
YCCKИЙ
N
EDERL ANDS
F
RANÇAIS
I
TALIANO
S
VENSKA
E
SPAÑOL
P
OLSKI
● Die Taste 8
start
drücken, die
ausgewählte Sprache ist gespeichert, die
Taste 2 a leuchtet auf.
●
●
SE_TK76_Teil_1_080917.indd 4 18.09.2008 08:40:32
Page 9
5
de
● Die Taste 2 a drücken, das Markenlogo
leuchtet im Display 5. Das Gerät heizt
nun auf und spült, etwas Wasser läuft aus
dem Kaffeeauslauf 9. Erscheinen im
Display 5 die Symbole für die Auswahl
der Zubereitung, ist das Gerät betriebsbereit.
ESPRESSO Ë Í
 à À Á Ä Å
Info: Der Espressovollautomat ist ab Werk
mit den Standardeinstellungen für optimalen
Betrieb programmiert. Das Gerät schaltet
nach 1 Stunde automatisch in den
„Sparmodus“ (siehe Kapitel
„Menüeinstellungen AUTO OFF IN“).
Tipp: Bei der ersten Benutzung oder wenn
das Gerät längere Zeit nicht in Betrieb war,
hat die erste Tasse Kaffee noch nicht das
volle Aroma.
Nach Inbetriebnahme des Espressovollautomaten wird eine feinporige und
standfeste „Crema“ erst nach dem Bezug
einiger Tassen dauerhaft erreicht.
Bedienelemente
Netzschalter O / I
Mit dem Netzschalter 1 O / I wird das Gerät
in den „Sparmodus“ geschaltet oder
vollständig ausgeschaltet. Im „Sparmodus“
leuchtet nur die Taste 2 a.
Wichtig: Das Gerät mit dem Netzschalter 1
erst abschalten, wenn es im „Sparmodus“
ist, damit der automatische Spülvorgang
durchgeführt wird.
Taste a
Mit der Taste 2 a wird das Gerät eingeschaltet (betriebsbereit) oder in den
„Sparmodus“ zurückversetzt.
Taste 2 a blinkt so lange das Gerät spült.
Das Gerät spült nicht, wenn:
es beim Einschalten noch warm ist.
vor dem Schalten in den „Sparmodus“
kein Kaffee bezogen wurde.
Das Gerät ist betriebsbereit, wenn im
Display 5 die Symbole für die Getränkeauswahl und Taste 8
start
leuchten.
Drehknopf
Mit dem Drehknopf 6 kann im Display 5
durch Drehen nach links und rechts
navigiert werden, oder es können im Menü
Parameter verstellt werden.
Wähltasten < und >
Durch Drücken der Wähltasten 4 < und >
kann in den Menüebenen (Navigationszeile
5c) nach unten und nach oben navigiert
werden.
●
●
SE_TK76_Teil_1_080917.indd 5 18.09.2008 08:40:32
Page 10
6
de
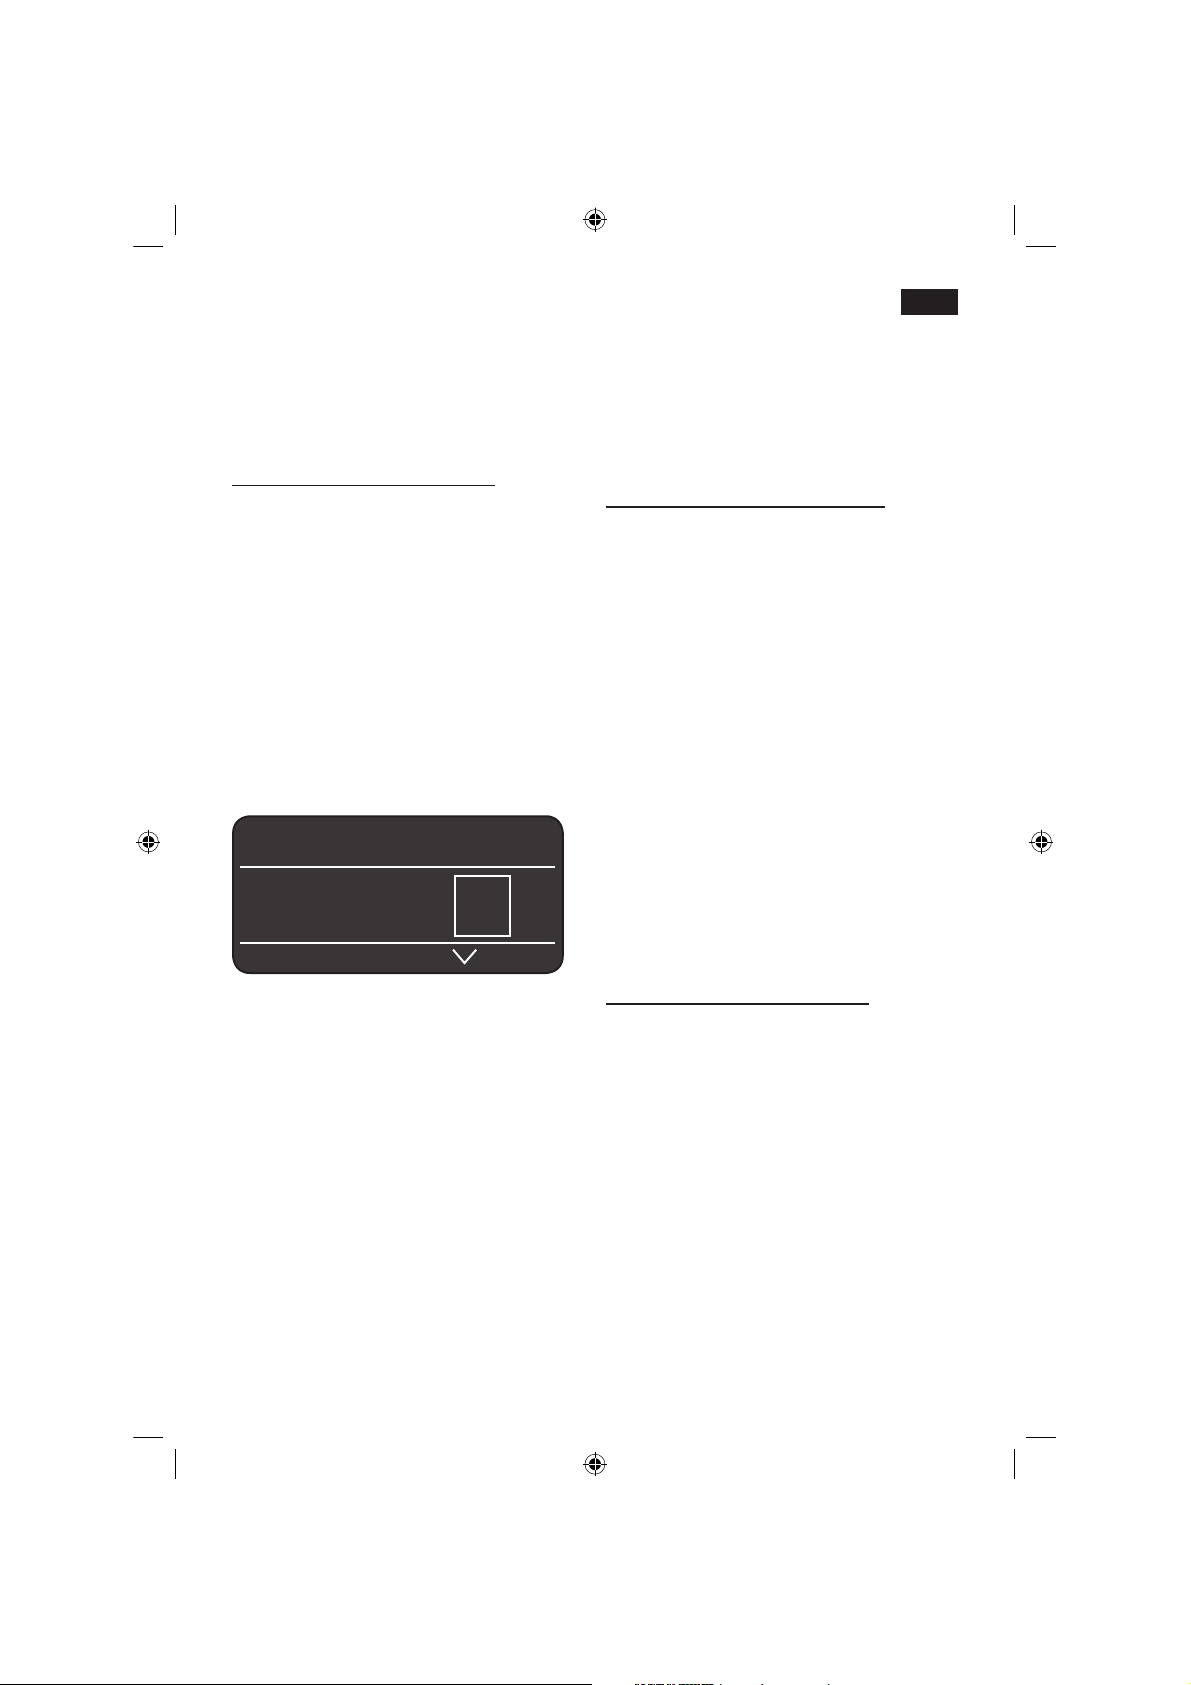
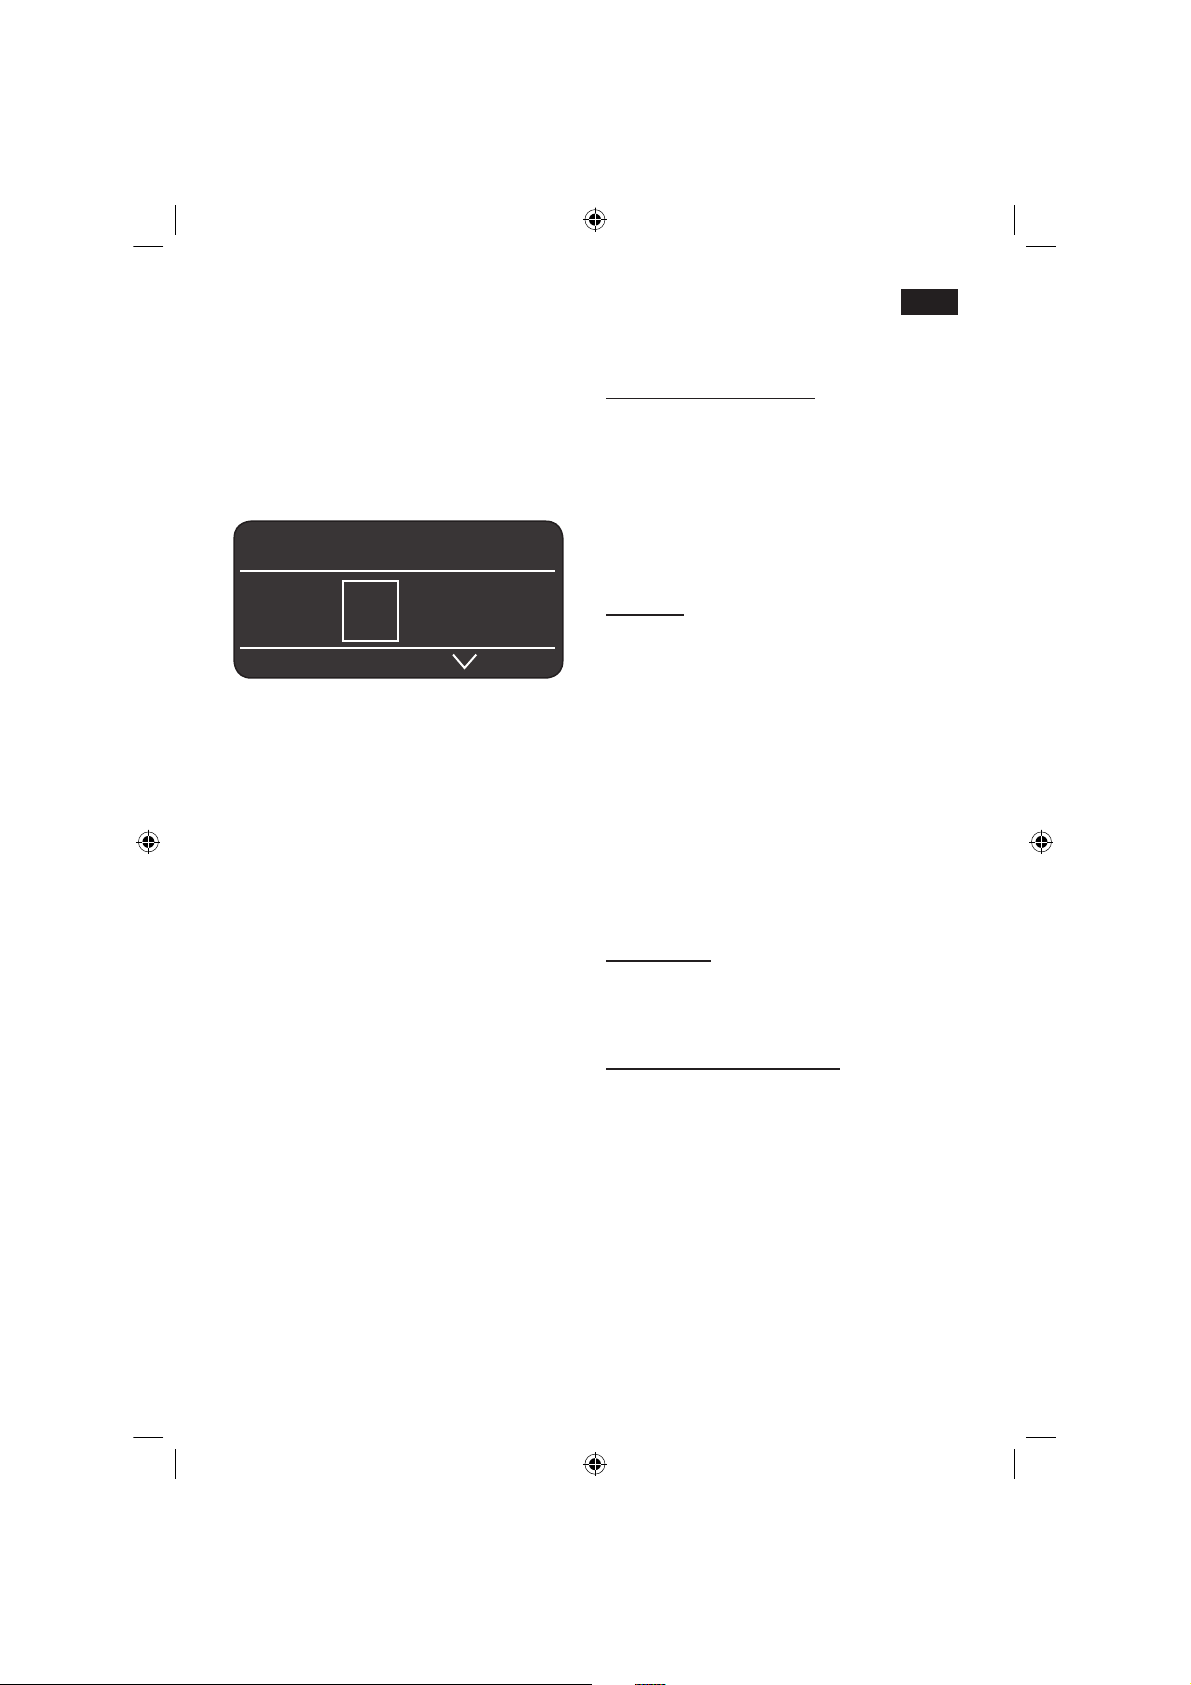
Display
Das Display 5 zeigt durch Symbole:
Auswahlmöglichkeiten, Kaffeestärke und
Füllmenge sowie durch Texte Einstellungen,
laufende Vorgänge und Meldungen an. Mit
Drehknopf 6 und Wähltasten 4 können hier
Einstellungen vorgenommen werden. Die
gewählte Einstellung wird durch einen
Rahmen markiert.
ESPRESSO ËË Í
 à À Á Ä Å
In der Statuszeile 5a des Displays 5 wird
der Name der Getränkeart sowie bei
Kaffeegetränken die Einstellung Stärke z.B.
55 und Menge z.B.
Î
angezeigt. In der
Auswahlzeile 5b werden Symbole für die
Getränkeauswahl dargestellt.
Die Pfeile in der Navigationszeile 5c zeigen
an, in welcher Richtung sich noch
Menüebenen befinden.
Displaymeldungen
Im Display 5 werden verschiedene
Meldungen angezeigt.
Informationen:
WASSERTANK BALD LEER
BOHNENBEHÄLTER BALD LEER
BITTE WARTEN
Aufforderungen zum Handeln:
WASSERTANK FÜLLEN
WASSERTANK EINSETZEN
WASSERTANK PRÜFEN
TROPFSCHALE EINSETZEN
TROPFSCHALE LEEREN
BOHNENBEHÄLTER FÜLLEN
KAFFEEAUSLAUF SCHWENKEN
MILCHSCHÄUMER AUFSETZEN
BRÜHEINHEIT EINSETZEN
T
ÜR SCHLIESSEN
BITTE BRÜHEINHEIT ÜBERPRÜFEN
PULVER EINFÜLLEN
SCHUBLADE SCHLIESSEN
SERVICE - FILTER WECHSELN
SERVICE - ENTKALKEN
SERVICE - REINIGEN
SERVICE - CALC‘N‘CLEAN
UNTERTEMPERATUR
BITTE WARTEN
ÜBER BZW. UNTERSPANNUNG
5a
b
c
SE_TK76_Teil_1_080917.indd 6 18.09.2008 08:40:32
Page 11
7
de
ESPRESSO ËË Í
Á Ä Å Æ Ç È
MY COFFEE Ë Í
5 55 555
MY COFFEE Ë Í
Î Ð Ò
MY COFFEE Ë Í
ESPRESSO MILCH
40%
Auswahlmöglichkeiten
Â
2 X ESPRESSO
Ã
2 X CAFÉ CRÈME
À
ESPRE SSO Á CAFÉ CRÈME
Ä MILCHKA FFEE
Å
MACC HIATO
Æ
CAPPUCCINO
Ç
MY COFFEE
È
MILCHSCH AUM É HEISSE MILCH
Ê
HEISSWASSER
Ì
K
URZSPÜLEN
MILCHSYSTEM
Kaffeestärke (nur für Kaffeegetränke)
5 5 5 5 5 5
Mild Normal Stark
Füllmenge (nur für Kaffeegetränke)
Î Ð Ò
klein mittel groß
Zusätzlich zu Kaffeestärke und
Füllmenge kann für die eigene KaffeeEinstellung MY COFFEE Ç noch das
Mischungsverhältnis von Espresso
und Milch gewählt werden:
Die Einstellung kann in 20% Schritten
durch Drehen des Drehknopfs 6
vorgenommen werden.
SE_TK76_Teil_1_080917.indd 7 18.09.2008 08:40:36
Page 12
8
de
Taste
start
Durch Drücken der Taste 8
start
wird die
Getränkezubereitung oder ein Service
Programm gestartet.
Durch erneutes Drücken der Taste 8
start
während der Getränkezubereitung kann der
Bezug vorzeitig gestoppt werden.
Taste
°C
Mit der Taste 3 °C kann die Temperatur für
Kaffee und Heißwasser eingestellt (kurz
drücken) sowie die Kindersicherung
(mind. 3 Sek. gedrückt halten) ein- oder
ausgeschaltet werden.
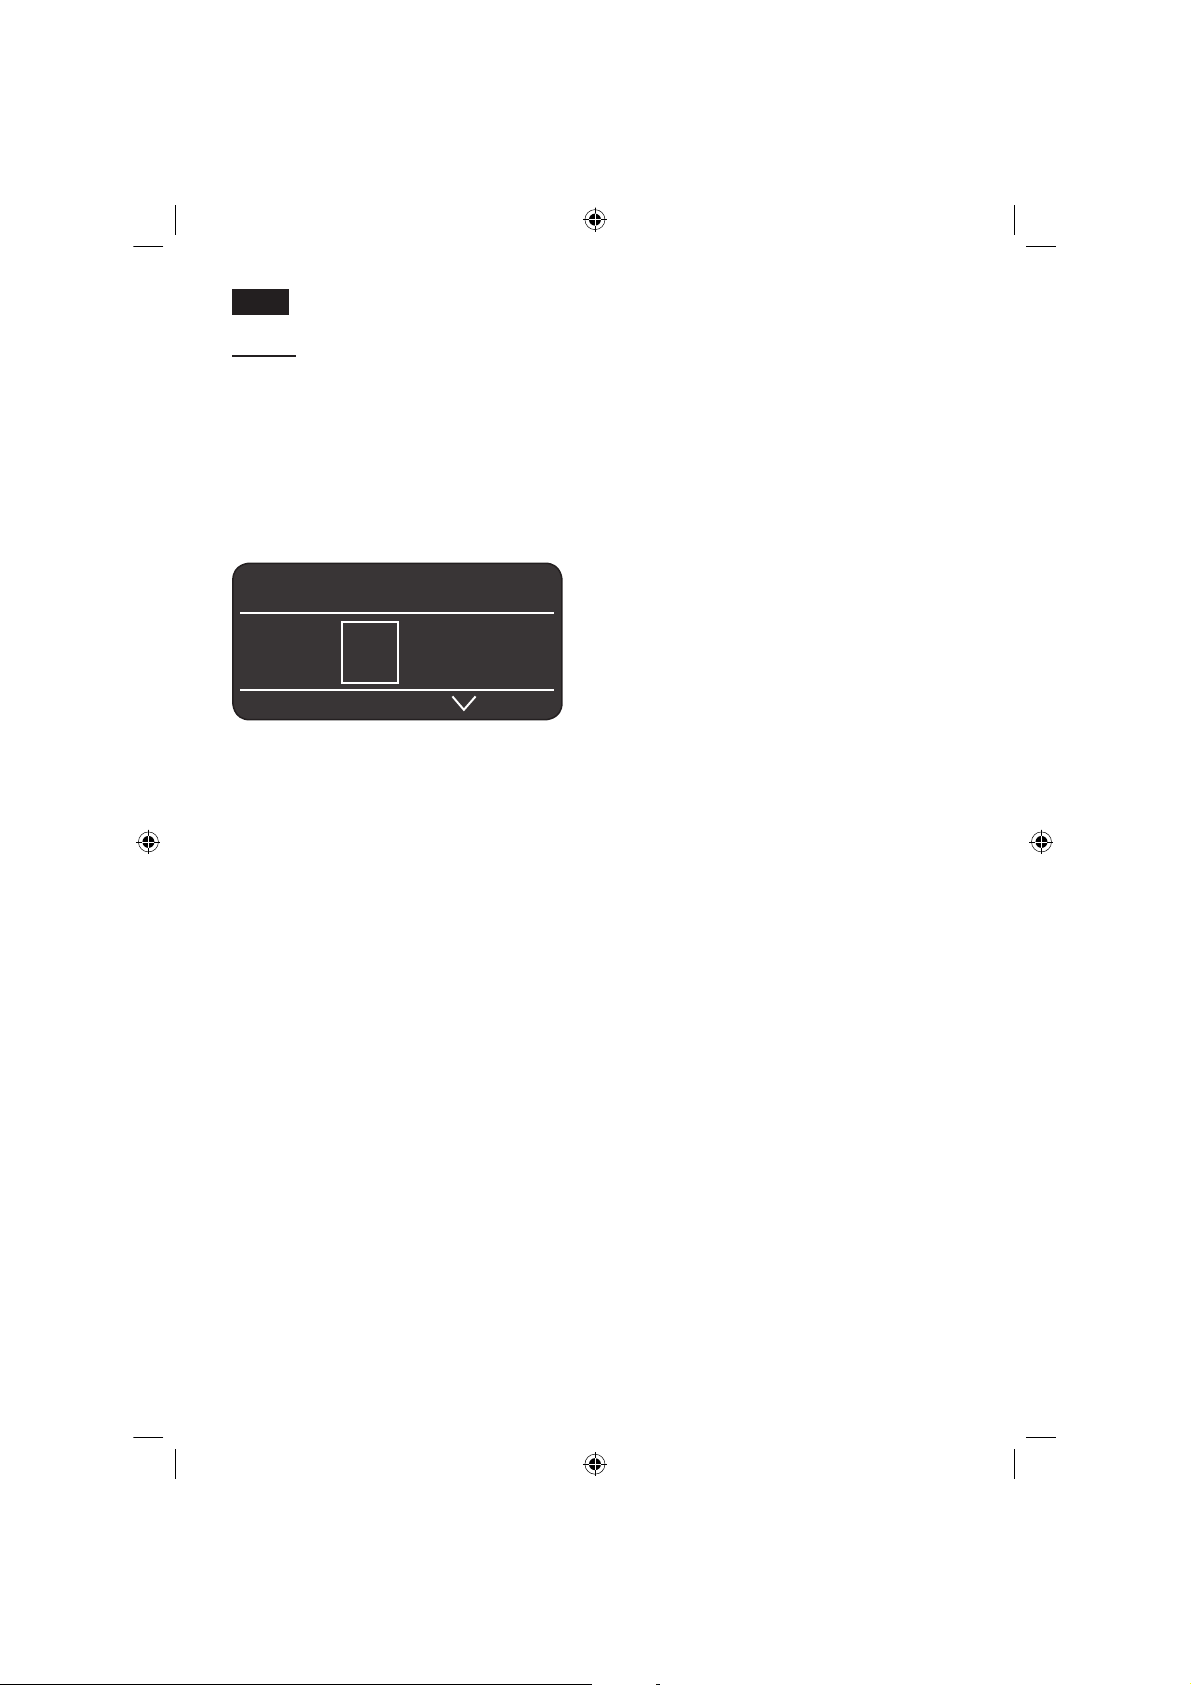
Temperatur einstellen:
Taste 3 °C kurz drücken und mit den Tasten
4 < und > und Drehknopf 6 die
Einstellungen vornehmen.
TEMPERATUR
KAFFEE
HEISSWASSER
NORMAL
TEMPERATUR
KAFFEE
HEISSWASSER
<90°C
Durch erneutes Drücken der Taste 3 °C
speichern und zurück zur Getränkeauswahl.
Diese Einstellungen sind automatisch für
alle Zubereitungsarten wirksam.
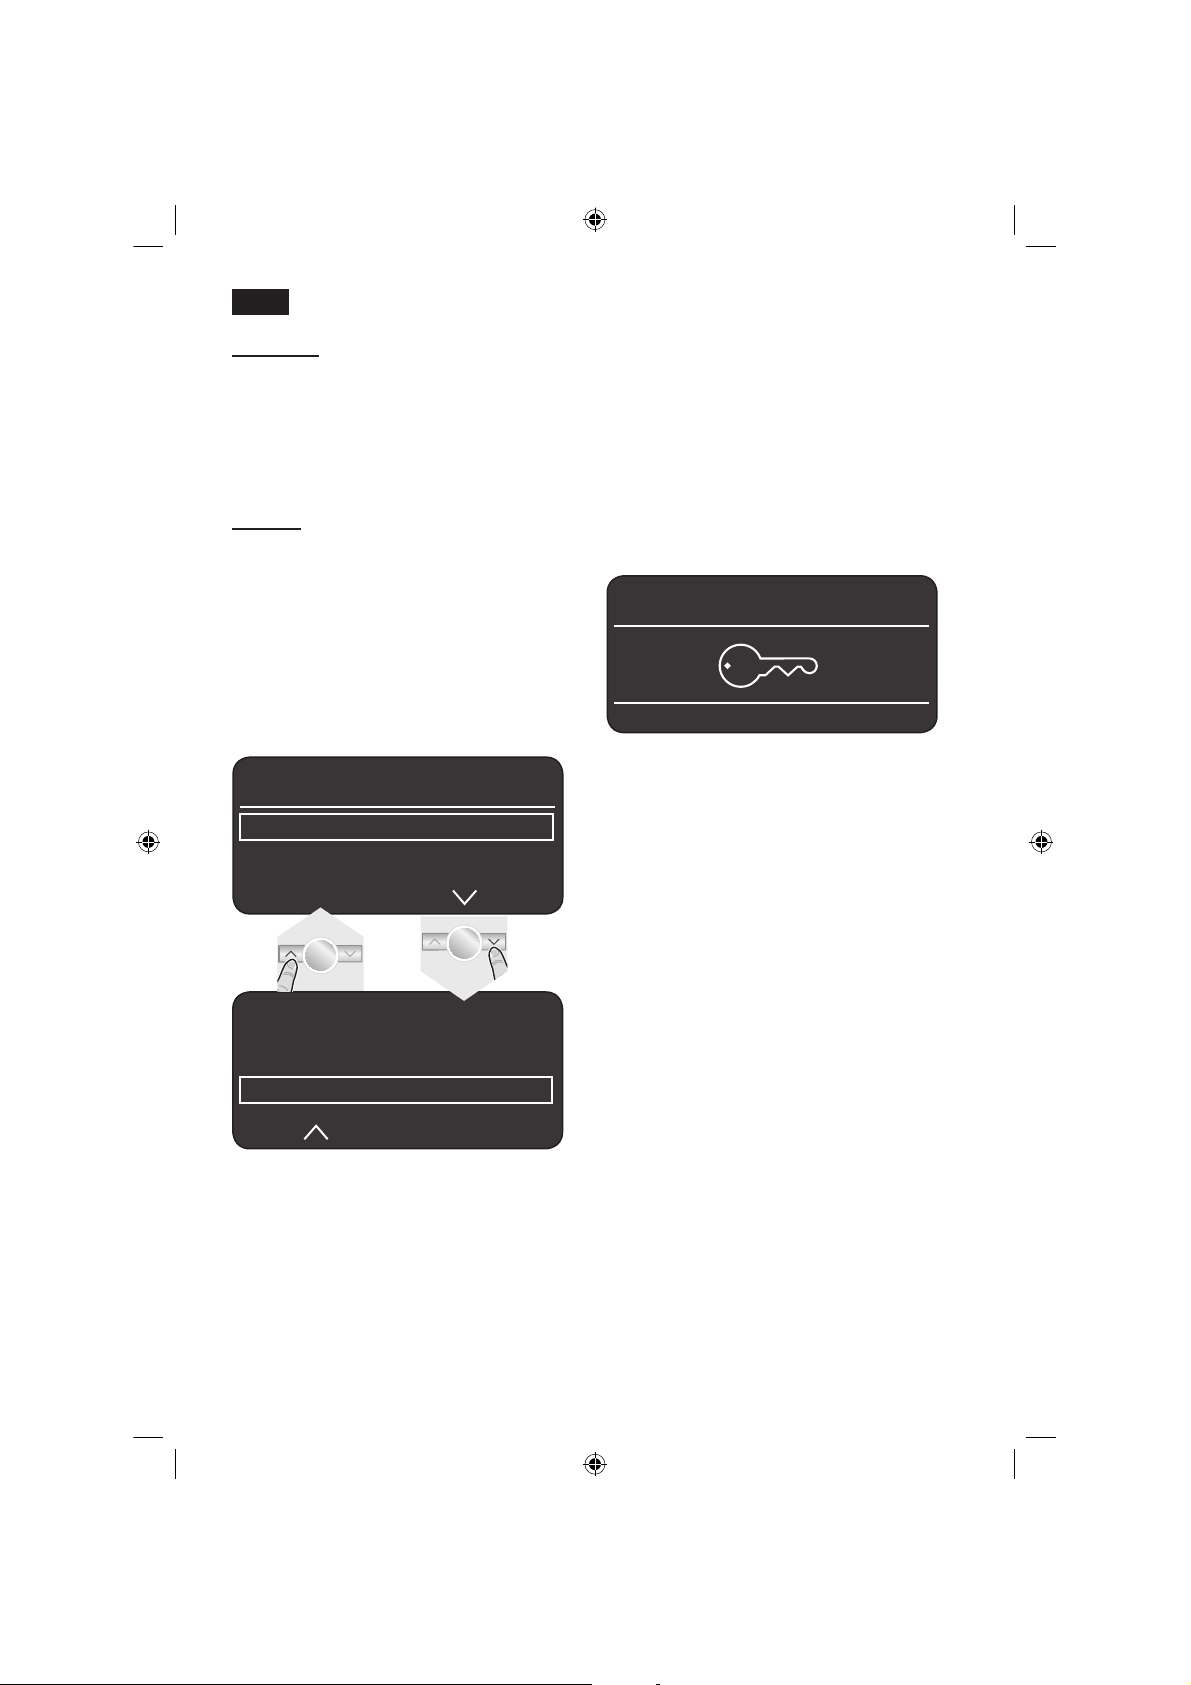
Kindersicherung
Um Kinder vor Verbrühungen und
Verbrennungen zu schützen, kann das
Gerät gesperrt werden.
● Taste 3 °C mindestens 3 Sekunden
gedrückt halten, im Display 5 erscheint
ein Schlüssel, die Kindersicherung ist
aktiviert.
Nun ist keine Bedienung mehr möglich,
der Tassenwärmer 19 ist ausgeschaltet.
ESPRESSO Ë Í
● Um die Kindersicherung zu deaktiveren
die Taste 3 °C mindestens 3 Sekunden
gedrückt halten, der Schlüssel im Display
5 verschwindet wieder.
SE_TK76_Teil_1_080917.indd 8 18.09.2008 08:40:37
Page 13
9
de
Taste j Einstellungen
Mit der Taste 7 j können Informationen
abgerufen (kurz drücken) und
Einstellungen vorgenommen werden
(mind. 3 Sek. gedrückt halten).
Informationen abrufen
Im Info-Menü können folgende
Informationen abgerufen werden:
wie viele Getränke seit der Inbetriebnahme des Espressovollautomaten
wurden bezogen
wann ist der nächste Service nötig.
● Taste 7 j kurz Drücken und mit den
Tasten 4 < und > navigieren.
INFO-MENÜ
ENTKALKEN IN CA. XXX TASSEN
REINIGEN IN CA. XXX TASSEN
KEIN FILTER EINGESETZT
FILTERWECHSEL IN CA. XXX TASSEN *
INFO-MENÜ
ANZAHL KAFFEE XX
ANZAHL MILCHGETRÄNKE XX
MENGE HEISSWASSER XL
*erscheint nur, wenn der Filter aktiviert ist.
Durch erneutes kurzes Drücken der Taste 7
j wechselt man zurück in die Getränke-
auswahl. Nach ca. 10 Sekunden ohne
Betätigung wechselt das Gerät automatisch
wieder in die Getränkeauswahl.
Einstellungen vornehmen
(siehe Kapitel „Menüeinstellungen“)
–
–
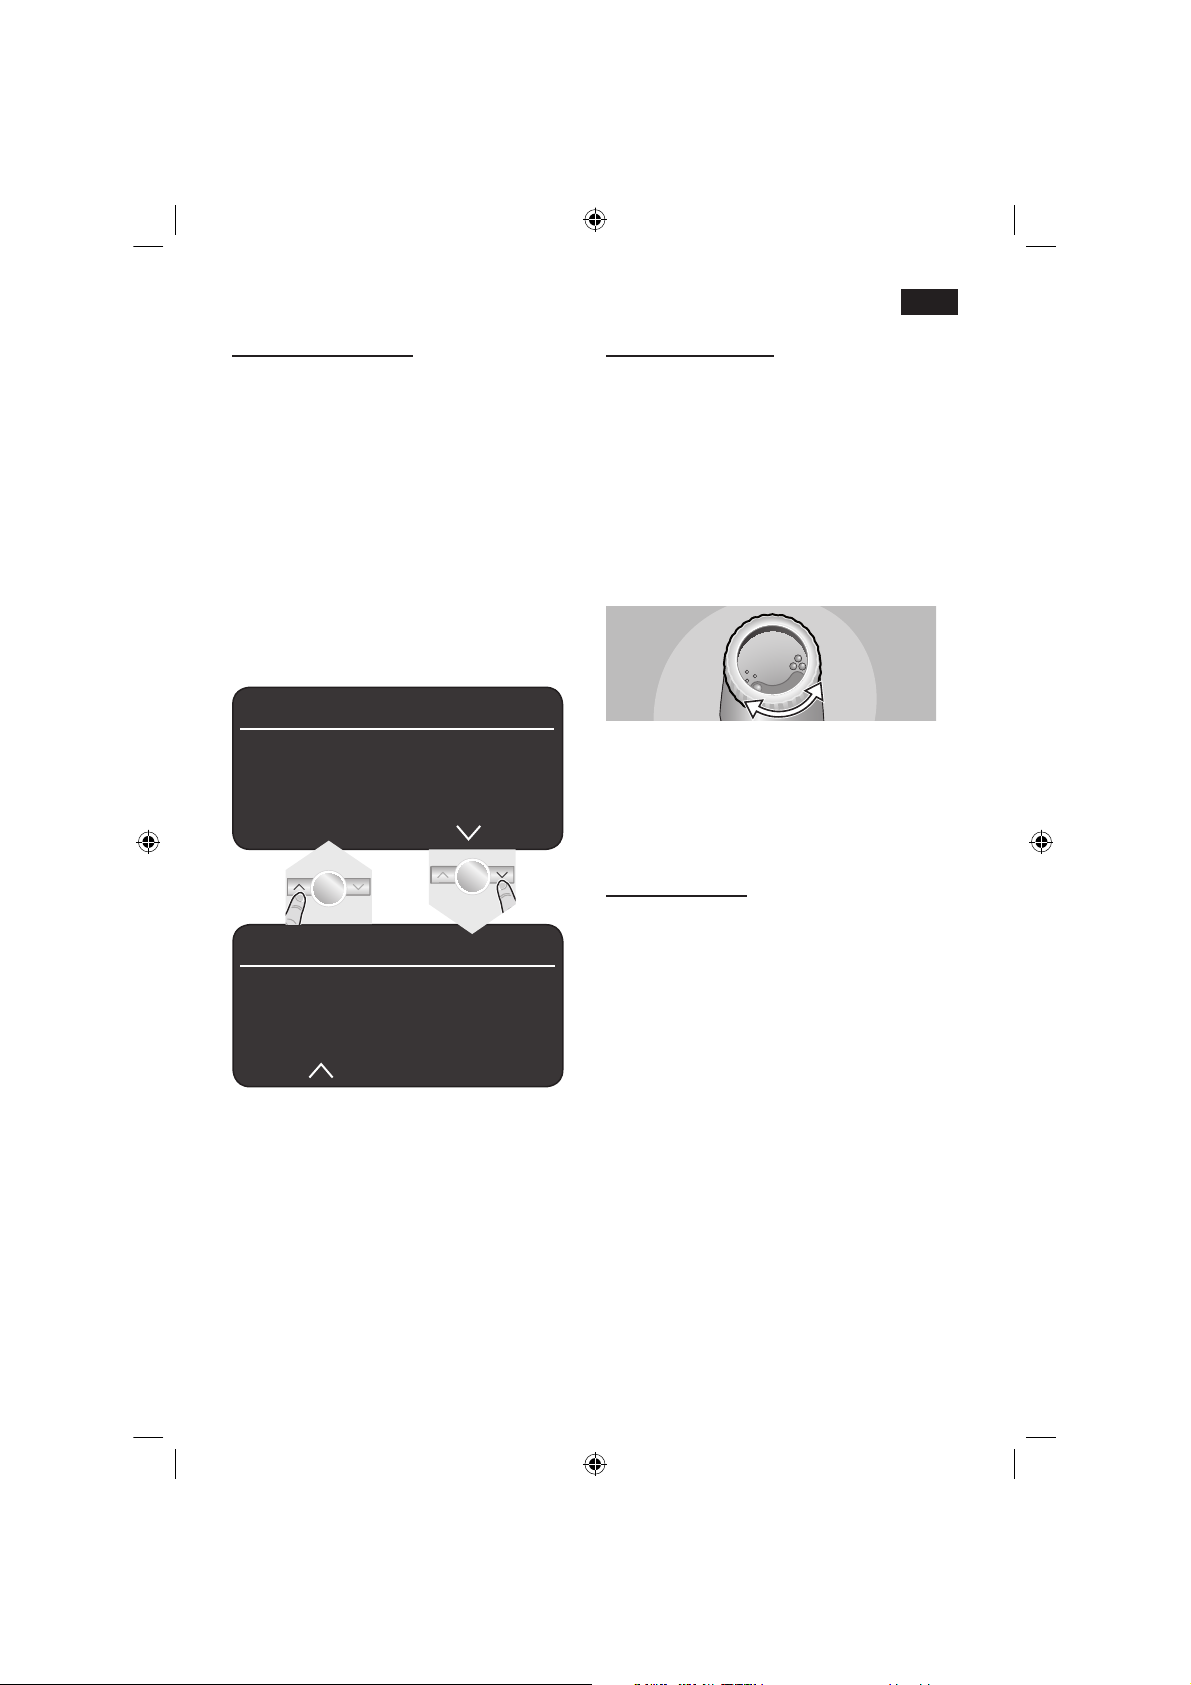
Mahlgrad einstellen
Mit dem Drehwähler 17 für Mahlgradeinstellung kann die gewünschte Feinheit des
Kaffeepulvers eingestellt werden.
Achtung
Den Mahlgrad nur bei laufendem Mahlwerk
verstellen! Das Gerät kann sonst
beschädigt werden.
● Bei laufendem Mahlwerk den Drehwähler
17 zwischen feinem Kaffeepulver • • • und
gröberem Kaffeepulver ● ● ● einstellen.
Info: Die neue Einstellung macht sich erst
ab der zweiten Tasse Kaffee bemerkbar.
Tipp: Bei dunkel gerösteten Bohnen einen
feineren, bei helleren Bohnen einen
gröberen Mahlgrad einstellen.
Tassenwärmung
r
!
Achtung, die Tassenwärmung 19 wird
sehr heiß!
Der Espressovollautomat verfügt über eine
Tassenwärmung 19 die mit der Taste 20
manuell ein oder ausgeschaltet werden
kann. Ist die Tassenwärmung 19 an,
leuchtet die Taste 20.
Tipp: Für eine optimale Erwärmung der
Tassen, diese mit dem Tassenboden auf die
Tassenwärmung 19 stellen.
Nur TK 76F09
Die Tassenwärmung 19 kann auch vorprogrammiert werden (siehe Kapitel
„Menüeinstellungen TASSENWÄRMER
EIN“).
SE_TK76_Teil_1_080917.indd 9 18.09.2008 08:40:38
Page 14
10
de
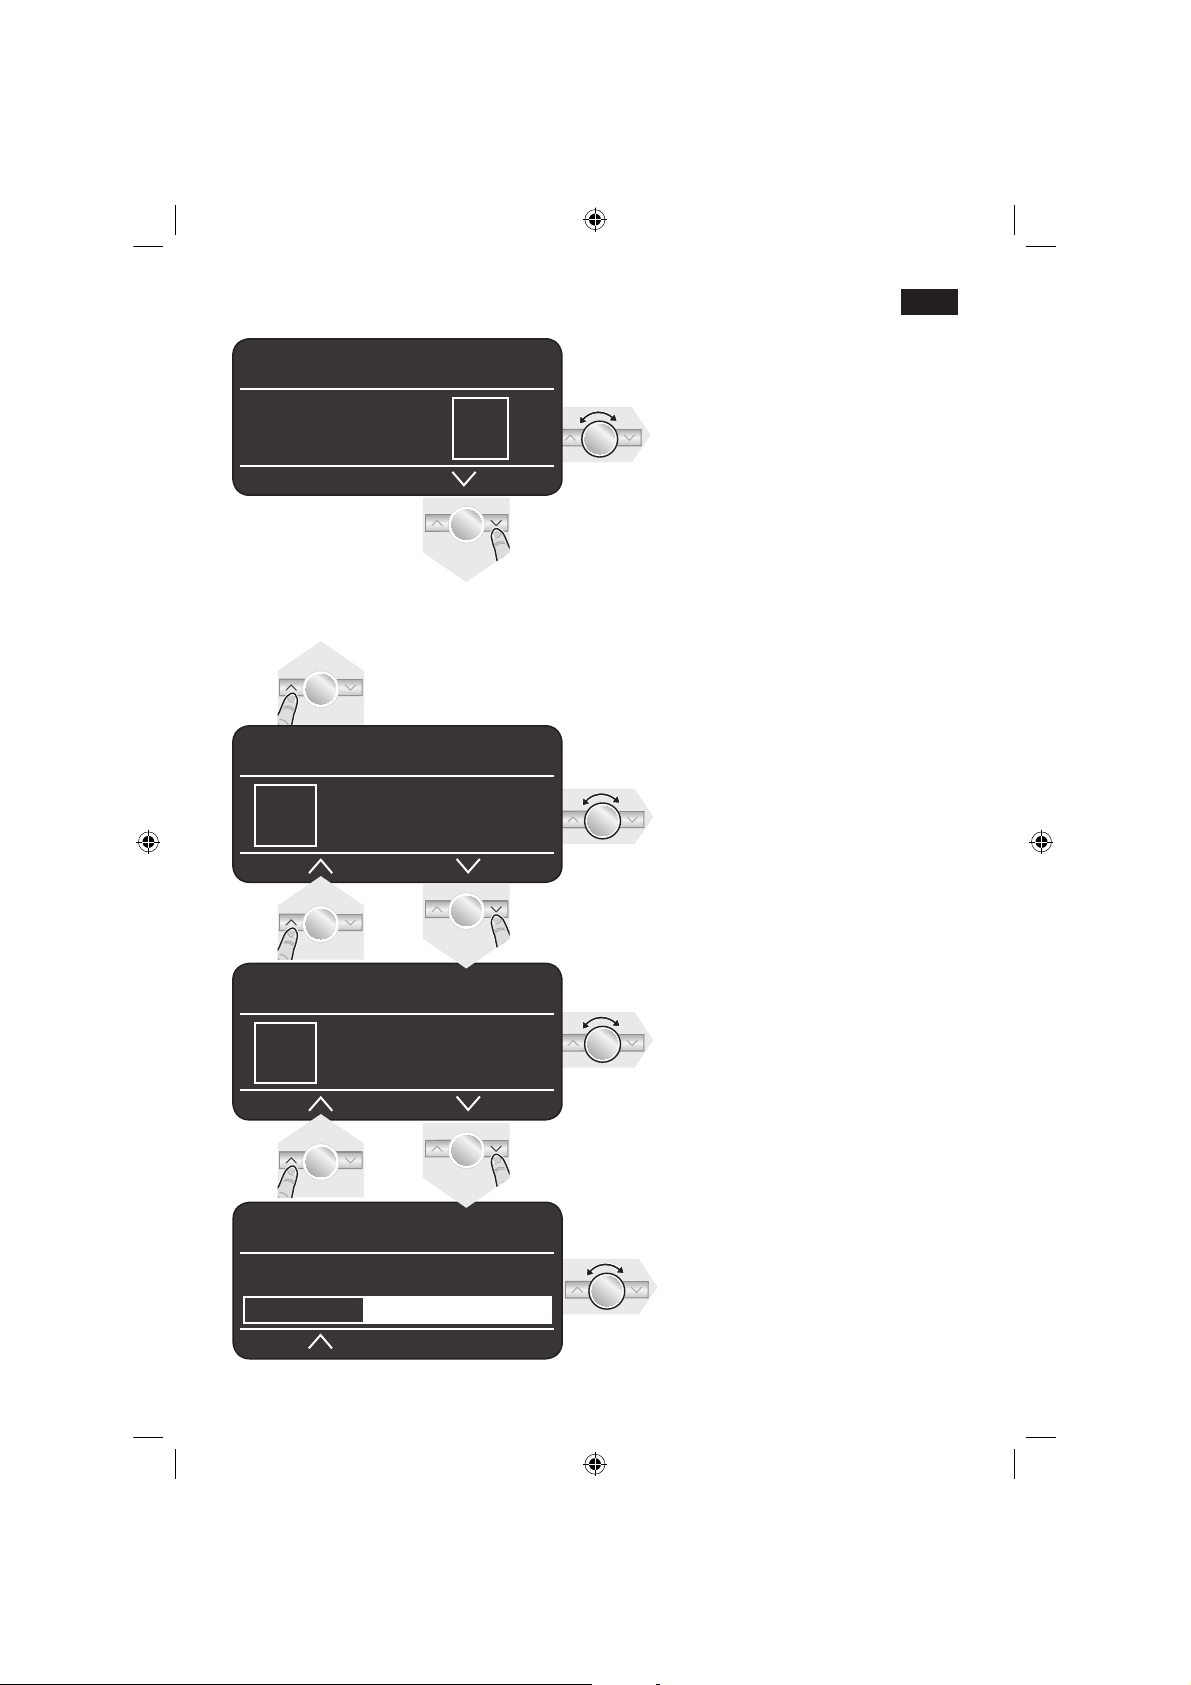
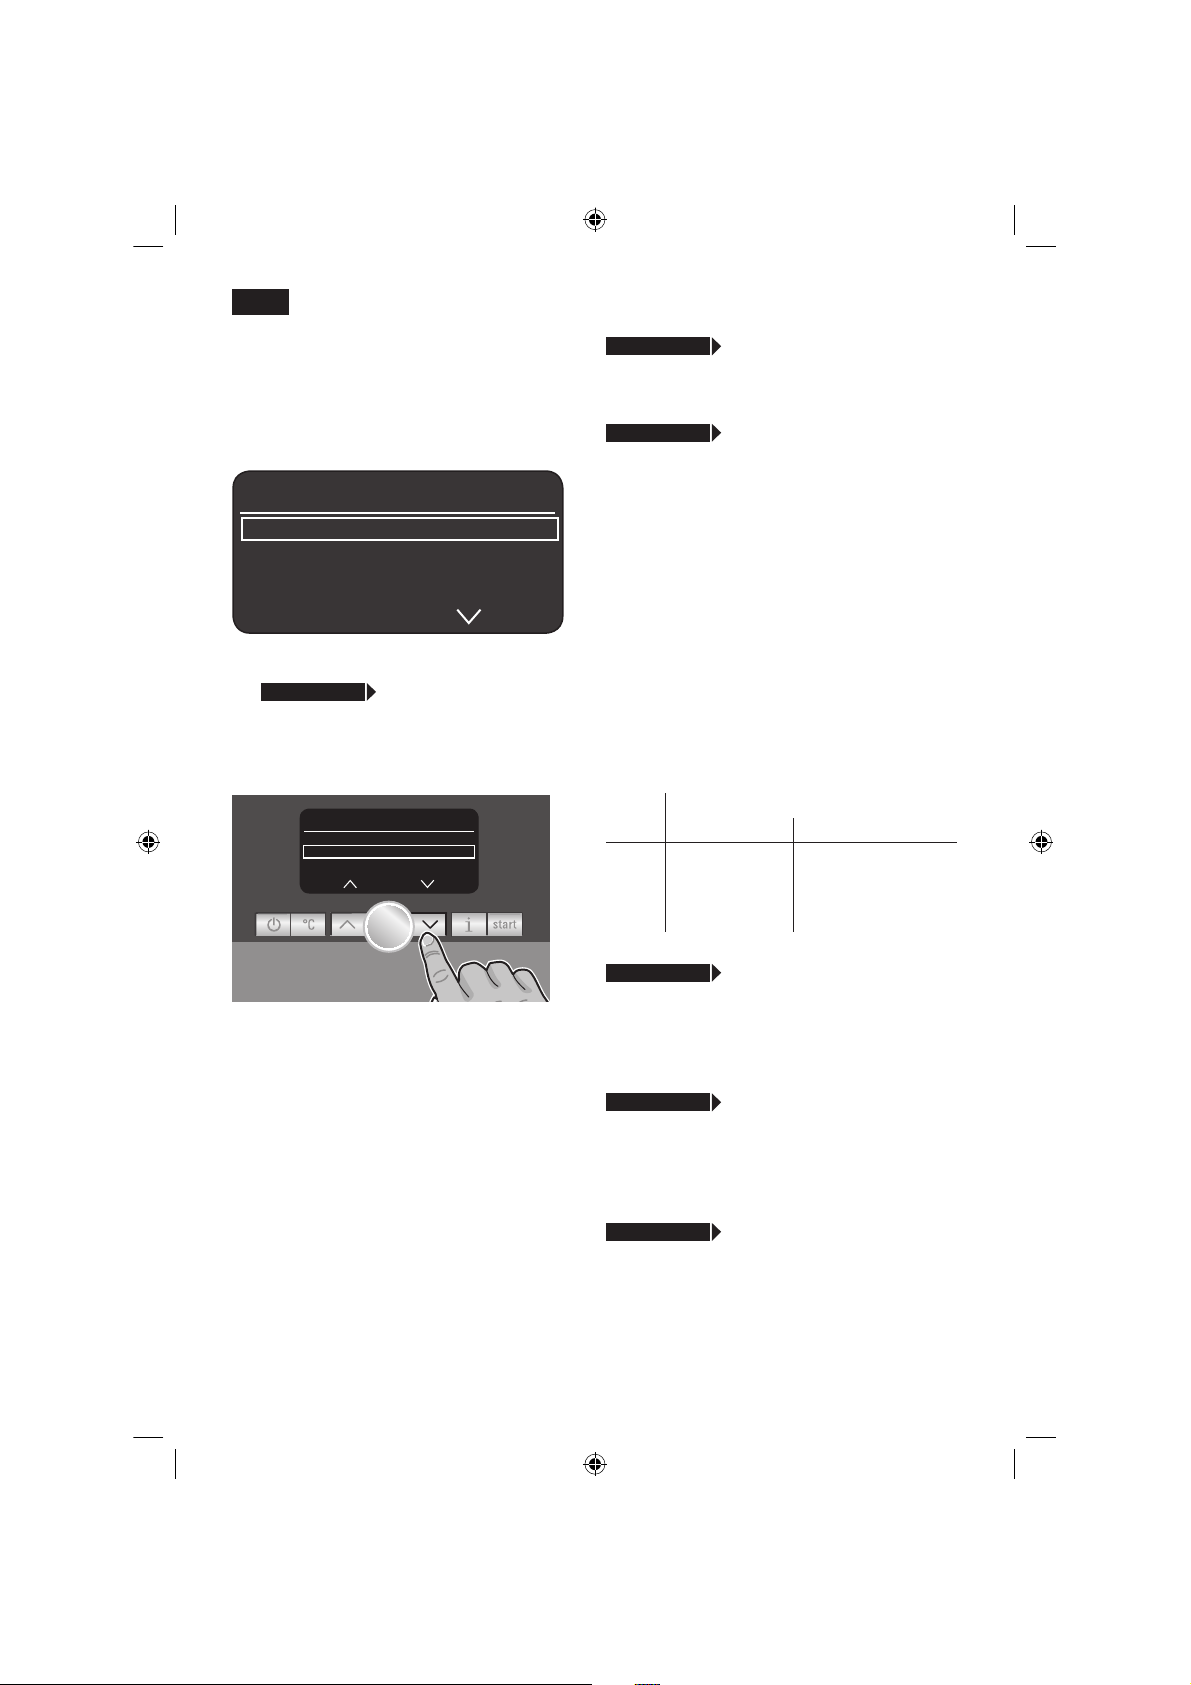
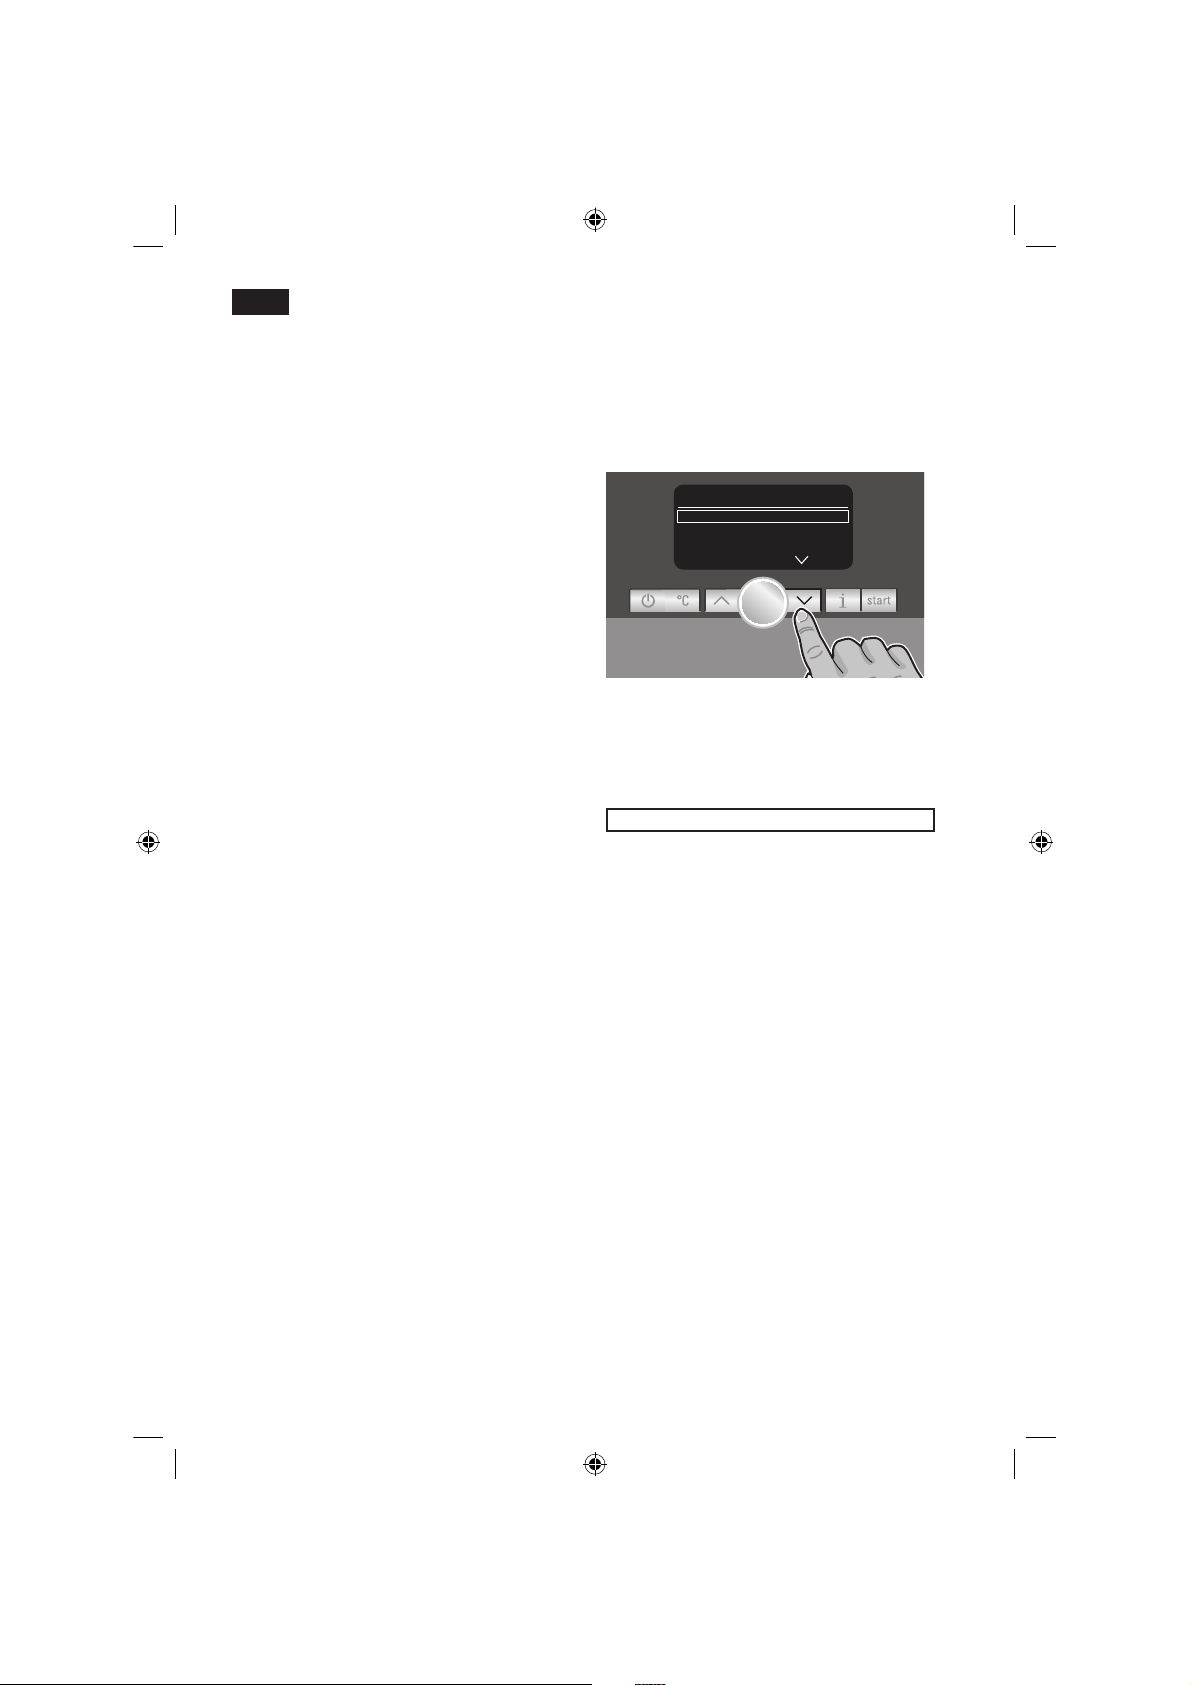
Menüeinstellungen
● Taste 7 j mindestens 3 Sek. gedrückt
halten.
Es erscheinen nun die verschiedenen
Einstellmöglichkeiten.
EINSTELLUNGEN
SPRACHE DEUTSCH
WASSERHÄRTE
ENTKALKEN
Im nachfolgenden Text der Gebrauchsanleitung beginnt jede neue Einstellung
mit
j 3 Sek. + >
und dazu eine genaue
Beschreibung.
Mit den Tasten 4 < und > können die
verschiedenen Einstellmöglichkeiten
ausgewählt werden.
EINSTE LLUNGEN
WASSERHÄR TE
ENTK ALKEN
Ò
START
REINIGEN
Hinweis: Die vorgenommenen Änderungen
werden automatisch gespeichert.
Eine zusätzliche Bestätigung ist nicht
erforderlich.
j 3 Sek. + >
SPRACHE
● Durch Drehen des Drehknopfs 6 kann die
gewünschte Sprache ausgewählt werden.
j 3 Sek. + >
WASSERHÄRTE
● Durch Drehen des Drehknopfs 6 kann die
gewünschte Wasserhärte 1,2,3 und 4
ausgewählt werden.
Info: Die richtige Einstellung der Wasserhärte ist wichtig, damit das Gerät rechtzeitig
anzeigt, wenn es entkalkt werden muss. Die
voreingestellte Wasserhärte ist Stufe 4.
Die Wasserhärte kann mit dem beiliegenden Teststreifen festgestellt oder bei der
örtlichen Wasserversorgung nachgefragt
werden.
● Den Teststreifen kurz in das Wasser
tauchen und nach 1 Minute das Ergebnis
ablesen.
Stufe Wasserhärtegrad
Deutsch (°dH) Französisch (°fH)
1
2
3
4
1-7
8-14
15-21
22-30
1-13
14-25
26-38
39-54
j 3 Sek. + >
ENTKALKEN
● Soll das Gerät entkalkt werden, die Taste
8
start
drücken und das
Entkalkungsprogramm durchführen
(siehe Kapitel „Entkalken“).
j 3 Sek. + >
REINIGEN
● Soll das Gerät gereinigt werden, die Taste
8
start
drücken und das Reinigungsprogramm durchführen (siehe Kapitel
„Reinigen“).
j 3 Sek. + >
CALC‘N‘CLEAN
● Soll das Gerät gleichzeitig entkalkt und
gereinigt werden, die Taste 8
start
drücken und das Calc‘n‘Clean Programm
durchführen (siehe Kapitel
„Calc‘n‘Clean“).
SE_TK76_Teil_1_080917.indd 10 18.09.2008 08:40:38
Page 15
11
de
j 3 Sek. + >
UHR ANZEIGEN
Hiermit kann eingestellt werden, dass im
Sparmodus die Uhrzeit im Display 5
angezeigt wird.
● Durch Drehen des Drehknopfs 6 kann
die Uhranzeige ein- = JA oder
ausgeschaltet = NEIN werden.
Info: Die Uhrzeit muss vorher unter UHR
STELLEN eingestellt werden.
j 3 Sek. + >
ZEITMODUS
Im Zeitmodus kann mit dem Drehknopf 6
das Uhrzeitformat auf 12H bzw. 24H
eingestellt werden.
j 3 Sek. + >
UHR STELLEN
● Durch Drehen des Drehknopfs 6 kann die
aktuelle Uhrzeit eingestellt werden z.B.
08:25. Die Zahl, die eingestellt werden
kann, ist jeweils hinterleuchtet. Die
Hinterleuchtung wechselt automatisch
zwischen den Stunden und Minuten.
Nur TK76F09
(programmierbarer Tassenwärmer)
j 3 Sek. + >
TASSENWÄRMER EIN
Mit dieser Zusatzfunktion schaltet sich der
Tassenwärmer 19 automatisch zu einer
programmierbaren Uhrzeit ein. Unabhängig
davon, ob sich das Gerät im „Sparmodus“
befindet oder betriebsbereit ist.
Info: Die Uhrzeit muss vorher unter UHR
STELLEN eingestellt werden.
Die gewünschte Uhrzeit durch Drehen
des Drehknopfs 6 einstellen.
Bei Auswahl OFF ist die Funktion
ausgeschaltet.
Nur TK76F09
(programmierbarer Tassenwärmer)
j 3 Sek. + >
TASSENWÄRMER AUS
Hiermit kann die Zeitspanne eingestellt
werden, zu der die Funktion Tassenwärmer
19 automatisch nach dem Einschalten
wieder abschaltet.
●
●
Info: In Tassenwärmer EIN muss die
Einschaltzeit eingestellt sein.
Die gewünschte Zeitspanne durch
Drehen des Drehknopfs 6 einstellen.
j 3 Sek. + >
AUTO OFF IN
Durch Drehen des Drehknopfs 6 kann die
Zeitspanne eingegeben werden, nach der
das Gerät automatisch nach der letzten
Getränkezubereitung in den „Sparmodus“
schaltet.
Die Einstellung ist von 5 Minuten bis zu 8
Stunden möglich.
j 3 Sek. + >
WASSERFILTER
Bevor ein neuer Wasserfi lter 35 verwendet
werden kann, muss dieser gespült werden.
Dazu Wasserfi lter 35 mit Hilfe des
Pulverlöffels 14 in den Wassertank 11 fest
eindrücken. Wassertank bis zur
Markierung „max“ mit Wasser füllen.
Durch Drehen des Drehknopfs 6 START
wählen und Taste 8
start
drücken.
●
0,5 L BEHÄLTER UNTER
M
ILCHSCHÄUMER STELLEN
Ò
START
Einen Behälter mit 0,5l Fassungs-
vermögen unter den Milchschäumer 10
stellen.
Taste 8
start
drücken. Wasser fl ießt nun
durch den Filter 35 um ihn zu spülen.
Anschließend das Gefäß entleeren. Das
Gerät ist wieder betriebsbereit.
Info: Durch das Spülen des Filters 35 ist
gleichzeitig die Einstellung für die Anzeige
Filterwechsel aktiviert worden.
●
●
●
●
●
●
●
SE_TK76_Teil_1_080917.indd 11 18.09.2008 08:40:39
Page 16
12
de
Nach Anzeige FILTER WECHSELN oder
spätestens nach 2 Monaten ist die Wirkung
des Filters 35 erschöpft. Er ist aus
hygienischen Gründen, und damit das
Gerät nicht verkalkt (Gerät kann Schaden
nehmen), auszutauschen.
Ersatzfilter sind über den Handel (TZ70003)
oder den Kundendienst erhältlich.
Wird kein neuer Filter 35 eingesetzt, die
Einstellung WASSERFILTER auf NEIN
drehen.
Info: Wird das Gerät längere Zeit nicht
benutzt (z.B. Urlaub), sollte der eingesetzte
Filter 35 vor dem Gebrauch des Gerätes
gespült werden. Dazu einfach eine Tasse
Heisswasser beziehen.
j 3 Sek. + >
KONTRAST
Der Kontrast im Display 5 kann von –20
bis +20 eingestellt werden. Die Werkseinstellung ist +0.
Mit dem Drehknopf 6 die gewünschte
Einstellung vornehmen.
j 3 Sek. + >
WERKSEINSTELLUNG Reset
Die eigenen Einstellungen können gelöscht
und die Werkseinstellungen wieder aktiviert
werden.
Zur Aktivierung der Werkseinstellung
Taste 8
start
drücken.
Info: Das Gerät kann auch manuell durch
Tastenkombination auf die Werkseinstellungen zurückgestellt werden. Das Gerät muss
komplett ausgeschaltet sein.
Tasten 4 < und > und Netzschalter 1
O / I gleichzeitig mindestens 5 Sekunden
gedrückt halten. Taste 8
start
drücken,
die Werkseinstellungen sind wieder
aktiviert.
●
●
●
Zubereitung mit
Kaffeebohnen
Dieser Espressovollautomat mahlt für jeden
Brühvorgang frischen Kaffee. Vorzugsweise
Espresso- oder VollautomatenBohnenmischungen verwenden. Für eine
optimale Qualität die Bohnen kühl und
verschlossen aufbewahren oder
tiefgefrieren. Die Kaffeebohnen können
auch tiefgefroren gemahlen werden.
Wichtig: Täglich frisches Wasser in den
Wassertank 11 füllen. Es sollte immer
ausreichend Wasser für den Betrieb des
Gerätes im Wassertank 11 sein.
Tipp: Tasse(n), vor allem kleine,
dickwandige Espressotassen auf der
Tassenwärmung 19 vorwärmen.
Es können verschiedene Kaffeegetränke
ganz einfach durch Knopfdruck zubereitet
werden.
Getränkezubereitung ohne Milch
Das Gerät muss betriebsbereit sein.
Vorgewärmte Tasse(n) unter den
Kaffeeauslauf 9 stellen.
Den gewünschten Espresso oder Kaffee
durch Drehen des Drehknopfs 6 auswählen.
Im Display 5 werden das gewählte
Getränk sowie die Einstellung der
Kaffeestärke und Kaffeemenge für dieses
Getränk angezeigt.
ESPRESSO Ë Í
 à À Á Ä Å
●
●
SE_TK76_Teil_1_080917.indd 12 18.09.2008 08:40:39
Page 17
13
de
Die Einstellungen können verändert werden
(siehe Kapitel „Bedienelemente“).
Taste 8
start
drücken.
Der Kaffee wird vorgebrüht und läuft
anschließend in die Tasse(n).
Getränkezubereitung mit Milch
Das Gerät muss betriebsbereit sein.
● Das Milchrohr 10d des Milchschäumers 10
in den Milchbehälter 34 einführen.
Den Kaffeeauslauf 9 nach rechts
schwenken bis er hörbar einrastet.
Vorgewärmte Tasse oder Glas unter
Kaffeeauslauf 9 und Milchschäumer 10
stellen.
Den gewünschten Milchkaffee Ä,
Macchiato
Å
, Cappuccino Æ, oder My
coffee Ç durch Drehen des Drehknopfs 6
auswählen. Im Display 5 wird das
gewählte Getränk sowie die Einstellung
der Kaffeestärke und Kaffeemenge für
dieses Getränk angezeigt.
CAPPUCCINO Ë Í
À Á Ä Å Æ Ç
Die Einstellungen können verändert werden
(siehe Kapitel „Bedienelemente“).
Taste 8
start
drücken. Zuerst wird Milch in
die Tasse bzw. das Glas gefördert.
Anschließend wird der Kaffee vorgebrüht
und läuft in die Tasse bzw. das Glas.
Wichtig: Getrocknete Milchreste sind
schwer zu entfernen, deshalb nach jeder
Benutzung den Milchschäumer 10 mit
lauwarmem Wasser reinigen (siehe Kapitel
„Milchsystem reinigen“).
●
●
●
●
●
Zubereitung mit
gemahlenem Kaffee
Dieser Vollautomat kann auch mit
gemahlenem Kaffee (kein löslicher Kaffee)
betrieben werden.
Getränkezubereitung ohne Milch
Mit dem Drehknopf 6 À oder Á
auswählen.
Vorgewärmte Tasse(n) unter den
Kaffeeauslauf 9 stellen.
Die Pulverschublade 21 durch Drücken
öffnen.
Maximal 2 gestrichene Pulverlöffel 14 mit
Kaffeepulver einfüllen.
Achtung: Keine ganzen Bohnen oder
löslichen Kaffee einfüllen.
Die Pulverschublade 21 schließen
Taste 8
start
drücken.
Der Kaffee wird gebrüht und läuft
anschließend in die Tasse(n).
Hinweis: Für eine weitere Tasse Kaffee den
Vorgang wiederholen. Wird innerhalb von
90 Sekunden kein Kaffee bezogen, entleert
sich die Brühkammer automatisch, um eine
Überfüllung zu vermeiden. Das Gerät spült.
Getränkezubereitung mit Milch
Mit dem Drehknopf 6
Milchkaffee Ä,
Macchiato Å, Cappuccino Æ oder My
coffee Ç auswählen.
Das Milchrohr 10d des Milchschäumers 10
in den Milchbehälter 34 einführen.
Den Kaffeeauslauf 9 nach rechts
schwenken bis er hörbar einrastet.
Vorgewärmte Tasse oder Glas unter
Kaffeeauslauf 9 und Milchschäumer 10
stellen.
Die Pulverschublade 21 durch Drücken
öffnen.
Maximal 2 gestrichene Pulverlöffel 14 mit
Kaffeepulver einfüllen.
Achtung: Keine ganzen Bohnen oder
löslichen Kaffee einfüllen.
●
●
●
●
●
●
●
●
●
●
●
●
SE_TK76_Teil_1_080917.indd 13 18.09.2008 08:40:40
Page 18

14
de
Die Pulverschublade 21 schließen
Taste 8
start
drücken. Zuerst wird Milch in
die Tasse bzw. das Glas gefördert.
Anschließend wird das Kaffeepulver
gebrüht und läuft in die Tasse bzw. das
Glas.
Wichtig: Getrocknete Milchreste sind
schwer zu entfernen, deshalb nach jeder
Benutzung den Milchschäumer 10 mit
lauwarmem Wasser reinigen (siehe Kapitel
„Milchsystem 10 reinigen“).
Hinweis: Für eine weitere Kaffee /
Milchmischung den Vorgang wiederholen.
Wird innerhalb von 90 Sekunden kein
Kaffee bezogen, entleert sich die Brühkammer automatisch, um eine Überfüllung zu
vermeiden. Das Gerät spült.
Milchschaum und
heiße Milch zubereiten
r
!
Verbrennungsgefahr
Der Milchschäumer 10 wird sehr heiß. Nach
Benutzung zuerst abkühlen lassen und erst
dann berühren.
Das Gerät muss betriebsbereit sein.
Das Milchrohr 10d des Milchschäumers
10 in den Milchbehälter 34 einführen.
Die vorgewärmte Tasse oder Glas unter
den Auslauf des Milchschäumers 10
stellen.
Die gewünschte Einstellung „Milchschaum“ È oder „Heisse Milch“ É durch
Drehen des Drehknopfs 6 auswählen.
Die Taste 8
start
drücken, Milchschaum
(ca. 40 Sek. lang) oder heiße Milch (ca.
60 Sek. lang) fließt aus dem Auslauf des
Milchschäumers 10.
Durch erneutes Drücken der Taste 8
start
kann der Vorgang vorzeitig gestoppt
werden.
●
●
●
●
●
●
●
Tipp: Für besonders heiße Milch, diese
nochmals aus dem Glas ansaugen und
durch den Milchschäumer 10 laufen lassen.
Erneutes Wählen der Funktion „Heisse
Milch“.
Info: Bei der Zubereitung von heißer Milch
kann es zu pfeifenden Geräuschen
kommen. Diese sind durch den
Milchschäumer 10 technisch bedingt.
Tipp: Für einen optimalen Milchschaum
bevorzugt kalte Milch mit einem Fettgehalt
von 1,5% verwenden.
Wichtig: Getrocknete Milchreste sind
schwer zu entfernen, deshalb nach jeder
Benutzung den Milchschäumer 10 mit
lauwarmem Wasser reinigen (siehe Kapitel
„Milchsystem reinigen“).
Heißwasser beziehen
r
!
Verbrennungsgefahr
Der Milchschäumer 10 wird sehr heiß. Nach
Benutzung zuerst abkühlen lassen und erst
dann berühren.
Das Gerät muss betriebsbereit sein.
Die vorgewärmte Tasse oder Glas unter
den Auslauf des Milchschäumers 10
stellen.
Die gewünschte Einstellung Heisswasser
Ê
durch Drehen des Drehknopfs 6
auswählen.
Die Taste 8
start
drücken, heißes Wasser
fließt ca. 40 sek. lang aus dem Auslauf
des Milchschäumers 10.
Durch erneutes Drücken der Taste 8
start
kann der Vorgang vorzeitig gestoppt
werden.
Hinweis: Die Temperatur des Heißwassers
kann eingestellt werden (siehe Kapitel
„Bedienelemente Taste °C“).
●
●
●
●
SE_TK76_Teil_1_080917.indd 14 18.09.2008 08:40:40
Page 19

15
de
Pflege und tägliche
Reinigung
r
!
Stromschlag-Gefahr!
Vor der Reinigung den Netzstecker ziehen.
Das Gerät niemals in Wasser tauchen.
Keinen Dampfreiniger benutzen.
Das Gehäuse mit einem feuchten Tuch
abwischen. Keine scheuernden
Reinigungsmittel verwenden.
Den Wassertank 11 und die Brüheinheit
24 nur mit Wasser spülen.
Der Verschluss Aufbewahrungsfach 26,
die Blende Tropfschalen 27 und
Isolierhülle Milchbehälter 34 dürfen nur
mit einem feuchten Tuch leicht
abgewischt werden. Nicht in den
Geschirrspüler geben.
Tropfblech Kaffeeauslauf 29, Tropfblech
Milchschäumer 31 und Tropfschale
Milchschäumer 30 abnehmen.
Tropfschale Kaffeeauslauf 28 mit
Kaffeesatzbehälter 32 nach vorne
herausziehen, entleeren und reinigen.
Alle Teile können auch im Geschirrspüler
gereinigt werden.
Pulverlöffel 14 Aromadeckel 16 und
Innenteil sowie Deckel des Milchbehälters
34 von Hand spülen oder in den
Geschirrspüler geben.
Innenraum des Gerätes (Aufnahme
Schalen) auswischen.
Wichtig: Tropfschalen 28/30 sollten täglich
geleert und gereinigt werden, um
Schimmelbildung zu vermeiden.
Hinweis: Wenn das Gerät mit der Taste 2
a im kalten Zustand eingeschaltet oder
nach Bezug von Kaffee in a-Betrieb
versetzt wird, spült das Gerät automatisch.
Das System reinigt sich somit selbst.
●
●
●
●
●
●
Milchsystem 10 reinigen
Milchsystem 10 nach jeder Benutzung
reinigen!
Das Milchsystem 10 kann automatisch
vorgereinigt werden.
Im Display 5 das Symbol
Ì
auswählen
und Taste 8
start
drücken.
LEERES GLAS UNTER SCHÄUMER
STELLEN, ANSAUGROHR IN GLAS GEBEN
Ò
START
Ein leeres Glas unter das Milchsystem 10
stellen und das Ende des Milchrohrs 10d
in das Glas geben.
Taste 8
start
drücken. Das Gerät füllt nun
automatisch Wasser in das Glas und
saugt es zum Spülen über das Milchrohr
10d wieder an. Nach ca. 1 Min. stoppt der
Spülvorgang automatisch.
Nun das Glas entleeren und das
Milchrohr 10d reinigen.
Zusätzlich das Milchsystem ca. alle zwei
Wochen gründlich reinigen (Geschirrspüler
oder per Hand).
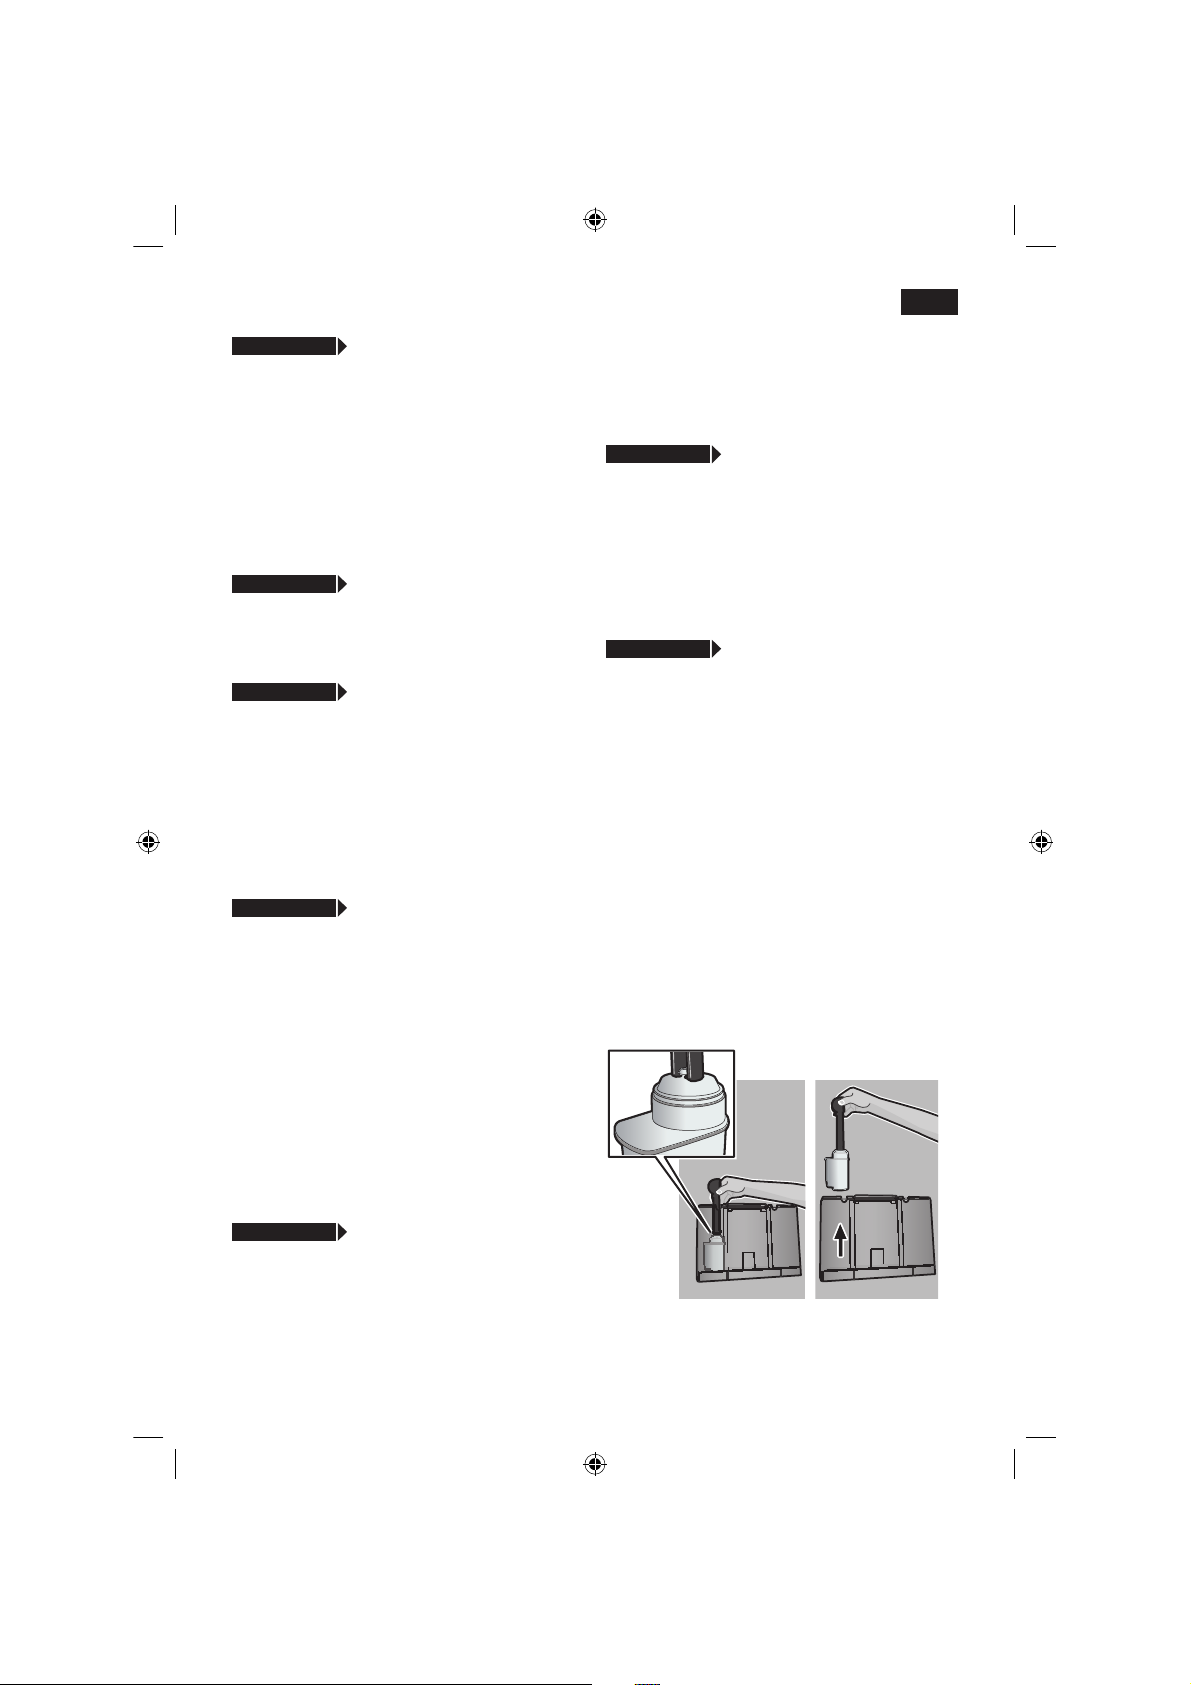
Milchsystem 10 zum Reinigen zerlegen:
Milchsystem 10 gerade nach vorne aus
dem Gerät herausziehen.
Die Einzelteile (
Bild C) mit Spüllauge und
einer weichen Bürste reinigen.
Alle Teile mit klarem Wasser spülen und
abtrocknen.
Alle Teile wieder zusammenstecken und
bis zum Anschlag einsetzen.
Info: Alle Teile des Milchschäumers 10
können auch in den Geschirrspüler
gegeben werden.
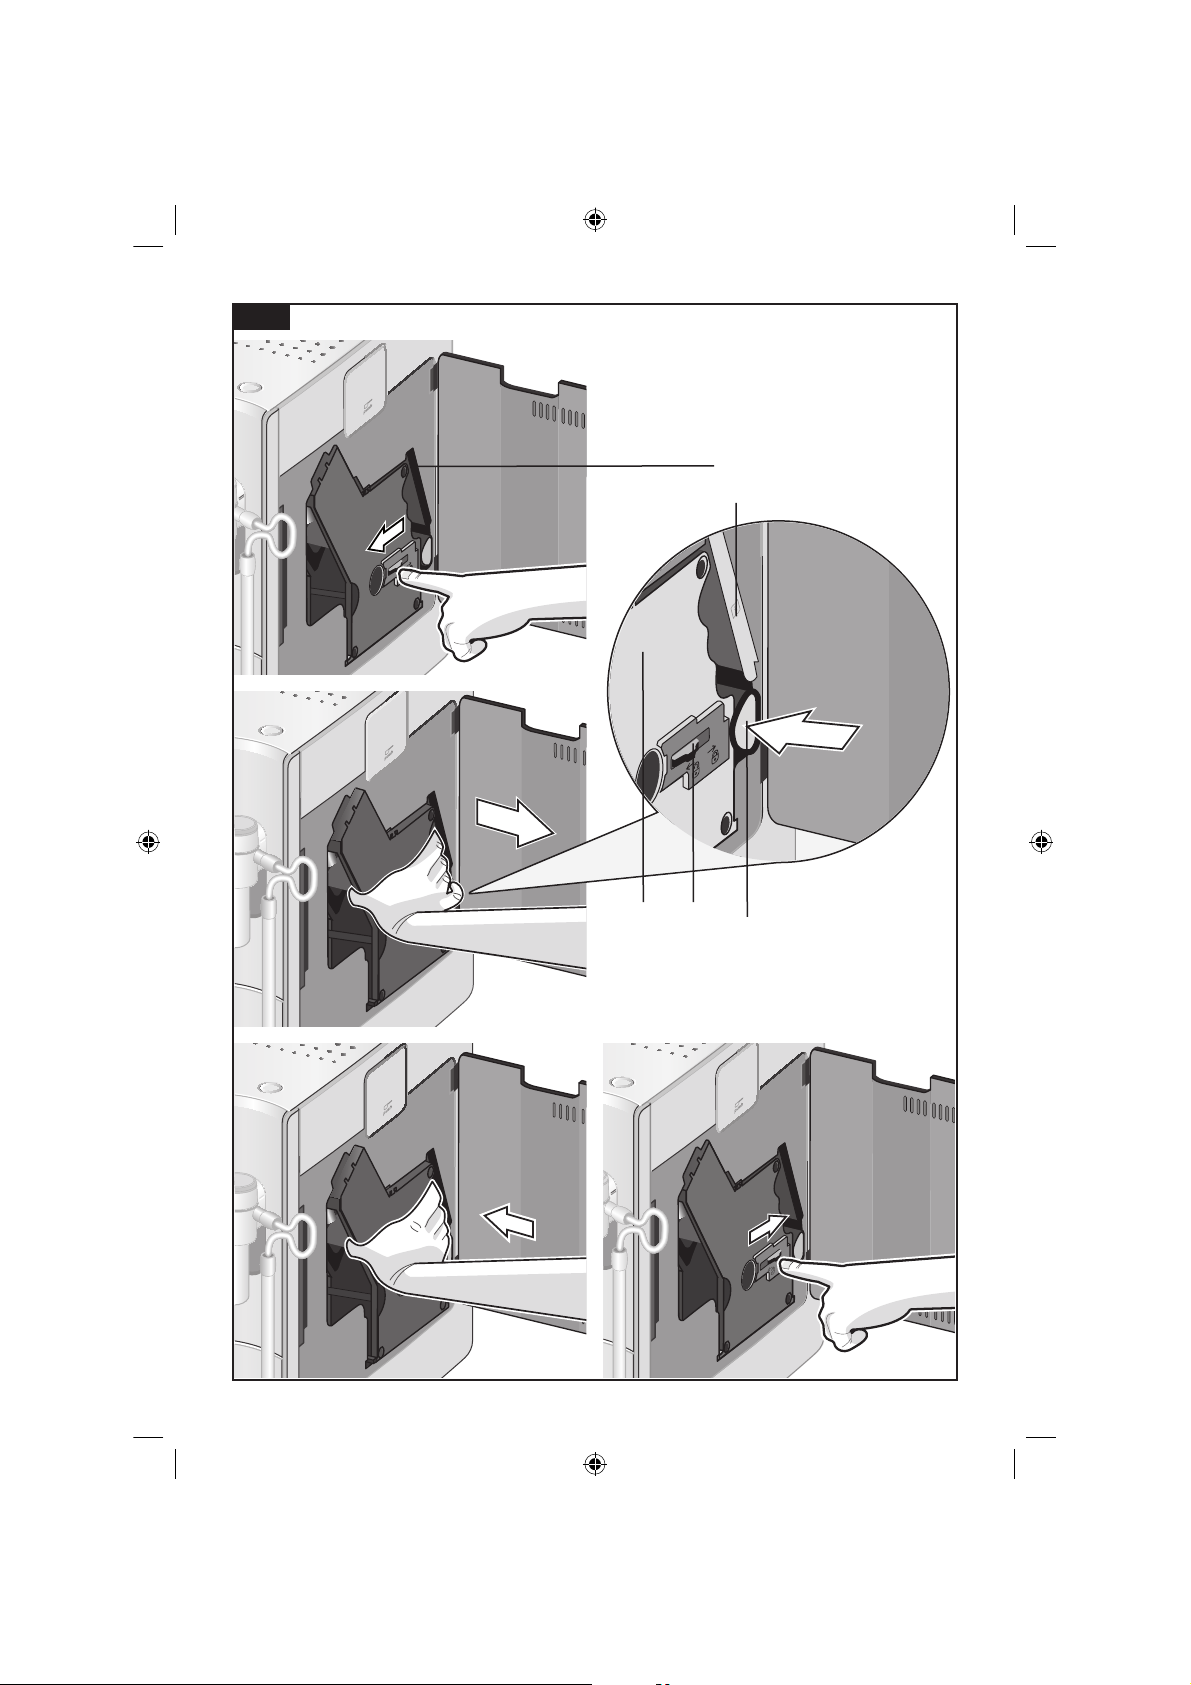
Brüheinheit 24 reinigen (siehe auch
Kurzanleitung)
Zusätzlich zum automatischen Reinigungsprogramm kann die Brüheinheit 24 zum
Reinigen entnommen werden.
Gerät mit Taste 2 a in den „Sparmodus“
schalten.
Mit dem Netzschalter 1 O / I komplett
ausschalten, keine Taste leuchtet.
●
●
●
●
●
●
●
●
●
●
SE_TK76_Teil_1_080917.indd 15 18.09.2008 08:40:40
Page 20

16
de
Den Türöffner 23 nach rechts schieben
und die Tür 22 zur Brüheinheit 24 öffnen.
Die rote Verriegelung 24b an der
Brüheinheit 24 ganz nach links schieben.
Die rote Drucktaste 24a drücken und die
Brüheinheit 24 an den Griffmulden (
Bild
E) fassen und vorsichtig herausnehmen.
Die Brüheinheit 24 unter fließendem
Wasser reinigen.
Wichtig: Ohne Spülmittel reinigen und nicht
in den Geschirrspüler geben.
Den Geräte-Innenraum mit einem
feuchten Tuch auswischen.
Brüheinheit 24 und Geräte-Innenraum
trocknen lassen.
Die Brüheinheit 24 bis zum Anschlag
einsetzen.
Die rote Verriegelung 24b ganz nach
rechts schieben und die Tür 22 schließen.
Aufbewahrung Zubehör
Der Espressovollautomat hat spezielle
Fächer um Zubehörteile und Kurzanleitung
am Gerät zu verstauen.
Um Pulverlöffel 14, Milchrohr 10d und
Schlauch 10c aufzubewahren, den
Wassertank 11 abnehmen und die Teile in
die vorgeformten Vertiefungen 13
einsetzen.
Die Kurzanleitung hat ein eigenes Fach im
Bereich der Brüheinheit 24.
Die Tür 22 zur Brüheinheit öffnen.
Den roten Verschluss 26 zum Aufbewahrungsfach 25 an der Lasche fassen und
abnehmen.
Die Kurzanleitung verstauen, Verschluss
26 aufstecken und Tür zur Brüheinheit 22
schließen.
Tipps zum Energiesparen
Der Espressovollautomat schaltet
automatisch nach einer Stunde
(Werkseinstellung) in den „Sparmodus“.
Im „Sparmodus“ verbraucht das Gerät
●
●
●
●
●
●
●
●
●
●
●
●
–
sehr wenig Strom. Die voreingestellte Zeit
von einer Stunde kann verändert werden
(siehe Kapitel „Menüeinstellungen
AUTO
O
FF IN“).
Wird der Espressovollautomat nicht
benutzt, das Gerät mit dem Netzschalter
1 O / I auf der Vorderseite des Geräts
ausschalten.
Kaffee- oder Milchschaumbezug nach
Möglichkeit nicht unterbrechen.
Vorzeitiger Abbruch führt zu erhöhtem
Energieverbrauch und zu einer
schnelleren Füllung der Tropfschale.
Das Gerät regelmäßig entkalken, um
Kalkablagerungen zu vermeiden.
Kalkrückstände führen zu einem höheren
Energieverbrauch.
Service-Programme
Tipp: Siehe auch Kurzanleitung im
Aufbewahrungsfach 25.
In gewissen Zeitabständen erscheint im
Display 5 entweder
SERVICE - ENTKALKEN oder
S
ERVICE - REINIGEN oder
SERVICE - CALC‘N‘CLEAN.
Das Gerät sollte unverzüglich mit dem
entsprechenden Programm gereinigt oder
entkalkt werden. Wahlweise können beide
Vorgänge durch die Funktion Calc‘n‘Clean
zusammengefasst werden (siehe Kapitel
„Calc‘n‘Clean“). Erfolgt das ServiceProgramm nicht nach Anweisung, kann das
Gerät beschädigt werden.
Achtung
Bei jedem Service-Programm Entkalkungsund Reinigungsmittel nach Anleitung
benutzen.
Das Service-Programm keinesfalls
unterbrechen!
Flüssigkeiten nicht trinken!
Niemals Essig, Mittel auf Essigbasis,
Zitronensäure oder Mittel auf
Zitronensäurebasis verwenden!
Keinesfalls Entkalkungstabletten oder
andere Entkalkungsmittel in die
–
–
–
SE_TK76_Teil_1_080917.indd 16 18.09.2008 08:40:40
Page 21

17
de
Pulverschublade 21 einfüllen!
Zum Entkalken und Reinigen ausschließlich
die beiliegenden Tabletten verwenden. Sie
wurden speziell für diesen Espressovollautomaten entwickelt.
Speziell entwickelte und geeignete
Entkalkungs- und Reinigungstabletten
sind über den Handel, sowie den
Kundendienst erhältlich.
Bestellnummer Handel Kundendienst
Reinigungs-
tabletten
TZ60001 310575
Entkalkungs-
tabletten
TZ60002 310967
Wichtig: Ist ein Wasserfilter 35 in den
Wassertank 11 eingesetzt, diesen
unbedingt vor dem Start des ServiceProgramms entfernen.
Entkalken
ESPRESSO Ë Í
S
ERVICE - ENTKALKEN
Ò
i - TASTE 3 SEK.
Während der einzelnen Entkalkungsschritte
blinkt die Taste 8
start
.
Die Zahlen rechts oben zeigen an, wie weit
der Ablauf fortgeschritten ist.
Taste 7 j mindestens 3 Sekunden
gedrückt halten.
ENTKALKEN ÒSTART
Taste 8
start
drücken, das Display 5 führt
durch das Programm.
TROPFSCHALE LEEREN
T
ROPFSCHALE EINSETZEN
Tropfschalen 28/30 leeren und wieder
einsetzen.
●
●
●
0,5 L BEHÄLTER UNTER
M
ILCHSCHÄUMER STELLEN
Ò
START
Einen Behälter mit 0,5l Fassungsvermögen unter den Milchschäumer 10 stellen.
Taste 8
start
drücken.
Info: Ist der Wasserfilter 35 aktiviert,
erscheint die entsprechende Aufforderung
den Filter 35 zu entfernen und erneut die
Taste 8
start
zu drücken.
WASSERFILTER ENTFERNEN ÒSTART
0,5 L WASSER + ENTK ALKER EINFÜLLEN
Ò
START
Lauwarmes Wasser in den leeren
Wassertank 11 bis zur Markierung „0,5l“
einfüllen und 2 Siemens
Entkalkungstabletten darin auflösen.
Taste 8
start
drücken, das
Entkalkungsprogramm läuft jetzt ca. 20
Minuten.
ENTKALKUNKSPROGRAMM LÄUFT
ZU WENIG ENTK ALKER
E
NTK ALKER NACHFÜLLEN
Info: Ist zu wenig Entkalkunglösung im
Wassertank 11, erscheint die
entsprechende Aufforderung.
Entkalkungslösung nachfüllen und erneut
Taste 8
start
drücken.
WASSERTANK SPÜLEN UND FÜLLEN
Ò
START
Den Wassertank 11 spülen und frisches
Wasser bis zur Markierung „max“
einfüllen.
Die Taste 8
start
drücken, das
Entkalkungsprogramm läuft jetzt ca. 1
Minute und spült das Gerät.
ENTKALKUNKSPROGRAMM LÄUFT
T
ROPFSCHALE LEEREN
TROPFSCHALE EINSE TZEN
Die Tropfschalen 28/30 leeren und wieder
einsetzen.
Das Gerät ist fertig entkalkt und wieder
betriebsbereit.
●
●
●
●
●
●
●
SE_TK76_Teil_1_080917.indd 17 18.09.2008 08:40:40
Page 22

18
de
Reinigen
ESPRESSO Ë Í
S
ERVICE - REINIGEN
Ò
i - TASTE 3 SEK.
Während der einzelnen Reinigungsschritte
blinkt die Taste 8
start
. Die Zahlen rechts
oben zeigen an, wie weit der Ablauf
fortgeschritten ist.
Wassertank 11 bis „max“ füllen.
Taste 7 j mindestens 3 Sekunden
gedrückt halten.
REINIGEN ÒSTART
Taste 8
start
drücken, das Display 5 führt
durch das Programm.
TROPFSCHALE LEEREN
T
ROPFSCHALE EINSETZEN
Tropfschalen 28/30 leeren und wieder
einsetzen, das Gerät spült zweimal.
KAFFEEAUSL AUF SCHWENKEN
Den Kaffeeauslauf 9 nach links
schwenken bis er hörbar einrastet.
REINIGUNGSPROGRAMM LÄUFT
PULVERSCHUBLADE ÖFFNEN
Die Pulverschublade 21 durch drücken
öffnen.
SIEMENS REINIGUNGSTABLETTE
EINWERFEN UND SCHUBLADE SCHLIESSEN
Eine Siemens Reinigungstablette einwerfen und die Schublade 21 schließen.
START DRÜCKEN
Taste 8
start
drücken, das Reinigungs-
programm läuft jetzt ca. 7 Minuten.
REINIGUNGSPROGRAMM LÄUFT
T
ROPFSCHALE LEEREN
T
ROPFSCHALE EINSETZEN
●
●
●
●
●
●
●
●
Die Tropfschalen 28/30 leeren und wieder
einsetzen.
Das Gerät ist fertig gereinigt und wieder
betriebsbereit.
Calc‘n‘Clean
Calc‘n‘Clean kombiniert die Einzelfunktionen Entkalken und Reinigen.
Liegt die Fälligkeit der beiden Programme
nah beieinander, schlägt der Espressovollautomat automatisch dieses
Serviceprogramm vor.
ESPRESSO Ë Í
S
ERVICE - CALC‘N‘CLEAN
Ò
i - TASTE 3 SEK.
Während der einzelnen Calc‘n‘Clean
Schritte blinkt die Taste 8
start
. Die Zahlen
rechts oben zeigen an, wie weit der Ablauf
fortgeschritten ist.
Taste 7 j mindestens 3 Sekunden
gedrückt halten.
CALC‘N‘CLEAN ÒSTART
Taste 8
start
drücken, das Display 5 führt
durch das Programm.
TROPFSCHALE LEEREN
T
ROPFSCHALE EINSETZEN
Tropfschalen 28/30 leeren und wieder
einsetzen.
Den Kaffeeauslauf 9 nach rechts
schwenken bis er hörbar einrastet.
Einen Behälter mit mind. 1 l Fassungsvermögen unter den Milchschäumer 10 stellen.
Taste 8
start
drücken, das Gerät spült
zweimal.
REINIGUNGSPROGRAMM LÄUFT
P
ULVERSCHUBLADE ÖFFNEN
Die Pulverschublade 21 durch drücken
öffnen.
●
●
●
●
●
●
●
●
SE_TK76_Teil_1_080917.indd 18 18.09.2008 08:40:40
Page 23

19
de
SIEMENS REINIGUNGSTABLETTE
EINWERFEN UND SCHUBLADE SCHLIESSEN
Eine Siemens Reinigungstablette in die
Schublade 21 einwerfen und schließen.
Info: Ist der Wasserfilter 35 aktiviert,
erscheint die entsprechende Aufforderung,
den Filter 35 zu entfernen und erneut die
Taste 8
start
zu drücken.
WASSERFILTER ENTFERNEN ÒSTART
0,5 L WASSER + ENTK ALKER EINFÜLLEN
Ò
START
Lauwarmes Wasser in den leeren
Wassertank 11 bis zur Markierung „0,5l“
einfüllen und 2 Siemens
Entkalkungstabletten darin auflösen.
Taste 8
start
drücken, das Entkalkungs-
programm läuft jetzt ca. 20 Minuten.
ENTKALKUNKSPROGRAMM LÄUFT
ZU WENIG ENTK ALKER
E
NTK ALKER NACHFÜLLEN
Info: Ist zu wenig Entkalkungslösung im
Wassertank 11, erscheint die entsprechen-
de Aufforderung. Entkalkungslösung nachfüllen und erneut Taste 8
start
drücken.
WASSERTANK SPÜLEN UND FÜLLEN
Ò
START
Den Wassertank 11 spülen und frisches
Wasser bis zur Markierung „max“
einfüllen.
Die Taste 8
start
drücken, das Entkalkungsprogramm läuft jetzt noch ca. 1
Minute und anschließend das Reinigungsprogramm ca. 7 Minuten und spült das
Gerät.
ENTKALKUNKSPROGRAMM LÄUFT
REINIGUNGSPROGRAMM LÄUFT
TROPFSCHALE LEEREN
T
ROPFSCHALE EINSETZEN
Die Tropfschalen 28/30 leeren und wieder
einsetzen.
Das Gerät ist fertig gereinigt sowie entkalkt
wieder betriebsbereit.
●
●
●
●
●
●
Wichtig: Wurde eines der ServiceProgramme z.B. durch Stromausfall
unterbrochen, wie folgt vorgehen:
Den Wassertank 11 spülen und frisches
Wasser bis zur Markierung „max“
einfüllen.
Die Taste 8
start
drücken, das Reinigungsprogramm läuft jetzt ca. 3 Minuten und
spült das Gerät.
REINIGUNGSPROGRAMM LÄUFT
TROPFSCHALE LEEREN
T
ROPFSCHALE EINSETZEN
Die Tropfschalen 28/30 leeren und wieder
einsetzen.
Das Gerät ist wieder betriebsbereit.
Frostschutz
r
!
Um Schäden durch Frosteinwirkung
bei Transport und Lagerung zu
vermeiden, muss das Gerät vorher
vollständig entleert werden.
Info: Das Gerät muss betriebsbereit und
der Wassertank 11 gefüllt sein.
Ein großes, schmales Gefäß unter den
Milchschäumer 10 stellen.
Die Einstellung „Milchschaum“
È
auswählen, starten und ca. 15 Sekunden
dampfen lassen.
Mit dem Netzschalter 1 O / I das Gerät
ausschalten.
Den Wassertank 11 und die Tropfschalen
28/30 entleeren.
Zubehör
Folgendes Zubehör ist über den Handel
und Kundendienst erhältlich.
Bestellnummer Handel Kundendienst
Reinigungs-
tabletten
TZ60001 310575
Entkalkungs-
tabletten
TZ60002 310967
Wasserfilter TZ70003 467873
●
●
●
●
●
●
●
SE_TK76_Teil_1_080917.indd 19 18.09.2008 08:40:40
Page 24
20
de
Einfache Probleme selbst beheben
Problem Ursache Abhilfe
Displayanzeige
BOHNENBEHÄLTER FÜLLEN
trotz gefülltem Bohnbehälter
15 oder
Mahlwerk mahlt keine
Kaffeebohnen.
Bohnen fallen nicht ins Mahlwerk (zu ölige Bohnen).
Leicht an den Bohnenbehälter 15 klopfen.
Eventuell Kaffeesorte wechseln.
Bei geleertem Bohnenbehälter 15 diesen mit einem
trocken Tuch auswischen.
Kein Heißwasserbezug
möglich.
Der Milchschäumer 10 oder
die Aufnahme des Milchschäumers 10 ist
verschmutzt.
Den Milchschäumer 10 oder
die Aufnahme des
Milchschäumers 10
reinigen.
Zu wenig oder kein
Milchschaum
oder
der Milchschäumer 10 saugt
keine Milch an.
Der Milchschäumer 10 oder
die Aufnahme des Milchschäumers 10 ist
verschmutzt.
Den Milchschäumer 10
oder Aufnahme des Milchschäumers 10 reinigen.
Ungeeignete Milch. Milch mit 1,5 % Fettgehalt
verwenden.
Der Milchschäumer
10 ist
nicht richtig
zusammengesetzt.
Milchschäumer 10 richtig
zusammenbauen.
Kaffee läuft nur
tropfenweise.
Der Mahlgrad ist zu fein.
Der Pulverkaffee ist zu fein.
Den Mahlgrad gröber
stellen. Gröberes
Kaffeepulver verwenden.
Das Gerät ist stark verkalkt. Das Gerät entkalken.
Kaffee hat keine „Crema“. Ungeeignete Kaffeesorte. Kaffeesorte wechseln.
Die Bohnen sind nicht mehr
röstfrisch.
Frische Bohnen verwenden.
Der Mahlgrad ist nicht auf
die Kaffeebohnen
abgestimmt.
Mahlgrad auf fein einstellen.
Der Kaffee ist zu „sauer
“. Der Mahlgrad ist zu grob
eingestellt oder das
Kaffeepulver ist zu grob.
Mahlgrad feiner stellen oder
feineres Kaffeepulver
verwenden.
Ungeeignete Kaffeesorte. Dunklere Röstung
verwenden.
Können Störungen nicht behoben werden, unbedingt die Hotline anrufen!
Telefon Nr. 018 05 54 74 36
SE_TK76_Teil_1_080917.indd 20 18.09.2008 08:40:41
Page 25

21
de
Problem Ursache Abhilfe
Der Kaffee ist zu „bitter
“. Der Mahlgrad ist zu fein
eingestellt oder das
Kaffeepulver ist zu fein.
Mahlgrad gröber stellen
oder gröberes Kaffeepulver
verwenden.
Ungeeignete Kaffeesorte. Kaffeesorte wechseln.
Displayanzeige
STÖRUNG
B
ITTE HOTLINE ANRUFEN.
Im Gerät ist ein Fehler. Bitte die Hotline anrufen.
Der Wasserfilter 35 hält
nicht im Wassertank
11.
Der Wasserfilter 35 ist nicht
eingerastet.
Wasserfilter 35 fest in den
Tankanschluss drücken bis
er fühlbar einrastet.
Der Kaffeetrester ist nicht
fest und zu trocken (bröselt).
Der Mahlgrad ist zu fein
eingestellt oder das
Kaffeepulver zu wenig.
Mahlgrad gröber stellen
oder 2 Löffel Kaffepulver
verwenden.
Der Kaffeetrester ist nicht
fest und zu naß.
Der Mahlgrad ist zu grob
eingestellt oder zuviel
Kaffeepulver vorhanden.
Mahlgrad feiner einstellen
oder nur 1 Löffel
Kaffeepulver verwenden.
Können Störungen nicht behoben werden, unbedingt die Hotline anrufen!
Telefon Nr. 018 05 54 74 36
Entsorgung A
Dieses Gerät ist entsprechend der
europäischen Richtlinie 2002/96/EG über
Elektro- und Elektronik-Altgeräte (waste
electrical and electronic equipment –
WEEE) gekennzeichnet. Die Richtlinie gibt
den Rahmen für eine EU-weit gültige
Rücknahme und Verwertung der Altgeräte
vor.
Über aktuelle Entsorgungswege bitte beim
Fachhändler informieren.
Garantiebedingungen
Für dieses Gerät gelten die von unserer
jeweils zuständigen Landesvertretung
herausgegebenen Garantiebedingungen, in
dem das Gerät gekauft wurde. Sie können
die Garantiebedingungen jederzeit über
Ihren Fachhändler, bei dem Sie das Gerät
gekauft haben oder direkt bei unserer
Landesvertretung anfordern. Die Garantiebedingungen für Deutschland und die
Adressen finden Sie auf den letzten vier
Seiten dieses Heftes.
Darüber hinaus sind die Garantiebedingungen auch im Internet unter der
benannten Webadresse hinterlegt. Für die
Inanspruchnahme von Garantieleistungen
ist in jedem Fall die Vorlage des Kaufbeleges erforderlich.
Änderungen vorbehalten.
Einfache Probleme selbst beheben
SE_TK76_Teil_1_080917.indd 21 18.09.2008 08:40:41
Page 26

22
deen
Safety instructions
Please read the operating instructions
carefully and keep them for future
reference.
This automatic espresso machine is
designed for domestic use and not
commercial use.
r
! Risk of electric shock
Connect and operate the appliance only in
accordance with the specifications on the
rating label.
Do not use if either the power cord or the
appliance is damaged.
Use indoors at room temperature only.
This appliance is not intended for use by
persons (including children) with reduced
physical, sensory or mental capabilities, or
lack of experience and knowledge, unless
they have been given supervision or
instruction concerning use of the appliance
by a person responsible for their safety.
Keep children away from the appliance.
Children should be supervised to ensure
that they do not play with the appliance.
In the event of malfunction, unplug the
appliance immediately.
To avoid potential hazards, repairs such as
replacing a damaged cord should only be
performed by our service personnel.
Never immerse the appliance or power cord
in water.
Do not reach into the grinding unit.
r
!
Risk of scalding
The milk frother for milk and hot water gets
very hot. After use, allow to cool down first
before touching.
Table of Contents
Overview...................................................23
Before using for the first time....................24
Controls ....................................................25
− Power on/off switch O / I .......................25
− a button ................................................25
− Rotary knob ...........................................25
− Selection buttons < and > ..................25
− Display ..................................................26
−
start
button ............................................28
− °C button ...............................................28
− j button and settings .............................29
− Adjusting the grinding unit .....................29
− Cup warming .........................................29
Menu settings ...........................................30
− Language ..............................................30
− Water hardness .....................................30
− Descale .................................................30
− Clean .....................................................30
− Calc‘n‘Clean ..........................................30
− Show clock ............................................31
− Time mode ............................................31
− Set clock................................................31
− Cup warmer on (TK76F09 only) ............31
− Cup warmer off ......................................31
− Auto off after ..........................................31
− Water filter .............................................31
− Contrast.................................................32
− Factory settings .....................................32
Preparation using coffee beans ................32
Preparation using ground coffee .............33
Preparing milk froth and hot milk ..............34
Dispensing hot water ................................35
Maintenance and daily cleaning ...............35
− Cleaning the milk system ......................35
− Cleaning the brewing unit .....................36
Storing accessories ..................................36
Tips on energy saving ..............................36
Service Programmes ...............................37
− Descaling ..............................................37
− Cleaning ................................................38
− Calc‘n‘Clean ..........................................39
Frost protection.........................................40
Disposal ....................................................40
Accessories ..............................................40
Guarantee.................................................40
Simple troubleshooting .............................41
SE_TK76_Teil_1_080917.indd 22 18.09.2008 08:40:41
Page 27

23
deen
Dear Coffee Connoisseur,
Congratulations on purchasing this fully
automatic espresso machine from Siemens.
These instructions describe various models
with different features.
Please also note the enclosed quick
reference guide. It can be kept in the
special storage compartment 25 until it is
needed.
Overview
Figures A, B, C, D and E
1 Power on/off switch O / I
2 a button
3 °C button (temperature / child-proof lock)
4 Selection buttons < >
5 Display
a) Status line
b) Selection line
c) Navigation line
6 Rotary knob for display settings
7 Info menu button j
8
start
button (drinks / programmes)
9 Coffee outlet, height-adjustable and
swivelling
10 Milk frother, height-adjustable
(milk / hot water)
a) Upper part
b) Lower part
c) Tube
d) Milk pipe
11 Removable water tank
12 Lid for water tank
13 Storage compartments
(measuring spoon and milk frother
accessories)
14 Measuring spoon
(insertion aid for water filter)
15 Bean container
16 Aroma cover
17 Selector for grind setting
18 Illuminated ring
19 Cup warming
20 Button for cup warming function,
illuminated
21 Drawer
(ground coffee / cleaning tablet)
22 Door to brewing unit
23 Door opener
24 Brewing unit
a) Sliding button
b) Lock
25 Storage compartment for quick
reference guide
26 Cover of storage compartment
27 Drip tray panel
28 Drip tray for coffee outlet
29 Grate for coffee outlet
30 Drip tray for milk frother
31 Grate for milk frother
32 Coffee grounds container
33 Cable storage compartment
34 Milk container (insulated)
35 Water filter
SE_TK76_Teil_1_080917.indd 23 18.09.2008 08:40:41
Page 28
24
deen
Before using
for the first time
General
Fill the water tank with fresh, uncarbonated
water only, and preferably use only beans
for fully automatic coffee and espresso
machines. Do not use coffee beans that
have been glazed, caramelised or treated
with other additives containing sugar, since
they will block the brewing unit.
The water hardness setting can be adjusted
on this appliance. The factory default setting
for the water hardness is 4. Check the
water hardness with the enclosed test strip.
If a value other than water hardness 4 is
displayed, change the setting on the
appliance accordingly after switching on
(see “Menu settings WATER HARDNESS”).
Switching on the appliance
Place the fully automatic espresso
machine on a flat surface that can take its
weight.
Note: The appliance has four runners under
its base and can be moved sideways in an
arc to make operation and positioning
easier.
Pull the power cord out of the storage
compartment 33 and plug in. Adjust the
length of the cable by pushing it back in
or pulling it out. The easiest way to do
this is to place the appliance so that its
back is flush with the edge of the counter
and either pull the cable downward or
push it upward.
Lift the lid of the water tank 12.
Remove and rinse the water tank 11 and
fill it with fresh cold water.
Do not fill above the “max” mark.
Replace the water tank 11 and push it
firmly downward into place.
Close the lid of the water tank 12 again.
Fill the bean container 15 with coffee
beans.
●
●
●
●
●
●
●
Press the power switch 1 O / I
. The
start
button 8 lights up and the different
languages appear in the display 5.
Use the buttons < and > 4 to select the
language in which you want the display
texts to appear.
LANG UAGE
DEUTS CH
Ò
START
ENGLISH
PYCCK ИЙ
The selected language is highlighted by a
frame. The following languages can be
selected:
DEUTSCH
E
NGLISH
P
YCCKИЙ
N
EDERL ANDS
F
RANÇAIS
I
TALIANO
S
VENSKA
E
SPAÑOL
P
OLSKI
● Press the
start
button 8. The language
you selected is saved and the a button 2
lights up.
●
●
SE_TK76_Teil_1_080917.indd 24 18.09.2008 08:40:41
Page 29
25
deen
● Press the a button 2. The brand logo
lights up in the display 5. The appliance
now heats up and rinses. Some water will
run out of the coffee outlet 9. The
appliance is ready for use when the
symbols for selecting the type of coffee
preparation appear in the display 5.
ESPRESSO Ë Í
 à À Á Ä Å
Note: The factory settings of the fully
automatic espresso machine are
programmed for optimal performance. The
appliance switches to “energy saving mode”
automatically after 1 hour (see “Menu
settings AUTO OFF AFTER”).
Tip: If the appliance is being used for the
first time or has not been operated for a
long period, the first cup of coffee will not
have the full aroma.
When using the espresso machine for the
first time, you will achieve a suitably thick
and stable “crema” only after the first few
cups have been dispensed.
Controls
Power on/off switch O / I
The power switch 1 O / I is used to switch
the appliance to “energy saving mode” or to
switch it off completely. In “energy saving
mode” only the a button 2 lights up.
Important: Do not switch the appliance off
at the power on/off switch 1 until it is in
energy saving mode, so that the automatic
rinse process can take place.
a button
The appliance is switched on (ready for
use) or put into “energy saving mode” with
the a button 2.
The a button 2 flashes while the appliance
is rinsing.
The appliance does not rinse if:
it is still warm when switched on
no coffee was dispensed before it was
switched to “energy saving mode”.
The appliance is ready for use when the
symbols for drink selection and the
start
button 8 light up on the display 5.
Rotary knob
Turn the knob 6 to the left or right to
navigate through the display 5, or to adjust
parameters in the menu.
Selection buttons < and >
Press the selection buttons < and > 4 to
navigate up and down through the menu
levels (navigation line 5c).
●
●
SE_TK76_Teil_1_080917.indd 25 18.09.2008 08:40:42
Page 30
26
deen
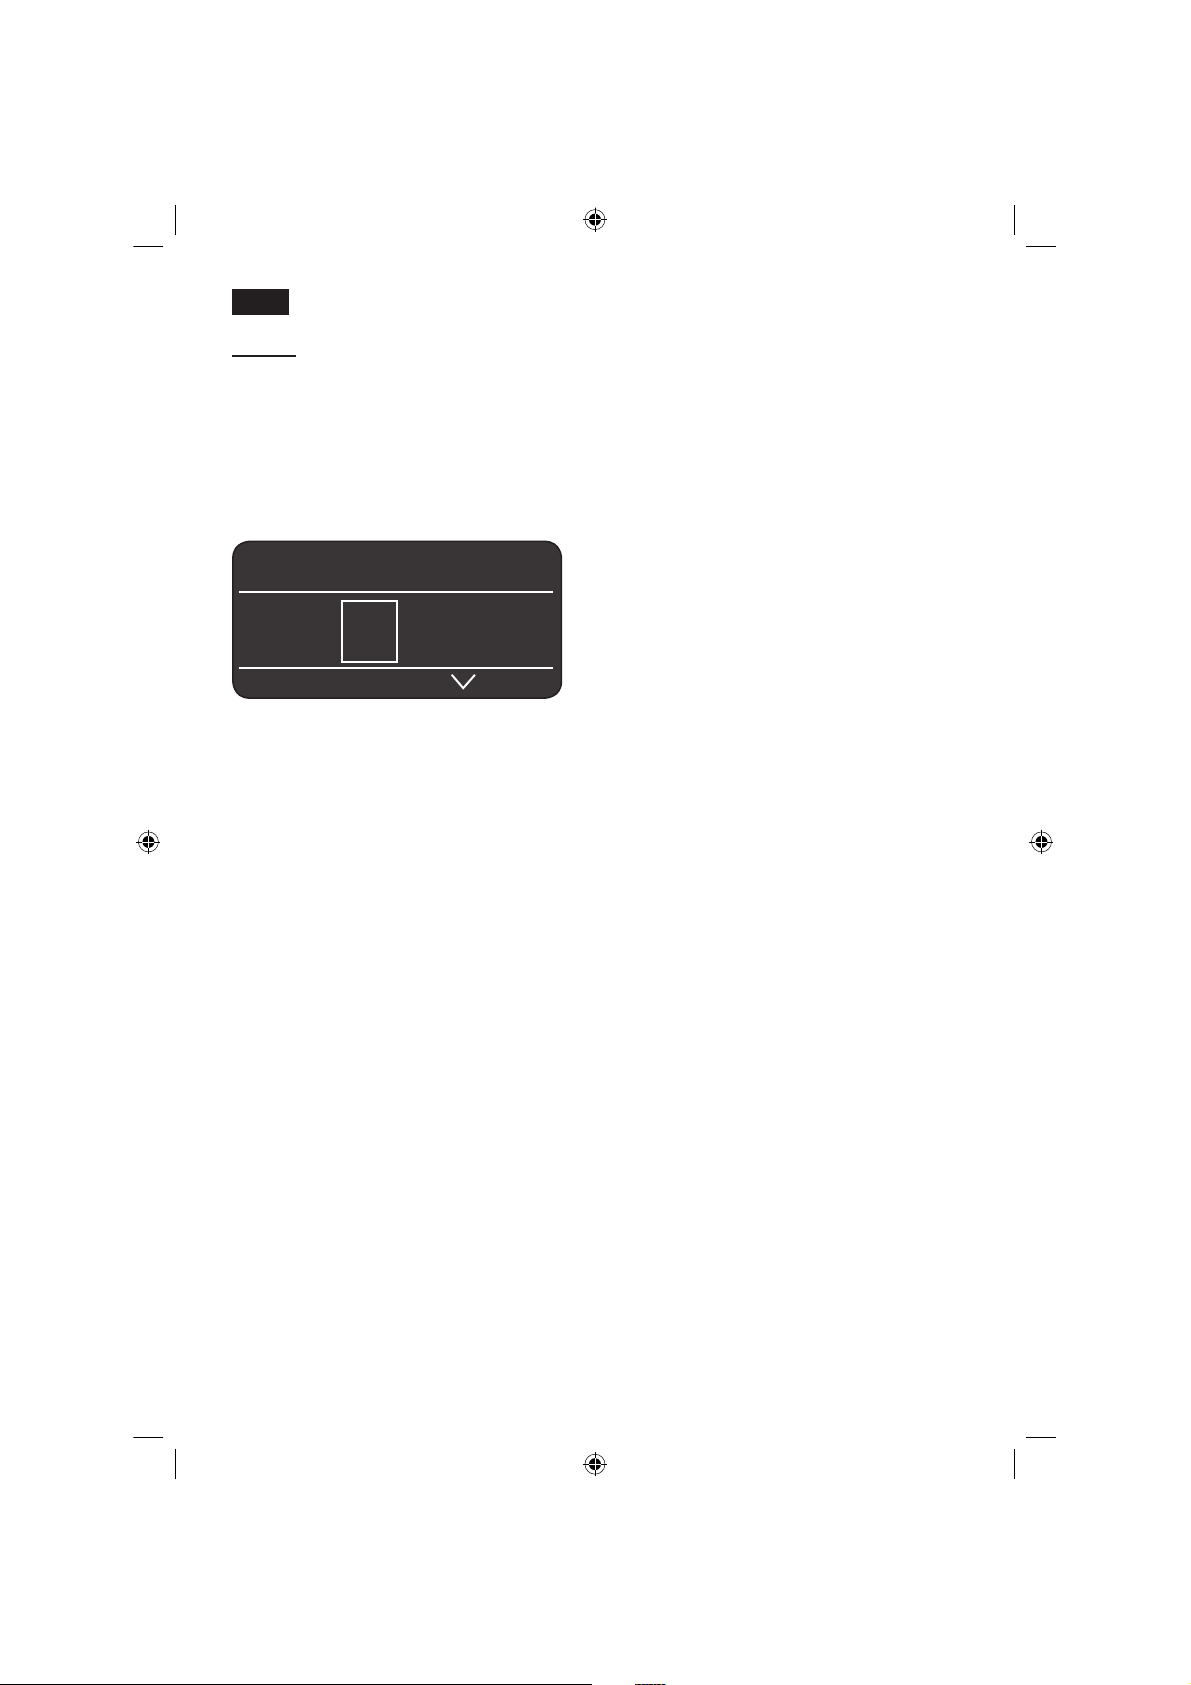
Display
The display 5 uses symbols to indicate the
selection options, coffee strength and percup quantity, and uses texts to indicate
settings, ongoing processes and messages.
The rotary knob 6 and selection buttons 4
can be used to change settings. The
selected setting is highlighted by a frame.
ESPRESSO Ë Í
 à À Á Ä Å
The status line 5a in the display shows the
name of the type of drink, along with the
strength setting, e.g. 55 and per-cup
quantity, e.g. Î. The selection line 5b
shows symbols for drink selection.
The arrows in the navigation line 5c indicate
the direction in which more menu levels can
be found.
Display messages
Various messages are shown on the
display 5.
Information:
WATER TANK ALMOST EMPTY
BEAN CONTAINER ALMOST EMPTY
PLEASE WAIT
Prompts:
REFILL WATER TANK
REPLACE WATER TANK
CHECK WATER TANK
REPLACE DRIP TRAY
EMPTY DRIP TRAY
REFILL BEAN CONTAINER
POSITION SWIVEL ARM
SET UP MILK FROTHER
REPLACE BREWING UNIT
C
LOSE DOOR
PLEASE CHECK BREWING UNIT
FILL DRAWER WITH POWDER
CLOSE DRAWER
SERVICE - CHANGE FILTER
SERVICE - DESCALE
SERVICE - CLEAN
SERVICE - CALC‘N‘CLEAN
INSUFFICIENT TEMPERATURE
PLEASE WAIT
HIGH OR LOW VOLTAGE
5a
b
c
SE_TK76_Teil_1_080917.indd 26 18.09.2008 08:40:42
Page 31

27
deen
ESPRESSO ËË Í
Á Ä Å Æ Ç È
MY COFFEE Ë Í
5 55 555
MY COFFEE Ë Í
Î Ð Ò
MY COFFEE Ë Í
ESPRESSO MILK
40%
Selection options
Â
2 X ESPRES SO
Ã
2 X COFFE E
À
ESP RES SO Á COF FEE
Ä WHIT E C OFFEE
Å
MACC HIATO
Æ
CAP PUCCI NO
Ç
MY CO FFEE
È
MILK FR OTH
É
HOT MILK
Ê
HO T WATE R
Ì
S
HOR T RINSE F OR
MIL K SYST EM
Coffee strength
(only for coffee drinks)
5 5 5 5 5 5
mild regular strong
Per- cup quantity
(only for coffee drinks)
Î Ð Ò
small medium large
In addition to selecting the coffee
strength and per-cup quantity you
can choose the exact mix of
espresso and milk for your own
coffee setting MY COFFEE Ç. The
setting can be defined in 20% steps
by turning the rotary knob 6.
SE_TK76_Teil_1_080917.indd 27 18.09.2008 08:40:45
Page 32

28
deen
Start button
Press the
start
button 8 to begin drink
preparation or to start a service programme.
Press the
start
button 8 again during drink
preparation to cut the dispensing process
short.
°C button
Use the °C button 3 to set the temperature
for coffee and tea water (press briefly) and
to switch the child-proof lock on or off
(hold down for at least 3 seconds).
Setting the temperature:
Press the °C button 3 briefly and enter the
settings with the < and > buttons 4 and
the rotary knob 6.
TEMPERATURE
COFFEE
HOT WATER
NORMAL
TEMPERATURE
COFFEE
HOT WATER
<90°C
Press the C° button 3 again to save the
settings and return to drink selection.
These settings are automatically effective
for all types of coffee preparation.
Child-proof lock
The appliance can be locked to protect
children from scalding and burning.
● Hold down the °C button 3 for at least 3
seconds. The display 5 shows a key: the
child-proof lock is activated.
It is no longer possible to operate the
appliance and the cup warmer 19 is
switched off.
ESPRESSO Ë Í
● To deactivate the child-proof lock, hold
down the °C button 3 for at least 5
seconds. The key disappears from the
display 5.
SE_TK76_Teil_1_080917.indd 28 18.09.2008 08:40:46
Page 33

29
deen
j button and settings
Use the j button 7 to display information
(press briefly) and adjust settings (hold
down for at least 3 seconds).
Displaying information
The following information can be displayed
in the Info menu:
how many drinks have been dispensed
since the espresso machine was switched
on
when should the next service be
completed.
● Press the j button 7 briefly and navigate
with the < and > buttons 4.
INFO
DESCALE AFTER XXX CUPS
CLEAN AF TER X X X CUPS
NO FILTER
CHANGE FILTER IN XXX CUPS *
INFO
NO. OF COFFEES XX
NO. OF MILK MIXES XX
AMOUNT H OT WATER XL
*appears only if the filter is activated.
Press the j button 7 again briefly to return
to drink selection. If no button is pressed for
about 10 seconds the appliance
automatically switches back to drink
selection mode.
Adjusting settings
(see “Menu settings”).
–
–
Adjusting the grinding unit
The rotary selector 17 adjusts the grind
settings from coarse to fine.
Warning
Adjust the grinding unit only while it is
running! Otherwise the appliance may be
damaged.
● While the grinding unit is running, adjust
the rotary selector 17 from fine • • • to
coarse ● ● ● as required.
Note: The new setting will not become
apparent until after the second cup of
coffee.
Tip: For dark roast coffee beans, choose a
finer grind, for lighter beans a coarser grind.
Cup warming
r
!
Warning: The cup warmer 19
becomes very hot.
The fully automatic espresso machine has a
cup warmer 19 that can be switched on or
off manually with button 20. When the cup
warmer 19 is on, button 20 lights up.
Tip: For optimal cup warming, place the
base of the cups on the cup warmer 19.
TK76F09 only
The cup warming function can also be preprogrammed (see “Menu settings CUP
WARMER ON”).
SE_TK76_Teil_1_080917.indd 29 18.09.2008 08:40:47
Page 34

30
deen
Menu settings
● Hold the j button down for at least 3
seconds.
The different setting options are now
displayed
SET TINGS
LANGUAGE ENGLISH
WATER HARDNESS
DESCALE
In the following operating instructions, each
new setting begins with
j 3 sec. + >
followed by an exact description.
The different setting options can be
selected with the < and > buttons 4.
SET TINGS
WATER HARDNES S
DESCA LE
Ò
START
CLEA N
N.B.: The changes you have made are
saved automatically.
It is not necessary to confirm them
additionally.
j 3 sec. + >
LANGUAGE
● Turn the knob 6 to select the required
language
j 3 sec. + >
WATER HARDNESS
● Turn the knob 6 to select the required
water hardness 1,2,3 or 4.
Note: It is important to set the water
hardness correctly, so that the appliance
indicates accurately when the descaling
programme should be run. The factory
setting for the water hardness is 4.
You can check the water hardness using
the enclosed test strip or by asking your
local water supplier.
● Dip the test strip in the water briefly and
check the result after 1 minute.
Level Water hardness
German (°dH) French (°fH)
1
2
3
4
1-7
8-14
15-21
22-30
1-13
14-25
26-38
39-54
j 3 sec. + >
DESCALE
● If you want to descale the appliance,
press the
start
button 8 and run the
descaling programme (see “Descaling”).
j 3 sec. + >
CLEAN
● If you want to clean the appliance, press
the
start
button 8 and run the cleaning
programme (see “Cleaning”).
j 3 sec. + >
CALC‘N‘CLEAN
● If you want to descale and clean the
appliance, press the
start
button 8 and
run the Calc‘n‘Clean programme (see
“Calc‘n‘Clean”).
SE_TK76_Teil_1_080917.indd 30 18.09.2008 08:40:47
Page 35

31
deen
j 3 sec. + >
SHOW CLOCK
With this function you can set the clock to
show the time in the display 5 during energy
saving mode.
● Turn the knob 6 to switch the clock
display on = YES or off = NO.
Note: You must already have set the time
as shown in SET CLOCK.
j 3 sec. + >
TIME MODE
In time mode you can turn the knob 6 to
set the time format to 12H or 24H.
j 3 sec. + >
SET CLOCK
● Turn the knob 6 to set the current time,
e.g. 08:25. The fi gure that can be set is
always backlit; the backlighting switches
automatically between the hours and
minutes.
TK76F09 only
(programmable cup warmer)
j 3 sec. + >
CUP WARMER ON
With this additional function the cup warmer
19 switches on automatically at a
programmable time, irrespective of whether
the appliance is in “energy saving mode” or
is ready for use.
Note: You must already have set the time
under SET CLOCK
Set the required time by turning the knob
6. If OFF is selected, the function is
deactivated.
TK76F09 only
(programmable cup warmer)
j 3 sec. + >
CUP WARMER OFF
Here you can set the time span after which
the cup warmer 19 switches off again
automatically.
Note: The switch-on time must be set under
CUP WARMER ON
Set the required time by turning the knob
6.
●
●
●
j 3 sec. + >
AUTO OFF AFTER
Turn the knob 6 to enter the time span
after which the appliance should
automatically switch to “energy saving
mode” following drink preparation.
A time between 5 minutes and 8 hours can
be set.
j 3 sec. + >
WATER FILTER
Before a new water fi lter 35 is used, it must
be rinsed.
To do this, press the water fi lter 35 fi rmly
into the water tank 11 with the aid of the
measuring spoon 14. Fill the water tank
with water up to the “max” mark.
Turn the knob 6 to select START and
press the
start
button 8.
● PLACE 0.5 L CONTAINER UNDER MILK
FROTHER
Ò
START
Place a container with a capacity of 0.5
litres under the milk frother 10.
Press the
start
button 8. Water will now
fl ow through the fi lter 35 to rinse it.
Next, empty the container. The appliance
is ready to use once more.
Note: Rinsing the fi lter simultaneously
activates the setting for the “change fi lter”
display.
The fi lter 35 is no longer effective when the
CHANGE FILTER display appears, or at the
latest after 2 months. It needs to be
replaced for reasons of hygiene and so that
there is no build-up of limescale (this could
damage the appliance).
●
●
●
●
●
●
SE_TK76_Teil_1_080917.indd 31 18.09.2008 08:40:48
Page 36

32
deen
Replacement filters can be obtained from
retailers (TZ70003) or from customer
service.
If no new filter 35 is used, turn the WATER
FILTER setting to NO.
Note: If the appliance has not been used
for a prolonged period (e.g. vacation) the
filter 35 should be rinsed before the
appliance is used again. To do this, simply
dispense a cup of hot water.
j 3 sec. + >
CONTRAST
The display contrast can be set from –20
to +20. The factory setting is +0.
Enter the required setting with the knob 6.
j 3 sec. + >
FACTORY SETTINGS
You can cancel your own settings and
reactivate the factory settings.
To activate the factory settings, press the
start
button 8.
Note: The appliance can also be reset to
the factory settings using a combination of
buttons. The appliance must be switched off
fully.
Hold down the < and > buttons 4 and
the on/off switch 1 O / I at the same time
for at least 5 seconds. Press the
start
button 8. The factory settings are now
reactivated.
●
●
●
Preparation
using coffee beans
This fully automatic espresso machine
grinds beans freshly for each brew. If
possible, use only beans for fully automatic
coffee and espresso machines. For optimal
quality, deep-freeze the beans or store in a
cool place in sealed containers. Coffee
beans can be ground while frozen.
Important: Fill the water tank 11 with fresh
water every day. The tank should always
contain sufficient water for operating the
appliance.
Tip: Pre-warm cups, especially small, thick
espresso cups, on the cup warmer 19.
Different coffee drinks can be prepared
quite simply at the press of a button.
Drink preparation without milk
The appliance must be ready for use.
Place the pre-warmed cup(s) under the
coffee outlet 9.
Select the required espresso or coffee by
turning the knob 6
. The display 5 shows
the selected drink along with the setting
for coffee strength and the per-cup
quantity for this drink.
ESPRESSO Ë Í
 à À Á Ä Å
The settings can be altered (see “Controls”).
Press the
start
button 8.
The coffee is brewed and then dispensed
into the cup(s).
●
●
●
SE_TK76_Teil_1_080917.indd 32 18.09.2008 08:40:49
Page 37

33
deen
Drink preparation with milk
The appliance must be ready for use.
● Place the pipe 10d of the milk frother 10
deep in the milk container 34.
Swivel the coffee outlet 9 to the right until
it clicks into place.
Place the pre-warmed cup or glass under
the coffee outlet 9 and milk frother 10.
Select the required Macchiato Å,
Cappuccino
Æ
, White coffee Ä or My
coffee Ç by turning the knob 6. The
display 5 shows the selected drink along
with the setting for coffee strength and
the per-cup quantity for this drink.
CAPPUCCINO Ë Í
À Á Ä Å Æ Ç
The settings can be altered (see “Controls”).
Press the
start
button 8. First milk is
delivered into the cup or glass. Then the
coffee is brewed and dispensed into the
cup or glass.
Important: Dried milk residue is difficult to
remove, so clean the milk frother 10 with
lukewarm water immediately after use
(see “Cleaning the milk system”).
●
●
●
●
Preparation using
ground coffee
This fully automatic espresso machine can
also be operated with ground coffee (not
instant coffee powder).
Drink preparation without milk
Select À or Á by turning the knob 6.
Place the pre-warmed cup(s) under the
coffee outlet 9.
Open the drawer 21 by pressing.
Pour in no more than 2 level measuring
spoons 14 of ground coffee.
Warning: Do not use whole beans or
instant coffee.
Close the drawer 21.
Press the
start
button 8.
The coffee is brewed and then dispensed
into the cup(s).
N.B.: Repeat the procedure for another cup
of coffee. If no coffee is taken within 90
seconds, the brewing chamber empties
automatically to avoid overfilling. The appliance rinses.
●
●
●
●
●
●
SE_TK76_Teil_1_080917.indd 33 18.09.2008 08:40:49
Page 38

34
deen
Drink preparation with milk
Turn the knob 6 to select White coffee Ä,
Macchiato Å, Cappuccino Æ or
My coffee Ç.
Place the pipe 10d of the milk frother 10
in the milk container 34.
Swivel the coffee outlet 9 to the right until
it clicks into place.
Place the pre-warmed cup or glass under
the coffee outlet 9 and milk frother 10.
Open the drawer 21 by pressing.
Pour in no more than 2 level measuring
spoons 14 of ground coffee.
Warning: Do not use whole beans or
instant coffee.
Close the drawer 21
Press the
start
button 8. First milk is
delivered into the cup or glass. After that
the ground coffee is brewed and
dispensed into the cup or glass.
Important: Dried milk residue is difficult to
remove, so clean the milk frother 10 with
lukewarm water immediately after use (see
“Cleaning the milk system”).
N.B.: Repeat the procedure for another
coffee / milk drink. If no coffee is taken
within 90 seconds, the brewing chamber
empties automatically to avoid overfilling.
The appliance rinses.
●
●
●
●
●
●
●
●
Preparing milk froth
and hot milk
r
!
Risk of burns
The milk frother 10 gets very hot. After use,
allow to cool down first before touching.
The appliance must be ready for use.
Place the pipe 10d of the milk frother 10
in the milk container 34.
Place the pre-warmed cup or glass under
the outlet of the milk frother 10.
Select the required setting
“Milk froth” È or “Hot milk” É by turning
the knob 6.
Press the
start
button 8. Milk froth or hot
milk flows from the outlet of the milk
frother 10 for about 40 or 60 seconds
respectively.
Press the
start
button 8 again to cut the
process short.
Tip: For extra-hot milk, allow it to be drawn
out of the glass and run through the milk
frother
10 again. Select the “Hot milk”
function again.
Note: When preparing hot milk you may
hear a whistling sound. This is caused by
the milk frother 10 for technical reasons.
Tip: For optimal milk froth quality, use cold
low-fat milk (1.5% fat) if possible.
Important: Dried milk residue is difficult to
remove, so clean the milk frother 10 with
lukewarm water immediately after use (see
“Cleaning the milk system”).
●
●
●
●
●
SE_TK76_Teil_1_080917.indd 34 18.09.2008 08:40:49
Page 39

35
deen
Dispensing hot water
r
!
Risk of burns
The milk frother 10 gets very hot. After use,
allow to cool down first before touching.
The appliance must be ready for use.
Place the pre-warmed cup or glass under
the outlet of the milk frother 10.
Select the required setting for hot water
Ê
by turning the knob 6.
Press the
start
button 8. Hot water runs
out of the milk frother outlet 10 for about
40 seconds.
Press the
start
button 8 again to cut the
process short.
N.B.: It is possible to set the temperature of
the hot water (see “Controls, °C button”).
Maintenance and daily
cleaning
r
!
Risk of electric shock
Unplug the appliance before cleaning it.
Never immerse the appliance in water.
Do not use a steam cleaner.
Wipe the outside of the appliance with a
damp cloth. Do not use scouring agents.
Rinse the water tank 11 and the brewing
unit 24 with water only.
The cover of the storage compartment
26, the drip tray panel 27 and the
insulating cover of the milk container 34
should only be wiped gently with a damp
cloth.
Do not put them in the dishwasher.
Remove the grate for the coffee outlet 29,
the grate for the milk frother 31 and the
drip tray for the milk frother 30. Take out
the drip tray for coffee outlet 28 with the
coffee grounds container 32 by pulling
them out forward, empty and clean. All
these parts can also be cleaned in the
dish washer.
●
●
●
●
●
●
●
●
Clean the measuring spoon 14, aroma
cover 16 and the inside and cover of the
milk container 34 by hand or in the dish
washer.
Wipe out the inside of the appliance (tray
holders).
Important:
Drip trays 28/30 should be
emptied and cleaned daily to prevent mould
from developing.
N.B.: If the appliance is cold when switched
on with the a button 2, or if it is set to a
mode after brewing coffee, it rinses
automatically, in other words the system
cleans itself.
Cleaning the milk system 10
Clean the milk system 10 immediately after
use!
The milk system 10 can be pre-cleaned
automatically.
Select the Ì symbol in the display 5 and
press the
start
button 8.
PLACE EMPTY GLASS UNDER FROTHER,
P
LACE SUCTION PIPE IN GL ASS
Ò
START
Place an empty glass under the milk
system 10 and put the end of the pipe
10d in the glass.
Press the
start
button 8. The appliance
now fills the glass automatically with
water and draws it in again through the
pipe 10d for cleaning. The rinse
procedure stops automatically after about
1 minute.
Now empty the glass and clean the pipe
10d.
In addition to this, clean the milk system
thoroughly once every two weeks or so (by
hand or in the dishwasher).
Dismantling the milk system 10 for
cleaning:
Pull the milk system 10 forward out of the
appliance.
Clean the individual parts (Fig. C) with a
detergent solution and a soft brush.
●
●
●
●
●
●
●
●
SE_TK76_Teil_1_080917.indd 35 18.09.2008 08:40:49
Page 40

36
deen
Rinse all parts with clear water and dry
them.
Reassemble all the parts and replace fully
in the appliance.
Note: All the parts of the milk frother 10 can
also be put in the dishwasher.
Cleaning the brewing unit 24
(refer also to the quick reference guide)
In addition to the automatic cleaning
programme, the machine offers the option
of removing the brewing unit 24 for
cleaning.
Switch to the “energy saving mode” with
the a button 2.
Switch the appliance off completely at the
power on/off switch 1 O / I; no buttons
are lit.
Slide the door opener 23 to the right and
open the door 22 to the brewing unit 24.
Slide the red lock 24b on the brewing unit
24 completely to the left.
Press the red button 24a, grasp the
brewing unit 24 by the recessed grips
(Fig. E) and remove carefully.
Rinse the brewing unit 24 under running
water.
Important:
Clean without detergent and do
not place in the dishwasher.
Wipe out the inside of the appliance with
a damp cloth.
Allow the brewing unit 24 and the inside
of the appliance to dry.
Reinsert the brewing unit 24 fully into the
appliance.
Slide the red lock 24b fully to the right
and close the door 22.
●
●
●
●
●
●
●
●
●
●
●
●
Storing accessories
The espresso machine has special compartments for storing the accessories and
quick reference guide inside the appliance.
To store the measuring spoon 14, milk
pipe 10d and tube 10c, remove the water
tank 11 and insert the parts in the shaped
recesses 13.
The quick reference guide has its own
compartment by the brewing unit 24.
Open the door 22 to the brewing unit.
Grasp the red cover 26 to the storage
compartment 25 by the tab and remove.
Stow away the quick reference guide,
replace the cover 26 and close the door
to the brewing unit 22
Tips on energy saving
The fully automatic espresso machine
switches to “energy saving mode”
automatically after one hour (factory
setting). The appliance uses very little
power in “energy saving mode”. The
default time of one hour can be altered:
(see Menu settings, “
AUTO OFF AFTER”) .
If the appliance is not being used, switch
it off at the power on/off switch 1 O / I on
the front.
If possible, do not interrupt coffee or milk
froth dispensing. Cutting the coffee or
milk froth dispensing process short
results in higher energy consumption and
in more residual water collecting in the
drip tray.
Descale the appliance regularly to avoid a
build-up of limescale. Limescale residue
results in higher energy consumption.
●
●
●
●
–
–
–
–
SE_TK76_Teil_1_080917.indd 36 18.09.2008 08:40:49
Page 41

37
deen
Service Programmes
Tip: Refer also to the quick reference guide
in the storage compartment 25.
At regular intervals, the display 5 shows the
following texts:
SERVICE - DESCALE or
S
ERVICE - CLEAN or
SERVICE - CALC‘N‘CLEAN.
The appliance should be cleaned or
descaled immediately using the
corresponding programme. You also have
the option of combining both processes with
the Calc‘n‘Clean function (see “Calc‘n‘Clean”).
If the service programme is not run as
instructed, the appliance may be damaged.
Warning
Each time you run the ser vice programme,
you should follow the instructions for using
the descaling and cleaning agents.
Never interrupt the ser vice programme!
Do not drink the liquids!
Never use vinegar, vinegar-based products,
citric acid or citric acid-based products!
Never put descaling tablets or other
descaling agents in the ground coffee
drawer or the drawer for cleaning tablets!
For descaling, use only the descaling
tablets included with the appliance. They
have been developed specially for this coffee
machine to optimise the descaling process.
Specially developed descaling and
cleaning tablets are available from
retailers or customer service.
Order number Retail Customer
service
Cleaning
tablets
TZ60001 310575
Descaling
tablets
TZ60002 310967
Important: If there is a filter 35 in the water
tank 11, it needs to be removed before the
service programme is run.
Descaling
ESPRESSO Ë Í
S
ERVICE - DESCALE
Ò
i - BUTTON 3 SEC.
The
start
button 8 flashes while the different
descaling processes are running.
The figures on the top right indicate the
progress of the programme.
Hold the j button 7 down for at least 3
seconds.
DESCALEÒSTART
Press the
start
button 8; the display 5 will
guide you through the programme.
EMPTY DRIP TRAY
R
EPLACE DRIP TRAY
Empty drip trays 28/30 and replace them.
PLACE 0.5 L CONTAINER UNDER MILK
FROTHER
Ò
START
Place a container with a capacity of 0.5
litres under the milk frother 10.
Press the
start
button 8.
Note: If the water filter is activated, the
display will prompt you to remove the filter,
then press the
start
button 8 again
REMOVE FILTER ÒSTART
ADD 0.5 L WATER AND DESCALER
Ò
START
Pour lukewarm water into the empty
water tank 11 up to the “0.5” litre mark
and dissolve 2 Siemens descaling tablets
in it.
Press the
start
button 8. The descaling
programme will now run for about 20
minutes.
DESCALING
●
●
●
●
●
●
●
SE_TK76_Teil_1_080917.indd 37 18.09.2008 08:40:49
Page 42

38
deen
NOT ENOUGH DESCALING
FLUID. REFILL FLUID
Note: If there is not enough descaling
solution in the water tank 11, the
corresponding prompt is displayed. Pour in
descaling solution and press
start
8 again.
CLEAN AND REFILL WATER TANK ÒSTART
Rinse the water tank 11 and refill it with
fresh water up to the “max” mark.
Press the
start
button 8. The descaling
programme now runs for about 1 minute
and rinses the appliance.
DESCALING
E
MPT Y DRIP TRAY
REPL ACE DRIP TRAY
Empty drip trays 28/30 and replace them.
The appliance has completed descaling and
is ready for use again.
●
●
●
Cleaning
ESPRESSO Ë Í
S
ERVICE - CLEAN
Ò
i - BUTTON 3 SEC.
The
start
button 8 flashes while the different
cleaning processes are running.
The figures on the top right indicate the
progress of the programme.
Fill the water tank 11 up to the “max”
mark.
Hold the j button 7 down for at least 3
seconds.
CLEANÒSTART
Press the
start
button 8; the display 5 will
guide you through the programme.
EMPTY DRIP TRAY
R
EPLACE DRIP TRAY
Empty drip trays 28/30 and replace them.
The appliance rinses twice.
POSITION SWIVEL ARM
Swivel the coffee outlet 9 to the left until it
clicks into place.
CLEANING
OPEN DRAWER
Open the drawer 21 by pressing.
INSERT SIEMENS CLEANING TABLET AND
CLOSE DRAWER
Drop a Siemens cleaning tablet in the
drawer 21 and close.
PRESS START
Press the
start
button 8. The cleaning
programme will now run for about 7
minutes.
●
●
●
●
●
●
●
●
SE_TK76_Teil_1_080917.indd 38 18.09.2008 08:40:49
Page 43

39
deen
CLEANING
E
MPT Y DRIP TRAY
R
EPLACE DRIP TRAY
Empty drip trays 28/30 and replace them.
The appliance is ready for use again.
Calc‘n‘Clean
Calc‘n‘Clean combines the separate
functions of descaling and cleaning. If both
programmes are due to be run soon, the
espresso machine automatically suggests
this service programmes.
ESPRESSO Ë Í
SERVICE - CALC‘N‘CLEAN
Ò
i - BUTTON 3 SEC.
The
start
button 8 flashes while the different
Calc’n’Clean processes are running. The
figures on the top right indicate the progress
of the programmes.
Hold the j button 7 down for at least 3
seconds.
CALC‘N‘CLEAN ÒSTART
Press the
start
button 8; the display will
guide you through the programme.
EMPTY DRIP TRAY
REPL ACE DRIP TRAY
Empty drip trays 28/30 and replace them.
Swivel the coffee outlet 9 to the right until
it clicks into place.
Place a container with a capacity of at
least 1 litre under the milk frother 10.
Press the
start
button 8. The appliance
rinses twice.
CLEANING
O
PEN DRAWER
Open the drawer 21 by pressing.
●
●
●
●
●
●
●
●
INSERT SIEMENS CLEANING TABLET AND
CLOSE DRAWER
Drop a Siemens cleaning tablet in the
drawer 21 and close.
Note: If the water filter 35 is activated, the
display 5 will prompt you to remove the filter
and press the
start
button 8 again.
REMOVE FILTERÒSTART
ADD 0.5 L WATER AND DESCALER
Ò
START
Pour lukewarm water into the empty
water tank 11 up to the
“0.5” litre mark
and dissolve 2 Siemens descaling tablets
in it.
Press the
start
button 8. The descaling
programme now runs for about 20
minutes.
DESCALING
NOT ENOUGH DESCALING
FLUID. REFILL FLUID
Note: If there is not enough descaling
solution in the water tank 11, the
corresponding prompt is displayed. Pour in
descaling solution and press
start
8 again.
CLEAN AND REFILL WATER TANK
Ò
START
Rinse the water tank 11 and refill it with
fresh water up to the “max” mark.
Press the
start
button 8. The descaling
programme now runs for about 1 minute
more, followed by the cleaning
programme for about 7 minutes, and
rinses the appliance.
DESCALING
CLEANING
EMPTY DRIP TRAY
R
EPLACE DRIP TRAY
Empty drip trays 28/30 and replace them.
The appliance has completed descaling and
cleaning and is ready for use again.
●
●
●
●
●
●
SE_TK76_Teil_1_080917.indd 39 18.09.2008 08:40:50
Page 44

40
deen
Important: If one of the service
programmes is interrupted, e.g. by a power
outage, proceed as follows:
Rinse the water tank 11 and refill it with
fresh water up to the “max” mark.
Press the
start
button 8. The cleaning
programme now runs for about 3 minutes,
and rinses the appliance.
CLEANING
EMPTY DRIP TRAY
R
EPLACE DRIP TRAY
Empty drip trays 28/30 and replace them.
The appliance is ready for use again.
Frost protection
r
!
To avoid damage from low tempera-
tures during transport and storage, the
appliance must be completely emptied
first.
Note: The appliance must be ready for use
and the water tank 11 filled.
Place a large, narrow receptacle under
the milk frother 10.
Select the “Milk froth” È setting, start and
release steam for about 15 seconds.
Switch the appliance off at the power on/
off switch 1 O / I.
Empty the water tank 11 and the drip
trays 28/30.
●
●
●
●
●
●
●
Disposal
A
This appliance is labelled in accordance
with the European Directive 2002/96/EG
relating to waste electrical and electronic
equipment – WEEE. The directive provides
the framework for the EU-wide take-back
and disposal of end-of-life appliances.
Please ask your specialist retailer about
current disposal facilities.
Accessories
The following accessories can be obtained
from retailers and customer service.
Order
number
Retail Customer
service
Cleaning
tablets
TZ60001 310575
Descaling
tablets
TZ60002 310967
Water filters
TZ70003 467873
Guarantee
The guarantee conditions for this appliance
are as defined by our representative in the
country in which it is sold. Details regarding
these conditions can be obtained from the
dealer from whom the appliance was purchased. The bill of sale or receipt must be
produced when making any claim under the
terms of this guarantee.
Right of modification reserved.
SE_TK76_Teil_1_080917.indd 40 18.09.2008 08:40:50
Page 45

41
deen
Problem Cause Solution
Display shows
REFILL BEAN CONTAINER
although the bean container
15 is full, or the grinding unit
does not grind the beans.
Beans are not falling into
the grinding unit
(beans too oily).
Gently tap the bean
container 15.
Change the type of coffee if
necessary.
When the bean container 15
is empty, wipe it with a dry
cloth.
No hot water dispensed. The milk frother
10 or its
holder is soiled.
Clean the milk frother 10 or
its holder.
Too little or no milk froth
or
The milk frother 10 does not
draw the milk in.
The milk frother 10 or its
holder is soiled.
Clean the milk frother 10 or
its holder.
Milk unsuitable for frothing. Use low-fat milk (1.5 % fat).
The milk frother 10 is not
correctly assembled.
Assemble the milk frother 10
correctly.
Coffee dispensing slows to
a trickle.
Coffee is ground too finely.
Pre-ground coffee is too
fine.
Adjust the grinding unit to a
coarser setting. Use coarser
pre-ground coffee.
Build-up of limescale in the
appliance.
Descale the appliance.
Coffee has no “crema”. Unsuitable type of coffee. Change type of coffee used.
The beans are no longer
fresh.
Use fresh beans.
The grinding setting is not
suitable for the beans.
Adjust grinding setting to
fine.
Coffee is too “acidic
”. The grinding setting is too
coarse or the pre-ground
coffee is too coarse.
Adjust the grinding unit to a
finer setting or use finer pre-
ground coffee.
Unsuitable type of coffee Use a darker roast.
Coffee is too “bitter”. The grinding setting is too
fine or the pre-ground
coffee is too fine.
Adjust the grinding unit to a
coarser setting or use
coarser pre-ground coffee.
Unsuitable type of coffee. Change type of coffee used.
Display shows
ERROR
P
LEASE CONTACT HOTLINE.
The appliance has a fault. Please call the hotline.
If you are unable to solve the problem, always call the hotline.
Simple troubleshooting
SE_TK76_Teil_1_080917.indd 41 18.09.2008 08:40:50
Page 46

42
deen
Problem Cause Solution
The water filter 35 does not
stay in position in the water
tank 11.
The water filter 35 is not
correctly engaged.
Press the water filter 35
firmly into the tank
attachment until you feel it
engage.
The coffee grounds are not
firm but dry and crumbly.
The grinding setting is too
fine or there is not enough
ground coffee.
Adjust the grinding unit to a
coarser setting or use 2
spoonfuls of ground coffee.
The coffee grounds are not
firm but wet.
The grinding setting is too
coarse or there is too much
ground coffee.
Adjust the grinding unit to a
finer setting or use only 1
spoonful of ground coffee.
If you are unable to solve the problem, always call the hotline.
Simple troubleshooting
SE_TK76_Teil_1_080917.indd 42 18.09.2008 08:40:50
Page 47

43
defr
Consignes de sécurité
Lire attentivement le mode d’emploi,
se conformer à ses indications et le
conserver à por tée de la main !
Cette machine à café est destinée à un
usage ménager, dans des quantités
généralement consommées à domicile
et en aucun cas pour une utilisation
commerciale.
r
!
Risque de choc électrique !
Pour le raccordement et l‘utilisation de la
machine, respecter impérativement les
indications figurant sur la plaque signaléti-
que. N’utiliser la machine que si le cordon
électrique et la machine ne présentent
aucun dommage.
N’utiliser la machine qu’à l’intérieur de locaux, à température ambiante.
Ne pas confier l’appareil à des enfants ou à
des personnes aux capacités sensorielles
ou intellectuelles diminuées ou ne disposant pas d’une expérience ou d’une
connaissance suffisante, sauf si elles le font
sous surveillance ou si elles ont bénéficié
préalablement d’une information à propos
de la manipulation de l’appareil de la part
de la personne responsable de leur sécurité.
Bien surveiller les enfants afin de les empêcher de jouer avec l’appareil.
En cas de défaut, débrancher immédiatement le cordon électrique. Les réparations
sur la machine, par ex. le remplacement du
cordon électrique, doivent être effectuées
uniquement par notre Service après-vente
afin d‘éliminer tous les risques. Ne jamais
plonger la machine ou le cordon électrique
dans l’eau.
Ne pas glisser les doigts à l’intérieur du
moulin.
r
!
Risque de brûlure !
La buse Eau chaude / Vapeur devient
brûlante. Après utilisation, bien laisser
refroidir la buse avant de la saisir.
Sommaire
Présentation .............................................44
Avant la première utilisation .....................45
Eléments de commande ...........................46
− Interrupteur électrique O / I ...................46
− Touche a ...............................................46
− Bouton rotatif .........................................46
− Touches de sélection < et > ...............46
− Ecran .....................................................47
− Touche
start
..........................................49
− Touche °C ..............................................49
− Touche j réglages .................................50
− Régler la finesse de la mouture ............50
− Chauffe-tasses ......................................50
Réglages menu ........................................51
− Langue ..................................................51
− Dureté eau ............................................51
− Détartrage .............................................51
− Nettoyage ..............................................51
− Calc‘n‘Clean ..........................................51
− Afficher heure ........................................52
− Mode .....................................................52
− Régler heure .........................................52
− Chauffe-tasses MA (TK76F09) ..............52
− AR chauf-tasse......................................52
− AR auto dans ........................................52
− Filtre eau ...............................................52
− Contraste...............................................53
− Réglage usine .......................................53
Préparation avec du café en grains ..........53
Préparation à partir de café moulu ..........54
Préparer de la mousse de lait et du lait
chaud ........................................................55
Préparer de l’eau chaude .........................55
Entretien et nettoyage quotidien ...............56
− Nettoyage du mousseur du lait .............56
− Nettoyer l‘unité de percolation...............56
Rangement des accessoires ...................57
Conseils pour économiser l’énergie .........57
Programmes de maintenance .................57
− Détartrage .............................................58
− Nettoyage ..............................................59
− Calc‘n‘Clean ..........................................60
Protection contre le gel .............................61
Accessoires ..............................................61
Mise au rebut et Garantie .........................61
Eliminer soi-même les problèmes simples 62
SE_TK76_Teil_1_080917.indd 43 18.09.2008 08:40:50
Page 48

44
defr
Chère amatrice de café,
cher amateur de café,
Félicitation pour avoir choisi la cafetière
Siemens.
Présentation
Figures A, B, C, D et E
1 Interrupteur électrique O / I
2 Touche a
3 Touche °C (température / sécurité
enfants)
4 Touches de sélection < >
5 Ecran
a) Ligne d‘état
b) Ligne de sélection
c) Ligne de navigation
6 Bouton rotatif pour réglages à l’écran
7 Touche j (menu Info)
8 Touche
start
(boissons / programmes)
9 Bec verseur du café, réglable en
hauteur et pivotant
10 Mousseur lait, réglable en hauteur
(production de mousse de lait / eau
chaude)
a) partie supérieure
b) partie inférieure
c) flexible
d) tube mousseur
11 Réservoir d’eau amovible
12 Couvercle du réservoir d’eau
13 Logements
(cuillère-dose et accessoire mousseur
lait)
14 Cuillère-dose (sert de poignée pour
placer le filtre d‘eau)
15 Bac à café
16 Couvercle préservateur d’arôme
17 Sélecteur de réglage de finesse de
mouture
Ce mode d’emploi décrit différents modèles
qui se différencient par leur niveau
d’équipement.
Veuillez également tenir compte du
Mémento fourni.
Un logement 25 a été prévu pour le
conserver à portée de main dans la
machine.
18 Anneau lumineux
19 Chauffe-tasses
20 Bouton de commande pour chauffe-
tasses éclairé
21 Tiroir à café
(café en poudre / pastille de nettoyage)
22 Volet de la chambre de percolation
23 Ouvre-volet
24 Unité de percolation
a) Bouton poussoir
b) Verrouillage
25 Logement du Mémento
26 Verrouillage logement
27 Panneau des bacs collecteurs
28 Bac collecteur du bec verseur du café
29 Grille bec verseur du café
30 Bac collecteur mousseur de lait
31 Grille mousseur de lait
32 Récipient pour marc de café
33 Logement du cordon électrique
34 Réservoir de lait (isolé)
35 Filtre eau
SE_TK76_Teil_1_080917.indd 44 18.09.2008 08:40:50
Page 49

45
defr
Avant la première
utilisation
Généralités
Utiliser uniquement de l’eau pure, sans gaz
carbonique et de préférence du café en
grain pour espresso ou pour percolateur.
Ne pas employer des grains de café avec
glaçage, des grains caramélisés ou enrobés d’une substance sucrée quelconque ;
ils encrassent et obturent l’unité de
passage.
Sur cette machine, il existe un réglage de la
dureté de l’eau. En usine, la machine est
réglée sur la dureté 4. Se servir de la bandelette fournie pour déterminer la dureté de
l’eau.
Si la dureté est différente de la valeur 4,
programmer la machine en conséquence
après la mise en route (voir point
«Réglages menu
DURETÉ EAU»)
Mise en service de la machine
Placer la machine sur une surface plane
et capable de supporter son poids.
Info : la machine à café est équipée de
quatre roulettes en dessous ; elle peut être
positionnée en forme d’arc afin de faciliter
la commande et l’accès.
Extraire du logement 33 la longueur de
cordon électrique nécessaire et brancher
dans une prise. Pour ajuster la longueur
du cordon, il suffit de le tirer ou de le
repousser à l’intérieur. Pour cela, placer
la machine sur un bord de table, par ex.,
et tirer le câble vers le bas ou le pousser
vers le haut.
Rabattre vers le haut le couvercle du
réservoir d'eau 12.
Retirer le réservoir d'eau 11, le rincer et le
remplir d’eau froide. Ne pas dépasser le
repère «max».
Placer le réservoir d'eau 11 bien vertical
et appuyer pour le faire descendre.
Refermer le couvercle du réservoir
d'eau 12.
●
●
●
●
●
●
Remplir de café en grains le bac
à café 15.
Appuyer sur l'interrupteur électrique 1
O / I, la touche 8
start
s’allume et, à
l’écran 5, s’affichent différentes langues.
A l’aide des touches de sélection 4
< et > choisir la langue souhaitée ; tous
les textes écrans s’afficheront ensuite
dans cette langue.
LANG UAGE
DEUTS CH
Ò
START
ENGLISH
PYCCK ИЙ
La langue sélectionnée est identifiée par
un cadre. Vous avez le choix entre les
langues suivantes :
DEUTSCH
E
NGLISH
P
YCCKИЙ
N
EDERL ANDS
F
RANÇAIS
I
TALIANO
S
VENSKA
E
SPAÑOL
P
OLSKI
● Appuyer sur la touche 8
start
, la langue
sélectionnée est enregistrée, la touche 2
a s’allume.
●
●
●
SE_TK76_Teil_1_080917.indd 45 18.09.2008 08:40:51
Page 50

46
defr
● Appuyer sur la touche 2 a, le logo de la
marque s’allume à l’écran 5. La machine
se met à chauffer et à effectuer un
rinçage ; un peu d’eau s’écoule du bec
verseur du café 9. Lorsque les symboles
de sélection de la préparation apparaissent à l’écran 5 la machine est prête à
fonctionner.
ESPRESSO Ë Í
 à À Á Ä Å
Info : la machine à café est programmée en
usine de manière à fonctionner de manière
optimale. Au bout de 1 heure, la machine se
place automatiquement en «mode Eco»
(voir point «Réglages menu AR AUTO
DANS»).
Conseil pratique : lors de la première
utilisation ou après une période d’arrêt
prolongée, la première tasse de café n’a
pas tout l’arôme désiré.
Une fois effectuée la mise en service de la
machine, la présence d‘une mousse dense
et fine sur le café n‘est obtenue qu‘après
avoir préparé plusieurs tasses.
Eléments de commande
Interrupteur électrique O / I
L’interrupteur électrique 1 O / I permet
d‘activer ou de désactiver entièrement le
«mode Eco“ de la machine. En «mode
Eco», seule la touche 2 a est allumée.
Important : ne couper l’alimentation que
lorsque la machine est en «mode Eco» afin
que le rinçage automatique soit effectué.
Touche a
La touche 2 a place la machine en position
marche (prête à fonctionner) ou la replace
en «mode Eco».
La touche 2 a clignote tant que la machine
effectue son rinçage.
La machine n’effectue pas de rinçage
lorsque :
elle est encore chaude au moment de la
mise en marche.
il n’a pas été préparé de café avant le
passage en «mode Eco».
La machine est prête à fonctionner lorsque
les symboles de sélection de boisson et la
touche 8
start
sont allumés à l’écran 5.
Bouton rotatif
Le bouton rotatif 6 sert à naviguer dans
l‘écran 5 en tournant vers la gauche et la
droite ; il permet aussi de modifier certains
paramètres dans le menu.
Touches de sélection < et >
L’activation des touches de sélection 4 < et
> permet de naviguer à l’écran (Ligne de
navigation 5c) vers le bas et vers le haut.
●
●
SE_TK76_Teil_1_080917.indd 46 18.09.2008 08:40:51
Page 51

47
defr
Ecran
A l‘aide des symboles Boissons au café,
Arôme et Quantité ainsi que des textes de
réglage, l‘écran 5 affiche en permanence
les opérations en cours et les messages. Le
bouton rotatif 6 et les touches de sélection
4 servent à effectuer les réglages. Le
réglage sélectionné est identifié par un
cadre.
La ligne d‘état 5a de l‘écran 5 indique le
nom de la boisson, ainsi que, pour les
boissons au café, l‘arôme réglé, par ex. 55
et la quantité, par ex. Î. Sur la ligne de
sélection 5b figurent les symboles pour le
choix des boissons.
Les flèches de la ligne de navigation 5c
indiquent la direction où se trouvent encore
des niveaux de menu.
Messages à l’écran :
L’écran 5 affiche différents messages.
Informations :
RÉS. EAU PRESQUE VIDE
BAC À CAFÉ PRESQUE VIDE
PATIENTEZ SVP
Invitations à agir :
REMPLIR LE RÉSERVOIR D‘EAU
PLACER LE RÉSERVOIR D‘EAU
CONTRÔLER LE RÉSERVOIR D‘EAU
PLACER LE BAC COLLECTEUR
VIDER LE BAC COLLECTEUR
REMPLIR LE BAC À CAFÉ
P
IVOTER LE BEC VERSEUR
PLACER L‘ EMBOUT POUR MOUSSE
REMPL ACER L‘UNITÉ DE PASSAGE
FEMER LE VOLET
CONTRÔLER L‘UNITÉ DE PASSAGE
METTRE DU CAFÉ
FERMER LE TIROIR
CHANGER LE FILTRE
DÉTARTRER SVP
N
ETTOYER SVP
C
ALC‘N‘CLEAN
TEMPÉRATURE TROP BASSE
PATIENTEZ SVP
S
URTENSION OU SOUS-TENSION
ESPRESSO ËË Í
 à À Á Ä Å
5a
b
c
SE_TK76_Teil_1_080917.indd 47 18.09.2008 08:40:51
Page 52

48
defr
ESPRESSO ËË Í
Á Ä Å Æ Ç È
MY COFFEE Ë Í
5 55 555
MY COFFEE Ë Í
Î Ð Ò
MY COFFEE Ë Í
ESPRESSO LAIT
40%
Sélections possibles
Â
2 X ESPRESSO
Ã
2 X CAFÉ
À
ESPRES SO Á CAFÉ
Ä CAFÉ AU LA IT
Å
MACCHIATO
Æ
CAP PUCCINO
Ç
MY C OFFEE
È
MOUSSE L AIT
É
LAIT CHAUD
Ê
EAU CHAUDE
Ì
R
INCE R BRIÈVEMENT
MOUSSEUR DE LA IT
Arôme du café (uniquement pour les
boissons au café)
5 5 5 5 5 5
Doux Normal Fort
Quantité (uniquement pour les
boissons au café)
Î Ð Ò
réduite moyenne importante
En plus de l‘arôme du café et de la
quantité, il est possible de définir pour
le réglage individuel MY COFFEE Ç
le rapport entre le café et le lait : le
réglage se fait de 20% en tournant le
bouton rotatif.
SE_TK76_Teil_1_080917.indd 48 18.09.2008 08:40:54
Page 53

49
defr
Touche start
Appuyer sur la touche 8
start
pour lancer la
préparation d‘une boisson ou pour effectuer
un programme de Service.
Pour réduire la quantité de boisson appuyer
de nouveau sur la touche
start
en cours de
préparation.
Touche °C
La touche 3 °C assure le réglage de la
température du café et de l‘eau chaude
(appui bref) ainsi que l‘activation et la
désactivation de la sécurité enfants
(maintenir appuyée durant 3 s mini.).
Régler la température :
Appuyer brièvement sur la touche 3
°C
et à
l’aide des touches < et > ainsi que du
bouton rotatif, effectuer les réglages.
TEMPÉRATURE
CAFÉ
EAU CHAUDE
NORMAL
TEMPÉRATURE
CAFÉ
EAU CHAUDE
<90°C
Appuyer de nouveau sur la touche 3 °C
pour enregistrer et revenir à la sélection des
boissons.
Les réglages s’appliquent automatiquement
à tous les modes de préparation.
Sécurité enfants
Afin d’éviter que les enfants ne se brûlent
ou s’ébouillantent, il est possible de
verrouiller la machine.
● Maintenir appuyée la touche 3 °C durant
au moins 3 secondes ; l’écran 5 affiche
une clé, la sécurité enfants est activée.
Aucune commande n’est plus possible, le
chauffe-tasses 19 est désactivé.
ESPRESSO Ë Í
● Pour désactiver la sécurité enfants,
maintenir appuyée la touche 3 °C durant
3 secondes au moins, la clé figurant à
l’écran 5 disparaît.
SE_TK76_Teil_1_080917.indd 49 18.09.2008 08:40:55
Page 54

50
defr
Touche j réglages
La touche 7 j sert à appeler des
informations (appui bref) et à effectuer
des réglages (maintenir appuyée durant 3 s
au moins).
Appeler des informations
Dans le menu Info, il est possible d‘appeler
les informations suivantes :
nom de boissons préparées depuis la
mise en service de la machine à café
date de la prochaine maintenance
appuyer brièvement sur la touche 7 j et
naviguer à l’aide des touches 4 < et >.
MENU INFO
DÉTARTRAGE
Ò
XX X TASSES
NETTOYER
Ò
XX X TASSES
FILTRE NON PLACÉ
CHANGER FILTRE
Ò
XX X TASSES *
MENU INFO
NBRE CAFÉS XX
N
BRE BOISSONS LAIT XX
Q
TÉ EAU BOUILLANTE X L
* apparaît uniquement lorsque le filtre est
activé.
Appuyer brièvement sur la touche 7 j pour
revenir à la sélection de boissons. Après
env. 10 secondes sans confirmation, la
machine se replace automatiquement en
mode de sélection des boissons.
Effectuer les réglages
(voir point «Réglages menu»).
–
–
●
Régler la finesse de la mouture
Le sélecteur 17 de réglage de la mouture
du café permet de régler la finesse de
mouture souhaitée du café.
Attention
Modifier le réglage de la mouture
uniquement lorsque le broyeur fonctionne.
Sinon la machine peut être endommagée.
● Lorsque le broyeur fonctionne, régler le
sélecteur 17 entre une mouture fine • • •
et une mouture plus grossière ● ● ●.
Info : le nouveau réglage n’est perceptible
qu’à la seconde ou la troisième tasse.
Conseil pratique : régler une mouture plus
fine pour les grains torréfiés foncés et un
pouture plus grossière pour les grains
torréfiés clairs.
Chauffe-tasses
r
! Attention, le chauffe-tasses 19
devient très brûlant !
La machine à café est équipée d‘un
chauffe-tasses 19 qui peut être activé ou
désactivé manuellement à l‘aide du bouton
20. Lorsque le chauffe-tasses 19 est
allumé, le bouton 20 est éclairé.
Conseil pratique : Pour réchauffer de
manière optimale les tasses, les poser sur
le chauffe-tasses 19 ouverture dirigée vers
le haut.
Uniquement pour la TK76F09
Le chauffe-tasses 19 peut aussi être
préprogrammé (voir point «Réglages menu
CHAUFFE-TASSES MA»).
SE_TK76_Teil_1_080917.indd 50 18.09.2008 08:40:56
Page 55

51
defr
Réglages menu
● Maintenir appuyée durant 3 s au moins la
touche 7 j.
Les différentes possibilités de réglage
s’affichent.
RÉGLAGES
LANGUE FRANçAIS
DURETÉ EAU
DÉTARTRAGE
Dans la suite du texte de ce mode d’emploi,
chaque nouveau réglage commence par
j 3 s + >
suivi d'une description
précise.
Les touches 4 < et > permettent de
sélectionner les différentes possibilités de
réglage.
RÉGLA GES
DURET É EAU
DÉTARTR AGE
Ò
START
NETT OYAGE
Remarque : les modifications effectuées
sont automatiquement enregistrées.
Aucune manipulation supplémentaire n‘est
nécessaire.
j 3 s + >
LANGUE
● Tourner le bouton rotatif 6 pour
sélectionner la langue souhaitée
j 3 s + >
DURETÉ EAU
● Tourner le bouton rotatif 6 pour sélection-
ner la dureté de l’eau : 1,2,3 et 4.
Info : le réglage correct de la dureté de
l’eau est important car il permet à la machine d’indiquer le moment où un détartrage est nécessaire. Par défaut, la dureté
de l’eau est réglée sur 4.
La dureté de l’eau peut être déterminée à
l’aide de la bandelette fournie ou être
demandée au Service des Eaux local.
● Plonger brièvement la bandelette de test
dans l‘eau et lire le résultat qui apparaît
au bout de 1 minute.
Niveau Dureté de l’eau
Allemagne
(°dH)
France (°fH)
1
2
3
4
1-7
8-14
15-21
22-30
1-13
14-25
26-38
39-54
j 3 s + >
DÉTARTRAGE
● Si la machine a besoin d’un détartrage,
appuyer sur la touche 8
start
et effectuer
le programme de détartrage (voir point
«Détartrage»).
j 3 s + >
NETTOYAGE
● Si la machine a besoin d’un nettoyage,
appuyer sur la touche 8
start
et effectuer
le programme de nettoyage (voir point
«Nettoyage»).
j 3 s + >
CALC‘N‘CLEAN
● Si la machine a besoin d’être détartrée et
nettoyée, appuyer sur la touche 8
start
et
effectuer le programme Calc‘n‘Clean
(voir point «Calc‘n‘Clean»).
SE_TK76_Teil_1_080917.indd 51 18.09.2008 08:40:57
Page 56

52
defr
j 3 s + >
AFFICHER HEURE
Il est possible de régler ici l’affi chage de
l’heure à l’écran 5 lorsque la machine est
en «mode Eco».
● Tourner le bouton rotatif 6 pour activer
l’affi chage de l’heure = OUI ou le
désactiver = NON.
Info : il faut préalablement défi nir l’heure
dans RÉGLER HEURE.
j 3 s + >
MODE
Dans Mode, le bouton rotatif 6 permet de
régler le format de l‘heure sur 12H ou
24H.
j 3 s + >
RÉGLER HEURE
● Tourner le bouton rotatif 6 pour régler
l’heure, par ex. 08:25. Le chiffre
réglable est rétro-éclairé ; le rétroéclairage passe automatiquement des
heures aux minutes.
Uniquement TK76F09
(chauffe-tasses programmable)
j 3 s + >
CHAUFFE-TASSES MA
Cette fonction supplémentaire met en marche le chauffe-tasses 19 automatiquement à
une heure programmée. Indépendamment
du fait que la machine se trouve en «mode
Eco» ou est prête à fonctionner
Info : il faut préalablement défi nir l’heure
dans RÉGLER HEURE.
Régler l'heure en tournant le bouton
rotatif 6. Sélectionner AR pour désactiver
la fonction.
Uniquement TK76F09
(chauffe-tasses programmable)
j 3 s + >
AR CHAUF-TASSE
Cela permet de régler l’intervalle de temps
à l‘issue duquel le chauffe-tasses 19 se
désactive automatiquement après la mise
en marche.
Info : dans RÉGLER HEURE l‘heure
d‘activation doit être réglée.
Régler l‘intervalle de temps en tournant le
bouton rotatif 6.
●
●
●
j 3 s + >
AR AUTO DANS
Tourner le bouton rotatif 6 pour défi nir
l’intervalle de temps à l’issue duquel la
machine se place en mode Eco après la
dernière préparation de boisson.
Le réglage possible est situé entre 5
minutes et 8 heures.
j 3 s + >
FILTRE EAU
Avant d‘utiliser un nouveau fi ltre à eau 35 il
faut tout d‘abord effectuer un rinçage.
Pour cela, enfoncer fermement le fi ltre à
eau 35 dans le réservoir d‘eau 11 à l‘aide
de la cuillère dose 14. Remplir d‘eau le
réservoir jusqu‘au repère «max».
Tourner le bouton rotatif 6 pour
sélectionner START et appuyer sur la
touche 8
start
.
● PLACER RÉCIPIENT 0,5 L SOUS
MOUSSEUR LAIT
Ò
START
Placer un récipient d'une capacité de 0,5l
sous le mousseur lait.
Appuyer sur la touche 8
start
. L‘eau
traverse le fi ltre 35 pour le rincer.
Ensuite, vider le récipient. La machine est
de nouveau prête à fonctionner.
Info : le rinçage du fi ltre 35 a activé le
réglage pour l’affi chage du changement de
fi ltre.
Au moment où s’affi che CHANGER LE
FILTRE ou bien au bout de 2 mois, au plus
tard, le fi ltre 35 n’est plus effi cace. Pour des
raisons d’hygiène et pour éviter l’entartrage
de la machine (ce qui provoque des
dommages), il faut remplacer le fi ltre.
●
●
●
●
●
●
SE_TK76_Teil_1_080917.indd 52 18.09.2008 08:40:57
Page 57

53
defr
Les filtres de rechange sont disponibles
dans le commerce (TZ70003) ou peuvent
être commandés auprès du Service
Clientèle.
Si l‘on n‘utilise pas un nouveau filtre 35, il
faut régler FILTRE EAU sur NON.
Info : si la machine n’est pas utilisée durant
une période prolongée (par ex. congés), il
faut que le filtre 35 utilisé soit rincé avant
utilisation ; pour cela verser tout simplement
une tasse d’eau chaude.
j 3 s + >
CONTRASTE
Le contraste de l’écran peut être réglé entre
−20 et +20 ; le réglage usine est +0.
Le bouton rotatif 6 permet de choisir le
réglage souhaité.
j 3 s + >
RÉGLAGES USINE
Il est possible d’effacer ses propres
réglages et de rétablir les réglages usine.
Pour rétablir les réglages usine, appuyer
sur la touche 8
start
.
Info : La machine peut à tout moment être
replacée manuellement sur les réglages
usine à l‘aide d‘une combinaison de tou-
ches. La machine doit être entièrement
désactivée.
Maintenir appuyés simultanément durant
5 secondes au moins les touches 4 < et
> ainsi que l‘interrupteur électrique 1
O / I. Appuyer sur la touche 8
start
, les
réglages usine sont rétablis.
●
●
●
Préparation avec du café
en grains
Cette machine à espresso / café entièrement automatique moud du café frais lors
de chaque préparation. Utiliser de préférence du café pour espresso/pour percolateur. Conserver le café au froid dans un
récipient hermétiquement fermé ou le
congeler. Il est possible de broyer les grains
de café congelés.
Important : mettre tous les jours de l’eau
fraîche dans le réservoir d’eau 11. Celui-ci
doit toujours contenir suffisamment d’eau
pour assurer le fonctionnement de la
machine.
Conseil : Placer les tasses, en particulier
les petites tasses épaisses pour espresso,
sur le chauffe-tasses 19 afin de les
préchauffer.
Il est possible de préparer différents cafés
très simplement, en appuyant sur un
bouton.
Préparation d’un espresso et d’un café
sans lait
La machine doit être prête à fonctionner.
Placer la(les) tasse(s) sous le bec verseur
du café 9.
Sélectionner l’espresso ou le café
souhaité en tournant le bouton rotatif 6.
L’écran 5 affiche la boisson choisie ainsi
que l’arôme du café et la quantité
correspondant à la boisson.
ESPRESSO Ë Í
 à À Á Ä Å
Les réglages peuvent être modifiés (voir
point «Eléments de commande»).
●
●
SE_TK76_Teil_1_080917.indd 53 18.09.2008 08:40:58
Page 58

54
defr
Appuyer sur la touche 8
start
.
La machine effectue la percolation du café
qui s’écoule dans la tasse/les tasses.
Préparation d‘une boisson avec du lait
La machine doit être prête à fonctionner.
Plonger profondément dans le récipient
du lait 34 le tube mousseur 10d du
mousseur de lait 10.
Basculer le bec verseur du café 9 vers la
droite jusqu‘à ce qu‘il s‘enclipse (bruit
caractéristique).
Placer la tasse préchauffée ou le verre
sous le bec verseur du café 9 et
mousseur lait 10.
Sélectionner la boisson : macchiato Å,
cappuccino Æ, café au lait Ä ou My coffee Ç en tournant le bouton rotatif 6.
L‘écran 5 affiche la boisson choisie ainsi
que l‘arôme du café et la quantité correspondant à la boisson.
CAPPUCCINO Ë Í
À Á Ä Å Æ Ç
Les réglages peuvent être modifiés (voir
point «Eléments de commande»).
Appuyer sur la touche 8
start
. Tout
d‘abord le lait est pompé dans la tasse ou
le verre. Ensuite, la machine effectue la
percolation du café qui s‘écoule dans la
tasse ou le verre.
Important : les restes de lait séchés sont
difficiles à retirer ; après chaque utilisation,
nettoyer le mousseur lait 10 à l’eau tiède
(voir point «Nettoyage du mousseur de
lait»).
●
●
●
●
●
●
Préparation à partir
de café moulu
La machine peut aussi préparer un café à
partir de café moulu (pas du café soluble).
Préparation d‘une boisson sans lait
A l’aide du bouton rotatif 6, sélectionner
À ou Á.
Placer la tasse/les tasses préchauffée(s)
sous le bec verseur du café 9.
Ouvrir le tiroir à café 21 en appuyant.
Verser au maximum 2 cuillères-dose 14
rases de café moulu.
Attention : ne pas verser de café en grains
ou de café soluble.
Fermer le tiroir à café 21.
Appuyer sur la touche 8
start
.
La machine effectue la percolation du café
moulu qui s’écoule dans la tasse/les tasses.
Remarque : pour préparer une autre tasse
de café moulu, répéter l’opération. Si vous
ne versez pas de café dans un délai de 90 s,
la chambre de percolation se vide automati-
quement afin d’empêcher un débordement.
La machine effectue un rinçage.
Préparation d‘une boisson avec lait
A l’aide du bouton rotatif 6, sélectionner
une boisson : Café au lait Ä,
Macchiato
Å
, Cappuccino Æ
ou My coffee Ç.
Introduire le tube mousseur 10d du
mousseur de lait 10 dans le récipient de
lait 34.
Faire pivoter le bec verseur du café 9
vers la droite jusqu’à ce qu’il s’enclipse
(bruit caractéristique).
Placer la tasse préchauffée ou le verre
sous le bec verseur du café 9 et le
mousseur lait 10.
Ouvrir le tiroir à café 21 en appuyant.
Remplir avec 2 cuillères-dose 14 rases
maxi. de café en poudre.
●
●
●
●
●
●
●
●
●
●
●
●
SE_TK76_Teil_1_080917.indd 54 18.09.2008 08:40:58
Page 59

55
defr
Attention : ne jamais remplir avec du café
en grains ou du café soluble.
Refermer le tiroir à café 21.
Appuyer sur la touche 8
start
. Tout
d‘abord le lait est pompé dans la tasse ou
le verre. Ensuite, la machine effectue la
percolation du café en poudre qui s‘écoule dans la tasse ou le verre.
Important : les restes de lait séchés sont
difficiles à retirer ; après chaque utilisation,
nettoyer le mousseur lait 10 à l’eau tiède
(voir point «Nettoyage du mousseur
de lait 10»).
Remarque : pour préparer une autre tasse
à partir de café moulu / lait, répéter l’opération. Si vous ne versez pas de café dans un
délai de 90 s, la chambre de percolation se
vide automatiquement afin d’empêcher un
débordement. La machine effectue un rinçage.
Préparer de la mousse
de lait et du lait chaud
r
!
Risque de brûlure
Le mousseur lait 10 devient brûlant. Après
utilisation, bien laisser refroidir avant de le
saisir.
La machine doit être prête à fonctionner.
Plonger le tube mousseur 10d du
mousseur 10 dans le réservoir de lait 34.
Placer la tasse préchauffée ou le verre
sous le mousseur lait 10.
Sélectionner «Mousse lait» È ou «Lait
chaud» É en tournant le bouton rotatif 6.
Appuyer sur la touche 8
start
, de la
mousse de lait (durant 40 s env.) ou du
lait chaud (durant 60 s env.) s‘écoule du
mousseur de lait 10.
Appuyer de nouveau sur la touche 8
start
pour interrompre l’opération.
●
●
●
●
●
●
●
Conseil : pour obtenir du lait très chaud,
aspirer de nouveau celui-ci à partir du verre
et le faire s‘écouler à travers le mousseur
de lait 10. Sélectionner de nouveau la
fonction «Lait chaud».
Info : lors de la préparation du lait chaud, il
peut se produire des bruits de sifflement.
Ceux-ci sont dus à la technologie du
mousseur de lait 10.
Conseil : pour obtenir une mousse de lait
optimale, utiliser de préférence du lait froid
d’une teneur en matières grasses de 1,5%.
Important : Les restes de lait séchés sont
difficiles à retirer ; après chaque utilisation,
nettoyer le mousseur lait 10 à l’eau tiède
(voir point «Nettoyage du mousseur de
lait»).
Préparer de l’eau chaude
r
!
Risque de brûlure
Le mousseur lait 10 devient très brûlant.
Après utilisation, bien laisser refroidir avant
de le saisir.
La machine doit être prête à fonctionner.
Placer la tasse préchauffée ou le verre
sous le bec du mousseur de lait 10.
Sélectionner le réglage souhaité Eau
chaude Ê en tournant le bouton rotatif 6.
Appuyer sur la touche 8
start
, l’eau
chaude s’écoule durant env. 40 s du
mousseur de lait 10.
Il est possible d’interrompre
prématurément cette opération en
appuyant de nouveau sur la touche 8
start
.
Remarque : il est possible de régler la
température de l‘eau chaude (voir point
«Eléments de commande Touche °C»).
●
●
●
●
SE_TK76_Teil_1_080917.indd 55 18.09.2008 08:40:58
Page 60

56
defr
Entretien et nettoyage
quotidien
r
!
Risque de choc électrique!
Avant tout nettoyage, débrancher le cordon
électrique. Ne jamais plonger la machine
dans l’eau. Ne pas utiliser de nettoyeur à
vapeur.
Essuyer le boîtier avec un chiffon humide.
Ne pas utiliser de produit abrasif.
Rincer le réservoir d‘eau 11 et l‘unité de
percolation 24 uniquement avec de l‘eau.
Pour le nettoyage, essuyer avec un
chiffon humide le couvercle préservateur
d‘arôme 26, le panneau des bacs
collecteurs 27 et l‘isolation du réservoir
de lait 34.
Ne pas passer au lave-vaisselle.
Retirer la grille du bec verseur du café 29,
la grille du mousseur de lait 31 et le bac
collecteur du mousseur de lait 30. Retirer
vers l‘avant le bac collecteur du bec
verseur de café 28 avec le récipient pour
marc de café 32, les vider et les nettoyer.
Tous ces éléments peuvent passer en
lave-vaisselle.
Nettoyer à la main la cuillère-dose 14, le
couvercle préservateur d‘arôme 16 ainsi
que la partie intérieure et le couvercle du
réservoir de lait 34 ou bien les passer en
machine.
Essuyer l‘intérieur de la machine (bacs de
collecte).
Important : les bacs collecteurs 28/30
doivent être vidés et nettoyés tous les jours
afin d‘éviter la formation de moisissures.
Remarque : lorsque la machine froide est
allumée à l’aide de la touche 2 a ou bien
placée en position a après un prélèvement
de café, la machine réalise un rinçage
automatique. Le système est donc
autonettoyant.
●
●
●
●
●
●
Nettoyage du mousseur de lait 10
Nettoyer le mousseur de lait 10 après
chaque utilisation!
Il est possible d‘effectuer un pré-nettoyage
automatique du mousseur de lait 10.
A l‘écran 5, sélectionnez le symbole Ì et
appuyer sur la touche 8
start
.
PLACER UN VERRE VIDE SOUS LE
MOUSSEUR, PL ACER L‘EMBOUT POUR
MOUSSE DANS LE VERRE
Ò
START
Placer un verre vide sous le mousseur de
lait 10 et introduire l‘extrémité du tube
mousseur 10d dans le verre.
Appuyer sur la touche 8
start
. La machine
remplit automatiquement le verre d‘eau
puis l‘aspire par le tube mousseur 10d
pour rincer le dispositif. Au bout de 1 min
environ, l‘opération de nettoyage s‘arrête
automatiquement.
Vider le verre et nettoyer le tube
mousseur 10d.
De plus, nettoyer soigneusement le
mousseur de lait toutes les deux semaines
environ (au lave-vaisselle ou à la main).
Démonter le mousseur lait 10 pour le
nettoyer.
Extraire le mousseur de lait 10 de la
machine en le tirant vers l‘avant.
Nettoyer les différents éléments (figure
C) à l‘eau savonneuse, avec une brosse
douce.
Bien rincer tous les éléments à l‘eau
courante et les sécher.
Remonter tous les éléments et les
remplacer jusqu‘en butée.
Info : tous les éléments du mousseur lait 10
peuvent être lavés en machine.
Nettoyer l‘unité de percolation 24 (voir
aussi Mémento)
En plus du programme de nettoyage
automatique, il est possible de retirer l‘unité
de percolation 24 pour la nettoyer.
Appuyer sur la touche 2 a pour placer la
machine en «mode Eco».
●
●
●
●
●
●
●
●
●
SE_TK76_Teil_1_080917.indd 56 18.09.2008 08:40:58
Page 61

57
defr
Arrêter entièrement la machine à l’aide de
l’interrupteur électrique 1 O / I, aucune
touche n’est allumée.
Faire glisser l'ouvre-volet 23 vers la droite
et ouvrir le volet 22 de l’unité de passage
24.
Faire glisser le verrouillage rouge 24b de
l‘unité de percolation 24 vers la gauche.
Appuyer sur le bouton poussoir rouge
24a et saisir l‘unité de percolation 24 par
les évidements (figure E) et la retirer
avec précaution.
Nettoyer l‘unité de percolation 24 sous un
jet d‘eau claire.
Important : ne pas ajouter de détergent, ne
pas laver en machine.
Essuyer l‘intérieur de la machine avec un
chiffon humide.
Laisser sécher l‘unité de percolation 24 et
l‘intérieur de la machine.
Replacer l‘unité de percolation 24 et
pousser jusqu‘en butée.
Faire glisser vers la droite le verrouillage
rouge 24b et fermer le volet 22.
Rangement des
accessoires
La machine est dotée de logements
spéciaux pour les accessoires et le
Mémento.
Pour ranger la cuillère-dose 14, le tube
mousseur 10d et le flexible 10c, retirer le
réservoir d‘eau 11 et placer les éléments
dans les évidements 13.
Le Mémento possède son propre logement
à côté de l‘unité de percolation 24.
Ouvrir le volet 22 de l‘unité de
percolation.
Saisir par la languette la fermeture rouge
26 du logement 25 et la retirer.
Ranger le Mémento, replacer la fermeture
26 et refermer le volet de l‘unité de
percolation 22.
●
●
●
●
●
●
●
●
●
●
●
●
●
Conseils pour économiser
l’énergie
La machine se place automatiquement en
«mode Eco» au bout d’une heure
(réglage usine). Dans ce mode, la
machine consomme très peu d’électricité.
La valeur par défaut de une heure peut
être modifiée, (voir point «Réglages menu
AR AUTO DANS»)
Lorsque la machine n’est pas utilisée,
l’arrêter au moyen de l’interrupteur
électrique 1 O / I placé à l’avant.
Autant que possible ne jamais interrompre la production de café ou de mousse
de lait. Une interruption provoque en effet
une consommation d’énergie supérieure
ainsi que le remplissage plus rapide des
bacs collecteurs.
Détartrer régulièrement la machine afin
d’éviter les dépôts de calcaire. Les dépôts de calcaire provoquent en effet une
consommation électrique plus élevée.
Programmes de
maintenance
Conseil : voir aussi le Mémento placé dans
son logement 25.
A certains intervalles de temps, l‘écran 5
affiche différents messages :
DÉTARTRER SVP
N
ETTOYER SVP ou
CALC‘N‘CLEAN.
La machine doit alors être nettoyée ou détartrée sans délai avec le programme correspondant. Il est également possible d‘effectuer les deux opérations simultanément
avec la fonction Calc‘n‘Clean (voir point
«Calc‘n‘Clean»). Si le programme de maintenance n‘est pas réalisé conformément
aux indications, cela peut détériorer la
machine.
–
–
–
–
SE_TK76_Teil_1_080917.indd 57 18.09.2008 08:40:58
Page 62

58
defr
Attention
Lors de chaque programme de maintenance, utiliser le produit détartrant et le produit
nettoyant conformément aux indications.
Ne jamais interrompre le programme de
maintenance !
Ne jamais boire les liquides !
Ne jamais utiliser de vinaigre, de produits à
base de vinaigre, d‘acide citrique ou de
produits à base d‘acide citrique !
Ne jamais déposer de pastilles de
détartrage ou autres produits de détartrage
dans le tiroir du café moulu 21 !
Pour le détartrage et le nettoyage, utiliser
exclusivement les pastilles de détar trage
fournies. Elles ont été spécialement
conçues pour la machine à café.
Des pastilles de détartrage et de nettoyage spécialement développées sont
disponibles dans le commerce et auprès
du Service Clientèle.
N° commande Commerce
Service
Clientèle
Pastilles de
nettoyage
TZ60001 310575
Pastilles de
détartrage
TZ60002 310967
Important : si un filtre d‘eau 35 est placé
dans le réservoir d‘eau 11 le retirer
impérativement avant de lancer le
programme de maintenance.
Détartrage
ESPRESSO Ë Í
D
ÉTARTRER SVP
Ò
TOUCHE i 3 S
Durant les différentes opérations de
détartrage, la touche 8
start
clignote.
Les chiffres en haut à droite indiquent la
progression de l‘opération.
Maintenir appuyée la touche 7 j au moins
3 secondes.
DÉTARTRAGEÒSTART
Appuyer sur la touche 8
start
, le
programme défile à l’écran 5.
VIDER LE BAC COLLECTEUR
P
LACER LE BAC COLLECTEUR
Vider les bacs collecteurs 28/30 et les
replacer.
PLACER RÉCIPIENT 0,5 L SOUS
MOUSSEUR LAIT
Ò
START
Placer un récipient d'une capacité de 0,5l
sous le mousseur lait 10.
Appuyer sur la touche 8
start
.
Info : si le filtre à eau 35 est activé,
l’utilisateur est invité à retirer le filtre et à
appuyer de nouveau sur la touche 8
start
RETIRER LE FILTRE EAU ÒSTART
0,5 L EAU + DÉTARTRANT REMPLIR
Ò
START
Verser de l‘eau tiède dans le réservoir
d‘eau 11 jusqu‘au repère «0,5l» et
dissoudre 2 pastilles de détartrage
Siemens.
Appuyer sur la touche 8
start
, le
programme de détartrage se déroule
maintenant durant 20 minutes environ
DÉTARTRAGE EN COURS
●
●
●
●
●
●
●
SE_TK76_Teil_1_080917.indd 58 18.09.2008 08:40:58
Page 63

59
defr
DÉTARTRANT INSUFFIS.
R
AJOUTER DÉTARTRANT
Info : s‘il n‘y a pas assez de solution de
détartrage dans le réservoir d‘eau 11, le
message demandant de rajouter de la
solution de détartrage s‘affiche ; appuyer de
nouveau sur la touche 8
start
.
RINCER LE RÉSERVOIR D’EAU ET REMPLIR
Ò
START
Rincer le réservoir d’eau 11 et le remplir
d’eau fraîche jusqu’au repère «max».
Appuyer sur la touche 8
start
, le
programme de détartrage se déroule
durant env. 1 minute et effectue un
rinçage de la machine.
DÉTARTRAGE EN COURS
V
IDER LE BAC COLLECTEUR
PLACER LE BAC COLLECTEUR
Vider les bacs collecteurs 28/30 et les
replacer.
La machine est maintenant détartrée et de
nouveau prête à fonctionner.
Nettoyage
ESPRESSO Ë Í
N
ETTOYER SVP
Ò
TOUCHE i 3 S
Durant les différentes opérations de
nettoyage, la touche 8
start
clignote.
Les chiffres en haut à droite indiquent les
progrès de l‘opération.
Remplir le réservoir d‘eau 11 jusqu‘à
«max».
Maintenir appuyée la touche 7 j au moins
3 secondes.
NETTOYAGEÒSTART
Appuyer sur la touche 8
start
, le
programme se déroule à l’écran 5.
●
●
●
●
●
●
VIDER LE BAC COLLECTEUR
P
LACER LE BAC COLLECTEUR
Vider les bacs collecteurs 28/30 et les
replacer, la machine réalise deux
rinçages.
PIVOTER LE BEC VERSEUR
Faire pivoter le bec verseur du café 9
vers la gauche dans la position café
jusqu’à ce qu’il s’enclipse (bruit
caractéristique).
NETTOYAGE EN COURS
OUVRIR TIROIR
Ouvrir le tiroir à café 21 en appuyant.
PLACER UNE PASTILLE DE NETTOYAGE
S
IEMENS DANS LE TIROIR ET REFERMER
Placer une pastille de nettoyage Siemens
dans le tiroir 21 et refermer.
APPUYER SUR START
Appuyer sur la touche 8
start
, le
nettoyage est activé pour une durée de 7
minutes env.
NETTOYAGE EN COURS
V
IDER LE BAC COLLECTEUR
P
LACER LE BAC COLLECTEUR
Vider les bacs collecteurs 28/30 et les
replacer.
La machine est maintenant nettoyée et de
nouveau prête à fonctionner.
●
●
●
●
●
●
SE_TK76_Teil_1_080917.indd 59 18.09.2008 08:40:58
Page 64

60
defr
Calc‘n‘Clean
Calc‘n‘Clean combine les fonctions
Détartrage et Nettoyage. Si le moment de
réaliser chacun des deux programmes est
proche, la machine propose
automatiquement ce programme.
ESPRESSO Ë Í
C
ALC‘N‘CLEAN
Ò
TOUCHE i 3 S
Durant les différentes opérations du
programme Calc‘n‘Clean, la touche 8
start
clignote. Les chiffres en haut à droite
indiquent l’avancement de l’opération.
Maintenir appuyée la touche 7 j durant 3
secondes au moins.
CALC‘N‘CLEANÒSTART
Appuyer sur la touche 8
start
, le
programme défile à l’écran.
VIDER LE BAC COLLECTEUR
P
LACER LE BAC COLLECTEUR
Vider les bacs collecteurs 28/30 et les
replacer.
Basculer le bec verseur du café 9 vers la
droite jusqu‘à ce qu‘il s‘enclipse (bruit
caractéristique).
Placer un récipient d'une capacité de 1 l
au moins sous le mousseur lait 10.
Appuyer sur la touche
start
, la machine
effectue deux rinçages.
NETTOYAGE EN COURS
O
UVRIR TIROIR
Appuyer sur le tiroir à café 21 pour
l’ouvrir.
PLACER UNE PASTILLE DE NETTOYAGE
S
IEMENS DANS LE TIROIR ET REFERMER
Placer une pastille de nettoyage Siemens
dans le tiroir 21 et refermer.
●
●
●
●
●
●
●
●
Info : si le filtre à eau 35 est activé,
l’utilisateur est invité à retirer le filtre et à
appuyer de nouveau sur la touche 8
start
.
RETIRER LE FILTRE EAU ÒSTART
0,5 L EAU + DÉTARTRANT REMPLIR
Ò
START
Verser de l‘eau tiède dans le réservoir
d‘eau 11 jusqu‘au repère «0,5l» et
dissoudre 2 pastilles de détartrage
Siemens.
Appuyer sur la touche 8
start
, le
programme de détartrage se déroule
durant 20 minutes env.
DÉTARTRAGE EN COURS
DÉTARTRANT INSUFFIS.
R
AJOUTER DÉTARTRANT
Info : s‘il n‘y a pas assez de solution de
détartrage dans le réservoir d‘eau 11, le
message demandant de rajouter de la solu-
tion de détartrage s‘affiche ; appuyer de
nouveau sur la touche 8
start
.
RINCER LE RÉSERVOIR D’EAU ET REMPLIR
Ò
START
Rincer le réservoir d’eau 11 et remplir
d’eau fraîche jusqu’au repère «max».
Appuyer sur la touche 8
start
, le
programme de détartrage se déroule
durant 1 minute environ, puis le
programme de nettoyage rince la
machine durant 7 minutes environ.
DÉTARTRAGE EN COURS
NETTOYAGE EN COURS
VIDER LE BAC COLLECTEUR
P
LACER LE BAC COLLECTEUR
Vider les bacs collecteurs 28/30 et les
replacer.
La machine est nettoyée et détartrée et de
nouveau prête à fonctionner.
Important : si l’un des programmes de
maintenance a été interrompu, par ex. par
une coupure de courant, procéder comme
indiqué ci-après :
●
●
●
●
●
SE_TK76_Teil_1_080917.indd 60 18.09.2008 08:40:59
Page 65

61
defr
Rincer le réservoir d’eau 11 et remplir
d’eau fraîche jusqu’au repère «max».
Appuyer sur la touche 8
start
, le programme de nettoyage se déroule durant 3
minutes environ et rince la machine.
NETTOYAGE EN COURS
VIDER LE BAC COLLECTEUR
P
LACER LE BAC COLLECTEUR
Vider les bacs collecteurs 28/30 et les
replacer.
La machine est de nouveau prête à
fonctionner.
Protection contre le gel
r
!
Afin d’éviter les dommages provo-
qués par le gel lors du transport et du
stockage, il faut préalablement vider
entièrement la machine.
Info : la machine doit être prête à fonction-
ner et le réservoir d‘eau 11 doit être rempli.
Placer un grand récipient étroit sous le
mousseur lait 10.
Sélectionner le réglage «Mousse lait» È,
et envoyer de la vapeur durant 15
secondes env.
Arrêter la machine à l’aide de
l’interrupteur électrique 1 O / I.
Vider le réservoir d’eau 11 et les bacs
collecteurs 28/30.
●
●
●
●
●
●
●
Accessoires
Les accessoires suivants sont disponibles
dans le commerce ou auprès du service
Clientèle.
N° commande Commerce
Service
Clientèle
Pastilles de
nettoyage
TZ60001 310575
Pastilles de
détartrage
TZ60002 310967
Filtre d‘eau TZ70003 467873
Mise au rebut A
Cet appareil est identifié selon la Directive
européenne 2002/96/CE relative aux
déchets d‘équipements électriques et
électroniques (DEEE). Cette directive définit
les conditions de collecte et de recyclage
des anciens appareils à l’intérieur de
l’Union Européenne. S‘informer auprès du
revendeur sur la procédure actuelle de
recyclage.
Garantie
Les conditions de garantie applicables sont
celles publiées par notre distributeur dans
le pays où a été effectué l’achat. Le reven-
deur chez qui vous vous êtes procuré
l’appareil fournira les modalités de garantie
sur simple demande de votre part. En cas
de recours en garantie, veuillez toujours
vous munir de la preuve d’achat.
Sous réserve de modifications.
SE_TK76_Teil_1_080917.indd 61 18.09.2008 08:40:59
Page 66

62
defr
Problème Cause Remède
Affichage de
REMPLIR LE BAC À CAFÉ
bien que le bac à café 15
soit rempli, ou bien le
moulin ne parvient pas à
moudre.
Les grains ne tombent pas
dans le broyeur (grains trop
gras).
Frapper légèrement le bac à
café 15.
Changer éventuellement de
café.
Une fois que le bac à café
15 est vide, l’essuyer avec
un chiffon sec.
Impossible de produire de
l’eau chaude.
Le mousseur lait 10 ou le
support du mousseur lait 10
est obturé.
Nettoyer le mousseur lait 10
ou son support.
Trop peu de mousse ou pas
de mousse
ou
le mousseur de lait
10
n‘aspire pas le lait.
Le mousseur lait 10 ou le
support du mousseur lait 10
est obturé.
Nettoyer le mousseur de lait
10 ou le support du
mousseur de lait 10.
Lait non adapté. Utiliser du lait à une teneur
de 1,5 % de matières
grasses.
Le mousseur de lait
10 n‘est
pas correctement monté.
Monter correctement le
mousseur de lait 10.
Le café s
’écoule goutte à
goutte.
Mouture trop fine, café
moulu trop fin.
Régler une mouture moins
fine. Utiliser du café moulu
moins fin.
La machine est fortement
entartrée.
Détartrer la machine.
Le café ne présente pas de
«crème».
Qualité du café ne convient
pas.
Changer de qualité de café.
Les grains ne sont pas
fraîchement torréfiés.
Les grains ne sont pas
fraîchement torréfiés.
La mouture n
’est pas
adaptée aux grains de café.
Optimiser la finesse de la
mouture.
Le café est trop «acide». La mouture n‘est pas assez
fine ou bien le café moulu
n‘est pas assez fin.
Régler une mouture plus
fine ou acheter du café
moulu plus fin.
Qualité de café non
adaptée.
Utiliser un café torréfié plus
foncé.
Lorsqu’il est impossible d’éliminer les défaillances, appeler impérativement le
Service Clientèle!
Eliminer soi-même les problèmes simples
SE_TK76_Teil_1_080917.indd 62 18.09.2008 08:40:59
Page 67

63
defr
Problème Cause Remède
Le café est trop
«amer». La mouture est trop fine ou
le café moulu est trop fin.
Régler une mouture moins
fine ou acheter du café
moulu moins fin.
Qualité du café ne convient
pas.
Changer de qualité de café.
Affichage à l‘écran
DEFAILLANCE
A
PPELER SERVICE
C
LIENTÈLE.
Une défaillance s‘est
produite dans la machine.
Appeler le Service Clientèle.
Le filtre à eau 35 ne tient
pas dans le réservoir
d‘eau 11.
Le filtre à eau 35 n‘est pas
enclipsé.
Bien appuyer le filtre
à eau 35 dans le réservoir
jusqu‘à ce qu‘il s‘enclipse
(bruit caractéristique).
Le marc de café n‘est pas
compact et il est trop sec (il
s‘effrite).
La mouture est trop fine ou
il n‘y a pas assez de café
moulu.
Régler une mouture moins
fine ou utiliser 2 doses de
café moulu.
Le marc de café n‘est pas
compact et il est trop
humide.
La mouture est trop
grossière ou il y a trop de
café.
Régler une mouture plus
fine ou n‘utiliser qu‘une dose
de café moulu.
Lorsqu’il est impossible d’éliminer les défaillances, appeler impérativement le
Service Clientèle!
SE_TK76_Teil_1_080917.indd 63 18.09.2008 08:40:59
Page 68

64
deit
Istruzioni di sicurezza
Leggere con attenzione interamente,
osservare e conservare le istruzioni per
l’uso!
Questa macchina automatica per
espresso è destinata all’uso domestico e
alla preparazione di quantità tipiche per
questo impiego e non all’attività
professionale.
r
!
Pericolo di scarica elettrica!
Nel collegamento e nell’uso
dell’apparecchio rispettare i dati della
targhetta di identificazione.
Usare solo se il cavo di alimentazione e
l’apparecchio non presentano danni.
Usare l’apparecchio solo in ambienti interni
a temperatura ambientale.
Non permettere l’uso dell’apparecchio ai
bambini o a soggetti con ridotte capacità
fisiche o psichiche o comunque non dotati
di sufficiente esperienza e conoscenza, a
meno che non siano sorvegliati o non
abbiano ricevuto istruzioni sull’uso
dell’apparecchio da una persona che sia
responsabile della loro sicurezza.
Tenere i bambini lontani dall’apparecchio.
Sorvegliare i bambini, per evitare che
giochino con l’apparecchio.
In caso di guasto, estrarre immediatamente
la spina di alimentazione.
Per evitare rischi, le riparazioni
all’apparecchio, quali ad esempio la
sostituzione di un cavo di alimentazione
danneggiato, devono essere eseguite solo
dal nostro servizio di assistenza clienti.
Non immergere mai l’apparecchio o il cavo
di alimentazione in acqua.
Non toccare i dispositivi di macinazione.
r
! Pericolo di scottature!
L’inserto schiuma per latte / acqua calda si
riscalda molto. Prima di toccarlo, dopo
l’uso, è necessario lasciarlo raffreddare.
Sommario
Riepilogo delle parti e degli elementi di
comando ...................................................65
Al primo impiego .......................................66
Elementi di comando ................................67
− Interruttore di rete O / I ..........................67
− Tasto a ..................................................67
− Pulsante girevole...................................67
− Tasti selettori < e > ............................. 67
− Display ..................................................68
− Tasto
start
.............................................70
− Tasto °C .................................................70
− Impostazioni del tasto j .........................71
− Regolare il grado di macinatura ............71
− Riscaldamento tazze .............................71
Impostazioni del menu..............................72
− Lingua ...................................................72
− Durezza acqua ......................................72
− Decalcificare..........................................72
− Pulire .....................................................72
− Calc‘n‘Clean ..........................................72
− Visualizzare ora .....................................73
− Modo ora ...............................................73
− Regolare ora .........................................73
− Riscald. tazza ON (solo per TK76F09) .73
− Riscald. tazza OFF................................73
− Auto spegnimento in .............................73
− Filtro acqua ...........................................73
− Contrasto...............................................74
− Imp.predefinita ......................................74
Preparazione con chicchi di caffè .............74
Preparazione con caffè macinato ............75
Preparazione di schiuma di latte
e di latte caldo ..........................................76
Prelievo di acqua per il thè .......................77
Cura e pulizia quotidiana ..........................77
− Pulire la linea del latte ...........................78
− Pulire il bollitore .....................................78
Accessori per la conservazione ................79
Consigli per risparmiare energia...............79
Programmi di assistenza .........................79
− Decalcificare..........................................80
− Pulire .....................................................81
− Calc‘n‘Clean ..........................................81
Protezione dal gelo e Accessori ...............82
Soluzione di piccoli guasti ........................83
Smaltimento e Garanzia ...........................84
SE_TK76_Teil_1_080917.indd 64 18.09.2008 08:40:59
Page 69

65
deit
18 Anello luminoso
19 Vassoio tazze con funzione di
riscaldamento
20 Tasto per l’accensione del vassoio
scaldatazze
21 Cassetto per caffè macinato /
pastiglie di pulizia
22 Sportelli del bollitore
23 Interruttore aprisportello
24 Bollitore
a) Pulsante scorrevole
b) Dispositivo di blocco
25 Scomparto per riporre le istruzioni brevi
26 Chiusura dello scomparto per la
conservazione delle istruzioni brevi
27 Pannello raccogligocce
28 Raccogligocce uscita caffè
29 Griglia di sgocciolamento uscita caffè
30 Raccogligocce inserto schiuma
31 Griglia di sgocciolamento inserto
schiuma
32 Contenitore per fondi di caffè
33 Vano portacavo
34 Recipiente per il latte (isolato)
35 Filtro per l’acqua
Riepilogo delle parti e
degli elementi di comando
Figure A, B, C, D ed E
1 Interruttore di rete O / I
2 Tasto a
3 Tasto °C
(temperatura / sicurezza bambini)
4 Tasti selettori < >
5 Display
a) Riga di stato
b) Riga di selezione
c) Riga di navigazione
6 Pulsante girevole per le impostazioni del
display
7 Tasto j (menu informativo)
8 Tasto
start
(Bevande / Programmi)
9 Uscita caffè regolabile in altezza e
orientabile
10 Inserto schiuma regolabile in altezza
(prelievo latte / acqua calda)
a) Elemento superiore
b) Elemento inferiore
c) Flessibile
d) Tubicino del latte
11 Serbatoio acqua rimovibile
12 Coperchio del serbatoio per l’acqua
13 Vano per riporre il dosatore del caffè
macinato e gli accessori dell’inserto
schiuma
14 Dosatore del caffè macinato (guida di
inserimento per il filtro dell’acqua)
15 Serbatoio chicchi
16 Coperchio salva-aroma
17 Selettore della regolazione del grado di
macinatura
ll presente manuale d’uso descrive diversi
modelli con dotazioni diverse.
Si prega di osservare anche le istruzioni
brevi. Queste si possono inserire in un
apposito scomparto 25, che consente di
tenerle sempre a portata di mano per la
consultazione durante l’uso.
Gentili amanti del caffè,
congratulazioni per aver acquistato questa
macchina automatica per espresso della
società Siemens.
SE_TK76_Teil_1_080917.indd 65 18.09.2008 08:40:59
Page 70

66
deit
Al primo impiego
Informazioni generali
Versare nei corrispondenti serbatoi solo
acqua pulita non addizionata con anidride
carbonica e preferibilmente miscele di caffè
per macchine automatiche per espresso e
caffè. Non usare chicchi di caffè glassati,
caramellati o trattati con altri additivi contenenti zucchero, in quanto otturano il bollitore.
In questo apparecchio è possibile regolare
la durezza dell’acqua. Il valore preimpostato
è 4. Determinare la durezza dell’acqua con
le apposite striscie fornite in dotazione. Se
la durezza indicata è diversa da 4, programmare di conseguenza l’apparecchio (vedere
il capitolo “Menu impostazioni DUREZZA
ACQUA”).
Mettere l’apparecchio in funzione
Posizionare la macchina per il caffè
espresso su una superficie piana, in
grado di sostenere il suo peso
Informazione: l’apparecchio è dotato, sul
fondo, di quattro rotelle, che permettono di
spostarlo su una linea ad arco al fine di
facilitarne l’uso e la collocazione.
Estrarre il cavo dal vano portacavo 33 e
inserire la spina. Per regolare la lunghezza, estrarre il cavo spostandolo verso il
basso oppure reinserirlo spostandolo
verso l’alto. Per eseguire questa operazione, posizionare l’apparecchio ad
esempio al bordo del tavolo.
Sollevare il coperchio del serbatoio per
l’acqua 12.
Estrarre il serbatoio per l’acqua 11
,
sciacquarlo e riempirlo con acqua pulita
fredda. Non superare il livello indicato
come “max“.
Posizionare il serbatoio dell’acqua 11
diritto e spingerlo completamente verso il
basso.
●
●
●
●
●
Richiudere il coperchio del serbatoio per
l’acqua 12.
Riempire l’apposito serbatoio 15 con i
chicchi di caffè.
Premere l’interruttore di rete 1 O / I, il
tasto 8 start si accende e sul display 5
vengono visualizzate diverse lingue.
Ora scegliere la lingua di visualizzazione
degli altri testi del display con i tasti
selettori 4 < e >.
LANG UAGE
DEUTS CH
Ò
START
ENGLISH
PYCCK ИЙ
La lingua selezionata viene
contrassegnata con una cornice. Sono
disponibili le seguenti lingue:
DEUTSCH
E
NGLISH
P
YCCKИЙ
N
EDERL ANDS
F
RANÇAIS
I
TALIANO
S
VENSKA
E
SPAÑOL
P
OLSKI
● Premere il tasto 8
start
, la lingua
selezionata viene memorizzata, il tasto 2
a si accende.
●
●
●
●
SE_TK76_Teil_1_080917.indd 66 18.09.2008 08:41:00
Page 71

67
deit
● Premere il tasto 2 a, sul display 5
compare il logo del marchio. Ora
l’apparecchio si riscalda ed esegue un
risciacquo, un po’ di acqua fluisce
dall’uscita caffè 9. Quando sul display 5
compaiono i simboli per la preparazione,
l’apparecchio è pronto per l’uso.
ESPRESSO Ë Í
 à À Á Ä Å
Informazione: la macchina per il caffè
espresso è preprogrammata con impostazioni standard per un funzionamento ottimale. Dopo 1 ora l’apparecchio passa automaticamente alla „modalità di risparmio” (vedere capitolo “Impostazioni di menu AUTO
SPEGNIMENTO IN”).
Consiglio: al primo utilizzo o quando l’apparecchio resta inutilizzato per un periodo
più lungo, la prima tazza non ha un aroma
pieno.
Dopo la prima messa in funzione della
macchina automatica per espresso, si
otterrà una crema consistente e densa solo
dopo aver prodotto alcune tazze.
Elementi di comando
Interruttore di rete O / I
L’interruttore di rete 1 O / I attiva o disattiva
completamente la “modalità di risparmio”
dell’apparecchio. Nella “modalità di
risparmio” è acceso solo il tasto 2 a.
Importante: spegnere l’apparecchio con
l’interruttore di esercizio solo quando è
attiva la “modalità di risparmio”, affinché
venga eseguito il risciacquo automatico.
Tasto a
Con il tasto 2 a l’apparecchio si accende
(pronto per l’uso) o si ripristina la “modalità
di risparmio”.
Il tasto 2 a lampeggia fino a quando
l’apparecchio esegue il risciacquo.
L’apparecchio non esegue il risciacquo
quando:
è ancora caldo all’accensione;
non è avvenuto alcun prelievo di caffè
prima del passaggio alla “modalità di
risparmio”.
L’apparecchio è pronto per l’uso quando i
simboli per la selezione delle bevande e il
tasto 8
start
lampeggiano.
Pulsante girevole
Il pulsante girevole 6 permette di navigare
nel display ruotandolo verso sinistra o verso
destra oppure di modificare i parametri nel
menu.
Tasti selettori < e >
Con i tasti selettori 4 < e > è possibile
navigare verso il basso o verso l’alto
all’interno dei livelli di menu (riga di
navigazione 5c).
●
●
SE_TK76_Teil_1_080917.indd 67 18.09.2008 08:41:00
Page 72

68
deit
Display
Il display 5 visualizza, mediante simboli,
possibilità di selezione, intensità del caffè e
quantità, e, mediante testi, impostazioni,
processi in corso e messaggi. Le impostazioni si eseguono qui mediante il pulsante
girevole 6 e i tasti selettori 4.
L’impostazione selezionata viene contrassegnata con una cornice.
ESPRESSO ËË Í
 à À Á Ä Å
Nella riga di stato 5a del display 5 viene
visualizzato il nome del tipo di bevanda e il
valore impostato per l’intensità, ad esempio
55 e per la quantità, ad esempio
Î
. La
riga di selezione 5b rappresenta i simboli
per la selezione delle bevande.
Le frecce nella riga di navigazione 5c
indicano in quale direzione sono disponibili
ulteriori livelli di menu.
Messaggi sul display
Sul display 5 vengono visualizzati diversi
messaggi.
Informazioni:
SERB. ACQUA IN ESAUR.
S
ERB. CHICCHI IN ESAUR.
S
I PREGA DI ATTENDERE
Azioni:
RIEMPIRE SERBATOIO ACQUA
INSERIRE SERBATOIO ACQUA
CONTROLLARE SERBAT. ACQUA
INSERIRE RACCOGLIGOCCE
VUOTARE RACCOGLIGOCCE
RIEMPIRE SERBATOIO CHICCHI
POSIZIONARE USCITA CAFFÈ
INSERIRE INNESTO SCHIUMA
INSERIRE UNITÀ DI INFUSIONE CAFFÈ.
C
HIUDERE SPORTELLO
CONTROLLARE UNITÀ DI INFUSIONE
CAFFÈ
VERSARE LA POLVERE
C
HIUDERE IL CASSETTO
CAMBIARE FILTRO
DECALCIFICARE
ESEGUIRE PULIZIA
CALC‘N‘CLEAN
TEMP. TROPPO BASSA
S
I PREGA DI ATTENDERE
ALTO – BASSO VOLTAGGIO
5a
b
c
SE_TK76_Teil_1_080917.indd 68 18.09.2008 08:41:00
Page 73

69
deit
ESPRESSO ËË Í
Á Ä Å Æ Ç È
MY COFFEE Ë Í
5 55 555
MY COFFEE Ë Í
Î Ð Ò
MY COFFEE Ë Í
ESPRESSO LATTE
40%
Possibilità di selezione
Â
2 ESPRESSO
Ã
2X CA FFÈ
À
ESPRESS O Á CA FFÈ
Ä CAFFELATTE
Å
MACC HIATO
Æ
CAP PUCCINO
Ç
MY COFFEE
È
SCHIUM A L ATT E É LATTE CALDO
Ê
ACQUA C AL DA
Ì
L
AVAGGIO RA PIDO
SISTEMA LATTE
Intensità del caffè
(solo per bevande a base di caffè)
5 5 5 5 5 5
Media Normale Forte
Quantità
(solo per bevande a base di caffè)
Î Ð Ò
piccola media grande
Oltre all’intensità del caffè e alla
quantità di riempimento, per
l’impostazione personalizzata
MY
COFFEE Ç è possibile selezionare
anche la proporzione di miscela tra
caffè espresso e latte: L’impostazione
può essere eseguita gradualmente,
con incrementi del 20%, ruotando il
pulsante girevole.
SE_TK76_Teil_1_080917.indd 69 18.09.2008 08:41:03
Page 74

70
deit
Tasto
start
Premento il tasto 8
start
si avvia la
preparazione della bevanda e un
programma di assistenza.
Premendo nuovamente il tasto 8
start
durante la preparazione della bevanda è
possibile interrompere anticipatamente il
prelievo.
Tasto °C
Con il tasto 3 °C si imposta la temperatura
del caffè e dell’acqua per il thè (premendo
per breve tempo) e si attiva o disattiva la
sicurezza bambini (tenere il tasto premuto
per almeno 3 secondi).
Regolazione della temperatura
Premere brevemente il tasto 3 °C ed
eseguire le impostazioni con i tasti < e > e
il pulsante girevole.
TEMPERATURA
CAFFÈ
ACQUA CALDA
NORMALE
TEMPERATURA
CAFFÈ
ACQUA CALDA
<90°C
Premendo nuovamente il tasto 3 C° e
ritornare alla selezione della bevanda.
Queste impostazioni sono efficaci
automaticamente per tutti i tipi di
preparazione.
Sicurezza bambini
Esiste la possibilità di bloccare l’apparecchio per proteggere i bambini da ustioni e
scottature.
● Tenere premuto il tasto 3 °C per almeno 3
secondi, sul display viene visualizzato il
simbolo di una chiave. A questo punto la
sicurezza bambini è attiva.
In questo stato la macchina non può
essere utilizzata. Il vassoio scaldatazze è
spento.
ESPRESSO Ë Í
● Per disattivare la sicurezza bambini
tenere premuto il tasto 3 C° per almeno 3
secondi; sul display 5 il simbolo della
chiave scompare.
SE_TK76_Teil_1_080917.indd 70 18.09.2008 08:41:04
Page 75

71
deit
Impostazioni del tasto j
Con il tasto 7 j è possibile richiamare delle
informazioni (premere brevemente) ed
eseguire le impostazioni (tenere il tasto
premuto per almeno 3 secondi).
Richiamare informazioni
Nel menu Info si possono richiamare le
seguenti informazioni:
– il numero di bevande prelevate dalla
messa in funzione della macchina per
caffè espresso
– il periodo che deve trascorrere fino al
prossimo intervento di assistenza
● Premere brevemente il tasto 7 j e
navigare con i tasti < e >.
MENU INFO
DECALC. TRA CA. XXX TAZZE
PULIRE TRA CA. X X X TAZZE
MANCA FILTRO
CAMBIO FILTRO TRA X X X TAZZE *
MENU INFO
NUMERO DI TAZZE XX
NUMERO DI MIX LATTE XX
QUANTITÀ DI ACQUA CALDA XL
*compare solo se il filtro è attivo.
Premendo di nuovo il tasto j per breve
tempo si ritorna alla selezione delle bevande. Dopo circa 10 secondi di inattività,
l’apparecchio passa automaticamente alla
modalità di selezione delle bevande.
Eseguire le impostazioni
(vedere capitolo “Impostazioni del menu”).
Regolare il grado di macinatura
Con il selettore 17 è possibile regolare il
grado di macinatura desiderato per il caffè.
Attenzione
Regolare il grado di macinatura solo con il
macinacaffè in funzione! In caso contrario
l’apparecchio potrebbe subire danni.
● Con il macinacaffè in funzione,
posizionare il selettore 17 su un valore
compreso tra caffè macinato fine • • • è
caffè macinato grosso ● ● ●.
Informazione: la nuova regolazione risulta
effettiva solo a partire dalla seconda tazza.
Consiglio: per chicchi più tostati scegliere
un grado di macinatura più fine, per chicchi
meno tostati scegliere un grado di
macinatura più grosso.
Riscaldamento tazze
r
! Attenzione! Il dispositivo di
riscaldamento tazze si riscalda molto!
La macchina automatica per espresso è
dotata di una funzione per il riscalda-mento
delle tazze 19, che può essere attivata o
disattivata manualmente con il tasto 20. Se
il riscaldamento tazze 19 è attivo, il tasto 20
si accende.
Consiglio: per un riscaldamento ottimale
delle tazze, posizionarle sul dispositivo con
la base a contatto con il riscaldamento 19.
Solo per TK 76F09
Esiste anche la possibilità di preprogrammare il riscaldamento tazze (vedere il
Capitolo “Impostazioni del menu
RISCALD.
TAZZE ON”).
SE_TK76_Teil_1_080917.indd 71 18.09.2008 08:41:05
Page 76

72
deit
Impostazioni del menu
● Tenere premuto il tasto 7 j per almeno 3
secondi.
Compaiono le diverse possibilità di
impostazione.
IMPOSTAZIONI
LINGUA ITALIANO
DUREZZA ACQUA
DECALCIFICARE
Nel testo che segue ogni nuova
impostazione inizia con
j 3 sec. + >
ed è seguita da una
descrizione precisa.
Con i tasti < e > è possibile selezionare le
diverse possibilità di impostazione.
IMPOSTAZ IONI
DUREZ ZA ACQUA
DECAL CIFICARE
Ò
START
PULIRE
Nota: le modifiche eseguite vengono
salvate automaticamente, senza la
necessità di un’ulteriore conferma.
j 3 sec. + >
LINGUA
● Ruotando il pulsante girevole 6 è
possibile selezionare la lingua desiderata.
j 3 sec. + >
DUREZZA ACQUA
● Ruotando il pulsante girevole 6 è
possibile selezionare la durezza
dell’acqua desiderata sui valori
1,2,3 e 4.
Informazione: l’impostazione della corretta
durezza dell’acqua è importante affinché
l’apparecchio venga decalcificato negli
intervalli dovuti. Il valore preimpostato per la
durezza dell’acqua è 4. La durezza
dell’acqua si può determinare con la strisce
di test fornite in dotazione oppure si può
richiedere alla società locale di distribuzione
dell’acqua.
● Immergere in acqua per breve tempo la
striscia di test e leggere il risultato dopo 1
minuto.
Grado Grado di durezza dell’acqua
Tedesco (°dH) Francese (°fH)
1
2
3
4
1-7
8-14
15-21
22-30
1-13
14-25
26-38
39-54
j 3 sec. + >
DECALCIFICARE
● Per eseguire la decalcificazione
dell’apparecchio, premere il tasto 8
start
e ed eseguire il programma di
decalcificazione (vedere Capitolo
“Decalcificare”).
j 3 sec. + >
PULIRE
● Per eseguire la pulizia dell’apparecchio,
premere il tasto 8
start
e ed eseguire il
programma di pulizia (vedere Capitolo
“Pulire”).
j 3 sec. + >
CALC‘N‘CLEAN
● Per eseguire contemporaneamente la
Decalcificazione e la Pulizia
dell’apparecchio, premere il tasto 8
start
ed eseguire il programma Calc‘n‘Clean
(vedere Capitolo “Calc‘n‘Clean“).
SE_TK76_Teil_1_080917.indd 72 18.09.2008 08:41:06
Page 77

73
deit
j 3 sec. + >
VISUALIZZARE ORA
In questo modo si può impostare la
visualizzazione dell’ora sul display in
modalità di risparmio.
● Ruotando il pulsante girevole 6 è
possibile attivare = SÌ o disattivare = NO
la visualizzazione dell’ora.
Informazione: dapprima è necessario
impostare l’ora con la funzione REGOLARE
ORA.
j 3 sec. + >
MODO ORA
Nel Modo ora il pulsante girevole 6
consente di impostare il formato dell’ora
scegliendo tra 12H o 24H.
j 3 sec. + >
REGOLARE ORA
● Ruotando il pulsante girevole 6 è
possibile impostare l’ora attuale, ad
esempio 08:25. Il numero da impostare
è retroilluminato e la retroilluminazione
cambia automaticamente tra ore e minuti.
Solo per TK76F09
(riscaldamento tazze programmabile)
j 3 sec. + >
RISCALD. TAZZA ON
Con questa funzione supplementare il riscaldamento delle tazze si attiva automaticamente ad un’ora programmabile, sia che
l’apparecchio si trovi in “modalità di risparmio”, sia che sia pronto per l’uso.
Informazione: dapprima è necessario
impostare l’ora con la funzione REGOLARE
ORA.
Ruotando il pulsante girevole 6 è
possibile selezionare l’ora desiderata.
Selezionando OFF la funzione è
disattivata.
Solo per TK76F09
(riscaldamento tazze programmabile)
j 3 sec. + >
RISCALD. TAZZA OFF
Questa impostazione permette di impostare
l’ora di disattivazione automatica della
funzione per il riscaldamento delle tazze
dopo la riaccensione.
●
●
Informazione: È necessario impostare l’ora
di attivazione in
RISCALD. TAZZA ON.
Impostare l’intervallo di tempo desiderato
ruotando il pulsante girevole 6.
j 3 sec. + >
AUTO SPEGNIMENTO IN
Ruotando il pulsante girevole 6 è
possibile inserire il tempo che deve
trascorrere dall’ultimo prelievo, prima che
l’apparecchio passi alla modalità di
risparmio.
È possibile impostare un intervallo minimo
di 5 minuti ed un intervalli massimo di 8 ore.
j 3 sec. + >
FILTRO ACQUA
Ogni volta che si inserisce un nuovo fi ltro
acqua nel serbatoio acqua 11, è necessario
eseguire un risciacquo del nuovo fi ltro.
Per eseguire questa operazione spingere
saldamente il fi ltro dell’acqua 35 nel
serbatoio dell’acqua 11 aiutandosi con il
dosatore 14. Riempiere poi il serbatoio
con acqua fi no al contrassegno
“max”
.
Ruotando il pulsante girevole 6 scegliere
START e premere il tasto 8
start
.
● POSIZIONARE RECIP.DA 0,5 L SOT TO
INSERTO SCHIUMA
Ò
START
Posizionare un recipiente con una
capacità da 0,5 l sotto l’inserto schiuma.
Premere il tasto 8
start
. Ora l’acqua
scorre attraverso il fi ltro per sciacquarlo.
Quindi vuotare il recipiente. L’apparecchio
è nuovamente pronto per l’uso.
●
●
●
●
●
●
●
SE_TK76_Teil_1_080917.indd 73 18.09.2008 08:41:06
Page 78

74
deit
Informazione: contemporaneamente al
risciacquo del filtro 35 viene attivata
l’impostazione di visualizzazione del cambio
filtro.
L’effetto del filtro 35 è esaurito quando
compare l’indicazione CAMBIO FILTRO
oppure al massimo dopo 2 mesi dalla
sostituzione. Il filtro deve essere sostituito
per ragioni igieniche e affinché
l’apparecchio non presenti un eccesso di
calcare (che può danneggiare l’apparecchio
stesso).
Filtri di ricambio sono disponibili persso i
rivenditori (TZ70003) o presso il servizio di
assistenza clienti.
Se non viene inserito alcun nuovo filtro,
posizionare l’impostazione
FILTRO ACQUA
su NO.
Informazione: Se l’apparecchio resta
inattivo per un periodo prolungato (ad
esempio durante le vacanze), prima
dell’uso si dovrebbe eseguire il risciacquo
del filtro inserito, semplicemente prelevando
una tazza di acqua calda.
j 3 sec. + >
CONTRASTO
Il contrasto del display può essere
impostato da –20 a +20. Il valore
predefinito è +0.
Eseguire l’impostazione desiderata con il
pulsante girevole 6.
j 3 sec. + >
IMP.PREDEFINITA
È possibile eliminare le impostazioni
personali e riattivare le impostazioni
predefinite.
Per attivare l’impostazione predefinita,
premere il tasto 8
start
.
Informazione
È possibile ripristinare manualmente le
impostazioni predefinite dell’apparecchio
mediante una combinazione di tasti.
L’apparecchio deve essere completamente
spento.
●
●
Premere contemporaneamente i tasti 4
< e > e l’interruttore di rete 1 O / I per
almeno 5 secondi; le impostazioni
predefinite sono nuovamente attive.
Preparazione con chicchi
di caffè
Questa macchina automatico per espresso
macina automaticamente i chicchi freschi
prima di ogni preparazione. Usare
preferibilmente miscele di caffè o espresso
appositamente preparate per l’uso con
macchine da caffè. Per garantire una qualità
ottimale, conservare i chicchi di caffè in
luogo fresco e chiuso oppure congelarli. È
possibile macinare anche chicchi congelati.
Importante: l’acqua del serbatoio
dell’acqua 11 deve essere sempre fresca. Il
serbatoio dovrebbe contenere sempre una
quantità di acqua sufficiente per garantire il
funzionamento dell’apparecchio.
Consiglio: Preriscaldare la o le tazze, in
particolare le piccole e grosse tazze da
espresso, sul vassoio portatazze 19.
È possibile preparare diverse bevande a
base di caffè in modo molto semplice
semplicemente agendo sui tasti.
●
SE_TK76_Teil_1_080917.indd 74 18.09.2008 08:41:07
Page 79

75
deit
Preparazione di bevande senza latte
L’apparecchio deve essere pronto per l’uso.
Posizionare la o le tazze preriscaldate
sotto l’uscita caffè 9.
Selezionare l’espresso o il caffè
desiderato ruotando il pulsante girevole 6.
Sul display 5 viene visualizzata la bevanda
selezionata e l’impostazione per l’intensità e
la quantità di caffè per questa bevanda.
ESPRESSO Ë Í
 à À Á Ä Å
Queste impostazioni possono essere
modificate (vedere capitolo “Elementi di
comando”).
Premere il tasto 8
start
.
Il caffè viene preriscaldato e poi fluisce nella
o nelle tazze.
Preparazione di bevande con latte
L’apparecchio deve essere pronto per l’uso.
● Inserire nel recipiente per il latte 34 il
tubicino del latte 10d dell’inserto
schiuma 10.
Spingere l’uscita caffè 9 verso destra fino
a quando si sente uno scatto.
Posizionare la tazza o il bicchiere
preriscaldato sotto l’uscita caffè 9 e
inserto schiuma 10.
Selezionare la funzione desiderata,
ovvero Macchiato
Å
, Cappuccino Æ,
Caffelatte Ä oppure My coffee Ç
ruotando il pulsante girevole 6.
Sul display 5 viene visualizzata la bevanda
selezionata e l’impostazione per l’intensità e
la quantità di caffè per questa bevanda.
●
●
●
●
●
●
CAPPUCCINO Ë Í
À Á Ä Å Æ Ç
Queste impostazioni possono essere
modificate (vedere capitolo “Elementi di
comando”).
Premere il tasto 8
start
.
Dapprima il latte viene immesso nella tazza
o nel bicchiere. Quindi il caffè viene
preriscaldato e versato nella tazza o nel
bicchiere.
Importante: I resti secchi di latte sono
difficili da rimuovere, per questa ragione si
consiglia di pulire l’inserto schiuma 10 con
acqua tiepida dopo ogni uso (vedere
capitolo “Pulire la linea del latte”).
Preparazione con caffè
macinato
Questa macchina automatica per caffè
espresso può funzionare anche con caffè
macinato (non con caffè solubile).
Preparazione di bevande senza latte
Con il pulsante girevole 6, selezionare À
oppure Á.
Posizionare la o le tazze preriscaldate
sotto l’uscita caffè 9.
Aprire il cassetto per il caffè macinato 21
esercitando una pressione.
Versare 2 dosatori di caffè 14 pieni.
Attenzione: non versare nel cassetto
chicchi interi o caffè solubile.
Chiudere il cassetto del caffè
macinato 21.
Premere il tasto 8
start
.
Il caffè viene preriscaldato e poi fluisce nella
o nelle tazze.
●
●
●
●
●
●
●
SE_TK76_Teil_1_080917.indd 75 18.09.2008 08:41:07
Page 80

76
deit
Nota: per preparare un’altra tazza con
caffè, ripetere l’operazione. Se entro 90
secondi non viene prelevato caffè, il
bollitore si vuota automaticamente per
prevenire che l’acqua trabordi.
L’apparecchio esegue un risciacquo.
Preparazione di bevande con latte
Con il pulsante 6 selezionare Caffèlatte
Ä, Macchiato
Å
, Cappuccino Æ oppure
My coffee Ç.
Inserire nel recipiente del latte 34 il
tubicino 10d dell’inserto schiuma 10.
Spingere l’uscita caffè 9 verso destra fino
a quando si sente lo scatto.
Posizionare la tazza o il bicchiere sotto
l’uscita caffè 9 e inserto schiuma 10.
Aprire il cassetto per il caffè macinato 21
esercitando una pressione.
Versare 2 dosatori di caffè 14 pieni.
Attenzione: non versare nel cassetto
chicchi interi o caffè solubile.
Chiudere il cassetto del caffè macinato
21.
Premere il tasto 8
start
.
Dapprima il latte viene aspirato, preparato e
pompato nella tazza o nel bicchiere. Quindi
il caffè macinato viene preriscaldato e poi
fluisce nella tazza o nel bicchiere.
Importante: I resti secchi di latte sono
difficili da rimuovere, per questa ragione si
consiglia di pulire l’inserto schiuma 10 con
acqua tiepida dopo ogni uso (vedere
capitolo “Pulire la linea del latte”).
Nota: per preparare un’altra tazza con caffè
macinato / mix. latte, ripetere l’operazione.
Se entro 90 secondi non viene prelevato
caffè, il bollitore si vuota automaticamente
per prevenire che l’acqua trabordi.
L’apparecchio esegue un risciacquo.
●
●
●
●
●
●
●
●
Preparazione di schiuma
di latte e di latte caldo
r
!
Pericolo di ustioni
L’inserto schiuma 10 si riscalda molto. Dopo
l’uso, prima di afferrarlo, aspettare che si
raffreddi.
L’apparecchio deve essere pronto per l’uso.
Inserire il tubicino del latte 10d dell’inserto
schiuma 10 nel recipiente del latte 34.
Posizionare la tazza o il bicchiere sotto
l’uscita dell’inserto schiuma 10.
Selezionare l’impostazione
“Schiuma latte”
È
oppure “Latte caldo” É
ruotando il pulsante girevole 6.
Premere il tasto 8
start
, la schiuma (per
circa 40 secondi) o il latte caldo (per circa
60 secondi) fuoriescono dall’uscita
dell’inserto schiuma 10.
Premendo nuovamente il tasto 8
start
è
possibile interrompere anticipatamente
l’operazione.
Consiglio: per preparare un latte particolarmente caldo, aspirarlo nuovamente dal
bicchiere e farlo passare attraverso l’inserto
schiuma 10. Selezionare di nuovo la funzione “Latte caldo”.
Informazione: durante la preparazione del
latte caldo, è possibile che la macchina
emetta dei fischi. Questi sono dovuti alla
struttura dell’inserto schiuma 10.
Consiglio: per una schiuma di latte di
qualità ottimale, usare preferibilmente latte
freddo con una percentuale di grasso del
1,5%.
Importante: I resti secchi di latte sono
difficili da rimuovere, per questa ragione si
consiglia di pulire l’inserto schiuma 10 con
acqua tiepida dopo ogni uso (vedere
capitolo “Pulire la linea del latte”).
●
●
●
●
●
SE_TK76_Teil_1_080917.indd 76 18.09.2008 08:41:07
Page 81

77
deit
Prelievo di acqua per il
thè
r
!
Pericolo di ustioni
L’inserto schiuma 10 si riscalda molto. Dopo
l’uso, prima di afferrarlo, aspettare che si
raffreddi.
L’apparecchio deve essere pronto per l’uso.
Posizionare la tazza o il bicchiere sotto
l’uscita dell’inserto schiuma 10.
Selezionare l’impostazione desiderata
Acqua thè Ê ruotando il pulsante
girevole 6.
Premere il tasto 8
start
, l’acqua calda
fuoriesce per circa 40 secondi dall’uscita
dell’inserto schiuma 10.
Premendo nuovamente il tasto 8
start
è
possibile interrompere anticipatamente
l’operazione.
Nota: è possibile regolare la temperatura
dell’acqua calda (vedere capitolo “Elementi
di comando Tasto 3 °C”).
●
●
●
●
Cura e pulizia quotidiana
r
!
Pericolo di scarica elettrica!
Prima della pulizia, staccare la spina di
rete.
Non immergere mai l’apparecchio in acqua.
Non usare dispositivi di pulizia a vapore.
Pulire l’involucro esterno con un panno
umido. Non usare detersivi abrasivi.
Lavare il serbatoio 11 e il bollitore 24 solo
con acqua.
La chiusura dello scomparto per la
conservazione delle istruzioni brevi 26, il
pannello delle vasche raccogligocce 27 e
il rivestimento isolante del recipiente del
latte 34 si possono lavare esclusivamente
con un panno umido.
Non mettere in lavastoviglie.
Togliere la griglia di sgocciolamento uscita caffè 29, la griglia di sgocciolamento
inserto schiuma 31 e il raccogligocce
inserto schiuma 30. Estrarre la vasca
raccogligocce dell’uscita caffè 28 insieme
con il contenitore per i fondi di caffè 32
tirando in avanti, pulire tutti gli elementi e
reinserirli. Tutti questi pezzi possono essere lavati anche in lavastoviglie.
Lavare a mano, o mettere in lavastoviglie,
il dosatore 14, il coperchio salva-aroma
16 e la parte interna nonché il coperchio
del recipiente del latte 34.
Pulire con un panno l’interno
dell’apparecchio (alloggiamento delle
vasche).
Importante: le vasche raccogligocce 28/30
dovrebbero venir svuotate e pulite quotidianamente, per evitare la formazione di muffe.
Nota: se l’apparecchio viene acceso con il
tasto 2 a a freddo oppure viene messo in
funzione dopo il prelievo di caffè, viene
eseguito un risciacquo automatico. Il
sistema è quindi autopulente.
●
●
●
●
●
●
SE_TK76_Teil_1_080917.indd 77 18.09.2008 08:41:07
Page 82

78
deit
Pulire la linea del latte 10
Pulire la linea 10 del latte dopo ogni
utilizzo!
È possibile eseguire una pulizia preventiva
automatica linea del latte 10.
Scegliere sul display 5 il simbolo
Ì
e
premere il tasto 8
start
.
INSERIRE UN BICCHIERE VUOTO SOTTO
L’INSERTO SCHIUMA, IMMERGERE IL TUBO
DI ASPIRAZIONE NEL BICCHIERE.
Ò
START
Inserire un bicchiere vuoto sotto la linea
del latte 10 e immergere l’estremità del
tubicino del latte nel bicchiere 10d.
Premere il tasto 8
start
. Ora l’apparecchio
versa automaticamente acqua nel
bicchiere e la riaspira per il lavaggio
attraverso il tubicino del latte 10d. La
procedura di lavaggio si conclude
automaticamente dopo circa 1 minuto.
Svuotare il bicchiere e pulire il tubicino
del latte 10d .
Pulire a fondo la linea del latte circa ogni
due settimane (in lavastoviglie o a mano).
Smontare la linea del latte 10 per pulirla:
Estrarre la linea schiuma 10
dall’apparecchio tirandola diritta verso il
lato anteriore.
Pulire i singoli pezzi (figura C) con una
soluzione di acqua e detersivo) e con uno
spazzolino morbido.
Sciacquare ed asciugare tutte le parti.
Rimontare tutti i pezzi, inserendoli fino in
fondo nelle loro posizioni.
Informazione: tutti i pezzi dell’inserto
schiuma 10 possono essere lavati in
lavastoviglie.
●
●
●
●
●
●
●
●
Pulire il bollitore 24
(vedere anche le Istruzioni brevi)
Oltre al programma automatico di pulizia, è
anche possibile estrarre il bollitore 24 per
pulirlo manualmente.
Attivare il modo di risparmio energia con il
tasto 2 a.
Disattivare completamente l’apparecchio
con l’interruttore di rete 1 O / I. Non è
illuminato nessun tasto.
Spingere verso destra l’interruttore
aprisportello 23 e aprire lo sportello 22
del bollitore 24.
Spingere completamente verso sinistra il
blocco rosso 24b sul bollitore 24.
Premere il pulsante 24a, afferrare il
bollitore 24 per le apposite maniglie
sagomate (figura E) ed estrarlo con
cautela.
Pulire il bollitore 24 sotto l’acqua corrente.
Importante:
non usare detersivi e non
lavare in lavastoviglie;
passare l’interno dell’apparecchio con un
panno umido;
lasciar asciugare il bollitore 24 e l’interno
dell’apparecchio;
inserire il bollitore 24 fino in fondo;
spingere completamente verso destra
il blocco rosso 24b e chiudere
lo sportello 22.
●
●
●
●
●
●
●
●
●
●
SE_TK76_Teil_1_080917.indd 78 18.09.2008 08:41:07
Page 83

79
deit
Accessori per la
conservazione
La macchina automatica per espresso è
dotata di appositi scomparti per riporre
accessori e istruzioni brevi al suo interno.
Per riporre il dosatore del caffè macinato
14, il tubicino del latte 10d e il flessibile
10c, togliere il serbatoio dell’acqua 11 e
inserire i pezzi negli appositi spazi
preformati 13.
Le istruzioni brevi hanno uno scomparto
apposito vicino al bollitore 24.
Aprire lo sportello 22 del bollitore.
Afferrare la linguetta della chiusura 26 per
lo scomparto 25 e togliere la chiusura.
Infilare le istruzioni brevi, reinserire la
chiusura 26 e chiudere lo sportello 22 del
bollitore.
Consigli per risparmiare
energia
La macchina automatica per espresso,
dopo un’ora (impostazione predefinita),
passa automaticamente alla modalità di
risparmio, nella quale il consumo di energia è molto ridotto. Il tempo reimpostato,
di un’ora, può essere modificato (vedere il
capitolo “Impostazioni del menu AUTO
SPEGNIMENTO IN”).
Se la macchina non viene utilizzata,
spegnerla con il tasto 1 O / I di
alimentazione posizionato sul lato
anteriore.
Se possibile non interrompere mai il
prelievo di caffè o di latte. L’arresto
anticipato del prelievo di latte o di caffè
provoca un consumo maggiorato di
energia e un eccessivo livello di acqua
residua nel raccogligocce.
Decalcificare regolarmente l’apparecchio,
per evitare eccessivi depositi di calcare.
La presenza di residui di calcare provoca
un maggior consumo di energia.
●
●
●
●
–
–
–
–
Programmi di assistenza
Consiglio: vedere anche Istruzioni brevi
nello scomparto per la conservazione 25.
A determinati intervalli di tempo sul
display 5 compare
DECALCIFICARE oppure
E
SEGUIRE PULIZIA oppure
CALC‘N‘CLEAN.
In questo caso l’apparecchio deve essere
immediatamente pulito o decalcificato
utilizzando il corrispondente programma. A
scelta le due procedure si possono riunire
nella funzione Calc‘n‘Clean (vedere
Capitolo Calc‘n‘Clean). Se il programma di
assistenza non viene utilizzato correttamente secondo le istruzioni, esiste il
rischio di provocare dei danni
all’apparecchio.
Attenzione
Per ogni programma di assistenza,
utilizzare i decalcificanti e i detergenti
seguendo le istruzioni.
Non interrompere mai il programma di
assistenza.
Non ingerire i liquidi utilizzati!
Non utilizzare mai aceto, sostanze a base
di aceto, acido citrico o sostanze a base di
acido citrico!
Non mettere mai le pastiglie di
decalcificante o altri decalcificanti nel
cassetto del caffè macinato 21!
Per decalcificare usare esclusivamente le
pastiglie di decalcificante fornite in dotazione, che sono state prodotte appositamente
per questo apparecchio.
Presso i rivenditori autorizzati e il
servizio clienti sono disponibili speci-
fiche pastiglie decalcificanti e deter-
genti.
SE_TK76_Teil_1_080917.indd 79 18.09.2008 08:41:07
Page 84

80
deit
Codice ordine Riven-
ditore
Servizio
clienti
Pastiglie di
detersivo
TZ60001 310575
Pastiglie
decalcificante
TZ60002 310967
Importante: se nel serbatoio per l’acqua 11
è inserito un filtro per l’acqua 35, è
assolutamente necessario toglierlo prima di
iniziare il programma di assistenza.
Decalcificare
ESPRESSO Ë Í
D
ECALCIFICARE
Ò
TASTO i PER 3 SEC.
Il tasto 8
start
lampeggia durante le singole
fasi di decalcificazione.
I numeri indicati in alto a destra indicano
l’avanzamento della procedura.
Tenere premuto il tasto 7 j per almeno 3
secondi.
DECALCIFICARE ÒSTART
Premere il tasto 8
start
. Il display 5 guida
nelle fasi del programma.
VUOTARE RACCOGLIGOCCE
I
NSERIRE RACCOGLIGOCCE
Vuotare i raccogligocce 28/30 e reinserirli.
POSIZIONARE RECIP. DA 0,5 L SOTTO
INSERTO SCHIUMA
Ò
START
Posizionare un recipiente con una
capacità da 0,5 l sotto l’inserto schiuma
10.
Premere il tasto 8
start
.
●
●
●
●
●
Informazione: se il filtro dell’acqua 35 è
attivo, compare l’invito a togliere il filtro e a
premere nuovamente il tasto 8
start
ELIMINARE FILTRO ACQUA ÒSTART
VERSARE 0,5 L ACQUA +
DECALCIFICANTE
Ò
START
Riempire il serbatoio dell’acqua 11 con
acqua tiepida fino al contrassegno ”0,5l” e
sciogliervi 2 pastiglie decalcificanti
Siemens.
Premere il tasto 8
start
. Il programma di
decalcificazione dura circa 20 minuti.
DECALCIFICAZIONE IN CORSO
MANCA DECALCIFICANTE
A
GGIUNG. DECALCIFICANTE
Informazione: se il serbatoio dell’acqua 11
contiene troppo poco decalcificante,
compare il messaggio corrispondente.
Aggiungere decalcificante e premere
nuovamente il tasto 8
start
.
SCIACQUARE E RIEMPIRE
SERBATOIO ACQUA
Ò
START
Sciacquare il serbatoio dell’acqua 11 e
riempirlo con acqua pulita fino al
contrassegno “max”.
Premere il tasto 8 start. Il programma di
decalcificazione dura circa 1 minuto e poi
esegue il risciacquo.
DECALCIFICAZIONE IN CORSO
V
UOTARE RACCOGLIGOCCE
INSERIRE ROCCOGLIGOCCE
Vuotare i raccogligocce 28/30 e reinserirli.
L’apparecchio è di nuovo pronto per l’uso.
●
●
●
●
●
SE_TK76_Teil_1_080917.indd 80 18.09.2008 08:41:07
Page 85

81
deit
Pulire
ESPRESSO Ë Í
E
SEGUIRE PULIZIA
Ò
TASTO i PER 3 SEC.
Durante le fasi del processo di pulizia, il
tasto 8 start lampeggia.
I numeri in alto a destra indicano lo stato di
avanzamento della procedura.
Riempire il serbatoio dell’acqua 11 fino al
contrassegno “max”.
Tenere premuto il tasto 7 j per almeno 3
secondi.
PULIRE ÒSTART
Premere il tasto 8
start
. Il display 5 guida
nelle fasi del programma.
VUOTARE RACCOGLIGOCCE
I
NSERIRE RACCOGLIGOCCE
Vuotare i raccogligocce 28/30 e reinserirli;
l’apparecchio esegue due risciacqui.
POSIZIONARE USCITA CAFFÈ
Posizionare l’uscita caffè 9 verso sinistra,
fino a sentire lo scatto.
PULIZIA IN CORSO
APRIRE CASSETTO POLVERE
Aprire il cassetto polvere 21 esercitando
una certa pressione.
INSERIRE PASTIGLIA PULIZIA SIEMENS E
CHIUDERE CASSETTO
Inserire una pastiglia di pulizia Siemens e
chiudere il cassetto 21.
PREMERE START.
Premere il tasto 8 start. Il programma di
pulizia dura circa 7 minuti.
PULIZIA IN CORSO
●
●
●
●
●
●
●
●
VUOTARE RACCOGLIGOCCE
I
NSERIRE ROCCOGLIGOCCE
Vuotare i raccogligocce 28/30 e reinserirli.
L’apparecchio è di nuovo pronto per l’uso.
Calc‘n‘Clean
La funzione Calc‘n‘Clean combina le due
operazioni di decalcificazione e di pulizia.
Se la scadenza delle due procedure è
ravvicinata, la macchina automatica per
caffè espresso propone questo programma
di servizio.
ESPRESSO Ë Í
C
ALC‘N‘CLEAN
Ò
TASTO i PER 3 SEC.
Durante le fasi del processo Calc‘n‘Clean, il
tasto 8
start
lampeggia. I numeri in alto a
destra indicano lo stato di avanzamento
della procedura.
Tenere premuto il tasto 7 j per almeno 3
secondi.
CALC‘N‘CLEAN ÒSTART
Premere il tasto 8
start
. Il display 5 guida
nelle fasi del programma.
VUOTARE RACCOGLIGOCCE
I
NSERIRE RACCOGLIGOCCE
Vuotare i raccogligocce 28/30 e reinserirli.
Spingere l’uscita caffè 9 verso destra fino
a quando si scatta.
Posizionare un recipiente con una
capacità minima di 1 litro sotto l’inserto
schiuma 10.
Premere il tasto 8
start
; l’apparecchio
esegue il risciacquo due volte.
PULIZIA IN CORSO
A
PRIRE CASSETTO POLVERE
Aprire il cassetto polvere 21 esercitando
una certa pressione.
●
●
●
●
●
●
●
●
SE_TK76_Teil_1_080917.indd 81 18.09.2008 08:41:07
Page 86

82
it
INSERIRE PASTIGLIA PULIZIA SIEMENS E
CHIUDERE CASSETTO
Inserire una pastiglia di pulizia Siemens e
chiudere il cassetto 21.
Informazione: se il filtro dell’acqua 35 è
attivo, compare l’invito a togliere il filtro e a
premere nuovamente il tasto 8
start
ELIMINARE FILTRO ACQUA ÒSTART
VERSARE 0,5 L ACQUA +
DECALCIFICANTE
Ò
START
Riempire il serbatoio dell’acqua 11 con
acqua tiepida fino al contrassegno ”0,5l”
e sciogliervi 2 pastiglie decalcificanti
Siemens.
Premere il tasto 8
start
. Il programma di
decalcificazione dura circa 20 minuti.
DECALCIFICAZIONE IN CORSO
MANCA DECALCIFICANTE
A
GGIUNG. DECALCIFICANTE
Informazione: se il serbatoio dell’acqua 11
contiene troppo poco decalcificante,
compare il messaggio corrispondente.
Aggiungere decalcificante e premere
nuovamente il tasto 8
start
.
SCIACQUARE E RIEMPIRE
SERBATOIO ACQUA
Ò
START
Sciacquare il serbatoio dell’acqua 11 e
riempirlo con acqua pulita fino al
contrassegno “max”.
Premere il tasto 8
start
. Il programma di
decalcificazione dura circa 1 minuto,
segue per circa 7 minuti il programma di
pulizia e quindi il risciacquo.
DECALCIFICAZIONE IN CORSO
PULIZIA IN CORSO
VUOTARE RACCOGLIGOCCE
I
NSERIRE RACCOGLIGOCCE
Vuotare i raccogligocce 28/30 e reinserirli.
L’apparecchio è di nuovo pronto per l’uso.
Importante: se il programma di assistenza
viene interrotto, ad esempio a causa di
un’interruzione di corrente, procedere come
indicato qui di seguito.
●
●
●
●
●
●
Sciacquare il serbatoio dell’acqua 11 e
riempirlo con acqua pulita fino al
contrassegno “max”.
Premere il tasto 8
start
, il programma di
pulizia viene eseguito ora per circa 3
minuti per risciacquare l’apparecchio.
PULIZIA IN CORSO
VUOTARE RACCOGLIGOCCE
I
NSERIRE RACCOGLIGOCCE
Vuotare i raccogligocce 28/30 e reinserirli.
L’apparecchio è di nuovo pronto per l’uso.
Protezione dal gelo
r
!
Per evitare danni provocati
dall’azione del gelo durante il trasporto o
il deposito, è necessario svuotare
completamente l’apparecchio.
Informazione: l’apparecchio deve essere
pronto per l’uso e il serbatoio dell’acqua 11
deve essere pieno.
Posizionare un recipiente alto e stretto
sotto l’inserto schiuma 10.
Selezionare l’impostazione “inserto
schiuma” È, avviare e lasciare che
fuoriesca vapore per circa 15 secondi.
Spegnere l’apparecchio con l’interruttore
di rete 1 O / I.
Svuotare il serbatoio dell’acqua 11 e i
raccogligocce 28/30.
Accessori
I seguenti accessori generalmente sono
disponibile presso i rivenditore e presso il
servizio clienti.
Codice
ordinazione
Riven-
ditori
Servizio
clienti
Pastiglie di
pulizia
TZ60001 310575
Pastiglie
decalcificanti
TZ60002 310967
Filtro acqua
TZ70003 467873
●
●
●
●
●
●
●
SE_TK76_Teil_1_080917.indd 82 18.09.2008 08:41:08
Page 87

83
it
Soluzione di piccoli guasti
Guasto Causa Rimedio
Sul display compare il
messaggio
RIEMPIRE SERBATOIO
CHICCHI 15
anche se il serbatoio chicchi
è pieno o se il macinacaffè
non macina chicchi.
I chicchi non ricadono nel
macinacaffè (chicchi troppo
oleosi).
Battere leggermente il
serbatoio chicchi 15.
Eventualmente cambiare il
tipo di caffè.
Quando il serbatoio chicchi
15 è vuoto, pulirlo con un
panno asciutto.
Prelievo acqua calda
impossibile.
L’inserto schiuma 10 o
l’alloggiamento dell’inserto
schiuma è otturato.
Pulire l’inserto schiuma 10 o
il suo alloggiamento.
Troppo poco o troppa
schiuma
oppure
L’inserto schiuma 10 non
aspira il latte.
L’inserto schiuma 10 o
l’alloggiamento dell’inserto
schiuma è sporco.
Pulire l’inserto schiuma 10 o
il suo alloggiamento.
Latte non adatto. Usare latte con una
percentuale di grasso del
1,5%.
L’inserto schiuma
10 non è
montato correttamente
Montare correttamente
l’inserto schiuma 10.
Il caffè fuoriesca a gocce. Grado di macinatura troppo
fine. Caffè macinato troppo
fine.
Aumentare il grado di
macinatura. Usare caffè
macinato più grosso.
L’apparecchio ha troppi
depositi di calcare.
Decalcificare l’apparecchio.
Il caffè non ha nessuna
crema.
Tipo di caffè non adatto. Cambiare il tipo di caffè.
I chicchi non sono freschi di
tostatura.
Utilizzare chicchi freschi.
Il grado di macinatura non è
adeguato ai chicchi di caffè.
Impostare il grado di
macinatura fine.
Il caffè è troppo “acido”. Il grado di macinatura è
troppo grosso oppure il
caffè è macinato troppo
grosso.
Impostare il grado di
macinatura su un valore più
fine oppure utilizzare un
caffè macinato più fine.
Tipo di caffè non adatto. Utilizzare un caffè più
tostato.
Se non possibile eliminare gli errori, chiamare assolutamente l’assistenza!
SE_TK76_Teil_1_080917.indd 83 18.09.2008 08:41:08
Page 88

84
it
Guasto Causa Rimedio
Il caffè è troppo “amaro”. Il grado di macinatura è
troppo fine oppure il caffè è
macinato troppo fine.
Impostare il grado di
macinatura su un valore più
grosso oppure utilizzare un
caffè macinato più grosso.
Tipo di caffè non adatto. Cambiare il tipo di caffè.
Messaggio sul display
5
ERRORE
C
HIAMARE L’ASSISTENZA.
Si è verificato un errore
nell’apparecchio.
Chiamare l’assistenza.
Il filtro dell’acqua 35 non
resta incastrato nel
serbatoio dell’acqua
11.
Il filtro dell’acqua 35 non è
incastrato.
Spingere saldamente il filtro
dell’acqua 35 nel punto di
inserimento sul serbatoio
fino a quando si incastra.
I fondi di caffè non sono
solidi e sono troppo secchi
(si sbriciolano).
È stato impostato un grado
di macinatura troppo fine
oppure è stato utilizzato
troppo poco caffè.
Regolare su un grado di
macinatura più grosso
oppure utilizzare 2 dosatori
di caffè macinato.
I fondi di caffè non sono
solidi e sono troppo umidi.
Il grado di macinatura
impostato è troppo grosso
oppure è stato usato troppo
caffè macinato.
Regolare il grado di
macinatura più fine oppure
utilizzare solo 1 dosatore di
caffè macinato.
Se non possibile eliminare gli errori, chiamare assolutamente l’assistenza!
Soluzione di piccoli guasti
Smaltimento A
Questo apparecchio è contrassegnato
conformemente alla Direttiva europea
2002/96/CE Rifiuti di apparecchiature
elettriche ed elettroniche (waste electrical
and electronic equipement-WEEE). La
direttiva stabilisce il quadro generale per un
ritiro e recupero valido in tutta I‘UE.
Informarsi presso il rivenditore specializzato
sulle attuali disposizioni per la rottamazione.
Garanzia
Per questo apparecchio sono valide le
condizioni di garanzia pubblicate dal nostro
rappresentante nel paese di vendita. Il
rivenditore, presso il quale è stato
acquistato l’apparecchio, è sempre ben
disposto a fornire a richiesta informazioni a
proposito. Per l’esercizio del diritto di
garanzia è comunque necessario
presentare il documento di acquisto.
Con riserva di modifica.
SE_TK76_Teil_1_080917.indd 84 18.09.2008 08:41:08
Page 89

85
denl
Veiligheidsinstructies
Lees de handleiding zorgvuldig door,
neem ze in acht en bewaar ze!
Deze espresso-automaat is voor
huishoudelijk gebruik en de verwerking
van normale huishoudelijke
hoeveelheden bedoeld, niet voor
bedrijfsmatig gebruik.
r
!
Gevaar van elektrische schok!
Het apparaat uitsluitend aansluiten en
gebruiken volgens de gegevens op het
typeplaatje. Gebruik het apparaat uitsluitend
indien het aansluitsnoer en het apparaat
geen beschadigingen vertonen. Het
apparaat uitsluitend binnenshuis bij
kamertemperatuur gebruiken.
Personen (ook kinderen) met fysieke,
zintuiglijke of geestelijke beperkingen of
met een gebrek aan ervaring en kennis
mogen het apparaat niet gebruiken, tenzij
ze daarbij onder toezicht staan of worden
begeleid door een persoon die voor hun
veiligheid verantwoordelijk is.
Houd het apparaat buiten het bereik van
kinderen. Let erop dat kinderen niet met het
apparaat spelen.
In geval van storing onmiddellijk de stekker
uit het stopcontact trekken.
Om gevaren te vermijden, mogen reparaties aan het apparaat – bijvoorbeeld het
vervangen van een beschadigd aansluitsnoer – uitsluitend worden uitgevoerd door
onze klantenservice.
Het apparaat en het aansluitsnoer niet
onderdompelen in water.
Niet in het maalwerk grijpen.
r
!
Risico op brandwonden!
De melkschuimer voor melk / warm water
wordt zeer heet. Na gebruik eerst laten
afkoelen en pas daarna aanraken.
Inhoudsopgave
De onderdelen ..........................................86
Voor het eerste gebruik ............................87
Bedieningselementen ...............................88
− Netschakelaar O / I ...............................88
− Toets
a ..................................................88
− Draaiknop ..............................................88
− Keuzetoetsen < en > ..........................88
− Display ..................................................89
− Toets
start
.............................................91
− Toets °C .................................................91
− Toets j instellingen ................................92
− Maalgraad instellen ...............................92
− Kopjeswarmer .......................................92
Menu-instellingen .....................................93
− Taal........................................................93
− Waterhardheid .......................................93
− Ontkalken ..............................................93
− Reinigen ................................................93
− Calc‘n‘Clean ..........................................93
− Tijd tonen ..............................................94
− Tijdmodus ..............................................94
− Tijd instellen ..........................................94
− Kopjeswarmer aan (alleen TK76F09) ...94
− Kopjeswarmer uit ..................................94
− Auto off na .............................................94
− Waterfilter ..............................................94
− Contrast.................................................95
− Fabrieksinstelling ..................................95
Koffiezetten met koffiebonen ....................95
Koffiezetten met gemalen koffie ..............96
Melkschuim en warme melk bereiden ......97
Warm water nemen ..................................97
Onderhoud en dagelijkse reiniging ...........98
− Melksysteem reinigen ...........................98
− Zetgroep reinigen ..................................98
Opberging toebehoren..............................99
Tips om energie te besparen ....................99
Serviceprogramma’s ................................99
− Ontkalken ............................................100
− Reinigen ..............................................101
− Calc‘n‘Clean ........................................102
Vorstbescherming ..................................103
Toebehoren.............................................103
Afval........................................................103
Garantie ..................................................103
Eenvoudige problemen zelf oplossen.....104
SE_TK76_Teil_1_080917.indd 85 18.09.2008 08:41:08
Page 90

86
denl
Beste koffieliefhebber,
Gefeliciteerd met uw nieuwe espressoautomaat van Siemens.
Deze handleiding beschrijft verschillende
modellen, die anders zijn uitgerust.
Lees ook de beknopte handleiding.
Ze kan in een speciaal opbergvak 25
worden bewaard, zodat ze altijd binnen
handbereik is.
De onderdelen
Afbeeldingen A, B, C, D en E
1 Netschakelaar O/I
2 Toets a
3 Toets °C
(temperatuur / kinderbeveiliging)
4 Keuzetoetsen < >
5 Display
a) Status
b) Keuze
c) Navigatie
6 Draaiknop voor instellingen display
7 Toets j (infomenu)
8 Toets
start
(bereiding / programma)
9 Koffie-uitloop in hoogte verstelbaar
en draaibaar
10 Melkschuimer, in hoogte
verstelbaar(melk / warm water)
a) Bovenstuk
b) Onderstuk
c) Slang
d) Melkpijpje
11 Afneembaar waterreservoir
12 Deksel waterreservoir
13 Opbergvakken
(maatlepel en toebehoren
melkschuimer)
14 Maatlepel (handvat voor waterfilter)
15 Bonenreservoir
16 Aromadeksel
17 Draaiknop voor maalgraadinstelling
18 Lichtring
19 Kopjeswarmer
20 Knop voor kopjeswarmer verlicht
21 Poederlade
(gemalen koffie / reinigingstablet)
22 Deur van de zetgroep
23 Deuropener
24 Zetgroep
a) Drukknop
b) Vergrendeling
25 Opbergvak beknopte handleiding
26 Afsluiting opbergvak
27 Scherm lekschalen
28 Lekschaal koffie-uitloop
29 Lekplaat koffie-uitloop
30 Lekschaal melkschuimer
31 Lekplaat melkschuimer
32 Koffiedikreservoir
33 Snoervak
34 Melkreservoir (geïsoleerd)
35 Waterfilter
SE_TK76_Teil_1_080917.indd 86 18.09.2008 08:41:08
Page 91

87
denl
Voor het eerste gebruik
Algemeen
Doe alleen schoon en koolzuurvrij water en
bij voorkeur espresso- of bonenmelanges
voor volautomatische apparaten in de overeenkomstige reservoirs. Gebruik geen geglaceerde, gekaramelliseerde of met andere suikerhoudende additieven behan-
delde koffiebonen, want deze verstoppen
de zetgroep.
Bij dit apparaat is de waterhardheid
instelbaar. In de fabriek is de waterhardheid
ingesteld op 4. Bepaal de hardheid van het
gebruikte water met het bijgevoegde
teststrookje. Wordt een andere waarde dan
hardheid 4 aangegeven, dan dient het
apparaat na de ingebruikname aangepast
te worden geprogrammeerd (zie onder
hoofdstuk ‘Menu-instellingen
WATERHARDHEID’).
Het apparaat in gebruik nemen
Plaats de espresso-automaat op een
vlakke ondergrond met voldoende draagvermogen.
Info: Het apparaat heeft aan de onderkant
vier wielen en kan in een boogvorm zijwaarts worden verschoven, om de bediening en plaatsing te vergemakkelijken.
Trek het netsnoer uit het snoervak 33 en
steek de stekker in. De gepaste lengte
kan worden ingesteld door het snoer naar
boven terug te schuiven of naar beneden
uit te trekken. Zet het apparaat daarvoor
met de achterzijde aan bijv. de tafelrand
en trek het snoer naar beneden of schuif
het terug naar boven.
Klap het deksel van het waterreservoir 12
omhoog.
Neem het waterreservoir 11 weg, spoel
het uit en vul het met vers, koud water.
Neem hierbij de markering ‘max’ in acht.
Zet het waterreservoir 11 rechtop in het
apparaat zetten en druk het helemaal
naar onderen.
●
●
●
●
●
Sluit het deksel van het waterreservoir 12
weer.
Vul het bonenreservoir 15 met
koffiebonen.
Druk op de netschakelaar 1 O / I, de toets
8
start
licht op en op het display 5
verschijnen verschillende talen.
Selecteer nu met de keuzetoetsen 4 <
en > de gewenste taal waarin de
displayteksten moeten verschijnen.
LANG UAGE
DEUTS CH
Ò
START
ENGLISH
PYCCK ИЙ
De geselecteerde taal wordt met een
kader gemarkeerd. Volgende talen zijn
beschikbaar:
DEUTSCH
E
NGLISH
P
YCCKИЙ
N
EDERL ANDS
F
RANÇAIS
I
TALIANO
S
VENSKA
E
SPAÑOL
P
OLSKI
● Druk op de toets 8
start
, de
geselecteerde taal is opgeslagen, de
toets 2 a licht op.
●
●
●
●
SE_TK76_Teil_1_080917.indd 87 18.09.2008 08:41:09
Page 92

88
denl
● Druk op de toets 2 a, het merklogo
verschijnt op het display 5. Het apparaat
warmt nu op en spoelt, er loopt wat water
uit de koffie-uitloop 9. Als op het display 5
de symbolen voor het kiezen van de
bereiding verschijnen, is het apparaat
klaar voor gebruik.
ESPRESSO Ë Í
 à À Á Ä Å
Info: De espresso-automaat is in de fabriek
geprogrammeerd met standaardinstellingen
voor een optimale werking. Het apparaat
schakelt na 1 uur automatisch in de
spaarmodus (zie hoofdstuk ‘Menuinstellingen AUTO OFF NA’).
Opmerking: Bij het eerste gebruik of als
het apparaat gedurende lange tijd niet is
gebruikt, heeft de eerste kop koffie nog niet
het volle aroma.
Als u de espressomachine voor het eerst
gebruikt, krijgt u pas een voldoend dikke en
stabiele laag ‘crema’ nadat u de eerste paar
kopje hebt getapt.
Bedieningselementen
Netschakelaar O / I
Met de netschakelaar 1 O / I wordt het
apparaat in de
‘spaarmodus’ geschakeld of
volledig uitgeschakeld. In de spaarmodus
brandt alleen de toets 2 a.
Belangrijk: Schakel het apparaat pas uit
met de netschakelaar, als het zich in de
spaarmodus bevindt, zodat het
automatische spoelproces plaatsvindt.
Toets a
Met de toets 2 a wordt het apparaat
ingeschakeld (gebruiksklaar) of opnieuw in
de spaarmodus geschakeld.
Toets 2 a knippert, zolang het apparaat
spoelt.
Het apparaat spoelt niet, als:
het bij het inschakelen nog warm is;
er voor het overschakelen naar de
‘spaarmodus’ geen koffie werd gezet.
Het apparaat is gebruiksklaar, als op het
display 5 de symbolen voor de drankkeuze
en de toets 8
start
branden.
Draaiknop
Met de draaiknop 6 kan op het display 5
naar links en rechts worden genavigeerd.
Met deze knop kunnen ook in het menu
parameters worden versteld.
Keuzetoetsen < en >
Met behulp van de keuzetoetsen 4 < en >
kunnen de menuniveaus (navigatie 5c)
omhoog en omlaag doorbladerd worden.
●
●
SE_TK76_Teil_1_080917.indd 88 18.09.2008 08:41:09
Page 93

89
denl
Display
Op het display 5 verschijnen symbolen voor
keuzemogelijkheden, koffiesterkte en -hoeveelheid alsmede teksten voor de instellingen, lopende processen en meldingen. Met
behulp van de draaiknop 6 en keuzetoetsen
4 kunnen hier instellingen worden gewijzigd. De geselecteerde instelling wordt met
een kader gemarkeerd.
ESPRESSO Ë Í
 à À Á Ä Å
In de regel ‘status’ 5a van het display wordt
de naam van de drank en de ingestelde
sterkte, bijv. 55, en hoeveelheid, bijv.
Î
,
vermeld. In de regel ‘keuze’ 5b verschijnen
symbolen voor de drankkeuze.
De pijltjes in de regel ‘navigatie’ 5c geven
aan in welke richting er zich nog menuniveaus bevinden.
Displaymeldingen
Op het display 5 worden verschillende
meldingen getoond.
Informatie
WATERRESERV. BIJNA LEEG
BONENRESERV. BIJNA LEEG
EVEN GEDULD
Instructies
WATERRESERVOIR VULLEN
WATERRESERVOIR PL AATSEN
WATERRESERVOIR CHECKEN
LEKSCHAAL PLAATSEN
LEKSCHAAL LEGEN
BONENRESERVOIR VULLEN
KOFFIE-UITLOOP DRAAIEN
MELKSCHUIMER PLAATSEN
ZETGROEP PLAATSEN
D
EUR SLUITEN
ZETGROEP CONTROLEREN A.U.B.
P
OEDER BIJVULLEN
LADE SLUITEN
FILTER VERVANGEN
ONTKALKEN
REINIGEN A.U.B.
C
ALC‘N‘CLEAN
TEMPERATUUR TE LAAG
EVEN GEDULD
SPANNING TE HOOG/LAAG
5a
b
c
SE_TK76_Teil_1_080917.indd 89 18.09.2008 08:41:09
Page 94

90
denl
ESPRESSO ËË Í
Á Ä Å Æ Ç È
MY COFFEE Ë Í
5 55 555
MY COFFEE Ë Í
Î Ð Ò
MY COFFEE Ë Í
ESPRESSO MELK
40%
Keuzemogelijkheden
Â
2 X ESP RES SO
Ã
2 X KOFF IE
À
ES PRE SS O Á KOFF IE
Ä KOFFI E + MEL K
Å
MA CCH IATO
Æ
CAPP UCC INO
Ç
MY COFFE E
È
MELKS CHUIM É WARME MELK
Ê
WARM WATER Ì
KOR T SP OELEN
MELKSY ST.
Koffiesterkte
(alleen voor koffiedranken)
5 5 5 5 5 5
mild normaal sterk
Hoeveelheid
(alleen voor koffiedranken)
Î Ð Ò
klein normaal groot
Naast de koffiesterkte en
hoeveelheid kan voor de eigen
koffie-instelling MY COFFEE Ç nog
de mengverhouding espresso-melk
worden gekozen. De instelling kan in
stappen van 20% worden gewijzigd
door aan de draaiknop 6 te draaien.
SE_TK76_Teil_1_080917.indd 90 18.09.2008 08:41:12
Page 95

91
denl
Toets start
Met een druk op de toets 8
start
wordt de
bereiding gestart of een serviceprogramma
uitgevoerd.
Door tijdens de bereiding nogmaals op de
toets 8
start
te drukken, kan het proces
vroegtijdig worden afgebroken.
Toets
°C
Met deze toets 3 °C kan de temperatuur
voor koffie en warm water worden ingesteld
(kort indrukken) en kan de kinderbeveiliging worden in- of uitgeschakeld (min. 3 s
ingedrukt houden).
Temperatuur instellen
Druk de toets 3 °C kort in en wijzig
vervolgens met de toetsen 4 < en > en de
draaiknop 6 de instellingen.
TEMPERATUUR
KOFFIE
WARM WATER
NORMAAL
TEMPERATUUR
KOFFIE
WARM WATER
<90°C
Door de toets 3 °C in te drukken, worden de
wijzigingen bewaard en keert u naar de
drankkeuze terug.
Deze instellingen gelden automatisch voor
alle bereidingswijzen.
Kinderbeveiliging
Om kinderen tegen brandwonden te
beschermen, kan het apparaat worden
vergrendeld.
● Houd de toets 3 °C ten minste 3
seconden ingedrukt. Op het display 5
verschijnt een sleutel, de
kinderbeveiliging is geactiveerd.
Nu is er geen bediening meer mogelijk, de
kopjeswarmer 19 is uitgeschakeld.
ESPRESSO Ë Í
● Om de kinderbeveiliging te deactiveren,
dient u de toets 3 °C ten minste 3
seconden ingedrukt te houden. De sleutel
op het display 5 verdwijnt weer.
SE_TK76_Teil_1_080917.indd 91 18.09.2008 08:41:13
Page 96

92
denl
Toets j instellingen
Met de toets j 7 kunt u informatie
opvragen (kort indrukken) en instellingen
aanpassen (ten minste 3 s ingedrukt
houden).
Informatie opvragen
In het infomenu kan de volgende informatie
worden opgevraagd:
hoeveel dranken sinds de ingebruikname
van de espresso-automaat werden
bereid;
wanneer de volgende service nodig is.
● Druk de toets j 7 kort in en blader met de
toetsen 4 < en >.
INFO-MENU
ONTKALKEN NA XXX KOPJES
REINIGEN NA XXX KOPJES
GEEN FILTER INGEZET
FILT. VERV. NA X X X KOPJES *
is.
INFO-MENU
AANTAL KOFFIE X X
AANTAL KOFFIE+MELK XX
VOL. WARM WATER XL
*Verschijnt alleen als het filter geactiveerd
Door de toets j 7 nogmaals kort in te drukken, keert u terug naar de drankkeuze.
Wordt gedurende ca. 10 seconden geen
toets bediend, dan keert het apparaat automatisch weer naar de drankkeuze terug.
Instellingen aanpassen
(Zie hoofdstuk ‘Menu-instellingen’.)
–
–
Maalgraad instellen
Met de draaiknop 17 voor de
maalgraadinstelling kan de gewenste
fijnheid van de gemalen koffie worden
ingesteld.
Let op!
Stel de maalgraad alleen bij draaiend
maalwerk in! Anders kan het apparaat
worden beschadigd.
● Stel, terwijl het maalwerk draait, de draaiknop 17 in van fijn gemalen koffie • • • tot
grof gemalen koffie ● ● ●.
Opmerking: De nieuwe instelling wordt pas
bij het tweede kopje koffie merkbaar.
Opmerking: Kies een fijnere maalgraad
voor donker gebrande bonen en een
grovere voor lichtere bonen.
Kopjeswarmer
r
!
Let op, de kopjeswarmer 19 wordt
heel heet!
De espresso-automaat beschikt over een
kopjeswarmer 19 die met toets 20
handmatig kan worden in- en uitgeschakeld.
Is de kopjeswarmer 19 ingeschakeld, dan
brandt de toets 20.
Opmerking: Voor een optimale verwarming
van de kopjes, dienen deze met de
onderzijde op de kopjeswarmer 19 te
worden geplaatst.
Alleen TK76F09
De kopjeswarmer 19 kan ook worden
voorgeprogrammeerd (zie hoofdstuk ‘Menuinstellingen KOPJESWARMER AAN’).
SE_TK76_Teil_1_080917.indd 92 18.09.2008 08:41:14
Page 97

93
denl
Menu-instellingen
● Houd de toets j 7 minstens 3 s ingedrukt.
Nu verschijnen de verschillende
instelmogelijkheden.
INSTELLINGEN
TAAL NEDERLANDS
WATERHARDHEID
ONTKALKEN
In het vervolg van deze handleiding begint
elke nieuwe instelling met
j 3 sec + >
,
gevolgd door een beschrijving.
Met de toetsen 4 < en > kunnen de
verschillende instelmogelijkheden worden
geselecteerd.
INSTEL LINGEN
WATERHARDHEID
ONTK ALKEN
Ò
START
REINIGEN
Opmerking: De uitgevoerde wijzigingen
worden automatisch bewaard.
Een extra bevestiging is niet nodig.
j 3 sec + >
TAAL
● Door de draaiknop 6 te verdraaien, kan
de gewenste taal worden geselecteerd.
j 3 sec + >
WATERHARDHEID
● Door de draaiknop 6 te verdraaien, kan
de gewenste waterhardheid 1, 2, 3 en 4
worden ingesteld.
Opmerking: De juiste instelling van de
waterhardheid is belangrijk, opdat het
apparaat tijdig zou aangeven dat het moet
worden ontkalkt. De vooringestelde
waterhardheid is 4.
De waterhardheid kan met het bijgevoegde
teststrookje worden vastgesteld of bij uw
waterleidingbedrijf worden nagevraagd.
● Dompel het teststrookje kort in het water
en lees na ca. 1 minuut het resultaat af.
Stand Waterhardheid
Duits (°dH) Frans (°fH)
1
2
3
4
1-7
8-14
15-21
22-30
1-13
14-25
26-38
39-54
j 3 sec + >
ONTKALKEN
● Dient het apparaat te worden ontkalkt,
druk dan op de toets 8
start
en voer het
ontkalkingsprogramma uit (zie hoofdstuk
‘Ontkalken’).
j 3 sec + >
REINIGEN
● Dient het apparaat te worden gereinigd,
druk dan op de toets 8
start
en voer het
reinigingsprogramma uit (zie hoofdstuk
‘Reinigen’).
j 3 sec + >
CALC’N CLEAN
● Dient het apparaat tegelijkertijd te worden
ontkalkt en gereinigd, druk dan op de
toets 8
start
en voer het programma
Calc‘n‘Clean uit (zie hoofdstuk
‘Calc‘n‘Clean’).
SE_TK76_Teil_1_080917.indd 93 18.09.2008 08:41:15
Page 98

94
denl
j 3 sec + >
TIJD TONEN
Hiermee kan worden ingesteld dat in de
spaarmodus de tijd op het display 5 wordt
weergegeven.
● Door de draaiknop 6 te verdraaien, kan
de tijdsweergave worden in- (
JA) of
uitgeschakeld (NEE).
Opmerking: De tijd moet vooraf onder TIJD
INSTELLEN worden ingesteld.
j 3 sec + >
TIJDMODUS
In de tijdmodus kan met de draaiknop 6
de uursweergave worden ingesteld op
12H of 24H.
j 3 sec + >
TIJD INSTELLEN
● Door aan de draaiknop 6 te draaien, kan
de huidige tijd worden ingesteld, bijv.
08:25. Het cijfer dat gewijzigd kan wor-
den, heeft een verlichte achtergrond. De
achtergrondverlichting schakelt automatisch om tussen de uren en minuten.
Alleen TK76F09
(programmeerbare kopjeswarmer)
j 3 sec + >
KOPJESWARMER AAN
Met deze functie schakelt de kopjeswarmer
19 op een programmeerbaar tijdstip automatisch in, onafhankelijk van het feit of het
apparaat zich in de ‘spaarmodus’ bevindt of
gebruiksklaar is.
Opmerking: De tijd moet vooraf onder TIJD
INSTELLEN worden ingesteld.
Door aan de draaiknop 6 te draaien, kan
de gewenste tijd worden ingesteld. Bij de
instelling OFF is de functie uitgeschakeld.
Alleen TK76F09
(programmeerbare kopjeswarmer)
j 3 sec + >
KOPJESWARMER UIT NA
Hiermee kan de tijdspanne worden
ingesteld, waarna de kopjeswarmer 19 na
het inschakelen automatisch weer wordt
uitgeschakeld.
●
●
Opmerking:
In ‘Kopjeswarmer AAN’ dient
de inschakeltijd ingesteld te zijn.
Door aan de draaiknop 6 te draaien,
wordt de gewenste tijdspanne ingesteld.
j 3 sec + >
AUTO OFF NA
Door aan de draaiknop 6 te draaien, kan
de tijdspanne worden ingesteld, waarna
het apparaat automatisch na de laatste
bereiding in de ‘spaarmodus’ wordt ge-
schakeld.
De instelling is mogelijk van 5 minuten tot 8
uur.
j 3 sec + >
WATERFILTER
Alvorens een nieuw waterfi lter 35 kan
worden gebruikt, moet dit gespoeld worden.
Daarvoor het waterfi lter 35 met behulp
van de maatlepel 14 in het waterreservoir
11 vastduwen. Het waterreservoir tot aan
de markering ‘max’ met water vullen.
Door de draaiknop 6 te verdraaien START
kiezen en op de toets 8
start
drukken.
● 0,5L-RESERVOIR ONDER MELKSCHUIMER
PLAATSEN
Ò
START
Plaats een reservoir met een inhoud van
0,5 liter onder de melkschuimer 10.
Druk op de toets 8
start
. Er loopt nu
water door het fi lter 35, om dit te spoelen.
Giet vervolgens het reservoir leeg. Het
apparaat is weer klaar voor gebruik.
Opmerking: Door het fi lter te spoelen, is
tegelijk ook de instelling voor de indicatie
van de fi ltervervanging geactiveerd.
●
●
●
●
●
●
●
SE_TK76_Teil_1_080917.indd 94 18.09.2008 08:41:16
Page 99

95
denl
Als FILTER VERVANGEN verschijnt, of na
maximaal 2 maanden is de werking van het
filter 35 uitgeput. Het dient om hygiënische
redenen en opdat het apparaat niet zou
verkalken (het apparaat kan schade
oplopen) te worden vervangen.
Reservefilters zijn in de handel (TZ70003)
of via de klantenservice verkrijgbaar.
Wordt er geen nieuw filter 35 geplaatst,
draai de instelling
WATERFILTER dan op
NEE.
Opmerking: Wordt het apparaat langere
tijd niet gebruikt (bijv. vakantie), dan dient
het geplaatste filter 35 te worden gespoeld,
alvorens het apparaat opnieuw wordt
gebruikt. Laat het apparaat daarvoor
gewoon een kop warm water bereiden.
j 3 sec + >
CONTRAST
Het contrast van het display 5 kan tussen
–20 en +20 worden ingesteld.
De fabrieksinstelling is +0.
Stel met de draaiknop 6 de gewenste
waarde in.
j 3 sec + >
FABRIEKSINSTELLING
Het is mogelijk de eigen instellingen
ongedaan te maken en de
fabrieksinstellingen weer te activeren.
Om de fabrieksinstelling te activeren,
drukt u op de toets 8
start
.
Opmerking: De fabrieksinstellingen in het
apparaat ook handmatig met een bepaalde
toetsencombinatie worden hersteld. Het
apparaat moet hiervoor compleet
uitgeschakeld zijn.
Houd de toetsen 4 < en > en de netschakelaar 1 O / I tegelijk ten minste 5
seconden ingedrukt. Druk vervolgens op
de toets 8
start
en de fabrieksinstellingen
zijn weer geactiveerd.
●
●
●
Koffiezetten
met koffiebonen
Deze espresso-automaat maalt voor elke
bereiding verse koffie. Gebruik bij voorkeur
espresso- of bonenmelanges voor
volautomatische apparaten gebruiken. Voor
een optimale kwaliteit dienen de bonen koel
en afgesloten te worden bewaard of te
worden diepgevroren. De koffiebonen
kunnen ook diepgevroren worden gemalen.
Belangrijk: Vul het waterreservoir 11
dagelijks met vers water. In het
waterreservoir 11 dient zich altijd voldoende
water te bevinden voor de werking van het
apparaat.
Opmerking: Verwarm de kopjes, vooral
kleine espressokopjes met een dikke wand,
voor op de kopjeswarmer 19.
Met een eenvoudige druk op een toets
kunnen verschillende koffiedranken worden
bereid.
Koffiedranken zonder melk
Het apparaat moet gebruiksklaar zijn.
Plaats de voorverwarmde kop(pen) onder
de koffie-uitloop 9.
Selecteer met de draaiknop 6 de
gewenste espresso of koffie. Op het
display 5 verschijnt de gekozen drank en
de voor deze drank ingestelde sterkte en
hoeveelheid.
ESPRESSO Ë Í
 à À Á Ä Å
●
●
SE_TK76_Teil_1_080917.indd 95 18.09.2008 08:41:16
Page 100

96
denl
De instellingen kunnen worden veranderd
(zie hoofdstuk ‘Bedieningselementen’).
Druk op de toets 8
start
.
De koffie wordt bereid en loopt vervolgens
in de kop(pen).
Koffiedranken met melk
Het apparaat moet gebruiksklaar zijn.
● Steek het melkpijpje 10d van de melk-
schuimer 10 diep in het melkreservoir 34.
Draai de koffie-uitloop 9 naar rechts
tot
hij hoorbaar vastklikt.
Plaats een voorverwarmd kopje of glas
onder de koffie-uitloop 9 en
melkschuimer 10.
Kies met behulp van de draaiknop 6 de
gewenste macchiato
Å
, cappuccino Æ,
koffie met melk Ä of my coffee Ç. Op
het display 5 verschijnt de gekozen drank
en de voor deze drank ingestelde sterkte
en hoeveelheid.
CAPPUCCINO Ë Í
À Á Ä Å Æ Ç
De instellingen kunnen worden veranderd
(zie hoofdstuk ‘Bedieningselementen’).
Druk op de toets 8
start
. Eerst wordt de
melk in het kopje of glas gepompt. Direct
daarna wordt de koffie bereid, die
vervolgens in het kopje of glas loopt.
Belangrijk: Gedroogde melkresten zijn
moeilijk te verwijderen. Reinig de
melkschuimer 10 daarom na elk gebruik
met lauw water (zie hoofdstuk ‘Melksysteem
reinigen’).
●
●
●
●
●
Koffiezetten
met gemalen koffie
Met deze espressoautomaat kan ook met
gemalen koffie (geen oploskoffie) koffie
worden gezet.
Koffiedranken zonder melk
Selecteer met de draaiknop 6 À of Á .
Plaats de voorverwarmde kop(pen) onder
de koffie-uitloop 9.
Open de poederlade 21 met een druk.
Doe er maximaal 2 afgestreken
maatlepels 14 gemalen koffie in.
Let op! Doe geen hele bonen of oploskoffie
in de poederlade!
Sluit de poederlade 21.
Druk op de toets 8
start
.
De koffie wordt bereid en loopt vervolgens
in de kop(pen).
Opmerking: Voor een volgende kop koffie
dient deze werkwijze te worden herhaald.
Als binnen 90 seconden geen koffie wordt
genomen, wordt het bereidingscompartiment automatisch leeggemaakt, om overlading te voorkomen. Het apparaat spoelt.
Koffiedranken met melk
Kies met behulp van de draaiknop 6
koffie met melk Ä, macchiato
Å
,
cappuccino Æ of my coffee Ç .
Steek het melkpijpje 10d van de melkschuimer 10 in het melkreservoir 34.
Draai de koffie-uitloop 9 naar rechts, tot
hij hoorbaar vastklikt.
Plaats een voorverwarmd kopje of glas
onder de koffie-uitloop 9 en
melkschuimer 10.
Open de poederlade 21 met een druk.
Doe er maximaal 2 afgestreken
maatlepels 14 gemalen koffie in.
●
●
●
●
●
●
●
●
●
●
●
●
SE_TK76_Teil_1_080917.indd 96 18.09.2008 08:41:16
 Loading...