

Page 1

Communication for the open minded
Siemens Enterprise Communications
www.siemens.com/open
Documentation
HiPath 1100
HiPath 1120, HiPath 1150, HiPath 1190
System Telephone
Profiset 3030
User Manual
Page 2

Introduction
Introduction
The HiPath 1100 family consists of the following systems:HiPath 1120, HiPath 1150 and
HiPath 1190. The features and operation of these systems are very similar. Their differences stem from their capability regarding the number of extensions, external lines and optional modules available.
The following documentation package was developed to describe the characteristics for
these systems:
• User Manual:
This manual describes step by step how to operate and use the features provided by
each system.
• Programming Manual:
The Configuration Manual briefly describes the installation of HiPath 1120, HiPath 1150
and HiPath 1190 systems as well as the programming codes for the entire family of systems. It highlights the specific characteristics of each system.
• System Telephones Instruction Manual:
It is included with the telephone package and describes how to setup and use the telephone sets.
• Quick Reference Guide Analog and System Telephones:
This guide provides summarized information on how to use the different codes for the
features of each system.
• Attendant Console Quick Reference Guide:
This guide provides summarized information on how to use a system telephone as an
Attendant Console.
• Service Manual.
This manual contains information regarding Siemens distributors and Service Centers
where you can purchase products and obtain technical support for your Communications System.
• Warranty Certificate:
This Certificate defines the terms and conditions of the warranty provided by Siemens.
About This User Manual
This manual describes the operation and implementation of the HiPath 1100 system features with Profiset 3030 system telephones. It also describes all feature codes and functions provided by your system. Some functions may not be available with your system. The
reasons for this are the following:
• The function is not configured for your type of line and/or system. Ask your System Administrator for further information.
• Your communications platform does not support the feature. Ask about upgrade capabilities for your system.
2
Page 3
Introduction
Important Notes
Do not install the system or telephone sets where there may be a risk of
explosion.
To ensure optimal performance and operation use only original accesso-
ries manufactured by Siemens.
Never open the system or dismantle any of the telephones. If you have
any problems, ask for assistance from your System Administrator.
Care of the equipment
Avoid putting the system and telephones in contact with coloring liquids or other damaging fluids such as tea, coffee, fruit juices or soft drinks.
The information in this document provides only general descriptions of the features. The
actual features may not correspond exactly to the descriptions herein and, furthermore,
they are subject to changes to the extent that products continue to be developed.
The selection of features to be provided is not binding unless explicitly established in the
terms of the contract.
Trademarks
This equipment conforms to the EU Directive 1999/5/EG, as attested by
the CE mark.
This device has been manufactured in accordance with our certified environmental management system (ISO 14001). This process ensures the
lowest consumption of raw materials and energy as well as the lowest
production of industrial waste.
For compliance with EU directives, do not discard any batteries, electrical or electronic equipment marked with this symbol in common household garbage. Discard this type of waste at a local recycling or waste disposal facility.
3
Page 4

Introduction
Introduction
Introduction. . . . . . . . . . . . . . . . . . . . . . . . . . . . . . . . . . .2
About This User Manual . . . . . . . . . . . . . . . . . . . . . . . . . . . . . . . . . . . . . 2
Important Notes . . . . . . . . . . . . . . . . . . . . . . . . . . . . . . . . . . . . . . . . . . . 3
Trademarks . . . . . . . . . . . . . . . . . . . . . . . . . . . . . . . . . . . . . . . . . . . . . . . 3
How to use this manual . . . . . . . . . . . . . . . . . . . . . . . .9
Display indications. . . . . . . . . . . . . . . . . . . . . . . . . . . . . . . . . . . . . . . . . 10
Configuring the keys . . . . . . . . . . . . . . . . . . . . . . . . . . . . . . . . . . . . . . . 11
Accessing a Feature . . . . . . . . . . . . . . . . . . . . . . . . . . . . . . . . . . . . . . . 12
... Using a Code . . . . . . . . . . . . . . . . . . . . . . . . . . . . . . . . . . . . . . . . 12
... Directly. . . . . . . . . . . . . . . . . . . . . . . . . . . . . . . . . . . . . . . . . . . . . 12
... Using the Service menu . . . . . . . . . . . . . . . . . . . . . . . . . . . . . . . 12
... using a programmable key. . . . . . . . . . . . . . . . . . . . . . . . . . . . . . 13
System support technician . . . . . . . . . . . . . . . . . . . . . . . . . . . . . . . . . . 13
Using the HiPath 1100 Features. . . . . . . . . . . . . . . . .14
Considerations. . . . . . . . . . . . . . . . . . . . . . . . . . . . . . . . . . . . . . . . . . . . 14
Numbering Plan. . . . . . . . . . . . . . . . . . . . . . . . . . . . . . . . . . . . . . . . . . . 14
Profiset 3030 Keys . . . . . . . . . . . . . . . . . . . . . . . . . . . . . . . . . . . . . . . . 15
System signaling tones . . . . . . . . . . . . . . . . . . . . . . . . . . . . . . . . . . . . . 15
Functions used for making calls . . . . . . . . . . . . . . . .17
Making Calls . . . . . . . . . . . . . . . . . . . . . . . . . . . . . . . . . . . . . . . . . . . . . 17
Considerations . . . . . . . . . . . . . . . . . . . . . . . . . . . . . . . . . . . . . . . . . 17
...Using the handset. . . . . . . . . . . . . . . . . . . . . . . . . . . . . . . . . . . . . 18
...With the handset on the hook . . . . . . . . . . . . . . . . . . . . . . . . . . . 18
...Using the speakerphone. . . . . . . . . . . . . . . . . . . . . . . . . . . . . . . . 18
...Using automatic seizure of an activated external line. . . . . . . . . . 19
...Using a group of external lines . . . . . . . . . . . . . . . . . . . . . . . . . . . 19
Switching to speakerphone. . . . . . . . . . . . . . . . . . . . . . . . . . . . . . . . . . 20
Switching to Handset . . . . . . . . . . . . . . . . . . . . . . . . . . . . . . . . . . . . . . 20
Speaker . . . . . . . . . . . . . . . . . . . . . . . . . . . . . . . . . . . . . . . . . . . . . . . . . 20
Ending a call. . . . . . . . . . . . . . . . . . . . . . . . . . . . . . . . . . . . . . . . . . . . . . 20
Seizure of a specific Line. . . . . . . . . . . . . . . . . . . . . . . . . . . . . . . . . . . . 21
Phonebook/Speed Dialing . . . . . . . . . . . . . . . . . . . . . . . . . . . . . . . . . . . 21
Using speed dialing . . . . . . . . . . . . . . . . . . . . . . . . . . . . . . . . . . . . . 22
Programming individual speed dialing . . . . . . . . . . . . . . . . . . . . . . . 22
Phonebook Search. . . . . . . . . . . . . . . . . . . . . . . . . . . . . . . . . . . . . . 25
4
Page 5

Introduction
Caller Lists . . . . . . . . . . . . . . . . . . . . . . . . . . . . . . . . . . . . . . . . . . . . . . . 26
External line reservation . . . . . . . . . . . . . . . . . . . . . . . . . . . . . . . . . . . . 29
For Internet access . . . . . . . . . . . . . . . . . . . . . . . . . . . . . . . . . . . . . 30
Recall . . . . . . . . . . . . . . . . . . . . . . . . . . . . . . . . . . . . . . . . . . . . . . . . . . . 31
Override. . . . . . . . . . . . . . . . . . . . . . . . . . . . . . . . . . . . . . . . . . . . . . . . . 33
Silent monitoring . . . . . . . . . . . . . . . . . . . . . . . . . . . . . . . . . . . . . . . . . . 33
Urgent call/Recall when busy . . . . . . . . . . . . . . . . . . . . . . . . . . . . . . . . 34
Hotline . . . . . . . . . . . . . . . . . . . . . . . . . . . . . . . . . . . . . . . . . . . . . . . . . . 35
Warmline . . . . . . . . . . . . . . . . . . . . . . . . . . . . . . . . . . . . . . . . . . . . . . . . 35
Calling an attendant console (AC) . . . . . . . . . . . . . . . . . . . . . . . . . . . . . 35
Direct communication call . . . . . . . . . . . . . . . . . . . . . . . . . . . . . . . . . . . 36
Handsfree answerback . . . . . . . . . . . . . . . . . . . . . . . . . . . . . . . . . . . . . 37
LCR . . . . . . . . . . . . . . . . . . . . . . . . . . . . . . . . . . . . . . . . . . . . . . . . . . . . 37
LCR Bypass . . . . . . . . . . . . . . . . . . . . . . . . . . . . . . . . . . . . . . . . . . 38
ACS . . . . . . . . . . . . . . . . . . . . . . . . . . . . . . . . . . . . . . . . . . . . . . . . . . . . 39
Timer for outgoing external calls . . . . . . . . . . . . . . . . . . . . . . . . . . . . . . 40
Timeout for external calls . . . . . . . . . . . . . . . . . . . . . . . . . . . . . . . . . . . 40
View timeout . . . . . . . . . . . . . . . . . . . . . . . . . . . . . . . . . . . . . . . . . . 41
DISA . . . . . . . . . . . . . . . . . . . . . . . . . . . . . . . . . . . . . . . . . . . . . . . . . . . 42
Using a temporary MSN to make a call. . . . . . . . . . . . . . . . . . . . . . . . . 43
Functions used during calls. . . . . . . . . . . . . . . . . . . . 44
Consultation. . . . . . . . . . . . . . . . . . . . . . . . . . . . . . . . . . . . . . . . . . . . . . 44
Transfer . . . . . . . . . . . . . . . . . . . . . . . . . . . . . . . . . . . . . . . . . . . . . . . . . 45
Toggle . . . . . . . . . . . . . . . . . . . . . . . . . . . . . . . . . . . . . . . . . . . . . . . . . . 46
Conference . . . . . . . . . . . . . . . . . . . . . . . . . . . . . . . . . . . . . . . . . . . . . . 47
Three party call . . . . . . . . . . . . . . . . . . . . . . . . . . . . . . . . . . . . . . . . 47
Conference with more than three participants . . . . . . . . . . . . . . . . 48
Parking. . . . . . . . . . . . . . . . . . . . . . . . . . . . . . . . . . . . . . . . . . . . . . . . . . 52
General parking . . . . . . . . . . . . . . . . . . . . . . . . . . . . . . . . . . . . . . . . . . . 53
Suffix dialing . . . . . . . . . . . . . . . . . . . . . . . . . . . . . . . . . . . . . . . . . . . . . 54
Flash on analog trunk. . . . . . . . . . . . . . . . . . . . . . . . . . . . . . . . . . . . . . . 54
Retrieving a call on hold. . . . . . . . . . . . . . . . . . . . . . . . . . . . . . . . . . . . . 55
Account code. . . . . . . . . . . . . . . . . . . . . . . . . . . . . . . . . . . . . . . . . . . . . 55
5
Page 6

Introduction
Functions used when receiving calls . . . . . . . . . . .57
Answering calls . . . . . . . . . . . . . . . . . . . . . . . . . . . . . . . . . . . . . . . . . . . 57
Answering a call on hold . . . . . . . . . . . . . . . . . . . . . . . . . . . . . . . . . 58
Pickup . . . . . . . . . . . . . . . . . . . . . . . . . . . . . . . . . . . . . . . . . . . . . . . . . . 59
Group. . . . . . . . . . . . . . . . . . . . . . . . . . . . . . . . . . . . . . . . . . . . . . . . 59
Individual . . . . . . . . . . . . . . . . . . . . . . . . . . . . . . . . . . . . . . . . . . . . . 60
Call forwarding. . . . . . . . . . . . . . . . . . . . . . . . . . . . . . . . . . . . . . . . . . . . 60
Internal. . . . . . . . . . . . . . . . . . . . . . . . . . . . . . . . . . . . . . . . . . . . . . . 60
External . . . . . . . . . . . . . . . . . . . . . . . . . . . . . . . . . . . . . . . . . . . . . . 61
When there is no answer . . . . . . . . . . . . . . . . . . . . . . . . . . . . . . . . 61
For Fax/DID . . . . . . . . . . . . . . . . . . . . . . . . . . . . . . . . . . . . . . . . . . . 62
Conditional . . . . . . . . . . . . . . . . . . . . . . . . . . . . . . . . . . . . . . . . . . . . 63
Disabling call forwarding . . . . . . . . . . . . . . . . . . . . . . . . . . . . . . . . . 64
Do not disturb . . . . . . . . . . . . . . . . . . . . . . . . . . . . . . . . . . . . . . . . . . . . 65
Voice mail . . . . . . . . . . . . . . . . . . . . . . . . . . . . . . . . . . . . . . . . . . . . . . . 65
Message Waiting Indicator (MWI). . . . . . . . . . . . . . . . . . . . . . . . . . . . . 67
MWI for system telephones . . . . . . . . . . . . . . . . . . . . . . . . . . . . . . 67
Activating receipt of an Internal MWI . . . . . . . . . . . . . . . . . . . . . . . 68
Mailbox access . . . . . . . . . . . . . . . . . . . . . . . . . . . . . . . . . . . . . . . . 69
Voice mail forwarding . . . . . . . . . . . . . . . . . . . . . . . . . . . . . . . . . . . 70
Leaving a message . . . . . . . . . . . . . . . . . . . . . . . . . . . . . . . . . . . . . 70
Entry voice mail (EVM) . . . . . . . . . . . . . . . . . . . . . . . . . . . . . . . . . . . . . 70
Mailbox greeting configuration . . . . . . . . . . . . . . . . . . . . . . . . . . . . 71
Personal mailbox activation . . . . . . . . . . . . . . . . . . . . . . . . . . . . . . . 72
Checking you personal mailbox . . . . . . . . . . . . . . . . . . . . . . . . . . . . 72
Second attendant . . . . . . . . . . . . . . . . . . . . . . . . . . . . . . . . . . . . . . . . . 74
Groups. . . . . . . . . . . . . . . . . . . . . . . . . . . . . . . . . . . . . . . . . . . . . . . . . . 74
Call groups (CG) . . . . . . . . . . . . . . . . . . . . . . . . . . . . . . . . . . . . . . . . 74
Hunt groups (HG). . . . . . . . . . . . . . . . . . . . . . . . . . . . . . . . . . . . . . . 75
Hunt group (HG) and Call group (CG) Login and Logout . . . . . . . . . 75
UCD subscriber groups . . . . . . . . . . . . . . . . . . . . . . . . . . . . . . . . . . 77
UCD group login/logout . . . . . . . . . . . . . . . . . . . . . . . . . . . . . . . . . . 78
Available/Unavailable agent for a UCD group. . . . . . . . . . . . . . . . . . 79
UCD agent in service out of service . . . . . . . . . . . . . . . . . . . . . . . . 80
Show queue size to UCD agent. . . . . . . . . . . . . . . . . . . . . . . . . . . . 81
Collect call barring . . . . . . . . . . . . . . . . . . . . . . . . . . . . . . . . . . . . . . . . . 81
Overflow extension . . . . . . . . . . . . . . . . . . . . . . . . . . . . . . . . . . . . . . . . 82
6
Page 7

Introduction
Miscellaneous functions . . . . . . . . . . . . . . . . . . . . . . 83
Changing the Password for the electronic lock . . . . . . . . . . . . . . . . . . . 83
Electronic lock . . . . . . . . . . . . . . . . . . . . . . . . . . . . . . . . . . . . . . . . . . . . 83
Music on hold . . . . . . . . . . . . . . . . . . . . . . . . . . . . . . . . . . . . . . . . . . . . 84
Busy signal when extension is busy . . . . . . . . . . . . . . . . . . . . . . . . . . . 85
Language/country settings . . . . . . . . . . . . . . . . . . . . . . . . . . . . . . . . . . 86
Relay . . . . . . . . . . . . . . . . . . . . . . . . . . . . . . . . . . . . . . . . . . . . . . . . . . . 88
Relay status check. . . . . . . . . . . . . . . . . . . . . . . . . . . . . . . . . . . . . . 88
Activating/Disabling a general alarm . . . . . . . . . . . . . . . . . . . . . . . . . . . 89
Disabling a general alarm . . . . . . . . . . . . . . . . . . . . . . . . . . . . . . . . . 90
Alarm clock . . . . . . . . . . . . . . . . . . . . . . . . . . . . . . . . . . . . . . . . . . . . . . 90
Scheduling Time Reminders . . . . . . . . . . . . . . . . . . . . . . . . . . . . . . 90
Deleting/Checking a Scheduled Time Reminder . . . . . . . . . . . . . . . 91
Scheduled Time Reminder Call . . . . . . . . . . . . . . . . . . . . . . . . . . . . 91
Alarm clock/Announcement association . . . . . . . . . . . . . . . . . . . . . . . . 92
COS (Class of Service) changeover . . . . . . . . . . . . . . . . . . . . . . . . . . . . 92
Data protection . . . . . . . . . . . . . . . . . . . . . . . . . . . . . . . . . . . . . . . . . . . 93
Call waiting signaling tone . . . . . . . . . . . . . . . . . . . . . . . . . . . . . . . . . . . 94
Disabling a feature. . . . . . . . . . . . . . . . . . . . . . . . . . . . . . . . . . . . . . . . . 95
Room Monitor . . . . . . . . . . . . . . . . . . . . . . . . . . . . . . . . . . . . . . . . . . . . 95
Room Monitor . . . . . . . . . . . . . . . . . . . . . . . . . . . . . . . . . . . . . . . . . 96
Night service . . . . . . . . . . . . . . . . . . . . . . . . . . . . . . . . . . . . . . . . . . . . . 96
Call forwarding when there is no answer on a digital line . . . . . . . . 97
Entrance telephone - door opener . . . . . . . . . . . . . . . . . . . . . . . . . . . . . 98
Activating system programming . . . . . . . . . . . . . . . . . . . . . . . . . . . . . . 99
Remote configuration . . . . . . . . . . . . . . . . . . . . . . . . . . . . . . . . . . . . . 100
Using an MF Telephone. . . . . . . . . . . . . . . . . . . . . . . . . . . . . . . . . 100
Using the HiPath 1100 System Manager application. . . . . . . . . . . 101
Fax Received . . . . . . . . . . . . . . . . . . . . . . . . . . . . . . . . . . . . . . . . . . . . 102
Associated group. . . . . . . . . . . . . . . . . . . . . . . . . . . . . . . . . . . . . . . . . 102
Call charge consultation. . . . . . . . . . . . . . . . . . . . . . . . . . . . . . . . . . . . 102
Programming the keys . . . . . . . . . . . . . . . . . . . . . . . . . . . . . . . . . . . . 103
Procedure for programming the keys . . . . . . . . . . . . . . . . . . . . . . 103
Features for programmable keys. . . . . . . . . . . . . . . . . . . . . . . . . . 104
Programming a procedure key. . . . . . . . . . . . . . . . . . . . . . . . . . . . 106
Printing key labels . . . . . . . . . . . . . . . . . . . . . . . . . . . . . . . . . . . . . 107
End Key . . . . . . . . . . . . . . . . . . . . . . . . . . . . . . . . . . . . . . . . . . . . . 109
Features for programmable keys
only on the HiPath 1100 Manager . . . . . . . . . . . . . . . . . . . . . . . . . 110
Virtual keypad . . . . . . . . . . . . . . . . . . . . . . . . . . . . . . . . . . . . . . . . . . . 110
Headphone . . . . . . . . . . . . . . . . . . . . . . . . . . . . . . . . . . . . . . . . . . . . . 110
Storing a phone number in a programmable key. . . . . . . . . . . . . . . . . 111
Date and time settings . . . . . . . . . . . . . . . . . . . . . . . . . . . . . . . . . . . . 112
PABX Trace log . . . . . . . . . . . . . . . . . . . . . . . . . . . . . . . . . . . . . . . . . . 112
7
Page 8

Introduction
Special functions for ISDN Lines . . . . . . . . . . . . . .114
Call forwarding on a Digital Line . . . . . . . . . . . . . . . . . . . . . . . . . . . . . 114
Disabling call forwarding . . . . . . . . . . . . . . . . . . . . . . . . . . . . . . . . 115
Anonymous Caller ID (Trace) . . . . . . . . . . . . . . . . . . . . . . . . . . . . . . . . 116
CLIR. . . . . . . . . . . . . . . . . . . . . . . . . . . . . . . . . . . . . . . . . . . . . . . . . . . 116
Using features provided by a carrier on ISDN Lines . . . . . . . . . . . . . . 117
Practical guide . . . . . . . . . . . . . . . . . . . . . . . . . . . . . .118
Care of the telephone . . . . . . . . . . . . . . . . . . . . . . . . . . . . . . . . . . 118
Troubleshooting . . . . . . . . . . . . . . . . . . . . . . . . . . . . . . . . . . . . . . . 118
System error messages. . . . . . . . . . . . . . . . . . . . . . . . . . . . . . . . . 119
Display Messages . . . . . . . . . . . . . . . . . . . . . . . . . . . . . . . . . . . . . 120
Responding to display messages: . . . . . . . . . . . . . . . . . . . . . . . . . 120
Index. . . . . . . . . . . . . . . . . . . . . . . . . . . . . . . . . . . . . . .121
Feature codes . . . . . . . . . . . . . . . . . . . . . . . . . . . . . . .125
Symbols. . . . . . . . . . . . . . . . . . . . . . . . . . . . . . . . . . . . . . . . . . . . . . . . 125
Numbering plan . . . . . . . . . . . . . . . . . . . . . . . . . . . . . . . . . . . . . . . . . . 125
Features . . . . . . . . . . . . . . . . . . . . . . . . . . . . . . . . . . . . . . . . . . . . . . . 126
System telephone functions . . . . . . . . . . . . . . . . . . . . . . . . . . . . . 126
Seizure of an external line . . . . . . . . . . . . . . . . . . . . . . . . . . . . . . . 127
Functions used for making calls . . . . . . . . . . . . . . . . . . . . . . . . . . 128
Functions used during calls . . . . . . . . . . . . . . . . . . . . . . . . . . . . . . 129
Functions used when receiving calls. . . . . . . . . . . . . . . . . . . . . . . . . . 130
Miscellaneous functions . . . . . . . . . . . . . . . . . . . . . . . . . . . . . . . . 131
Alarm clock . . . . . . . . . . . . . . . . . . . . . . . . . . . . . . . . . . . . . . . . . . 134
UCD Subscriber group functions . . . . . . . . . . . . . . . . . . . . . . . . . . 134
Satellite PABX . . . . . . . . . . . . . . . . . . . . . . . . . . . . . . . . . . . . . . . . 135
Functions for ISDN lines . . . . . . . . . . . . . . . . . . . . . . . . . . . . . . . . 135
8
Page 9
Step by step
q, ll ,p... Enter numbers, keys, passwords, internal or external
How to use this manual
How to use this manual
The steps for programming the system are presented
sequentially in graphic format under the column "Step
by Step" on the left side of each page.
Meaning of symbols:
Press the Flash/Fil key.
d
n Lift the handset.
t Replace the handset.
s Start conversation.
phone numbers, etc.
CONSULT
2nd CALL
CONSULTINT.
CONSULT?
Press the programmable key with the LED turned off.
Press the programmable key with the LED turned on.
Press the programmable key with the blinking LED.
w Wait to hear an audible tone through the handset or
speaker.
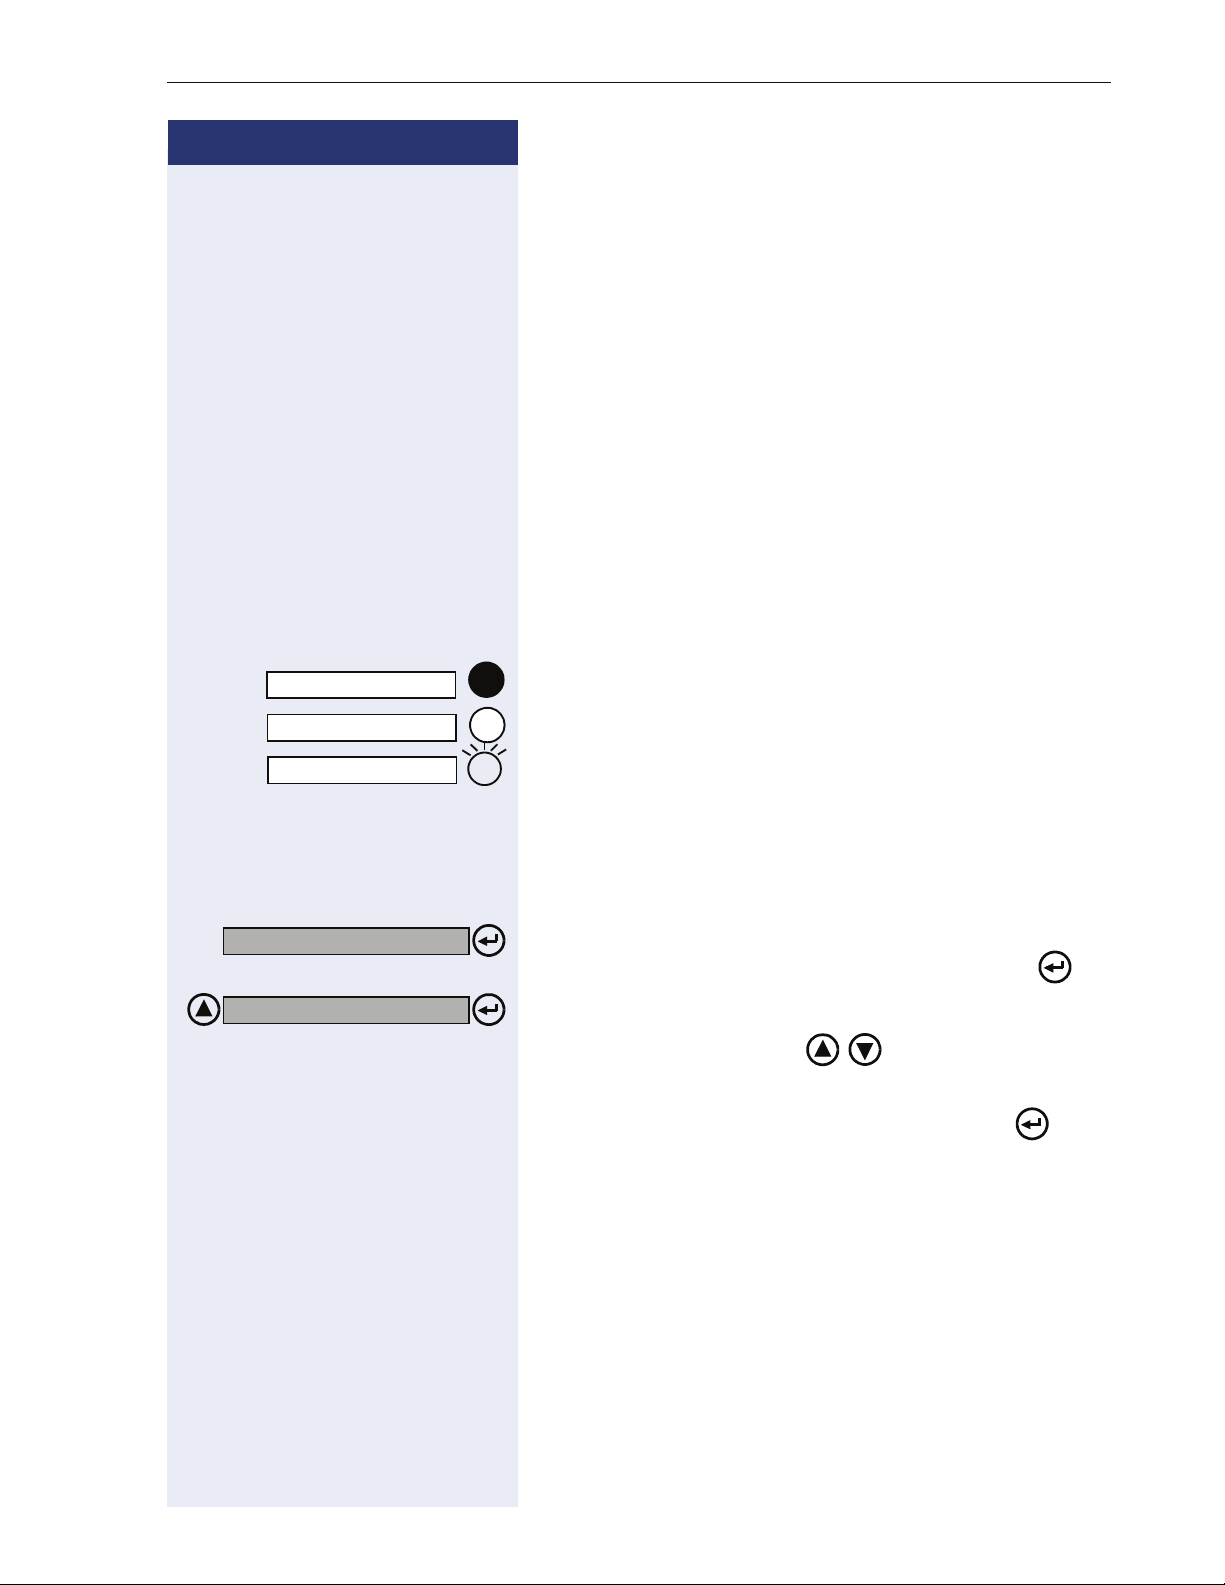
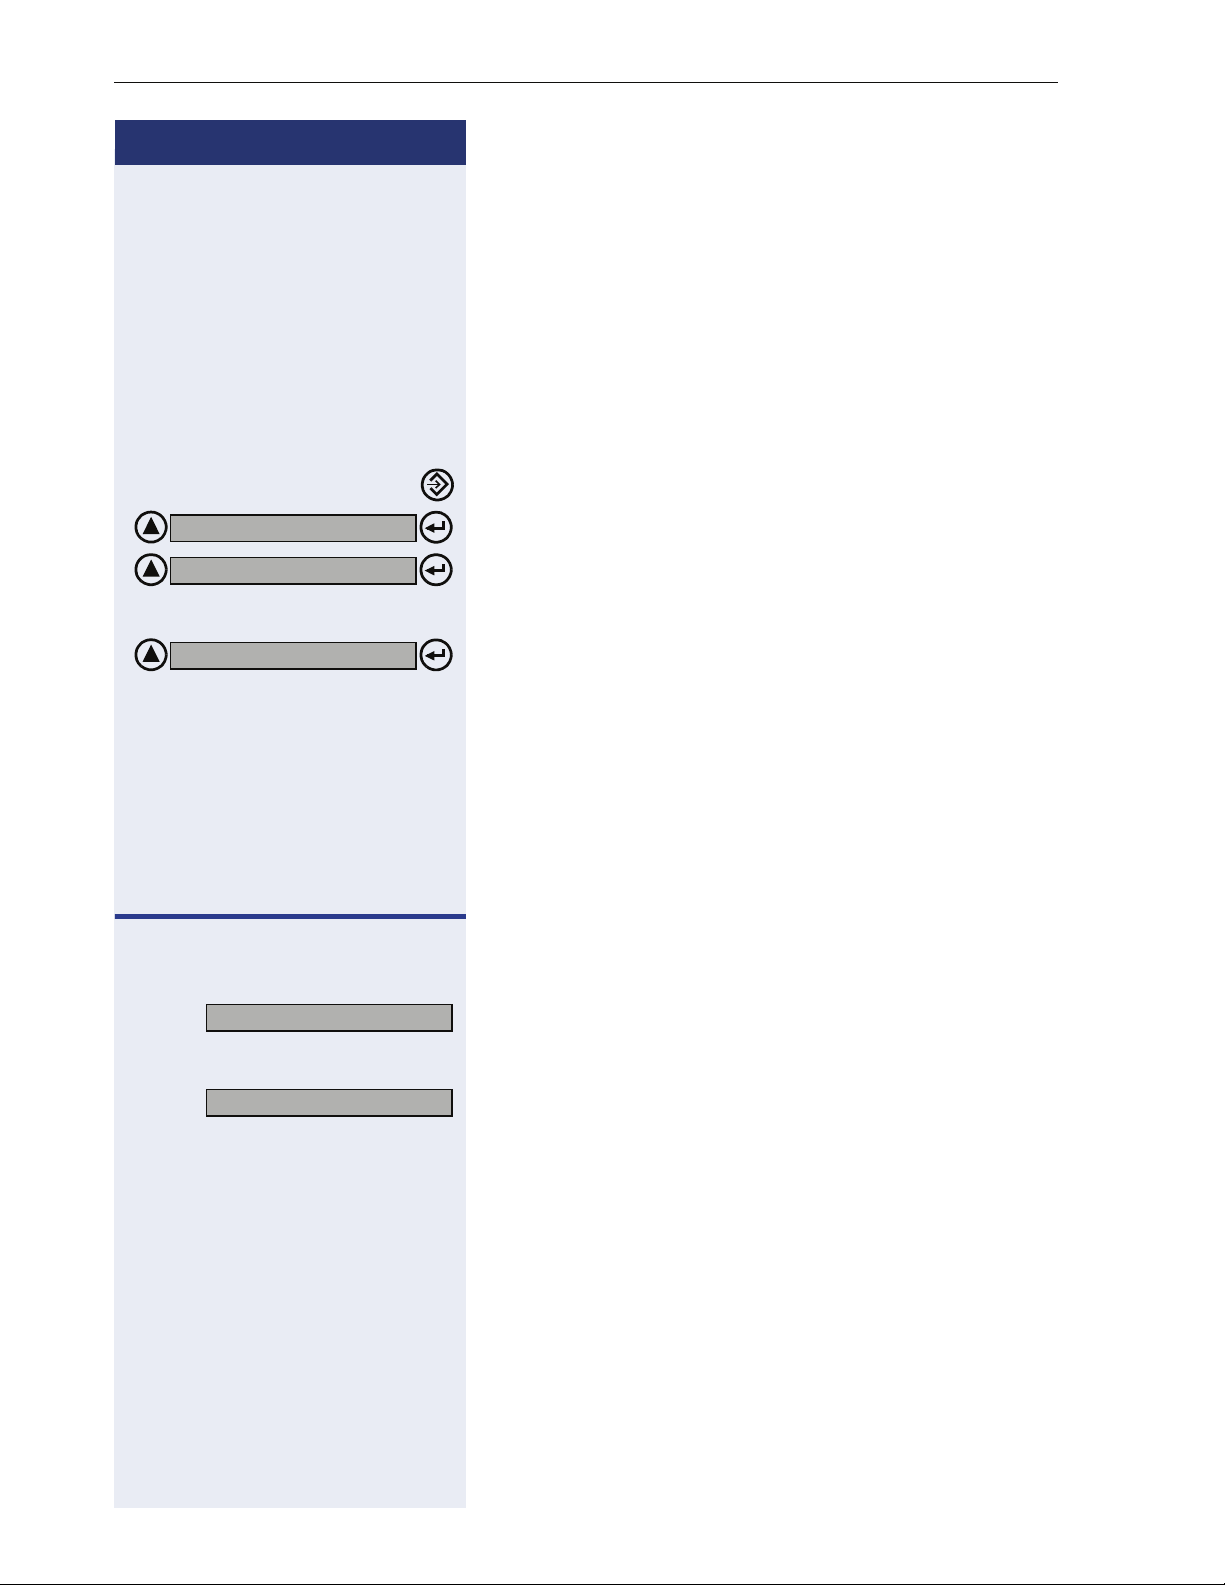
<< >>
An extension is calling.
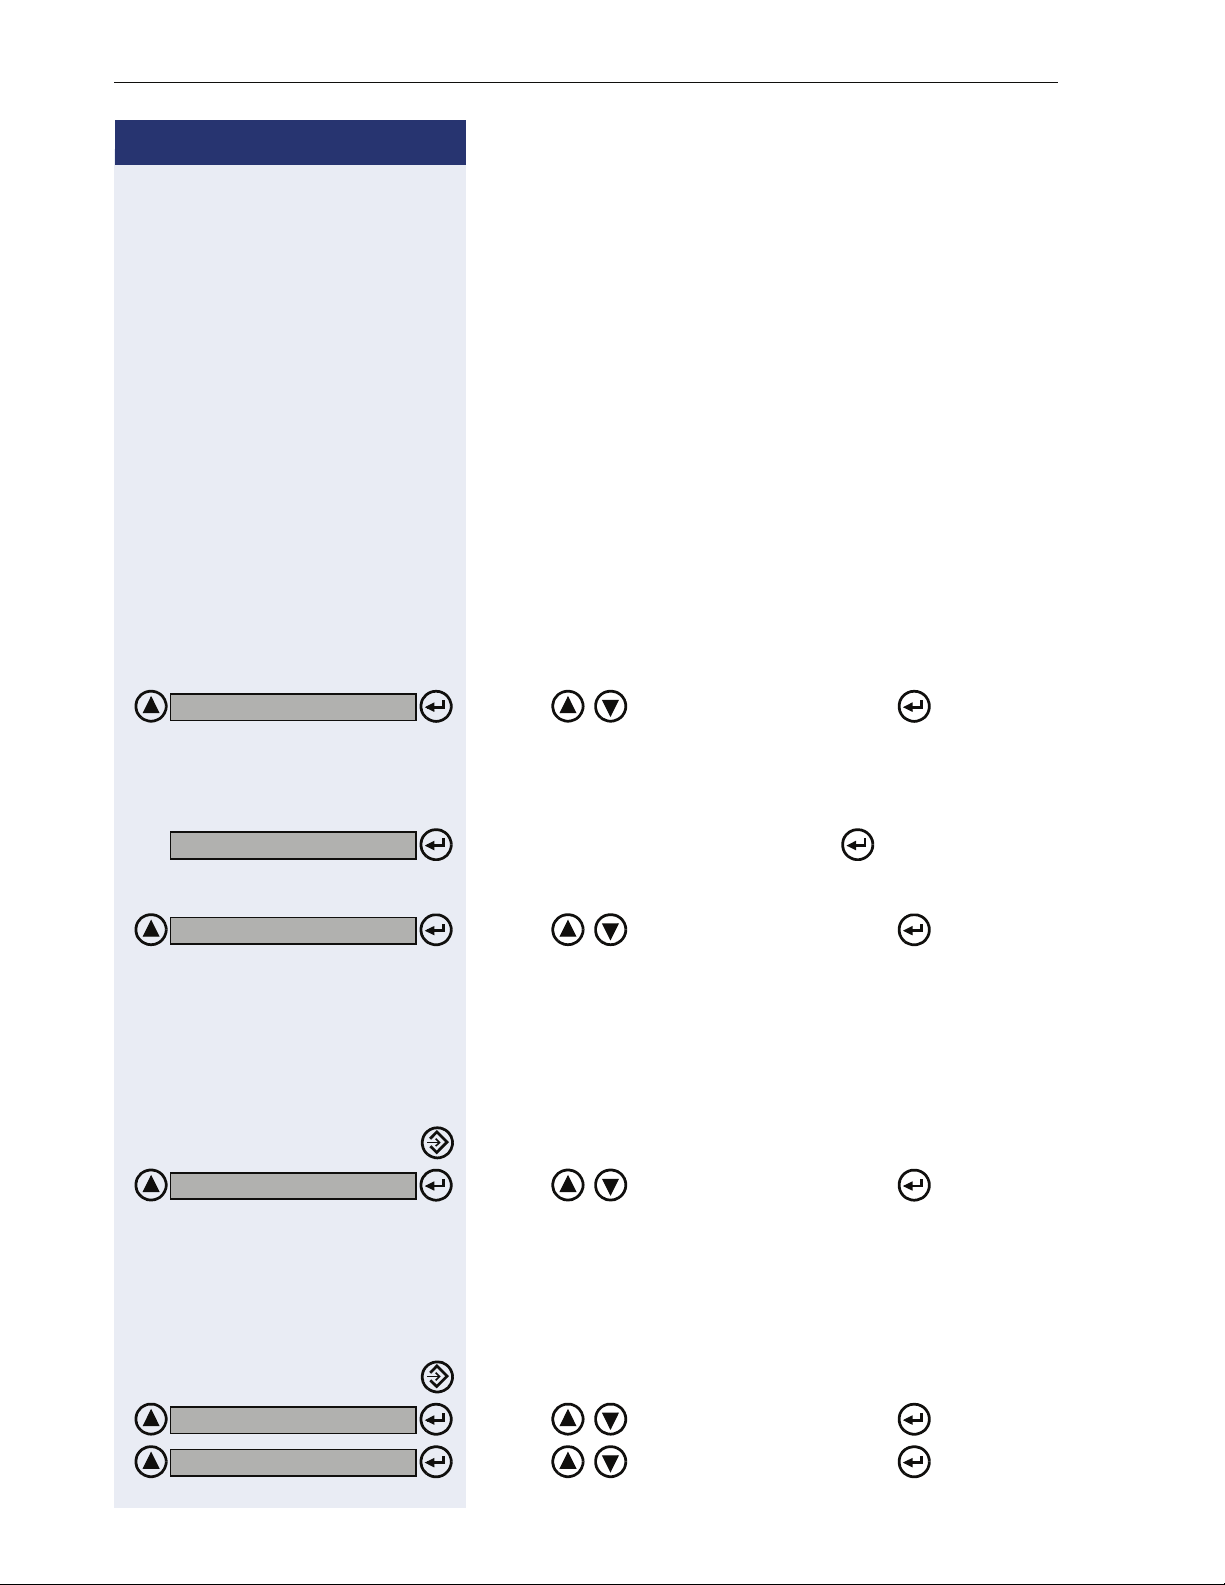
The display shows the available function.
To enable the displayed function, press the key. .
Browse all functions available.
Press the navigation keys ,
until the desired function shows on the display.
Then press the key to confirm your selection. .
When enabling certain functions and procedures, a long
beeping tone means the activation was successful.
When enabling certain functions and procedures, short
beeping tones mean the activation failed.
9
Page 10
How to use this manual
Step by step
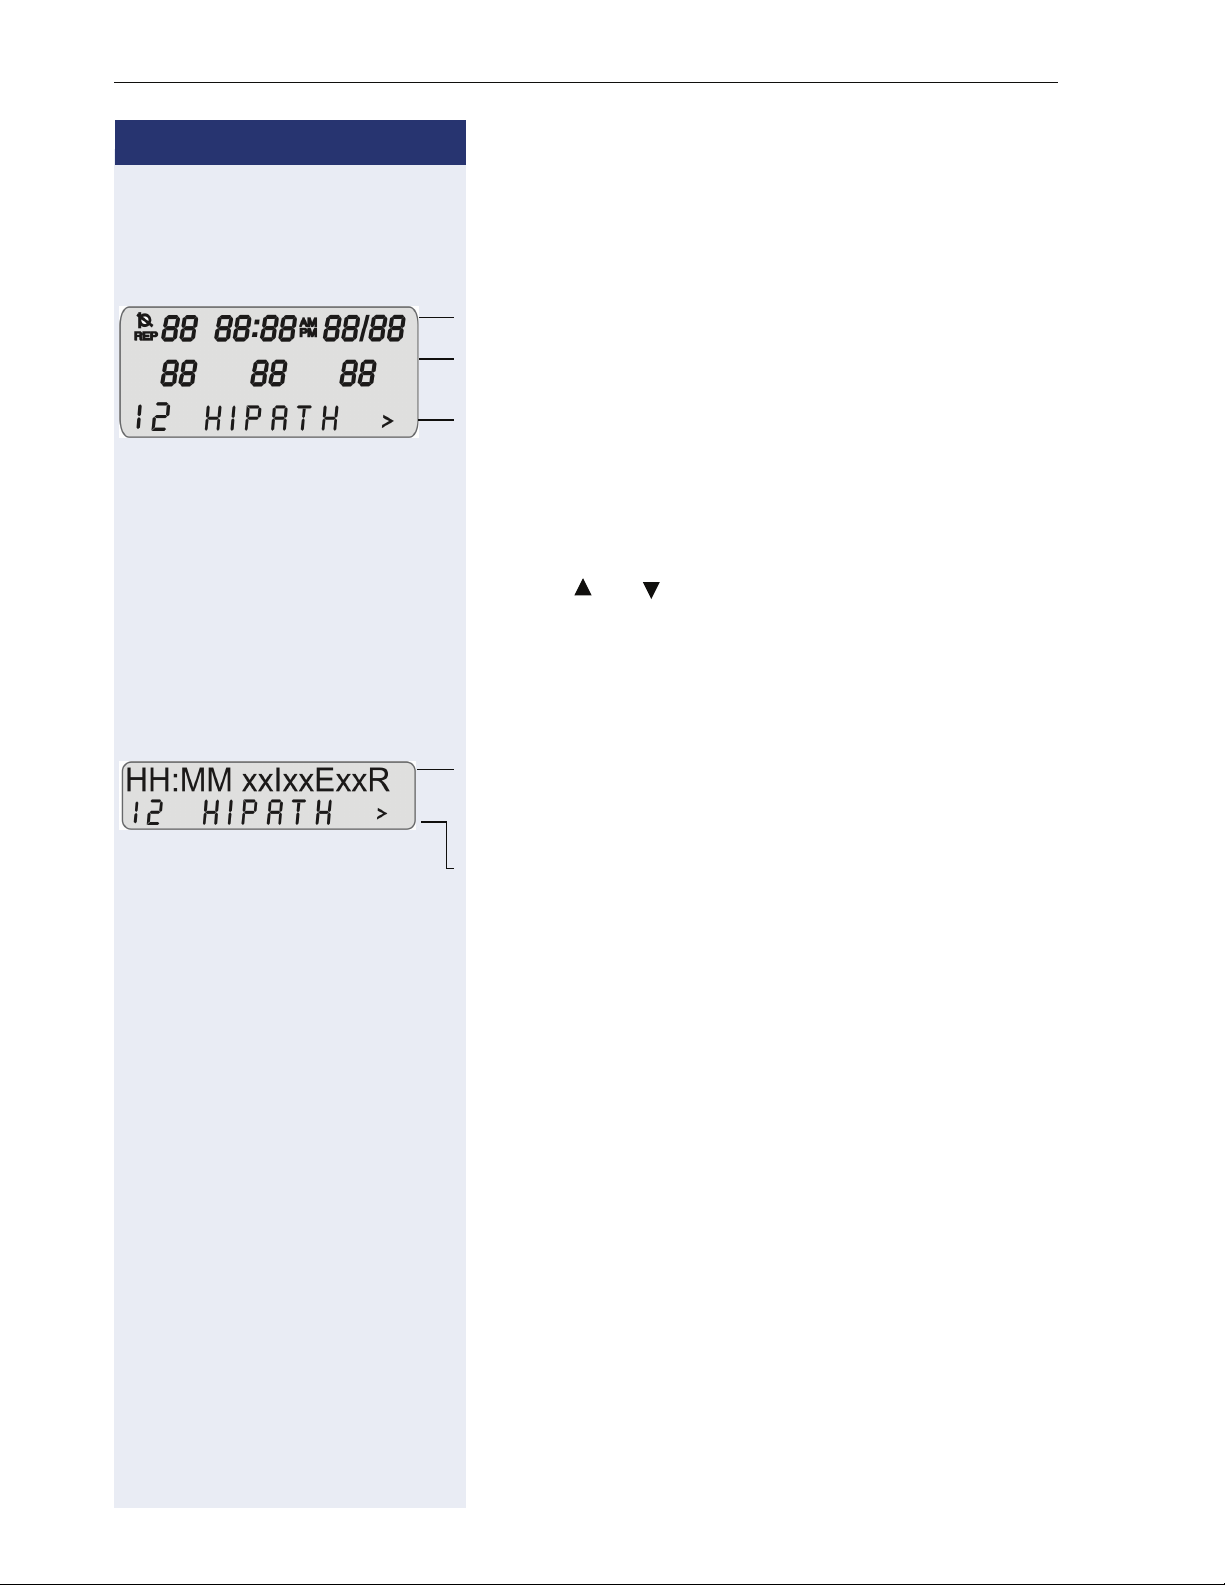
Display indications
Profiset 3030
The first line displays time and date.
The second line displays the number of the called extension, for example, and system messages.
The third line displays the extension number and system messages pertaining to feature selection options.
When a ">" or "N" symbol appears next to the line, it
means there are additional selection options. To scroll
through the available options use the navigation keys.
To select an option press the Enter key.
When a " " or " " symbol appears next to the line, it
means there are additional lines to be displayed. Select
the “Menu” key to access the next line or the previous
line.
E822 ST
The first line displays time, date, day of the week, number of the extension called, and number of system messages.
The second line displays the extension number and system messages pertaining to feature selection options.
When a ">" symbol appears on the right, there are additional selection options. To scroll through the available
options use the navigation keys. To select an option
press the enter key.
10
Page 11
Step by step
How to use this manual
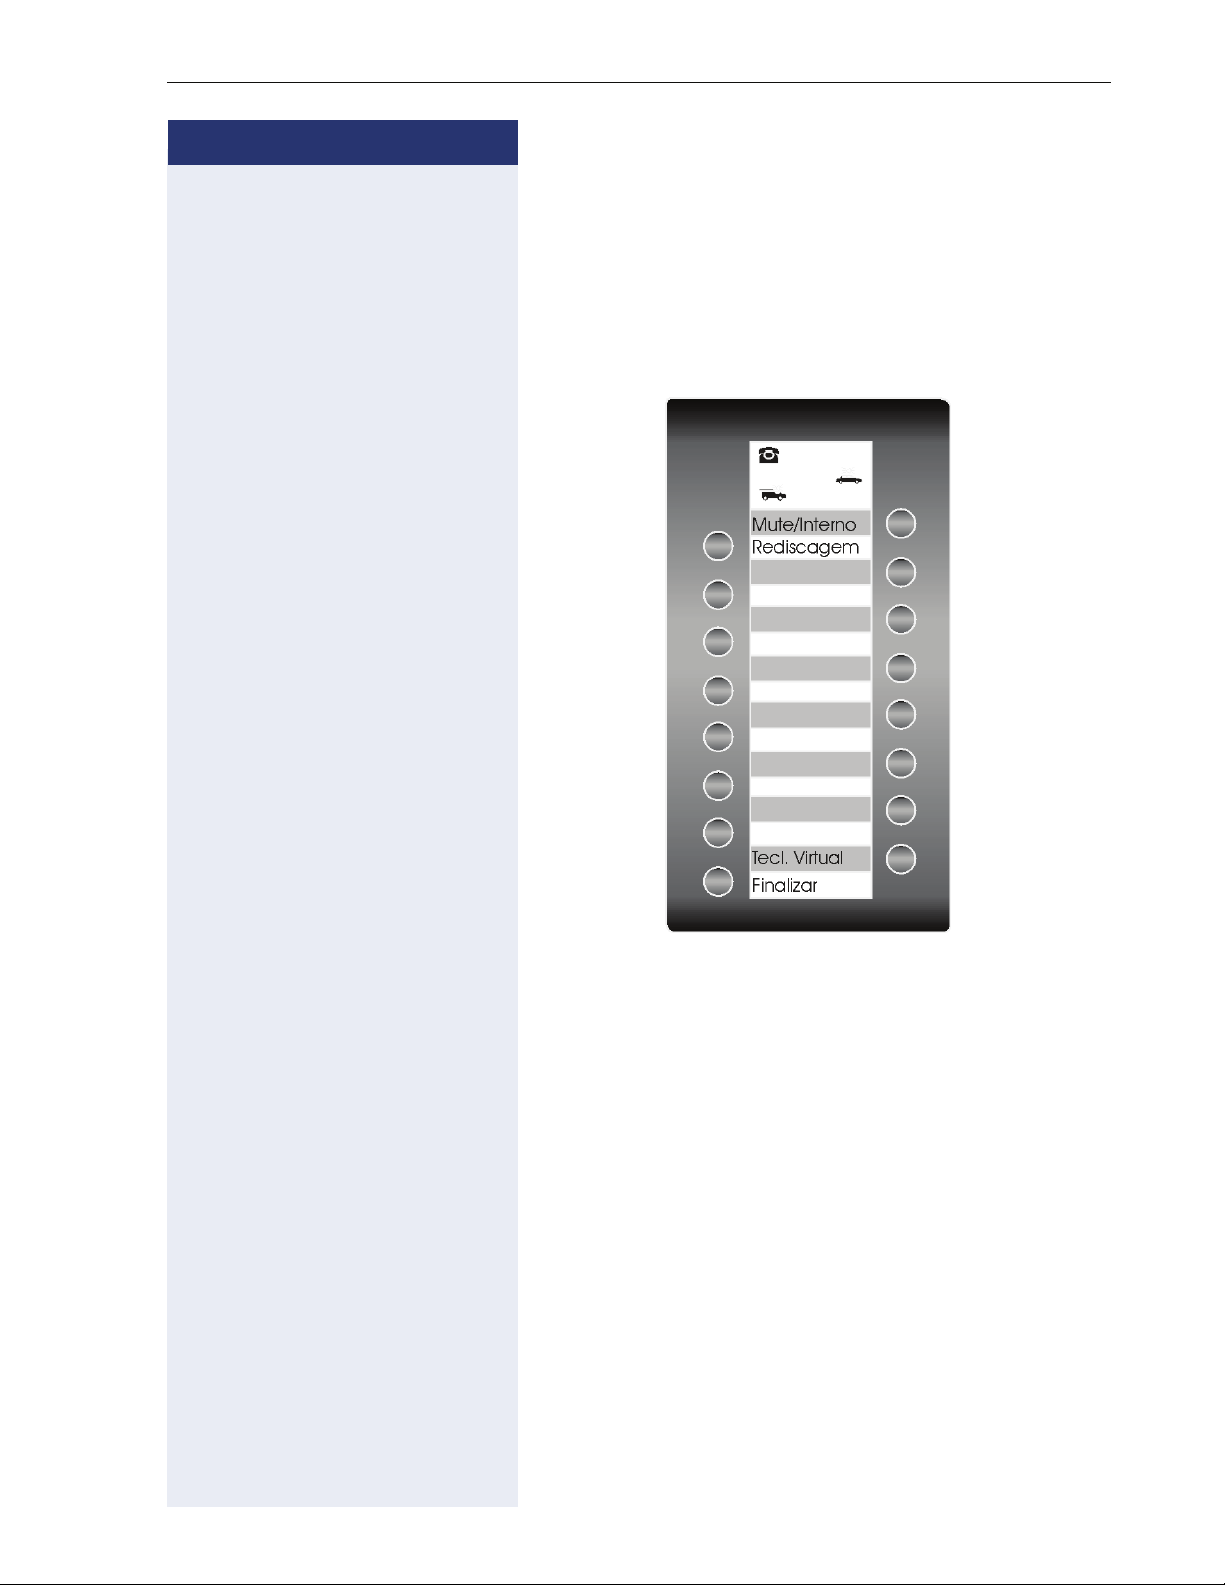
Configuring the keys
Programmable keys are available on two key banks on
the “Virtual keypad”. The default key configuration for
bank 0 is shown below. On bank 1, only the Virtual keypad key is configured by default. All other keys are available and can be programmed.
Notes:
The Mute/Internal key will function as Internal when
Automatic Seizure of an external line is activated. In all
other cases it functions as Mute.
11
Page 12
How to use this manual
Step by step
Accessing a Feature
... Using a Code
HiPath 1100 features can be activated by entering the
appropriate codes directly on the telephone. For ex-
ample, in the case of the do not disturb feature:
qmk Enter the code to enable do not disturb.
rmk Enter the code to deactivate do not disturb.
Feature activation codes always start with the * character key. Deactivation codes always start with the # key.
... Directly
FWD ON.?
RECALL?
CONSULT?
#0=RESET SRVC.?
Certain features can be selected directly, for instance:
Select and confirm by pressing .
Certain features may be selected directly during a
call, under certain conditions. For example, a call to a
busy extension:
Confirm the selection by pressing .
or
Select and confirm by pressing .
... Using the Service menu
To make these selections you must first press the Feature key and chose an option, for example: "#0=RESET
SRVC.?"
Select the Feature key to enter the Service menu.
Select and confirm by pressing .
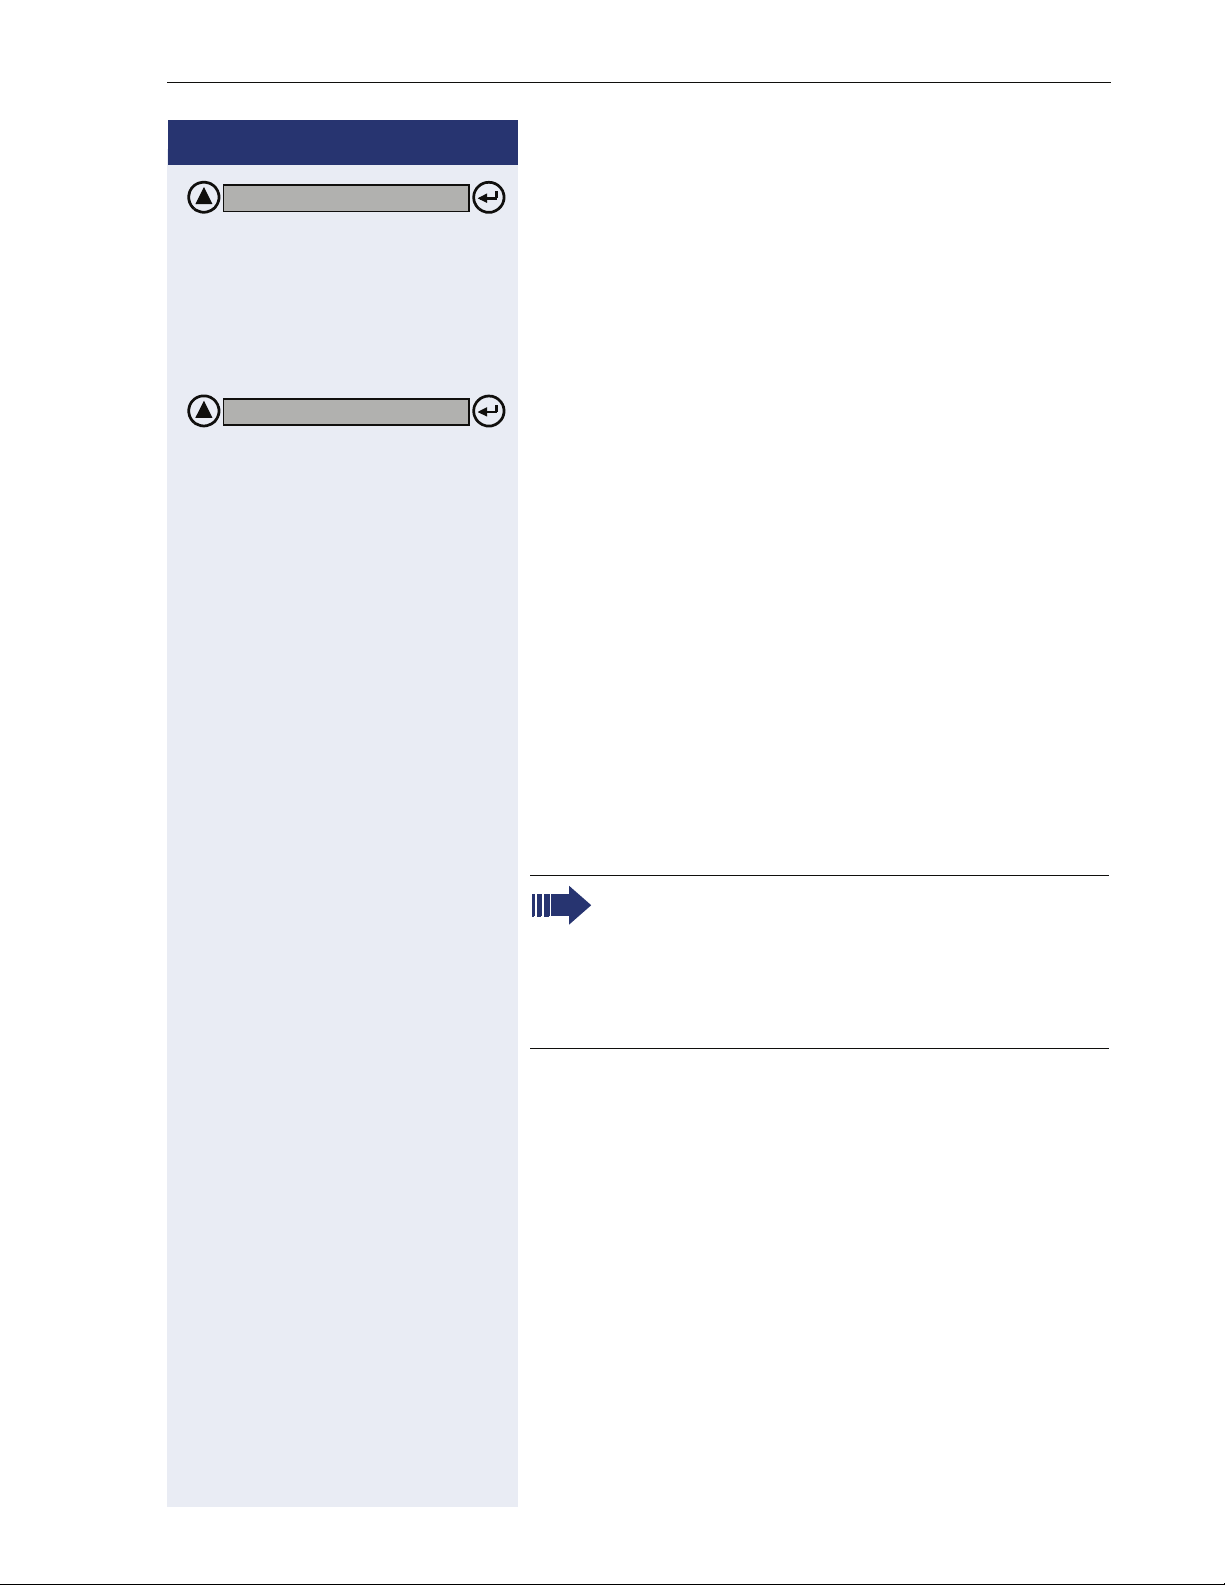
In the Service menu, under "MORE FEATURES?", there
are additional options available. For example,
"*11=FWD. ON?". These options are also available
when the phone is in Sleep Mode or during calls, but
without the code.
MORE FEATURES ?
*11=FWD ON.?
12
Select the Feature key to enter the Service menu.
Select and confirm by pressing .
Select and confirm by pressing .
Page 13

Step by step
How to use this manual
... using a programmable key
When a key has been programmed for a certain feature,
simply press the key to enable the feature. For example:
CONFERENCE
Press the "CONFERENCE" key to activate this feature.
”Feature codes” Æ page 125.
System support technician
The support technician is the person responsible for
programming your HiPath 1100. The support technician
has all the necessary tools and information available in
order to carry out his/her job..
Assistance with troubleshooting
First contact your system’s support technician. If the
problem is not solved, the support technician should
call Technical Support.
13
Page 14

Using the HiPath 1100 Features
Using the HiPath 1100 Features
Considerations
The descriptions and explanations of all available features HiPath 1100 are based on a
Profiset 3030 system telephone.
Check specific procedure to be followed for the different system telephone models. For information on how to configure each model, refer to the manufacturer’s Instructions Manual.
For information on basic functions refer to the Quick Reference Guide for system telephones.
The information in this document provides only general descriptions of the features. The
actual features may not correspond exactly to the descriptions herein and, furthermore,
they are subject to changes to the extent that products continue to be developed.
The selection of features to be provided is not binding unless explicitly established in the
terms of the contract.
Numbering Plan
A Numbering Plan assigns extensions, external lines, and groups - as well as other numbers
that can be selected with features and programming codes - to execute specific functions.
Description HiPath 1120 HiPath 1150 HiPath 1190
External line 801 to 808 801 to 832 801 to 845
Extension, including S
Groups of external lines 0 or 890 to 899
Call Groups (CG) 770 to 779
Hunt Groups (HG) 780 to 789
UCD Subscriber Groups 790 to 799
Carrier 9
EVM - Default internal number 790
EVM - Message ports 7491 and 7492
0
11 t o 3 0 11 t o 6 0
610 to 645
101 to 240
EVM - Virtual ports 744 to 747
Fax/DID - Virtual ports for messages 740 to 743
USB/CAPI line 10 100
Substitution for * and # 75 and 76 (accordingly)
Note:
The number of external lines and extensions available depends on the system’s configuration.
14
Page 15
Profiset 3030 Keys
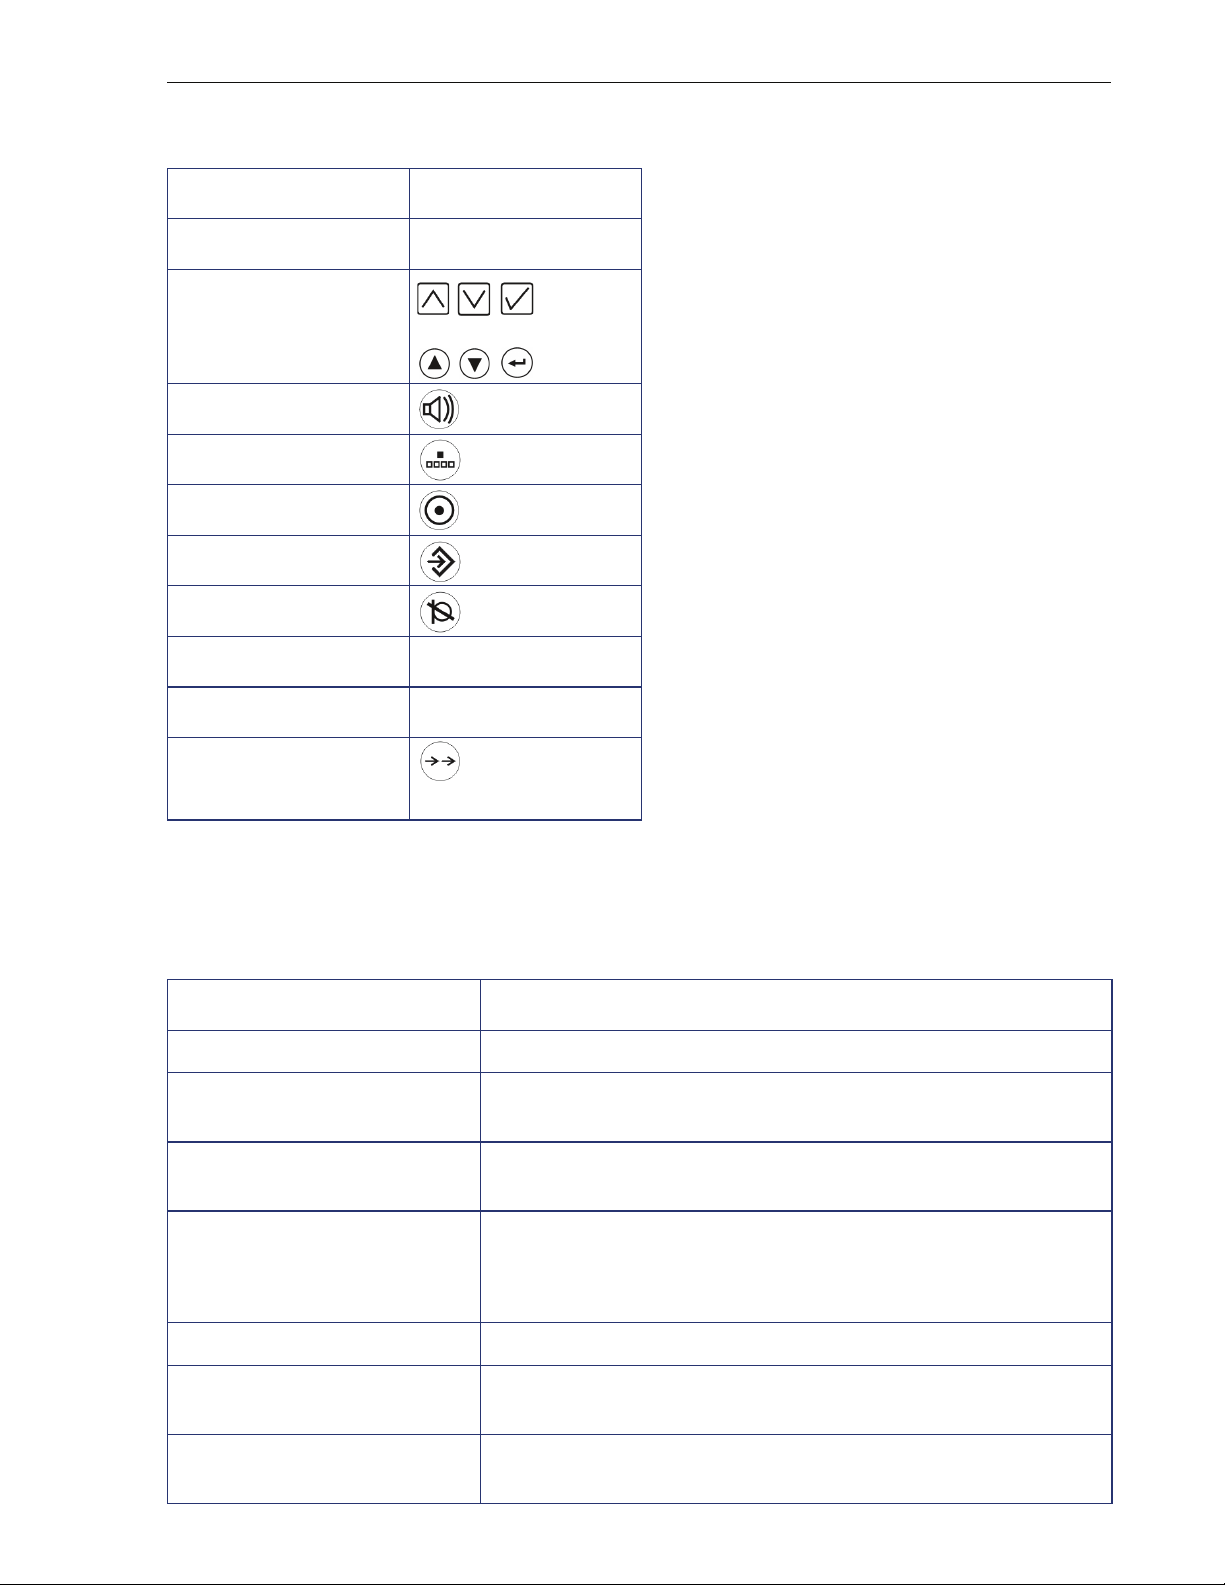
Function Profiset 3030
Display 3 lines
Navigation keys or
Speaker
Flash/Fil
Menu
Feature
Mute
Using the HiPath 1100 Features
Call Forwarding ---
Parking ---
Redial
System signaling tones
During feature configuration the system uses the following signaling tones:
To n e M e a n i n g
Internal dialing tone The system is ready to receive and send call information.
Signaling tone Connection established. Ring signal is being applied to
phone number.
Dial tone Network accepted information request and is sending a re-
quest for more information.
Busy signal It indicates to the caller that the number is busy.
It is also used when the destination cannot be accessed
(e.g., invalid number).
External false signal The dial tone that is heard is not from the carrier.
Call Waiting Signaling Tone It indicates to the user having a conversation that there is
another call ringing.
Call Waiting tone for Door
Opener
It indicates to the user having a conversation that someone
is requesting the Door Opener to open the door.
15
Page 16

Using the HiPath 1100 Features
Confirmation tone The procedure was successfully completed and accepted.
Rejection tone
Override tone It alerts the user having a conversation that the call’s priva-
Conference tone It indicates that a new participant joined the conversation.
Recall confirmation tone It confirms a callback
Alert signal It alerts the called party when the Speakerphone Auto-An-
Special Dial Tone Indicates that a service is activated (Night Service, Elec-
Auto-Answering Tone After a Direct Communication Call is established.
The procedure is invalid and was not accepted.
cy was violated (override).
swering and Paging features are enabled.
tronic Lock, Do Not Disturb, etc.)
16
Page 17

Step by step
Functions used for making calls
Functions used for making calls
Making Calls
Considerations
• When authorized, it allows you to call external num-
• The HiPath 1100 can also be programmed to require
• Ask your support technician for the required internal
• Depending on how the HiPath 1100 is programmed
• On system telephones volume control is adjusted
1
bers
pressing the "Internal" key before an internal number
can be dialed. When this occurs, there is no need to
enter an external line access code to dial an external
number ("Automatic seizure of an external line"
Check with your system’s support technician.
numbers, public network access codes as well as
information about activated features and available
extensions.
(ask the system’s technical support team) it will automatically select the most economical route for
making an external call (LCR - Least Cost Routing).
When an LCR is not available, the non-default carrier
name or "EXPENSIVE CONN" appears on the display, and a warning tone is emitted.
individually on each set during calls.
on a public network.
2
).
[1] See the chapter Important Programming Data - Classes of Service
in Programming manual.
[2] It allows the user to dial an external call directly, without having to
dial an external access code (e.g 0). If a continuous dialing tone is
heard when the handset is lifted, it means that Automatic Seizure
Mode is activated (see Programming na External Line - Automatic
Seizure of an external line, in the programming manual).
17
Page 18

Functions used for making calls
Step by step
n Lift the handset.
w s Wait for the call to be answered. Start conversation.
...Using the handset
• Internal call
p Enter the extension number (e.g. 11/101).
or
•For an external call:
Enter the access code to access an external line (e.g.,
0) and the external number you want to call.
...With the handset on the hook
t Handset on the hook.
p •For an internal call: Enter an extension number
(e.g., 11/101).
or
•For an external call: Enter the access code to access an external line (e.g., 0) and the external number you want to call.
w s Wait for the call to be answered. Start conversation.
...Using the speakerphone
t Handset on the hook.
Press the SPEAKER key.
p •For an internal call: Enter an extension number
(e.g., 11/101).
or
•For an external call: Enter the access code to access an external line (e.g., 0) and the external number you want to call.
18
w s Wait for the call to be answered. Start conversation.
Page 19

Step by step
Functions used for making calls
...Using automatic seizure of
an activated external line
• For an internal call:
INTERNAL
Press the "INTERNAL" key.
p Enter the extension number (e.g. 11/101).
• For an external call:
p Enter the external number you want to call.
w s Wait for the call to be answered. Start conversation.
...Using a group of external lines
An extension can originate external call or calls to a
Master PABX through a group of external lines.
p Enter the number of the appropriate group of external
lines.
d or lmd to lmm = group of external
•
1
lines
w Wait for a dial tone.
p Enter the external number you want to call.
w s Wait for the call to be answered. Start conversation.
... When a group is busy
If an overflow group was configured when the system
was programmed, the call is made using a second
group of external lines.
The second group of external lines takes into account
the extension’s class of service.
[1] When operating as a Satellite PABX for external calls or for calling
extensions of a Master PABX, select the group of external lines before selecting the second external access code (0...9 or 00...99).
Or, select the extension number, as appropriate (see Important
programming data - Assigning groups of external lines to extensions in the Programming manual). When a group of external lines
is configured as a Satellite PBX, a false dial tone is not generated.
Overflow group for external lines (see Programming manual. Programming an external line - Overflow for a group of external lines
19
Page 20
Functions used for making calls
Step by step
and t Press and hold the SPEAKER key while placing the
n and s Lift the handset and resume conversation.
Switching to speakerphone
Required: Conversation using the handset.
handset on the hook. Then release the key and resume
the call.
Switching to Handset
Required: Conversation using the speakerphone.
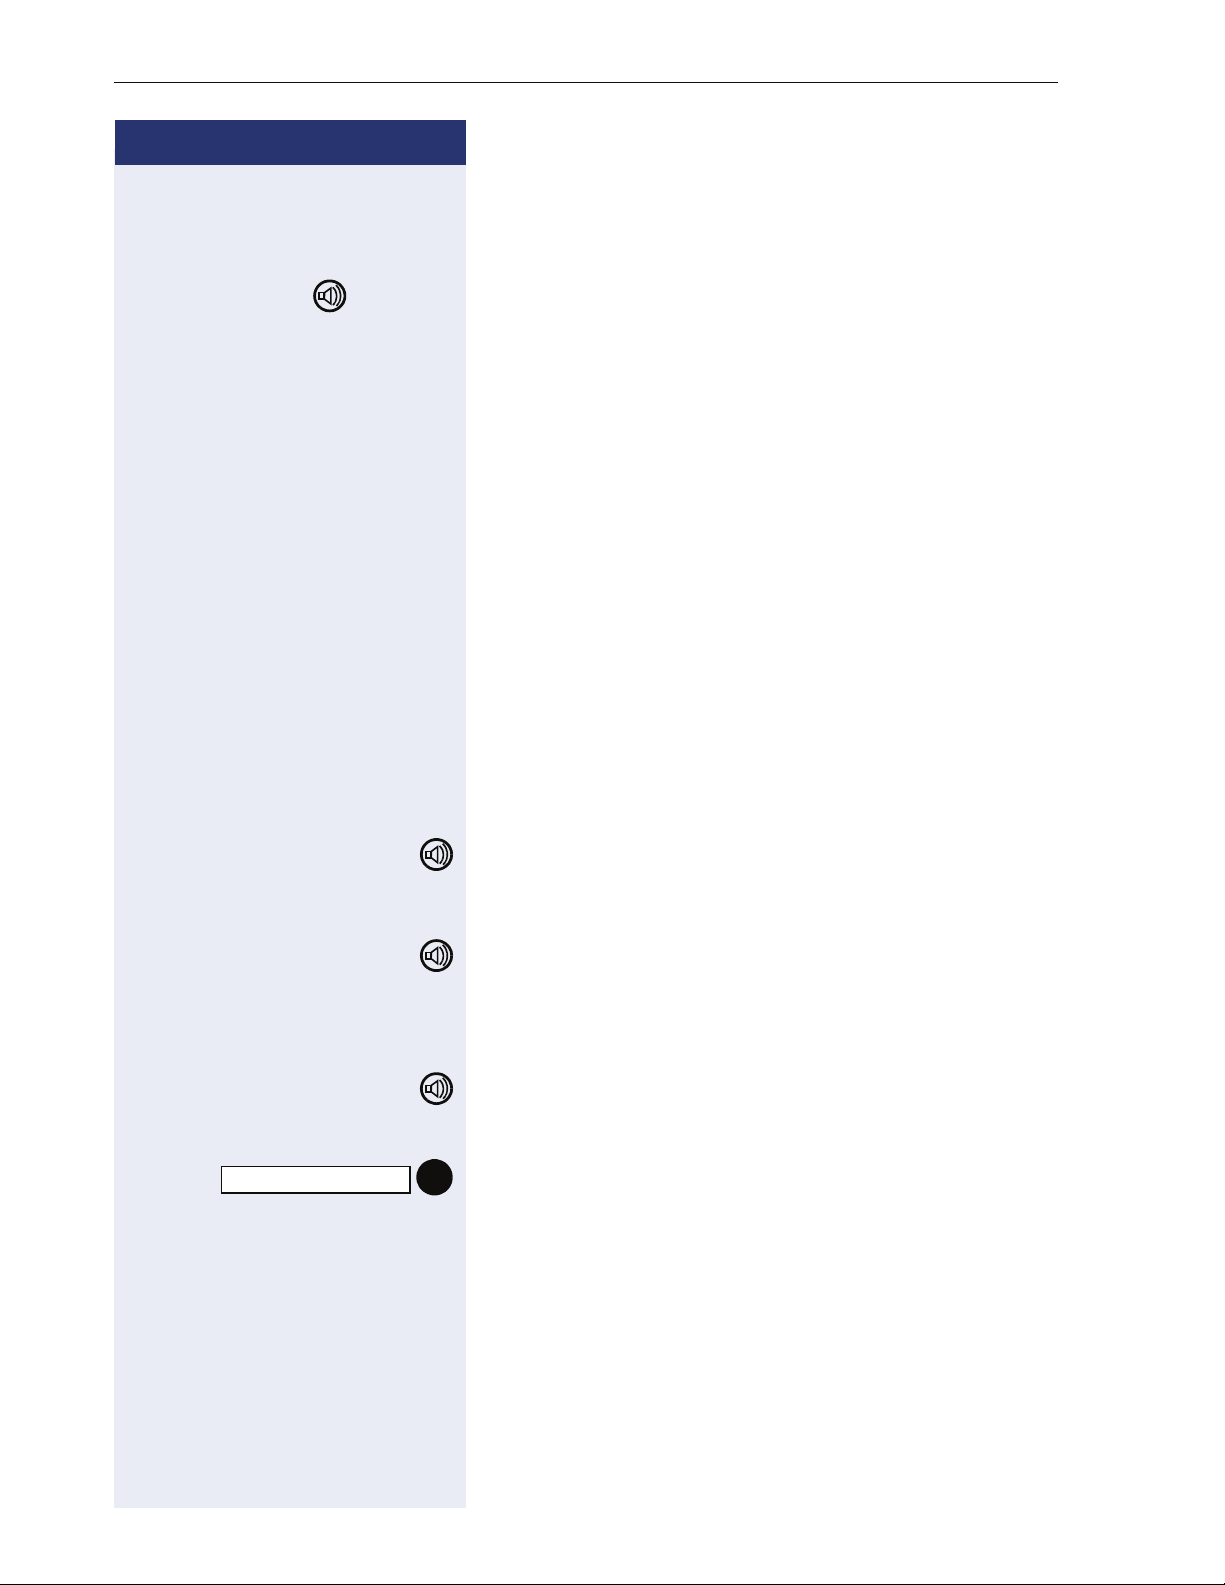
Speaker
END
This feature turns the speaker on temporarily to allow
other people in the same room to participate in the conversation. Inform the called party that the speaker is on.
Required: Conversation using the handset.
To e n a b l e
Press the SPEAKER key. The LED comes on
To d e a c t i v a t e
Press the SPEAKER key. The LED goes off.
Ending a call
or Replace the handset or press the SPEAKER key.
t
or
Press the "EXIT" key.
20
Page 21

Step by step
Functions used for making calls
Seizure of a specific Line
Seizing a specific line selects that line for generating an
external call or a call to another PABX.
p Enter the number of the external line (e.g., 801).
or
LINE 801
Press the "LINE 801" key, for example, to use the external line 801.
w Wait for a dial tone.
p Enter the external number you want to call.
w s Wait for the call to be answered. Start conversation.
Phonebook/Speed Dialing
Frequently used telephone numbers can be stored as
abbreviated numbers in two types of phonebooks or
speed dialing directories:
• system speed dialing
ASystem Speed Dial stores up to 250 numbers (000
to 249)most frequently used HiPath 1100. Numbers
are stored andcan be accessed and used from any
extension (when authorized, check with your support technician).
• Individual speed dialing
The Individual speed dialing stores up to 5 numbers
chosen by the user. The numbers are configured by
the user and remain stored only at the extension.
1
[1] Numbers are stored during system configuration. They can be di-
aled from the system or 1 optiPoint with a system display accessible from any authorized extension. See the chapter Main
Configurations - speed dialing in the Programming Manual. To assign names to numbers, use the HiPath 1100 Manager.
21
Page 22

Functions used for making calls
Step by step
Using speed dialing
Required: Individual speed dialing numbers are stored by
the user. System speed dialing numbers are stored by
the support technician.
Press to access the Service menu.
*7=SPD DIAL?
Select and confirm.
or
qk Enter the code to access speed dialing.
p Enter the desired abbreviated number from the system
speed dialing directory:
•
ddd to fhm = system speed dialing
qd to qh = Individual speed dialing
•
w s Wait for the call to be answered. Start conversation.
Programming individual speed dialing
The speed dialing numbers stored in the Individual
speed dialing directory are only available for the extension in which they were entered. These numbers can
be updated, modified and deleted. Each extension can
have up to 5 speed-dial numbers of 20 digits each.
Press to access the Service menu.
22
*92=CH SPD DL?
NEXT?
NEXT?
Select and confirm.
or
qmf Enter the code to program a speed-dial number.
p Enter the individual speed dialing abbreviated number:
•
qd to qh = Individual speed dialing
or
Confirm.
Press until you see the abbreviated number you want.
If a number has already been stored, the name (if entered) or the telephone number associated will be display.
Page 23
Step by step
Functions used for making calls
CHANGE?
ENTER NAME?
Select and confirm.
p Enter the external number to be stored in this position
in the individual speed dialing directory.
Optional You can also enter a name to be associated to the num-
ber. This name will be stored in the speed dialing directory and displayed when the number is dialed.
Select and confirm.
p Enter the name you want to associate to the number for
Caller ID and phonebook searches.
The telephone keypad is now available for entering letters by repeatedly pressing the key for the letter you
want.
Entering Letters
1x
f Letter A
2x
f Letter B
3x f Letter C
4x f Number 2
1x
g Letter D, and so on.
Example: Press the " 2" key three times to enter
the letter "C" or press "3" twice to enter the letter
"E."
• Key "0" = enters a space.
• Keys "1" and "#" = delete the last character
entered.
Optional An Interdigit Pause ("P") can be added by pressing the
redial key.
23
Page 24
Functions used for making calls
Step by step
Each "P" character inserts a 2-second pause (default) in the connection. A longer pause can be inserted by entering more than one character (for
example, for a 4-second pause enter "PP")
The first "P# or #" specifies that the next digits for
A will only be forwarded if:
• Digital line or S
extension:
0
P# - DTMF digits are sent after local carrier
identification, when B is not answered.
# - DTMF digits are sent after B is answered.
• Analog trunk or analog extension:
P# or # - DTMF digits are sent after B is answered.
Other characters ("#" and/or "*") may be added after "P#".
SAVE?
PREVIOUS?
VIEW STAT NO.?
VIEW NAME?
DELETE?
EXIT?
Confirm.
or If you make a mistake:
Select and confirm. All information is deleted.
or If a name is displayed, you can view the number asso-
ciated to it.
Select and confirm.
or If a number is displayed, you can view the name asso-
ciated to it.
Select and confirm.
or Delete all abbreviated number entries.
Select and confirm.
or
Select and confirm.
24
Page 25
Step by step
Functions used for making calls
Phonebook Search
A Phonebook Search or and alphanumeric search allows
an extension to look up a person’s number by the person’s name when making a call.
Required: Names must be assigned to the speed dialing
numbers recorded.
n or Lift the handset or press the SPEAKER key.
DIRECTORY?
SCROLL NEXT?
SCROLL PREV?
Confirm.
The first record is displayed.
Select and press to go to another record.
or
Select and press to go to another record.
or
p Enter the name you want to select or the first letters of
the name. The name is searched.
The telephone keypad is now available for entering letters by repeatedly pressing the key for the letter you
want.
Entering Letters
1x
f Letter A
2x
f Letter B
3x
f Letter C
4x f Number 2
1x
g Letter D, and so on.
Example: Press the " 2" key three times to enter
the letter "C" or press "3" twice to enter the letter
"E."
• Key "0" = enters a space.
• Key "1" = displays the first record on the
• Keys "*" and "#"= do not mean anything
speed dialing directory.
25
Page 26

Functions used for making calls
Step by step
Optional
If no match is found for the letters entered or if it is not
possible to enter letters at the moment, you will hear a
short beeping sound.
DELETE CHAR?
DELETE LINE?
VIEW STAT NO.?
VIEW NAME?
CALL?
Select and confirm. Deletes the last character that was
entered If all characters are deleted, the first speed dialing entry will be displayed again.
Optional
Select and confirm. All characters that were entered will
be deleted, and the first entry of the speed dialing directory will be displayed again.
Optional
Select and confirm.
Optional
Select and confirm.
The record selected is displayed:
Select and confirm.
Caller Lists
The last calls identified1by the extension are stored in
three caller lists. These caller lists can be programmed
to save only external calls or both external and internal
calls. A system telephone with a display allows you to
view and select lists:
• 1 = CALLS NOT ANSWERED
2
• 2 = CALLS ANSWERED
•3 = CALLS MADE
Up to 10 calls can be stored for each caller list. They are
stored in the order they were received or made. Each
call is stored with a time stamp. The list starts with the
most recent call that has not been recalled. If several
calls were from the same caller, the list will show the
time of the last call and the total number of times the
call was received.
[1] Make sure that Caller ID is activated by your carrier.
[2] The calls will not be stored if they are for hunt groups (HG) or UCD
agents.
26
Page 27
Step by step
Functions used for making calls
Calls not answered by an MSN/Call group (CG)
appear in the list of "Unanswered calls" of all the
participants of the group. If one of the members
of the group returns the call using the "Caller List"
feature and the call is completed or any other extension takes the call, the record of this call will
be removed from the list of "Unattended Calls" of
all the members of the group.
If an MSN DID does not attend an external call, it
will be stored in the unattended calls list, specifying the Name/Number of the call and/or Name/
Number called (MSN). The fields that should appear in the display should be configured using HiPath 1100 Manager.
CALLR LST?
1=N ANS CALLS?
2=ANS CALLS
3=OUTG CALLS
Looking up a caller list
Select and confirm.
or
rlf Enter the dialing code for looking up caller lists.
Select and enter the type of caller list wanted.
or
or
or
p Enter the number of the list you want to look up:
e = Unattended calls
f = Attended calls
NEXT ?
EXIT?
g = Dialed calls
Enter to display additional lists.
End consultation.
Select and confirm.
or
27
Page 28
Functions used for making calls
Step by step
t or Replace the handset or press the SPEAKER key
Press the Service menu key.
or
Consultation about time of call and additional caller information
Required: The record wanted is shown in the caller list
during the consultation.
.
DATE/TIME?
VIEW STAT NO.?
VIEW NAME?
WHO?
CALL?
Select and confirm.
or
or
or
Calling a number from a caller list
1
Required: The record wanted is shown in the caller list
during the consultation.
Select and confirm.
ws Wait for the call to be answered. Start conversation.
Delete the record from the caller list.
28
DELETE?
Required: The record wanted is shown in the caller list
during the consultation.
Select and confirm.
[1] If a list is full and a call is made, the last number stored is automat-
ically erased from the caller list.
Page 29

Step by step
Functions used for making calls
LINE RESERVATION?
External line reservation
When there is no line available for making an external
call, use the line reservation feature.
Required: The user tried to access an external line and
received a busy signal.
Wait 7 s w Wait 7 seconds until you hear a distinctive tone (this
may vary depending on system’s configuration).
or
Confirm.
or
1
qil Enter the code to confirm line reservation.
w Wait for a confirmation tone.
t or Replace the handset or press the SPEAKER key
w Wait for callback when an external line becomes avail-
able.
When a line becomes available...
<< >>
The telephone rings (a distinctive ring).
n or Lift the handset or press the SPEAKER key.
p Enter the external number you want to call.
w s Wait for the call to be answered. Start conversation.
[1] On HiPath 1100 systems, only four external line reservations can
be done simultaneously.
29
Page 30
Functions used for making calls
Step by step
For Internet access
The line reservation for the Internet access feature allows an extension to have exclusive access to a specific
external line. The remaining extensions will not be able
to use this line while this feature is activated. This, however, does not prevent the line from receiving incoming
calls as usual.
Enter reservation/remove reservation of a line
Press to access the Service menu.
MORE FEATURES ?
*493=INTERNET?
#493=NET ONOFF?
INTERNET ON
INTERNET OFF
Select and confirm.
or
or
qhmg Enter the code for reserving or removing an external line
reservation.
or
rhmg Enter the code for reserving or removing an external line
reservation.
p Enter the code for the external line (e.g., 801).
The display shows that this feature is activated.
or
The display shows that this feature is deactivated.
30
Page 31

Step by step
Functions used for making calls
RECALL?
Recall
This feature allows you automatically to place a call to an
extension or external number (over an ISDN line) that is
unavailable at the moment. The call will go through as
soon as the line is available.
Required: The destination number is not available.
Callback due to no answer/busy
Confirm.
or
1
qil Enter the code to confirm the recall.
or
Wait 7 s
w Wait 7 seconds (if configured, Recall will be automati-
cally activated).
RECALL ON.?
w Wait for a confirmation tone.
t or Replace the handset or press the SPEAKER key
w Wait for the recall.
If Callback has been deactivated during configuration, do the following to enable it:
Wait a few seconds until the display shows "RECALL
ON." and the busy signal or the ringing signal stop briefly.
2
:
t or Replace the handset or press the SPEAKER key.
w Wait for the recall.
[1] Extension is busy - the system generates a recall as soon as a line
is available.
Extension is free - the system generates a recall once the caller has
returned to the station and made a call.
External number is busy - The system generates a recall as soon
as the destination number is free. This feature must be activated
by the carrier and the system needs to have an S
stalled.
Only one recall can be activated for each extension. A new recall
cancels the previous one.
[2] (See Activating Callback/Urgent Call with timeout, in the program-
ming manual)
module in-
0
31
Page 32

Functions used for making calls
Step by step
Answering a recall
Required: A recall has been entered.
RECALL FROM:......?
VER RECALL?
DELETE?
EXIT?
<< >>
The telephone rings (a distinctive ring).
The display shows "RECALL FROM:......" and the num-
ber you want to call.
n or Lift the handset or press the SPEAKER key.
w s Wait for the call to be answered. Start conversation.
Recall verification/deactivation
Select and confirm.
or
ril Enter the code for canceling a recall.
Delete the record displayed
Confirm.
End consultation
Select and confirm.
CANCEL RECALL?
or
<< >>
Press the SPEAKER key.
Option to deactivate recall for digital line or ISDN
terminal
Required: The destination of the recall is connected to
an S
port. (S0 module)
0
The telephone rings in the calling extension.
The caller display displays an option to cancel the recall.
32
Page 33

Step by step
Functions used for making calls
OVERRIDE?
OVERRIDE
qjf Enter the code to confirm the override.
(warning)
Override
The Override feature allows the user to override a conversation. A beep signals that the conversation in
progress has been overridden.
Required: There is a conversation in progress at the call
destination.
Select and confirm.
or
or
Press the "OVERRIDE" key.
The called party and the caller hear a warning signal every two seconds. If the called party is using a system
telephone with a display, it will show: "OVERRIDE:
(name or telephone number) and "RELEASE?"
1
SLNT MNTR?
s Start conversation.
Silent monitoring
Silent monitoring allows a user to override a call without
sending a beep (for certain countries only).
Required: There is a conversation in progress at the call
destination.
Select and confirm.
or
qmhh Enter the code for silent monitoring.
p Enter the extension (e.g., 11/101).
2
w s Wait. Start monitoring.
[1] The user must have authorization from the system’s support tech-
nician in order to use this feature Programming manual, Programming an extension - Override).
[2] The user must have authorization to use this feature (see Program-
ming manualProgramming an extension - Silent monitoring).
Within the system, silent monitoring has the same restrictions as
the Conference and Override features.
If the monitoring or the monitored party change status, silent monitoring is canceled. This occurs, for example, when a call is placed
on hold.
33
Page 34

Functions used for making calls
Step by step
On Profiset 3030 telephones, the MUTE option
is automatically activated with silent monitoring.
CAMP-ON!
RECALL?
CAMP-ON!
Urgent call/Recall when busy
The Urgent call feature is used when the extension being called is busy.
Required: The destination called is busy.
Wait a few seconds until the display shows "CAMP-ON"
and the busy signal changes to a ring.
w Wait for the call to be answered.
If the configuration has been changed, do the following to reenable the Urgent Call feature:
Confirm.
or
qil Enter the code to confirm an urgent call.
Wait a few seconds until the display shows "CAMP-ON"
and the busy signal changes to a ring.
1
2
w Wait for the call to be answered.
[1] An urgent call cannot be made when data protection, consultation
or conference features are activated at the extension called.
[2] (See Activating with a timeout, in the programming manual).
34
Page 35

Step by step
Functions used for making calls
Hotline
The Hotline feature allows an extension to automatically
generate a call to a pre-programmed number in the system speed dialing as soon as the handset is lifted.
1
n or Lift the handset or press the SPEAKER key.
w s Wait for the call to be answered. Start conversation.
Warmline
Warmline is the length of time the extension should
wait to call the first number configured as a Hotline. Assuming the timeout is 9 seconds, the call will be made
9 seconds after the handset is lifted. However, if during
the 9 second time interval a key is pressed on the
phone keypad, the call to the Hotline will be canceled.
Each extension can have a different timeout for enabling
a Hotline. This timeout may vary from 0 to 9 seconds.
2
n or Lift the handset or press the SPEAKER key.
w s Wait for the call to be answered. Start conversation.
Calling an attendant console (AC)3
An attendant console can be called at any time for making a call or simply for consultation.
m Enter the code for calling the attendant console.
w s Wait for the call to be answered. Start conversation.
[1] Extensions configured to use the Hotline feature cannot dial any
other internal or external numbers. However, they are able to receive calls as usual (see Programming an extension - Hotline in the
Programming manual).
[2] Extensions configured to use the Warmline function are able to dial
all other internal or external numbers, as well as receive calls as
usual (see Programming an extension - Warmline in the Programming manual).
[3] When no extension is programmed as an attendant and "9" is en-
tered, a busy signal is heard.
35
Page 36

Functions used for making calls
Step by step
Direct communication call
This features enables voice messages to be sent to
Profiset 3030 telephones using the speakerphone. A
message can be sent to an extension or a Call group
(CG).
When a message is sent, the called party hears a warning signal before the message is played and the display
shows the caller’s name and number.
Required: Destination number uses a Profiset 3030 or an
optiPoint with a speakerphone telephone.
Press to access the Service menu.
*80=SPKR CALL?
Select and confirm.
or
qld Enter the code for direct messaging.
p Enter an extension or Call group (CG).
s Record the message.
Answer the call
n or Lift the handset or press the SPEAKER key.
s Start conversation.
36
Page 37

Step by step
Functions used for making calls
1
HFA ON?
HFA OFF?
Handsfree answerback
The called extension receives an alert tone. the call using the speakerphone is established immediately after
this tone is received.
Required: A system telephone with a speakerphone at
the destination number.
Select and confirm.
or
or
qmjor rmj Enter the code to enable or deactivate answering.
2
LCR
LCR (Least Cost Routing) is designed to lower telephone communications costs. When LCR is activated,
all outgoing calls are routed to provide the least expensive connection costs. A table is created listing all times
of the day, days of the week, telephone service providers (rules) so that calls can be made when rates are at
their lowest. After programming, you can make calls
with no need to enter the carrier code since LCR automatically uses the carrier that provides the lowest rate
at the time the call is being placed.
Required: This feature must be configured for the system by using the HiPath 1100 Manager.
n or Lift the handset or press the SPEAKER key.
p Enter the code to access an external line (e.g., 0).
w Wait for an external line dial tone.
p Enter the external number you want to call.
w s Wait for the call to be answered. Start conversation.
You can program the HiPath 1100 to send a warning
tone if no external line is available for LCR (see Programming manual - Main Configurations - Warning Tone
[1] This feature must be activated by the destination number during
programming (see Programming an extension - Auto-answering
mode, in the Programming manual).
[2] Settings must be configured on the HiPath 1100 Manager.
37
Page 38

Functions used for making calls
Step by step
when LCR is not available). This will alert the user to the
fact that the call is being completed by a standard carrier and that rates may be higher than usual.
LCR BYPASS?
LCR BYPASS
(warning)
qhi Enter the code for "LCR BYPASS".
To warn the user that a different carrier is completing
the call, the system telephone will display the new carrier or "EXPENSIVE CONNECTION" and a warning tone
will sound.
LCR Bypass
This makes it possible temporarily to deactivate the
rules of the LCR for an external call, using the carrier selected by the user to make the connection.
Required: The LCR feature is available.
Select and confirm.
or
Press the "LCR Bypass" key.
or
1
p Enter the desired carrier code and number.
s Start conversation.
End LCR Bypass
t or Replace the handset or press the SPEAKER key
[1] The rules of the LCR will only be ignored for the current call. If a
consultation or redialing is made, the rules of the LCR will be analyzed for this new call.
This feature may be activated by any extension.
38
Page 39

Step by step
Functions used for making calls
ACS
With ACS (Alternative carrier selection) the system can
be set to use a specific carrier regardless of user’s selection. This feature is very useful for selecting the carrier that offers the best rates at the time of call or for
setting the system to use one operator only. This is
done by properly defining the rules.
The first digits of the number dialed by the user are analyzed by the system. If they match the conversion rule,
they will be replaced by the default number as set forth
by that rule. You can also preset the route/destination to
be used. There is no field available to specify a carrier.
The carrier code must be included in the conversion
rule.
Different conversion rules can be applied to the same
number, depending on the time of day and day of the
week. It is possible to define a maximum of 100 conversion rules.
Example: Number dialed: 262 XXXX
1
Conversion Rules:
Index Number
Selected
01 267 342 0 801
02 262 341 801 803
The number that will be selected by the system is
341XXXX using destination 801. If this route/destination
is busy, the overflow option will be route/destination
803. You may insert pauses in the Conversion rules
(Consult the HiPath 1100 Manager help file).
Required: This feature must be configured for the system by using the HiPath 1100 Manager.
Alternative
number
Alternative destination
t or Lift the handset or press the SPEAKER key.
p Enter the code to access an external line (e.g., 0).
w Wait for an external line dial tone.
Overflow
destination
p Enter the external number you want to call.
[1] ACS does not affect emergency numbers when the user dials di-
rectly.
39
Page 40

Functions used for making calls
Step by step
w s Wait for the call to be answered. Start conversation.
When the LCR or ACS is activated, the extensions receive a false line tone for external dialing.
TIME EXCEEDED
Timer for outgoing external calls
This setting specifies a maximum time for the duration
of an outgoing external call for each extension.
The time count starts upon connection of a call and it
never restarts while the call is in progress (e.g., when
there is a transfer). Once the specified time expires, the
call is automatically disconnected.
Required: This feature must have been configured and
activated for the extension.
1
p Enter an external number.
w s Wait for the call to be answered. Start conversation.
w Timer for the specified time period is initiated.
Before a call is disconnected by the timer, a 10-second
warning tone is sent to the extension and the message
"TIME EXCEEDED" is shown on the display.
t Once the specified time has elapsed the call is discon-
nected.
Timeout for external calls
The "timeout for external calls" feature defines a time
"credit" for an extension to make external calls. In other
words, when the total time of the external calls made
reaches the time limit set for calls underway, these calls
will be interrupted and no further calls may be made until more time "credit" is awarded.
[1] See Programming an extension - Timer for outgoing external calls,
in the programming manual
[2] See programming manual - Programming the extension - Timeout
for external calls.
2
40
Page 41

Step by step
Functions used for making calls
Calls may also be interrupted if the extension has
been configured with these features:
• ”Timer for outgoing external calls”, the
timeout stops counting.
• "Billing for an extension" - the call will only
be started or can continue if the time and
credit limit have not been reached.
For simultaneous calls, call times will be counted
separately.
If the call ends before a cycle is complete, the
time will be counted as if the call had completed
a 5-second cycle.
Required: This feature must have been configured and
activated for the extension.
#65 = Show time?
p Enter an external number.
w s Wait for the call to be answered. Start conversation.
w The time count set for the extension is started.
t The call is disconnected once the specified time has
elapsed.
View timeout
This allows you to view the time spent and the time remaining for making external calls.
Required: This feature must have been configured and
activated for the extension.
Press to access the Service menu.
Select and confirm.
or
rji Enter the code for "view timeout".
or
TIMEOUT
HH:MM
HH:MM
06:30 SEC 03.OUT 05
27 HiPath 1100>
Press the "TIMEOUT" key.
Shows the time spent for 5 seconds.
Shows the time remaining for 5 seconds.
The system shows the date and hour again.
41
Page 42

Functions used for making calls
Step by step
DISA
1
DISA (Direct Inward System Access) is a feature that allows you to make an external call from an external telephone (as if it was an extension) through your system.
In addition, the following features can be activated or
deactivated:
• ”Internal”
• ”Disabling a feature”
• ”Conference”
• ”Night service”
• ”Suffix dialing”
• ”Entrance telephone - door opener”
• ”Electronic lock”
• ”Phonebook/Speed Dialing” (system and individual)
•”Relay”
• ”Do not disturb”
Required: The telephone must be an MF telephone that
is not part of the system, that is, it cannot be an extension.
n Lift the handset.
p Call the HiPath 1100 by entering a DISA MSN number
(see MSN DISA in the programming manual or the HiPath 1100 Manager) previously provided by a support
technician).
w Wait for a continuous tone.
p Enter the extension number for the user with a DISA
permission (see DISA permission Programming manual, in the programming manual).
p Enter the current 5-digit password for the electronic
lock (default is: 00000).
[1] The HiPath 1100 allows only one DISA call at a time. When there
is a DISA call in progress, a second call to a DISA external line or
one with a DISA answering mode is treated as a regular call.
The DISA line is available for another call as soon as the phone is
placed back on the hook. When there is a DISA call in progress, a
second call to a DISA external line or one with a DISA answering
mode is treated as a regular call.
If a call is received over an external line configured as a Fax/DID and
DISA, the call is answered by the Fax/DID if this facility is available
at that moment.
You can program an external analog DISA line to be activated for
certain time periods (see External DISA Line, in the programming
manual).
TAPI only monitors physical ports. To operate correctly, a DISA feature must use special ports, and those cannot be monitored. If a
physical port is used when the DISA feature is activated, the TAPI
will be able to monitor it.
42
Page 43

Step by step
Functions used for making calls
w Wait for a continuous tone.
p Enter the feature code (e.g, *97 – Do not disturb).
or
p Enter the external number you want to call.
s Start conversation.
Using a temporary MSN to make a call
This feature allows you to use a temporary MSN from
your own directory to make an external call. Or use the
"Programming the keys" feature to assign a key to an
MSN for monitoring incoming and outgoing calls.
MORE FEATURES?
*41=TEMP MSN?
Required: You must know which selection option was
configured (see Programming manual Assigning a temporary MSN) for accessing the MSN:
• Enter the slot (001 ...140) for the MSN number or
• Enter the MSN number
Example
Slot MSN
001 3415565 - Home
002 3416496 - Office
User is at his/her office (3416496):
Press to access the Service menu.
Select and confirm.
or
qhe Enter the code for the temporary MSN.
TEMP MSN
or
Press the "TEMP MSN" key.
p Enter the slot (e.g., 001) or the MSN Number (e.g.,
3415565) you want to sent to the destination.
p Enter the code to access an external line (e.g., 0).
43
Page 44

Functions used during calls
Step by step
p Enter the external number you want to call.
w s Wait for the call to be answered. Start conversation.
At this time, the called destination receives the Caller ID
information displaying the number 3415565, even
though the call has been originated from number
3416496.
Functions used during calls
CONSULT?
CONSULT
Consultation
The Consultation feature allows the extension to make
a consultation to a third party when a call is in progress.
At the same time, it prevents the first caller from listening to the conversation.
Required: A call must be in progress.
Confirm.
or
Press the "CONSULT" key
1
p Enter the extension number (e.g. 11/101) or dial the ac-
cess code for an external line (e.g., 0) then the external
number.
w s Wait for the call to be answered. Start a consultation.
To return to the first call...
44
QUIT AND RET?
HELD CALL?
Confirm.
or
w t Wait for the consulted party to replace the handset.
If the consultation extension is busy or does not answer, or if you want to return to the first call before
answering...
Confirm.
or
[1] When the handset is replaced during a consultation, the first call is
transferred to the extension that was consulted.
Page 45

Step by step
Functions used during calls
TRANSFER?
TRANSFER?
qd
Enter the code to return to the first call.
w s Wait to return. Proceed with the conversation.
Tra n sf er
The Transfer feature allows an extension to transfer a
call (incoming or outgoing) to another extension or to an
external number.
Required: A call must be in progress.
Select and confirm.
p Enter the extension or external number.
Optional (s) Let the caller know that there is a second call.
Confirm.
or
1
t or Replace the handset or press the SPEAKER key
External-to-external over an analog trunk
2
When there is an external call in progress, an extension
can make a consultation to another external number
and transfer the call, as described above.
Once the call is transferred and answered at the destination, a disconnect timer is activated (default is 5 minutes). A 20-second warning tone is sent to both parties
before the call is disconnected. In order to continue the
call without disconnecting, the destination number
must enter a code (MF, default "00") to restart the timeout., The call disconnect timeout and the Code to reset
it are configurable. Please ask your system’s support
technician for further information.
[1] If a transfer’s destination extension does not answer, the call is re-
turned to the calling extension.
An external-to-external transfer can only be made when at least
one of the calls is an outgoing call.
A call cannot be transferred to an entrance telephone, neither can
an entrance telephone transfer a call.
[2] A call is terminated under three conditions:
• Disconnect timeout after and external-to-external transfer (Code
183);
• When a busy signal is detected;
• Type of answering signal (Code 158) detected.
45
Page 46

Functions used during calls
Step by step
If the consultation extension is busy or does not answer, or if you want to return to the first call before
answering...
HELD CALL?
TOGGLE?
Confirm.
or
qd Enter the code to return to the first call.
w s Wait to return. Proceed with the conversation.
Toggle
The toggle feature makes it possible to switch conversations between two calls.
Required: A consultation is in progress.
Select and confirm.
or
Press to access the Service menu.
qf Enter the code to switch between two calls.
or
TOGGLE
Press the "TOGGLE" key.
w s Wait to return. Proceed with the conversation.
46
Page 47

Step by step
Functions used during calls
CONSULT?
START. CONF?
Conference
The conference feature allows a third party to participate in a conversation when a call is in progress.
1
Three party call
Required: A call must be in progress.
Select and confirm.
or
Select and confirm.
p Enter the extension (e.g., 11/101) or dial the access
code for an external line (e.g., 0) then the number to be
included in the conference.
w Wait for the call to be answered.
s Inform the person about the conference.
CONFERENCE?
CONFERENCE
Select and confirm.
or
Press to access the Service menu.
qg Enter the code to add the participant.
or
Press the "Conference" key
w Wait.
s Start the conference.
[1] The extension must be activated for conferencing.
After the conference, a new ticket is generated that provides information on the conference.
An entrance telephone cannot be part of a conference.
47
Page 48

Functions used during calls
Step by step
Conference with more than three participants
Required: A three-way conference must be in
progress.
In a conference with more than three participants the
extension that began the conference (master extension) may administrate up to 5 new participants (slave
extensions).
• Adding a participant;
• Removing a participant;
• Leave the conference;
• End a conference;
Considerations:
• If the master replaces the telephone on the hook or
an error occurs during the consultation, a callback is
begun for the conference.
• When an external call is received, the master can
temporarily leave the conference, answer the call
and add that new participant to the conference. If it
is a slave extension, it can answer the call with the
telephone menu, but it will then be disconnected
from the conference.
• The maximum number of conference calls (including override and silent monitoring) is two, as one extension cannot take part in both at the same time.
• In the HiPath 1190 there is an upper limit of 16 lines
configured with the CLIP DTMF option that causes
limitations in the conference feature depending on
the number of lines being used by the CLIP DTMF
at any given time. This is caused by the fact that
both the CLIP DTMF and the Conference use common resources in the system.
So, for example:
– In a system with 16 CLIP DTMF lines there can be
2 conferences with 3 participants;
– In a system with 8 CLIP DTMF lines there can be
1 conference with 8 participants or 2 conferences
with 4 participants;
– In a system with no CLIP DTMF lines there can be
2 conferences with 8 participants.
To free additional ports for use with the Conference
feature without depending on the use of the CLIP
DTMF, this function should be disabled for certain
lines. (see Manager or Programming Manual*, Analog Identification - CLIP).
48
Page 49

Step by step
Functions used during calls
Adding a participant
Required: A conference with more than three speakers
activated and the extension as master.
CONF:n PARTIC.
ADD PARTIC.?
CONFERENCE?
CONFERENCE
The display shows the number of participants.
Select and confirm.
p Enter the extension (e.g., 12/102) or dial the access
code for an external line (e.g., 0) then the number to be
included in the conference.
w Wait for the call to be answered.
s Inform the person about the conference.
Select and confirm.
or
Press to access the Service menu.
qg Enter the code to add the participant.
or
Press the "Conference" key
w Wait.
s Start the conference.
Considerations:
• During consultation status, the master extension
will temporarily be left out of the conference. If one
of the slaves disconnects from a conference with
only 2 slaves, the conference will be ended and the
other will be placed on hold.
• When the master makes more than one consultation, the Toggle feature will switch between the last
two calls on hold.
• A new participant may only be added if there is only
one slave on hold. If more than one participant is on
hold, the master should disconnect them until only
one is left, and then add the new participant.
• The TAPI interface only supports 3 participants in a
conference, therefore it is not possible to add a
fourth member if at least one of the participants is
being monitored by the TAPI
49
Page 50

Functions used during calls
Step by step
Removing a participant
The master extension can remove a slave extension at
any time, while keeping the other participants in the
conversation.
Required: A conference activated and the extension as
master.
CONF:n PARTIC.
SEE CONF PTYS.?
NEXT?
REMOVE CONF PTYS.?
LEAVE LIST?
CONF:n PARTIC.
LEAVE CONF?
The display shows the number of participants.
Select and confirm.
Select the participant to remove and confirm.
Select and confirm to remove the participant.
To return to the main menu
Select and confirm to return to the menu main.
Leave the conference
When you leave the conference, a new master extension will be designated automatically.
Required: A conference activated and the extension as
master.
The display shows the number of participants.
Select and confirm to leave the conference.
or
50
t or Replace the handset or press the SPEAKER key
Considerations:
•S
• If external call timer is activated and the master ex-
telephones and external telephones cannot be
0
designated as master. If the conference does not
have an extension that can be master, the conference will be ended. Except when only two external
lines are in conversation and the external-to-external
transfer feature is activated.
tension leaves the conference, the timer stays activated. When the time is up, the external lines will be
disconnected but the other members of the conference will keep talking.
Page 51

Step by step
Functions used during calls
End a conference
The master extension can end the conference, disconnecting all the participants.
Required: A conference activated and the extension as
master.
CONF:n PARTIC.
MORE FEATURES?
#3=END CONF?
END CONF?
END CONF.
The display shows the number of participants.
Press to access the Service menu.
Select and confirm.
Select and confirm.
or
Select and confirm.
or
Press "End Conf" key.
51
Page 52

Functions used during calls
Step by step
*56=PARK CALL?
PARK
Parking
The parking feature can place up to 10 internal or external calls on hold and answer these at any extension.
Required: A call must be in progress.
Press to access the Service menu.
Select and confirm.
or
1
qij Enter the code for parking a call.
or
Press the "PARK" key.
d ... m Select a parking slot
(e.g., 0).
t or Replace the handset or press the SPEAKER key
#56=RTRV CALL?
PARK
Recovering a parked call
Press to access the Service menu.
Select and confirm.
or
Press to access the Service menu.
rij Enter the code to retrieve the call.
or
Press the "PARK" key.
d ... m Select a parking slot
(e.g., 0).
s Start conversation.
52
[1] If the slot selected is busy, a rejection tone is heard.
If a call that was placed on parking is not recovered after a specified
timeout, it is sent back to the originating extension.
Page 53

Step by step
Functions used during calls
GENERAL PARKING?
GNRL PARKING?
General parking
General parking allows external calls to be placed on
hold using a programmable key (”Programming the
keys”) configured with this option or using the display
menu and retrieved from any extension that has a "Sei-
zure of a specific Line" key configured with the same
external line or using the respective feature code.
The information that there is an external call parked on
a certain line can be viewed using the LED indicator of
the key programmed with the "Seizure of a specific
Line" feature that will blink slowly in the extensions activated.
Required: An external call must be in progress.
Press to access the Service menu.
Select and confirm.
or
Press the "GNRL PARKING" key.
1
MORE FEATURES?
*63=RTRV LINE?
LINE 801
t or Replace the handset or press the SPEAKER key
Recovering a parked external call
Press to access the Service menu.
Select and confirm.
Select and confirm.
or
qjg Enter the code to retrieve the call.
p Enter the number of the external line where the call is
parked (for example: 801).
or
Press the "LINE 801" key, for example, for recovering a
parked call.
s Start conversation.
[1] If the slot selected is busy, a rejection tone is heard.
If a call that was placed on parking is not recovered after a specified
timeout, it is sent back to the originating extension.
53
Page 54

Functions used during calls
Step by step
Suffix dialing
Suffix dialing allows an extension to send information or
MF commands during a call (e.g: for telebanking).
Required: The call is in progress and the system accessed is ready to receive the information/codes.
1
p Enter the information requested by the answering ser-
vice.
w Wait for confirmation of the data.
Flash on analog trunk
The flash on external line feature allows the caller to
send a flash signal when making an external call (e.g.:
Master PABX commands).
Required: An external call must be in progress.
MORE FEATURES?
*51=FLASH?
FLASH
Press the Flash key.
d
or
Press to access the Service menu.
Select and confirm.
or
qie Enter the code for sending a flash signal over the exter-
nal line.
or
Press the FLASH key.
s Follow the instructions to make your selections.
54
[1] This feature differentiates the numbers entered from system ser-
vice numbers.
Page 55

Step by step
Functions used during calls
Retrieving a call on hold
This feature allows you to retrieve a call on hold because
the destination number was busy.
Once the call is resumed, the destination is disconnected.
Required: A consultation was completed and the destination is busy.
RET HELD CALL?
Confirm.
or
qd Enter the code to return to the first call.
w s Wait to return. Proceed with the conversation.
Account code
External calls can be assigned account codes which
provide more control over telephone costs. This information may be presented on the billing ticket. An account code is specified by a sequence of up to 10 random digits (0...9). For example, the number of a lawsuit.
In system telephones, this feature is selected before or
during a call, using the menu, an account code or a programmable key, according to the switch. Consult the
support technician for further information.
Required: Account codes must already be defined and
the system’s support technician must have defined the
mode in which the feature works.
1
*60=ACCT CODE?
ACCOUNT CODE
External outgoing calls
Press to access the Service menu.
Select and confirm.
or
qjd Dial the code to enter with the account code.
or
Press the "ACCOUNT CODE" key.
[1] This information may or may not appear on the billing ticket (see
Programming manual - call detail report - Ticket account code).
You do not require an account code to dial emergency numbers.
When a ”External line reservation” is made, the account code will
be stored to be used automatically later when the "reserve" calls
back.
55
Page 56

Functions used during calls
Step by step
p Enter the account code (a sequence of up to 10 digits
from 0 to 9).
r If the account code has not been configured using Hi-
Path 1100 Manager or the option to validate the account
code is deactivated, this key closes the sequence of
digits if the code has fewer than 10 digits.
If the account code has been configured using HiPath
1100 Manager and the option to validate the account
code is activated, this key should not be used.
p Enter the code to access an external line (e.g., 0) and
the external number you want to call.
ws Wait for the call to be answered. Start conversation.
*60=ACCT CODE?
ACCOUNT CODE
Incoming external calls (optional)
Required: During the conversation.
Press to access the Service menu.
Select and confirm.
or
Press the account code key.
p Enter the account code (a sequence of up to 10 digits
from 0 to 9).
r If the account code has not been configured using Hi-
Path 1100 Manager or the option to validate the account
code is deactivated, this key closes the sequence of
digits if the code has fewer than 10 digits.
If the account code has been configured using HiPath
1100 Manager and the option to validate the account
code is activated, this key should not be used.
56
s Proceed with the conversation.
Page 57

Step by step
Functions used when receiving calls
It is also possible to configure the system so that
it is either mandatory or optional to enter an account code at the start of the call. These settings
can be configured using HiPath 1100 Manager
(see Account codes - A31003-K1160-B810-*-*) or
programming code (see Programming Manual,
A31003-K1160-B804-*-*, Account code type).
The account code can be configured in advance
using HiPath 1100 Manager (see Account codes
- A31003-K1160-B810-*-*). If it has been configured and the option to validate the account code
is selected, only the configured codes will be accepted. If an invalid account code is typed in, a
negative tone will sound or a message will be
displayed.
Functions used when receiving
calls
Answering calls
Extensions receive different ringing signals and tones
depending on the type of call being received and the
specified country setting. For example, some types of
ringing signals are:
• When receiving an internal call or callback, the telephone rings twice (two short beeps) at 4-second intervals (double sequence).
• When receiving an external call, the telephone rings
once (single beep) at 4-second intervals
• When receiving an entrance telephone call, the telephone rings three times (triple beeps) at 4-second
intervals.
• When receiving a second call, a short tone (beep) is
heard at 6-second intervals.
• When receiving an alarm clock call, the telephone
rings twice (a long and a short beep) at 4-second intervals).
• On system telephones volume control is adjusted
individually on each set during calls.
57
Page 58

Functions used when receiving calls
Step by step
The display shows the caller’s number, if Caller ID has
not been blocked by the caller. On the HiPath 1100, if
you record a name associated to the number the name
will also be displayed (if so configured by your system’s
support technician).
...Using the Handset
CALL WTNG?
<< >>
The extension rings. The display shows the Caller ID information.
n Lift the handset.
...Using the speakerphone
>>
<<
The extension rings. The display shows the Caller ID information.
Press the SPEAKER key.
Answering a call on hold
If there is an intermittent signal in the background when
a conversation is in progress, it means there is a second
or an urgent call being made to that extension.
Required: A call must be in progress.
Select and confirm.
or
58
CALL WAITING
TOGGLE?
Press to access the Service menu.
qii Enter the code for answering a call.
or
Press the "CALL WAITING" key.
or
Select and confirm.
or
Press to access the Service menu.
qf Enter the code to switch between two calls.
w s Wait for the call to be answered. Start conversation.
w The first call is put on hold.
Page 59

Step by step
Functions used when receiving calls
Switching between calls (Æ page 46)
TOGGLE?
TOGGLE
Select and confirm.
or
Press to access the Service menu.
qf Enter the code to switch between two calls.
or
Press the "TOGGLE" key.
w s Wait to return. Proceed with the conversation.
Pickup
Group
The group pickup feature allows any group extension to
answer a call that rings at a different extension belonging to the same group (Ask your system’s support technician).
1
PICKUP-G?
PICKUP GROUP
Required: The extension rings briefly. The display shows:
CALL PICKUP GRP
Confirm.
or
Press to access the Service menu.
qik Enter the code for picking up a group call.
or
Press the PICKUP- GROUP" key.
w s Wait. Start conversation.
[1] An external call takes precedence over an internal call.
In the event of a recall, only the extension of the group that activated the feature can answer it. For further information about the
group pickup feature, see Programming an extension - Pickup
groups, on the Programming manual.
59
Page 60

Functions used when receiving calls
Step by step
Individual
The Individual pickup feature allows a system extension
to answer a call that rings in a different known extension
number.
Required: A known extension is ringing.
Press to access the Service menu.
*59=PICKUP-D?
INDIVIDUAL PICKUP
Select and confirm.
or
Press to access the Service menu.
qim Enter the code for individual pickup.
or
Press the INDIVIDUAL PICKUP key.
p Enter the extension number (e.g. 11/101).
w s Wait. Start conversation.
Call forwarding
This allows a call to be forwarded up to two times2 to
another extension or call group, or even for a configured
external number.
1
60
FWD ON?
Internal
Internal call forwarding reroutes calls made to an extension to another specified extension or to a group associated to a voice mail server, Call group (CG) or Fax/DID.
Select and confirm.
or
qee Enter the code for call forwarding.
[1] When a UCD agent enables call forwarding, the agent is automati-
cally logged out of the group. When the agent is logged into the
group, call forwarding is deactivated. When a UCD agent enables
call forward no answer, the agent’s status becomes unavailable.
When the status is available, call forwarding is deactivated.
Disabling call forwarding does not affect the UCD agent status.
[2] Cascaded forwarding is possible up to the third destination, i.e.,
destination 1 has call forwarding to destination 2 and destina-
tion 2 has call forwarding to destination 3. Any call to destination
1 will be forwarded to destination 3. If destination 3 has call for-
warding, this will not be made (see Programming Manual A31003-K1160-B804-*-*, Cascaded call forwarding).
Page 61

Step by step
Functions used when receiving calls
SAVE?
FWD ON ?
p
Enter the number for the
1. Extension you want to call (e.g., 11/101).
2. UCD subscriber group for voice mail (e.g., 790).
3. Call group (e.g 770)
Confirm.
External
1
The external call forwarding feature allows calls made to
a specific extension to be forwarded to an external
number.
Select and confirm.
or
qee Enter the code for call forwarding.
p Enter the number for accessing an external line:
1. Fo r e x a m p l e , 0 ;
2. A group of external lines (e.g., 890).
SAVE?
MORE FEATURES?
*14=CFNR ON?
w Wait for a dial tone.
p Enter the number you want to call.
Confirm.
When there is no answer
The call forward no answer feature allows rerouting a
call made to a specific extension to another extension,
a voice mail subscriber group or an external number, after a specified timeout that can be pre-programmed or
if busy.
Press to access the Service menu.
Select and confirm.
[1] Call forwarding on an analog line times out after 5 minutes of con-
versation. Call forwarding does not take place when the external
destination number is busy. When a call is forwarded by the internal entrance telephone, it is disconnected after 1 minute of conversation.
[2] The call rings at the destination extension until the preset timeout
expires (see Programming manual, Programming an extension call forward no answer) or is forwarded immediately if busy.
2
61
Page 62

Functions used when receiving calls
Step by step
or
qeh Enter the code for internal call forwarding.
p Enter the number for the
1. Extension you want to call (e.g., 11/101).
2. UCD subscriber group for voice mail (e.g., 790).
3. Call group (e.g 770)
4. Access to an external line (e.g., 0) and the external
destination number.
SAVE?
FORWARD TO:
TO: FAX
Confirm.
If call forwarding is activated, the display will show
"FORWARD TO:" during a period of time.
For Fax/DID
When a Fax/DID module is installed, calls can be forwarded to Auto-answering mode.
1
p Enter the type of call forwarding wanted:
qee - Direct call forwarding
1.
qeh - Call forward no answer
2.
3.p
Enter the call forwarding destination number.
1.
khd - FAX
Call forward to FAX is indicated on the display.
2. khe - Attendant (direct dialing to extension)
62
TO: DID
TO: FAX/DID
TO: ANNOUNCEMENT
SAVE?
Call forward to DID is indicated on the display.
3. khf - Fax/DID
Call forward to DID/FAX is indicated on the display.
4. khg - Message
Call forward to Greeting is indicated on the display.
Confirm.
[1] For further information about the Fax/DID module, see Fax/DID
Auto-answering mode in the Programming manual.
Page 63

Step by step
Functions used when receiving calls
Conditional
1
This feature is available when using a CTI (Computer Telephony Integration) interface.
Incoming calls can be forwarded to a specified destination list, as configured in a TAPI-type application such as
a Windows TAPI Browser. The settings of the previous
list or unconditional call forwarding will be replaced with
the new list settings.
The following information is required for configuring a
list:
• Incoming caller ID
• Day of the week and time
• Type of call (internal or external)
When more than one number have been specified for
incoming calls to an extension, the call forwarding priority will be:
1. Checks to see if the Caller ID for the incoming call
matches the number programmed for the extension
2. Checks to ensure that the Type of Call (internal or external) has been configured
3. Checks the time settings.
CFC ON
Required: The extension has permission for conditional
call forwarding and the system is connected to a PC that
has a TSB application installed.
1. Rules and conditions for call forwarding can be configured for each extension by using a Windows TSP
application
2. Apply the settings to the extension desired.
3. From this moment on the extension will be forwarded.
The display shows that this feature is activated.
[1] The system allows up to 50 call forwarding numbers (see Program-
ming manual,Programming an extension - Conditional forwarding
limited by extension and external CFW).
Conditional call forwarding has priority over an unconditional call
forwarding.
Conditional call forwarding is not available for S
extensions.
0
63
Page 64

Functions used when receiving calls
Step by step
Disabling call forwarding
This feature allows an extension to resume answering
incoming calls.
Internal/External
Press to access the Service menu.
MORE FEATURES?
#11=FWD OFF?
#0=RESET SRVC?
Select and confirm.
or
ree Enter the code to deactivate call forwarding.
Conditional
Press to access the Service menu.
Select and confirm.
or
rd Enter the code to enable the features.
When there is no answer
When calls are not answered after a specified time,
they will no longer be forwarded to another extension,
voice mail subscriber group or external number.
Press to access the Service menu.
MORE FEATURES ?
#14=CFNR OFF
64
Select and confirm.
or
reh Enter the code to deactivate call forwarding.
Page 65

Step by step
Functions used when receiving calls
Do not disturb
1
The Do not disturb feature prevents internal and external calls from being directed to an extension while allowing it to continue making and calls. When the handset is lifted there is a distinctive dial tone to remind the
user that the feature is activated.
Press to access the Service menu.
MORE FEATURES ?
*97=DND ON?
Select and confirm.
or
#97=DND OFF?
or
qmk or rmk Enter the code to deactivate Do not disturb.
DND ON
The display shows that this feature is activated.
DND OFF
or
The display shows that this feature is deactivated.
Voice mail
2
Voice mail is an information tool designed to facilitate
communications within and outside of organizations. It
is similar to electronic mailing, faxing, etc. The characteristic feature of voice mail is that communications are
carried out by means of voice. More specifically, the
main advantage of voice mail is that it allows the user to
be accessible at any time, answering and receiving calls
while maintaining other personal and direct communications.
[1] The extension activated with the feature Do not disturb is not
warned about an urgent incoming call or a recall request. Moreover, it cannot be used as a destination for call forwarding. The attendant console or overflow extension cannot enable this feature.
When an extension configured as a door opener enables this feature, only calls originating from the door opening device will ring.
[2] This feature is only available when the HiPath 1100 is connected to
a voice mail server. This can be an organization’s own internal server or it can be part of the services provided by a local carrier. Voice
mail Servers provide a wide range of features. We recommend
reading the Instruction Manual to familiarize yourself with the services provided and how to use them correctly.
65
Page 66

Functions used when receiving calls
Step by step
Users can retrieve messages:
• from their own telephones
• using an external or an internal telephone.
The voice mail server may be Internal or External. An
internal voice mail server refers to a server owned by
the company itself while an external voice mail server
refers to a facility outsourced to a local carrier.
Internal Server
An internal voice mail server works with a UCD subscriber group that is configured during the programming process. This is known as a VMIe group Interface.
To enable extensions to receive MWI (Message Waiting
Indicator) from the internal voice mail server you must
enable the internal MWI feature.
The configuration of a UCD subscriber group for the
VMIe group Interface must fulfill these requirements:
• It must not be programmed as a DID for an external
line
• It must not be configured for Overflow.
• The agent’s auto-notes time interval must be set to
at least 5 seconds.
• Queue size must be set at the maximum allowed
(default)
External Server
A voice mail server outsourced to a local carrier works
for specified extensions grouped as a "External MWI
group" during configuration of the system. When there
is a message in the mailbox, the extensions that belong
to this group receive a MWI (Message Waiting Indicator) from the external voice mail server.
66
Page 67

Step by step
Functions used when receiving calls
Message Waiting Indicator (MWI)
1
The Message Waiting Indicator (MWI) is used in the
HiPath 1100 to help manage voice mail. With this feature when a mailbox (internal or external) receives a
new message, a signal or tone indicates that there is a
message waiting.
This indication is provided in the following manner:
• By means of a key programmed as a MWI, in the
case of system telephones.
• By means of an icon shown on the display, in the
case of Profiset 3030 system telephones or standard telephones with Caller ID (CLIP-FSK).
The signal indication is activated when the first message is received in the mailbox. The indication is deactivated automatically by the voice mail server.
MWI for system telephones
2
When there is a message in the user’s mailbox, the key
configured will blink as an indication.
*91=PROG. FEATURE KEY?
qme Enter the programming code a key.
CHANGE KEY?
MAILBOX?
Programming a key as a MWI for the Internal Server
A programmable telephone key is assigned as an indicator for a new message in the mailbox by using an internal voice mail server.
Press to access the Service menu.
Select and confirm.
or
Select a programmable key.
Confirm.
Select and confirm.
[1] When using an internal voice mail server, extensions must be pro-
grammed in the subscriber group to which voice mail was assigned (see Programming an extension - UCD subscriber group in
the programming manual).
When using an external voice mail server (contracted with a local
carrier), the extensions assigned to voice mail must be programmed and the service must be activated in the external MWI
group (see Programming an extension - External MWI group in the
programming manual).
[2] For system telephones without a display the signaling must be pro-
grammed using the HiPath 1100 System Manager application.
67
Page 68

Functions used when receiving calls
Step by step
SAVE?
ANOTHER KEY?
*91=PROG KEY?
CHANGE KEY?
Confirm.
or
Select and confirm.
Programming a key as a MWI for the external server
A programmable telephone key is assigned as an indicator for a new message in the mailbox by using an external voice mail server.
Press to access the Service menu.
Select and confirm.
or
qme Enter the programming code a key.
Select a programmable key.
Confirm.
1
MAILBOX?
SAVE?
ANOTHER KEY?
Select and confirm.
Confirm.
or
Select and confirm.
Activating receipt of an Internal MWI
When a subscriber group is programmed as a VMIe
group Interface, it becomes a voice mail subscriber
group that can be activated for signaling the moment a
new message is waiting (see Programming an extension - VMIe group Interface in the programming manual). This is the only group with permission to deactivate
the internal MWI.
Press to access the Service menu.
[1] When this key is pressed, the message "XTRN WAIT MSG" will ap-
pear on the system telephone display.
[2] When all mailboxes of the Internal voice mail system are busy, the
call is forwarded to the UCD subscriber group queue assigned to
voice mail.
Remember: It is not possible to transfer calls to the voice mail system.
2
68
Page 69

Step by step
Functions used when receiving calls
MORE FEATURES ?
*68=INT WAIT MSG ON?
*68=INT WAIT MSG OFF?
Select and confirm.
or
or
Press to access the Service menu.
qjl or rjl Enter the code to enable or deactivate internal MWI.
INT WAIT MSG ON
INT WAIT MSG OFF
The display shows that this feature is activated.
or
The display shows that this feature is deactivated.
p Enter the extension number assigned to the mailbox
(e.g., 12/102).
MESSAGE
MESSAGE
Mailbox access
To access your mailbox, call the direct access number
(Voice mail subscriber group) and follow the voice mail
system prompts.
You can also do the following:
• Record/Change a greeting announcement to be
played when there is a call.
• Listen to the messages left in your mailbox by callers.
n or Lift the handset or press the SPEAKER key.
or
Select this key.
p Enter the direct access code (Voice mail subscriber
group) for the voice mail system (e.g., 790).
w s Wait for the voice mail to answer the call.
Proceed with what you want to do by following the instructions given by the voice mail server.
69
Page 70

Functions used when receiving calls
Step by step
Voice mail forwarding
With this feature, calls that are received at a specified
extension can be forwarded to a voice mail server (see
Æ page 60).
Leaving a message
Most callers access the called party mailbox when the
called party is not at the usual workstation (Voice mail
forwarding). On such occasions, the caller hears a greeting announcement and can leave a message at the mailbox.
Example:
The HiPath 1100 receives a call of a user who is not at
the company at that particular moment. The user’s extension is programmed to use the Mail Voice feature
and forward the call to your mailbox. The HiPath 1100
answers the call and connects the mailbox to the voice
mail of the user who is not available to answer it.
The caller will hear a greeting announcement and will
then be able to leave a message in the mailbox.
Entry voice mail (EVM)
The HiPath 1100 can be equipped with an integrated
voice recording capability for voice mail .
The support technician can configure up to 24 standard
mailboxes, 2 of which are for forwarding (message for
day/night service). Two parallel actions are allowed for
call transfer and auto-answering (2 message ports).
If the system’s support technician has authorized the
user to configure the mailboxes, then s/he may configure her/his own mailbox.
A personal voice mailbox answers the user’s calls,
plays a personal recorded greeting (or a default greeting) and allows the user to record his/her own message.
mailboxes allow callers not only to record a message or
greeting but also to access them directly or via another
mailbox.
70
Page 71

Step by step
Functions used when receiving calls
Example:
– The caller hears a message or music while waiting
for an answer.
Example: "Hello. All our attendants are busy at
the moment. Please hold the line".
– The caller may leave a message after the greeting.
Example: “The person you are calling is not available at the moment". Please leave your message
after the tone.
When a call to an extension is forwarded to an
EVM mailbox (call forward no answer or busy) a
message is played, explaining why the call is being forwarded.
These messages are played before the greeting
message and cannot be overwritten.
Messages:
• Call forwarding - Busy after call forwarding no
answer: "User’s connection is busy at the moment".
• Call forward no answer: "The user you are
calling is not answering".
Mailbox greeting configuration
If the support technician has not already configured
your personal voice mailbox.
Required: Voice mailbox configuration has been authorized by the system’s support technician.
kmd Enter the code for "Entry voice mail" (default = 790)
p Enter the password for the mailbox (default = 1234).
w s Wait for the voice mail to answer the call.
Follow the voice mail prompts to make your selections.
It is recommended that you change the password after accessing your mailbox for the first
time.
Only numbers are allowed (0-9). Do not use
"1234" or "0000" .
If you forgot your password, please inform your
support technician so that the default setting can
be reset.
71
Page 72

Functions used when receiving calls
Step by step
EVM does not prompt for a mailbox number
when the personal mailbox and an external line
mailbox use the same password. For example,
When a user accesses an EVM mailbox with the
same password used for a mailbox from a line in
which the user is a member, that mailbox is always considered as a personal mailbox.
The user must change his/her personal or external line mailbox password in order to access the
external line mailbox to which he/she belongs.
Personal mailbox activation
In order for the calls to be answered by voice mail, you
must first configure call forwarding Æ page 60 to 790
(=Entry voice mail) on your telephone.
When the DISA feature Æ page 42 is activated, calls
made to your phone number can be forwarded to your
Entry voice mail.
MAILBOX
CALL VOICE MAIL?
Checking you personal mailbox
Messages stored in your mailbox are indicated on your
telephone as follows:
• An audible tone is heard when you lift the handset.
• The "Mailbox" key blinks if this feature has been configured Æ page 67.
• The number of messages stored is shown on the
display. For example, "3 new messages".
The number of messages shown on the display
is the total number for all messages contained in
the personal and all other mailboxes for the lines
the user is a member.
Select the blinking key.
or
kmd Enter the code for "Entry voice mail" (default = 790).
or
Select and confirm.
72
p Enter your personal mailbox password (default = 1234).
Page 73

Step by step
Functions used when receiving calls
w s Wait for the voice mail to answer the call.
Follow the voice mail prompts to make your selections.
In another internal extension
kmd Enter the code for "Entry voice mail" (default = 790)
p Enter your personal mailbox password (default = 1234).
p Enter your mailbox number (the same as your internal
extension number).
w s Wait for the voice mail to answer the call.
Follow the voice mail prompts to make your selections.
In an external telephone
p Connect to your HiPath 1100.
Enter the MSN designated to your EVM by the system’s
support technician (check with the support technician).
or If call forwarding to Entry voice mail is activated:
p + q Enter your external number (MSN) and press the Aster-
isk (*) key during the message playback.
p Enter your personal mailbox password (default = 1234).
p Enter your mailbox number (the same as your internal
extension number).
w s Wait for the voice mail to answer the call.
Follow the voice mail prompts to make your selections.
If your HiPath 1100 is configured "...Using automatic seizure of an activated external line" (consult the system’s support technician), press the
Flash key before selecting your mailbox.
In DEC telephones, use "Suffix dialing" (MF)
Æ page 54.
73
Page 74

Functions used when receiving calls
Step by step
Second attendant
When a second attendant is configured, it receives calls
forwarded by the first attendant (an extension or group)
to the second attendant (an extension or group). This
occurs when the first attendant is not available or does
not answer the call within a specified period of time.
Groups
A group consists of extensions joined by type or proximity. Its goal is to prevent calls from going unanswered
when an extension is busy or absent.
2
1
Call groups (CG)
When a call to a Call group (CG) is received, it rings at
all the extensions for that group. The first user (telephone) to answer the call initiates conversation with the
caller. Once the call is answered the other telephones
stop ringing.
Calling a Call group (CG)
p Enter the Call group number.
•
kkd to kkm = Call group (CG);
w s Wait for the call to be answered. Start conversation.
[1] A second attendant may also consist of a Fax/DID
Refer to the programming manual: Programming an extension second attendant for MSN, and Programming an external line Timeout for a second attendant to answer a call on an analog trunk.
[2] See Programming an extension - groups, in the Programming man-
ual.
74
Page 75

Step by step
Functions used when receiving calls
Hunt groups (HG)
The Hunt group (HG) feature allows you to configure extension groups which are then assigned for answering
calls directed to a specific number (up to 10 Hunt
groups, from 780 to 789).
When a group receives an incoming call, the call rings
at one extension at a time. If an internal or external call
is not answered after a specified timeout, it rings at the
next extension, and so on, until it is answered by an
available extension. The selection of an extension
where unanswered calls should ring is made in two different ways: linear or round-robin.
• A linear search always starts from the first extension
in the group.
• A round-robin search starts after the last extension
selected.
JOIN GRP?
LEAVE GRP?
Calling a Hunt group (HG)
p Enter the Hunt group number (HG).
•
kldto klm = Hunt groups (HG)
w s Wait for the call to be answered. Start conversation.
Hunt group (HG) and Call group (CG) Login
and Logout
Hunt group (HG) and Call group (CG) login and logout allow an extension to join or exit one or more of its groups
at any time.
Group login/logout
Select and confirm.
or
or
1
qli or rli Enter your group login (ON) or logout (OFF) code.
or
LOGON/LOGOFF GROUP
Press the "GP LOGON/GP LOGOFF" key.
or
[1] Each group member or non-member can also be accessed through
its extension number.
75
Page 76

Functions used when receiving calls
Step by step
LOGON/LOGOFF GROUP
If the extension belongs to more than one group
JOIN GRP?
Select and confirm.
or
LEAVE GRP?
or
qli or rli Enter your group login (ON) or logout (OFF) code.
or
LOGON/LOGOFF GROUP
LOGON/LOGOFF GROUP
770 X (Name)
Press the "GP LOGON/GP LOGOFF" key.
or
If an X appears next to the group number (e.g., 770) it
means that a ringing signal for this group is activated.
If a name has been stored for this group, it will be displayed (if configured by the system’s support technician).
770 (Name)
NEXT?
JOIN GRP?
or
If an X does not appear, it means that the ringing signal
is deactivated.
or
p Enter the Call group number.
•
kkd to kkm = Call group (CG);
or
p Enter the Hunt group number.
•
kld to klm = Hunt groups (HG)
Press to confirm. The next number in the group will be
displayed.
or
Select and confirm.
The ringing signal for the group displayed is activated.
or
76
Page 77

Step by step
Functions used when receiving calls
LEAVE GRP?
#= LV ALL GRPS?
* = RJN ALL GRPS?
Select and confirm.
The ringing signal for the displayed group is deactivated.
or
Select and confirm.
The ringing signal for all groups is deactivated.
or
r Enter the code for "LV ALL GRPS".
or
Select and confirm.
The ringing signal for all groups is activated again.
or
q Enter the code for "RJN ALL GRPS".
UCD subscriber groups
Each UCD (Uniform Call Distribution) subscriber group
is formed by a maximum of 32 extensions. These extensions are assigned to answer calls destined to a specific
number that identifies the group.
1
The users of these extensions are called agents.
Calling a UCD group
p Enter the UCD group number.
•
kmd to kmm = UCD group;
w s Wait for the call to be answered. Start conversation.
[1] Internal or external calls to a UCD subscriber group are routed to
the extension that has been free the longest. Calls made to a specific extension do not affect the way calls are distributed.
Login/Logout, available/unavailable, and processing later activity is
recorded for statistical purposes only. For more details see Programming manualProgramming an extension - UCD subscriber
group in the.
UCD subscriber groups are used for voice mail functions.
77
Page 78

Functions used when receiving calls
Step by step
GP LOGON?
GP LOGOFF?
GP LOGON/GP LOGOFF
UCD group login/logout
1
Allows an agent, at any time, to enter a group to which
he/she belongs.
Group login/logout
Select and confirm.
or
or
qhde Enter the code to login or logout of the UCD group.
or
rhde Enter the code to login or logout of the UCD group.
or
Press the "UCD GP LOGON/LOGOFF" key.
or
GP LOGON/GP LOGOFF
GP LOGON?
GP LOGOFF?
GP LOGON/GP LOGOFF
If the extension belongs to more than one group
Select and confirm.
or
or
qhde Enter the code to login or logout of the UCD group.
or
rhde Enter the code to login or logout of the UCD group..
or
Press the "UCD GP LOGON/LOGOFF" key.
or
[1] Once an agent is connected (logged in) to a group, the agent will
be automatically disconnected (logged out) from the previous
group.
When a UCD agent enables call forwarding, the agent is automatically logged out of the group. When the agent is logged into the
group, call forwarding is deactivated. When a UCD agent enables
call forward no answer, the agent’s status becomes unavailable.
When the status is available, call forwarding is deactivated.
Disabling call forwarding does not affect the UCD agent status.
78
Page 79

Step by step
GP LOGON/GP LOGOFF
Functions used when receiving calls
790 X (Name)
790 (Name)
NEXT?
GP LOGON?
If an X appears next to the group number (e.g., 790) it
means that the ringing signal for this group is activated.
If a name has been stored for this group, it will be displayed (if configured by the system’s support technician).
or
If an X does not appear, it means that the ringing signal
is deactivated.
or
p Enter the UCD group number.
•
kmd to kmm = UCD group;
Press to confirm. The next number in the group will be
displayed.
or
Select and confirm.
The ringing signal for the group displayed is activated.
GP LOGOFF?
UCDGRP ON/OFF?
GP AVAIL ?
GP UNAV ?
or
Select and confirm.
The ringing signal for the displayed group is deactivated.
or
Select and confirm.
The ringing signal for all groups is activated/deactivated.
Available/Unavailable agent for a UCD group
Activates an agent to start receiving calls within a group
or to stay away from the group, for example, in the
event of a meeting.
Available/Unavailable agent
Select and confirm.
or
or
79
Page 80

Functions used when receiving calls
Step by step
qhdf Enter the code to become available in the UCD group.
or
rhdf Enter the code to become available or unavailable in the
or
UCD group.
GP AVAIL/GP UNAV
GP AVAIL/GP UNAV
AVAILABLE
NOT AVAILABLE
Press the " UCD GP AVAIL/UNAV" key
or
The display indicates that the agent is available.
or
The display indicates that the agent is unavailable.
The message will only be shown if the extension
is on the hook.
UCD agent in service out of service
This allows an agent to resume receiving calls in a group
once he/she is available again.
Or it prevents an agent from receiving calls within a
group when he/she is busy with a request, such as a
customer’s inquiry.
80
WORK ON?
WORK OFF?
qhdg Enter the code to switch the status to in service or out
rhdg Enter the code to remove the extension from the ser-
IN SERVICE / OUT OF SERVICE
Agent In Service/Out of Service
Select and confirm.
or
or
of service.
or
vice.
or
Press the "IN SERVICE / OUT OF SERVICE" key.
or
Page 81

Step by step
IN SERVICE / OUT OF SERVICE
Functions used when receiving calls
IN SERVICE
MORE FEATURES ?
*405=SHOW QUEUE?
qhdi Enter the code to show calls in the queue.
The display indicates on that the agent is in service.
The message will only be shown if the extension
is on the hook.
Show queue size to UCD agent
This shows the number of calls in the hold queue of the
UCD agent for 5 seconds on the left of the first line of
the display.
Required: The extension should be logged in to the
UCD group.
Press to access the Service menu.
Select and confirm.
or
or
SHOW QUEUE
Calls in the queue:(X)
If the LED is lit, press the "Show queue" key.
The number of calls in the hold queue is shown.
Collect call barring
When this feature is activated, the system automatically
rejects all incoming collect calls over a digital line. Calls
received over an analog line are rejected only at the moment they are answered.
Types of collect call barring:
• Collect call barring by extension
(see Programming an extension - collect call barring
by extension, in the programming manual)
• Collect call barring for a UCD subscriber group
The system bypasses collect call barring for members and non-members of the UCD group. This
means that collect call barring is only acknowledged.
81
Page 82

Functions used when receiving calls
Step by step
(see Programming an extension - collect call barring
for a UCD subscriber group, in the programming
manual)
• Collect call barring for Fax/DID
Call barring will not work for calls transferred to a
Fax/DID.
(see Fax/DID - collect call barring for Fax/DID, in the
programming manual)
Overflow extension
An overflow extension only receives calls when the extension that was called is not available, that is, when it
is busy, there is no answer, or the number called does
not exist.
Examples:
• The extension called is activated for room monitoring (Babyphone)
• The extension that was programmed as the first attendant is currently assigned as internal entrance
telephone
• No first attendant has been configured for the extension
Another way to access an Overflow extension is by dialing its internal number
1
82
[1] The overflow extension cannot be configured or used for Fax (see
Programming an extension - overflow extension, in the programming manual).
Page 83

Step by step
Miscellaneous functions
Miscellaneous functions
Changing the Password for the electronic lock
This is a security feature that protects against unauthorized use by setting a personal password.
Press to access the Service menu.
*93=CHNG PIN?
Select and confirm.
or
qmg Enter the code to change the password.
p Enter the current 5-digit password for the electronic
lock (default is 00000).
p Enter a new password.
p Confirm the new password.
If you forget your password, contact your system’s support technician to reset the default
password "00000".
Electronic lock
The electronic lock allows the user to prevent unauthorized persons from making calls from that particular extension.
1
CHGOVR ON ?
When an extension is configured for using a special
Class of Service (see Main Configurations – special
class of service for blocked extensions, in the Programming manual) it will allow specific functions. For instance, when an electronic lock is activated for an extension authorized for international calls, that extension
will only allow local calls (seeTechnical Support).
Select and confirm.
or
[1] It will be possible to make external calls using the Speed Dial
phonebook or an authorized password for that specific extension.
When an extension is blocked, a distinctive dial tone is heard when
the handset is lifted.
83
Page 84

Miscellaneous functions
Step by step
CHGOVR OFF ?
qjj orrjj Enter the code to deactivate the electronic lock.
or
p Enter your 5-digit password (the default is: 00000).
LOCK PHONE
UNLCK PHONE
MOH ON?
MOH OFF?
The display shows that this feature is activated.
or
The display shows that this feature is deactivated.
Music on hold
This feature plays pre-programmed music during the
time an external call is on hold (see General programming - music on hold in the programming manual).
The music can be heard, for instance, through a system
telephone speaker, as background music.
Select and confirm.
or
or
qmhed Enter the code to enable music on hold.
84
or
rmhed Enter the code to deactivate music on hold.
PLAY SYS MUSIC
SYS MUSIC STOP
The display shows that this feature is activated.
or
The display shows that this feature is deactivated.
Page 85

Step by step
Miscellaneous functions
Busy signal when extension is busy
This features allows all telephones in the "Busy Signal"
group to automatically switch to a busy signal when a
member of the group has a call in progress (see Programming a digital trunk - busy signal, in the programming manual). External calls do not ring (on digital lines
the caller hears a busy signal).
This is useful when there is only one person of the
group available and this person does not want to interrupt the conversation in progress.
Press to access the Service menu.
MORE FEATURES ?
*9411=BBB ON
#9411=BBB OFF
qmhee Enter the code to enable Busy Signaling.
rmhee Enter the code to deactivate Busy Signaling
BBB ON
BBB OFF
Select and confirm.
or
or
or
The display shows that this feature is activated.
or
The display shows that this feature is deactivated.
85
Page 86

Miscellaneous functions
Step by step
Language/country settings
This allows you to configure the system specifically according to the country.
Language and currency settings for the telephone display can also be configured.
Required: The extension has permission to use this feature.
Press to access the Service menu.
MORE FEATURES ?
*9412=CTRYDEF
qmhef Enter the code to select a country.
Select and confirm.
or
p Enter the country code (8 digits).
The code is stored and the system is restarted.
Country Code
Brazil 14463075
Chile 30259680
Portugal 37496521
Vietnam 48220818
Thailand 50692539
Ukraine 50889647
86
M ex i co 5 19 11111
Pakistan 51951328
Greece 52632505
IM French 52633110
Venezuela 56589679
South Africa 58049590
Russia 64243015
Canada 67831496
Singapore 74857265
Peru 75051002
Page 87

Step by step
Miscellaneous functions
Country Code
Malaysia 76010255
IM English 85315585
Spain 96149549
China 98245912
China2 98245924
IM Spanish 98256348
India 98274553
Argentina 99195953
Philippines 99251479
Turkey 53951509
Latvia 23730903
Lithuania 54369901
Italy 70129594
Australia 99168546
United Kingdom 54721445
France 68141859
Korea
1
99251480
Germany 45109382
Netherlands 49545821
Belgium 25279542
Austria 48376691
Czech Republic 98385917
[1] The numbering plan changes as follows:
a) Access to the group of external lines (
digit "9" instead of "0";
b) Calling an operator terminal (
stead of "9";
c) group call pickup (
stead of "*57";
d) Recovery of a parked call (
"*57" instead of "*0";
Æ page 59) is done with sequence "*0" in-
Æ page 35) is done with digit "0" in-
Æ page 55) is done with sequence
Æ page 19) is done with
87
Page 88

Miscellaneous functions
Step by step
1
*90=RELAY ON?
*90=RELAY OFF?
Relay
The relay on the HiPath 1120 music module is used to
control all peripheral equipment, such as the door opener, etc.
Press to access the Service menu.
Select and confirm.
or
or
qmd or rmd Enter the code to enable or deactivate the relay.
If a Fax/DID feature was configured...
The relay can be controlled by a remote MF telephone
Required: The remote telephone must have a conversation in progress with the system’s programming extension.
Press to access the Service menu.
*90=RELAY ON?
*90=RELAY OFF?
Select and confirm.
or
or
qmd or rmd Enter the code to enable or deactivate the relay.
p Enter the system password at the remote telephone
(the default is: 31994).
Relay status check
This feature allows you to check if the relay is ON or
OFF.
Required: System telephone with a display.
Press to access the Service menu.
MORE FEATURES ?
88
Select and confirm.
[1] Enable (contacts closed) or Deactivate (contacts open) the relay im-
mediately or after a specified time (see Relay and Sensors in Programming manual, HiPath 1120).
Page 89

Step by step
*9414=RLA CHK
Miscellaneous functions
or
qmheh Enter the code for checking the status of the relay.
Activating/Disabling a general alarm
If the support technician configured the alarm feature
for your extension, it will ring whenever there is an
alarm condition on the HiPath 1100.
Answer the call to acknowledge that the alarm was detected. If the alarm call is not acknowledged, a new attempt at a call will be made (as programmed) and the
extension will ring again.
Required: The display shows "CALL: RLA CHK..."and
your telephone will ring three times (three short beeps)
at 4-second intervals.
n or Lift the handset or press the SPEAKER key.
t or Replace the handset or press the SPEAKER key
89
Page 90

Miscellaneous functions
Step by step
rmheh Enter the code to deactivate a general alarm.
Disabling a general alarm
If an alarm system has been activated, in addition to the
alarm signal, it can be deactivated.
p Enter the access code (default is 31994).
Alarm clock
The alarm clock allows you to program an extension to
send the user a reminder at a specific time, at fixed
time intervals or cyclically.
To use this feature you must specify and store the time
when the reminders alerts should be sent. Time alerts
can be set for:
• Daily reminders
• Daily except weekends
• A reminder after a specified period of time
• A reminder for a specific date
*46=ALARM ON?
1= DAILY?
2=NOT WEEKEND
3=AFT TIMEOUT
4=SPEC DAY
Scheduling Time Reminders
Press to access the Service menu.
Select and confirm.
or
qhj Enter the code to set the alarm clock.
Select and press to confirm the type of scheduled time
reminder you want.
or
or
or
90
or
e or f or g or h Enter an option.
Page 91

Step by step
Miscellaneous functions
For type 4 timed reminder
only p
SAVE?
or If you make a mistake:
PREVIOUS?
p Enter the hour in a 4-digit format. For example, 0905 for
SAVE?
or If you make a mistake:
PREVIOUS?
Enter the day, month, hour, minutes (e.g., 05080830 for
August 5, 8:30 a.m..
Confirm.
Select and confirm. All digits that were entered are deleted and the display returns to the Time Reminder options.
9:05 a.m. or 1430 for 2:30 p.m.
Confirm.
Select and confirm. All digits that were entered are deleted and the display returns to the Time Reminder options.
Deleting/Checking a Scheduled Time Re-
#46=ALARM OFF?
DELETE?
END?
TIMED REMIND
n t or Lift the handset or press the SPEAKER key.
minder
Press to access the Service menu.
Select and confirm.
or
rhj Enter the code to delete a timed reminder.
Confirm.
or
Select and confirm.
Scheduled Time Reminder Call
Required: A time reminder was scheduled.
The telephone rings. The scheduled time is displayed.
91
Page 92

Miscellaneous functions
Step by step
qfjd Enter the code.
Alarm clock/Announcement
association
The alarm clock/announcement association allows you
to associate an announcement to the scheduled time
reminder feature. The second announcement of the
voice mail will be used to be played at the answering of
a timer reminder call.
n Lift the handset.
p Enter the extension number for which the announce-
ment has to be associated (e.g., 11/101).
MORE FEATURES ?
*508=WLKNG COS?
w Wait for a confirmation tone.
t Replace the handset.
COS (Class of Service) changeover
The COS changeover feature authorizes the user to use
a different system extension temporarily to make calls
as if he was at his own extension but with a lower class
of service.
Press to access the Service menu.
Select and confirm.
or
qidl Enter the code for COS changeover.
p Enter the extension number for which you have autho-
rization (e.g., 11/101).
1
92
p Enter the 4-digit password for the electronic lock (de-
fault is 0000).
p Enter the code to access an external line.
[1] COS changeover must be activated in order for an extension to use
another extension (see Main Configurations - COS changeover in
the Programming manual).
Page 93

Step by step
Miscellaneous functions
w Wait for a dial tone.
p Enter the external number you want to call.
w s Wait for the call to be answered. Start conversation.
t Once the handset is on-hook, the extension can use its
regular class of service.
*490=CW TRM ON?
#490=CW TRM OFF?
qhmd Enter the code to enable data protection.
rhmd Enter the code to deactivate data protection.
Data protection
The data protection feature prevents audio signals generated by the system from affecting data equipment
connected to the extension, such as faxes, modems, Internet connections or answering machines.
Press to access the Service menu.
Select and confirm.
or
or
or
1
[1] Data protection cannot be activated if the extension is configured
as an overflow extension or as an attendant console.
If the extension is an MSN attendant console and enables this feature, external calls will be forwarded to an overflow extension.
93
Page 94

Miscellaneous functions
Step by step
Call waiting signaling tone
With this feature you can block/allow a second call to
automatically send a signal (call waiting) when a conversation is in progress.
Required: The extension being called is busy.
Press to access the Service menu.
MORE FEATURES ?
#87=WAIT ON?
*87=WAIT OFF?
Select and confirm.
or
or
rlk or qlk Enter the code to enable or deactivate the call waiting
signal.
94
Page 95

Step by step
Miscellaneous functions
Disabling a feature
The feature deactivation function allows an extension to
deactivate the following features simultaneously:
• Call forwarding (conditional and immediate unconditional)
• Headphone
• Do not disturb
• Data protection
• Alarm clock
• Callback
• Urgent Call
• Handsfree answerback
Press to access the Service menu.
#0=RESET SRVC?
*88=BABYPHONE?
Select and confirm.
or
rd Enter the code to enable the features.
Room Monitor
The Room Monitor feature uses a telephone handset as
a microphone to capture audio signals in a room.
To e n a b l e
Press to access the Service menu.
Select and confirm.
or
1
qll Enter the code to enable the Room Monitor feature.
n or Lift the handset and position it facing the object to be
monitored. Or press the SPEAKER key.
To d e a c t i v a t e
t or Replace the handset or press the SPEAKER key
[1] When the Fax/DID module is installed, you can monitor an environ-
ment even from an external telephone. After the answering message completes, enter the extension number assigned to the
feature, then enter the extension password (same as the electronic lock).
This cannot be activated for an overflow extension or members of
a Hunt group.
95
Page 96

Miscellaneous functions
Step by step
Room Monitor
... From an Extension
p Enter the extension number for the room you want to
monitor (e.g., 11/101).
w s Wait. The user calls the extension assigned to the fea-
ture to hear the audio signals present.
... From an external telephone
Required: The telephone must be a DTMF telephone or
you must be able to switch it to DTMF. The telephone is
not connected to the system.
p Connect to the HiPath 1100. Enter the DISA-MSN num-
ber (ask your support technician).
p Wait for a continuous tone (if necessary, switch to DT-
MF) then enter your internal number and the lock’s
password.
p Enter the number for the extension to be monitored.
w s Wait. The user calls the extension assigned to the fea-
ture to hear the audio signals present.
Night service
The night service feature enables DIDs on the night table. It can be activated or deactivated at any system extension.
When night service is ON - for example, at lunch time
or after business hours-- all external calls are forwarded
to a specified internal extension (night destination). The
category of the extension may or may not be changed.
The night service extension and the required password
for activation/deactivation are specified by the system’s
support technician.
1
96
[1]Extensions are configured during system programming (see Pro-
gramming an extension - night service in the Programming manual).
If night service is ON, a distinctive tone will be heard when you
lift the handset.
An extension’s category may be changed.
Page 97

Step by step
Miscellaneous functions
The support technician may also specify a time for automatically enabling/deenabling night service. Automatic
night service does not function when Manual control is
on.
NT ANS ON
NT ANS OFF
Select and confirm.
or
Select and confirm.
or
qhh or rhh Enter the code to enable or deactivate night service.
or
NIGHT SERVICE
NIGHT SERVICE
Press the "NIGHT SERVICE" key.
or
p Enter your 5-digit password (the default is: 31994).
Call forwarding when there is no answer on a
digital line
In some circumstances incoming calls over a digital line
are forwarded to an Overflow extension after a specified timeout.
1. When no MSN number is assigned to an extension
number.
2. When an MSN number is assigned to an extension
number. The MSN number incoming call rings at the
extension assigned to it. If the extension that received the forwarded call does not answer after a
specified timeout (default of 30 seconds), the call is
rerouted to the Overflow extension;
"Call forward no answer With Timeout" is set using
the code 30.
3. When an MSN number is assigned
to an extension number. The extension assigned is
configured for a second attendant using the code
"*14". The MSN number incoming call rings at the
extension assigned to it. If a call is not answered after a specified timeout (default of 30 seconds), the
system again reroutes the call to an extension configured as second attendant. If the call is still not an-
97
Page 98

Miscellaneous functions
Step by step
swered after the specified timeout (default is 30
seconds), the call is rerouted to the Overflow extension.
4. When an MSN number is assigned
to an extension number. The extension assigned is
forwarded to another extension. The incoming MSN
call will ring at the call forwarding extension destination. If the extension that received the forwarded
call does not answer after a specified timeout (default of 30 seconds), the call is rerouted to the Overflow extension.
5. When an MSN number is assigned
to an extension number. The extension assigned is
not able to receive a call forwarding signal. For example, it may be configured for data protection.
OPEN DOOR
Open Door?
Entrance telephone - door opener
This feature lets the system allow certain pre-programmed extensions to order a door to open using an
entrance telephone device equipped with door opening
control.
Required: The entrance telephone extension has permission to open the door.
A call is received from the entrance telephone
1
n or Lift the handset or press the SPEAKER key and identify
the person who wants to enter.
or
Press the "OPEN DOOR" key once to answer.
Press to confirm.
or
98
*61=OPEN DOOR?
Press to access the Service menu.
Select and confirm.
or
qje Enter the code to open the door.
[1] Extensions authorized to open doors are configured during system
programming (see entrance telephone in the Programming manual).
An urgent call warning tone is played when the extension configured to answer the entrance telephone is busy.
Page 99

Step by step
Miscellaneous functions
or
OPEN DOOR
OPEN DOOR
*61=OPEN DOOR?
Press the "OPEN DOOR" key a second time to open.
The extension is in sleep mode and calls the entrance telephone
In this case the entrance telephone will receive a call
signal.
n or Lift the handset or press the SPEAKER key and identify
the person who wants to enter.
or
Press the "OPEN DOOR" key once to call.
Press to access the Service menu.
Select and confirm.
or
qje Enter the code to open the door.
note For the two options above, if the system has more than
one entrance telephone installed and the extension had
permission to open the door, the system will request
the extension number of the entrance telephone.
ENTR. PHON. EXTENSION?
OPEN DOOR
MORE FEATURES ?
*95=SYSADMIN ?
Asks you which entrance telephone you wish to open
the door.
p Enter the entrance telephone extension (for example:
12/102).
or
Press the "OPEN DOOR" key a second time to open.
Activating system programming
The system programming mode allows extension 11 on
the HiPath1120/1150 and extension 101 on the HiPath
1190 to access the programming codes and change system features.
Press to access the Service menu.
Select and confirm.
99
Page 100

Miscellaneous functions
Step by step
or
qmi Enter the programming code.
p Enter your 5-digit password (the default is: 31994).
p Enter the codes and their complements according to
Programming manual.
MORE FEATURES ?
*991=REM. ADM?
Remote configuration
The remote configuration feature allows remote configuration of the HiPath 1100.
1
Using an MF Telephone
Required: The programming extension must have a con-
versation in progress with the remote programmer.
Press to access the Service menu.
Select and confirm.
or
qmme With a conversation in progress enter the programming
extension code to transfer control of the HiPath 1100 to
the remote programmer.
100
p w The remote programmer must now enter the system’s
password on an MF telephone (the default is 31994)
and wait for a confirmation tone.
p w To set the required configuration, proceed as if the re-
mote telephone were locally connected to the system.
If there is a DID installed
If the system is equipped with a Fax/DID module programmed as an external line DID.
qmi w Enter the code using a remote MF telephone after the
call is answered.
[1] If the system’s serial port is connected to a modem with access to
a telephony network, and the remote PC has a modem installed,
remote configuration can be carried out using the HiPath 1100 System Manager application. Ask your support technician how to do
this.
 Loading...