

Page 1
SpeedStream® 1020
PCI 10/100 Ethernet Adapter
Quick-Start Guide
007-0120-001
Page 2
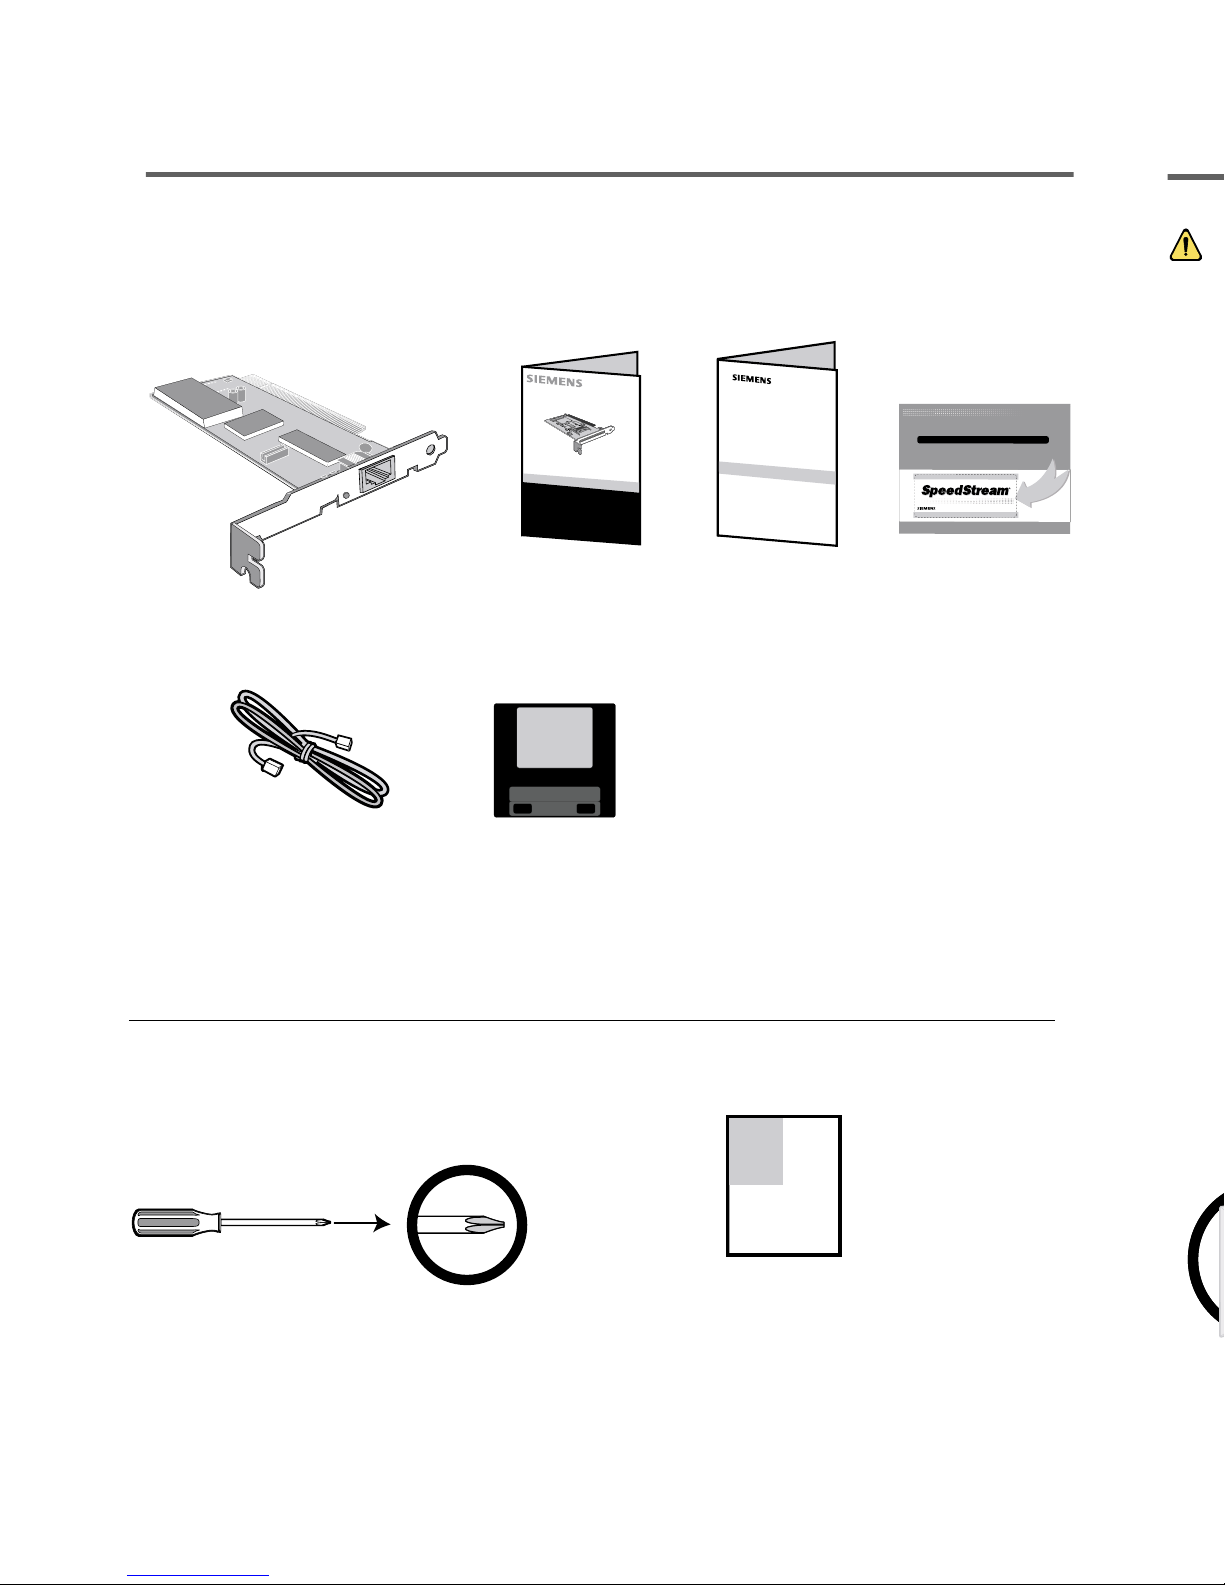
Package Contents
Your package includes the following:
Before you begin:
Step
Network cards are sensitive to static electricity. Avoid touching its electrical components. To eliminate static electricity, always
touch the chassis of your computer before handling the card. Backup your driver and use the copy as the working copy to
protect the original from accidental damage.
1. Switch off the computer, unplug the power cord, and remove the computer cover.
2. Select an unused PCI bus-master slot and remove its protective bracket.
3. Carefully insert the card and press until the whole edge connector is firmly seated inside the slot.
4. Screw the card’s bracket securely into the PC chassis.
5. (Optional step) Attach the optional Wake-On-LAN cable. If you require Wake-On-LAN capability
from a powered-off state, attach one end of the three-pin Wake-On-LAN cable to the connector on
the top edge of the card. Attach the other end to the "5 V Standby" connector on the computer’s
motherboard. To locate this connector, refer to your computer’s installation manual.
6. Connect the SpeedStream
using UTP cable. The maximum allowable length of UTP cable connections is 328 ft (100 meters).
7. Replace the computer cover; then power on the computer. The computer BIOS should
automatically configure the SpeedStream
computer, you may have to manually configure the computer
information, see the Troubleshooting section of this Quick-Start Guide.
8. Install the appropriate network driver for your operating system. The driver floppy disk that
accompanies the SpeedStream
drivers supported by this card. Please read the “RELEASE.TXT” file on the floppy disk for a list of
all drivers. A text file included in each folder details the proper installation procedure for that
operating system.
Testing Program: If the host computer does not automatically configur e the SpeedStr eam
problem with the card, run the DOS-based Testing Program to view the computer’s BIOS settings. Boot the computer to a full
DOS environment (not a DOS window) and run the Testing Program, “ACCTEST.EXE”, from the driver floppy disk. If any of the
diagnostic tests fail, reboot your computer and run the diagnostics again to see if the problem persists. If it does, record the
failure indicated and contact Technical Support for assistance.
1
Quick Setup
of your
Personal Computer
Note: You will also need a Phillips® screwdriver and the instruction manual that came with your computer.
J
U
S
T
G
O
T
O
w
w
w.s
p
e
e
d
s
trea
m
.c
o
m
/
re
g
/
e
xtw
r
nty
G
E
T
A
O
N
E
Y
E
A
R
H
A
R
D
W
A
R
E
W
A
R
R
A
N
T
Y
E
X
T
E
N
S
I
O
N
O
N
Y
O
U
R
S
P
E
E
D
S
T
R
E
A
M
P
R
O
D
U
C
T
.
G
E
T
A
O
N
E
Y
E
A
R
H
A
R
D
W
A
R
E
W
A
R
R
A
N
T
Y
E
X
T
E
N
S
I
O
N
O
N
Y
O
U
R
S
P
E
E
D
S
T
R
E
A
M
P
R
O
D
U
C
T
.
E
X
T
E
N
D
E
D
WA
R
R
A
N
T
Y
!
E
X
T
E
N
D
E
D
WA
R
R
A
N
T
Y
!
K
e
e
p
t
h
i
s
n
e
a
r
y
o
u
r
P
C
t
o
k
n
o
w
w
h
e
r
e
t
o
g
o
f
o
r
s
u
p
p
o
r
t
,
D
S
L
e
d
u
c
a
t
i
o
n
,
a
n
d
n
e
w
p
r
o
d
u
c
t
i
n
f
o
.
w
w
w
.
s
p
e
e
d
s
t
r
e
a
m
.
c
o
m
L
i
v
e
a
Br
o
a
dba
n
d
L
i
f
e ™
0
0
7
-
0
1
0
5
-
0
0
2
T
h
i
s
o
f
f
e
r
m
a
y
b
e
r
e
v
o
k
e
d
,
a
m
e
n
d
e
d
,
s
u
p
p
l
e
m
e
n
t
e
d
,
r
e
v
i
s
e
d
,
a
l
t
e
r
e
d
,
c
h
a
n
g
e
d
o
r
t
e
r
m
in
a
t
e
d
a
t
a
n
y
t
im
e
w
it
h
o
u
t
n
o
t
i
c
e
i
n
t
h
e
s
o
l
e
a
n
d
a
b
s
o
l
u
t
e
d
i
s
c
r
e
t
i
o
n
o
f
E
f
f
i
c
i
e
n
t
N
e
t
w
o
r
k
s
,
I
n
c
.
T
h
i
s
o
ff
e
r
i
s
a
v
a
i
l
a
b
l
e
o
n
s
e
l
e
c
t
p
r
o
d
u
c
t
s
o
n
l
y
.
T
h
i
s
o
ff
e
r
i
s
a
v
a
i
l
a
b
l
e
i
n
s
e
l
e
c
t
c
o
u
n
t
r
i
e
s
o
n
l
y
.
T
h
e
o
f
f
e
r
i
s
g
o
o
d
f
o
r
t
h
i
r
t
y
(
3
0
)
d
a
y
s
f
r
o
m
t
h
e
d
a
t
e
o
f
i
n
s
t
a
l
l
a
t
i
o
n
.
O
f
f
e
r
v
o
i
d
w
h
e
r
e
p
r
o
h
i
b
i
t
e
d
b
y
l
a
w
.
C
e
r
t
a
i
n
r
e
s
t
r
i
c
t
i
o
n
s
m
a
y
a
p
p
l
y
.
©
2
0
0
1
E
f
f
i
c
i
e
n
t
N
e
t
w
o
r
k
s
,
I
n
c
.
A
S
i
e
m
e
n
s
C
o
m
p
a
n
y
FREE
FREE
S
p
e
e
d
S
t
r
e
a
m
®
Quick-
St
a
r
t
G
ui
de
Safety an
d
C
e
rtif
ications
Safety an
d
C
e
rtif
ications
PCI 10/100 Quick-Start Guide Safety and Extended Warranty
Ethernet Adapter Certification and Registration card
information
Phillips
®
screwdriver Computer manual
Wake-On-LAN Floppy disk
Cable containing
documentation
and drivers
Page 3

3
5 6
7
Step
1
Hardware Installation
Network cards are sensitive to static electricity. Avoid touching its electrical components. To eliminate static electricity, always
touch the chassis of your computer before handling the card. Backup your driver and use the copy as the working copy to
protect the original from accidental damage.
1. Switch off the computer, unplug the power cord, and remove the computer cover.
2. Select an unused PCI bus-master slot and remove its protective bracket.
3. Carefully insert the card and press until the whole edge connector is firmly seated inside the slot.
4. Screw the card’s bracket securely into the PC chassis.
5. (Optional step) Attach the optional Wake-On-LAN cable. If you require Wake-On-LAN capability
from a powered-off state, attach one end of the three-pin Wake-On-LAN cable to the connector on
the top edge of the card. Attach the other end to the "5 V Standby" connector on the computer’s
motherboard. To locate this connector, refer to your computer’s installation manual.
6. Connect the SpeedStream®1020 PCI adapter directly to a 10Base-T or 100Base-TX hub or switch
using UTP cable. The maximum allowable length of UTP cable connections is 328 ft (100 meters).
7. Replace the computer cover; then power on the computer. The computer BIOS should
automatically configure the SpeedStream®1020 PCI adapter. However, if you have an older
computer, you may have to manually configure the computer’s BIOS settings. For more
information, see the Troubleshooting section of this Quick-Start Guide.
8. Install the appropriate network driver for your operating system. The driver floppy disk that
accompanies the SpeedStream®1020 PCI adapter contains all the network operating system
drivers supported by this card. Please read the “RELEASE.TXT” file on the floppy disk for a list of
all drivers. A text file included in each folder details the proper installation procedure for that
operating system.
Testing Program: If the host computer does not automatically configur e the SpeedStr eam® 1020 PCI adapter, or if there is a
problem with the card, run the DOS-based Testing Program to view the computer’s BIOS settings. Boot the computer to a full
DOS environment (not a DOS window) and run the Testing Program, “ACCTEST.EXE”, from the driver floppy disk. If any of the
diagnostic tests fail, reboot your computer and run the diagnostics again to see if the problem persists. If it does, record the
failure indicated and contact Technical Support for assistance.
2
1
r
nty
S
I
O
N
S
I
O
N
T
Y
!
T
Y
!
K
e
e
p
t
h
i
s
e
a
r
y
o
u
r
P
C
t
o
k
n
o
w
w
h
e
r
e
o
f
o
r
s
u
p
p
o
r
t
,
D
S
L
e
d
u
c
a
t
i
o
n
,
a
n
d
n
e
w
p
r
o
d
u
c
t
i
n
f
o
.
0
0
7
-
0
1
0
5
-
0
0
2
o
u
t
n
o
t
i
c
e
i
n
t
h
e
s
o
l
e
a
n
d
a
b
s
o
l
u
t
e
s
e
l
e
c
t
c
o
u
n
t
r
i
e
s
o
n
l
y
.
T
h
e
o
f
f
e
r
i
s
n
s
m
a
y
a
p
p
l
y
.
Hardware installation is complete. See reverse for LED and troubleshooting information.
Page 4

3
4
5 6
Hub/Switch
5
-p
o
r
t
E
th
e
r
n
e
t
H
u
b
P
W
R
C
O
L
7
Hardware installation is complete. See reverse for LED and troubleshooting information.
Page 5

For more information regarding SpeedStream
Efficient Networks, Inc.
A Siemens Company
4849 Alpha Road
Dallas, TX 75244
©2001 Efficient Networks, Inc. All rights reserved. Efficient Networks, its logos, "Live a Broadband Life" and SpeedStream are registered and unregistered trademarks of
Efficient Networks, Inc. Siemens and the Siemens logo are registered trademarks of Siemens AG, Germany. All other brand names and trademarks are held by their
respective companies. Efficient Networks reserves the right to make changes to product specifications at any time without notice.
LED Functions
The following table describes the operation of the SpeedStream®1020 PCI
adapter’s status LED.
Check the following troubleshooting items before contacting Technical Support.
PCI Compatibility
Some computers are not self-configuring and require you to perform some or all of the following
functions. You may need to change the motherboard jumper settings and/or Setup program
configuration. Refer to your computer's manual for configuration procedures specific to your
computer components.
• Make sure your BIOS correctly supports the PCI Local Bus Specification v2.0 or later. Upgrade your
computer BIOS to the latest version.
• Verify that the PCI slot is an enabled bus-master slot and not a slave PCI slot. In some computers, the
PCI slot must be configured to enable bus mastering.
• If resources are not properly assigned between installed car ds, you may be requir ed to disable Plugand-Play in the BIOS Setup program. Refer to your computer manual for instructions.
• Some computers may require you to reserve interr upts and memory addresses for installed ISA car ds
in order to prevent PCI cards from using the same settings.
• Make sure the PCI slot is configured to support INTA.
• Be sure that INTA for the slot is assigned to a free interrupt (IRQ) number.
• Check the PCI parameters in the BIOS setup program for the slot where the SpeedStream
®
PCI adapter
is installed. Be sure the slot is configured for level-triggered inter r upts instead of edge-triggered
interrupts. An example of typical PCI parameters follows:
PCI Slot #: (slot number where the network card is installed)
Master: Enabled
Slave: Enabled
Latency Timer: 40 (range is 20 to 255)
Interrupt Type: Level-Triggered
Interrupt Number: (choose any number the BIOS setup provides that does not conflict with another installed card)
Note: The wording of these parameters varies with dif ferent computers, and not all parameters may be configurable.
Always consult your computer manual for information on changing motherboard jumper settings and BIOS
setup program parameters for use with PCI network cards. If you set a motherboard jumper and modify
the computer BIOS setup, make sure the jumper and BIOS settings match.
COLOR STATUS DESCRIPTION
Amber On Indicates a valid 10Base-TX link
Amber Flashing Indicates 10 Mbps network activity
Green On Indicates a valid 100Base-TX link
Green Flashing Indicates 100 Mbps network activity
Adapter Installation Problems
If your computer cannot find the SpeedStream
not install correctly, check the following:
• Make sure the adapter is securely seated in the PCI slot. Check for any hardware pr oblems, such as
physical damage to the card’s edge connector.
• Try the card in another PCI bus-master slot. If this fails, test with another PCI adapter that is known to
operate correctly.
• Check for resource conflicts in the PCI configuration. (See ‘PCI Compatibility.’)
• Make sure your computer is using the latest BIOS available.
• If there are other network adapters in the computer, they may be causing a conflict.
Remove all other adapters from the computer and test the SpeedStream
• Check for a defective computer or PCI bus by tr ying the adapter in another computer that is known to
operate correctly.
Network Connection Problems
There may be a network connection problem if the LED on the card’s bracket does not light, or if
you cannot access any network resources from the computer. Check the following:
• Be sure you are using Category 5 cable for 100 Mbps connections and that the length of any cable
does not exceed 328 ft (100 meters).
• Inspect all network cables and connections. Make sure the network cable is securely attached to the
card’s connector.
• Make sure the correct network car d driver is installed for your operating system. If necessary,
tr y r einstalling the driver.
• Make sure the computer and other network devices are receiving power. If you suspect a faulty power
outlet, plug another device into it to verify that it is working.
• If the network card’s speed or duplex mode has been configured manually, check that it matches that
of the attached network device por t. It is recommended that you set the car d to auto-negotiation when
installing the network driver.
• The por t on the network device that the car d is attached to may be defective. Tr y using another port
on the device.
• If you cannot access a Windows
configured the service correctly. If you cannot connect to a particular server, be sure that you have
access rights and a valid ID and password.
• If you cannot access the Internet, be sure you have configured your system for TCP/IP.
Technical Support for North America is available 24 hours a day, 7 days a week, by phone, email or online:
Phone: 1-877-823-6722
Email: support@speedstream.com
Online: http://www.support.speedstream.com
Troubleshooting
Page 6

For more information regarding SpeedStream®products visit: www.speedstream.com.
Efficient Networks, Inc.
A Siemens Company
4849 Alpha Road
Dallas, TX 75244
©2001 Efficient Networks, Inc. All rights reserved. Efficient Networks, its logos, "Live a Broadband Life" and SpeedStream are registered and unregistered trademarks of
Efficient Networks, Inc. Siemens and the Siemens logo are registered trademarks of Siemens AG, Germany. All other brand names and trademarks are held by their
respective companies. Efficient Networks reserves the right to make changes to product specifications at any time without notice.
Adapter Installation Problems
If your computer cannot find the SpeedStream®1020 PCI adapter, or if the network driver does
not install correctly, check the following:
• Make sure the adapter is securely seated in the PCI slot. Check for any hardware pr oblems, such as
physical damage to the card’s edge connector.
• Try the card in another PCI bus-master slot. If this fails, test with another PCI adapter that is known to
operate correctly.
• Check for resource conflicts in the PCI configuration. (See ‘PCI Compatibility.’)
• Make sure your computer is using the latest BIOS available.
• If there are other network adapters in the computer, they may be causing a conflict.
Remove all other adapters from the computer and test the SpeedStream
®
PCI adapter separately.
• Check for a defective computer or PCI bus by tr ying the adapter in another computer that is known to
operate correctly.
Network Connection Problems
There may be a network connection problem if the LED on the card’s bracket does not light, or if
you cannot access any network resources from the computer. Check the following:
• Be sure you are using Category 5 cable for 100 Mbps connections and that the length of any cable
does not exceed 328 ft (100 meters).
• Inspect all network cables and connections. Make sure the network cable is securely attached to the
card’s connector.
• Make sure the correct network car d driver is installed for your operating system. If necessary,
tr y r einstalling the driver.
• Make sure the computer and other network devices are receiving power. If you suspect a faulty power
outlet, plug another device into it to verify that it is working.
• If the network card’s speed or duplex mode has been configured manually, check that it matches that
of the attached network device por t. It is recommended that you set the car d to auto-negotiation when
installing the network driver.
• The por t on the network device that the car d is attached to may be defective. Tr y using another port
on the device.
• If you cannot access a Windows
®
or NetWare service on the network, check that you have enabled and
configured the service correctly. If you cannot connect to a particular server, be sure that you have
access rights and a valid ID and password.
• If you cannot access the Internet, be sure you have configured your system for TCP/IP.
Technical Support for North America is available 24 hours a day, 7 days a week, by phone, email or online:
Phone: 1-877-823-6722
Email: support@speedstream.com
Online: http://www.support.speedstream.com
 Loading...