

Page 1
User Manual
Page 2

Contents
Contents
For your safety . . . . . . . . . . . . . . . . . . . . . . . . . . . . . . 4
Notes on the operating instructions . . . . . . . . . . . . . . . . . . . . . . . . . . . . . . . . . . . . . . . 4
Safety precautions . . . . . . . . . . . . . . . . . . . . . . . . . . . . . . . . . . . . . . . . . . . . . . . . . . . . . 5
Trademarks . . . . . . . . . . . . . . . . . . . . . . . . . . . . . . . . . . . . . . . . . . . . . . . . . . . . . . . . . . . 6
Installing the software and device drivers . . . . . . . 7
System requirements . . . . . . . . . . . . . . . . . . . . . . . . . . . . . . . . . . . . . . . . . . . . . . . . . . . 7
Gigaset products . . . . . . . . . . . . . . . . . . . . . . . . . . . . . . . . . . . . . . . . . . . . . . . . . . . 7
Minimum PC requirements . . . . . . . . . . . . . . . . . . . . . . . . . . . . . . . . . . . . . . . . . . . 9
Pack contents . . . . . . . . . . . . . . . . . . . . . . . . . . . . . . . . . . . . . . . . . . . . . . . . . . . . . . . . . 9
Preparing the base station . . . . . . . . . . . . . . . . . . . . . . . . . . . . . . . . . . . . . . . . . . . . . . 10
Installing the Gigaset M34 software . . . . . . . . . . . . . . . . . . . . . . . . . . . . . . . . . . . . . . 11
Starting the Setup Wizard . . . . . . . . . . . . . . . . . . . . . . . . . . . . . . . . . . . . . . . . . . . 11
Installing the software . . . . . . . . . . . . . . . . . . . . . . . . . . . . . . . . . . . . . . . . . . . . . . 12
Installing the device drivers . . . . . . . . . . . . . . . . . . . . . . . . . . . . . . . . . . . . . . . . . . 13
Possible problems during installation . . . . . . . . . . . . . . . . . . . . . . . . . . . . . . . . . . 14
Checking successful installation . . . . . . . . . . . . . . . . . . . . . . . . . . . . . . . . . . . . . . . . . 15
Audio settings . . . . . . . . . . . . . . . . . . . . . . . . . . . . . . . . . . . . . . . . . . . . . . . . . . . . . . . 15
Registering a base station . . . . . . . . . . . . . . . . . . . . . . . . . . . . . . . . . . . . . . . . . . . . . . 16
Status displays for the Gigaset M34 USB . . . . . . . . . . . . . . . . . . . . . . . . . . . . . . . . . . . 17
Operating information . . . . . . . . . . . . . . . . . . . . . . 18
Operation with multiple devices . . . . . . . . . . . . . . . . . . . . . . . . . . . . . . . . . . . . . . . . . 19
Configuring the Gigaset M34 software . . . . . . . . . 20
Checking the connection status . . . . . . . . . . . . . . . . . . . . . . . . . . . . . . . . . . . . . . . . . 20
Configuring the Gigaset M34 software . . . . . . . . . . . . . . . . . . . . . . . . . . . . . . . . . . . . 21
Registering a base station . . . . . . . . . . . . . . . . . . . . . . . . . . . . . . . . . . . . . . . . . . . 21
Connecting the base station . . . . . . . . . . . . . . . . . . . . . . . . . . . . . . . . . . . . . . . . . 21
Changing device names . . . . . . . . . . . . . . . . . . . . . . . . . . . . . . . . . . . . . . . . . . . . . 22
Calling the Gigaset M34 USB . . . . . . . . . . . . . . . . . . . . . . . . . . . . . . . . . . . . . . . . . 22
Deregistering a base station . . . . . . . . . . . . . . . . . . . . . . . . . . . . . . . . . . . . . . . . . 23
Configuring power management . . . . . . . . . . . . . . . . . . . . . . . . . . . . . . . . . . . . . 24
Firmware update . . . . . . . . . . . . . . . . . . . . . . . . . . . . . . . . . . . . . . . . . . . . . . . . . . 24
Operating the Gigaset M34 software . . . . . . . . . . 26
Changing and saving settings . . . . . . . . . . . . . . . . . . . . . . . . . . . . . . . . . . . . . . . . . . . 27
Opening Help . . . . . . . . . . . . . . . . . . . . . . . . . . . . . . . . . . . . . . . . . . . . . . . . . . . . . . . . 27
Closing the program . . . . . . . . . . . . . . . . . . . . . . . . . . . . . . . . . . . . . . . . . . . . . . . . . . 27
2
Page 3

Contents
Glossary . . . . . . . . . . . . . . . . . . . . . . . . . . . . . . . . . . 28
Appendix . . . . . . . . . . . . . . . . . . . . . . . . . . . . . . . . . . 35
Service (Customer Care) . . . . . . . . . . . . . . . . . . . . . . . . . . . . . . . . . . . . . . . . . . . . . . . 35
Guarantee Certificate United Kingdom . . . . . . . . . . . . . . . . . . . . . . . . . . . . . . . . . . . . 36
Guarantee Certificate Ireland . . . . . . . . . . . . . . . . . . . . . . . . . . . . . . . . . . . . . . . . . . . 37
Index . . . . . . . . . . . . . . . . . . . . . . . . . . . . . . . . . . . . . 39
3
Page 4

For your safety
For your safety
ì Before installing the Gigaset M34 USB PC adapter and software, carefully read the
following information:
"Notes on the operating instructions" on page 4
"Safety precautions" on page 5
Notes on the operating instructions
Online Help
u During installation, detailed descriptions appear on the screen.
u There is also an online help for each component of the Gigaset M34 software.
Open the appropriate component and then either click on the Help icon in the tool-
bar or press the F1 key.
Operating instructions
You can also print out all the operating instructions, which can be found in *.pdf format
on the CD-ROM supplied. To read the instructions you will need the Adobe Acrobat
Reader program. You can install this directly from the Gigaset M34 software
Setup Wizard.
ì Read the instructions carefully before using for the first time.
Up to date information
The Gigaset M34 CD-ROM also includes the file readme.txt. This contains further
important information that only became available after the manual had been printed.
ì Read the additional information contained in the file readme.txt carefully.
ì Also note the product information on the Internet at
http://www.siemens.com/gigaset
.
4
Page 5

For your safety
Safety precautions
General safety precautions
u Only give the Gigaset M34 USB to third parties with the installation instructions and
CD-ROM.
u All electrical and electronic products should be disposed of separately from
the municipal waste stream via designated collection facilities appointed by
the government or the local authorities.
This crossed-out wheeled bin symbol on the product means the product is covered
by the European Directive 2002/96/EC.
The correct disposal and separate collection of your old appliance will help prevent
potential negative consequences for the environment and human health. It is a pre-
condition for reuse and recycling of used electrical and electronic equipment.
For more detailed information about disposal of your old appliance, please contact
your city office, waste disposal service or the shop where you purchased the prod-
uct.
u Not all of the functions described in this manual are available in all countries.
Installation information
u In the Windows 2000 and Windows XP operating systems, you must be logged in as
a user with administration rights. Contact your system administrator for details if
necessary.
u Before installing the Gigaset M34 software, read the information under
"System requirements" on page 7 to avoid loss of data.
u During installation, you are prompted to connect the Gigaset M34 USB to a free
USB port on your PC. This starts the Windows operating system's automatic hard-
ware recognition routine and installs the device drivers.
Safety precautions for the Gigaset M34 USB PC adapter
u The operation of medical appliances may be affected.
u Do not operate the Gigaset M34 USB in bathrooms or shower areas. The
Gigaset M34 USB PC adapter is not splash proof.
u Avoid the immediate proximity of heat sources such as radiators and do not expose
the Gigaset M34 USB to direct sunlight.
u Only use the USB extension cable supplied.
u Do not connect or disconnect the Gigaset M34 during a storm. This brings a risk of
electric shock.
u If the Gigaset M34 USB comes into contact with liquid, do not use it.
– Allow the liquid to drain out of the device, and then pat all parts of the device dry.
– Store the Gigaset M34 USB in a warm, dry place for at least 72 hours. In many
cases, you will then be able to use it again.
5
Page 6

For your safety
Wireless transmission between the base station and portable part is based on the
DECT 6.0 Standard. The Gigaset M34 USB PC adapter meets the appropriate European
specifications. Should there nevertheless be any picture and sound interference with
satellite receivers, please consult your retailer to have your satellite receiver equipment
tested for poor shielding.
Trademarks
Windows 2000, Windows XP, Outlook, Windows Media Player and Windows Explorer are
registered trademarks of the Microsoft Corporation.
Acrobat is a registered trademark of Adobe Systems Incorporated.
Yahoo! is a registered trade mark of Yahoo! Inc.
6
Page 7

Installing the software and device drivers
Installing the software and device drivers
i
The Setup Wizard for the Gigaset M34 software guides you through the installation of
all the associated software components. The number and kinds of installation steps
depend on the features of your base station and the devices and functions you want to
use with your base station.
Normally, the following steps are necessary to successfully install the
Gigaset M34 software:
1. Prepare base station for use, see "Preparing the base station" on page 10.
2. Insert Gigaset M34 CD and run the Setup Wizard, see "Installing the Gigaset M34
software" on page 11.
3. Reboot the PC.
4. Connect the Gigaset M34 USB PC adapter to the PC.
5. Install the device drivers for the Gigaset M34 USB PC adapter.
6. Set up further components as required.
After successful installation, you can start the Gigaset M34 software and configure it to
your own requirements.
!
Do not plug in the unit until the software has been successfully
installed and when prompted to by the Setup Wizard.
With the Gigaset S450 Y supplied, Yahoo! and Y! Out are assigned to the
two display keys if you register the Gigaset M34 USB adapter on this base
station.
System requirements
In order to be able to use the full range of functions, the following minimum requirements must be met for installation of the Gigaset M34 USB and software:
Gigaset products
Base station and handset
ì The table below provides information about which functions you can use with your
base station.
7
Page 8

Installing the software and device drivers
Base stations Internet access (IP) Internet telephony
and PC control
Maximum number
of handsets
C340/345 –+6
C350/355 –+6
E450/455 –+6
S440/445 –+6
S450/455 –+6
S450 Y –+6
S645 –+6
SL440 –+6
SL550/555 –+6
CX340/345isdn + + 1+4**
CX100/150isdn +–6
SX100/150isdn +–6
SX203/253isdn +–8
SX205/255isdn +–8
SX303/353isdn +–8
SX440/445isdn + + 1+4**
SX450/455isdn + + 1+4**
SLX740isdn +–8
4170/75isdn*+–8
3070/75isdn*+–8
* For these base stations, you must update the firmware on the Gigaset SX205/255 during installation.
** One Gigaset M34 USB PC adapter and a maximum of 4 handsets can be registered on these base
stations.
u You can also use a type SL1 or S1, SL1 colour, S1 colour, C34, E45, S44, S45, SL55
or SL74 handset with one of the above base stations.
u The base station is ready for use.
For details, refer to the operating instructions for your base station.
Gigaset M34 USB PC adapter
u The Gigaset M34 USB should not be connected to the PC before installation.
8
Page 9

Installing the software and device drivers
Minimum PC requirements
Hardware
u IBM AT-compatible Pentium III with 500 MHz processor speed
u 128 MB RAM main memory
u 20 MB free hard disk memory
u 1 free USB port
u 1CD-ROM drive or 1 DVD drive
Software
u Operating system
Windows 2000 (Service pack 4) or Windows XP.
Have the installation CD for your Windows operating system to hand. During the
installation of the Gigaset M34 software, the Setup Wizard checks the configuration
of your operating system. You may be prompted to install certain additional
Windows components.
u User rights
It is necessary that you are logged in as a user with administration rights. Contact
your system administrator for details if necessary.
Pack contents
u 1 Gigaset S450 Y
u 1 Gigaset M34 USB PC adapter
u 1 USB extension cable
u 1 CD-ROM containing software and comprehensive operating instructions
u 1 set of installation instructions
9
Page 10

Installing the software and device drivers
Preparing the base station
ì Read the operating instructions for your base station.
ì Connect your base station.
– Connect your base station to your phone line or PABX using the telephone cable.
– Connect the base station to the power supply using the mains adapter.
Your base station is now ready for use.
Now that your base station is ready for use, you can make external calls
and also take incoming calls.
It is not necessary to install the Gigaset M34 software to do this.
ì You can check that your base station is working properly by dialling an
i
external telephone number.
ì If you cannot make the call, check your phone line or the settings for
your PABX.
You will find a detailed description in the operating instructions for
your phone line or PABX.
10
Page 11

Installing the software and device drivers
Installing the Gigaset M34 software
i
When the software has been installed successfully please do not
plug in the device until the Setup Wizard prompts you to do so.
ì Read the information in "System requirements" on page 7 and the readme.txt file
before starting to install the Gigaset M34 software. You will find the readme.txt file
in the readme directory on the product CD. It contains current additional informa-
tion on installation and software.
ì Close all the programs running on your PC. This also includes those programs
(e. g. antivirus software), whose activity is only indicated by an icon in the status
area of the taskbar (next to the clock).
Starting the Setup Wizard
ì Insert the Gigaset M34 CD into your PC's CD-ROM drive.
The Setup Wizard for the Gigaset M34 software is started automatically.
If the Setup Wizard for the Gigaset M34 software does not start automatically:
i
ì Open Windows Explorer.
ì Select the CD-ROM drive.
ì Double click start.exe.
The Setup Wizard guides you through the installation.
ì Select the language in which you want to install the Gigaset M34 software.
ì Click on Continue.
The main menu for the installation software is opened.
11
Page 12

Installing the software and device drivers
ì Click on one of the following options if you want to read additional information
about installing the software.
Readme files Up to date additional information about installation
and the software.
Operating instructions The operating instructions for the Gigaset M34 USB
and software. The operating instructions are in PDF
format and can be viewed on your PC or printed out.
To do this, you will need the free Acrobat Reader software. This can be found in the Service & Support area
of the CD-ROM supplied. As well as the operating
instructions in PDF format, the software also provides
an online help, which you can call up directly from
within the program.
Service & Support This area contains Internet links to the web pages
for Siemens Home and Office Communication Devices
GmbH & Co. KG. You can also install the Acrobat
Reader program to view the operating instructions.
Uninstall all components This is used to remove the entire Gigaset M34 soft-
ware, including all components, from your PC.
Or
ì Click on Install software to start the installation of the Gigaset M34 software.
You will find a detailed description of the installation steps in the next section.
Installing the software
Installation involves various steps in which you can select a number of options. After
each step confirm your selection with Next to continue the installation procedure. Use
Back to return to your previous selection.
You will find detailed information on installing, configuring and operating the Yahoo!
Messenger with Voice in the operating instructions for these software packages. You
will find these operating instructions in PDF format in the gigaset-m34-software\man-
uals directory on the CD you received when you bought the M34 USB PC adapter.
When you select the Install software option, the InstallShield Wizard for the Gigaset
M34 software starts up. This installation wizard guides you through the individual steps
of the installation procedure.
ì Click on Continue to start the installation.
The directory in which the software is to be installed is shown.
ì Select the appropriate mode for installing device drivers. We recommend that you
do not change the Simple (Recommended) settings.
ì Click on Continue.
ì Select the folder where the selected software components are to be installed:
– Click Continue to confirm the default installation directory.
12
Page 13
Installing the software and device drivers
Or
– Click Browse to choose your own installation directory.
ì Click on Install.
i
If a dialog box appears during installation informing you about a missing
signature, click Yes to continue the installation.
ì After installation of the software components, click on Finish to confirm completion
of the installation procedure.
You then need to reboot your PC. You can only set up the Gigaset M34 USB
PC adapter after rebooting.
ì Click on Yes to reboot the PC.
Installing the device drivers
After restarting, installation is continued automatically.
You are prompted to connect the Gigaset M34 USB PC adapter to the PC and the driver
software is then installed. Later, you should register the Gigaset M34 USB PC adapter on
your base station and you can then use the full range of functions of the software.
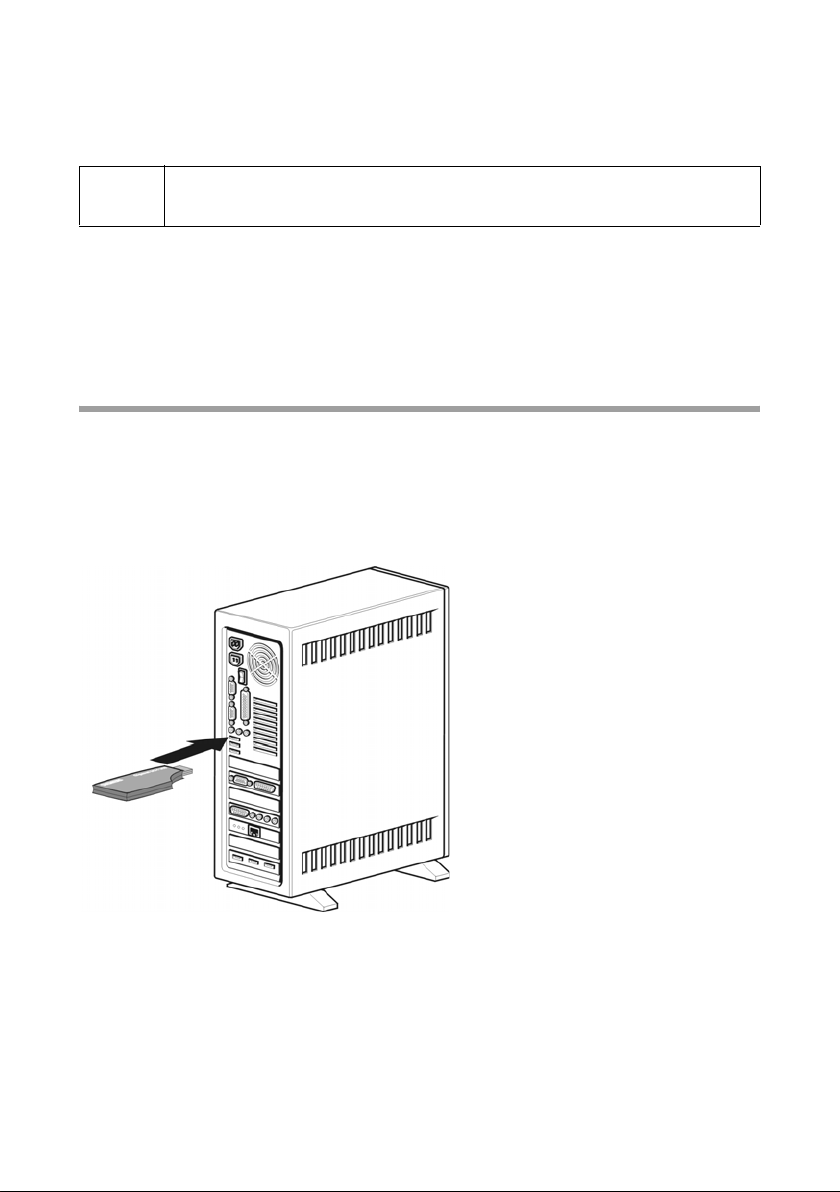
ì Connect the Gigaset M34 USB to a free USB port on your PC.
ì When you connect the Gigaset M34 USB, hardware recognition is started. This fea-
ture monitors the installation of new devic e drivers. Depending on the previous con-
figuration of your PC, it may be necessary to install several drivers for you Gigaset
M34 USB PC adapter. Hardware recognition is started automatically for each driver
installation.
–Follow the hardware recognition instructions.
– On Windows XP, confirm the preset options with Continue and then click on
Finish.
13
Page 14

Installing the software and device drivers
If you cancel hardware recognition, the driver software cannot be correctly
installed.
ì Wait until the hardware recognition procedure has completed installation of the
device drivers and you see a message to that effect. Once this message is displayed,
click on Continue in the Setup Wizard.
ì Click on Finish in the Setup Wizard.
ì Reboot your PC if you are prompted to do so.
ì A message will be displayed, informing you that the standard device settings for
recording and playback have been changed (see also section "Audio settings" on
page 15). Click on OK to complete the installation.
u If you want to use your Gigaset M34 USB PC adapter for Internet
telephony (VoIP), you must install Yahoo! Messenger with Voice on
i
your PC. The software is available on the Internet at
http://messenger.yahoo.com/
Reboot your PC after installation.
Possible problems during installation
On rare occasions it can happen that a program called up by the Gigaset M34 software
Setup Wizard does not respond:
ì Close the Setup Wizard and the program that is not responding and try again.
If the USB driver cannot be found even though it has been set properly:
ì Disconnect the Gigaset M34 USB PC adapter from your PC.
ì Reboot your PC.
ì Reconnect the Gigaset M34 USB to your PC.
ì Restart the Setup Wizard.
14
In some older PC systems, chipsets are fitted, which no longer correspond
to the valid USB standard. This can lead to problems with the USB connec-
!
tion.
Manufacturers of these hardware components normally supply a driver
update. Please contact the manufacturer of your PC.
Page 15

Installing the software and device drivers
Checking successful installation
After rebooting the PC, the following things indicate that the Gigaset M34 USB and software have been successfully installed:
u The Start menu contains three new links:
– Start > Programs > Gigaset DECT > Gigaset M34 Software
– Start > Programs > Gigaset DECT > Gigaset M34 USB – Firmware update
u The following items have been added to the Device Manager in your Windows
operating system (Start > Settings > Control Panel > System > Hardware >
Device Manager):
–Under DECT Devices: Cordless Internet Access
–Under Network Adapters
–Under Audio, Video and Game Controllers: USB audio device
– Under USB Controller: Cordless Device Configuration, Cordless Device Line
Access, Cordless Device Update, Cordless PC Control
u The Software area in the Control Panel of the Windows operating system shows
the names of the installed software components:
– Gigaset M34 Software
– Gigaset M34 USB
u Certain entries are only displayed when a base station is connected.
i
u The drivers may have different names depending on the Windows
operating system you are using and the voice packets installed.
Audio settings
Due to Microsoft Software Regulations the audio device driver USB audio device has
been installed onto your PC as your default device for recording and playback. This is
also necessary because it allows you to listen to music through your handset with
Windows Media Player or make phone calls via the Internet.
For example, if you wish to record or playback sound on your PC (e.g. through your PC's
loudspeaker/microphone or connected headphones) while playing a computer game,
you must change the settings of the device driver.
ì Click on Start > Settings > Control Panel > Sounds and Audio Devices
(Windows 2000) or Sounds and Multimedia (Windows XP), Audio tab.
ì For sound playback and recording, select the default sound card driver of your PC as
the default device instead of the entry USB audio device.
ì Click on OK to accept the setting.
Using PC loudspeaker/headset with your handset
In most Windows applications you can also give the audio device driver specific settings
irrespective of the settings in the Control Panel. This allows you to specify where sound
15
Page 16

Installing the software and device drivers
is recorded and played back (PC or handset) for specific applications.
For example, if you have set your PC's default soundcard driver, you can make a phone
call with your handset over the Internet while listening to music through your PC's loudspeakers at the same time.
Please note: For Internet telephony with Yahoo! Messenger with Voice, the device
driver USB audio device is automatically set (temporarily) as soon as you telephone
with the handset.
Registering a base station
You can register your Gigaset M34 USB on up to 6 base stations. To do this, you enter
the base stations available at the relevant location of the PC in the Gigaset M34 software. The registered base stations are saved in the software and you can then connect
to one of the registered base stations as required.
Requirements:
u There must be a free space in the list under Base stations.
u There must be another free registration location for internal
participants on the base station.
i
u The base station must be in registration mode before commencing
the registration procedure.
u The base station PIN must be entered during registration.
For further information, refer to the operating instructions for the relevant base station.
ì Open the Gigaset M34 software via Start > Programs > Gigaset DECT >
Gigaset M34 Software.
ì In the menu tree, select M34 USB > Configuration.
ì Under Base stations click on one of the <free base> options.
The Register button is activated.
ì Set the base station to registration mode.
– Press and hold the registration key for a few seconds. Some base stations signal
registration mode with an acoustic signal or a flashing LED.
– Refer to the operating instructions for your base station for more details.
ì Click on Register to begin registration.
This opens the Register dialog.
ì Enter the PIN for the base station (factory default "0000") and confirm your entry
with OK.
ì Wait until registration has been completed.
The Register dialog is closed.
Once the connection between your base station and the M34 USB has been estab-
lished, you will see the base station data on your PC. The Name field contains the
name under which the Gigaset M34 USB has been registered on the base station.
16
Page 17

Installing the software and device drivers
You will need this name to establish the connection between the handset and the
M34 USB.
Status displays for the Gigaset M34 USB
LED is constantly illuminated: Base station found; Gigaset M34 USB is ready for use.
LED flashes slowly: Gigaset M34 USB is looking for the base station or no base station
has been registered.
LED flashes quickly: Data connection active between Gigaset M34 USB and base
station.
LED flickers: Gigaset M34 USB is in firmware update mode.
17
Page 18

Operating information
Operating information
Your Gigaset M34 USB PC Adapter opens up a wide range of possibilities when used in
conjunction with your Gigaset base station and the Gigaset M34 software.
The Gigaset M34 USB is a PC adapter, which allows wireless communication between
your Gigaset base station and your PC. For example, you can transfer your PC directories
to the handset, make calls over the Internet or operate the handset remotely from the
PC.
The functions available depend on your Gigaset base station, the handset you are using
and the software components installed. For details of which base stations can use a particular software component, refer to the description of the relevant component.
You can use the Gigaset M34 software to configure the connection between your base
station and your PC. The software does not have to be started to use the basic functions
of your Gigaset M34 USB PC adapter; you only need the software for special functions
such as transferring directories.
18
Page 19

Operating information
Operation with multiple devices
ì Refer to the table below for details of which devices you can connect to one another.
Base stations Internet access (IP) Internet telephony
and PC control
C340/345 –+6
C350/355 –+6
E450/455 –+6
S440/445 –+6
S450/455 –+6
S450 Y –+6
S645 –+6
SL440 –+6
SL550/555 –+6
CX340/345isdn + + 1+4**
CX100/150isdn +–6
SX100/150isdn +–6
SX203/253isdn +–8
SX205/255isdn +–8
SX303/353isdn +–8
SX440/445isdn + + 1+4**
SX450/455isdn + + 1+4**
SLX740isdn +–8
4170/75isdn*+–8
3070/75isdn*+–8
Maximum number
of handsets
* For these base stations, you must carry out a firmware update to Gigaset SX205/255 during the
installation.
** One Gigaset M34 USB PC adapter and a maximum of 4 handsets can be registered on these base
stations.
19
Page 20

Configuring the Gigaset M34 software
Configuring the Gigaset M34 software
Wi th the Gigas et M34 USB, yo u can s et up your P C fo r operat ion on up to 6 b ase stat ions.
Particularly when the location of the PC or laptop changes often, this provides the
advantage that you only need to enter the available base stations once in the configuration to be able to establish a connection from those locations at any time. However,
you should note that a simultaneous connection to multiple base stations is not possible.
Use the M34 USB option in the menu tree to open up the configuration of the Gigaset
M34 software. The following configuration dialogs are available:
Menu tree Brief description
M34 USB
Status Display connected base station and quality of connec-
tion
Configuration Register and configure Gigaset M34 USB and enter avail-
able base stations
Firmware update Update device software for your Gigaset M34 USB
Checking the connection status
ì Open the Gigaset M34 software and select the M34 USB > Status option in the
menu tree.
The working area displays up to date information about the connection to the base
station:
Connected base
If a connection already exists, the name of the base station to which your PC is con-
nected via the Gigaset M34 USB is shown.
Field strength
The signal strength of the wireless connection is indicated in the form of a bar.
Connection status
The wireless connection can have the following operating statuses:
– Initialise
Connecting; searching for an available base station.
– No connection
No connection to base station or connection broken.
– Active
Your PC is connected to the base station displayed.
20
Page 21

Configuring the Gigaset M34 software
Configuring the Gigaset M34 software
You can make various settings in the Gigaset M34 software: change the names of your
devices, register or deregister base stations, connect devices to one another, control the
power management feature and update the firmware if necessary
Registering a base station
ì Open the Gigaset M34 software and select the M34 USB > Configuration option in
the menu tree.
ì Under Base stations click on one of the <free base> options.
The Register button is activated.
ì Set the base station to registration mode.
– Press and hold the registration key for a few seconds. Some base stations signal
registration mode with an acoustic signal or a flashing LED.
– Refer to the operating instructions for your base station for more details.
ì Click on Register to begin registration.
This opens the Register dialog.
ì Enter the PIN for the base station (factory default "0000") and confirm your entry
with OK.
ì Wait until registration has been completed.
The Register dialog is closed.
ì For further information refer to "Registering a base station" on page 16.
Connecting the base station
When you register a base station, it is connected immediately. If several base stations
are registered, you can choose which one to connect to. The base stations that are not
connected do not need to be deregistered. This allows you to switch between different
base stations without having to set them to registration mode again.
ì Open the Gigaset M34 software and select the M34 USB > Configuration option in
the menu tree.
ì Under Base stations click on one of the base stations that is registered but not con-
nected.
The Connect button is activated.
ì Click on the base station you want to connect.
ì Click on Connect.
21
Page 22

Configuring the Gigaset M34 software
Changing device names
When connected to a base station, your PC is uniquely identifiable by its device name.
You can change this device name as required.
ì Open the Gigaset M34 software and select the M34 USB > Configuration option in
the menu tree.
The working area shows the current device name of the Gigaset M34 USB.
ì Enter the desired device name under Identification > Name. The maximum length
of the device name is 10 characters.
ì Confirm your entry by pressing the return key (Return, Enter).
The new device name is sent to the connected base station.
If you also want to change the device name of your PC for connections to
i
another registered base station, first of all connect to the desired base
station and then repeat this procedure.
Calling the Gigaset M34 USB
A connection between your handset and the Gigaset M34 USB allows you to access the
PC through your handset. The requirement for this connection is that your handset is
registered on the same base station as the Gigaset M34 USB. To create the connection
between your handset and the Gigaset M34 USB, make a free internal call from the
handset to the Gigaset M34 USB.
ì Press the INT key on your handset.
ì Choose the Gigaset M34 USB as the internal party. The internal name under which
it is registered on the base station can be seen in the Gigaset M34 software under
M34 USB > Configuration > Name.
ì Press the Talk or Handsfree key on the handset to make the internal connection.
22
!
Note that your handset will be blocked to other calls for the duration of
the internal connection.
Page 23

Configuring the Gigaset M34 software
When the connection is no longer required:
ì Break the connection by pressing the End call key on your handset.
Deregistering a base station
For operation with the Gigaset M34 USB, a maximum of 6 base stations can be registered. If all spaces on the list are occupied, you must first deregister a base station
before you can register another base station.
A base station can only be deregistered if the Gigaset M34 USB is connected to it.
!
If there is no connection to this base station or the signal strength of the
connection is too low, the base station is only deregistered in the Gigaset
M34 software.
In this case, your PC must also be deregistered as an internal device in the
base station menu.
ì Open the Gigaset M34 software and select the M34 USB > Configuration option in
the menu tree.
The working area shows a list of the base stations already registered.
ì Under Base stations, click on the registered and connected base station.
The De-register button is activated.
ì Click on the De-register button to deregister the selected base station.
The space in the list is released. The name of the base station is replaced by the entry
<free base>.
23
Page 24

Configuring the Gigaset M34 software
Configuring power management
You do not have to do without the Gigaset M34 USB functions, even if your PC is in
standby mode. You can configure the Gigaset M34 software so that your PC is automatically activated when an internal call is received.
ì Open the Gigaset M34 software and select the M34 USB > Configuration option in
the menu tree.
The options for PC activation are shown in the working area.
ì Under Wake-up, choose whether your PC is to be automatically activated for an
internal call.
u We recommend that you activate the Enable wake-up with internal
call option if you want to use your Gigaset M34 USB for Internet
telephony.
i
Firmware update
The firmware is the device software stored in your Gigaset M34 USB. If your Gigaset
M34 USB no longer functions correctly or if you want to operate it with more recent
software, you can update the firmware. To do this, first check which firmware version is
currently being used. Then either download the most up to date version of the firmware
from the Internet or use the firmware on the CD.
u When the Gigaset M34 USB PC adapter is operating together with a
base station of type Gigaset S450 Y, the PC is activated as soon as you
press a display key on the S45 handset, on which there is an M34 function.
Checking the firmware version
ì Open the Gigaset M34 software and select the M34 USB > Configuration option in
the menu tree.
The version numbers of the installed hardware and software for your Gigaset
M34 USB are shown in the working area.
ì Compare the version numbers shown with the information you have received with
your new firmware.
u Note that a firmware update does not eliminate any hardware faults.
!
24
u Only update the firmware if
– your devices are not working properly or
– if the version number of your new firmware is higher.
Page 25

Configuring the Gigaset M34 software
Updating firmware
ì Close all running applications except the Gigaset M34 software.
ì Make sure that your Gigaset M34 USB PC adapter is directly connected to the PC.
ì Click on the Firmware update option in the menu tree. The button to start the
firmware update is shown in the working area.
ì Click on Start firmware update.
The Gigaset M34 software is closed. The Wizard for downloading new firmware
program is opened.
ì Click on Continue.
An Explorer window is opened.
ì Open the directory containing the current firmware (CD-ROM or firmware down-
loaded from the Internet, which must be unpacked).
ì Select the setup file (*.dat) for the firmware update.
ì Click on Open.
The version of the selected firmware is compared with the current version.
ì Click on Continue.
The firmware for your Gigaset M34 USB is updated.
The update can take up to several minutes.
!
During the update, you may not start any other PC applications.
You may not cancel the firmware update.
ì After the firmware update, a message indicates whether the update was successful.
ì Click on Finish to close the Wizard for downloading new firmware program.
ì After completing the firmware update, reboot your PC if you are prompted to do so.
25
Page 26

Operating the Gigaset M34 software
Operating the Gigaset M34 software
When started for the first time, the Gigaset M34 software is opened with the preset
view. This view is divided into the following sections:
Gigaset M34 Software
File Edit entry Options Help
M34 USB
-- Status
-- Configuration
--
Firmware update
Menu tree Working area Menu bar and toolbar
u The menu tree shows all software components that have been installed with the
Gigaset M34 software. This is where you can select the component you want to use.
The components are sorted alphabetically in the menu tree. If you install additional
components, the sorting of the entries therefore changes.
u The working area shows the configuration dialog for the selected component.
This is where you configure the components and enter your data.
u As well as the Help for the Gigaset M34 software, the menu bar and the toolbar
contain all commands available for the relevant components.
26
Page 27

Operating the Gigaset M34 software
Changing and saving settings
Settings that you change in the Gigaset M34 software become effective immediately
when you exit the relevant option box.
Opening Help
The Gigaset M34 software provides you with various forms of help:
u During installation, detailed descriptions appear on the screen.
u There is also an online help for each component of the Gigaset M34 software.
Open the appropriate component and then either click on the Help icon in the tool-
bar or press the F1 key.
u You can also print out all the operating instructions, which can be found in *.pdf for-
mat on the CD-ROM supplied. To read the instructions, you will need the Adobe
Acrobat Reader program. This can be installed directly from the Setup Wizard for the
Gigaset M34 software.
u The Gigaset M34 CD-ROM also includes the file readme.txt. This contains additional
important information that only became available after the manual was completed.
Closing the program
ì Select File > Exit in the menu bar.
The Gigaset M34 software is closed and all entries are saved. Manual saving is not
necessary.
27
Page 28

Glossary
Glossary
A
Access code
Can be set in the base station as the access code for all outgoing calls. This is necessary,
for example, on a PABX that expects 0 or 1 for opening an outside line.
ACN International (trunk prefix)
Can be preset in the base station as the access code for all calls abroad (international)
or other local networks (national).
Answering machine (AM)
An answering machine accepts calls and records voice messages. There are various
designs of answering machine: base stations can be equipped with an internal answering machine function. Analogue answering machines may be connected to a base station. Some network provider offer an answering machine function on the public telephone network.
Authorisation
Internal devices can be blocked in the base station for certain types of connection. From
certain devices, e. g. devices only approved for internal calls, no connections can be
made with external phone numbers. Calling an emergency number is always possible.
B
B-channel
Use channel of an ISDN line with a transmission speed of 64 kbit/s. There are normally
two B-channels on an ISDN line. This allows two calls to be made via the public telephone network at the same time. For dial-up connections, both B-channels can be bundled to increase the transmission speed.
Block dialling
You first of all enter the complete number and then correct it as necessary. Then lift the
receiver or press the call key to dial the number.
Bluetooth
New technology for wireless transmission of data. Bluetooth permits wireless transmission of voice and multi-media data over a range of a few meters. The range of the connection depending on the technical features of the connected device. Unlike with infrared transmission, Bluetooth devices do not need to be in line of sight.
28
Page 29

Glossary
C
Callback when the call is not answered
If a user does not respond when called, a caller can arrange an automatic callback. As
soon as the destination phone has completed a call and is free again the caller is rung
back. This service must be supported by the exchange. The callback request is automatically cancelled after about 2 hours (depending on the network provider).
Callback when the number is busy
If a caller hears the busy tone, he or she can activate the callback function. As soon as
the connection is free the caller is rung back. As soon as the caller lifts his receiver the
connection is made automatically.
Call Forwarding, CF
Automatic redirecting of a call to a different telephone number. A separate call forwarding number can be set up for each MSN. Call forwarding can be triggered in the network
provider's exchange or in the base station.
There are three kinds of call forwarding:
CFU, Call Forwarding Unconditional
CFB, Call Forwarding Busy
CFNR, Call Forwarding No Reply
Call Waiting (CW)
Feature provided by a network operator. An acoustic signal during a call indicates that
another caller is waiting. In addition, ISDN phones indicate this with a displayed message. You can then decide whether to accept or reject the second call.
Calls list
The Calls list stores all the incoming and outgoing calls for the base station. A Calls list
filter differentiated the call types (incoming, outgoing, missed). The list stores the
number called, date and time of the call and, in some cases, the duration of the call.
CAPI (Common ISDN Application Programming Interface)
Vendor-independent PC device driver for ISDN connections. A CAPI driver enables a PC
to use an ISDN connection with fax and telephone software.
CF (Call Forwarding)
See "Call Forwarding"
CLIP (Calling Line Identification Presentation)
This permits transfer of your personal phone number. The person you are calling will see
your telephone number.
CLIR (Calling Line Identification Restriction)
This blocks transfer of your personal phone number. The person you are calling will not
see your telephone number.
29
Page 30

Glossary
Comfort handset
Handset with special features, e. g. a backlit graphic display, a larger directory capacity
or the option of downloading ringtones.
CW (Call Waiting)
See "Call Waiting"
D
DECT (Digital Enhanced Cordless Telecommunication)
Standard for wireless telecommunications enabling the exchange of voice and multimedia data between a base station and up to 8 end devices. DECT is now accepted as
a standard in more than 70 countries. In conjunction with the GAP Standard, this allows
devices from various vendors to be combined.
Dialler
Originally programs enabling a PC to access telephone connections (e. g. the dialler in
the Windows operating systems). The term dialler is now used for programs that set up
connections independently and unnoticed to preset special numbers. This normally
leads to very high connection charges. Diallers can end up on a PC during an Internet
download and then install themselves unnoticed. To protect against diallers, there are
programs e. g. the dialler blocker, which a PC can use to control the connections made
and to allow only particular connections.
Dial-up connections (remote data transfer)
A term for transmitting digital data over the telephone network. Well-know dial-up connections are fax and Internet connections.
Dial-up network
Windows component for remote data transfer that connects a PC via a telephone line
(analogue or ISDN) with an external network, e. g. the Internet.
E
Enquiry call
You are making a call. An enquiry allows you to temporarily interrupt the call to connect
to a second external or internal party. If you terminate the connection to this user immediately, then this was an enquiry call. If you switch to and fro between the first and second user, it is called toggling.
Exchange
Node in a public telephone network via which external connections are set up and redirected. A distinction is made between e. g. local exchanges and long-distance
exchanges.
External call forwarding
Call forwarding is set to the exchange. The second B-channel is not used for external call
forwarding. The network provider may charge an additional fee.
30
Page 31

Glossary
F
Firmware
Device operating system. Comparable with the BIOS of a PC, it stores all the basic information necessary for the functioning of a device. To correct errors or update the device
software, a new version of the firmware can be loaded into the device's memory
(firmware update).
G
GAP (Generic Access Profile)
Standard enabling the combined use of DECT products from different vendors.
Group call
Group of internal devices that have been assigned the same Receive MSN. All the
devices in the call group react to an incoming call on that MSN. When one device takes
the call, the others return to the idle state.
GSM (Global System for Mobile Communications)
Originally, European standard for mobile networks. GSM can now be described as a
worldwide standard. In the USA and Japan national standards are now more frequently
supported than in the past.
H
Handset
General term for a cordless telephone that complies with international standards DECT
and GAP.
Headset
Combination of microphone and headphone. A headset makes handsfree calls more
comfortable. There are headsets which are connected by a cable to the handset and
wireless headsets that can be registered to a base station via Bluetooth.
Hold
Interrupts and re-instates an existing connection. In particular, it permits enquiry calls
and toggling between calls.
I
Internal call forwarding
Call forwarding is set to the base station. The second B-channel is used for forwarding
the call. Both B-channels are busy during an internally redirected call. If a B-channel is
already busy before the call is redirected, internal call forwarding cannot be activated.
Internal calls
Free calls between devices connected to the base station.
31
Page 32

Glossary
Internal ringer
Special ring tone on PABXs to distinguish between internal and external calls.
ISDN (Integrated Services Digital Network)
All data (including voice) is sent digitally with ISDN. The network operator normally provides at least two B channels per ISDN line. An active connection can be set up for each
B channel allowing e. g. simultaneous surfing and calling.
K
Keypad
Keypad supports special function keys such as the star (*) and hash (#). This allows you
to send control signals during a call, so that you can use particular features of your ISDN
network.
M
MSN (Multiple Subscriber Number)
Multiple subscriber number. Multiple subscriber numbers are your own telephone numbers assigned to you by your network provider when your ISDN line was set up. Up to
ten MSNs can be assigned to one ISDN connection.
Music on hold
Playing of music or a service announcement. With the enquiry call, toggling and redirect
features, the call is held in the telephone exchange or the base station. Music can be
played while the caller is on hold.
N
NTBA (Network Terminator Basic Access)
Network terminator device. The public ISDN network is terminated with an NTBA. ISDN
end devices and PABXs are connected to the NTBA.
P
PDA (Personal Digital Assistant)
Also known as hand-held PC. Mobile computer in wallet format offering not only organiser functions but also communication via telephone, email, Bluetooth etc.
PIN (Personal Identification Number)
Protects against unauthorised use, e.g., system PIN, answering machine PIN, headset
PIN. When accessing a protected area, e. g. device configuration, when PIN protection
is activated a particular combination of numbers or characters has to be entered.
32
Page 33

Glossary
R
Receive MSN
MSN assignment for incoming calls. A call for a particular MSN is sent to all internal
devices that have been assigned this MSN as their Receive MSN.
Reject
An incoming call is rejected on an internal device. If several devices have the same
Receive MSN, these will continue to ring until the call has been rejected on all the
devices in that call group or it has been taken on one of the devices.
Reject all
Extended call rejection. When an incoming call is rejected on any device, that call is
rejected for all devices in the same call group. The caller continues to hear the ringing
tone but the devices themselves no longer ring.
Remote check
Also remote access. Operating the answering machine from any external telephone
number. After entering a PIN, messages can be played back and deleted or the answering machine settings changed.
Repeater
A repeater increases the range of a handset connected to a base station. The device
receives the radio signal from the base station and broadcasts it further.
Ring delay
For each internal party, you can specify how many rings take place before this party
hears the ring. This can also be set for each MSN phone number.
S
Send MSN
MSN assignment for outgoing calls. A particular MSN is assigned to an internal device
as the Send MSN via which all the calls are made. A device can have only one Send MSN.
However, the same MSN can be used as the Send MSN for several devices.
Set
An outline line is reserved when you pick up the telephone receiver or press the corresponding key on your handset (call key).
Streaming
Streaming refers to the real time transfer of multimedia data via a network connection.
The data is not stored in the device used to play it but is downloaded at the time of playing. This allows real time transfer, for example for the reception of Internet radio.
Streaming requires a continuous data flow; the server on which the files are located
must continuously send the data to the client.
33
Page 34

Glossary
T
Tog gli ng
Toggling allows you to switch between two external callers without allowing the waiting caller to listen in.
V
VoIP (Voice over Internet Protocol)
Telephone calls are no longer placed and transmitted over the telephone network but
over the Internet (or other IP networks).
34
Page 35

Appendix
Appendix
Service (Customer Care)
We offer you fast support tailored to your specific needs!
u Our Online Support on the Internet can be contacted any time from anywhere:
www.siemens.com/gigasetcustomercare
It will give you 24/7 support for all our products. It also provides interactive trouble-
shooting, a list of FAQs and answers plus operating instructions and current soft-
ware updates for you to download.
u Personal advice on our range of products is available on our Premium-Hotline:
United Kingdom 0 90 69 50 04 30
You can talk to qualified Siemens technicians who will guide you expertly through
product information and installation.
u For fast and dependable assistance with any repairs or guarantee/warranty claims,
contact our Service Centres in:
Ireland 18 50 77 72 77
United Kingdom 0845 367 0812
Please have your proof of purchase ready when calling.
Replacement or repair services are not offered in countries where our product is not sold
by authorised dealers.
Please address any questions about the DSL or cable connection to your network provider.
Authorisation
This device is intended for use within the European Economic Area and Switzerland.
If used in other countries, it must first be approved nationally in the country in question.
Country-specific requirements have been taken into consideration.
We, Siemens Home and Office Communication Devices GmbH & Co. KG, declare that
this device meets the essential requirements and other relevant regulations laid down
in Directive 1999/5/EC.
A copy of the 1999/5/EC Declaration of Conformity is available at this Internet address:
http://www.siemens.com/gigasetdocs
.
35
Page 36

Appendix
Guarantee Certificate United Kingdom
Without prejudice to any claim the user (customer) may have in relation to the dealer or
retailer, the customer shall be granted a manufacturer's Guarantee under the conditions
set out below:
u In the case of new devices and their components exhibiting defects resulting from
manufacturing and/or material faults within 24 months of purchase, Siemens shall,
at its own option and free of charge, either replace the device with another device
reflecting the current state of the art, or repair the said device. In respect of parts
subject to wear and tear (including but not limited to, batteries, keypads, casing),
this warranty shall be valid for six months from the date of purchase.
u This Guarantee shall be invalid if the device defect is attributable to improper treat-
ment and/or failure to comply with information contained in the user manuals.
u This Guarantee shall not apply to or extend to services performed by the authorised
dealer or the customer themselves (e. g. installation, configuration, software down-
loads). User manuals and any software supplied on a separate data medium shall be
excluded from the Guarantee.
u The purchase receipt, together with the date of purchase, shall be required as evi-
dence for invoking the Guarantee. Claims under the Guarantee must be submitted
within two months of the Guarantee default becoming evident.
u Ownership of devices or components replaced by and returned to Siemens shall vest
in Siemens.
u This Guarantee shall apply to new devices purchased in the European Union. For
Products sold in the United Kingdom the Guarantee is issued by: Siemens Home and
Office Communication Devices GmbH & Co. KG, Schlavenhorst 66, D-46395
Bocholt, Germany.
u Any other claims resulting out of or in connection with the device shall be excluded
from this Guarantee. Nothing in this Guarantee shall attempt to limit or exclude a
Customers Statutory Rights, nor the manufacturer's liability for death or personal
injury resulting from its negligence.
u The duration of the Guarantee shall not be extended by services rendered under the
terms of the Guarantee.
u Insofar as no Guarantee default exists, Siemens reserves the right to charge the cus-
tomer for replacement or repair.
u The above provisions does not imply a change in the burden of proof to the detri-
ment of the customer.
To invoke this Guarantee, please contact the Siemens telephone service. The relevant
number is to be found in the accompanying user guide.
36
Page 37

Appendix
Guarantee Certificate Ireland
Without prejudice to any claim the user (customer) may have in relation to the dealer or
retailer, the customer shall be granted a manufacturer’s Guarantee under the conditions
set out below:
u In the case of new devices and their components exhibiting defects resulting from
manufacturing and/or material faults within 24 months of purchase, Siemens shall,
at its own option and free of charge, either replace the device with another device
reflecting the current state of the art, or repair the said device. In respect of parts
subject to wear and tear (including but not limited to, batteries, keypads, casing),
this warranty shall be valid for six months from the date of purchase.
u This Guarantee shall be invalid if the device defect is attributable to improper care or
use and/or failure to comply with information contained in the user manuals. In par-
ticular claims under the Guarantee cannot be made if:
– The device is opened (this is classed as third party intervention)
– Repairs or other work done by persons not authorised by Siemens.
– Components on the printed circuit board are manipulated
– The software is manipulated
– Defects or damage caused by dropping, breaking, lightning or ingress of mois-
ture. This also applies if defects or damage was caused by mechanical, chemical,
radio interference or thermal factors (e.g.: microwave, sauna etc.)
– Devices fitted with accessories not authorised by Siemens
u This Guarantee shall not apply to or extend to services performed by the authorised
dealer or the customer themselves (e.g. installation, configuration, software down-
loads). User manuals and any software supplied on a separate data medium shall be
excluded from the Guarantee.
u The purchase receipt, together with the date of purchase, shall be required as evi-
dence for invoking the Guarantee. Claims under the Guarantee must be submitted
within two months of the Guarantee default becoming evident.
u Ownership of devices or components replaced by and returned to Siemens shall vest
in Siemens.
u This Guarantee shall apply to new devices purchased in the European Union.
For Products sold in the Republic of Ireland the Guarantee is issued by
Siemens Home and Office Communication Devices GmbH & Co. KG,
Schlavenhorst 66, D-46395 Bocholt, Germany.
u Any other claims resulting out of or in connection with the device shall be excluded
from this Guarantee. Nothing in this Guarantee shall attempt to limit or exclude a
Customers Statutory Rights, nor the manufacturer’s liability for death or personal
injury resulting from its negligence.
u The duration of the Guarantee shall not be extended by services rendered under the
terms of the Guarantee.
u Insofar as no Guarantee default exists, Siemens reserves the right to charge the
customer for replacement or repair.
37
Page 38

Appendix
u The above provisions does not imply a change in the burden of proof to the detri-
ment of the customer.
To invoke this Guarantee, please contact the Siemens helpdesk on 1850 777 277.
This number is also to be found in the accompanying user guide.
38
Page 39

Index
Index
A
Access code. . . . . . . . . . . . . . . . . . . . 28
ACN . . . . . . . . . . . . . . . . . . . . . . . . . . 28
Answering machine (AM) . . . . . . . . . 28
Appendix
Audio settings . . . . . . . . . . . . . . . . . . 15
Authorisation . . . . . . . . . . . . . . . . . . 28
. . . . . . . . . . . . . . . . . . . . . . 35
B
Base station
prepare for use. . . . . . . . . . . . . . . . 10
preparing for installation . . . . . . . . 10
B-channel
Block dialling . . . . . . . . . . . . . . . . . . . 28
Bluetooth
. . . . . . . . . . . . . . . . . . . . . 28
. . . . . . . . . . . . . . . . . . . . . 28
C
Call forwarding
external . . . . . . . . . . . . . . . . . . . . . 30
internal
Call forwarding CF . . . . . . . . . . . . . . . 29
Call Gigaset M34 USB . . . . . . . . . . . . 22
Call waiting
Callback when the call is not
Callback when the number is busy
Calling up Help . . . . . . . . . . . . . . . . . 27
Calls list . . . . . . . . . . . . . . . . . . . . . . . 29
CAPI
CF (Call Forwarding) . . . . . . . . . . . . . 29
Change device names . . . . . . . . . . . . 22
Check connection status
CLIP . . . . . . . . . . . . . . . . . . . . . . . . . . 29
CLIR. . . . . . . . . . . . . . . . . . . . . . . . . . 29
Close
Close software. . . . . . . . . . . . . . . . . . 27
Comfort handset . . . . . . . . . . . . . . . . 30
Configuration
call Gigaset M34 USB . . . . . . . . . . . 22
change device names . . . . . . . . . . . 22
check connection status
configure power management . . . . 24
connect base station . . . . . . . . . . . 21
. . . . . . . . . . . . . . . . . . . . . 31
. . . . . . . . . . . . . . . . . . . . 29
answered . . . . . . . . . . . . . . . . . . 29
. . . 29
. . . . . . . . . . . . . . . . . . . . . . . . . 29
. . . . . . . . . . 20
. . . . . . . . . . . . . . . . . . . . . . . . . 27
. . . . . . . . . . . . . . . 20, 21
. . . . . . . . . 20
deregister base station . . . . . . . . . . 23
register base station . . . . . . . . . 16, 21
update firmware
Configure power management. . . . . . 24
Configuring the Gigaset M34
software
Connect base station . . . . . . . . . . . . . 21
Control Panel
software
Customer Care . . . . . . . . . . . . . . . . . . 35
CW (Call Waiting) . . . . . . . . . . . . . . . . 30
. . . . . . . . . . . . . . . . . . . . . 15
. . . . . . . . . . . . . . . 24
. . . . . . . . . . . . . . . . 20, 21
D
DECT . . . . . . . . . . . . . . . . . . . . . . . . . 30
Deregister base station. . . . . . . . . . . . 23
Device drivers
Device Manager . . . . . . . . . . . . . . . . . 15
Dialler . . . . . . . . . . . . . . . . . . . . . . . . 30
Dial-up connections
Dial-up network . . . . . . . . . . . . . . . . . 30
. . . . . . . . . . . . . . . . . . . . 7
. . . . . . . . . . . . . . 30
E
Enquiry call . . . . . . . . . . . . . . . . . . . . 30
Exchange
. . . . . . . . . . . . . . . . . . . . . . 30
F
Firmware . . . . . . . . . . . . . . . . . . . . . . 31
For your safety . . . . . . . . . . . . . . . . . . . 4
G
GAP . . . . . . . . . . . . . . . . . . . . . . . . . . 31
Gigaset M34 software
calling up Help . . . . . . . . . . . . . . . . 27
. . . . . . . . . . . . . . . . . . . . . . . . 27
close
Group call . . . . . . . . . . . . . . . . . . . . . 31
GSM. . . . . . . . . . . . . . . . . . . . . . . . . . 31
Guarantee Certificate
. . . . . . . . . . . . . 36
H
Handset . . . . . . . . . . . . . . . . . . . . . . . 31
Headset . . . . . . . . . . . . . . . . . . . . . . . 31
. . . . . . . . . . . . . . . . . . . . . . . . . . 31
Hold
39
Page 40

Index
I
Install software and device drivers. . . . 7
Installation . . . . . . . . . . . . . . . . . . . . . 7
base station
check installation success. . . . . . . . 15
device drivers. . . . . . . . . . . . . . . . . . 7
possible errors
sequence . . . . . . . . . . . . . . . . . . . . . 7
software. . . . . . . . . . . . . . . . . . . . . . 7
start Setup Wizard
update firmware . . . . . . . . . . . . . . 24
Installing the Gigaset M34 software. . 11
Installing the software
Internal calls . . . . . . . . . . . . . . . . . . . 31
Internal ringer . . . . . . . . . . . . . . . . . . 32
. . . . . . . . . . . . . . . . . . . . . . . . . 32
ISDN
. . . . . . . . . . . . . . . . . . 10
. . . . . . . . . . . . . . . . 14
. . . . . . . . . . . . . 11
. . . . . . . . . . . . 12
K
Keypad . . . . . . . . . . . . . . . . . . . . . . . 32
M
MSN . . . . . . . . . . . . . . . . . . . . . . . . . 32
Music on hold . . . . . . . . . . . . . . . . . . 32
N
Notes on the operating instructions. . . 4
. . . . . . . . . . . . . . . . . . . . . . . . . 32
NTBA
O
Online help . . . . . . . . . . . . . . . . . . . . . 4
Operating information. . . . . . . . . . . . 18
Operating instructions
online help. . . . . . . . . . . . . . . . . . . . 4
up to date information . . . . . . . . . . . 4
Operating software
changing and saving settings
Operating the Gigaset M34 software . 26
Operation with multiple devices
. . . . . . . . . . . . . 4
. . . . . 27
. . . . 19
P
PDA . . . . . . . . . . . . . . . . . . . . . . . . . . 32
PIN . . . . . . . . . . . . . . . . . . . . . . . . . . 32
Prepare for use
. . . . . . . . . . . . . . . . . 10
R
Readme file . . . . . . . . . . . . . . . . . . 4, 27
Receive MSN . . . . . . . . . . . . . . . . . . . 33
Register base station
Reject. . . . . . . . . . . . . . . . . . . . . . . . . 33
Reject all . . . . . . . . . . . . . . . . . . . . . . 33
Remote check
Repeater . . . . . . . . . . . . . . . . . . . . . . 33
Ring delay . . . . . . . . . . . . . . . . . . . . . 33
. . . . . . . . . . 16, 21
. . . . . . . . . . . . . . . . . . . 33
S
Safety precautions . . . . . . . . . . . . . . . . 5
general . . . . . . . . . . . . . . . . . . . . . . . 5
installation . . . . . . . . . . . . . . . . . . . . 5
Send MSN
Service (Customer Care). . . . . . . . . . . 35
Set . . . . . . . . . . . . . . . . . . . . . . . . . . . 33
Settings
changing
saving
Start menu . . . . . . . . . . . . . . . . . . . . . 15
Start Setup Wizard . . . . . . . . . . . . . . . 11
Status displays for the
Streaming . . . . . . . . . . . . . . . . . . . . . 33
System requirements
Gigaset products. . . . . . . . . . . . . . . . 7
operating system . . . . . . . . . . . . . . . 9
PC
user rights . . . . . . . . . . . . . . . . . . . . 9
. . . . . . . . . . . . . . . . . . . . . 33
. . . . . . . . . . . . . . . . . . . . 27
. . . . . . . . . . . . . . . . . . . . . . . 27
Gigaset M34 USB
. . . . . . . . . . . . . 17
. . . . . . . . . . . . . . 7
. . . . . . . . . . . . . . . . . . . . . . . . . . . 9
T
Tog glin g. . . . . . . . . . . . . . . . . . . . . . . 34
Tra demarks
. . . . . . . . . . . . . . . . . . . . . 6
U
Up to date information . . . . . . . . . . . . . 4
Update firmware . . . . . . . . . . . . . . . . 24
User interface
working area
. . . . . . . . . . . . . . . . . . 26
W
Waiting melody (Music on hold). . . . . 32
40
Page 41

Issued by
Siemens Home and Office Communication Devices GmbH & Co. KG
Schlavenhorst 66
D-46395 Bocholt
© Siemens Home and Office Communication Devices GmbH & Co. KG 2006
All rights reserved. Subject to availability.
Rights of modification reserved.
www.siemens.com/gigaset
Ref.No.: A31008-M403-R101-4-7619
 Loading...