

Page 1
17.7.99
bk_front.fm5
s
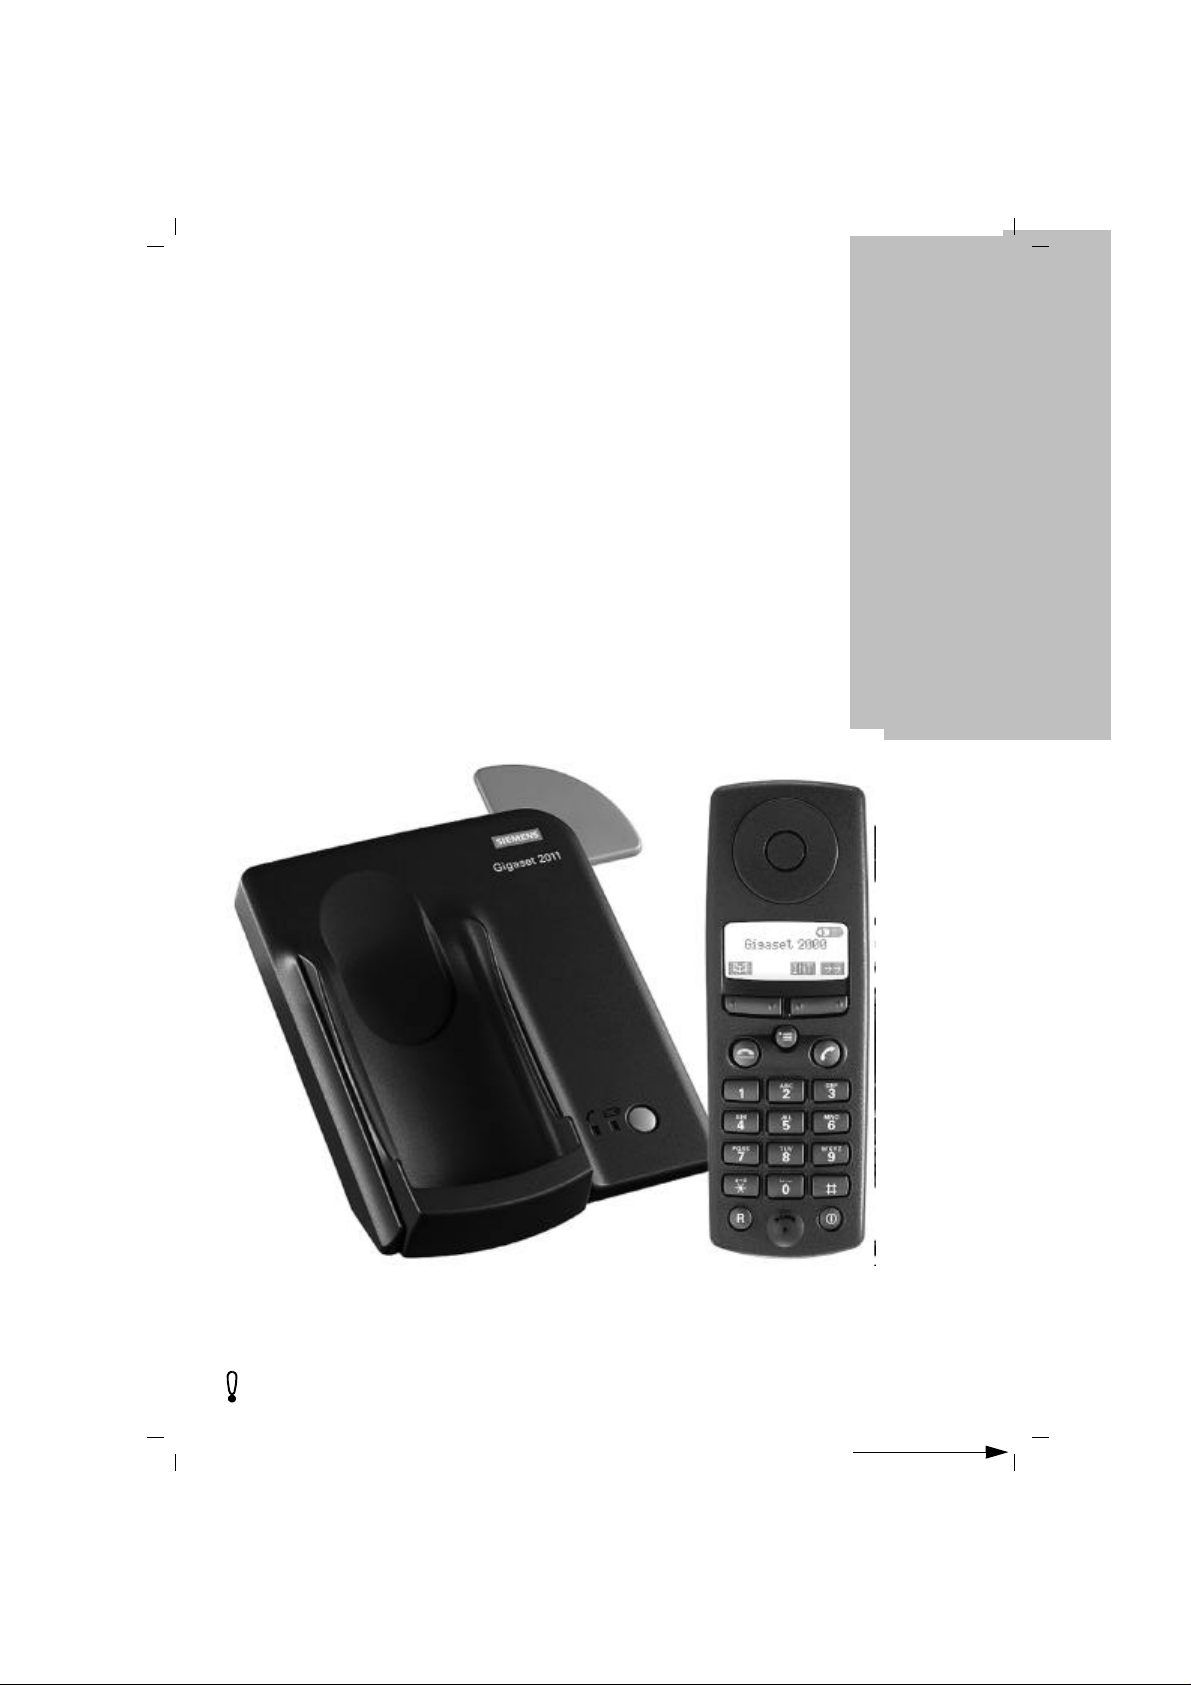
The cordless digital
DECT telephone system
expandable to 6 handsets
Gigaset 2011 Comfort, GBR: A30852-X1106-B307-1-
Comfort
Gigaset 2011
Operating instructions
Please read the safety precautions outlined in these operating instructions before putting the equipment into service
ACHTUNG! Schnittkante ggf. auf Titelseite U1 nach außen versetzen wg. Falz-Ausklappseite
Page 2

17.7.99
kap00.fm5
Gigaset® 2011
Your guide to this manual
Gigaset 2011 Comfort, GBR: A30852-X1106-B307-1-
The first telephone call
Using more than one handset
Using at more than one base station
Operating with short cuts
Putting the telephone into service
(➔ page 1).
Conducting a call (➔ page 17).
Registering new handsets at the base
station (➔ page 69).
Making internal calls (➔ page 25).
Holding internal consultation calls during an external calls and transferring
external calls to internal extensions
(➔ page 27).
Registering at a new base station
(➔ page 69).
Optimum settings for station search
(➔ page 75).
Short cut list (➔ page 83).
Quick guide to operation
II
Quick reference guide
(➔ page 98).
U2
Page 3
17.7.99
kap00.fm5
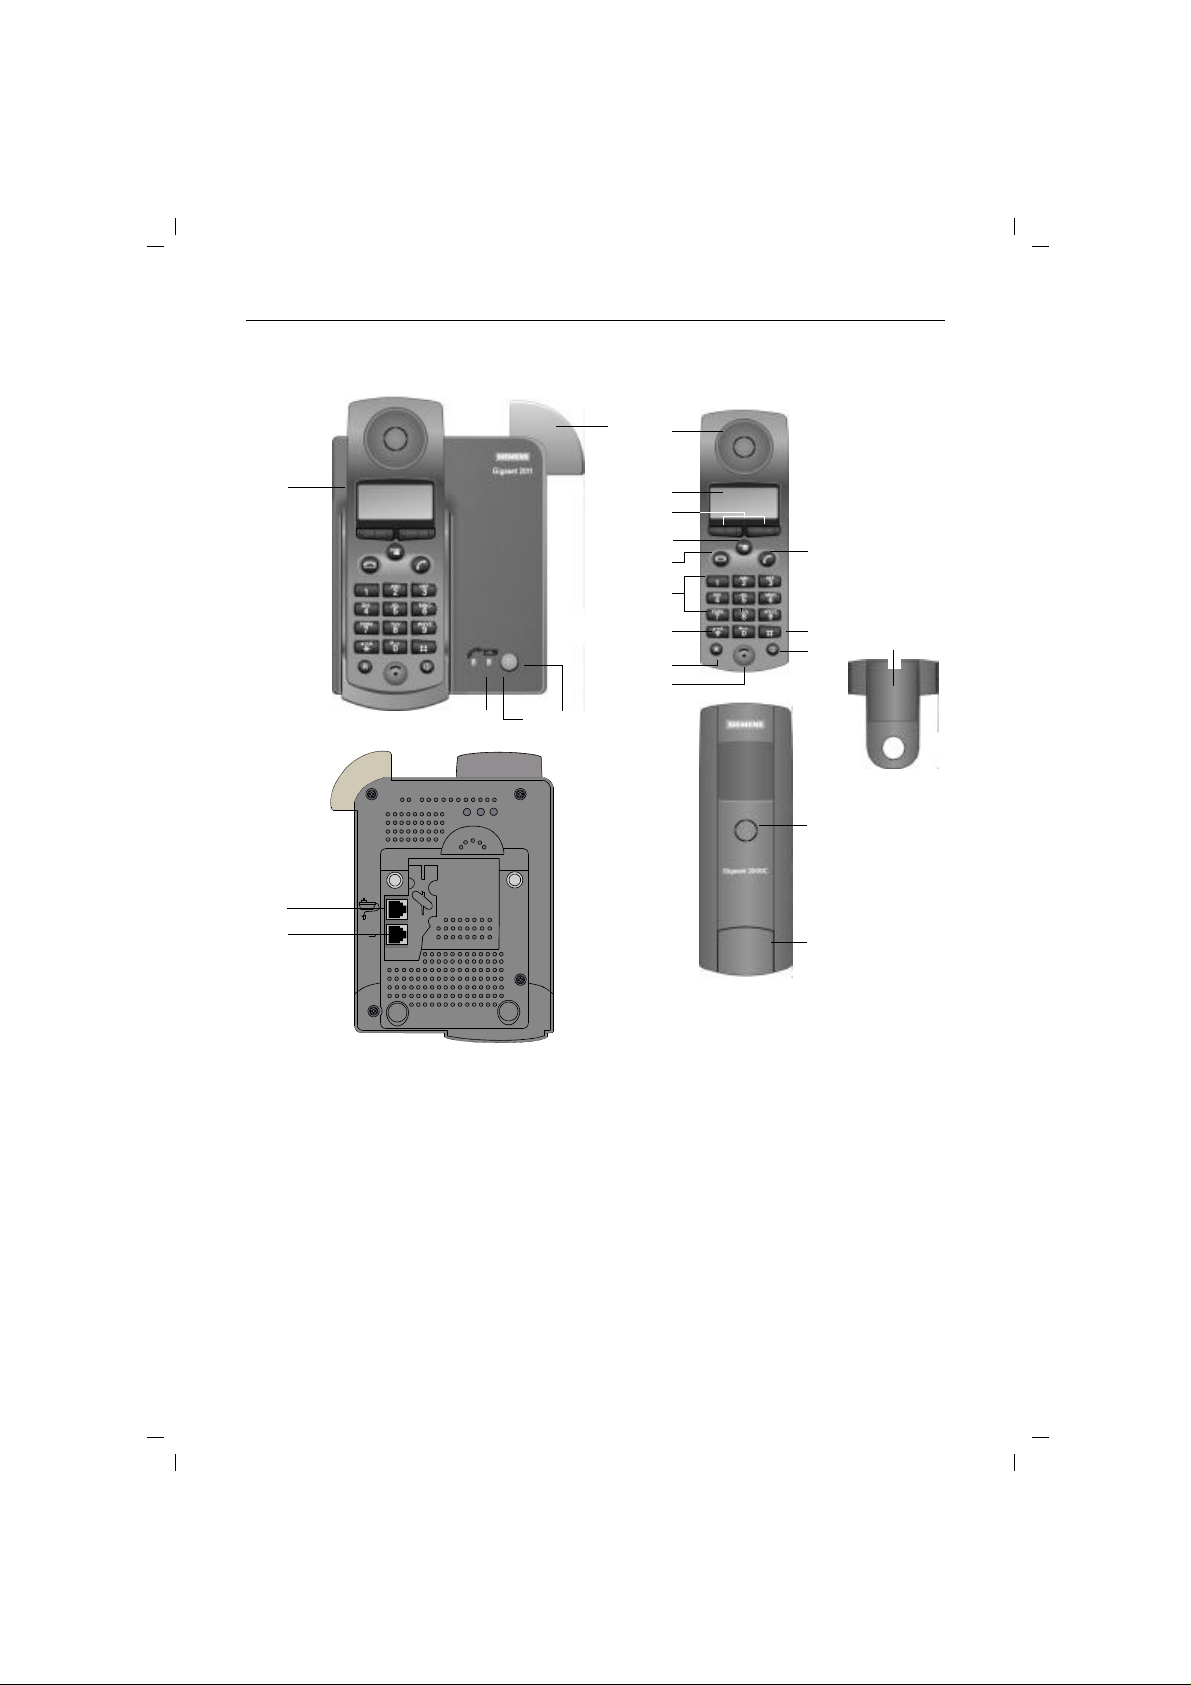
Overview: Gigaset 2011
Gigaset 2011 Comfort, GBR: A30852-X1106-B307-1-
5
8
1
6
7
1
Handset rest/charging unit
2
Paging key (calling registered handsets)
3
Trunk LED (lights up when dial-up line is seized)
4
Battery LED (lights up when charging batteries)
5
Antenna
6
Jack for power cord
7
Jack for telephone cord
9
10
11
12
13
14
15
16
23 4
8
Earphone
9
Display
10
Display keys
11
Menu key
12
On-hook key
13
Dialling keypad
14
Star key
15
Recall key (flash)
16
Microphone
17
On/off/protected key
18
Pound key
19
Talk key
20
Ringer loudspeaker
21
Battery compartment
(cover for removal)
22
Carrying clip
19
18
17
20
21
22
U3
III
Page 4

17.7.99
W
d
INT
z
Z
Y
>
<
OK
{
GO BACK
X
SET
COLL.CALL
ACCEPT
RNG OFF
OFF
ON
REDIAL
PAUSE
SVC
Overview: keys
Base station keys
Display keys assignments
kap00.fm5
?
or
or
Gigaset 2011 Comfort, GBR: A30852-X1106-B307-1-
Green paging key for calling all registered handsets and
for registering handsets.
Activates additional menu
Selects call number from the directory
Sets up internal connection
Redials one of the five last numbers dialled
Selects menu item or entry
Adjusts (larger or smaller)
Confirms
Exits a menu level, cancels an action
Scrolls back to the previous menu level
Deletes characters
Saves setting and exits
Starts internal collective call
Accepts queued external call
Deactivates ringer for incoming call
Deactivates feature
Activates feature
Redials the last call number
Inserts pause
Dialog key for using Select Services
IV
U4
Page 5

17.7.99
Overview: keys
1 - @, : and#
kap00.fm5
Gigaset 2011 Comfort, GBR: A30852-X1106-B307-1-
u x Menu-dependent keys (display keys)
Menu key
.
Dialling keys for call numbers and input keys for procedures and entering characters ("s" = blank,
"." = full stop, "-" = hyphen, "a}A" = change from lowercase to upper-case) in the telephone directory
Recall key (flash) for transmitting a signal to the public tel-
R
ephone network or to telephone systems
Key for activating/deactivating the handset or for switch-
h
ing on the protect feature
Talk key for setting up external connections
c
On-hook key for clearing down connections, switching to
a
the basic menu or, if necessary, cancelling a function
(panic function)
V
Page 6
17.7.99
Symbol
Explanation
kap00.fm5
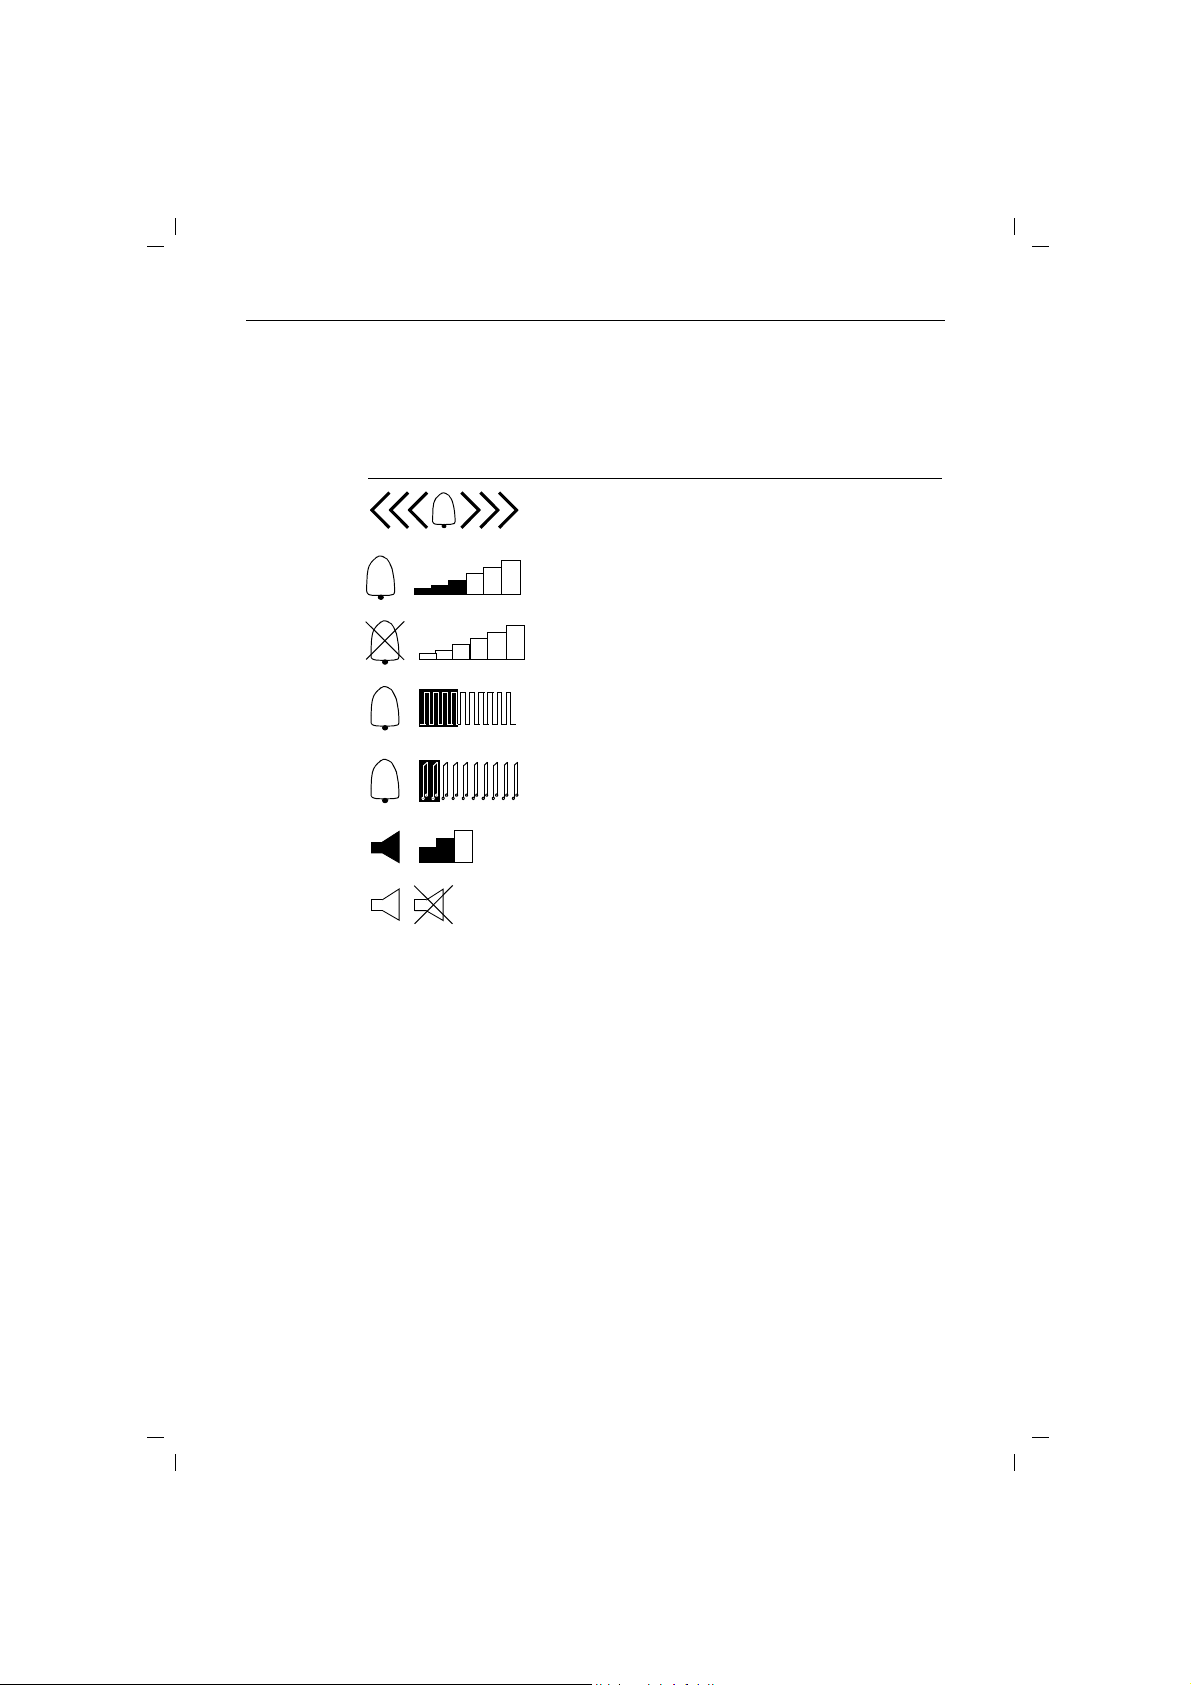
Overview: display symbols
Gigaset 2011 Comfort, GBR: A30852-X1106-B307-1-
Operating actions and statuses are graphically displayed
on the Gigaset 2000C handset.
Incoming call
Set the ringer volume
Ringer is deactivated
Set the ringer tone
Set the ringer melody
VI
T
V
_
vw
×Ø
Set the handset volume
The signal tone is activated/deactivated
Range warning symbol
Battery charging status
Input cursor
Automatic backlight on/off
Handset lock on/off
Page 7
18.7.99
B
kap01.fm5
Safety precautions
Gigaset 2011 Comfort, GBR: A30852-X1106-B307-1-
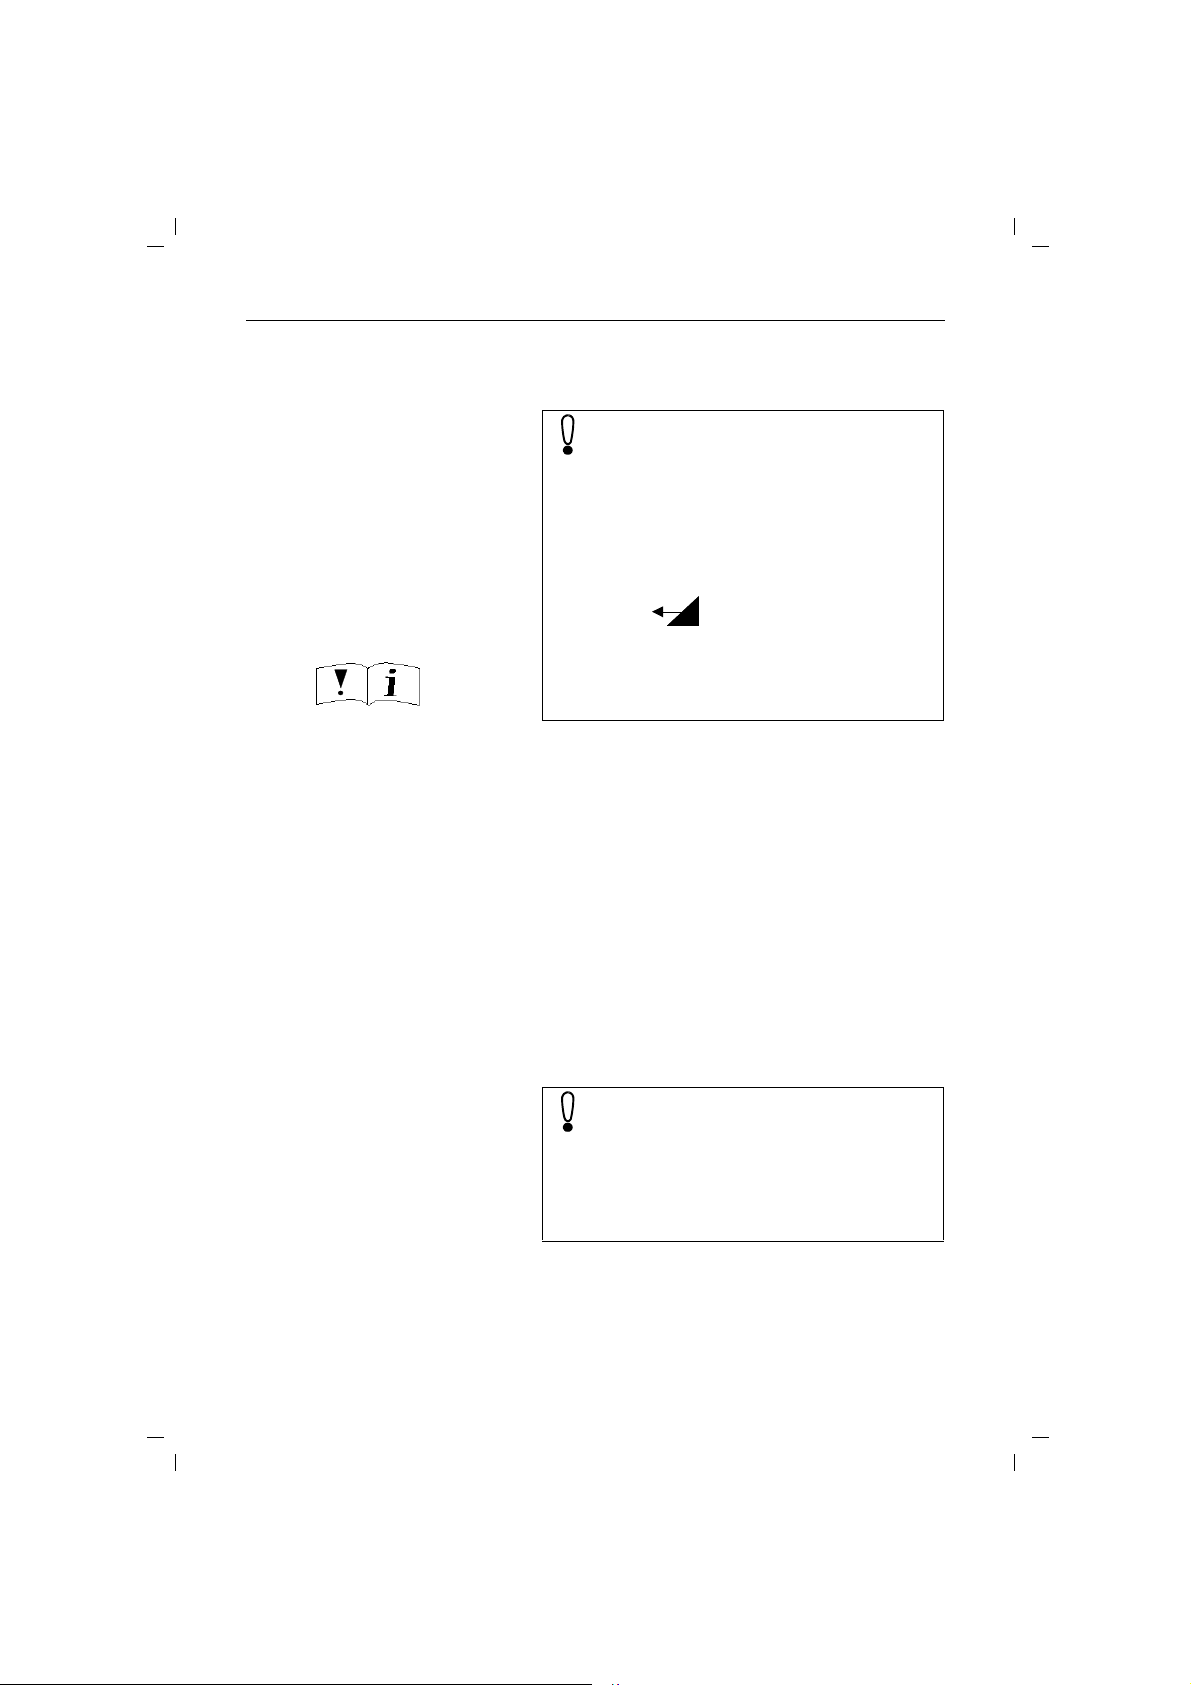
Only use approved nickel-cadmium (NiCd) batteries or nickelmetalhydride batteries (NiMH)!
(➔ page 86).
Never use other batteries or ordinary (non-rechargeable) batteries.These can short circuit or
destroy the battery unit (dangerous). The following labels are found on the battery compartments of the handset and charging unit:
_
+
● Avoid contact with water and fire.
● Do not dispose of old, defective batteries with ordi-
nary household refuse.
● During charging, batteries heat up. This is normal and
is not dangerous.
● Do not use non-Siemens charging units. This could
damage the batteries.
● Only use the plug-in power unit supplied (number
C39280-Z4-C67).
● If possible, do not cross the base station plugs. Oth-
erwise the voltage applied to the charging contacts
may surge during storms, for example.
● Do not operate the handset in environments where
there is danger of explosion.
Only use rechargeable batteries with the poles aligned
as shown.
Type as indicated in these
installation instructions.
Research has shown that in certain cases, medical equipment can be affected by activated
cordless telephones (DECT). A distance of at
least one metre should therefore be maintained
between the telephone and the medical equipment. When using cordless telephones in the
vicinity of medical equipment, the regulations of
the relevant institution must be observed.
VII
Page 8

18.7.99
Approval and conformity
kap01.fm5
Gigaset 2011 Comfort, GBR: A30852-X1106-B307-1-
Your Gigaset 2010 has been certified by the "British Approvals Board for Telecommunications", the British office
for telecommunications certification. It has been approved according to EU guideline 91/263/EWG (CTR6,
CTR10) for telecommunications terminals. Anyone is permitted to connect this telephone to a telephone socket
and use it at the Public Telecommunications Network in
the UK. This telephone fulfils the requirements of the following EU guidelines:
CE Compliant to
89/336/EEC
73/23/EEC
(EMC Directive) and
(Low Voltage Directive)
The CE marking confirms that the telephone is in compliance with the above-mentioned guidelines (CE 0188 X).
VIII
Page 9

17.7.99
giga2011.IVZ
Gigaset 2011 Comfort, GBR: A30852-X1106-B307-1-
Contents
Overview: keys ............................................................................................................................... V
Overview: display symbols .............................................................................................................VI
Step by step guide to putting into service ................................................................................ 1
Step 1: Observe the safety precautions ......................................................................................... 1
Step 2: Check the contents of the package ................................................................................... 1
Step 3: Connect the base station .....................................................................................................2
Step 4: Insert the batteries into the handset ....................................................................................3
Step 5: Charge the batteries .......................................................................................................... 3
Step 6: Check the signalling method ............................................................................................. 4
Menu-driven operation ................................................................................................................ 5
On-line menu ....................................................................................................................................8
Principal menus ................................................................................................................................9
Operating modes ....................................................................................................................... 11
On/off/protected mode ................................................................................................................ 11
Signalling method ...........................................................................................................................13
Incoming calls ............................................................................................................................ 14
Call number display ...................................................................................................................... 14
Accepting calls ............................................................................................................................. 15
External call-waiting during internal calls ...................................................................................... 16
Ending a call ................................................................................................................................. 16
Deactivating the microphone (mute function) .............................................................................. 16
External outgoing calls .............................................................................................................. 17
Calling external parties ................................................................................................................. 17
Suppressing secret numbers for redial ........................................................................................ 18
Suppressing call number display at the called party .................................................................... 18
No answer or line busy ................................................................................................................ 18
Redial ........................................................................................................................................... 19
Dialling with the directory ............................................................................................................ 19
Dialling from the call list ............................................................................................................... 20
Controlling devices with dual-tone multifrequency signalling (DTMF) ......................................... 23
Ending a call ...................................................................................................................................24
Collective ringing and internal calls ......................................................................................... 25
Making collective calls to all handsets from the base station ...................................................... 25
Making collective calls from one handset to all handsets ............................................................ 25
Making internal calls ..................................................................................................................... 25
Ending an internal call .................................................................................................................. 26
Internal consultation calls and transferring calls ................................................................... 27
Consultation calls ......................................................................................................................... 27
Transferring calls .......................................................................................................................... 28
Allowing internal parties to listen in on a call ............................................................................... 29
Creating and managing the directory ...................................................................................... 30
Entering/copying/editing/deleting call numbers/names ..................................................................31
Copying numbers ......................................................................................................................... 32
Deleting the directory ................................................................................................................... 33
Available memory ...........................................................................................................................34
Copying an entry/directory ........................................................................................................... 34
Administering the redial memory ............................................................................................ 35
IX
Page 10

17.7.99
giga2011.IVZ
Gigaset 2011 Comfort, GBR: A30852-X1106-B307-1-
Contents
Input function ............................................................................................................................. 37
Entering names and numbers ...................................................................................................... 37
Entering letters, special characters, and digits ............................................................................. 41
Important basic settings ........................................................................................................... 43
Changing the base code/PIN ........................................................................................................ 43
Resetting the base station to the factory defaults .........................................................................45
Resetting the Gigaset 2000C handset to the factory defaults .......................................................46
Operating in a telephone system ...................................................................................................47
Individual base station settings ............................................................................................... 50
Switching the base station ringer off and setting the ringer volume ........................................... 50
Activating/deactivating music on hold ............................................................................................51
Setting the base station ringer tone ............................................................................................. 51
Individual handset settings ....................................................................................................... 52
Setting the handset volume ......................................................................................................... 52
Ringer settings ...............................................................................................................................53
Activating/deactivating automatic backlight ................................................................................. 54
Automatic call acceptance ............................................................................................................ 54
ISDN configuration ....................................................................................................................... 54
Activating/deactivating notification and warning tones ..................................................................55
Baby alarm ................................................................................................................................... 57
Baby alarm level .............................................................................................................................58
Selecting a language .................................................................................................................... 58
Select services ............................................................................................................................. 59
Displaying call duration ............................................................................................................. 60
Activating/deactivating call duration display ................................................................................. 60
Gigaset 2011 lock functions ...................................................................................................... 61
Activating/deactivating the lock for outgoing calls ....................................................................... 61
Emergency calls when the system is locked ............................................................................... 61
Barred numbers for handsets ........................................................................................................63
Activating/deactivating the call number lock ..................................................................................65
Setting trunk access for the handset .............................................................................................66
Lock functions on the handset ................................................................................................. 67
Activating/deactivating the handset lock ...................................................................................... 67
Handset display with active lock ....................................................................................................68
Registering/de-registering more than one handset at the base station .............................. 69
Registering a Gigaset 2000C handset at a base station ............................................................... 69
De-registering a handset from a base station .............................................................................. 70
Operating more than one handset ........................................................................................... 71
Call allocation for incoming calls ................................................................................................... 71
Naming handsets ......................................................................................................................... 73
Operating at more than one base station ............................................................................... 74
Selecting the best station ..............................................................................................................75
Setting the preferred or fixed station ........................................................................................... 75
Base station names ........................................................................................................................76
De-registering a base station ....................................................................................................... 76
X
Page 11

17.7.99
giga2011.IVZ
Gigaset 2011 Comfort, GBR: A30852-X1106-B307-1-
Contents
Short cuts ................................................................................................................................... 77
Descriptions with example ........................................................................................................... 77
Short cut menu ............................................................................................................................ 77
New entry ......................................................................................................................................78
Editing an entry ............................................................................................................................ 80
Deleting an entry .......................................................................................................................... 80
Displaying an entry .........................................................................................................................81
Deleting all entries ....................................................................................................................... 81
Available memory ......................................................................................................................... 81
Copying an entry/memory ..............................................................................................................82
Starting a short cut .........................................................................................................................83
Default short cuts ......................................................................................................................... 83
Short cut list ...................................................................................................................................84
Important notes on putting into service and operation ........................................................ 85
Installing the base station ............................................................................................................. 85
Notes on operating the handset .....................................................................................................86
Operating with the Gigaset 2000S (1000S) handset ......................................................................89
Maintenance ................................................................................................................................ 89
Connecting the telephone socket ..................................................................................................90
Technical data ................................................................................................................................91
Third party use/disposal .................................................................................................................92
Warranty ....................................................................................................................................... 92
Procedure in the case of malfunctions ...........................................................................................93
Contact person ............................................................................................................................. 94
Overview: signal tones ...................................................................................................................95
Special accessories .................................................................................................................... 96
Quick reference guide handset Gigaset 2000C ....................................................................... 98
Index ............................................................................................................................................ 99
XI
Page 12
18.7.99
kap02.fm5
Gigaset 2011 Comfort, GBR: A30852-X1106-B307-1-
Step by step guide to putting into service
Step by step guide to putting into service
The Gigaset 2011 base station must be connected before you can put the handset into service.
Please follow the step-by-step instructions for putting the
handset into service.
Step 1: Observe the safety precautions
Please read the safety precautions outlined in
these operating instructions before putting the
equipment into service.
Step 2: Check the contents of the package
The default package contains:
● a Gigaset 2011 base station (see label with CE symbol
on the underside of the base station),
● enhanced Gigaset 2000C handset (see imprint on the
rear of the handset),
● a telephone cord with Mini-Western plug,
● a power cord with Mini-Western plug and BT plug
C39280-Z4-C67,
● a cover for the handset’s battery compartment,
● a carrying clip for the handset,
● two batteries,
● operating instructions.
1
Page 13
18.7.99
kap02.fm5
Gigaset 2011 Comfort, GBR: A30852-X1106-B307-1-
Step by step guide to putting into service
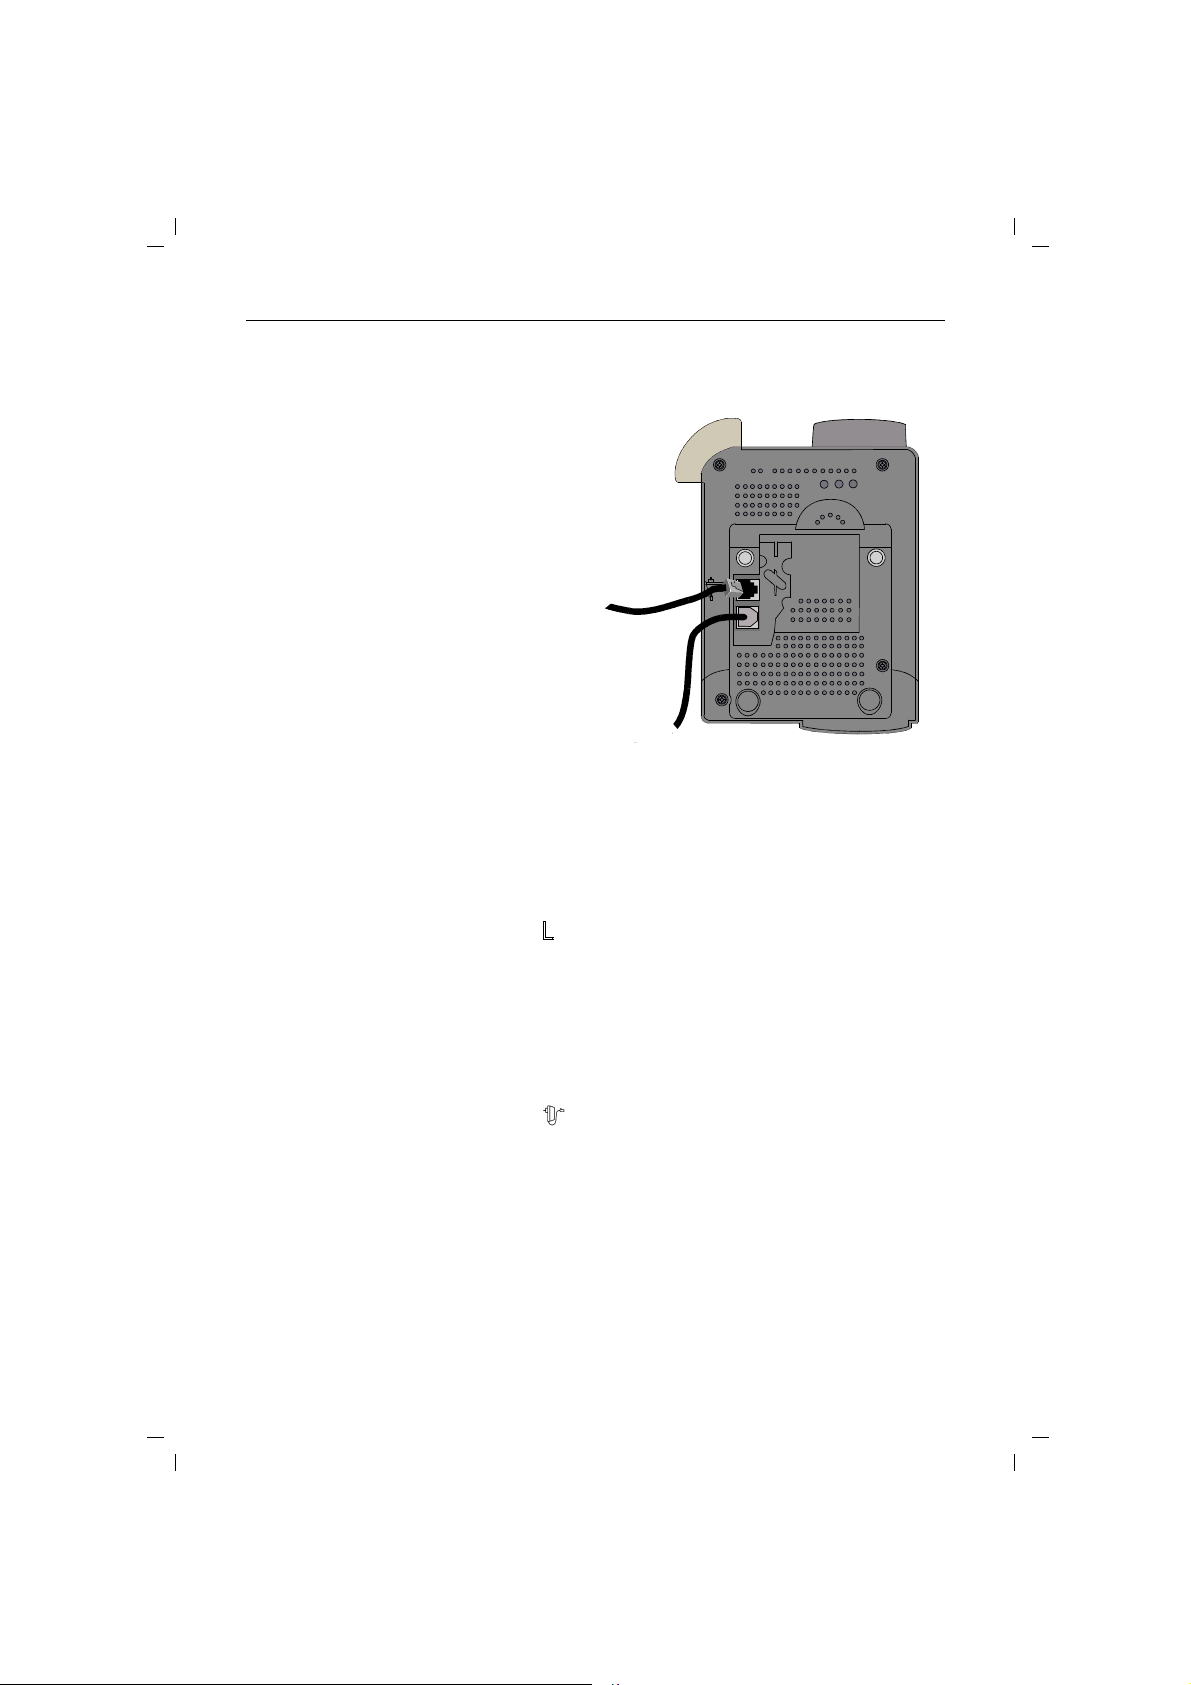
Step 3: Connect the base station
Power cord
Telephone cord
Underside of base
station housing
Telephone cord
Power cord
2
Insert the Mini-Western plug on your telephone cord into
the base station. The jack on the underside of the base
station is identified by the following symbol:
Insert the plug on your telephone cord into the telephone
socket.
Insert the Mini-Western plug on your power cord into the
base station. The jack on the underside of the base station
is identified by the following symbol:
Insert the power cord on your power supply unit into a
mains socket (220/230 V).
Page 14
18.7.99
kap02.fm5
Gigaset 2011 Comfort, GBR: A30852-X1106-B307-1-
Step by step guide to putting into service
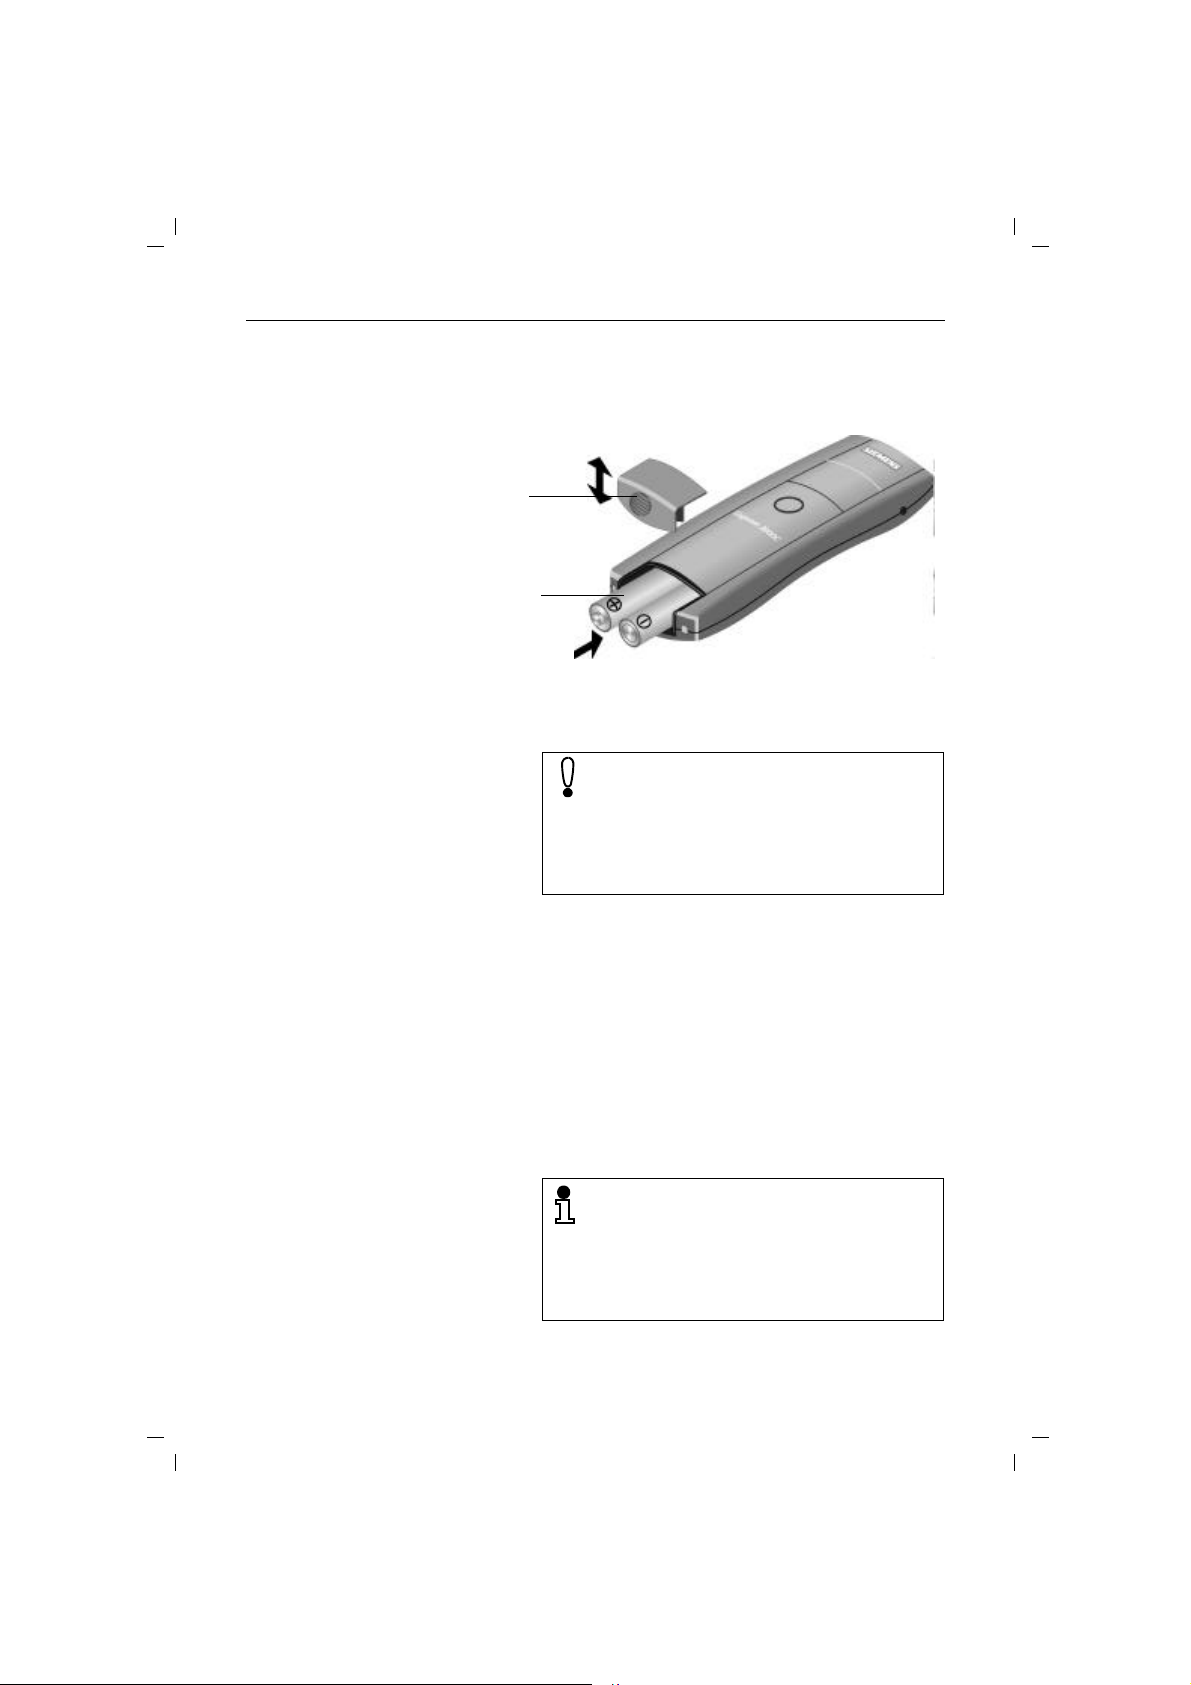
Step 4: Insert the batteries into the handset
The handset is powered by two batteries.
Battery compartment cover
Battery compartment with batteries
Hold the handset with the keypad facing downwards.
Insert the batteries into the battery compartment.
Make sure that the +/– battery poles are aligned
correctly. The +/– marks on the label in the battery compartment must be aligned with the +/–
marks on the batteries.
The handset will not work and may even be
damaged if the batteries are incorrectly inserted.
Slide the cover of the battery compartment downwards
into the grooves on the handset and close the compartment. For more information on charging/operating times
and battery use, see ➔ page 86.
Step 5: Charge the batteries
To charge the batteries place the handset in the rest on
the base station. The charging contacts on the base of the
handset must touch the contacts in the base station. It
does not matter whether the keypad is facing up or down.
If you have correctly inserted the handset, the LED below
the battery symbol on the base station will light up.
You must charge the batteries before you can
make any telephone calls or define settings. We
recommend that the batteries be charged for 16
hours without interruption, e.g. overnight, for
the initial start-up.
For more information on the use of batteries
(➔ page 86).
3
Page 15
18.7.99
REDIAL
SET
kap02.fm5
Gigaset 2011 Comfort, GBR: A30852-X1106-B307-1-
Step by step guide to putting into service
Step 6: Check the signalling method
Telecom telephone lines can operate with the following
signalling methods:
● Dial pulsing (DP)
● Dual-tone multifrequency signalling (DTMF)
Your Gigaset 2011 is set to DTMF signalling by default.
Checking your own telephone’s signalling method
Press the Talk key. You will hear the dial tone (on-hook sig-
c
nal).
Press any digit, e.g. 2. If you can still hear the dial tone
o
(on-hook signal), you must set the signalling method to
dial pulsing (DP).
Setting dial pulsing
Press the menu key on the keypad.
.
Press the left display key until Service is displayed.
Press the right display key for OK to confirm your selection.
Initiate the procedure.
Enter the four-digit base code; (factory default: "0000")
o
(➔ page 43).
Set dial pulsing (DP).
u
@33
#1
x
The settings "DTMF/Flash" or "DP" are only
needed to operate your Gigaset 2011 at the
main station telephone.
The other signalling method settings are intended for operating Gigaset 2011 in telephone sys-
tems (➔ page 47).
Gigaset 2011 is ready for operation.
4
Page 16

18.7.99
Z
Z
OK
{
Settings
kap03a.fm5
Menu-driven operation
Gigaset 2011 Comfort, GBR: A30852-X1106-B307-1-
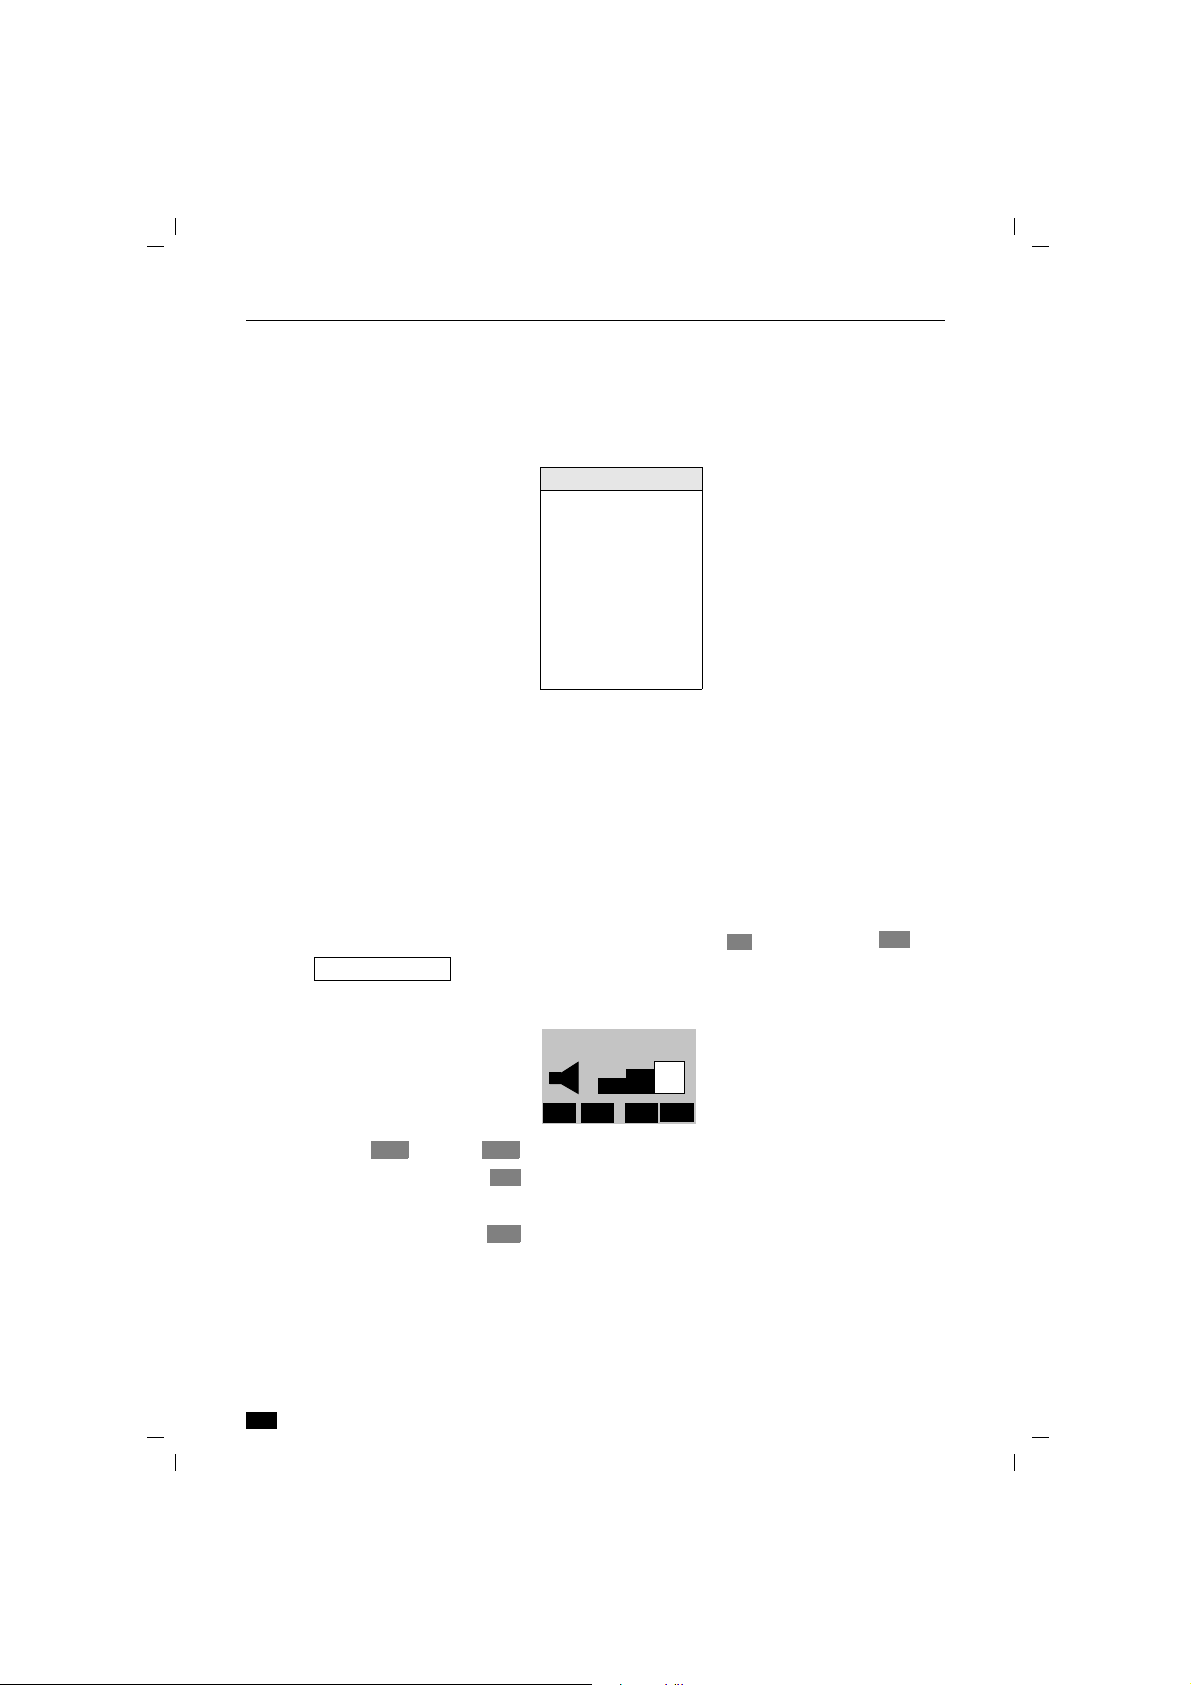
Menu-driven operation
Press the . key to activate the local menu of the enhanced Gigaset 2000C handset (off-line).
Menu structure
Handset Lock
Short Cut
Baby Alarm
Y
WEITER
Z
{
OK
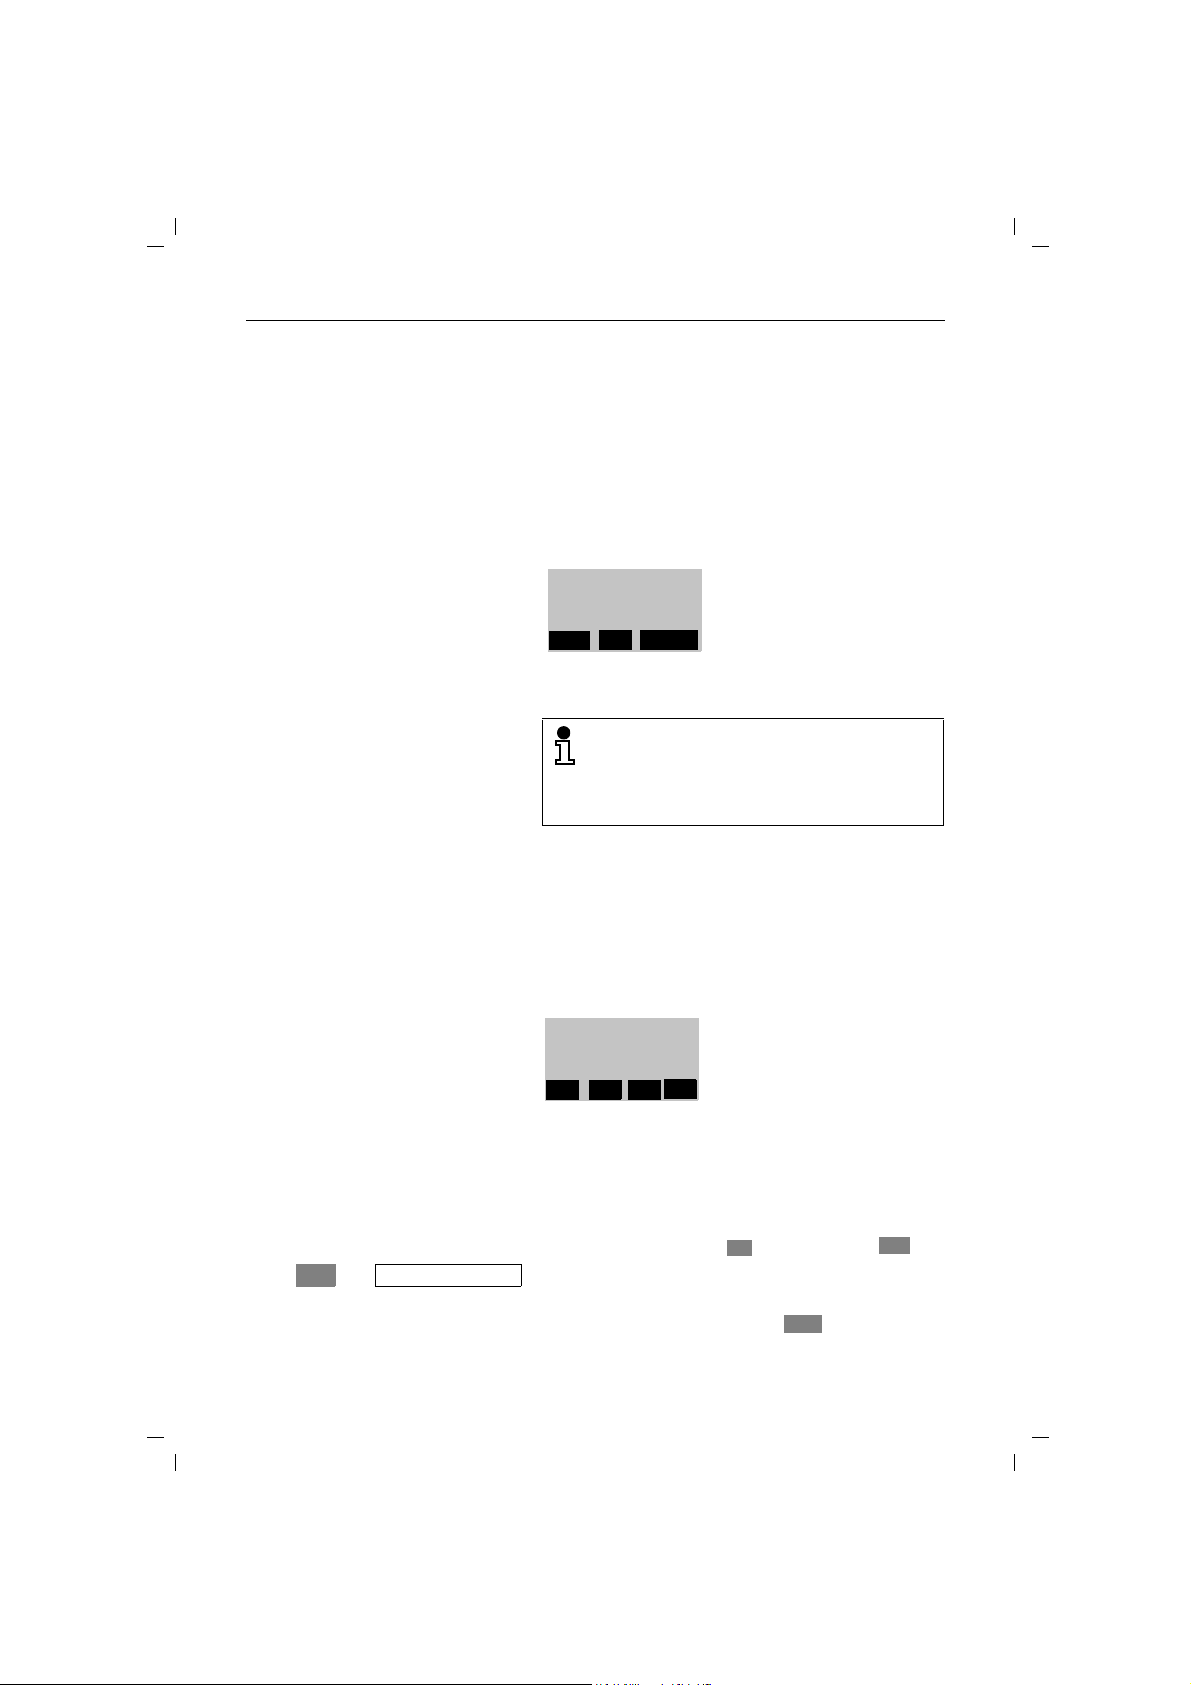
The first menu level appears
when the menu has been activated with .. Three lines of available menu items are shown in the
display.
The first menu item is highlighted. This menu item is selected.
.
Use to scroll down to the next menu item. The broken line indicates the end of the menu. If this line is selected, you can return to the start of the menu by pressing
.
Press to confirm the selected menu item. Press
to jump back from a sub-menu to the original menu item
selected. Press . to quit the menu from the top level.
The off-line display appears.
For an overview of the main menu and sub-menus,
➔ page 9.
The menu structure is hierarchical.
Settings
Service
-----------------
Y
Z
WEITER
{
OK
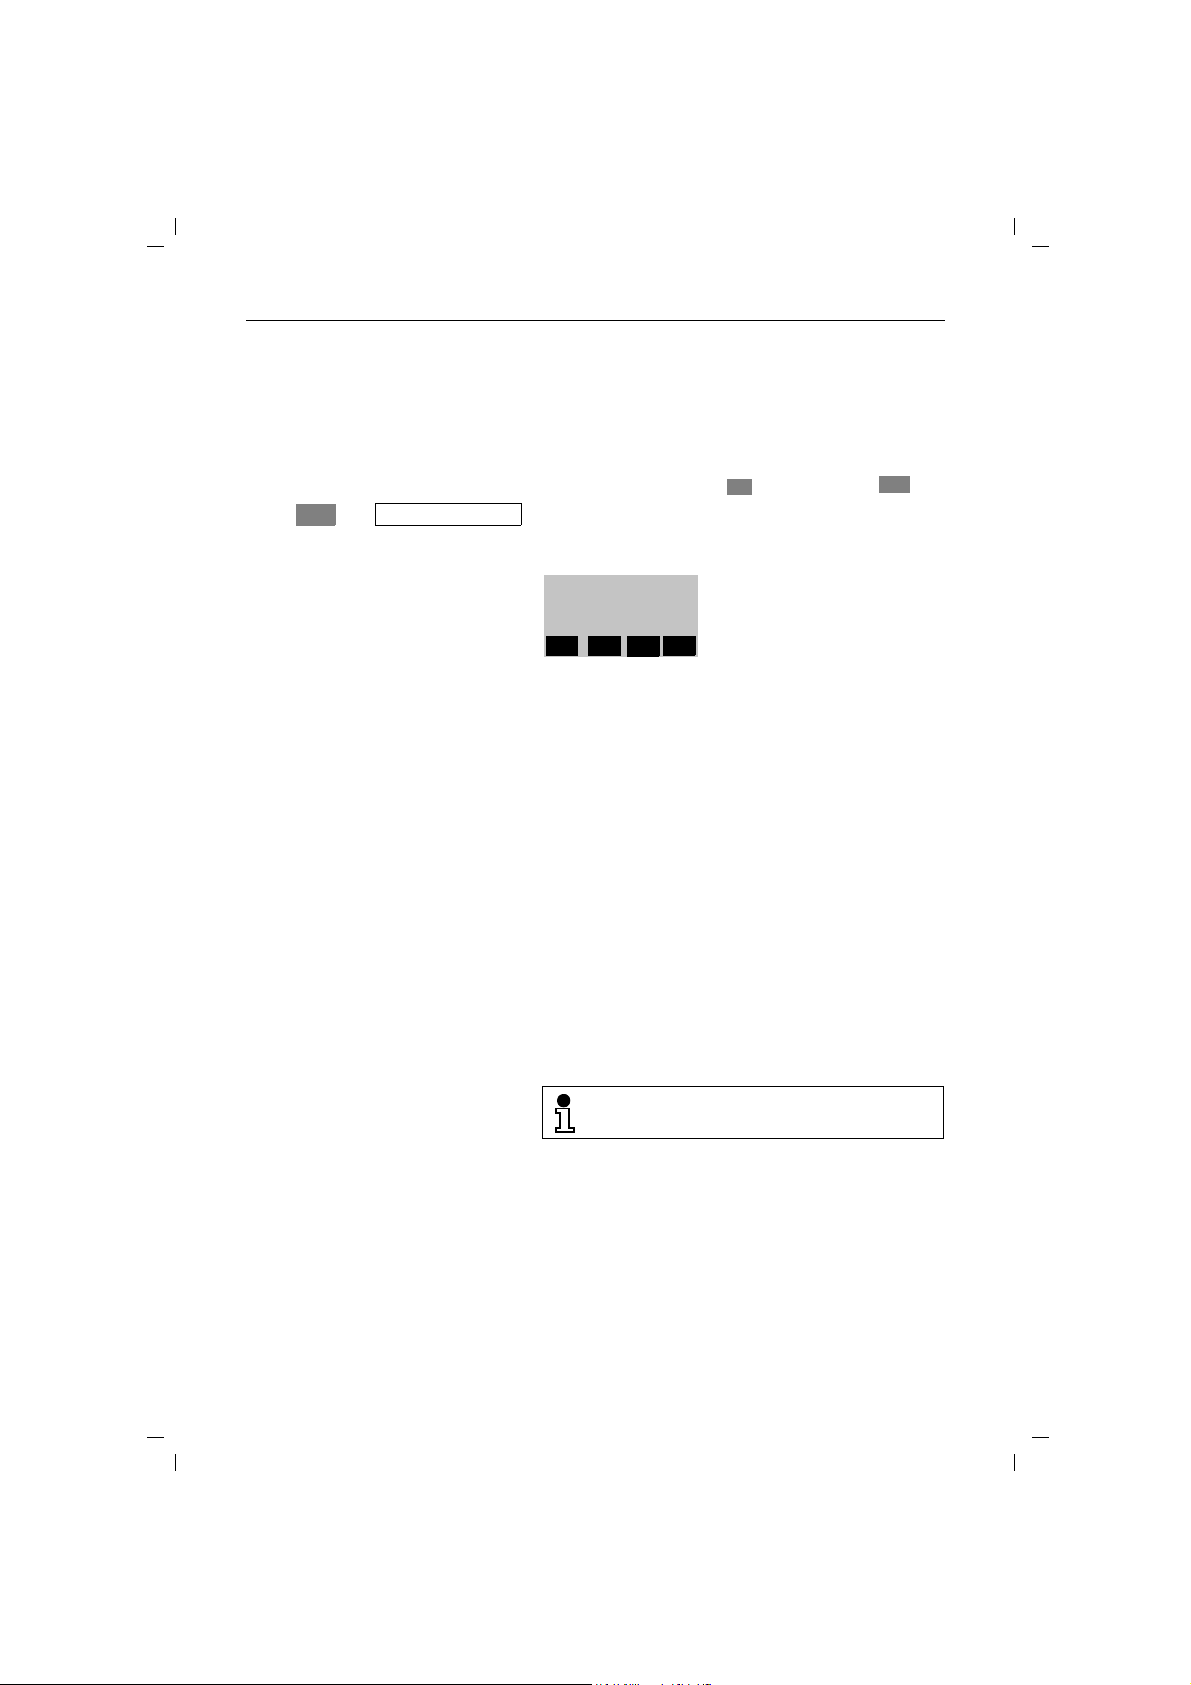
If you select in the
main menu, for example, you
will access a sub-menu with
settings options.
Handset Volume
Ringer Options
Register
Y
Z
WEITER
{
OK
5
5
Page 17
18.7.99
{
{
OK
GO BACK
W
kap03a.fm5
Menu-driven operation
Moving to higher menu levels and exiting a menu
When your are in the top menu level, you can exit the
menu by pressing .. If you are at a lower menu level,
you can move up one level by pressing without saving any settings made. When you reach the end of a menu
(indicated by a broken line) the and keys merge
and become the ,key. Press this key to exit the
menu level. When you return to the higher menu, the activating menu is displayed in reverse video in the first
place on the display.
Use the on-hook key a to exit all functions
without saving changes and return to the off-line
display (panic function).
Activating the additional menu
An additional menu is available in some menus (e.g. redial
menu). This can be activated by pressing .
Gigaset 2011 Comfort, GBR: A30852-X1106-B307-1-
6
6
Page 18

18.7.99
Z
OK
Settings
Z
OK
Handset Settings
Z
OK
Beeps
Z
OK
Confirm Beep
{
ON
OFFOKOFF
ON
ON
OFFOKOFF
ON
{
W
kap03a.fm5
Displays in the operating instructions
.
x
x
x
x
x
x
x
u
u
u
u
/
Gigaset 2011 Comfort, GBR: A30852-X1106-B307-1-
Menu-driven operation
The selection of a function in one of the menus or submenus is depicted using symbols. The following inputs,
for example, must be made to deactivate the confirmation
beep:
Press the menu key.
Scroll to and confirm.
Scroll to and confirm.
Scroll to and confirm.
Scroll to and confirm.
Exit menu without saving changes.
Press / to deactivate/activate the key confirma-
tion beep.
Abbreviated presentation
When describing procedures in these operating instructions, the route to the "target menu item" is abbreviated.
.
u
t
u
d
Settings
/
x
W
t
x
u
t
Handset Settings
Press / to deactivate/activate the confirmation
beep.
Exit menu without saving changes.
Abbreviated presentation when activating the menu
with a display key
If you want to activate New Entry, for example, in the directory menu using the display key, the presentation is as follows:
New Entry
t
Beeps
Confirm Beep
t
7
7
Page 19
18.7.99
u
,
x
Z
OK
(Example: handset volume
>
<
OK
{
kap03a.fm5
Menu-driven operation
On-line menu
Gigaset 2011 Comfort, GBR: A30852-X1106-B307-1-
Once you have seized a line (c key), an on-line menu is
displayed when you press .. You can select the following menu items:
Menu
Select Services
Directory
Internal Call
Short Cut
Switch to Tone
Handset Volume
Service
Display keys assignment is controlled by the base station
in on-line mode. Dual key assignment is deactivated during a call.
Example of menu operation during a telephone call
You can set the handset volume to one of three levels via
the on-line menu during a call:
Level 1 ... level 3 = handset volume low ... high
.
8
8
t
Handset Volume
u or x
x
x
Factory default: level 1 (normal/low).
(tmeans: scroll with
The following is displayed:
:
Handset Vol. 2
<
>
{
OK
Set the handset volume and
confirm.
or
Exit the menu without saving changes.
confirm with
is set at level 2)
)
Page 20
18.7.99
OK
W
d
Main menu
W
W
W
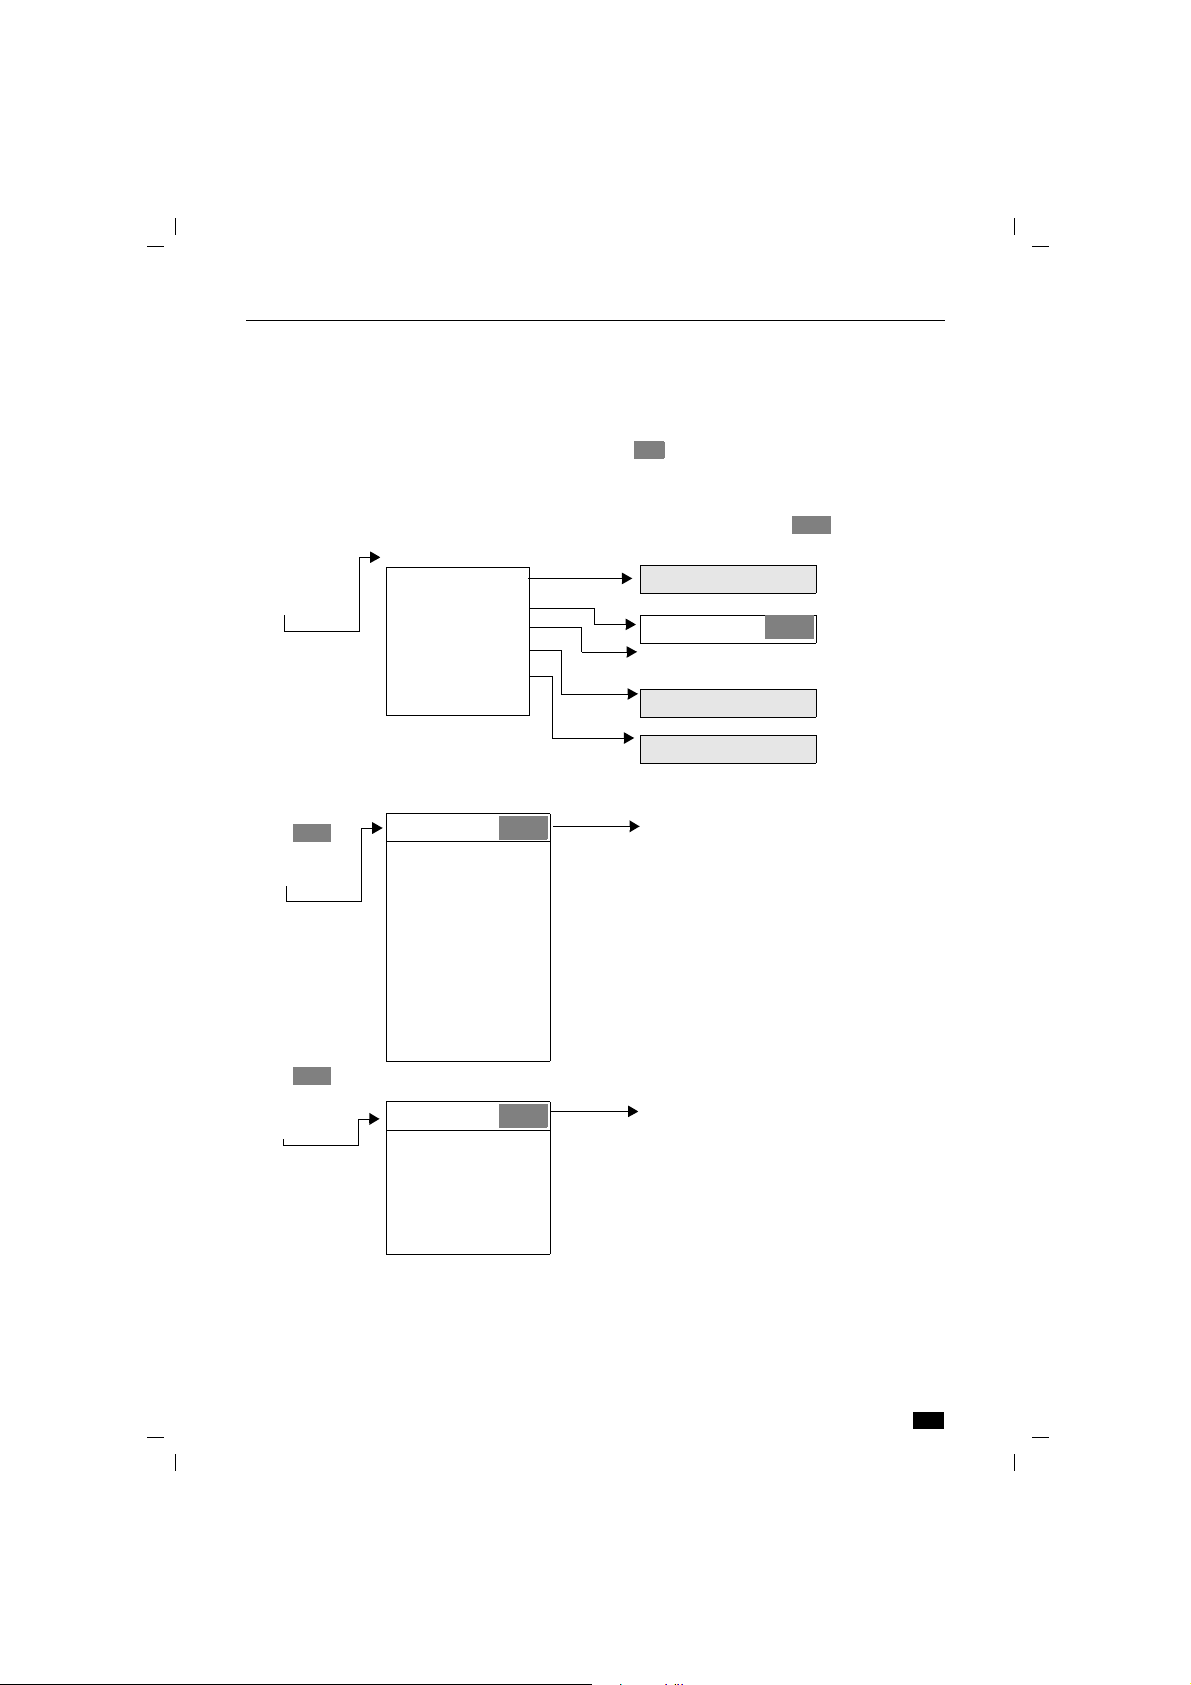
Principal menus
kap03a.fm5
Gigaset 2011 Comfort, GBR: A30852-X1106-B307-1-
Menu-driven operation
If an arrow in the diagram points directly to a menu or a
function with a name, you can select this item by
● pressing or
● automatically by entering a character
Menus or functions that contains the characterW in the
header can be reached by pressing .
Press .
to select.
Press
to activate the
directory.
Press
to activate the
redial list.
Handset Lock
Short Cut
Baby Alarm
Select Base
Settings
Service
Directory menu
Dial Number
New Entry
Edit Entry
Delete Entry
Display Entry
Copy Entry
Delete Directory
Copy Directory
Available Memory
Redial menu
Dial Number
Copy Number
Edit Number
Delete Number
Display Number
Menu: Handset Lock
Short Cut menu
S➔ page 57
Menu: Select Base
Menu: Settings
S➔ page 30
S➔ page 35
S➔ page 67
S➔ page 77
S➔ page 76
S➔ page 52
9
9
Page 21
18.7.99
kap03a.fm5
Menu-driven operation
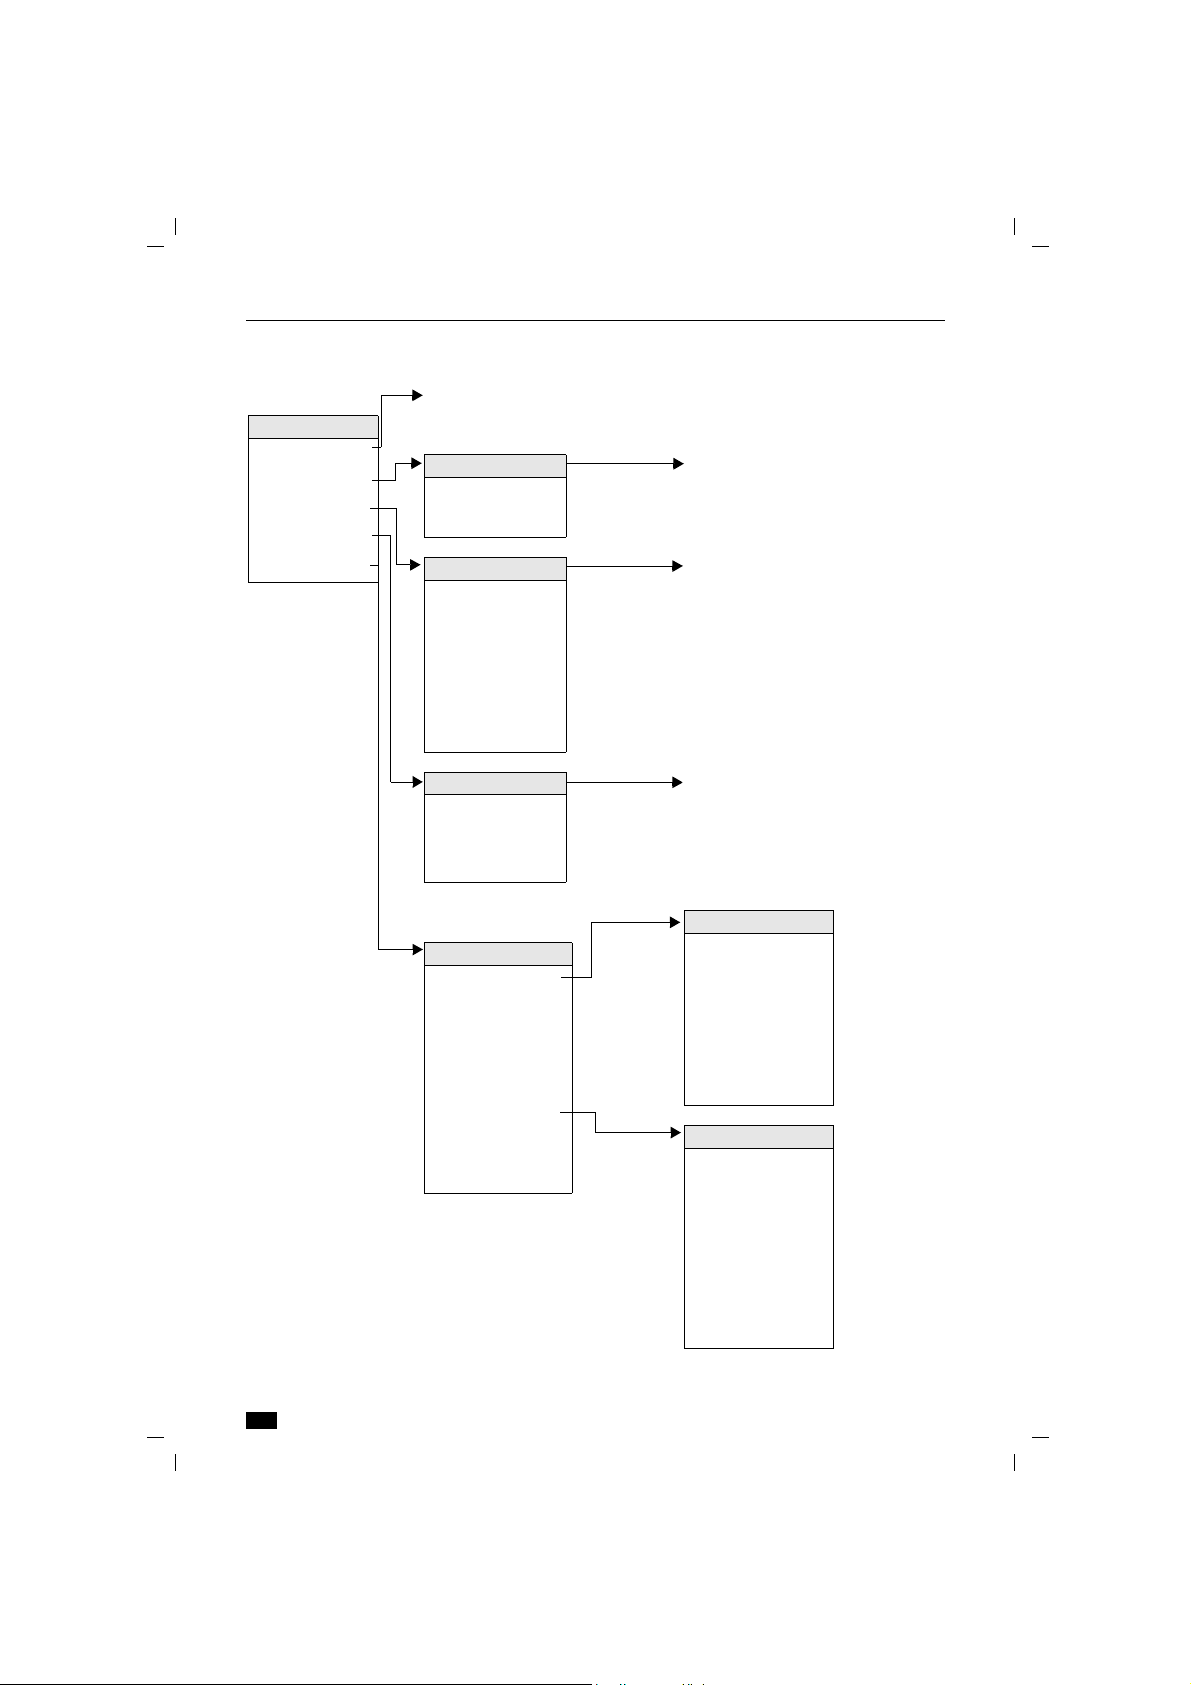
Settings
S➔ page 52
Settings
Handset Volume
Ringer Options
Register
Base Settings
Handset Settings
Ringer Options
Ringer Volume
Ringer Tone
Base 1
Base 2
Base 3
Base 4
Base 5
Base 6
Register
Gigaset 2011 Comfort, GBR: A30852-X1106-B307-1-
S➔ page 53
S➔ page 69
Base Settings
Office
Warehouse
Apartment
Handset Settings
Beeps
✓Auto Backlight
✓Auto Talk
✓Select Services
Change PIN
Language
BabyAlarmLevel
Initialization
S➔ page 76
(registered bases only)
✓Key Beeps
✓Batt. Low Beep
S➔ page 54
S➔ page 54
S➔ page 59
S➔ page 44
S➔ page 58
S➔ page 45
Range Warning
✓Confirm Beep
✓Error Beep
In Range Beep
✓German
English
French
Italian
Spanish
Portuguese
Dutch
Beeps
Language
S➔ page 55
S➔ page 58
10
10
Page 22
18.7.99
U
kap04.fm5
Operating modes
On/off/protected mode
Gigaset 2011 Comfort, GBR: A30852-X1106-B307-1-
Operating modes
You can switch your handset
● to protected mode,
● off,
● and on (again).
When the handset is in protected mode, it is protected
against inadvertent use. The handset switches on automatically to receive incoming calls. If you want to make an
outgoing call, you will have to switch the handset on first.
When the handset is switched off, incoming calls are not
signalled. If you want to make an outgoing call, you will
have to switch the handset on first.
Protected mode is useful, for example, if you
carry your handset is your pocket.
To preserve the batteries, we recommend that
you switch off the handset if you move outside
the base station radio range.
If your handset was switched on and outside
the radio range for an extended period of time,
you can speed up the process of "finding" the
base station again by switching it off for a moment and then on again.
Switching the handset to protected mode
Press the handset button briefly. You will hear a positive
h
confirmation beep. If the handset is in protected mode,
the following message appears on the display:
:
Keypad
locked
11
Page 23

18.7.99
U
Operating modes
Switching on the handset
kap04.fm5
h
h
Gigaset 2011 Comfort, GBR: A30852-X1106-B307-1-
When the handset is in protected mode:
Press the handset button briefly. You will hear the positive confirmation beep. The following message appears
on the display when the handset is switched on:
:
Base 1
Handset vol.
d
When the handset is switched off:
Press the handset button briefly. You will hear the positive
confirmation beep. The symbol\ flashes on the display.
Wait until the symbol stops flashing. The handset is activated.
or
Replace the handset in the base station charging unit.
The symbol \ is displayed. The handset is activated.
INT z
Switching off the handset
Press the handset button until the display goes out com-
h
pletely. You will hear the positive confirmation beep.
12
Page 24
18.7.99
u
,
x
Z
OK
REDIAL
SET
REDIAL
SET
kap04.fm5
Gigaset 2011 Comfort, GBR: A30852-X1106-B307-1-
Signalling method
Telecom telephone lines can operate with the following
signalling methods:
● Dial pulsing (DP)
● Dual-tone multifrequency signalling (DTMF)
Your Gigaset 2011 is set to DTMF signalling by default.
If your telephone line is connected to a digital
switch, you can use both dial pulsing and DTMF
signalling. In this case, leave the default DTMF
setting or reset it, for example, after relocating
your handset.
Checking the signalling method of your telephone line
Press the Talk key. You will hear the dial tone.
c
Press any digit, e.g. 2. If you still hear the same dial tone,
o
you must switch the signalling method to dial pulsing
(DP).
Operating modes
Setting the signalling method
t
.
Service Initiate the procedure.
#1
u
u
@33
@37
x
x
(tmeans: scroll with
confirm with
Initiate the base function.
Enter the four-digit base code (factory default: "0000")
o
(➔ page 43).
Set to dial pulsing.
or
Set to DTMF.
)
13
Page 25
18.7.99
Incoming calls
Incoming calls
Call number display
kap05.fm5
Gigaset 2011 Comfort, GBR: A30852-X1106-B307-1-
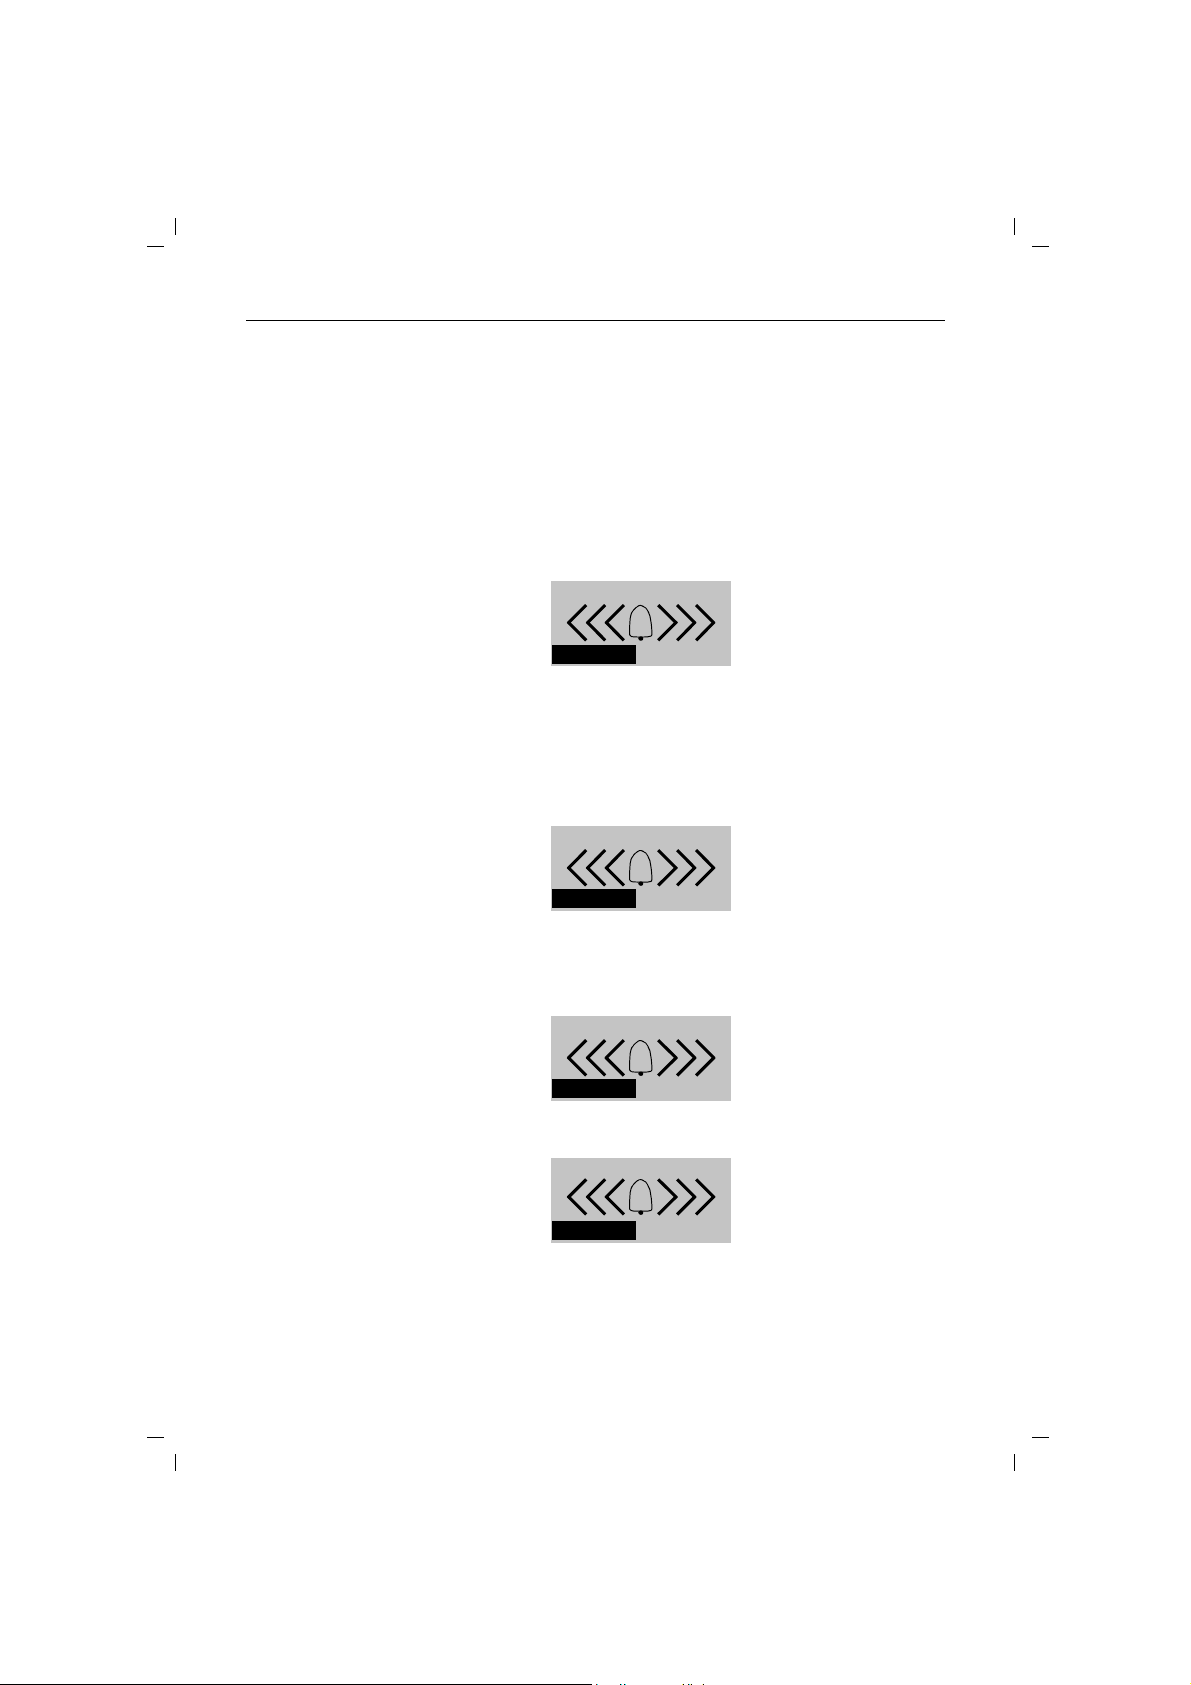
An incoming call is indicated by the ringer (bell symbol)
and appears on the display. If the network carrier supports
call number display (CLIP), the external caller’s number is
shown on your handset display. The following messages
can be displayed
● The call number is displayed
:
08972244667
RING OFF
● A name is displayed
If the external caller’s number is entered in the handset’s directory, the name associated with the number
is displayed. In this case, the number stored must be
identical to the call number (national and international
prefix included).
:
Durand, Paris
14
RING OFF
● Special case
If the external caller suppresses his/her call number
(CLIR), the following entry is displayed:
:
*xxx*
RING OFF
● Call number display is not supported
:
External call
RING OFF
Page 26

18.7.99
RNG OFF
Accepting calls
kap05.fm5
u
Gigaset 2011 Comfort, GBR: A30852-X1106-B307-1-
Incoming calls
● Internal call
The following example shows a call from mobile
unit 2.
:
Internal call 2
RING OFF
Calls can be accepted as long as the call symbol is
displayed.
You can switch off the ring tone.
When the handset is in the base station or charging
unit:
Remove the handset from the charging unit. You are connected.
Automatic call acceptance by removing the
handset from the charging unit is an adjustable
setting (➔ page 54). If you have switched this
function off, you must press the c button
when you remove the handset from the charging unit.
When the handset is not in the base station or
charging unit:
Press the Talk key on the handset. You are connected
c
15
Page 27
18.7.99
ACCEPT
INT
kap05.fm5
Incoming calls
External call-waiting during internal calls
The call waiting beep signals an external call while an internal call is in progress. Your internal connection is
cleared down if you accept the external call. The external
call is signalled on the display:
:
EXTERN INTERN
Gigaset 2011 Comfort, GBR: A30852-X1106-B307-1-
2
x
You accept the external call immediately.
or
Disconnect the internal call. You will hear the ring tone.
a
Accept the external call.
c
Ending a call
Replace the handset in the base station or charging unit.
The line is disconnected.
or
Clear down the connection.
a
If the handset was in protected mode, it remains in this mode after you press a.
Deactivating the microphone (mute function)
You can deactivate the microphone while an external call
is in progress. This allows you to consult other people in
the room while the external party is on hold. The external
party cannot what you are saying and will hear music.
u
Set up a connection.
The microphone is deactivated. Hold consultation with
people in the room.
Activate the microphone. You are reconnected with the
R
external party.
ACCEPT
16
Page 28
18.7.99
u
,
x
Z
OK
W
{
kap06.fm5
External outgoing calls
Calling external parties
c
Gigaset 2011 Comfort, GBR: A30852-X1106-B307-1-
External outgoing calls
Press the Talk key. You will hear the on-hook signal.
Enter the required call number using the dialling keypad.
o
The number you have entered is shown on the display,
e.g.:
EXTERN
0043123456
°
INT
You will hear the ring tone.
PAUSE
Suffix dialling
If you have dialled the call number of a switch,
for example, you can now suffix-dial an extension manually. You can also suffix dial a call
number from the directory or the call list.
Dialling with call number checking (en-bloc dialling)
En-bloc dialling allows you to check and correct the external call number (max. 32 digits) entered before it is dialled.
The input function is activated with call number checking
(➔ page 37).
Enter the required call number. The number you have en-
o
tered is shown on the display, e.g.:
:
0043P123456
<
>
You can correct the number entered with the input function,
Press the Talk key within 30 seconds to seize the line. The
c
call number is dialled. You will then hear the ring tone.
or
(tmeans: scroll with
Dial
u
t
The call number is dialled. You can leave the additional
menu without dialling by pressing .
_
W{
confirm with
)
17
Page 29
18.7.99
u
,
x
Z
OK
W
kap06.fm5
External outgoing calls
Manually inserting a pause
Pause
u
t
Gigaset 2011 Comfort, GBR: A30852-X1106-B307-1-
If you repeatedly get the busy signal after entering the
country code, for example, when dialling en-bloc, insert a
pause (3seconds) between the country code and the call
number:
(tmeans: scroll with
The pause "P" appears on the display.
:
confirm with
)
0043P123456
<
>
_
W{
Suppressing secret numbers for redial
Call numbers dialled are stored in a redial list. Suffix-dialled
numbers, e.g. extensions, and any secret "service numbers" that may follow are also entered in the redial list
along with the call numbers. To avoid transferring secret
numbers, activate "TempSwitchToTone", for example, after entering the extension (➔ page 23). You telephone is
then set to DTMF signalling.
Suppressing call number display at the called party
To suppress call number display at the called party’s telephone, use a T-Net services sequence. Your telephone
must be set to DTMF signalling.
Press the Talk key.
c
:31#
Enter the T-Net service sequence for call number suppression, wait until you hear the dial tone and then
enter the call number.
o
The feature must be supported by the network
provider.
No answer or line busy
Replace the handset in the base station or charging unit.
The connection is cleared down.
or
Clear down the connection.
a
18
Page 30

18.7.99
u
,
x
Z
OK
REDIAL
z
Z
W
{
d
Z
Y
Z
kap06.fm5
Redial
Repeating the last number dialled
Press the Talk key.
c
x
Repeating one of the last five call numbers
u
Dial Number
x
t
Press the Redial key: the last number called is redialled.
You can call up a list of numbers for redial by pressing
ferent numbers you called, including numbers which were
dialled from the directory.
Select the desired call number.
Press the Talk key. The number is dialled.
c
or
(tmeans: scroll with
or
Quit the additional menu and the redial list by pressing
Gigaset 2011 Comfort, GBR: A30852-X1106-B307-1-
External outgoing calls
. You will be presented with a list of the last five dif-
confirm with
.
)
Dialling with the directory
u
u
2 … 9
For information on further options for editing the redial
list, see the chapter on administering redial on ➔ page 19.
You can store up to 100 call numbers with corresponding
names in your handset directory (➔ page 30). You can
search for names and dial numbers directly from the directory.
Activate directory.
:
Alpha
Bravo
Charlie
W
{
Scroll to the required entry.
or
Enter a letter
e.g. "B" – press digit key "2" twice.
The directory jumps to the first entry starting with the letter "B". If there is no such entry in the directory, the directory will stay on the current entry and you will hear the error beep.
19
Page 31

18.7.99
u
,
x
Z
OK
W
{
kap06.fm5
External outgoing calls
Dial Number
x
t
Dialling from the call list
Gigaset 2011 Comfort, GBR: A30852-X1106-B307-1-
Press the Talk key within 30 seconds. The call number is
c
dialled. You will hear the ring tone.
or
(tmeans: scroll with
confirm with
The number is dialled. You can quit the additional menu
without dialling by pressing .
If a call attempt is unsuccessful, e.g. if the party called is
absent, the calling party’s number is stored in a call list,
provided this feature is supported by the network operator. This feature enables you to call back the party that
was unable to reach you. You can select the call numbers
from the list and set up the connection.
The call list has the following properties:
● it can contain up to 10 call numbers which are saved
in chronological order. The 11th call number is positioned at the top of the list, thus deleting the last entry
● a counter tells you how many call attempts were
made
● it replaces the call number with a name if the call
number is entered in the handset’s directory
● the left base station LED flashes when a new call
number is entered and the icon ° appears on the
display of the Gigaset 2000C handset
● it marks call numbers that were called back (either
successfully or unsuccessfully)
You can activate the call list at any time. Entries that are
no longer required can be deleted from the list. The flashing base station LED is deactivated and the ° icon disappears from the handset display as soon as all numbers
in the list have been called back.
)
20
Page 32

18.7.99
U
d
EXTERN
Z
OK
Activating the call list
kap06.fm5
u°
Gigaset 2011 Comfort, GBR: A30852-X1106-B307-1-
External outgoing calls
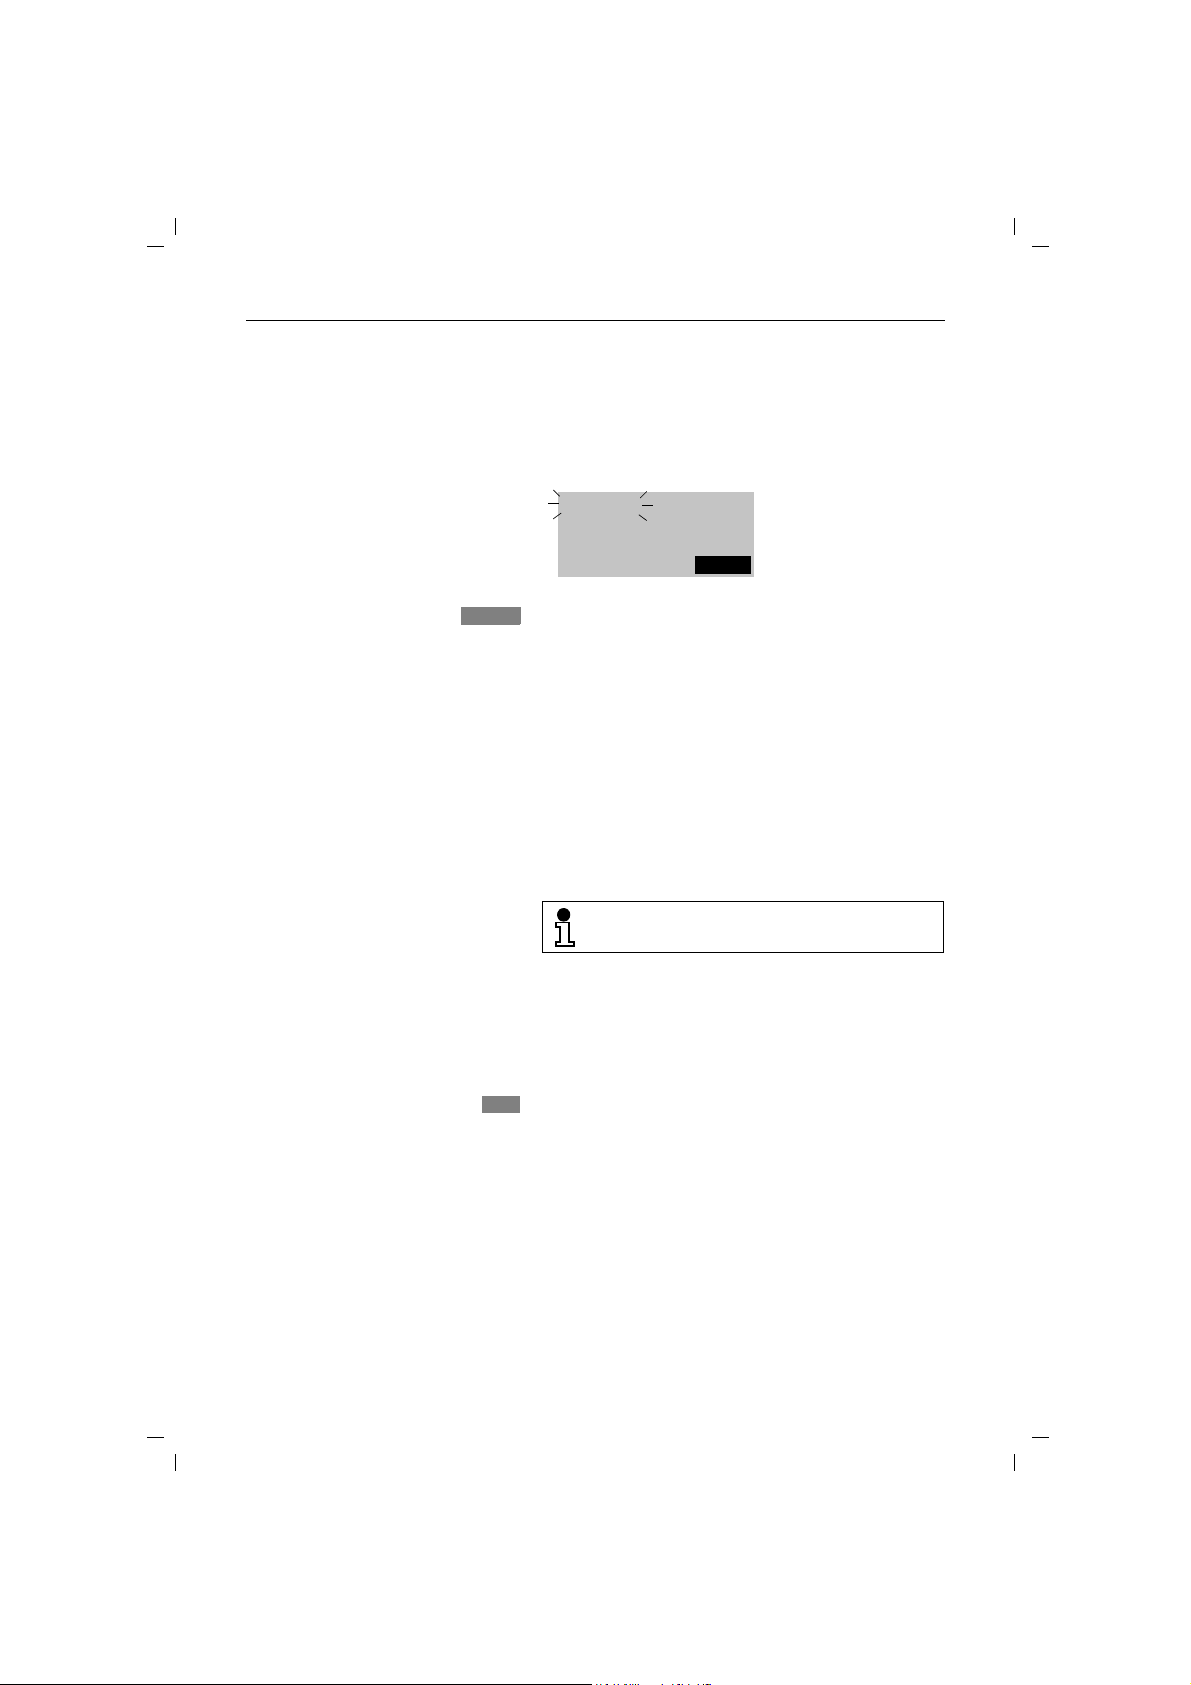
The left LED on the base station blinks and the ° icon
appears on the handset display when "unanswered" calls
are entered. To check the call list or initiate a callback, proceed as follows:
Press the display key to activate
the call list.
Base 1
°
INT
z
c u°
Selecting and calling back a caller
u
x
a
If there are no more "unanswered" calls in the list, seize
the line first and then activate
the call list with the display key.
When a caller is selected, the
current date, time, number and/
or name of the caller are indicated on the display provided that
there is an entry for him in the
phonebook of the handset.
The asterisk indicates that you
are dealing with a callback from
your own mailbox.
Search for the party you want to
call back from the list. In the example opposite, the call number
is replaced by a name.
In this example, the "2" in the first line indicates that "Peter
White" has already made two attempts to reach you. The
symbol ✓ means that one callback attempt has already
been made.
Dial the selected call number by pressing the display key.
or
Press the on-hook key if you only want to check the calls.
:
:
---
°
INT
1 17.0115:03*
089722244667
Y
Z
✓2 17.0115:03*
White Peter
Y
Z
REDIAL
X
X
OK
OK
If the call list is empty,
you will see the display shown opposite.
0
~
Y
Z
X
OK
21
Page 33

18.7.99
u
,
x
Z
OK
Z
X
P
N
kap06.fm5
External outgoing calls
Deleting a callback party from the call list
Gigaset 2011 Comfort, GBR: A30852-X1106-B307-1-
u
x
Search for a callback party
Delete an entry from the list.
Call list in the Gigaset 2000S/1000C handset
Activating the call list
New calls are only signalled at the base station.
Gigaset 2000S
Press the Talk key.
c
B#3
Activate the call list.
The call number of the last
caller is displayed.
Searching for and dialling a callback number
Search for a call number in the list.
#
Dial the call number.
O
or
Press the on-hook key if you only want to check the calls.
a
Gigaset 1000C
(tmeans: scroll with
g
f
t
Service
# 3
Select the Service menu item.
Activate the call list.
A callback number is not incorporated in the redial list.
089722244667
f
confirm with
b F
)
Display change in the call list
An entry in the call list is composed of three pieces of information:
● call number of the calling party
● counter for calls to the same call number
● code for callback attempt "u" or "R"
These specifications are not displayed simultaneously but
rather in two separate screens. Use the star key to switch
from one screen to another.
22
Page 34

18.7.99
u
,
x
Z
OK
P
N
kap06.fm5
Gigaset 2011 Comfort, GBR: A30852-X1106-B307-1-
External outgoing calls
Deleting a callback party from the call list
Display after activating the
call list.
Change to the second dis-
*
play line of the entry. In
this example, there were
089722244667
f
b F
u3
P f
N
b F
three calls to this number
and one callback attempt.
Search for a call number in the list.
#
Delete the entry.
0
Controlling devices with dual-tone multifrequency signalling (DTMF)
Your telephone must be set to dual-tone multifrequency
signalling (DTMF) for certain connections, for example, if
you want to check an answering machine or a voice infobox or avail of telecom services such as CityRuf or Scall
(paging services available in Germany).
If your Gigaset 2011 is connected to a line with DTMF signalling, every connection is automatically set up using
DTMF signalling mode. If this is the case, you do need the
function to switch to DTMF signalling.
If the device is connected to a line with dial pulsing (DP),
you can switch to DTMF signalling once the connection
has been set up.
You can check which signalling method is set if you are unsure (➔ page 13). DTMF signalling is set by default.
Prerequisite: an external connection exists.
.
(tmeans: scroll with
t
Switch to Tone Activate temporary DTMF via the menu.
confirm with
)
Once you have switched to DTMF, you can
switch between the two signalling methods
during the connection using the R recall key.
When the line is disconnected, the telephone
will automatically return to the original signalling
method.
Any digits or symbols that you enter after
switching signalling methods are not copied to
the redial memory.
23
Page 35

18.7.99
kap06.fm5
External outgoing calls
Ending a call
Gigaset 2011 Comfort, GBR: A30852-X1106-B307-1-
Replace the handset in the charging unit. The line is
cleared down.
or
Clear down the connection.
a
24
Page 36

18.7.99
INT
COLL.CALL
INT
kap07.fm5
Gigaset 2011 Comfort, GBR: A30852-X1106-B307-1-
Collective ringing and internal calls
Collective ringing and internal calls
Making collective calls to all handsets from the base station
It can be useful to make a collective call from the base station, for example, to locate mislaid handsets. It is not possible to make internal calls during a collective call from the
base station.
It is also possible to make collective calls from
the base station if you only have one handset.
Press the green paging key on the base station. All acces-
?
sible handsets will be called for approximately 30 seconds.
End call prematurely
Press the green paging key on the base station.
?
or
Clear down the connection at the handset.
c
Making collective calls from one handset to all handsets
If your phone has several handsets, you can make a collective call from each handset to all of the other accessible
handsets. The first internal party to accept the call is connected to you. You can also use this function to locate
missing handsets.
x
x
Set up a connection .
Press the display key shown. You will hear the internal
ring tone. All accessible handsets and ancillary devices
are called .
Making internal calls
If your telephone has more than one handset (➔ page 71),
you can call the other handsets free of charge.
x
Initiate the connection.
Enter the number of the handset you wish to call (1 to 6).
o
You will hear the internal ring tone. The handset you dialled is called.
25
Page 37

18.7.99
INT
kap07.fm5
Collective ringing and internal calls
Checking your own internal number
Gigaset 2011 Comfort, GBR: A30852-X1106-B307-1-
Ending an internal call
x
Initiate the connection.
The internal call number
of the handset is displayed.
SET
Replace the handset in the base station or charging unit.
The line is disconnected.
or
Clear down the connection.
a
INTERN
2
COLL.CALL
26
Page 38

18.7.99
INT
kap08.fm5
Gigaset 2011 Comfort, GBR: A30852-X1106-B307-1-
Internal consultation calls and transferring calls
Internal consultation calls and transferring calls
During a external call it is possible to:
● hold a consultation call with an internal party,
● transfer the external call to the internal party.
Consultation calls and call transfer are only possible if
● more than one handset is in operation
(➔ page 71).
Consultation calls
When more than one handset is in operation
If more than one handset is in operation (➔ page 71), you
can conduct a consultation call with an internal party during a call with an external party. The external party cannot
hear your conversation with the internal party and will
hear music while on hold.
u
Set up a connection.
Enter the number of the handset which you wish to call
o
(1 to 6). You will hear the internal ring tone. The handset
is being called. The external call is put on hold.
End consultation/resume external call
End the internal consultation call. You are now reconnect-
R
ed to the external party.
When a telephone system is in operation
You can conduct a consultation call with a party in your telephone system during an external call. Please check the
operating instructions for the telephone system.
Set up a consultation call. You will hear the dial tone. The
R
external call is put on hold.
Enter the desired extension number. The relevant party is
o
called.
End consultation/resume external call
End the internal consultation call. You are now reconnect-
R
ed to the external party.
27
Page 39

18.7.99
INT
kap08.fm5
Gigaset 2011 Comfort, GBR: A30852-X1106-B307-1-
Internal consultation calls and transferring calls
Transferring calls
When more than one handset is in operation
If more than one handset is in operation it is possible to
transfer an external call to an internal party (➔ page 71).
u
either
Set up a connection.
Enter the number of the handset to which you want to
o
transfer the call (1 to 6). You will hear the internal ring
tone. The handset is called. The external call is put on
hold.
Wait until the internal party answers and inform him/her
about the external call you are about to transfer.
Transfer the external call.
a
or
Do not wait until the internal party answers. Transfer the
a
external call directly.
Instead of pressing a, you can also replace
your handset in the charging unit.
If you have transferred the external call directly
and the internal party does not accept the call
within 30 seconds, an automatic recall is carried
out.
If you have transferred the external call directly
and the internal party is busy, an automatic recall is carried out immediately.
If you accept the recall, you will be reconnected
to the external party. A recall is accepted in the
same way as all other calls (➔ page 14).
When a telephone system is in operation
If a telephone system is in operation, you can transfer an
external call to an internal party. Please check the operating instructions for the telephone system.
Set up a consultation call. You will hear the dial tone. The
R
external call is put on hold.
Enter the desired extension number. The party in ques-
o
tion is called. Wait until the party answers and inform him/
her about the external call you are about to transfer.
Transfer the external call.
a
28
Page 40

18.7.99
INT
LIST.ON
LIST.OFF
kap08.fm5
Gigaset 2011 Comfort, GBR: A30852-X1106-B307-1-
Internal consultation calls and transferring calls
Allowing internal parties to listen in on a call
An internal party can be allowed to listen in on a call with
an external party with his/her handset.
Prerequisite: an external connection has been set up.
An external connection has been set up.
c
u
x
u
Set up a connection .
(
Dial the internal party (1... 6). The external all is put on
o
hold. The internal party answers. Conduct the consultation call.
Press the key shown. The external call is resumed and
the internal party can listen in.
Disconnect the internal party
Press the key shown. The internal party is disconnected
and hears the busy tone.
or
The internal party hangs up.
a
29
Page 41

18.7.99
u
,
x
Z
OK
d
W
kap08a.fm5
Gigaset 2011 Comfort, GBR: A30852-X1106-B307-1-
Creating and managing the directory
Creating and managing the directory
You can store up to 100 entries in the electronic directory.
The entries comprise:
● call numbers (maximum 32 digits), and
● names (maximum 16 characters).
When you activate the directory, the names are presented
in alphabetical order. You can scroll through it at your ease
and dial directly from it (➔ page 19).
You can call up the directory and its entries by pressing
. To manage the directory (e. g. change or delete entries) call up the directory menu in the directory by pressing .
The following menu items are available in the directory
menu:
● Dial Number
● New Entry
● Edit Entry
● Delete Entry
● Display Entry
● Copy Entry
● Delete Directory
● Copy Directory
● Available Memory
The activation of the individual menu items is abbreviated
as follows:
(tmeans: scroll with
t
u
d
u
W
e.g. New Entry
confirm with
)
30
Page 42

18.7.99
u
,
x
Z
OK
W
W
W
W
kap08a.fm5
Gigaset 2011 Comfort, GBR: A30852-X1106-B307-1-
Creating and managing the directory
Entering/copying/editing/deleting call numbers/names
New Entry
To add a new entry to the directory, select New Entry in
the directory menu.
(tmeans: scroll with
t
u
d
u
W
New Entry
When you select New Entry, the input function is active.
The name and number are entered as described in the
chapter “Input function“ ➔ page 37.
The names are sorted in alphabetical order.
Press : or # on the first letter of the name to
move entries to the top of the directory list.
Additional menus are available for the Name and Contents fields. You can reach these menus by pressing
.
Saving an entry or cancelling an operation
To save entries in the Name and Contents fields or to cancel the operation, activate the relevant functions (Save Entry or Cancel) in the additional menu.
confirm with
)
x
x
x
Save Entry
t
Cancel
t
Insert Function
t
or
Inserting a pause
You can insert a pause, e.g. after the international code
when entering call numbers in the Contents field.
t
Pause
A "P" is inserted into the call number.
31
Page 43

18.7.99
u
,
x
Z
OK
u
,
x
Z
OK
W
W
z
Z
W
d
Z
W
kap08a.fm5
Creating and managing the directory
Displaying a special character
You can display the meaning of any special character in
the call number, e.g. "P". Place the cursor on the character:
Show Function
u
u
t
Check Duplicate
t
The explanation is shown on the display: Digit “P“:
Pause.
Checking an entry
To prevent an entry appearing in the directory more than
once, it is possible to have new entries checked.
If there is an identical number in the directory, the name
of the double entry is shown on the display.
Copying numbers
You can copy the last number dialled into the directory.
x
u
Call up redial by pressing the display key shown.
Select the desired number from the five available redial
numbers.
Gigaset 2011 Comfort, GBR: A30852-X1106-B307-1-
u
Edit Entry
x
32
Copy Number
t
Edit Entry
t
u
Activate the Copy Number in the additional menu.
(tmeans: scroll with
Continue as described under "Directory", "New Entry"
➔ page 31 and add a name to the selected number.
It is possible to edit existing entries.
Call up the directory and
select the entry to be editited.
Call up the “Edit Entry” option in the additional menu.
(tmeans: scroll with
The input function is active. Correct the name or number
as described in the input function rules ➔ page 37.
confirm with
confirm with
)
)
Page 44

18.7.99
u
,
x
Z
OK
u
,
x
Z
OK
d
Z
W
OK
OK
YES
YES
NO
Delete Entry
x
Delete Entry
t
kap08a.fm5
u
x
Gigaset 2011 Comfort, GBR: A30852-X1106-B307-1-
Creating and managing the directory
Processing and saving an entry
The options available under New Entry are also available
in the additional menu.
Entries in the directory can be selected using
the search function. Enter the first letter of the
name. The first entry starting with this letter is
displayed.
It is not possible to add new entries if the directory is full. You must first delete an existing entry.
You can delete individual entries from the directory.
Activate the directory and
select the entry to be deleted.
Activate the Delete Entry menu item in the additional
menu.
(tmeans: scroll with
confirm with
The entry is deleted when you press OK. A confirmation
beep is sounded and the message “Entry has been deleted” appears on the display.
)
Deleting the directory
u
d
x
W
o
t
x
Delete Directory
x
The Delete Directory menu item allows you to delete all
of the directory data from the memory.
(tmeans: scroll with
confirm with
)
Enter the PIN (➔ page 44) and confirm. The message
“Delete all entries?“ appears on the display.
If you confirm by pressing , all entries are deleted.
The message “All entries deleted” is shown on the display. You can cancel the procedure by pressing .
33
Page 45

18.7.99
u
,
x
Z
OK
u
,
x
Z
OK
u
,
x
Z
OK
d
Z
W
W
kap08a.fm5
Creating and managing the directory
Available memory
It is possible to show the percentage of memory available
for your entries.
(tmeans: scroll with
t
u
d
x
W
Available Memory
The message "Memory: 70% available", for example, is
displayed for approximately two seconds.
Copying an entry/directory
Directory entries can be copied between enhanced Gigaset 2000T or 2000C telephones or enhanced handsets.
This feature is supported by the Gigaset 2011 base station.
Activate the directory and
select the entry to be copied.
Activate Copy Entry in the additional menu.
(tmeans: scroll with
x
t
u
Copy Entry
Gigaset 2011 Comfort, GBR: A30852-X1106-B307-1-
confirm with
confirm with
)
)
x
u
34
d
t
x
Copy
W
t
Copy Directory
Enter the internal extension of the telephone or handset
o
receiving the entries in response to the request "Copy entry to internal". Start the copy operation as follows:
The receiving telephone is called. When the call is answered, the called party is requested to enter the PIN.
The copy operation begins if the PIN is correct.
The Copy Directory function is performed in the same
way as the Copy Entry function:
(tmeans: scroll with
confirm with
The receiving telephone is called. When the call is answered, the called party is requested to enter the PIN.
The copy operation begins if the PIN is correct.
)
Page 46

18.7.99
u
,
x
Z
OK
u
,
x
Z
OK
z
Z
W
Z
OK
W
kap08b.fm5
Administering the redial memory
Editing the redial number
You can call up a list of redial numbers by pressing .
Select one of the last five different numbers called by
pressing .
You can edit a selected call number in the redial list:
(tmeans: scroll with
Edit Number
x
t
The input function is activated. For information and rules
on the input function, see from ➔ page 37.
Additional menu from the input function
Another additional menu can be activated from the input
function: This menu contains the following menu items:
● Save Entry
– The edited call number is saved in the same posi-
tion in the redial list.
● Insert Function
– You can insert a pause in the call number.
● Show Function
– You can show the meaning of a special character
selected with the cursor.
● Cancel
– Exit the additional menu.
The menu items are selected with the button and
activated by pressing .
Gigaset 2011 Comfort, GBR: A30852-X1106-B307-1-
Administering the redial memory
confirm with
)
Deleting a call number from the redial memory
You can delete a selected call number from the redial
list:
(tmeans: scroll with
Delete Number
x
t
The call number is deleted.
confirm with
)
35
Page 47

18.7.99
u
,
x
Z
OK
u
,
x
Z
OK
W
W
GO BACK
kap08b.fm5
Administering the redial memory
Copying a redial number to the directory
You can copy a selected call number to the directory.
(tmeans: scroll with
Copy Number
x
Displaying the call number
x
t
Display Number
t
x
The input function is activated. Proceed as described under "New entry" in the chapter entitled "Creating and managing the directory" ➔ page 30.
Up to 16 digits of a call number can be displayed in the redial list. You can display a longer call numbers completely:
(tmeans: scroll with
The selected call number is displayed in full.
Return to the redial list.
Gigaset 2011 Comfort, GBR: A30852-X1106-B307-1-
confirm with
confirm with
)
)
36
Page 48

18.7.99
kap08c.fm5
Input function
Entering names and numbers
Gigaset 2011 Comfort, GBR: A30852-X1106-B307-1-
Input function
The input function is always active when names or call
numbers are entered or edited, e.g.
● New Entry, Edit Entry (directory, short cut, base set-
tings)
● Enter Number, Edit Number (redial)
● DSS Number
● BabyAlarm
● En-bloc Dialling, PIN
The three display lines are divided as follows:
● Line 1 for name (16 characters)
● Lines 2 and 3 for contents (32 characters)
In the following diagrams, "s" marks a blank space.
sssss<Name>sssss
ssss<Contents>ssss
ssssssssssssssss
Name input field
Contents input field
WEITER
The number of fields available for input depend on the input type, i.e. both are available for the directory, for example, and only the second field for en-bloc dialling.
If data is entered or edited only in the Contents fields, the
Name field remains empty or contains information such
as the redial number.
37
Page 49

18.7.99
X
<
>
kap08c.fm5
Input function
Exception
The Name field is generally used for entering names. An
exception to this occurs when editing base names in the
Base Settings – edit names menu. In this instance, the
name is edited in the Contents field.
Inserting, deleting, and moving characters
Inserting
Characters are always inserted to the left of the cursor.
Deleting
Characters to the left of the cursor are deleted by pressing the display key.
Moving
The cursor is moved using the and display keys.
Moving from the Name field to the Content field
sssssssssssssss
ssssssssssssssss
ssssssssssssssss
Gigaset 2011 Comfort, GBR: A30852-X1106-B307-1-
_
To move to the Name field,
shift the cursor to the left of
the first place in the Contents field.
38
ssssssssssssssss
_
sssssssssssssss
ssssssssssssssss
To move to the Contents
field, shift the cursor to the
right of the last place in the
Name field.
Page 50

18.7.99
_
>
kap08c.fm5
Example: making a new directory entry
Gigaset 2011 Comfort, GBR: A30852-X1106-B307-1-
Input function
Select New Entry in the directory menu to obtain the following output on the display:
Examples: changing an entry
ssss<Name>sssss
< Tel. number>s
ssssssssssssssss
No characters have
been entered yet.
W
_
ssssssssssssss
W
< Tel. number>s
ssssssssssssssss
>
X
<
The first character (in
this case an "W") has
been entered.
W
For information on entering data see ➔ page 41.
If you have entered the name in full and wish to add the
corresponding telephone number, move the cursor to
the second field (Contents) using the display key and
enter the number.
Whit e s s sssssssss
_
ssssssssssssss
0
ssssssssssssssss
<
>
X
The first digit (in this
case a “0“) has been
entered.
W
You can also make corrections while making new entries.
The following display appears , for example, if you have already selected "Edit Entry" in the directory menu:
Making changes in the Name field
White s s sssssssss
_
089P1234567
ssssssssssssssss
<
>
sssss
X
The field containing the
cursor flashes until you
press the delete key or
enter a character.
W
39
Page 51

18.7.99
<
X
>
X
Input function
kap08c.fm5
Gigaset 2011 Comfort, GBR: A30852-X1106-B307-1-
Wh_te ssssssssss
089P1234567
ssssssssssssssss
<
>
ssssss
X
Change the name, e.g.
from White to Whyte.
Procedure:
W
Using the button,
move the cursor to the
Wh_te ssssssssss
089P1234567
ssssssssssssssss
<
>
ssssss
X
letter "t" in the Name
field. Press to delete the letter "i" and enter the new letter "y".
W
Making changes in the Contents field
White s s sssssssss
_
_
_
sssss
X
ssssss
X
sssss
X
089P1234567
ssssssssssssssss
<
>
White s s sssssssss
089P123456
ssssssssssssssss
<
>
White s s sssssssss
089P1234568
ssssssssssssssss
<
>
W
W
For example, replace the
last digit with an "8".
Procedure:
W
Press to place the
cursor after the digit "7" in
the Contents field: Press
to delete this digit
and enter "8".
40
Page 52

18.7.99
W
Example: field boundaries
kap08c.fm5
Gigaset 2011 Comfort, GBR: A30852-X1106-B307-1-
Input function
If you enter characters in fields that are already fully assigned (16 in the Name field and 32 in the Contents field),
the last character in the relevant field is shifted to the right
and thereby lost.
Smih-Macallister
>
>
_
X
ssssss
X
089P1234567
ssssssssssssssss
<
Smit_-Macalliste
089P1234567
ssssssssssssssss
<
If, in this example, the last “e” were to be replaced by an
“l”, the entry mark would have to be set to this place because the next place is in the second line and does not belong to the Name field.
Entering letters, special characters, and digits
The Contents fields are reserved for entering digits (e.g.
call numbers). An additional menu is available for
entering special characters (e.g. pause).
123
4%6
789
To make entries in the Name field, use the digit keys as
an alphanumeric keypad. The letters are assigned to the
digit keys in groups of three or four. Special characters,
such as é, ö, ñ etc. are entered by pressing the key for the
relevant letter group several times. To enter a space, full
@
stop, and hyphen, press the 0 digit key.
You can shift from lower case to upper case by pressing
:
the “*“ key. The shift will apply to one character, after
which the default lower case setting is restored
sssss
For example, in the case
of the double-barrel
name Smith-Macallister,
if the missing “t” is inserted in Smith, the last
W
“r” of Macallister will disappear.
W
a, b, c, d....x, y, z Depending on the position of the digit key, letters are in-
put by briefly pressing the key (less than 1 second). For
example, if you wish to enter the letter “r”, you must
press the 7 key three times in succession, as “r” is
the third letter assigned to this key.
For example, for key 1, press the following keys re-
peatedly: "ä", "ö", "ü", "ß", "1", ",".
41
Page 53

18.7.99
Input function
kap08c.fm5
Gigaset 2011 Comfort, GBR: A30852-X1106-B307-1-
Character set
The following table shows how often a key has to be
pressed to enter a specific character (letter, digit, and special character).
Default setting = lower case
Press x 1
Press x 2
Press x 3
Press x 4
key
Press x 5
1 ä ö ü ß 1 ,
2 a b c 2 ä à â ç
3 d e f 3 ë é è ê
4 g h i 4 ï î
% j k l 5
6 m n o 6 ö ñ ó ô
7 p q r s 7 ß
8 t u v 8 ü ú ù û
9 w x y z 9
@
: a } A
s
. _ 0 + : ? !
/ ( ) = & @
*
# #
Press x 6
Press x 7
Press x 8
42
Shift to upper case by pressing “*“
Press x 1
Press x 2
Press x 3
Press x 4
Press x 5
Press x 6
key
Press x 7
1 Ä Ö Ü 1
2 A B C 2 Ä À Â Ç
3 D E F 3 Ë É È Ê
4 G H I 4 Ï Î
% J K L 5
6 M N O 6 Ö Ñ Ó Ô
7 P Q R S 7
8 T U V 8 Ü Ú Ù Û
9 W X Y Z 9
@
: a } A
s
. _ 0 + : ? !
/ ( ) = & @
*
# #
Press x 8
Page 54

18.7.99
u
,
x
Z
OK
SET
kap09.fm5
Important basic settings
Changing the base code/PIN
Changing the base code
Gigaset 2011 Comfort, GBR: A30852-X1106-B307-1-
Important basic settings
In order to protect basic and individual settings, your Gigaset 2011 has two four-digit "key numbers", the base
code and the handset PIN (personal identification
number). The factory default for both numbers is "0000".
The base code must be known if you want to perform important basic settings or lock the handset for outgoing
calls. The base code is the main key to your Gigaset 2011.
The PIN is used to protect settings that mainly affect the
handset or the handsets, and have no influence on the
basic operation of the base station. For security reasons,
you should set a new base code and a new PIN.
The same base code applies to all handsets if more than
one is used (➔ page 71).
.
(tmeans: scroll with
t
Service Select the Service menu item.
#8:
u
Start the setting procedure.
Enter the old base code (factory default: "0000").
o
Enter the new, four-digit base code and note carefully the
o
number entered.
Re-enter the new base code to confirm.
o
Save the setting.
confirm with
)
43
Page 55

18.7.99
u
,
x
Z
OK
OK
kap09.fm5
Important basic settings
Changing the handset PIN
. t Settings
t
x
Gigaset 2011 Comfort, GBR: A30852-X1106-B307-1-
The PIN (personal identification number) for your handset
can have up to 8 digits. The factory default for the handset
PIN is 4 x "0". Changing the PIN prevents unauthorised
persons from clearing entries from your directory, for example.
(tmeans: scroll with
confirm with
Handset Settings tChange PIN
Once "Change PIN" has been confirmed, you are requested to enter the current PIN.
:
Enter
PIN:
_
Y
Enter the new PIN and note carefully the number en-
o
tered.
Re-enter the new PIN to confirm.
o
Store the new PIN. The message "New PIN stored!" appears on the screen.
Z
X
OK
)
If you forget your base code or PIN
44
Incorrect entries can be modified. Do do this,
follow the input function rules described from
➔ page 37.
When entering a new base code or PIN, you must not for-
get the number entered. Otherwise, it may be necessary
to open up the device. If this happens, please contact the
manufacturer (for call number, see ➔ page 94 of these operating instructions).
Page 56

18.7.99
u
,
x
Z
OK
REDIAL
SET
kap09.fm5
Gigaset 2011 Comfort, GBR: A30852-X1106-B307-1-
Resetting the base station to the factory defaults
You can use this function to reset the following settings to
factory defaults:
● Signalling method (➔ page 13)
● Pause length following analog trunk/MSI (➔ page 49)
● Call allocation (➔ page 71)
● Call charge factor (not available in the UK)
The following stored data can be deleted:
● Call list
● Analog trunk/MSI
● Call units/charges
The base code stored (➔ page 43) is not deleted.
All registered handsets remain registered.
Important basic settings
.
u
(tmeans: scroll with
t
Service Select the Service menu item.
# 1
2%@ x
Start the setting procedure.
Enter the four-digit base code (factory default: "0000")
o
(➔ page 43).
Reset the base station to the factory default.
confirm with
)
45
Page 57

18.7.99
u
,
x
Z
OK
OK
kap09.fm5
Gigaset 2011 Comfort, GBR: A30852-X1106-B307-1-
Important basic settings
Resetting the Gigaset 2000C handset to the factory defaults
You can use this procedure to reset the following settings
to the factory defaults:
.
t
Settings
t
Handset Settings
o
x
●
Ringer volume
●
Ringer tone
●
Handset volume
●
Range warning, in-range beep
●
Key beep, battery warning beep, confir-
6
1
1
OFF
ON
mation beep, error beep
●
Automatic call acceptance, automatic
EIN
backlighting
●
Baby alarm level
●
Language setting
●
DSS number, redial,
2
German
Deleted
ISDN configuration
●
Select Services
ACTIVE
The handset PIN stored (➔ page 44) is not deleted.
(tmeans: scroll with
t
Initialization
confirm with
)
You are requested to enter the current PIN (factory default: "0000").
The settings are reset to the factory defaults when you
confirm your entry.
46
Page 58

18.7.99
u
,
x
Z
OK
REDIAL
SET
REDIAL
SET
kap09.fm5
Operating in a telephone system
To be able to operate your Gigaset 2011 in a telephone
system, you must first
1. check the signalling method,
2. enter the analog trunk or MSI
3. enter the pause lengths after the
Possible signalling method settings
The factory default for the signaling method is
● DTMF/Flash.
You must first reset this setting to one of the following in
order to operate your handset in telephone systems:
● DP
or
● DTMF/Flash.
Please also consult the instructions for use supplied with
your telephone system.
(tmeans: scroll with
t
.
u
u
Service Activate the Service menu item.
#1
@33x
Start the setting procedure.
Enter the four-digit base code (factory default: "0000")
o
(➔ page 43).
Set dial pulsing (DP)
or
@37x
Dual-tone multifrequency signalling DTMF/Flash
Gigaset 2011 Comfort, GBR: A30852-X1106-B307-1-
Important basic settings
analog trunk or MSI.
Call number display (CLIP) can only be used if
supported by the telephone system.
confirm with
)
47
Page 59

18.7.99
u
,
x
Z
OK
REDIAL
REDIAL
REDIAL
REDIAL
SET
kap09.fm5
Important basic settings
Analog trunks
Entering the analog trunk and the MSI
t
.
Service Activate the Service menu item
#@
o
x
or
x x
o
u
Gigaset 2011 Comfort, GBR: A30852-X1106-B307-1-
For operating your Gigatset 2011 in a telephone system
for through connection to the public telephone network
you must set:
● the analog trunk
● the pause length after the analog trunk (if a pause is
necessary after entry of the analog trunk)
If the telephone system is connected as a subsystem to
a main system, you must set the:
● the analog trunk
● the MSI
● the pause length after the analog trunk/MSI
For the pause length to be entered after the analog trunk/MSI, please consult the documentation supplied with your telephone system.
The analog trunk and MSI have one to three characters
and can comprise the digits @ to 6 and the :, #,
and R keys.
(tmeans: scroll with
confirm with
)
Start the setting procedure.
Enter the four-digit base code (factory default: “0000“)
(➔ page 43).
Select the analog trunk.
Select the MSI.
Enter the analog trunk or the MSI. If more than one ana-
log trunk or MSI is available, you can enter the next analog
trunk/MSI by pressing
u
.
Save the setting.
48
Page 60

18.7.99
u
,
x
Z
OK
u
,
x
Z
OK
REDIAL
SET
REDIAL
SET
REDIAL
SET
REDIAL
SET
REDIAL
SET
kap09.fm5
Modify the pause length after the analog trunk/MSI
Possible pause lengths are:
1 second
2 seconds
3 seconds (factory default)
6 seconds
(tmeans: scroll with
t
.
u
Service Activate the Service menu item.
Save the setting.
Enter the four-digit base code (factory default: “0000“) .
o
Select pause length of 1 second.
@24
#1
x
or
u
@2%
x
Select pause length of 2 seconds.
or
u
@2@
x
Select pause length of 3 seconds (factory default).
or
u
@21
x
Select pause length of 6 seconds.
Gigaset 2011 Comfort, GBR: A30852-X1106-B307-1-
Important basic settings
confirm with
)
Deleting the analog trunk/MSI
t
.
Service Select the Service menu item.
#1
x
2%3
u
The first analog trunk is appended to the incoming call when saving calls to the call list. This facilitates callback beyond the telephone system.
(tmeans: scroll with
confirm with
Start the setting procedure.
Enter the four-digit base code (factory default: “0000“) .
o
Delete analog trunk/MSI.
)
49
Page 61

18.7.99
u
,
x
Z
OK
(Example: ringer volume 6
SET
kap09a.fm5
Gigaset 2011 Comfort, GBR: A30852-X1106-B307-1-
Individual base station settings
Individual base station settings
You can program your Gigaset 2011 to suit your own individual requirements. The settings are made from a registered handset.
Switching the base station ringer off and setting the ringer volume
It is possible to define whether the ringers should be signalled at the base station or only on the handset. You can
set the ringer volume for the ringer at the base station.
There are seven volume levels available:
Level 0 = Switch off base station ringer.
Level 1 ... Level 6 = Ringer volume low ... high
The factory default is level 6 (loud/high).
It is also possible to set the ringer volume on the
handset (➔ page 53).
Calls will only be signalled on the
handset.
.
(tmeans: scroll with
t
Service Activate the Service menu item.
#
:
Start setting procedure. The ringer setting is sounded.
%
The set volume is indicated on the display:
:
*5 6
SET
REDIAL
o
u
SET
SET
Press the digit for the desired volume (1 to 6) or 0 to
switch the ringer off and save the setting.
confirm with
is set)
)
50
Page 62

18.7.99
u
,
x
Z
OK
u
,
x
Z
OK
REDIAL
SET
REDIAL
SET
(Example: tone level 1 is
SET
kap09a.fm5
Activating/deactivating music on hold
You are connected to an external party who has been
placed on hold while you conduct an internal consultation
or you have activated the mute function. The external party will hear music while on hold. Music on hold is activated by default.
(tmeans: scroll with
t
.
u 411 x
u 41@ x
Service Activate the Service menu item.
#1
Start the setting procedure.
Enter the four-digit base code; (factory default: "0000")
o
(➔ page 43).
The current setting is displayed after the first digit 1 :
411 = activated, 41 0 = deactivated. Music on hold is activated the next time the digit 1 is entered (factory default)
or
Deactivate music on hold.
Gigaset 2011 Comfort, GBR: A30852-X1106-B307-1-
Individual base station settings
confirm with
)
Setting the base station ringer tone
It is possible to define the tone used to signal calls at the
base station. You can choose from a range of six tones.
The factory default is level 1.
(tmeans: scroll with
t
.
Service Activate the Service menu item.
#:6
Start setting procedure. The selected ringer tone is
sounded. The set tone level is indicated on the display:
:
*6 1
SET
o
u
Enter the applicable digit for the required ringer tone (1 to
6) and save.
To set the ringer tone, the base station ringer
must be switched on.
It is easier to distinguish between calls signalled
at the base station and the handset if different
ringer tones are set for each. The ringer tone can
also be set for the handset
(➔ page 53).
confirm with
)
set)
PRG
REDIAL
51
Page 63

18.7.99
u
,
x
Z
OK
(Example: handset volume
>
<
OK
{
kap10.fm5
Individual handset settings
Individual handset settings
You can program your handset to suit your own individual
requirements. All settings are made directly on the handset. When operating with more than one handset, the
handset must be registered at the base station
(➔ page 69).
Setting the handset volume
The handset has three volume settings:
Level 1 ... Level 3 = handset volume normal ... loud
The factory default is level 1 (normal).
Gigaset 2011 Comfort, GBR: A30852-X1106-B307-1-
This setting can also be adjusted during a call.
.
t
Settings
u
or
t
Handset Volume
u
x
or
u
(tmeans: scroll with
The following appears on your display:
:
Handset vol. 2
WR
<
>
Set handset volume and
confirm
Quit the function without saving any changes.
The handset volume is displayed when the
handset is on hook.
{
OK
confirm with
is set to level 2)
)
52
Page 64

18.7.99
u
,
x
Z
OK
u
,
x
Z
OK
>
<
OK
{
>
<
OK
{
Ringer settings
Setting the ringer volume
t
.
Settings
kap10.fm5
t
Ringer Options
Gigaset 2011 Comfort, GBR: A30852-X1106-B307-1-
Individual handset settings
You can set the ringer on your handset to suit your individual requirements. The ringer volume and tone can be
modified using the ringer options menu.
You can set the ringer volume on your handset to one of
seven settings:
Level 0 ... Level 6 = Ringer volume off ... loud
The factory default is level 6 (loud).
(tmeans: scroll with
t
Ringer Volume
:
Ringer Volume: 3
confirm with
(Example: the ringer volume is set to level 3.)
)
u
x
Setting the ringer tone
t
.
Settings
u
x
or
or
or
or
u
x
t
u
x
<
>
{
OK
Modify ringer volume.
Store the setting or quit the function without saving any
changes.
If the ringer volume is switched off (level 0), the symbol
is shown on the display.
You can set the ringer tone on your handset to one of ten
levels.
The factory default is level 1.
If several handsets are being operated in one
room, it is easier to distinguish their ringers if
they are set to different tones.
(tmeans: scroll with
Ringer Volume
:
Ringer Tone: 4
<
>
t
Ringer Tone
{
OK
confirm with
(Example: the ringer tone is
set to level 4.)
Change the ringer tone.
Store the setting or quit the function without saving any
changes.
)
53
Page 65

18.7.99
u
,
x
Z
OK
u
,
x
Z
OK
ON
OFFOKOFF
ON
{
ON
OFFOKOFF
ON
{
kap10.fm5
Gigaset 2011 Comfort, GBR: A30852-X1106-B307-1-
Individual handset settings
Activating/deactivating automatic backlight
If the automatic backlight is set ( ✓ beside the menu
item), the display backlight is activated automatically
when you press a key or when a call is signalled (factory
default).
(tmeans: scroll with
.
t
Settings
u
/
t
Handset Settings
x
or
x
t
Switch the automatic backlight off or on by pressing
/ and save. Symbol for ON = v,
symbol for OFF = w .
Quit the function without saving any changes.
Automatic call acceptance
If the automatic call acceptance function is active,(✓ beside the menu item), calls are accepted by removing the
handset from the charging unit (factory default).
(tmeans: scroll with
.
t
Settings
u
/
t
Handset Settings
x
or
x
t
Switch the automatic call acceptance function off or on by
pressing / and save. Symbol for ON = (,
symbol for OFF =).
Quit the function without saving any changes.
Auto Backlight
Auto Talk
confirm with
confirm with
)
)
ISDN configuration
54
This menu item is not available with the Gigaset
2011 base telephone.
Page 66

18.7.99
u
,
x
Z
OK
u
,
x
Z
OK
ON
OFFOKOFF
ON
{
ON
OFFOKOFF
ON
{
kap10.fm5
Gigaset 2011 Comfort, GBR: A30852-X1106-B307-1-
Individual handset settings
Activating/deactivating notification and warning tones
You can switch the following notification tones on and off
in the base station menu:
● Key beeps
● Battery low beep
● Range warning
● Confirm beep
● Error beep
● In range beep
A ✓ beside the menu item indicates that this function is
activated.
Activating/deactivating the key beep
If the key beep is switched on, each keystroke is confirmed acoustically. You can switch the key beep on (factory default) or off.
(tmeans: scroll with
.
t
Settings
u
/
t
Handset Settings
x
or
x
t
Beeps
Switch the key beep off or on by pressing the /
key beep switch and save.
Quit the menu without saving any changes.
confirm with
t
Key Beeps
)
Activating/deactivating the battery low beep
If the battery low beep is switched on, a beep is sounded
when the battery charge is too low. You can switch the
battery low beep on (factory default setting) or off.
(tmeans: scroll with
.
t
Settings
u
/
t
Handset Settings
x
Switch the battery warning beep off or on by pressing
or
Quit the menu without saving any changes.
x
t
Beeps
/ and save.
confirm with
t
Batt. Low Beep
)
55
Page 67

18.7.99
u
,
x
Z
OK
u
,
x
Z
OK
u
,
x
Z
OK
ON
OFFOKOFF
ON
{
ON
OFFOKOFF
ON
{
ON
OFFOKOFF
ON
{
kap10.fm5
Gigaset 2011 Comfort, GBR: A30852-X1106-B307-1-
Individual handset settings
Activating/deactivating the range warning beep
If the range warning beep is switched on, a beep sounds
if the handset is too far from the base station during a call.
You can switch the range warning beep on or off (factory
default).
(tmeans: scroll with
t
t
Settings
u
Settings
u
/
/
.
Activating/deactivating the positive confirmation beep
.
t
Handset Settings
x
or
x
t
Handset Settings
x
or
x
t
Switch the range warning beep off or on by pressing
/ and save.
Quit the menu without saving any changes.
The confirm beep is sounded when settings are completed correctly. You can switch the confirm beep on (factory
default) or off.
(tmeans: scroll with
t
Switch the confirm beep off or on by pressing /
and save.
Quit the menu without saving any changes.
Beeps
Beeps
confirm with
t
Range Warning
confirm with
t
Confirm Beep
)
)
Activating/deactivating the error beep
.
56
t
Settings
u
/
t
Handset Settings
x
or
x
If the error beep is switched on it is sounded when an incorrect entry is made. You can switch the error beep on
(factory default) or off.
(tmeans: scroll with
t
Beeps
Switch the error beep off or on by pressing / and
save.
Quit the menu without saving any changes.
confirm with
t
Error Beep
)
Page 68

18.7.99
u
,
x
Z
OK
u
,
x
Z
OK
ON
OFFOKOFF
ON
{
W
W
OFF
kap10.fm5
Activating/deactivating the in range beep
If the in range beep is switched on, it is sounded when a
handset that was too far from the base station moves
back into range. You can switch the in range beep on or off
(factory default: off).
(tmeans: scroll with
.
t
Settings
u
/
t
Handset Settings
x
or
x
Switch the in range beep off or on by pressing /
and save.
Quit the menu without saving any changes.
Baby alarm
If this function is switched on, an internal call is made to
a second handset if noise above a specified volume is detected. An internal call is conducted with the baby alarm
handset when the call is answered. If the call is not answered, or if you have already hung up, a new baby alarm
call is set up as soon as the volume exceeds the set level.
The baby alarm feature is not available in combination with
a telephone lock.
Gigaset 2011 Comfort, GBR: A30852-X1106-B307-1-
Individual handset settings
)
t
Beeps
confirm with
t
In Range Beep
Activating/deactivating the baby alarm
t
.
x
x
Baby Alarm
Store
t
Cancel
t
o
(tmeans: scroll with
Enter the internal number of the internal party to be
called.
or
To deactivate the baby alarm function, press the display key.
Please switch off all warning beeps before using
the baby alarm. When using your handset as a
baby alarm, we recommend that you only operate it with fully charged batteries and not while
it is standing in the charging unit.
confirm with
)
57
Page 69

18.7.99
u
,
x
Z
OK
u
,
x
Z
OK
<>{
>
<
OK
{
Z
Y
OK
{
kap10.fm5
Individual handset settings
Baby alarm level
.
t
Settings
t
Handset Settings
Gigaset 2011 Comfort, GBR: A30852-X1106-B307-1-
You can set the baby alarm level to one of three levels.
(tmeans: scroll with
t
BabyAlarmLevel
:
Alarm Level2
confirm with
(Example: alarm level 2 is
set)
)
u
or u
x
or x
W
Change the level.
Save the setting or quit the function without saving any
changes.
OK
Selecting a language
You can choose from seven languages for the displays:
German, English, French, Italian, Spanish, Portuguese and
Dutch.
(tmeans: scroll with
.
t
Settings
t
Handset Settings
t
Language
:
✓German
English
French
{
OK
u
or u
x
or x
Y
Z
Select a language.
Save the setting or leave the active language.
You can reset inadvertent language changes using the following table:
Language version Settings Handset Settings Language English
D Einstellungen Lokale Einst. Sprache Englisch
GB Settings Handset Settings Language English
F Réglages Réglages combiné Langue Anglais
I Impostazioni Impostaz.Telef. Lingua Inglese
E Ajustes Ajuste local Idioma Inglés
P Programações Program. local Língua Inglês
NL Instellingen Lokale instell. Taal Engels
confirm with
(Example: German is set)
)
58
Page 70

18.7.99
u
,
x
Z
OK
SVC
OFFONOK
{
SVC
W
Select services
kap10.fm5
Gigaset 2011 Comfort, GBR: A30852-X1106-B307-1-
Individual handset settings
Some of the functions required for the select services offered by Deutsche Telekom are preprogrammed on your
handset. You can activate the select services by pressing
or from the on-line menu ( ➔ page 8 ) after pressing
the Talk key. Select services are activated by default and
the a list of the available select services is provided.
Select services list
Name Keys Meaning
.
t
Settings
t
Handset Settings
Enquiry Call R Initiate an enquiry call/consulta-
End active R1 End the active connection
End inactive R0 End the call that is on hold
Toggle R2 Toggle between 2 external calls
3-Way Calling R3 Initiate a 3-way conference
Call waiting off #43#QE Deactivate call waiting
Call waiting on *43#QE Activate call waiting
tion
Activating and deactivating select services
(tmeans: scroll with
t
Select Services
confirm with
)
Press or to deactivate or activate select services, press to save them or to quit the menu without saving any changes.
Loading the select services list provided
The select services list is loaded via the additional menu
(select services menu).
Only load the select services list once, otherwise the entries will be duplicated. If you want
to update the list with "Reload", you should first
delete all existing select service entries.
u x
Load Select Serv
t
x
LOAD
Select services menu
For information on administering the select services list,
see the chapter on short cuts ➔ page 77.
59
Page 71

18.7.99
u
,
x
Z
OK
INT
SET
REDIAL
SET
SET
kap11.fm5
Gigaset 2011 Comfort, GBR: A30852-X1106-B307-1-
Displaying call duration
Displaying call duration
In the following routines, you can use the key
sequence x u ) instead of activating the Service menu item.
Activating/deactivating call duration display
In the case of external connections (➔ page 17), the call
duration display appears approximately 12 seconds after
the last digit is dialled. The display remains visible for approximately 4 seconds after the call has been ended.
Call duration display is activated by default.
.
t
Service
x
@
1
# 1
o
9 6
u
or
u
(tmeans: scroll with
confirm with
)
Select the Service menu item.
Start the setting procedure.
Enter the four-digit base code (factory default: "0000").
The current setting appears on the handset display: 961
= activated, 960 = deactivated.
Deactivate call duration display.
Activate call duration display.
60
Page 72

18.7.99
u
,
x
Z
OK
SET
SET
kap13.fm5
Gigaset 2011 Comfort, GBR: A30852-X1106-B307-1-
Gigaset 2011 lock functions
Gigaset 2011 lock functions
Activating/deactivating the lock for outgoing calls
It is possible to lock the Gigaset 2011 for outgoing calls.
If emergency numbers are stored, they can be dialled
even if the lock is active.
It is possible to receive calls while the lock function is on.
The factory default for this function is deactivated.
You can also lock individual handsets for outgoing external calls (➔ page 67).
(tmeans: scroll with
.
t
Service
# 2 4
u
1
Select the Service menu item.
Start the setting procedure.
Enter the four-digit base code (factory default: "0000").
o
Switch on the lock.
or
@
u
Switch off the lock.
Emergency calls when the system is locked
You can program up to four emergency call numbers.
Emergency call numbers can be dialled from each registered handset,
● even if the Gigaset 2011 is locked for outgoing calls,
or (➔ page 61), or
● if the handset is only set for outward-restricted trunk
access (➔ page 66).
● if the handset lock is switched on (➔ page 67).
Emergency call numbers can have up to 16 digits.
The emergency numbers 999, 112 and 9112 are
preset in the base station.
confirm with
)
61
Page 73

18.7.99
u
,
x
Z
OK
u
,
x
Z
OK
REDIAL
(Example: no emergency
(Example: emergency
REDIAL
SET
REDIAL
SET
SET
kap13.fm5
Gigaset 2011 lock functions
Displaying and storing emergency numbers
Gigaset 2011 Comfort, GBR: A30852-X1106-B307-1-
.
t
Service
# 2 %
x
o
x
u
x
u
(tmeans: scroll with
confirm with
Select the Service menu item.
Start the setting procedure.
Enter the four-digit base code (factory default: "0000").
(➔ page 43). The current entry for the first emergency
number is displayed:
:
1
~
number stored)
SET
SET
:
1 110
REDIAL
number 110 stored)
SET
SET REDIAL
Display the next emergency number.
or
Quit the display.
or
Enter the emergency number for the displayed entry (1 to
o
4). If a number is already stored there, the new number
will overwrite the old one.
Display the next number. The emergency numbers you
have entered are programmed for storage.
or
End procedure. Store all entries.
)
Deleting all emergency numbers
t
.
Service
# 2 7
u
62
(tmeans: scroll with
confirm with
Select the Service menu item.
Start the setting procedure.
Enter the four-digit base code (factory default: "0000").
o
Delete all emergency numbers.
)
Page 74

18.7.99
u
,
x
Z
OK
(Example: handsets 1, 2,
REDIAL
(1st example: no barred
(2nd example: barred
REDIAL
REDIAL
kap13.fm5
Barred numbers for handsets
Displaying or storing barred numbers
Gigaset 2011 Comfort, GBR: A30852-X1106-B307-1-
Gigaset 2011 lock functions
By storing barred numbers for each registered handset,
you can prevent certain external call numbers or types of
number from being dialled if the call number lock is activated (➔ page 65).
You can store up to three barred numbers for each handset. Barred numbers can have up to eight digits.
.
t
Service
# 8 %
o
o
x
x
or
o
x
(tmeans: scroll with
confirm with
)
Select the Service menu item.
Start the setting procedure.
Enter the four-digit base code (factory default: "0000").
(➔ page 43). The registered handsets or their internal extensions are shown on the display:
:
1 2 3
and 3 are registered)
SET
SET
REDIAL
Enter the internal extension of the desired handset (1 to
6).
Select the first barred number for the selected handset.
The barred number is shown on the display:
:
1 ~
number stored)
SET
SET
:
1 00
REDIAL
number 00 stored)
SET
SET REDIAL
Display the next barred number.
Enter a barred number for the displayed memory slot (1
to 3). If a barred number is already stored, the new
number overwrites the old one.
Display the next barred number. The barred number you
entered is stored.
63
Page 75

18.7.99
u
,
x
Z
OK
SET
(Example: barred numbers
SET
kap13.fm5
Gigaset 2011 lock functions
u
Deleting all barred numbers
Gigaset 2011 Comfort, GBR: A30852-X1106-B307-1-
or
End procedure:
The barred numbers only take effect if the call
number lock is switched on
.
t
Service
# 8 7
o
o
x
(tmeans: scroll with
confirm with
)
Select the Service menu item.
Start the setting procedure.
Enter the four-digit base code (factory default: "0000").
(➔ page 43). The registered handsets or their internal extensions which have a barred number stored are shown
on the display:
:
are stored for handsets 1, 4,
14 5
and 5)
SET
SET REDIAL
Enter the internal extension of the desired handset (1 to
6).
Delete all barred numbers for the selected handset. The
delete function must be repeated for each handset.
The delete function must be repeated for each
handset.
64
Page 76

18.7.99
u
,
x
Z
OK
(Example: handsets 1, 2,
SET
SET
kap13.fm5
Gigaset 2011 Comfort, GBR: A30852-X1106-B307-1-
Activating/deactivating the call number lock
You can activate and deactivate the call number lock separately for each registered handset. Other handsets are
not affected by the lock.
Calls can still be accepted on the handset even if the call
number lock is switched on.
The factory default setting is off.
(tmeans: scroll with
.
t
Service
# 8 4
Select the Service menu item.
Start the setting procedure.
Enter the four-digit base code (factory default: "0000").
o
(➔ page 43). The registered handsets, i.e. their internal
extensions, are shown on the display:
:
1 2 3
SET
SET
REDIAL
Gigaset 2011 lock functions
confirm with
and 3 are registered)
)
1
@
u
u
Enter the internal extension of the desired handset (1 to
o
6).
Switch on the call number lock for the selected handset.
or
Switch off the call number lock for the selected handset.
65
Page 77

18.7.99
u
,
x
Z
OK
REDIAL
(Example: handset
2
has1
SET
SET
kap13.fm5
Gigaset 2011 lock functions
Setting trunk access for the handset
You can define for each registered handset whether or not
external calls can be made. A distinction is made between:
● Unrestricted trunk access (factory default) – exter-
nal calls allowed, and
● Outward-restricted trunk access – external calls
cannot be made but incoming calls can be accepted.
The call list cannot be activated with handsets with
outward-restricted trunk access.
(tmeans: scroll with
.
t
Service
x
# 1
: 1
Select the Service menu item.
Start the setting procedure.
Enter the four-digit base code (factory default: "0000")
o
(➔ page 43).
Prepare to select the required handset.
Enter the internal extension (1 to 6) of the handset. The
o
current status of the selected handset is shown on the
display:
:
*12 1
SET
Gigaset 2011 Comfort, GBR: A30852-X1106-B307-1-
confirm with
)
= unrestricted trunk access)
SET
REDIAL
66
1
@
u
u
Set “Unrestricted trunk access“.
or
Set “Outward-restricted trunk access“.
Page 78

18.7.99
u
,
x
Z
OK
OK
ON
OFFOKOFF
ON
{
kap14.fm5
Lock functions on the handset
It is possible to lock your handset against unauthorised
use. Depending on the type of lock you select, emergency numbers can still be called from the handset.
Activating/deactivating the handset lock
You can lock your handset for outgoing calls to protect it
against unauthorised use. Calls can be answered with
locked handsets.
(tmeans: scroll with
.
t
Handset Lock
u
/
o
t
x
x
x
Lock On/Off
When you select the handset lock you will be requested
to enter your handset PIN.
Enter the PIN (factory default “0000“) and confirm.
Switch the handset lock off or on by pressing the /
or
key and save.
Quit the menu without saving any changes.
Gigaset 2011 Comfort, GBR: A30852-X1106-B307-1-
Lock functions on the handset
confirm with
)
Barred numbers for handsets
Barred numbers are stored and displayed for handsets via
the base station (➔ page 63 ).
67
Page 79

18.7.99
U
kap14.fm5
Lock functions on the handset
Handset display with active lock
Display with locked handset
Display with system lock
Gigaset 2011 Comfort, GBR: A30852-X1106-B307-1-
The handset lock is
switched on.
Handset locked
The seizure of the line with
or without prior call
number entry results in the
opposite display.
Display with call number lock
Any attempt to dial a
barred number is rejected
with an error tone.
Display with outward-restricted trunk access or internal access
In the case of outward-restricted trunk access
(➔ page 66), an error tone
is output.
EXTERN
---
J
EXTERN
08972224667
J
SET
EXTERN
---
J
68
Page 80

18.7.99
u
,
x
Z
OK
Z
OK
OK
Enter
Z
kap15.fm5
Gigaset 2011 Comfort, GBR: A30852-X1106-B307-1-
Registering/de-registering more than one handset at the base station
Registering/de-registering more than one handset at the base
station
You can operate up to six handsets of the types Gigaset
2000S and/or Gigaset 2000C or Gigaset 2000T as well as
the Gigaset 1000TAE cordless socket at a Gigaset 2011
base station.
The standard Gigaset 2000C handset supplied is already
registered at the base station with the internal call
number 1 and base number 1.
Each additional handset that you purchase must be registered at the base station. We recommend that you keep
the base number 1 for this base station when registering
other handsets at the base station.
Registering a Gigaset 2000C handset at a base station
If you want to operate your handset at more
than one base station (up to six) (➔ page 71),
you must repeat the following procedure at
each base station.
.
t
Settings
u
Register
t
x
x
o
2 … 6
(tmeans: scroll with
The available base stations are
displayed (1 to 6). Select a base
station (recommendation: Base
1)
Prepare the base station
Press the green paging key on the base station until you
?
hear the logon tone (after approximately ten seconds).
Register the handset
Enter the four-digit base telephone base code and confirm (factory default: "0000"). The handset
is now registered at the base station.
The unassigned internal numbers
are displayed. Use the dialling keypad to select one of these numbers as the handset number.
confirm with
Base 1
Base 2
Base 3
Y
base code:
_
* *
Y
2 3 4 5 6
Z
{
X
)
W
OK
69
Page 81

18.7.99
u
,
x
Z
OK
SET
SET
kap15.fm5
Gigaset 2011 Comfort, GBR: A30852-X1106-B307-1-
Registering/de-registering more than one handset at the base station
If you do not enter one of the numbers, the system automatically assigns the next free handset number after several seconds. Registration is complete when the station
selected is displayed.
Registering the Gigaset 1000TAE cordless socket
You can connect a fax, modem or another telephone, for
example, to the cordless socket, The device in question is
registered at the base station in the same manner as a
handset. Gigaset 1000TAE is not included in the Gigaset
2011 scope of supply. For more information, contact your
specialist dealer.
De-registering a handset from a base station
.
(tmeans: scroll with
t
Service Activate the Service menu item.
# 7 2
Start the setting procedure.
Enter the four-digit base code (factory default:”0000“)
o
(➔ page 43). All registered handsets are shown on the
display.
o
x
Enter the internal call number of the desired handset (1
to 6) and confirm by pressing
confirm with
x
)
.
70
Page 82

18.7.99
u
,
x
Z
OK
REDIAL
(
Example
:1 =
collective call
SET
SET
kap16.fm5
Operating more than one handset
Call allocation for incoming calls
It is possible to set how incoming calls should be signalled
when operating several handsets. A distinction is made
Collective call group
Call group 1
Call group 1
Call group 2
Call group 2
between:
● Collective call (factory default) – incoming calls are
signalled to all registered handsets.
You can exclude individual handsets from the collective call group and reintegrate previously excluded
handsets.
● Ring priority – incoming calls are first signalled at a
preferred (prioritised) handset. If this party does not
accept the call, the system automatically forwards it
to the handsets assigned to the collective call group
after an defined number of rings.
You can define which handset is assigned to the first
group and which are assigned to the second group.
Extensions that are not entered are excluded from
ring priority.
Gigaset 2011 Comfort, GBR: A30852-X1106-B307-1-
Operating more than one handset
Switching between collective call and ring priority
(tmeans: scroll with
.
t
Service
# 1
Activate the “Service” menu item.
Start the setting procedure.
Enter the four-digit base code (factory default:”0000“)
o
(➔ page 43).
x
: 2 3
The current setting is shown on the display:
:
*23 1
SET
1
2
u
u
Set collective call.
or
Set ring priority.
SET
REDIAL
confirm with
is set)
)
71
Page 83

18.7.99
u
,
x
Z
OK
u
,
x
Z
OK
REDIAL
(
Example 1
: handsets
1,
(
Example 2:
handset 3 is
SET
REDIAL
(
Example: handset
1
has
SET
kap16.fm5
Gigaset 2011 Comfort, GBR: A30852-X1106-B307-1-
Operating more than one handset
Excluding or including a handset from/into collective call
t
.
Service
# 1
o
x
: 2 1
u
o
Selecting a handset for ring priority
t
.
Service
# 1
o
x
: 2 2
(tmeans: scroll with
confirm with
)
Activate the Service menu item
Start the setting procedure.
Enter the four-digit base code (factory default:”0000“)
(➔ page 43).
The current setting is shown on the display. Handsets
which are in collective call mode are indicated by their internal extensions and excluded handsets are indicated by
a space:
:
2,3,4 are in coll. ringing)
*21 1234
SET
SET
:
*21 124
SET
Enter the internal extension of the desired handset (1 to
6) and confirm. If the handset is already in collective call
mode it is excluded. If it was previously excluded it is reintegrated into the collective call.
(tmeans: scroll with
Activate the Service menu item.
Start the setting procedure.
Enter the four-digit base code (factory default:”0000“)
(➔ page 43).
The current setting is shown on the display:
:
*22 1
SET REDIAL
REDIAL
SET
REDIAL
SET
not in collective call)
confirm with
ring priority)
)
o
u
Enter the internal extension of the desired handset (1 to
6) and confirm.
72
Page 84

18.7.99
u
,
x
Z
OK
REDIAL
(
Example:
3
rings are set)
SET
kap16.fm5
Setting the number of rings for ring priority
Gigaset 2011 Comfort, GBR: A30852-X1106-B307-1-
Operating more than one handset
t
.
Service
x
Naming handsets
# 1
: 6
u
o
(tmeans: scroll with
confirm with
Activate the Service menu item.
Start the setting procedure.
Enter the four-digit base code (factory default:”0000“)
o
(➔ page 43).
The current setting is shown on the display:
:
*6 3
SET
SET
Enter the desired number of rings (two to nine) and confirm.
The station at which the handset is registered is shown on
the display. This is useful for identifying your handsets.
The base station is assigned a different name for every
handset.
For the first handset, call Base 1 "Mobile1", for example,
and call the second one "Mobile2".
For information on renaming stations, see ➔ page 76.
REDIAL
)
73
Page 85

18.7.99
kap17.fm5
Gigaset 2011 Comfort, GBR: A30852-X1106-B307-1-
Operating at more than one base station
Operating at more than one base station
You can register and operate your handset at up to 6 Gigaset base stations (as of Gigaset 1010 and Gigaset 2010
and higher).
This offers the following advantages:
● You can operate the same handset at base stations in
different geographical locations (e.g. in the office and at
home).
● You can extend the range or the area in which you can
call with the same handset in large areas by placing
the base stations in suitable locations.
Please note the following when operating at
more than one base station:
● Ongoing calls are interrupted or cleared
down when you move from one base station radio range to another.
● Internal calls can only be made within the ra-
dio range of a base station, i.e. not to handsets that are in another base station radio
range.
● If you are out of range of a base station for
several minutes, and your handset is
switched on, then when you re-enter the
range it may take up to 20 minutes to "find"
the base station again
switch the mobile unit off for a minute and
then on again
We recommend following the procedure below:
● Register your handset at the required base stations
(➔ page 69) and assign the required base station
numbers (1to4). Register your handset at all base
stations with the same internal call number, provided
this is not yet assigned.
You can see which base station your handset is currently
using at any time on your handset display. Note the instructions for naming handsets on ➔ page 73.
. In such cases,
.
74
Page 86

18.7.99
u
,
x
Z
OK
u
,
x
Z
OK
Z
OK
Z
W
W
kap17.fm5
Operating at more than one base station
Selecting the best station
The handset automatically selects the station to which it
can set up the best radio connection.
(tmeans: scroll with
t
.
Select Base
:
Best Base
Base 1
Base 2
Y
u
x
Select Best Base and press OK to confirm.
Setting the preferred or fixed station
In the case of "priority selection", the handset first searches for the required base station (identified by an "*" in the
display). The handset only searches for an alternative station if it cannot find this. If "Fixed Selection" is set, the
handset only searches for the required base station.
(tmeans: scroll with
t
.
Select Base
:
Base 1
Base 2
Base 3
Gigaset 2011 Comfort, GBR: A30852-X1106-B307-1-
)
)
Z
ZY
{
{
confirm with
OK
confirm with
W
Priority selection
x
t
Fixed station
x
t
u
Priority Select.
Fixed Selection
Select the base station.
If the handset is unable to set up radio contact to the selected station, the handset automatically searches for the
current base station. An "*" identifies the preferred station
in the display, e.g."*Base 2".
75
Page 87

18.7.99
u
,
x
Z
OK
Z
W
W
{
Z
W
kap17.fm5
Operating at more than one base station
Base station names
You can change the preset base station names ("Base1" to
"Base 6"). In a company, one station can be called "Purchasing", for example, and another "Stock". You can also
use this function to name handsets (➔ page 73)
(tmeans: scroll with
.
x
x
t
Settings
t
t
Change Base Name
Save Entry
t
u
Base Settings
Select the base station you want to rename.
Activate Change Base Name in the additional menu.
If you change a name (➔ page 37), save it with "Save Entry".
You can exit the relevant menu levels at any time without
saving any changes by pressing .
Gigaset 2011 Comfort, GBR: A30852-X1106-B307-1-
confirm with
)
De-registering a base station
.
x
t
Settings
t
De-register base
t
u
Base Settings
The menu item ISDN Config. does not apply to
Gigaset 2011.
This menu option is for de-registering the handset if the
base station is no longer available, i.e. if it is defective or
at a remote location.
Select the base station you want to de-register.
Activate De-register base in the additional menu.
The registration data is only deleted in the handset if you perform this function on the handset.
To ensure that your handset is de-registered at
the base station, the de-registration must be
performed at your base station (➔ page 70).
76
Page 88

18.7.99
u
,
x
Z
OK
W
kap17a.fm5
Short cuts
Descriptions with example
t
.
Short Cut
t
Unit check
Gigaset 2011 Comfort, GBR: A30852-X1106-B307-1-
Short cuts
A short cut is a series of commands that is stored under
a short cut name and can be activated from the list of
short cut names in the same way as a directory entry.
Short cuts are very useful for base stations at which the
Gigaset 2000C must be operated with key combinations.
You can store operating sequences or inputs for base station settings.
If you want to check your own call allowance account, for
example, the following inputs are necessary via the menu
or keyboard:
t
.
# 2 2
In this case, a short cut would contain the following elements:
"S # 22BS“.
A macro created with the input function could be entered
in the short cut list under the name "Unit check", for example. It is activated with:
(tmeans: scroll with
The balance of your handset account is displayed. This
short cut is provided with the system macros (➔ page
83).
Service
confirm with
)
Short cut menu
When you call up the short cut function, a list is available
containing all of the available short cuts. If the list is empty, a broken line is shown. The short cut menu is activated
by pressing the display key. The following options
are available
● Start
● New Entry
● Edit Entry
● Delete Entry
● Display Entry
● Copy Entry
● Delete Memory
● Copy Memory
● DefaultShortCuts
● Available Memory
:
77
Page 89

18.7.99
u
,
x
Z
OK
W
W
Short cuts
New entry
Short Cut
t
.
Function list
u
Insert Function
t
kap17a.fm5
u
Gigaset 2011 Comfort, GBR: A30852-X1106-B307-1-
To create a short cut, call up the short cut function in the
main menu. If no short cut has previously been created,
the short cut list will contain a broken line. You can create
a new short cut using the New Entry option in the short
cut menu.
(tmeans: scroll with
New Entry
t
When you select New Entry you can access a one-line
Name field and a two-line Contents field. First give the
new short cut a name.
Entries for a short cut follow the rules described in the
chapter “Input function“ ➔ page 37.
To make it possible to enter short cut elements (special
characters) in the Content field in addition to digits, call up
the Insert Function option in the additional menu.
A list of functions is displayed from which you can
choose. Each function which can occur in a command line
is presented in this list as plain text. The available functions and their meanings are explained in the following table.
Function Display
confirm with
)
78
Request PIN Code C
Request Number N
Insert Pause P
Request Acknowl. Q
Base Prompt B
INT Key I
SET Key S
Redial Key W
End Call E
TempSwitchToTone M
In order to create the "Unit check" short cut, the special
characters "C*BS" for Request PIN Code, Display base
messages and SET Key are necessary. As these characters cannot be entered in the Contents field with the keyboard, they must be obtained from the function list.
Page 90

18.7.99
W
W
W
W
W
kap17a.fm5
Gigaset 2011 Comfort, GBR: A30852-X1106-B307-1-
Unit check ssssssss
_
sssssssssssssss
ssssssssssssssss
X
<
>
W
Short cuts
Insert Function
u
u
u
t
Insert Function
t
Insert Function
t
Displaying a function
SET Key
t
Unit check ssssssss
_
ssssssssssssss
S
ssssssssssssssss
<
>
X
W
The numerical values and the *, # symbols are entered directly via the keypad.
Unit check ssssssss
_
sssssssssss
S#22
ssssssssssssssss
X
X
W
W
<
>
Base Prompt
t
SET Key
t
Unit check ssssssss
_
S#22C*BS
ssssssssssssssss
<
ssssssss
>
To find out the meaning of a function (special character),
place the cursor on the character and call up the Show
Function menu item. An explanatory text appears on the
display.
u
t
Saving a short cut
u
t
Show Function
You can save the short cut when all of the values have
been entered.
Save Entry
79
Page 91

18.7.99
u
,
x
Z
OK
u
,
x
Z
OK
W
W
Z
W
Z
W
kap17a.fm5
Short cuts
Cancelling a procedure
Checking for double entries
Check Duplicate
u
t
Editing an entry
Short Cut
t
.
x
Gigaset 2011 Comfort, GBR: A30852-X1106-B307-1-
You can also delete the entry by selecting Cancel.
Cancel
u
To avoid having a short cut feature several times in your
list under different names, you can have the list checked
automatically. As soon as an identical entry is found, it is
indicated on the display. For this function, the cursor must
be located in the Contents field.
You can edit any entry in the short cuts list at any time.
(tmeans: scroll with
Select the entry to be edited and call up the Edit Entry
menu option.
t
confirm with
)
Edit Entry
u
t
Deleting an entry
Short Cut
t
.
Delete Entry
u
80
t
x
The input function is active. Proceed as for New Entry.
You can also delete entries from the short cuts list.
(tmeans: scroll with
Select the entry to be deleted and call up the Delete Entry
menu option.
The entry is deleted and the short cuts list is displayed
again.
confirm with
)
Page 92

18.7.99
u
,
x
Z
OK
u
,
x
Z
OK
u
,
x
Z
OK
Z
W
GO BACK
W
YES
YES
NO
NO
W
Displaying an entry
Short Cut
t
.
Display Entry
u
t
Deleting all entries
Short Cut
t
.
kap17a.fm5
x
u
o
x
x
Gigaset 2011 Comfort, GBR: A30852-X1106-B307-1-
Short cuts
Short cuts can be displayed for checking purposes.
(tmeans: scroll with
Select the entry you wish to display from the list and call
up the Display Entry menu option.
The short cut name and contents will be shown on the
display. You can return to the short cuts list by pressing
the display key.
You can delete all entries from the short cuts list.
(tmeans: scroll with
Delete Memory
t
You will be requested to enter the PIN (factory default
“0000 “). The rules for the input function apply
➔ page 37.
When you have entered the correct PIN, you can delete
all entries by pressing and return to a blank short
cuts list.
or
You can cancel the procedure by pressing , or by
pressing the .menu key.
confirm with
confirm with
)
)
Available memory
Short Cut
t
.
u
You can display the percentage of memory available for
further entries using this function.
(tmeans: scroll with
Available Memory
t
confirm with
)
A message with the requested information, for example
“Memory: 70% available“ is displayed.
81
Page 93

18.7.99
u
,
x
Z
OK
u
,
x
Z
OK
u
,
x
Z
OK
Z
W
W
W
kap17a.fm5
Short cuts
Copying an entry/memory
Gigaset 2011 Comfort, GBR: A30852-X1106-B307-1-
Short cut entries can be copied between enhanced Gigaset 2000T or 2000C telephones/handsets. The Gigaset
2011 base station supports this feature.
.
x
u
.
t
t
Short Cut
t
t
Short Cut
x
Copy Entry
Copy
u
(tmeans: scroll with
confirm with
Select the required entry from the list.
Activate Copy Entry from the additional menu.
(tmeans: scroll with
Enter the internal extension of the telephone or handset
o
receiving the entries in response to the request "Copy en-
confirm with
try to internal". Start the copy operation as follows:
The receiving telephone is called. When the call is answered, the called party is requested to enter the PIN.
The copy operations begins if the correct PIN is entered.
The Copy Memory function is performed in the same way
as the Copy Entry function:
(tmeans: scroll with
Copy Memory
t
confirm with
The receiving telephone is called. When the call is answered, the called party is requested to enter the PIN.
The copy operations begins if the correct PIN is entered.
)
)
)
82
Page 94

18.7.99
u
,
x
Z
OK
u
,
x
Z
OK
Z
W
W
Starting a short cut
Short Cut
t
.
Start
u
t
Default short cuts
kap17a.fm5
x
Gigaset 2011 Comfort, GBR: A30852-X1106-B307-1-
Short cuts
If one or more short cuts have been created, you can select them and start them when you are both off-line and
on-line (after pressing the Talk key).
(tmeans: scroll with
confirm with
Select the desired short cut from the list and call up the
Start menu option.
The active status is shown on the display until the short
cut is executed. A typical message would read "Shortcut
active: unit check".
The display message will only be interrupted if, for example, the user is requested to enter the PIN.
A list of default (system) short cuts is already loaded in
your short cuts list. The list contains the following short
cuts:
)
Name Sequence Meaning
Total units S#83C*BS Check total call charges for all handsets
Unit check
Call Barring off
Call Barring on
Base lock
Base Tone Ringer
Base Ringer Vol.
t
.
u
Short Cut
t
S#22BS
S#84CB0S
S#84CB1S
S#24CBS
S#*6BS
S#*5BS
DefaultShortCuts
Check call allowance account
Switch off call barring
Switch on call barring
Switch base lock on/off
Change base ringer volume
Change base tone ringer
(tmeans: scroll with
confirm with
All of the default short cuts can be loaded into the short
cuts list by pressing . You can quit the procedure by
pressing . The system short cuts are arranged in
CANCEL
LOAD
alphabetical order in an existing short cuts list.
)
83
Page 95

18.7.99
Short cuts
Short cut list
kap17a.fm5
Gigaset 2011 Comfort, GBR: A30852-X1106-B307-1-
for handset and base functions:
Suggested short cut
name
Changebasecode S#8*CCCS Change the base code ➔ page 43
Callduration S#1CW961BS Call duration display on ➔ page 60
Actcalldisplay S#1CW962BS Activate call charge display not available in
Dis handsetcharges S#83CBNBS Display total charges for one/all
Del handsetcharges S#83CBN0BS Delete total charges for one/all
Baselockon/off S#24CBNS Activate/deactivate base sta-
Dis/modemergnos S#25CWBWBWBWBS Display/save emergency num-
Dis/modbarrednos S#85CBNWBWBWBS Display/save barred numbers ➔ page 63
Delh/sbarrednos S#87CBNS Delete all barred numbers for a
Acth/strunkaccess S#1CW*1N1BS Activate unrestricted trunk ac-
Acth/sout-restaccss S#1CW*1N0BS Activate outward-restricted
Modcallallowancea/c S#21CBBS Edit the call allowance account not available in
Short cut Meaning Page reference
the UK
handsets
handsets
tion lock
bers
handset
cess for a handset
trunk access for a handset
not available in
the UK
not available in
the UK
➔ page 61
➔ page 62
➔ page 64
➔ page 66
➔ page 66
the UK
84
Page 96

18.7.99
kap18.fm5
Gigaset 2011 Comfort, GBR: A30852-X1106-B307-1-
Important notes on putting into service and operation
Important notes on putting into service and operation
Installing the base station
Installation site/installation area
● A 220/230V AC power socket must be located at the
installation site.
● In order to avoid interference, the base station should
not be in the direct vicinity of other electronic equipment such as Hi-fi, office or microwave equipment.
● Place the base station on a flat, non-slip surface. Un-
der normal circumstances, the rubber feet will not
leave marks. However, due to the vast array of surface
finishes applied to furniture, marks on the installation
surface cannot be entirely ruled out.
● Radio transmission between the base station and
handsets complies with the DECT standard. Gigaset
2011 thus observes all relevant European regulations.
However, if there is interference to the picture or
sound of your satellite equipment, consult your specialist satellite dealer.
● Depending on ambient conditions, the maximum ra-
dio range between the base station and the handset
is approx. 300 m outdoors, and approx. 50 m indoors.
If the range warning is activated for the handset
(➔ page 56), a signal will sound when you move outside the radio range.
Temperature/ambient conditions
● The base station is designed for operation in protect-
ed areas with a temperature range from +5 °C to
+45°C.
● The base station should not be installed in damp are-
as (such as bathrooms or laundry rooms), close to
heat sources or in direct sunlight.
85
Page 97

18.7.99
kap18.fm5
Gigaset 2011 Comfort, GBR: A30852-X1106-B307-1-
Important notes on putting into service and operation
Notes on operating the handset
For users who wear hearing aids
If you wear a hearing aid, please note that radio signals
can interfere with hearing aids, and if sufficiently loud, can
cause a very unpleasant humming sound.
Using rechargeable batteries
The following should be noted when using
rechargeable batteries:
● Only use the rechargeable battery types supplied
(AAnickel-cadmium batteries).
● Nickel-metal-hydride (NiMH) rechargeable batteries
can significantly increase the time for which Gigaset
2000S/2000C can be used.
● The following batteries are authorised:
Nickel-cadmium Nickel-metal-hydride
Saft RC6 Sanyo HR-3 U (1300 mAh)
Panasonic P-60 AA/1P GP GP120 AA HC
Philips R6 NC-P Emmerich CE R 6
UCAR RC6 Energizer EMH-1100 AAC
Energizer Eveready RC 6 Varta VH 1101 AA
DAIMON ACCU 1000
Varta Accu Plus Ni-Cd 1,2V No.
5006
Sanyo N-3U
86
Page 98

18.7.99
kap18.fm5
Gigaset 2011 Comfort, GBR: A30852-X1106-B307-1-
Important notes on putting into service and operation
Once the NiMH rechargeable batteries have
been inserted, the following should be observed to ensure maximum lasting power from
your batteries: once the batteries have been fully charged for the first time, the handset prematurely indicates that the batteries are running
low (i). In order to deep discharge the batteries, continue to use the handset until the battery
symbol j appears and the batt. low beep
sounds (caution: max. operating time remaining
is 10 minutes). In this way the handset recognises the extended capacity of the rechargeable
batteries and will in future display the correct
battery charging status.
Opening the battery compartment resets the
display to the capacity of the batteries delivered
with the telephone.
Only use NiMH batteries with the Gigaset 2000S
and 2000C handsets.
These batteries cannot be used with Gigaset
1000S and 1000C handsets!
● Using other battery types or non-rechargeable batter-
ies may cause malfunctions or even damage the
equipment. The manufacturer shall assume no liability
in this case.
Never use ordinary batteries.
When installing and using the rechargeable batteries,
please follow the rules below:
● The handset can be replaced in the rest each time a
call is ended. Charging is controlled electronically.
This ensures optimum and even charging of the batteries.
● Initially charge the batteries thoroughly. We recom-
mend charging the batteries for approximately 16
hours without interruption (overnight for example).
During the first week of operation, continually replace
the handsets in the charging unit for recharging.
● New batteries do not usually reach their full capacity
(i.e. maximum time when the telephone is in use and
stand-by time) until they have been in normal use for
several days. Although the battery LED indicates that
the rechargeable batteries of a handset have been
charged (LED off), you must assume during this initial
phase that the capacity may not reach that of maximum time when the telephone is in use, or that of
stand-by time.
87
Page 99

18.7.99
kap18.fm5
Gigaset 2011 Comfort, GBR: A30852-X1106-B307-1-
Important notes on putting into service and operation
● After they have initially been thoroughly charged
(proven charging time approx. 16 hours), the rechargeable batteries are fully operative. The rechargeable
batteries should be discharged from time to time.
Caution: partially discharged batteries only offer limited operating time.
● Make sure that the contacts do not touch metal or oily
objects.
● The LED display lights up occasionally to indicate that
float charging is taking place.
Handset battery life:
Battery charging times:
Fitting the carrying clip on the handset
Battery type Stand-by time
NiCd, 600 mAh up to 70 up to 7 (8.5*)
NiMH,1100 mAh up to 110 up to 11 (13*)
NiMH, 1300
mAh
*In use near the base station
Battery type Charging time
NiCd
NiMH, 1100 mAh
(hours)
up to 130 up to 13 (16*)
in the handset
(hours)
4–5 24
8–9 40
In use
(use)
Charging time
in the batt. comp.
(hours)
If required, you can fit the carrying clip supplied with the
handset, e.g. if you wish to carry the handset in your pocket.
Hold the handset with the keypad facing the palm of your
hand. You will see two small holes on the sides, level with
the display. Place the clip in one hole and then insert it into
the opposite hole until it clicks into place.
88
Page 100

18.7.99
Service
SET
REDIAL
z
COLL.CALL
ACCEPT
LIST.ON
LIST.OFF
kap18.fm5
Gigaset 2011 Comfort, GBR: A30852-X1106-B307-1-
Important notes on putting into service and operation
Operating with the Gigaset 2000S (1000S) handset
The Gigaset 2000S (1000S) handset supports all Gigaset
2011 features.
Differences in operation
Maintenance
Gigaset 2000C
(Gigaset 1000C)
c or a c or a
t
.
u
x
x
x
x
x
x
Simply wipe the handset and base station with a damp
cloth or an antistatic wipe.
Gigaset 2000S Gigaset 1000S
g
B
B
O
O
I*
BR
BR
BR
w
w
z
z
I
w
w
w
*
R
R
R
Never use a dry cloth as this causes static
discharge.
89
 Loading...