

Page 1
UX-B700E
SERVICE MANUAL
No. 00ZUXB700ESME
SUPPLEMENT
MODEL
MODEL
UX-B700
This Service Manual UX-B700E appear only a change from the service manual UX-B700
which has already been issued. Please refer to it in accordance with the Service Manual of
UX-B700 (00ZUXB700USME).
FACSIMILE
UX-B700E
SELECTION CODE
E
DESTINATION
U.S.A.
Specification of UX-B700E is changed as follows:
1.Colors of the cabinet, panel unit, etc. are changed. "E" is added to the decoration panel
and the spec sheet.
2.The Secure FAX Receive and the 2-Sided Send/Copy functions are added.
The following parts are changed accordingly.
Parts marked with " " are important for maintaining the safety of the set. Be sure to replace these parts with specified ones for
maintaining the safety and performance of the set.
SHARP CORPORATION
This document has been published to be used
for after sales service only.
The contents are subject to change without notice.
Page 2

UX-B700E
UX-B700E
CHAPTER 1. DIFFERENCE
[1] Operation panel change
Service Manual
METALLIC GRAY 143
APPLY STD
ASPHALT GRAY
Add mark
Change Color
APPLY STD
ABC
1 2 3
GHI
JKL
4 5 6
PQRS
TUV
7 8 9
MODERATE GRAY
1
0
7
Add "E" mark
2
E
TEL FAX
DEF
MNO
WXYZ
8
3
AM
RESOLUTION/
RECEPTION MODE
FUNCTION
SPEED DIAL
HOLD
SPEAKER
9
BLACK
PANEL RELEASE
10
2-SIDED SEND
UP
START/
MEMORY
DOWN
5
4
01 02 03 04 05 06
07 08 09 10 11 12
13 14/POLL 15/G1 16/G2
COPY/HELP
Z
REDIAL
STOP
1211
13
14
engrave
PINK 004
6
SECURE RECEIVE
A
15
FROSTYWHITE
RAPID KEY
MODERATE GRAY
Add letter
2-SIDED SEND
SECURE RECEIVE
MODERATE GRAY
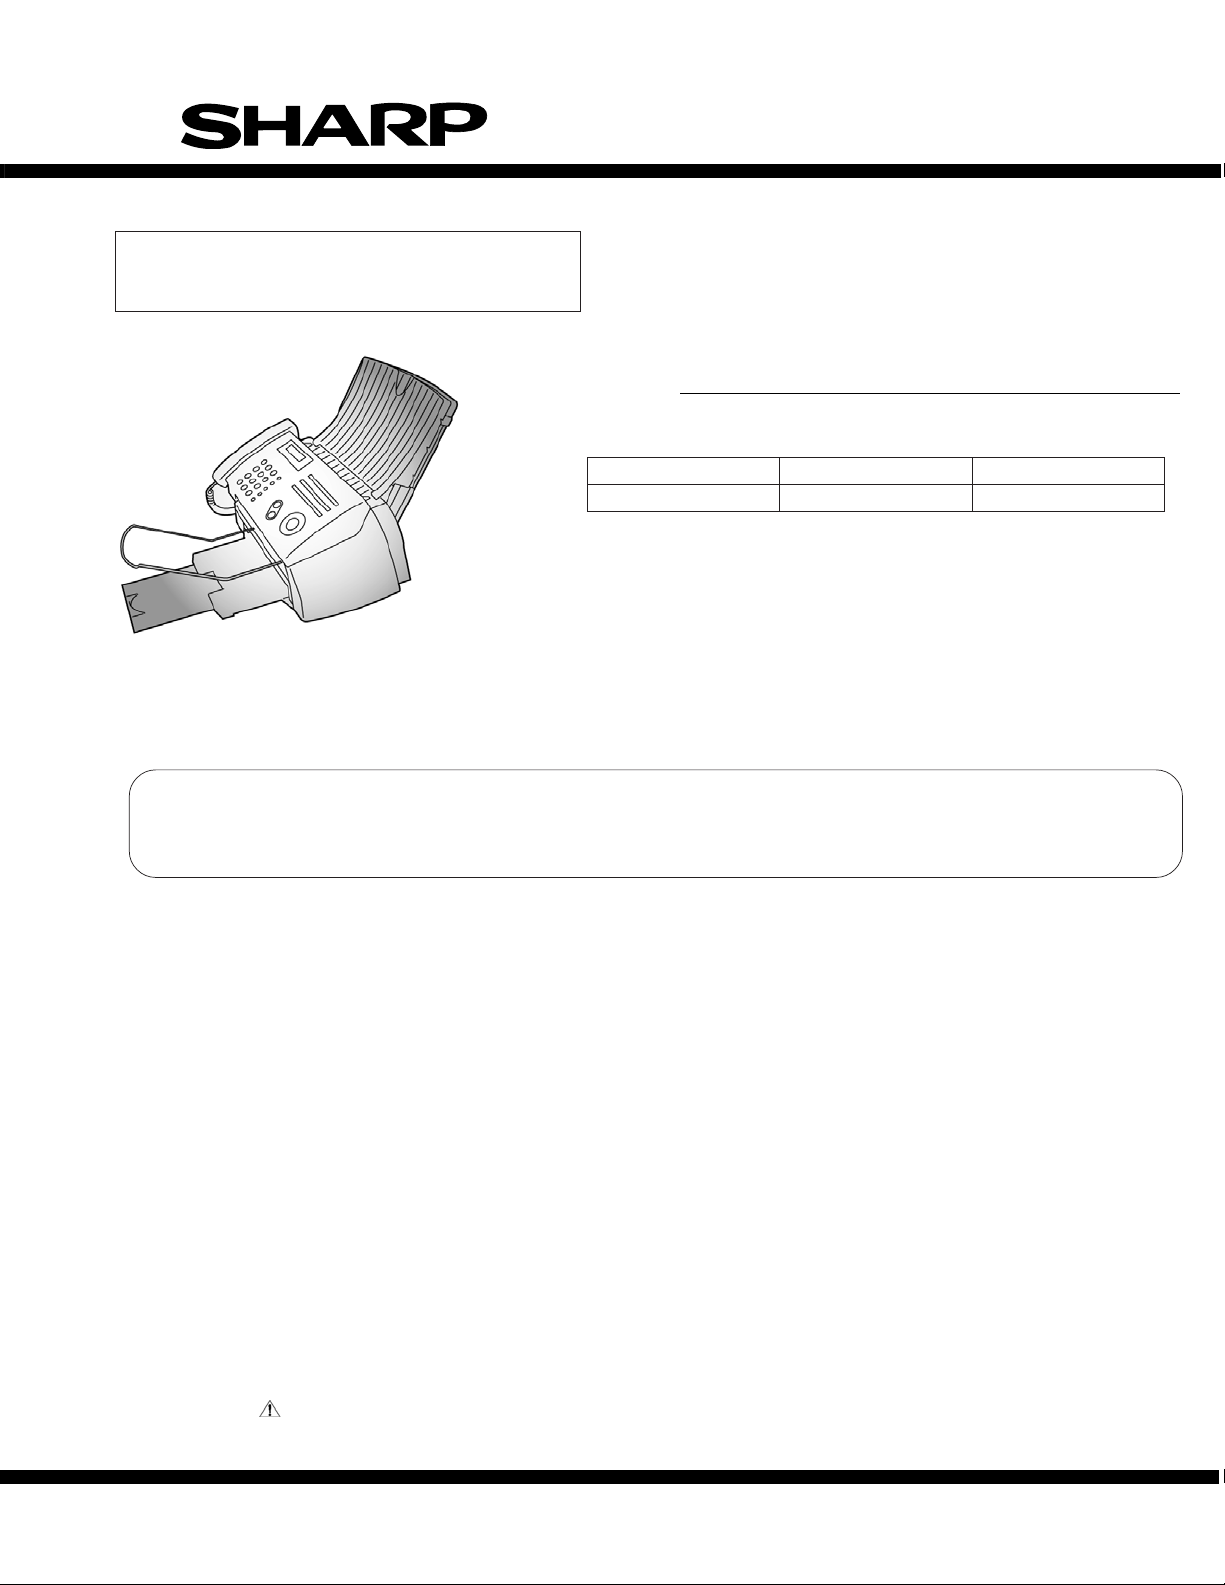
Display
1
This displays messages and prompts to help you operate the machine.
FUNCTION key
2
Press this key followed by the arrow keys to select special functions and
settings.
3
RESOLUTION / RECEPTION MODE key
When a document is in the feeder, press this key to adjust the resolution for
faxing or copying. At any other time, press this key to select the reception
mode (an arrow in the display will point to the currently selected reception
mode).
Rapid Dial Keys
4
Press one of these keys to dial a fax number automatically.
2-SIDED SEND key
5
Press this key to fax or copy two-sided documents.
SECURE RECEIVE key
6
This key is used to set up and use the Secure Receive function, which holds
received faxes in memory instead of printing them as they are received. To
print the faxes, the programmed Secure Receive code must be entered.
Number keys
7
Use these keys to dial numbers, and enter numbers and letters when storing
auto-dial numbers.
SPEED DIAL key
8
Press this key to dial a fax or voice number using an abbreviated 2-digit
Speed Dial number.
SPEAKER key
9
Press this key to listen to the line and fax tones through the speaker when
faxing a document.
Note: This is not a speakerphone. You must pick up the handset to talk with
the other party.
HOLD key
10
Press this key to put the other party on hold during a phone conversation.
When this is done, they cannot hear you. You can put the handset back in the
cradle without breaking the connection. When you are ready to speak with the
other party again, pick up the handset. If you did not put the handset back in
the cradle, press the HOLD key again to resume conversation.
PANEL RELEASE
11
Grasp here and pull up to open the operation panel.
COPY/HELP key
12
When a document is in the feeder, press this key to make a copy of a
document. At any other time, press this key to print out the Help List, a quick
reference guide to the operation of your fax machine.
STOP key
13
Press this key to cancel an operation before it is completed.
START/MEMORY key
14
Press this key after dialing to begin fax transmission. Press this key before
dialing to send a fax through memory. The key can also be pressed in the date
and time display to show the percentage of memory currently used.
Arrow keys
15
Use these keys to scroll through and select settings, and to search for autodial numbers.
1 – 1
Page 3

UX-B700E
[2] Difference table
1. Difference between UX-B700 (To the production in November 2004) and UX-B700E (From the production in December 2004)
UX-B700E(From the production in December 2004) UX-B700 (To the production in
PG NO. PARTS CODE PRICE
RANK
1-1 DCEKC886UXHZZ BN N E Control PWB unit(Within ROM) 1-1 DCEKC580TXHZZ
1-2 GCABB2419XHSD BE D Bottom cabinet 1-2 GCABB2419XHSA
1-8 GCABA2418XHSD BF D Upper cabinet 1-8 GCABA2418XHSC
1-9 GCOVA2458XHSC AS C Back cover 1-9 GCOVA2458XHSA
1-10 GCOVA2467XHSD AQ C Front cover 1-10 GCOVA2467XHSC
1-24 LPLTP3260XHSC AP C Exit tray 1-24 LPLTP3260XHSA
1-25 LPLTP3261XHSC AM C Extension exit tray 1-25 LPLTP3261XHSA
1-26 LPLTP3263XHSH AM C RP release plate 1-26 LPLTP3263XHSE
1-49 PHOP-2095XHVC AU C Paper hopper 1-49 PHOP-2095XHVA
2-2 HPNLH2426XHZL AK N D Decoration panel 2-2 HPNLH2426XHZZ
2-3 GCASP2168XHSL AV N D Panel case 2-3 GCASP2168XHSA
2-4 JBTN-2381XHSB AM C 12 key 2-4 JBTN-2381XHSA
2-5 JBTN-2382XHSD AK C Start/Memory key 2-5 JBTN-2382XHSA
2-8 JBTN-2385XHSC AF C Copy/Help key 2-8 JBTN-2385XHSA
2-9 JBTN-2386XHSC AG C Rapid dial key 2-9 JBTN-2386XHSA
2-21 PGIDM2650XHSF AU C Document guide upper 2-21 PGIDM2650XHSE
2-901 DCEKP438CXH12 BH N E Operation panel unit 2-901 DCEKP438CXH01
3-3 GCOVA2477XHSC AG C Connector cover 3-3 GCOVA2477XHSA
3-4 MLEVP2380XHZA AE C Hook switch lever 3-4 MLEVP2380XHZZ
3-14 PGIDM2619XHVG AG C Hopper guide, left 3-14 PGIDM2619XHVA
3-15 PGIDM2620XHVG AG C Hopper guide, right 3-15 PGIDM2620XHVA
3-16 PGIDM2649XHSC AV C Document guide lower 3-16 PGIDM2649XHSA
5-1 CPAKC366GXH01 BA N D Packing case with label 5-1 CPAKC224EXH03
5-2 TINSE4299XHTE AN N D Operation manual 5-2 TINSE4299XHTD
5-4 Not used - - Setup guide 5-4 TCADH3457XHZZ
5-5 Not used - - Registration card 5-5 TCADZ2891XHZZ
5-7 DUNTK497CXHSG AY N E Handset 5-7 DUNTK497CXHFW
5-8 LPLTP2889XHVC AR C Paper tray 5-8 LPLTP2889XHVA
5-9 LPLTP2890XHVC AL C Tray extension 5-9 LPLTP2890XHVA
5-10 LPLTP3264XHSC AS C Document tray 5-10 LPLTP3264XHSA
5-11 PCOVA2115XHVD AY C Paper tray cover 5-11 PCOVA2115XHVC
5-15 QCNWG209BXHGY AN C Handset cord 5-15 QCNWG209BXHOW
5-25 Not used - - Rapid key labels 5-25 TLABH446EXHZZ
6-901 DCEKC886UXHZZ BN N E Control PWB unit(Within ROM) 6-901 DCEKC580TXHZZ
6-140 VHIF004/TE52B BG B IC, Flash ROM Ver.TE52B[IC5] 6-140 VHIF004/TC86A
NEW
MARK
PART
RANK
DESCRIPTION PG NO. PARTS CODE
November 2004)
1 – 2
Page 4

UX-B700E
2. Exploded view
1) Cabinet, etc.
CHANGED
OPERATION
PANEL
UNIT
DOCUMENT
GUIDE
UPPER UNIT
CHANGED
B8
38
47
22
68
B11
13
45
60
B1
B8
29
B8
B5
48
B6
B8
W1
7
41
59
14
18
66
39
61
B8
B3
B11
B6
19
33
27
B6
1
28
56
B8
B8
CHANGED
63
50
B2
B8
17
C
HANGED
B11
B8
33
31
36
54
16
55
B9
49
9
B8
26
B8
35
CHANGED
B9
CHANGED
37
B2
DOCUMENT
GUIDE
LOWER UNIT
CHANGED
4
B7
B9
23
67
34
CHANGED
40
69
10
B8
43
64
3
32
5
B8
B12
B8
PRINTER
UNIT
57
B10
20
42
B8
46
8
12
B8
65
62
58
CHANGED
15
6
52
53
21
30
2
B8
CHANGED
25
1 – 3
24
CHANGED
11
CHANGED
11
12
Page 5

2) Operation panel unit / Document guide upper
UX-B700E
CHANGED
Add "E" mark
CHANGED
2
CHANGED
901
CHANGED
3
1
27
26
13
CHANGED
19
14
17
HANGED
C
4
ED
CHAN
29
G
B2
22
8
7
9
B1
6
25
5
B1
CHANGED
24
18
12
21
11
16
28
23
10
30
15
31
20
15
B1
1 – 4
Page 6

UX-B700E
3) Document guide lower
CHANGED
14
CHANGED
3
CHANGED
15
4) Printer unit
There is no change.
17
1
CHANGED
8
18
CHANGED
16
4
5
9
11
7
6
18
10
B1
2
1 – 5
Page 7

5) Packing material & Accessories
UX-B700E
CHANGED
CHANGED
CHANGED
31
DELETE
7
TAPE
3
CHANGED
15
11
TAPE
9
30
4
CHANGED
8
28
19
AC Cord
16
14
29
2
10
DELETE
DELETE
CHANGED
CHANGED
23
24
20
25
5
18
13
TAPE
22
6
Add "E" mark to Spec
21
sheet.(refer below)
17
[Spec Sheet]
0~2
STD
STD
Add "E" mark
0~2
E
Add "E" mark
1
CHANGED
TAPE
26
TAPE
27
1 – 6
Page 8

UX-B700E
COPYRIGHT © 2005 BY SHARP CORPORATION
COPYRIGHT©XXXX BYSHARP CORPORATION
ALL RIGHTS RESERVED.
ALL RIGHTS RESERVED.
No part of this publication may be reproduced,
stored in a retrieval system, or transmitted in
No part of this publication may be reproduced,
any form or by any means, electronic, mechanical,
stored in a retrieval system, or transmitted in
photocopying, recording, or otherwise, without
any form or by any means, electronic, mechanical,
prior written permission of the publisher.
photocopying, recording, or otherwise, without
prior written permission of the publisher.
SHARP CORPORATION
Communication Systems Group
Quality & Reliability Control Center
Higashihiroshima, Hiroshima 739-0192, Japan
A0504-100SS•IS•T
 Loading...